


hamilton
-
Posts
1,919 -
Joined
-
Last visited
Content Type
Profiles
Forums
Gallery
Events
Posts posted by hamilton
-
-
-
Maybe it's just me but I can't see any of the Vanguard kits when I visit your website and the links above give me a 404 error......are you still carrying Vanguard products?
hamilton
- Canute, mtaylor and JacquesCousteau
-
 3
3
-
Thanks Tony! This one's pretty different from Bluenose that's for sure! But just as fun so far....
Harlequin! It's good to hear from you! I get it - I probably have more kits than I need, but I still have hope that I can complete all of them in my lifetime!! I took a long break from modelling - putting in sporadic and minor work from Summer 2017 until Summer 2021 when I built a small (undocumented here) rowing skiff at 1:12 scale. This was meant to get me back into modelling again and it worked! But like with everything, it's often good and refreshing to take a rest - I hope you return to it at some point - but either way, you're always welcome here!!
hamilton
- harlequin and Knocklouder
-
2
-
-
-
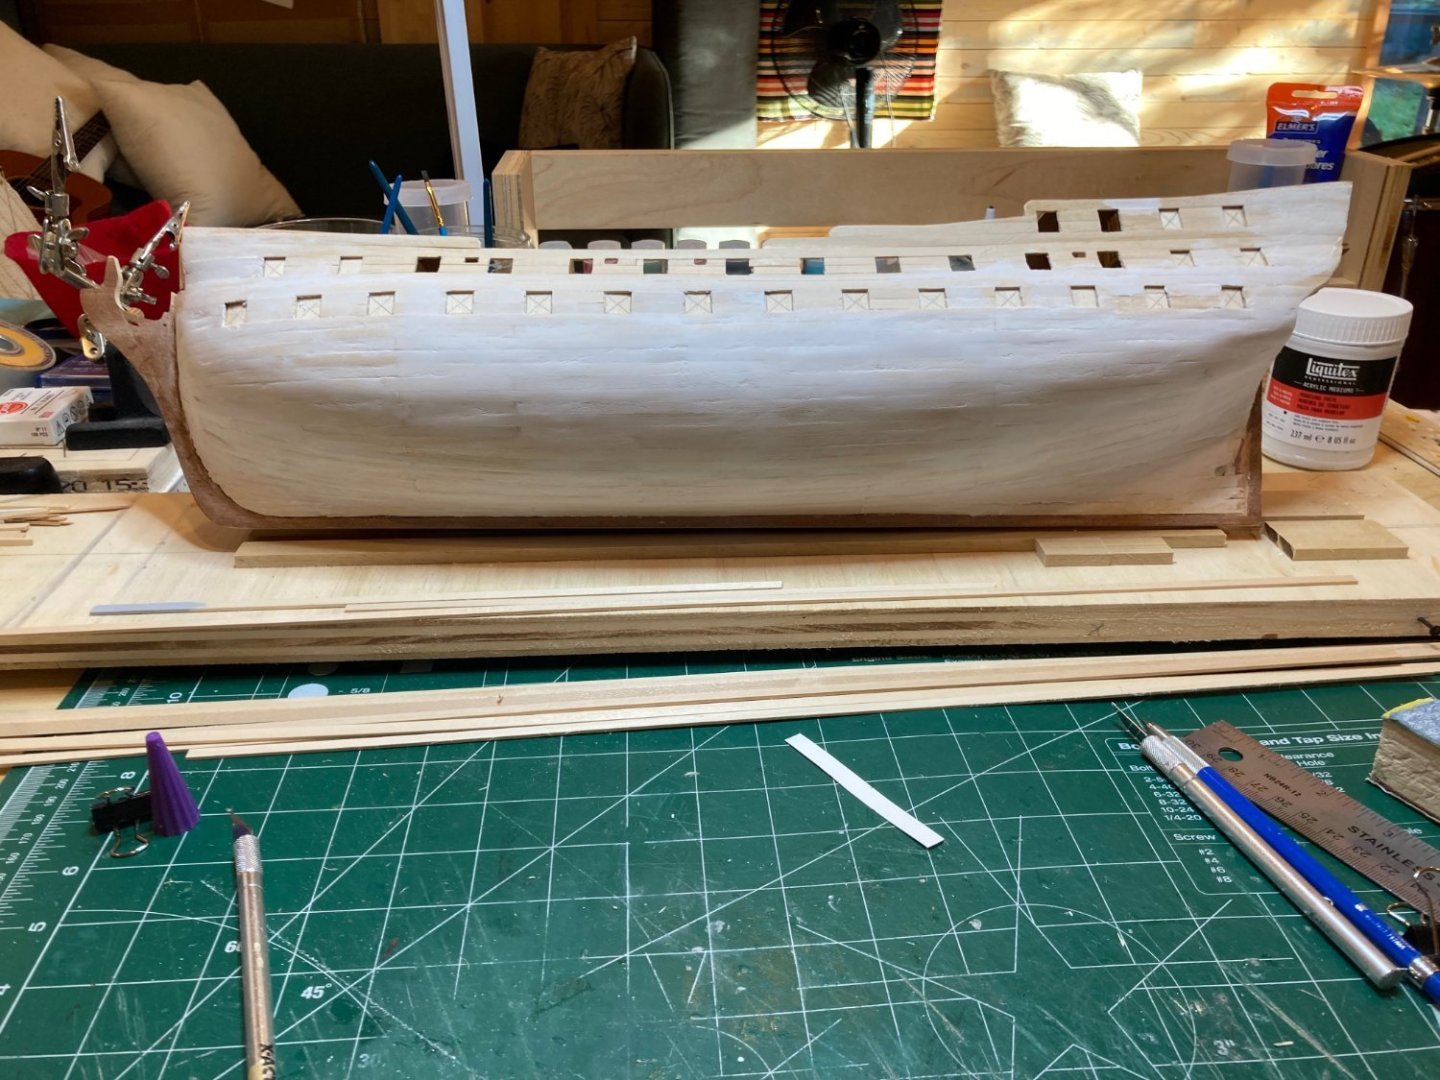
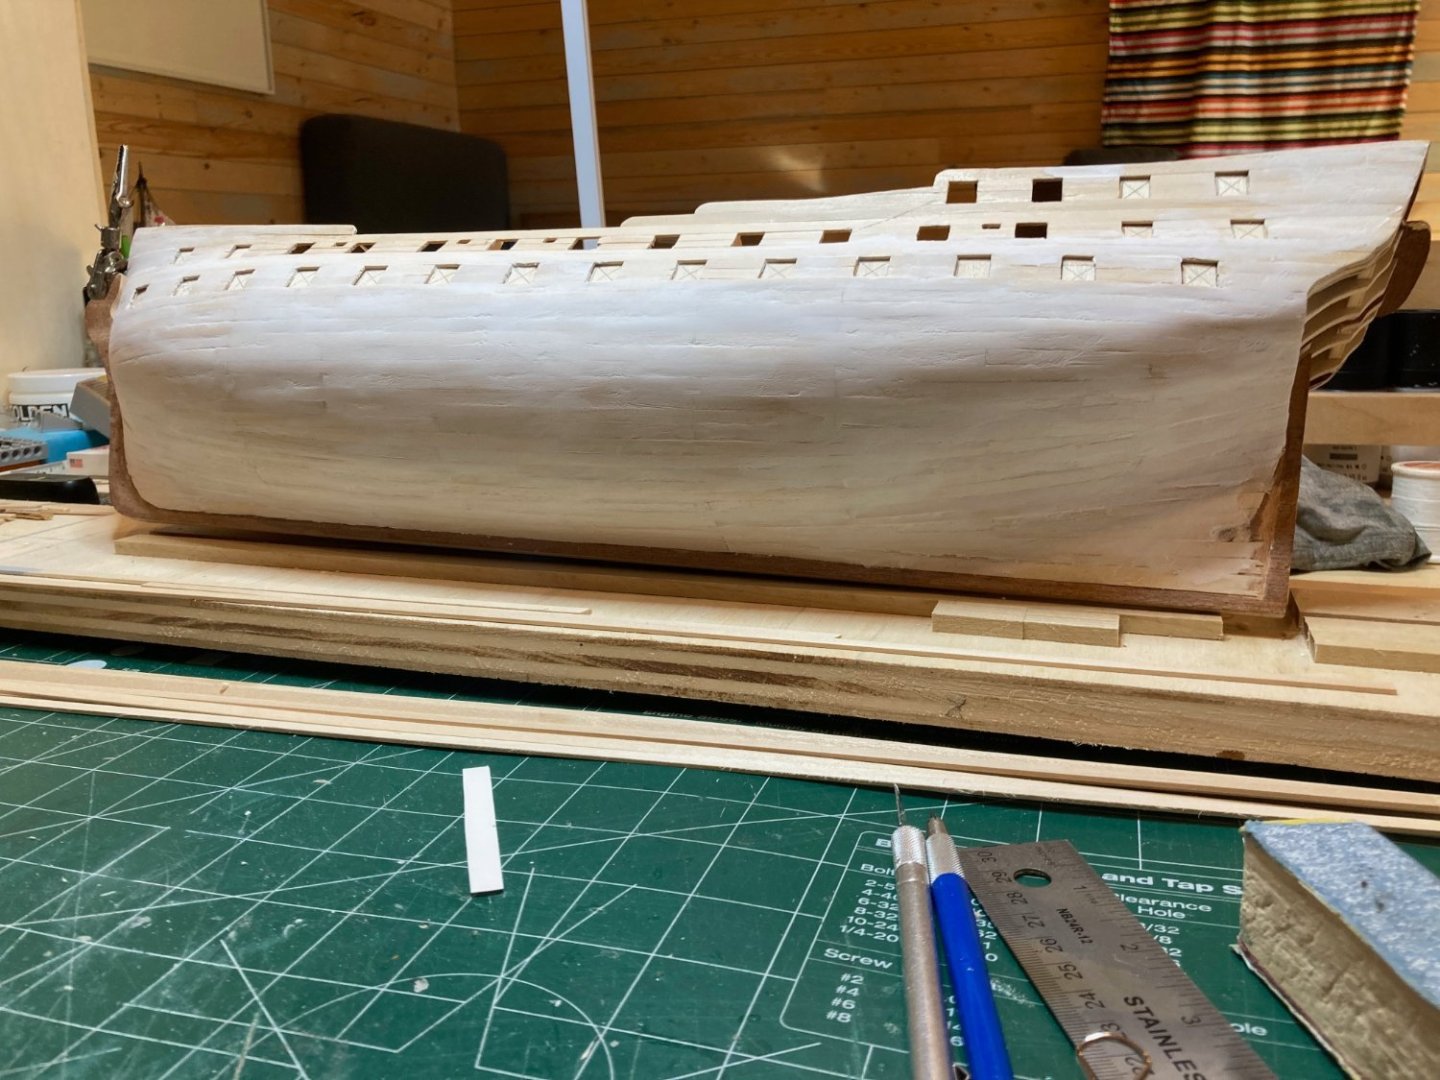
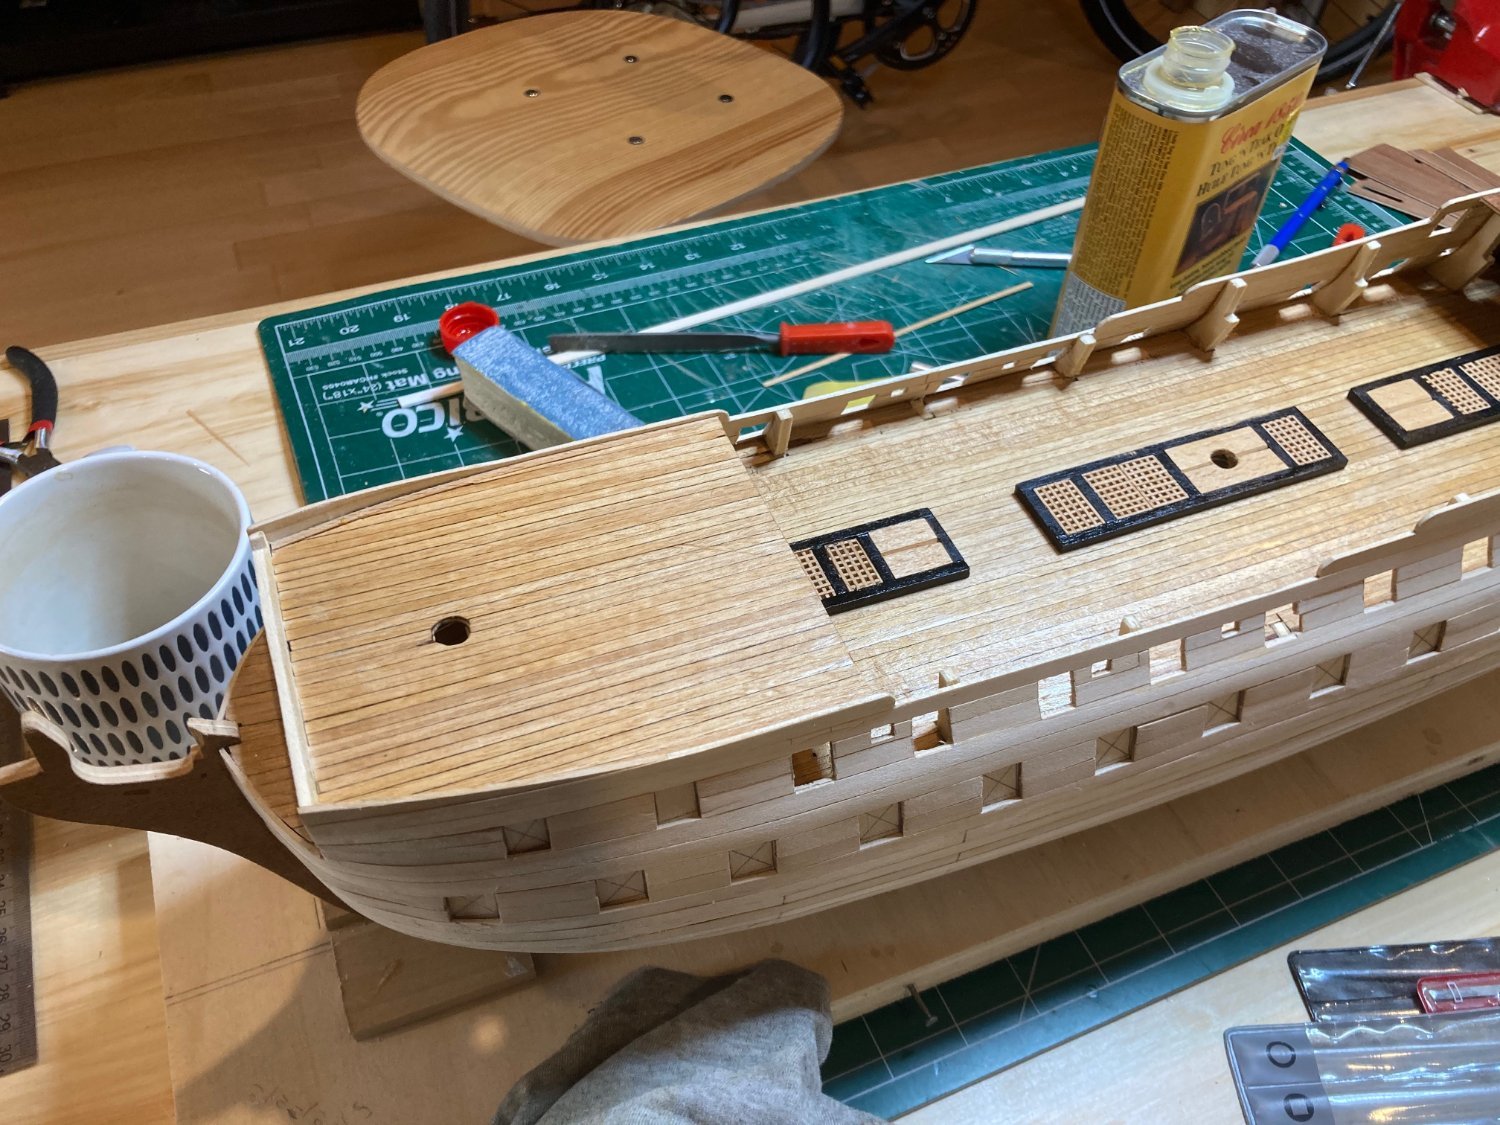
OK - it's been very busy at work the last couple of weeks, but we're in a lull now until end of next week, so I'll have a bit of time at the bench til then to make some progress on Bellona. I'm still soldiering on with the first layer of hull planking and in a milestone have now completed the port side, filled and sanded. The starboard side is still in progress with roughly 8 strakes remaining.
The planking is pretty rough I haver to say, but it should provide a decent foundation for the second layer, which I'll pursue with more care and sensitivity to the results! My goal is to finish the first planking tomorrow and then move on to the beakhead, stern area and quartergallery framing, which I'm both very excited about and pretty intimidated by....but we'll see how it goes! Not much in the way of interest in the photos, really, but here they are
hamilton
PS - to the right in the background in the first photo, you'll see the filler product I use - Liquitex acrylic modelling paste. It is really a wonderful product (I have no association with the company at all) - it is a medium thickness almost like light cake icing, but it dries incredibly hard and sands down to a very fine eggshell finish. It also takes both paint and adhesive really well, which is a nice bonus.
h.
- Tony28, KARAVOKIRIS, mtbediz and 4 others
-
7
-
Incredible craftsmanship here! Great modifications to the MS kit!
hamilton
- Retired guy and FriedClams
-
1
-
 1
1
-
Thanks for your response Chris!
Yes I understand - but it's not about a version of the vessel - it's about specific kits that are desirable to build and that create real excitement among the modelling community - yours and Chuck's fall squarely into that category. No offence to Panart, but the Victory you designed just seems better in every respect. I don't necessarily want to build "a" Victory, but I definitely want to build your Victory, if that makes sense.
The economics of kit manufacture are unfamiliar to me, so I would never presume the circumstances you face in developing and maintaining your business. That's not what the issue is. It's more that perhaps some business innovation - like Chuck's with the Winnie & Cheerful broken into chapters, or CAF's with their line - will be helpful at sustaining this craft for a broader cross-section of the ship model market. $500.00 is about my limit for a kit - about the price of Chapter 1 of CAF's Granado. I imagine others set their sights similarly or lower. If the Victory or other high end kits were presented in modules, I imagine way more people would buy them and manufacturers could tap into markets for their products that otherwise represent unrealised demand. It requires some innovation and re-thinking on the manufacturer's side, but once that's done.....
It's kind of like when the Bell phone company originated, they though that their business model would involve selling expensive devices and connection services to the wealthy - niche product, small market, high price point. Bell (well....Alfred Vail) figured out that the value of their network was based on volume of connectivity - so there was good business sense in expanding the network and lowering the cost of service to facilitate this - a move that led to massive profits for Bell and put them in the catbird seat for network development for a sustained period of time. I believe you, Chuck, CAF are in that position now, representing younger and more innovative entries into the manufacturer's market with an opportunity to refresh things overall - think of the number of kits you have developed in the last 2 years relative to what Caldercraft/Jotika has introduced in the last 2 decades....that says a lot, I think, about market position and market potential. People are excited about your kits and Chuck's too, and this community provides an active following that serves direct promotional functions. It's a great situation! But it could be even better!
The idea of the high-value product for the niche modelling market is fine, but there is still money to be made outside of that market with the same product through a different organisation of the manufacture and presentation of the kits. Admittedly I have no idea how offering kits in sections/chapters might affect the cost of manufacture - obviously a big concern - or even if it is a realistic approach to design....but it seems something worth exploring more generally as a means of sustaining the craft and the businesses on which it depends. The modular nature of ship modelling itself also supports this approach.
Full disclosure - I'm a philosopher by trade and not an entrepreneur, so my comments here come from a pretty idealised conception of how to run a ship model business - or any business! But at the level of accessibility and market development, it seems to make sense to offer avenues of access that can realise the value of the ship modelling market more fully than the complete high-end product can or does.
I hope these remarks are not taken in any way as a slight against any kit manufacturer's practices! More the observations of an envious modeller dreaming of a different world.....
hamilton
- FrankWouts, Canute, Knocklouder and 3 others
-
6
-
On 11/19/2023 at 11:20 AM, James H said:
I wouldn't surmise at this point.
Feel like it's more of an educated guess, based on the price of the Vanguard Indy, which at today's exchange rate would set me back $2300 CDN....a desirabe kit, beautifully constructed and well out of my grasp.
hamilton
- FrankWouts, Canute and mtaylor
-
3
-
Hi Tim - not sure how I missed this log during my BN build....your work is excellent! Very nice results. I'm always impressed by those who, like you, can pull off such nice metal work at this scale!
hamilton
-
Hello again Helmar:
Here is a link to a thread here on MSW that has some images of a seizing process - not the same one I use, but with better results! Hope this can help, too if that's the kind of help you're looking for....
hamilton
-
Hello Helmar:
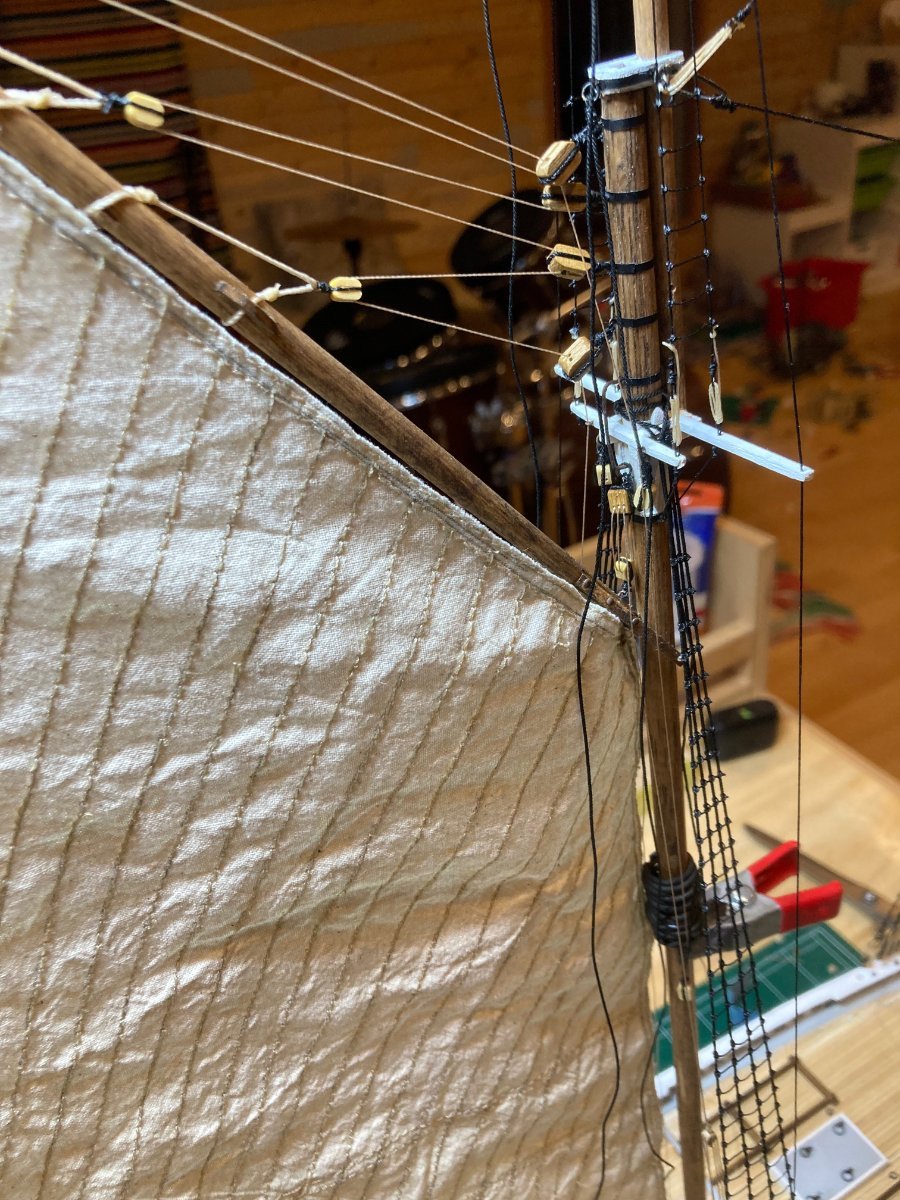
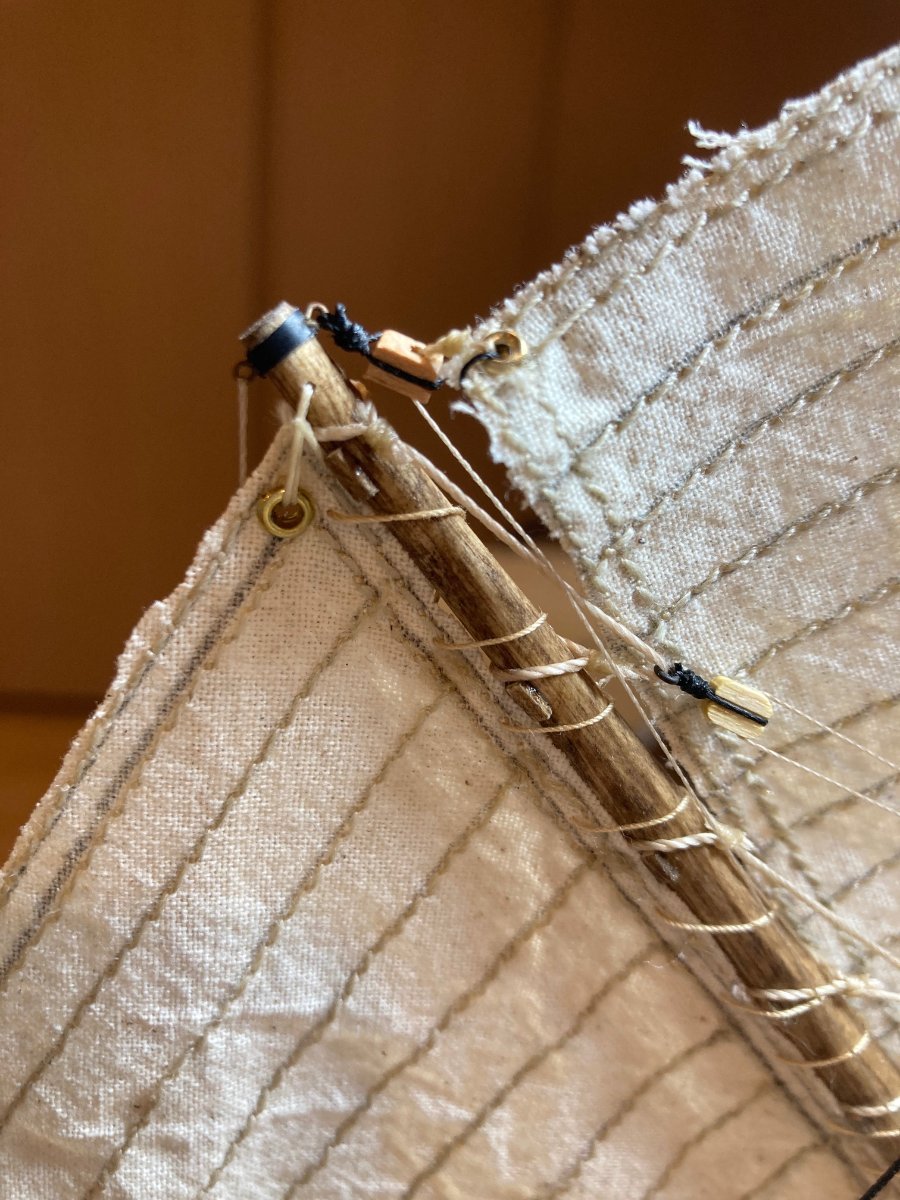
Are you talking about the blocks on the gaff for the main peak halliard (photo below)? If so, you need to attach 3 slings to the gaff, which are held in place by small wooden chocks attached slightly to port and starboard on the bottom of the gaff (as shown on the plans). The peak halliard blocks are then seized onto these.
My approach was to first seize a length of tan rigging thread to the gaff by the pair of chocks at the end of the gaff (the seizing should be on the outward side of the chocks so when the halliard is tied on the sling gets pulled snugly against the chock and held in place) - I used lengths that are much longer than required as this makes the process easier. Once that was on, I ran a small blackened brass ring onto the sling (this was used to seize the halliard block onto), and then looped the other end around the gaff at the next set of chocks towards the mast (again, on the outward side for pressure), seized this loop and then pulled the loose end of the sling through the seizing until it was a reasonable size, then sealed the seizing with a bit of diluted wood glue. This process was repeated two more times for the other slings on the main gaff.
To rig the blocks, I seized them to the brass rings on the gaff slings. The halliard runs from deck-level on one side through the blocks on the mast and the gaff and ends in a tackle on the other side as per the plans.
It is very difficult to describe in words alone how to do this....There may be a topic thread in the rigging section of MSW that shows how to do some basic operations - like stropping blocks and seizing lines. I know I was deeply confused about these terms when I started modelling. Hopefully this descriptive account can help a bit....
hamilton


-
I really hope Amati considers releasing this in chapters like CAF's models.....this would make it more accessible to those of us who model on a limited budget! I'm guessing the retail price on this kit will be around $2000....not a realistic prospect for many, myself included.....with many desirable kits priced so highly (and understandably given rising costs of materials, particularly wood), it makes good business sense to widen the market by providing a more modular approach to building....but that may just be my view from the cheap seats.....
hamilton
- mtaylor, Canute and Ryland Craze
-
3
-
Missed your last question from your latest post....I use a scalpel blade to shave off thickness of the planks where they buckle out from one another and then sand them as smooth as possible. I also use (as many do) healthy doses of wood filler (actually I use acrylic modelling paste, which I find to be a very good product for this purpose) will help with any cracks or seams and then more sanding.
Is this a double-planked hull? I can't recall from when I built it, but I thought it was only single planked.....In any case, on this model it isn't necessary to get a pristine planking job on the hull - unless you don't plan on painting it. Once you fill and sand the planks and paint them, you will not see any of the imperfections of the planking itself.
hamilton
-
I built this kit over a decade ago so my memory is foggy, but the cutwater you refer to above is to be added along the keel edge forward - you need to leave a gap in the planking from the bottom of the keel (horizontal section) forward and then add the cutwater as a strip between the plank-ends once the planking is complete. I hope this helps with your first question.
As for question 2, I'll be honest and say I haven't read the other members' responses, so I may be repeating here, but I believe this is just to ensure consistency in its width after you plank the hull. This part of the build was, I recall. confusing for me too as it wasn't clear whether I was supposed to plank over the keel all the way to its base or only to the bottom of the bulkhead frames. I believe I planked only to the bottom of the frames to maintain the width of the laser cut keel and not thicken its width by planking over it....I also hope this response is clear....
This was a fun build as I recall, and I think it's a good one for getting into the hobby as long as you keep in mind that the rig on this one is quite a bit simplified from the actual vessel (good for learning the basics) and that the small scale sometimes makes it a bit tricky. But if you approach it as a learning experience, then you can start to hone skills that will help with the next one. Have fun!
hamilton
-
-
Yes - the Santa Claus approach (making a list and checking it twice) is to be advised at this point - I definitely found that I'd missed a couple of things that it would have been better to add earlier at this stage - the rig is shaping up for you now, though John! Looks great - can't wait to see the next phase
hamilton
-
Could be a generational thing, Chuck. The more younger members join - which is to be encouraged to keep the craft going for future generations - it's probably to be expected that some of the broader elements of digital culture are going to creep in.....MSW - like most web forums - is old school internet, where it takes human beings to set up and enforce community standards. This is how the whole thing was when I first went online as a teen in the mid-1980s, when the NSF was still running the show. But most folks (young and old) have gotten used to a world where "moderation" has largely been automated through SEO algorithms and algorithmic news feeds, so I don't think there is as clear an understanding of the human labour that goes into managing a site like this and keeping its quality as high as it is. But it doesn't help if users treat the forum as if it were Facebook or "Twitter", where these kinds of posts have literally 0 impact on the management of the platform itself. If I had more time between my young family and my work I'd love to chip in to help with moderation here - I'll reach out once I can afford to retire - in 2043!!!! Waaahhhh!!!
hamilton
- mtaylor, hollowneck and Egilman
-
3
-
Thanks Nearshore - and for the planking tips. I will try to carve a "light" rabbet of about 1mm and then just thin down the planks aft for the first layer and then, as you say, carve a similar rabbet aft into the first layer of planking for the second layer....I find this kind of work very nervewracking, but I'll see if I can give this a go. This is definitely the most challenging model I've attempted so far! But it's also pretty fun...once I get past planking it will be a lot more enjoyable!!
hamilton
-
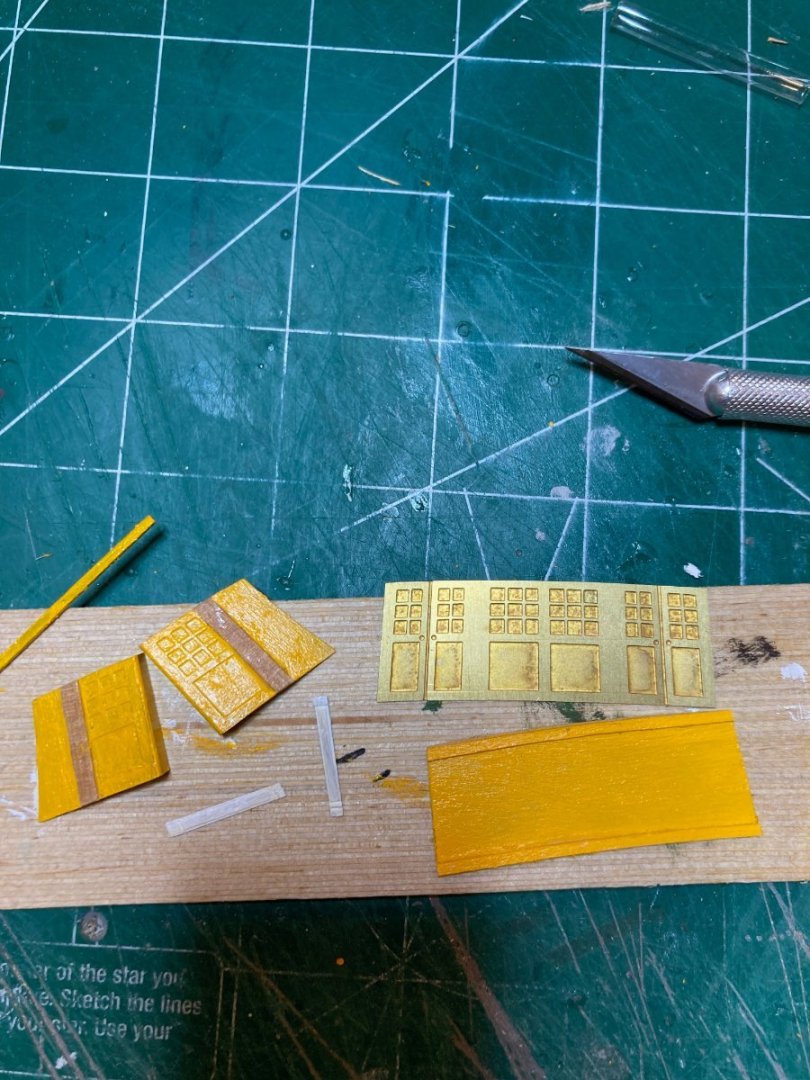
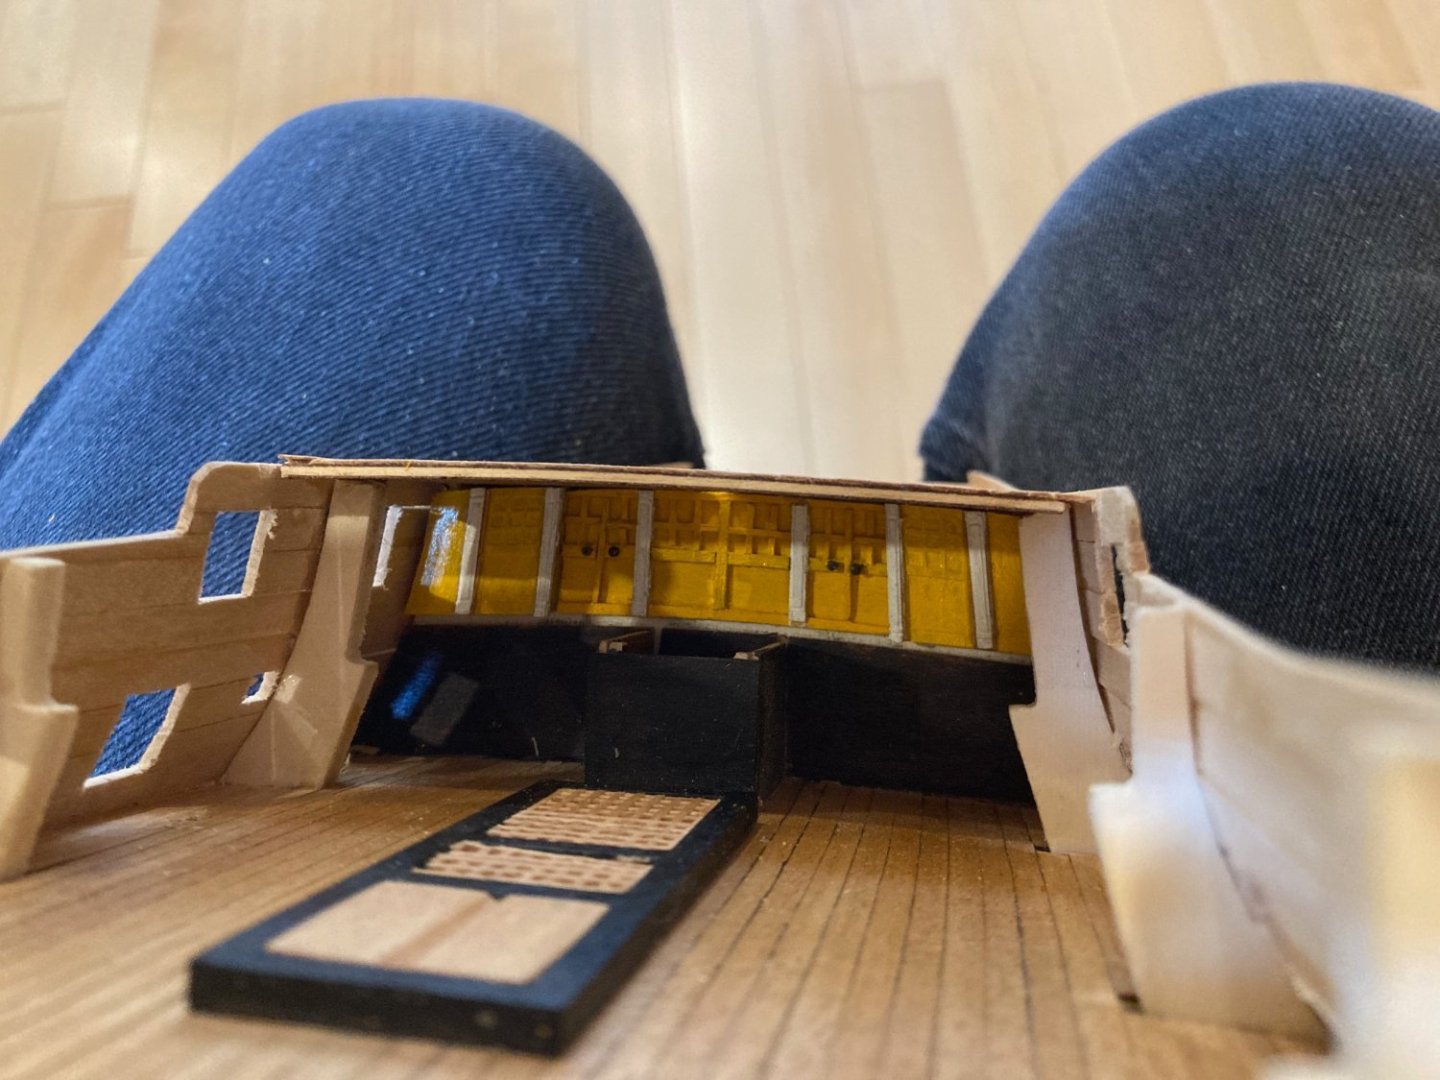
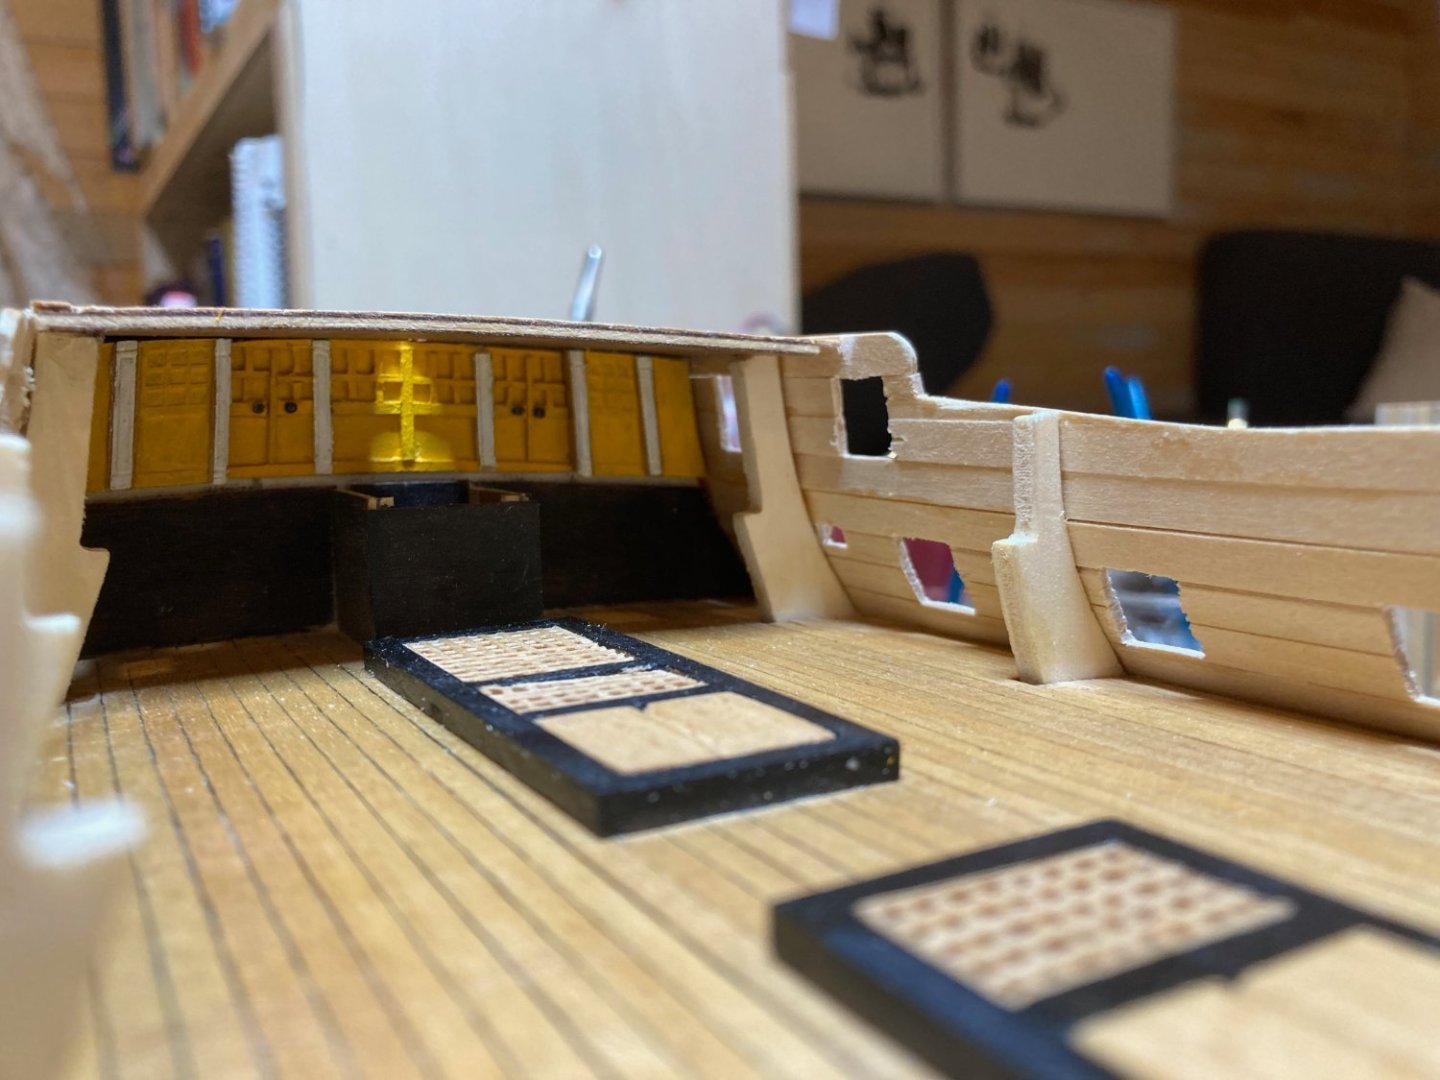
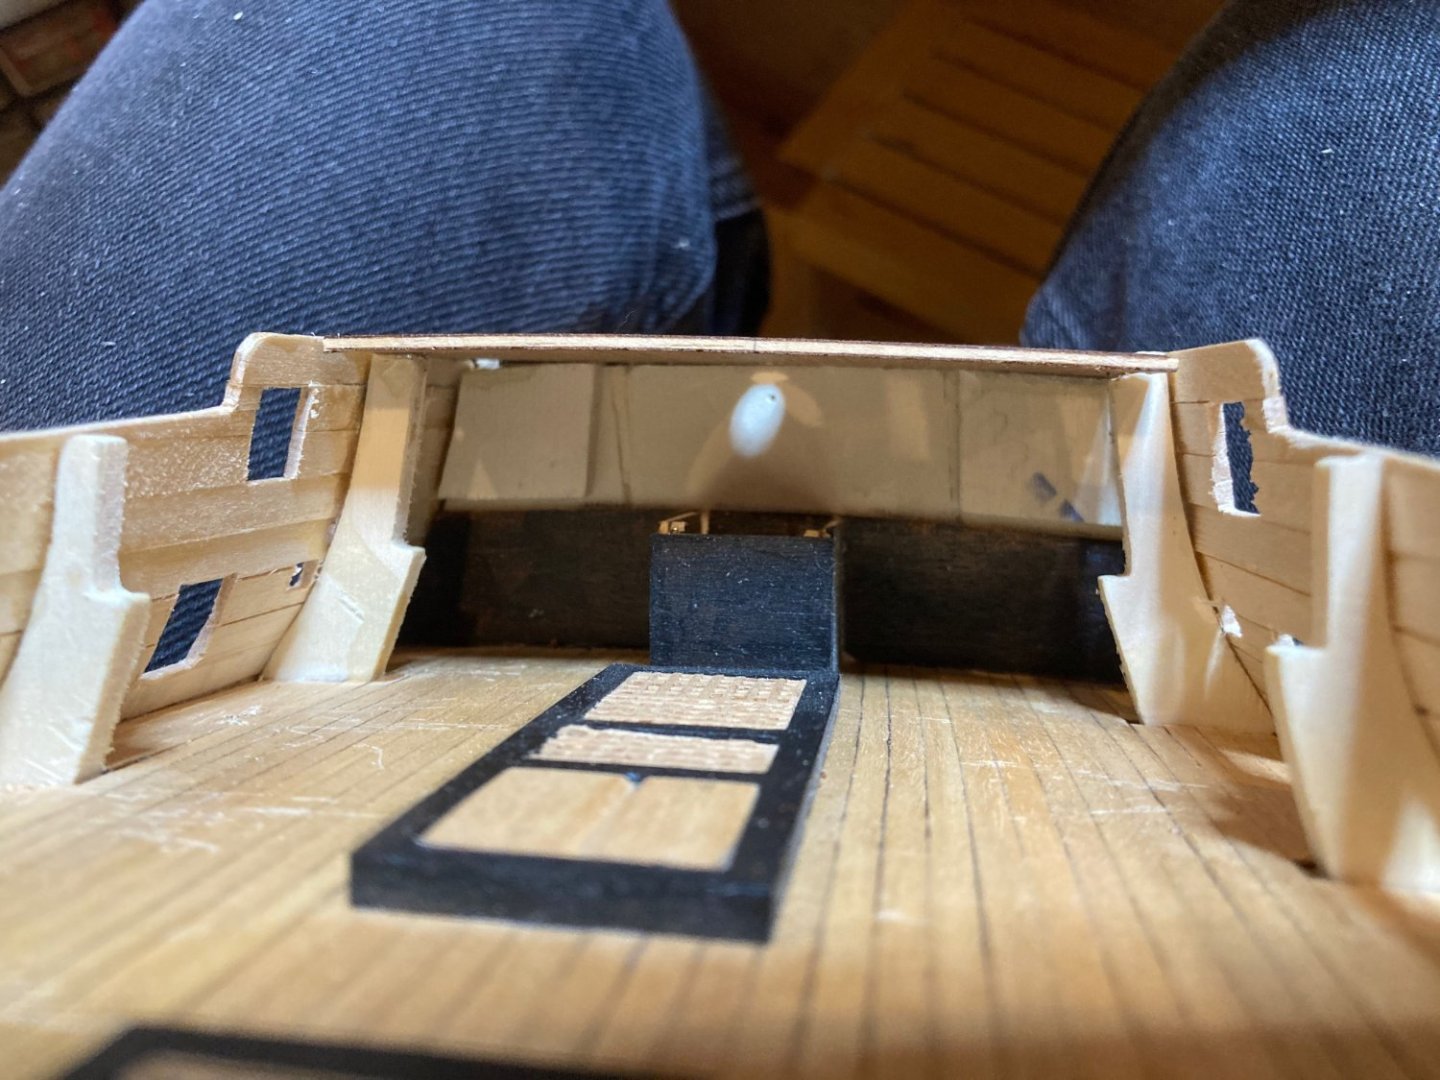
Managed to resolve one of the issues noted above - fitting the main cabin bulkhead back under the poop deck. My results are not as clean as I'd like, but since this area will be pretty hard to see when all's said and done the clumsiness of it will likely fade a bit.
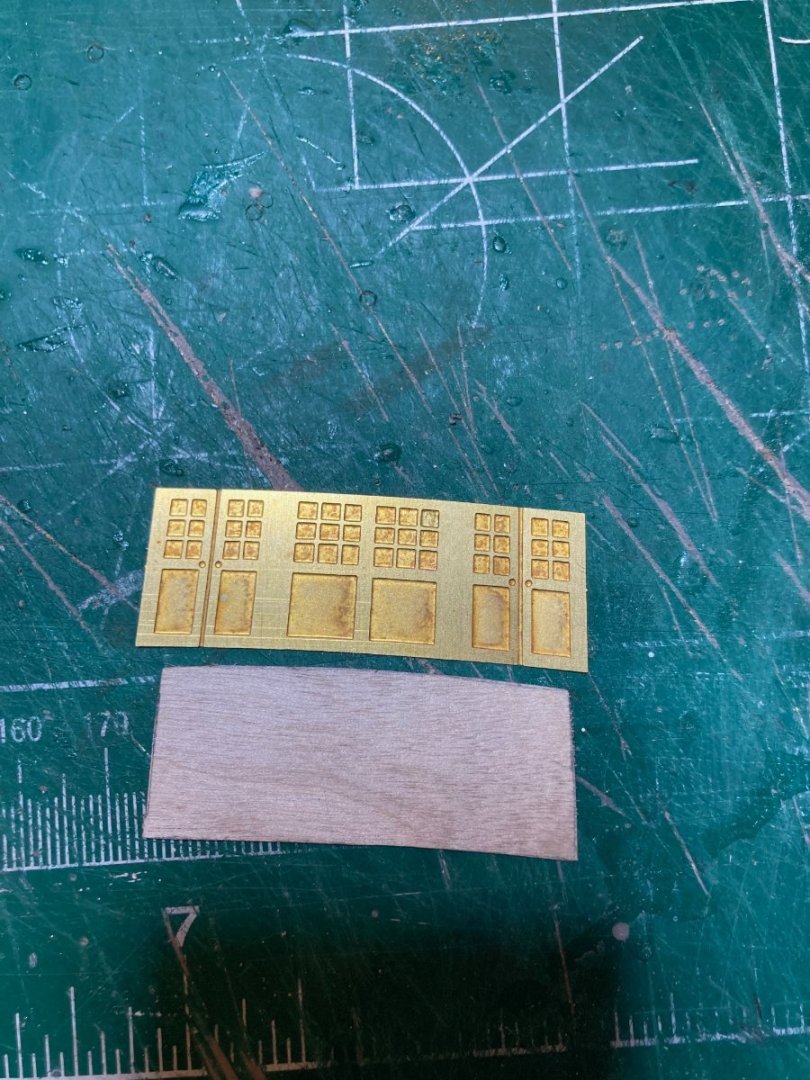
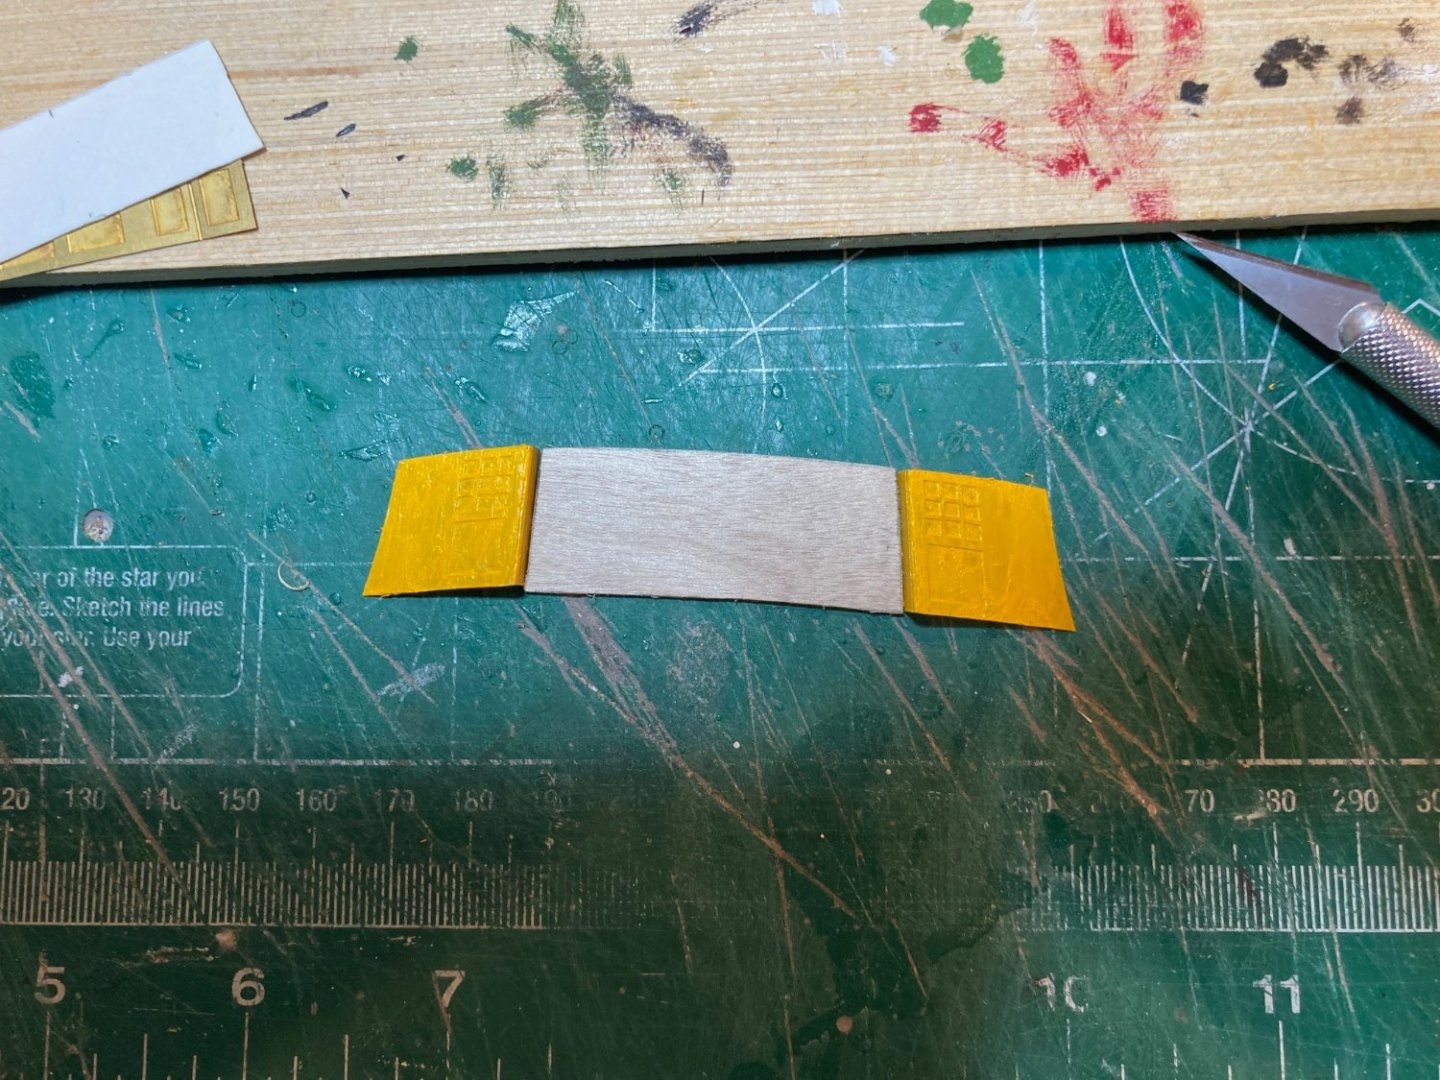
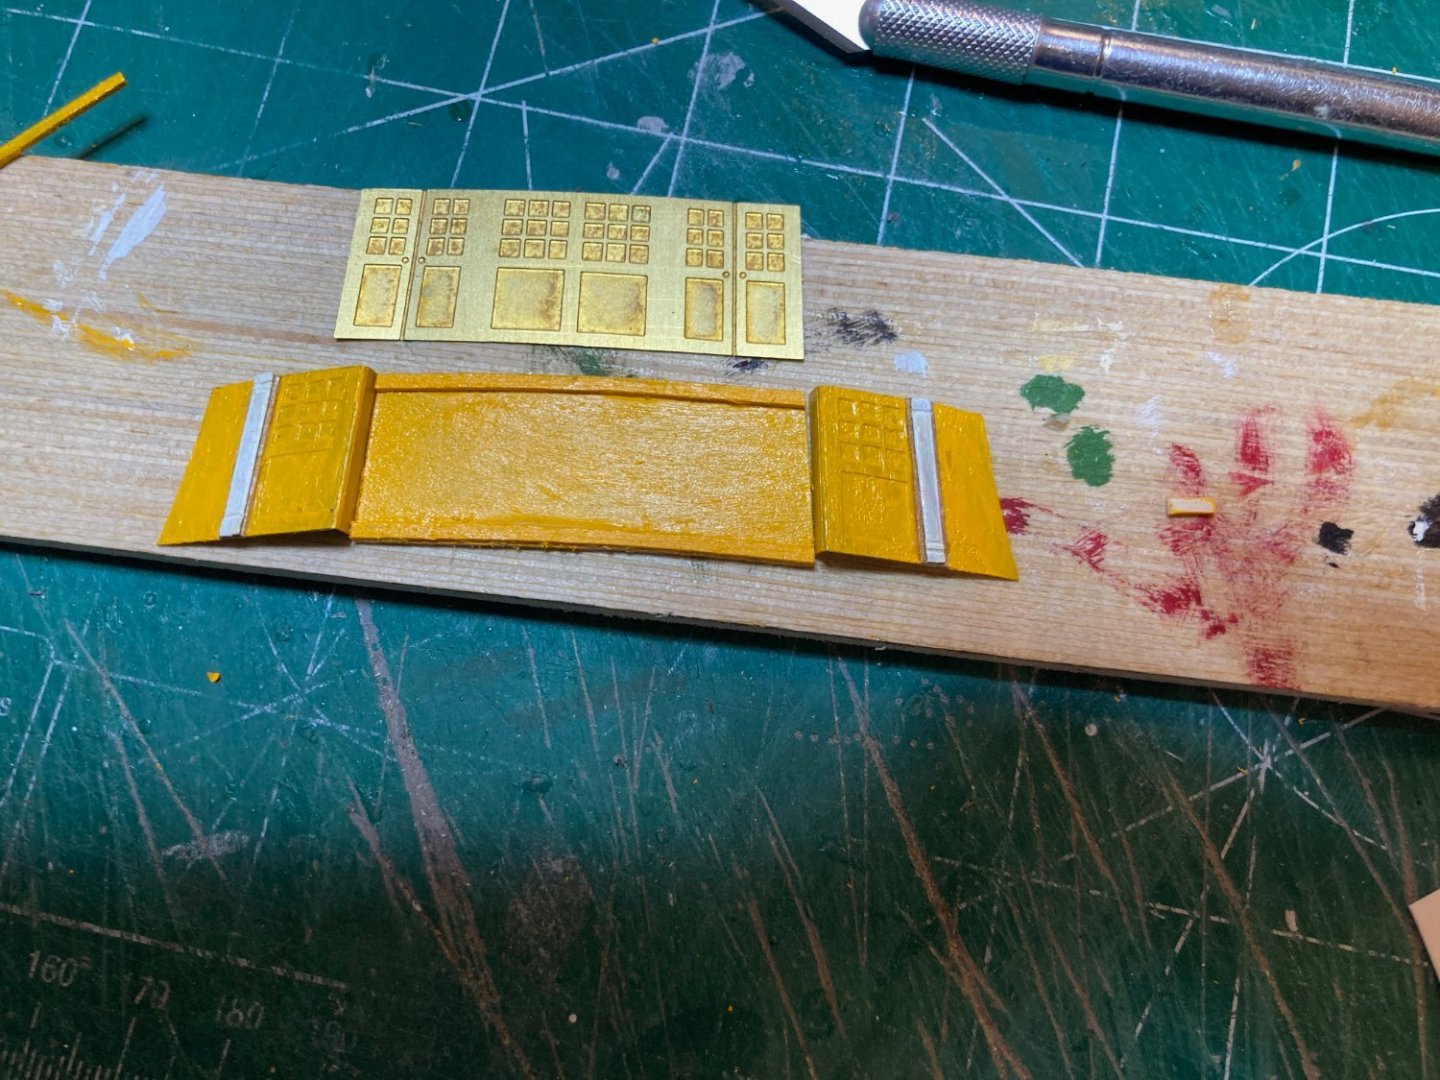
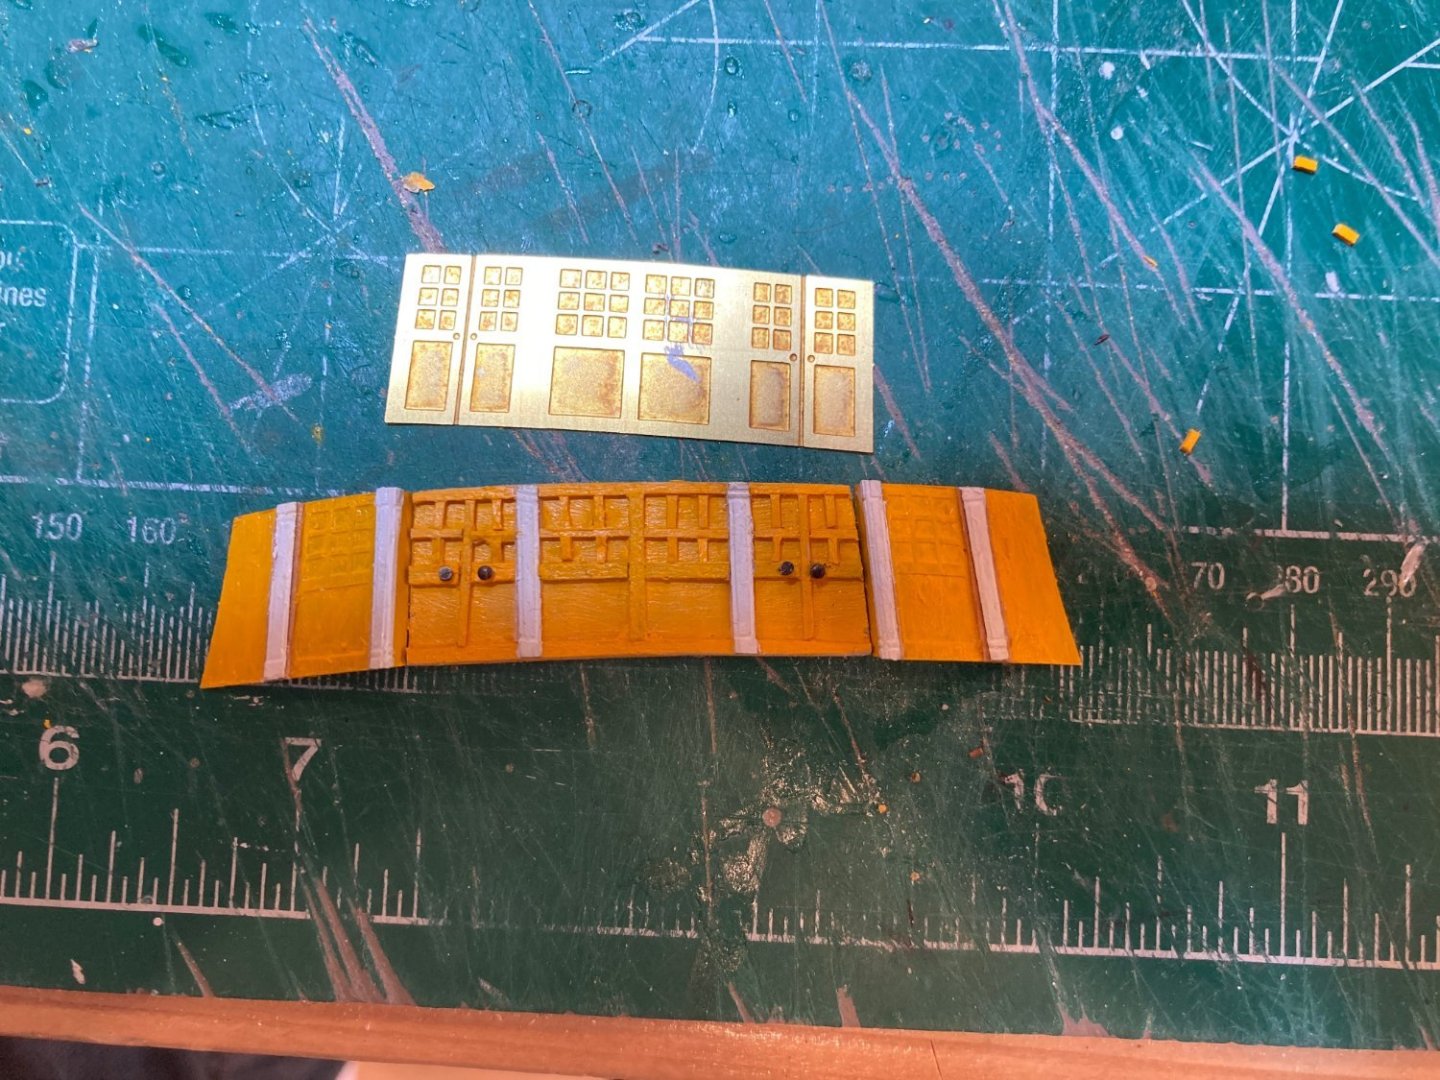
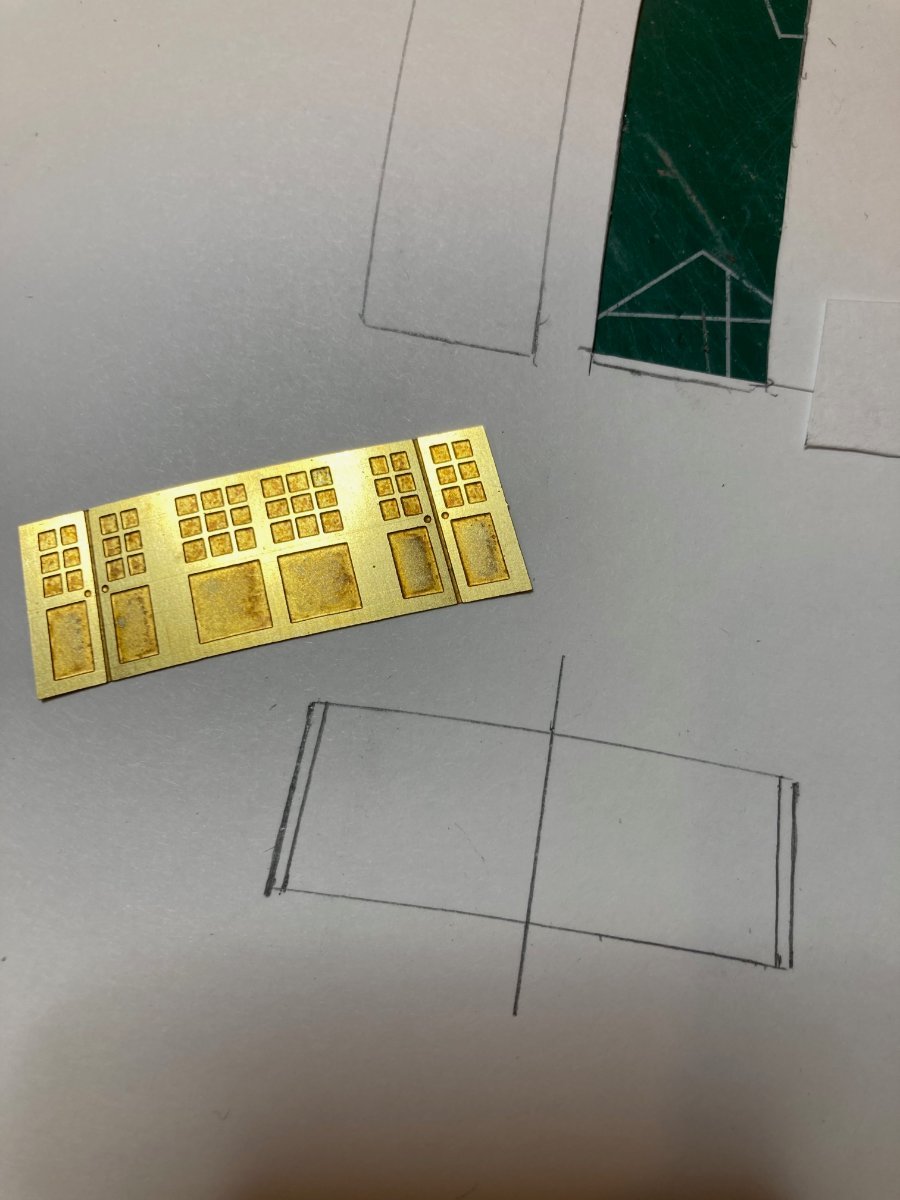
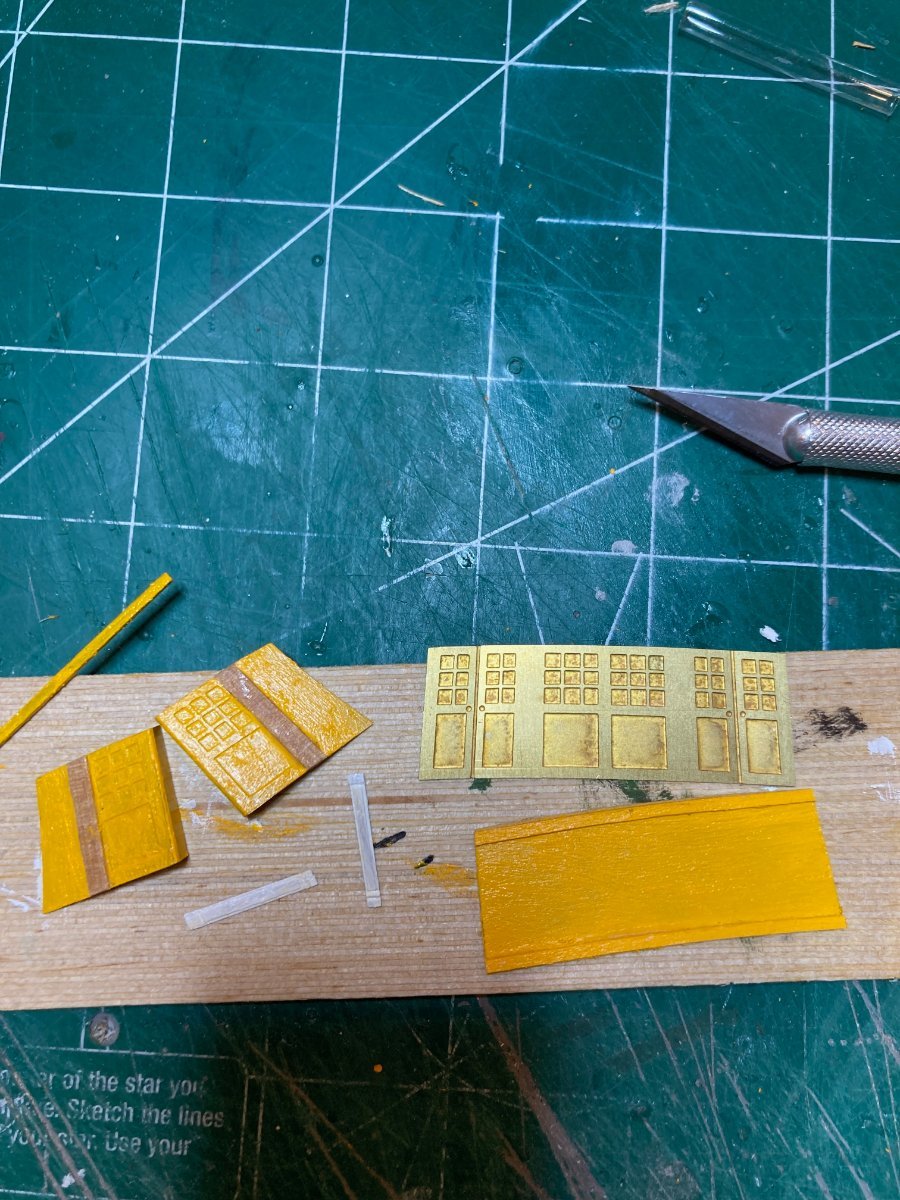
There are three components to this bulkhead - a central section with the two doors, and two side panels. These are provided as photo-etched brass fittings, but as noted a couple of posts ago, the central part was too wide for the model as-built. I used the p-e parts for the side panels, and these worked fine. The pillars are also p-e brass, fitted atop .6mm x 3mm tanganyika strips so they stand a little proud of the panels. I decided to finish the pillars white to contrast with the yellow cabin bulkhead.
The centre part I scratch-built using 1/64 birch plywood sheeting. I traced the shape of the central p-e part on some card paper and adjusted this until it fit in the appropriate space on the model, then used this as a template to cut a backing from the birch ply. To frame out the panels and cabin doors, I used a combination of 1mm x 2mm and 1mm x 1mm strips, finished yellow. As I say the results are far from perfect, but this area of the model will be barely visible on completion, so I won't mind it too much and have learned a thing or two in the process.
I test fitted these with the sub-decks for the quarterdeck in place, and I will have to make some small adjustments to those subdecks when the time comes to install them so they slot in properly - the back edge will need to be slightly thinned to fit - not a problem I don't think.
Enjoy the photos and bye for now
hamilton

- yvesvidal, KARAVOKIRIS and Ronald-V
-
3
-
Wow! That is some impressive scale work! How do you do it?? Maybe I missed it but were you a jeweller or watchmaker in a former life? I cannot imagine getting those results...amazing.
hamilton
- Glen McGuire and John Ruy
-
1
-
1
-
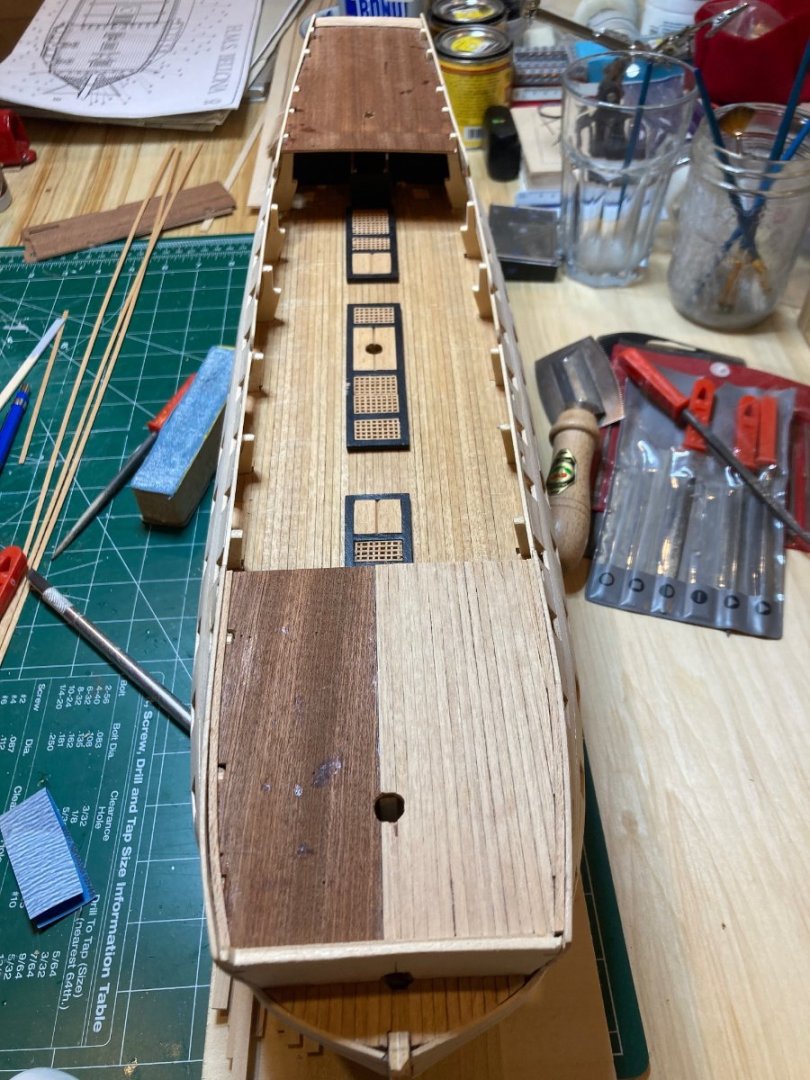
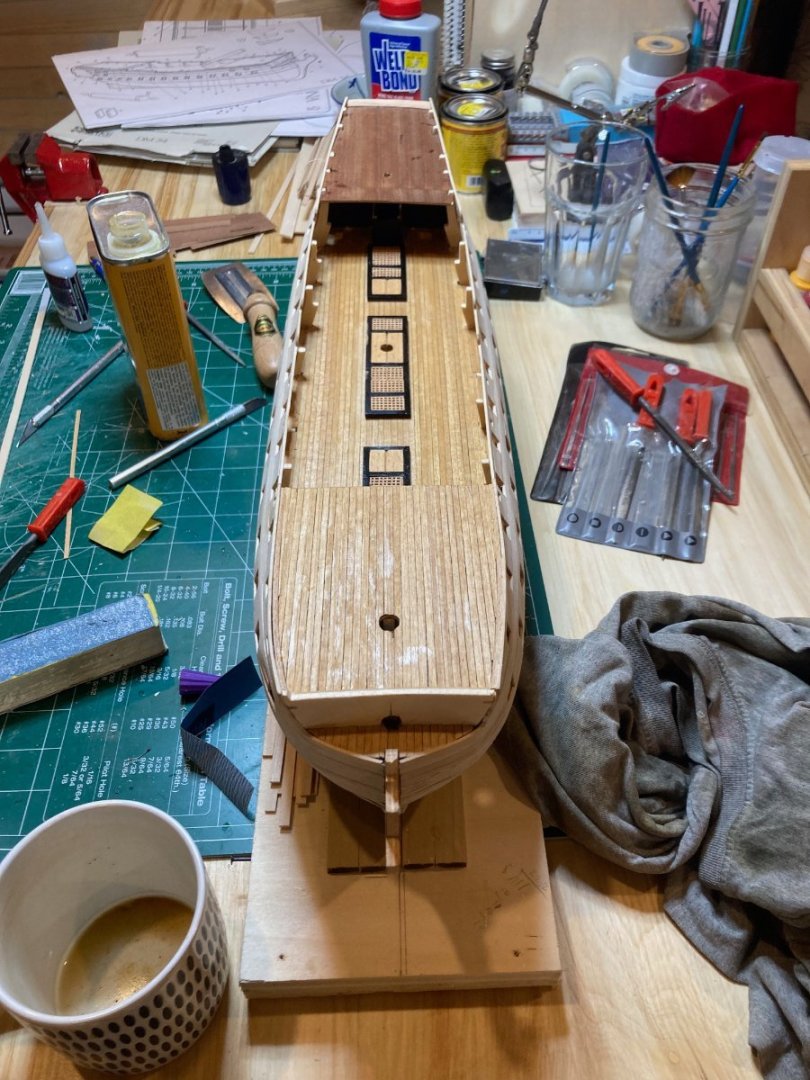
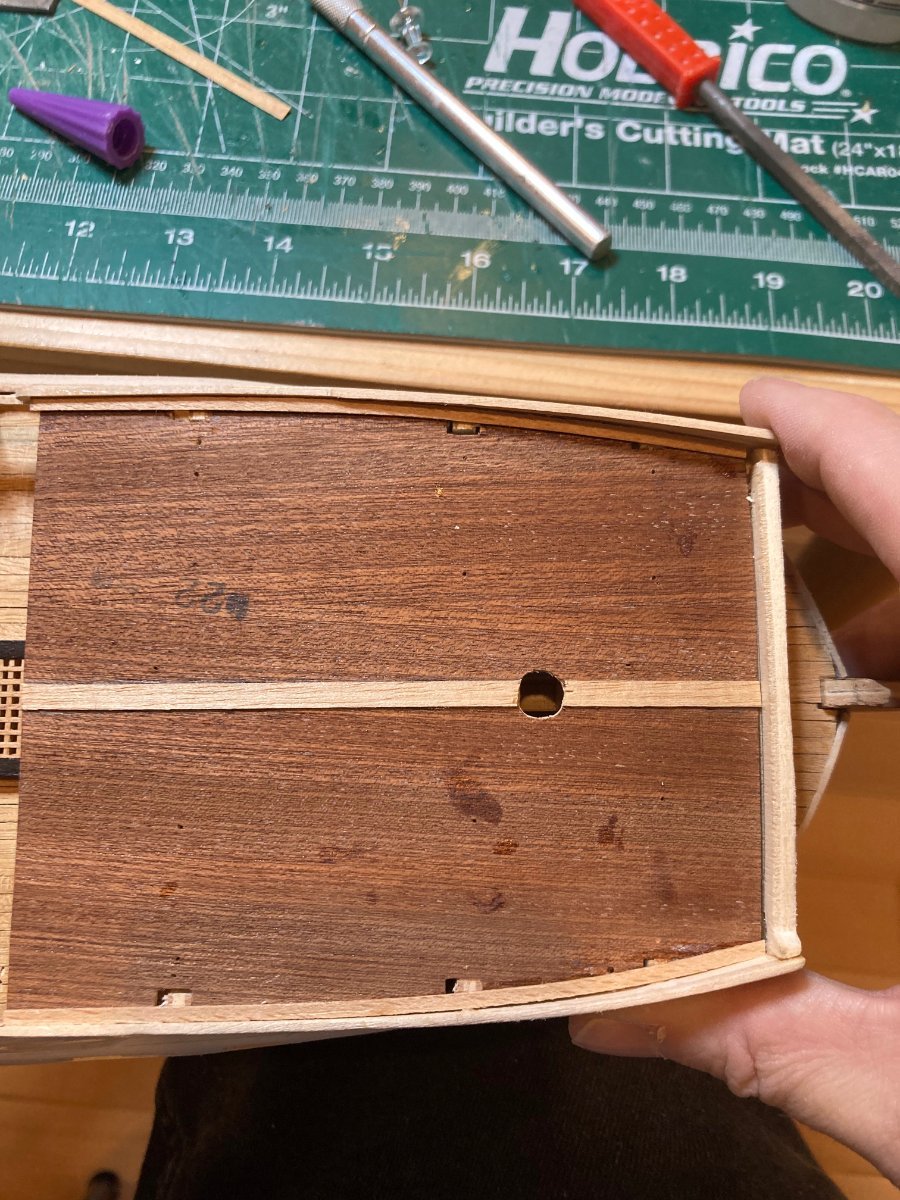
Given the need to consider an approach to the elements noted above, I decided to spend a bit of time today planking the f'csl. I installed two waterway planks to port and starboard these were from 1mm x 2mm strips of Tanganyika. The central king plank is .6mm x 4mm while the deck planking is .6mm x 3mm. A very straightforward process.
I also installed central sections of the garboard planking while considering how to proceed on the lower hull. I'll probably complete the lower hull planking forward as this is less mysterious than the planking aft, and then complete planking on the poop deck. Hopefully by that time I'll have a strategy for addressing the issues noted in my last post....until then - enjoy the photos and bye for now
hamilton


-
Well - with the Bluenose being in a very nearly-completed state (and with me still fretting over how to approach the dorys...) I've decided to turn back to HMS Bellona, which has been languishing for the last year and more.
Almost immediately on picking the model up again, I realised that I needed to re-acquaint myself with it - given that at the stage where I left it there were several threads I could pick up to move it forward - planking the f'csl and quarterdeck; working on the main cabin bulkhead beneath the poop deck; completing the lower hull planking....as I considered this I noticed two issues that I'm hoping I can get some advice on - I may post these as questions elsewhere, too - but if anyone's looking in and has advice on these I would appreciate it.
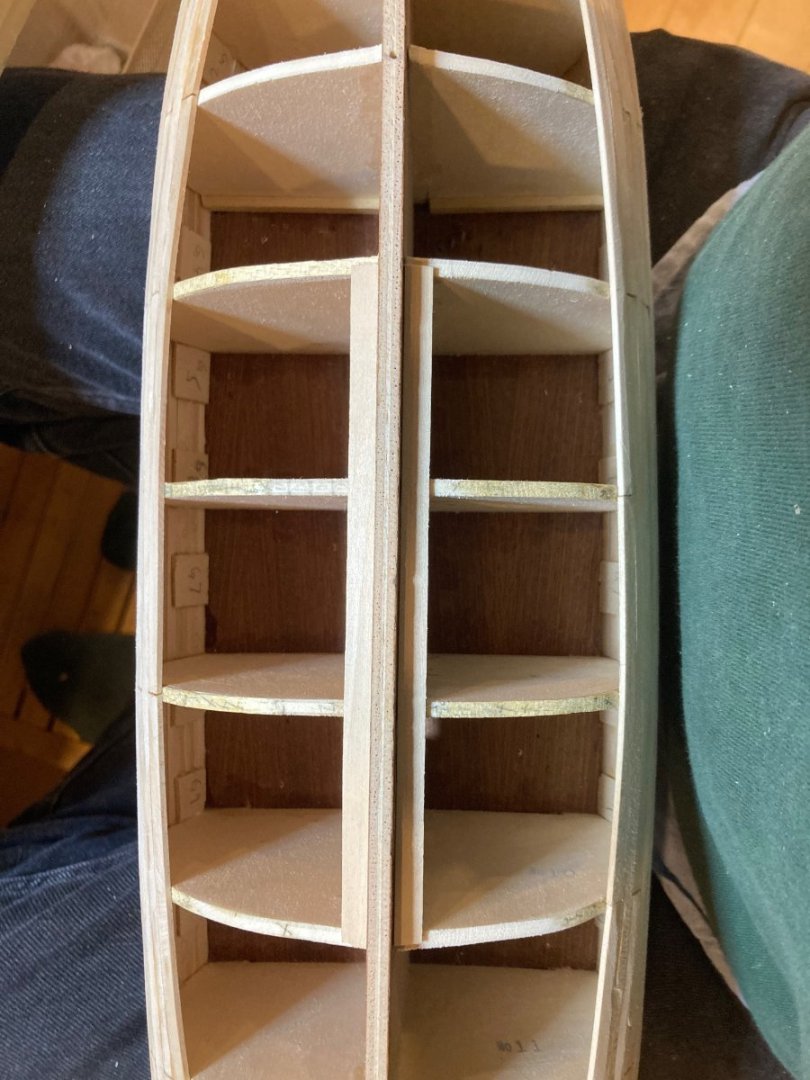
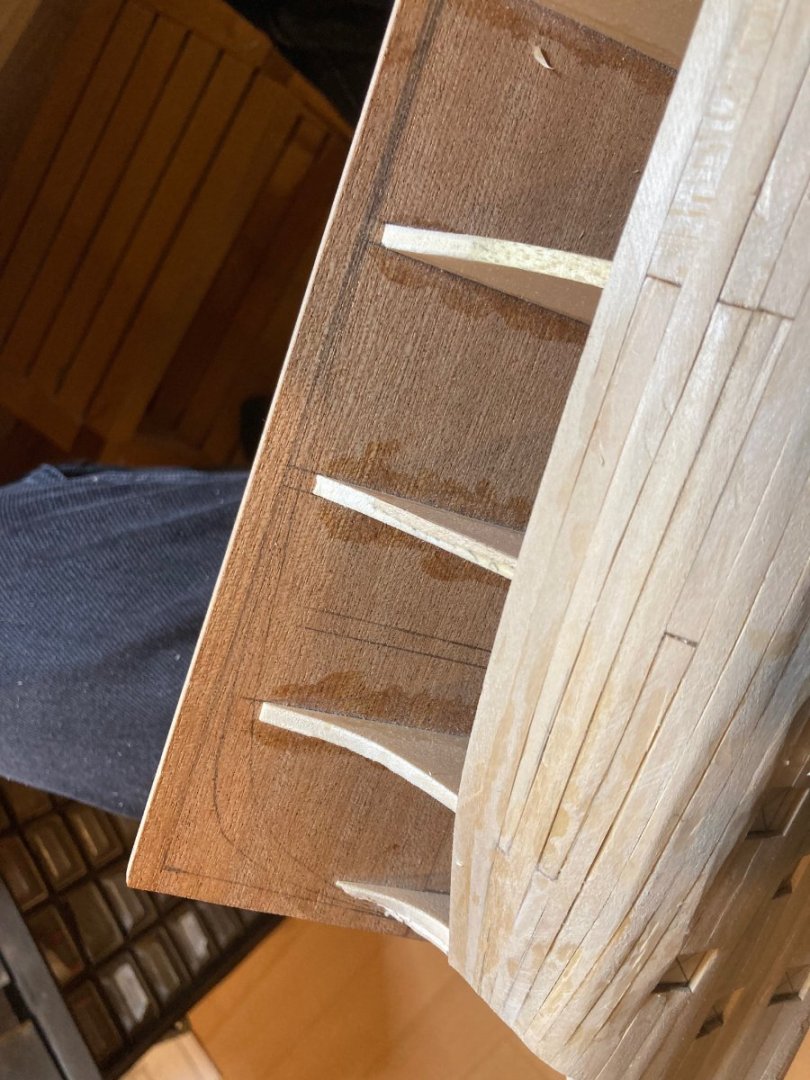
1. Lower hull planking at sternpost - I marked out the bearding and rabbet lined on the centre keel and had thought of cutting in a rabbet before installing the bulkhead frames, but the material is so soft and my hands so ungentle that I was worried about destroying this piece so I left it - now I'm face with a conundrum where I don't know how I can complete the hull planking aft while maintaining correct width of the sterpost...I could try cutting a rabbet along the aft part of the centre keel, even a shallow one, and then thinning the planks; or I could try feathering the planks along the bearding line (though this could be quite tricky especially at the transition points between the centre keel and the aft bulkhead frames.....I'll have to consider how to proceed, but any advice on these approaches would be helpful.
2. cabin bulkhead - these consist of 3 photo-etched brass parts, similar to the bulkhead under the f'csl that I installed earlier. The two p-e parts that fit on the port and starboard sides with nicely, though the starboard one might need to be trimmed at the bottom to allow the subdeck of the quarterdeck to slot in beneath them. The issue is the centre piece which does not fit at all - it is too wide to fit in the space on the model as-built....I followed the build order as laid out on the plans and installed the poop deck before adding these parts, which was probably dumb, as the space where they need to go, while not totally inaccessible, is tricky to get at. I will likely have to scratch-build this central part to fit and then use the p-e parts for the port and starboard side...fortunately, this area will be minimally visible on the completed model, so it is less of a concern than the other issue above....though installing the quarterdeck is a part of the build that I am not looking forward to.....
Anyway, here are some photos to illustrate the issues.....any suggestions, tips or advice will be most welcome! Hopefully I've explained the issues clearly....
hamilton
-
Excellent work on the masts John - there's a lot to keep in your head with this part of the build in preparation for rigging - but it's nice to start building vertically! Really starts to come to life at this stage!
hamilton
- Glen McGuire and GGibson
-
2


1921 Bluenose by John Ruy - FINISHED - Model Shipways - 1/64 scale - Canadian Fishing Schooner
in - Kit build logs for subjects built from 1901 - Present Day
Posted
Great progress John!
hamilton