HOLIDAY DONATION DRIVE - SUPPORT MSW - DO YOUR PART TO KEEP THIS GREAT FORUM GOING!
×


hamilton
-
Posts
1,931 -
Joined
-
Last visited
Content Type
Profiles
Forums
Gallery
Events
Everything posted by hamilton
-
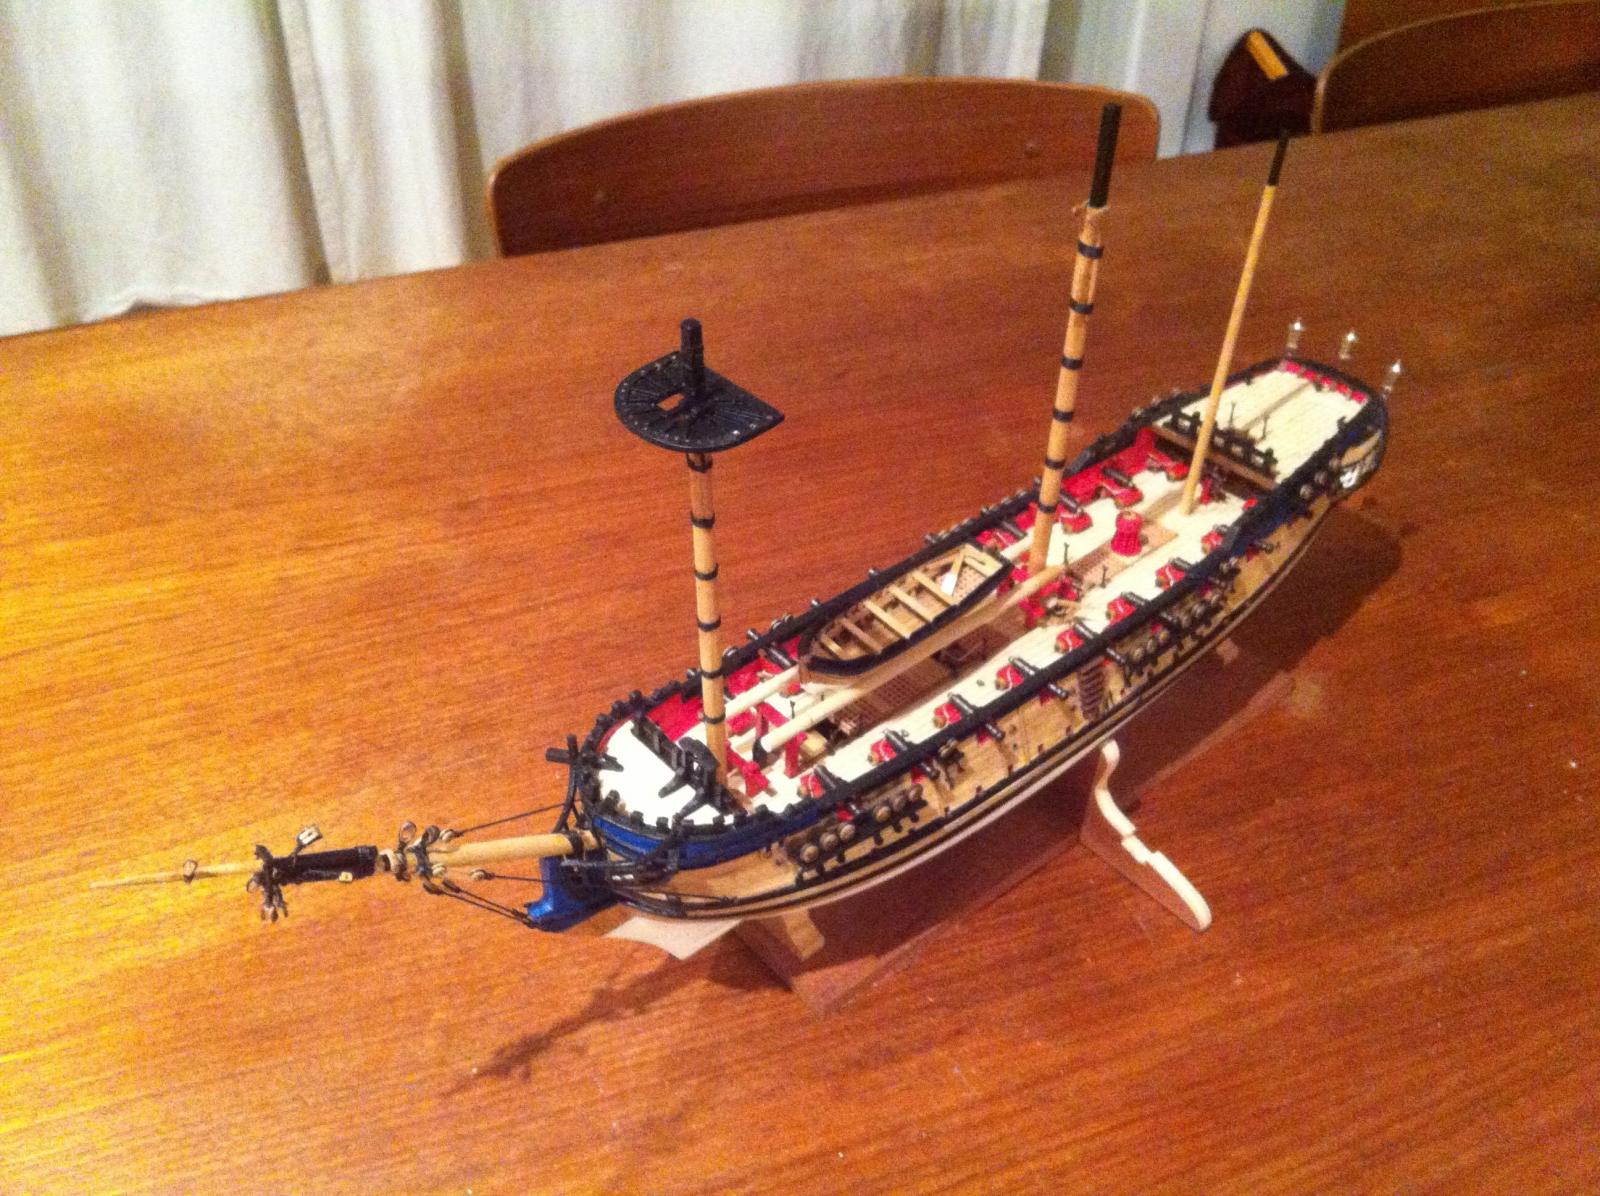
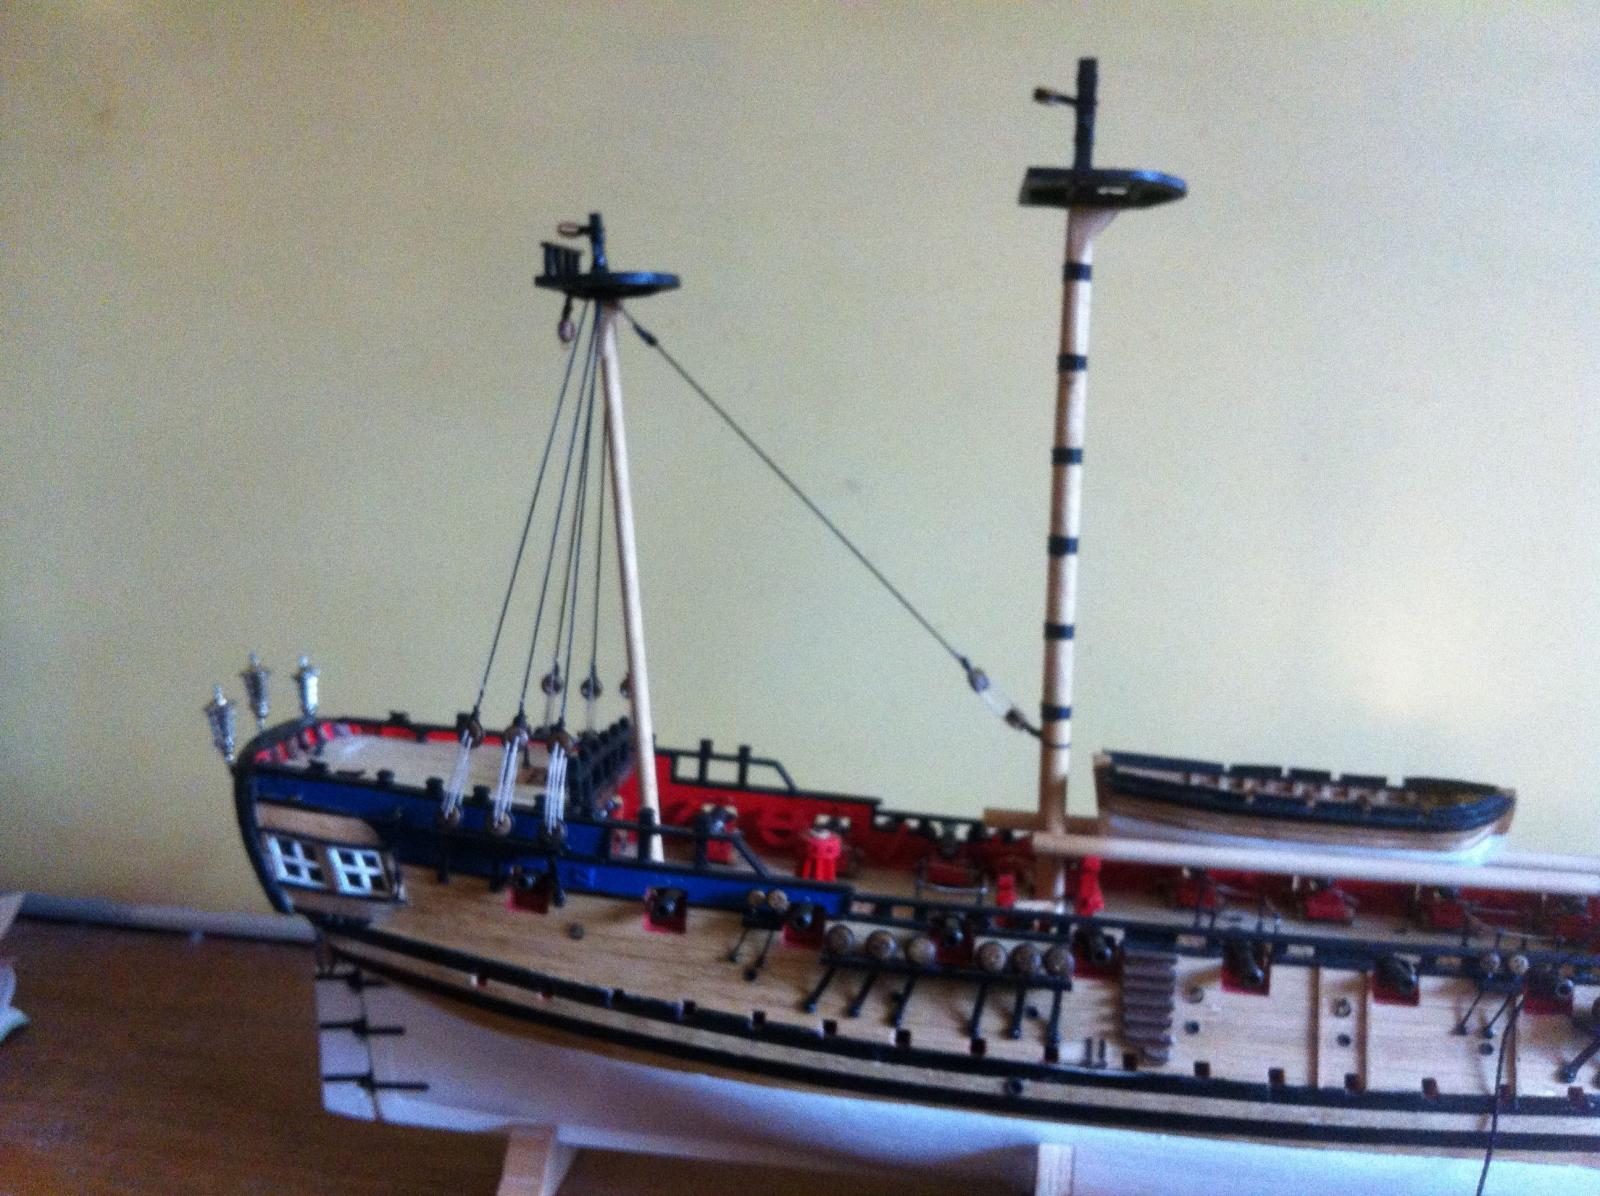
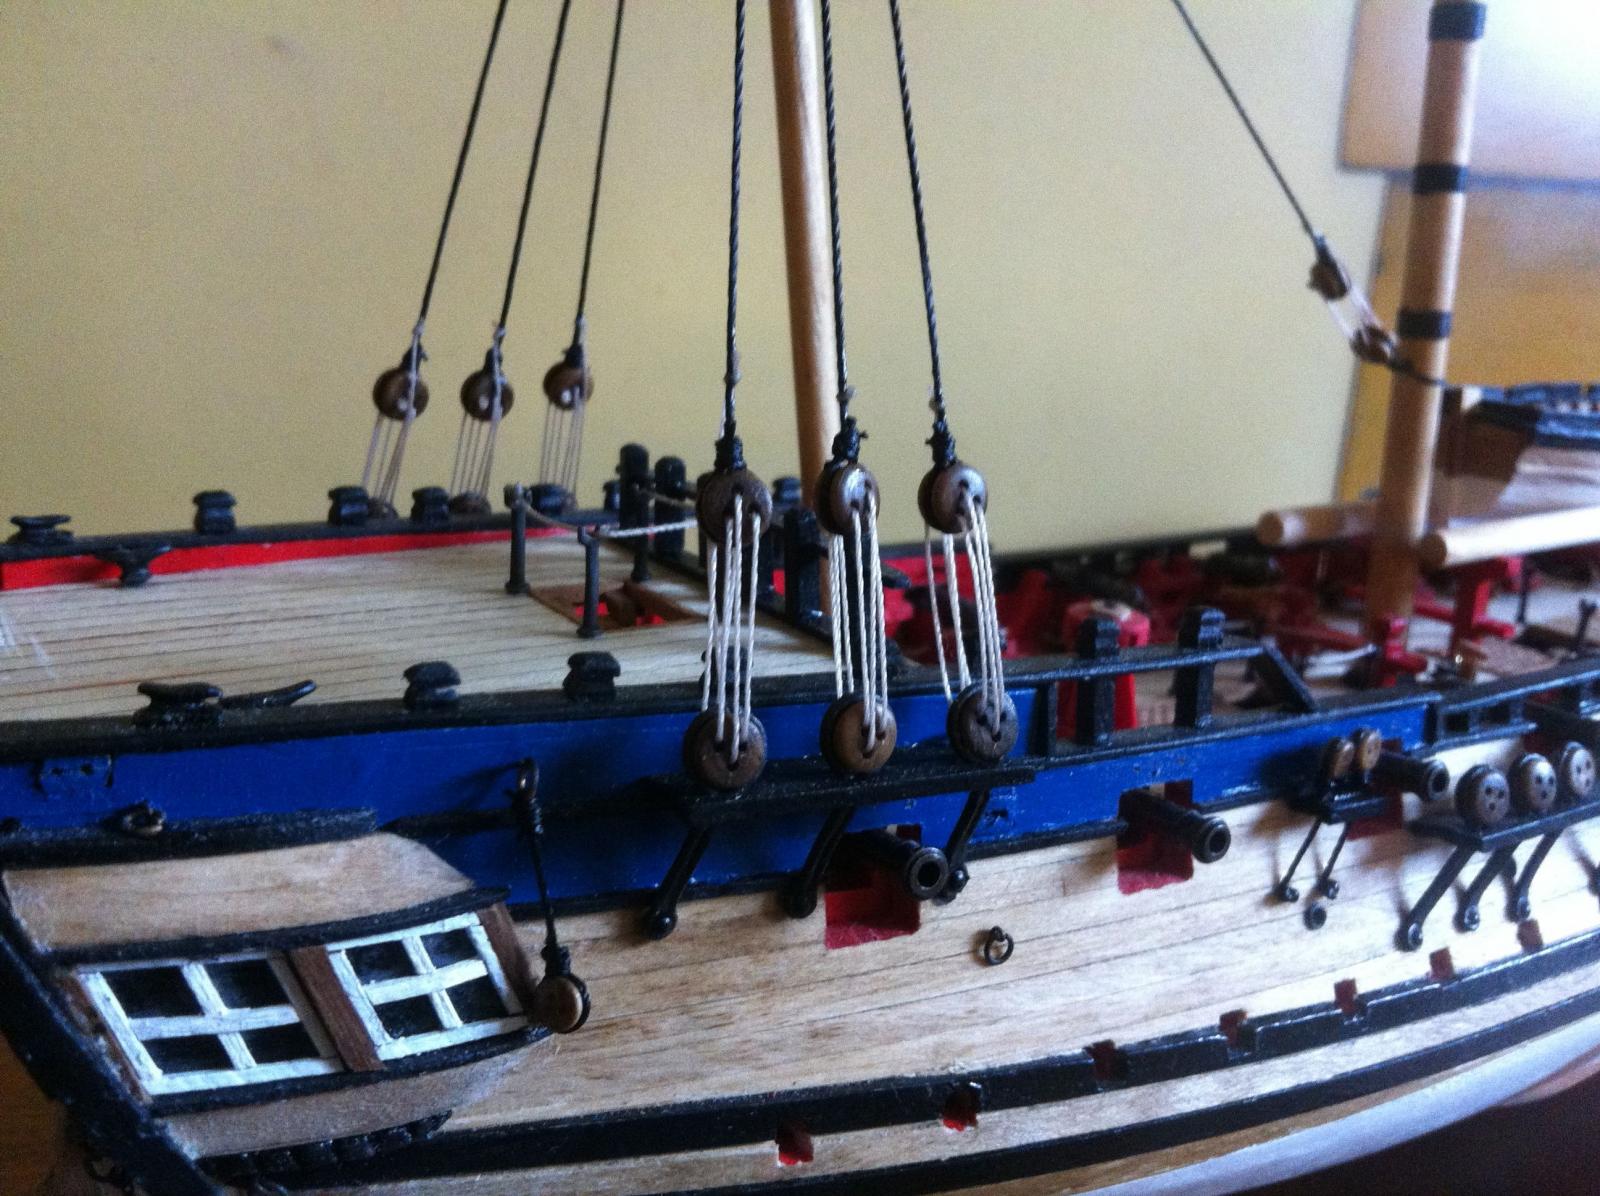
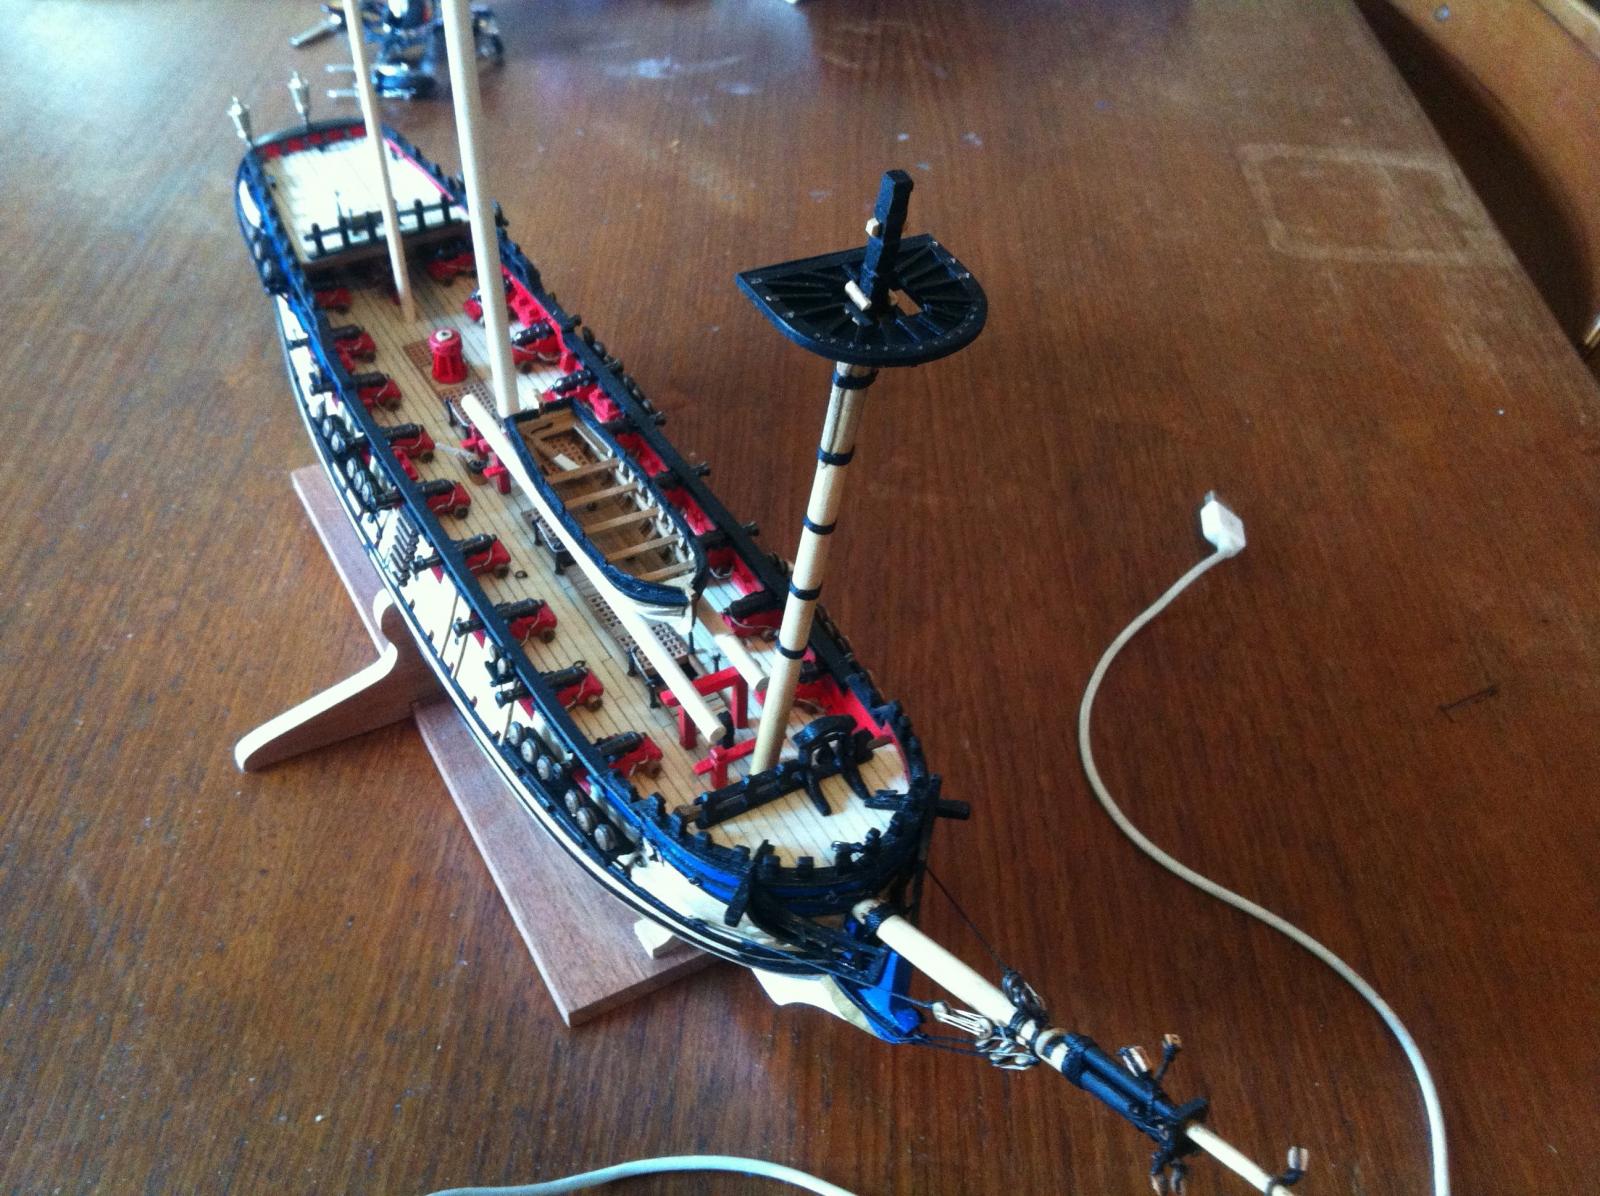
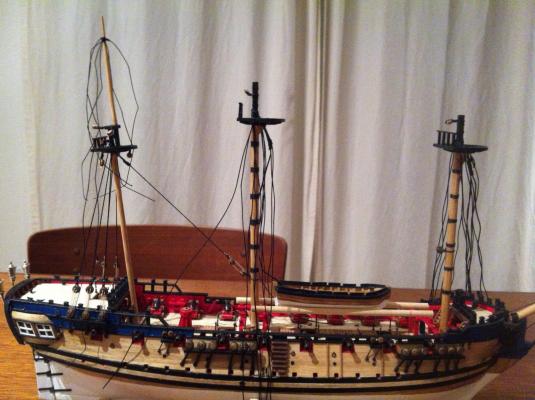
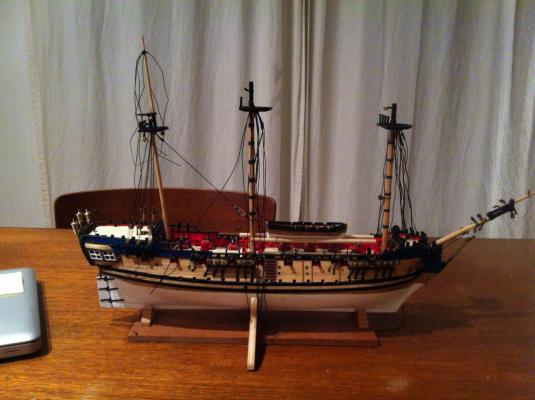
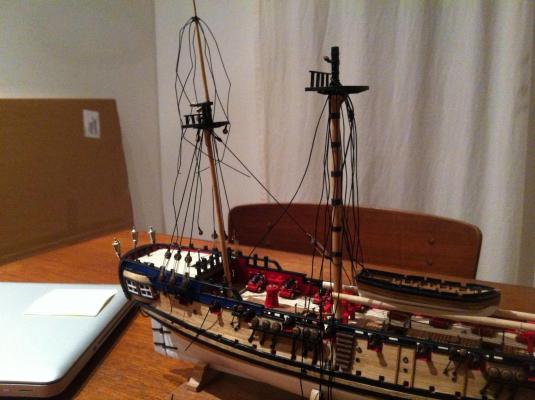
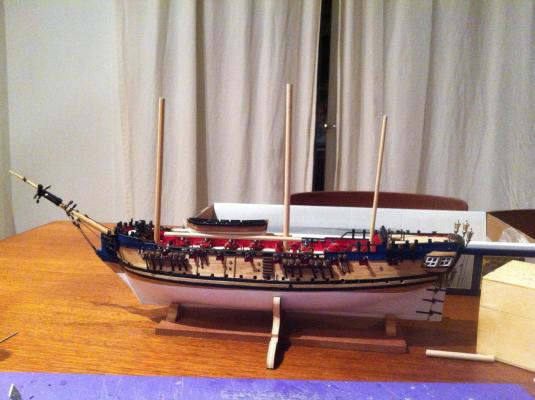
 Well I've received word that the 2mm blocks are winging their way across the pacific! And I think I'll be ready for them when they arrive.... Since my last post, here's what I've managed to do: 1. All lower masts & mast tops completed 2. Lower shrouds & stays/preventer stays (where appropriate) added (though not all rigged) 3. Mizzen mast stepped; mizzen lower shrouds & stay rigged 4. Mizzen topmast constructed & installed 5. Mizzen topmast shrouds, stay & backstays added (but not yet rigged) So right now, the Blandford looks to be in quite a bit of disarray - lots of lines hanging around not doing much. Nevertheless, given that it's been a while since my last photographic update, I'll add a few photos....enjoy! hamilton
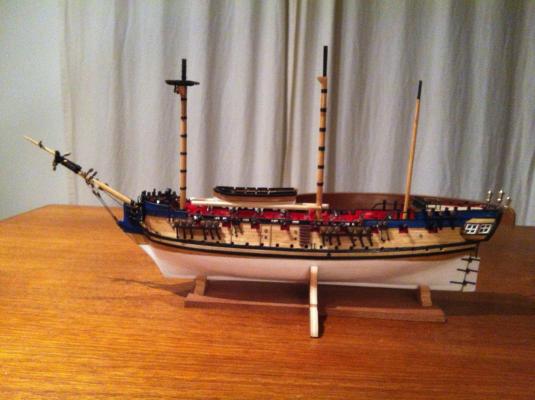

-
Would love to go there someday....our annual vacations normally don't take us back east, but maybe soon.... hamilton
- 2,250 replies
-
- 1
-

-
- model shipways
- Charles W Morgan
- (and 1 more)
-
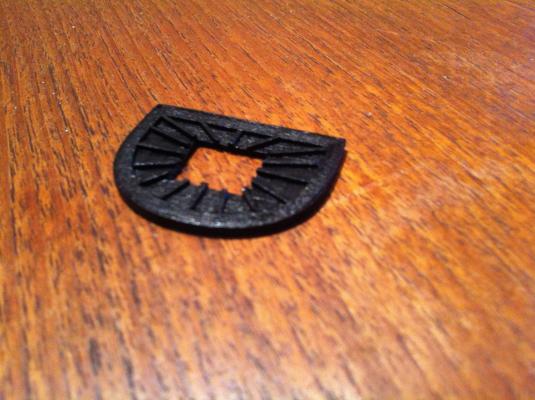
Looks great Mobbsie - have to say I can't imagine what a triangular deadeye looks like! Or how such a thing could make it into a kit box in the first place...Regardless, excellent work! hamilton
- 1,279 replies
-
- 1
-
-
- agamemnon
- caldercraft
- (and 1 more)
-
This just keeps getting more and more impressive!! Ian your work is a real inspiration hamilton
-
Hi Ferit: I'm assuming that the idea of you not building another ship model is just exaggeration.....no one with your talent for this should give it in! Anyway, prior to the Greyhound/Blandford, my experience with Corel was quite good. But it seems that like all kit manufacturers there are, as Mark says, both major and minor inconsistencies. You would think that on a high end kit like the WVH the inconsistencies would be of the minor variety - the Corel Bellona, sitting on my shelf now, looks to be a really nice kit....and the WVH is a step up from there....I would love to see how that giant would look after passing through your hands! Pretty amazing, I'm guessing hamilton
-
Looks great Augie - this seems like a very useful tool for those tight corners - might be worth the investment! hamilton
- 2,191 replies
-
- 1
-
-
- confederacy
- Model Shipways
- (and 1 more)
-
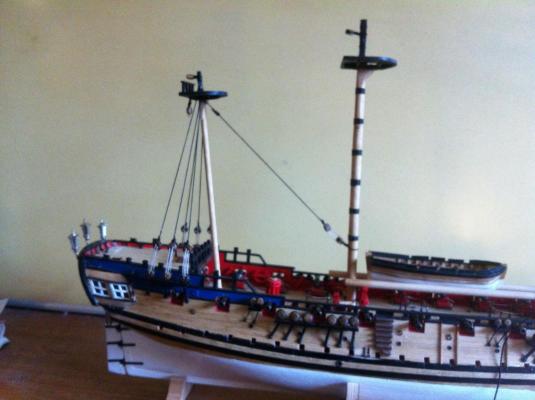
Thanks John Ferit and Alistair! John - obviously you have to come up with a "portable modelling workbench" for those times when you're away. Not only will it allow you to enjoy your holidays more thoroughly, but you could probably also make a tidy business out of such a thing! Ferit - though I'm a university prof in a communication department, I try not to complain too much about grammar! It's hard enough to get ideas across in one's native language let alone another one! Alistair - thanks for the offer! See my PM to you. I only need 6 for the crowsfeet tackles....the size is intimidating - and I had thought of fudging it with some 3mm blocks, not yet clearly knowing how awkward they might look.... Anyway there's been a bit of progress amidst work. I've now completed and dressed the foremast and the mizzen mast, and stepped and rigged the mizzen. I've realised that it will be necessary for me to construct, install and rig the main topmast before I get to the foremast. This is because I need to set the main stay and main preventer stay tackles at the foot of the foremast and this will be very tricky with the foremast shrouds rigged. This evening I hope to finish off the main mast (I need to re-position a block or two and add the rail on the mast top) and then add the rigging elements (shrouds, stay, preventer stay), with the rigging to come tomorrow. Then its on to build a couple of main mast tops (one to be installed and one for support of the ship's boat on the gallows. I figured I'd build both at the same time so I can get them as close to matching as possible. Anyway it's started raining here - something which will be more or less continuous for the next 6 months. No time is better for modelling, and yet there is no time!!!! Hope you're all enjoying yourselves! hamilton
-
The cathead sheaves look amazing - nicely done! hamilton
-
Looking good Ferit - the light in your working area looks nice too! Must be nice to work in such beautiful sunshine hamilton
-
Taters for the oven and a pheasant for the rotisserie, please - at 1:75 scale, obviously....you can make them out of metal if you prefer! Shouldn't be a problem, right? hamilton
-
Lower mast tackles, Burton pendants/tackles, top ropes
hamilton replied to hamilton's topic in Masting, rigging and sails
Thanks John for the confirmation, Frank for the musing, and Henry for the definitions! Much appreciated hamilton -
Lower mast tackles, Burton pendants/tackles, top ropes
hamilton replied to hamilton's topic in Masting, rigging and sails
Thanks a lot Frank - so if I read you right - just have the pendants rigged as such - hanging loose? Or would they be secured somehow - Lees mentioned lashing the Burton pendants to the topmast shrouds for fore and main topmasts....I'm assuming this would go for the tackle pendants on the lower masts, too? hamilton -
Hi there: In doing more research on the rigging of the HMS Blandford (6th rate ship rigged post ship, 1719), I've been reading about (in James Lees' Masting & Rigging of English Ships of War) the following lines whose function I'm a little unclear on.... 1. "Pendants, runners & falls of tackles" - a feature of the lower fore & main masts. Lees suggests that smaller ships had one pair on each mast,with a single block seized in the end hanging at the level of the upper catharpins. He then says that runners are seldom seen rigged on models and also that the falls are rigged with a single block used in conjunction with the double block on the runner....this would lead me to believe that the falls would not be rigged on the model, either, if the runners weren't. This would mean that the pendant would just kind of hang there.....Would it be correct to rig the falls in conjunction with the block on the pendant? And what is the function of these lines - lateral stabilisation? 2. Burton pendants and falls - mentioned in conjunction with the Mizzen lower mast and fore and main topmasts - Lees says that these were standard on most ships but that the falls were "made up" in the top with the end coiled up and lashed to the fall when not in use.....but what is the context of use? And should these be rigged on the model? 3. Toprope pendants and falls - Lees shows the standing ends of these lines as being seized to eyebolts on the forward underside of the lower mast caps. From there it runs through sheaves in the topmast heel, then up through single blocks seized to eyes on the aft underside of the caps....the pendants end in thimbles. This seems straightforward enough. But Lees' description of the fore topmast toprope falls is confusing....He says that the lower block was made fast to the main deck on either side of the main hatch, with the falls leading to either side of the belfry....this makes no sense to me, as the belfry is mounted on the aft edge of the forecastle and the main hatch is, obviously, at mid-ships....I'm also unclear on the purpose of the topropes.... Anyway, sorry for the lengthy post, but any clarification on these points would be most helpful - thanks a lot! hamilton
-
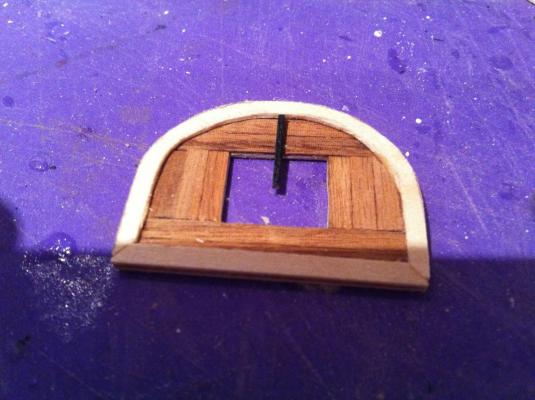
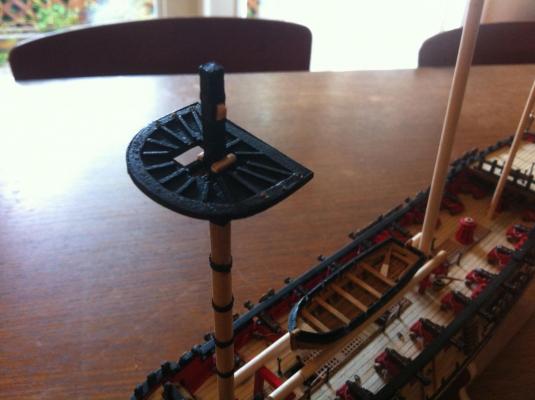
OK let's try again..... Next after fiddling with the lengths of the lower masts, here is what I arrived at.... These are just the raw dowels set in the mast holes - the rake in the mizzen isn't accurate and the rake in the foremast shouldn't be there at all. Anyway, this is just to demonstrate relative size... Here are the foremast cheeks and bibbs which I made as 1 piece instead of separately, thinking that to make separate parts at this scale would simply be too tough. Here is the foremast top, unfinished. Corel's laser cut part was accurate with respect to dimensions, except the thickness (1.5mm) which would have made the top much too bulky after adding the planking and the margins. So I traced the laser cut part onto a 1/32 thick sheet of lime and planked it using .5mm x 3mm strips. The margins are also 1/32"lime. It looks a little mongrelly here, but after painting it's much better (sorry for the bad focus!) Finally here are a couple of the shots of the fore mast dry fitted. It's not exactly finished yet - I still have to paint the bolsters and the mast head cleats and also reduce the latter's size so they don't look so bulky.... You may notice the holes drilled in the forward edge of the top for the crow's feet, which I plan on adding. My worry here is that the smallest blocks I have are 3mm, which even at that small size is too big for the crow's feet tackle. A suitable euphroe I can probably manage, but the tackle blocks will be a challenge. I'm not sure how much I can reduce the size of the 3mm blocks supplied by corel (which at any rate are very fragile things) though I might be able to do something with 1/8" blocks supplied by model shipways and leftover from previous builds (though these are slightly larger than the corel ones!! Anyway that's a future worry. Hope you're all enjoying the day - now back to work!! hamilton


-
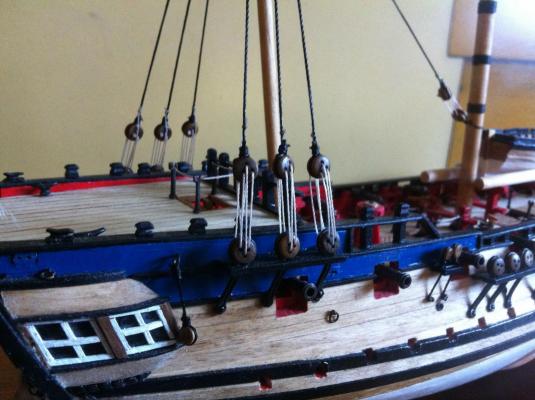
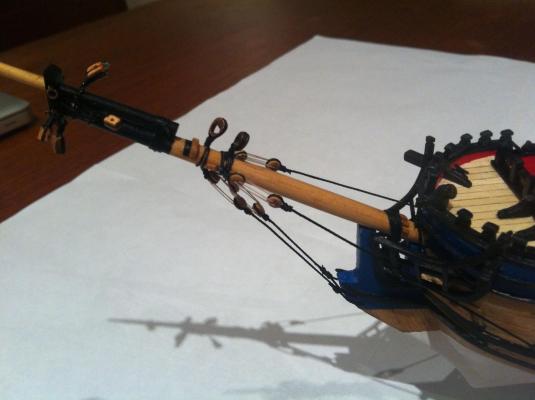
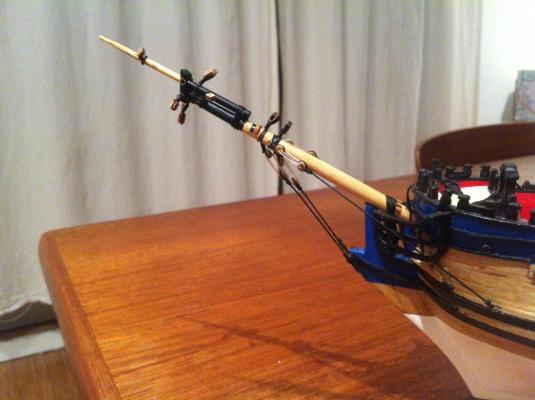
OK so I'm working from home today and I thought I'd take a break and load some photos. Lots to do for work so I'll make it quick.... First we have the bowsprit standing rigging - shrouds and bobstays. Goodwin shows one, but Lees says that 2 were carried after 1719, so I went with Lees... So for some reason I'm not able to upload more photos than this in this post....not sure what's going on - I'll try to continue in another.... hamilton
-
Hi Ian: I dedicated a bit of time this summer to learning the rules of cricket, since my son (4 years old) saw a bit of a match on tv and was completely captivated. We discovered that there are a few local leagues here and a really nice little pitch down in Stanley park here in Vancouver - not an arena, but just in an open field surrounded by huge cedar trees and with a great view of the mountains and the city. Many a Sunday picnic surrounded by the very few people around here who have an interest in the game! As for ruggers......sorry! I'm a basketball man....also uncharacteristic for a Canadian..... And I think it would be very valuable adding some notes on your soldering tools. To date I've been able to avoid soldering, but when I was building my Glad Tidings, I felt I could have done a much better job of the metal work if I'd had a decent scale soldering tutorial..... Anyway, keep up the great work! Maybe if you haven't already, you should try a whaling ship - modelling the try works on a C.W. Morgan would be a great exercise in your skilled hands. Bye for now hamilton
-
Thanks Frank - I've admired your Supply build from afar and feel very flattered by your words! Bye for now hamilton
-
Thanks Augie and Mark! I will, of course, be dedicating a portion of my scarce time to following your builds!! hamilton
-
Well there has been some progress on the Blandford, but I have no photos to show for it yet, unfortunately. I've not been documenting the last stages of the build as closely as I have in the past, mostly since I have much less time for modelling with the start of another academic year. So while I'm at the bench, I prefer to work rather than take photos. There will be some in the near future, I promise.... I've spent the last 3 days puzzling through the fore mast. Lots of trial and error following all the questions about calculations of length. The final lengths of the lower masts I posted above. I cut the dowels to length (actually about 10mm longer in each case) and dry fit them on deck, checking the look and trimming until i got something that looked right. The fore mast has been a kind of experiment. Shaping it and squaring the head was not a problem, but what to do with the head was another matter. I added some 1/16 pinstripe tape as iron bands, which I thought added a nice subtle detail. I then thought to add the vertical battens, which I made out of 1/32 x 1/32 lime. I installed these (2 on each side as illustrated in Goodwin), and then sanded them down even thinner to try and approximate the very small scale. I thought they looked pretty good, but once they were done it was clear that they threw off the dimensions of the other elements (specifically the top and the topmast/cap) so I did away with them and had to strip the head and re-do it. I did add rope woldings (5) and scratch built the bibs and cheeks since the laser cut ones provided were nowhere near the mark. Making the top was really a lot of fun, and I think it'll look great once it's finally installed and adorned with railing and topmast shroud deadeyes.... Anyway, as I say, there isn't a huge amount of time for modelling in my world, as there is during the summer, so I won't be posting here quite as frequently as before. I'll try to keep my updates with photos, since all this reading is dull work if there are no photos to draw the eye.... Hope you're all enjoying yourselves.... hamilton
-
Thanks Alistair! It's possible it won't! But I don't know....after all the problems I've experienced with the adaptation, I might for my next build just do something right out of the box...for one thing, we'll have a new baby and there will be less time....for another, my next build is a gift (as many of them have been) and I'd like to complete it in time for the recipient's birthday - in June.... Anyway, we'll see - when I get to my Bellona, I may again turn to the AOS for inspiration and adaptation (I hesitate to say "improvement") Your Pegasus is shaping up very well, by the way! hamilton
-
Thanks BE: I will most likely try to doctor these lanterns - ordering is not really in the realm of possibility. I checked out your work on the Pegasus lanterns, and of course - they look amazing! I have a "yellow ochre" paint that does not really look like the ochre I see used on model ship's - it's an artist acrylic from Golden that has a little too much green in it to be useful....not sure how I'll address this issue yet, but since there's no pressure to complete the lanterns before moving on with the masting and rigging, I'll just mull it over for now.... Thanks again BE - you're always a wealth of great ideas and useful resources! hamilton
-
Thanks Frankie - I'll have to revisit the rigging plan to see if there's anything amiss with what I've already done - but this makes sense. Thanks again hamilton
-
Thanks a lot Thanasis!! A very clear and precise description with a great illustration - very much appreciated!! hamilton