hamilton
-
Posts
1,933 -
Joined
-
Last visited
Content Type
Profiles
Forums
Gallery
Events
Everything posted by hamilton
-
 Beautiful looking model! hamilton
 -
This should be a good one! An impressive looking kit! I know it might be early to ask, but what are you thinking regarding wood substitutions? hamilton
-
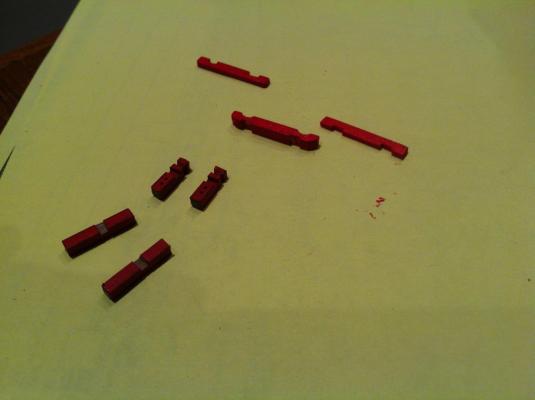
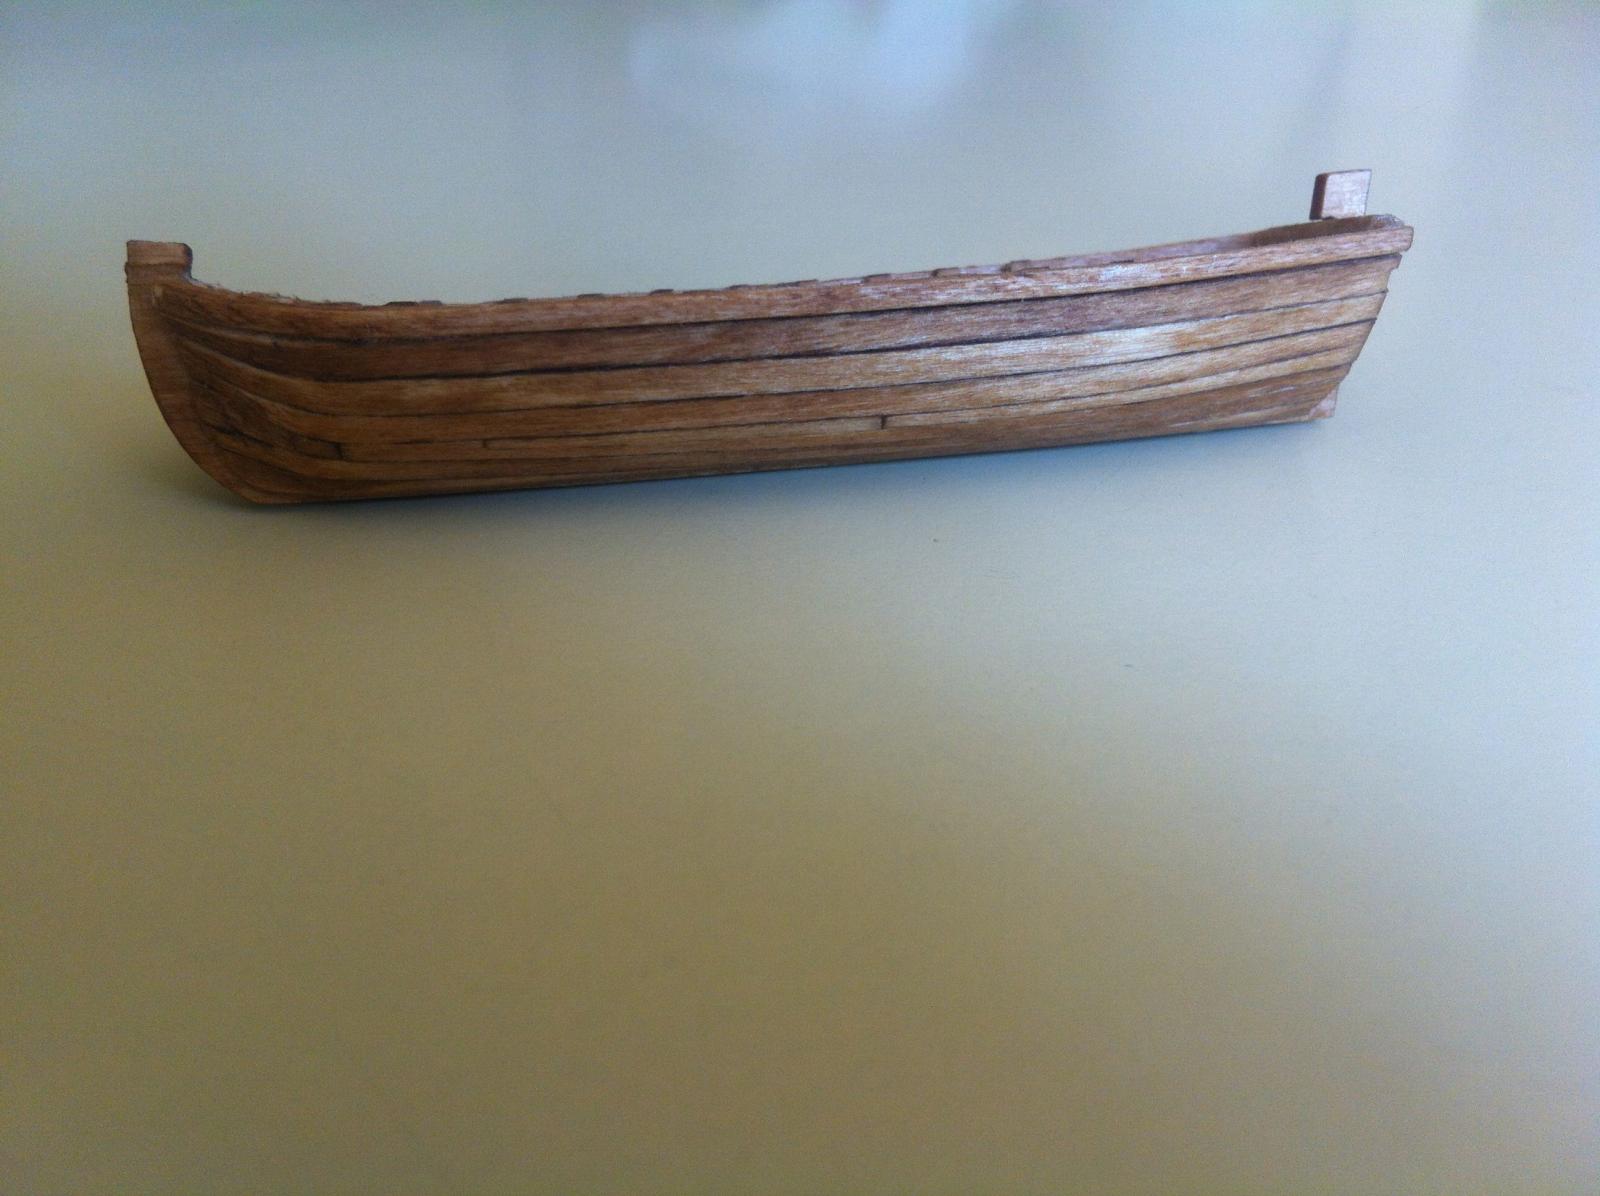
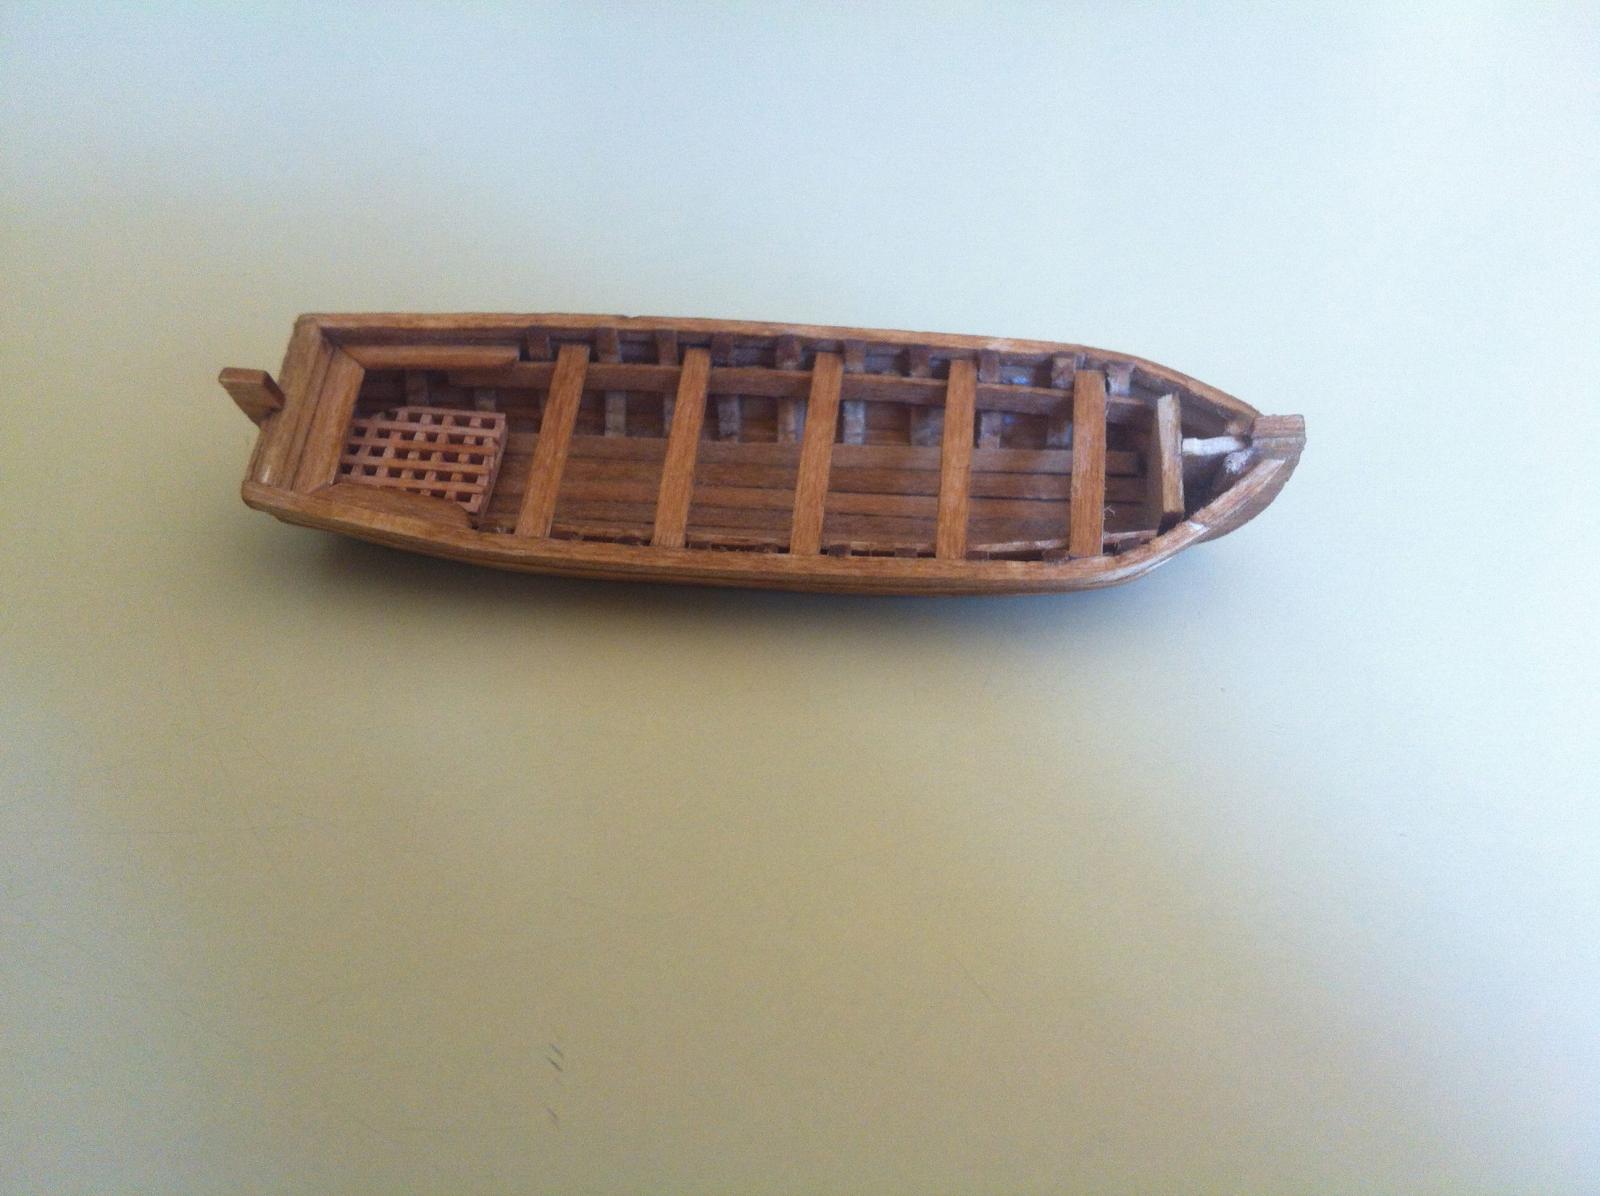
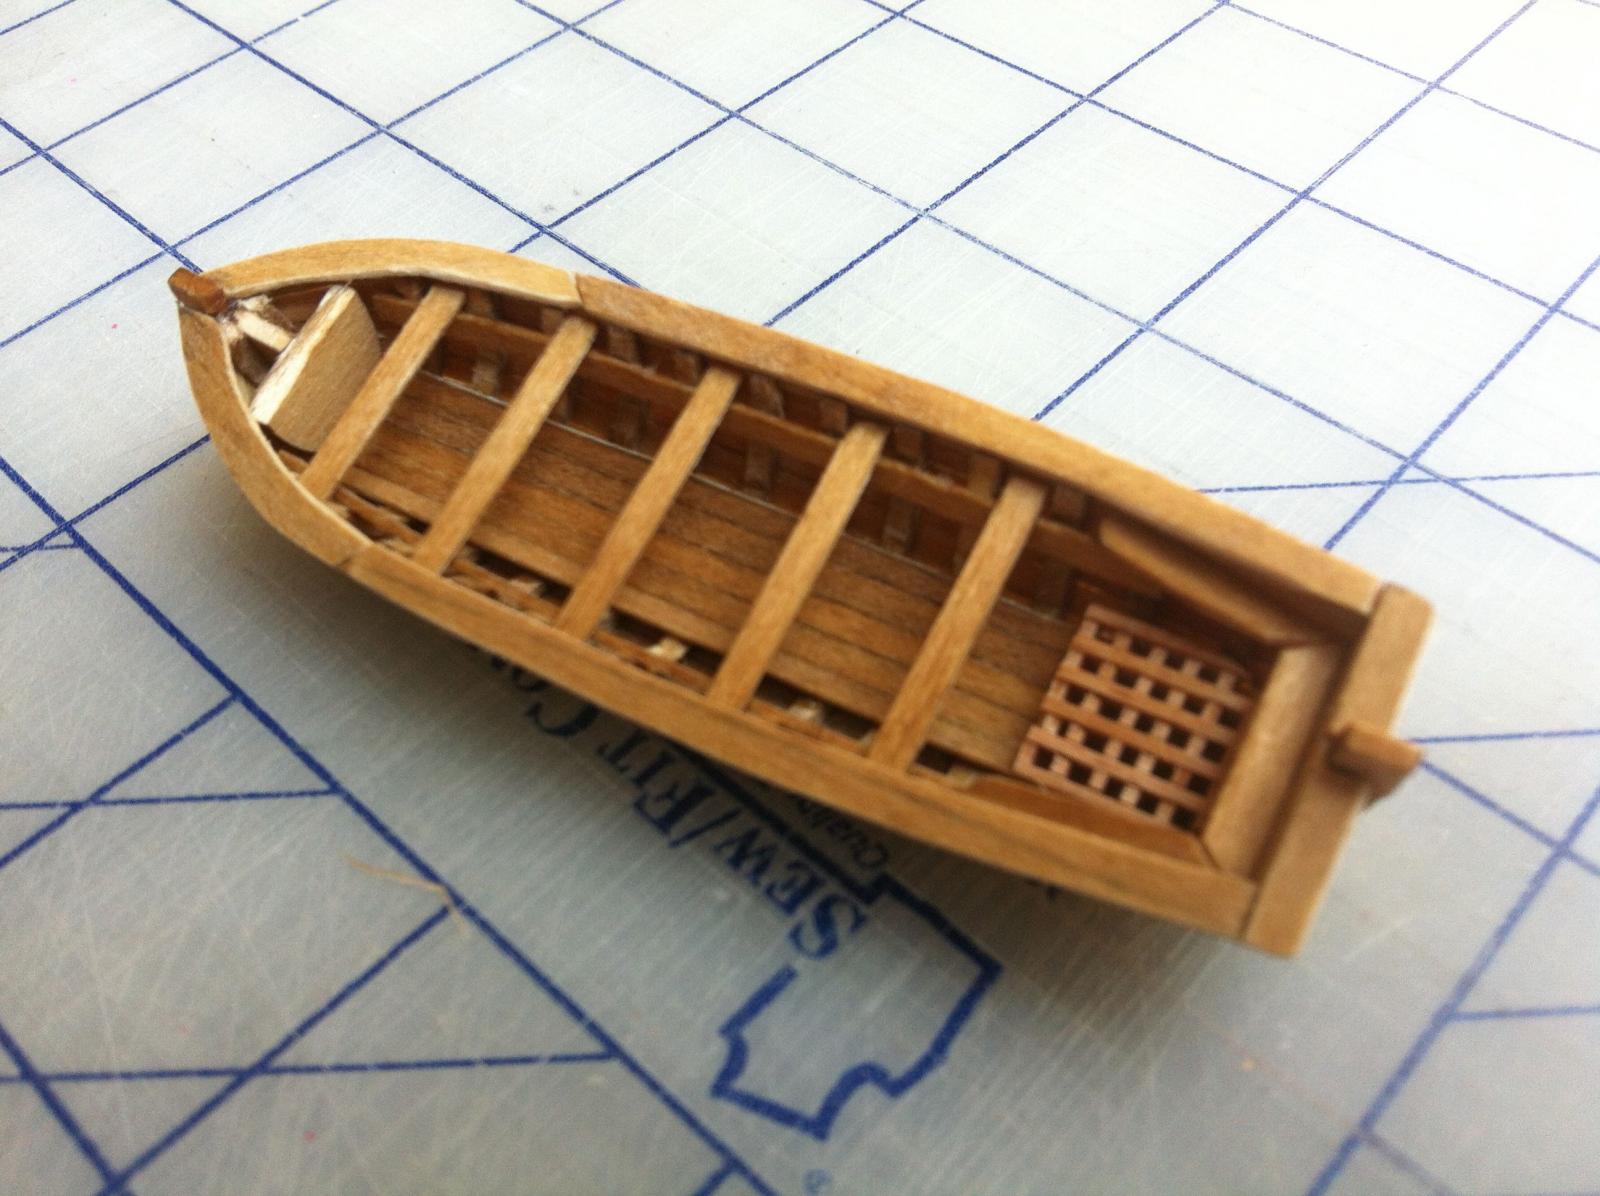
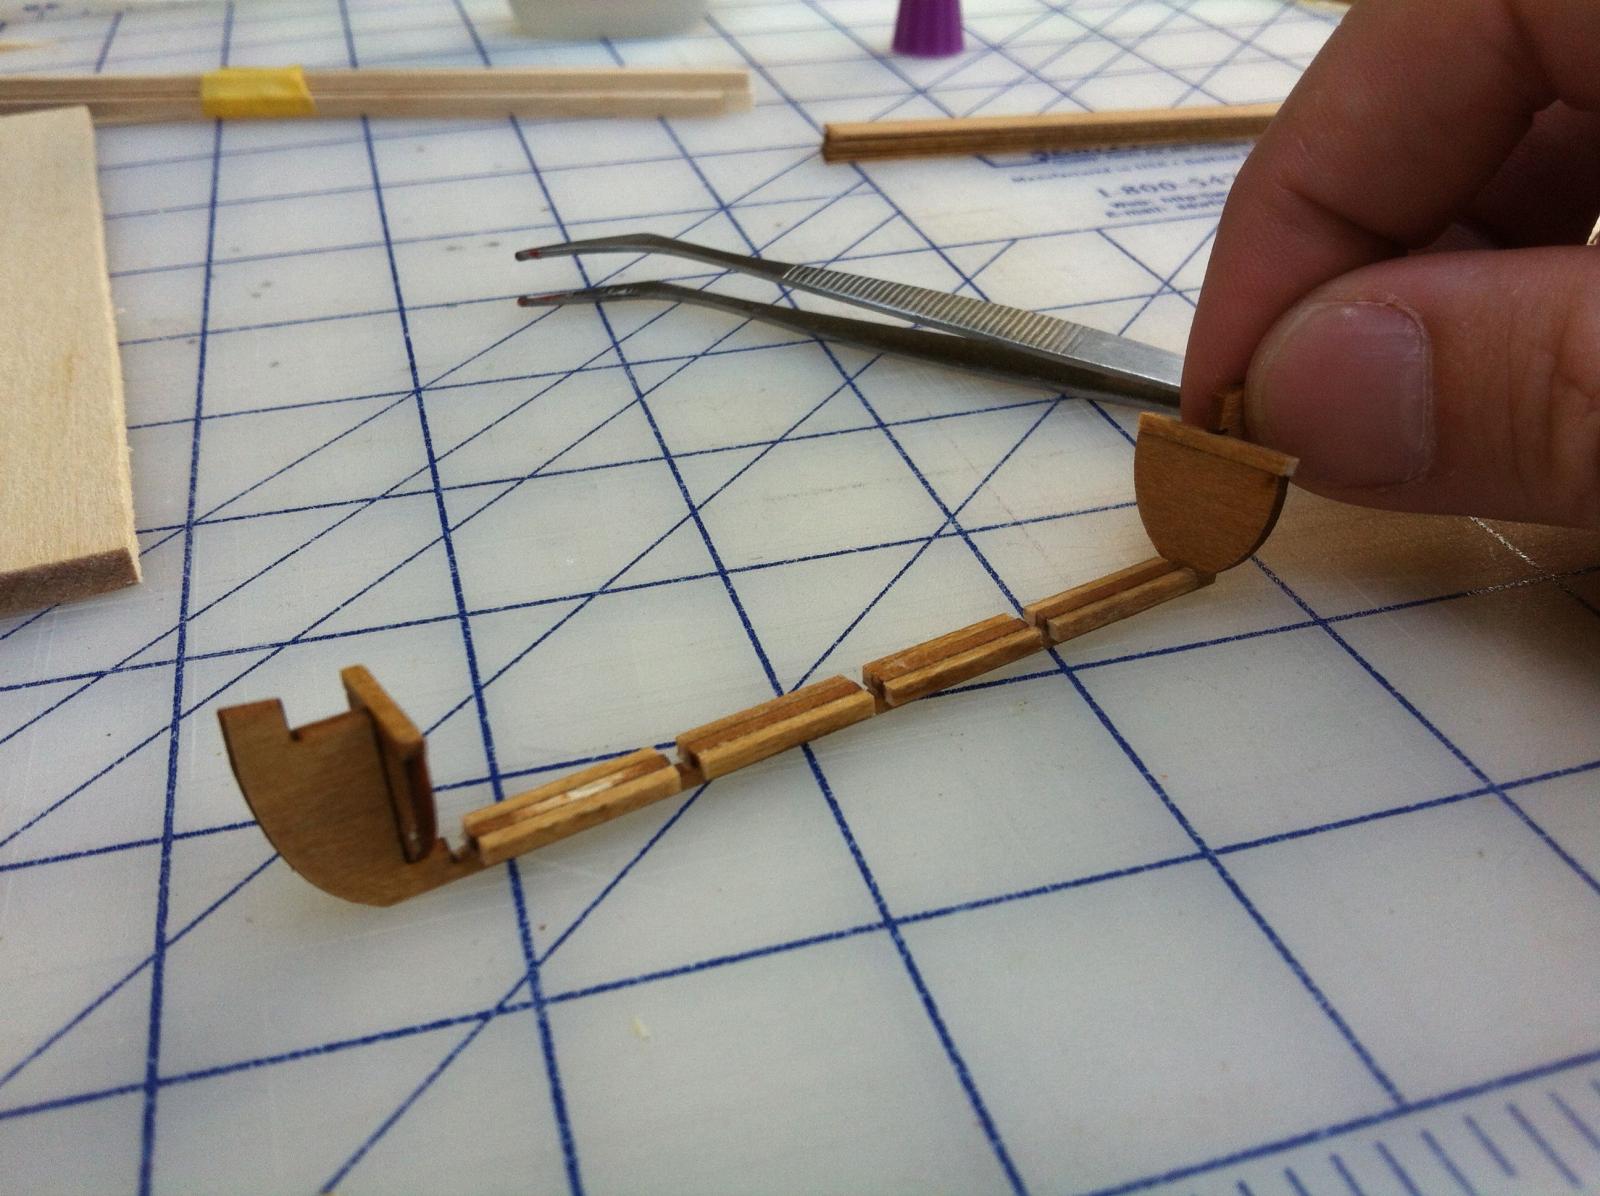
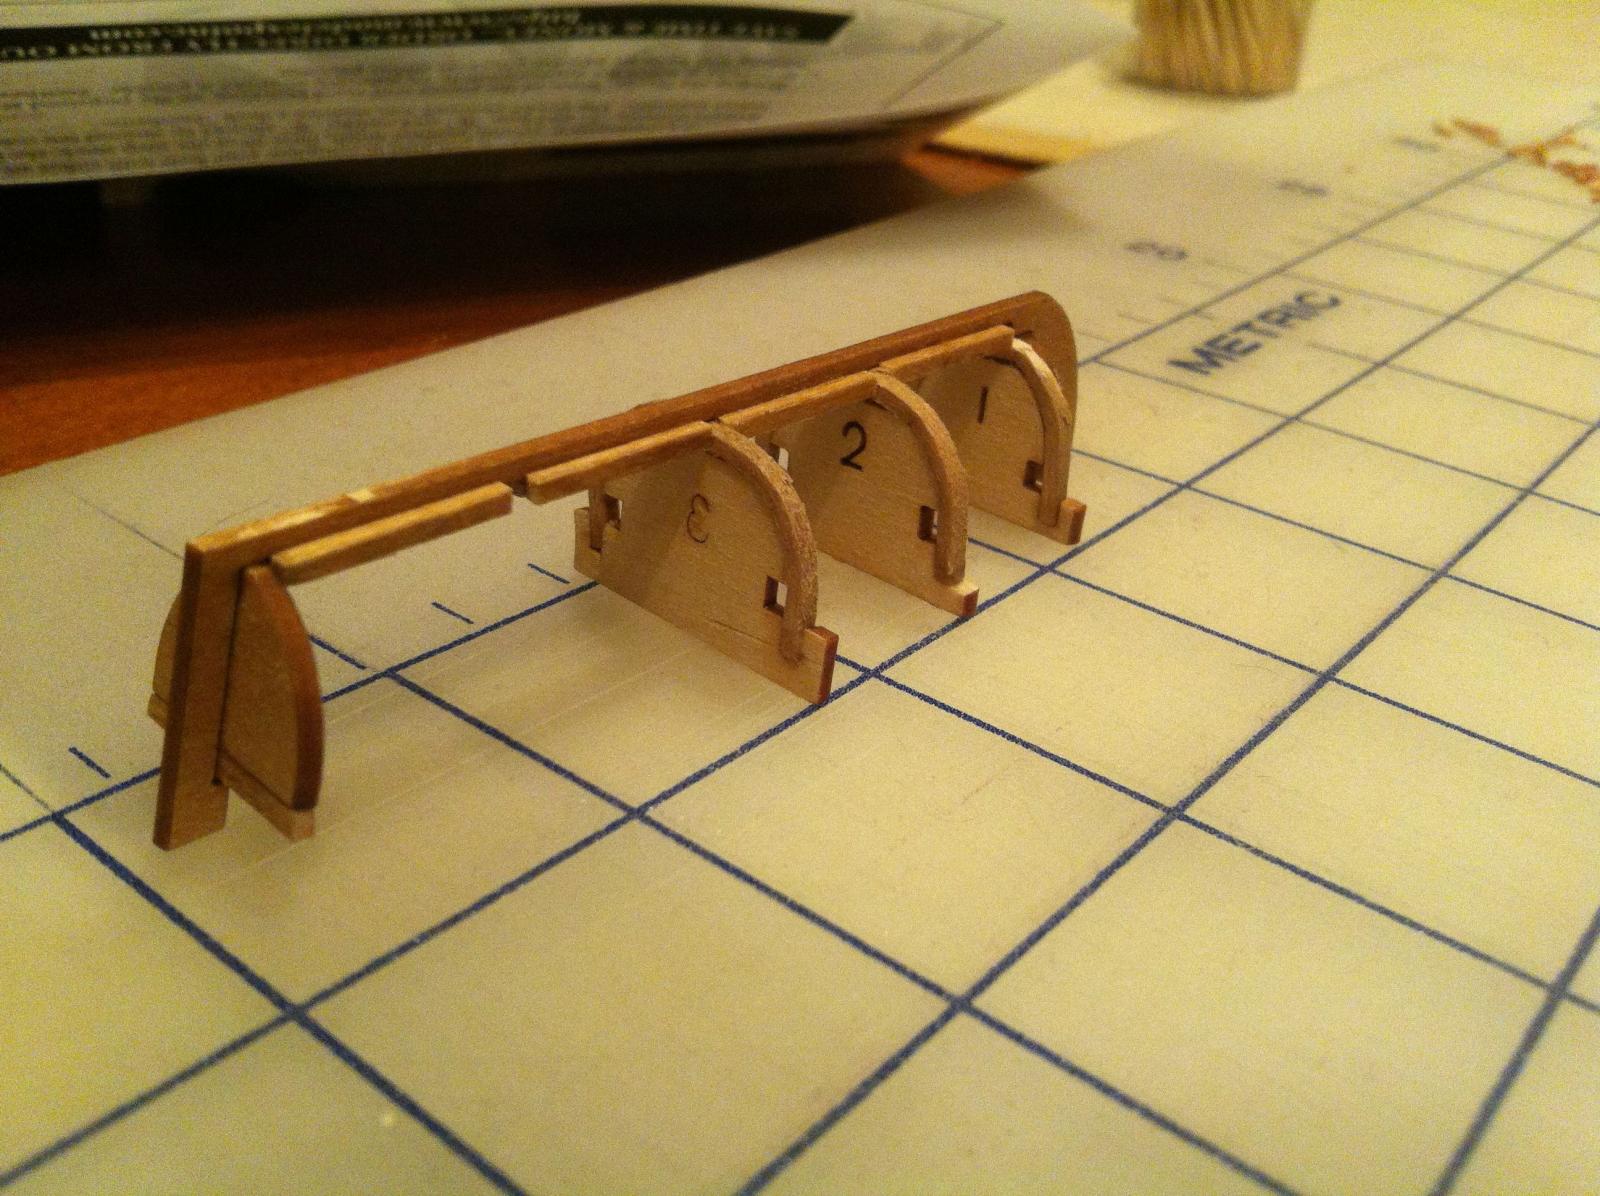
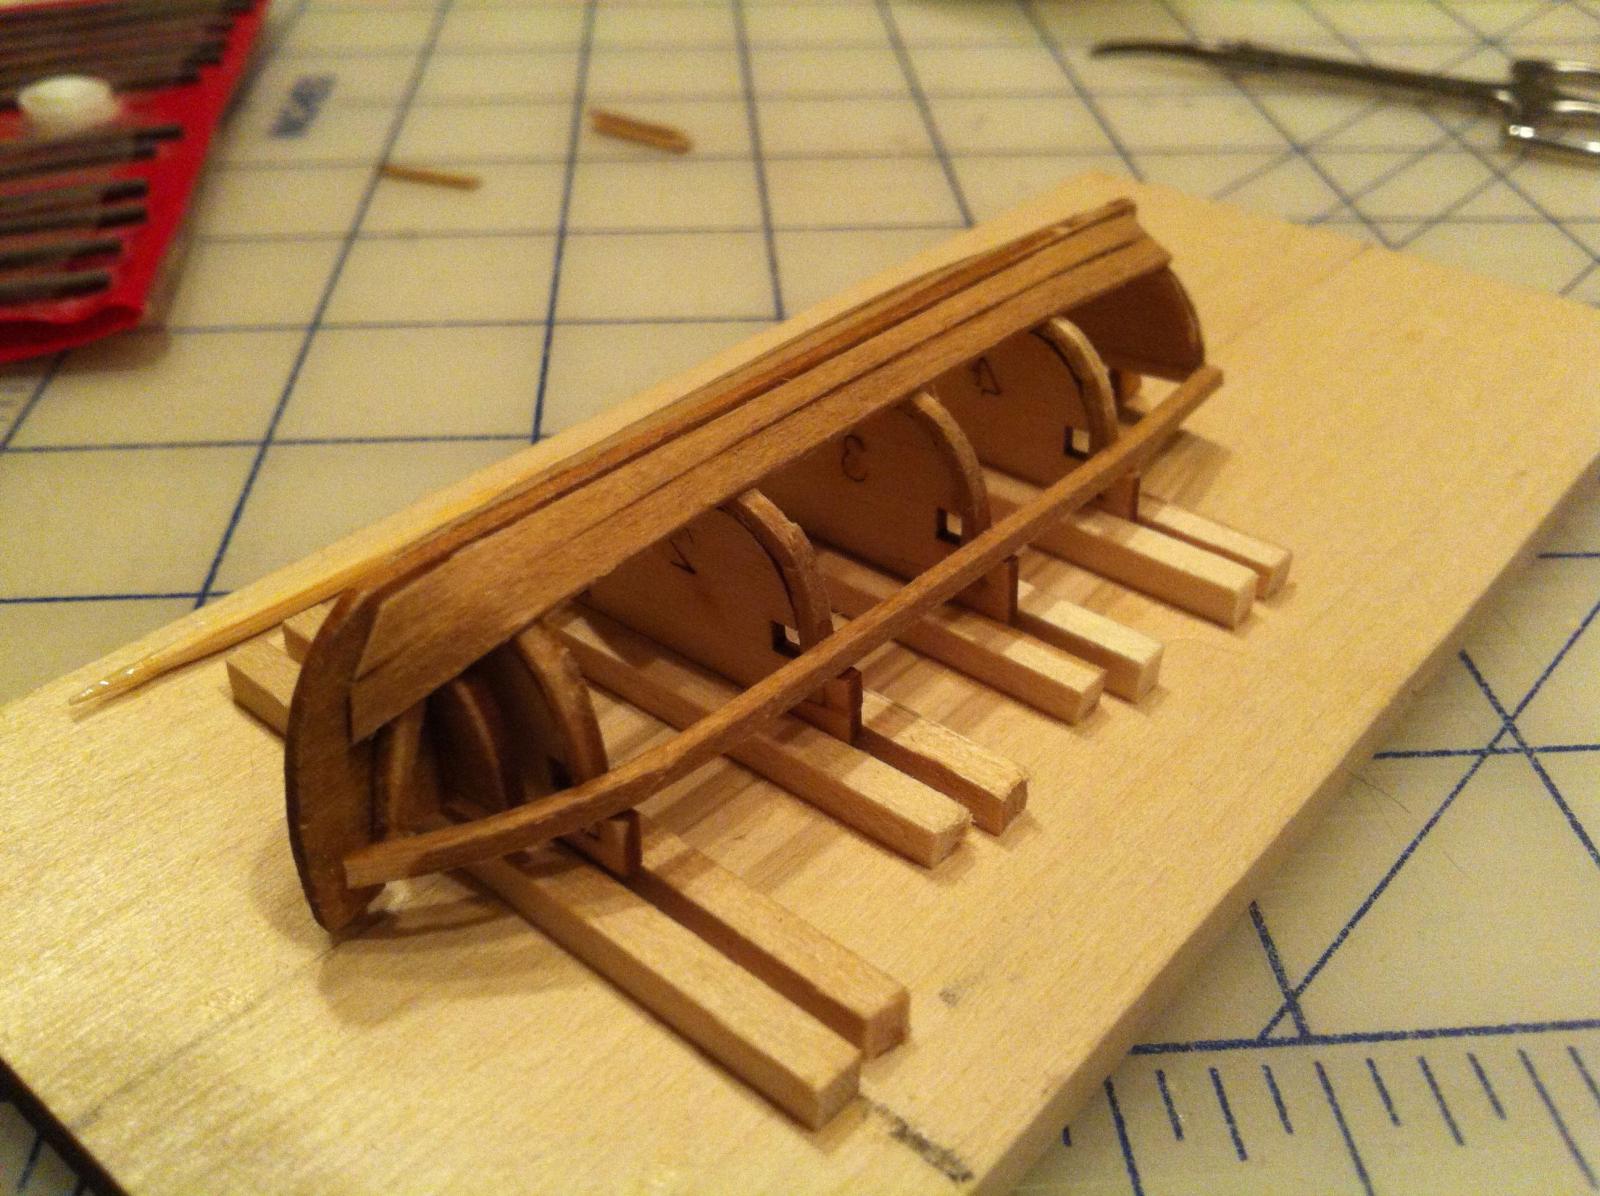
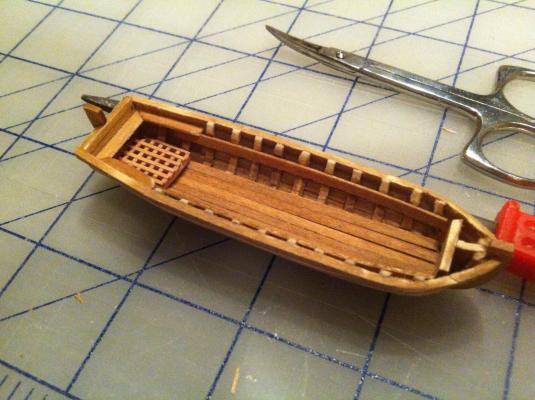
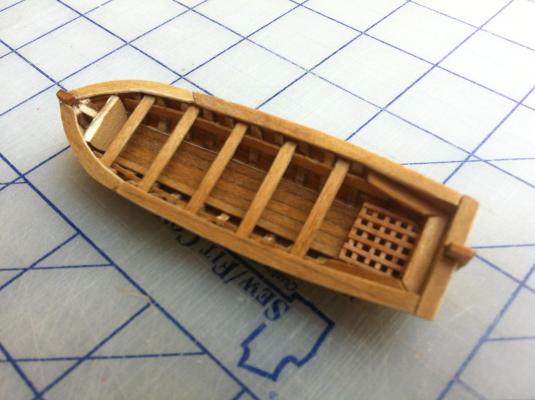
Hi Ian: Yes - 4 frames, plus a transom piece and a bow piece. I think you could probably dispense with the bow piece altogether and outfit the boat with a proper breast hook rather than the bow planking - though I guess it would depend on the type of boat you were trying to model. Planking across the 4 main frames and then yes, the removal of the frame formers. The other frames were added (in port and starboard sections) afterwards. I added bottom boards over the seams between the false frames and the keel to make it look more authentic (well....you know what I mean) The ship's boat came together very easily. The strip wood was not of the highest quality and even after soaking the 1/16 x 1/16 pieces ended up shredding when bent around the frames. I had to spend a bit of time after they were dry in sanding then down and fairing them - tricky at this scale, particularly at the bow, which is why it looks a little kinked there. Anyway - I say go for it. It was a fun little holiday project. Model expo offers several sizes of this same boat from 5" down to 3" (or smaller, I can't recall). The one I built was the 3 3/4 which pretty is much exactly the length of the Corel supplied metal boat hull. hamilton
-
Hi Ferit: Thanks a lot! But I'm afraid there will be no oars!! I will be making 38 sweeps for the big ship, and the thought of making even 8 tiny ones for this little boat - given my increasingly limited modelling time - is too much!! In other news, I tried this beer the other day at a friend's house - it says it's Turkish (at least the brewery is in Istanbul) - I imagine this is a mass market export and that there must be some fine Turkish beers out there....If I ever make it back to your lovely city (I was there for 10 very memorable days back in 1998) perhaps we can try some together! hamilton

-
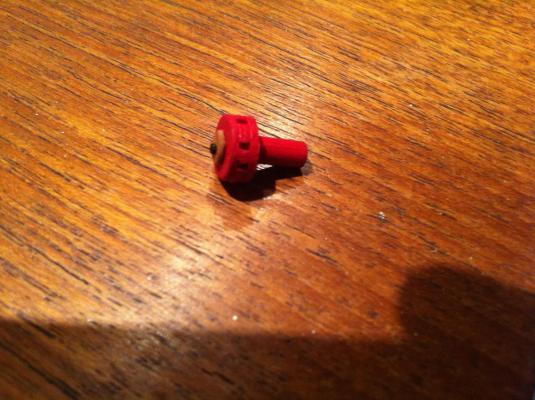
Hi Mark Thanks! It was a pretty straightforward little kit, though there are issues with using a rather generic design for all manner of ship's boats. The basic ship's boat kit is a 5" kit (not sure the scale) and for the smaller ones they just scale down the same design. I understand the economics of this kind of thing, but it does pose limitations if your aim is to produce something historical. Other issues I had were the use of 1/16 x 1/16 lime for the frames - it's easy enough to work, but in the end it needs to be sanded down to 1/32" to bring it closer to scale. Anyway, it was fun to put together! Thanks for coming by hamilton
-
Hi there: It seems I've had to divide this post in two - I was having trouble uploading some of the photos in the last post - not sure why....let's try again hamilton

- 594 replies
-
- 10
-

-
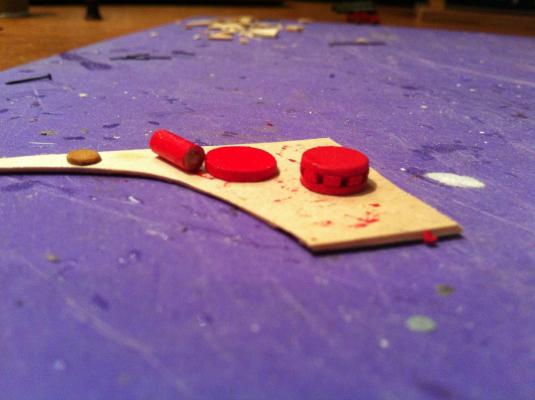
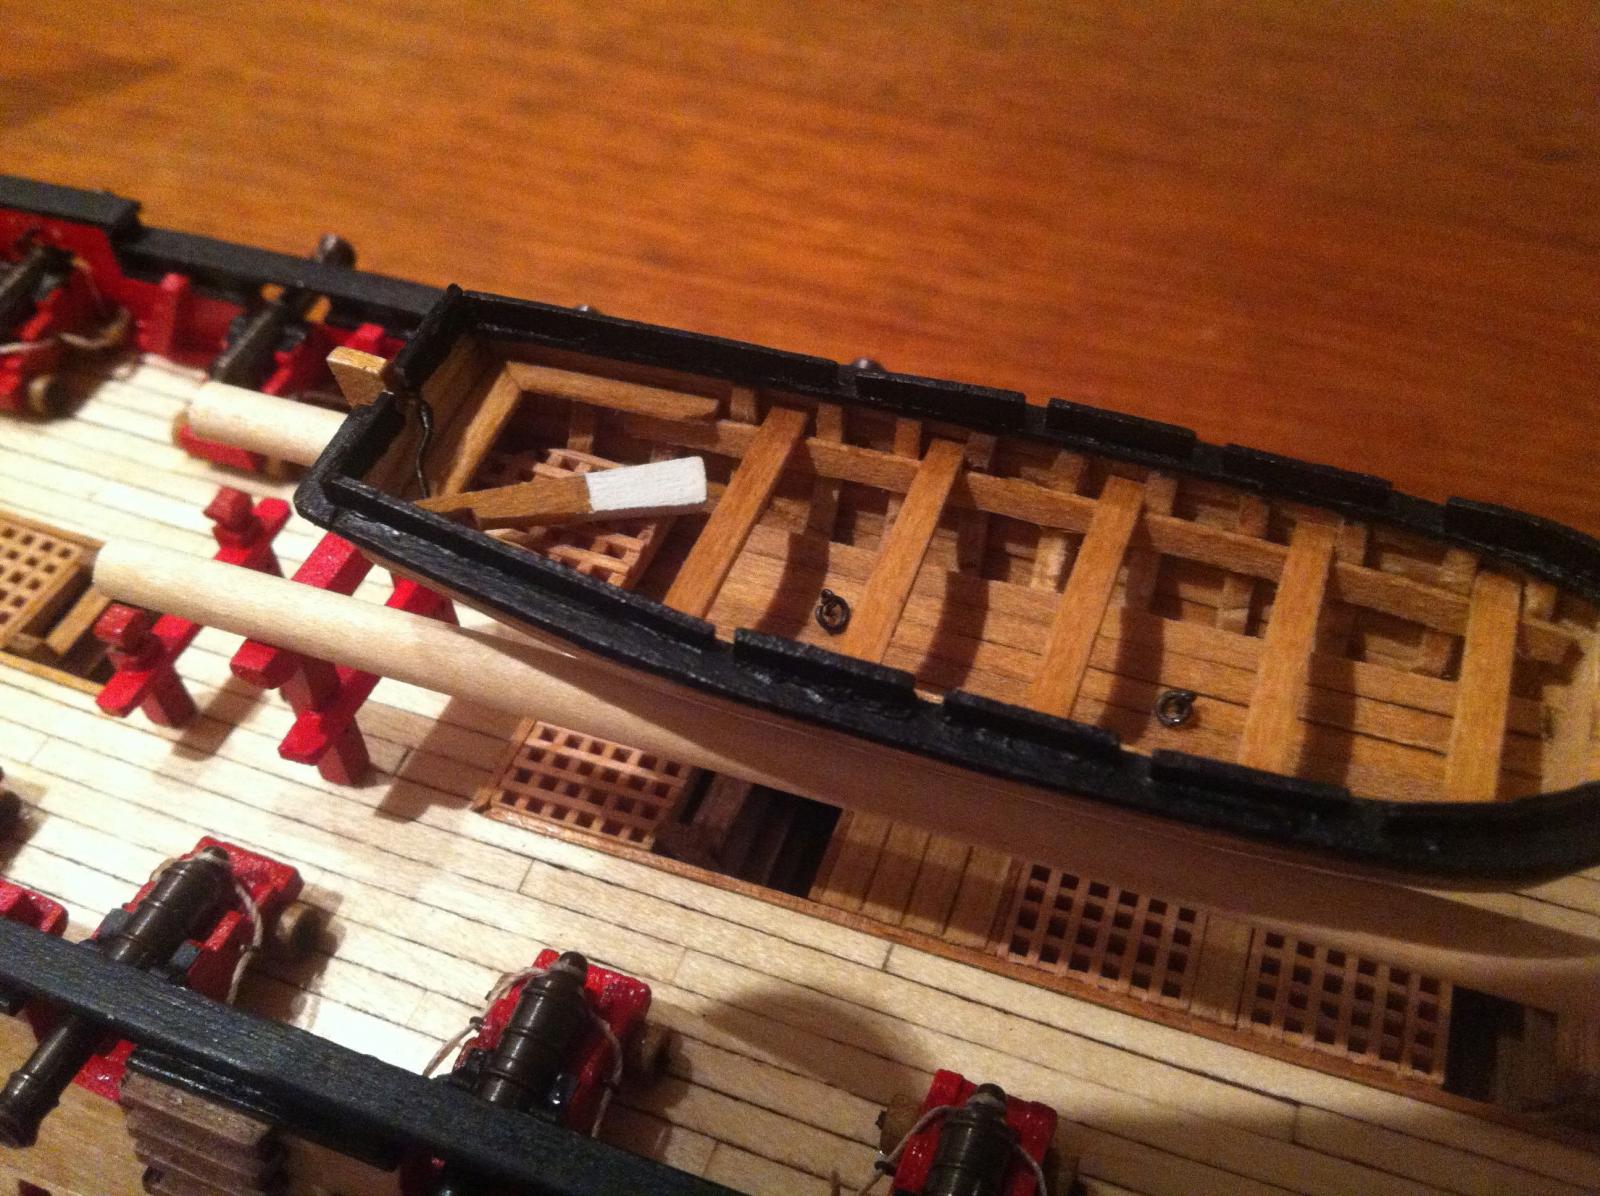
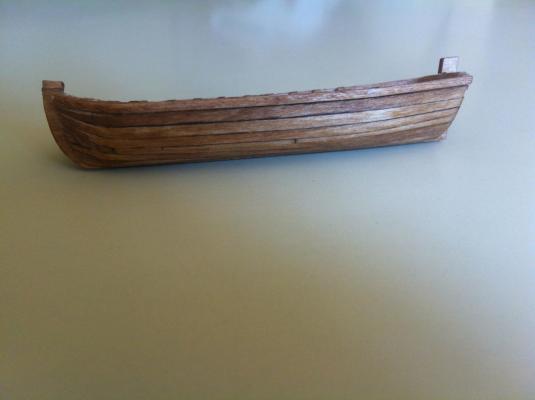
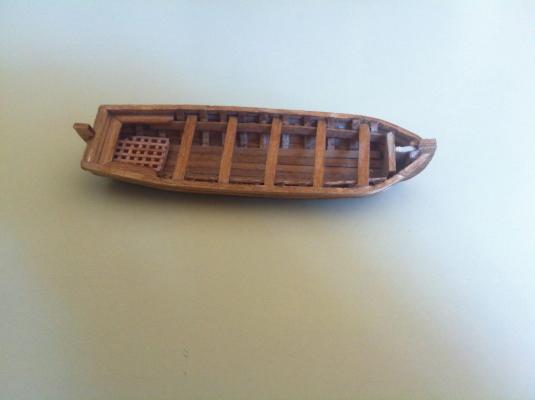
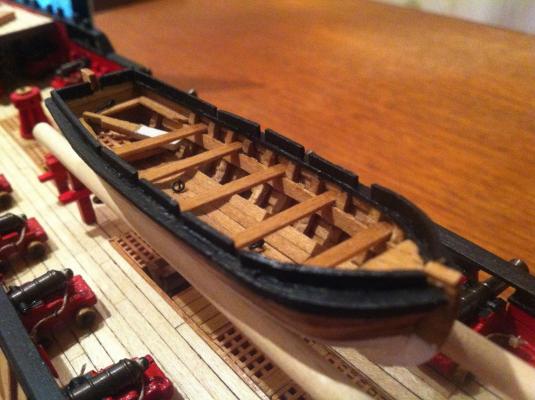
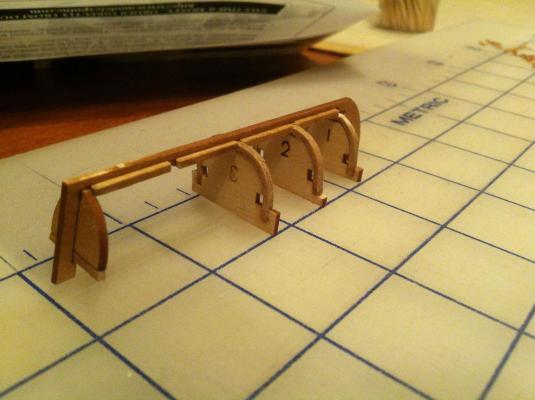
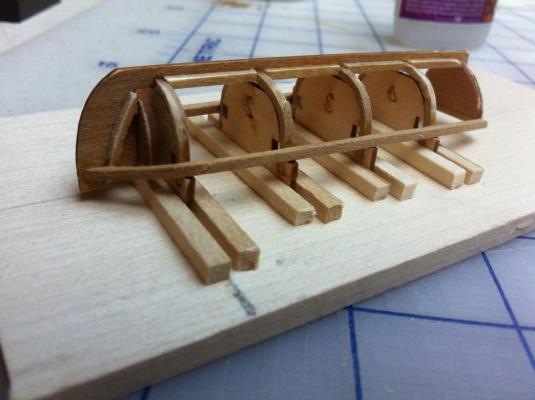
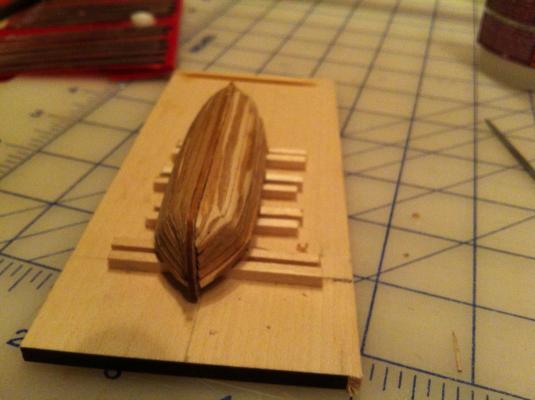
Alright - though I've been away I have been working on the ship's boat. We just arrived back this morning and after putting the boy down to sleep I did a tiny bit of work and finished it off. It was made from a Model Shipway's ship's boat kit (the 3 3/4" version). The boat is just about the right size - pretty much right on the length of the metal boat provided by Corel and only a touch wider on the beam. I deviated from the design of the ship's boat - mostly by referencing the pinnace drawings from the Blandford book and the large cutter drawings from the AOS Bellona. I could not achieve the precise effect of either of these boats and mine is something of a mongrel. It is probably most like the yawl in the Goodwin book in the end.... Anyway, I'm more or less please with the results. My main issue is that my dad didn't have any blue paint, so I was unable to paint the sheer strake blue as I had wanted - I could (and should) have left it raw for when I came home, but exercising my usual impatience I just painted it all black...Here are the pictures hamilton


-
Hi Augie: In one of the last set of photos it looks like you've got your jacket hanging off the main topgallant! But that can't be....Looking great - can't wait to see it installed in all its splendour hamilton
- 1,668 replies
-
- 1
-
-
- syren
- model shipways
- (and 1 more)
-
The ship's boats look amazing - it must have been very tricky using the paper for the ribs! I just finished a ship's boat at 1:100 and used 1/16 x 1/16 lime sanded down after installation to 1/32...this was fiddly enough - I can't imagine using the paper to the same high quality result you've obtained! hamilton
-
Looking great! Now that the coppering's behind you the build will really start to move! Looking forward to seeing more hamilton
-
Always a joy to behold! I'm wondering, Ferit - did you bend the wood for the crow's nests or did those come as CNC or laser cut parts? Just wondering how the crow's nest was worked up - it is very elegant looking! hamilton
-
Hi Mobbsie - though I'm a little late, let me add my birthday congratulations! You Aug 20 and me the 21st! Many happy returns. Second - excellent work as usual on the Aggy! Looking forward to more! hamilton
-
Thanks again all! Wayne - I wasn't back in NB, but visiting my dad in his place of retirement - Cumberland Ontario. Not exactly "home", but a nice bit of green lawn in the country with a nice wood for tramping and bird/owl watching. Anyways - thanks all! hamilton
-
I'd say you should be very pleased with the results - an excellent job on the planking - especially considering the material you were dealing with! Great work hamilton
-
Hi Doug: She's really coming together - wonderful work! hamilton
-
Looking great Jack! hamilton
-
Thanks all for the birthday wishes! 42 seems pretty unremarkable. Augie - I appreciate the Bay of Fundy reference - New Brunswick is my home province! We're heading home tomorrow - I did manage to get the Blandford ship's boat finished (almost) while here. I still need to add a few details (ringbolts for hoisting and a tiller for the rudder) and to refinish the exterior. But it's looking alright so far. No photos to post, but soon enough. Thanks again all for the birthday wishes and bye for now! hamilton
-
Looks great Mark! As for the Ebony - I seem to recall seeing something on rlb's Oneida build log - a tea-based stain, maybe? I tried poking around on his log to find the exact place, but the admiral is calling me away from my computer...sorry! Hopefully this helps! hamilton
-
Hi Ferit: I know I've asked before for wide shots to see the state of the whole thing, but I have to say I love the detail photos, too - it doesn't seem to matter how close you get the camera to the model - it still shows an absolutely flawless build! Inspiring work hamilton
-
Hello all. My son and I are off to visit my dad back east tomorrow so there won't be too much going on here for another little while....things starting to slow down with the approach of another school year, too....I always say that the coming year will be easier than the last, but this is never true! I don't know why I continue to deceive myself..... Anyway, my dad is a modeller, too (planes), so I think I'm going to smuggle the Blandford ship's boat kit out there in my carry-on so I can sneak in a little time at his workbench (which is much more well-developed and well-equipped than my dining room table!)....We'll see. I know he'll want to tour me around his latest projects and he may be interested in seeing how these little boats come together and lending a hand, who knows? In the mean time - happy modelling to all hamilton
-
Acrylic over oil based stain?
hamilton replied to Paddy's topic in Painting, finishing and weathering products and techniques
As per the glue issue - best to stain the wood parts or strips before gluing to avoid this problem. Stain the wood and let dry completely before assembling. Good luck! hamilton -
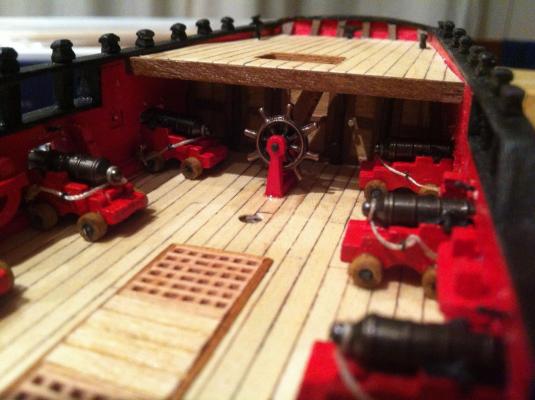
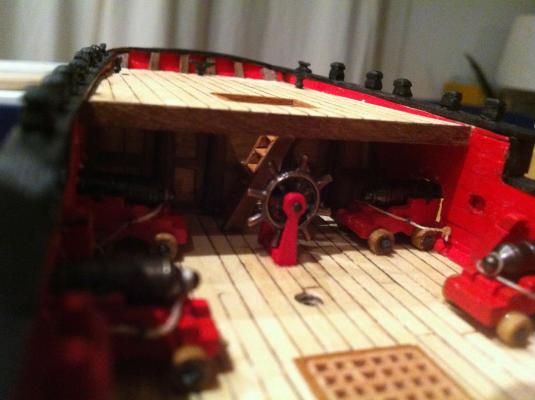
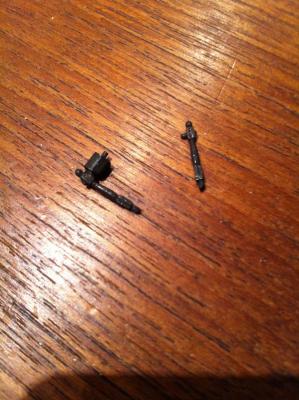
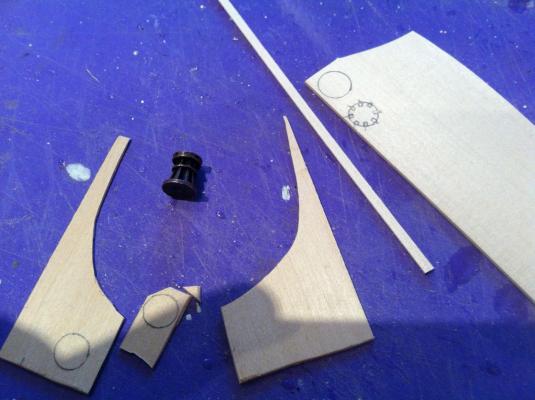
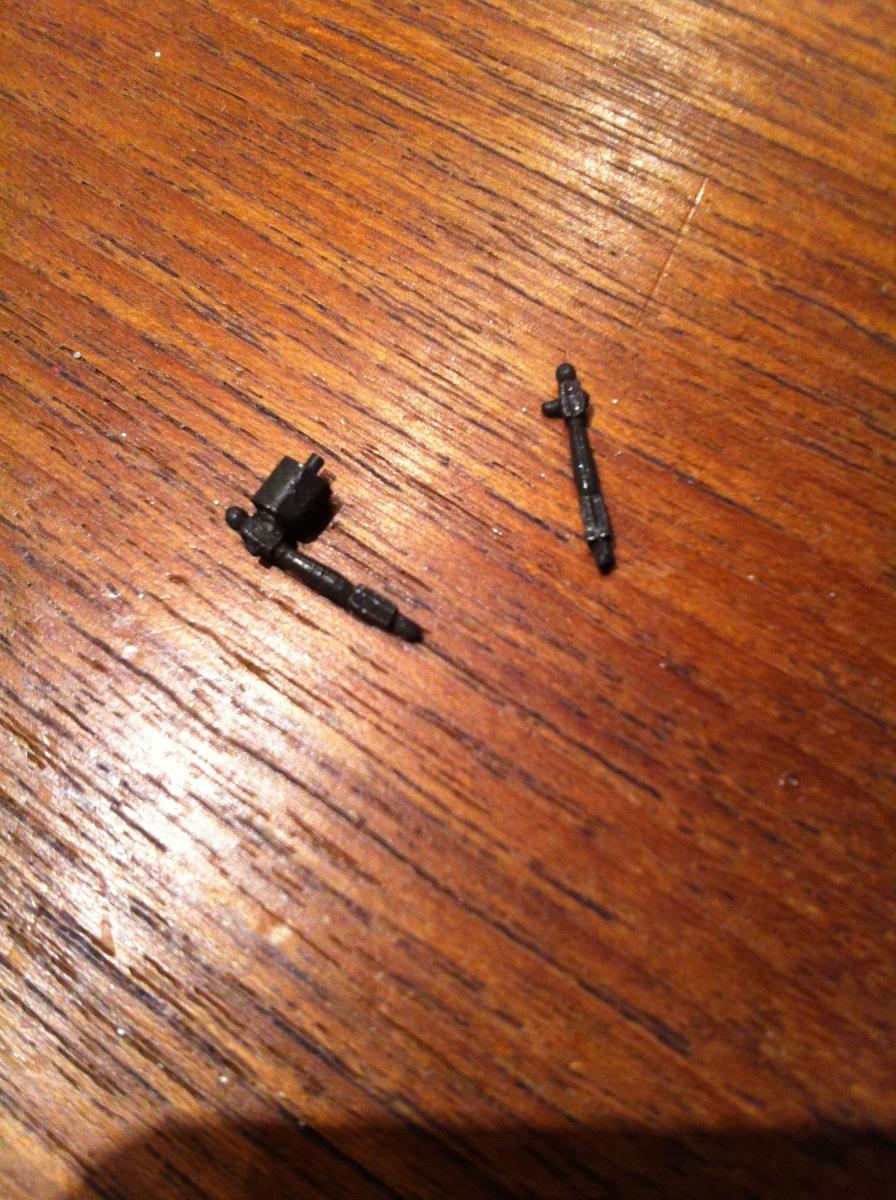
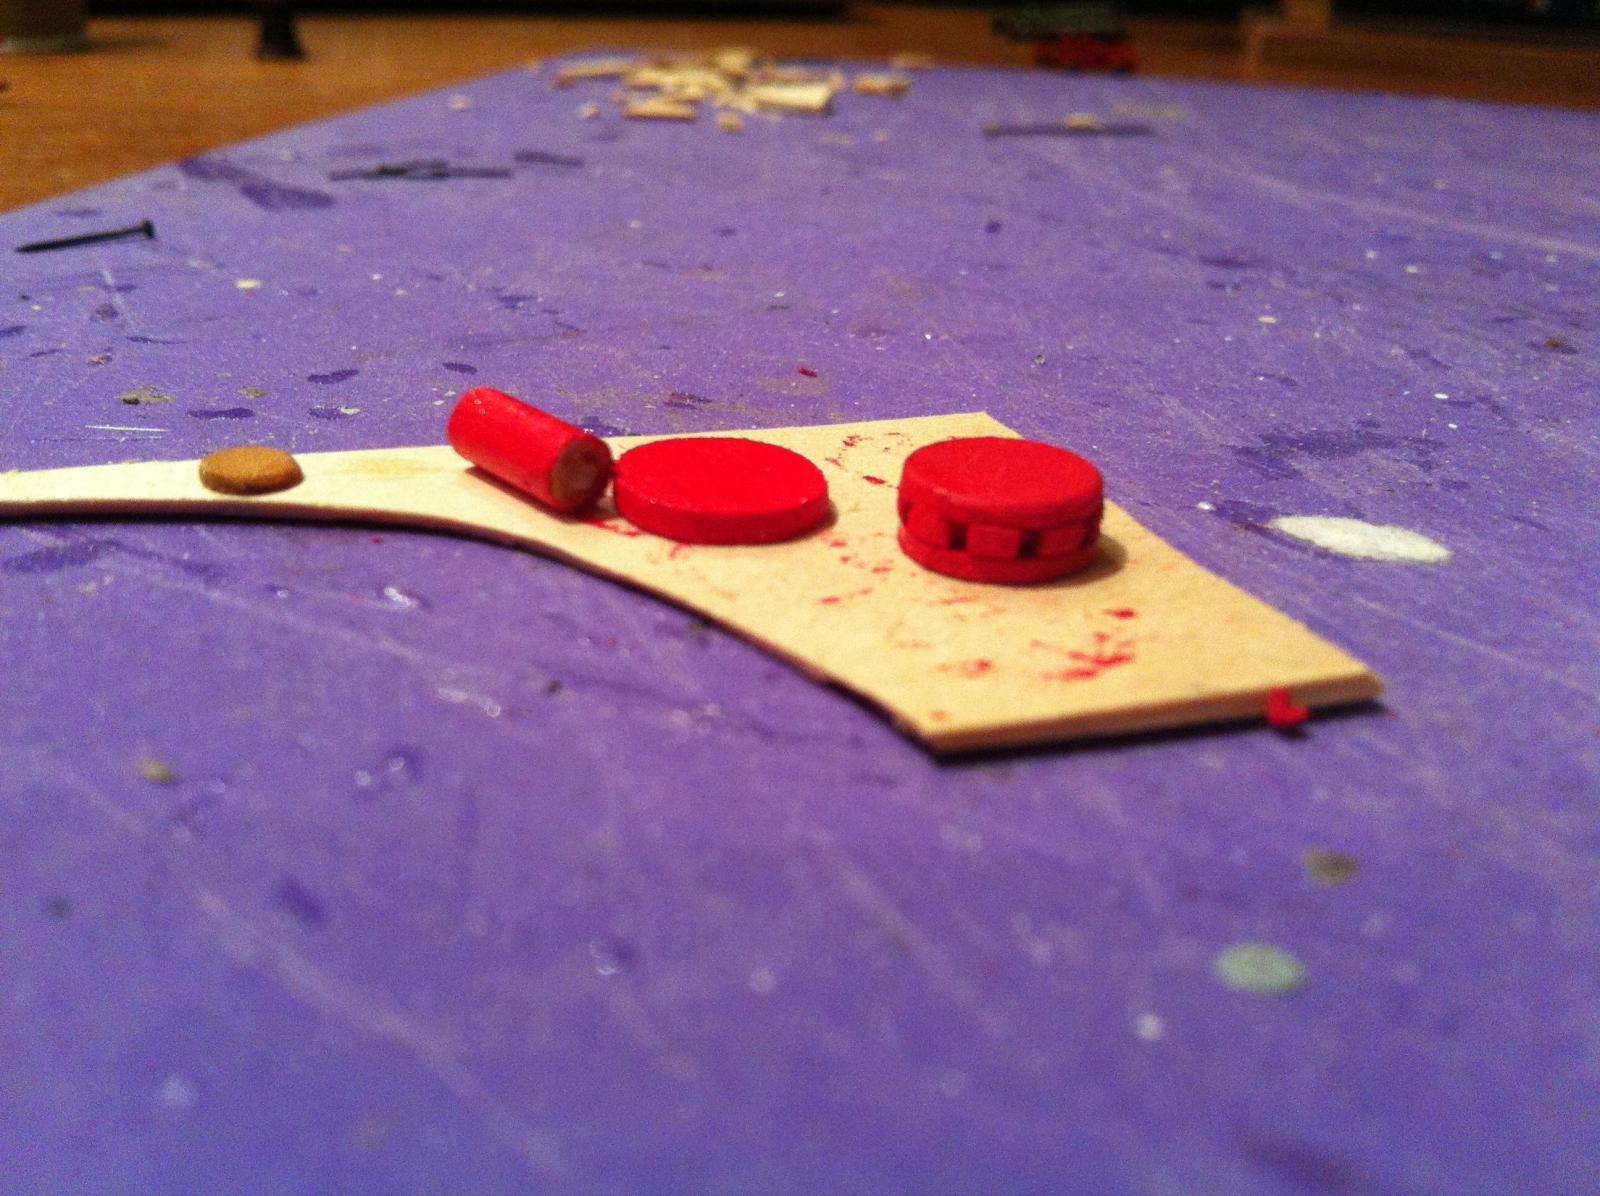
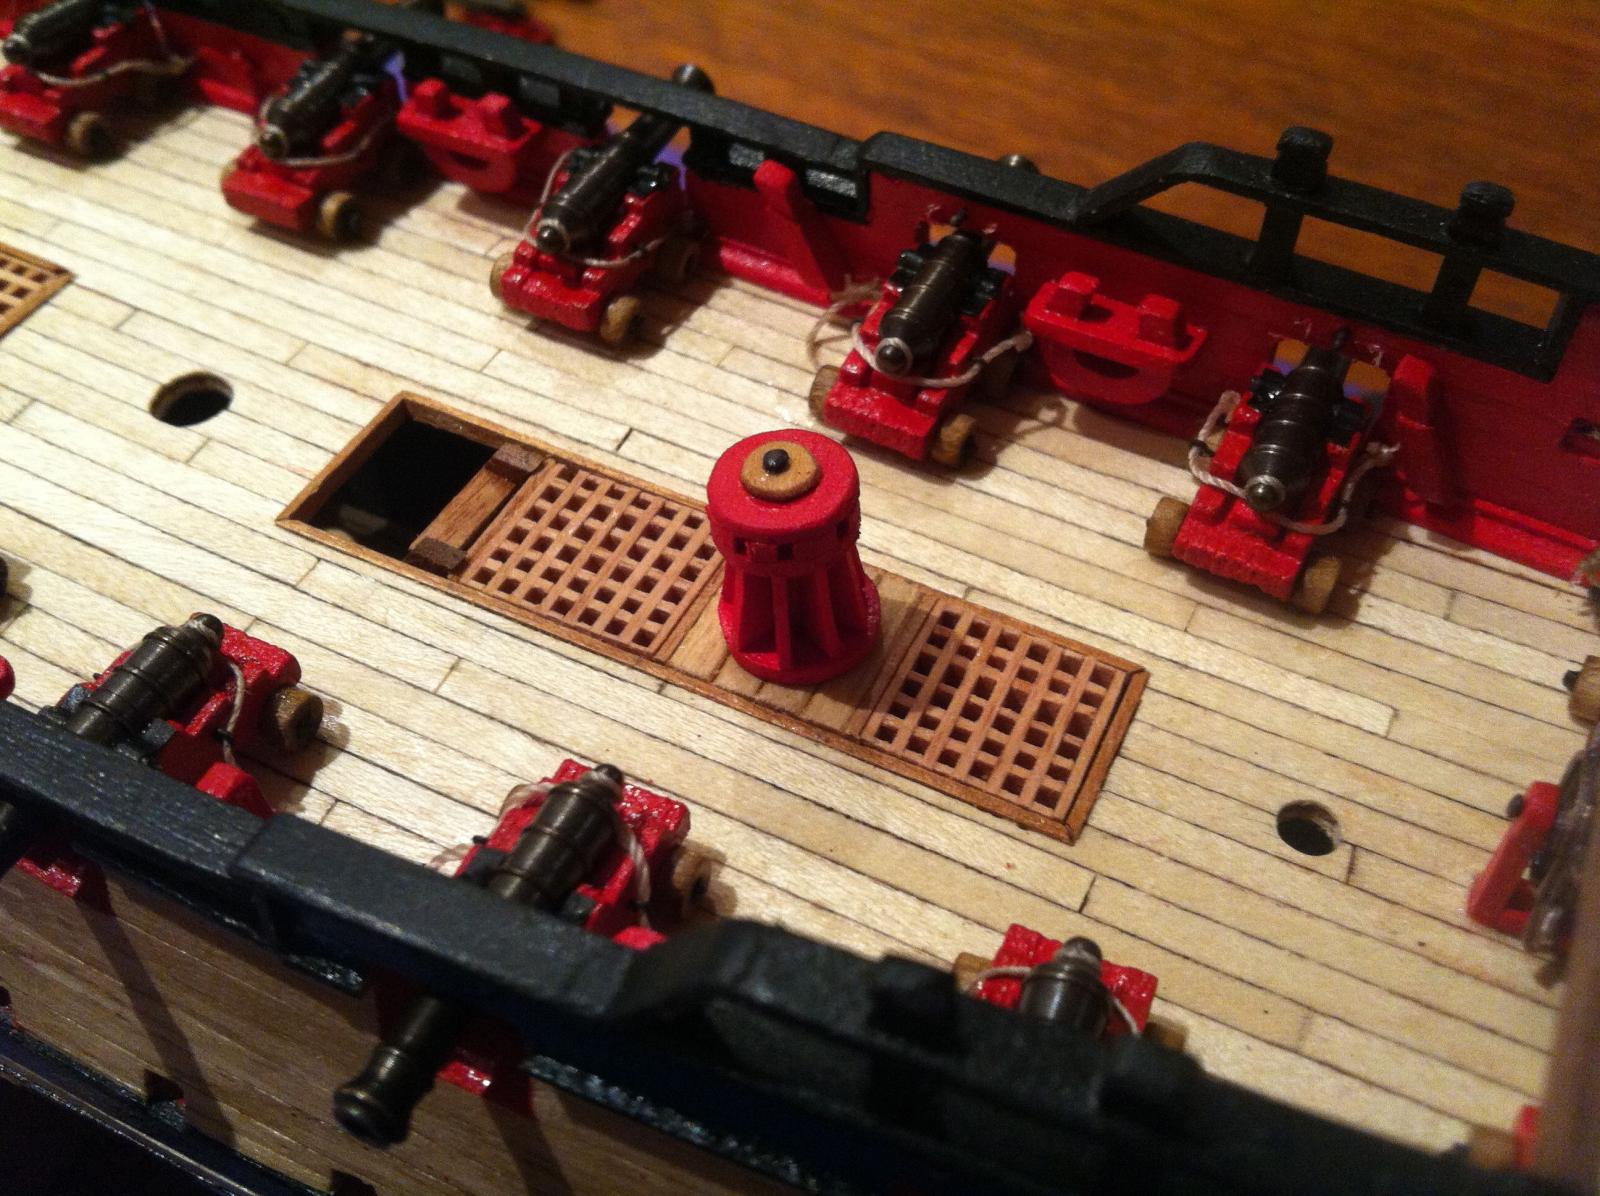
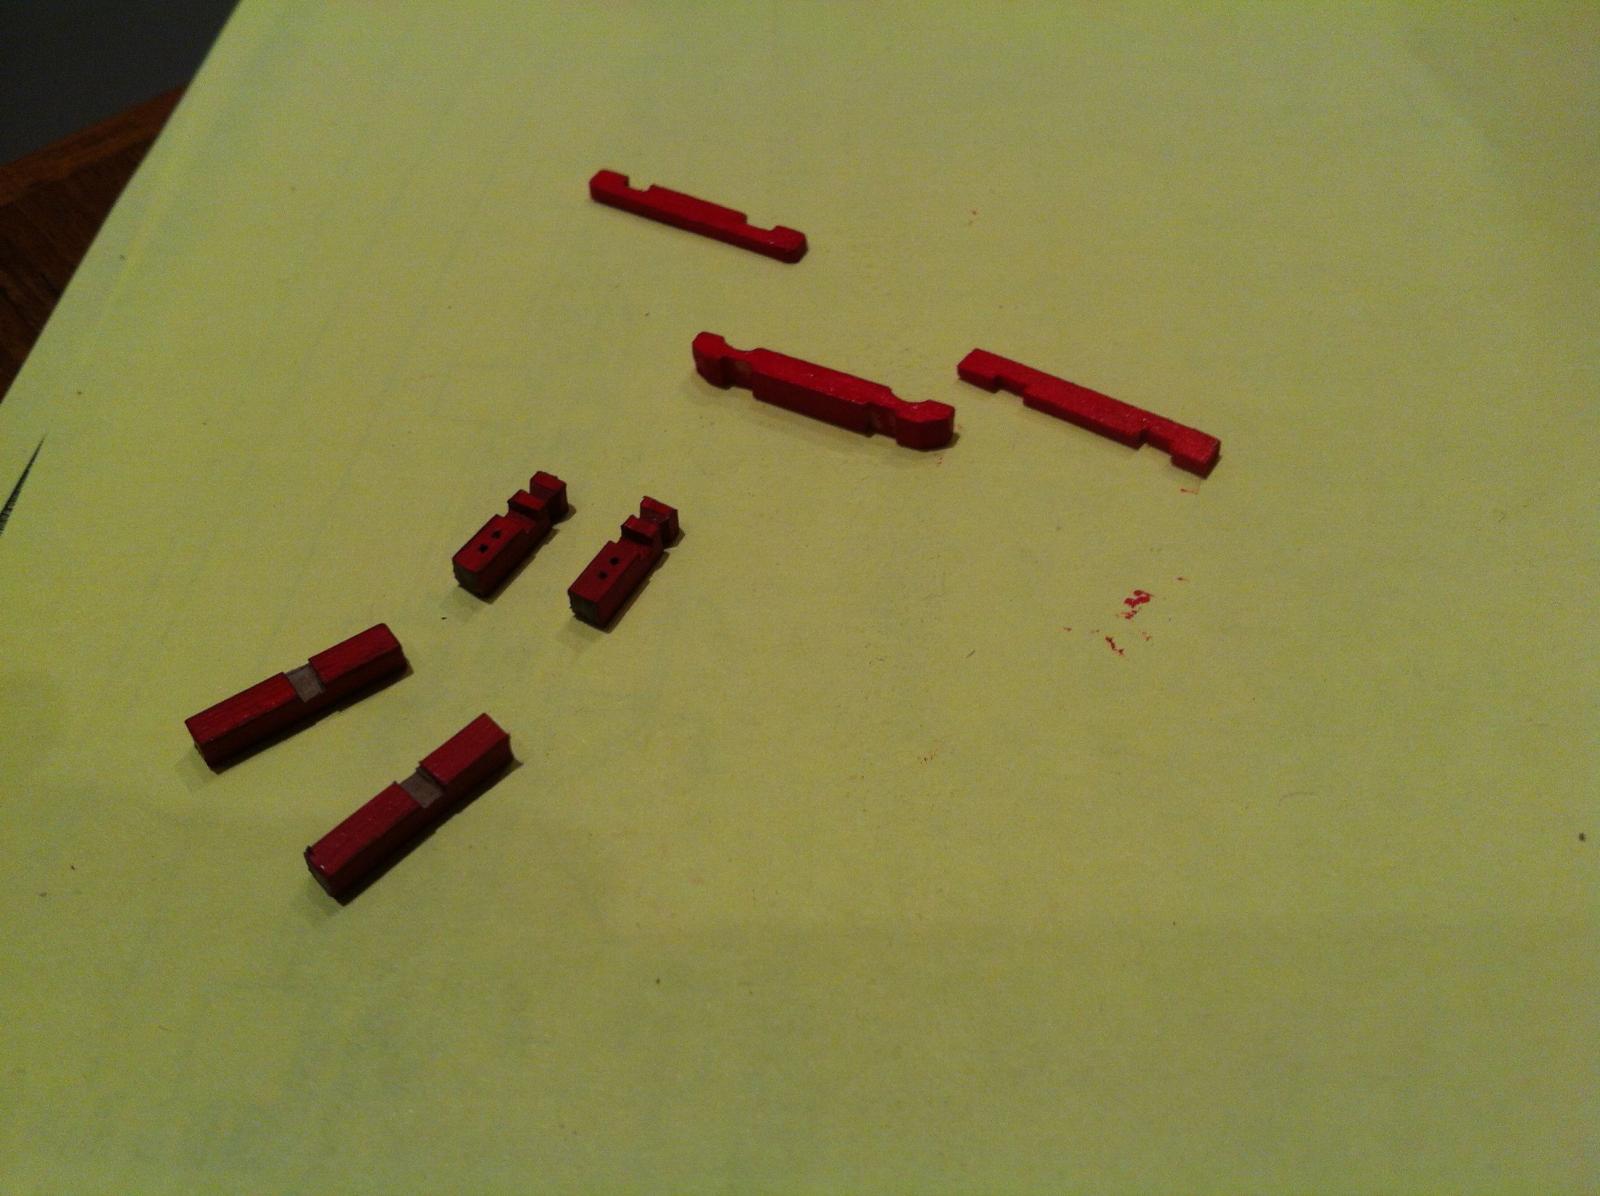
Hi Ian: You should give it a shot. Mine is a bit over-sized for scale (perhaps about 1-1.5mm too tall), but I think it was worth it to take a stab at it. It's one of those things where, as I said before, the more you build yourself the harder it gets to use the kit-supplied parts, mostly because when you do they'll stick out like a sore thumb! The capstan was not too difficult in itself to fabricate - I actually used the kit supplied one to trace the circumferance of both the base and the drum head on thin sheets of basswood. After that it was just a matter of cutting a square section out of the sheet with the traced circle in the middle, trimming it down and then sanding it into the circular shape you see in the finished piece....I used the kit supplied capstan also to mark the holes for the capstan bars on the appropriate circle (before cutting it out) - this was 1mm thick, and sandwiched between 2 .5mm thick pieces. I filled out the holes with the thin edge of a flat micro file and then assembled the head. After assembly I drill a hole through the centre and inserted a blackened brass nail (this protruded out the end and was used as a support when I fixed the central post) . I used a 3mm dowel for the central post and drilled a hole in one end to accept the nail from the drum head. These parts were then assembled together. I then drilled another hole in the bottom of the central post and also through the centre of the circular base. I inserted a piece of brass wire through here again to provide extra support for the whole assembly. The welps were made from 3mm x .5mm basswood, which I rough cut in an upward slope before installing (8 in total positioned between the bar holes on the drum). I then used a hobby knife to trim these further down for a better look. Once again, the capstan is by no means perfect, but I'm happy with the results and I know it looks better than the kit supplied one would after it had been slathered with red paint.... Now that I've installed all the cannons, I'm wishing I had scratch built the carriages! The Corel ones are "just fine", but only just....My next step is to build the elm tree pumps, which at this scale could be very difficult...especially the brake handles which will be shaped out of 1mm x 1mm walnut...and the brackets which I'm thinking of fashioning out of wood to simulate iron....anyway, these are very small parts and will test whatever skills I've managed to acquire over the last little while..... hamilton
-
Thanks all! I appreciate these words of encouragement greatly! Andy - perhaps it is making less sense to call this a kit - of all the kit-supplied cast parts, I've only used the ship's wheel - all the others I've tossed into a drawer which is kind of like a graveyard of unused metal parts from various kits....Still, the bones of it are the Corel kit - and my scratch-building exercises are really only a derivative of this kit's limitations - especially where they have not entirely worked (as with the open bulwarks and rails).....Taking a dive into real scratch building will require a dedicated workspace which I do not have and a lot of new tools (which the admiral would welcome if I turned them to home improvement projects but which would be looked at with loathing if I was just using them for modelling!). In the meantime, I'm contemplating the Echo cross-section from Admiralty models as an intro to scratch-building.....perhaps followed by the Lumberyard Hannah....but that is for the far future - at least 3 years out! Alistair - I tried a few experiments with the scans you sent me of the ship's decorations....I was just using regular printer paper, shrunk down from 1:64 scale to 1:100 but at this scale the paper ripped with even the sharpest blade....I will have another go with heavier stock - this may work (I hope), but if not I will have to call the experimentation off.....one more stab at it and we'll see how it goes.... hamilton
-
Very nice and precise work here - the addition of the masts really makes her come alive. hamilton
-
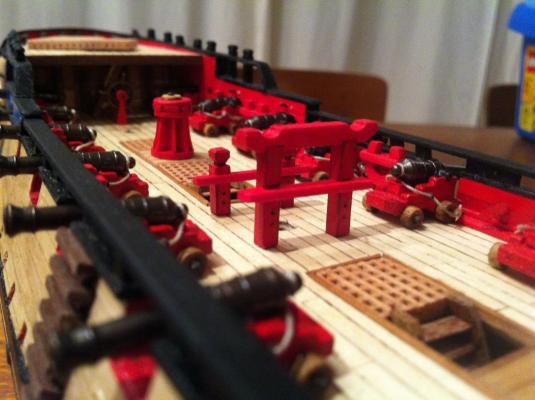
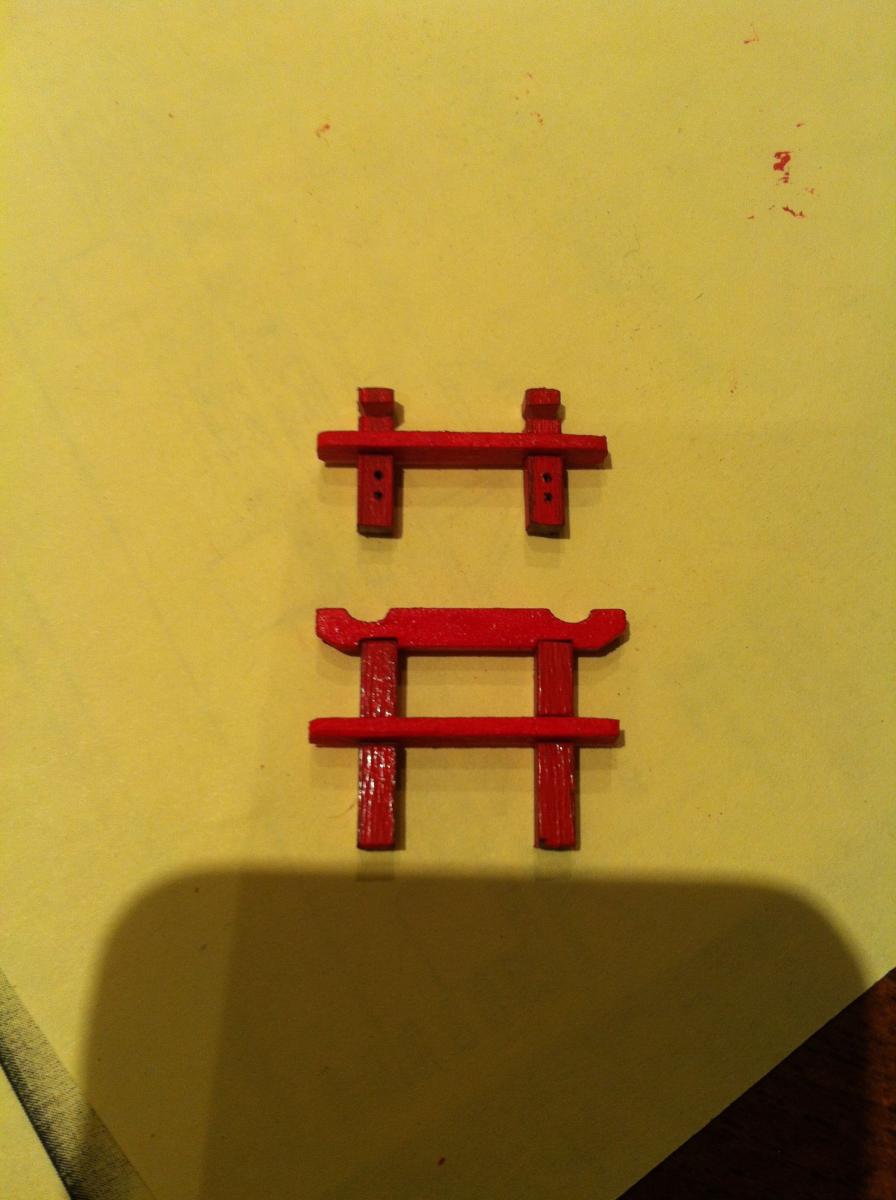
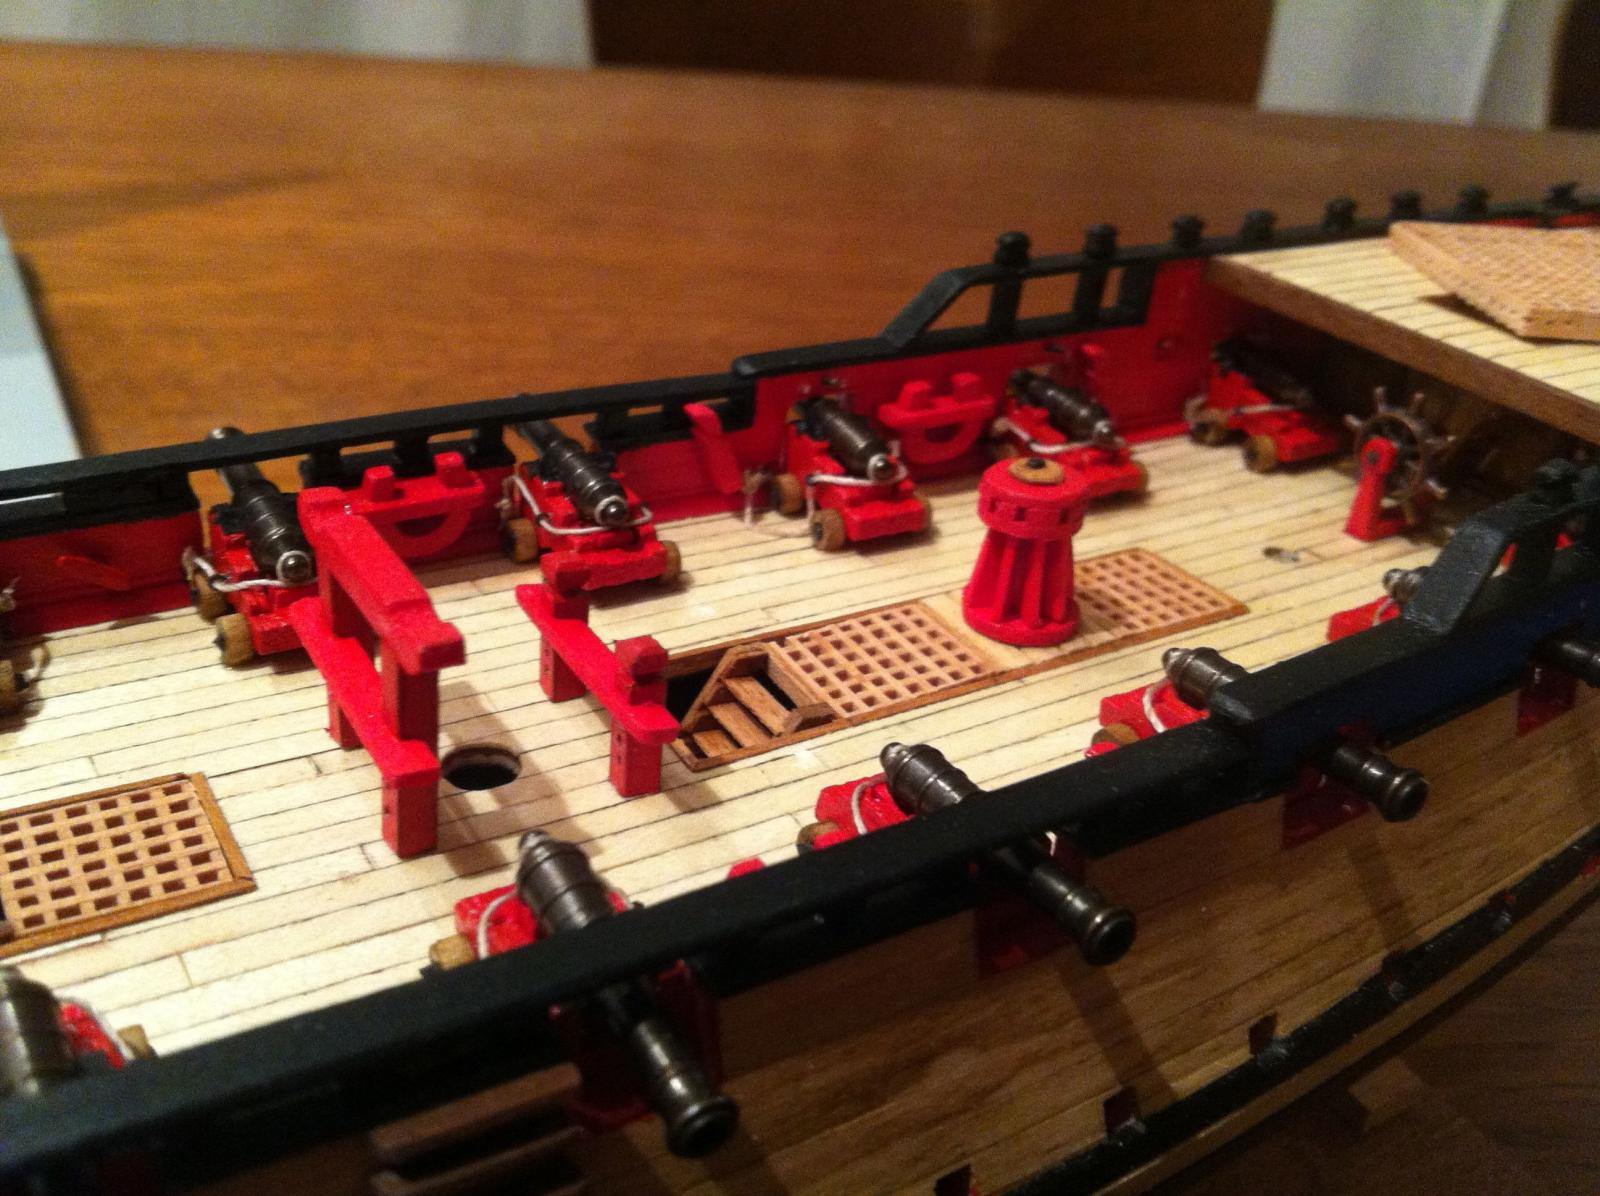
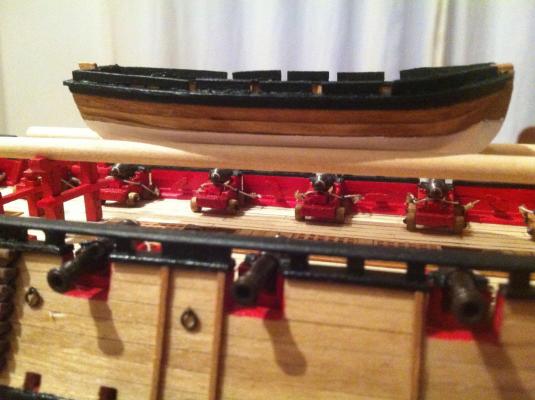
Thanks a lot for the words of encouragement Mobbsie! Much appreciated as usual! OK - time for another update. The cannon rigging continues, but I've decided to break it up a bit by completing some other parts of the build at the same time - namely, the ship's wheel, the capstan, the main jeer & topsail sheet bitts (the latter fitted with gallows) and the forward gallows (positioned just forward of the forward hatches and not yet installed). The forward gallows are not included in the Corel kit nor do they appear in Goodwin's drawings. They do, however, show up in a photo of a model in Goodwin's book, and I've used that photo as support for the decision to install these gallows. In any case, I need them as forward support for the spare masts that act as a cradle for the ship's boat (about which I asked an extremely stupid question in another area of this forum). So there it is.... All the parts were scratch built with the exception of the ship's wheel itself, which I did not even try to attempt. The supports for the wheel that were included in the kit were these spindly metal pieces - they looked like metal pillars that had been repurposes as a ship's wheel. I derived the design for the ones I built from Goodwin. The capstan was a lot of fun to make, and even though it did not turn out perfect, I'm more or less happy with the results. I could have made it again, but I feel pressure to move along with the build - I may have mentioned earlier that we're expecting another child in late November, so once that happens, there will be precious little time for modelling - and lots of time for bouncing the little person on my knee and teaching our son how to change diapers! Now the photos hamilton