MORE HANDBOOKS ARE ON THEIR WAY! We will let you know when they get here.
×


texxn5
-
Posts
2,473 -
Joined
-
Last visited
Content Type
Profiles
Forums
Gallery
Events
Everything posted by texxn5
-
thanks to all who hit the like button and commented...much appreciated. Thanks Adam these guys were "tricky" to say the least. Fun little projects and fun to detail. I may have to wait a while for the harpoons and oars --- I forgot to bring my Byrne's Drawplate with me...not sure how I overlooked it but in the rush to leave it got left behind. So I'll probably go back to making the remaining yards (6 of them). I still have a few more details to do to the boats that I'll probably go ahead and finish though. Adam, wasn't it cool to go aboard the Morgan? It's an experience every time I go aboard. Glad you enjoyed it and got to expeerience her. Look forward to you joining the Morgan Club. thanks Dennis, glad you stopped by.
- 2,250 replies
-
- 2
-

-
- model shipways
- Charles W Morgan
- (and 1 more)
-
Happy Birthday Dave....Fran did an outstanding job....rigging for her might be a good idea....then it's a family project. Sorry we won't be able to meet up this year, but we spent all our time in New England -- now headed back to Texas probably sometime in October. Glad you guys are doing well...have some shrimp and grits for us. John & Diane
- 601 replies
-
- 1
-
-
- constitution
- revell
- (and 1 more)
-
thanks Michael and Buck for the kudos. these have been fun so far....got a lot more details to do yet. More photos and comments are posted on my website for any that want to see more angles, especially if you're building the Morgan. Be sure to check it out for those who have an interest. http://www.charleswmorganmodel.com
- 2,250 replies
-
- 1
-
-
- model shipways
- Charles W Morgan
- (and 1 more)
-
Looking very nice Bruce. Looks like you'll be rigging very soon.
-
Sorry for the multiple posts, but I keep thinking about things as I observe your pictures. If the height and width are correct, the side with the crooked brass rods can be put under the Hurricane house and won't be seen. Don't glue it in place until you finish the Hurricane House and you will be able to place it where you need it as well as see how it looks to scale. Just a thought.
-
By the way, the skylight was the most difficult item to build on the Morgan for me. Keeping it small enough to stay in scale was a real pain as was the brass bars. I had to rebuild mine too since my first one was too big. It also took a lot of hours that were wasted or should I say "good practice for the next one". I hate being politically correct ---actually it was a real pain in the a$%...lol Clamping it in the x-y table is the only way to accomplish it, and the basswood is not forgiving like a hardwood would be. It kept splitting and breaking at every opportunity. Good job!
-
Hi Ron, thanks for the "plug" - greatly appreciated....just a slight correction, my email is texxn5@aol.com or texxn65@gmail.com for anyone interested. I'm glad I've been able to help and that is why I did the website as about 30 pages or so of pictures posted on MSW were lost in a glitch a few months ago. My website is complete and up to date with many more pictures and explanations of my procedure. Not perfect by any means but at least a good reference. Thanks again, my friend. Your build looks fantastic. John
-
Looks great Ron. Outstanding job. I agree on the chains. Keep it up and keep posting pictures for us. Reminds me of when I was at this point...it is very rewarding.
-
Thanks to all that hit the like button and made comments. Greatly appreciated. Next I get to make a bunch of oars, harpoons and "whale stuff" to add to the boats. At least this stuff is now easy to make inside my RV....no more sawdust to contend with. The weather is changing and it's getting cooler...time to move south. Will be in Columbus, OH tonight.
- 2,250 replies
-
- 2
-
-
- model shipways
- Charles W Morgan
- (and 1 more)
-
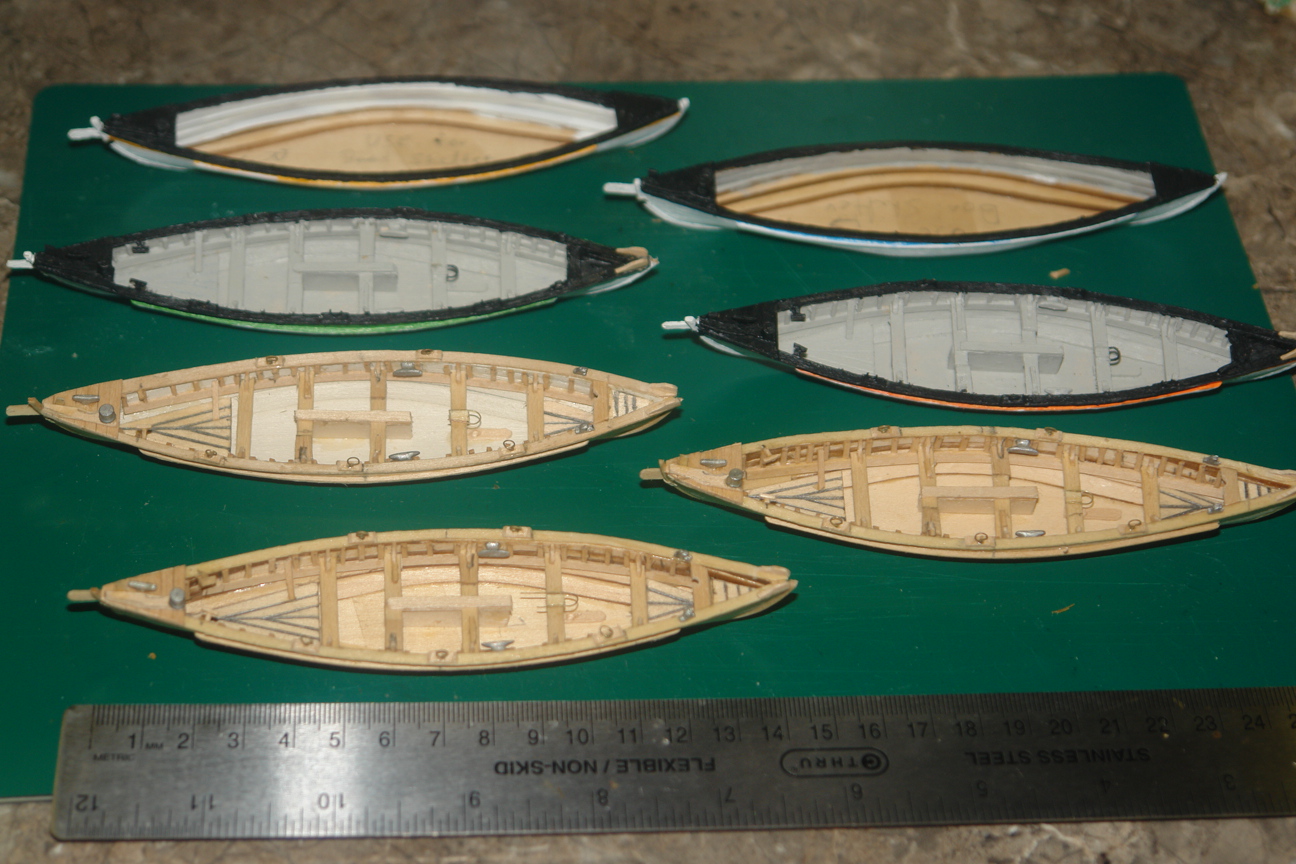
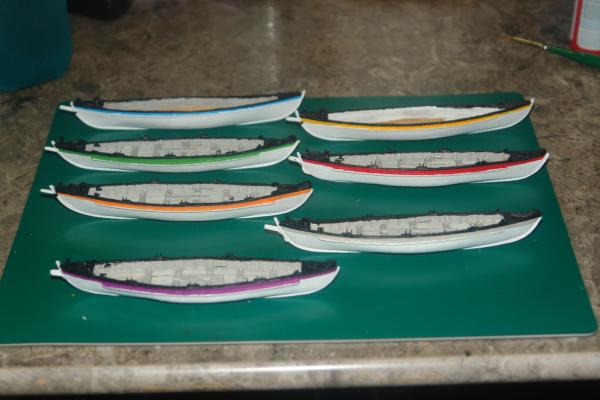
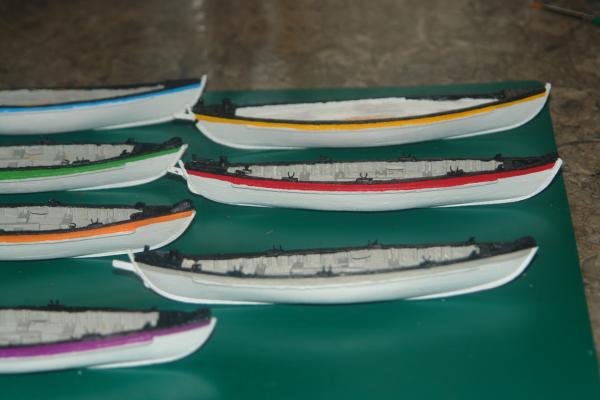
After 3 nine hour days or more, the boats are now completed to the stage of only needing to add the tools and accessories the boats carried with them. The structures are completed and painted. New status of The Fleet:

- 2,250 replies
-
- 10
-
-
- model shipways
- Charles W Morgan
- (and 1 more)
-
I managed to get the remaining boats to the point of ready for details. Also included are some better photos of the one that is finished. Here's the fleet at this stage:
- 2,250 replies
-
- 10
-
-
- model shipways
- Charles W Morgan
- (and 1 more)
-
Thanks Lester, glad you stopped by. Seeing the boats and photographing them on this last stop really helped. Just let me know when you're ready to post.
- 2,250 replies
-
- 1
-
-
- model shipways
- Charles W Morgan
- (and 1 more)
-
Thanks George, this should answer your question concerning how I was going to finish the interior.
- 2,250 replies
-
- 2
-
-
- model shipways
- Charles W Morgan
- (and 1 more)
-
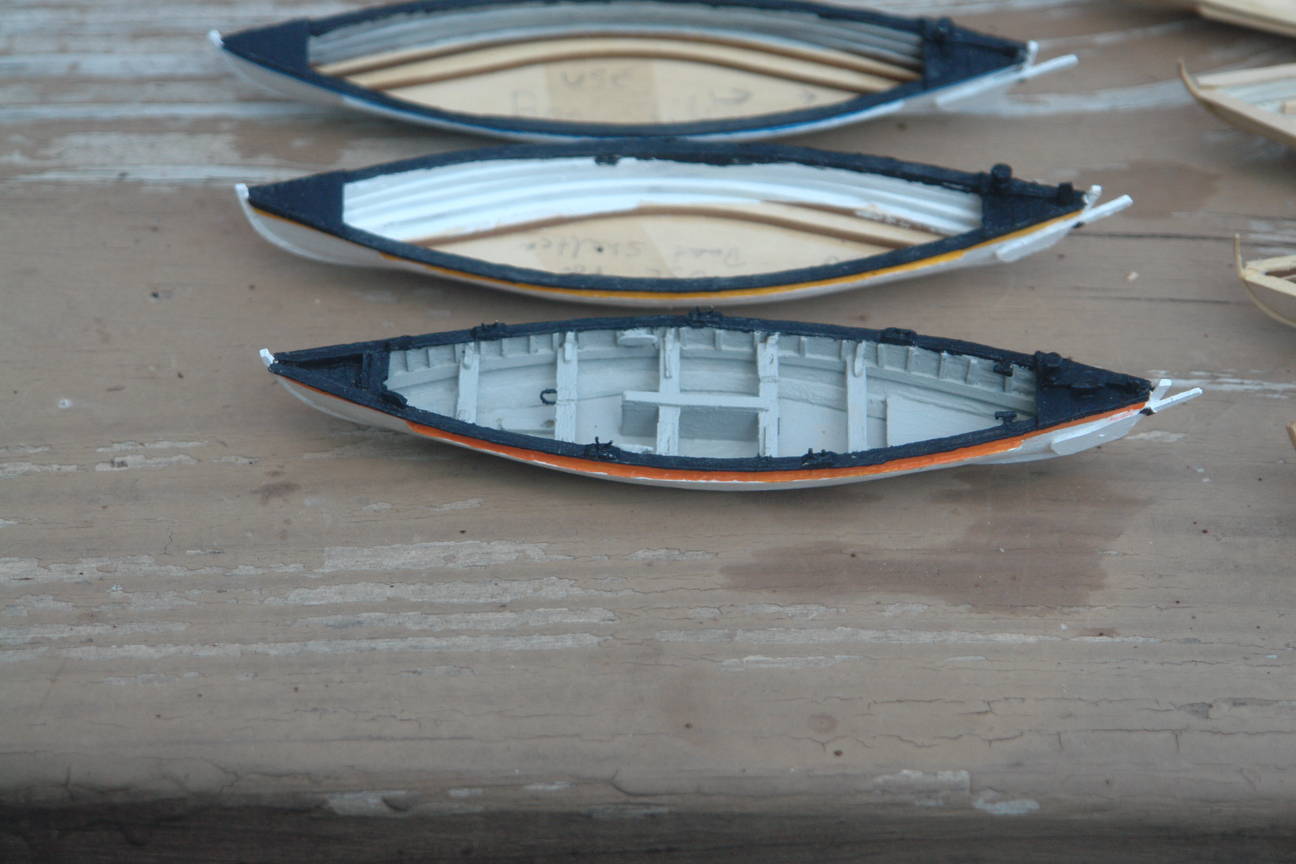
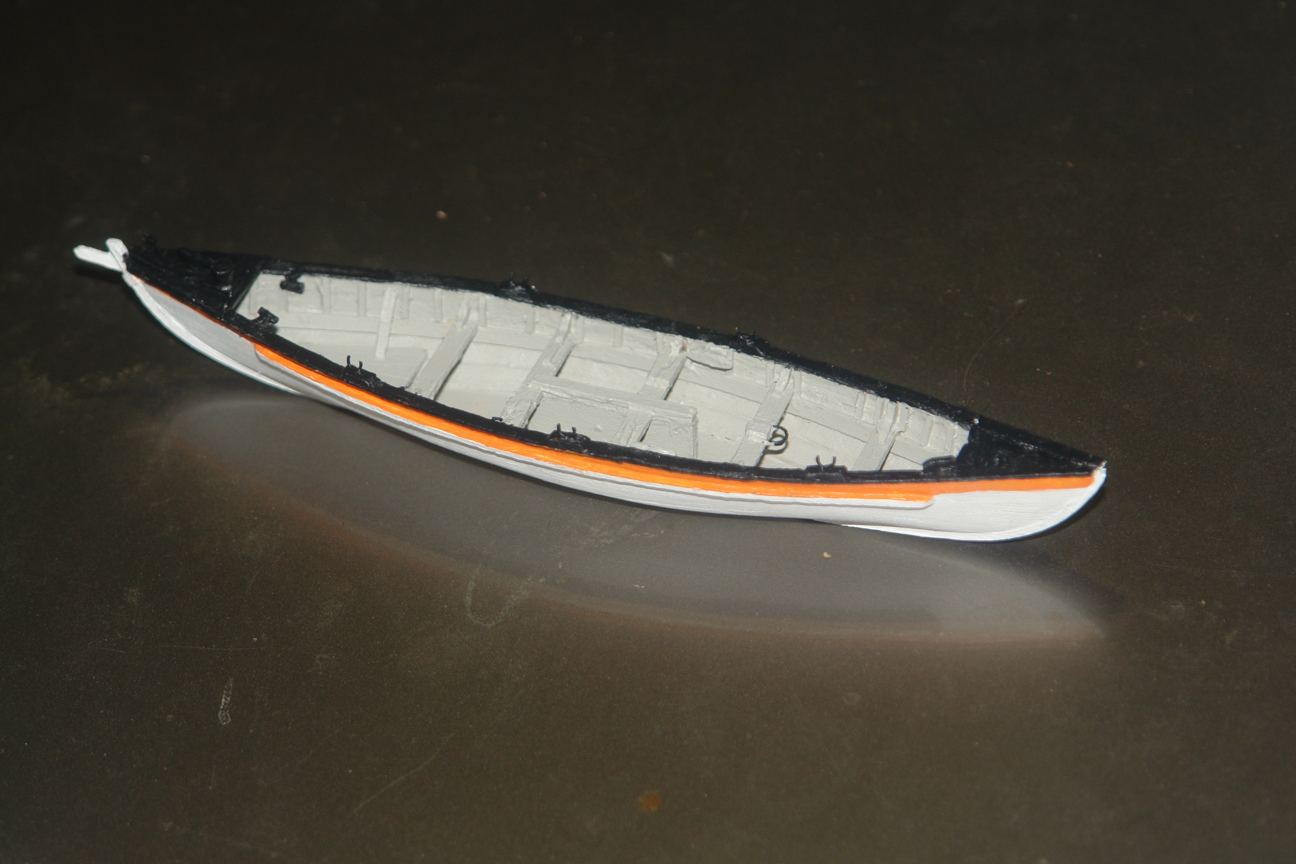
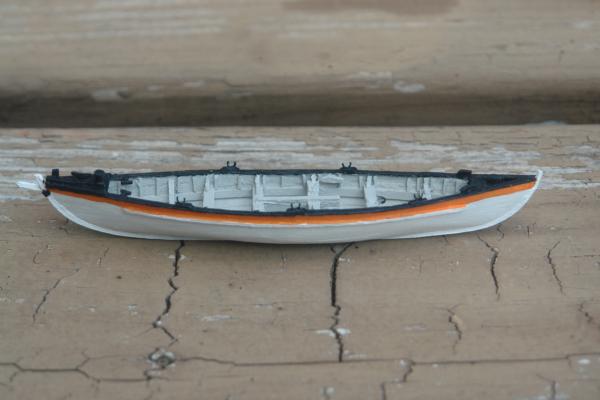
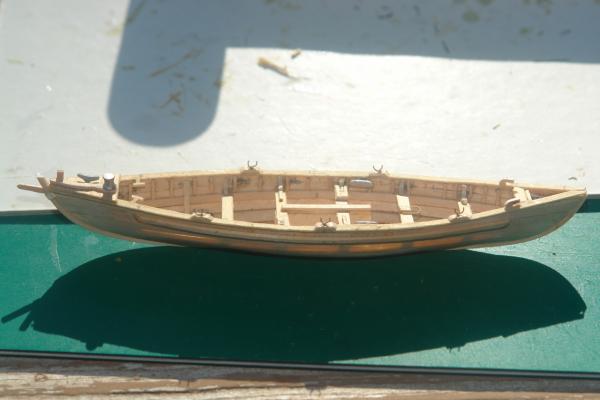
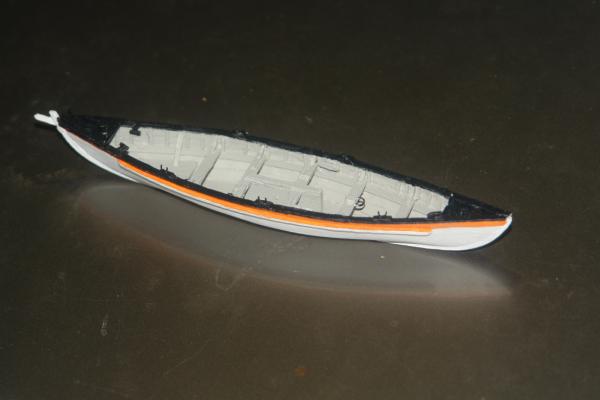
Added the remaining details to the boat. The first boat is now completed and ready for painting. Completed the painting and ID'd it as Orange. One down and four to go. I'm quite pleased with how it turned out. Adding all the little stuff was fun and really made it look like the real ones. I will finish all the boats to this stage before adding the accessories to make them ready to mount to the Morgan later.
- 2,250 replies
-
- 12
-
-
- model shipways
- Charles W Morgan
- (and 1 more)
-
Hi George, I plan to follow the paint scheme used on the real whaleboats. The interiors will be gray,and the outsides white with black rails and various colors for the stripe for identification as shown on the previous posts. Glad to hear about the Mill, you will enjoy it. I'll have to check on the part for you.
- 2,250 replies
-
- 4
-
-
- model shipways
- Charles W Morgan
- (and 1 more)
-
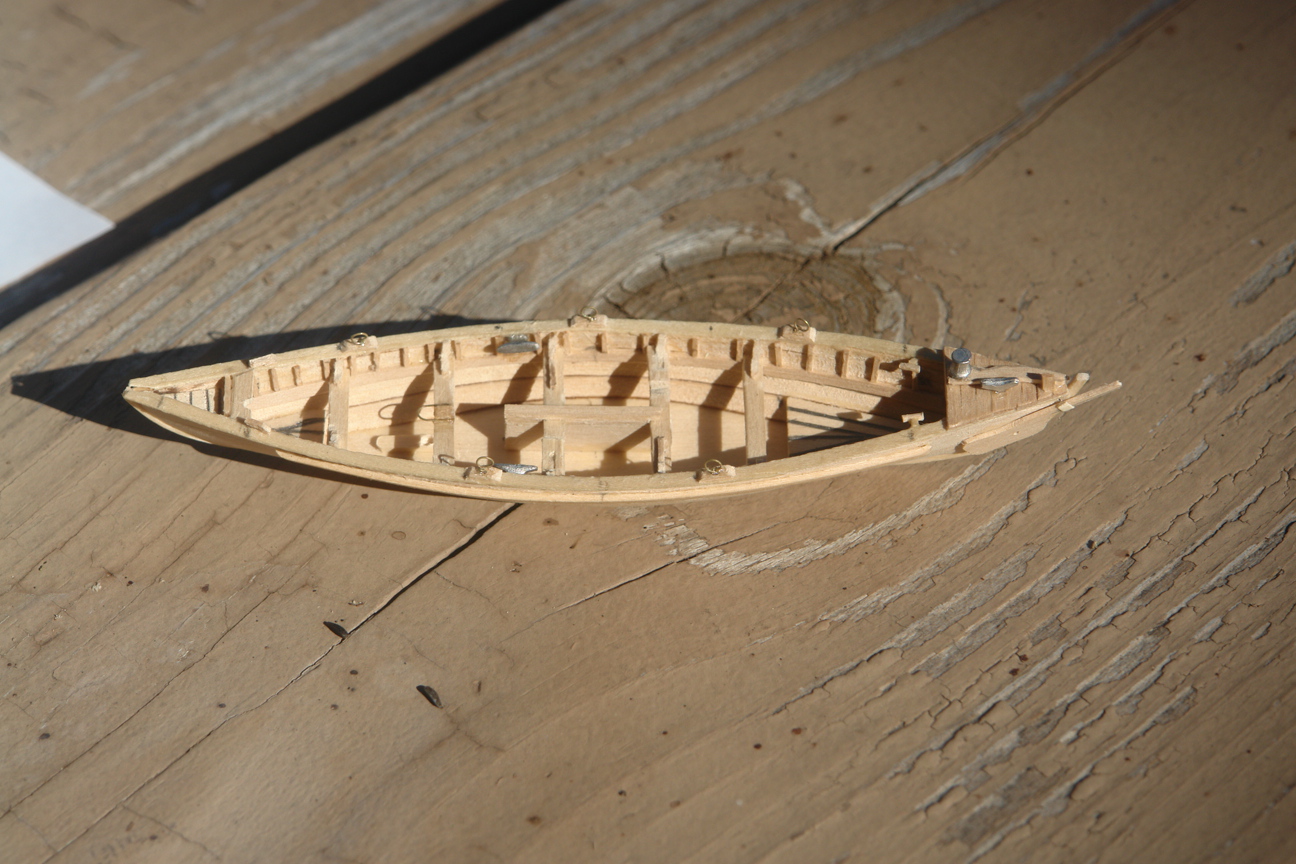
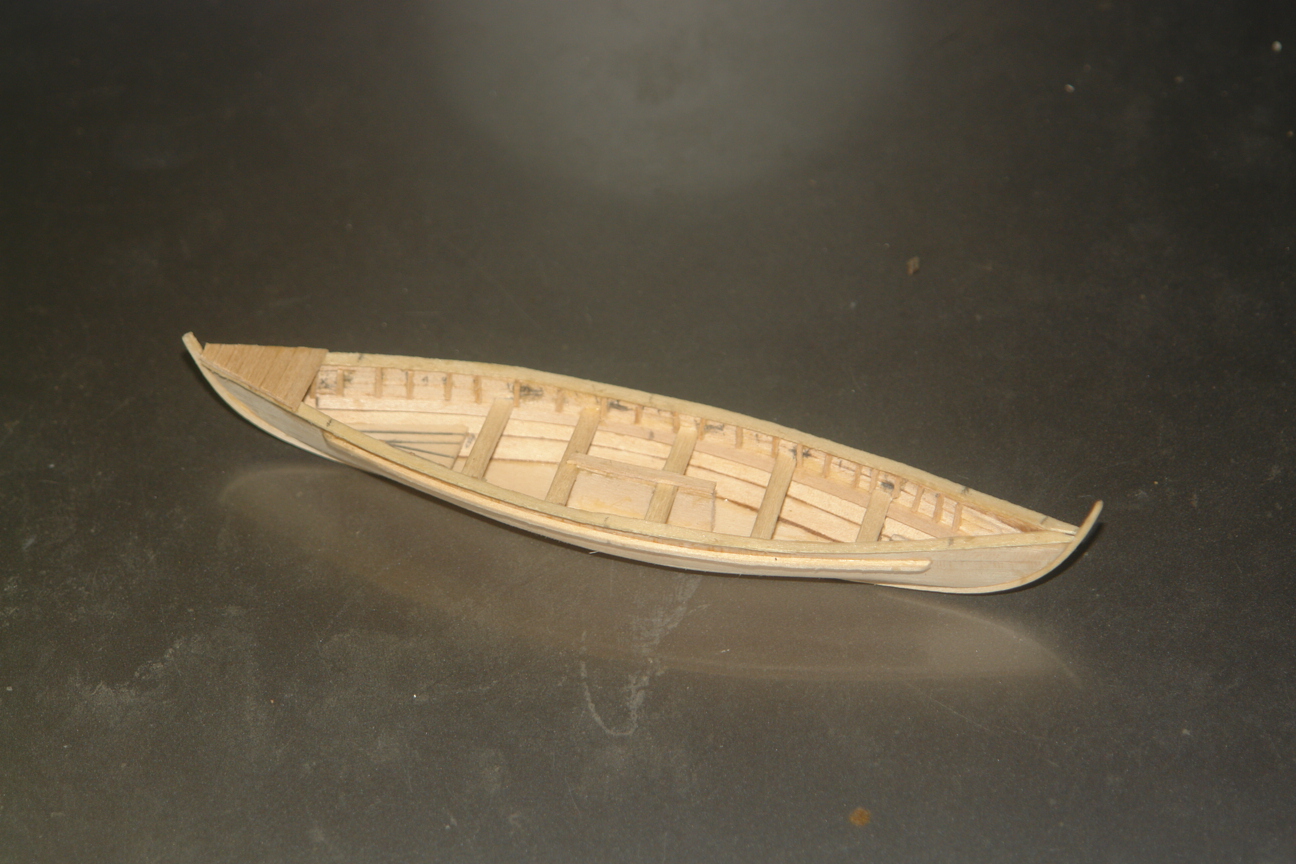
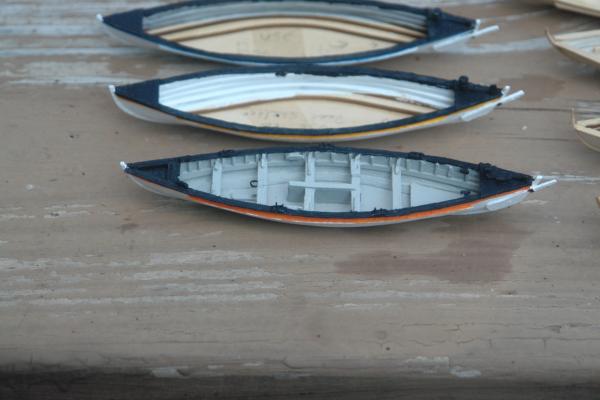
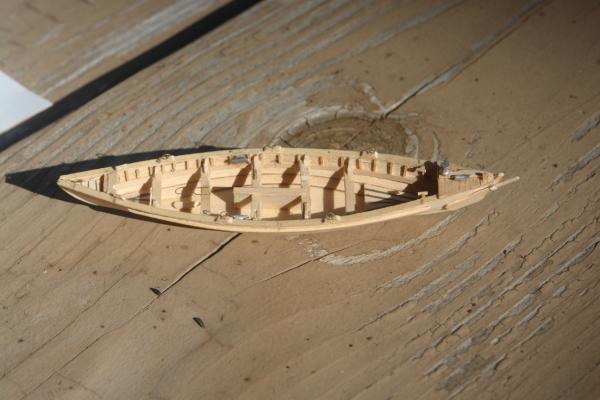
The first of the five remaining whaleboats is shown with the following interior details installed. The Cieling Planks were installed first, then the 5 Thwarts (seats), the Stern Sheets (lower decking or Boat Steers Sole) the Bow Sheets (lower decking or Harpooners Sole), the Mast Step, the Center Board Case, the Ribs above the Ceiling Plank, and the Cutty Boards (Aft Top Deck). All of the parts were made from 1/64" x 1/64" strips and also 1/32" thick strips measured and cut from the 1/64" and 1/32" x 3" sheets since these size strips are not supplied in the kit. The Thwarts are 1/32" thick material. This boat will be completly fitted out before completing the remaining 4 boats which will only be duplicating this boat. All five boats will be completed and then the tools, harpoons, tubs, sail and mast, etc. will be added to each completed boat.


- 2,250 replies
-
- 14
-
-
- model shipways
- Charles W Morgan
- (and 1 more)
-
Hello BE, thanks for stopping by. Greatly appreciate the comments. The Niagra was fun to visit especially since it will probably be my next build. I got some good photos (about 400)of the Morgan a couple of weeks ago, but internet restrictions have prevented me from uploading them to my website yet. The whaleboat technique luckily worked out good. Hopefully will be detailing them now that the hulls are completed.
- 2,250 replies
-
- 3
-
-
- model shipways
- Charles W Morgan
- (and 1 more)
-
I missed your question on the anchor deck. In real life, the anchor deck goes over the top of the bowsprit. Mine didn't fit, so I planked around it, then the Breasthook goes over that. Let me know if you need pictures as it is an area I re photographed, I also think I show this in my logs ( how I had to do it). John
-
Hi Ron, sorry this took so long to answer. I was just checking your build log and found your post. My internet access lately hasn't been too good, so I've only taken care of business as I could. Hopefully I'll get this posted before I get bumped off the internet again. So far it's bumped me twice while I try to get this written. To answer your question, I had a piece of 1/16" square brass tubing I found in a hobby shop last year. The company that makes it discontinued it so I don't think any is still available unless you just stumble accross some. It bent well and soldered well. By the time I might get home in October and you haven't solved your problem I'll be glad to send you a piece that should be sufficient for you to make this piece. Hopefully, it won't be too late for you to make it the way you wish. I did not bring it with me unfortunately. I'll keep you posted as to when I might be home. Just let me know if you will still need it around that time. You might check with a model airplane RC type of shop and you might find some....don't know. Good luck. I'm currentloy building whaleboats along my travels. they're small and I have 7 of them to do so I can work on them in my RV or on the picinic table. I visited the Morgan a couple of weeks ago and took 400 more pictures which hopefully will be posted to my website in the next few weeks - again, dependant on internet connections. Hope this helps some. Looking good - John
-
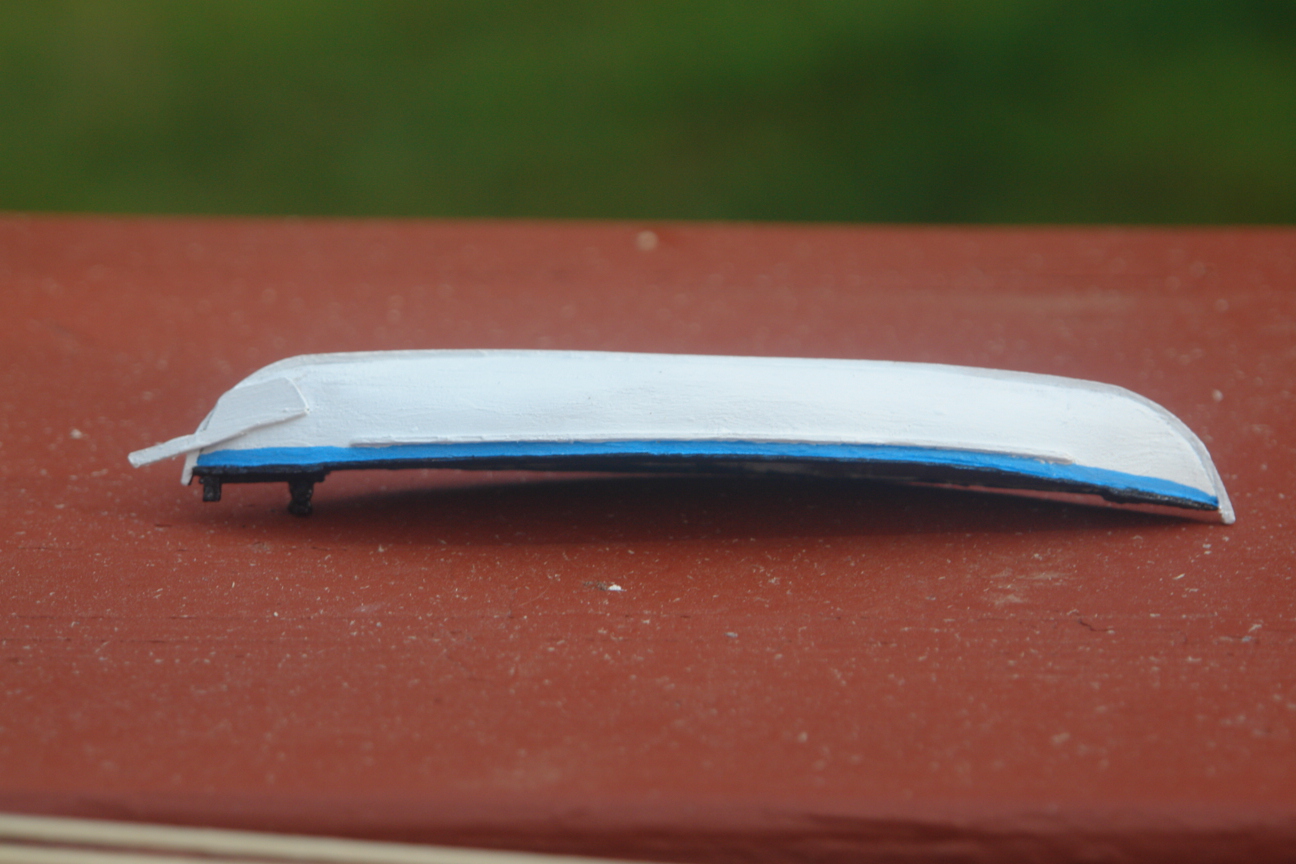
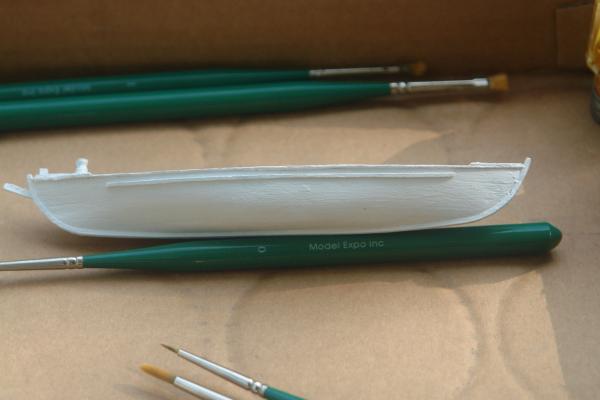
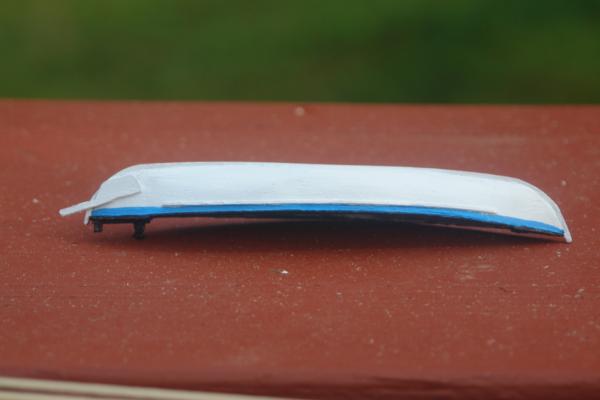
Managed to get the first boat finished today (6 more to go). It is one that will mount upside down on the Shelter Roof, so not much details other than on the exterior. this one has a blue stripe on the side. Each boat had a unique color so they could be easily identified and monitored from the ship as they were either catching or chasing a whale.
- 2,250 replies
-
- 15
-
-
- model shipways
- Charles W Morgan
- (and 1 more)
-
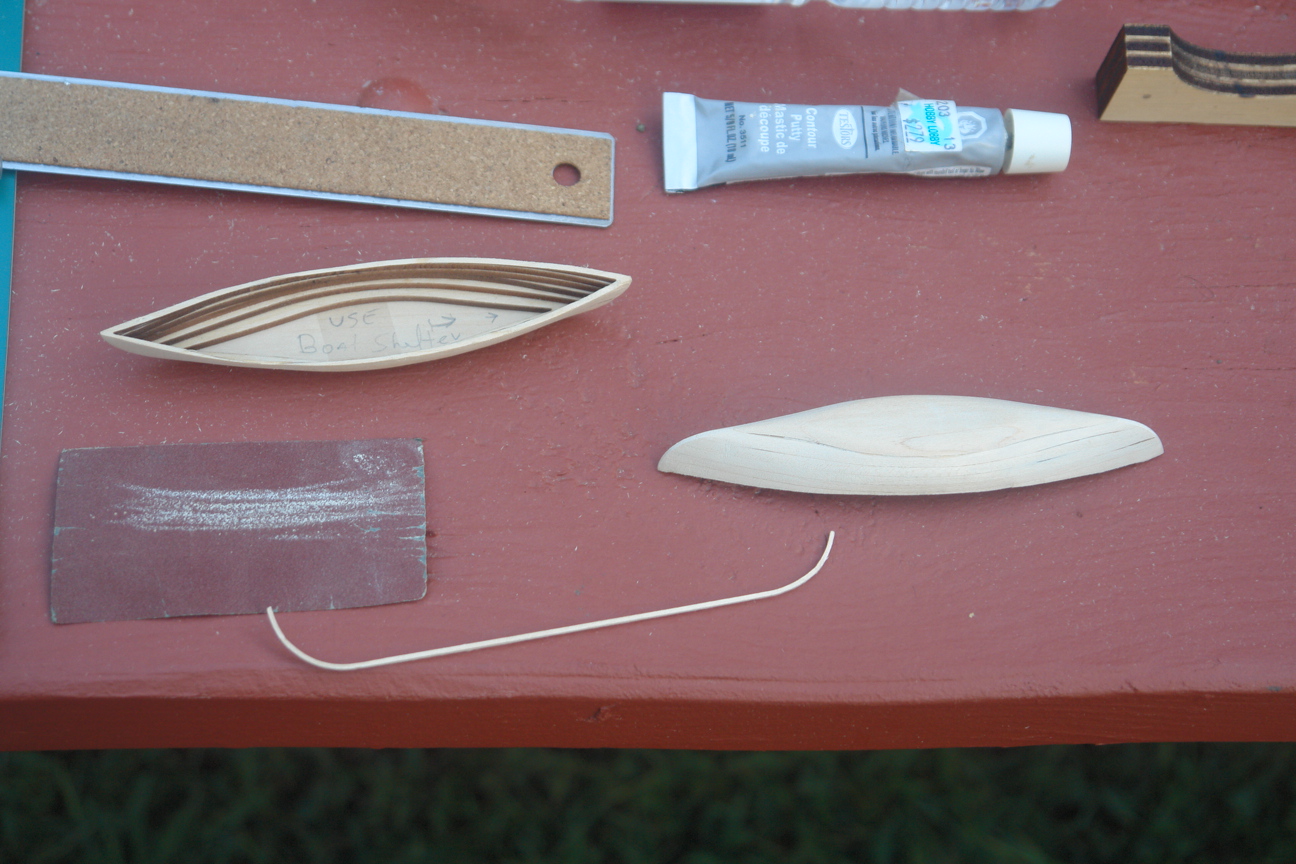
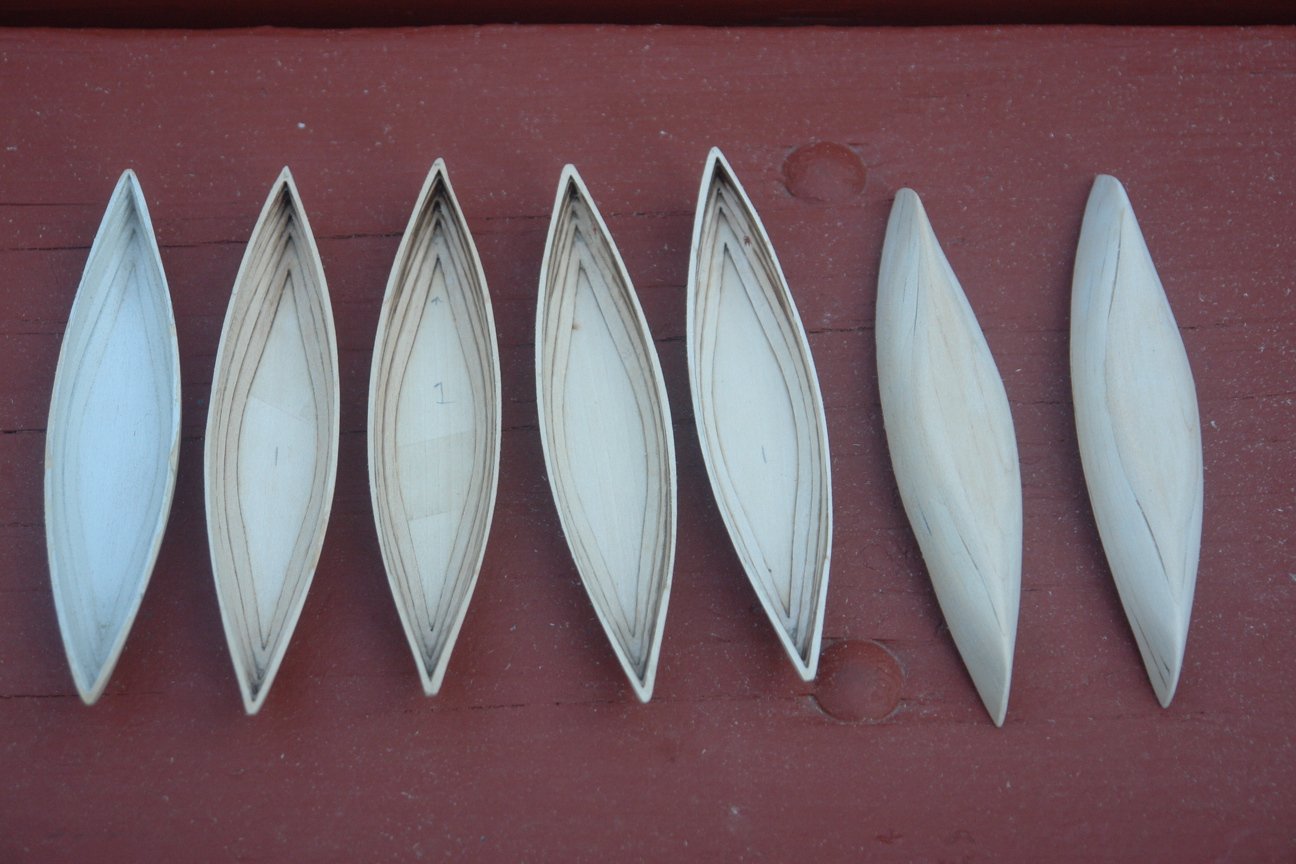
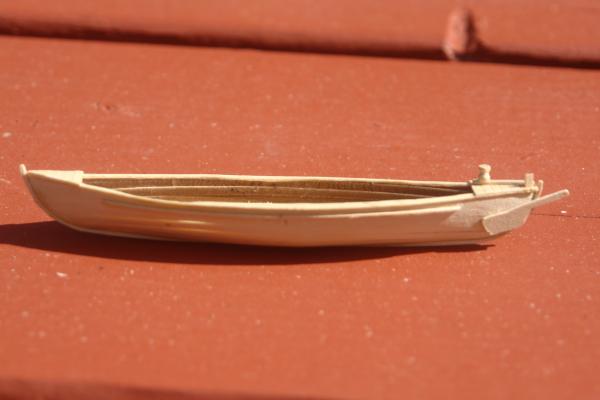
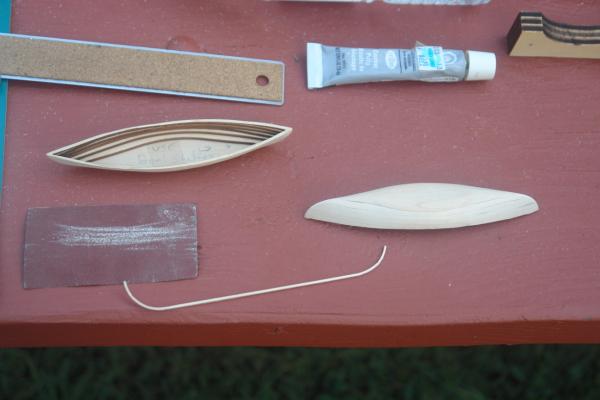
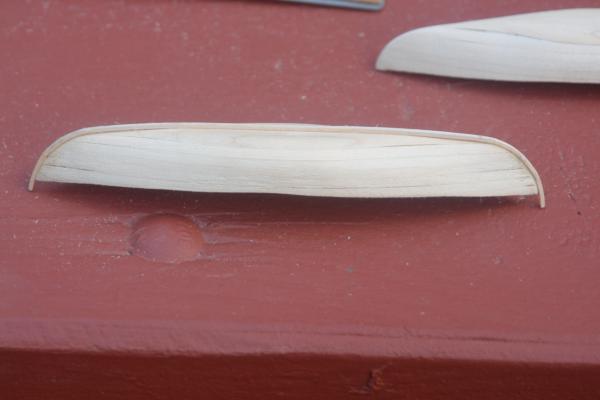
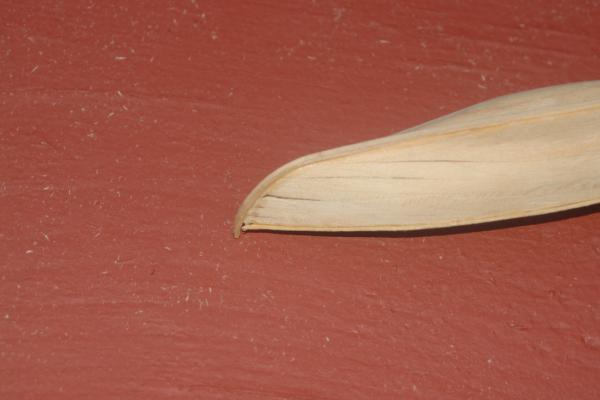
Managed to make a keel and one rail for one boat. Shaped the keel form from the proper size piece of wood, used the electric heat plank bender to form it, and glued it to a boat and then glued one rail on.
- 2,250 replies
-
- 10
-
-
- model shipways
- Charles W Morgan
- (and 1 more)
-
Thanks Dennis, glad you like them, it's getting fun again....
- 2,250 replies
-
- 3
-
-
- model shipways
- Charles W Morgan
- (and 1 more)
-
Hi Lester, thanks for the kudos. This scale is tight for these kind of details. We saw the display you mention, it was great to see it. Also, the whaleboat shack next to the Morgan had good info also...was glad to see it since that's what I'm working on now. I figured you were busy at work or home since I hadn't seen updates on your whaleboat in a while. The day we were there I asked different people if you were around, and only one of them knew you and she was a staff member and kind of snotty. She was working on the Morgan that day. She acted like she didn't know you, then turned around to walk away from me and said "oh, I know who you're talking about no way he rigged this ship" then continued walking off. I thought she was rude and unprofessional. I told her that I didn't say you rigged the ship, but that you worked on the rigging and the Roann. Didn't phase her she just kept going. I don't remember her name, she had short brown hair and looked to be in her late 40's.
- 2,250 replies
-
- 2
-
-
- model shipways
- Charles W Morgan
- (and 1 more)
-
Thanks George. Hi Piet, good to hear from you. Hope all is good on your end. Hope you don't get Erika up your way. We're heading back inland from here so we won't be coming down the east coast this year as well as it looks like the Atlantic might be getting geared up for storms. Tell Gwen hi for us..take care John
- 2,250 replies
-
- 2
-
-
- model shipways
- Charles W Morgan
- (and 1 more)
-
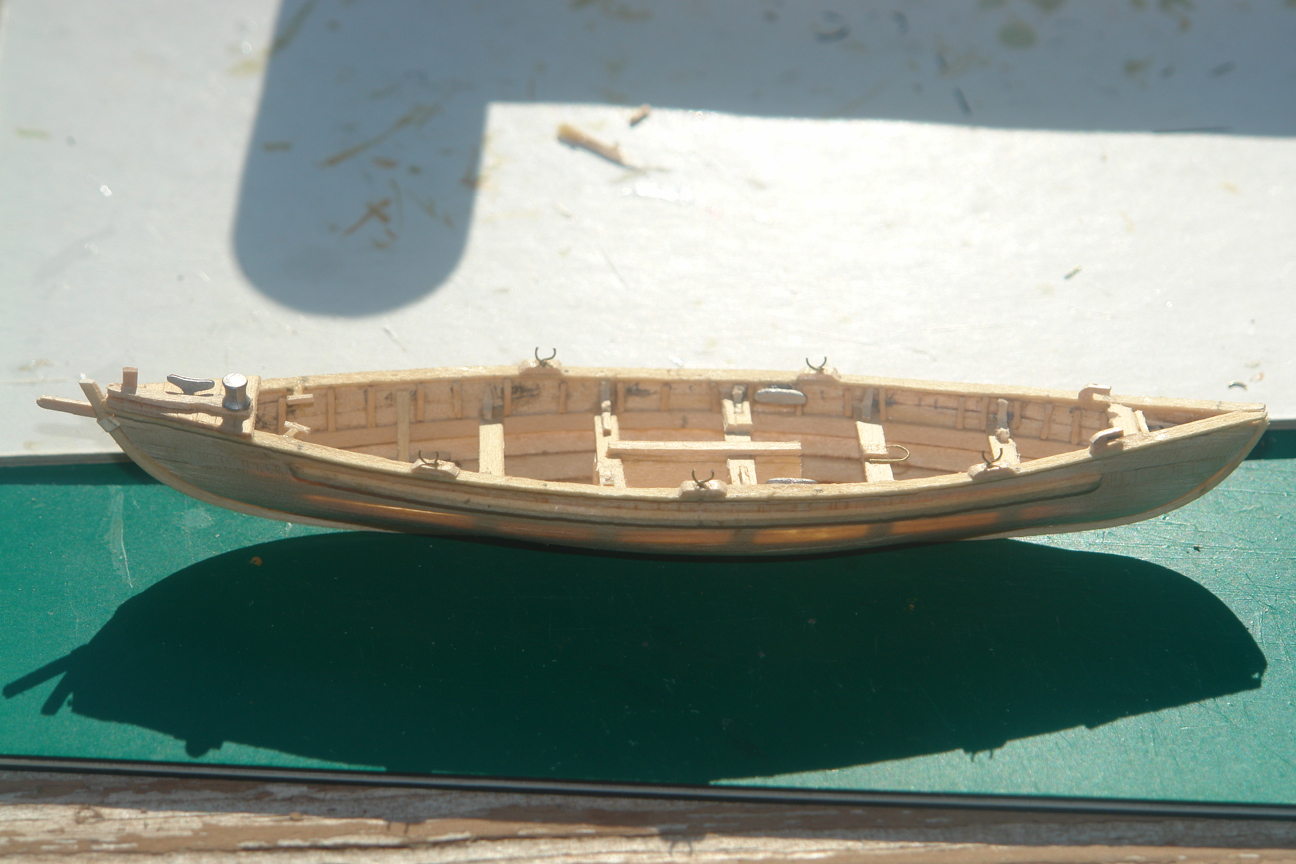
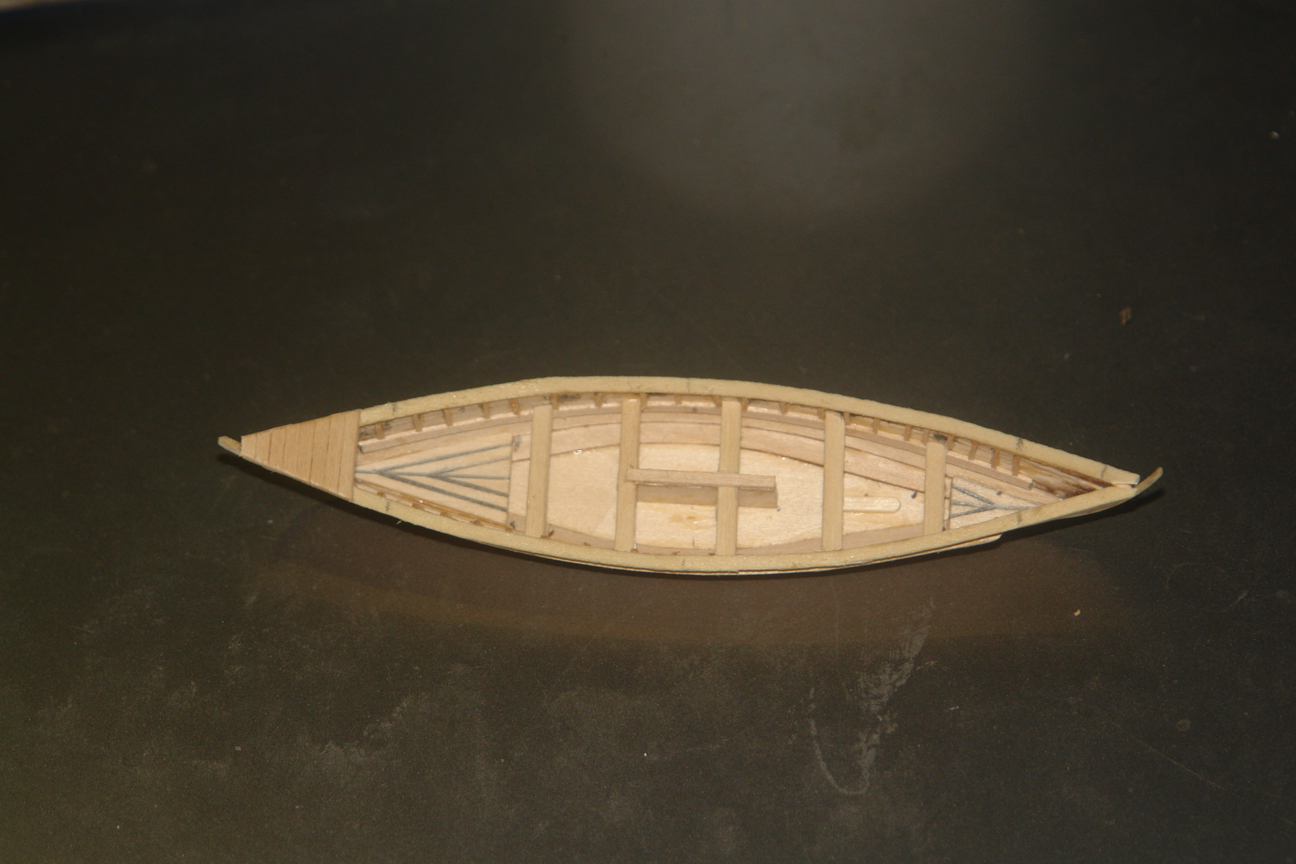
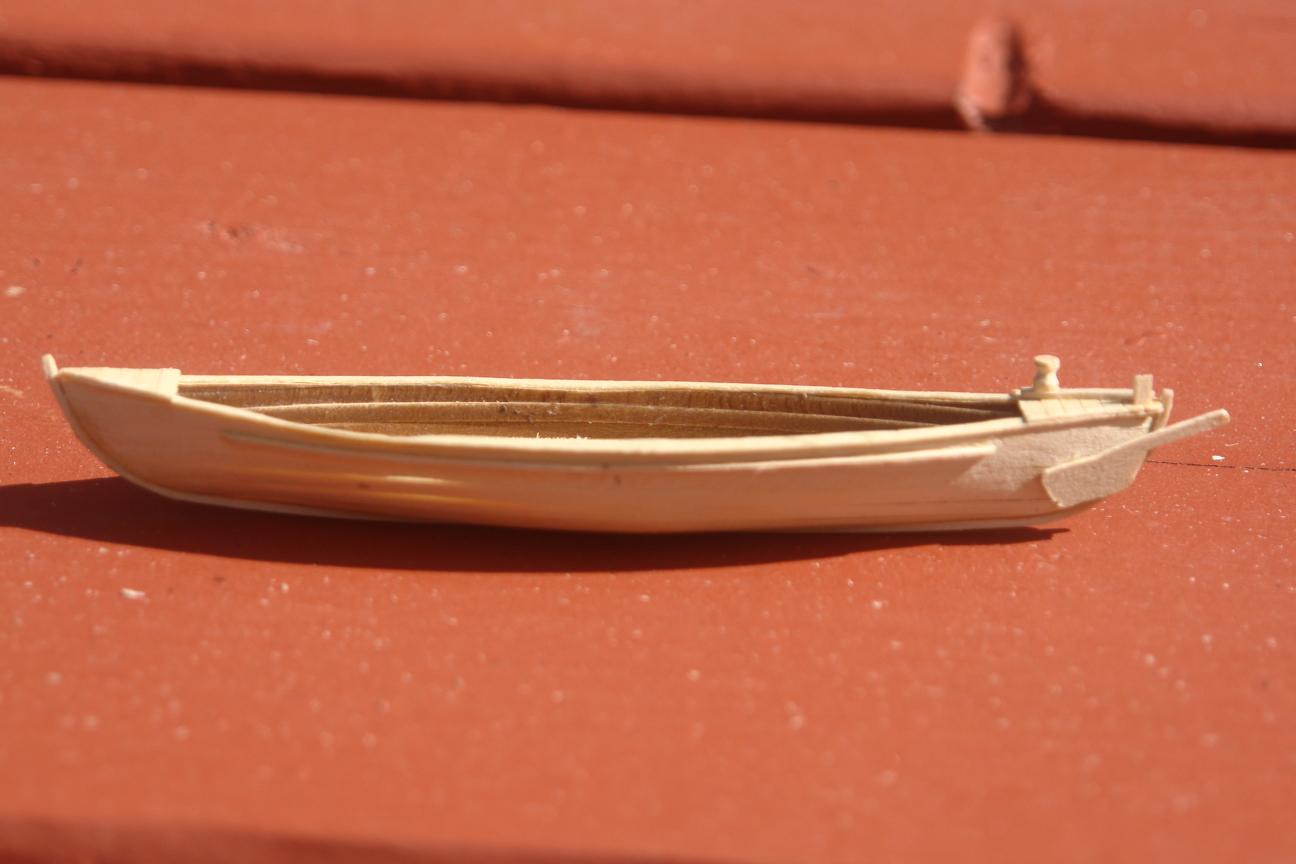
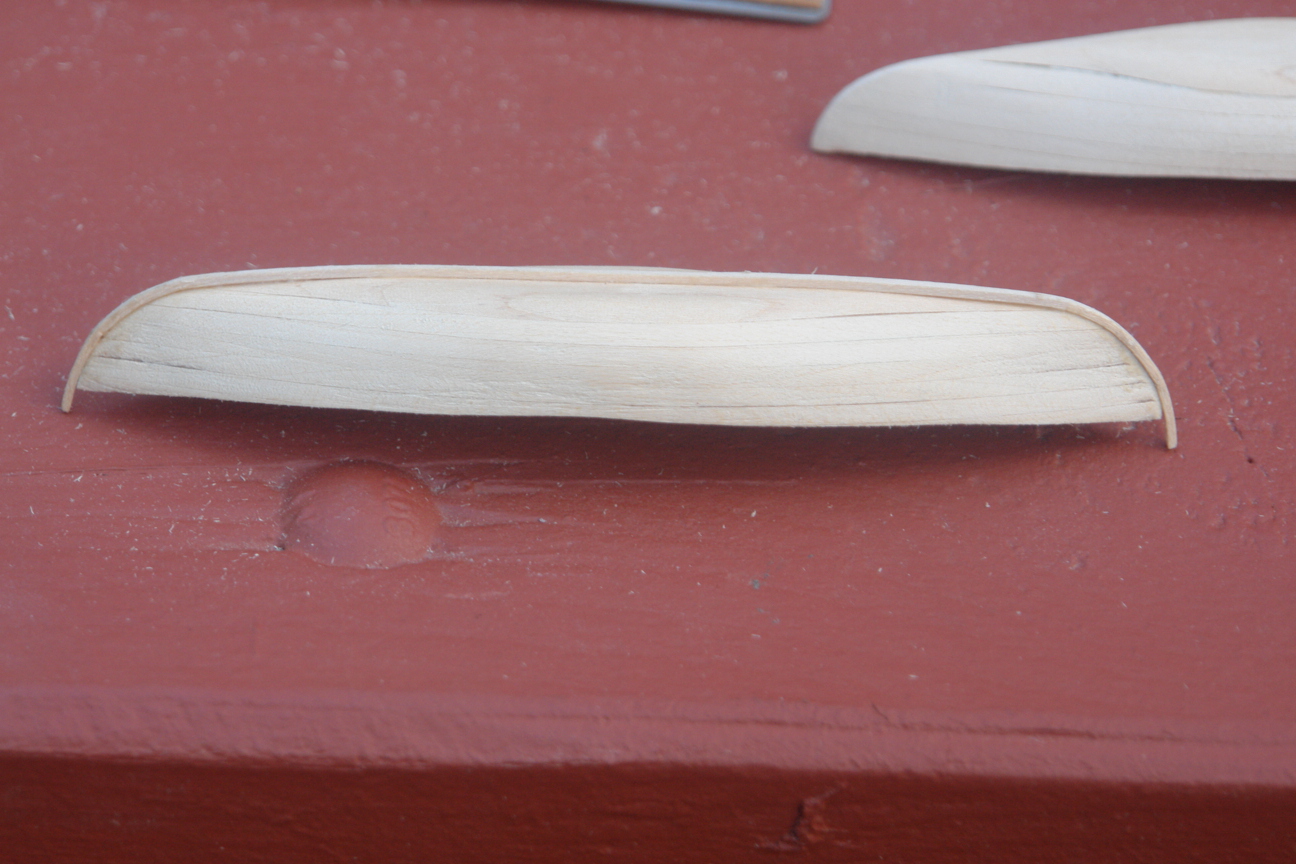
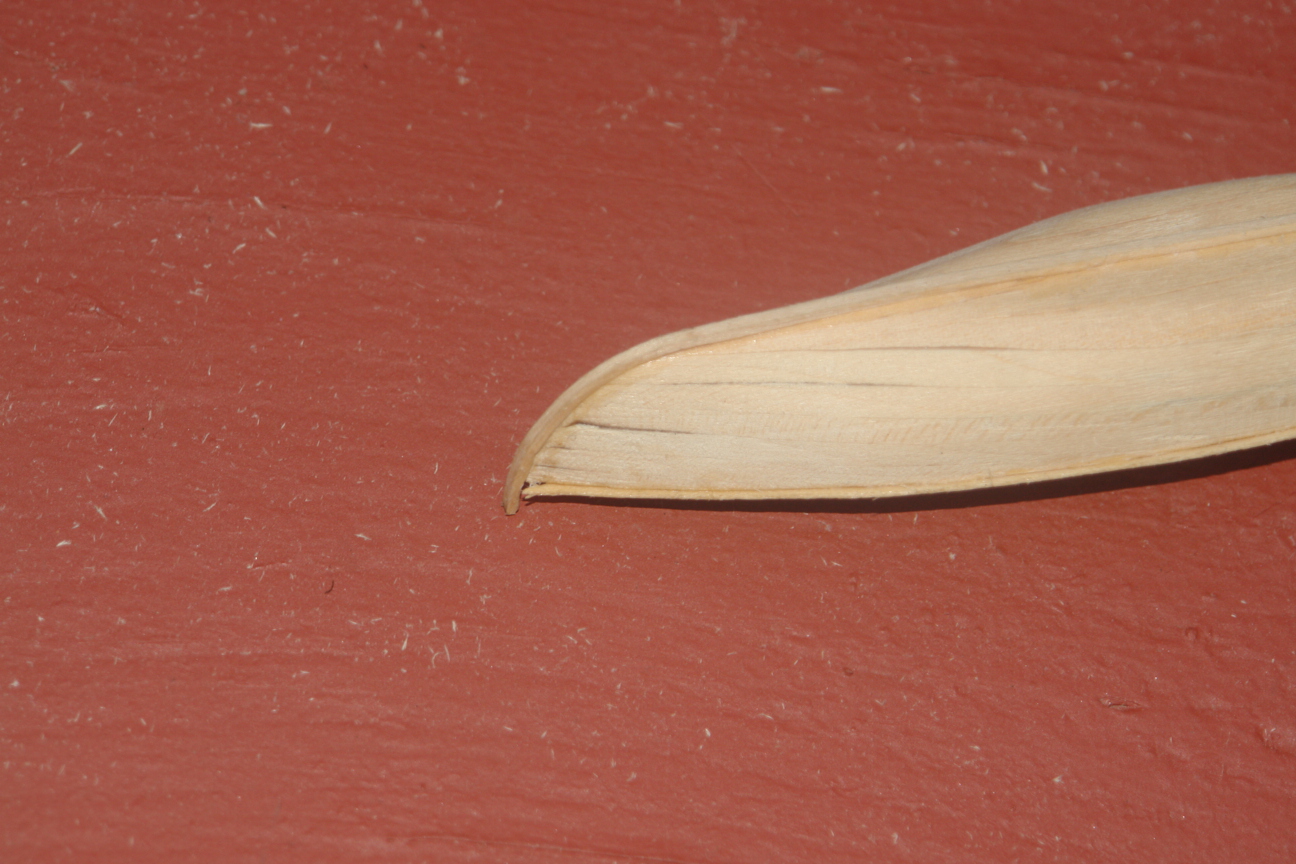
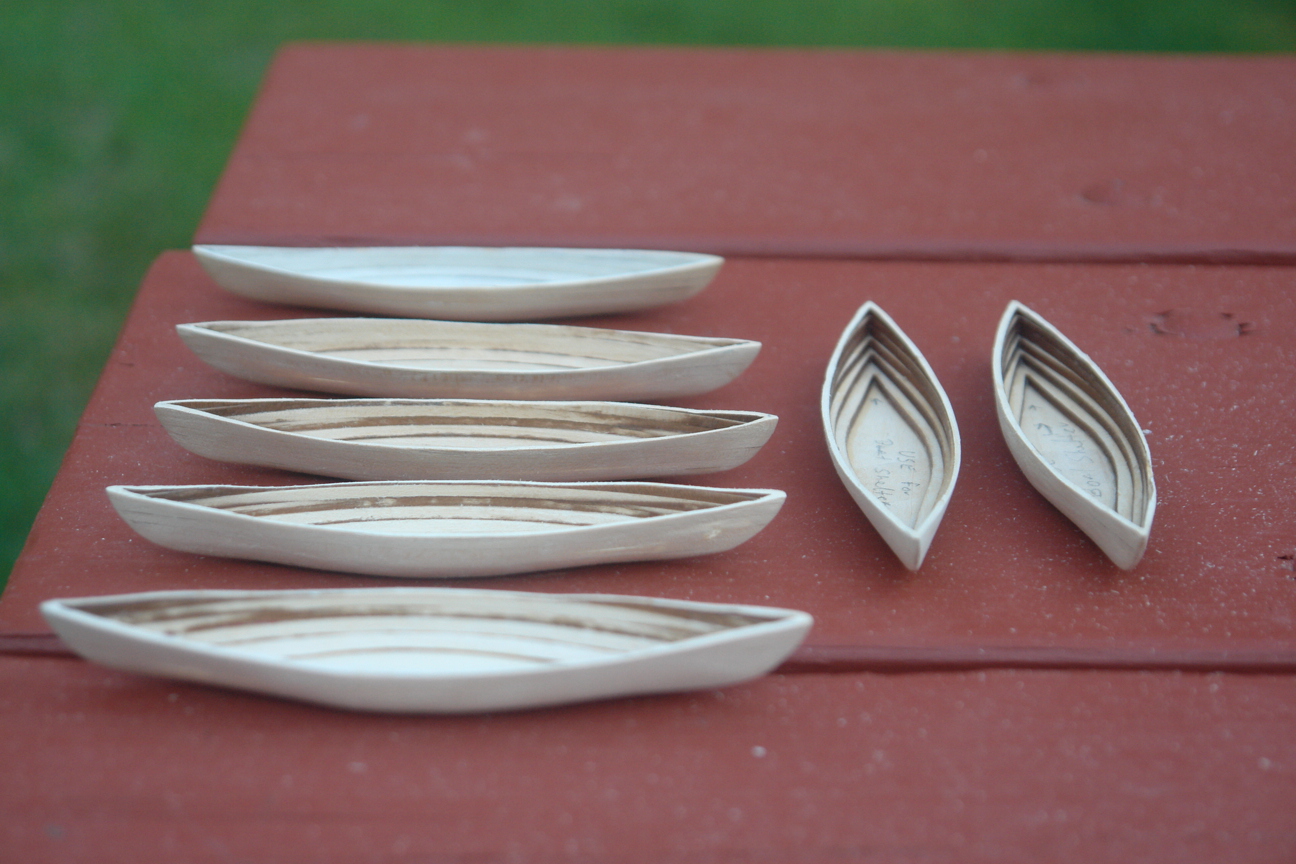
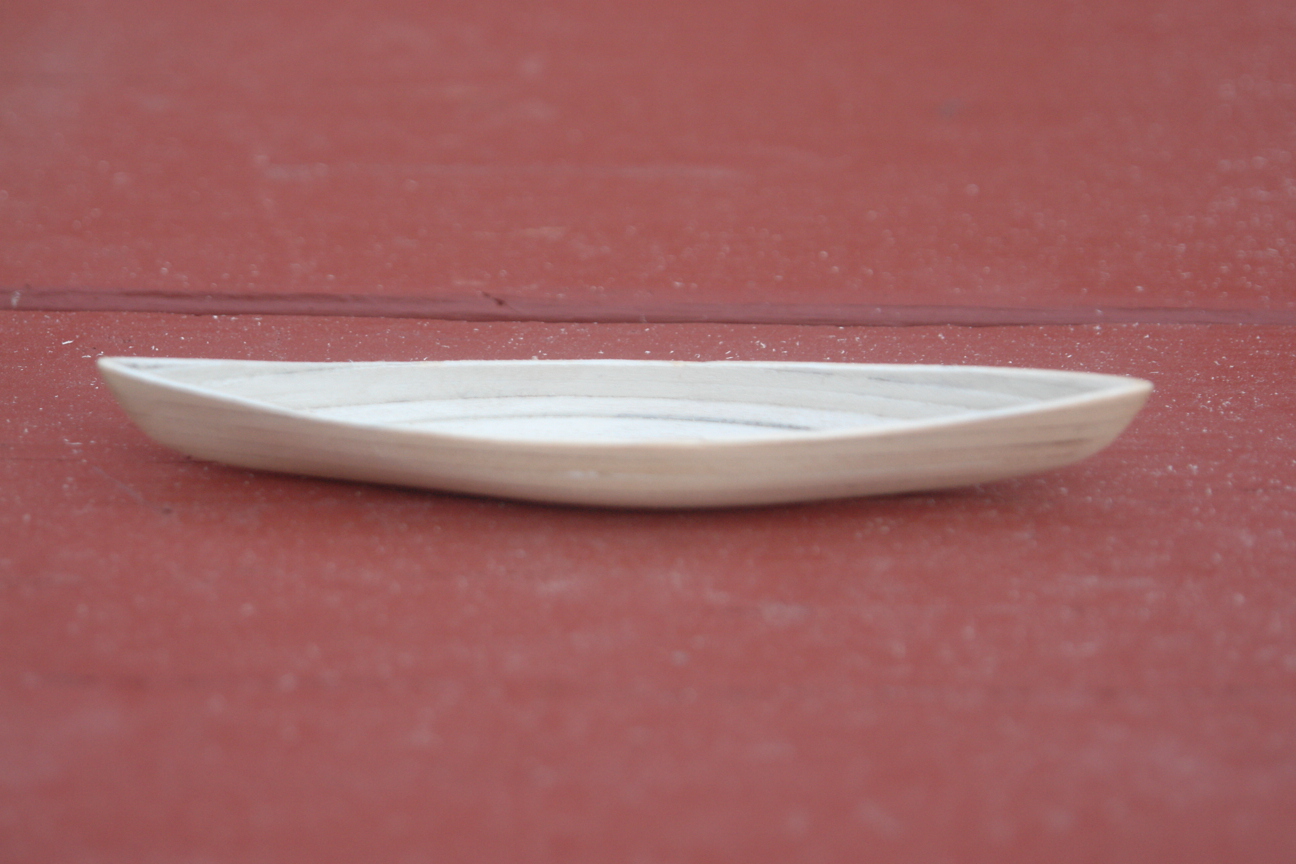
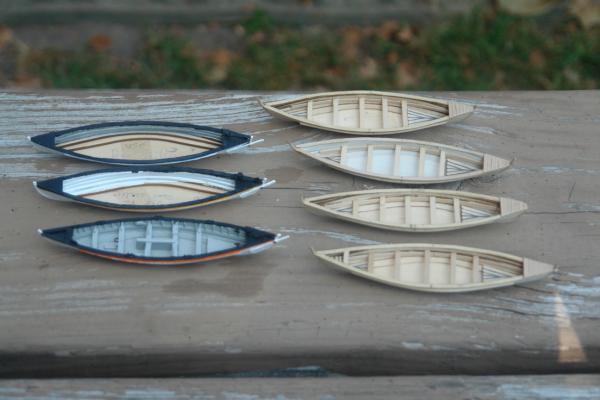
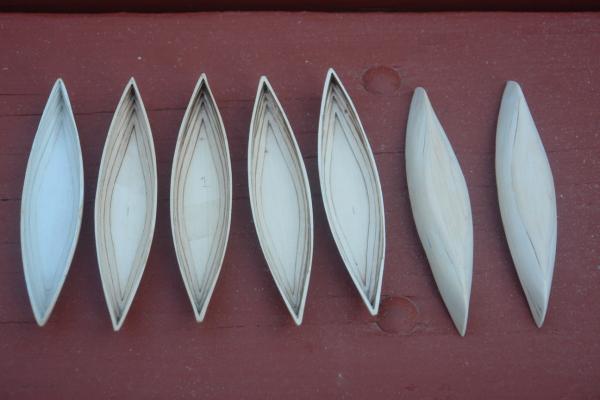
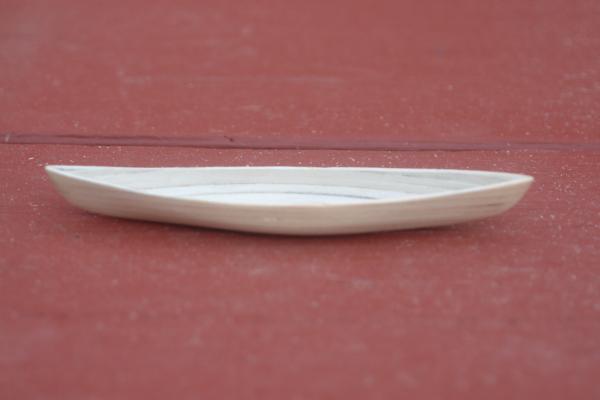
Five of the boats should look something like this at this point. The next steps will be adding the details to each of the boats. I will work on one boat at a time to add the rest of the details. Each boat is a model in itself and will get a lot of attention. these are the boats that will be attached to the ship on the boat bearers and davits. I will post pictures as I progress, however, it might be some time inbetween the photos since quite a bit of work will need to be done to accomplish a finished boat. Please be patient. I have been fortunate to be able to work on these as I travel. I estimate about 3 hours per boat to be at this stage of construction. Many more hours are needed for the details. The last picture shows a profile for reference.

- 2,250 replies
-
- 13
-
-
- model shipways
- Charles W Morgan
- (and 1 more)