GrandpaPhil
-
Posts
6,166 -
Joined
-
Last visited
Content Type
Profiles
Forums
Gallery
Events
Everything posted by GrandpaPhil
-
That is incredible! What did you make the center clear piece of?
-
Incredible work!
-
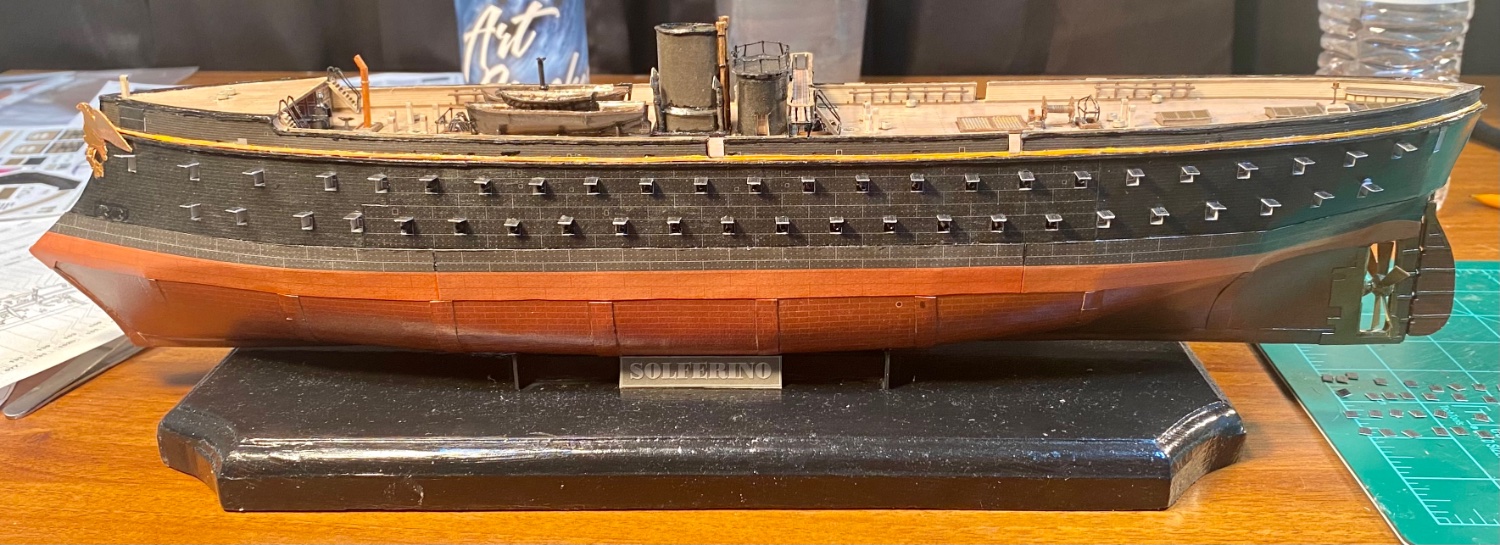
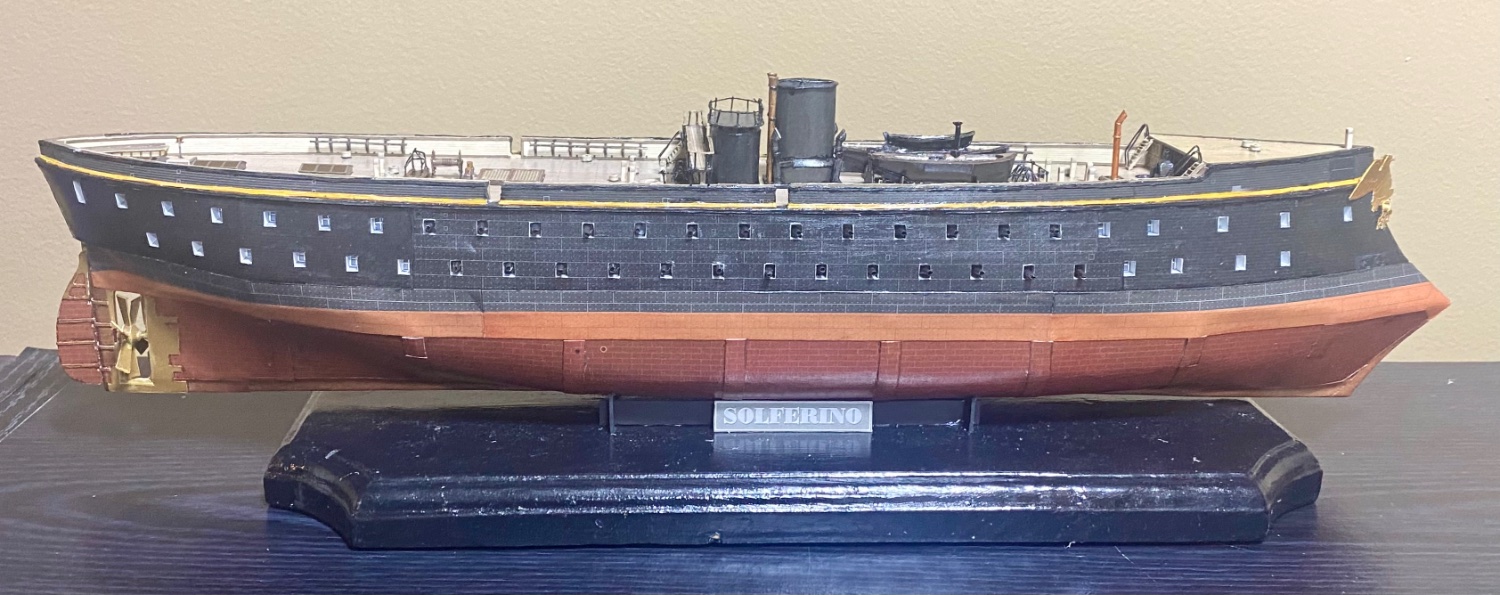
I’m honestly surprised I made it this far on this model. But, here I am, one year in. I am roughly at the same point on my Victory, 5+ years in, which I really need to finish after I finish this model. I’m at the point where I have to start looking and planning ahead. This kit has you install the anchors, davits and most of the rest of the hull fittings, this step, but it doesn’t have you do any of the rigging for any of the hull fittings until the next three steps, when you have masted the model and are doing the standing and running rigging. Based on my knowledge of model ship building, that is badly out of sequence. If you do it that way, everything will be in the way, so I am going to do as I know how and just start rigging as I go, with the fittings that require it. This means that the gunport lids will be rigged next (yes, even at 1/200 scale). After that, I will be making the stern gallery (more of a stern porch/promenade). Then it’ll be time to get the rest of the deck fittings. That will include all eyebolts (hull too) to secure rigging. It will also include the stays for the stack and the tie downs for the ship’s boats. Next up will be the remainder of the hull fittings such as catheads, anchors, boarding ladders and davits, all of which will get rigged as they get installed, so all my hull rigging is done before masting. Speaking of rigging, I am also going to drop eyebolts in the deck to secure the shroud deadeyes while I install the rest of the eyebolts. The two Magenta-classes had internal channels. There is no way I can secure the deadeyes to those, without them ripping out so I’m going to secure them to the deck. This also means that Solferino will have real shrouds and ratlines (I actually enjoy tying ratlines). But, the Magenta-classes also only had one bank of ratlines. Which, since we’re discussing rigging, it is also time to discuss masts and yards. I will not use paper masts or yards. I have the original masting and rigging diagram for the barque-rig, from 1864, courtesy of the French Ministry of Defense, and I am going to use it to make all masts, yards and gaffs from bamboo kitchen skewers and dowels. Now, mast tops and so forth, are fine to make from card. I did that with my last two models. I am also going to be putting sails on this model (I love sails, they make the model for me). Whether I use the sails that came in the kit or make my own is still yet to be seen. That will depend on if they fit or not. I may just make them from silk span. I haven’t decided yet.
-
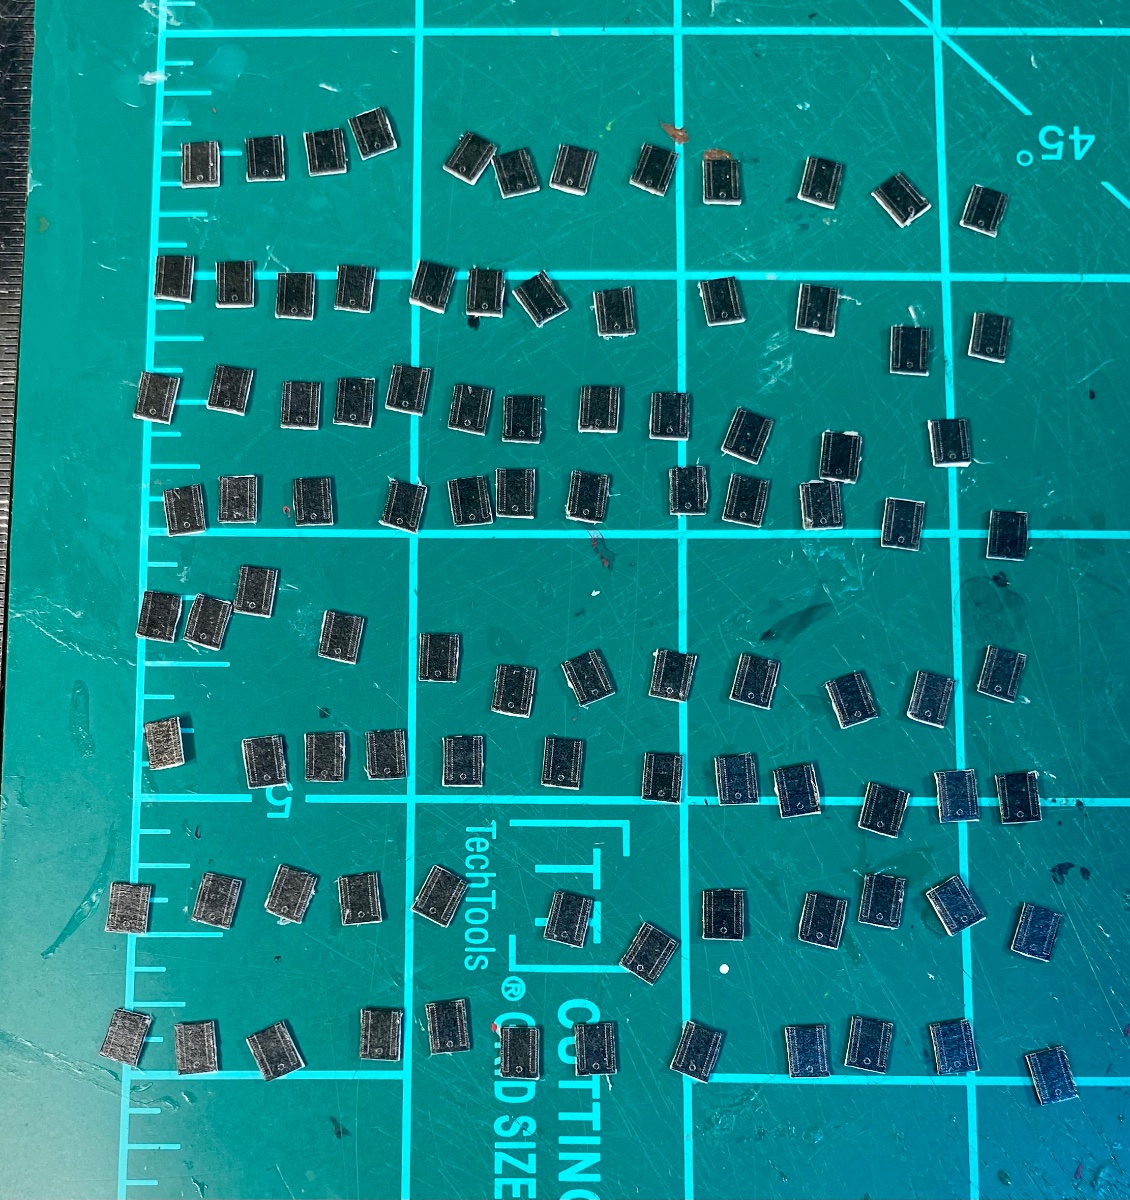
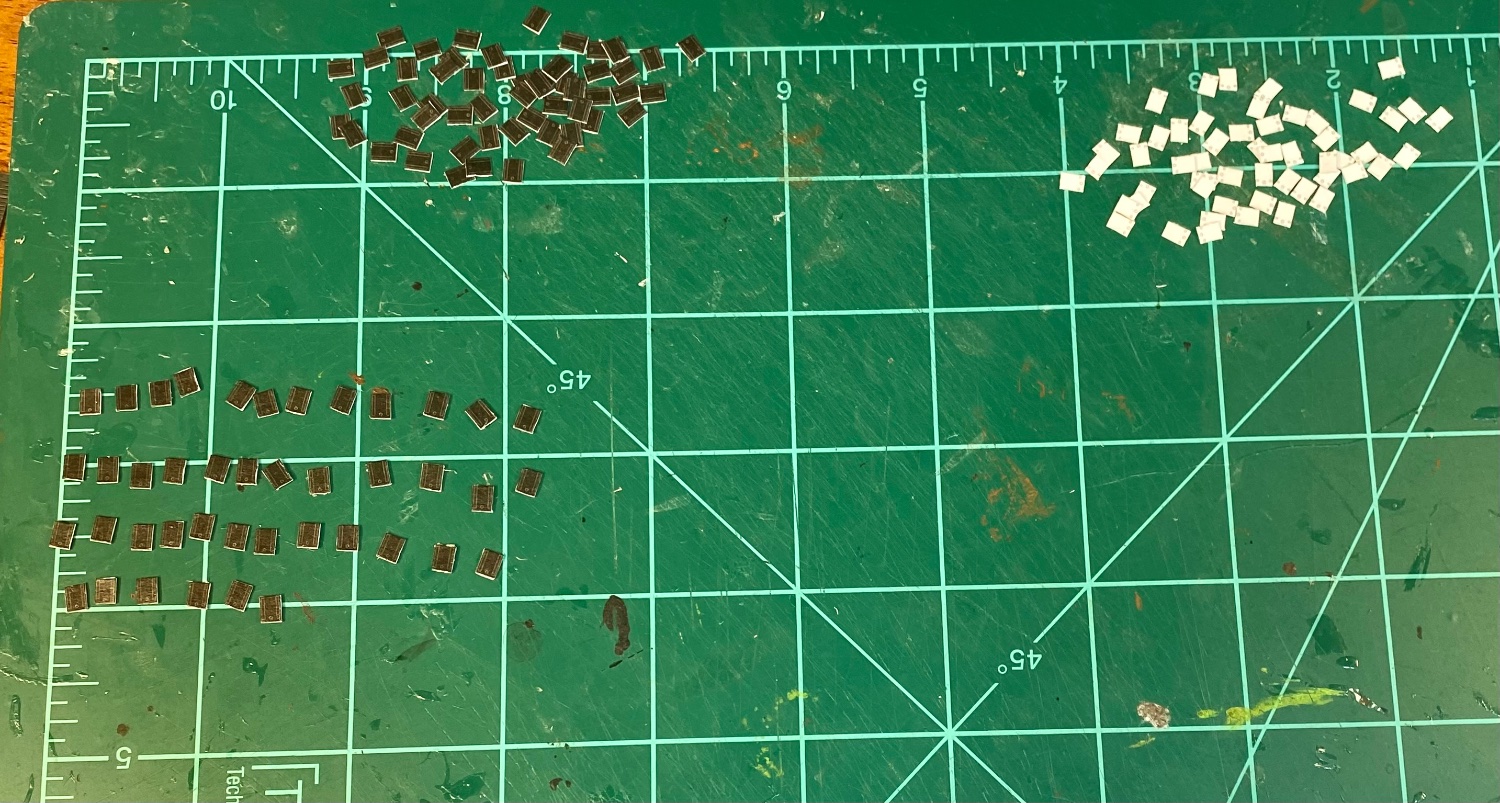
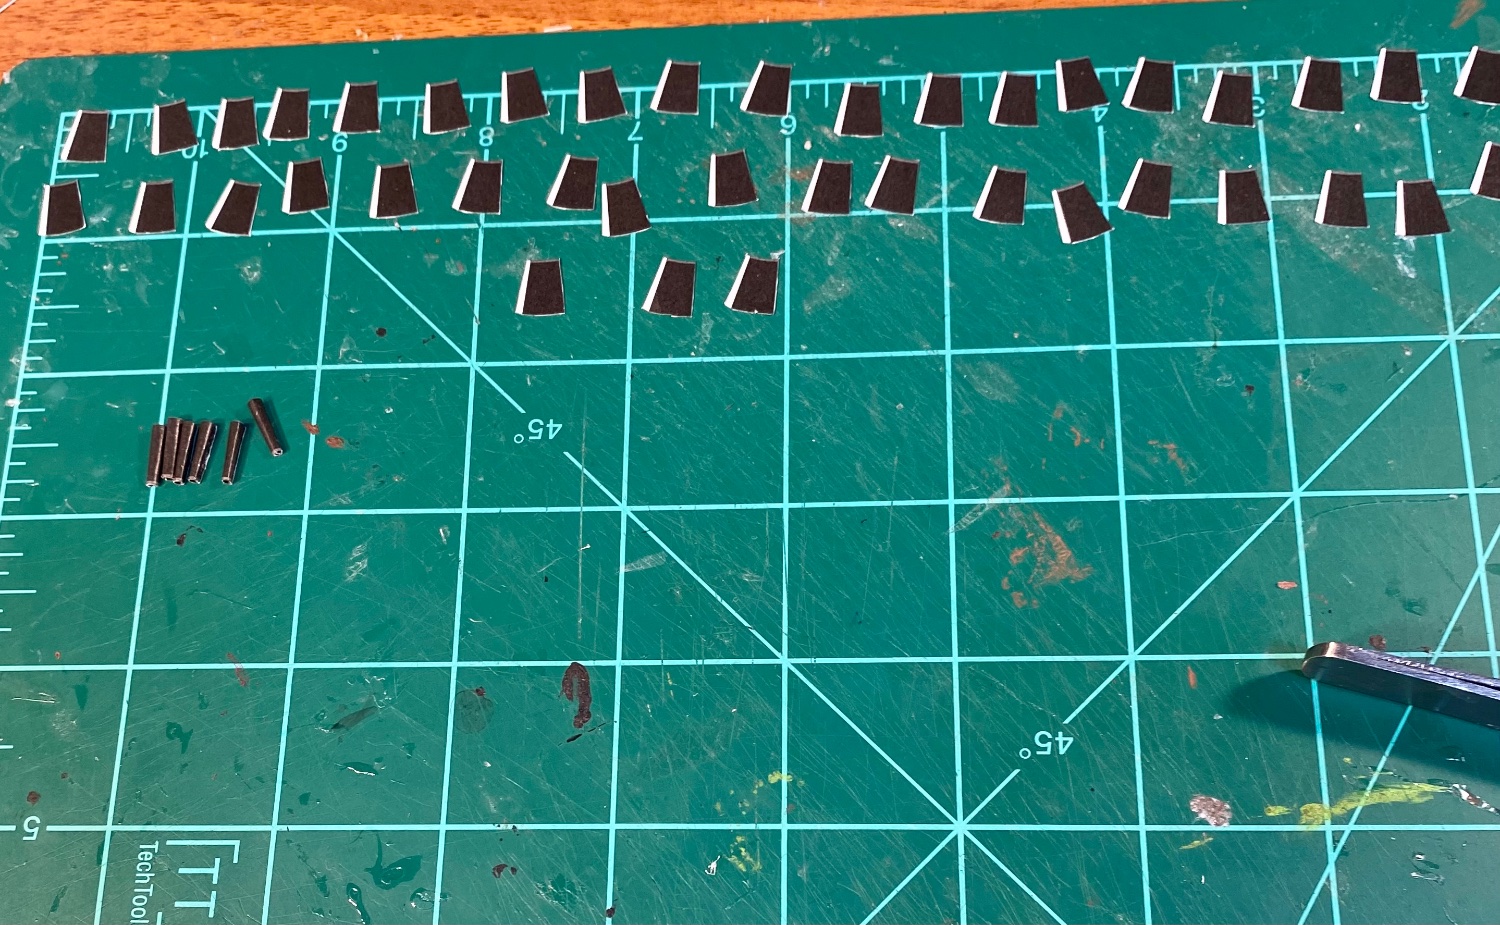
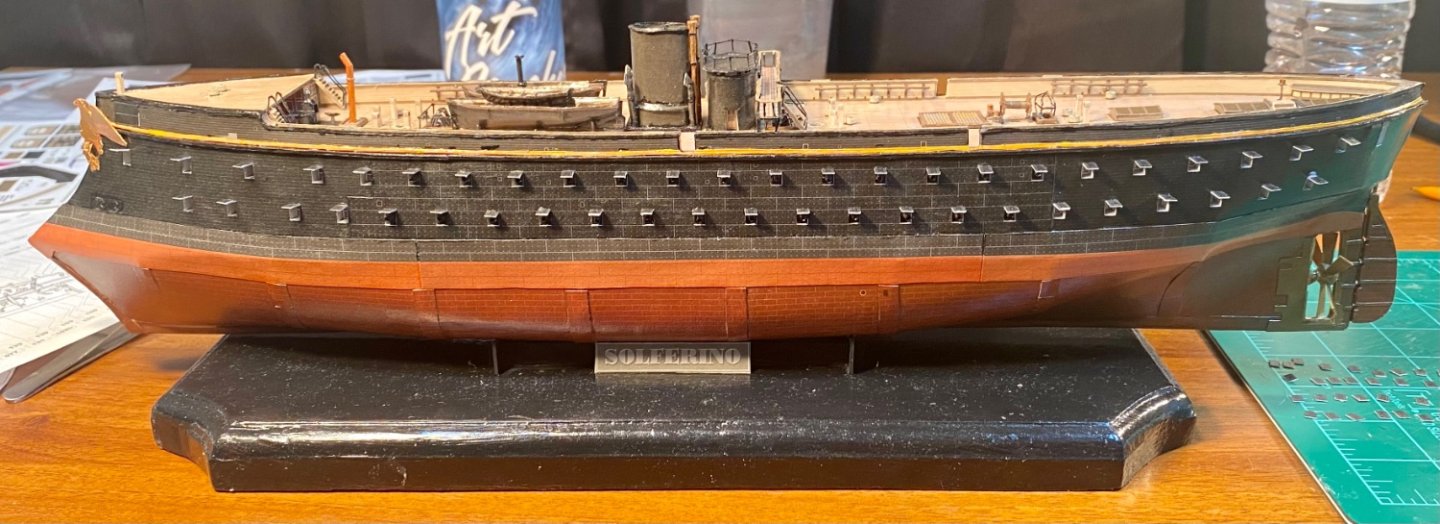
96 gunport lids: The first side almost installed: I only have 12 gunport lids left to install.

-
Gunport lid assembly line: One nice thing about these is that I don’t need to edge paint them because the inner part of the lids is white.

- 278 replies
-
- 10
-

-
Hope everything goes well for you! Take care of yourself! Looking forward to seeing you pick back up on your build when you are ready! Best of luck to you!
-
Very cool build!
-
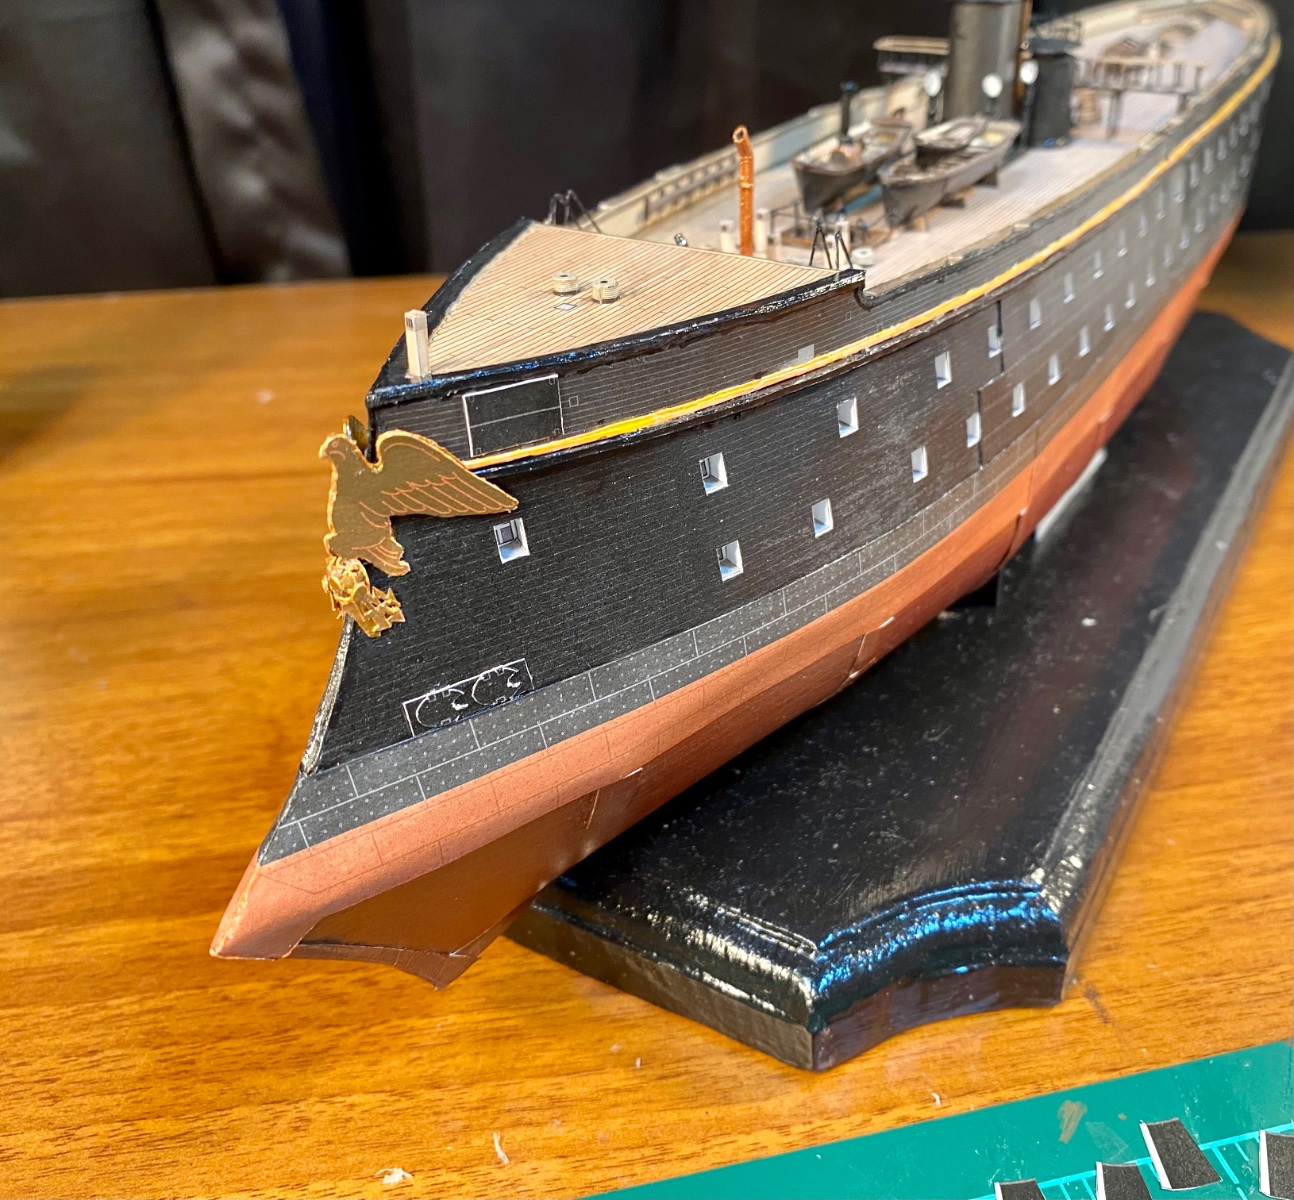
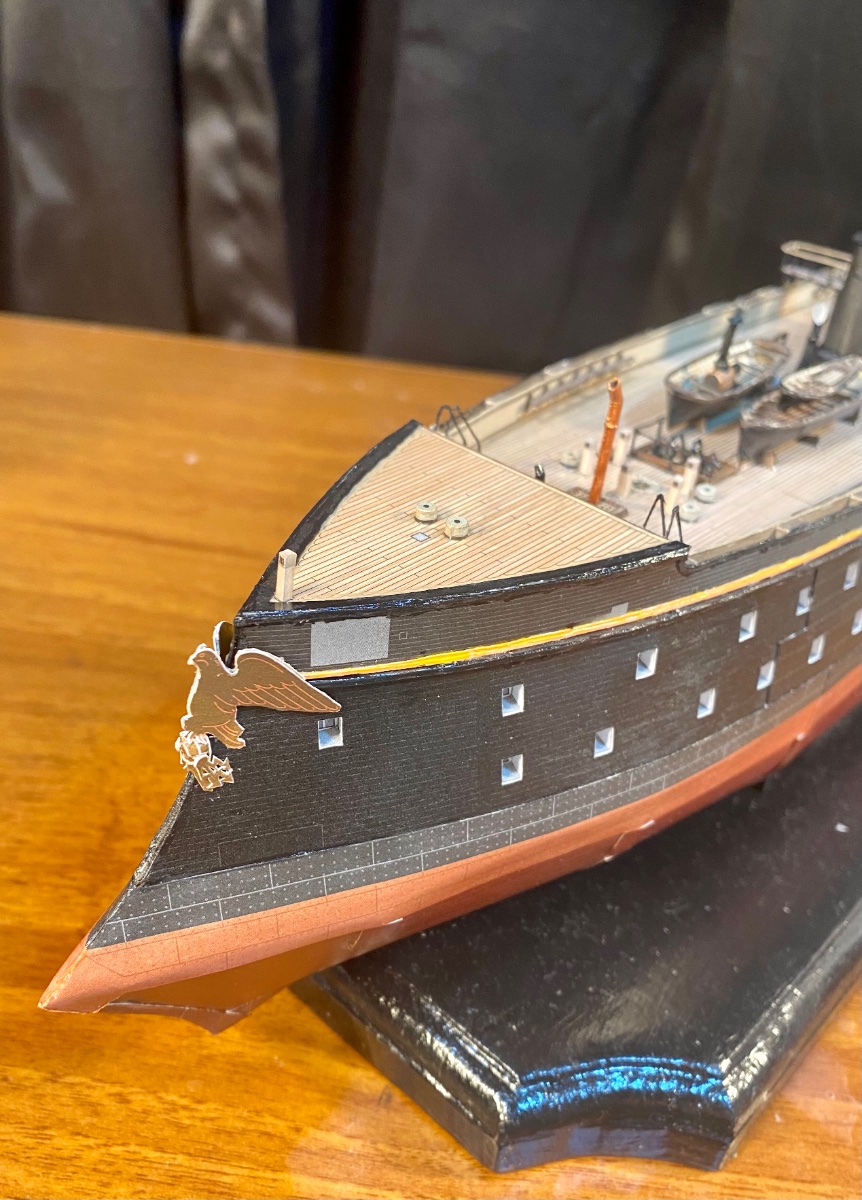
The hull on this behemoth will be 7/16” thick from outer planking to inner planking. I’ll see how much interior is visible with the Mercury, through the windows and then decide how crazy I want to get with detailing the interior of my follow on build. The ship I’m going to be building doesn’t have stern gallery windows (she’s an ironclad), but she does have windows inset in place of gunports (false gunports).
-
How much detail does one ordinarily put in enclosed internal decks on a multidecked ship if one is building a fully planked plank-on-bulkhead model?
-
52 guns are rolled and installed: One of the guns started life as a toothpick. I may or may not have dropped the original down inside the model. I need to seal everything in and then proceed to the gunport lids. There are 96 gunport lids. Next will be the stern gallery (more of a stern promenade at this point in history). I’ll need to assemble the loom to make the wrap around railings.

- 278 replies
-
- 10
-
-
review HMS Wolf 1754, 10-gun Brig (Snow) - Shipyard - 1/72 - CARD
GrandpaPhil replied to catopower's topic in REVIEWS: Model kits
I have the just the basic version of a couple Shipyard kits. I have never seen the kind of detail that are in those kits in any other kit that I’ve ever bought before, in any medium. I bought one of the 30th Anniversary combo sets. I would happily buy more of them. -
Rolling cannon: I have rolled 36 so far. This is different for me. I usually just carve these from dowel rods, bamboo skewers or toothpicks. I will be carving all 56 on Magenta and all the guns for Mercury.

- 278 replies
-
- 10
-
-
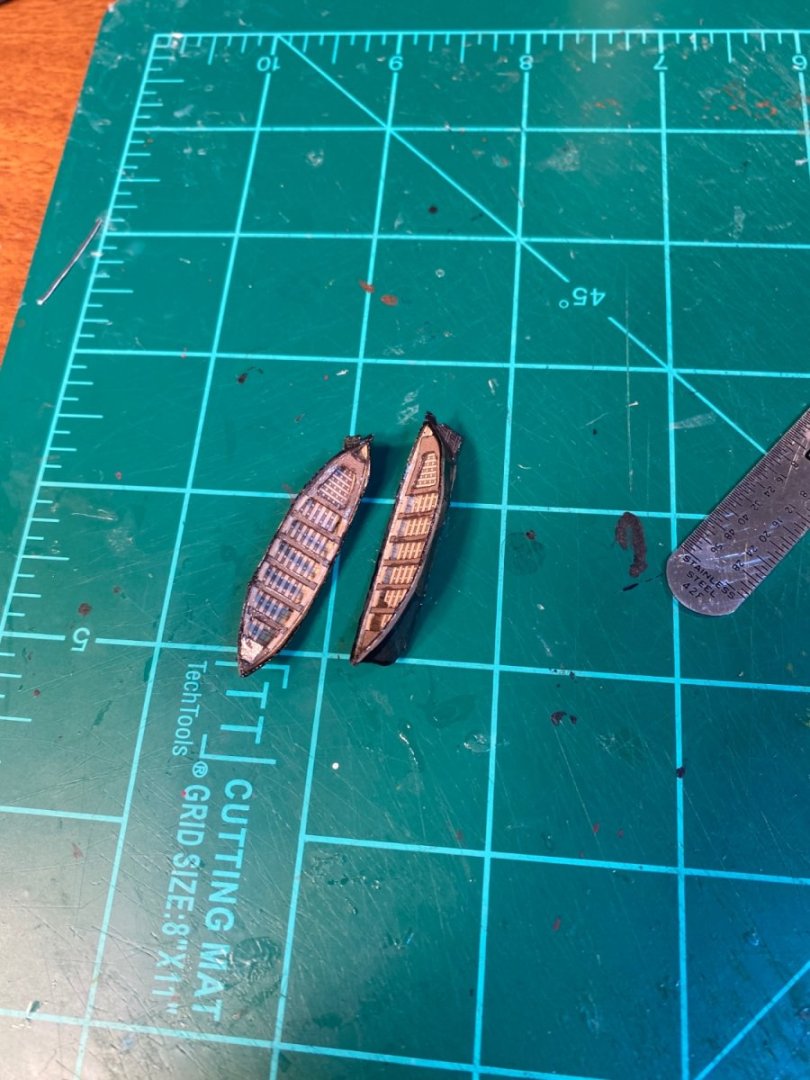
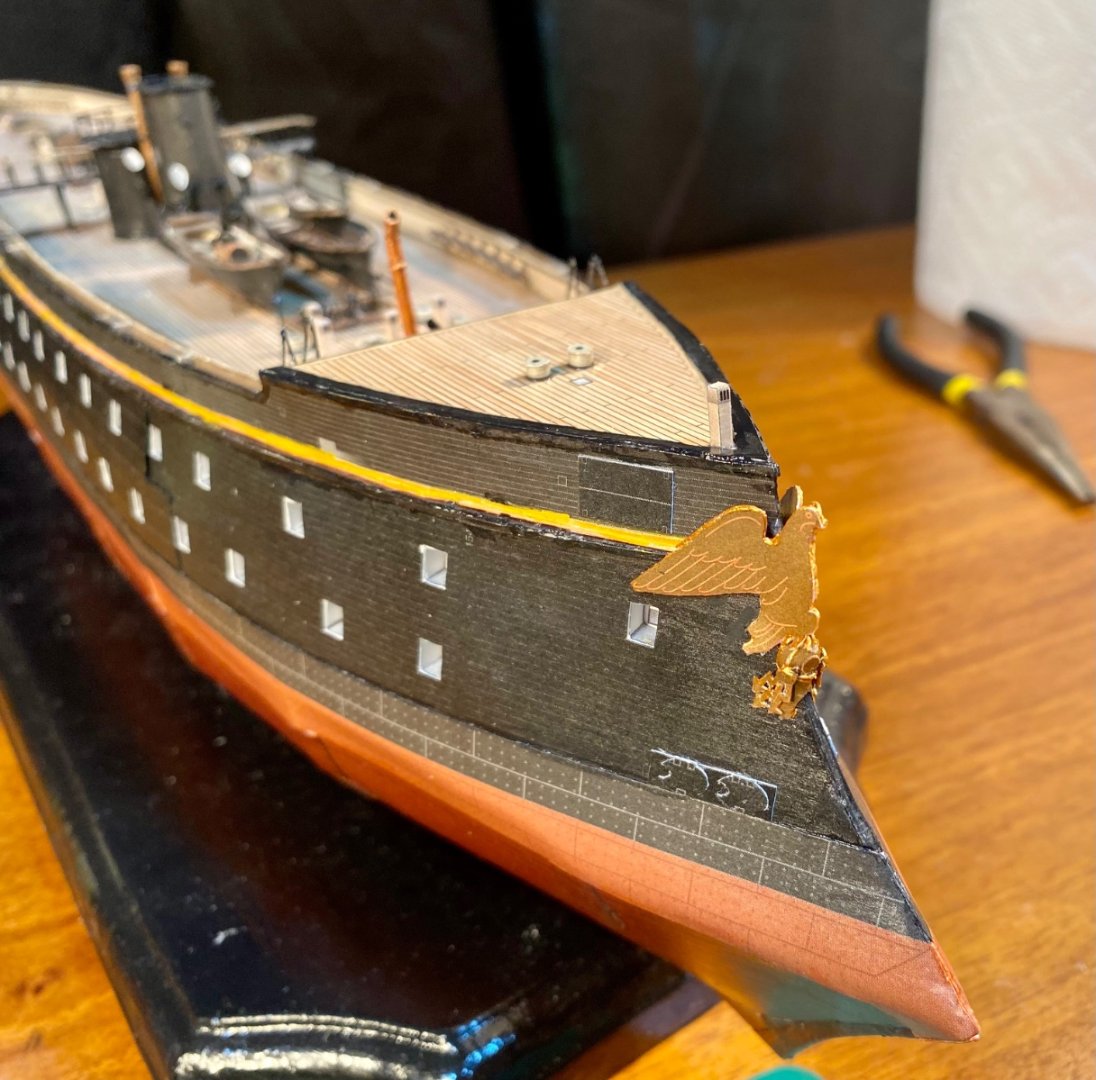
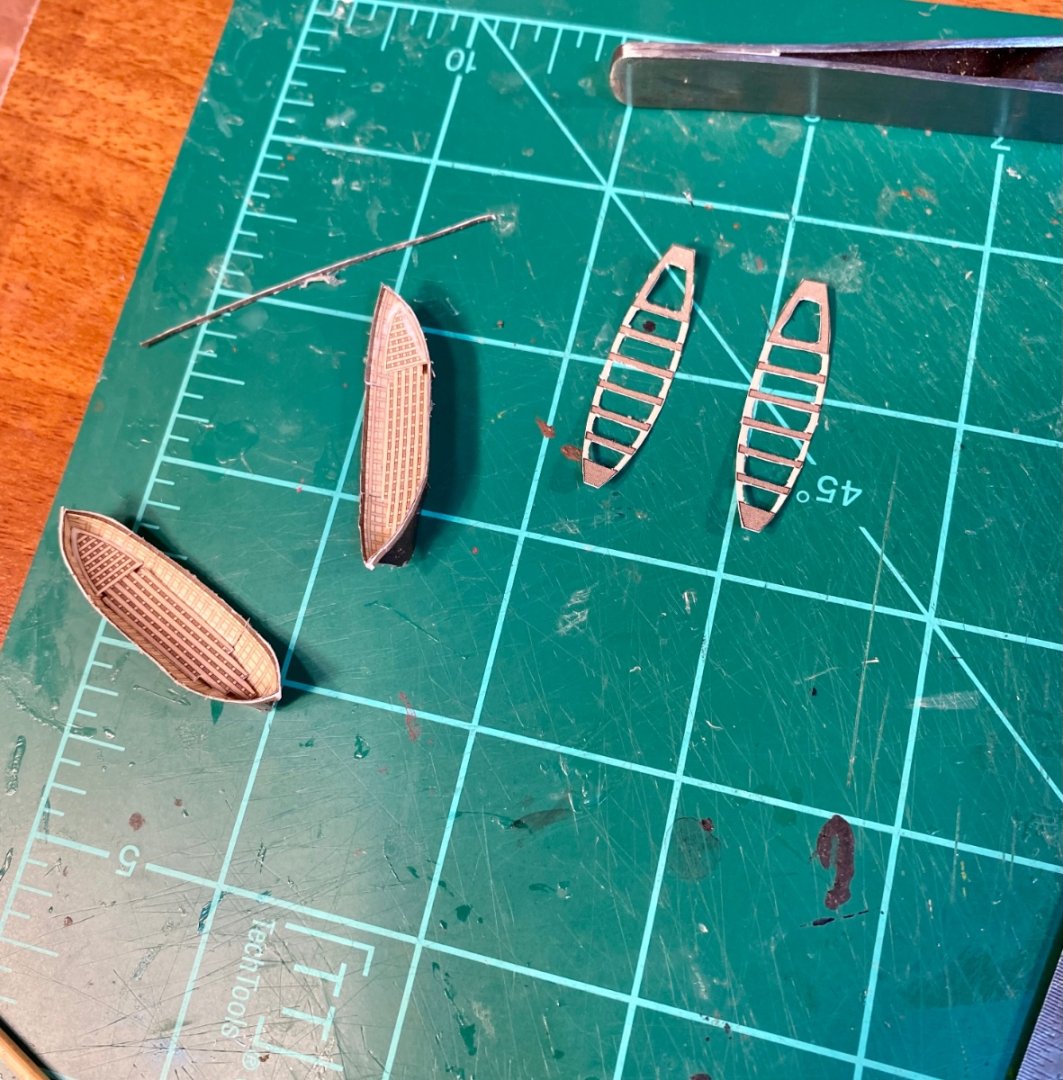
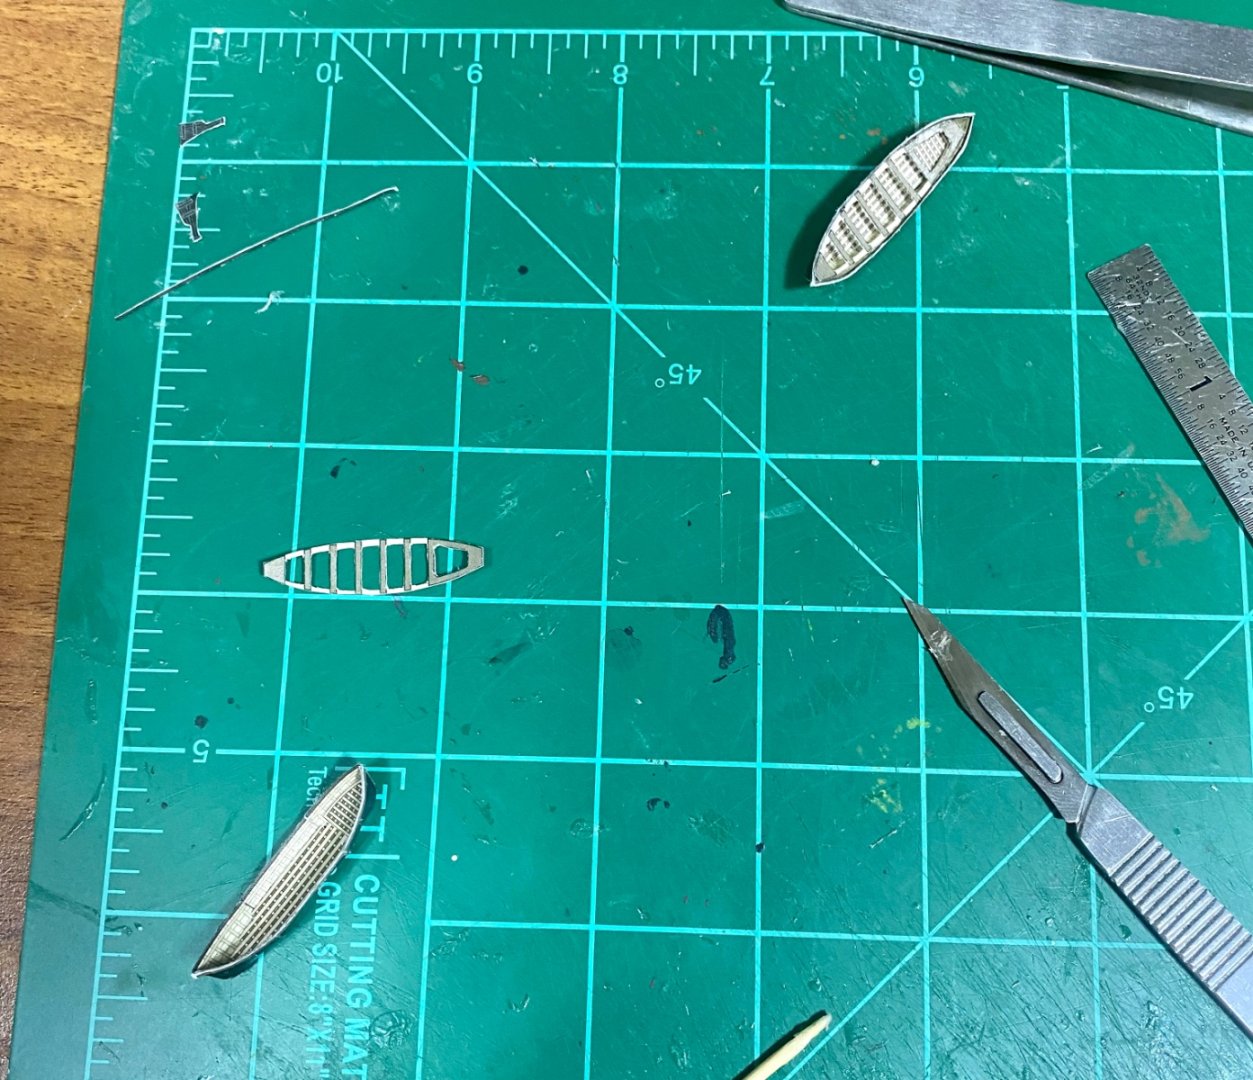
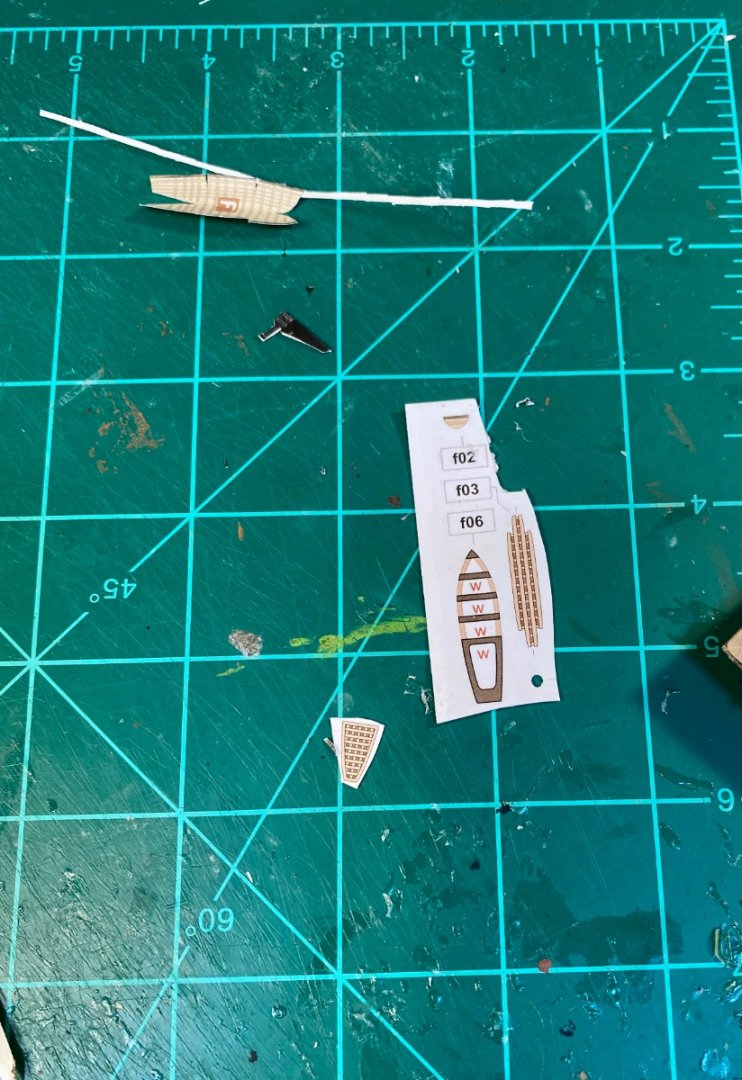
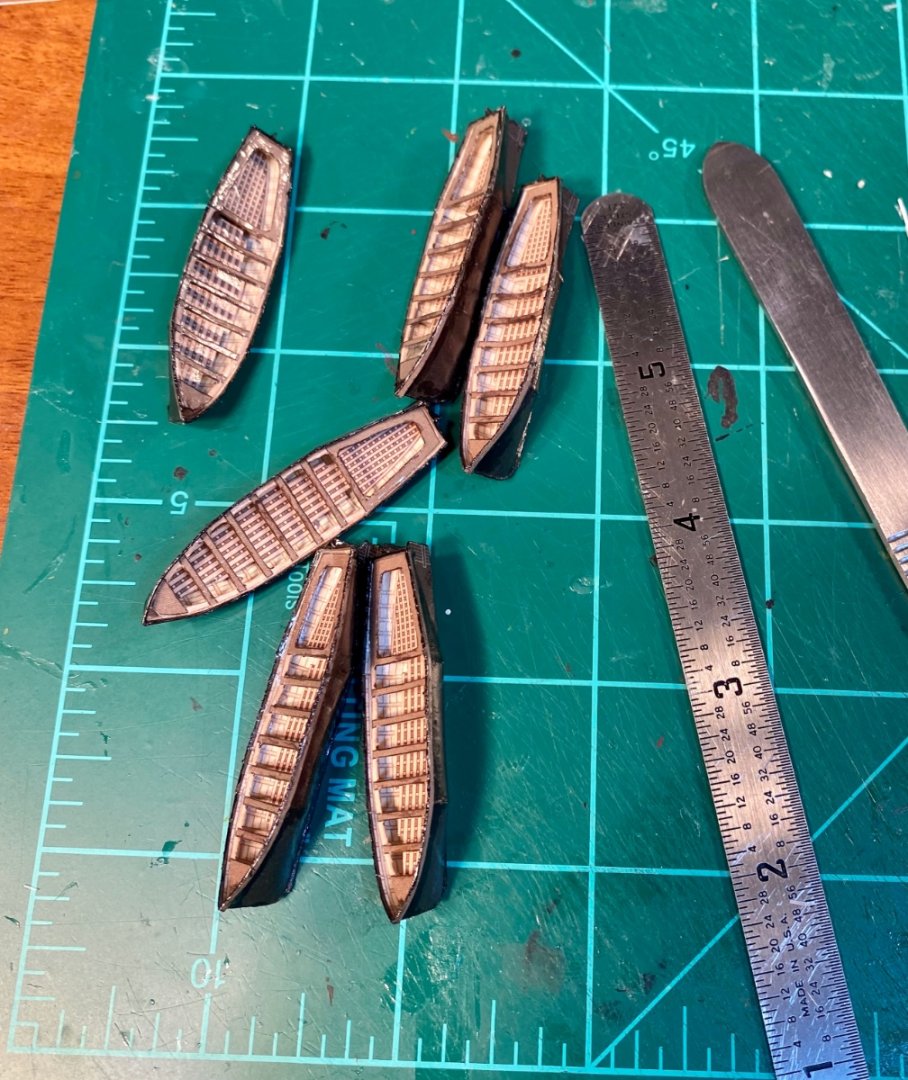
All ship’s boats are done (except for the eyebolts, and I will be having an eyebolt party in the near future): The figurehead is edge painted and looks much better, plus starting on the hull details: And it is now time for this warship to get her guns: This is one of my favorite points of the build. This kit comes with 56 cannon. 52 on the gun decks and 4 on the main deck.


- 278 replies
-
- 16
-
-
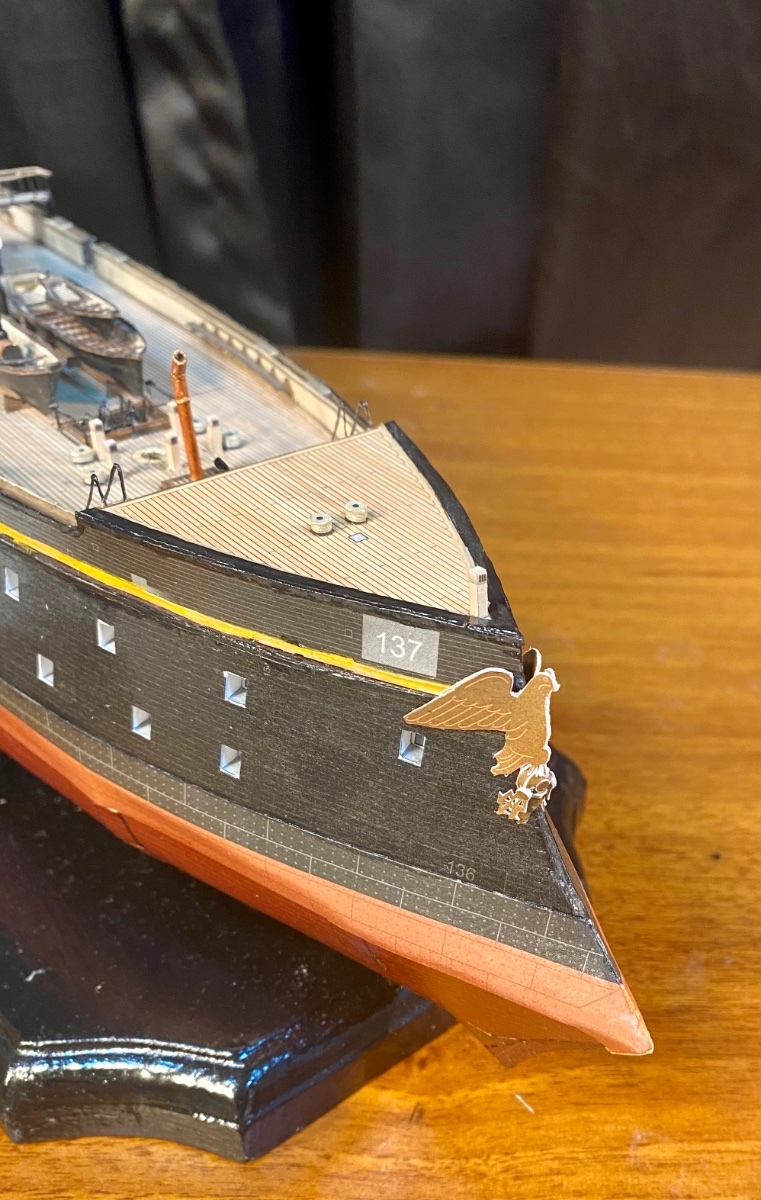
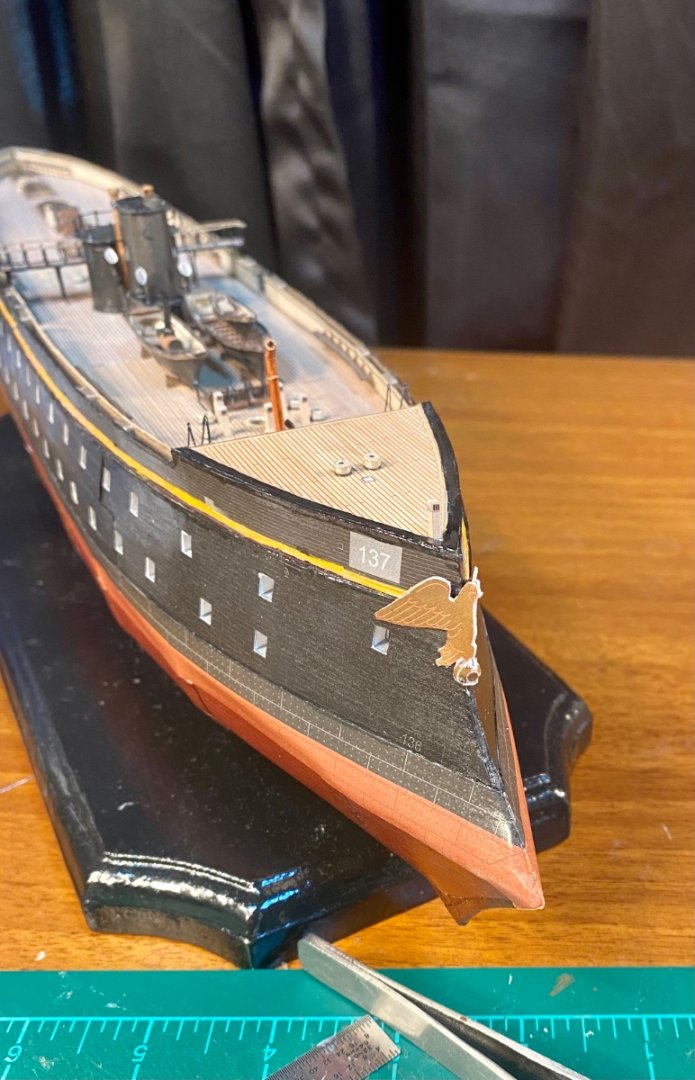
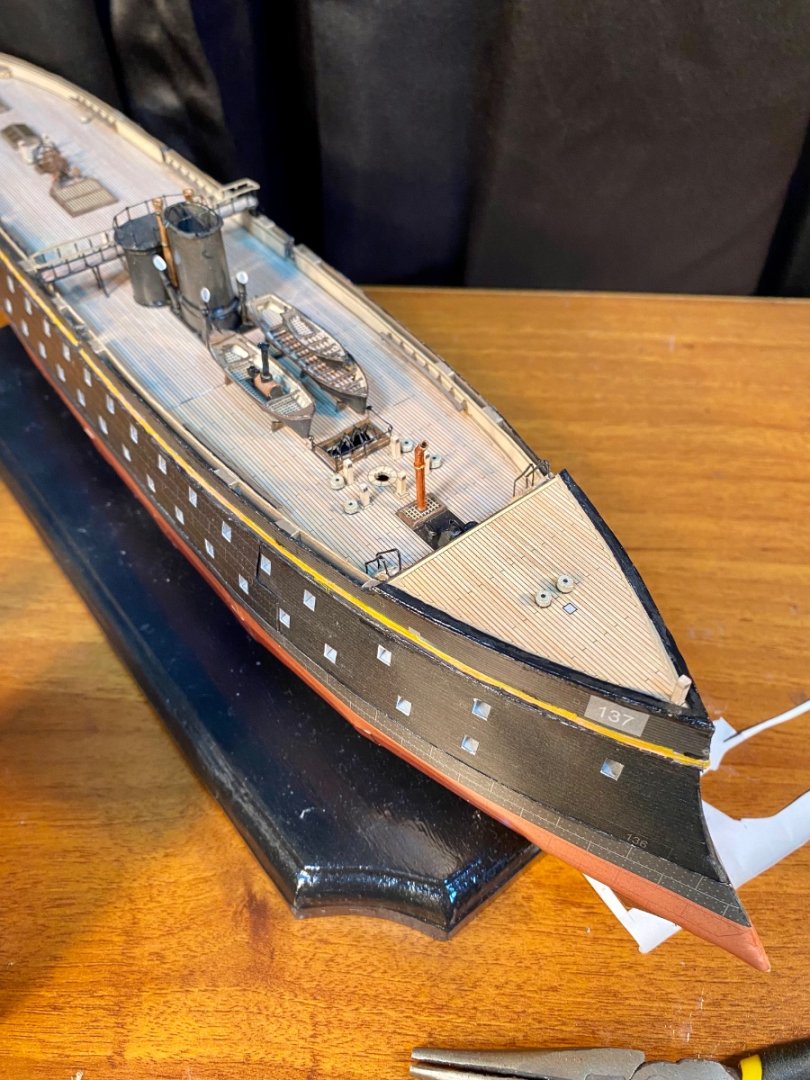
The figurehead begins: Added the globular structure: And assembled in place: I used the structure of the ship to give the figurehead rigidity and form. On a quick personal note: I half wonder if I shouldn’t have just carved it. But, at this point it’s already solidly glued to the hull, which would cause a LOT of damage removing it, plus I have a full set of carvings for my Mercury that I have going, that needs made. Plus, at 1/200 scale, once it’s edge painted and sealed, it won’t be possible to tell the difference anyway.


- 278 replies
-
- 12
-
-
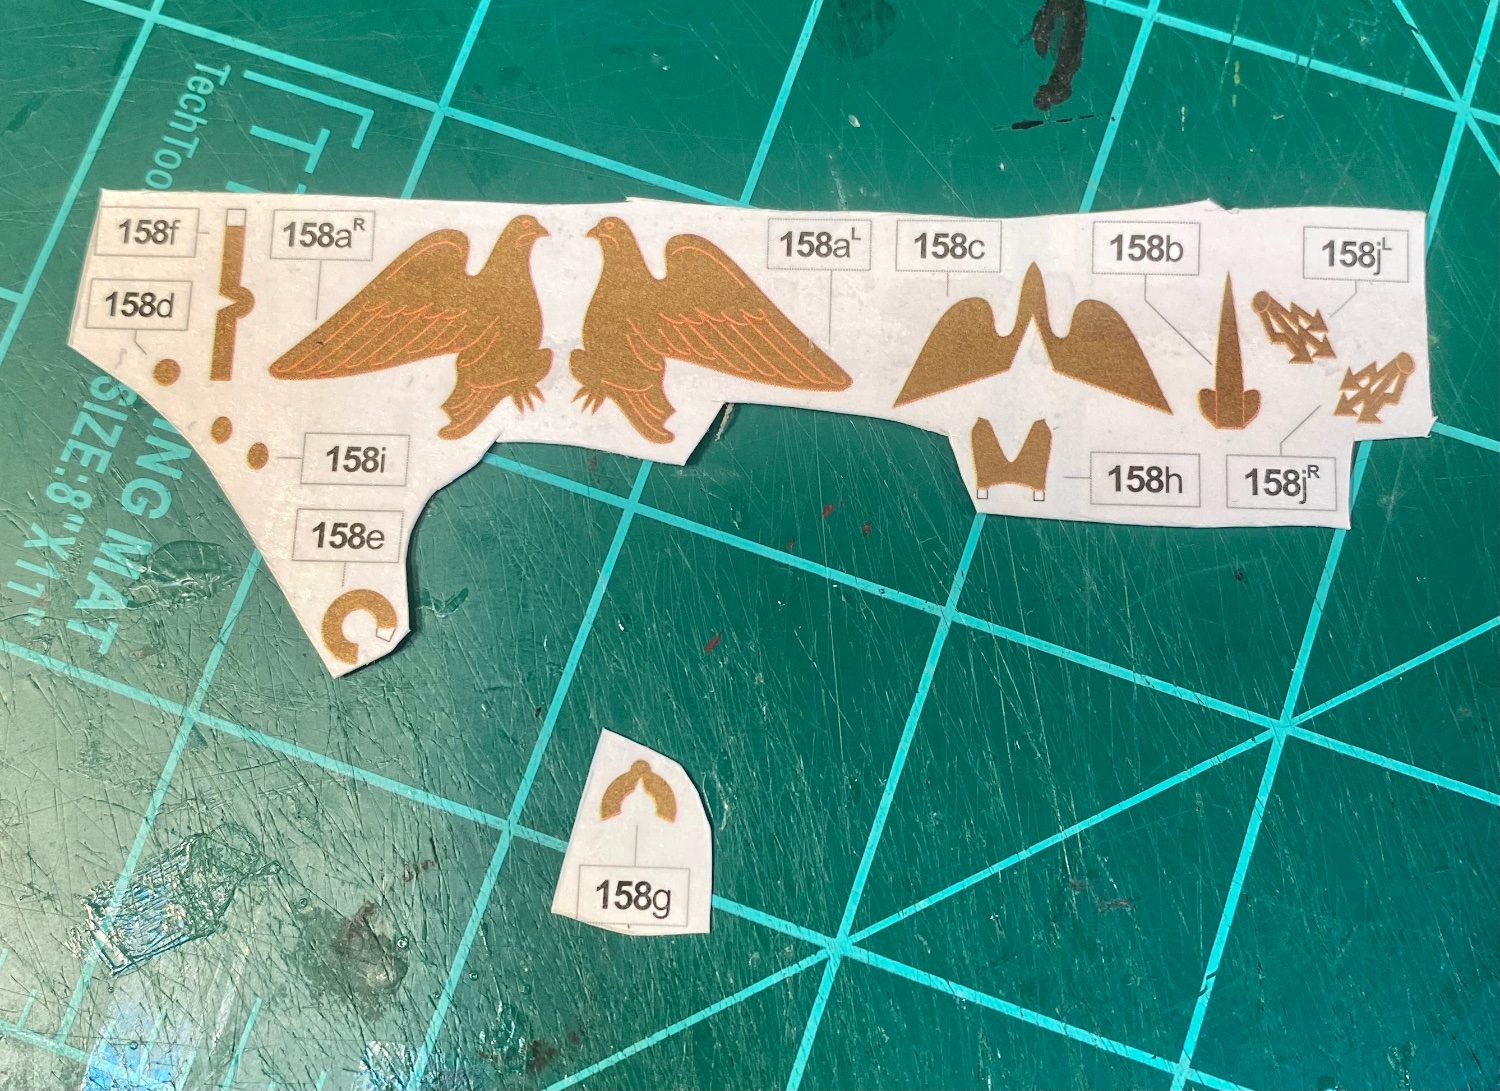
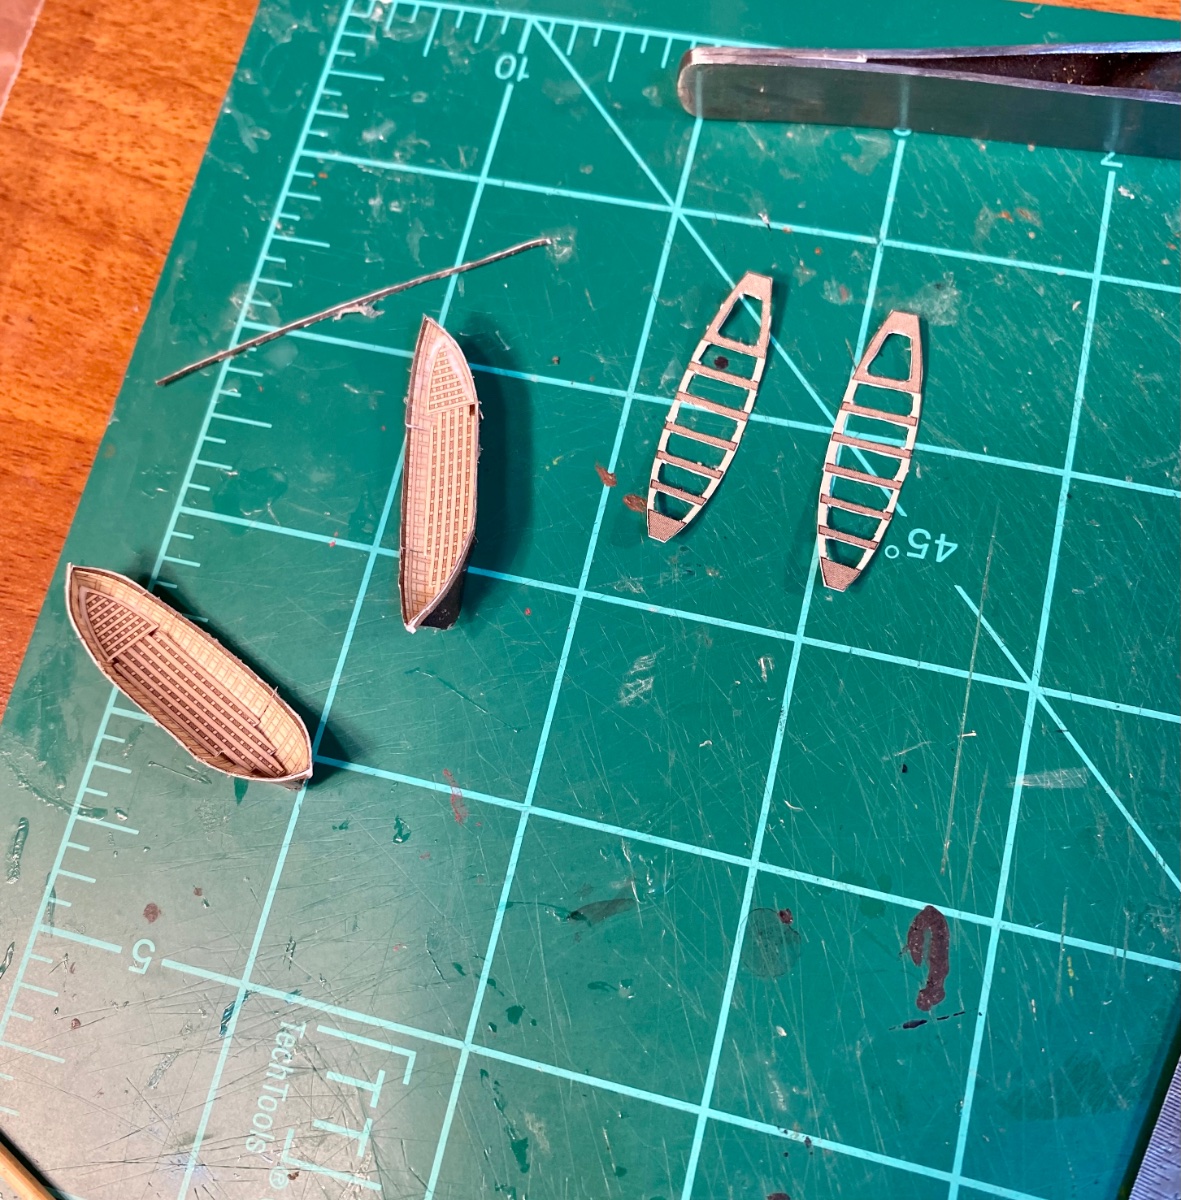
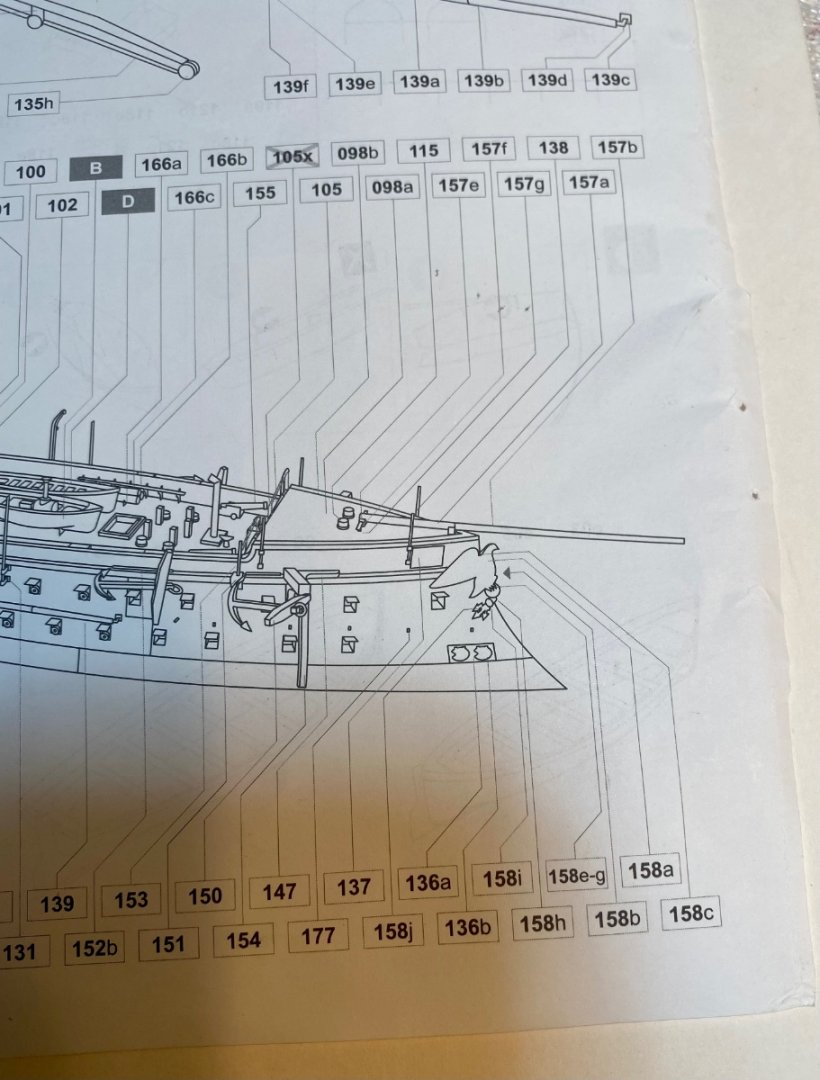
The last two ship’s boats are assembled: Time for the Eagle Figurehead! I’m not really sure how it goes together, but we’ll figure it out! I know the eagle, parts a, b and c sit on a globular structure, parts e-g and most likely d. This globular structure sits atop h. Then I know that parts i and j are the lightning bolt pieces. Otherwise, i feel like I am just going to have take parts off the paper and start fitting them together and see what happens.


-
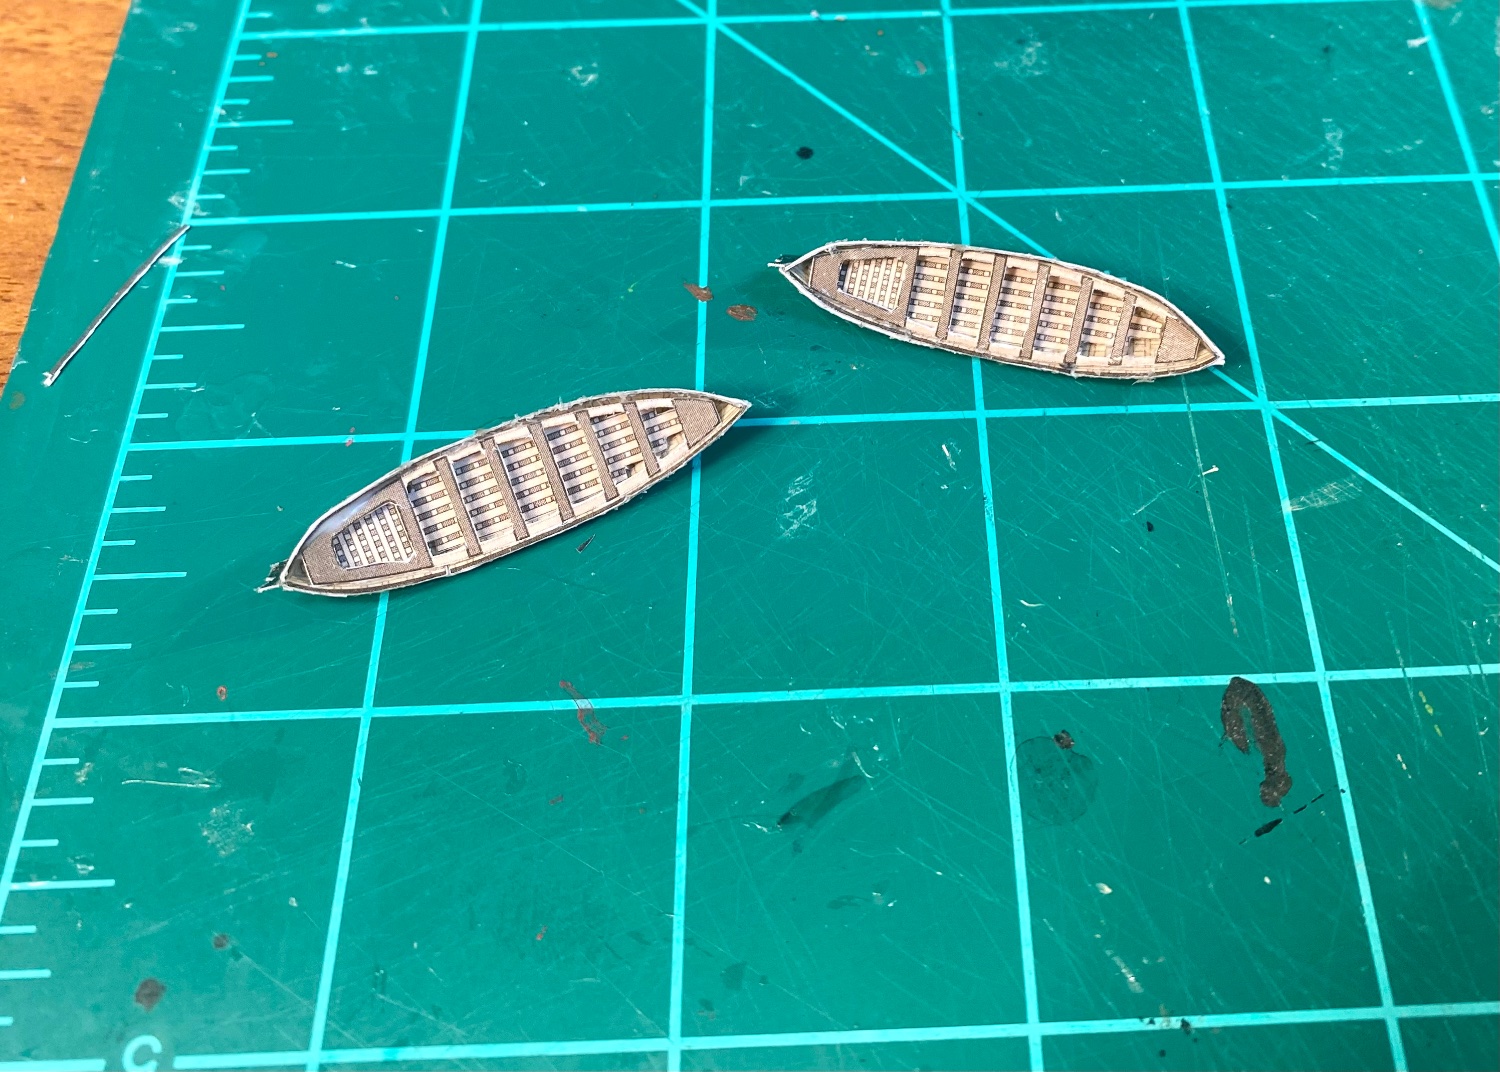
The small ship’s boat is in place and sealed: The last two ship’s boats, that will hang off the stern are in progress: On a quick side note, I need to make a full set for my Victory as well. I’ll make those a la Zu Monfeld when I get around to them, just like I did the ones for my Prince de Neufchatel and my Hannah.

-
Looking good!
-
Joe, You’ll do just fine! The important thing is to finish your first models! You’ll learn a lot of tricks and techniques. Then you’ll keep learning and getting better as you progress. Every one of us is still learning. And don’t be afraid to try something new in a build, because that’s how you grow as a model builder.
-
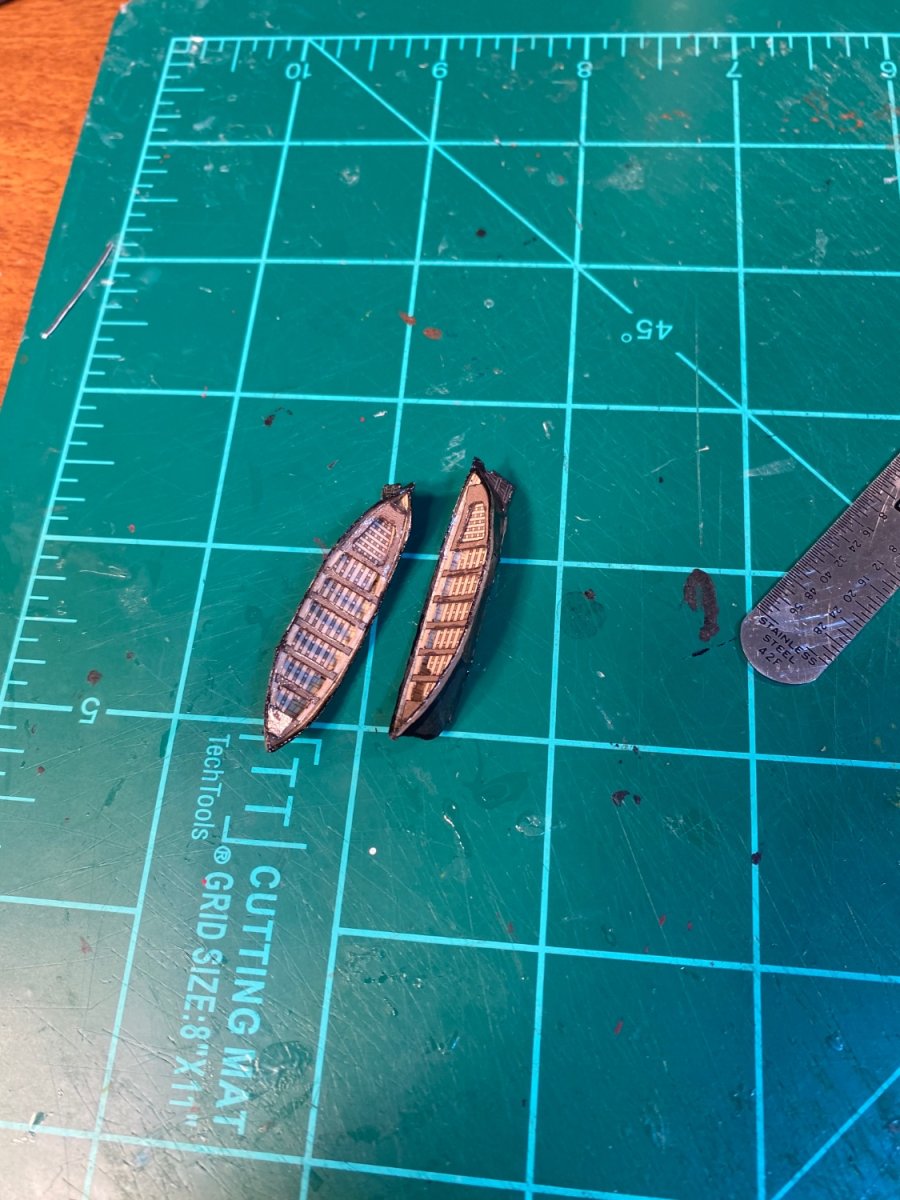
6 painted and sealed ship’s boats: The smallest of the ship’s boats, because it sits in the big one on the deck: After that, there’s just the two which will hang off the stern. I would assemble the davits now, but that would cause problems with the gunport and window (false gunport) lids along with the stern gallery.
- 278 replies
-
- 11
-
-
The one on EBay is in Massachusetts.
-
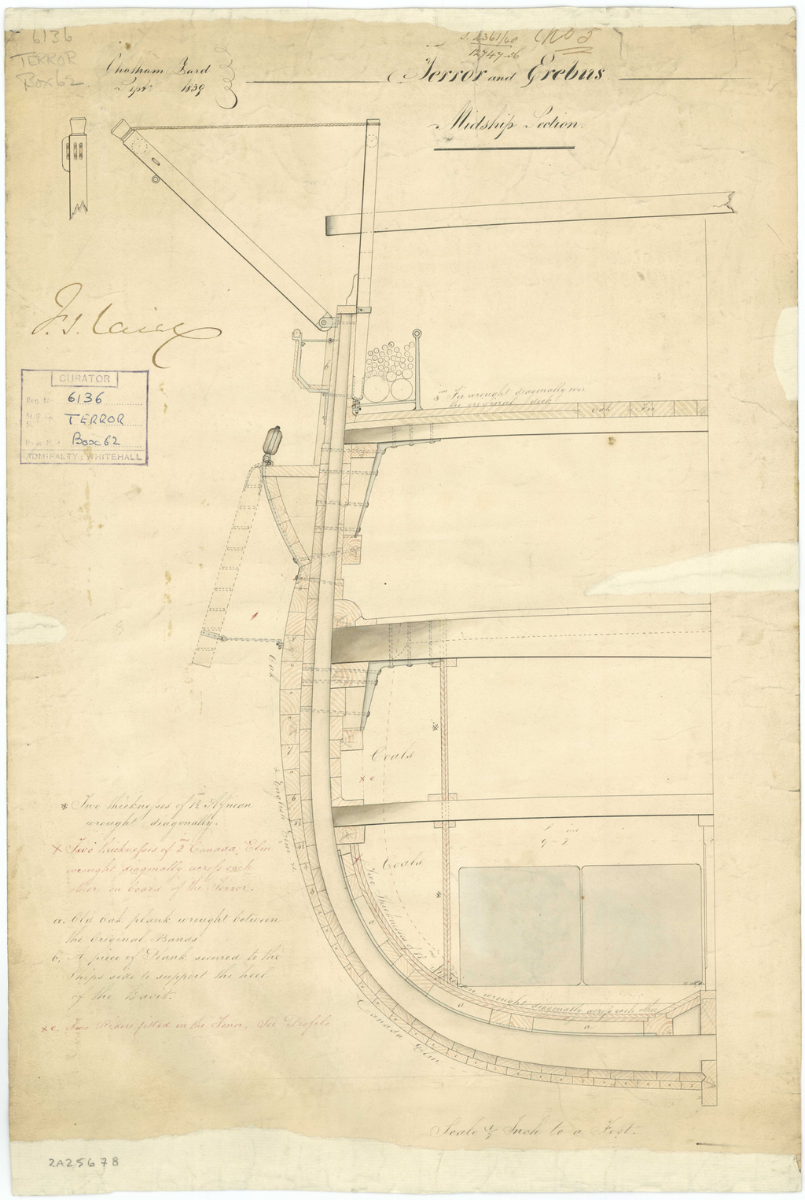
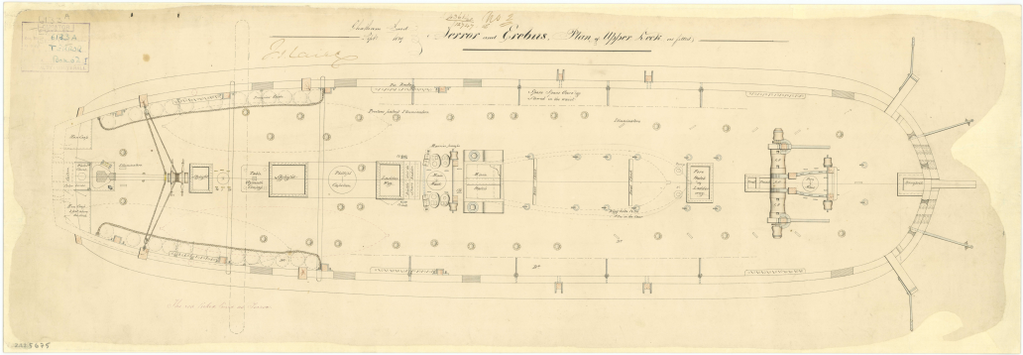
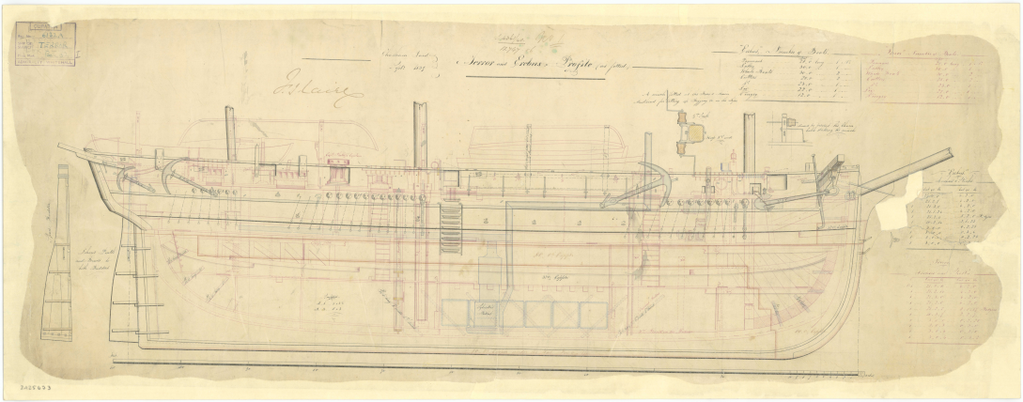
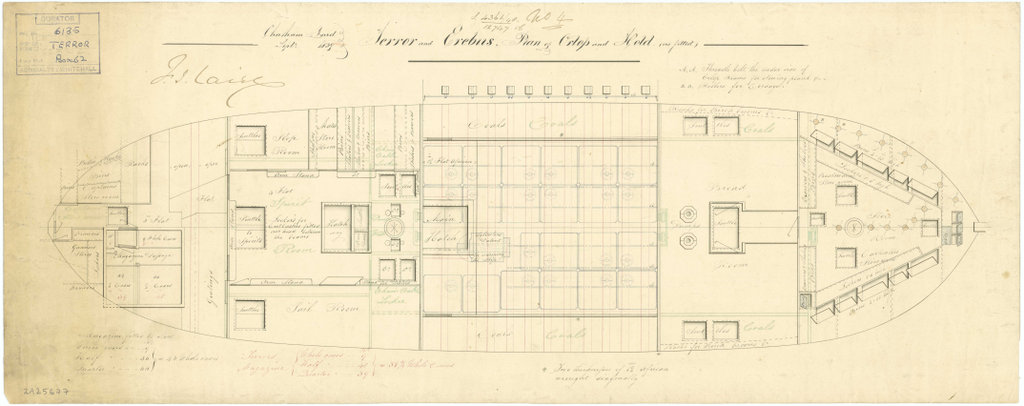
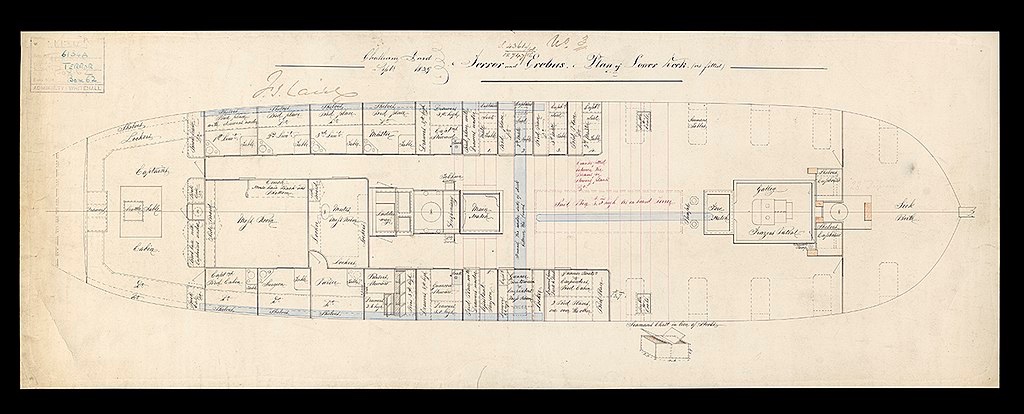
The inboard profiles, deck plans and cross-section are shared between the Erebus and the Terror (post-refit for scientific exploration) according to the Royal Museum at Greenwich plans (low res) on Wikimedia Commons. This means that the two ships were identical (at least in the hull) after the refit for scientific exploration. Based on this, if you wanted both ships, I would buy two Terrors and make minor modifications to one to build up as the Erebus. I am doing a similar thing with my Solferino and Magenta builds. My Magenta build is being built from French Ministry of Defense Solferino plans, because they are mostly identical.

-
Very nicely done!
-
For the curved and rolled pieces, I use dowel rods or the edge of my table to “break down” the paper and get it to take a curve.