


SIDEWAYS SAM
-
Posts
248 -
Joined
-
Last visited
Content Type
Profiles
Forums
Gallery
Events
Posts posted by SIDEWAYS SAM
-
-
Thanks for visiting and the likes.
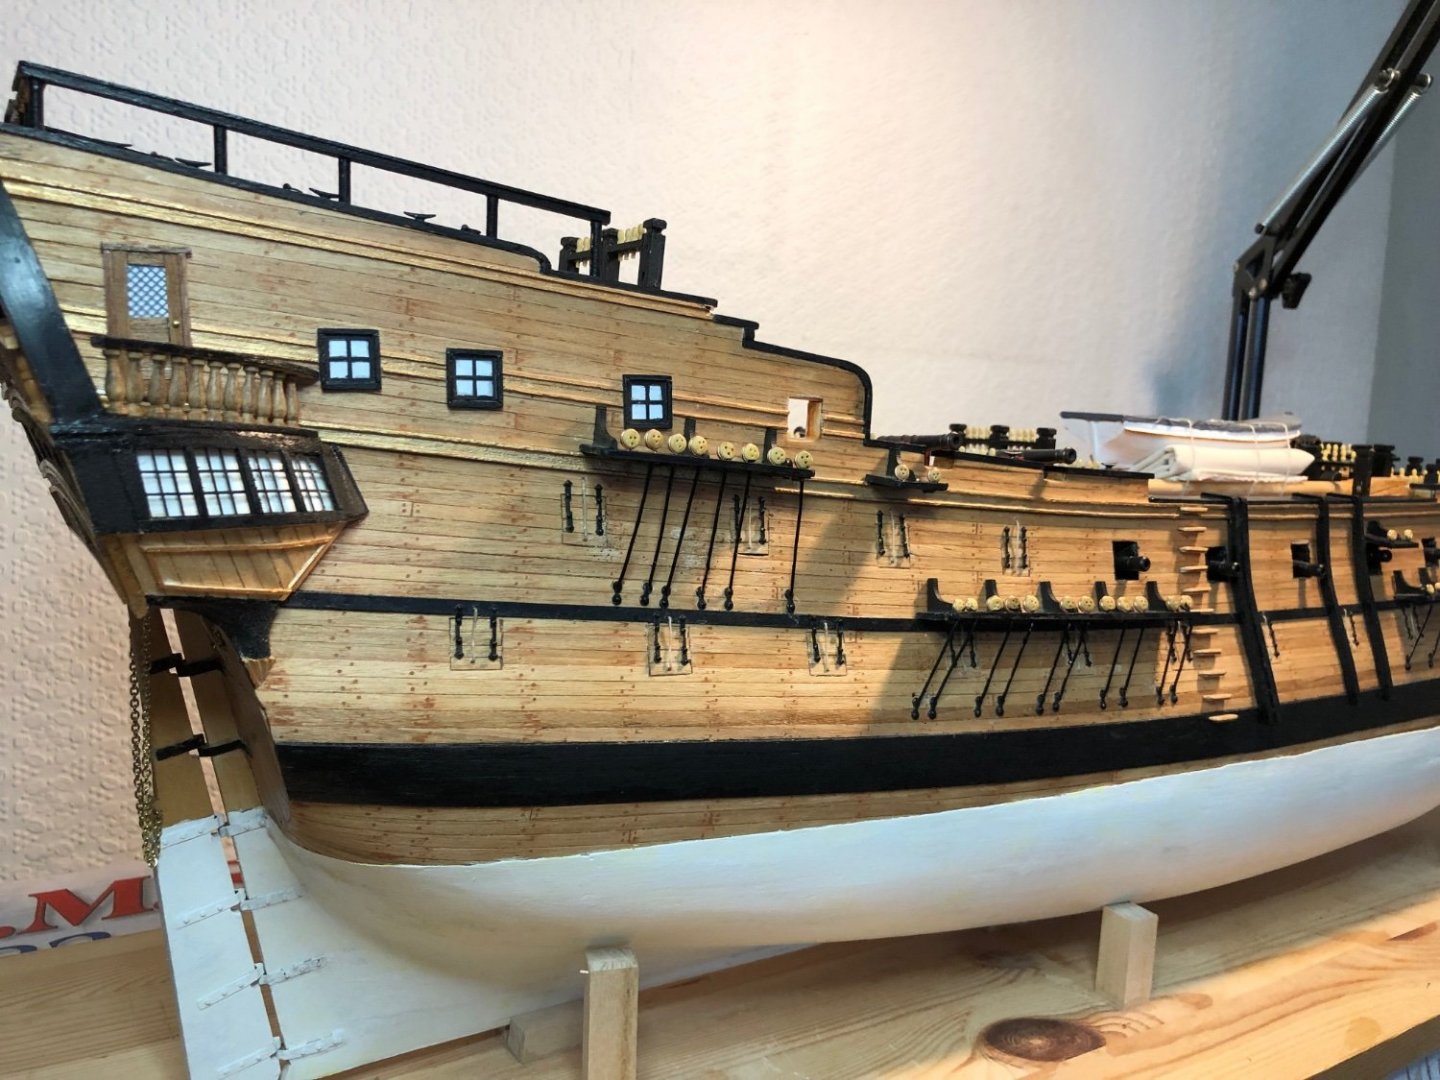
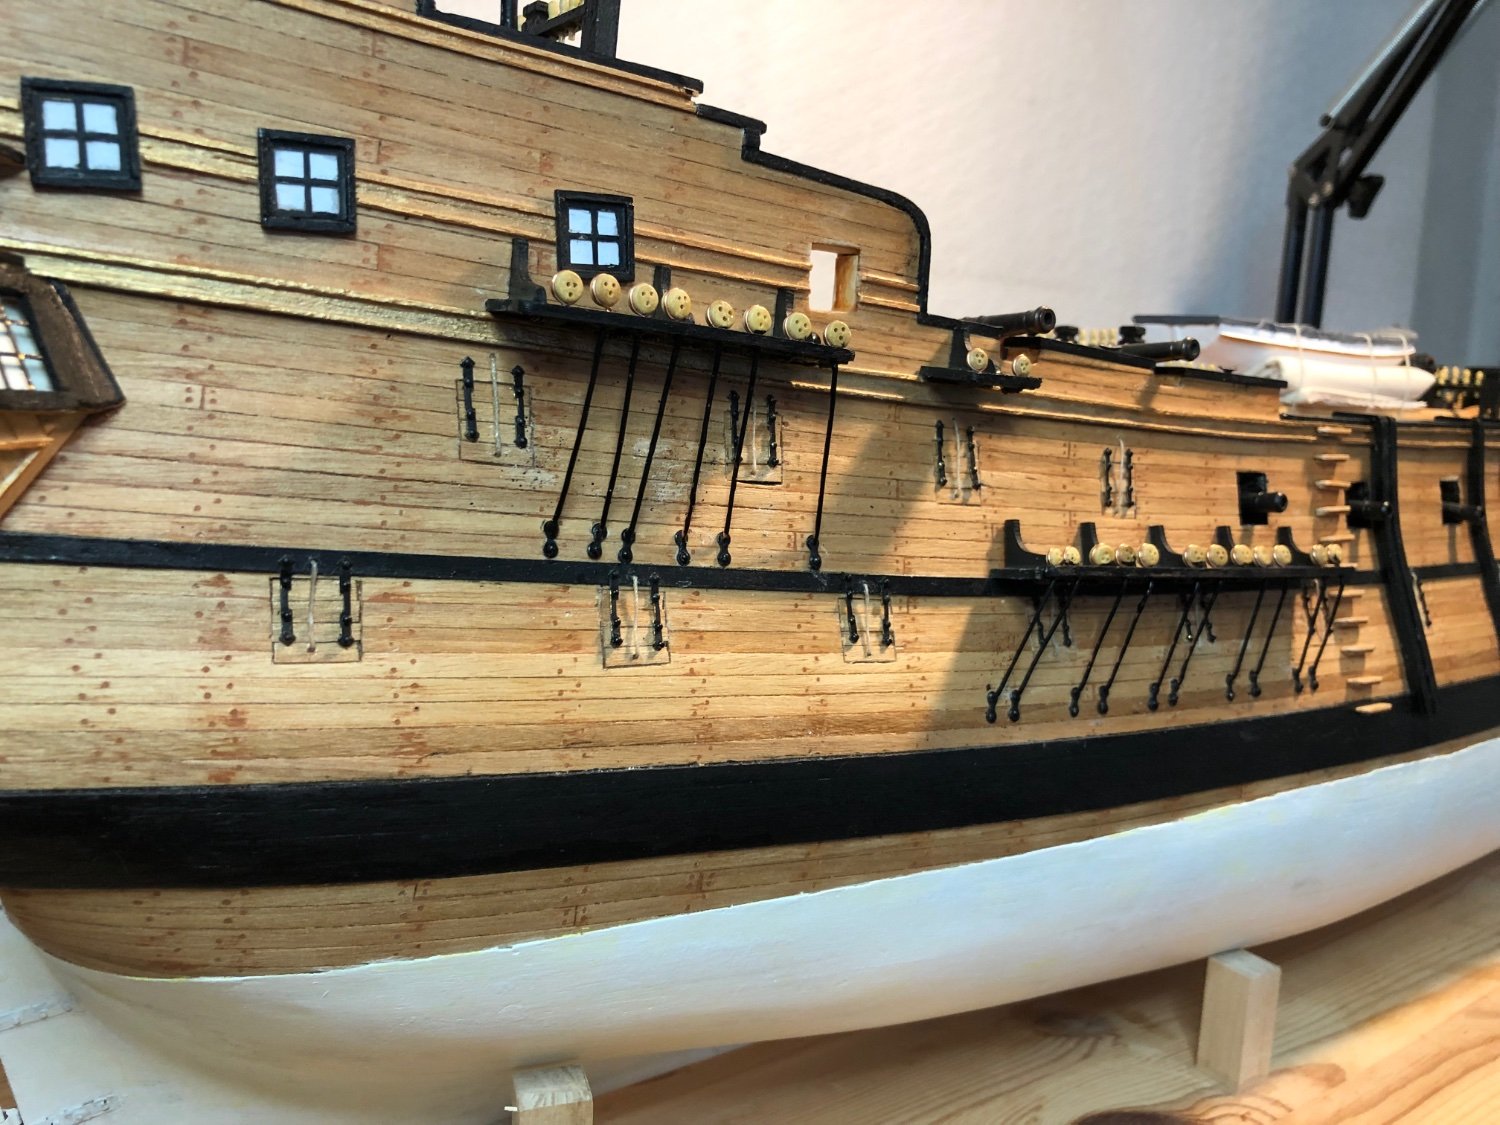
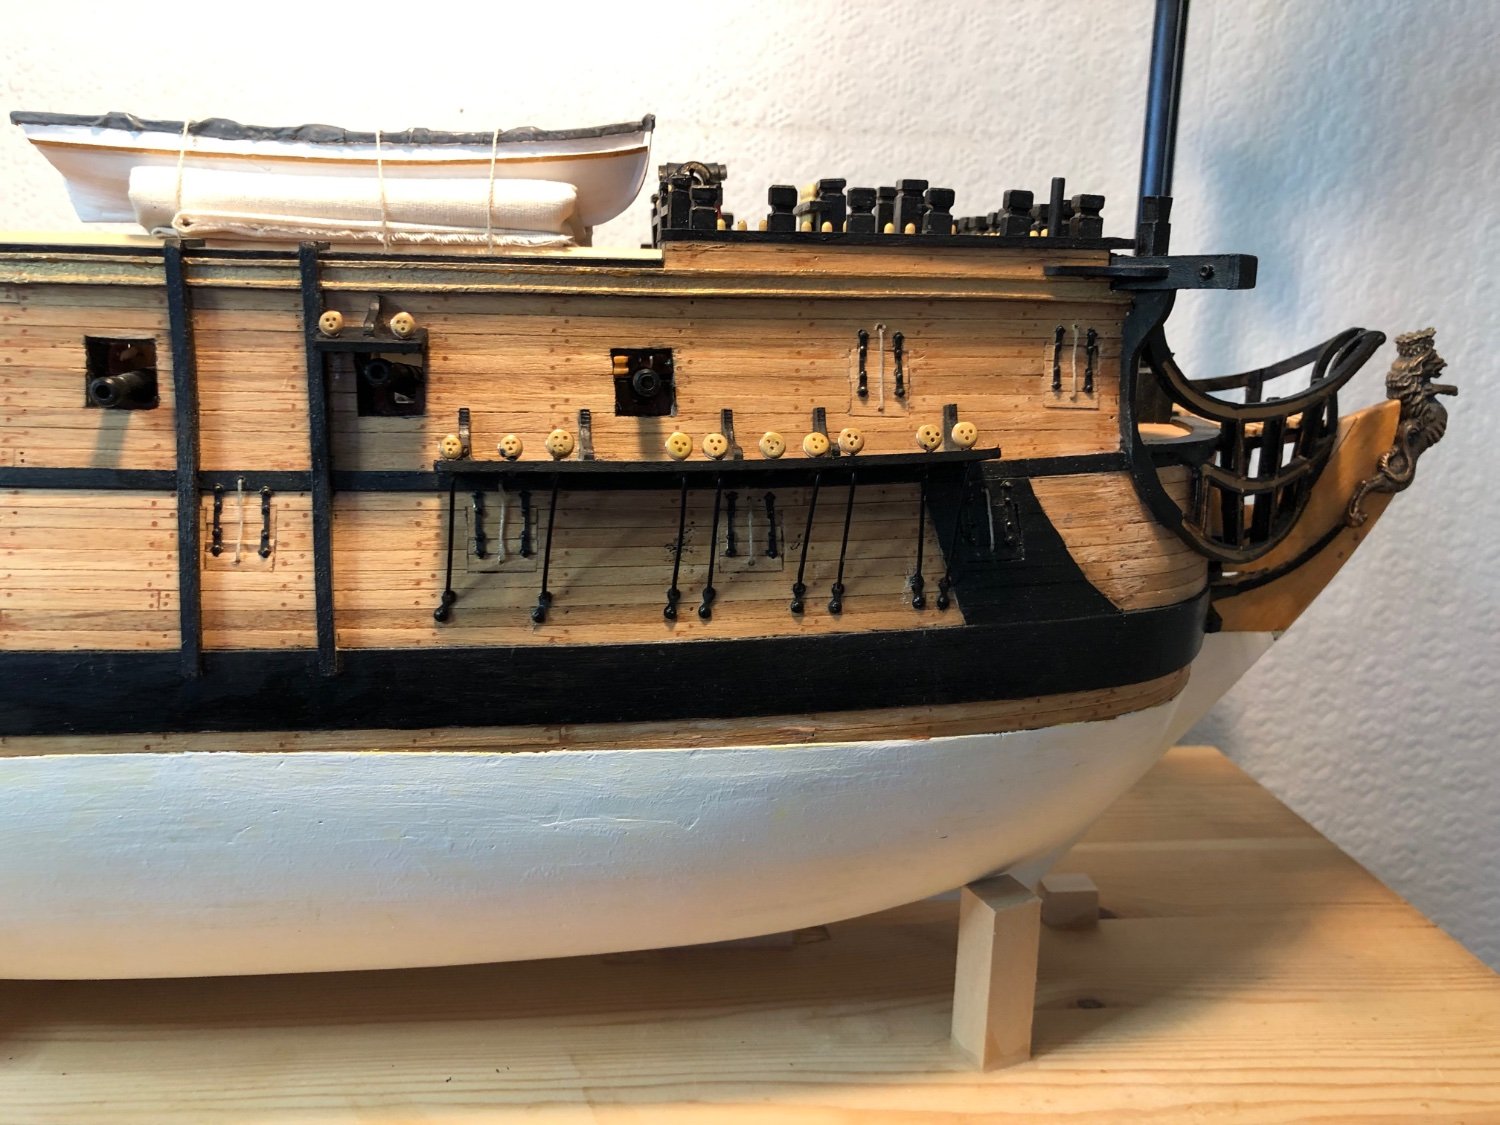
At last - some progress.
Lower deadeyes, chains and channels fitted.
This was my fourth attempt.
Not very authentic but I need to finish this kit
and get on to something else.
Ended up ditching the brass wire provided by OcCre
and replaced with (eventually) soft copper, uncoated.
The end result is shown below.
As I said - not authentic but neither is a lot of this kit.
Still some odd bits to fix then the hull is finished.
Regards,
Sam.


- scrubbyj427, Paul Le Wol, sferoida and 4 others
-
 6
6
-
 1
1
-
-
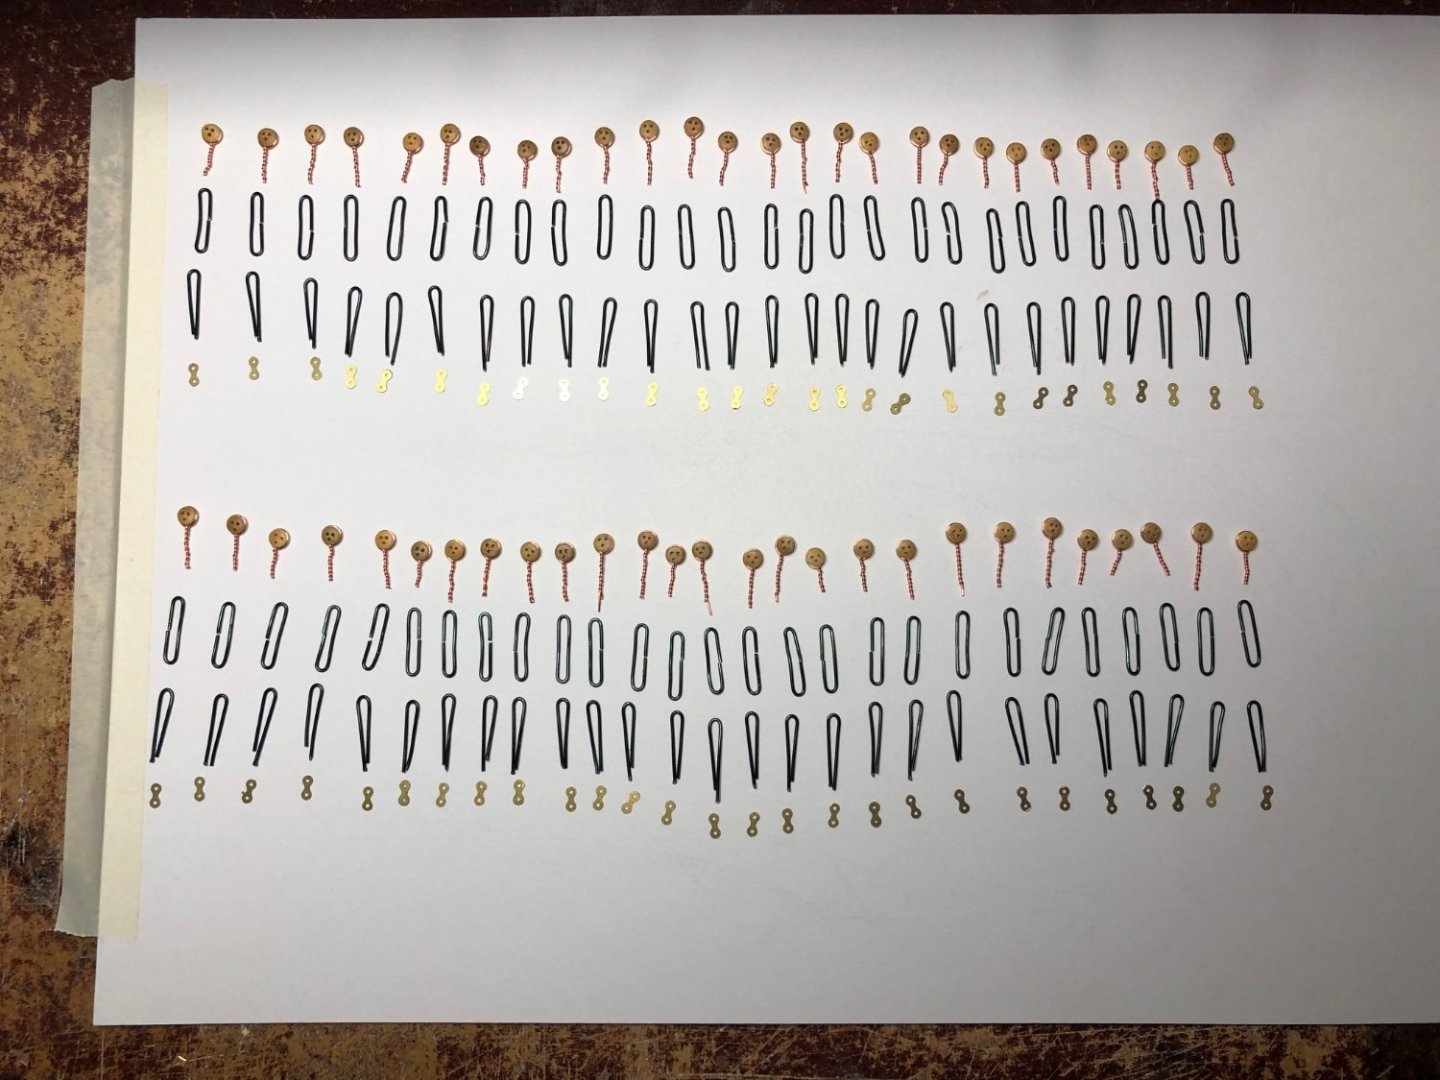
At last some progress.
Lower large deadeyes and chains sorted ready for assembly and painting.
There are a few spares provided but these bits are easy to lose.
The brass rod provided with the kit was far too springy.
Tried stretching and annealing it but not at all happy with the result.
Ended up using soft copper wire around the deadeyes and,
aluminium wire for the chains. The chains will be tweaked after assembly
and during fitting. The lower chains will be bent to suit individual
locations. Apologies for the "light bounce" in the centre of the photo.
Regards,
Sam.
- sferoida, BobG, GrandpaPhil and 3 others
-
6
-
Hi and, thanks for the likes.
No real progress.
Still not sure what to do with the deadeyes and chains.
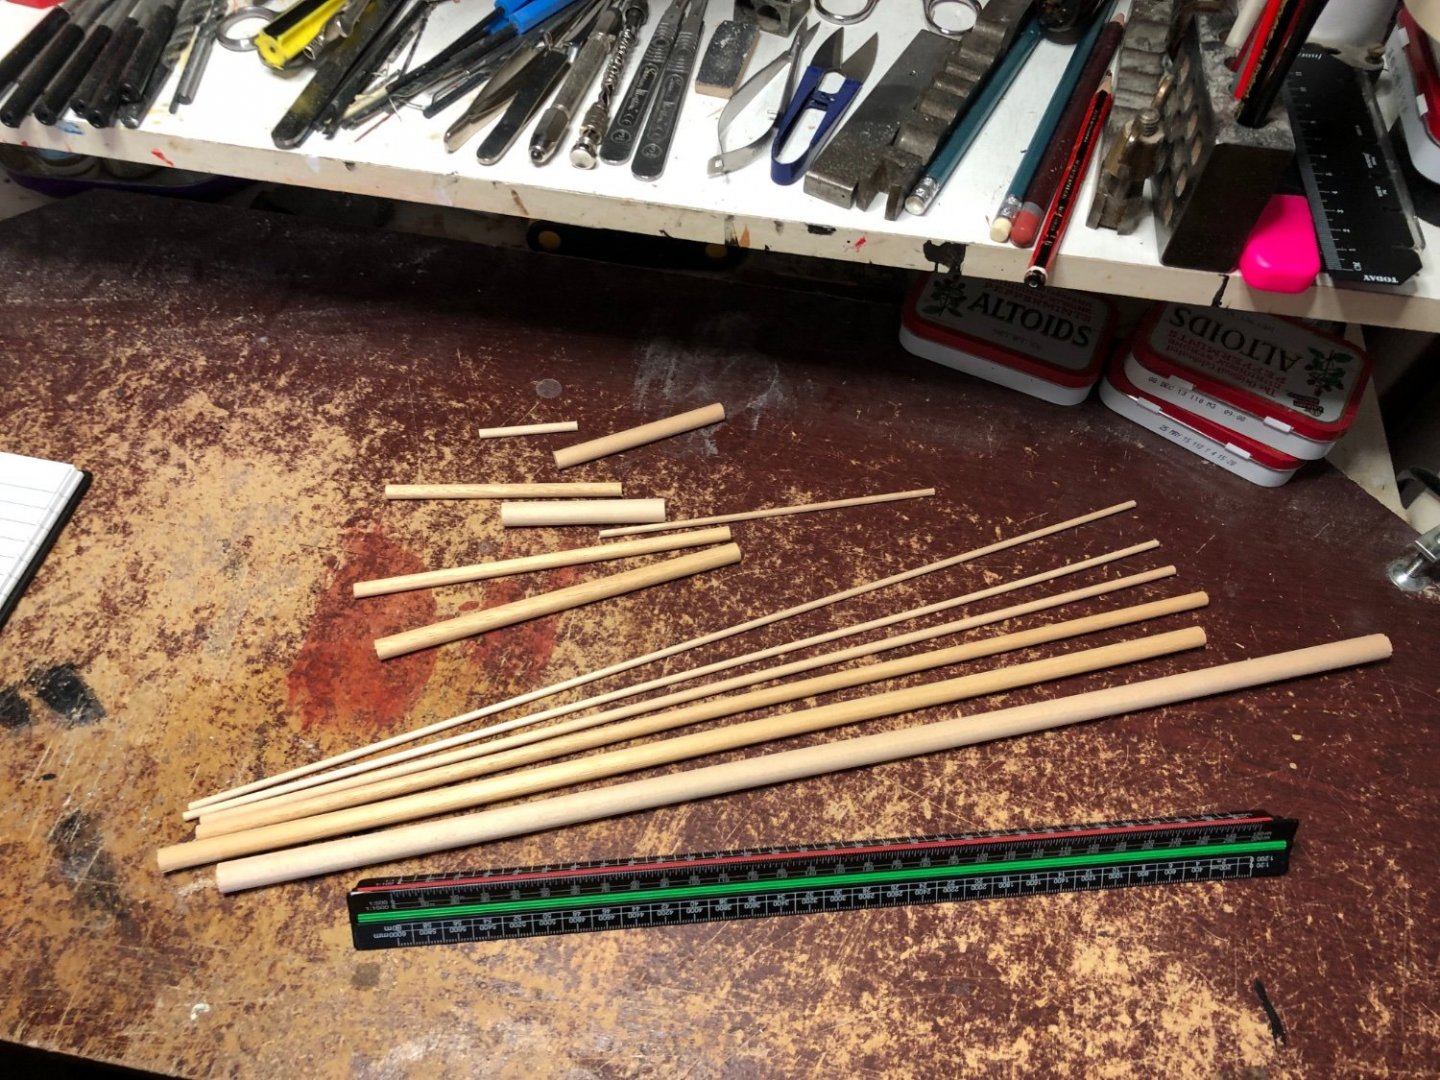
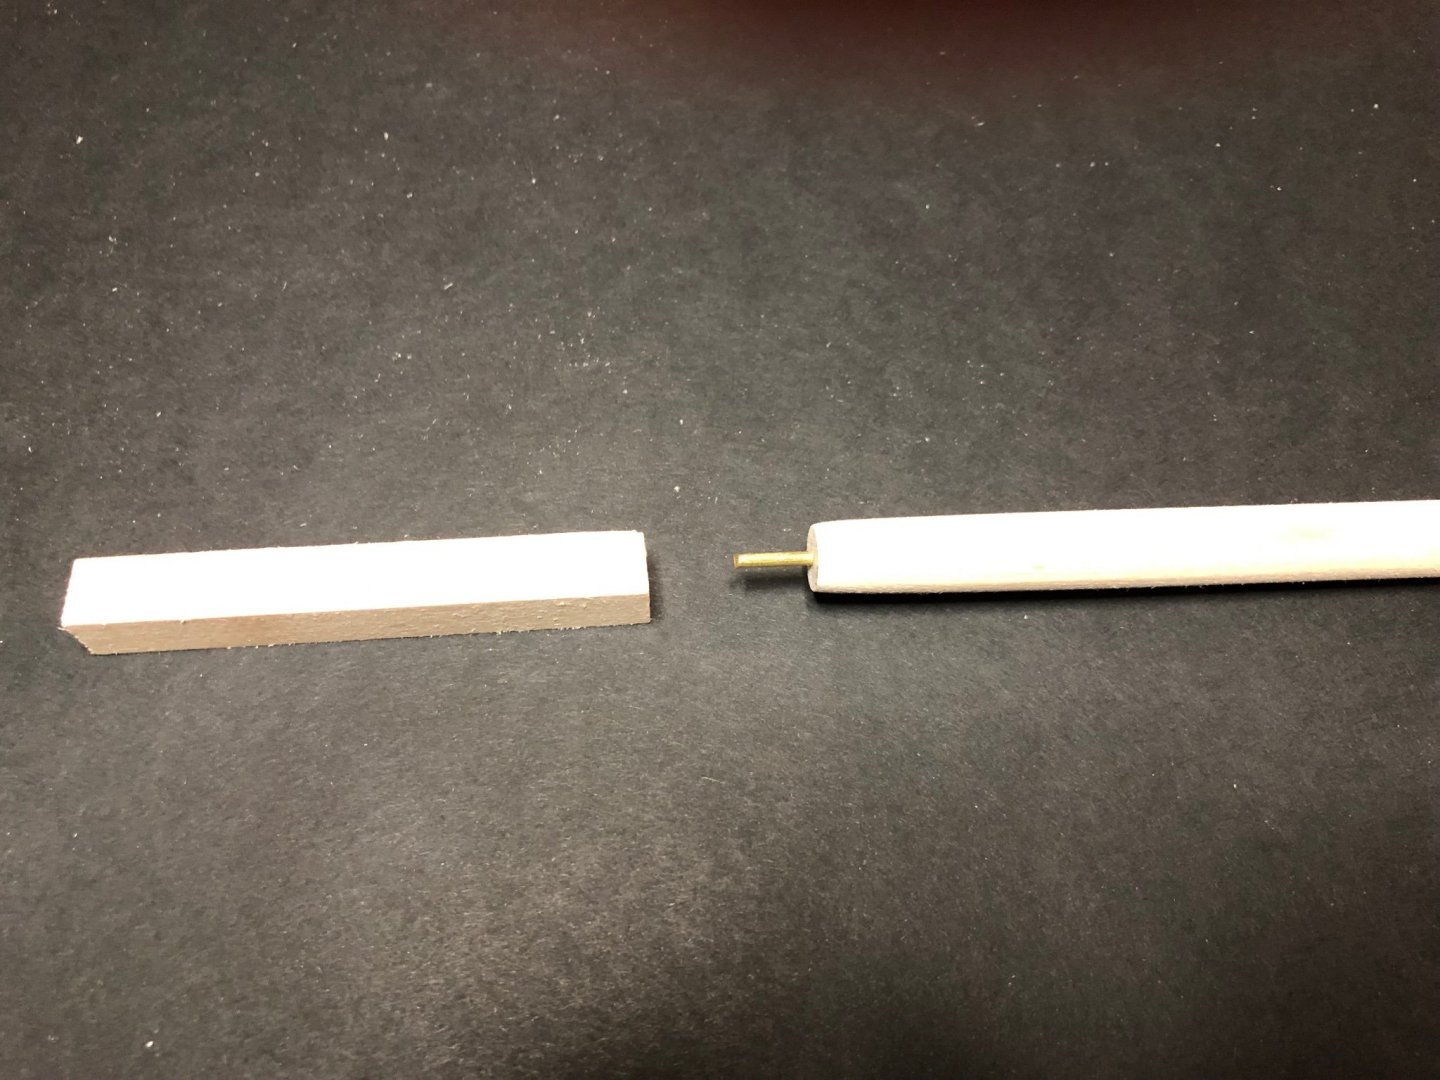
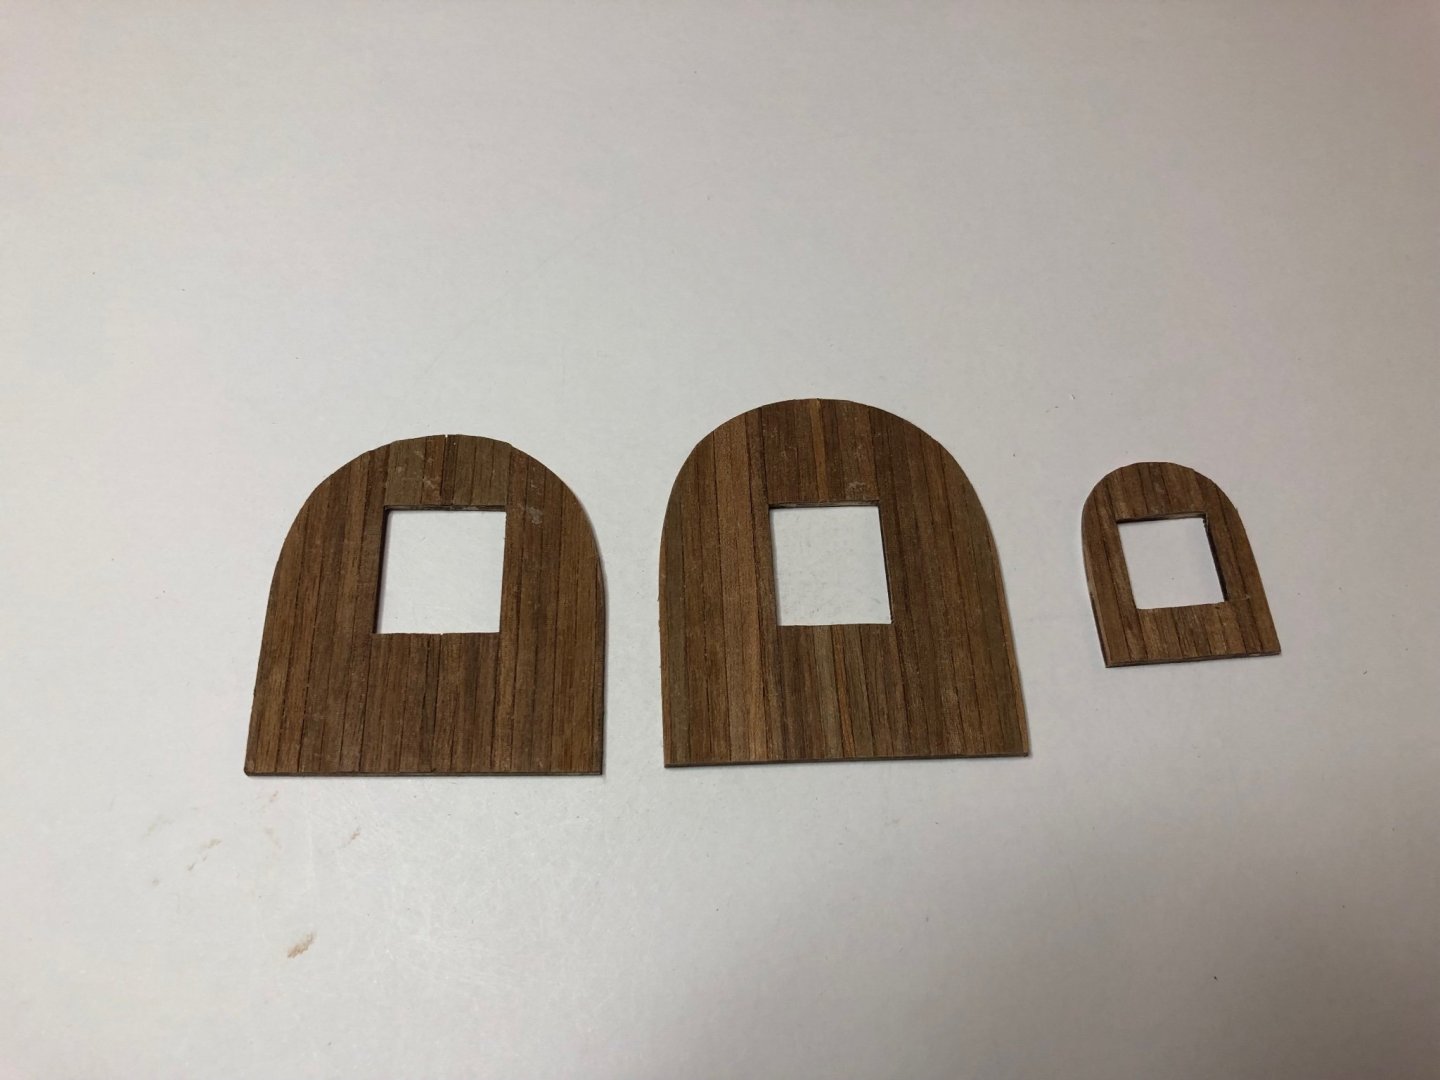
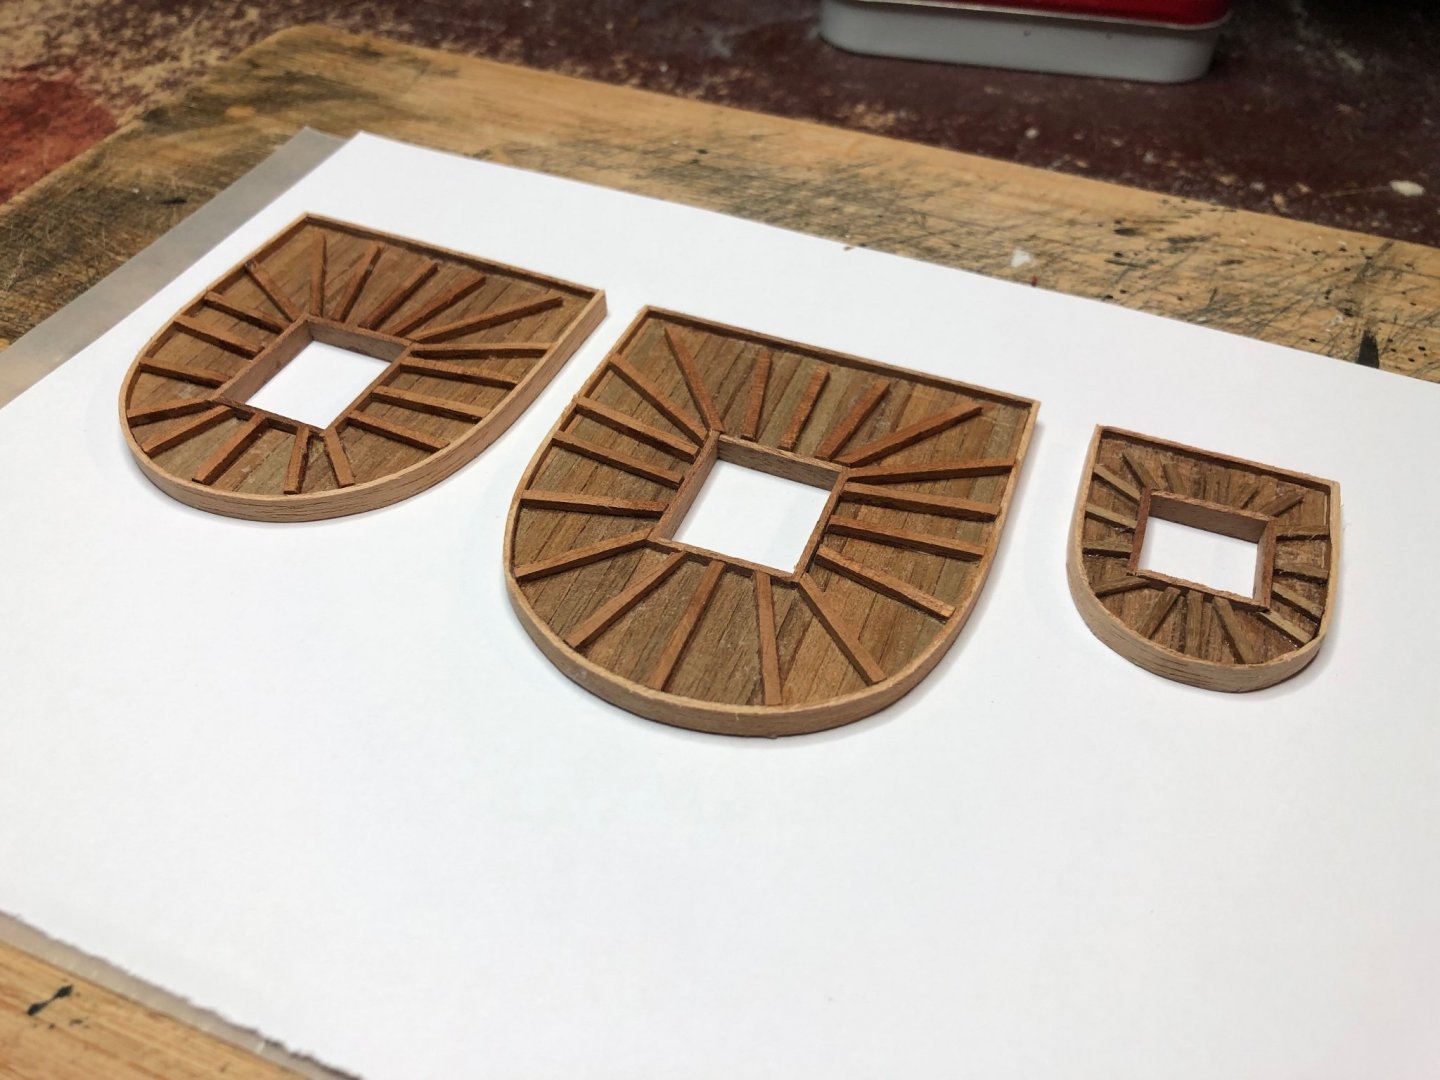
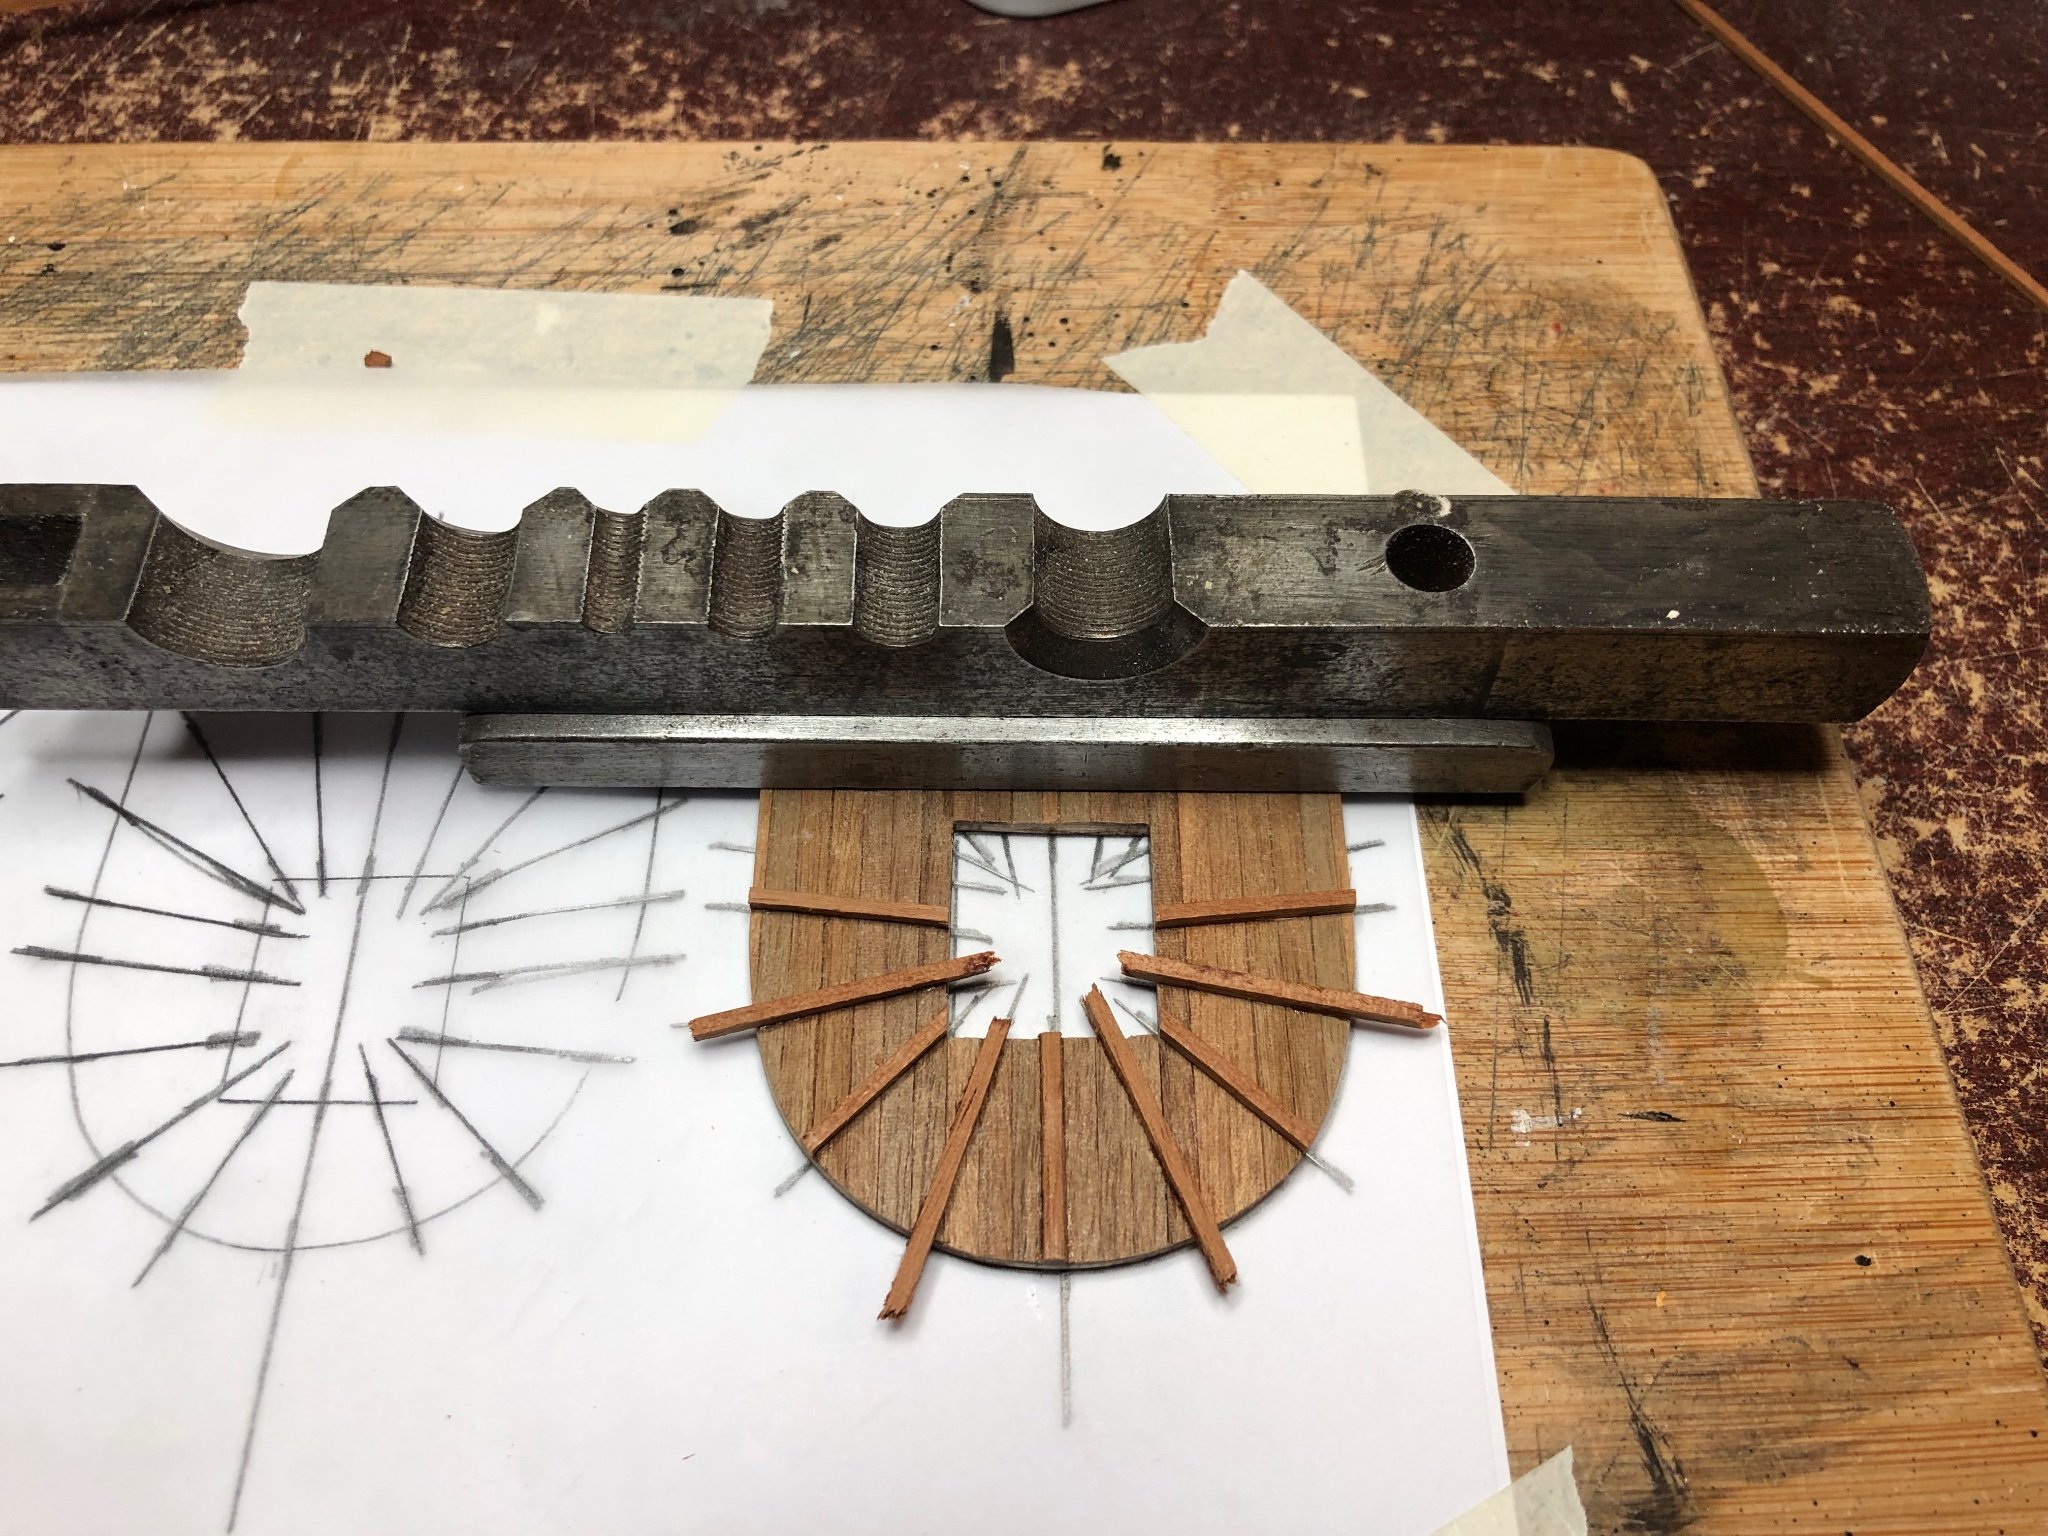
Decided to cut material for the yards, booms, boomkins and flag mast.
Seem to have a lot of dowel left over.
Either I'm missing something or OcCre have been generous.
Have put spares back in box until I find out which.
Lots of work to be done on the yards so putting off
the chainplate decision until later.
Regards,
Sam.
-
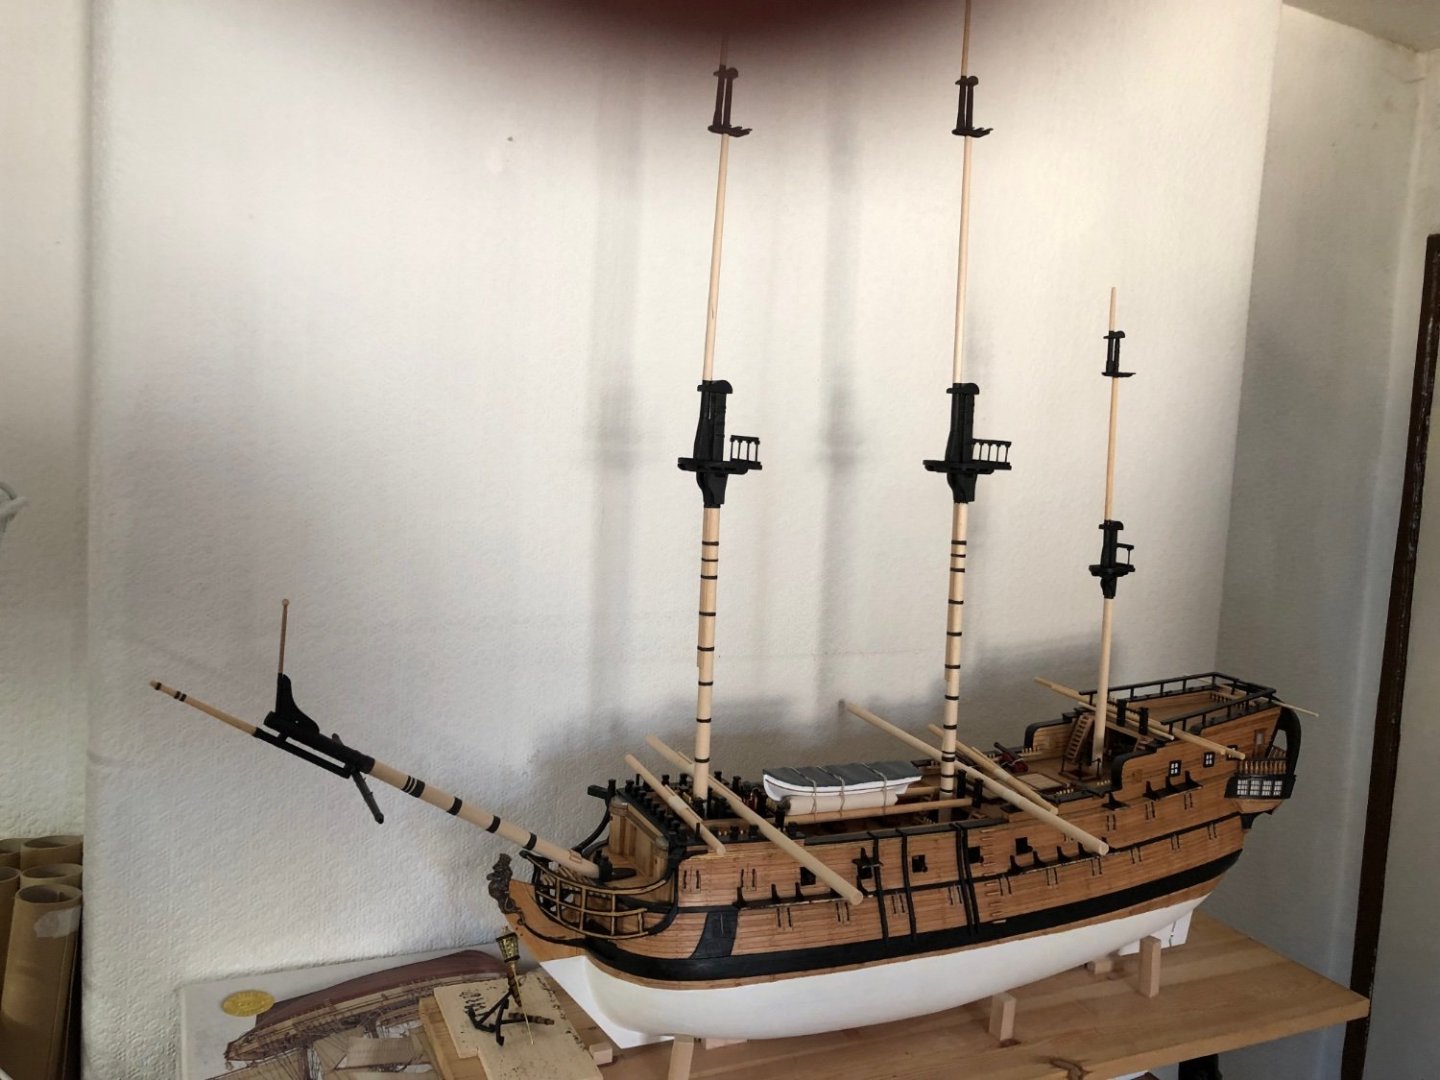
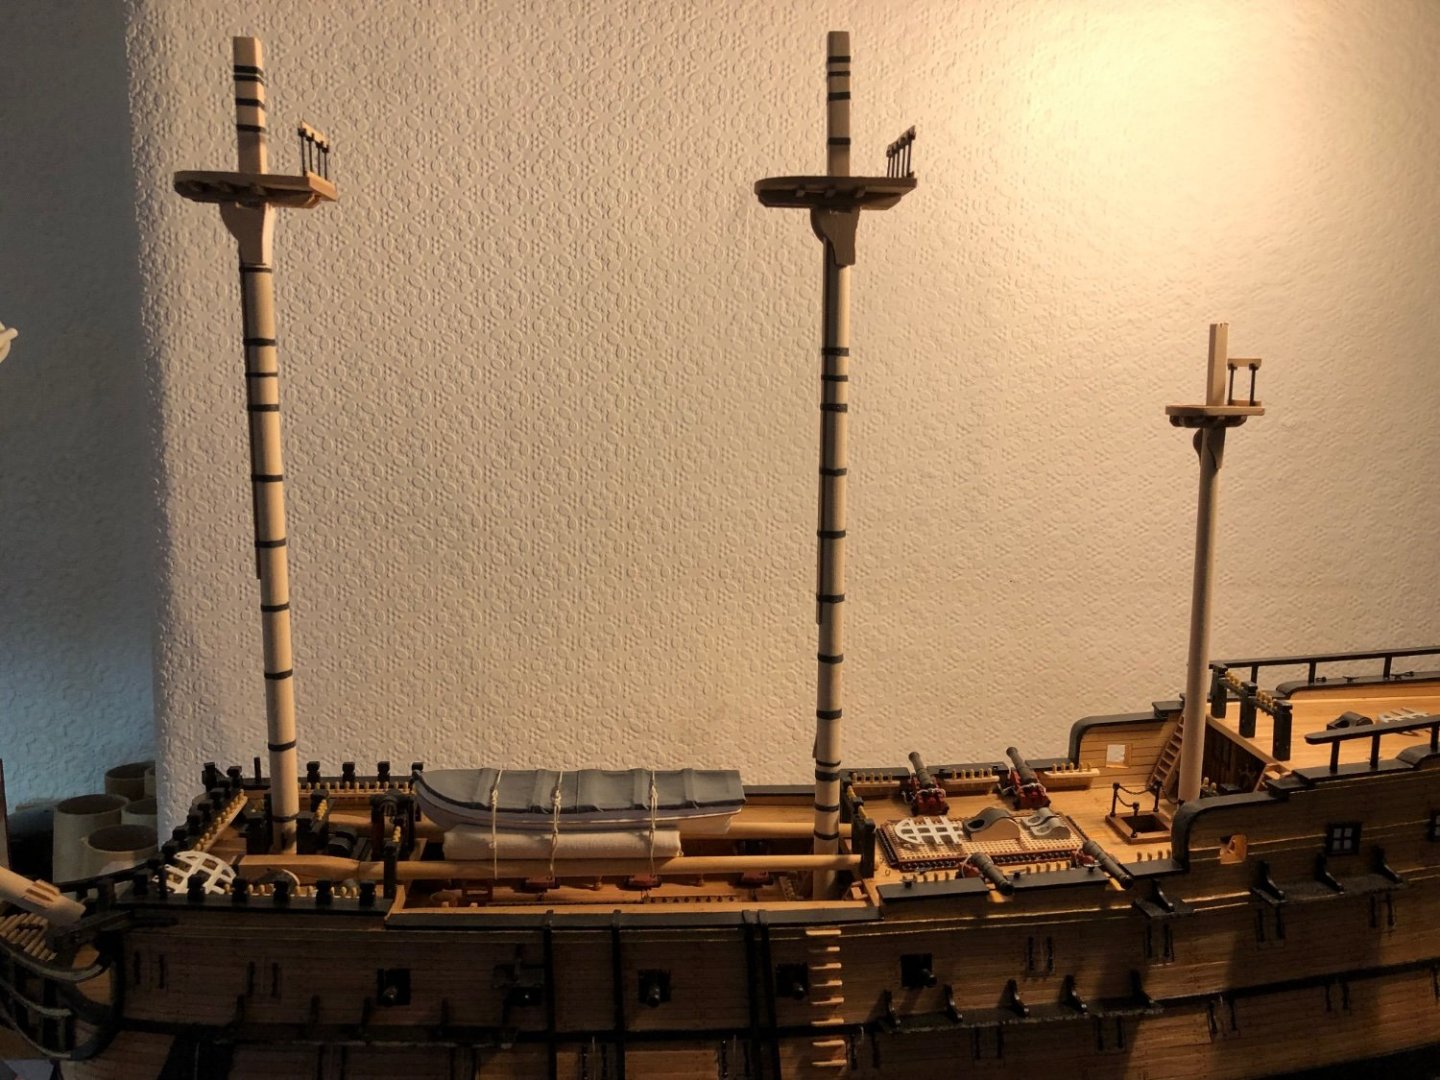
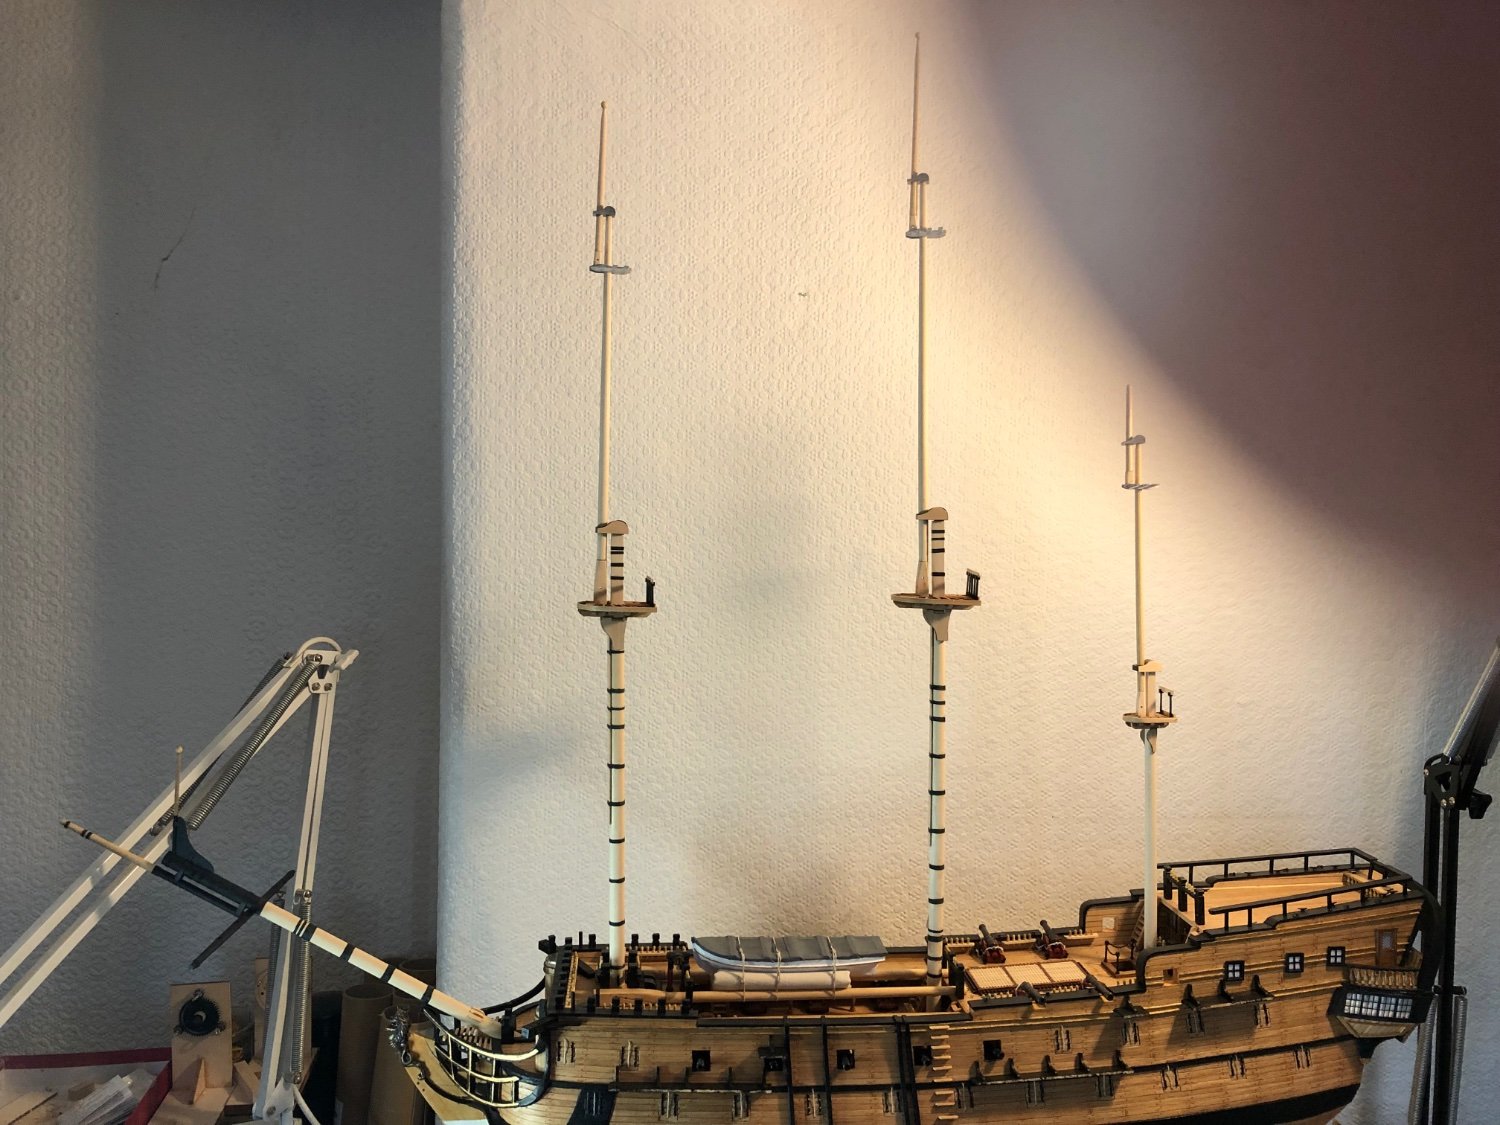
Hi and, Happy New Year everyone.
Basic masts constructed and temporarily located.
Usual discrepancies between parts list and plans
but it all went together fairly well.
Appear to have too many dowels of one size
and not enough of other sizes.
Yards are painted black so I can use the walnut dowel
from my spares box.
It pays to plan out all materials and fittings well in advance
for this kit to make sure you have enough good quality pieces
for each stage.
Yards next then painting and fixing blocks etc.
Regards,
Sam.

-
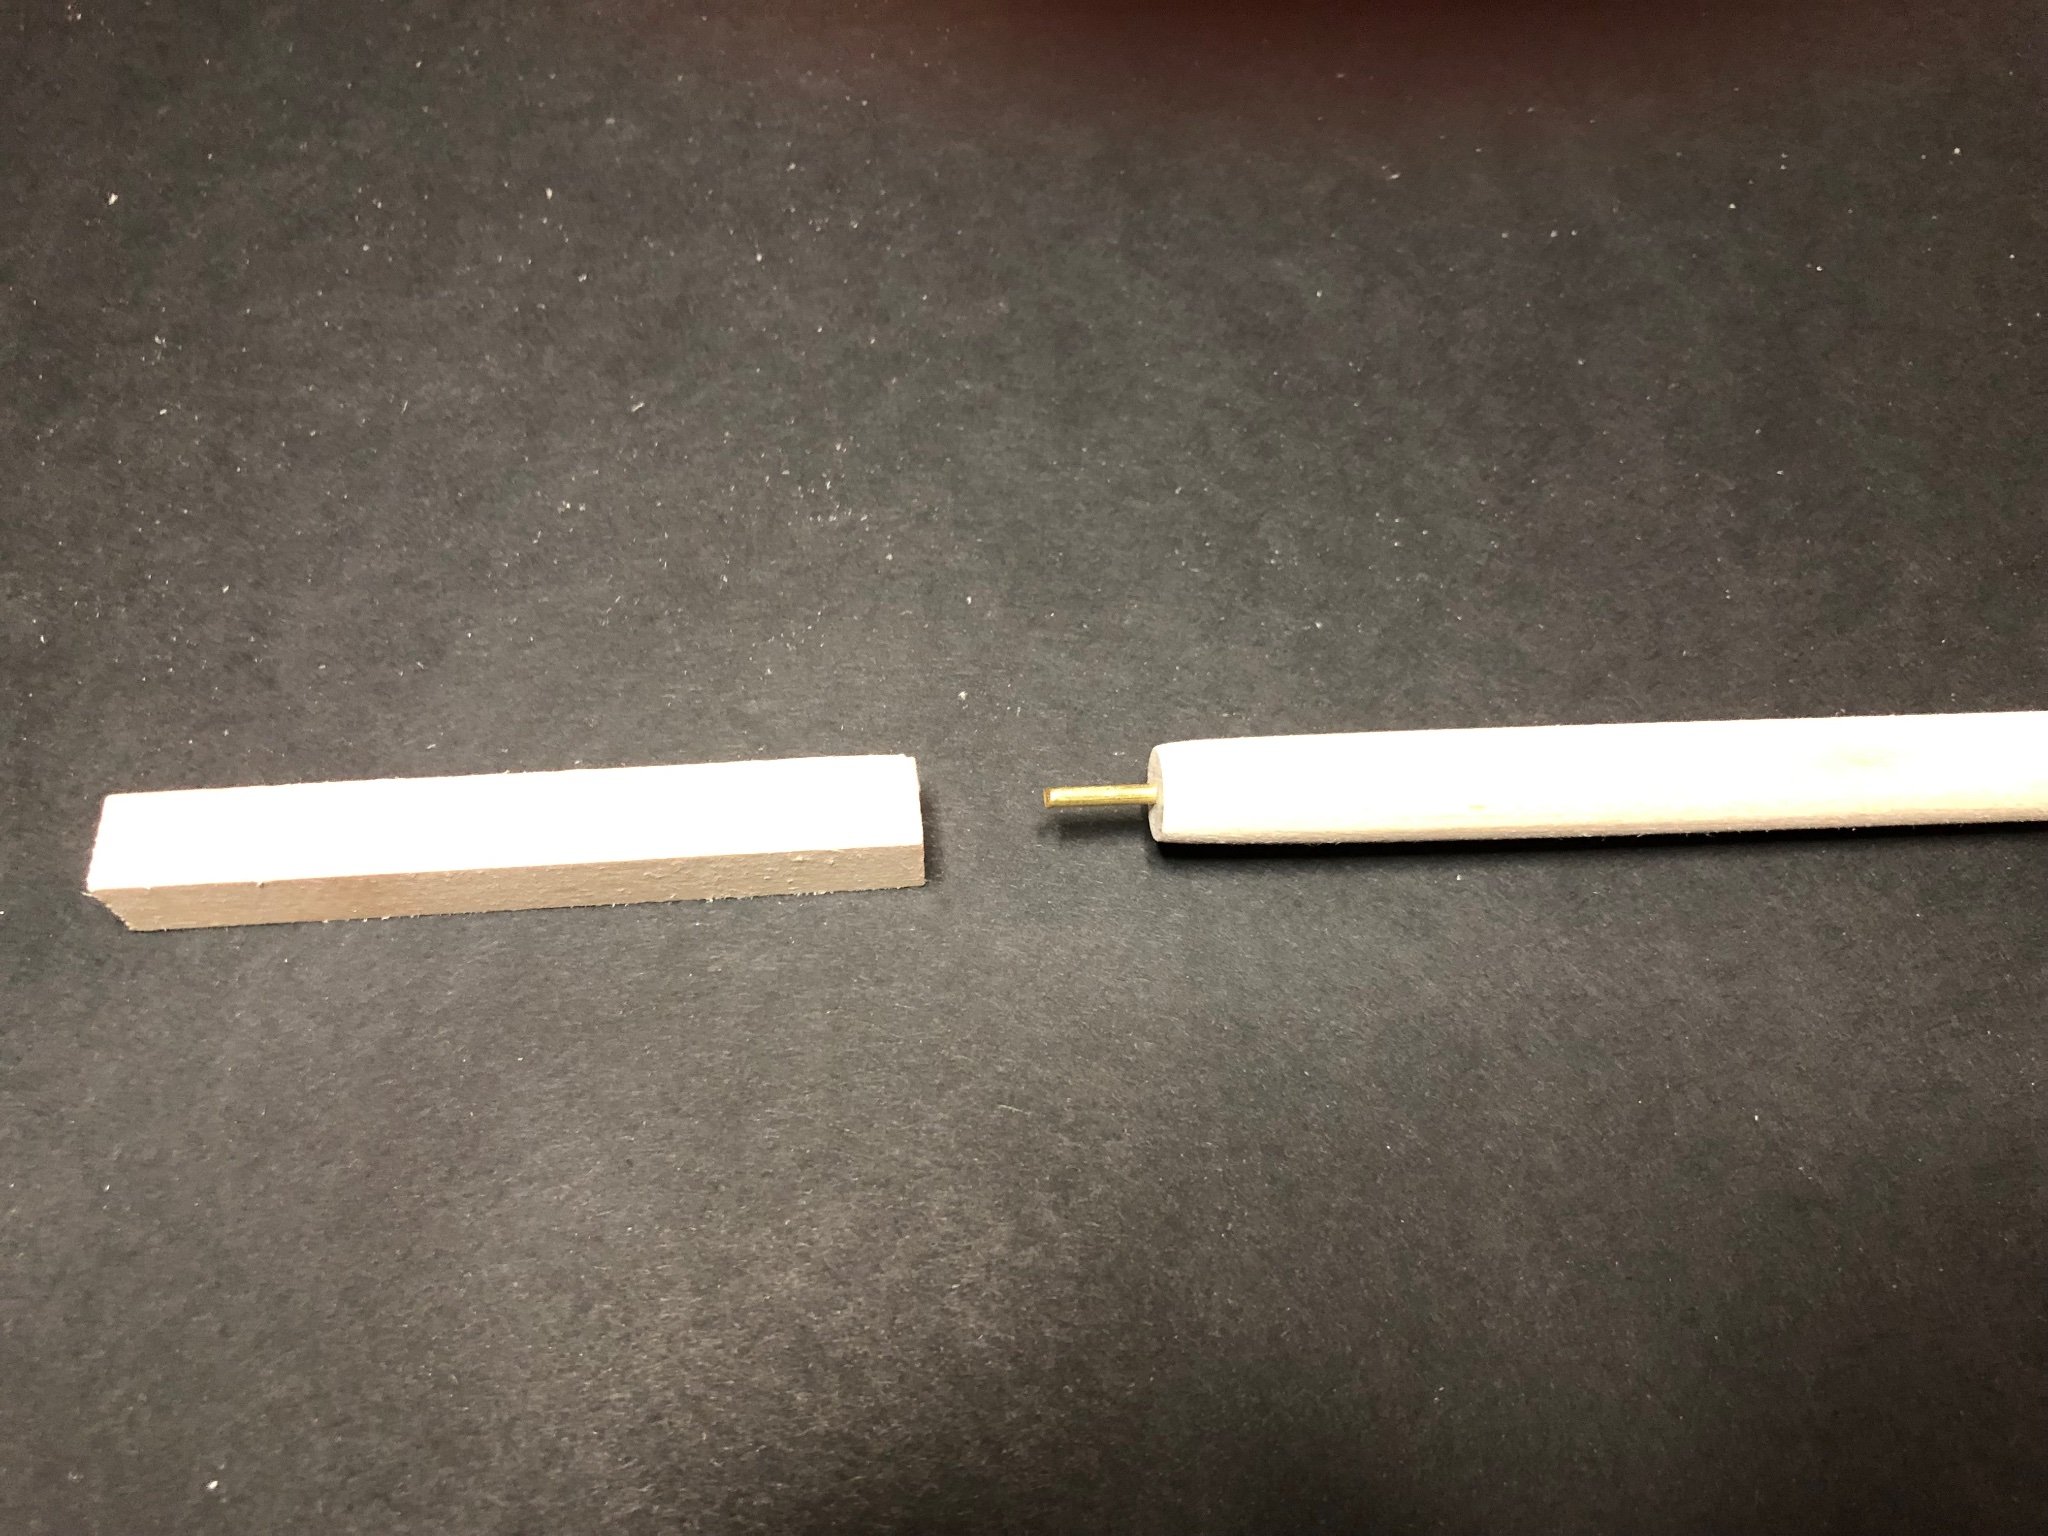
Basic lower masts temporarily located.
Started topmasts.
Parts list calls for 10mm diameter masts - drawings show 8mm dia.
I noticed this after the masts had been cut to length and lower chocks fitted.
My spares box is taking a hammering again.
Also mizzen mast part 318 (preformed metal) has gone walkabout.
Both problems easy to deal with but frustrating.
Really looking forward to rigging this monster.
Happy New Year,
Sam.
-
Hi Tim,
Superb model.
Happy birthday and seasons greetings.
Looking forward to your next build.
Regards,
Sam.
-
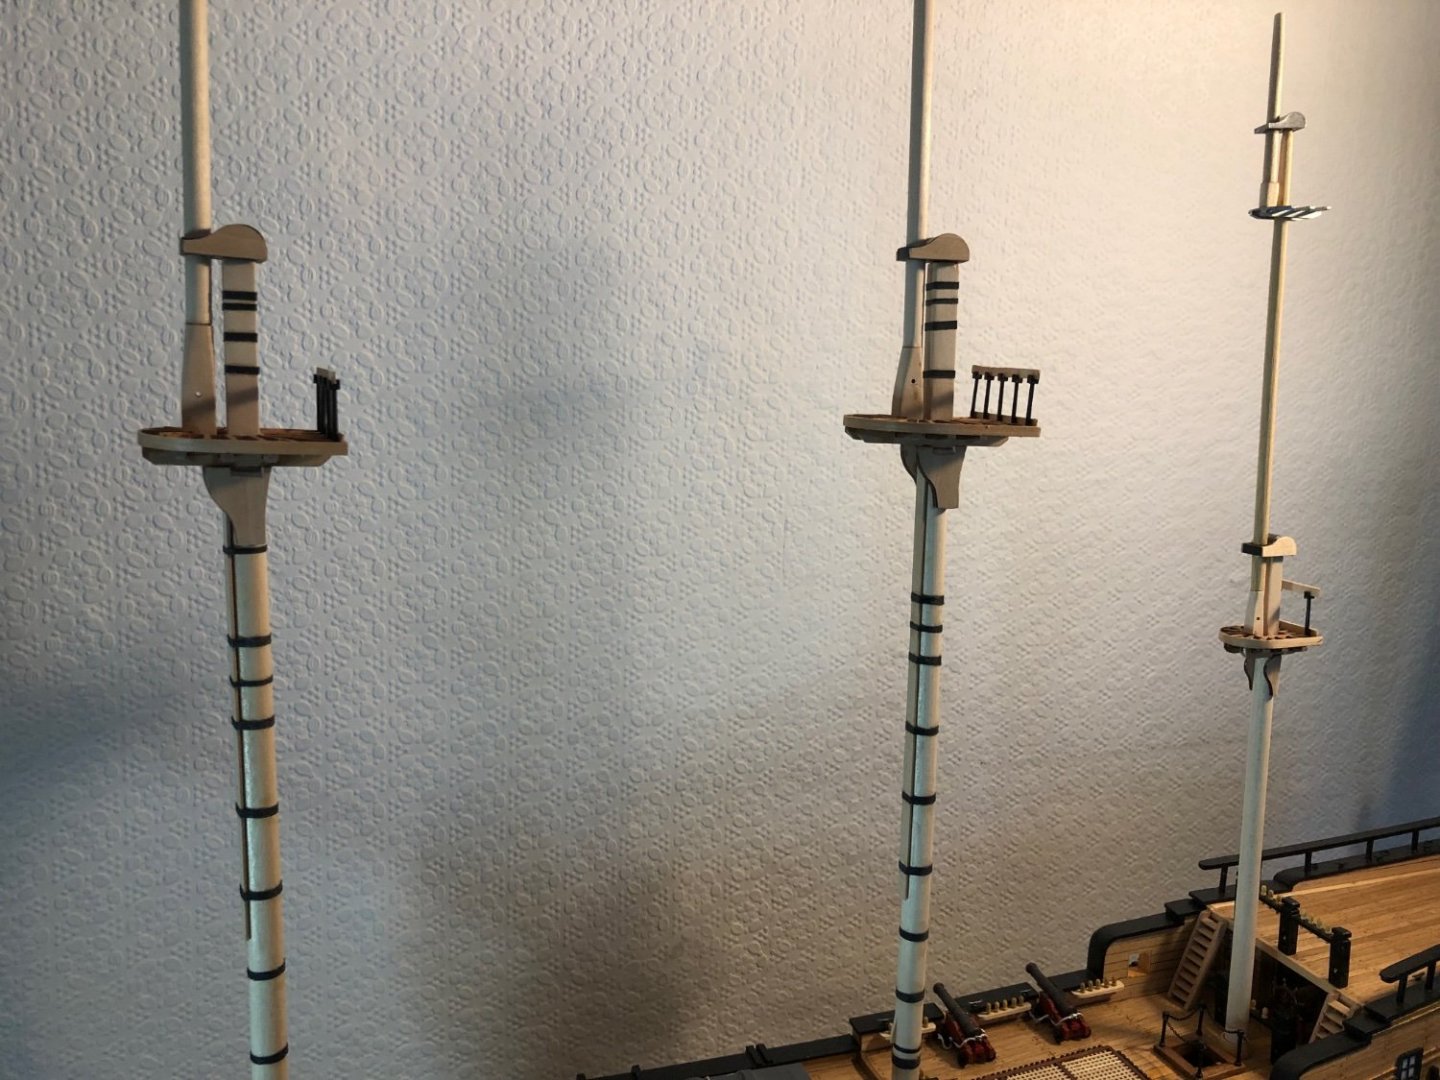
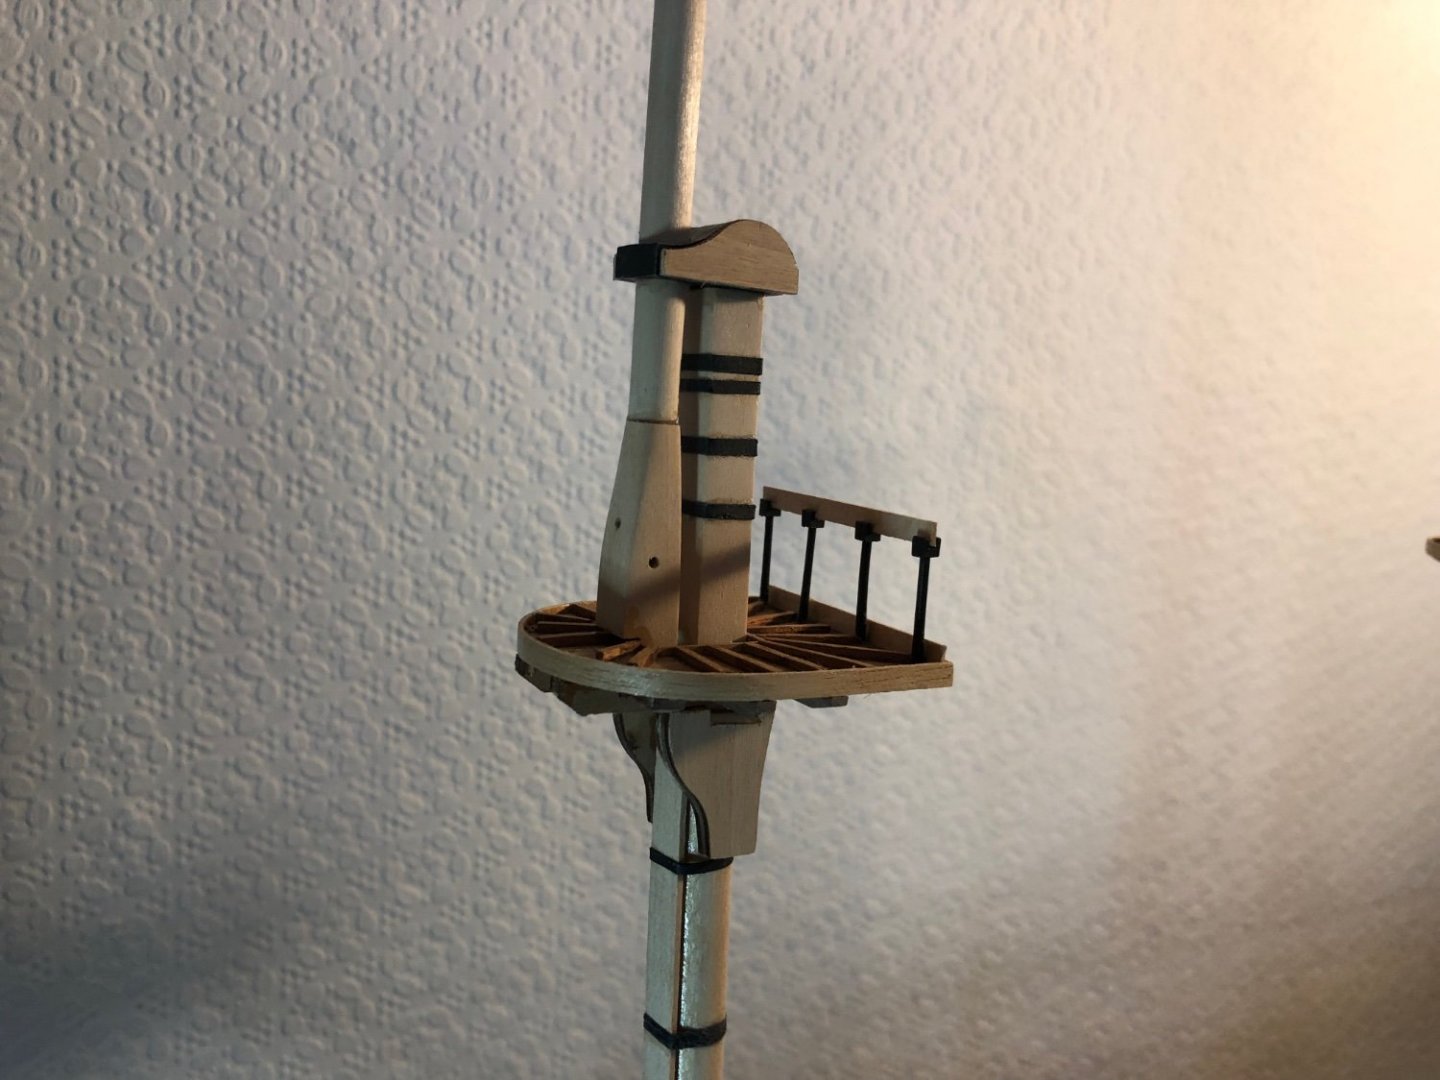
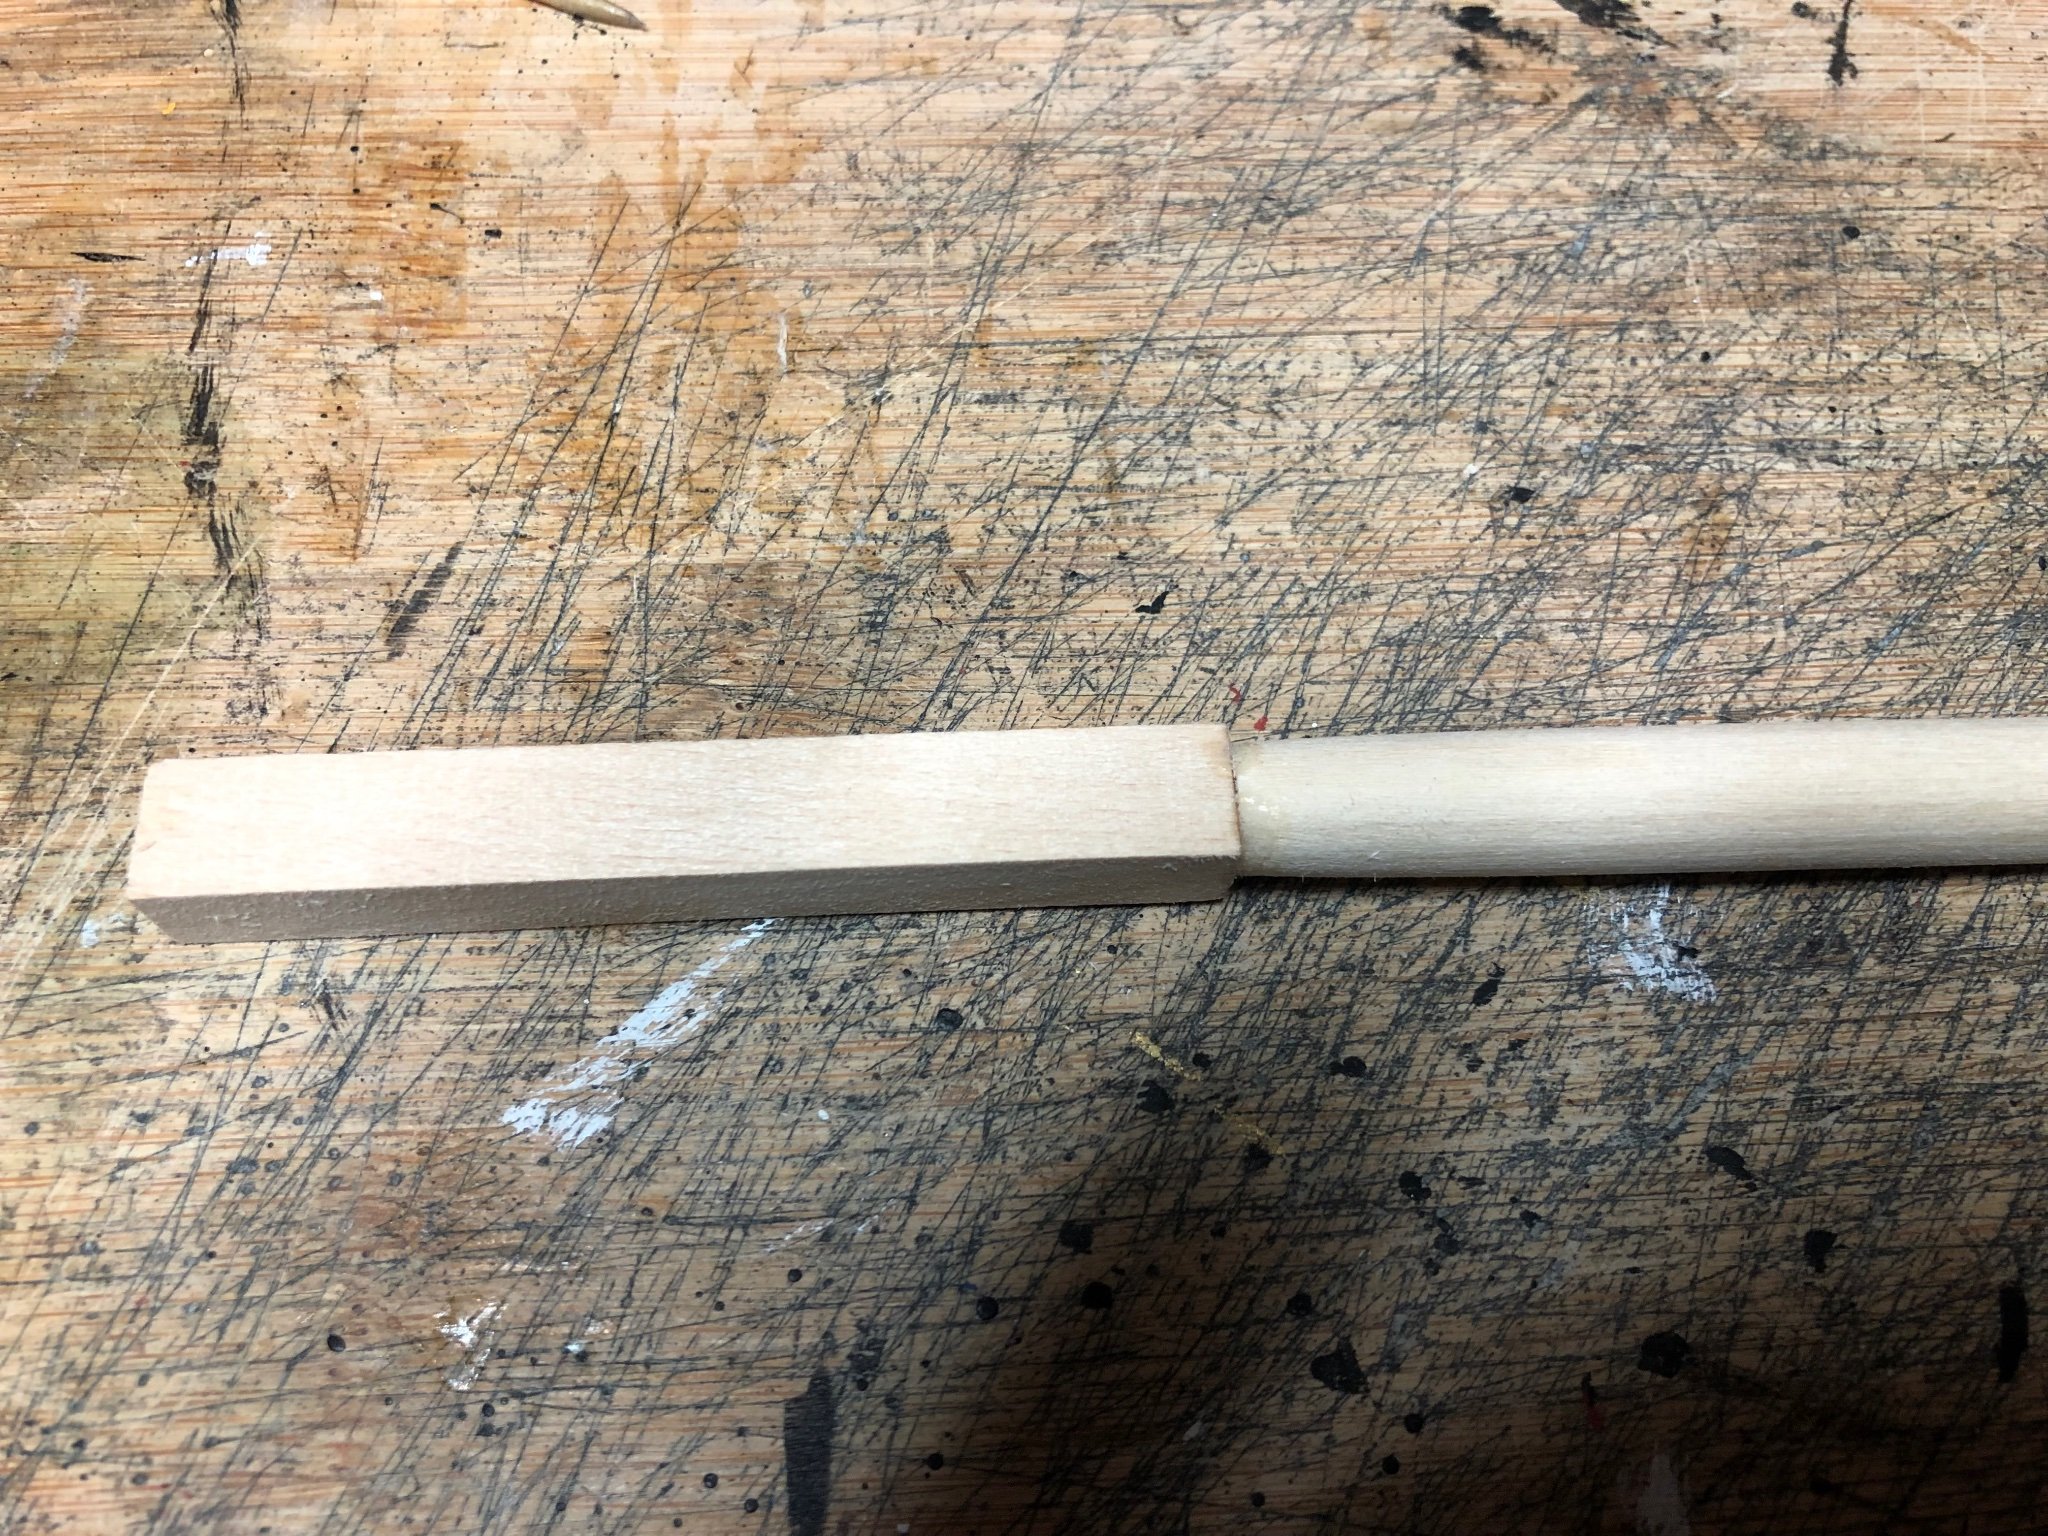
Hi and, thanks for the likes.
Started on the lower masts.
Slightly unusual construction but worked well.
Tops partially finished, cross trees to add then rear railings
and drilling.
Regards,
Sam.


- GrandpaPhil, HardeeHarHar, Jeff T and 2 others
-
5
-
Thanks Puckotred.
Have built Panarts Royal Caroline and really enjoyed it.
Will look for your postings.
Regards,
Sam.
-
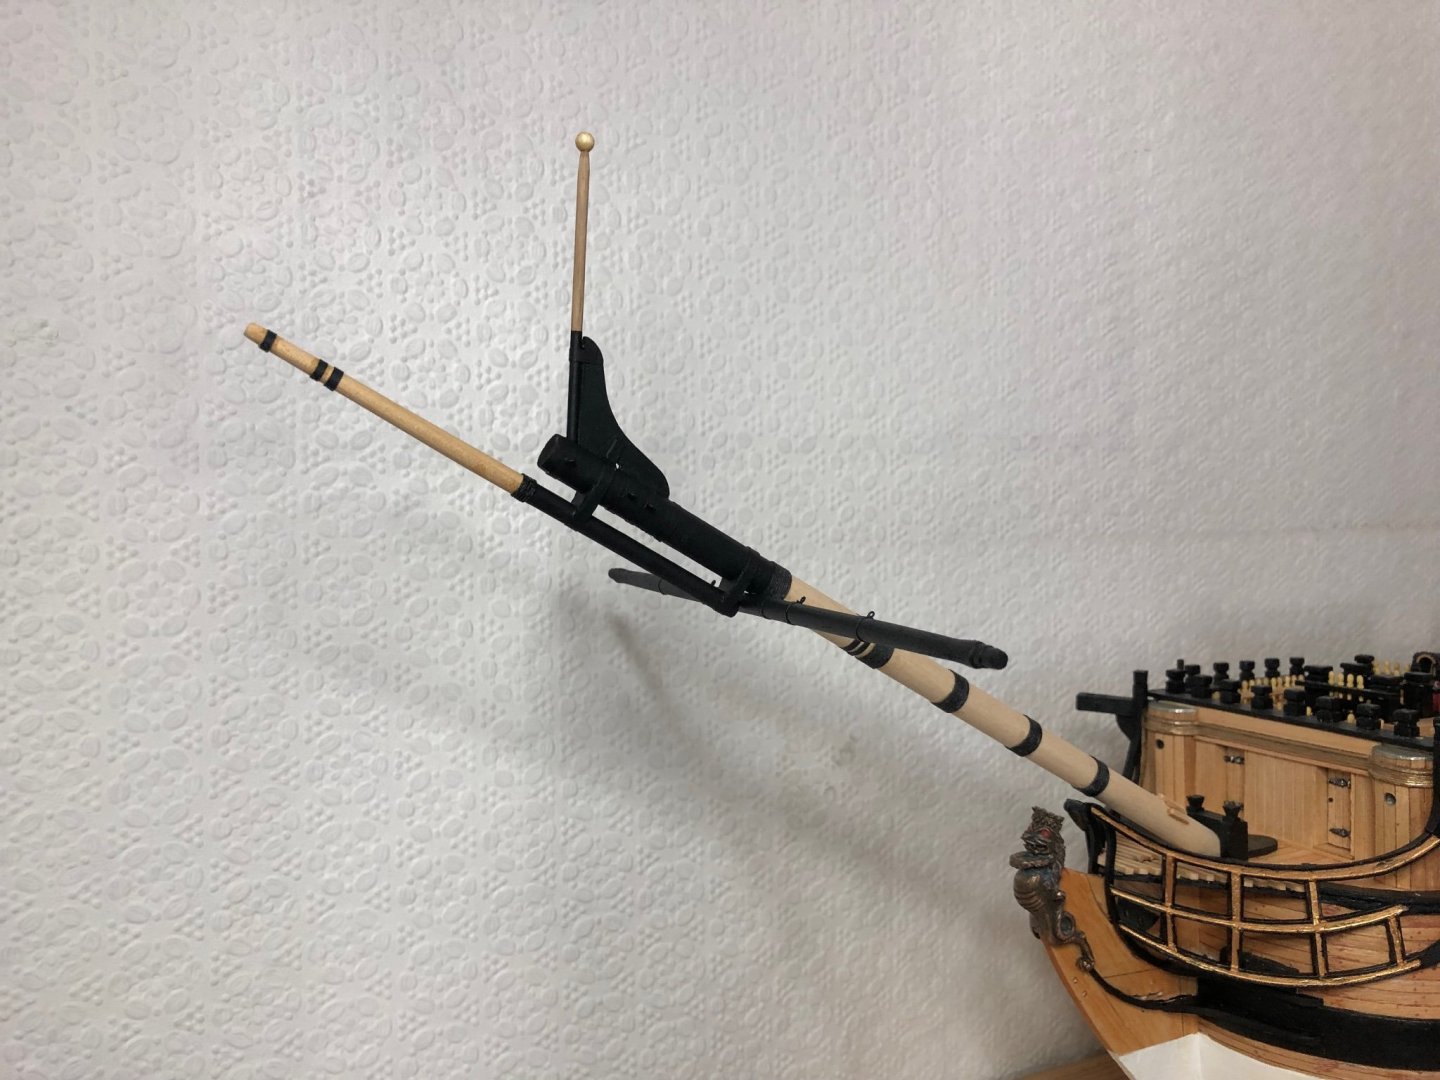
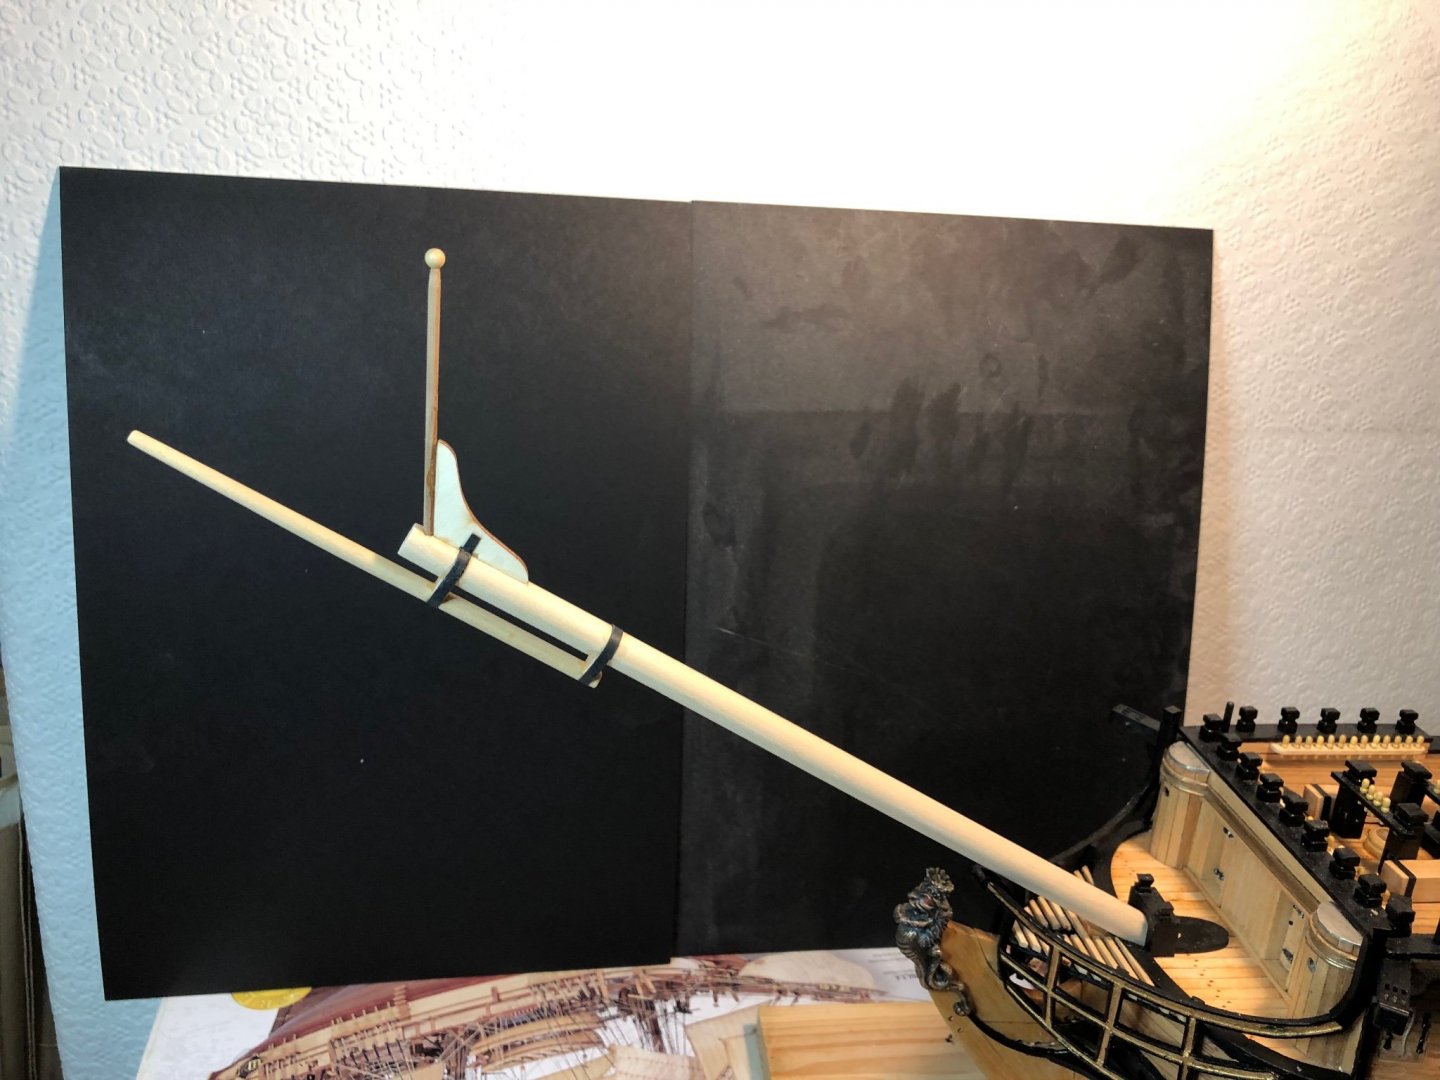
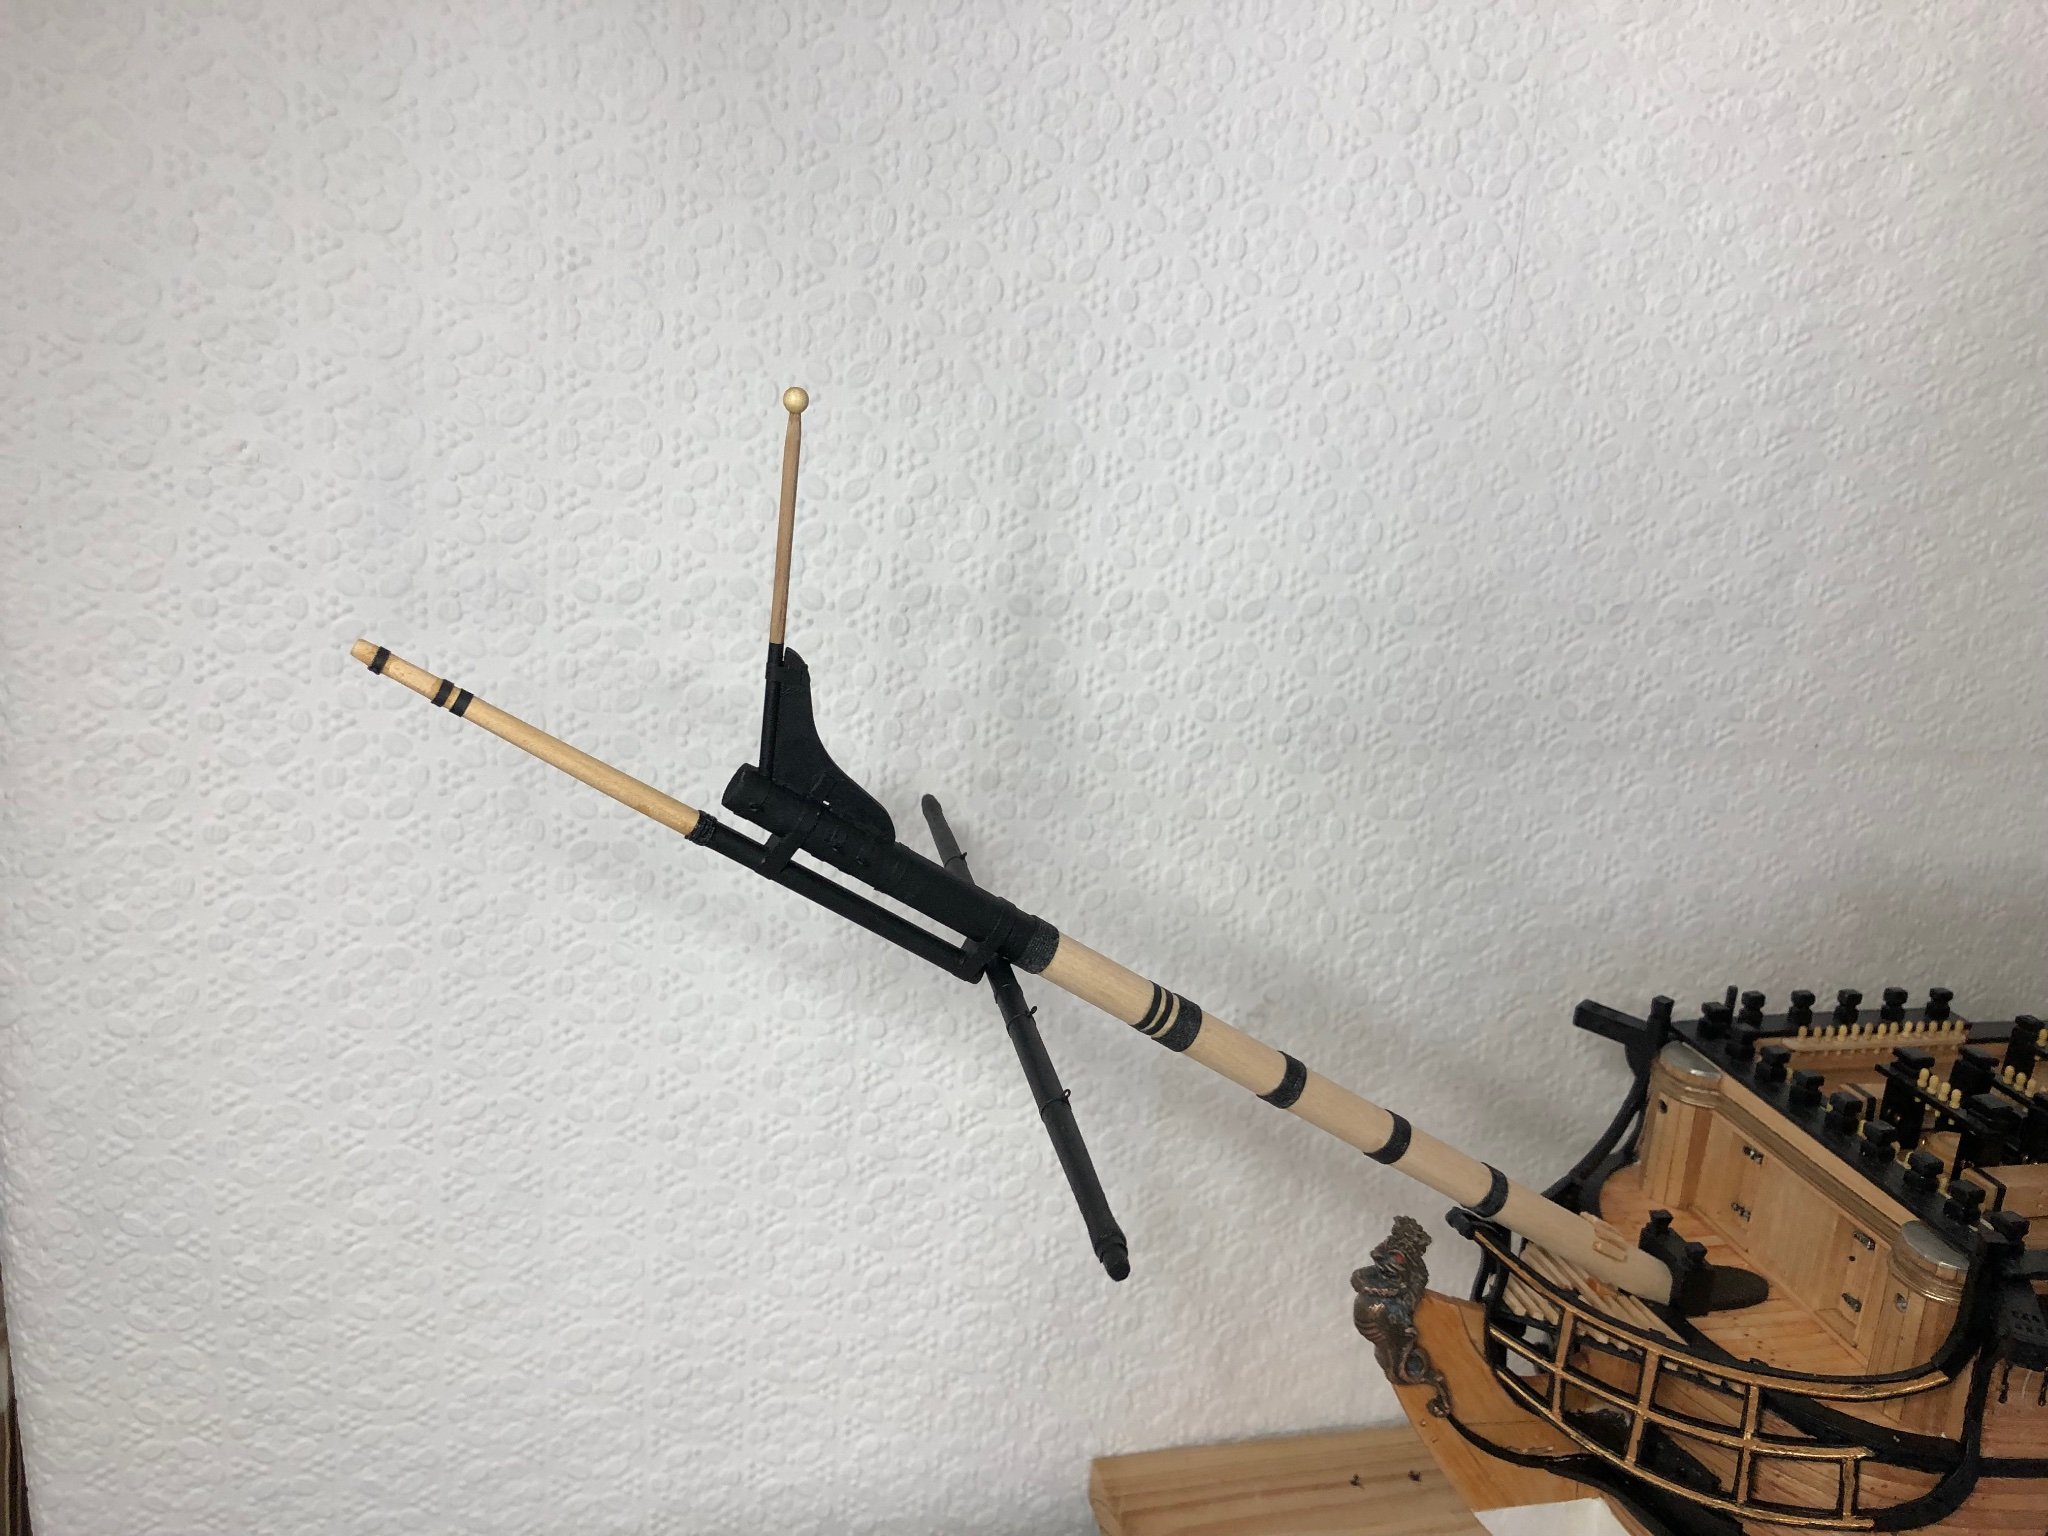
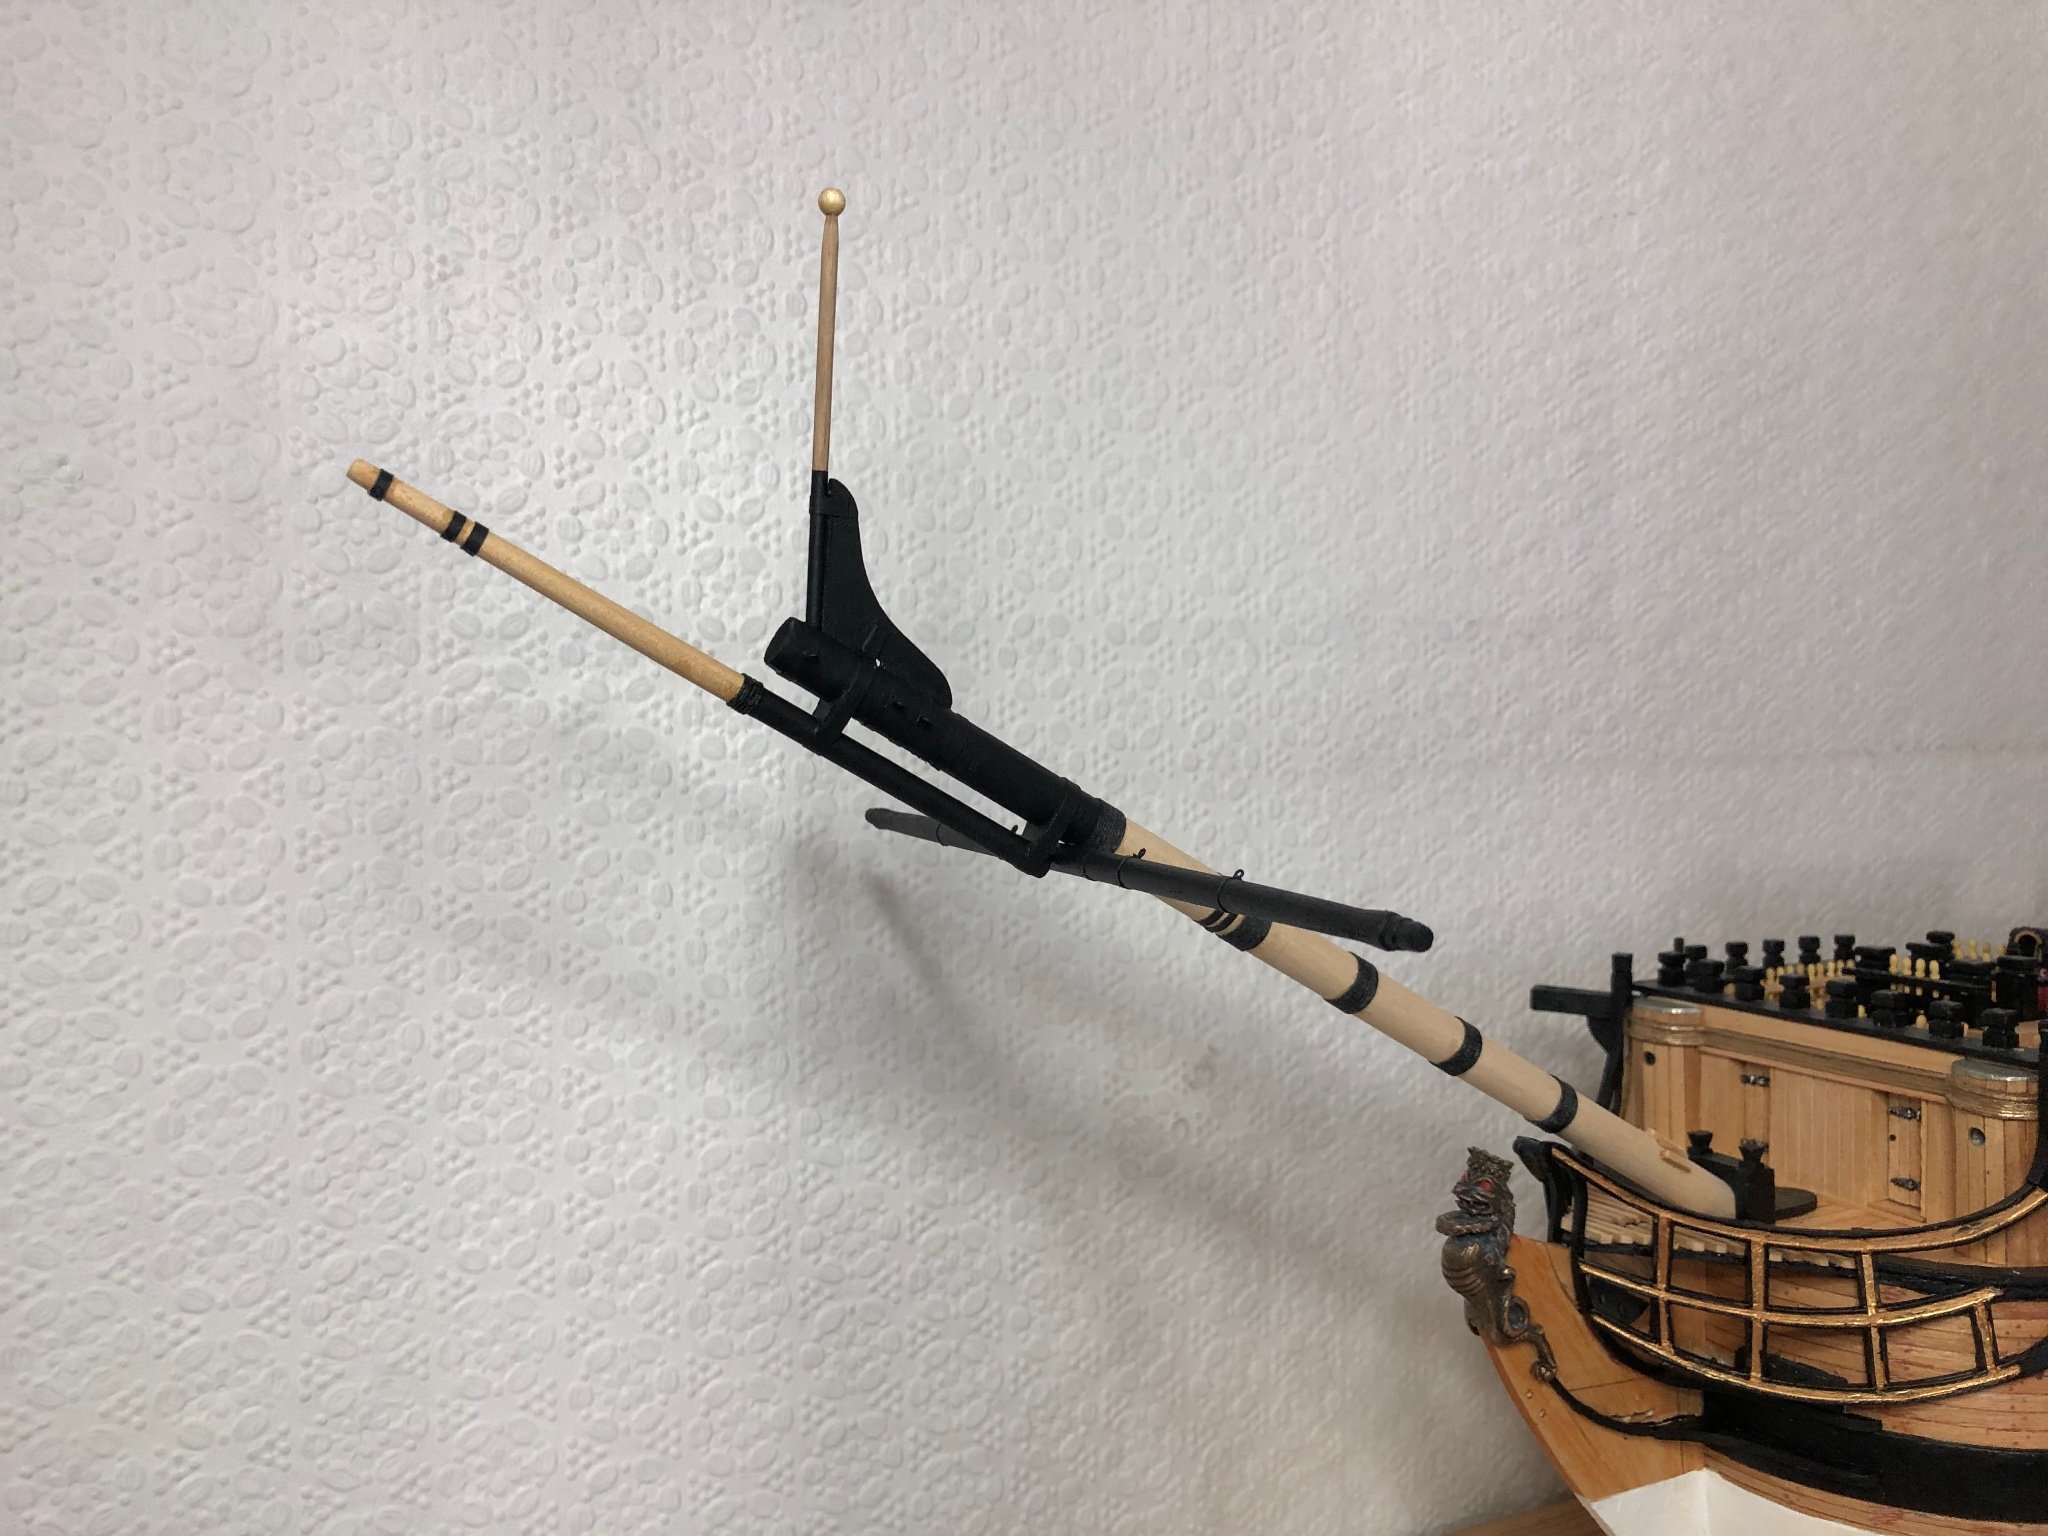
Hi and, thanks for the comments and likes.
Basic bowsprit construction finished.
Just got to add the blocks and fix into position.
Still undecided on how to make the deadeyes and chains
so will make the masts to the same level.
This will give me time to sort out the deadeyes (hopefully).
Regards,
Sam.

- HardeeHarHar, coxswain, GrandpaPhil and 2 others
-
5
-
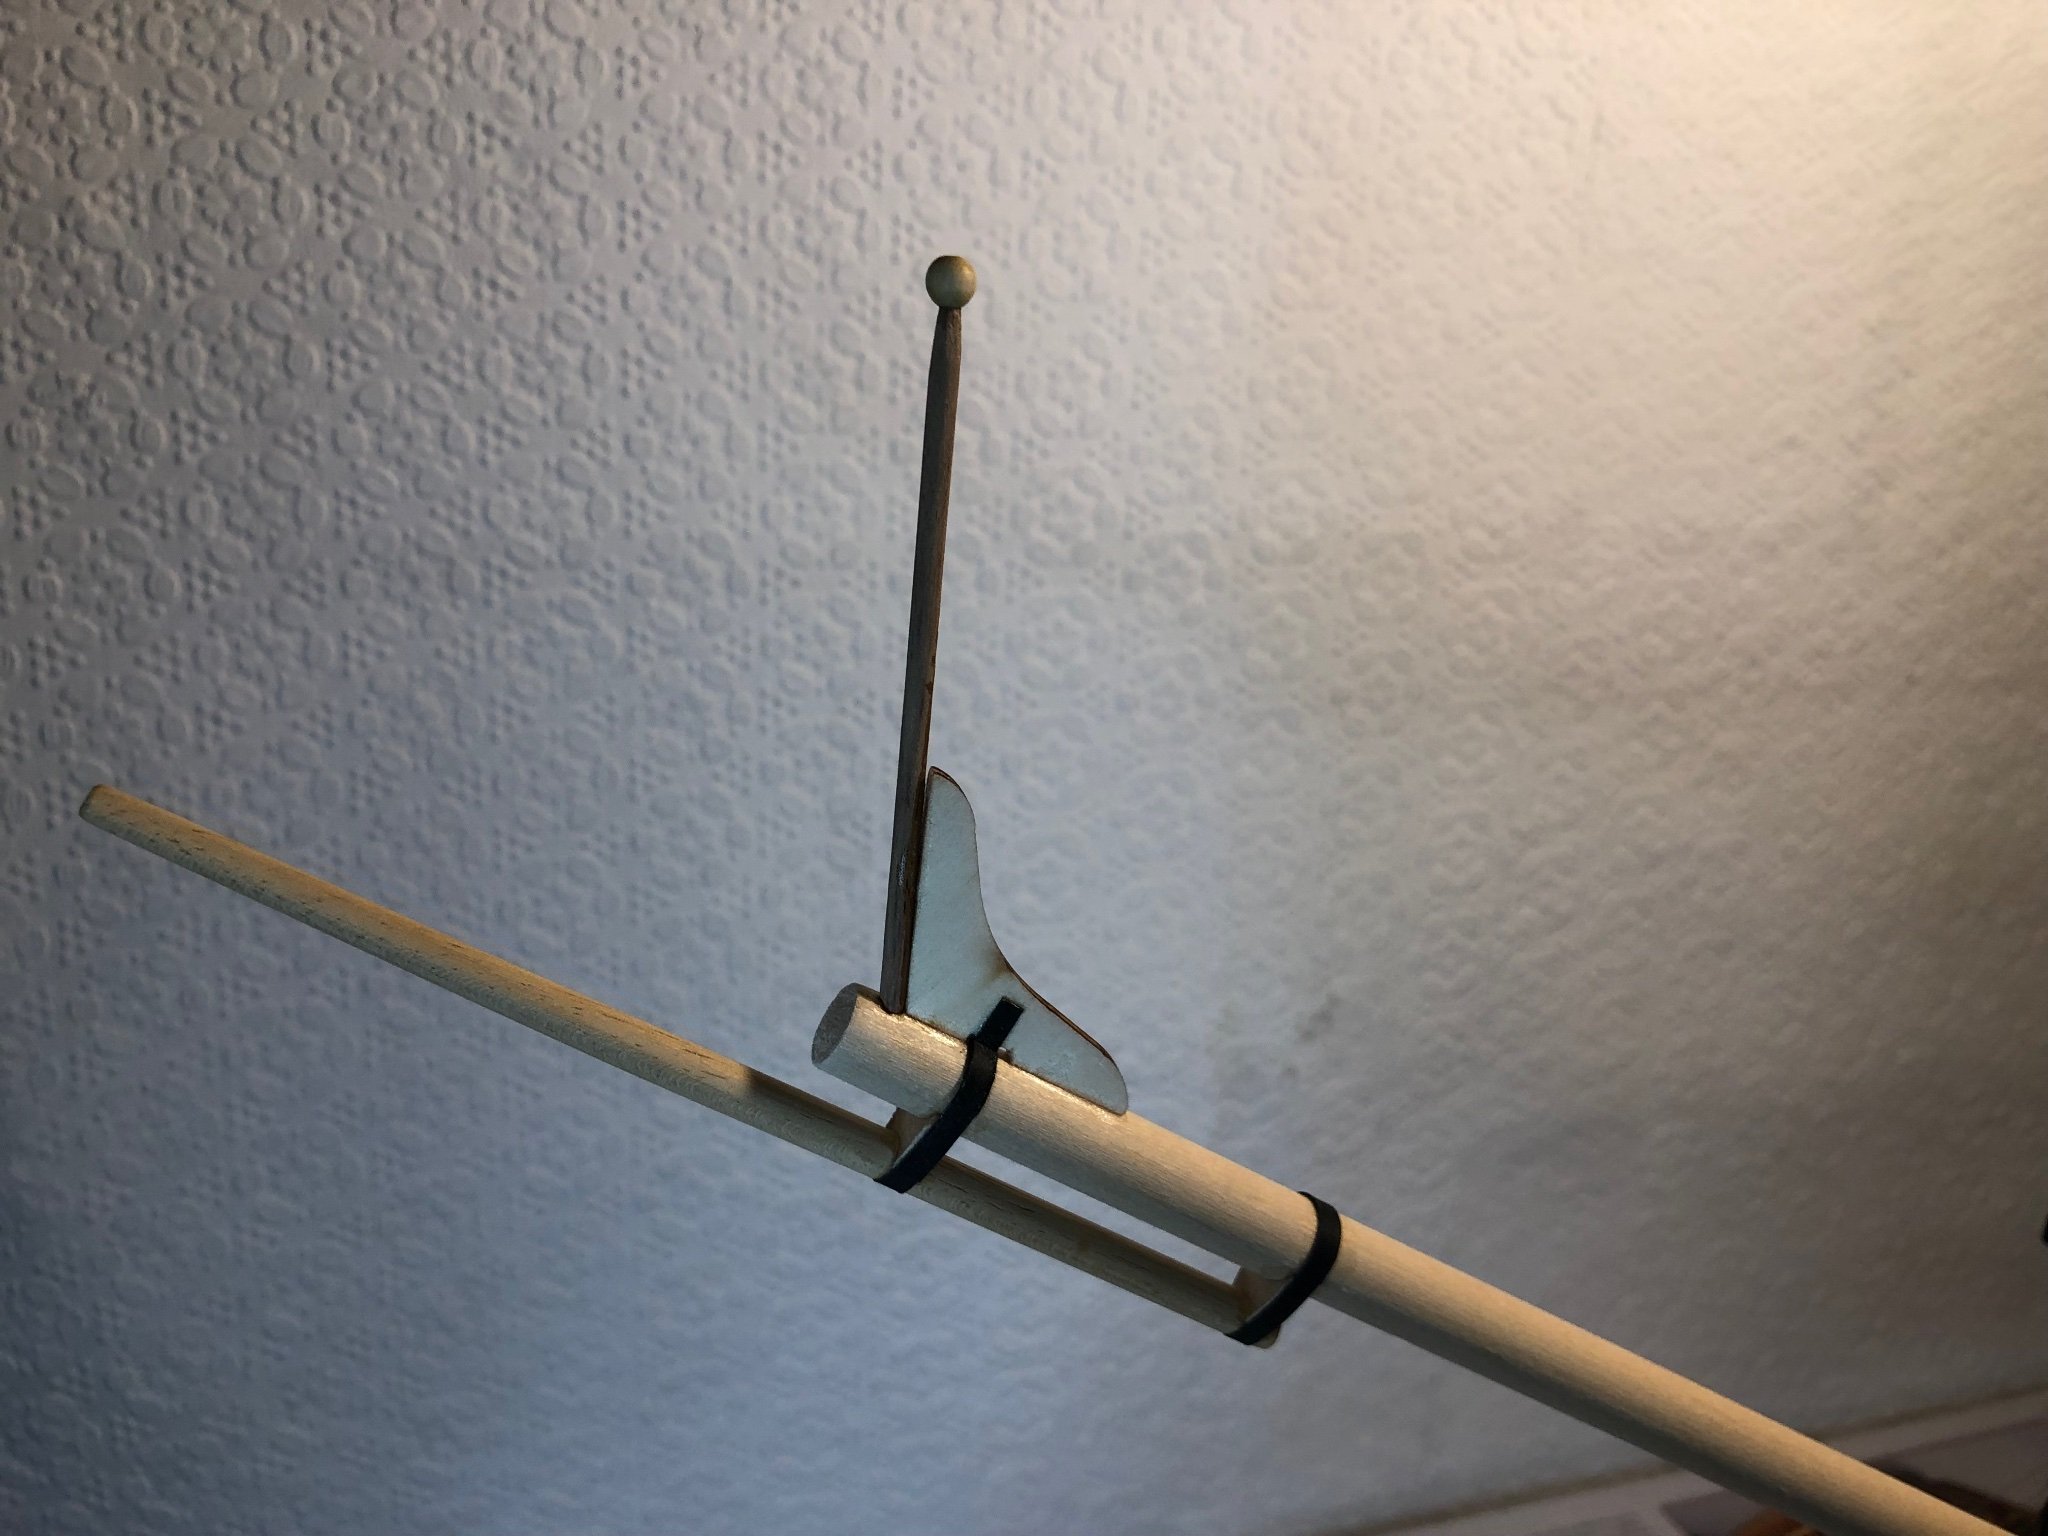
Hi and, thanks for visiting.
Schubbe - Not just wine but good German wine.
Snug Harbour Johnny - agree with your comments.
It was the thick ribs and one piece cover board that put me off.
I have noticed some 1/48 scale ships boat kits available.
These may be the answer. Though at £45 - 50 a pop added to the extras
already used on this build I decided to use the supplied pieces where possible.
Still mulling over what to do with the deadeyes and chains so put it off for a few days
and moved on to the bowsprit. Photo shows basic construction.
A lot more work required.
Regards,
Sam.

- puckotred, ccoyle, Edwardkenway and 2 others
-
5
-
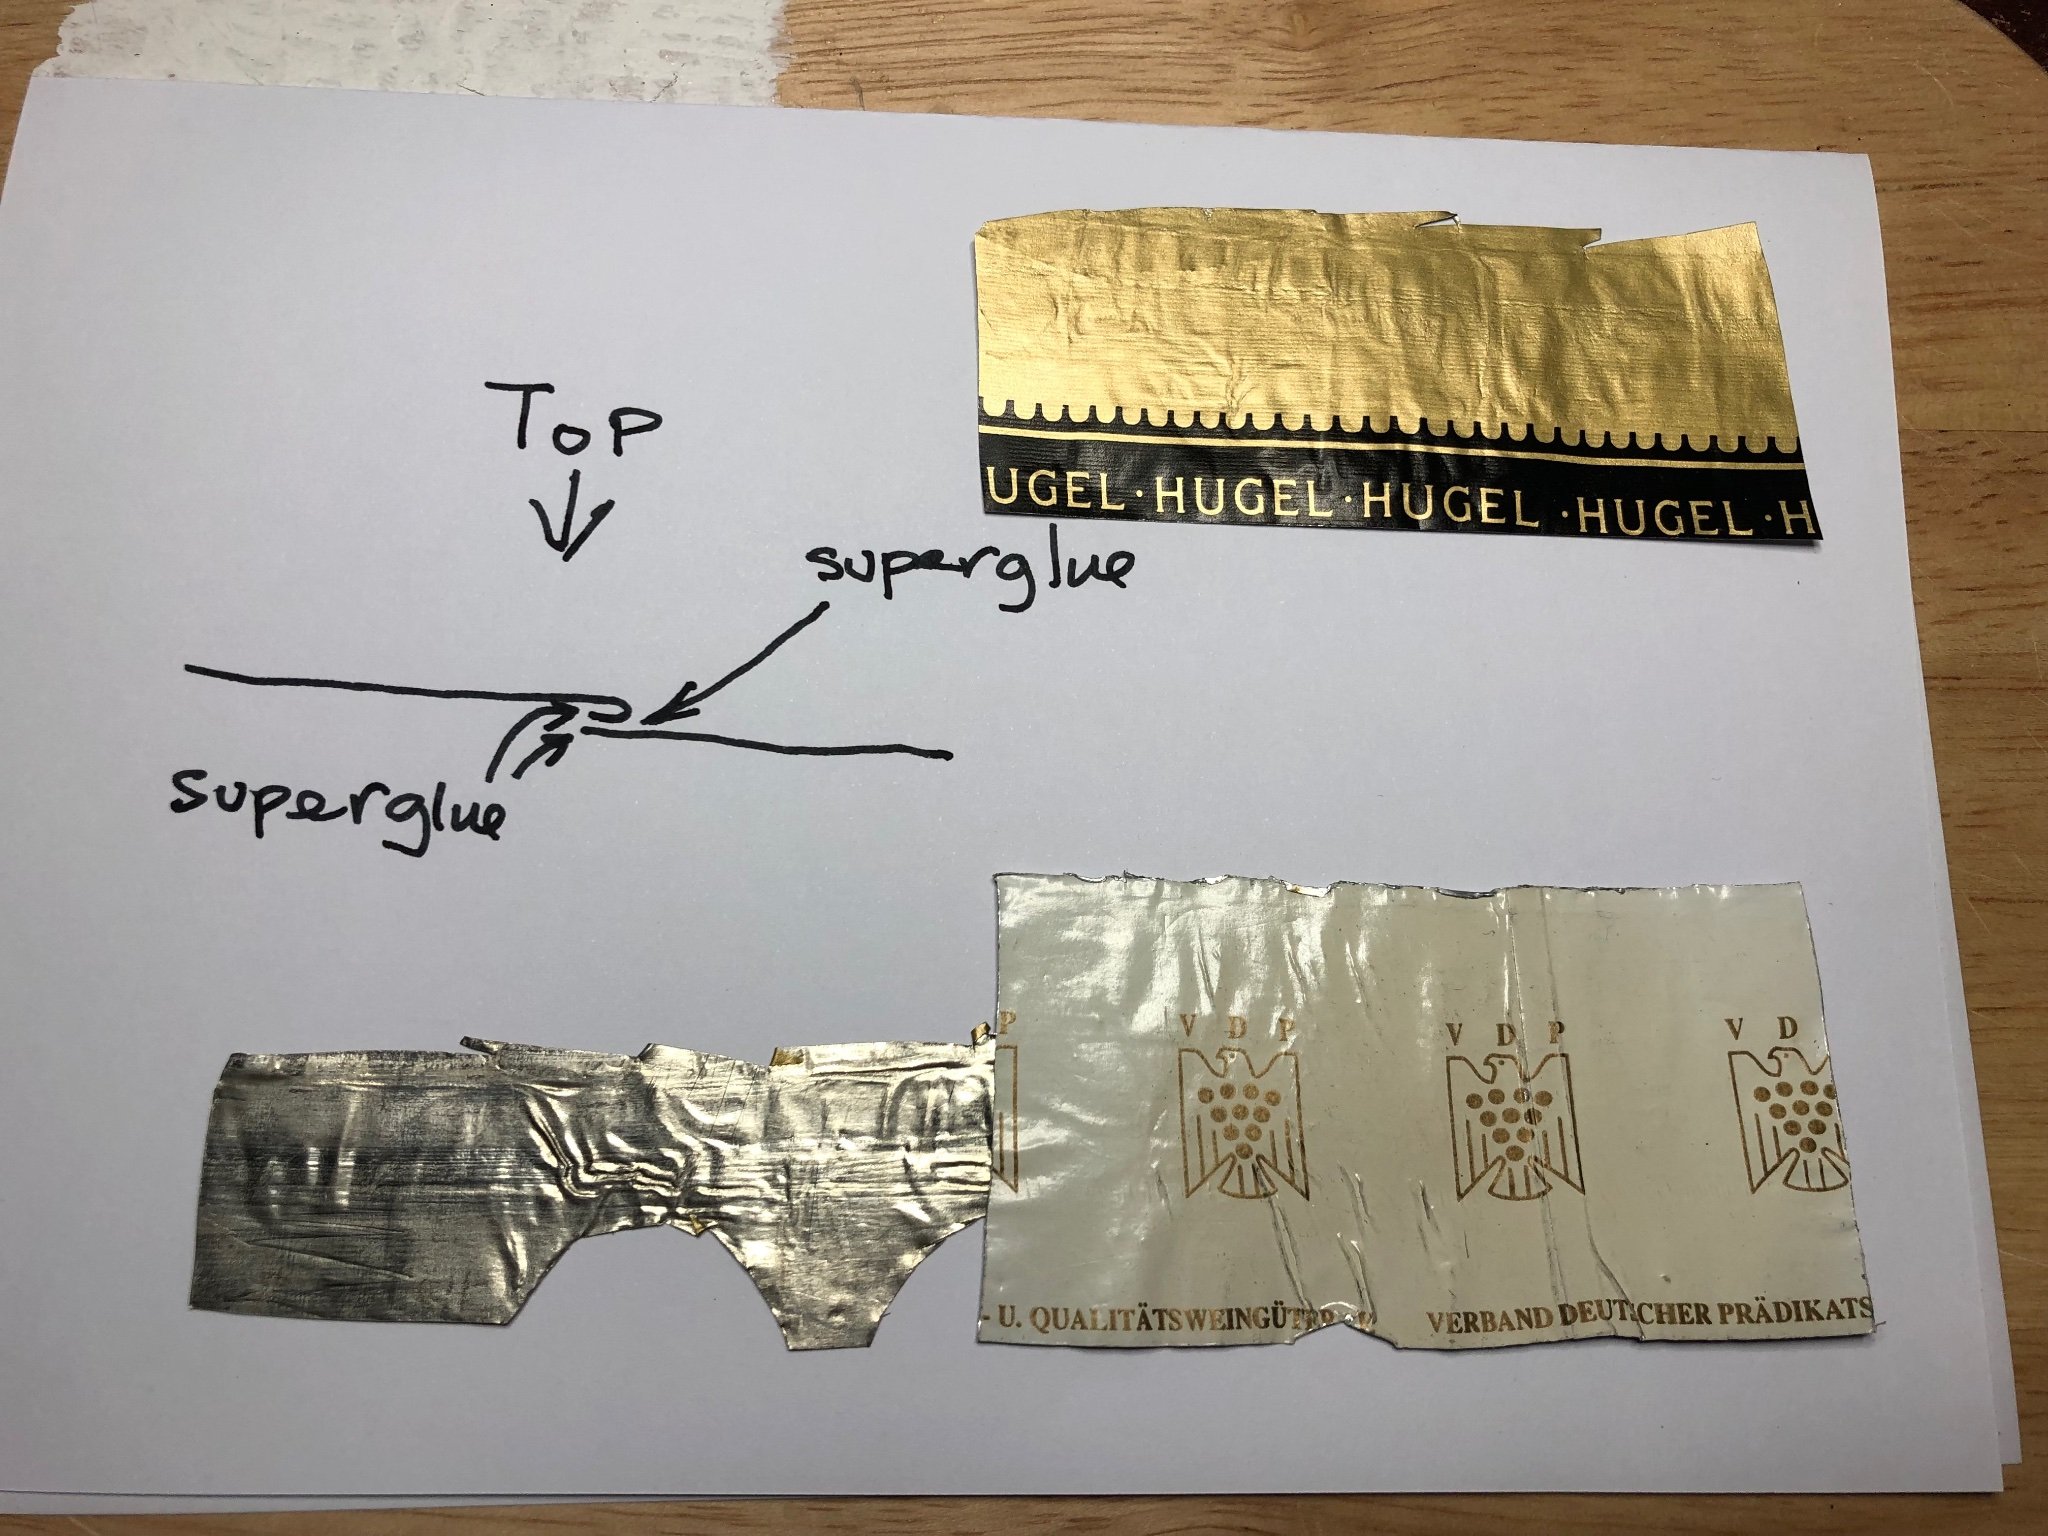
Hi Pukotred and thanks Schubbe for the interest.
The cover is lead or aluminium foil recovered (very carefully) from the tops of wine bottles.
Have been harvesting this material for years.
Not so common now because of screw tops and plastic seals.
The seam necessary because I had to use two pieces of material.
Formed by folding over one side and glueing then, superglueing down to the other side.
A very thin bead of thin superglue along the outside of the seam forms a seal.
Then three or four coats of ordinary water based domestic paint applied by "dabbing"
with a stiff brush to give texture.
Being formed from lead it is easy to form and keeps it's shape.
Hope this helps,
Sam.

- puckotred, GrandpaPhil, ccoyle and 2 others
-
5
-
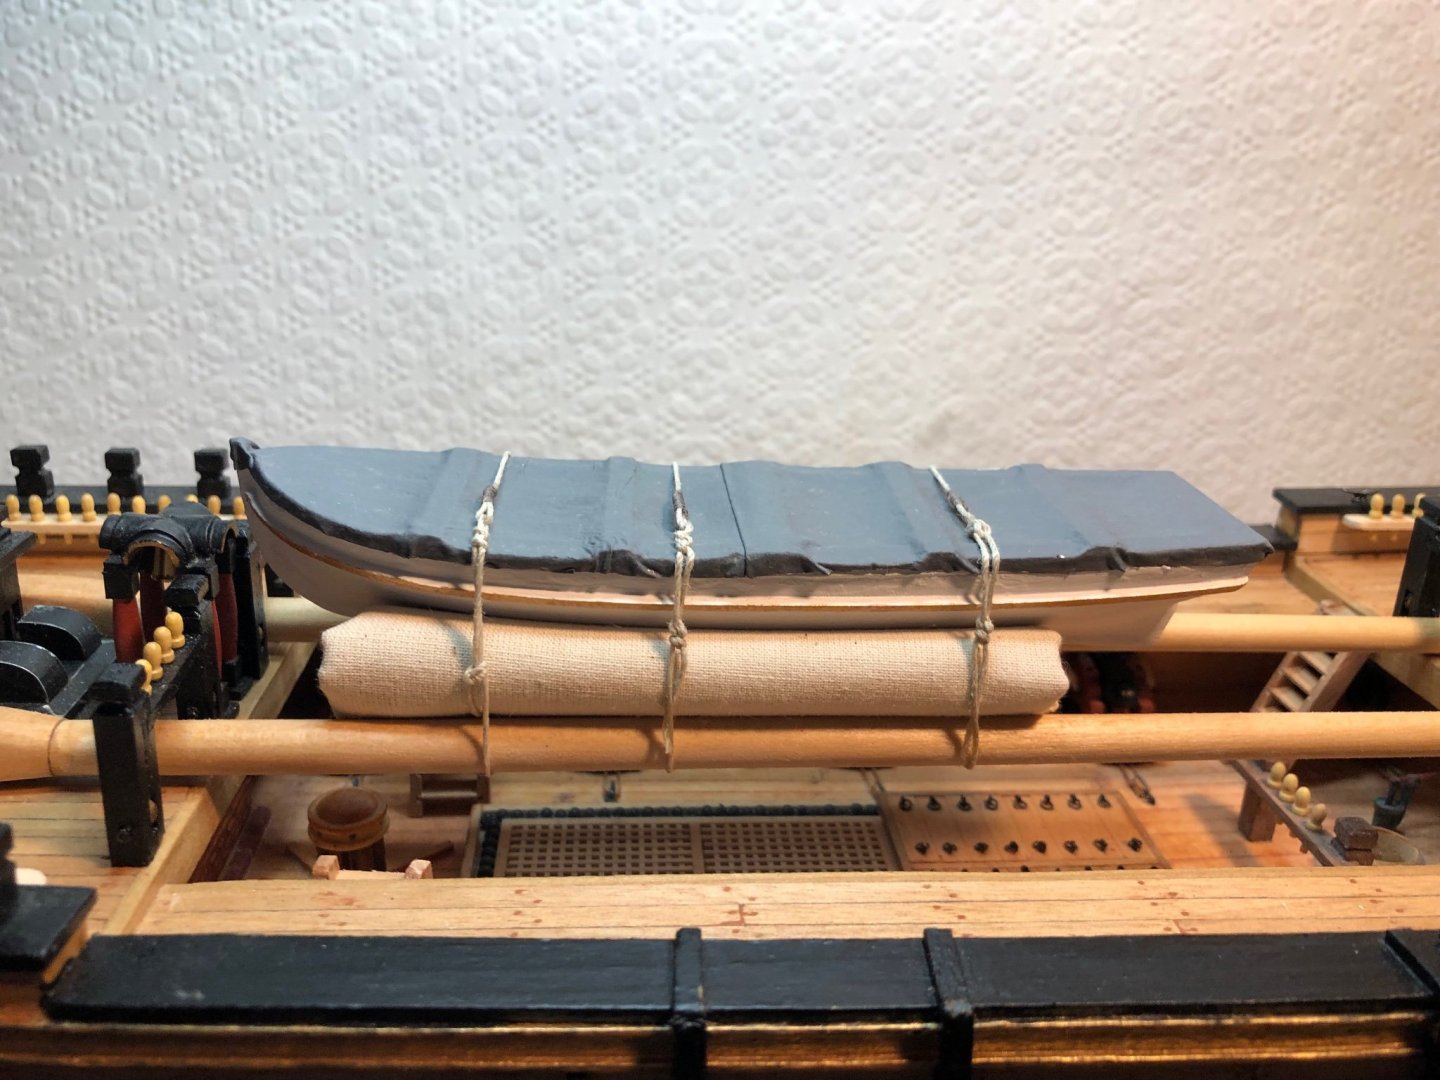
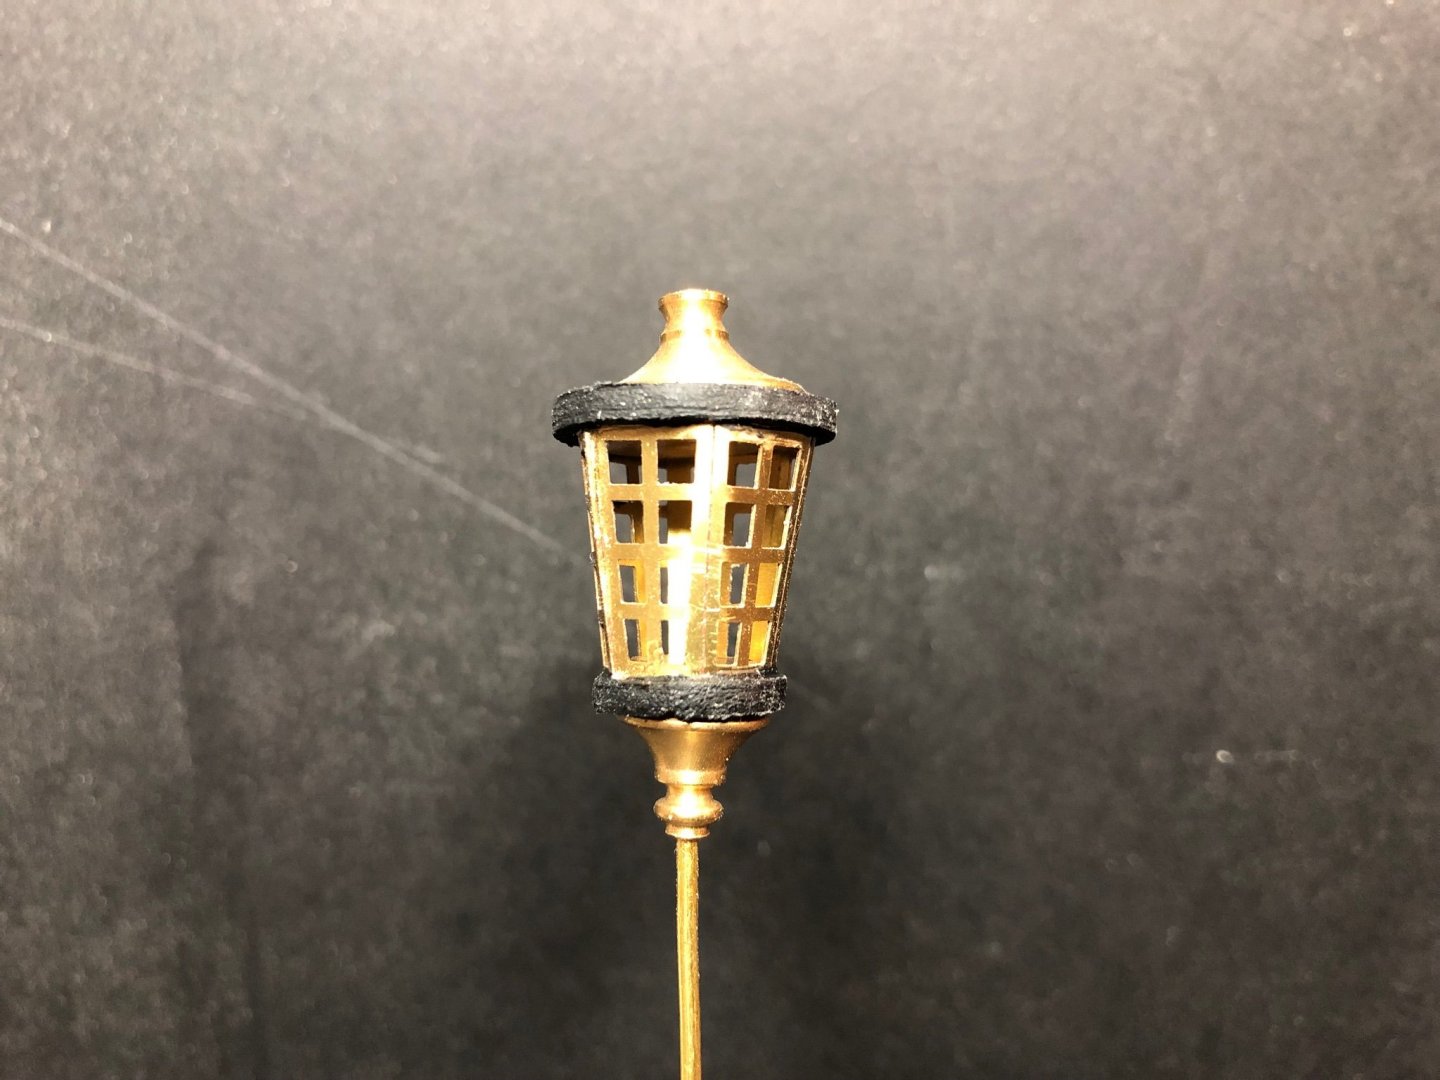
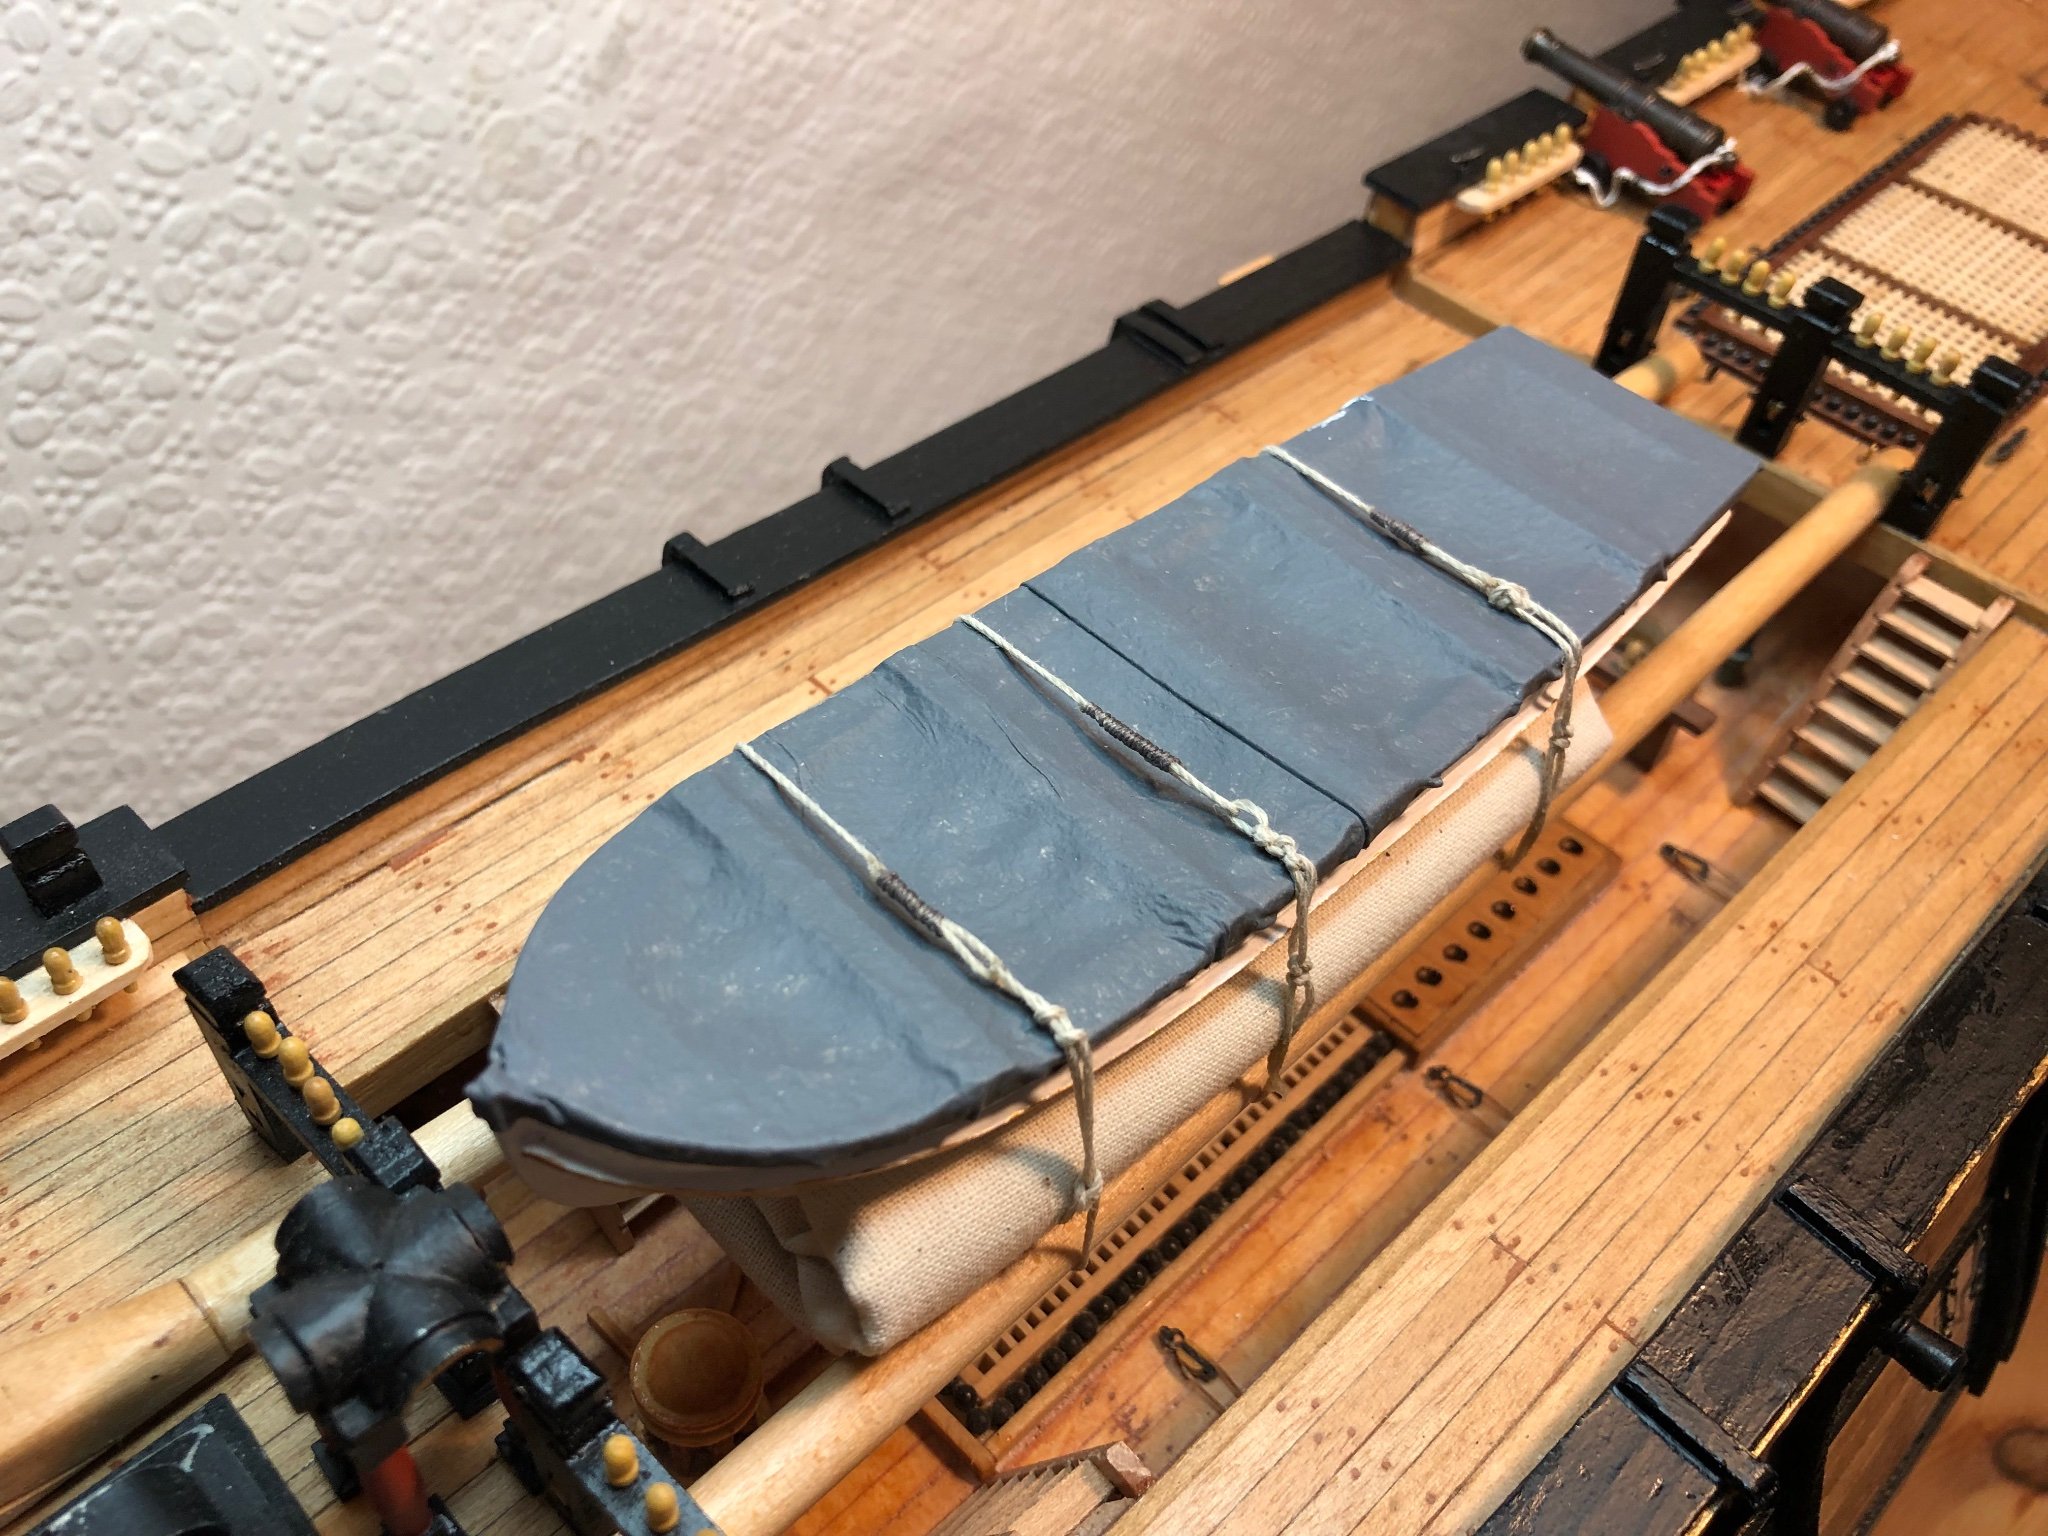
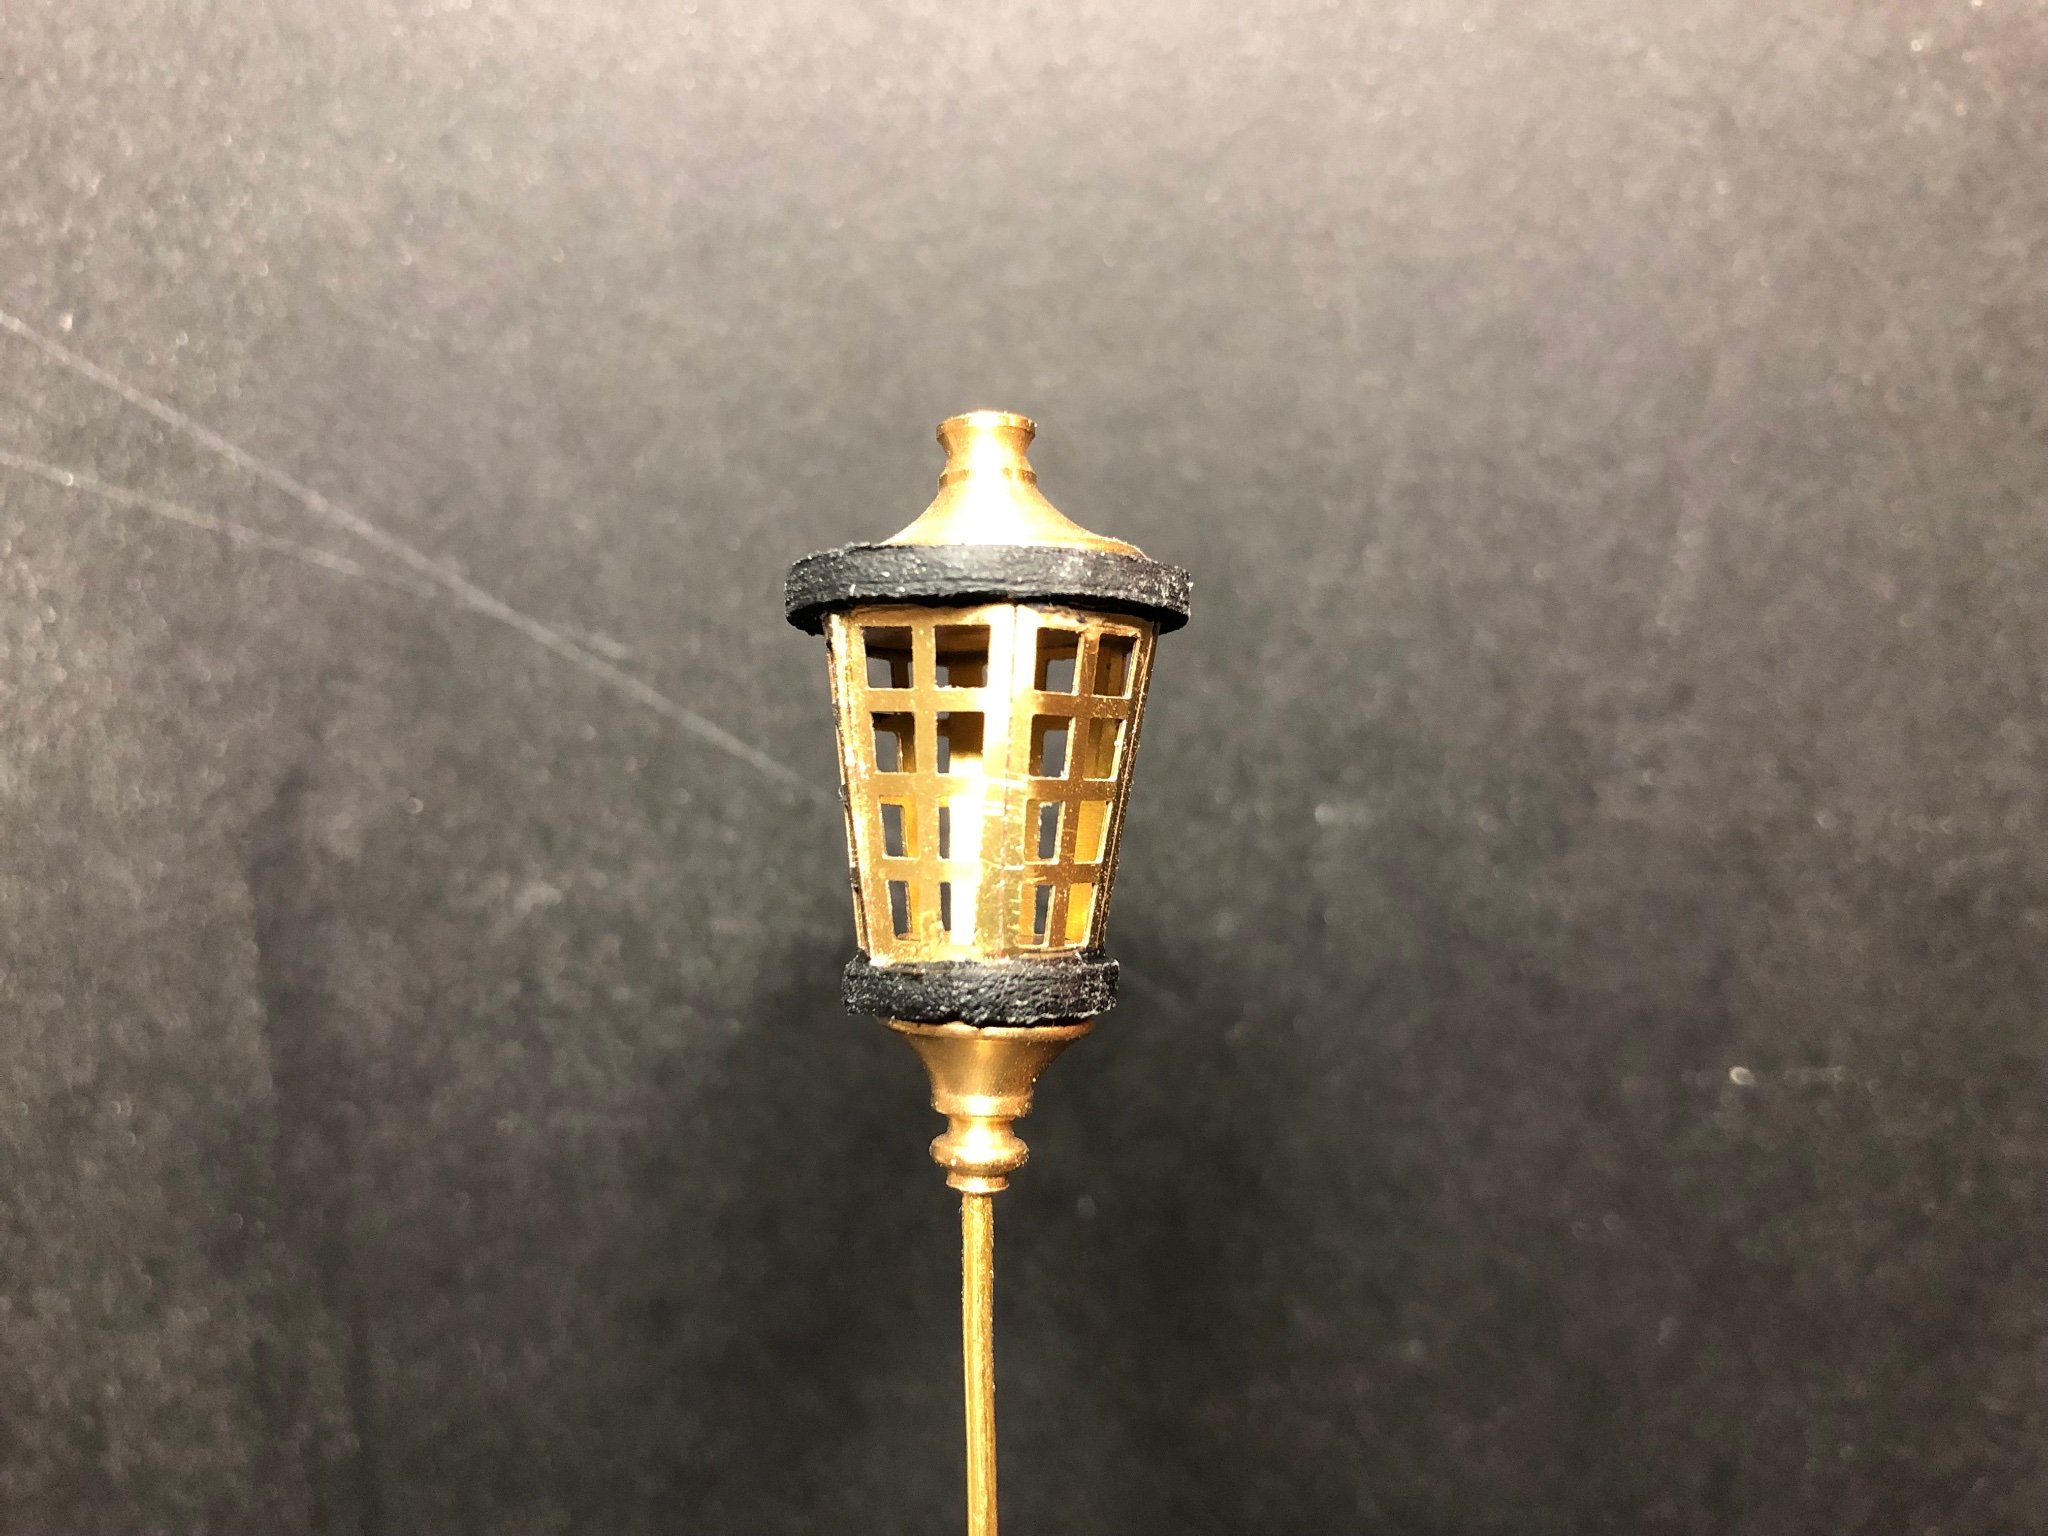
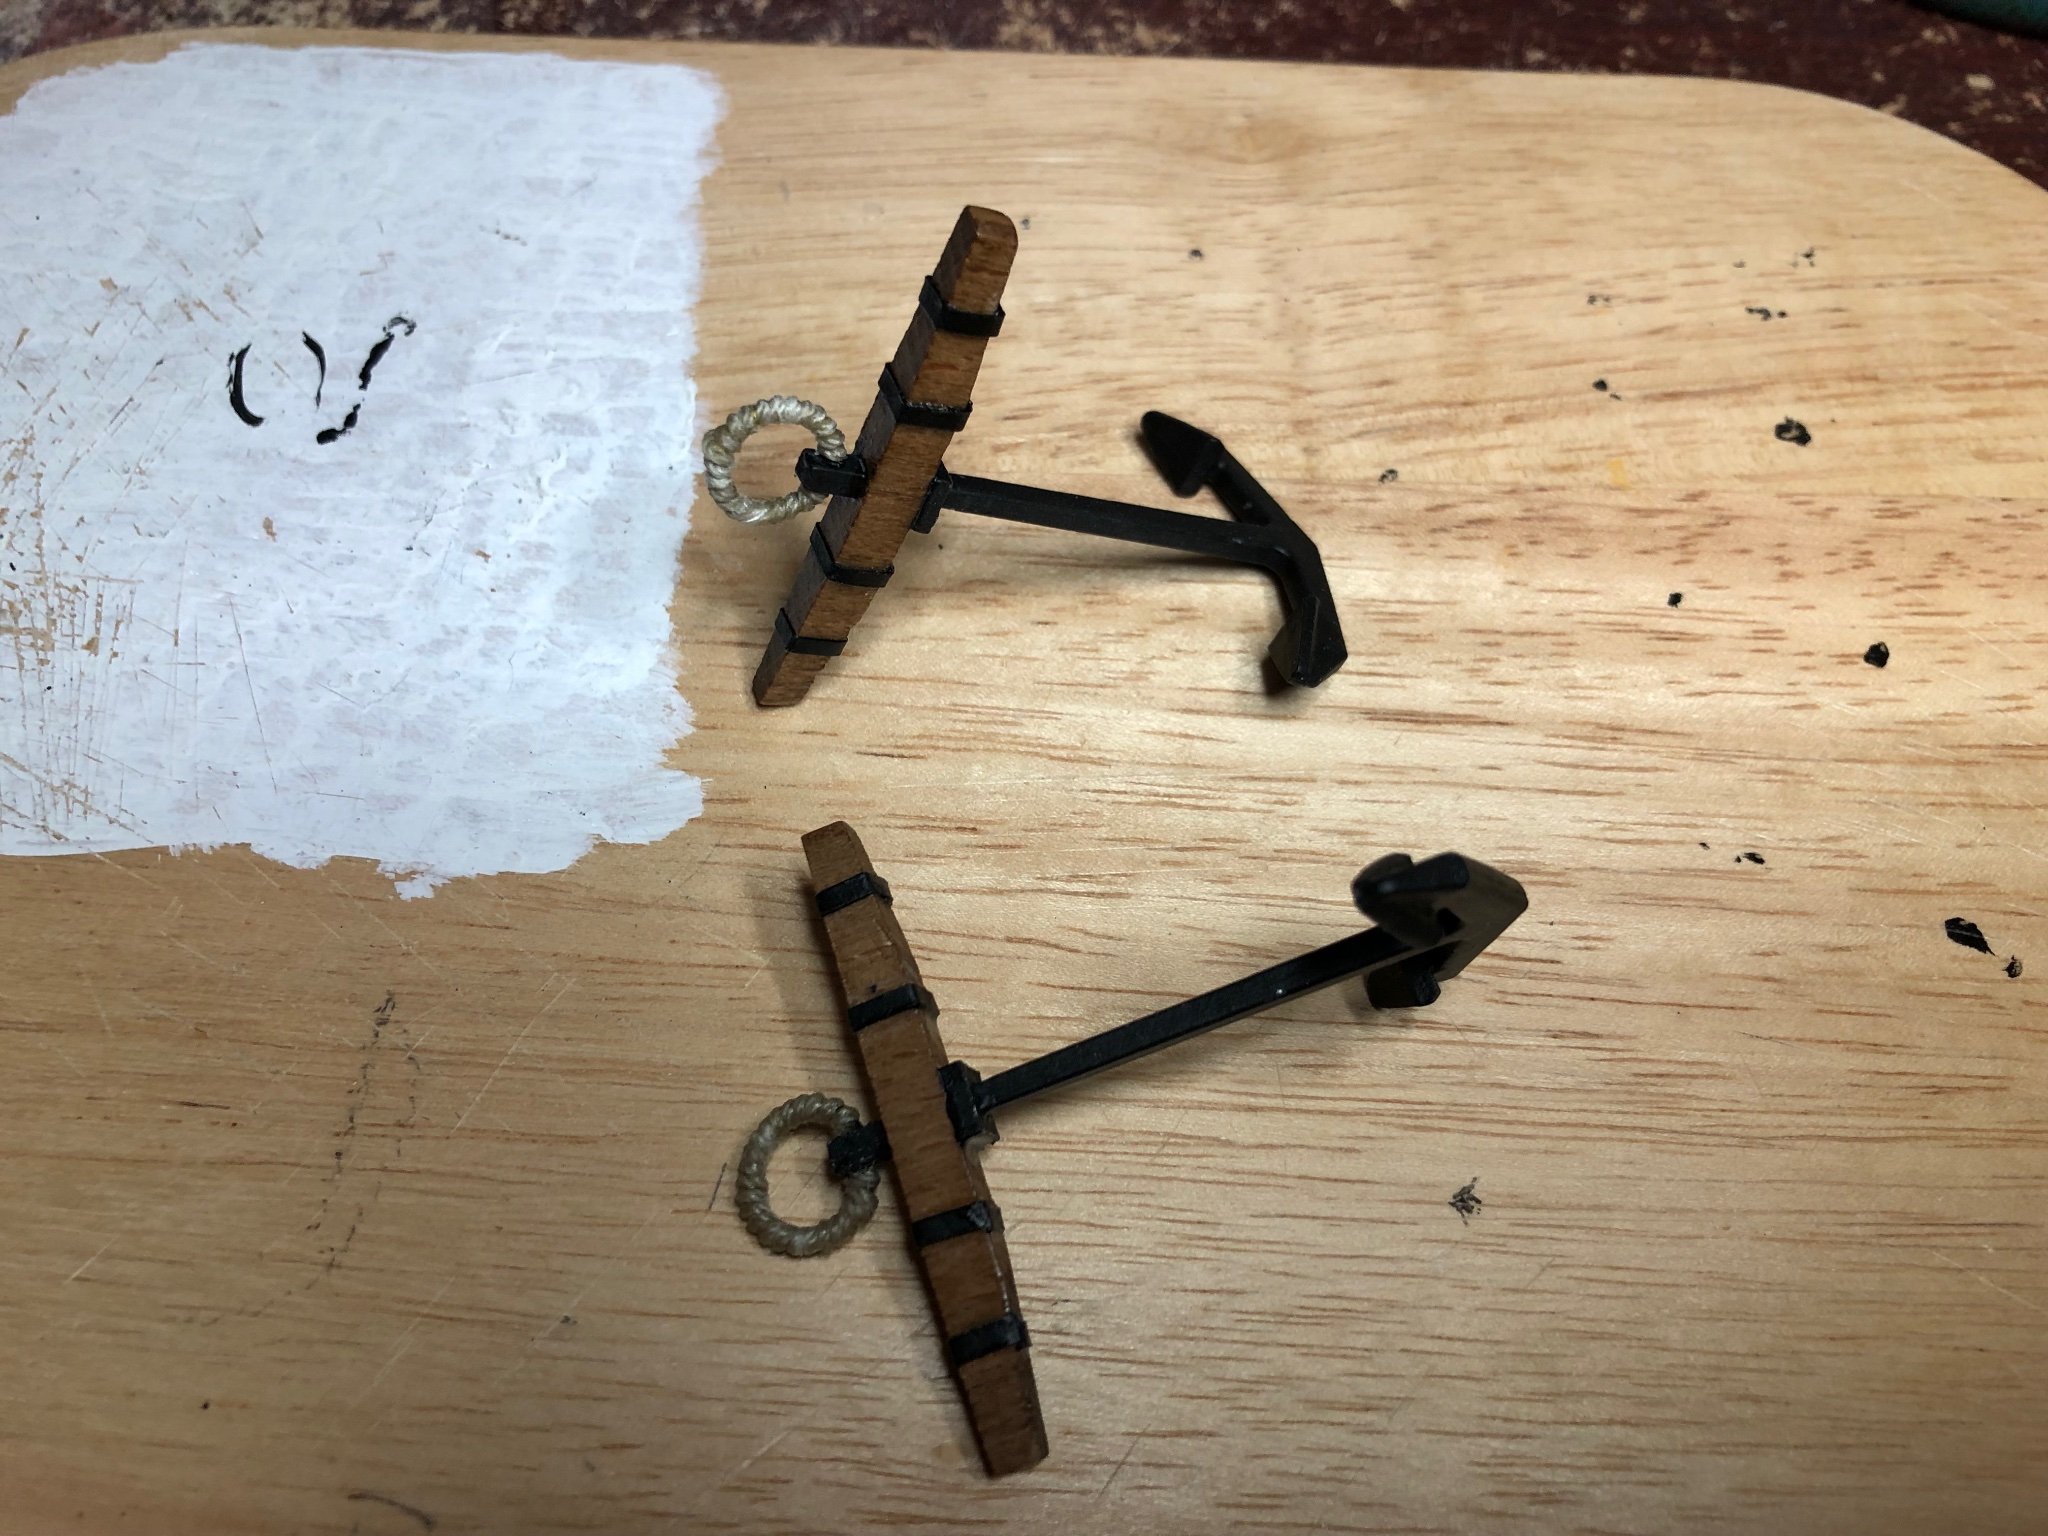
Hi, thanks for visiting and all the likes.
Ships boat finished and located.
Lantern and anchors done.
These will be fixed later.
Next will be the deadeyes.
Regards,
Sam.


- HardeeHarHar, puckotred, ccoyle and 4 others
-
7
-
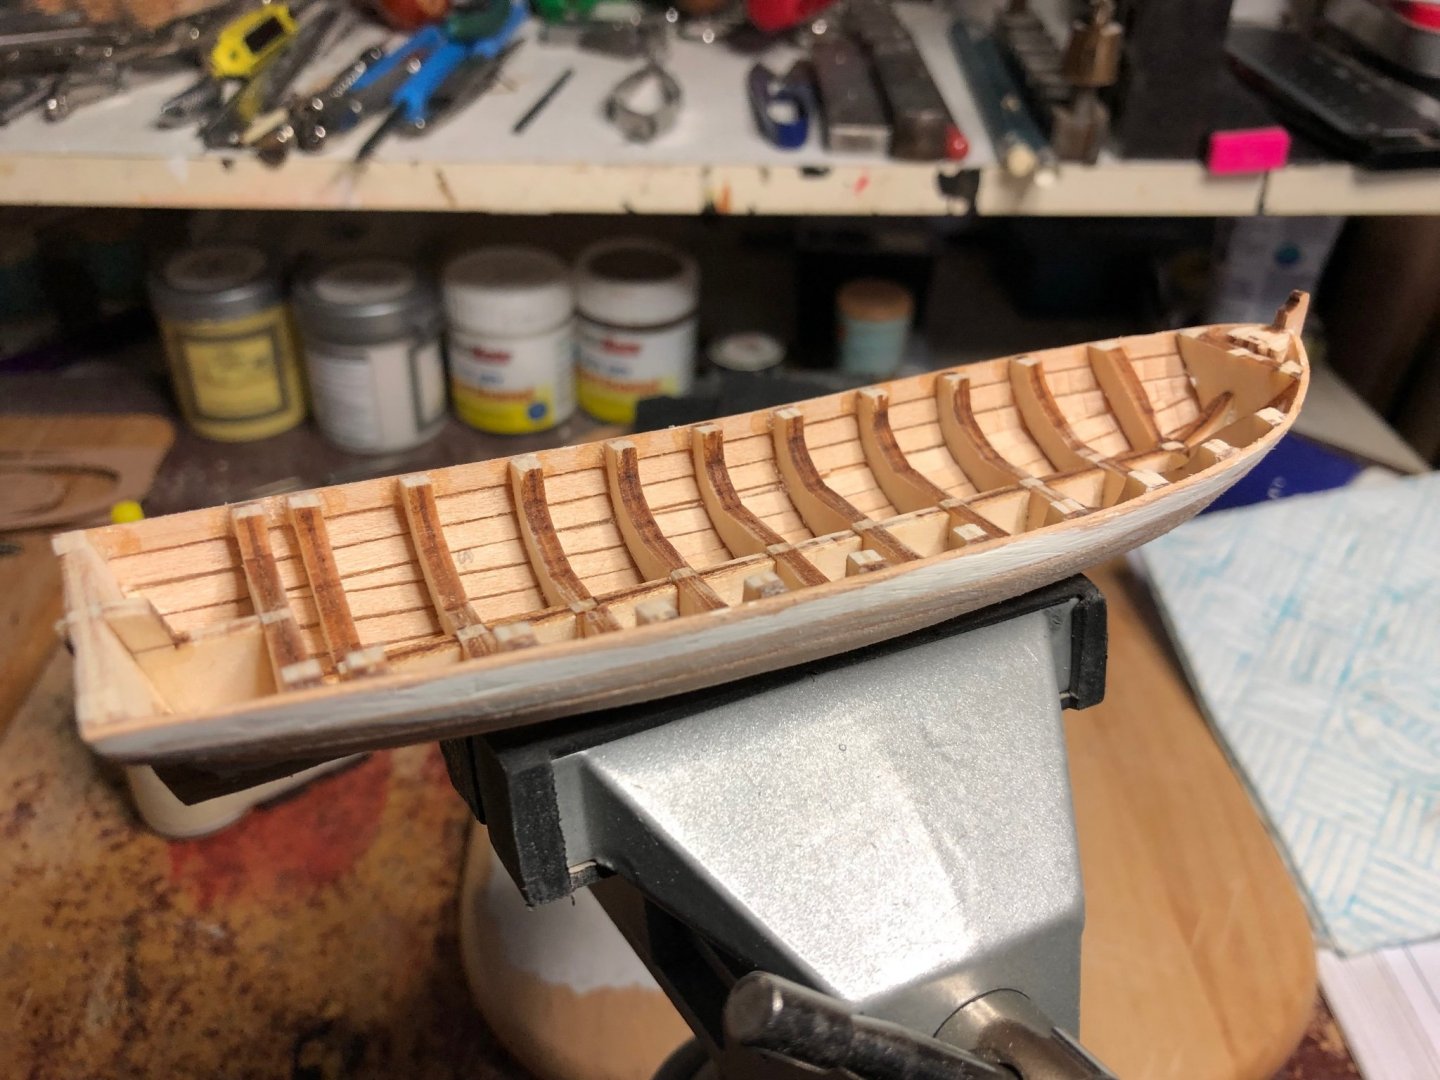
Hi, and thanks for visiting and, the likes.
Planking finished with no real problems.
Next is sanding down and, the rubbing strakes.
Have decided to fit a cover and paint the outside.
Regards,
Sam.

-
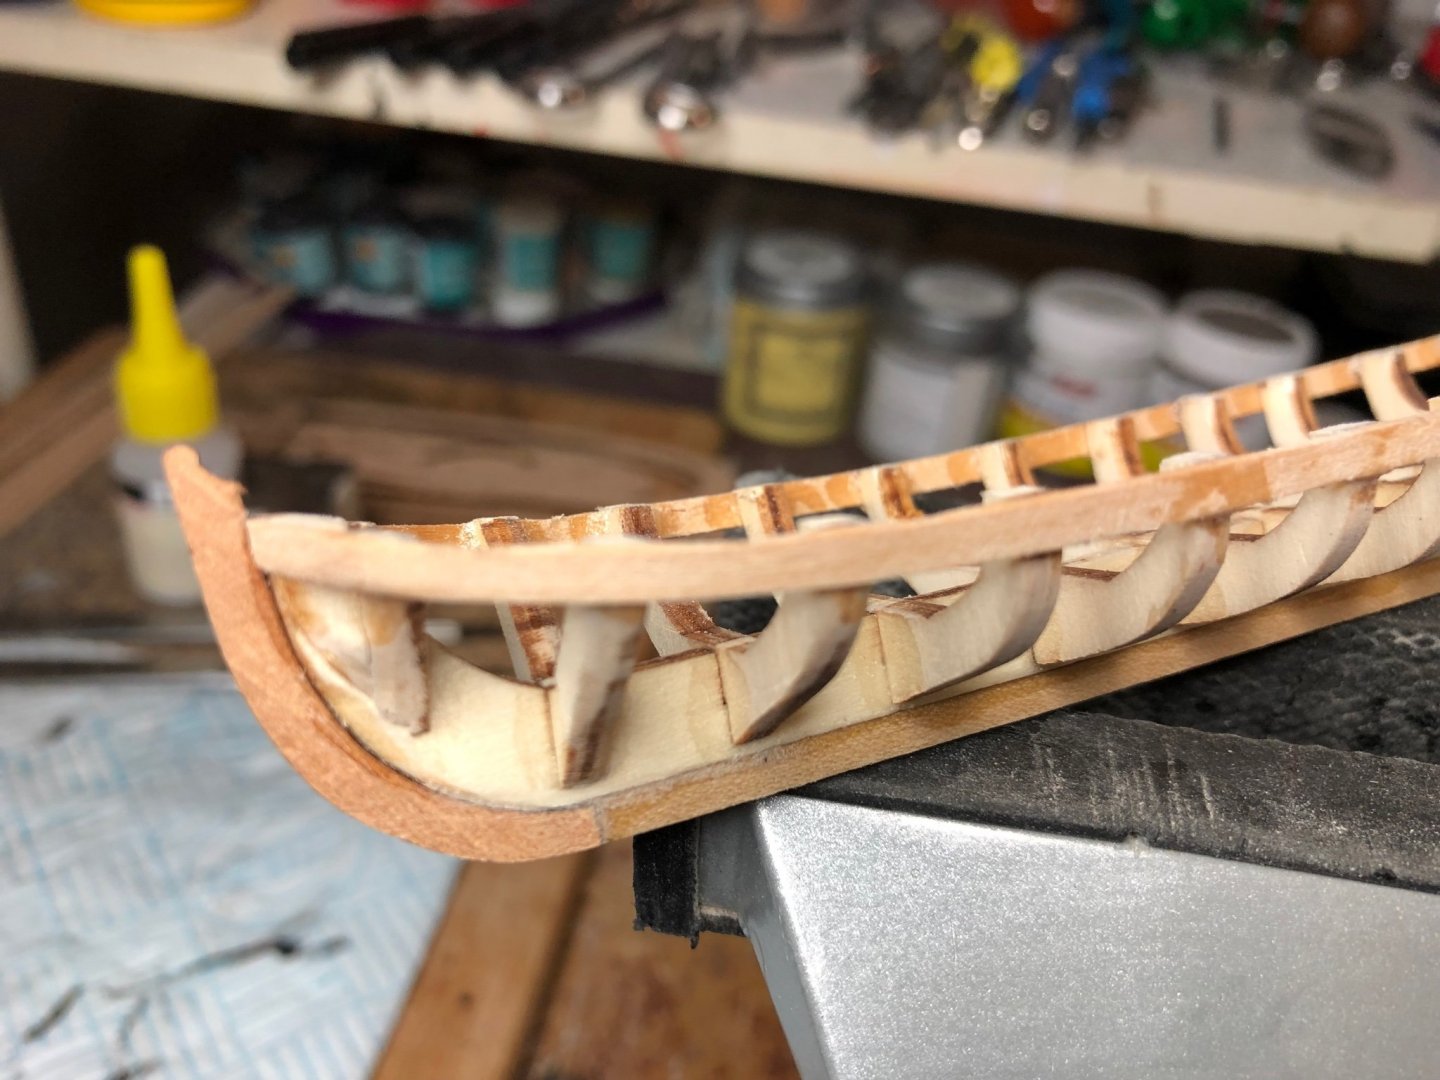
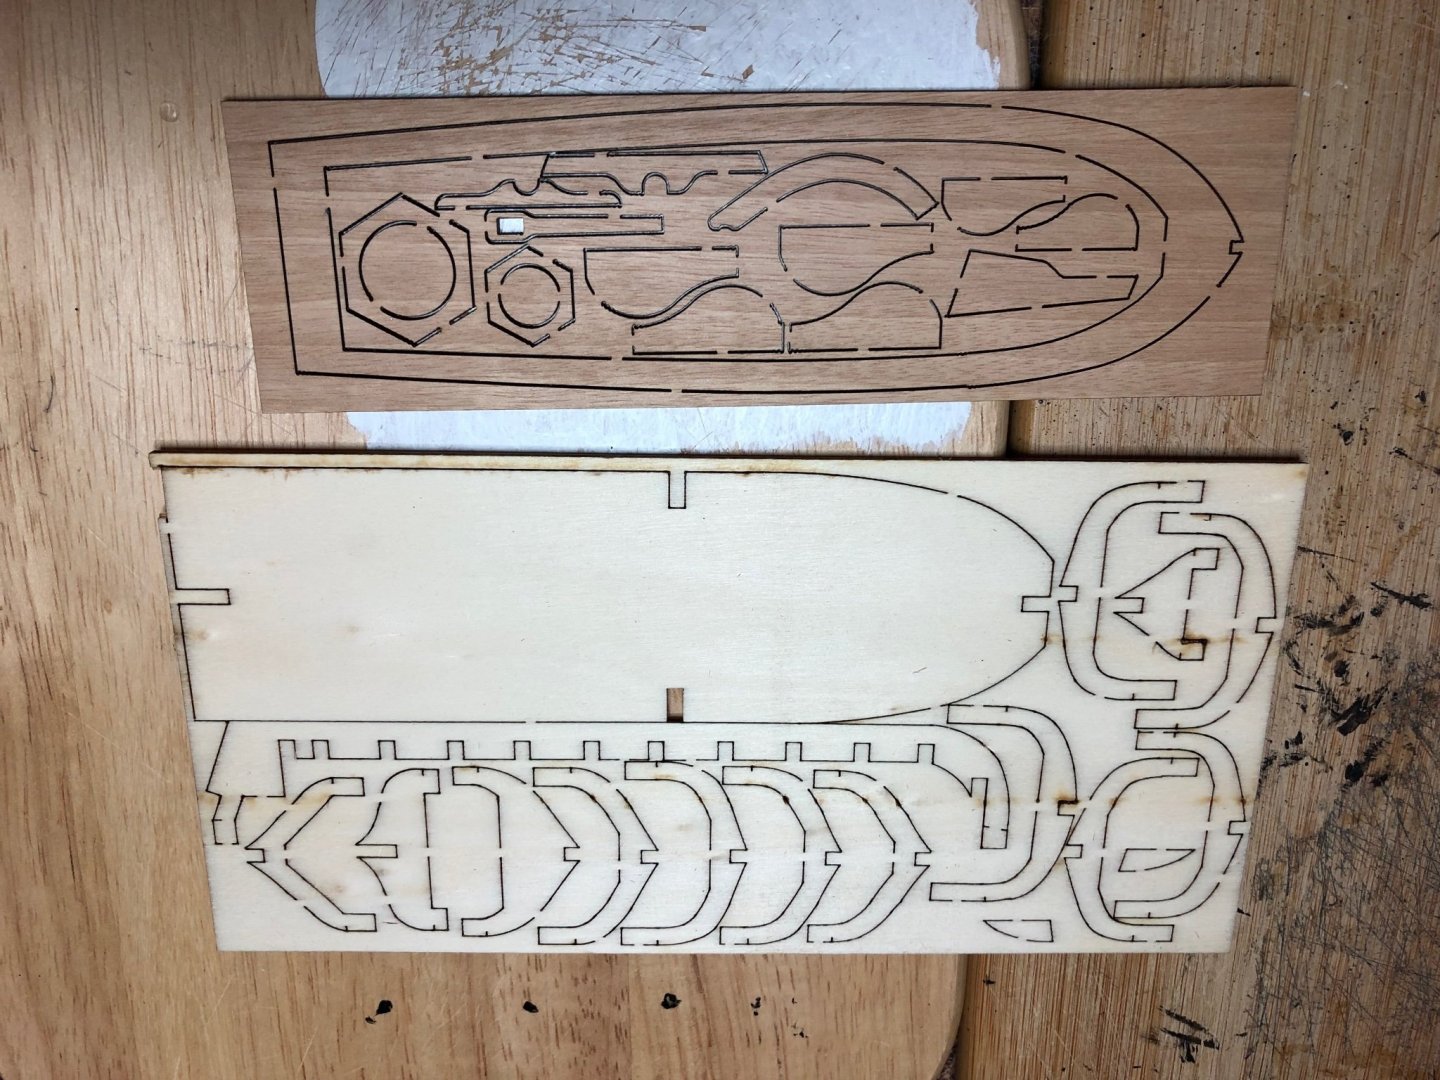
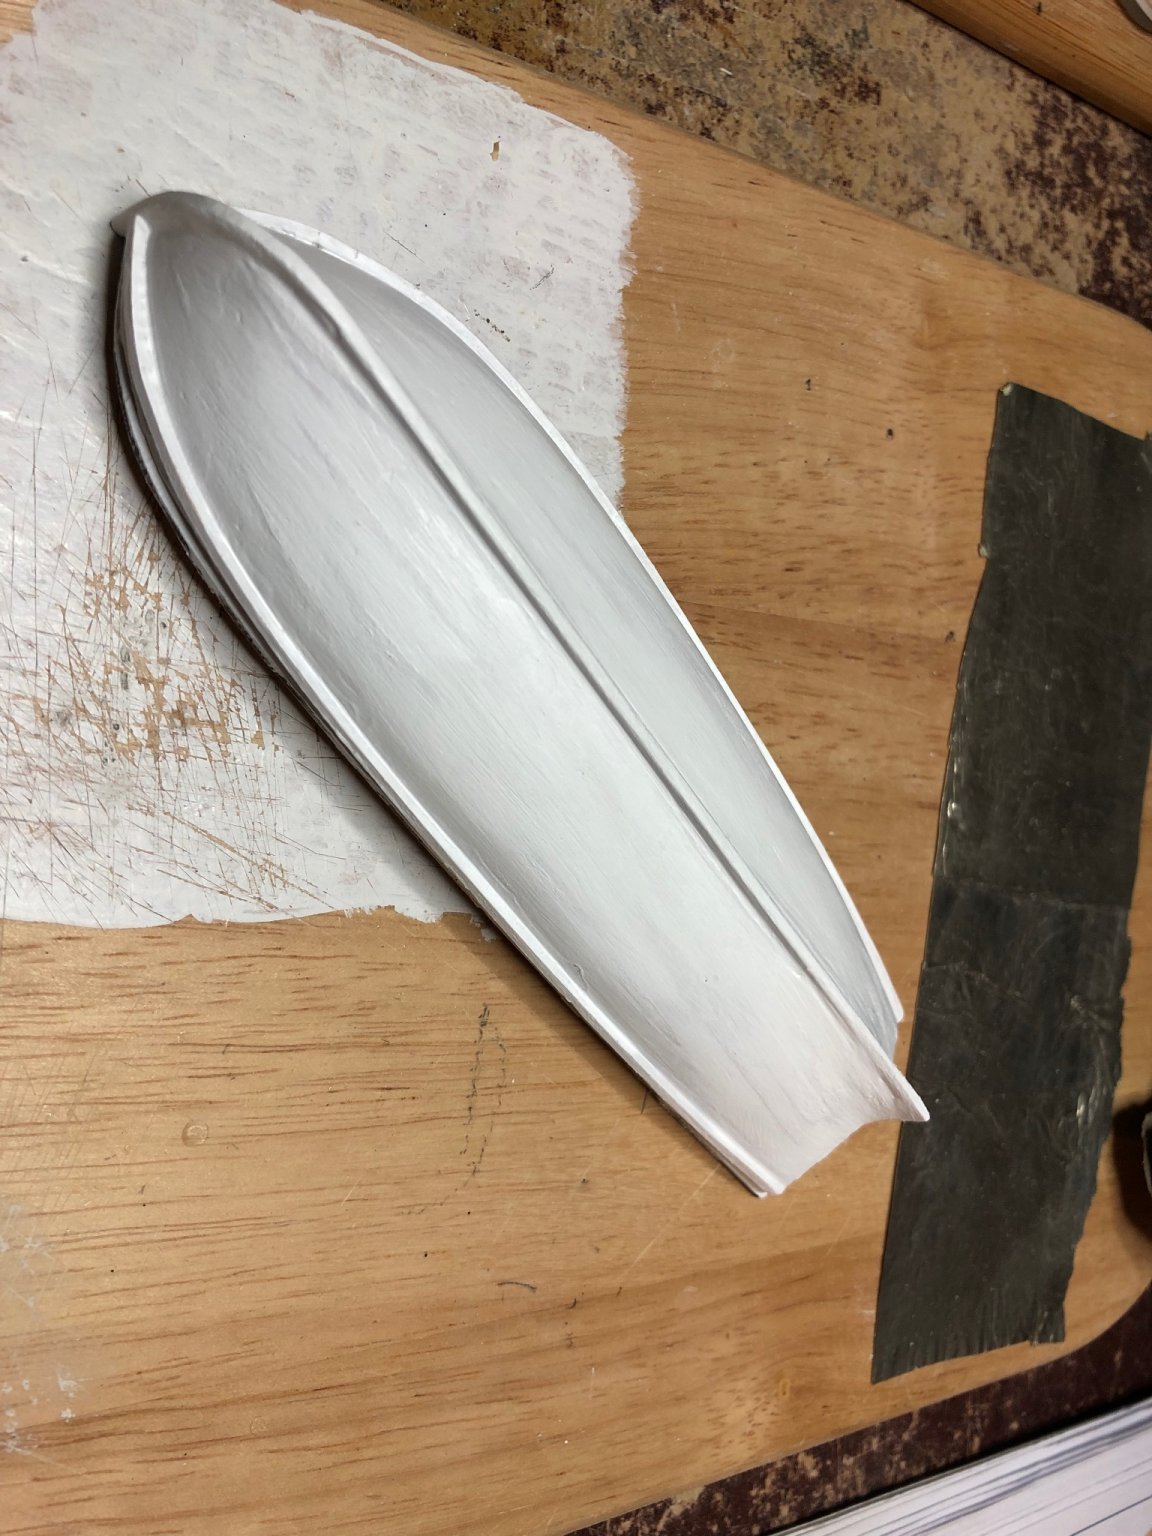
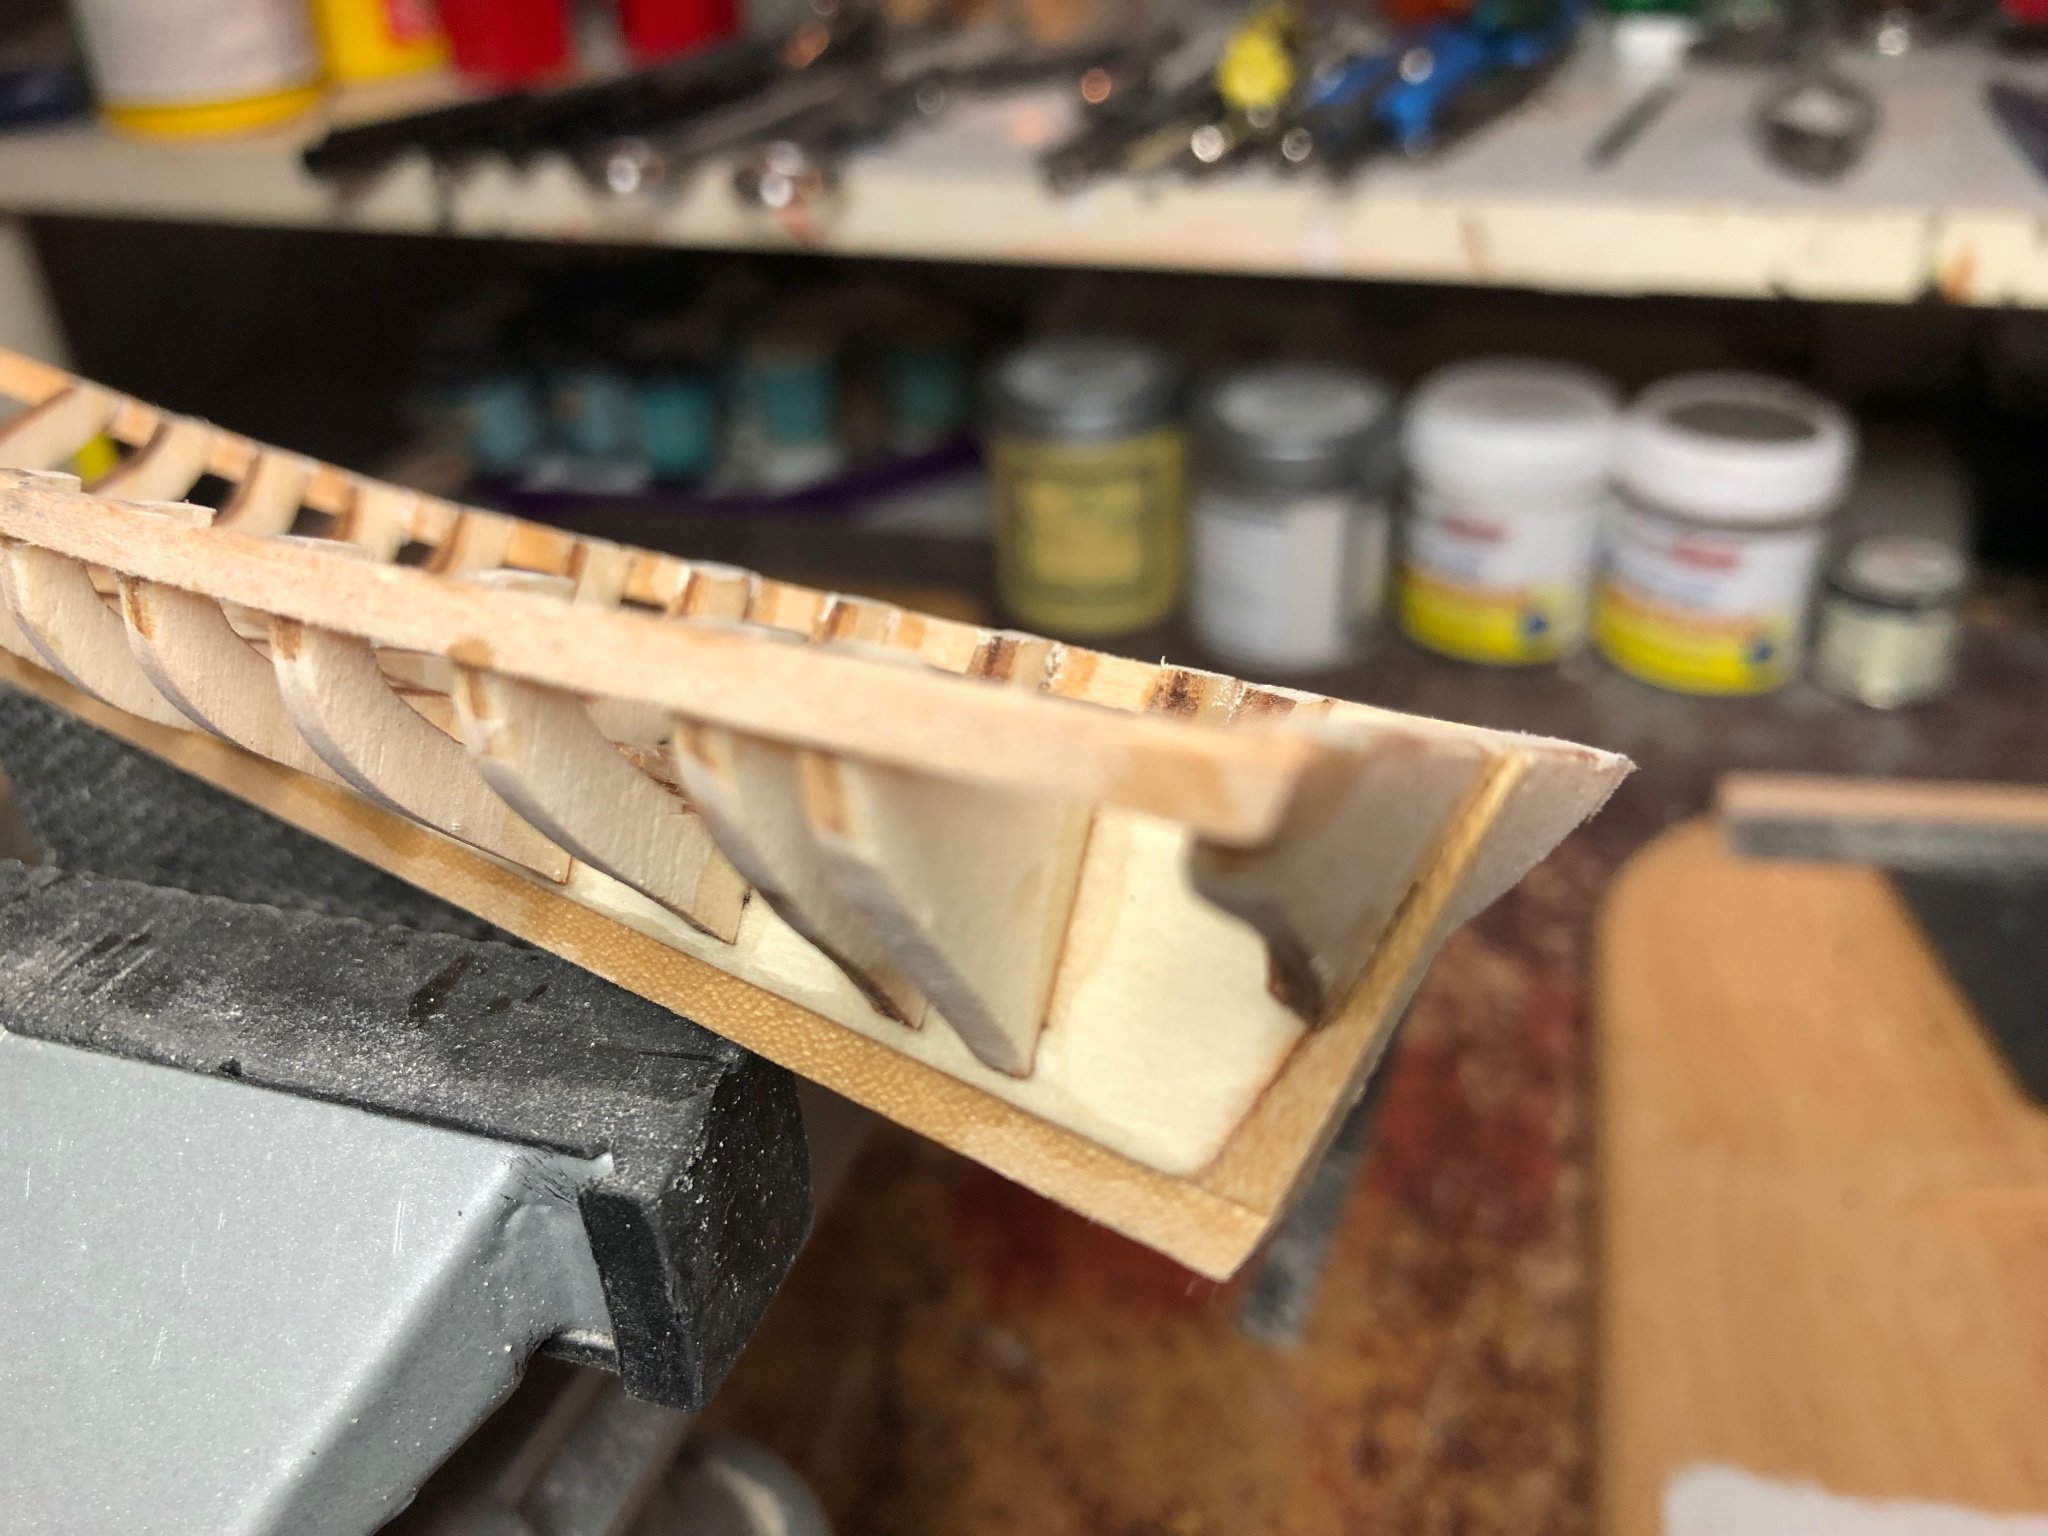
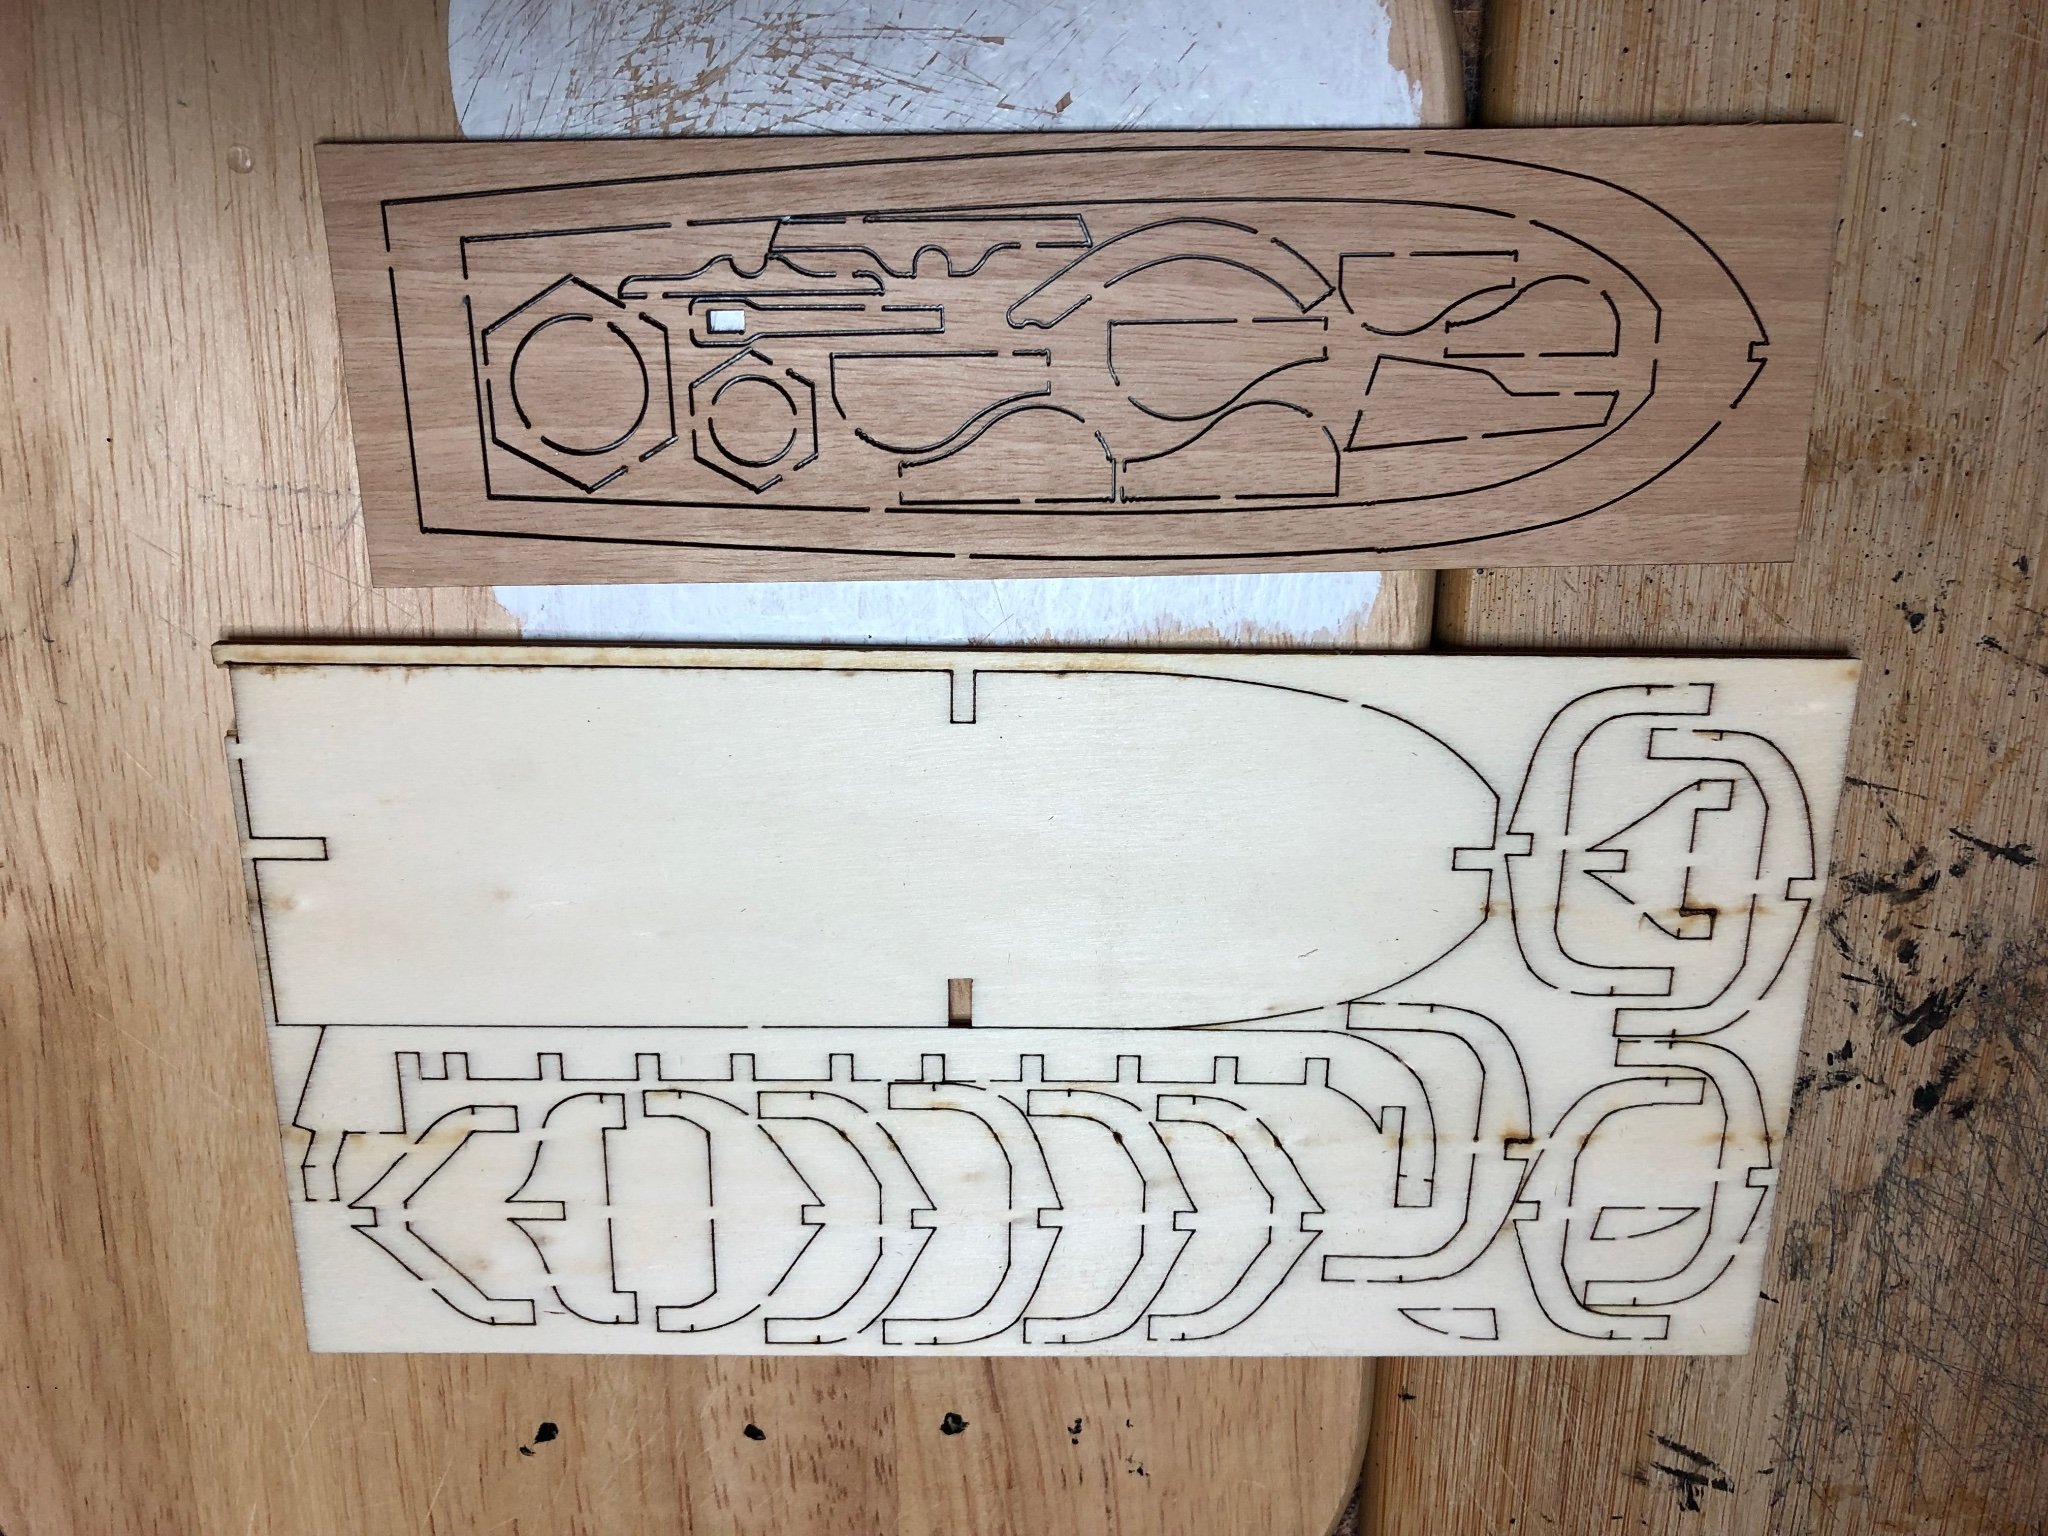
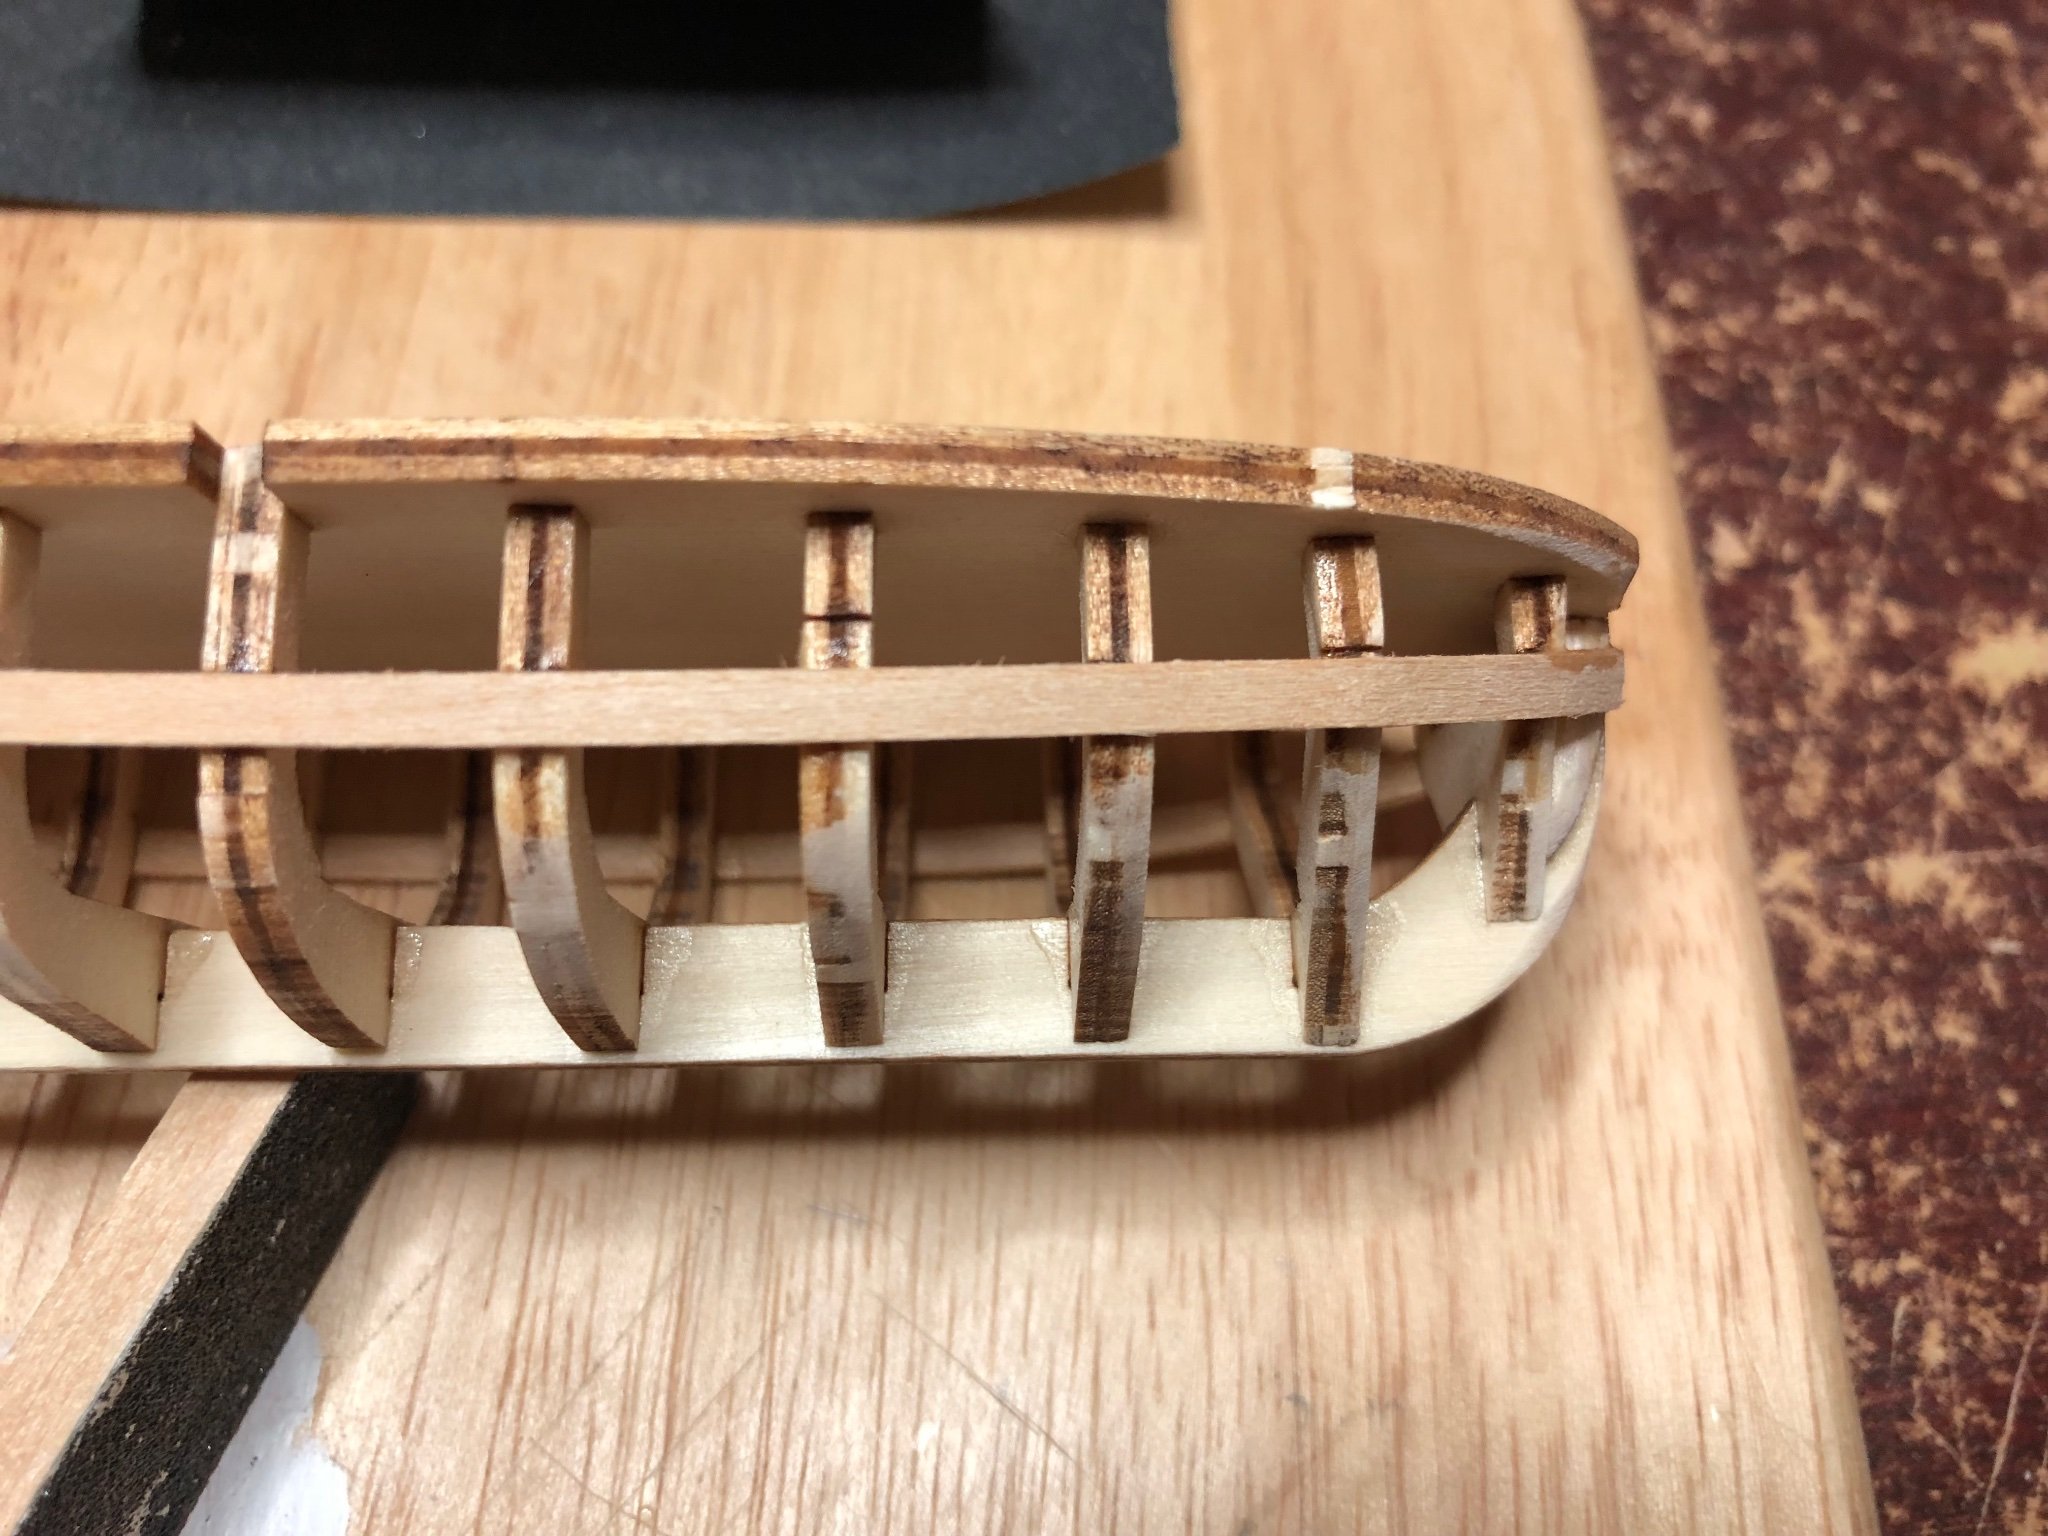
Started on the ships barge.
Good quality ply sheets provided.
Instructions say -- glue false keel and frames to baseboard provided.
Then sand frames and fit planks starting from the false keel.
It then suggests you fit the first plank following the marks on the frames
closest to the base. I went for the common sense approach.
The marks for this plank are slightly hit and miss. A5 is 2mm out this side, correct other side.
Then the keel will be fitted
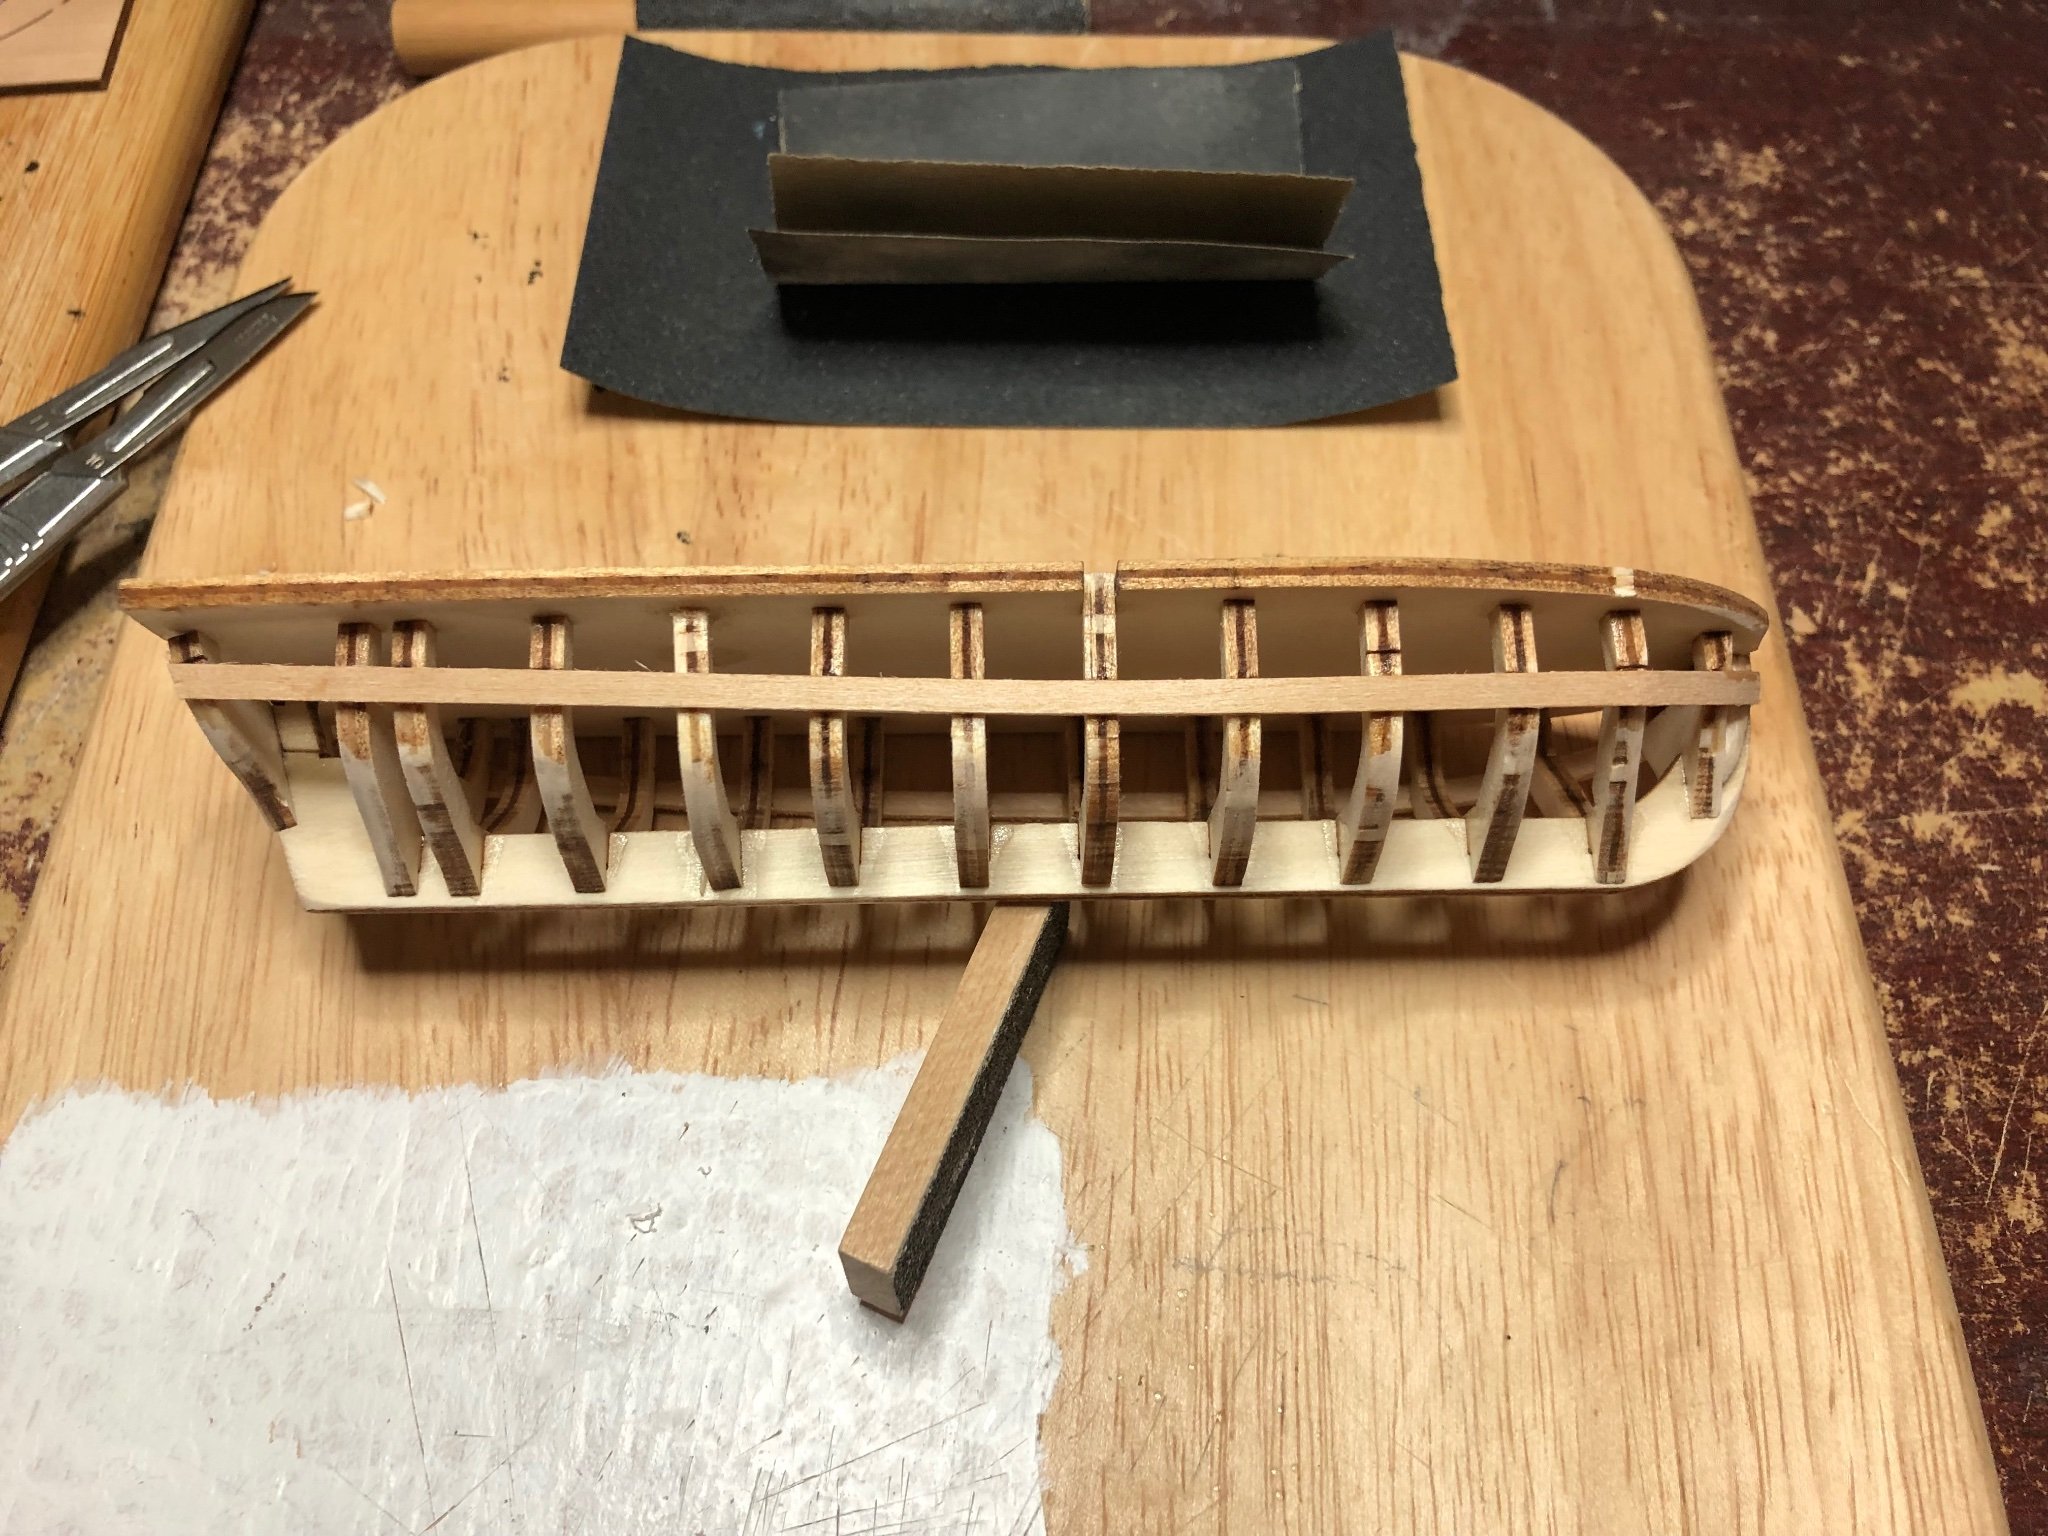
Then fix up and down ending in the middle with a plank sharpened at both ends.
Once the garboard strake is fitted I will remove the structure from the base board,
trim the tops of the frames down to the top plank and fit the covering board.
After planking will be fixed the rubbing strakes and the thole pins.
Not bothering with the insides, I intend fitting a canvas cover to keep the
rain and seagulls out. Might paint the outside white.
Regards,
Sam.


- puckotred, ccoyle, marktiedens and 5 others
-
8
-
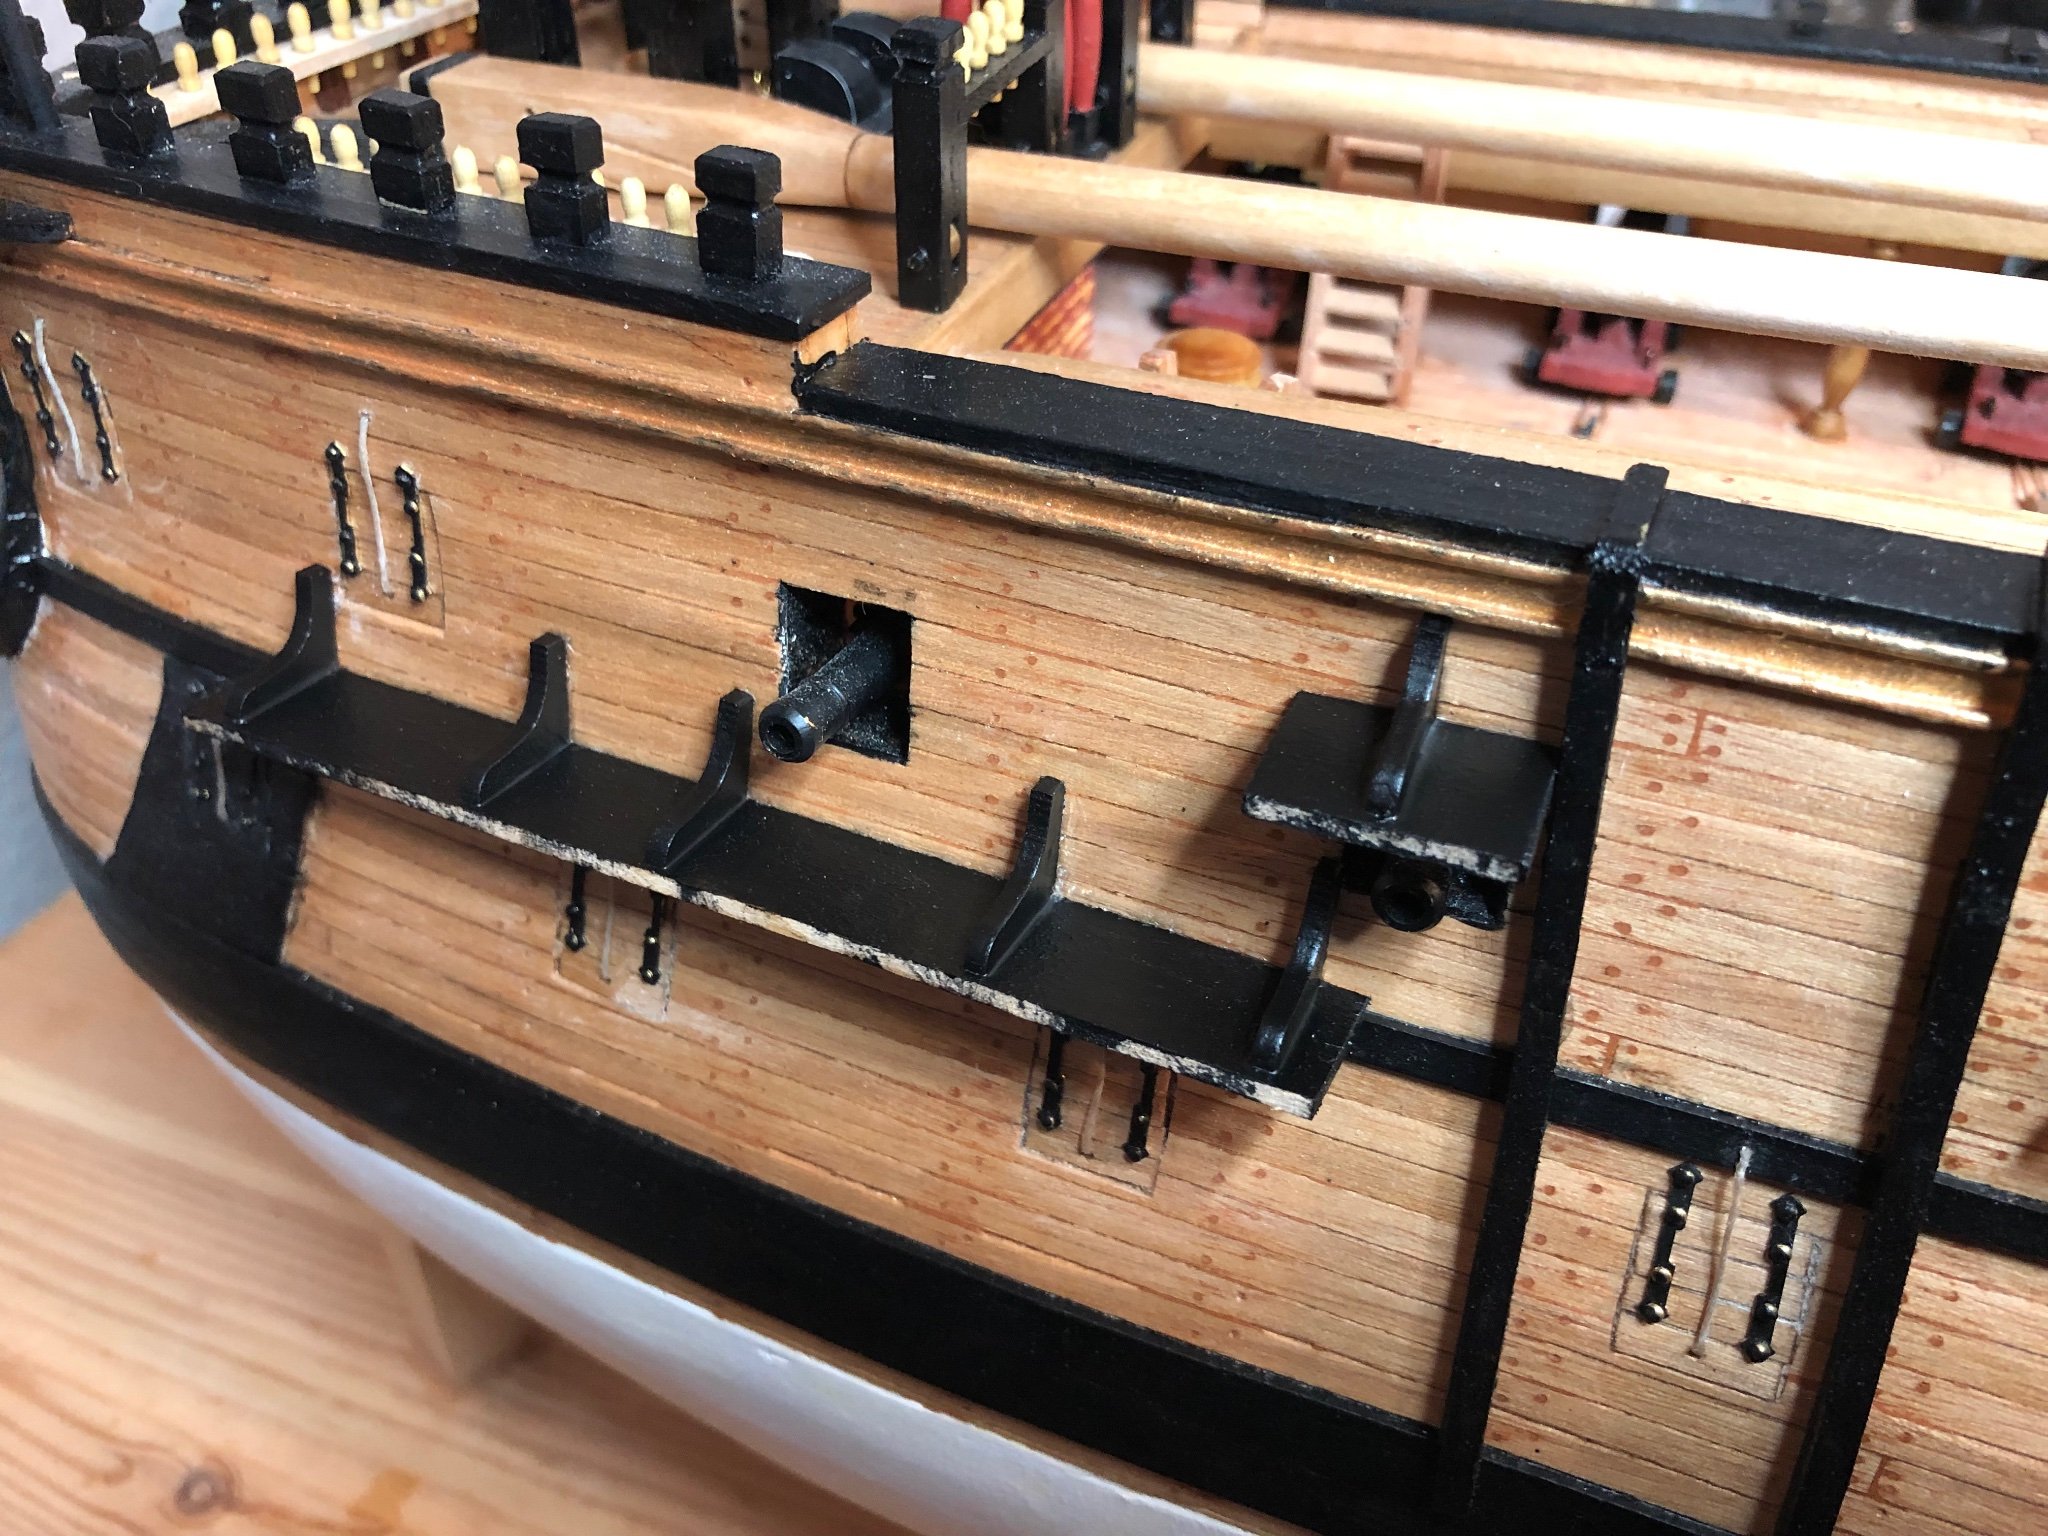
Hi, and thanks for the likes.
Channels fitted. The plywood brackets came away from the sheet very cleanly
and needed no prep work apart from removing the laser char.
Next would be the lower deadeyes but still mulling over what to do with the chains.
Might replace with real chain as Mark's postings.
In the mean time having a go at the ship's boat. This should be interesting.
Regards,
Sam.


-
Hi,
Thanks for the likes and comments.
Just adding four guns to the upper deck.
Will add gun tackle later, maybe when my hands stop shaking.
Next is the channels and lower deadeyes.
Regards,
Sam.

- ccoyle, puckotred, HardeeHarHar and 4 others
-
7
-
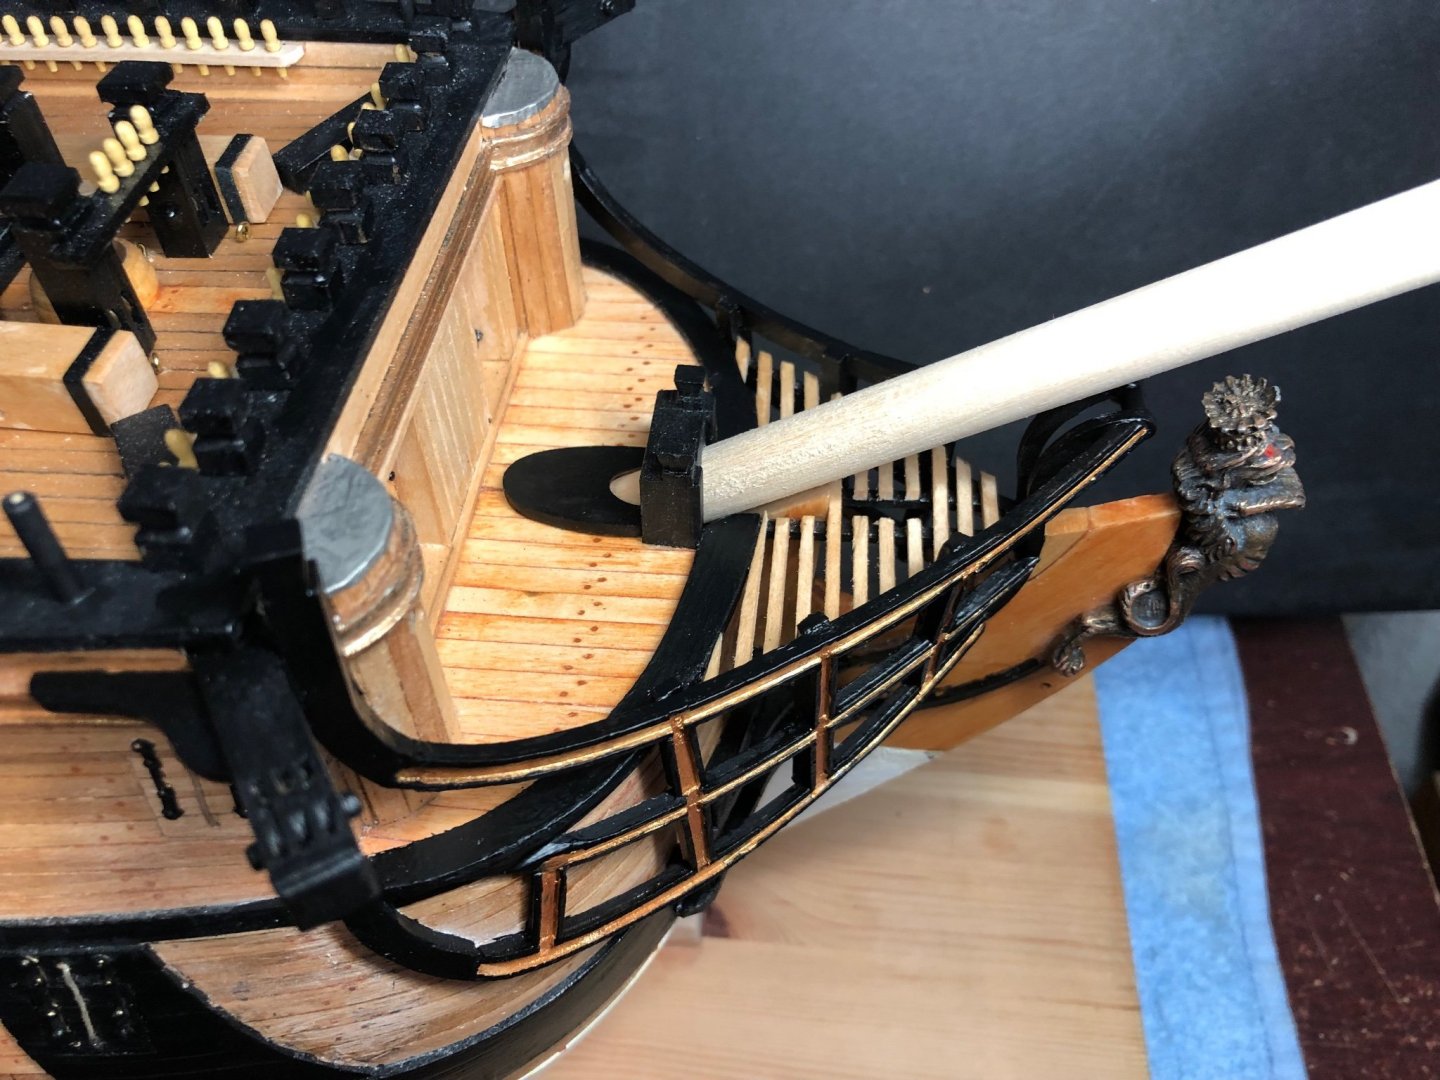
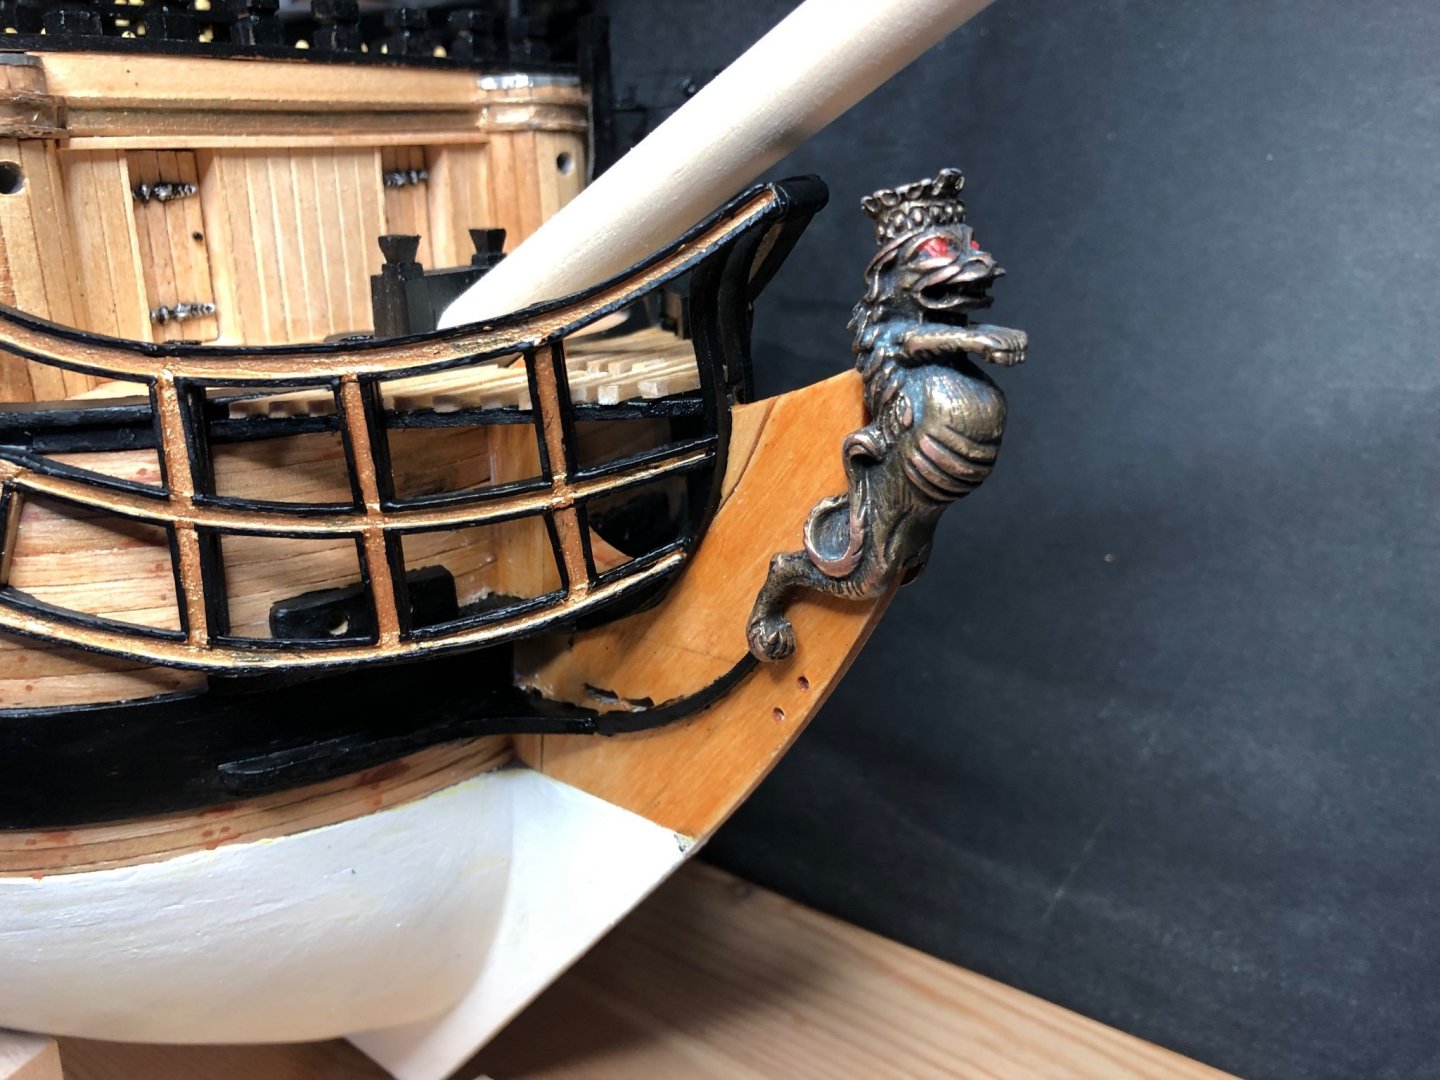
Hi and, thanks for visiting.
Head timbers fitted. These are all supplied laser cut
and as usual didn't fit. All scratch built except for
pieces 138 and 133 which merely needed re-shaping.
The trimming pieces to the hawse holes disintegrated
as they were being detached from the sheet and,
as for the windshields part no. 181 - there was only one
supplied on the sheet. No big problem because the supplied
part didn't fit anyway.
Compared the one third scale side elevation with the photo's supplied.
Checked to see what Mark and Sferoida did then went my own way.
This is my first build that doesn't supply full size plans.
How much is a piece of paper ???
Next steps are - four guns on the upper deck then.
channels and deadeyes.
The lantern, anchors, falconets, ships boat
and touch up to follow.
Regards,
Sam.

- puckotred, HardeeHarHar, ccoyle and 5 others
-
8
-
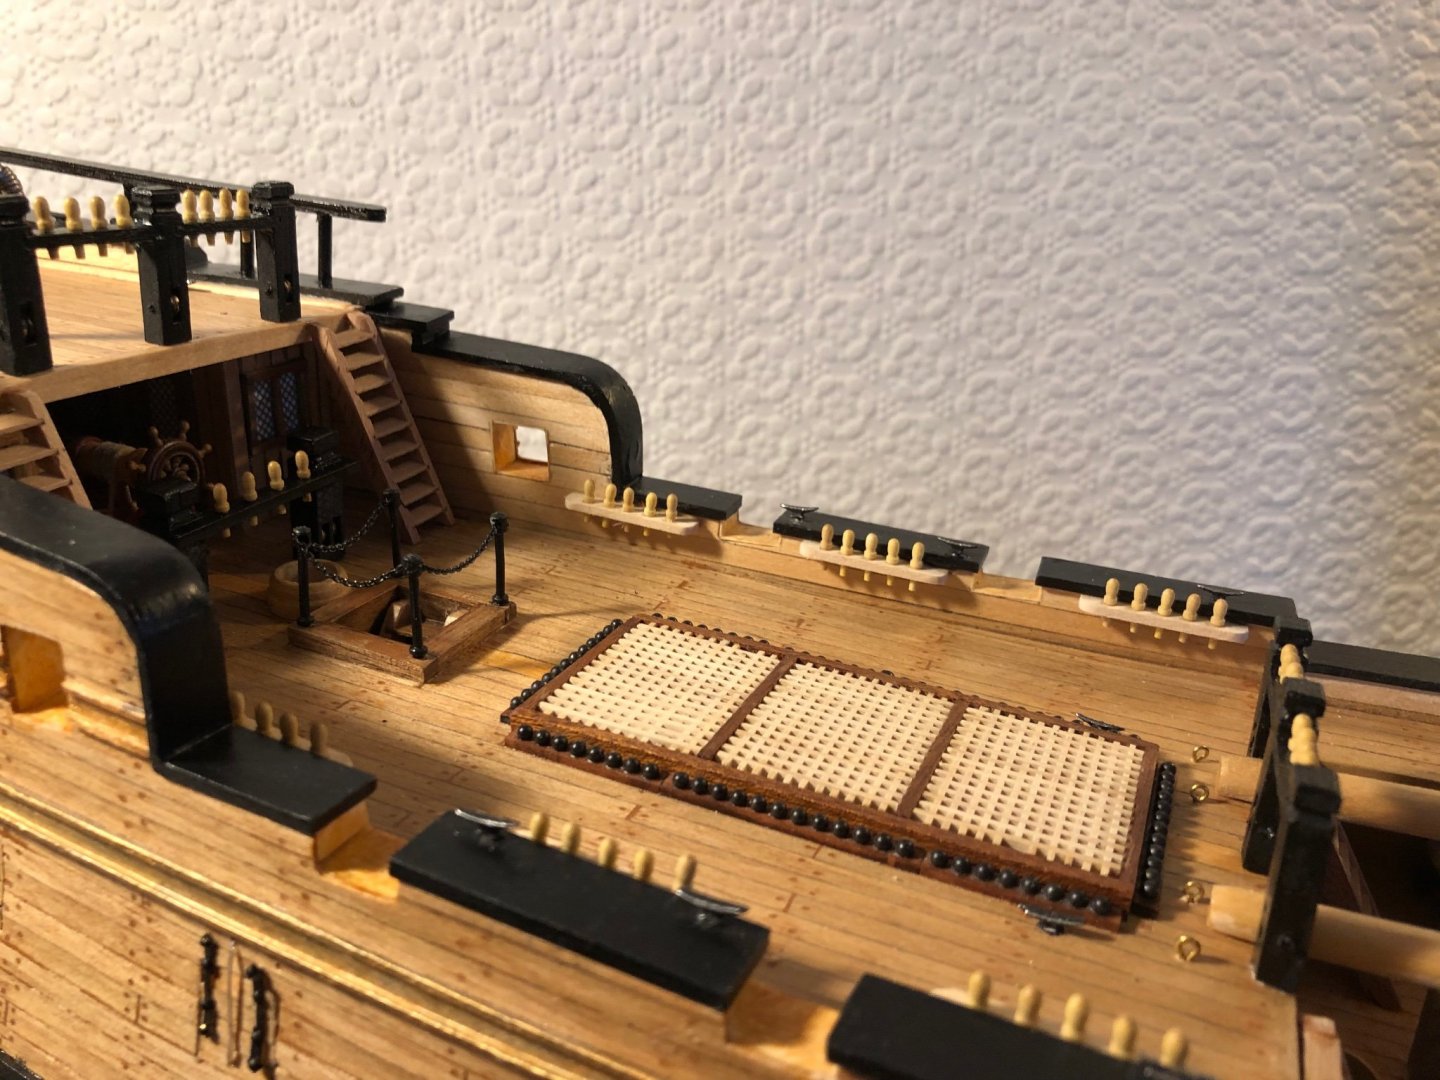
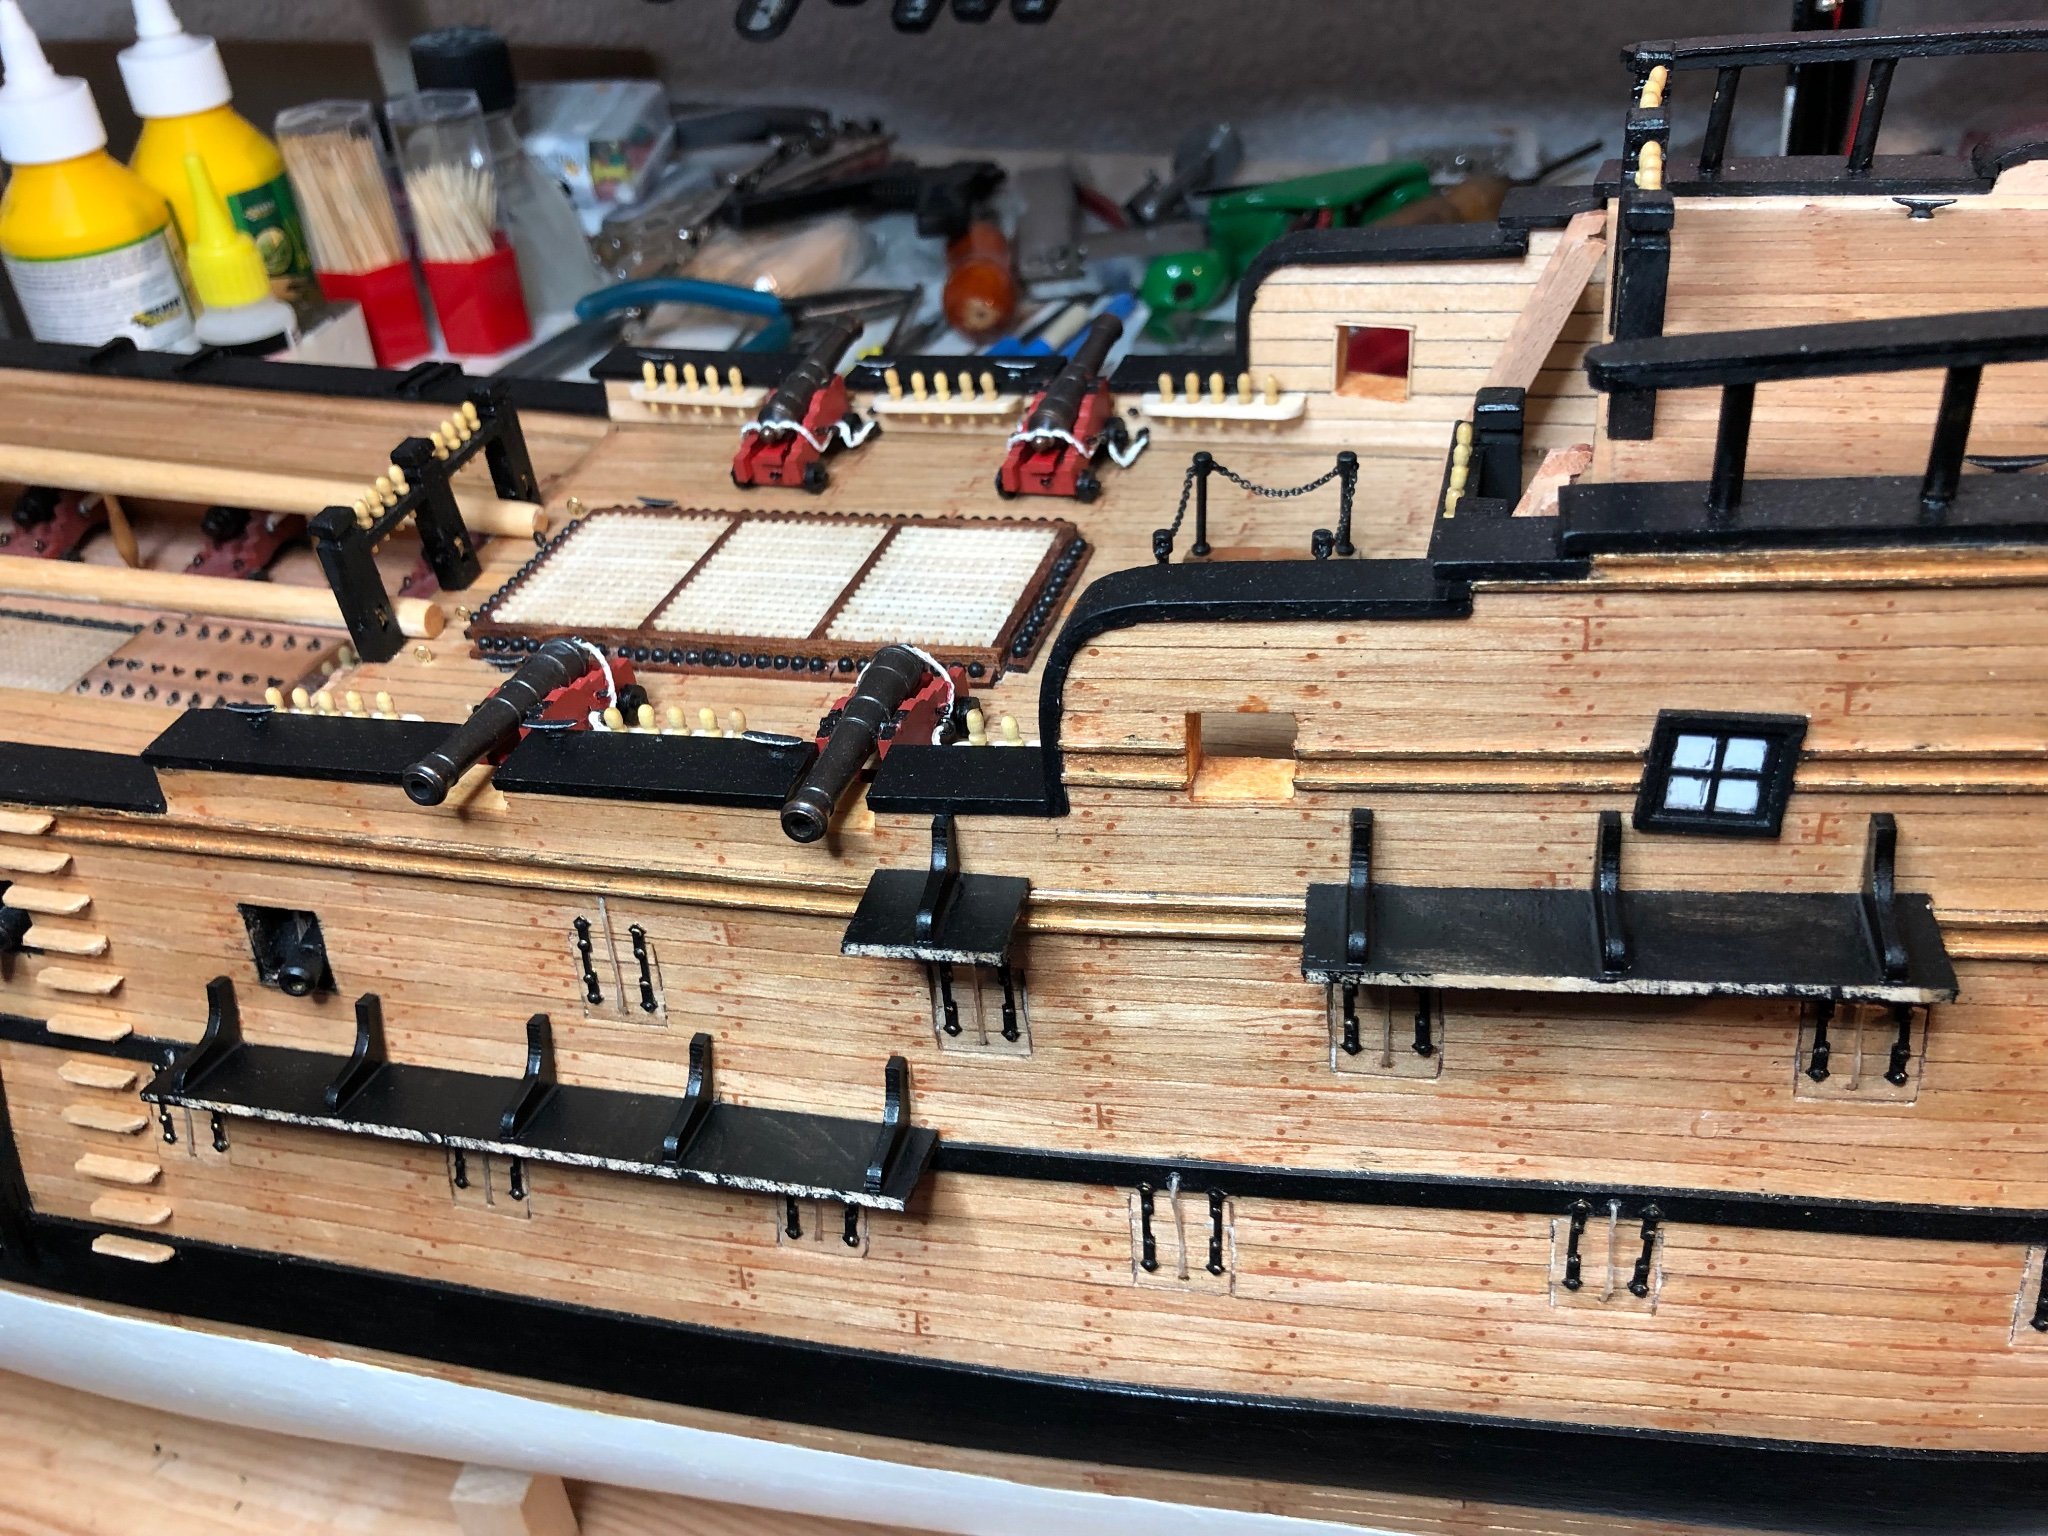
Hi and, thanks for visiting and, the likes.
Loading skids and access steps fitted.
Instructions said to form the steps by filing 2 x 6mm strip to form an L shape.
Instead superglued 2 1mm thick strips of different width together
to form the required profile. A lot faster and, neater.
Regards,
Sam.

- BobG, puckotred, GrandpaPhil and 4 others
-
7
-
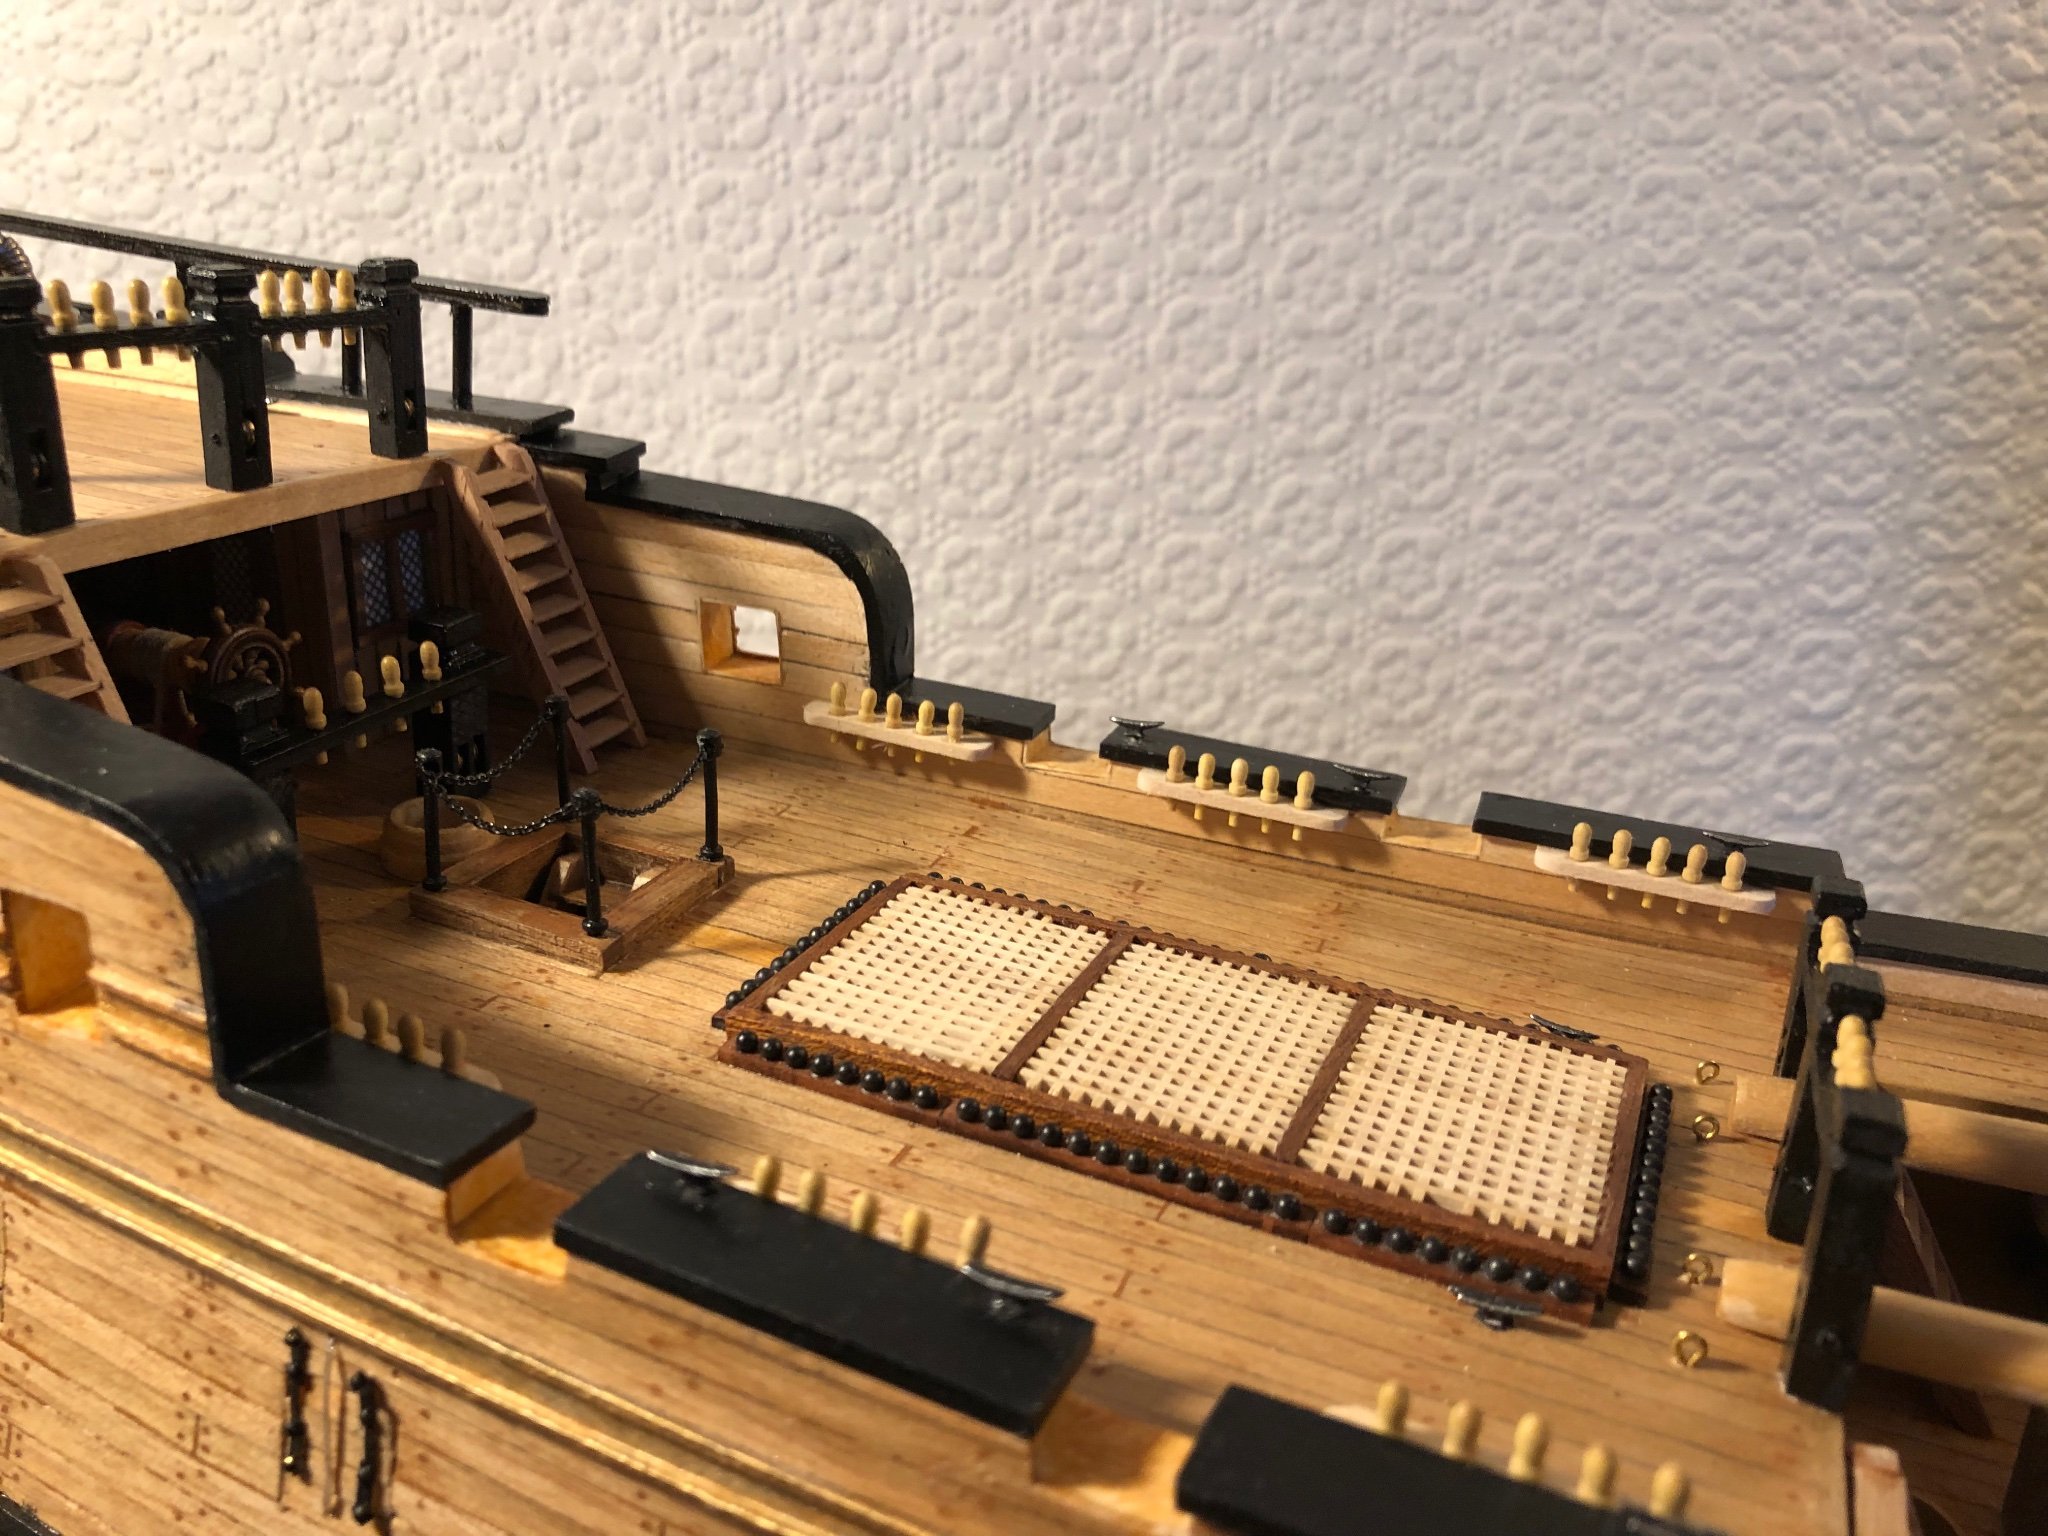
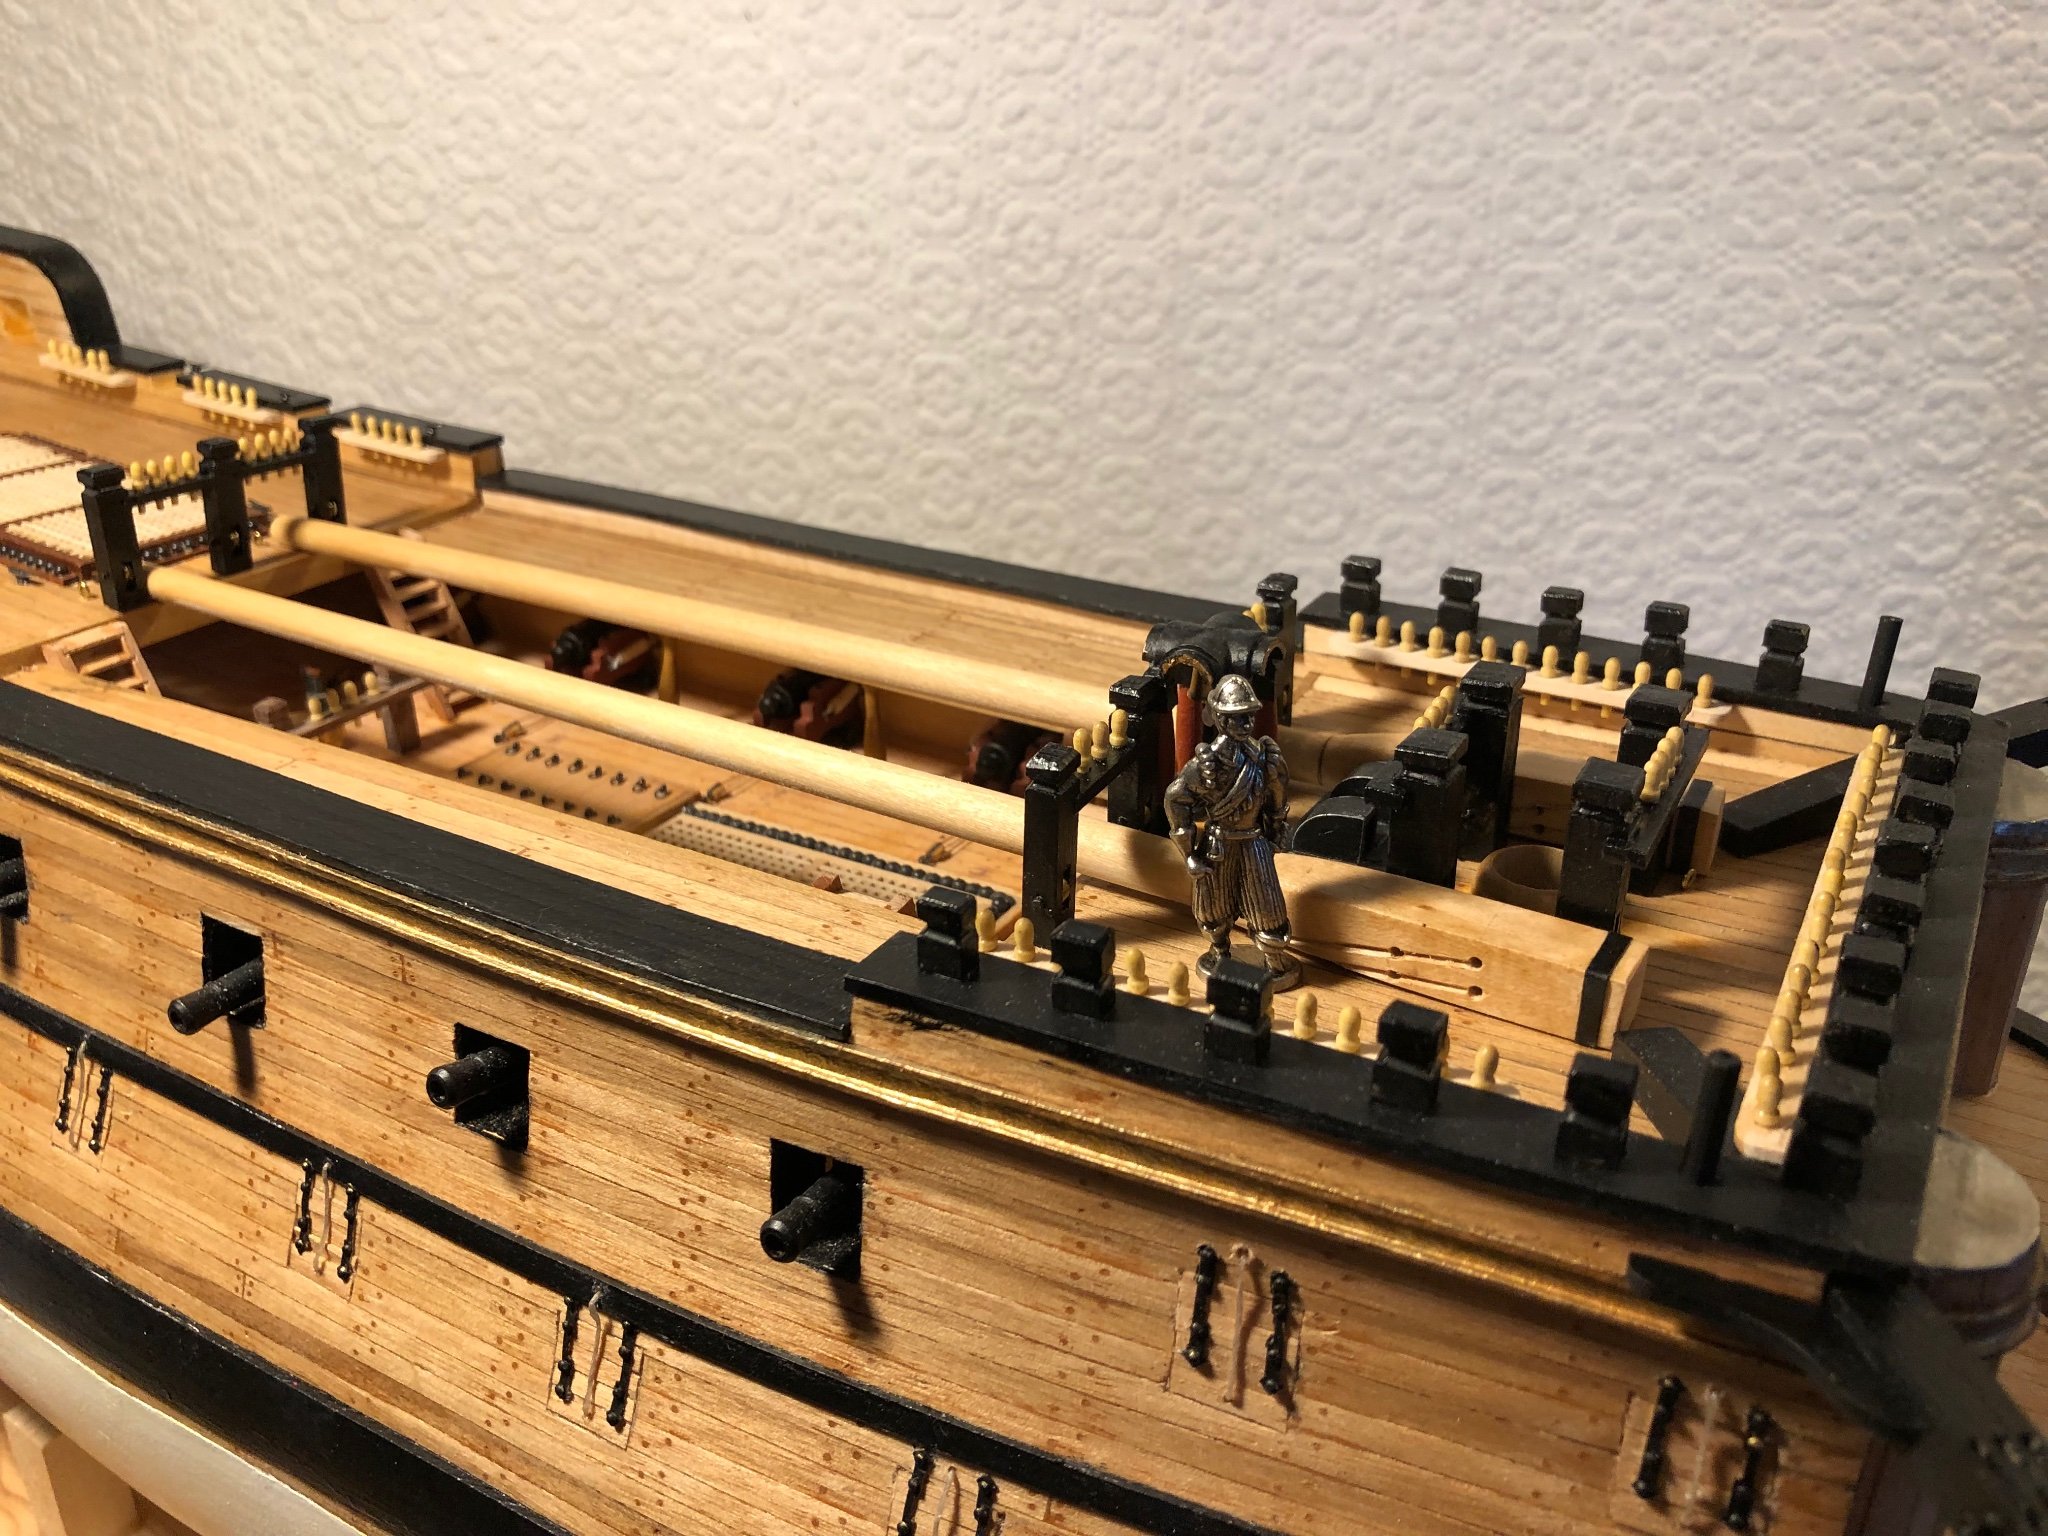
Deck furniture added except for top deck guns, lantern etc.
These will be fixed later.
Deck cleats supplied were deformed and had to be replaced.
Next step is to start hanging things on the hull.
Spotted that the channel brackets and stem pieces are plywood.
Not sure wether to replace these or paint them.
The cannon carriages and barrels are good and will be used.
The brass eyes are temporary and will be painted and fixed
with the rigging.
Regards,
Sam.

-
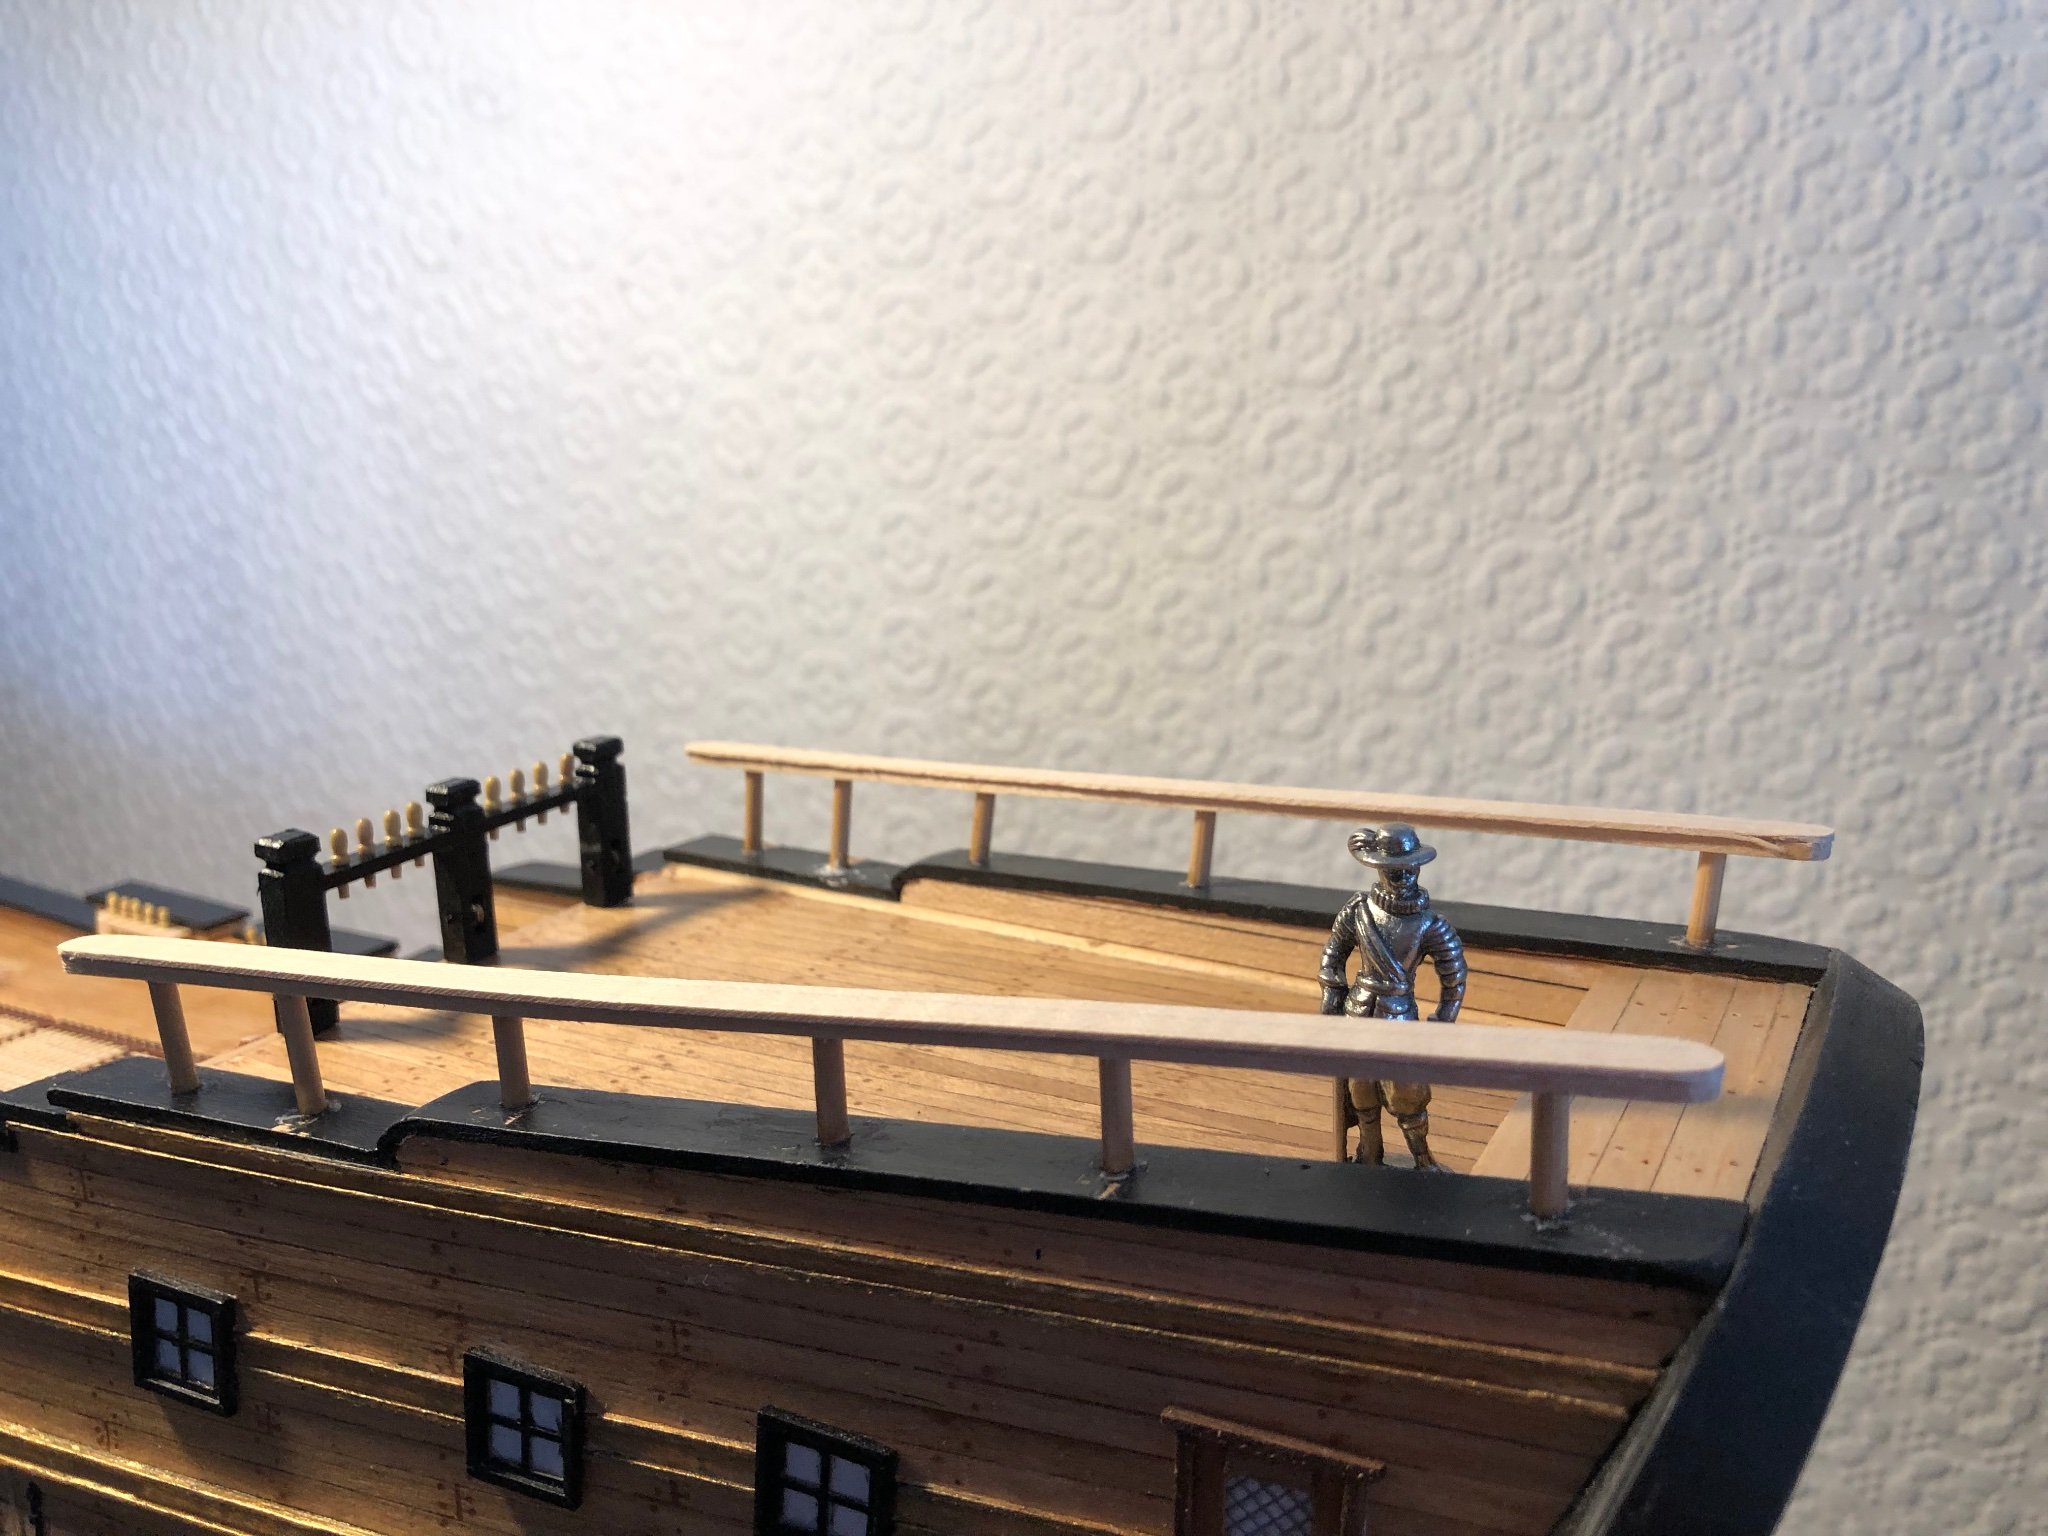
Hi Mark and, thanks for the comments.
Decided to stick with what I've got and add a rail across the stern.
Looking ahead to the stem brackets I notice that these parts
are from the dreaded plywood. Might replace.
Will have a good look at your build log first.
Regards,
Sam.
-
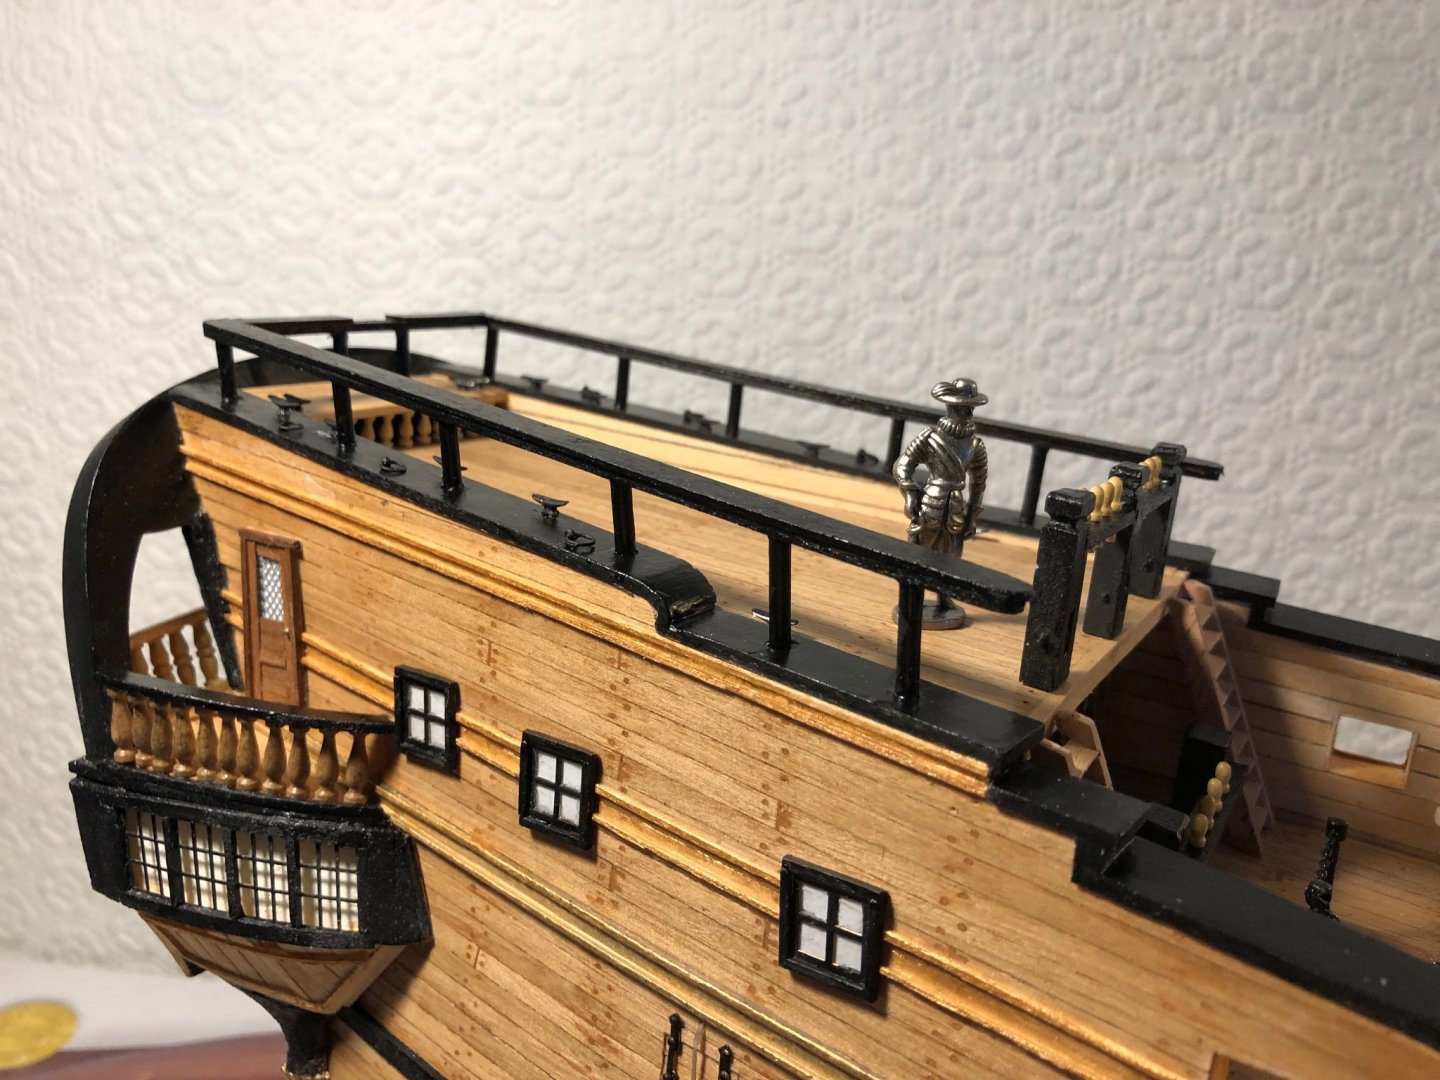
Well I have finally hit the buffers on this build.
Not been happy with the stern for some time and thought that the stern piece built from laser cut parts
was too low. I was very wrong.
The real problem starts with bulkheads 12, 13, 16 and 17 - the top deck upstands are too high.
Also the laser cut parts for the rear cabin walls below the poop deck parts 39, 40, 41 and 42 are also too high.
10 to 15mm too high.
Being laser cut parts I took them at face value and fixed them.
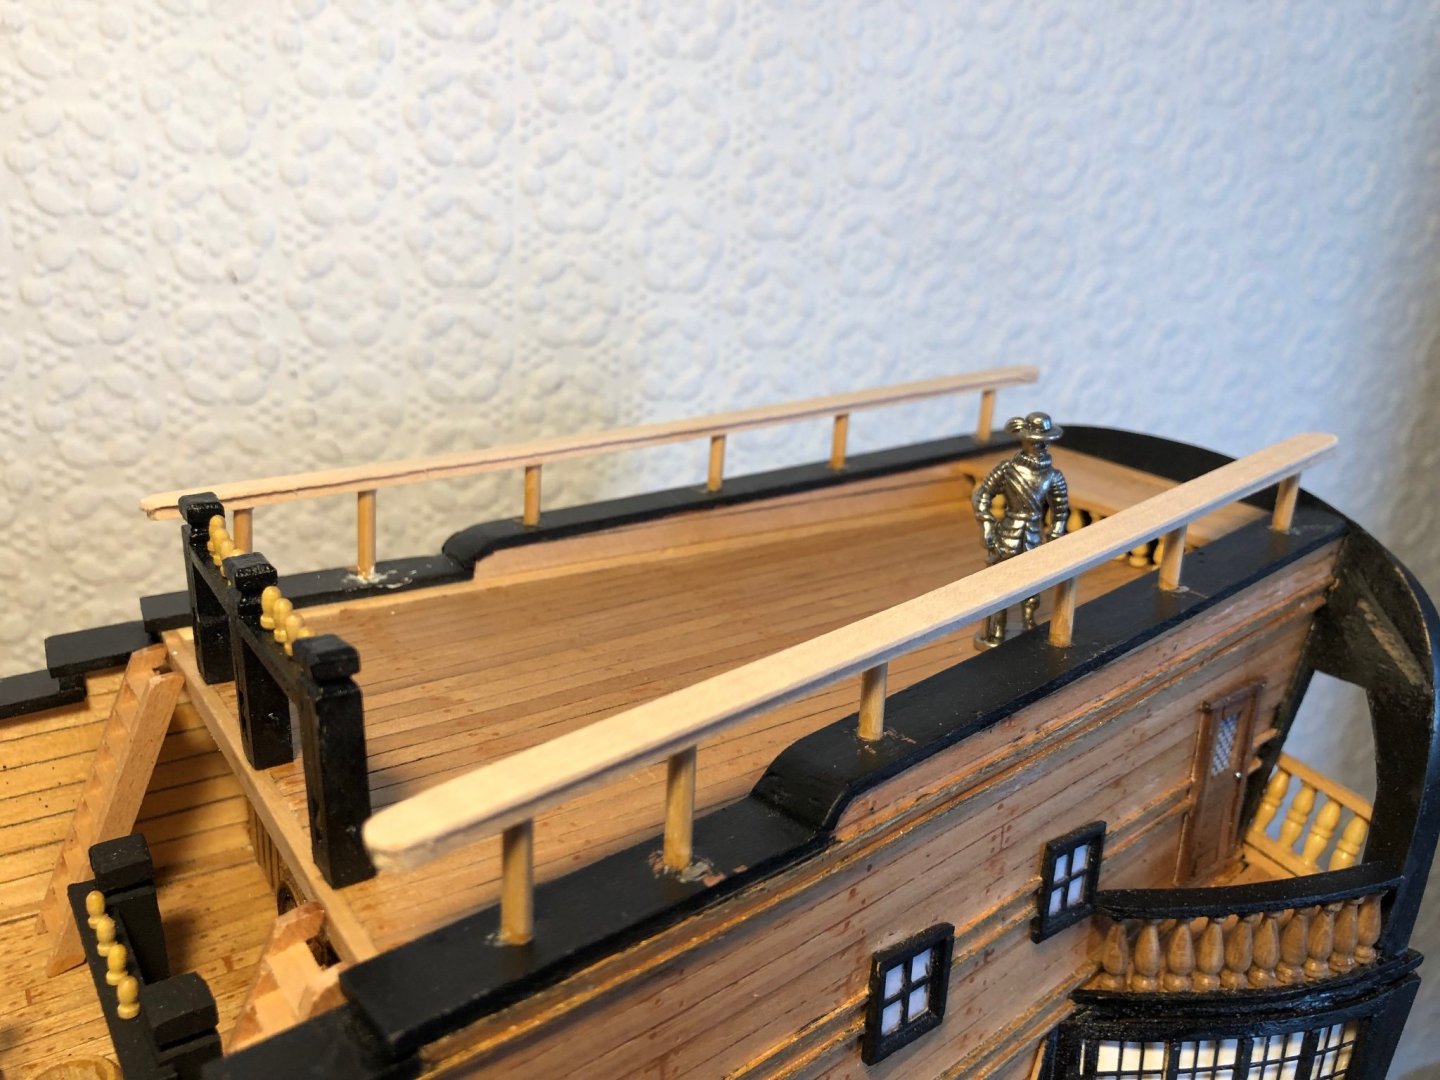
The trouble starts with the poop deck rails. I have made these slightly higher and all this does
is highlight a giant gap at the stern over the stern piece.
Obviously this needs filling in with some sort of rail which will be a pain to build.
Or I remove the rail just fitted, make good and call it a day.
Or remove the rail fitted and provide new side and rear rails much lighter in construction
but less visible. This will take some thinking about.
Previous comments I have seen say that OcCre kits are for the more experienced builder.
I thought I was.
Still persevering, still here, should have taken up herding cats as a hobby.
Regards,
Sam.

-
Hi Phil, and please excuse the invasion of your postings.
Perhaps a solution would be to provide netting and stuff with hammocks
to hide any botched fixings to the ship's rail.
See sketch below.
Two eyebolts tuned in at the bottom with a gap between the ends for a fixing nail
and brass wire soldered both sides. (Eyes should be thro' 90 degrees)
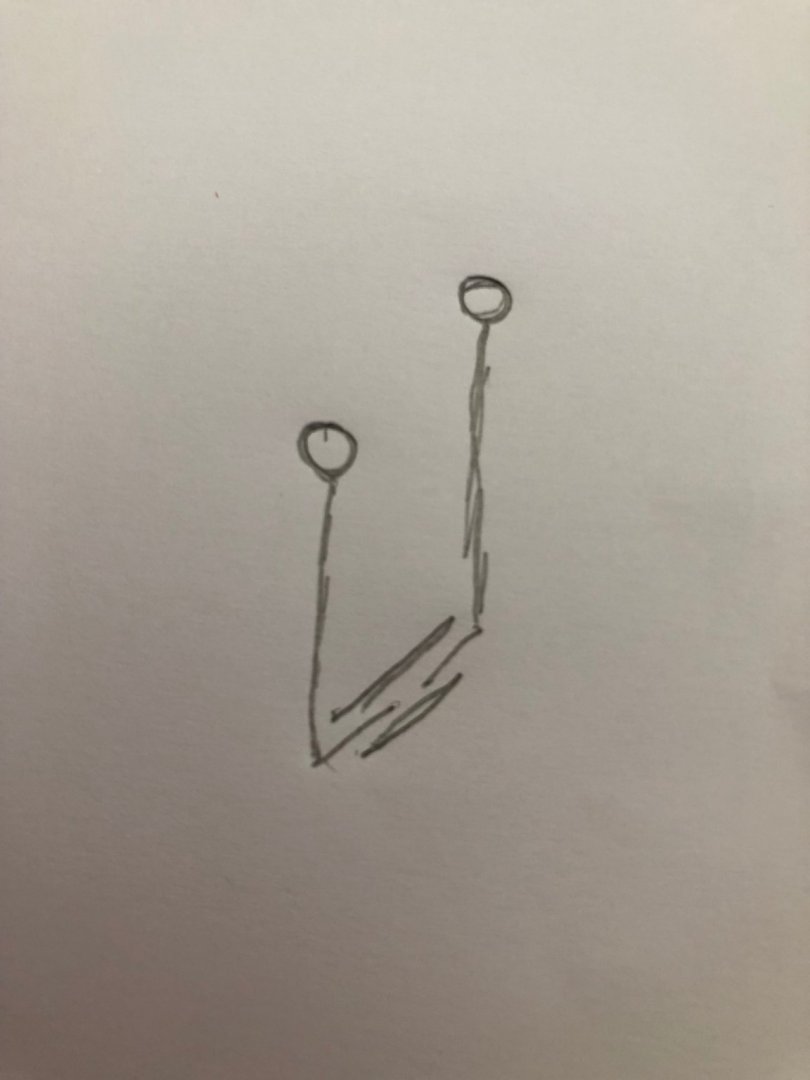
Should give a sturdy fixing.
Sam.
- GrandpaPhil, Edwardkenway, zappto and 1 other
-
3
-
 1
1
-
Enjoying the deck detail and, the tutorials.
I too am dreading the hammock cranes on my build.
Occres instructions for these are way beyond my capabilities
so I will be watching with interest hoping to pick up some tips.
Keep up the good work.
Sam.


HM Bark Endeavour 1758-61 by DaveBaxt - Caldercraft - 1:64
in - Kit build logs for subjects built from 1751 - 1800
Posted
Good work on the masts.
Still no nearer starting my version
but after seeing yours I will get around to it.
Enjoy the rest of the build.
Best regard,
Sam.