


SIDEWAYS SAM
-
Posts
248 -
Joined
-
Last visited
Content Type
Profiles
Forums
Gallery
Events
Posts posted by SIDEWAYS SAM
-
-
Hi and, thanks for the likes.
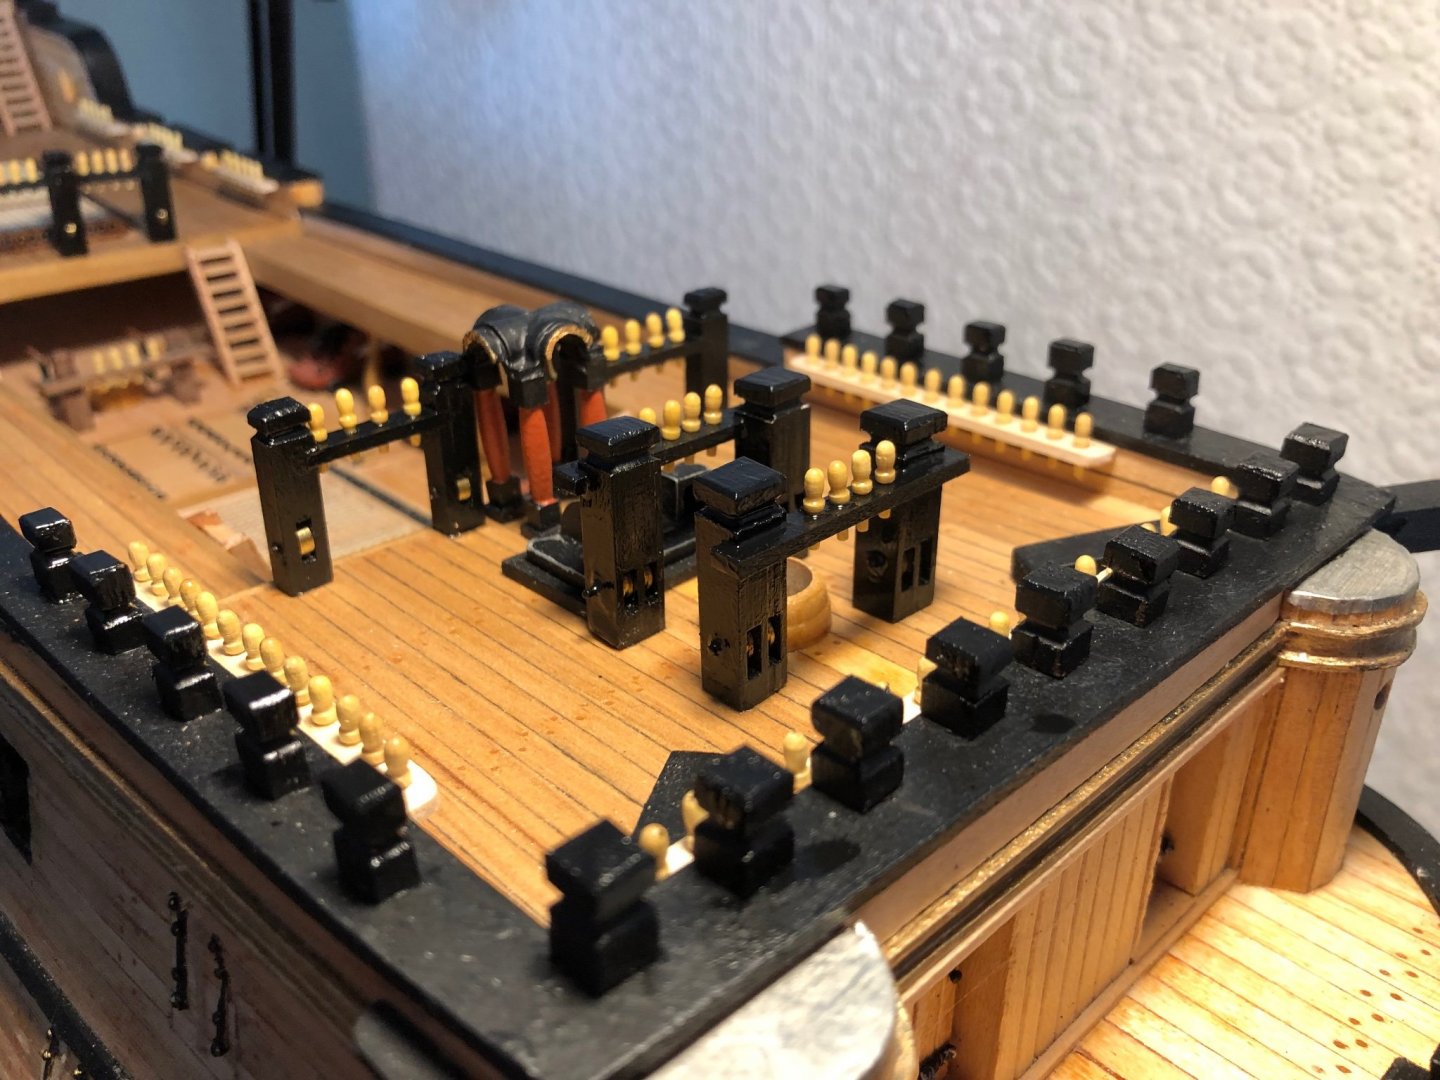
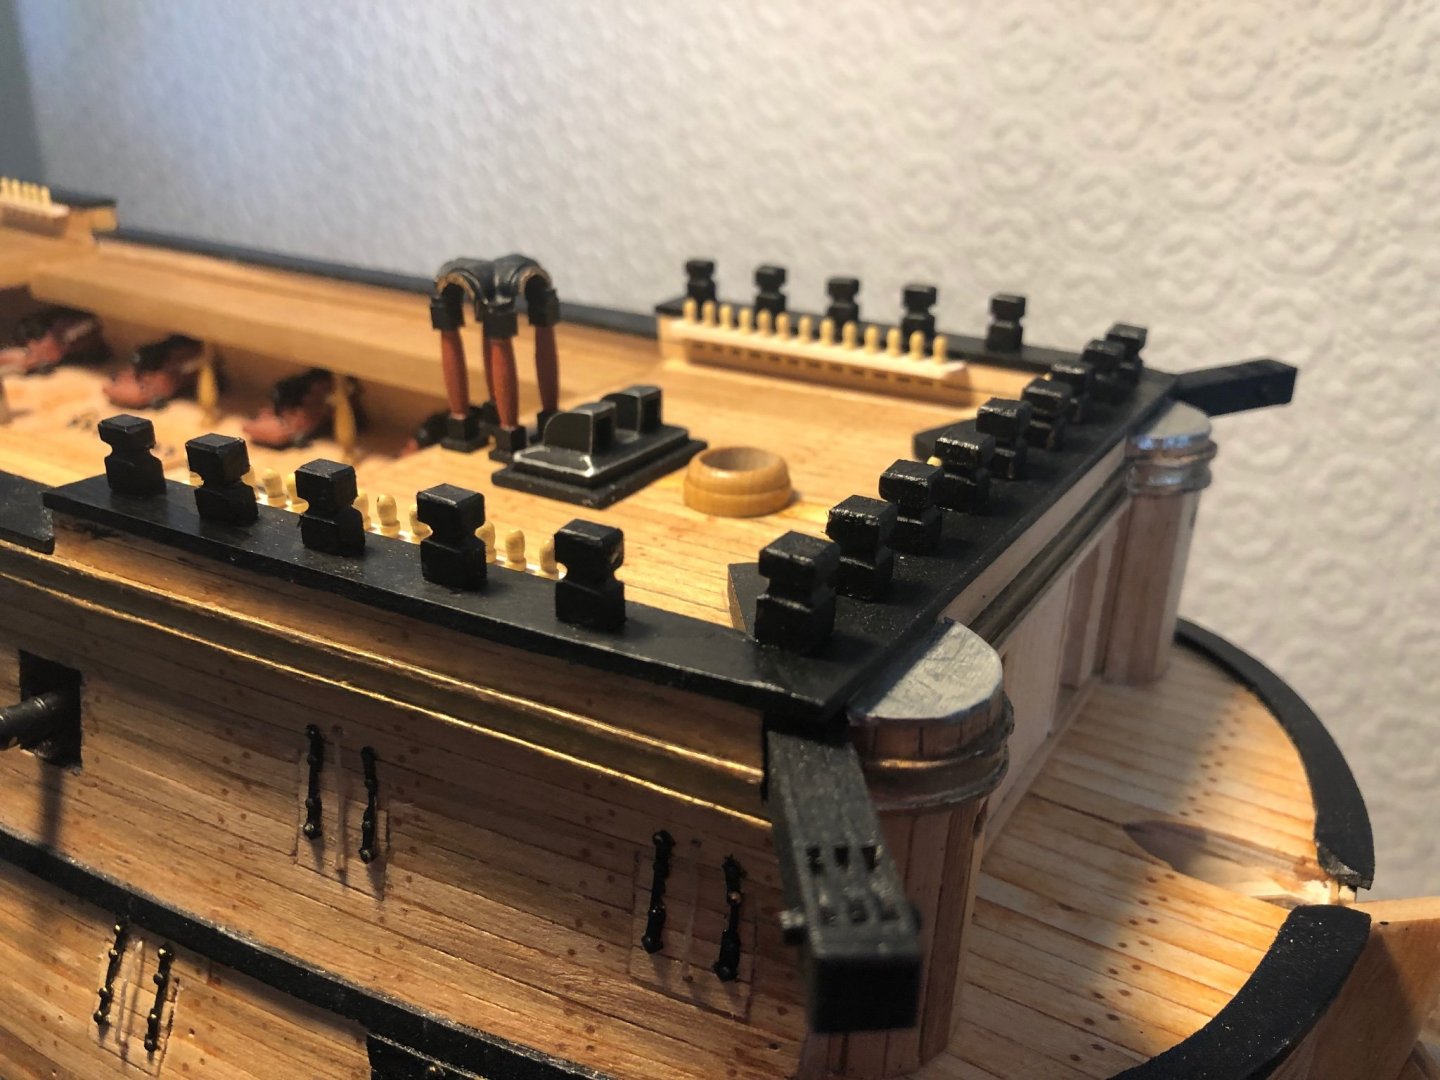
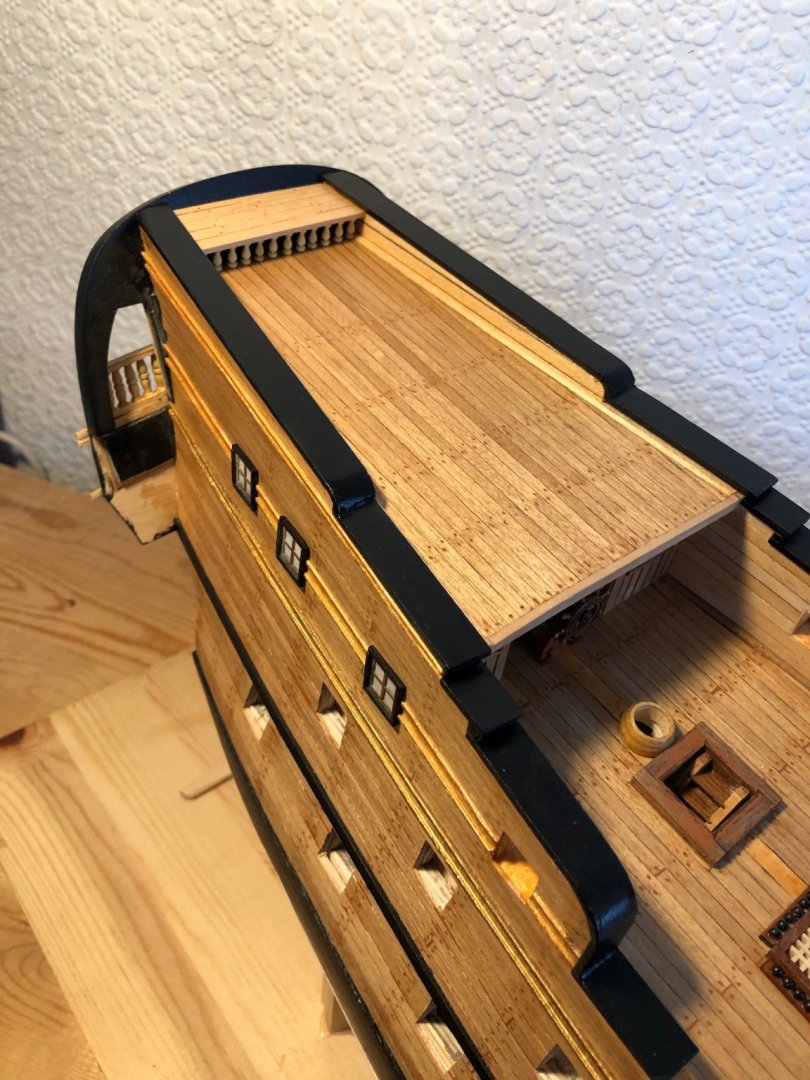
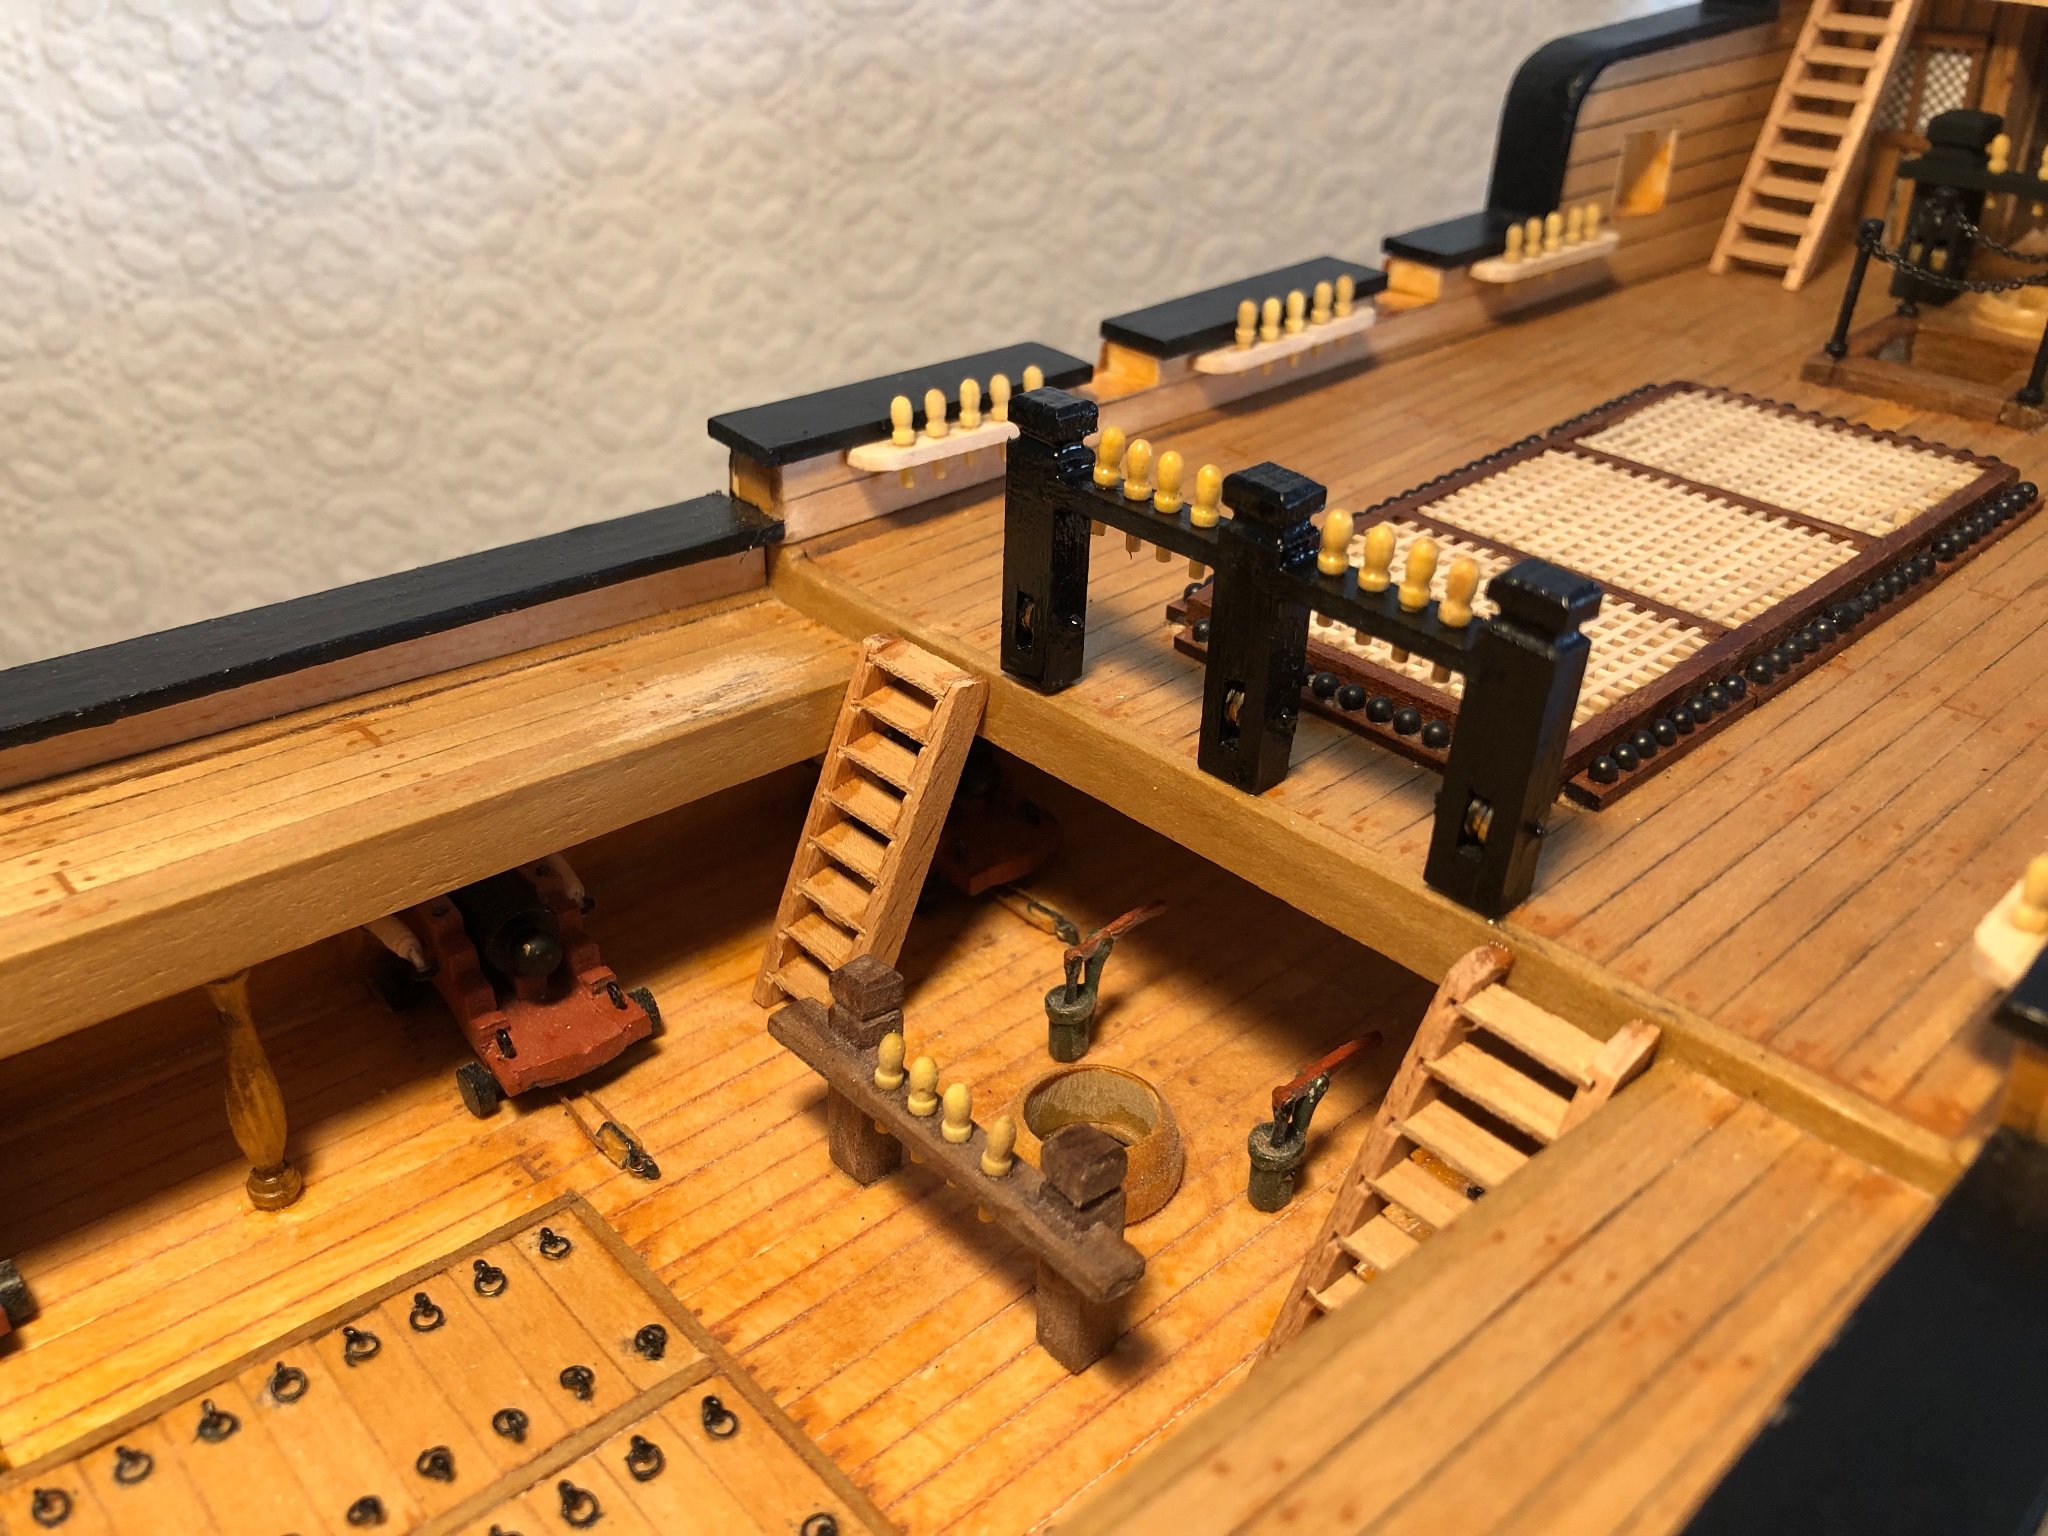
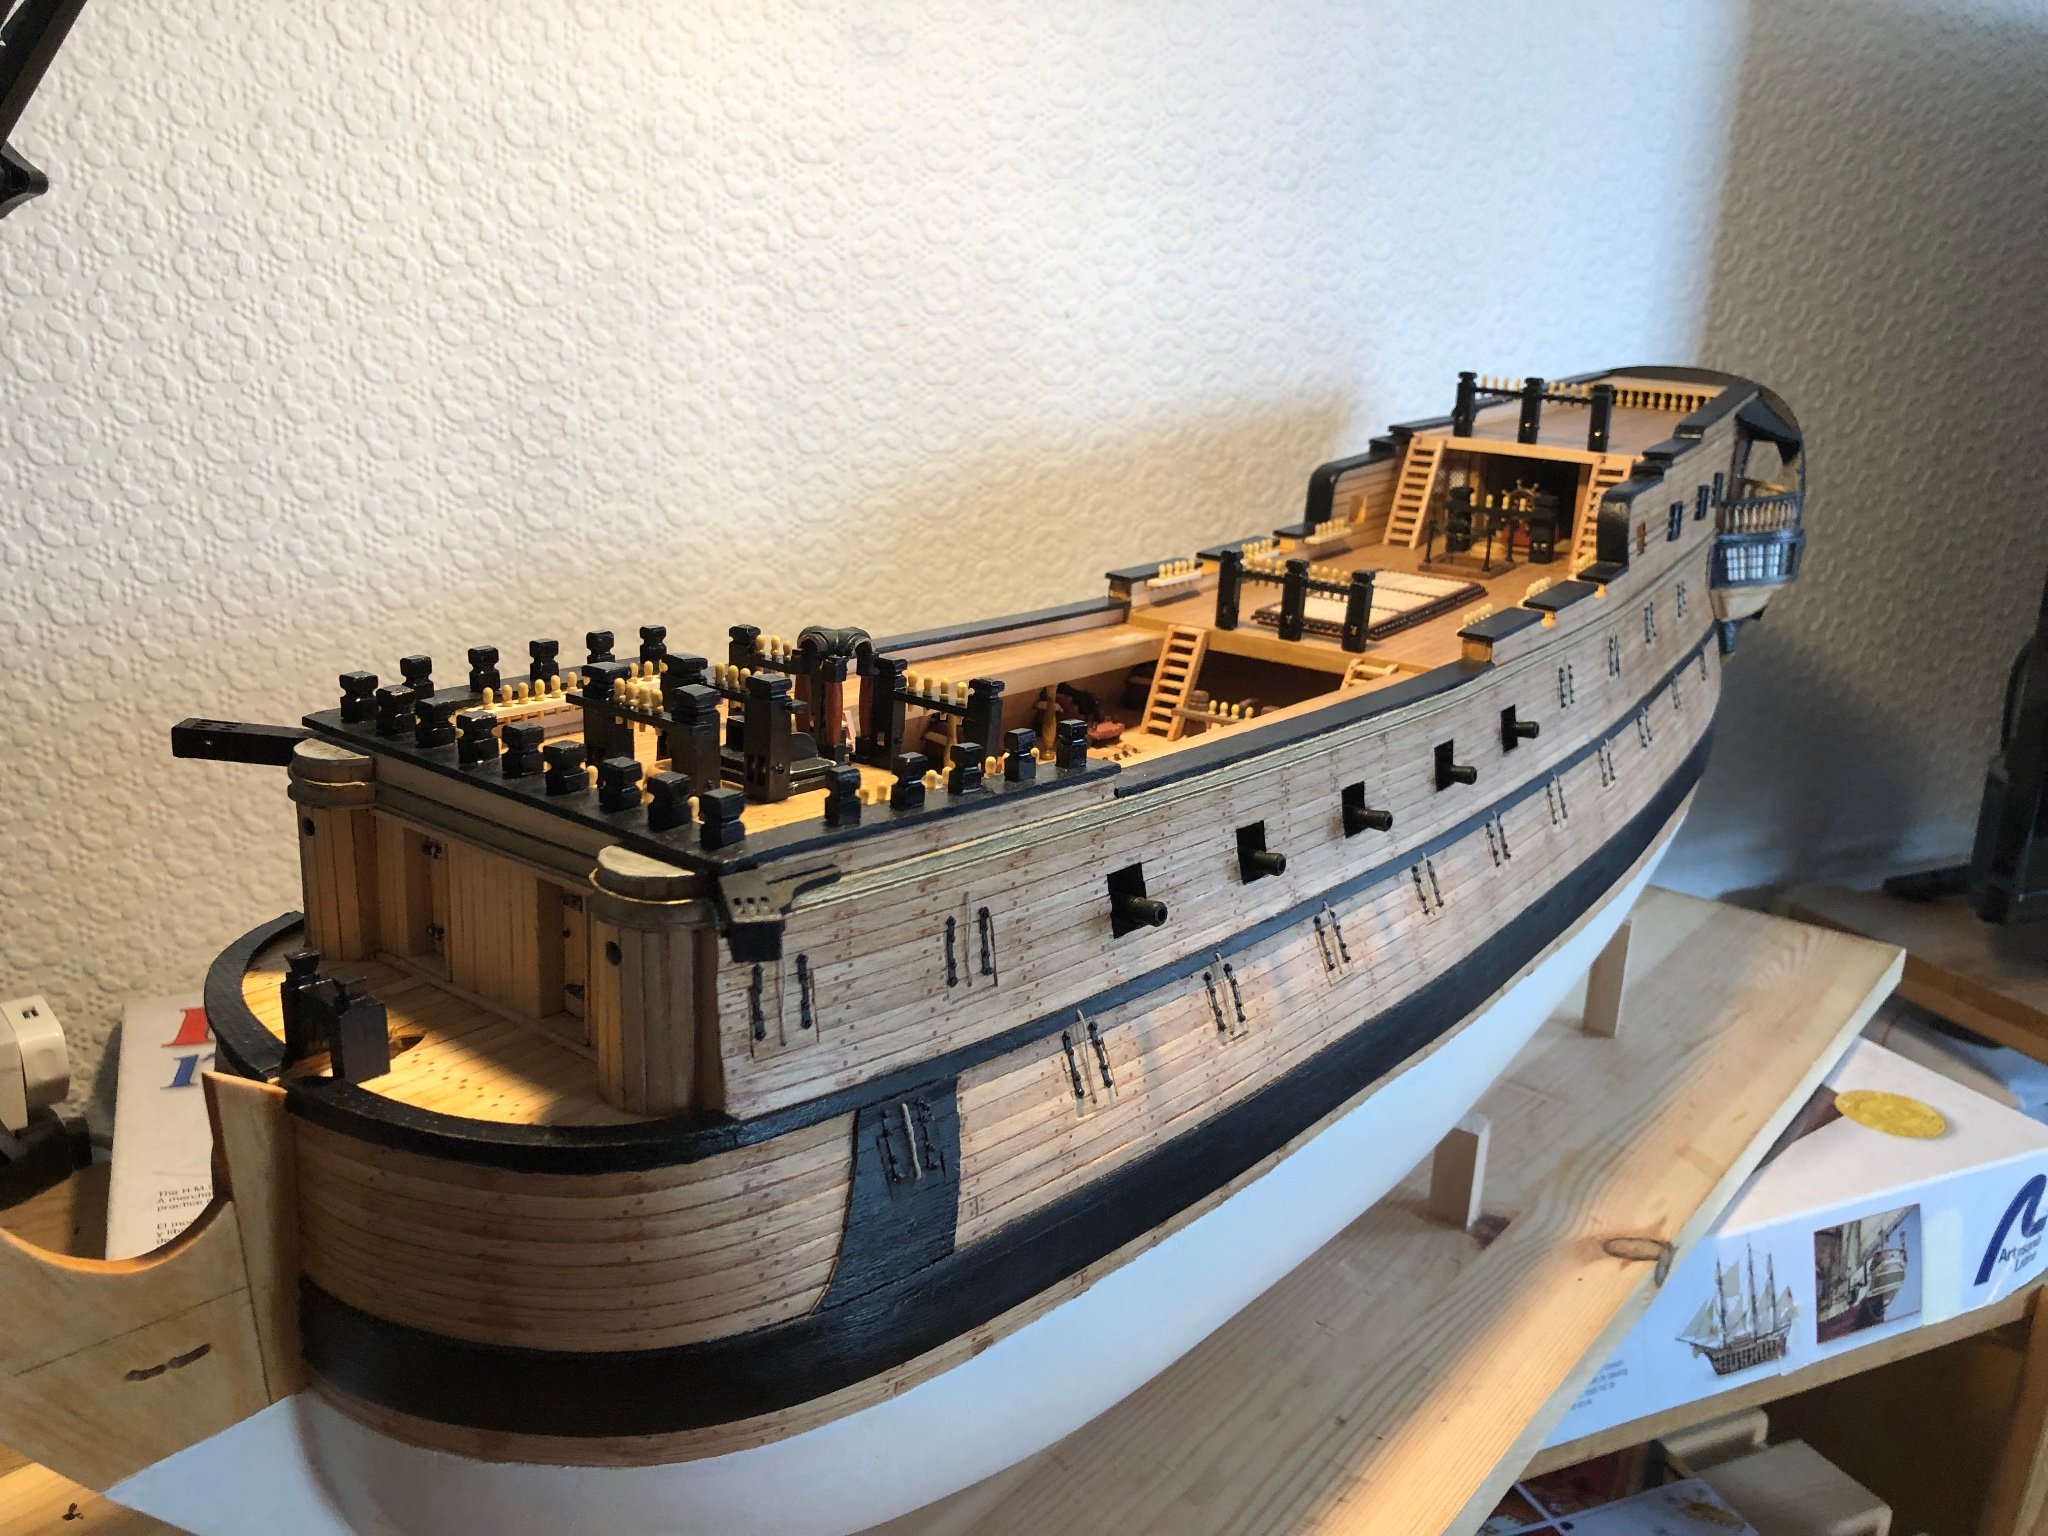
Knightheads, mast pinrails and ladders added.
Regards,
Sam.


- maurino, Edwardkenway, marktiedens and 3 others
-
 6
6
-
Hi Phil,
How big is that lantern ??
Sam.
-
Thanks for the likes and, GP for the comments.
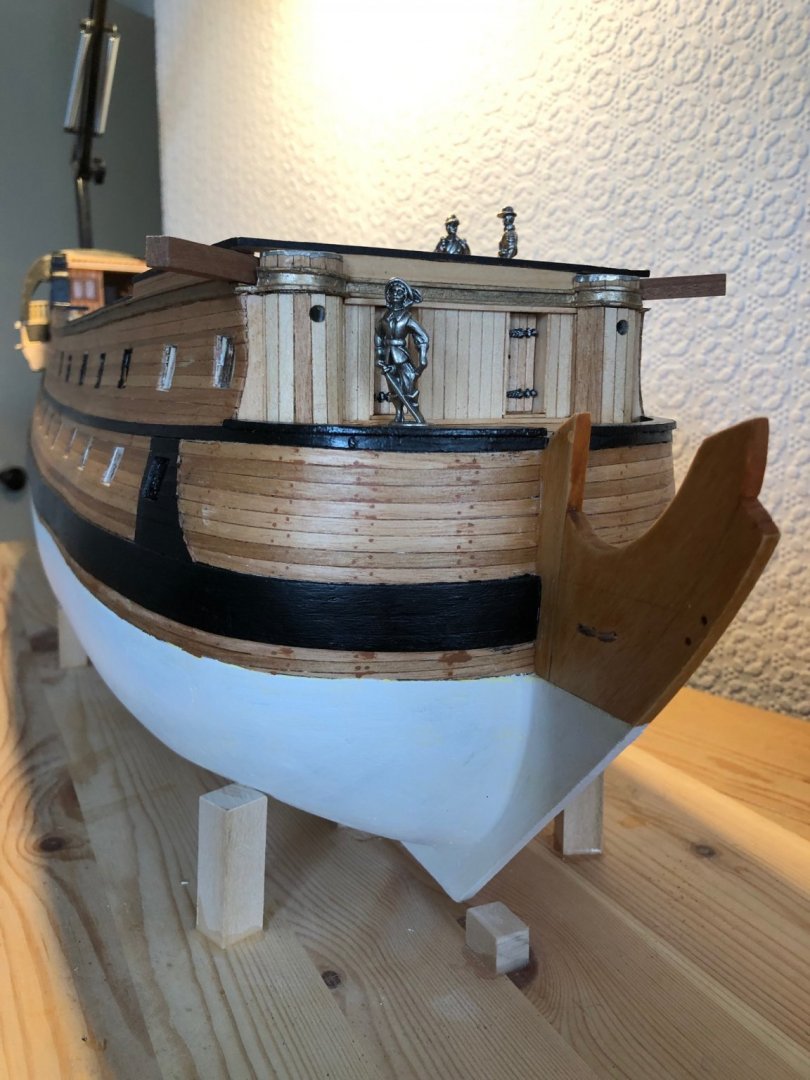
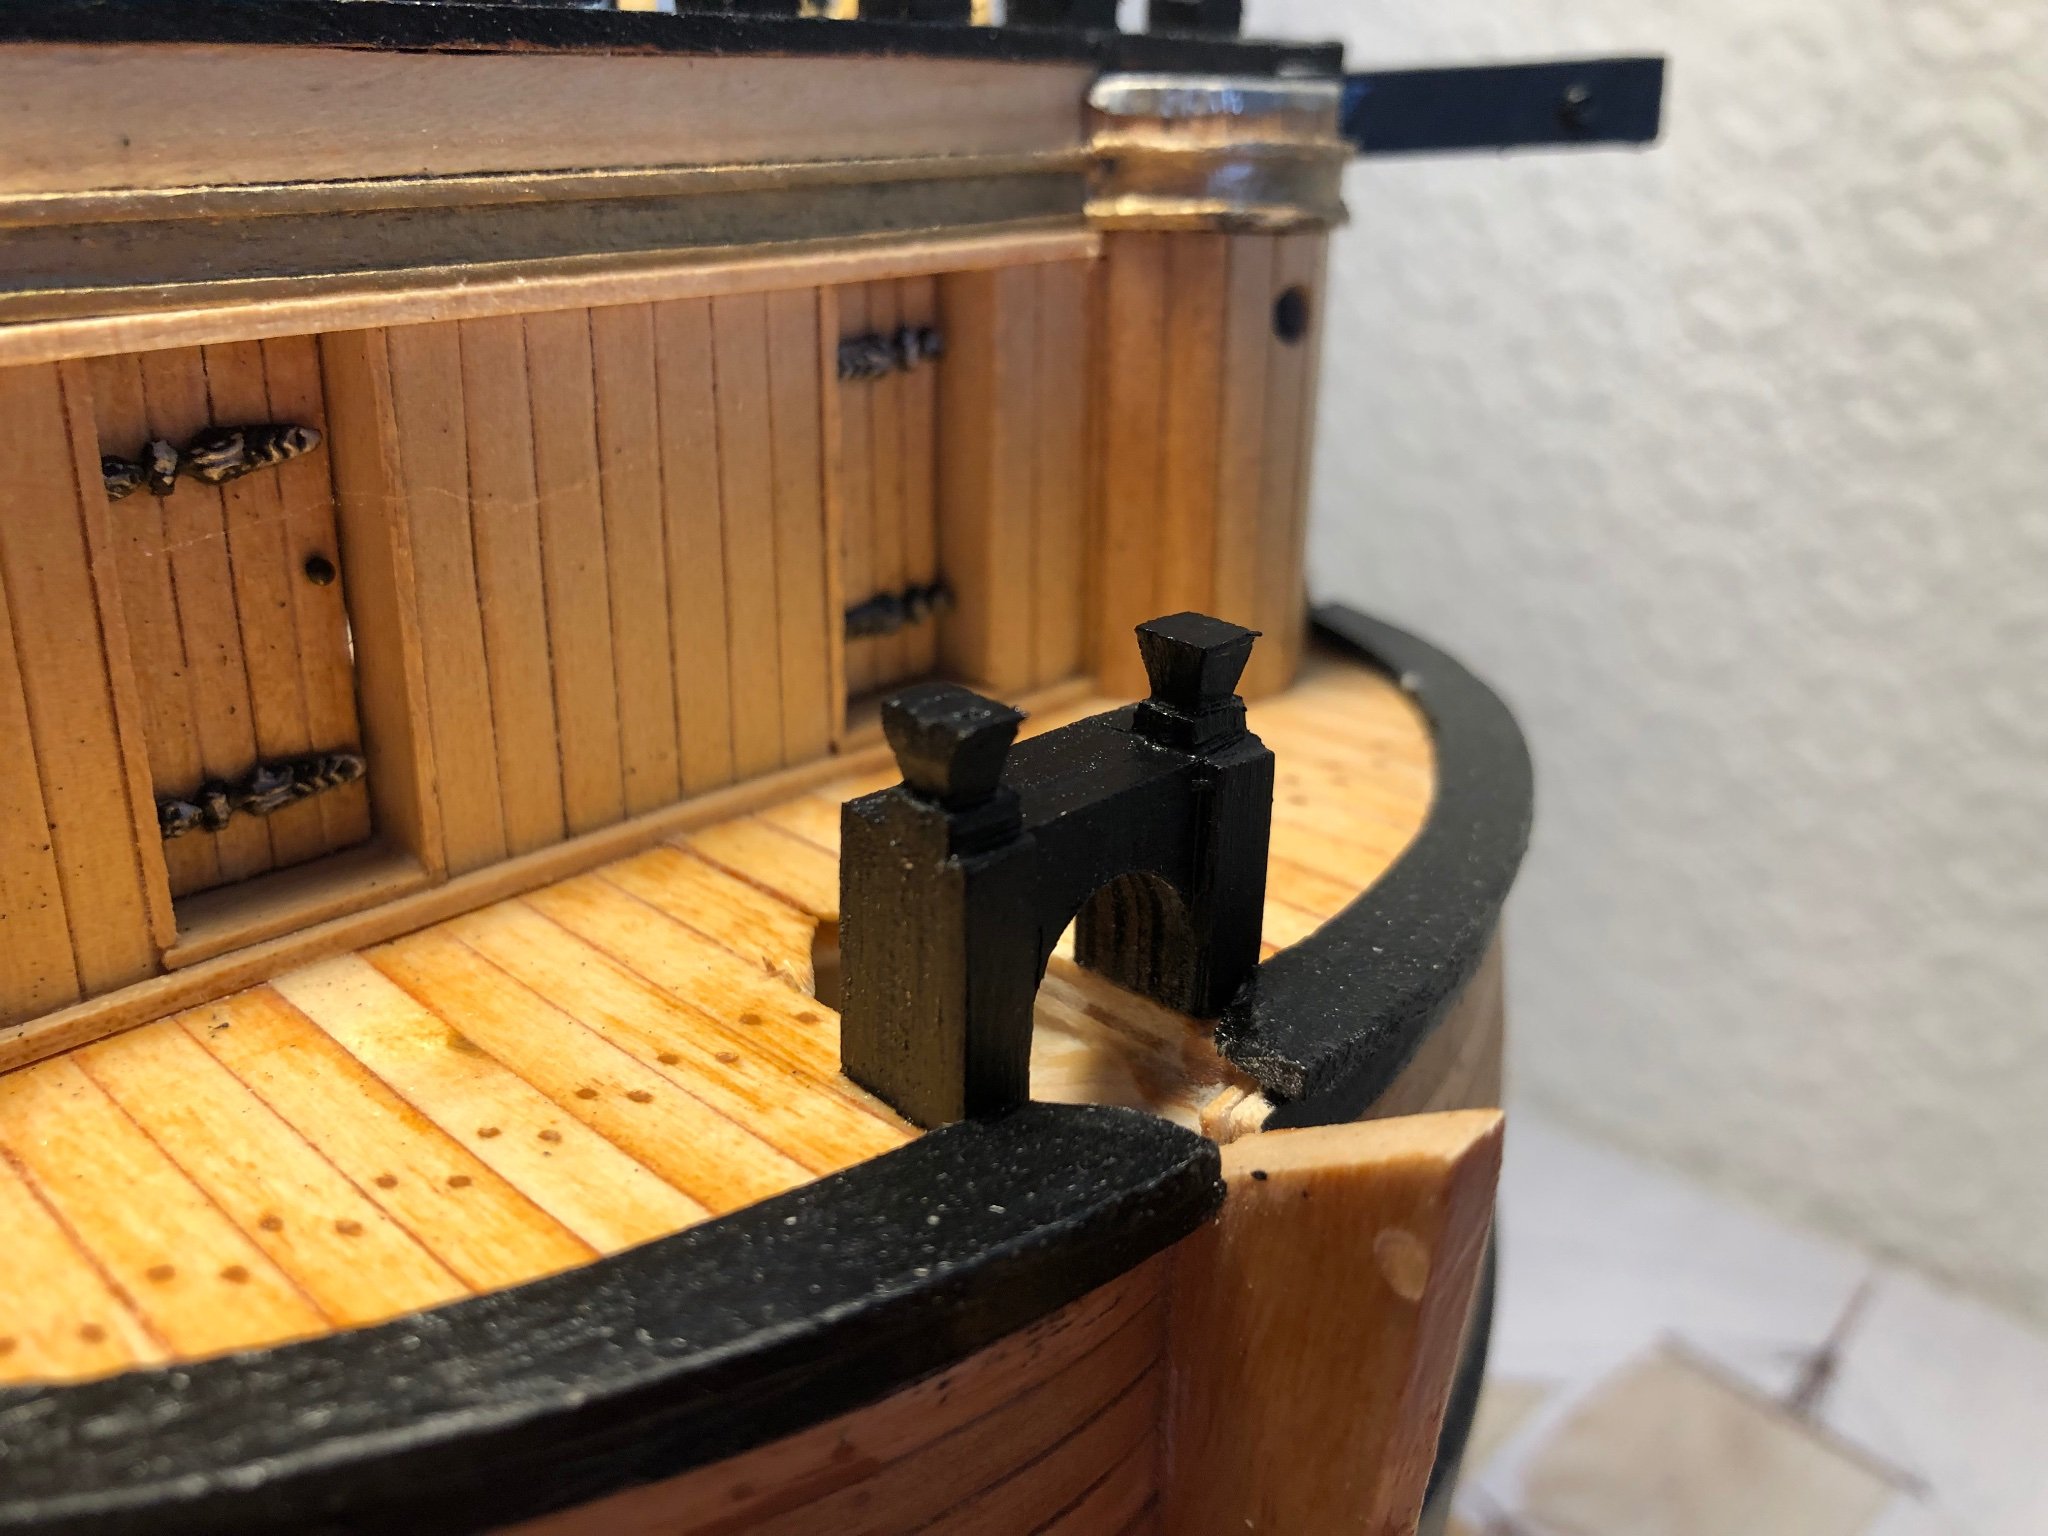
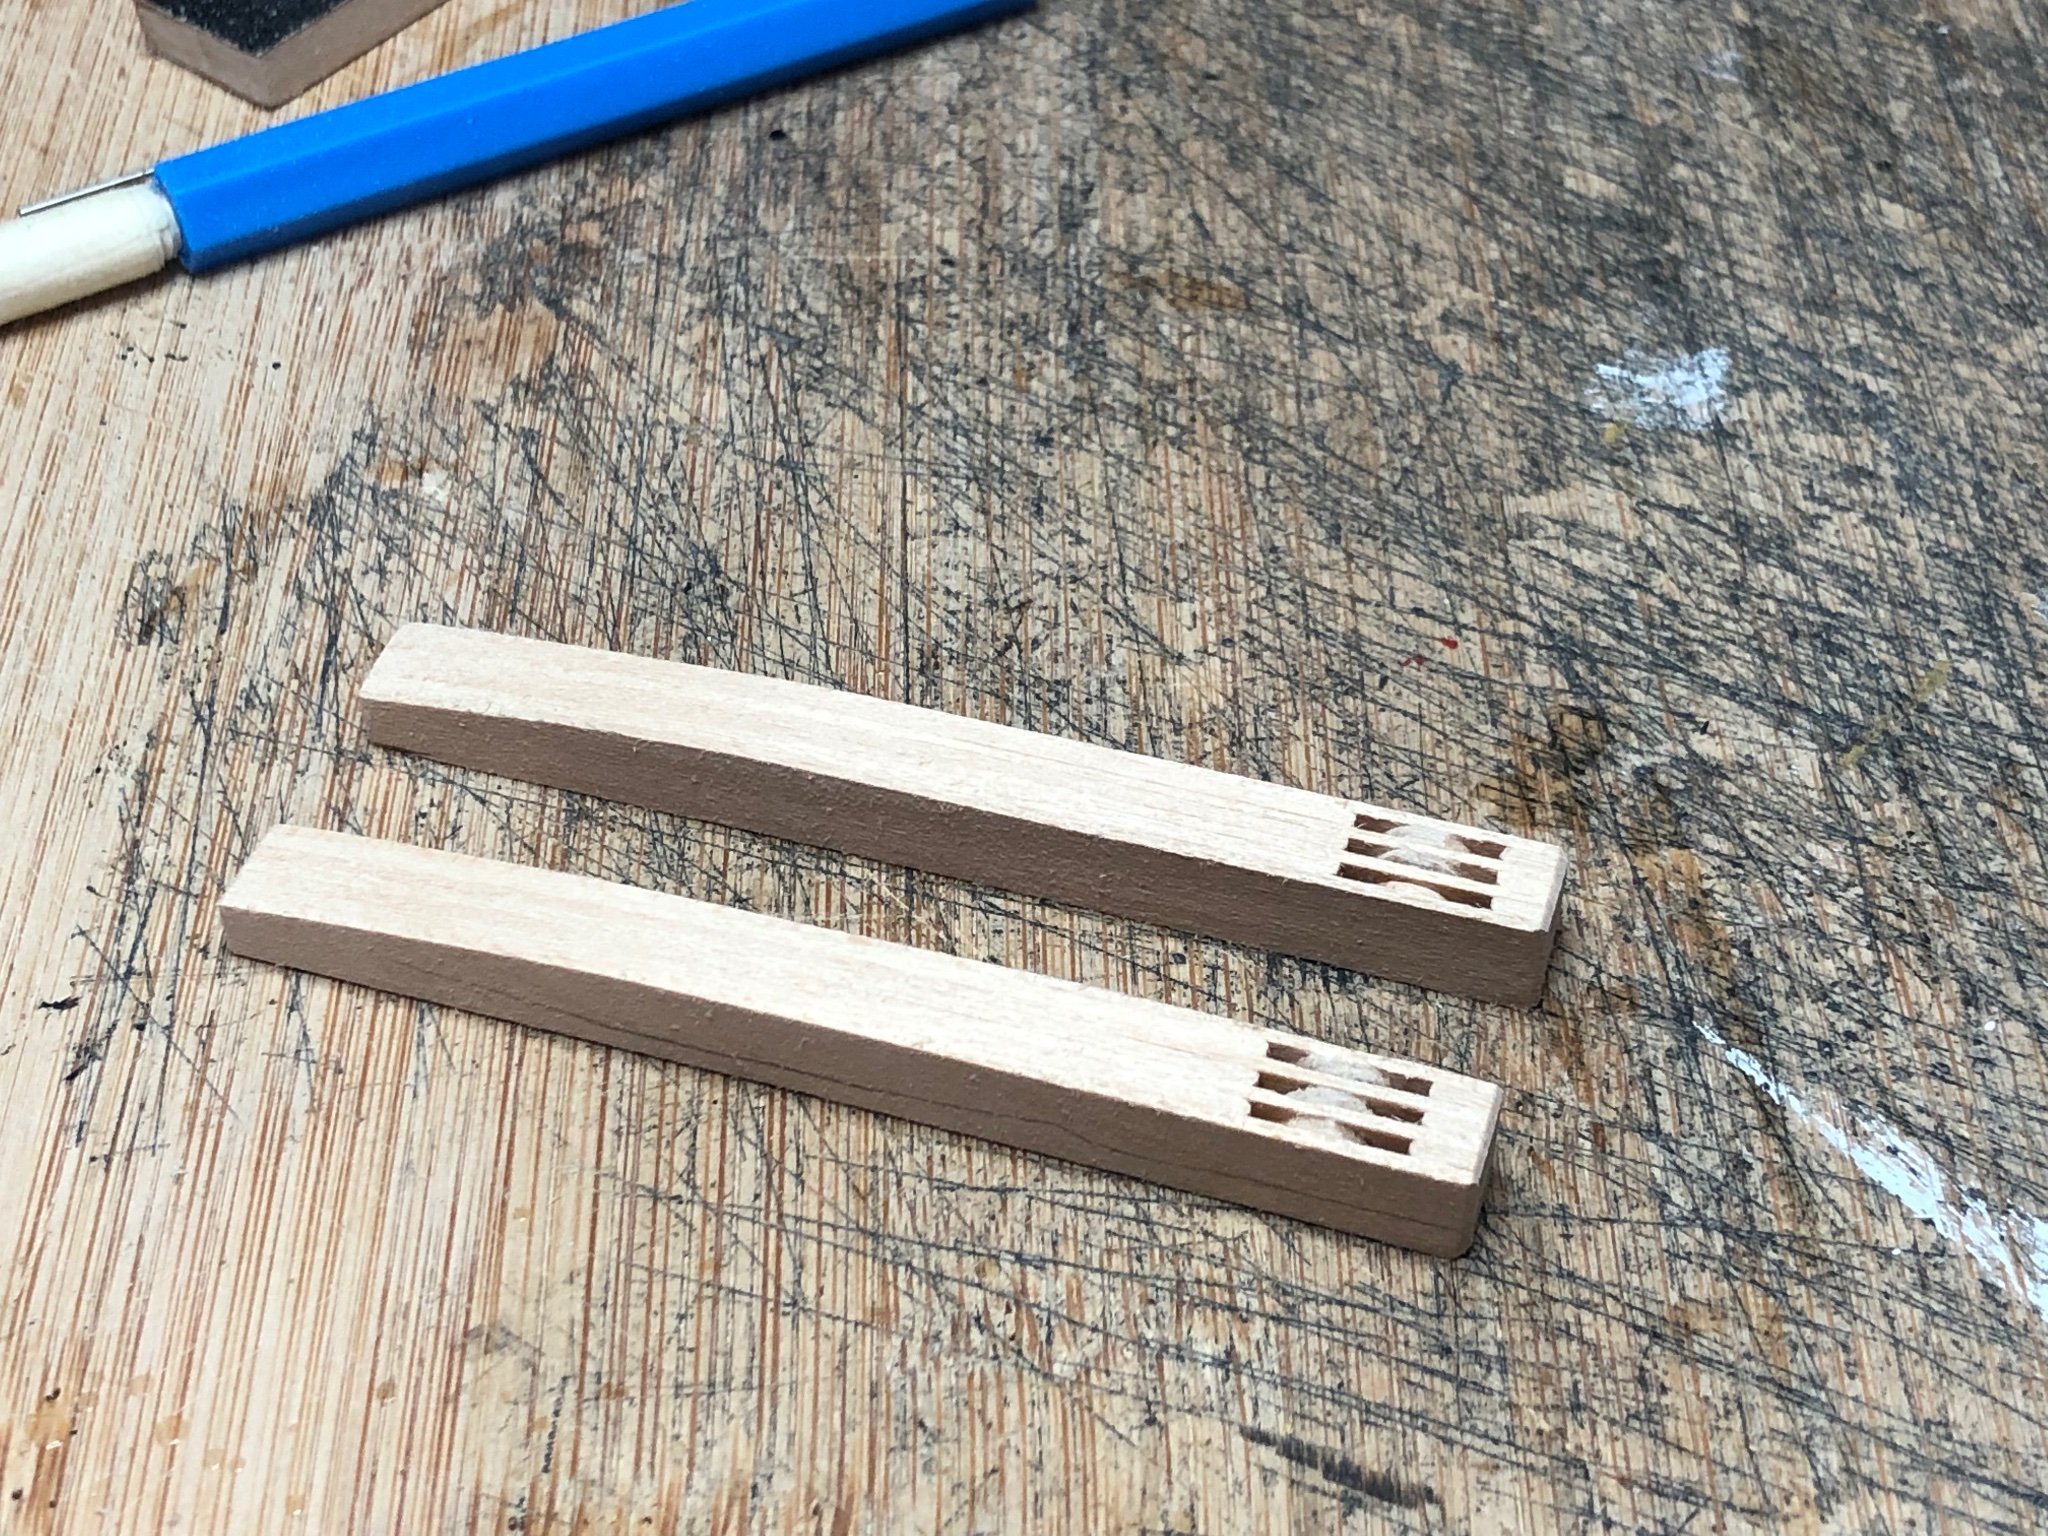
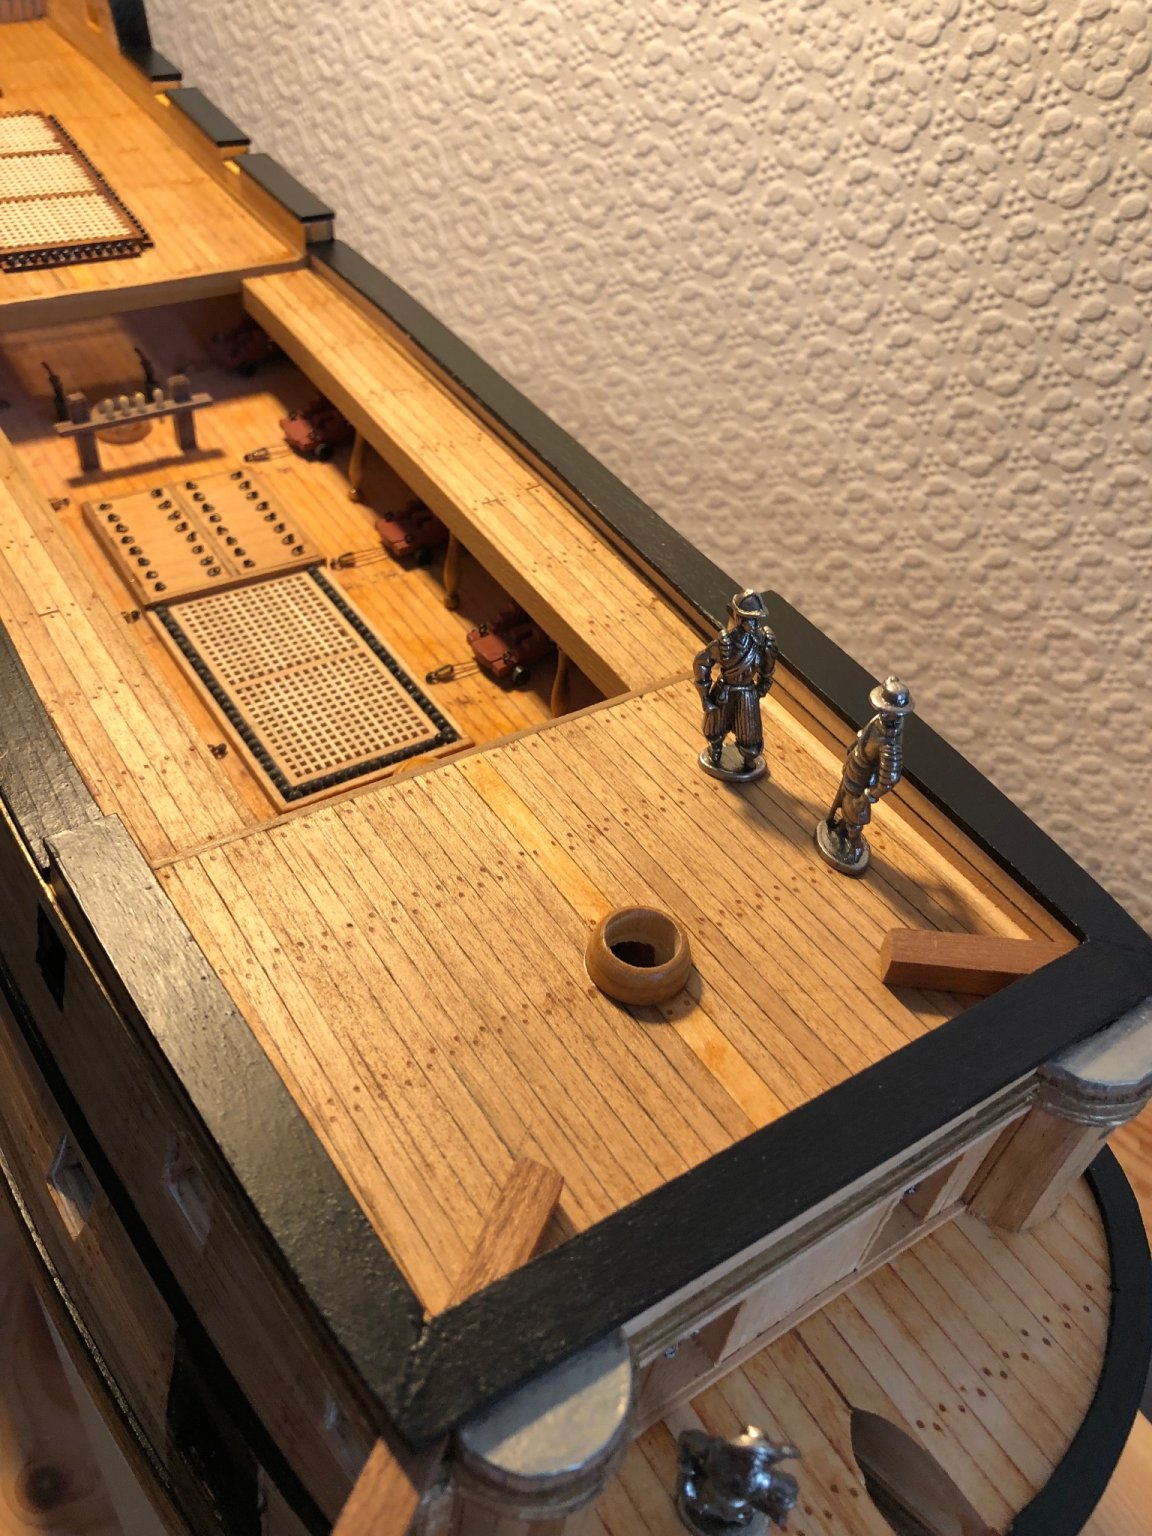
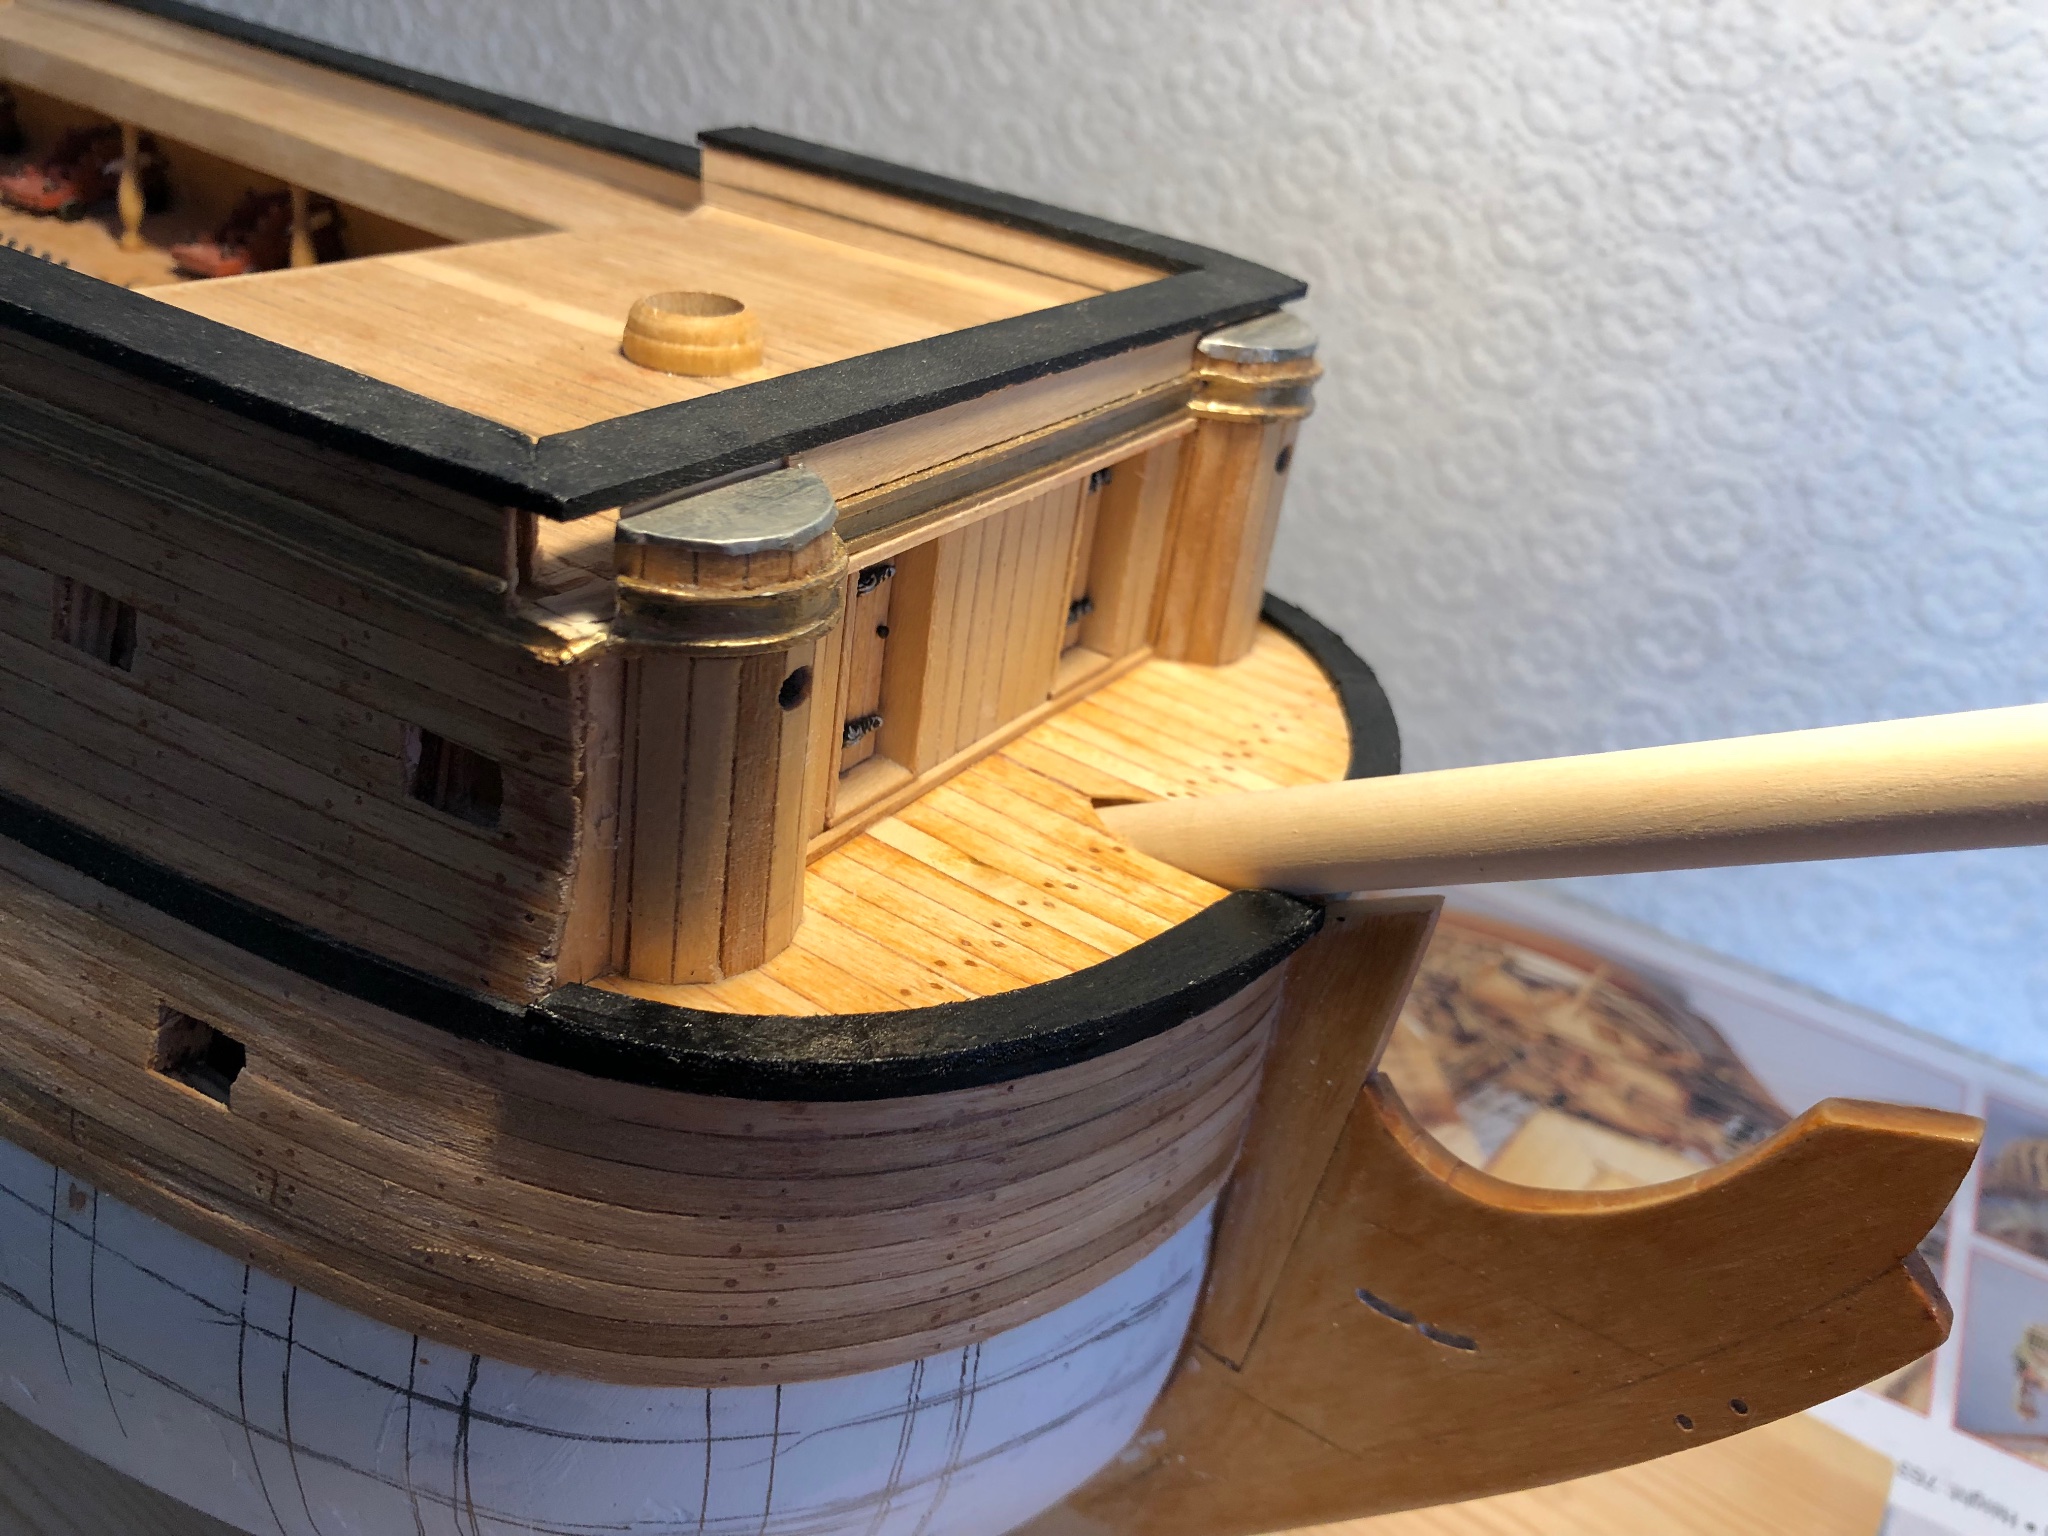
Samson posts made, painted and fitted.
Usual mix up between photo's, plans, parts list and timber supplied.
Went with plans and material from spares box.
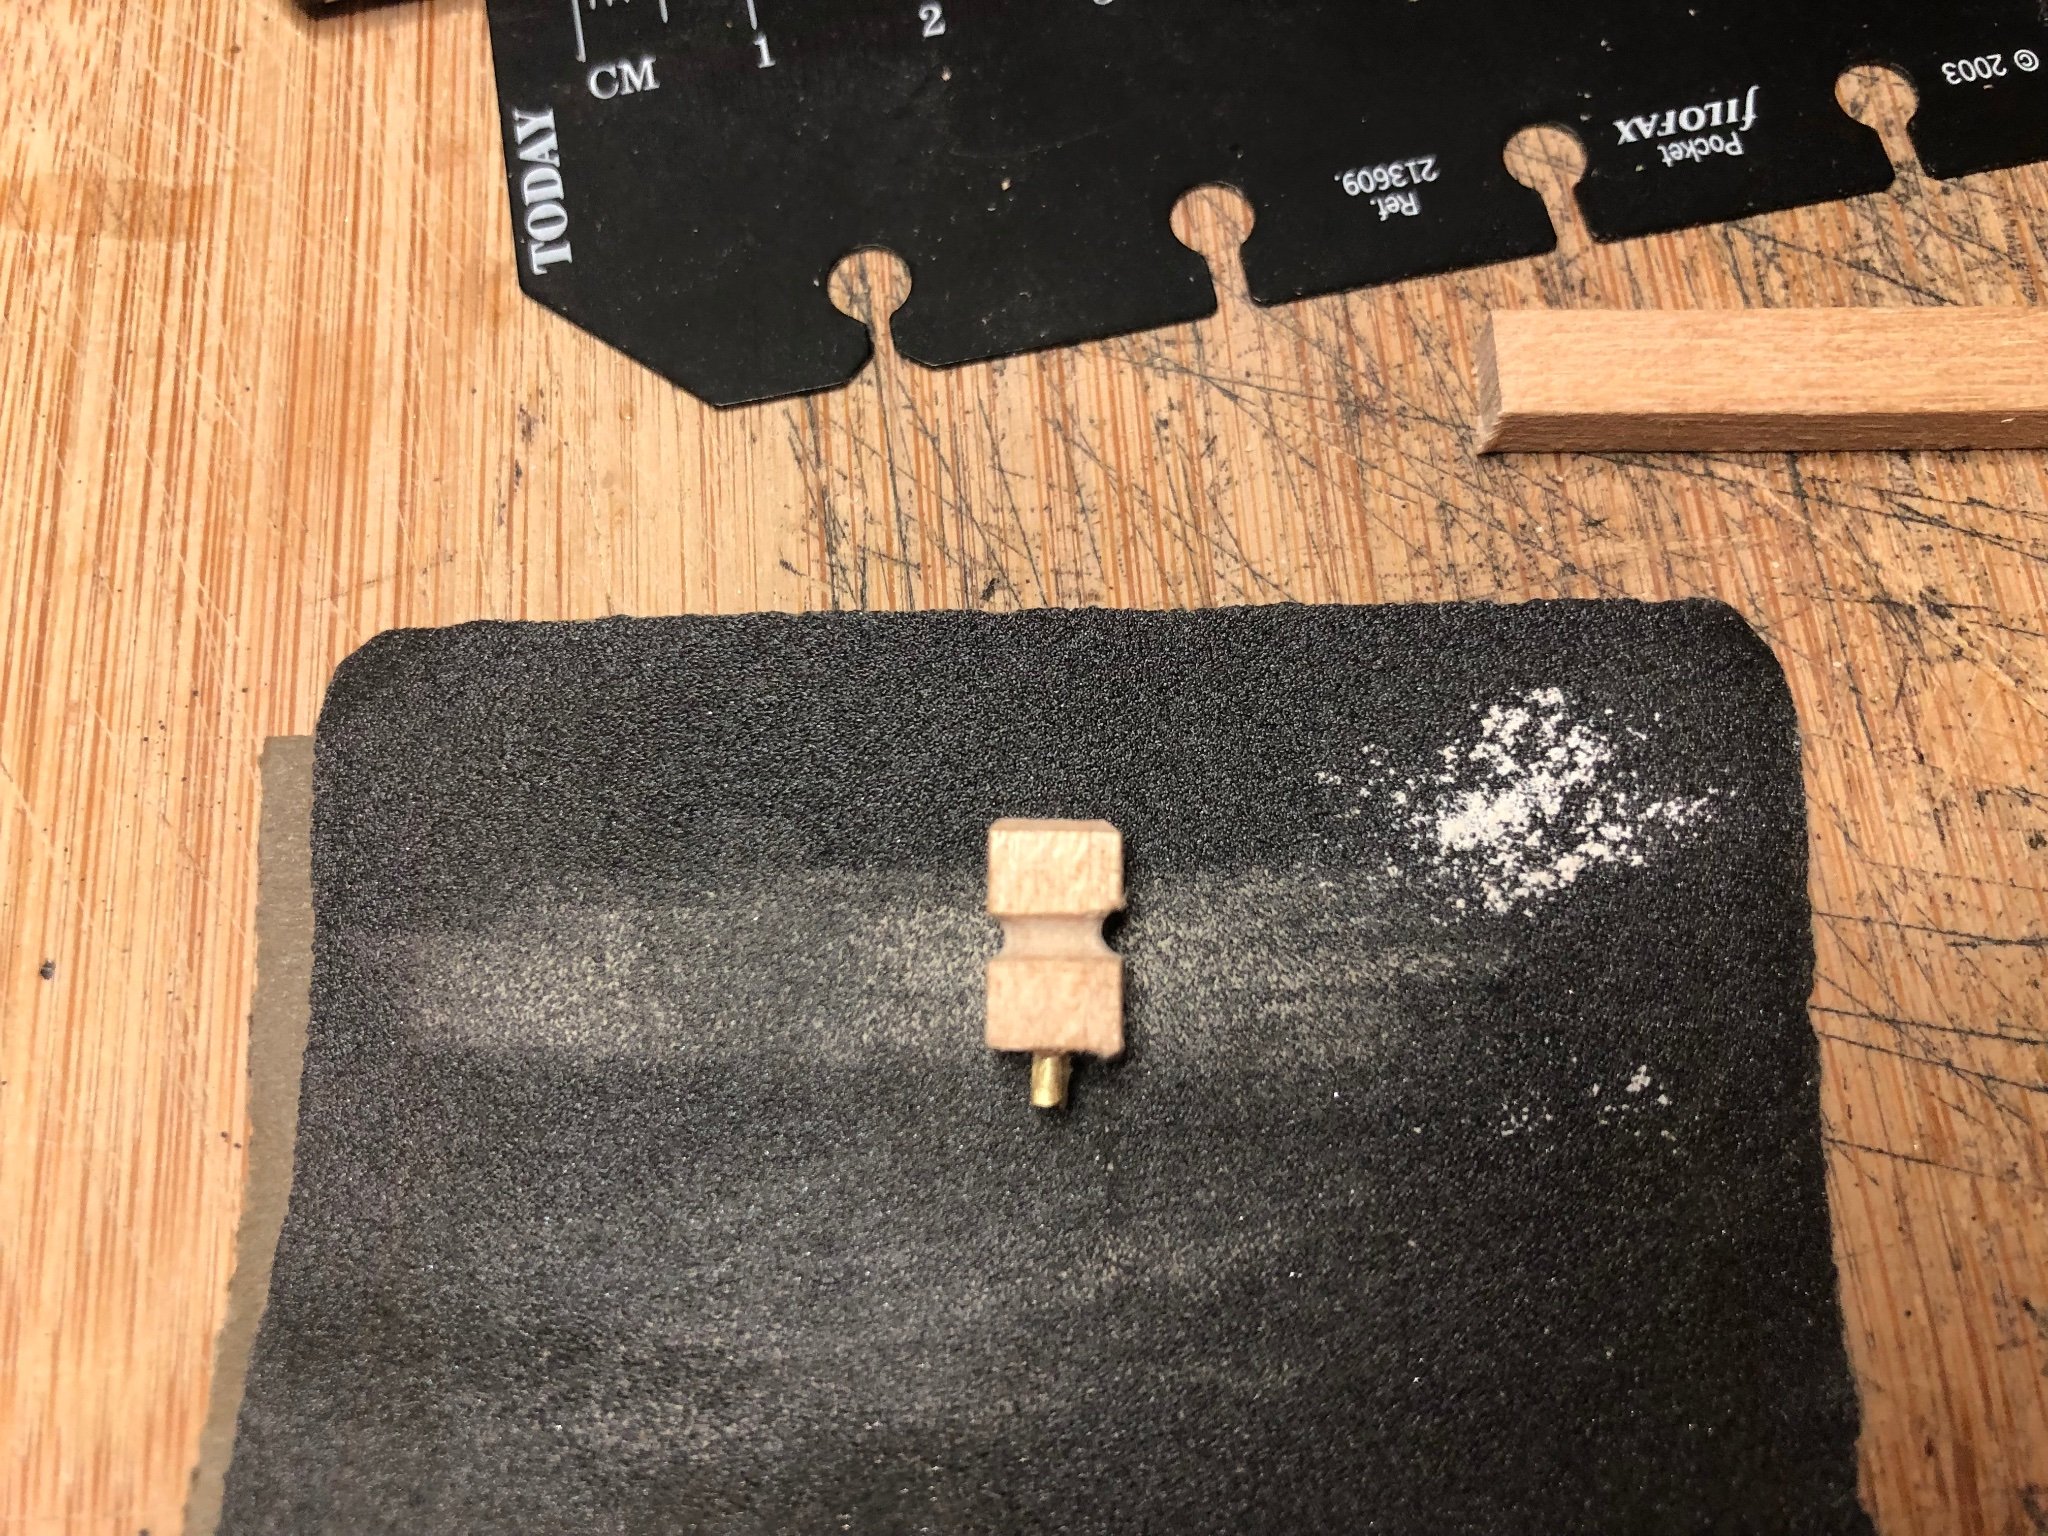
When fitting brass pegs I try to leave as short a length out of the bottom
as I can and still provide a decent shear key.
This is because I have a big problem with drilling vertically and the shorter
the length of peg the more chance the post will sit vertically in position.
This is a bodge but with gap filling glue works quite well.
Regards,
Sam.

- BobG, marktiedens, maurino and 5 others
-
8
-
Like the buckets and brackets. Very smart.
Sam
-
Hi, and thanks for the likes.
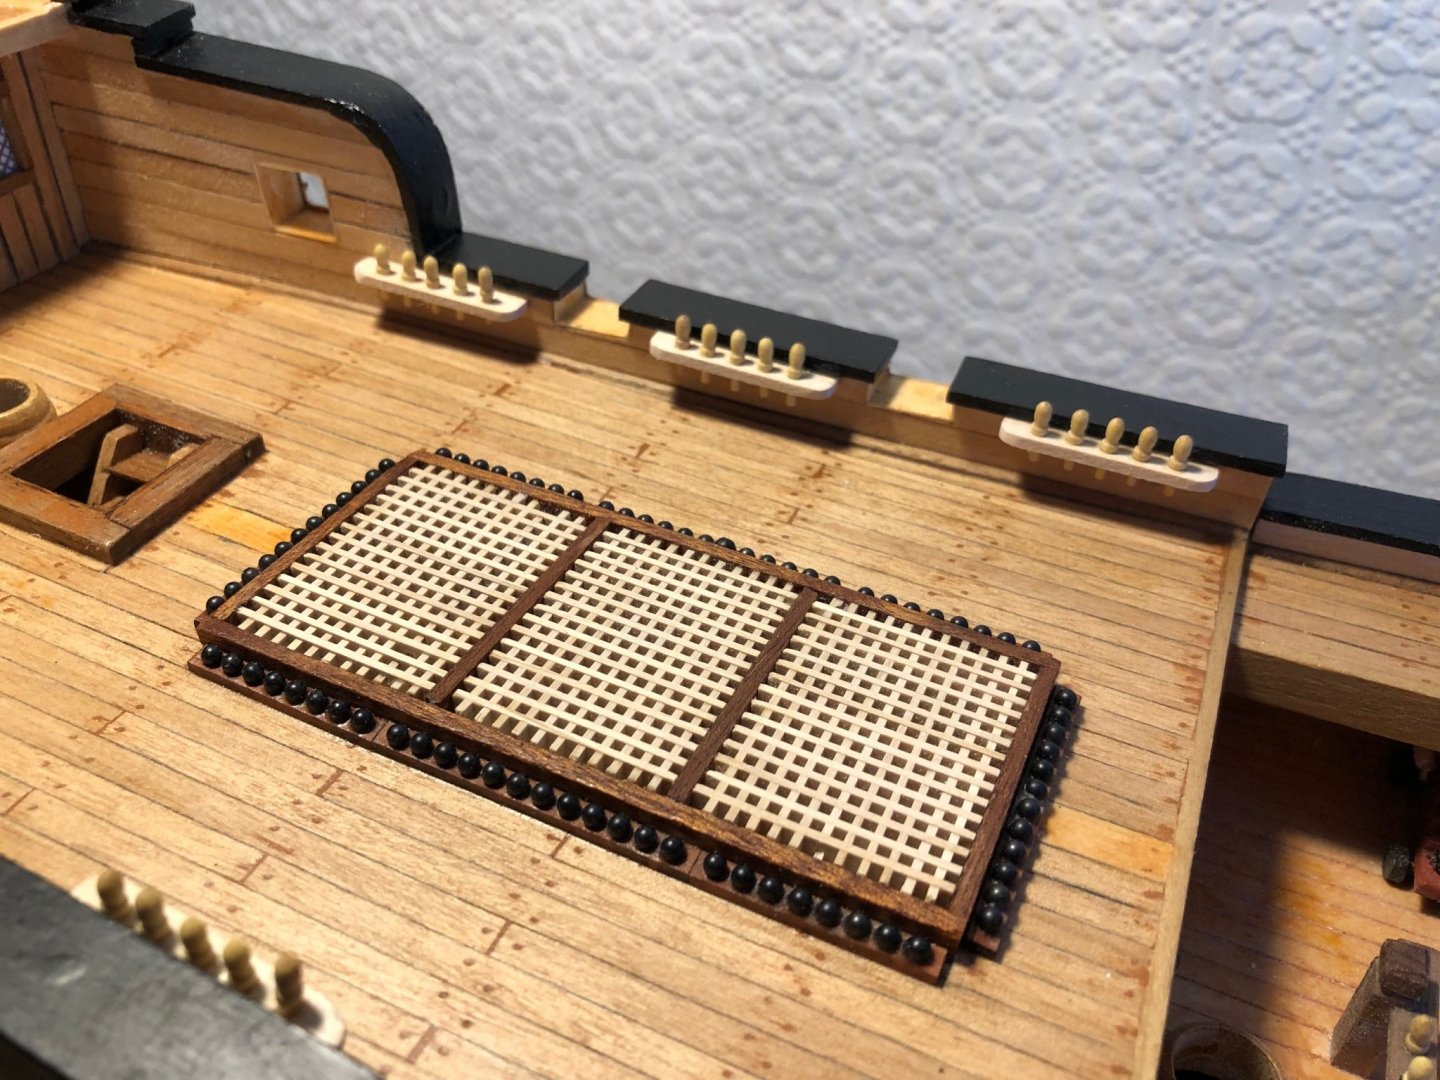
Side and bow pinrails fitted.
Regards,
Sam

-
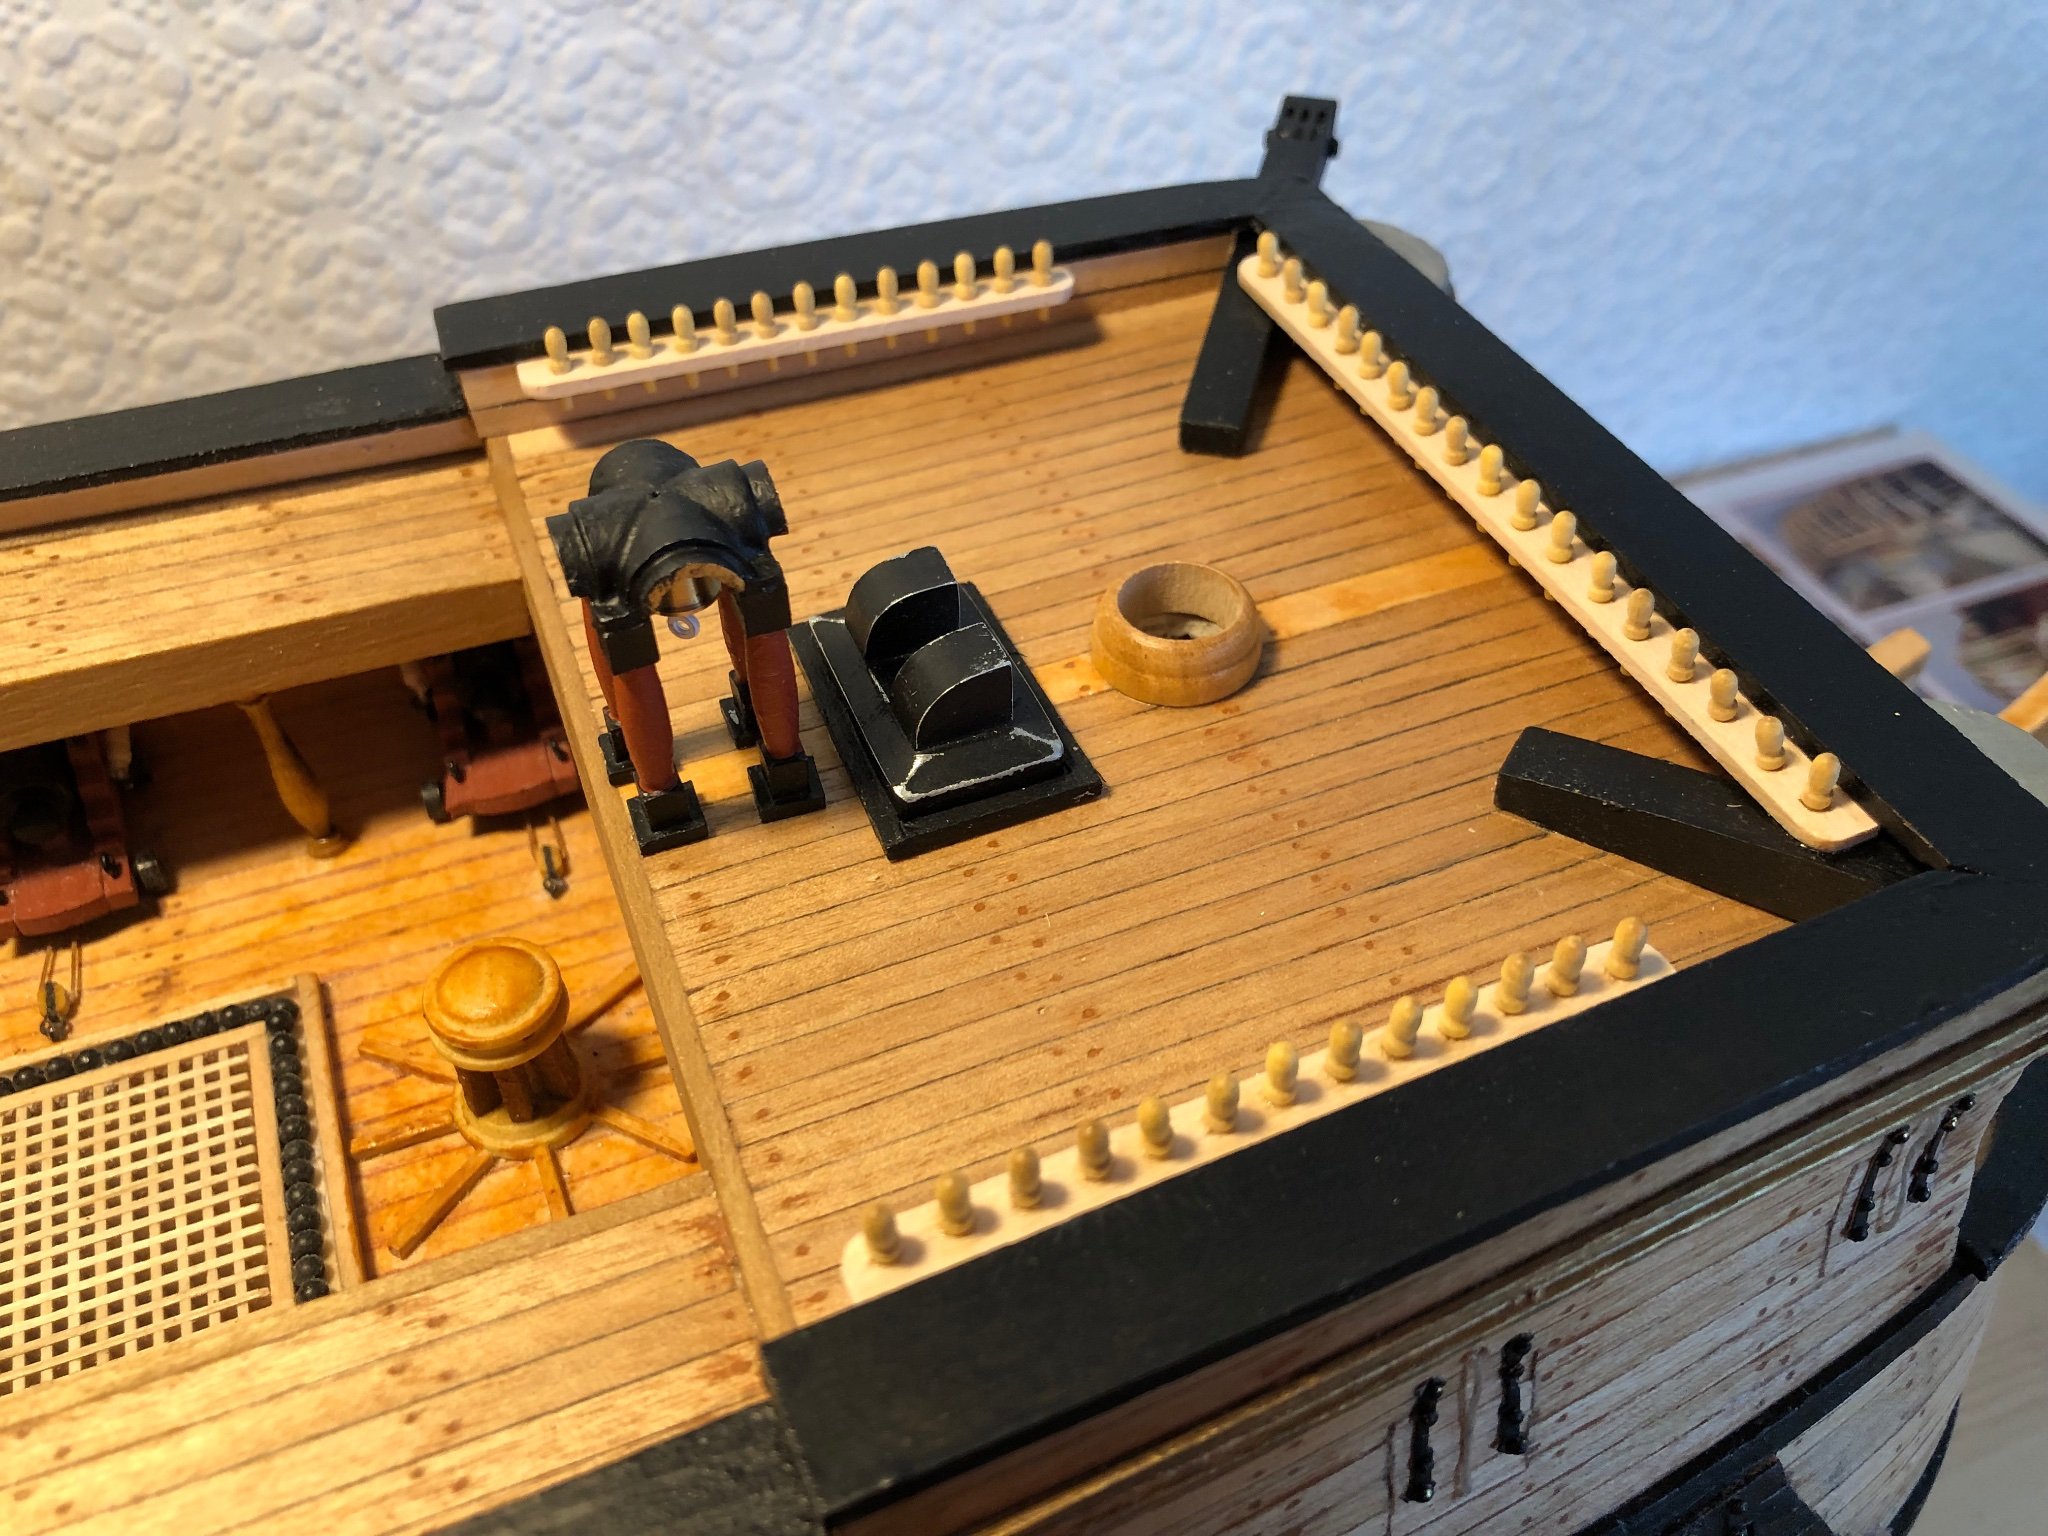
Remember that old saying - measure twice, cut once ??
Not happy with the chimney orientation after posting.
Checked with instruction photo 141then finally checked plan
which shows it correctly. Photo below.
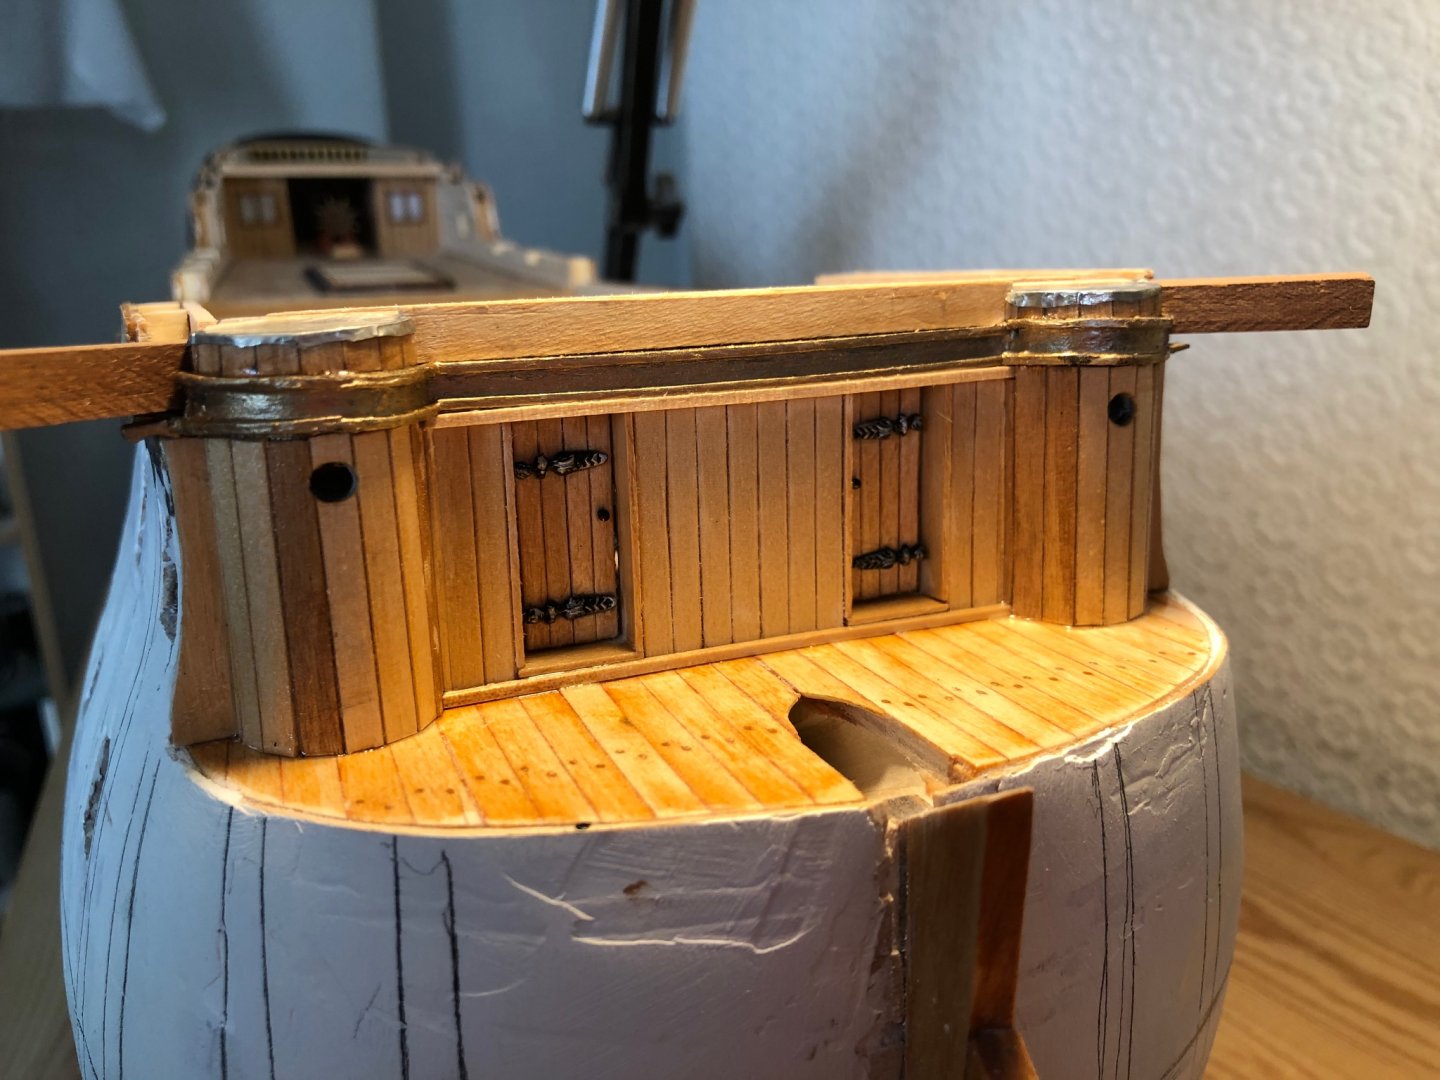
Also, samson posts to forecastle - bow posts from 5 x 5 material,
side posts from 6 x 6 in parts list.
Plan shows bow posts correct, side posts should be 6 x 4.
Forgot how bad the plans and instructions are.
No harm done but won't be so cocky next time.
Is it weird that I am enjoying this build ???
Regards,
Sam.

- BobG, Baker, scrubbyj427 and 6 others
-
9
-
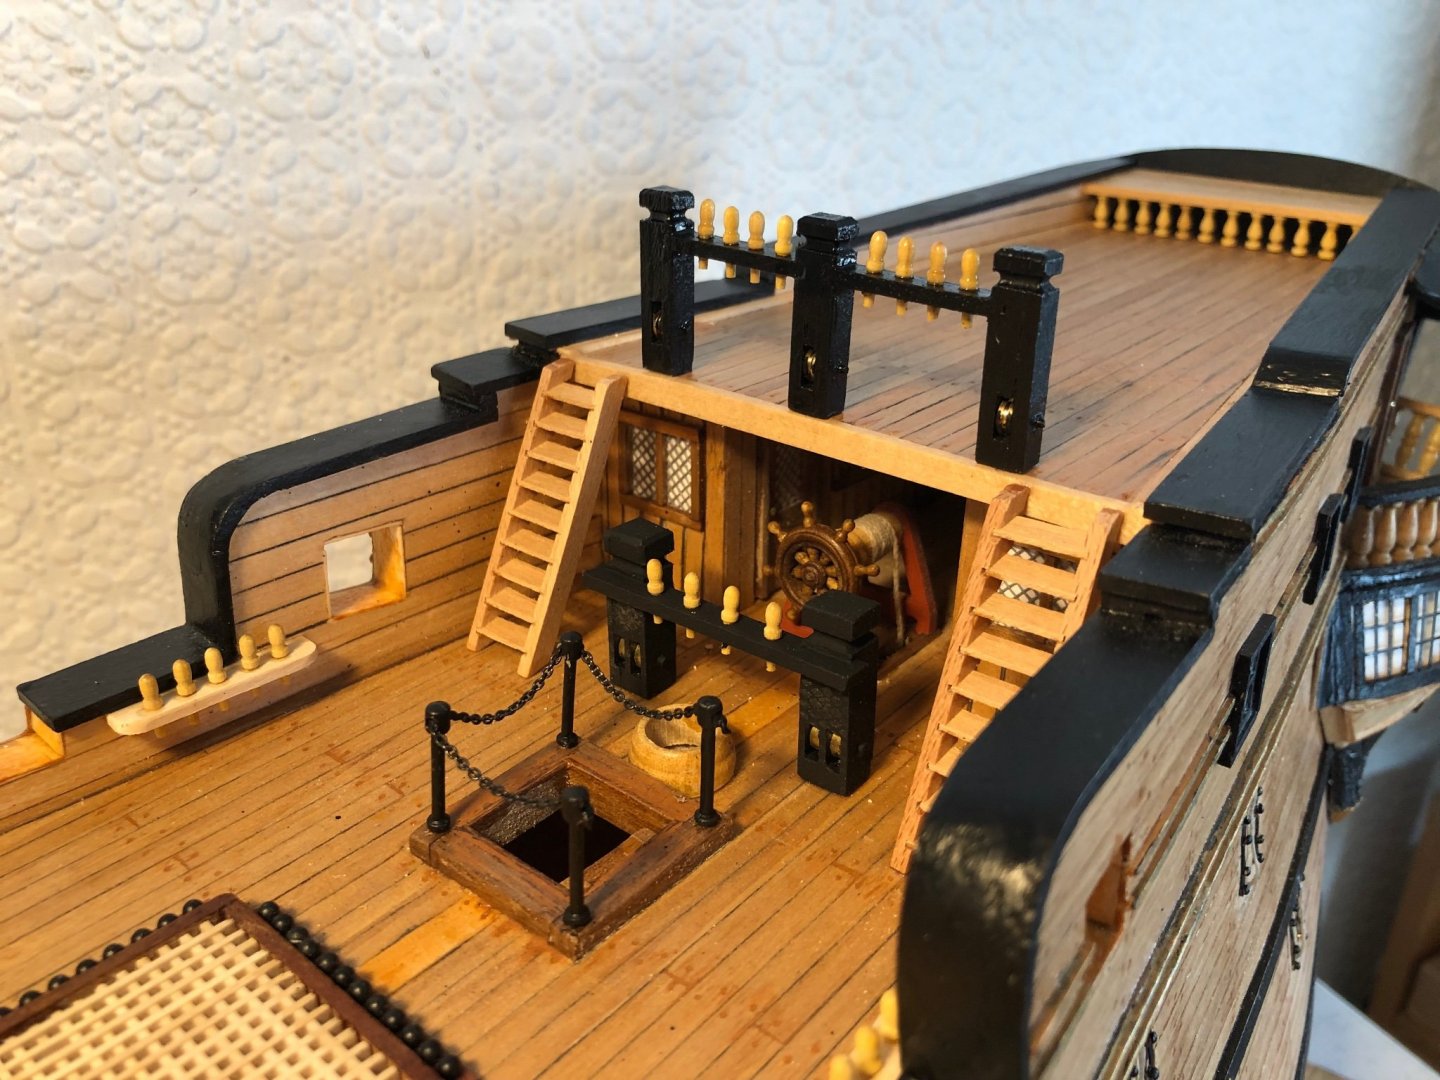
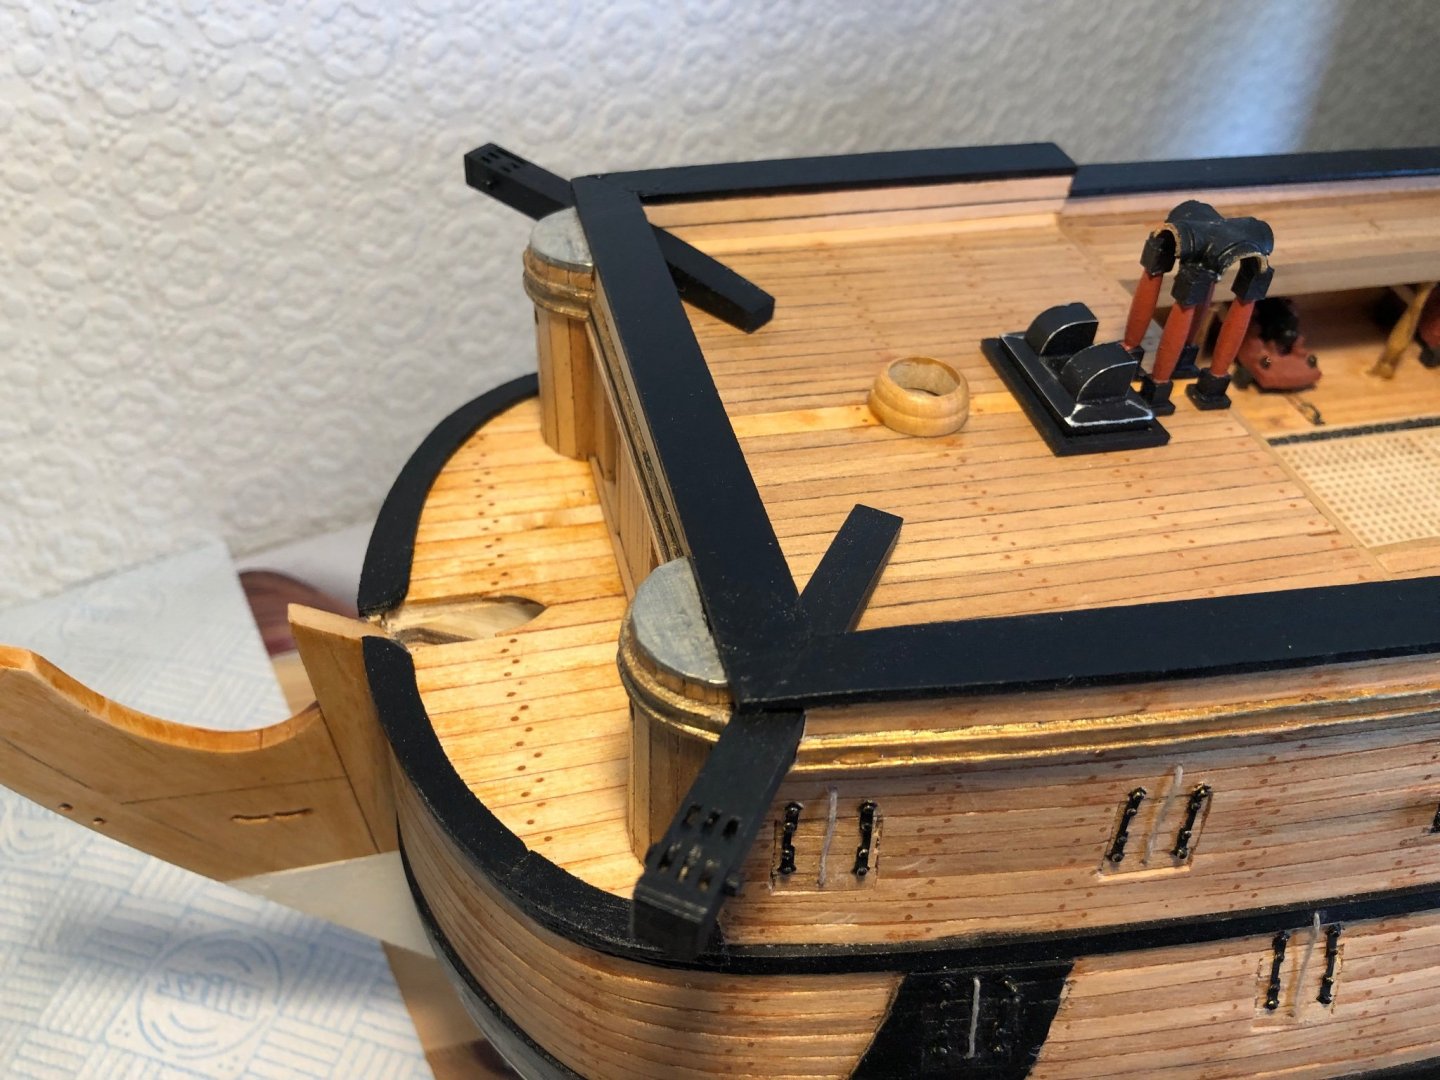
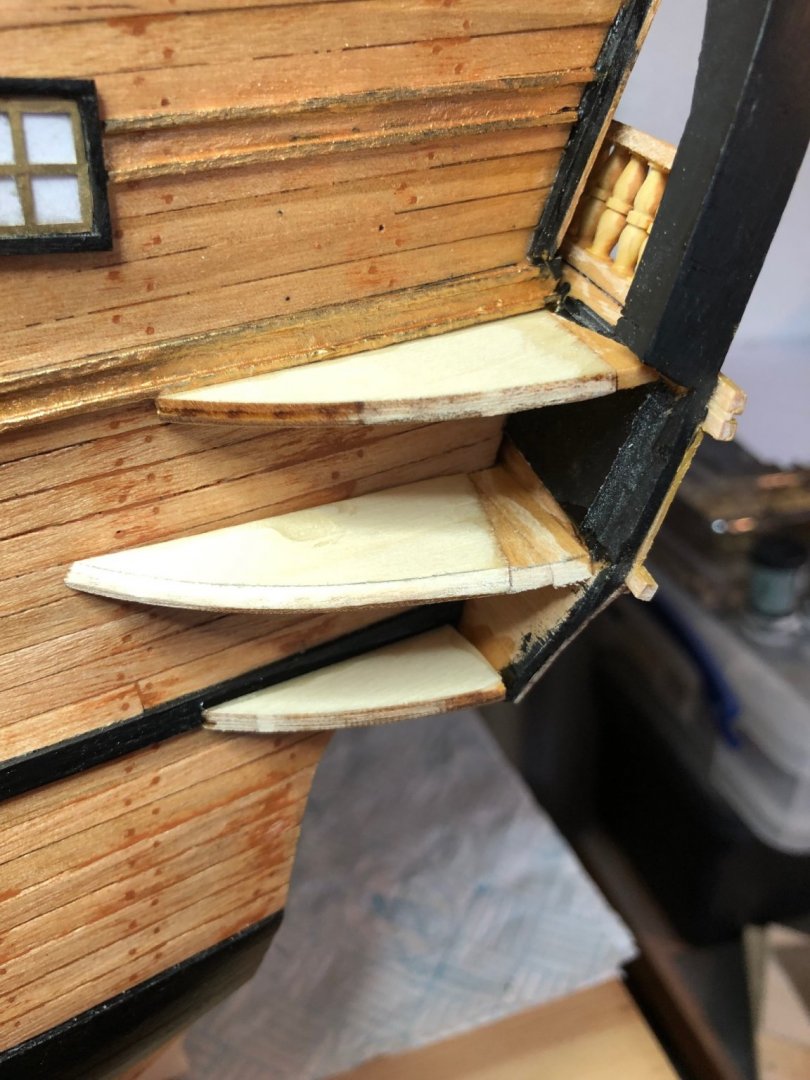
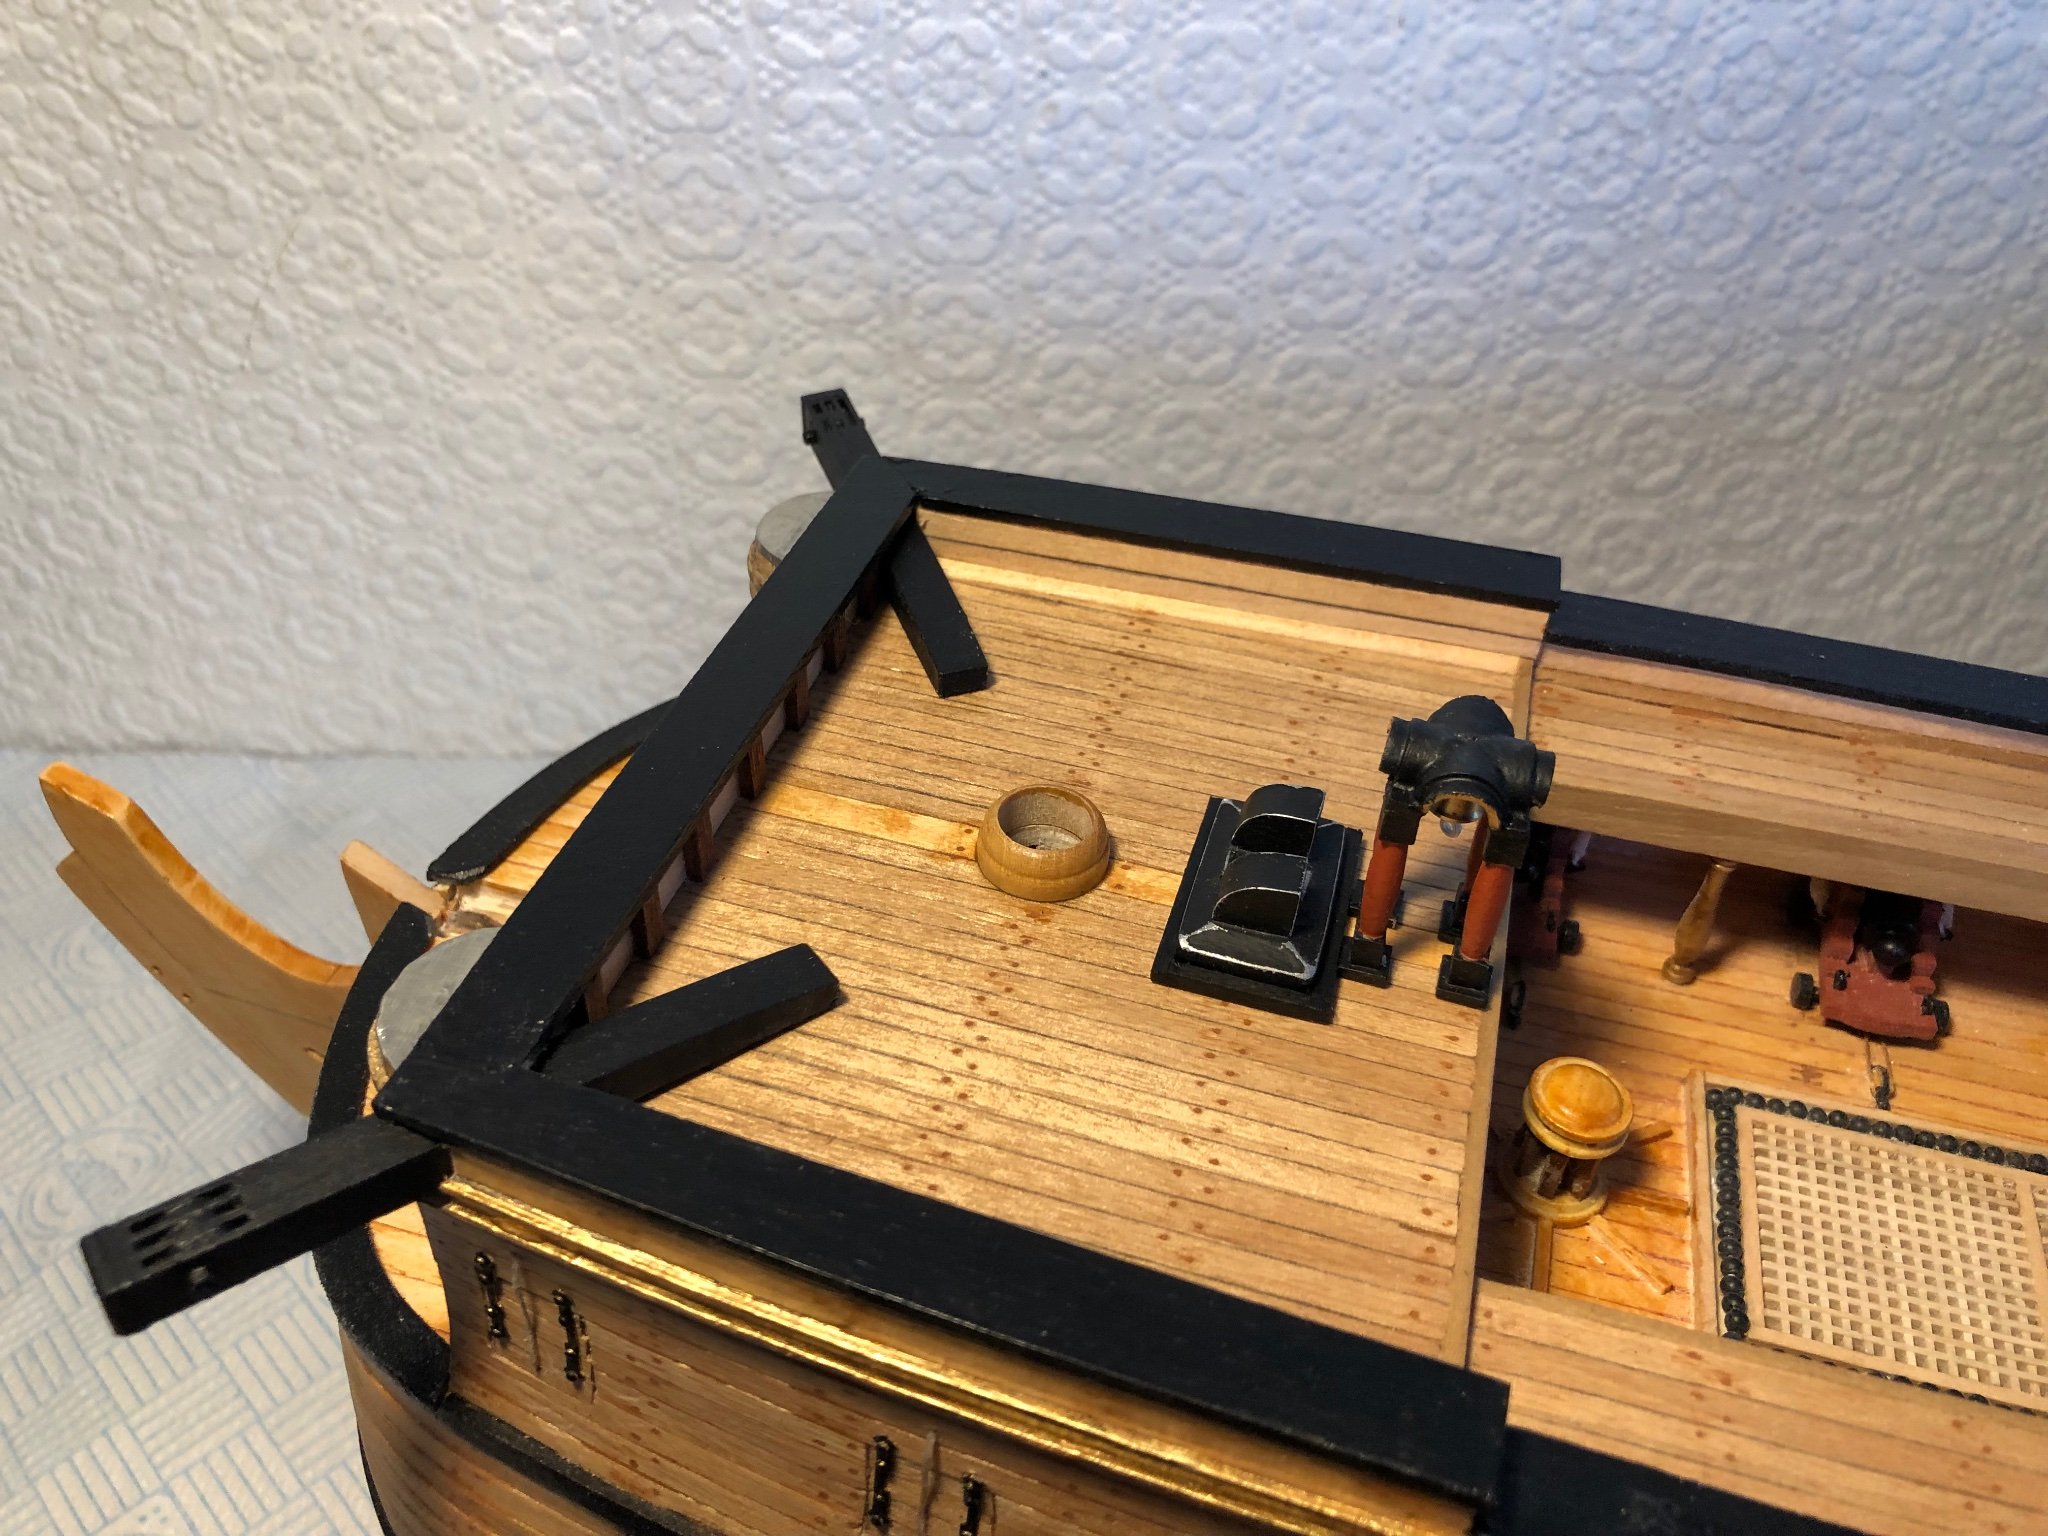
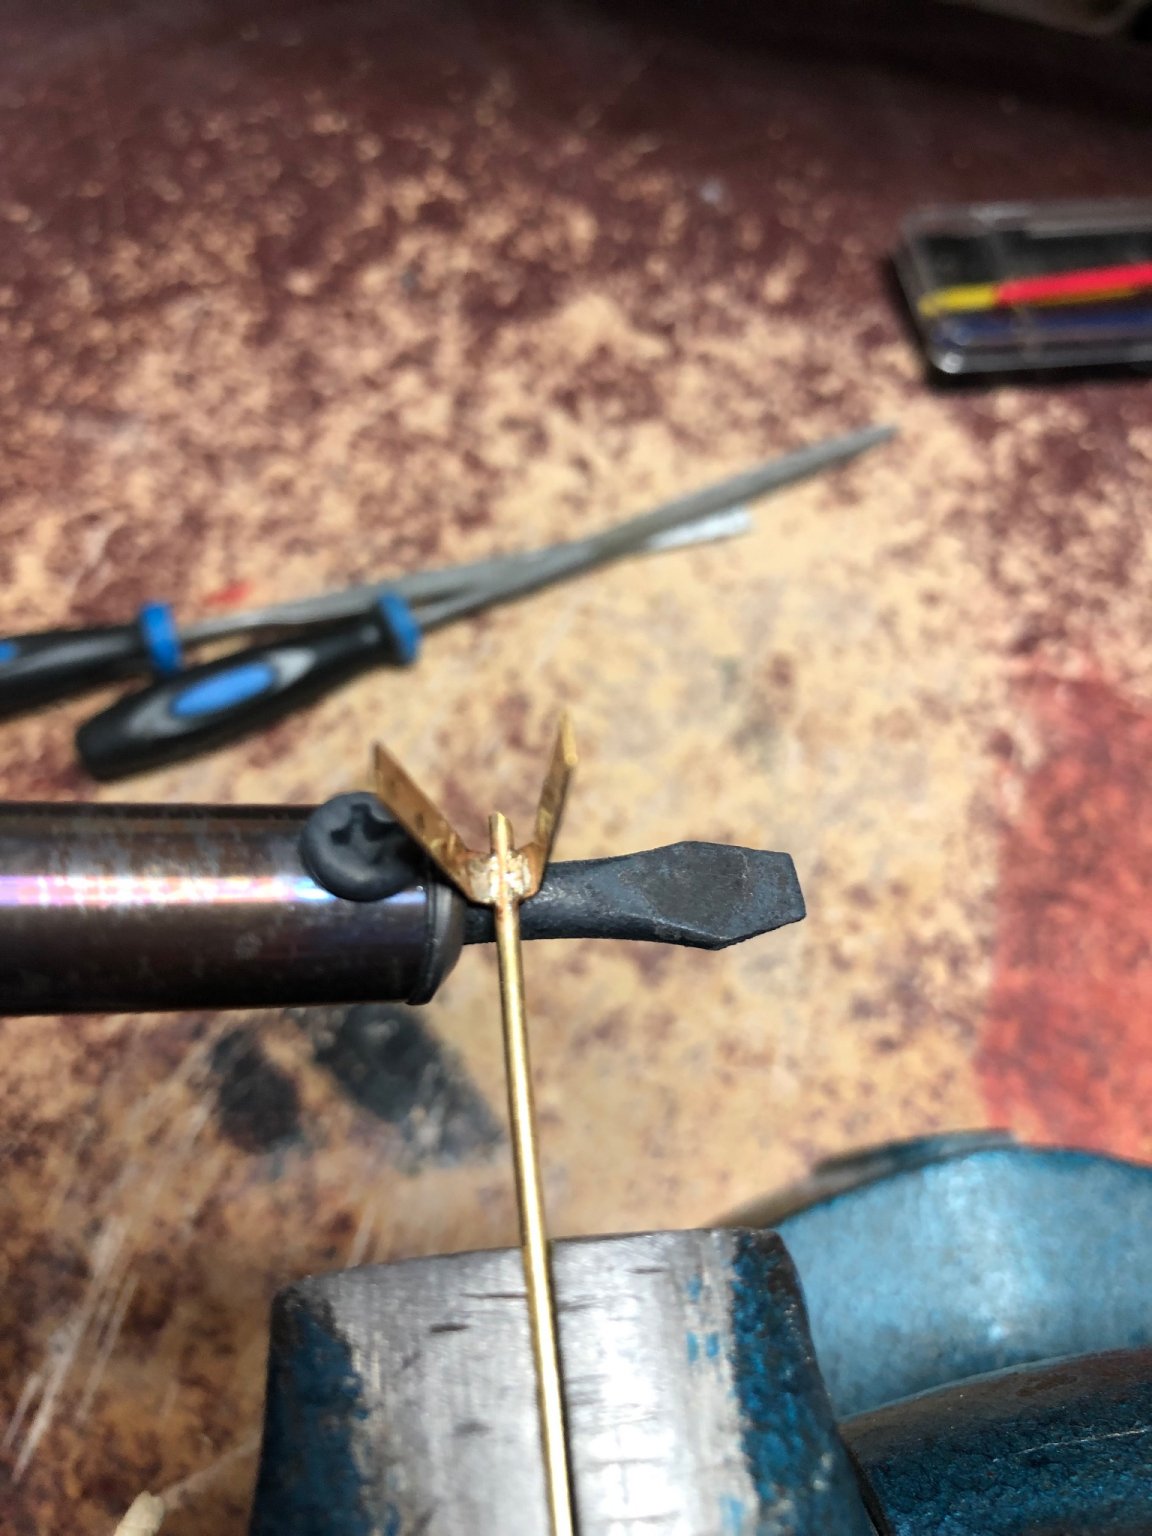
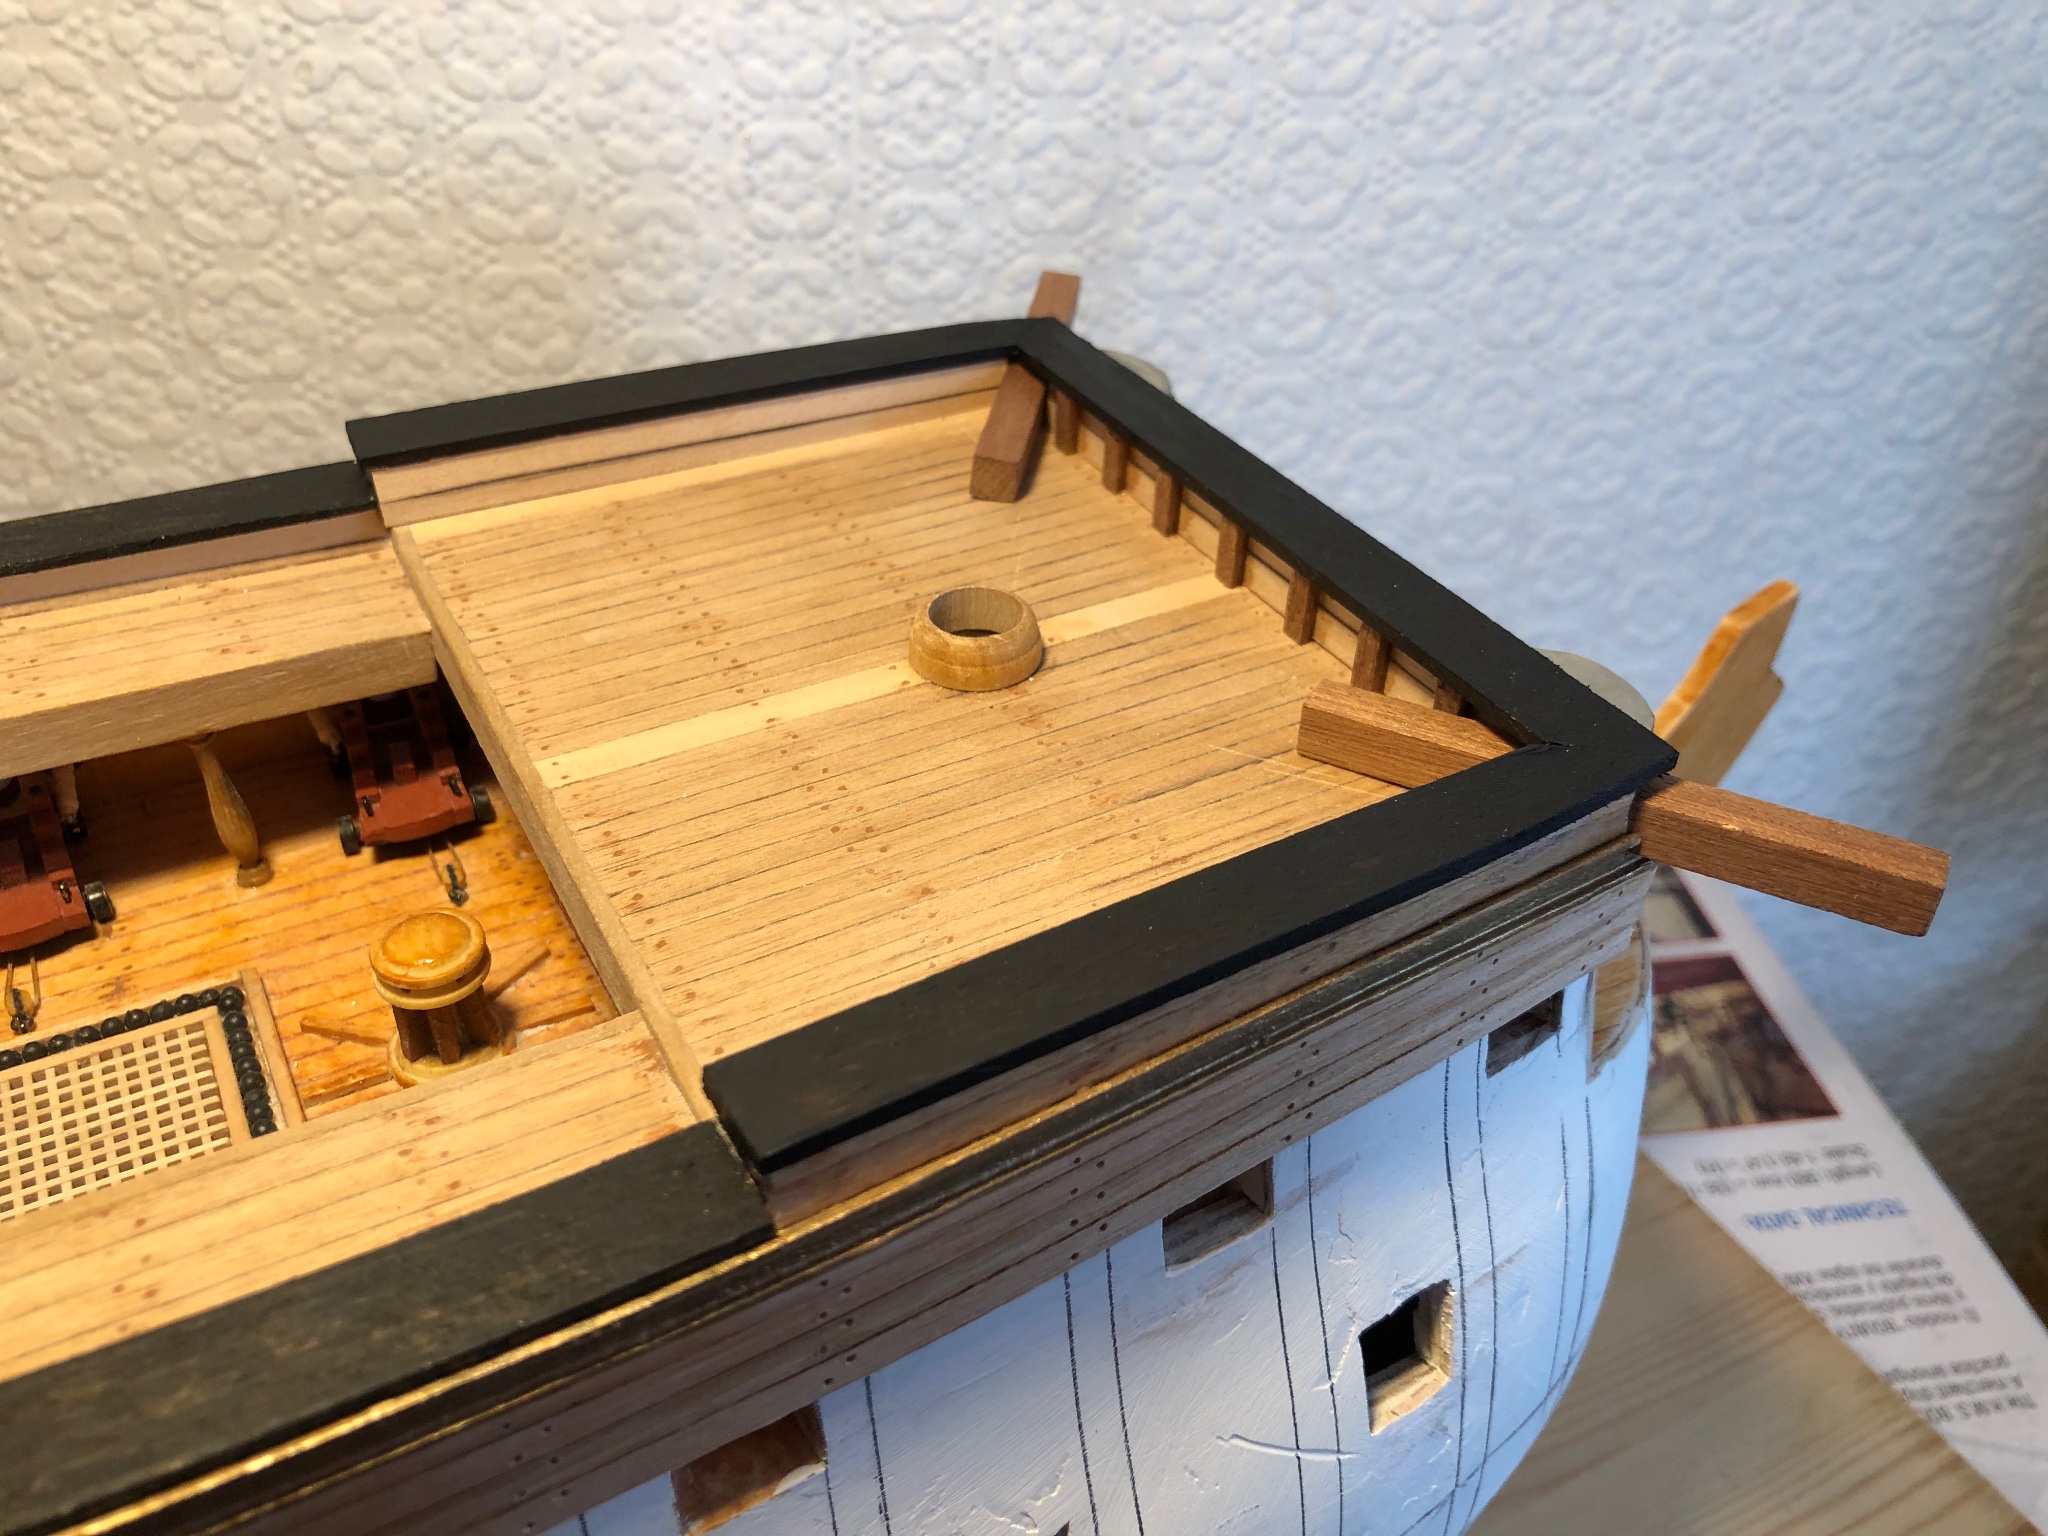
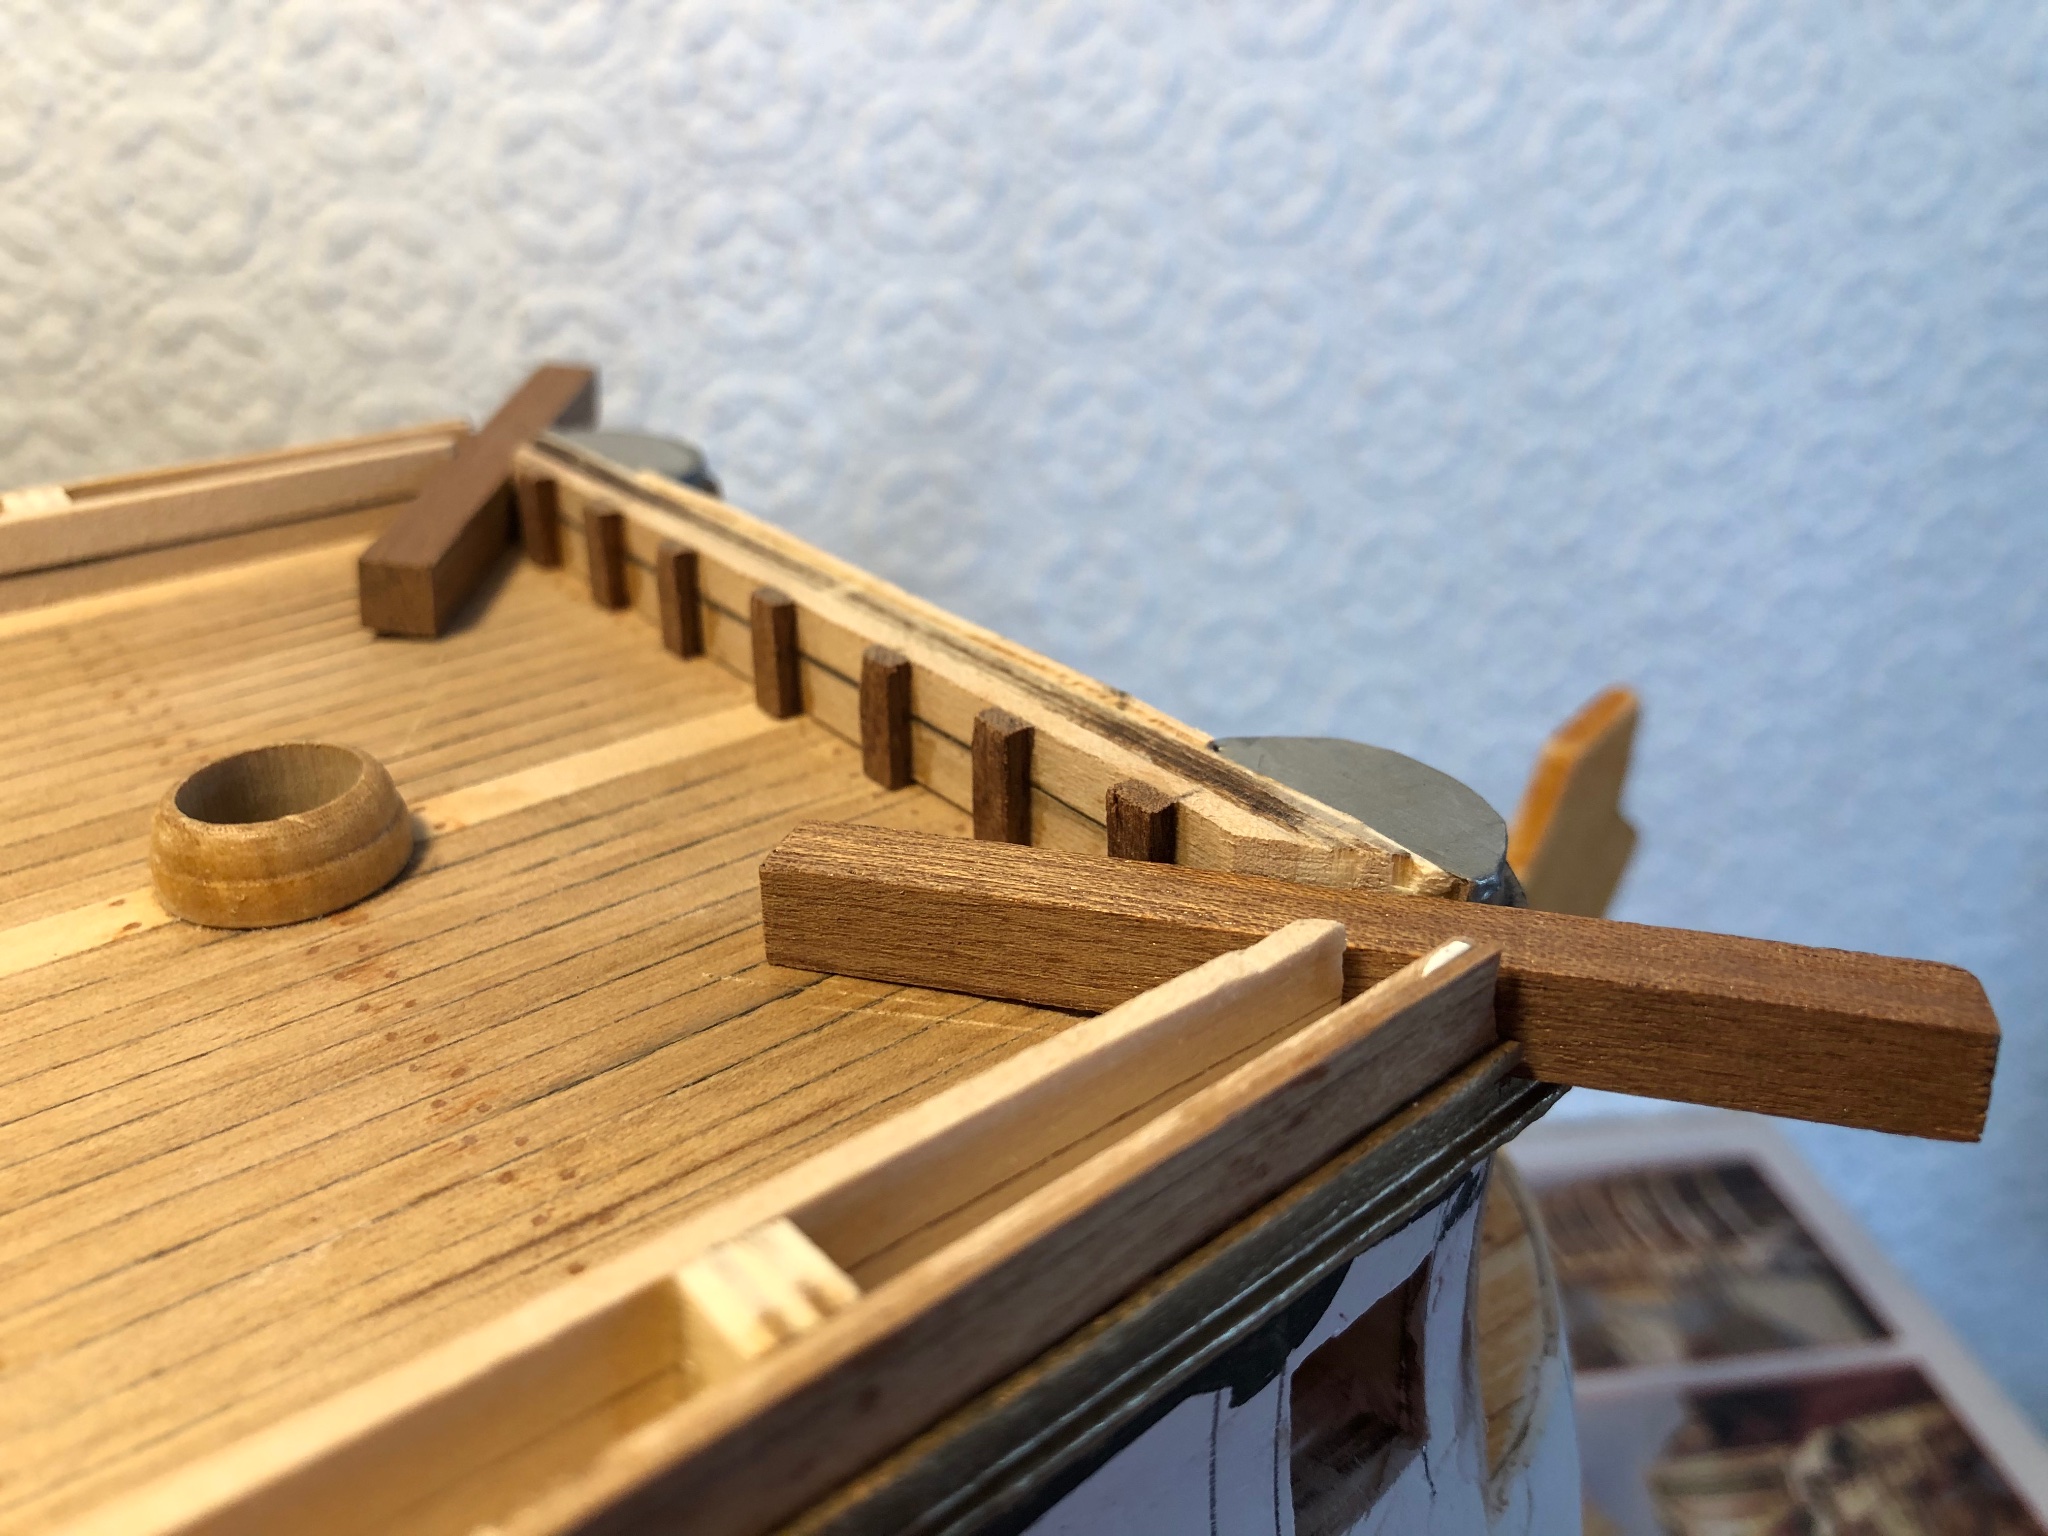
Hi and, thanks for visiting.
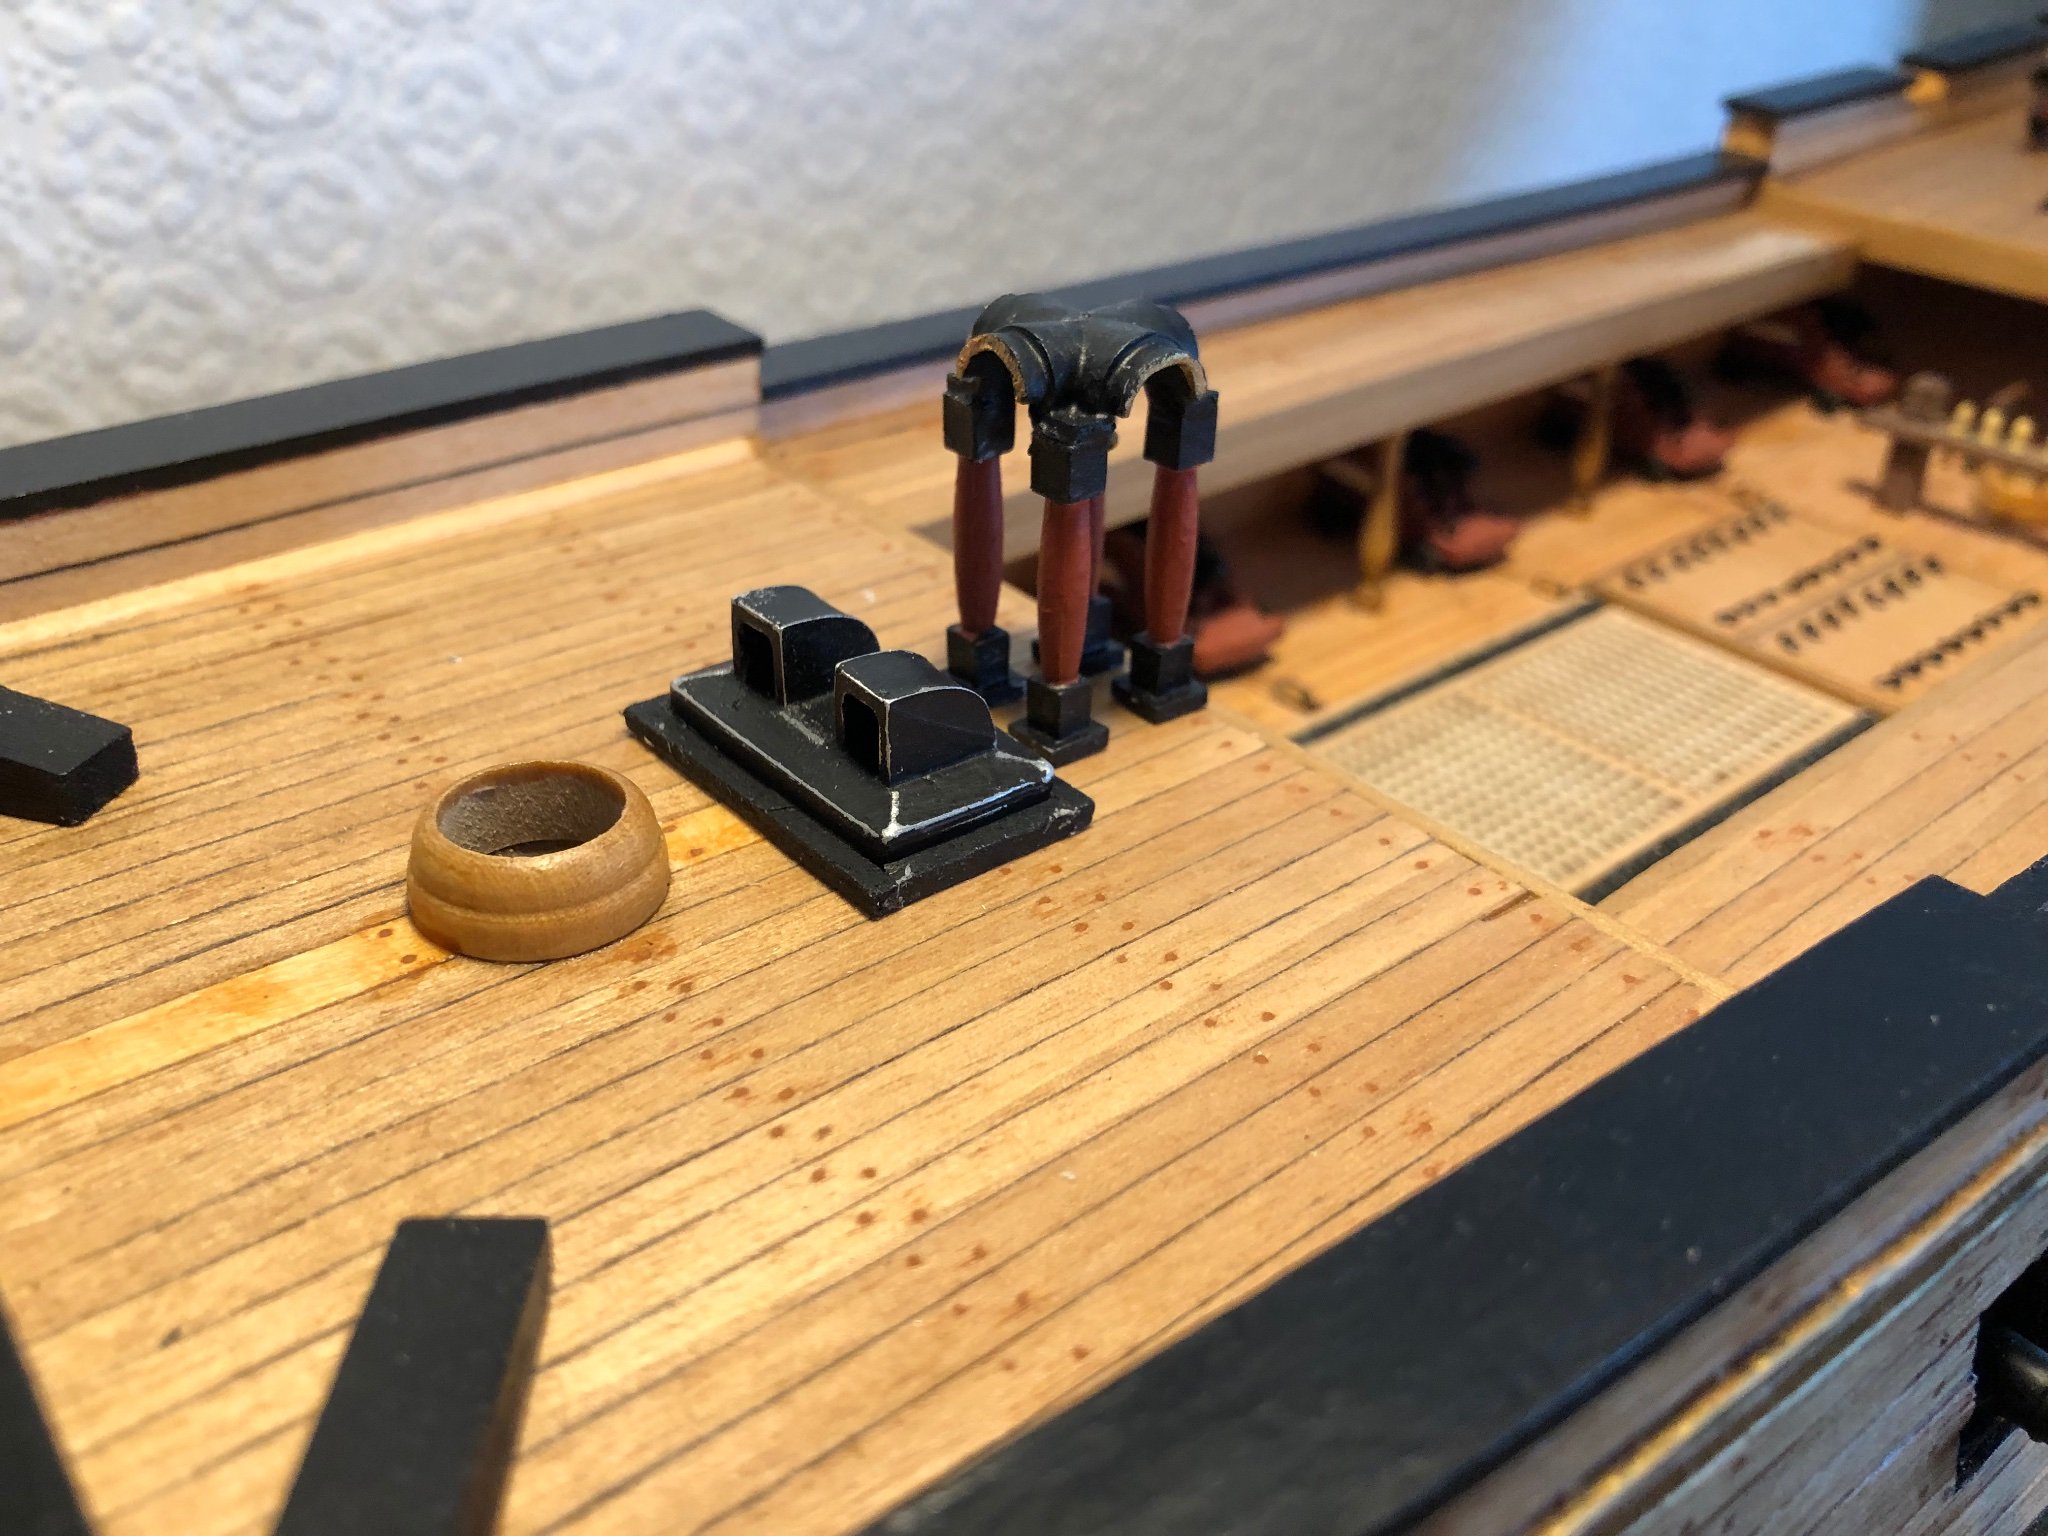
Waist cannon barrels added.
Also belfry, chimney and cat-heads added to forecastle.
The cat-heads were my third attempt.
Regards,
Sam.


- Danstream, marktiedens, Baker and 4 others
-
7
-
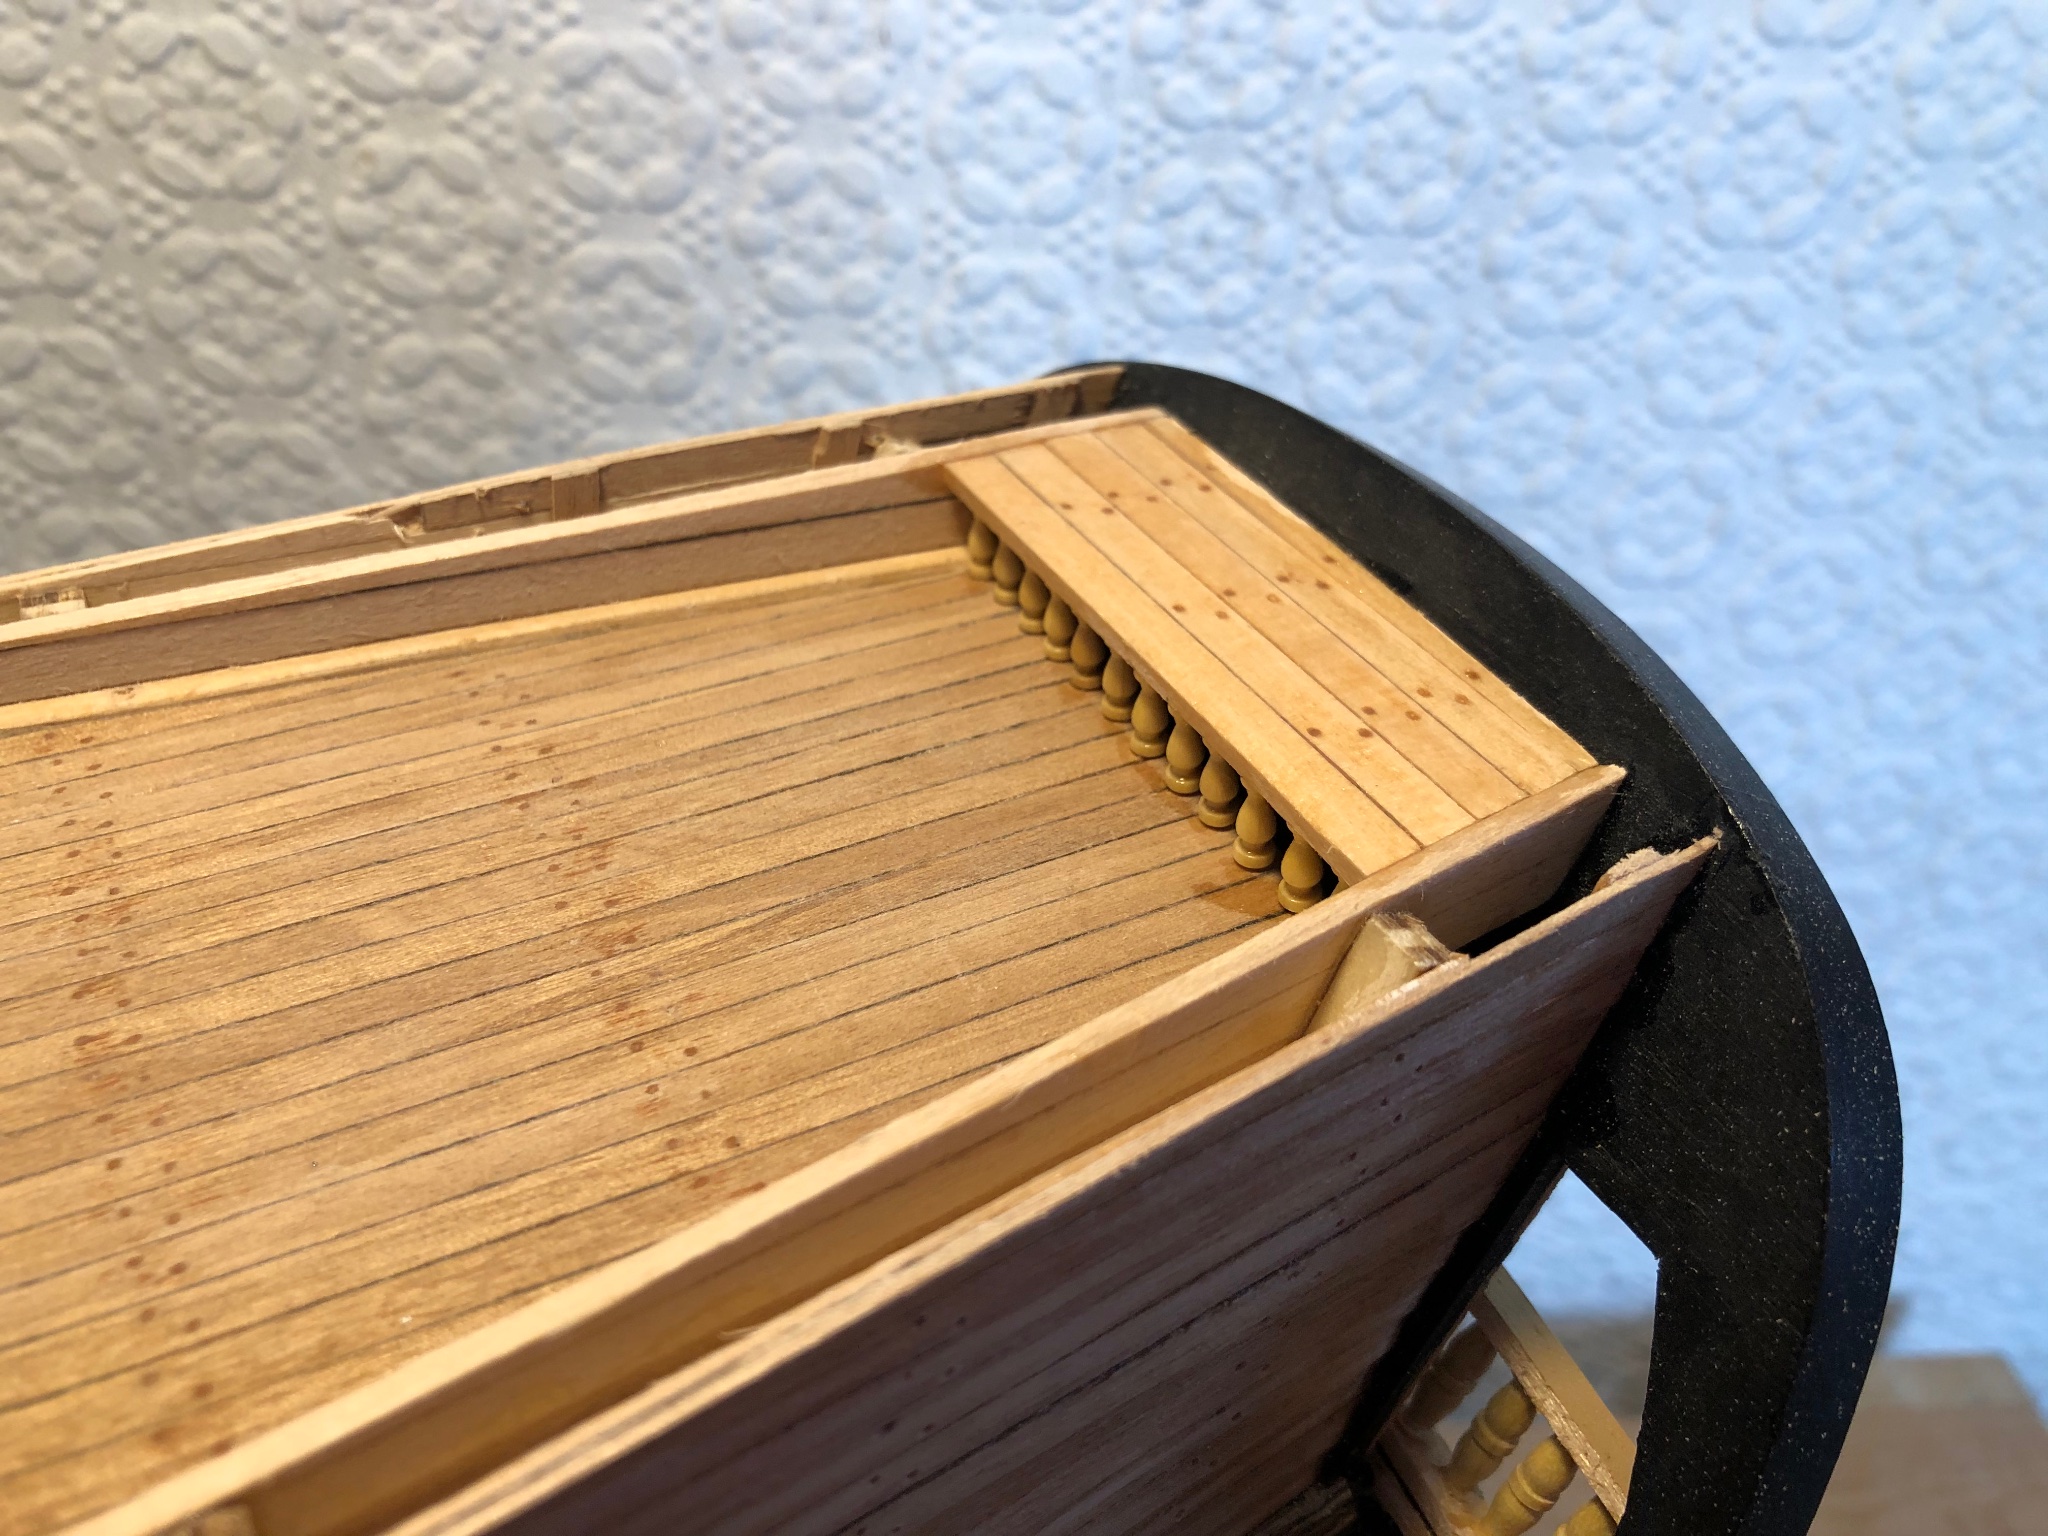
Hello and, thanks for visiting.
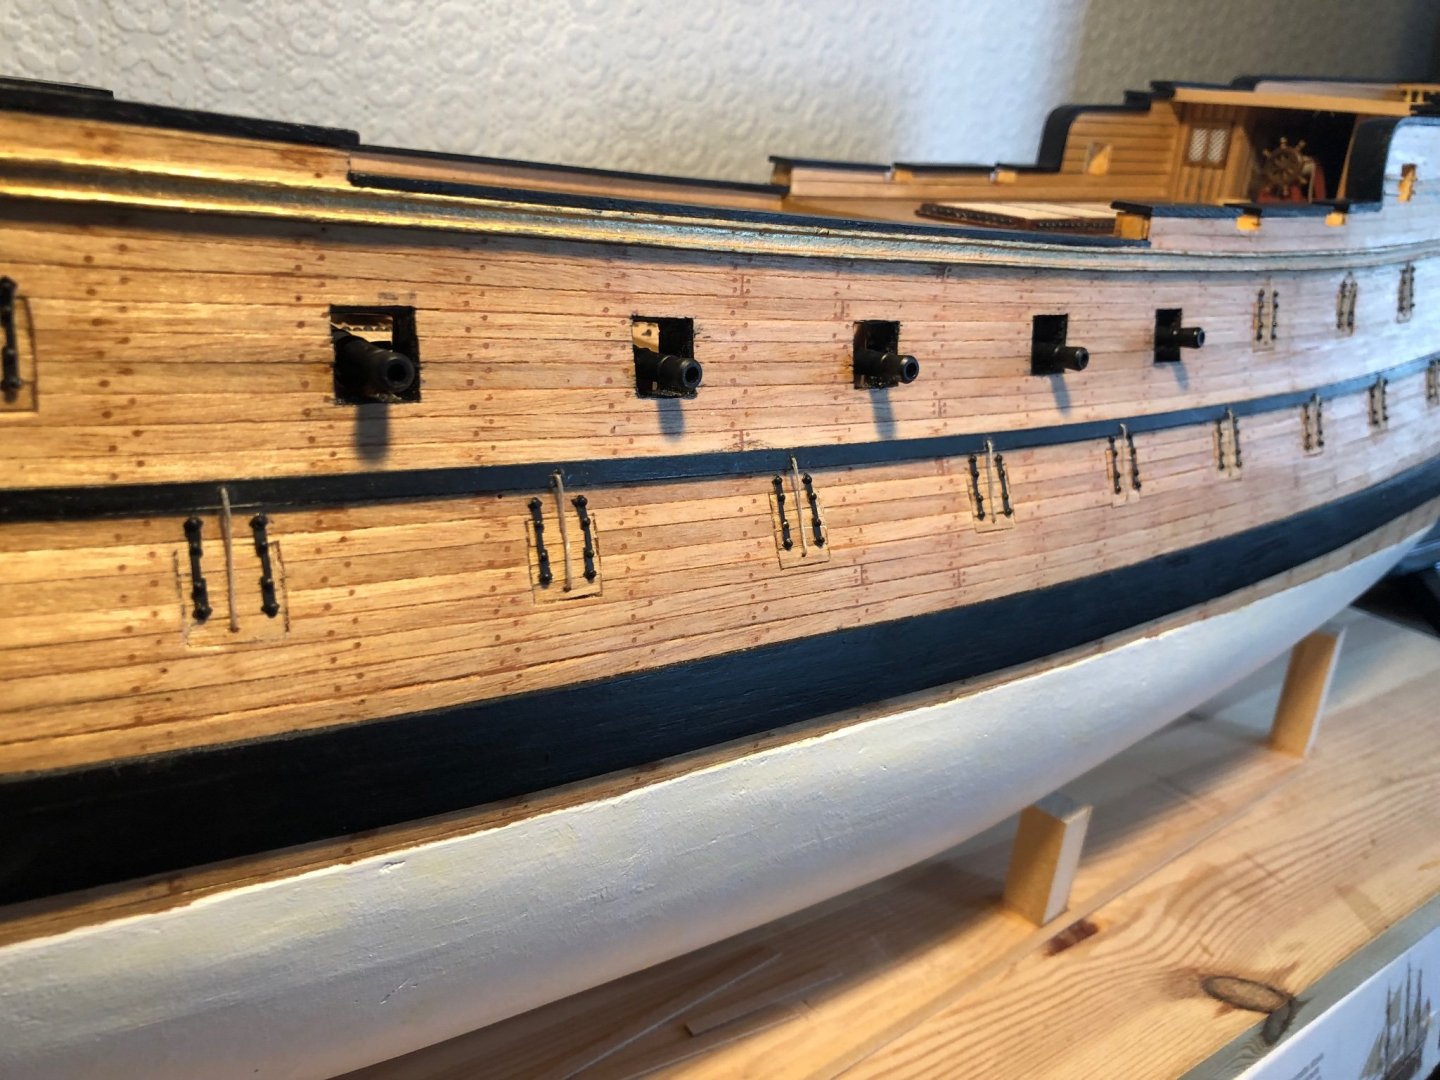
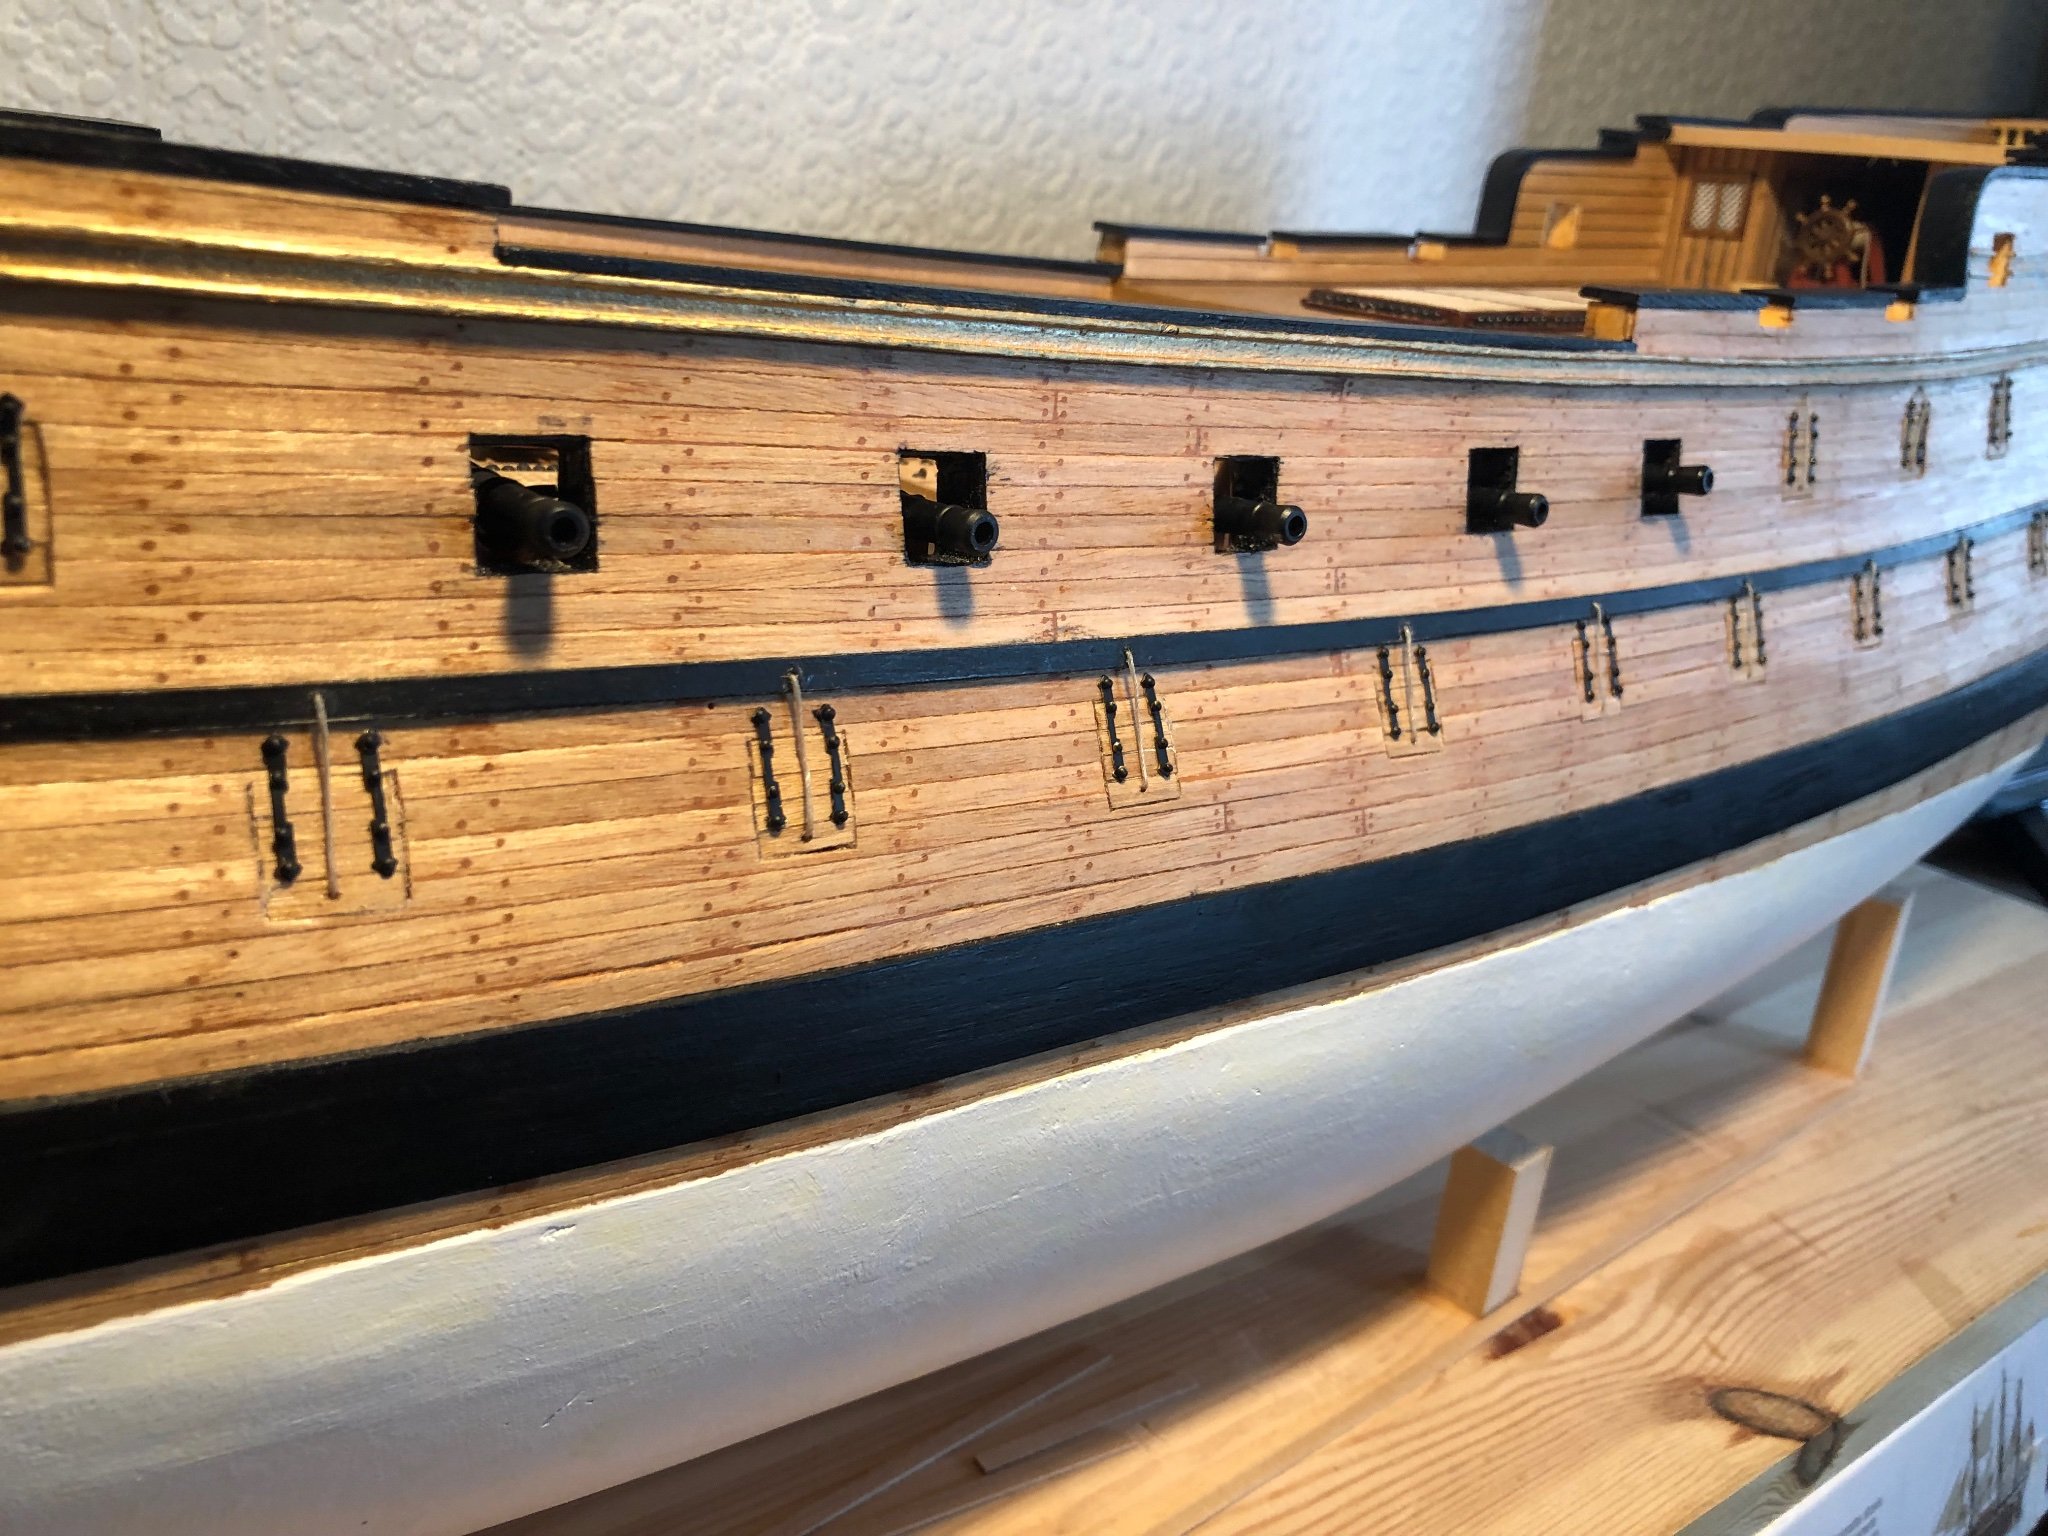
Gunport lids fitted.
Wasn't happy with the cannon barrels provided so substituted
the 10 waist cannon with stock from the spares box and fitted lids to the rest.
The waist cannon are being painted next. Carriages already in position.
Probably go for deck furniture next.
Regards,
Sam.
- marktiedens, puckotred, Danstream and 4 others
-
7
-
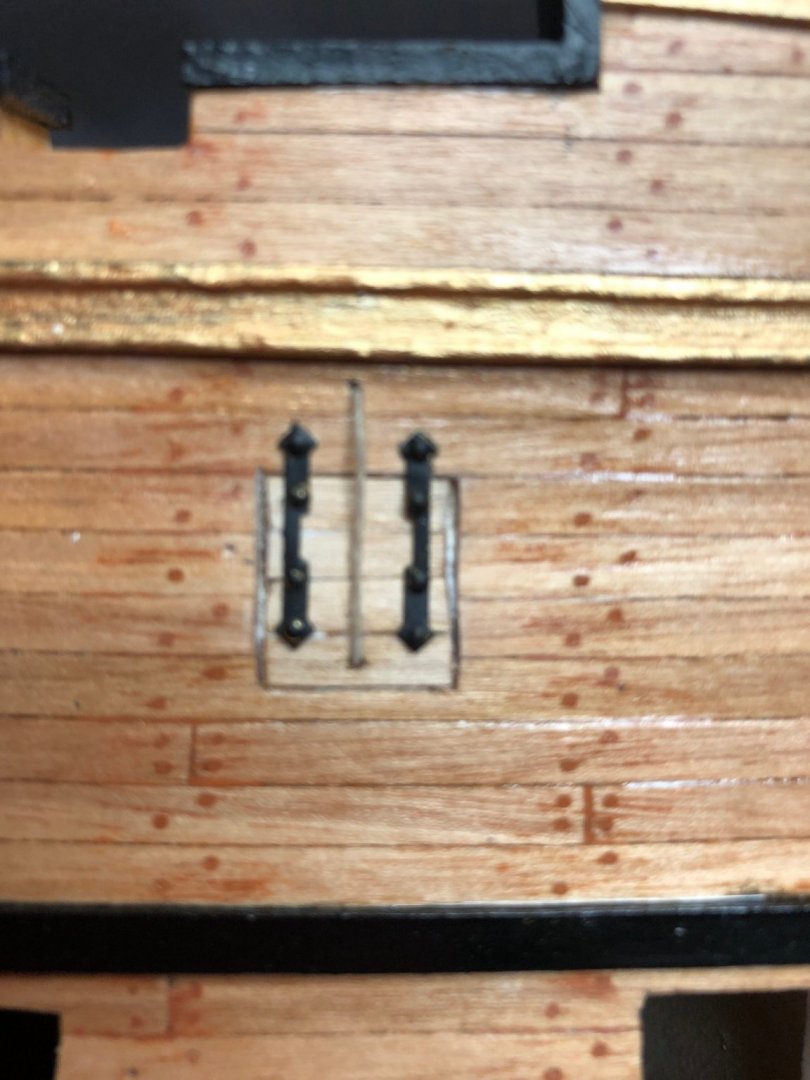
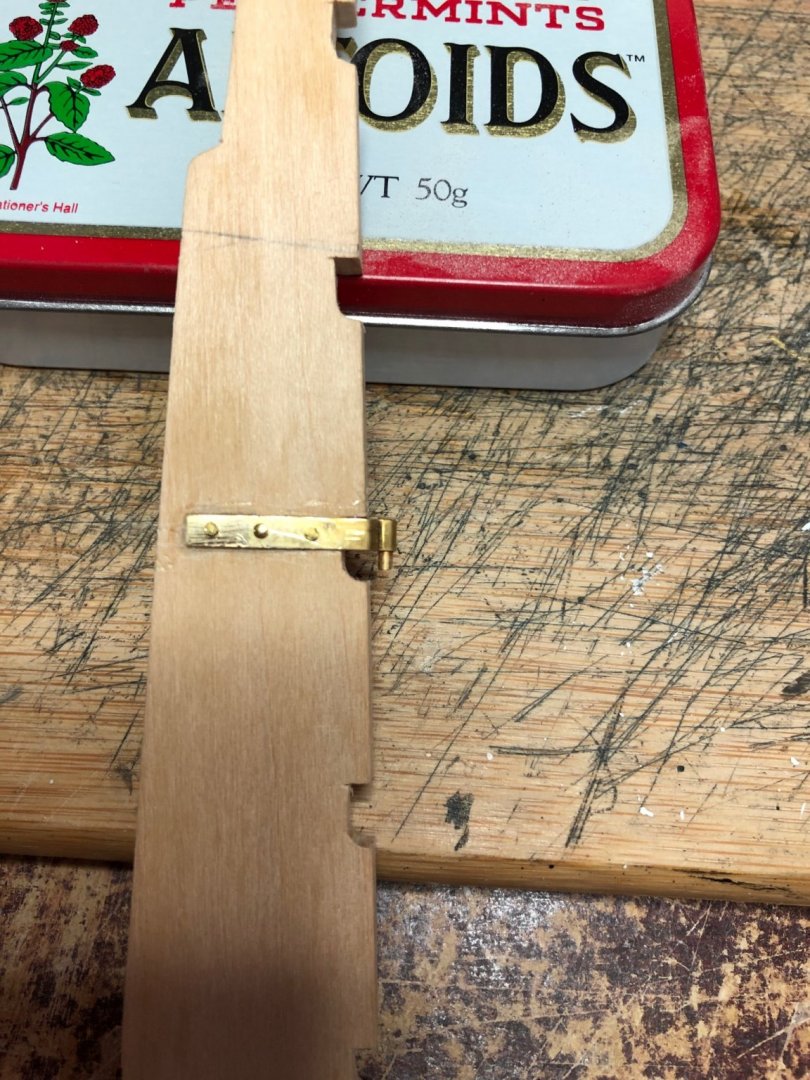
Hi, and thanks for the likes.
First gunport lid fitted.
Another 35 to go.
This is worse than ratlines.
The hinges were the closest I could get to pattern and size.
Regards,
Sam
- coxswain, marktiedens, Edwardkenway and 4 others
-
7
-
Thanks for visiting and the likes.
Rudder constructed and attached.
Next will be the gunport lids which could take some time.
Have obtained some hinges from Cornwall Model Boats.
Will not be using cannons provided in kit so all ports will be fixed closed
except for the ten waist cannon, from my spares box.
Regards,
Sam.

- Edwardkenway, BobG, GrandpaPhil and 3 others
-
6
-
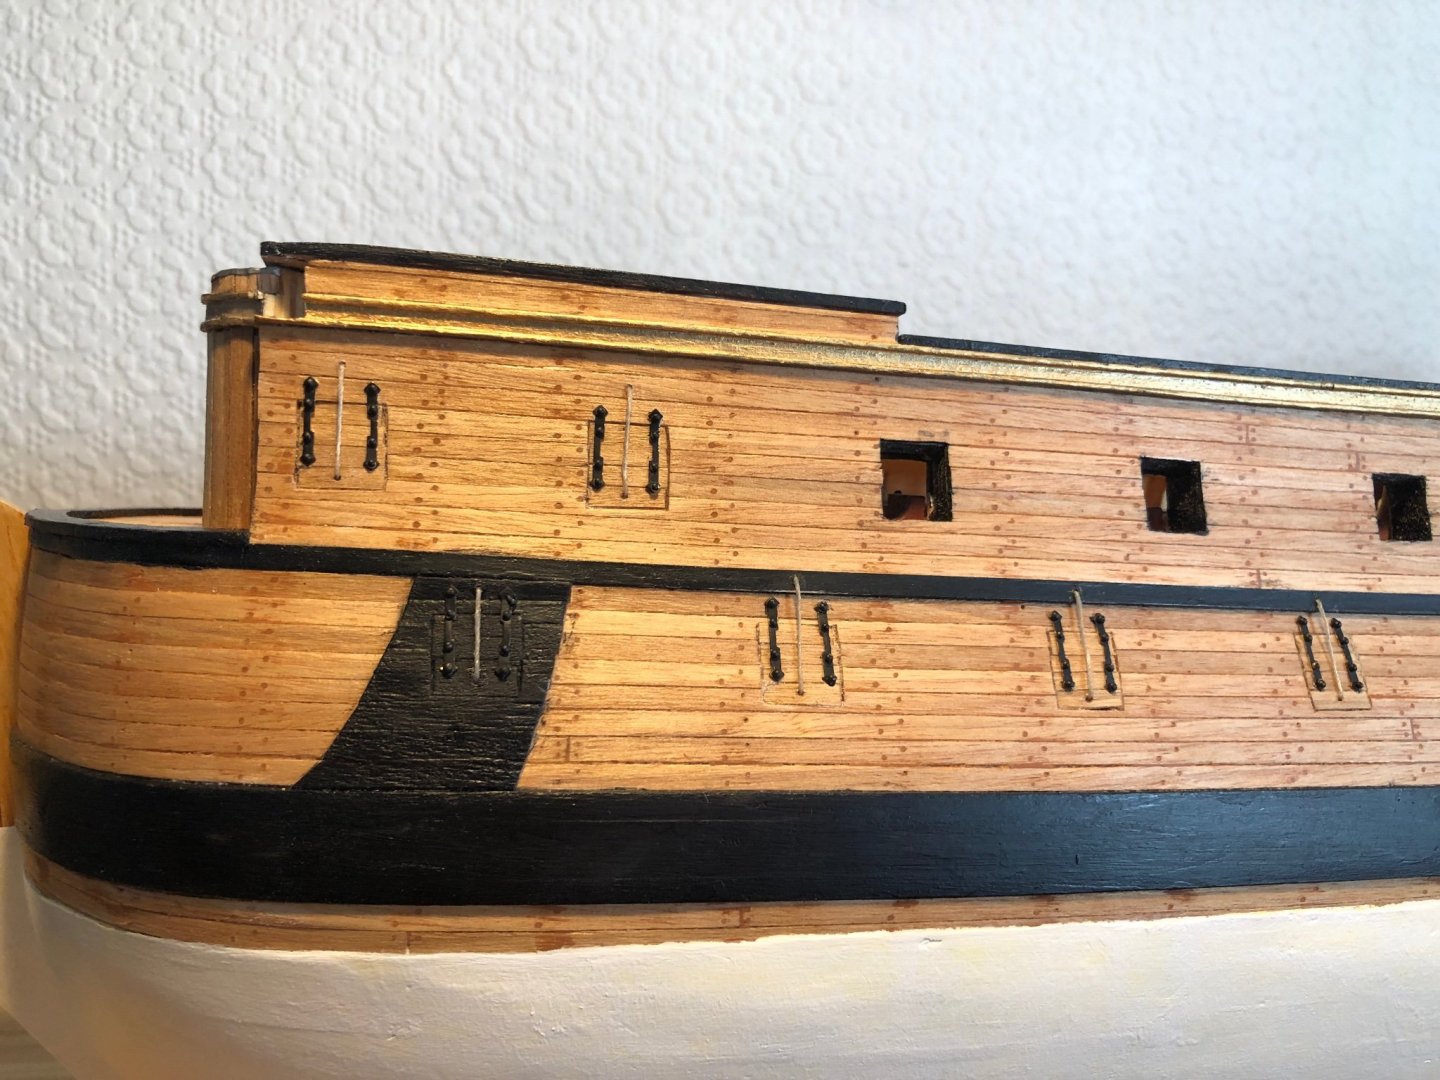
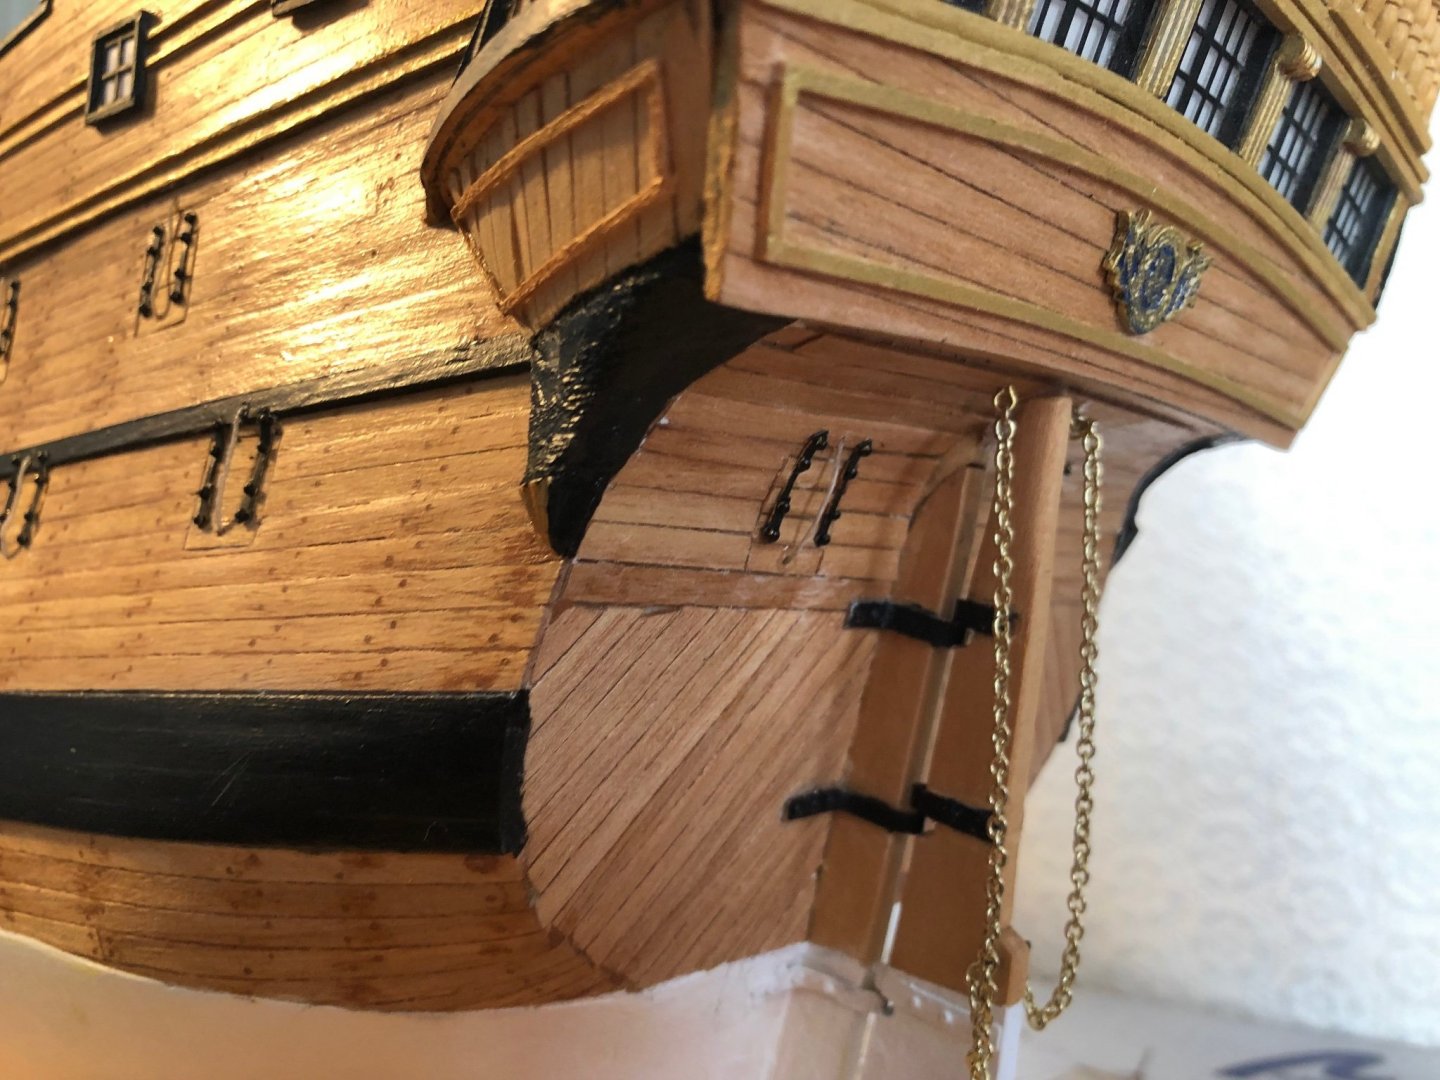
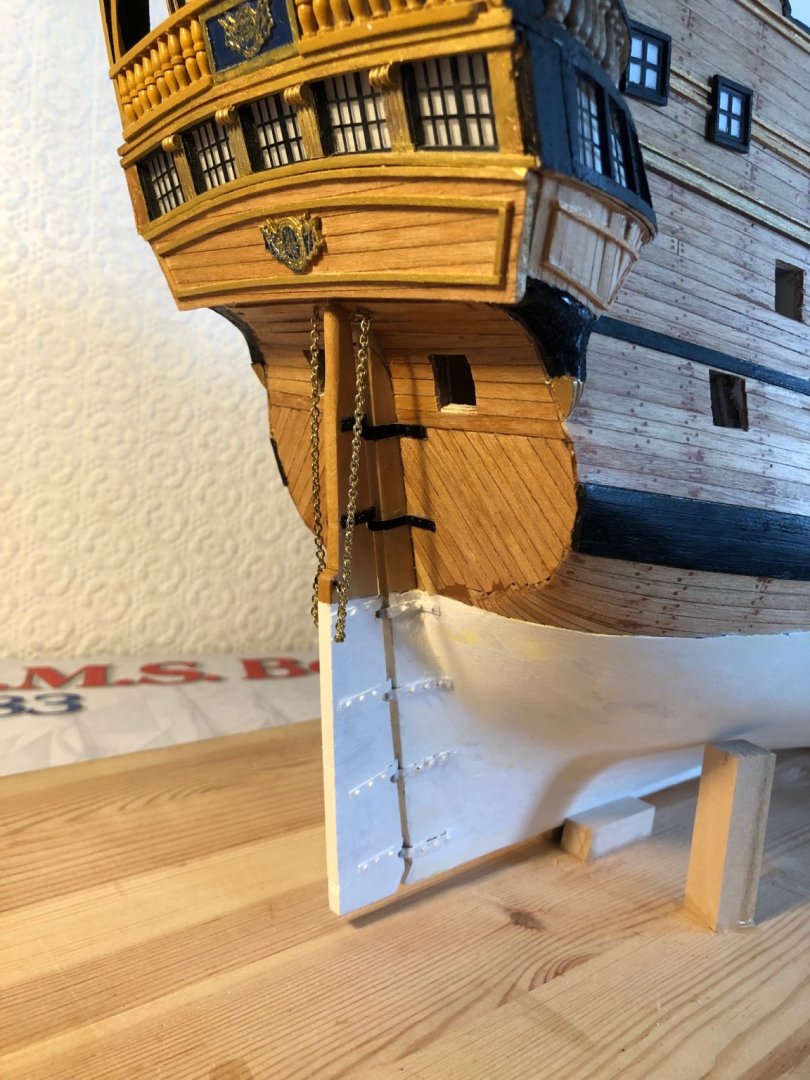
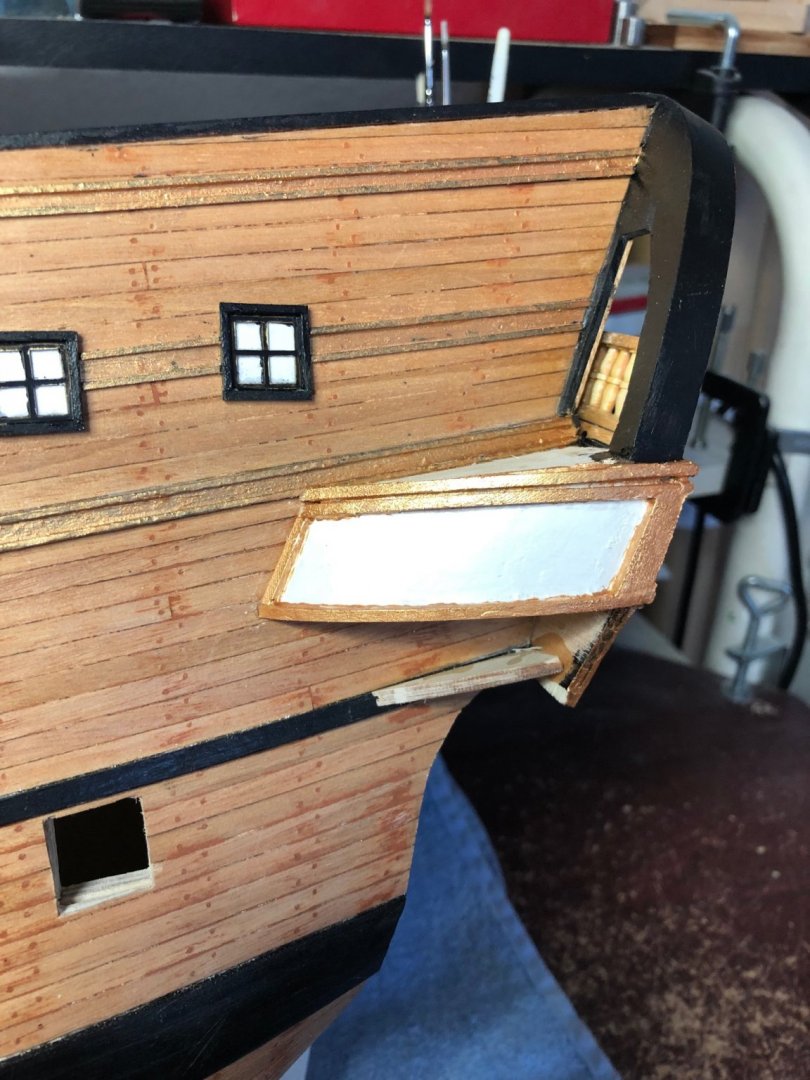
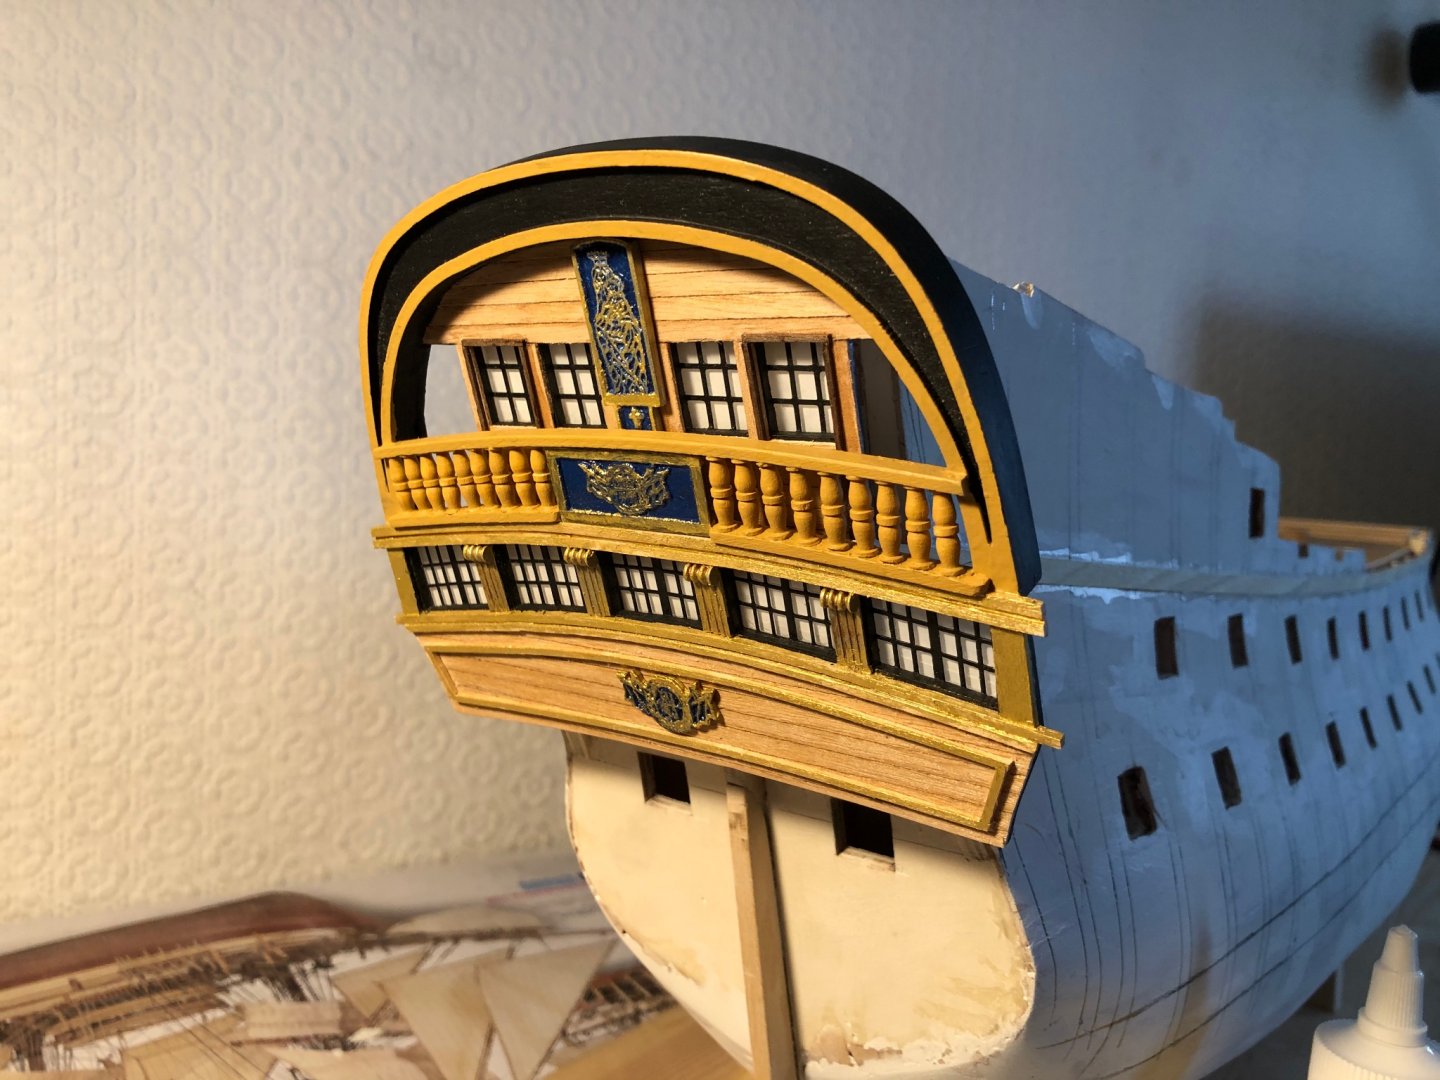
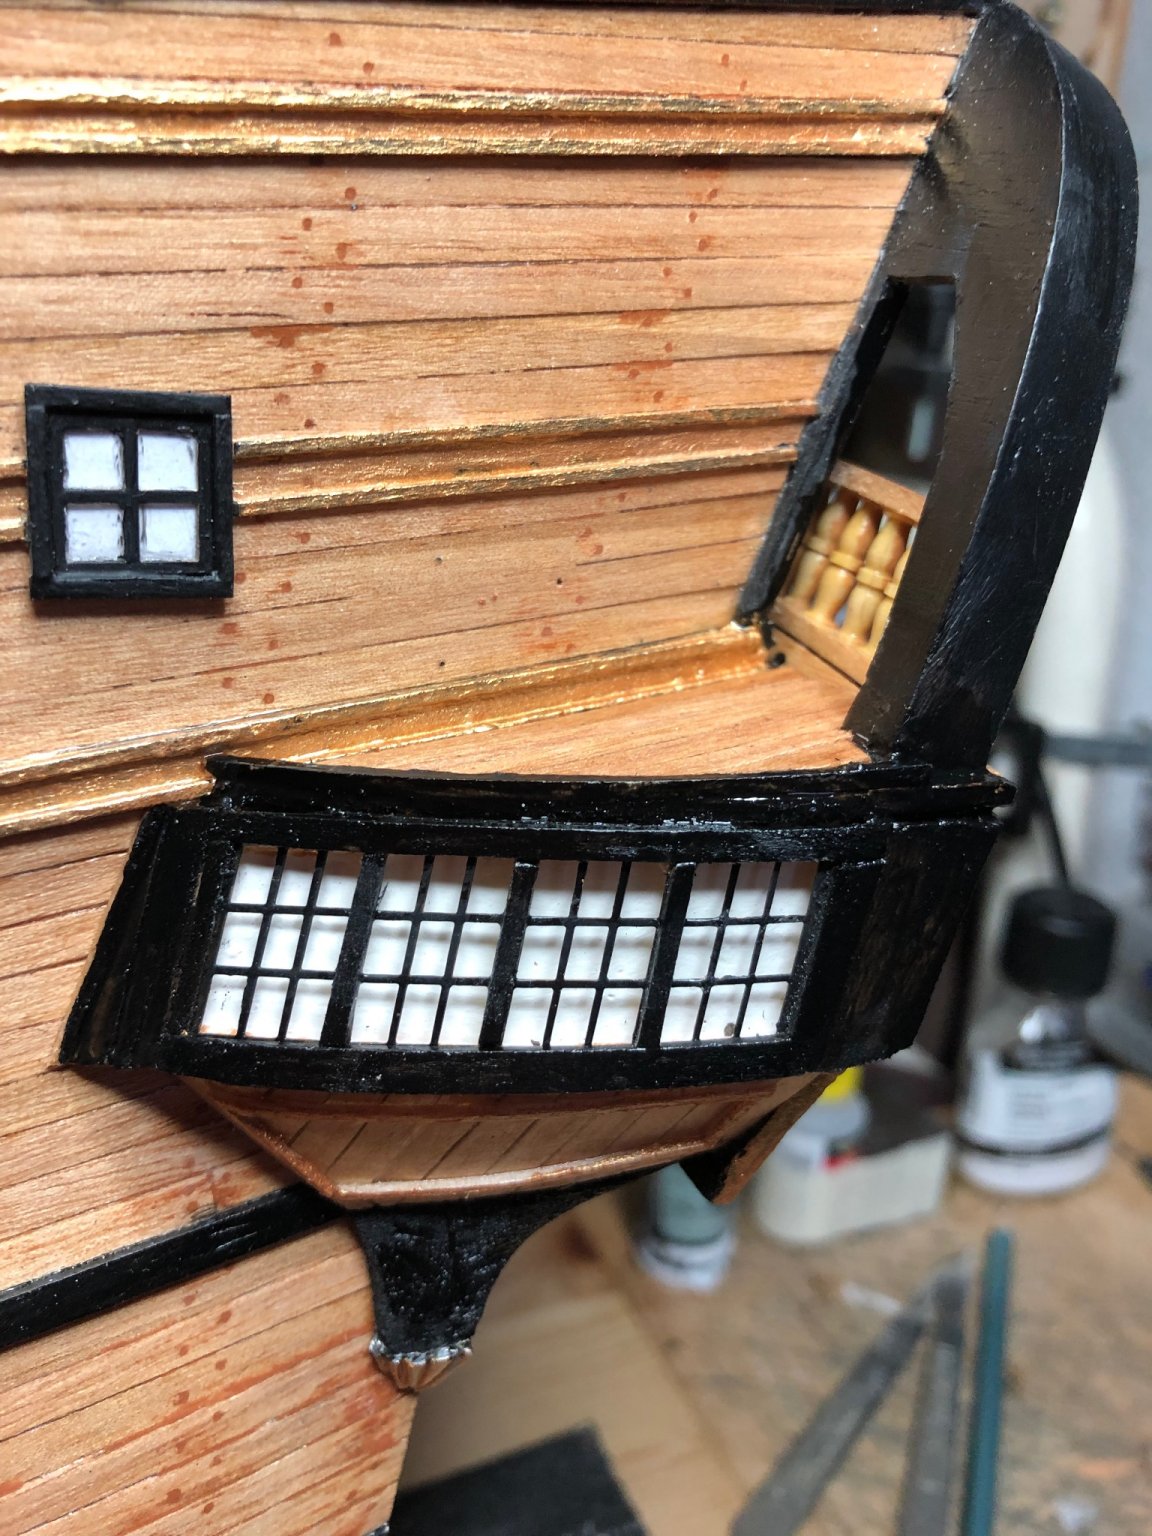
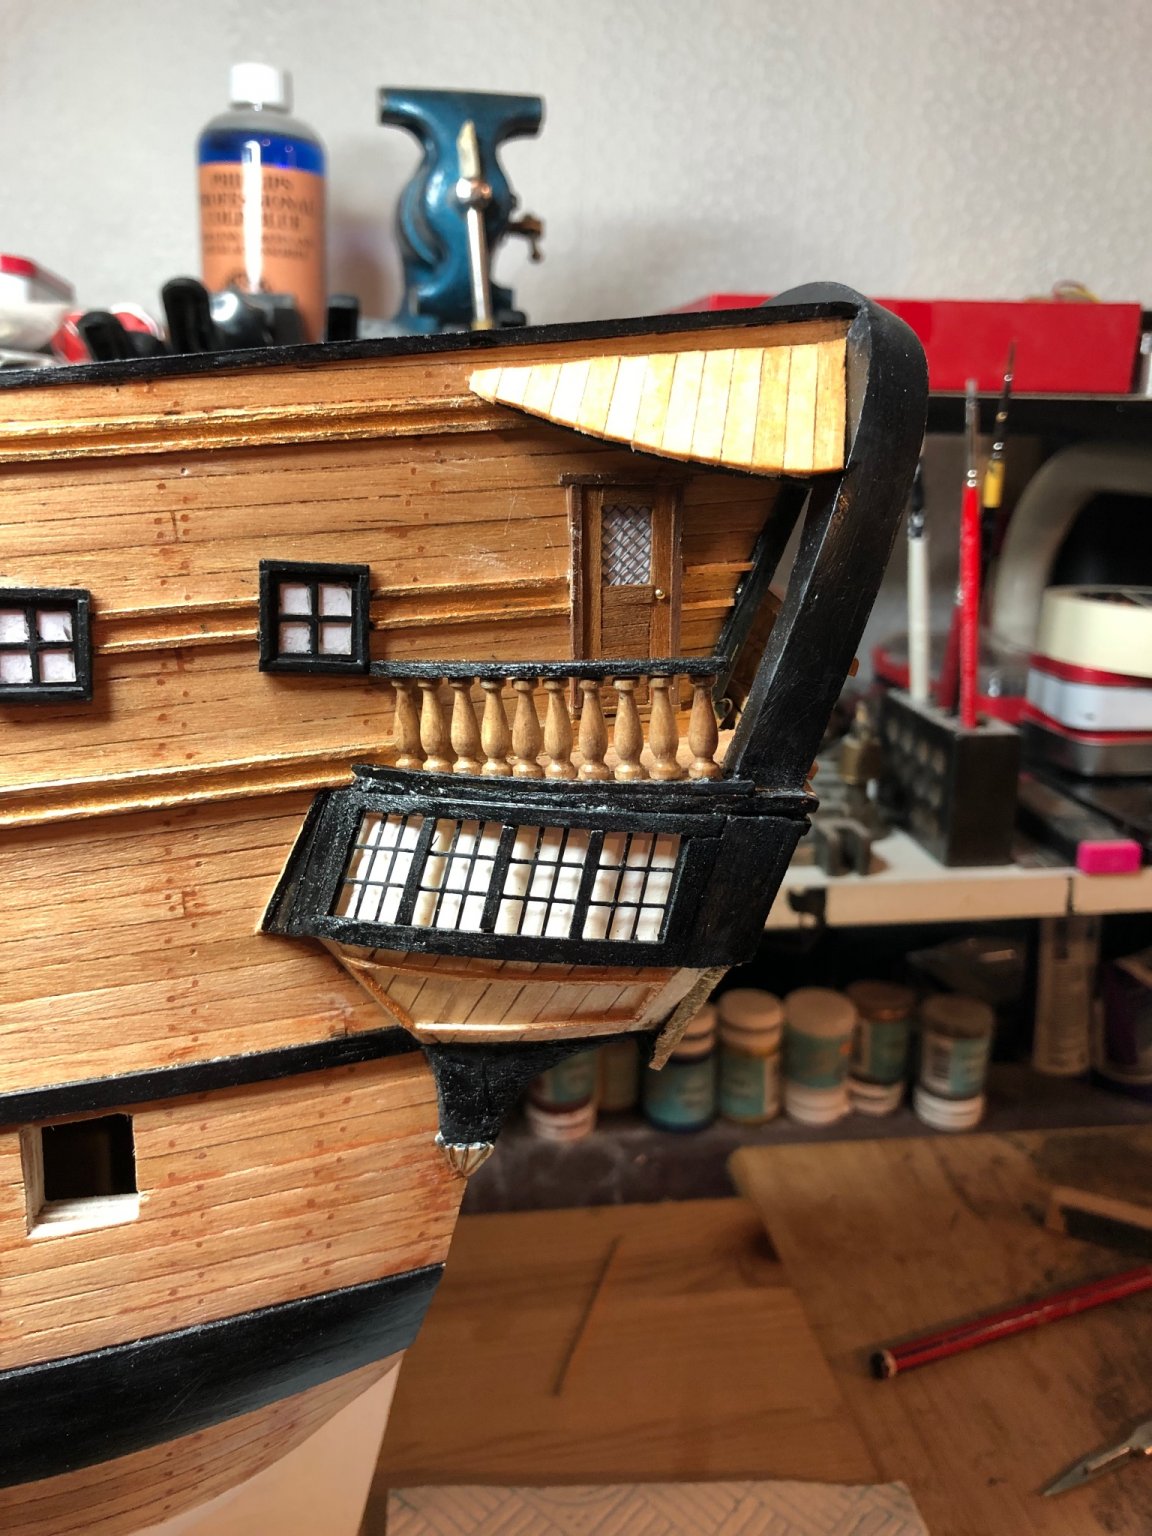
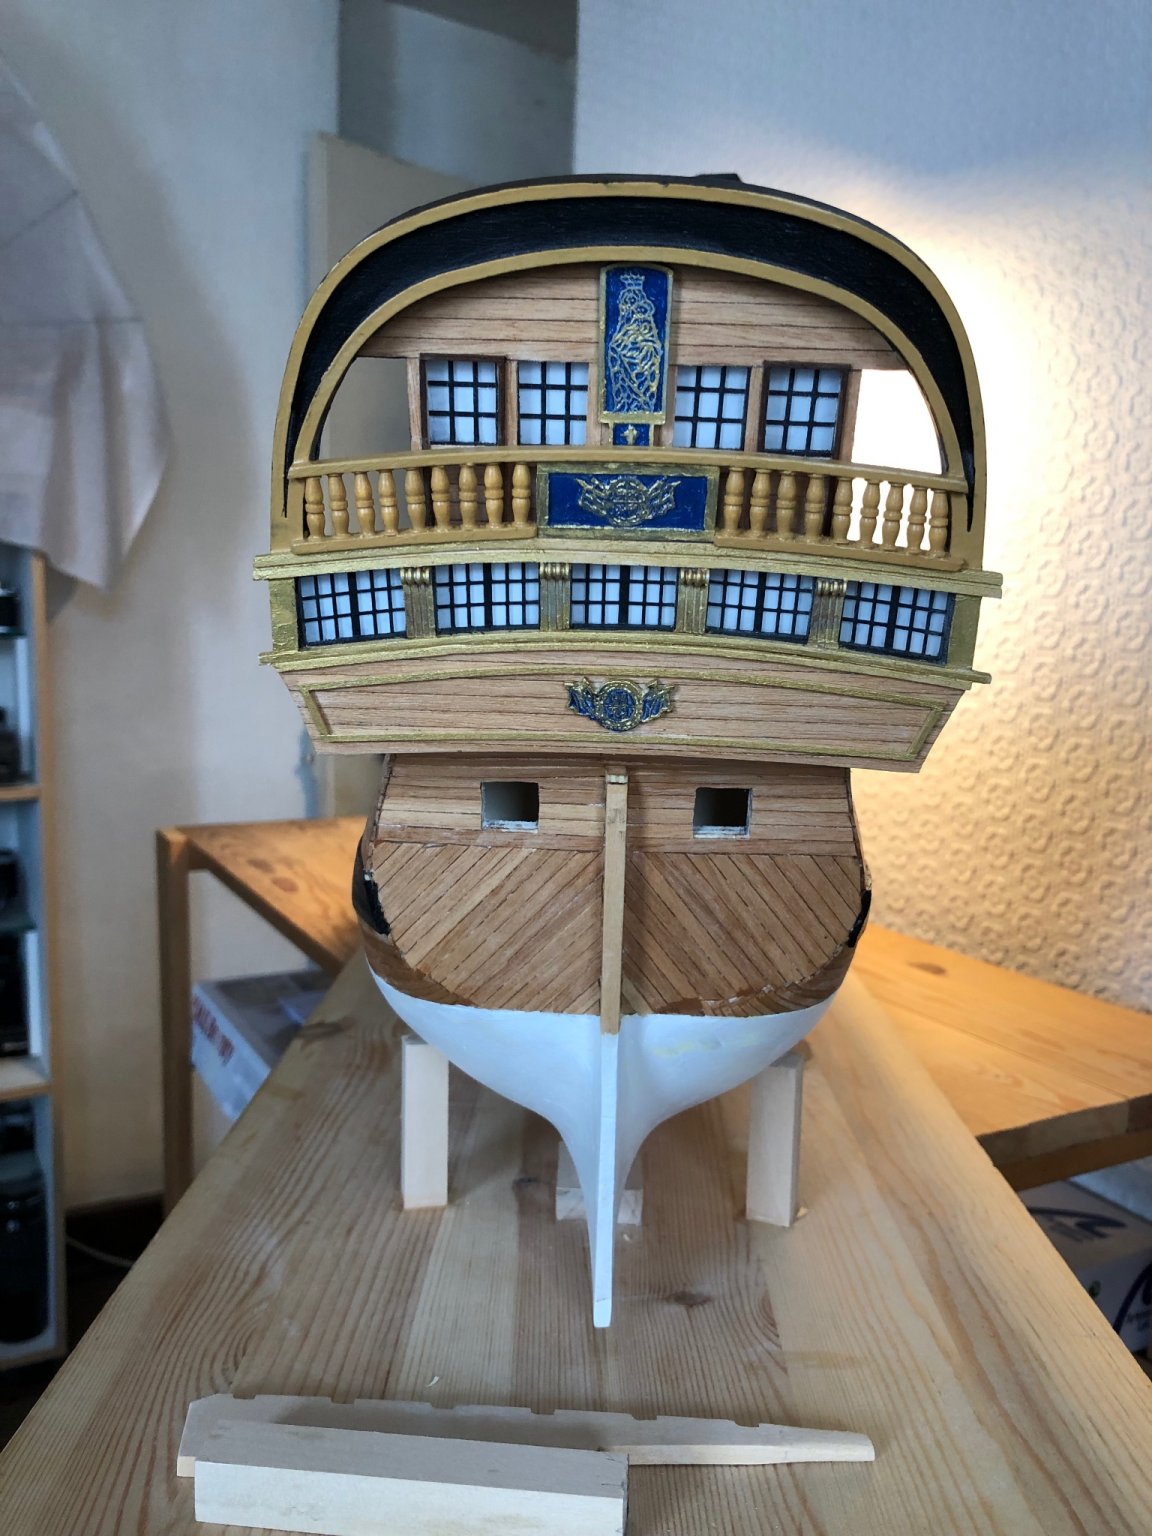
Stern quarter galleries fitted though I may add decoration to the top gallery roof
because it looks a bit plain.
Lots of problems making the supplied parts fit so went my own way.
The photo book supplied is obviously of the prototype build and bears little similarity
to the kit. My build is the nearest I can get.
I think that the interesting part of this will be masts, yards and rigging.
This is a very challenging kit but surprisingly absorbing.


Regards,
Sam.
-
Thanks for the likes and thanks Edward for the comments.
Planking is Tanganyka with two coats of Windsor and Newton
Artists Satin Varnish. Artists, not Artisans grade.
This dries with a silky look but is quite a rough finish actually.
A finishing rub down with a sponge pot scourer gives a good finish
but this time I have found wire wool too aggressive.
Different planking materials affect the finish obtained
so practicing on scrap before applying to the model
is essential.
Regards,
Sam.
- sferoida, Edwardkenway and HardeeHarHar
-
2
-
 1
1
-
Looking good.
Reading the tips on sail material with interest.
Always have trouble with this part of the build
so any help is appreciated.
Sam.
- mtaylor, Edwardkenway, Keith Black and 1 other
-
4
-
Thanks for visiting.
Quarter gallery floors parts 93, 94 and 95 fitted.
Precut parts provided not even close but at least the plywood didn't split.
Will fit the windows and blend into the stern piece before deciding on the
upper floor treatment.
Regards,
Sam.
Sam
-
Thanks for visiting and the likes.
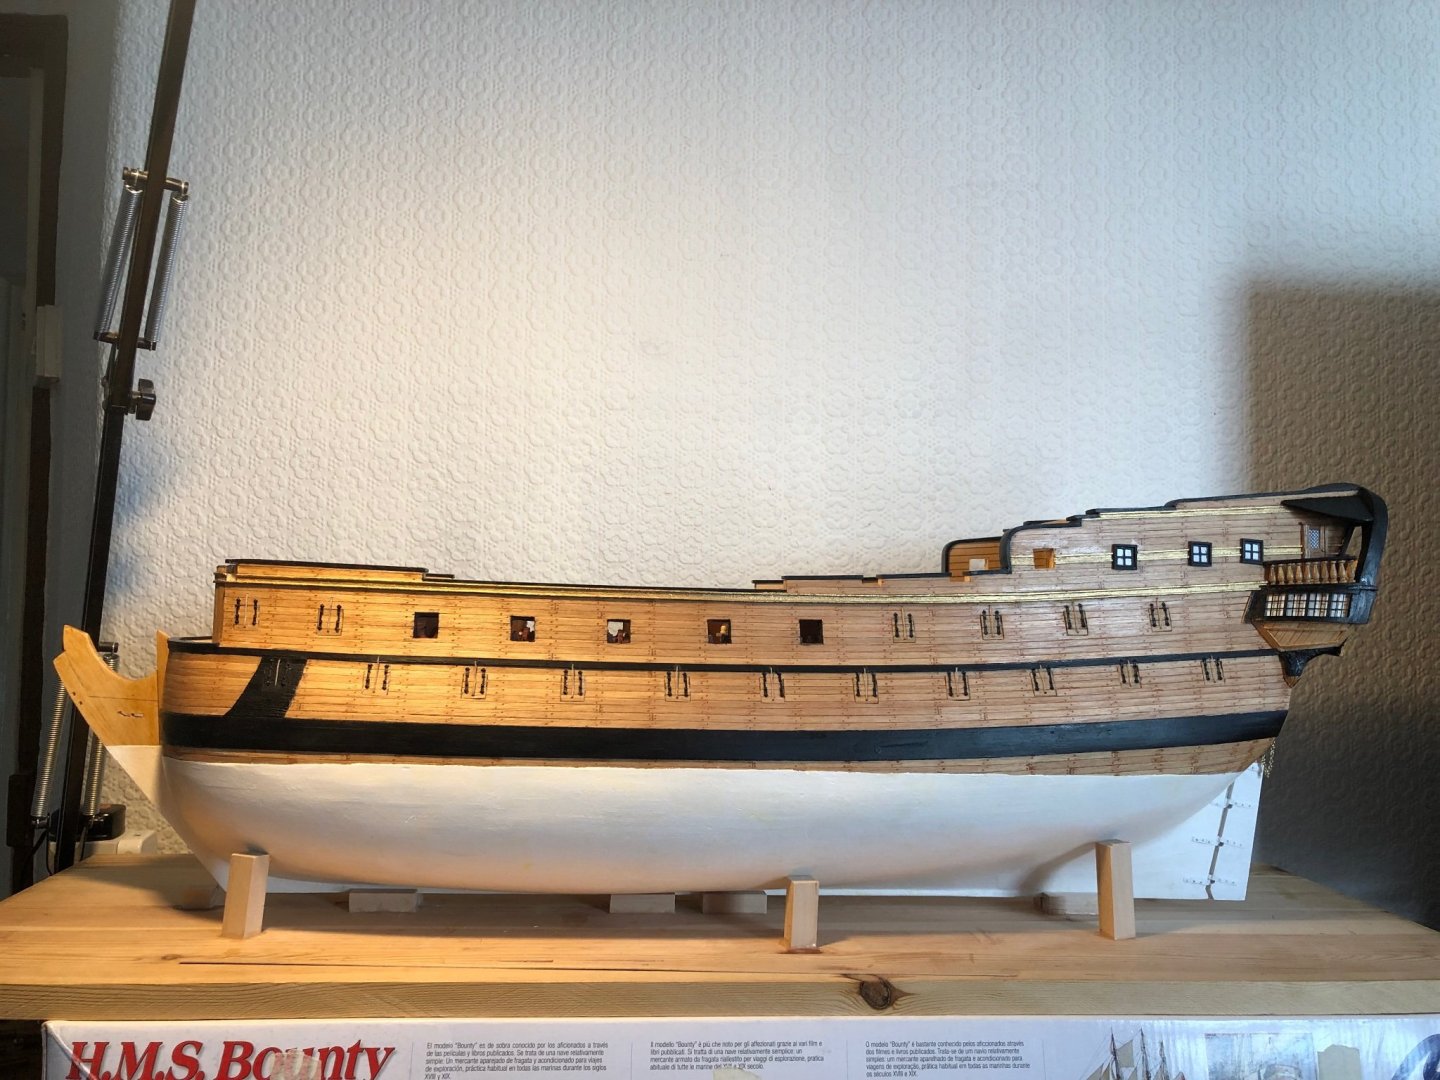
Hull planking finished.
Figures dotted about for scale only. These will be removed later.
Next will be finishing the stern, adding channels and gunport lids.
Without full size plans this part will be fiddly.
Posts by Mark Tiedens and Sferoida are invaluable. Thanks.
Future posts should be more frequent.


Regards,
Sam.
-
Thanks for the likes.
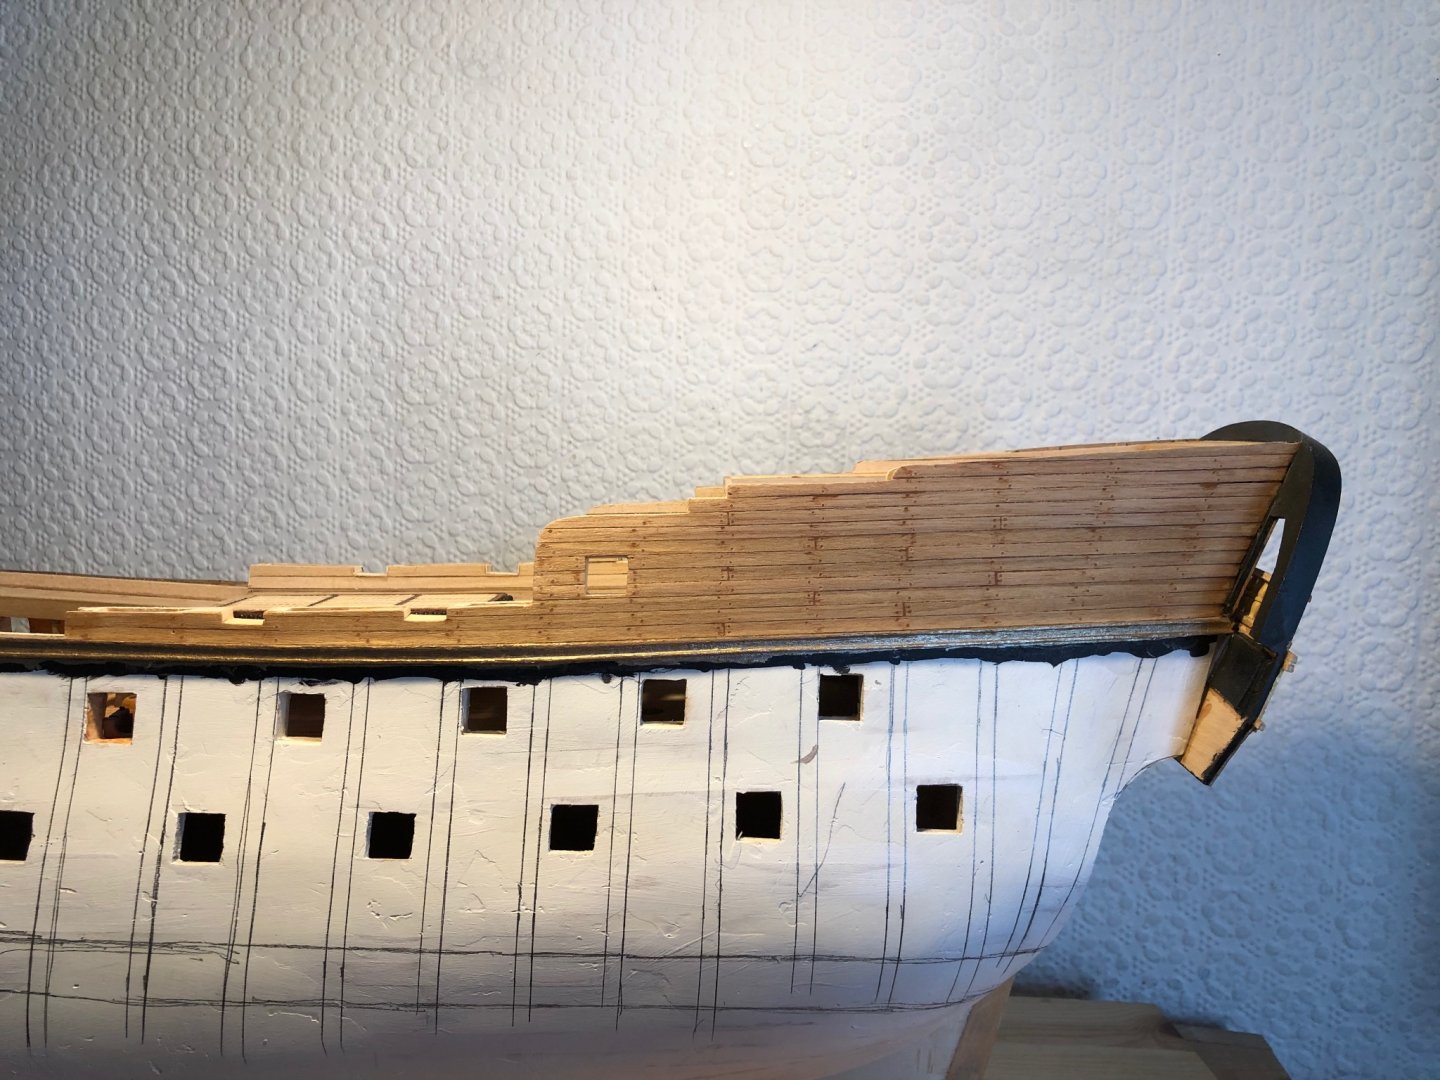
Hull planked down to wale and bowsprit deck capping rail added.
Next is the wales and finish the hull planking.
Then I can finish trimming the gunports.
Regards,
Sam

- Edwardkenway, scrubbyj427, coxswain and 2 others
-
5
-
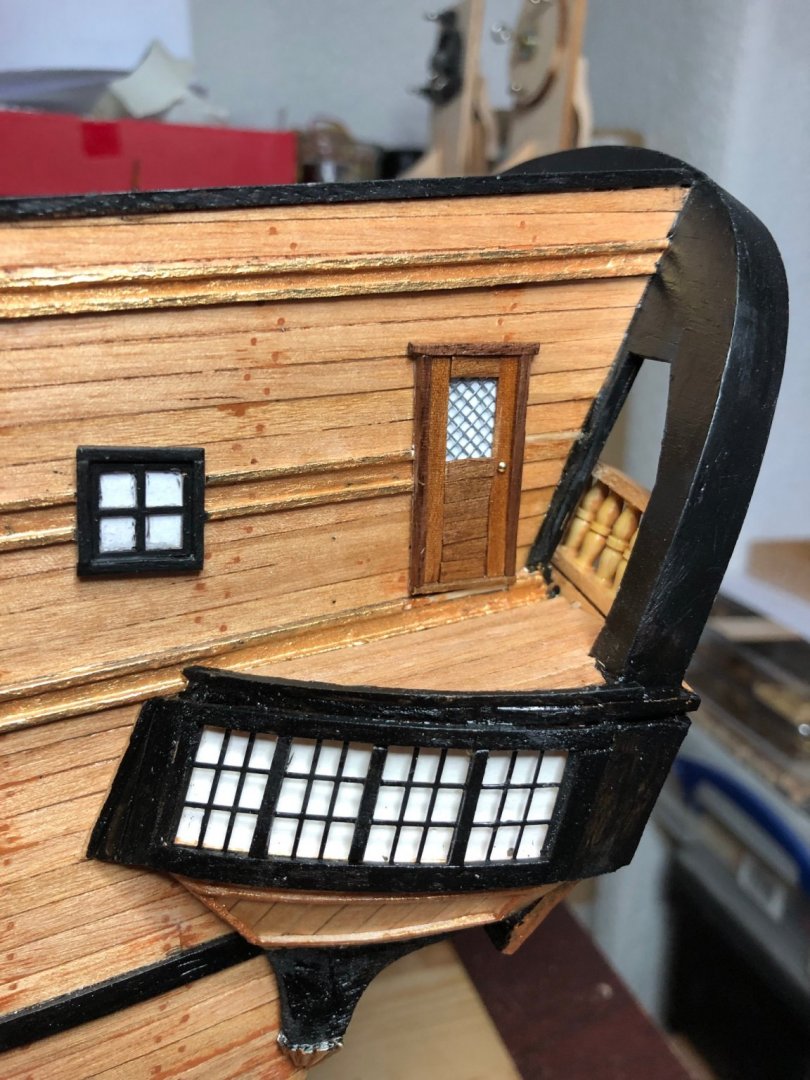
Hi, and thanks for the likes.
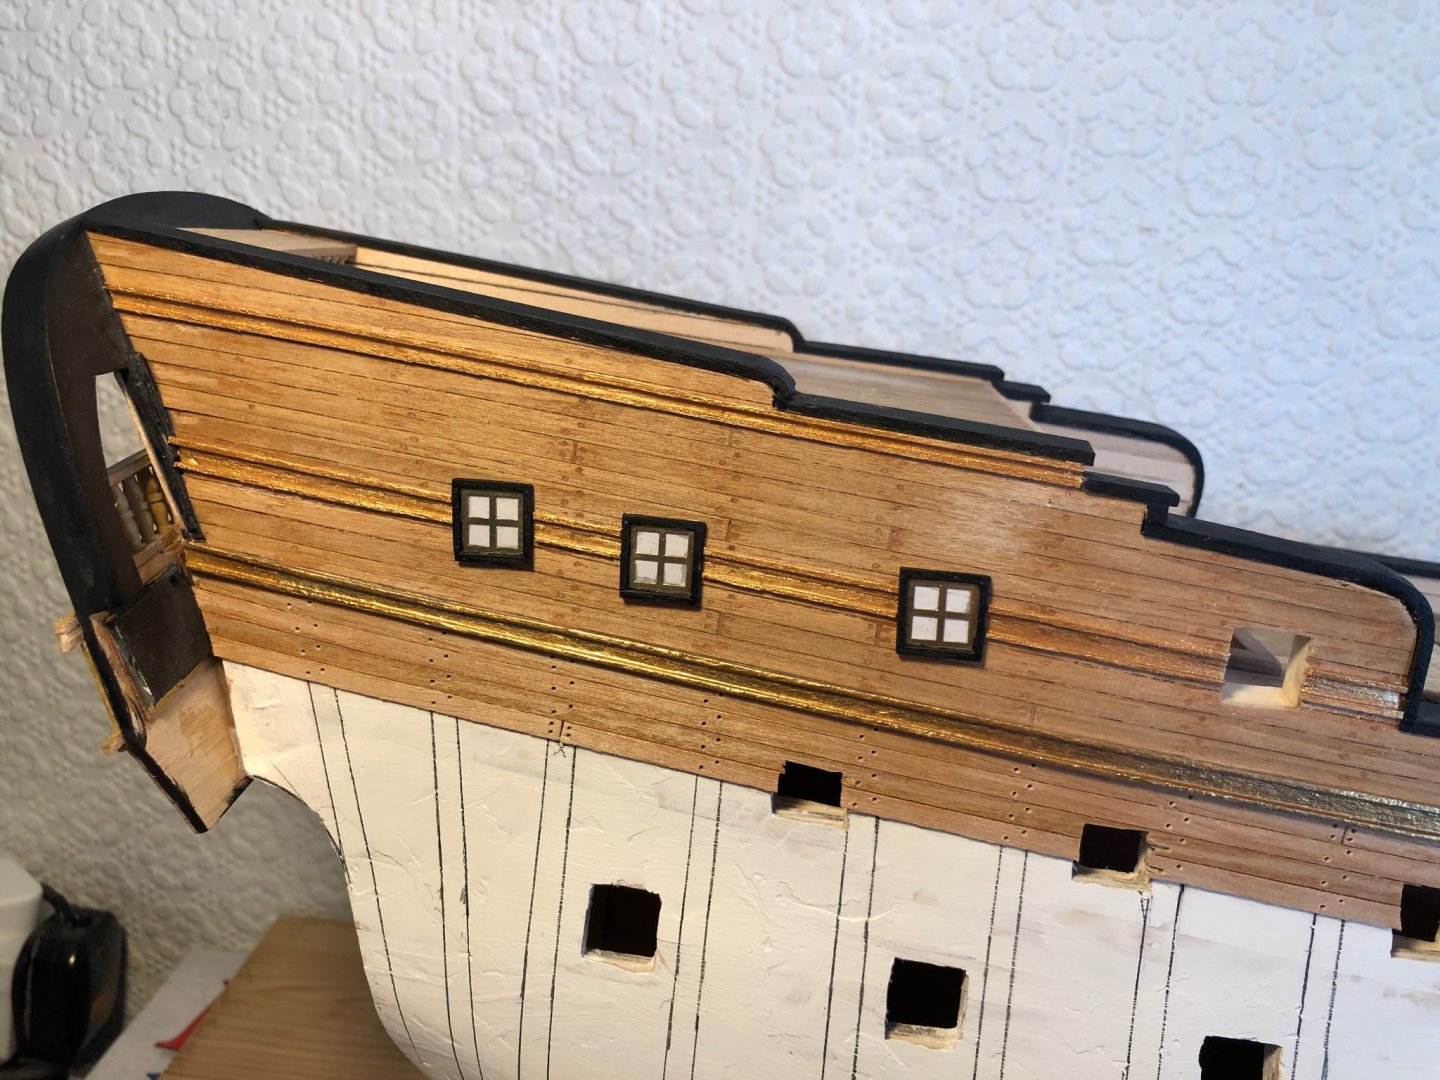
Upper cabin side windows fixed and rails added.
Wasn't happy just sticking them on so framed them.
Probably noticed by now that I am doing anything but finishing the hull planking
(I would rather tie ratlines) but the bullet is about to be bit.
Regards,
Sam
- sferoida, Edwardkenway and marktiedens
-
3
-
Capping rails fixed. Occre supplied several lengths of 2 x 12 mm sapele for these.
Probably the only pieces in this kit that were straight and true when they needed to be
slightly curved on plan. In the end I replaced the waist rails with 2mm thick flat sheet
I had in stock so lots of the sapele left. Won't waste it, quality material.
Looked at the photo's and instruction book twice. Stared at the wall for inspiration
and then went on Mark Tiedens log to se how he did it.
Gave it a try and it actually worked. This build is travelling further and further from
the real thing. Not authentic but as close as I can get.
Looking ahead the next problems will probably be the pinrails and belaying pins.
Time to finish the hull planking.
Regards,
Sam.

- puckotred, marktiedens, HardeeHarHar and 1 other
-
4
-
Hi and thanks for the likes.
Upper hull planking applied and stem bulkhead stanchions fitted.
Next step is the various rails or as the instructions call them - the covering strips.
Kit supplied material for these is 2 x 12mm sapele. This is good quality but the waist rails need to be
curved slightly on plan. Will use in stock 2mm thick sheet for these, cut and shaped to suit.
Finished rails will be painted black so I hope that the different material used will not show.
Starting at the stern with these to see what sort of mess I make of the large radius curves
before starting on the other changes in level. If the large ones turn out OK I will curve the others.
If not, they will be "squared up" instead of radiused. Let's see what happens.

Regards,
Sam.
- gieb8688, Edwardkenway, marktiedens and 1 other
-
4
-
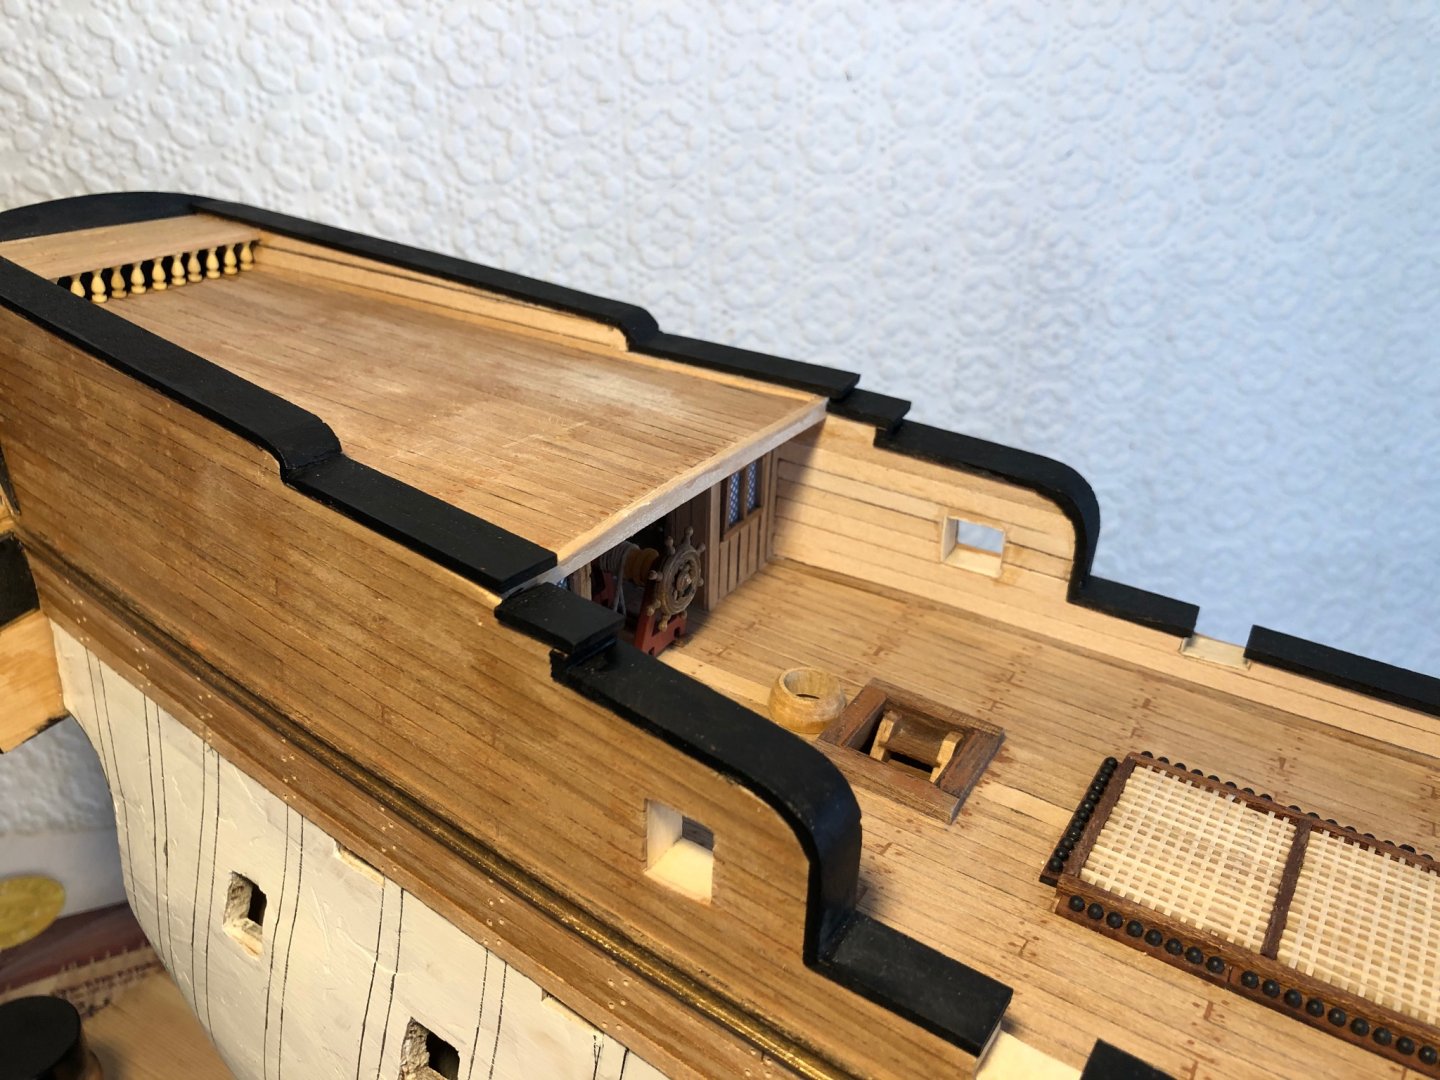
Upper poop deck fitted.
Stem bulkhead planked and doors fitted, lead foil as roofing to roundhouses.
Catheads for photo only. Will be attached later.
Regards,
Sam.

-
Hi and, thanks for the likes. Also thanks Mark for the comments.
I keep comparing the parts, the instructions and, your build log.
Agree with your comments about the mis-match with the windows and deck camber
and still haven't decided what to do here but it will entail a lot of scratch building.
Also my stern piece finishes a lot lower than yours so I have had to lower the replacement
bulwark pieces slightly to make sure that the rails finish inside the stern piece.
The rearmost deck part No. 122 will be a much smaller step.
This will end up a good model but, I'm not sure what it will be a model of.
Thanks for your input.
Regards,
Sam.
- marktiedens and Edwardkenway
-
2
-
Hi and, thanks for the likes.
After a careful examination of Mark Tiedens build log I have been trying to sort out the stern.
The parts provided in my kit don't match the instruction book and the plans (lol) are no help at all.
In addition the stern side cheeks mark 29 are approx 4mm too long and protrude below
the stern piece. They lock into place so can't really be fixed incorrectly. I have corrected these.
I have decided on the following approach ---
The stern piece is attached and is not moving.
The second planking will be extended to meet the stern piece at the higher verandah and a door
for access into the high level cabins provided in the sides.
I may have to scratch build the side windows. Will visit this after second planking is fixed.
Next - the top moulding piece mark 70 goes down both sides of the hull and across the bowsprit deck
above the two access doors. Instructions say "use a small triangular file to form a groove down the centre
of 2 x 5mm sapele strips. Then sand to form the B shaped moulding. Not happening.
Will fabricate using 2x5 strip with 1x1 strips both sides. Artisania Latina make a set of micro planes
which would be ideal for profiling mouldings but don't offer them for sale in Great Britain.
Last problem -- The top moulding across the bowsprit deck clashes with the two door openings in the bulkhead.
After a close examination of the instructions it appears that the doorways have been cut 5 to 6mm too high.
This one is easy to correct.
Obviously the photo's were taken during building of the prototype and the laser cut sheets produced afterwards.
This has been a challenging build from day 1 and I have to say I am enjoying every minute of it.
It is not just a case of - nail part A to part 58 and stick it in a display case.
Neither is it a kit for the absolute beginner. It is building into a sturdy good looking model.
Will admit I am spending as much time staring at it and thinking about the next stage as I am building it.
This is a very absorbing kit and a cheap hobby.
Regards,
Sam.
- puckotred, marktiedens, catopower and 3 others
-
6
-
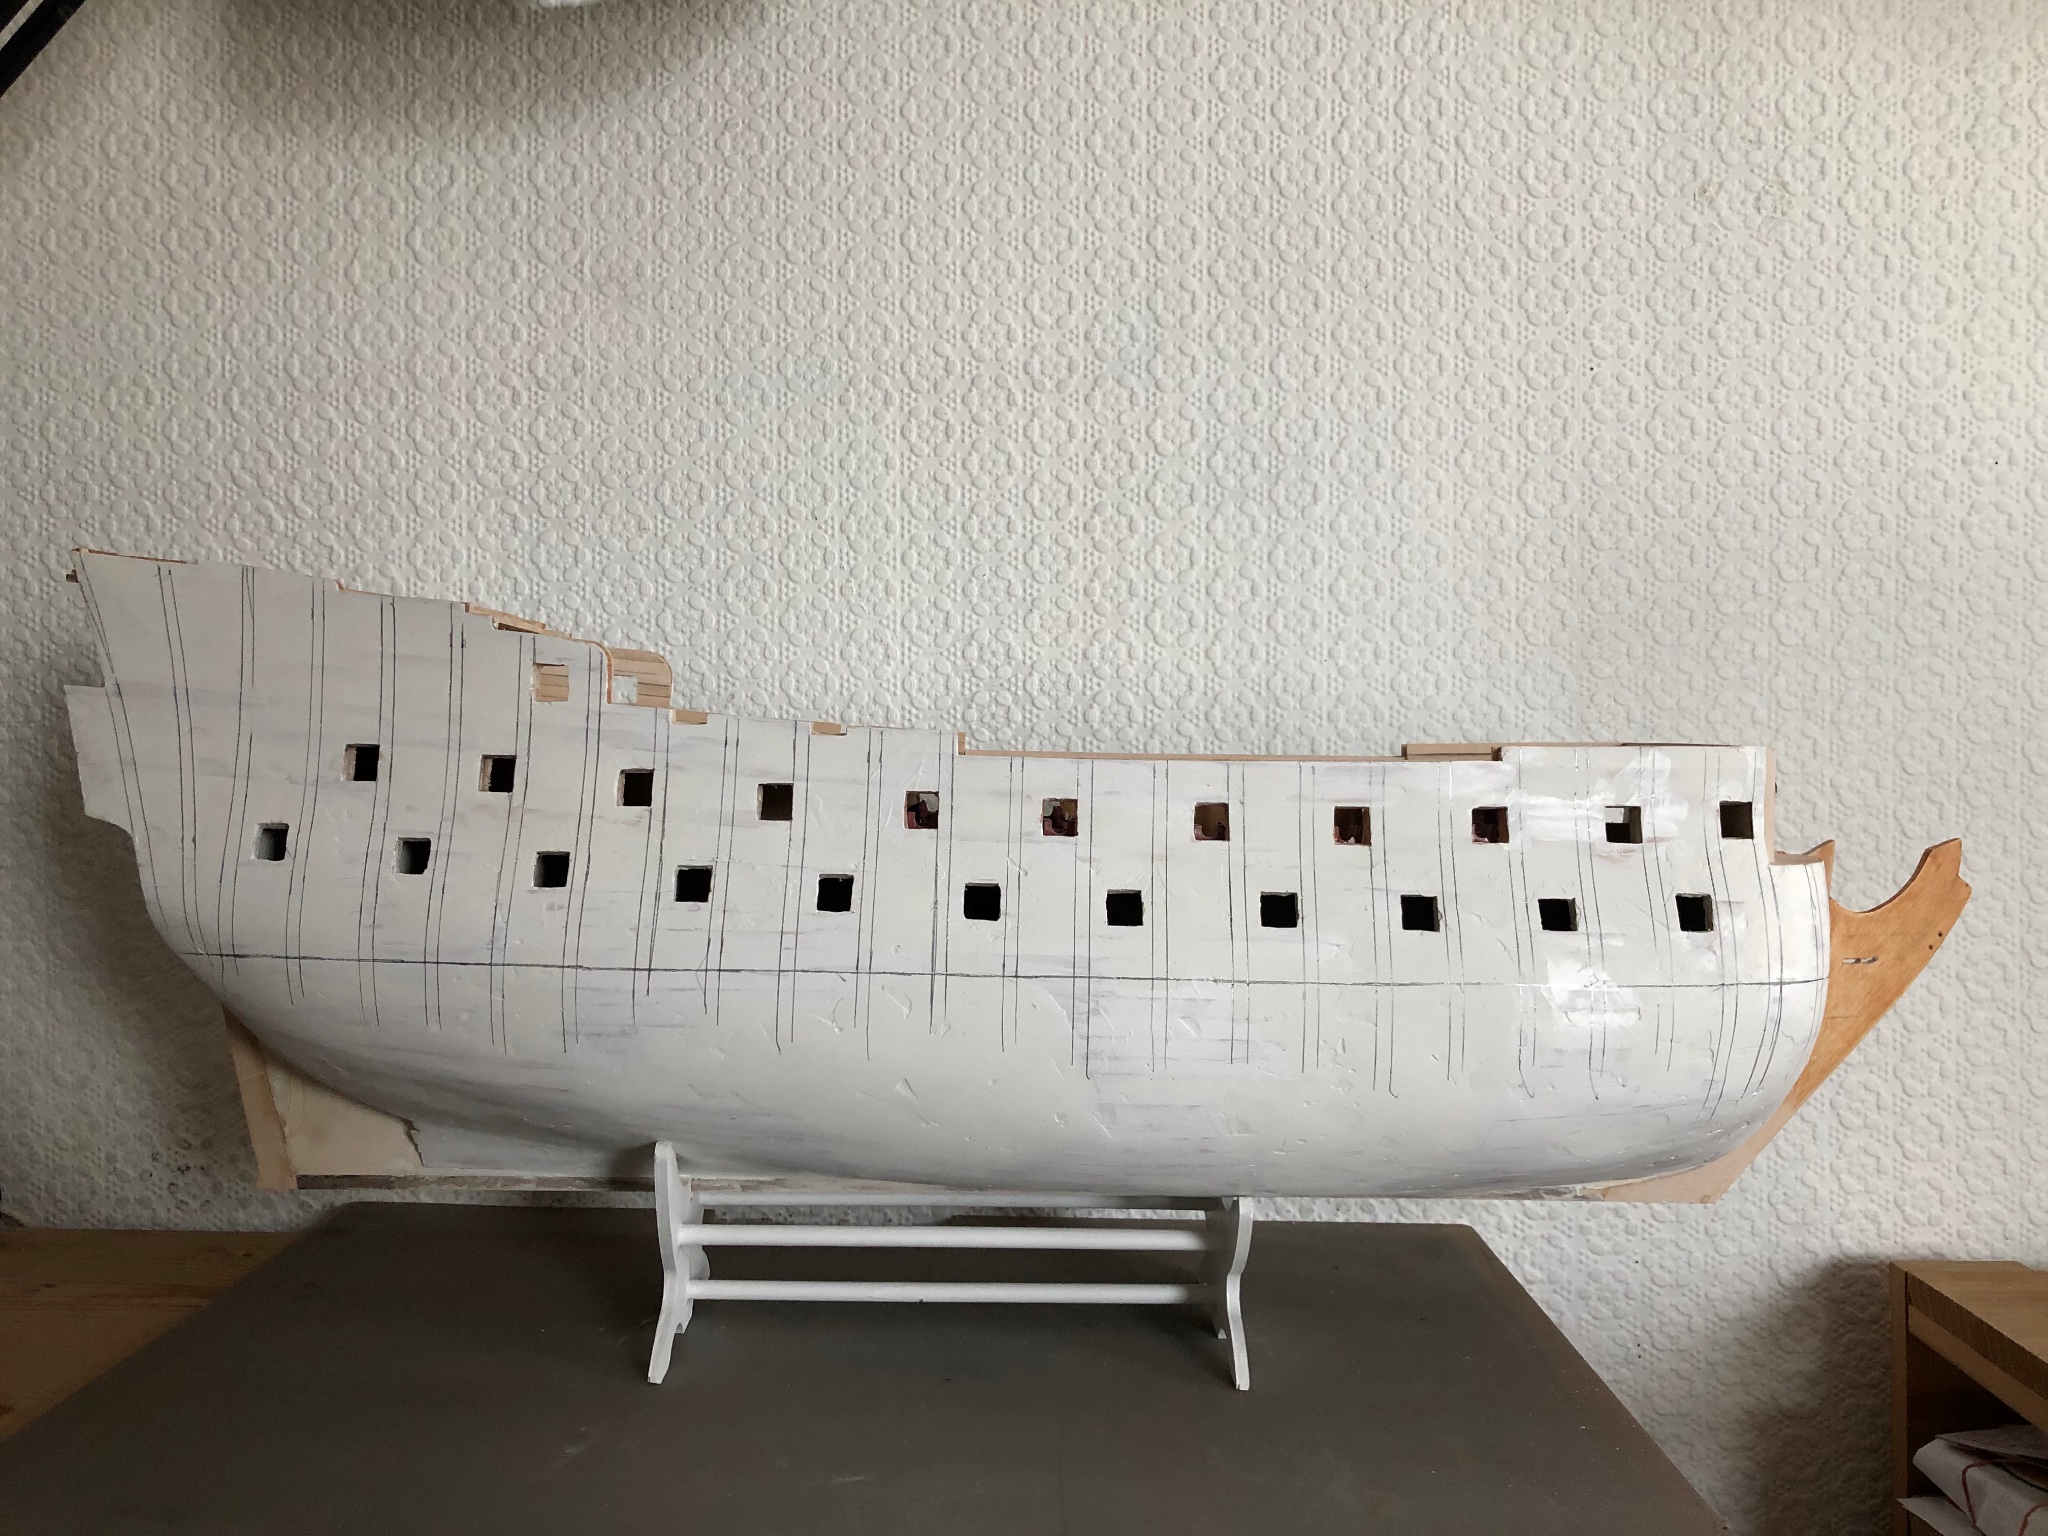
First hull planking fixed, filled, whitewashed and marked up ready for second planking.
This is a big fat boat and planking took for ever.
Waterline marked but feels too high. Needs dropping 12mm.
Will have to do more research before I settle on this location.
The supplied plans are no use at all, the side elevations differ significantly.
Bulkheads 9 and 11 were too low over middle third.
Didn't spot this until after planking. This was both sides and took a fair bit of filling.
Sam.

-


Nuestra Senora Del Pilar by Sideways Sam - OcCre - 1:45
in - Kit build logs for subjects built from 1501 - 1750
Posted
Hi, and thanks for visiting. Also thanks HardeeHarHar for the encouragement.
Basic jury masts made and mounted so that I can see how much room there is
to fix the blocks at the base of the masts.
These will be finished, fixed and chocked into position at a later date.
Regards,
Sam.