


CPDDET
-
Posts
960 -
Joined
-
Last visited
Content Type
Profiles
Forums
Gallery
Events
Posts posted by CPDDET
-
-
While the shipwrights series does come with the "necessary" tools, you might want to consider a few others in case you need to make a scratch part. That may include, but not limited to a steel rule, small square, razor saw and set of files.
Your inability to acquire things while on fire watch puts you in kind of a pickle. Take your time in building a complete list and asking others on this forum for their input.
Once you have chosen a model, let us know which one it will be. That will be a big help on giving you advice on tools and supplies.
- mtaylor, Keith Black and allanyed
-
 3
3
-
The stuff does have a shelf life though. About 3 months at room temp I believe, longer if refrigerated. I got some very small glass bottles from Amazon and just squirt the whole tube into one, keeping it tightly capped and stored in a cool place out of the sun.
-
I agree with the Model Shipways, Shipwrights series route. You might be able to finish the first 2 in the series seeing that you will have ample time on your hands.
Buy the kits well ahead of time and acquire the necessary supplies like glues, de-bonders and such.
You might want to hit the hobby shop and pick up some basswood sheets of different thicknesses to have on hand in case you ruin something and have to replace it with a scratch built part.
- Keith Black, grsjax and mtaylor
-
3
-
1 hour ago, Nirvana said:
Been working behind the scenes as both spreaders are almost done.
I used the old regular solder I had but the outcome is not to my satisfaction.
Tomorrow there is a small package from Amazon containing Solder-It, which I will try out.
But here is the current solder of "bolt" on irongate.

I've been using Solder-it and have been pleased with the results. I just squirt a small amount out on a piece of scrap and use a solder pic or toothpick to place a tiny amount where needed. Then just a touch of the soldering iron and done.
-
-
-
-
Paid $17 for this light on Amazon.
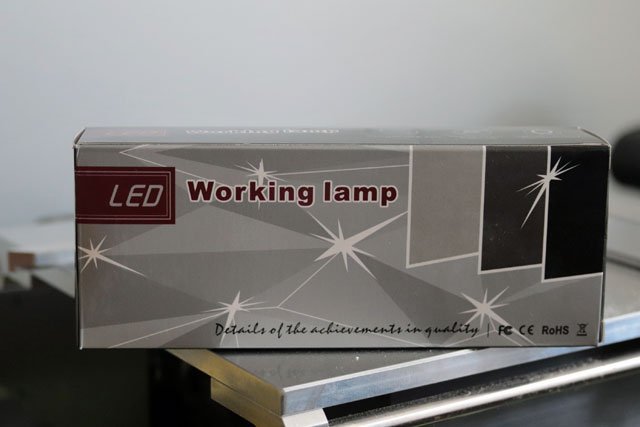
It has a very strong magnetic base, but didnt come with a base plate. I picked up some 1.5 inch metal washers at the local Ace Hardware and glued one on on each side of the mill using Gorilla glue. This way I can switch sides or even purchase another light for cross lighting.
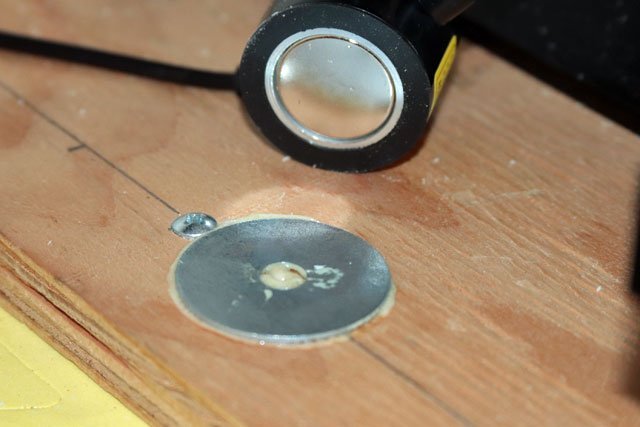
Easy to reach on/off switch and plenty bright enough for my purpose.
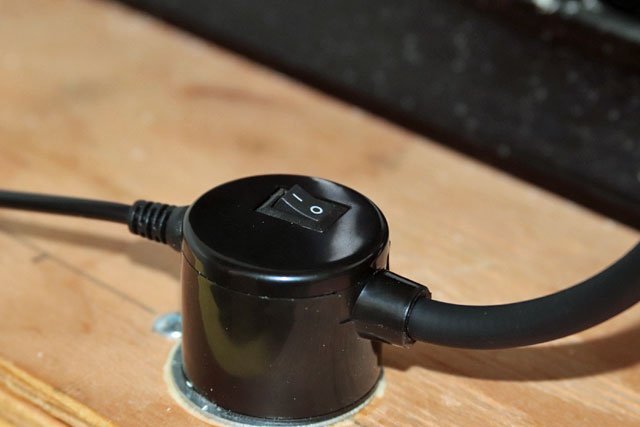
The 12 inch neck is perfect for a mill, saw, drill press, lathe etc.. But not long enough to use on the build table. A longer neck would be preferable for that.
-
My kit is the Bluenose, not the Bluenose II.
Every photo I can find of the Bluenose shows a black bowsprit, so that's the way I'm going.
And thanks for the compliment, mcb!
- mtaylor and GrandpaPhil
-
2
-
All the photos I have seen of the Bluenose II show the bowsprit painted black from the bow forward and white from the bow aft.
My plans state the bowsprit is natural wood from the bow forward and white from the bow aft.
Just wondering what others who are building the Bluenose have done.
Dave
- mtaylor and Keith Black
-
2
-
-
-
I currently have a similar light on my work top but rarely if ever use the magnifier. Actually I need something much smaller and flexible for the mill.
Currently researching magnetic LED lights with flexible goose neck. Sometimes called sewing machine lights.
https://www.amazon.com/gp/product/B07J4ZKGF4/ref=ppx_yo_dt_b_asin_title_o00_s00?ie=UTF8&psc=1
I might even get 3 of these. I could then move them to different areas when needed (saw, mill, lathe) and also use them on the work bench for cross lighting. I would just use double stick tape for some large metal washers to mount them.
-
I have a Sherline mill and need a bit more light on my work piece as my 71 year old eyes could use the help.
Has anyone come up with some kind of clamp on, screw on, glue on or other kind of small light to mount on their mill or other shop equipment?
Dave
-
-
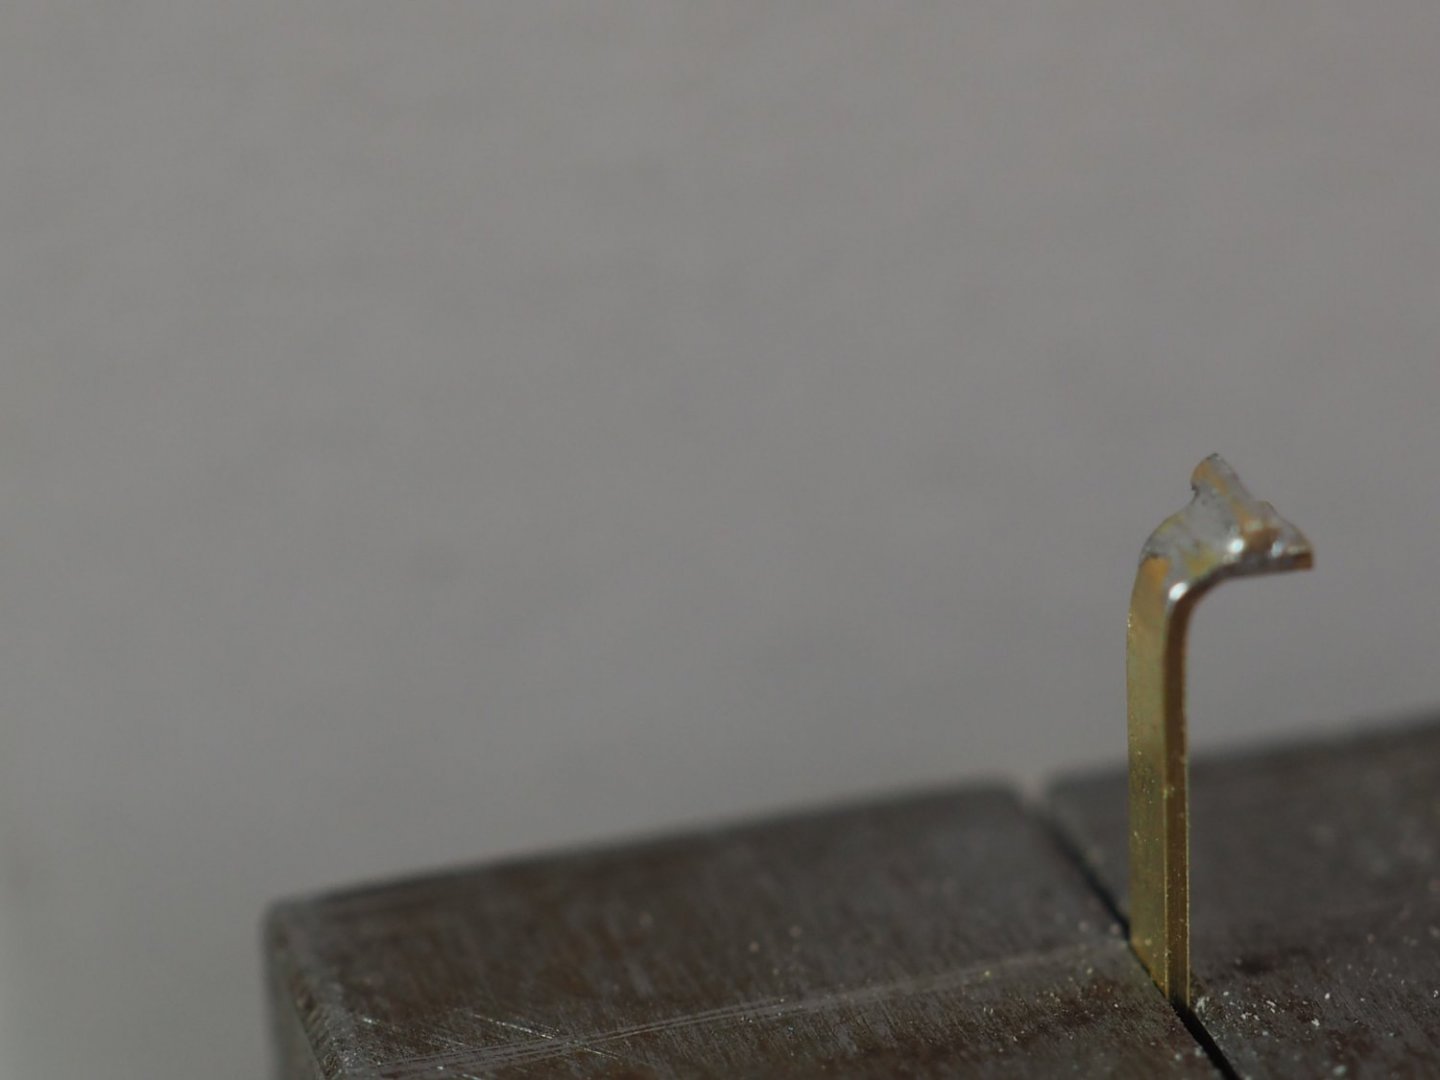
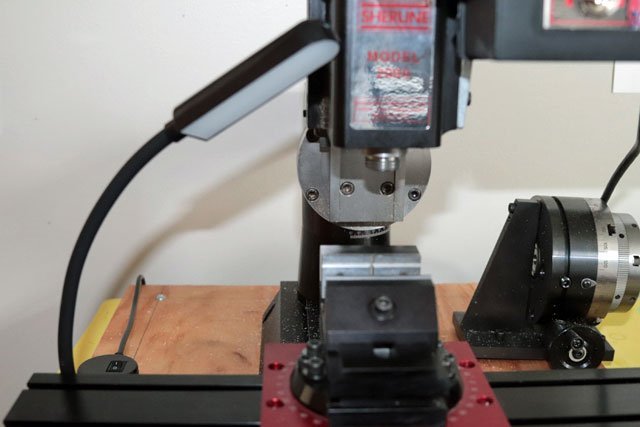
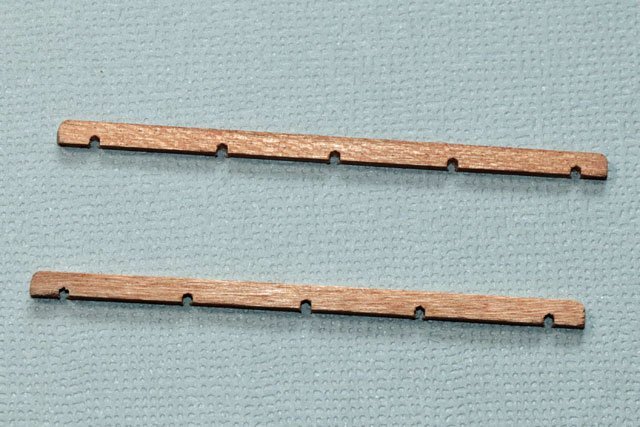
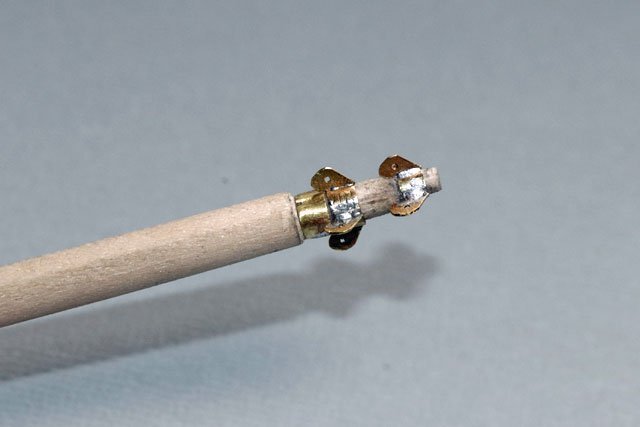
Started off making the battens for the jib stops. Had some scrap cherry so decided to use that.
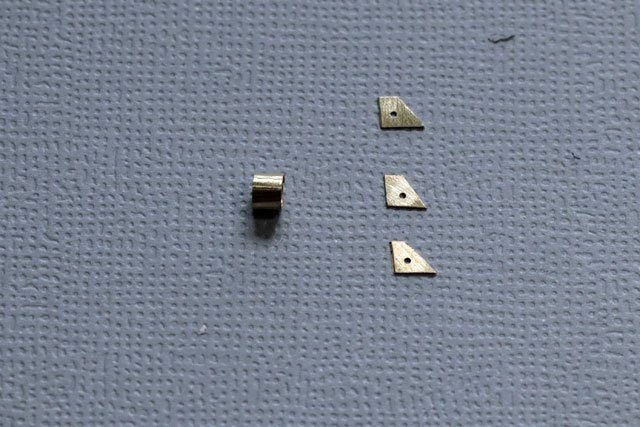
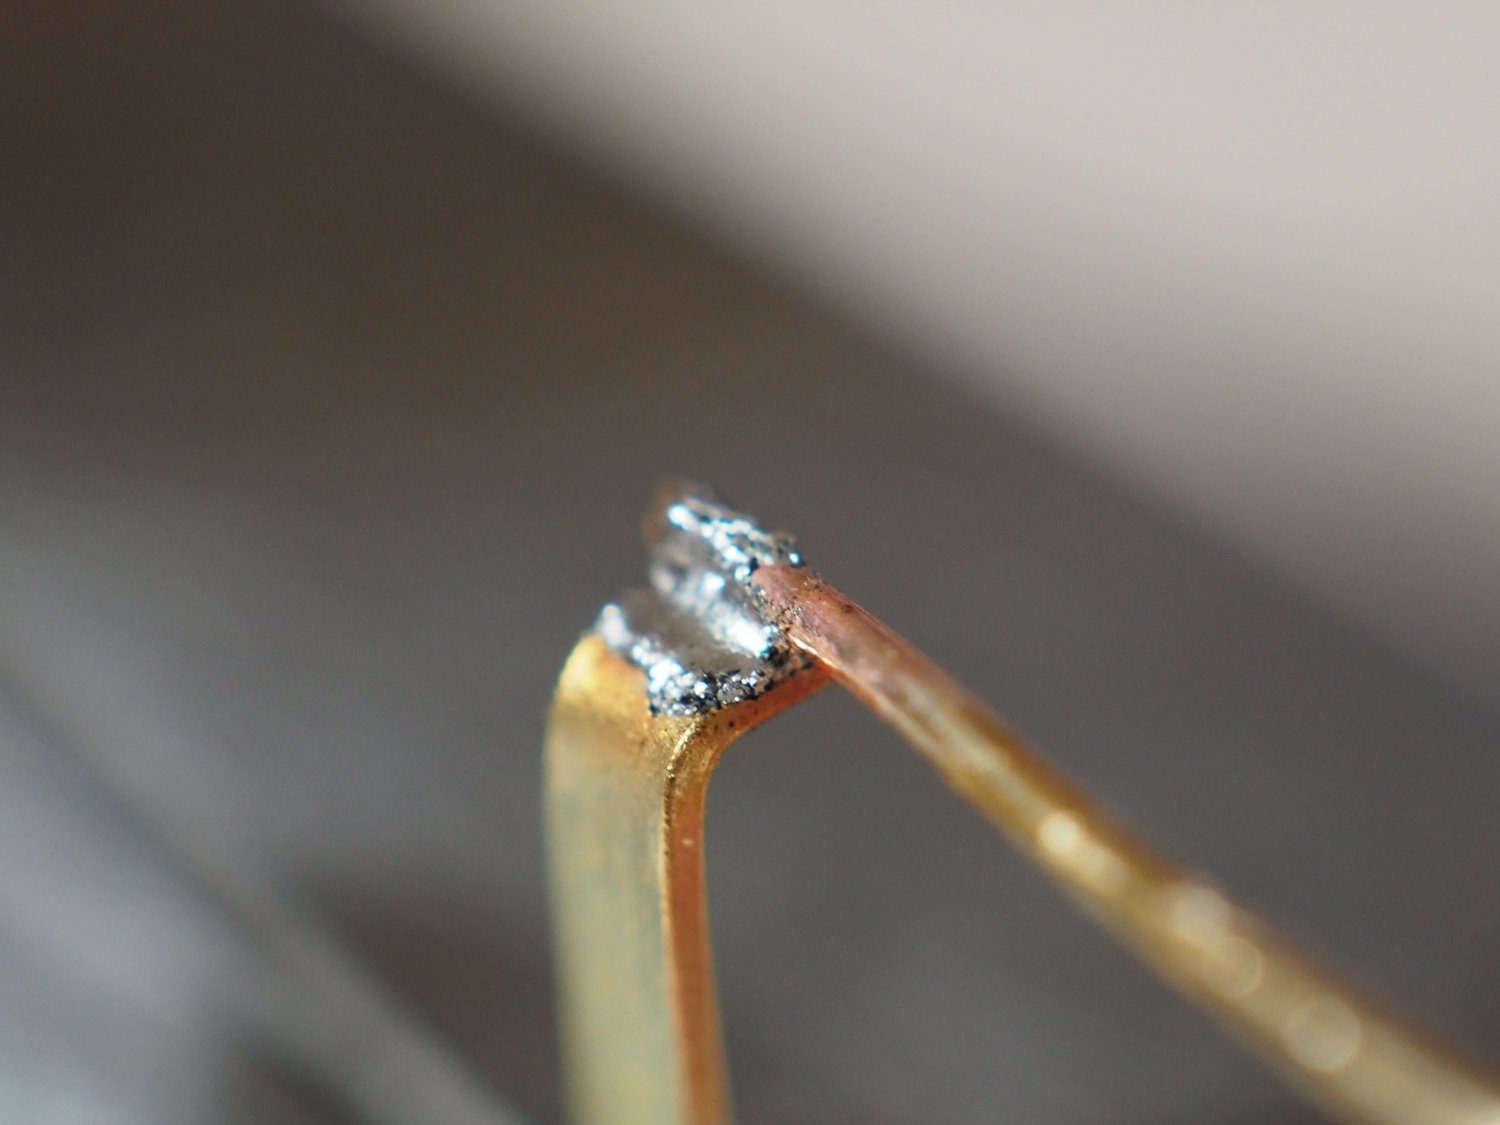
Then, after consulting with my usual mentors, made the bands and eyes. My plan shows the eyes slanting toward the ship so I cut the eye pieces at an angle to achieve this and drilled holes in them.
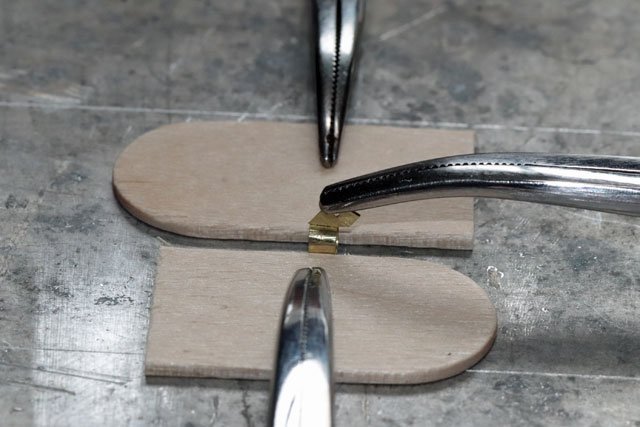
This was the set up I used to solder the eyes to the bands. I found that using silver bearing solder paste worked great. It has a low flow temp, 450 degrees, and has flux mixed right in. I was able to place very small amounts where needed using a soldering pick. The brand I used was “Solder-It” but solder paste is much cheaper if purchased at a jewelers supply, like Rio Grande. The weights I used to hold the hemostats in place are just BB’s in small ziplock bags. I got 4 pounds of BB’s for 10 bucks on Amazon.


Mounted the band on a drill bit shaft. Then mounted the drill bit on a hand vice and the hand vice on a bench vice. This gave me a sturdy mount to file the eyes into a rounded shape.
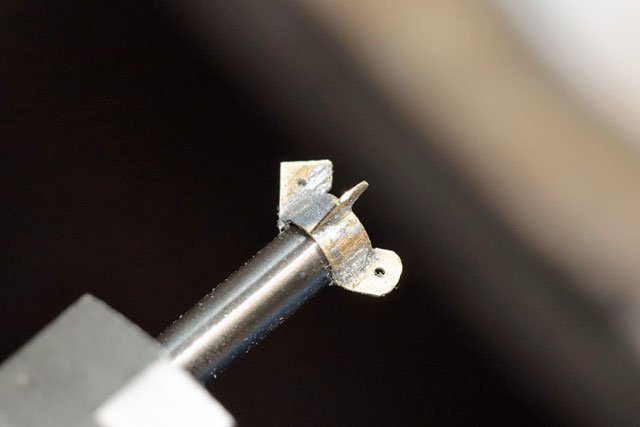
Test fit before final cleaning and blackening
- Nirvana, GrandpaPhil, Retired guy and 1 other
-
3
-
 1
1
-
Welcome, Todd! Always nice to meet another modeler.
- Dave_E, Keith Black and mtaylor
-
3
-
Welcome! I'm sure you will get all the help you need on this site.
- mtaylor and Keith Black
-
2
-
-
-
-
3 hours ago, Ed Ku20 said:
Dave, awesome job on the bowsprit! It looks great. However, you've given me a case of tool envy!! Gonna have to think about investing in a milling machine for my next build.
Yes, it's nice to have such a tool. But it's a huge learning curve for me. Having no experience at all with a mill, or lathe for that matter, has hampered my ability to use it to it's full advantage. These tools are great but having the knowledge on how to use them is the real key. No magic pill here.
-
Welcome Alex! Enjoy your new hobby.
- mtaylor, mc_chopski, Dave_E and 2 others
-
5
-
5 hours ago, Nirvana said:
Maybe a sherline mill isn't so expensive after all, take a look at this unit!
Holy smokes!


Questions Before I Buy My First Ship
in New member Introductions
Posted
Lots of good advice and information in these posts. But don't get confused or bewildered. Stay on course. Make out lists for needed tools, supplies and reference material. Try not to get overwhelmed. Being organized, calm and patient will serve you well.