


CPDDET
-
Posts
1,098 -
Joined
-
Last visited
Content Type
Profiles
Forums
Gallery
Events
Posts posted by CPDDET
-
-
Welcome aboard! Nice model you have there.
- mtaylor, Shuriksun and Keith Black
-
 3
3
-
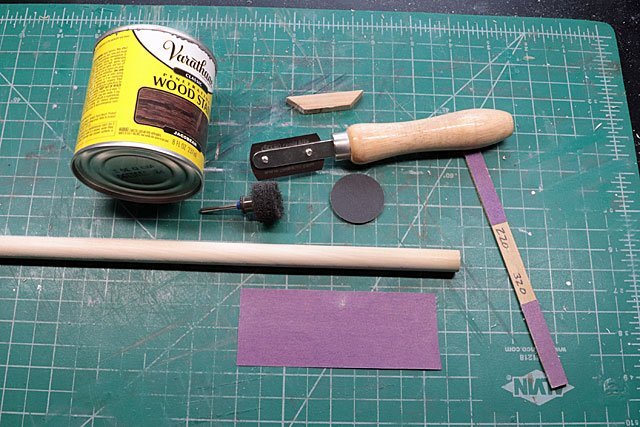
These are the tools I used to remove the parts from the billet (think billet is the correct word) and to remove the char. The razor saw has been my favorite for quite some time to cut the pieces out. Others are sanding sticks, various grits of sand paper and buffing pad. The dowel and can were used to sand curved areas. I included a sanding disk because it was recommended by Toni although I had finished the chore before I got her message.
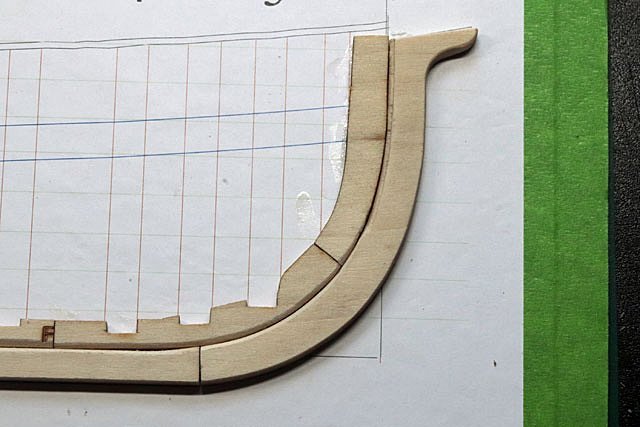
The small piece of wood at the top cut with 45 degree angles was used to make the rabbet. By wrapping a small piece of sandpaper around the angel and sliding it along the keel, keelson, stem and stemson it’s pretty easy to achieve the correct angle; just sand to the drawn pencil line. The wood piece is narrow enough to handle the curves as well.
After dry fitting the keel, stem, stemson and keelson pieces and making adjustments, I tacked them down with white glue (later switched to rubber cement) and double checked the joint alignments.
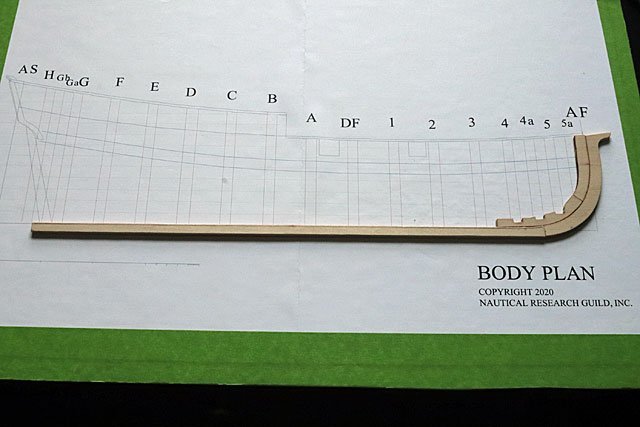
Then removed them from the plan and drew the lines for the rabbet.
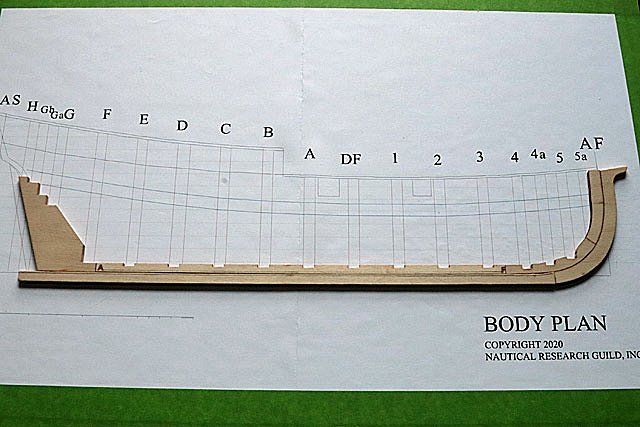
After marking the deadwood portion of the keel, I took a deep breath and sanded the edges using the angle cut wood block and 220 sand paper. The “step” on the upper part of the stem was cut using a #11 blade and small chisels.
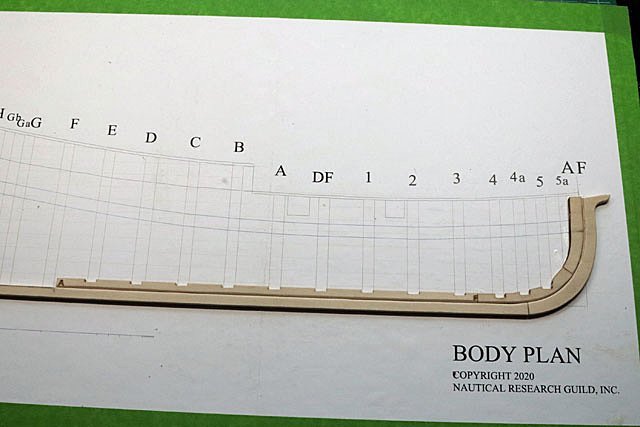
While the transition of the rabbet as it rises up the stem and stemson isn’t perfect, it’s much better than my first attempt and I’m happy with it.
Moving on…….
- Ryland Craze, robert952, Diver and 6 others
-
9
-
-
-
-
Welcome aboard!
- Vlax, Keith Black and mtaylor
-
3
-
And so we begin again.
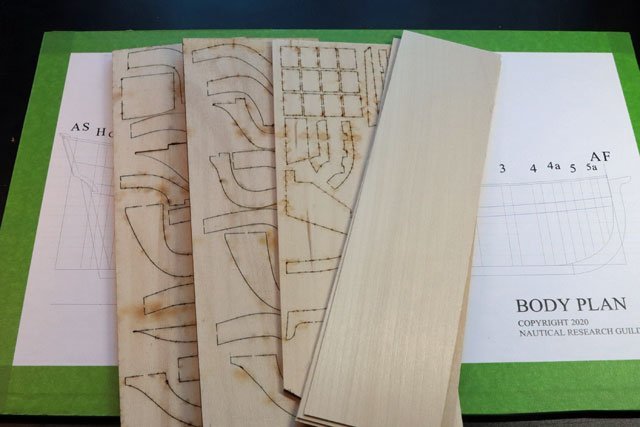
The build plan is mounted to the foam board using spray adhesive, as suggested in the practicum. I added the tape around the edges because I found the adhesive was letting loose just as I decided to start over. If one finished this build in a reasonable amount of time I doubt that would be a problem. I had taken far too long and that’s what probably caused the issue.
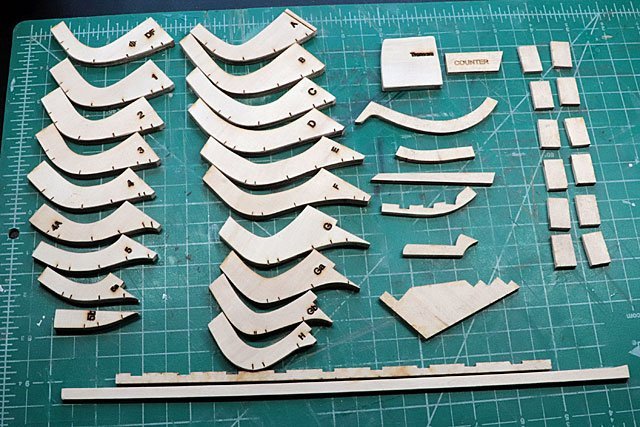
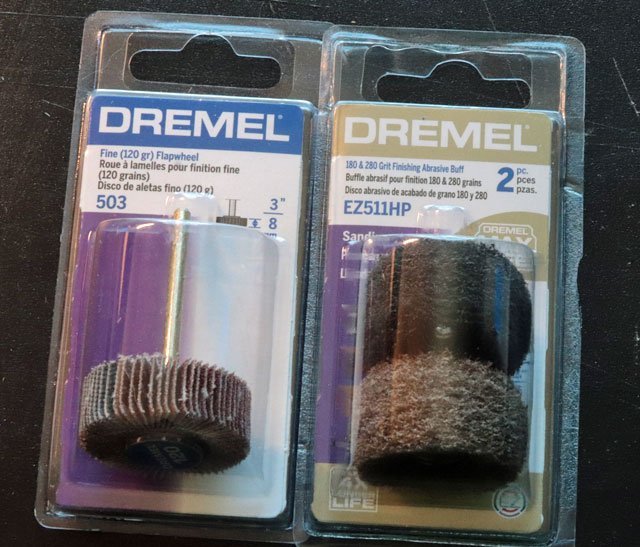
Before cutting out the various parts I wanted to do a bit of research into finding an easier way to remove the char. On the previous model I had used a sanding drum (shown below) with a rotary tool. But unless you’re very skillful or very experienced with this method it can cause problems by removing too much wood along with the char and cause deformities in the piece. Looking back, this was one of the first problems I caused myself.
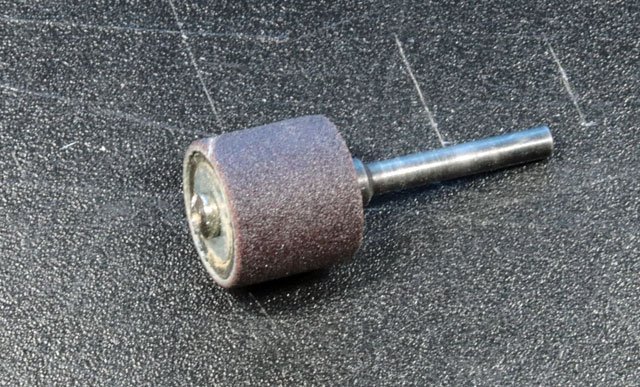
So I picked up some abrasive buff wheels and a 120 grit flapper wheel. While they all easily removed the char I found the 120 grit flapper wheel and the 180 grit buff to be too aggressive. The 320 grit buff wasn’t aggressive enough but the 280 grit buff was just right.
This weekend I will cut out all the pieces, remove the char and store them away in a safe place.
- JacquesCousteau, Cathead, robert952 and 4 others
-
7
-
Welcome aboard! You've picked the right port to dock in. Great people here and much experience.
- Ryland Craze, mtaylor, JeffT and 2 others
-
5
-
4 hours ago, JacquesCousteau said:
I'm sorry to hear that, but I'm looking forward to seeing the new half-hull. As someone who is building their own half-hull (very very slowly), I have to ask: would you be at all willing to share what went wrong? It could be very helpful as a warning for others.
Let's just call it over confident carelessness and a sometimes nonchalant attitude.
- Bryan Woods and robert952
-
2
-
3 hours ago, JacquesCousteau said:
I'm sorry to hear that, but I'm looking forward to seeing the new half-hull. As someone who is building their own half-hull (very very slowly), I have to ask: would you be at all willing to share what went wrong? It could be very helpful as a warning for others.
For starters, over faring some of the bulkheads and then attempting to add shims to correct. Resulted in uneven curvature of hull. Poor shaping of the deadwood. Both the garboard and broad strake too wide resulting in very narrow planks in the lower band. Poor clamping technique that resulted in deformed broad strake. Poor assembly of counter. And so on. Mistakes add up to bigger problems.
Plain to see I'm highly critical of myself and expect better craftsmanship.
Take your time, and if you're not sure things are completely correct, stop and research further.
-
Things have not been progressing well. Small mistakes made earlier are now turning into major problems as the build progresses. So I've decided to bite the bullet and begin anew. A replacement kit has been ordered and Ill continue this build log once that arrives.
I know this sounds a but drastic, but I'm determined to end up with a half hull model that I'm proud to display. Unfortunately that's not going to happen with the current build.
- Bryan Woods, tlevine, robert952 and 1 other
-
4
-
Very nice build! Welcome aboard
- mtaylor and Keith Black
-
2
-
I use a piece of brass round stock . Same diameter as the sherline knockout bar which didn't come with my sherline mill. I've always been fearful of ruining threads using the bolt method.
- Roger Pellett, AON, mtaylor and 3 others
-
6
-
-
Welcome aboard!
- Keith Black and mtaylor
-
2
-
Welcome aboard!
- Keith Black and mtaylor
-
2
-
Welcome aboard!
- mtaylor and Keith Black
-
2
-
Welcome Dave. Don't know if the OCD thing runs rampant here but it's something I deal with often. But if I built everything perfect there wouldn't be any challenges left to keep me building. Hang in there and enjoy the hobby.
- mtaylor, Keith Black and Dcox
-
3
-
Been quite awhile since my last post. Its been a bumpy few months with the holidays and coming down with a mild case of pneumonia. At 73 years it took almost 2 months to get over that and still the cough lingers. But feeling better now and some progress has been made on the model.
Topline has been trimmed, wale marked, bulkheads faired, shims installed where necessary, transom and counter installed, garboard plank and broad strake installed and dark thread used to designate planking bands. All of this has taken some time to try and get everything just so and required multiple attempts. I think I installed the garboard plank at least 3 times and ended up tearing it out each time until I was satisfied.
Sorry for the lack of pictures, will try to get back to taking more as the planking proceeds. But here is where I sit right now. As suggested by Toni I will take a break and take a fresh look at the planking bands tomorrow before proceeding any further.

- robert952, CiscoH, Ryland Craze and 4 others
-
7
-
Welcome aboard! I have the same book and found it very useful
- JeffT, Keith Black, mtaylor and 2 others
-
5
-
Welcome aboard!
- mtaylor, Ryland Craze and Keith Black
-
3
-
While I have used CA in the past for hull planking, I currently use Titebond Thick and Quick. Have been very happy with this product with its quicker dry time. And it dries clear.
- Scottish Guy, Mike Shea, mtaylor and 1 other
-
4
-
Welcome from another sailor. While I'm landlocked now I spent years sailing different sloops from 18 foot to 50 foot. Sailed most of the Great Lakes as well at the Leeward Islands. My last boat was a S2 9.1 meter sloop.
I love the old model you have. Stripping it down reveales many of the build techniques and makes a great project.
I'm sure you will find the help you need here as well as great mates.
Dave
- Keith Black and mtaylor
-
2
-
Welcome Jerry! While I don't possess the skils necessary for your project, perhaps you could post some pictures of the needed work so people on this site can give their input/advice.

Bluenose by CPDDET - Model Shipways - Scale 1:64 - First ship build
in - Kit build logs for subjects built from 1901 - Present Day
Posted
Check out page 11 of this build log