HOLIDAY DONATION DRIVE - SUPPORT MSW - DO YOUR PART TO KEEP THIS GREAT FORUM GOING! (Only 36 donations so far out of 49,000 members - C'mon guys!)
×


Ab Hoving
-
Posts
689 -
Joined
-
Last visited
Content Type
Profiles
Forums
Gallery
Events
Everything posted by Ab Hoving
-
 Planking a hull in less than an hour: Still a lot to do (and a lot to hide :-)).
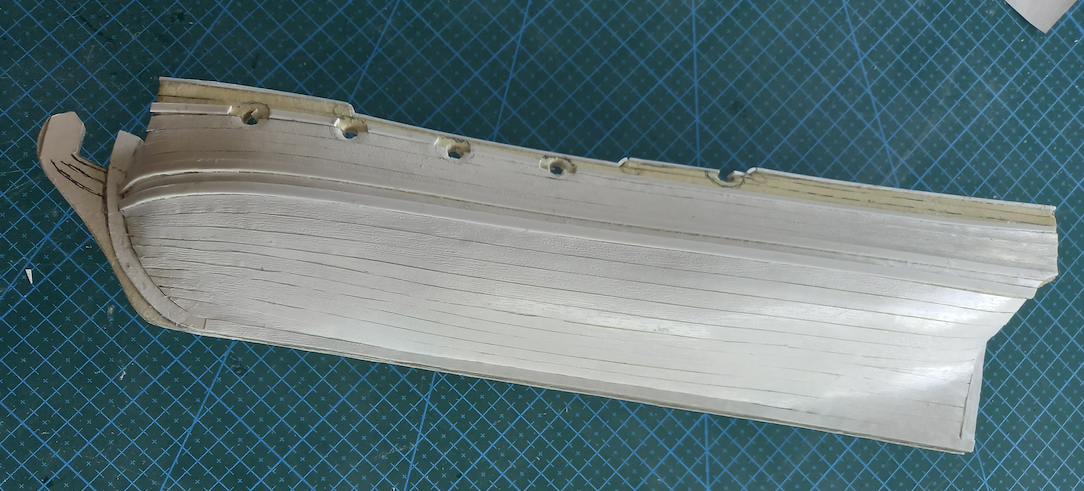
- 77 replies
-
- 10
-

-

-
- Royal Yacht
- card
- (and 1 more)
-
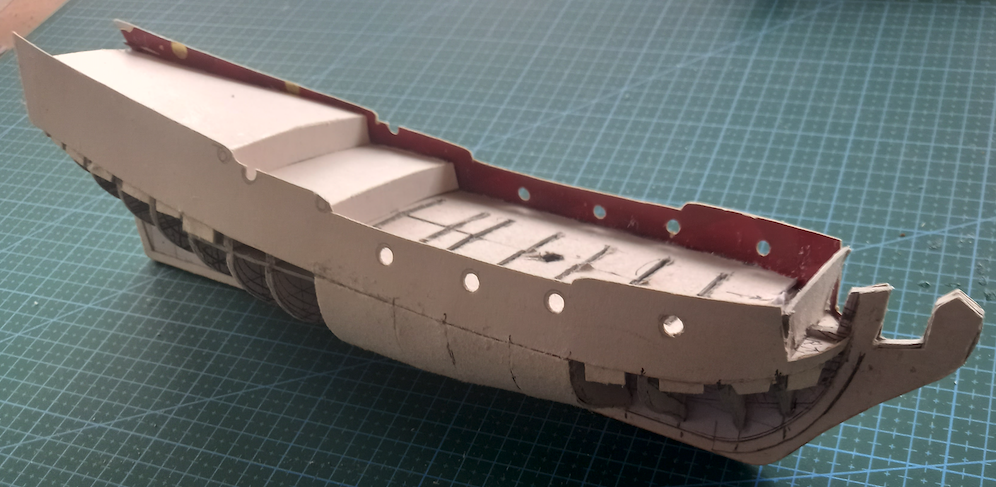
I started planking the upper strakes with c-d-fix self adhesive latex. The top planking will have to be covered with carvings, so that is for later. Things are going real fast now. Covering up all the mistakes I made in previous phases. Glueing on the covering boards is a start for a neat finish.
- 77 replies
-
- 4
-
-
- Royal Yacht
- card
- (and 1 more)
-
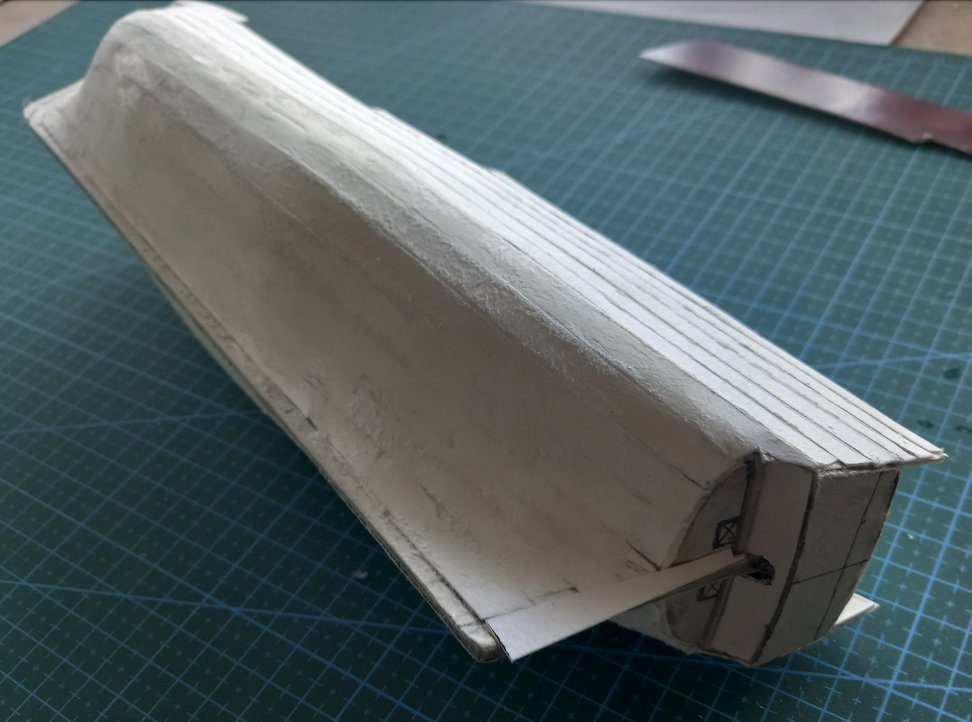
The longitudinal planks are glued on, they needed some sanding, which makes them a bit furry. I use shellac to mend that. Some filler here and there is also necessary. That's how it goes building from scratch.... The inside of the bulwarks is stiffened with an extra layer of card and the outside is planked. I work about six hours a day and I think for a small ship like this one a week should be enough to roughly finish the hull. But then the deck furniture and the decorations follow, not to mention the rigging. Still a long way to go....
- 77 replies
-
- 11
-
-
-
- Royal Yacht
- card
- (and 1 more)
-
Thank you Patrick, most helpful. Don't pick up my wrong habits. 🙂
- 77 replies
-
- 4
-
-
- Royal Yacht
- card
- (and 1 more)
-
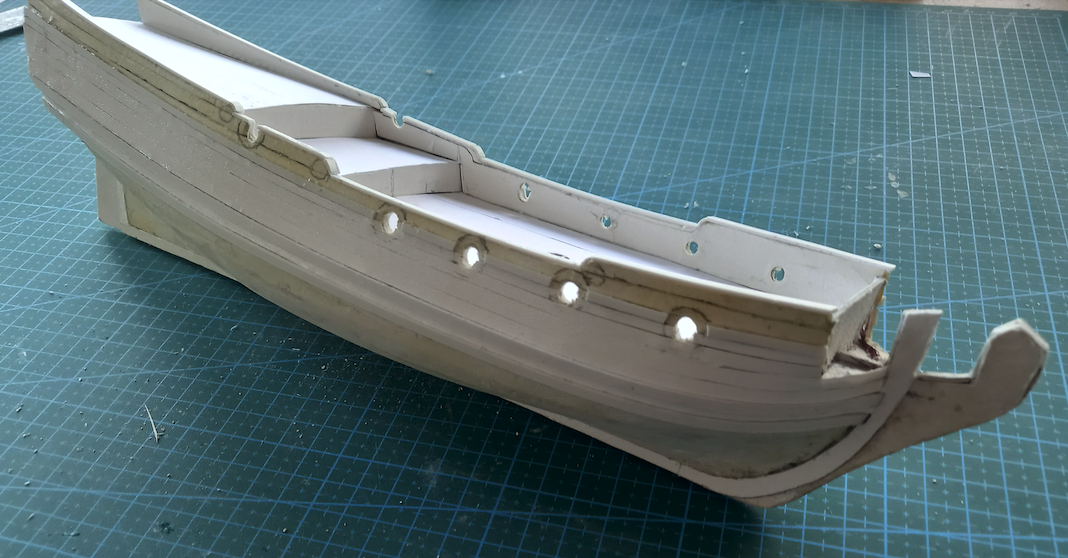
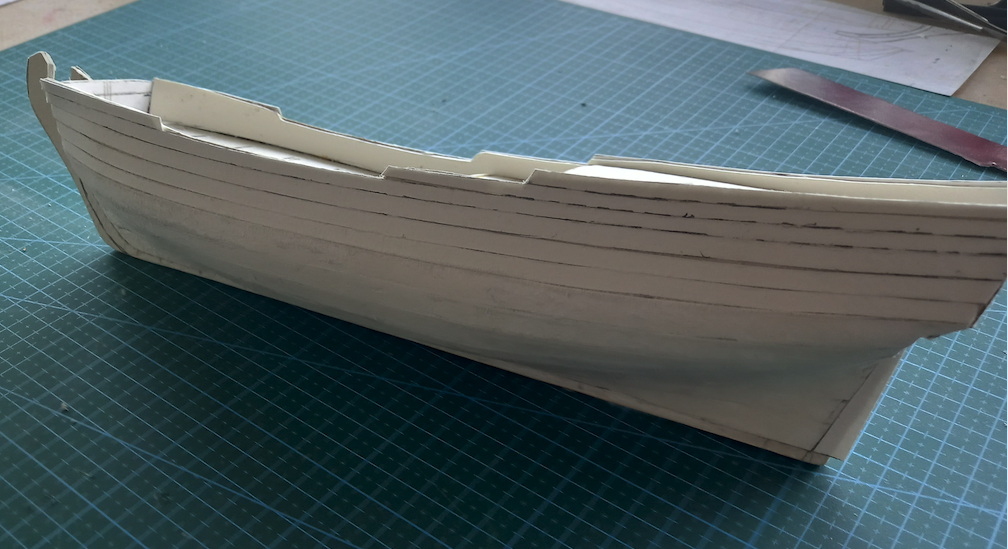
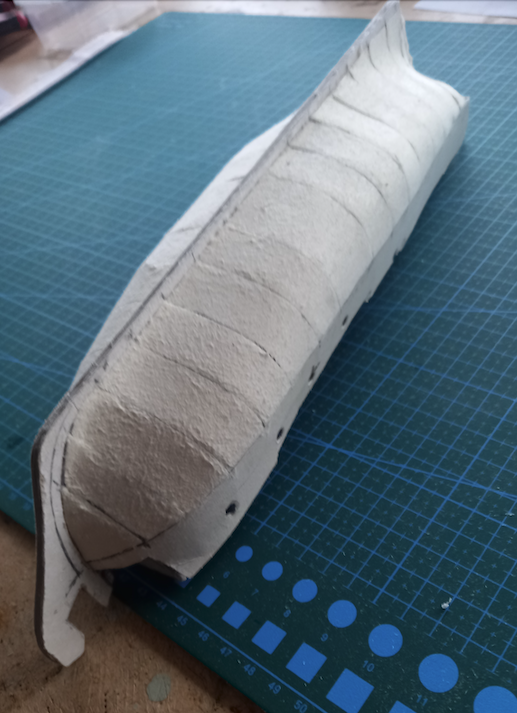
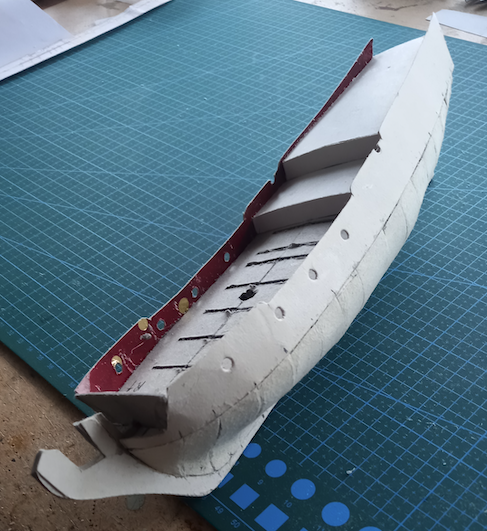
There is one thing about working with card that is worth noticing: it is incredibly fast. I started on Thursday with nothing but a rather obscure drawing and yesterday, after a dozen of hours work at the most, the hull was closed, both above and below the waterline. Something else to notice is, that the usual sharp and crispy lines we see on wooden building projects are obviously not (yet) here. But it is most reassuring that everything you see here, will be covered with other material, one way or another. The sides above the wales are simply copied on card from the drawing and glued into place. Covering the part below the wales is simply done by glueing vertical strips over the frames. Some slight sanding is enough to take away the roughest obstacles. It looks quite bumpy, but actually the pictures, done with grazing light are more unforgiving than the real object. A second layer of planking will stretch any irregularities in the shape. To be continued.
- 77 replies
-
- 13
-
-

-
- Royal Yacht
- card
- (and 1 more)
-
Hello David, I can hardly express how happy I am about your remark about the lack of sources for these yachts. I never aim to picture a specific ship with my models, I am always more after just a type. I don't even think in the direction of making such a beautiful model as you did. I just want to see an impression of what such a ship looked like in reality. So now I am free to make a model of an impression of such a ship without being hindered by what the real ship looked like. No rivet counters for me... I just want to make fun building a model. Did I tell you how much I admire what you did on the Fubbs? High class! Dazzling. Best, Ab
- 77 replies
-
- 6
-
-
- Royal Yacht
- card
- (and 1 more)
-
The pictures of Fubbs are most helpful and I had to adjust the model in only a minimal way. But Fubbs was not the ship I wanted to model, because of the different rig. Does anyone know of pictures, drawings or whatever of an English yacht with only one mast?
- 77 replies
-
- 3
-
-
- Royal Yacht
- card
- (and 1 more)
-
Thank you Martes! And Chris and Mike: I hope not to disappoint you.
- 77 replies
-
- 2
-
-
- Royal Yacht
- card
- (and 1 more)
-
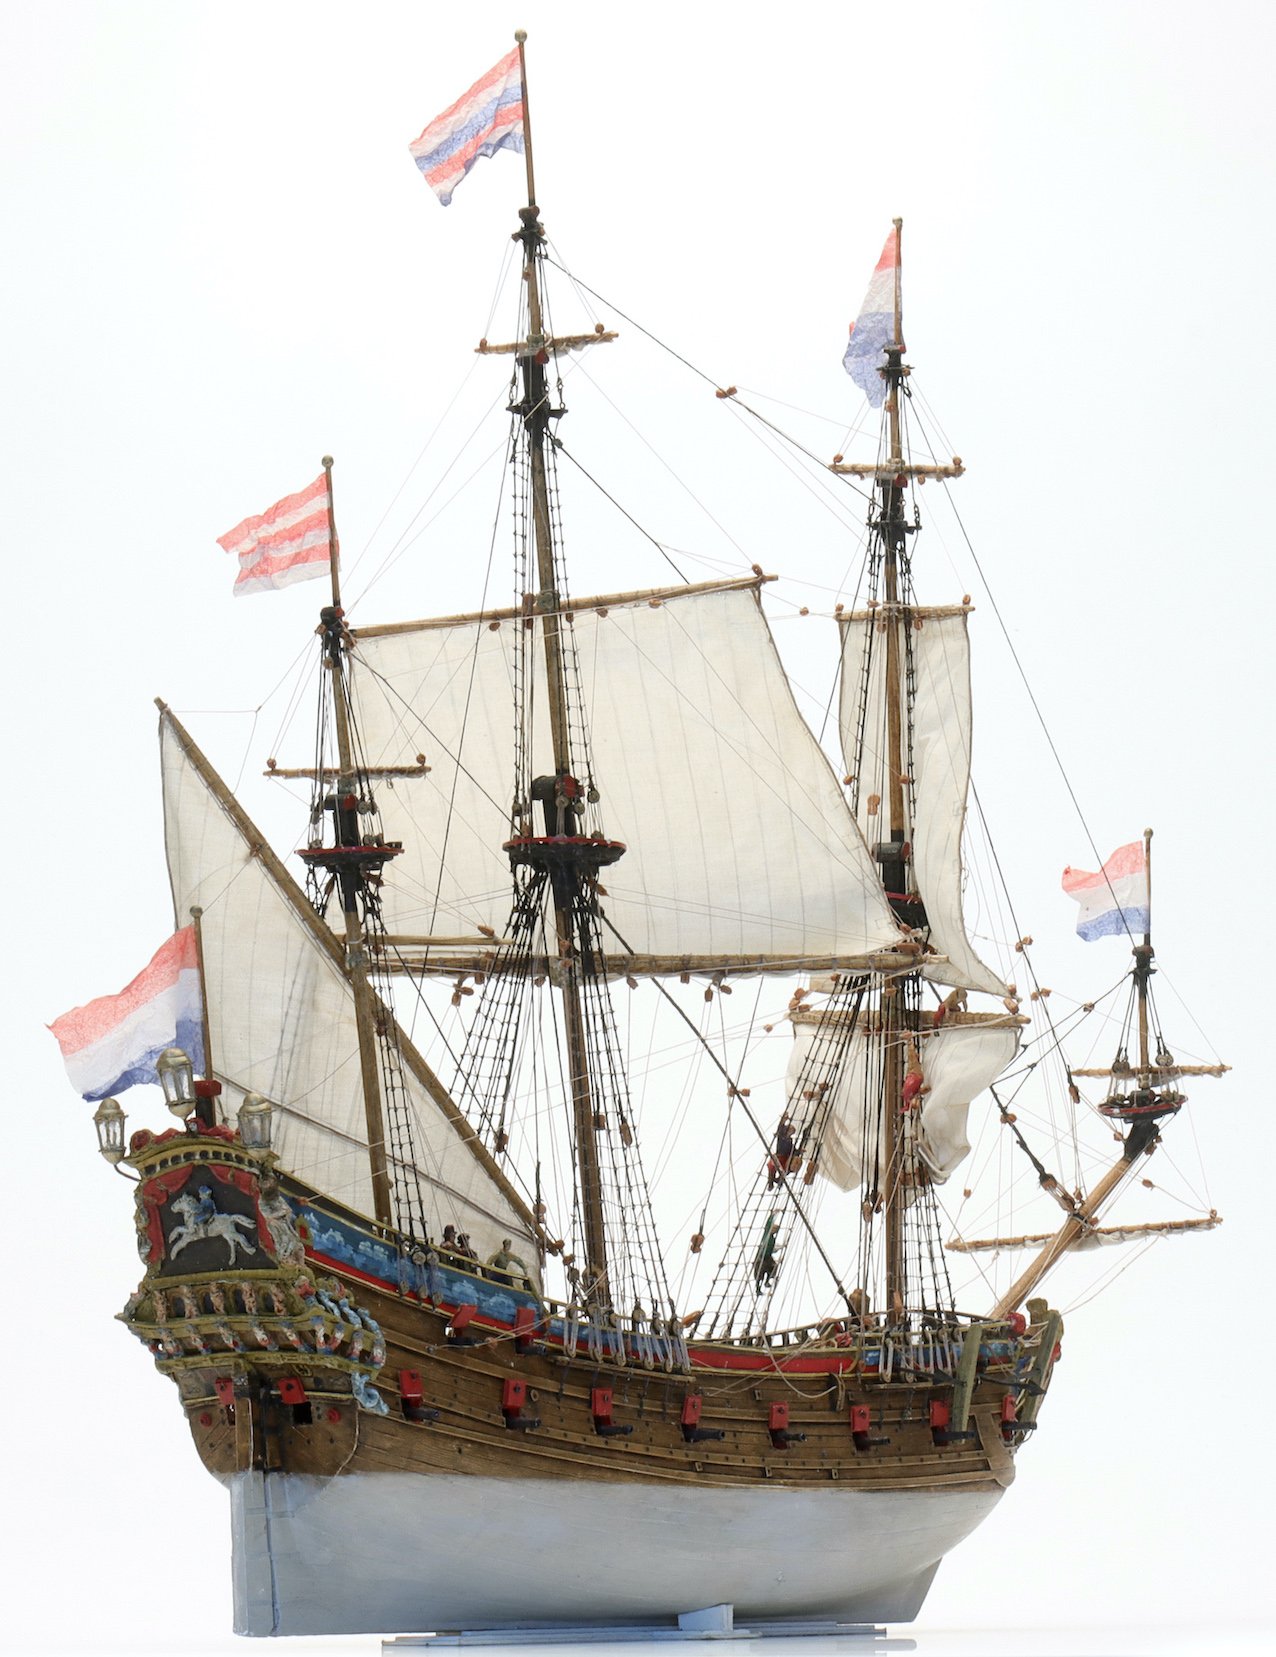
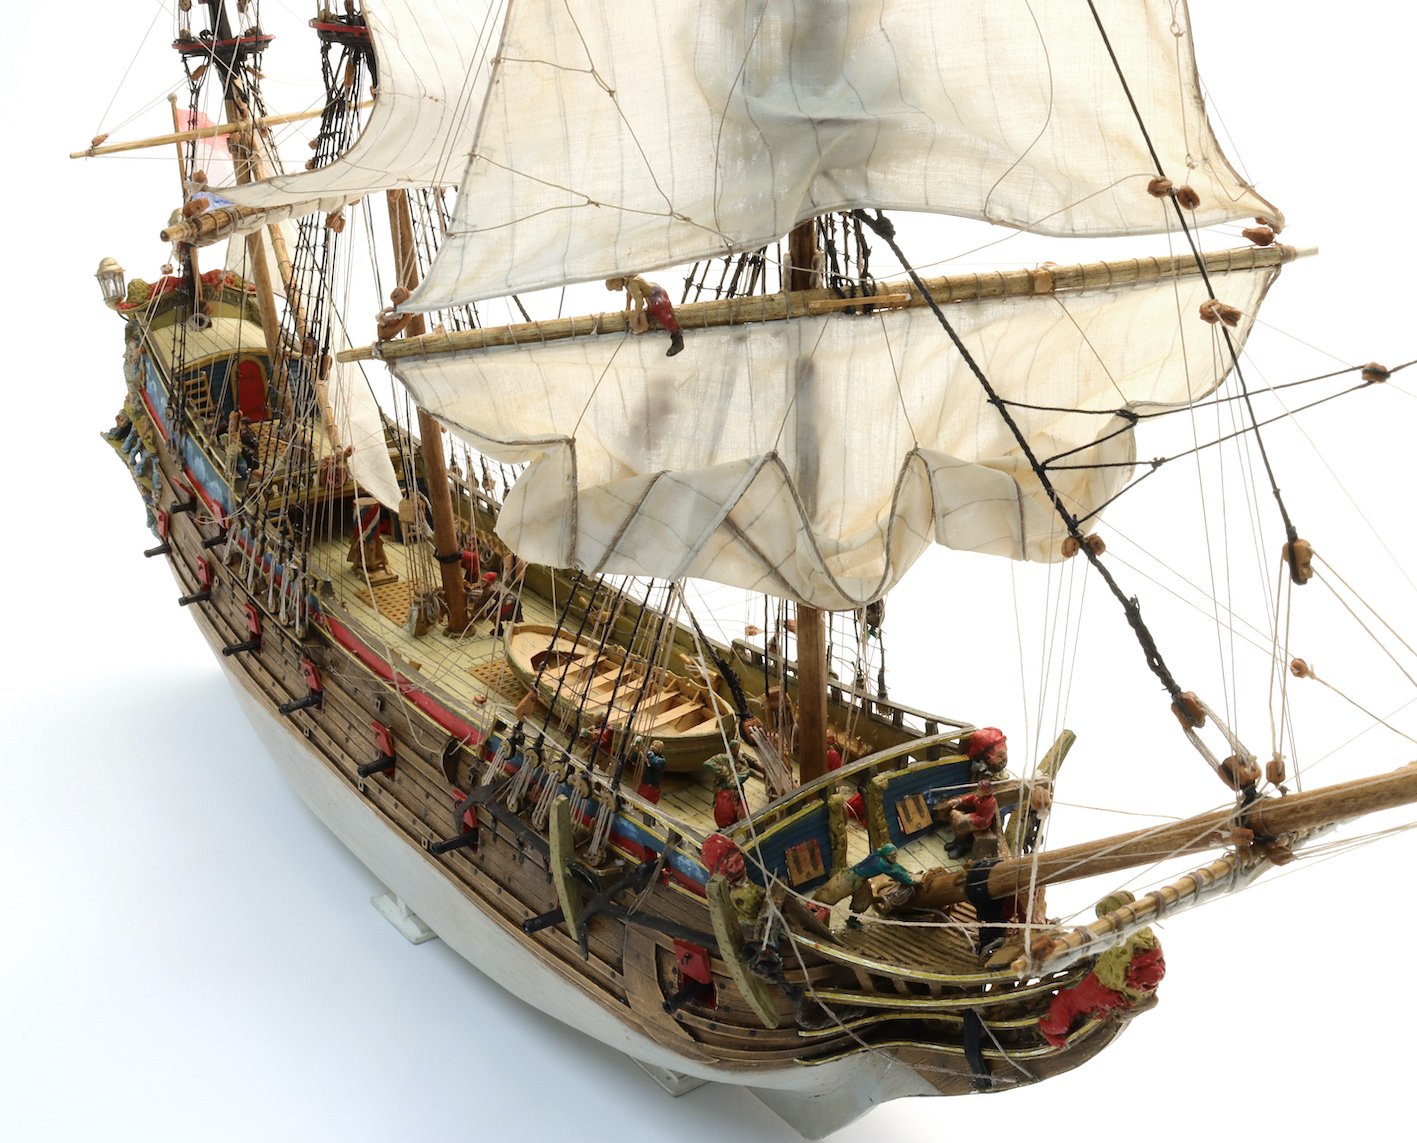
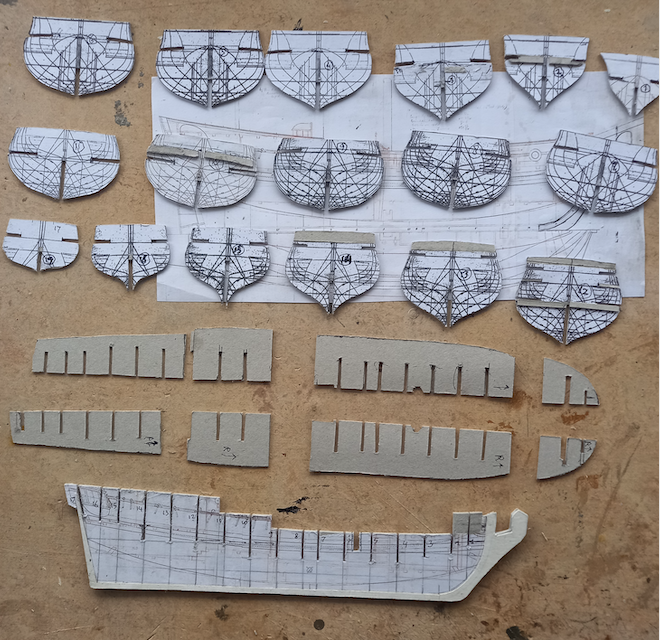
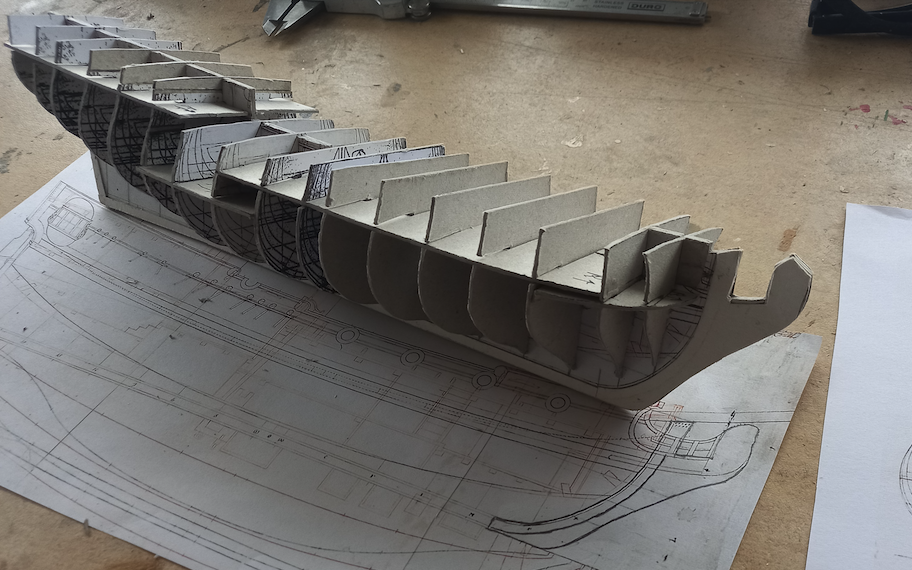
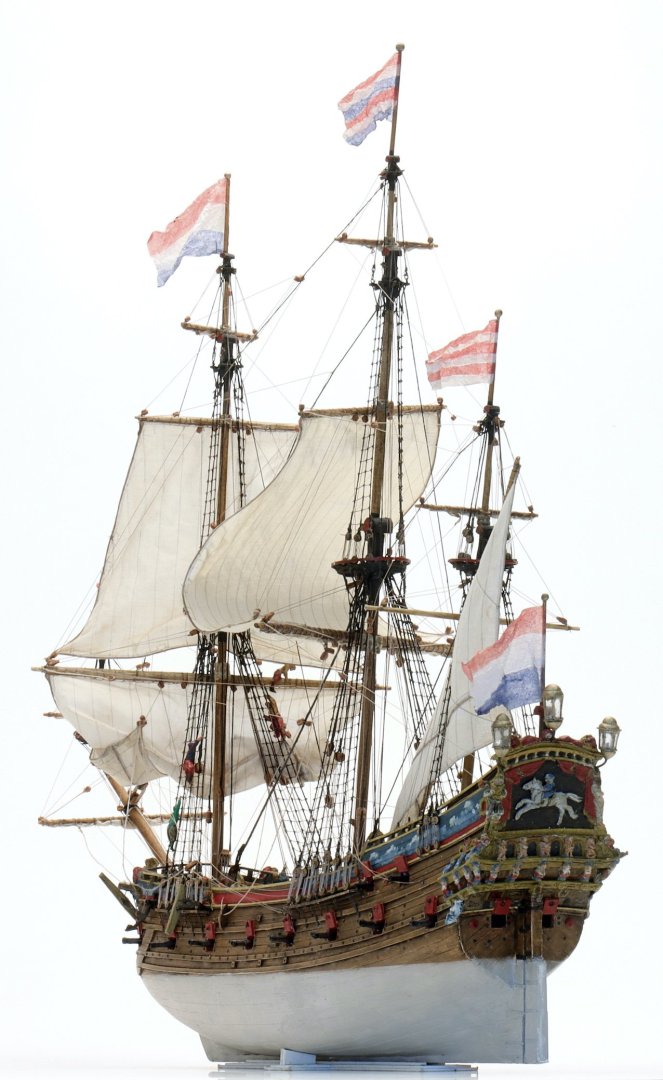
The gift from a friend inspired me to build a model of the type that is shown in the drawing. (See https://modelshipworld.com/topic/22309-what-did-you-receive-today/page/154/#comment-1083544) Fortunately I have a nice drawing. It is for a ketch-rigged ship, but changing that into a standing gaff rig is just a matter of minutes: So I spent a day to set up the basics for a nice paper hull: So far I do not see any problems for the near future. Making a hull with this material is just a breeze. But the point is that I wonder into a world I know nothing about. A Dutch yacht would not have been any problem as I have shown earlier (https://modelshipworld.com/gallery/image/17836-satenjacht_3_lrjpg/?context=new), but about the English counterpart many details on the hull are unknown to me. And here (I hope) you come in.... Is there anyone who has clear close-up pictures of a model like this or maybe even draughts? Can you please post them here? I'd be most grateful.
_RMG_M0186.jpg.5c041e8e5ed1381a36aba071b05a8138.jpg)
- 77 replies
-
- 12
-
-
-
- Royal Yacht
- card
- (and 1 more)
-
Intro to Card Models Intro and Table of Contents
Ab Hoving replied to ccoyle's topic in Card and Paper Models
Hi Chris, I had no idea you wrote this tutorial. I would certainly have referred to it in my book. Why didn't you mention it when you edited it? Your work is substantial and advisable for every beginner. Sorry for my ignorance! Ab -
Thank you Jan. I don't think there are UK people who want to deny the event, just that it hurts to be confronted with another nation having invaded their country. Yes Steven, it is, but from my own experience there are people who have problems accepting it. That's all I wanted to mention. As I said, the Dutch were beaten by the English several times and maybe it depends on what your vision on history is how you cope with it. My 'corrector' obviously had a different vision than I had. I suppose this forum has a max for uploading pictures. Therefore I will send you the high res picture in a PM. Thanks for your appreciation. Ab
-
I really hope so David. Years ago when I did a contribution about the stern carvings of the captured Royal Charles for Model Shipwright, a beautiful English magazine, a desk editor, who had no business at all with the content of the article, changed my somewhat ironic text into something much more acceptable (for himself). John Bowden, the editor was furious about what had happened, but it was too late. It shows that the matter might touch an open nerf for some people, even knowing that the British did defeat the Dutch fleet several times most convincingly...
-
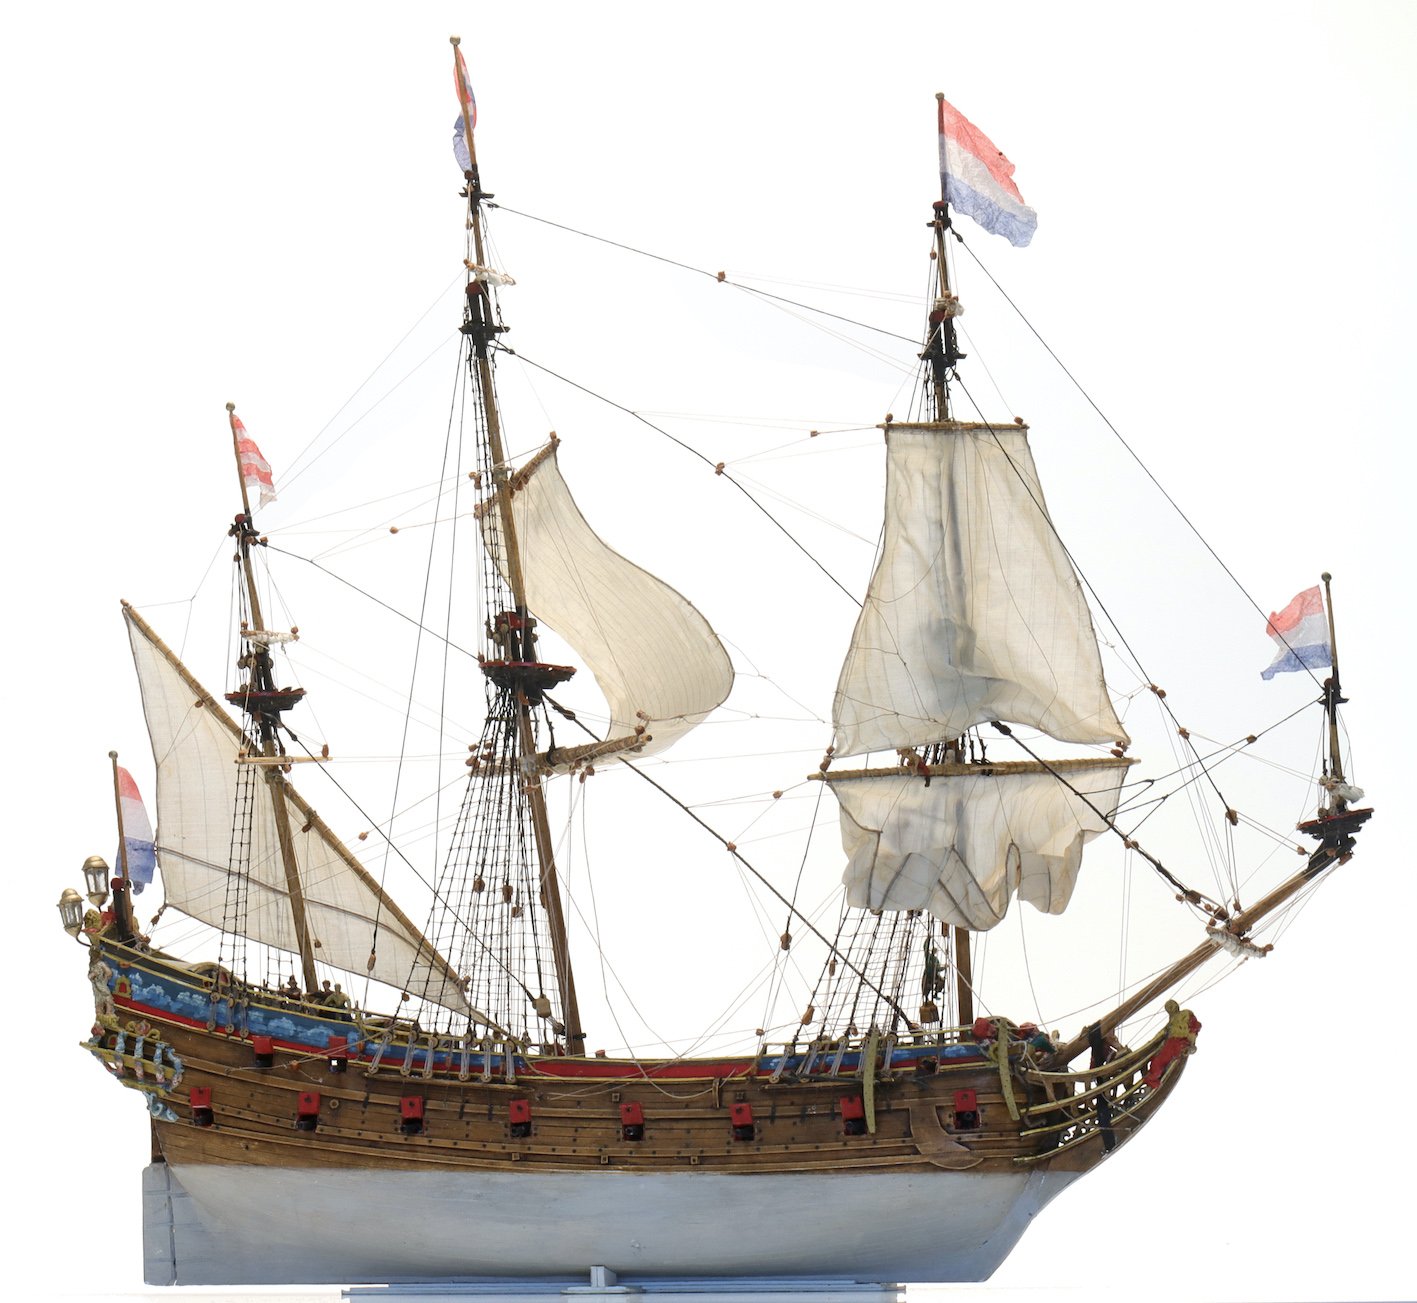
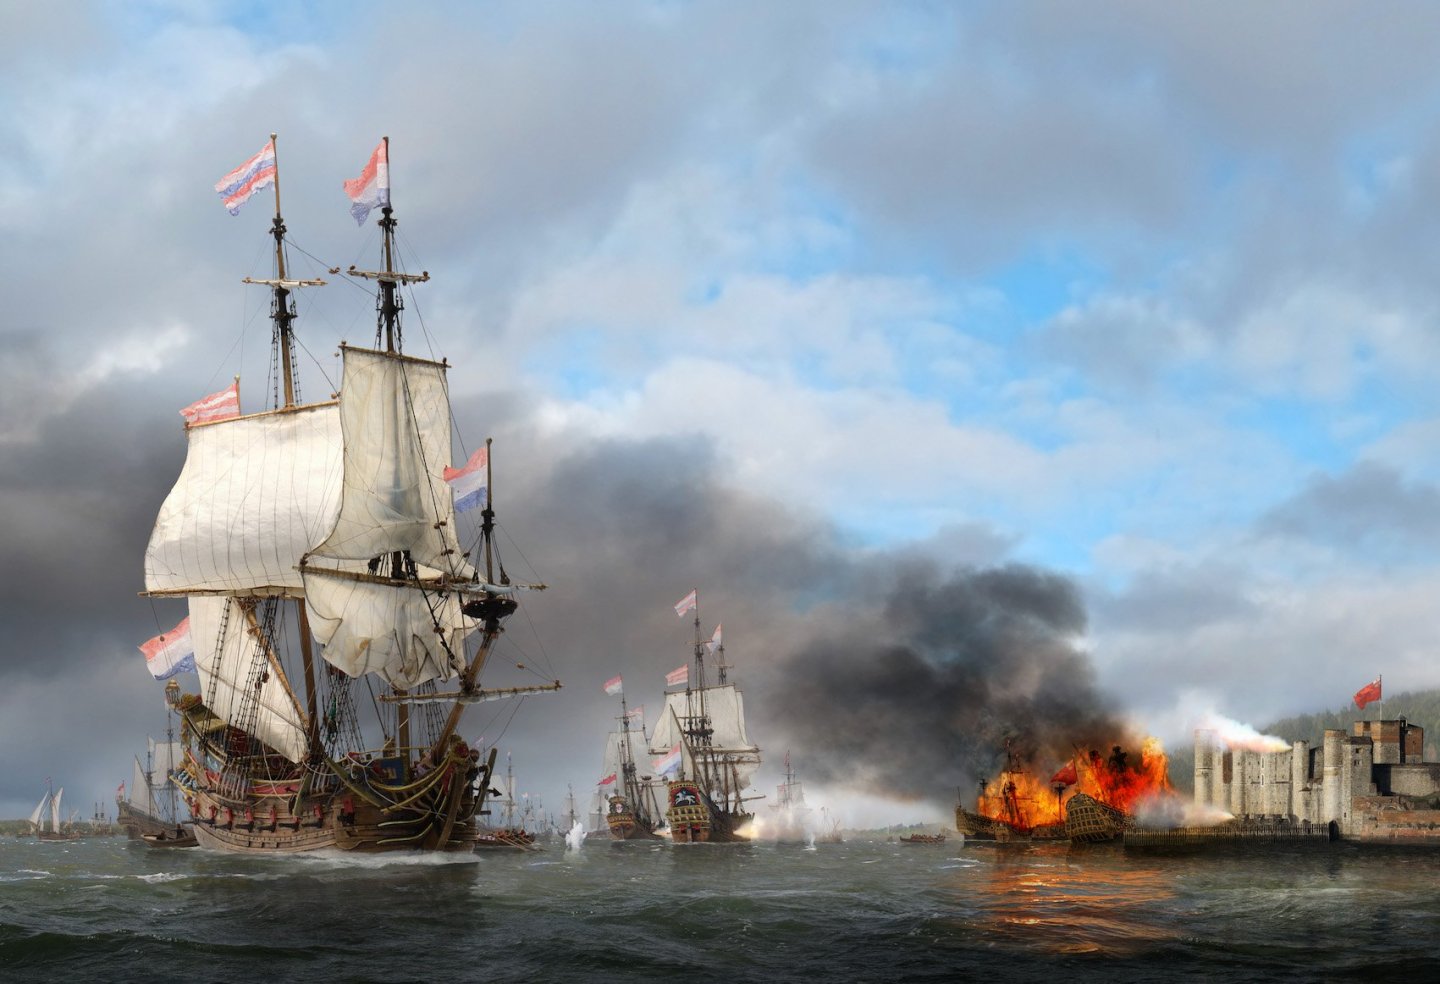
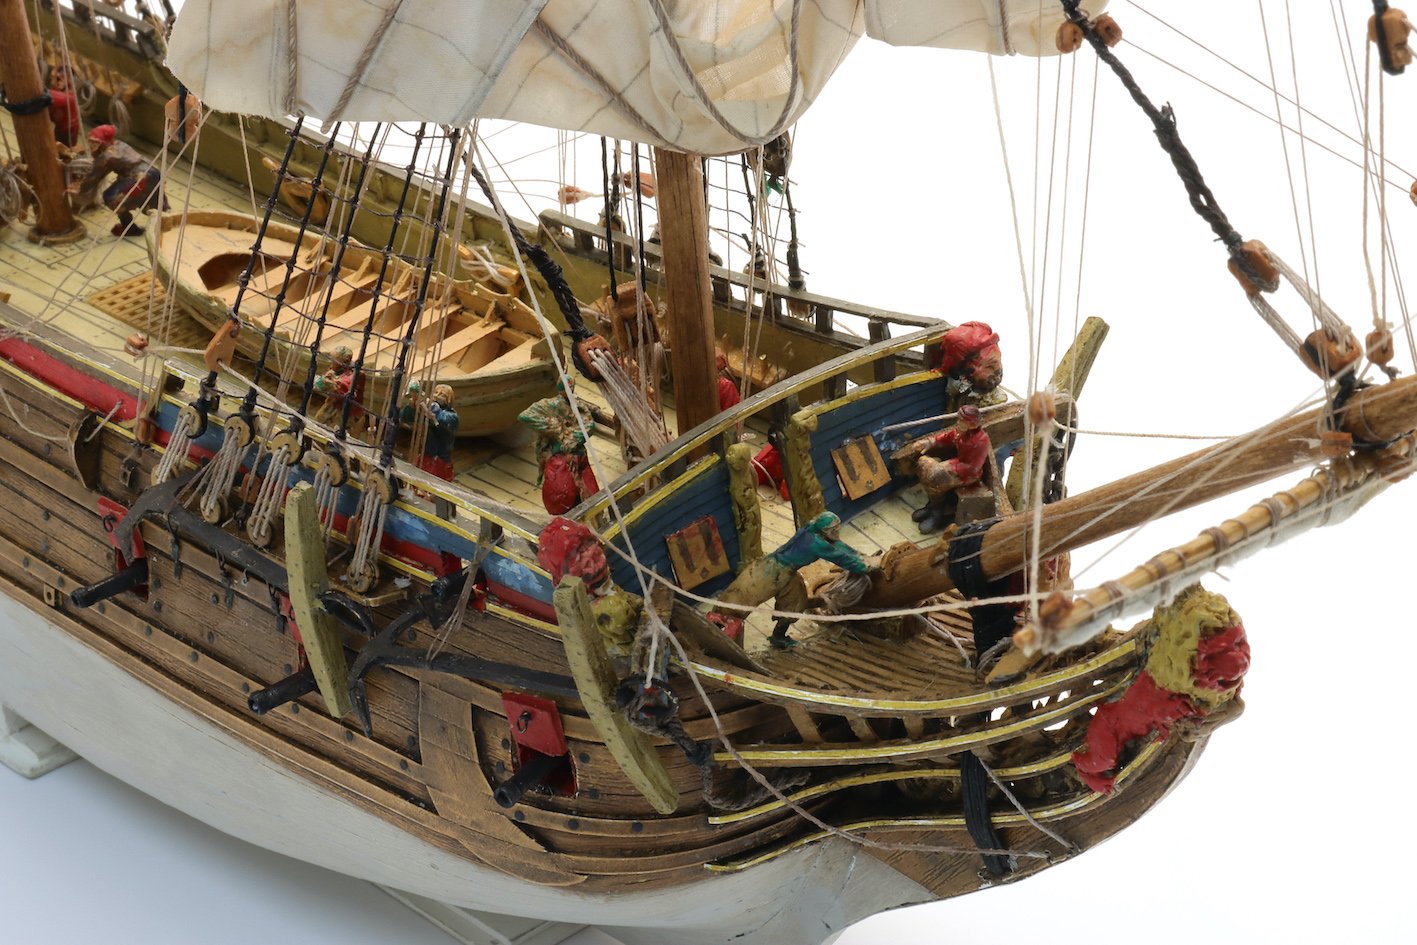
As I promised earlier hereby the (temporary) 'natural surrounding' of the frigate Postiljon. It is the situation during the Raid on the Medway on June 22 1667. Earlier the fortress Sheerness at the mouth of the river was conquered, the chain that closed the river was broken and here Upnor castle is under attack by the Dutch frigates. Three of the king's ships laid up near the castle were set to fire and little later the flagship Royal Charles was taken and brought to Holland as a trofee. The action speeded up the negotiations for a profitable peace and is still in the Dutch history books as a showpiece for the abilities of admiral Michiel de Ruyter (although he himself only arrived at the end of the action). I'm sure English history books have another view of the event if mentioned at all. Emiel tried to keep as close to the facts as possible.
-
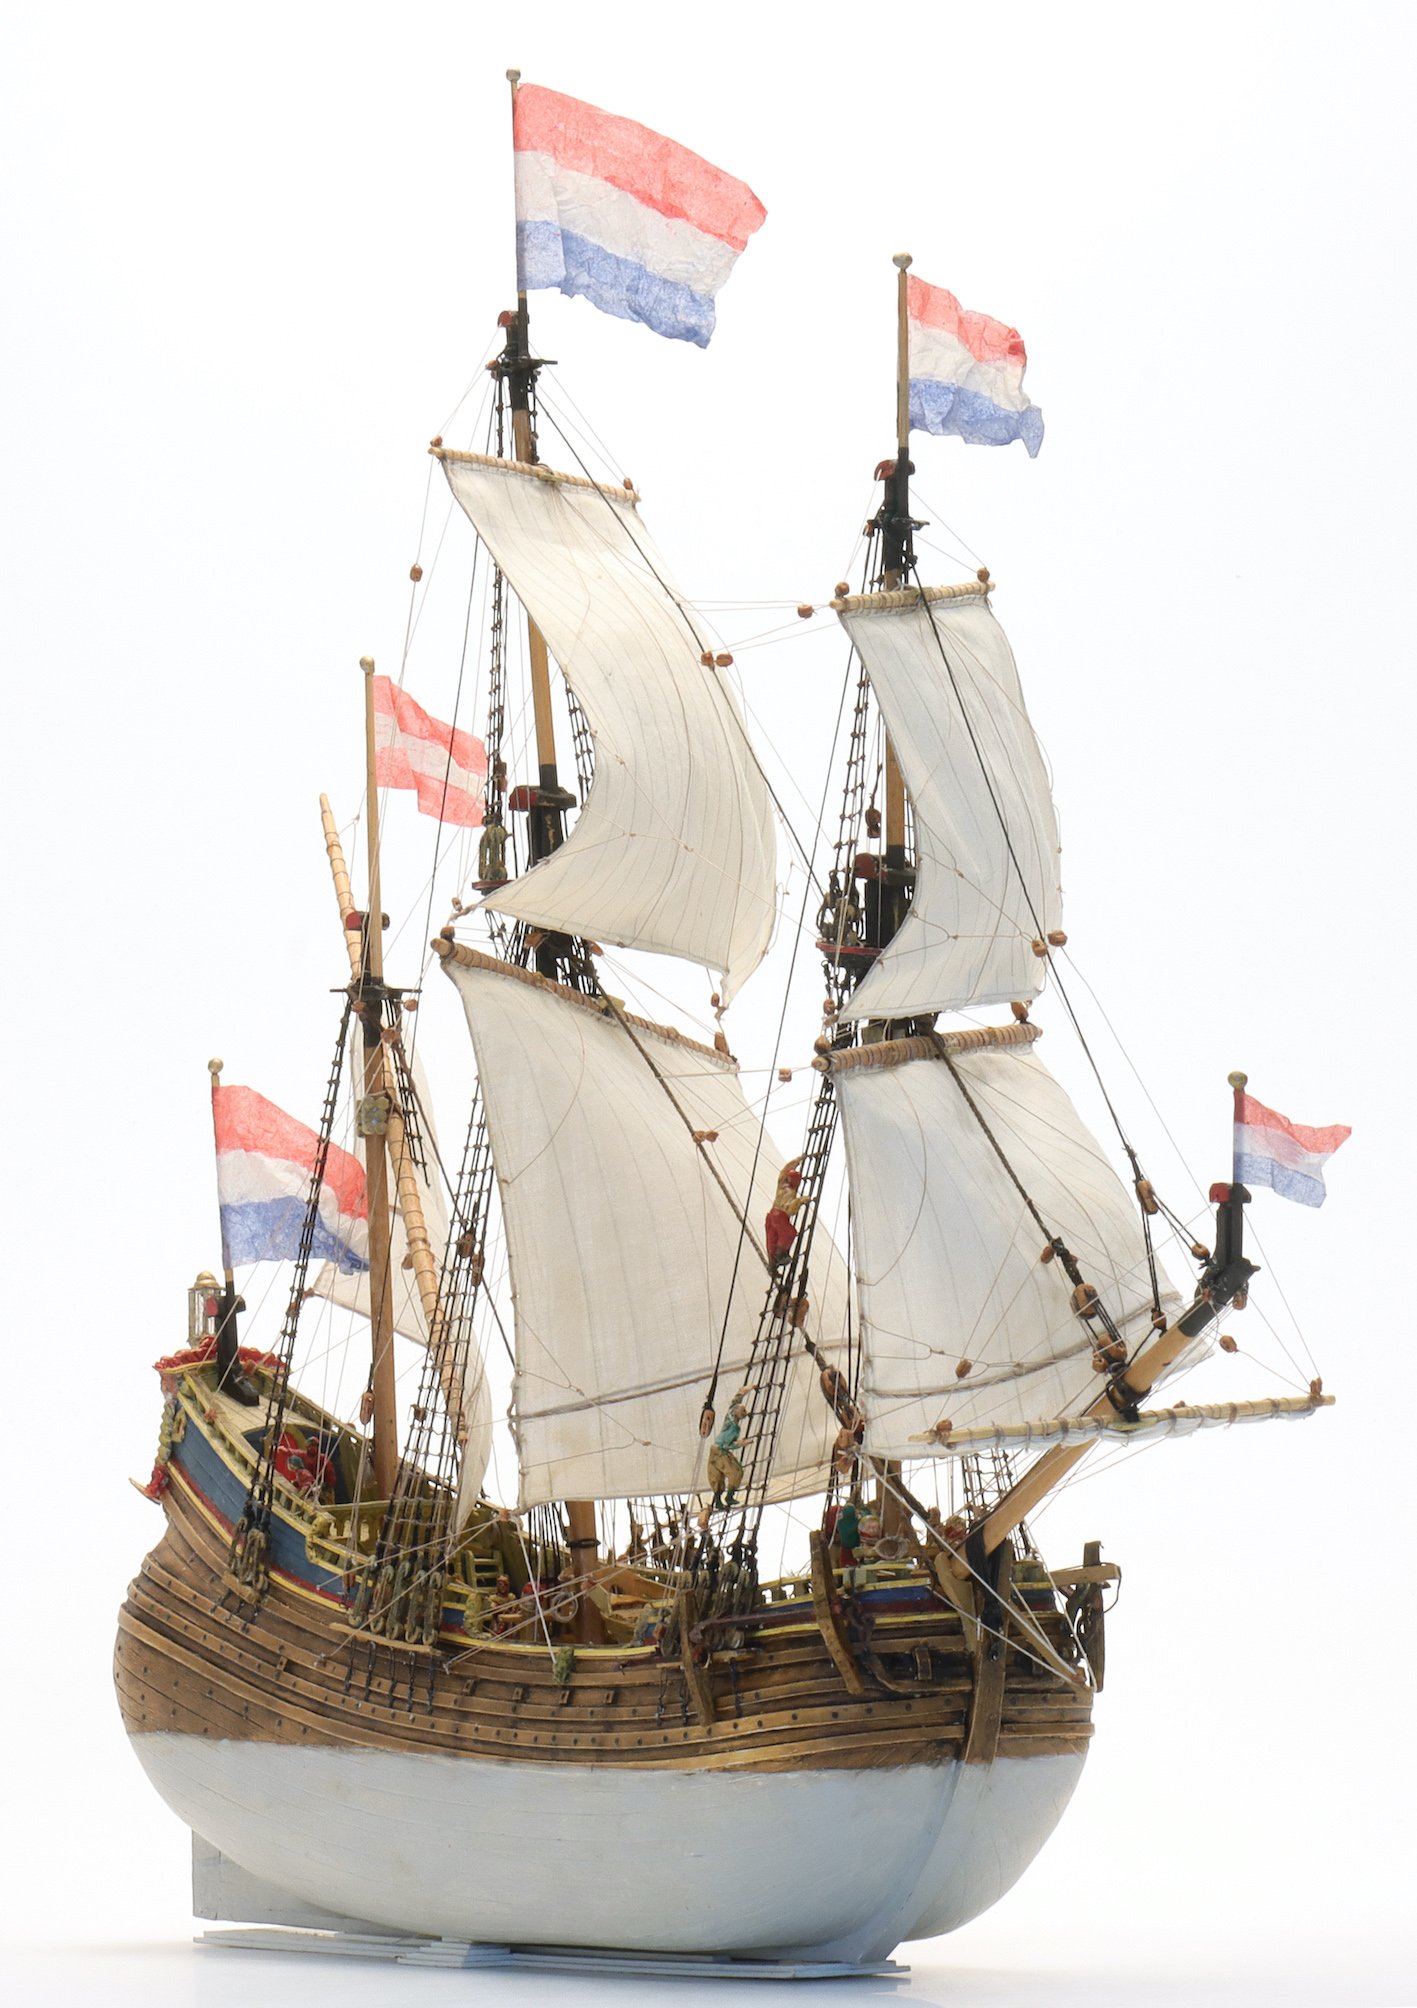
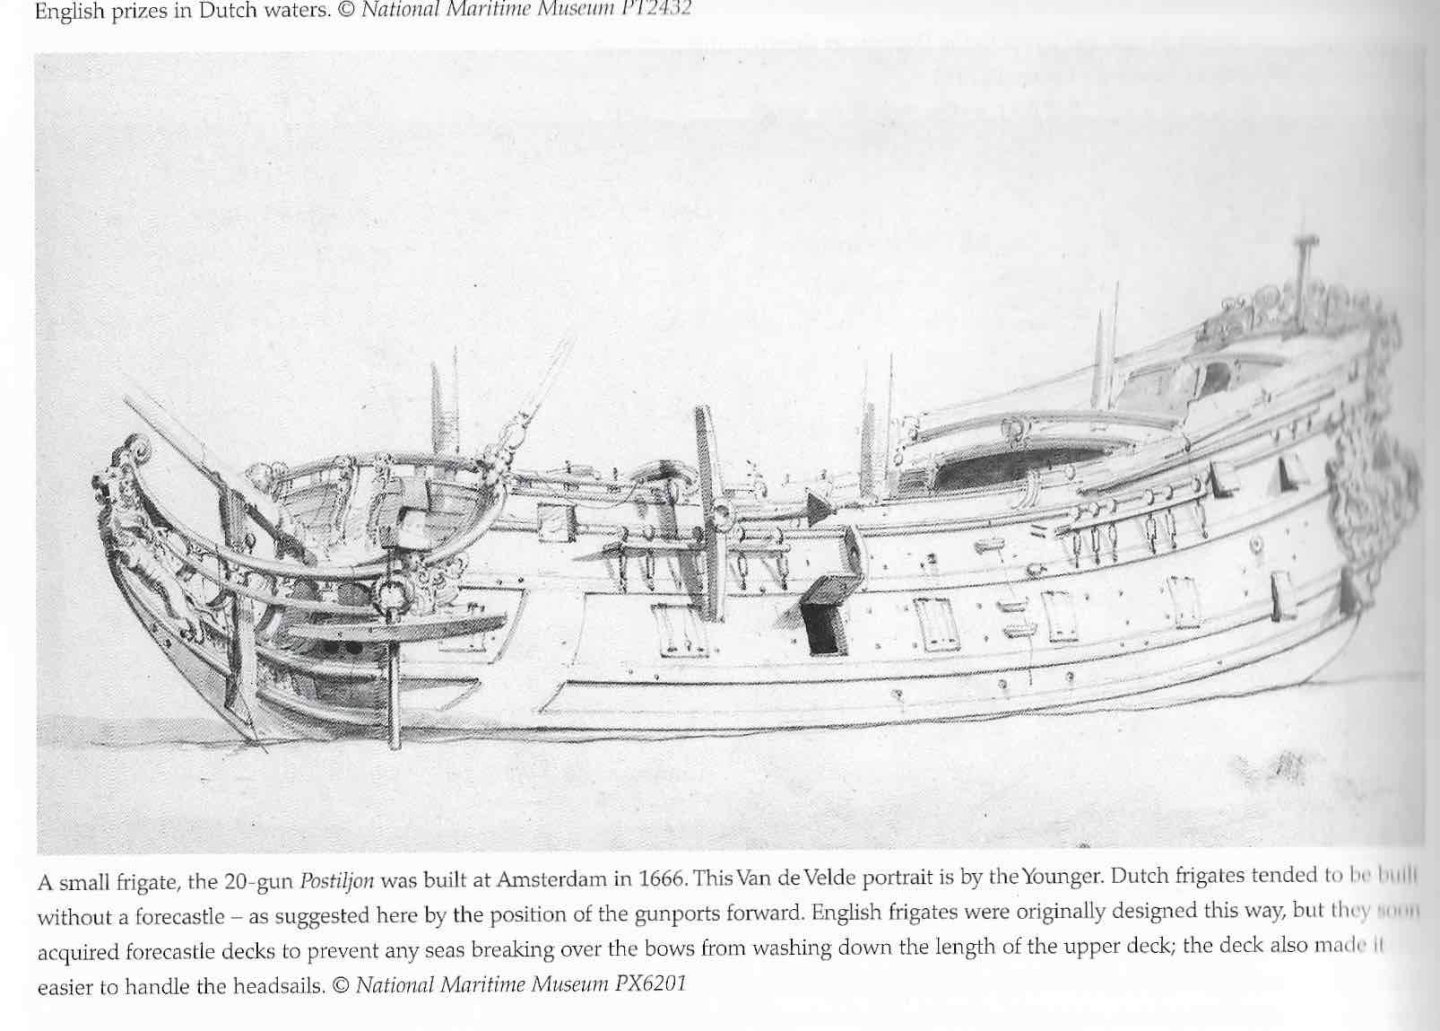
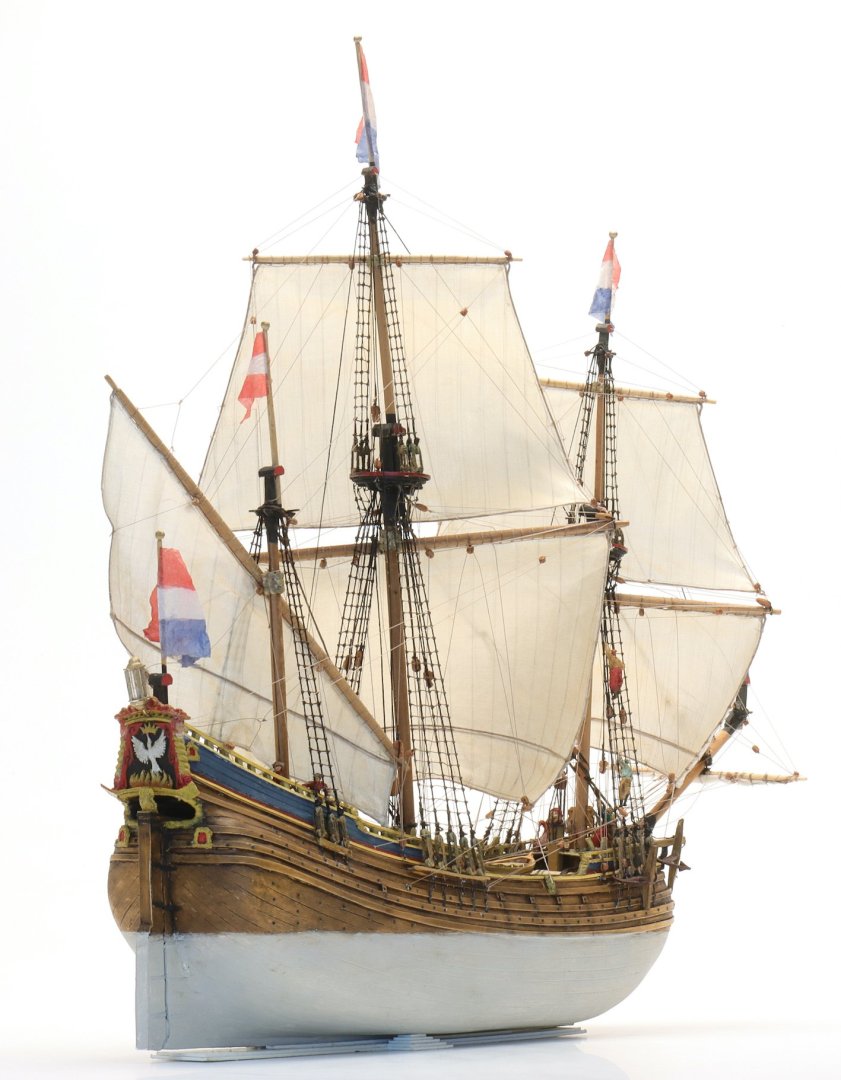
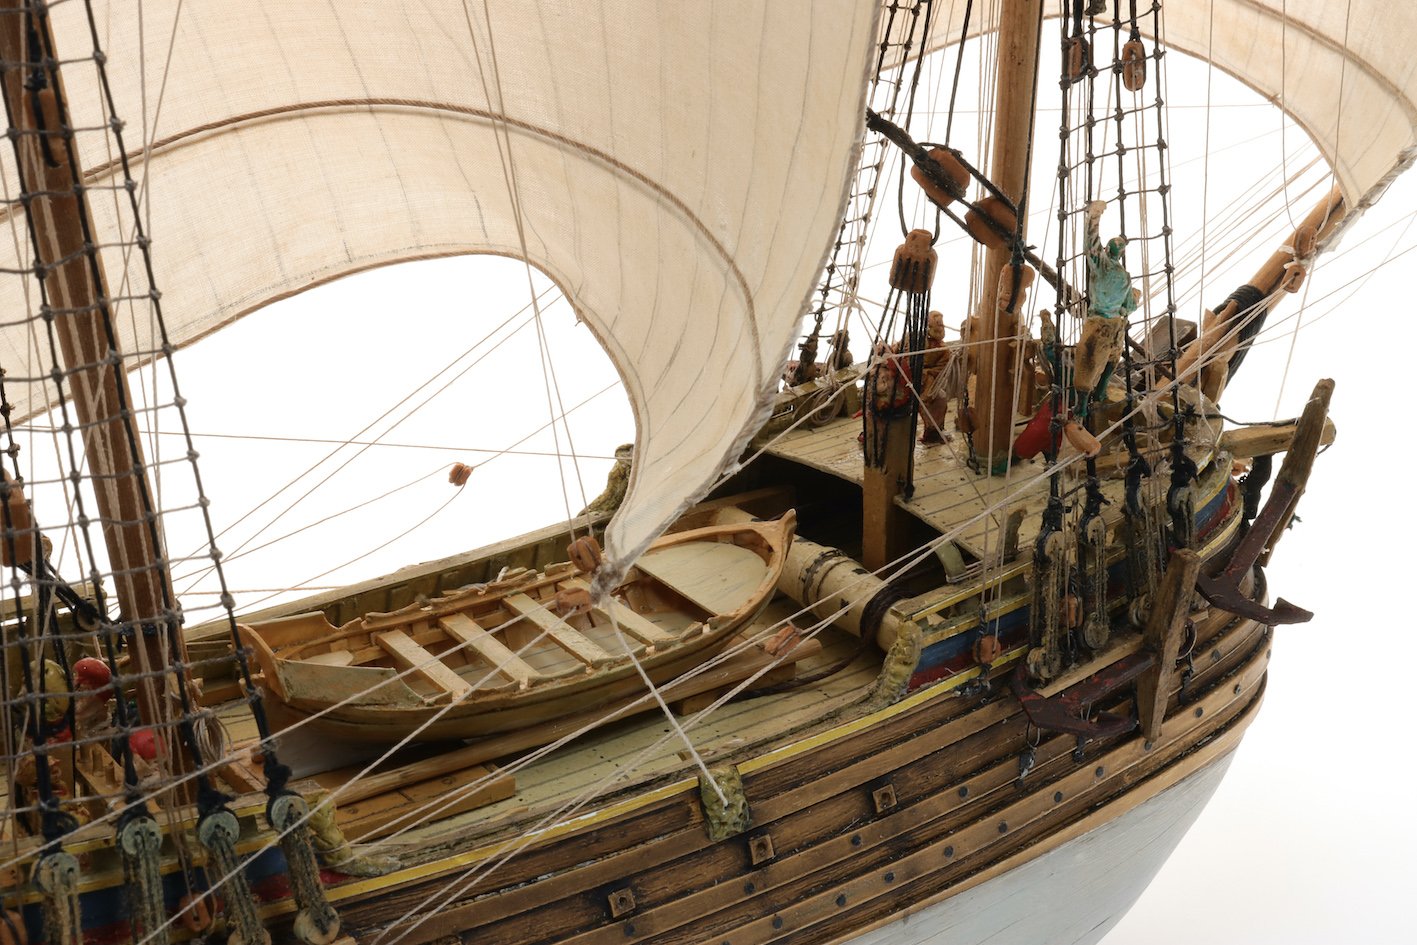
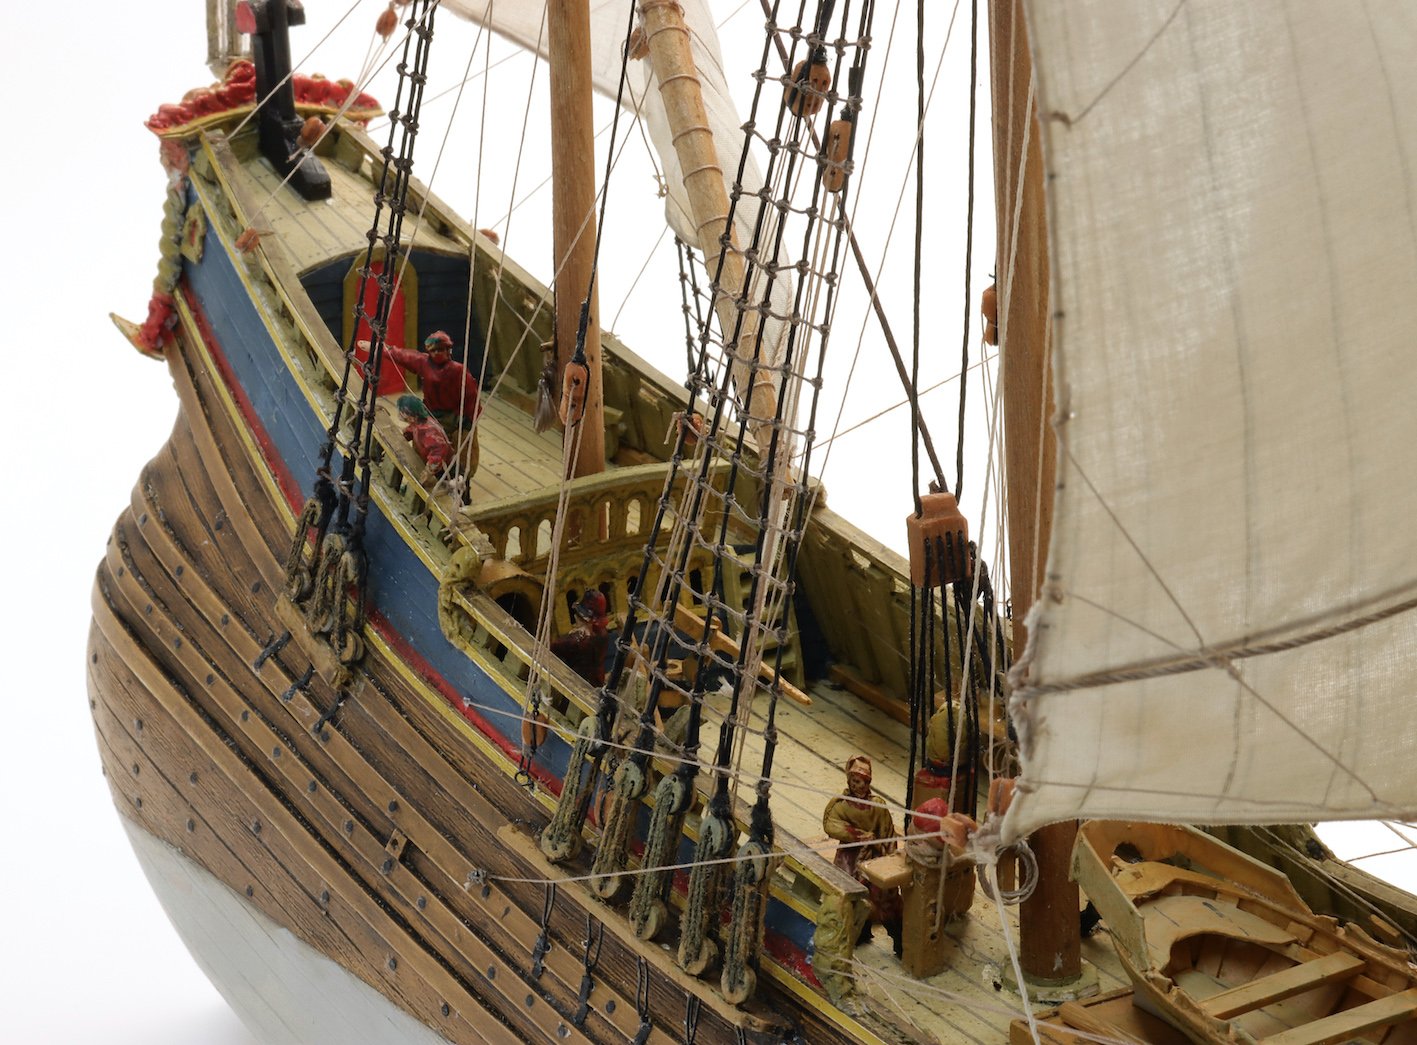
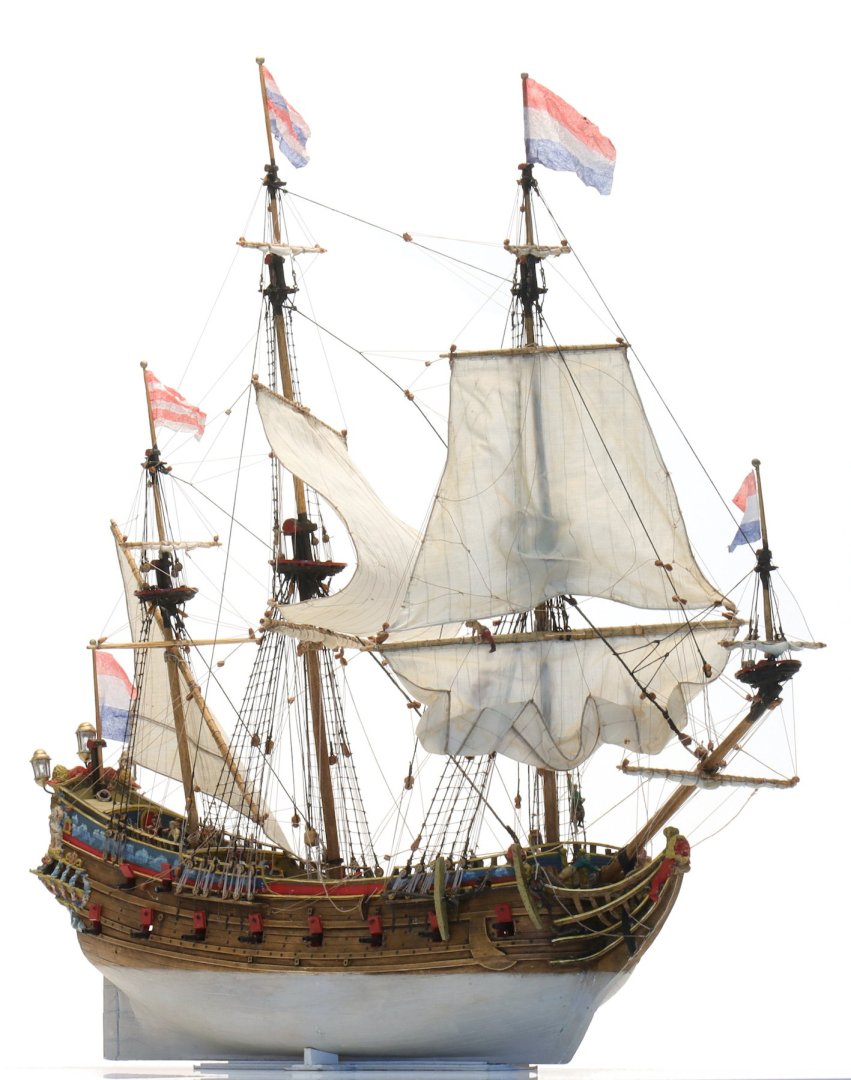
Thank you gentlemen, for all for your undeserved praise, @druxey: The shapes of fluits have been a subject of mockery from the beginning of its development. Still it was a most functional vessel for those days. @Alvb: At the moment Ter Velde is laying the fore deck: @TheDuckDetective: Next summer the full size plastic fluit will be built on the premises of the old Willemsoord Navy yard in Den Helder. @flying_dutchman2: You are making nice progress with your fluit. @Baker: Thanks Patrick, I cannot stand in your shadow with your 'noblest ship' @Michael Mash: Thanks Mike. Still, as a paper modeler yourself you know the tricks. @firdajan: Wonderfull work on your SoS, Jan. @scrubbyj427: I have a confession to make JJ. Usually I never picture a specific ship, because it suggests that I know all the details. I don't. I prefer building a ship type, on which I put an invented name in the stage when the taffrail has to be added. But it is all fake. There are almost no 17th century ships of which we can be sure above a certain level. All I had as a source was this Van de Velde picture, which shows some peculiarities, like a two-rails beak head instead of a three rails one, the locations of the gunports, the ship's ladder, the absence of the forecastle deck, and some more details which I tried to model Furthermore what James Bender tells us in his book Dutch Warships. All the rest is general knowledge of how the decks were detailed, dimensions of the rigging, etc. To make a long story short: what I make is little more than a mixture of general knowledge, logical thinking and the impression the images Van de Velde left us, translated in paper and paint. You can get any support for your build you want from me, but don't expect your model to be a true replica of the original. At least mine is not.

-
Thanks to all the people who liked my model. Inspiring! Special thanks to Alvb and Jsk for their kind remarks and to Alvb: No, neatness and accuracy are not my main purposes. I must confess the lack of them in my models are partly a result of the physical problems I encounter, but I never felt much attraction in polished, neat, shiny ship models, although I admire the skills of those who produce them. In the end we are all here to inspire others and when it sometimes succeeds, it is a reason to be contend. Oh, by the way, I built another model this summer for a friend who is building full size vessels from wasted plastic. Here is his web site. https://www.clean2a.nl/onze-schepen/ It is worth to keep an eye on him, because next summer, after he finished his pleasure vessel after Witsen, he will start a full size 100 feet long fluit. For inspiration I built him this model: Just a paper finger exercise. Best, Ab
-
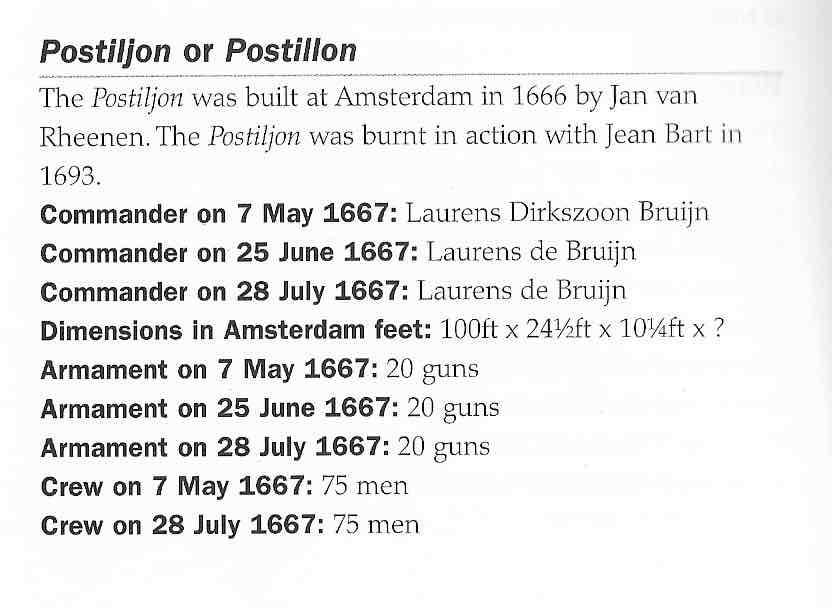
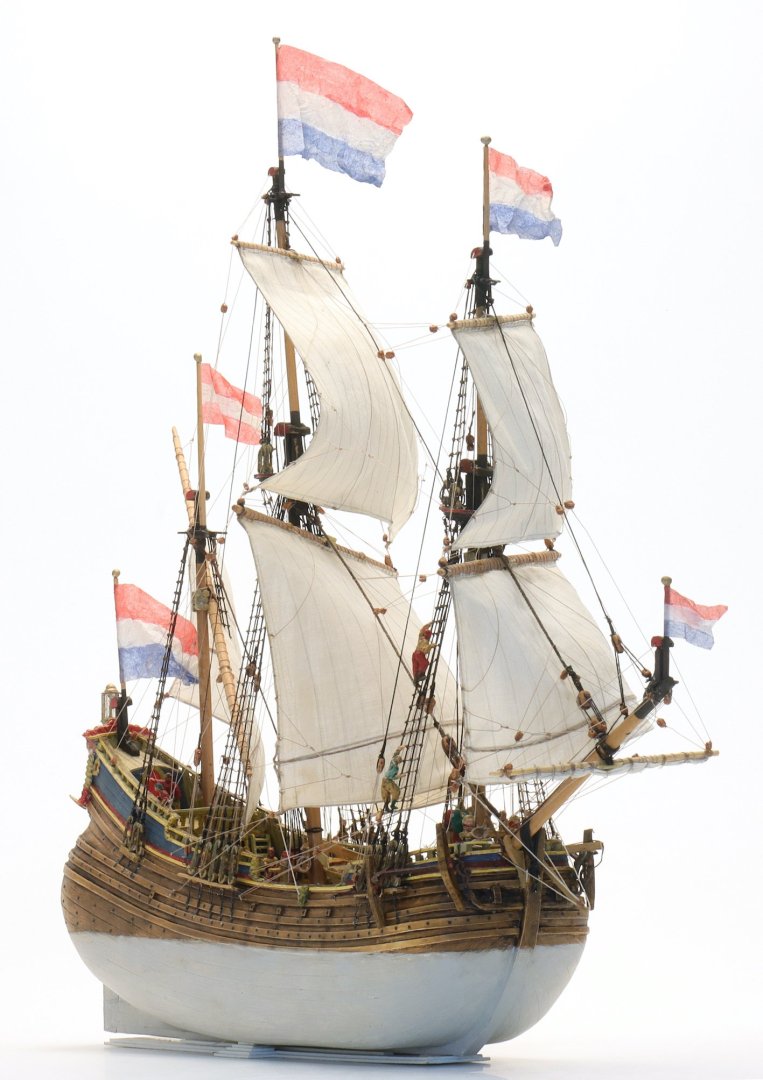
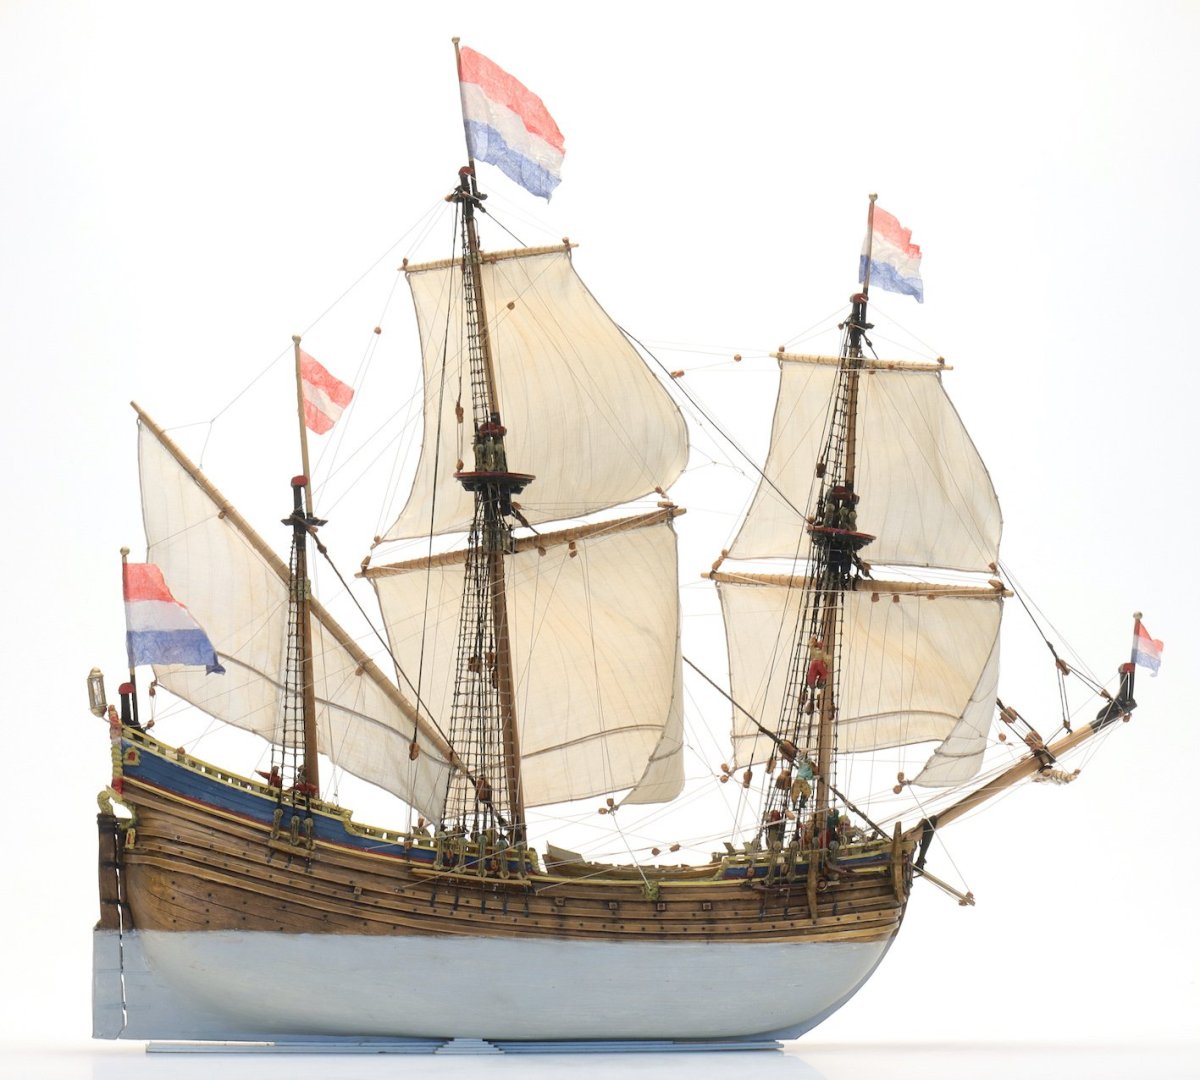
In spite of my shaking hands and fading eyesight I just could not resist the building of this light frigate. The Postiljon only measured 100 x 24,5 x 10,25 feet and was armed with 20 guns. Het crew existed of 75 men. She was part of the group that executed the Raid on Chatham, an occasion at which many British warships were burned and the flagship Royal Charles was captured and brought to the Netherlands. Postiljon only played a modest roll in the event, but she was on the Medway, so she wrote history. I pictured het counter-braced to come to a halt. We will probably come with images showing her in her natural surroundings. For whoever is interested, here are the plans in 1/77 scale. The model measures 52 cm over all, bowsprit and lanterns included. I hope you like it. Ab Postiljon_rev_1_77b.pdf


-
Fantastic result so far Patrick!
-
Hallo Rik, My compliments for your work and your research. They both make sense. @TheDuckDetectiveAs for the book 'In Tekening Gebracht', I'm sorry to tell you that is has been sold out for years. Maybe second hand (try Boekwinkeltjes.nl)? I do have an English translation though, so if you are interested I can send the pdf. As for the model NG-MC-498, you can find pictures of the model at the Rijksmuseum site and I have a draught after my own measurements. Let me know what you like. Best, Ab
-
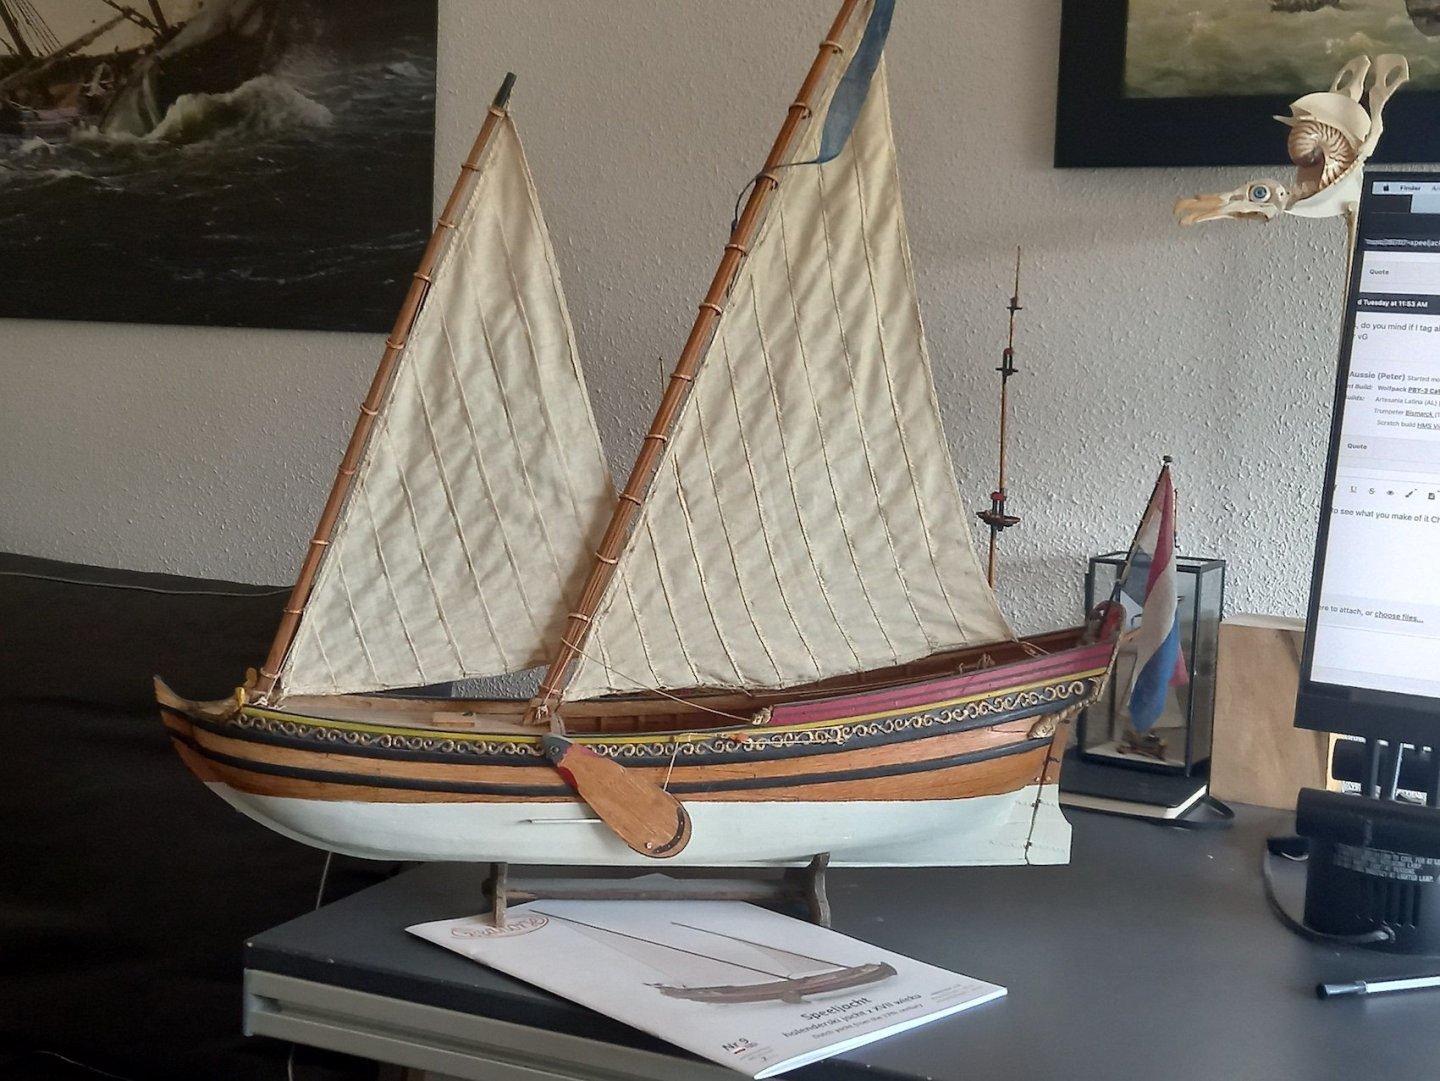
Most interested to see what you make of it Chris. The model this whole project was based on dates from my wood-building period, long ago. It was built in 1988 and was the start of my museum career. It still sits in my window-sill. A little dusty nowadays... Best, Ab
- 146 replies
-
- 14
-
-
-
- Speeljacht
- Seahorse
- (and 2 more)
-
As to your second question: In 2000 I published a book called 'De schepen van Abel Tasman' at Verloren Publishers (www.Verloren.nl), both in Dutch and in German and English especially for model builders. The Dutch version was sold out long ago, but probably you can get it second hands somewhere. A lot of what you need can be found in the book.
- 65 replies
-
- 5
-
-
- fish hooker
- fishing
- (and 2 more)
-
Thanks for the compliment Marcel. I sent you a PM with the Dutch version. Too big to post here. Good luck. Ab
- 65 replies
-
- 3
-
-
- fish hooker
- fishing
- (and 2 more)
-
A pleasure to watch your thread Patrick. Ab
-
Nice work Constant.