HOLIDAY DONATION DRIVE - SUPPORT MSW - DO YOUR PART TO KEEP THIS GREAT FORUM GOING! (Only 24 donations so far out of 49,000 members - C'mon guys!)
×


Ab Hoving
-
Posts
689 -
Joined
-
Last visited
Content Type
Profiles
Forums
Gallery
Events
Everything posted by Ab Hoving
-
 Beautiful image of this gun. Were the wheels not built up in two layers of wood?
 -
They were, but just on the front side. I asked the IT man who transformed the Delftship files in something useful for the internet. I'll keep you posted on his answer. Ab
-
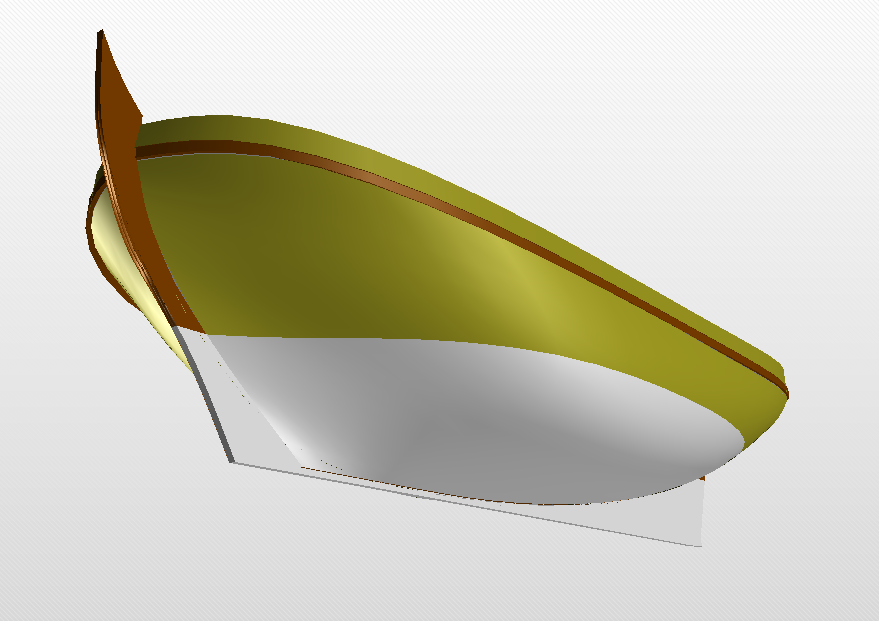
Ah, now I understand. The colors on the inside are a regrettable result of working with 3D programs: each part gets its color right from the start and it gets it all around. In reality the inside of the hull was simply tarred brown to protect the wood. The colors were only applied to the outside. Sorry for the confusion.
-
Hello Petr, Good to see you are making progress with the pinas again. I didn't know there was a deviation in the plans. Originally there was. I made the drawings after working hours on the kitchen table on tracing paper, and it appeared that the paper had stretched after over a year having been rolled up and back. But to tell you the truth, when making the models, I never noticed any problems with them, because I work more 'by sight' than looking at plans. I admire your desire for perfection. I don't think I understand your problems: painted on the inside?. Anyway, you seem to have found a solution and the hull looks nice and sturdy, although I am not really a fan of plywood frames, but that's just a personal opinion. I suppose you will add a second layer of planking. Look out, the start is crucial. Try to find the correct position of the wales and fill in the rest of the planking. And yes, the ship is deeper at the stern. There even was a formula for that: For every 50 feet of length the stern was 1 foot deeper in the water. For the pinas that was about 2 1/2 feet (ca 70 cm). When I made my 1/50 scale wooden model I tested that in the bath tub: the difference between for and aft was spot on: about 1,5 cm! Indeed the keel was made out of three parts. It was all depending of the available wood. If there were trunks of sufficient length available they used two, in rare cases four were necessary, for smaller ship usually one piece was enough. Apparantly Witsen witnessed the building of this pinas and saw three pieces were used. Good luck, you are off to a great start.
-
You are right, they look red. My guess would be rust, but who am I?
-
Yes, the ship remembers in many ways the Vasa, but also has characteristics of its own. I understand your priorities very well, I was surprised to see the progress you made in a relatively short time. It took Rene Hendrickx and me almost four years to work out every part of Witsen's pinas, so you are very fast indeed. Your bow shape is not very blunt, compared to the fluits I've seen. Looks good for a man-of-war. Your question about anchors is a tough one. I never read anything about painting anchors, but I would not be surprised if they were tarred. And of course (as wood tar is not completely waterproof) rust grabs its chance. For all safety I usually make my anchors black (or actually very dark brown- Van Dijk's Brown) and clutter them with red to mark unprotected rusty spots. But nothing is really sure. Are you certain about this observation that they were red on paintings? If they were, they certainly were not painted that way, we should have found amounts of red paints in inventory lists. Good luck with this Beautiful project.
-
Wonderful! No carlings underneath the ledges of the lower decks? Ab
-
Line drawing and art - Willem van de Velde son
Ab Hoving replied to Aa-schipper's topic in Nautical/Naval History
Oh, and indeed such yachts were used for pleasure only. And in that case, shouldn't there be music on board as well? -
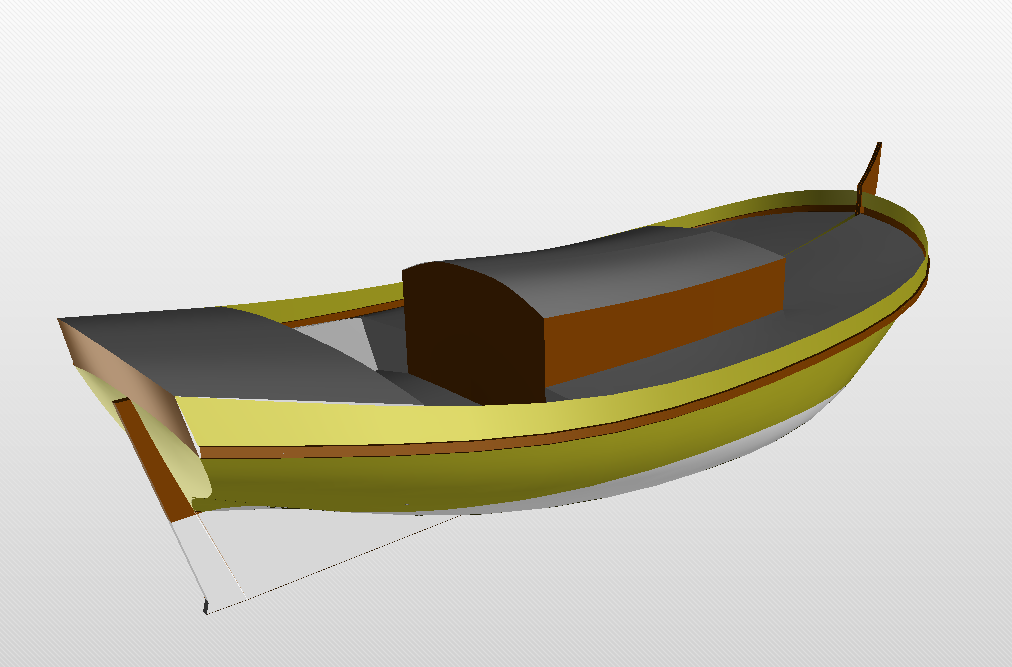
Line drawing and art - Willem van de Velde son
Ab Hoving replied to Aa-schipper's topic in Nautical/Naval History
Sorry, I have not been paying attention for a long time. Actually, I did nothing, but I asked my friend Rene Hendrickx to work van de Velde's sketch out in 3D with Delftship and he came out with this: For anyone interested to build the model, here is the Delftship file: VANDEVELDE 008.fbm Be my (our) guest. Ab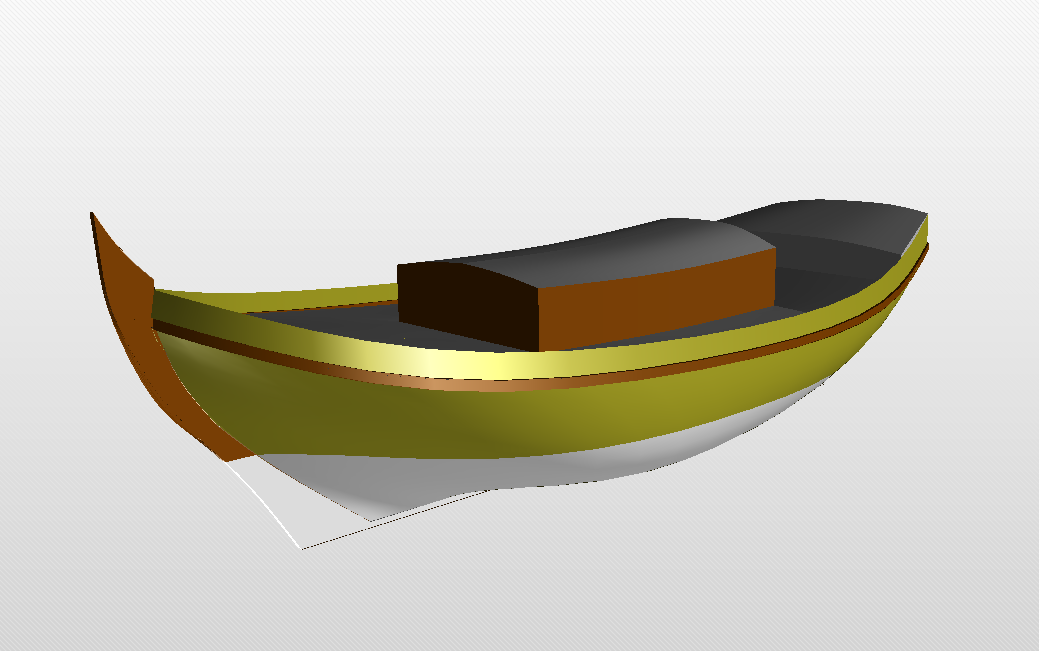
-
A beautiful job! Chapeau.
-
Various applications of 3D drawing
Ab Hoving replied to 3Dships's topic in CAD and 3D Modelling/Drafting Plans with Software
Beautiful! -
Nice project GrandpaPhil. Impressive. I see it for the first time. I should visit this site more often. Best, Ab
-
Hallo Johan,
Ik ben een beetje vergeten de reacties op mijn gallery bijdrage bij te houden. Daarvoor mijn excuus. Je kunt me een PM sturen als je nog altijd met mij in contact wil komen.
Groet,
Ab
-
No, thank you Heredia Bill. Your reaction is exactly why I wrote this tutorial. Have fun. Ab
- 65 replies
-
- 3
-

-

-
- fish hooker
- fishing
- (and 2 more)
-
Hi Meriadoc, Making pins is something you can do in detail, but you can also think it enough to cut pieces of wire and glue them in a strip of card. Once the rope is belayed on the pin, any detail is hidden, so why bothering making detailed pins? Except of course if you like making these details. In my experience the eye forgives a lot of shortcuts, as long as the overall look and the lines of the model are OK. If using card for the pinrail, the best to do is soak it with CA glue once all the pins are in. They can be filed or cut at even lengths after glueing. A support strip, invisbly glued underneath the rail will prevent the whole thing to be ripped off if the tense of all the lines becomes too much. I never experienced that actually, but better safe than sorry.
- 65 replies
-
- 3
-
-
-
- fish hooker
- fishing
- (and 2 more)
-
That would at least be a lot cheaper, but alas, the fabric of my shirts is a lot cruder than Navarra Fine Lawn White. I'm just a simple man....
-
In itself the idea of picking a sort-like ship as the one you are trying to replicate is not a bad idea. But according to my sources the Mayflower was an English ship and was built on a shipyard belonging to 'the legendary Darley family' (source: Wikipedia). That means the ship was definitely not a fluit. It must have been a simple English freighter. Perhaps you can find an example of such a vessel somewhere? As jaager suggested Mayflower kits have very little to do with the actual ship. They just (educated) guesses. If you consider building a fluit, there are better ways to get draughts. Kits are only seldom the starting point for a good model... Ab
-
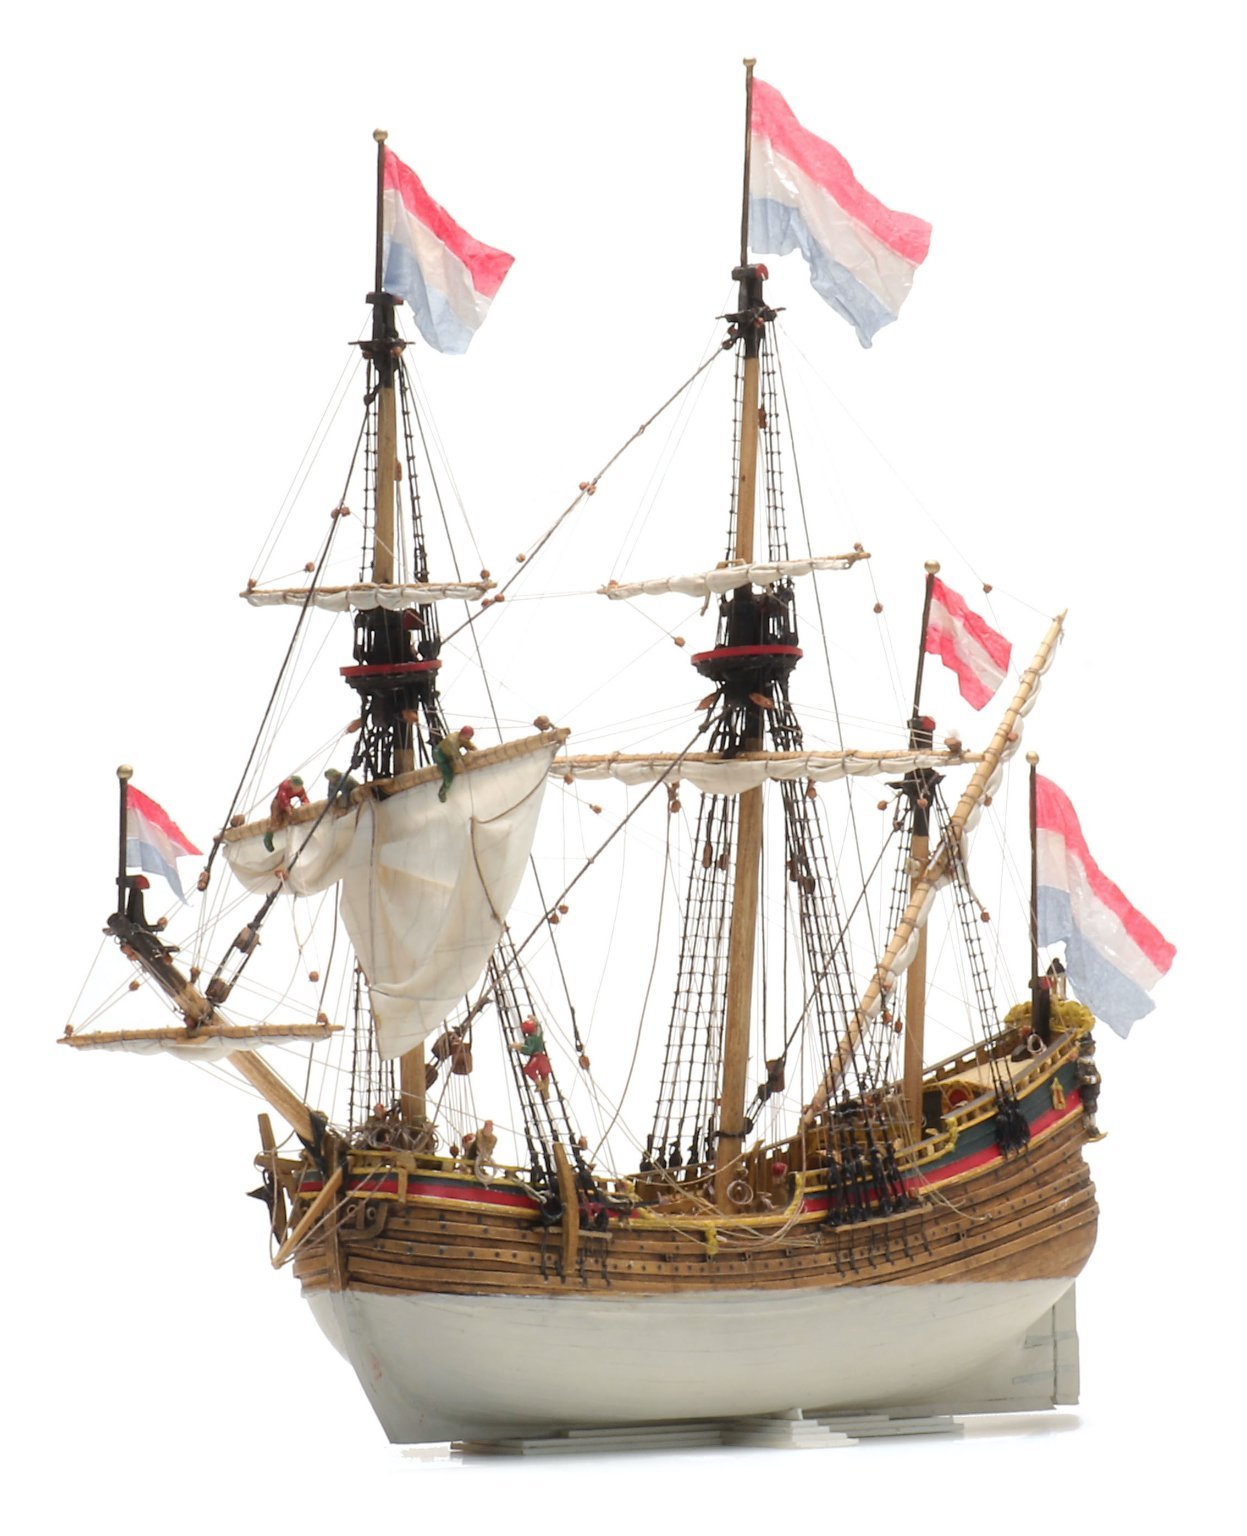
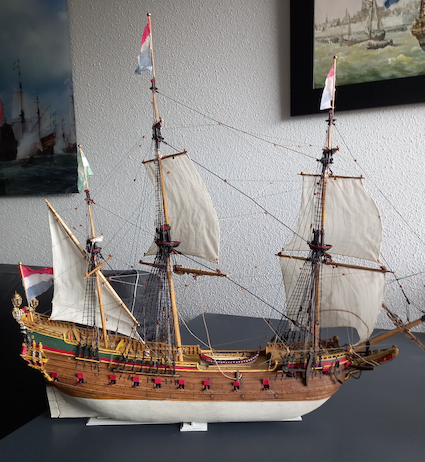
Hello Petr, Good to hear you are still active. I almost started to believe you gave up on this one, which would be a pity, because it's a beautiful ship. I don't remember if I mentioned it here, but seven of my paper models were adopted by and exhibited in the archaeological museum 'Huis van Hilde' in Castricum, Holland. Amongst those seven models were three fluit-models and my pinas model. Of course I was proud of the beautiful location for showing my work, but at the same time I also missed the sight of my fluits and my pinas in the interior of my house. So I started working on a few new models for my own use: a small fluit and a new pinas (Why do you call it 'pinasa'? Is that plural in your country?) Sorry for the bad picture of the latter, better ones will follow once my son has time to do a better job. I did a report of the build of the pinas (which took only two months in total) on another forum, which seems to be not very popular here, so I will skip the rest. Now for your questions: 1. Colors are up to a degree a matter of personal taste, together with the available pigments at the time. Yellow was used a lot, but only in earth colors. A good method is to use an ochre and cover it after drying with a light brown varnish to dim the brightness. 2. You must realize that the 3D representation of the pinas was done in a program (Delftship), which was originally not meant to make such complicated shapes with. It's the talent of my companion Rene Hendrickx that led to the decorations as can be studied in the 3D model. For making a model it seems a good idea to also study pictures of contemporary paintings and drawings, to get a more realistic result. As to details, like scroll work or other options like you show, you must know that the only rule here was that the upper work of the stern was 'doorluchtig', which in translation literally means 'episcopal'. That does not really clear the sight, but In fact it just means that there were openings in it, so the wind did not have too much effect. It makes no difference wether you use scroll work or small bars, as long as there are sufficient openings there. You could even use both options together. 3. Good question. There were several types of guns aboard for various reasons. There were three types of 'metal' (bronze) guns, of which two types (both 12-pounders) were installed in the gunroom: the normal type and a short version, which was placed behind the most afterward gun ports. If necessary this gun was easier to turn to the gun ports in the square tuck in case the ship was being chased. The reason that they used bronze guns here was because iron guns could influence the working of the close-by compasses in the steering compartment. The third type of bronze gun was a 6-pounder 'draeck' (dragon) of considerable length to be used for chasing and was placed behind the most forward gunport in the forecastle. The rest are cast iron guns, which were heavier, but also much less costly. The big ones, the 12-pounders were placed behind gun port 2 and 3 of the lower deck, reckoned from the bow, the rest of the gun ports were used for the 8-pounders in the list. The four 4-pounders were used in the forecastle. 4. The lower planking stretching up to the aft side of the stern is a typical Dutch solution to make sure that the stern was supported as much as possible. Other traditional building methods, like in England, did not apply this method, probably because the sterns there were supported by a huge piece of dead wood. I cannot think of any Dutch vessel that did not show this extended planking at the stern. I hope you find these remarks useful and wish you succes with the build. Don't hesitate to ask if you are in doubt about anything. Best, Ab

-
Hi Kevin, I really don't know anything about any model from the Science Museum. Sorry. Ab
-
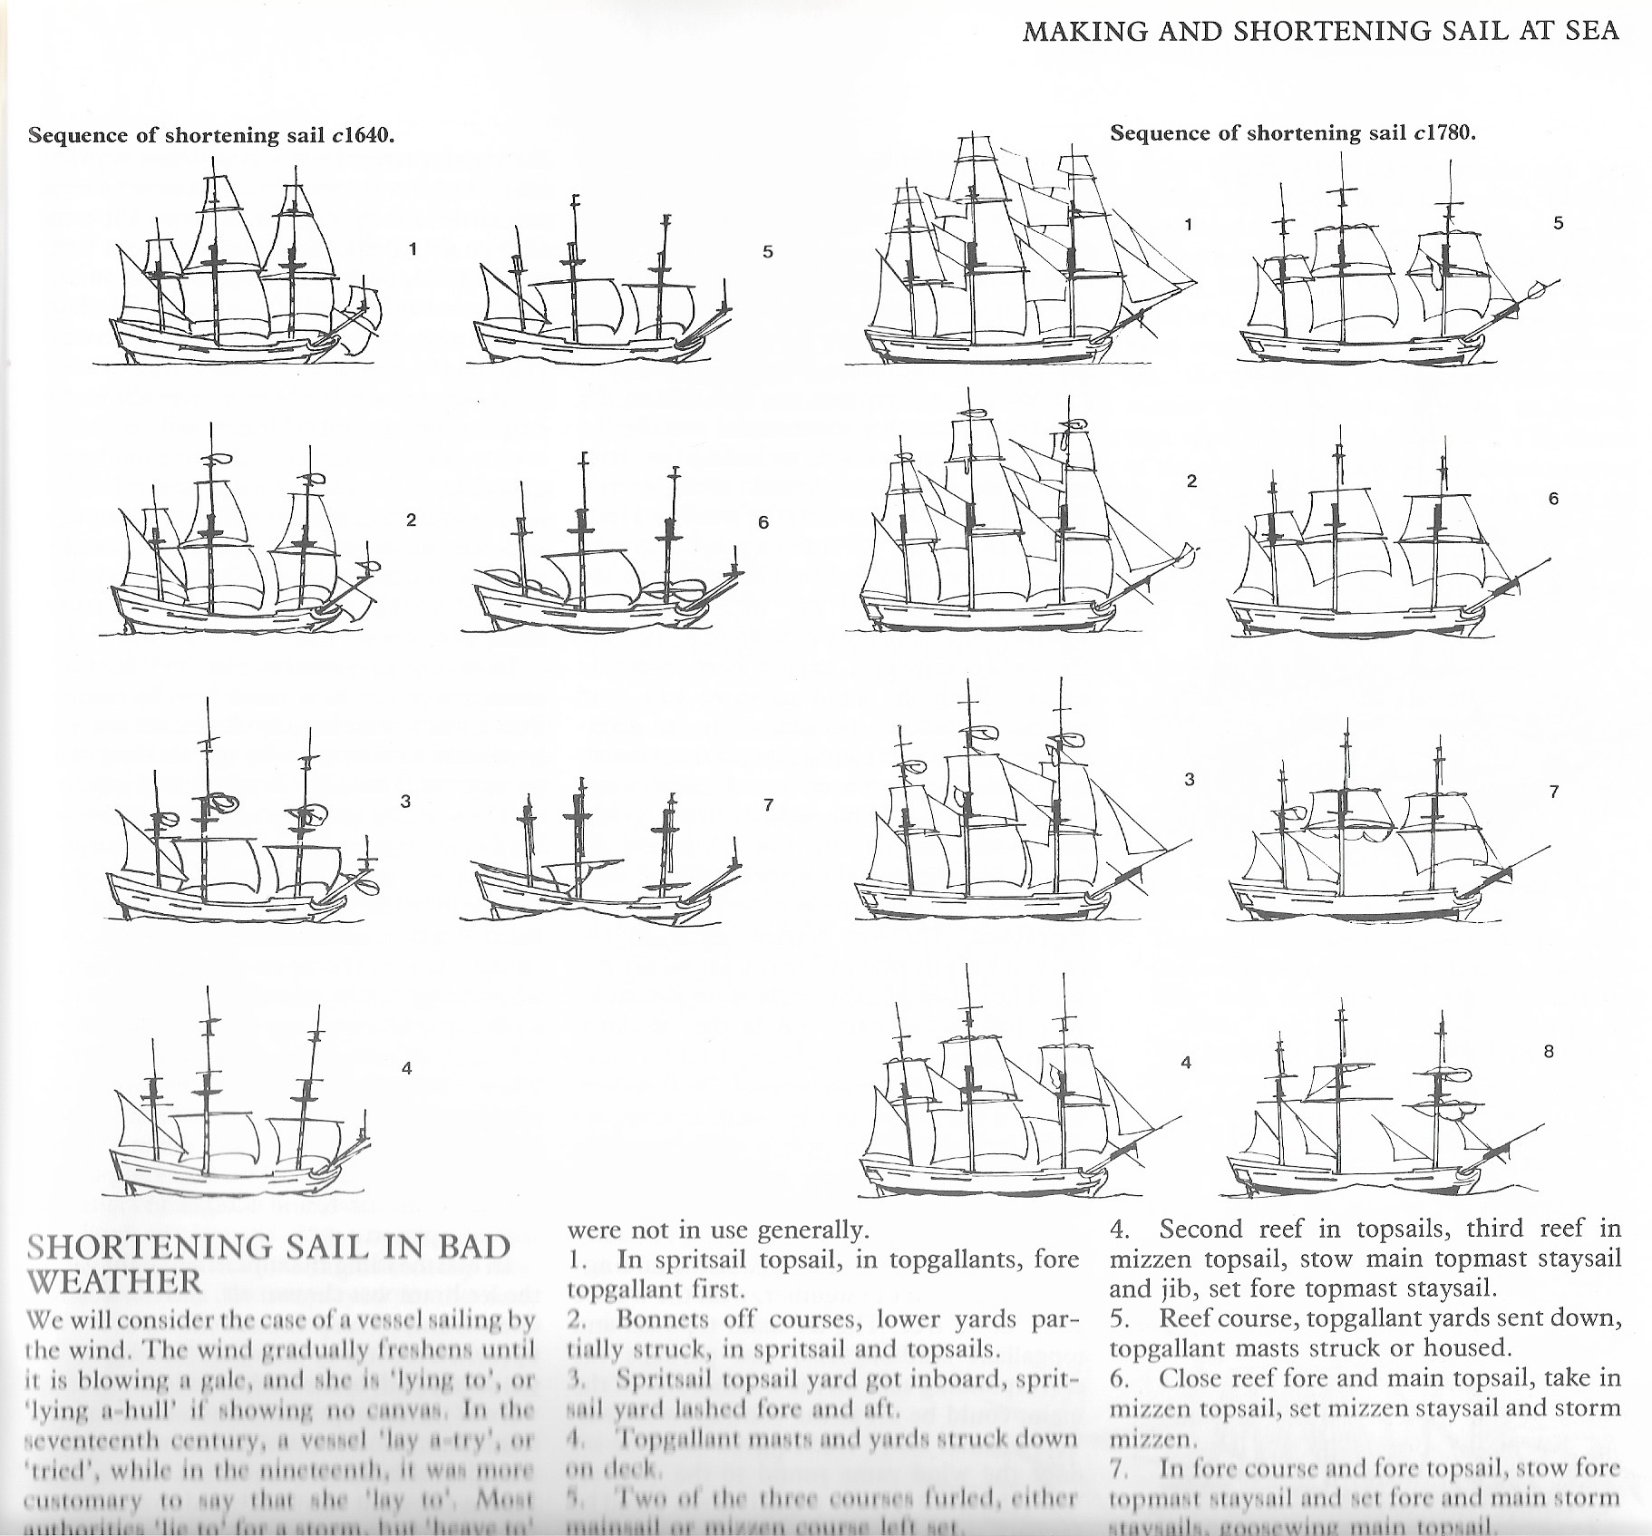
What sails did a ship like Vasa have set in severe weather?
Ab Hoving replied to ubjs's topic in Nautical/Naval History
One solid advice: Buy Seamanship in the Age of Sail by John Harland. Everything you wanted to (and should) know about sailing period ships.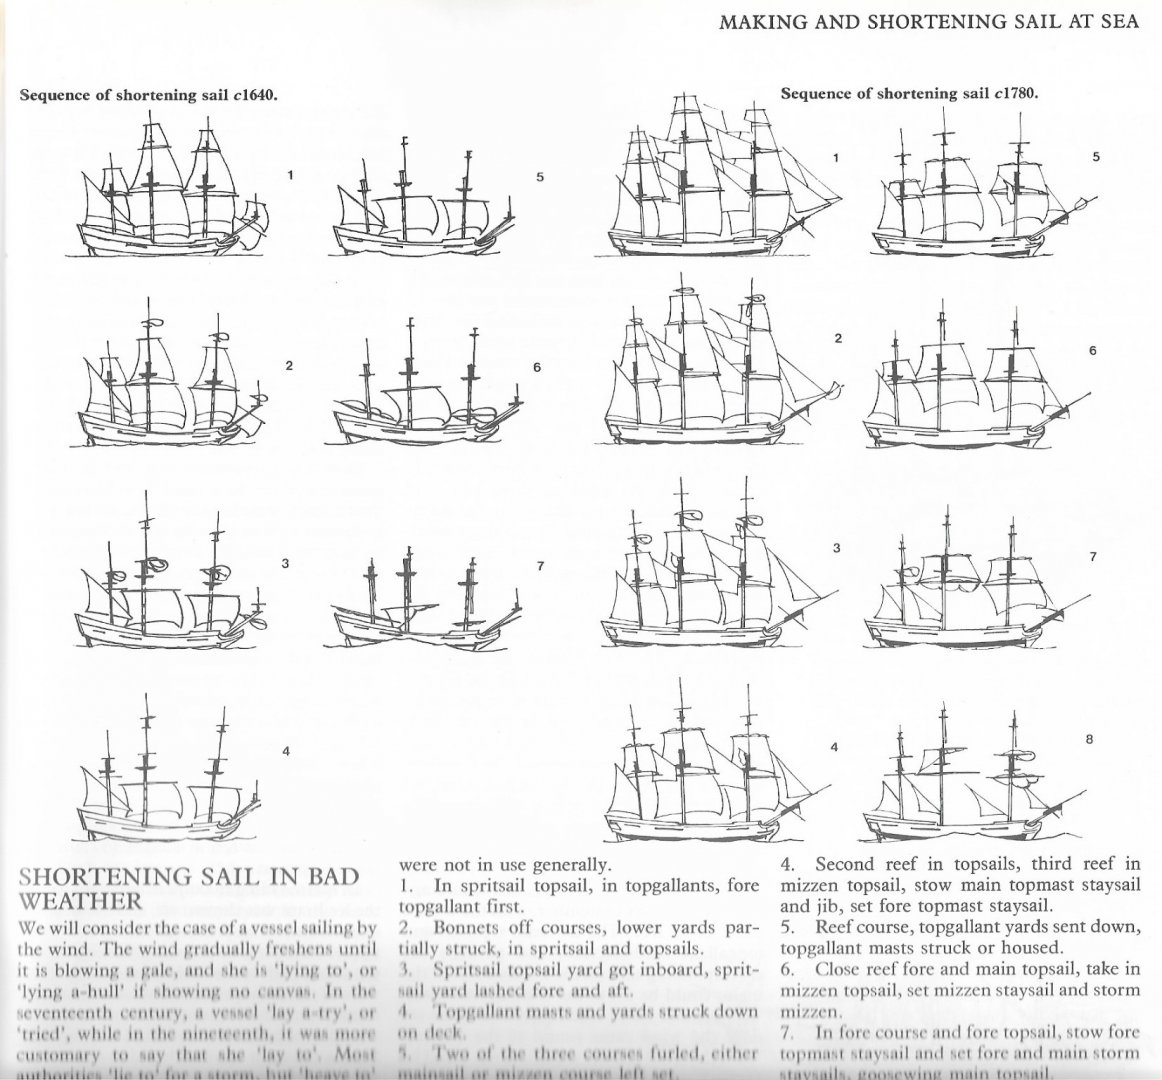
-
Coca by Foremast - Amati -1:60
Ab Hoving replied to Foremast's topic in - Kit subjects built Up to and including 1500 AD
I know Waldemar, I too think it's an iconic model and I would not dare to deny anyone's right to duplicate it. I simply wanted to point out that if you want to draw conclusions or solve mysterious issues coming with it, it might be a better idea to work from a model with more authentic dimensions. No more. I recognize the joy of creating a model with an obvious character, keeping in mind the limits of its technical value. I wish you a lot of joy building. No better way to spend your available hours (and more).