
HOLIDAY DONATION DRIVE - SUPPORT MSW - DO YOUR PART TO KEEP THIS GREAT FORUM GOING! (Only 36 donations so far out of 49,000 members - C'mon guys!)
×


lraymo
-
Posts
297 -
Joined
-
Last visited
Content Type
Profiles
Forums
Gallery
Events
Everything posted by lraymo
-
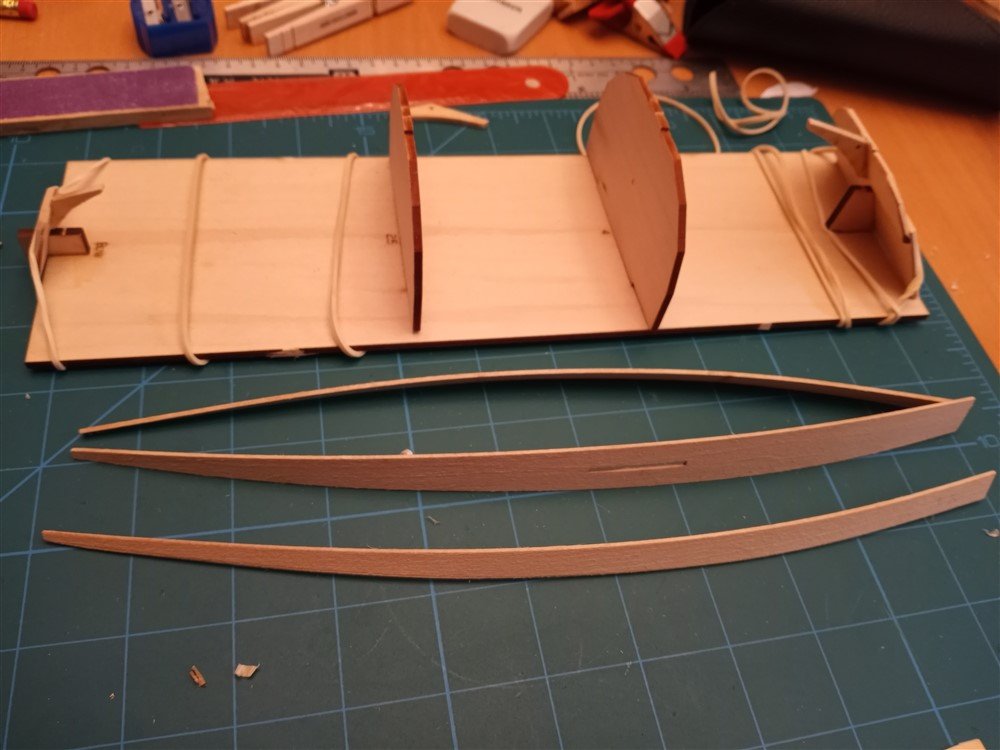
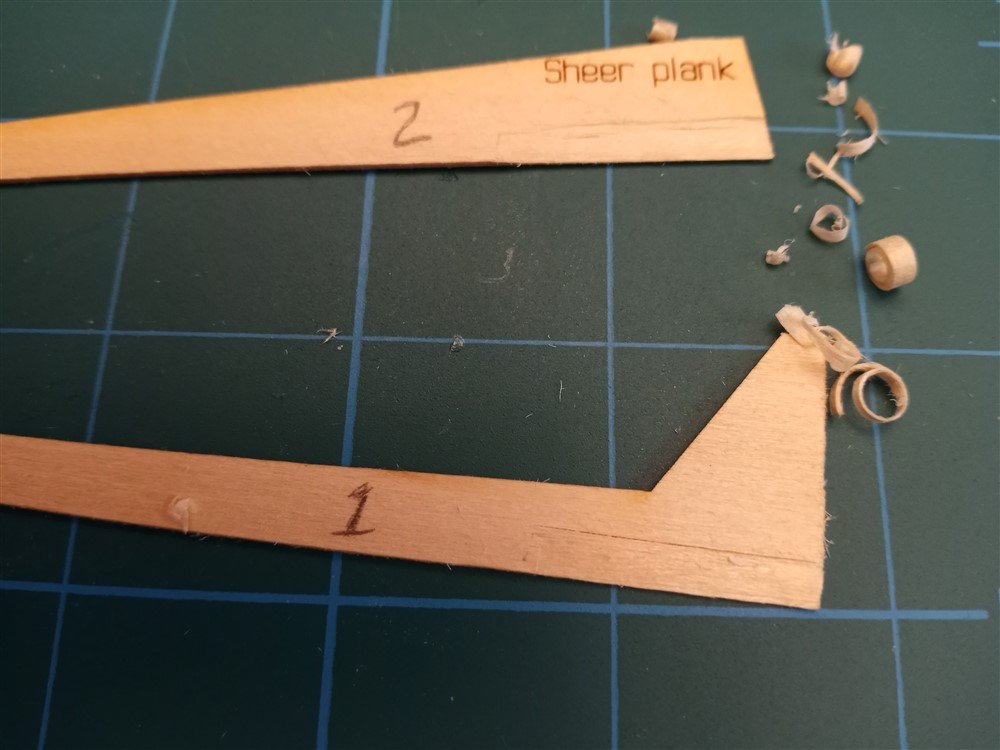
Ok, the pin vise and other tools won't arrive for another 3 days, so I'm doing what I can while I wait. Fixed the broken stern transom holder, bent the first few planks, and started practicing "rabbets" on some scrap wood. I'm a little nervous attempting these on actual planks, but its all a learning process! I think my first one turned out better than the 2nd one!
- 160 replies
-
- 4
-

-
- Model Shipways
- norwegian sailing pram
- (and 1 more)
-
Going slowly. I am waiting on the pin vise to be delivered, to finish the bow transom, and then I managed to break the stern transom holder while assembling the building board. Thinking I need to stop for today! Thanks Paul, for your words of wisdom. And I think the dremmel needs to be my next purchase. Eric, the instructions could sure use an editors help!
- 160 replies
-
- 5
-
-
- Model Shipways
- norwegian sailing pram
- (and 1 more)
-
Thanks Keith! Geesh, I thought I'd really screwed up just starting out!!! I'll forge ahead (with a close look at SkiBee's log!) Thanks druxey! (what was I thinking??... a spare knee makes much more sense! )
- 160 replies
-
- 3
-
-
- Model Shipways
- norwegian sailing pram
- (and 1 more)
-
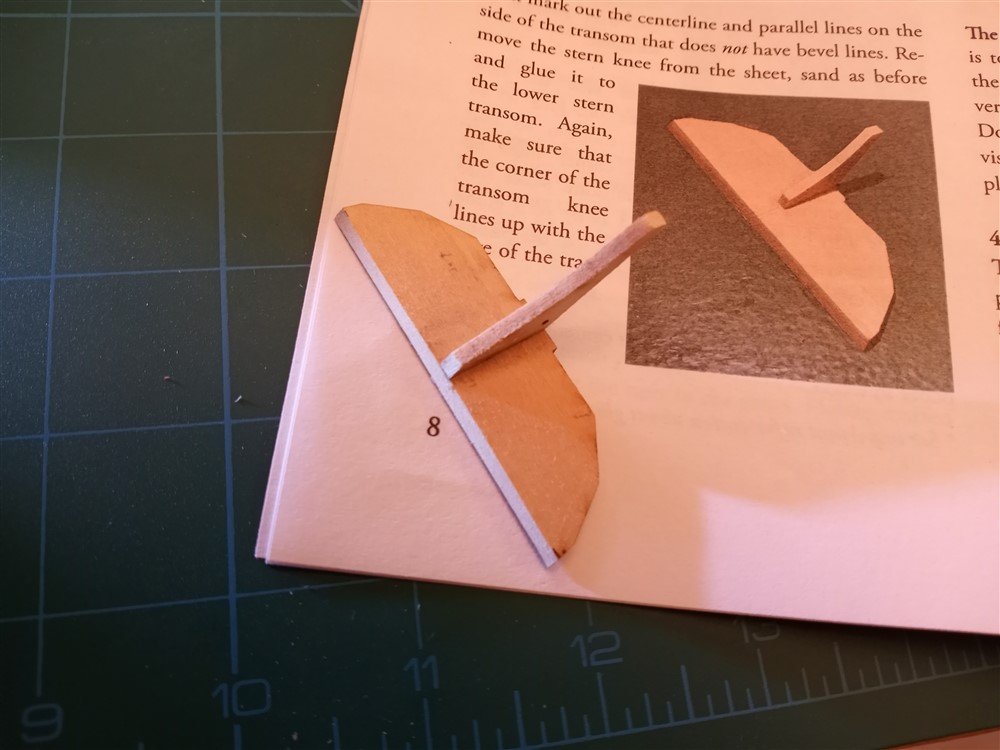
Ok, I think I figured it out. The manual talks about "small differences" in parts... and when I look at @SkiBee build log (#5) it looks like his stern transom and knee look like mine. So maybe its ok?
- 160 replies
-
- 1
-
-
- Model Shipways
- norwegian sailing pram
- (and 1 more)
-
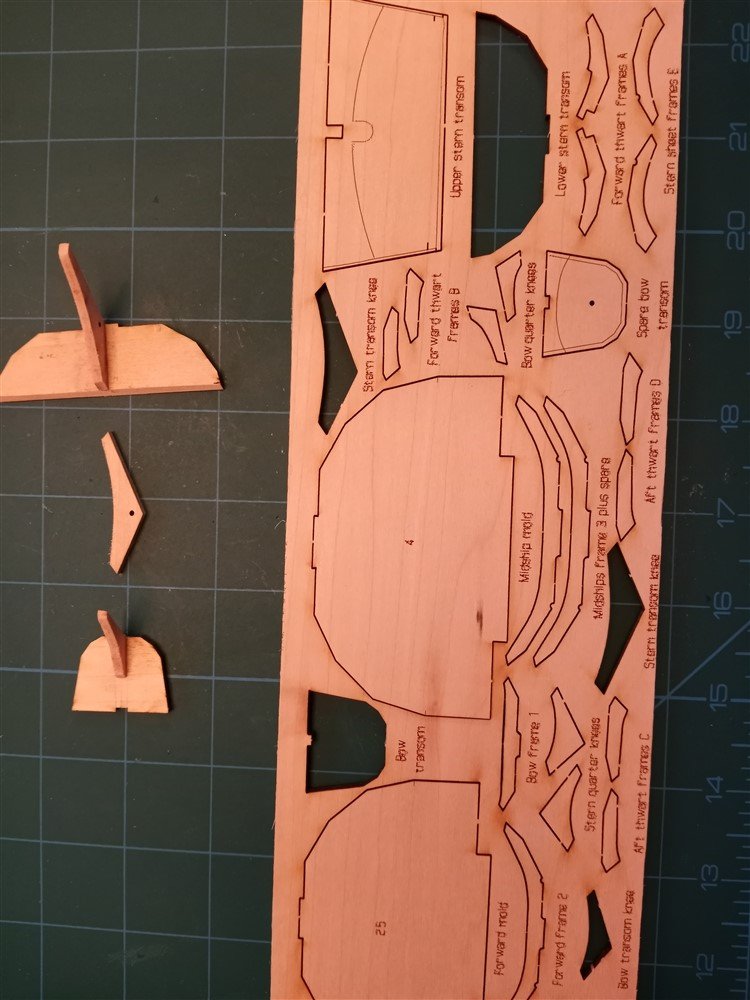
Ok, I'm confused. Here's the cutouts. There's two "stern transom knees' (I assume for the upper and lower stern transom), and there's one "bow transom knee" on the cutouts. And here's what I've done so far. Very confusing. Not sure what went wrong!
- 160 replies
-
- 1
-
-
- Model Shipways
- norwegian sailing pram
- (and 1 more)
-
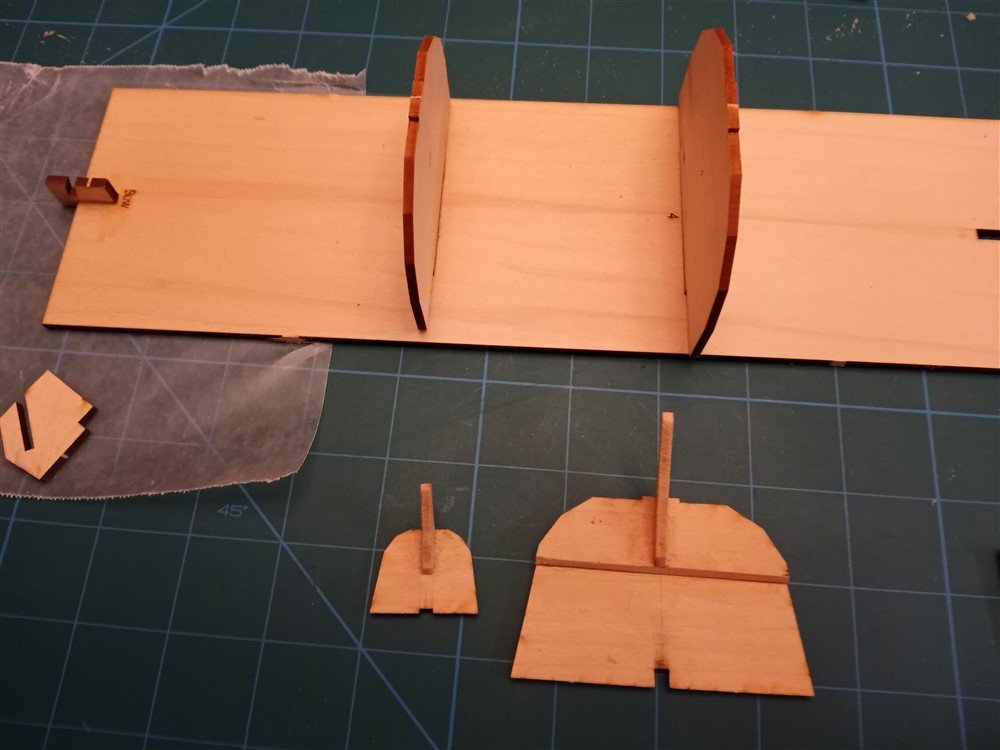
Getting a really slow start. Just started on the bow transom and the lower stern transom. In the instruction manual, the knee for the stern transom covers just over half the transom, whereas the knee on MY transom covers almost all the distance of the transom. Am I using the wrong knee? (I used the "stern transom knee") I put mine next to the picture in the manual to show the difference. Hoping this is ok. Also, I'm trying to do better on cleaning up excess glue!
- 160 replies
-
- 2
-

-
-
- Model Shipways
- norwegian sailing pram
- (and 1 more)
-
Thanks Ryland - I added appropriate tags! Thanks Keith - I've ordered drill & bits, miter box, and a set of files. The guys at Model Shipways say these will get me started, and if I need to, I can order more as needed in the future. I'm looking forward to this new challenge, and as always, thanks for your encouragement!
- 160 replies
-
- 3
-
-
- Model Shipways
- norwegian sailing pram
- (and 1 more)
-
Wow, looking good!
-
Beautiful work!
-
Thanks everyone! My new build log for the next project (Norwegian Sailing Pram) is listed below. It looks more complex!
- 85 replies
-
- 4
-
-
- Lowell Grand Banks Dory
- First Build
- (and 2 more)
-
Thanks for the feedback. I've got a call into Model Shipways to discuss the tools I need for this build.
- 160 replies
-
- 2
-
-
- Model Shipways
- norwegian sailing pram
- (and 1 more)
-
@Ryland Craze Hi Ryland. Do I need to add "tags" to the title of this new build log? Or is that something that you do? (I didn't do that for my Dory log, but they magically appeared). Just wanting to make sure I'm doing things correctly!
- 160 replies
-
- 2
-
-
- Model Shipways
- norwegian sailing pram
- (and 1 more)
-
Thanks Ryland, I just added my "Current Build" per your instructions, and I think it worked!
-
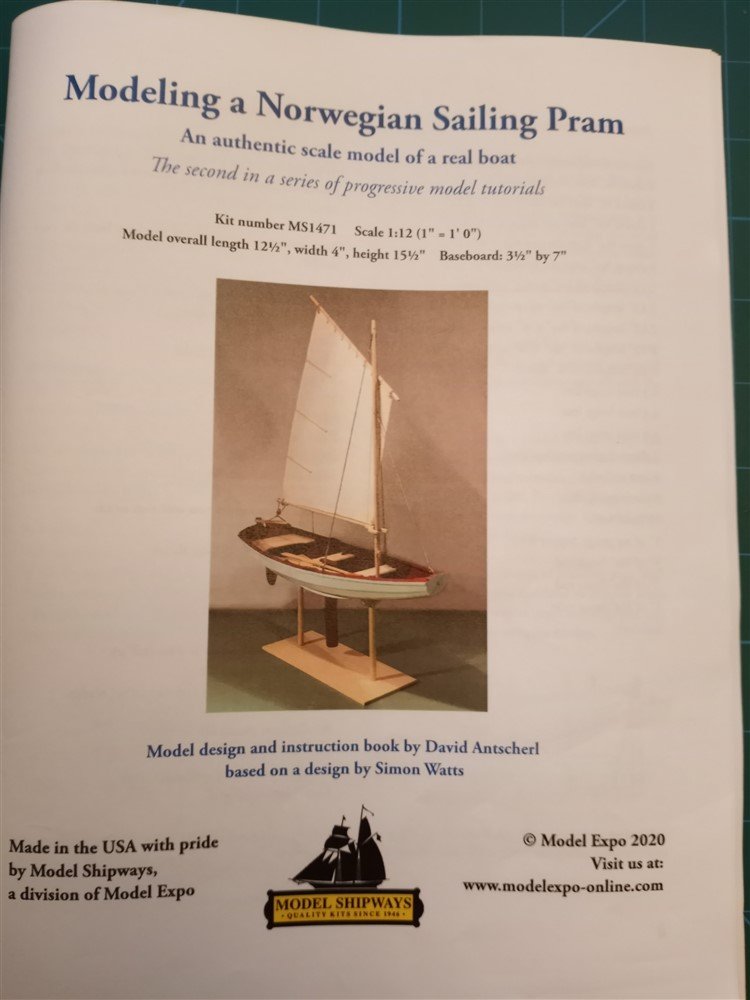
I'm just starting my SECOND model ... the Norwegian Sailing Pram. As a rank beginner, I learned alot from my first build (the Lowell Grand Banks Dory), but this one looks even more complex and challenging! So I first read several of your Build Logs here, and I'm glad I did. Found out my instruction manual was printed at less than 100%, so I downloaded and printed the appropriate pages (p 4, 5, 39) from the Model Shipways pdf, specifying 100% on my printer. Worked out well. (As an FYI, the "foot" of the sail pattern is supposed to measure 6". In my manual, it was only 5 3/4", so my new printout is now correct.) I also learned from the logs to do an Inventory check. Sure enough, mine was missing two oar locks. Called Model Shipways and they were really great, and will mail me the missing parts. But now I have questions on tools. I only have the initial tool set from the Dory, but the instructions show a longer list of tools required. I know I need drills and files, but it also mentions "hard metal flush cutting shears", bench block, miter box, broach (what are these used for?), and mini plane? Any advice on which tools I really need? Thanks and looking forward to getting started!
- 160 replies
-
- 5
-
-
- Model Shipways
- norwegian sailing pram
- (and 1 more)
-
Thanks, Steve. I really enjoyed this kit and learned alot, although I am a rank beginner, so it was challenging for me, as will be the next one, the Norwegian Sailing Pram that I'm about to start! You'll enjoy this one. Have fun!
- 85 replies
-
- 5
-
-
- Lowell Grand Banks Dory
- First Build
- (and 2 more)
-
Hi. I tried to enter a signature, but I couldn't figure out how to change the text "Lowell Grand Banks Dory" into the link for the actual build log. Any help appreciated!
-
Thank you, everyone, for your warm welcome and encouragement! I am enjoying this community, you are all wonderfully kind and encouraging and helpful! I'm going to spend some time reading the build logs for the Pram, and getting familiar with the instructions before I start, but I am hoping I can carry forward what I learned from the Dory (which is proudly displayed in my dining room!) Stay tuned for the next build, and thanks again! - Lynn
- 85 replies
-
- 4
-
-
- Lowell Grand Banks Dory
- First Build
- (and 2 more)
-
@Cathead Thanks, I'm definitely happy with how it turned out, mistakes and all. And I will apply much of what I learned to the Pram (and thanks for encouraging me to continue with a build log!) Have fun at the Royals games (if you don't get rained out!) @ERS Rich Thanks for the congrats! @Keith Black Keith, you've been so encouraging to me throughout this entire process, and I can't thank you enough! To be able to share on this forum and have you and the others give me feedback and encouragement has been awesome, and kept me from giving up at times, knowing there were folks out here that I could turn to for advice and sharing. So I believe I may be one of the very few women out here, and I think you may have all thought I was a guy since I never indicated male or female. I didn't think it was needed, as I've always been in professions that are male-dominated (engineering and IT), and I always fit in quite well. But I wanted to make sure you all know who you're talking to, because I've grown to appreciating you all alot, and I hope that it doesn't change things, because I'm going to rely on you all for help with my next build! One more thing... on alot of comments, I see things like "Current Build" or "Completed Projects". Where does that get added? (Now that I've completed something, I'd like to post it!)
- 85 replies
-
- 4
-
-
- Lowell Grand Banks Dory
- First Build
- (and 2 more)
-
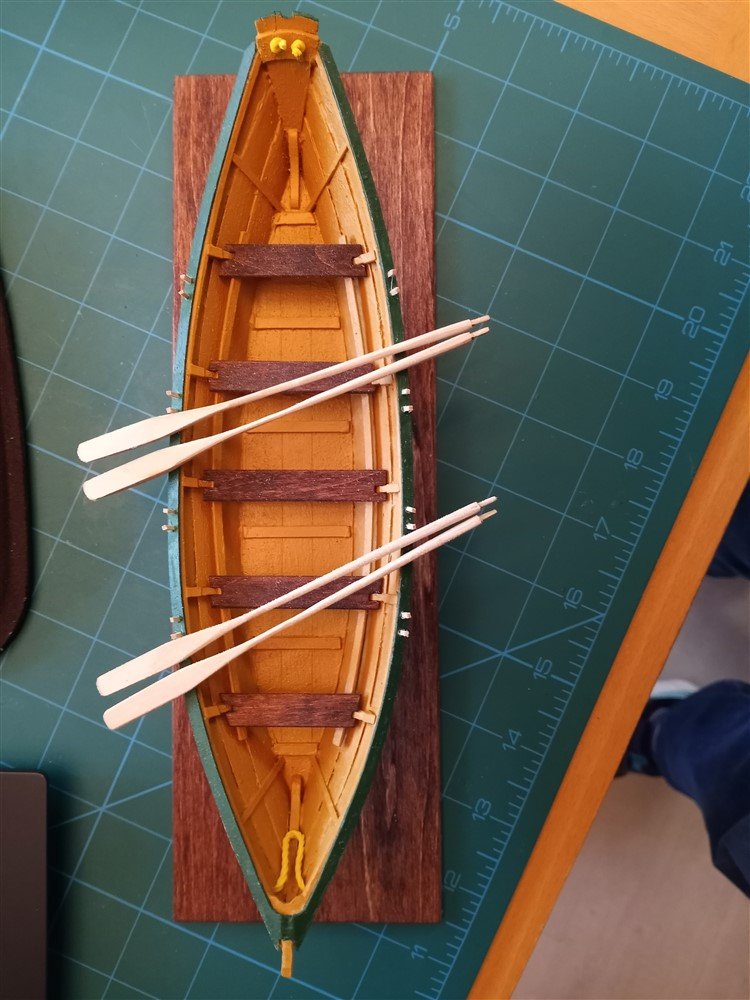
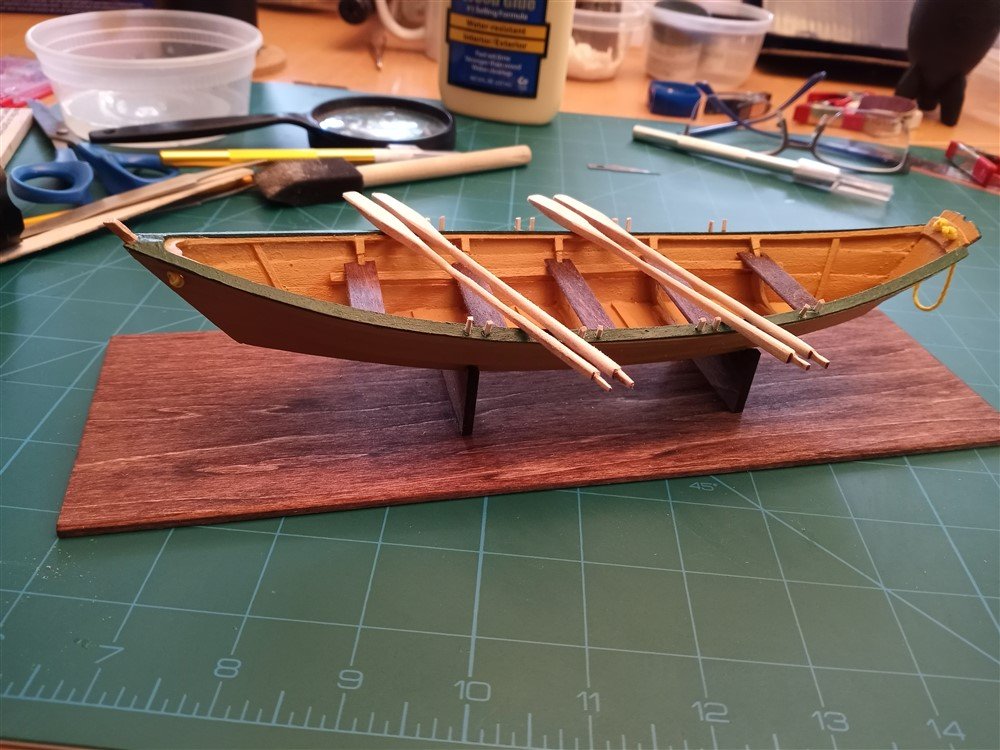
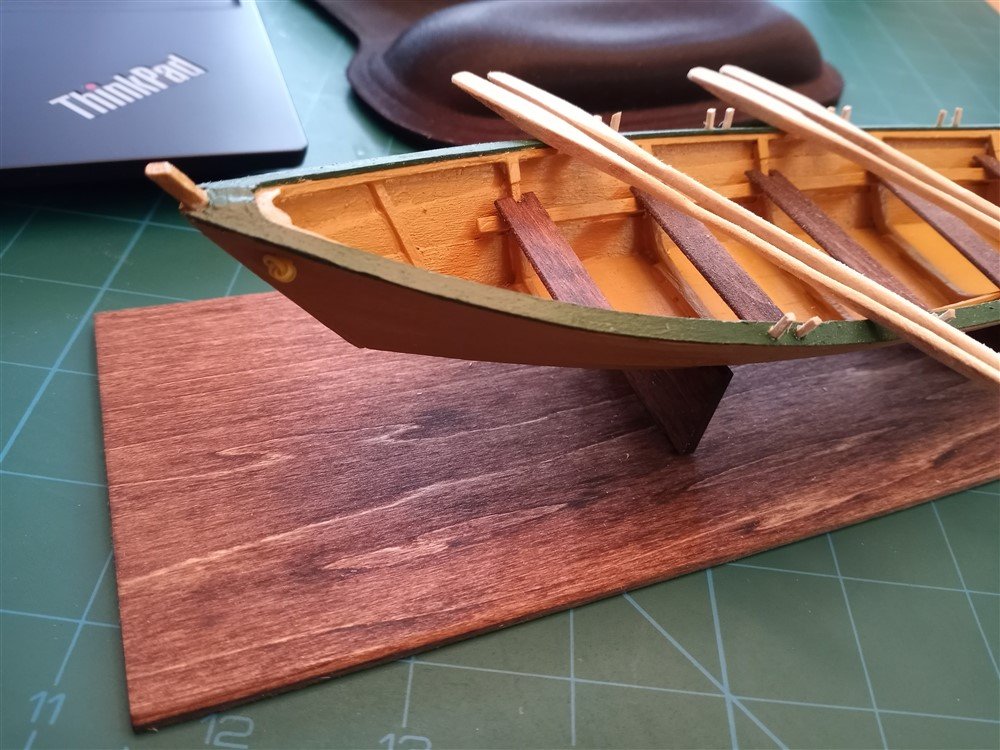
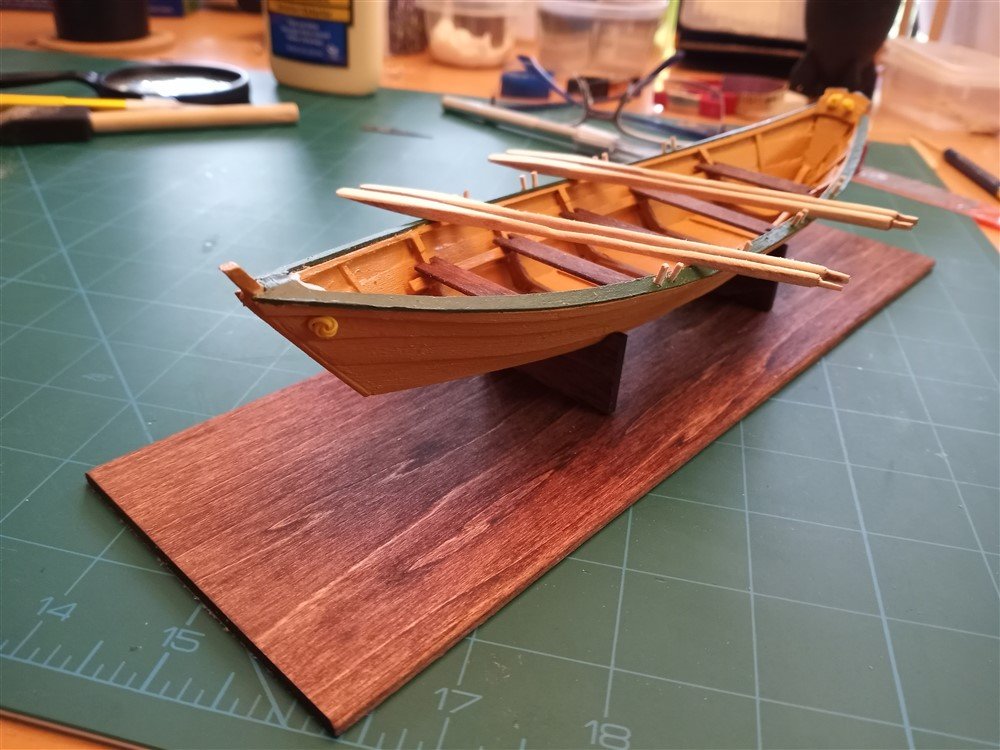
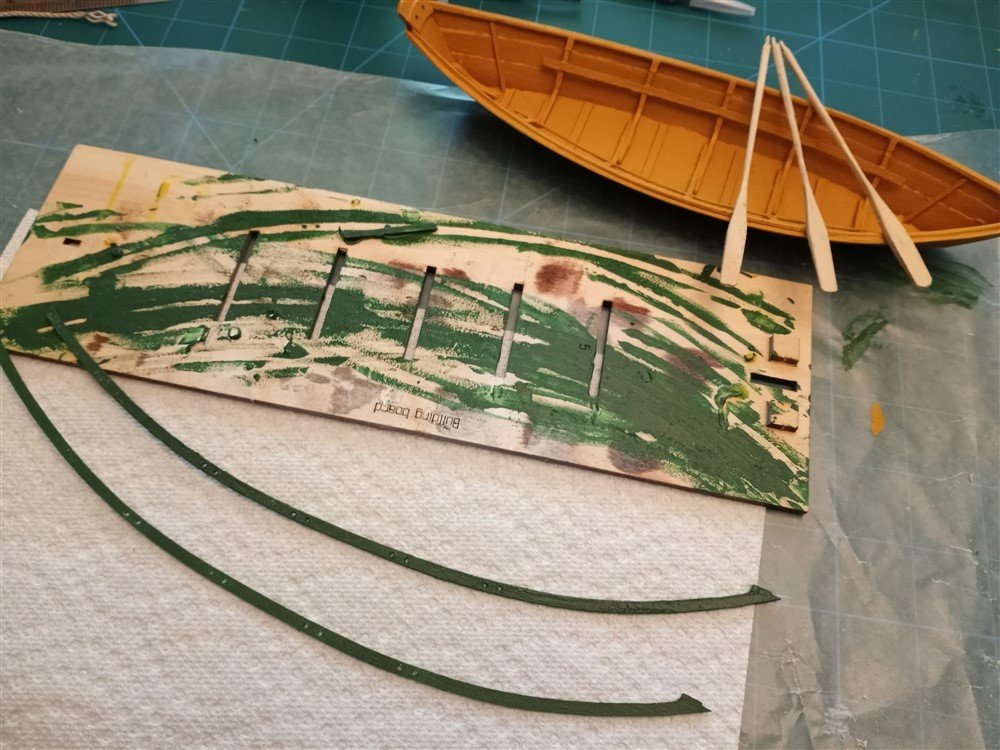
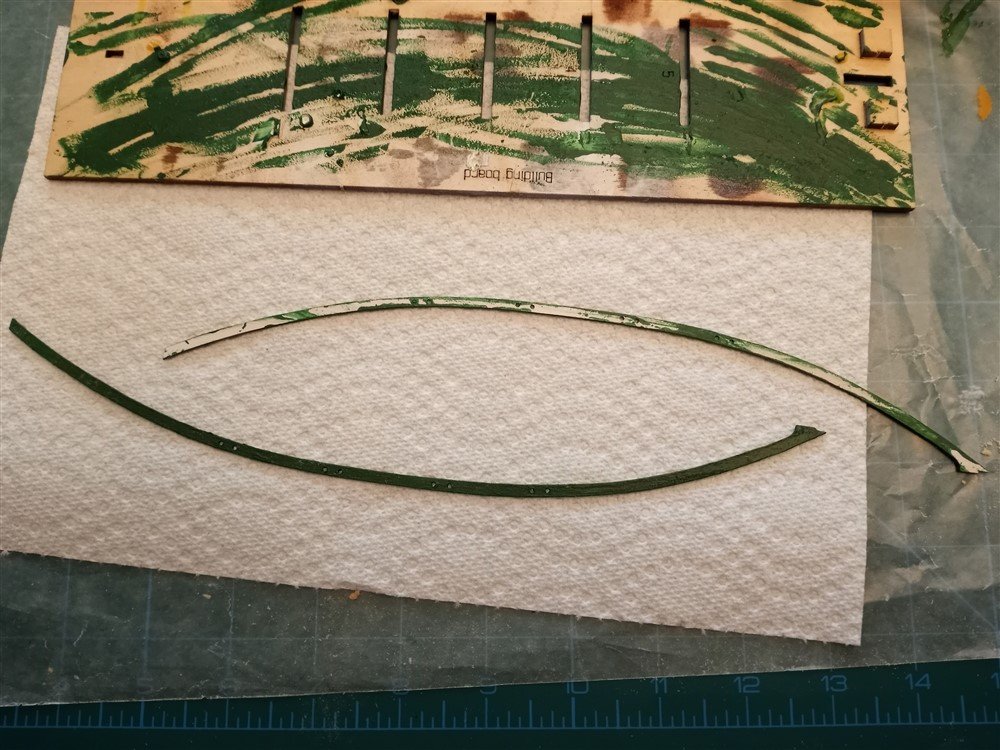
It's DONE! I have FINISHED my very first wood ship model! Whee-ha! I have learned so much... thank you, thank you, for all of your suggestions, comments, and encouraging words! It was a huge learning curve for me, and looking at the instructions for the Norwegian Sailing Pram (my next project which arrived yesterday), I can see its going be another giant learning curve! But I'm enjoying learning new things about myself (patience comes to mind), and even with frustration and not knowing what I am doing, its still been fun! Here's the final pics... lots of mistakes along the way, but I am ok with everything, given all that I learned! Again, thanks! I used Red Oak Minwax wood finish on the base and on the thwarts. Size 18 yellow twine for the becket. I could've spent more time on the oars, but I was concerned about breaking them, so I decided to stop. In looking at the pictures, you can see the frayed planks, excess glue, and many other imperfections, but still, I am happy with my first-time results! PS - Tholes are difficult. I am glad they supplied 12 inches of dowel, even though only 4" are needed, since I used several extra inches in trial and error!
- 85 replies
-
- 9
-
-
- Lowell Grand Banks Dory
- First Build
- (and 2 more)
-
Thanks Cathead, what a great idea! I will definitely get one of those for my next build.
- 85 replies
-
- 2
-
-
- Lowell Grand Banks Dory
- First Build
- (and 2 more)
-
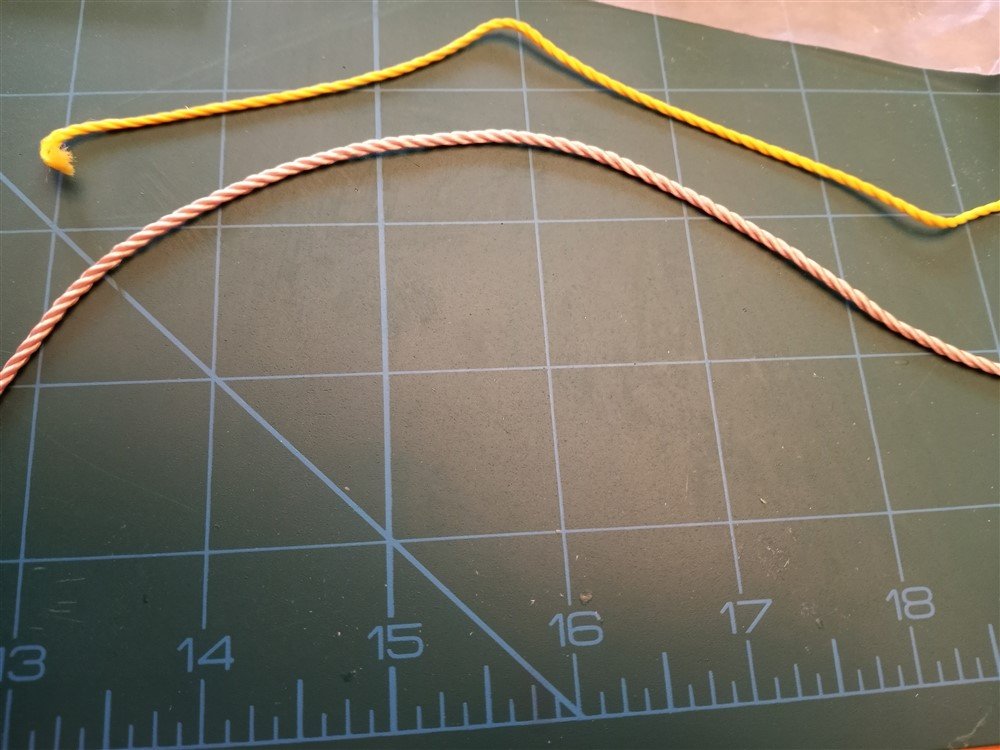
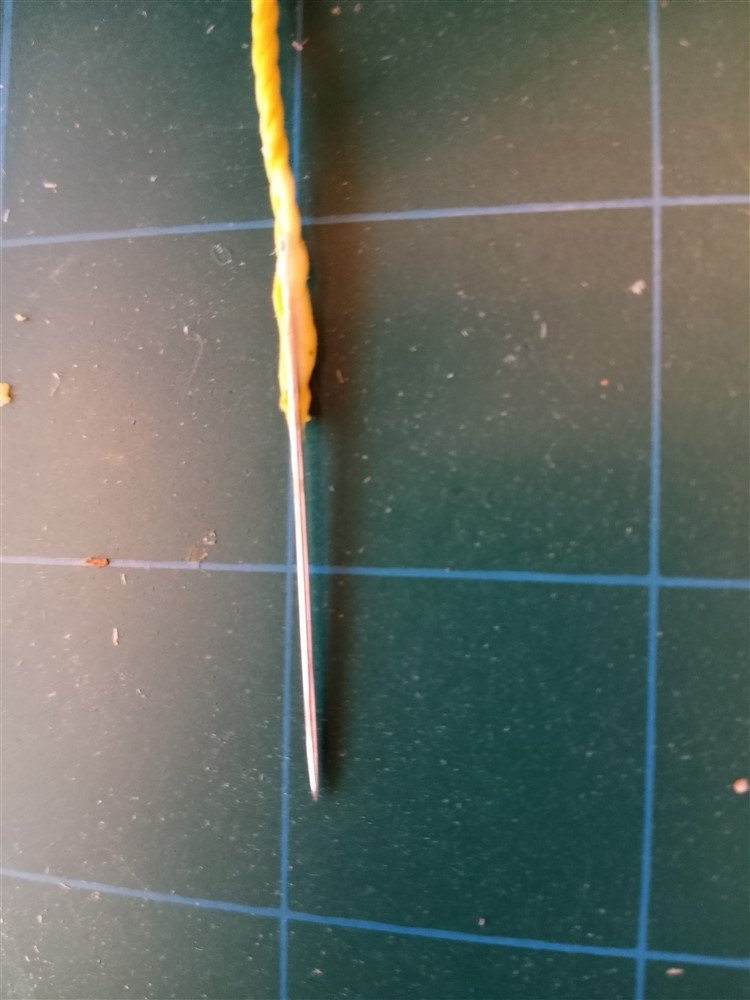
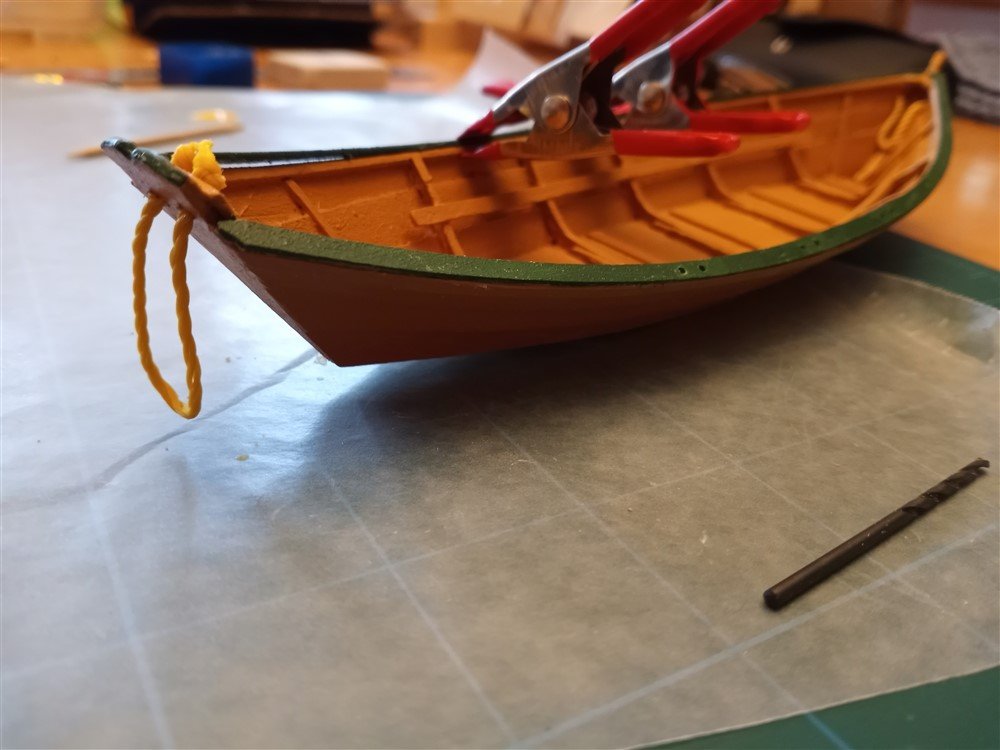
Problem solved by using all your suggestions! First, I went to the hardware store and found thinner string. In the pic below, the tan string came with the kit, but I found a thinner yellow string (and I liked the color better anyway!) Then, as Keith suggested, I glued the string to a needle, (rather than tying it as I first tried to do). And then, as bobandlucy pointed out, I used a drill bit (turning it by hand) to enlarge the holes. I haven't finished the cap rail yet, but wanted to solve the becket problem first. Thanks for all the advice! Needle glued to yellow string Becket installed! Whew!
- 85 replies
-
- 3
-
-
- Lowell Grand Banks Dory
- First Build
- (and 2 more)
-
Thanks Keith. I tried using a needle and thread, tying the rope to the thread and passing the needle thru. It just pulled the thread off the rope! Drilling is beyond my skill level at this point (and increases my stress!) but i may try the wire suggestion. Thanks!
- 85 replies
-
- 2
-
-
- Lowell Grand Banks Dory
- First Build
- (and 2 more)
-
Thanks for the glue removal info. I got nervous about potentially separating some of the pieces in trying to remove blobs. It looks a little better after the 3rd coat of paint. I was really feeling good about my progress after I painted the cap rails and finished 3 of 4 oars (I broke an oar while sanding, so I really appreciated the spare in the kit!) Felt good about the painting UNTIL I realized I painted the wrong side of one of the rails! Oops! One other question... any ideas on how to thread the THICK piece of rope thru the TINY holes in the becket? I glued the end as instructed, but it still isn't thin enough to make it. I may try to find some thinner "rope-like" string at the local hardware store! Oops! Realized my mistake when I placed the cap rails in the direction they'll need to go! Back to painting!
- 85 replies
-
- 3
-
-
- Lowell Grand Banks Dory
- First Build
- (and 2 more)
