.jpg.01e54eff8de6be562e7bc1146f40d40a.jpg)
Matt D
-
Posts
629 -
Joined
-
Last visited
Content Type
Profiles
Forums
Gallery
Events
Everything posted by Matt D
-
.thumb.jpg.6d6ee4bdbfaac2c58ecc77e7b80ae374.jpg) I hear what you're saying. Especially drilling such a nice deck as yours. But the ring bolts and eyes really add a lot and you'll be amazed at how they look when you get them installed.
I hear what you're saying. Especially drilling such a nice deck as yours. But the ring bolts and eyes really add a lot and you'll be amazed at how they look when you get them installed.- 840 replies
-
- 6
-

-
- winchelsea
- Syren Ship Model Company
- (and 1 more)
-
It looks like you've done a fantastic job on your bulkheads. I agree with you that buying Chuck's laser cut bulkheads would be much easier, but you can't beat the feeling of having done it yourself. Plus, your next model might not have that as an option, so now you know that you can make your own. My own had many errors that I didn't recognize until I was fairing the hull. I had to fill a few voids and file a few humps. From these photos, I think you're in great shape.
-
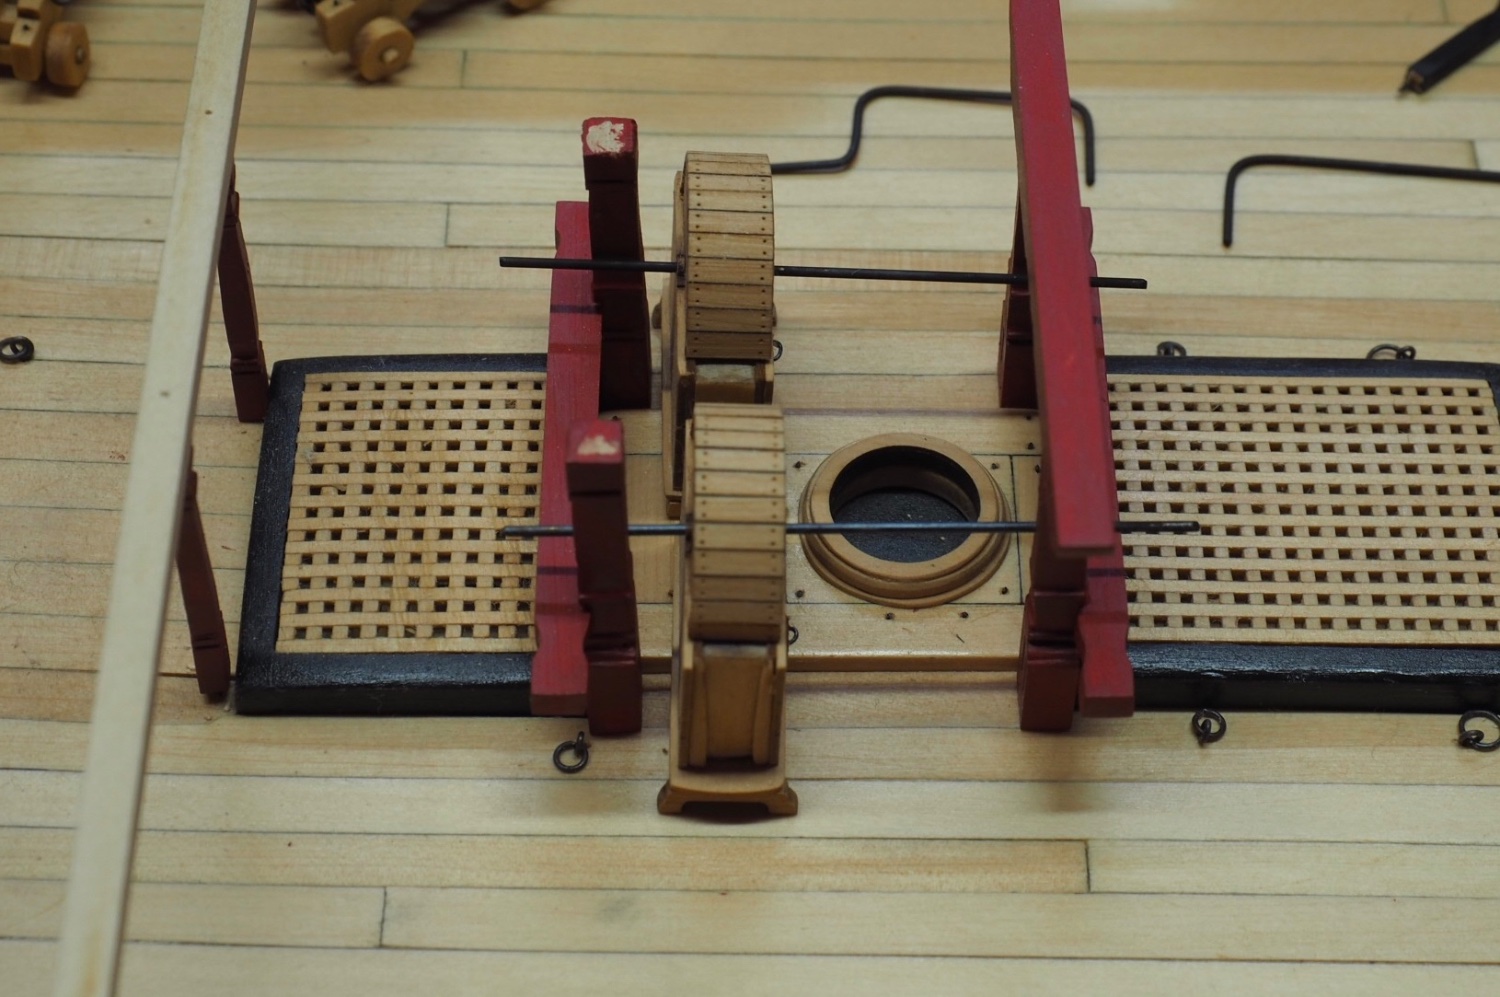
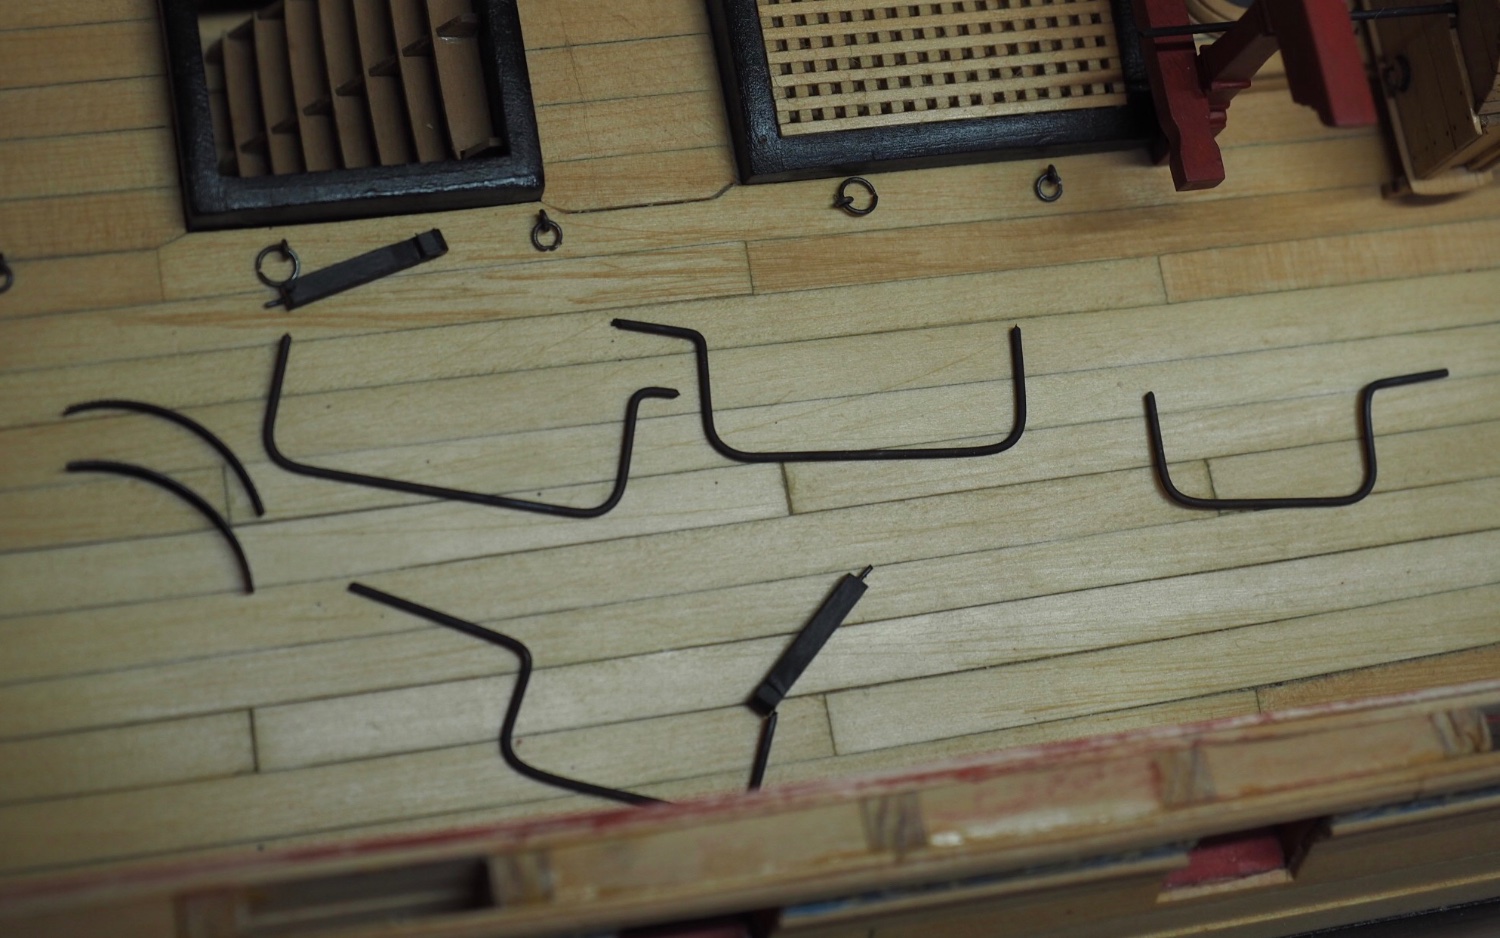
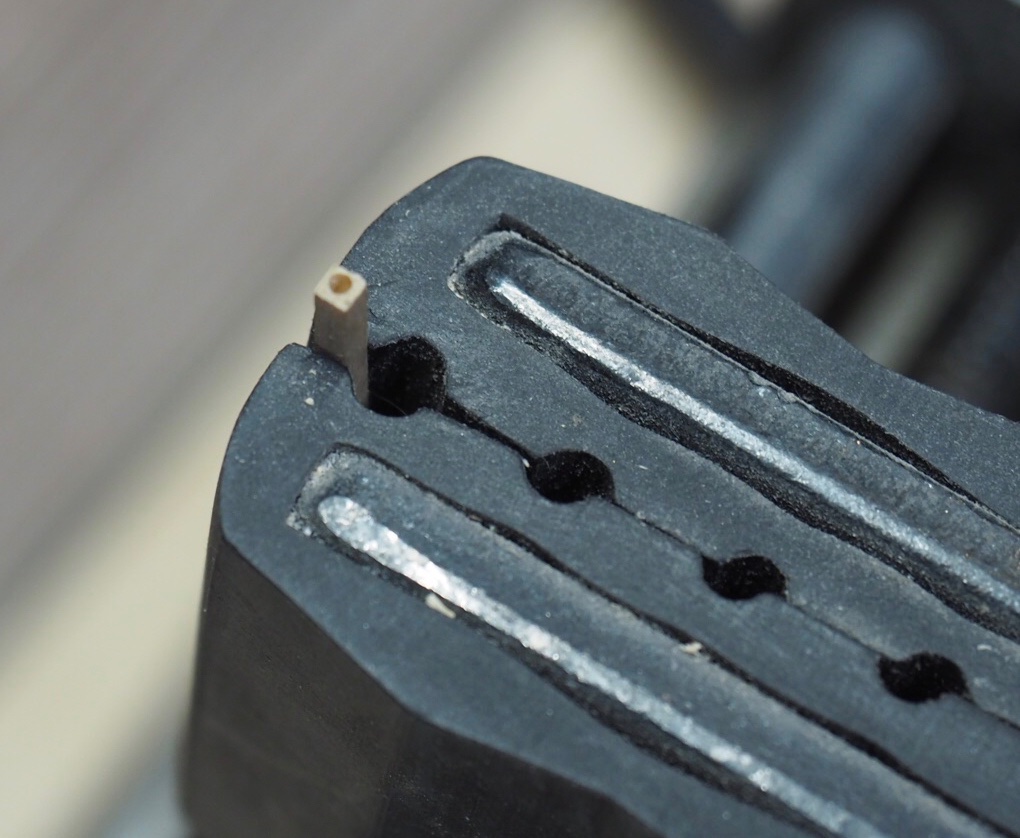
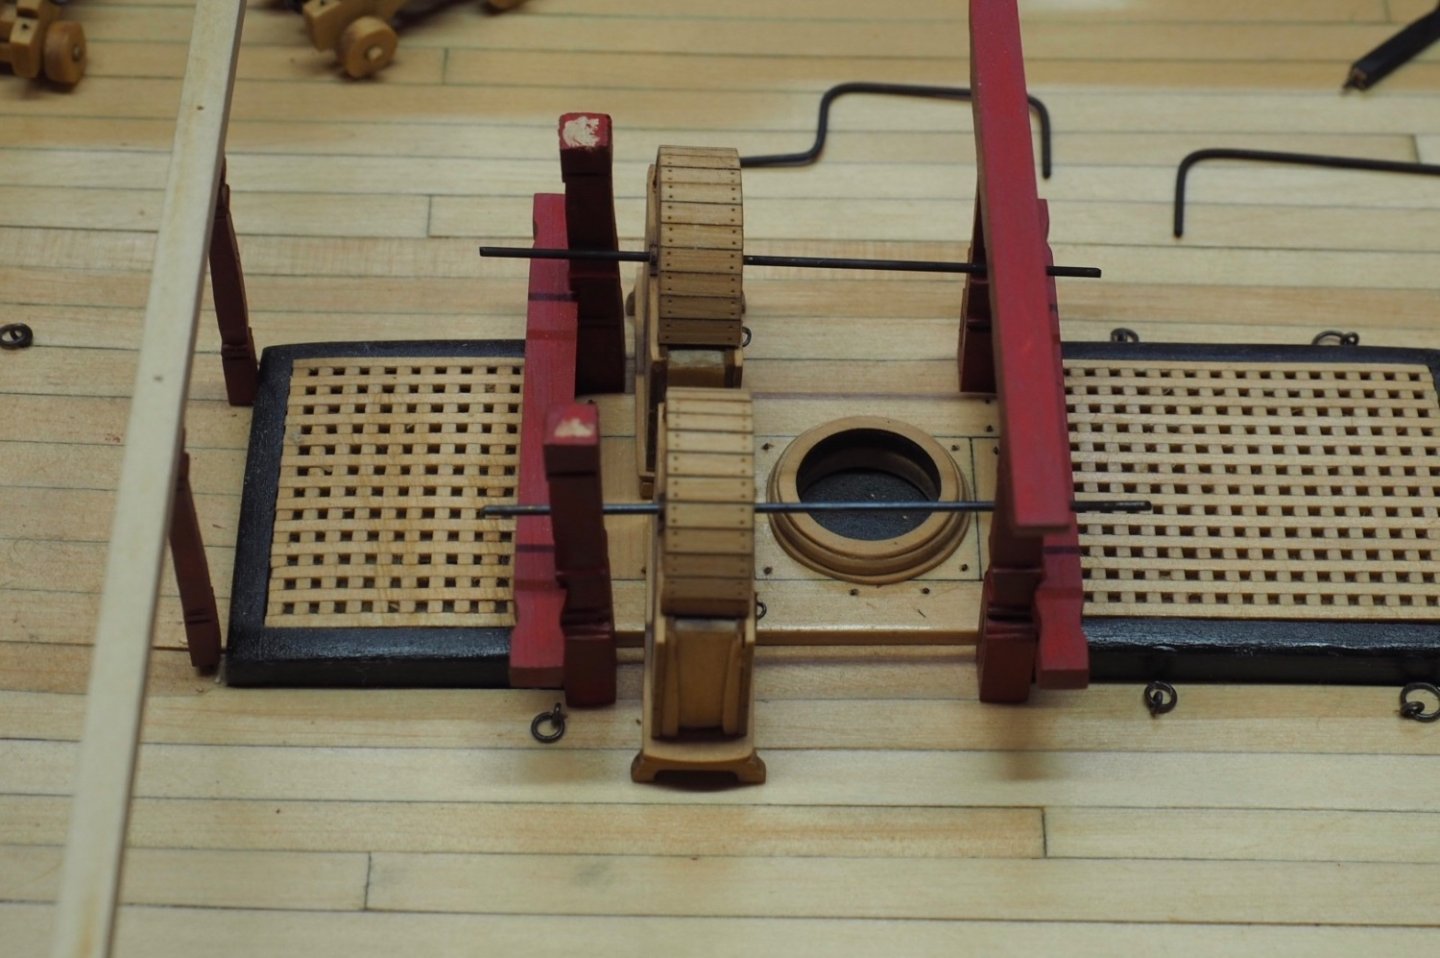
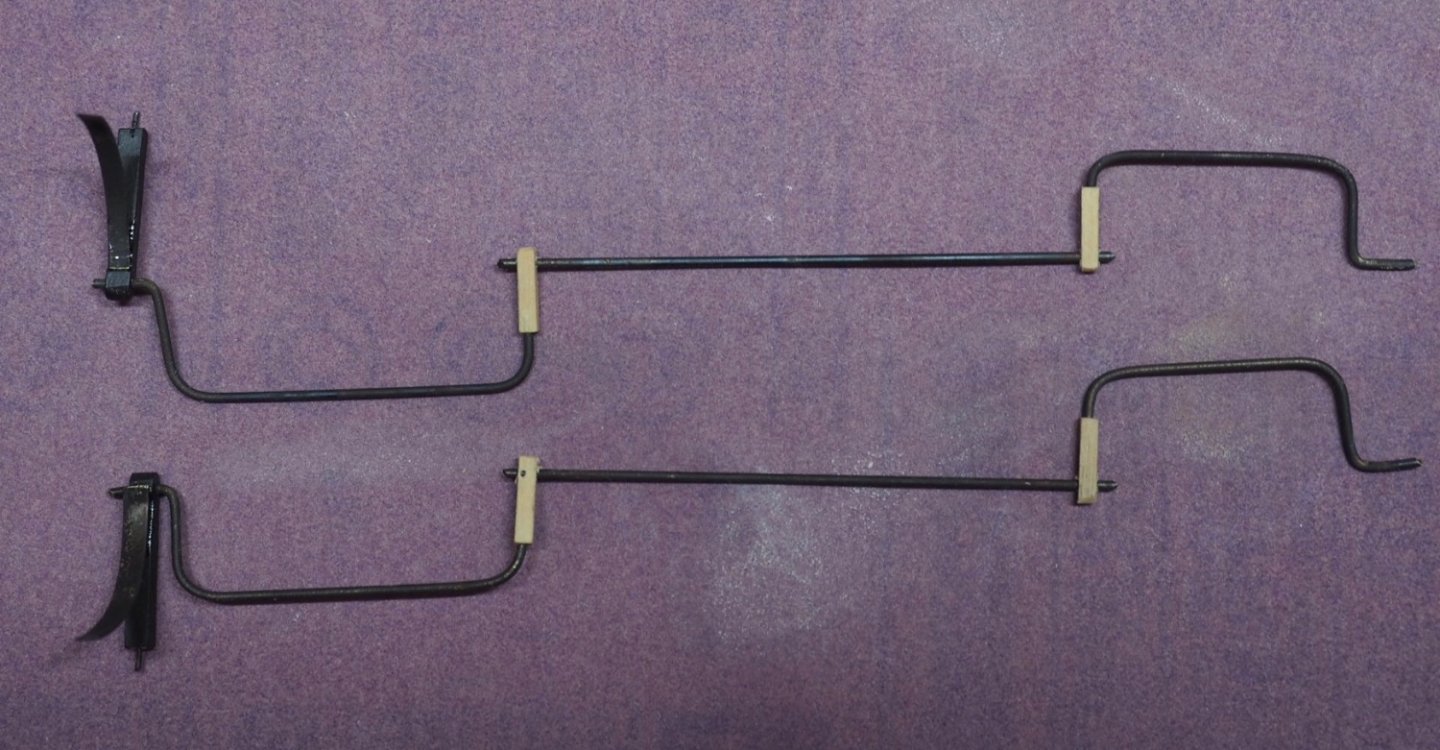
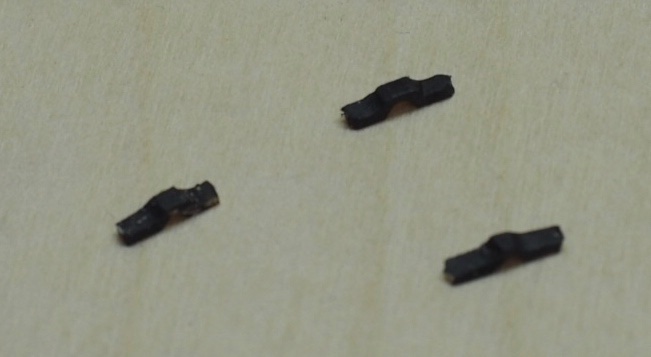
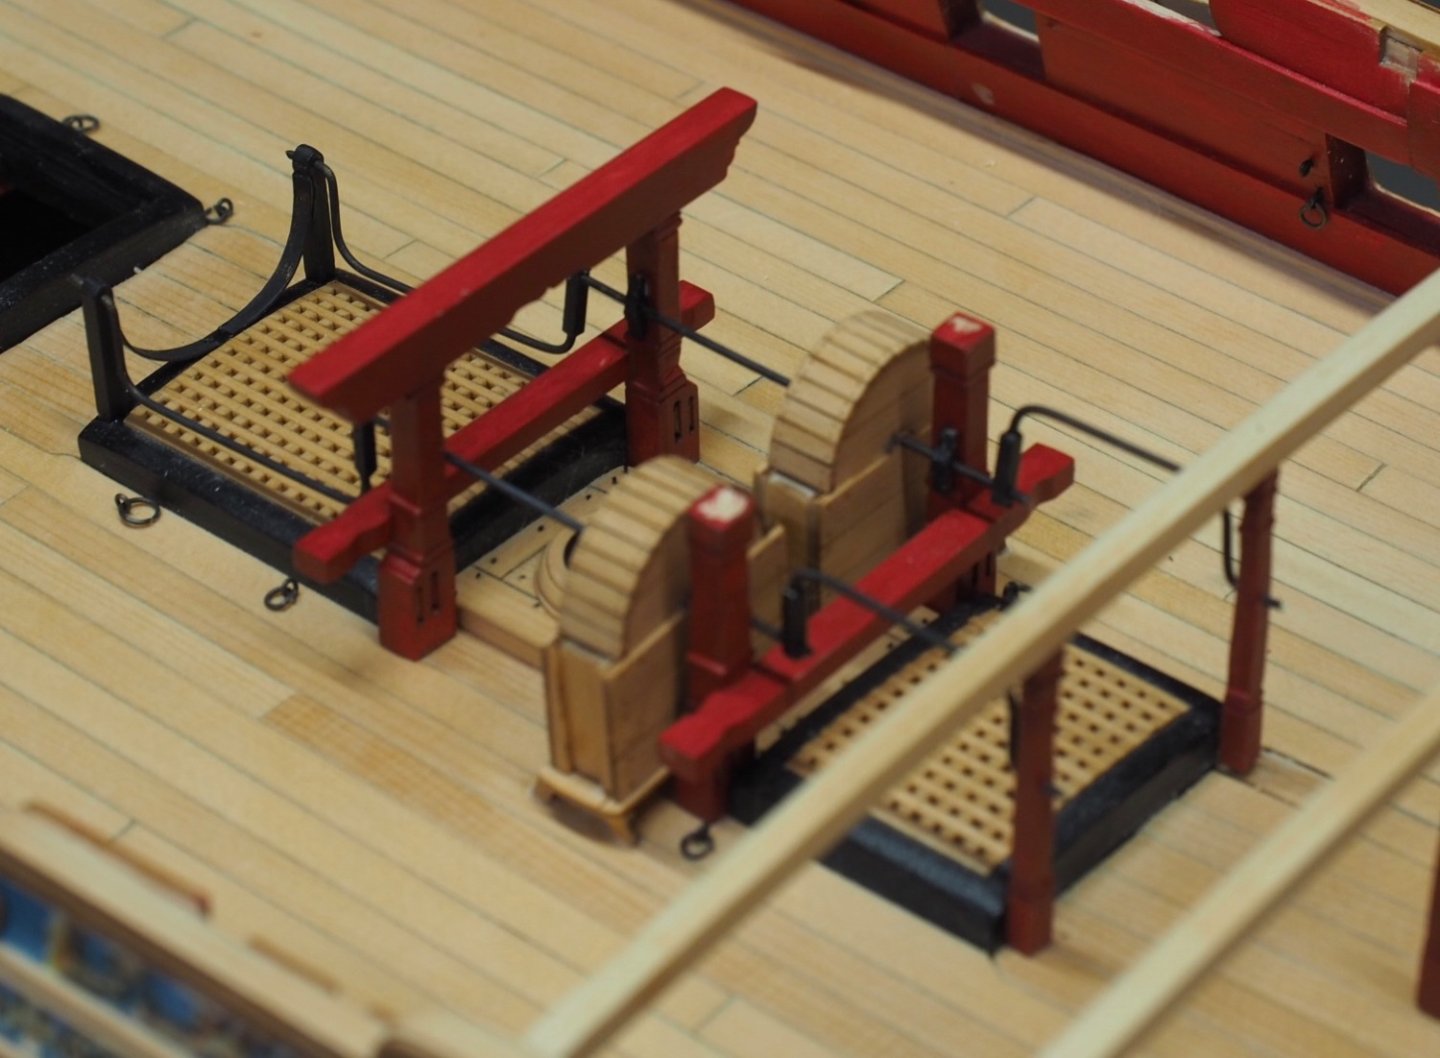
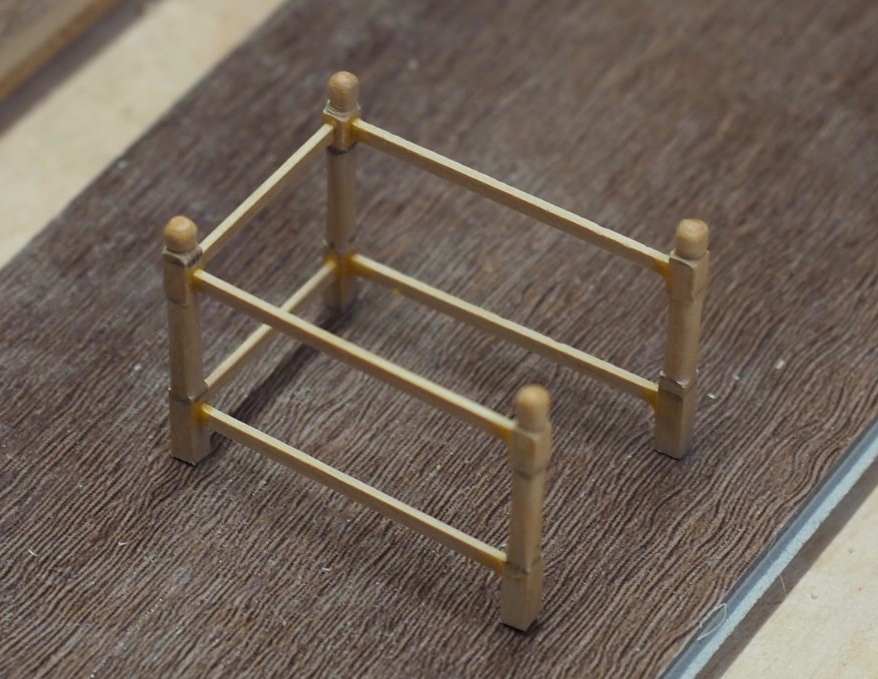
Thanks, Chuck, JJ, and Glenn. Chuck, I agree with you 100%. One think I didn't mention was that I pinned everything except the chain pumps. After I figured out how to get the holes drilled in the right spot using masking tape, I've been a pinning maniac. I thought about pinning the chain pumps, but decided the risk of splitting the feet was not worth any benefit. I'm certain they're not going anywhere with the 1mm brass crank rod holding them down. I'm away from home for work this week and looking forward to building the elm pumps this weekend after I get home. I have my 7-10-7 marks on the 3/16"x3/16" boxwood strip, so I can start filing right away.
-
That looks amazing, Frank! You're the model of taking your time and doing a beautiful job!
-
Thanks JJ, Jim, and Glenn! Today, I finished the chain pump installation. This feels like a huge accomplishment. The metal work and the small boxwood parts are very challenging, so to get them done and be happy with the result is really something. Here are several photos documenting the steps.


-
Thanks Chuck and Frank. And thanks to all the “likes”! I deserve no credit for the quoins: I bought 8mm belaying pins from The Crafty Sailor to use there. The ones I tried to make were awful!
-
Niagara by Alex-Ks1 - 1:7 Scale
Matt D replied to Alex-Ks1's topic in - Build logs for subjects built 1801 - 1850
8 feet long?! Wow! This will be amazing! I can’t wait to see your progress. -
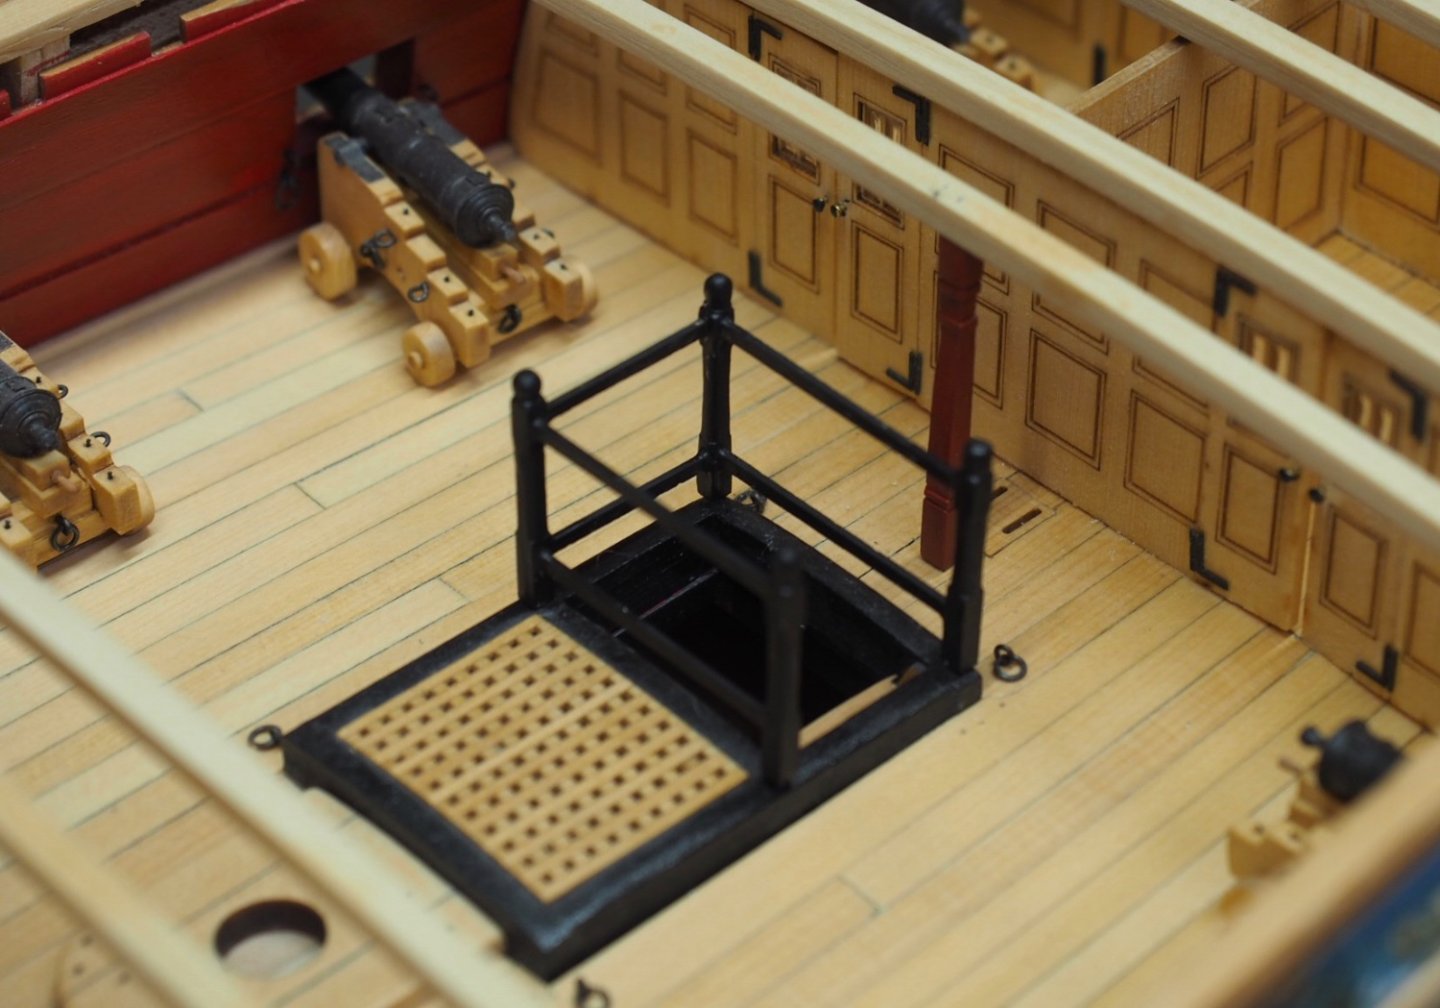
Here are a couple of shots of the railing around the companionway. I tried to do this exactly as described in chapter 7. Turning the stanchions was very easy using a Dremel tool and a small file. I glued it up using PVA. I expected it to be very fragile, but it’s surprising strong. I pinned it using 24 gauge steel wire. I’m pretty happy with how it turned out.
-
Thanks, Chuck. That makes perfect sense.
-
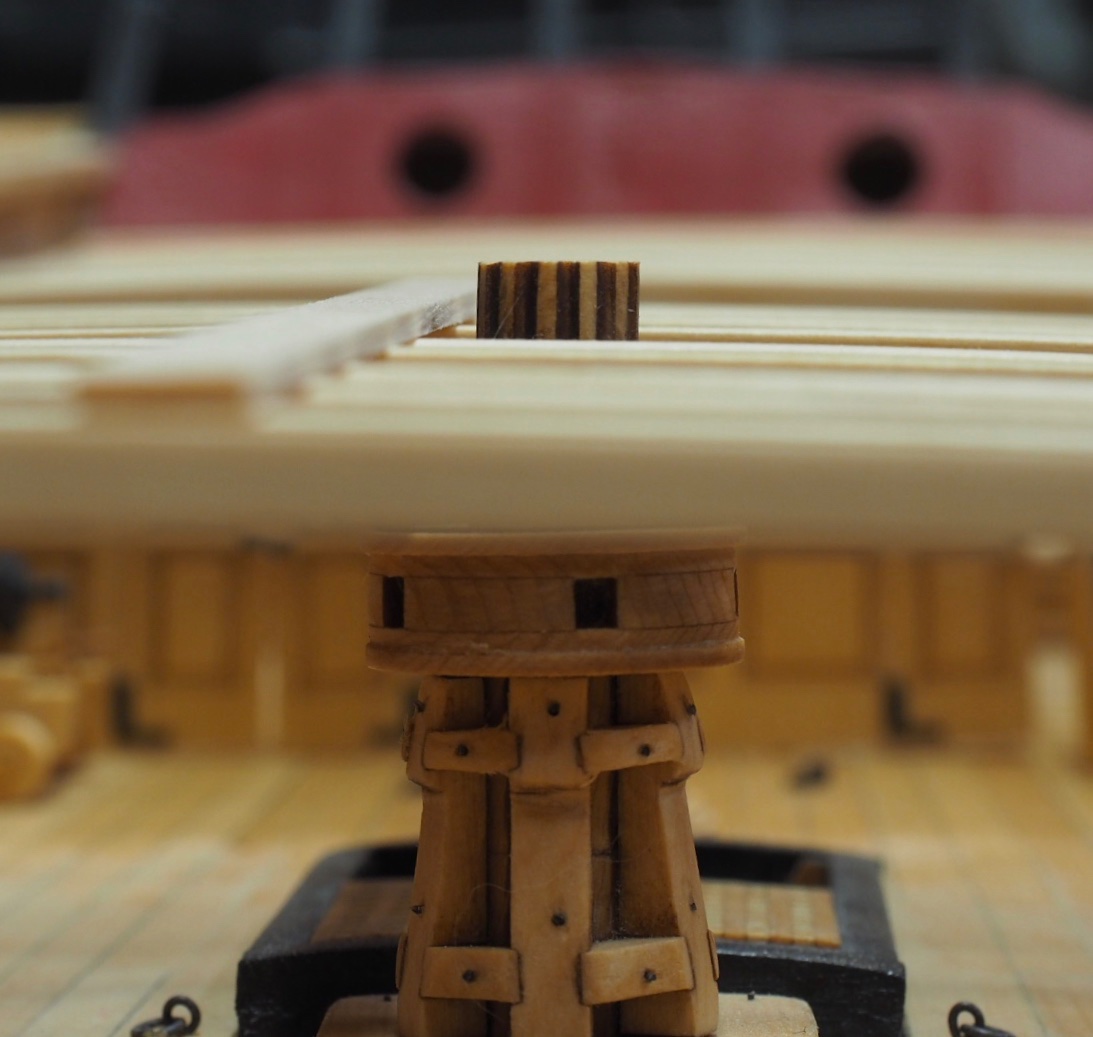
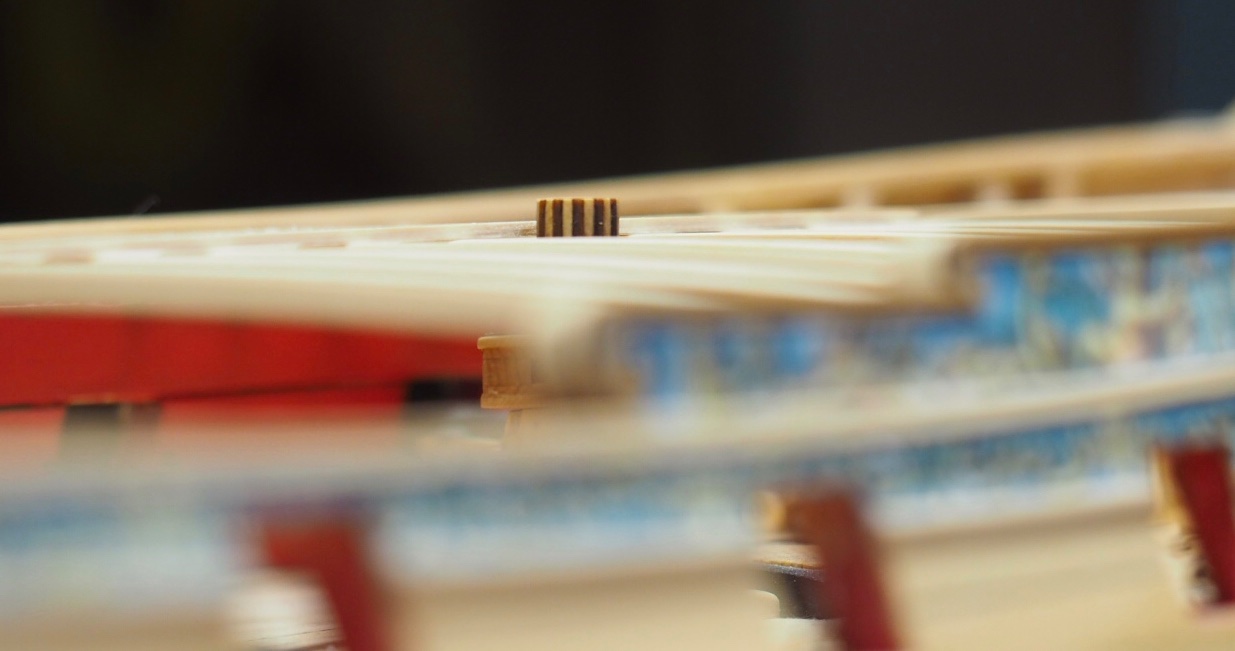
Thanks for looking, JJ. Yes, the lower part is all the way into the base below. Once I have a better idea of how high it should be, I can carefully cut or sand it down to fit. So this is a solvable problem.
-
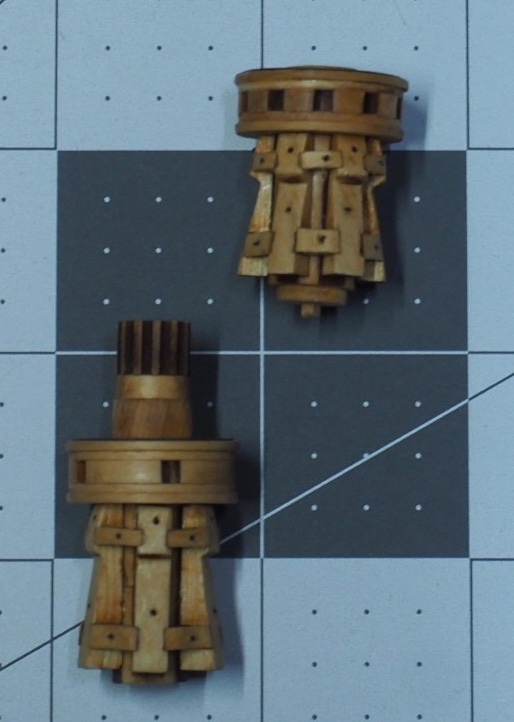
I think I have a problem with the height of my capstan. I can’t find a good view that shows how high above the quarterdeck beams the upper capstan should be. But I think mine is too high. I’ve carefully measured with my calipers and the top of the cog is 11/64” above the beam just forward of the capstan. Do any of you know if that’s too high as I suspect?
-
That sounds terrible, David. I hope everyone was ok. I hope your new Syren build goes well.
-
Welcome aboard the Winchelsea project, my fellow Michigander! You’re definitely not too late to the party. You will see that we have someone working in every chapter at this moment, which is pretty amazing if you ask me. So there are many sources of good advice for you. As Joe has already mentioned, birch plywood is potentially a problem. Do you mean high quality Baltic Birch? Or are you talking about the birch plywood that they sell at Lowes and Home Depot, which is only veneered in birch and is much softer inside? The former is much more like hardened blue steel appropriate for the hull of a battleship. Fairing it will be a really hard job. The latter is just about perfect for this project. My first hull attempt was with Baltic Birch. My second was with Home Depot birch.
-
I'll give that a try, Frank. Here I thought the Glue Gods were just frowning on me.
-
The "window maker" glass looks really nice, Gary. I used Micro Krystal Klear for mine, following Bob's lead @rafine . I had already installed and enclosed the acetate on the outboard stern, just as you have described. But with the Micro Krystal Klear, I was able to carefully put it over top using a toothpick to spread it around just like you would in an empty frame. One advantage (in addition to having a look you might like better) is that it gives some degree of protection against breaking the window pieces later in the build. You might be able to test it on one of the extra windows from Chapter 3 by gluing an acetate window on and then applying the window maker afterwards.
- 389 replies
-
- 2
-
-
- winchelsea
- Syren Ship Model Company
- (and 1 more)
-
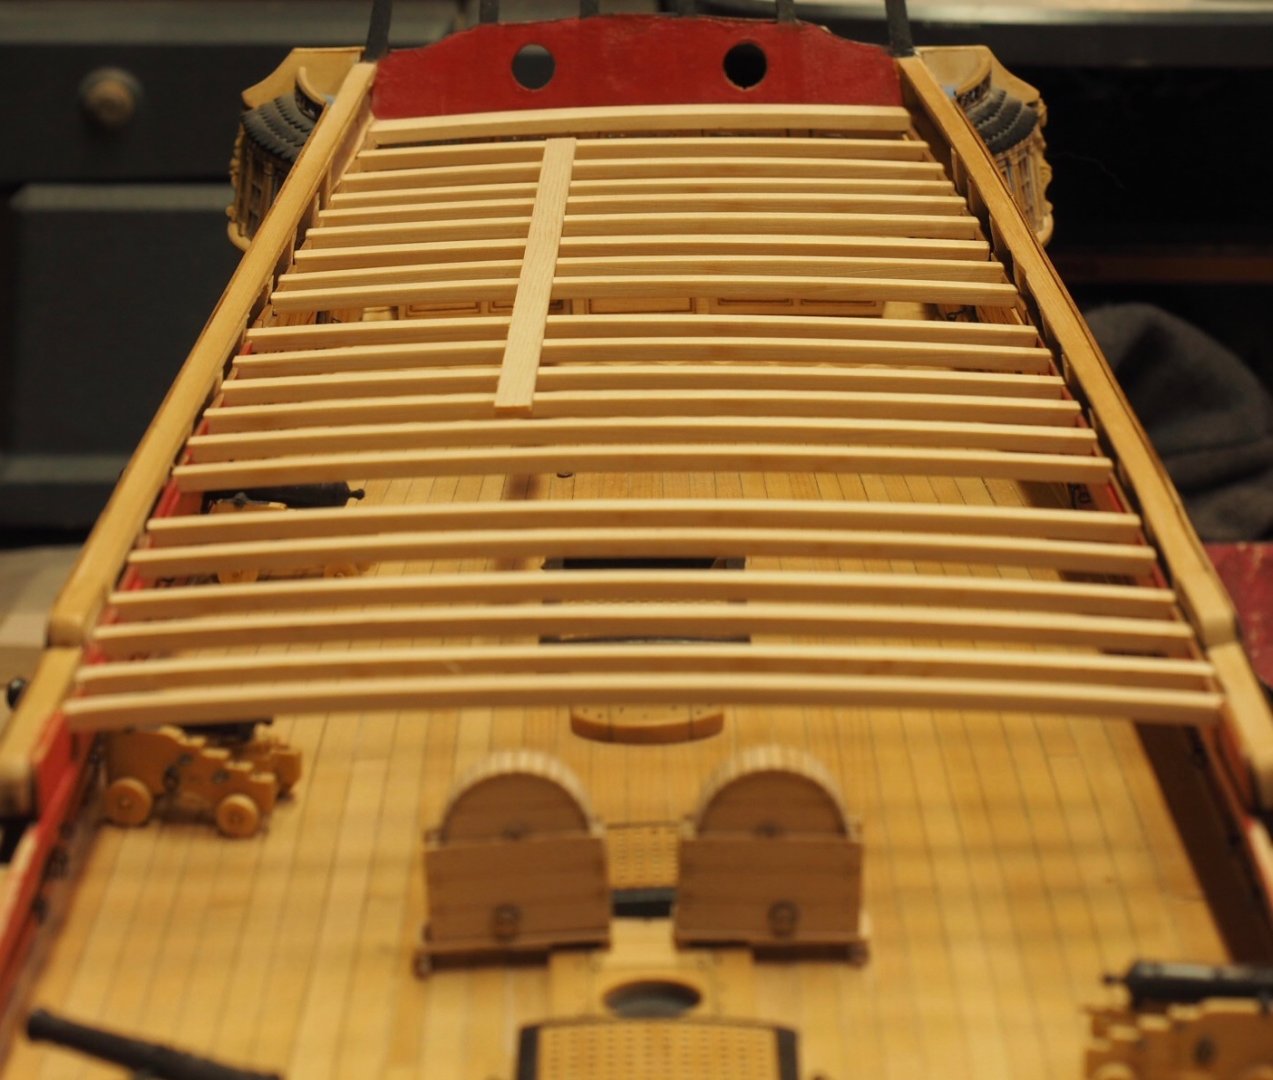
Thanks, Rusty, and all of the likes, too. Chapter 7 has some neat stuff in it. But I'm a little freaked out by the beams. On the one hand, I can't wait to get them in and I love how they're going to look. On the other, I want to make sure everything is just right and the cannon are all very secure before I close her up. I'd hate to have to try to remove any of these beams down the road!
-
I’m with you on putting off the cannon as long as possible, brother! I still have 8 in the packages! Also, your lights look really cool, JJ!
-
Thanks, JJ. It feels good to make some progress on her.
-
The New Up Arrow Button!
Matt D replied to Matt D's topic in Using the MSW forum - **NO MODELING CONTENT IN THIS SUB-FORUM**
You’re the man, @James H! -
I just want to say thank you to whoever came up with the new up arrow button at the lower right. I love not having to scroll all day to get back to the top of the page, now.

- 2 replies
-
- 12
-
-
You're doing a beautiful job, Frank! I'm looking forward to seeing your planking come together. The lines are excellent.
-
Thanks, Glenn and Chuck. I need to be more judicious with the CA on the rest of the hinges. And for some reason it sticks much better where you don’t want it, than where you do.
-
That looks great, Brad! It looks like you're doing well figuring out how to make use of the laser cutter.
-
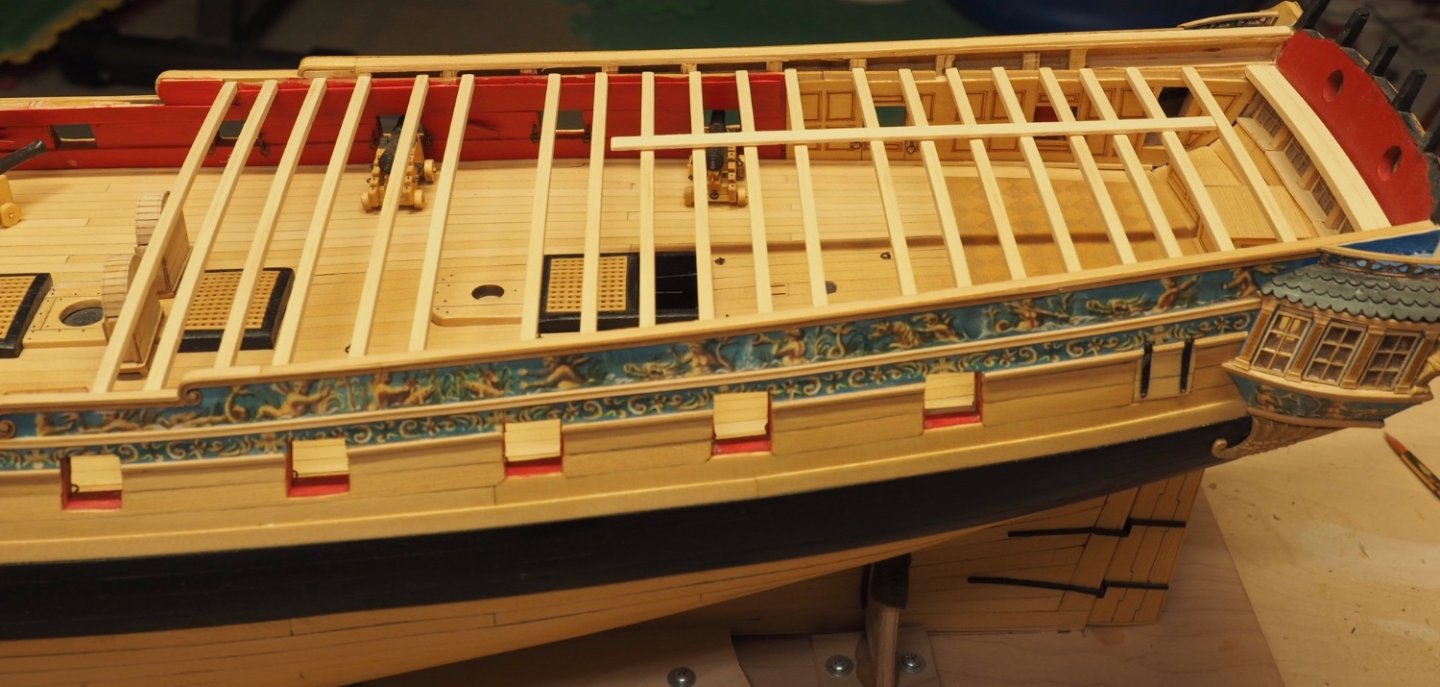
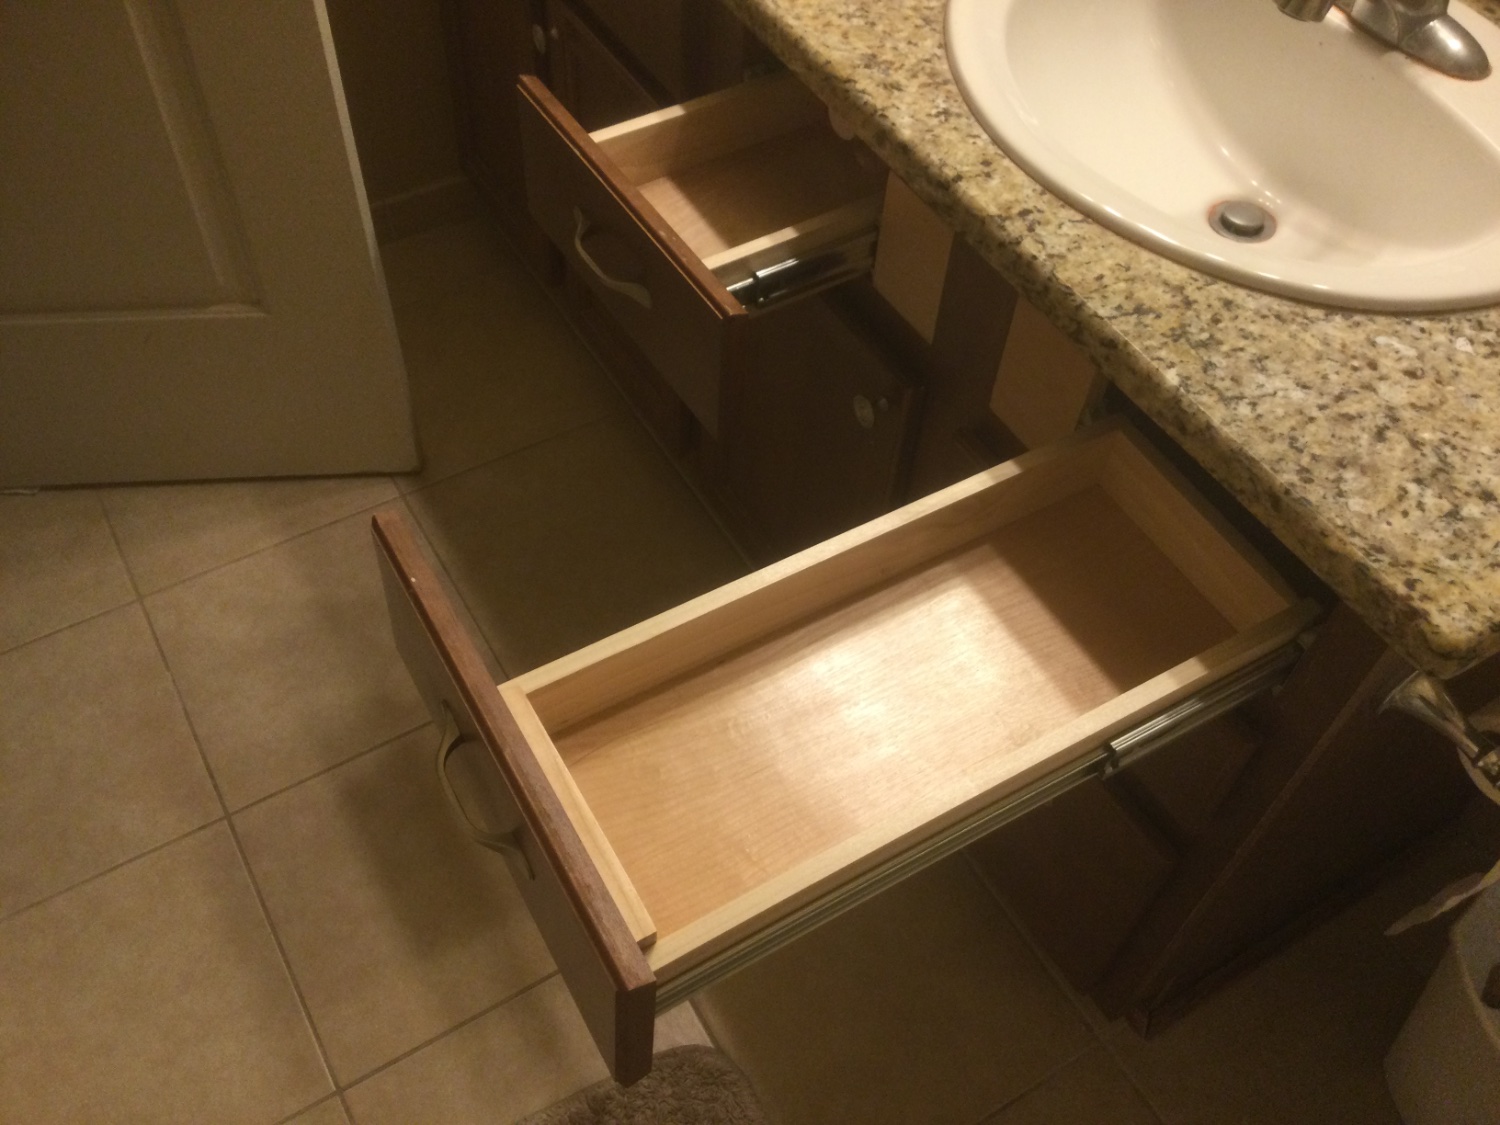
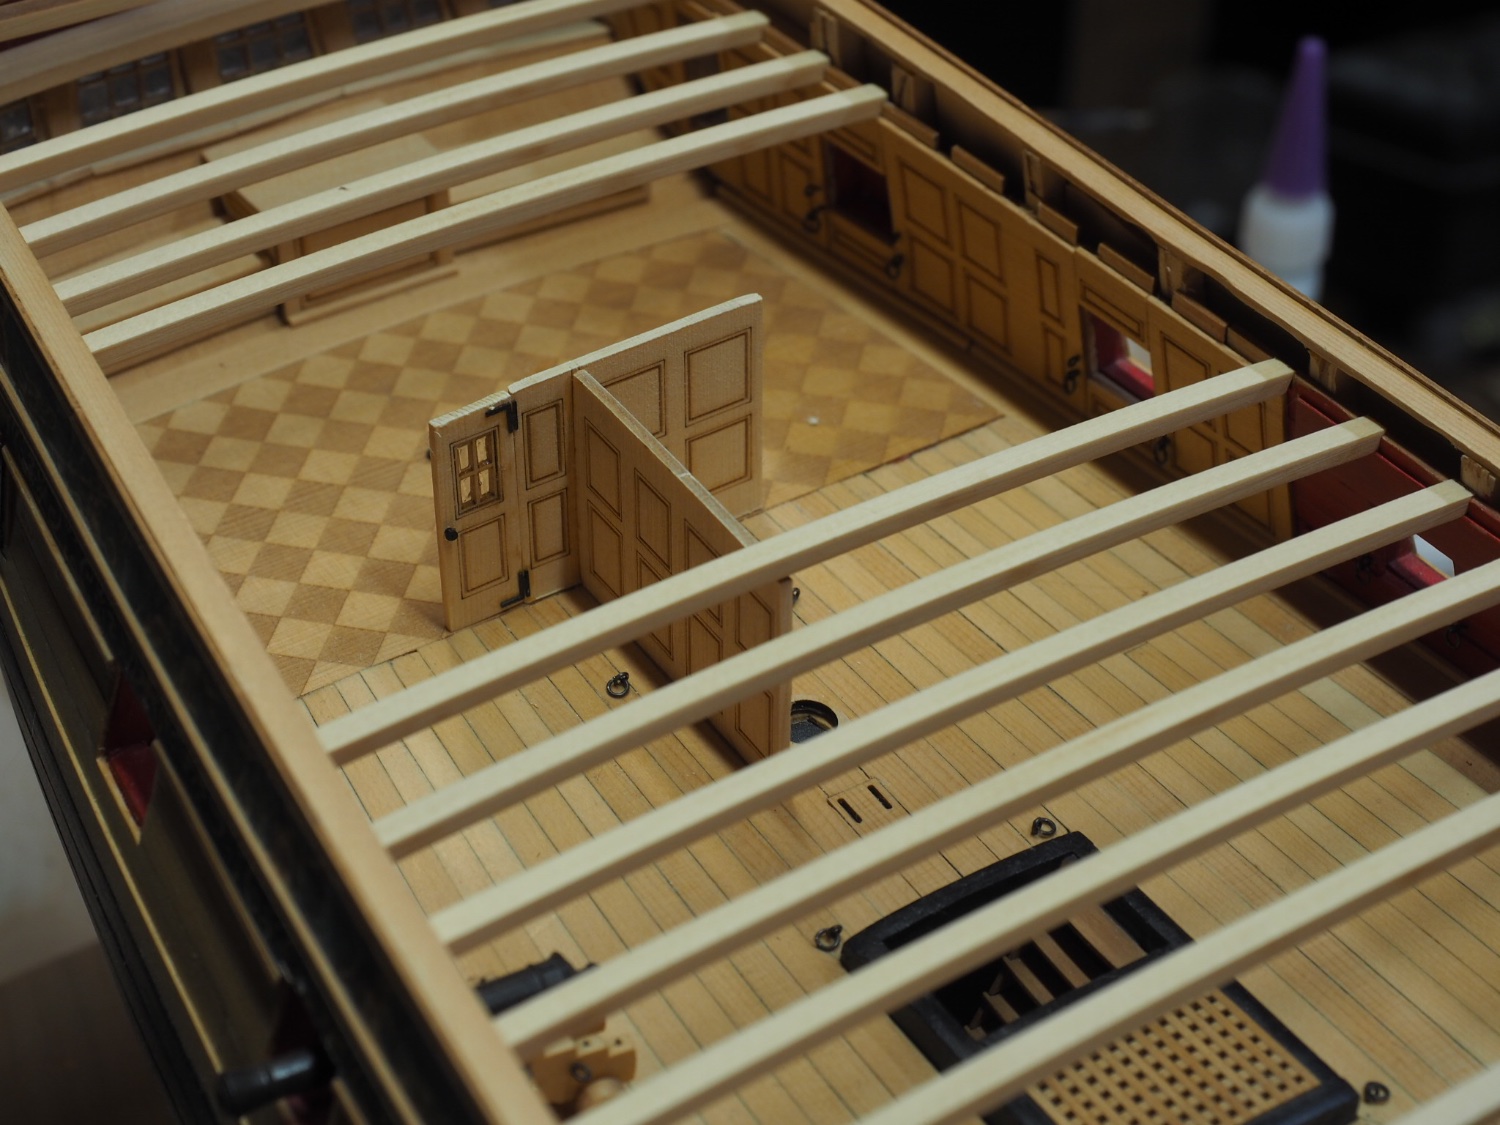
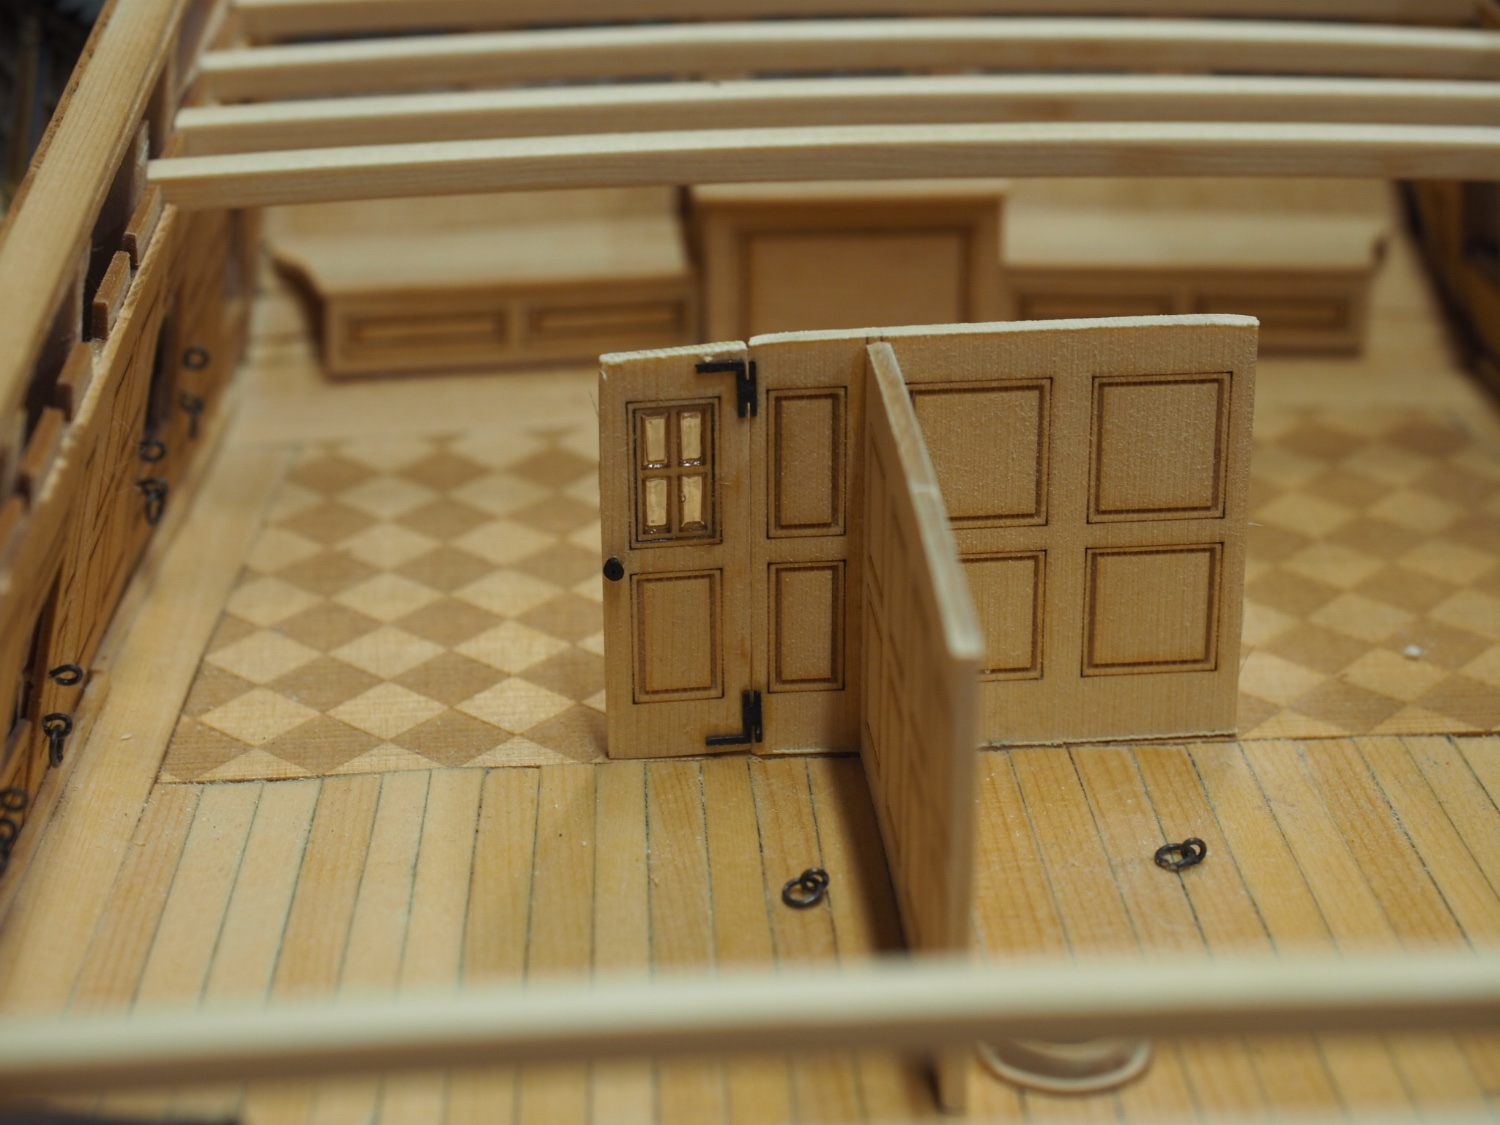
Where has the time gone? I’m working on chapter 7 and thought I’d add an update. I couldn’t help myself and had to start the chain pumps as soon as I received my chapter 7 parts. They’re not fully complete, but you can see that the bulk of the work is done. After that, I worked on the beams. Thanks to Chuck’s wonderful design on the deck clamps in Chapter 4, the beams are very easy to fit and align. With all of the quarter deck beams fit, I’m now working on the bulkheads. The center section of the aft bulkhead is not attached in the photo below. I have test fit and glued the fore to aft piece to ensure that aft bulkhead is vertical with respect to the model. I’d like to leave one door open in this bulkhead, but it won’t be either of the starboard side doors because I’ve accidentally glued the edges of those doors to the bulkhead pieces. I’ll try to be more careful on the port side. If you see those installed closed in a later post, you’ll know I was unsuccessful. Here’s a picture of a little project I did with my 15 year old son during the holiday break in the kids’ bathroom. These are new drawers in the vanity that fit next to the sink. The kids will each have their own drawer. He needed to do a project for a boy scout merit badge and I wanted to make their bathroom a little less messy.