.jpg.01e54eff8de6be562e7bc1146f40d40a.jpg)
Matt D
-
Posts
629 -
Joined
-
Last visited
Content Type
Profiles
Forums
Gallery
Events
Everything posted by Matt D
-
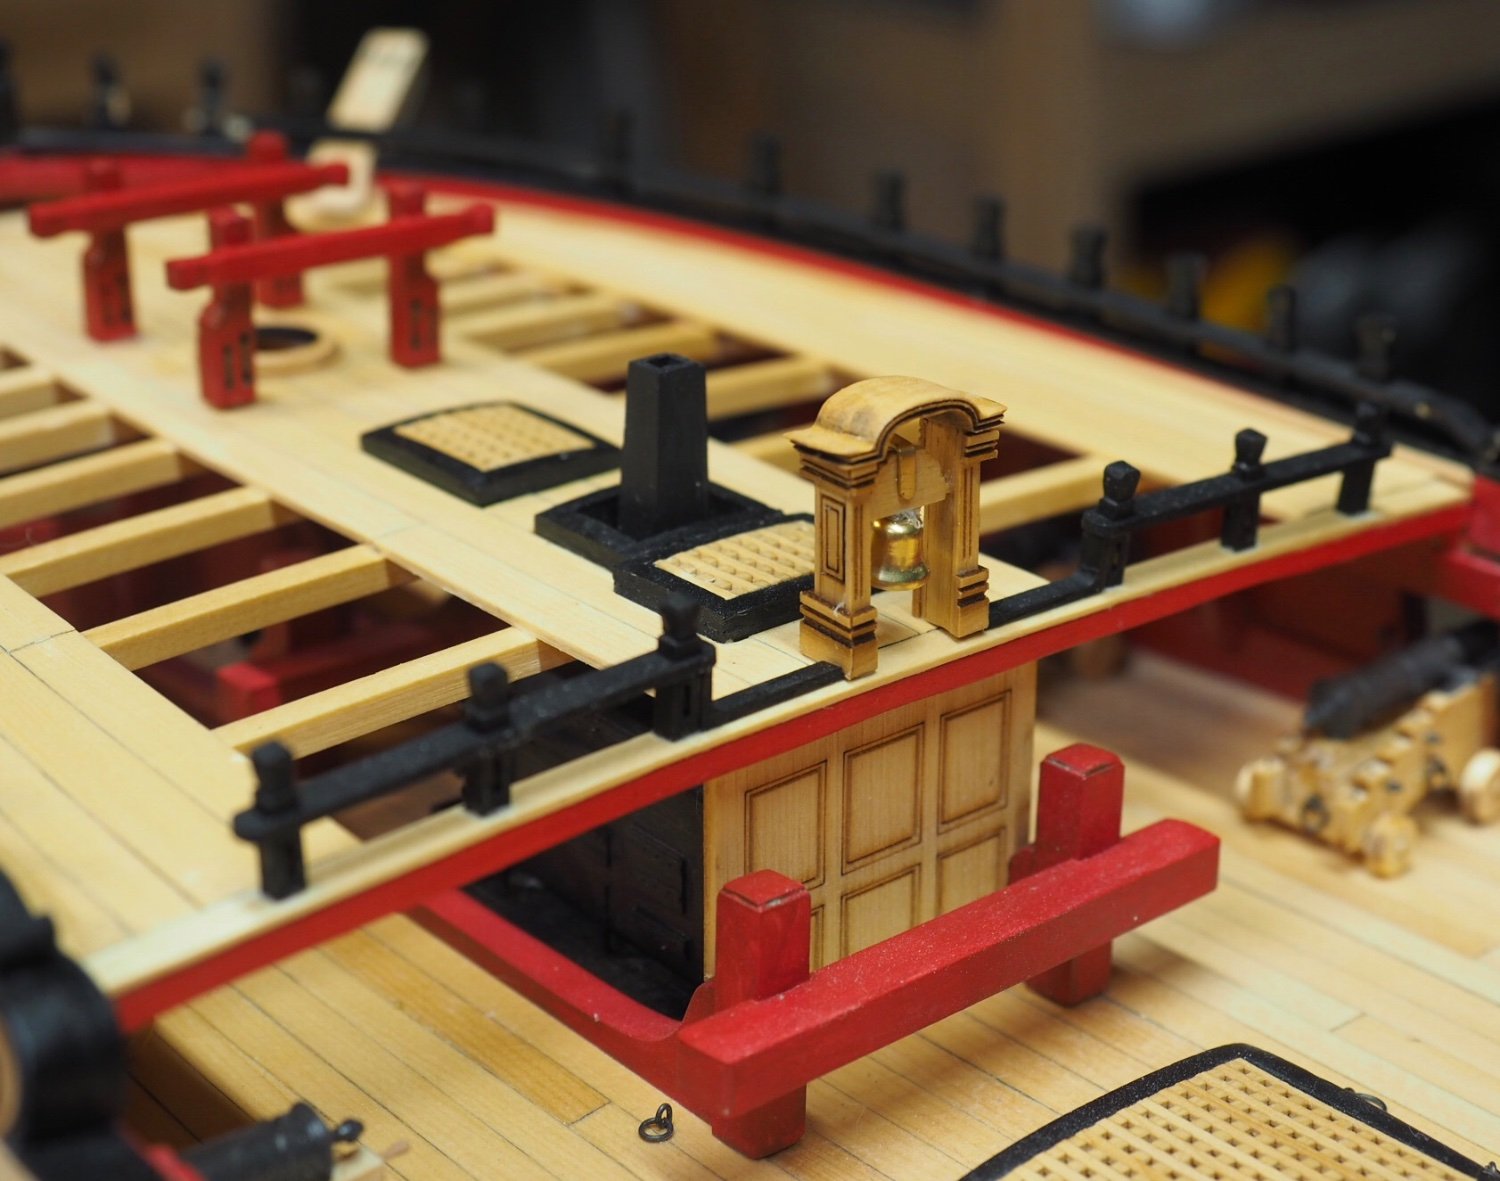
.thumb.jpg.6d6ee4bdbfaac2c58ecc77e7b80ae374.jpg) That looks great, Gary! I've been working on chapter 9 as well and agree that not using CA was a good choice on the timberheads. I didn't use any glue on the railing, either. Just friction and the paint holds it in place. But I don't think it's going anywhere.
That looks great, Gary! I've been working on chapter 9 as well and agree that not using CA was a good choice on the timberheads. I didn't use any glue on the railing, either. Just friction and the paint holds it in place. But I don't think it's going anywhere.- 389 replies
-
- 1
-

-
- winchelsea
- Syren Ship Model Company
- (and 1 more)
-
I used the exact same talent on mine!
- 840 replies
-
- 4
-
-

-
- winchelsea
- Syren Ship Model Company
- (and 1 more)
-
Glenn, they look great to me. What do you mean about the wheels being over sanded? When I read that, I was expecting to see rounded edges, but they look nice and square. Also, did you make those perfect looking quoin handles?
- 840 replies
-
- 4
-
-
- winchelsea
- Syren Ship Model Company
- (and 1 more)
-
HMS SUSSEX by KarenM - FINISHED - 1:48
Matt D replied to KarenM's topic in - Build logs for subjects built 1501 - 1750
This is stunningly gorgeous, Karen! You have so many amazing carvings! -
Thanks, JJ and Glenn. I'm glad to know I'm not alone in breaking stuff. Sometimes I feel like I should go back to my old hobby of making ochre paintings on my cave walls. Model ships might be too sophisticated for me.
-
JJ, how did you make that beautiful figurehead? I was just looking more closely at it and it looks so amazing. I'd love to know a little about the process you used.
-
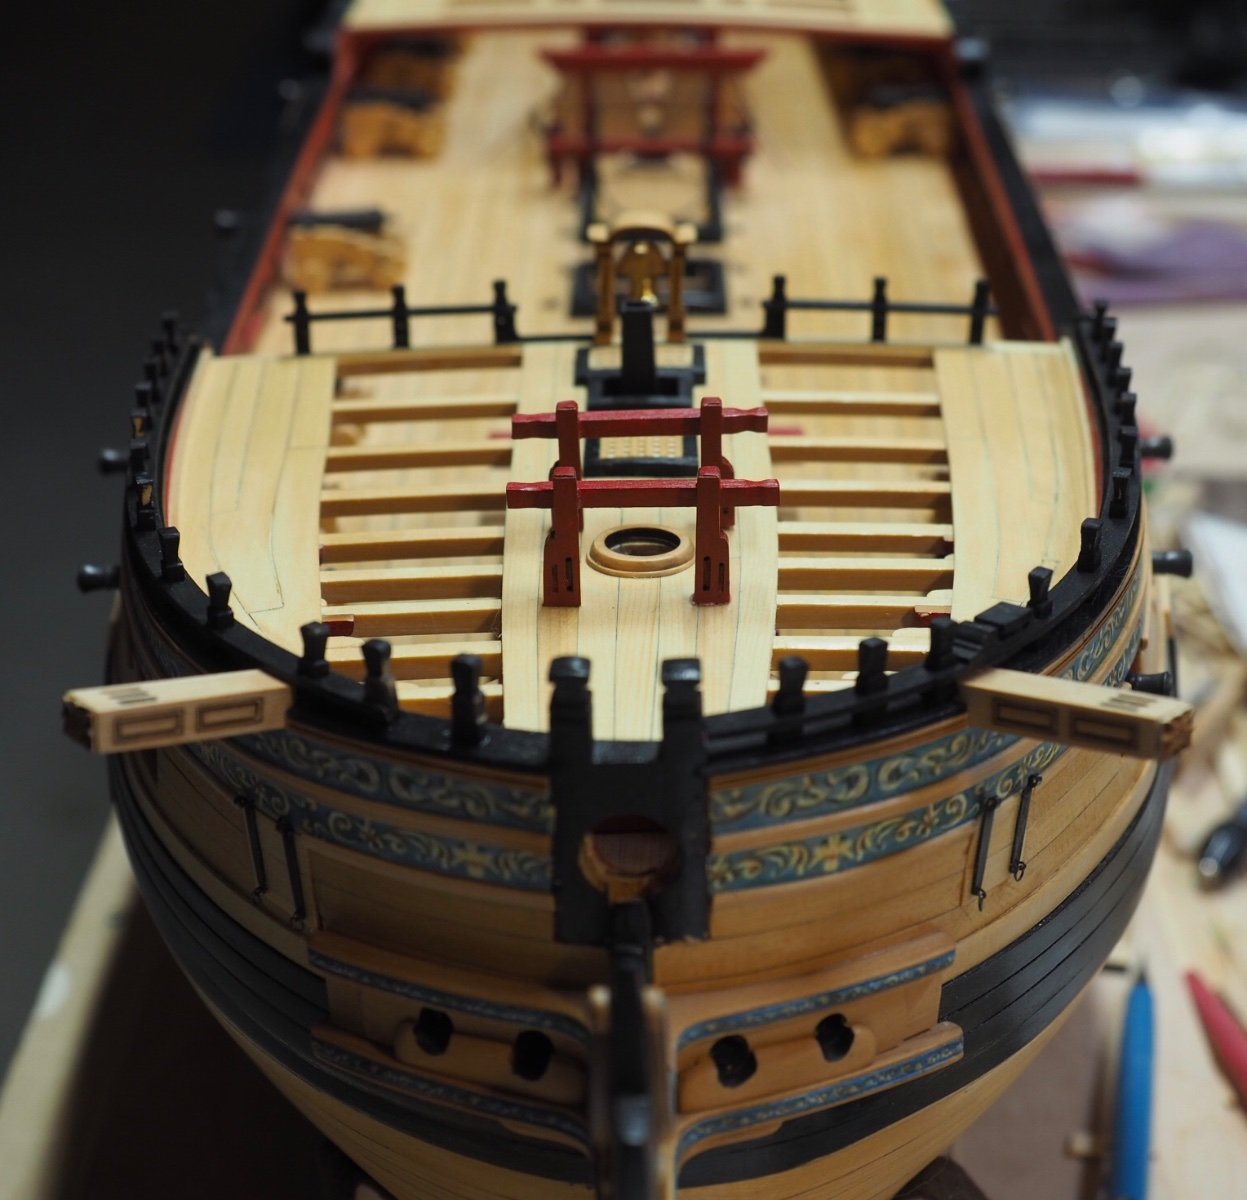
I’m nearly done with chapter 9 and want to show some of my progress. As you can see, it hasn’t been without problems. I broke the forecastle rail on both sides. I’ve repaired the port side, which broke at the third timberhead opening while I was sanding the edge. The starboard broke the same way, but got much worse while I was trying to finish the installation. It was back together and then came apart while I was trying to slide the rail into the right elevation. I’m going to let the glue dry on the timber heads and then fix the railing. I’m pretty sure I can fix it and hide the repair.


-
That looks like a fantastic trip! I’ve seen the Rhine River cruise ships in Cologne and thought it looked Interesting. I hope you have a great time.
- 587 replies
-
- 3
-

-
-
- Indefatigable
- Vanguard Models
- (and 1 more)
-
Mine is the Flying Tigers version. My main airplane interest US WW2 fighters. I have a couple of plastic kits on the shelf. This kit looks great and I’m thinking about ordering one.
- 150 replies
-
- 10
-
-
This looks amazing, Chris! I'm really glad to see this kit. Based on seeing your other card airplane models, I bought a Halinski P40 kit with the laser cut frames and the canopy option. But when I opened it, I was totally intimidated by it! I love watching you build yours, though.
- 150 replies
-
- 10
-
-
USS Constitution by mtbediz - 1:76
Matt D replied to mtbediz's topic in - Build logs for subjects built 1751 - 1800
This is very exciting, Mustafa! It looks like you're off to an excellent start. I really enjoyed your Essex build. I will click the Follow button on this one. -
HMS Granado by ir3 - CAF - 1:48 - POF
Matt D replied to ir3's topic in - Kit build logs for subjects built from 1501 - 1750
That's amazing progress! I'm so glad you persevered through the frame 25 problems. I'm looking at the template issue and it looks like the 3d image shows either a notch for the sill or the sill and template occupying the same space. Are the deck clamps made for you or do you have to cut them out of wood stock? -
This looks like such a great kit! I'm going to pull up a chair and follow your built, Brian. I'm looking forward to watching it come together.
-
This looks like an excellent project, JJ! I’m very excited for you and looking forward to following your progress.
-
Glenn, I’m really sorry that happened and I hope you recover quickly. Your build is coming together beautifully.
- 587 replies
-
- 2
-
-
-
- Indefatigable
- Vanguard Models
- (and 1 more)
-
Congratulations on your amazing model, Rusty. It has been a great journey and I've enjoyed watching your progress. It has also been great to be in this group with you. I'm looking forward to seeing how you display this beauty.
- 642 replies
-
- 3
-
-
- winchelsea
- Syren Ship Model Company
- (and 1 more)
-
I really struggled to find the area that you painted black. Do you mean between the molding and the grating? You did a fantastic job of it and I can imagine that it would have looked weird if you hadn't done so. That had to be some tricky masking and painting! It looks amazing, Rusty! You've done a fantastic job.
- 642 replies
-
- 1
-
-
- winchelsea
- Syren Ship Model Company
- (and 1 more)
-
I think that would have been really hard to accomplish. You would have to either really carefully sand the edge, or really carefully not paint it.
-
She looks fantastic, JJ! I'm not sure I understand what you are saying about the channel color configuration. What would you have done differently?
-
Your head rails are beautiful, Rusty! The last two grating slats look like they will be tricky.
- 642 replies
-
- 1
-
-
- winchelsea
- Syren Ship Model Company
- (and 1 more)
-
Hi Chuck. Now that it seems you have recovered, I will say that I really like the new material and would love to use them instead of wood. If I understand you, they are easier to use and can be made to look really amazing. Please add my vote to the Syrenite column.
-
That’s a beautiful display, Jim. Congratulations on your wonderful model!
- 105 replies
-
- 1
-
-
- winchelsea
- Syren Ship Model Company
- (and 1 more)
-
The relationship is 3/32 inch per foot. To covert to unit-less scale, divide by 12. 3/32” per ft. divided by 12”/ ft simplifies to 1/128 and the units cancel.
-
I think this would work fine, Gary. As Gregory noted above, the slots are the area that is most affected by the thickness. Once you have the bulkheads cut accurately, the thickness isn't very critical. Be sure to transfer the marks for the gun port sills to the plywood as accurately as possible. This is a fantastic project and we'd love to have you join us in building your own Winnie. One last thing to consider: are you buying the laser cut chapter sets from Syren and having them shipped to you? If so, then the incremental cost of adding the laser cut bulkhead set may be worth considering. I don't know your experience level with a scroll saw. I thought I did a really good job and then found out down the road that I would have been much better off buying Chuck's. Unless you're scratch-building the whole thing, it might be worth shelling out the dough for the laser cut set. Please don't take this as discouragement if that's what you really want to do, because I understand that as well. I really wanted to cut out my own bulkheads.