DONATION DRIVE - SUPPORT MSW - DO YOUR PART TO KEEP THIS GREAT FORUM GOING!
×

.jpg.01e54eff8de6be562e7bc1146f40d40a.jpg)
Matt D
-
Posts
629 -
Joined
-
Last visited
Content Type
Profiles
Forums
Gallery
Events
Everything posted by Matt D
-
.thumb.jpg.6d6ee4bdbfaac2c58ecc77e7b80ae374.jpg) The only way I’ve found to add text between photos is to edit the post on my computer. I create the post on my iPad, which is easier because my camera interfaces with iOS really well. Then I go to the post on my laptop and edit it to include text between the photos. If there’s a better way, I haven’t seen it.
The only way I’ve found to add text between photos is to edit the post on my computer. I create the post on my iPad, which is easier because my camera interfaces with iOS really well. Then I go to the post on my laptop and edit it to include text between the photos. If there’s a better way, I haven’t seen it. -
That looks excellent, Rusty. Well done!
- 642 replies
-
- 2
-

-
- winchelsea
- Syren Ship Model Company
- (and 1 more)
-
That's a fantastic shop! It looks like you get to spend a lot of time on your hobby, so a nice shop will get a lot of use. I just went through you build and it looks terrific! This is a really neat kit and you're doing a great job building it.
-
I don’t recall where the instructions are to corroborate this, but a full length plank is 8 bulkheads long. The shift is two bulkheads, meaning the pattern repeats every four strakes. Look at page 14 of the chapter 2 monograph to see Chuck’s as an example. Also, find Chuck’s YouTube videos to learn more. I hope that helps. Here is the thread on planking. It has links to the videos, too.
- 1,784 replies
-
- 4
-
-
- winchelsea
- Syren Ship Model Company
- (and 1 more)
-
Good thing she didn't think it was a bathtub toy!
-
Welcome to the land of a thousand eyebolts! I’m glad to have more company, JJ. You’ll be amazed at how they add to the deck.
-
Beautiful work, Christian! Your carvings are a joy to see.
-
Do you need someone to come by and chain you to the workbench or something? It will be great to see more of your excellent work, JJ!
-
Wow, Jorge! That's incredible carving work!! That looks fantastic.
-
Fred, I agree with Chuck. Like you, I didn't have a lot of ship modeling experience when I started this big and challenging project. So I have a lot of mistakes in mine and understand where you're coming from. But your model looks excellent. Chuck also makes a good point about the gun deck. In addition to the forecastle and quarterdeck, it will be concealed by the gangways and barge. Shadows will obscure whatever view is left. Anyone looking closely will be captivated by all of the amazing accoutrements (stove, capstan, pumps, gratings, ladders, etc.).
-
Thanks, Frank. Chuck's advice to use the belaying pins from Crafty Sailor was great. I'm very happy with the 8mm size. I'm slowly working my way through the cannon carriages, eye bolts, and split rings. I also have to figure out how to make the hinges for the gun ports. I'm going to need to buy some better drill bits before I can make good progress on those. So far, all I've done is scratch and bend the brass with what I have.
-
That sounds great, Chuck. I'm looking forward to the external details, too. Do you have any more updates on the barge or pinnace? Will that be its own chapter?
- 1,784 replies
-
- 2
-
-
- winchelsea
- Syren Ship Model Company
- (and 1 more)
-
Thanks for the nice comments, JJ, Rusty, and Vlad. And thank you for the “likes”, too. JJ, I’m not going to rig any of them. My model will be free of any ropes.
-
That’s some nice looking rope, Derek. After looking at your picture in awe of the amount of thread you have, I was very happy to read that it is a lifetime supply.
- 345 replies
-
- 1
-

-
- Duchess Of Kingston
- Vanguard Models
- (and 1 more)
-
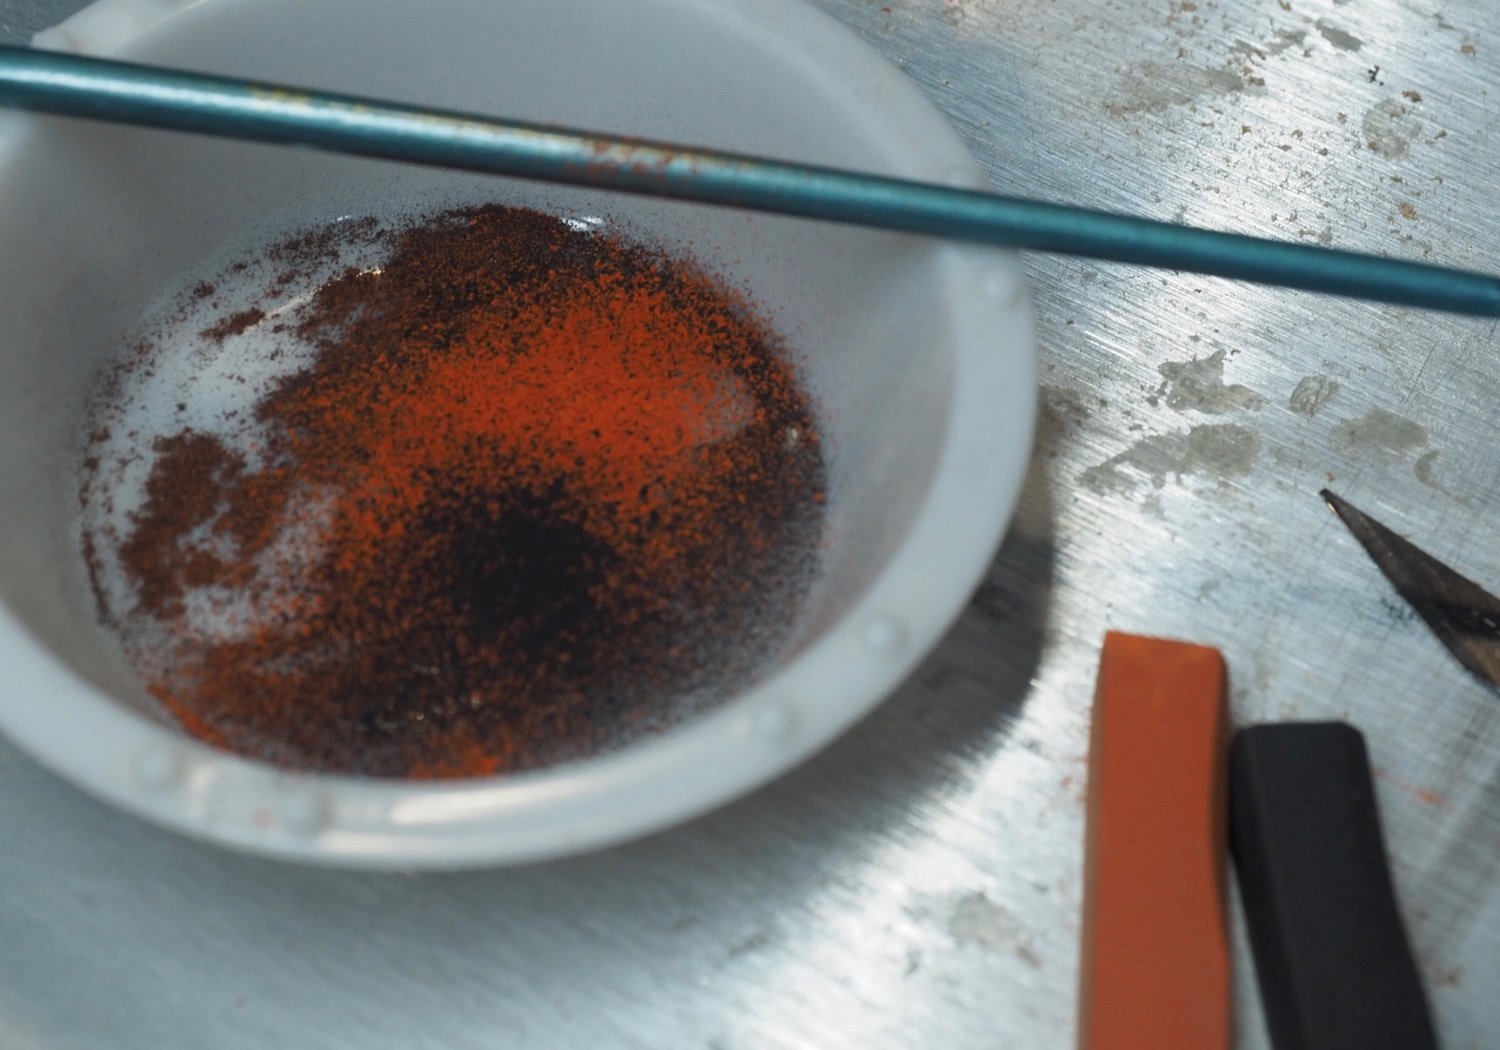
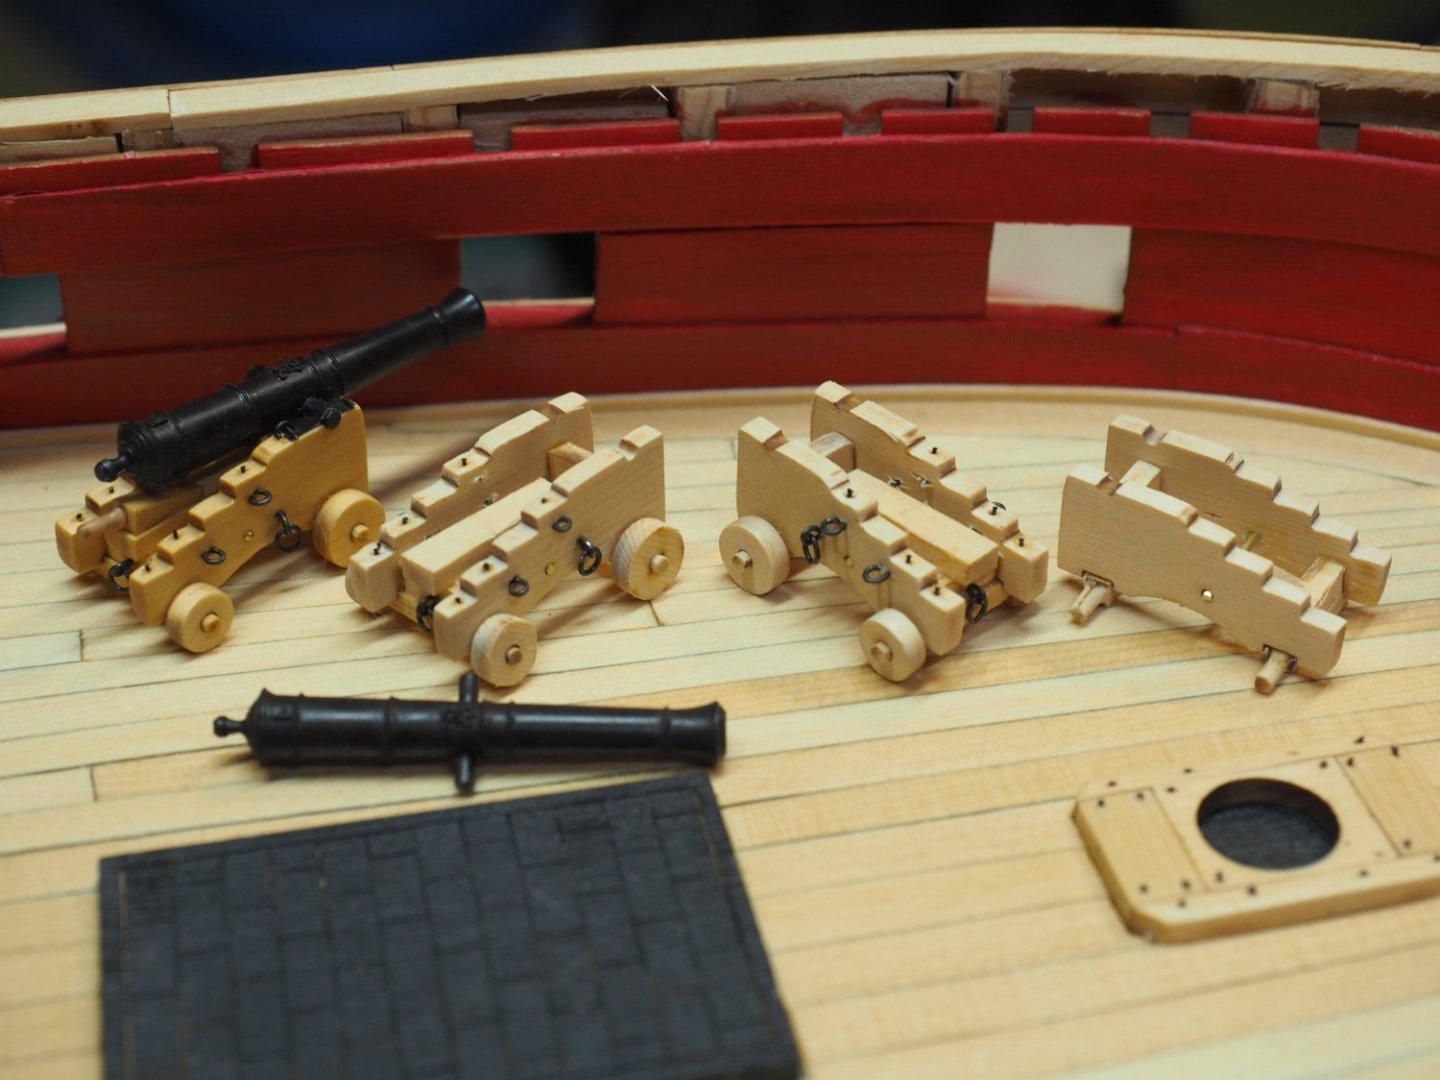
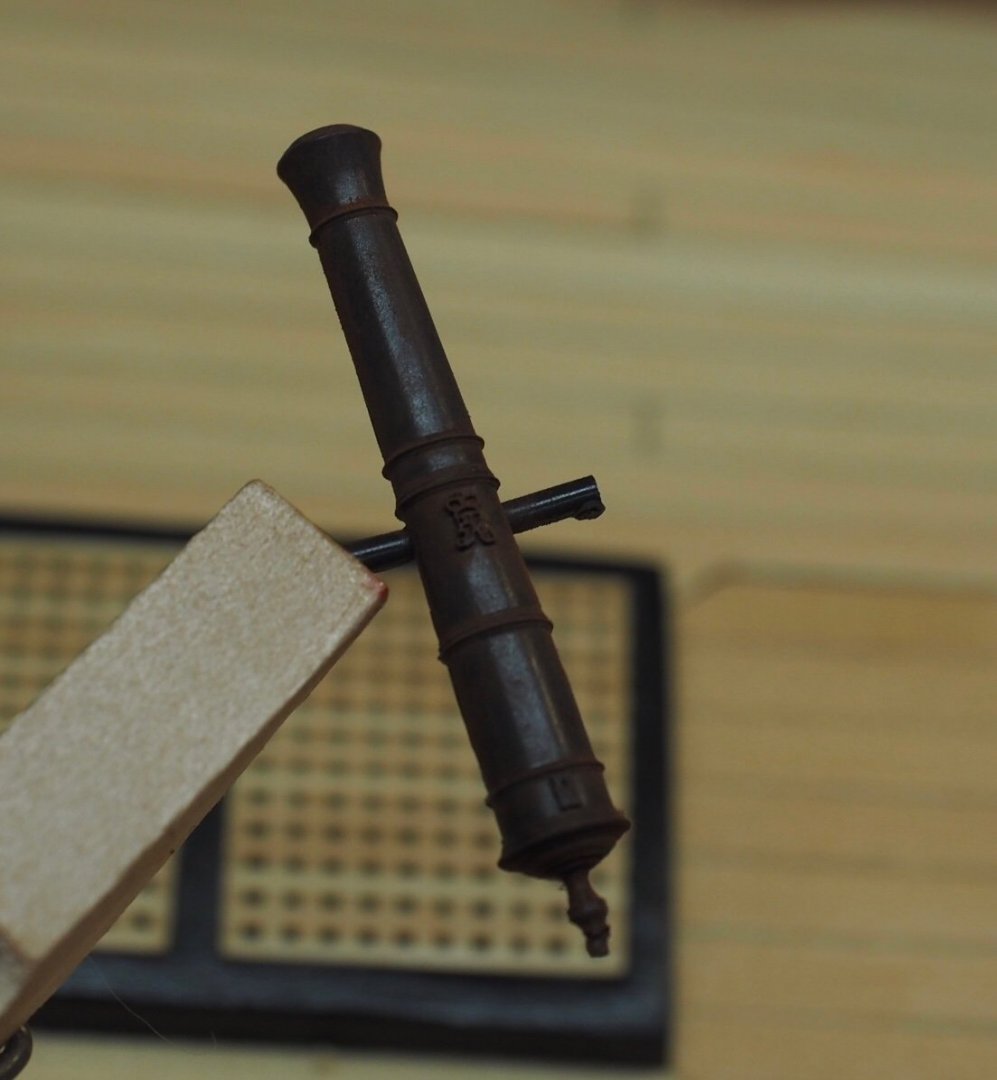
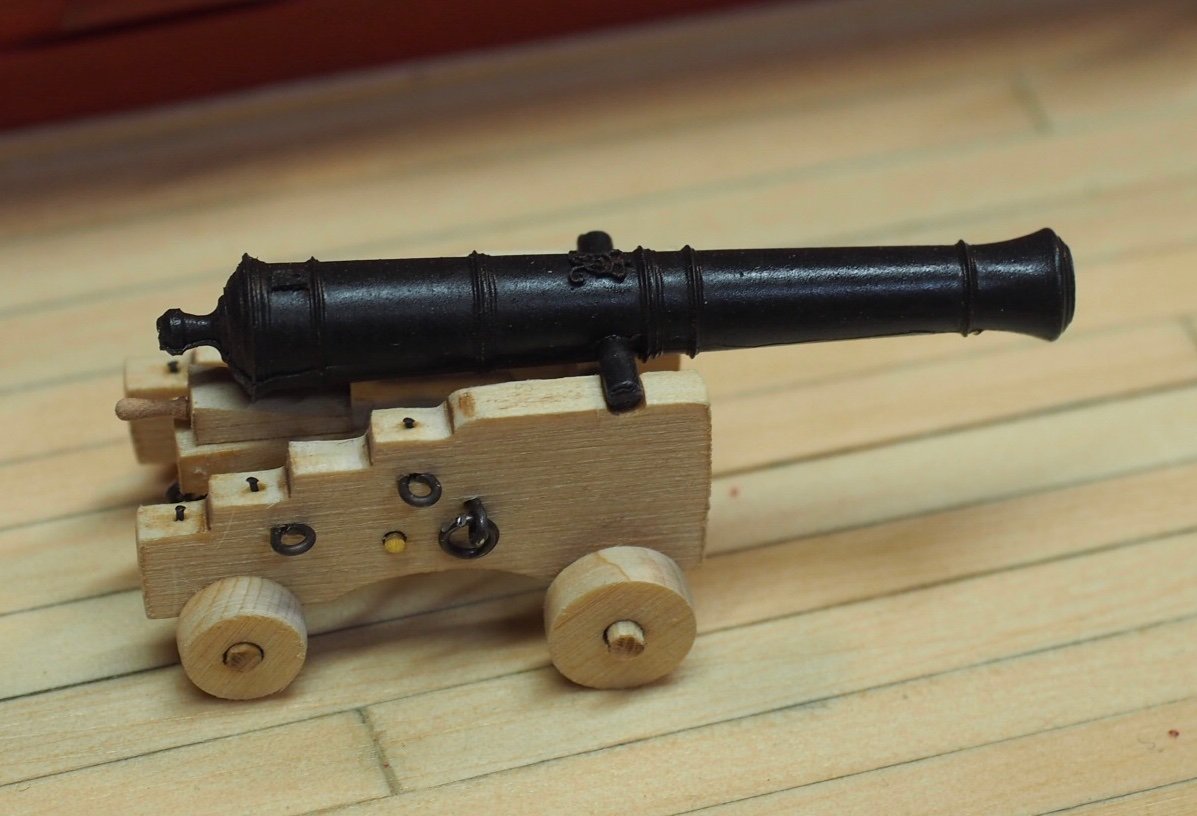
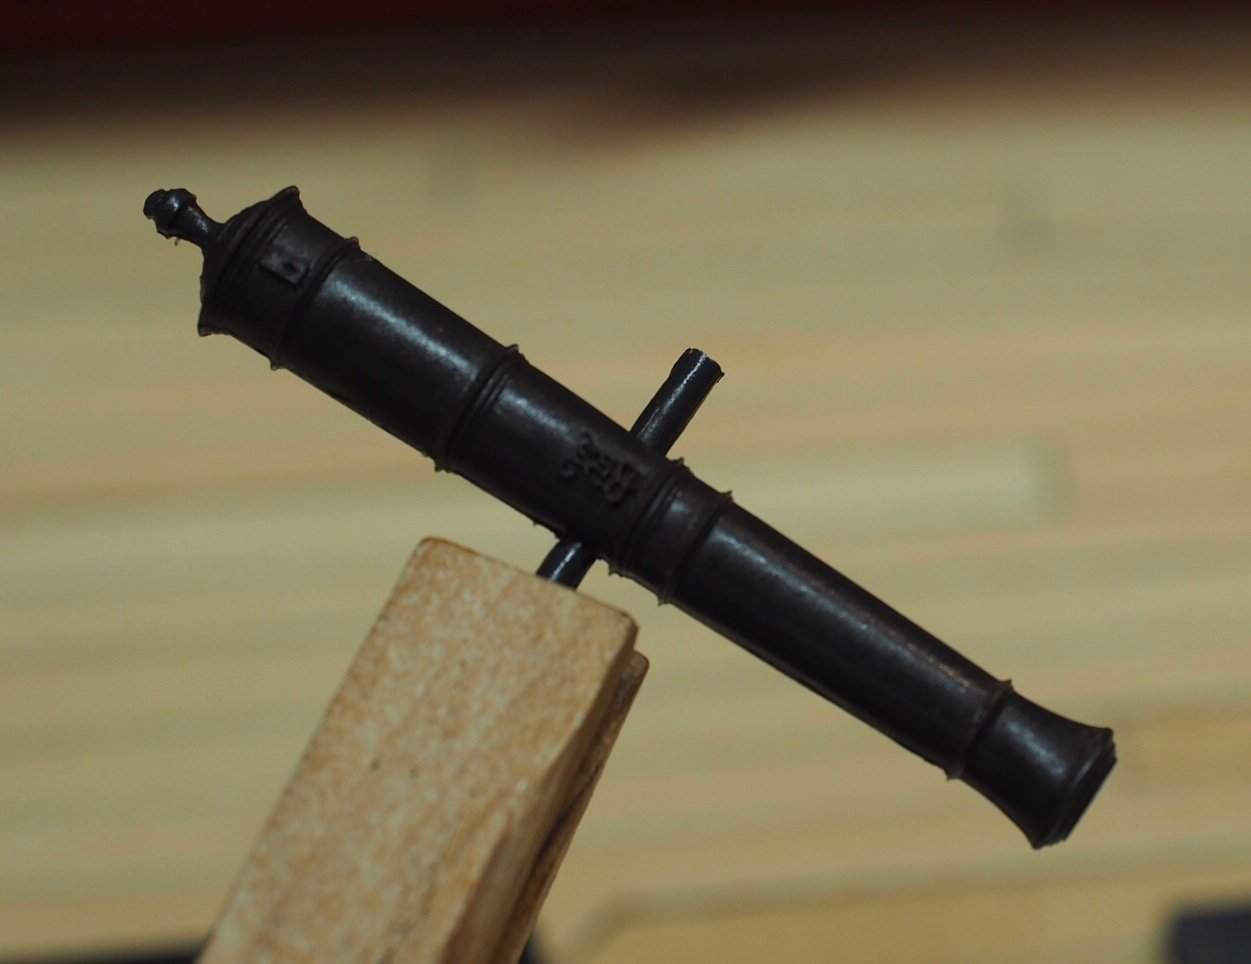
I still have quite a few guns to build, but I wanted to share what I’m doing. These resin barrels are great! I pretty much follow Chuck’s example. I start by cleaning up the seems with a file. Then I give them a light coat of matte fixative. For weathering, I’m using oil pastels scraped into a powder. I brush it on with a paintbrush. It looks a little overdone, but a final coat of matte fixative tones them down. They look to me like cast iron after that. I also bought the 8mm belaying pins from Crafty Sailor. These look just right to me as quoin handles. Lastly, you can see the effect the wipe on poly has on the carriages. Oil Pastels scraped to create a powder for weathering Powder brushed onto the barrel. It looks overdone before the matte fixative spray After fixative spray. 8mm belaying pin used for the quoin handle. This looks better than anything I can make and seems like a good size. The one on the left has WOP applied. I used a brush to apply it and then wiped down any shiny spots.

-
How many kits do you have on the go at the moment?
Matt D replied to CaptnBirdseye's topic in Wood ship model kits
Given that this is a hobby and supposed to be something you enjoy, that makes a lot of sense. @BikerMart that model railroad looks awesome! Is it done to the point that you can run trains? I haven't tried building more than one at a time, but mainly because I'm still captivated by the one I'm working on. I want to finish mine and have an idea of how I'll display them. Winnie will get a custom made wall-mounted case. -
Welcome to the group, Kurt! That looks like a very nice start. I'm looking forward to seeing your work on this beauty.
-
It looks terrific, WalrusGuy!
-
That looks great, Frank! Planking feels like it takes forever, but the results are so satisfying.
-
Wow! The guns look excellent, Rusty! The eyebolts on the deck look great, too! I’m so nervous about getting those in the right spots on mine.
- 642 replies
-
- 2
-
-
- winchelsea
- Syren Ship Model Company
- (and 1 more)
-
They totally forgot about the delusions of grandeur!
-
Royal Caroline by EJ_L - Panart - 1:48
Matt D replied to EJ_L's topic in - Kit build logs for subjects built from 1501 - 1750
That floor looks amazing, EJ! Excellent, excellent work!! -
Happy New Year, friends! Thank you, Rusty, JJ, Glenn, and Frank for your kind words. Thanks also for your input on the quoin handles and the discussion in Rusty’s log. I’m trying to emulate Henry Ford’s assembly line with these guns, but I can’t get myself to make very many split rings and eye bolts before I get frustrated and have to start working on something else. So it has been more of getting each carriage ready for the metalwork and then make those parts. I’m sure it’s slower, but I enjoy it better that way. I’m glad I don’t work in a factory. I’d never survive!
-
Welcome to the Winchelsea group, Dusan! It’s a great time to start. I hope you have a lot of fun with the project.