DONATION DRIVE - SUPPORT MSW - DO YOUR PART TO KEEP THIS GREAT FORUM GOING!
×

.jpg.01e54eff8de6be562e7bc1146f40d40a.jpg)
Matt D
-
Posts
629 -
Joined
-
Last visited
Content Type
Profiles
Forums
Gallery
Events
Everything posted by Matt D
-
.thumb.jpg.6d6ee4bdbfaac2c58ecc77e7b80ae374.jpg) Beautiful, Bob! You've done an amazing job! How did you know how to simulate the worn paint next to the cockpit? It looks so realistic, but I can't imagine how you did it.
Beautiful, Bob! You've done an amazing job! How did you know how to simulate the worn paint next to the cockpit? It looks so realistic, but I can't imagine how you did it. -
This looks great, Justin! The new knees are excellent. I agree with Mark: there’s nothing wrong with the wales.
-
Jagdtiger by Jörgen - Tamiya - 1/35 - PLASTIC - Weathering
Matt D replied to Jörgen's topic in Non-ship/categorised builds
I see them. Your camouflage paint is fantastic! -
I checked out Amati's site. This looks like an amazing model. I can't wait for the in-box review and to see a build log!
-
This looks like a really nice kit, Bob. I will pull up a chair and watch.
- 109 replies
-
- 1
-

-
- Finished
- Artesania Latina
- (and 1 more)
-
I hope you have a wonderful time. Share a picture with us if you can. Your oars look terrific! The rack display looks really neat, too.
- 185 replies
-
- 2
-
-
- queen anne barge
- Syren Ship Model Company
- (and 1 more)
-
Glenn, you've done an incredible job! And your build log is an inspiration. Thank you for sharing this with us.
- 778 replies
-
- 2
-
-
- cheerful
- Syren Ship Model Company
- (and 1 more)
-
It’s beautiful, BE! I was starting to thing the carvings would never come free, so I’m glad they did. I feel bad for this one guy who has to do all the rowing. Did he have gas or something?
- 185 replies
-
- 3
-
-
- queen anne barge
- Syren Ship Model Company
- (and 1 more)
-
Welcome to MSW, Ron. Your model is looking good so far. I’ve looked at this kit many times and considered it for my first build. But I didn’t realize it is a single plank model. One thing I have noticed on some of the Constructo models is that the bulwarks are built up off of the planking rather than off of the bulkheads. It looks like that’s how this will be done. If so, then be careful to make sure you the strake at the deck overlaps it so you have something to attach to continuing up. That should be described pretty well in the instructions. I hope this goes well for you. This site is very helpful and makes modeling much more fun.
- 18 replies
-
- 1
-
-
- constructo
- Albatros
- (and 1 more)
-
Beautiful work, Steve! I’m going to do the same - leaving the coamings, partners, etc. loose until the deck is done. I’m certain I would damage them otherwise.
- 99 replies
-
- 3
-
-
- winchelsea
- Syren Ship Model Company
- (and 1 more)
-
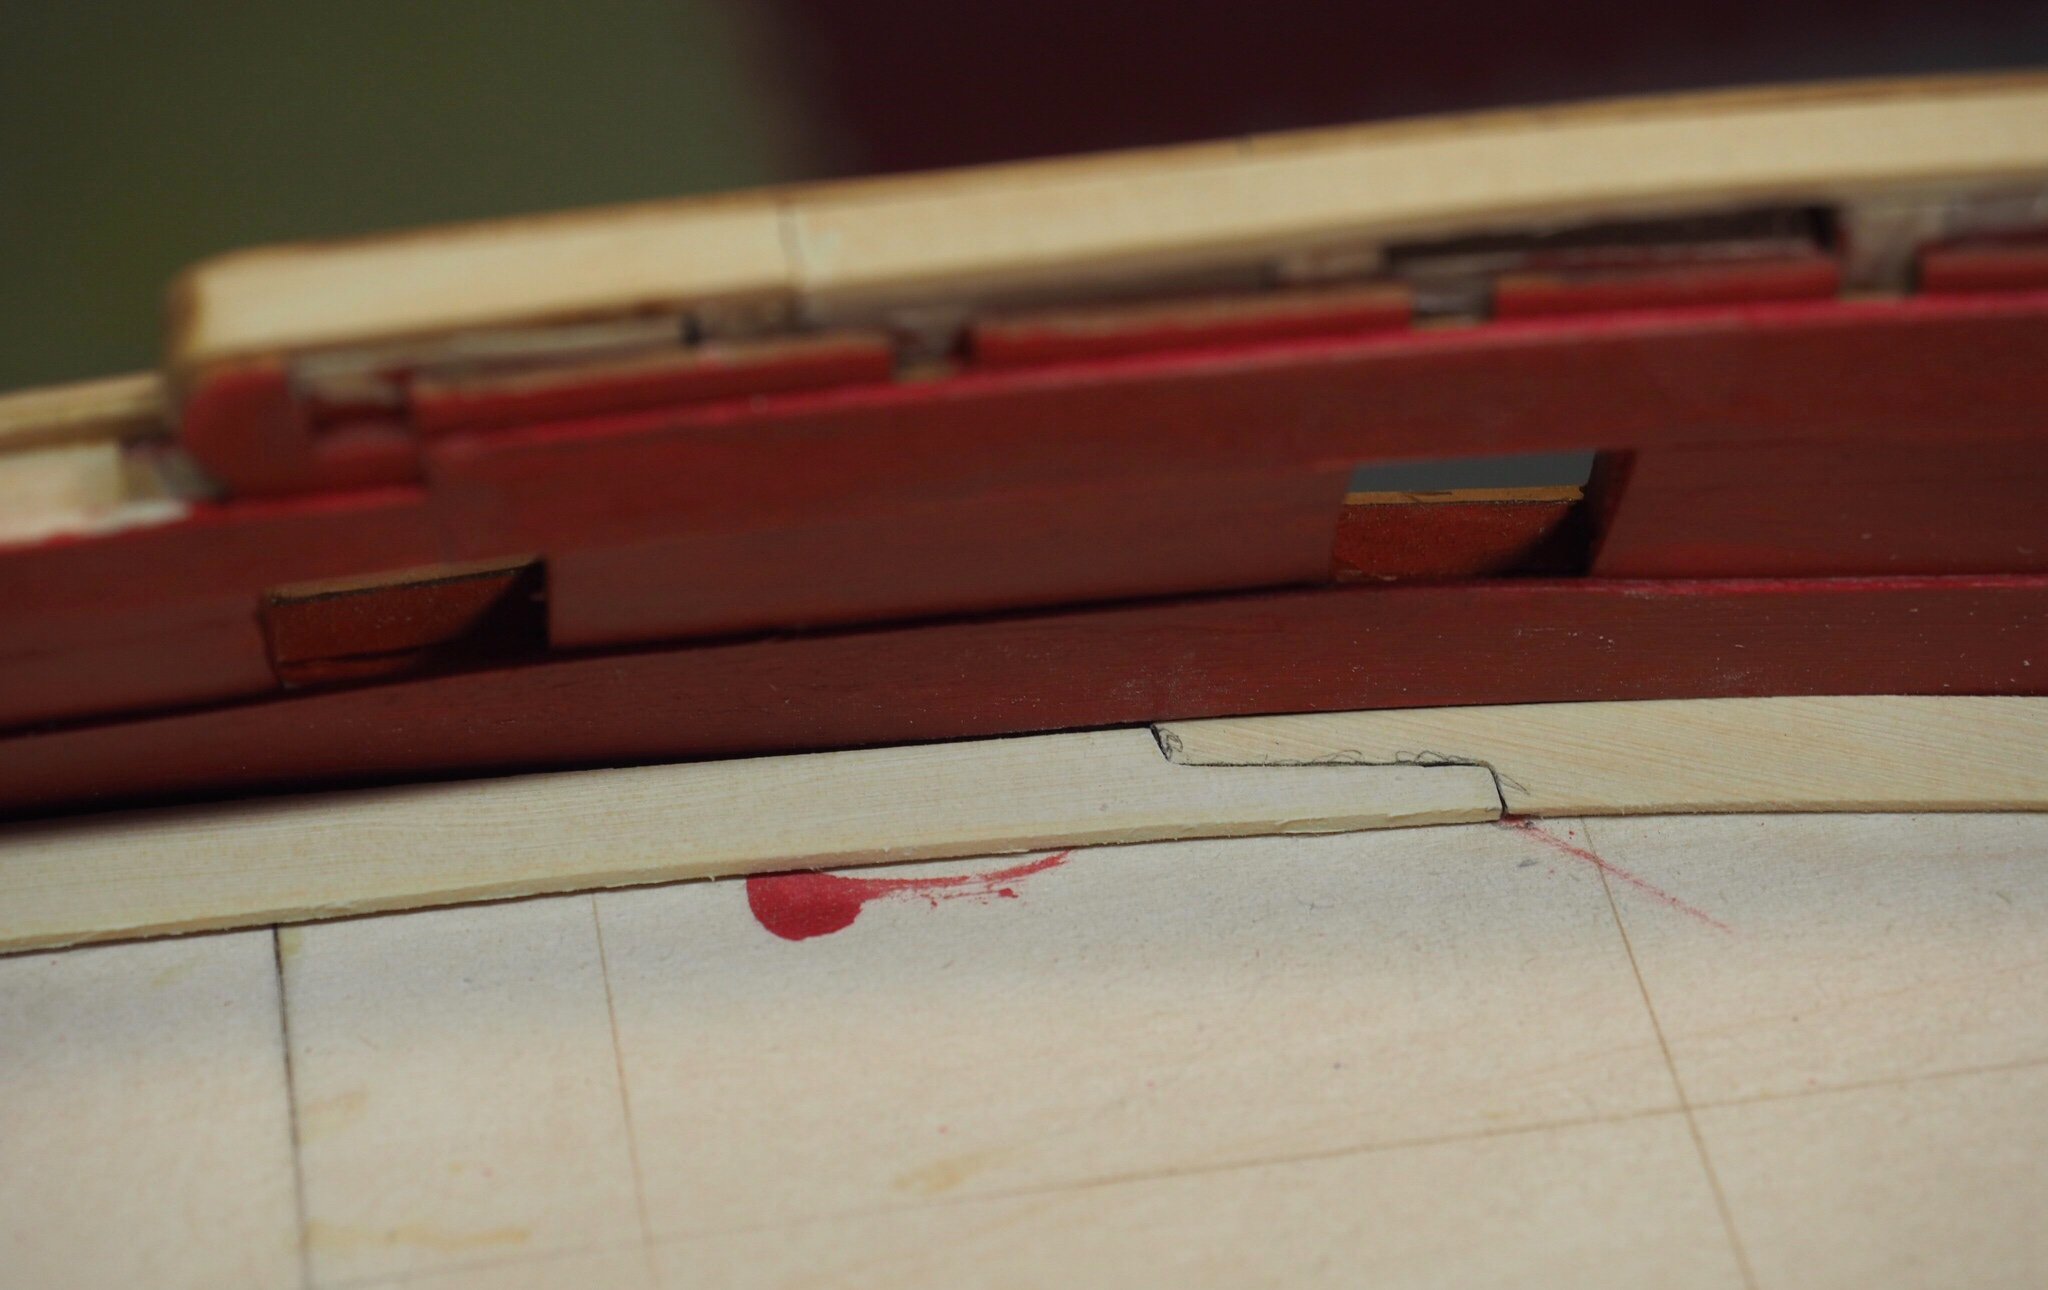
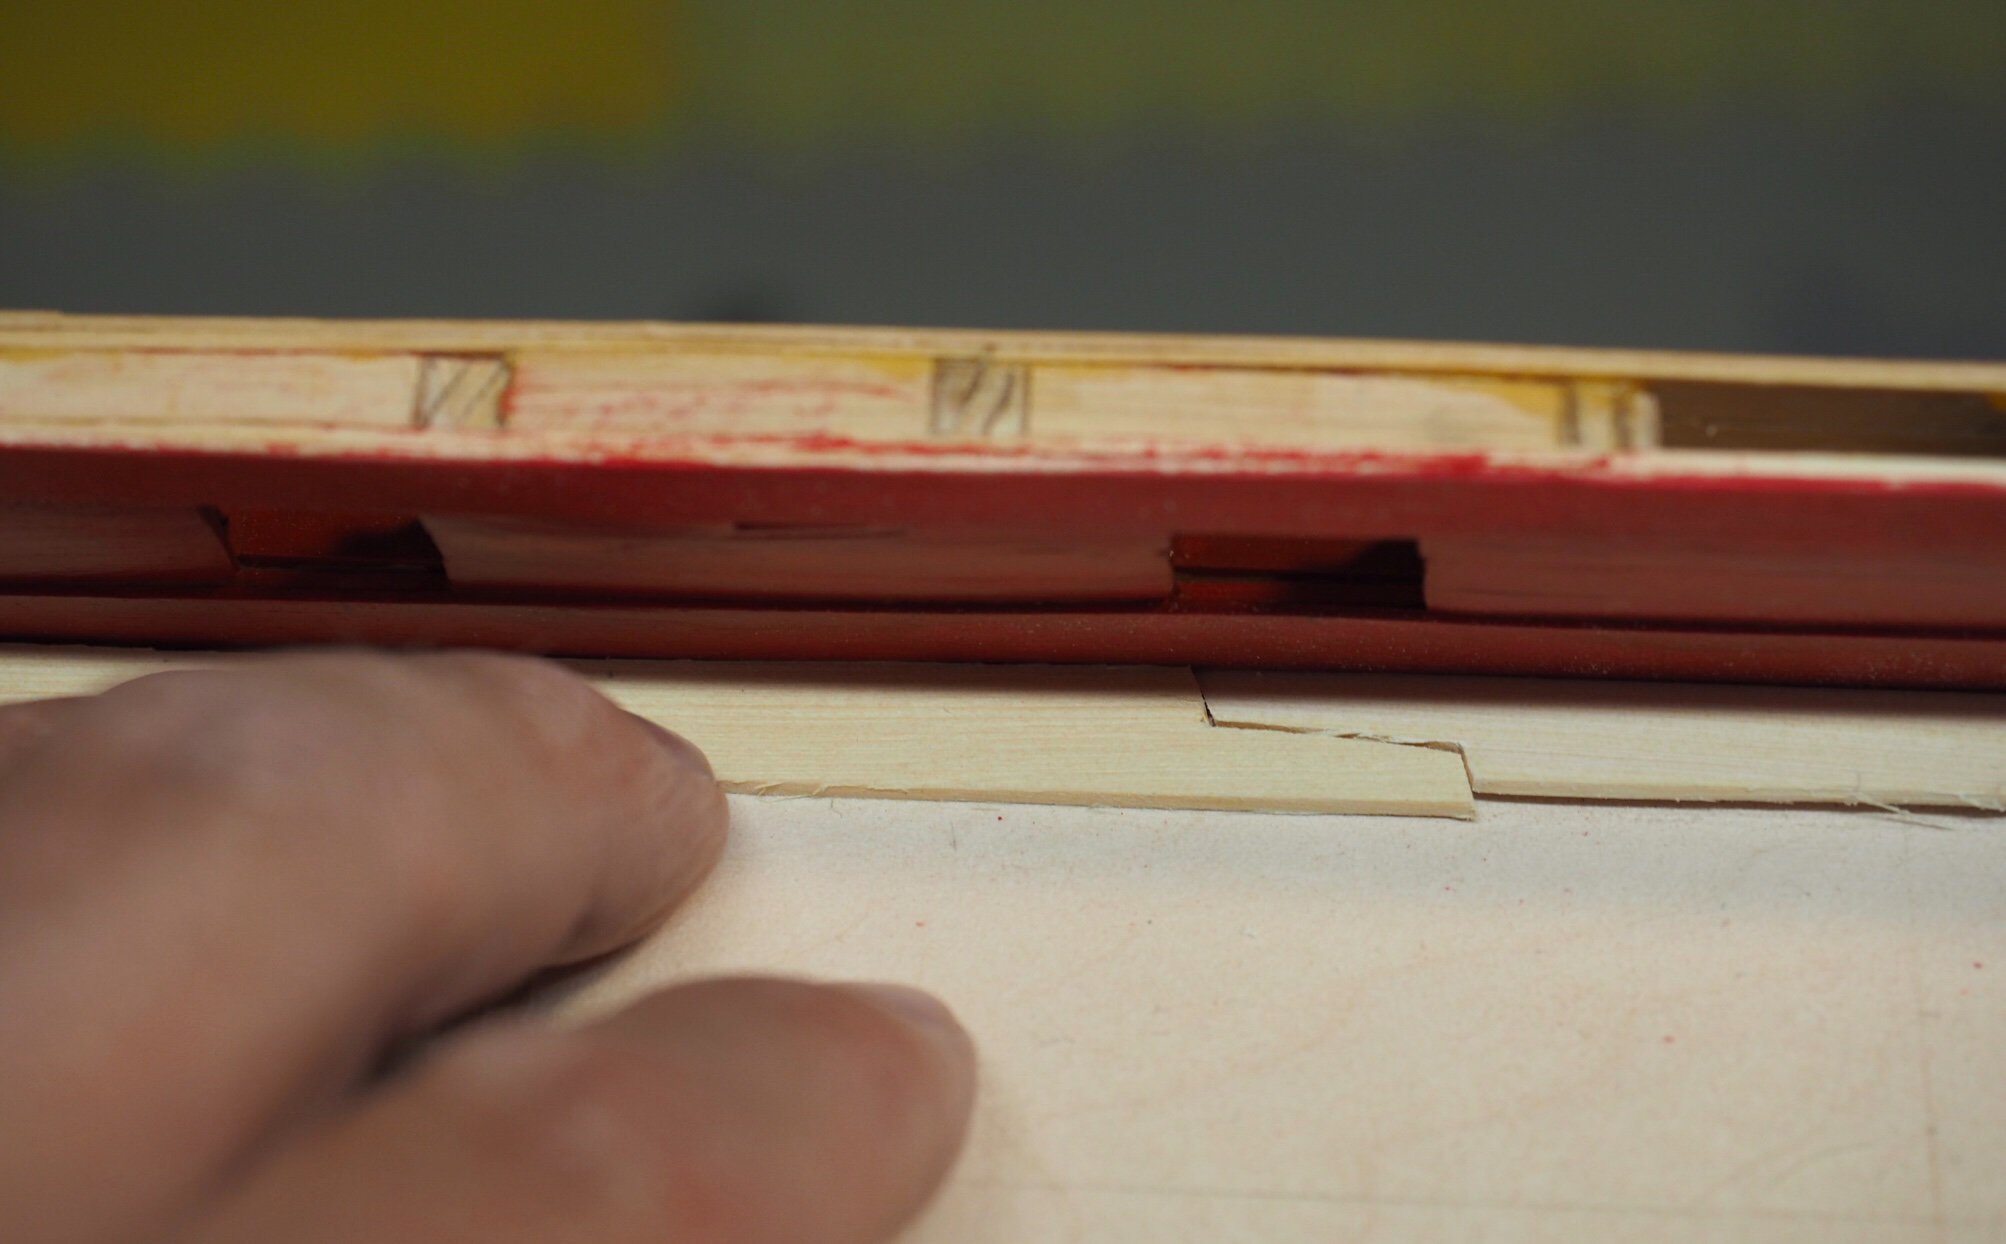
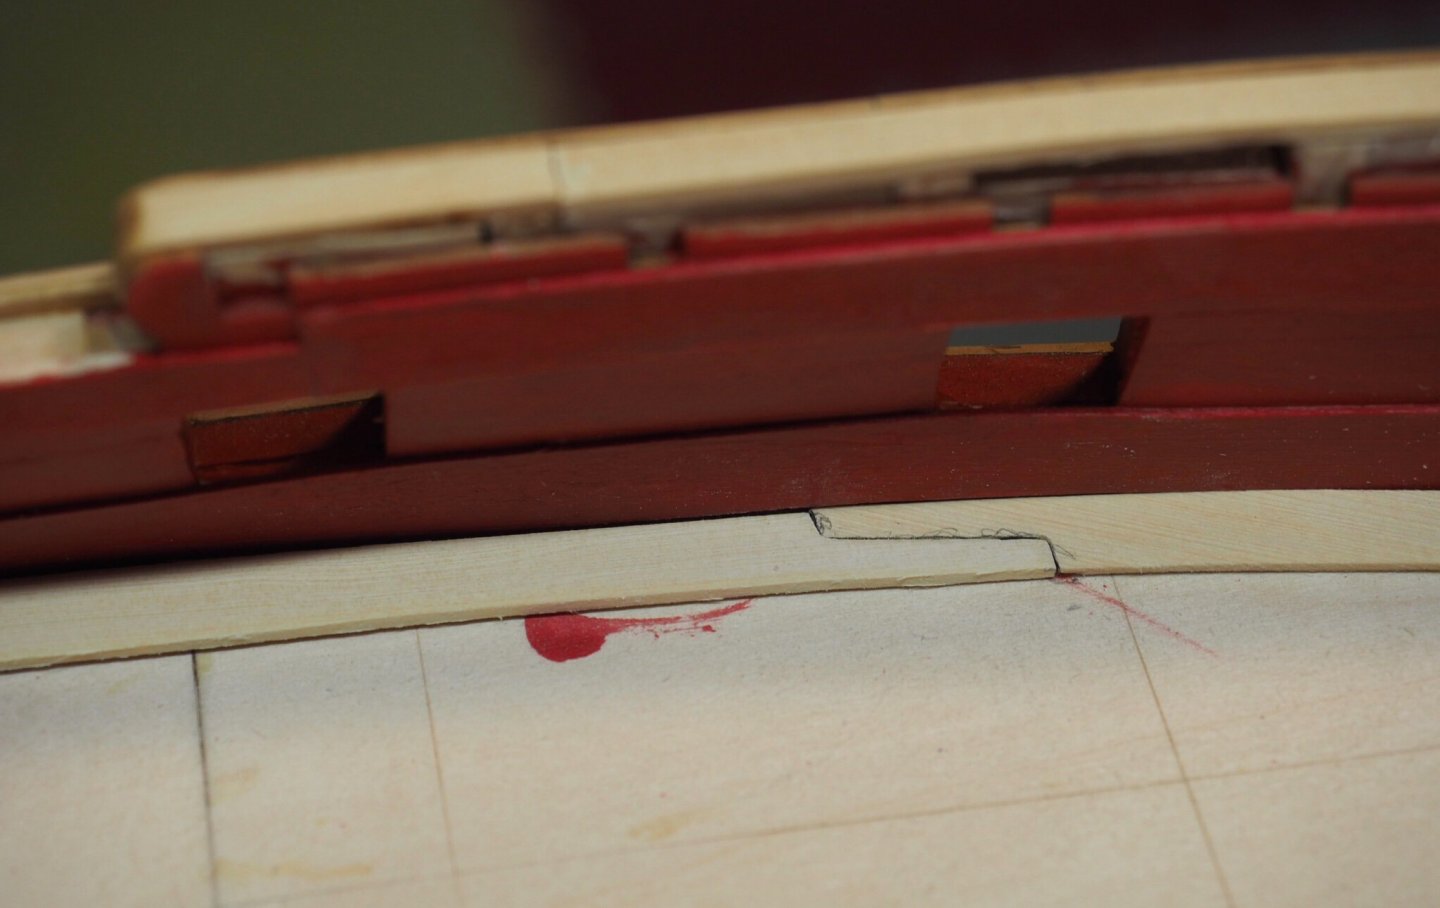
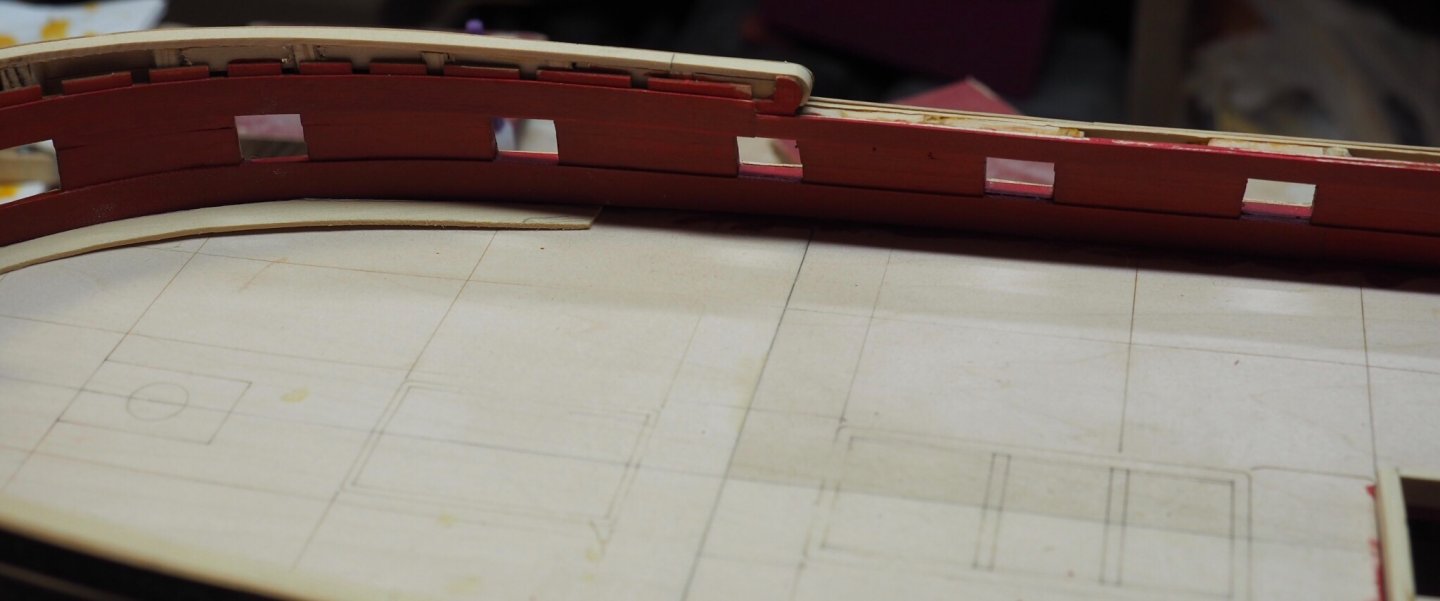
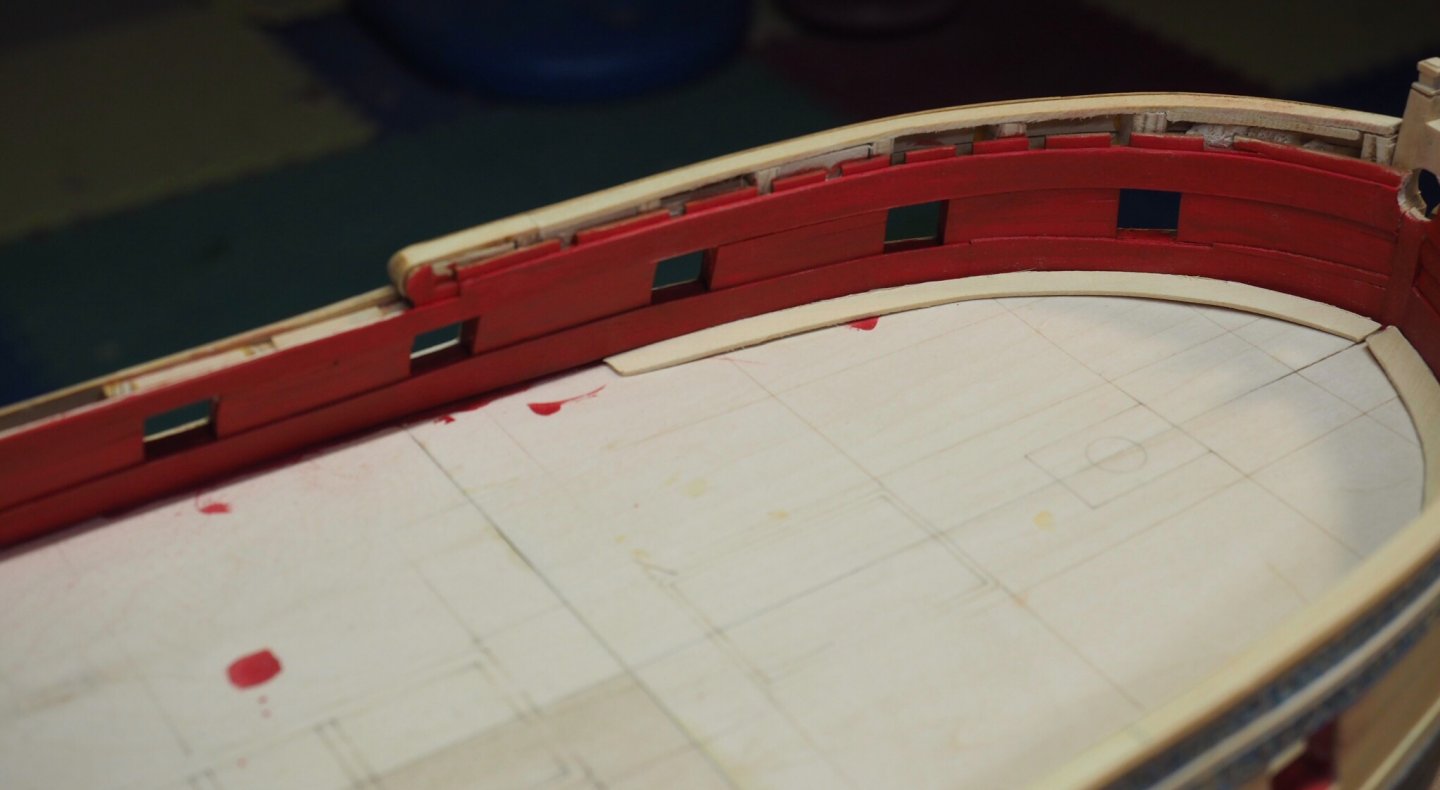
I’m working on the margin planks. I started on the starboard side, but they were not going together very well. So I cut out the pieces for the port side and started working on it. I must have just needed more practice, because these are going much better. Here’s the forward most, which is done, and the next one moving aft, still in progress.

-
That’s nothing short of stunning, Mike.
- 607 replies
-
- 2
-
-
- winchelsea
- Syren Ship Model Company
- (and 1 more)
-
Trying to understand white balance
Matt D replied to Gaetan Bordeleau's topic in Photographing your work. How to do this.
My camera is an Olympus OMD-EM5 Mark II. It has white balance settings: Auto, Daylight, Cloudy, Incandescent, Fluorescent, Custom 1 and 2. My shipyard is illuminated by warm white LED fixtures (I don’t like the bright white LEDs). I use the custom white balance setting, which required me to set it using a piece of white paper. I put it on the bench where I usually take pictures of my model. I’ve used Canon Digital EOS cameras in the past and they work very similarly. If you’re not sure how to do this, look it up in your user manual or search for it on the internet. It makes a big difference in your photos. Also, the setting stays through power cycles, so you don’t have to redo it each time you pull out the camera. If your lighting hasn’t changed, then you’re all set. -
I’m looking forward to watching your progress. This looks like a really interesting kit. I hope it goes well for you.
-
Thank you, Chuck and Frank, for the nice comments. And also thank you to everyone who clicked "Like". I'm glad my error won't hurt me. This continues to be an unrivaled model building experience for me. This hobby is even more fun shared with all of you.
-
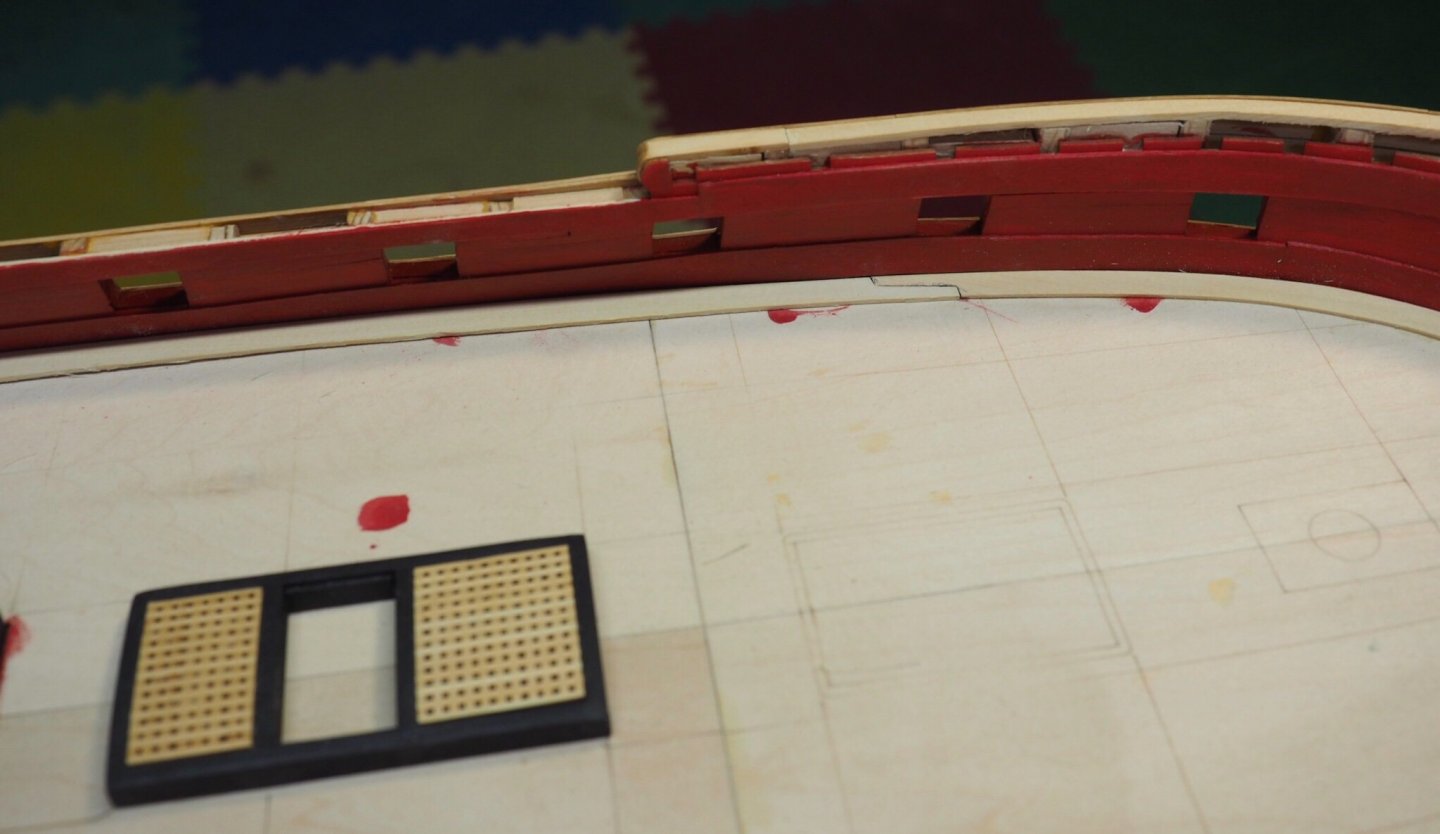
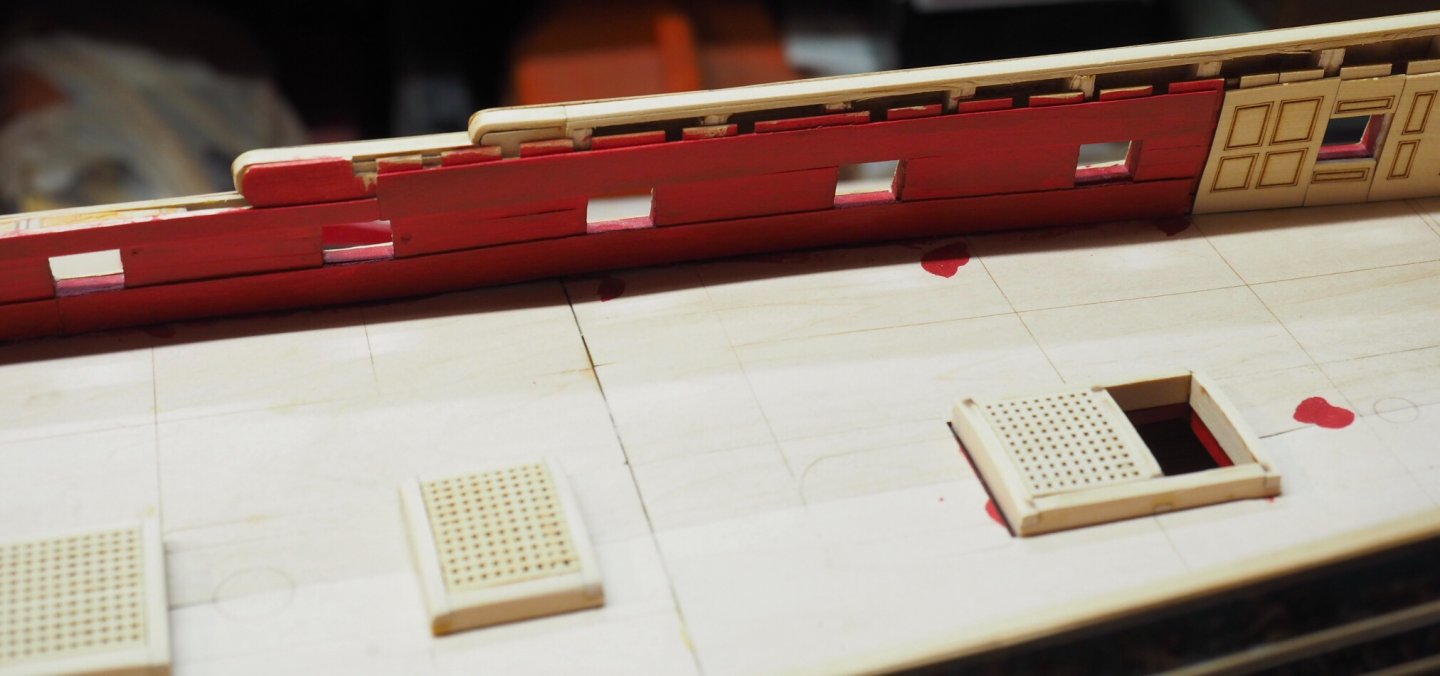
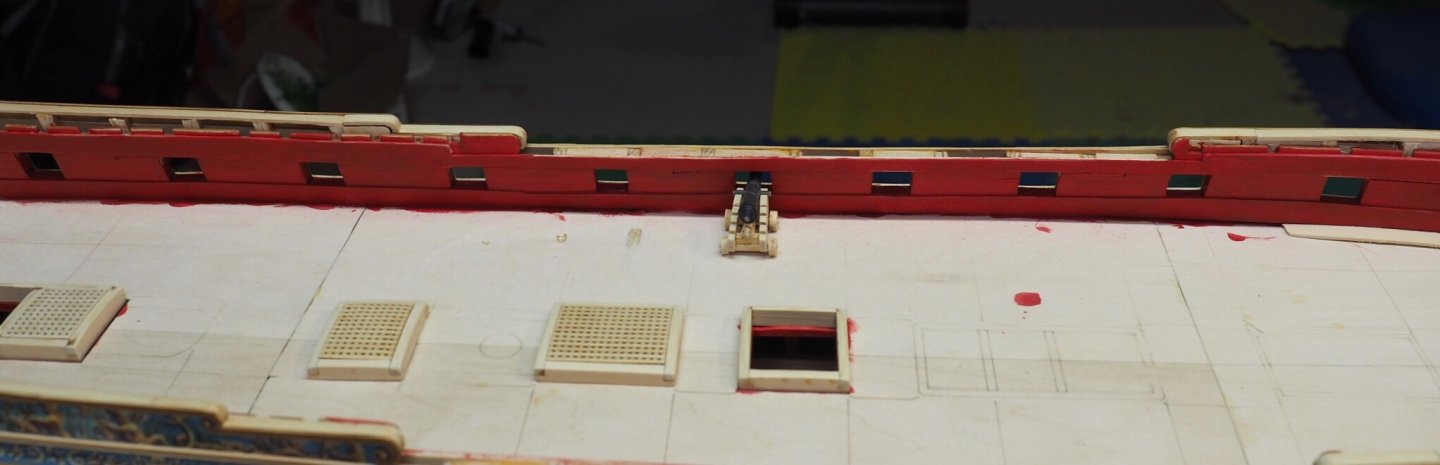
It has been a while since I posted an update. There’s not much to see, but I’ve missed posting. I’ve completed the spirketting and am starting to work on margin planks. These are a ways from complete and are still pretty uneven. The cannon is also far from complete. I built it just enough to confirm that my gun ports are OK. I totally cheated on the quoin by using a store bought belaying pin. I will try to make them from scratch when I get to chapter six. I’m happy with the three gratings in this shot, but the other three are a train wreck right now. I bought another grating kit to replace them. You can see that I cracked the port side beam clamp at the forward notch. I think this will be hidden in the end. The port margin plank in this shot is pretty close. I not cutting the scarf joint until the next piece is ready.
-
I don’t know much about making rope, but that looks terrific to me. I agree that the cotton looks better than the polyester.
- 274 replies
-
- 1
-
-
- Cheerful
- Syren Ship Model Company
- (and 1 more)
-
Hi Frank. I'm getting close to making an update. Spirketting has been a slow process for me with not much good to show in the middle of the process.
-
Nicely done, Steven. They look great! Also, thanks for your description of the process to make them.
-
Congratulations on finishing your Syren model. You did a wonderful job on her. I’m looking forward to watching your USF Confederacy come together.
- 950 replies
-
- 1
-
-
- syren
- model shipways
- (and 1 more)
-
Neat site, Paul. It sent me down an hour long rabbit hole into airplanes!
-
Hi Ken. I think you will find a lot of helpful hints for planking on this site. I’m sure I never would have finished planking mine without the example, instructions, and support from MSW. Do you have any pictures to share?
-
Well done, Bob! You’re a master at cannon rigging, for sure! Hospital time? That’s no good. I hope everything is ok now.
-
Beautiful, Ainars! That mast section is really cool! It looks like a tricky assembly to make.