HOLIDAY DONATION DRIVE - SUPPORT MSW - DO YOUR PART TO KEEP THIS GREAT FORUM GOING! (89 donations so far out of 49,000 members - C'mon guys!)
×


Vane
-
Posts
618 -
Joined
-
Last visited
Content Type
Profiles
Forums
Gallery
Events
Everything posted by Vane
-
 Working with the whales. First a layer or walnut and now on to the boxwood for a nicer surface.
-
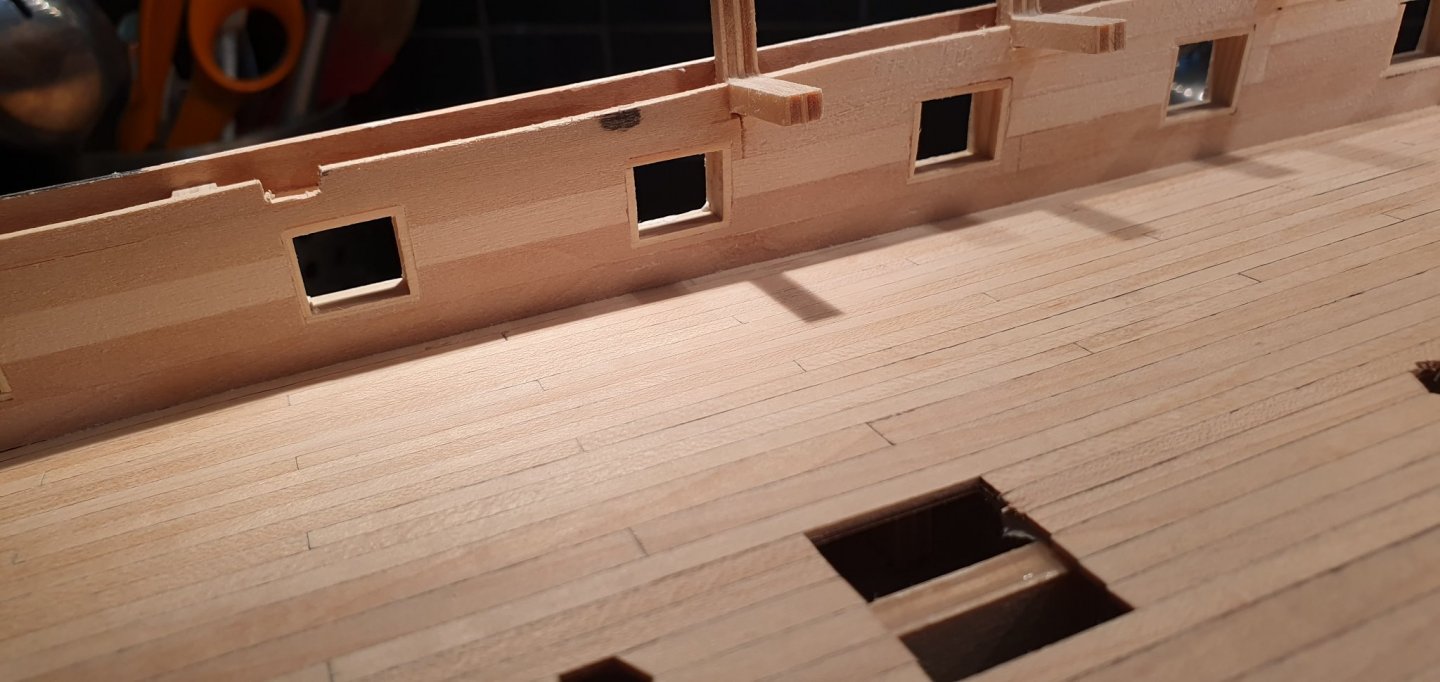
All canon ports done... My Proxxon discsander really help me out during this step.
-
Now when all the details start to come to place I must admit that it exceeds my expectations by far!
- 355 replies
-
- 2
-

-
- vanguard models
- Sphinx
- (and 1 more)
-
Oh noooo... my list of ongoing projects and kit stash is already full... please dont work quicker! I need to complete more stuff before I can take on anything new! But good luck with the company, great news!
-
As a former researcher and also a semiprofessional photographer, the problem I have is the Magazines/Journals always want content for free but only give "exposure" in return and that deal sucks. The used to hand out at least a printed copy for free but that is going away also. My advice would be that you contact the author directly if you wish to read an article. They wrote it for free and want to have "exposure" so they will often just send it to you if you ask for it.
-
I have experience from Caldercraft kits and Vanguards. I have never built an Amati but studied several buildlogs. The first thing you need to understand is that many of the kits from the "Nelson era" has the same designer. But they are from different years and under different flags. All these kits are good but things has happend over the years. The intructions/plans for my Diana (one of Chris first ships) are very basic and looks quite old. When it comes to my Speedy , its like the perfect buildlog. Amati probably comes in between. Vanguard is a small business and Chris can basically create whatever he wants as long he dont run short of money. And as I understand, he want to be top notch but also recreate kitmaking. As a designer at larger business you are much more limited to follow the "company style". One of the advantages with Vanguards is the "simplicity" in the design and instructions. Alot of effort has been spent on finding solutions that will speed up the build. I luv that. But if you are an oldschool builder, you might want to figure out more from the plans yourself and spend time to cut and sand things and want to go with more traditional kits.
-
As a semi proffesional photographer, I can say that there is a lot of fine tuning you can discuss when it come to photography but I would say the 3 things that is mostly the problem in this forum when it comes to photos is: 1) Light... and then I am talking power. Yes you can light your model in different ways and angles etc... but the you need lots of light to make all details visable. If you dont have proper light equipment your model, you need to bring it close to the window or get every single movable lamp you have. You can also raise the ISO settings and exposure time in your camera but what ever you do, dont shoot your model in the dark 2) Clean background. White paper is always best if you want everything to look professional. Fabrics has wrinkles so it can actually hurt more than it helps. The photo is always about the model and not the background. Workbench photos also work as long as you have light and its not to messy. 3) Strange angles... get down on you knees and dont shoot the boat from above.
- 725 replies
-
- 5
-
-
- vanguard models
- speedy
- (and 1 more)
-
Arkowood
-
This cost me a small fortune.... but decided to go for some upgrades 🙂

-
I am building three of their kits and as I said they used to be the most interesting kit manufacturer. I think the problem people have with Jotika is not that they are not producing any new ships (most wooden kit companies produce very little new nowadays). Its just that they just stopped so suddenly in the middle in their development and didnt bother to inform their customers about the situation. If they just remove the info on the upcoming "Surprise" and "74-gun ship" on their website, people dont get confused. They even put out this message about lack of updates (JoTiKa Ltd. ~ New Kits Page 1 (jotika-ltd.com) . Its not dated, but I think that is a very old statement from many years ago. Back in the days, they were coming out with so many new kits on a regular basis, they became kind of the top of the line and we were just so surprised (and also disappointed) that everything just stopped.
-
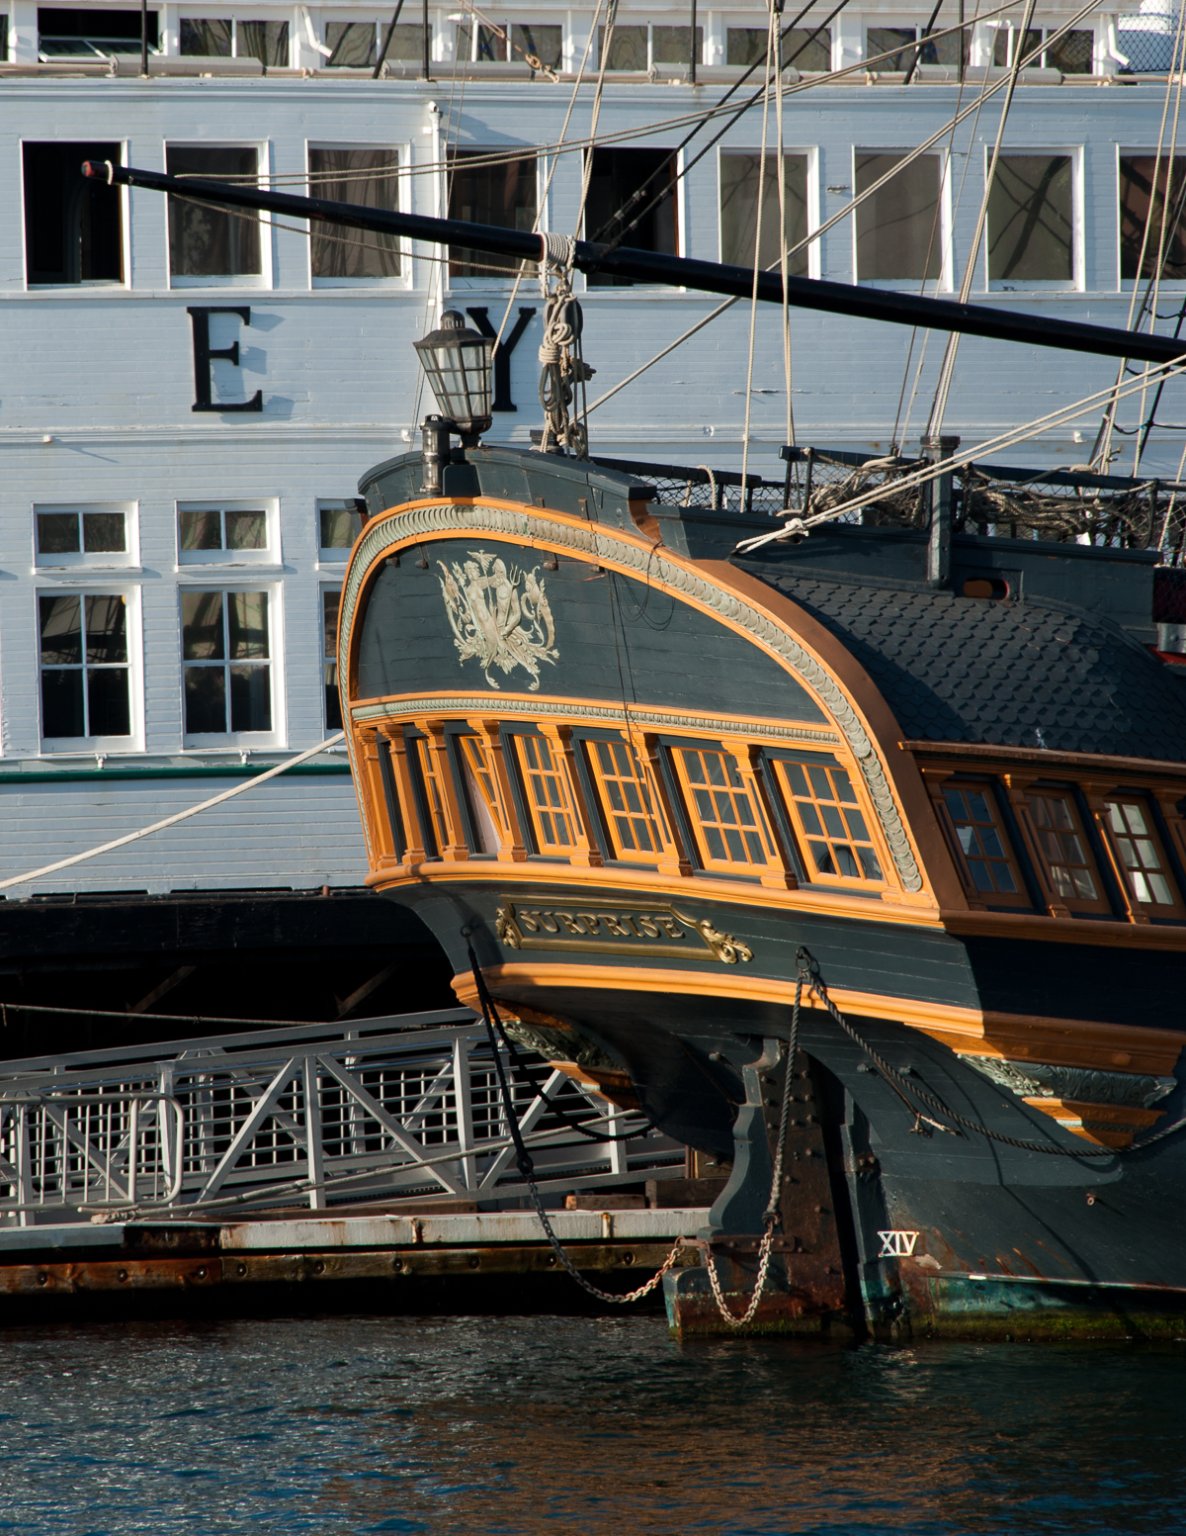
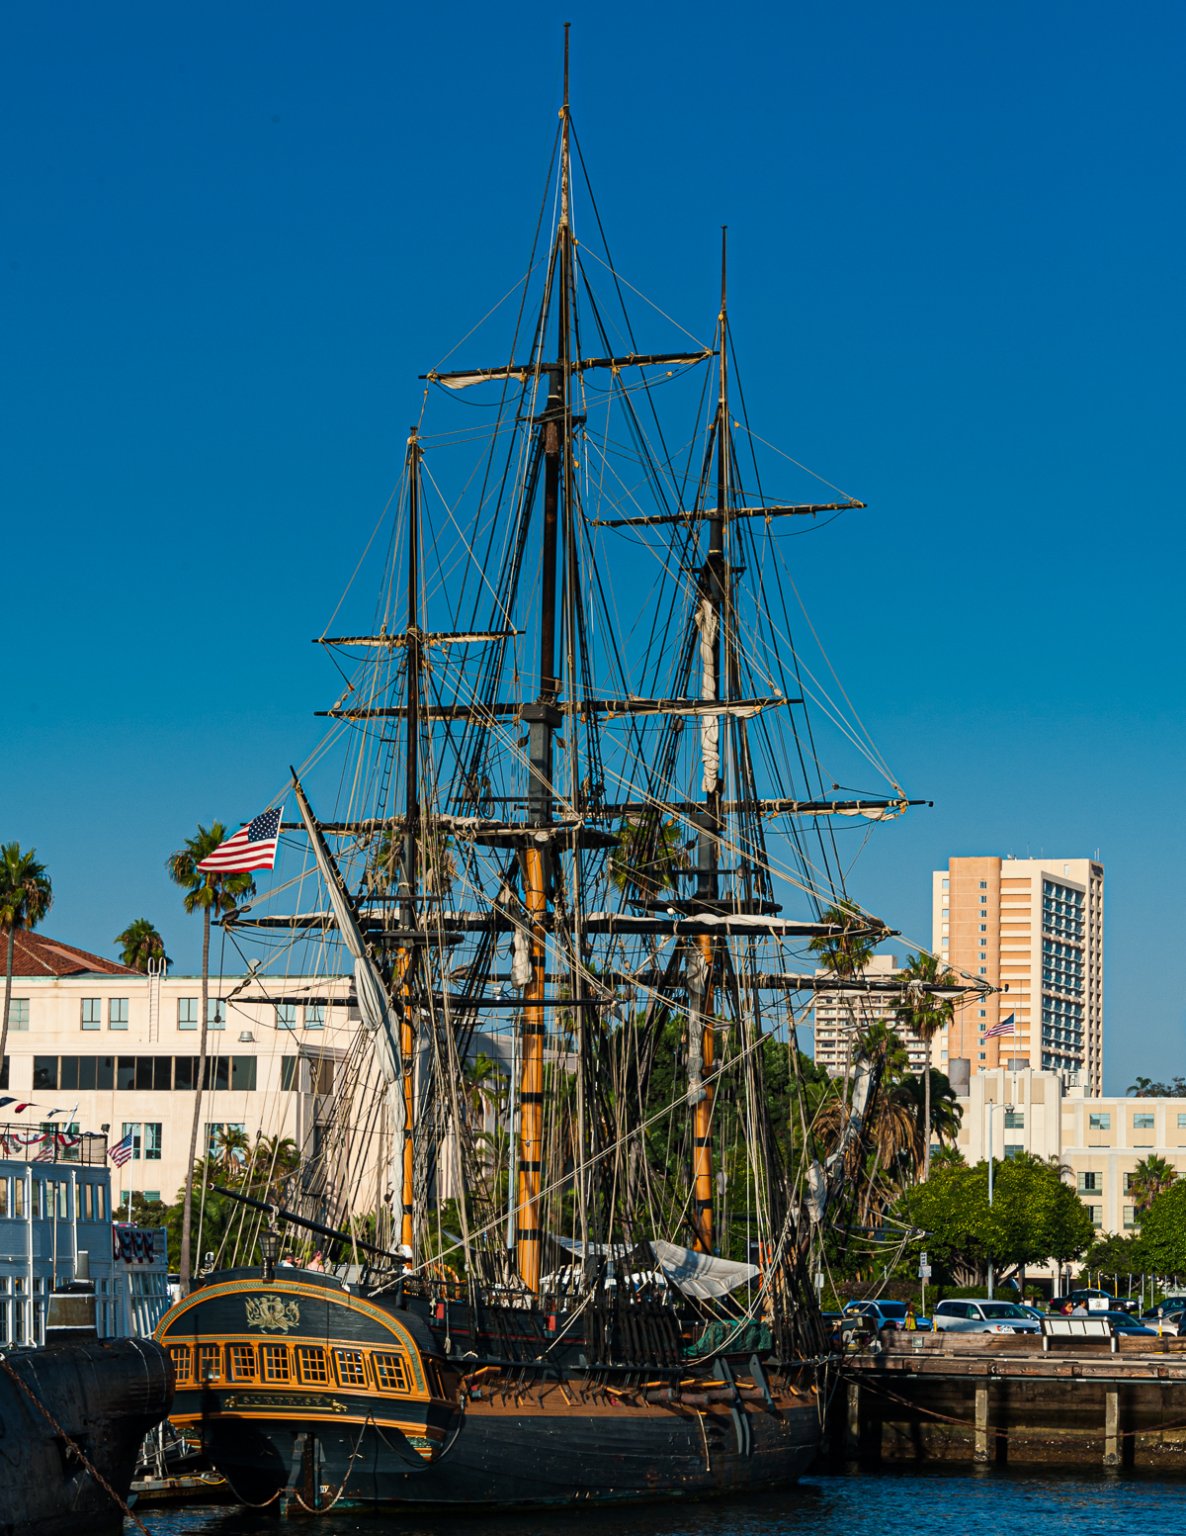
I think the window of opportunity is lost concerning that kit. It could had rided on the wave and popularity of the Hollywood movie, but too much time has passed now. Luckily, I got to see the movie ship in San Diego when I was there on a business trip back in 2012.


- 29 replies
-
- 10
-
-
They used to be one of the most interesting kitmakers, then they simply stop producing anything new at all. They even seamed to have lost the password to their website since it has been completely silent for more than 10 years.
-
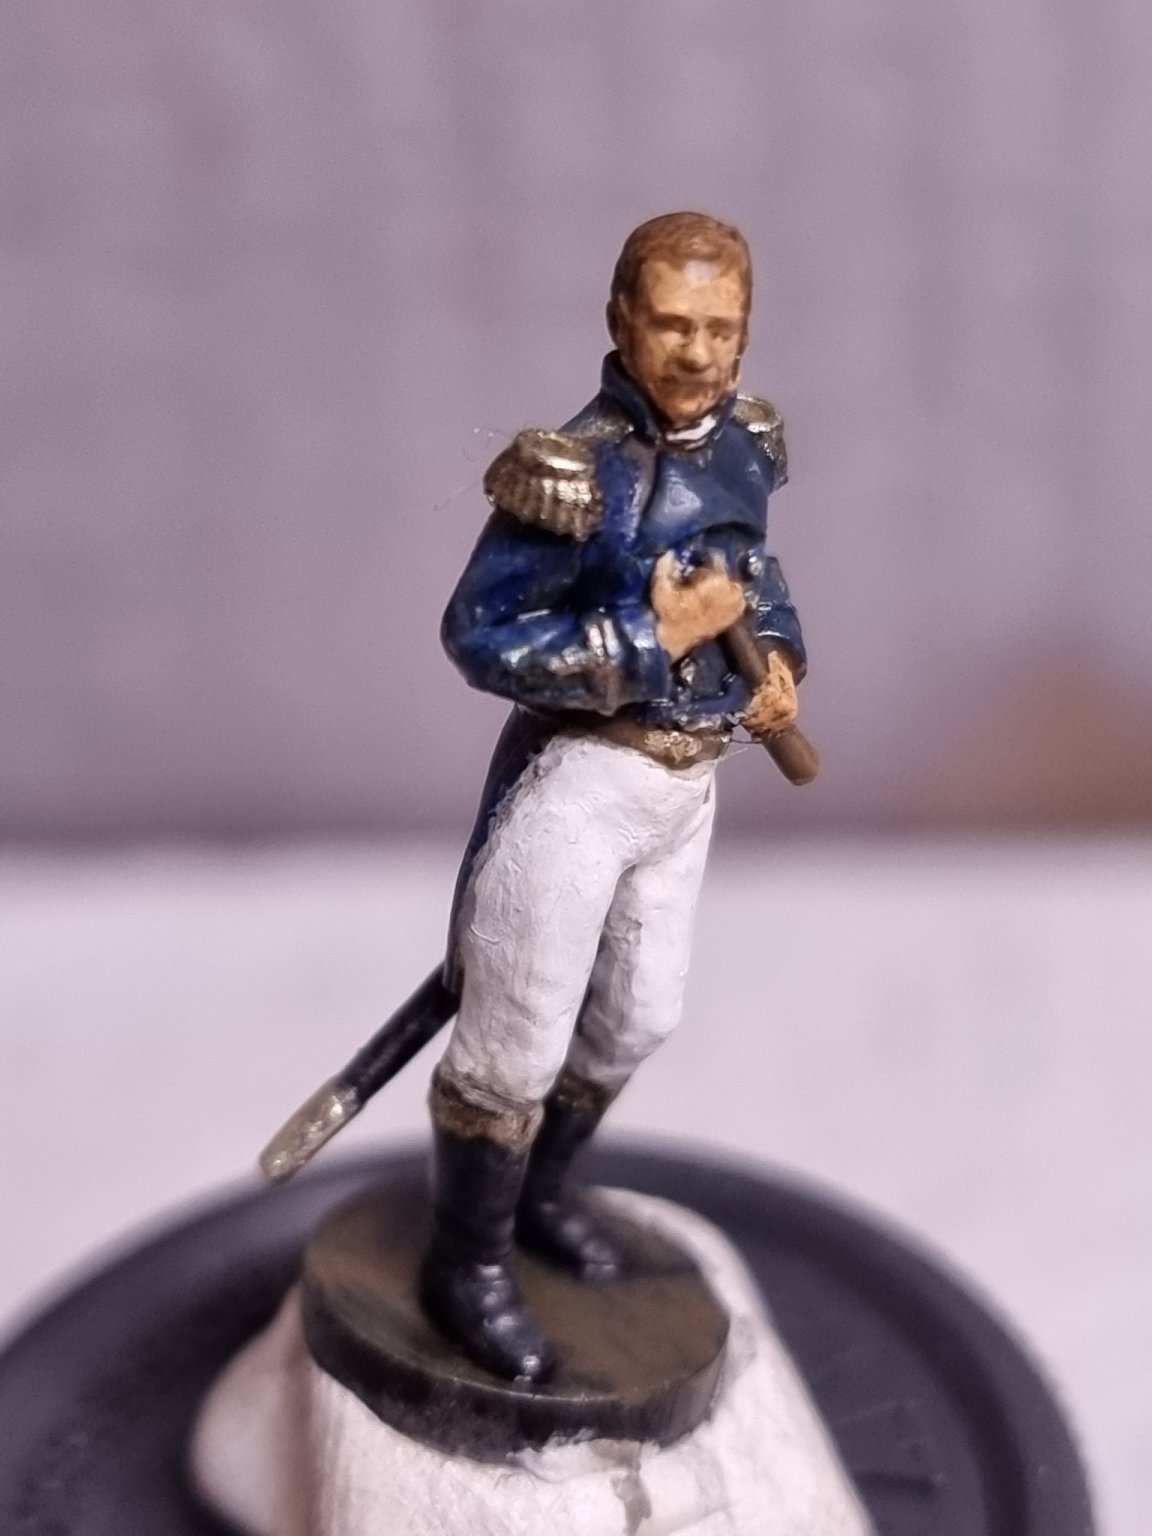
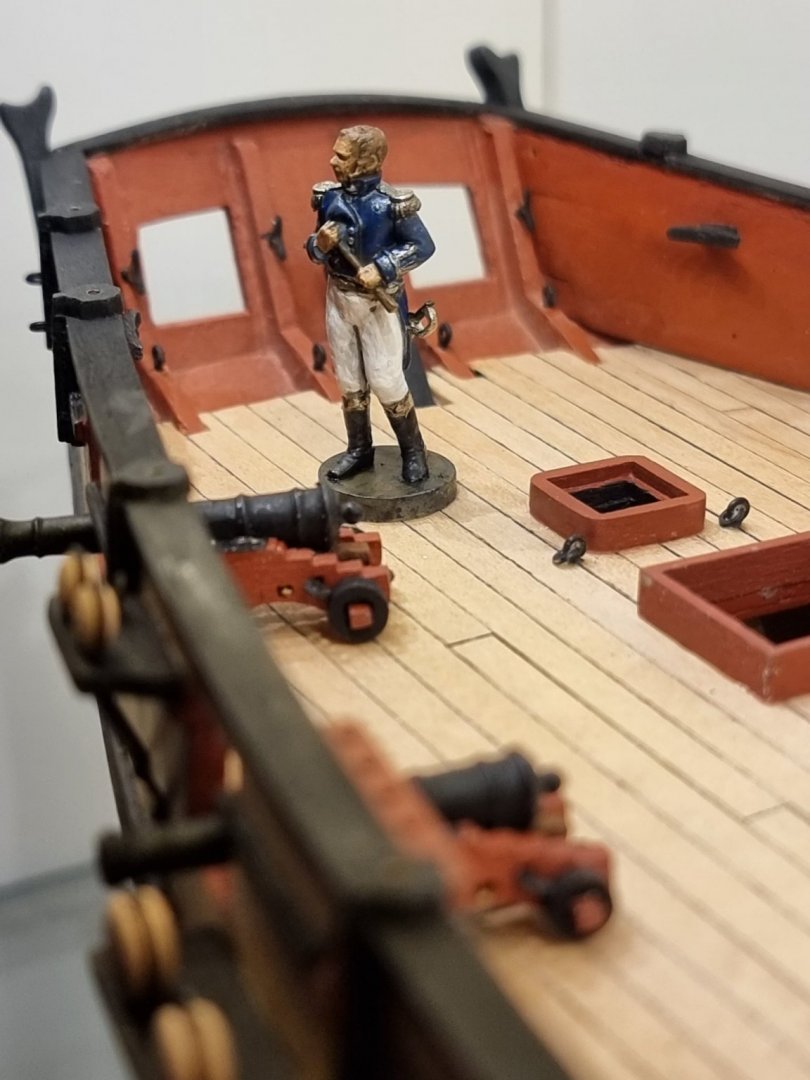
The Captain is not happy with the progress and decided to come and inspect the build. I promised that we will double our efforts....


-
An amazing build and I am happy you finalized it. Your HMS Jason will be even better but this one is definitely one of the better Snakes I have seen on the forum! Congrats!
- 800 replies
-
- 2
-
-
- snake
- caldercraft
- (and 1 more)
-
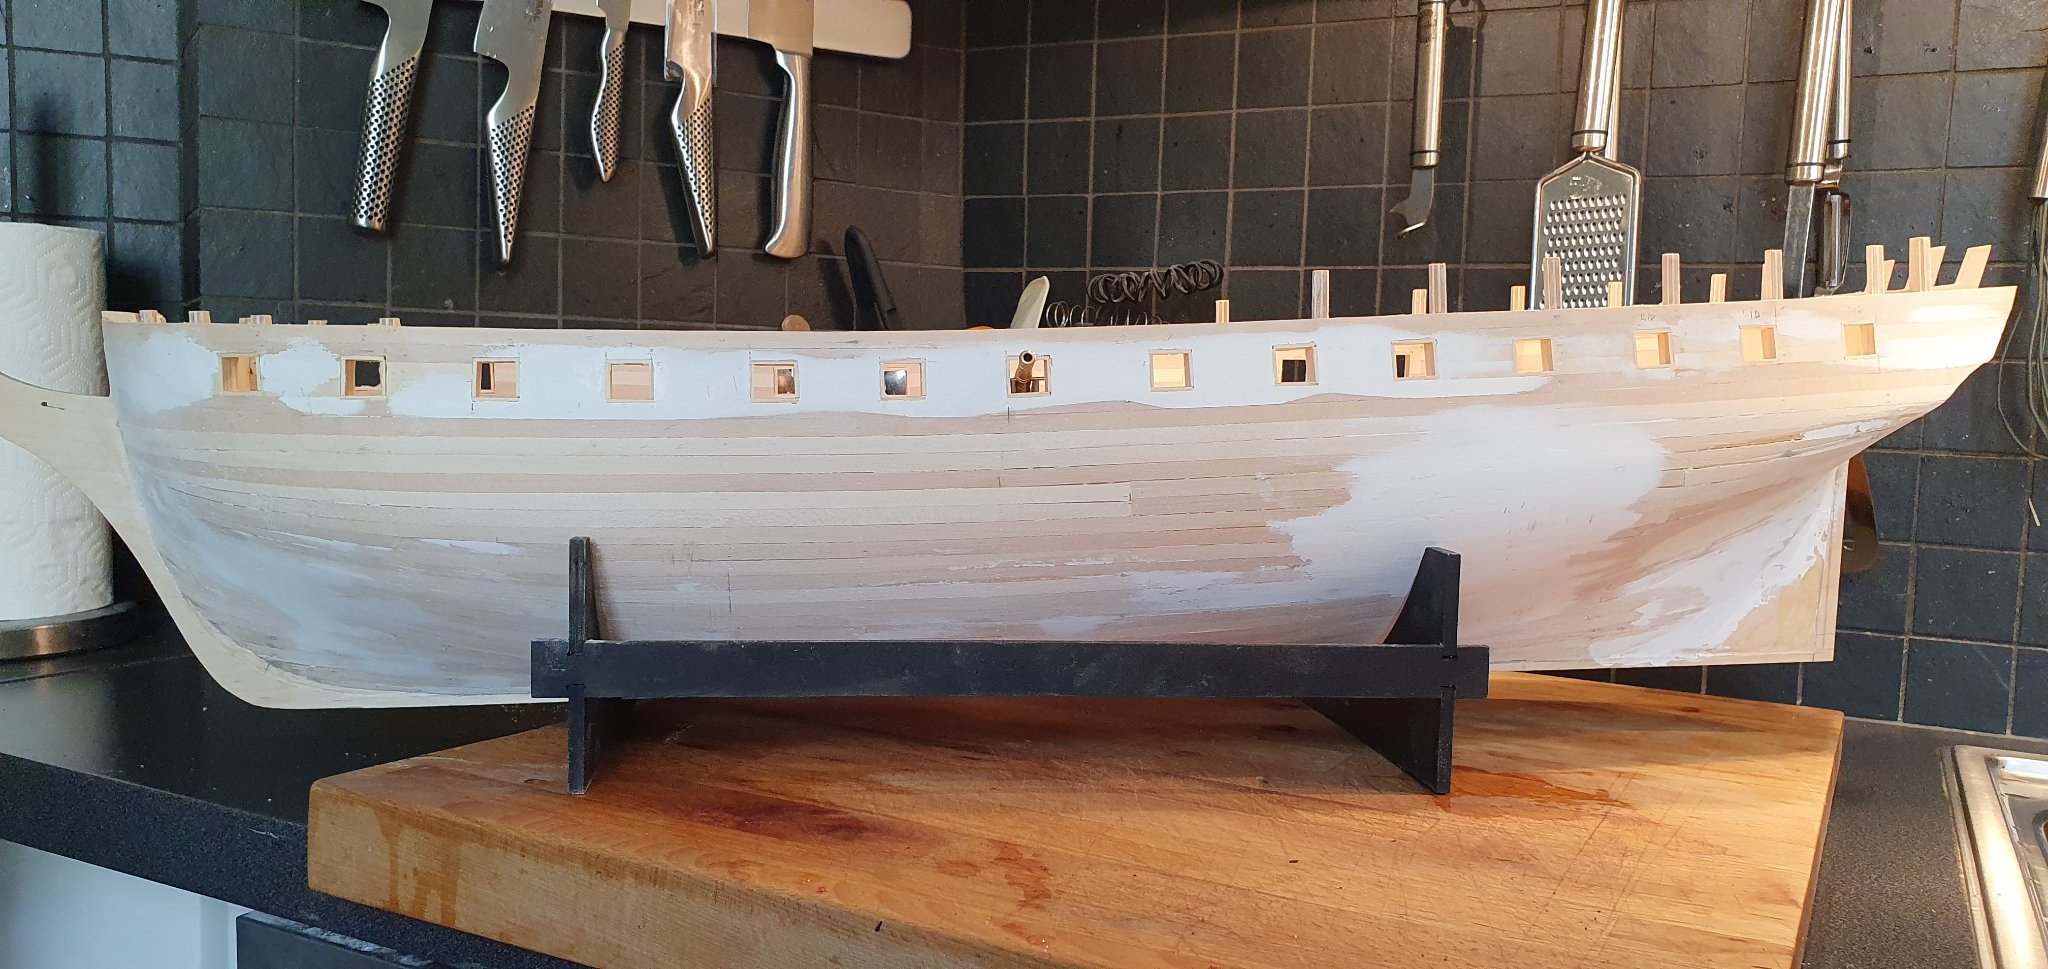
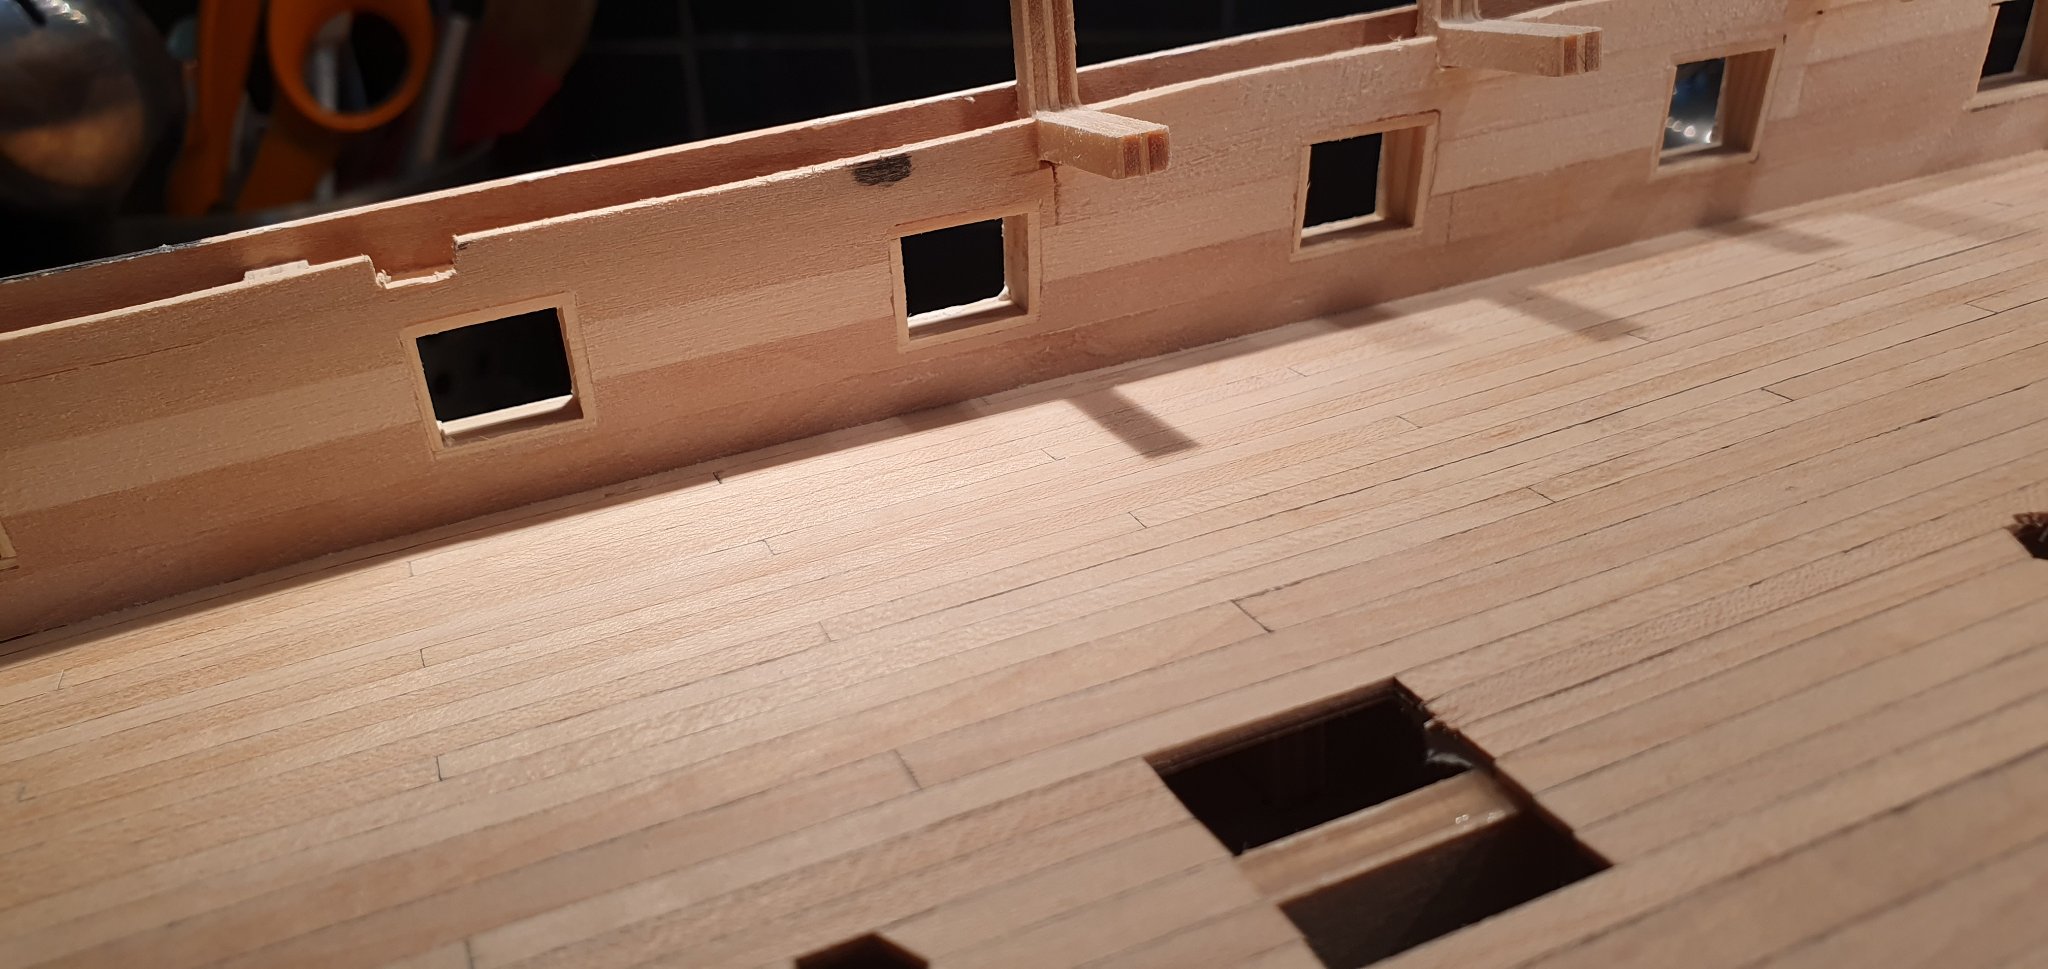
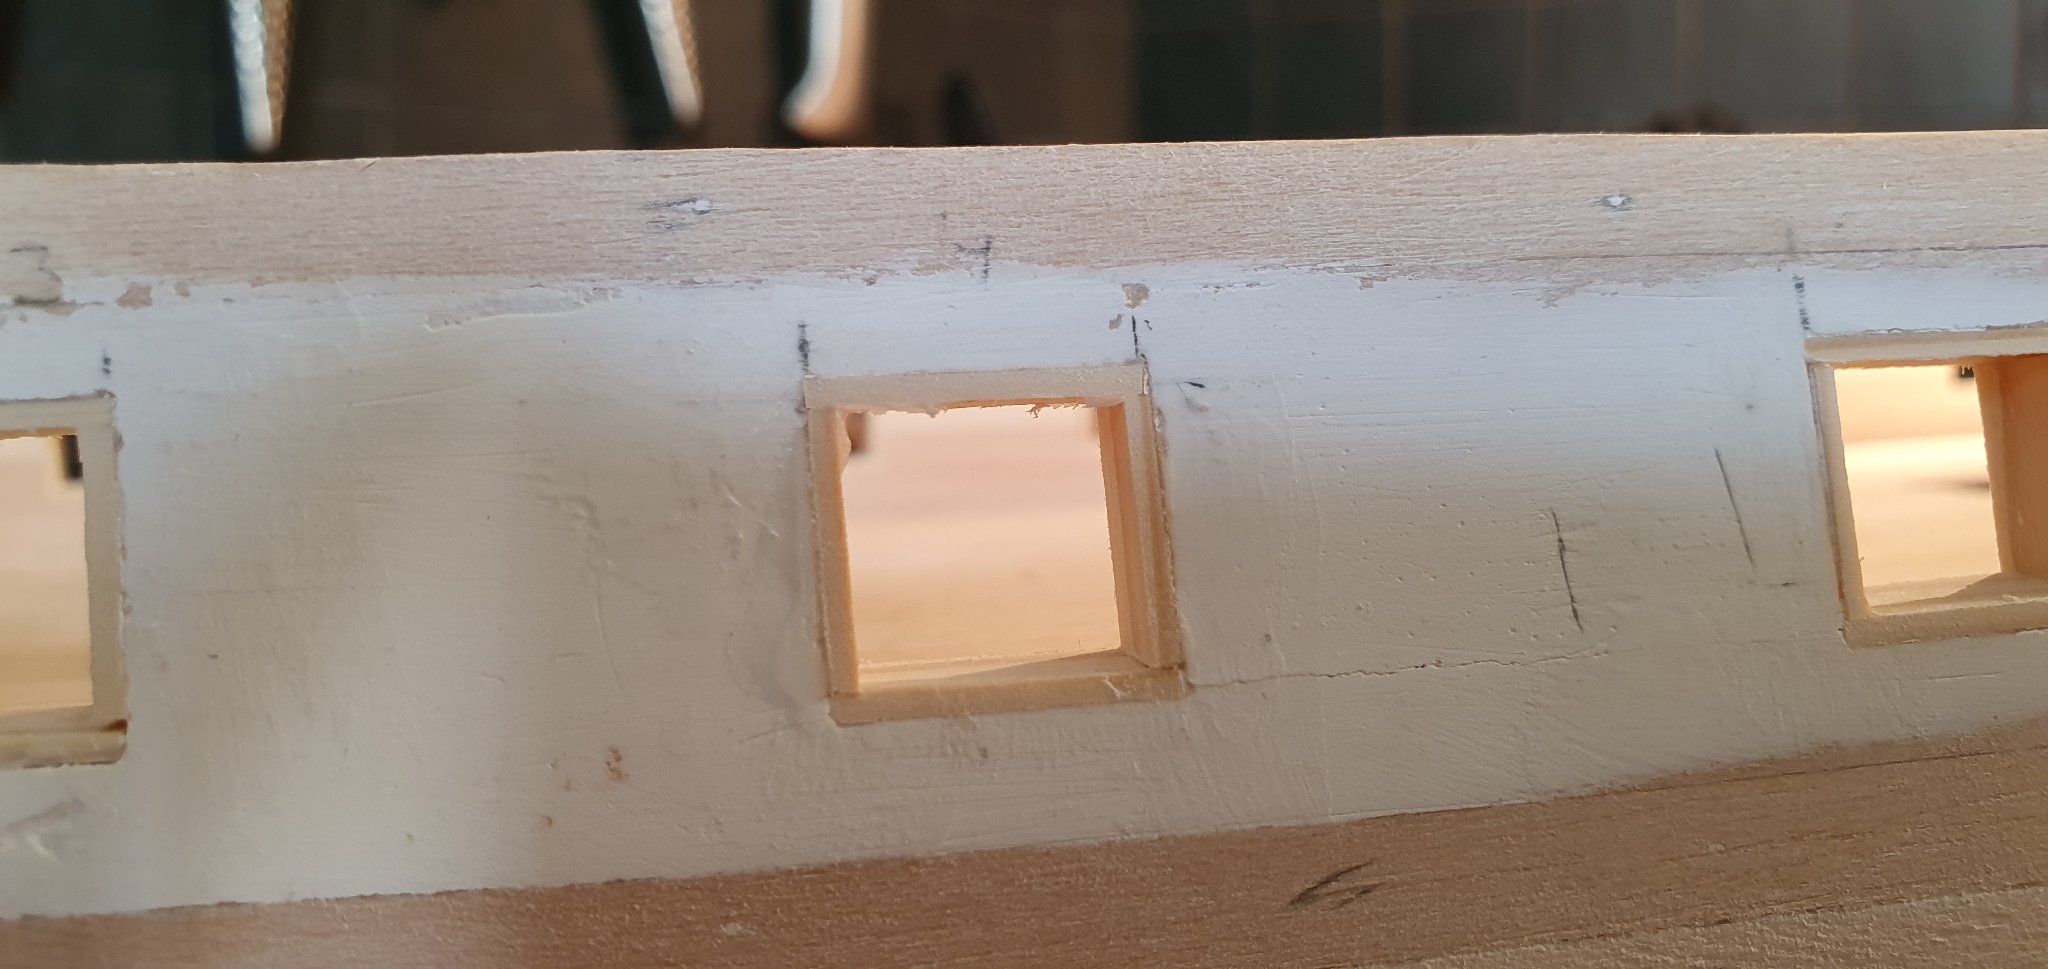
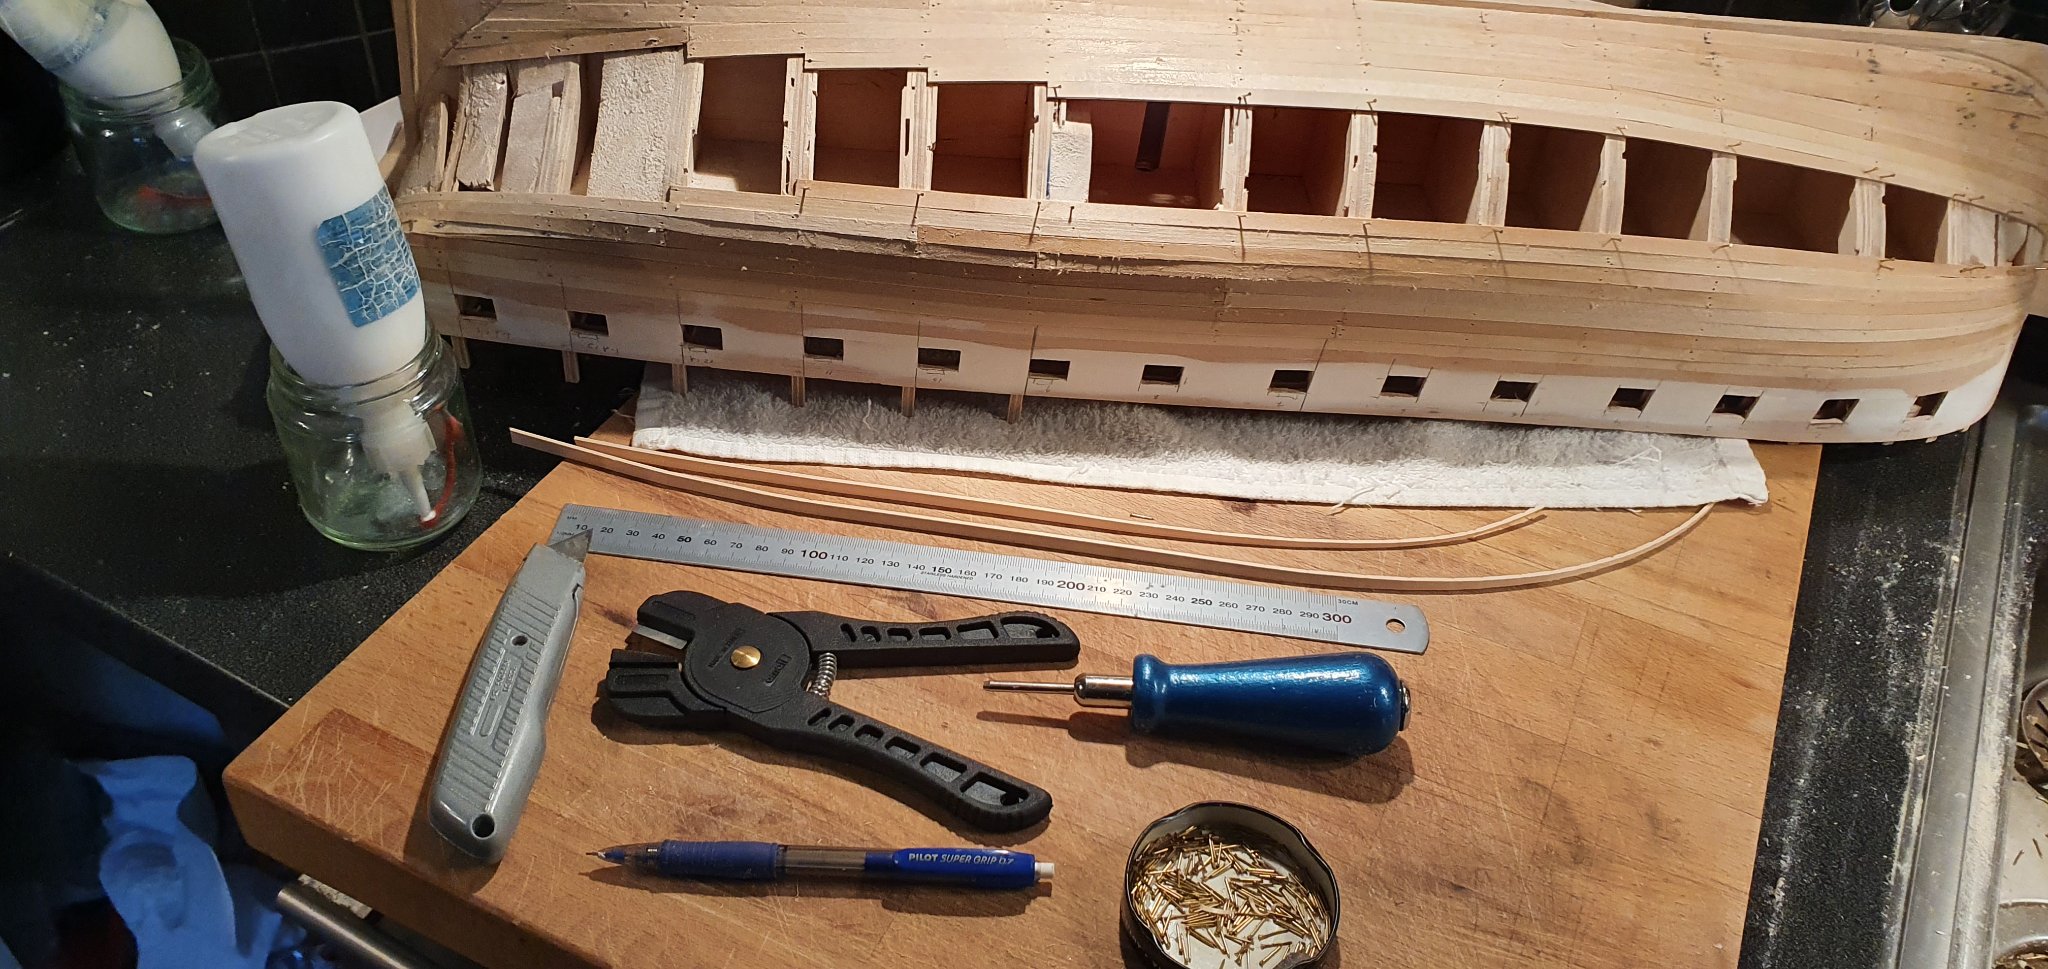
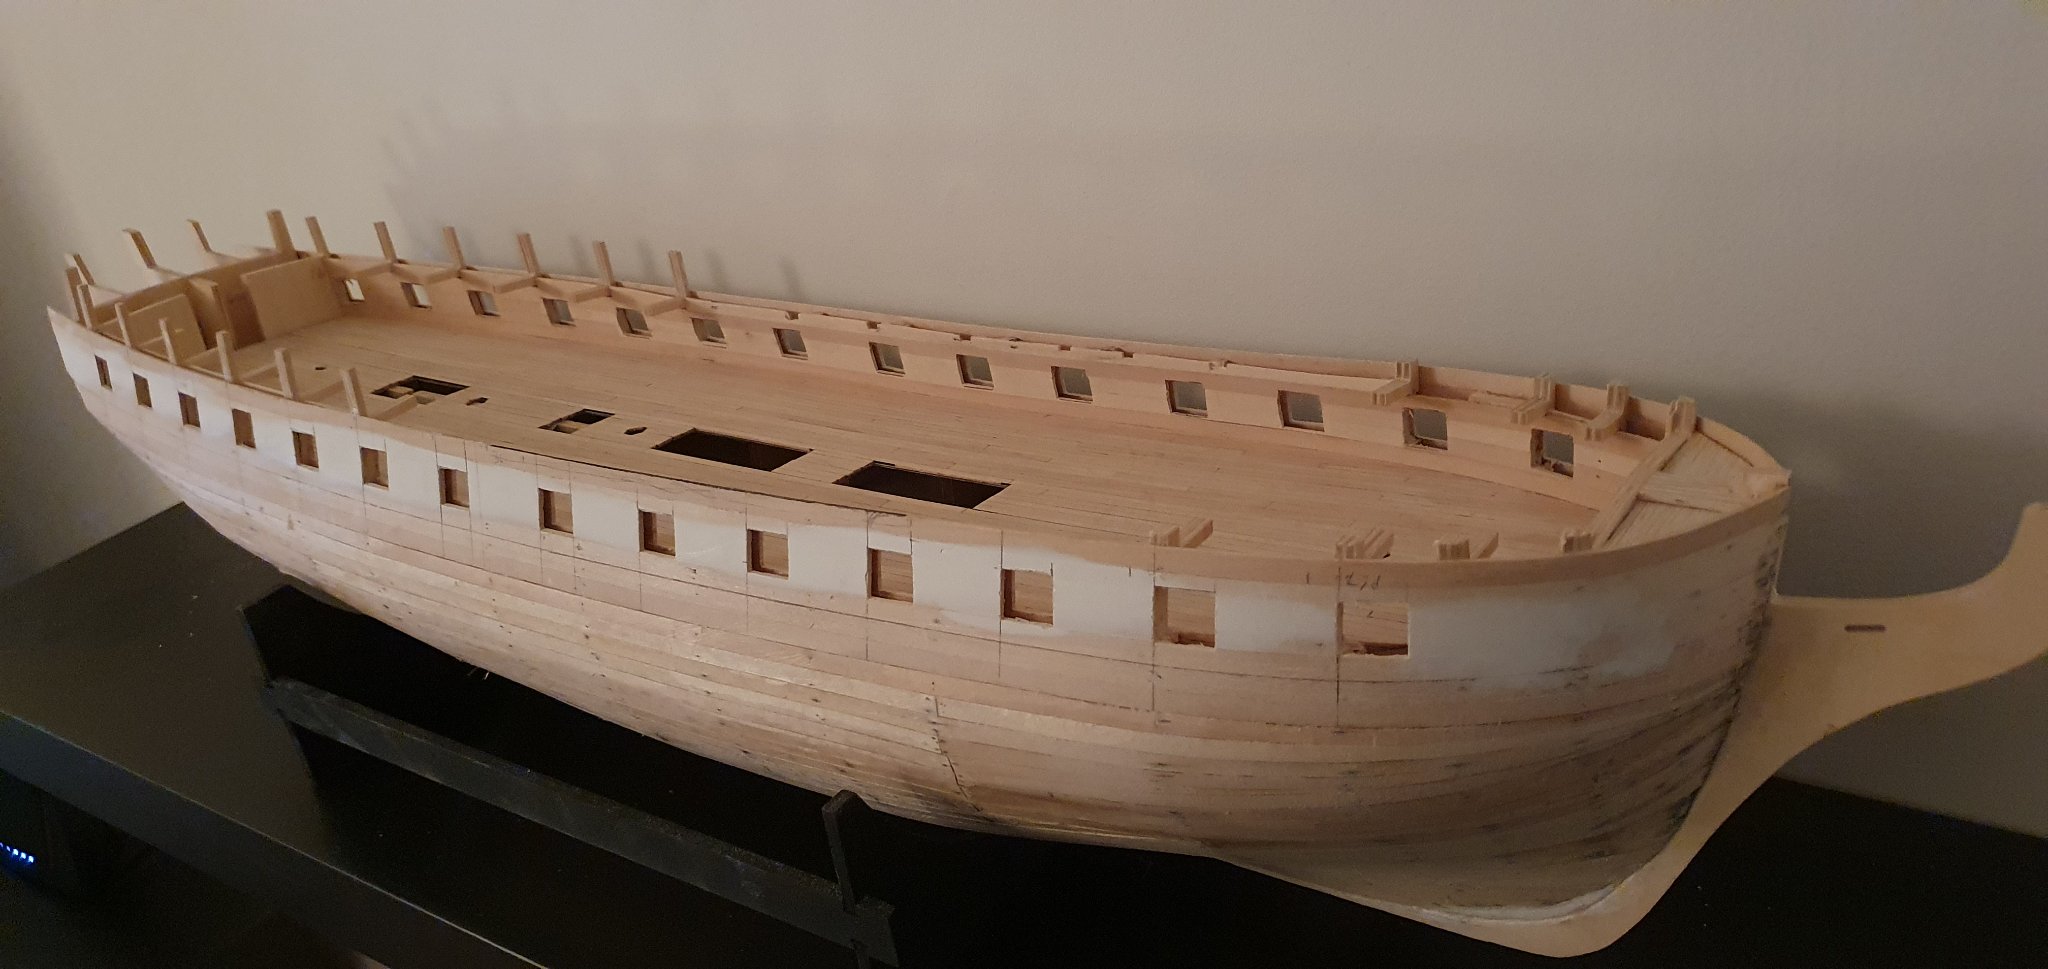
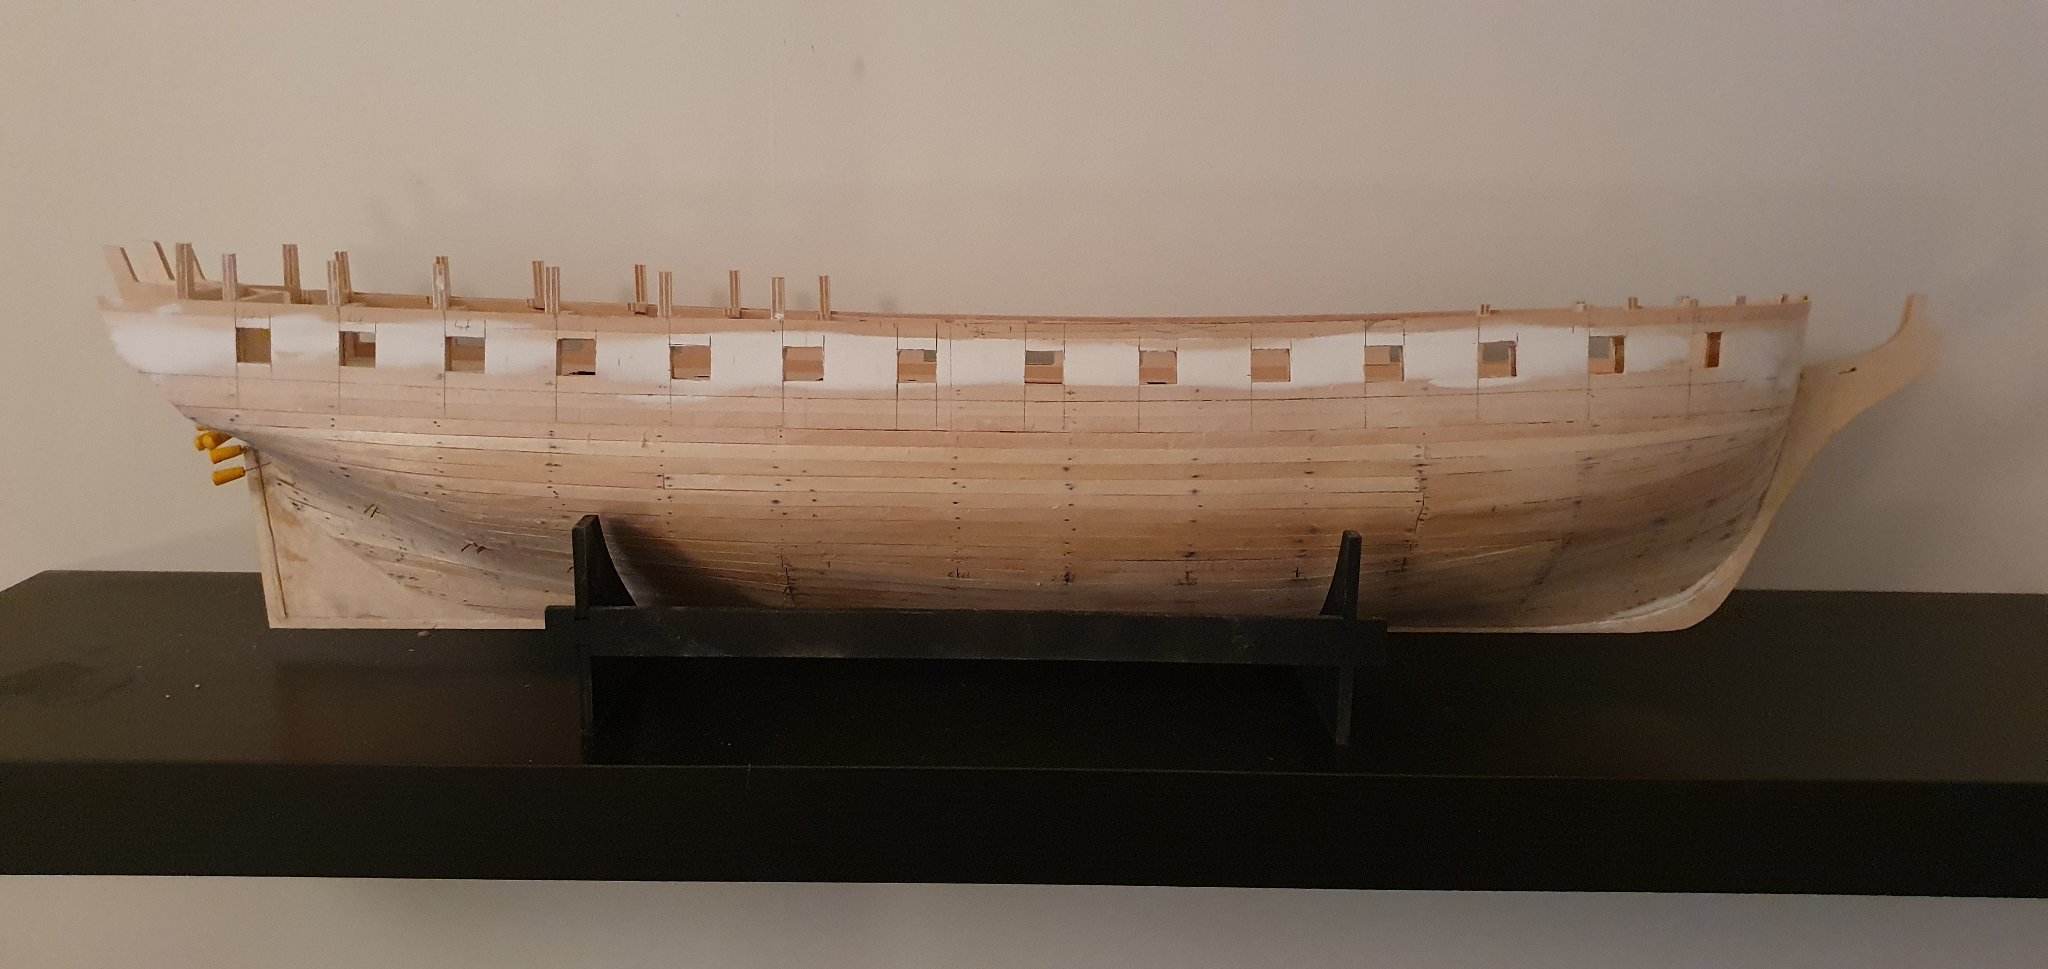
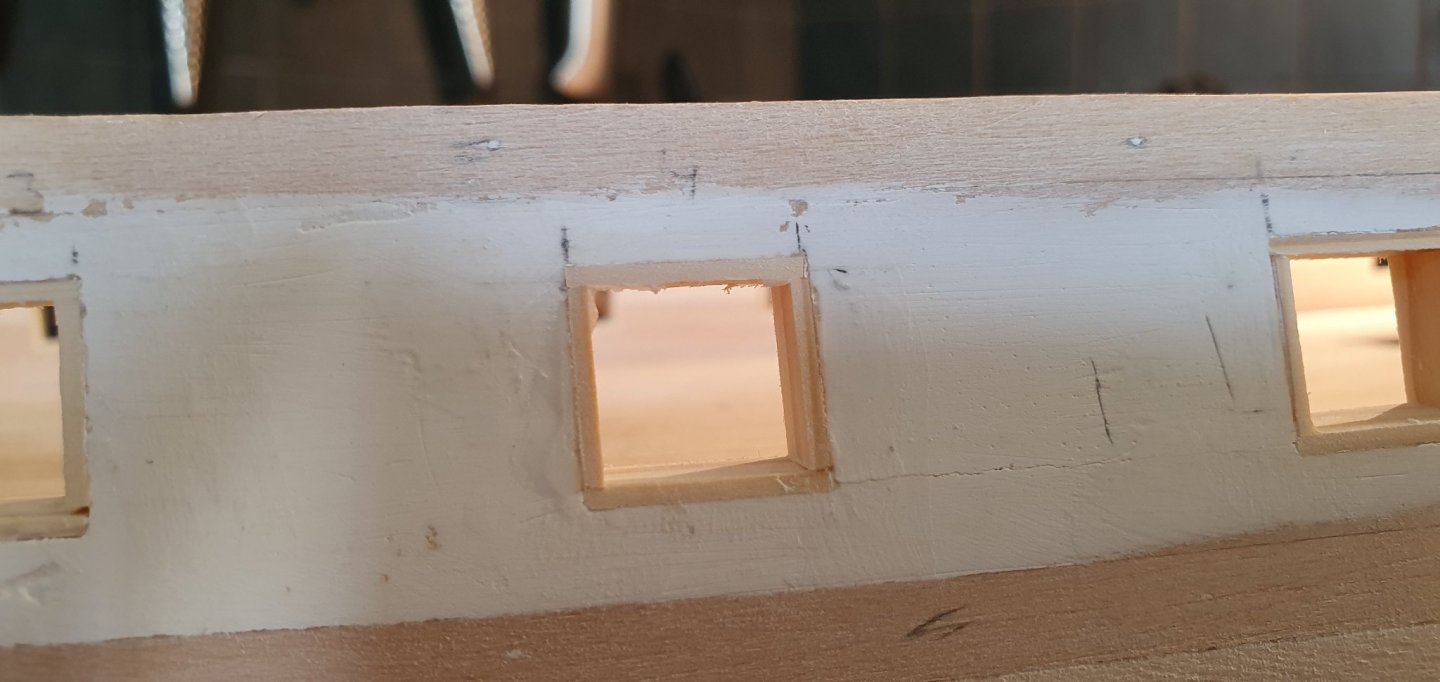
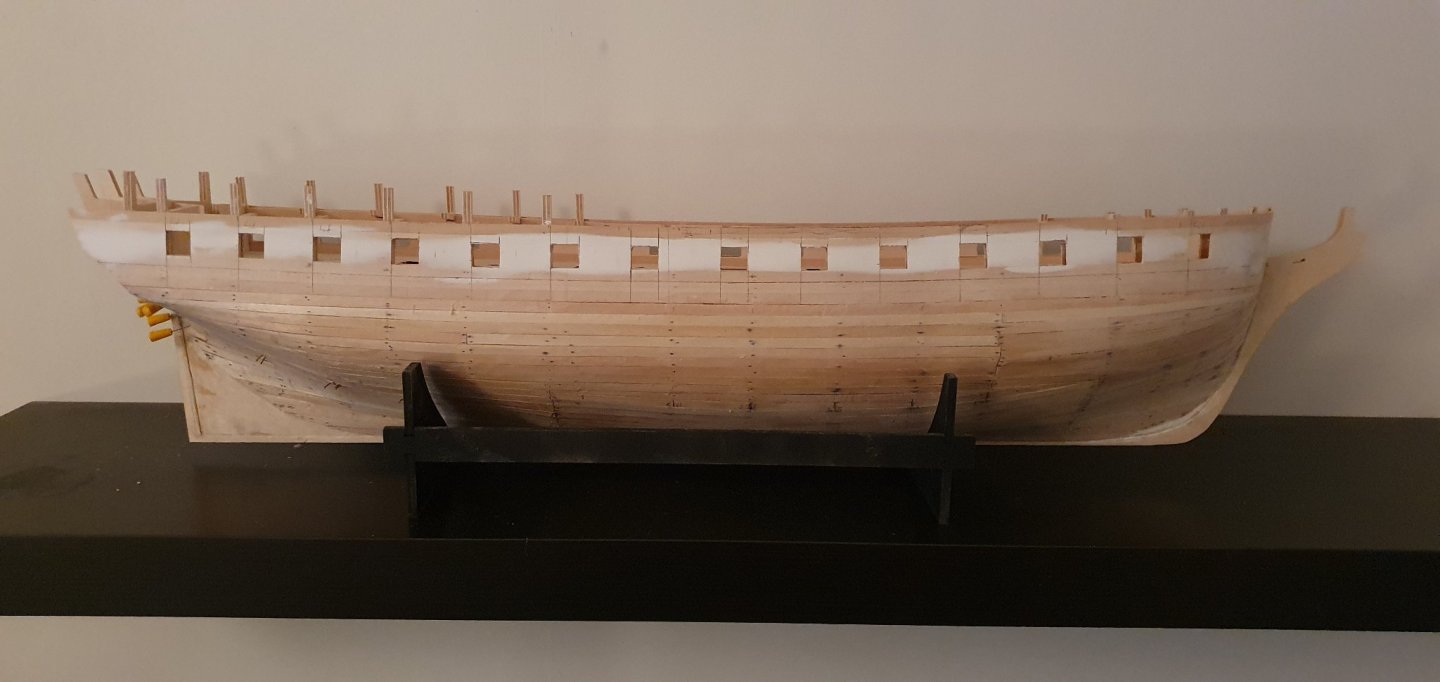
Thanks, I decided to do the gunports before doing the whole hull. Easier to work on when it was fixed in the rig and things to grab when you need some support for the carving. And also, much easier to clean up the dust instead of having it inside the hull. Next step will be to pland the gunports but I might work on my other projects abit more before going there. At least I have a nice hull to look at on the shelf and not that skeleton.
-
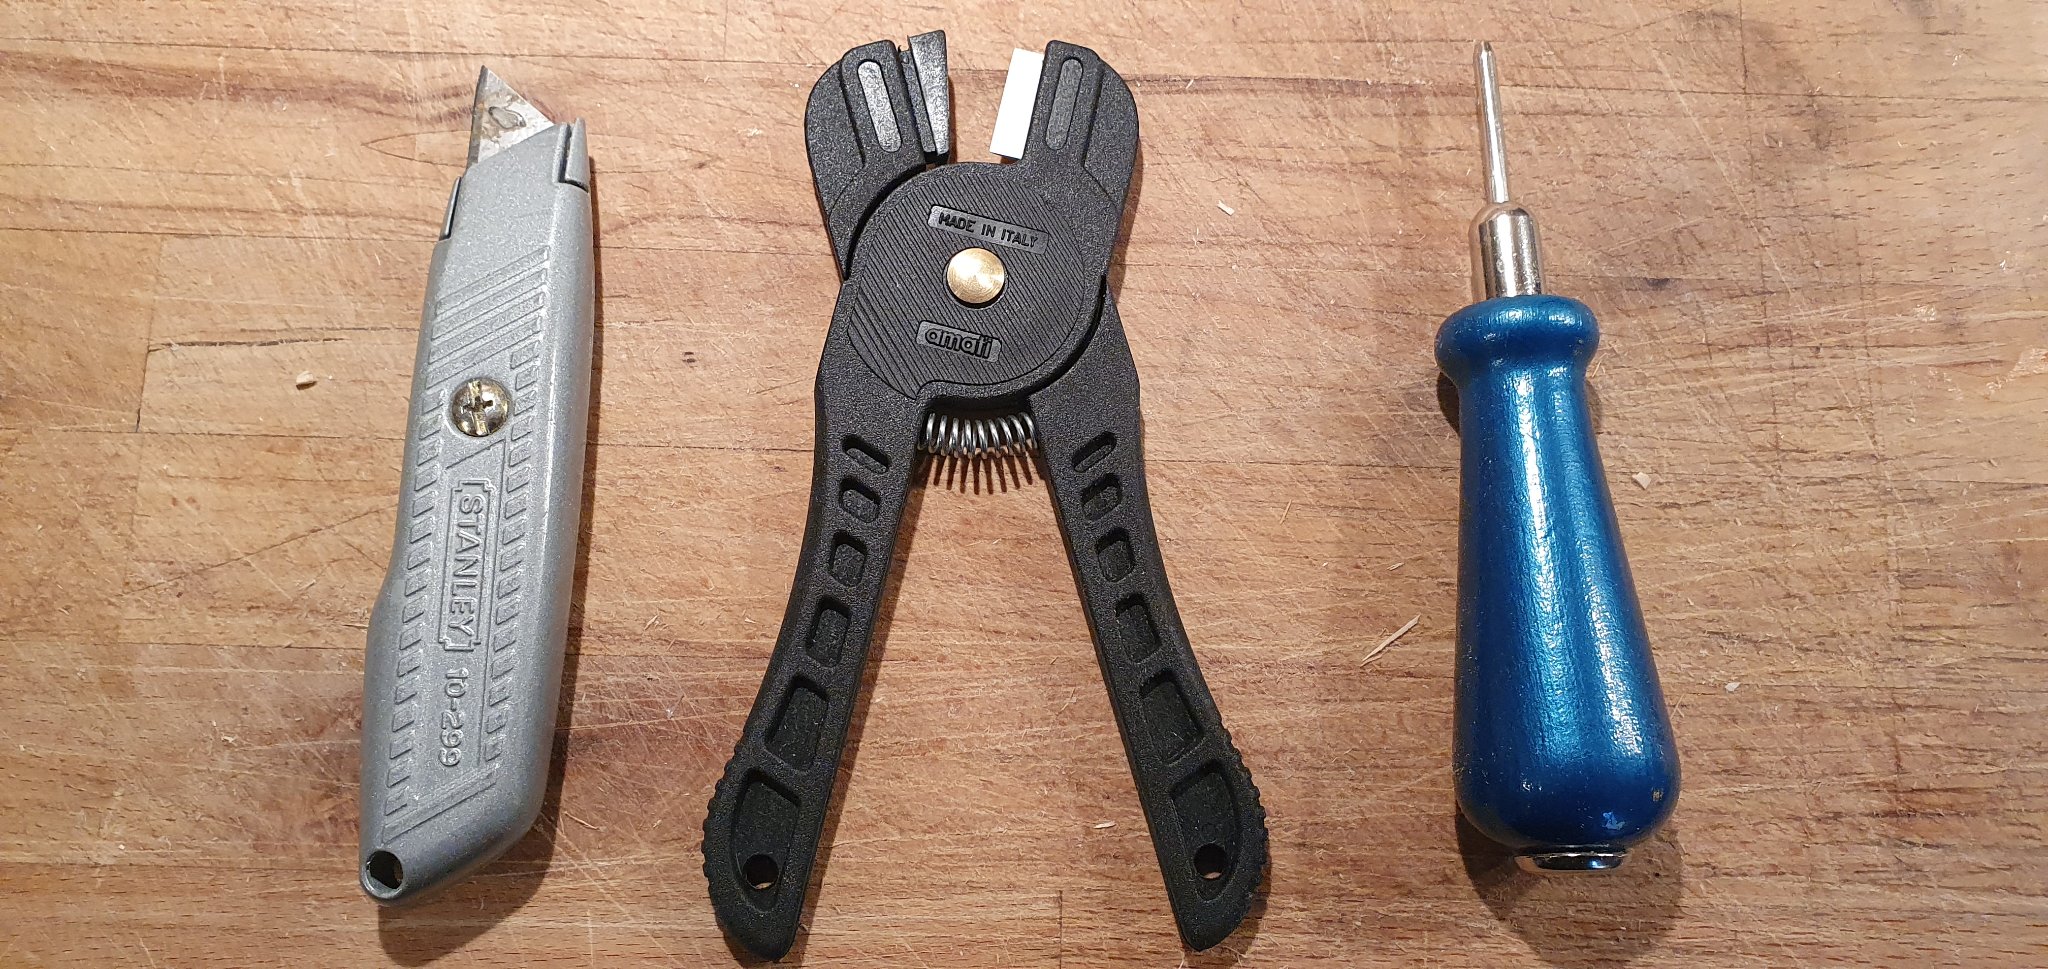
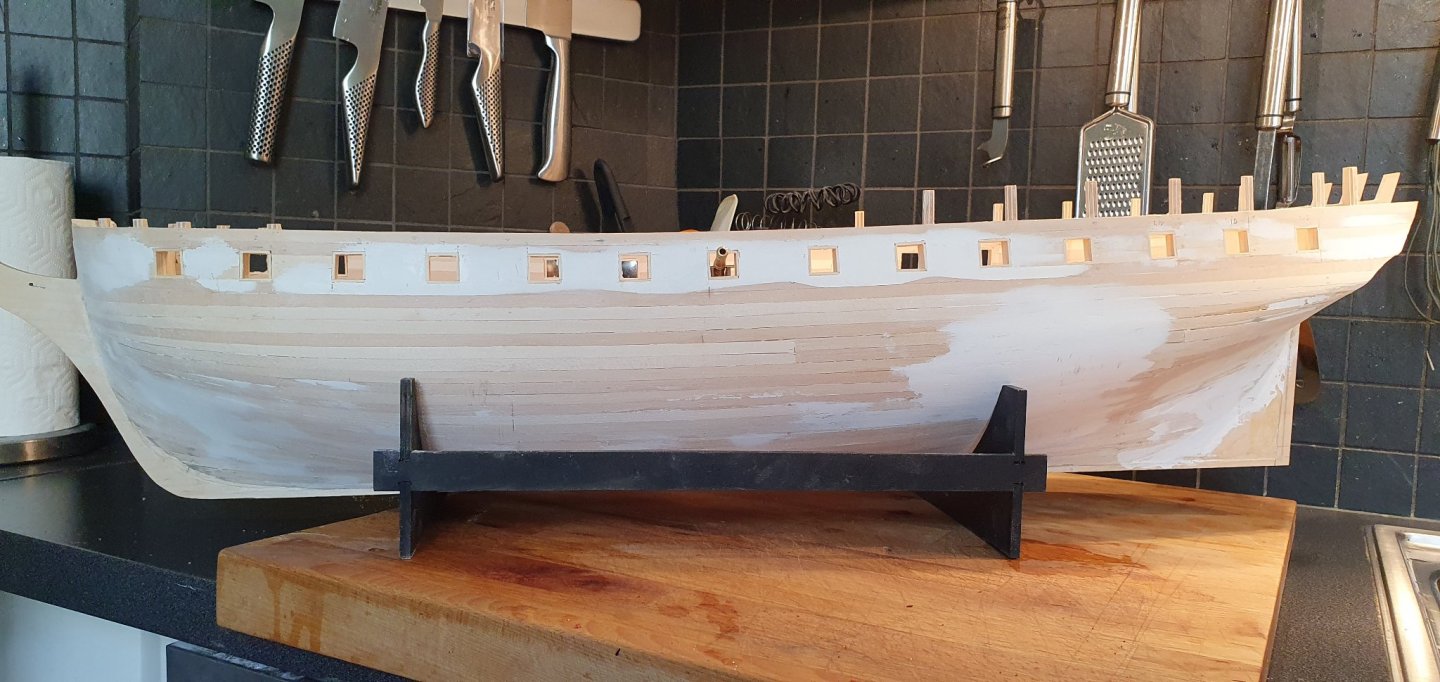
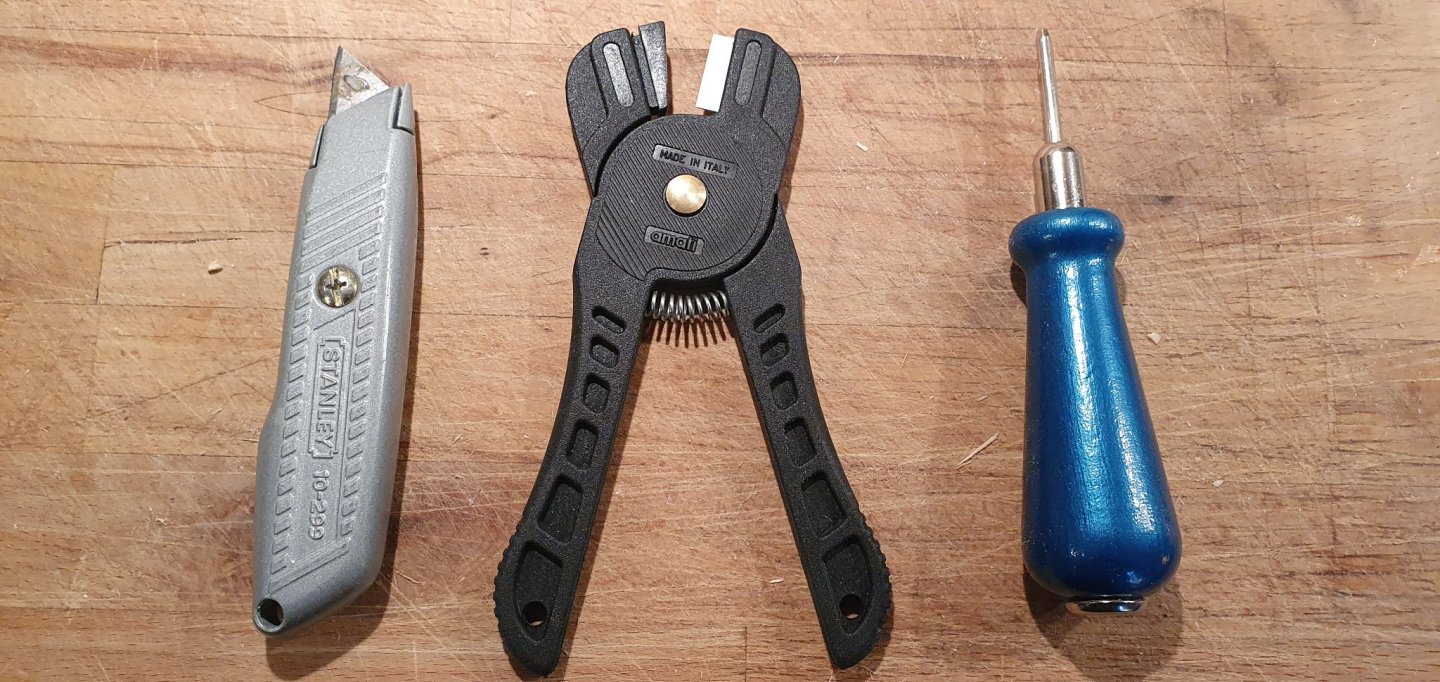
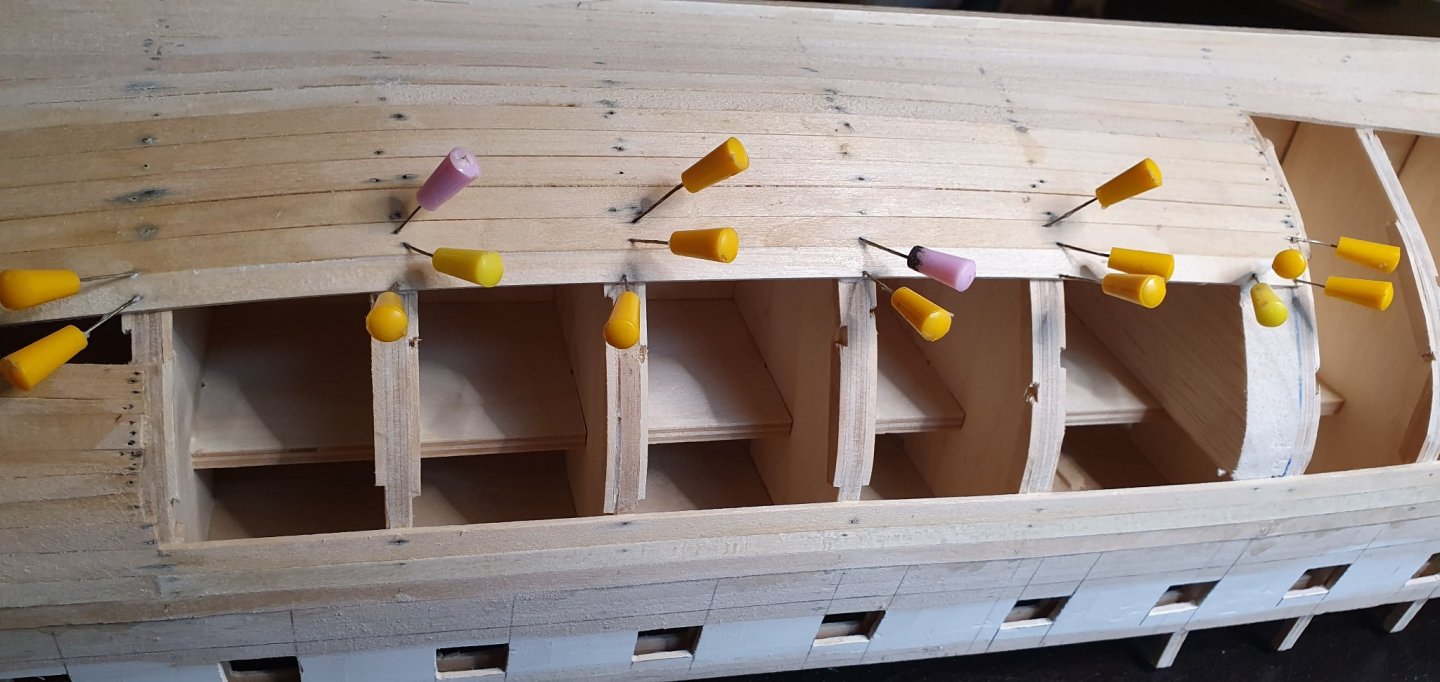
When it comes to first planking I have given up on the soaking of wood and now i use these three tools. First planking dont need to be that pretty, its just about shape and support for the next level. 1) matt cutter is not that precise but its much more comfy than an exacto knife and it can cut 1.5mm lime very effective. Sometimes i use it together with a ruler if its a long cut. 2) dry planks are instantly shaped with this plank bender. Not pretty, but its easy and effective. 3) this tool can effectively press down some nails once u get a hang of it. It needs to be straight otherwise u can bend the nails. Plenty of PVA is used and then i remove the nails after it has dryed. For the 2nd planking i will do the Chuckmethod witho prebending and CA. I also sand the side of the planks for a perfect fit. It takes time but thats what make a difference in how it all looks. Builds without proper sanding looks quite horrible in my opinion. But the first layer dont matter that much.

-
HMS Victory by Vane - Corel - Scale 1:98
Vane replied to Vane's topic in - Kit build logs for subjects built from 1751 - 1800
Thanks, unfortunately not much done on this one for a while. But hope to pick it up soon and practice my rigging! -
My main mission is not to be able to put something on display when I build it. I just like to create stuff. Of course a ship is fantastic to look at, but its the therapy of putting it together that is the important part of it. And the more you build, it just becomes to overwhelming to put everything up. One way can be just to have one special spot in your house and switch ships with the seasons.
-
Thanks, well it depends on how i put them on display. We will see, its years away but if there will be glasscases for all of them it will be tigth.. I guess i will finish Speedy first and she is not that big.
-
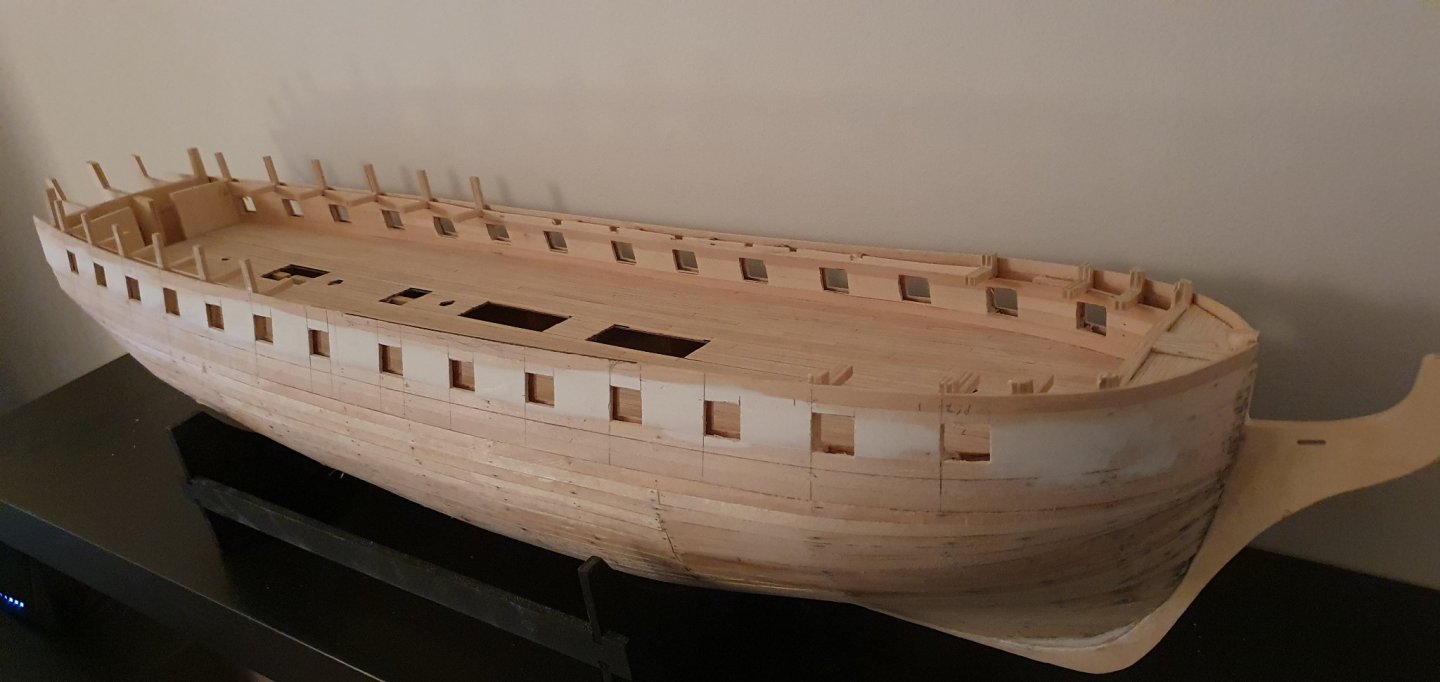
Thanx alot for the kind words. The hull is slightly over 80cm and this kit is one of the first Chris Watton designed for Caldercraft in the Nelson Navy. Its a beauty, but its from the 90s and Caldercraft hasnt updated any of their kits so they start to get really old. So basically the plans and instructions are poor and also the precut parts etc. In order to get it in good shape you need to work alot on all details as well as make some updates in mtrl. I have already bought better copper and will likely replace the visable wood with something else than Walnut. I bought this kit before Vanguards had started to pick up speed, but today I would rather wait for Chris to design a new frigate than building this one. Nothing wrong with the Diana but his newer designs and kits are top notch and so much more easy to build.
-
This shot kind of some up this years current status of my wooden builds. It will all become a nice family of 1:64 ships. Hopefullt i can at least finalize one of them during 2021.

-
Its quite a big ship.... first planking done!
-
Trying to finish off the first planking. The distance between the bulkheads are rather long on this kit. I added scrap stipes on the edges and now it is much steadier as well as more easy to sand down and get a nice curve.
-
My Snake is about 55cm and have 18 carronades so Sphinx is slightly bigger and 22 guns if I got it right. Its definitely on the bucket list. I just need to finish some of my current builds first... I am quite active at my work bench but I have so many simultanius things going on. I dont care much about the pricetag (as long as its well spent money) and Speedy has been a very nice build so personally I think the higher quality the better (even though it will come with a cost). I got my Speedy about a year ago and what I really like with Vanguards is that its increadible how the "design" has evolved since then. As an engineer its also fun to watch how you keep inventing new solutions making things more easy. I cant say I like ALL the inventions, but its great to see that someone is trying to improve things in this hobby where most companies just seem to live on 20-40 year old kits. And I always have the option of "scratchbuilding" details that I dont like the pre-made stuff. I recently got into plastics as well and those companies are much better in producing new kits than the woodenship manufacturers. When I started, I was suprised that the price of two similar kits could be so different. But after buying some cheap planes and tanks I realised quickly why. Some kits can be 40+ years old and just gotten a new box. Old kits dont have the details and fit as the new ones and most of the time I would rather spend 2-3 times as much for a new kit rather than an old. Its just aint worth the hazzle to save a few bucks.