HOLIDAY DONATION DRIVE - SUPPORT MSW - DO YOUR PART TO KEEP THIS GREAT FORUM GOING!
×


src
-
Posts
2,300 -
Joined
-
Last visited
Content Type
Profiles
Forums
Gallery
Events
Everything posted by src
-
Mark, you posted while I was typing, thank you!! ARRGH! you said it, DARK SIDE....... Now the Gremlin is dancing about going "See? See?? why mess around with kits?" Sam
-
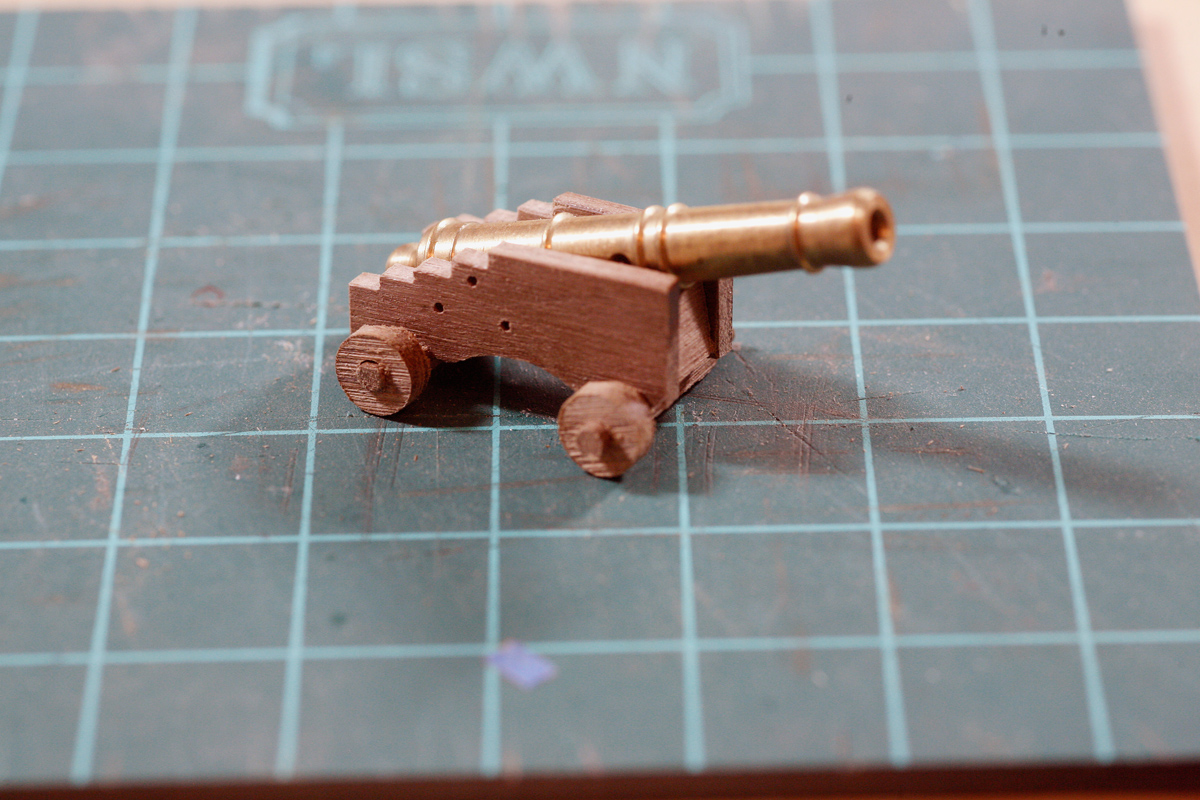
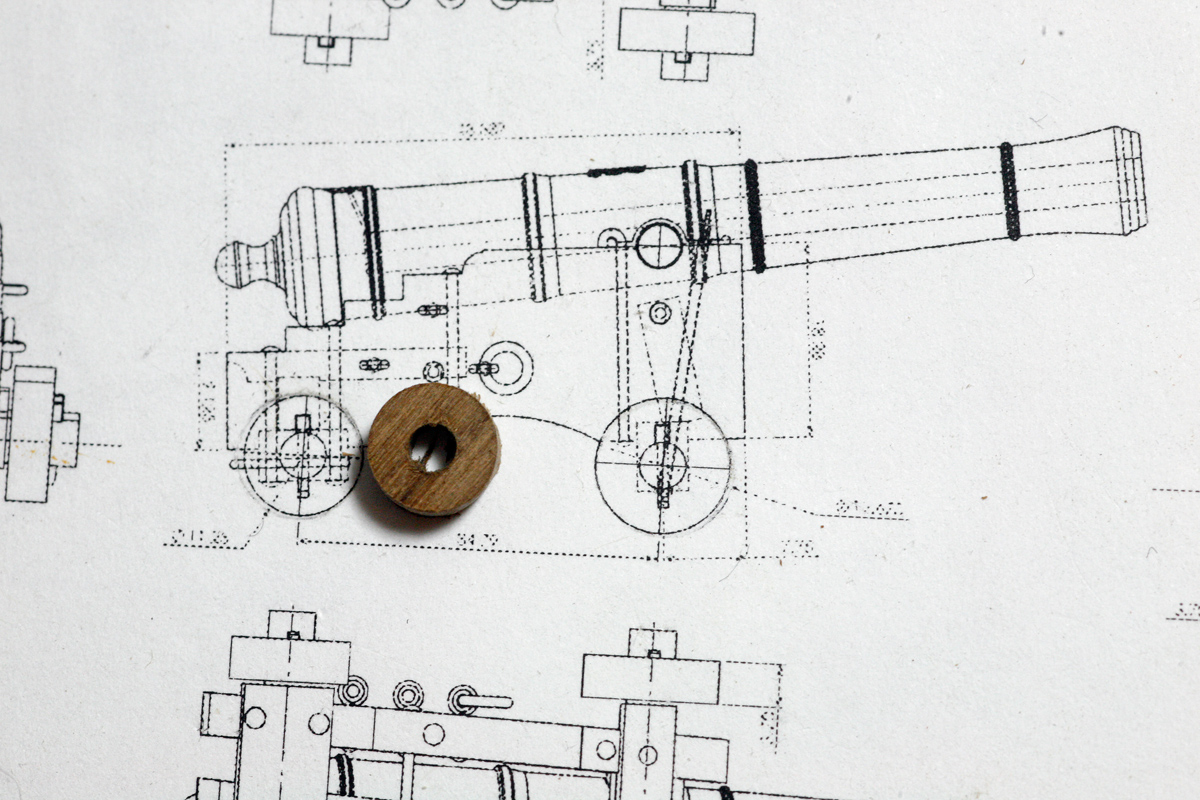
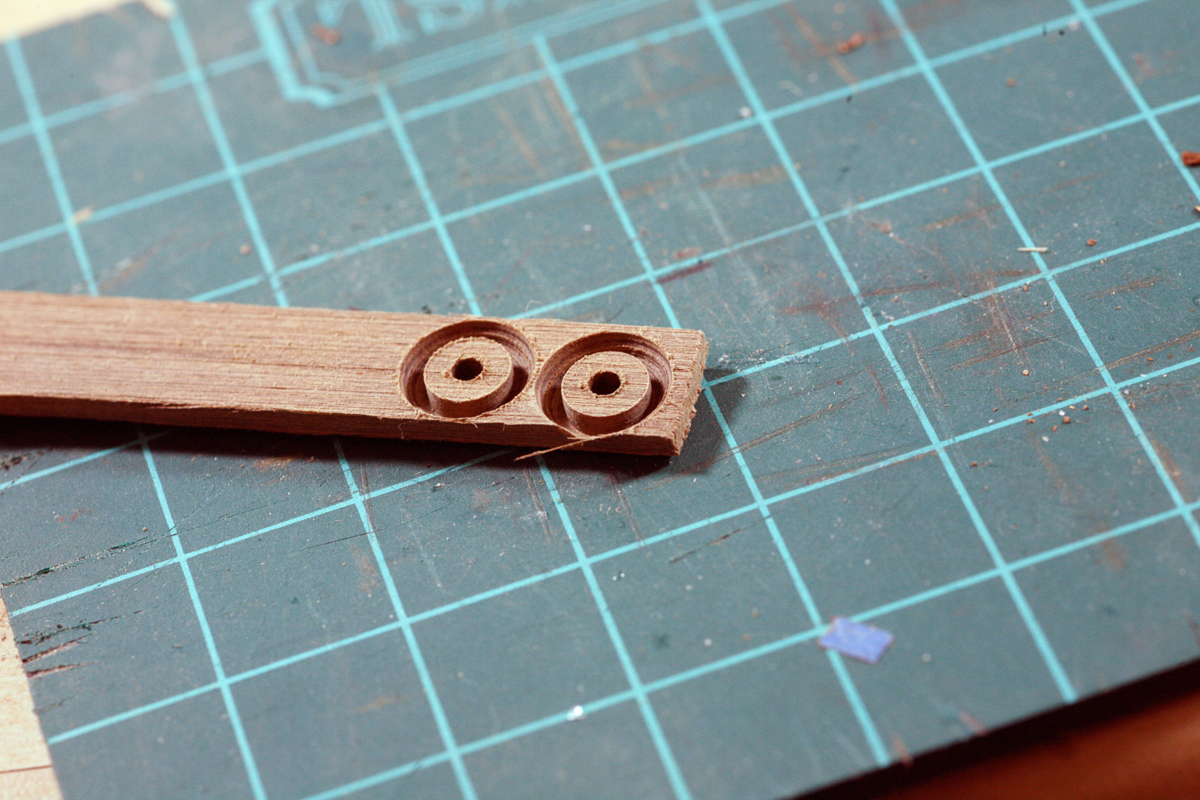
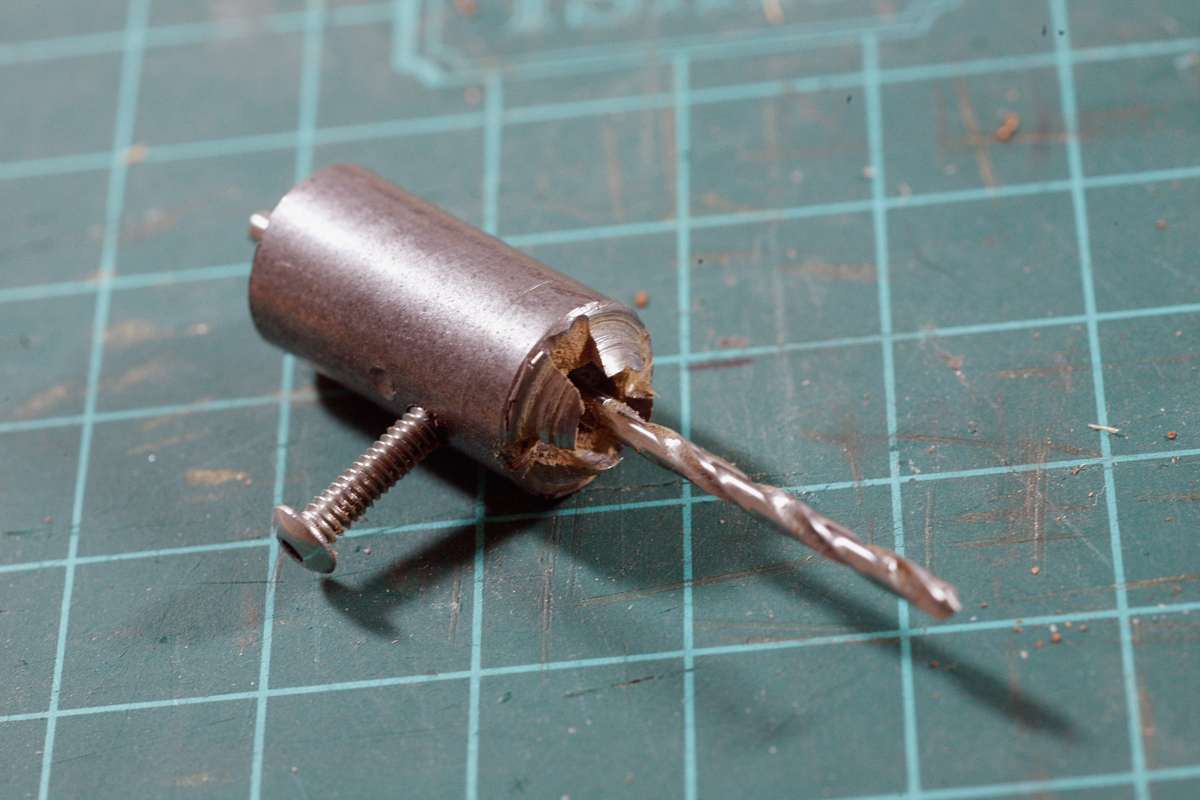
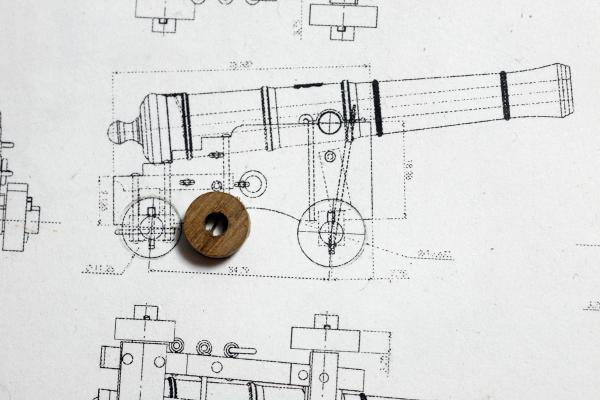
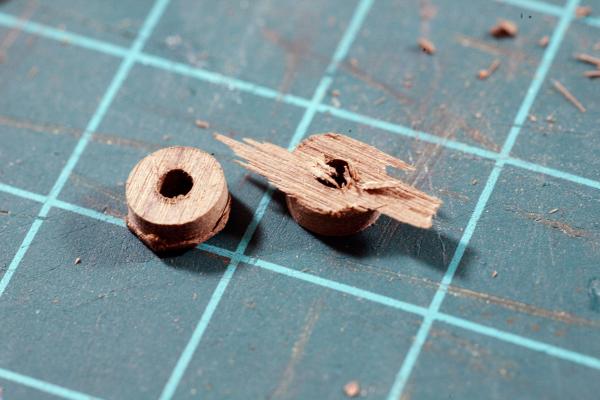
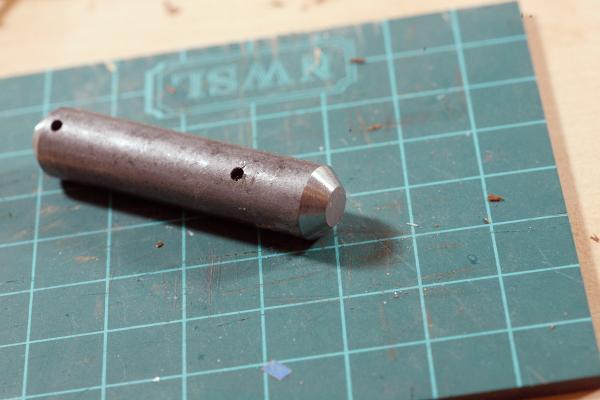
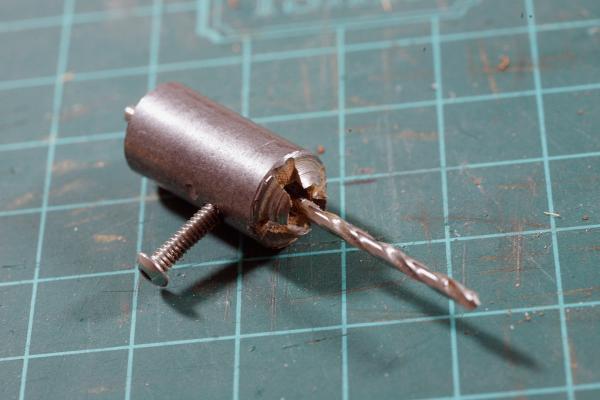
Woo Hoo! McMaster-Carr delivered my new #4-40 taps today. I was able to finish a plug cutter for my trucks. I started with some short lengths of 3/8" pencil rod, mostly because we have a bunch of scraps at the shop. Also I figured a heavier body might be less likely to burn the edges on my trucks. Not having a metal lathe or a mill I had to adapt and improvise a way to make these. I chucked the blanks in my fastest hand held drill motor and spun them against a running belt sander. First 80 then 120 grit then I hand filed to the best finish I could get. I then went to my wood lathe and chucked the blank up there. Using a jacobs chuck I through drilled the pilot hole for the axel, then stepped up several times to get my finished bore size. I then drilled my set screw hole, here is where I ran into trouble; I broke my bottoming tap, inside the hole and couldnt get it out so I had to make a new blank. I then broke the pilot hole bit in the new blank, inside the hole again!!!!! Fortunately I had made a couple of blanks (I am learning....) so was able to get one complete today. I have started a new set of blanks for back up. I thought I would get fancy and clamped a file into the drill vise and tried to turn the outer diameter down so I dont waste so much wood, it works but looks kind of crude. Naturally once I finished tapping my setscrew hole I had to try things out. I grabbed a length of lumber and cut two truck, all told it cuts amazingly clean, especially considering how I have gone about making these. I am pretty pleased with the results so far. I need to come up with a way to clean up the edges, I am thinking a mandril of some sorts and throw them on the lathe at the slowest speed and use a file. We will see. My first plug cutter, kind of rough but it works! A blank for two more. The first cuts. Pretty clean all things considered. Even the backs arent too bad Compared to the drawings Mounted to a carriage. These are both rear trucks. Hopefully the weekend I can get the tooling for fronts made. as well as a method to clean everything up. Sam


-
Russ, I agree. Also if I am REALLY concerned about it I can put brass pins in and hide them with rope or even not put those sails on. I wasnt planing on rigging all the sails anyway. Also since they do not appear to carry a lot of weight, it probably wont even matter. Sam
-
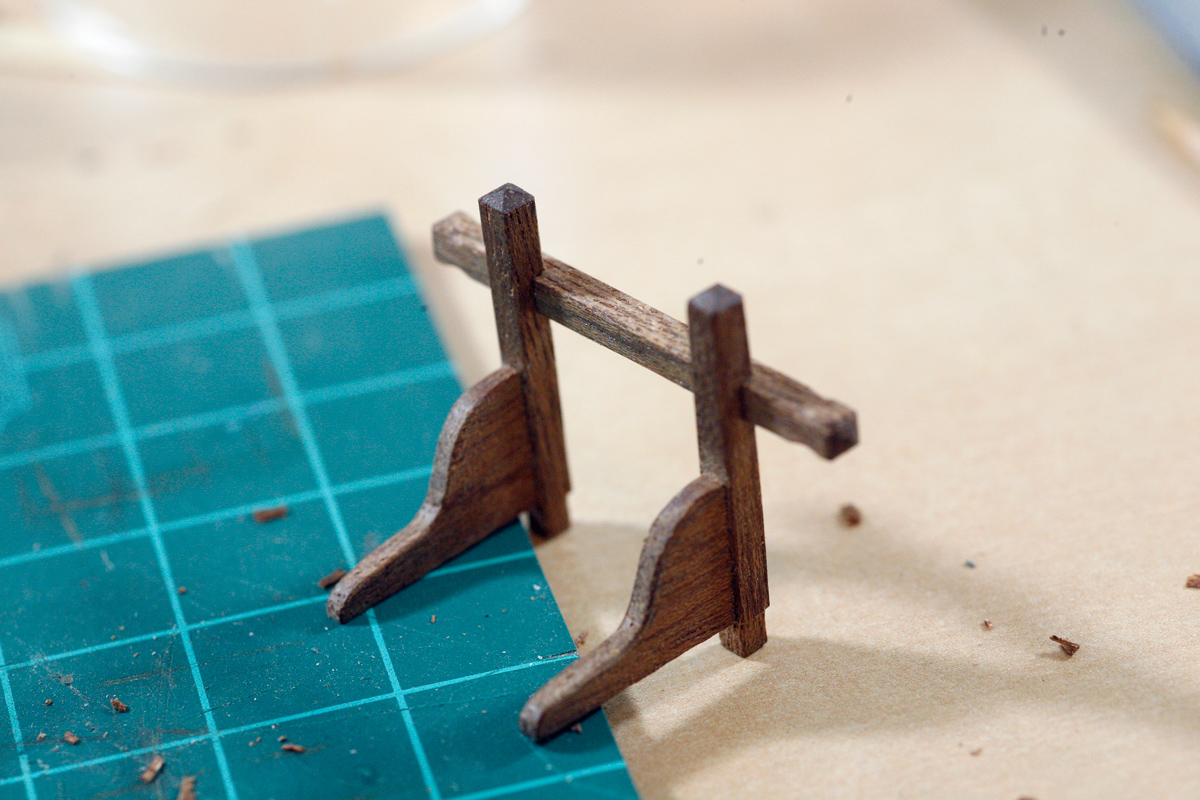
Thanks for all the likes its always appreciated. Russ, yea that really makes a difference even at this scale. Especially the pins. I am very mildly concerned with the cross piece, its dadoed and pinned and seems very secure but its such a small glue area and right on the edge. When i did my joinery I went in just a bit over 1/32" about 0.0335" instead of .3125" to give myself a good shoulder and then went 1/64" on the bit just to hide any discrepancies in my cuts. Never having rigged anything before I dont know how much stress will be placed on this part. It appears that the rigging that terminate here are for the Stay Sail and the Fore Jigger. I dont know the terminology of the line yet but it appears to be a line that will control how much wind or how full the sail is allowed to be. Clew line?? I guess its time to really start reading Masting and Rigging. I am probably worrying unnecessarily. Me?? Never! Ok off to work. Sam
-
Rich, looks great. How did it work out pr drilling your tree nails? Sam
-
I think it looks very good
-
Very very nice Sjors! Your a man of great patience. Sam
- 1,616 replies
-
- 1
-

-
- caldercraft
- agamemnon
- (and 1 more)
-
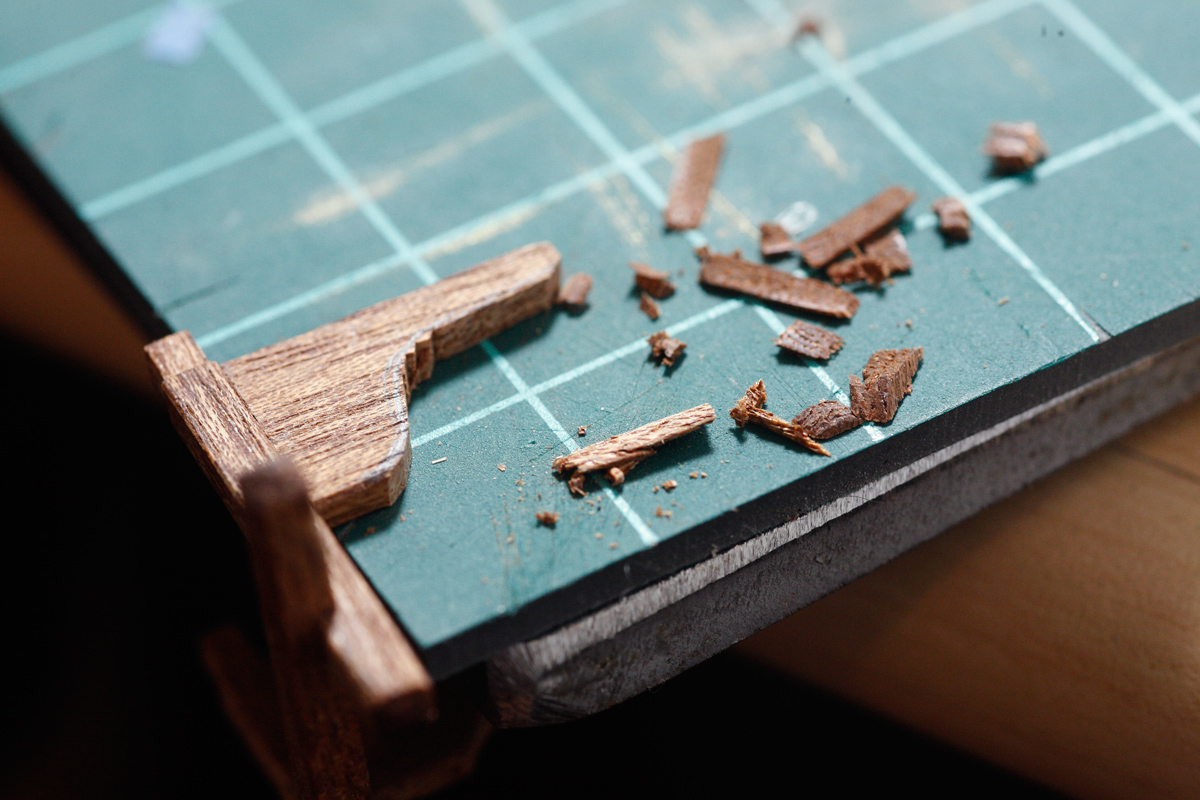
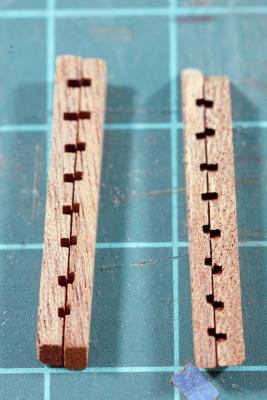
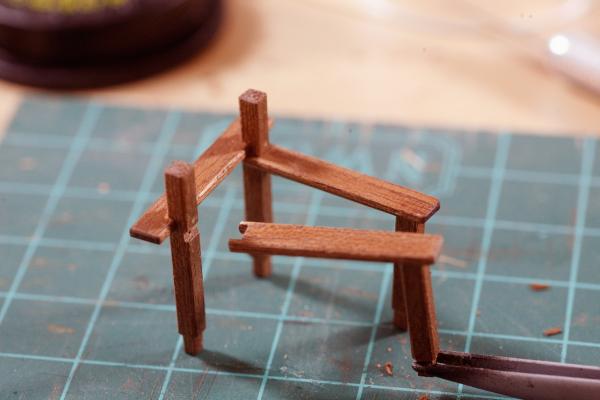
Been a very slow week build wise. I came home on Monday to discover the cat had knocked one of the Admirals favorite decorative teacups off the bookshelf trying to get to a potted flower plant on the top shelf, she has now knocked it off twice this week and I am in the process of fixing it for the second time - what little build time I have in the evenings has been spent fixing it. The second time she converted it to numerous dissimilar fragments. Was using my break time at work to make a couple of cutters for my trucks and managed to break my last bottoming 4-40 tap, inside the hole for the set screw. Made another one and broke the drill bit - inside the hole......aaarrgh!!! I didnt realize "Break time" had numerous definitions. I have another 4-40 tap set do in on Tuesday, hopefully by next Saturday I can start cutting wheels. In spite of all that I have managed to get some forward progress today. I recut the jeer bit knees to approximate what Russ drew, I may have taken a little too much at the bottom. They look ok. we'll see how they look when I get some stain on 'em. I spent most of today fabricating the Main Bits. The instructions dont give a name, I am just assuming this is the correct term. These miniature dados and mortises are both enjoyable and challenging for me. I am pleased with the results. While I was waiting for the glue to dry on the Main Bits I thought I would start in on the ladders. After looking at the kit parts I realized I will have to make my own as Constructo seems to have sent me mis-matched parts. I can totally except simplified parts and choosing to make my own. Even the door and side badges dont bother me, its my choice to build my own. BUT: Really Constructo???? Sam


-
Rich, Wasnt trying to make you change your mind, just kind of wondering "out loud."
- 1,756 replies
-
- 1
-
-
- constitution
- constructo
- (and 1 more)
-
I wonder how they would be retracted then, a pole and a hook?
- 1,756 replies
-
- 1
-
-
- constitution
- constructo
- (and 1 more)
-
Augie, thank you!! I am pleased with my joinery, The planking, well stain and grain filler hide a lot of sins I have learned. There is more than enough room, no need to sit in the back. Popcorn in the corner and there is beer, wine and teguilla in the fridge.
-
Rich, it may be going slow in your eyes, but the result is great! Looking at your lids, I understand what holds the upper half open, any idea what holds the lower half on the real Connie? Sam
- 1,756 replies
-
- 1
-
-
- constitution
- constructo
- (and 1 more)
-
Russ, I agree with the others, she looks really nice. Good to see you getting in some time in on your build. Have fun at the show. Sam
-
So how are you supposed to know if you have everything? go through the instruction book page by page and make your own parts matrix? For what they charge for the kit? I dont think that's reasonable at all. Now you have me wondering if I have enough blocks. Sam
-
I was wondering the same thing. When I have taken finish off on my enterprise I have scribed a line and only removed where the part will touch. You will avoid a color change. Its also easier to clean excess glue up; it wont stick to varnish. Your ports look good, nice and square. Sam
- 1,756 replies
-
- 1
-
-
- constitution
- constructo
- (and 1 more)
-
Jeese thats frustrating Rich! Maybe they could give you some more replacement wood also? Sam
- 1,756 replies
-
- 1
-
-
- constitution
- constructo
- (and 1 more)
-
Rich, I agree with the others, She looks quit good. Not to worry, I have the same problem with walking... Keep the great work and pictures coming. Sam
- 1,756 replies
-
- 1
-
-
- constitution
- constructo
- (and 1 more)
-
Rich, I agree, progress is a good thing, even when its reverse progress. You know where you went wrong so the next one will be perfect. Sam
-
Yikes! My gudgeons are sweating!!
src replied to src's topic in Metal Work, Soldering and Metal Fittings
E&T, Thanks for the info. Its been so long I cant remember now if I neutralized or not. I dont indicate in my original posts so I am assuming I did not. I certainly do now though. Sam -
Rich, Some combination of Dave and Augies suggestion should get you there. There is another way with spring steel as a backer (picture below) but it seems complicated for this scale. If the Dave and Augies suggestions dont work let me know and I will explain it to you. I really think the ammonia will do it for you though. http://www.finewoodworking.com/how-to/article/7-secrets-of-steam-bending.aspx Sam
- 1,756 replies
-
- 1
-
-
- constitution
- constructo
- (and 1 more)
-
Hooked or not your joinery looks great! Sam
-
Me likey! Sam
-
Rich, How about 5 minute epoxy? You will have more working time and I think it holds better than CA. Just my 2 cents Sam
- 1,756 replies
-
- 2
-
-
- constitution
- constructo
- (and 1 more)
-
Thanks for the likes and encouragement. Wow Steve thank you!! Sjors, yea wood is great stuff. I have an ongoing debate with one of the metal workers where I work, I say wood is a superior product. He says metal is cause modern ships are built from steel, aluminum, etc. but I can theoretically at least walk into to wilds a build a shelter with nothing more than a rock and some tree branches. Anyway, I think I have come to a decision on my trucks, tomorrow I will reshape my knees and start on the trucks. This weekend being Mother's Day here in the States I won't get a lot done but some progress should be made. Sam