HOLIDAY DONATION DRIVE - SUPPORT MSW - DO YOUR PART TO KEEP THIS GREAT FORUM GOING! (Only 13 donations so far - C'mon guys!)
×


src
-
Posts
2,300 -
Joined
-
Last visited
Content Type
Profiles
Forums
Gallery
Events
Everything posted by src
-
Rich, Thats Boxwood I used on the gun ports not Basswood. Basswood is a bit softer in my experience. I imagine you could use Basswood and never see the difference although Basswood fuzzes up a bit when you sand. A thin wash of finish will stiffen up the fibers and then another light sanding and you should have a nice smooth surface although that will mess with your staining later if you go that rout. Sam
- 1,756 replies
-
- 1
-

-
- constitution
- constructo
- (and 1 more)
-
Rich, Enjoy your trip with your family, we will be here when you get back. remember - No baton twirling in the work room. Sam
- 414 replies
-
- 1
-
-
- caldercraft
- victory
- (and 1 more)
-
Rich, Take a look at my stern ring and gun ports, those are boxwood and the other white wood is Constructo's Ayous, I think the only difference is a slightly more open grain on the Ayous. Oh and the boxwood I received from Hobby Mill is a bit harder/denser. I actually prefer the boxwood after working with it. It sands nicer also. Basswood tends to fuzz up in my limited experience. Sam
- 1,756 replies
-
- 3
-
-
- constitution
- constructo
- (and 1 more)
-
What is it with Admirals and mess? Dont they understand that a clean work area is a sign of a dissatisfied shipwright? I had t threaten my better half with rearranging her kitchen if I had to clean my work space. Sam
- 1,756 replies
-
- 1
-
-
- constitution
- constructo
- (and 1 more)
-
Mark, thanks. They are working out ok so far. I have been slowly building more jigs so I have a total of four as well as making more carriages. At the moment I have a wopping TWO carriages done...... Woo. hoo!! Only twelve more to go. So glad I am not making one of those 60 gun shops ships at the moment. I have been making round head nails at the same time. Maybe I will have something to show over the weekend. Sam
-
So now when we get stuck on something we can say "WWSD?" (What Would Sjors Do) and the reply will be DaSD (pronounced "dazed") Sorry Sjors, couldnt resist. They do look good though, if mine come out half as good you'll hear the "Stompin' of the Klompen" from my happy dance! Sam
- 1,873 replies
-
- 6
-
-
- occre
- san ildefonso
- (and 1 more)
-
Great job like always Sjors! Sam
-
Instant wood filler! Thats a lot of little wood pieces. When I worked in my first furniture shop I used to tell people who asked what I did for a living, "I cut big pieces of wood into smaller pieces and then glue them back into big pieces of wood" Looks like your doing the same thing here just on a smaller scale. Looks like you had a very productive day! Sam
-
Rich, this is just my personal opinion, but actual varnish is too shiny straight out of the can. It can be cut to satin/eggshell with steel wool but to me it seems like a lot of work on a ship. There are Polyurethane finishes that you can get in various sheens, many of the builders here seem to like the water based stuff, its water white and doesnt change color over the years. That is nice since once you stain it your color wont change when you apply the finish and it wont yellow over the years. When I finished my Enterprise I used a combination of shellack as a wash coat, stain, colored grain filler and then a mixture of boiled linseed oil and beeswax. As expected as the finish ages it is yellowing, I happen to like the effect, it looks antique-y to me. Beauty is in the eye as they say. Just my 2 cents EDIT - Keep in mind if you stain you will change the color of the blond wood also, for better or worse. If for some reason you have never stained before make sure ALL the glue is off your planking, the stain wont take there. A water based clear will just enhance the the look. Best to make a sample board before you do anything. Sam
- 1,756 replies
-
- 2
-
-
- constitution
- constructo
- (and 1 more)
-
Steve, looking very good. Sam
-
Robbyn, thanks! I kinda figured others did something similar but didnt see anything in the forums. I dont usually spend too much time making pretty jigs, more wham-bam! I do appreciate the art like tools and jigs I see here though. Rich, thanks. The break was needed. Tim, Thanks for stopping in, always enjoy new faces. stop by again. Didnt get much of anything accomplished today build wise - domestic bliss (house cleaning) reared its ugly head. sam
-
I know what you mean, many years ago when PE parts were just coming out I bought an F16 and an afterburner PE kit. WAY beyond my skills and experience. I never did finish it. I think now with a site like this for aircraft I could do it but then in my early 20's when I had no clue about metal parts? No way. Enjoying folloing along sam
-
Thank you Bindy! Sometimes half the fun is figuring out how to get from "A" to "B" - although it doesnt always feel like it at the time. Back from R&R, had a great time. Enjoyed some adult beverages, sight seeing, some girl watching while the better half enjoyed some boy watching. Tried zip lining, that was fun, dont feel any burning urge to do it again, but wont rule it out either. Back to building, gonna see how many carriages I can glue up today. Might even get the metal work blackened. I still have to make a plug cutter for the trucks and the quoins, bolster and beds. Looking back I should have made the bolsters out of the same plank I made the rear axletrees with. Pictures when there is something to show. Sam
-
Can't go wrong with Kentucky windage! Nice fix on the windows.
- 1,756 replies
-
- 1
-
-
- constitution
- constructo
- (and 1 more)
-
Thanks everybody. Got a whole pile of parts ready to go as well as a couple more plugs so I can glue up more than one at a time. Right now the better half and I are taking a few days for some R&R. See you soon. Sam
-
Steve, Your off to a great start. Joggeling is something I want to try on my next build. Sometimes I find it helpful to do my layout with a sharp knife instead of a pencil. Sam
- 569 replies
-
- 1
-
-
- shenandoah
- corel
- (and 1 more)
-
Looks good Rich. Yea those brass nails are fun arent they? Sam
- 1,756 replies
-
- 1
-
-
- constitution
- constructo
- (and 1 more)
-
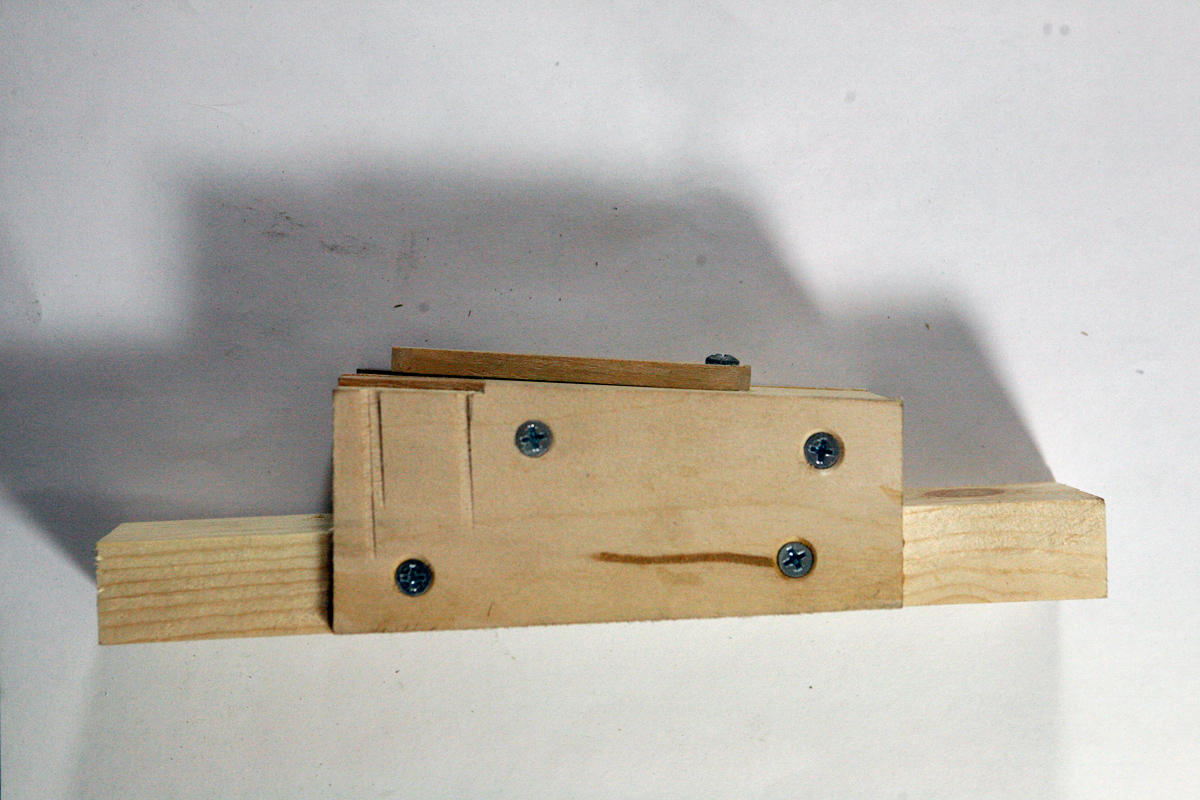
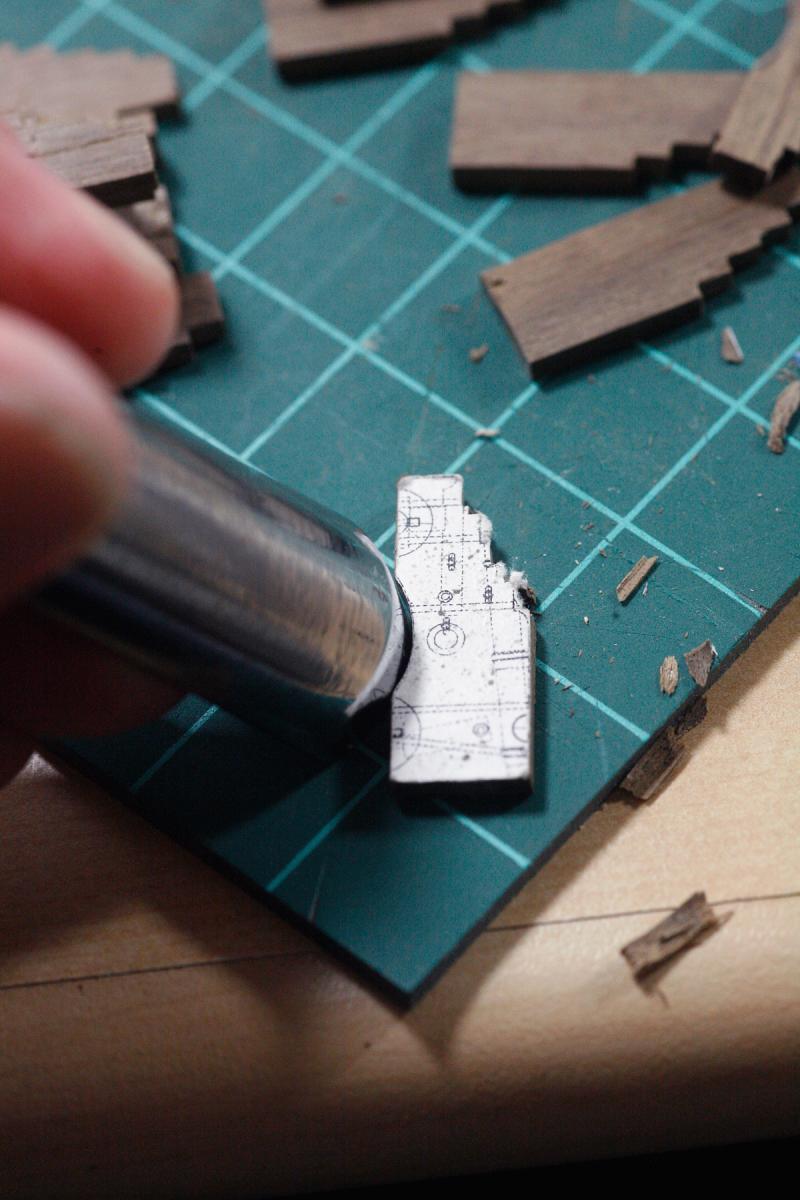
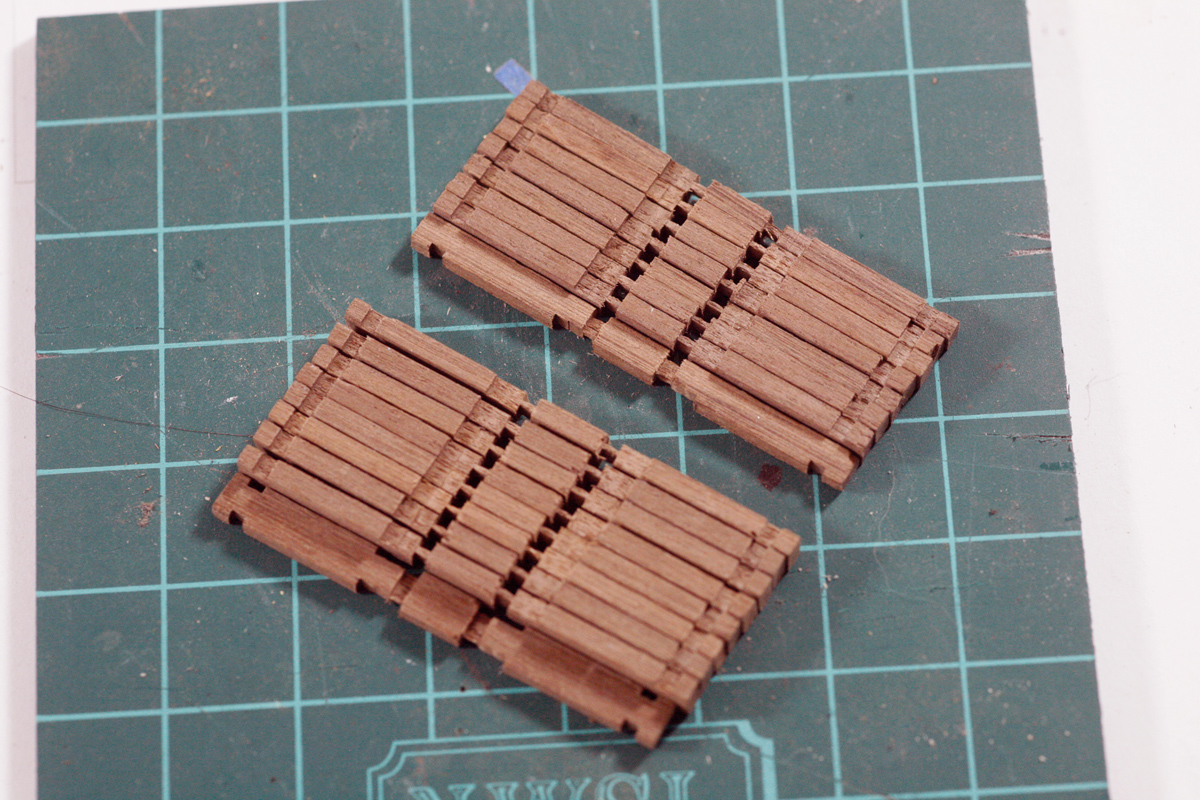
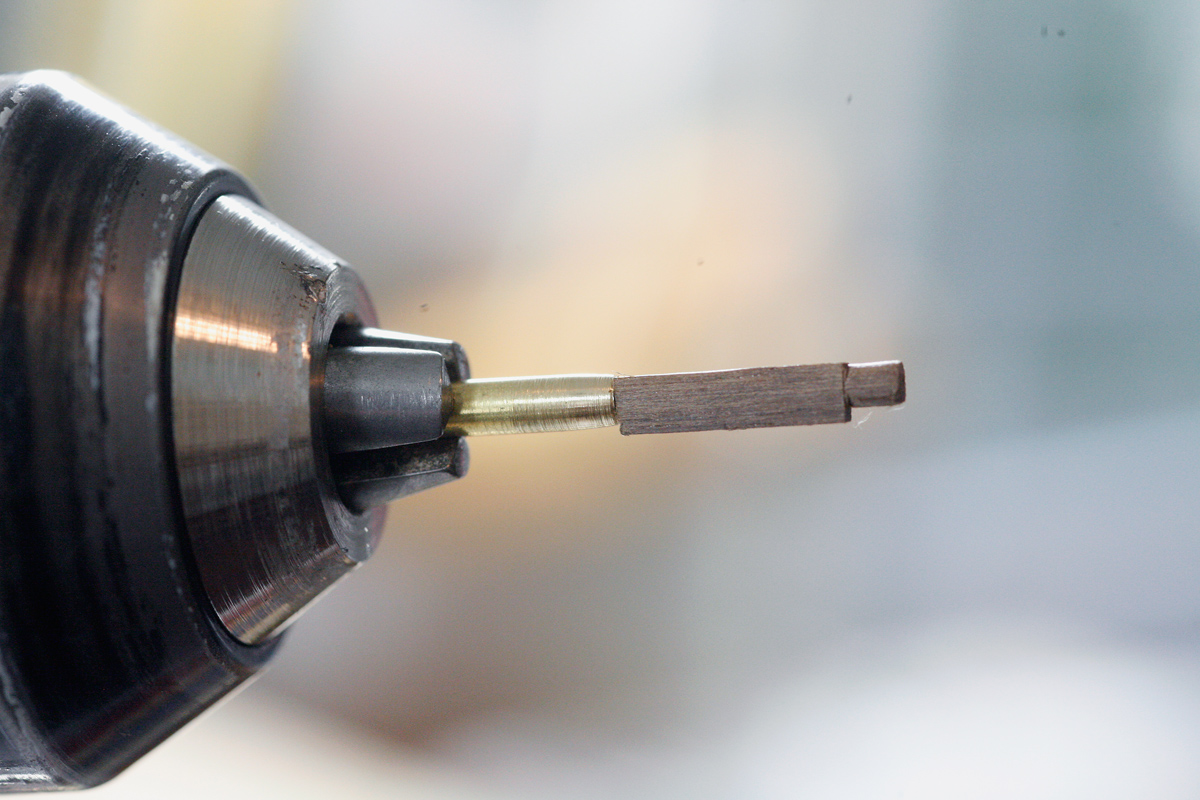
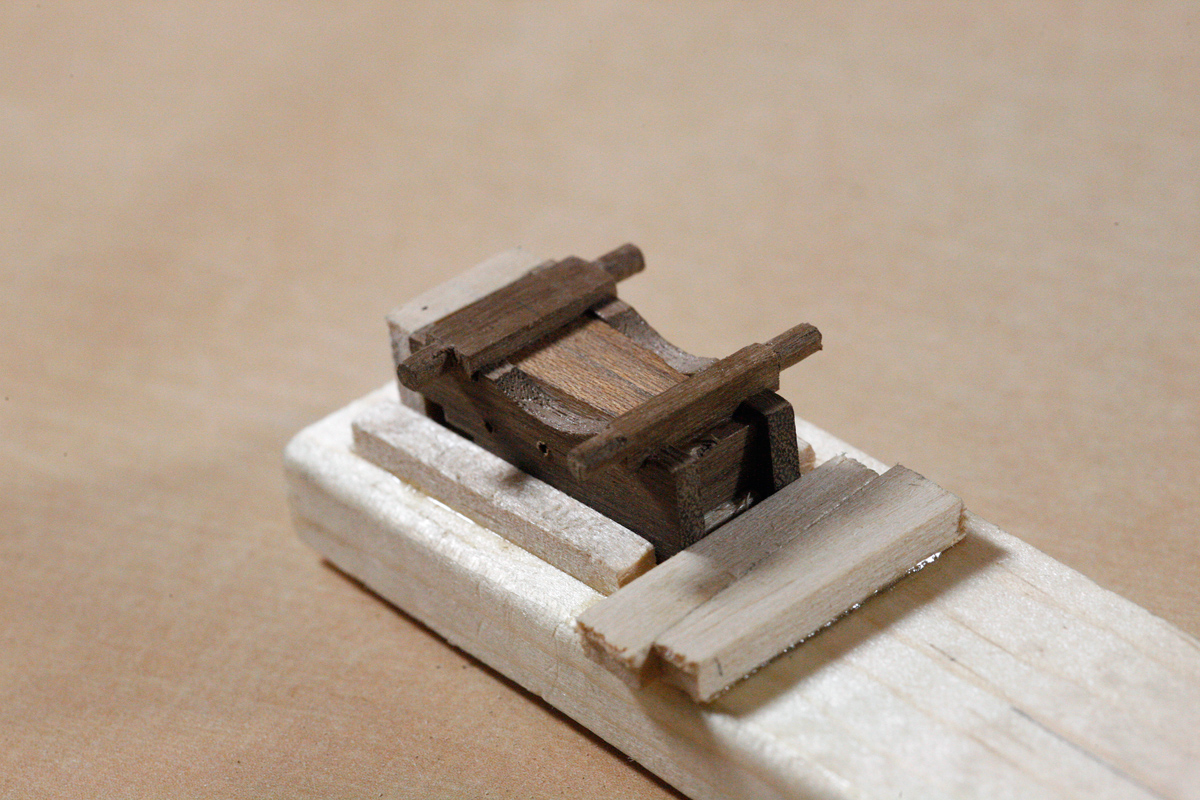
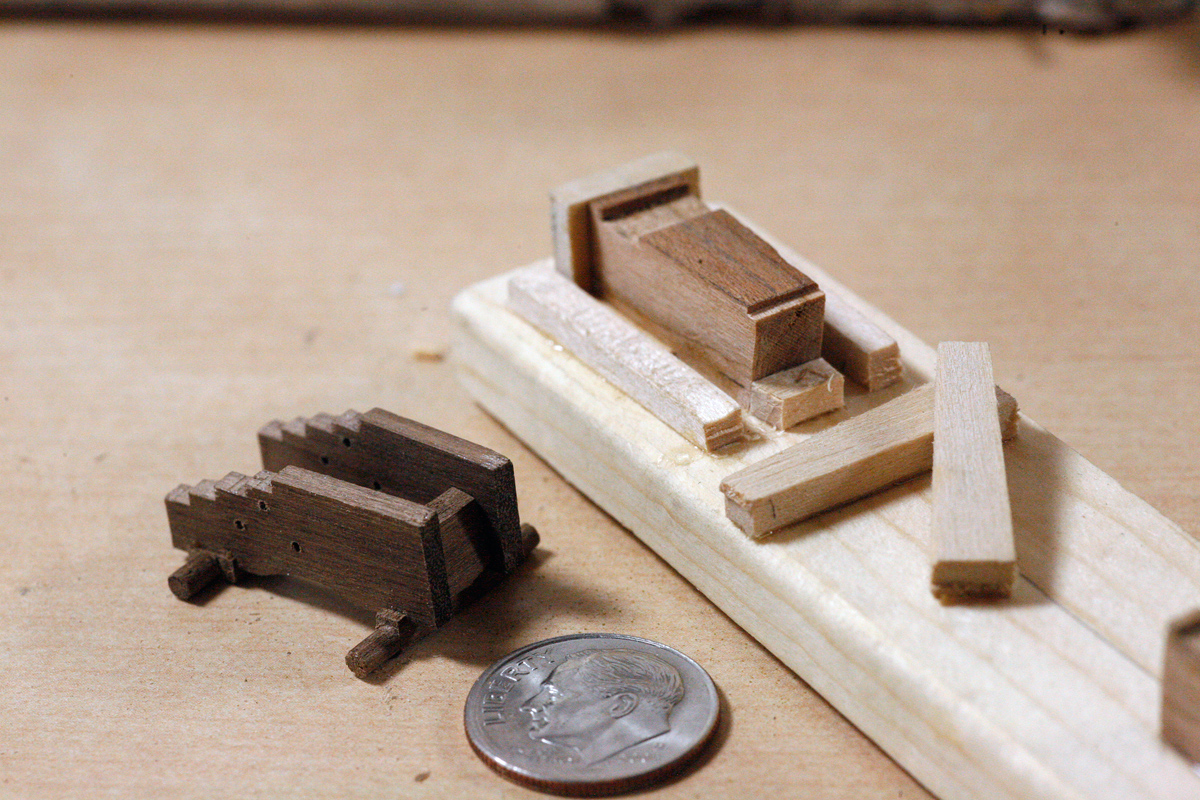
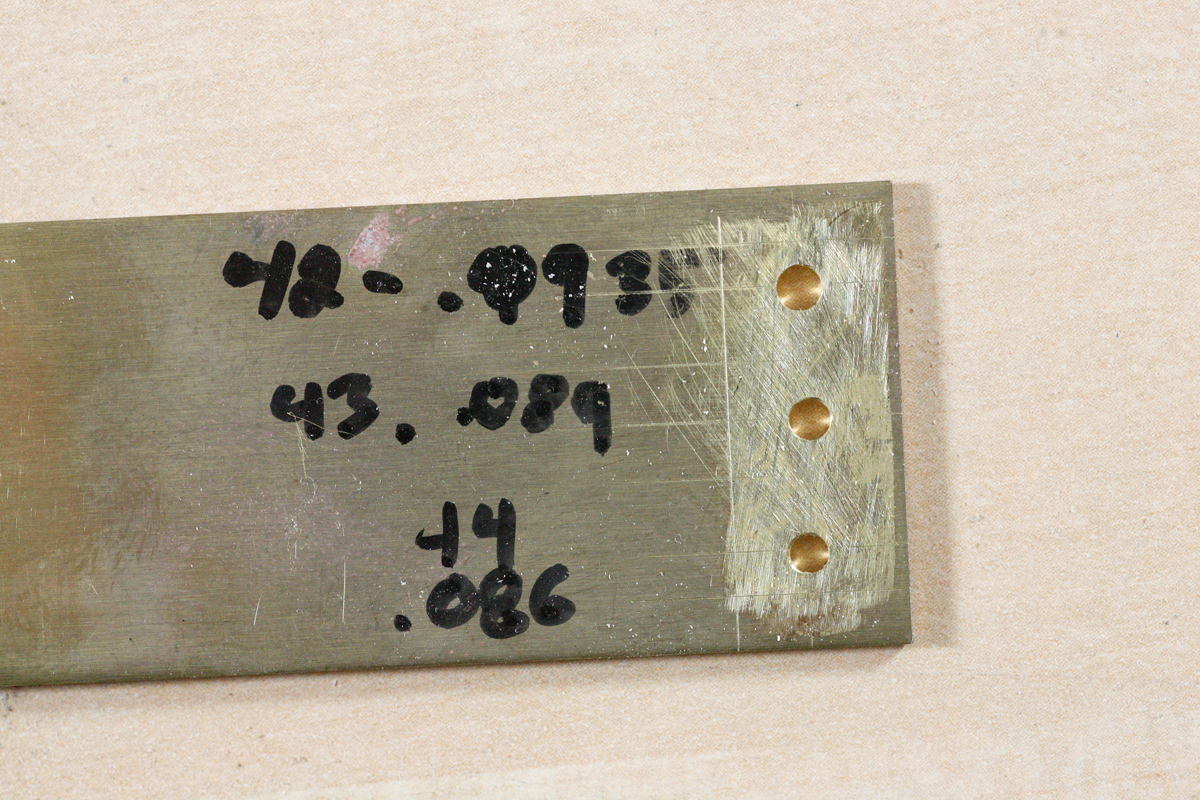
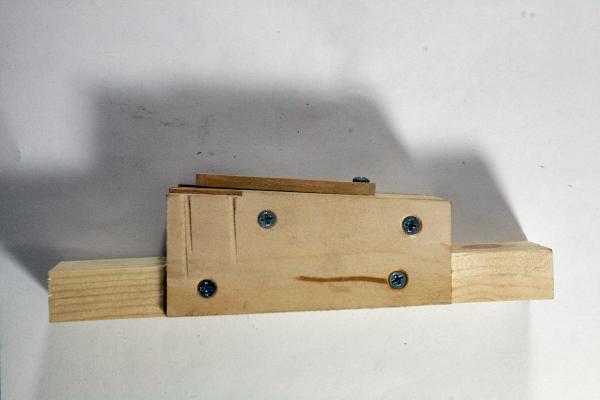
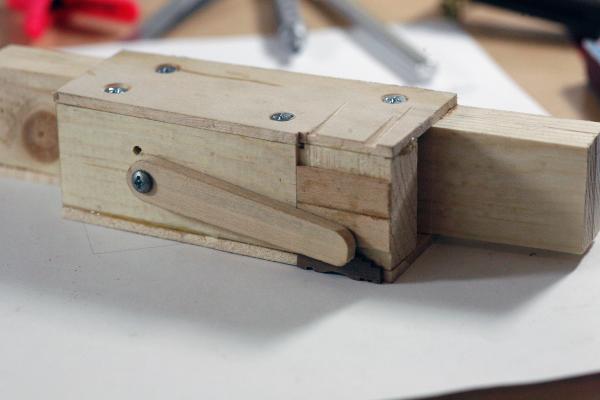
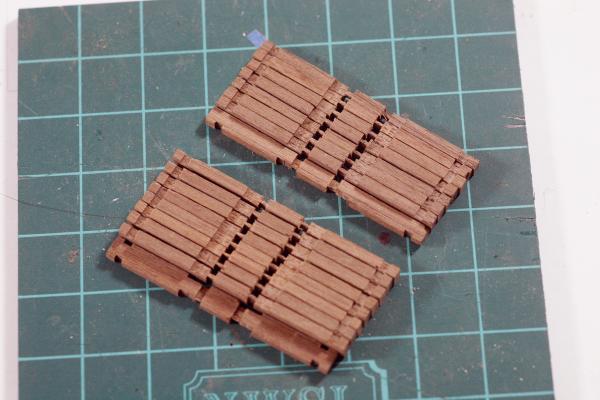
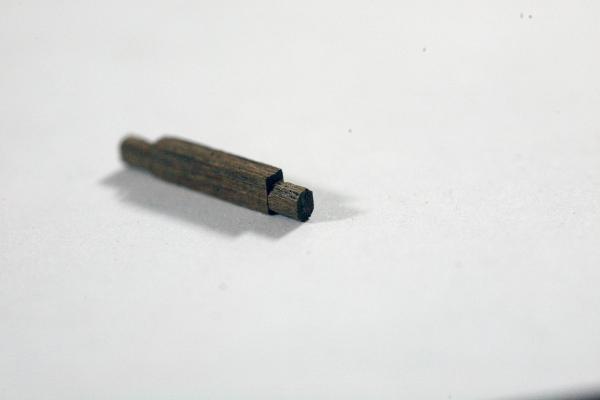
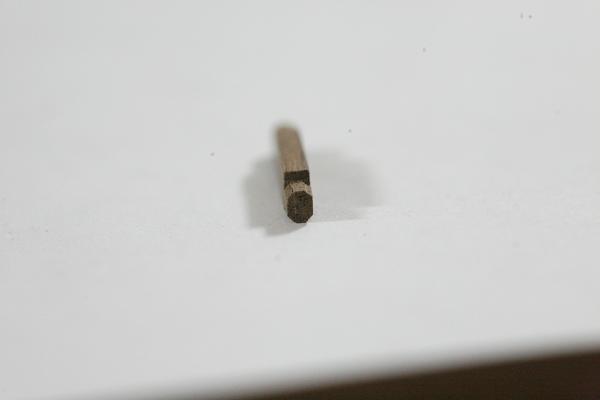
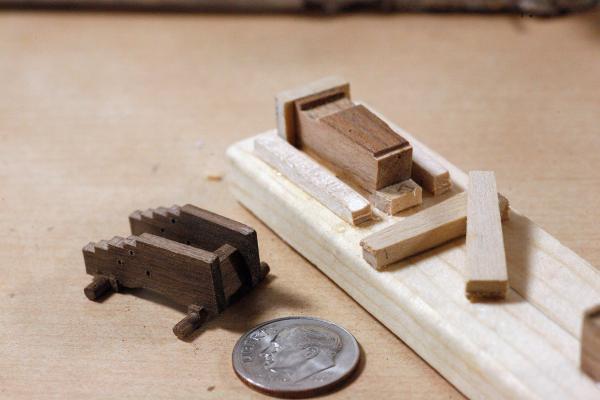
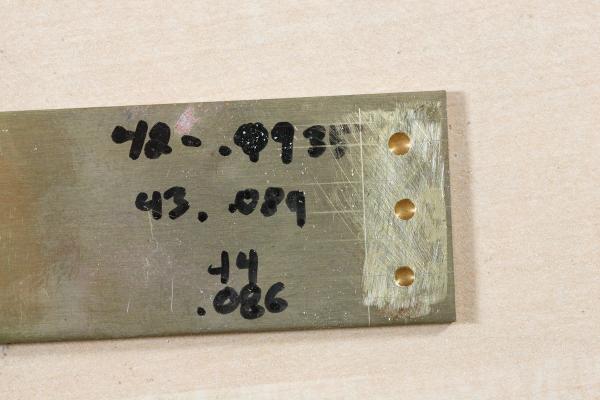
Woo! Hooo!!! is been months since I had something to show. I havent been idle, just busy with work etc. When I last posted an update I had just re-cut my carriage sides, the next step was to let in for the axels, I made a two sided jig so I could cut everything on the table saw safely. Clamp to the sled and cut away for all the left side parts, flip it over reset and finish the right side parts. Worked pretty well over all, a little sloppy on a couple of the cuts, nothing the wheel and a filler wont hide. Something slipped when I was milling, I dont think I had everything clamped down as tight as I should have. Some short work with a carving chisel and I had a mostly finished side. Still some work to do final sanding, cut the slot for the trunnion, etc. Next was the Axletrees. I milled them in pairs it was safer; make a cut flip the part around and make the matching cut. After I separated them into individual parts I puzzled over how to make a nice round axle. I started out chamfering the corners and planned to file everything round. That wasnt working so well, I was getting ovals and eggs. After ruining two I made a plug cutter out of some brass tube that was about the right I.D. After chucking that up in a drill motor I had more or less round axles, just a bit over sized so I made a drawplate out of brass. steel would have been better but I only had 70 or so axles to true up so brass worked out well. It started getting dull towards the end, a quick pass with a #4 cut file and all was well. The entire time I was doing all this I was noodleing over how to assemble all these carriages easily and consistently. I made up a plug to the same dimensions as the inside of the carriage and then built up guides and keys around that. After that it was just a matter of inserting two sides and gluing everything up. Like all my jigs its not pretty like some I see here but its functional. Sometime whilst all this was being done I spent a couple of evenings making a drilling jig for the rings and predrilled for those - on the wrong side! a little bit of filler will take care of that since its on the inside. Thats it for now, hopefully its not 3 months till my next update. Sam


-
Z, Sorry to hear about your father, he is doing better now, thats great news. Your build is coming along nicely, nothing like some build time to let go of troubles and worry for a while. Sam
-
Sjors, there is NO paint anywhere? Do I need new glasses? maybe a new memory and re-read your log? I could swear there is some paint on the build in the background. I am going to go contemplate my for life for a while........ Sam
- 1,873 replies
-
- 4
-
-
- occre
- san ildefonso
- (and 1 more)
-
and spend ten times the kit cost in tools materials and research material.
- 569 replies
-
- 4
-
-
- shenandoah
- corel
- (and 1 more)
-
Now that I have had some coffee I see I got the names mixed up! Fonzie is painted and Aggie has filler! Sheesh! AhhhPfft! I think you know what I mean now. Sam
-
I have done the same thing with hot water or a heat gun, just dont walk away from the heat gun...... Good to know it doesnt alter the strength.
- 1,756 replies
-
- 1
-
-
- constitution
- constructo
- (and 1 more)
-
Looking great Sjors. Looking at your Aggie your making want to paint my next build. Sam
- 1,873 replies
-
- 1
-
-
- occre
- san ildefonso
- (and 1 more)