HOLIDAY DONATION DRIVE - SUPPORT MSW - DO YOUR PART TO KEEP THIS GREAT FORUM GOING!
×


src
-
Posts
2,300 -
Joined
-
Last visited
Content Type
Profiles
Forums
Gallery
Events
Everything posted by src
-
Rich, looks like you found a method that works for you, they look good! Sometimes I think thats half the battle, finding out what works for you. I may have to disagree with David for once, I think we are the sane ones. Wait, David, you said abnormal, maybe we're both right! Sam
- 1,756 replies
-
- 1
-

-
- constitution
- constructo
- (and 1 more)
-
Thanks Rich ! I'm enjoying the process. But I am finding, once you start modifying and "improving" a kit it becomes a situation if where do I stop?? I have had to pull myself back on a few occasions where I got tunnel vision on one part and was going to end up with various levels if detail. Sam
-
Ahhh... I see now. That does bring it more in line with Fully framed also. Thanks!! Sam
-
So we now have kit bashing and KIT Bashing! LOL. I am sure david is right about it happening all the time. Hang in there, slow and easy. If you go with some sort of drill template, maybe make it open on only one side like maybe the bottom side? Then you have a Go-No-Go gauge also. Sam
- 1,756 replies
-
- 1
-
-
- constitution
- constructo
- (and 1 more)
-
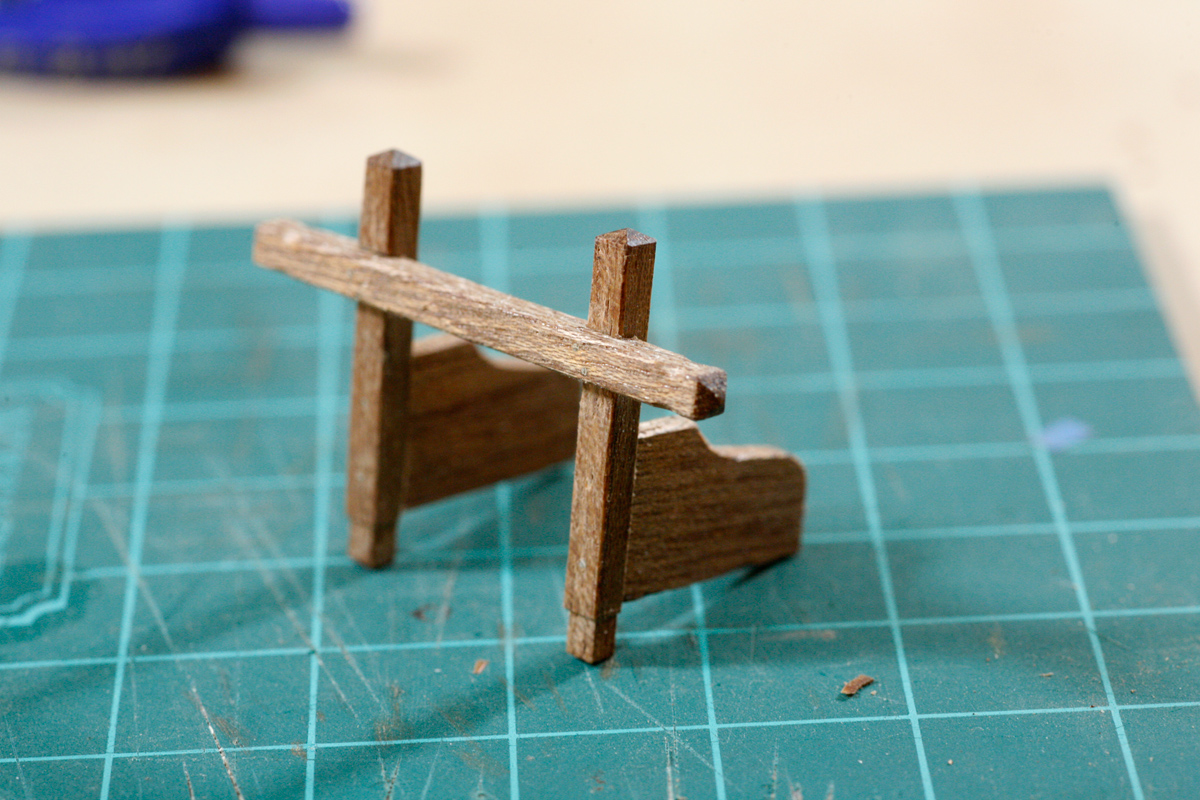
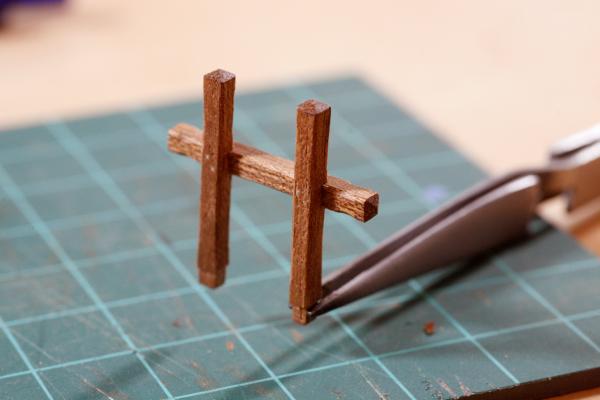
Russ, Thank you. I was somewhat concerned about things coming undone when I rigged. I know I am on the right track now. As far as the knees, I wondered the same thing. The parts came pre cut and more or less match the plans. The only thing I have to compare to is Fully Framed and those dimensions are completely different. So more like the red line? I can drop about an eighth of an inch before I hit my tenon, for that matter I can remake the entire assembly, it wasn't hard to make. Feel free to modify the photo if its easier to explain. Sam

-
Rich, Robbyn, Thanks! Quick update. While I noodle over how I want to make my trucks I am making the various bits and assorted furniture. I have made the Fore Jeer and Sheet Bits. I think thats what they are called. I am pretty pleased with the Jeer Bits, I may remake the Sheet Bits, they are a little inconsistent on the chamfers. I was really pleased with my tenons on the Jeer Bits, I wish I had taken pictures, they are the cleanest scale tenons I have cut in mahogany since I started this build. I reinforced all the joints with pins after the glue dried. Once I get a few more parts made I will get some finish on everything. Hopefully this weekend I can make a cutter for the carriage trucks, I want to make them with flat stock instead of dowel rod. Mostly because I have plenty of flat stock and no dowel rod.

-
Wow Rich, there's a couple of canons on this one! Your gonna have fun rigging and lashing all those Sam
-
Steve, that looks great! The hooked scarf isnt really difficult. Like any joint its all in the layout. Take a look at this link. There is a picture about 1/2 way down, extend the line of the cheek/face to the end, then its just careful chisel work, no more difficult than what you have done already IMHO. Leave your points long and "sneak up" on them. http://www.diy-wood-boat.com/Joints.html Sam
- 569 replies
-
- 1
-
-
- shenandoah
- corel
- (and 1 more)
-
Rich, how are you at soldering? Maybe coy cut a piece of brass and solder some "T" brass to the edge - make sure you keep them square to each other then drill holes in the brass for the "nails." Use that as a drill template and locate your hinges to the holes? This is assuming constructo has drilled the hinges consistently of course. For your planks if it was me I would consider glueing up long strips instead of lots of short pieces. Maybe even leave them a bit wide to allow for any tear out when you cut those 1/2 round cut outs. If I was doing something like that full size I would glue up a double width and rip after the hole was cut. Two holes for one rip that way. Don't know if you have a way to do that at this scale? Sam
- 1,756 replies
-
- 1
-
-
- constitution
- constructo
- (and 1 more)
-
Thanks Duff, I was unaware of Gilmer. The one time I needed to buy hobby wood I went to either Hobby Mill or The Lumber Yard, cant remember which. Right at the moment life is interfering with Life again so I havent contacted anybody for a couple of samples. I am leaning towards something light colored like the box wood alhough both the spruce and alder might go well also. Decisions decisions.... Fortunately at the rate I am building it will be at least a couple of months before I really need to worry about masts. I dont mind winging it to a point but it is nice to have a plan in place first. Sam
-
That bow grate looks like it was quit the project, looks great! Sam
- 1,756 replies
-
- 1
-
-
- constitution
- constructo
- (and 1 more)
-
Mark, Will they be visible? Does it matter, or is it one of those, "I know they are there" kind of things? Sam
-
All, Thanks for your responces, a nice variety, just what I have come to love and expect here. Duff, I looked on The Lumberyards website and they dont list Costello, does it have another name? I may have to get 2 or 3 different color woods and see what I like. Thanks again, Sam
-
Steve, Your deck looks good, the variegated colors work well. sam
-
Steve, Are you going to use wood putty, wood filler or grain filler? Wood filler will dry and need to be sanded, that might be a problem with a sealed and possibly stained deck. You can stain and finish over wood filler after its sanded. Wood putty doesnt dry and is designed to be used after your clear coat is on. Grain filler is a thin paste that you can tint to most any color you want. Its primarily used to fill the grain on open pored woods like walnut, cherry and mahogany. Its one of the trick finishers use to get a glass smooth finish on those woods. Colored it can be used to control the contrast between your base color on your wood and the grain color. As an example on my Enterprise, I wanted to pores to be closer to my base color so before I stained I applied a coat of tinted grain filler after a washcoat of shellac. That allowed me to control the overall look. For your tree nails, I think any of the above methods will work although you mentioned you have sealed already. If you use filler you will have to sand and you most likely will go through the sealer and have to seal again, most likely not a problem. I think your easiest rout might be to finish and then wood putty. You will probably have to re-drill/re-dimple before you putty. Grain filler is a bit of an art, Rockler is only a few miles from you, a trip there might be a good starting point if you want to play with that. I think before you do anything you probably want to make a sample board first. Sam
- 569 replies
-
- 1
-
-
- shenandoah
- corel
- (and 1 more)
-
Rich, I dont think you have anything to be envious about at all! Your joinery looks great, and the comb idea, Brilliant! Sam
- 1,756 replies
-
- 1
-
-
- constitution
- constructo
- (and 1 more)
-
Hmmmmmm Sjors It appears Siri cant spell. Nope, I had nothing to do with that at all, not me, no sir! Sam
- 1,616 replies
-
- 2
-
-
- caldercraft
- agamemnon
- (and 1 more)
-
You work fast shoes. May should be a good month. Sam
-
Rich, Augie brings up a good point. Halogen bulbs are a slightly different temperature. Check out this page if interested. http://www.lightbulbsdirect.com/page/001/ctgy/colortemp Sam
- 1,756 replies
-
- 1
-
-
- constitution
- constructo
- (and 1 more)
-
Thanks Russ, I will look into that over the weekend. If it is similar to the alder I have used in the past on cabinets it can be a very nice wood to work with. The slight red tint might also be a good contrast to the rest of the wood tones. Sam
-
Steve, That looks great. Like J pointed out, it seperates the two dark woods nicely. Sam
-
What is a good wood for making scale masts? The mast material that came with my Enterprise isnt as straight as I would like and I cut a piece off some time back to fit my bowsprit and 'The cat ate it"Now I may not have enough. Anyway I am considering boxwood, I know I need straight and fine grained, is there a better material? I will most likely go with square stock so I can build up my masts and yards based on "Fully Framed IV" and "Masting and Rigging" Thanks in advance for any advice. Sam
-
Mark, Dan, thats not sawdust, those are little tiny granules of Retirement Induced Contentment and Happiness! Your R.I.C.H! And now a question. Are each of your frames made of two layers with the joins off set or one layer with half lapped joints? I enlarged the photo and for the life of me I cant tell. Sam
-
Rich, Yea I am not sure as to how common that was. Most of the pictures/drawings I see show them either run in/out or with the muzzle against the bullworks. I have seen a couple of drawings showing a lashing with the carriage sideways like I have in the lower picture. On a smaller ship like the Enterprise I suspect that there may have been times when they were lashed sideways but I have no proof. Such as times when there was little likely hood of combat. When I look at how much deck space is taken up with the guns run in and lashed it seems like an awful lot of deck space taken up. Then again, I am probably using 21st century values. Either way I will be lashing the two forward most carriages that way just to hide the mess I made out of my deck when I moved the bits from the deck to the cap rail.As far as the rest, a bit of research and then a game time decision. Its gonna be weeks before I get to that point so I am not worried about it at the moment. Sam