iMustBeCrazy
-
Posts
976 -
Joined
-
Last visited
Content Type
Profiles
Forums
Gallery
Events
Everything posted by iMustBeCrazy
-
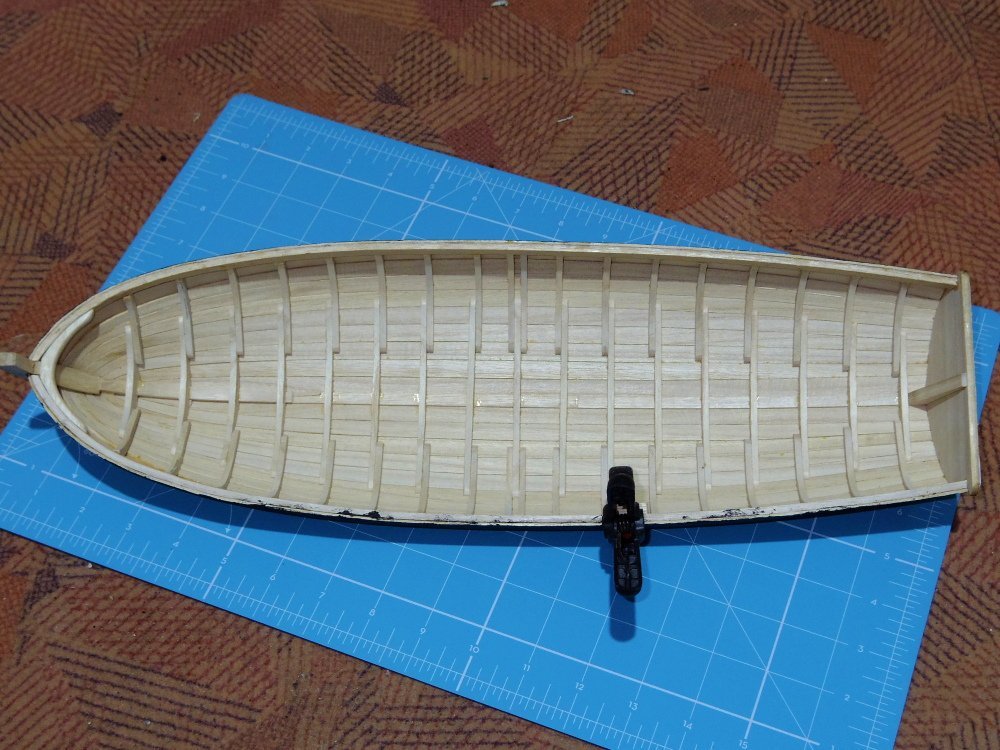
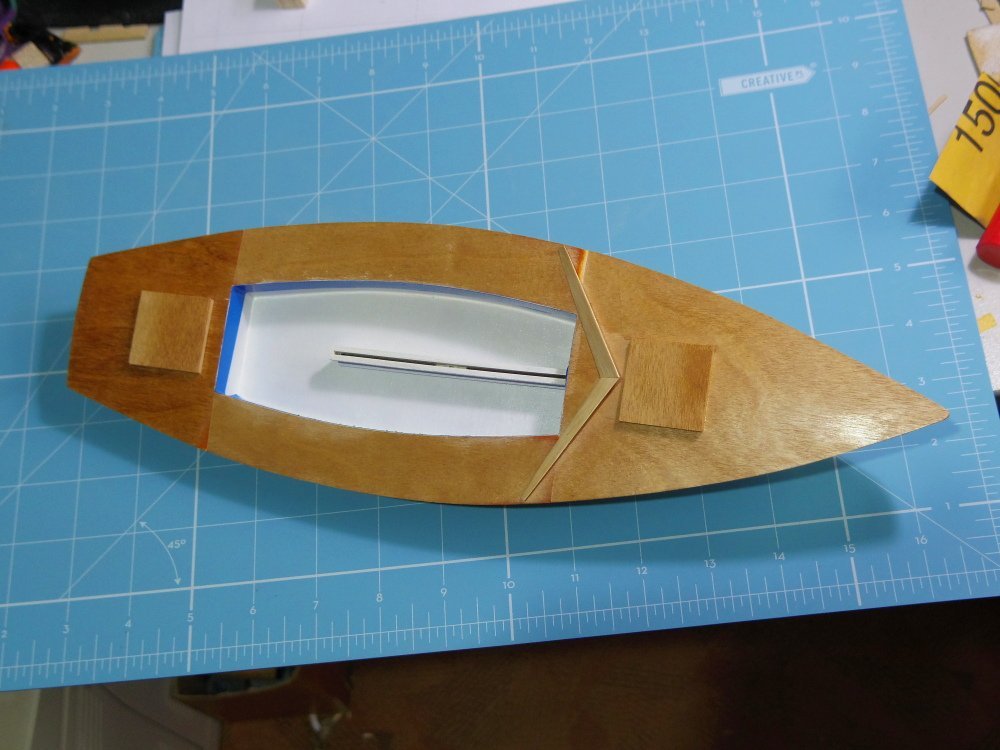
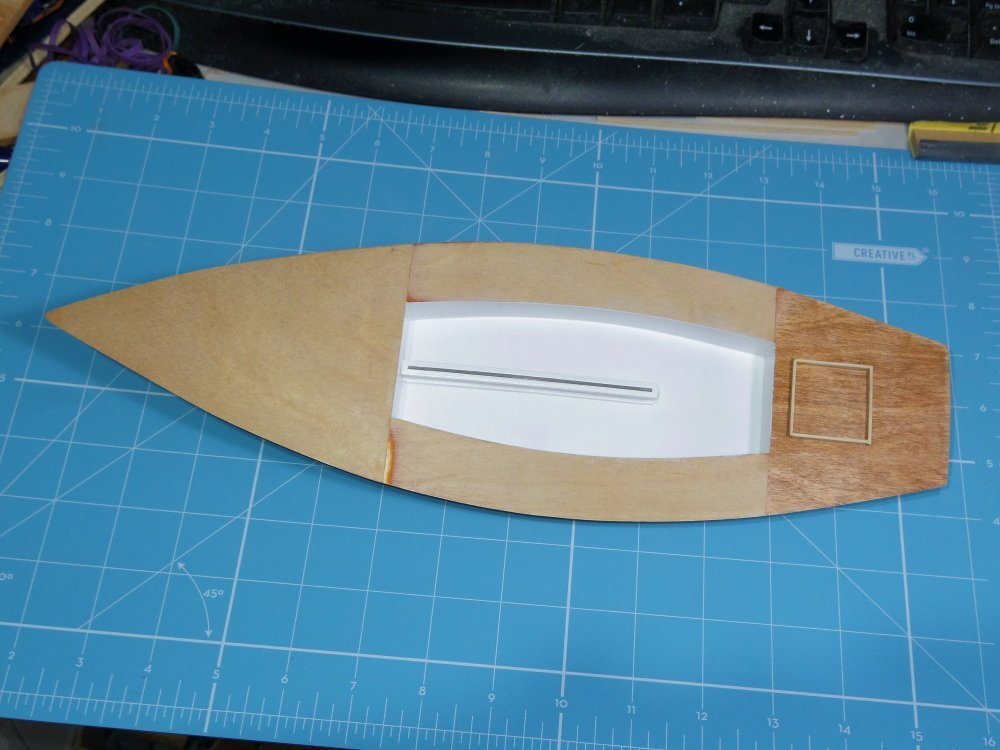
 Debating what to do about the colour scheme. The exterior I will probably paint white or white below the waterline, the interior I'm going to leave 'natural' but the wood seemed a bit too light (see first pic in the post above) so I took some shellac and added a touch of spirit based stain and brushed it on. Seems to have done the trick nicely. The stain bled through the plank joins in some places, but only enough to darken the seams a little. I could leave the hull with the current shellac finish without anyone noticing.
-
Transom Build Plans
iMustBeCrazy replied to Matrim's topic in CAD and 3D Modelling/Drafting Plans with Software
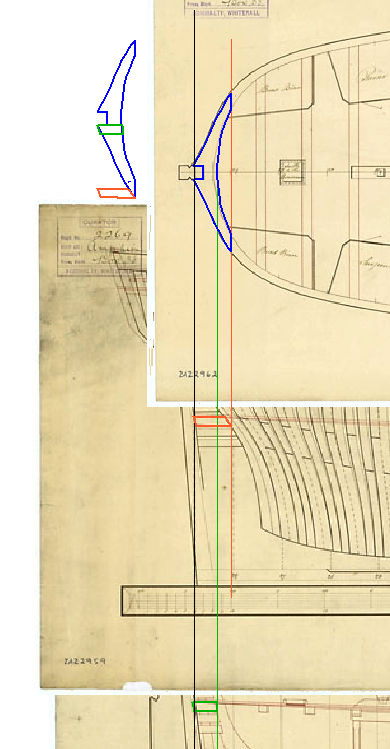
Well I'm certainly not one of them, I believe I'm further down the learning curve than you. But since I have to do this myself sometime I had a play and this is what I came up with (not much): This superimposes the frame plan (green) and the outboard profile (blue) over the inboard profile (red) and shows that the transoms are horizontal across the stern and that they are horizontal in profile except number 3 which tilts down following the lower deck. Since number 3 tucks up under the lower deck, we can use the lower deck plan to get the shape of number 3. That's about all I can come up with, hope it helps.
-
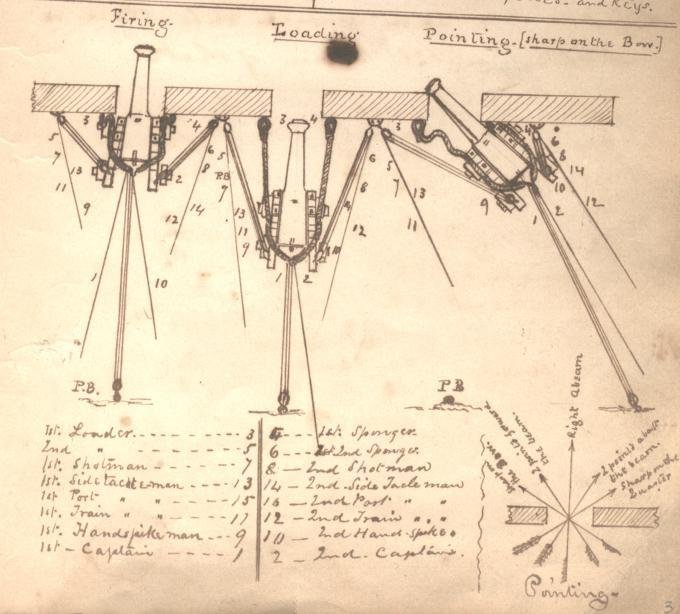
It comes from a sketchbook by David Stauffer https://www.gilderlehrman.org/news/civil-war–era-sketches-david-stauffer There is a second part to the sketch:
-
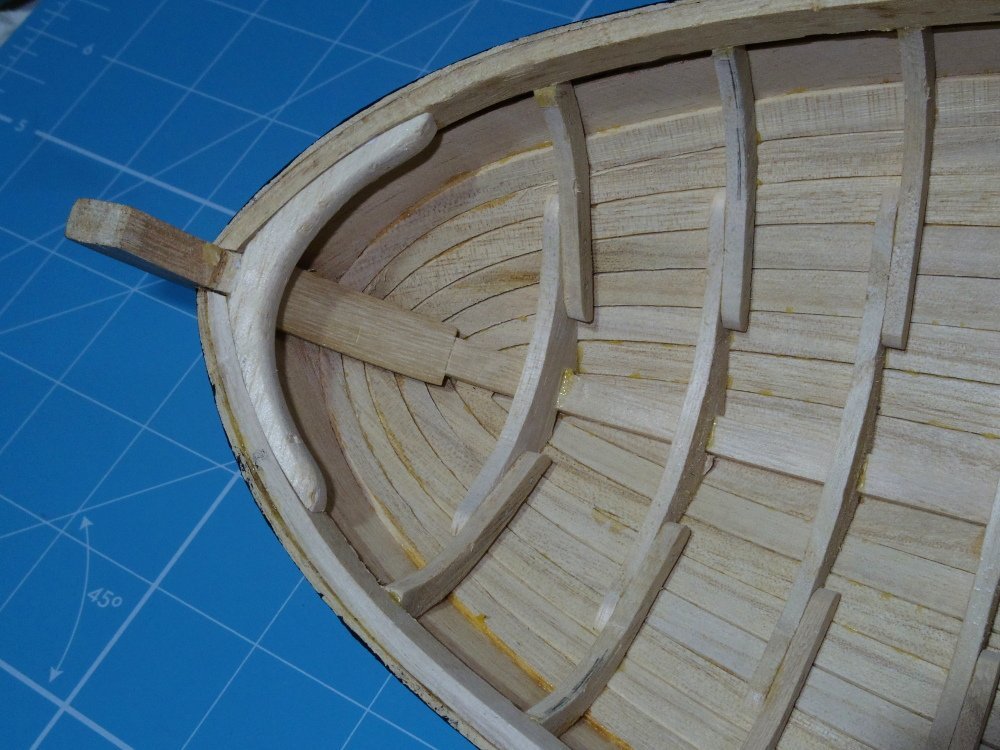
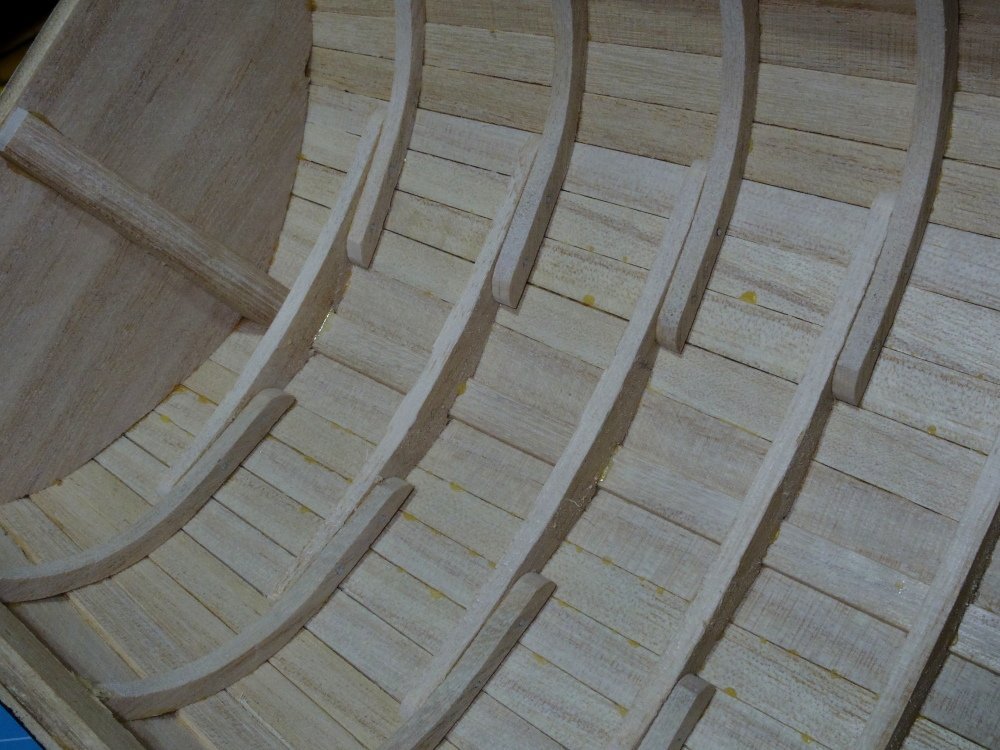
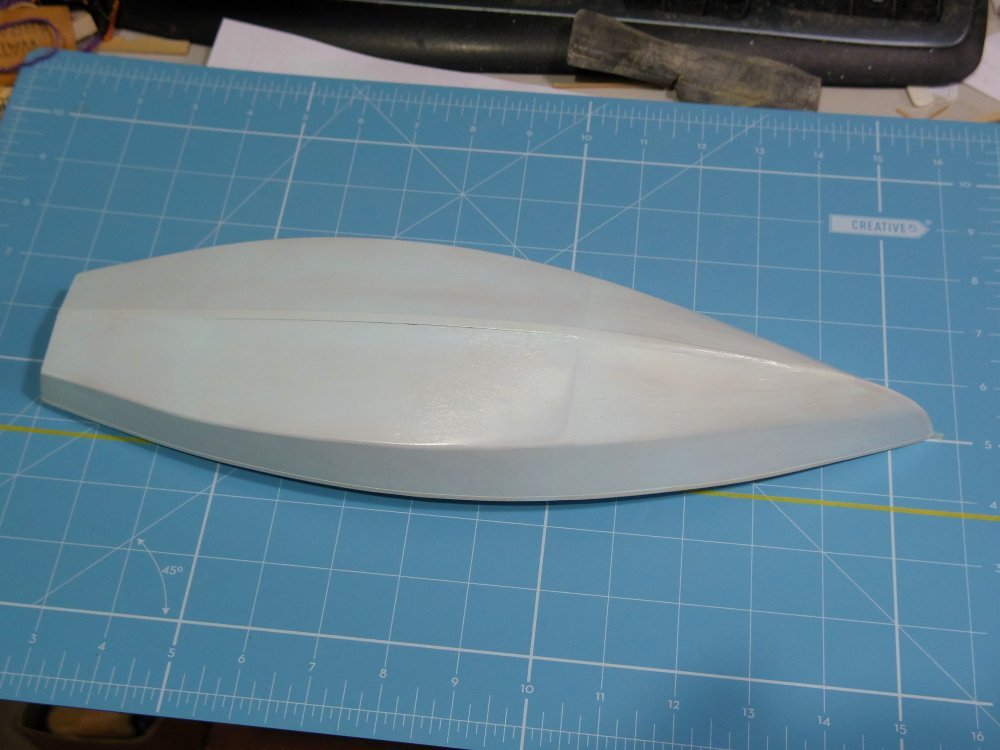
Ok, ok. I couldn't wait. She popped of pretty easy, just snagged a little on the plywood tabs holding the frames (see post #33), the cling film (saran wrap) worked great. A small amount of excess glue and I over bevelled the planks a little but otherwise she's good.
-
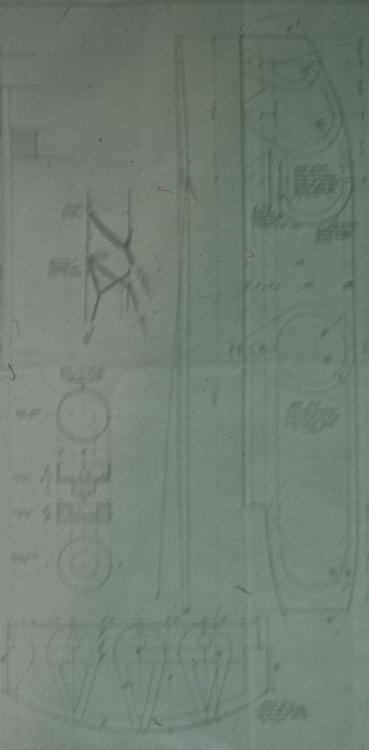
Kitty's hull is currently getting re-painted white, I had it wrong. She will look a lot better for it. I have also drawn up the mast, below is what I had to work with alongside one cross section drawn by my Father. That's the mast on the right and the boom at the bottom. And, no I can't read any of the measurements either.
-
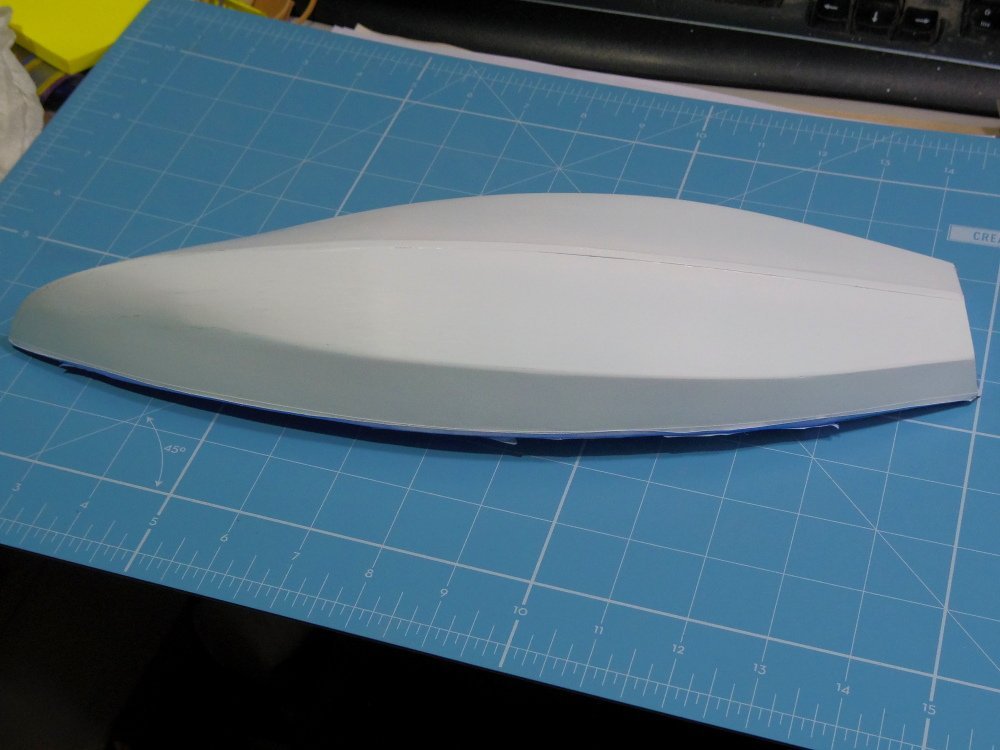
Finally back to it, sheer strakes fitted and painted. Tomorrow I will find out if I've glued her to the mould.
-
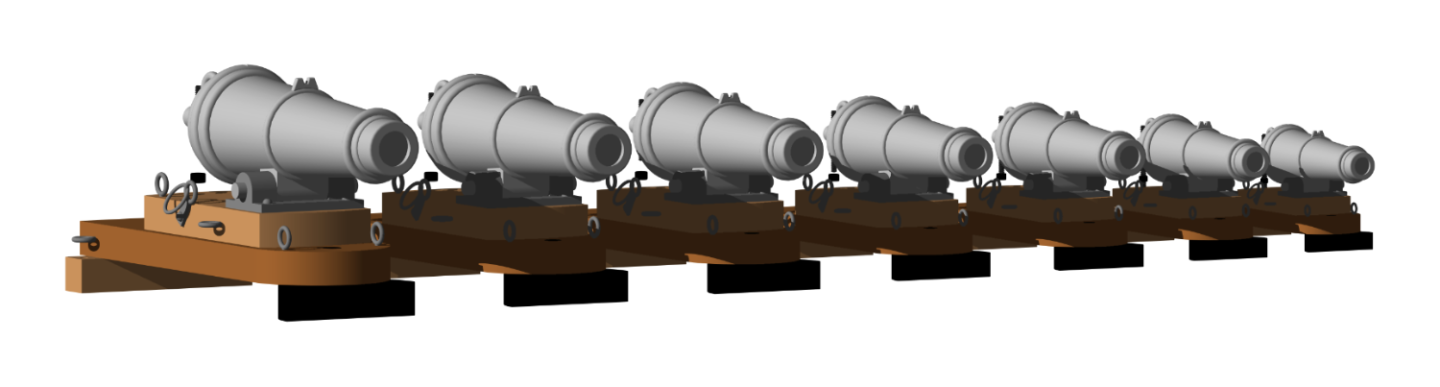
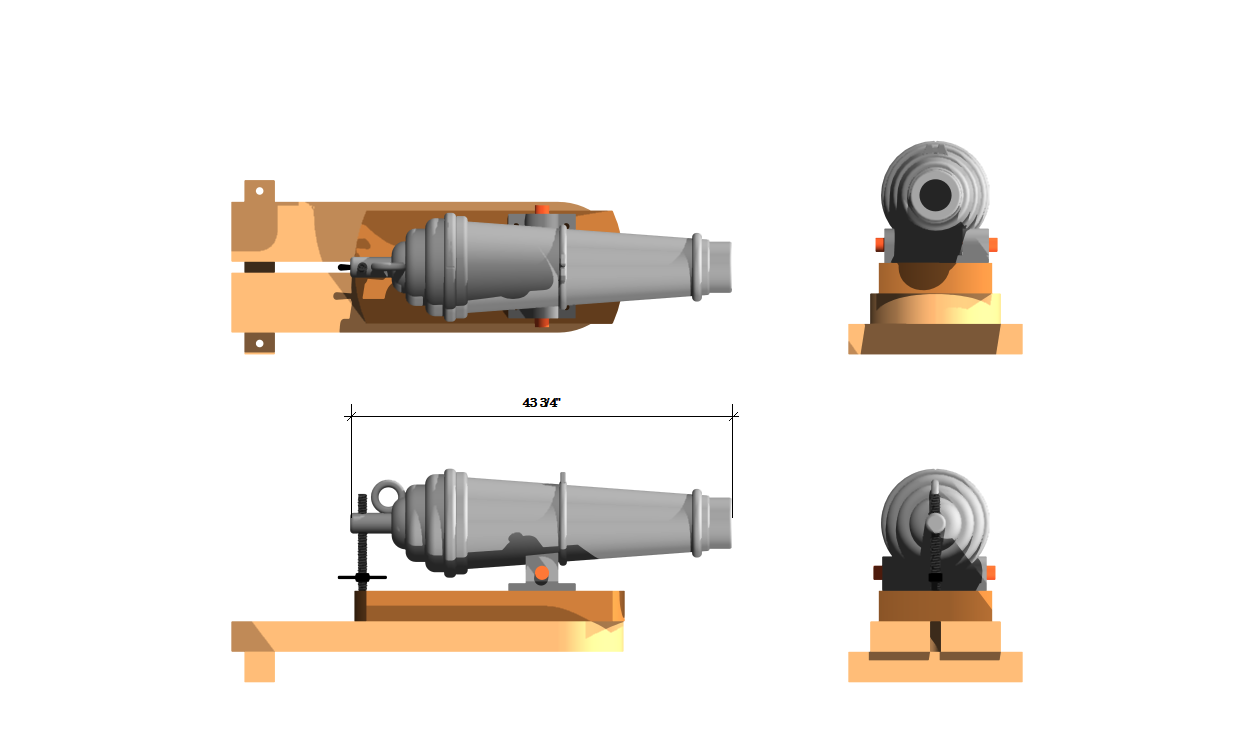
Just for the heck of it, here are 4,6,9,12,18,24 and 32 pounders in a row: Just a matter of re-scaling based on caliber.

-
STL files if anybody wants them. 6 Pounder Carronade Barrel.stl 6 Pounder Carronade Mount.stl 6 Pounder Trunnion Carronade Barrel.stl 6 Pounder Carronade Axle.stl
-
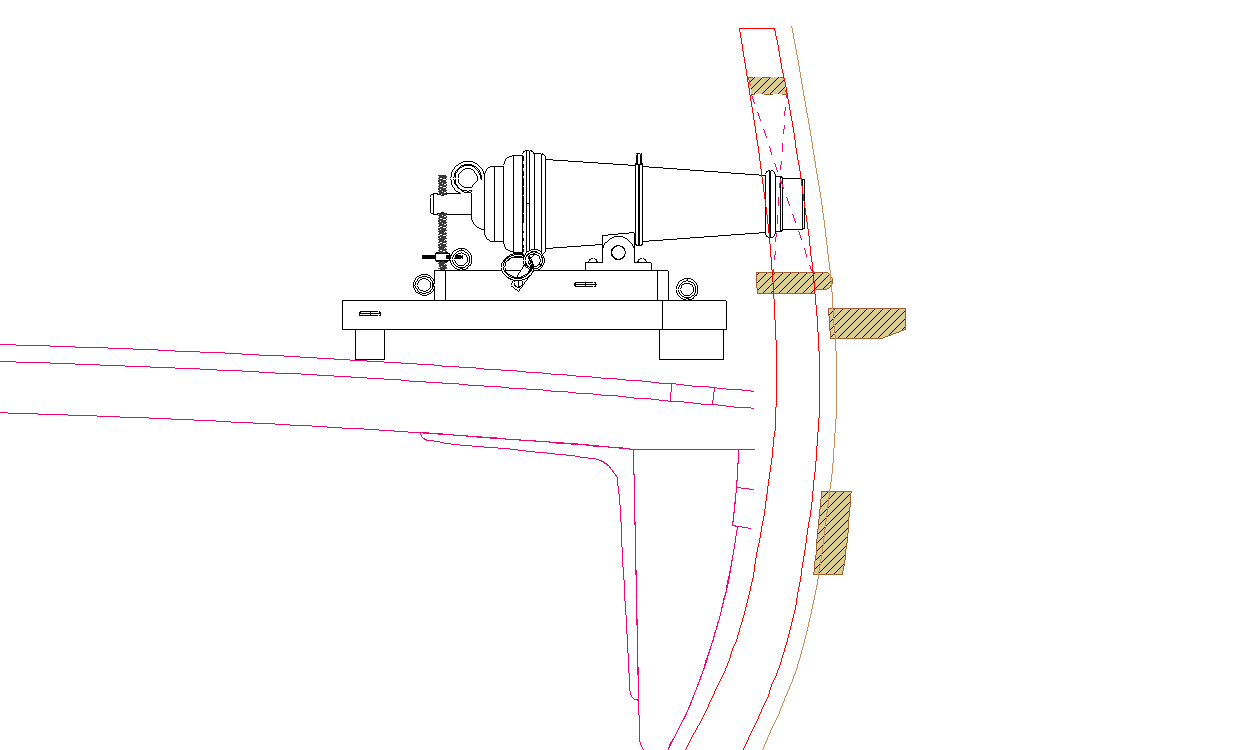
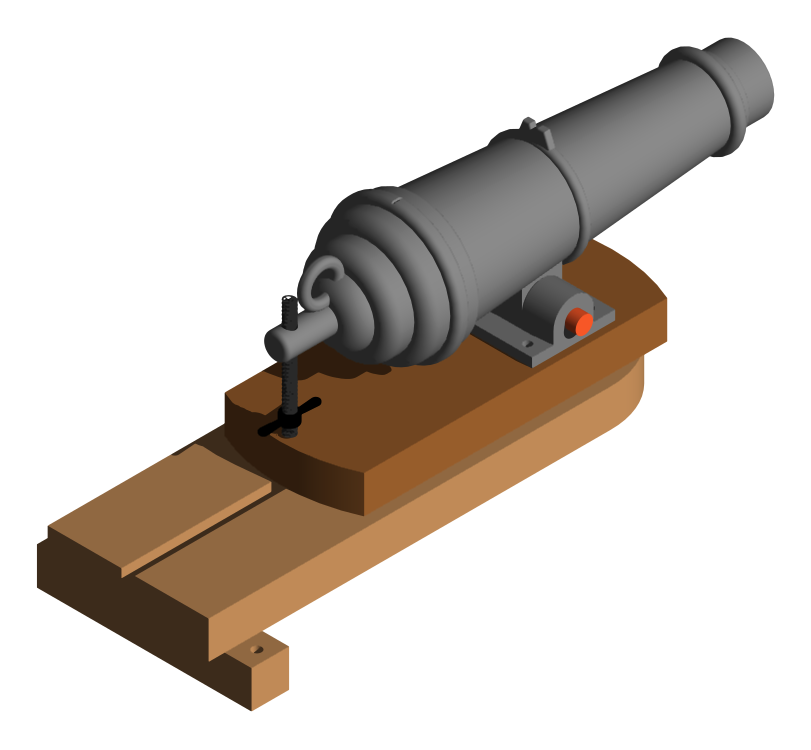
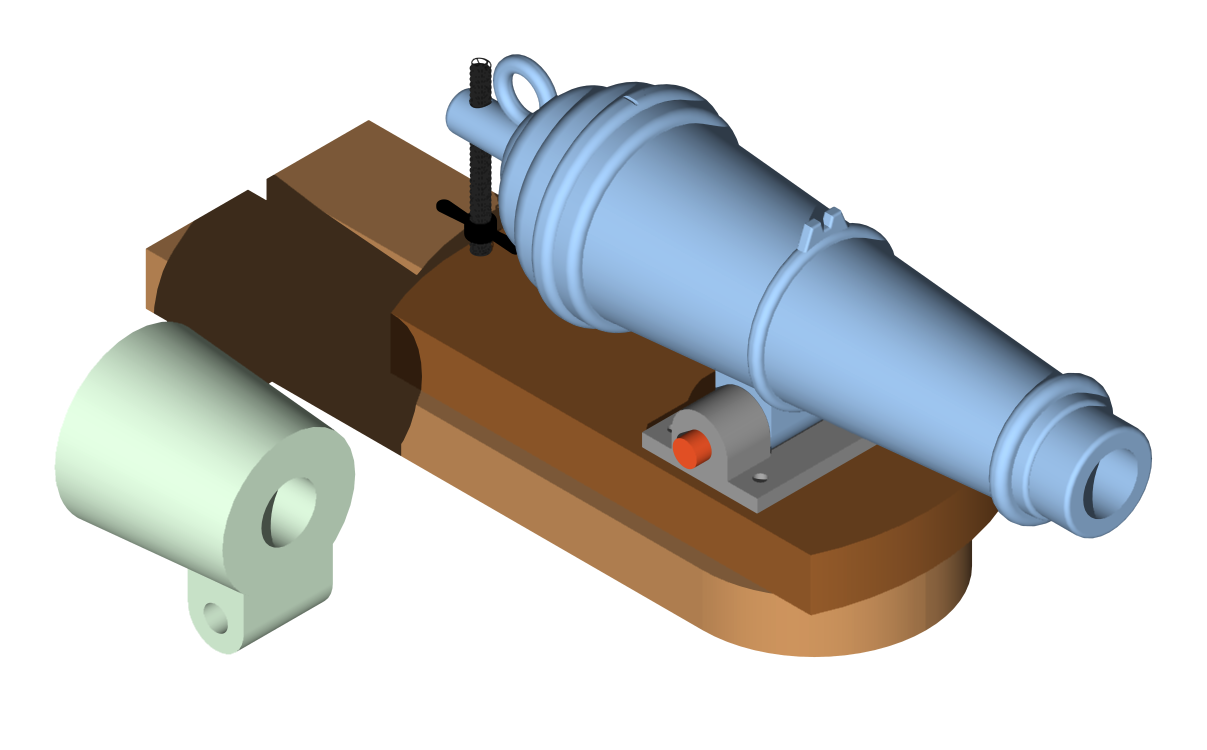
Added a few fiddly bits, I think it's pretty much done. And about how it fits in Lapwing:

-
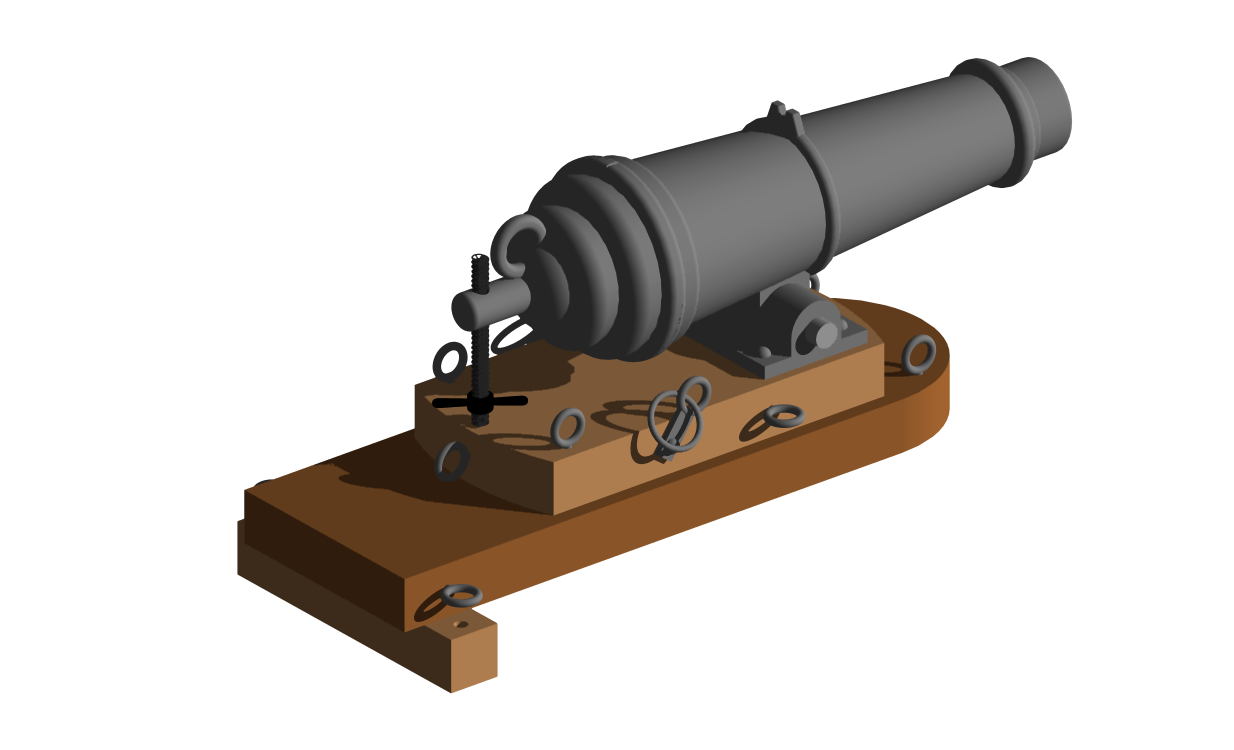
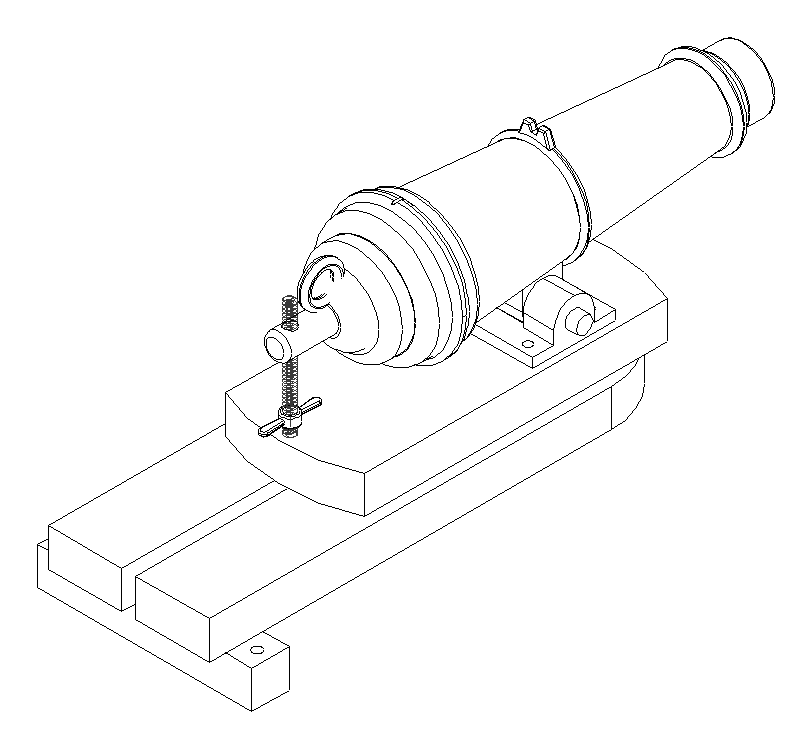
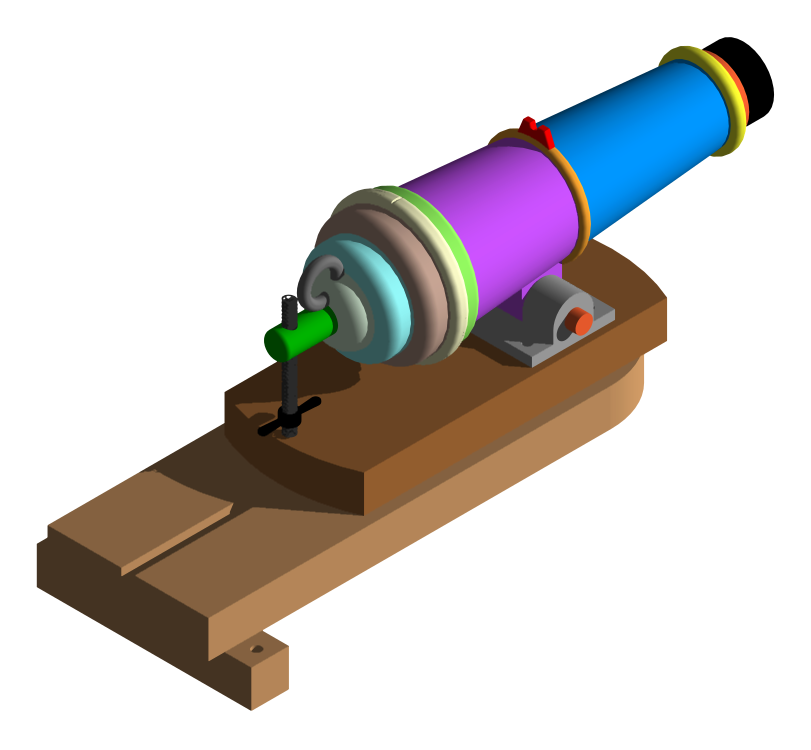
I was looking at drawing this trunnion carronade ( https://www.rmg.co.uk/collections/objects/rmgc-object-86768 ) as a possibility For Lapwing when I get back to her. But it turned out that it was a poorly dimensioned sketch and the carronade is too wide for trunnion supports to fit on the slide and bed. I could have made those wider but decided to put the mount under the barrel as per more normal carronades. I also decided to do a 3D version which is something that has been outside my comfort zone. The results so far: The barrel was built in sections indicated by the different colours. And the mount was merged into the section of barrel. Drawings and perhaps an STL file later, decisions about what to include and angles still to be made.
-
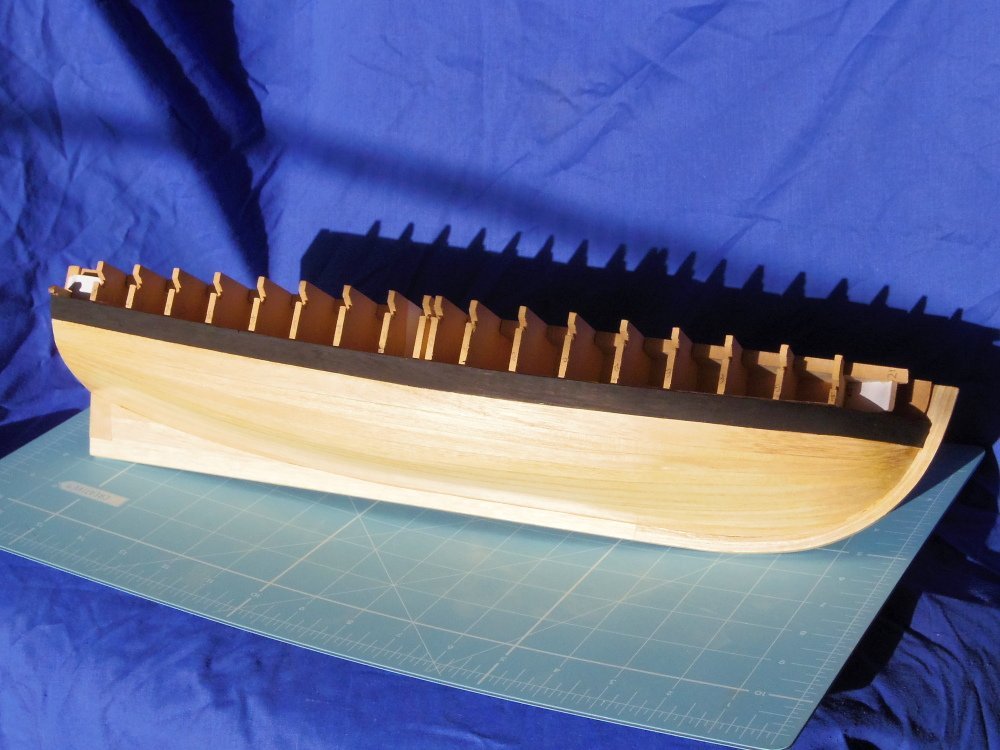
Looking good. But have you faired 1,2 and 3 already? That gets done after you fit the ribs to the other moulds (but not 1,2 & 3). Not a big deal if you have but you will have to glue on some false ribs. So, your spacers are about 0.1mm long giving a cumulative error of about 1.5mm or are the about 0.2mm long giving a cumulative error of about 1.5mm each end? I think the magic number was 26.1mm so I would suggest replacing every fourth one with one 0.2mm short (ie: 25.9mm). These have to twist to follow the faired moulds, I'm not too sure about a bending iron. I think I finished up boiling them for two minutes and fitting them as one piece (port and starboard as one) by poking it through the keel to the middle then bending but I don't think the keel actually needs to be fitted which would make it easier. Don't just grab the ends and bend, work your way out from the false keel applying pressure and clamping as you go. Make two sets of ribs so you have the intermediate ones pre-bent. When the second set has dried you could put a small dab of glue on each and then fit the keel. 😁
-
I'm off to the park to photograph birds.
-
I certainly did Tim. Fortunately my run has had better outcomes. Late last year my younger brother was diagnosed with leukemia, treatment seems to have worked but full recovery will take time. Two weeks ago my mother had a small heart attack during a pacemaker replacement, she is nearing recovery. Three days after that my elder brother was diagnosed with prostate cancer, it was removed and despite it being a very aggressive cancer it doesn't appear to have spread. Me, my migraines are almost gone (they were only mild anyway). But, that's life in a big city. As for cutters, Lapwing will probably get some re-drawing after reading this document posted by Kris.
-
Well, that went well. She was recognised and appreciated, and I should be getting a few more colour photos.
-
Ok, the deadline has arrived. I would have liked a couple more coats of paint but that's life. I didn't really expect to get any further in the timeframe.
-
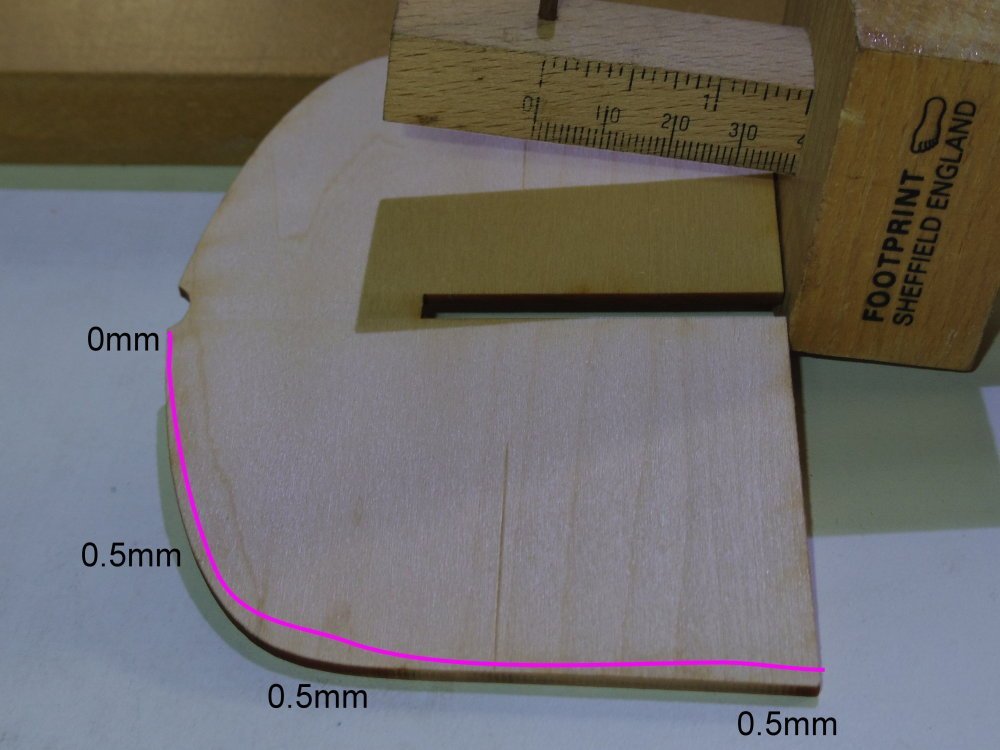
No problem. One thing that would help with the planks is to take a bit more off the moulds when fairing, half a millimetre might do. And you may be able to fit the transom with the TRANS on the inside and cover it with a backrest for the stern seat. Check it first, I might be wrong.
-
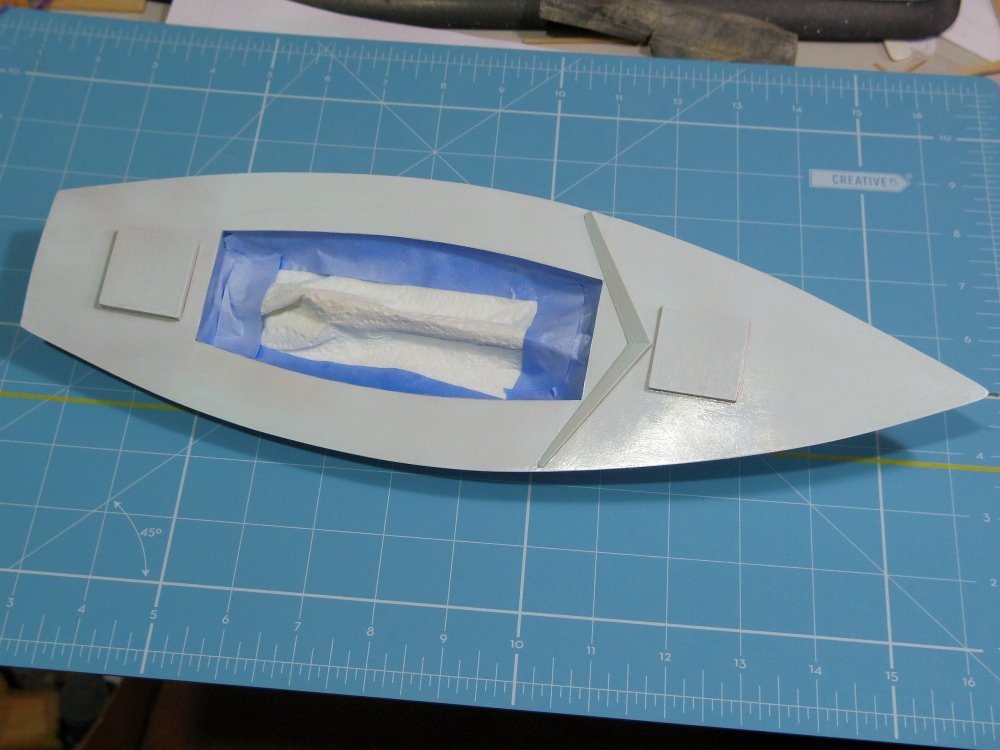
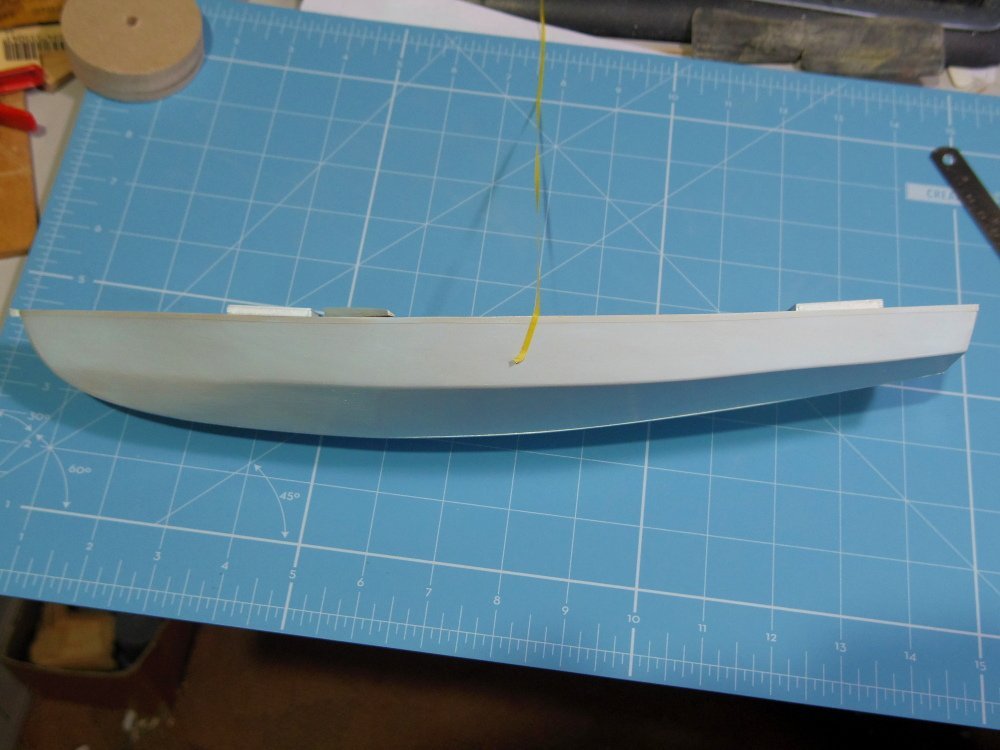
First coat of paint.
-
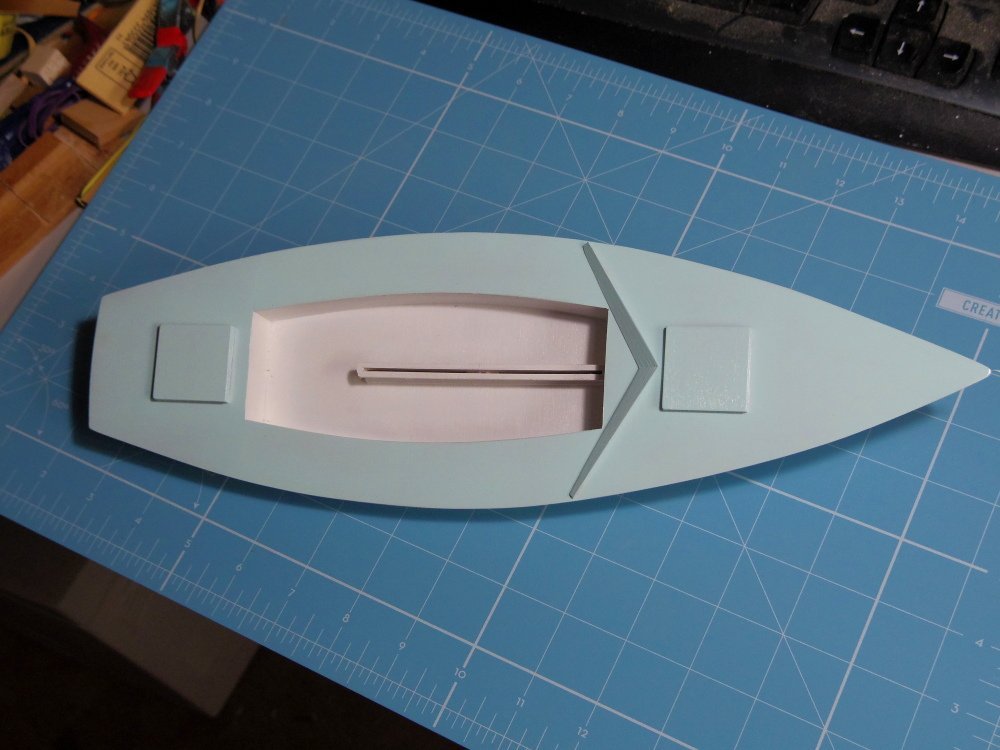
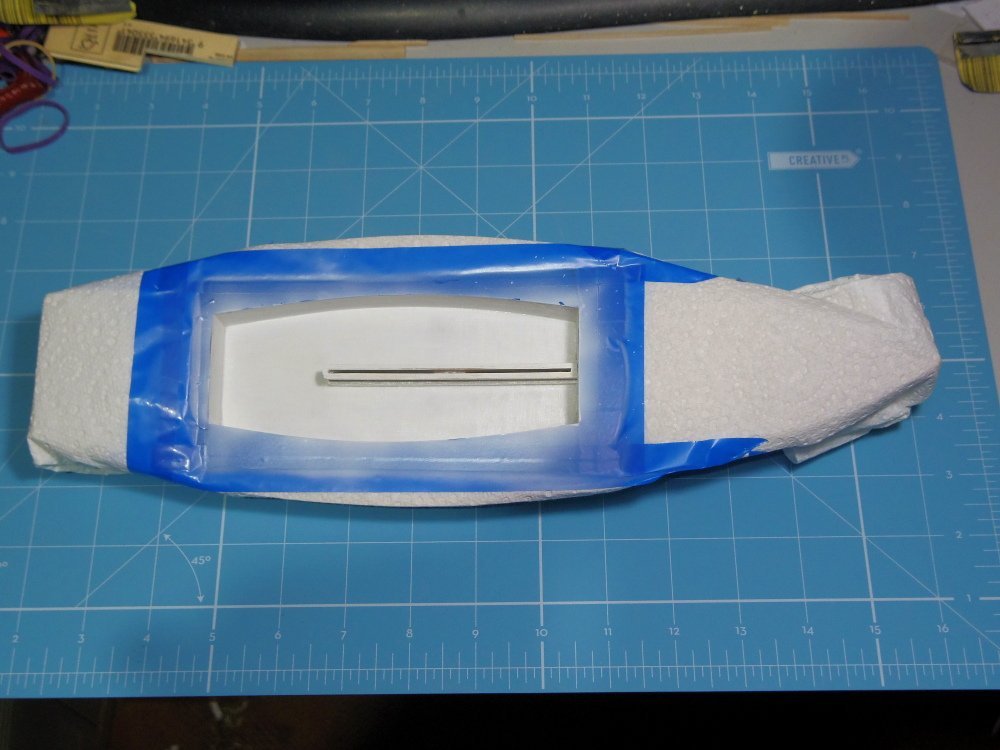
Hopefully I've done all the woodwork needed for now. A little more prep and masking and get some colour on her tomorrow. That splash guard was a right pain, way too many angles all at once.
-
English fleets and small vessels in the early 1700s
iMustBeCrazy replied to Dan DSilva's topic in Nautical/Naval History
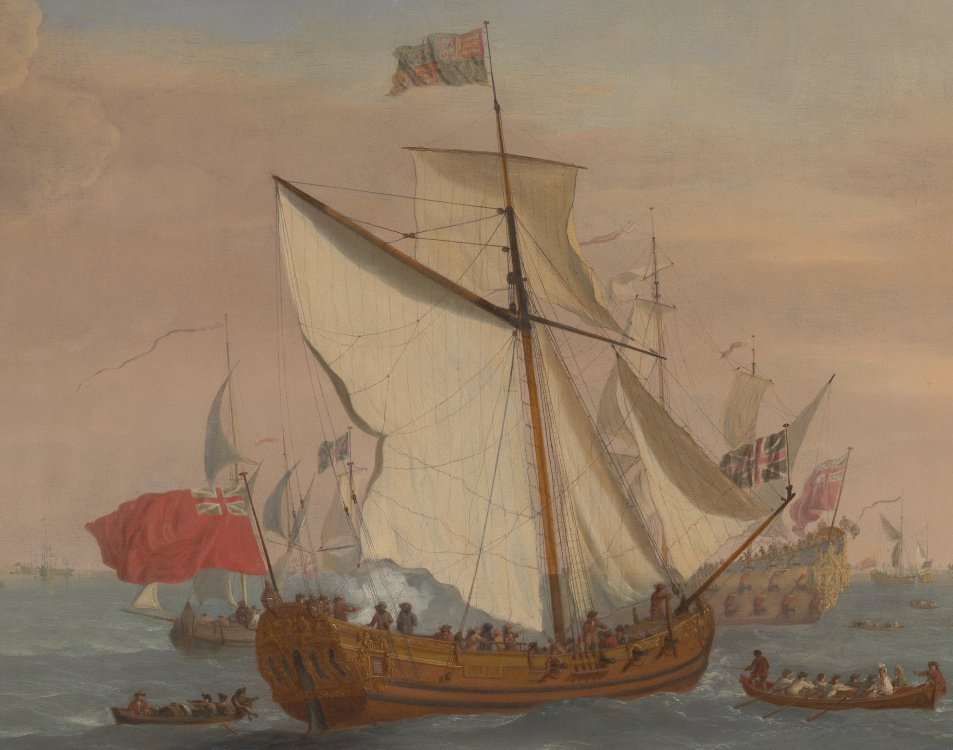
No, sorry perhaps I did. However I do think that the Sailmaker painting is based on the Knijff painting and therefore the same vessel. I think here are just too many similarities. But hey, I could be wrong.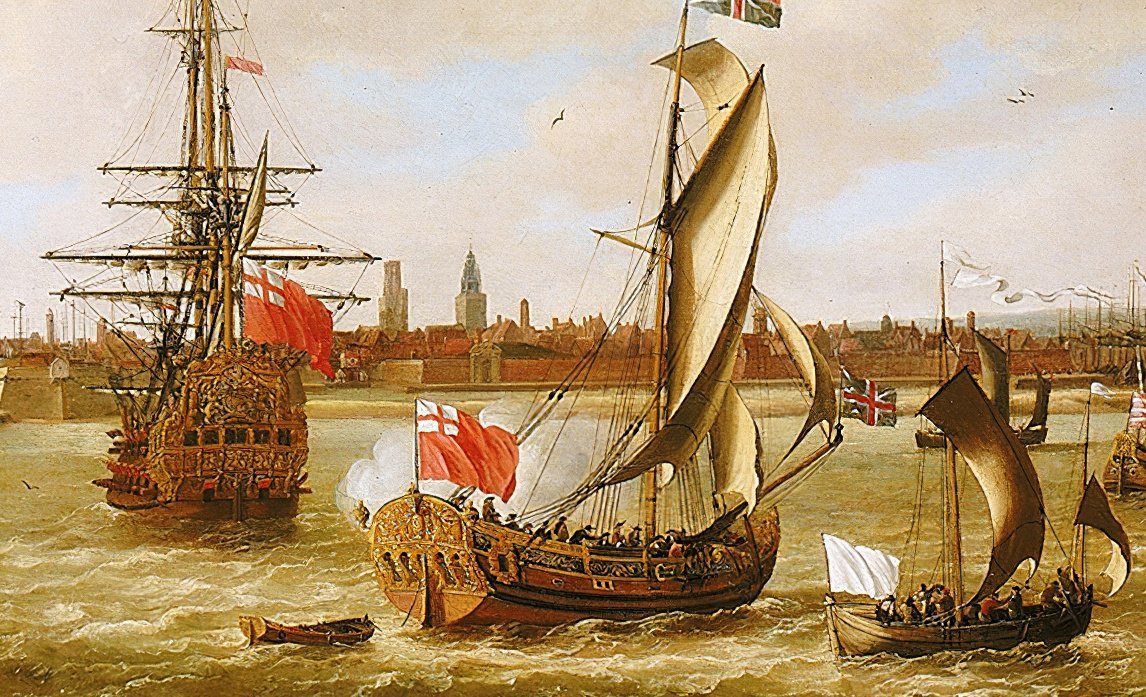
-
More progress, remember to mask everything when spraying.
-
English fleets and small vessels in the early 1700s
iMustBeCrazy replied to Dan DSilva's topic in Nautical/Naval History
And here the RMG show otherwise. The wiki entry for HMY Fubbs says James II had 9 yachts. The two paintings in your first post are showing the same vessel at the same event and I suspect it is the same as the closest one in the painting I linked to. I doubt either artist was at that event but both must have had access to the vessel or a painting of it Or perhaps one painter based his off the others painting?? -
Greetings fellow Bounty Launch builder, I'm on my second which is a scratch build, the first was a Model Shipways. There are a few traps with the Model Shipways kit so I suggest you read all the build logs, this link should help you find them. The most common are the word 'TRANS' etched on the transom and the length of the planks (only just enough if you do them perfectly), they should have been a little longer. In this thread we try to sort fact from fiction, you might find it interesting. It starts as a discussion about oars but morphs into a more general discussion on the Bountys boats. Truthfully, nobody knows. It is likely it was white or perhaps grey but again nobody knows so do what you like. If that's about station/frame 3 it doesn't matter, that rib is added after removing the boat from the false keel. Same for 1 and 2. The ribs sit in the notches in the keel, the moulds should sit at a height that supports them there EXCEPT 1 2 and 3 where the moulds include false ribs as the real ones are added later. The instructions should warn against gluing planks to moulds 1 2 and 3. I believe I've got that all correct but it was a while ago.
-
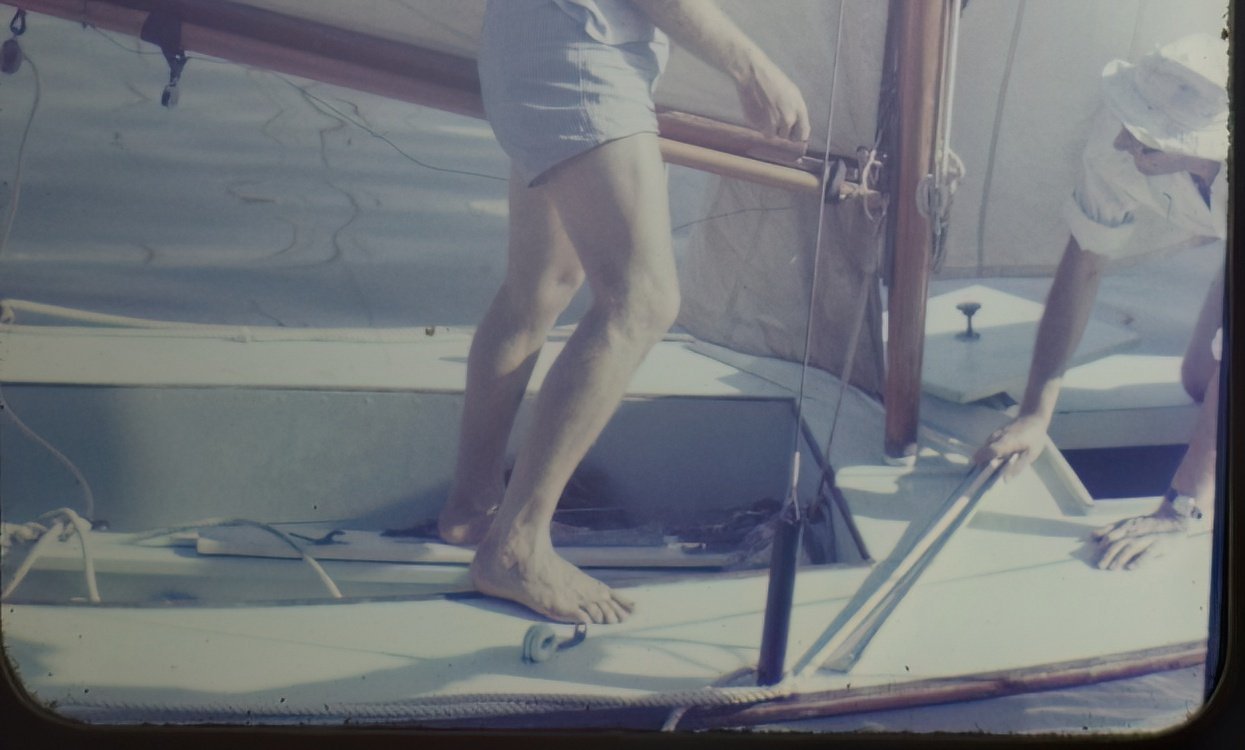
The last pieces of decking being glued: As you can see I was going to stain and 'varnish' the decks as the was how she was in the photos I had, but I found a later colour slide showing her in a pale aqua which is how I remember her (I couldn't remember if the deck was still varnished). I see the boom has a splint (has been fished) but when the photo was taken there wasn't even a breath of wind, I wonder what the story was.

-
Steven, I may be wrong but: (I might have to put that in my signature) To me the depictions in the mosaics look more like sweeps through ports in the stern than any form of styrbord or rudder. I don't know how that would fit historically.