


dunnock
-
Posts
531 -
Joined
-
Last visited
Content Type
Profiles
Forums
Gallery
Events
Everything posted by dunnock
-
Thanks for the tip on lamination. I will try that and see how it works out. I noticed too that you reduced the angle of the catheads to 20deg. I was thinking of doing the same because the 30deg shown iin AotS looks very steep and reducing the angle would make them sit better within the bulwarks. Like everyone else, I'm overawed by the quality of your Sphinx and the details of the build and techniques in your log. David
- 857 replies
-
- 3
-

-
- Sphinx
- Vanguard Models
- (and 1 more)
-
Thanks BE - I've been wondering how to tackle the cathead supports and eking rail transition on my Diana. Your solution looks excellent so I am going to attempt to follow your method.
- 857 replies
-
- 4
-
-
- Sphinx
- Vanguard Models
- (and 1 more)
-
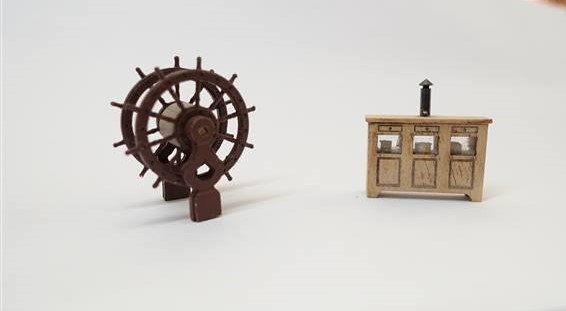
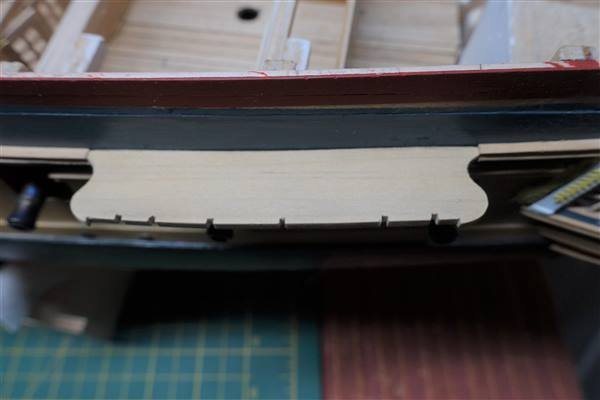
The maple strip that I was waiting for finally arrived – it seems that my payment had not gone through but when I called CMB to put my order through again, they were very quick to despatch it. So now I have finished planking the galleries. The quality of the wider maple strip was not as good as that used for the rest of the deck and I’m not altogether happy with the finish but it has passed the ultimate inspection so will probably leave it as is. While waiting for the strips, I started work on some of the deck fittings. The ship’s wheel supplied in the kit was never going to satisfy so I bought the better brass version from Jotika and made it up. Not sure how Captain Faulkonor was expected to navigate his ship without binnacle and compass. None is supplied in the kit but the mini kit from Vanguard Models makes up very nicely. I added some small bits of square section and dowel to give an idea of compass and lamp and glazed the windows with PET film. I’m now not sure whether to paint it red, stain it darker or simply apply a couple of coats of matt varnish. I have also made up the forward bits using the kit stanchions and 4x2 walnut and did a little bit of shaping to improve the look. The open rails looked quite a challenge, firstly deciding what size they should be and then how to make them up. I started with a card template and then made up three sections at the stern as a trial using lime for the plansheer, because it is easier to work and will be painted over, walnut ply for the timberheads and boxwood for the stanchions. I’m quite pleased with the way they have turned out but having proved the principle I will put them to one side because of the risk that they will get knocked about while working on the deck fittings. I am now turning my attention back to the head works. Somewhere along the way the the upper cheek on the port side disappeared so a replacement had to be made. Then I noticed the gammoning knee that I made a while ago no longer looked to be a good enough fit when I tried it so that will be replaced too, then maybe finally I can get on. Thanks for all the likes and for following my log David
- 310 replies
-
- 7
-
-
- Diana
- Caldercraft
- (and 1 more)
-
Thanks for your kind comments Dave. I'm sure that you will anyway, but be sure to check out Beef Wellington, Robdurant, Ray and also DavidEN's new log among others too. I'm about 2 1/4 hours away but thankfully the ticket is valid for 12 months so I will definitely be making a return trip to Hartlepool. I've taken up birding in the last few years and the coastal marshes around that area are full of interest which makes another good reason for a return visit.
- 310 replies
-
- 4
-
-
- Diana
- Caldercraft
- (and 1 more)
-
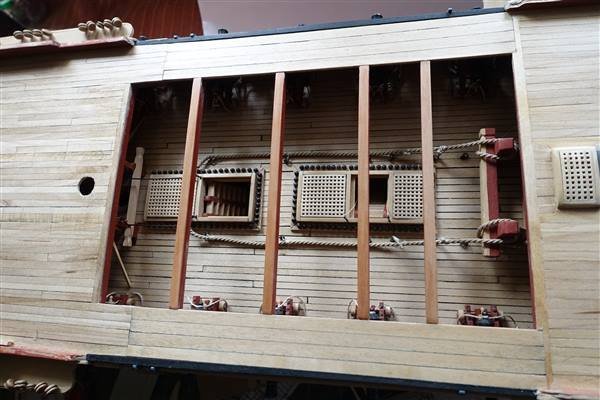
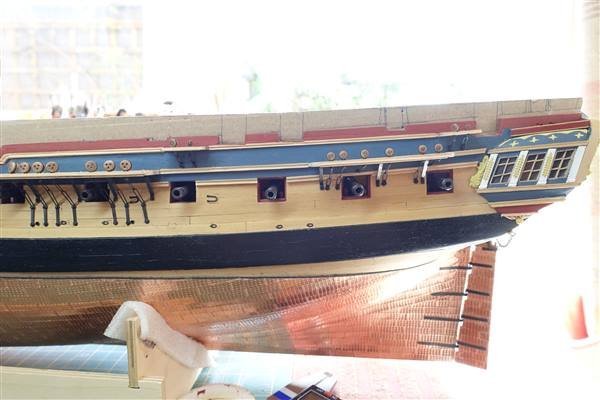
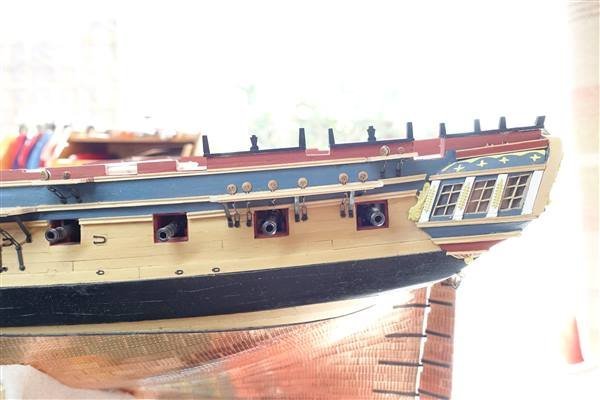
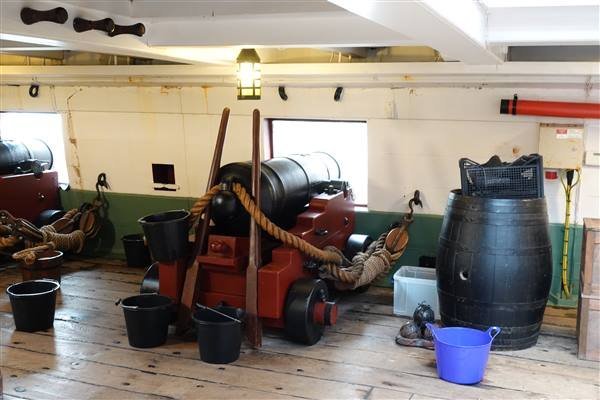
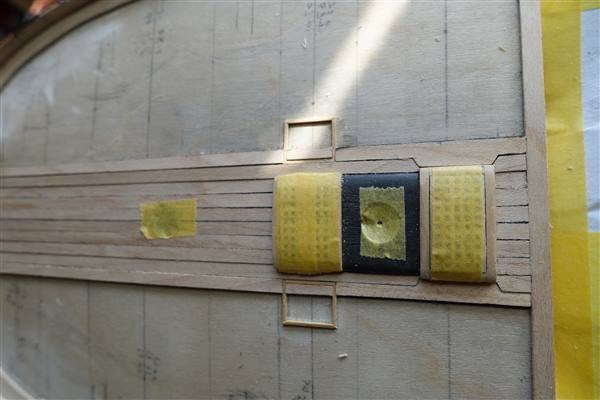
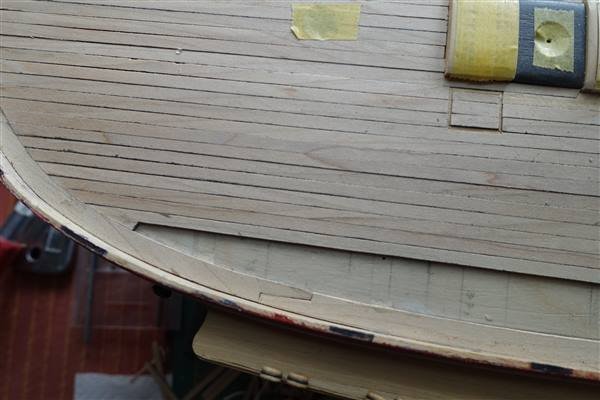
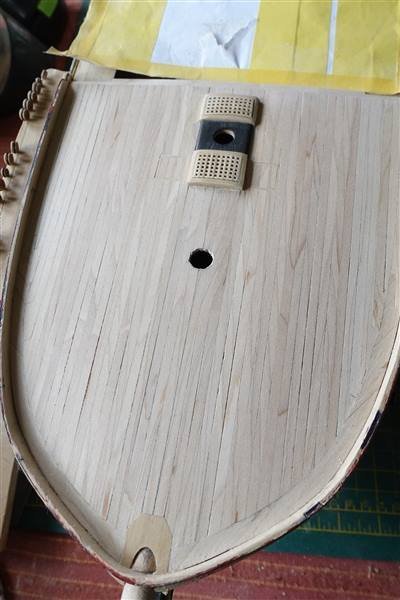
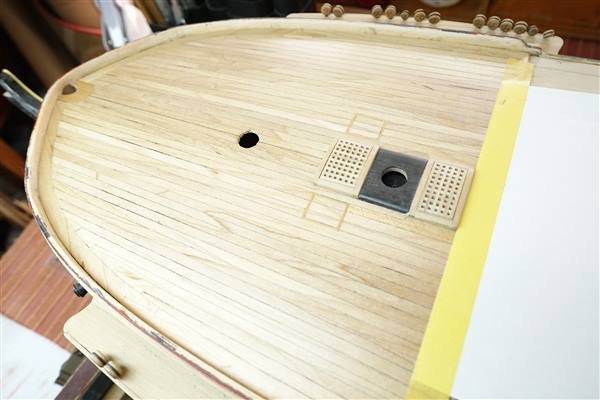
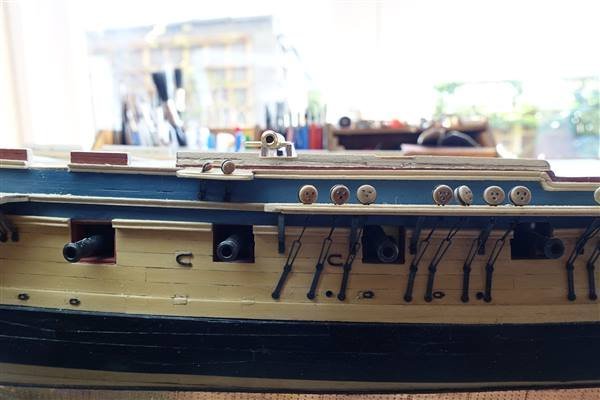
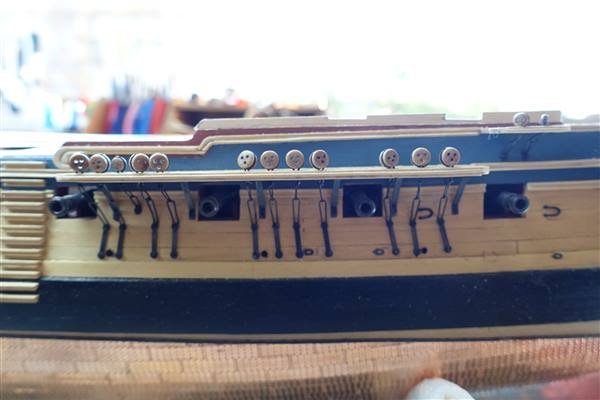
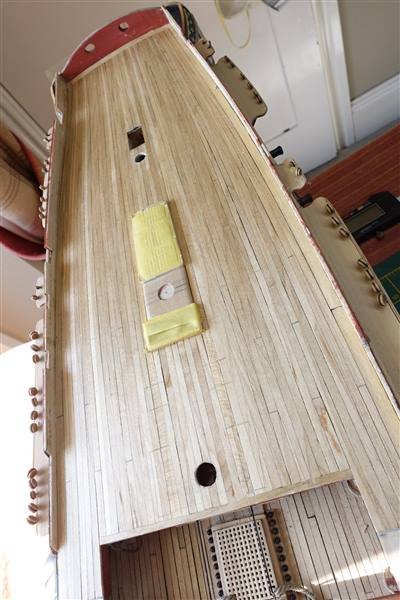
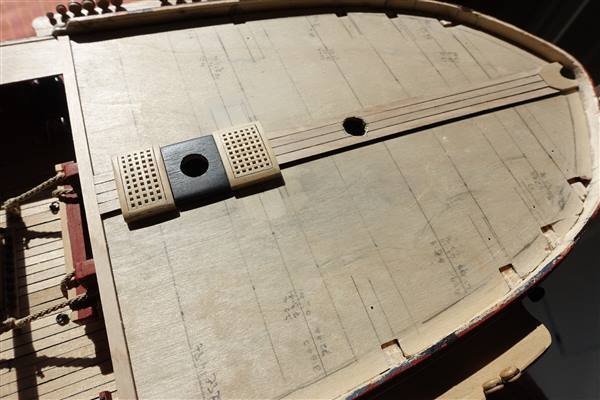
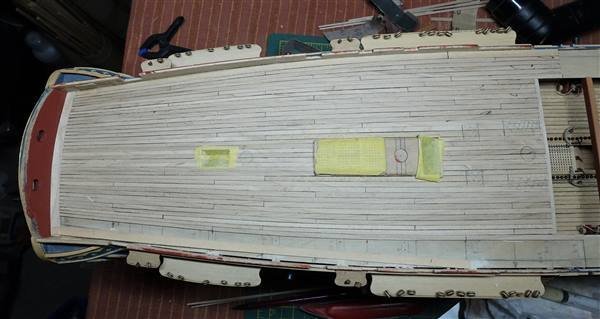
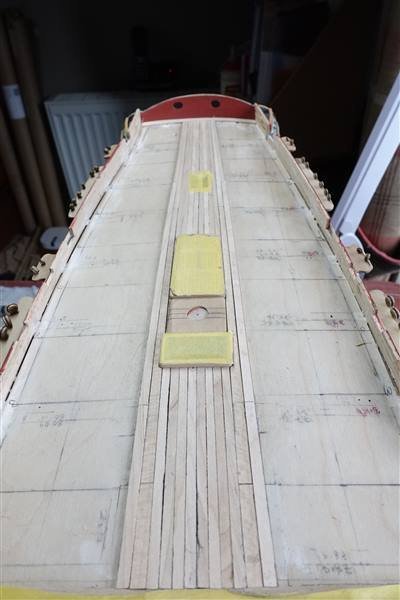
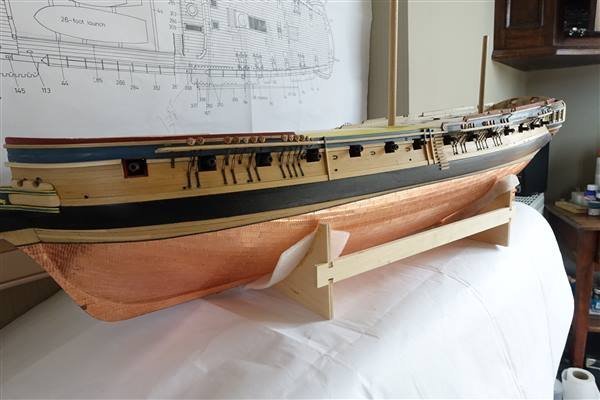
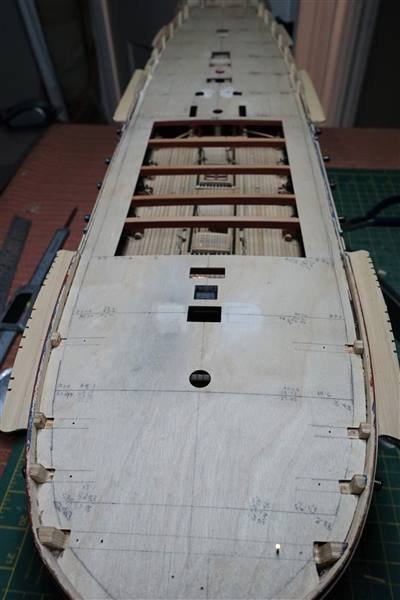
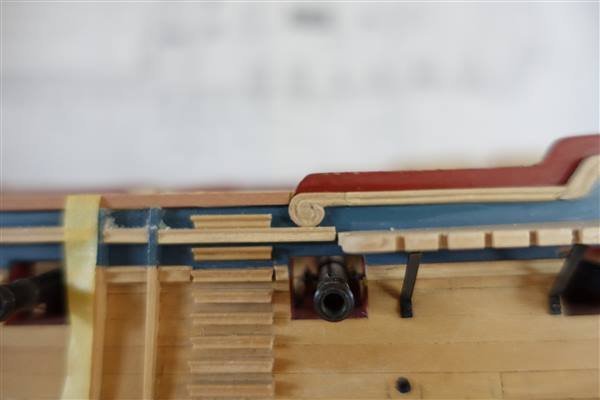
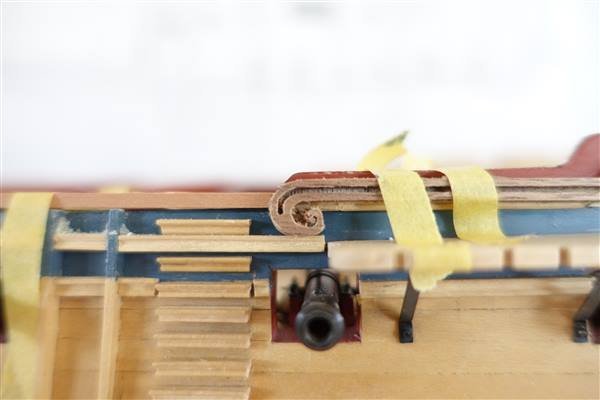
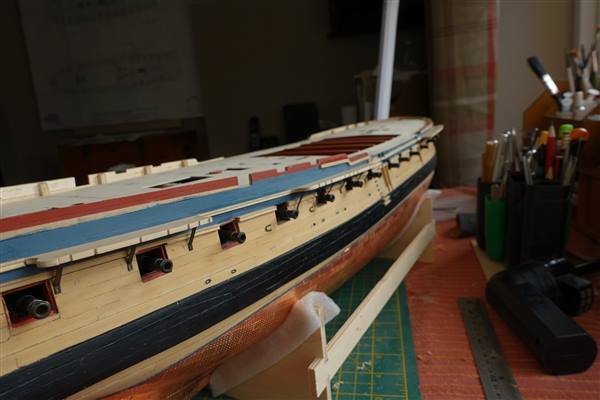
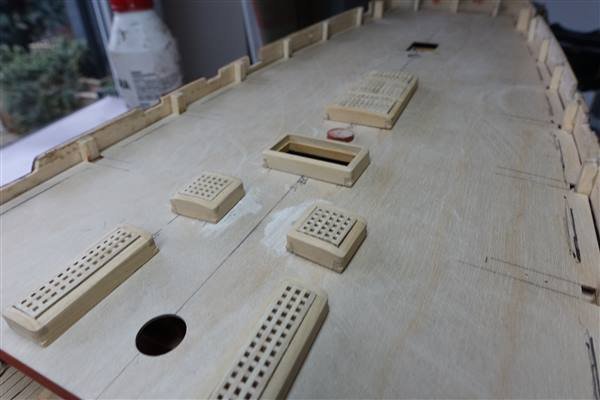
A disappointing visit with the Admiral on a cold and windy March day. to the NMM at Hartlepool. I particularly wanted to look around the quarter deck and foc’sl but it was unfortunately closed off for repair work and nobody seemed to know when it would reopen -although certainly not that day. On the upper deck evidence of rainwater leakage was obvious from the buckets scattered around. Still it was interesting to see the differences in layout of Trincomalee compared to Diana. PHOTO The planking of the focs’l is finished and I’m quite pleased with the result. It all went fairly smoothly although cutting the plank around the steam grating took a few tries to get right and there was some trimming and recutting of the final two planks on each side to achieve a reasonable symmetry. Like the quarter deck, there was a lot of scraping and sanding required to get a smooth finish... ...and after 3 coats of shellac I was hoping to continue with planking the galleries but the wider planks that I ordered looked more like lime than maple so I am waiting for fresh supplies. In the meantime, I have been working on something that has been bothering me for a while: the quarterdeck bulwarks. I replaced the stern section some time ago but I was never happy with the two 9 pounder ports as they seemed too deep and now wish that I had replaced the whole run at the time when channels and deadeyes were not in the way. I made up one of the 9 pounder guns to provide a reference and also a great help was Rob Durant’s CAD drawing of the open rails on his Ethalion, which I downloaded from his log of Jason. Thankfully It wasn’t too difficult to remove the offending sections and replace with fresh lime strip. The new carronade and gun ports have been cut in after rechecking that there was no danger of shooting away the shrouds and I have started to line them out before I add the boxwood planking on both the inner and outer walls. Hopefully it will all come good. Thanks for all the likes and comments David
- 310 replies
-
- 9
-
-
- Diana
- Caldercraft
- (and 1 more)
-
Lovely work David and I agree with Theodosius, no improvement required on the gun carriage
-
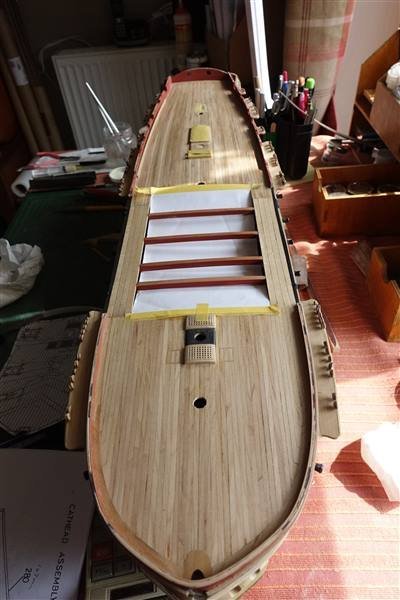
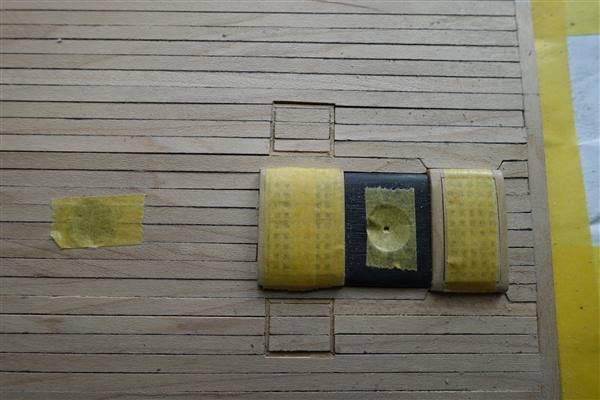
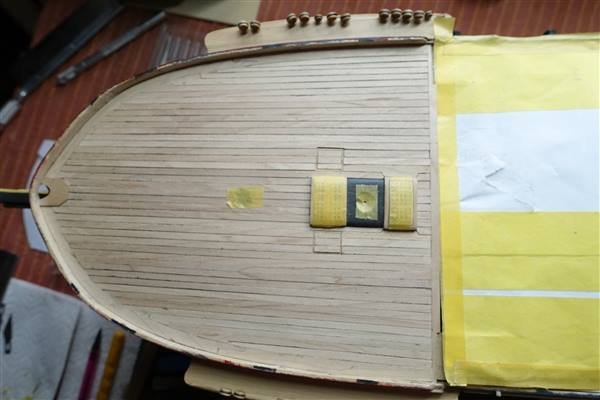
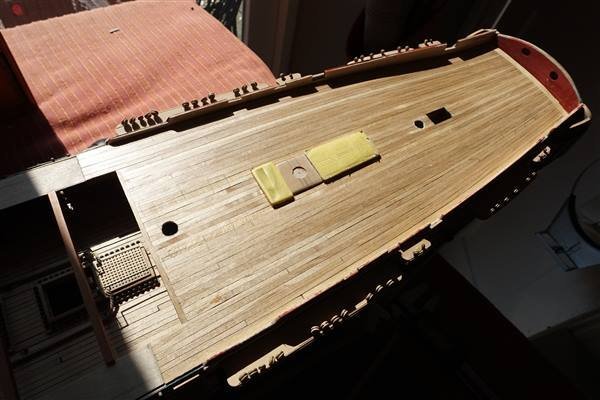
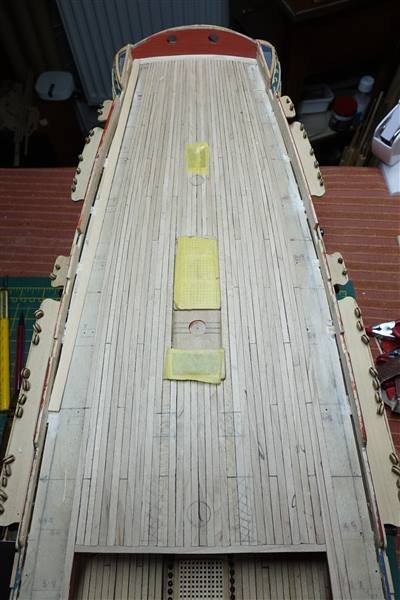
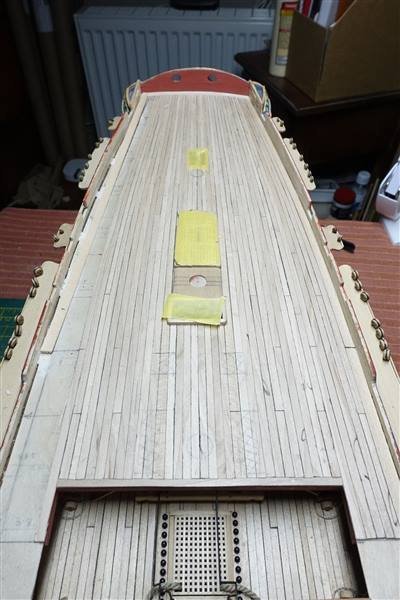
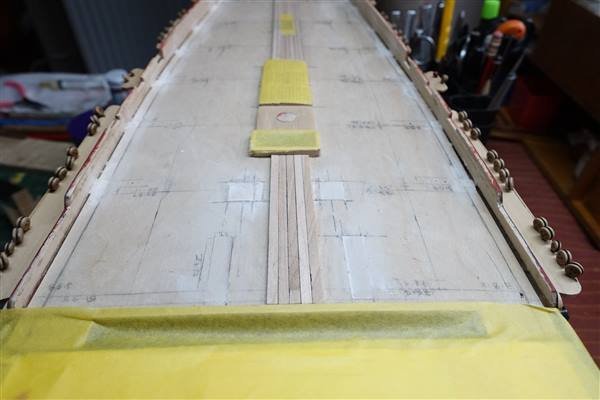
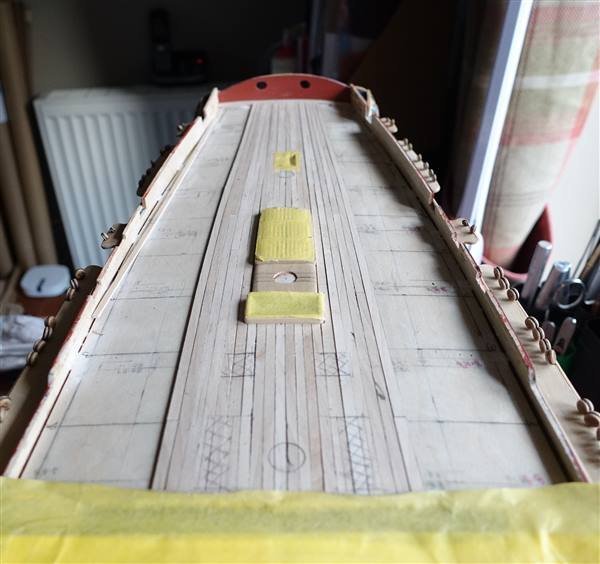
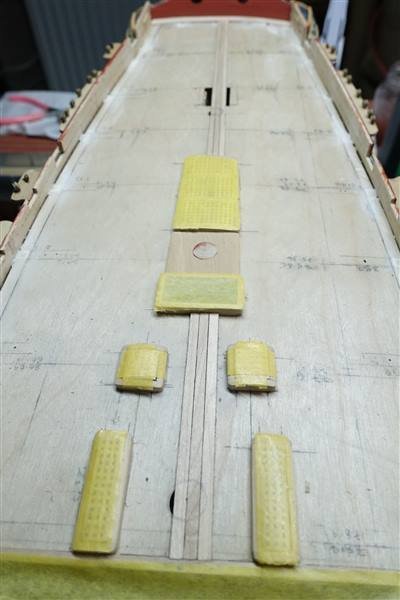
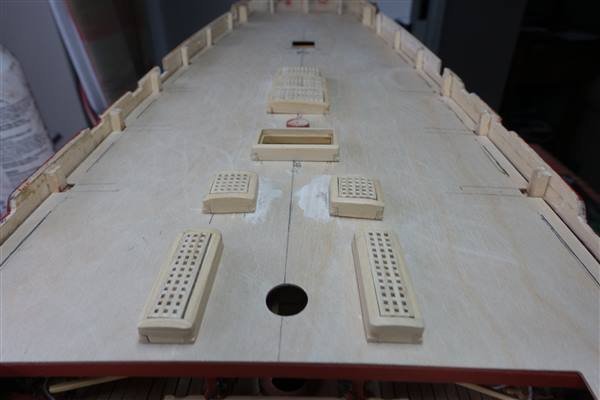
Thanks to all for the likes and for continuing to follow this log. The planking of the quarterdeck is now complete. As expected quite a bit of scraping and sanding was required to get a good finish. It was then sealed with several coats of shellac. Shellac gives a good finish but viewed in this nice early spring sunshine that we are having, is perhaps a bit too glossy so I may eventually tone it down with matt varnish. Having completed the quarterdeck, I was tempted to do something a bit different but was inspired by Beef Wellington’s treatment of the forecastle so I pressed on. I needed to make the two coamings and gratings. As per the quarterdeck, these were made from 6x2mm boxwood and sanded back to 3mm depth. For the chimney, I strayed from both the kit plans and the AotS and went with my interpretation of the images of ship models in The Sailing Frigate. I made a solid deck fitting from 3mm boxwood sheet and painted it with Tamiya Dark Iron. I thought that this makes a nice continuation between the two gratings and has the added advantage of avoiding having to plank this small area. I made a completely new jig for the planks with only a slight taper from 3.6 to 3.4mm which I hope will be sufficient. The first four runs of planking are complete and the bowsprit partner installed. It maybe a bit late in the history of this model but next week, I am finally making a trip to the NMM in Hartlepool to visit HMS Trincomalee. Although built nearly 20 years later in Mumbai (formally Bombay), I'm still hoping for further inspiration and pointers as to how to continue with HMS Diana.

- 310 replies
-
- 8
-
-
- Diana
- Caldercraft
- (and 1 more)
-
Thanks David that's kind of you but for an exemplar on planking, take a look at at Beef Wellington's log of HMS Jason
- 310 replies
-
- 1
-
-
- Diana
- Caldercraft
- (and 1 more)
-
I'm just catching up with your log again. Superb work on the planking Jason. I will soon be at the stage of planking the forecastle and I think that I will take your approach rather than joggling the planks into the waterway as depicted in the AotS. I makes a much neater finish to my eye. David
-
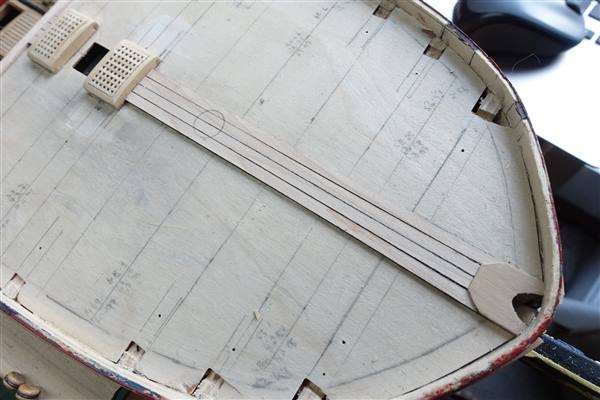
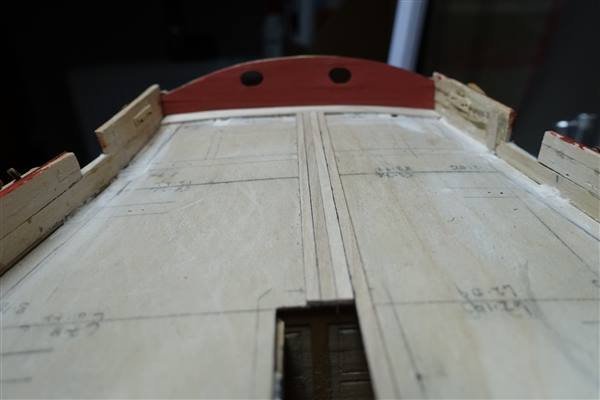
I have now completed planking on the port side of the quarterdeck. I laid planks on each side to maintain some symmetry until the last four strakes. At this point I needed to consider the waterway which I had laid out to be made from 6mm maple strip to allow for any accommodation of variation in planks. The waterway plank was soaked and edge-bent to take up the curve of bulwark and marked up to butt up against the last plank. A bit more fettling than I would have liked was required at the stern but now that the port side is completed I am reasonably happy with the way it looks so I will repeat the exercise on the starboard side. If I were to start again, I would take more measurements along the length than the every 50mms I chose to do. Every 20mms would give better accuracy and result in a better graduation of the curve of the planking. The thickness of the planks are very variable so the deck is going to take a lot of scraping and sanding once laid.
- 310 replies
-
- 8
-
-
- Diana
- Caldercraft
- (and 1 more)
-
Lovely work David and your 3d printed work around are a vast improvement on the kit. David
-
Hi Dave, I'm just catching up with your log having been away for the weekend. Your Diana is looking really good and it's nice to see that you are putting your own stamp on the kit. I can't believe this is only your second wooden ship build, I think that you must have picked up a lot of expertise from other fields of model making. I too really liked that ladder jig and although I didn't use Jotika's, wish I could have used something other than kit supplied ladders. For boxwood, I have used two suppliers, the first for stripwood and sheets is Original Marquetry https://www.originalmarquetry.co.uk/product-category/inlays-lines/lines-stringing/ The second is Timberline who supply 6x2mm boxwood that I used for coamings https://shop.exotichardwoods.co.uk/castello-boxwood-guitar-banding-800-x-6-x-2mm.html I will be following your log with great interest. David
-
Thanks Jason and for all the likes
-
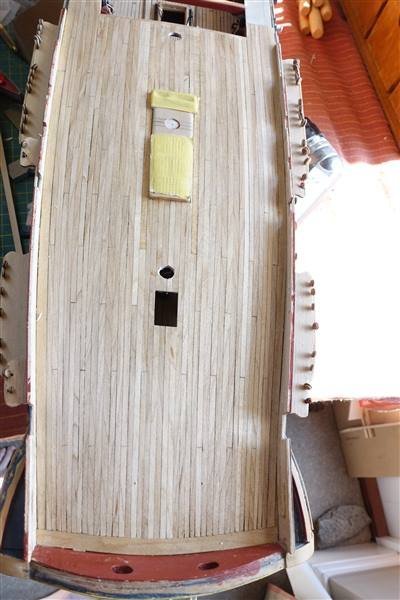
Thanks again for the discussion on the quaterdeck scuttles and David, it would be great to see a log of your build of Diana. Following on from the discussion on the quaterdeck scuttles, I removed the planking that I had so far laid and then the coamings. I filled in the spaces with scraps of ply (which would have been lot easier if I had done it before fixing the deck) and started the planking process once again. I had completed 6 strakes each side and decided that I wasn’t happy with the way it was turning out. There seemed to be a pronounced convex curve developing towards the stern on the starboard side so it all had to come off again. I decided to start from scratch and check all my measurements across the width. I again took the average of three measurements at each station and found some differences so made up a new jig. I shape 10 strips at a time starting with coarse grit sandpaper and then getting progressively finer. The first four strips either side of the centre line are laid without joins. Before moving on to shaping the next batch of strips, I have rechecked the widths and adjusted where necessary. 9 strakes on each side are now completed and I’m happier with the way it is looking. No doubt more adjustments will need to be made as I go along.
- 310 replies
-
- 4
-
-
- Diana
- Caldercraft
- (and 1 more)
-
No problem David. Thanks for pointing out those subtle differences that I had completely missed, so I must look more closely at the drawings in future. In the light of previous posts on this subject from Jason and Allen, and now confirmed by your photo of Trincomalee,I have already been in discussion with the Admiral, whose preference was for removing the coamings around the scuttles and your photo of Trincomalee confirms that this is the way to go. Perhaps a bit late in my build of Diana but I have a trip to Hartlepool planned at the end of this month to visit the ship. I hope that the weather is as good to me as it obviously was for you.
- 310 replies
-
- 2
-
-
- Diana
- Caldercraft
- (and 1 more)
-
Allan and Jason thanks very much for your comments on my dilemma over the quarterdeck scuttles. I have looked again at both the plan of the quarterdeck (ZAZ2363) and the inboard deck plan (ZAZ2359) from the NMM archives and my reading is that the top tackle scuttles do not have coamings. The ledges for the pump scuttles are shown on the deck plan but I can't see openings marked on the inboard sectional view in the same way the tackle scuttles are marked, although I have no doubt that they should be there. The two models said to be of Diana, (SLR0342 and SLR0572) shown in The Sailing Frigate, only show hatches with coamings down the centre line for the gratings and ladderway on the quarterdeck. I'm a relative newcomer to ship models but from the drawings and models, I think that for authenticity, the coamings should not be present for the scuttles. I'm still hesitating over which way to go and although I have started to plank around the top tackle scuttles, it wouldn't be a big problem to go with a plain deck. David
- 310 replies
-
- 4
-
-
- Diana
- Caldercraft
- (and 1 more)
-
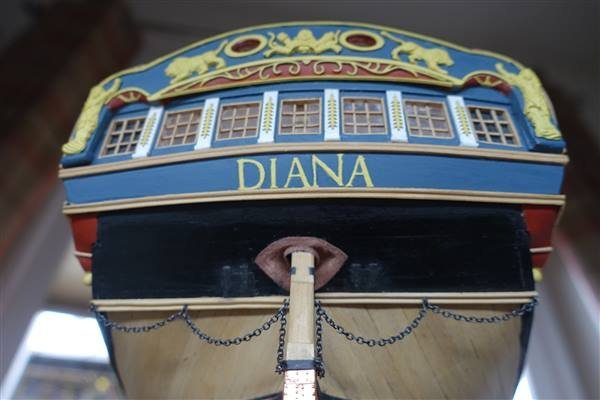
Thanks Ron for your kind comments and for putting me right on the rudder trunk. I may not have left enough slack in it to allow full movement of the rudder in reality but I'm quite happy with the way it looks. You have also confirmed my thoughts on the rudder chains. I am assuming that they would be tied off to the shrouds with a lanyard rather than some separate anchor. David
- 310 replies
-
- 1
-
-
- Diana
- Caldercraft
- (and 1 more)
-
Thank you everyone for the likes All the deadeyes and chains are in place on channels and stools and the blackened parts touched in with matt black where necessary. I’ve moved on to the quarterdeck and completed some preliminary work prior to beginning planking. Firstly before fixing them in place, I sanded down the hatch coamings to 3mm high because I had made them to the same pattern as the upper deck and then realised that they should be shallower. I debated whether to use the hatches that I had made for the scuttles, which do not appear on the NMM ship model of Diana but are in the AotS drawings. I have decided to use them, even though it makes planking more difficult and adds yet another variation to my intention to build Diana largely as originally built. Finally, again although not shown in the AotS, I added a plank across the stern to tidy up that area and then painted the inner bulwark red ochre. I have placed the first few planks on the quarterdeck, one each side of the centre line and 3 across on the starboard side. The planks are 1mm maple, planed and sanded using a jig to shape 10 planks at a time to achieve a consistent taper from 2.3mm at the stern to 3.8mm amidships. Before fixing, one edge of the plank is painted black with archival ink using a Pigma Brush - easier and I think, a better result than other methods that I've tried. This is the first time that I have tried using tapered planks and cutting them up to the fixed hatches so I will be taking it slowly and regularly rechecking the measurements and adjusting the taper if necessary. David
- 310 replies
-
- 1
-
-
- Diana
- Caldercraft
- (and 1 more)
-
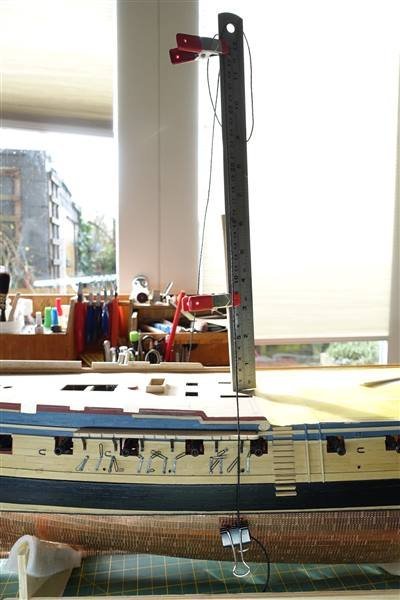
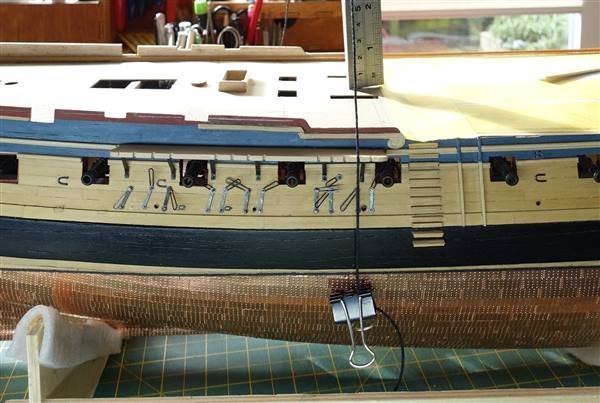
Thanks to everyone for all the likes. The 5mm deadeye strops arrived from CMB, so rather than start planking the quarter deck, I have been working on the channels chains and links. Quite a fiddly task and I wish that I had followed Jason's lead in completing them before fitting the upper deck guns but I think that I have now got a system that works without incurring too much frustration and loss of little bits and pieces. First all the pins, strops, links and preventers were blackened. The line of the chains was determined by clamping a ruler to a stub mast and then clamping a line to the rule at the appropriate height - 265mm in the case of the fore mast – and running it down through the slot in the channel. This is the set up for the main mast having forgotten to take one for the fore. I made a pencil mark and then measured up 2.5mm from the black strake and marked the position of the hole for drilling. The preventer link was pinned in place and then using the line through the slot in the channel to achieve the correct angle, a second hole was marked and drilled and the preventer and lower link pinned in place. Carefully removing the lower pin, without disturbing the upper pin, this could now be glued with a drop of thin CA. The deadeyes are placed in the channel slots and the upper link connected. I tried using the 0.5mm brass rod that Caldercraft suggest but found that I could achieve a satisfactory result more easily using Gutterman black linen thread which is 0.4mm diameter tied off at the strop. Once the deadeye and links were connected, the top pin on the preventer link could be carefully removed and fixed with a drop of CA. Sorry if all this is a bit obvious but it's as much as a reminder to myself for future builds as for the benefit of any readers. A 2.5mm deadeye was used for the royal backstay on the fore channel and a strop made from the same linen thread as the upper link. I think that this gives a nice differential in size as drawn in the AotS. The channel slots are covered by a strip of 2.5 mm boxwood and finished with 1x1mm boxwood stringing. I think it must be the angle at which the shot was taken that seems to throw out the angles of the first two chains but they are almost vertical in reality. Both port and starboard fore channels are completed and I’m part way through fixing the starboard main channel. There will be quite a bit of touching up to do of the blackened parts when I’ve finished and some tidying up where I drilled a hole in the wrong place.
- 310 replies
-
- 4
-
-
- Diana
- Caldercraft
- (and 1 more)
-
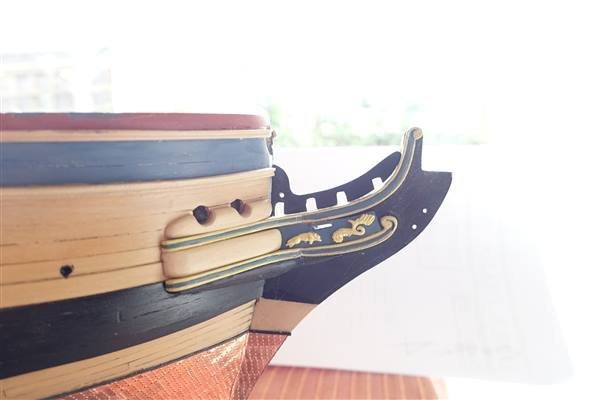
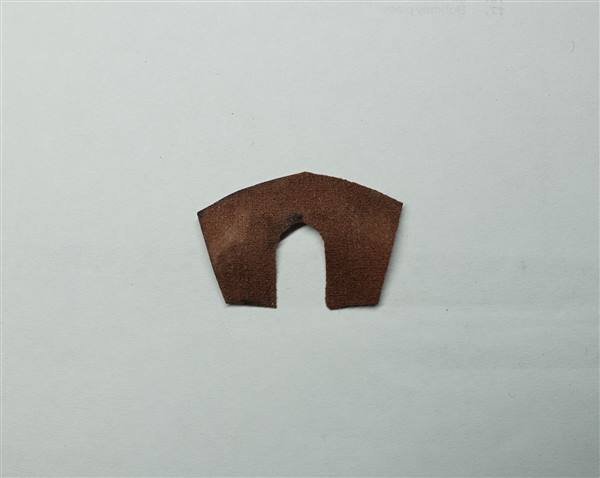
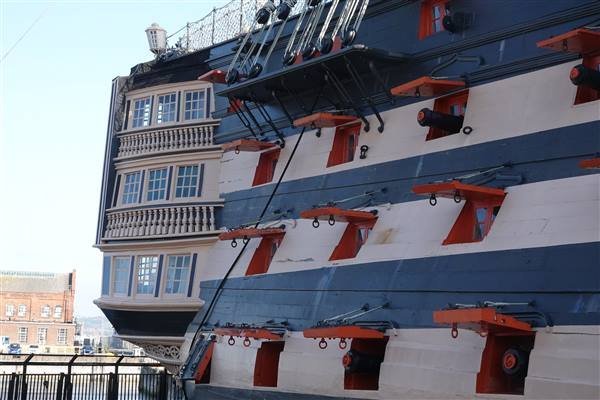
Always happy to receive constructive criticism, I have followed Jason’s suggestion and after several attempts, have made the hance scrolls larger so that they sit above the line of the gangway. I was moving on to the deadeyes and links but I couldn’t get on with the 5mm deadeye strap so have ordered some replacements from CMB. I also have some doubts about the sizes of deadeyes supplied. In the kit are 5 and 3mm versions but looking at the AOTS and the NMM drawing, there appear to be three different sizes with the royal backstays running down to scale 2.5mm deadeyes. I have some of this size left over from HMS Fly that I can use In the meantime, I have finished off the stern by fixing the rudder coat and chains. The rudder coat was made from some non-woven lens cleaning cloth cut to shape and painted with Tamiya Nato Brown. The chains are kit supplied and blackened with Birchwood Casey Brass Black in the usual way. I believe that there should also be a cable (pendant?) attached to the end of the chains that leads back to the mizzen channels as shown in this photo of the starboard quarter of Victory taken back in 2020 but I want to look into this more before deciding what diameter this should be. The quarterdeck and forecastle decks are now glued in place, covering most of the work that went into the upper deck (much to my wife’s consternation) but before doing so, I filled in the two top-tackle scuttles that don’t appear on the NMM models and plans for Diana. Thanks for looking in. David
- 310 replies
-
- 7
-
-
- Diana
- Caldercraft
- (and 1 more)
-
Thanks Jason, I'm going to follow your advice and have a go at re-cutting the scrolls to 8mm. The line plan on NMM website does show only a small area above the rail. I'm wishing that I had splashed out on a set of drawings from NMM now which might have saved me a lot of confusion. Thanks to others for all the likes and encouragement so far too David
-
Hi Jason, Thanks for your comments on the scroll and following your suggestion, I have been taking a closer look at its size and position. I was imagining that the top of the scroll runs level with the top of the gunwale. I have taped a piece of 2mm thick pearwood to check this alignment and it seems about right as in the photo below. But I think that you are saying that it should sit higher than it does. The kit version of the scroll is 8.2mm whereas mine is 6.0 If I use the dimension of the kit piece it would sit like this... If this is more like the correct position, it also seems that I will have to increase the height of the quarterdeck walls.. It would be good to hear your further views on this because I am struggling to interpret the various plans and photographs of versions with and without the built up quarterdeck rails. David
- 310 replies
-
- 3
-
-
- Diana
- Caldercraft
- (and 1 more)
-
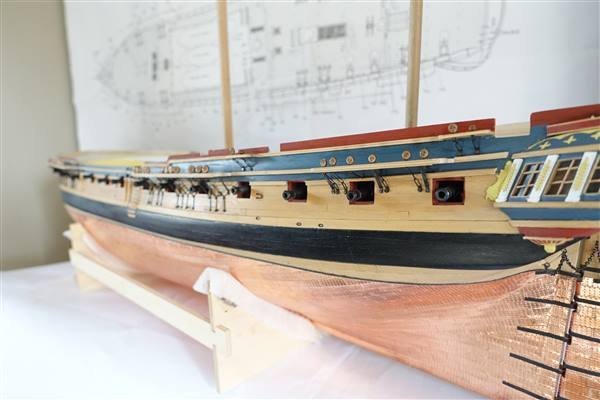
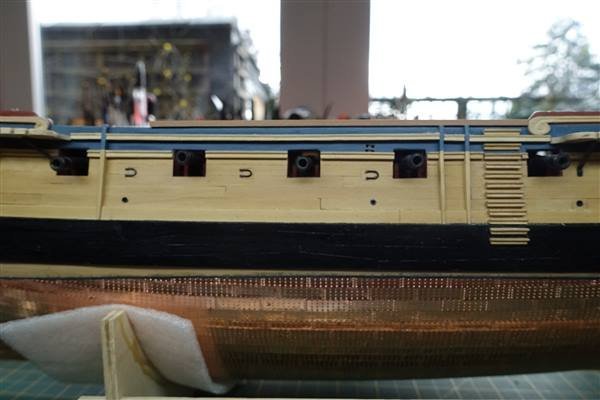
I’ve been making some corrections to the position of the sheer rail and mizzen channels. The scrolls for the drift rails supplied in the kit made from walnut didn’t look right so I scratched them from 1.5mm boxwood sheet but when placing them, they didn’t seem to sit right in relation to the sheer rail and plansheer. This prompted me to look more closely at the original plans for Diana on the NMM website and the photographs in the Sailing Frigate. As I plan to build Diana without the built-up quarter deck bulwarks, I realised that the mizzen channel should be on the same level as the main and forward channels rather than in-line with quarter deck drift rail. I also realised that I had placed the sheer rail slightly too high. All this resulted in a few days’ work removing the rails, filling the holes for the pins of the mizzen channel and some repainting. I have made new mizzen channels because the Diana plans and photographs of ship models showed that originally, in my understanding, the mizzen channel carried only the shrouds and standing backstays and that the mizzen and royal backstays ran to a separate stool. The two additional stools will be made from 1.5mm boxwood sheet as before. The sheer rail and mizzen channel are now in what I believe are their correct positions. I have used 15 brackets each side, three on the mizzen and six each on the main and fore channels. I have assumed that on the fore channel, there are brackets not seen on the plans which are hidden both behind the anchor stock and the anchor lining. Only 22 parts are supplied in the kit so a further 8 have been made from the brass strip that remains when the PE parts are removed. These shots also show the boxwood drift rail scrolls in place. I'm waiting until I have a better idea of the placement of the quarter deck guns before finishing the rail All the channels are now placed with their brackets but I have yet to drill and fix the pins which is the next thing to do.


- 310 replies
-
- 6
-
-
- Diana
- Caldercraft
- (and 1 more)
-
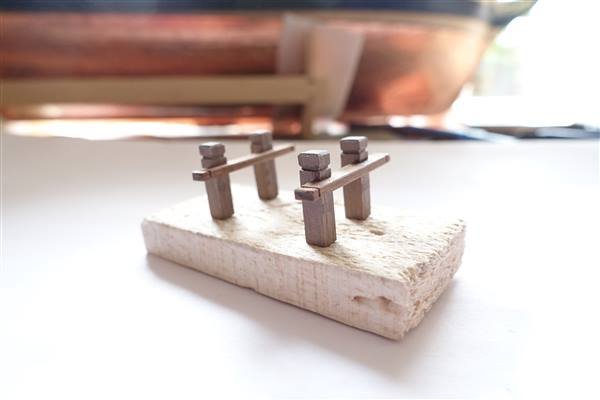
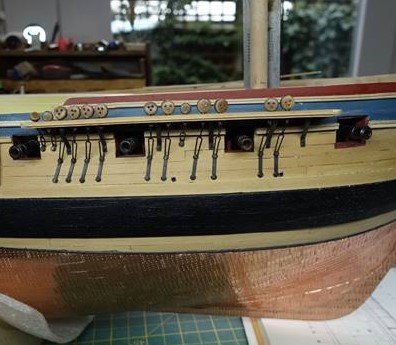
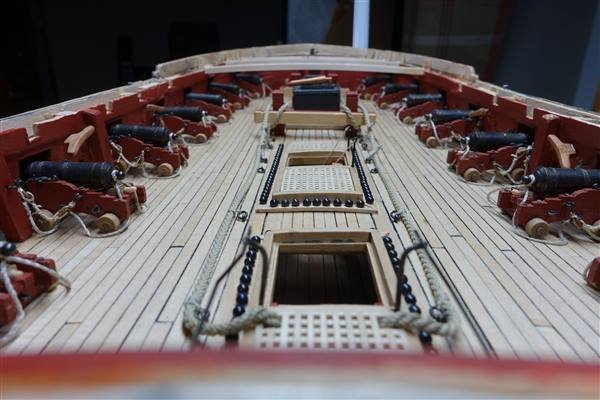
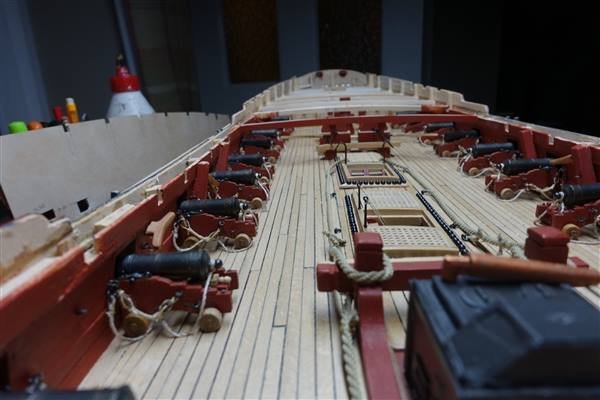
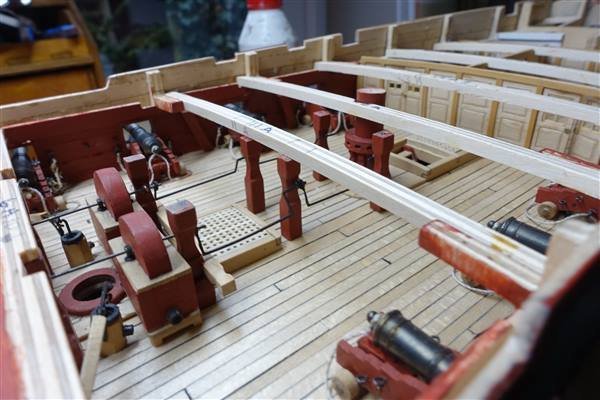
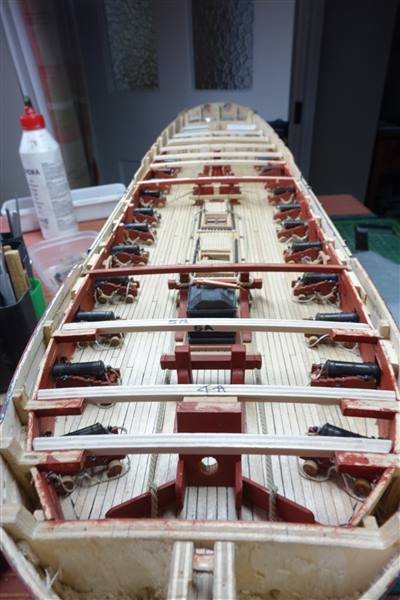
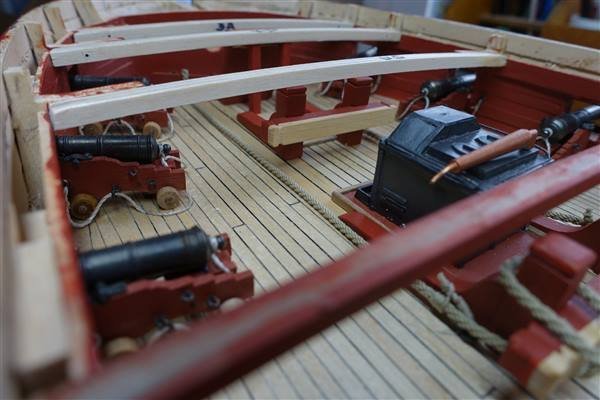
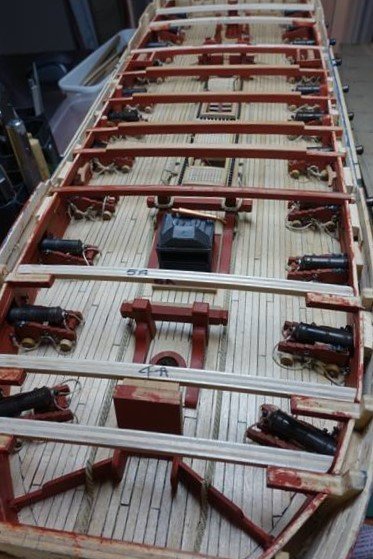
The quarter deck hatches are now finished, rounding off the profiles of coamings and gratings and giving several of coats of dilute matt varnish. Looking at the scuttles and gratings on the forecastle, the photos of the admiralty models show only one grating forward of the stove chimney. Beef Wellington, in his blog, talks about flush scuttles rather than the raised coamings shown in the kit plan but I’m not sure what this means. There are clearly openings shown in the AotS plans on page 46 but not in the models. Are they just planked coverings? Meanwhile, I have been able to continue with the fittings of the upper deck. The anchor cables are now in place. I made up 3 bitt stoppers aside and then used the deck rings in place for training tackles as deck stoppers. And with all the upper deck fittings now in place, this brings to an end a major stage in the build but before putting the skid beams in place and finally closing the lid on the upper deck, I hope that you won't mind if I indulge in a few photos. And finally with skid beams in place I've had no response from Caldercraft regarding extra channel supports so I will just go ahead and make the extra number required from brass strip David

- 310 replies
-
- 7
-
-
- Diana
- Caldercraft
- (and 1 more)
-
Hi Ben, Good news, my ropes arrived today and they look great. The anchor cable is very close to what I would expect and the other two items I ordered just to see, I'm also very pleased with. Now I'm thinking about whether to replace all the thread supplied in the kit. David
- 310 replies
-
- 2
-
-
- Diana
- Caldercraft
- (and 1 more)