


mic-art
-
Posts
49 -
Joined
-
Last visited
Content Type
Profiles
Forums
Gallery
Events
Posts posted by mic-art
-
-
-
Old topic but if anybody is interested, there is a used copy for sale in at a Swedish antiquarian shop. It's quite expensive though (~130$)
Link:
-
This was a very interesting and educational thread to read!
And as a comment to the conservation vs restoration debate, I would like to remind you of what can happen if restoration is done by someone less skilled 😏 :
-
-
Funny, I said to the Admiral just the other day that the nice part about this forum, is the politeness lack of heated topics, but here it is getting warm
")
JerseyCity Frankie said something about the lack of accurate litterature in the topic. It seems there's a lot of knowledge here, and I suppose not everyone would have time to write a book, but perhaps it would be manageable writing an article in a wiki, on for example wikipedia.org or www.fandom.com. It is just an idea and I'm probably not the first to suggest it.
")
//Mikael
-
Thanks for the book tip! Found a cheap paperback copy at 15 euro that I ordered.
https://www.bokus.com/bok/9781848322189/rigging-period-fore-and-aft-craft/
-
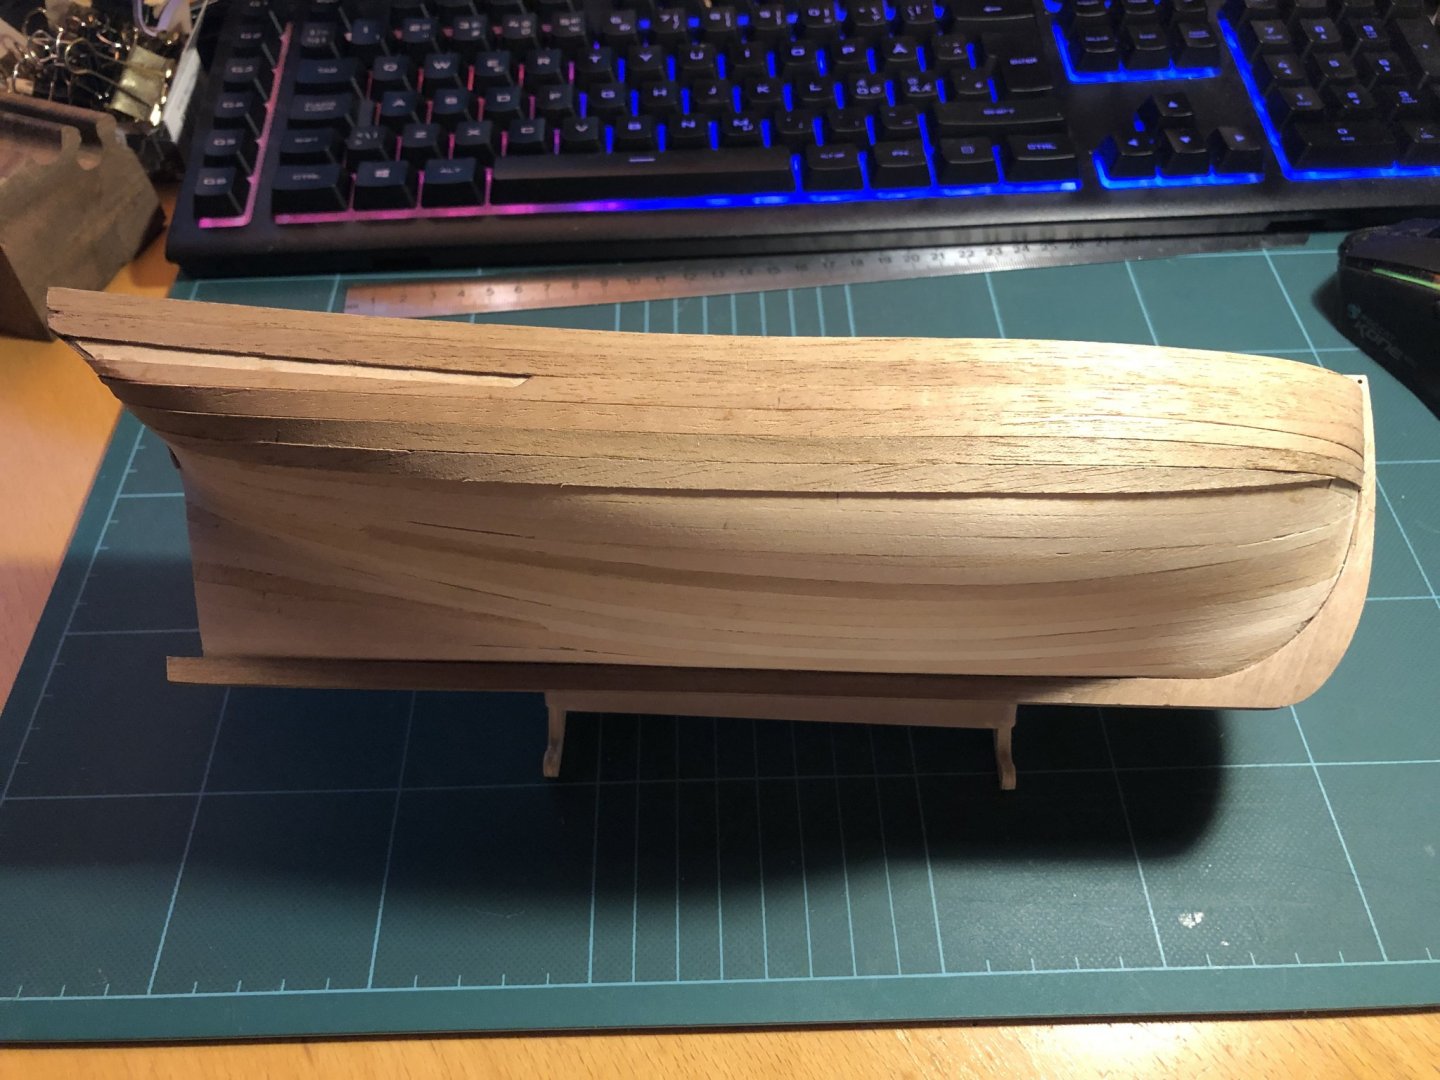
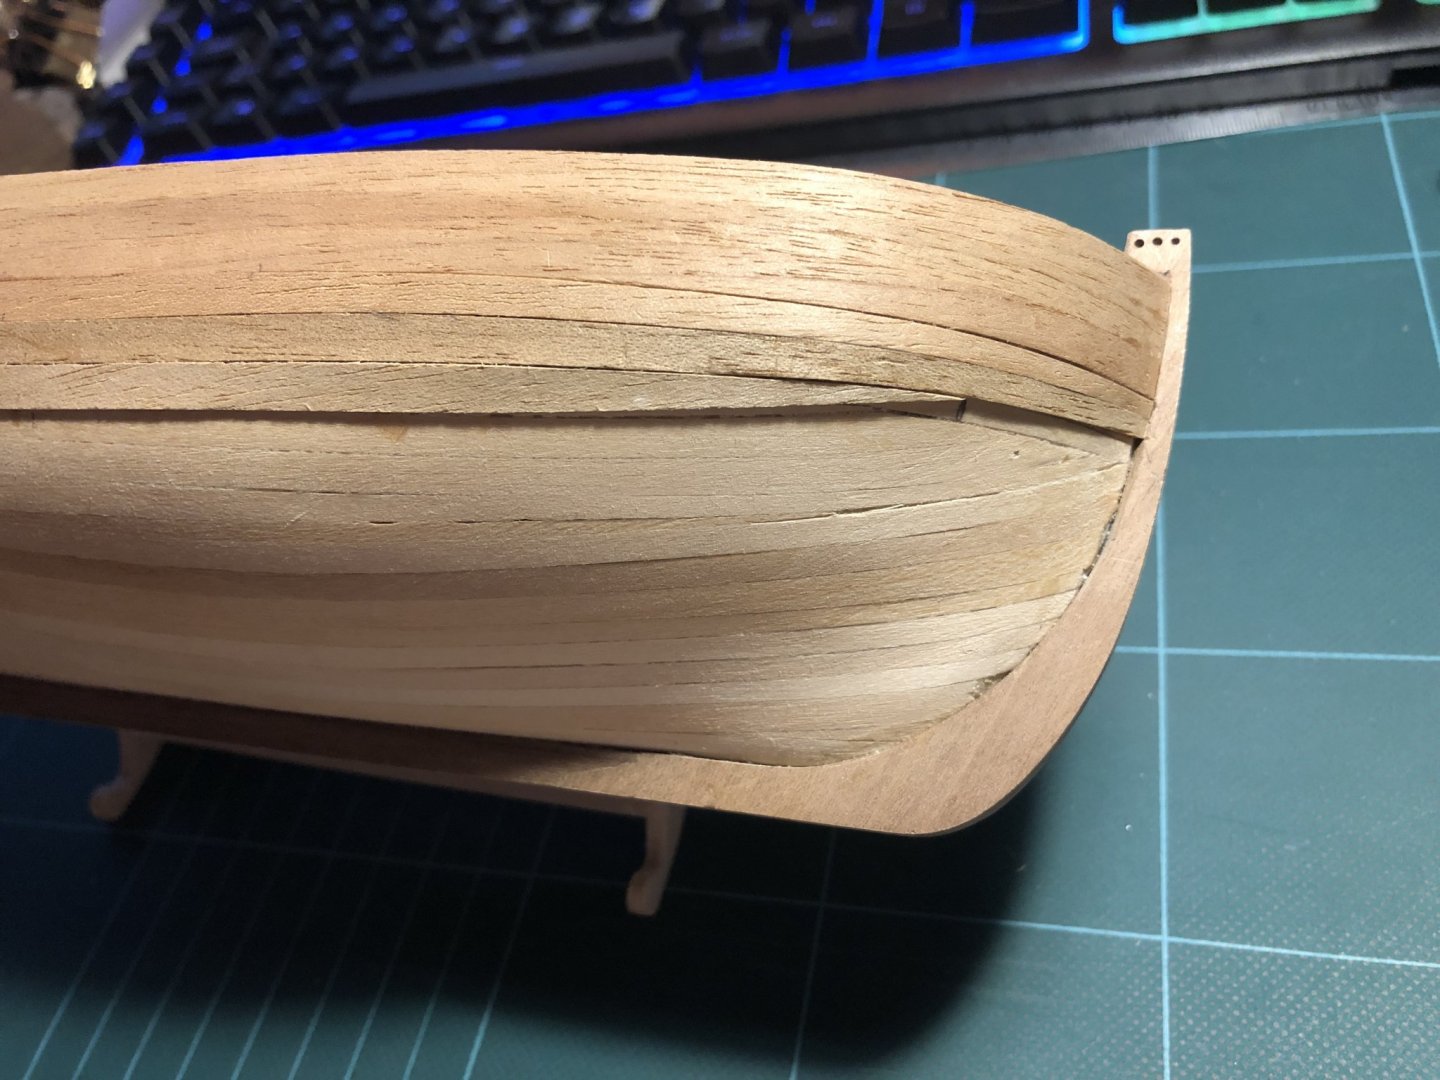
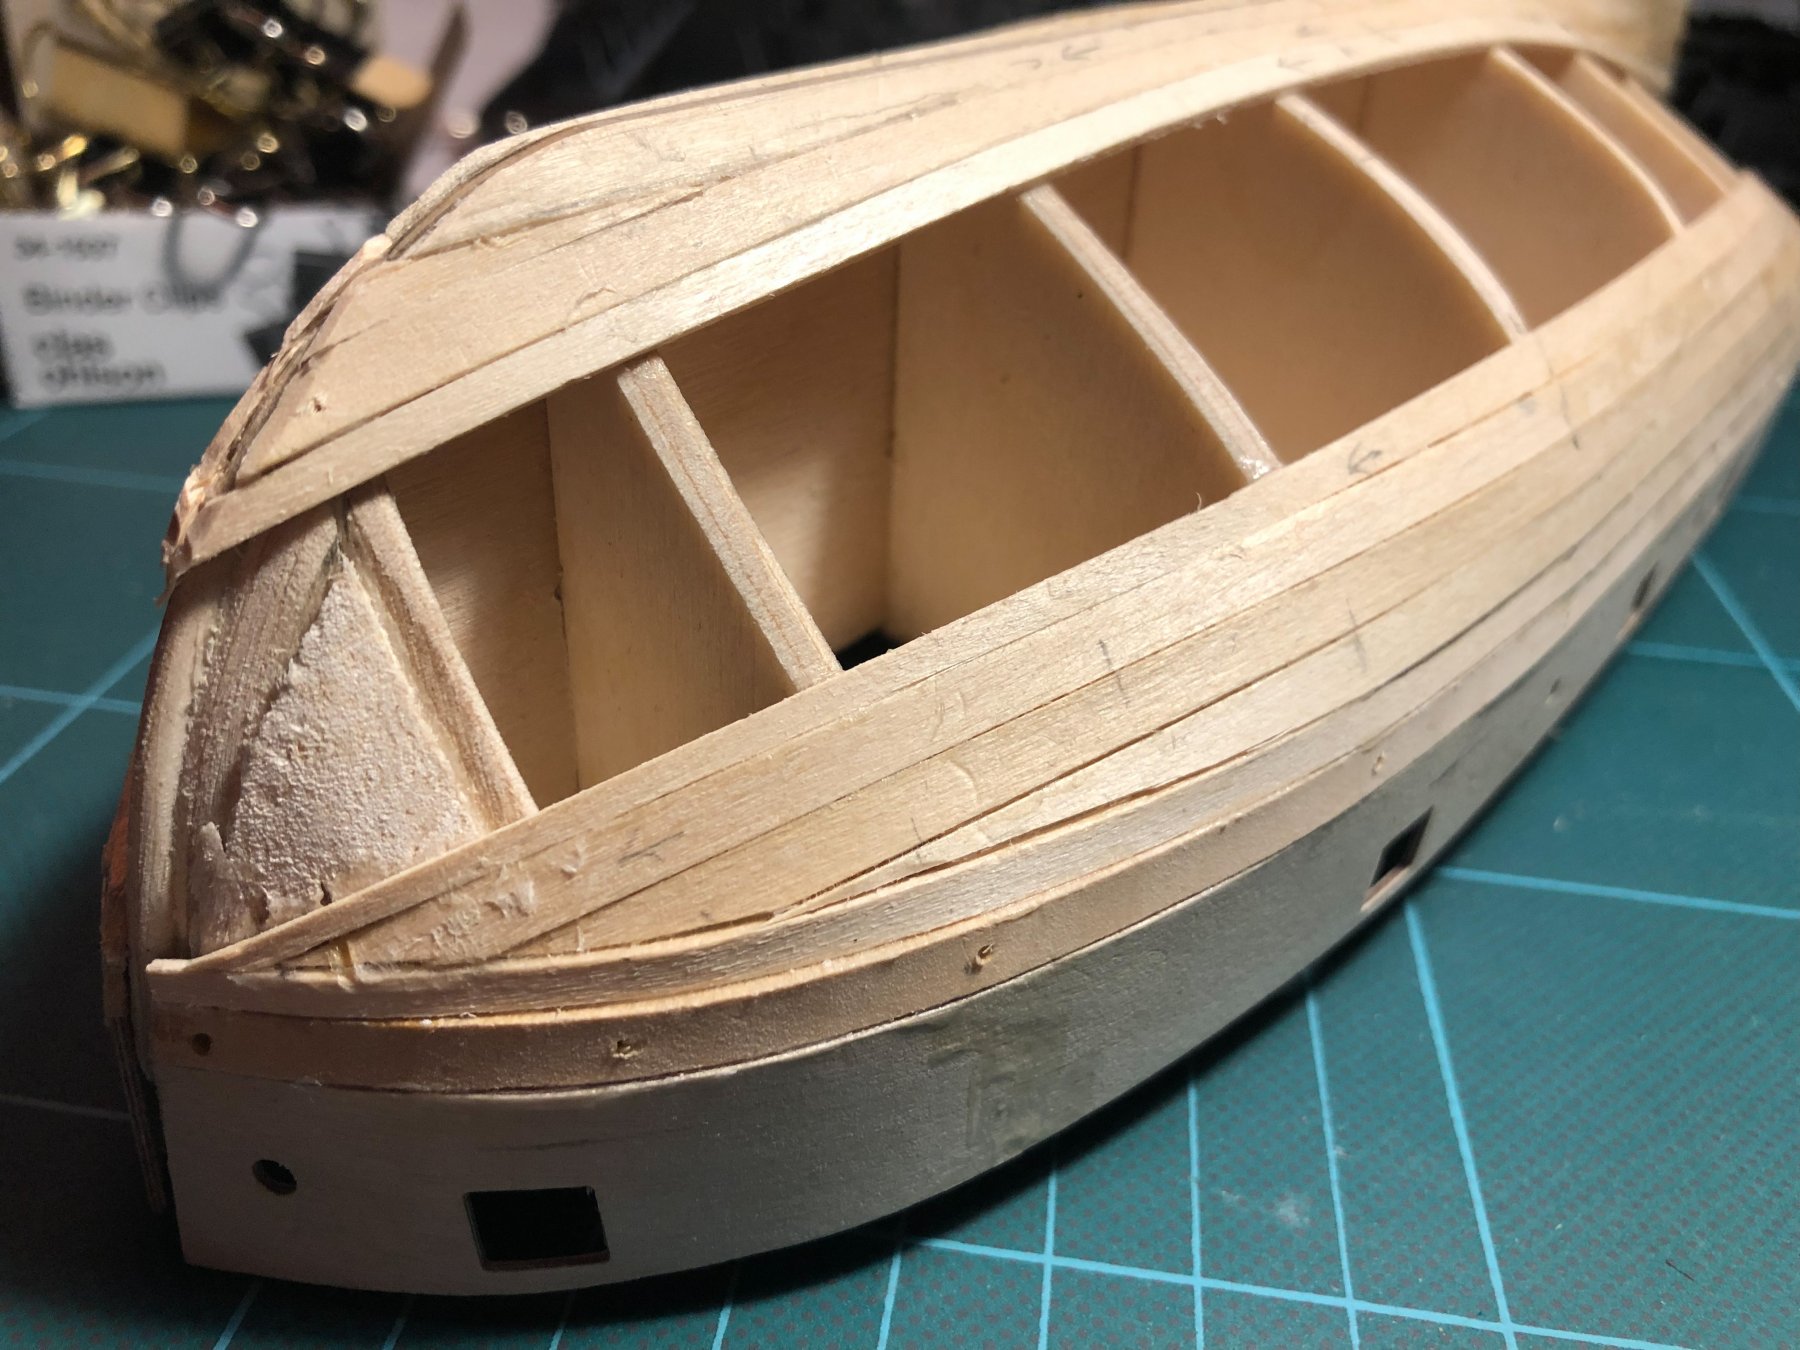
Slow progress on second planking. Someone advised using 0.5 mm planks so I bought some 5mm during our vacation in Stockholm. It is much easier to bend. I do not have any good clamps for this stage so I glue with CA glue.
The first 4 planks was easy to fit but then it got more difficult to make planks follow smooth In the stem. I can not see how to do that correctly. Anyway I had to end the planks as in the photo. I figure the wale will cover the ugly joints.
- john2013, Edwardkenway, tkay11 and 1 other
-
 4
4
-
-
The Caldercraft Cutter Sheroune kit comes with some hideous brass letters to mount in the stern.
I have tried to find any reference on how it would have looked on a English cutter from that period, but have failed to find any.
From paintings it looks as if the ships only had decorations in various forms - but no name.
Is there any "proof" that small ships like Sherbourne actually did have a name displayed?
//Mikael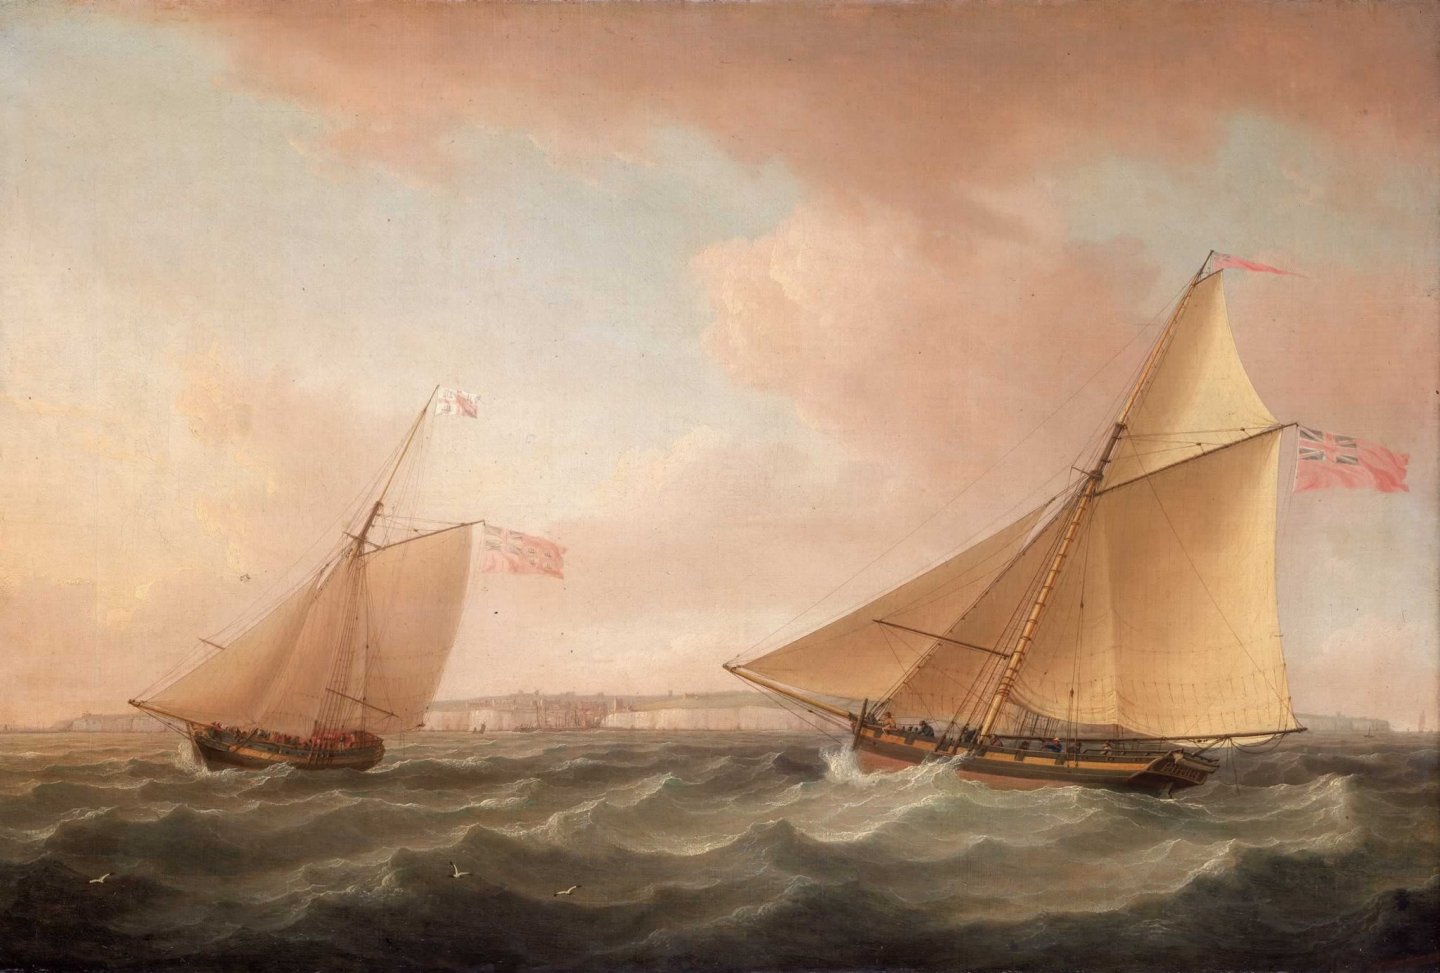
-
On 8/23/2019 at 1:51 PM, Jörgen said:
I use the Alert book to name the things. And I have no idea what it is in Swedish:) Good job.
Hej Jörgen och tack för ditt stöd!
I suppose you mean "The Naval Cutter Alert (Anatomy of the Ship) "?
I have ordered a used copy of "Skeppet" by Björn Landström from a second hand bookshop, I will study that to get some more in depth knowledge in the ship lingo. Meanwhile and most likely in the future too, I will rely on google.
-
29 minutes ago, tkay11 said:
Nice progress. Normally the hull planks would go over the edge of the transom timbers as they would be nailed from the outside to them. However, if you are going to paint the hull, you should be able to hide the fact that they are lying on the inside of them. Even if you don't, I don't think it would be worth tearing off your planking to re-do it as it is quite neat. You can check this with some of the build logs of the Sherbourne.
Tony
Thank you for your input Tony. You are correct in that the planks would go over the edge of the transom, and it will, with the second planking. 😉
-
-
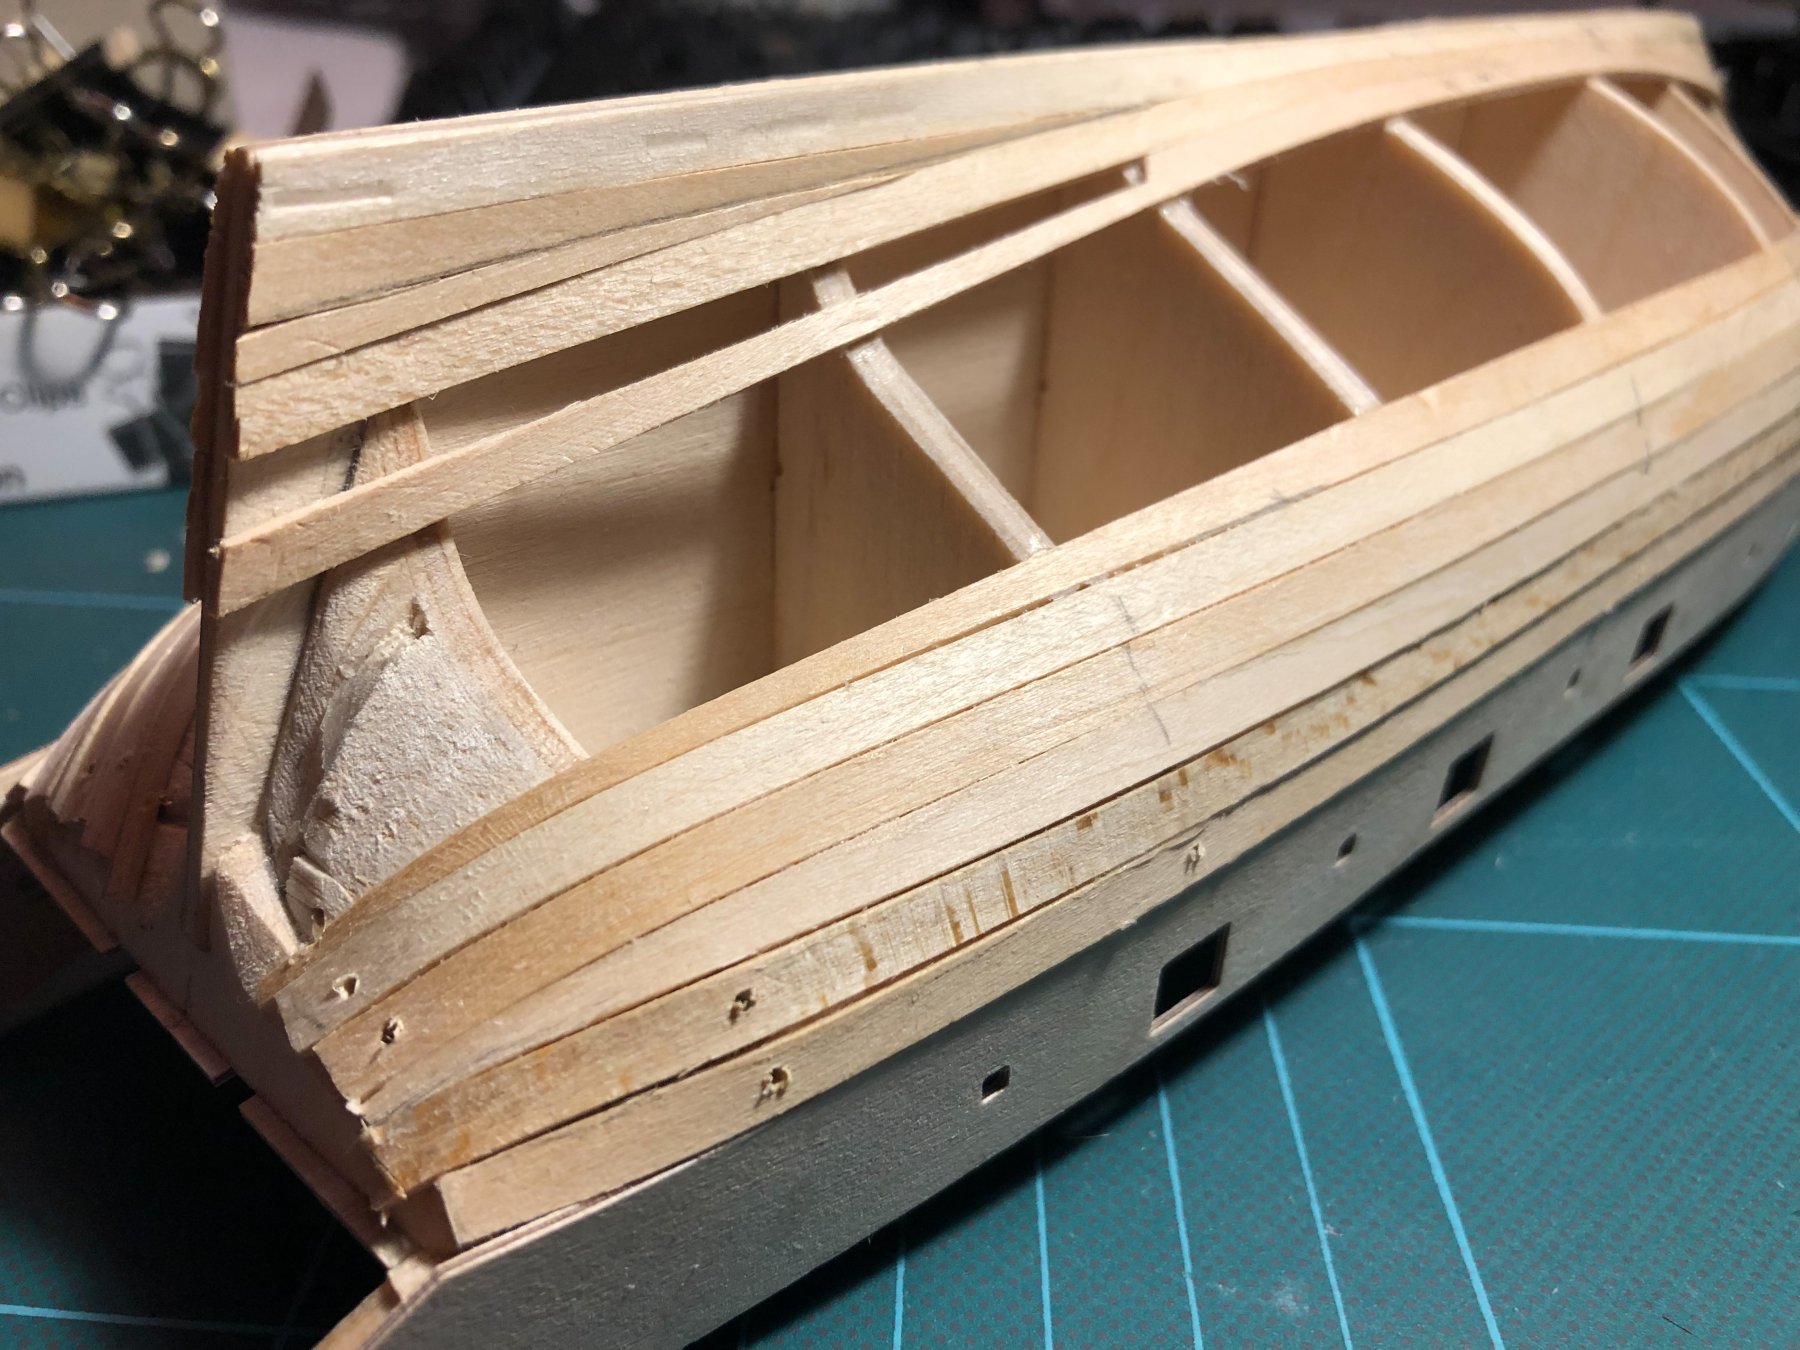
Hello and thanks for all the replies and support!
Here is a small update on my slow progress.

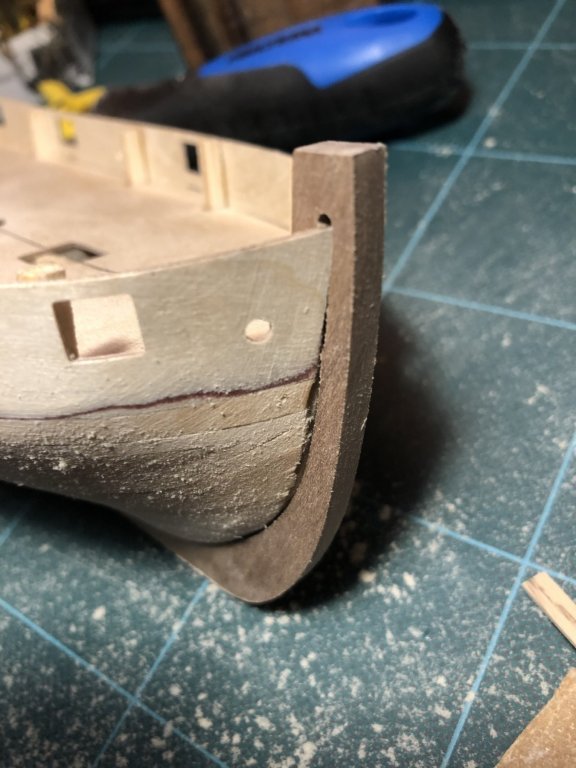
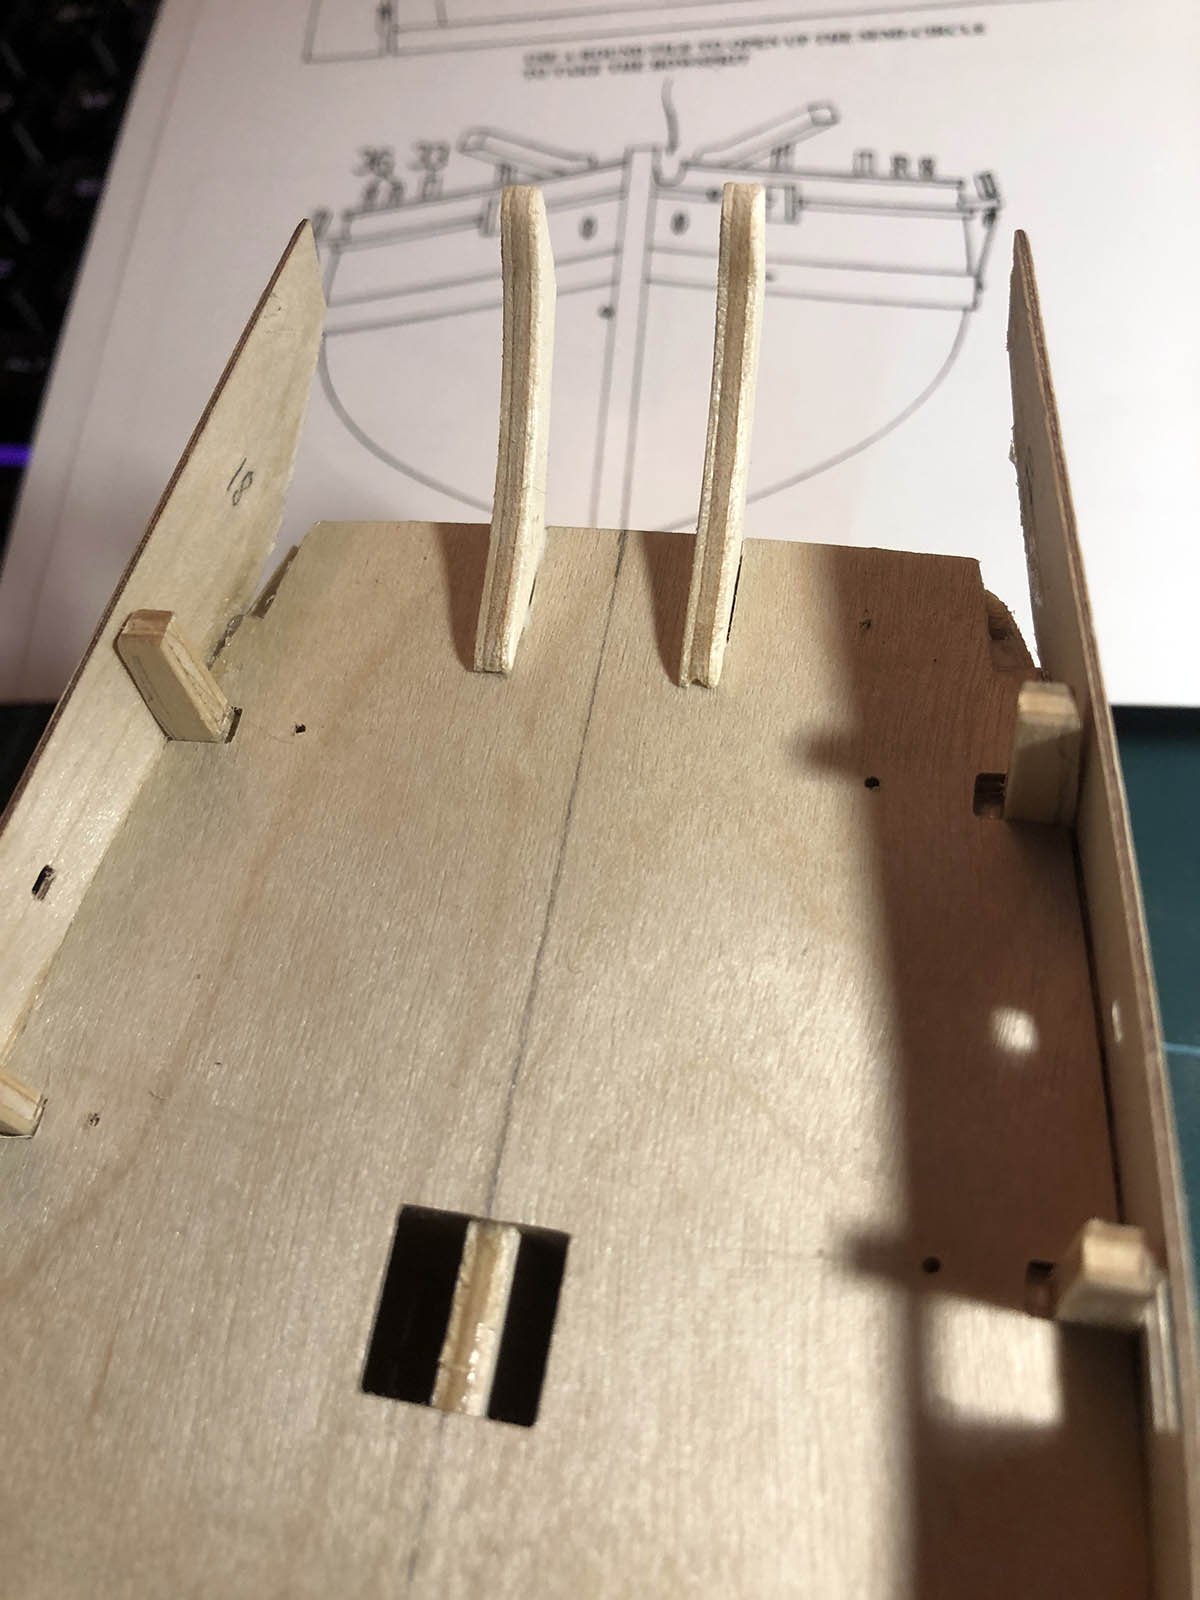
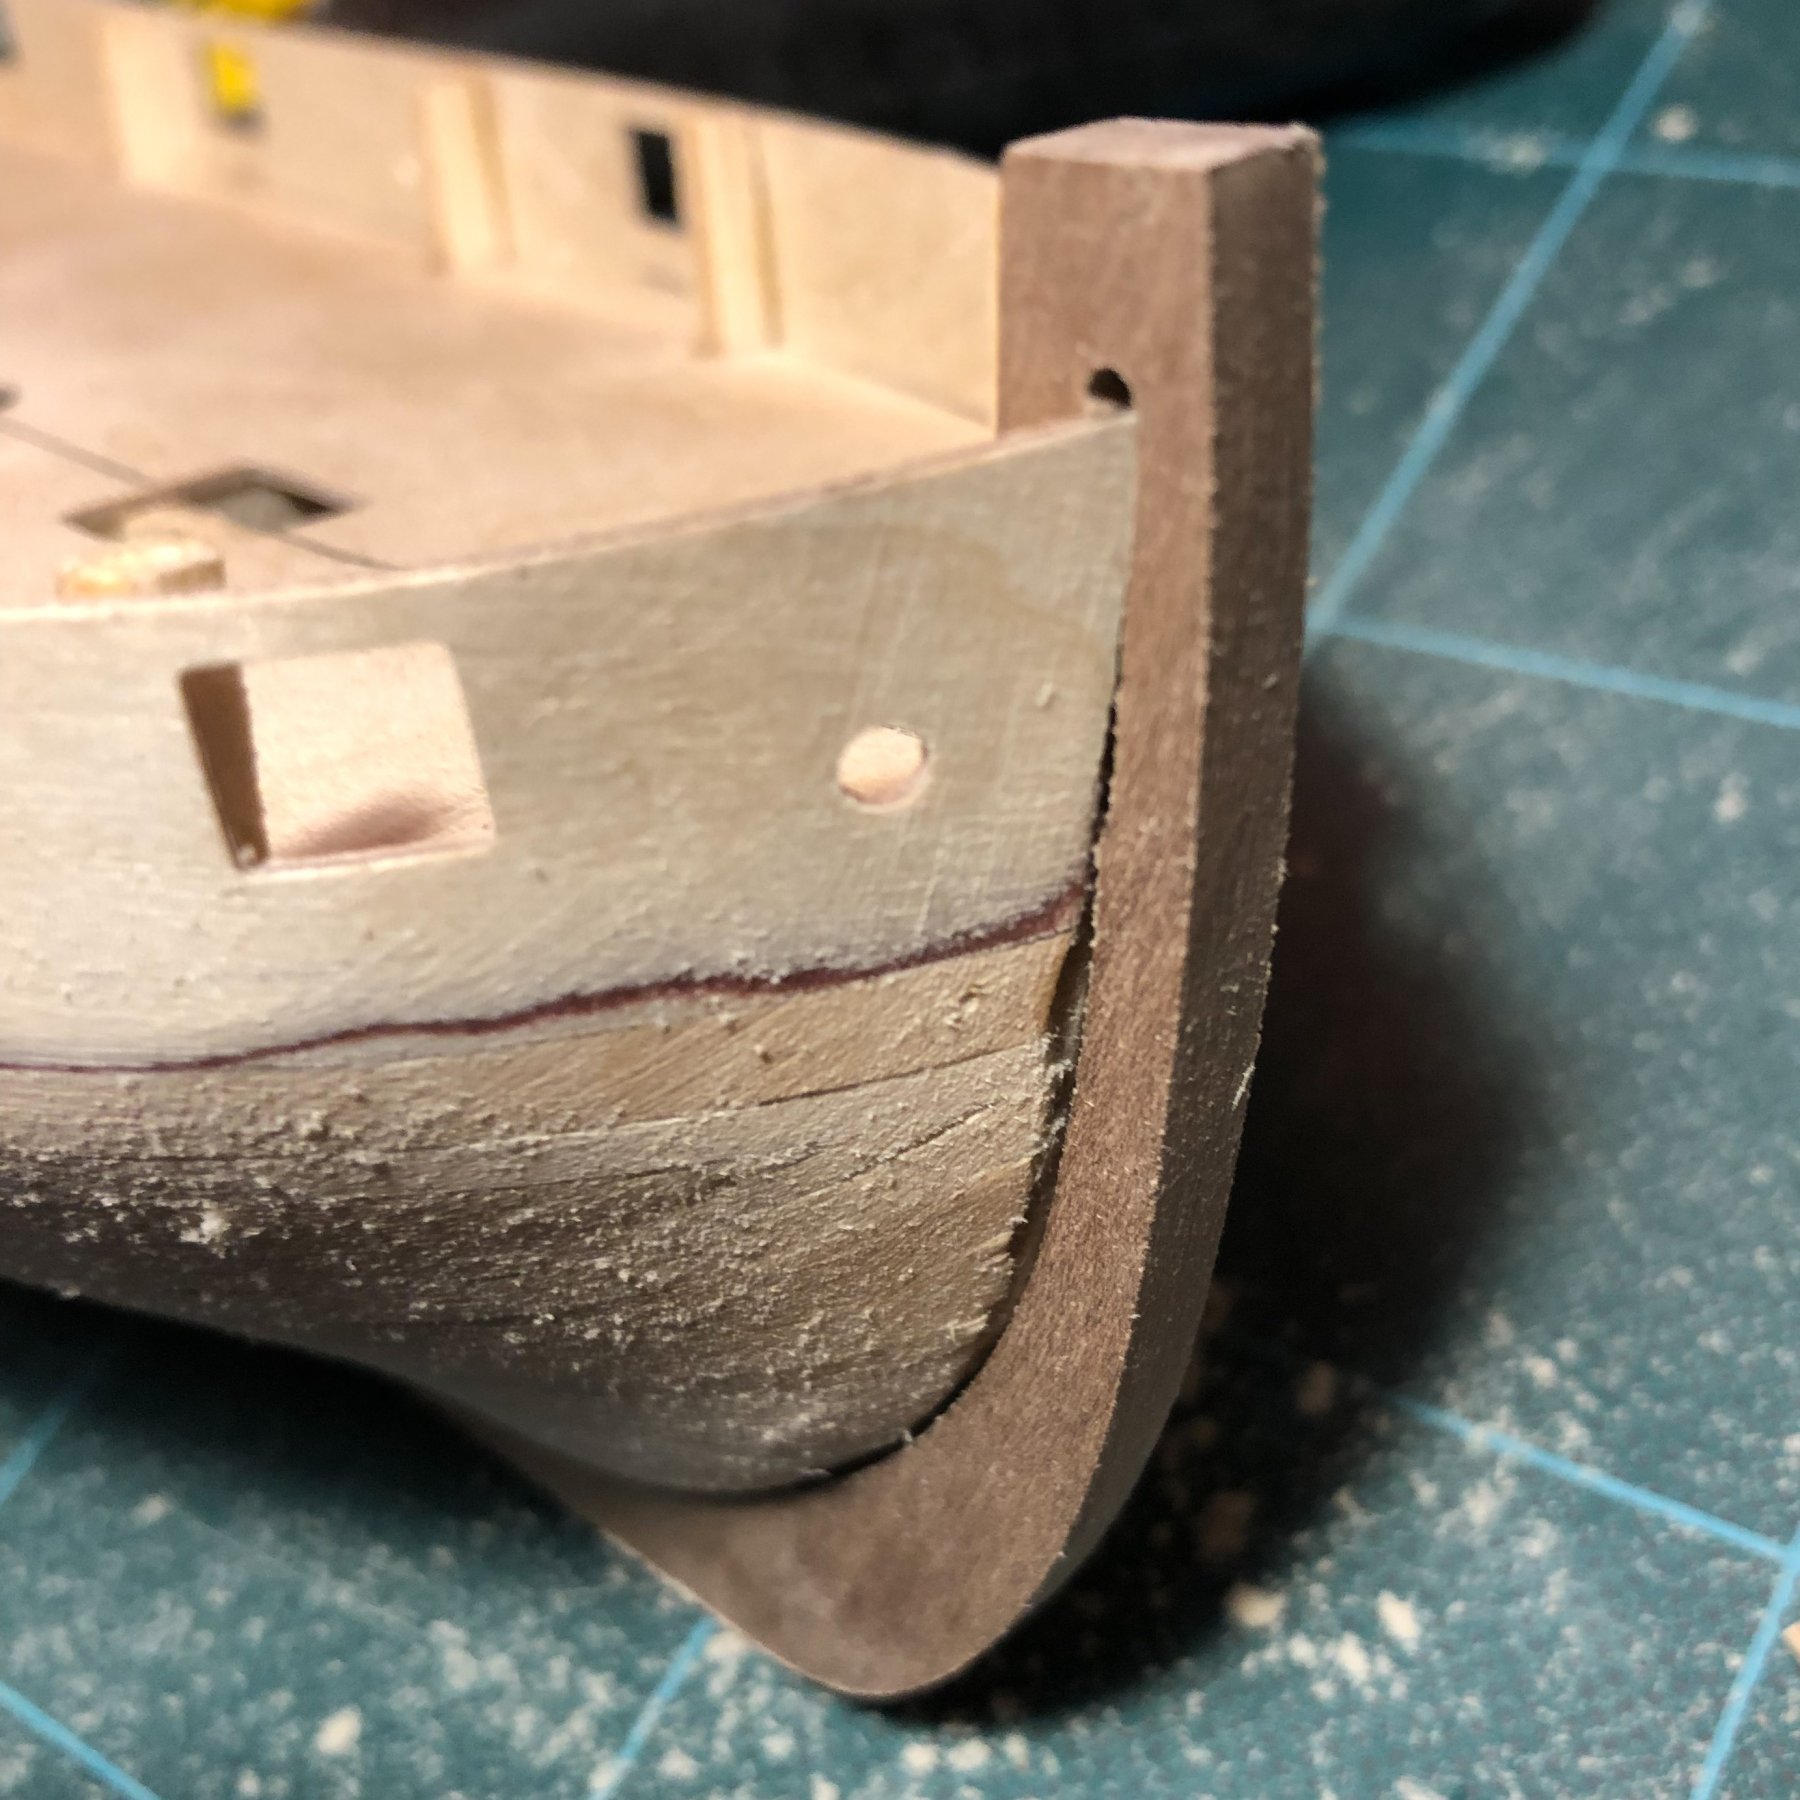
I fitted the middle sternposts first after the first planking was sanded.At this point I noticed that the outer stern timbers where in the wrong angle so I removed them with the help of some methylated spirit (technical alcohol in english?), which dissolved the PVA glue like a charm. Then fitted them again with the middle stern timbers as guide.
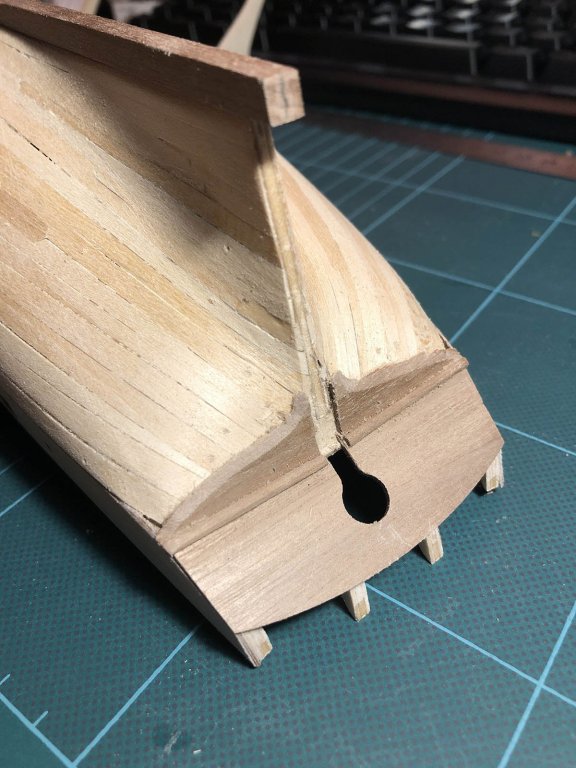
Next step was to plank the stern. There was a gap between transom and the planking which I covered with a bullnose batten. Would that be historically out of line?
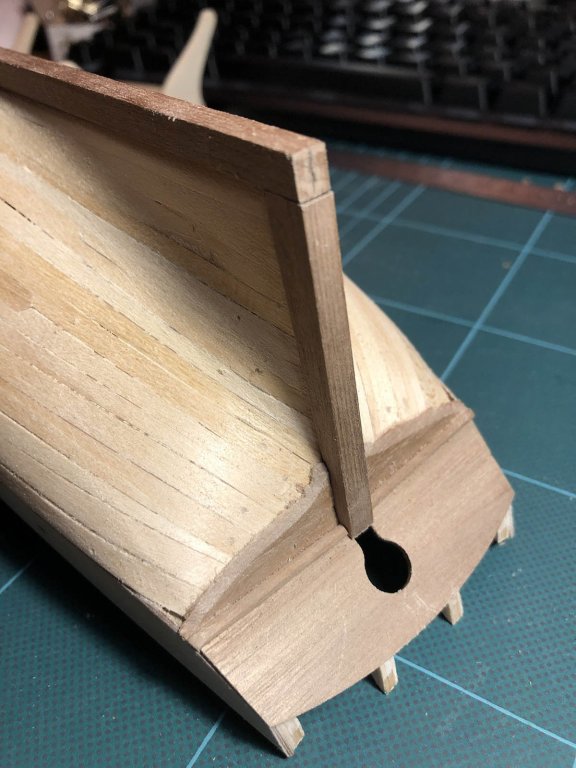
I dry fitted the stern post to achieve a snug fit for the stern planking. I will fit it permanently after the second planking (which I am a bit afraid of)
I hope my writing is comprehensive as I have to learn what the parts of a ship is called, not only in english, but also in Swedish 😉
- JpR62, Jörgen, GrandpaPhil and 2 others
-
5
-
I must say it looks very nice!
So you would recommend a pin pusher then? I was thinking of buying one but I got the feeling that people think it is a waste of money. Did you use it for your second planking too? -
Greetings!
I have been hesitant whether to start a build log or not as I don’t want to jinx it. What if I never finish, then I will stand in shame in public instead of just hiding the object of shame on a shelf to be forgotten.
Anyway here I am and I hope to make it to the end. This is my first build in 30 years so excuse my lack of skill and technique. 😉
I will try to recapitulate what I have done so far:
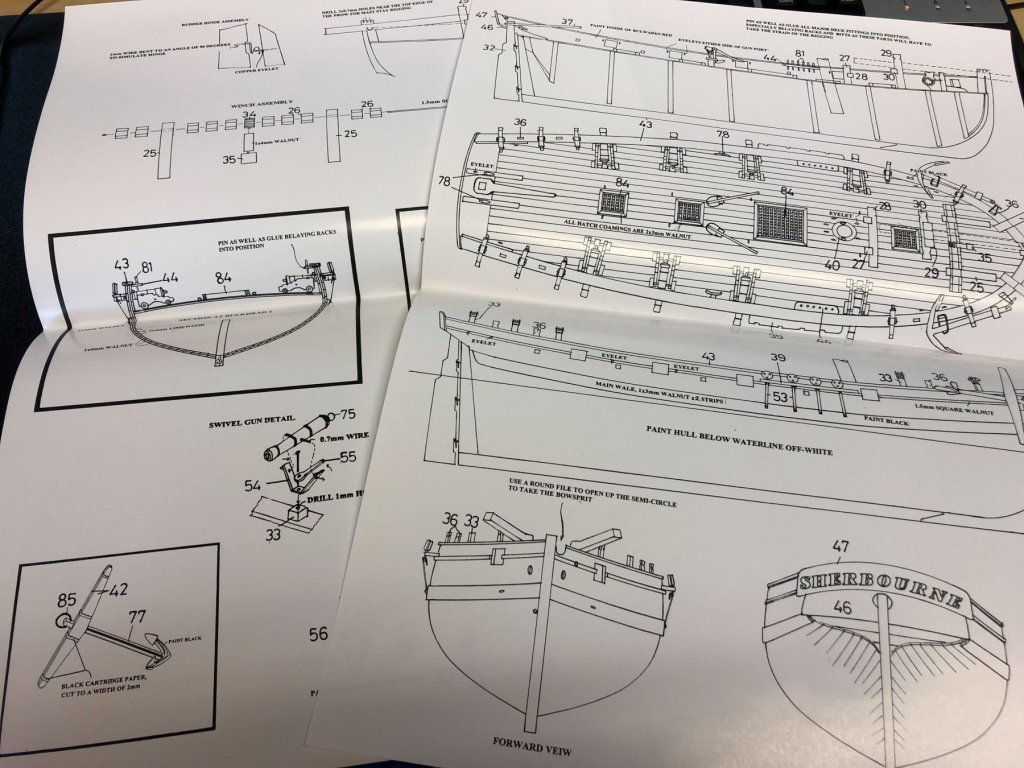
After a lot of pondering what and where to buy I finally ordered the kit from Cornwall model boats in the UK. It arrived a week later together with some tools, paints and glue. While waiting for the kit to arrive I read all Sherbourne build logs I could find to be prepared.
Upon unboxing the first thing I noticed was that the plans where big – much bigger than I have room for. Thus I decided to scan the plans and rearrange the layout so they fit on a A3 paper.
Not many problems fitting the bulkheads but I had and issue were the #4 and #5 bulkhead exceeded the false keel so I had to sand them down so they are flush with the false keel. Member AH1973 had similar issue in his build:
I decided to add filler blocks in bow and stern as advised by other builders. In the picture you see I had to add some more to adjust the shape of the bow. Here you see the false deck being glued.
I think I was a bit over enthusiastic bevelling the stern bulkhead.

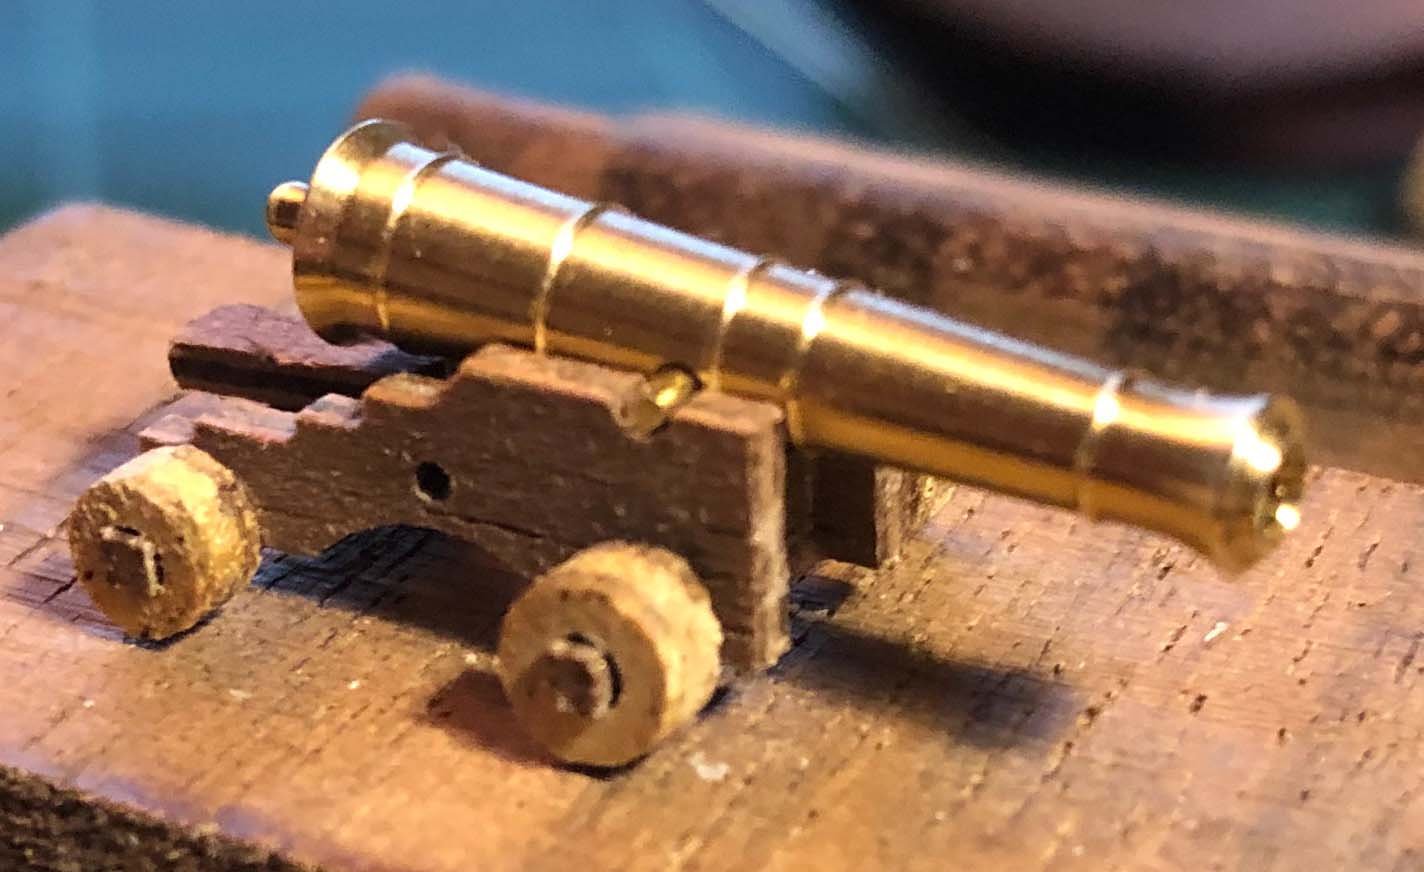
Before I fitted the bulwarks I assembled a gun to test that the gun ports where in correct position.

Fitting of the bulwarks. As Stockholm Tar https://modelshipworld.com/profile/427-stockholm-tar/ suggested, I cut half the way though all the frames at deck level to make it easier to remove them at a later stage.
I decided to fit the keel parts after first planking.
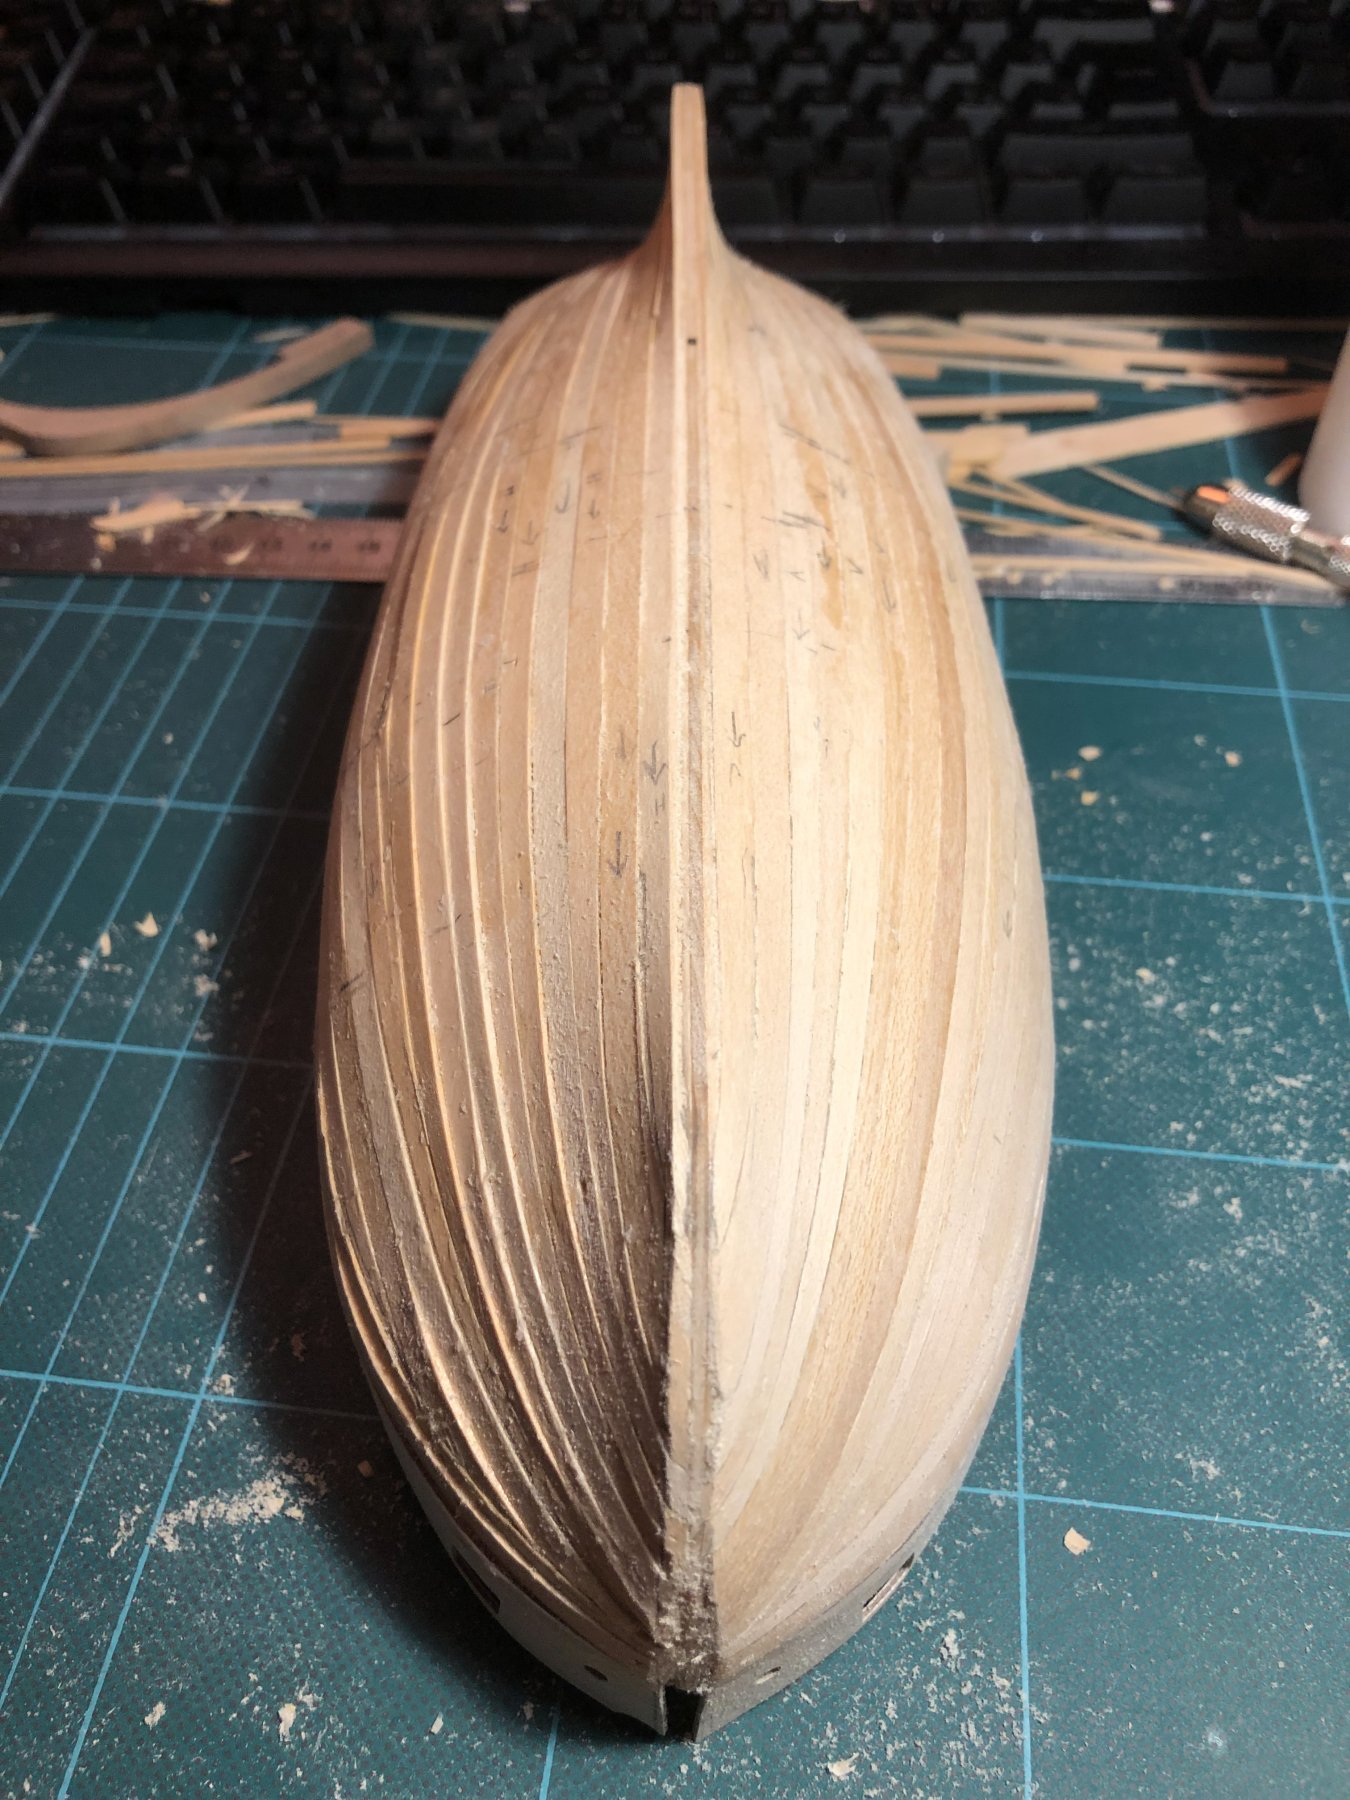
First planking
Here comes a trickier part, shaping and bending planks so they sit nice, one next to the other.

I was not so successful in tapering the planks correctly, hence the ugly bow. For the second planking I must be more careful.
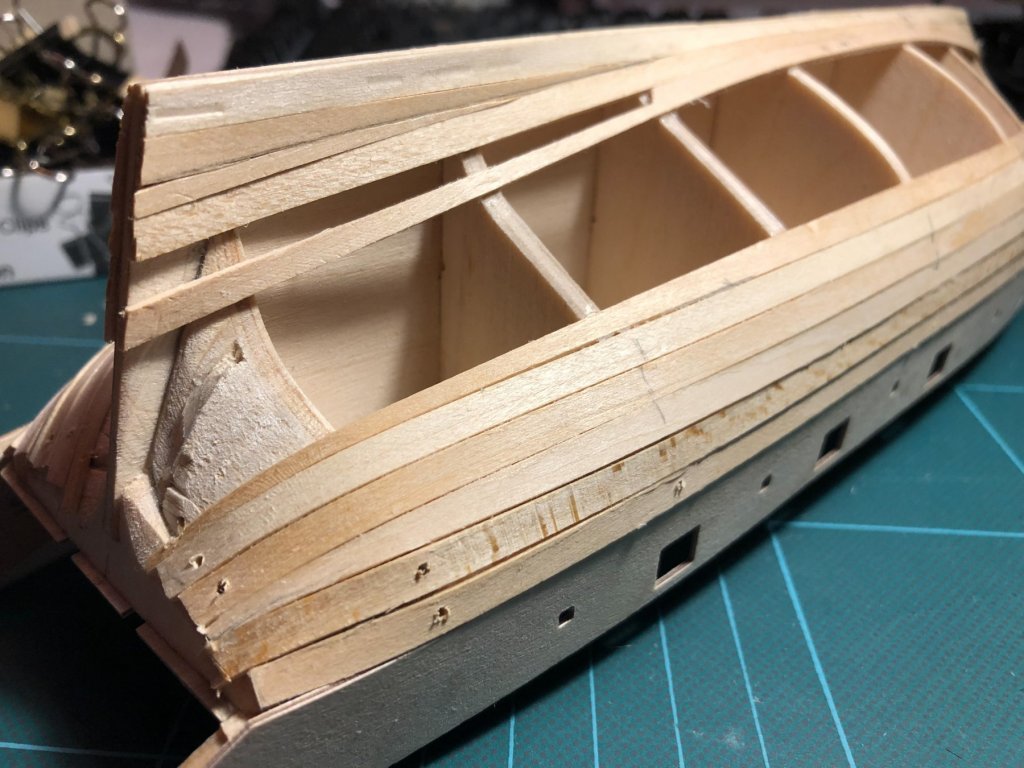
I experimented with stealers in the stern.

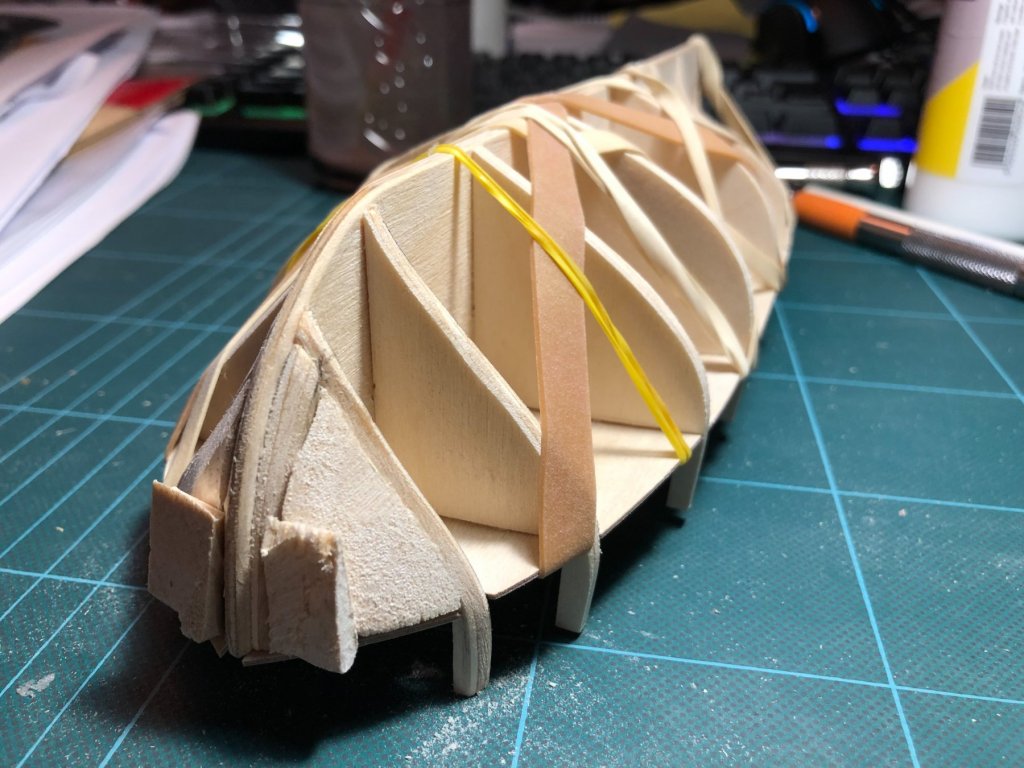
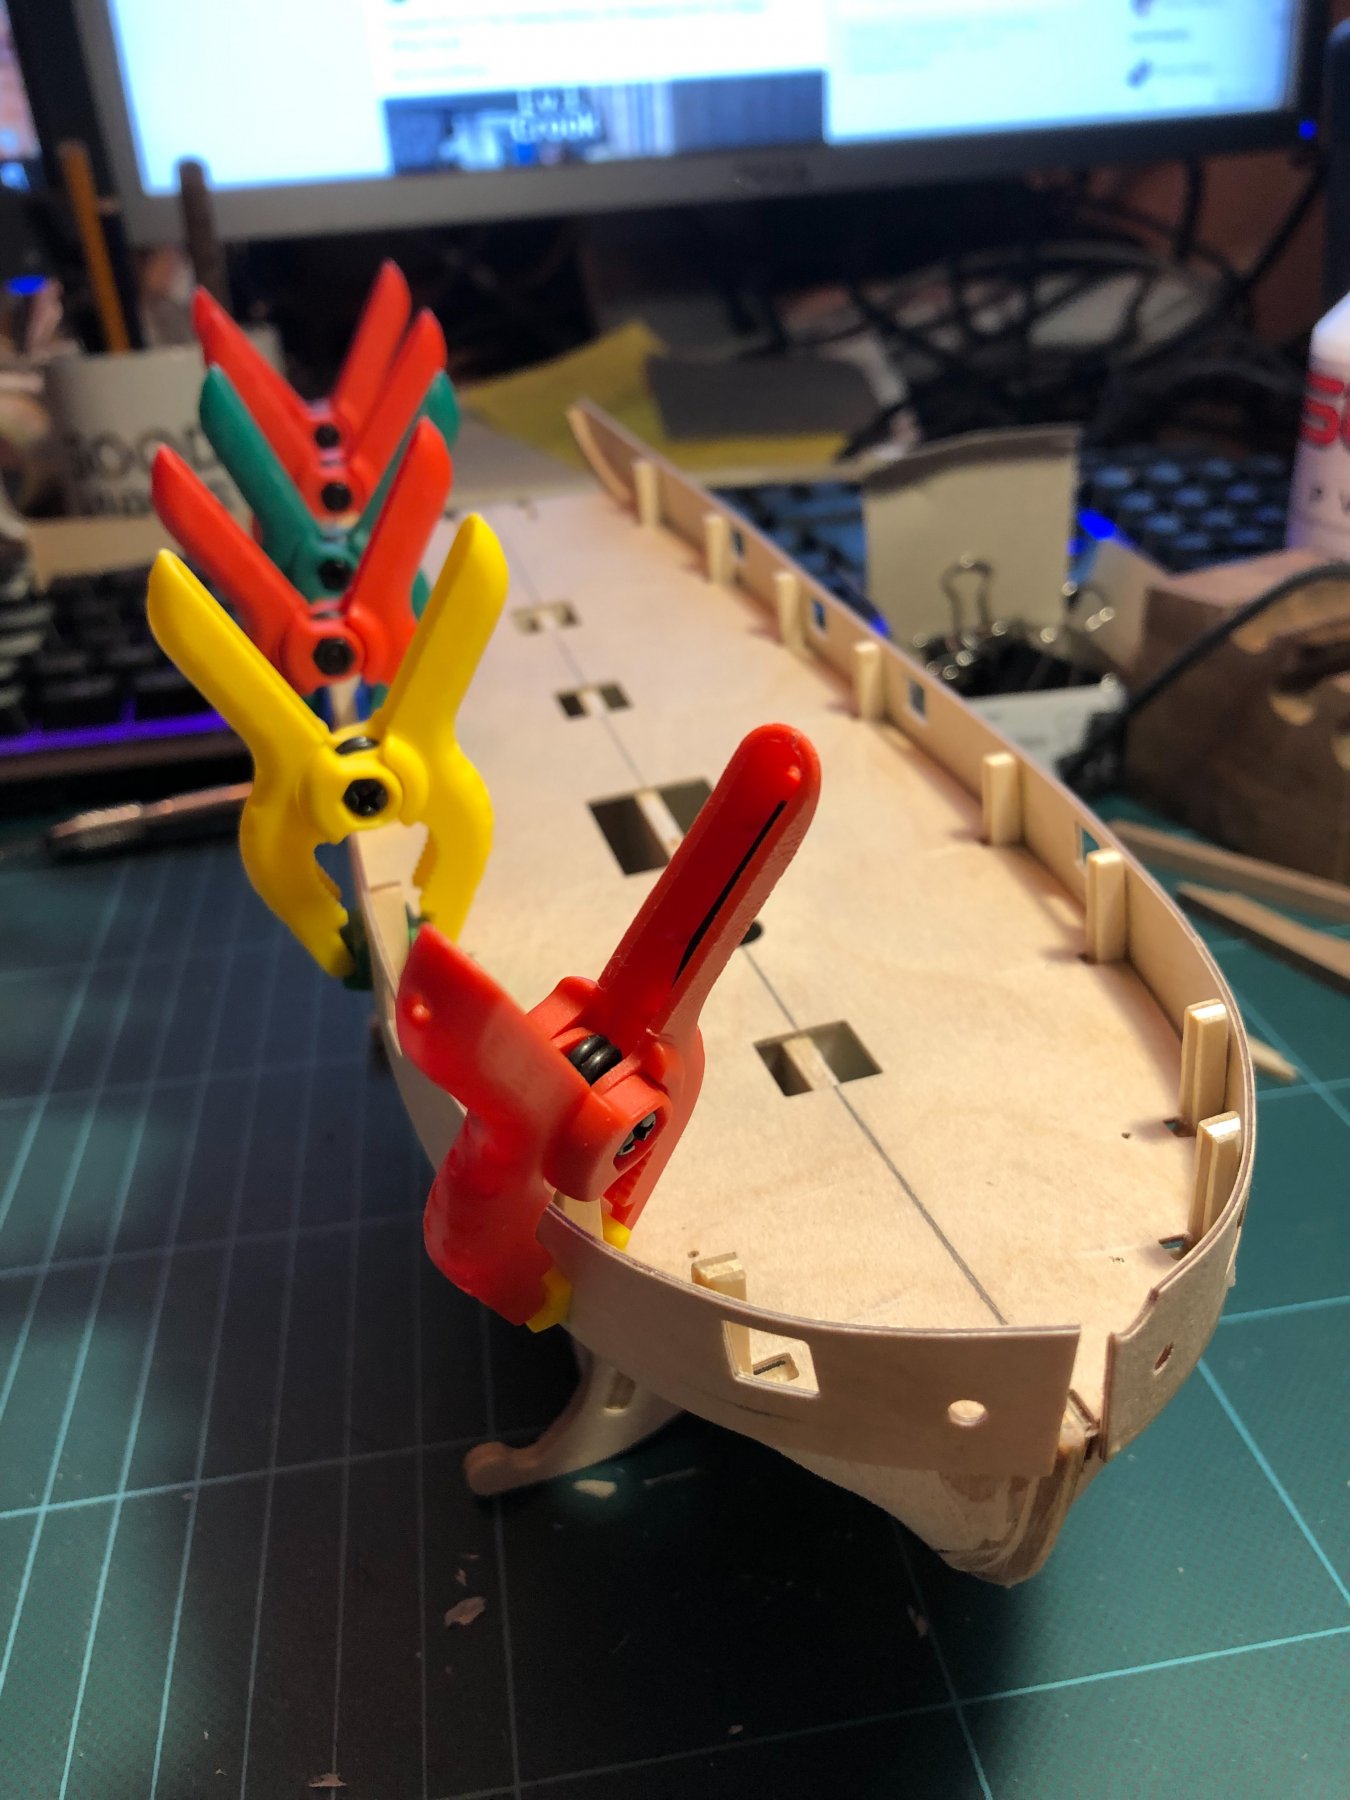
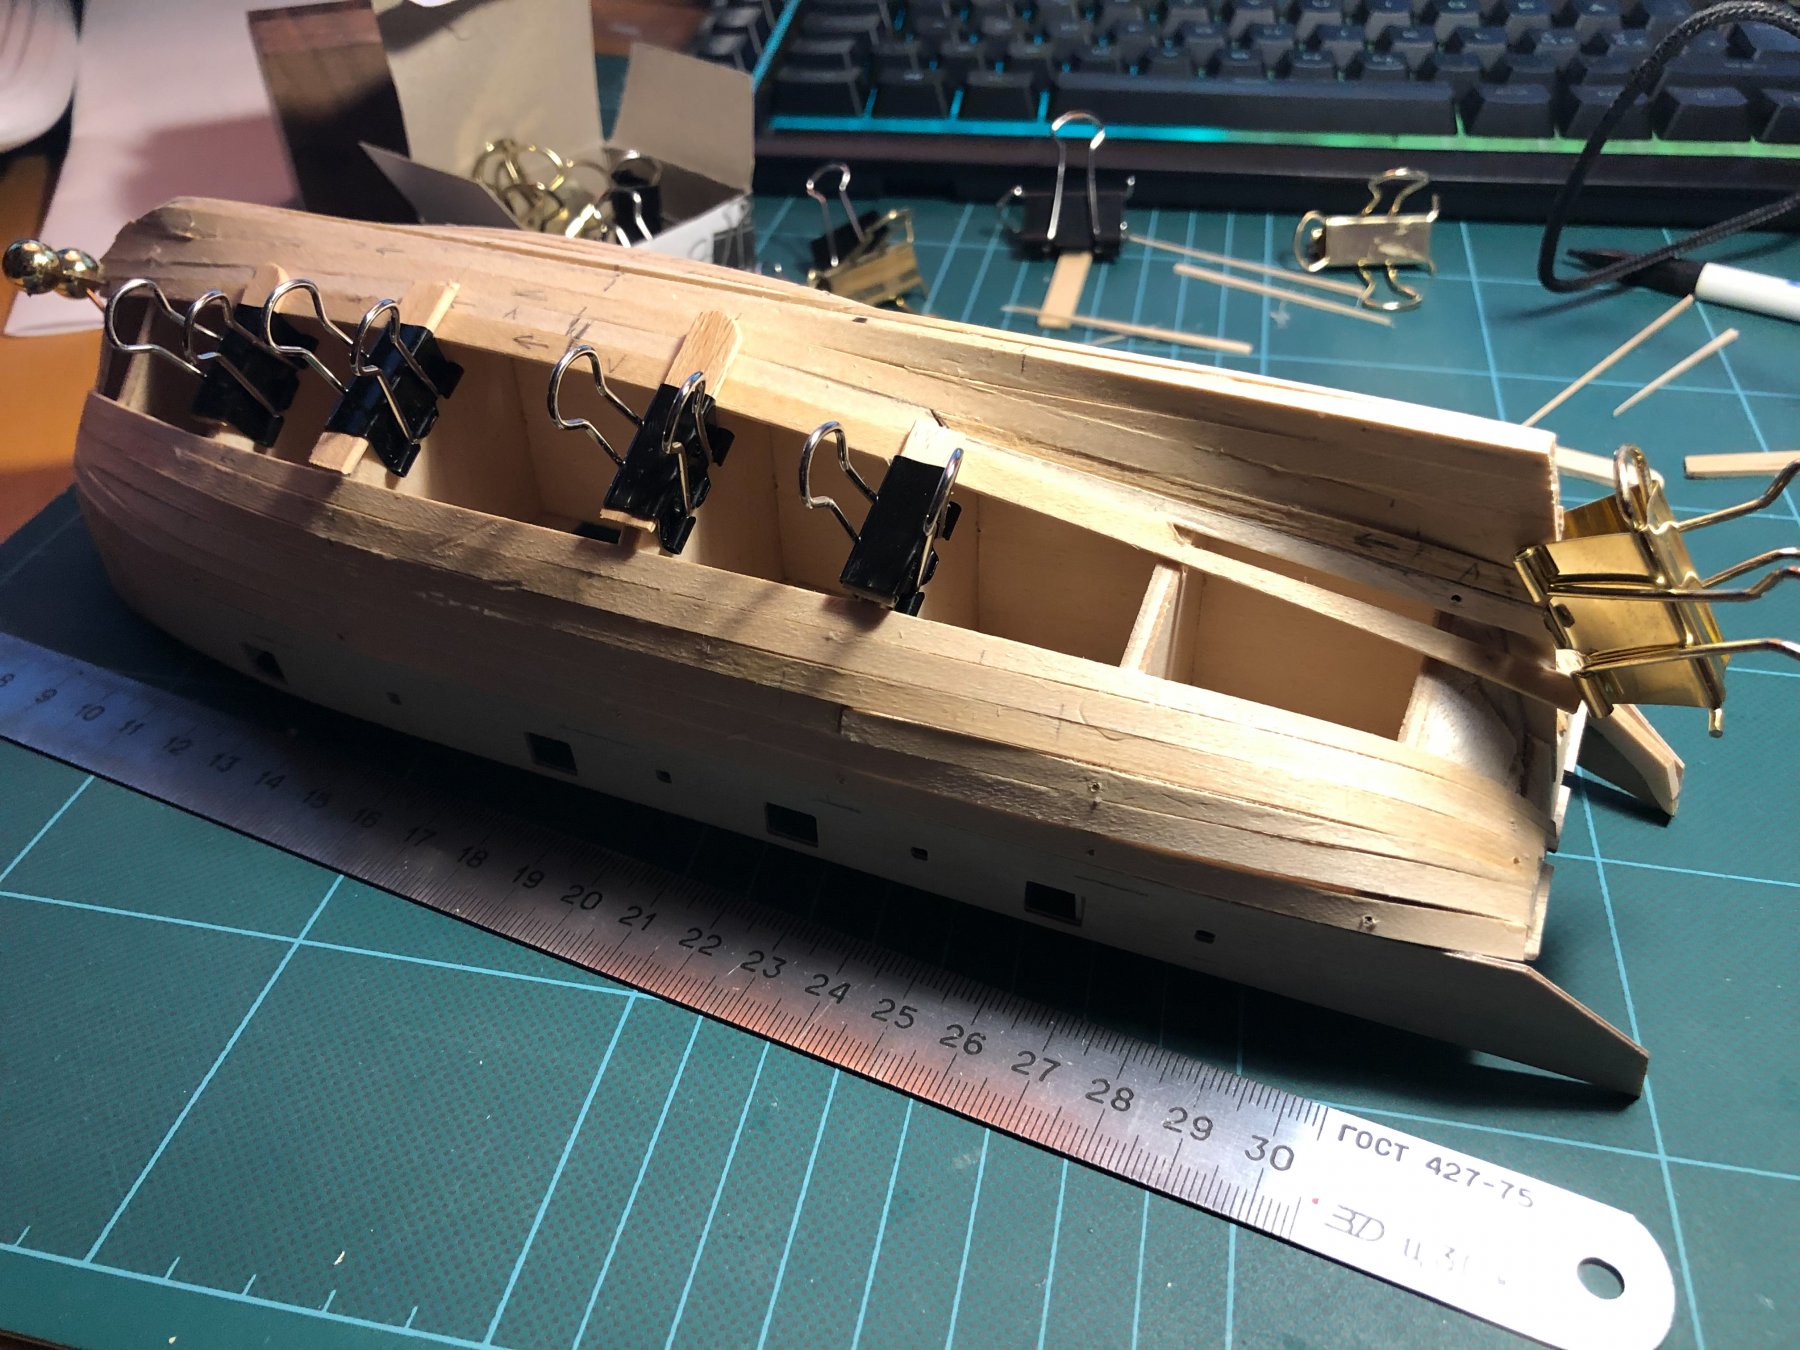
At first I tried using the brass pins that comes with the kit which didn’t work at all for me. They bent very easily and did not sit tight. Instead I use reconfigured paperclips where possible and rubber bands and pins in the ends. For the big paperclips I used popsicle sticks. (notice the USSR steel ruler with price etched in to it in the front )
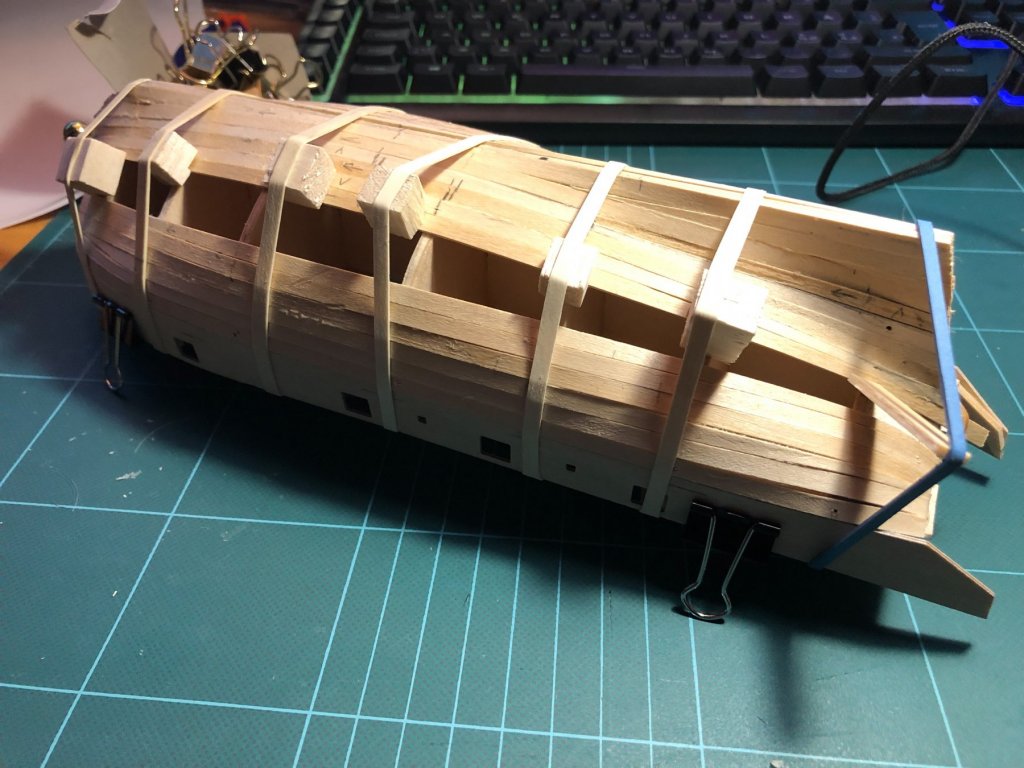
When the paperclips where to big I used rubber bands and blocks of balsa to concentrate the pressure.

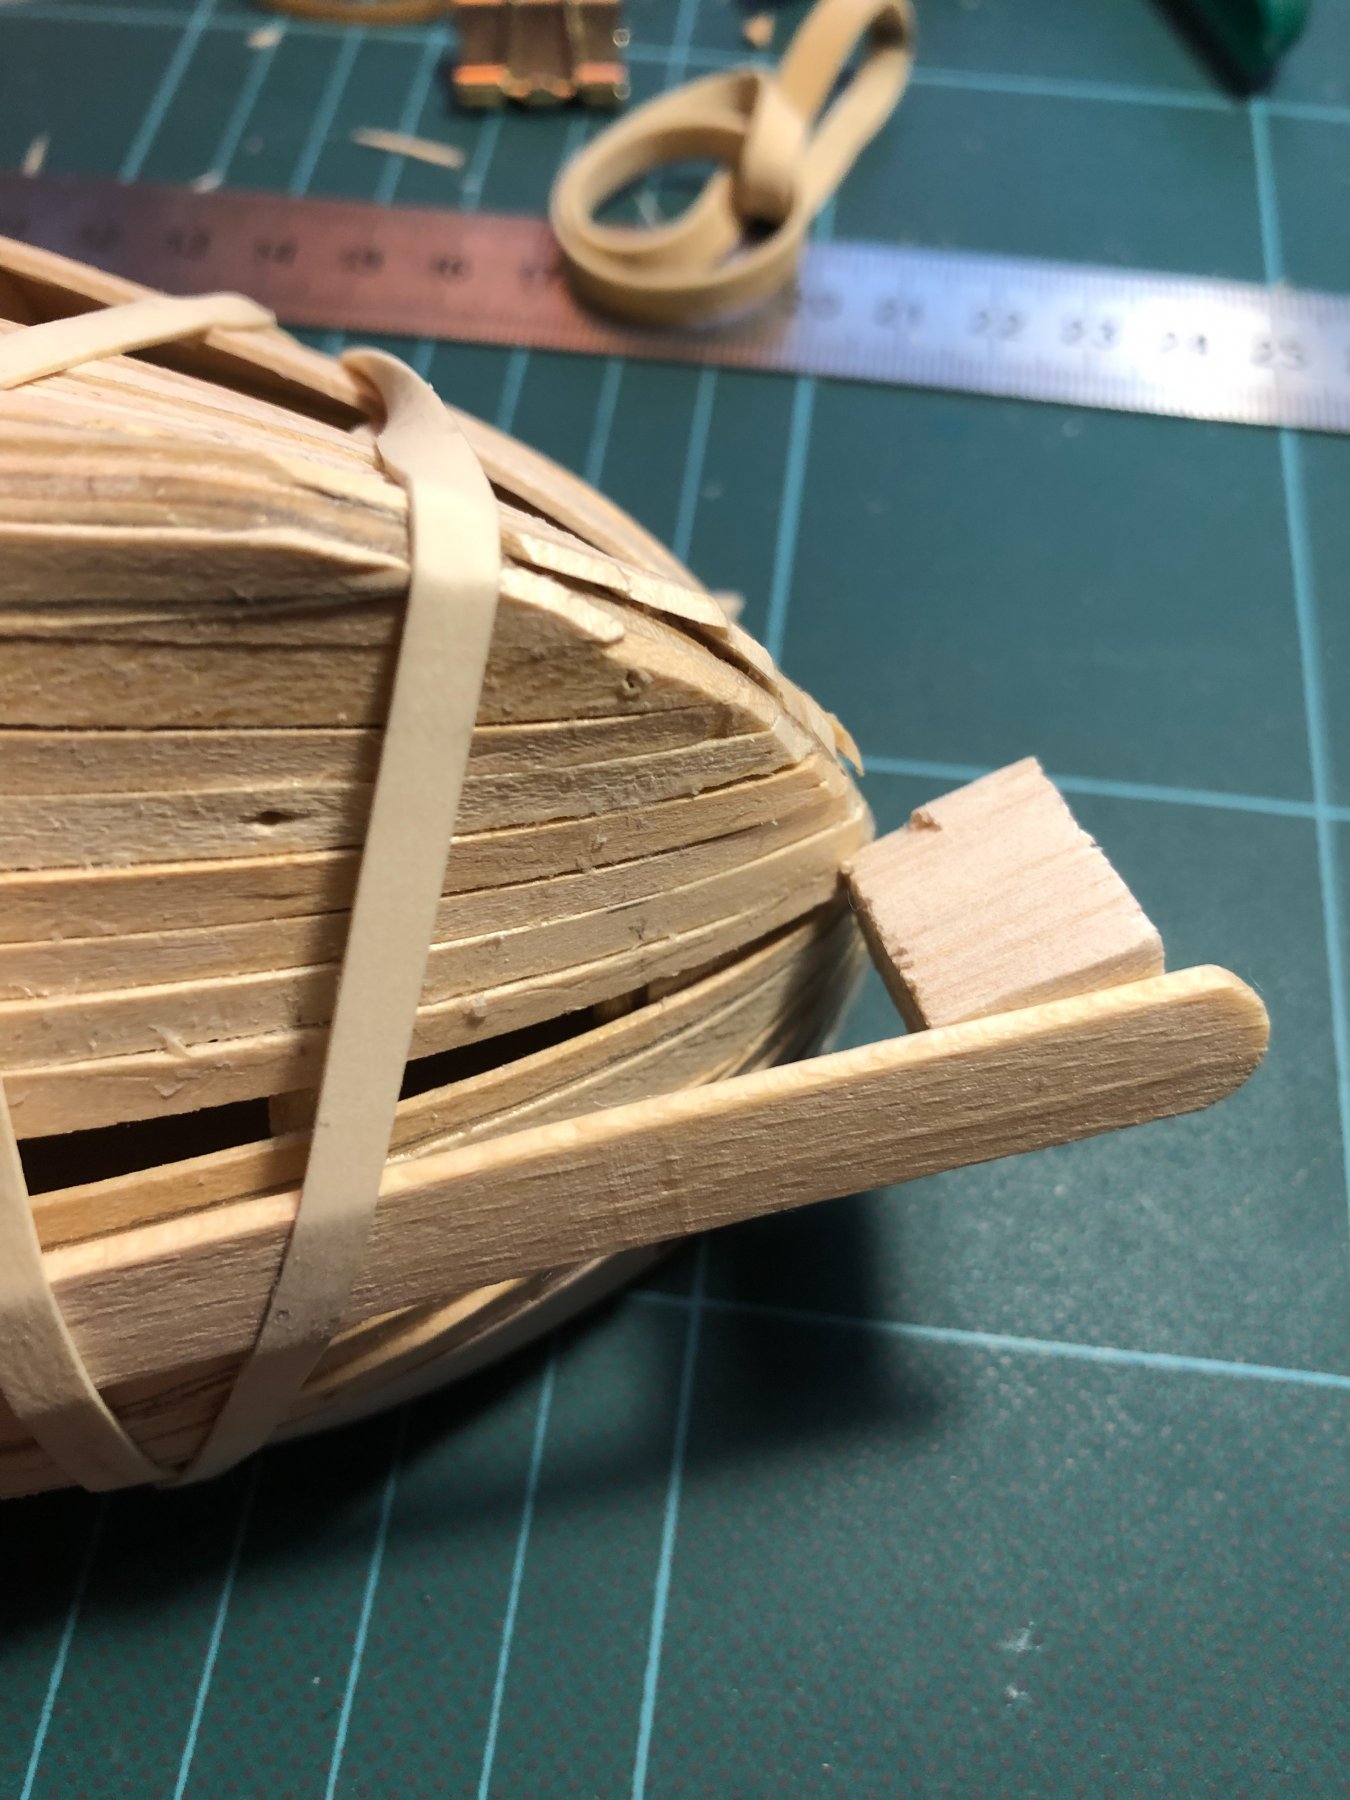
Need is the mother of invention. Clamping down a thin plank in the bow where ordinary clamps just slipped.

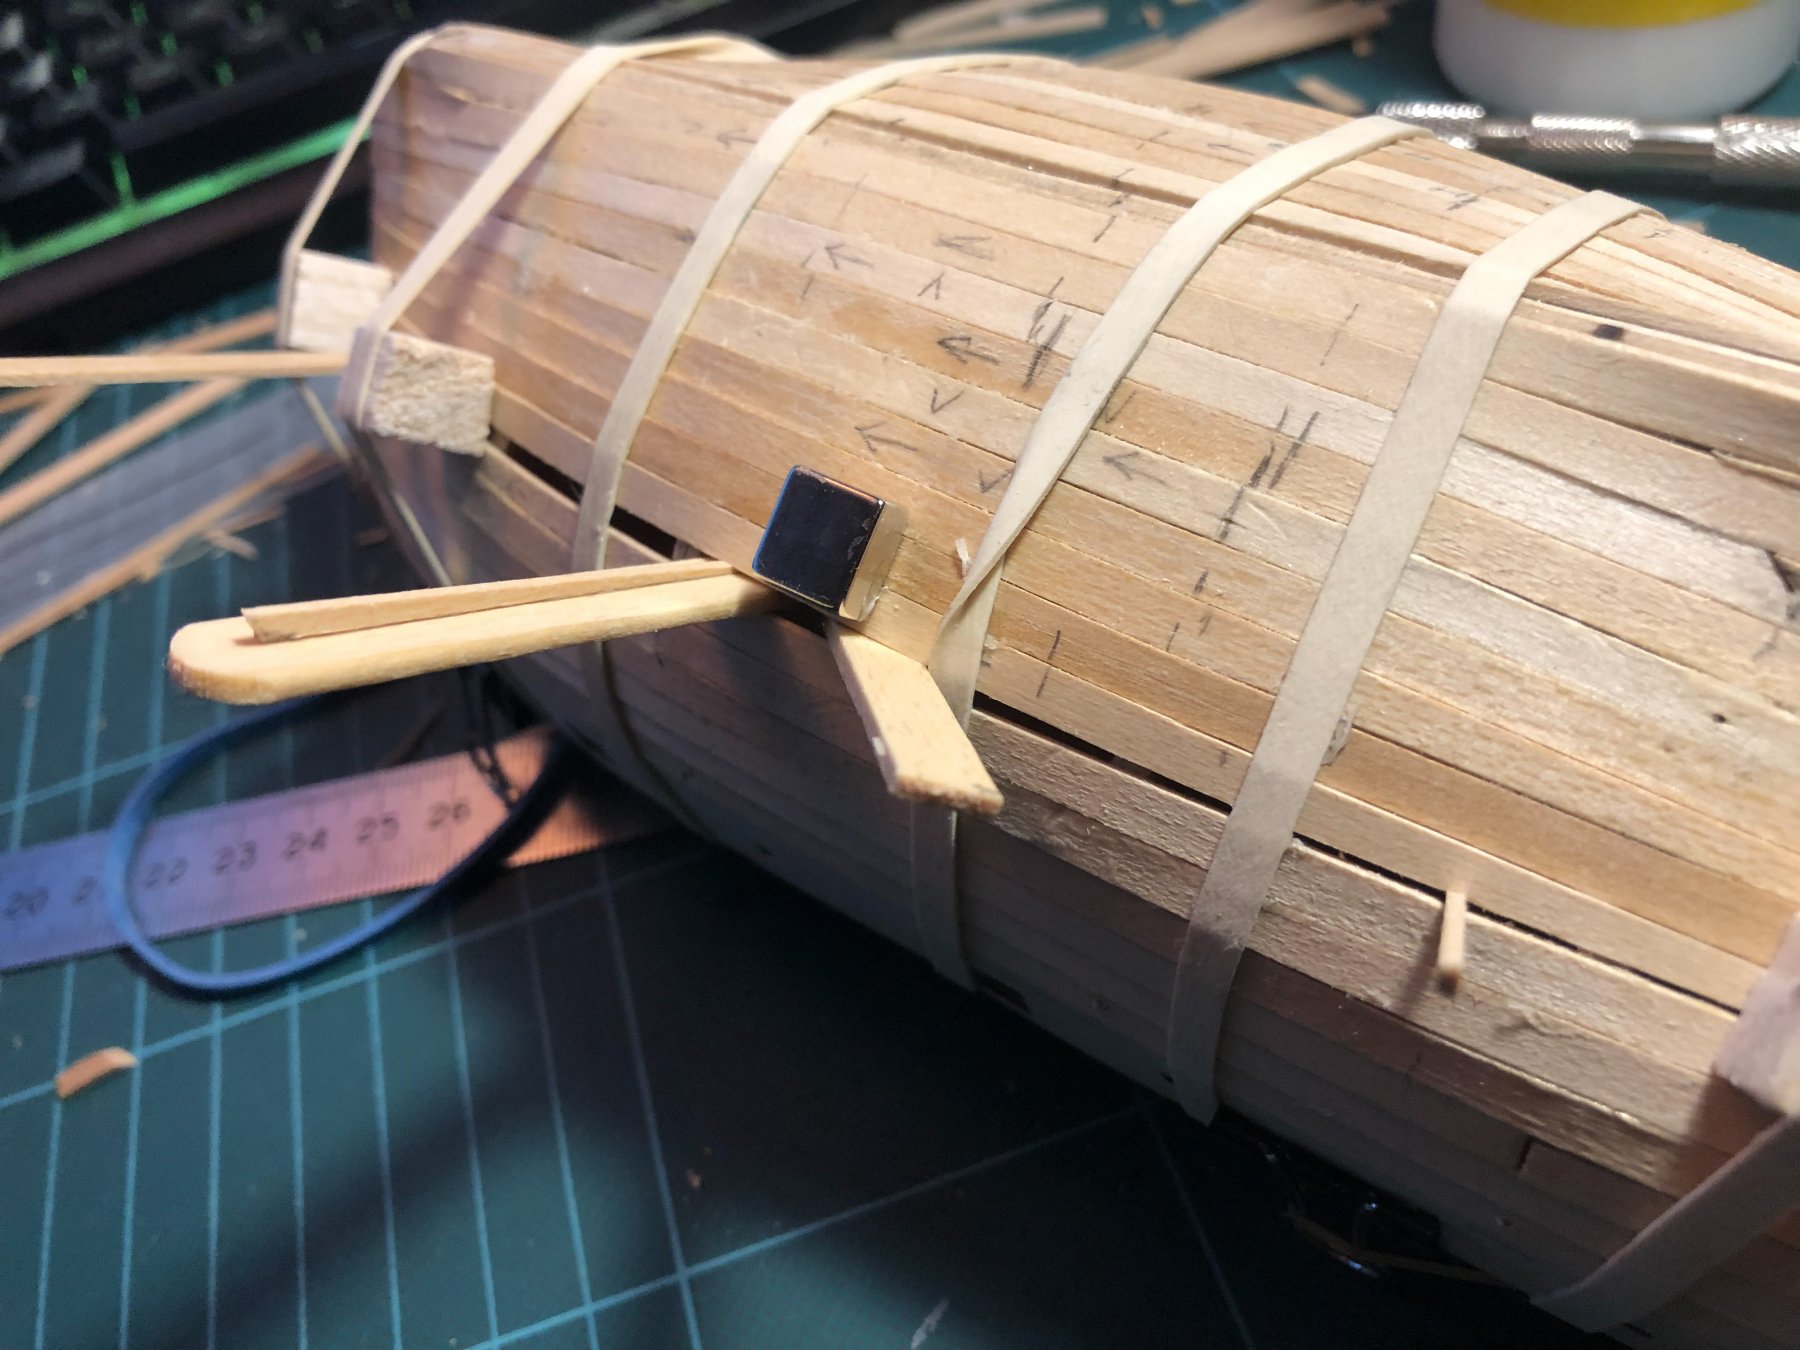
I also bought some super strong magnets that I used in the end. Here I use wedges to ensure the planks where flush with each other. How to fit that last plank in a better manner?

First layer finished and the port(?) side rough sanded. As you can see – not a pretty planking. Looks more like clinker to me.

Dry fitting of the stem and keel. At this point I discovered that the keel was a couple of millimetres to short in the stern, in the juncture with the stern post. The reason I discovered, is that the notch in the false deck is smaller than the thickness of the stem. I cut recesses in the stem so it fitted better and voilà, the keel and stern post fitted!
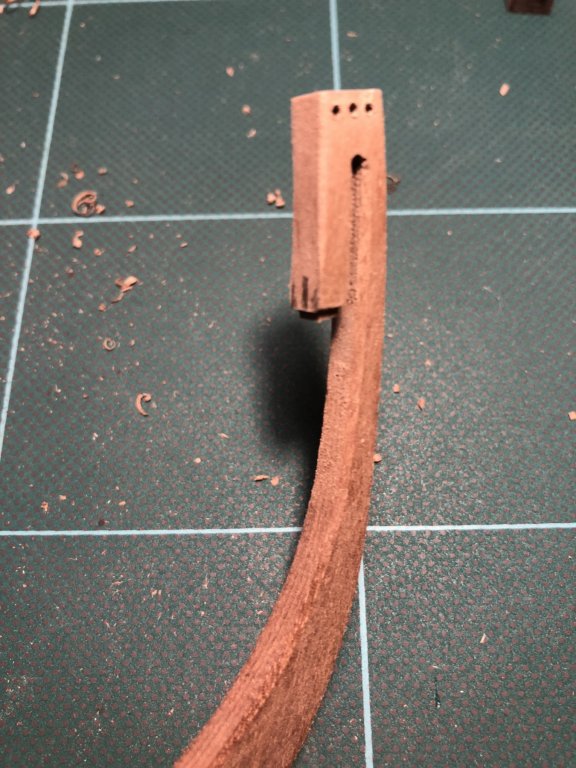
As advised by others, I drilled the holes in the stem at this point. I drilled from both sides to avoid splinter. For measuring I used a precision compass (Rotring).
I cut a bearding line in the stem so far.
Next will be gluing the keel and stem and then fit the stern counter.
//Mikael
- ccoyle, tkay11, GrandpaPhil and 4 others
-
7
-
-
I can imagine using a sponge is a great idea. I have used sponge for staining furnitures in the past and it worked perfect. It should work ona small scale too. A lot cheaper and easier alternative than airbrush i.m.h.o.
Here is a video tutorial:
- Canute, mtaylor and Edwardkenway
-
3
-
-
Thank you all for answering! 🙂
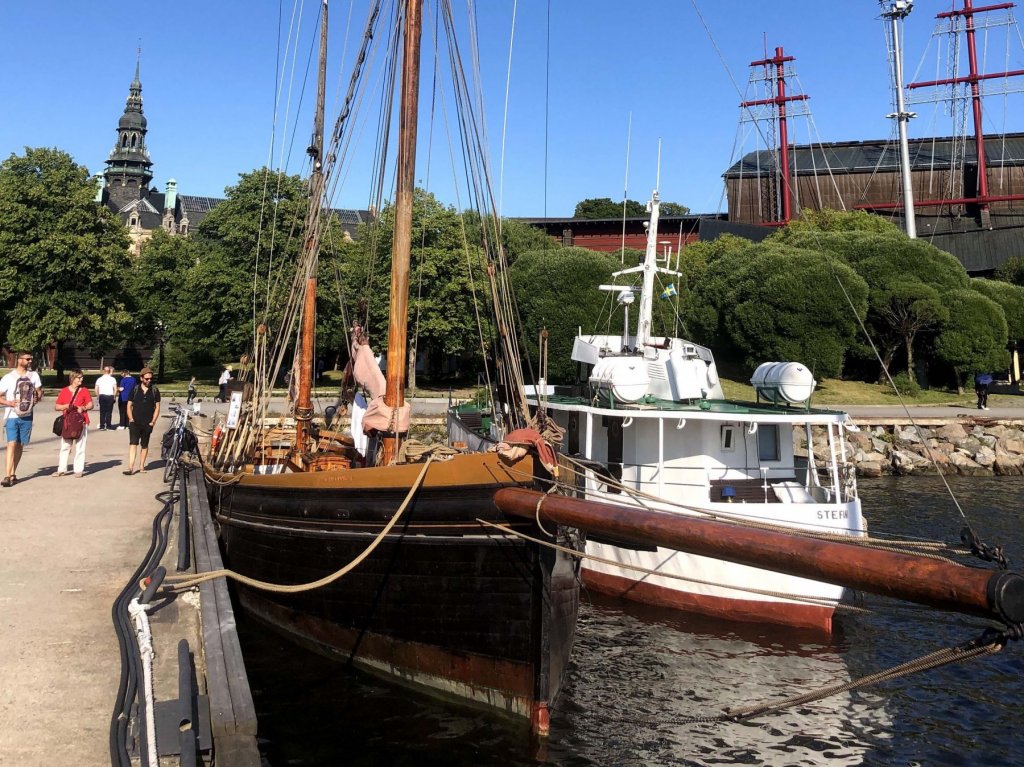
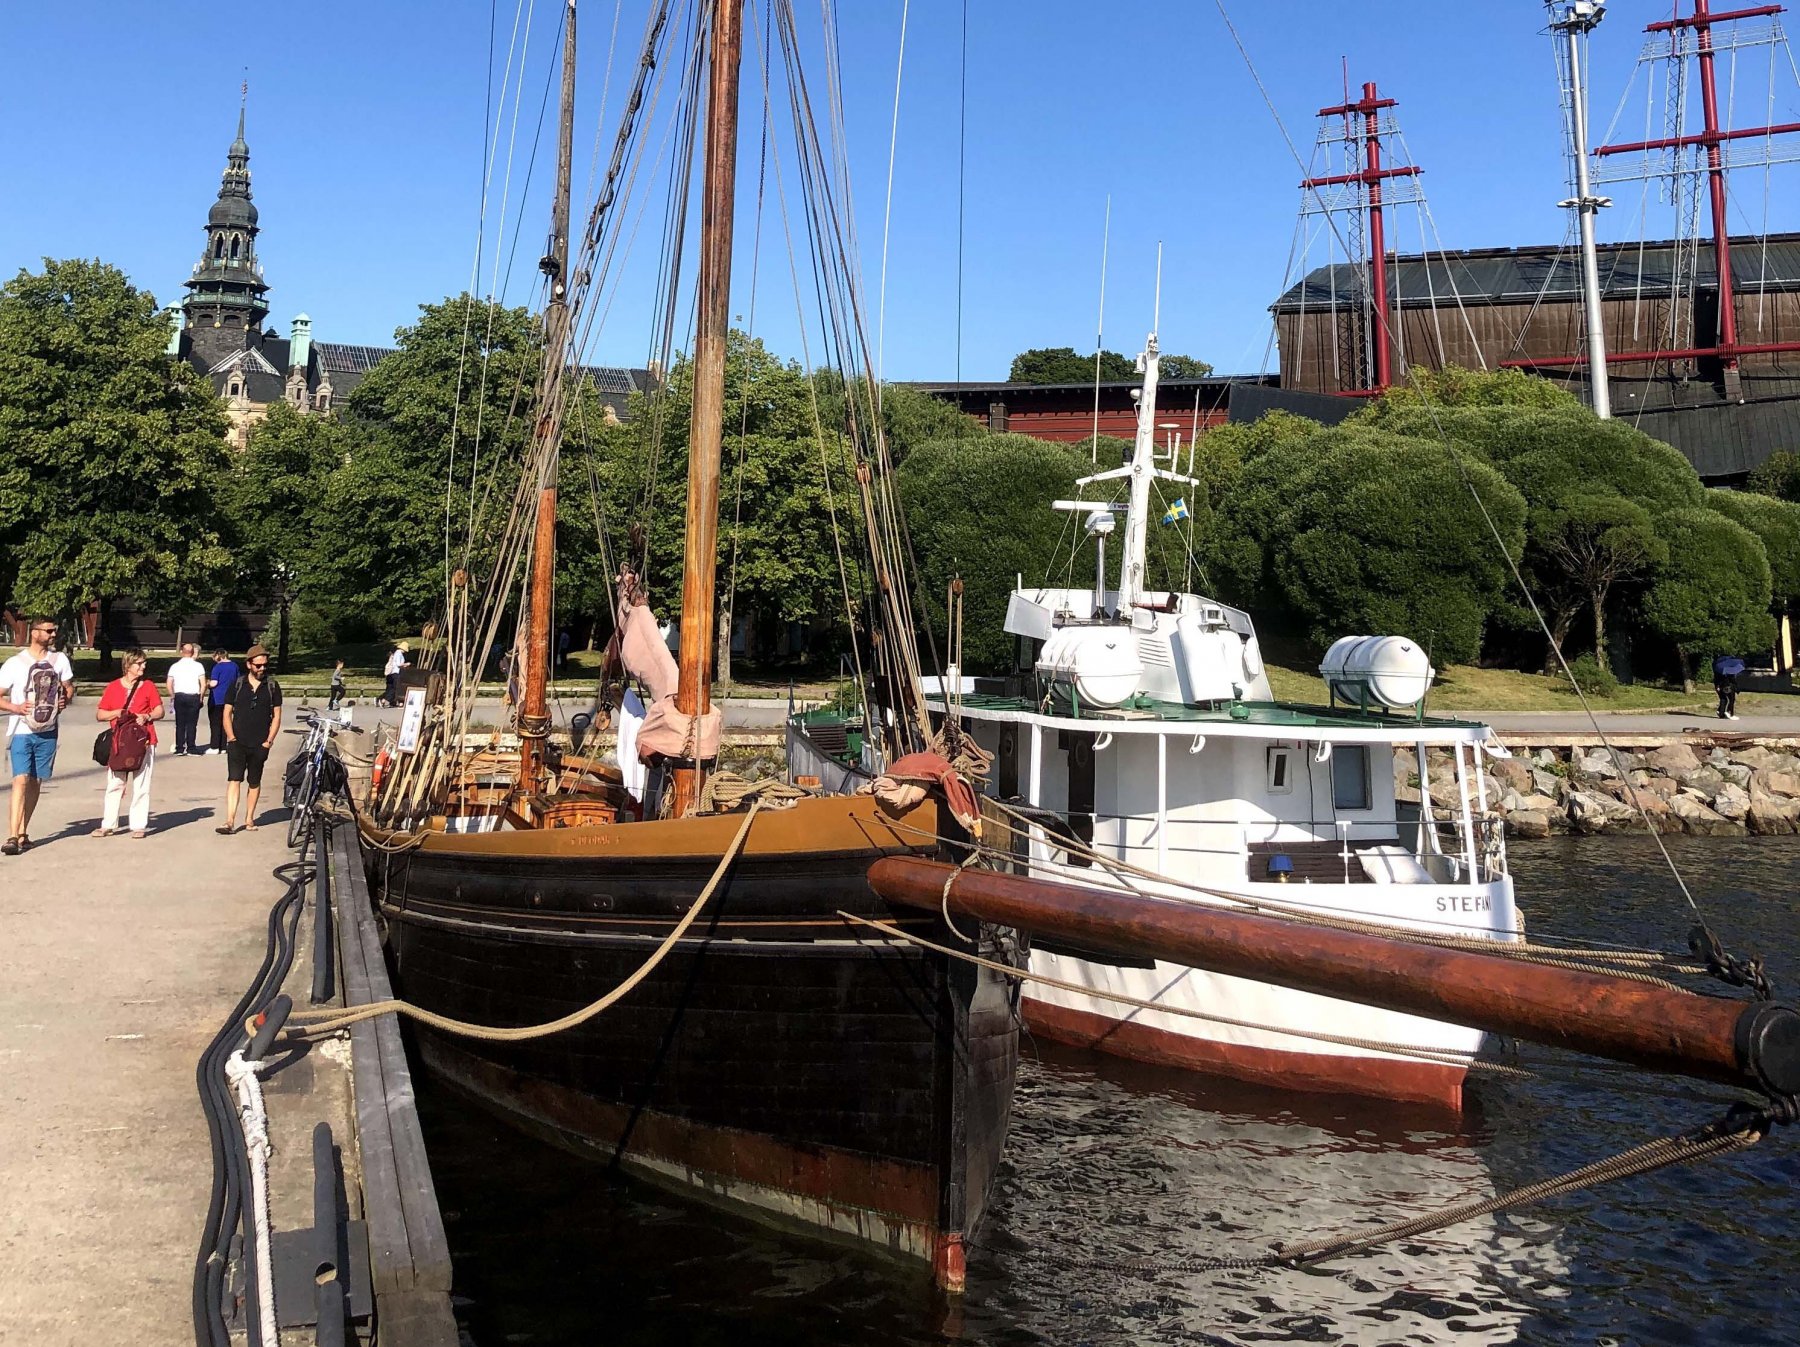
As you point out most edges would be rounded. But looking at the bow of the fishing cutter Deodar(see photo), built about 100 years later then the Sherbourne, which I try to build, the edges are quite sharp. I'm not sure though if one can use that as reference.🤔
-
I wonder if anyone know where the scuppers would be located on Sherbourne. I can't find them in the plans for the Caldercraft kit. Would they look like the ones in Blue Ensigns build of Cheerful? Or will they be too small in 1:64...🤔
-
3 hours ago, druxey said:
Thanks for bringing this significant find to our attention, mic-art! Tak!
My pleasure! Now i’m resting my feet after a visit at the Vasa museum. Took a bazillion photos 😉
- mtaylor, paulsutcliffe, druxey and 1 other
-
4
-
I saw this in the news on swedish television today. This was the only news in english i could find at the moment.
-
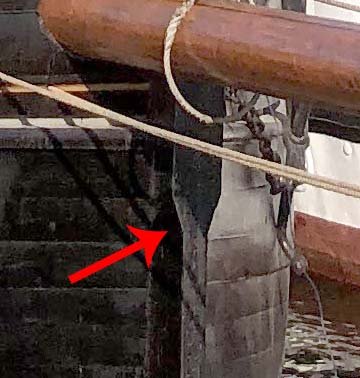
I wonder what would give the best and most realistic result on the keel. Keeping the edges sharp and square or soften a tad? What do you think?
-
I just got a tip on a website where you can design your own figure in 3d and then print it out. It seems to be mostly for wargaming, but perhaps with some tweaking they will make do. Anyone have experience with it?
Check it out at desktophero3d.com.


NEW Vasa kit from Artesania Latina -- looks to be quite good
in Wood ship model kits
Posted
The flag also look wrong. At the time naval ships could use either rectangular or the "three tongued" flag used today. We just don't know for certain what was used on Vasa. Personally, I think it looks better with the three tounged.