

Cleat
-
Posts
197 -
Joined
-
Last visited
Content Type
Profiles
Forums
Gallery
Events
Posts posted by Cleat
-
-
I finished the hull with Minwax Wipe-On Poly (clear/satin). I finished the deck with Watco tung oil thinned with mineral spirits (50/50). I wanted the deck to look more polished than the hull.
- Knocklouder, Cathead and berhard
-
 3
3
-
I sanded the deck and hull and left the saw dust on the pieces. I applied some finish and used wet/dry sandpaper to create a slurry to fill gaps and openings in the grain.
Before:
After:
- Cathead, Bob Fraser and kgstakes
-
3
-
-
-
I started to plank the hull but I didn’t like how my process to apply a thin layer of glue worked. I decided to plank the deck to work out my gluing technique. I set up a jig and cut the 10 cm planks; I cut 26 plank strips, I got 5 planks and 1 slightly shorter plank from each 60 cm plank (I kept the last pieces separate and used them for short sections).
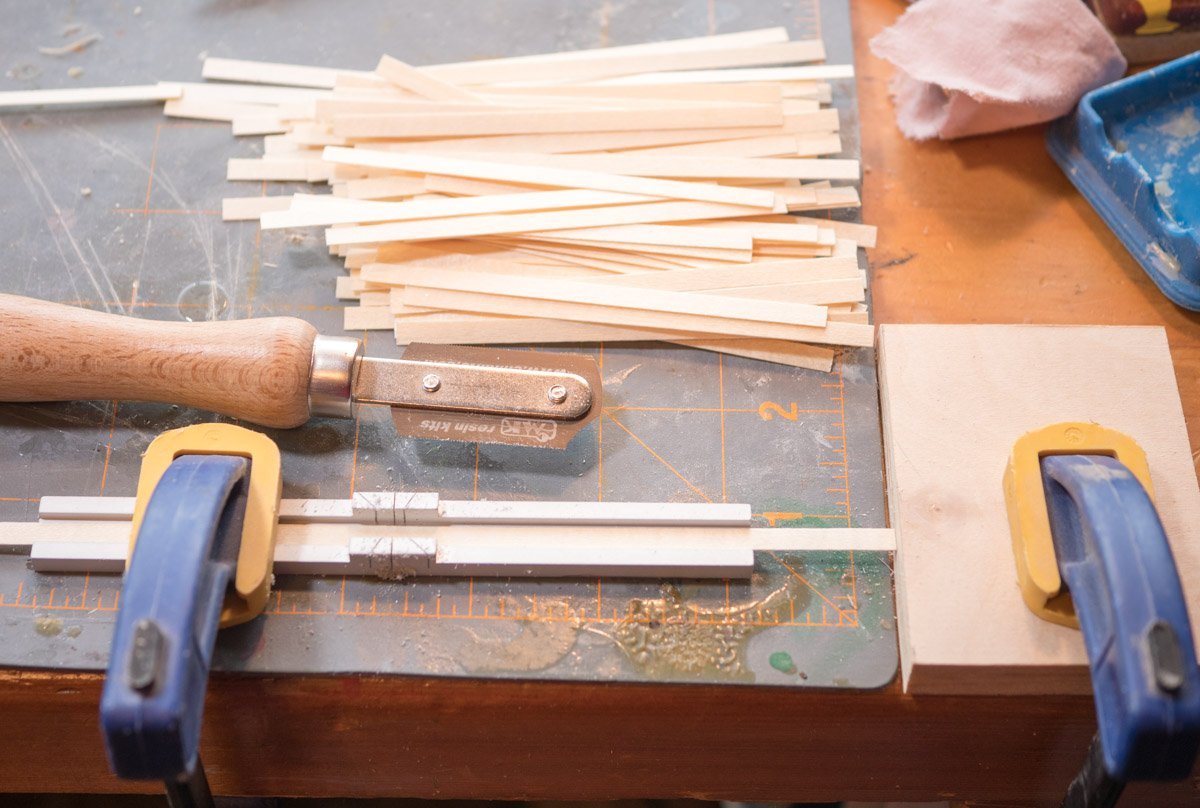
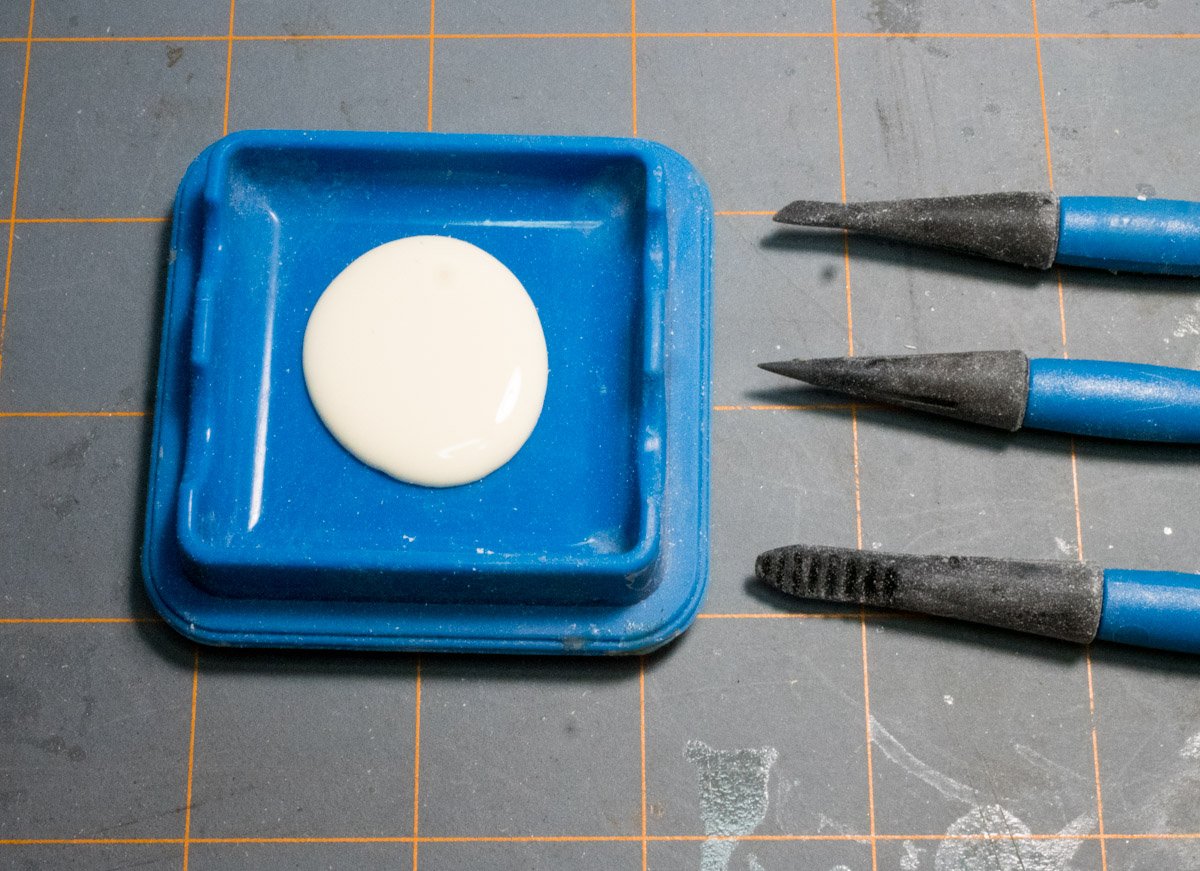
I like using the Rockler silicone gluing tools, one of the applicators worked well applying a thin coat of glue.
-
-
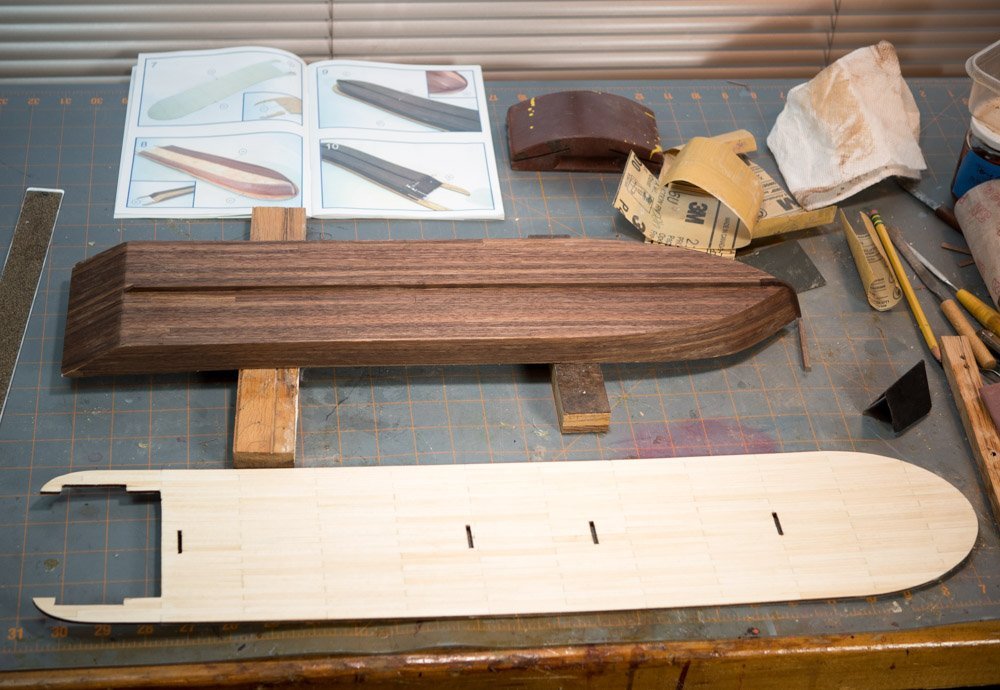
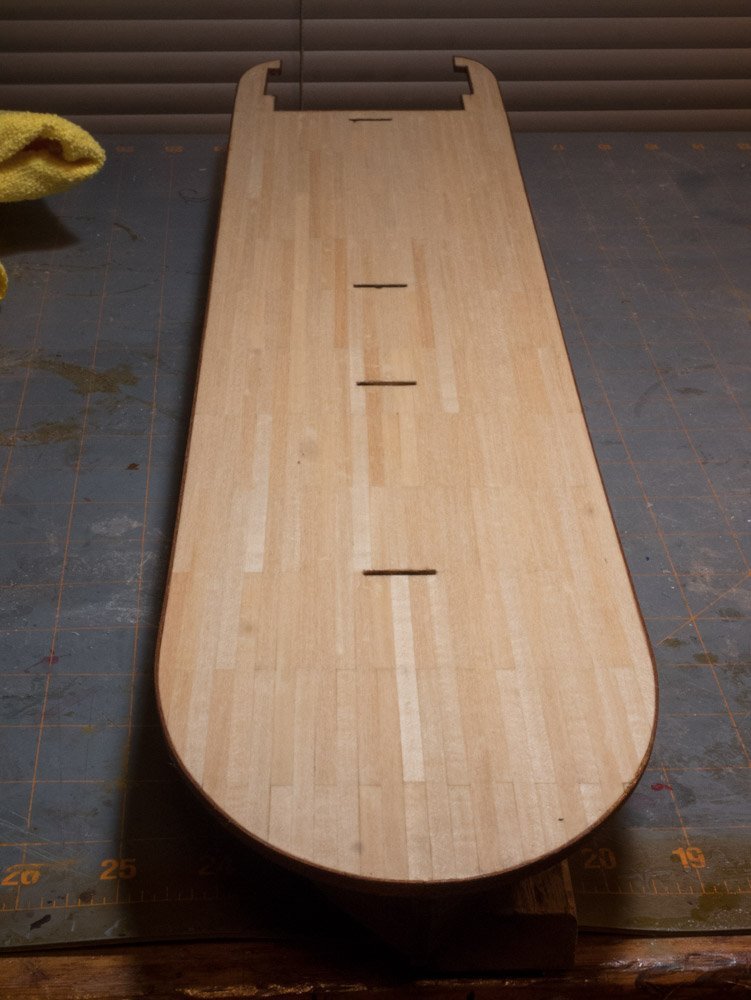
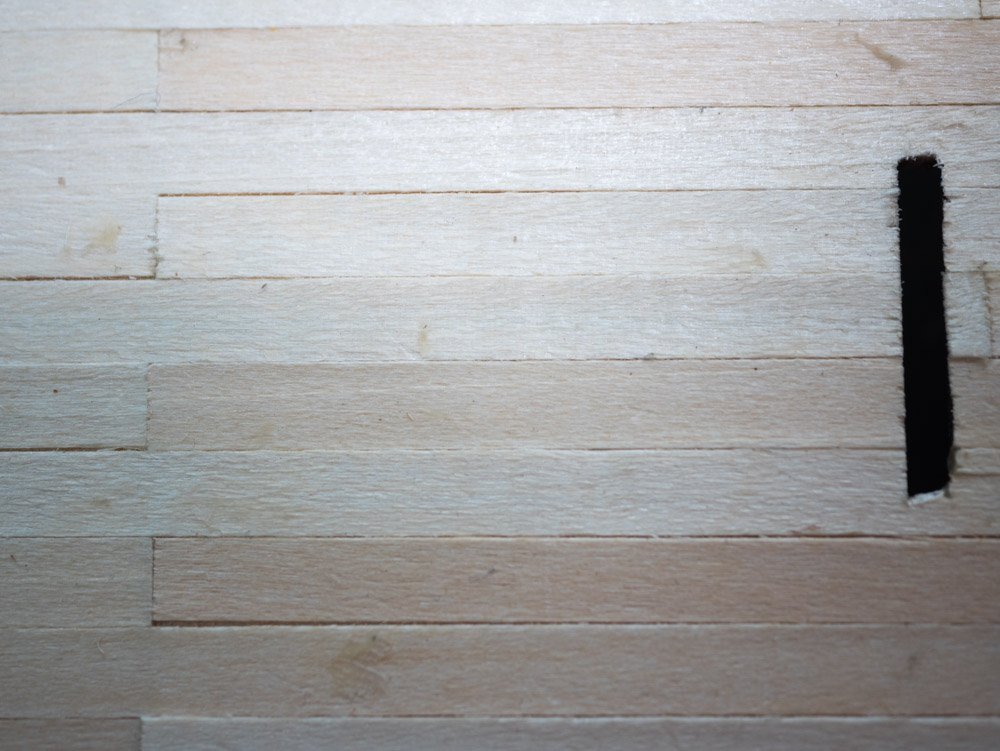
I'll plank the deck before gluing it down. I'll need to access from the bottom to open the tab slots. Plus I read in another build that the slots should be moved so I'll look into what that is about. I have the basswood strips too (I was referring to the laser cut panels).
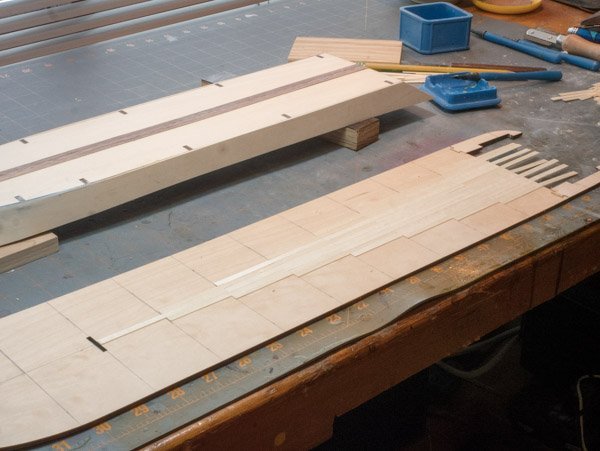
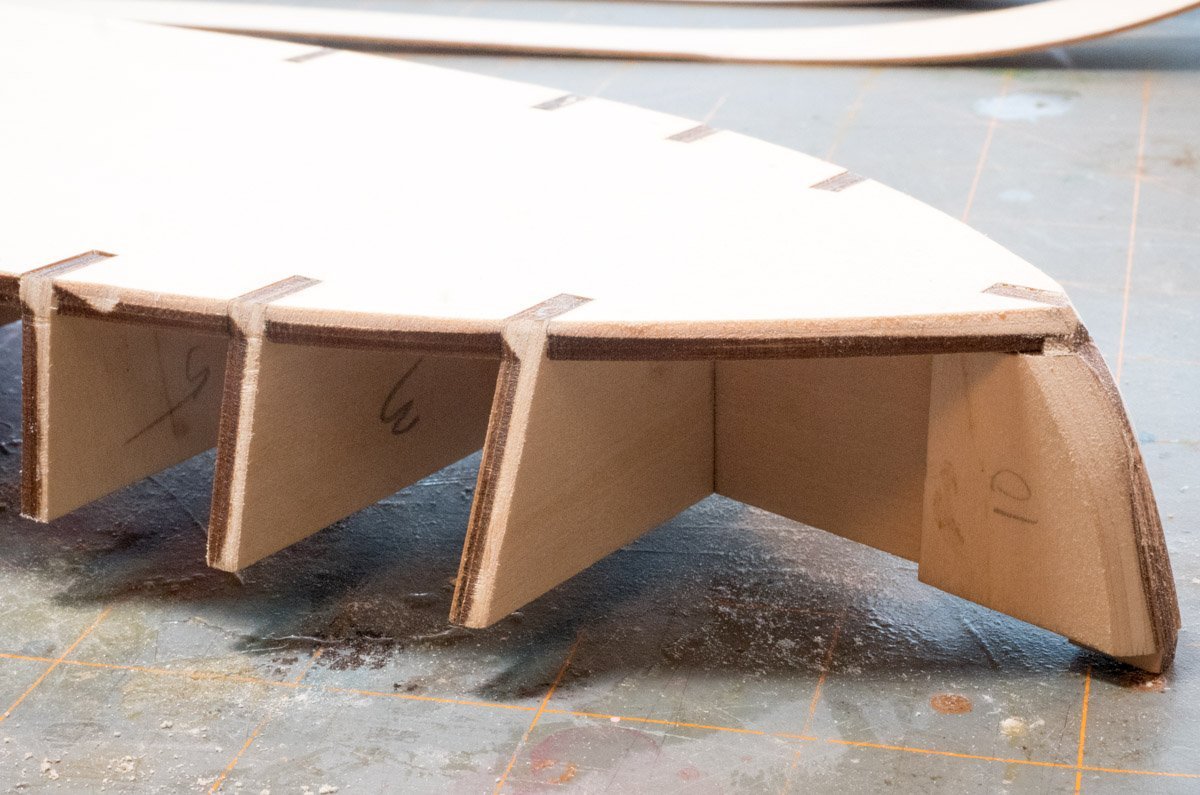
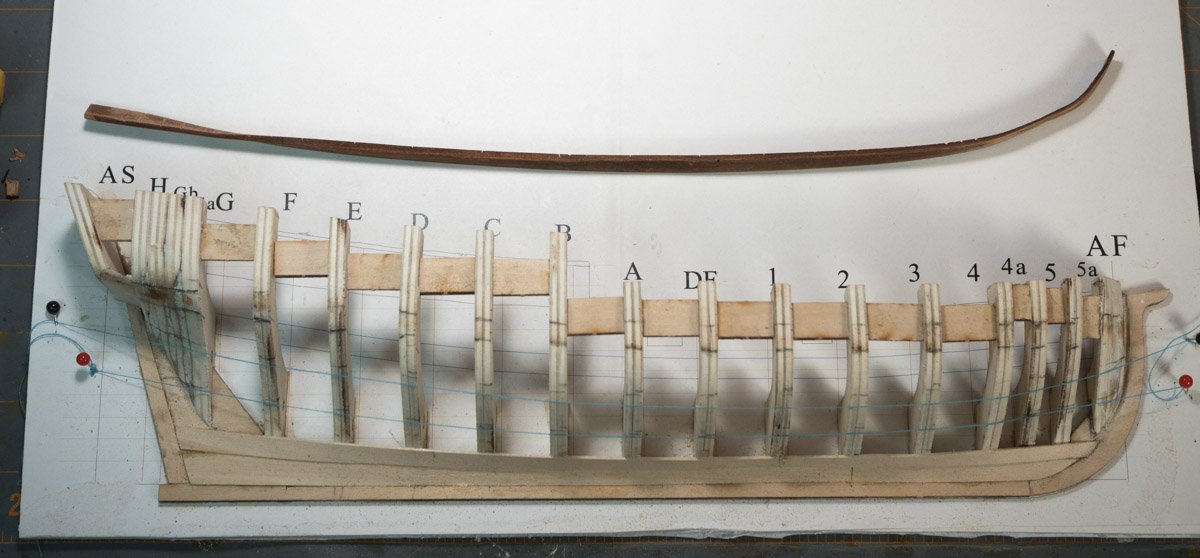
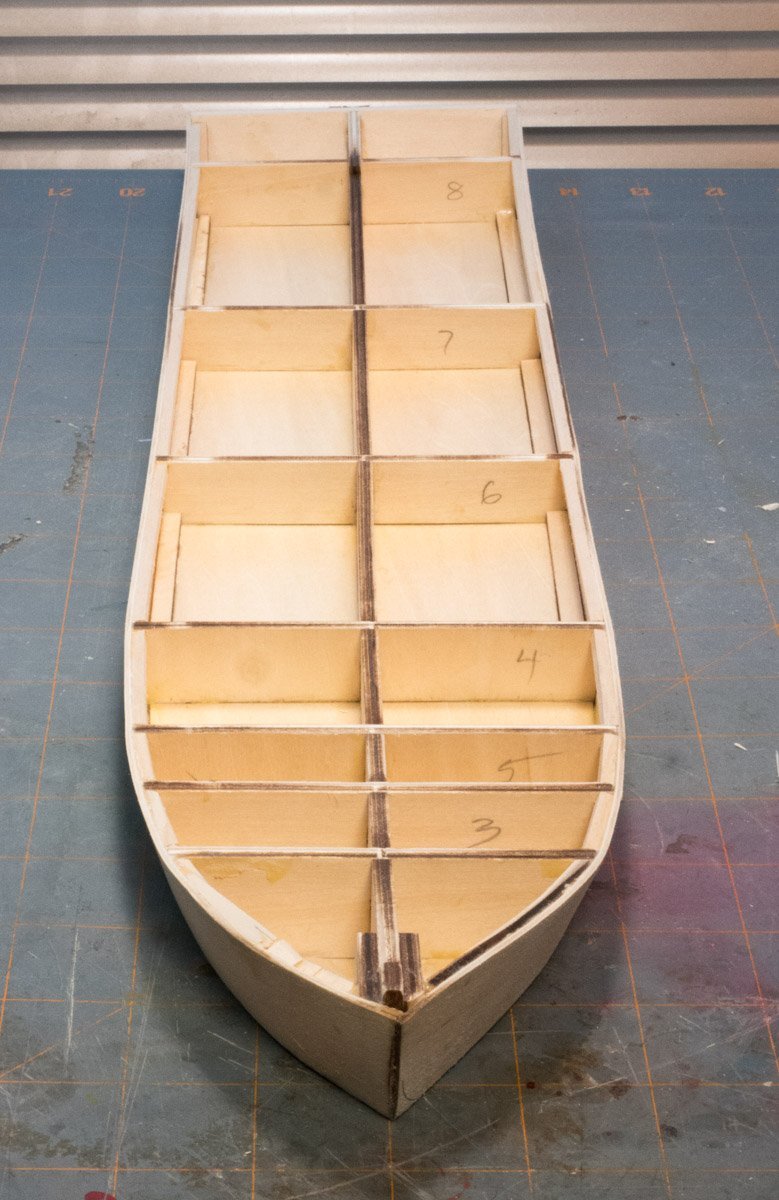
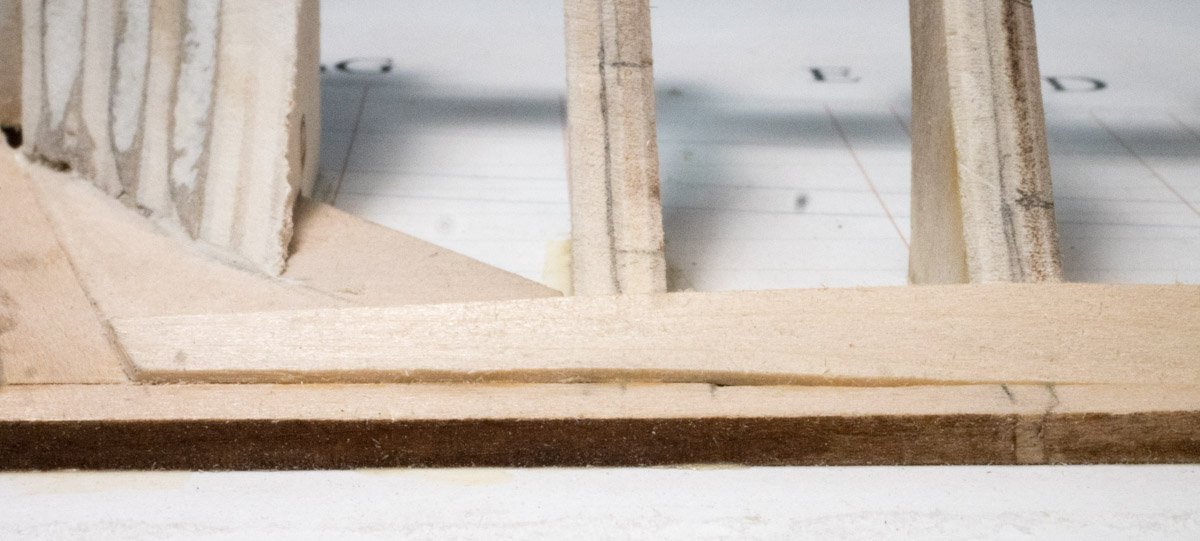
I'm using a metal ruler to fine tune the flatness of the structure (mostly adjusting the height of the stern). The bow bends up while most of the structure is flat.
-
Test fitting the first deck I noticed that the lower structure isn't flat. With the forward tab engaged I discovered the rear tab was off a couple mm. The deck will need have a bow in it. I'm trying to decide if I should attach the deck to the structure before adding the deck planking it or if I should plank it then mount it to the structure.
-
I test fitted the bulkhead sides but when I came time to clamp it I had to use some larger clamps. At the time I didn't notice that the frame pieces weren't completely square. My clamps held the top in place but the bottom wasn't a tight fit. So my lesson is that there are nothing square in a boat.
-
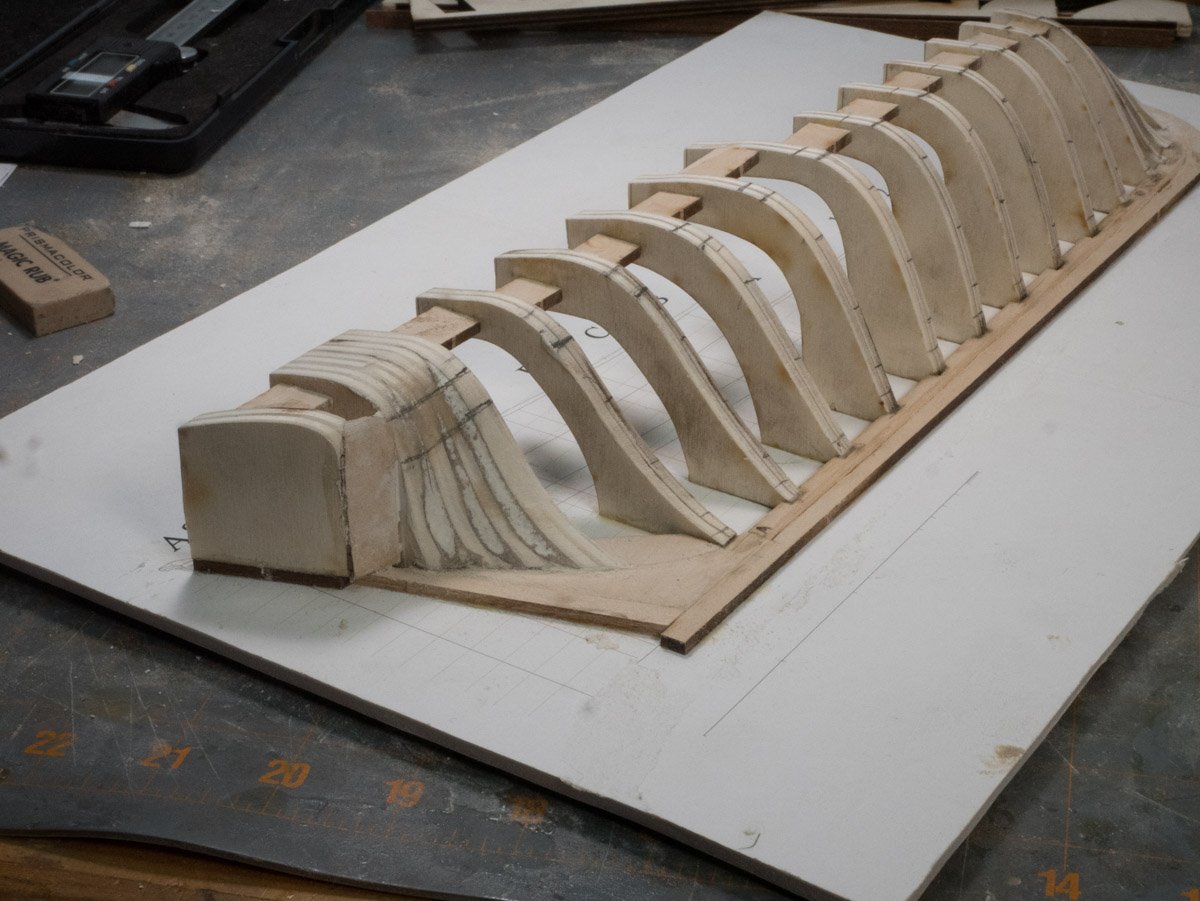
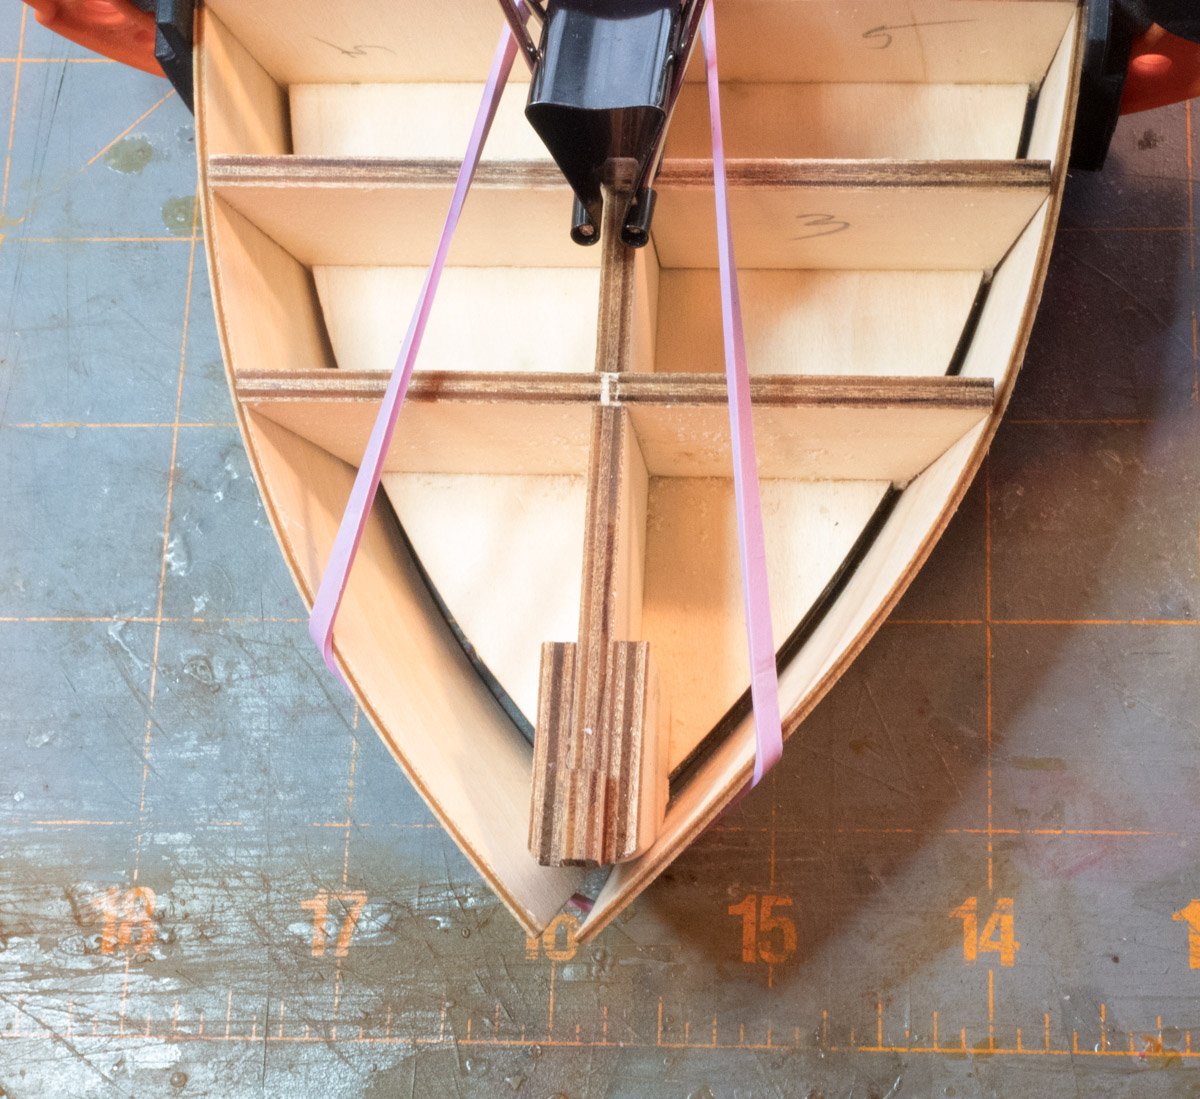
I decided to bend the bulkheads before I sanded the bow knightheads, I wanted to visualize how the curve needed to be sanded. I soaked the bow tips of the bulkheads in hot water for about 20 seconds and used a clothes iron to create the bow, then I loosely clamped them to the structure. (My clothes iron has a steam feature and I wonder if anyone had used that feature to been thin wood).
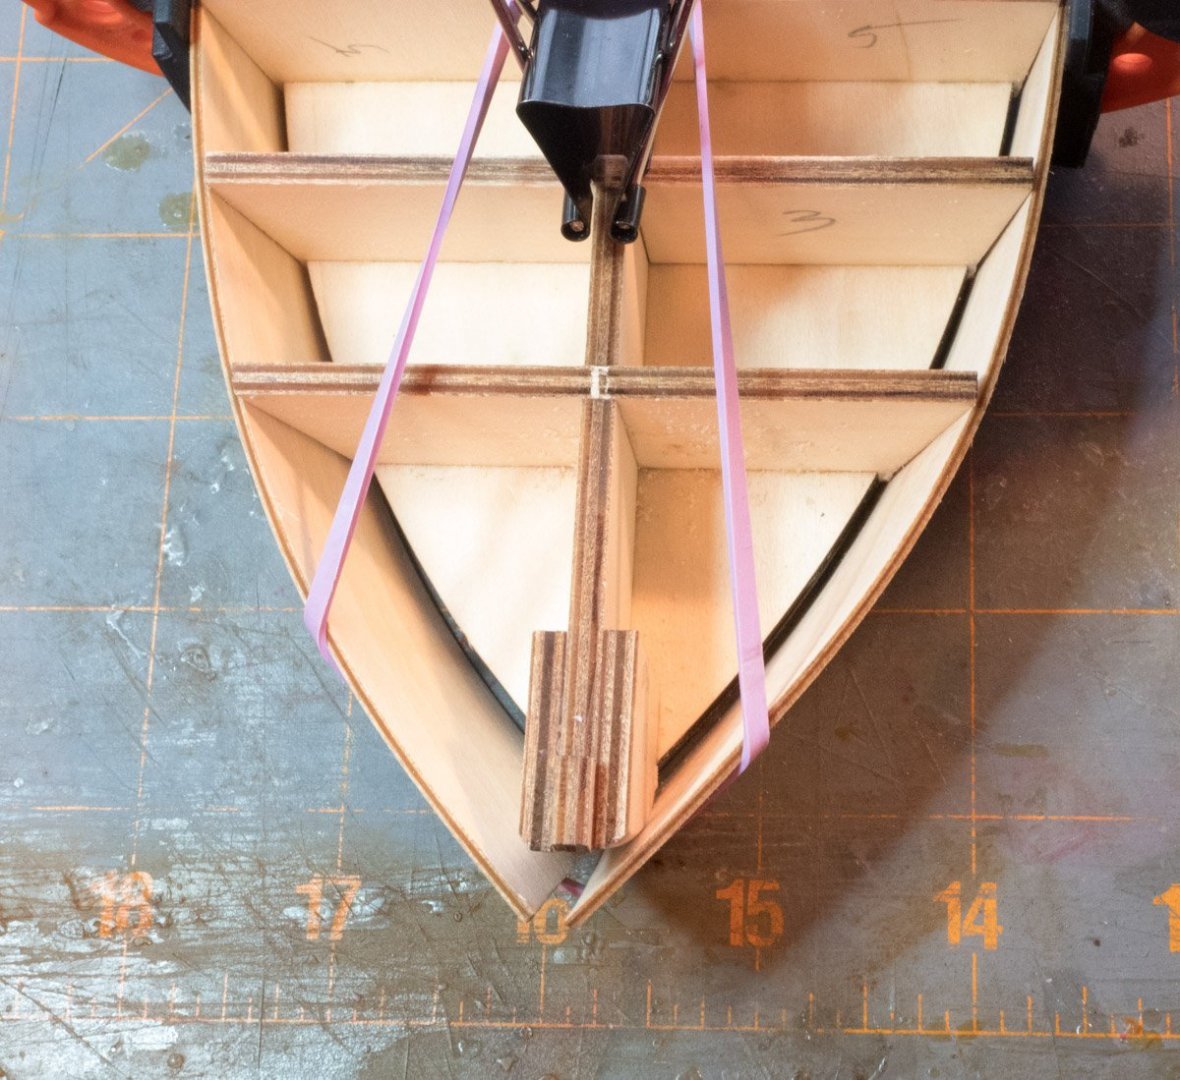
I also sanded the first four frames to angle the edges a bit and apply a progressive bevel to the bottom board. I test fit the bulkheads to measure my sanding progress.
-
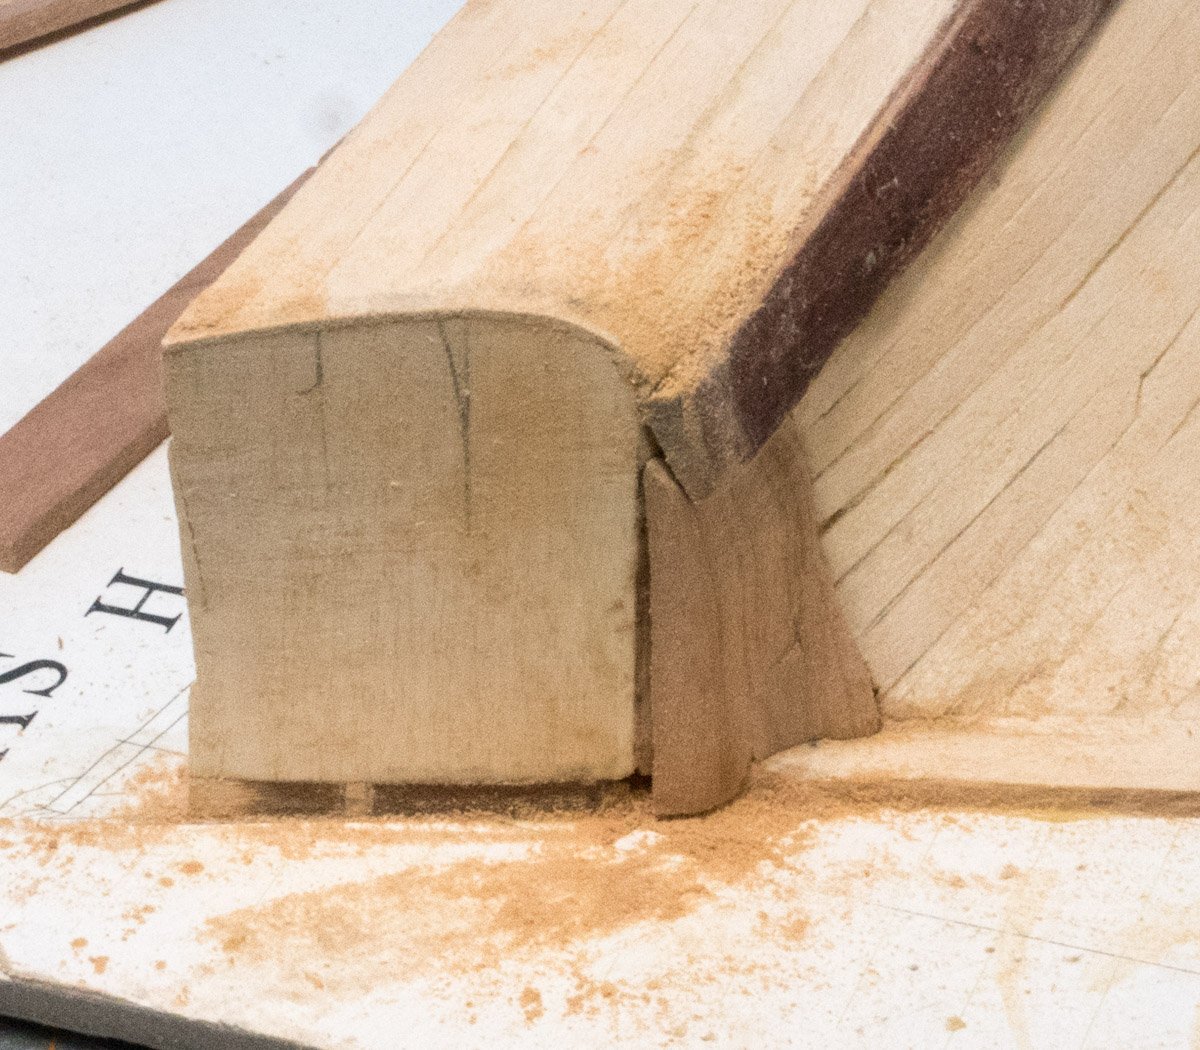
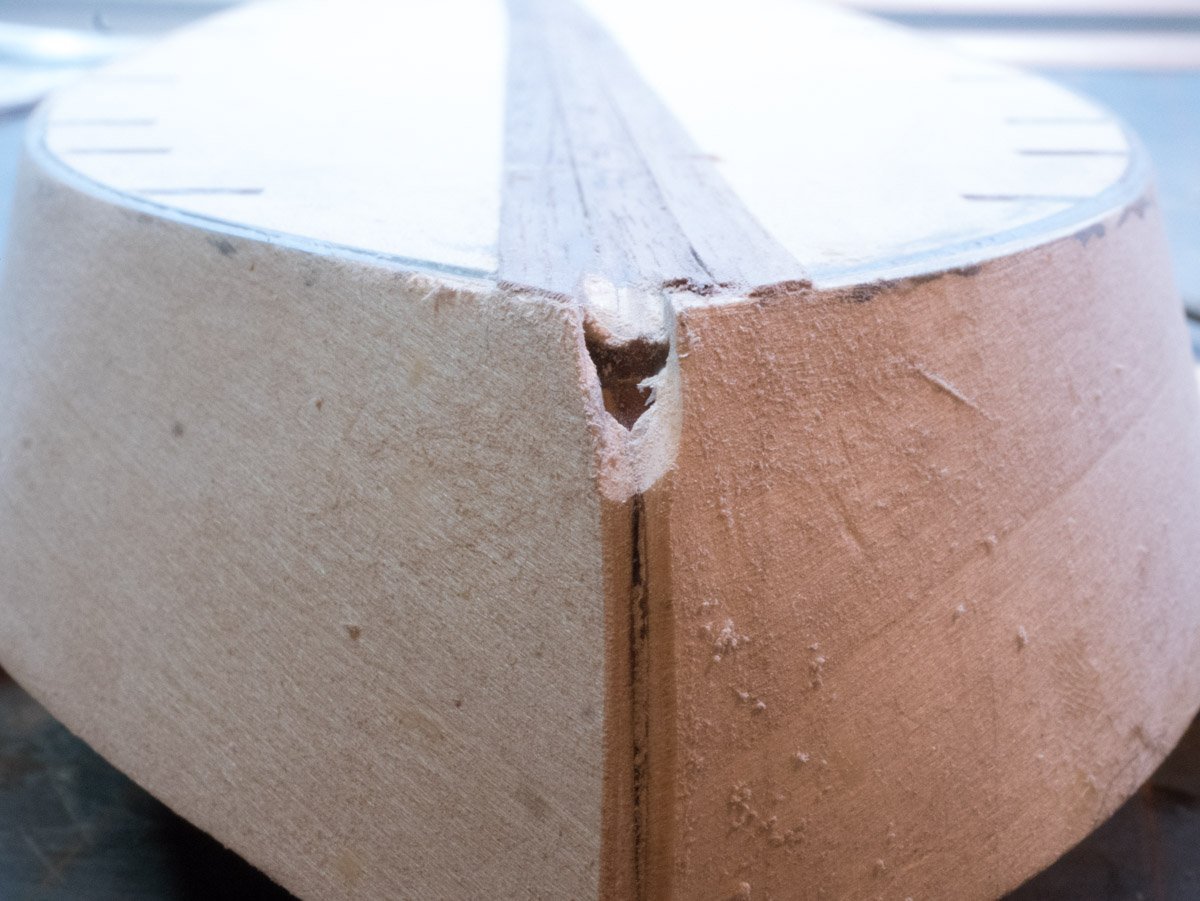
I wasn’t sure how the upper stern should be attached. When I test fitted the upper stern to the false keel tab the upper stern it didn’t contact the bottom board. I elongated the slot so the upper stern contacted the base board and I beveled the upper stern to fit the bottom board. In hind sight I should have followed the instructions, the manual picture shows a bevel on the bottom board and a complimentary bevel on the upper stern .
-
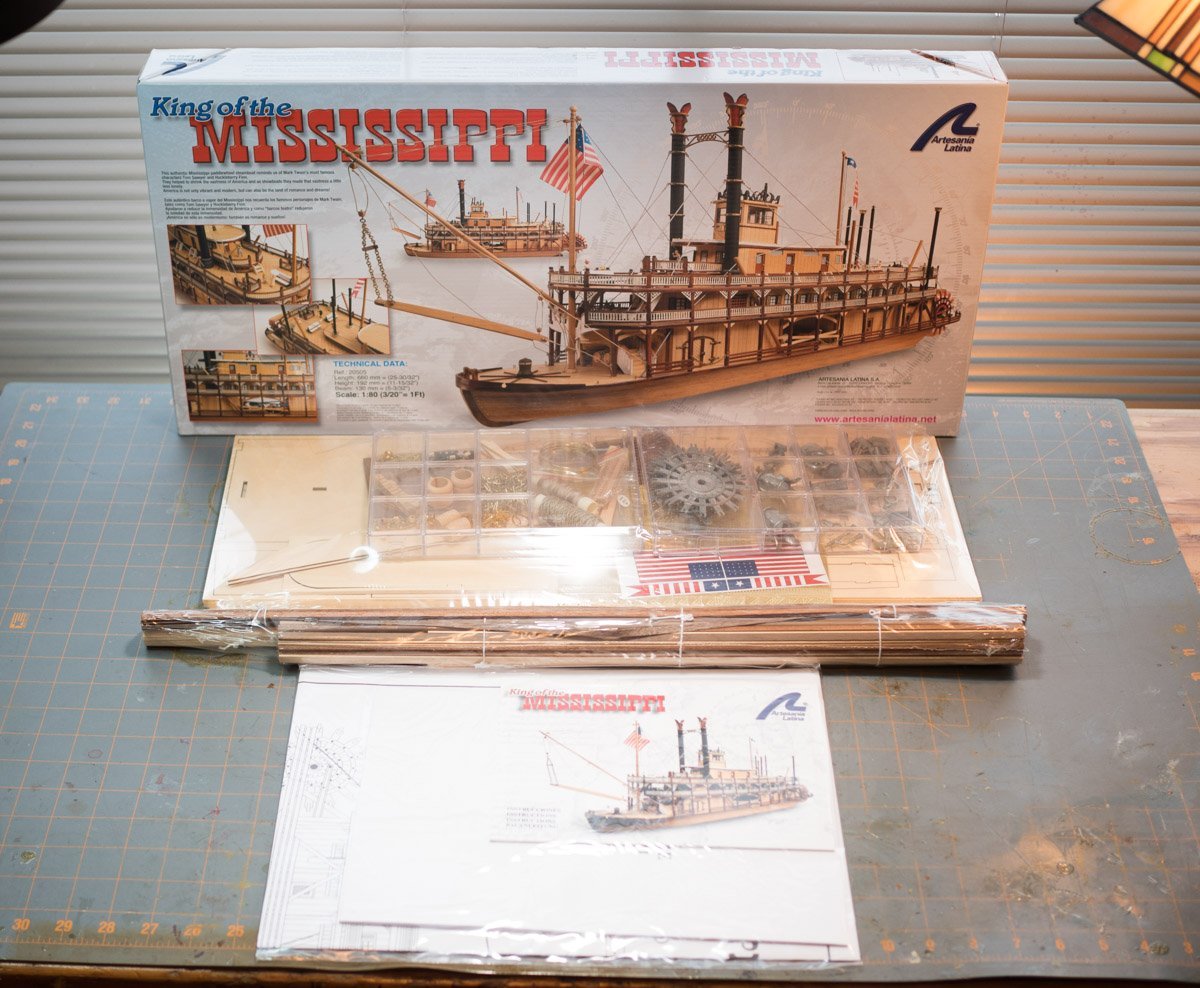
I got the King of the Mississippi kit for my third build. I’ve reviewed several build logs for this kit to prepare for my build and I referred to many when I had questions, they are helpful. There are a lot build logs for this kit (popular kit).
This kit includes several laser cut planks, small parts are in a plastic containers, and documentation. The documentation is pretty good, it includes a large drawing showing the completed boat with the part numbers identified, the part numbers are referenced in the instructions which includes a parts list. The instructions include a manual with color photographs showing various steps and a manual with text in four languages (the text is minimal but adequate when used with the pictures).
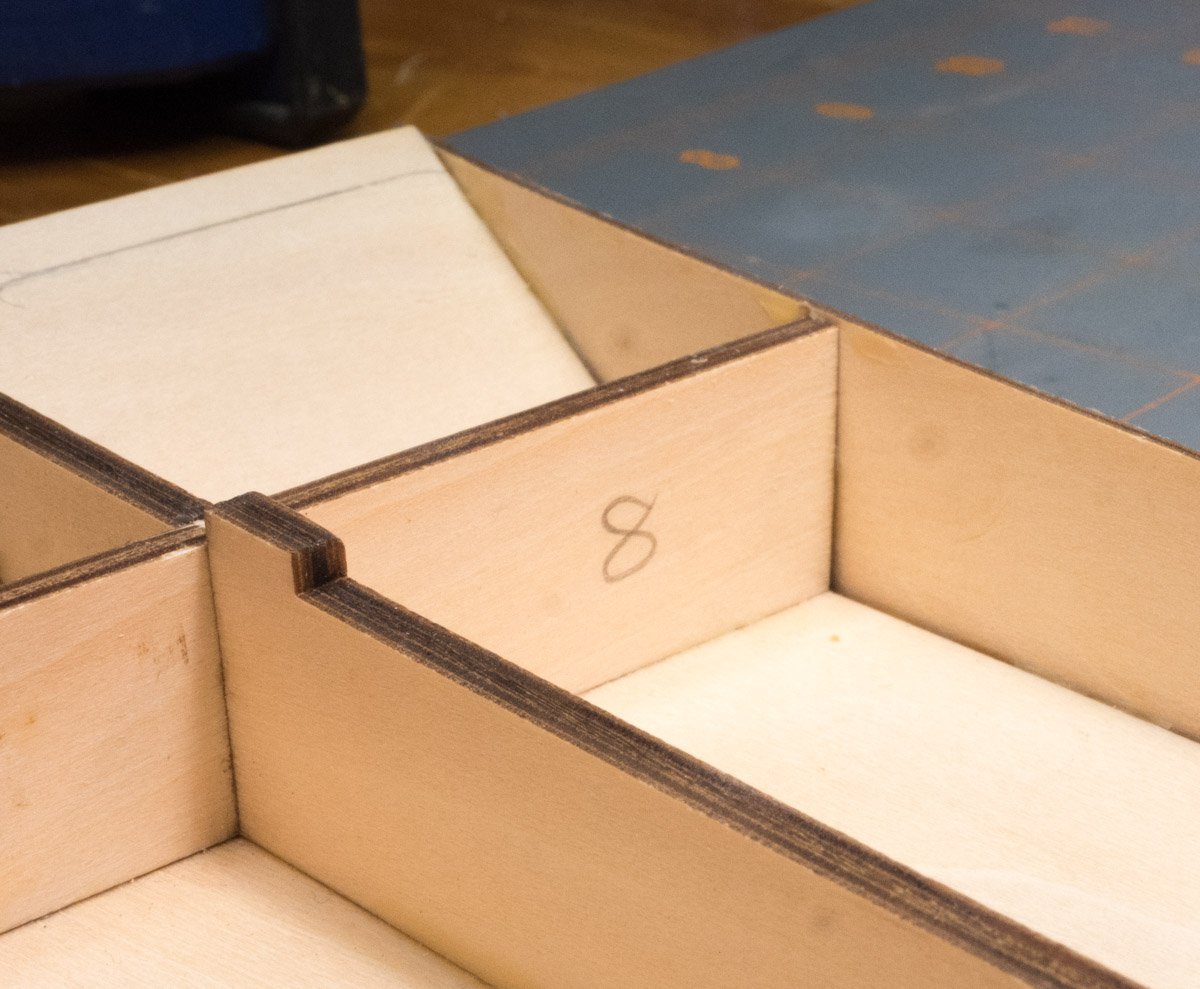
I test fitted the frame pieces and I remembered that other build logs mentioned that frame pieces 4 & 5 were mislabeled (thanks for the heads up). The frame pieces fit very well, they fit snug and I could press them in place by hand.
- ccoyle, Artesania Latina and Cathead
-
3
-
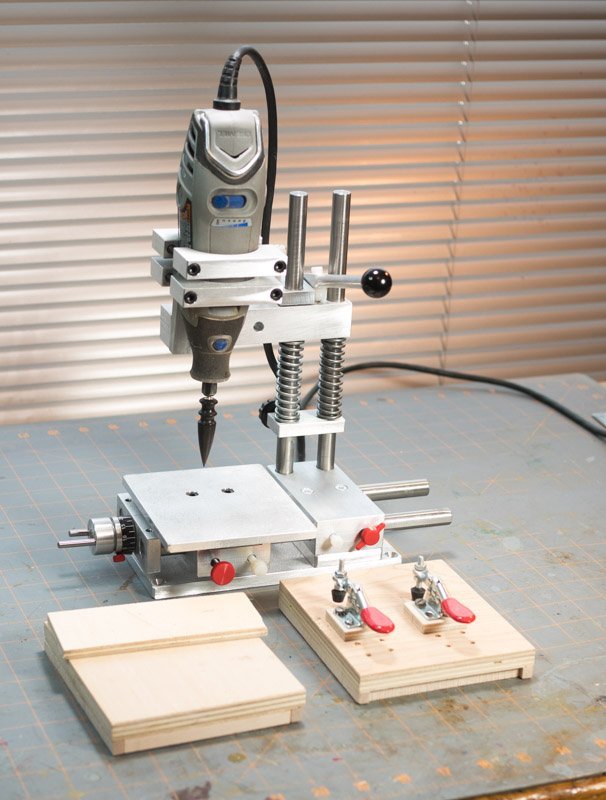
I have a benchtop drill press in my garage but I wanted something smaller for my hobby room. I looked into the Vanda-Lay drill press because it makes use of my Dremel tool, I also got side tracked with the various configurations. I ended up getting the Vanda-Lay Acra Mill with the drill press and X-axis configuration.
The quality is good although I replaced the drill press springs with stronger springs from a hardware store. Once I assembled it, I realized I probably wouldn’t want to remove the Dremel tool so I had an excuse to get another one.
I customized mine with a couple wooden tables & sacrificial piece to cover the metal plate and I replaced a couple set screws with thumb screws.
As shown, I'm using it with a burnishing bit for leather working.
-
On 8/15/2021 at 8:10 PM, bmb00d said:
Any other tips for someone starting this build? I am embarking upon same project. Noticed a few tips in the instructions buried like foil tape for details.
Sorry for the late followup. Learning more about planking would help. That was the most frustrating part for me, I didn't understand why the straight planks wouldn't follow the contour of the bow. (I did the planking kit after the Crist-Craft kit, I learned more - and made more mistakes which helped me understand how planking works).
-
During my first build I was frustrated using toothpicks to apply glue. I was at Rockler's and discovered mini glue brushes and a glue keeper for my next built - I really like these silicone tools (I use larger ones in my garage). When the glue drys it is easy to remove from the keeper and brushes. I typically just put a small dollop of glue for the task (much smaller than the picture), wipe any glue from a brush (wet/semi dry/dry), and repeat. The keeper shown is the top of a larger container.
- thibaultron, bruce d, Moab and 6 others
-
9
-
I completed the kit. I wish I knew then what I know now when I started the kit. I had hoped for a better result – I expected a better result. But I learned a lot. One of the things I learned is that I want/need more practice at ship building.
I had some goals. I wanted to how much I could bend and twist the wale board without a splice. I avoided making a slice on one bulk head to see how the planks look uninterrupted. I also wanted experience working with small pieces (I still haven’t mastered tweezers), I’m used to working with ¾” stock and I knew it would be a challenge working with small stock. I cut some barn wood to size for the black embellishments shown in the kit, I took the opportunity to try a sequence of different stain colors just to see how the color changed.
I didn’t think my joints were that bad; when I sanded the hull I think that I probably made an angled cut – something to be aware of the next time I cross cut with an Exacto knife. I had used wet/dry sandpaper with saw dust and finish in the past with good filling results, but that was with darker wood.
I practiced some scarf slices (z-splices) to make a base for the trim piece. I made the trim piece one piece from bow to stern like the wale board. I wanted to see how much I could bend the stock I made – I found the limits. I broke a piece off on my first attempt and didn’t have any stock to try again. I made a piece to splice in but the color was too different. So I went with the look of side trim of an old car.
I purchased a river boat kit for my next winter project. I had reviewed a couple build logs before I bought it. I can see more challenges with that kit.
-
I created a new transition piece. I didn't twist the wale board enough for a flush fit. I was concerned about breaking it, I broke the first piece and this was my only spare piece so took it as far as I thought it could take.
-
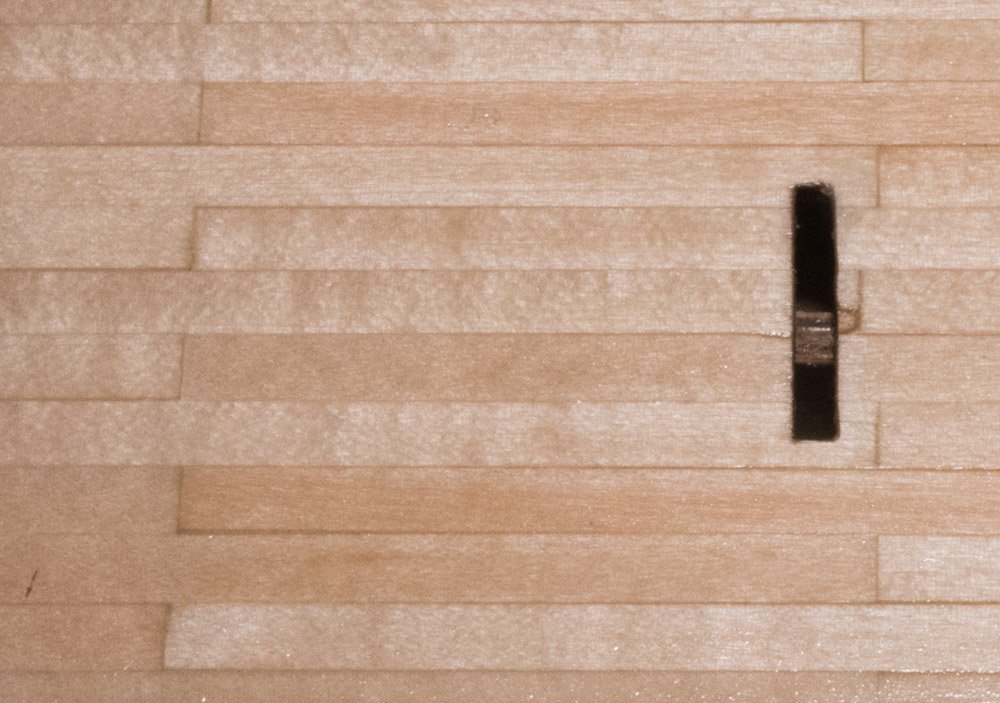
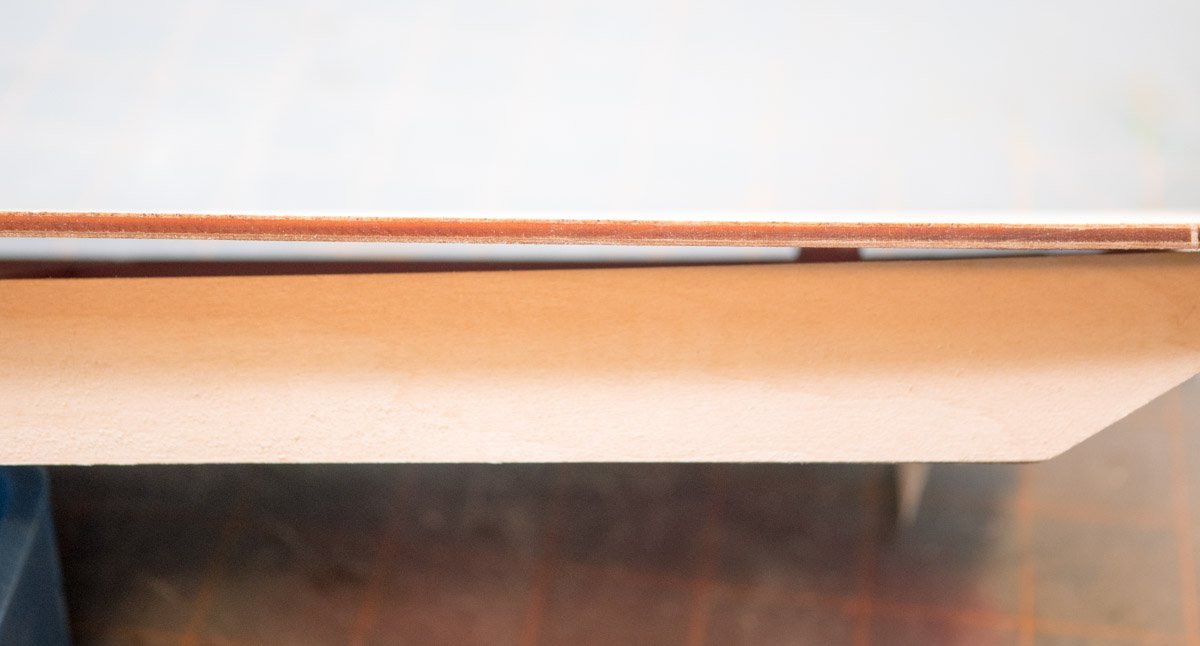
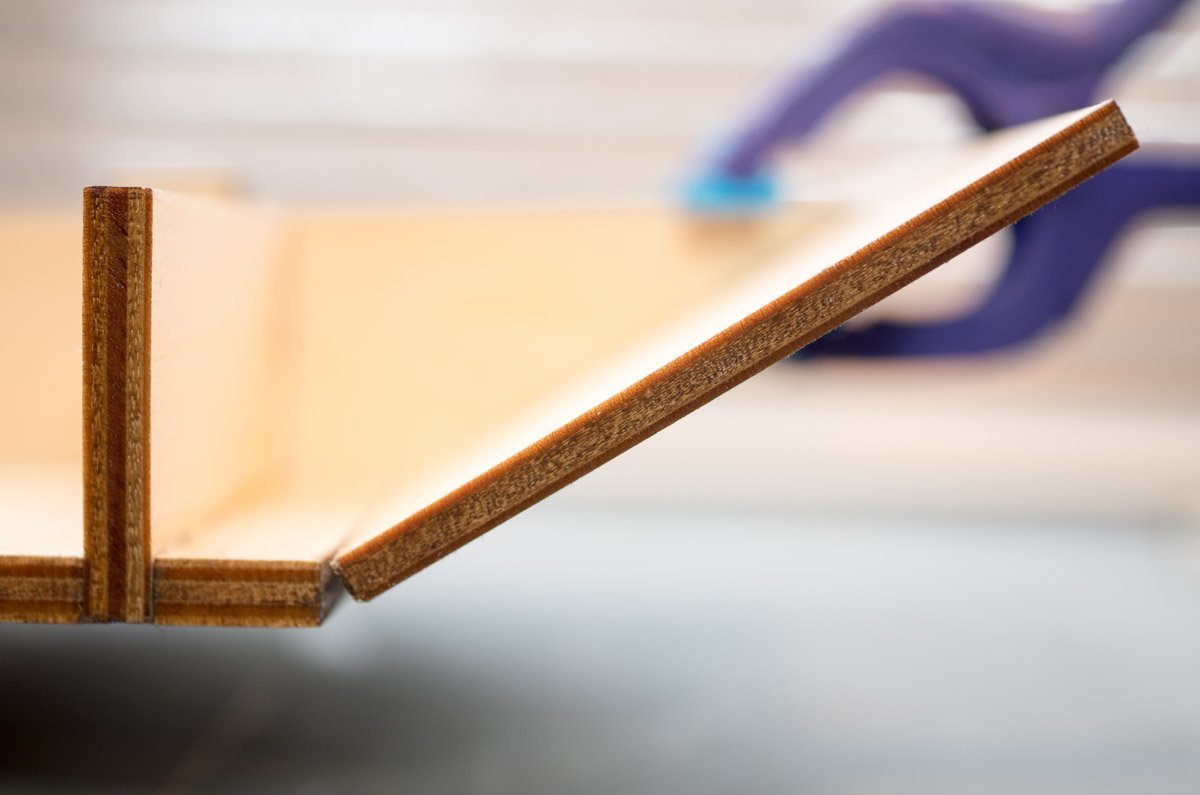
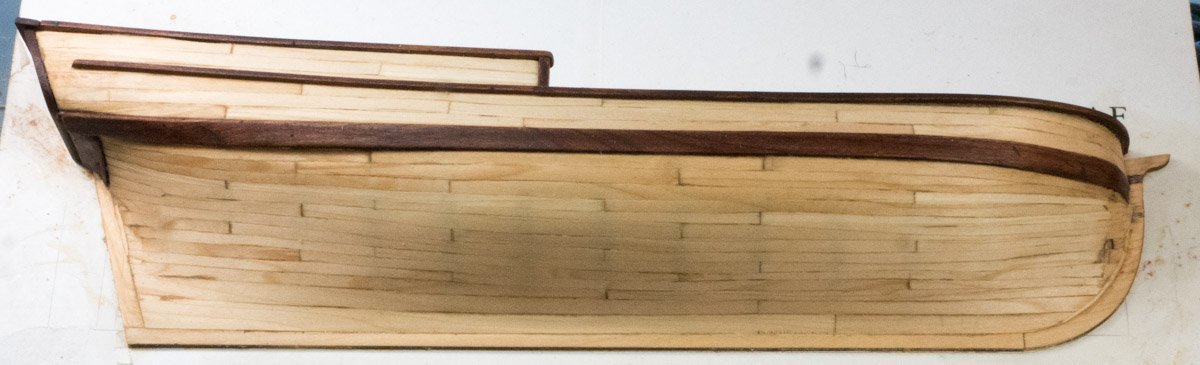
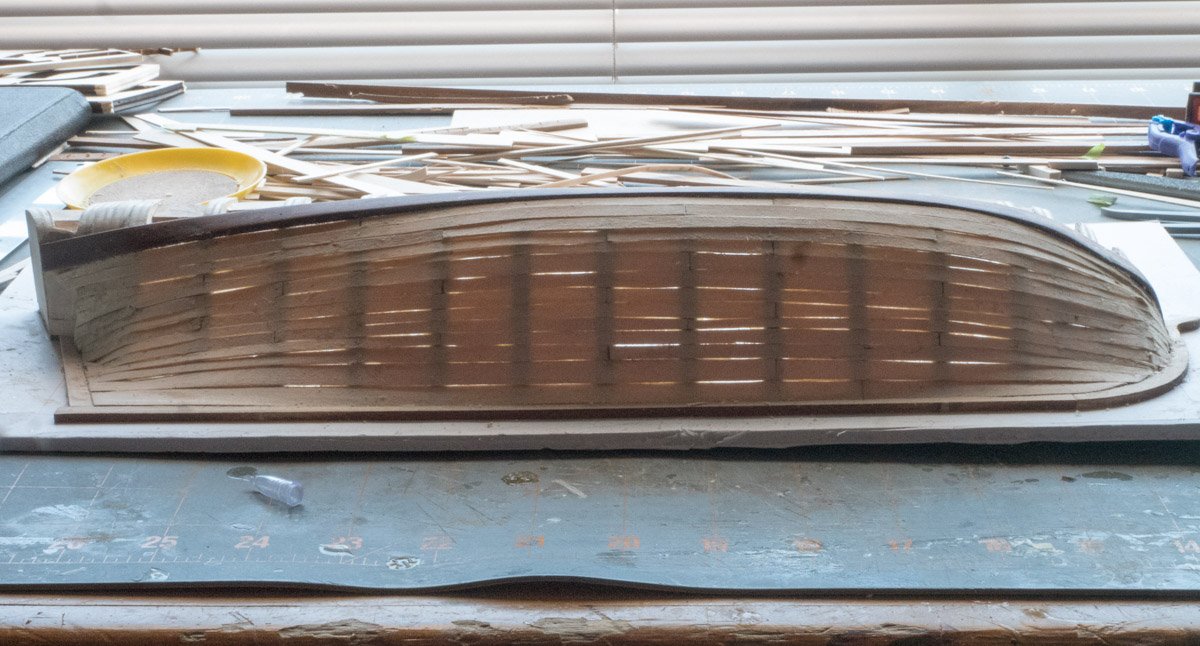
This screen door won’t float. This picture shows the gaps between planks, I didn’t think it was as bad as it is until I backlit the hull. I’ll be testing my “fix it” ability (I'm pretty sure I can't fix all of my mistakes).
I completed planking the belts and I see my mistakes. I’m reviewing my work I’m not happy with how it turned out. But I am happy with what I learned by completing this task. I tried several planking methods to see how they worked. I’m still getting used to working with small stock and impatience snuck in. I have a pretty good idea what I did wrong with the bow. When I did the rough sanding I backlit the hull to ensure I wasn’t getting too close to sanding through the thin material.
The best thing I learned was performing the tasks of measuring, cutting, and shaping dozens of planks. Learn by doing.
I used painter’s tape and I noticed my marks indented the tape, I think I'll look for better tape.
I've started working on some embellishments, I'm adding barn wood to the transom and the transition between the planks and transom. I filed away enough to expose defects in the scrap wood I used so I'm remaking the transition with new pieces. I'll be staining the pieces to match the wale board. I still need to make the bow rail but I noticed a splice called a scarf in the instructions that I'm not familiar with, I've never made that kind of splice before.
I will sand the hull smoother; I will be using a back light to determine where I'm getting to thin. There will be some indentations that I can't recover but this is a learning experience.
- bruce d, Ryland Craze, kurtvd19 and 1 other
-
4
-
I found the tutorial historical information about the size of the planks to be interesting but my goal is to learn how the shapes work. I chose to ignore the historical accuracy in favor of practicing the skills needed for planking. I installed the wale board because it is a reference for my process. I discovered that both ends of the wale board aren't exactly where they should be. And I'm having to deal with running out of room for the last planks at the bow. The stealer plank worked as it should, but I should have read about the dropped plank concept before I got to the last four rows. I have a lot of gaps to deal with but I have a plan for that (I hope a woodworking trick works for this application).
I'm planning on using the barn wood I used for the wale board for the railings and dress up the stern feature.
I'm finding the tutorial to be worthwhile. I thought this build thread should be in the planking section but the build logs I'm referencing are located here.
-
-
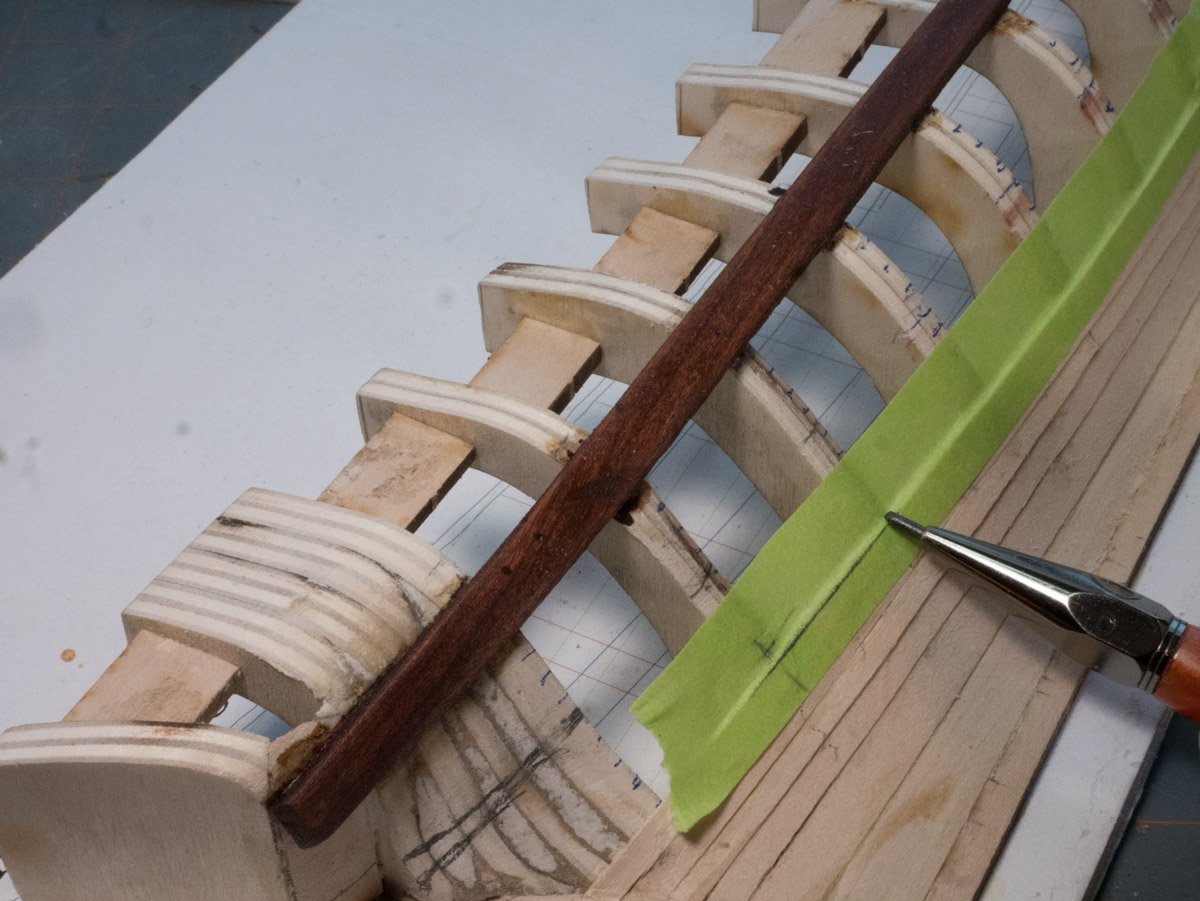
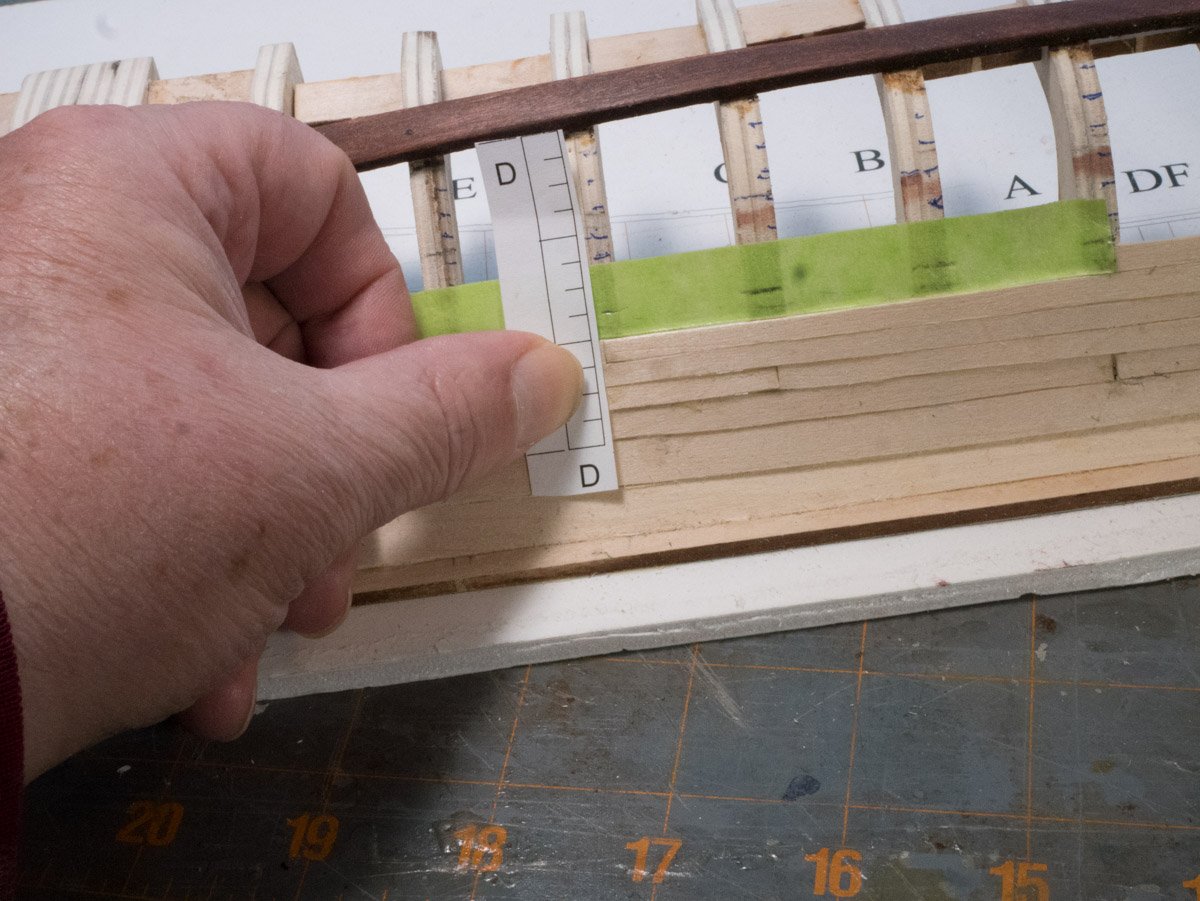
I measured the distance between the bottom of the wale board and the top of the strake plank for each frame. I used drawing software to create strips for each bulkhead with the 12 plank marks evenly distributed.
I tried several techniques to create the planks with mixed results. I started to call my Exacto knife the Happy Wanderer, but I really knew it was my technique. What works for me is to apply painter’s tape on the course of planks, I use a pencil to mark the edge of the plank. I cut the tape to shape and apply it to the bulkheads. I use the marking strip for the bulkhead to mark the height the plank, repeat for each bulkhead.

-
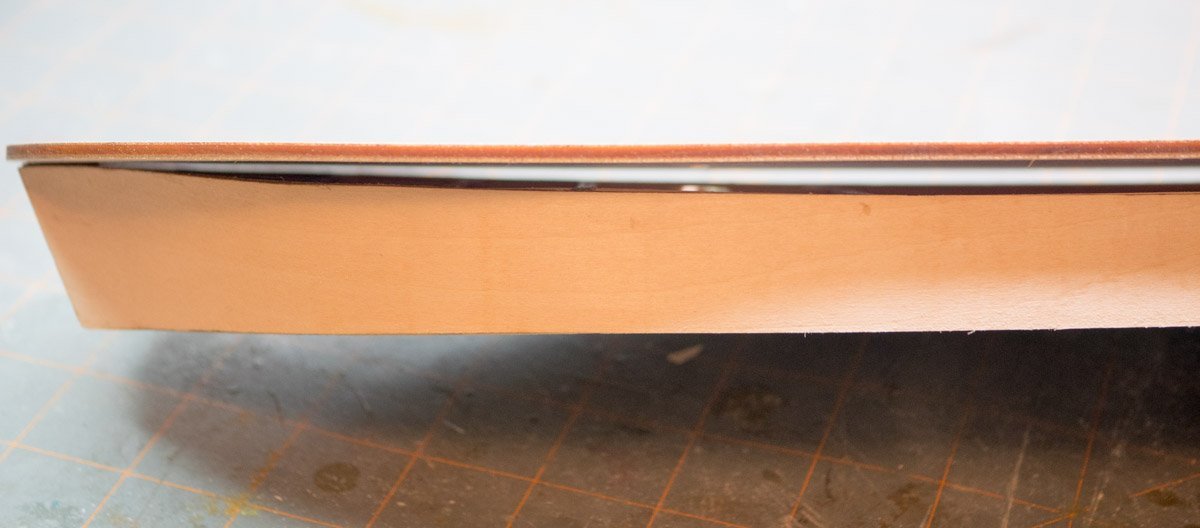
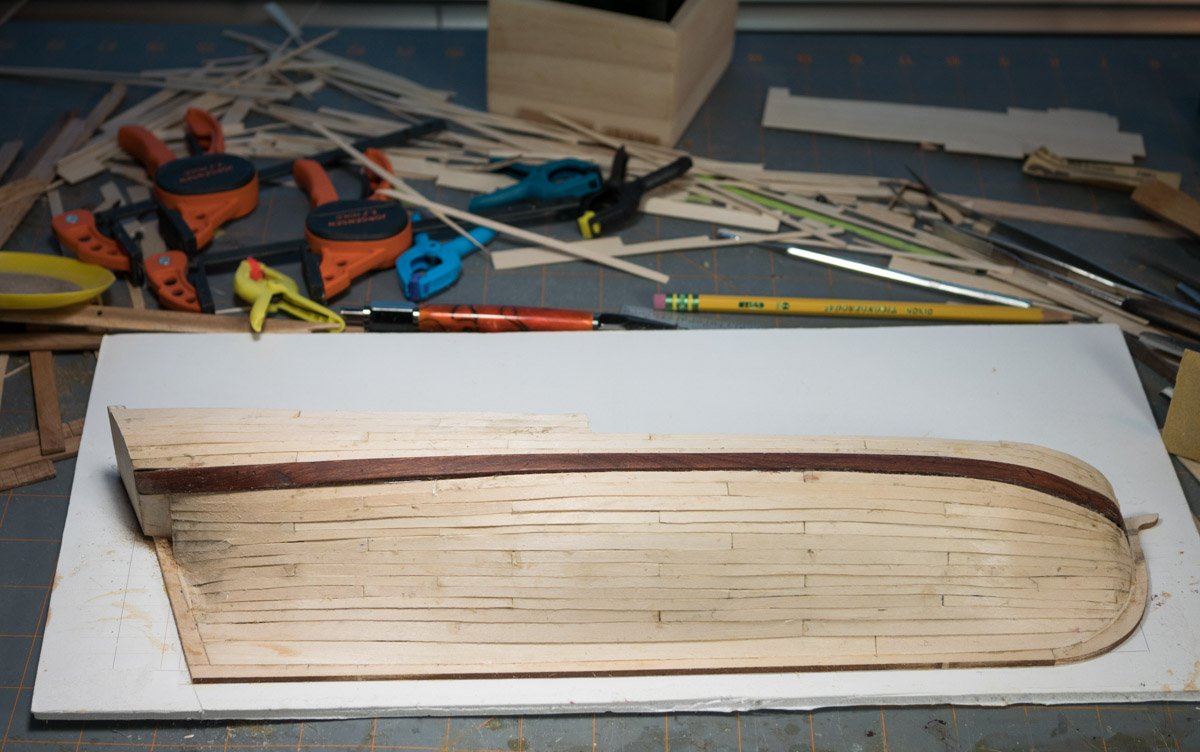
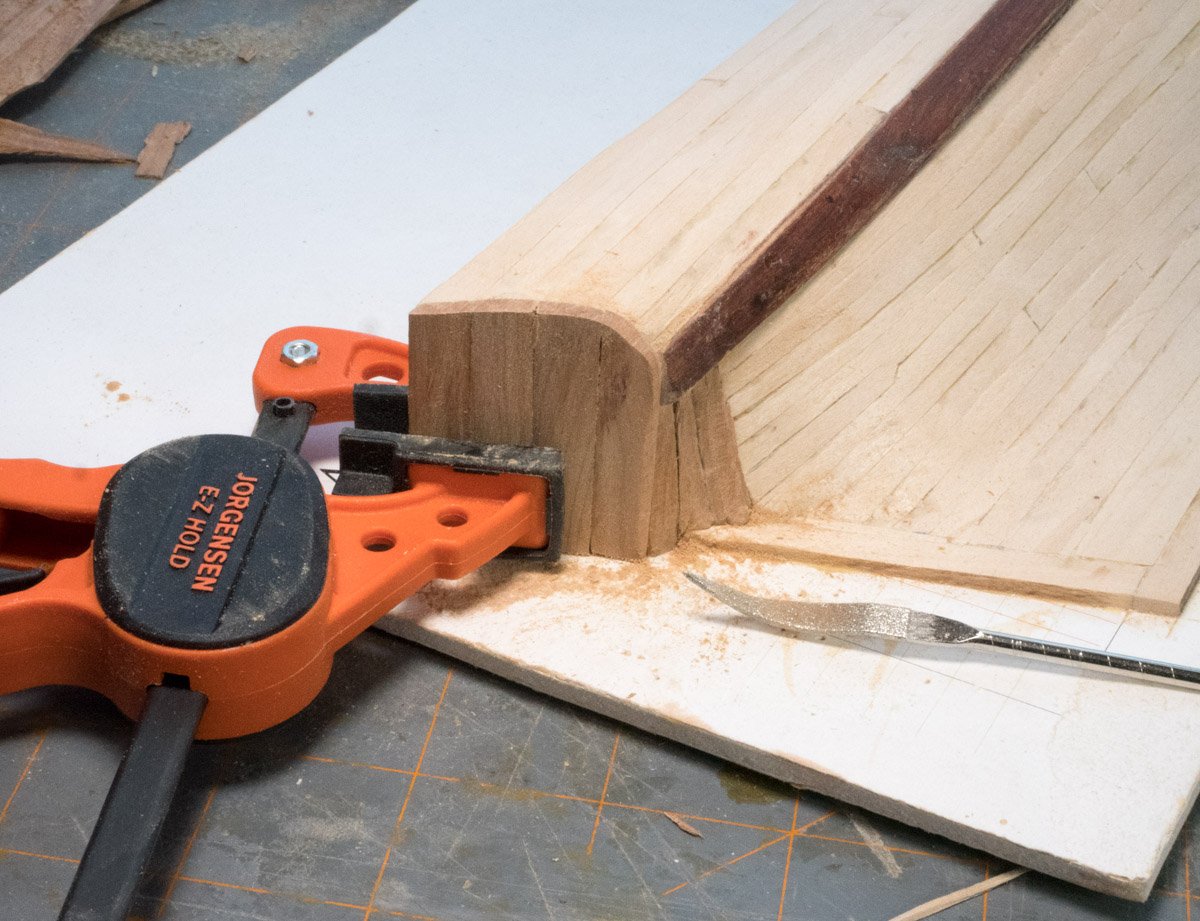
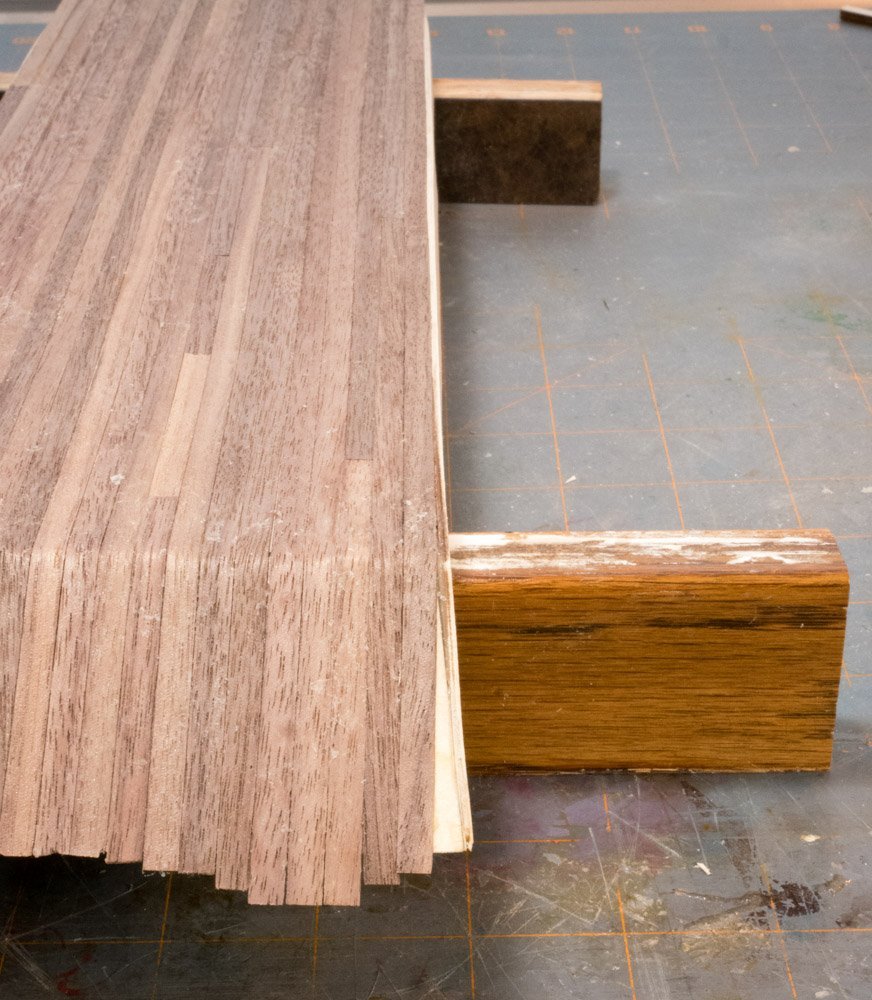
I had cut some pieces of scrap barnwood for the wale board, there were about 3mm thick. I wanted to stain the wale board to customize the kit with something special. And I wanted to bend and twist a long piece of wood (it is a tutorial).
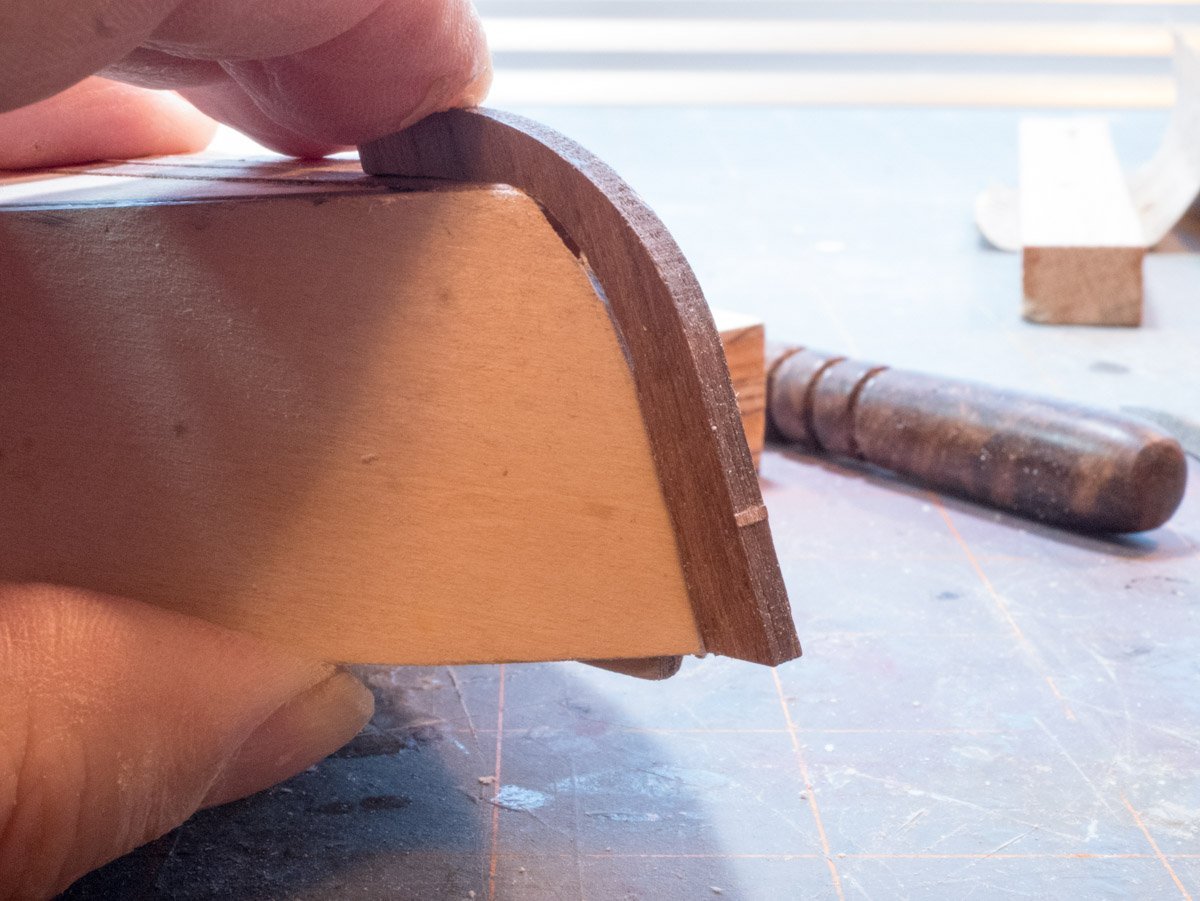
I soaked part of it in water for about 15 minutes, then used an iron to bend and crimp the piece for the bow. The first piece broke. I made some shallow cuts on the concave side and tapered the 3mm thickness to 2mm where the bend would be – it worked. I soaked the other end in water and use the iron to twist the piece for the stern – that worked too. I soaked the piece two more times to fine tune the fit by clamping the piece to the frame and letting it dry.
I discovered a problem with my wale board, it has a flat spot in the bow curve. I took some measurements of the frame and compared it to the cutout, they were close. I considered building up the frame but I was concerned how that might affect the planking, in the end I glued it on. In hindsight I realized I could have put a piece of plank material behind the flat spot to help reduce the flat spot.
I glued the wale board onto the frame because all of the planking would be referenced from it. I also stained it to give it some color.
-
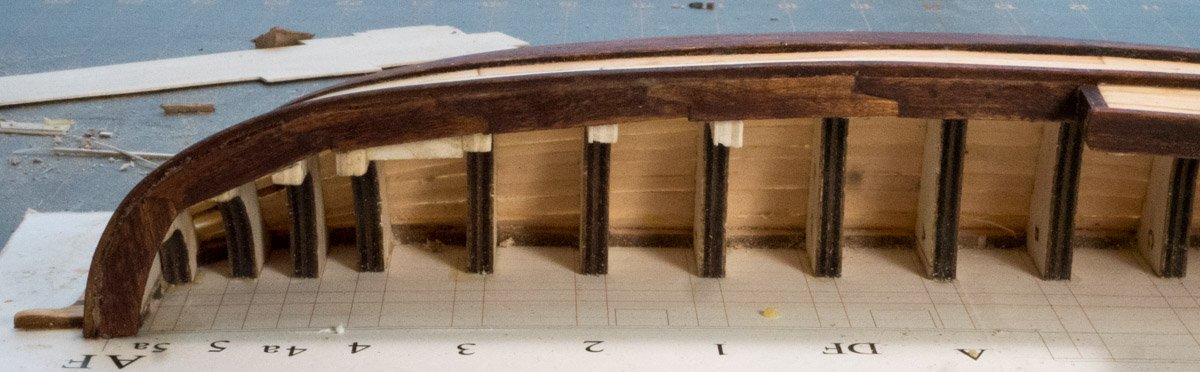
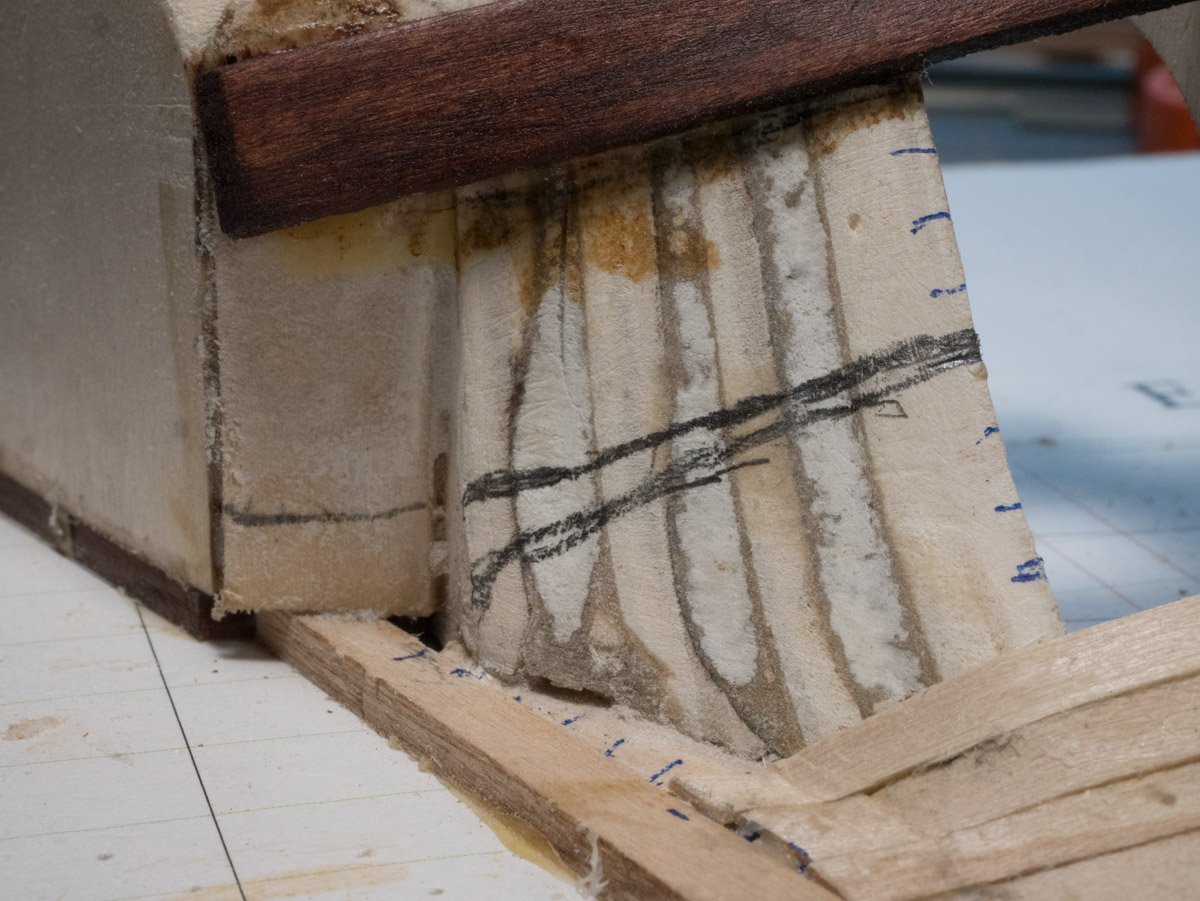
I’ve never sanded so lightly when I did the fairing of the frame, I didn’t want to go too far so I worked it in a couple sessions so I could evaluate what I had done before finalizing my shape. The last four bulkhead frames were connected for my kit (other builds showed fewer frames). I was trying to decide how far to sand that area. I wasn’t sure if I should sand them down to create a solid piece. I decided to go half way and fill the gaps with sawdust/glue, I didn’t have enough sawdust so I used Hobbylite Filler to complete the fill. I figured I wanted the largest contact patch when gluing the planks to the contour of the stern.
-
King of the Mississippi by Cleat - FINISHED - Artesania Latina - 1:80
in - Kit build logs for subjects built from 1851 - 1900
Posted
I don't know how the shingling happened when I glued the hull planks:
I managed to sand through the edges without going through the thin planks.