


stuglo
-
Posts
705 -
Joined
-
Last visited
Content Type
Profiles
Forums
Gallery
Events
Posts posted by stuglo
-
-
If I was still intending to build kits, this would be the one.
- mtaylor, Old Collingwood, Canute and 1 other
-
 4
4
-
-
Just skill and not a Proxxon in site
- shipman, davyboy, thibaultron and 2 others
-
5
-
-
-
-
-
-
2 hours ago, Kevin Kenny said:
The reason i get so many nice tools from new york is that one of my daughter lives there and i send all my on line purchase tools to her apartment. Tools for woodworking. I’ve actually only found two great physical stores to visit. The first is “tools for woodworking “ . Its located in a bit of a grubby area so don't take your wife as i did. 112 26th Street, Brooklyn, NY 11232. They also have a web site toolsforwoodworking.com so you can see what they have. The other is. jak Jewelry tools 37 west 46th street in Manhattan. You have to walk up a number of stairs and there is lots of security all around the place . I guess they must make jewelry around the area. Again they have a web site jakjewelrytools.com. My usual on line store is Lee Valley which has some wonderful miniature tools that i have shipped to her home.
Thank you again
-
-
-
On 7/19/2023 at 8:08 PM, Kevin Kenny said:
The Foredom is a totally different tool. It runs at around 20,000 rpm and is full of power. The Turbo carves runs at 400,000 rpm and has no power what so ever. You paint with the turbo while you cut with the Foredom. You will have to use one to understand what i mean. I have long had a compressor so that cost is not of concern for me. The hand piece is around $200.
You've reawakened my interest in this tool. What would you suggest as the basic burrs and accessories based on your experience ?
-
-
Welcome. We have a local Israeli model boat building club. We would be most happy for you to join us. The next meeting is this Friday. Looking forward to hearing from you.
- mtaylor and Keith Black
-
2
-
"am working on the handrails. It's all done with 0.2 mm black monofilament line,"
Was it easy to fit the CONTAINMENT rails after handrails, or better to do these first?
Your build is an excellent one. My painting with spray cans was OK for the hull but excessive for the deck fittings. Probably my inexperience and lack of patience.
-
-
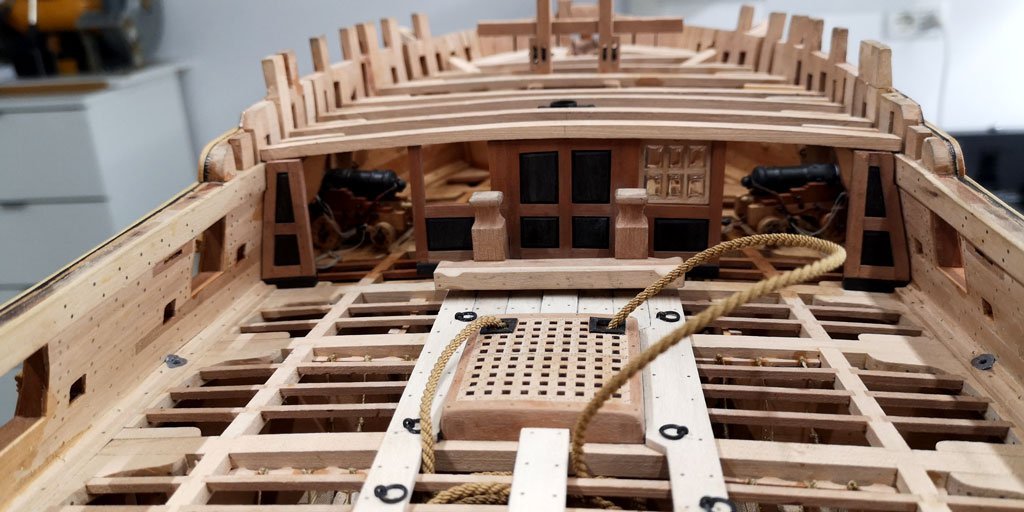
On 4/5/2023 at 9:31 PM, giampieroricci said:
I resumed the setting up of the upper deck:
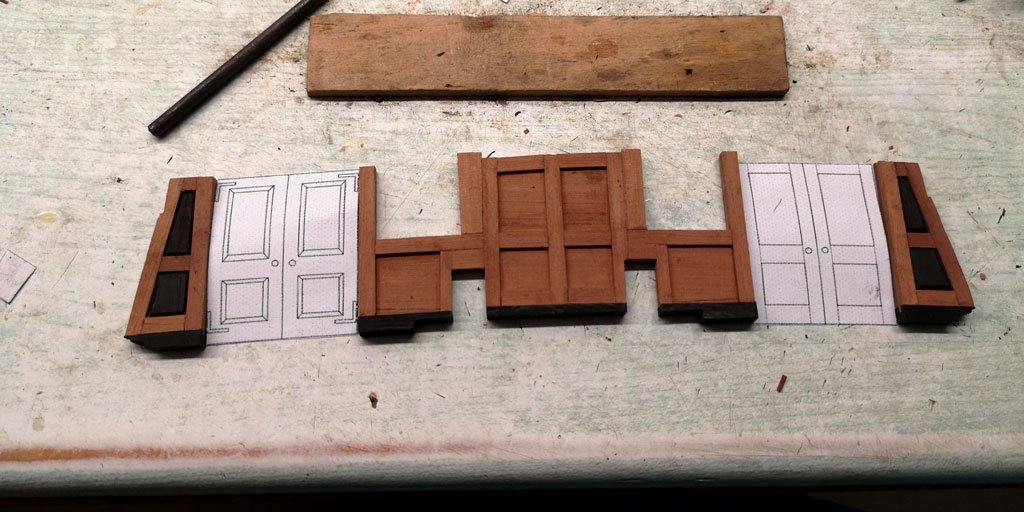
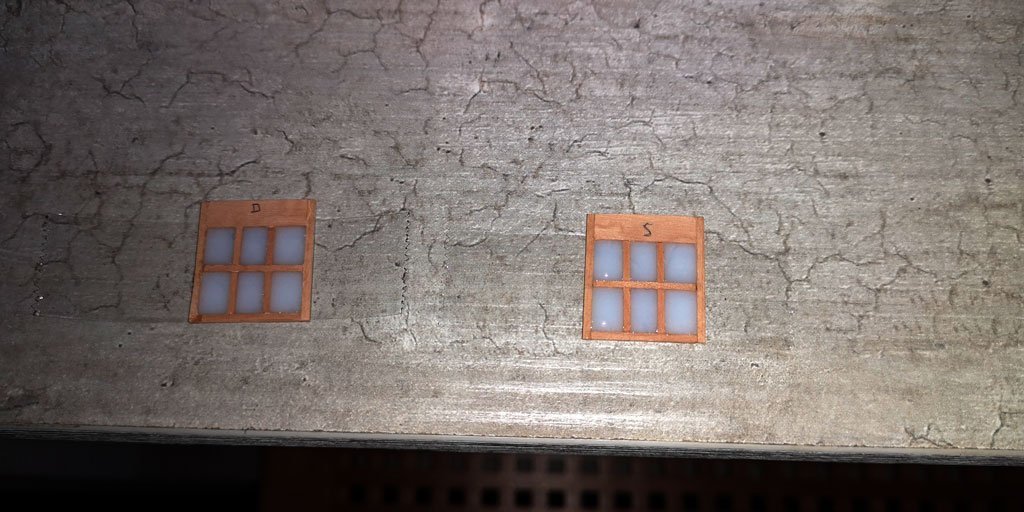
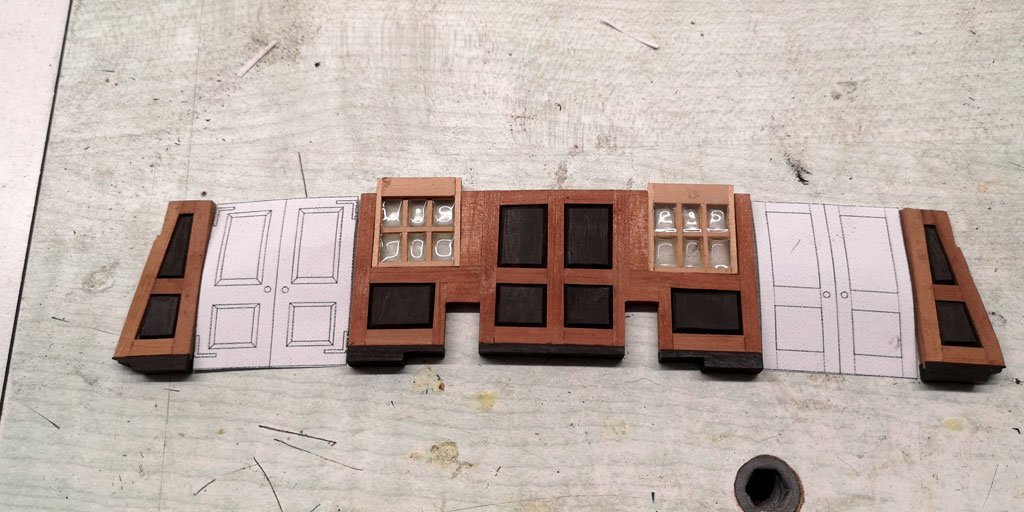
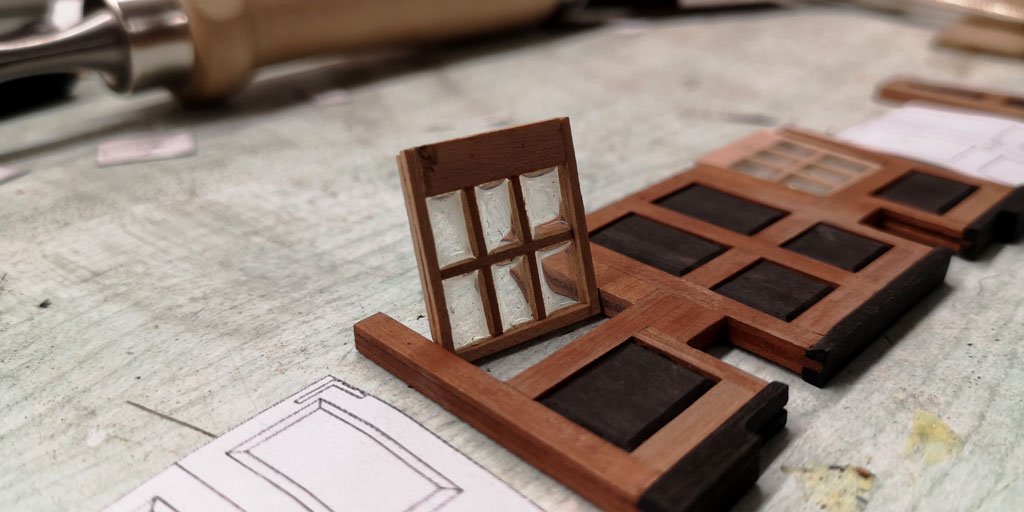
I must have missed it, but how did you make the "glass" in the windows?
- mtaylor, Peanut6 and billocrates
-
3
-
On 3/9/2023 at 9:36 AM, stuglo said:
I'm spending more time correcting the wooden parts than I would have if I made them from scratch. The design is really good, the the fun in the project drains away with the frustration and annoyance. The old kits I built were far less inaccurate. ? Imperfect or inappropriate use of modern technology + lack of consideration for the purchaser/builder?
In fairness, I must update these comments, because as I proceed with the build, the PE and plastic parts are really compensating for the initial frustration. The amount of work and expertise that must have gone into the planning details is phenomenal. The issue with the wood should be easily rectified; then the kit will be perfect.
-
4 minutes ago, Ian B said:
No happy to have side conversations were all doing the same build ...
I'm spending more time correcting the wooden parts than I would have if I made them from scratch. The design is really good, the the fun in the project drains away with the frustration and annoyance. The old kits I built were far less inaccurate. ? Imperfect or inappropriate use of modern technology + lack of consideration for the purchaser/builder?
-
-
-
On 11/3/2021 at 8:21 PM, ted99 said:
Rod--In reading your build log I saw a comment on the cost of this kit. My experience with the top-end wooden kits is that the Brit sources are the cheapest plus "in-stock" and the US sources the most expensive and "special order only". No import duties and preferential air shipping rates have always been a winner.
I am building this as display-only, so I've decided to glue down the deck. Just reached the point of gluing the deck and it's the moment of truth for decisions made earlier. I mentioned I really had trouble figuring out the instructions for the armor belt "step" and did a true step at the stern (repeating the picture of this). At the bow, I did a smooth transition as the proper treatment was not evident from the notches cut in the tops of the bulkheads. All became perfectly clear when I started fitting the decks. I wish I had trial fitted the decks earlier, because the proper treatment would have been obvious. The "step" treatment I did at the Aft end is correct and should be repeated at the Bow between bulkheads 13 and 14. There will be a slight delay as I go back and correct for this mistake. One of the photos shows the doubling I am doing behind the planking between 13 and 14 to give me room to cut out the correct step.
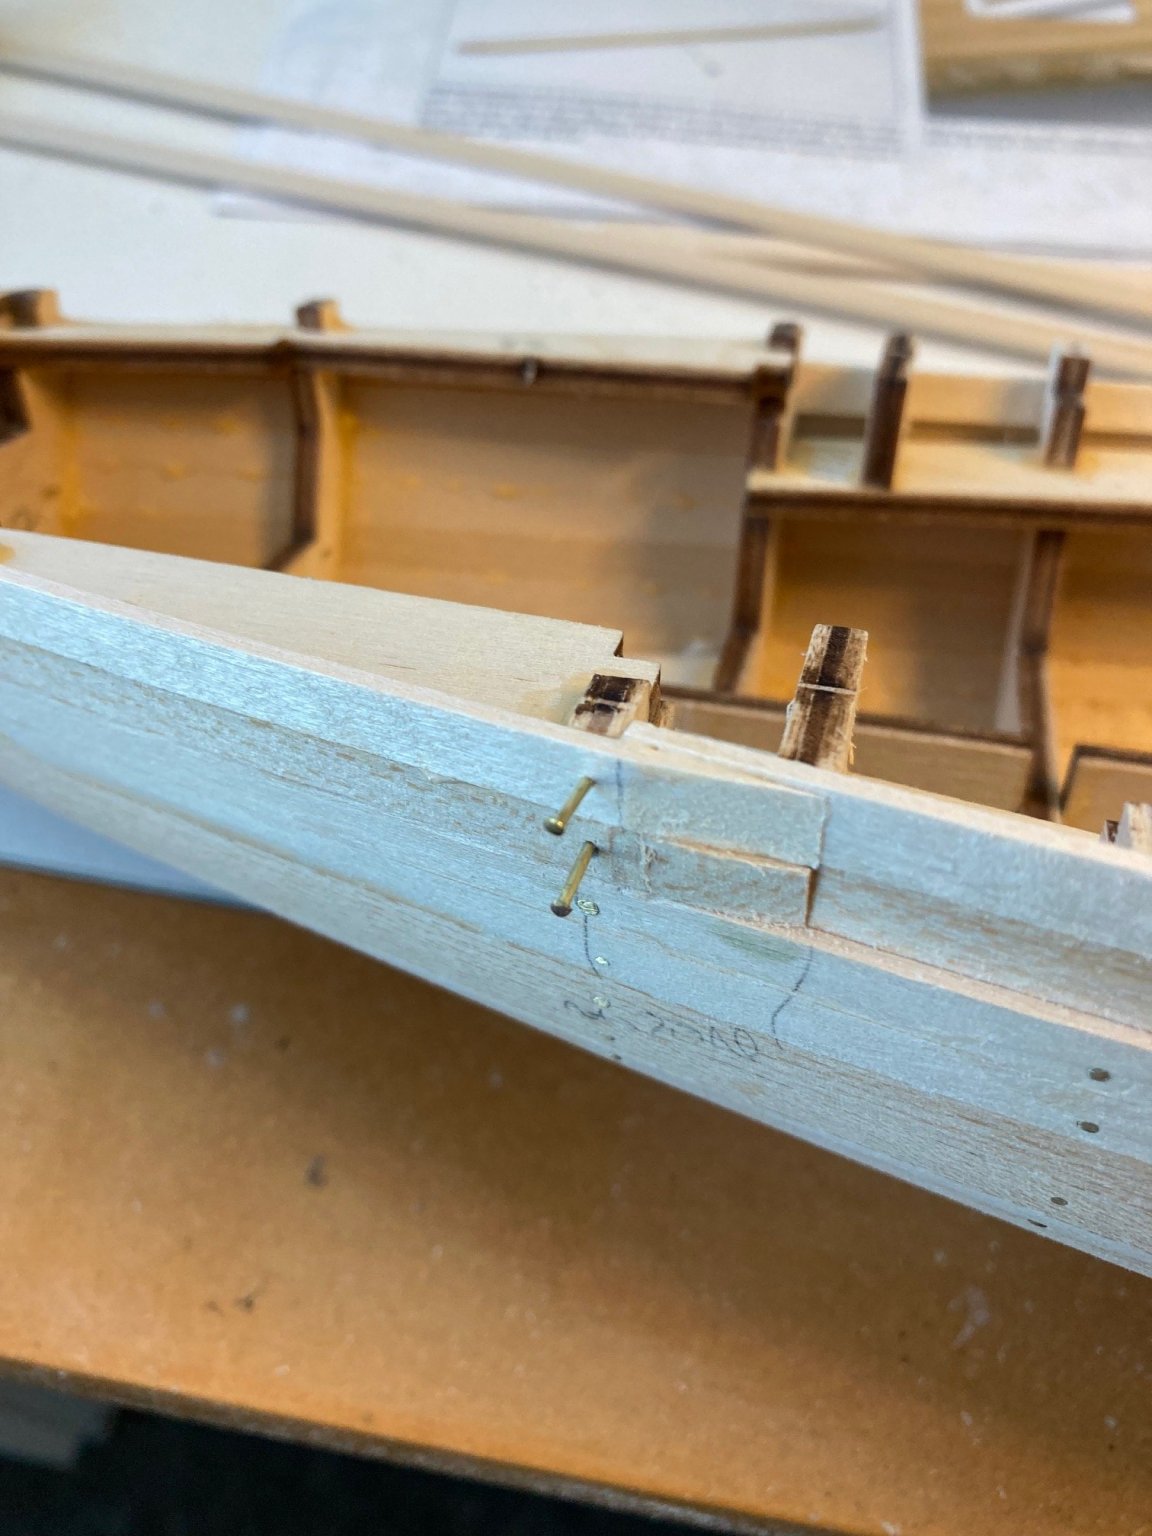
Some of my photos show a relatively thick nail head protruding above the plank surface as I was doing the two rows of planking above the armor belt. I correctly judged that the sanding in this restricted area would be much easier without nail heads. As I mentioned earlier, Amati doesn't provide enough nails to put one in every plank and every bulkhead, so I used some left over from previous builds. These were slightly shorter and slightly thicker than the Amati nails. I drill a pilot hole for every nail and it turned out that if I used a slightly undersized pilot hole, a partially driven thicker nail held the plank firmly against the bulkhead as the glue dried. If I had it to again, I would have used this technique for all the planks. The nails are very easy to pull out after the glue dries. I think this works because the hull profile, combined with the planking layout shown in the instructions doesn't require much force to hold a plank to a bulkhead. I'm not sure if this would work with the Amati nails as they are the thinnest I have ever seen. At most, I would only use the Amati nails driven fully at the ends of planks as this is the place needing the most holding power. I found that a #65 drill was optimum size for maximum grip on the Amati nails. It turned out I preferred to use a slightly larger drill, but only drilled to 3/4 of the nail length. The Amati nails are so thin that it's very easy to bend one if the pilot hole is undersized. Using a pilot hole just a hair larger than the nail, but less than full length of the nail allowed easy placement of the nail in the hole and the final 1/4 of the length gripped firmly in the ply bulkhead. As I said, given what I now know, I would use slightly larger nails partially driven till the glue dries, and then pull them out.
Bow picture shows the most complex area for sanding

I see you have fixed the 1st planking before the decks. Is this in the plans because mine says to complete the planking after the decks are fitted? Your way seems easier and better.
- mtaylor, Canute and Old Collingwood
-
3
-
-
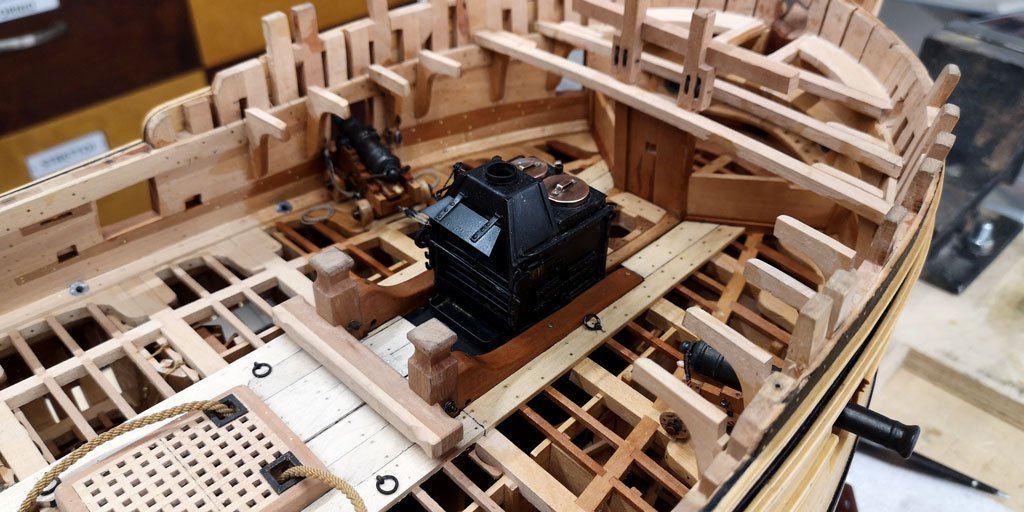
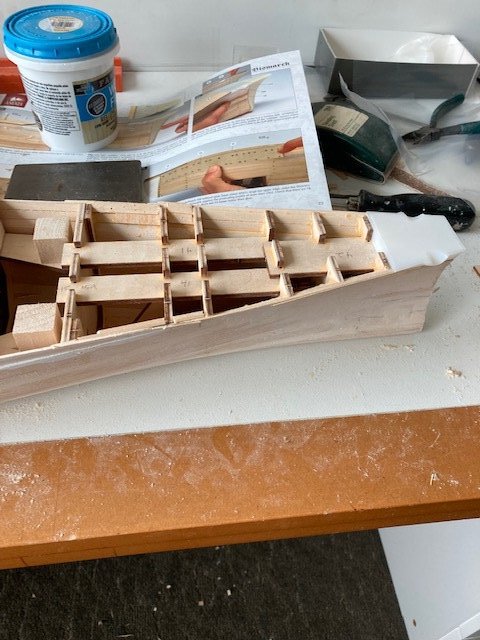
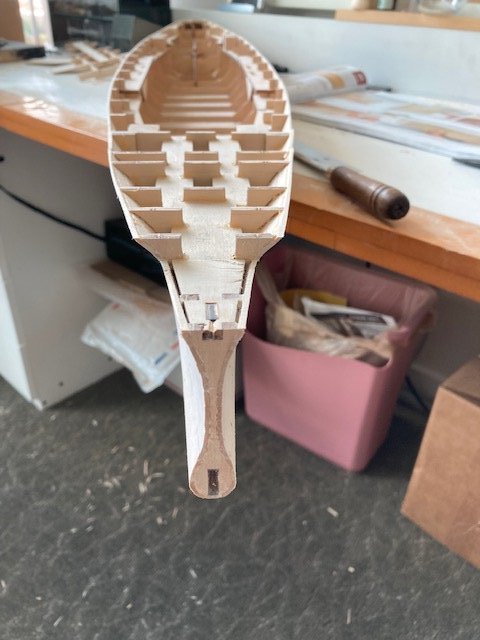
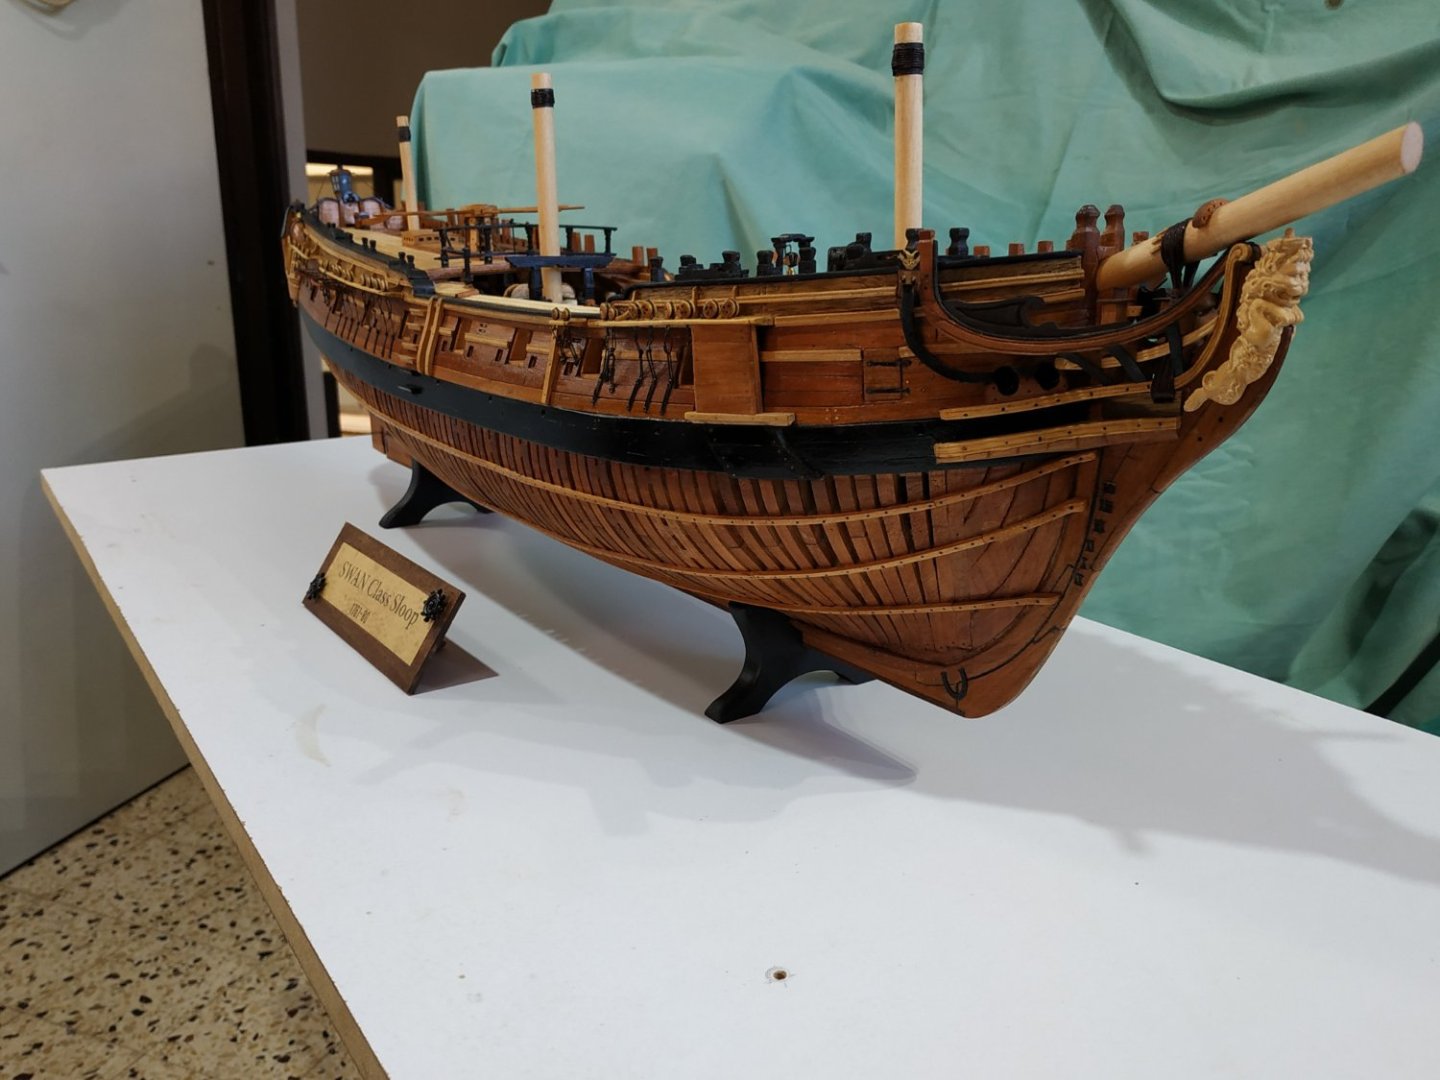
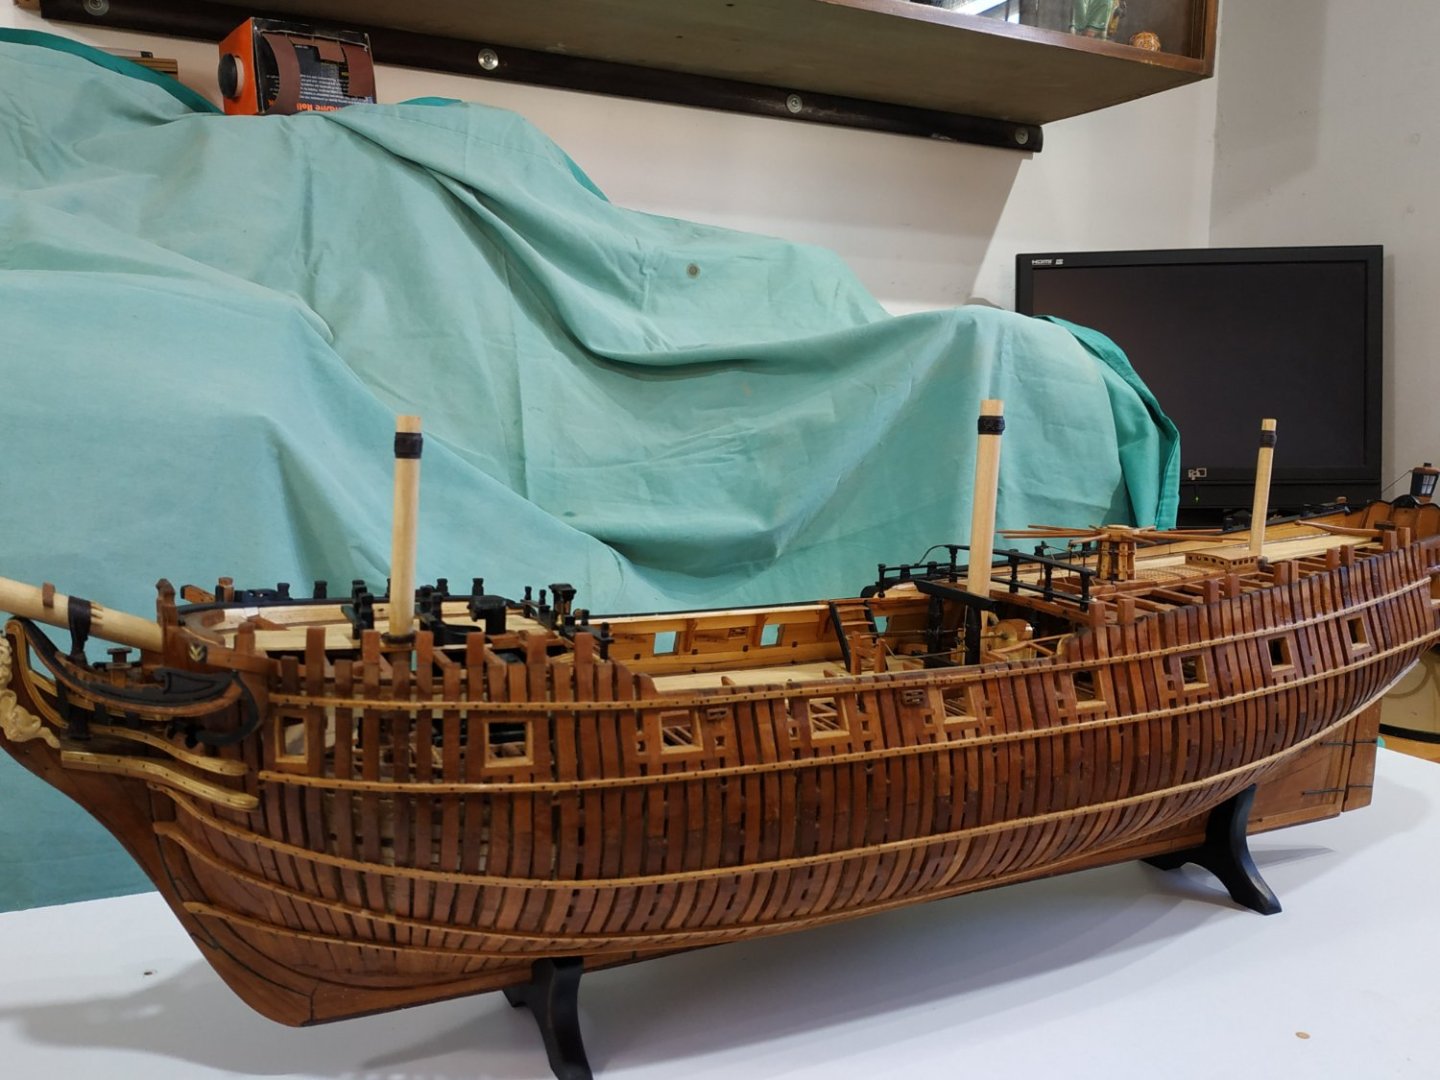
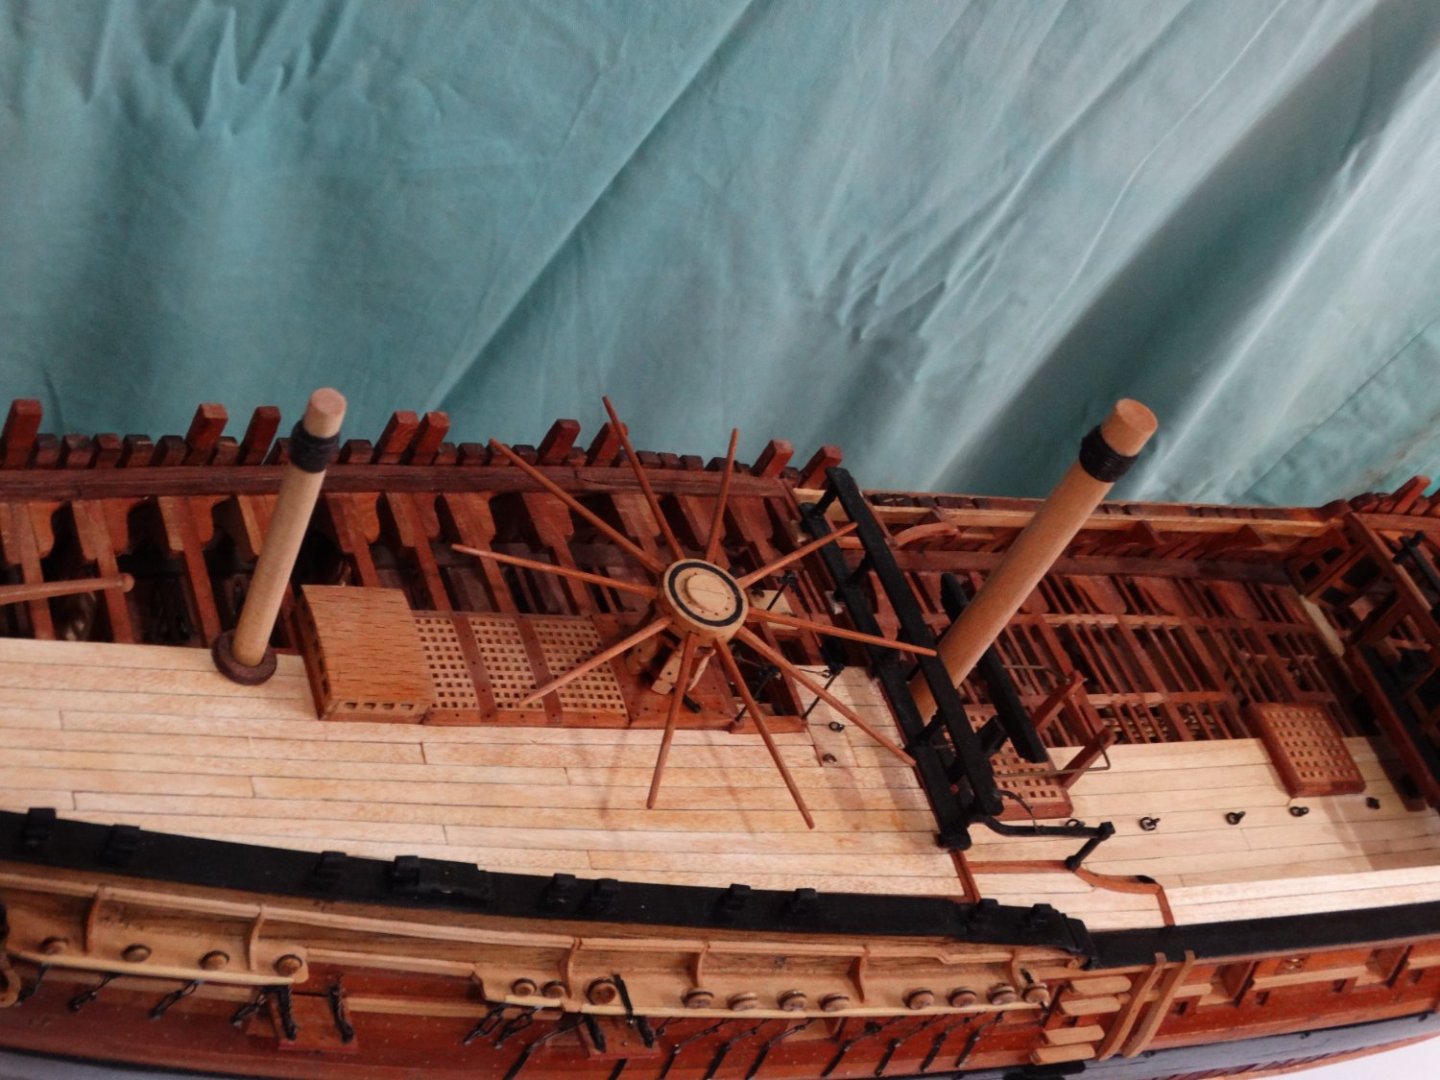
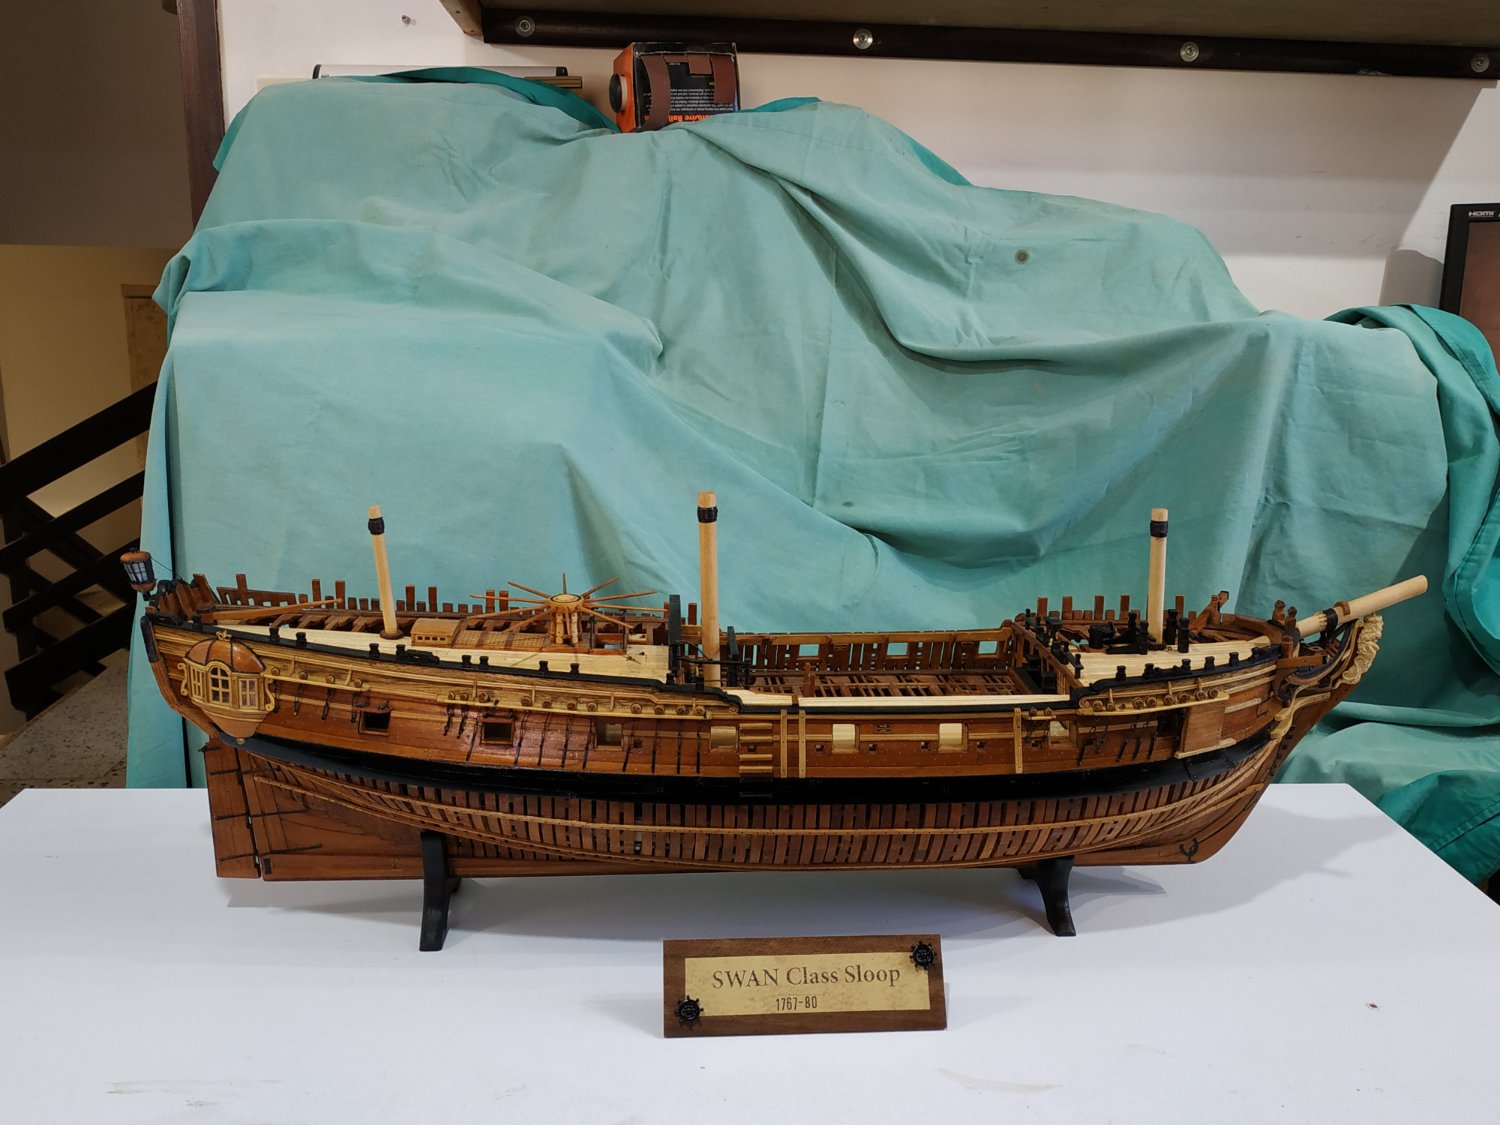
Finishing my Swan Class Sloop
Mast Wedges, stubs for the masting, and a figure head.
I purchased the Lion figure (boxwood?) online from PRC. Required some adaptation for fitting.
Not one of the class as listed, but I read somewhere that a generic lion figure was sometimes used even when the ship’s name was something else.
Well, 30 months, about 3000 hours, 500+ postings. What a voyage of discovery. There were times, particularly at the beginning, that I wondered if I’d even depart the harbour. Of course, without the practicum TFFM books , Dan Vardas blogs and Kevin’s Videos, I would have been sunk many times. Thank you all.
Thanks to the Bosun (wife) for tolerating my taking a spare bedroom (and sometimes a second one), disappearing for hours, making noise in the early hours of the morning, and turning a blind eye to the expense of the new tools that I acquired. My grandchildren, perhaps hoping to inherit the ship, are even more attentive than usual.
Like a good book that you regret when finishing, so is this project.
I have more on the shelf, but will return to a Swan, perhaps with reduced innards, but fully planked and rigged. I have volume 4 TFFM and enough cherrywood stock.
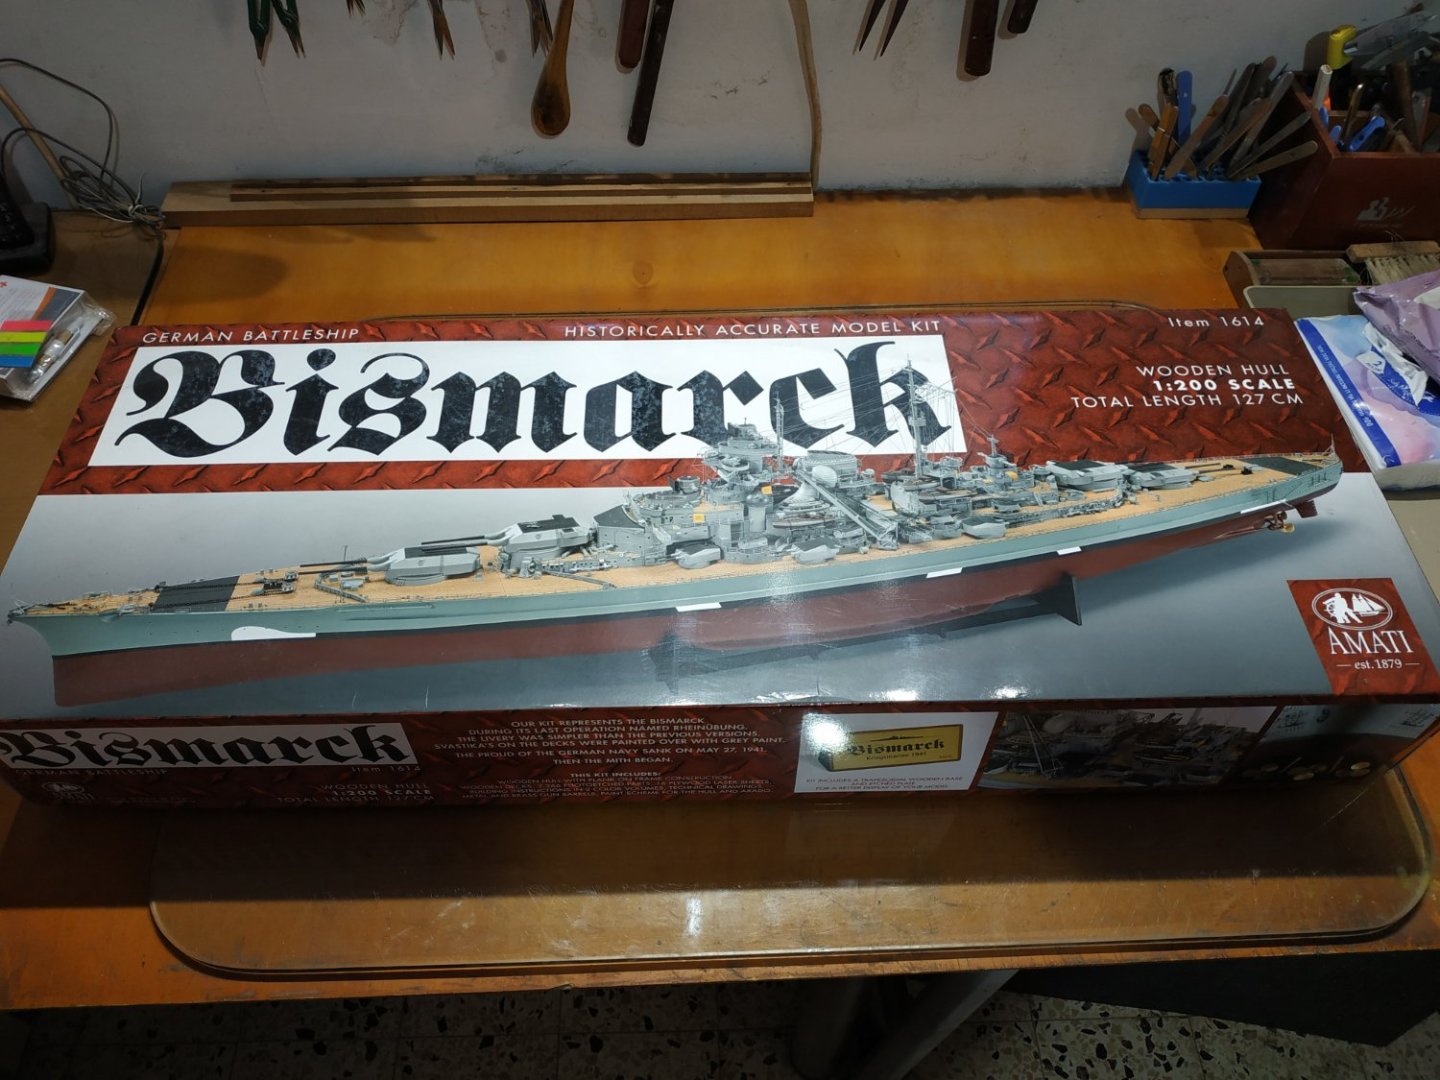
And now for something completely different (Monty Python)----
The BISMARK - Amarti kit.


Rattlesnake by JSGerson - FINISHED - Mamoli - 1:64 - Using Robert Hunt’s practicum
in - Kit build logs for subjects built from 1751 - 1800
Posted
Grip with a strip of folded sand paper (rough side towards wood)