HOLIDAY DONATION DRIVE - SUPPORT MSW - DO YOUR PART TO KEEP THIS GREAT FORUM GOING! (Only 72 donations so far out of 49,000 members - Can we at least get 100? C'mon guys!)
×

NovaStorm
-
Posts
321 -
Joined
-
Last visited
Content Type
Profiles
Forums
Gallery
Events
Everything posted by NovaStorm
-
 Will look forward to seeing the final pics. I wish this kit didn't come with sheet decking. I would much rather be able to plank the deck with nibbing like the real ship has. It is such a beautiful ship.
 -
You are some brave nailing the batten on. I would recommend clamping them on if possible especially as they are only temp. You can nail or pin them on down lower on the bulwark. The rabbet is the grove that runs from the stem down along the keel Also I would suggest setting your self up for pre-bending off ship rather than on. I think you will find it easier. If you do a photo copy of the bottom of plan sheet one, you can draw out the shape of the bow on a board, I use cork board. Add a few nails or pins to make the soaked plank take the shape of the hull. Once you have the planks shaped you can hit them with a hair dryer for a few min to dry and your done. Watch the admiral doesn't catch you with her dyer lol. I think Chuck shows it in the instructions otherwise look through my build log I've got my set up there and I bend and dry 6-9 planks at a go. Cheers ~
- 950 replies
-
- 4
-

-
- syren
- model shipways
- (and 1 more)
-
You are making some real progress now. It is looking good! Take your time and use battens to constantly check as you fair things up. I didn't do a very good job with my gun ports as I tried different things on each side. It is one of the most important area's to take your time with. One thing to really watch out for is to get the gun port sill at the correct height above the deck when it goes on. Otherwise you will have difficulty fitting in the carronade carriage at just the right height. I have mine a touch low on one side I suspect and will have to sort a workaround. Also the laser marks on the stanchions it is important to keep track of them. Mark them right round the stanchion and keep track of them so they don't get covered up or sanded out when you start work on the ports frames. They are also needed for the wales and sheer strake when the time comes. Cheers hope this helps ~
- 950 replies
-
- 4
-
-
- syren
- model shipways
- (and 1 more)
-
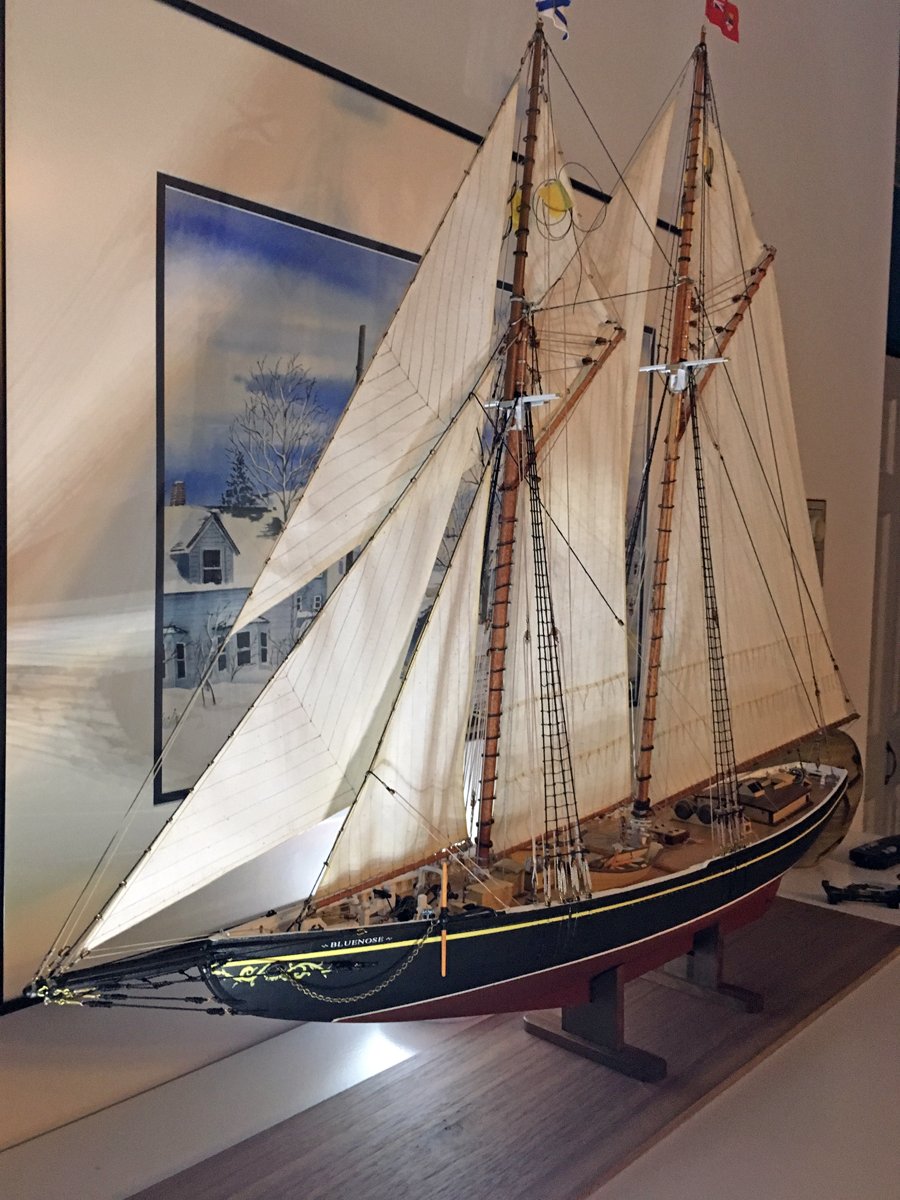
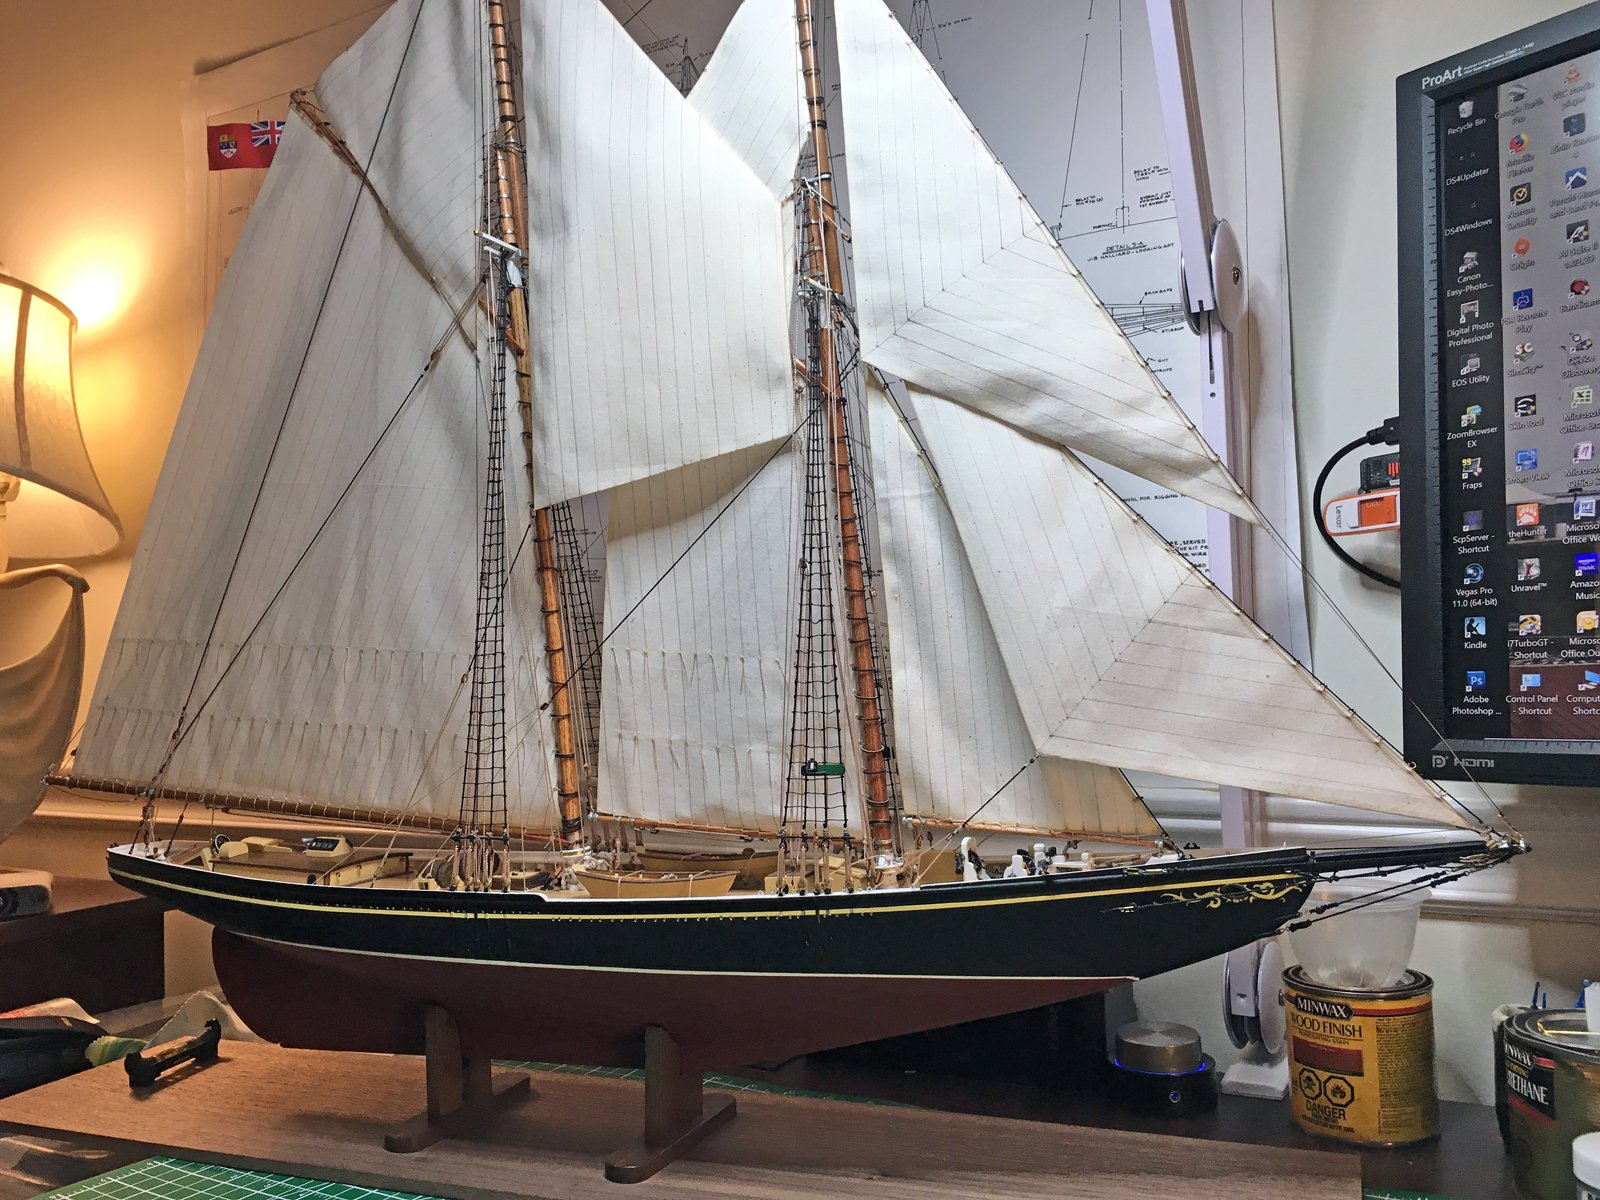
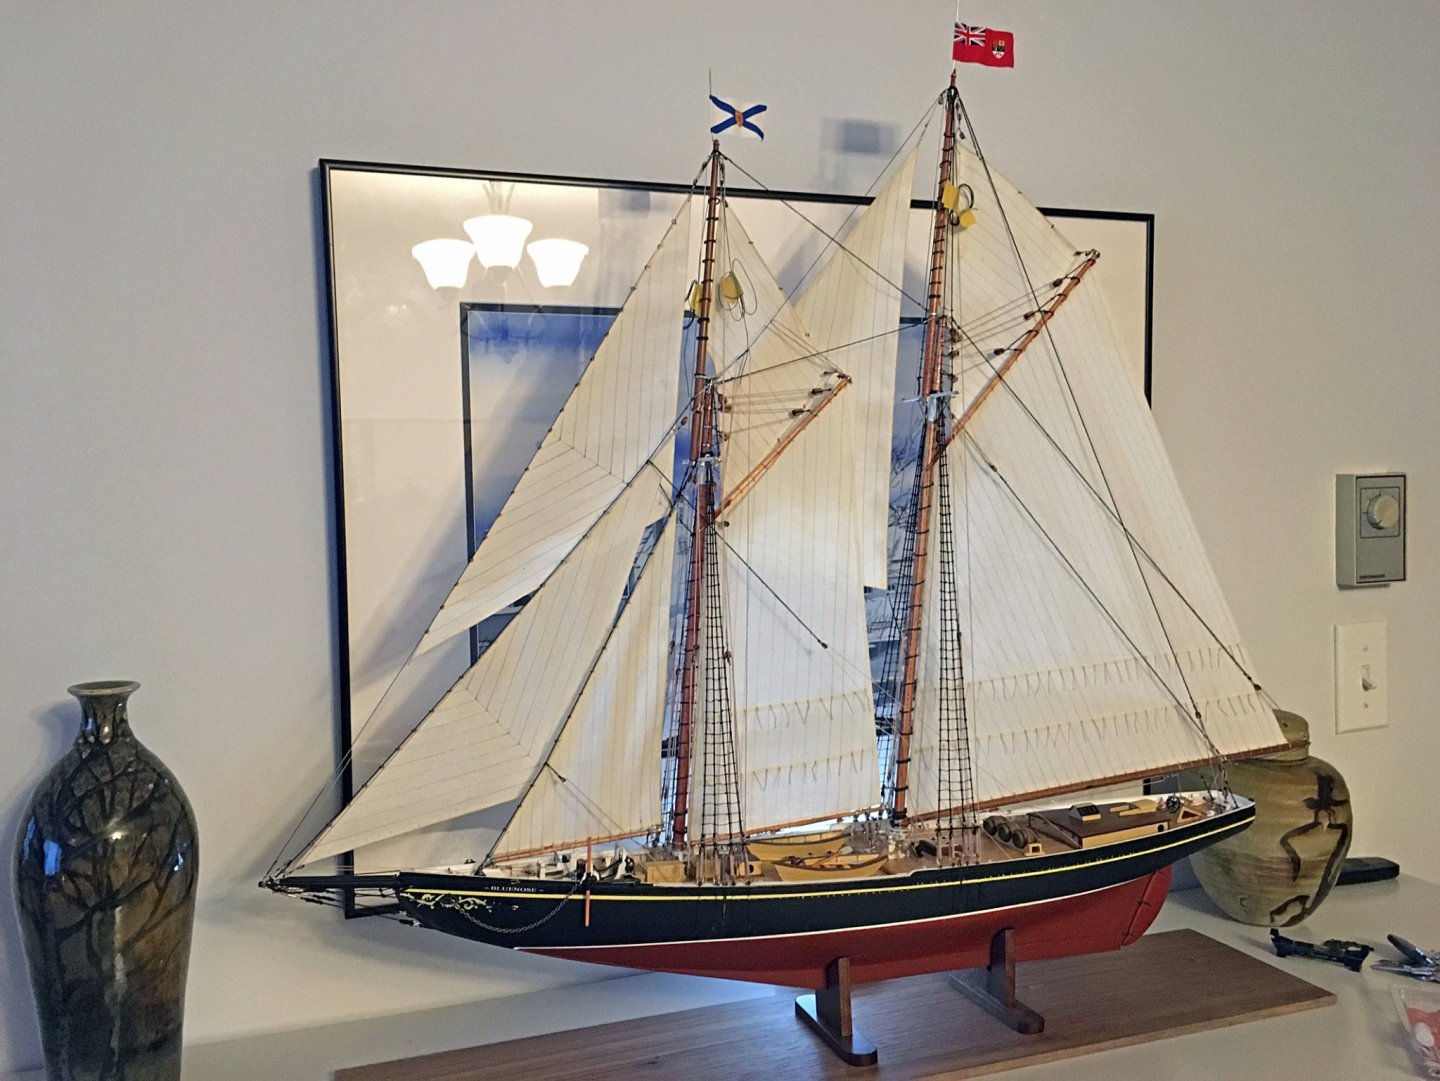
Richard thank you my friend. The Bluenose was my first taste of model ship building. Like you I spent a lot of time researching before attempting to build her. I haven't put the time into properly taking some pics since finishing, but will stick up a few taken at or near completion. First though let me say that if anyone has not seen Richards aka Retired Guys Bluenose build that is going on now, it is a must see and you can find it HERE ! In comparison to my meager first attempt


-
It won't hurt to fill in between the last two bulkheads at the stern, They don't in the instructions, I didn't, but some do. The advantage is you have a lot more surface area for glue. Especially at the tight bend in both area's of the bow and stern. The advantage to not gluing in the masts on models is if they ever need repair or replacement due to breakage it is much easier to accomplish. Also they are not glued in on the real ship and the old time model ship builders will tell you not to glue them. An alternative I have heard of is to lightly glue them just enough to set there rake before you begin rigging. Then they are not as difficult to remove years later it repair is required... Cheers Great to see the progress your making.
- 950 replies
-
- 4
-
-
- syren
- model shipways
- (and 1 more)
-
Very nicely designed and executed. Boxwood coamings looking good Thanks for sharing such a wonderful build in the way you are. She deserves it!
-
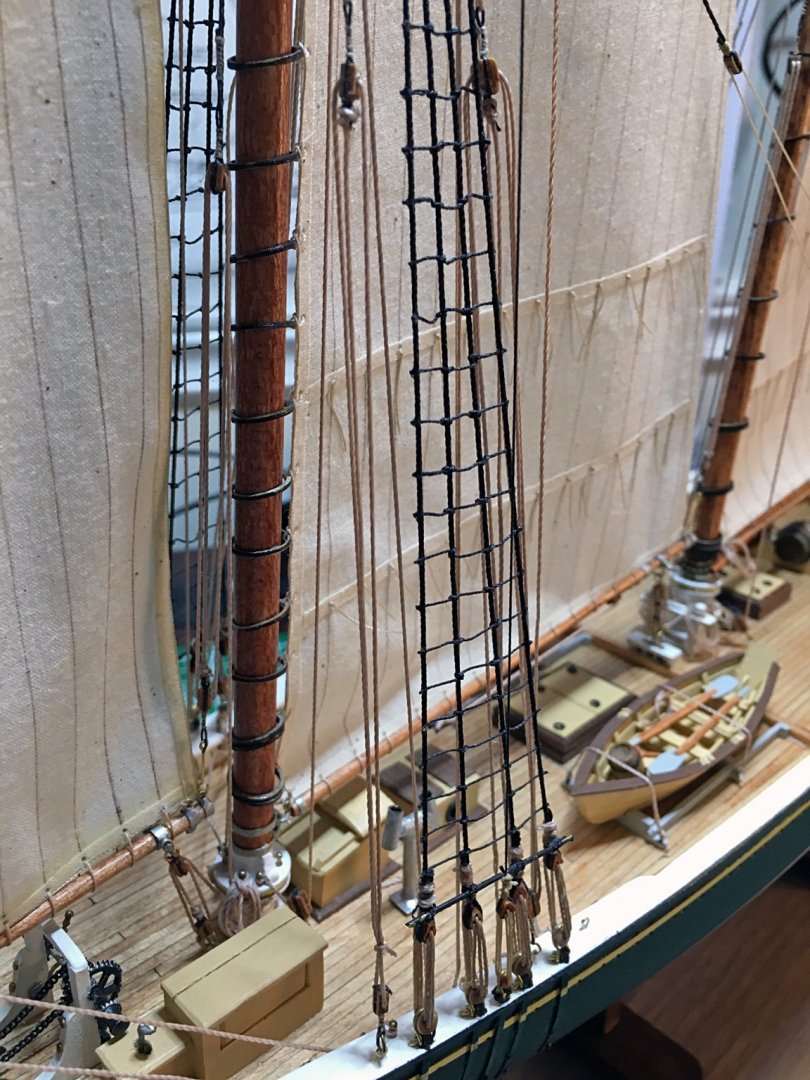
Your off to a great start. the mast notches look real good. When you go to set your masts you can slip in little wedges to secure them and make any slight angle adjustments. The wedges can be glued to the box and or the mast depending on if you want the mast glued in or not. Personal choice The rigging and shrouds and ratlines will all super secure the masts if you don't glue them in. It will be a bit trickier though as you have to really keep track of how you secure and what lines you install first so you don't pull them out of alignment.
- 950 replies
-
- 4
-
-
- syren
- model shipways
- (and 1 more)
-
Wow that looks great. Your moving right along You fixed up the bowsprit by the looks of it too.
-
It should be a great way to set the masts if you don't fancy drilling. That was taken from the MS Bluenose which is done this way. It worked great for me on my Bluenose and I did not glue the masts in but they are true and solid as a rock

-
Keith it is looking really good. I like the Parks Canada Pick of the wreck you stuck in there too.
-
Hi Wally that is correct. I used balsa for the filler blocks and the plywood is scrap left over from the bulkhead sheets. So if you use a hardwood for the filler you will be fine. Cheers welcome to the club
-
Bob Hi Bob are you sure that photo is the Bluenose? I ask because of the mini rail showing on top of the main. It looks worn enough looking that you would think it would exist in any number of photo's. I have only seen one other (sorry busy no link atm) with it published as the BN and was not convinced in that case.
-
Thomas it will be real pleasure to have you on board! Your Syren is a work of art, one of the best that I have seen Cheers, Robin ~ Thanks Justin but the jig is all Chucks I took it straight from the instructions really. Good to hear from you.
-
What a great idea. If you could use a smoldering fire somehow it should work especially well, using a reduction atmosphere to pull the oxides out of the copper. That is what we do in Raku pottery.
-
Excellent those plates look great. All the trial and error paid off and you worked out the solution. I didn't use a hammer, I pressed mine and found having thin art board under the copper helped making the impression. To each their own
-
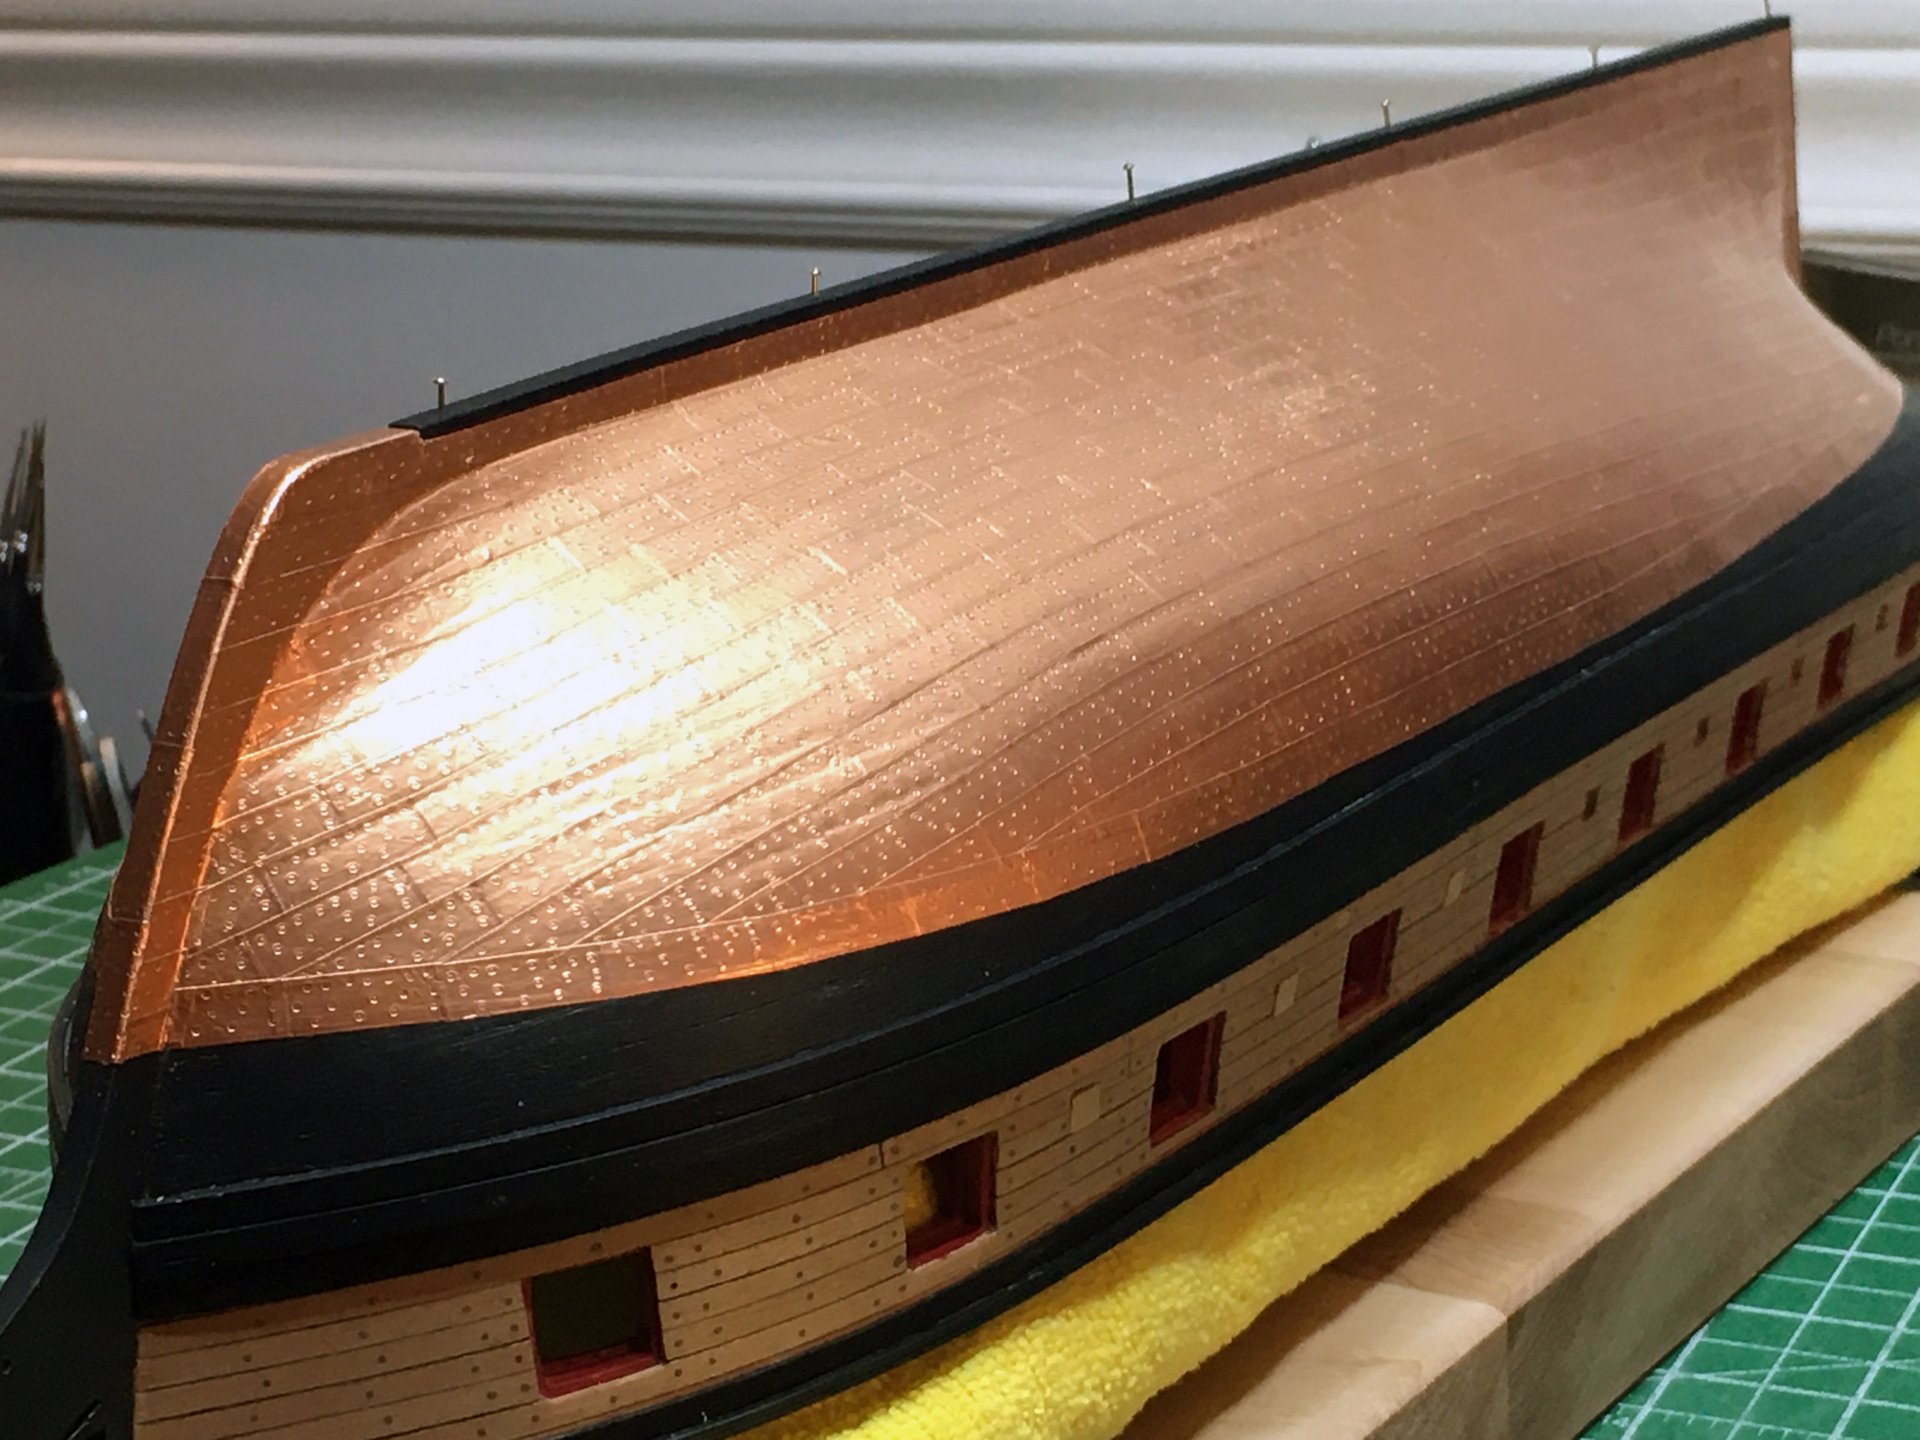
Hi thanks for the comment and that is a great question because at the start of plating I was like what the hey this is going to take forever and then some. But believe it or not I caught on to a way of removing the backing that worked pretty good for me. Hold the plate up with your left hand between thumb and forefinger so the top third of the plate is sticking up showing, with the foil side facing toward you. Put the free hand forefinger just above the plate and with a downward and inward motion toward you, flick down on the top of the plate with your finger tip. Try and flick it so you don't land hard on top edge but just flick it to skim the edge. You will know what I mean when you try it. If your folding the plate you are not skimming it the way you need to. Usually in one to three flicks the copper will release from the plate backing once you get use to it. Now you are still not out of the water, the copper has not released all the way and there is a trick to now peeling off the backing that is still stuck. Don't peel the copper in a arc it will damage the plate severely. I found it way better to kind of peel or pry out the backing from the copper by kind of suctioning it out and away while keeping the copper static. You will figure it out or something similar that works for you not to worry. You do not need CA for the back of the plate it already has a contact cement type glue on it. You will need to seal the hull tho to give the plates something to stick to. Most use a sanding sealer. I found it would be expensive as I didn't have any and so used primer paint that came with the kit. My thinking was the primer will seal the planks but remain porous to give the glue on the plate something to grab onto. To lay the plates down on the hull I place the left side corner of the plate, working from the stern, loosely exactly where it needs to be and adjust the line of the plate with tweezers holding the right side. Once in line up press it down with your finger. Do an area and then burnish pressing the plates down smooth and tight. You can press them quite firmly without removing the impression and it will actually improve it imho. You barely need any overlap, just a little not a lot. Hope this helps for you, it is a tricky one but gets easier as you go. PS I had enough copper to do the hull twice so don't worry to much about wasted plates. Use your best!
-
That is not the cruiser sitting on the shelve below? You are giving me a good idea of what to expect when I get around to starting mine. Slow going now but you are doing a good job figuring it all out
-
Wow bud your doing great. Some of your solutions sound good to, easy fixes like the barrel or a coil of rope to hide any small issues. Just a thought have you tried slipping a pie shaped wedge of wood into the gap between bowsprit and stem just to see if it would look alright. Your rigging is looking top notch too
-
You are probably correct Keith, but the way the model presents it is a touch confusing which is why I asked. Thanks for the great response.
-
Hi Keith, your doing a great job with her. I have the Terror sitting on the closet shelve for a future project and will enjoy watching your build. I am also quite new to ship modelling but can't help but wonder why there are no bulkhead stanchions on the inboard side up from the deck. It confuses me because what holds up all of that planking on the Real Ship. BTW great job with the wheel it looks excellent. Are you watching AMC while you build her It's available with Canadian Amazon Prime.
-
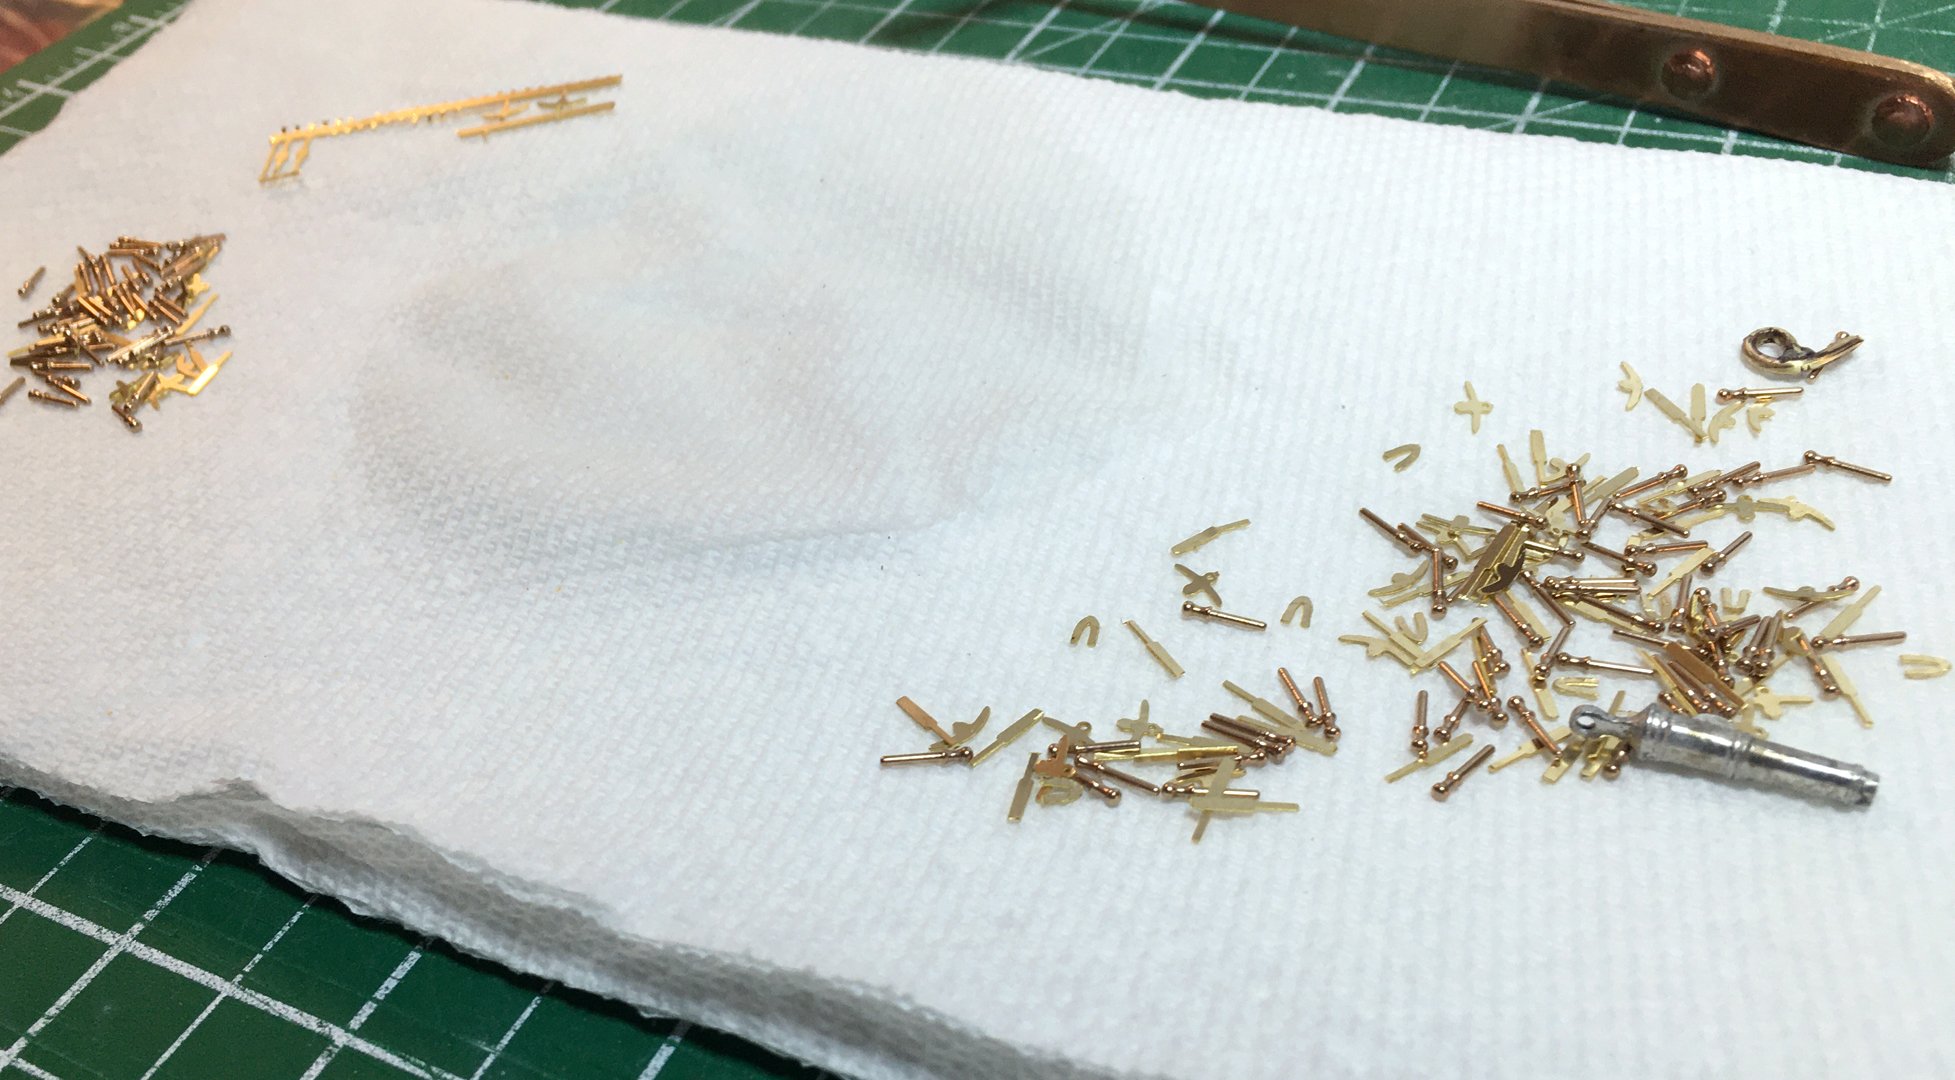
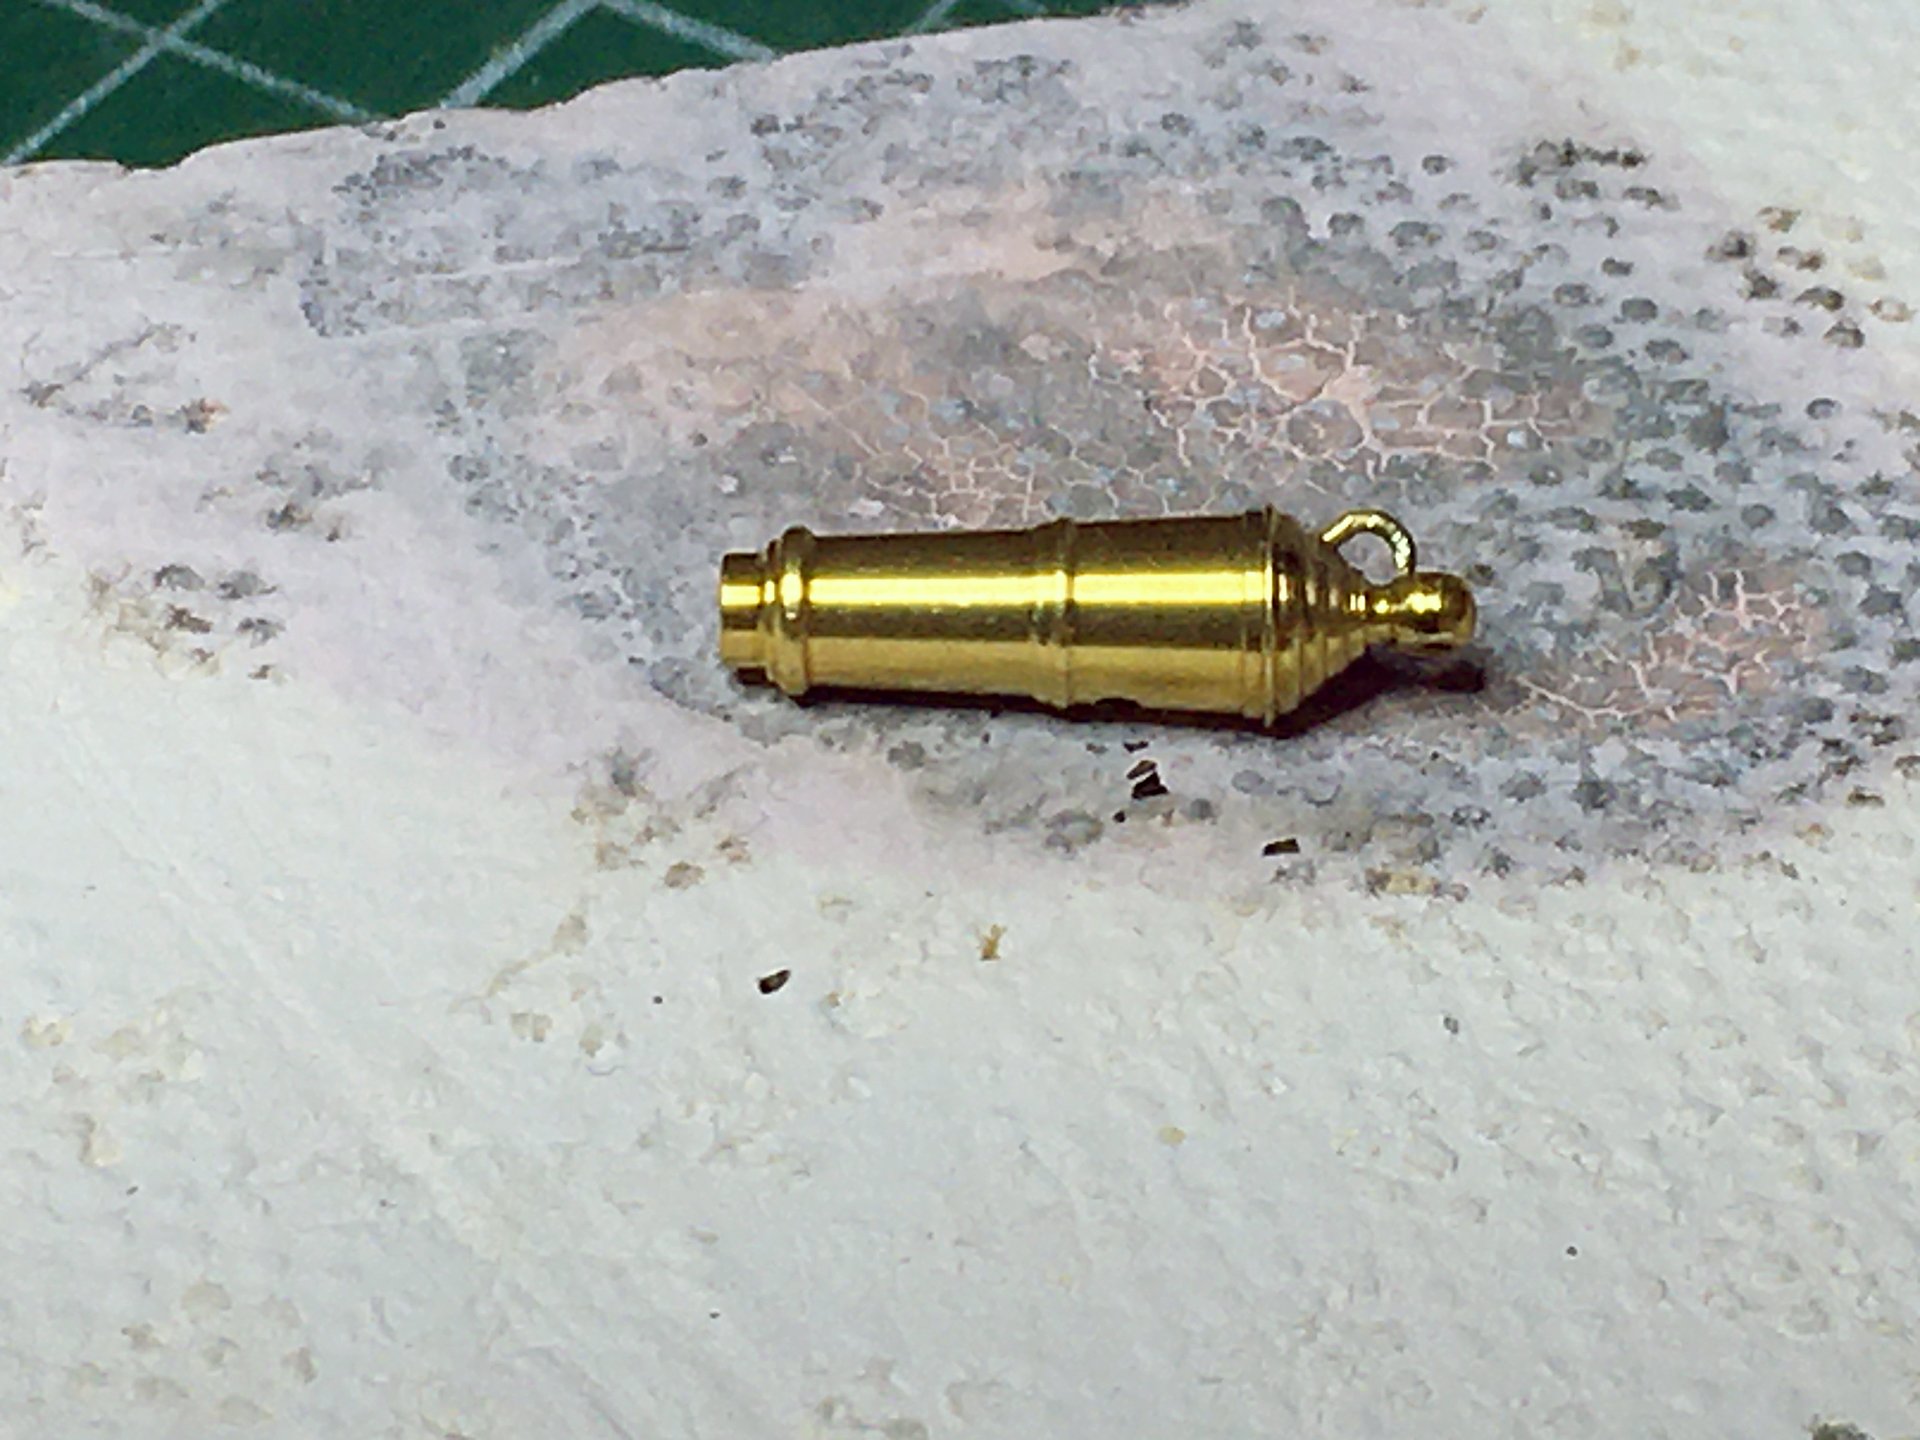
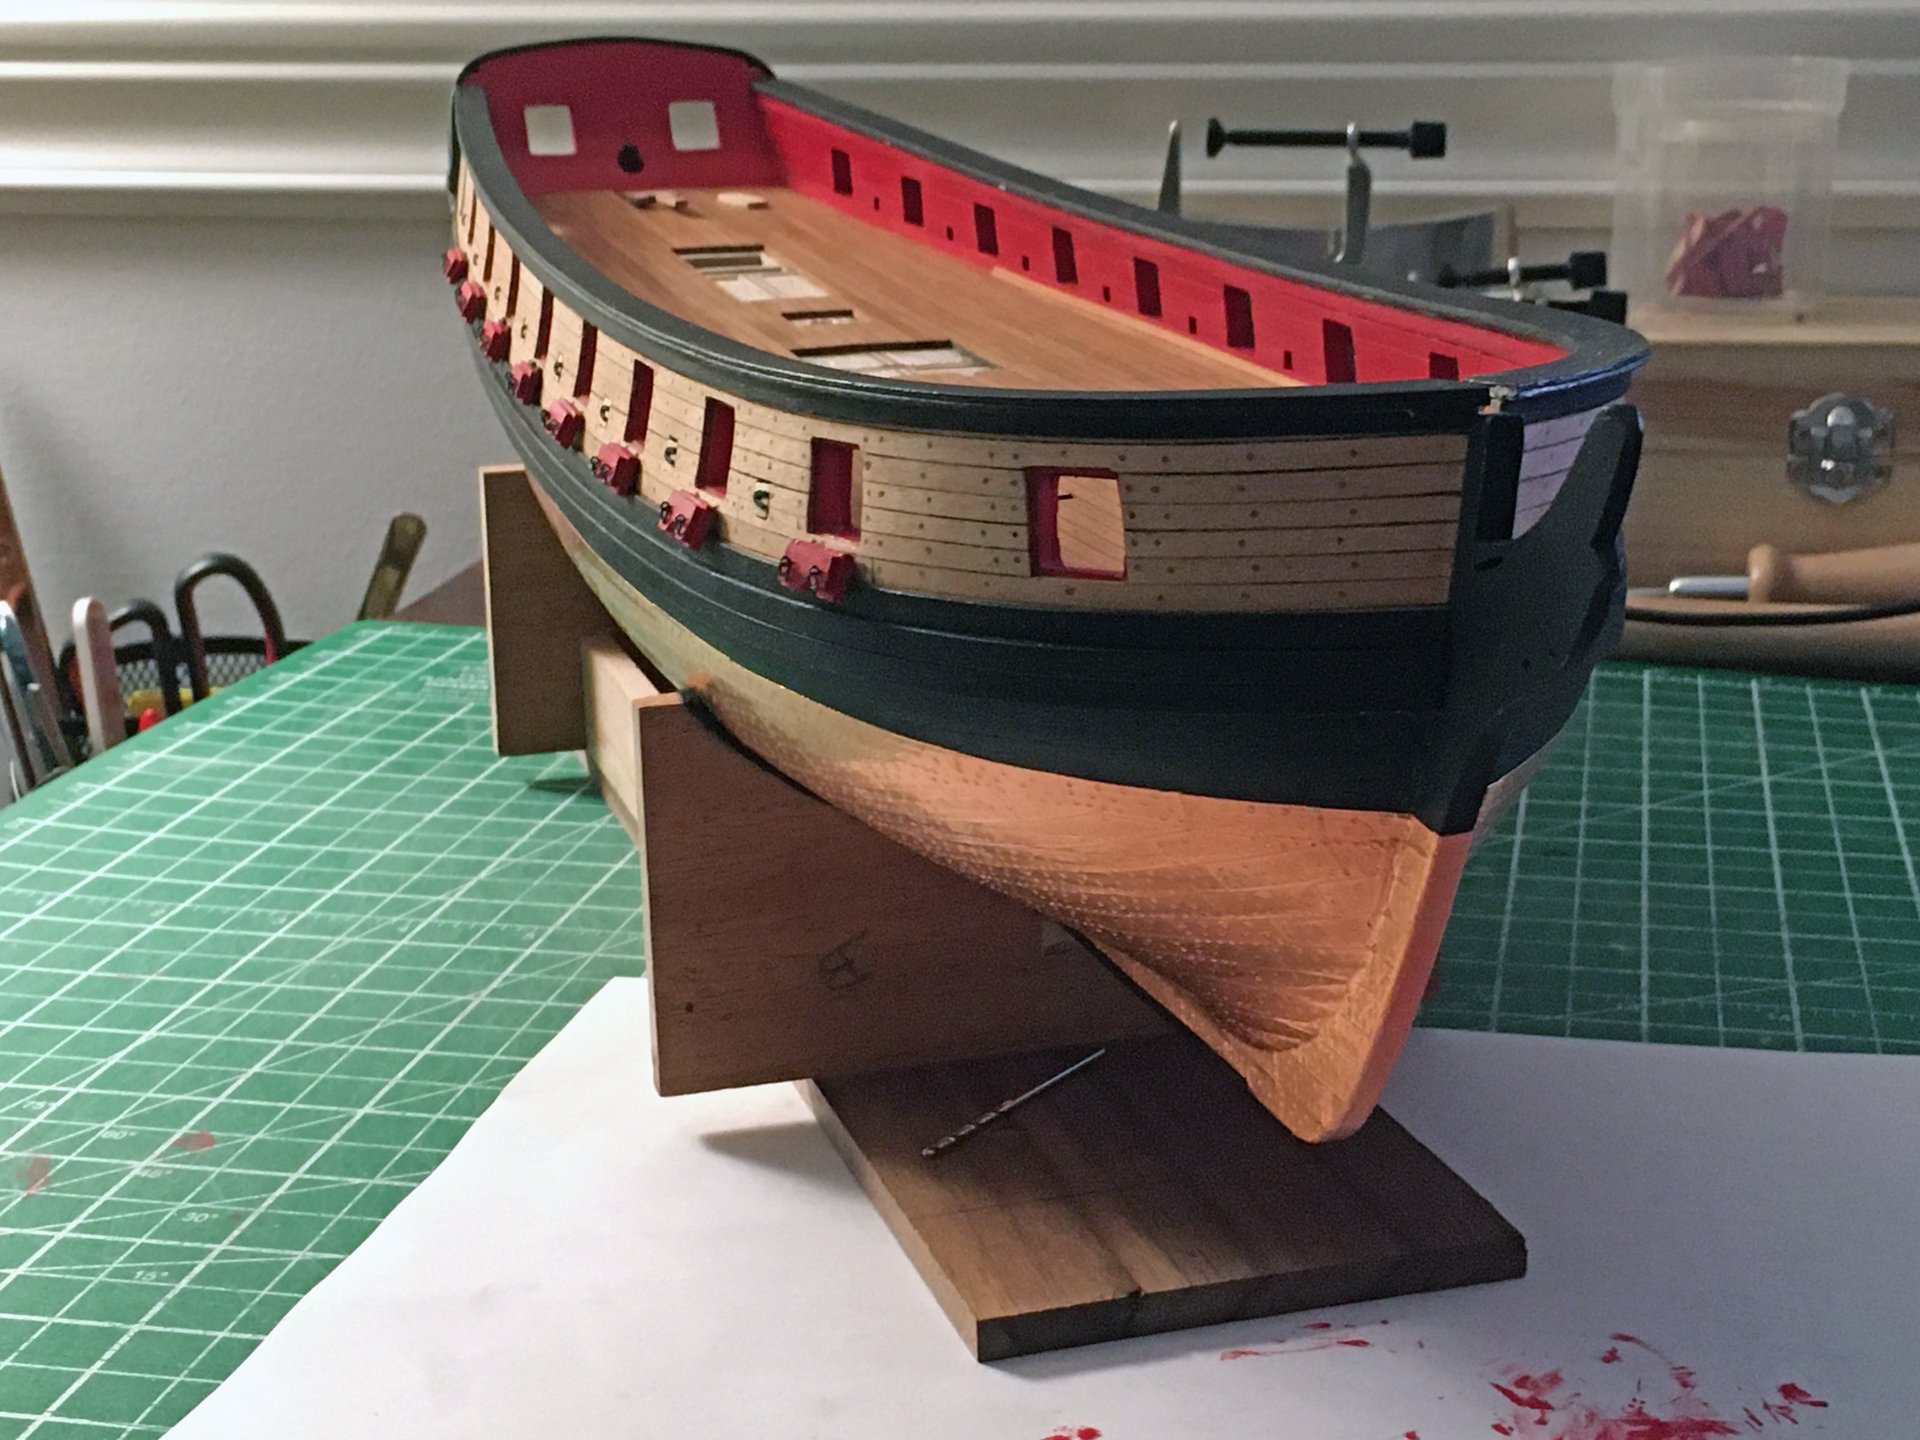
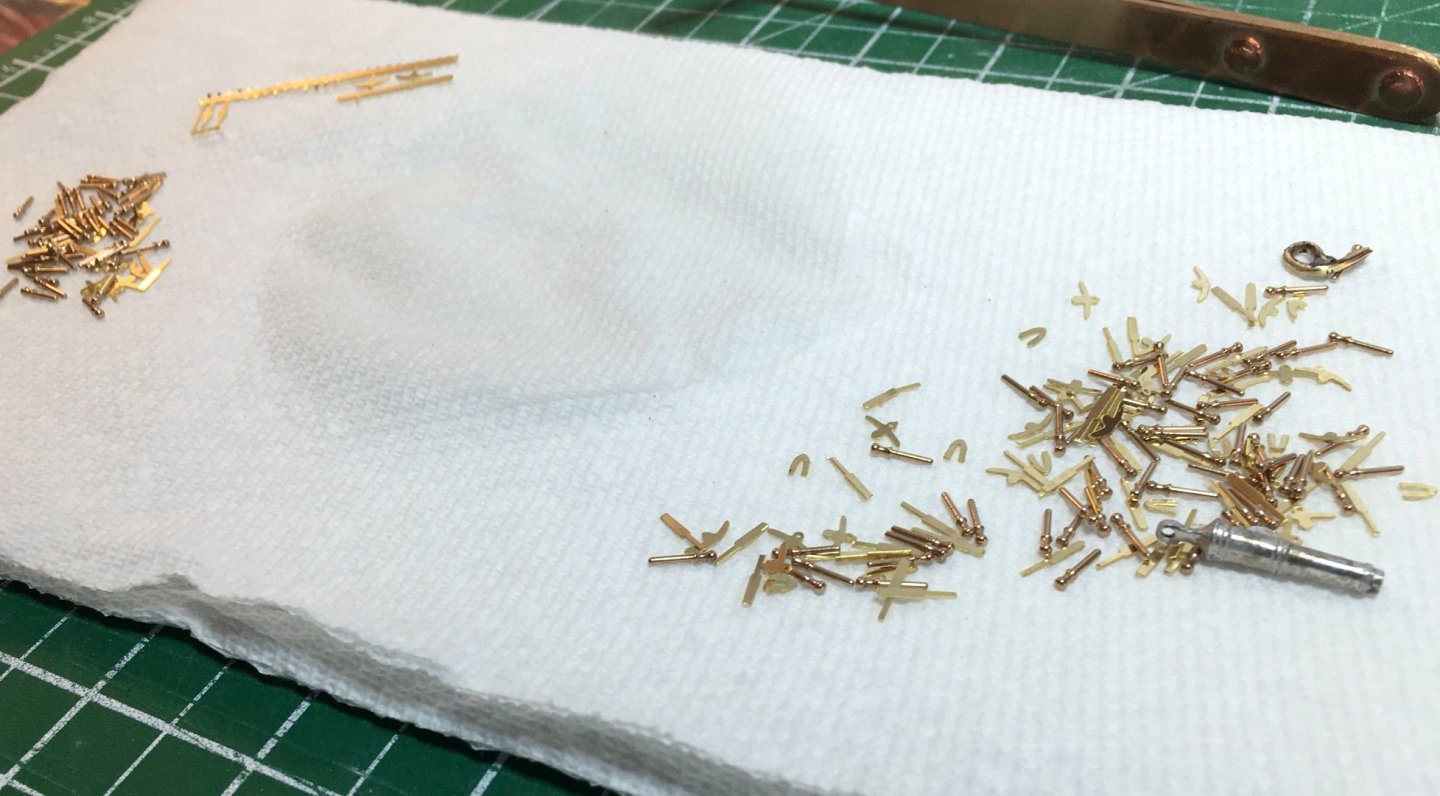
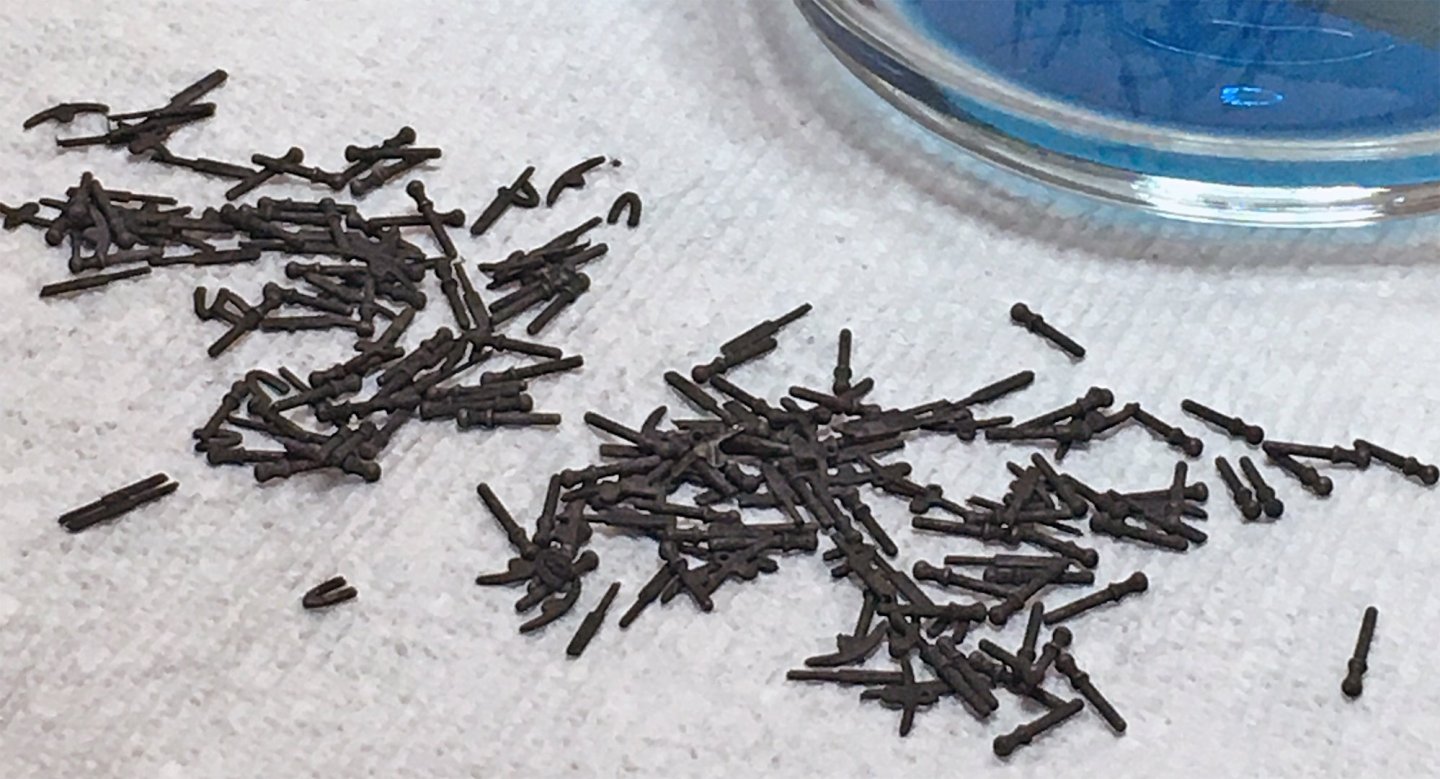
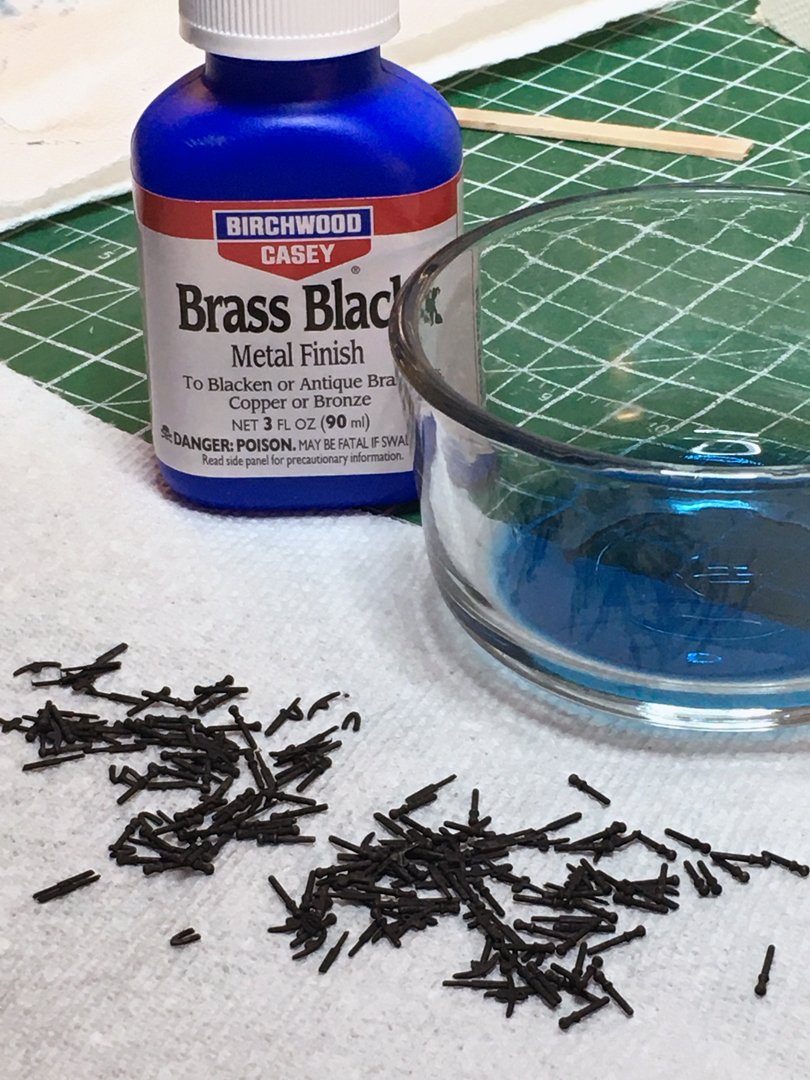
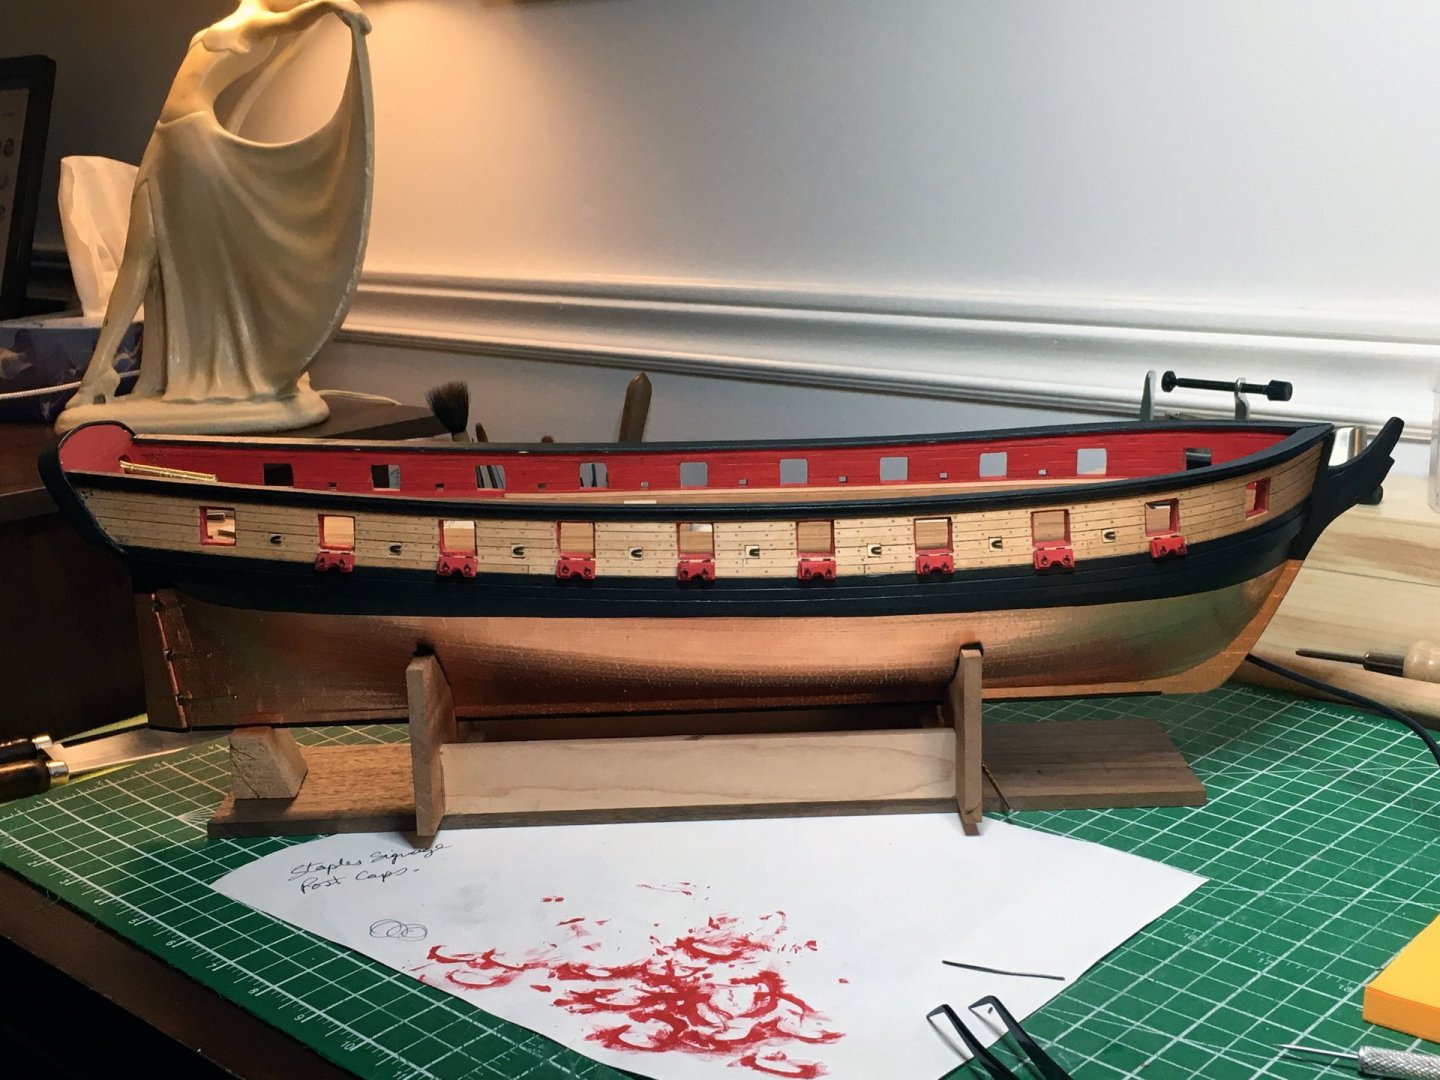
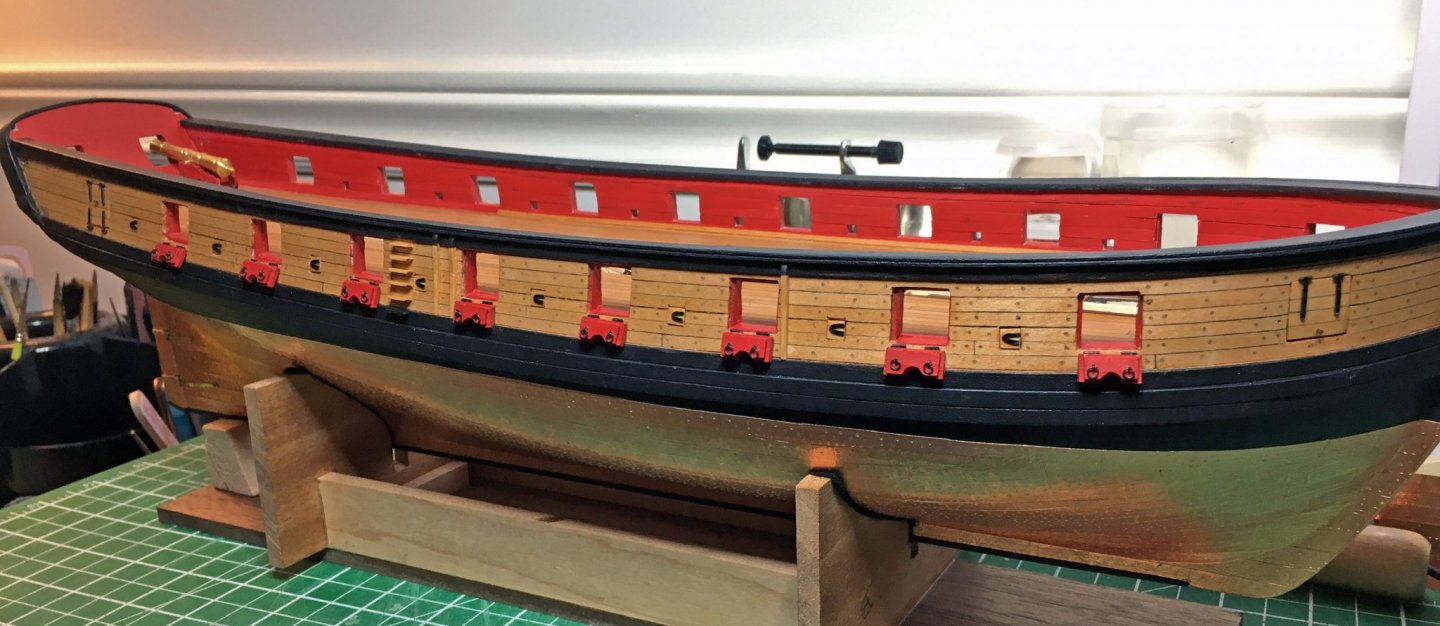
Time to start thinking about blackening brass parts, eye bolts, photo etched hinges etc. Got some brass on order to make the mounts for the carronades. Did up my first breach ring as a test. Used silver solder which might have been a mistake as I forgot to test if the casey brass black would blacken it and it does not! fortunately I got next to no run off so I can fix up the one. The 50/50 seems to blacken but I will do some more tests. Got a new toy the dremel vasaflame for soldering. I will have play with it a bit to get the hang of it. Darn thing gets hot fast and will melt small brass parts quickly lol. Before blackening the brass the parts were first cleaned using Sparex no2 which was mixed with water into a warming pot bought from the second hand store. After 1.5 hrs they came out nice and shinny and were then placed into straight Birchwood Casey's Brass Black for all of 7 seconds. I used a bit of cheese cloth over the opening to drain off the casey's into a spare container so the cloth would catch any parts. This worked really well and the caseys was saved for the next time I would use it. The brass turns the Casey's a dark blue. After removing the parts it will clear again after sitting for a while. I have used the same little bit of Caseys several times now. You only need a small amount depending on the size of the pieces you are doing. This is my first time using Brass Black so your results may be better or worse but I found it worked quite well. I tried doing a bunch of little parts without acid washing them in the Sparex and they came out just fine to. First pic the parts have come out of the Sparex cleaner and been rinsed off before going into the Caseys. Second & third pic: after 7 seconds the Caseys was drained off into a second container and the blackened parts were rinsed off. My new toy First attempt at a carronade breach ring I'm fairly happy with the results so far. It is my first time for a lot of this stuff. Happy to be at a point in the build where I can finally start adding some details. This will be my last update for a little while. As I have finally managed to bring the log to the point where I now stand in the build. I expect to working a little slower now also because I am managing a very large group of mostly seniors and people at risk some in isolation though the present crisis going on in the world. As a result I haven't touched the ship in the last couple of weeks but will try and get my heart back in it and get going again. Last few pics, I started in on the outboard hull details, gunport lower covers, sweep port covers and the port fore and aft covers with hinges. Boarding ladder is installed and the bumpers and chesstree. Thanks to all of you who have come on board and left comments or likes, it really helped spur me on to getting this posted up here. Stay safe all ~ Regards, Robin aka Nova


-
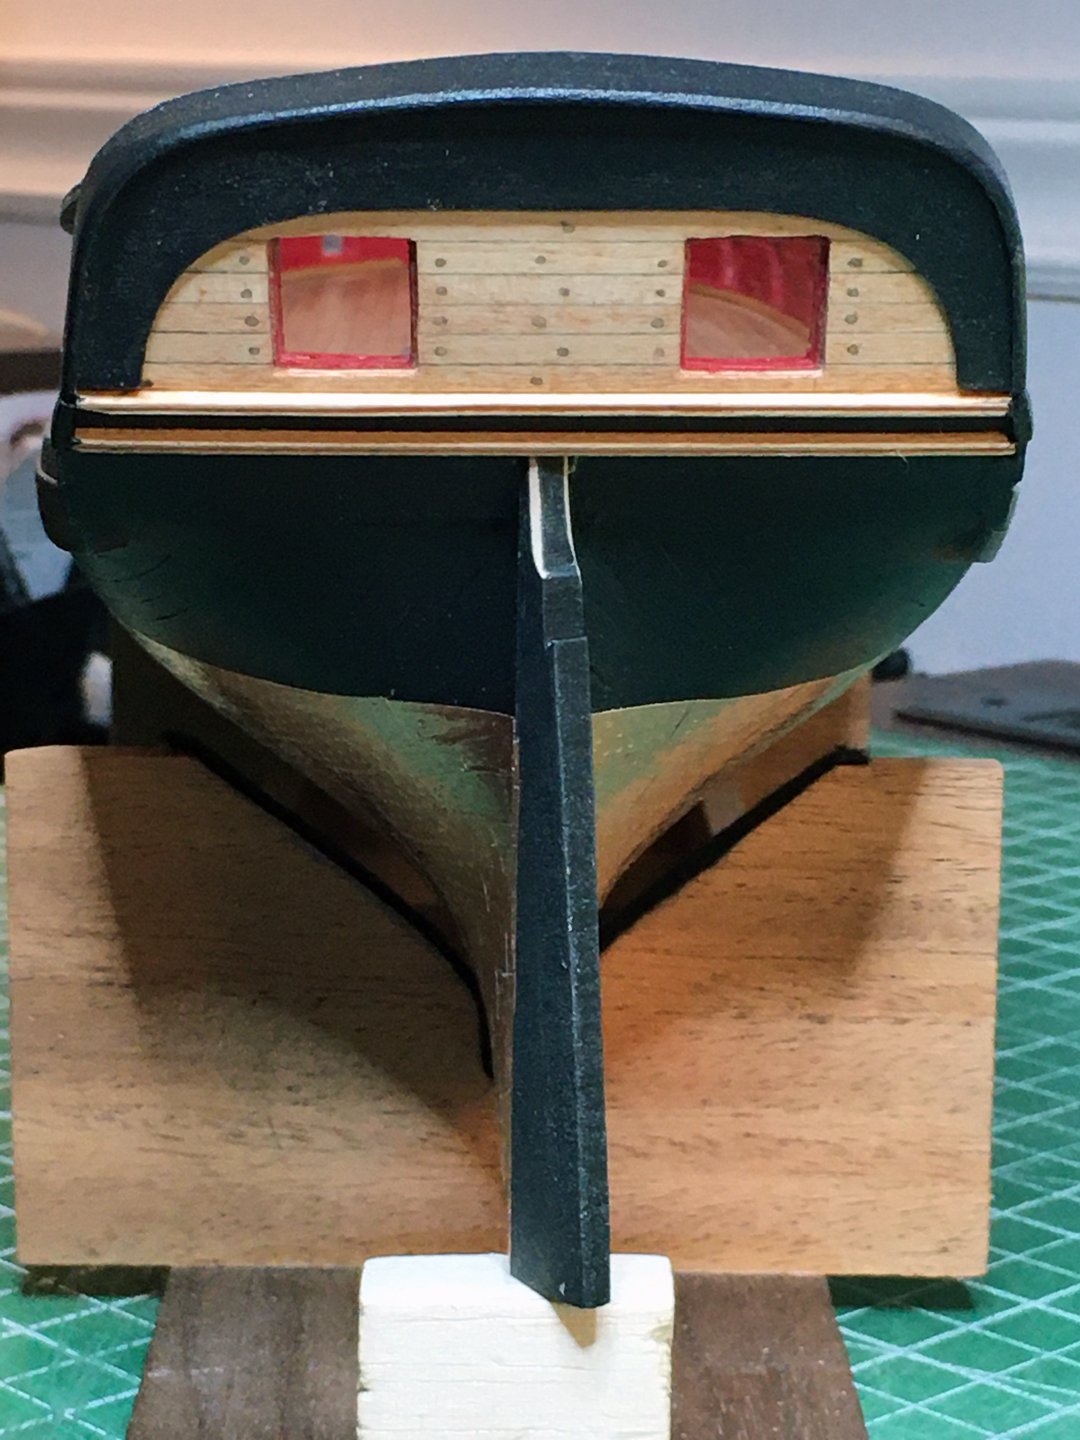
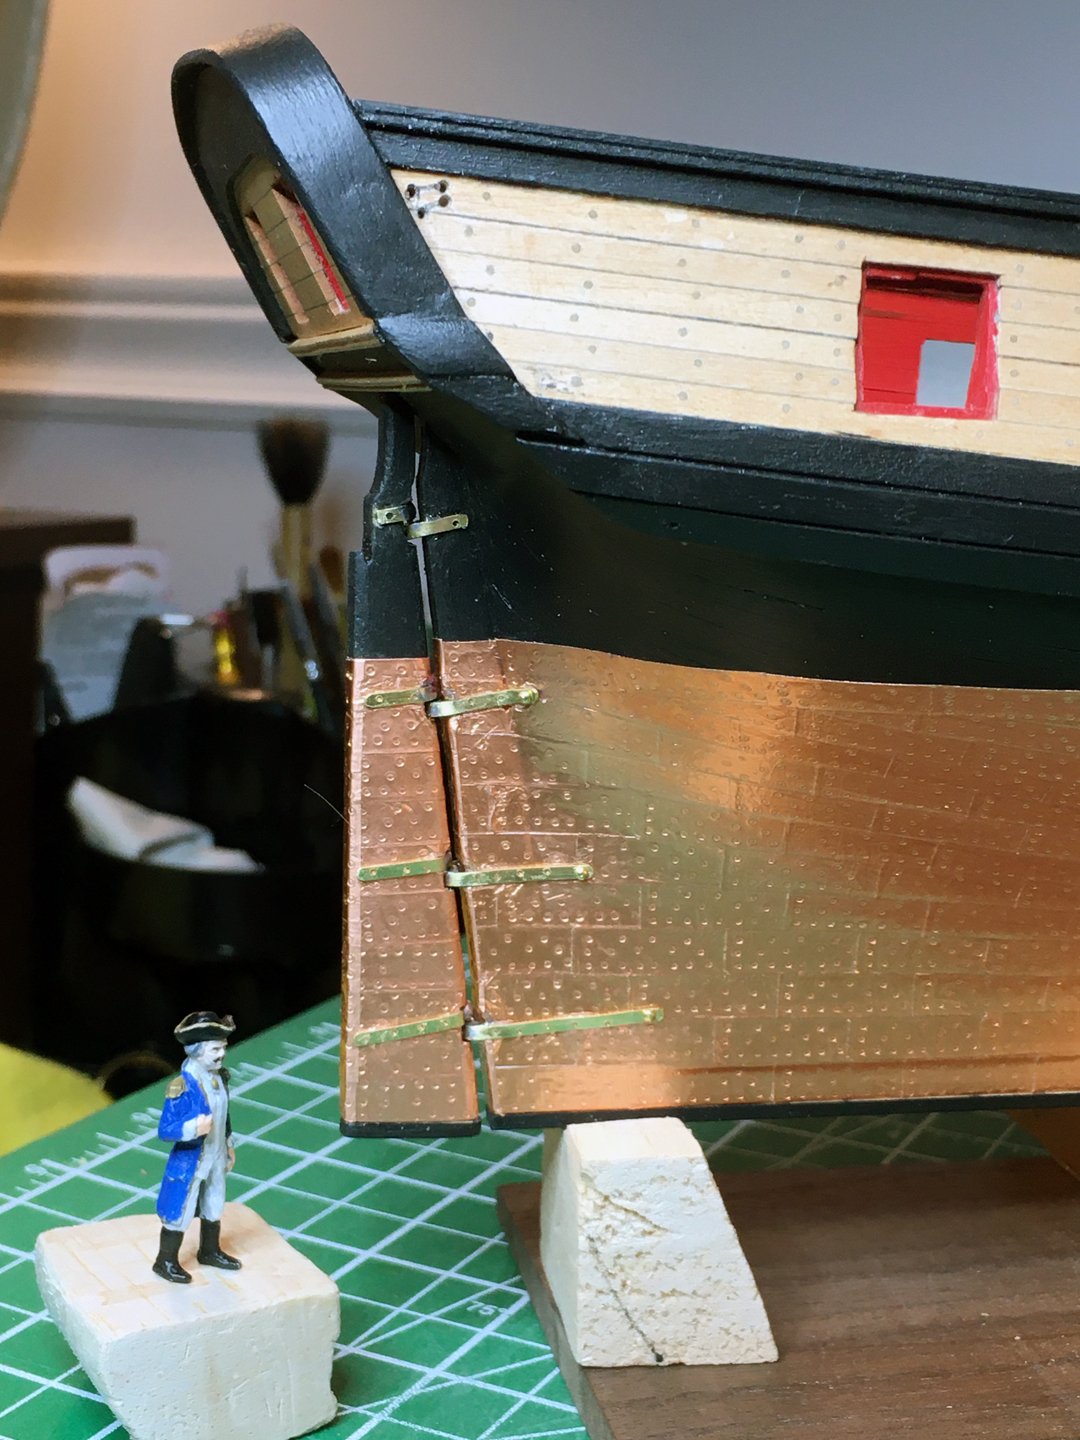
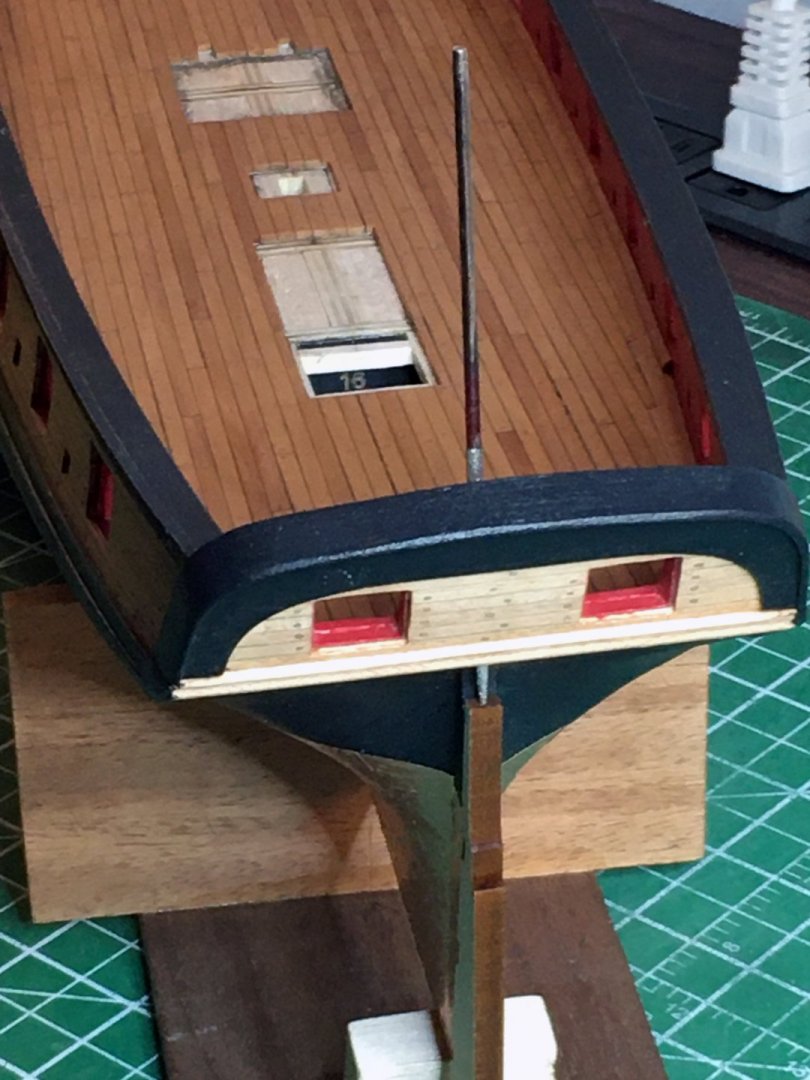
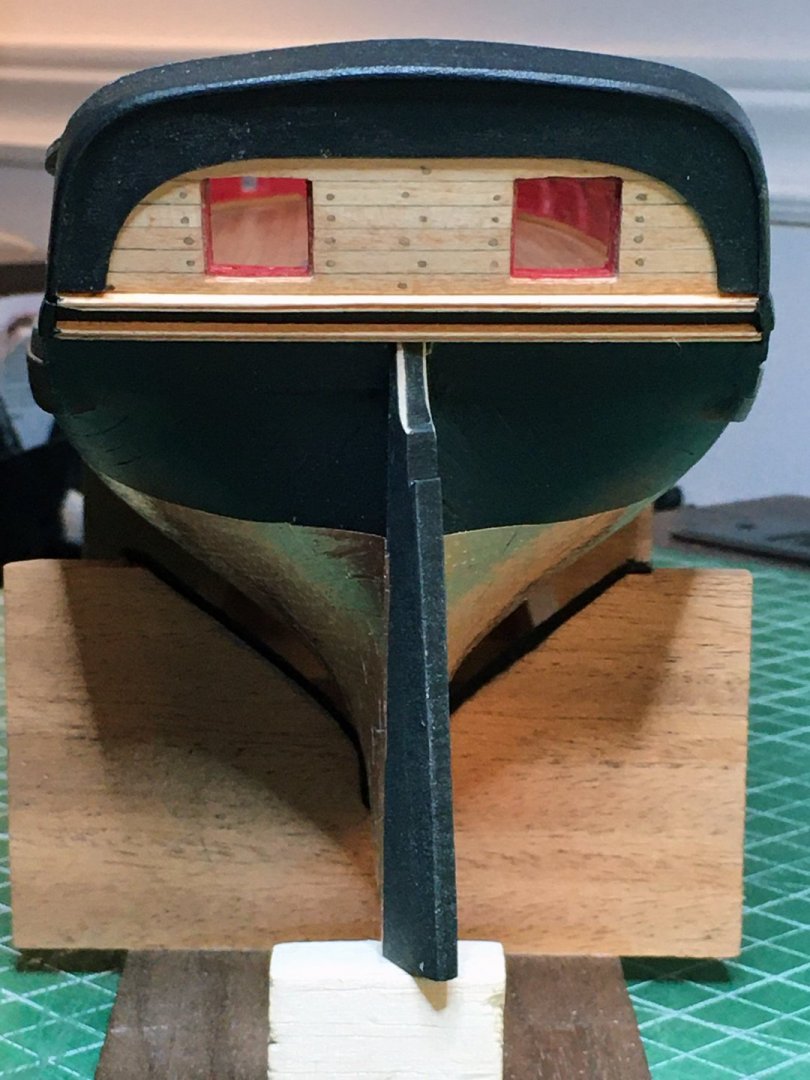
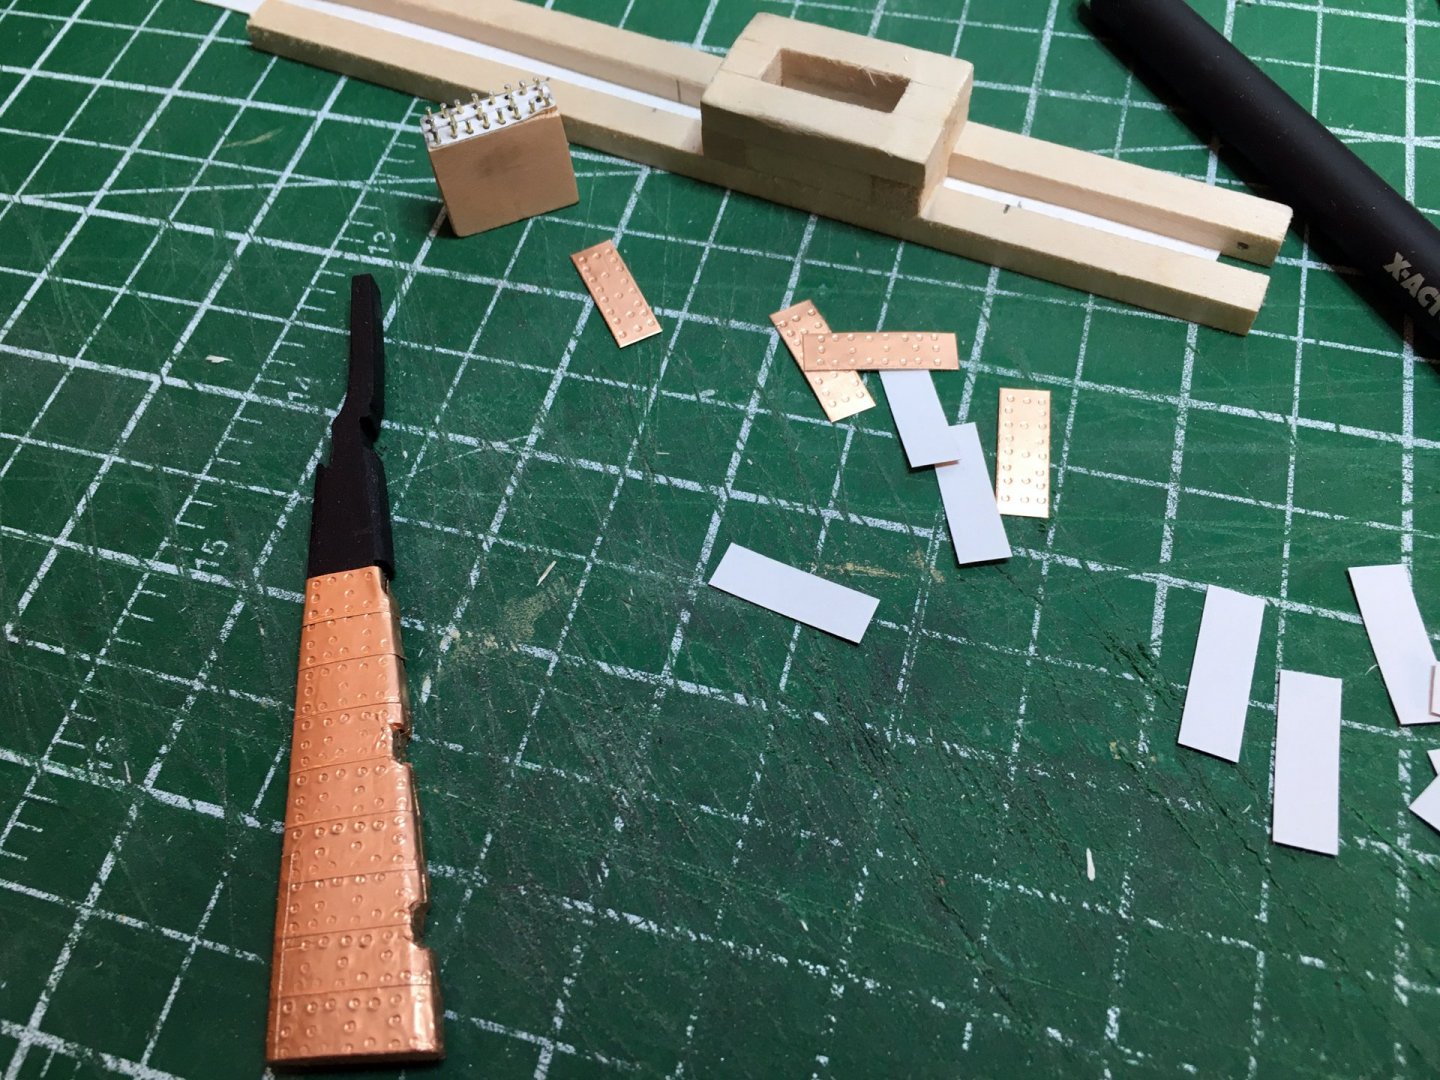
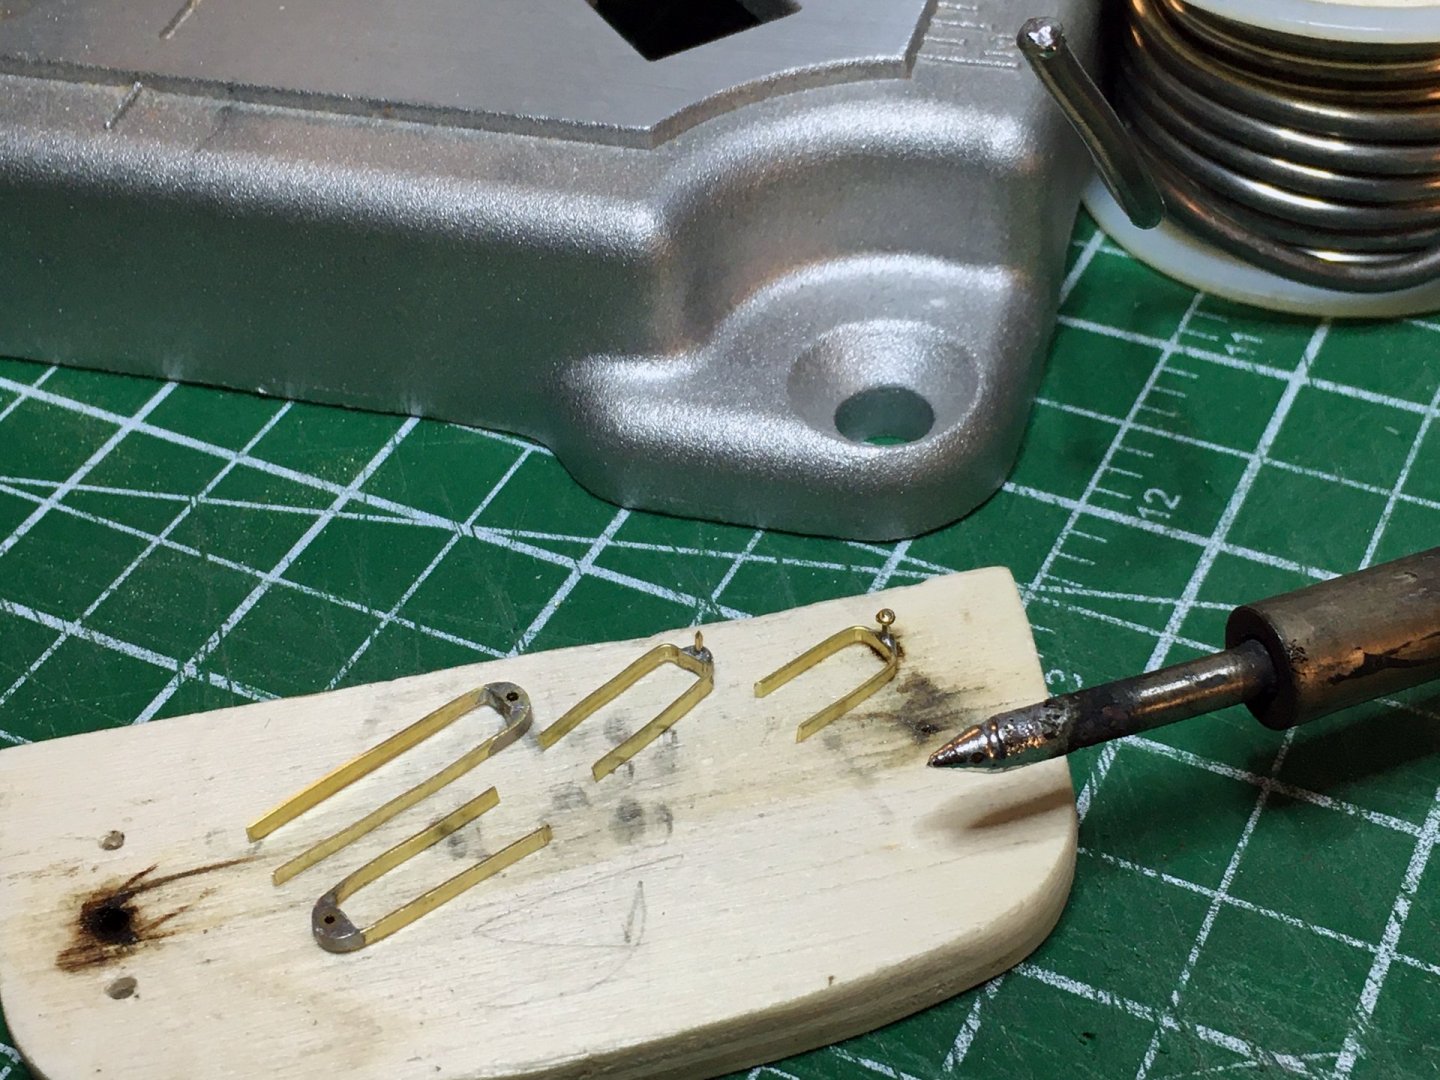
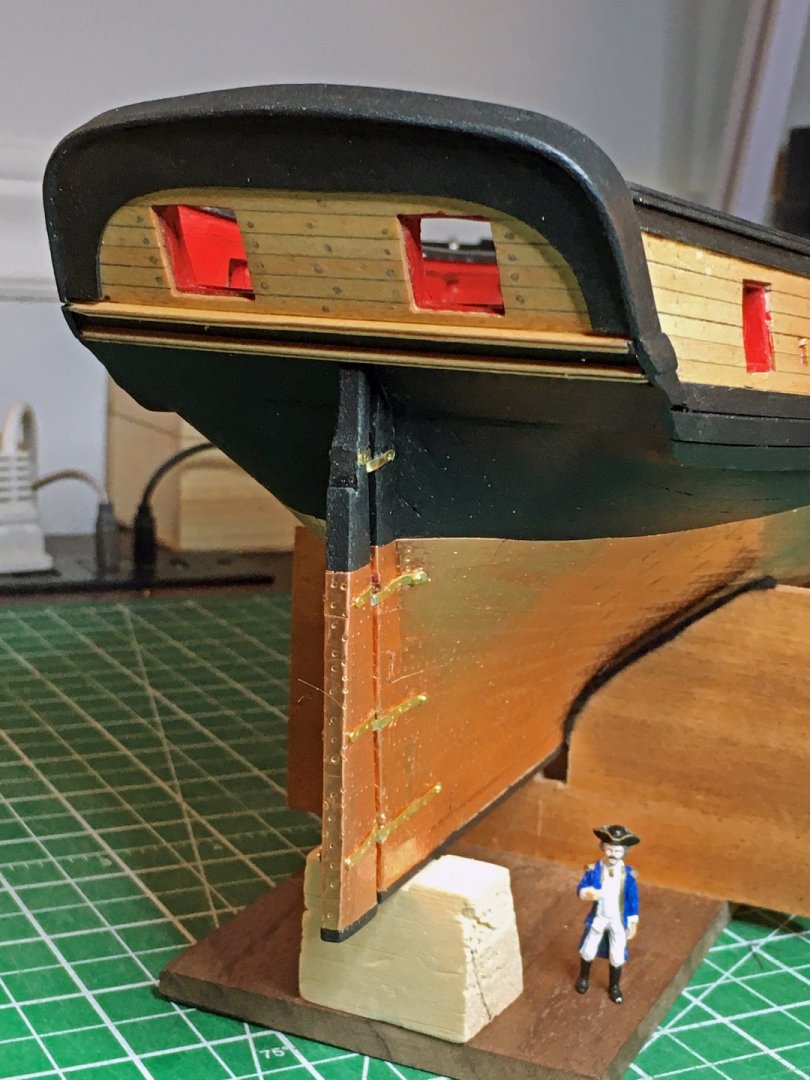
I got the cap rail put on over the transom then the rudder required some shaping followed by plating. I drilled a hole through the transom which was filed out large enough to take the rudder post. The false keel plank was painted black then glued and pinned into the keel with brass nails. Next I began making the pintles and gudgeons a nail for the pintle pin and a 1/16 bit of brass tube for the gudgeons soldered onto 1/8th brass strip. I used 5 min epoxy to glue the whole assembly on with cut down brass nails to secure it.


-
Thank you Edward, very much appreciated
-
Wonderful log, exceptional build of one amazing schooner I think they could of used you down in Lunenburg for the metal work on the RL II. would have saved them a ton of money. Will look forward to following through to the end.