HOLIDAY DONATION DRIVE - SUPPORT MSW - DO YOUR PART TO KEEP THIS GREAT FORUM GOING! (Only 13 donations so far - C'mon guys!)
×

NovaStorm
-
Posts
321 -
Joined
-
Last visited
Content Type
Profiles
Forums
Gallery
Events
Everything posted by NovaStorm
-
 Fantastic bit of detail adding the engine Richard. Just enjoyed going through all the photo's from your build again. I see you painted around the outboard edge on the main rail and monkey rail. Most do I think because the BII was done this way. Looking forward to your next installment Cheers ~
 -
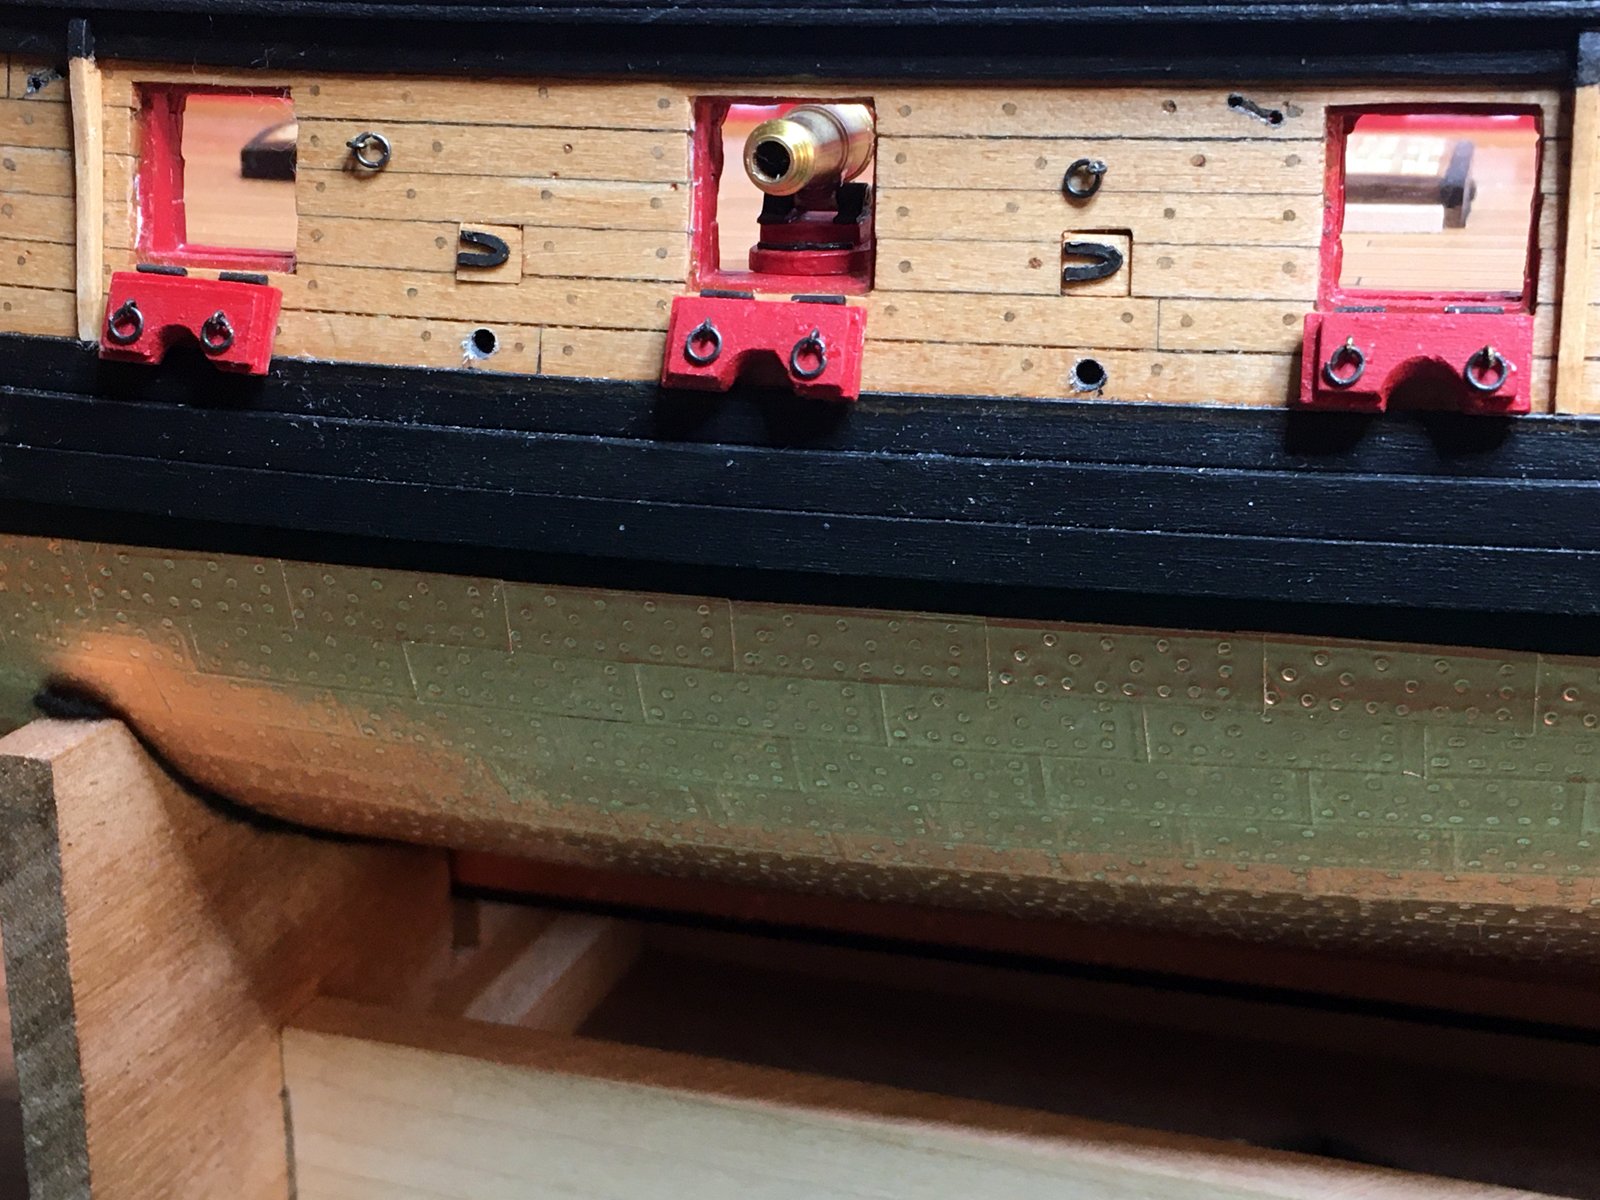
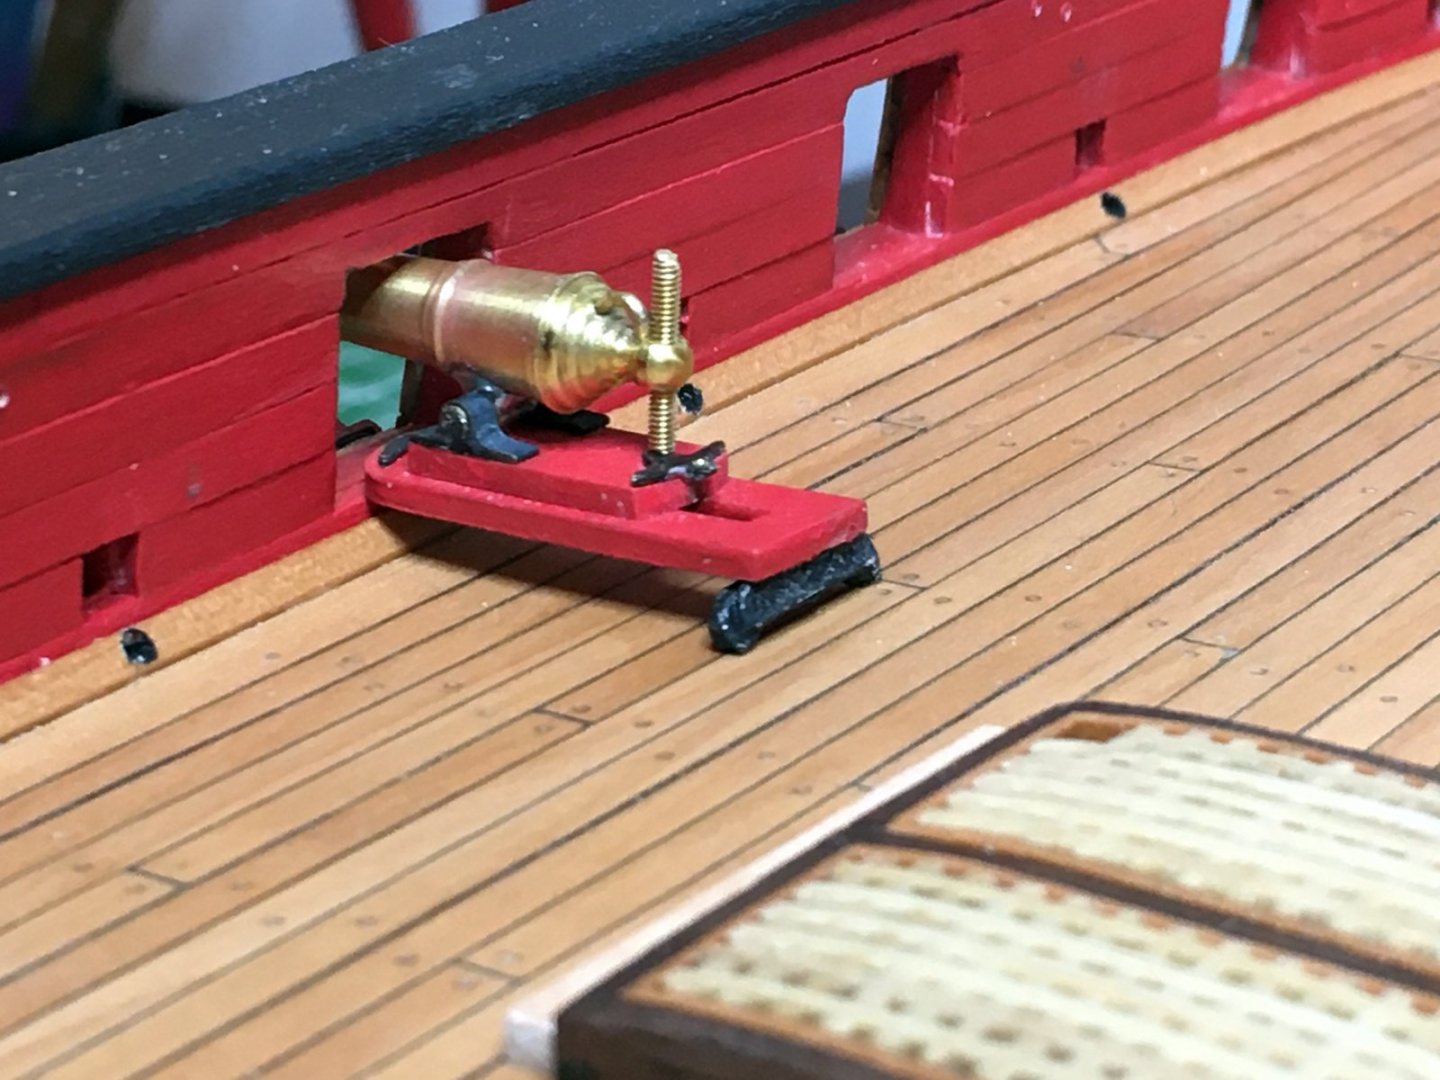
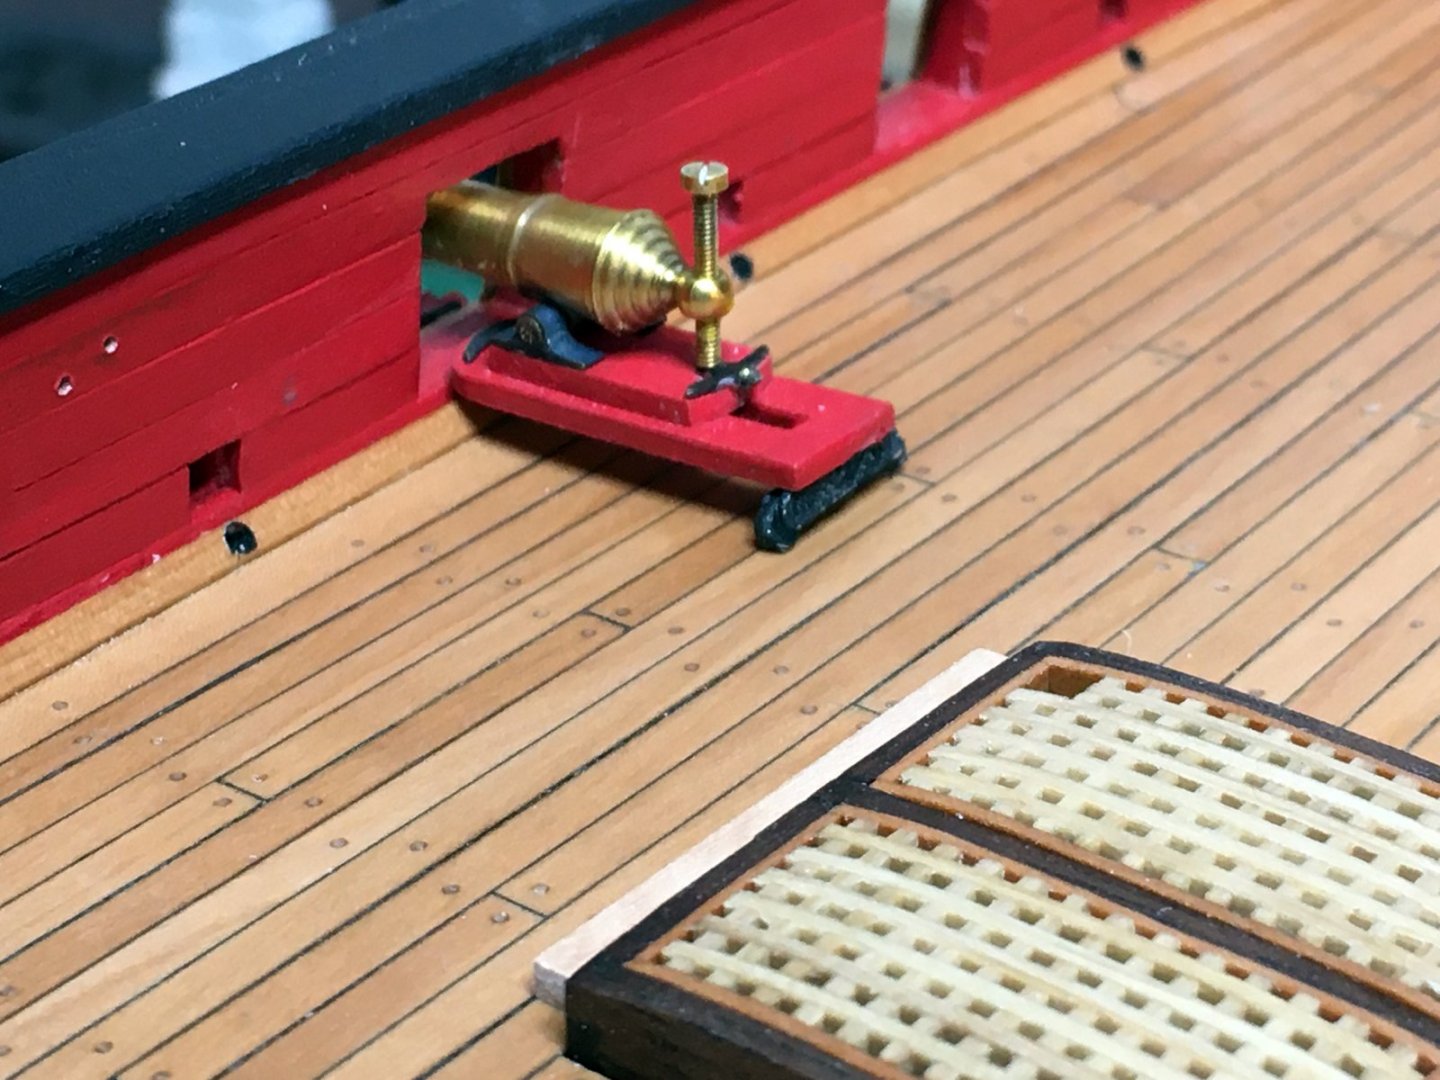
Believe me it has been a treat working with pear. The guy who cut it for me did such a precise job, the planks were all exact. He is really happy with how it came out to. Thanks for the great comments Thomas it was exactly as you predicted. I tested one carronade out in the ports and it was sitting to high. I removed the tube filed into the carronade with a round file and re-soldered the tube inset into the carronade. Big difference. I will go a little bit deeper with the recess on the next ones. Appreciate the heads up. Here are a couple before and after pics Original before filing First Pic After Filing Second pic Original Before Filing After Filing Shots taken with carronade set level with the sled Thanks again, Cheers Robin ~

-
Ahhh another Bluenoser eh. Looking good must be nice to be back at it
-
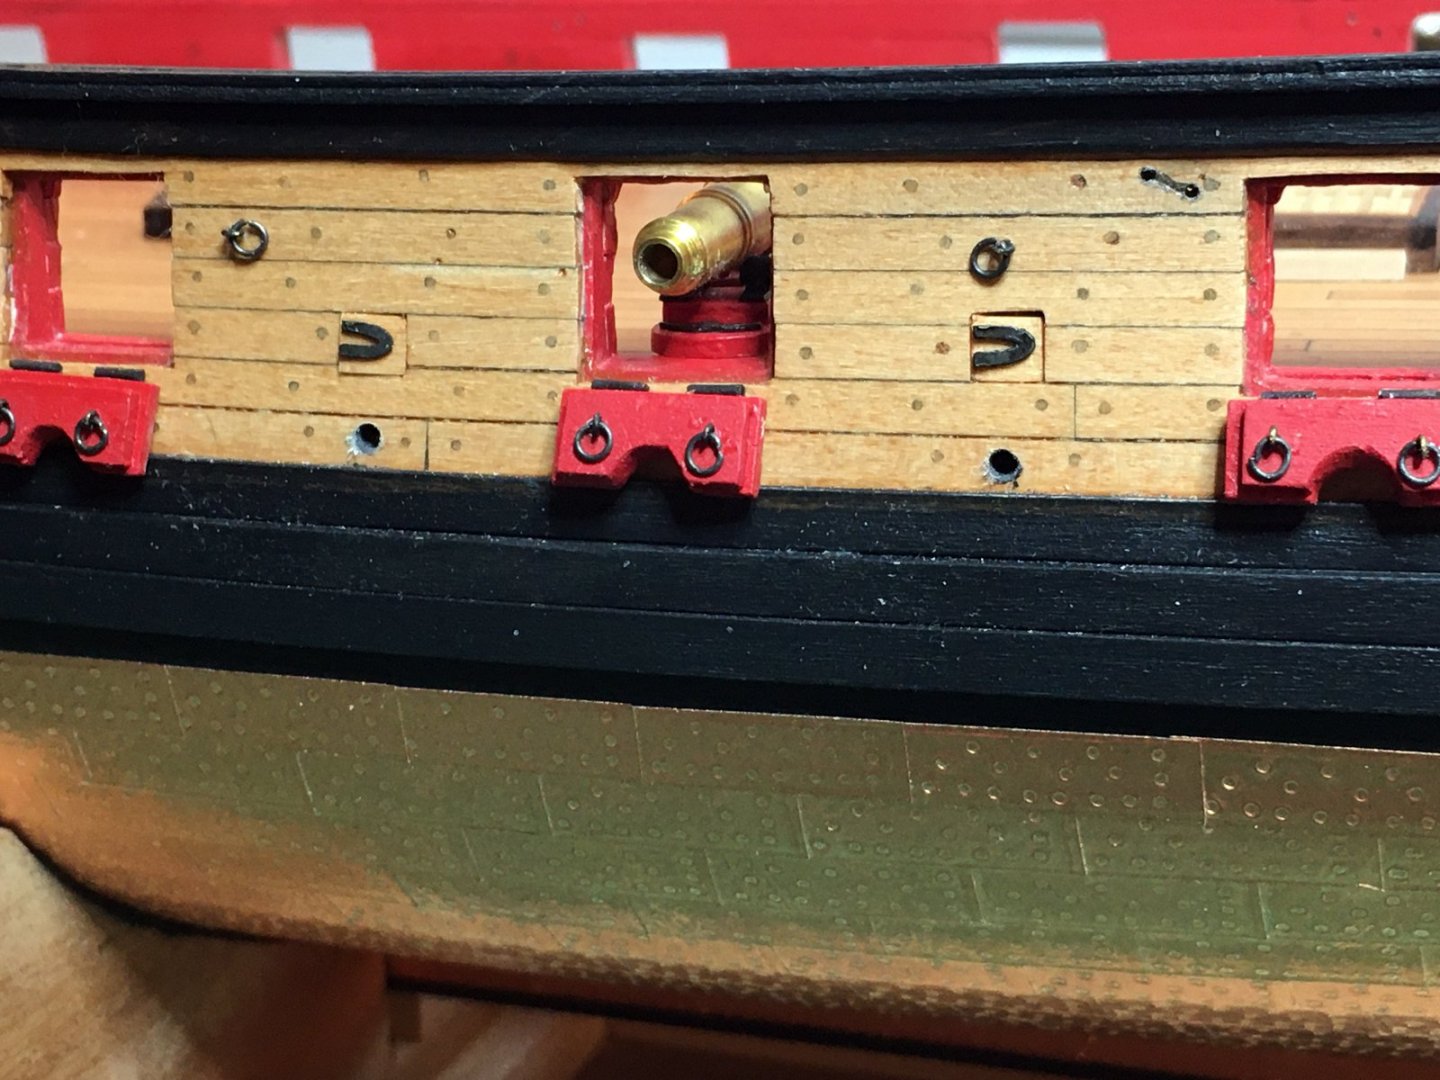
Hi Thomas, great to hear from you . That is good to know I will be trying out a the two I've done up before I continue and be on the look out for that issue. You milled your drilled blocks in a bit too so that makes me a little nervous will have to see what happens. I forgot you milled them into the underside of the carronade. If mine end up looking to high I could file a grove fairly easily which would make soldering even better and easier. Thanks for the heads up!
-
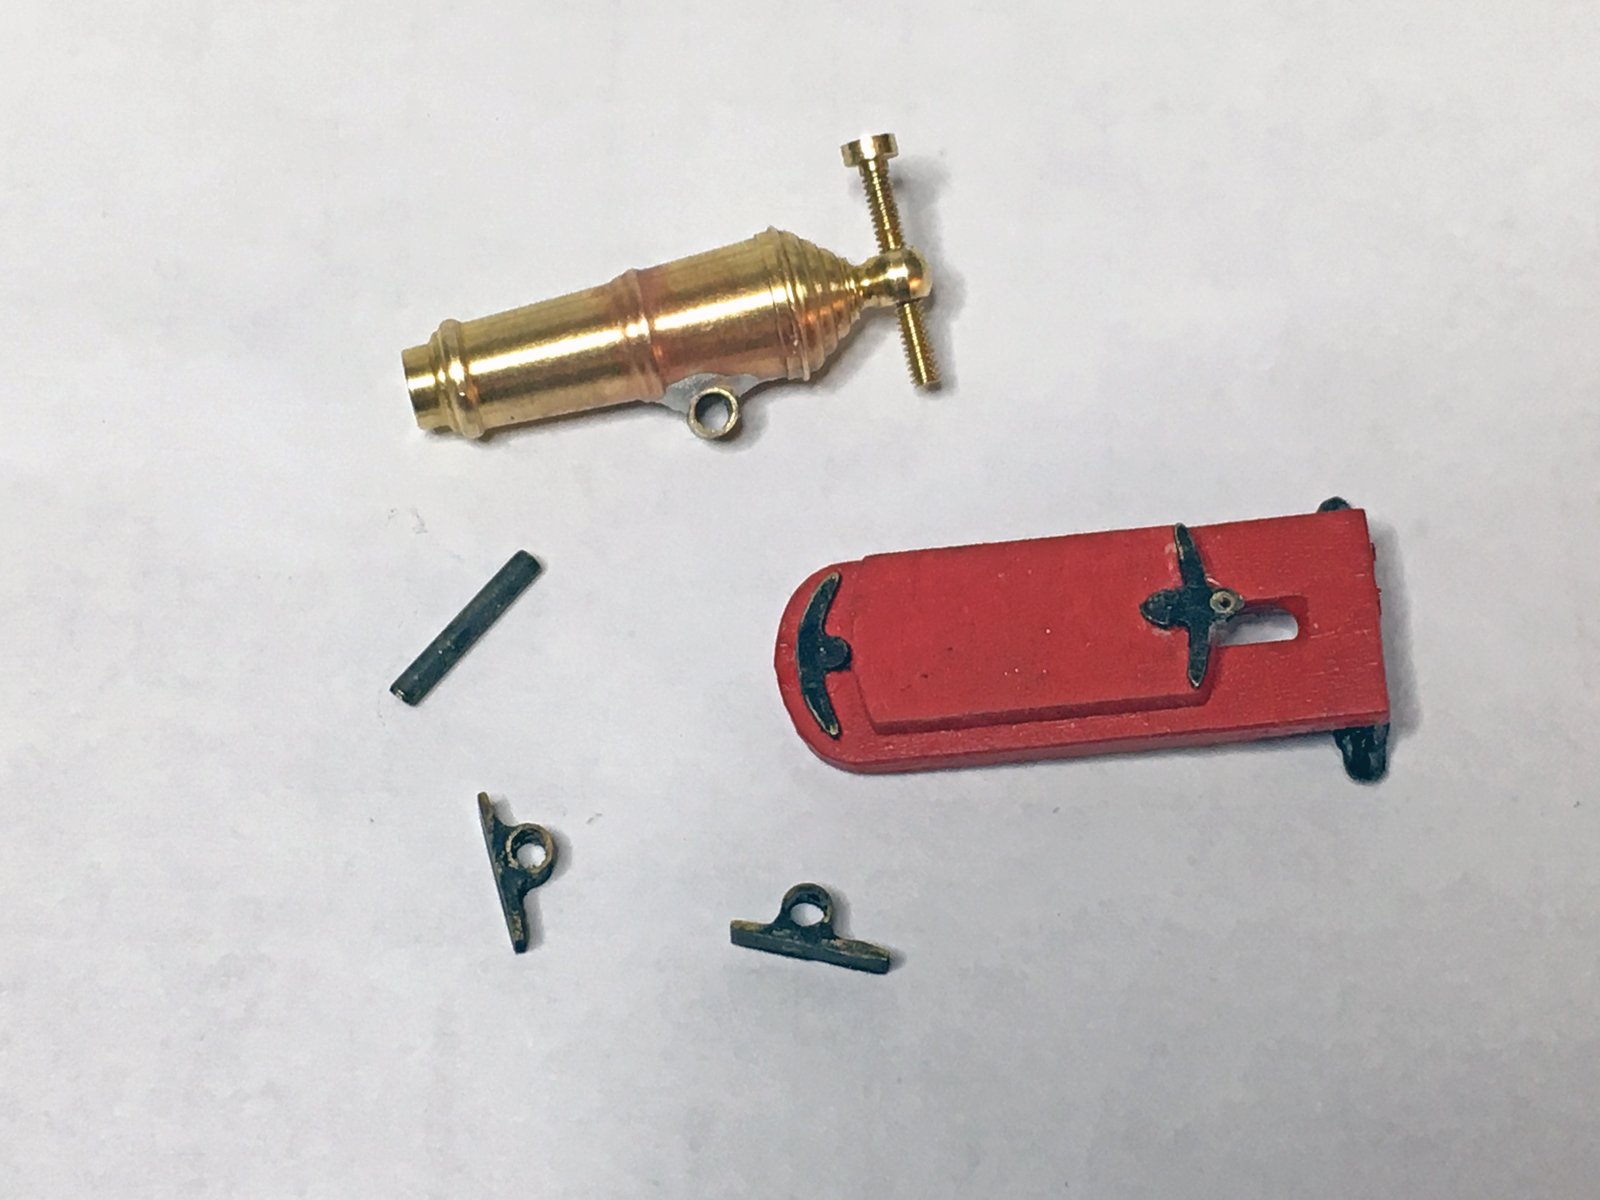
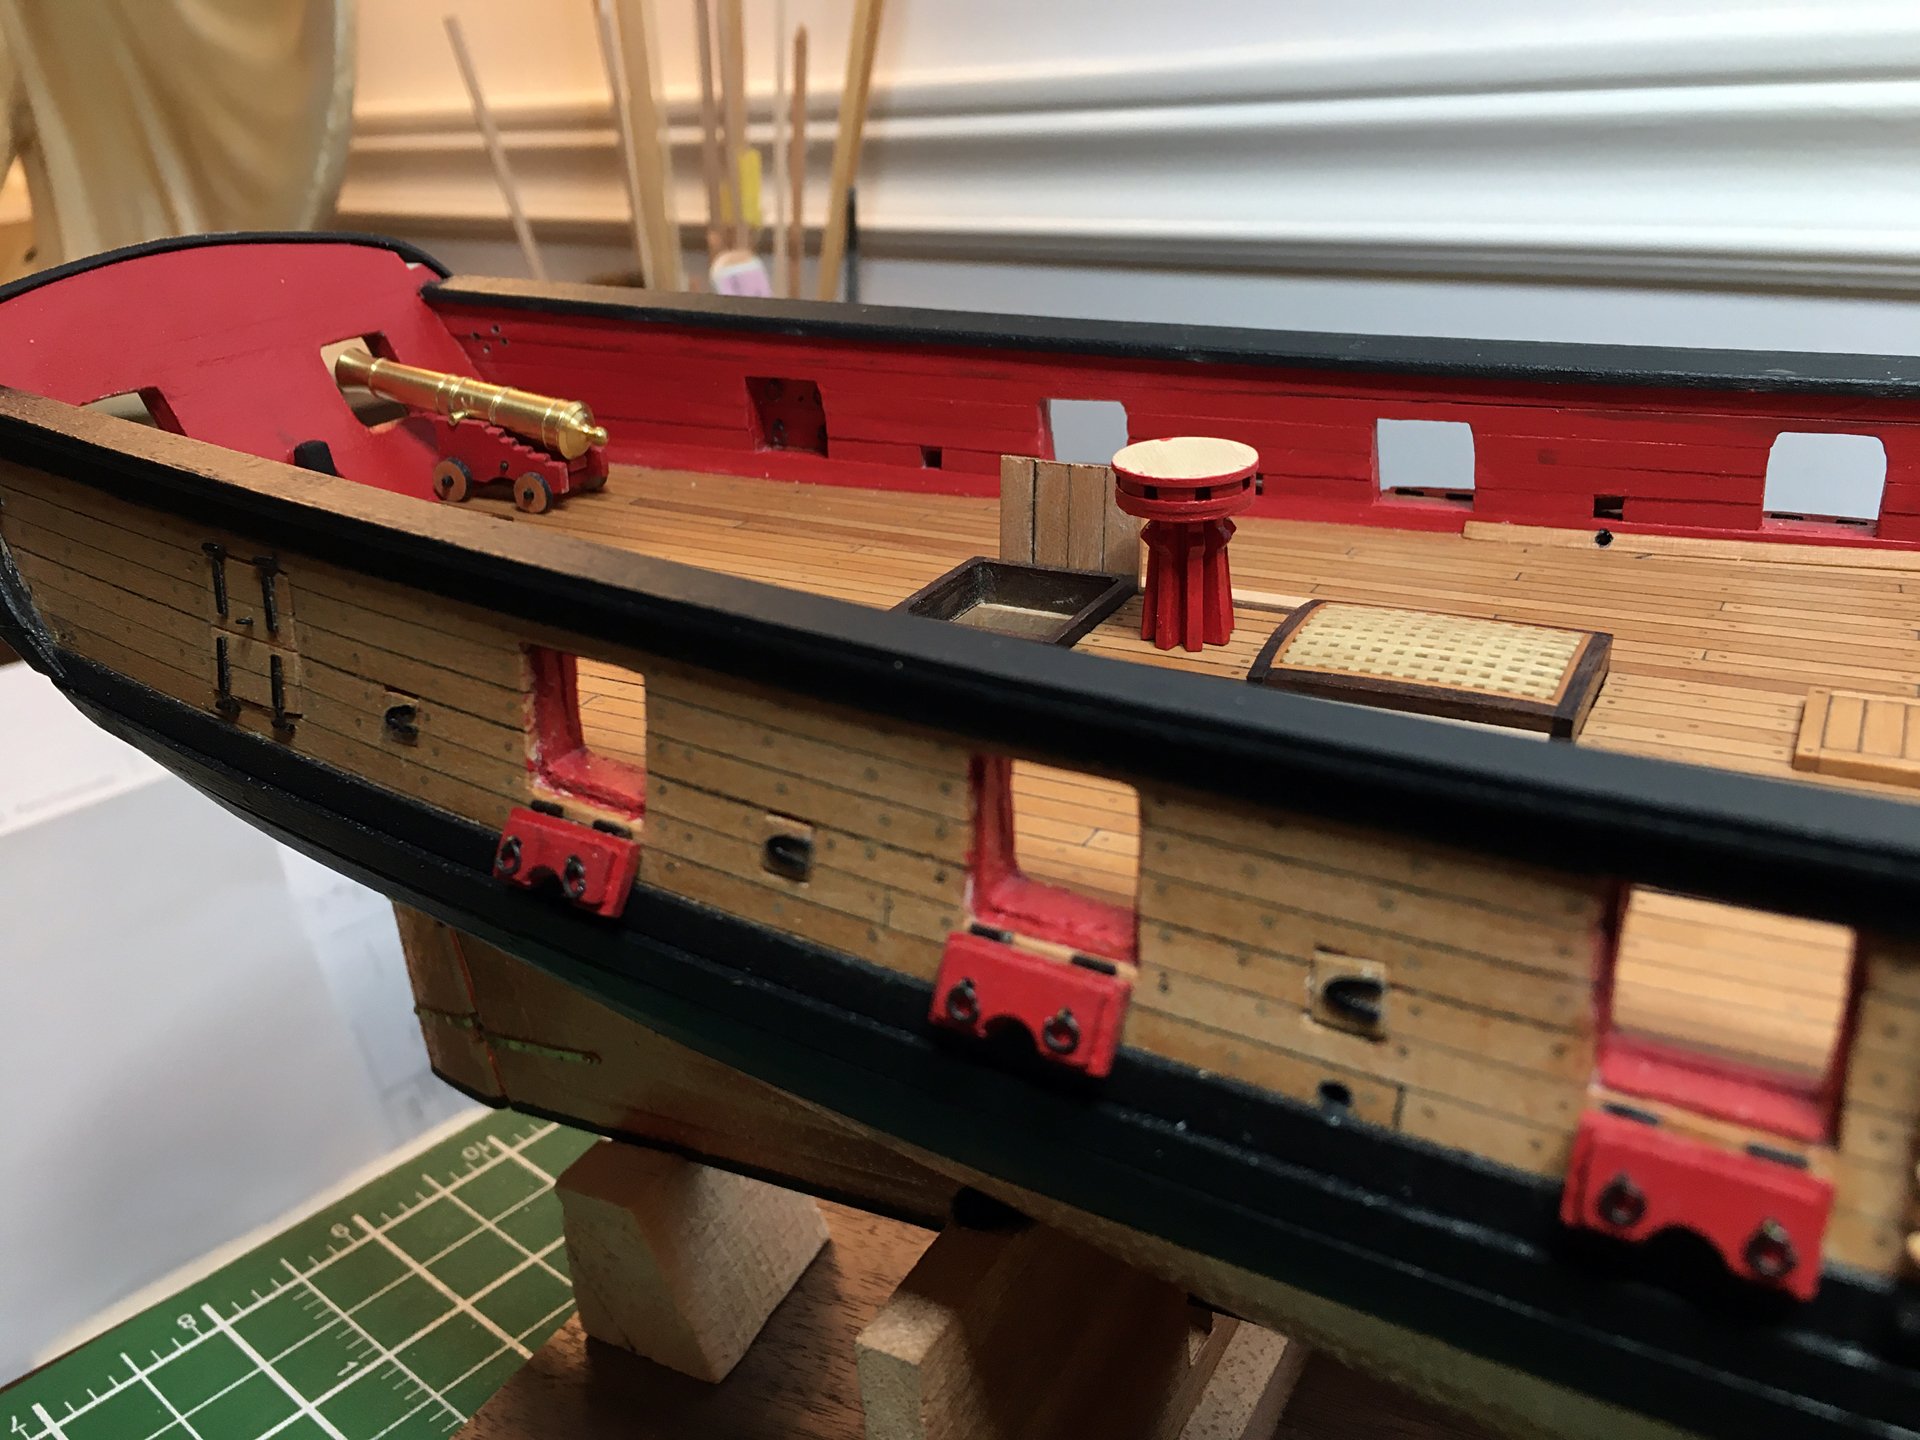
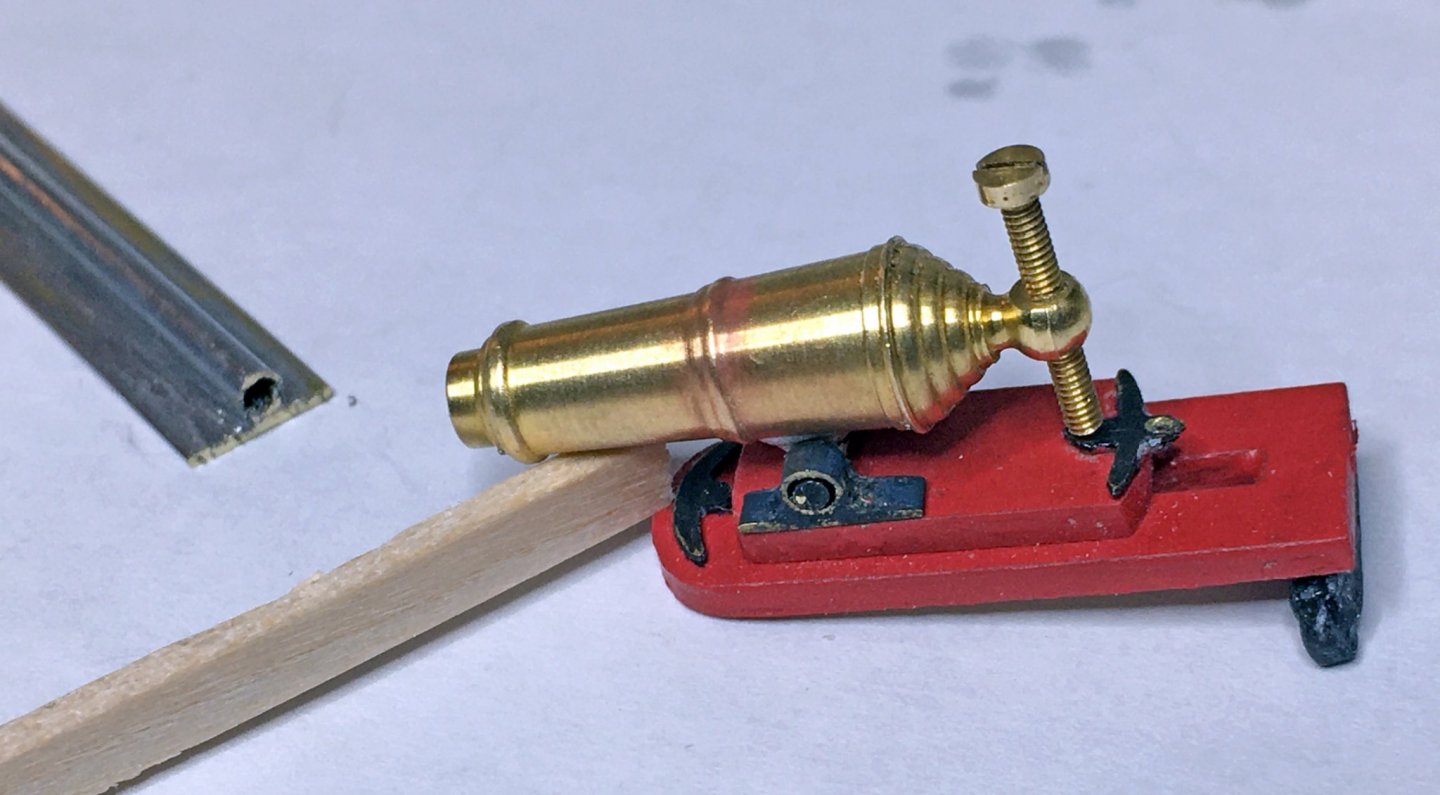
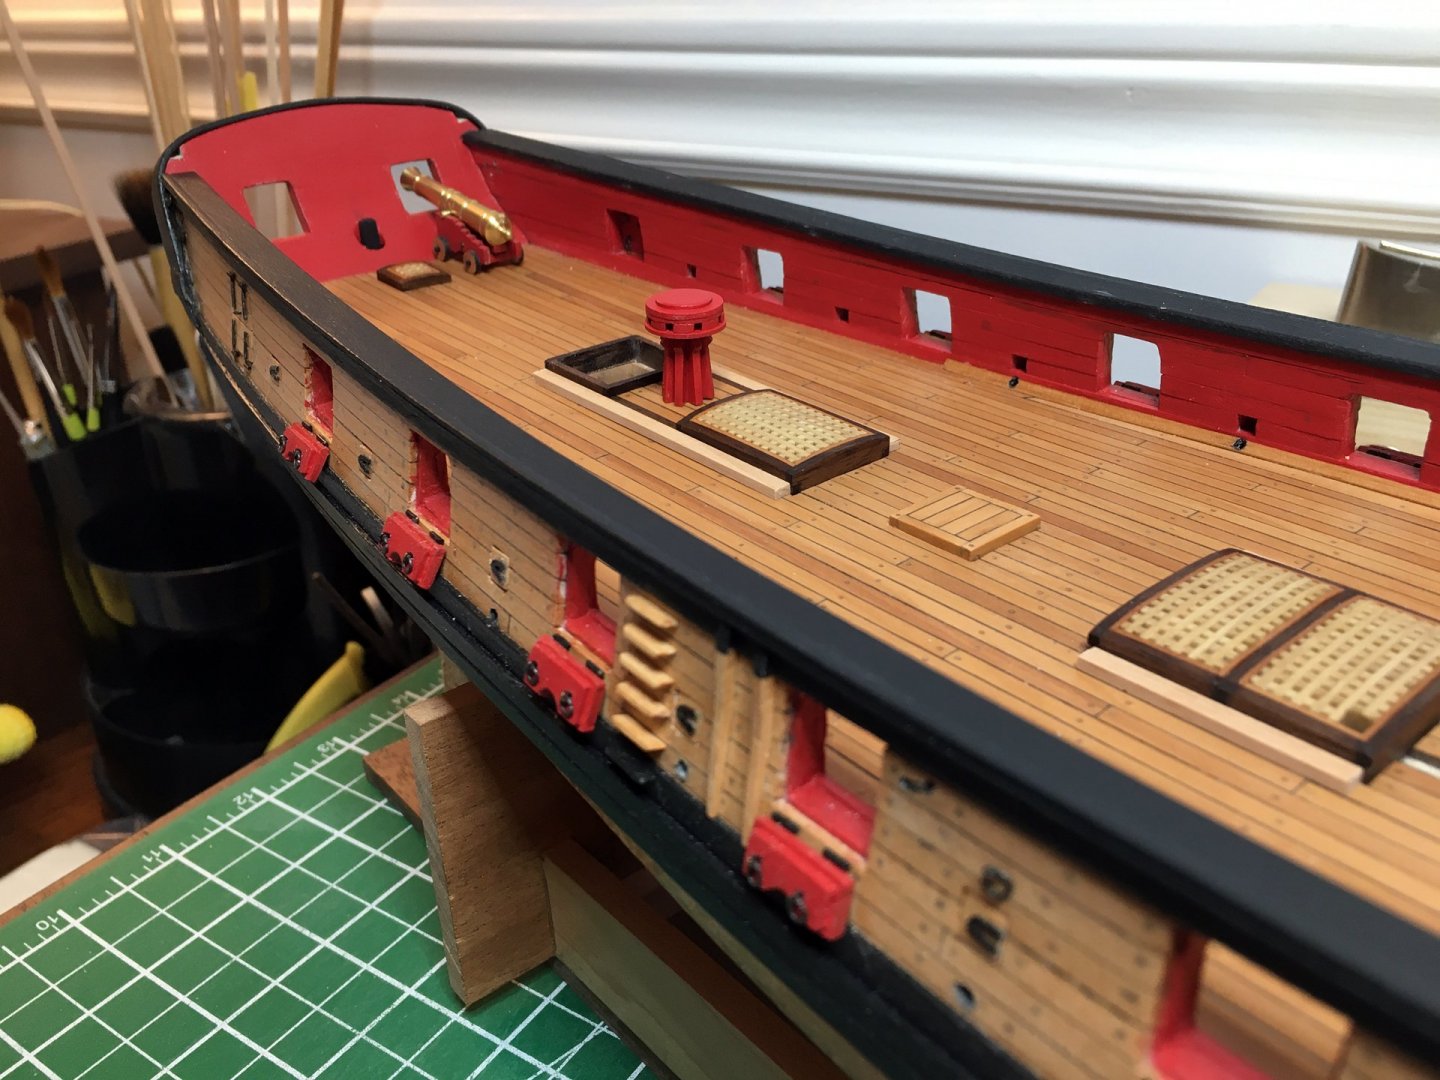
Hoss and Wally thank you both appreciate you taking the time While waiting for the brass I had on order I continued on the deck fittings. Not knowing a lot about Capstan's I did a little research and got a little help from my friends and now know how at least it works. I made up the capstan pretty much as indicated in the instructions. I am going to flip the head upside down on the drum tho to give me a little more height for the companionway. Haven't detailed it at all yet either ~ Got the brass in I was waiting for and made up a carronade prototype. Couple pics showing the sled mounts which were made by soldering a brass tube onto a brass flat bar strip then slicing thin diagonal strips to act as sled mounts. For the carronade I just used a short piece of brass tube soldered on. I know it doesn't look perfect but It is pretty much hidden under the carronade. I couldn't use silver solder because the caseys brass black won't affect it. Nothing cleaned up or glued on yet... Stay the blazes home. Stay safe


-
This is the naughtiest site I know Link just saying
-
I think it is great as is Keith. Really stands out nicely without distracting, but adding to the rest of the ship. Just my 2cents
-
Keith you are doing one fantastic job with your research and build. You are showing us what is possible with this kit. Thanks for sharing
-
Those are looking real good. Way better than mine I had a %^^%% of a time doing the gun ports.
- 950 replies
-
- 1
-

-
- syren
- model shipways
- (and 1 more)
-
Really nice looks dead on with the redo Have you got some blocks you can cut to put under your blocking on each side. That will really stiffen up everything and prevent you cracking the keel while planking above the wales. I also took ruffly a one foot piece of 2X4 ran a strip the the thickness of the keel down the center of it, so I could slide it into the slot on the board put a cloth on top and flip the ship upside down onto it if I wanted. Easy to switch back and forth. Here is a pic nothing fancy but make sure the 2x4 is think enough the ship stem and transom are sitting high enough off the table. Forgive me if you already have a solution. Cheers ~

- 950 replies
-
- 4
-
-
- syren
- model shipways
- (and 1 more)
-
Port side on the photo does not seem to be glued in yet and is sticking out a bit. Otherwise you look to be doing a great job! I would want it as even as possible starting out. Just remember you are your worst critic Don't be afraid to take your time and not rush. Redo if you are not happy with what you are seeing otherwise it will bug you even more once you finish. Keep up the good work.
- 950 replies
-
- 4
-
-
- syren
- model shipways
- (and 1 more)
-
Joe thanks for the response. I suspected you had and I was going to try that on my bluenose but brushed the edge with so so results, only because it was my first time airbrushing. Cheers thanks for the conformation on a better way to go!
-
You did a great job with the airbrush the paint looks super!!! How did you handle the top edge, where the black meets the white on top of the rail. Were you able to tape that off on top of the rail and use the airbrush or did you use a paint brush along the edge? Beautiful work
- 140 replies
-
- 2
-
-
- benjamin w latham
- model shipways
- (and 1 more)
-
Richard & Patrick thank you both for taking the time and to all of you for the many likes! Much appreciated.
-
Thomas thank you for taking the time and the wonderful comment Cheers, Robin I've got some of the grating left over I doubt enough to redo but enough to test. I may try sticking some gun stock stain on a scrap as a test and see what we get. I don't mind redoing if I decide to either. I kinda like the walnut because it makes it more mine. Cheers ~ Thanks for the input.
-
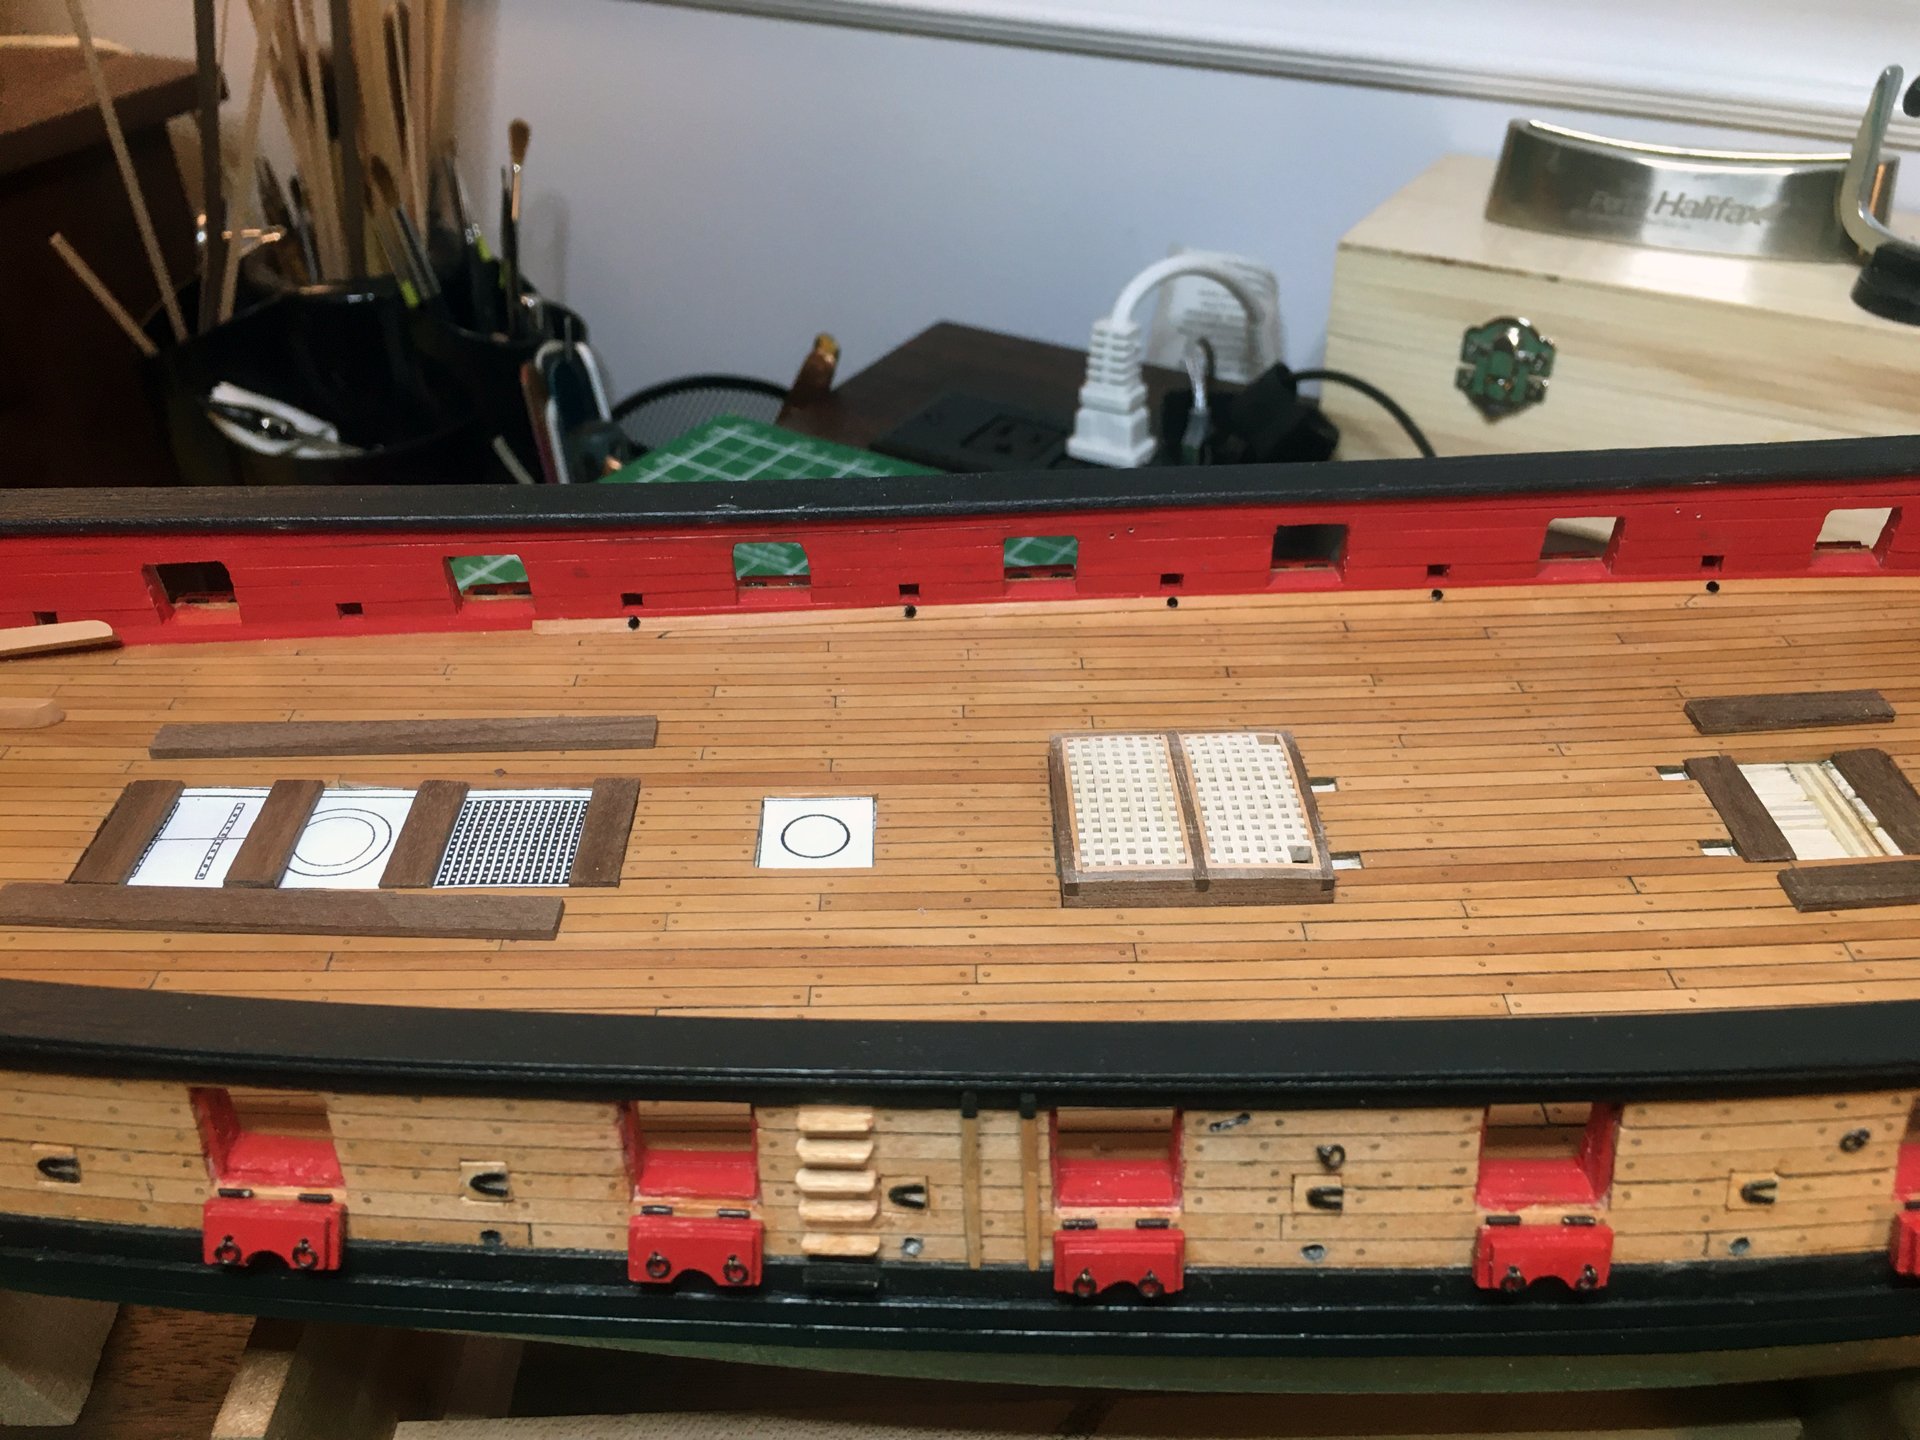
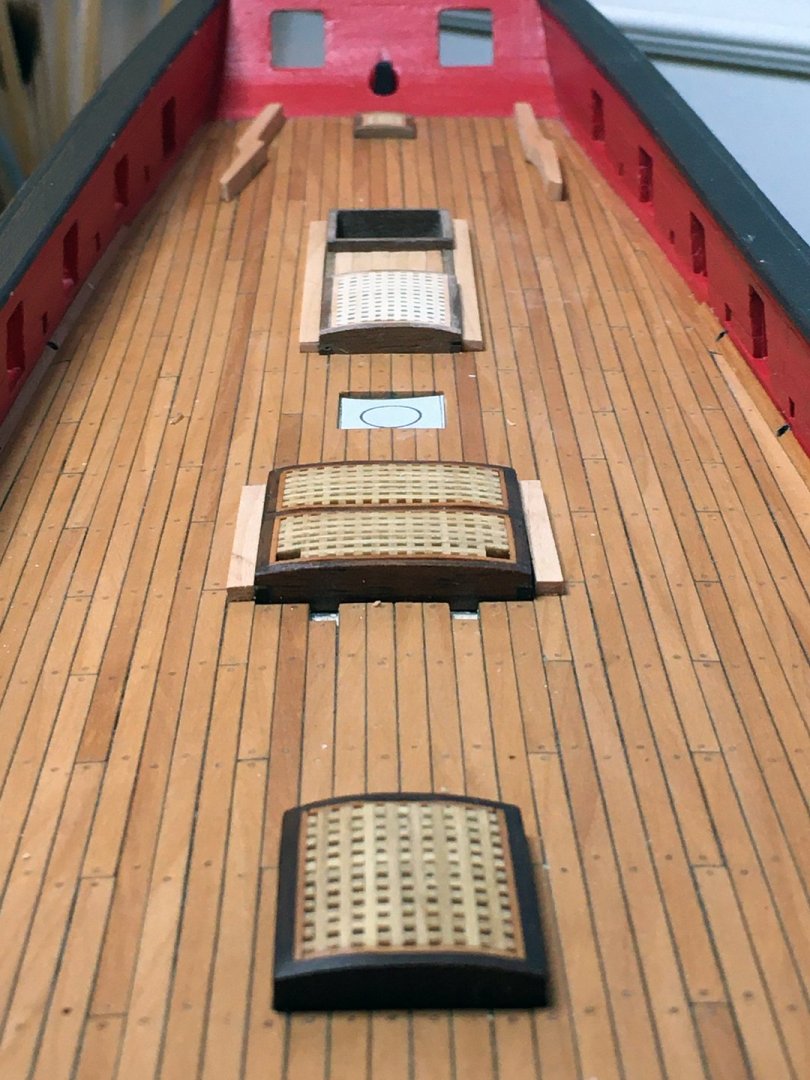
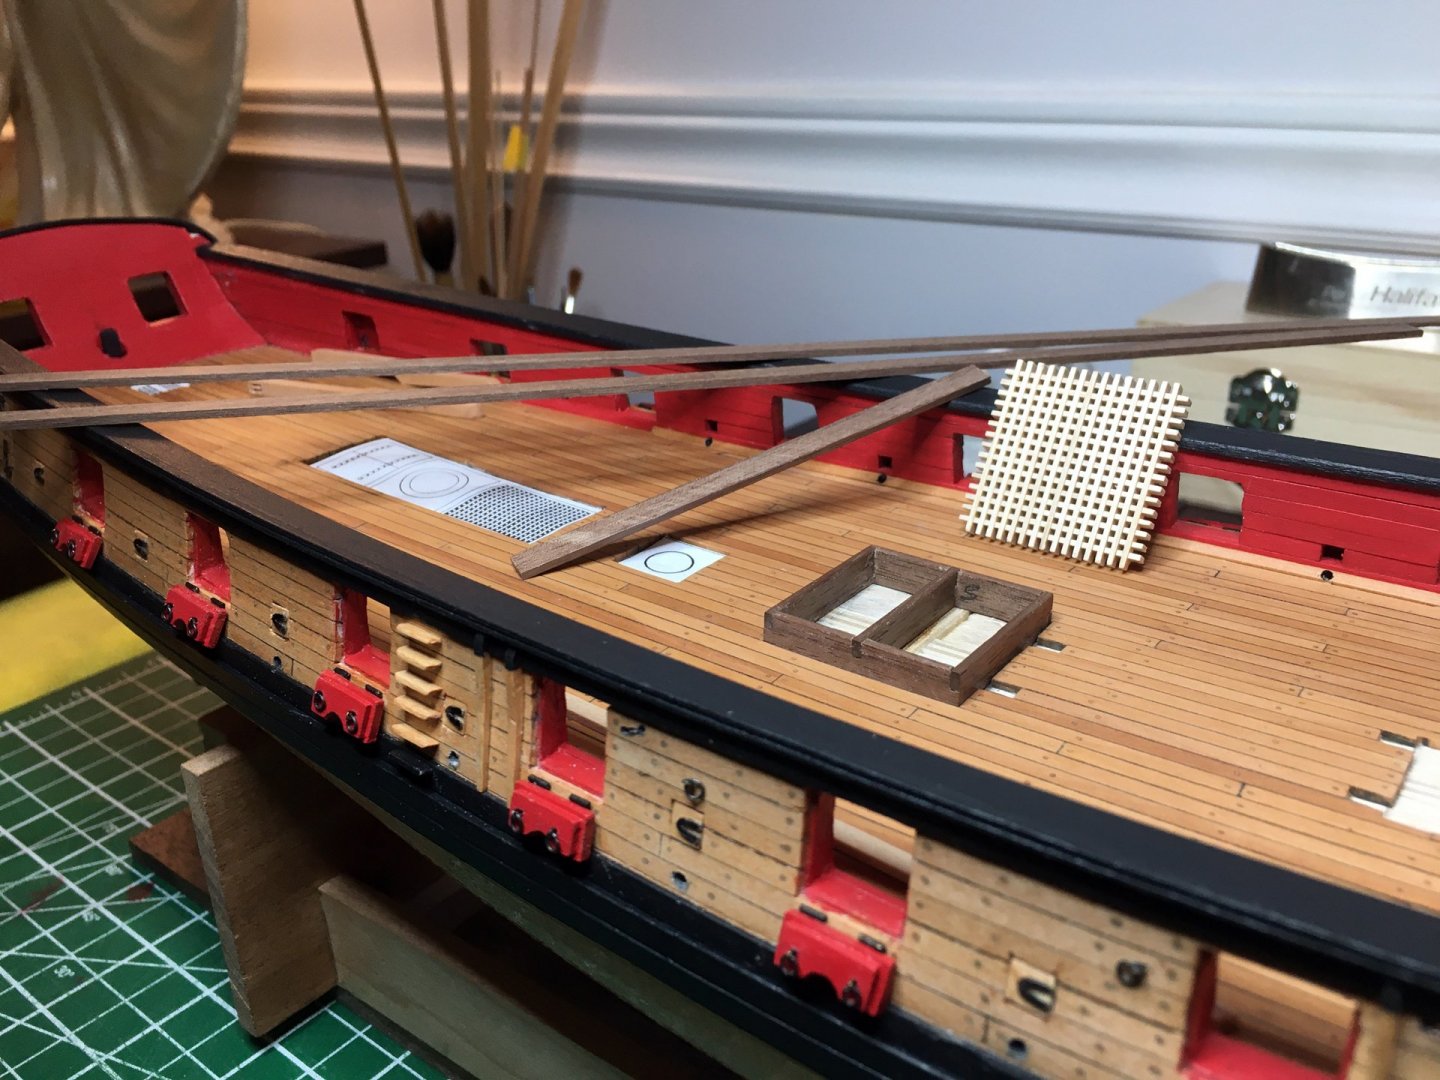
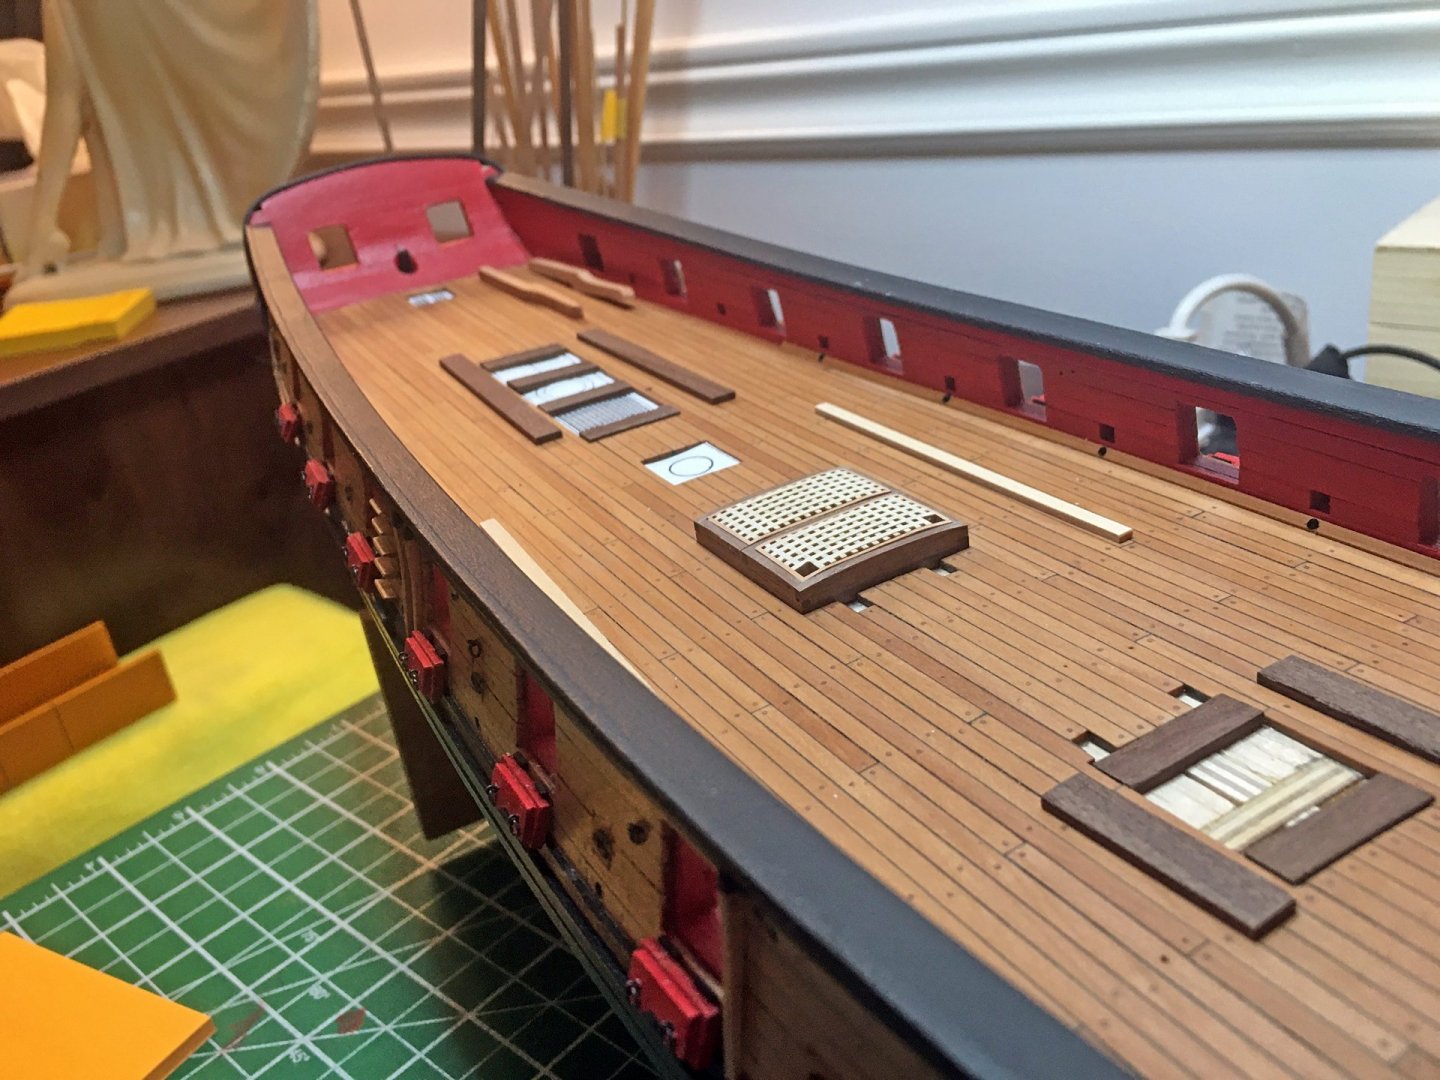
Finished up putting my hatches, grates and the companionway opening together. None of it is glued in and I may or may not use what I've done. Can't decide if I like the walnut coamings and I don't like how yellow the gratings turned with the tung oil. The treenails and notched corners on the coamings also disappears against the dark walnut once it is oiled, making that kind of a waste of time. It has been fun cutting and using my own lumber for it all tho. I am winding up bashing more than I thought I would. Cheers hope you are all Staying safe.


-
I presume you machined those nuts for the boom buffer, nice going it could be real life size in the pic. Fyi I don't think there was glass in the portholes on the Bluenose. Just in the cabin skylight Richard. I could be wrong but fairly sure Nice clean work so much fun to watch come together. Regards ~
-
You are really progressing along, keep up the good work The lines are looking good!
- 950 replies
-
- 2
-
-
- syren
- model shipways
- (and 1 more)
-
Awesome job you can be super proud of this one
-
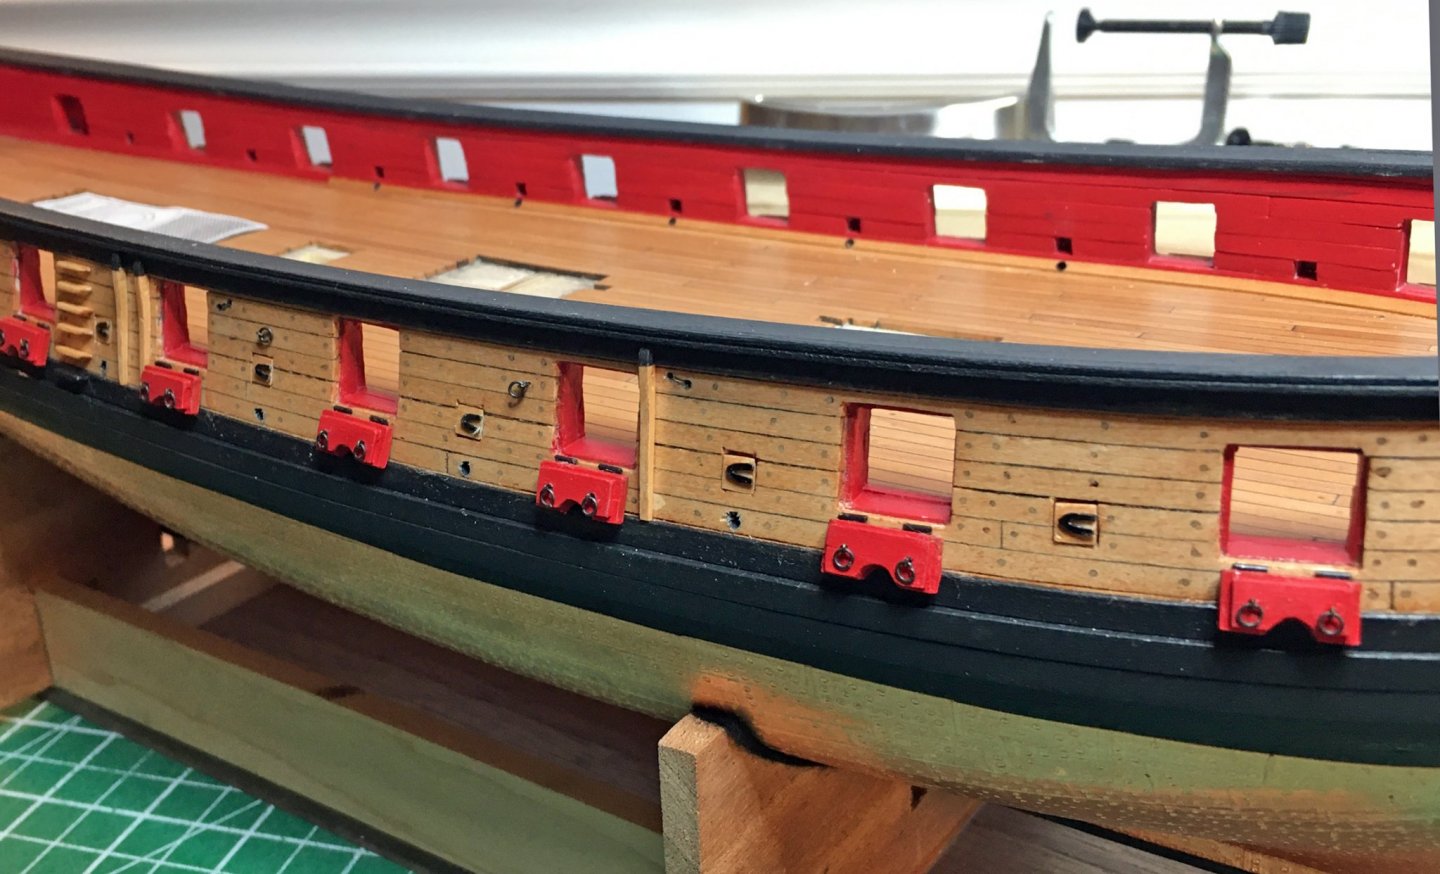
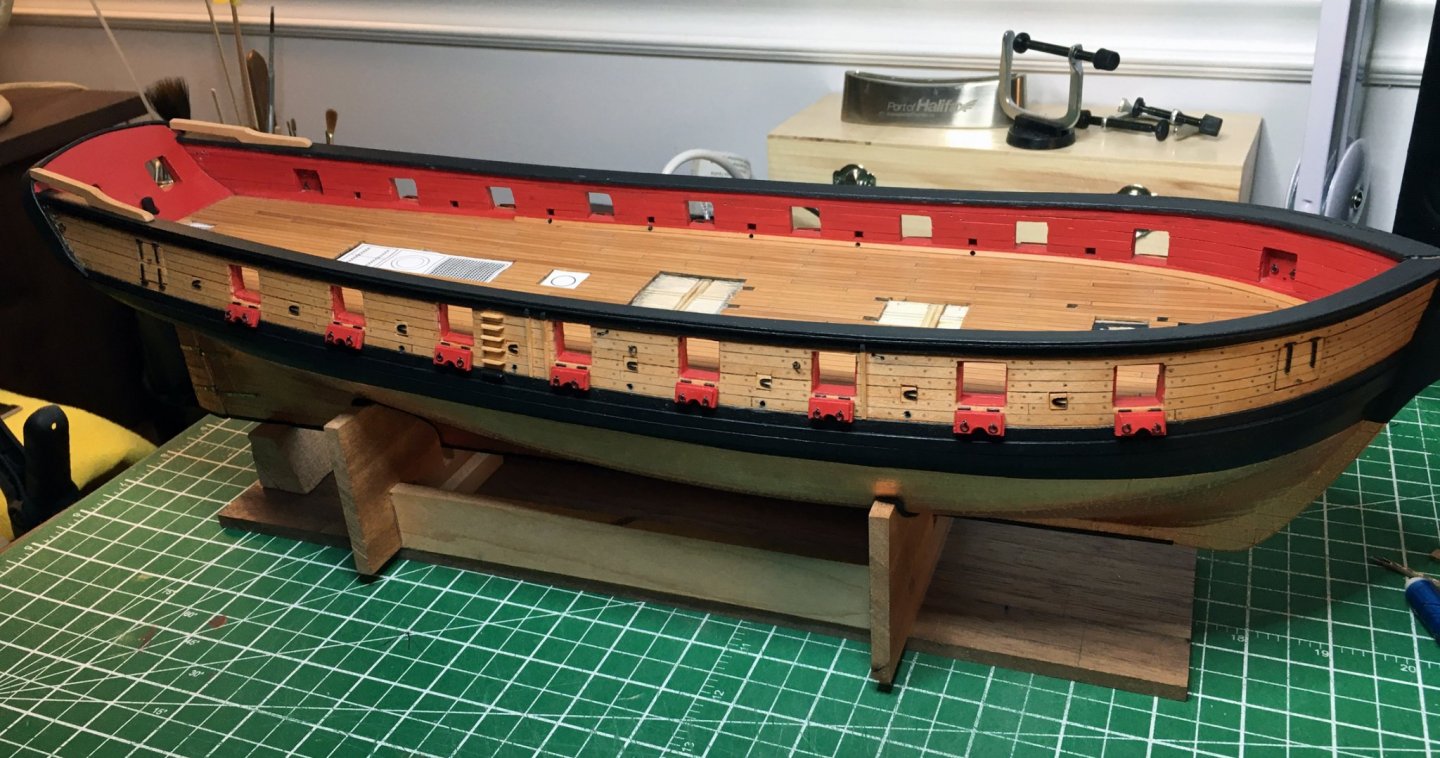
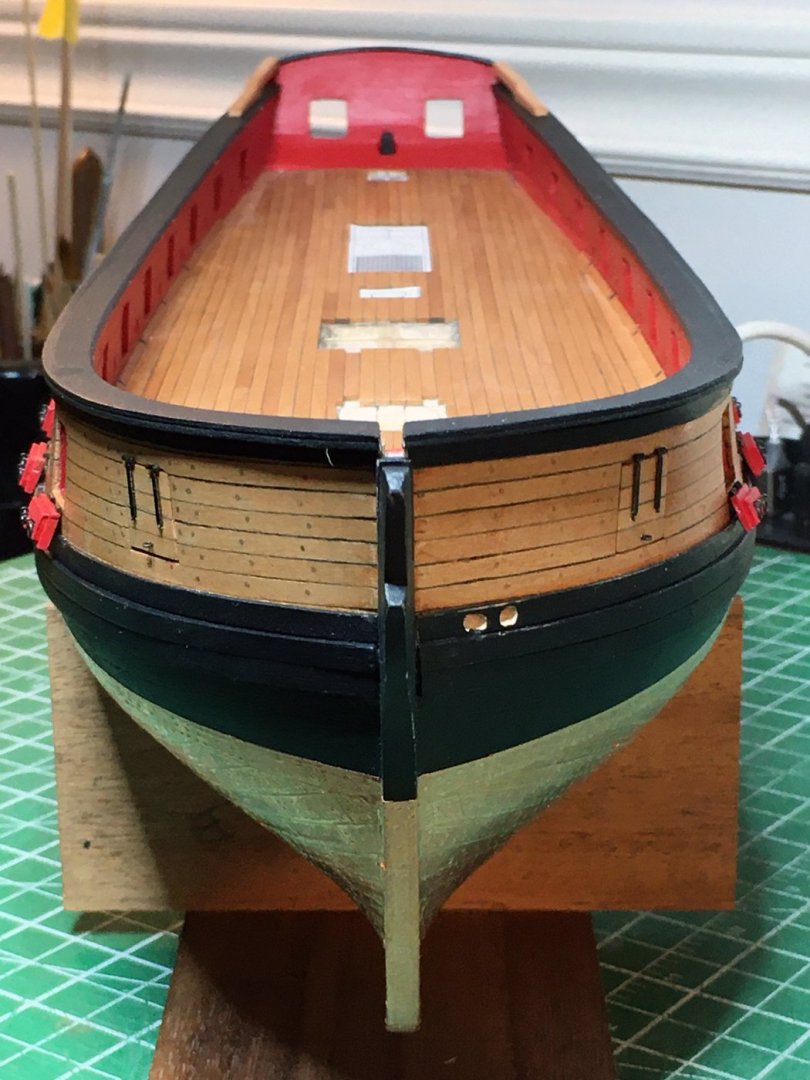
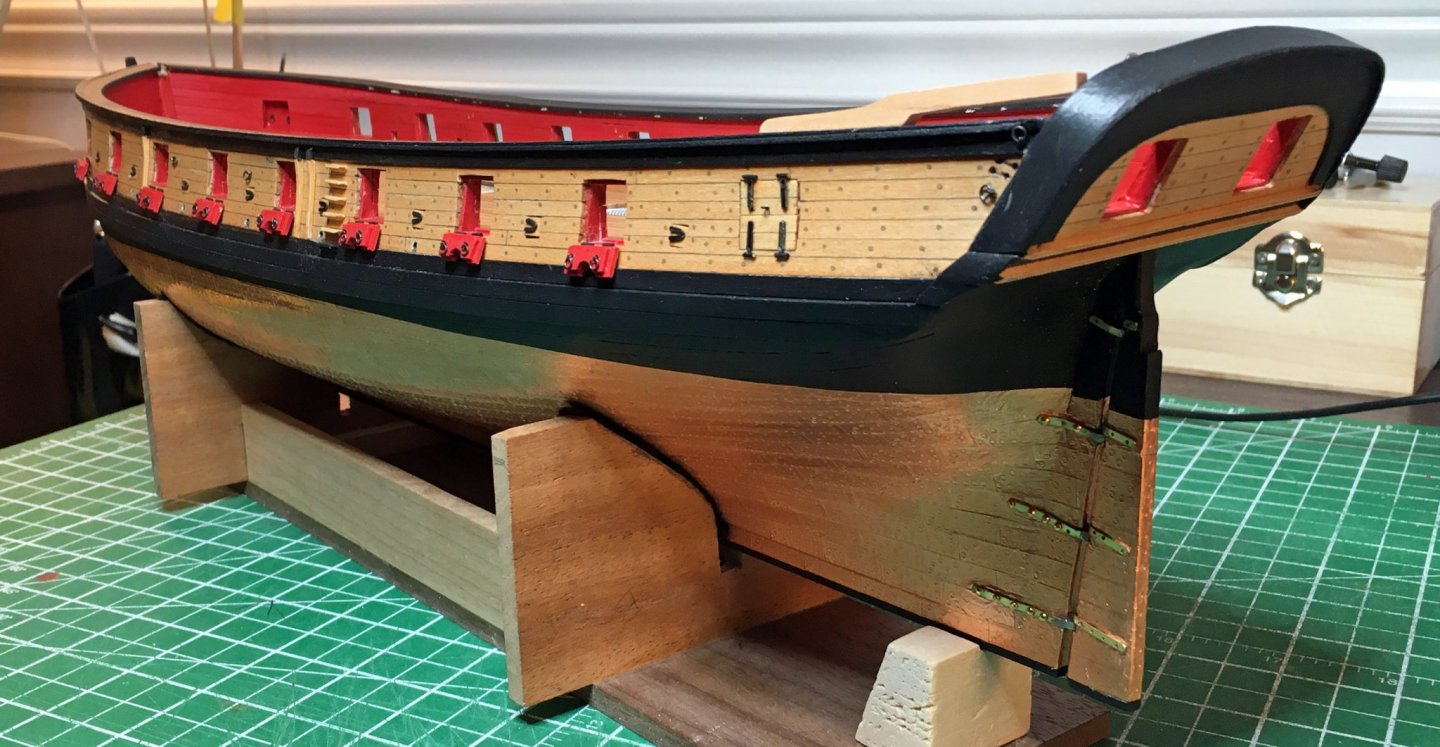
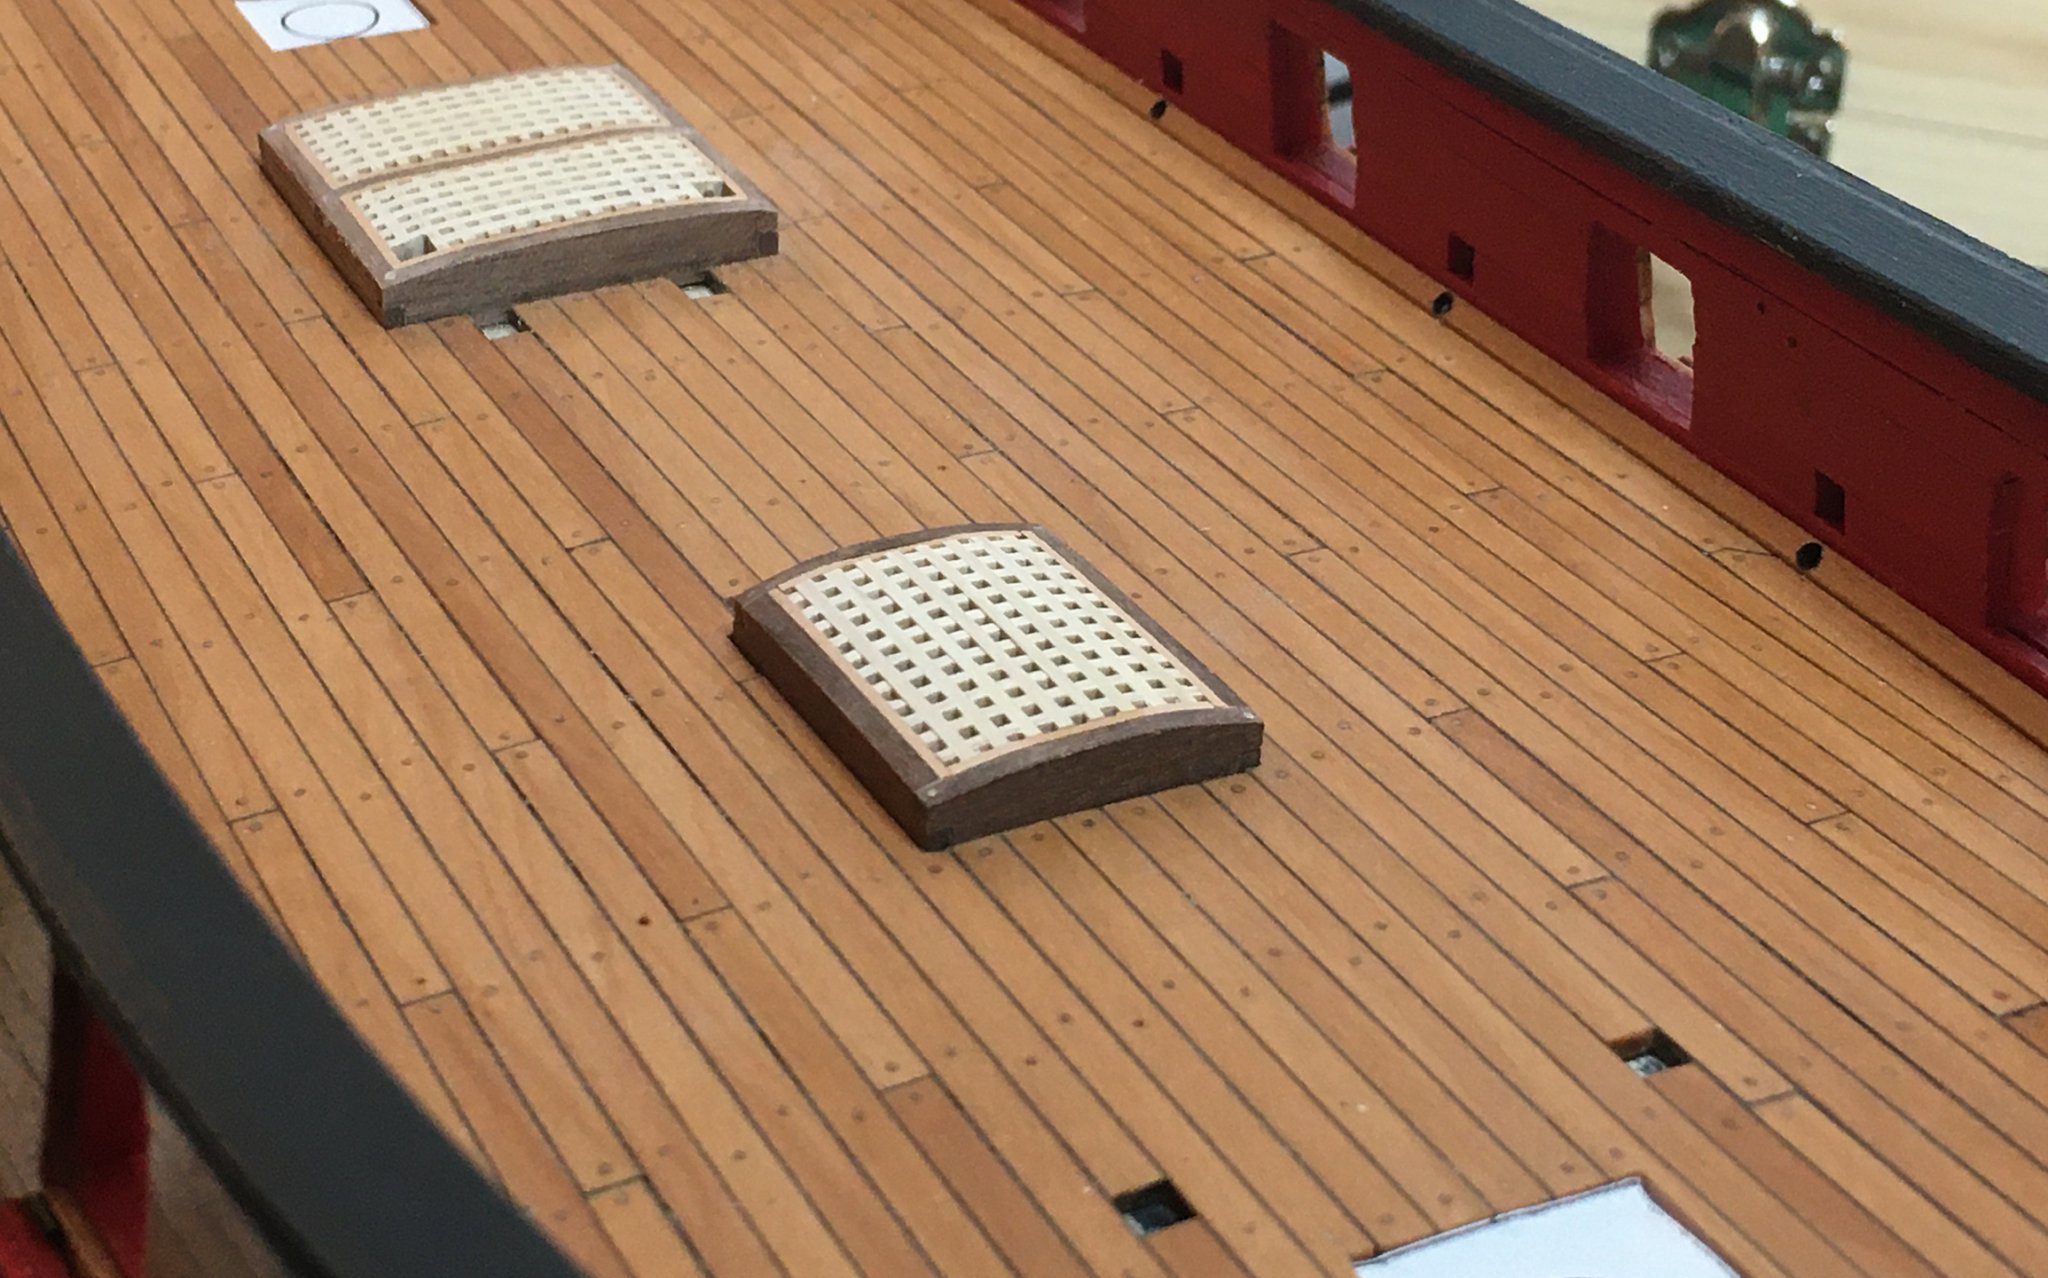
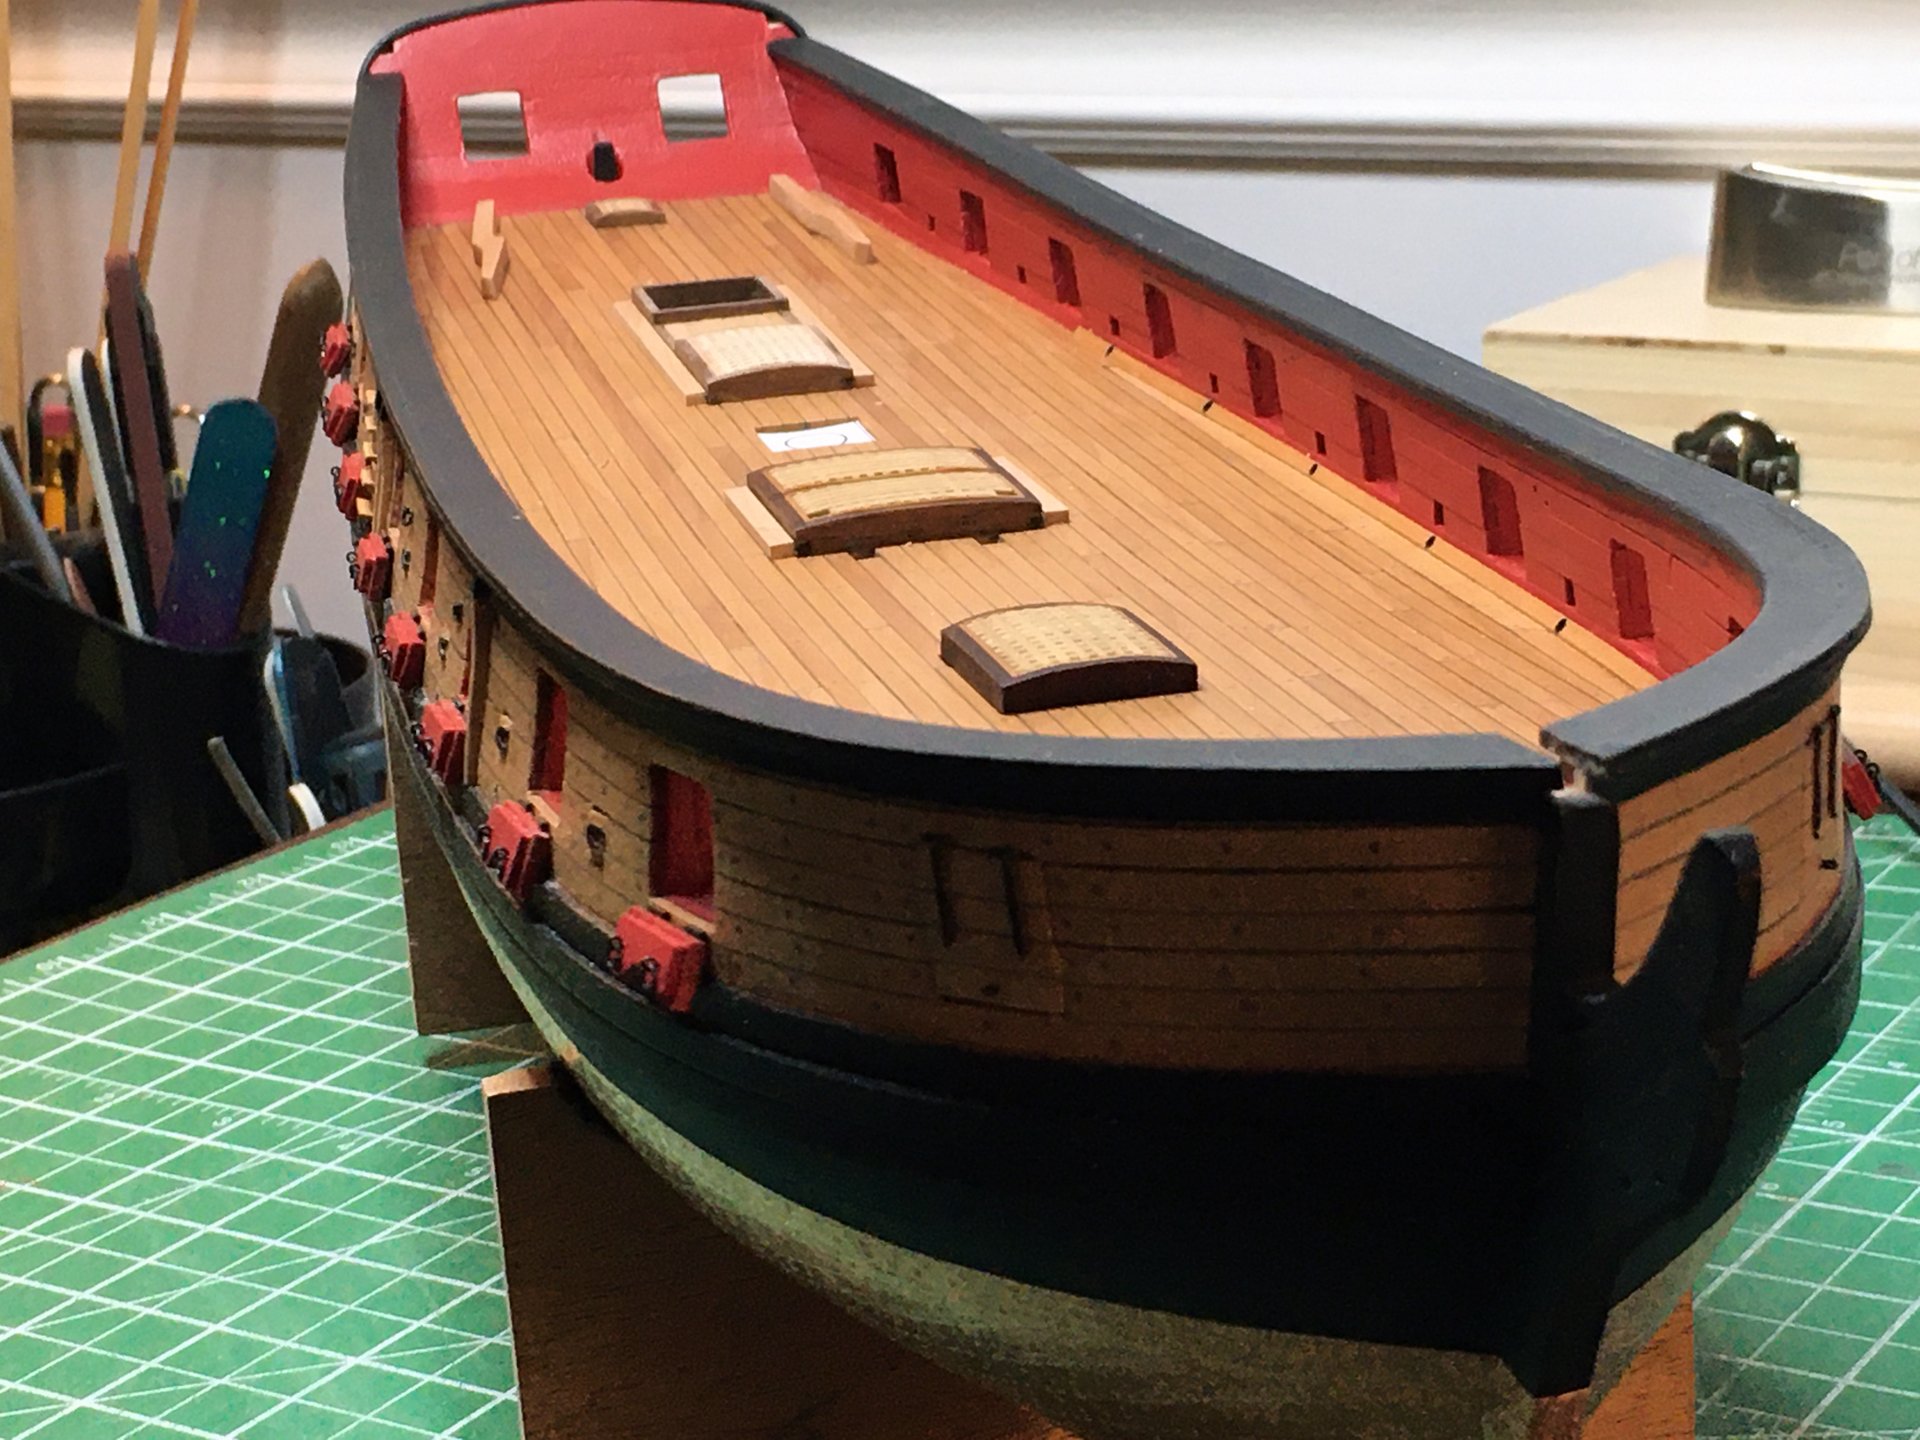
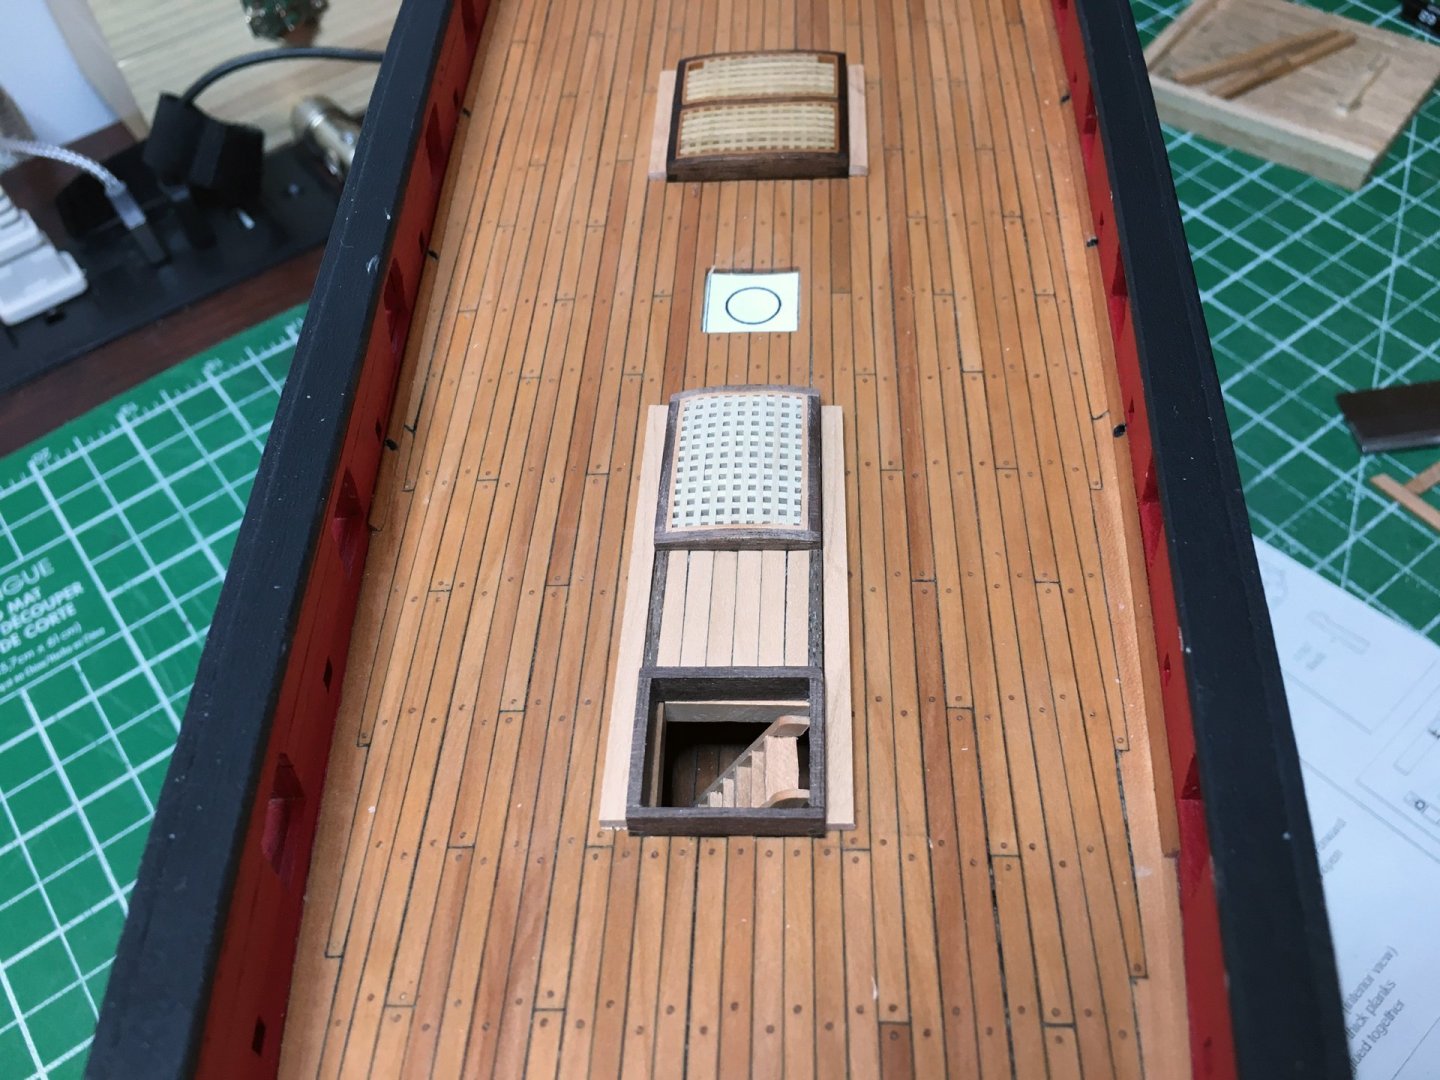
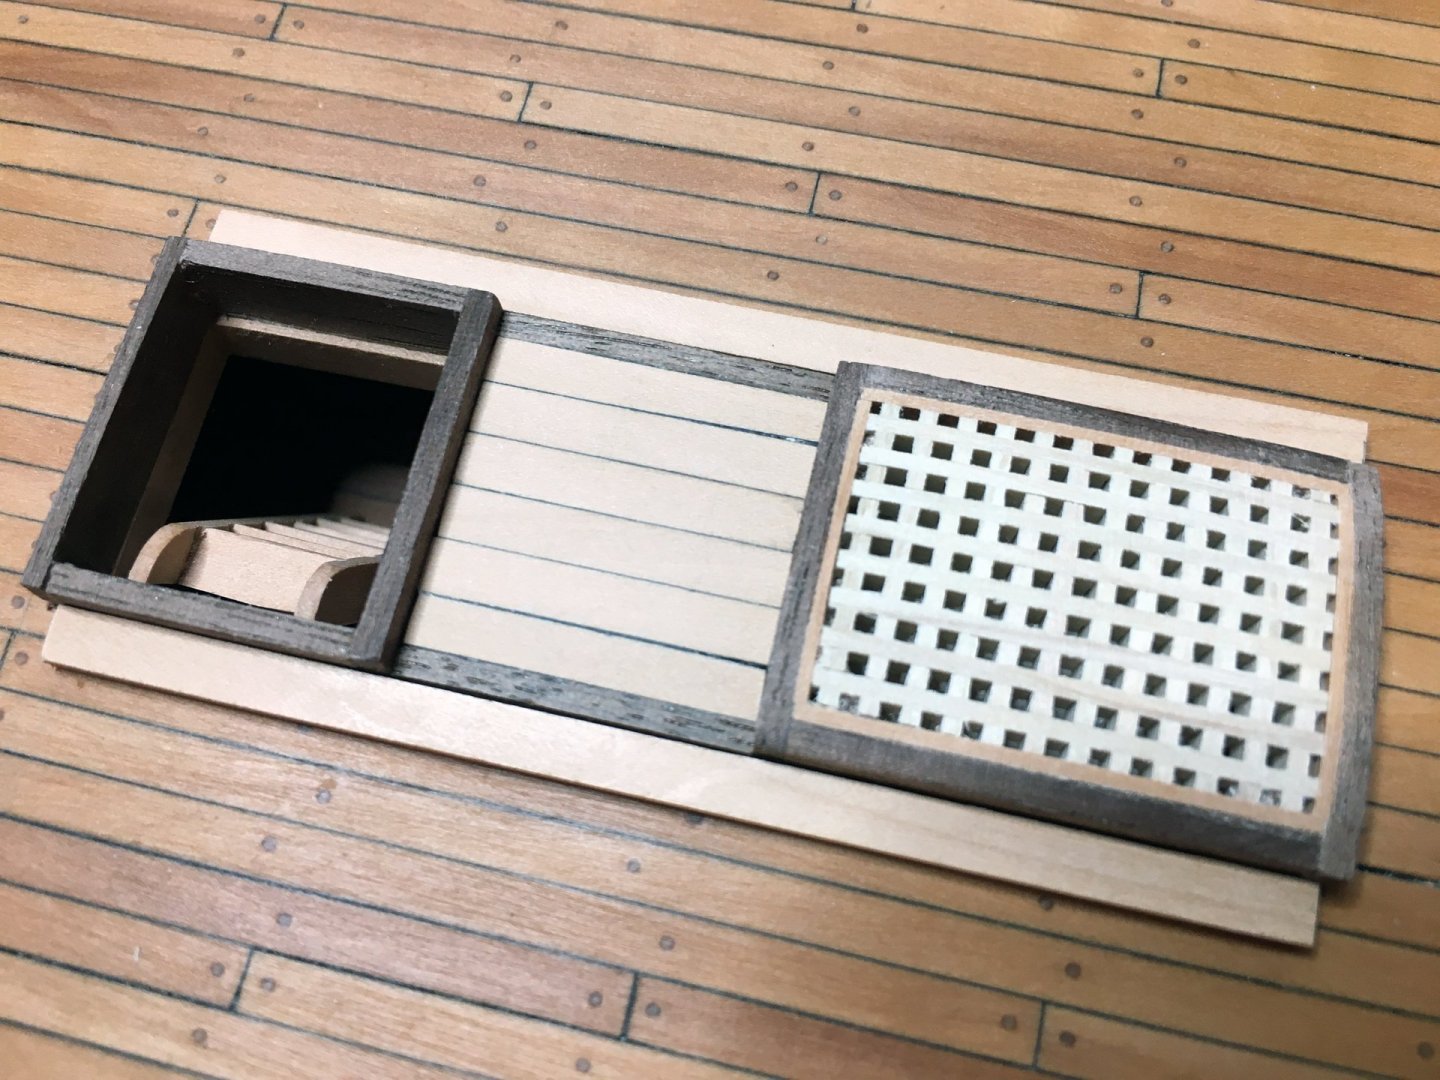
Last night I was looking at chapter 12, today I got out my proxon fet (little present to myself at xmas) I sliced up a black walnut board I had and ripped some 3/8 x 1/16 walnut planks and some 1/32 pear and decided to try my hand at some deck fittings. I haven't done hatches with gratings before so wanted to give that a go. First I cut out all the coamings to size using the walnut. Then I set about building one frame and putting in the grates. They are a little tricky to work with but everything was so nice and square that it made it a lot easier. I had no luck trying to cut the square grate with a #11 blade so used a fine tooth kerf saw and that worked well. I cut them slightly oversize and then sanded them to fit. Here are a couple of pics. I am not sure how best to treat the grating as I don't want it sitting around getting dirty. I will probably go with tung oil or I might use an ultra matt varnish I have. I put a fine inside boarder using the 1/32 pear also. Cheers ~ ~ I'll add some treenails to it tomorrow ~

-
Hi Wally it is looking really good. Don't sand the top of the lintels or the nubs that are sticking up above them. You may still need those spots for gluing planks and you won't really know until you plank both outboard up from the wale and inboard. They are just fine the way you have them for now. Your doing a great job! Cheers, Robin ~
- 950 replies
-
- 3
-
-
- syren
- model shipways
- (and 1 more)
-
Keith are you not putting the metal plates on the bow or have I missed it. It is looking real good, half the fun is in the research
-
Andrew thank you so much for that information. I meant to ask you that more as a question than i did, so glad you caught my drift I will seriously consider getting this kit knowing that. Cheers ~
-
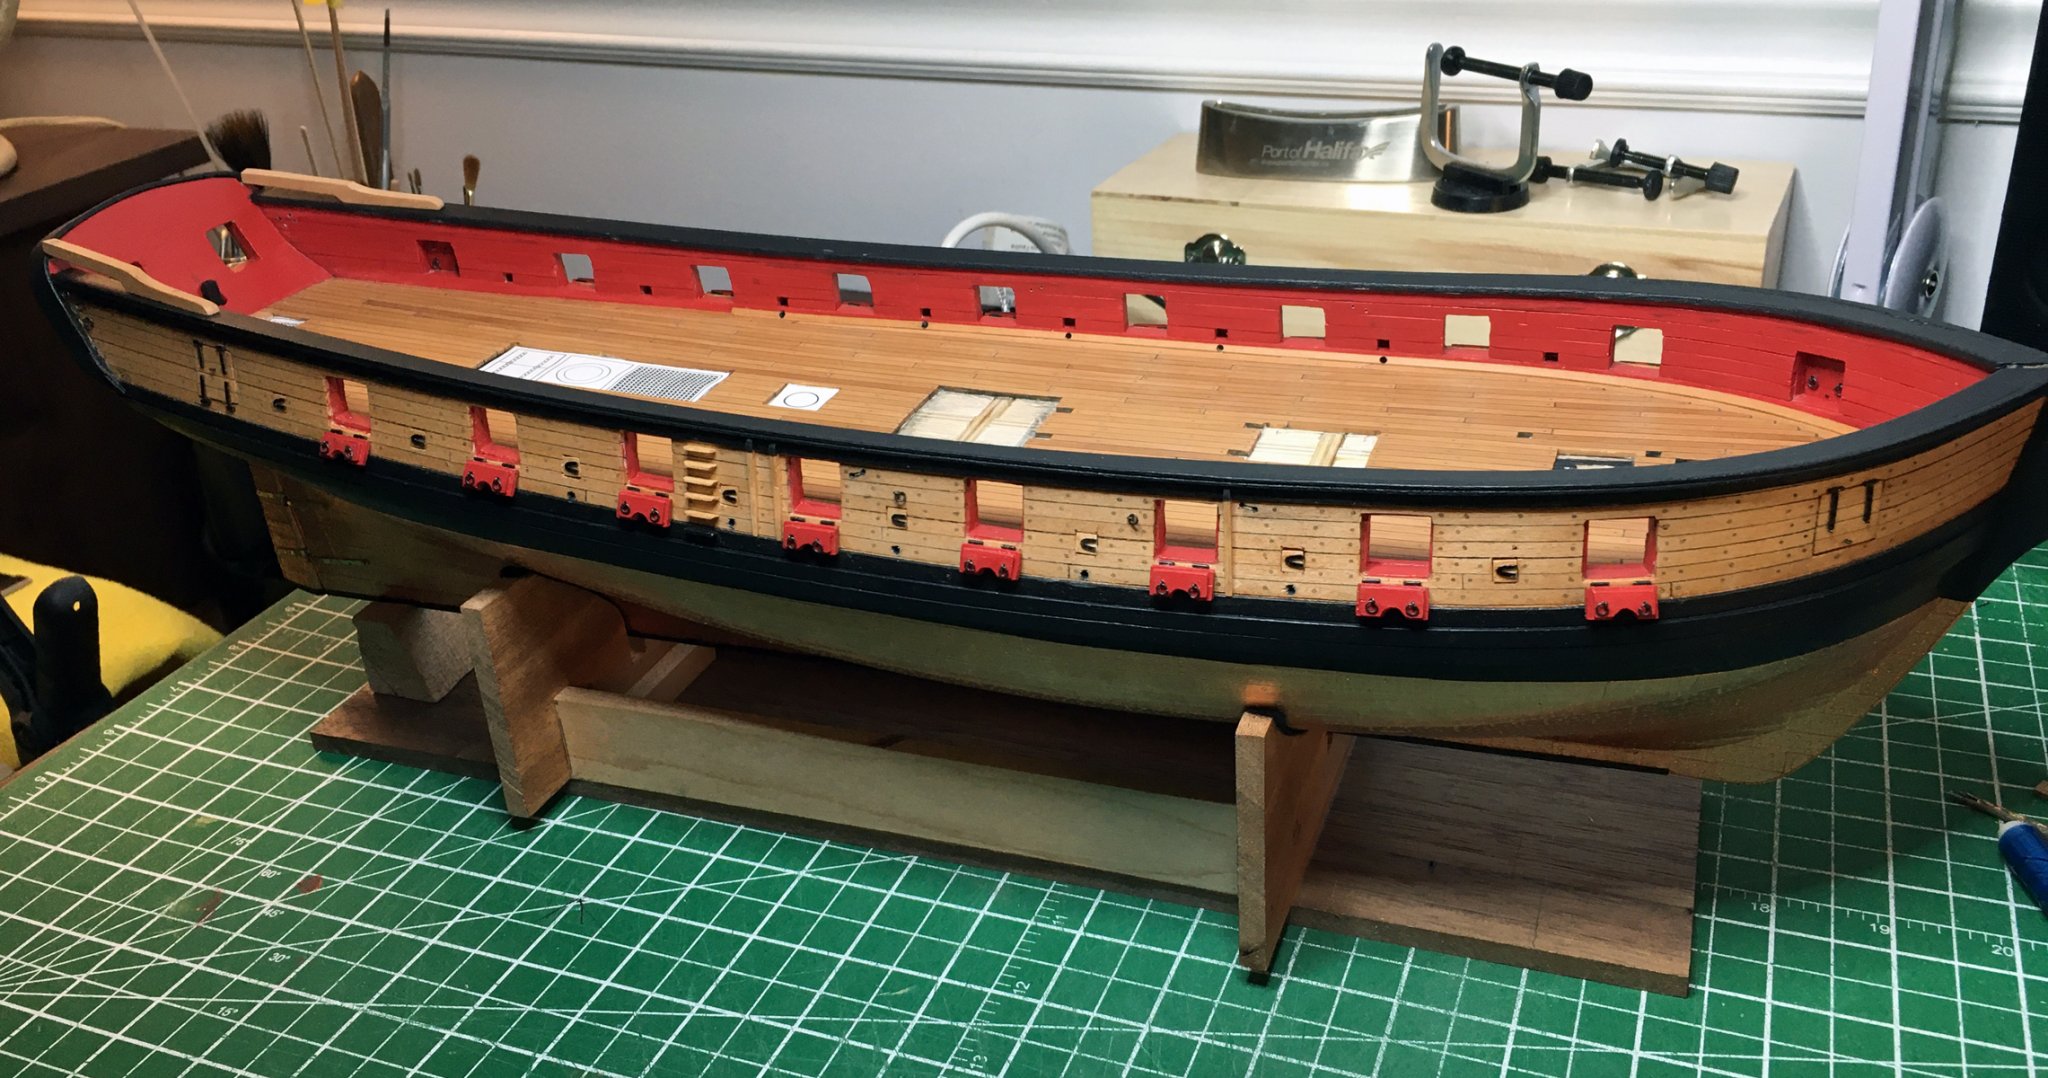
Phil and Richard thanks for taking the time. Your comments and the many likes I received are very much appreciated It was a labor of love. My first build and a real learning experience from researching on down to construction. I hope to do a complete scratch of her some day... After over a month of not working on the Syren I managed to get back into the shipyard last weekend. Mostly working on completing little missing details here and there. the rudder pintels and gudgeons needed the the nail heads added. The scuppers needed to be added inboard and outboard. The sheaves added and eyebolts outboard above the wales. There are two Davits that get cut into the transom I have them ruffed out using swiss pear to replace the kit ones. Made up a bunch of split rings and such. It all needs a good cleaning up but here are a few picks.