-
Posts
321 -
Joined
-
Last visited
Content Type
Profiles
Forums
Gallery
Events
Everything posted by NovaStorm
-
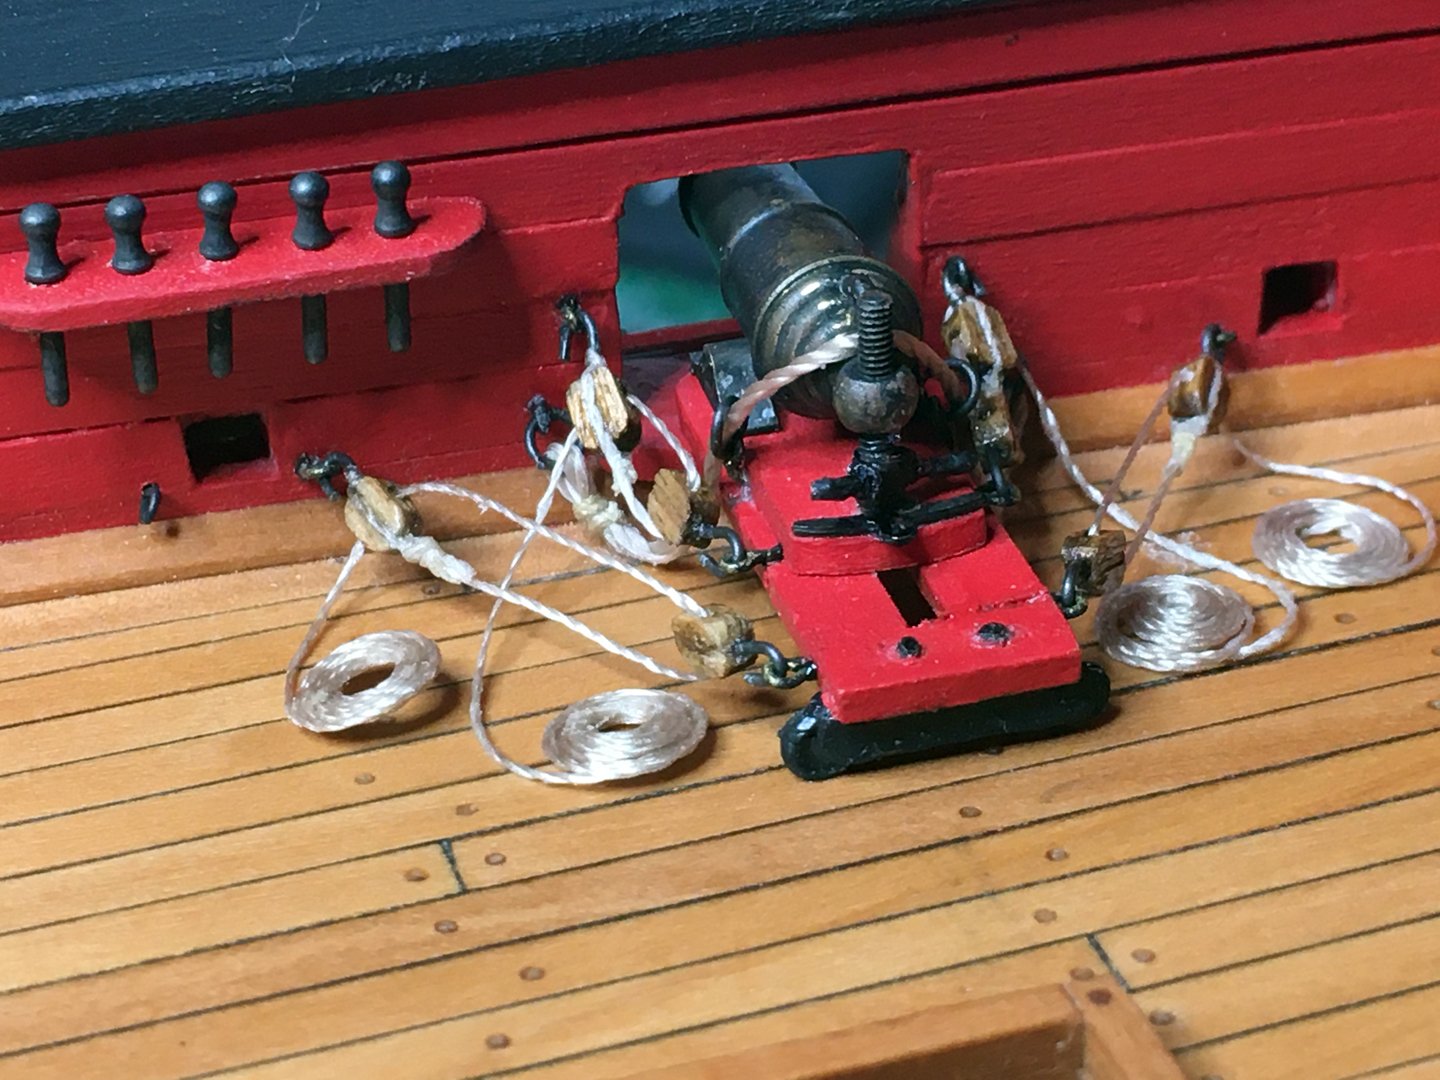
I find it amazing what a thin little plate of steel holds that huge carronade onto the sled. Amazing job you are doing Wally! Looking forward to seeing more
- 950 replies
-
- syren
- model shipways
-
(and 1 more)
Tagged with:
-
I've just found your fantastic build, thank you for sharing your weathering techniques I really appreciate seeing how they are done. Cheers ~
-
Thomas your to kind and I thank you for giving me that kick in the back side. It encouraged me to replace the kit rope and I am sure glad of that. The carronades have been a bit of a struggle to sort out, my eyes are not what they use to be and I keep making silly mistakes. I will get though it eventually
-
You are doing some great work and moving right along nicely
- 950 replies
-
- syren
- model shipways
-
(and 1 more)
Tagged with:
-
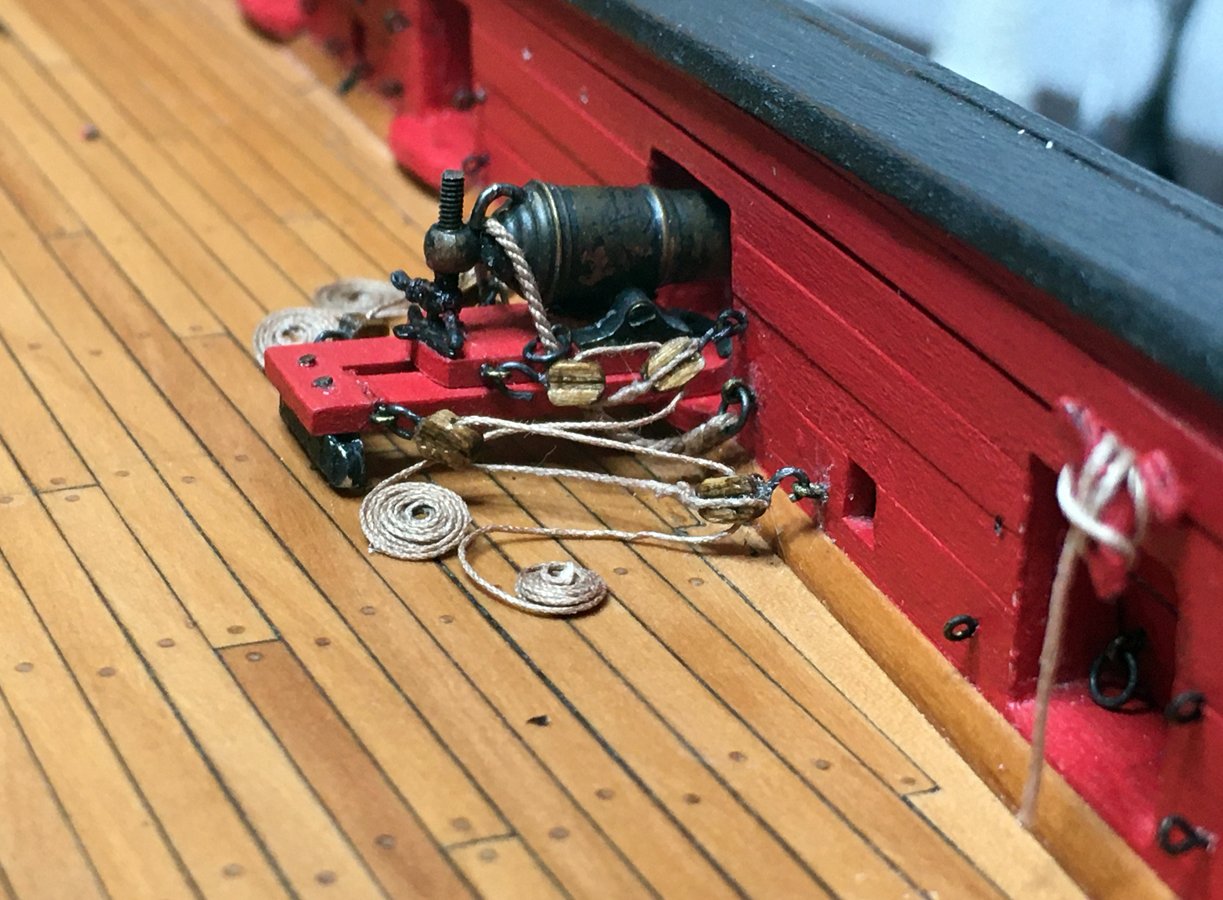
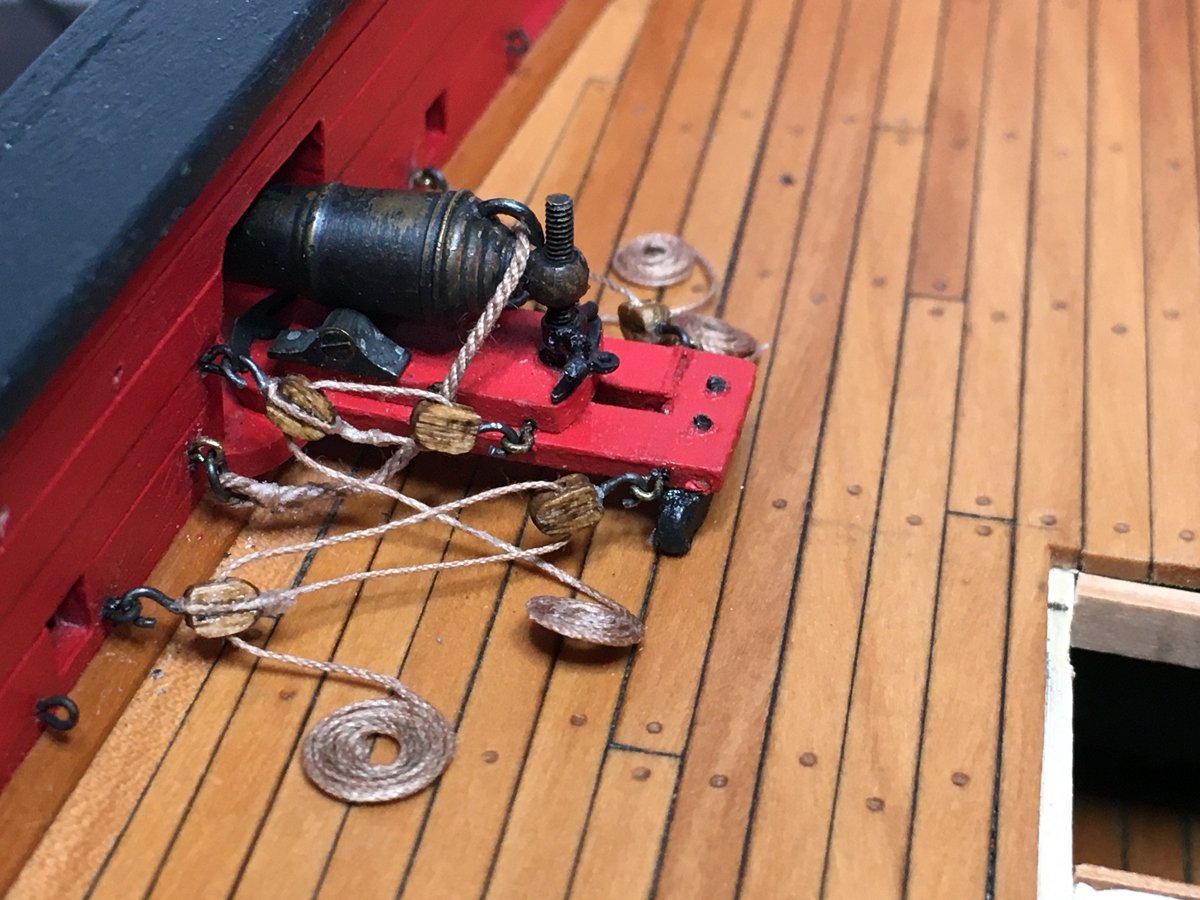
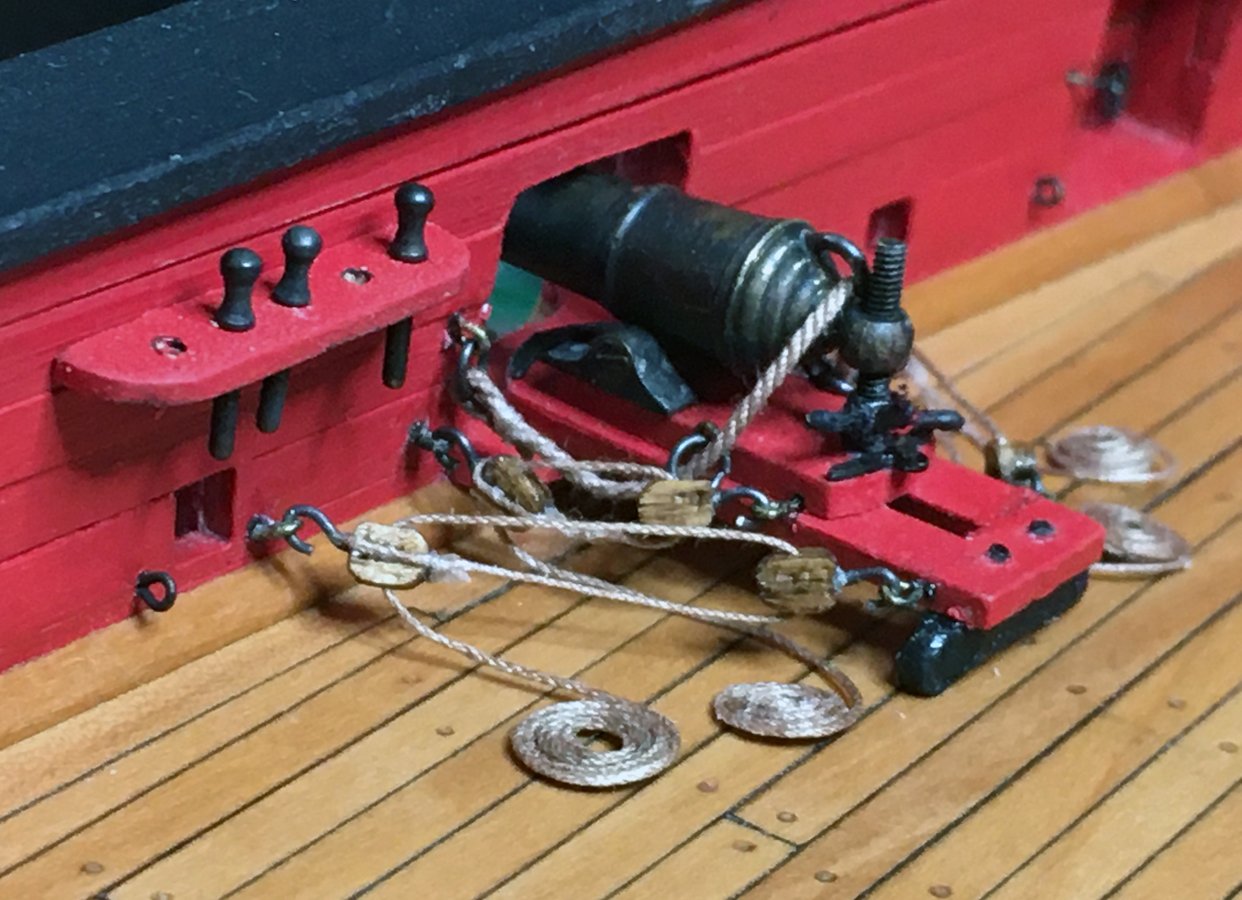
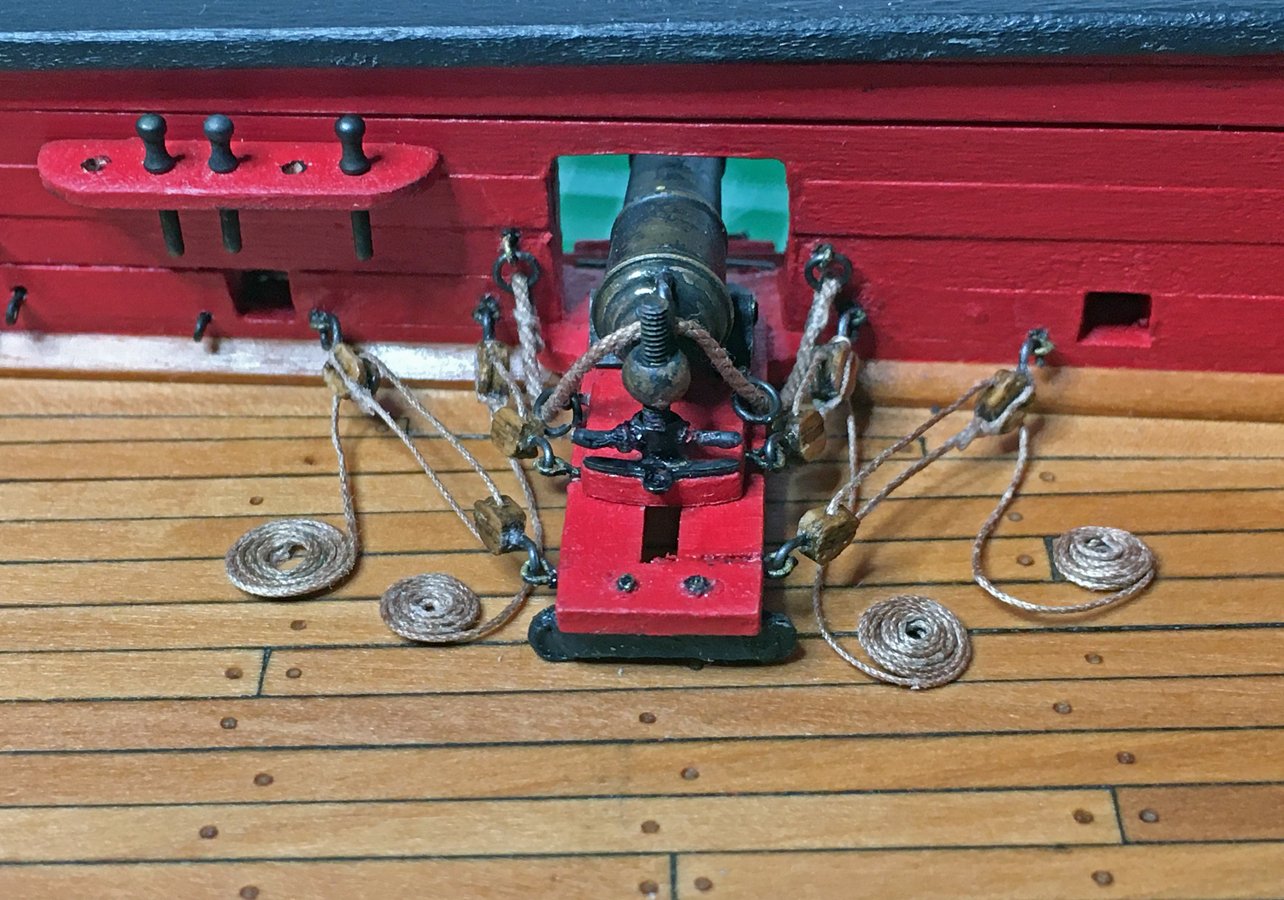
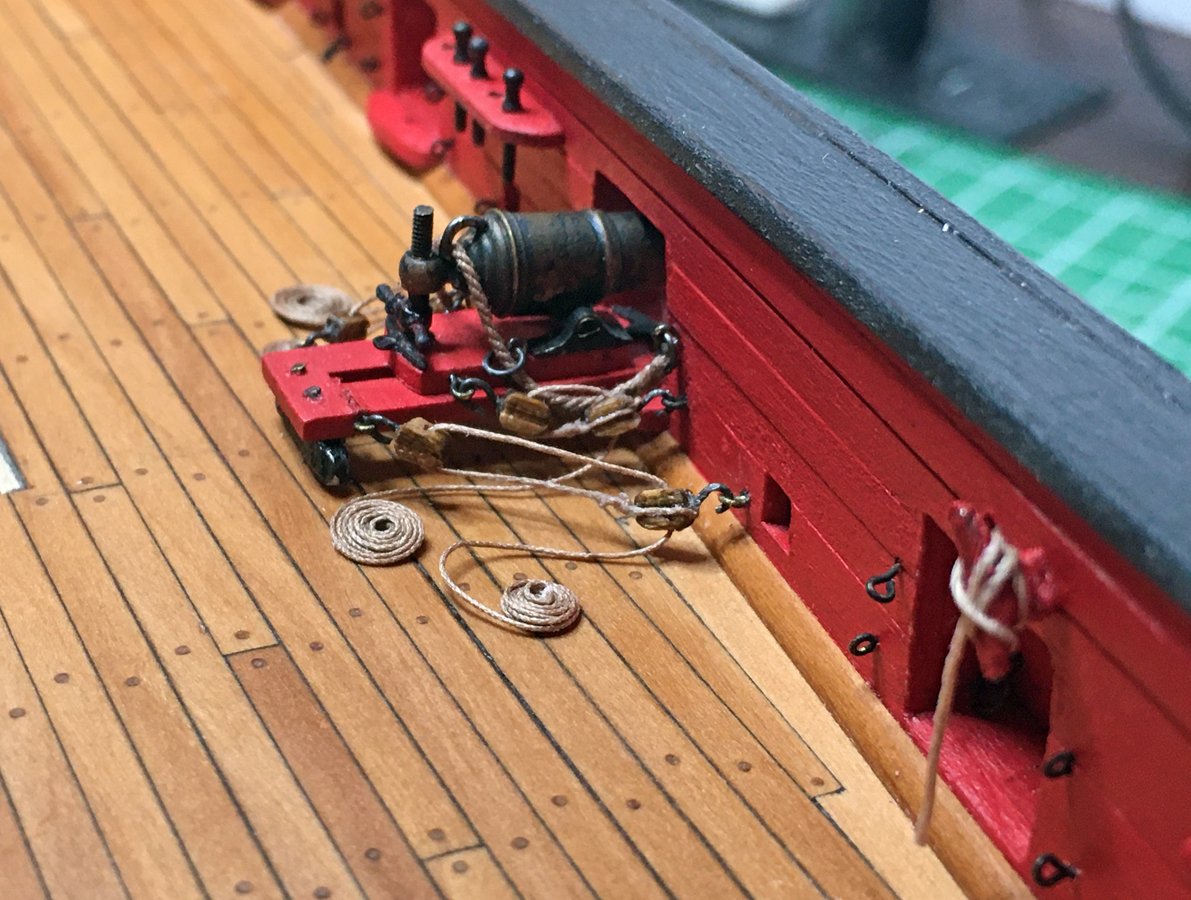
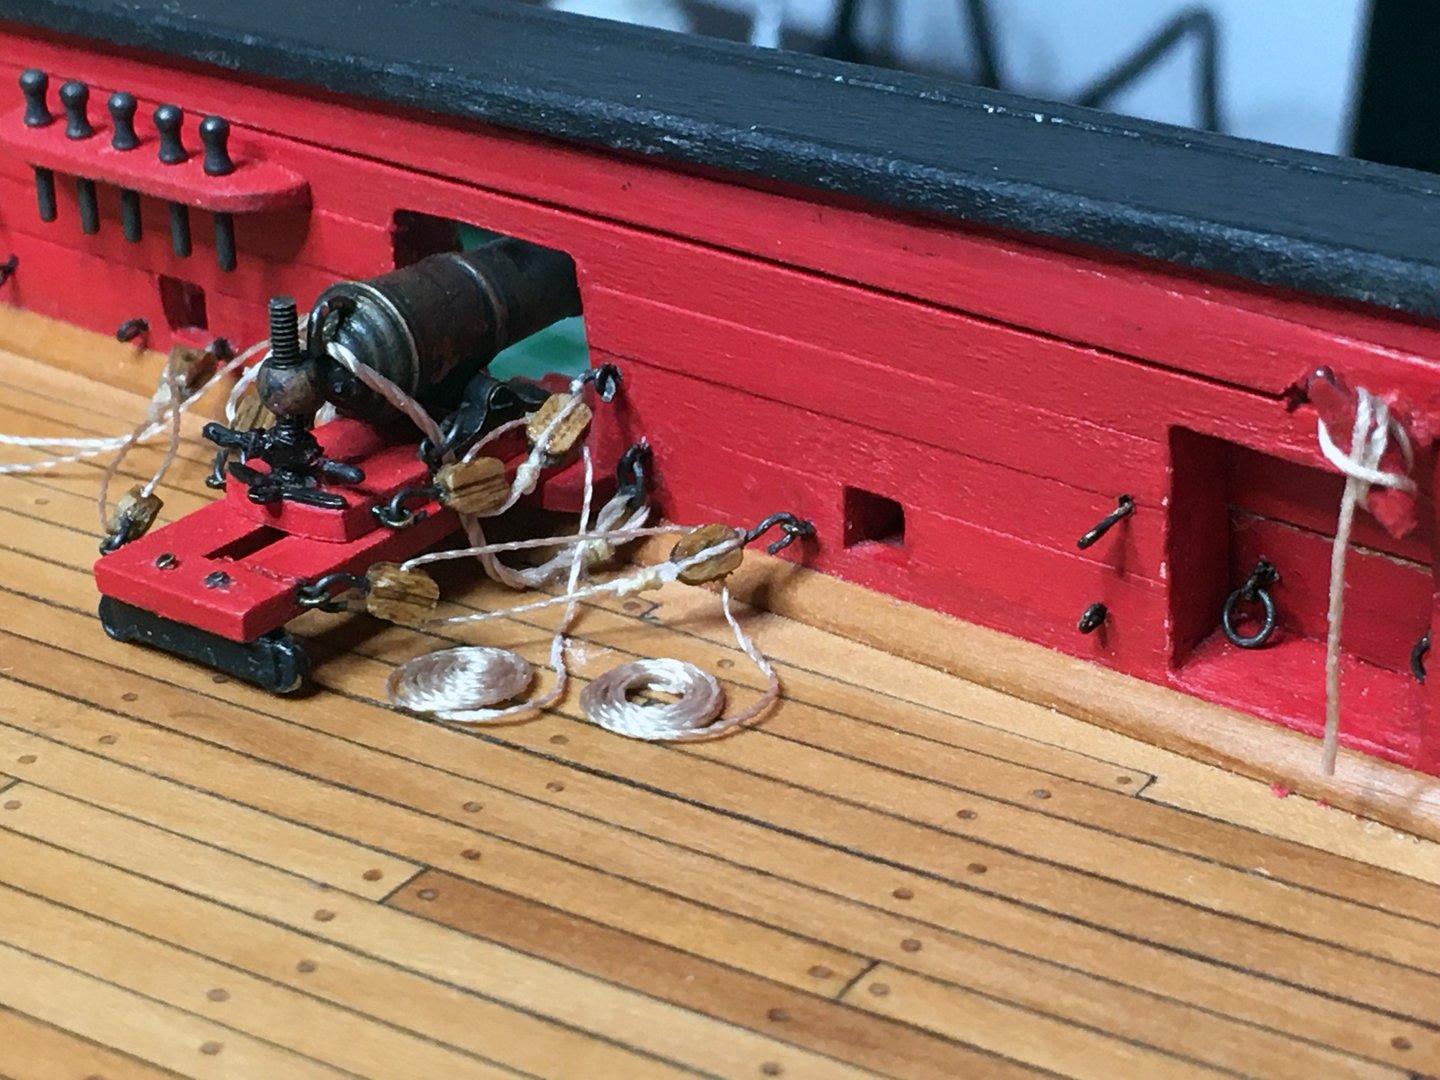
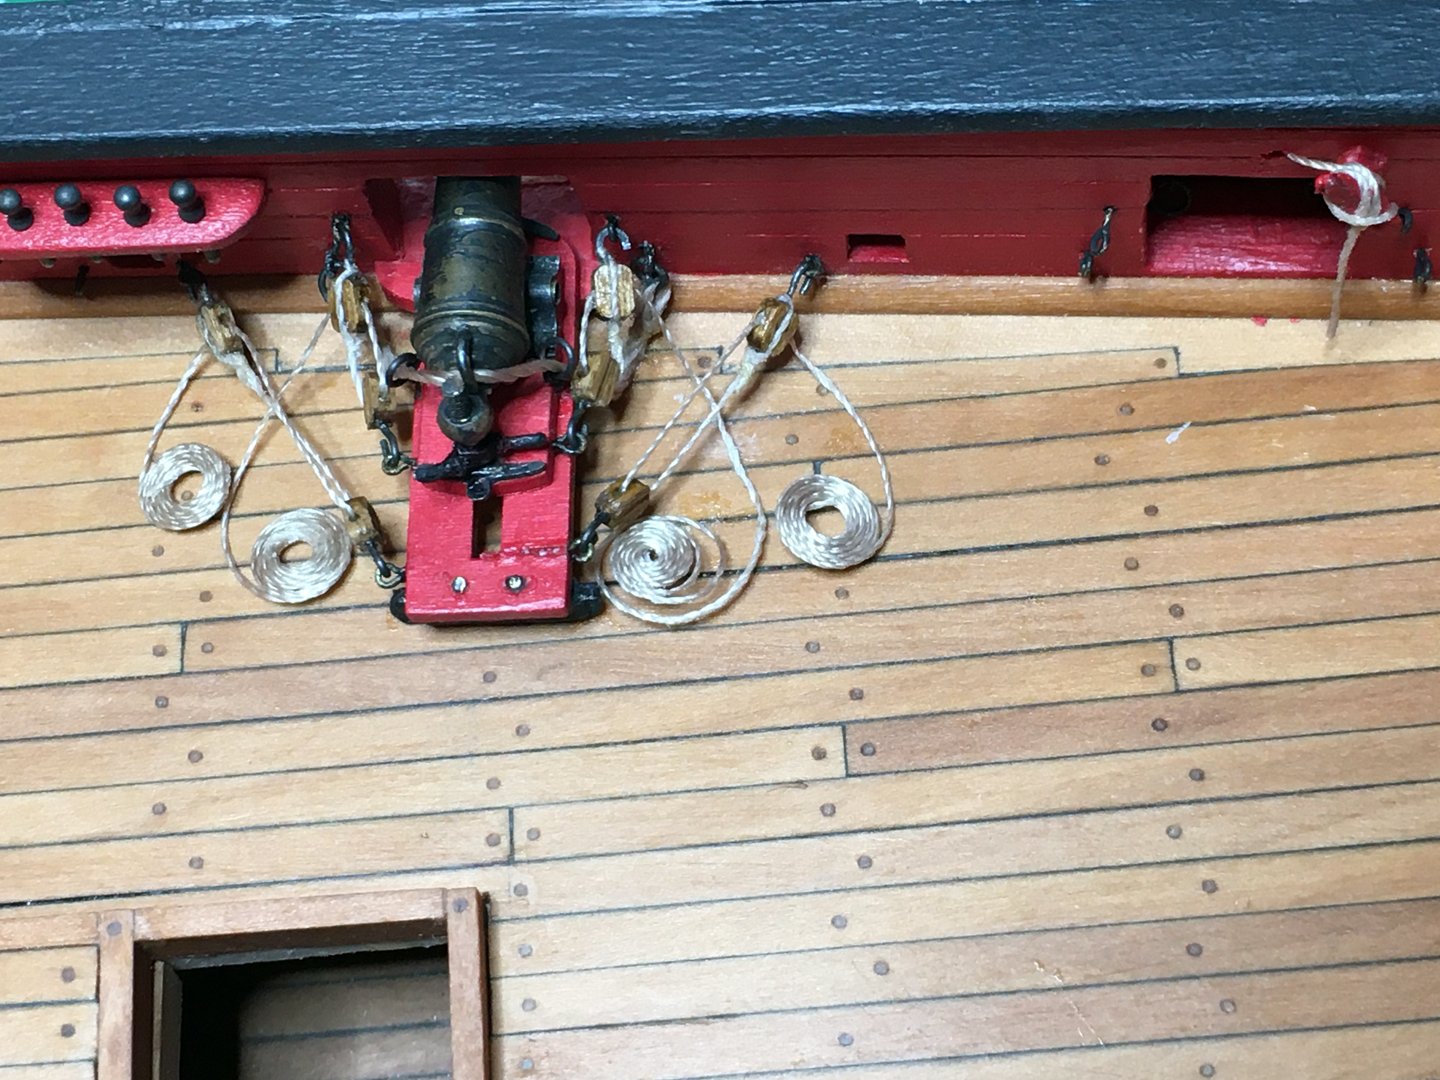
Rigged my test carronade using rope purchased from Chuck. What a difference to work with some quality rope over the kit material. Night and Day. Couple pics again using my worst carronade and sled, which has taken a beating from all my experimenting. Breach ropes, this time I have not draped the rope down to the deck surface. It looked to long to me, I did that with the kit material in the earlier post. I think it looks the right length now for it's purpose. I'm thinking of going a little smaller on the rope coils to. They are not glued at all, the coil is being held together with fray stop. If you look at the natural drape of the breach line it just shows how nice Chucks rope is! Try doing that with kit material. Oops another one of those newbie mistakes! I need to drop the breach line down one eyebolt and put the lower block up! Ahh the advantages of doing a test run
-
Nice concise directions you are giving and a fantastic job you have done. It is really looking good
- 157 replies
-
- model shipways
- syren
-
(and 1 more)
Tagged with:
-
Not sure i totally follow how you have achieved the .5mm pencil treenails. Are you drilling a tiny hole and inserting a small piece of lead, sorry if this is a dumb question. The results with the pencil look great the eye effect makes it look aged and weathered especially with the stain you are using. Nice going ~
-
Steven great job you are doing. I like the 8mm belaying pins, nice upgrade!
- 157 replies
-
- model shipways
- syren
-
(and 1 more)
Tagged with:
-
Nice work, just finding your log now and we are both about the same point
- 157 replies
-
- model shipways
- syren
-
(and 1 more)
Tagged with:
-
Having tried the kit supplied nylon rope I made the decision to purchase rope from Chucks, Syren Ship Model Company Model Expo has a limited supply of rope for there kits so the supplied rope does not always fit to scale. I knew I had seen the info somewhere so after much searching with out luck through Dubz's Syren log, I was able to finally find the info which I had saved to my comp months earlier. Here is a reprint of what is required to fit the ship with the recommended rope sizes, posted by Chuck. I will reprint that info here for anyone looking for that information. whenever you see .021 listed in the instructions this should be changed to .025 whenever you see .028 it should be bumped to .035 Changes are as follows and only with standing rigging. The running rigging is fine. I went through the instructions and found what needs to be changed so you can upgrade your rope. Breech line for guns - .025 tan Standing Rigging Changes Lower Shrouds .035 Topmast shrouds .025 lower pendants .025 Lower stays .045 lower preventer stays - .035 Futtock shrouds .025 Topmast stays .035 Topmast preventer stays .025 Here is what you would need to buy to rig your model if you decide to get it from Syren Ship Model Company. Black or Brown standing rigging .045 - 1 pack .035 - 2 packs .025 - 3 packs .018 - 3 packs .012 - 1 pack .008 - 7 packs Tan running rigging .062 anchor 1 pack .025 - 2 packs ,008 - 12 packs .018 - 2 packs .012 - 4 packs
-
I dry fitted the belaying pins because I learned a little trick while doing my Bluenose. Drill the holes so you can slip the rope in through it followed by the pin and have it hold tight. When rigging feed the rope in through the top of the hole pull it out through the bottom and snug it up. The pin is now pushed in tight and holds the rope in position. You can continue doing the same as you rig without gluing the lines until you are satisfied with the layout and tension. If one gets a little loose or to tight simply lift the pin, pull or loosen the tension and reinsert the pin. Once you have a bunch and are satisfied you can add some glue to finish, snip off the extra and add any rope coils you want over the pins. Hope this helps bud, others may wish to add there methods but this one worked very well for me. I know Thomas and totally agree. I am going to bite the bullet I just have to decide if I want to make my own by purchasing a ropewalk (which I don't see listed on Chucks site anymore) or go with pre-made or both lol. Decisions decisions. Thanks for the kick bud I need one every now and then ~
-
Hi Richard, I should have just bought the plans and gone scratch. At this point I am wondering if I can justify purchasing rope, since to date I haven't used any of the kit lumber. Even the hull planking I used leftovers from my Bluenose 😉 Decisions, decisions. The nylon is almost useless to work with. I will consider purchasing rope for all the running rigging and use the kit standing. My bluenose kit came with the same brass belaying pins as The Syren kit uses. Link: Here they are 8mm and also available in 20 packs. MS now has a much better supply of belaying pins available though so look through all they carry, they now have some good looking boxwood & pear ones available in several sizes that look interesting. Cheers
-
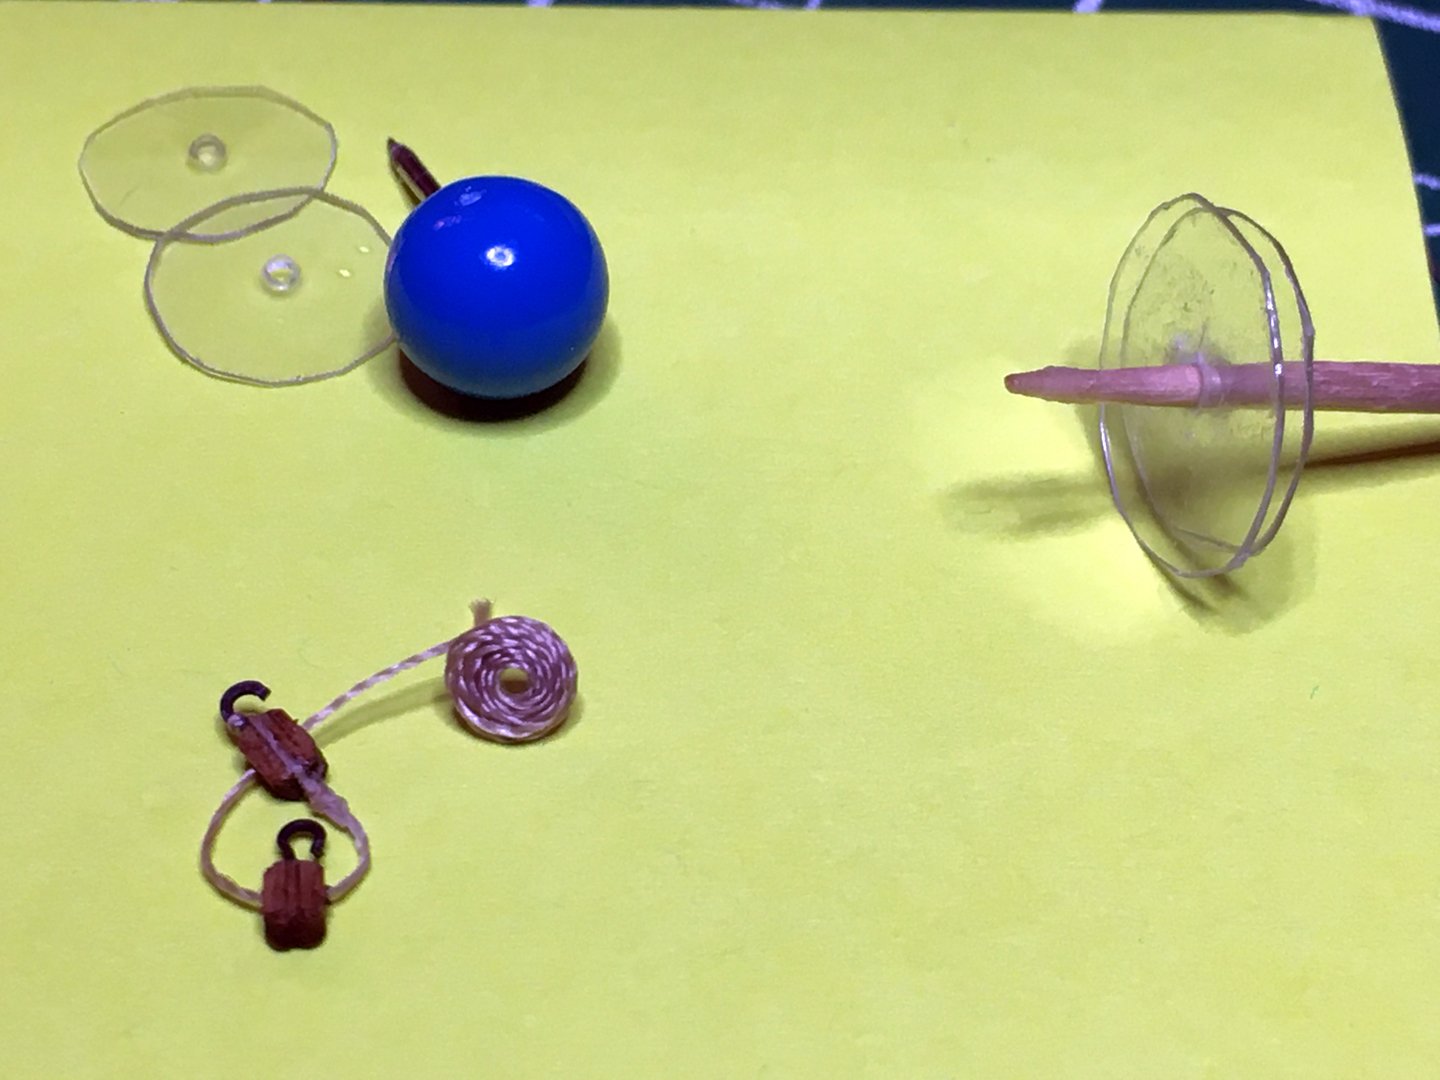
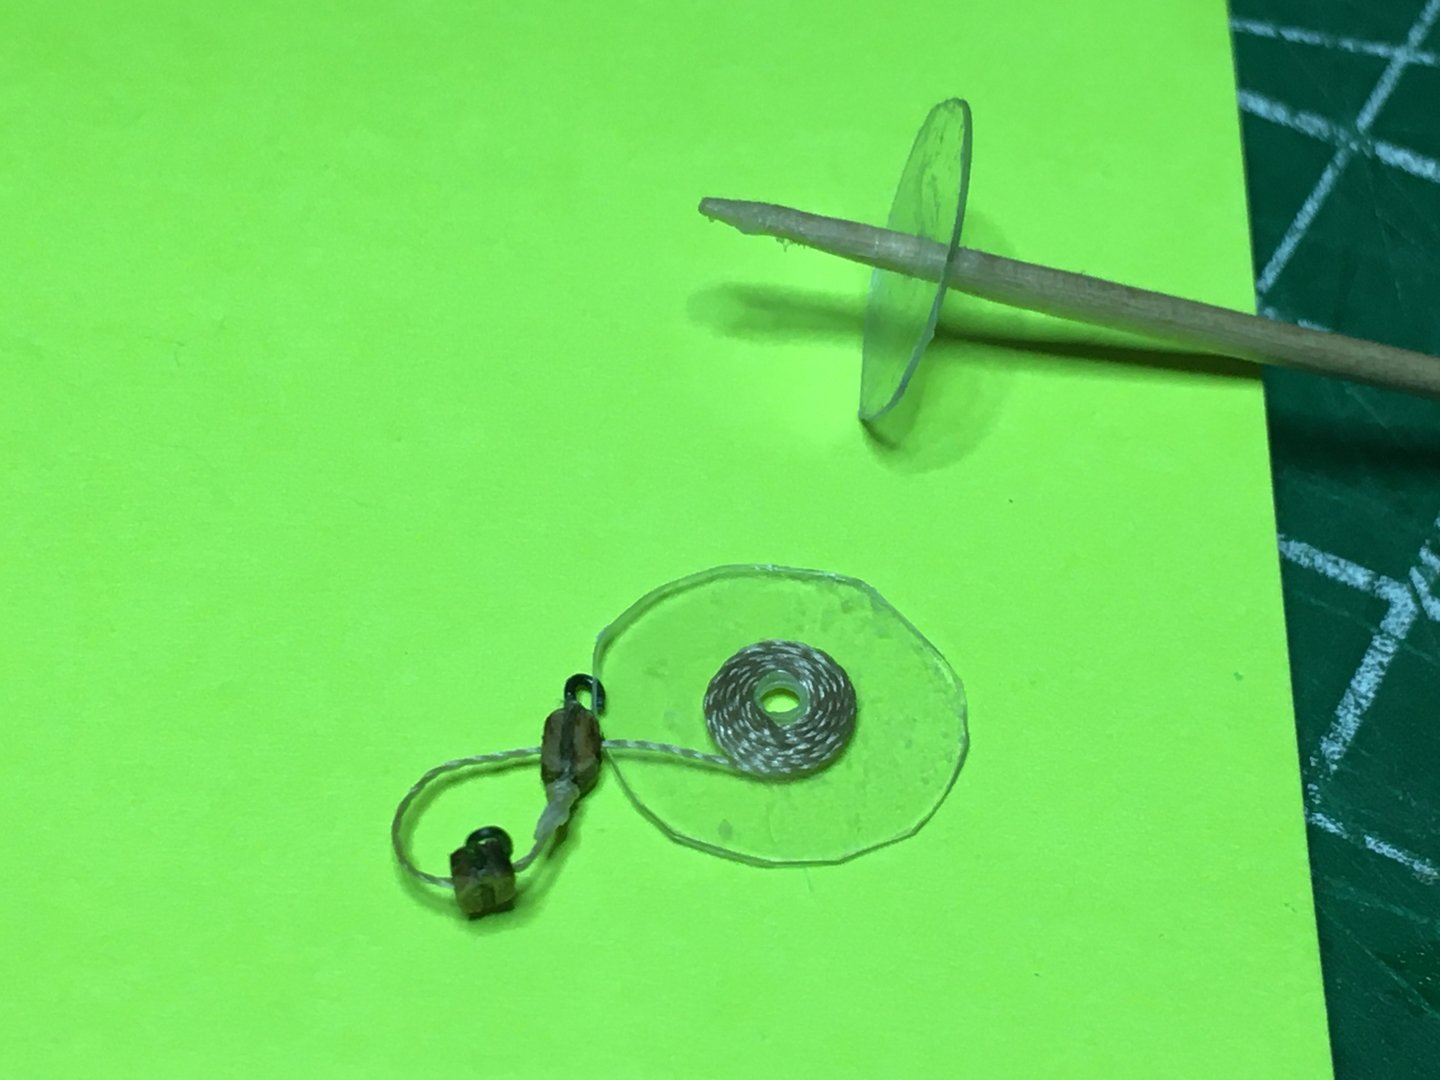
Rigging carronades with the nylon rope that comes with the kit is not a lot of fun So I took my worst carronade and sled to work with as a prototype. Working with the nylon took a lot of trial and error, trying to make rope coils proved fruitless for the first while. After trying several jigs I had seen with no success, because the nylon was just to springy. I sleep on it and the next day got surprising results with a quick easy jig I made up. Here are a couple of pics showing the jig and my initial coils. I think the coils are maybe to large so I will try making them a little smaller. Your opinion would be appreciated! Two circles of thin plastic were cut out and a hole poked through the centers for a spindle. The rope starts out by being poked just through the opening of the hole in the first piece of plastic then the pin or tooth pic is inserted to hold the rope tight and in position. I then ran a bead of Fray Stop ( fabric store ) down the rope and put the second piece of plastic on and snugged it up on the rope. Now by just turning the tooth pic or pin the rope would wind around making a coil with out springing away and the fray stop actually glues it enough to prevent it from springing when removed.
-
Well you managed to really pull it off they looks really good.
- 950 replies
-
- syren
- model shipways
-
(and 1 more)
Tagged with:
-
Two days without a pic I knew exactly what you were up to. I feel for you bud
- 950 replies
-
- syren
- model shipways
-
(and 1 more)
Tagged with:
About us
Modelshipworld - Advancing Ship Modeling through Research
SSL Secured
Your security is important for us so this Website is SSL-Secured
NRG Mailing Address
Nautical Research Guild
237 South Lincoln Street
Westmont IL, 60559-1917
Model Ship World ® and the MSW logo are Registered Trademarks, and belong to the Nautical Research Guild (United States Patent and Trademark Office: No. 6,929,264 & No. 6,929,274, registered Dec. 20, 2022)
Helpful Links
About the NRG
If you enjoy building ship models that are historically accurate as well as beautiful, then The Nautical Research Guild (NRG) is just right for you.
The Guild is a non-profit educational organization whose mission is to “Advance Ship Modeling Through Research”. We provide support to our members in their efforts to raise the quality of their model ships.
The Nautical Research Guild has published our world-renowned quarterly magazine, The Nautical Research Journal, since 1955. The pages of the Journal are full of articles by accomplished ship modelers who show you how they create those exquisite details on their models, and by maritime historians who show you the correct details to build. The Journal is available in both print and digital editions. Go to the NRG web site (www.thenrg.org) to download a complimentary digital copy of the Journal. The NRG also publishes plan sets, books and compilations of back issues of the Journal and the former Ships in Scale and Model Ship Builder magazines.

