NovaStorm
-
Posts
321 -
Joined
-
Last visited
Content Type
Profiles
Forums
Gallery
Events
Everything posted by NovaStorm
-
 You've done a fantastic job on those cheeks and rails. The carving has come out looking really good too. Nice to see how well you have done with the basswood in this tricky area. Cheers ~
- 950 replies
-
- 2
-

-
- syren
- model shipways
- (and 1 more)
-
Well I would be very interested in seeing what you could come up with by using some weathering effects. I really want to try my hand at weathering have it in mind to do the Terror that way. Cheers ~
-
Outstanding job Richard, the guard looks like it belongs there and the brake is so well done!!! Great update ~
-
That is looking seriously great. Glad you fixed the channel otherwise it would have driven you nuts Nice job on the fix!
- 950 replies
-
- 2
-
-
- syren
- model shipways
- (and 1 more)
-
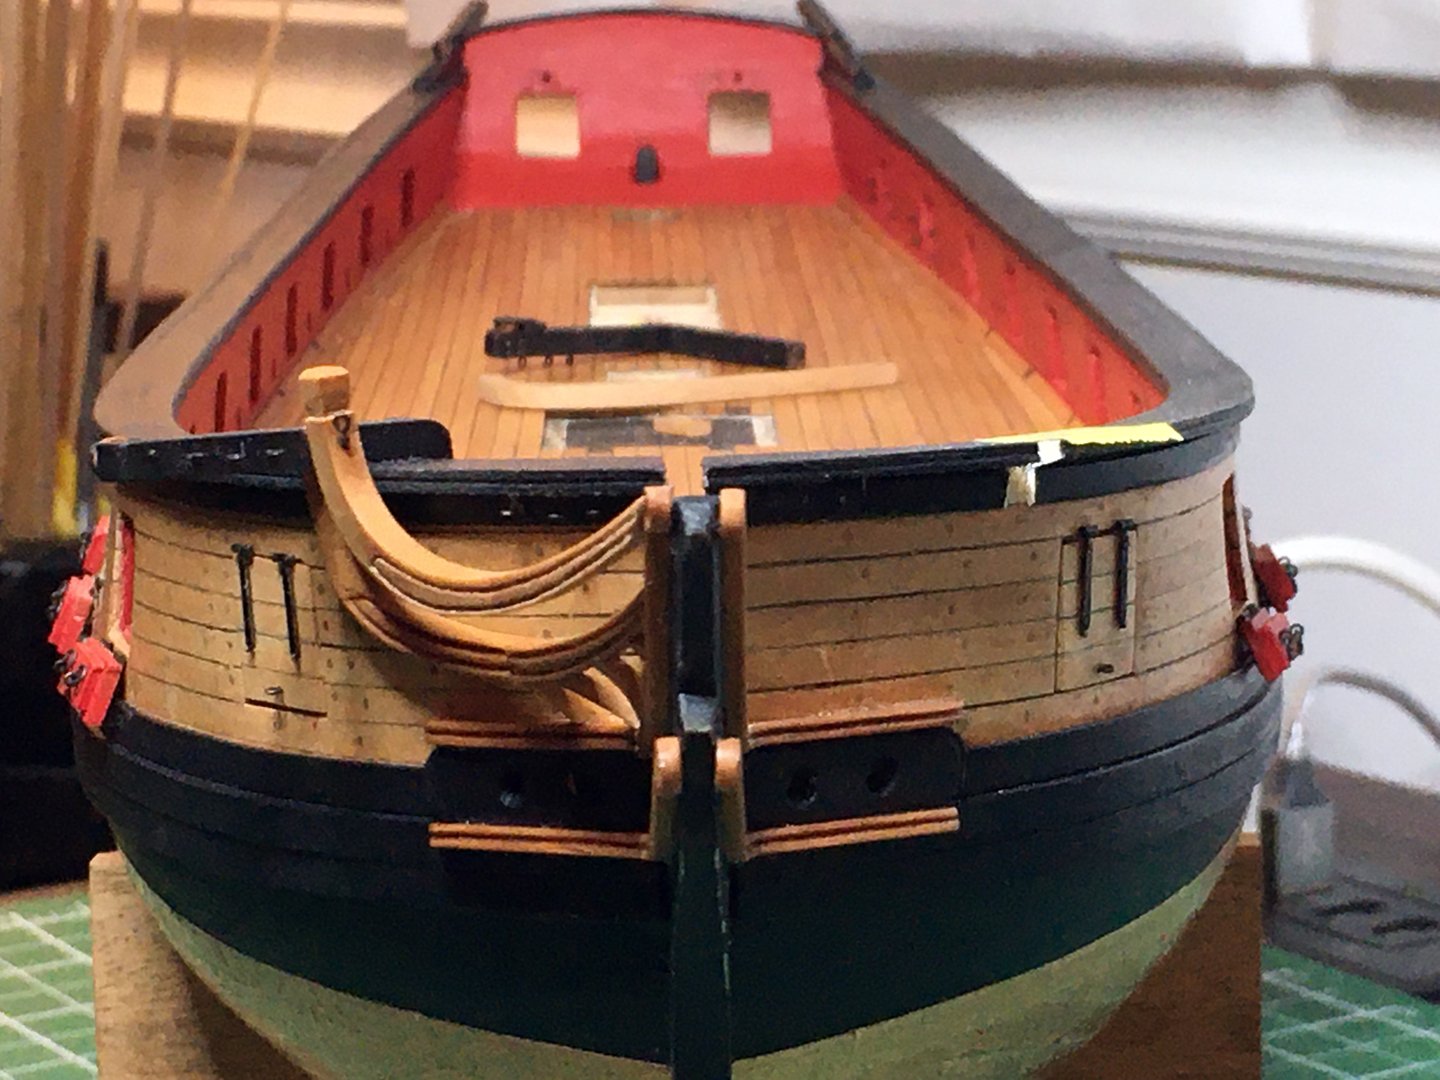
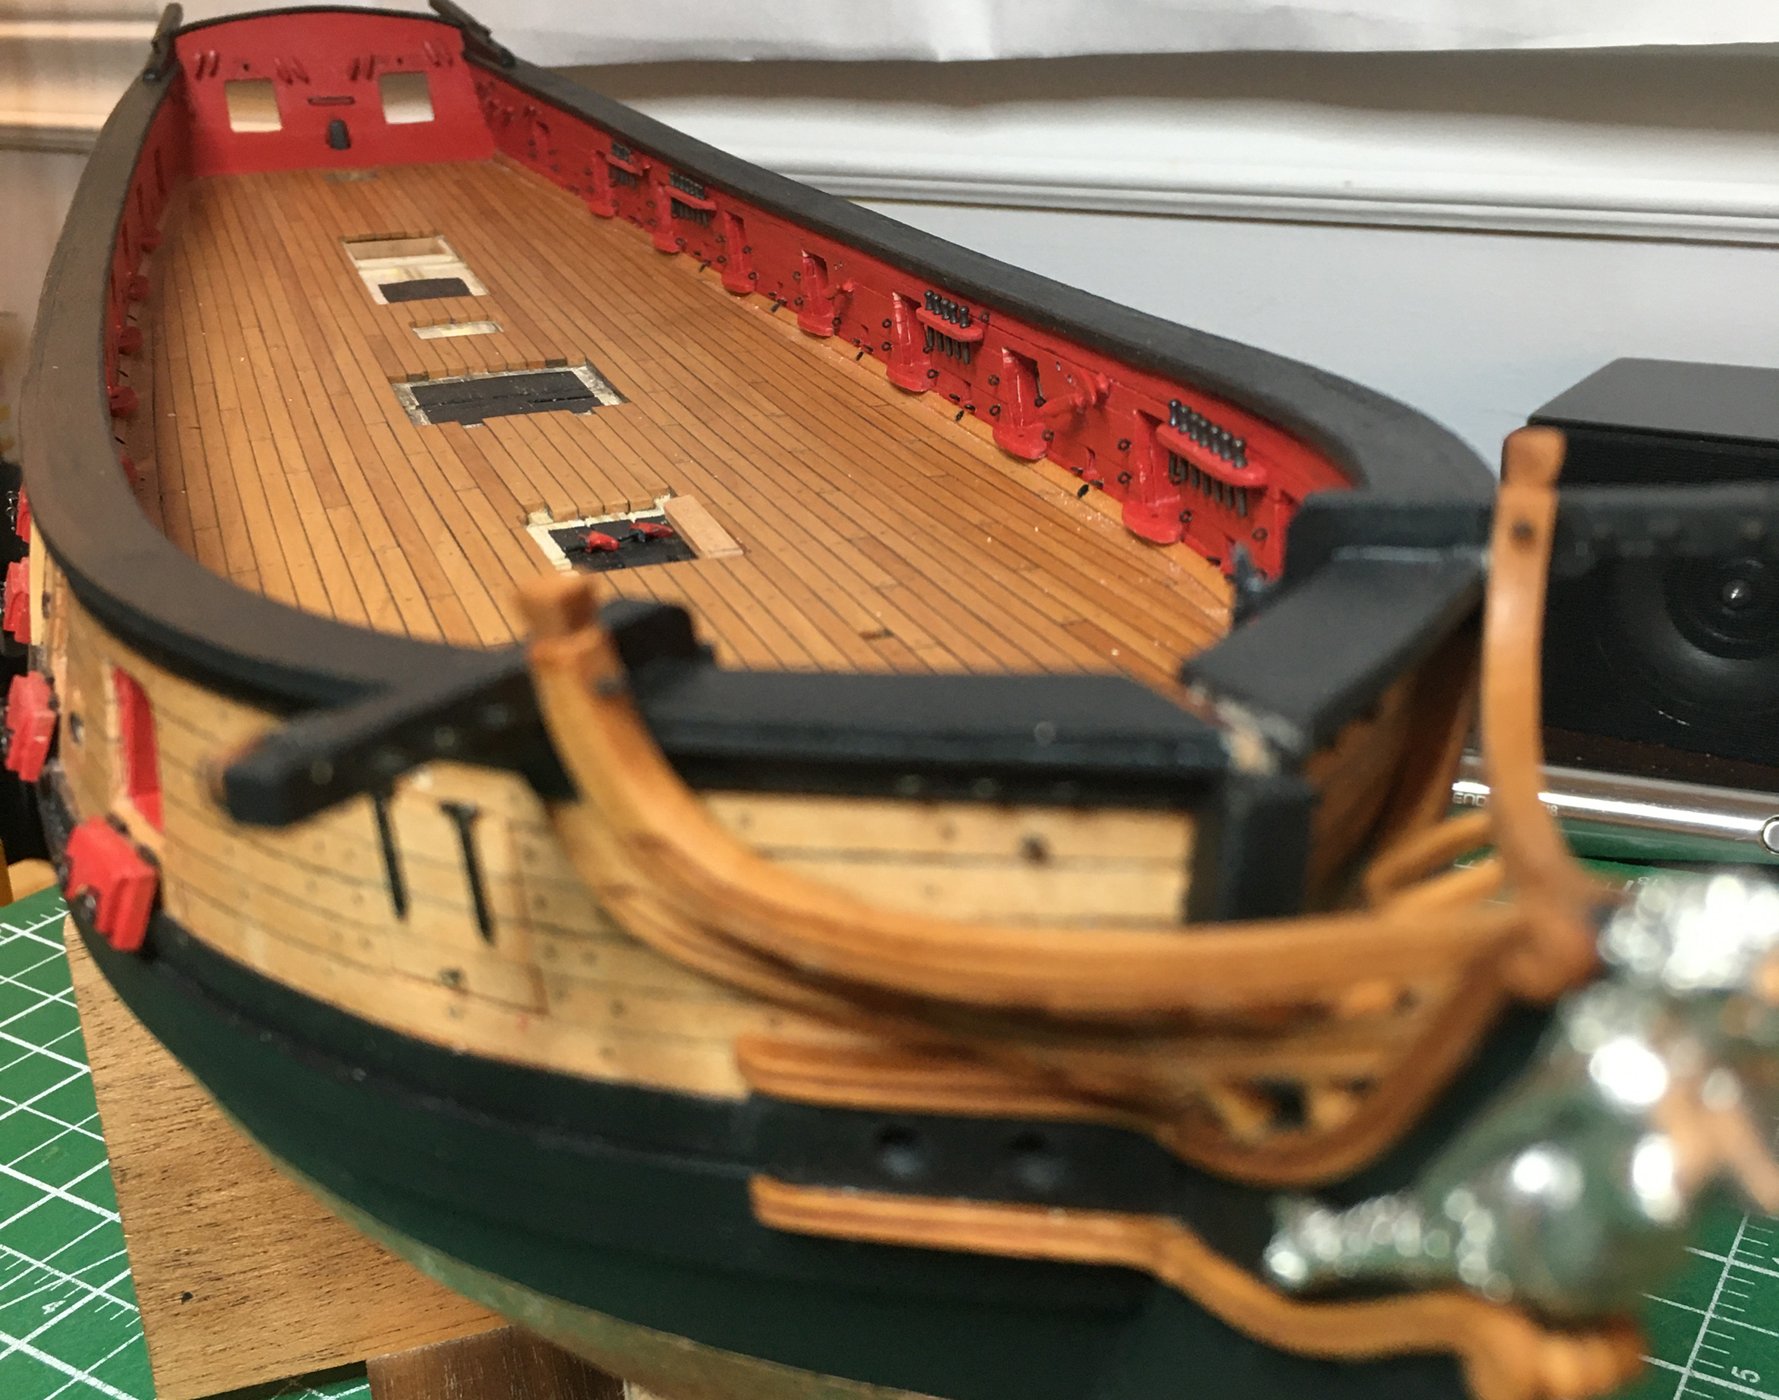
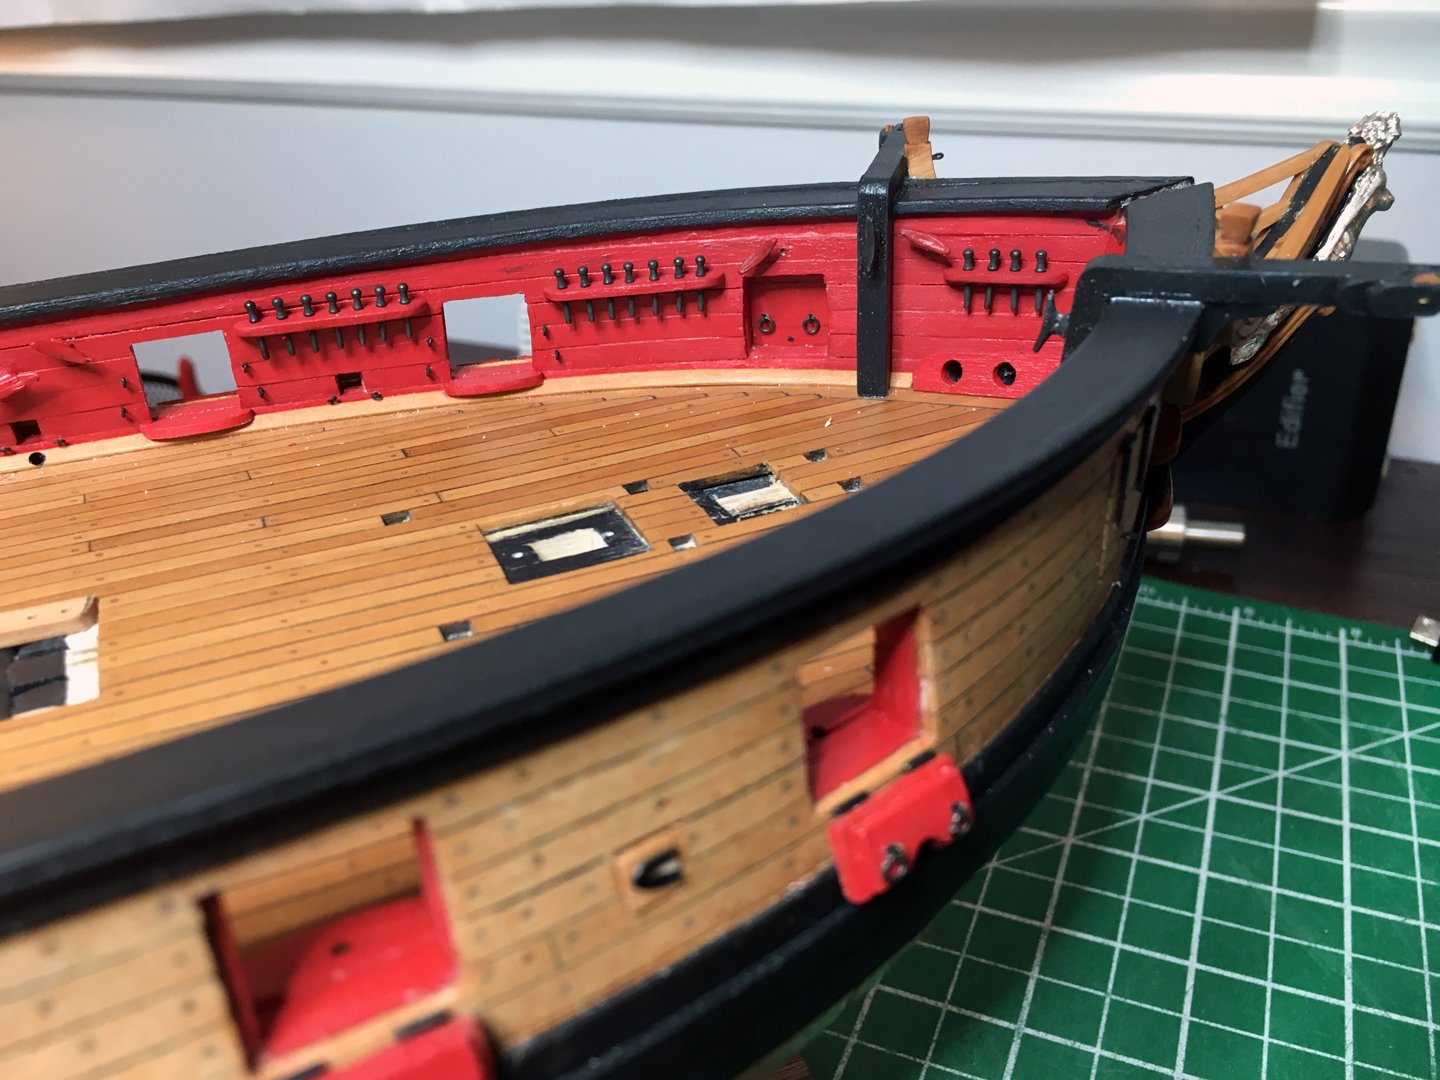
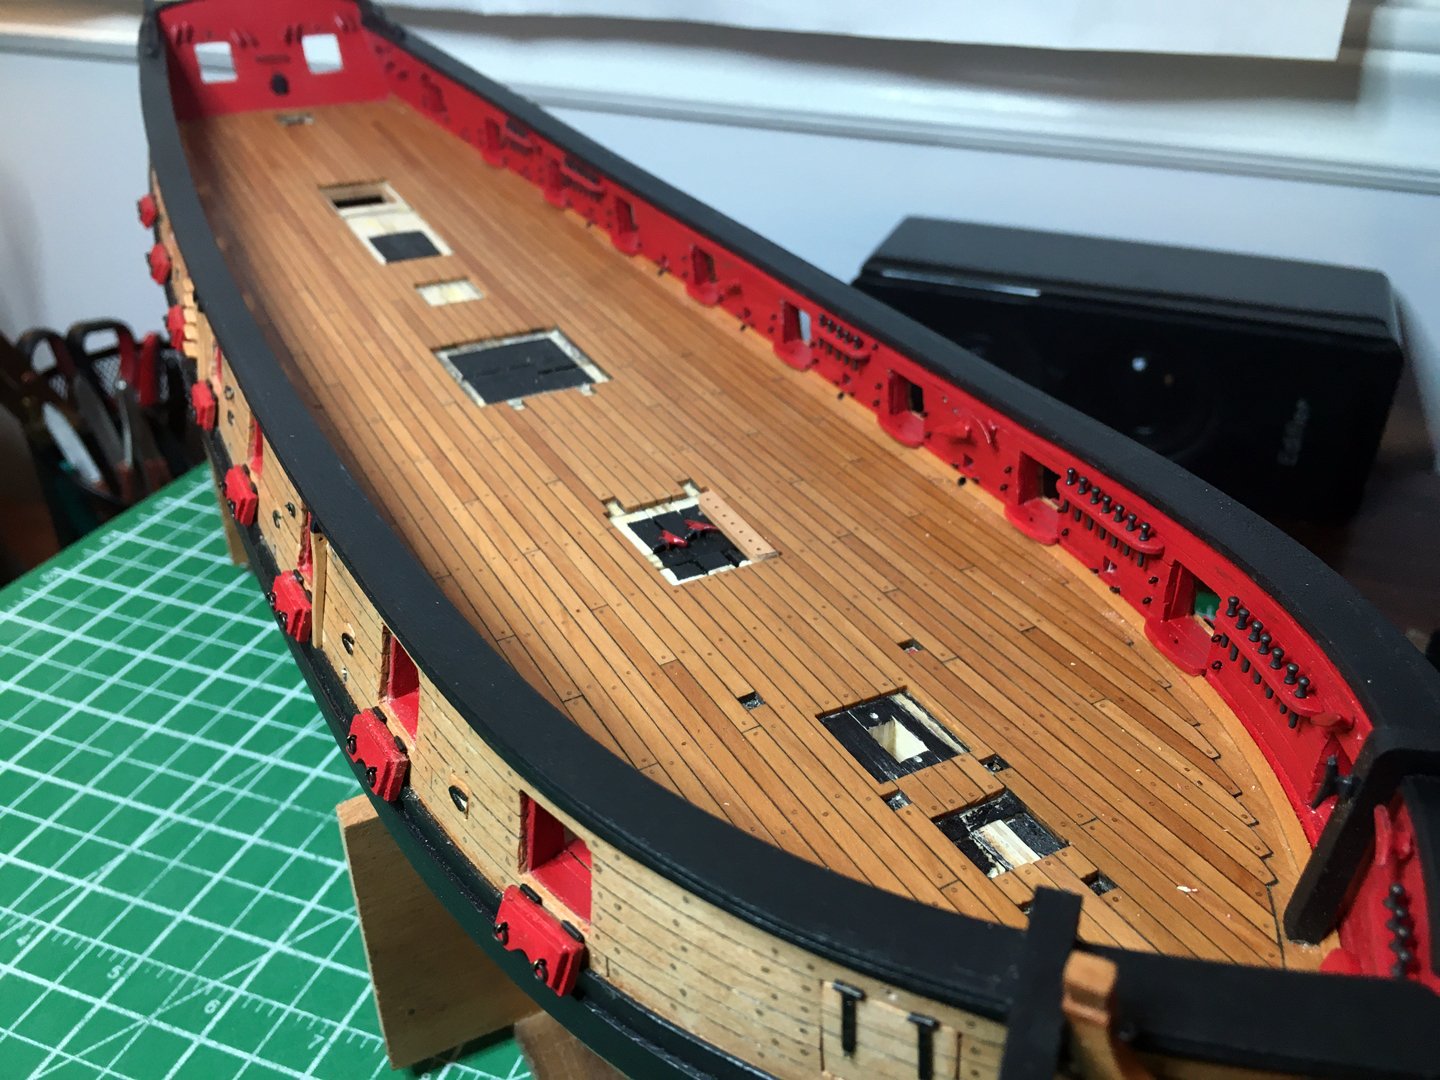
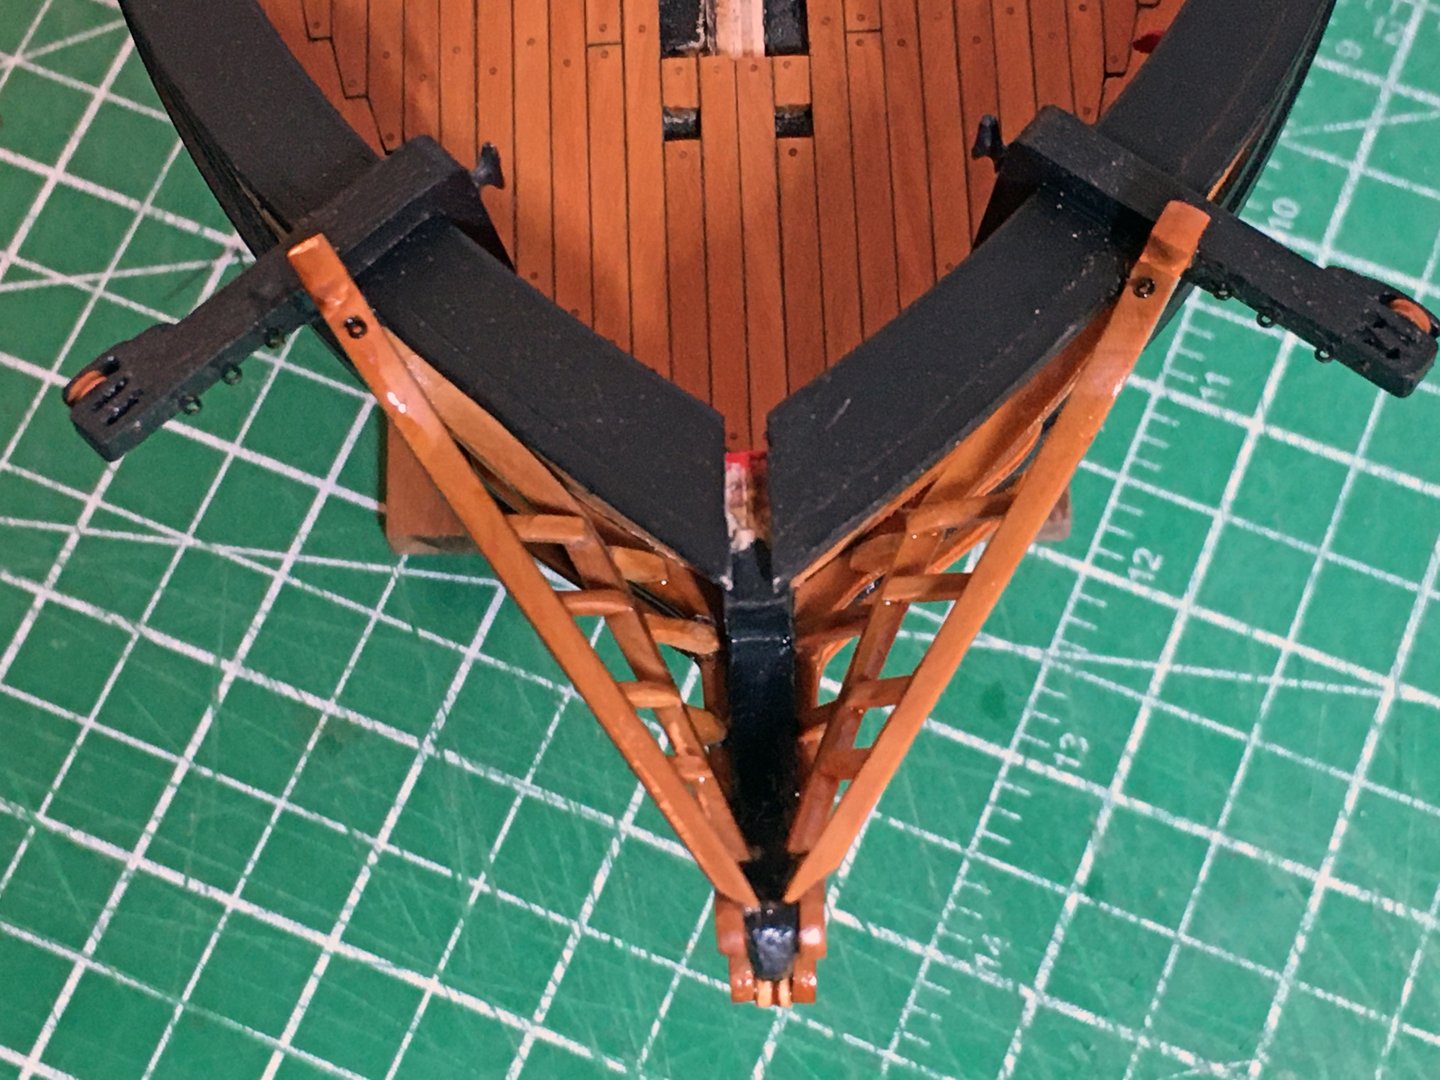
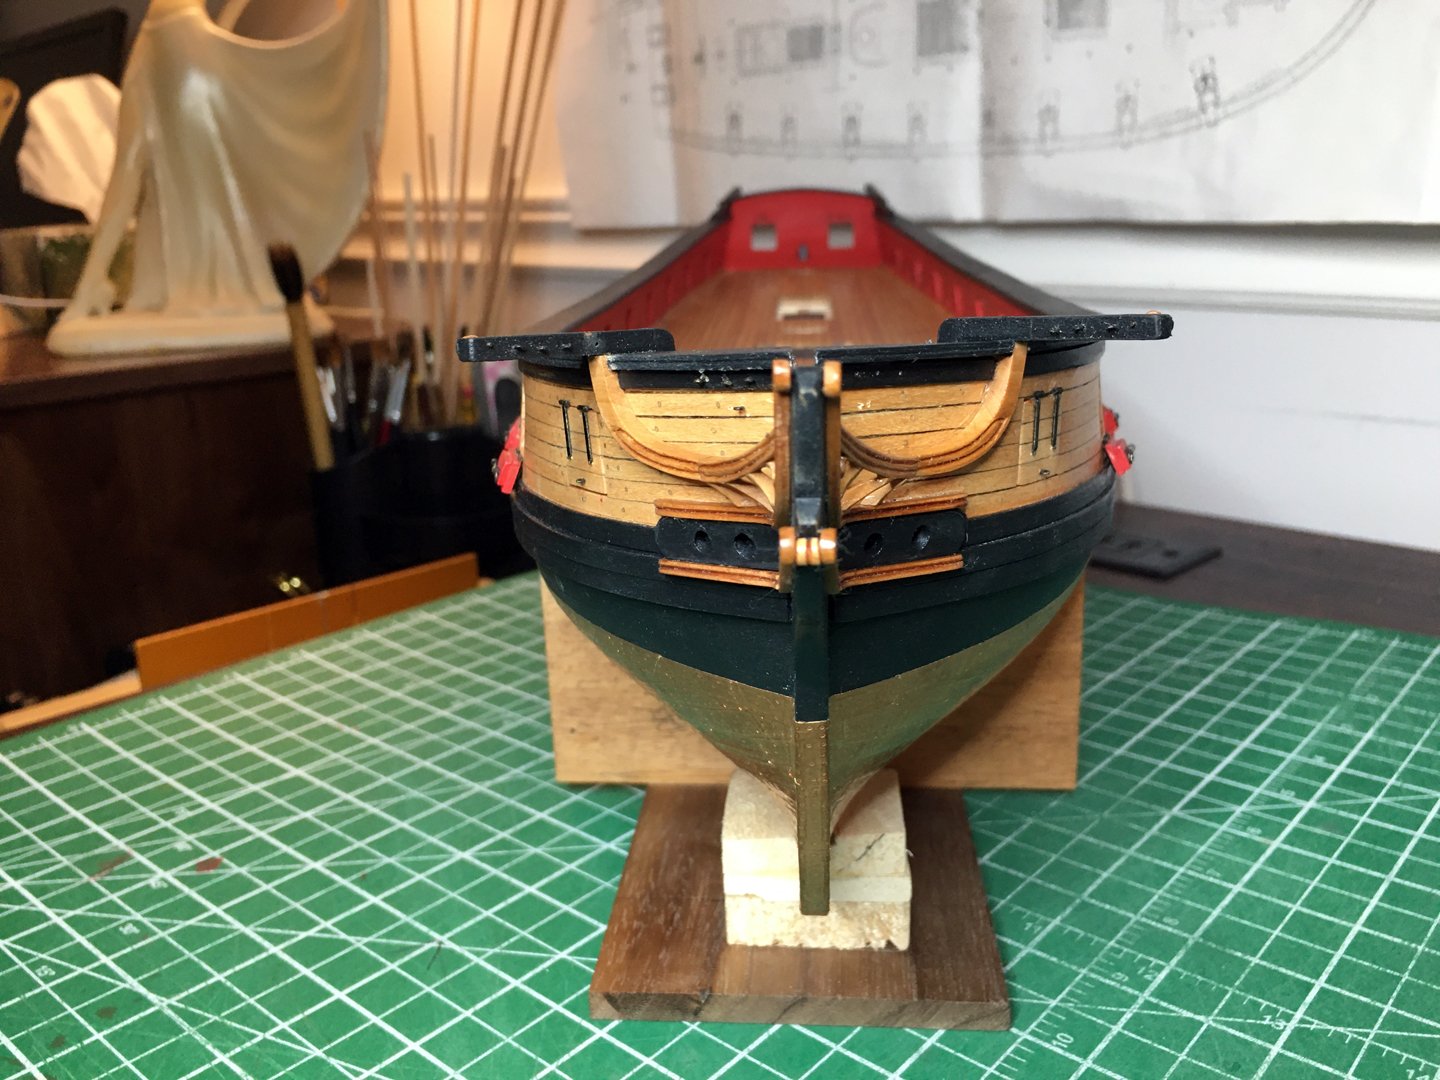
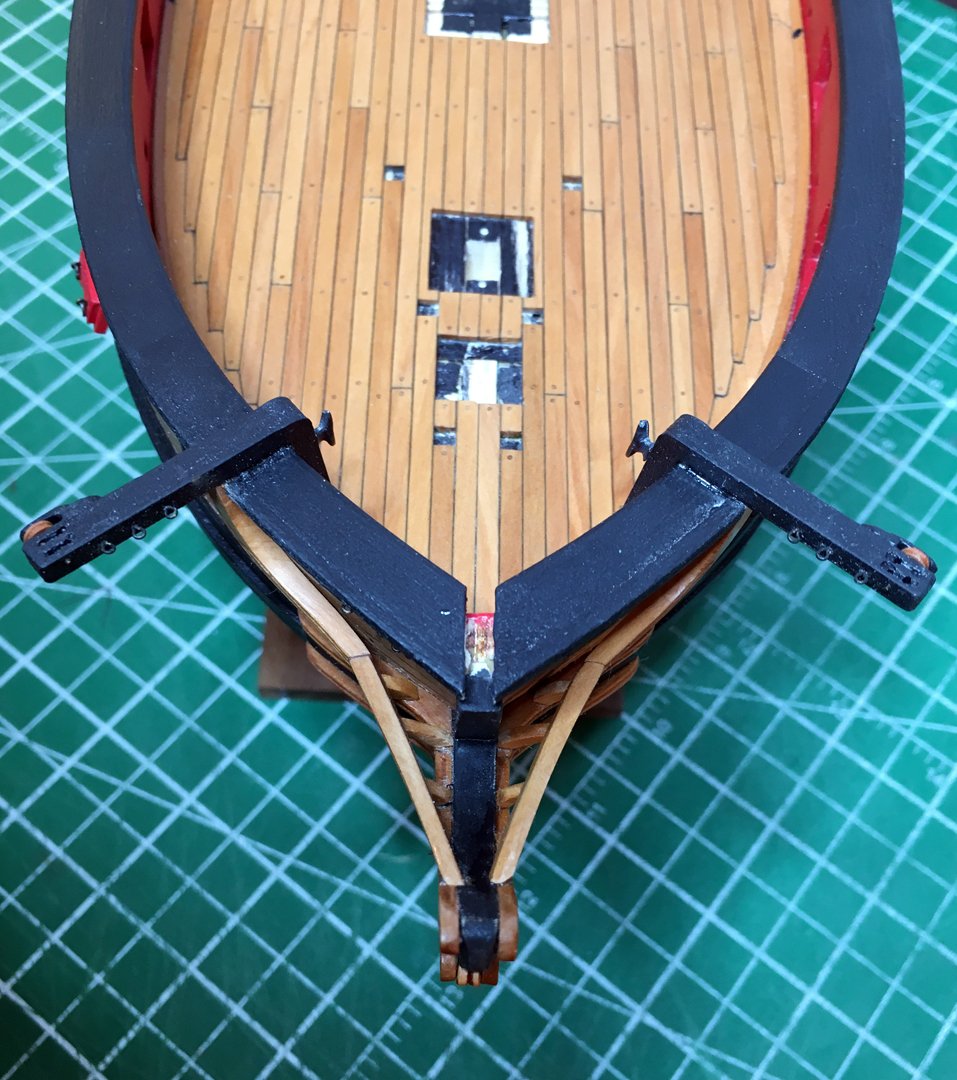
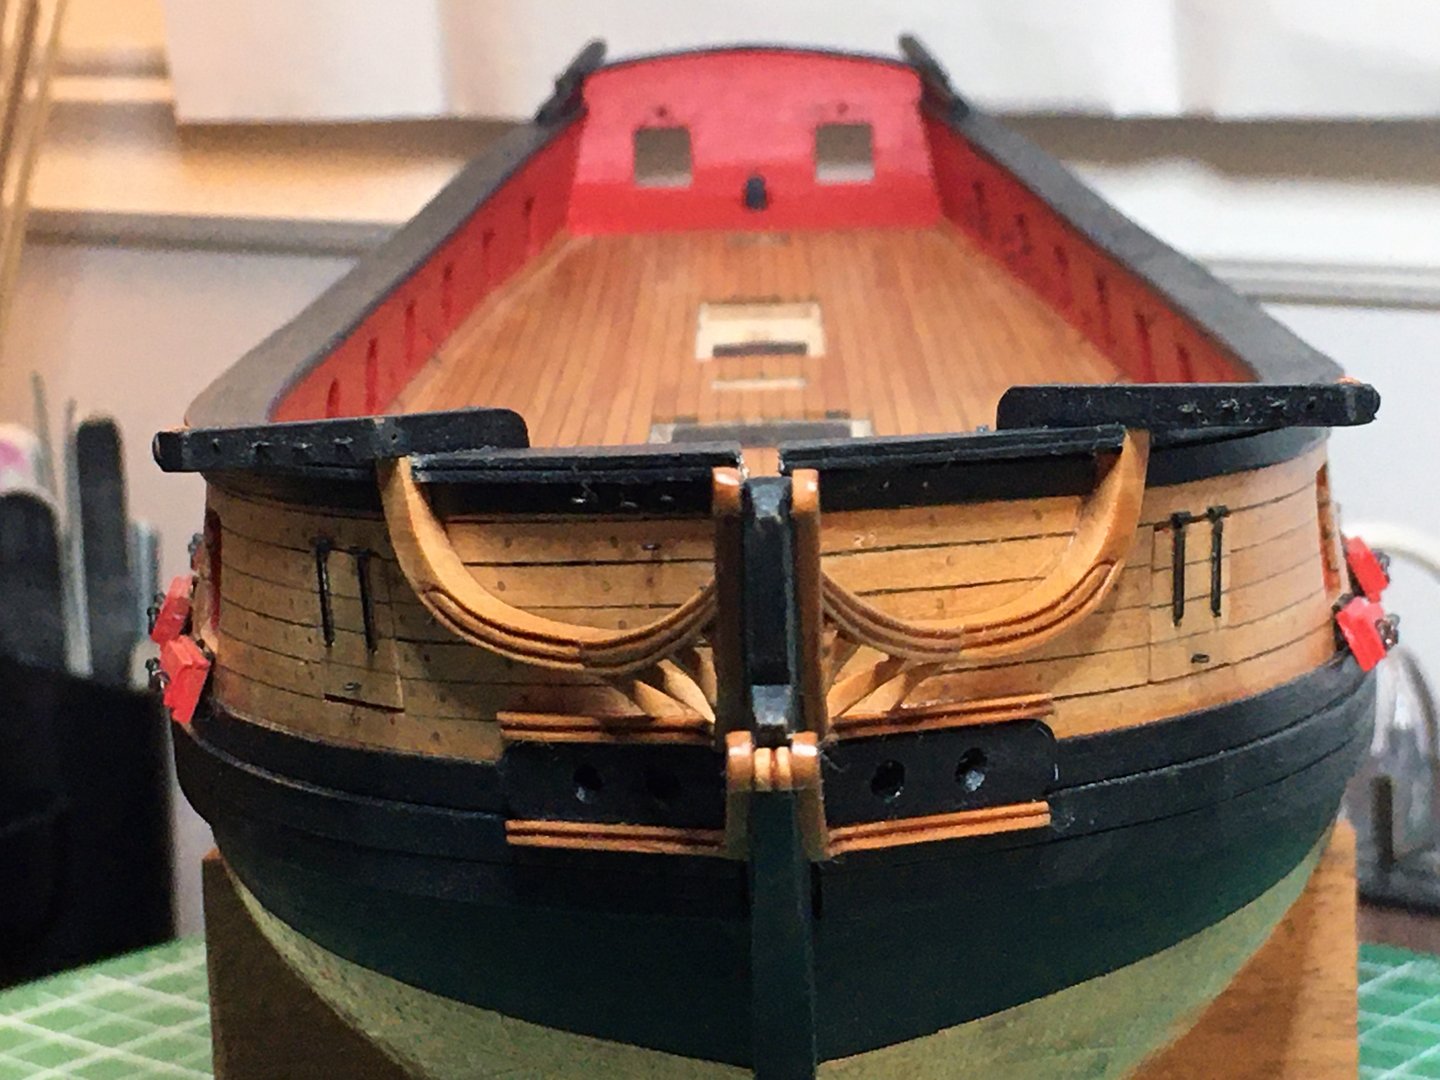
Little update since coming back from holiday. Added the swivel brackets for the carronades and then started adding lots of inboard bulwark details, pin rails, eye bolts and cleats. Used 1/16 pear for the pin rails then sanded it thinner toward in the outer edge, used cut off nails to pin everything for strength ... There are six pin rails per side. Some picks

-
Beautiful work love the job you have done on the cabin.
- 140 replies
-
- 3
-
-
- benjamin w latham
- model shipways
- (and 1 more)
-
That is looking really good, nice going. I've put off installing the channels because they look so darn breakable. My luck and all
- 950 replies
-
- 2
-
-
- syren
- model shipways
- (and 1 more)
-
Hi sorry for the late response I am still away on holiday I blackened all the photo etched parts except the Syren letters, I also blackened the belaying pins using Casey's Brass Black. For these smaller parts you can probably get away without cleaning them, I tried both ways and as long as you don't overly handle them they should blacken fine. Smaller parts blacken easily as it tends to react with them quicker. You can reuse the blackening solution. I used it straight up. It will turn blue when you use it and remain blue for a while after you remove the items. Let it sit and it will clear off and can be used again. I think it takes longer with an older used solution to work so it may wear down a bit with usage. Nail polish or vinegar should help in cleaning but as I said you can try it without on the very small parts I had no issues. I used these by Tamiya to remove the parts, but if you have some good sewing, fly tying or maybe nail scissors they should work ok to. Probably better than a #11. Hope this helps.
-
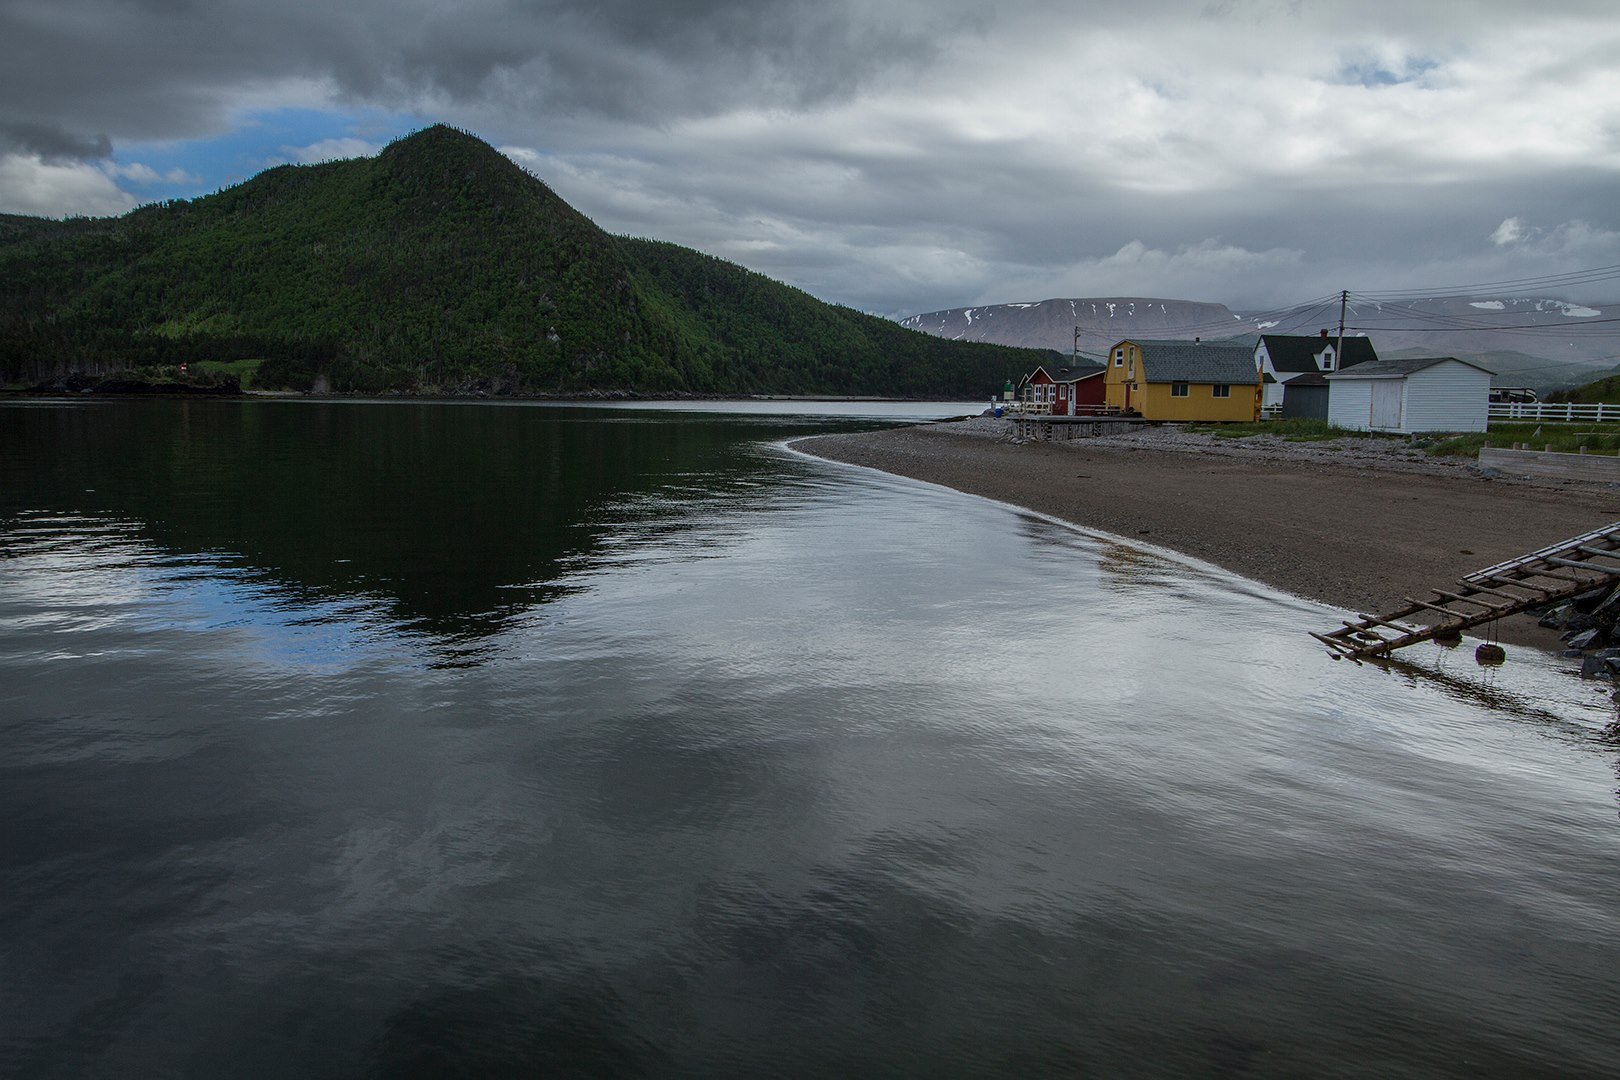
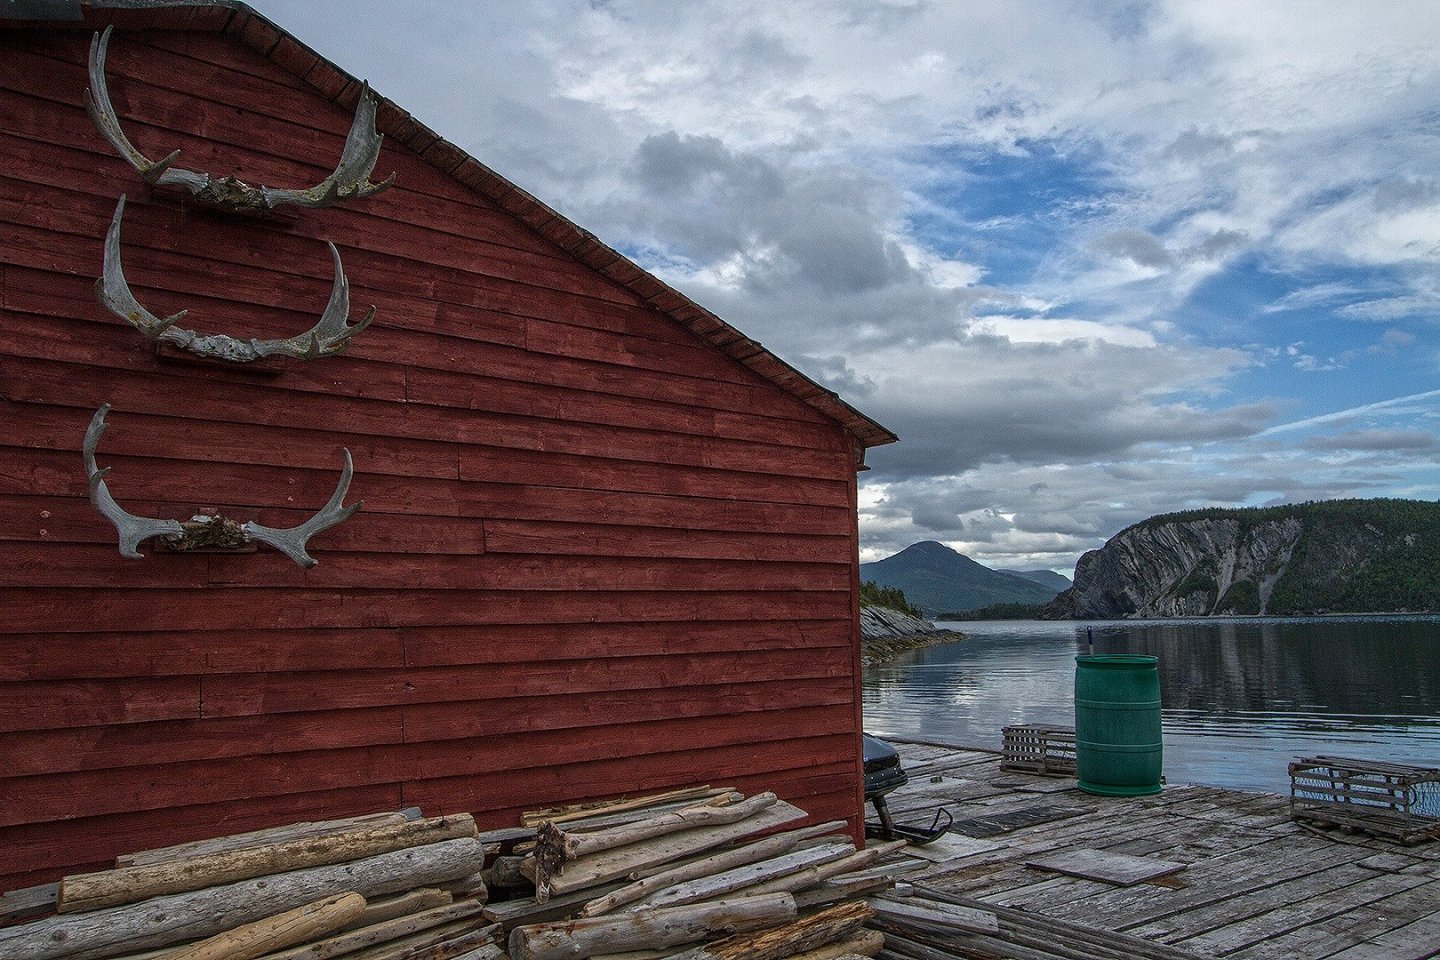
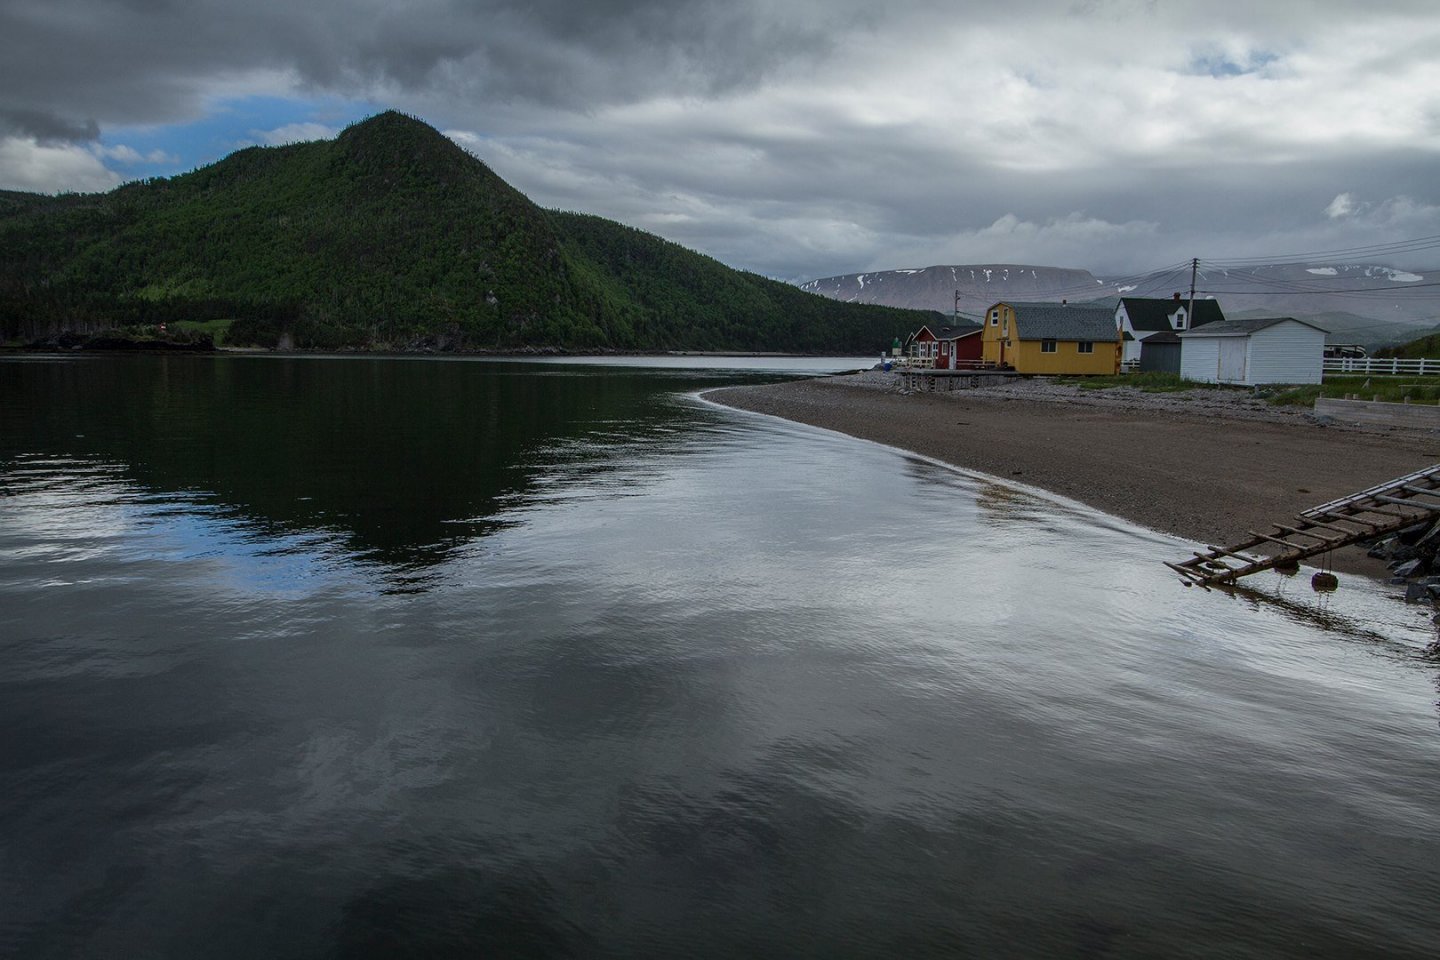
When I saw Thomas's build I knew it was the way to go. The kit parts looked to much like sticking plywood onto the transom. The Admiral and I have escaped to Newfoundland for a couple of weeks R&R. I won't be working in the dockyard but watching out for moose. A couple pics from the rock!
-
Really fine work Patrick, I like (A) the best to.
-
Great job Patrick, those bottom nails look perfect! Gotta say you are some ambitious using two per plank, cant wait to see the results.
-
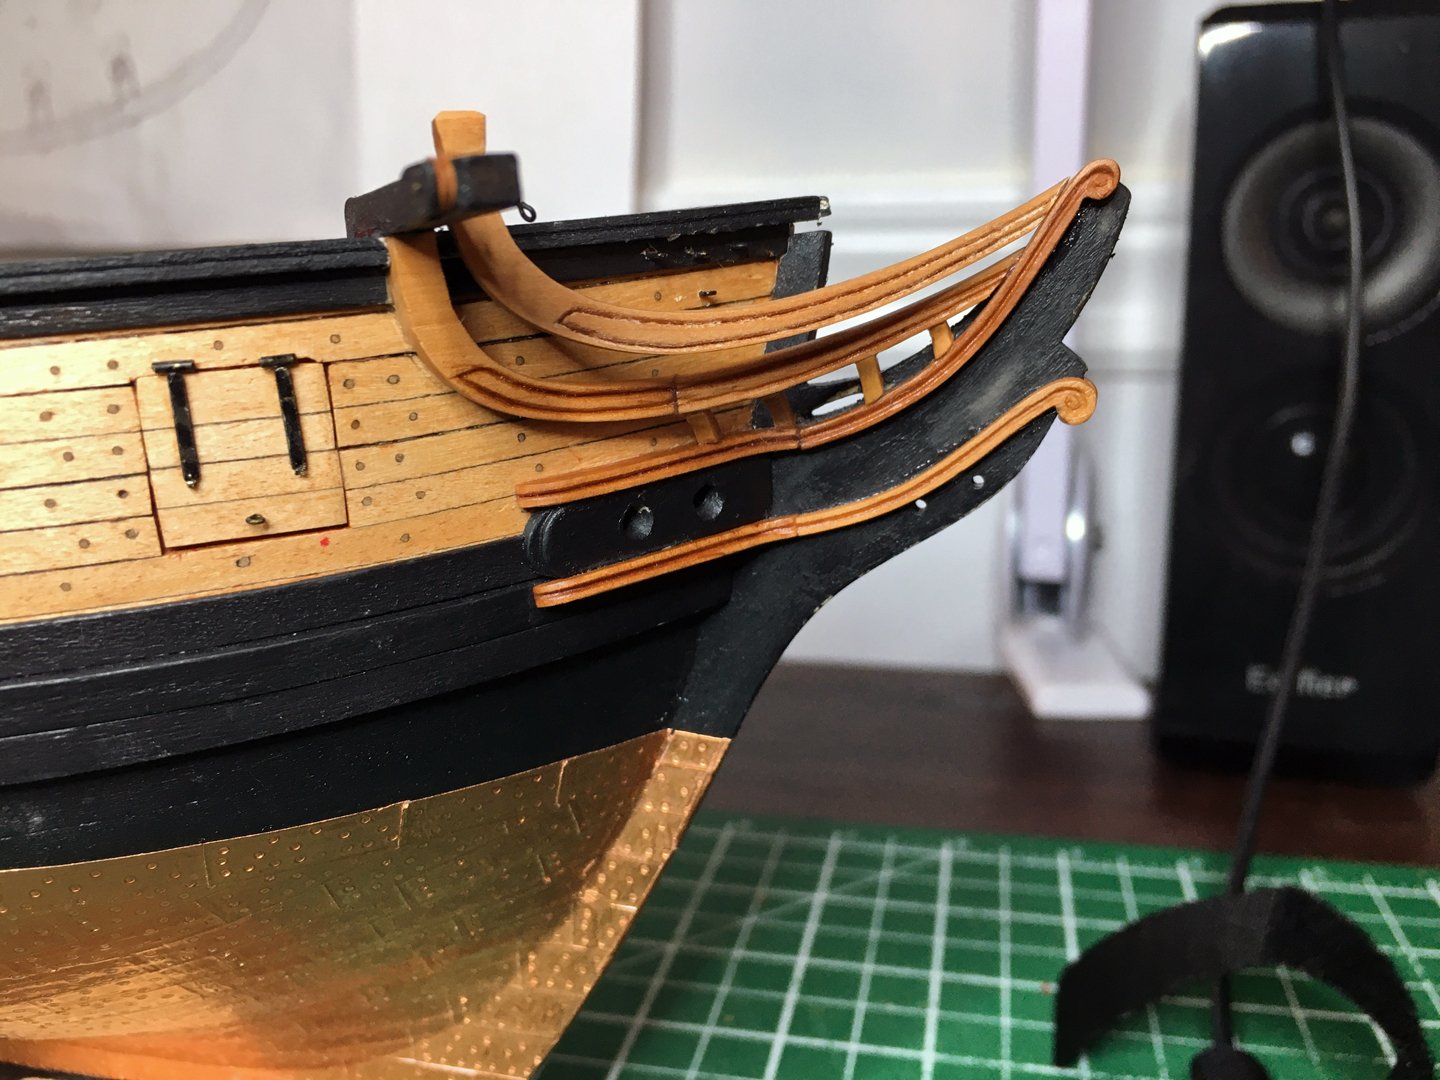
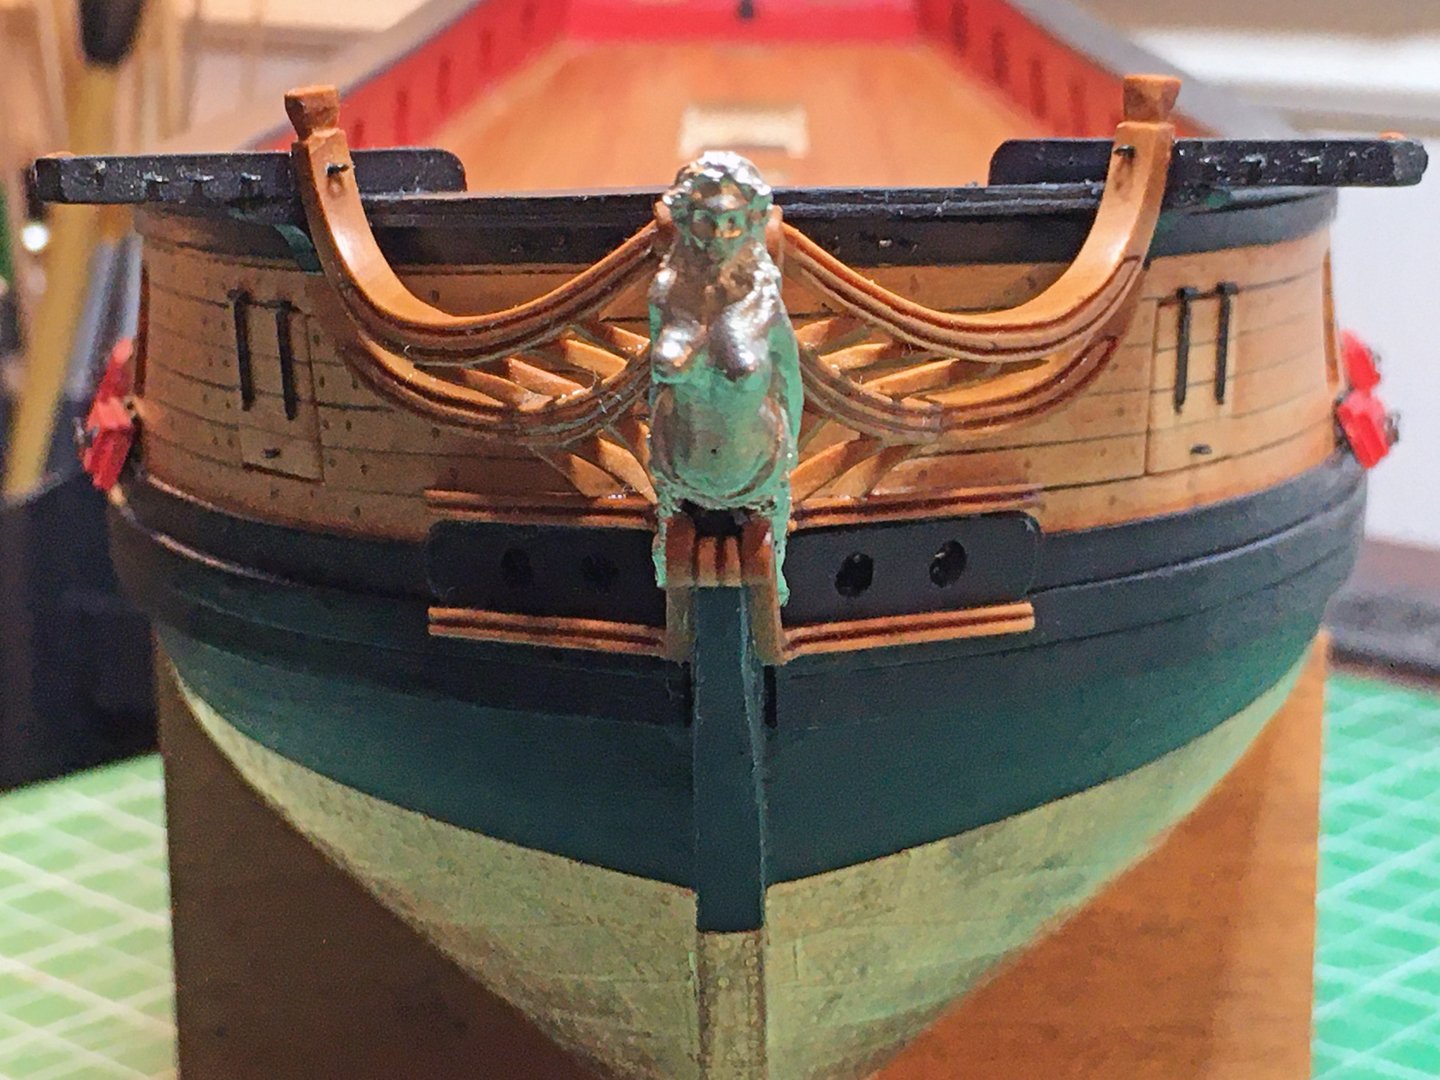
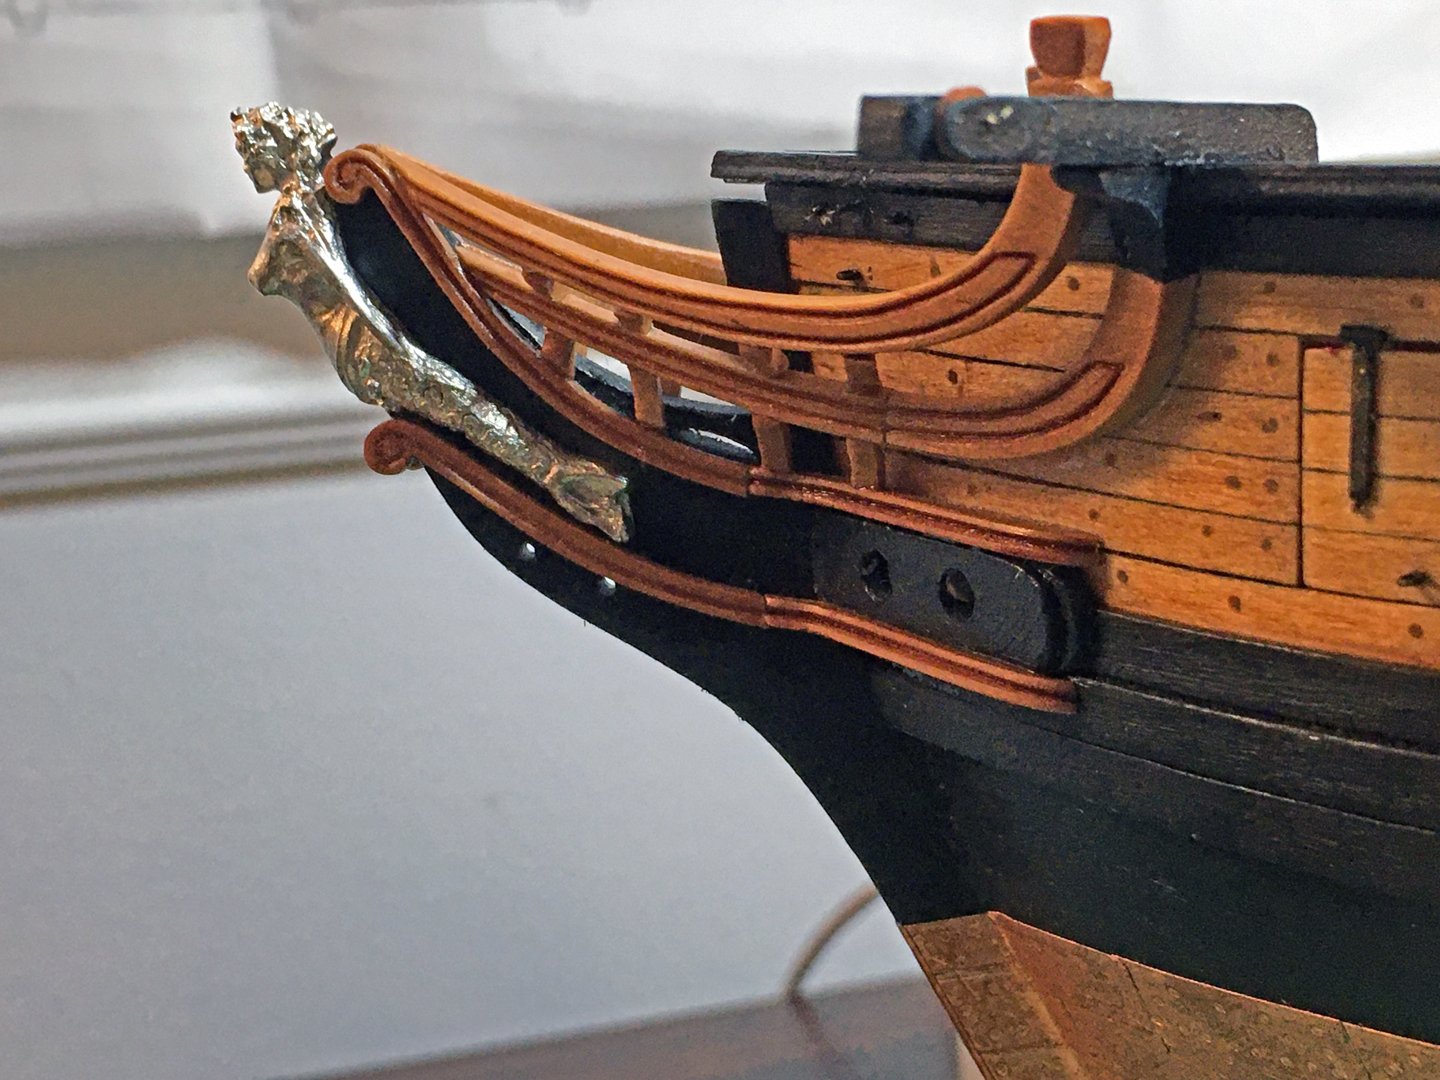
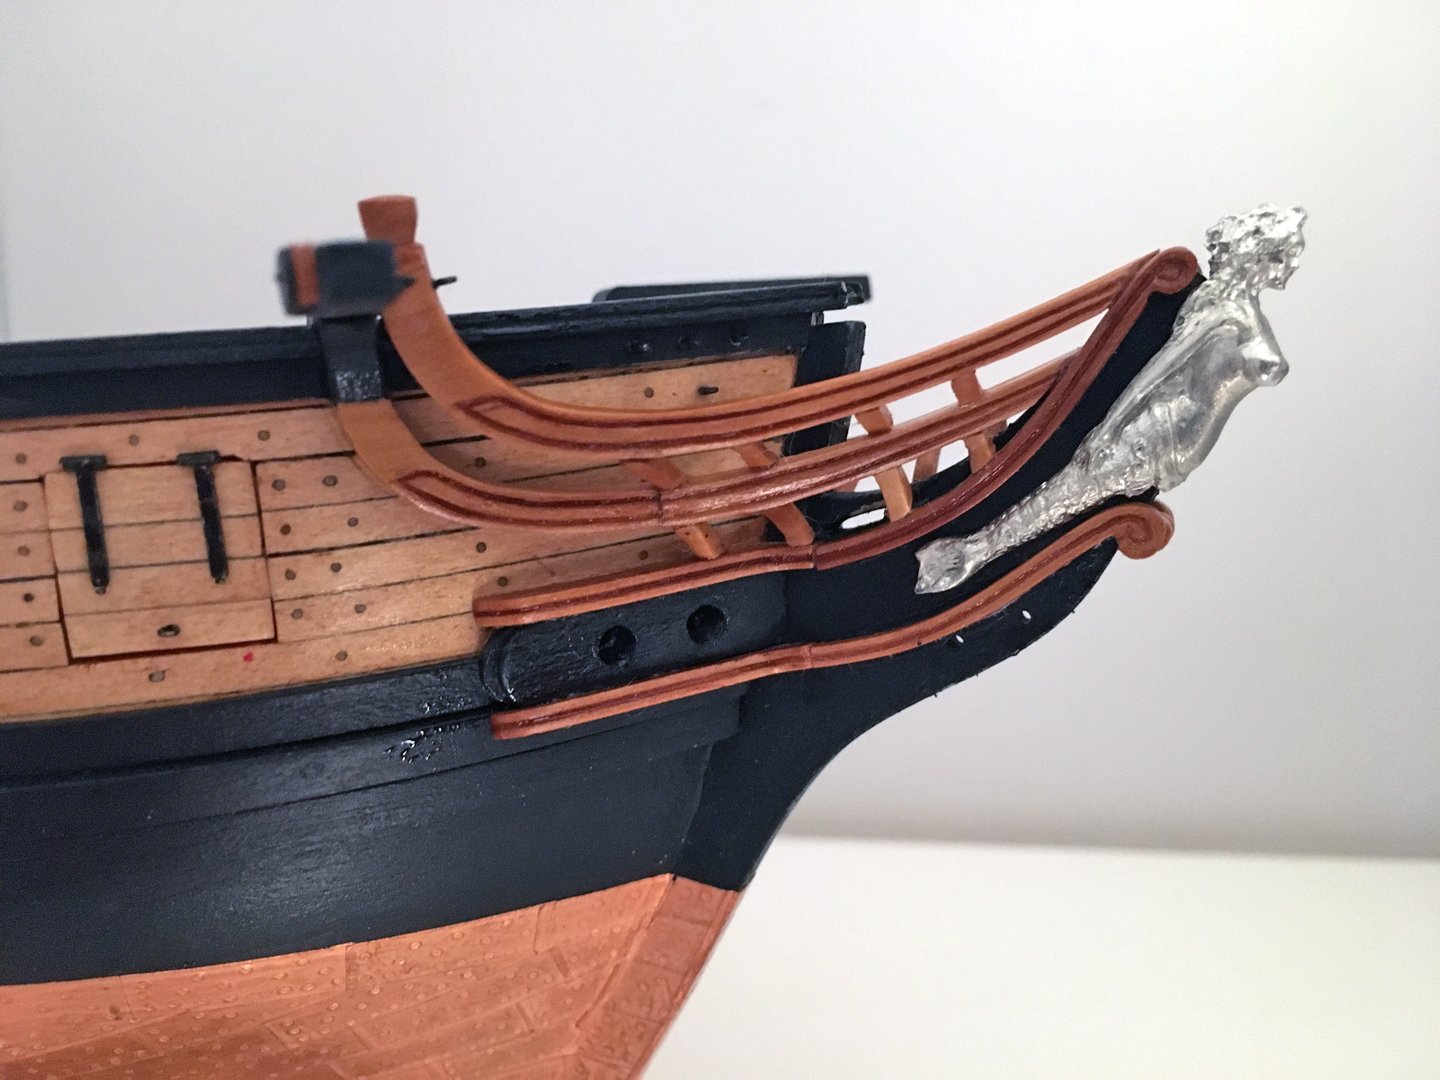
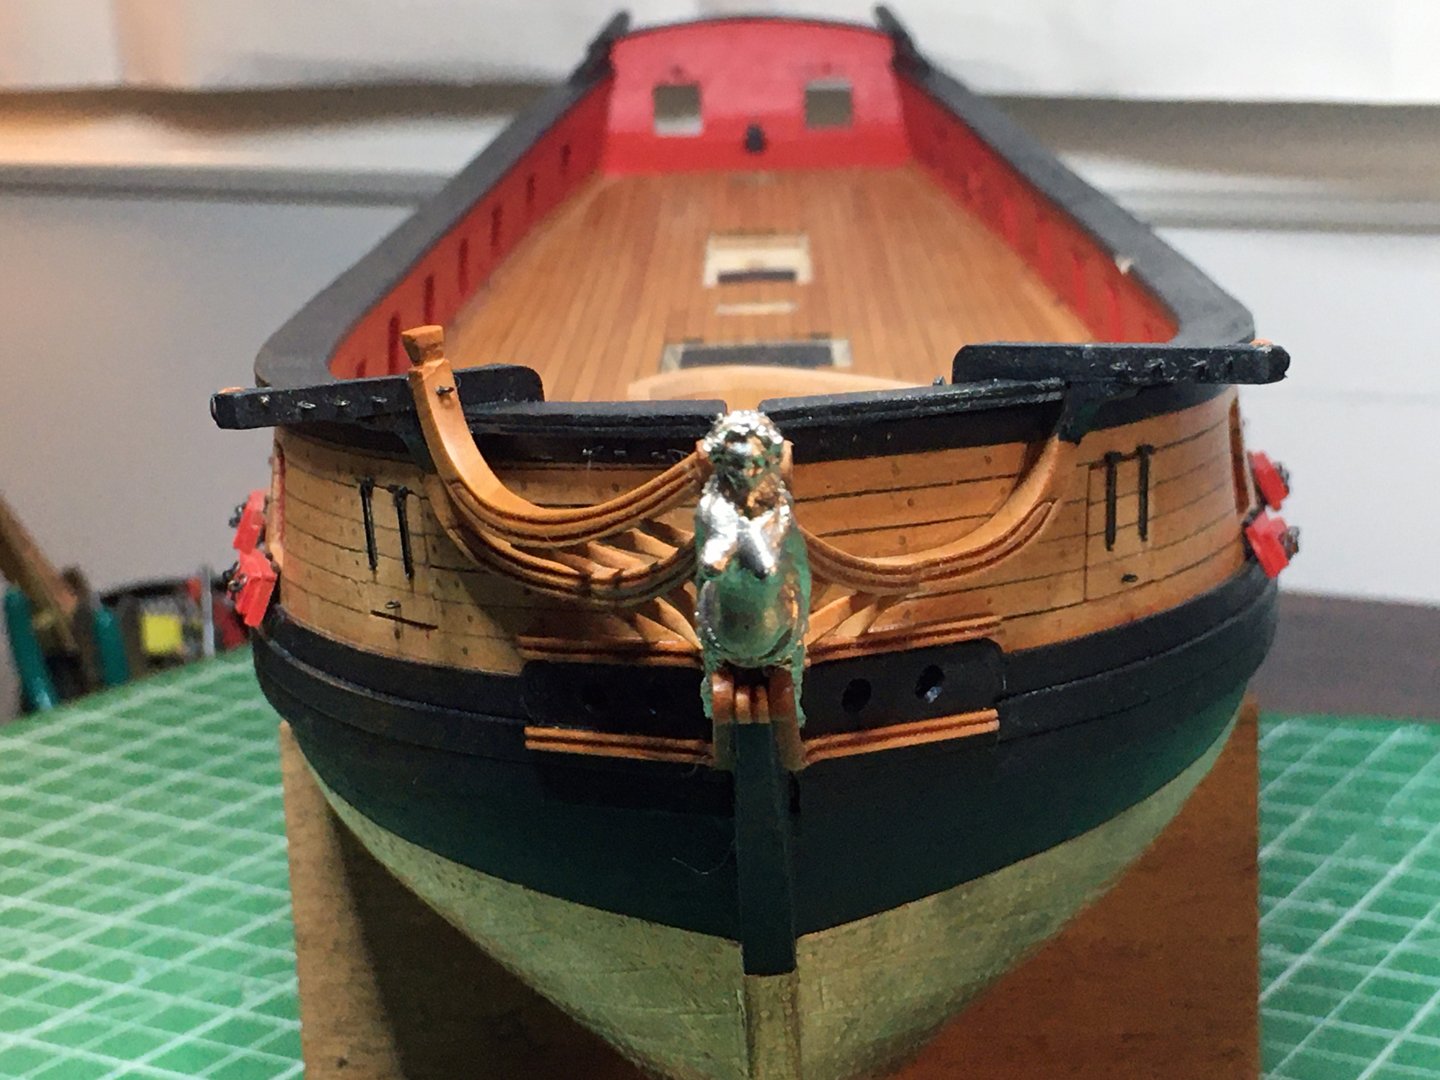
Thank you so much Thomas, you were a big help by suggesting the rails needed to be placed to achieve a concave look when adding the timbers. I doubt I would have gotten that without your advice Adding the timbers to the port side went quite quickly in the end. Once you know what basic ruff form to shoot for in cutting out your timbers. I used 1/16 X 1/8 to cut out the tiny ruff form, this would be test fitted by sliding it into place for the particular timber spot. If all the little angles of which there are many worked I would spot glue it on and use my mini chisels, mini sanding sticks and files to final shape it properly in position. I am not totally happy with the timbers, but with the naked eye they look pretty good. My spacing could use some improvement but they are tricky to do at best and I learned a lot doing them. I have some homework to do because I don't totally know all the purposes of the head rail system? I presume it is to help take the stresses caused by the fore sail and jib sails. But I really need to do some more homework. I placed my rails back a bit more towards the port than suggested in the instructions. This also meant extending the middle rail length along the hull leading to the joint for the extension running to the checks on the stem. Couple of pics of final results there will still be a straight top rail to go on with stanchions. Once that is done as to how you get in there to rig the eight little eye bolts hidden in back is beyond me, but time will tell lol. Cheers all, thanks for all the comments like's and suggestions!
-
Aren't we both. I can't wait to see your results with the woods you are using Patrick. Half the fun is getting away from the generic kit parts and making it on your terms. This is only my second build to my friend, so I am getting just as much inspiration from your way
-
Fantastic job, mission accomplished, you beat the castings all to
- 950 replies
-
- 3
-
-
- syren
- model shipways
- (and 1 more)
-
Patrick thanks for the advice If I get a drill press I will be sure to include the table.
-
Finally got my top head rail and timbers installed on the starboard side. I made a bad cut and had to redo the top rails. I don't think I've done a very good job on this area but I've got to much on my plate at the moment to want to change it out and start over. I'm calling it as a learning experience and will hopefully do better on future builds with head rails and timbers. Heading off to Newfoundland end of next week also for a couple of weeks and looking forward to that Cheers ~
-
I have a friend who makes his treenails this way. It is a really good way to do it. Nice work if I had a drill press I would be doing it this way over toothpics too.
-
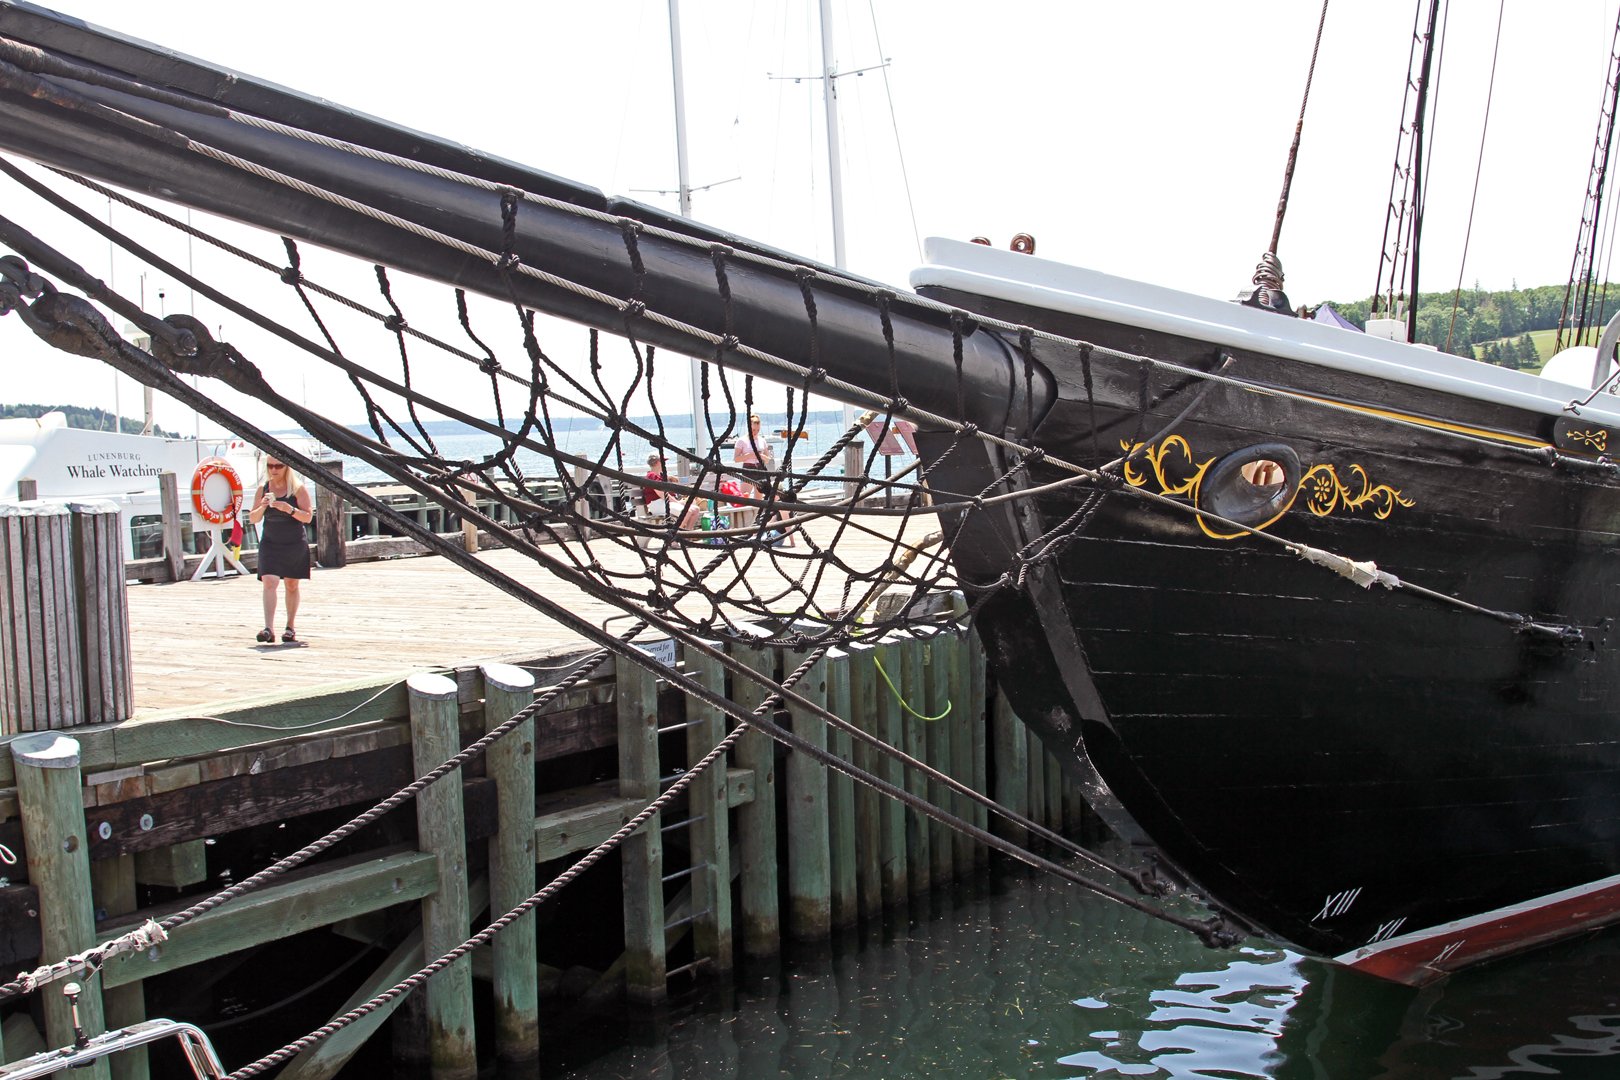
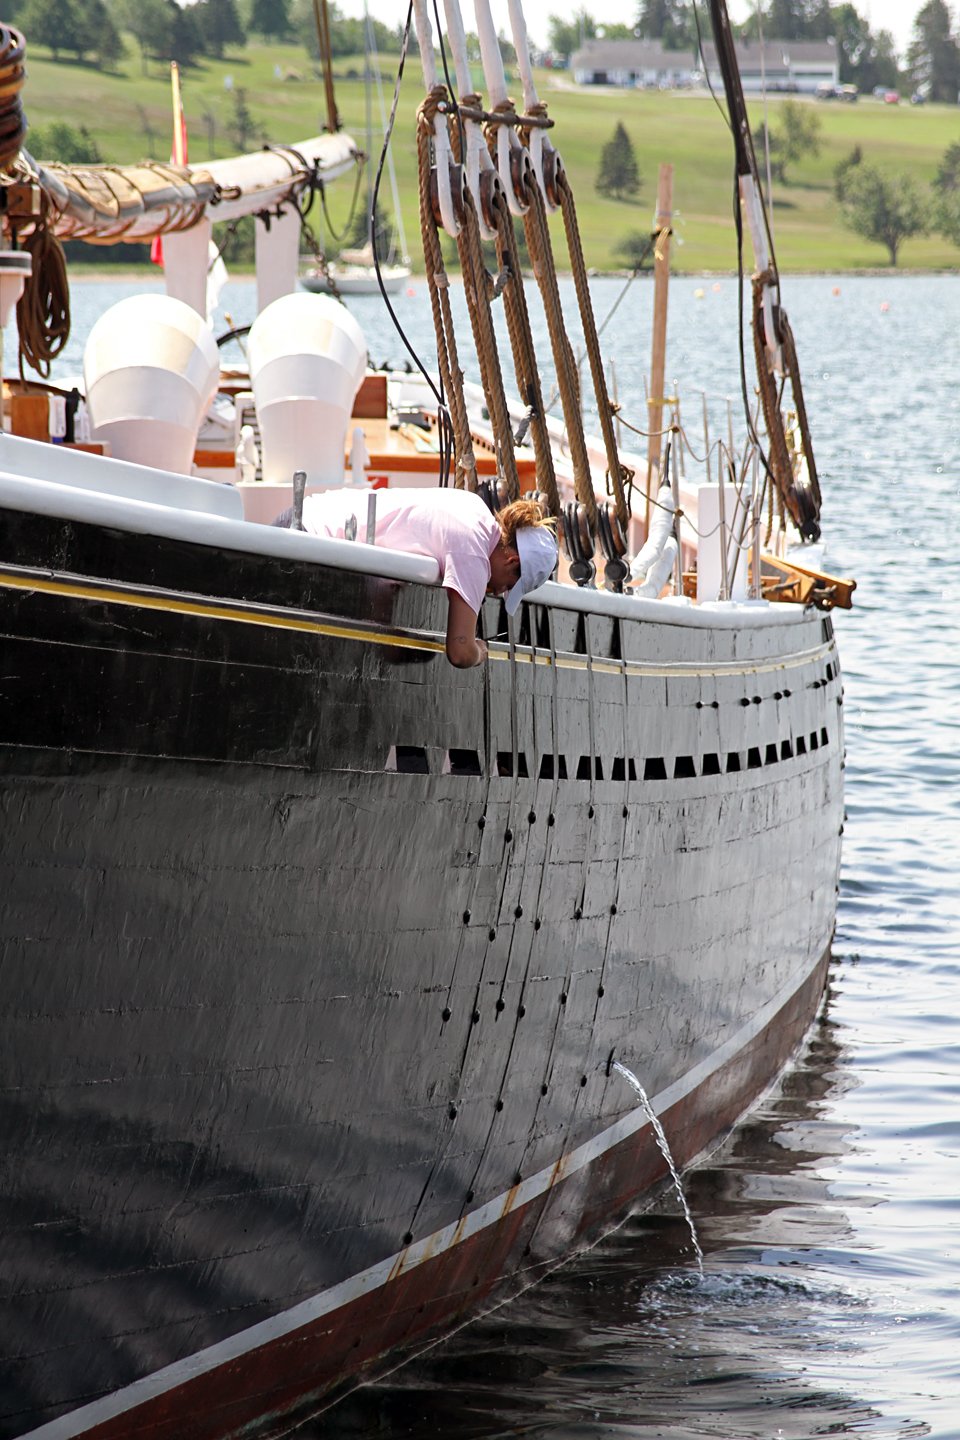
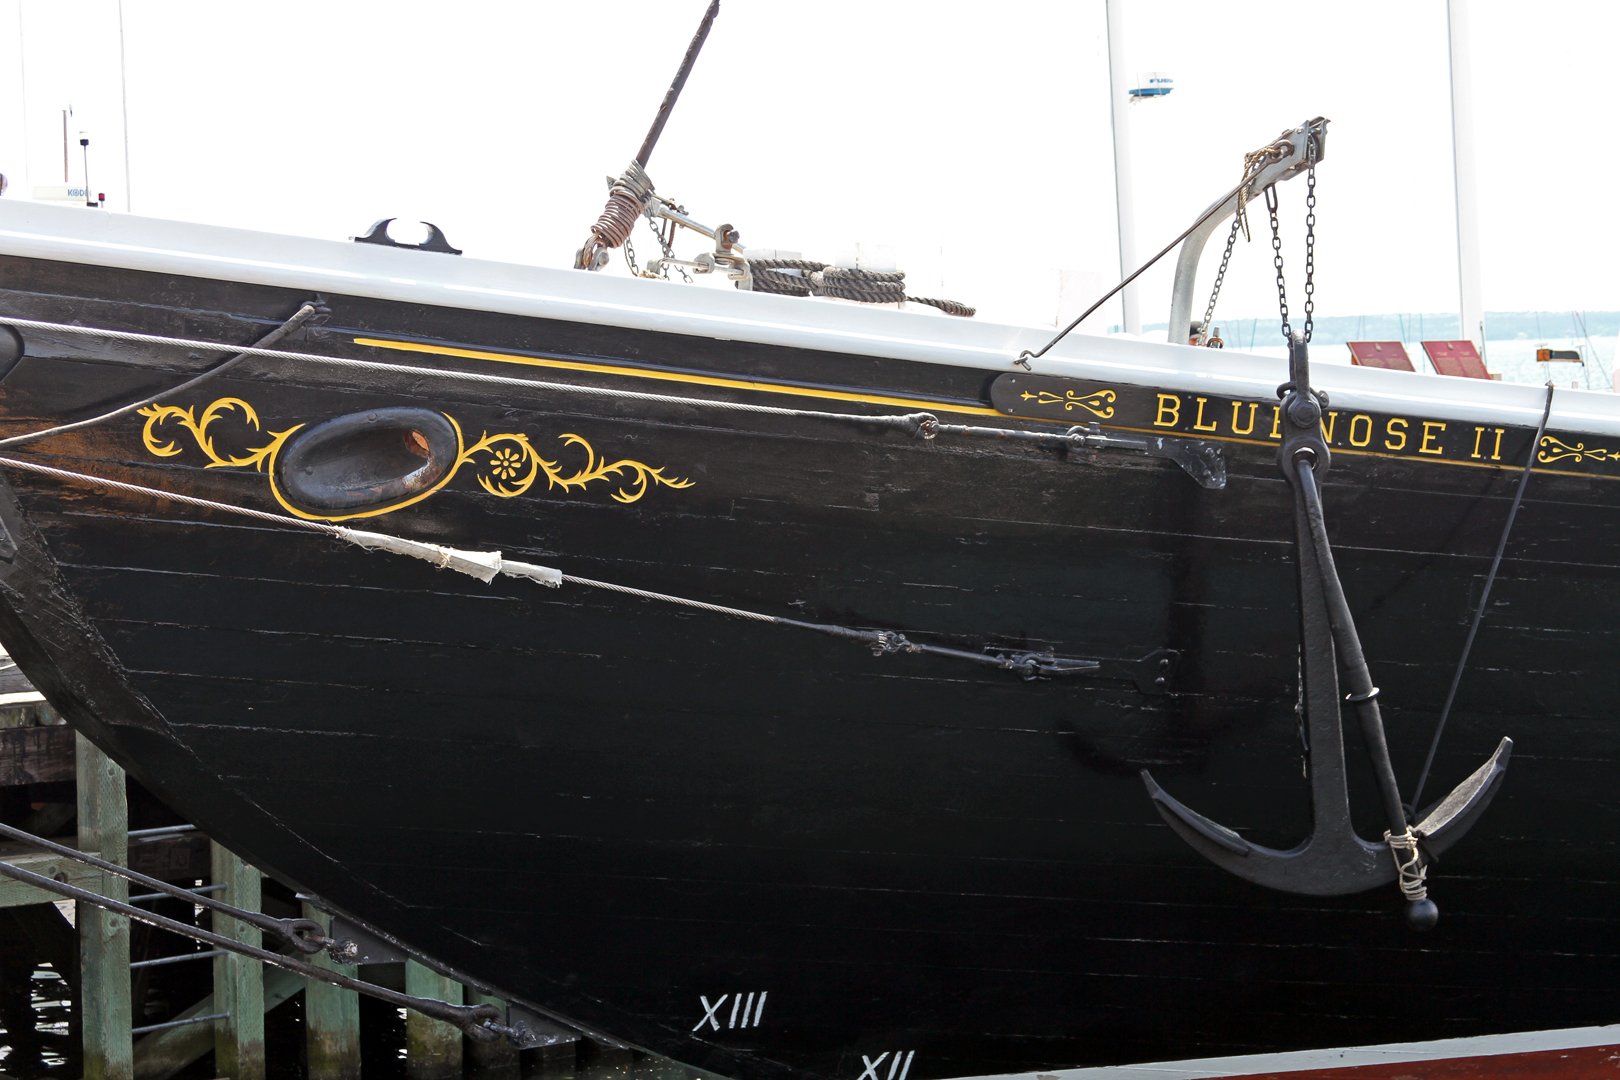
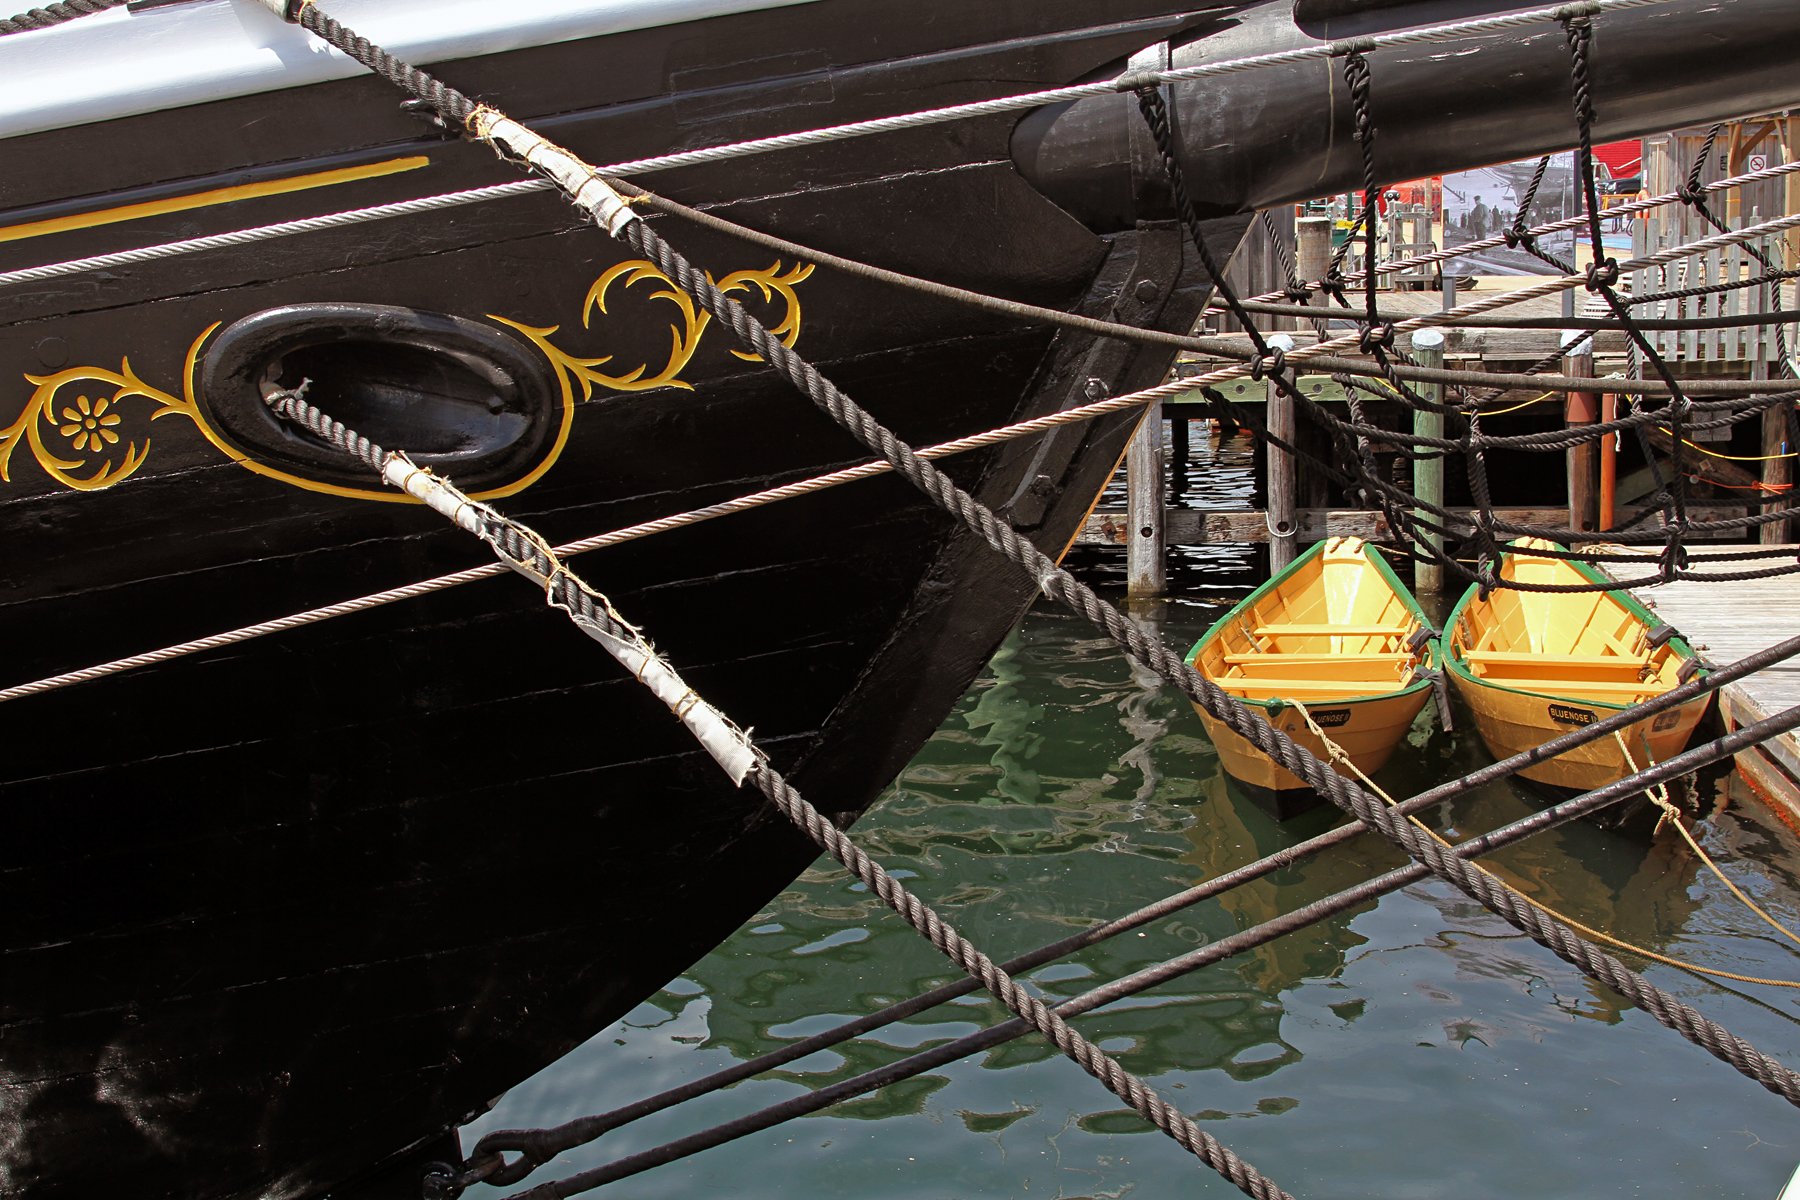
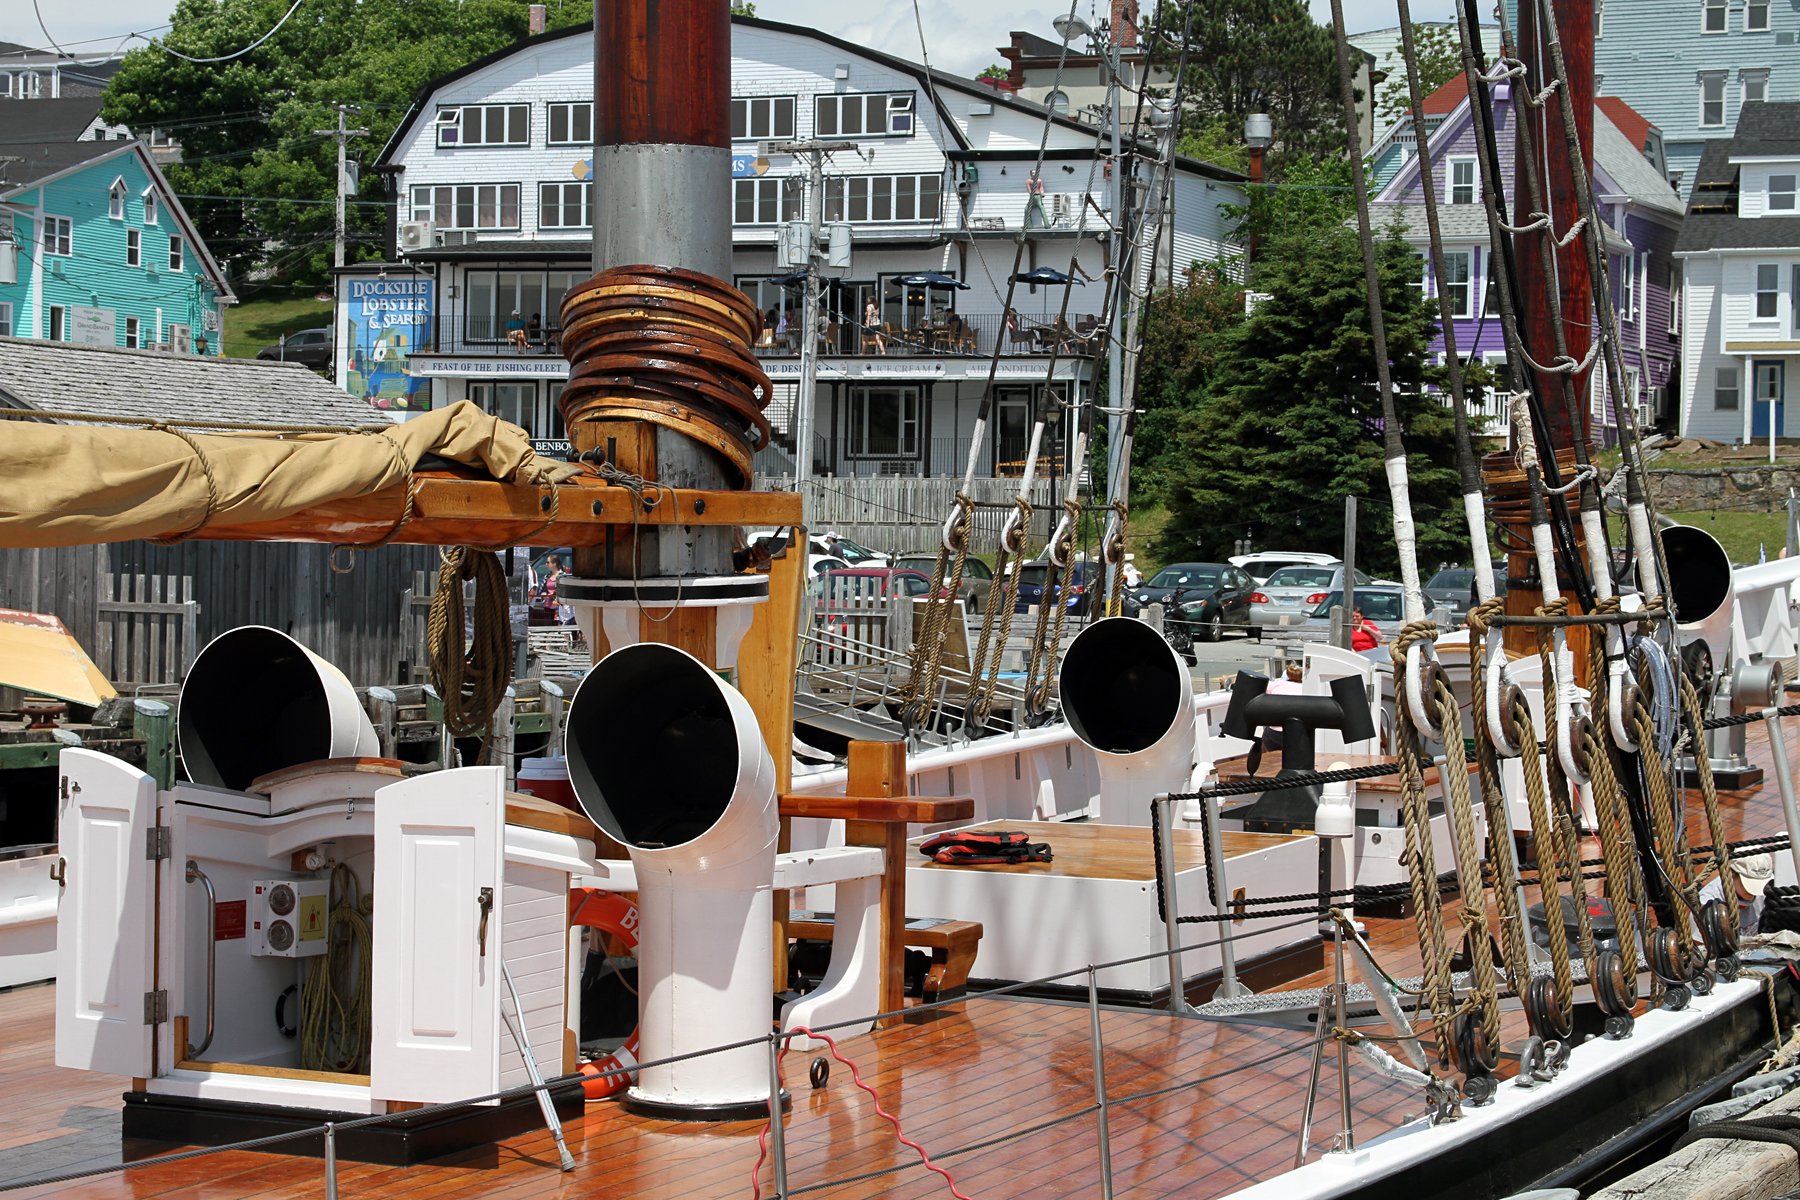
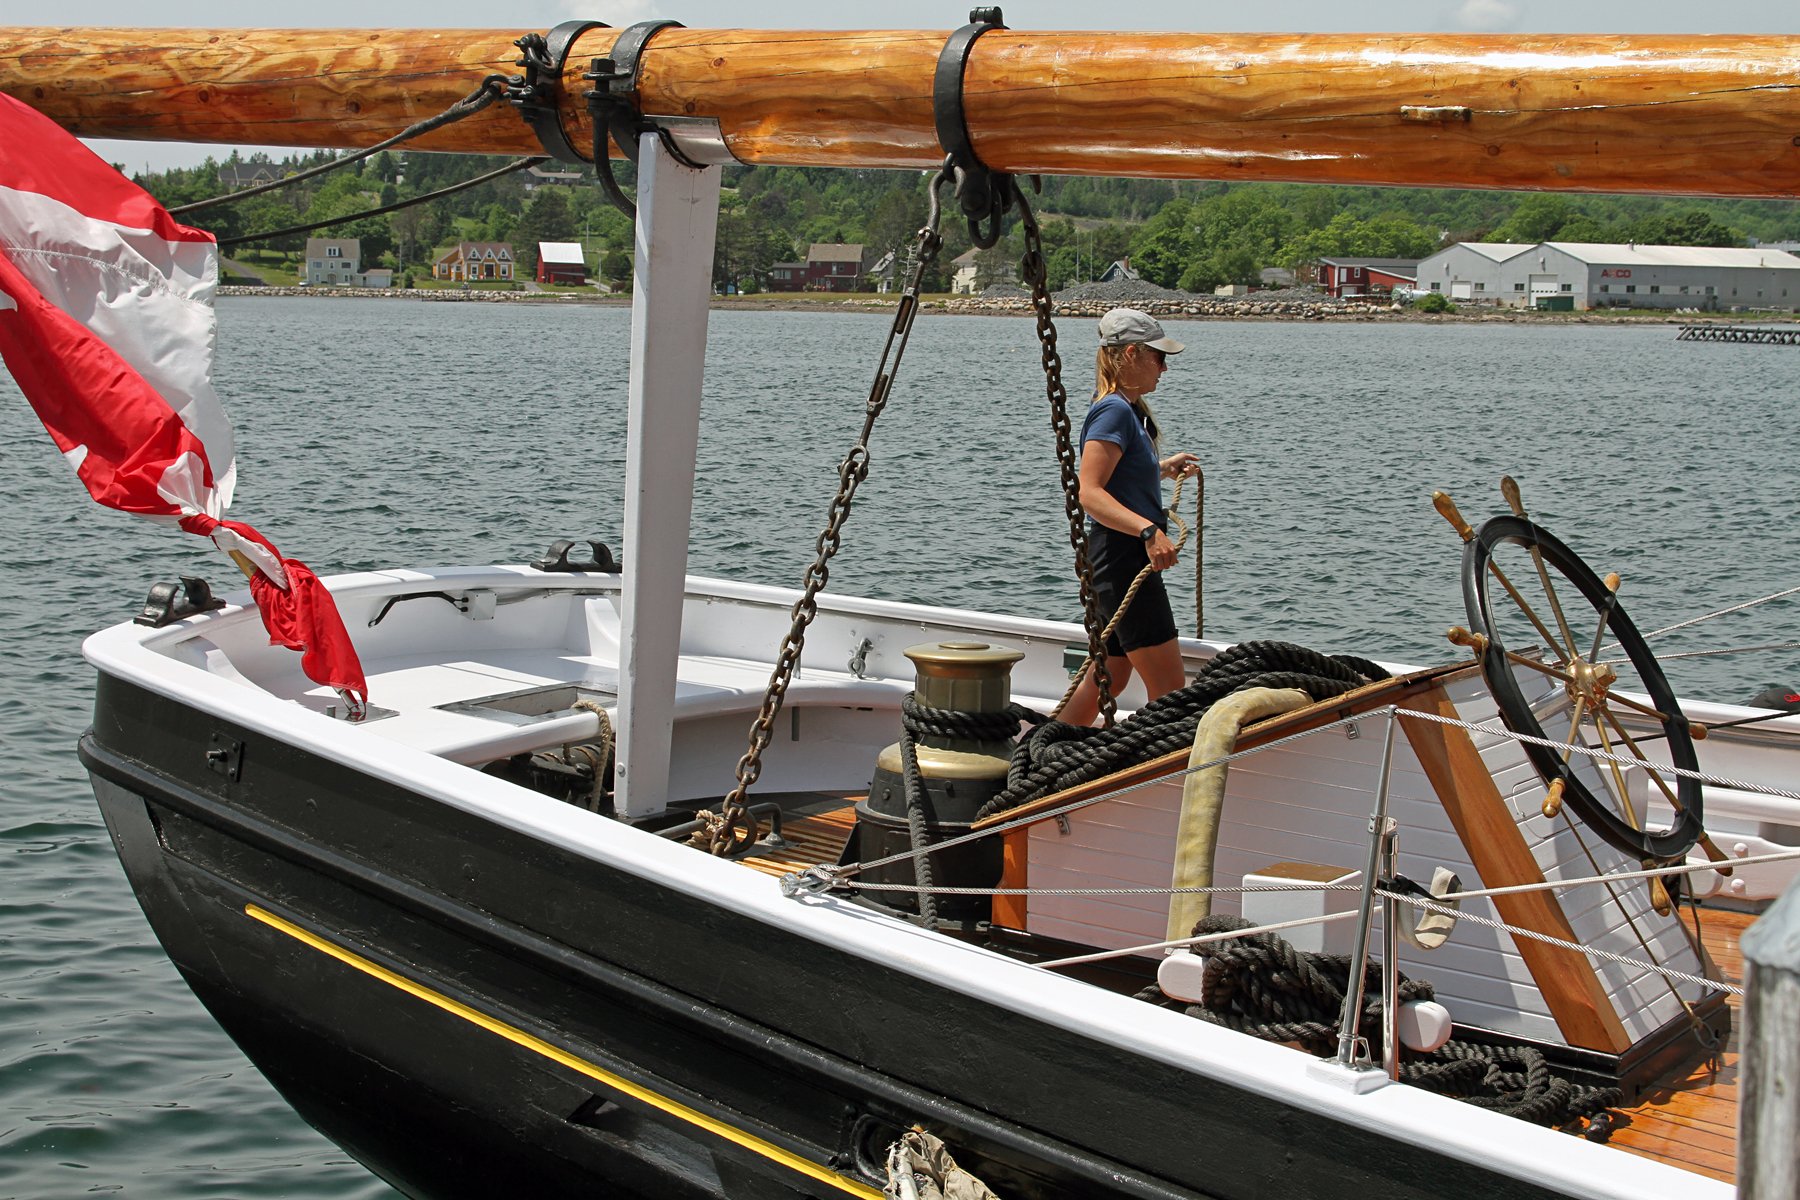
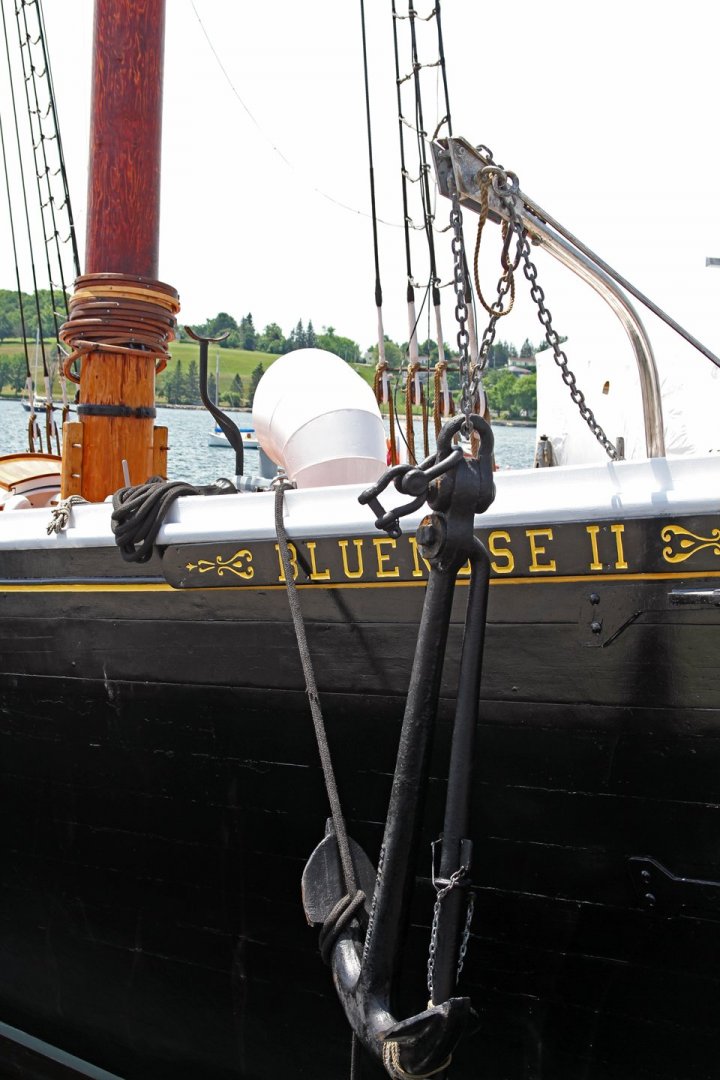
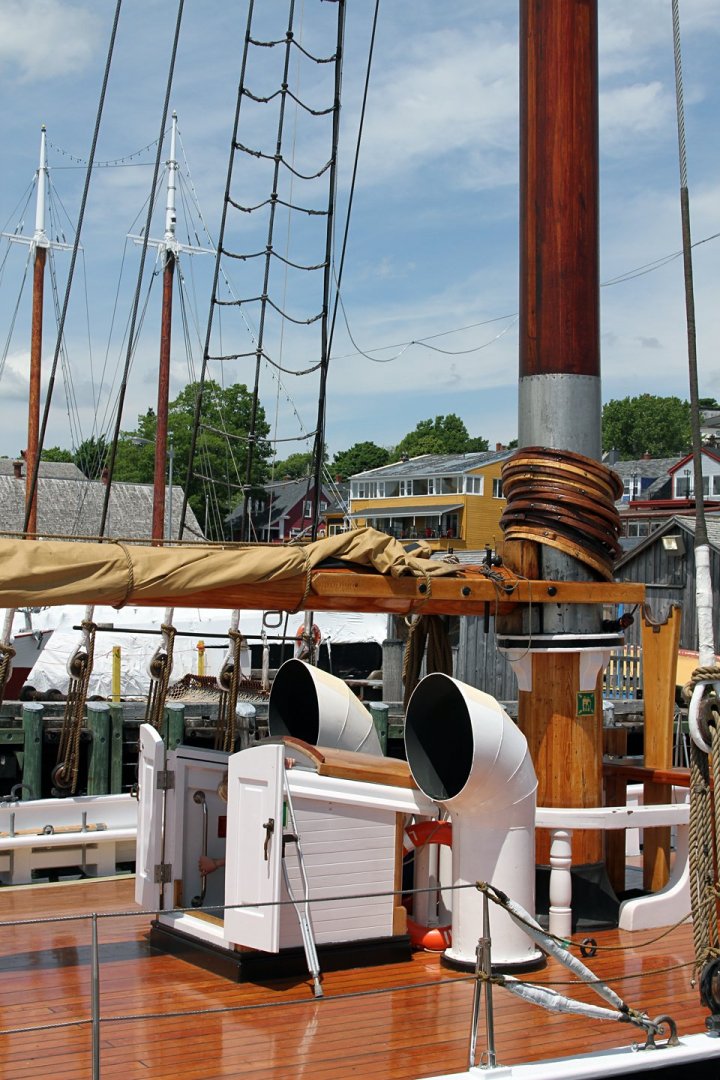
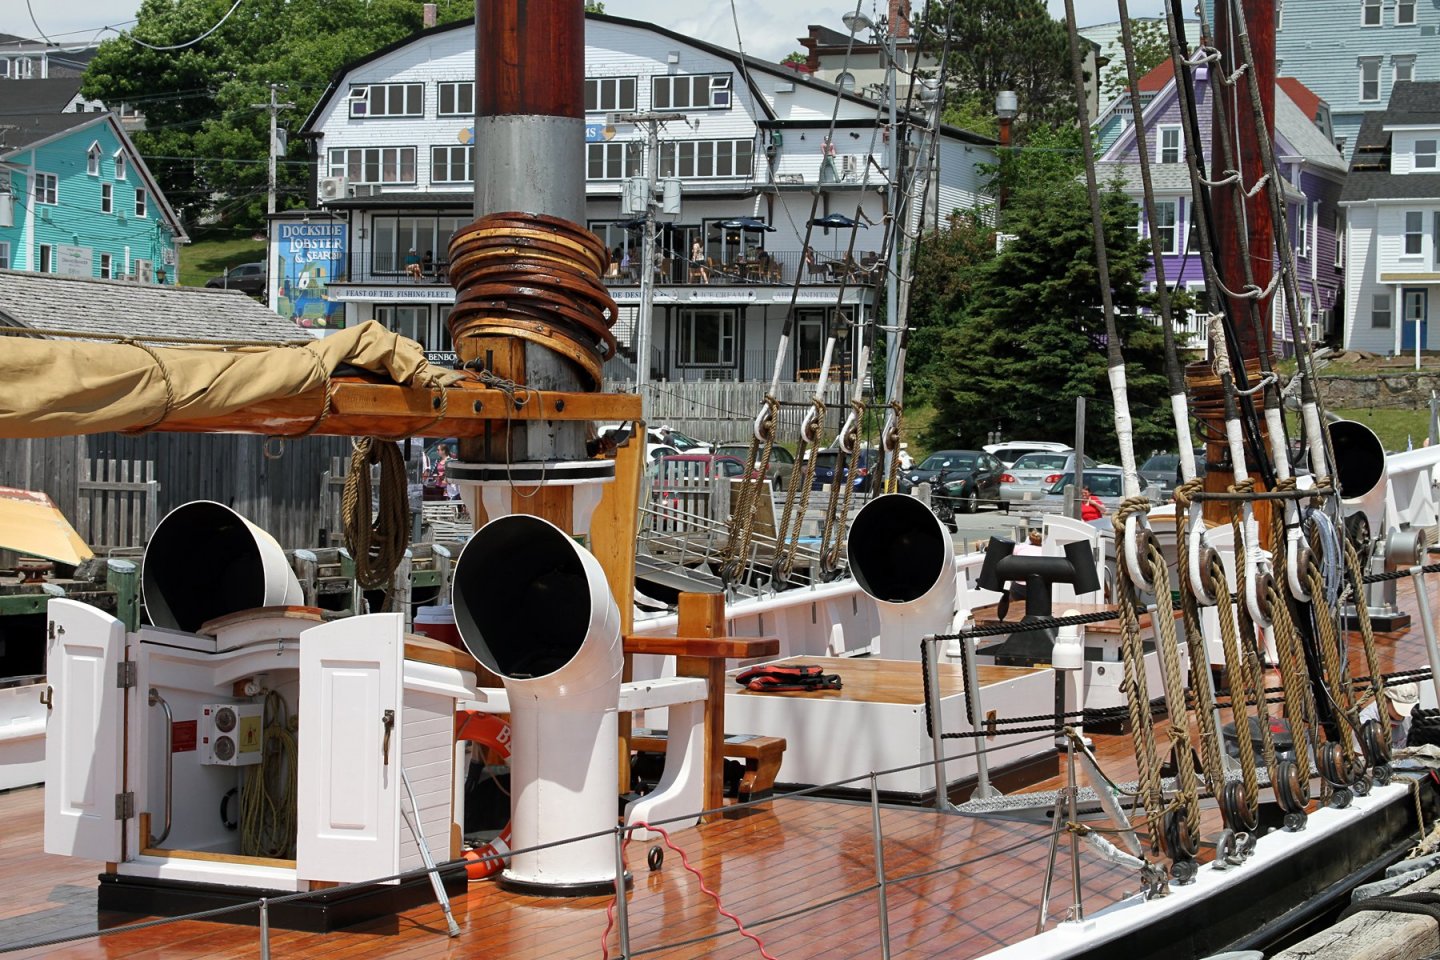
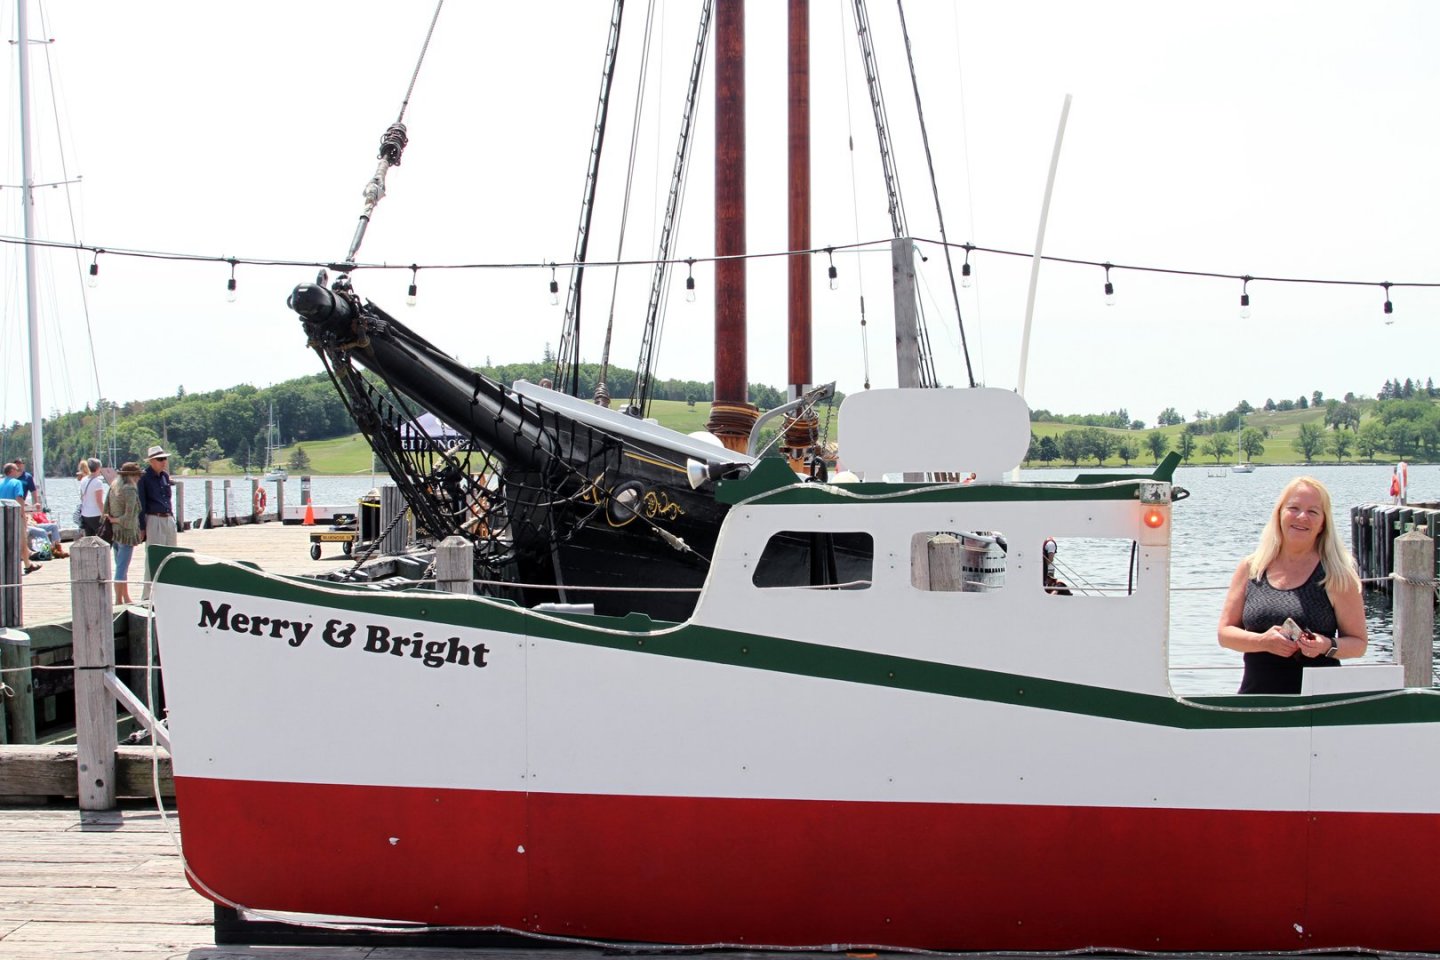
Thank you all for the comments and likes helps keep the build juices flowing. Took the Admiral to Lunenburg for her bday. Of coarse we went down to the wharf and saw the Bluenose II, had a great chat with some of the crew and grabbed a few pics. No one is allowed on board as the crew are all self isolating together. They are in the process of getting her ship shape to head out around the Maritimes for the season. The plan is to sail around most of Nova Scotia from Yarmouth to Meat Cove, as well as parts of New Brunswick and PEI. Season schedule: Here


-
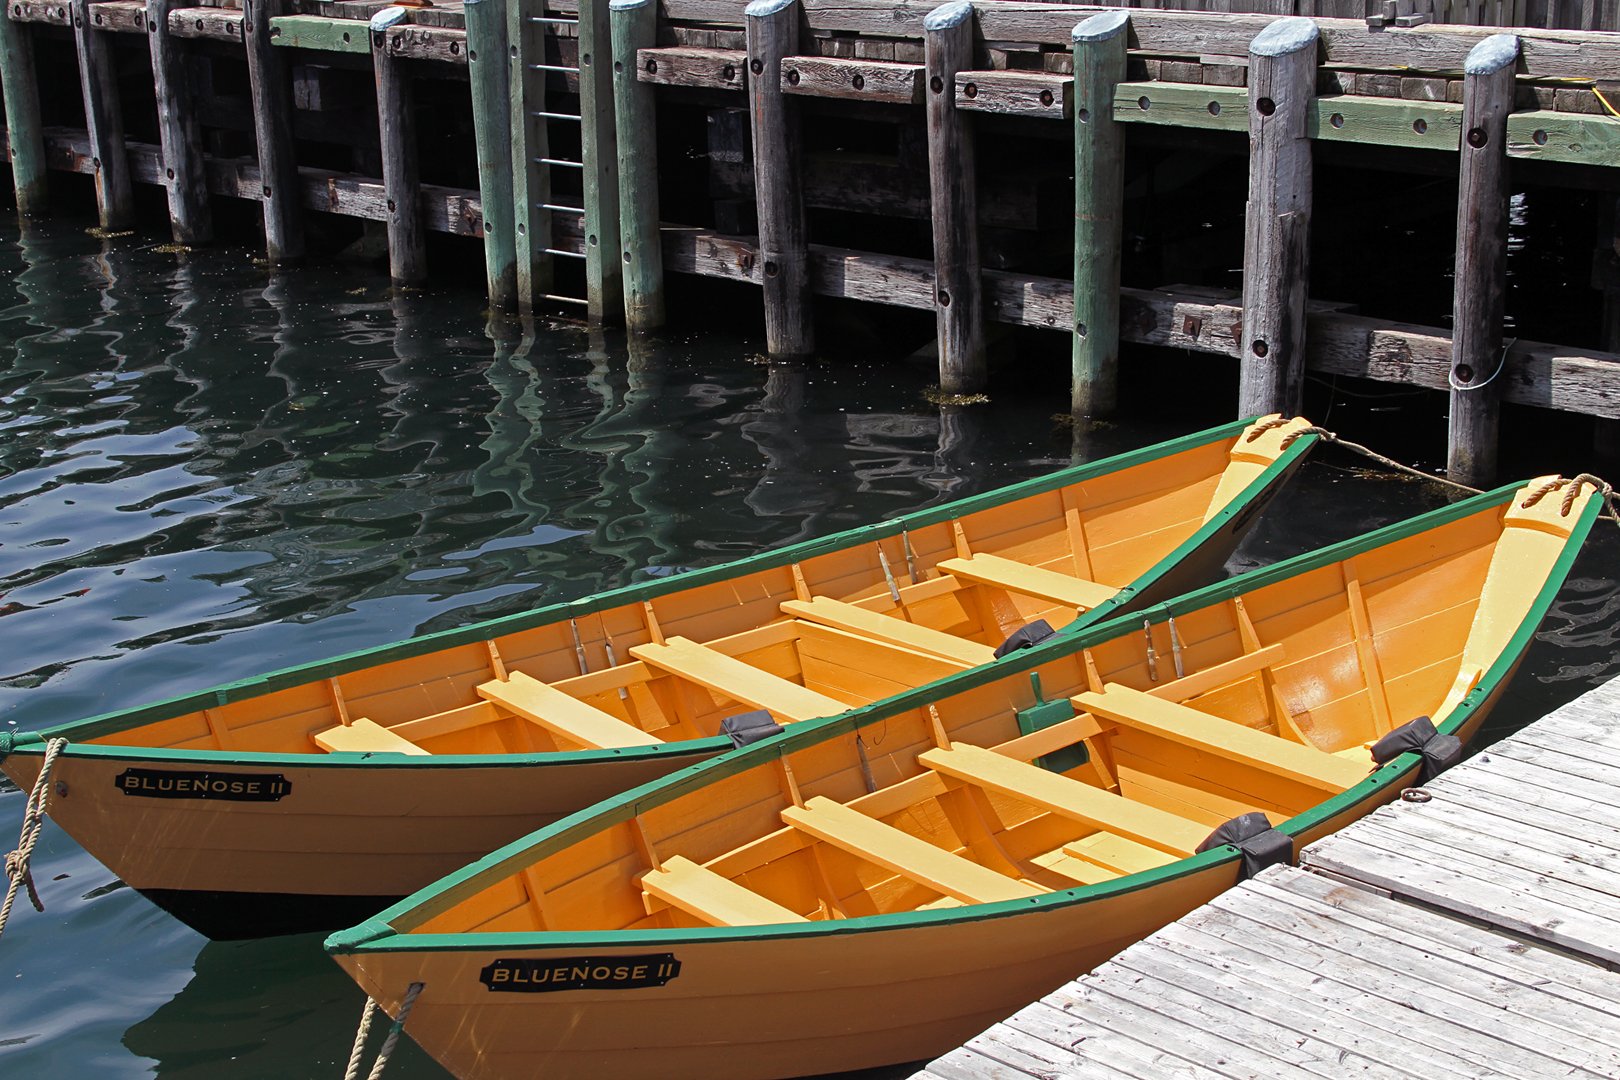
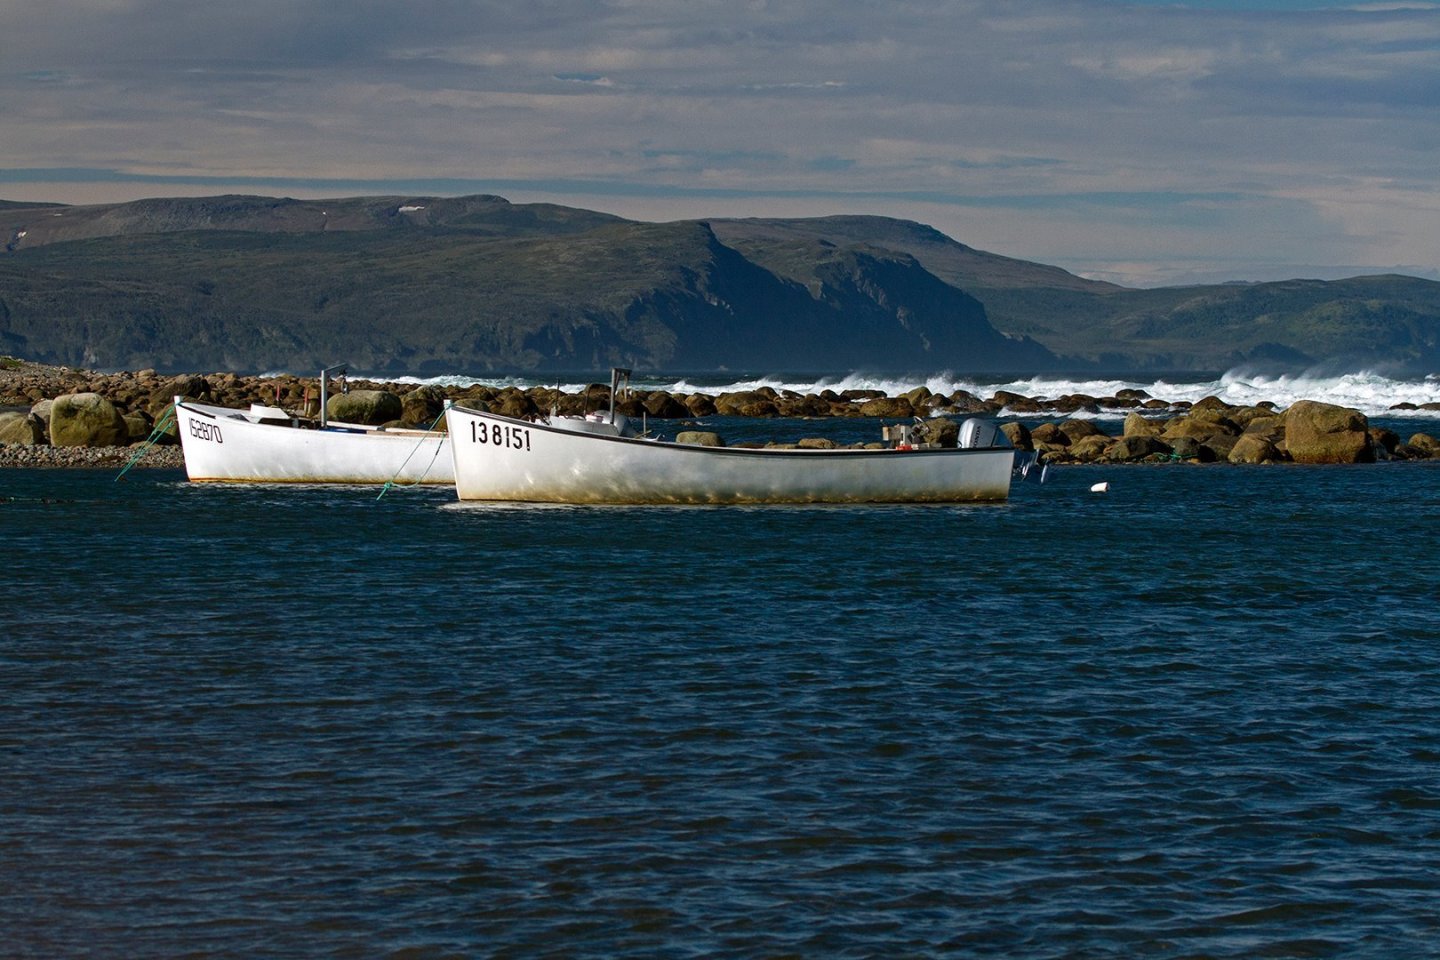
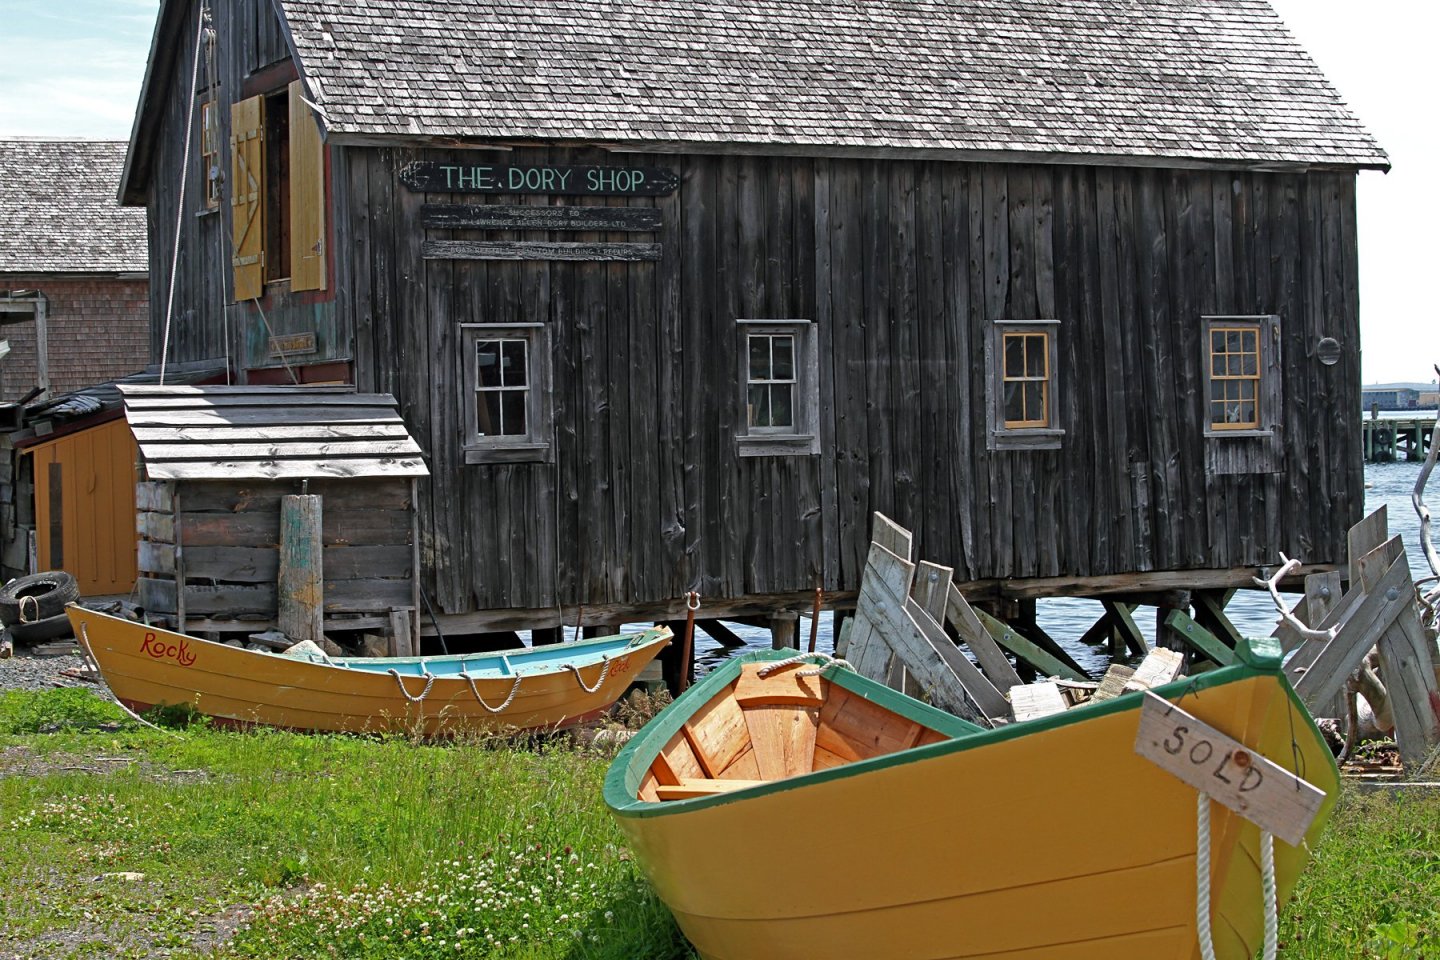
Yes that was an amusing story thanks for sharing. I can see why those little dory's were so popular too. Here is a pic I took yesterday down on the wharf in Lunenburg. The design hasn't really changed over the years. Cheers ~

-
That is one great looking dory. Nice work!
- 140 replies
-
- 2
-
-
- benjamin w latham
- model shipways
- (and 1 more)
-
Looks great from here
-
Judging by where you are now you will have no problem doing the tiles no comparison to the castings! I am not sure why they even put them in the kit? You will be caught up to me soon at the rate your going and thanks for doing the quarters ahead of me It is one item I have been putting off.
- 950 replies
-
- 4
-
-
- syren
- model shipways
- (and 1 more)
-
Wally thanks for the great comment bud. I think I made each one of them timbers about five times to get one I was even remotely happy with lol. Cheers
-
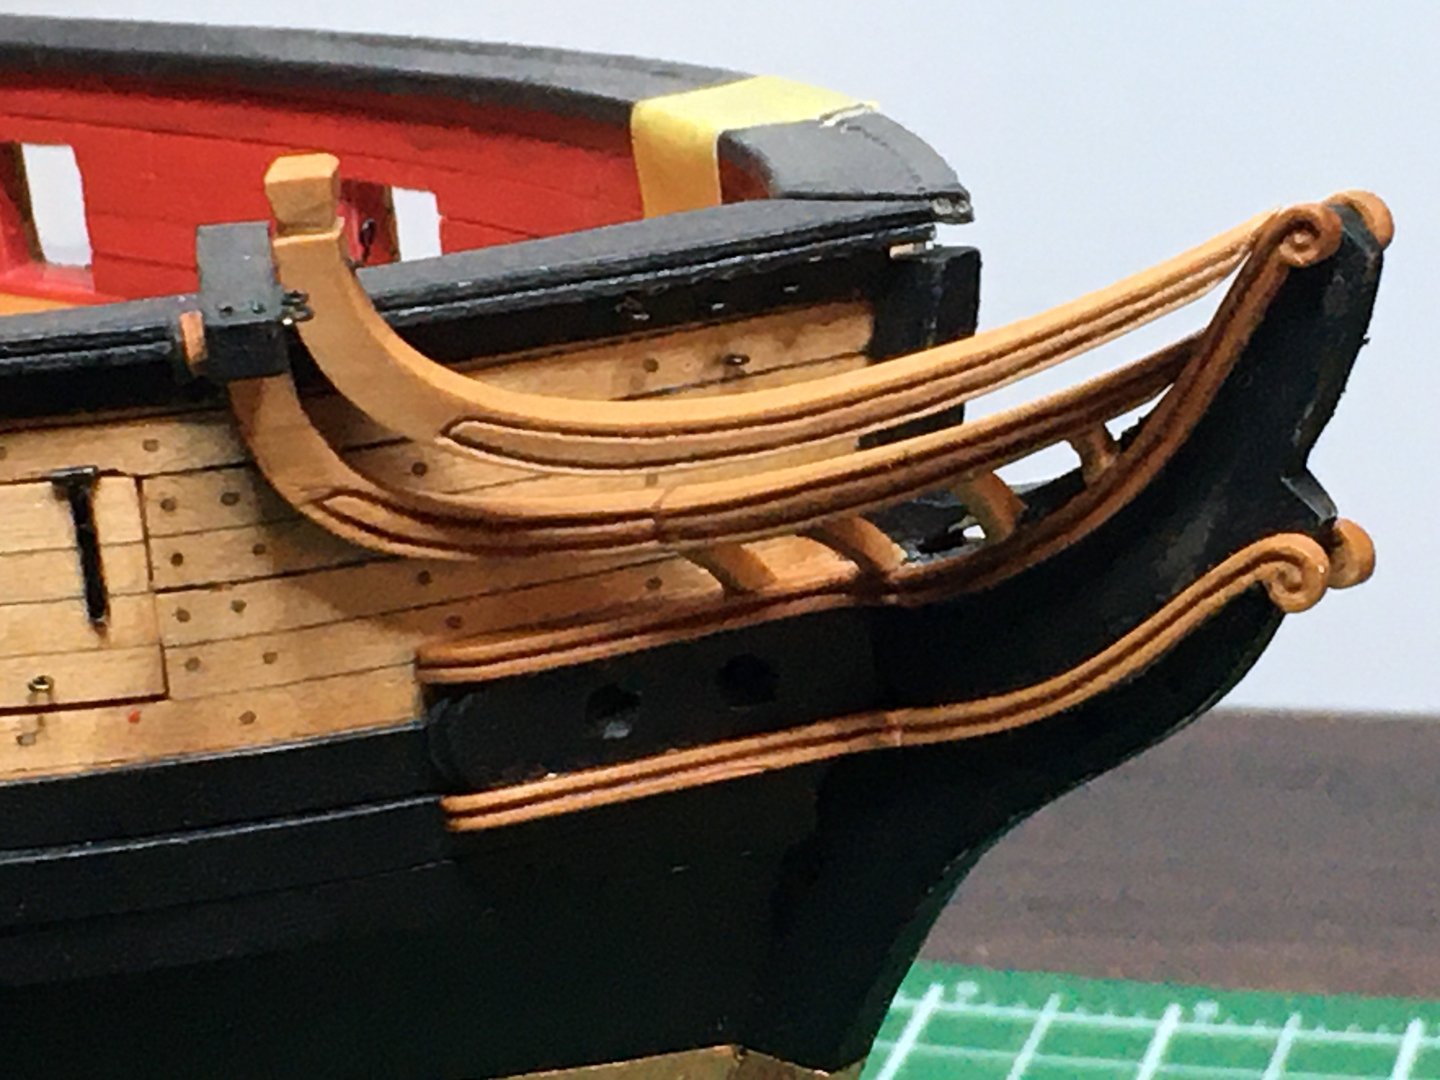
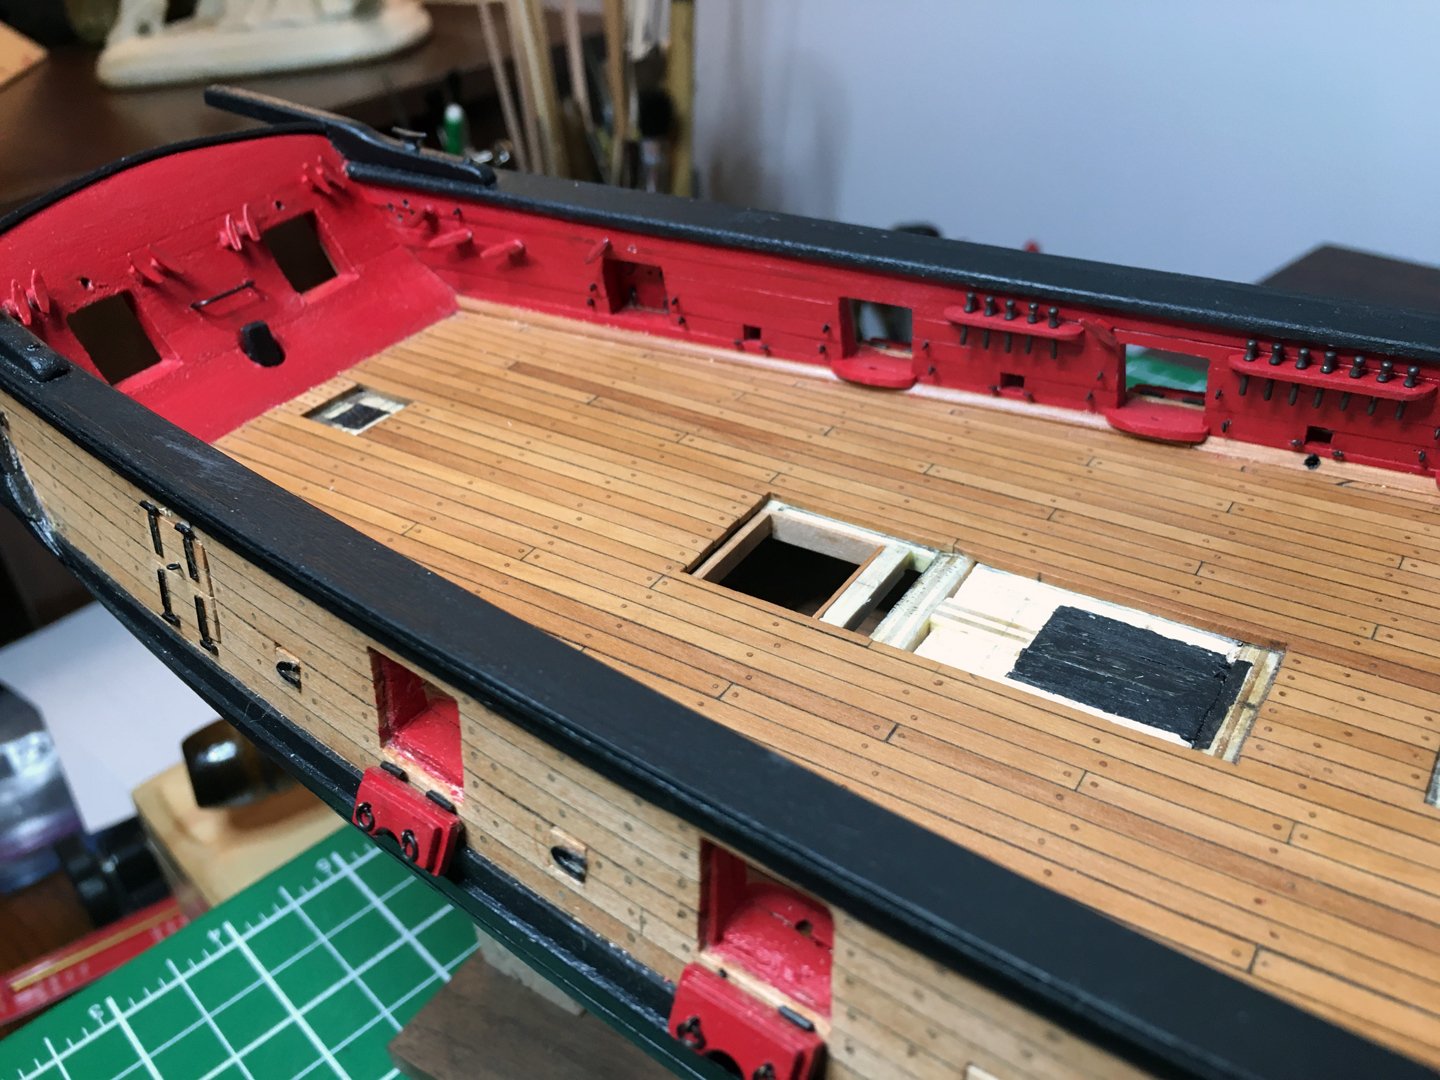
OMG! THE LOWER HEAD RAIL TIMBERS ARE IN!!! man that would drive a sailor to drink Btw in the first pic you will notice I did not sand the starboard inboard planking! I left it natural on purpose because I wanted to see the difference with the port side which was sanded lightly. PHEW!!!
-
Not a lot of time in the last couple of weeks but I have all my headrail parts cut out of pear and the catheads with little working sheaves. Started assembly and began adding the headrail timbers oh is that fun.