capnharv2
-
Posts
727 -
Joined
-
Last visited
Content Type
Profiles
Forums
Gallery
Events
Everything posted by capnharv2
-
 Thanks Geoff. There is a lot of detail. Every time I think I'm getting everything covered, I realize that I missed something. Jay and Jeff, I don't know if I have an old kit or not (old being relative ). The heads seem large and out of scale. With the tight spacing of the pins on the fife rails, I worried that I would have trouble rigging lines to them) We have belaying pins on our boat to cleat halyards, and the ones in the kit, relative to our real belaying pins, are definitely too large. I would have lived with the ones in the kit, but I found, in my stacks of spare parts, some brass belaying pins that are just about perfect. But I only had a dozen. I saw ME and Bluejacket both had them. I ordered from ME because they were less expensive (150 for 7.00 at ME vs. a dozen at Bluejacket for 3.50). If they aren't what I want, I'll try Bluejacket. I'm tempted to make my own belaying pins, based on an article in last fall's NRJ. But it's a little too challenging for me right now (maybe in the future). I'll post some pictures of my search for the Holy Grail of mass produced belaying pins when I finally get what I'm looking for. Floyd, I would like to post a tutorial on block making. I needed to get this one done so we could sail again, but I plan to replace all the blocks in the next couple of years. Note that most of my blocks are made blocks, not mortised, with an internal bronze strop. There are a few locations on the boat where I could go with at rope stropped block, but they require more frequent maintenance. For those curious about the block I've been working on, here's a picture of it: It goes on tomorrow. Thanks, Harvey
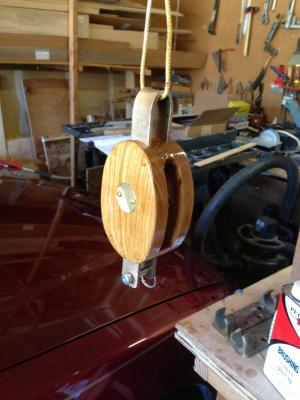
-
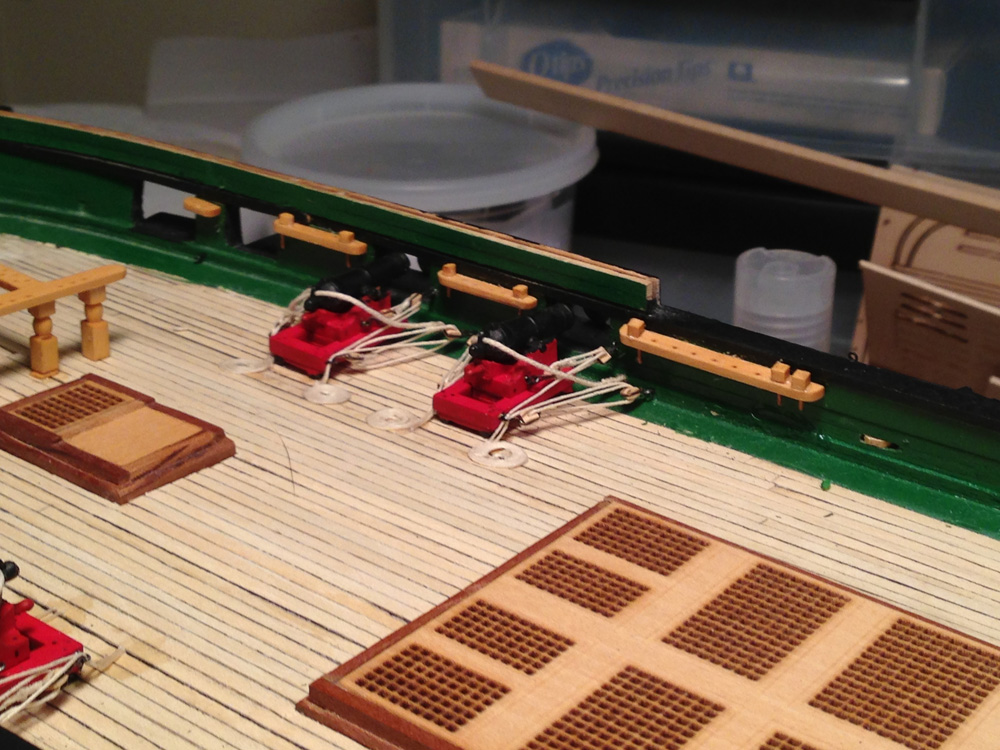
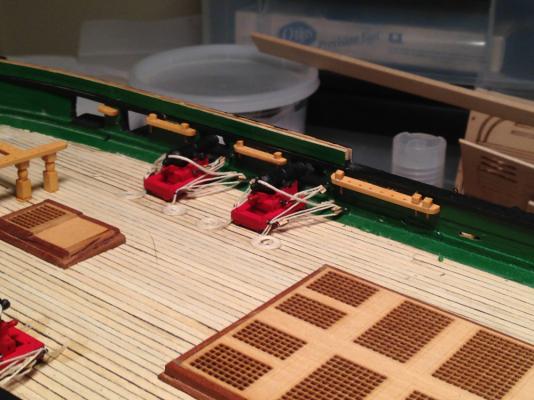
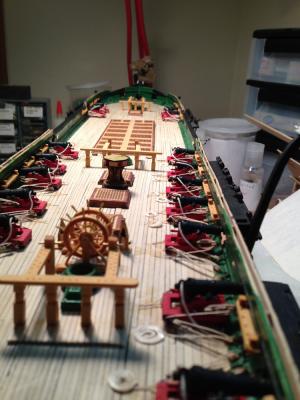
It's been a few weeks since my last update (a few weeks more than I thought. . .). Emergent work on the real boat (new halyard block) Anyway, I've been working on the belaying pin racks. I got the last of them in tonight (except for the ones above the bowsprit). Still waiting on belaying pins (on backorder ) Forward Pin rails and carronades. I put the coils on for these carronades tonight: View looking forward. She's getting there. Thanks, Harvey
-
I'm impressed! Harvey
-
Fantastic work Garward! Thanks for posting the pictures. Harvey
-
Thanks for the enlightenment Carl. There's always things like that that blur the line. For example, I've sailed on boats that have fixed backstays (standing rigging) and running backstays (tightened and loosened on each tack). They act like running rigging, but I guess they're standing since they help hold the mast up.
-
Thanks Wayne. I had forgotten about fixed lifts. Gee, does that make them standing rigging or running rigging? Harvey
-
I know some New Englanders have little affection for "Dude Schooners", but you can learn a lot by spending a week on one. We spent a week on the Lewis R French out of Rockland about 20 years ago, and it was really enlightening to learn the workings of an old schooner. And I still want to go back! Thanks, Harvey
- 755 replies
-
- 2
-

-
- finished
- caldercraft
- (and 1 more)
-
Looks good Wayne. That's an almost impossible scale to work at (at least for me). Question on your drawing. Are the green line going to the ends of the yard the lifts? If so, will you have lifts on all 3 yards? Thanks, Harvey
-
Gil, You might want to take a daysail on Lady Washington when she's in the area. If there's a little wind you can help them "Let go and Haul". I find that sailing (both on our boat and other boats) helps me better understand and appreciate the hows and whys of boat/ship design-which translates into a more accurate model. Thanks, Harvey
-
"Follow the topic"
capnharv2 replied to Nirvana's topic in Using the MSW forum - **NO MODELING CONTENT IN THIS SUB-FORUM**
Dr. Per, Might I suggest a 286 processor with MS-DOS 5.0? Who needs this Windows stuff anyway?? Harvey -
what powertools to buy
capnharv2 replied to Adrieke's topic in Modeling tools and Workshop Equipment
Sarah, What size lathe are you looking for? Unimat/Sherline/Proxxon (Micromark) or something a little bigger? Regarding a drill press, I have the one for the Dremel (minus the Dremel). If you like, I can bring that along to the next meeting (I've been using my U3 milling head as a drill press lately, so I don't need it). Thanks, Harvey -
Beautiful! Thanks Garward! Harvey
-
Cool tool lathe Unimat (moved by admin)
capnharv2 replied to Sjors's topic in Modeling tools and Workshop Equipment
Thanks Crackers. My biggest problem with that setup? My electric drill doesn't work! Harvey -
And I started on my MS Constitution kit in 2007! I guess I can forget that scratchbuild fleet of Harold Hahn ships Harvey
-
Garward, I apologize for not getting back to you sooner. Thank you for the videos and photos! I feel like I made a mess of the copper plating on my Constitution, and want to do a better job on the Agamemnon and Flying Cloud (should I decide to copper the FC). These will be a big help. Thanks again, Harvey
-
Cool tool lathe Unimat (moved by admin)
capnharv2 replied to Sjors's topic in Modeling tools and Workshop Equipment
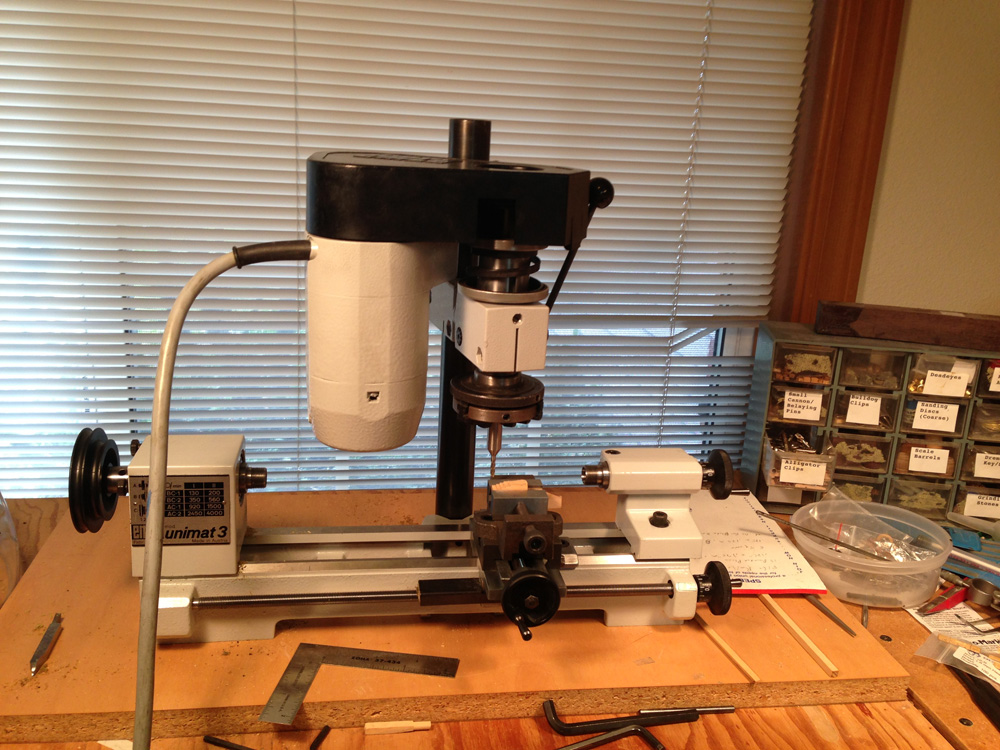
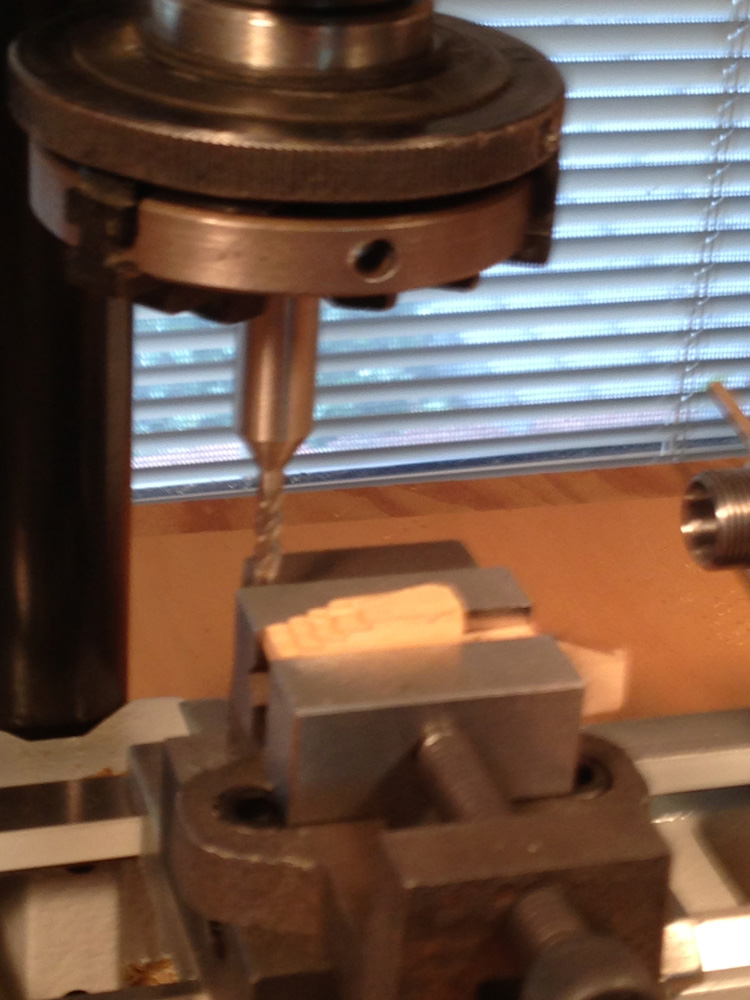
Sjors, Here's my U3: I weighs about 20 pounds. Mainly Aluminum alloy parts. I believe the only plastic are the drive pulleys and the handwheels (and they make replacement Al handwheel) It's set up for milling some cannon carriages: And here's most of the accessories for it: I got it about 15 years ago for 50 dollars and an unused Dremel Tool. It came with the standard toolpost, 3 jaw and 4 jaw chucks, and a steady rest. Since then, I've had it refurbished, and added the milling post, milling vise, milling table and a compound angle toolpost. That said, I have a lot to learn about using the tools and setting up the machining operations to get what I want. But I'm enjoying myself-and that's the point, isn't it? Thanks, Harvey


-
Cool tool lathe Unimat (moved by admin)
capnharv2 replied to Sjors's topic in Modeling tools and Workshop Equipment
I haven't heard a lot about Proxxon lathes, but what I have heard has been positive. Aren't these also sold under the Micro-Mark label too? -
Cool tool lathe Unimat (moved by admin)
capnharv2 replied to Sjors's topic in Modeling tools and Workshop Equipment
Sjors, I'll post some pictures later today. As Tony said, the Unimat 3 is one of the better lathes, but no longer available new. As far as the newest Unimats go, I agree, they aren't worth the trouble or money. I debated getting a Sherline. I've heard lots of good things about them, and are larger with more capability. I decided to keep the Unimat and add the milling head because a) I was familiar with it The total cash outlay was less (I already had the lathe) c) the overall footprint in my shop is smaller, and I will need to downsize in the near future Thanks, Harvey -
Looks good Jeff. Here's an idea. try soldering something like brass hoops to get a feel for how the soldering iron interacts with the flux, brass and solder. If you run out of brass, it's pretty easy to get. This will also help you understand the cleanliness required for soldering. One of the problems I had with the deadeyes is the heat from the soldering iron would scorch the deadeyes. I don't know of any way around it, but I do know too much heat too long on the joint will yield char-broiled deadeyes. Not very tasty, and not very appealing. Hope that helps. Thanks, Harvey
-
Cool tool lathe Unimat (moved by admin)
capnharv2 replied to Sjors's topic in Modeling tools and Workshop Equipment
Well guys, I for one am happy with my Unimat 3. It does everything I want, and the only problems I've had are those of my own creation. Thanks, Harvey -
Bob, Maybe you can take one of the Ship's boats along to work on while you're there. Harvey
-
American Small Sailing Craft. The MBLS shows up later in the book (around page 300). Hope that helps. Thanks, Harvey
-
I had the same problem when I was kidding with Bob-mine posted twice. Thanks Admins, for fixing the problem Harvey
-
Bob, You must really like this build since your comment repeated 4 times Seriously, Toni, your work is an inspiration to those of us who aren't there yet (but want to). Thanks, Harvey
-
Tim, Very nice! Harvey