HOLIDAY DONATION DRIVE - SUPPORT MSW - DO YOUR PART TO KEEP THIS GREAT FORUM GOING! (Only 13 donations so far - C'mon guys!)
×

.jpg.1f80adf1a9b14a937cfcf2ca6af0f0d4.jpg)
WalrusGuy
-
Posts
1,007 -
Joined
-
Last visited
Content Type
Profiles
Forums
Gallery
Events
Everything posted by WalrusGuy
-
.thumb.jpg.62d1d69fed1f32364417cb1f9cdeb009.jpg) Thank you Robin and Thomas! It's been lots of fun building this little boat. I don't think I could've managed this (mini)project without referring to Thomas's log several times 😅
Thank you Robin and Thomas! It's been lots of fun building this little boat. I don't think I could've managed this (mini)project without referring to Thomas's log several times 😅 -
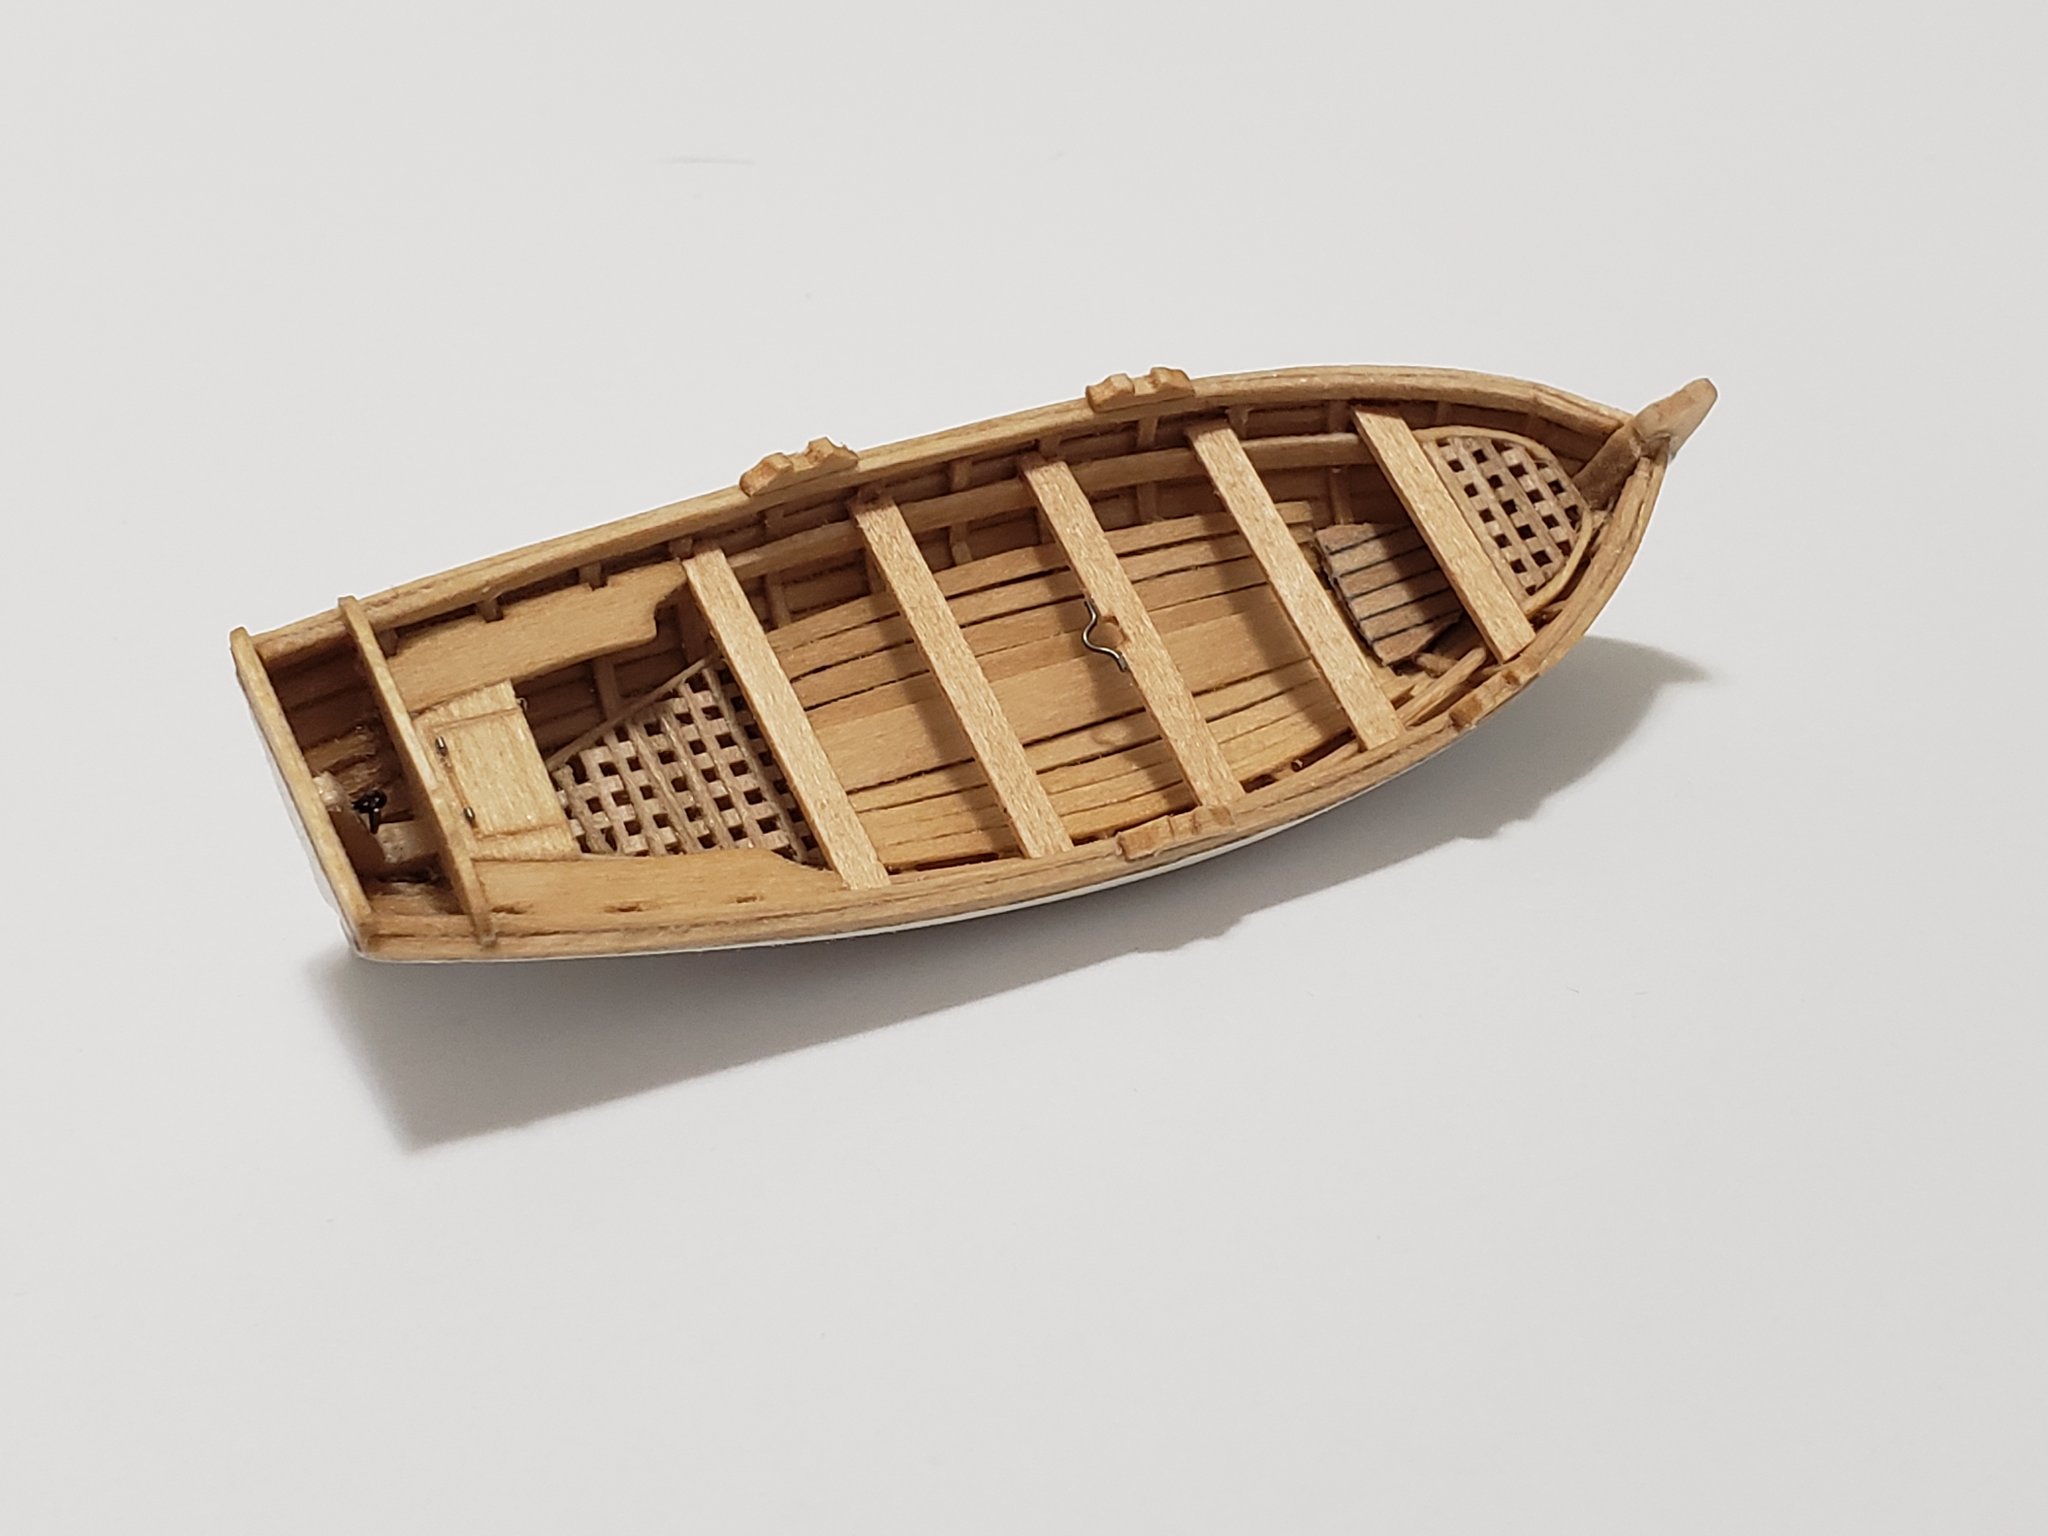
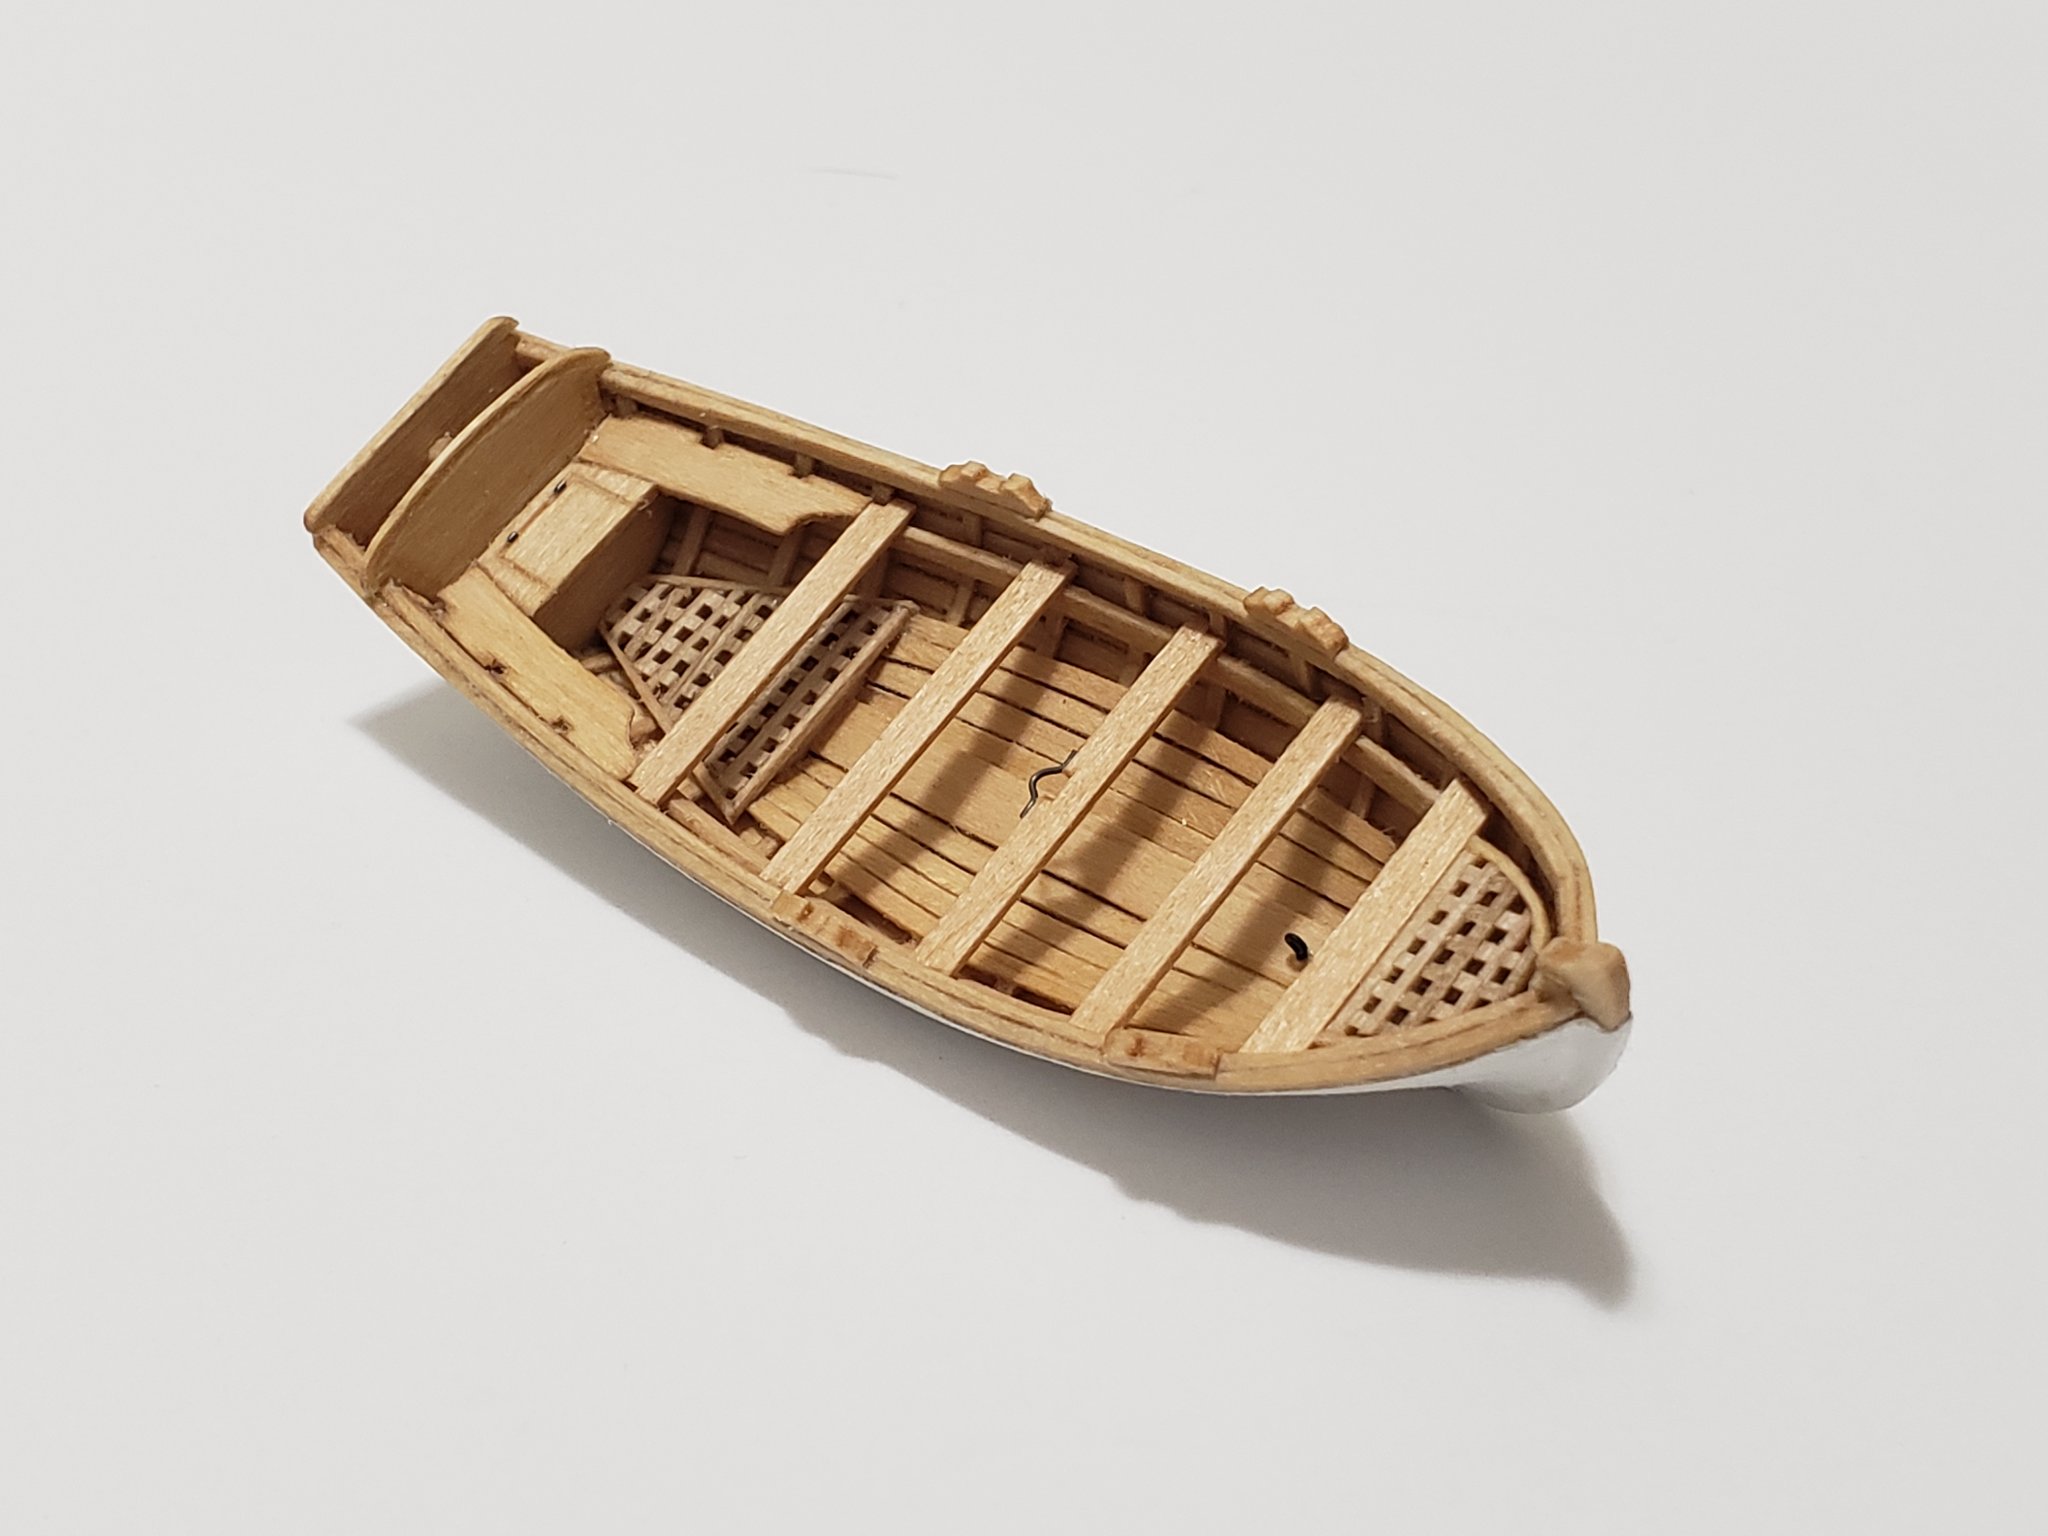
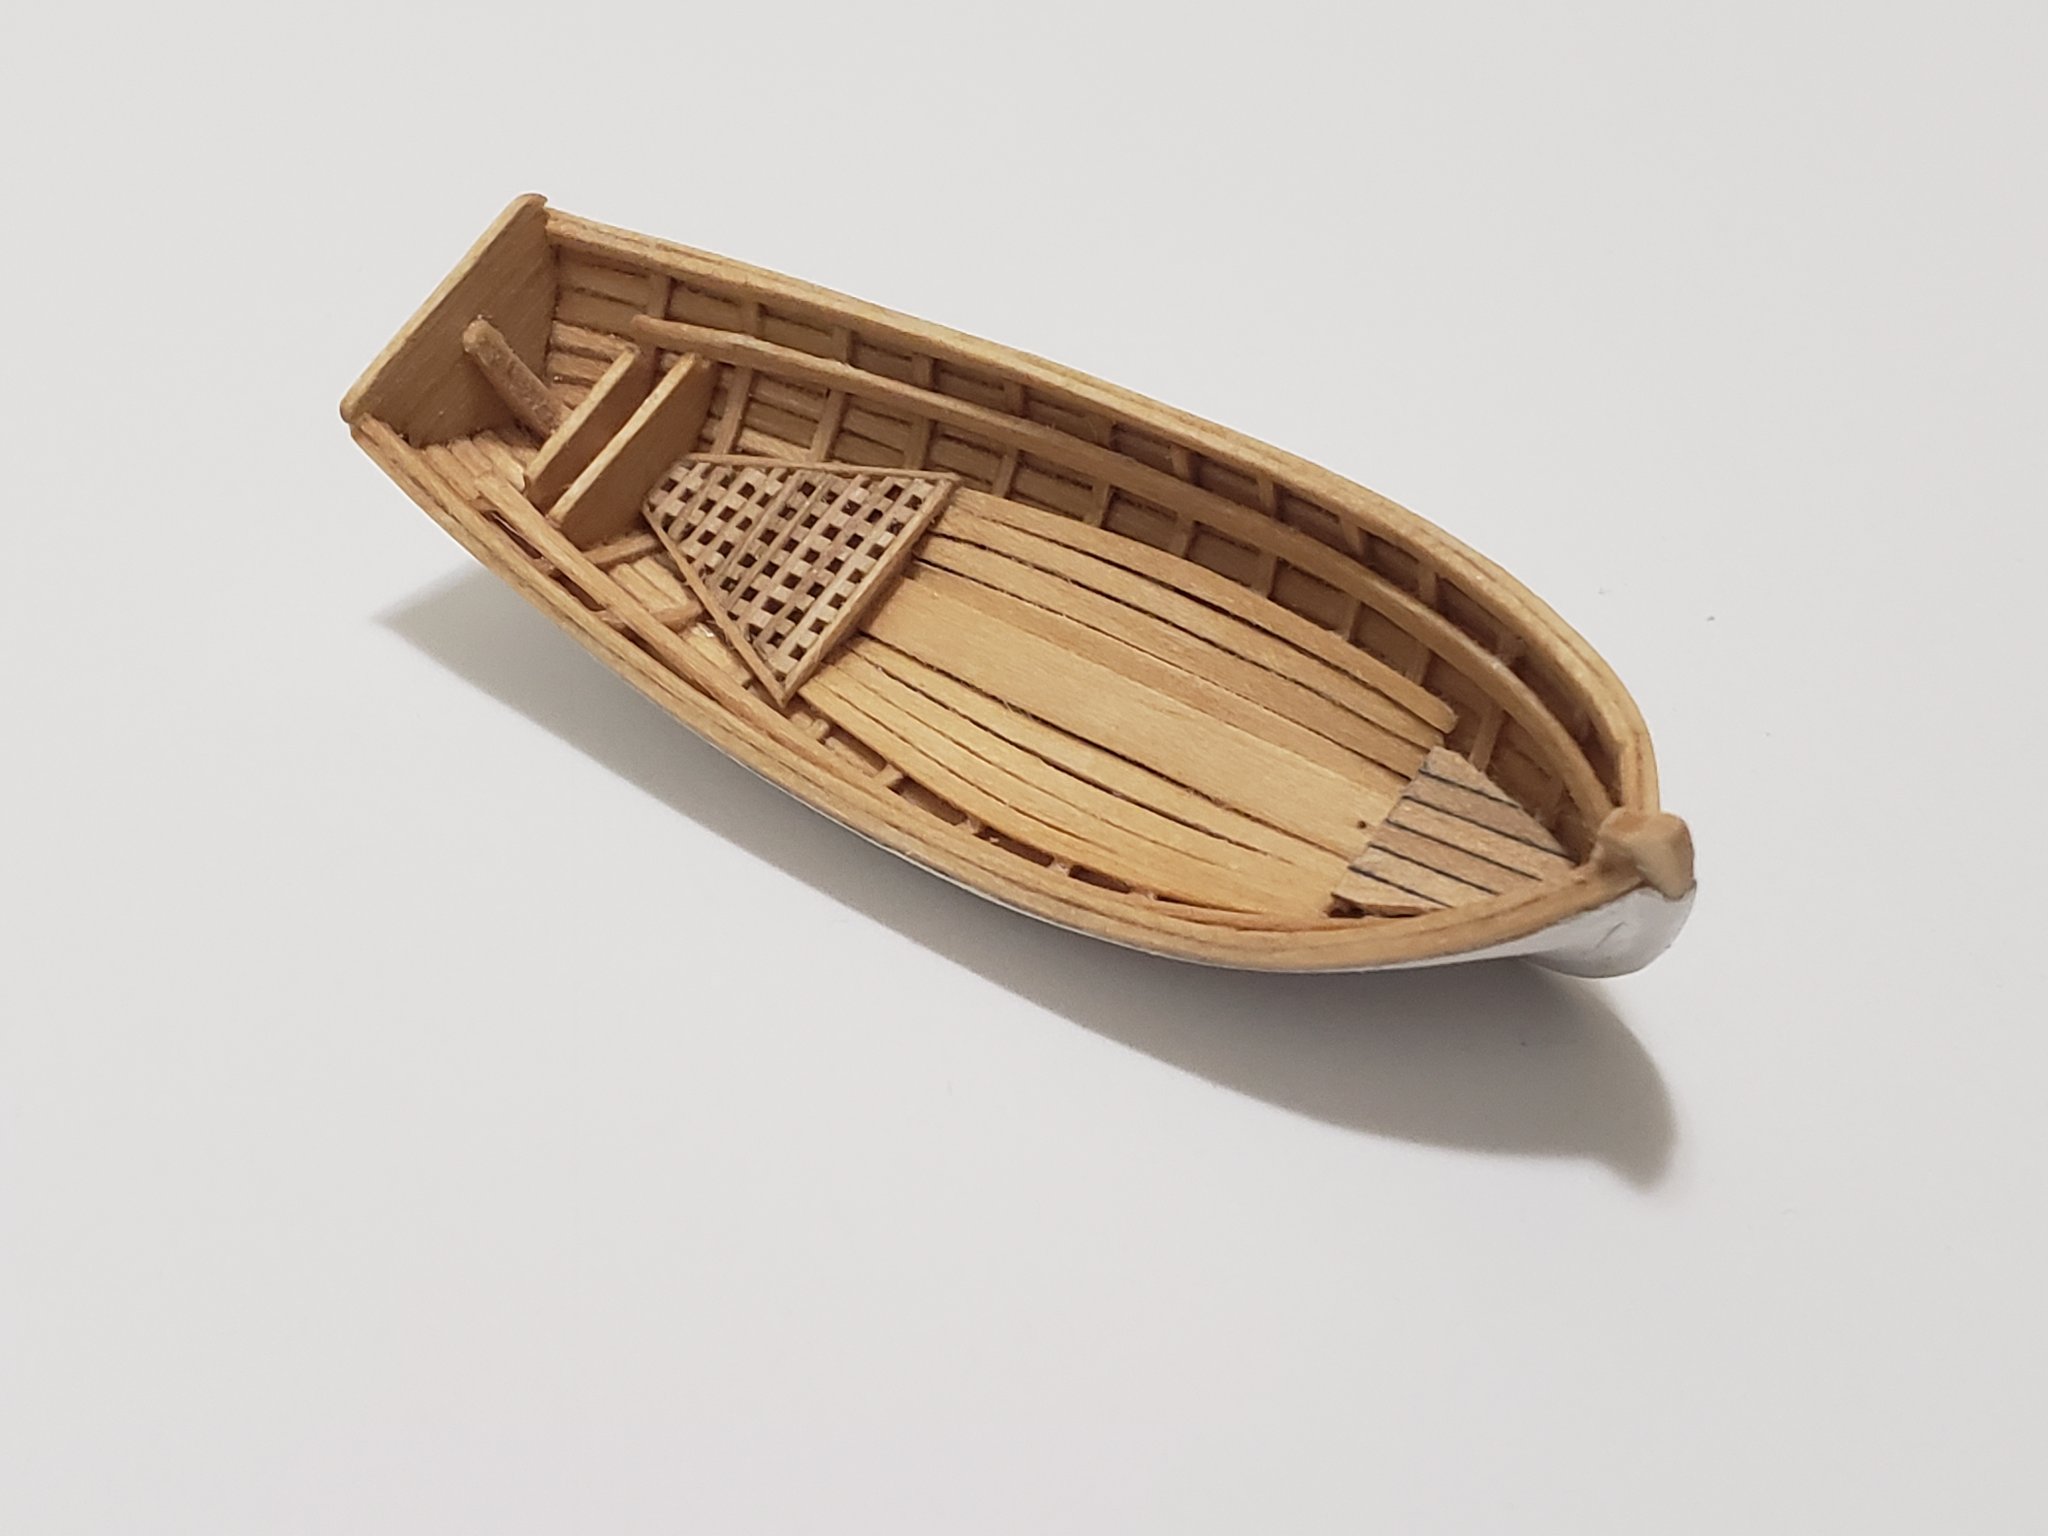
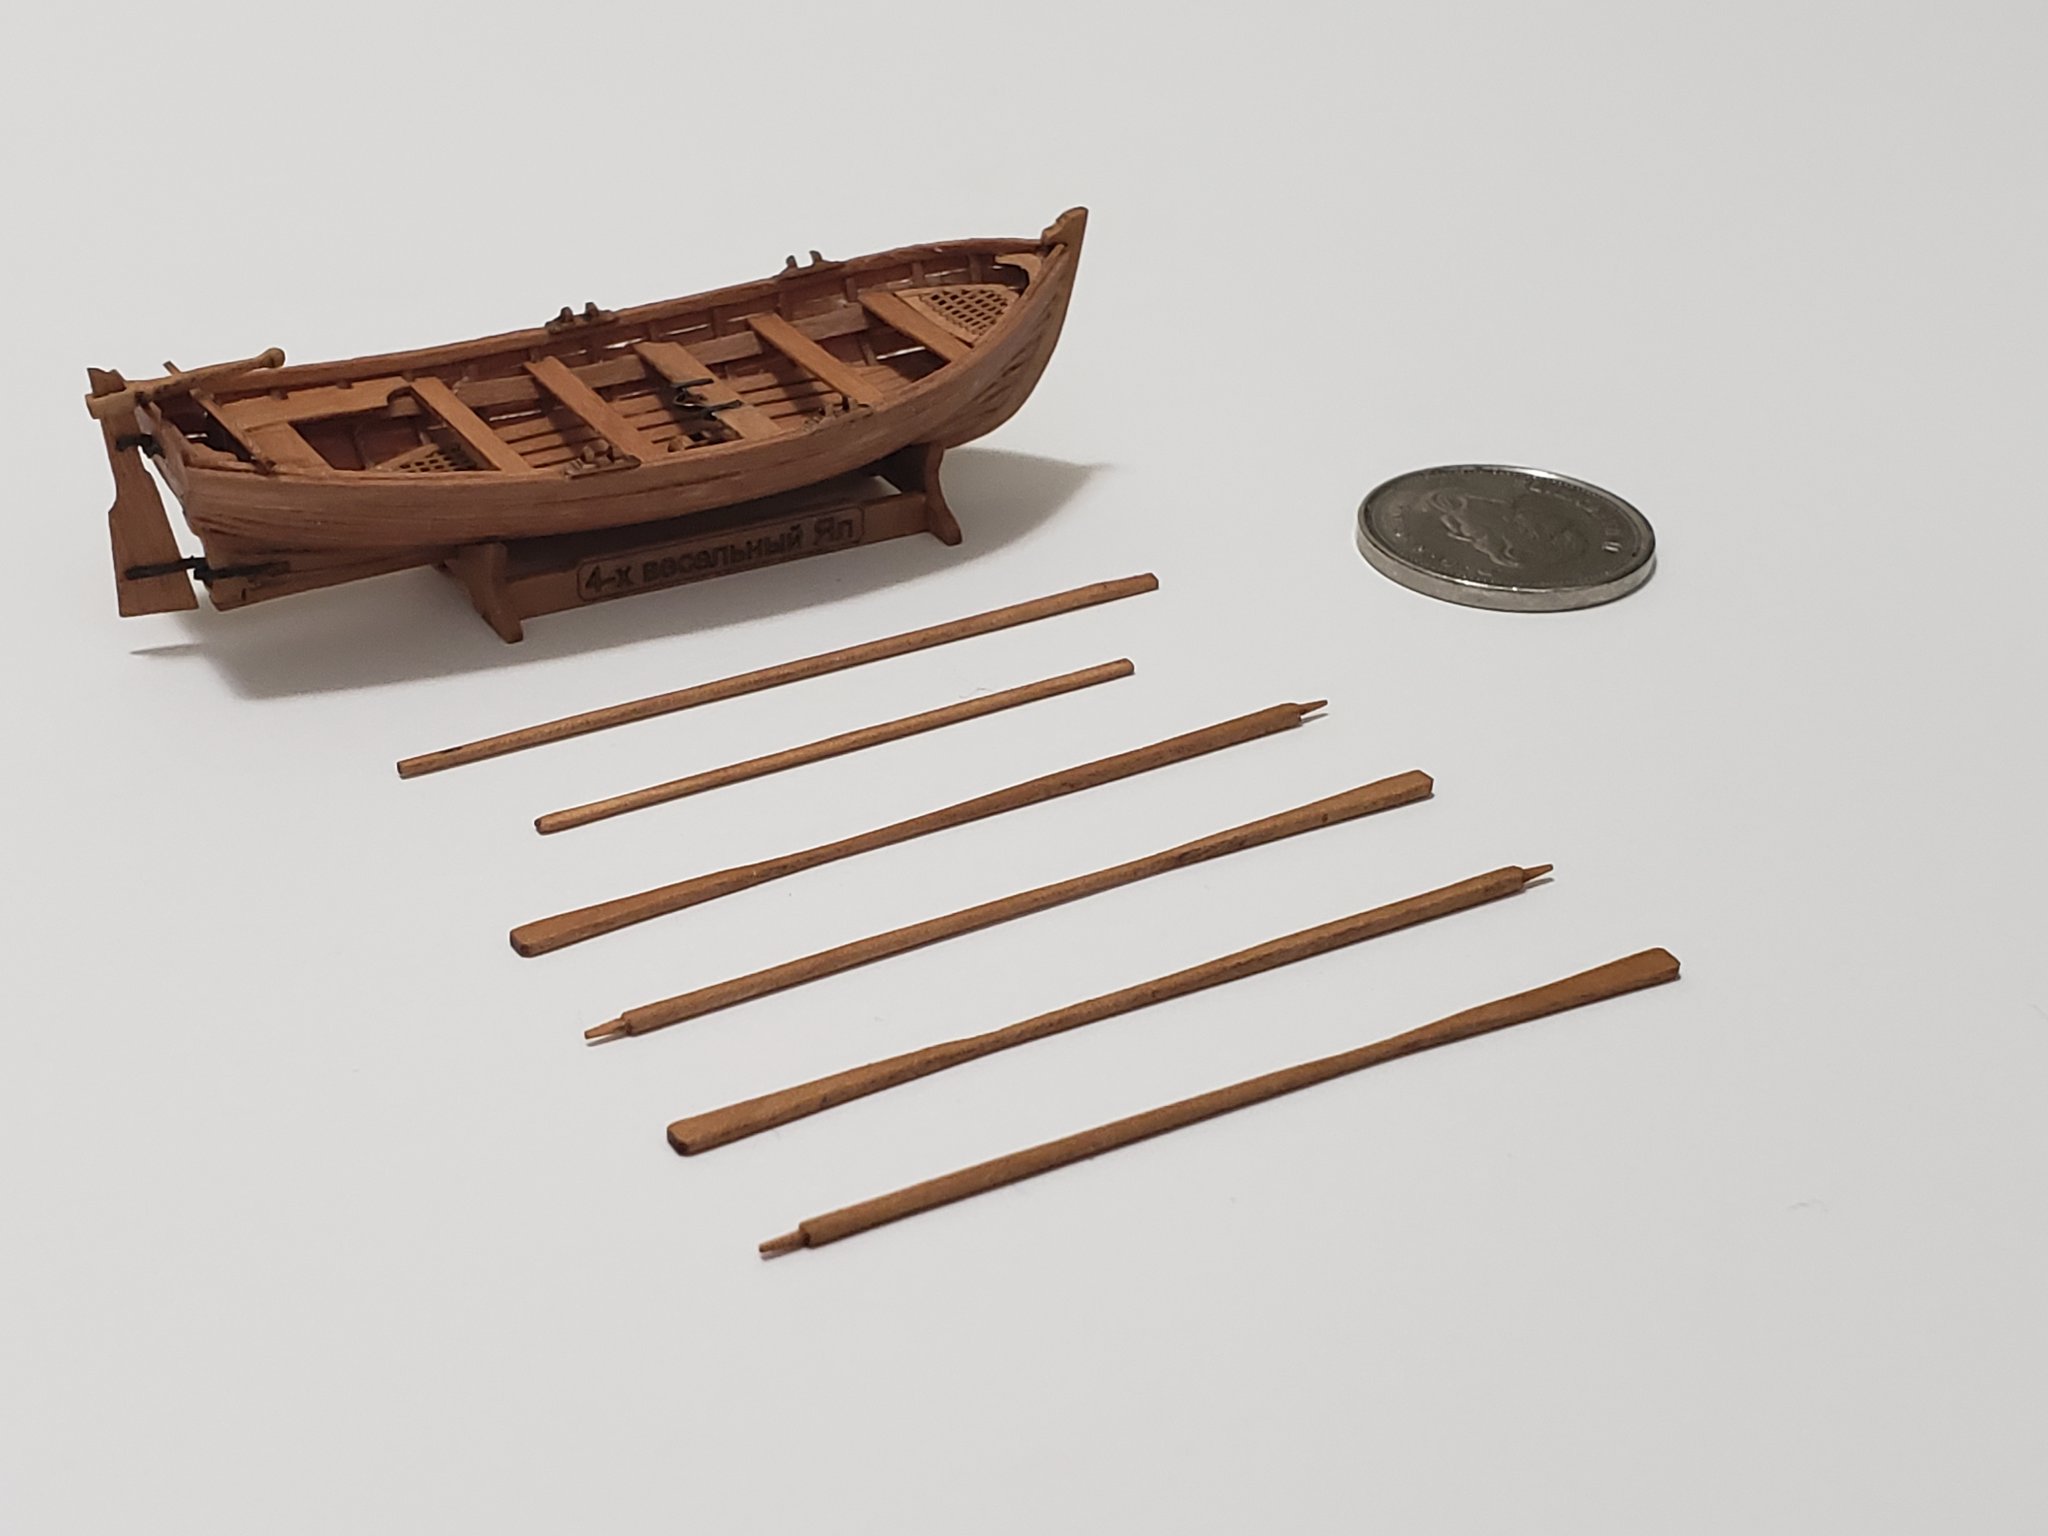
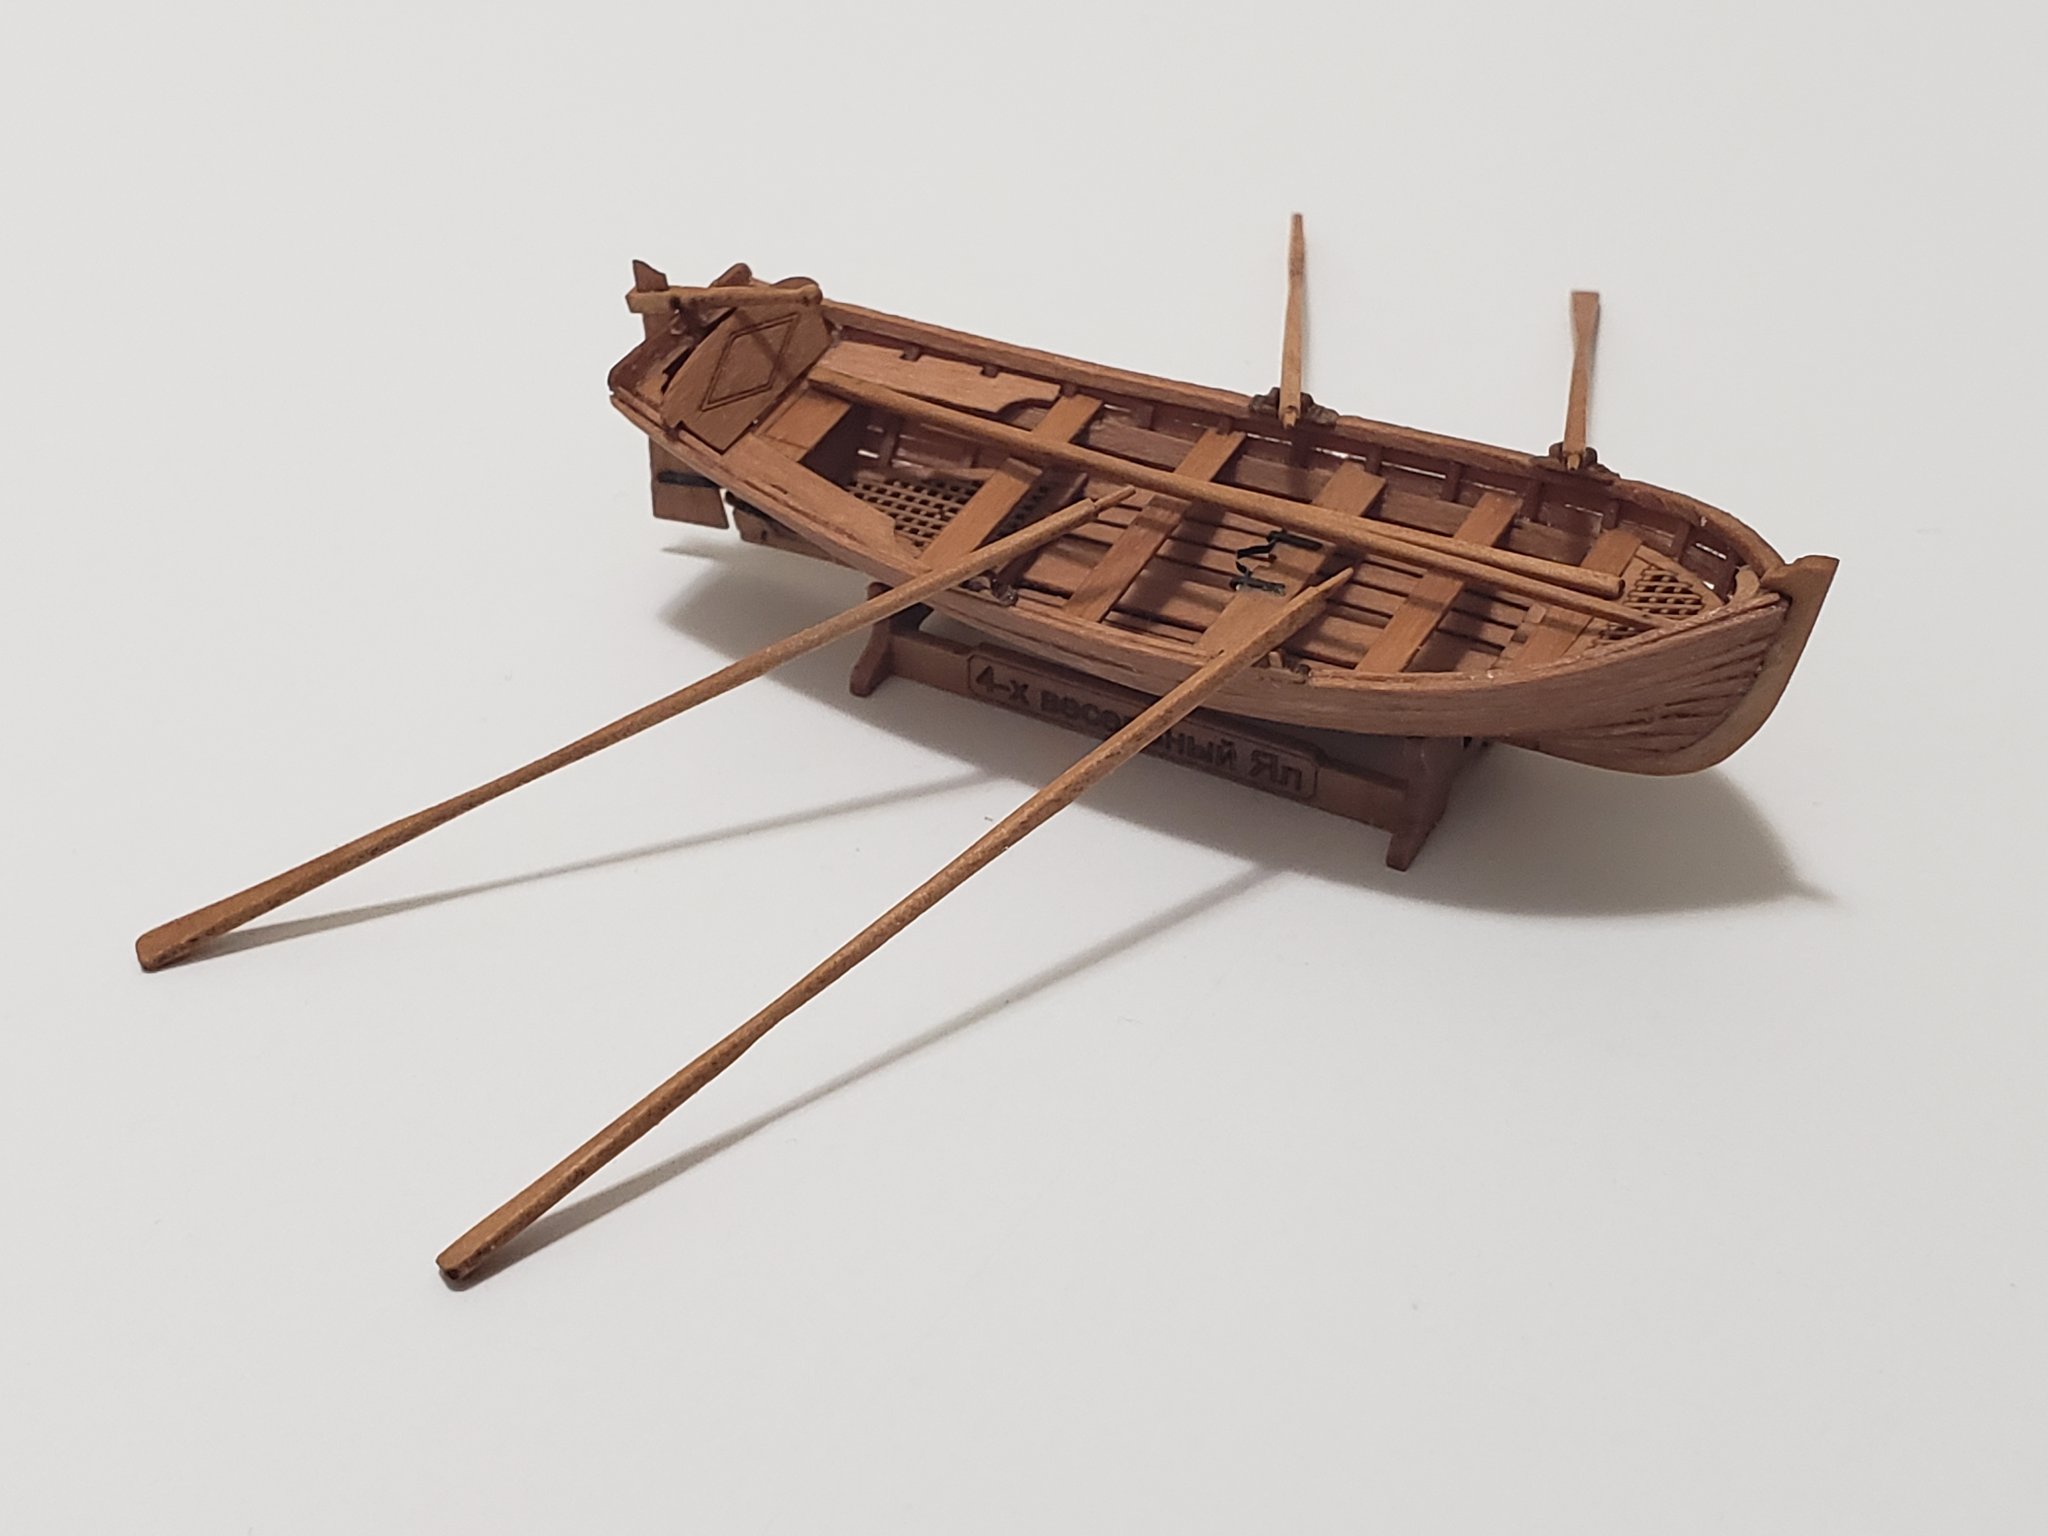
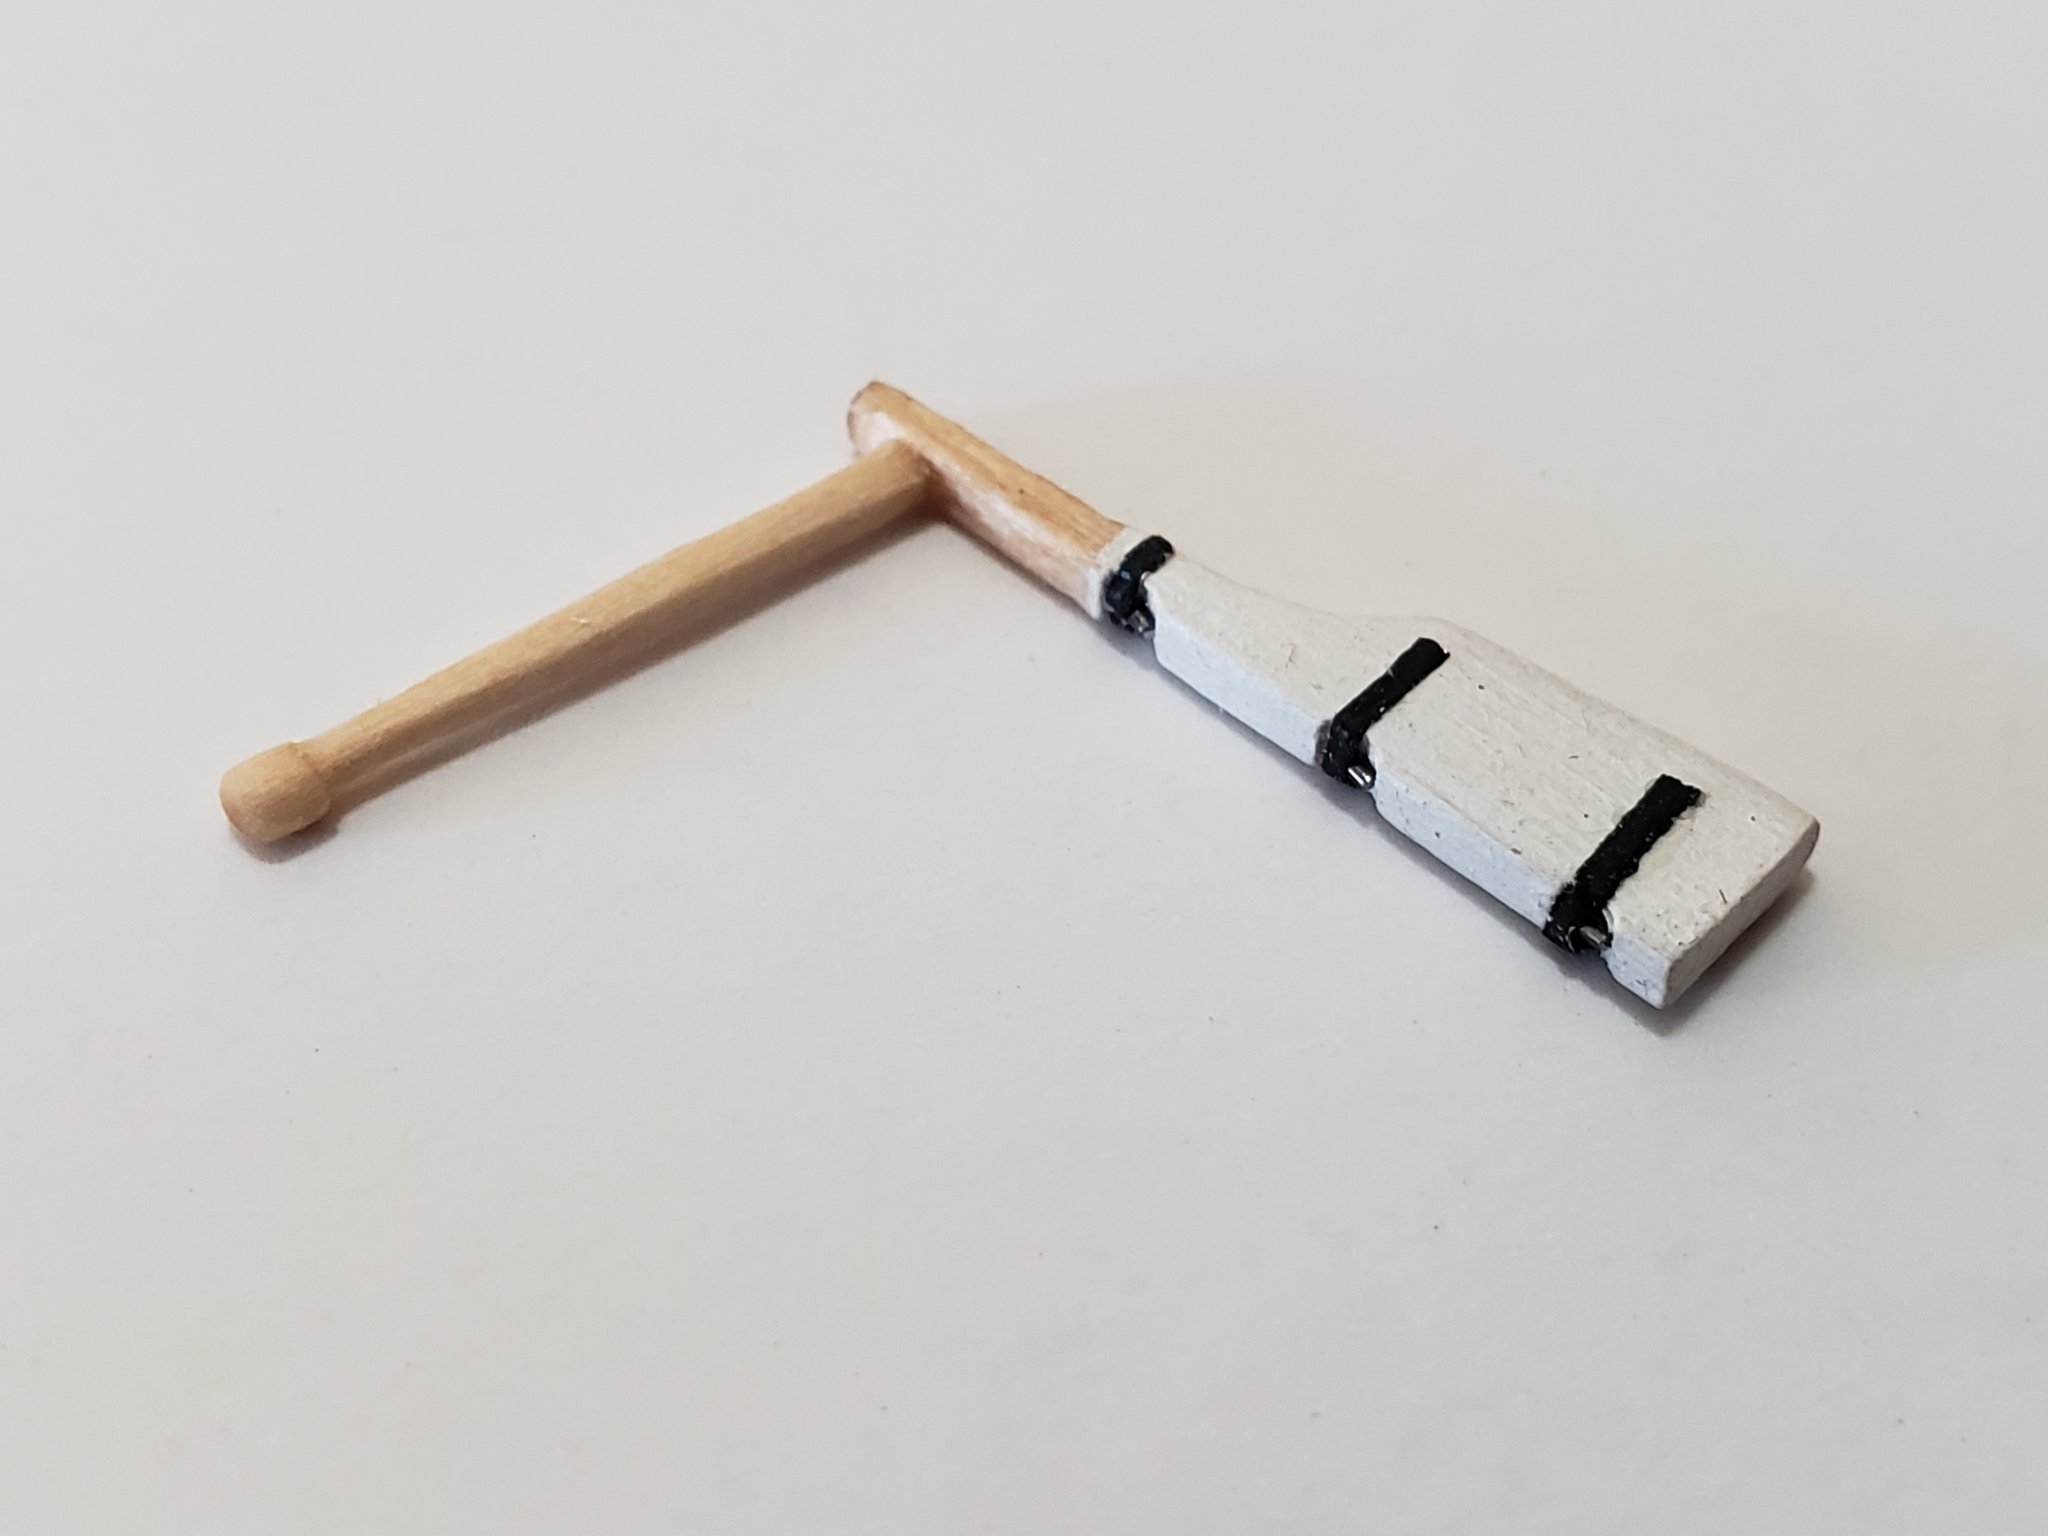
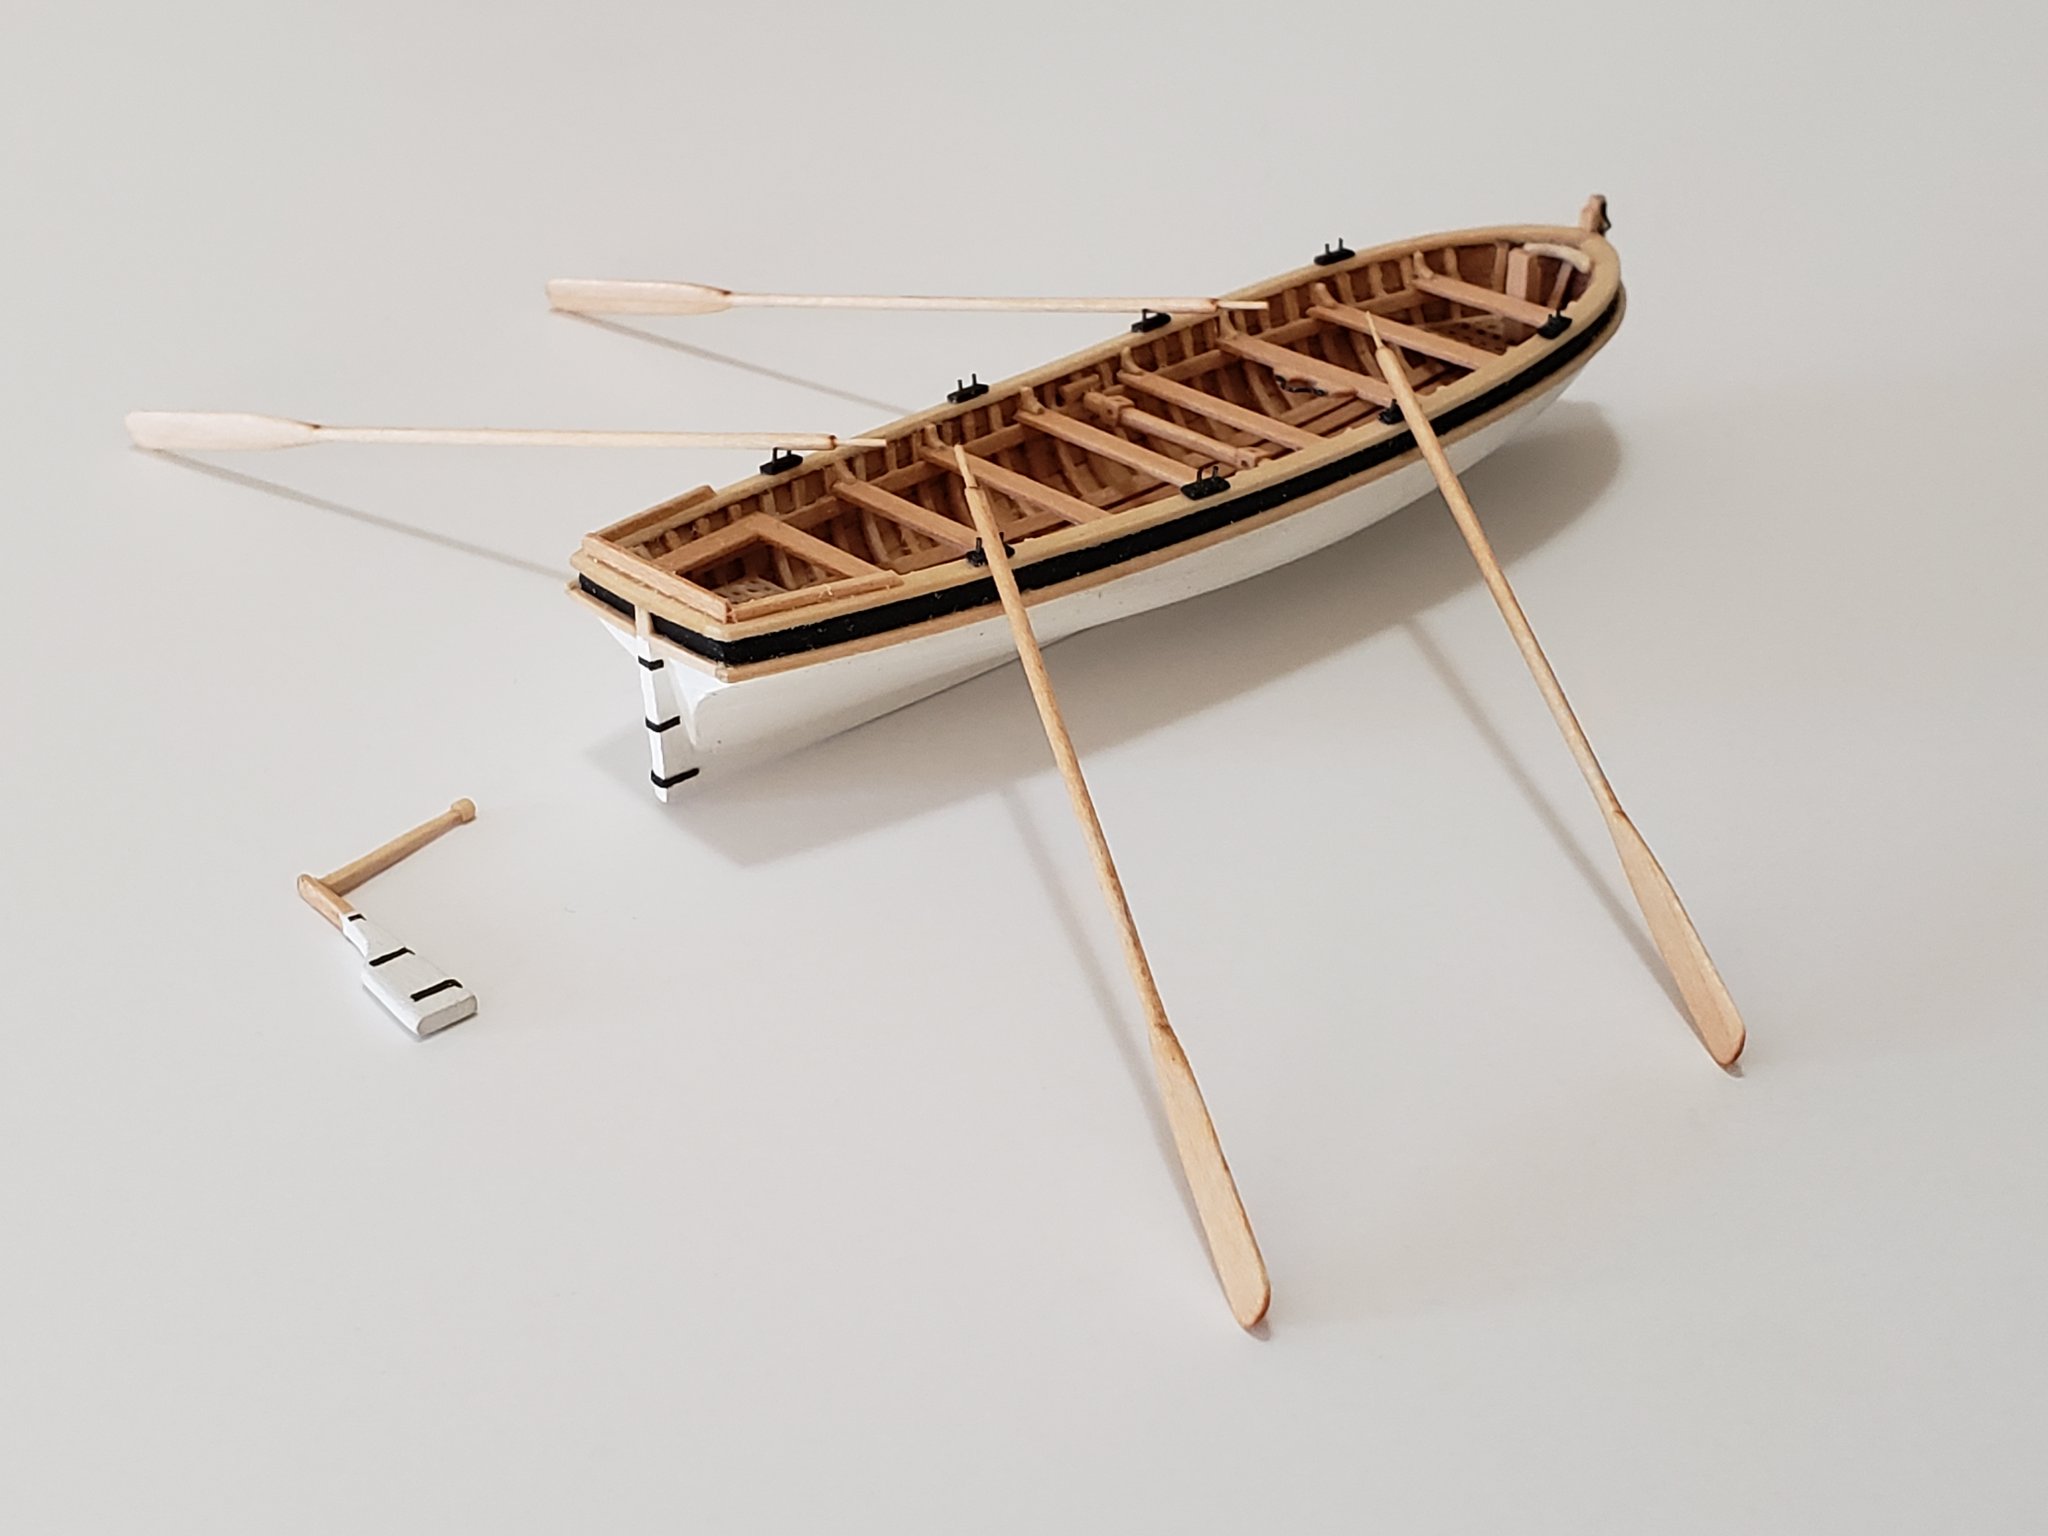
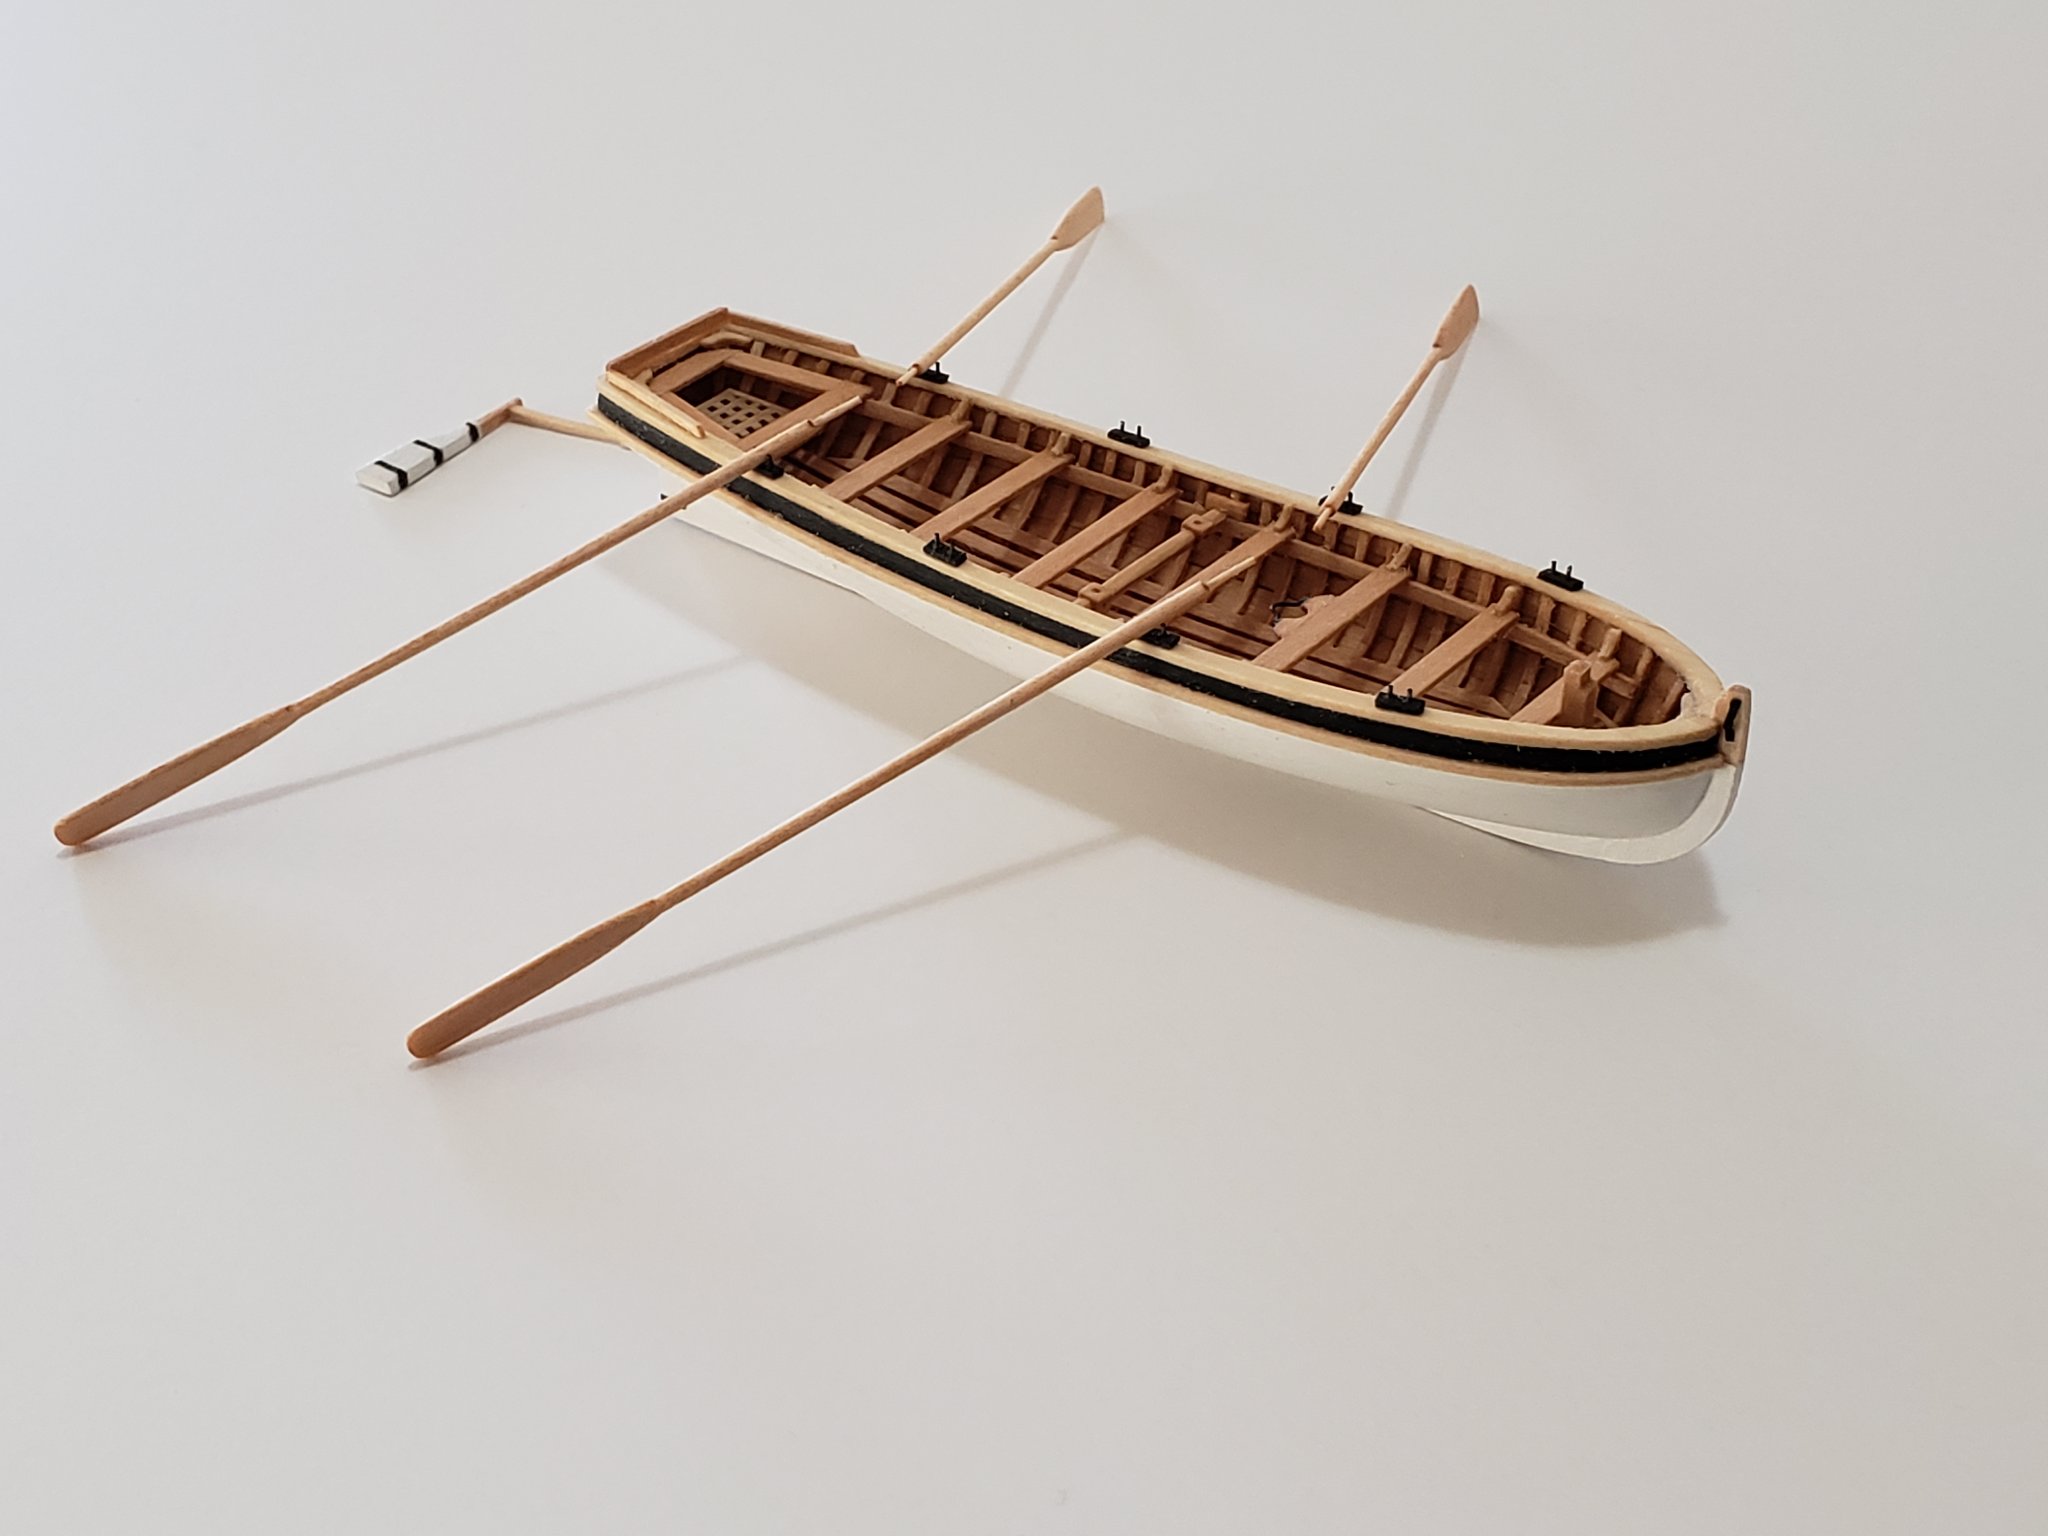
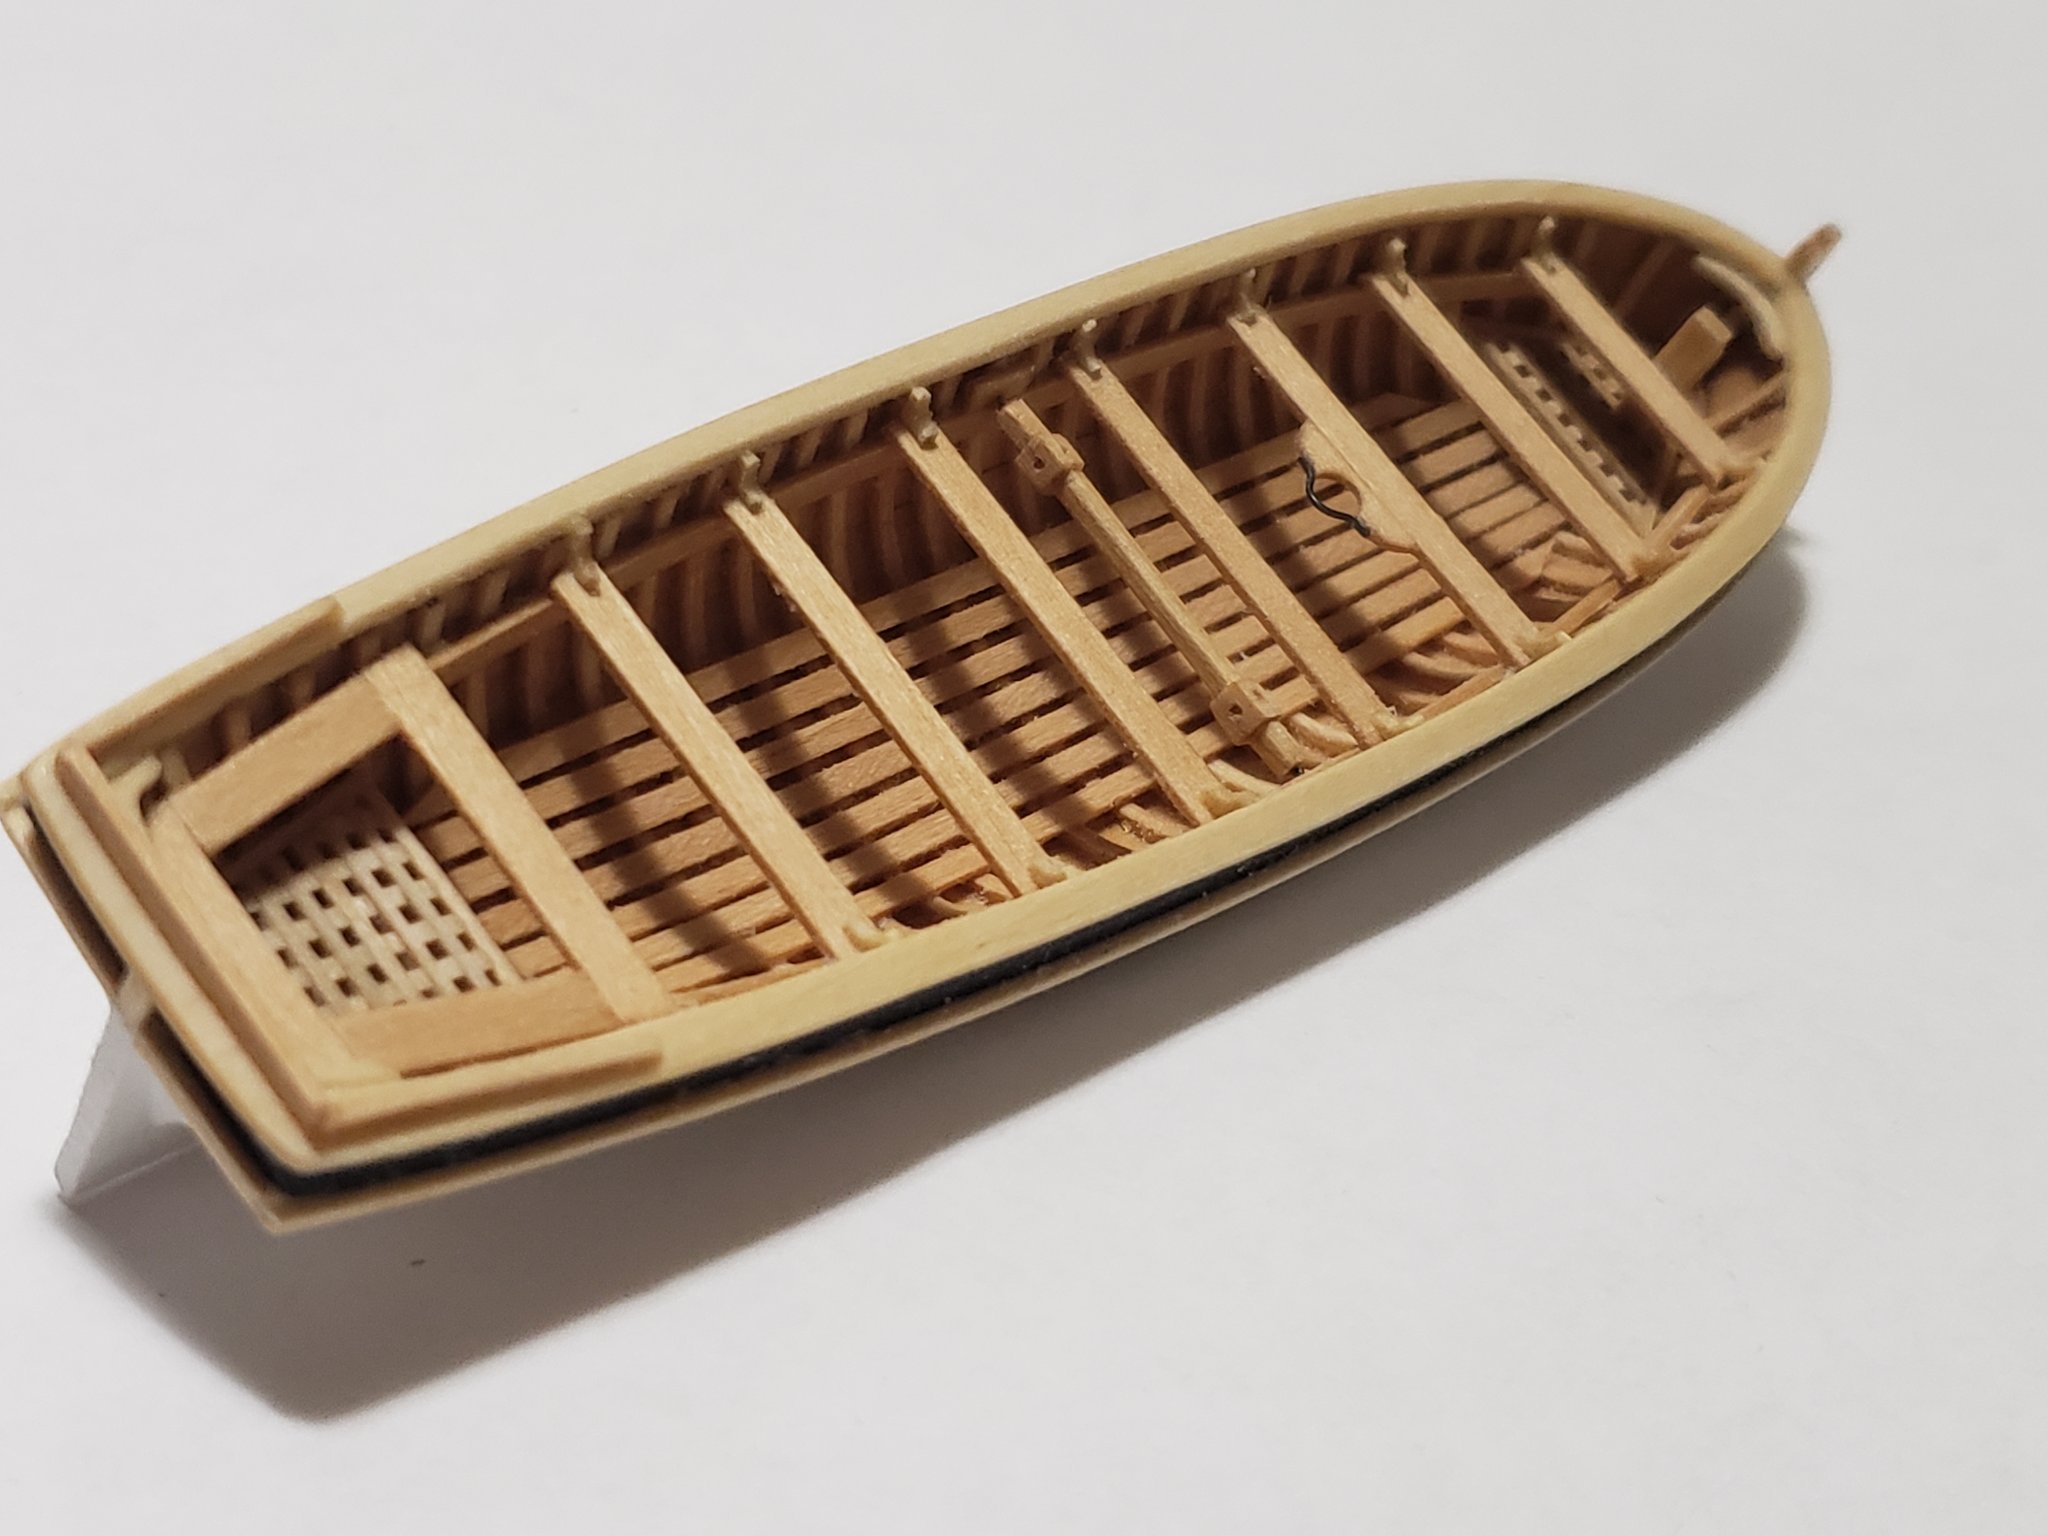
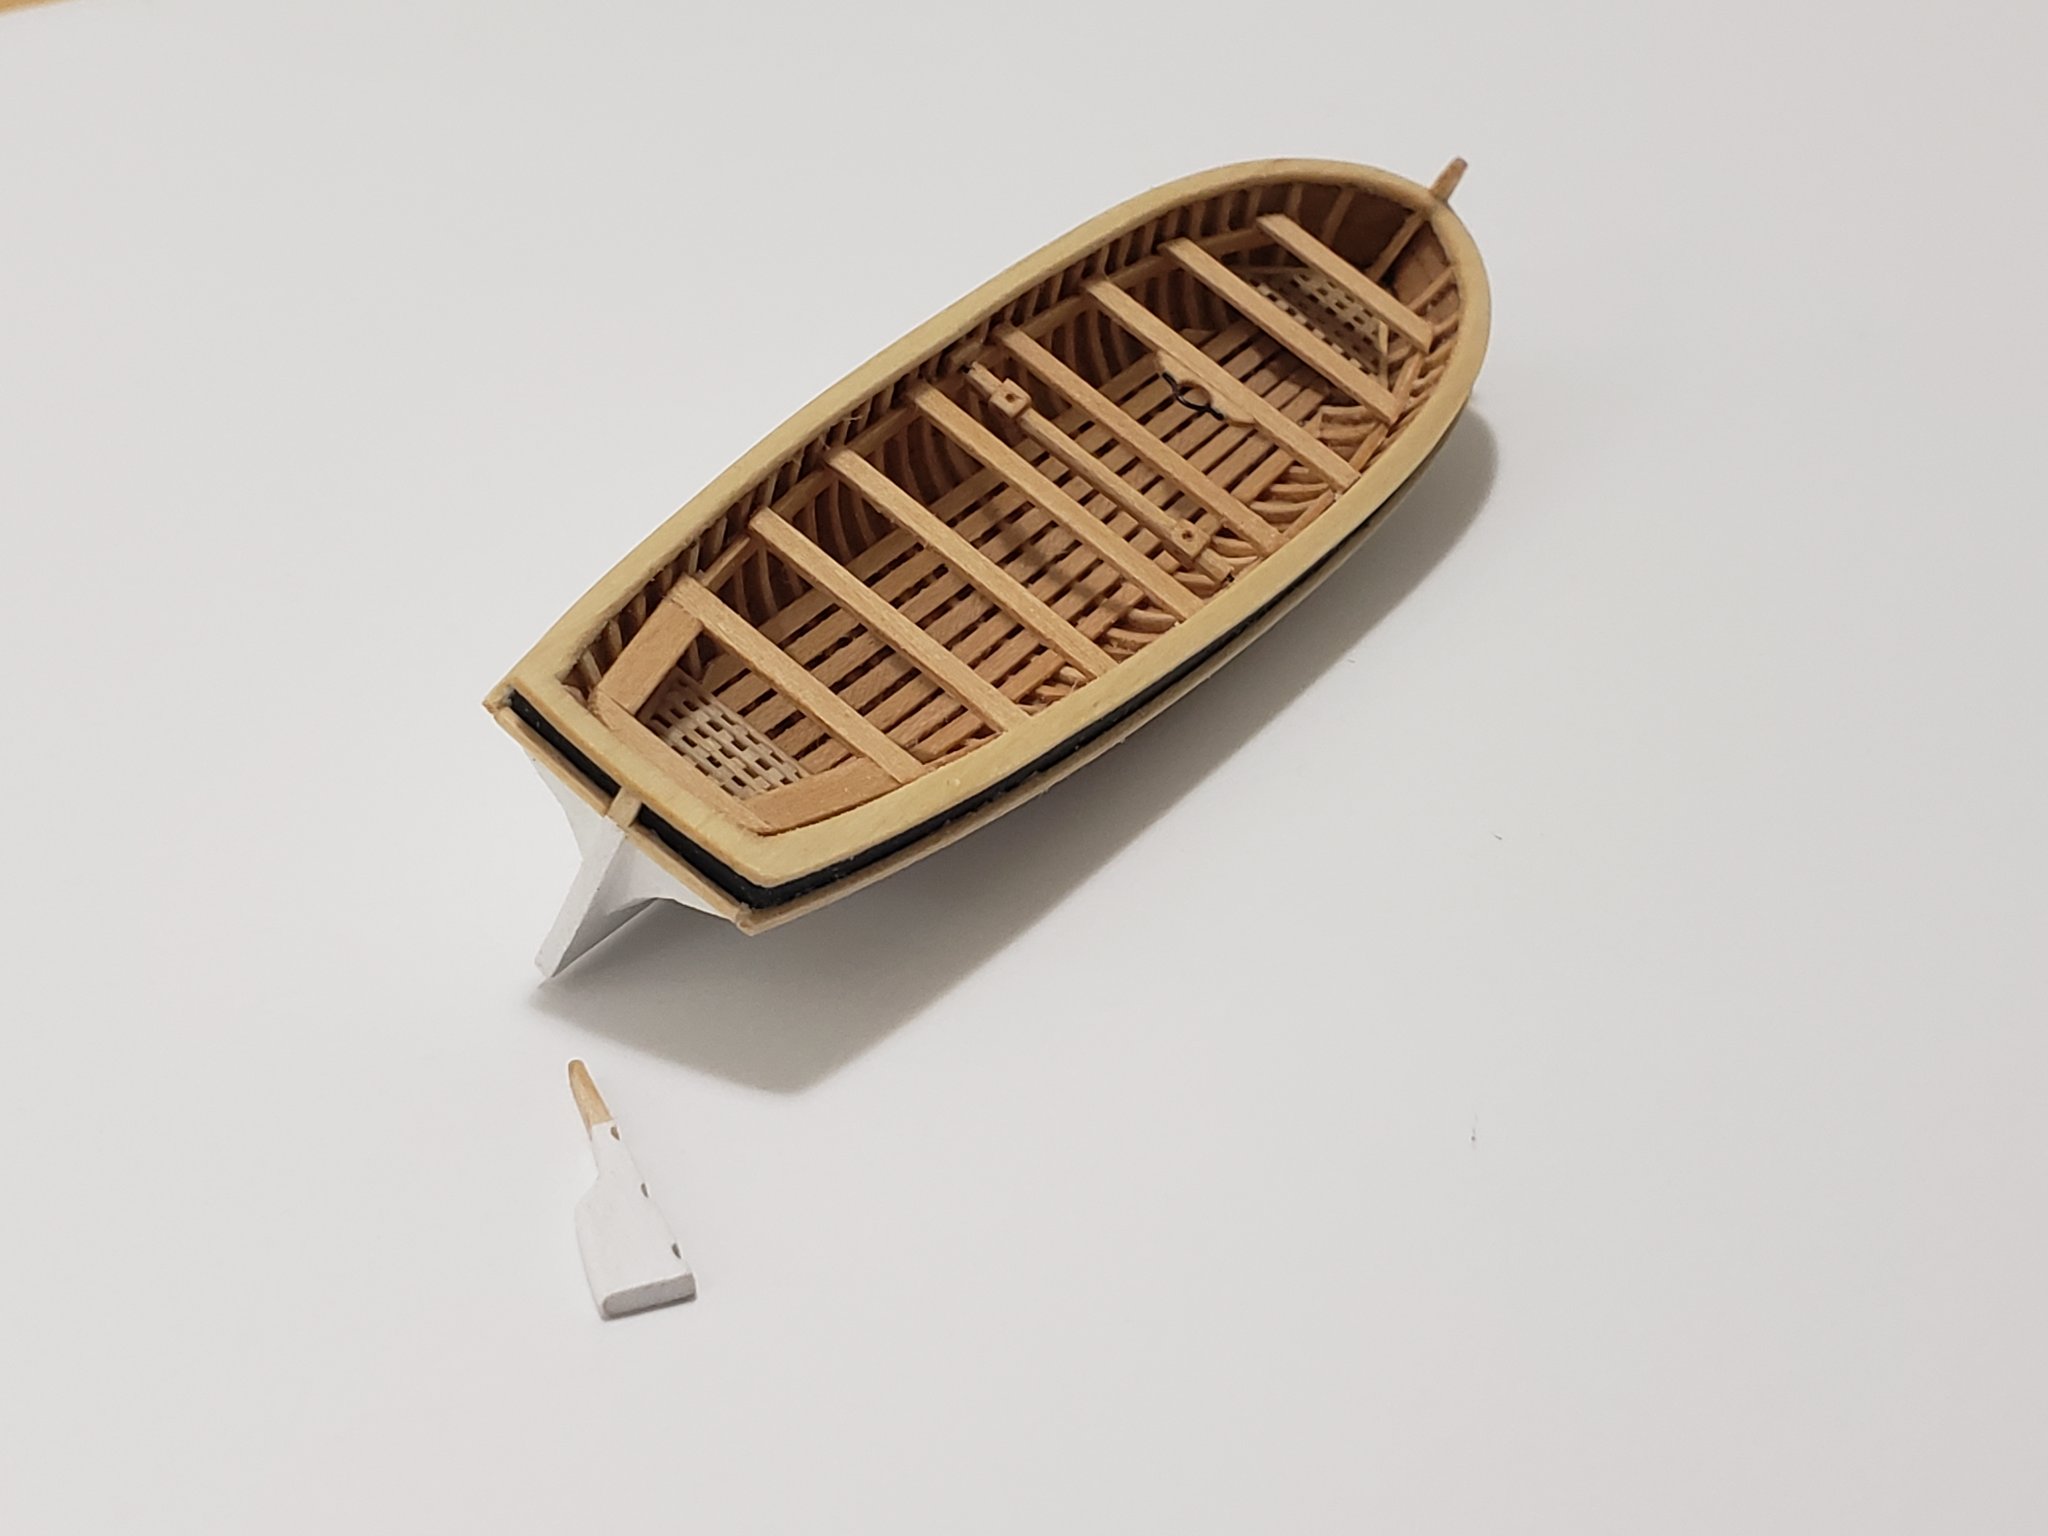
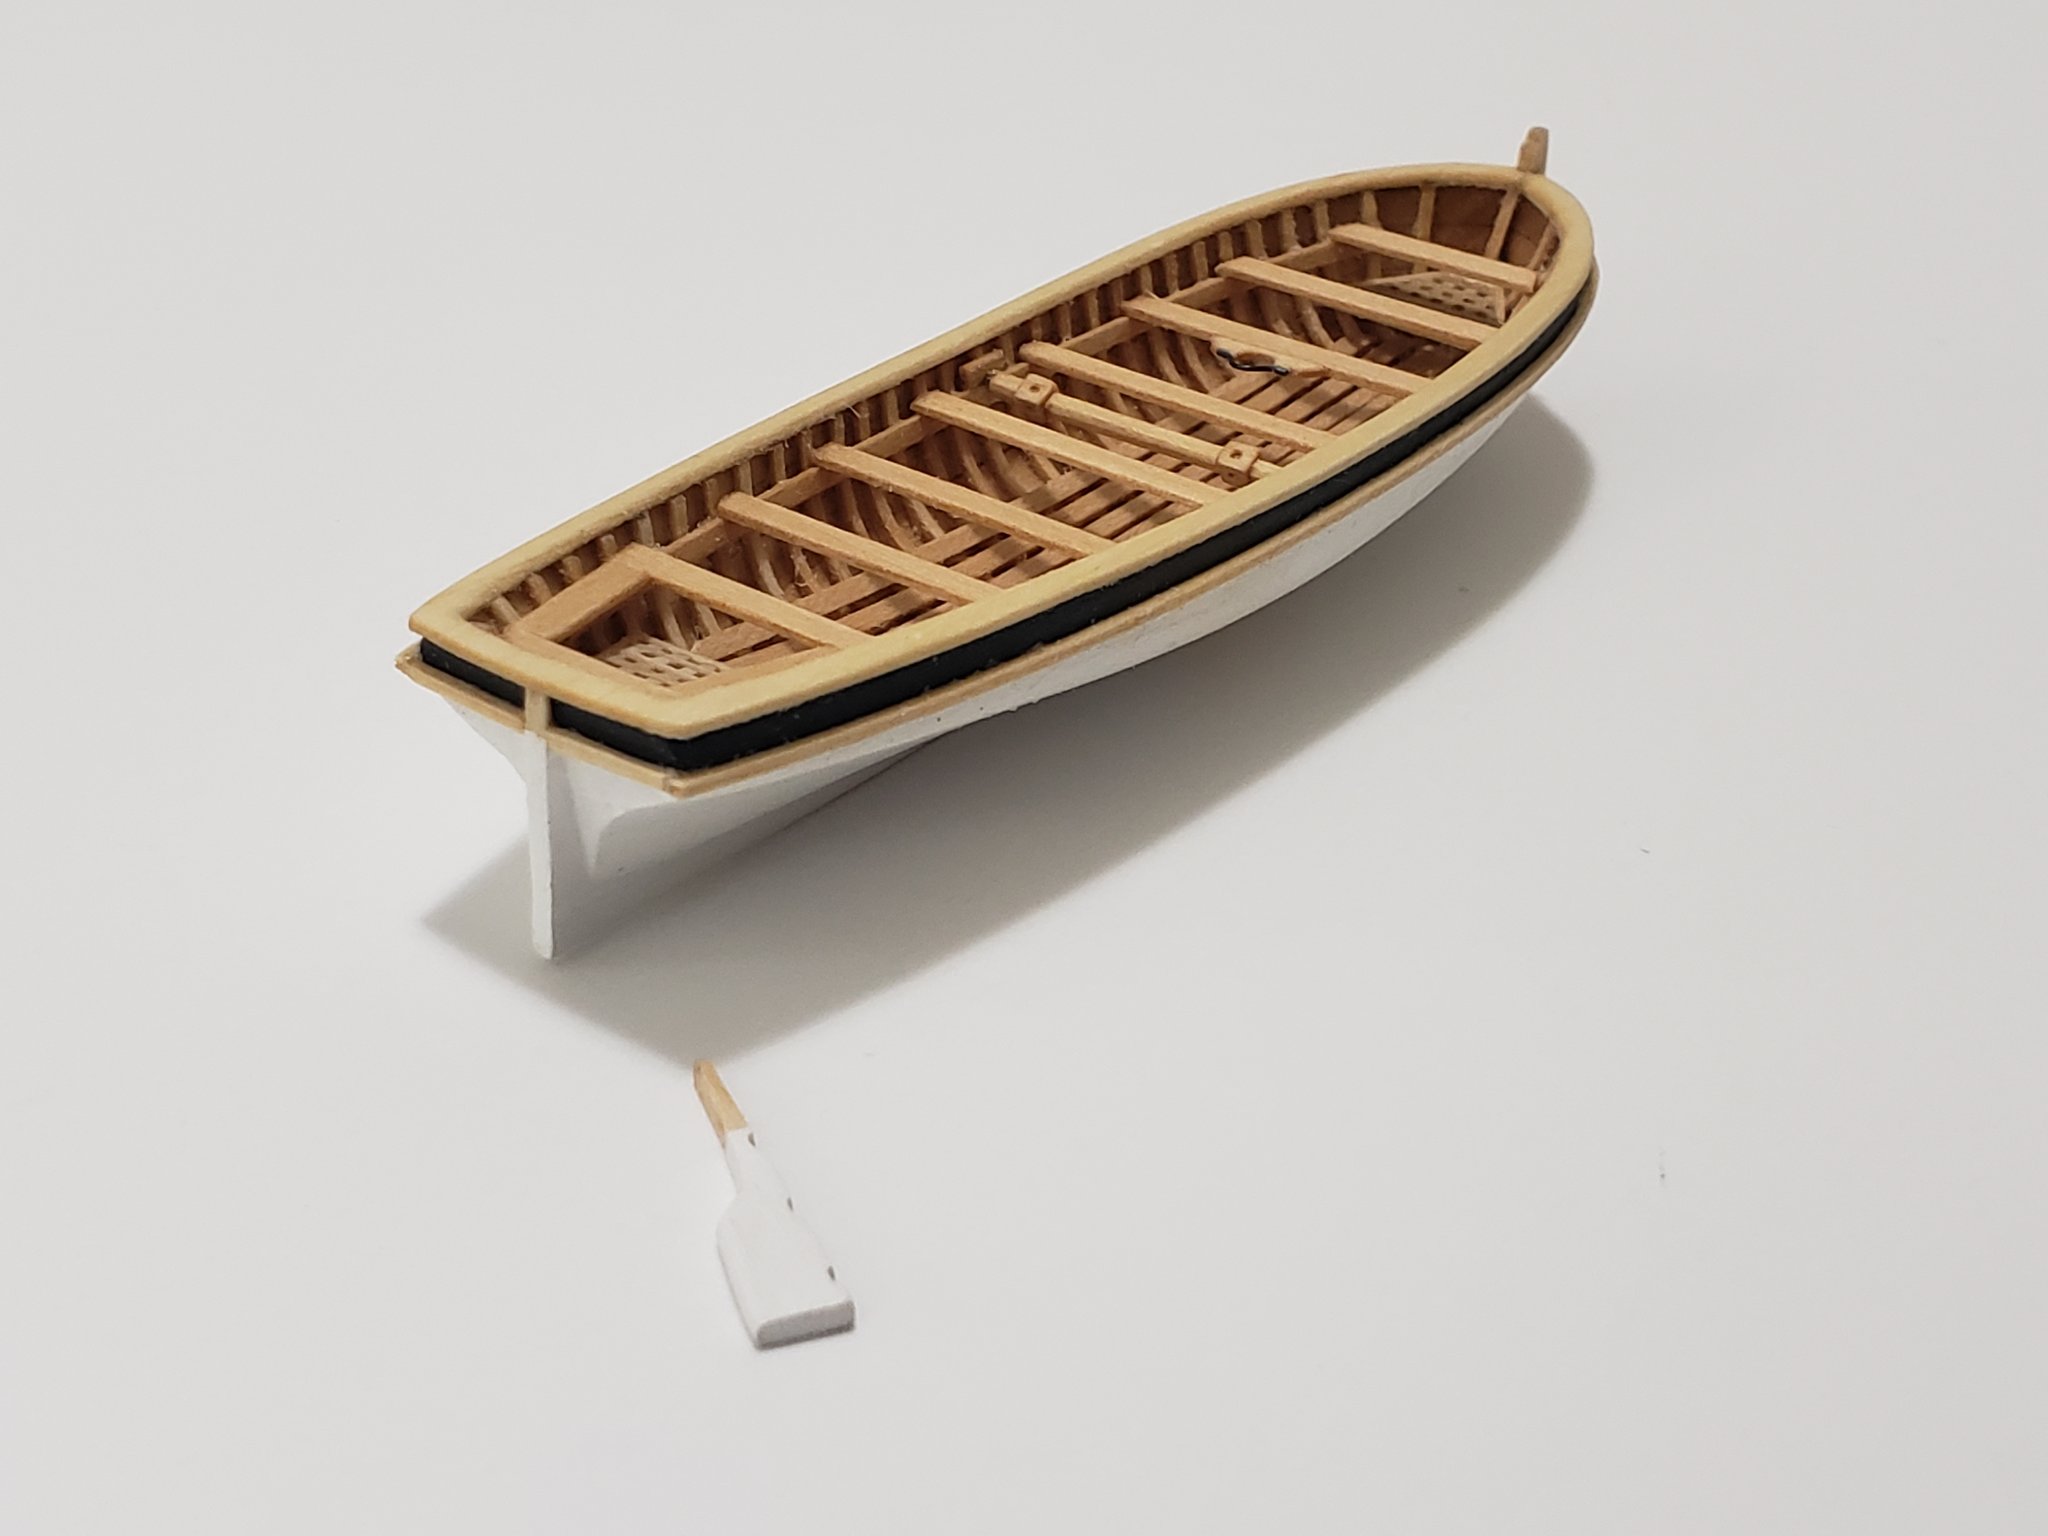
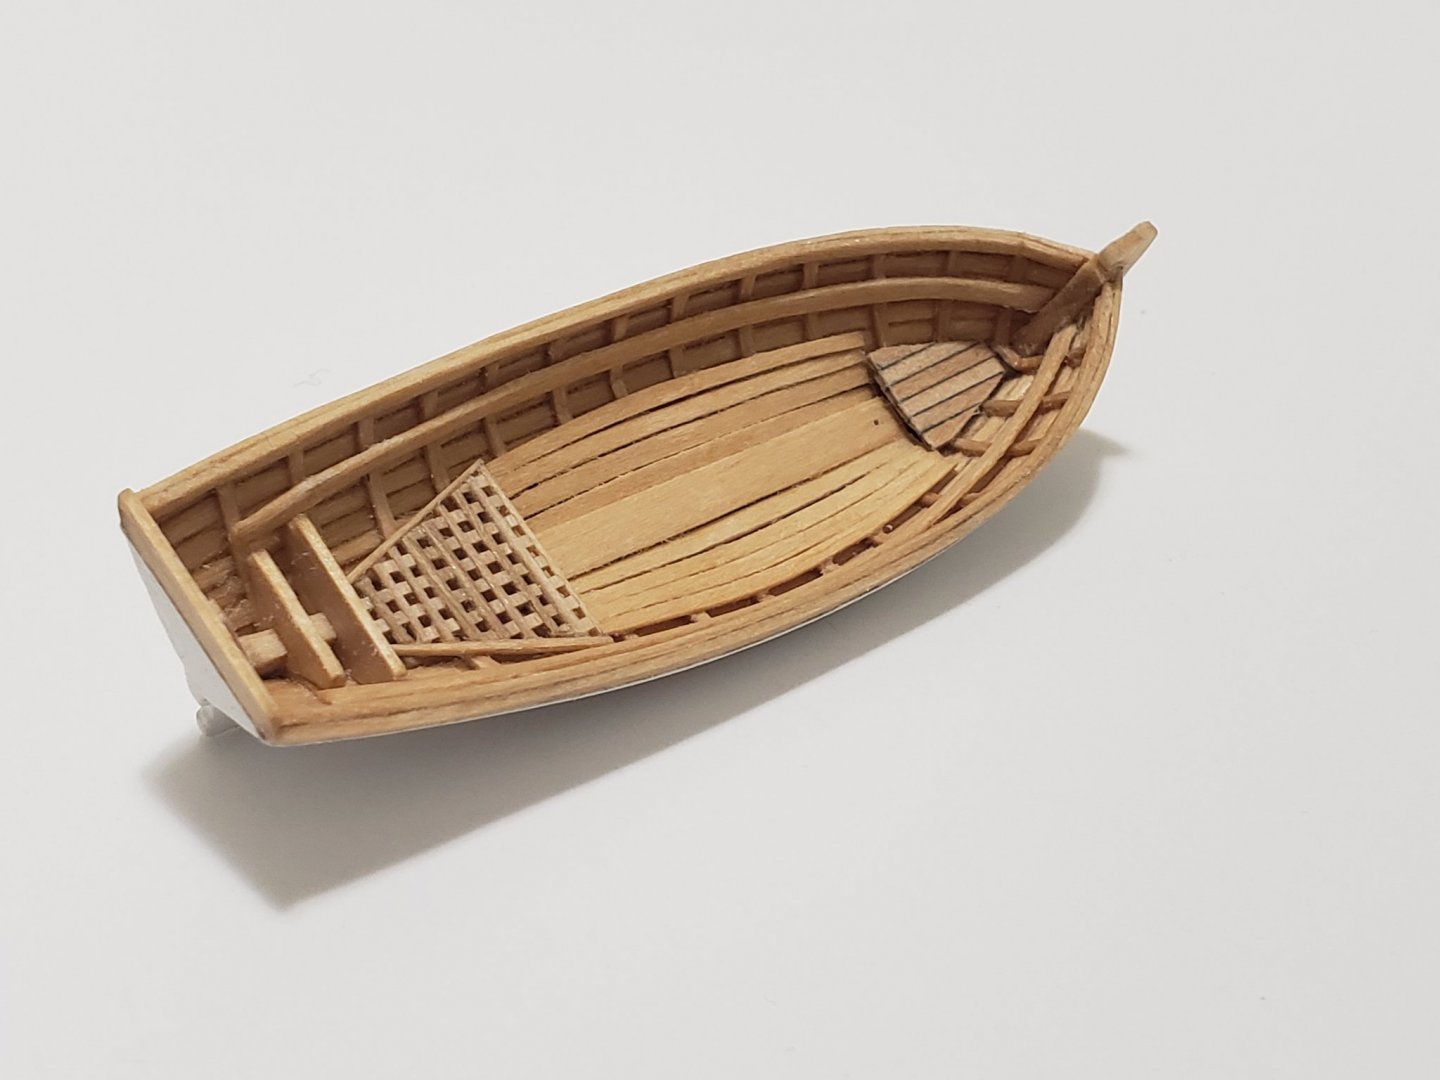
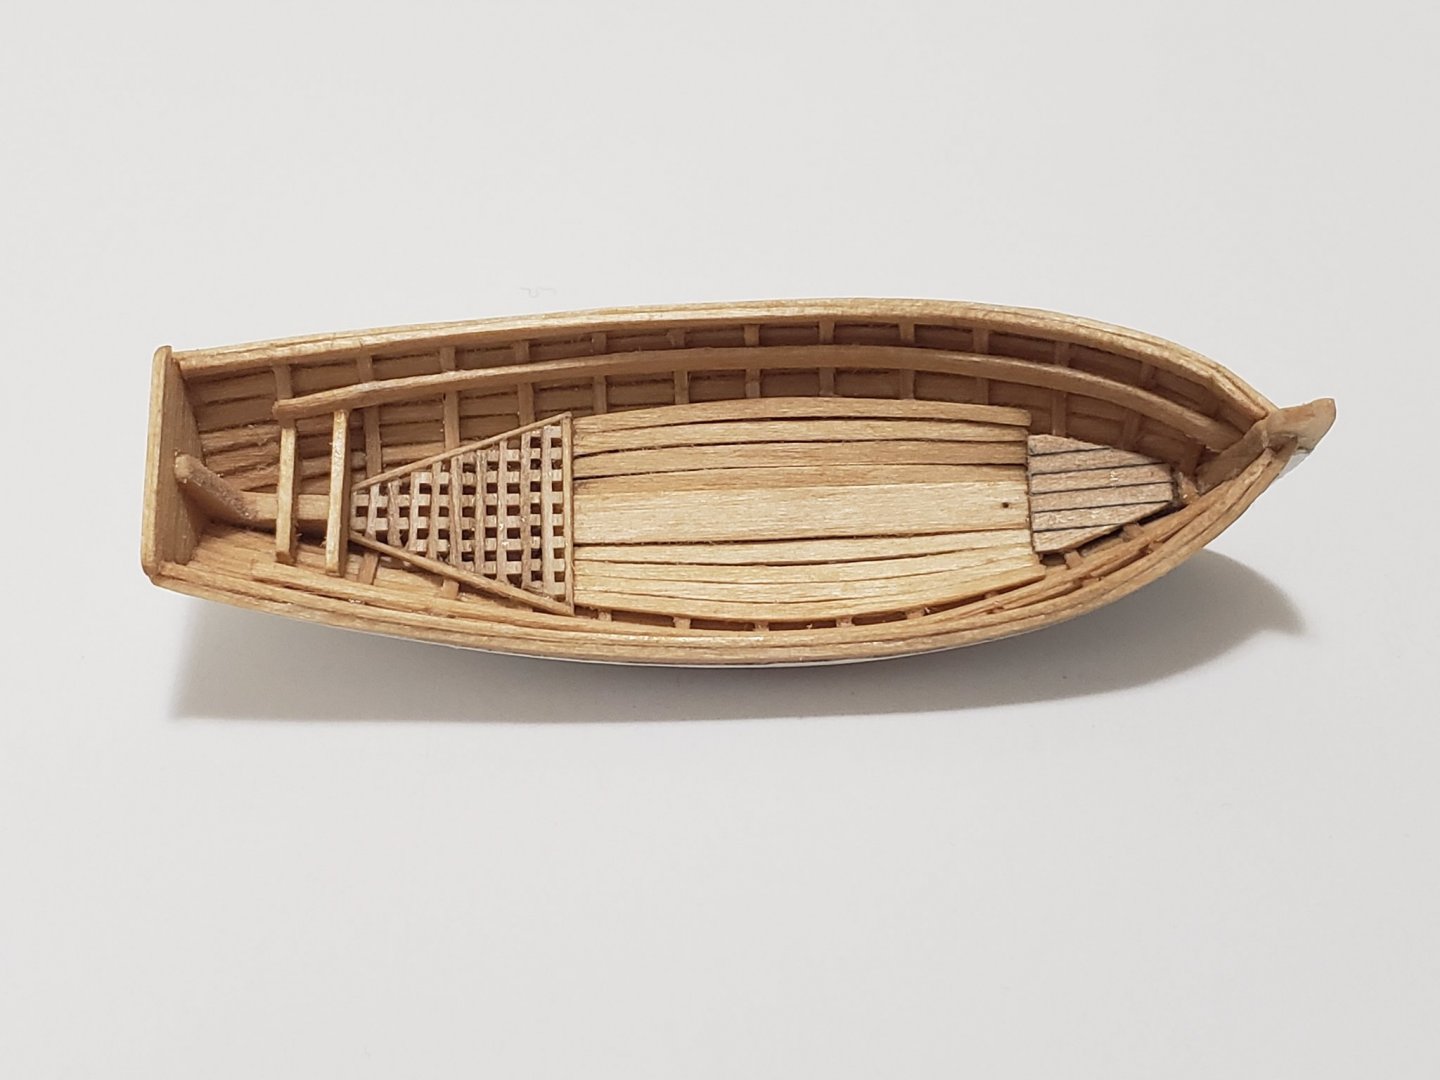
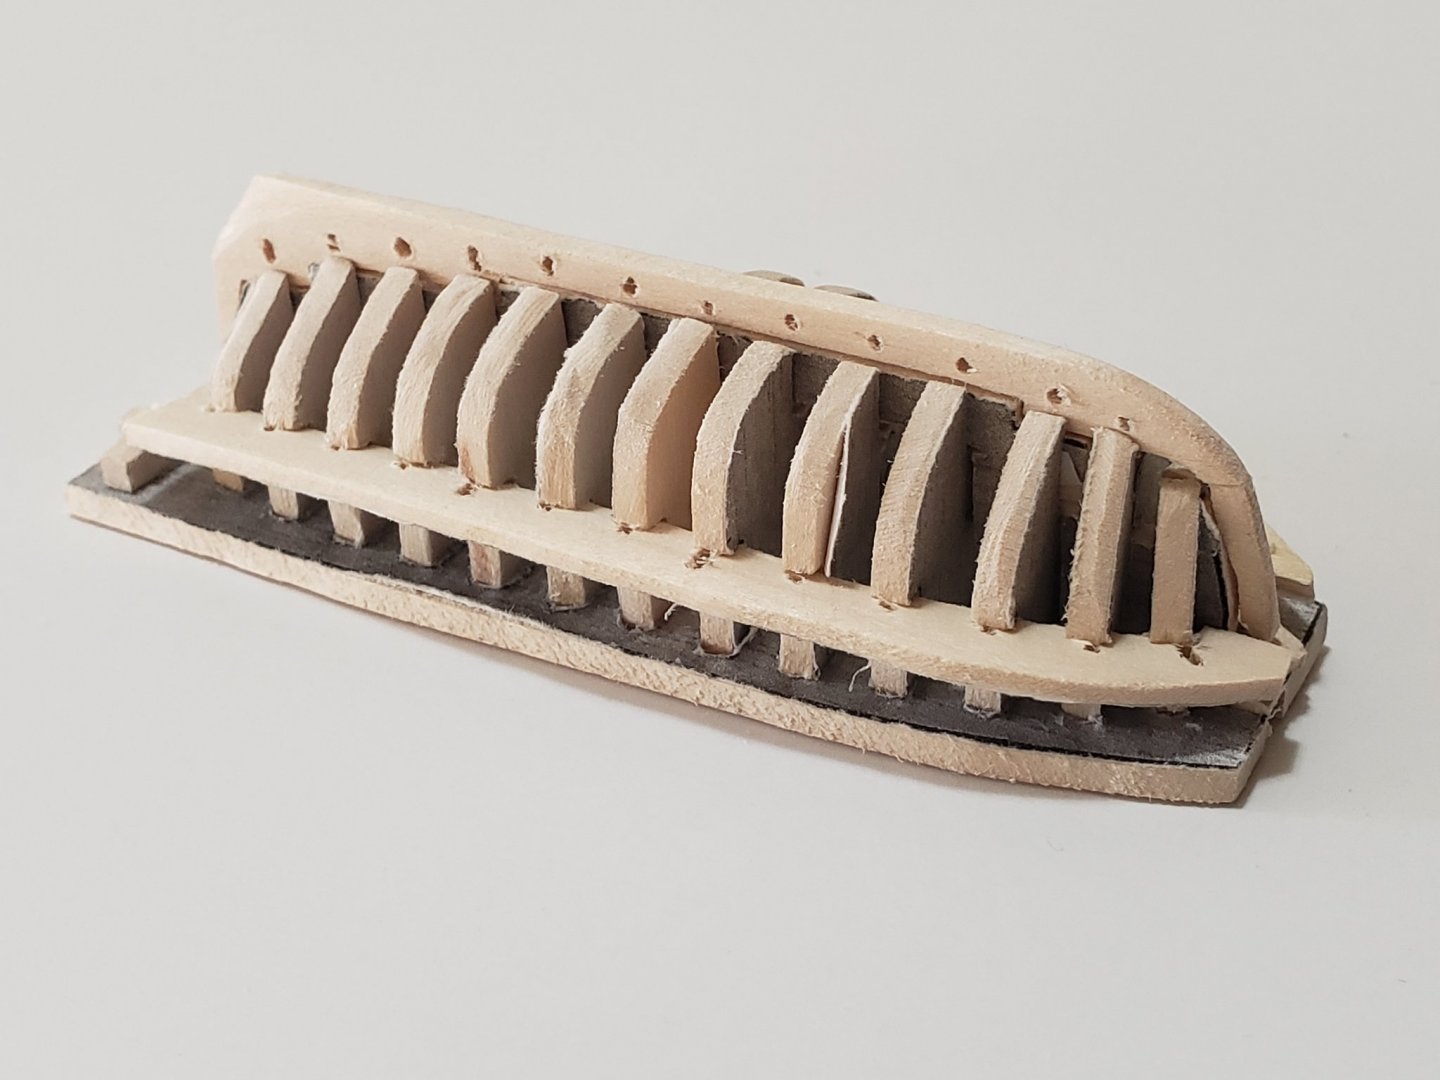
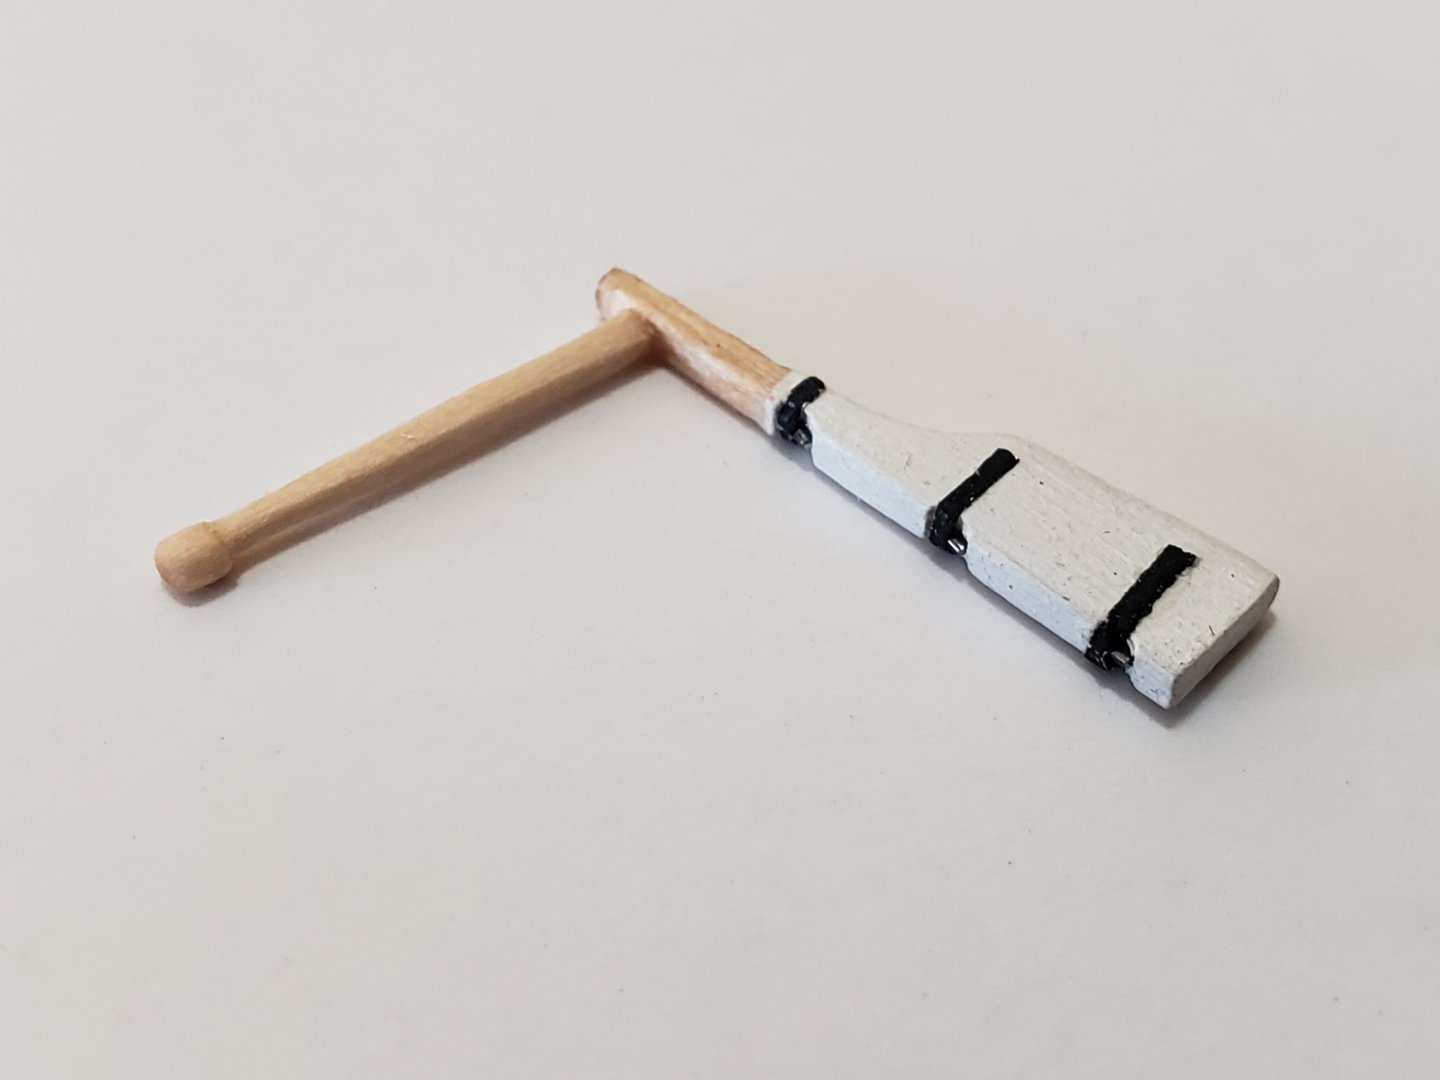
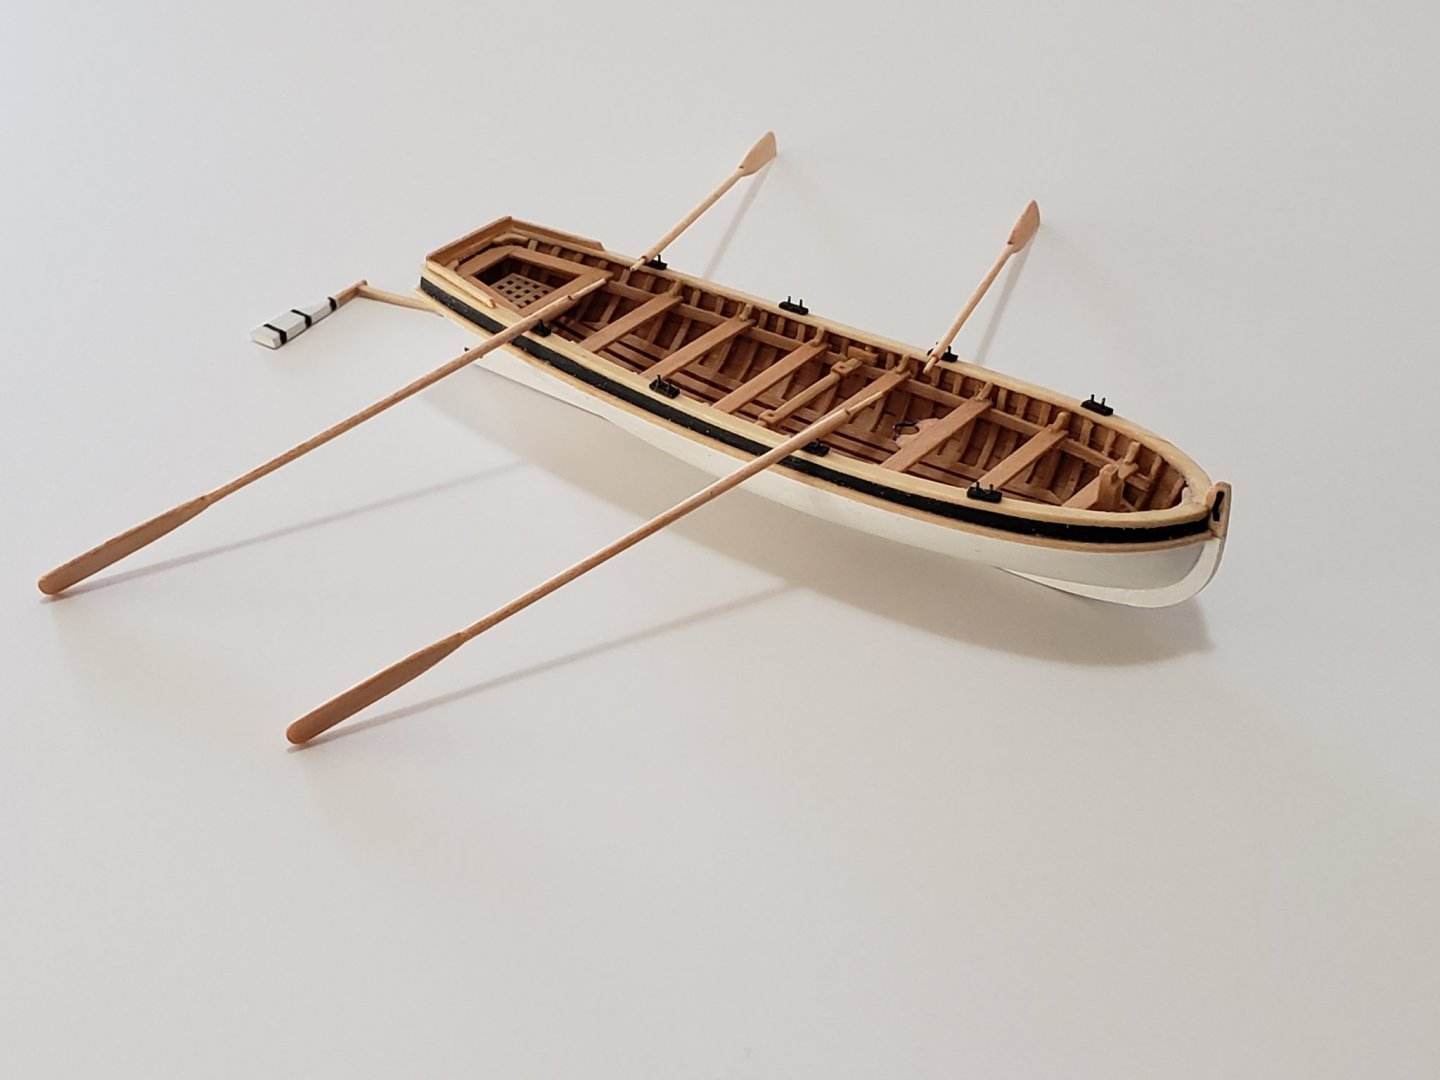
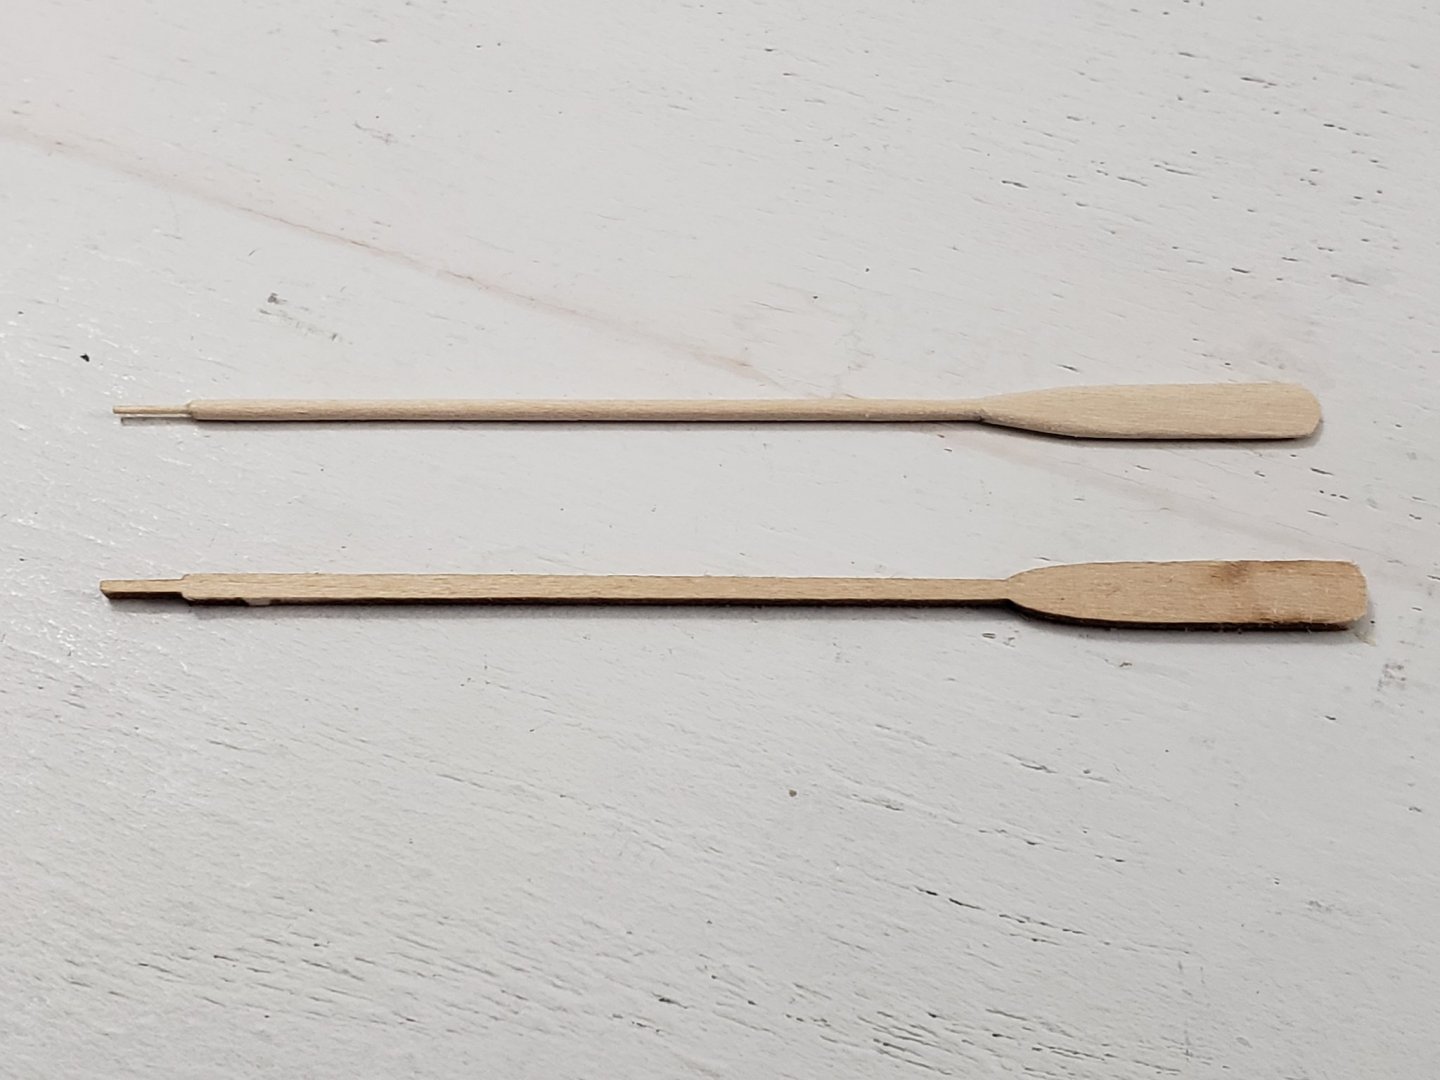
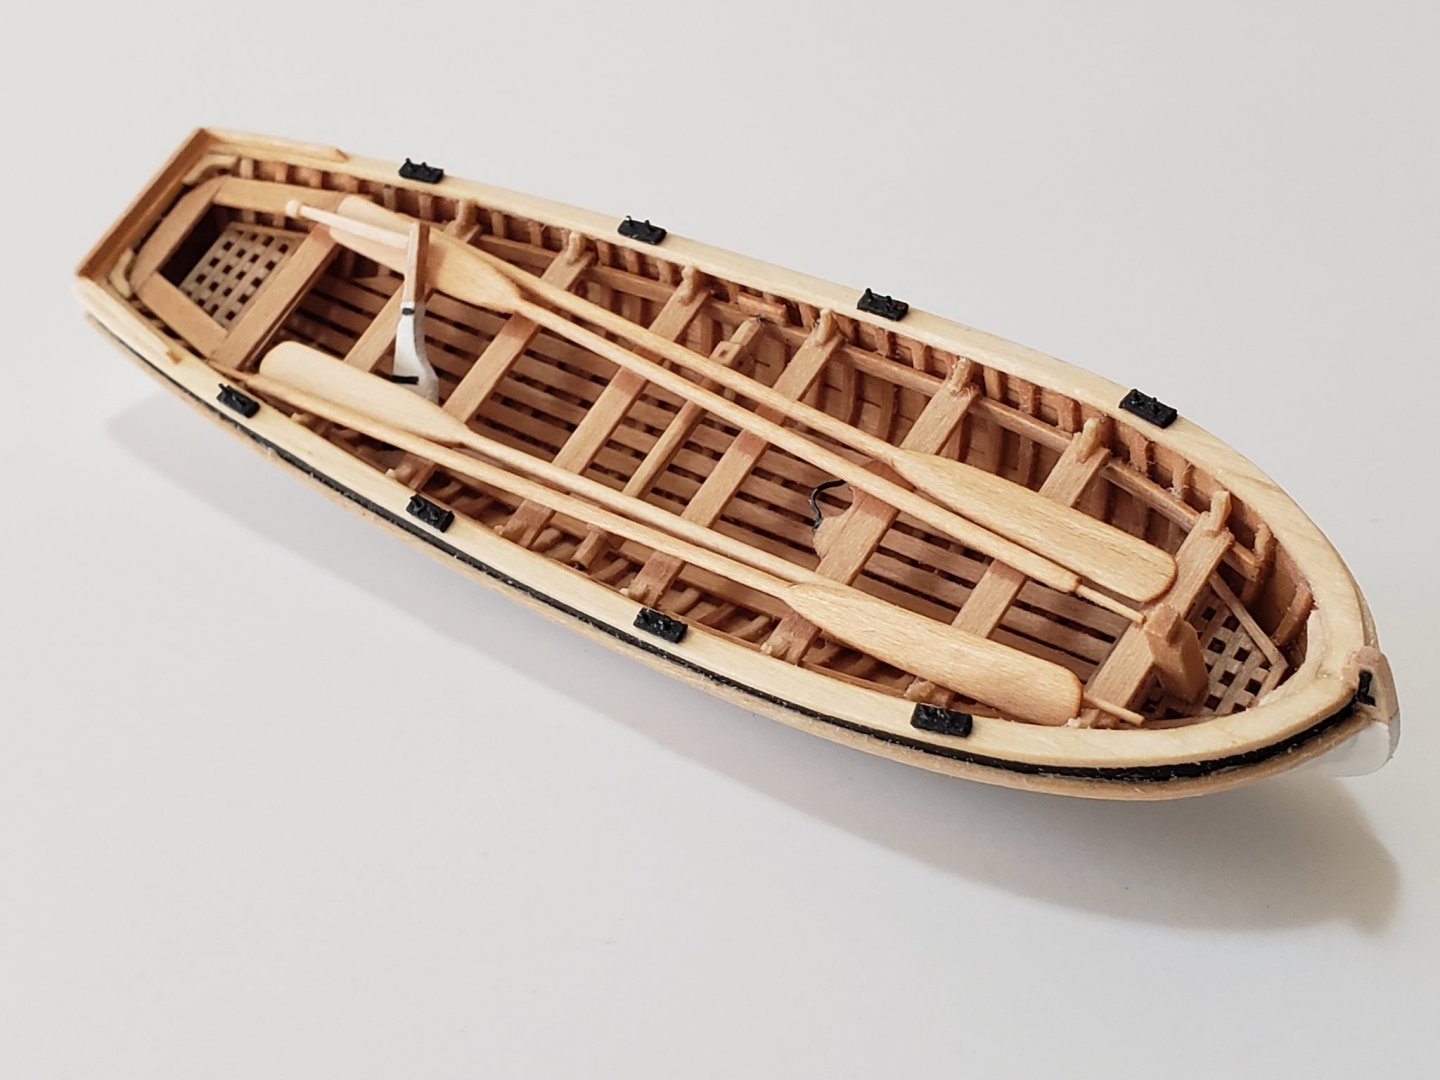
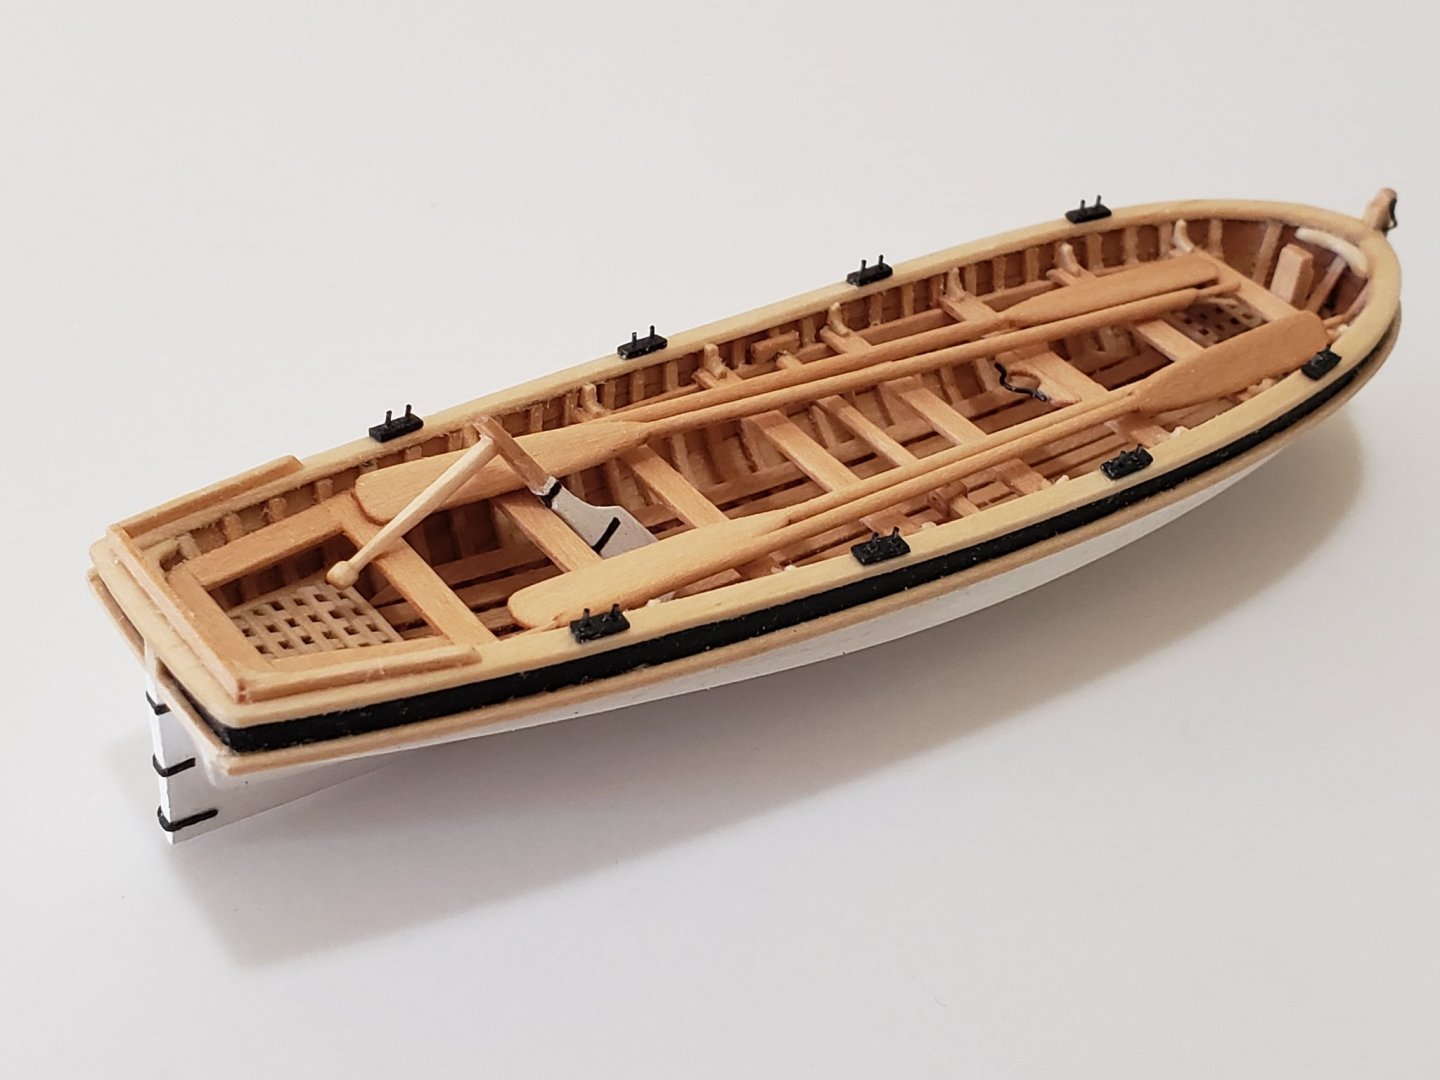
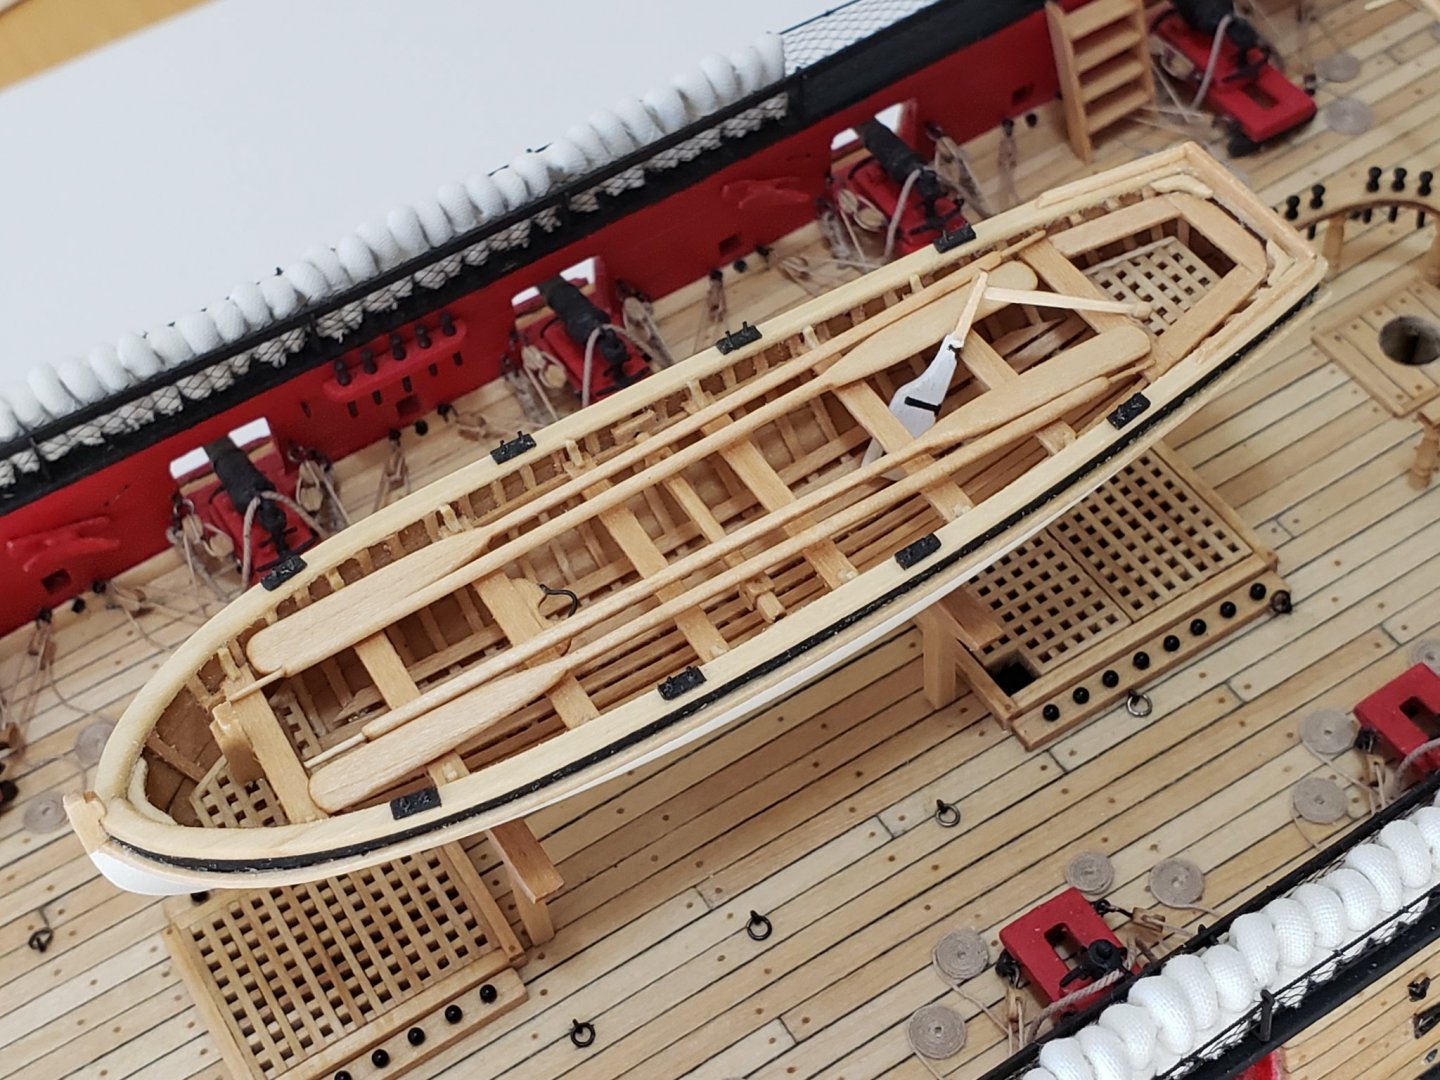
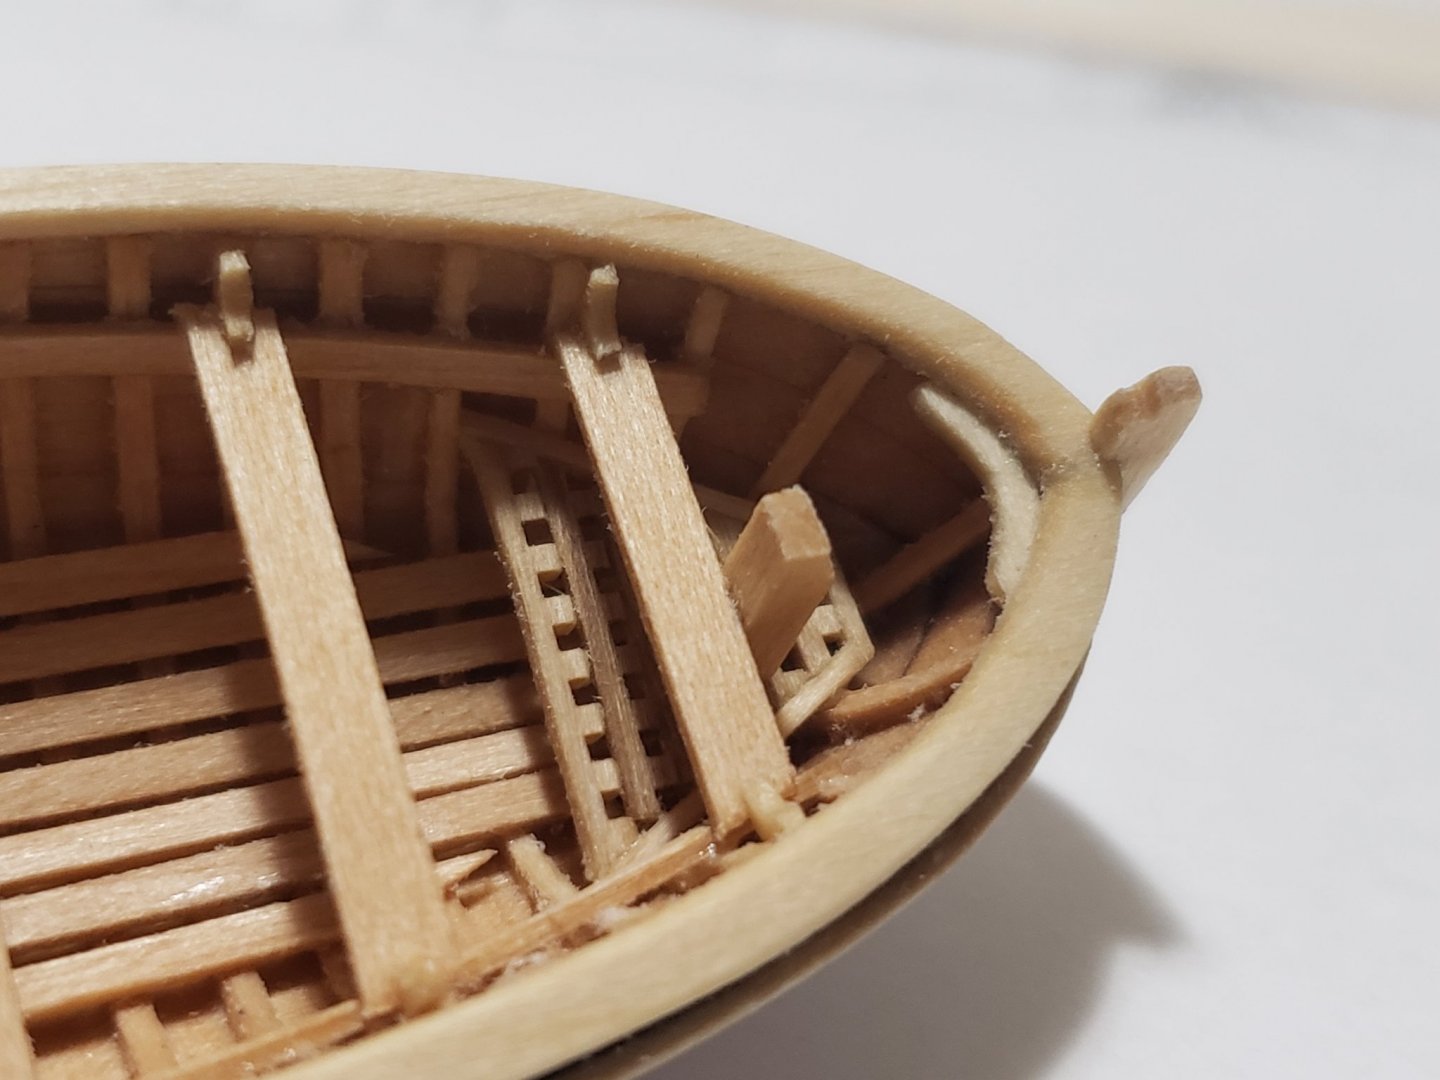
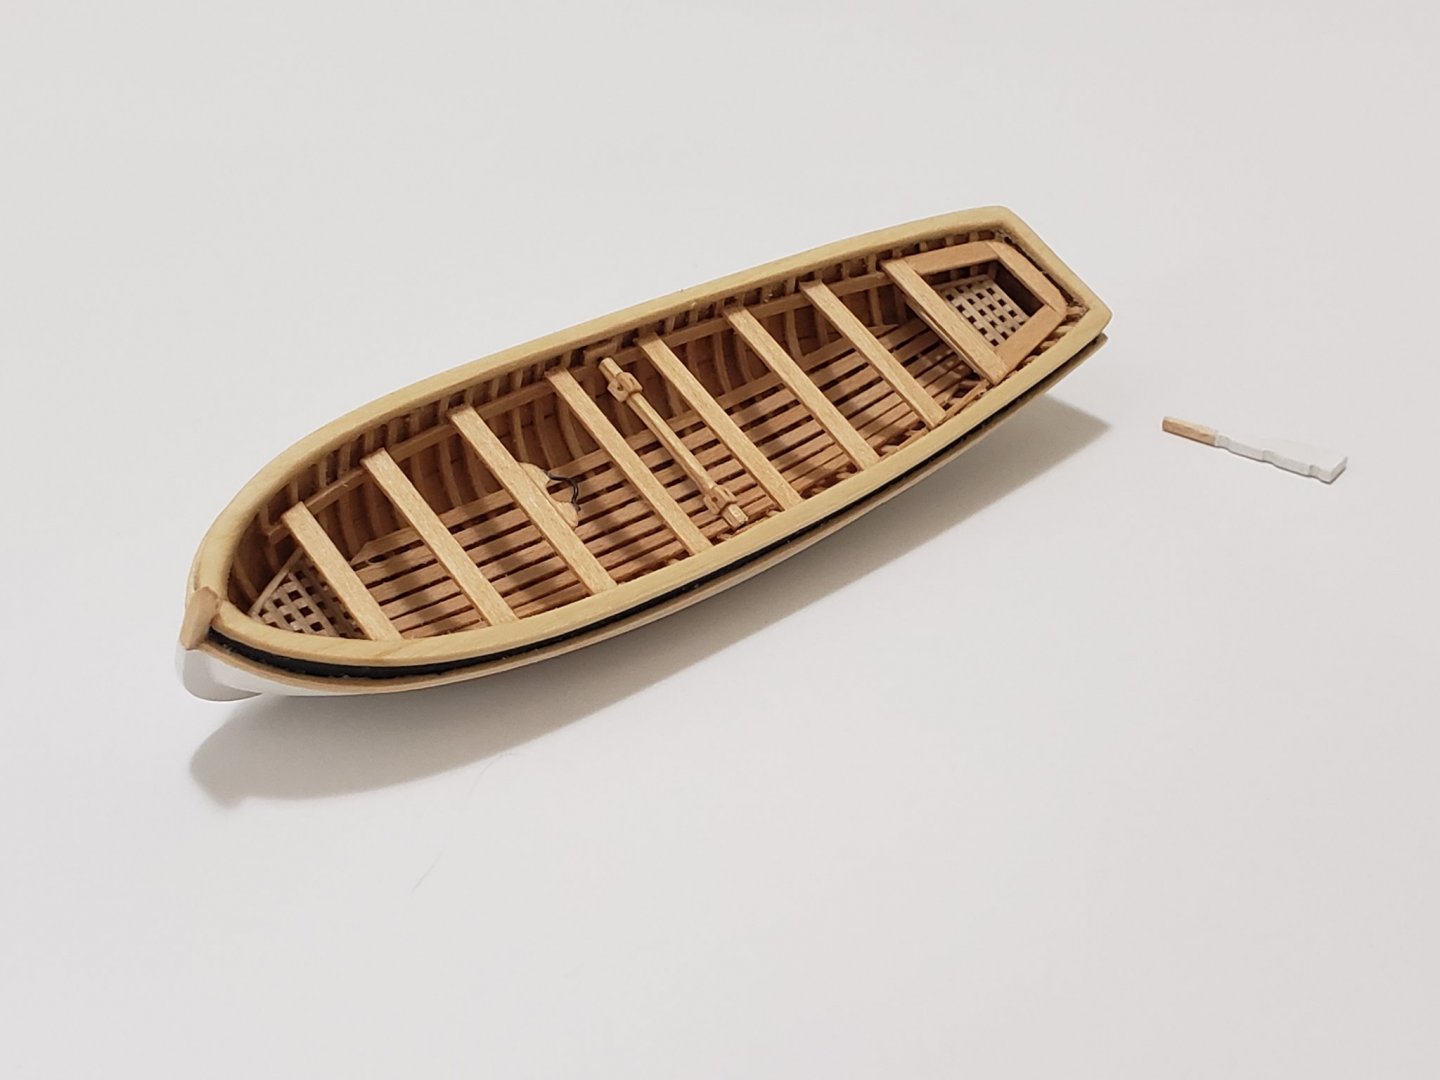
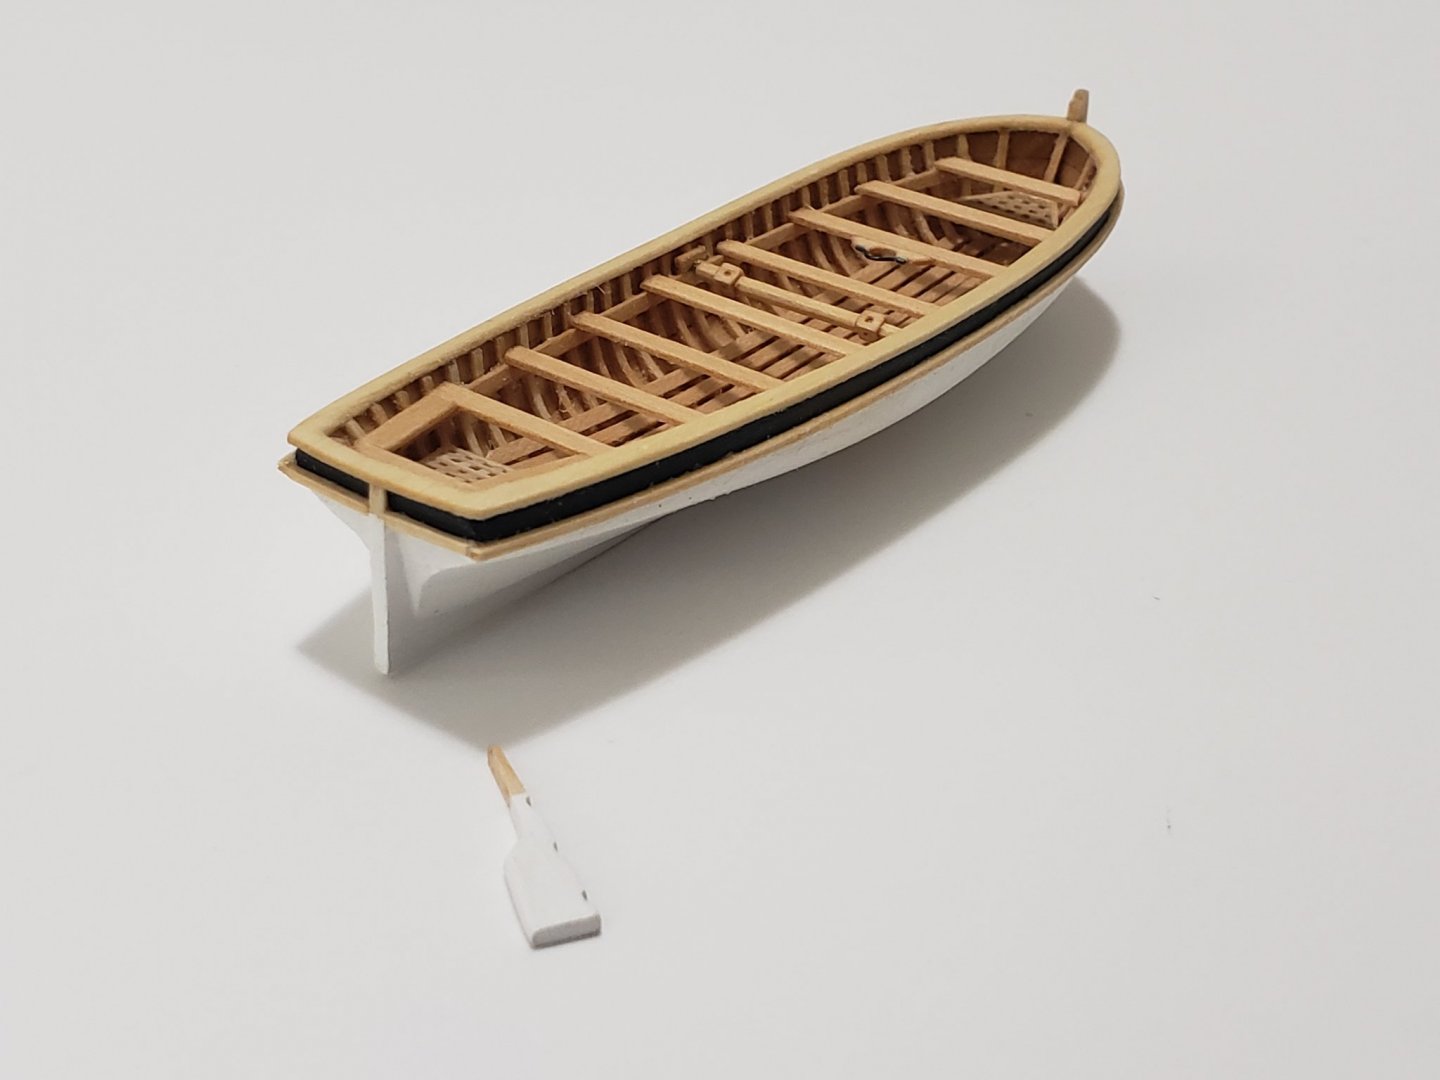
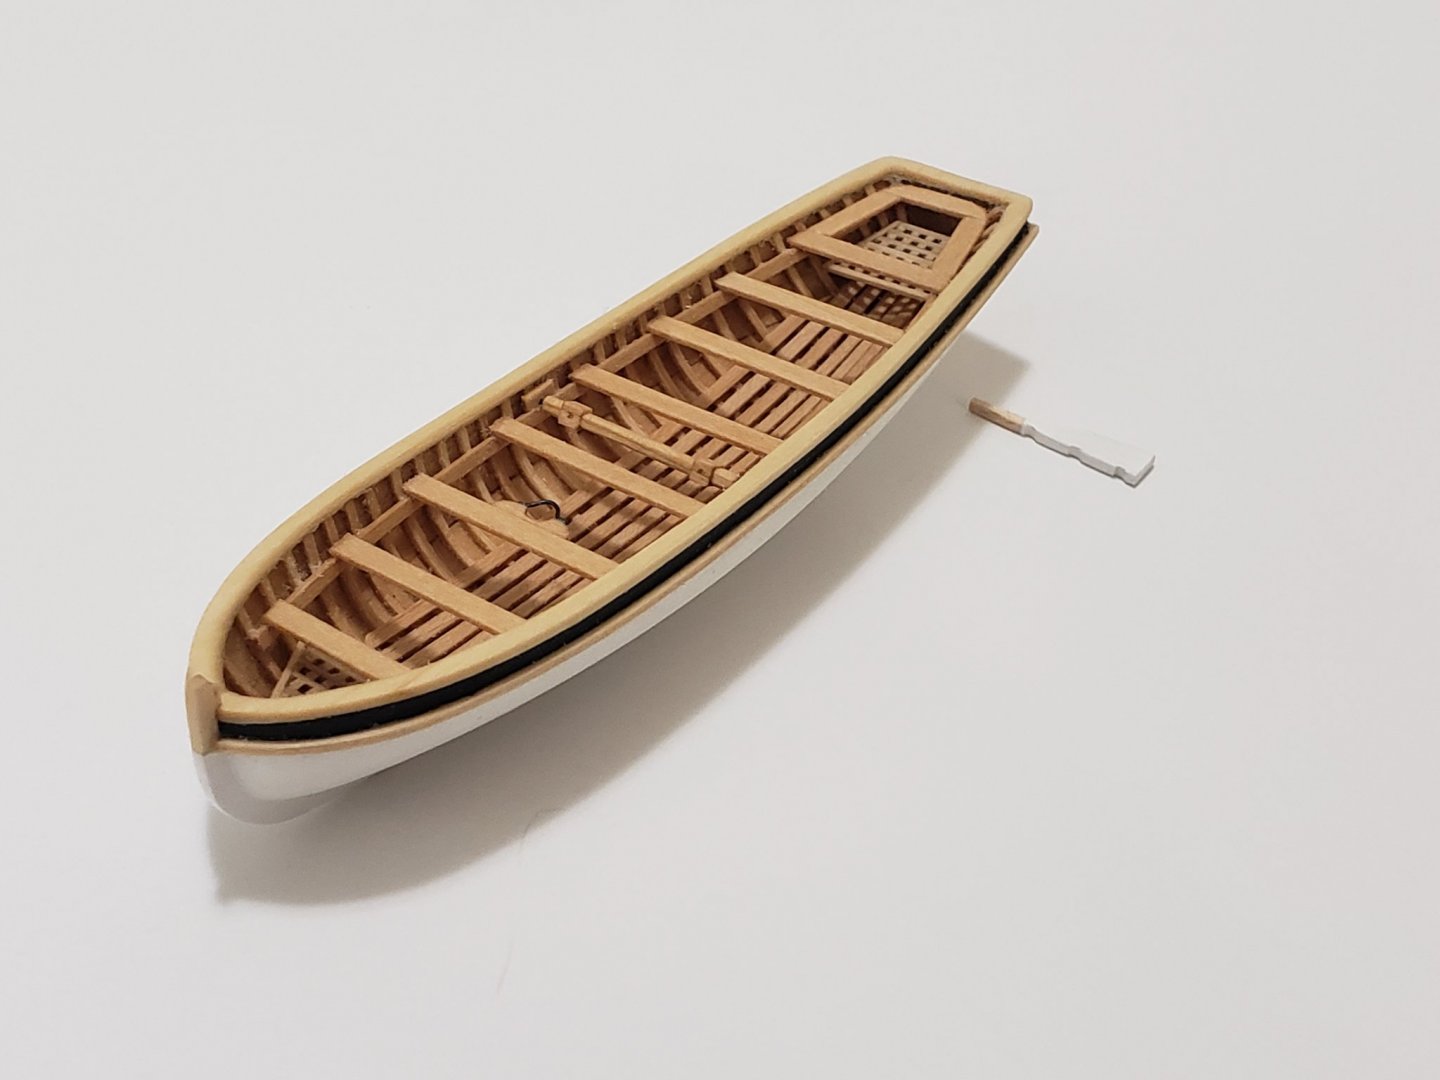
Thank you Thomas! 😄 I'm almost done with the jolly boat. I'd say about 95% completed. Here is where she is at: Remaining bits are the knees, rudder, pintle and gudgeon, and oars.

- 950 replies
-
- 10
-

-
- syren
- model shipways
- (and 1 more)
-
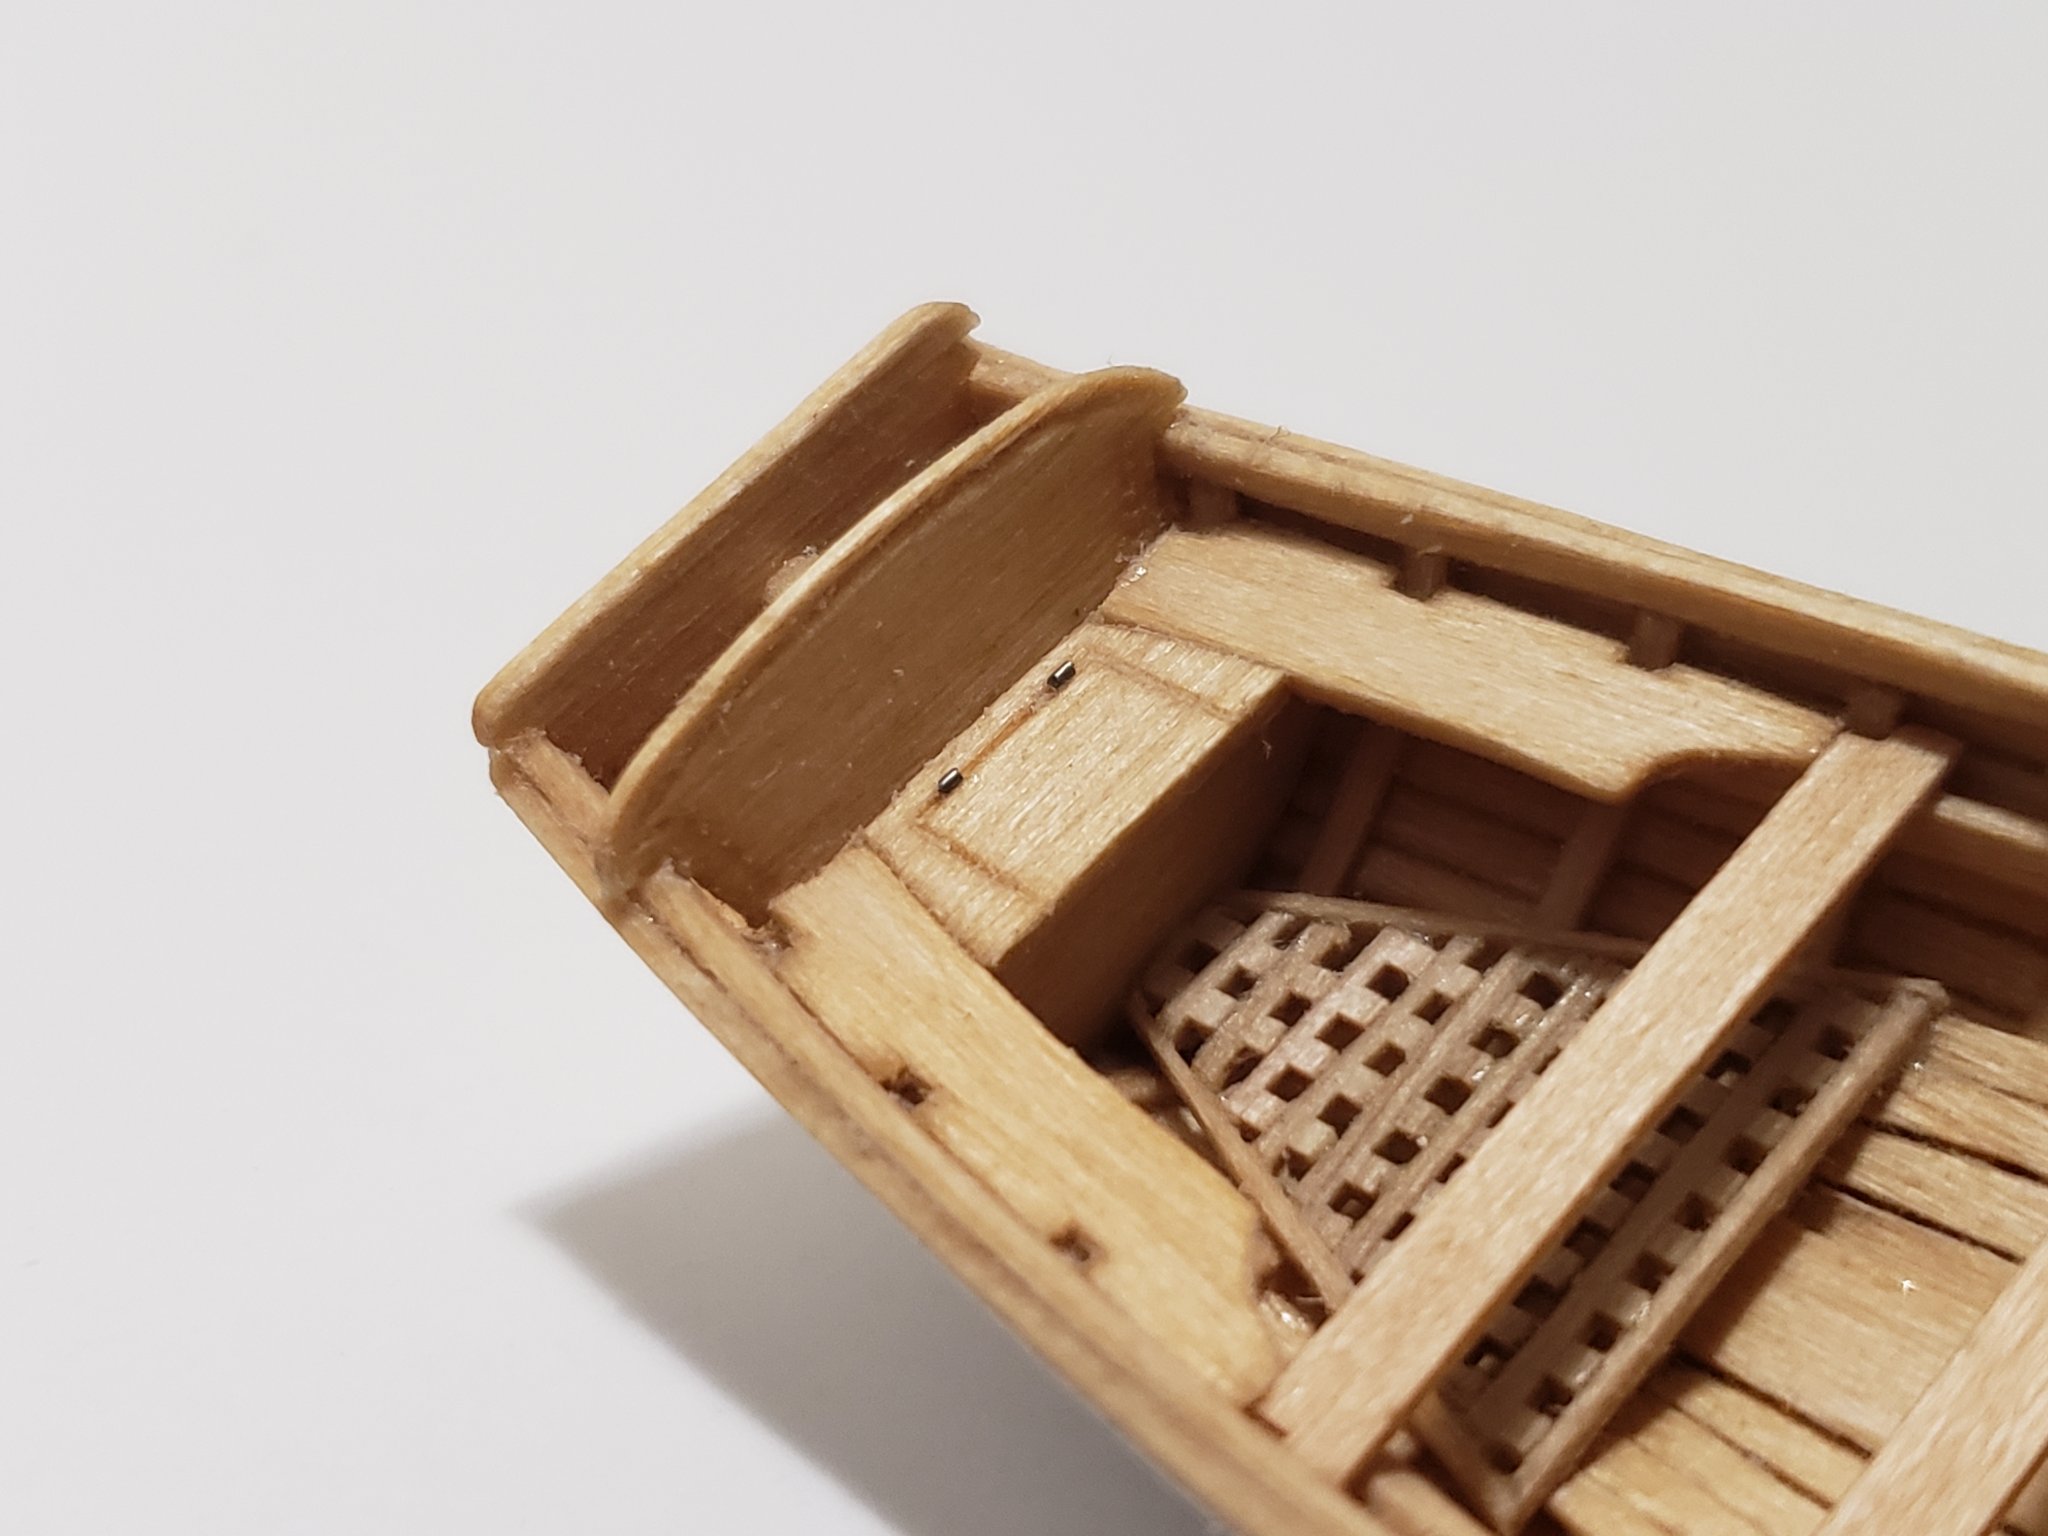
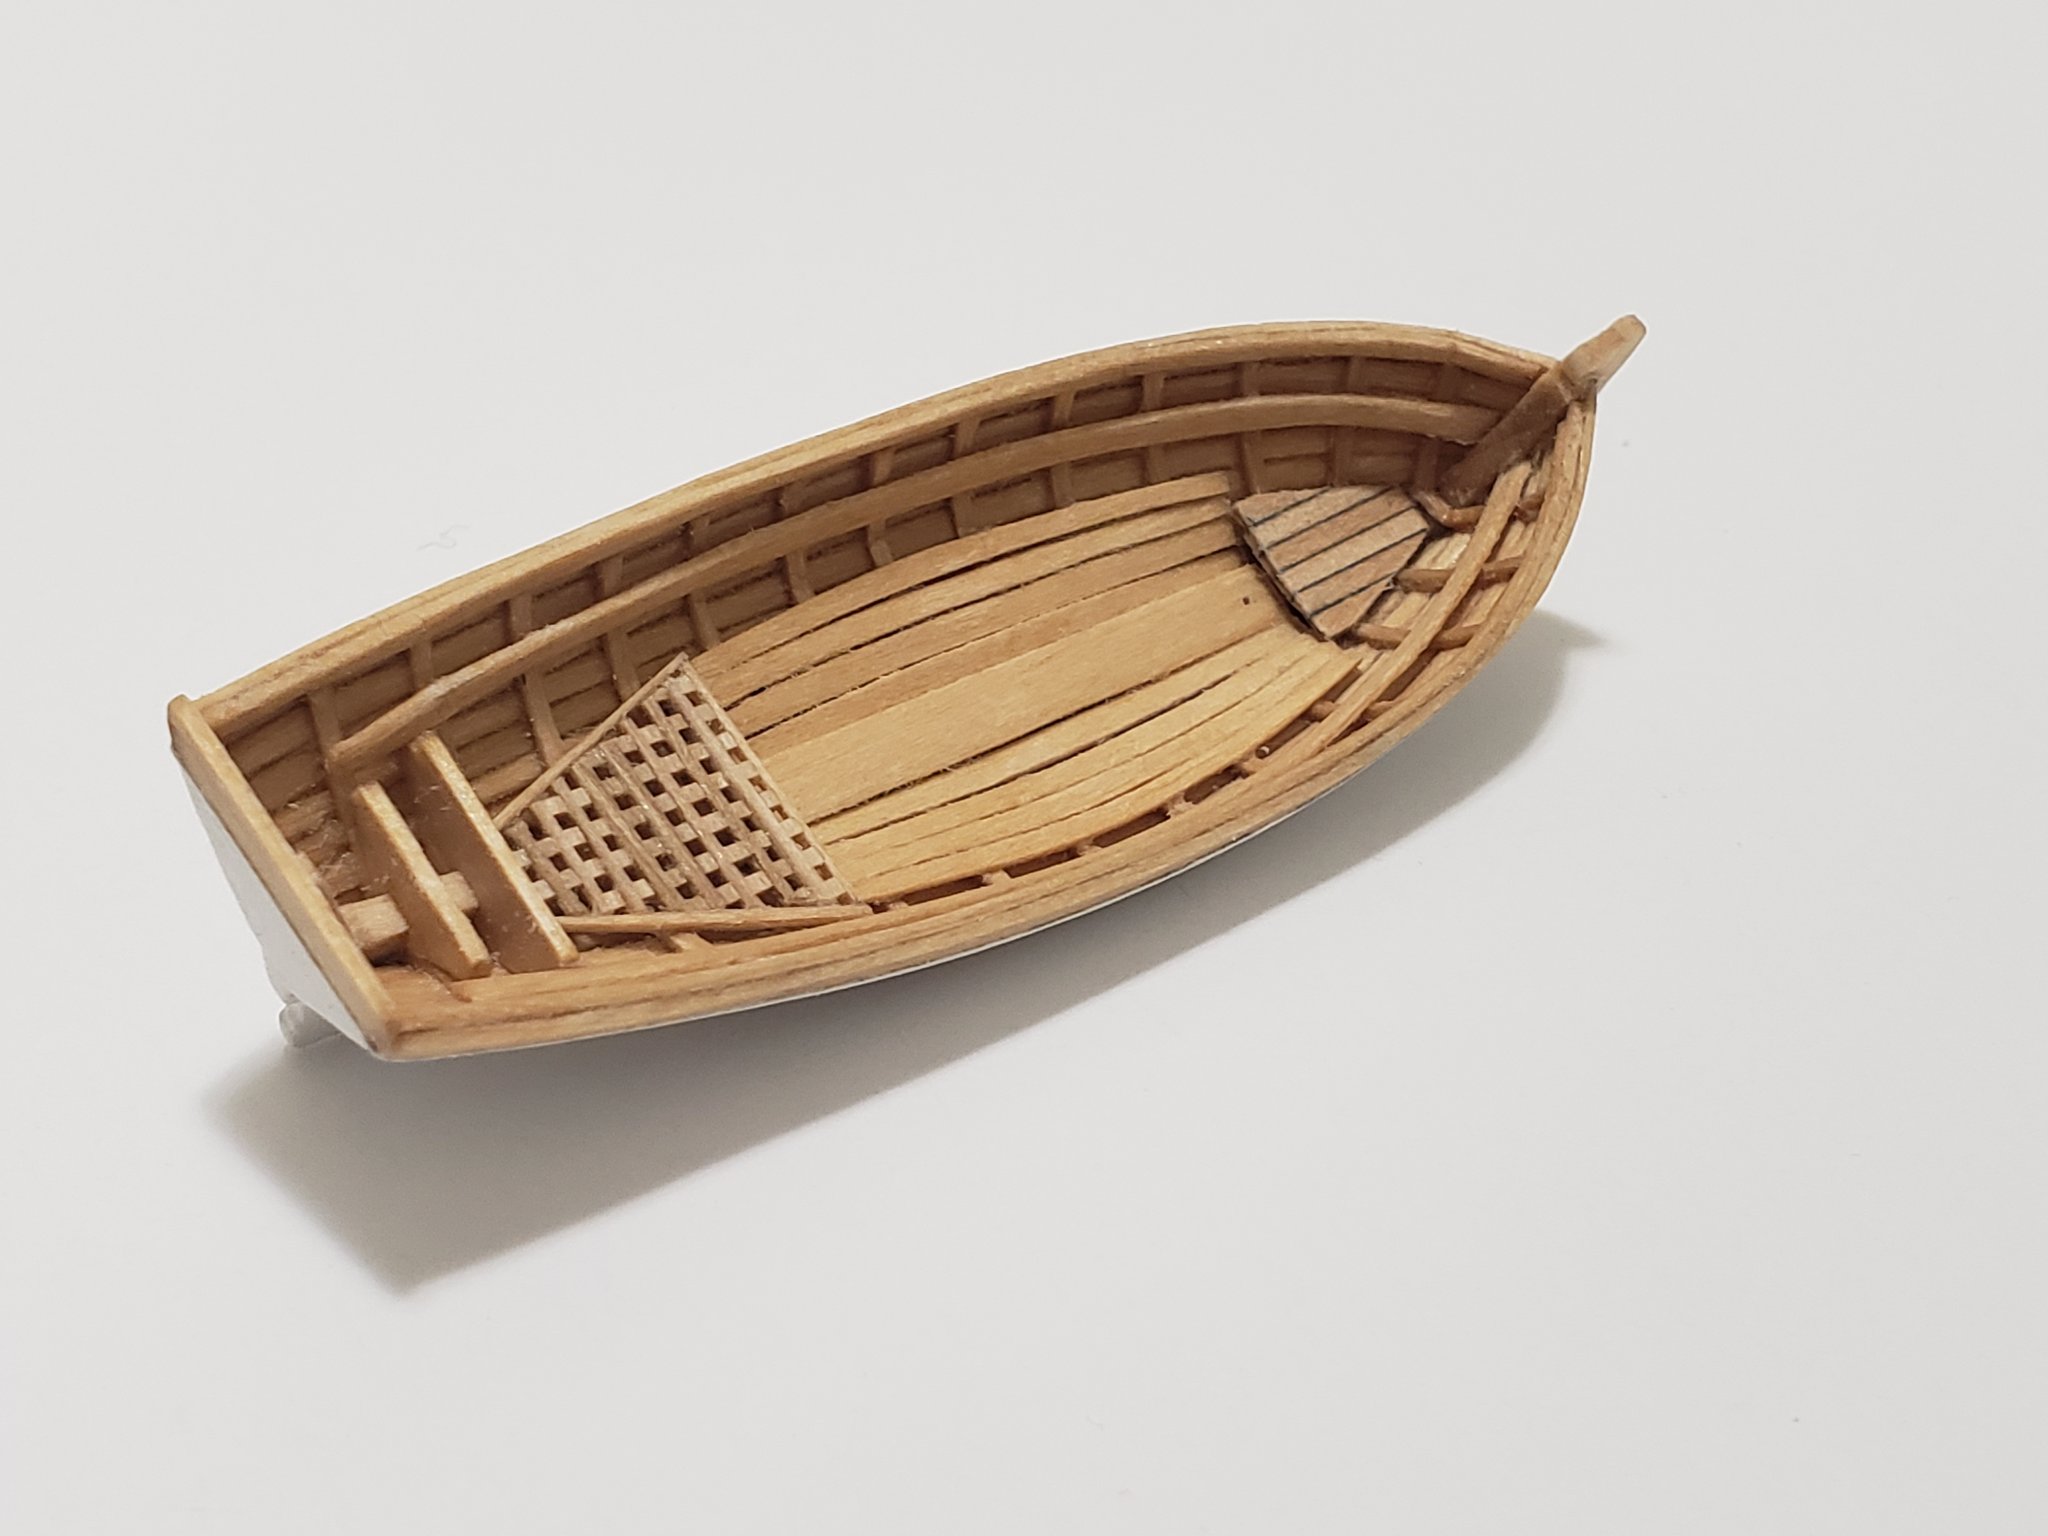
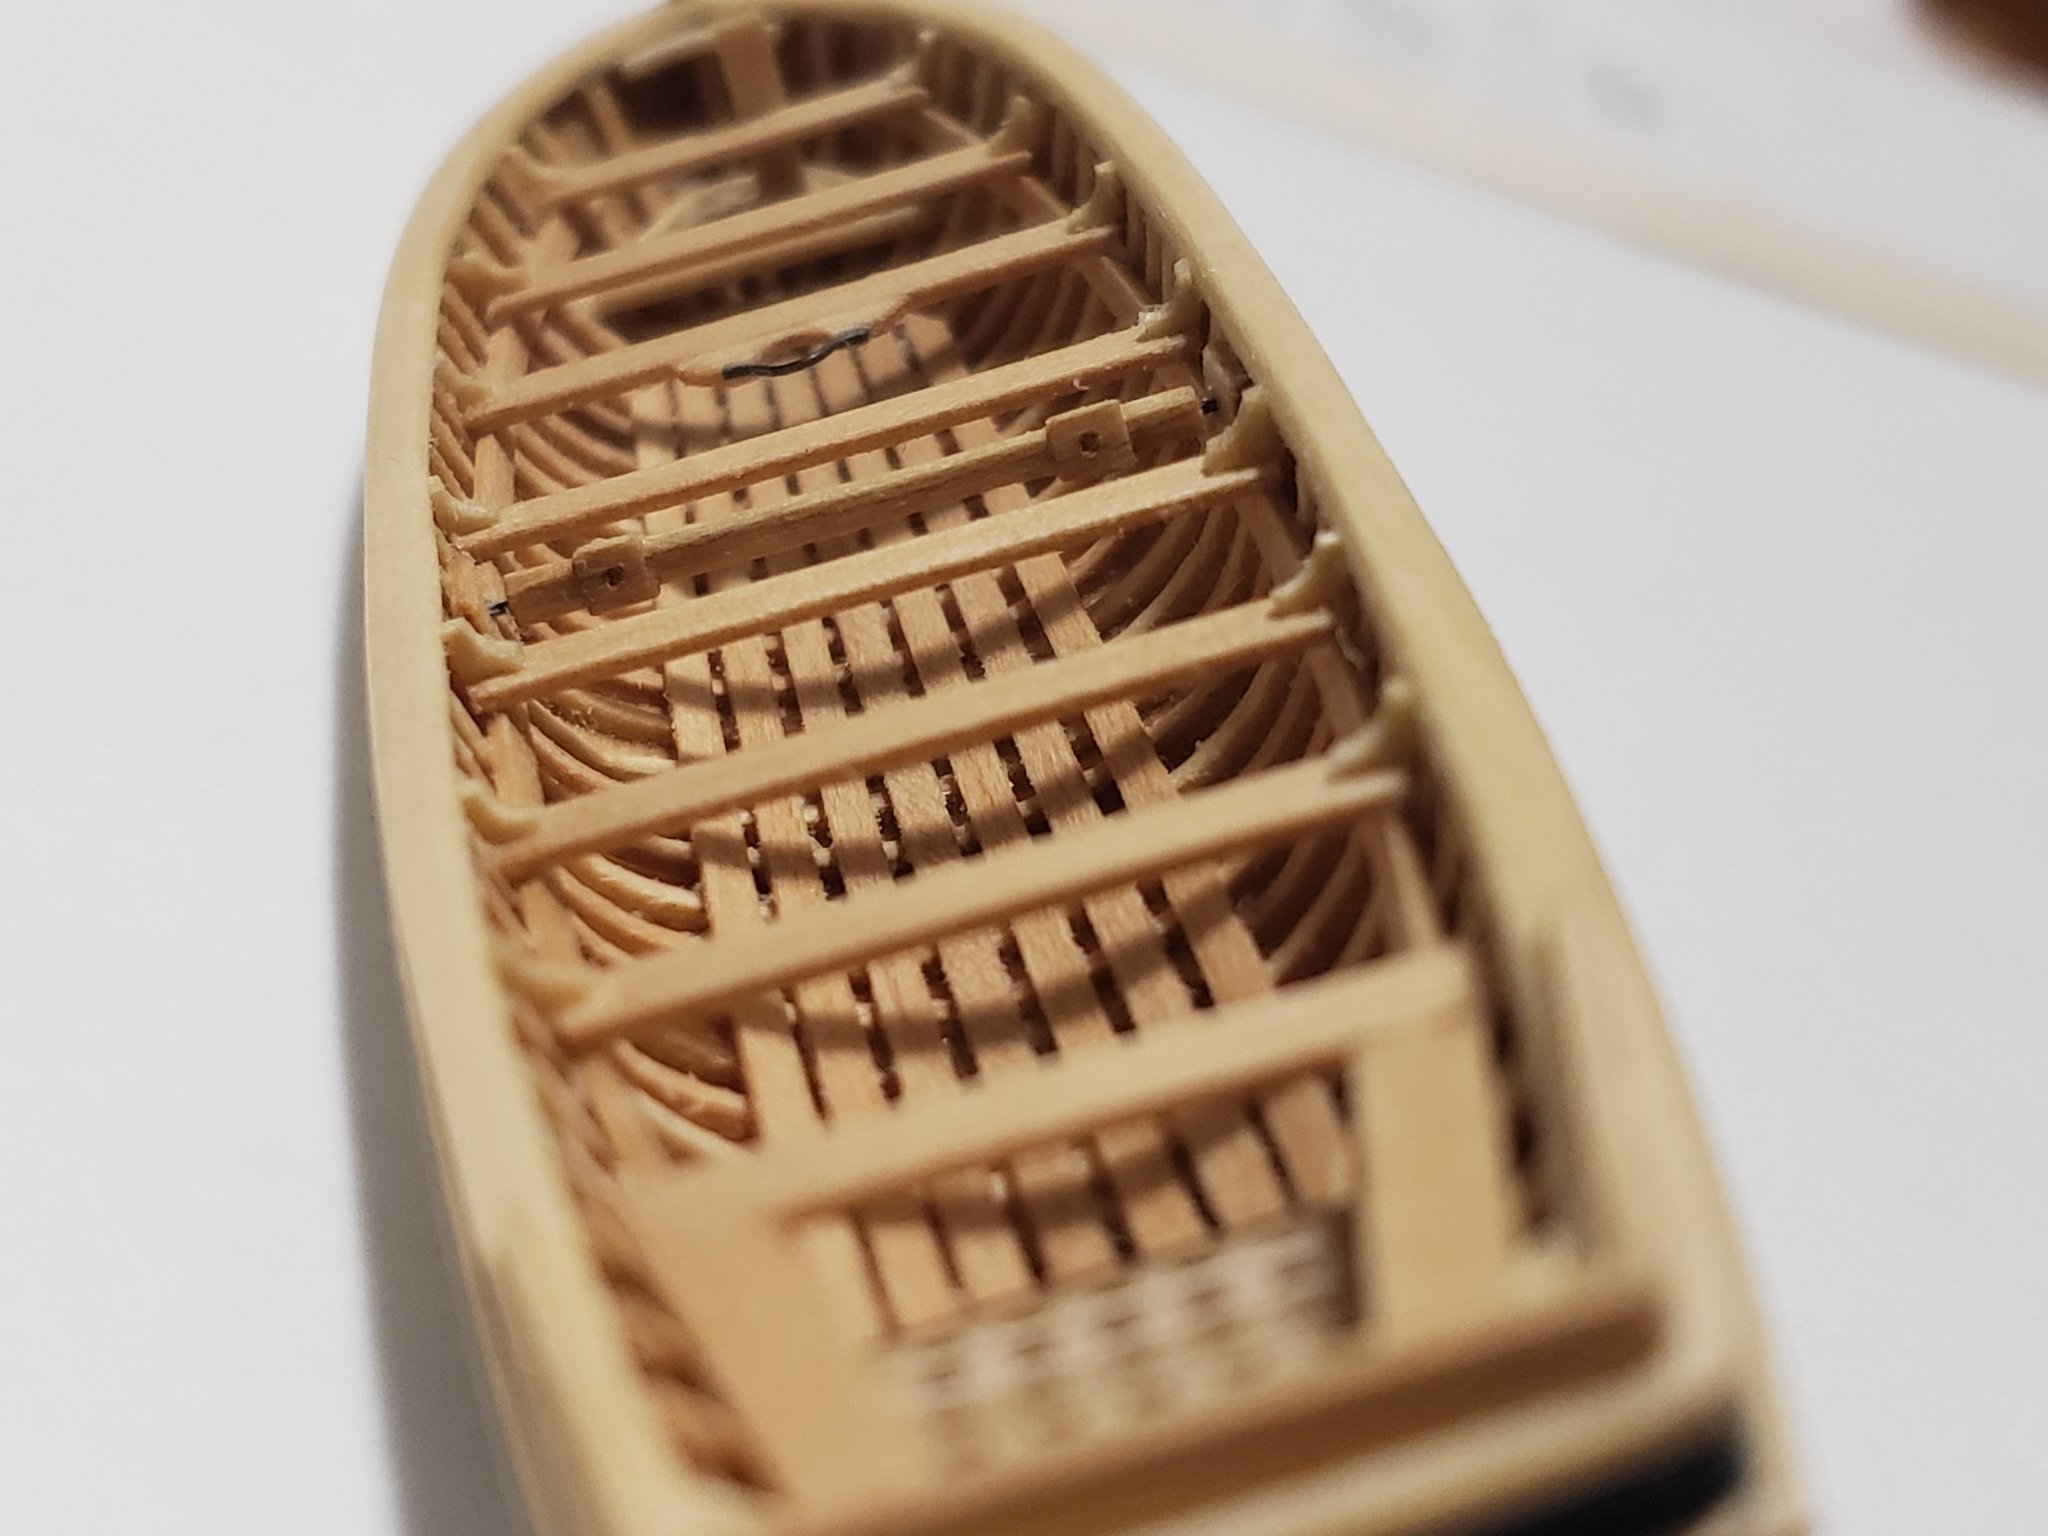
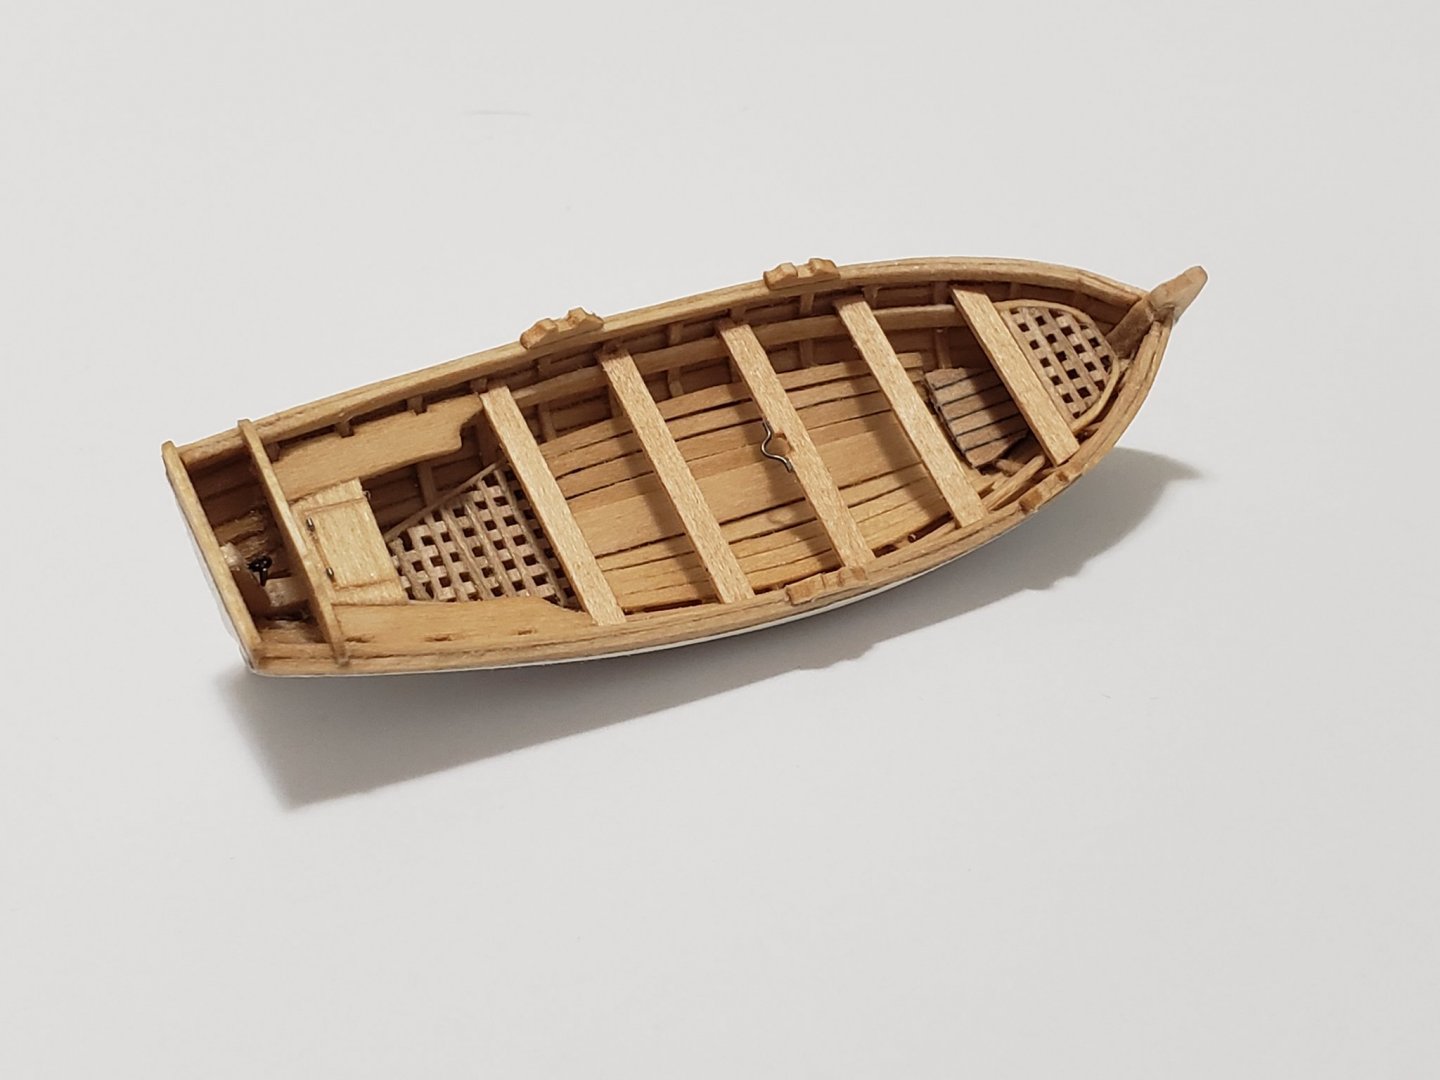
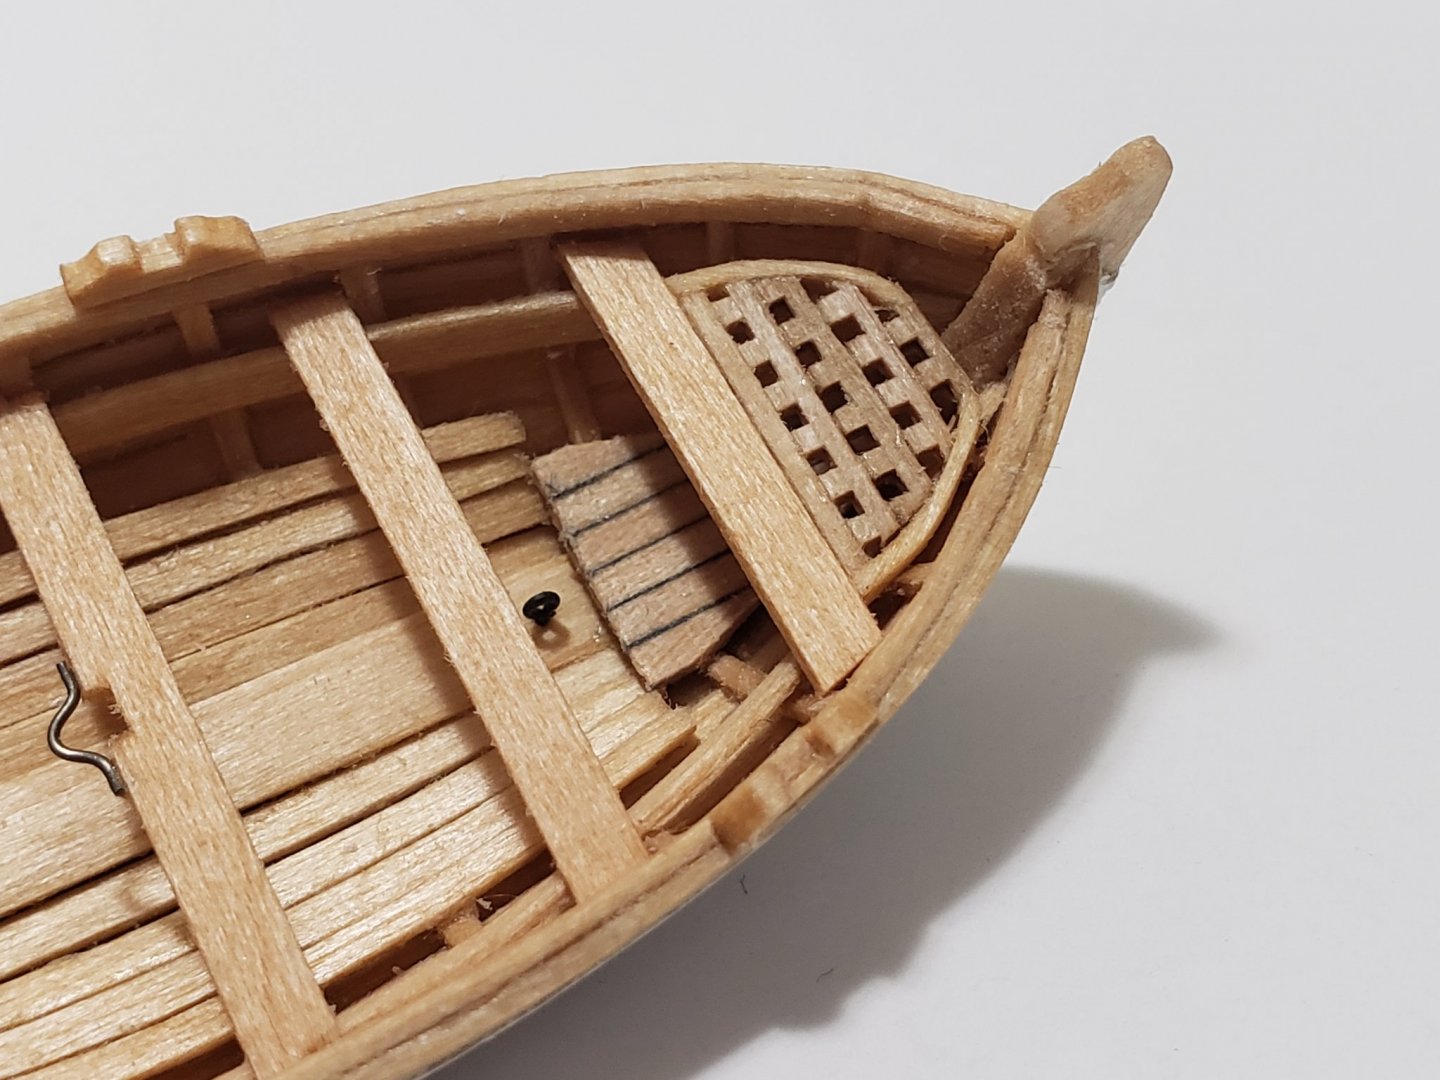
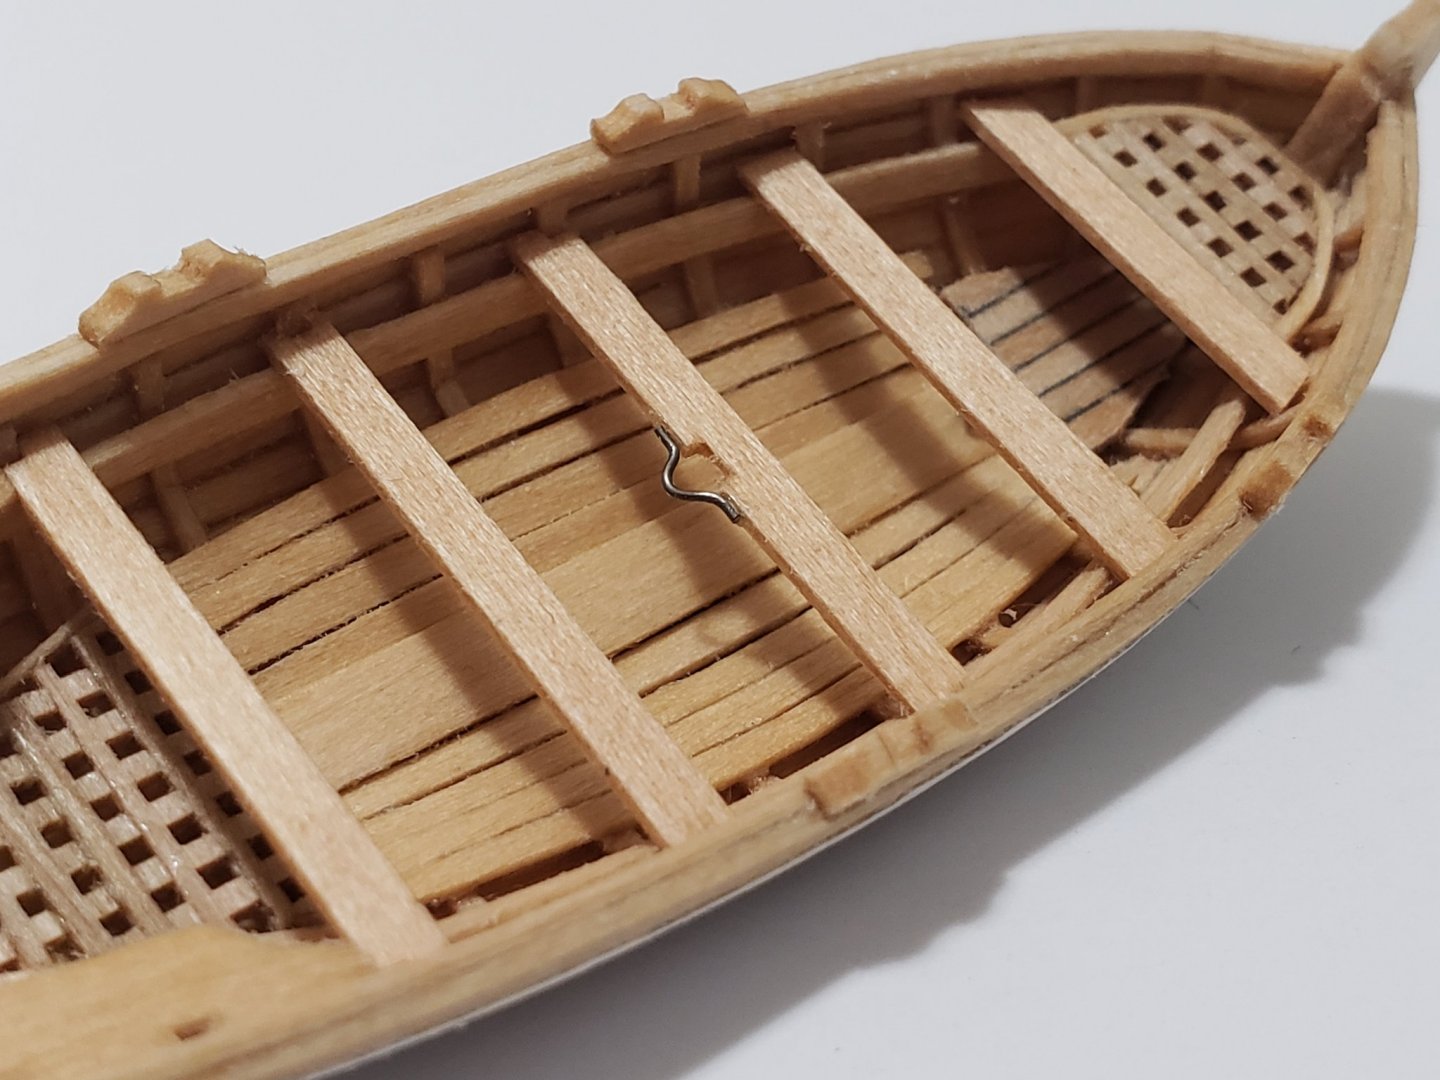
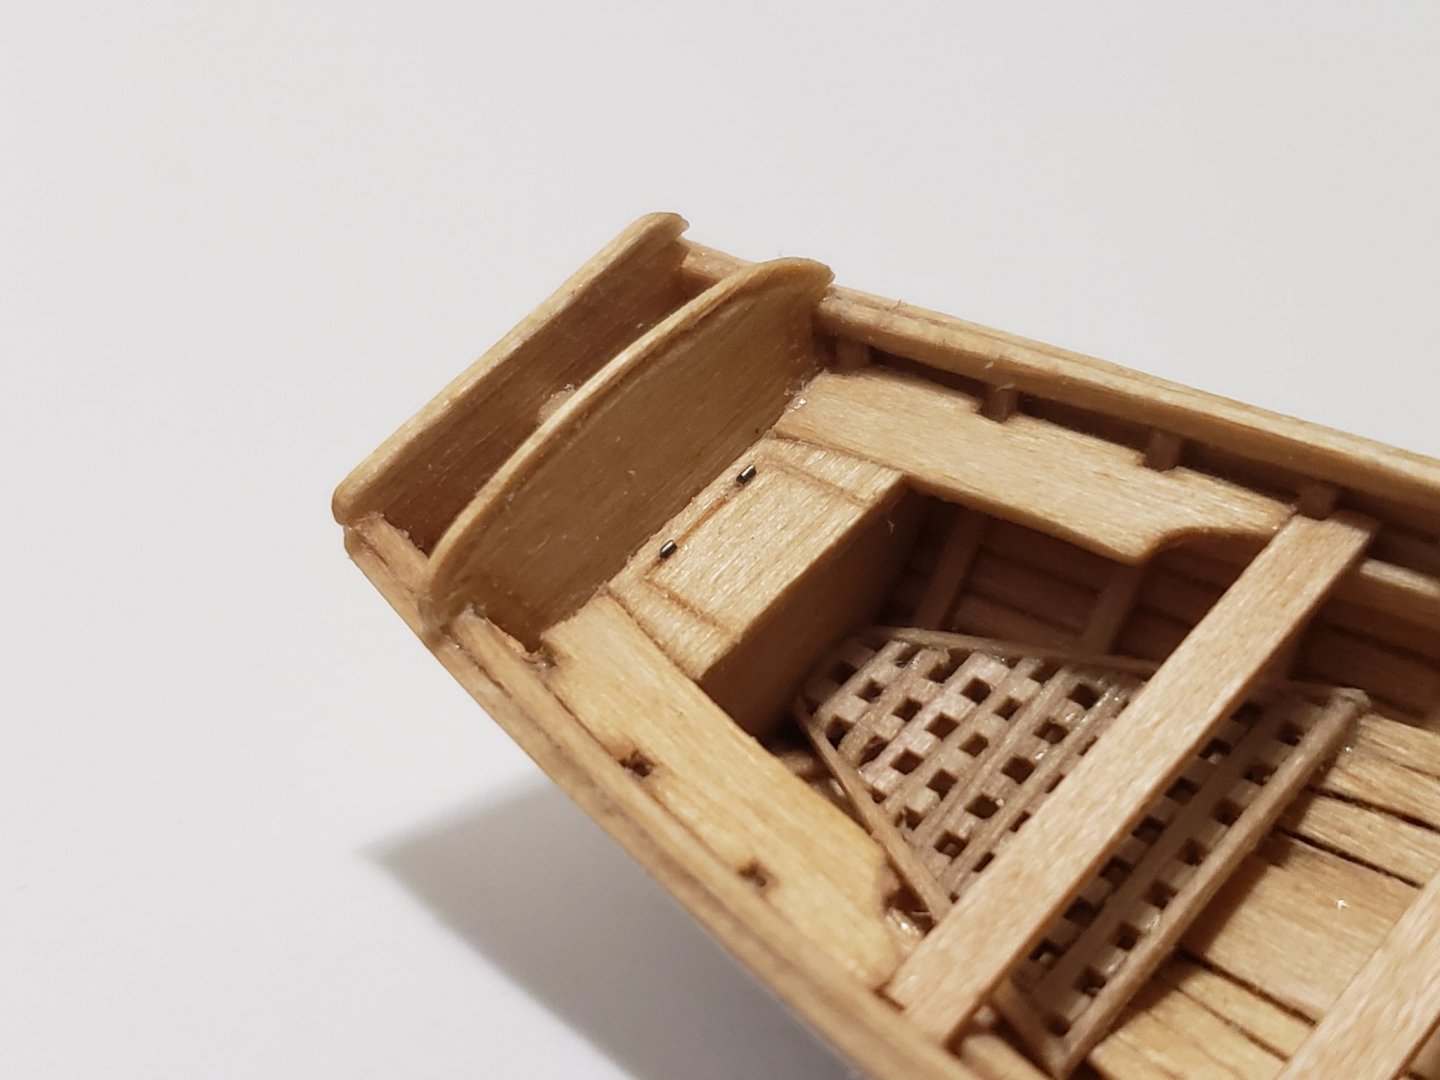
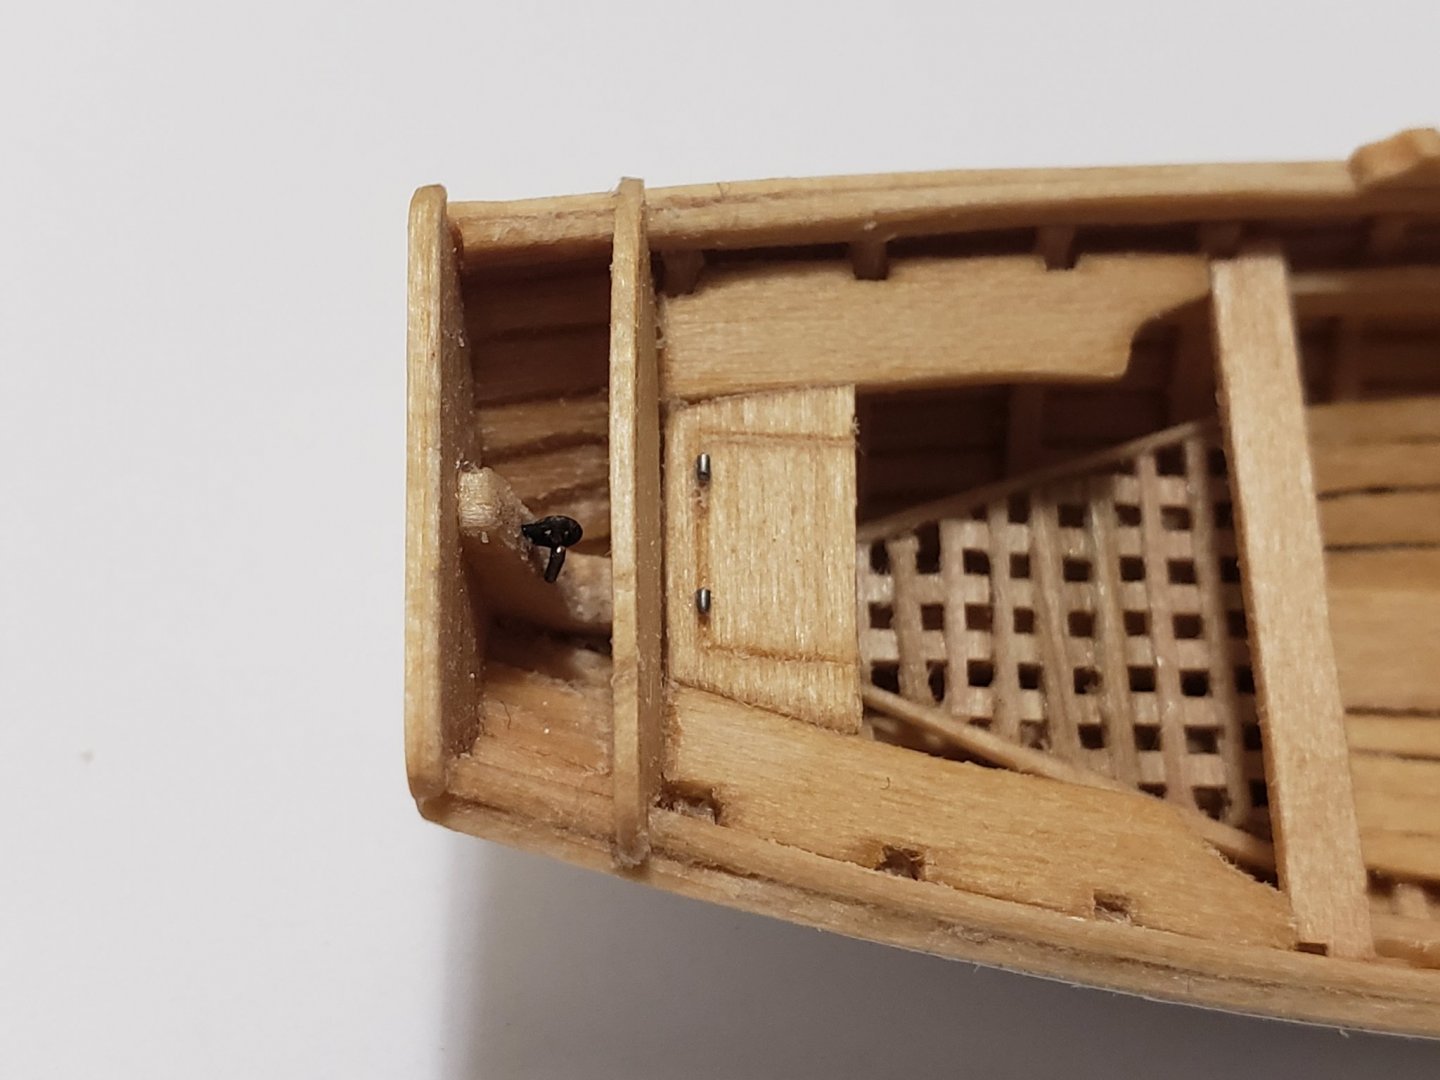
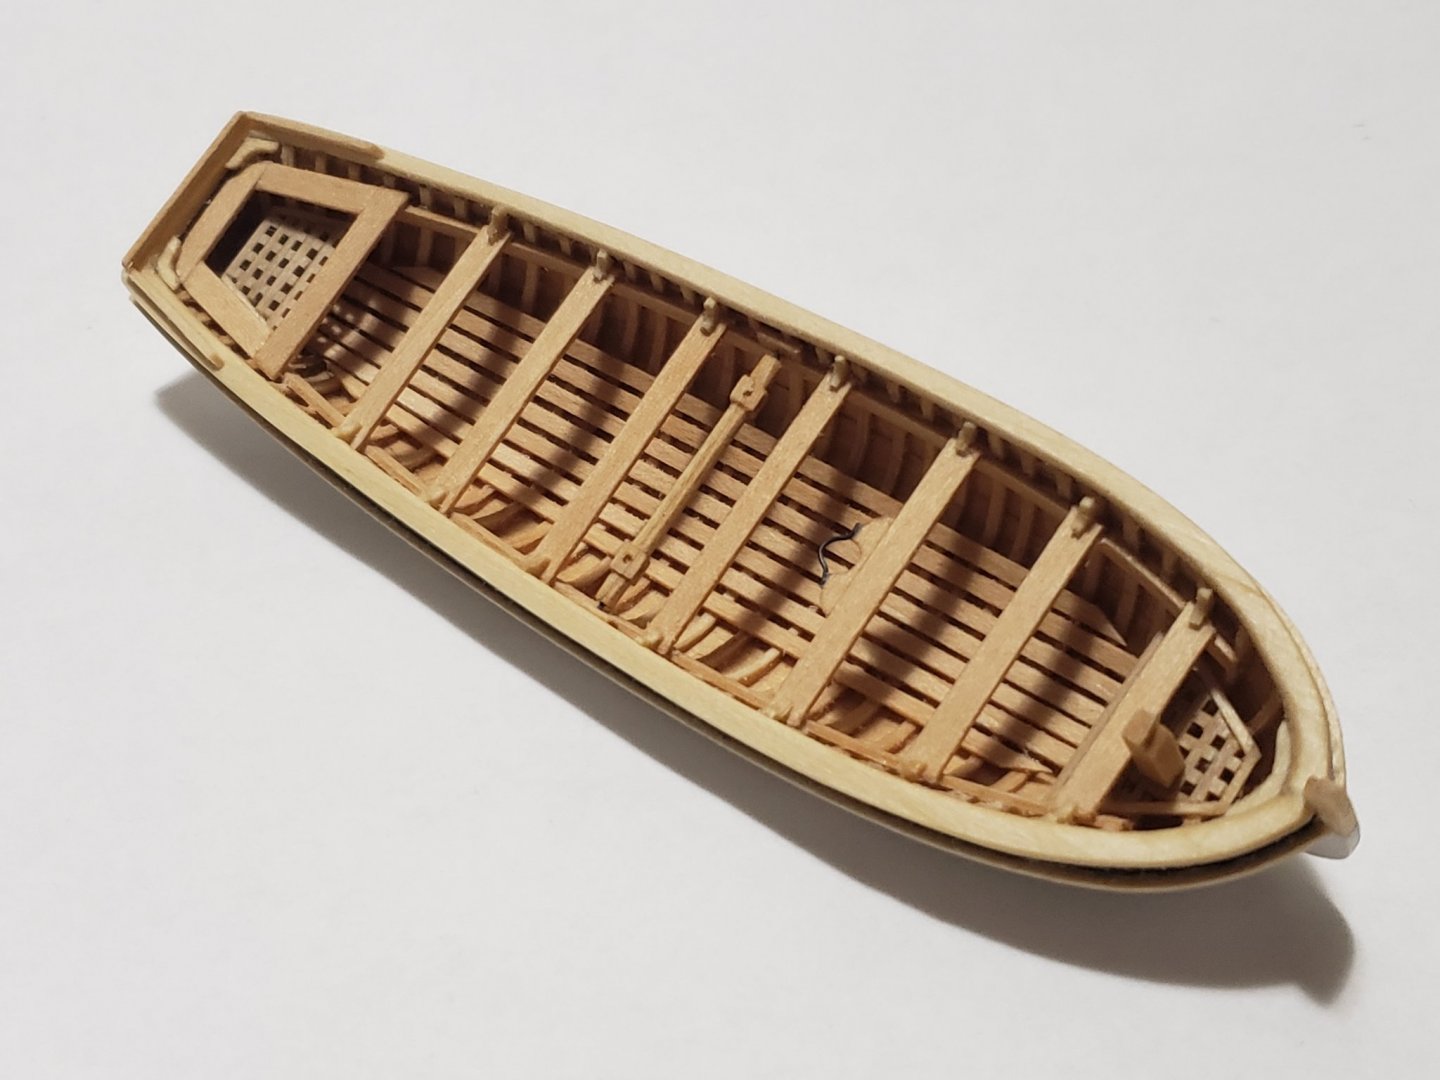
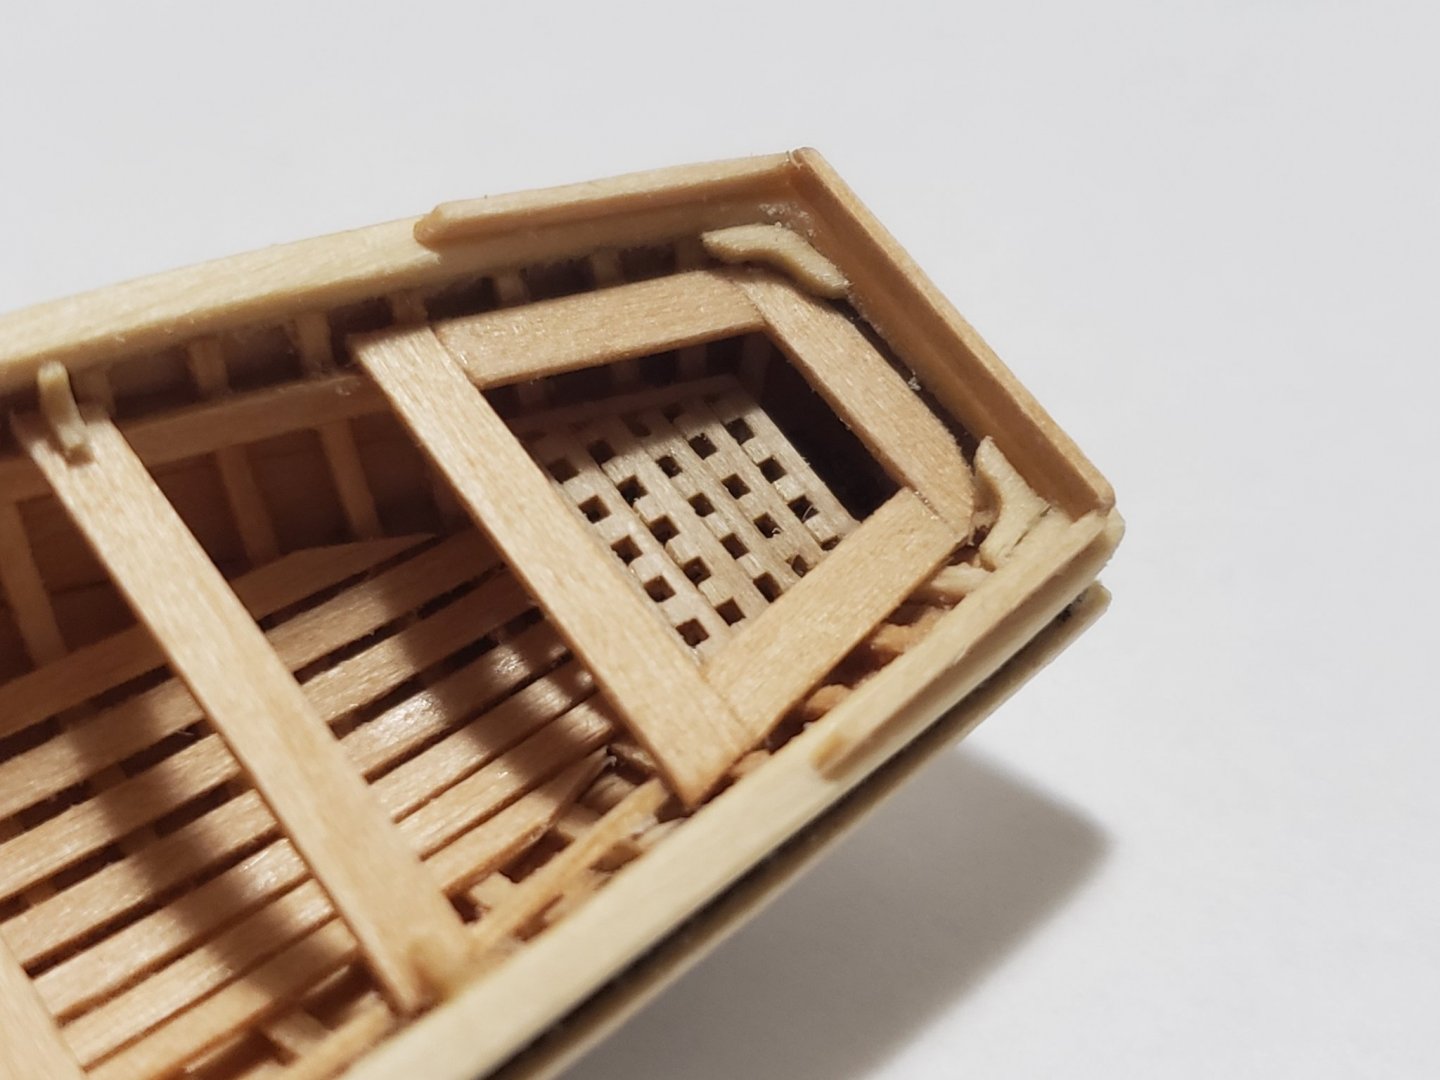
Many thanks Bob!! And thanks for all the likes as well! I'm about halfway with the details. Everything was cut out from a 1/32" sheet of basswood. I had to sand some parts to be a bit thinner (the ones that needed some bending) The grating was made the same way as the ones for the longboat

- 950 replies
-
- 13
-
-
- syren
- model shipways
- (and 1 more)
-
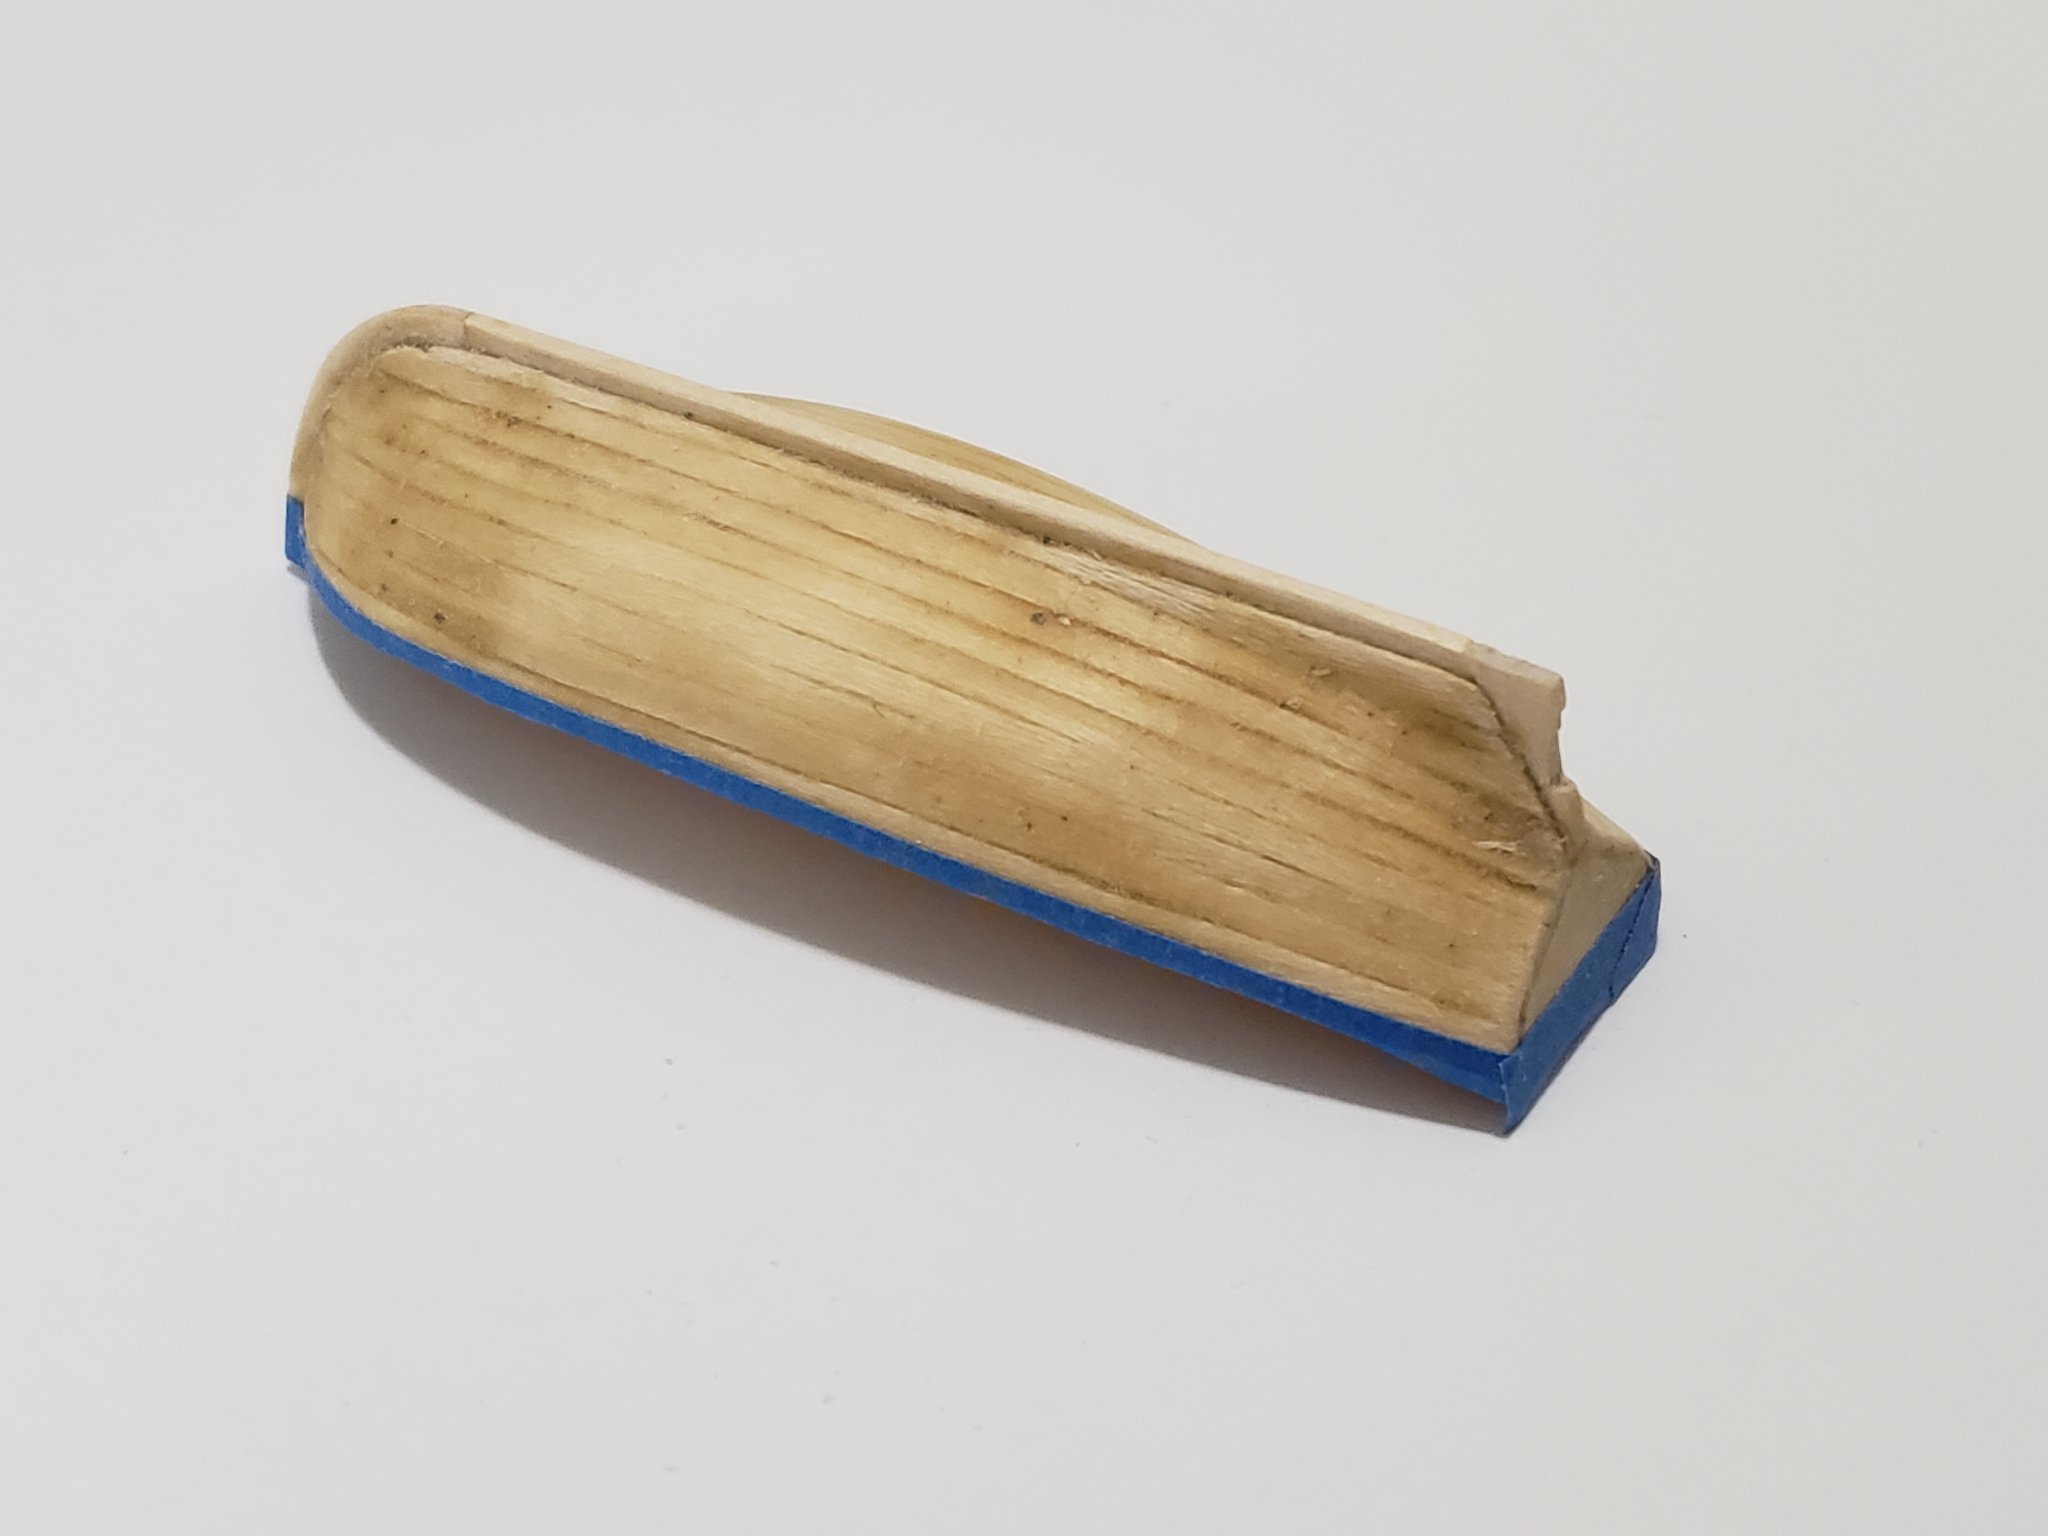
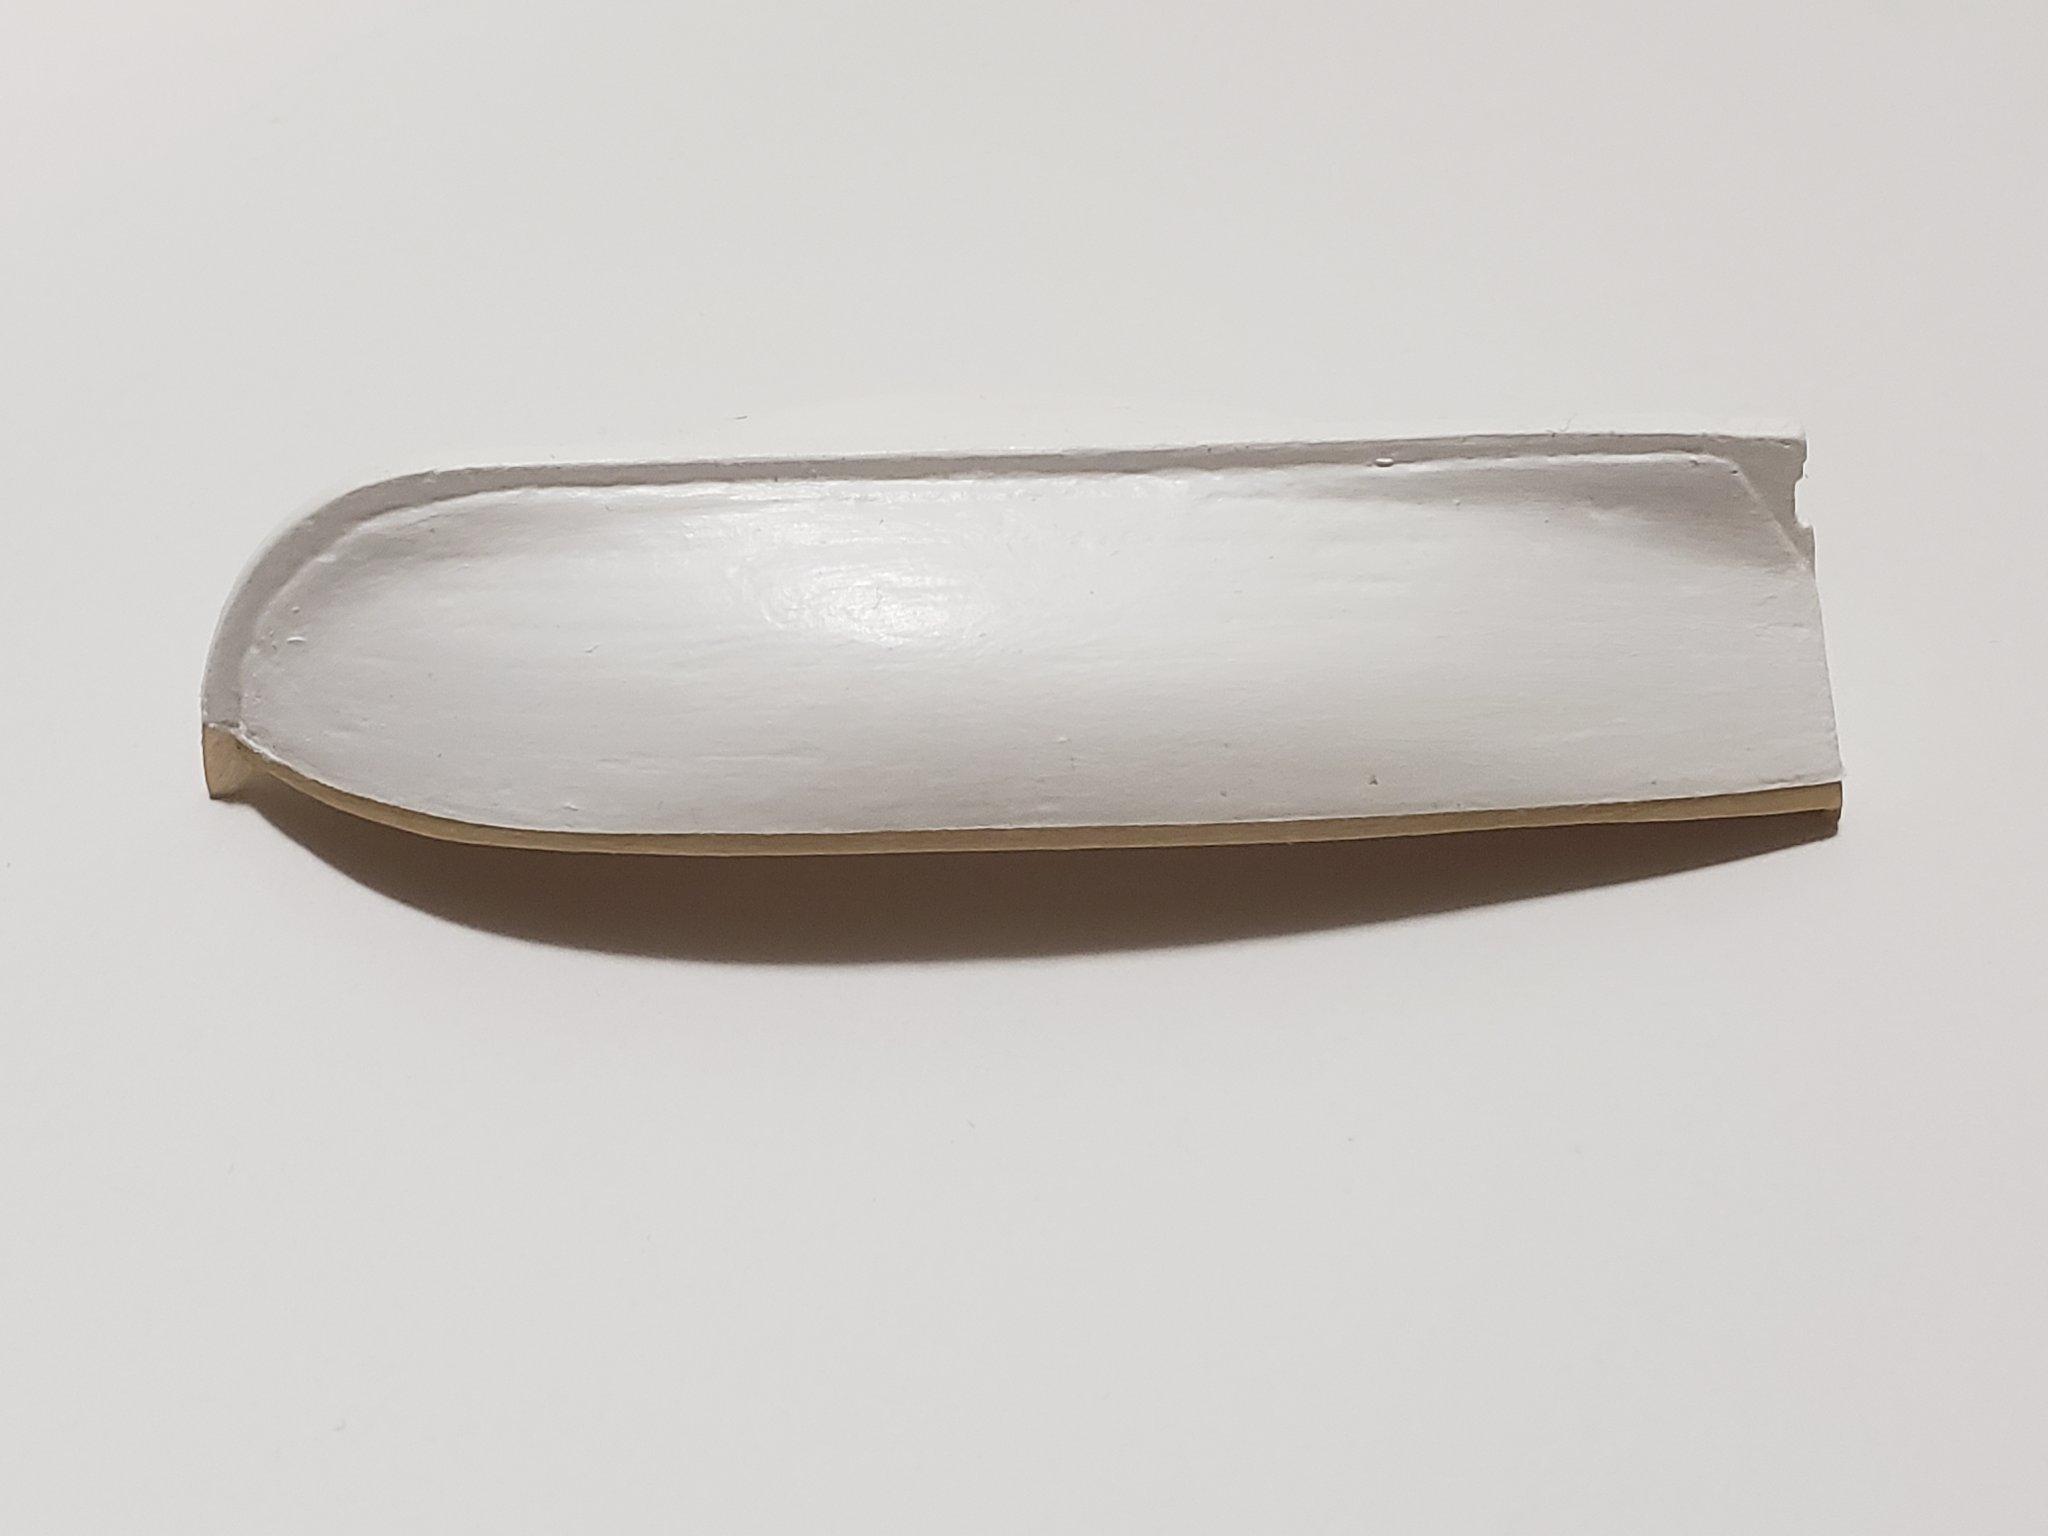
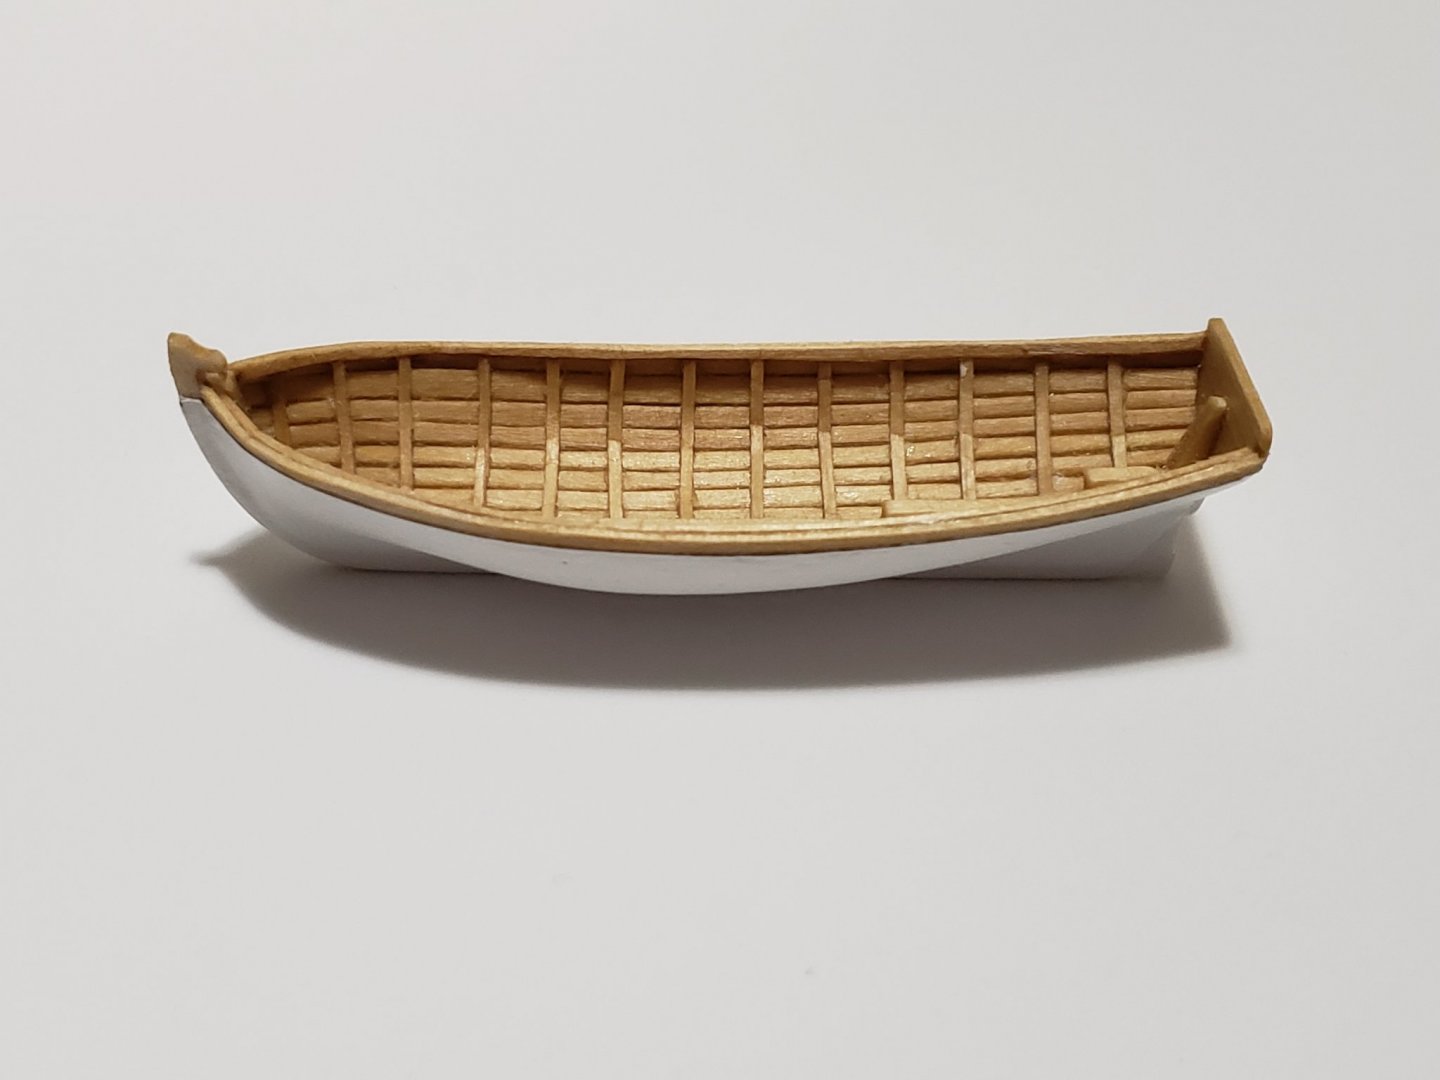
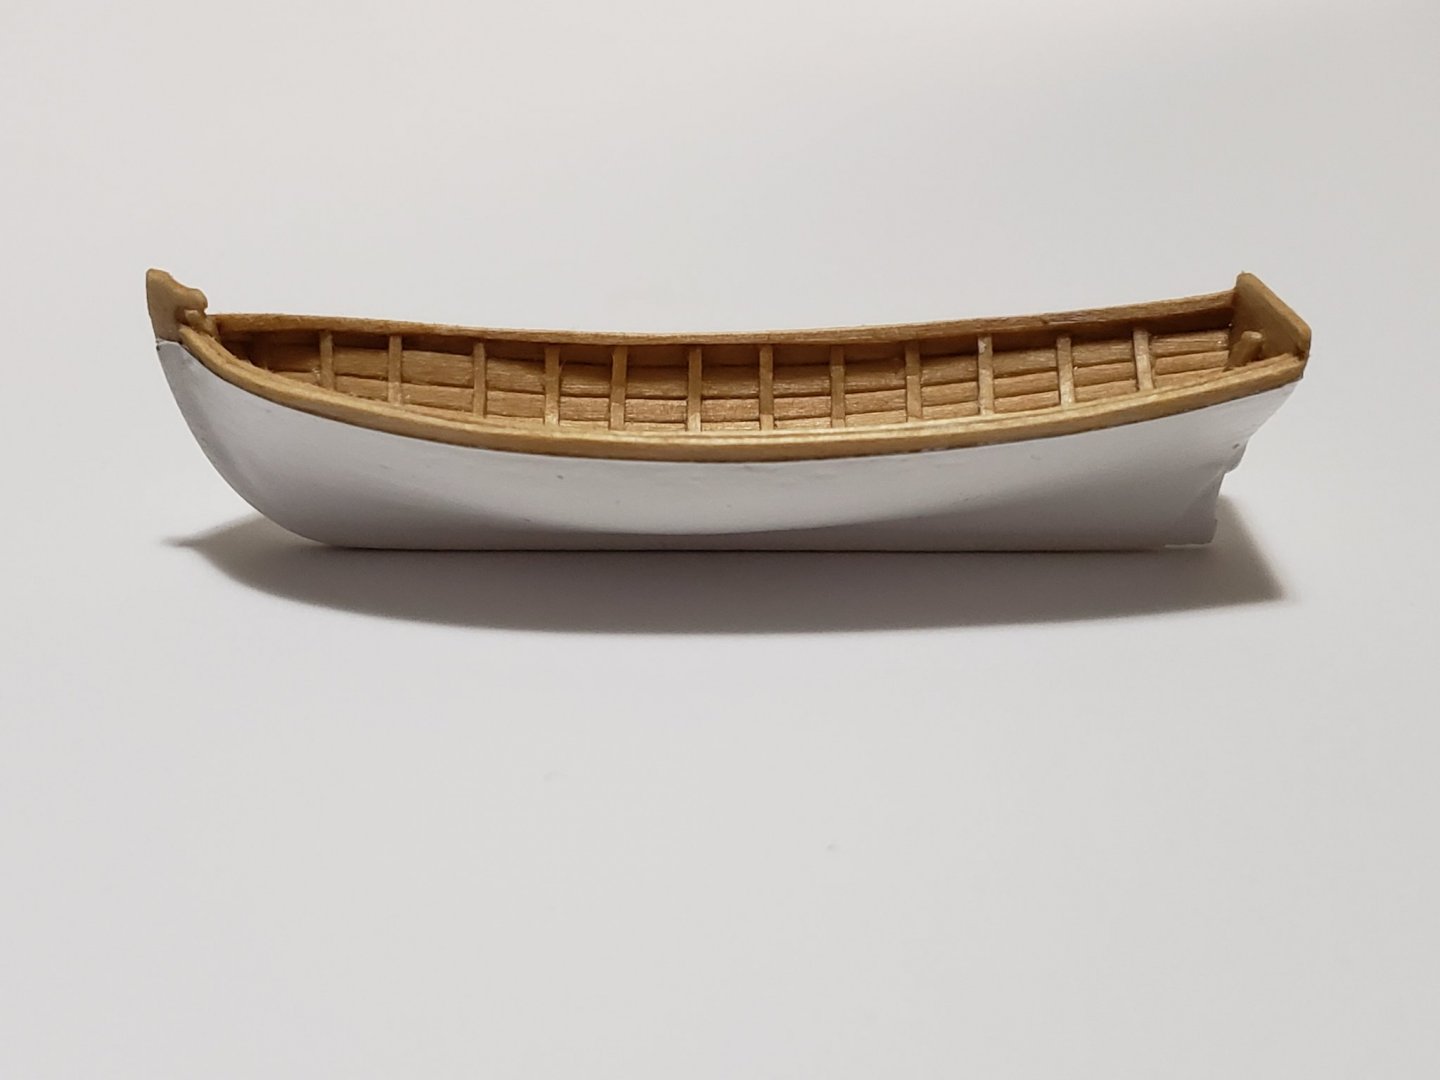
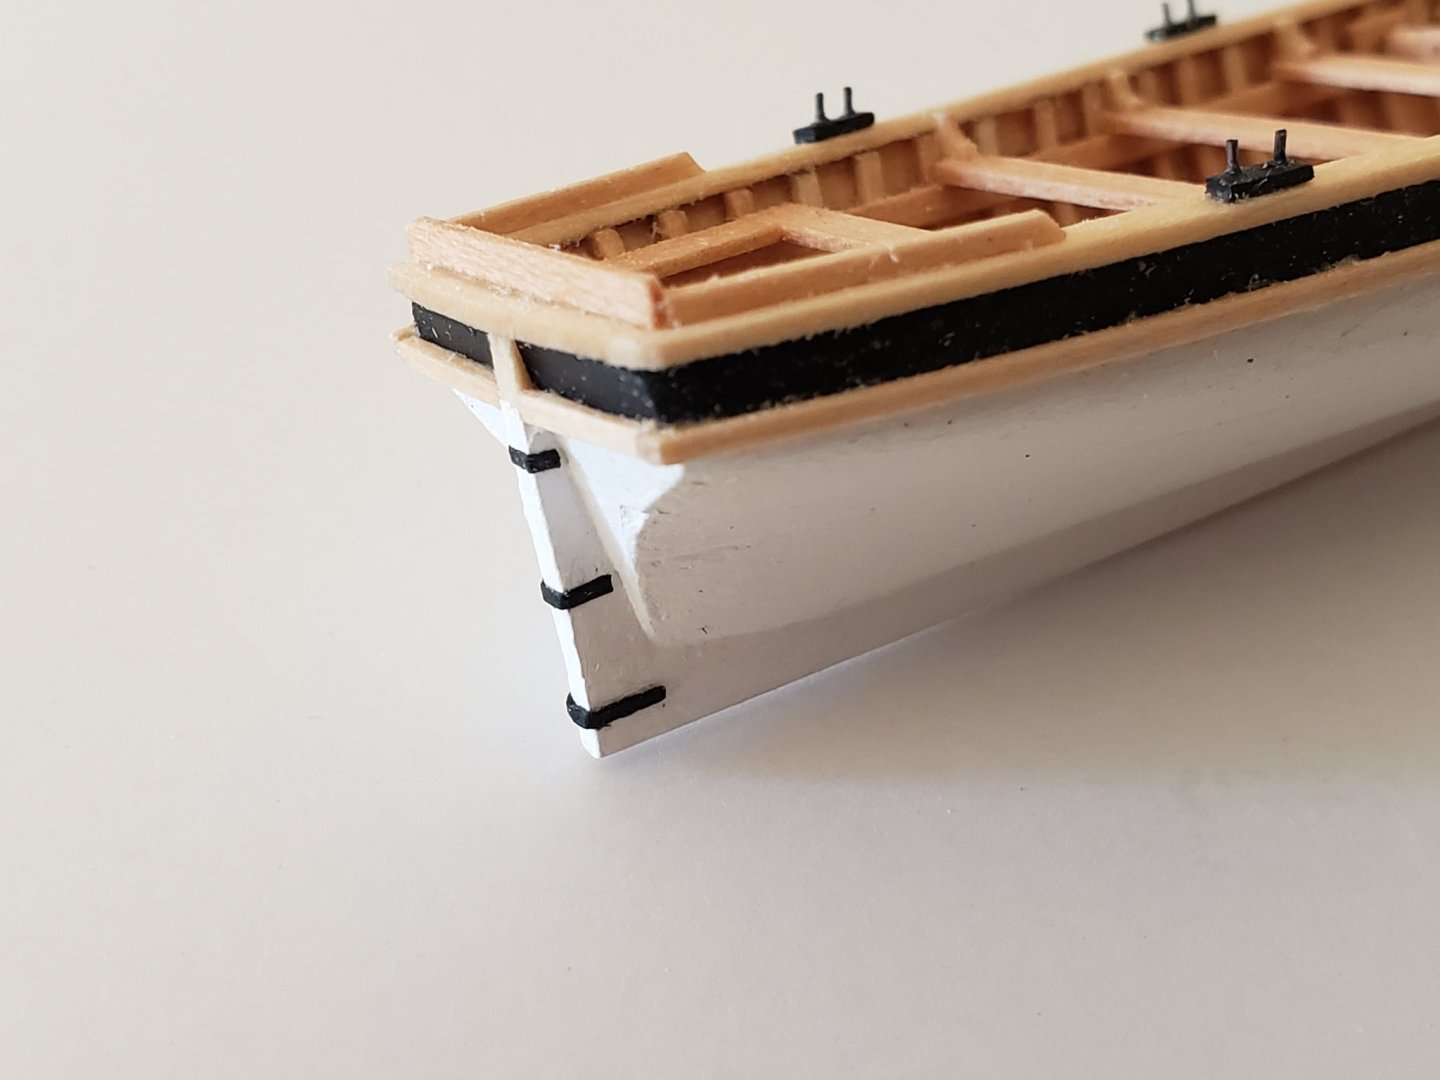
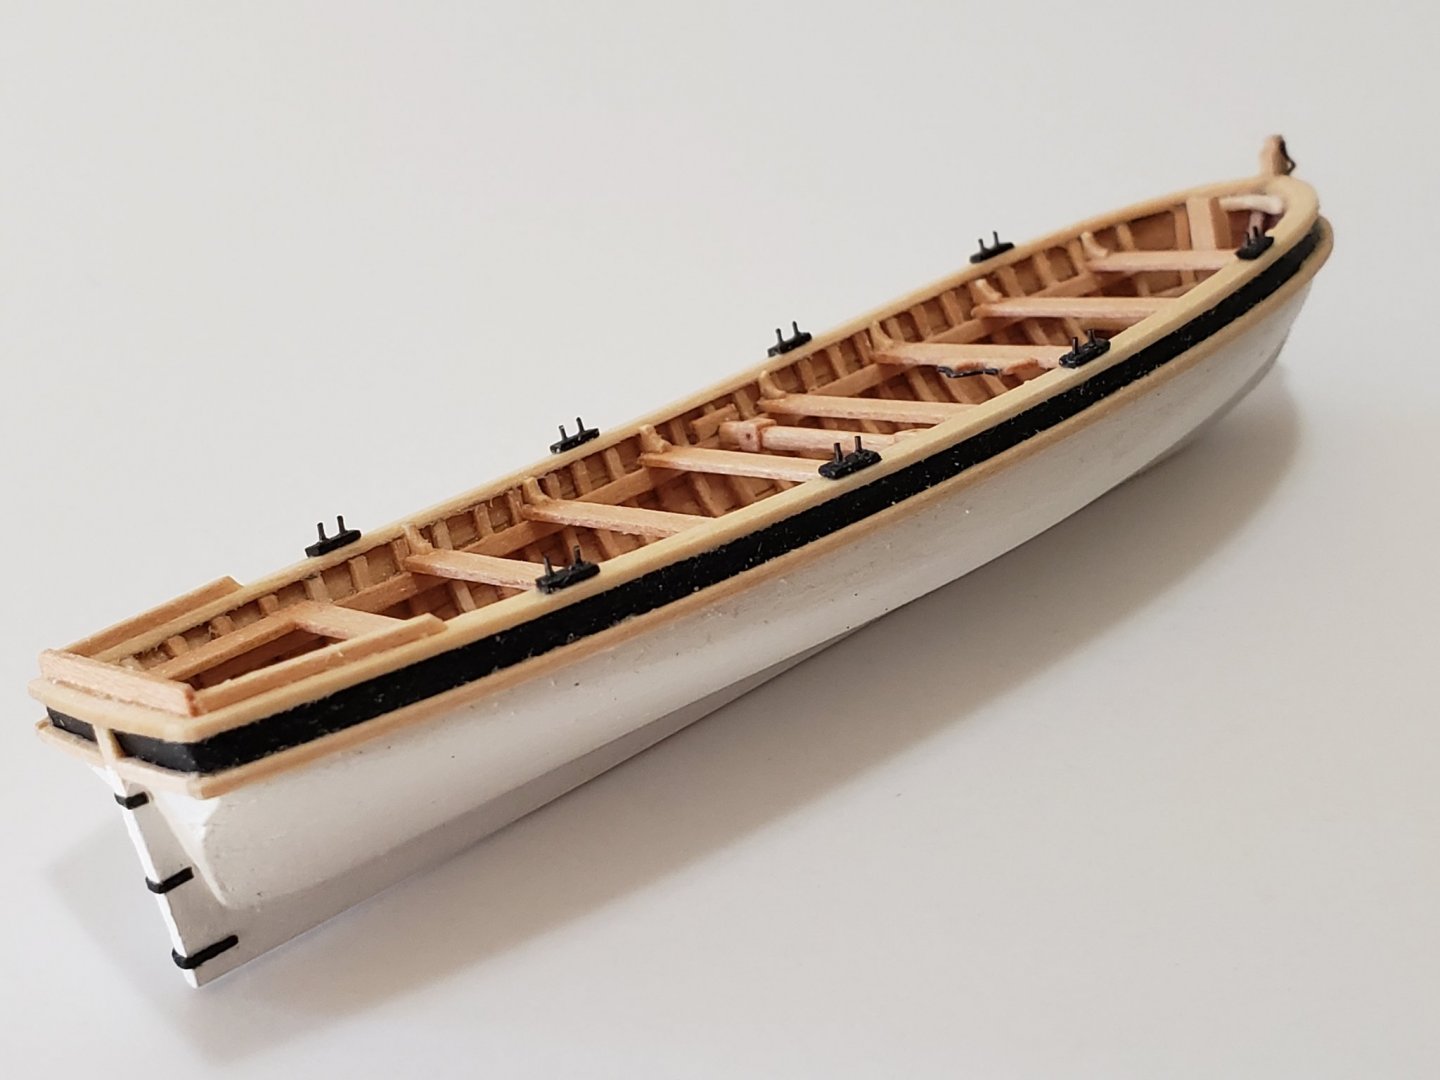
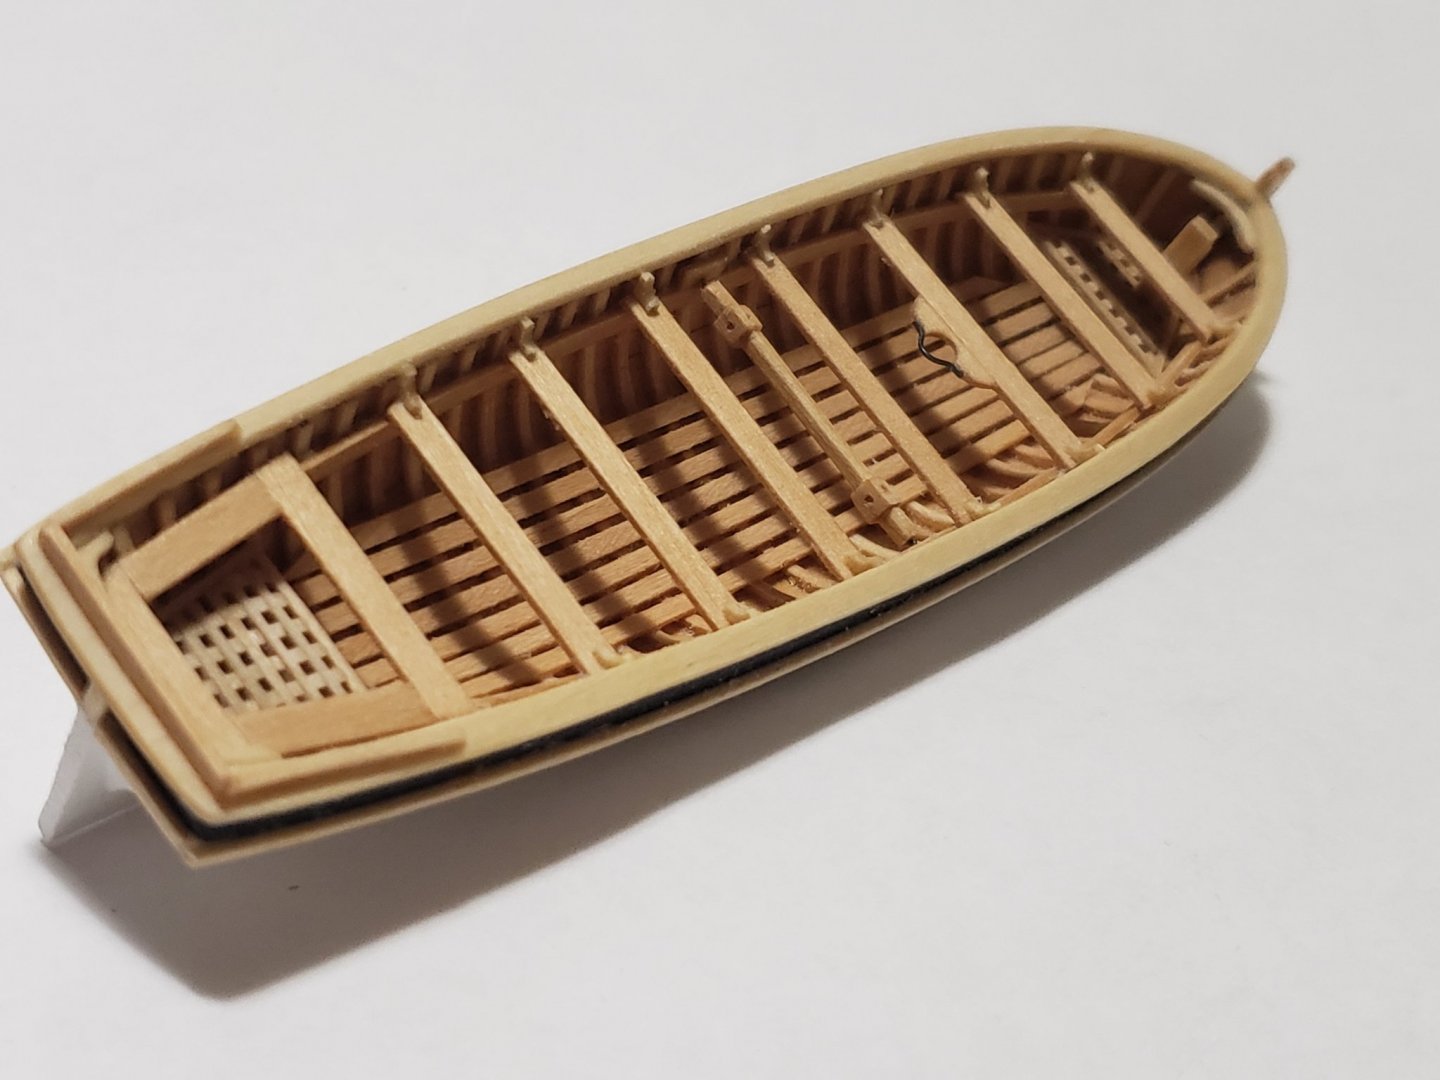
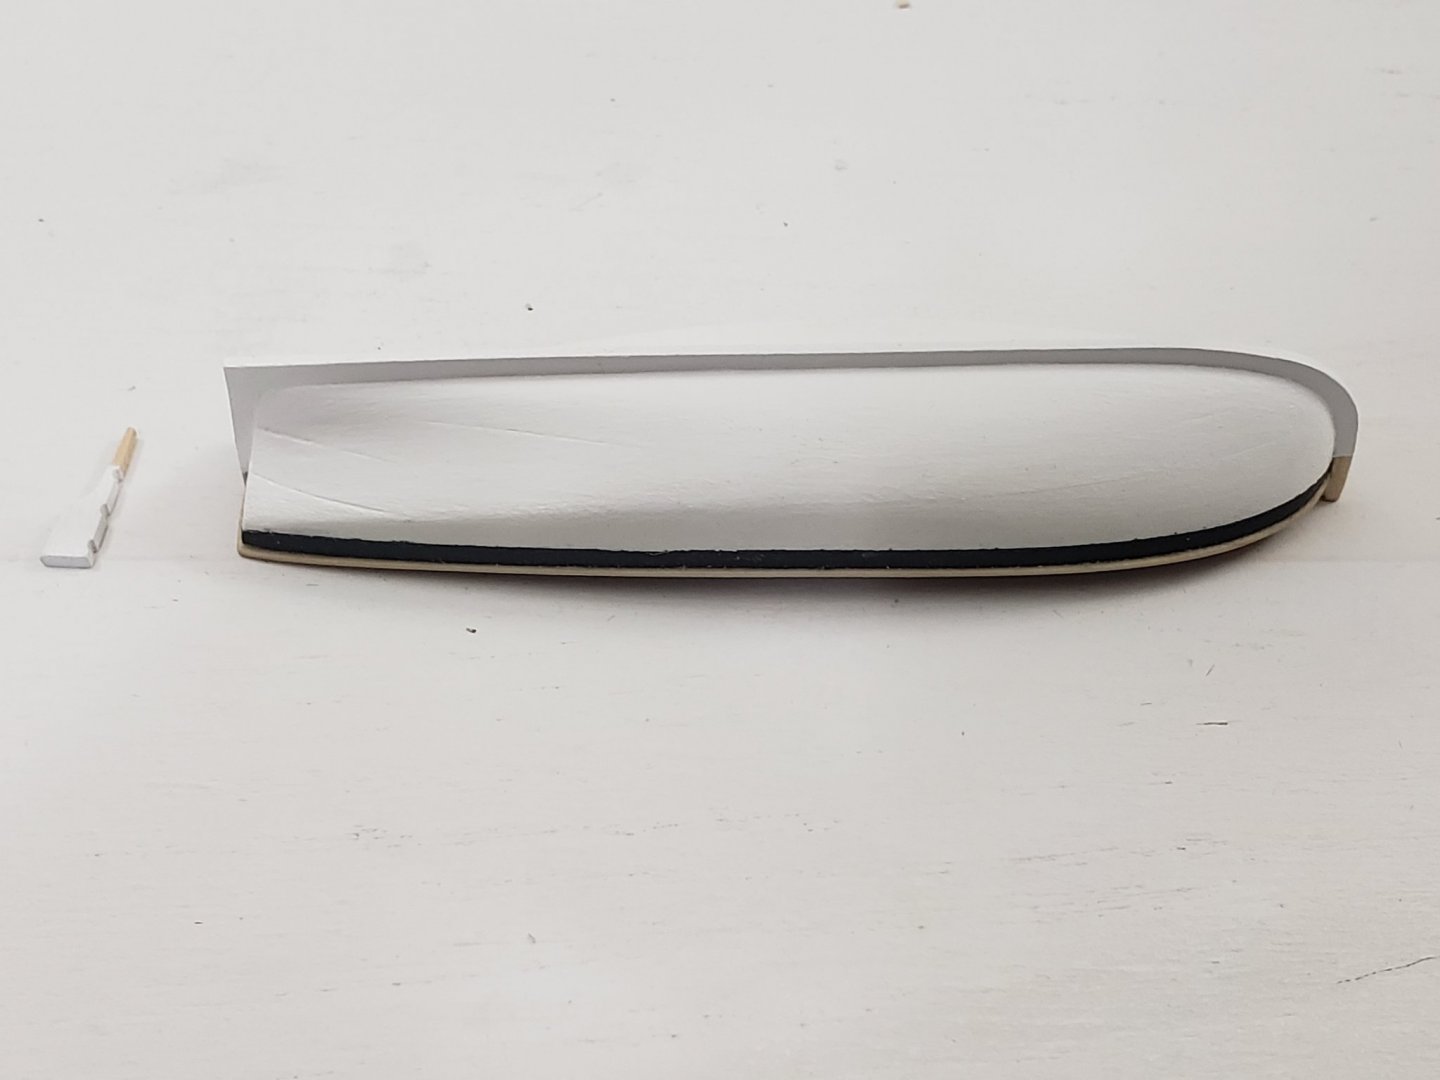
Thank you Captain Hook Today I finished the major makeovers (ie. paint and tung oil 😁). I made a major oopsie when painting the exterior as detailed below, but first, I cut out the stem and stern post from a 1/16 sheet. For the keel i used 1/16x1/16 strip. I also stuck in the upper inboard planking strip. Nothing major to report here apart from the stem not fitting perfectly. So I had to sand between each fit in areas touching the boat until it fitted flush entirely, then I cut out the outer portion. Now for the oopsie. I sealed the exterior using wood glue and sawdust mixture, but didn't do too good of a job sanding it smooth. After applying multiple coats, I realized parts of the boat were very very blotchy. So, I had to sand everything out and make sure it was smooth then reattempt painting. The second round seems to be much better. There still are some areas of slight blothiness, but nothing in comparison to my first attempt. I didn't take any pics of the first attempt since it looked so bad, but here is where she's at now: After painting, I applied tung oil to all exposed wood: Next I'll work on the interior details.


- 950 replies
-
- 12
-
-
- syren
- model shipways
- (and 1 more)
-
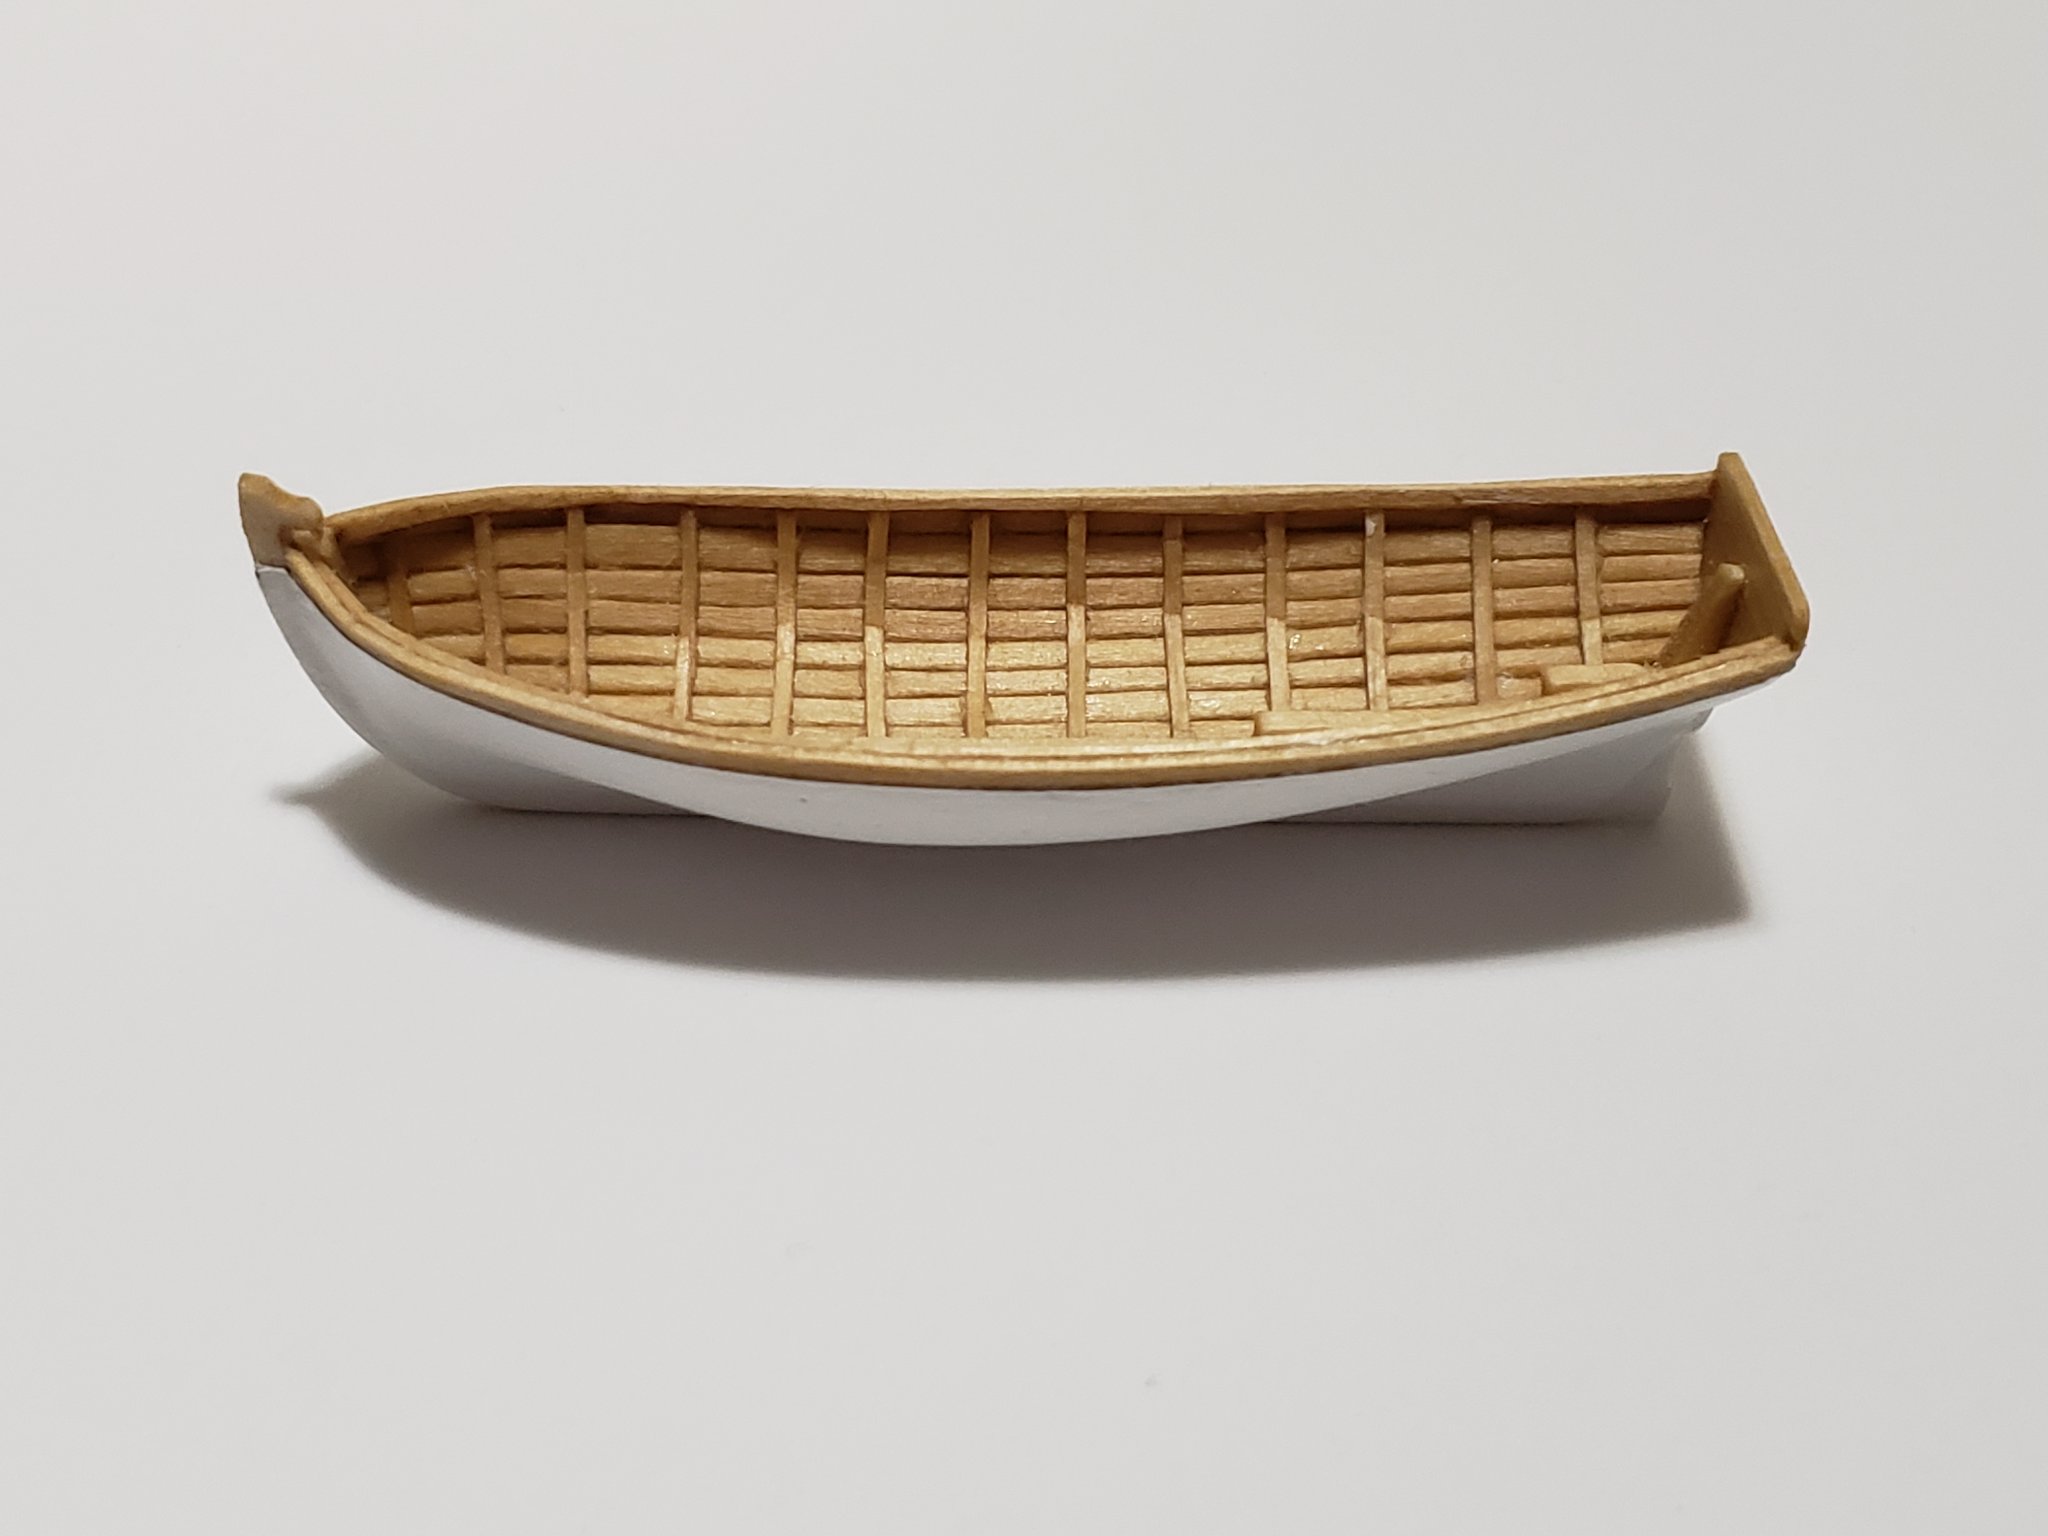
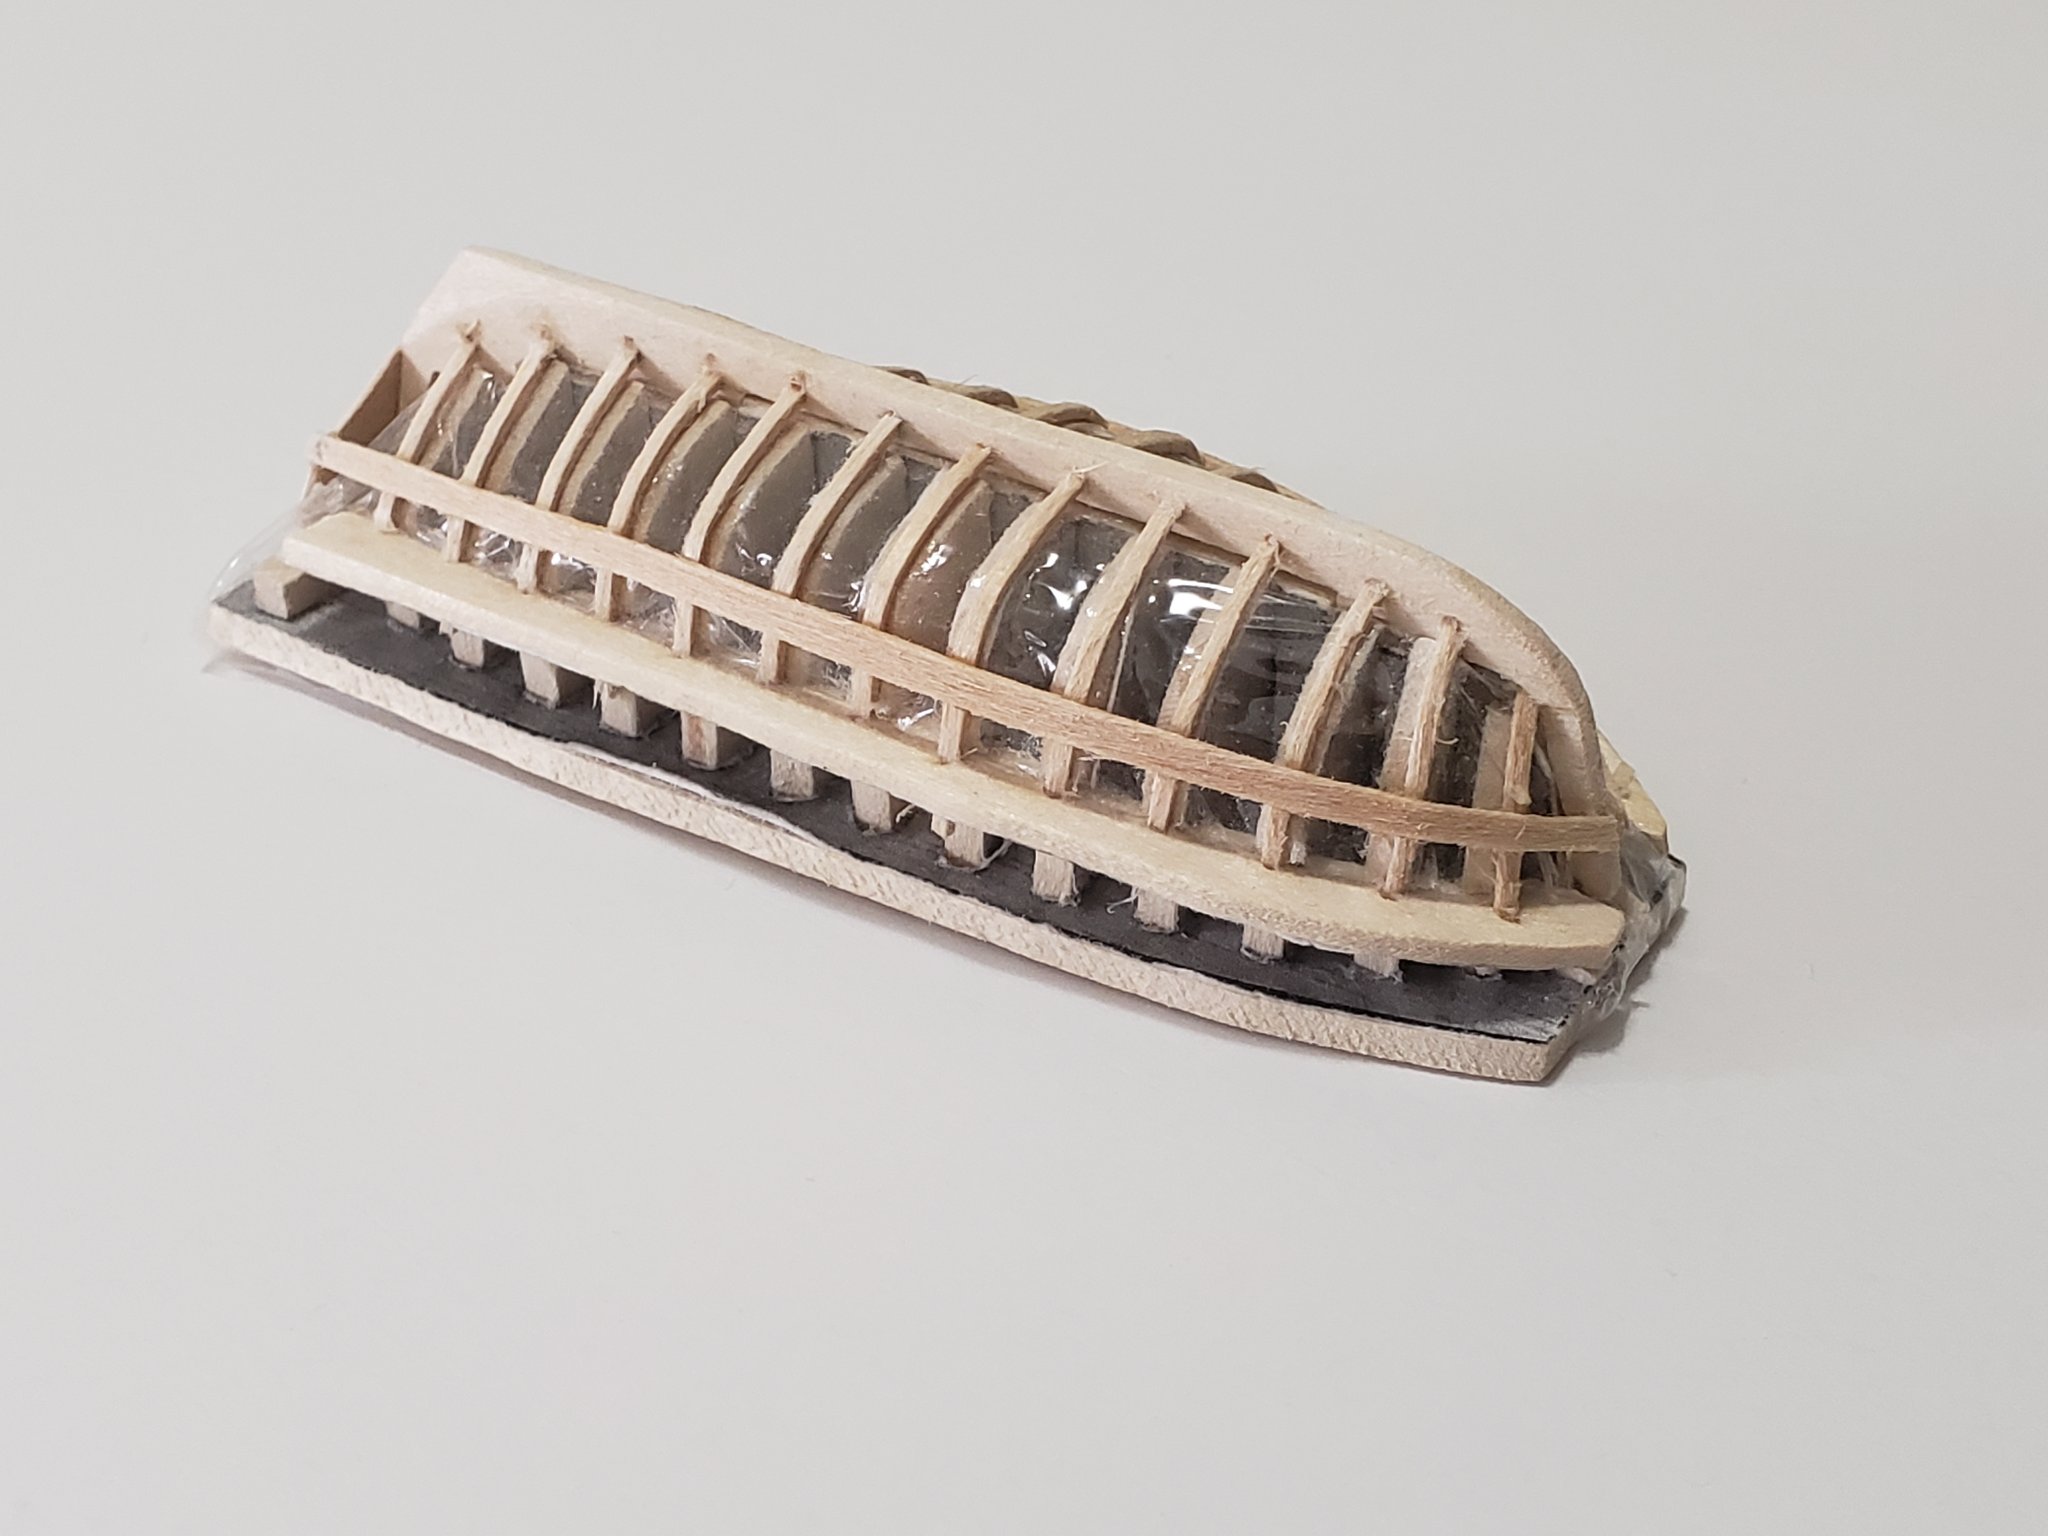
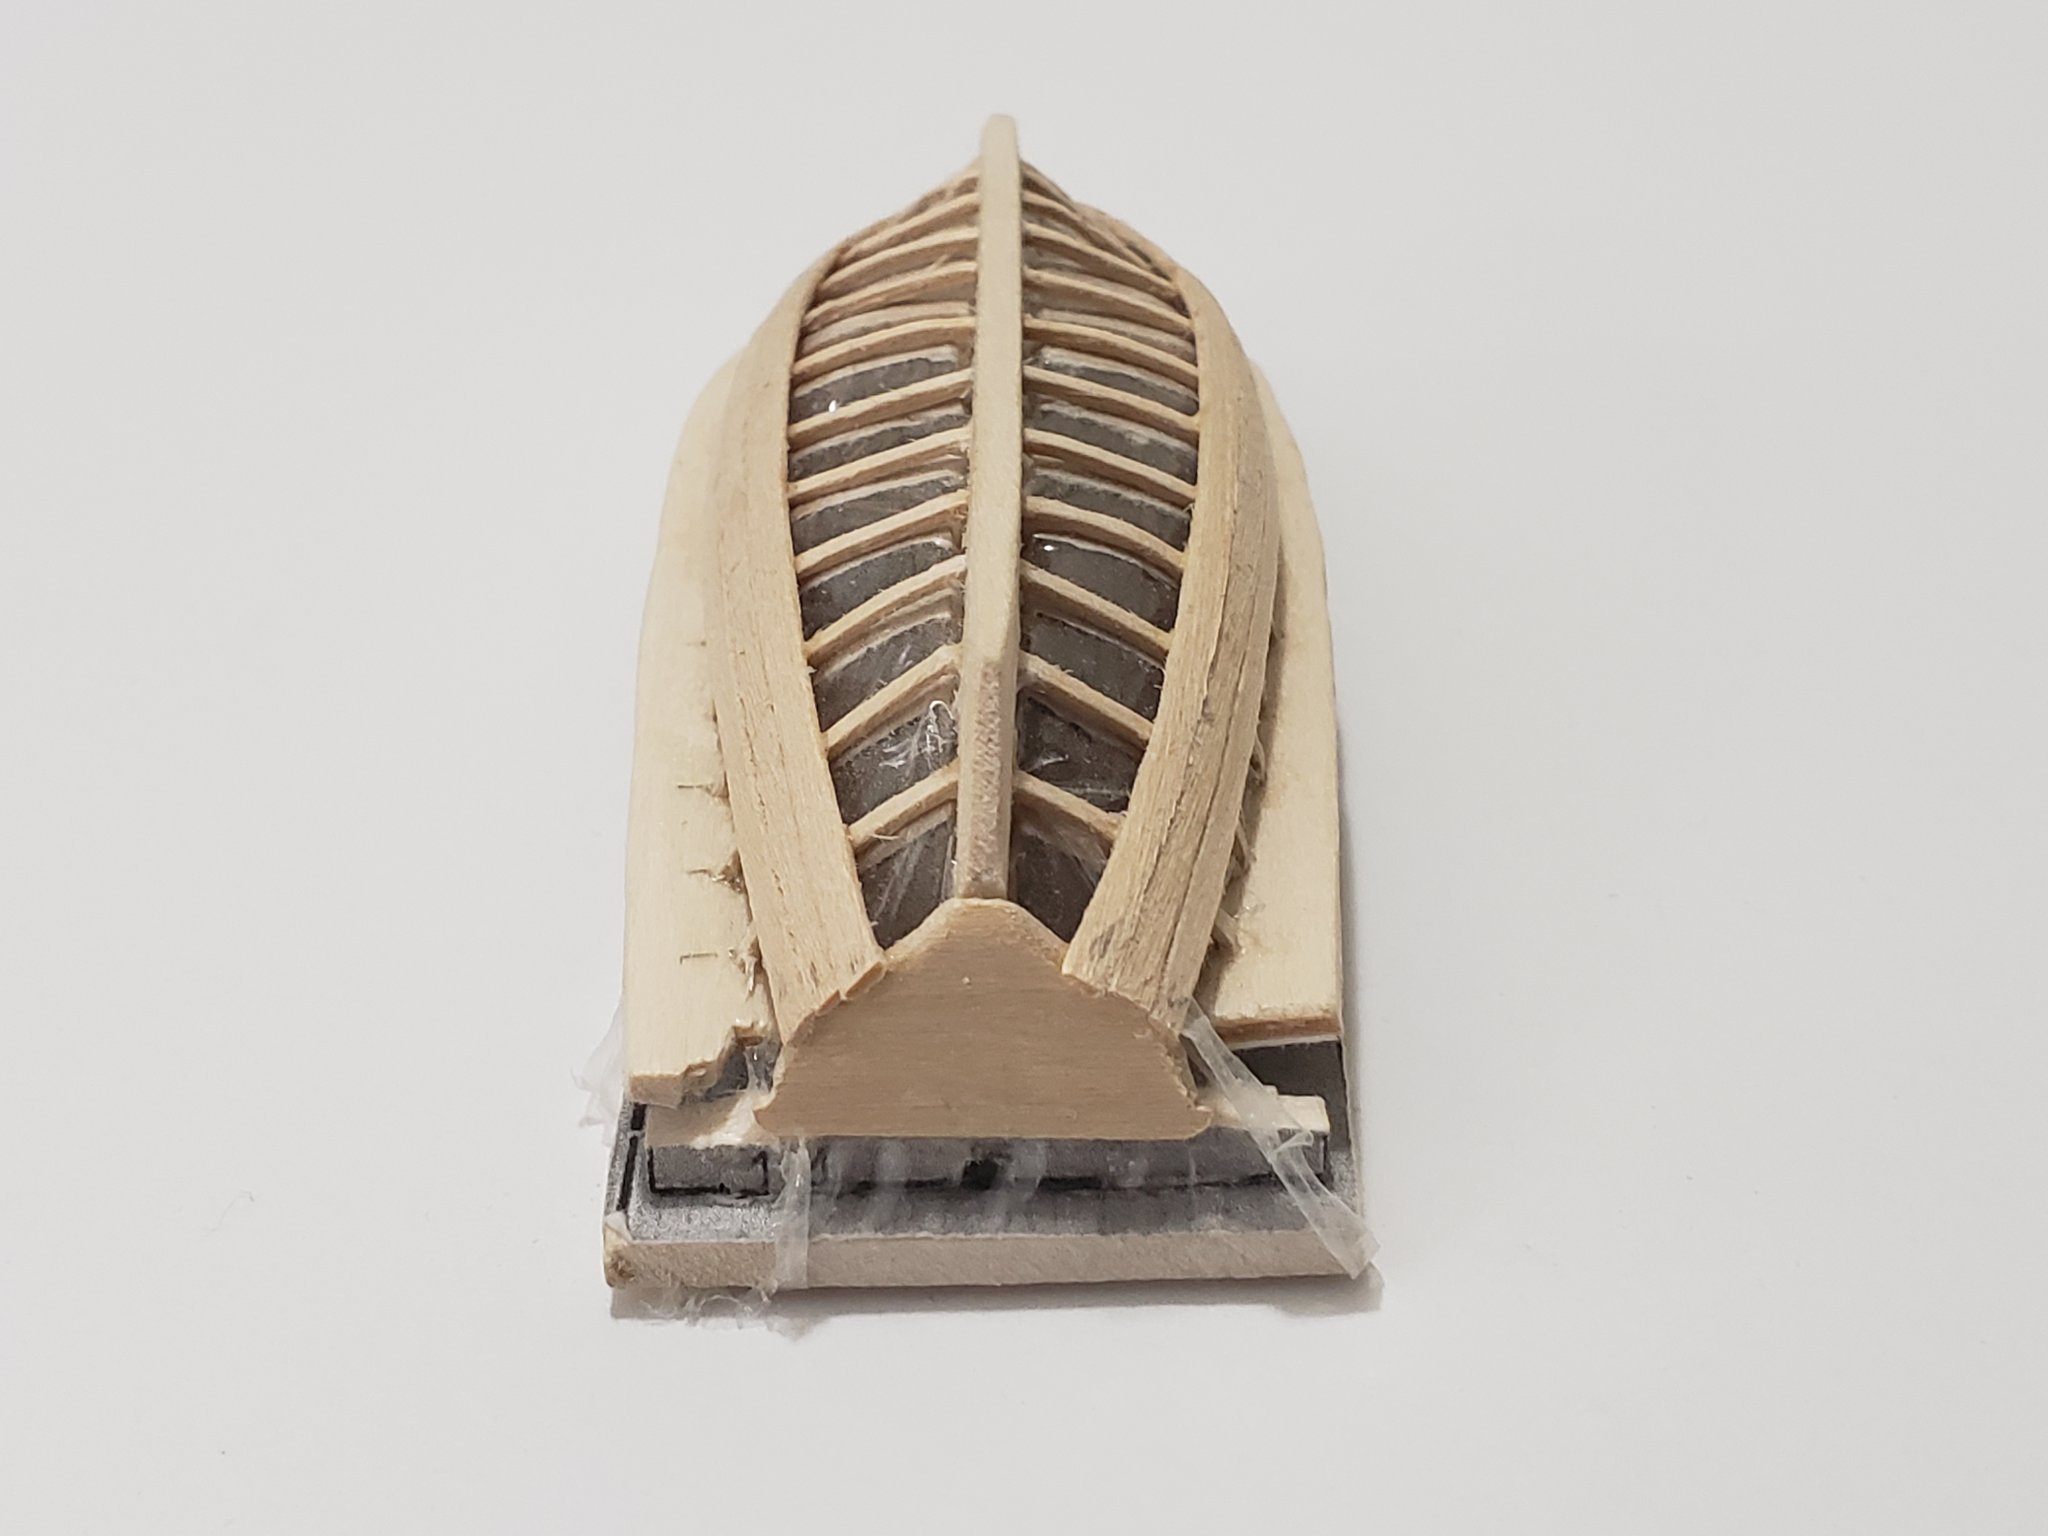
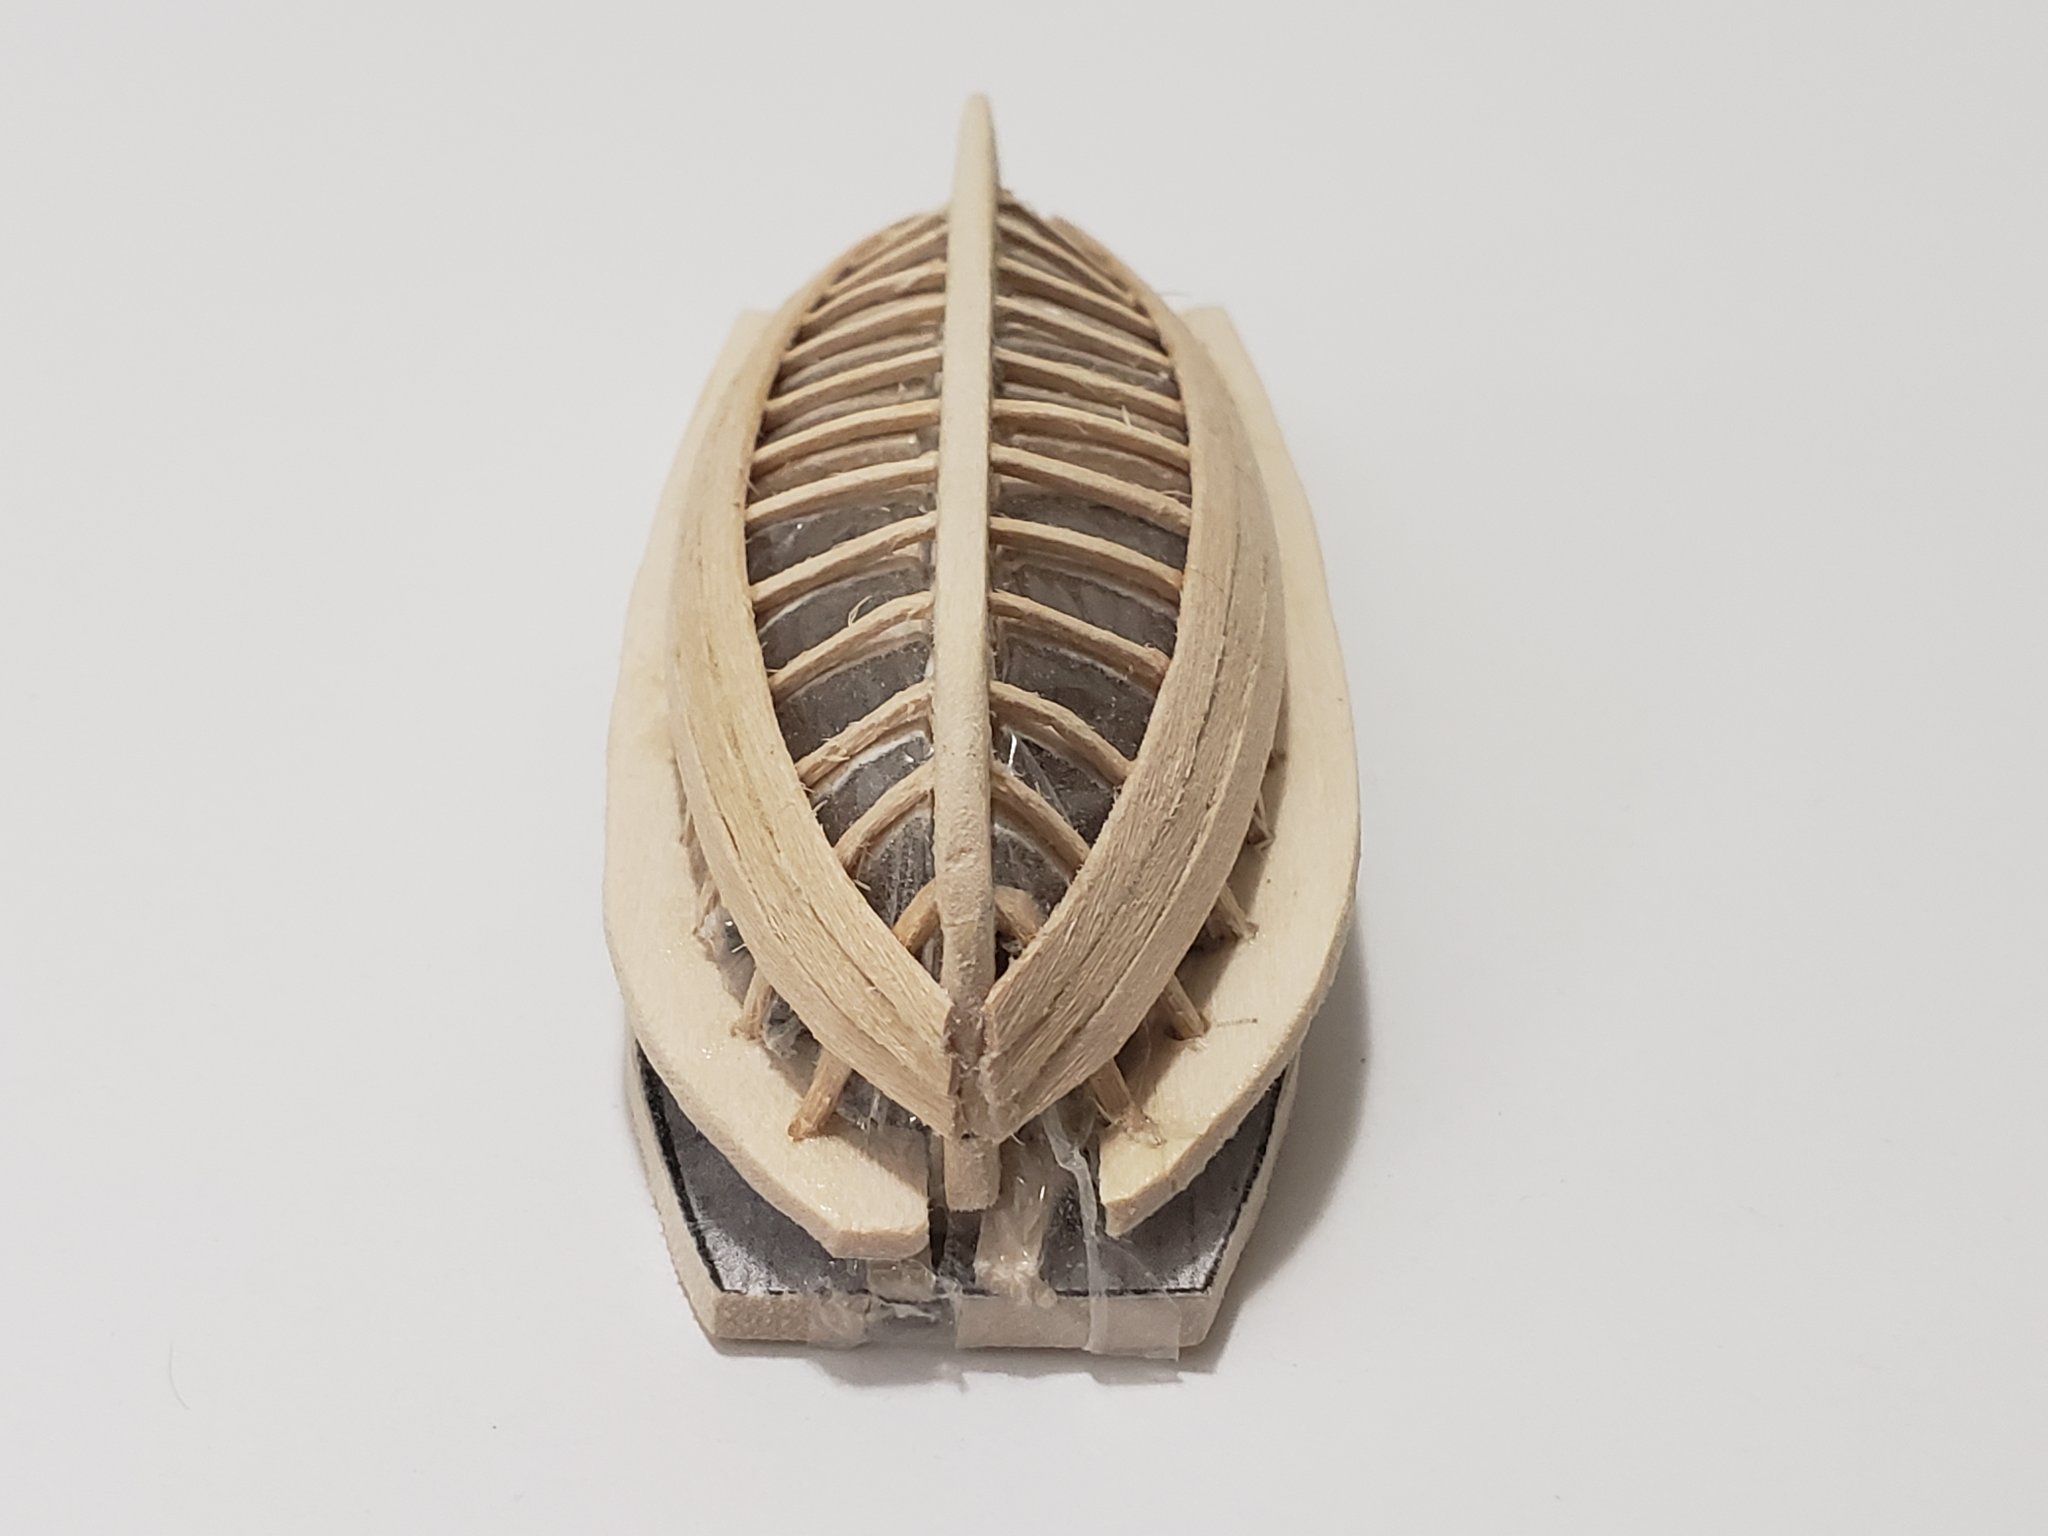
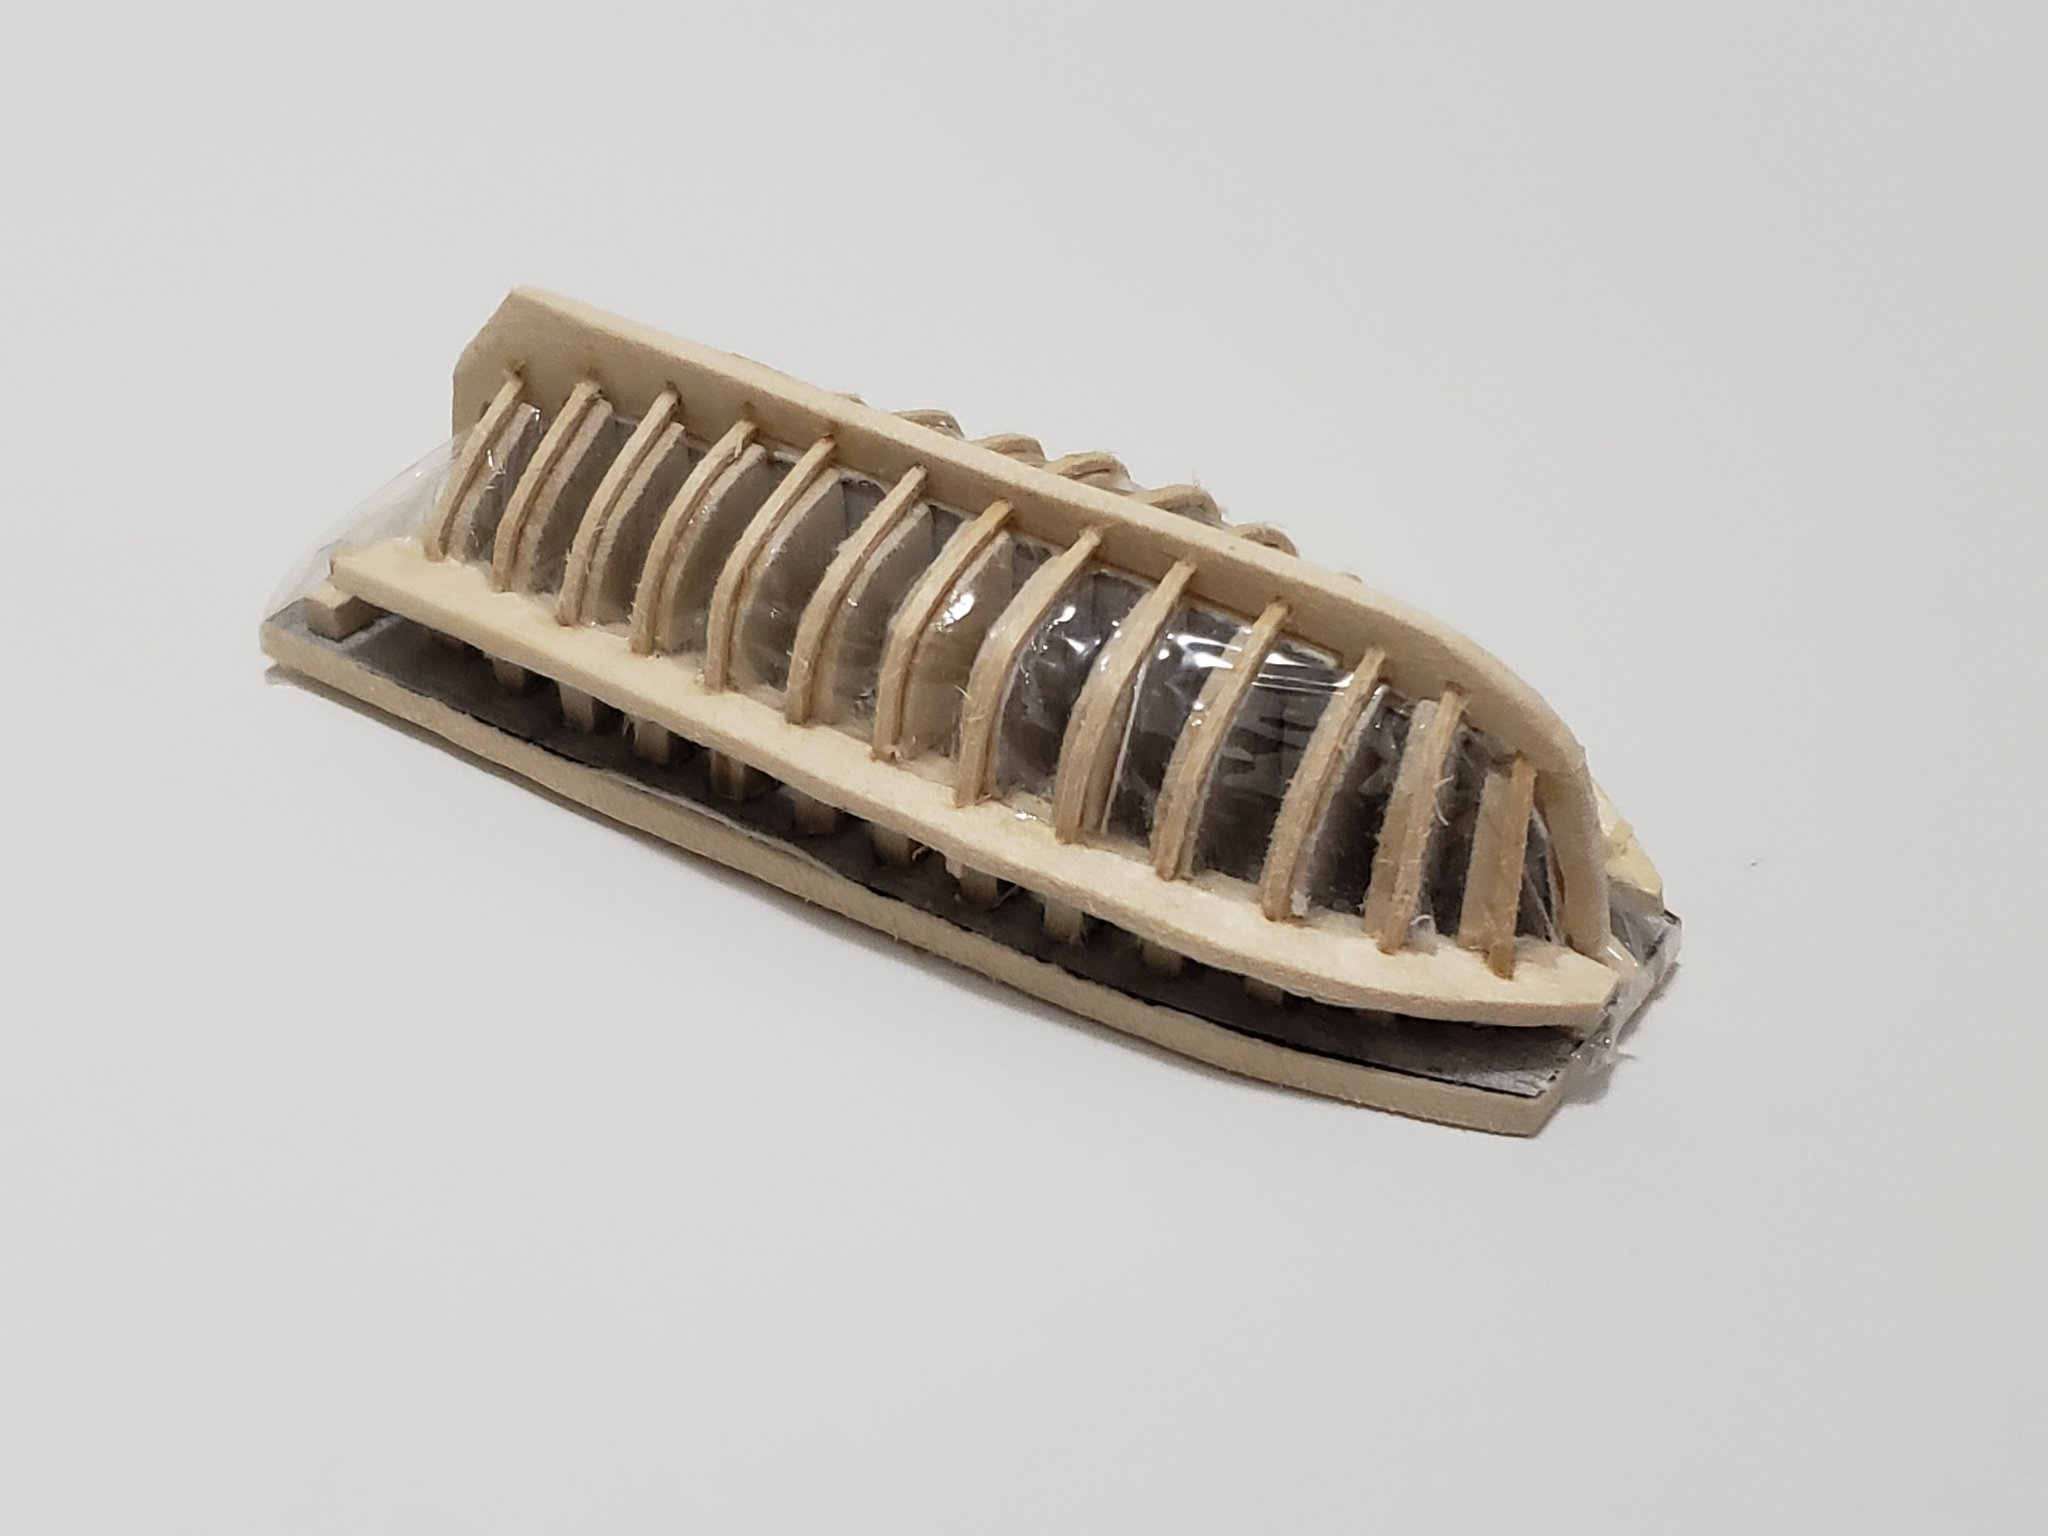
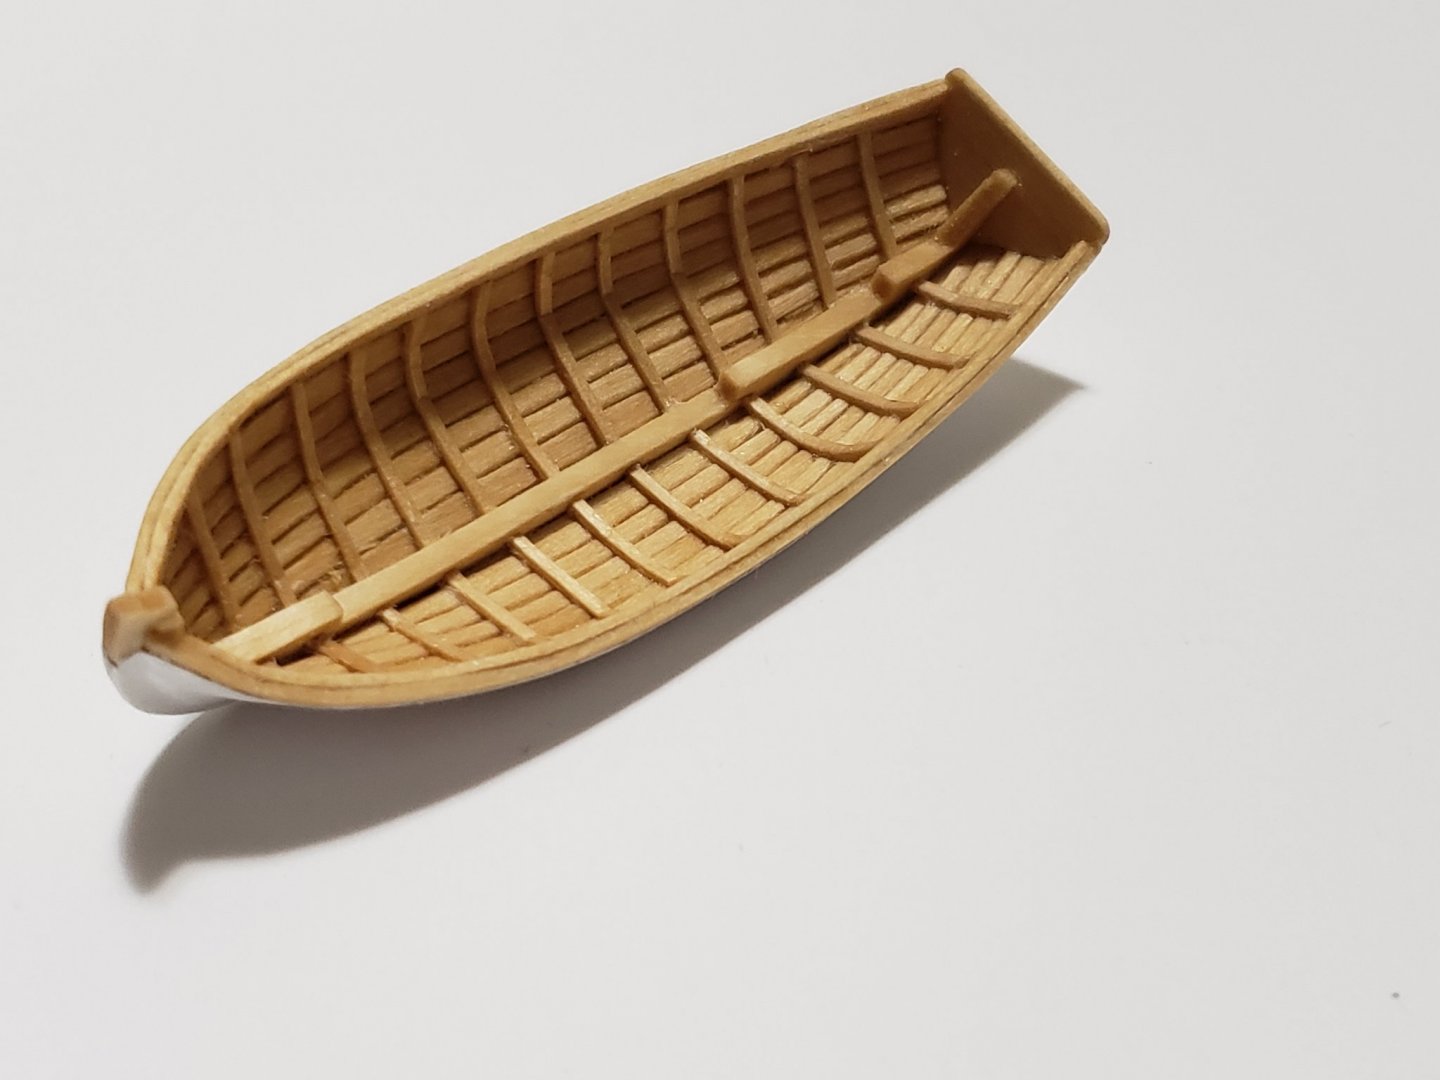
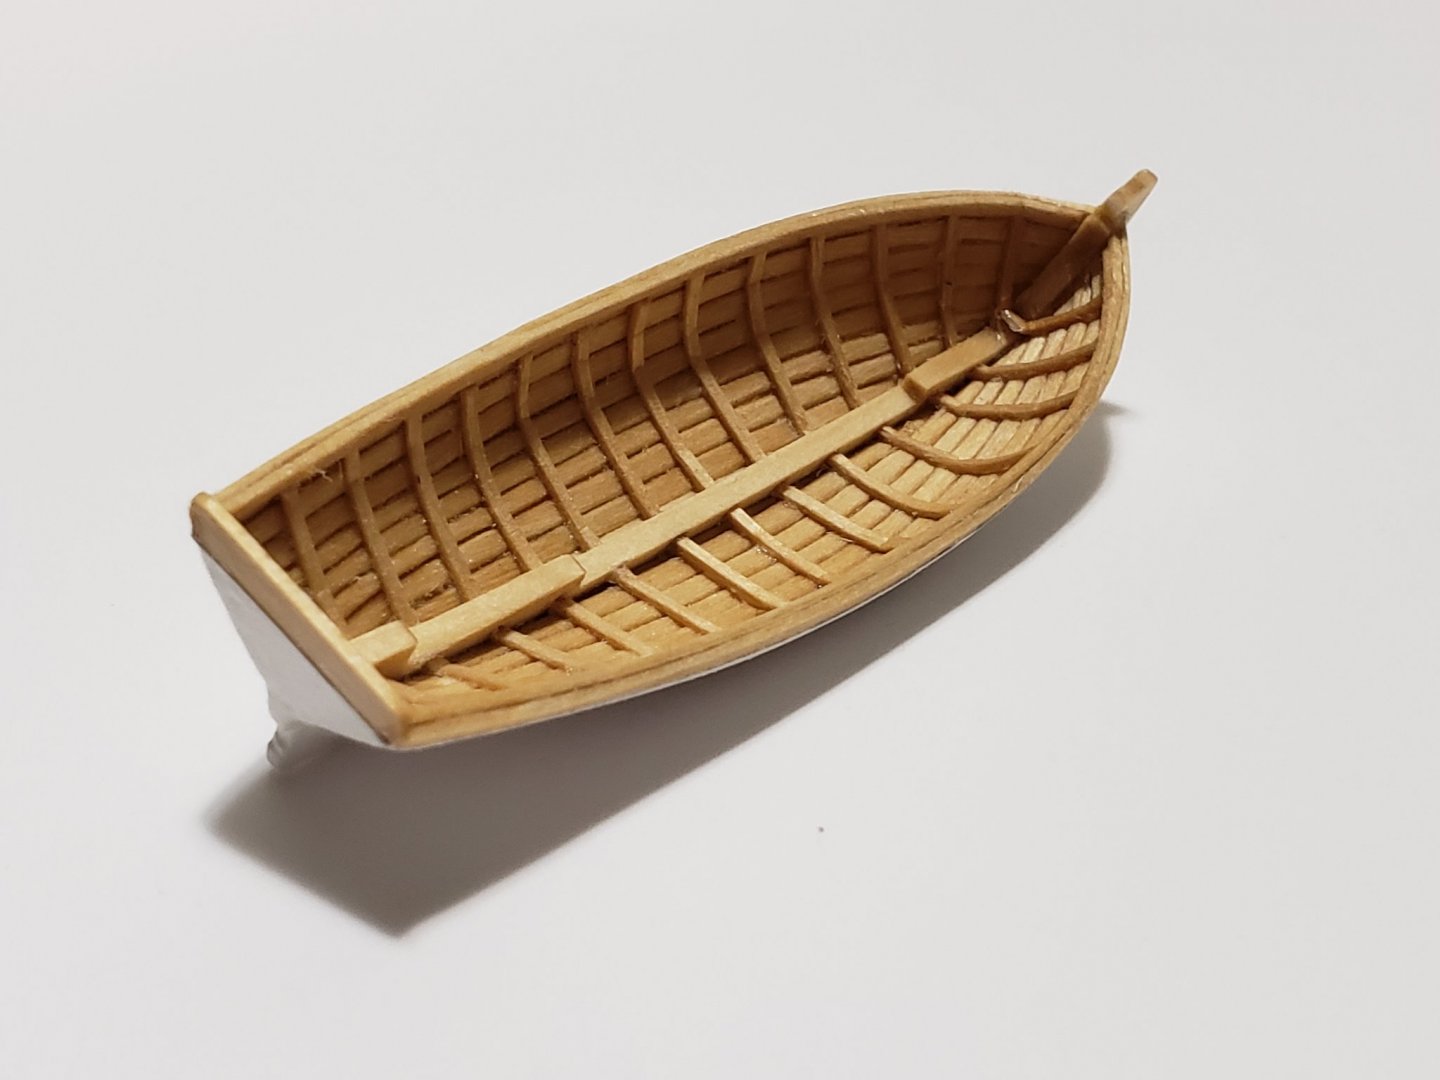
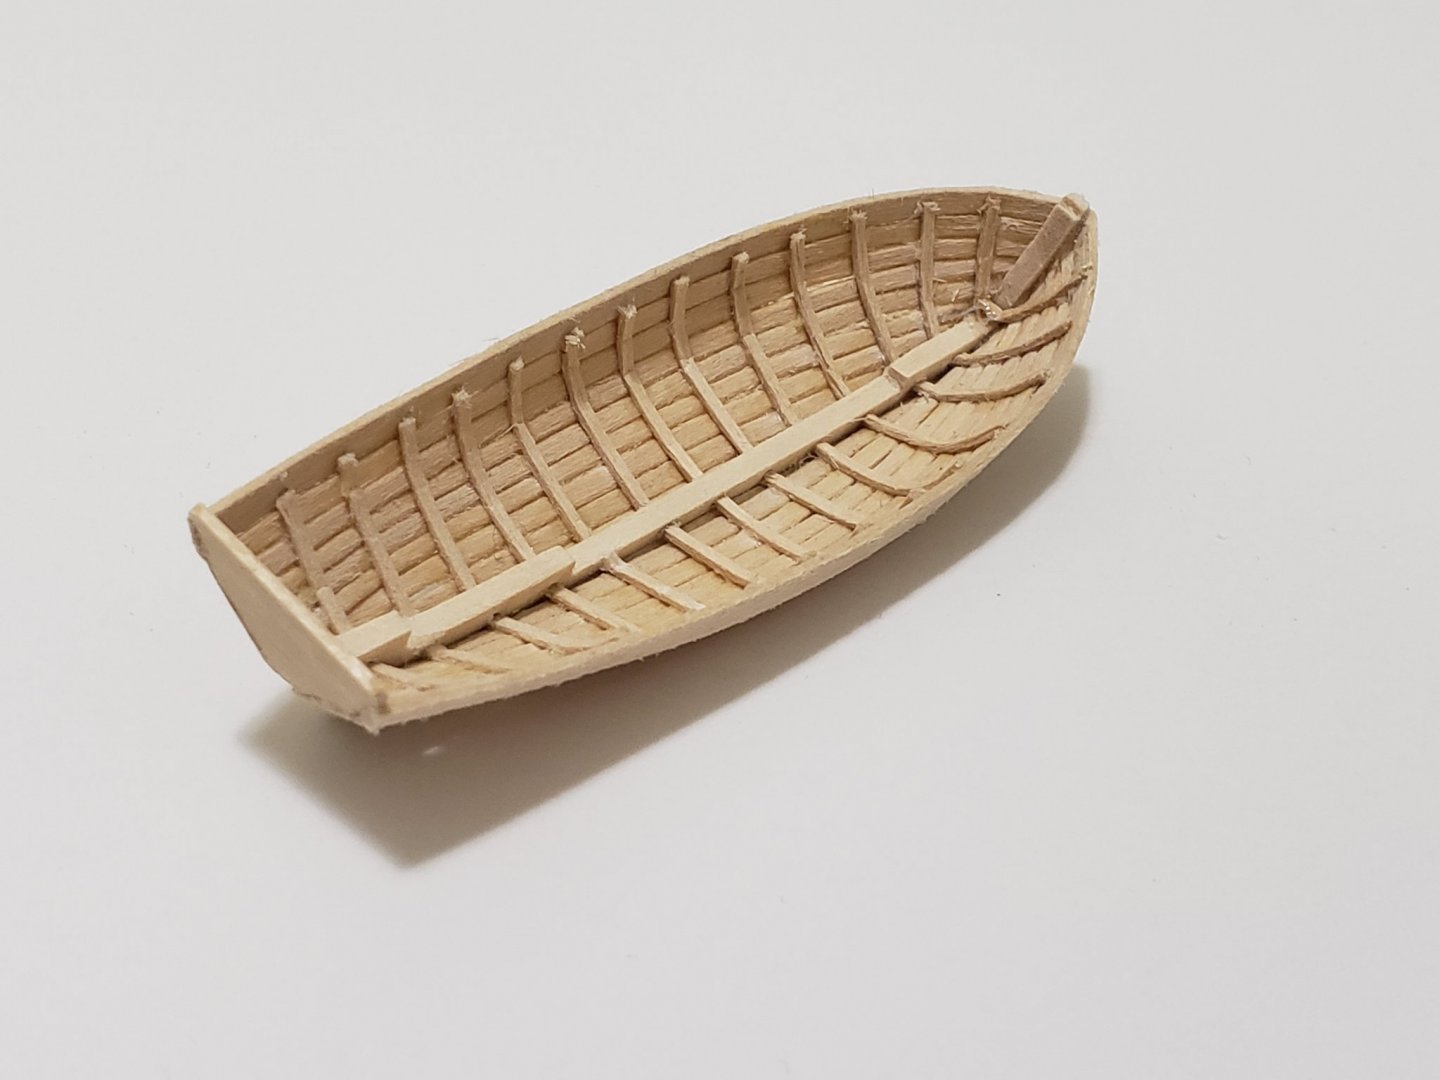
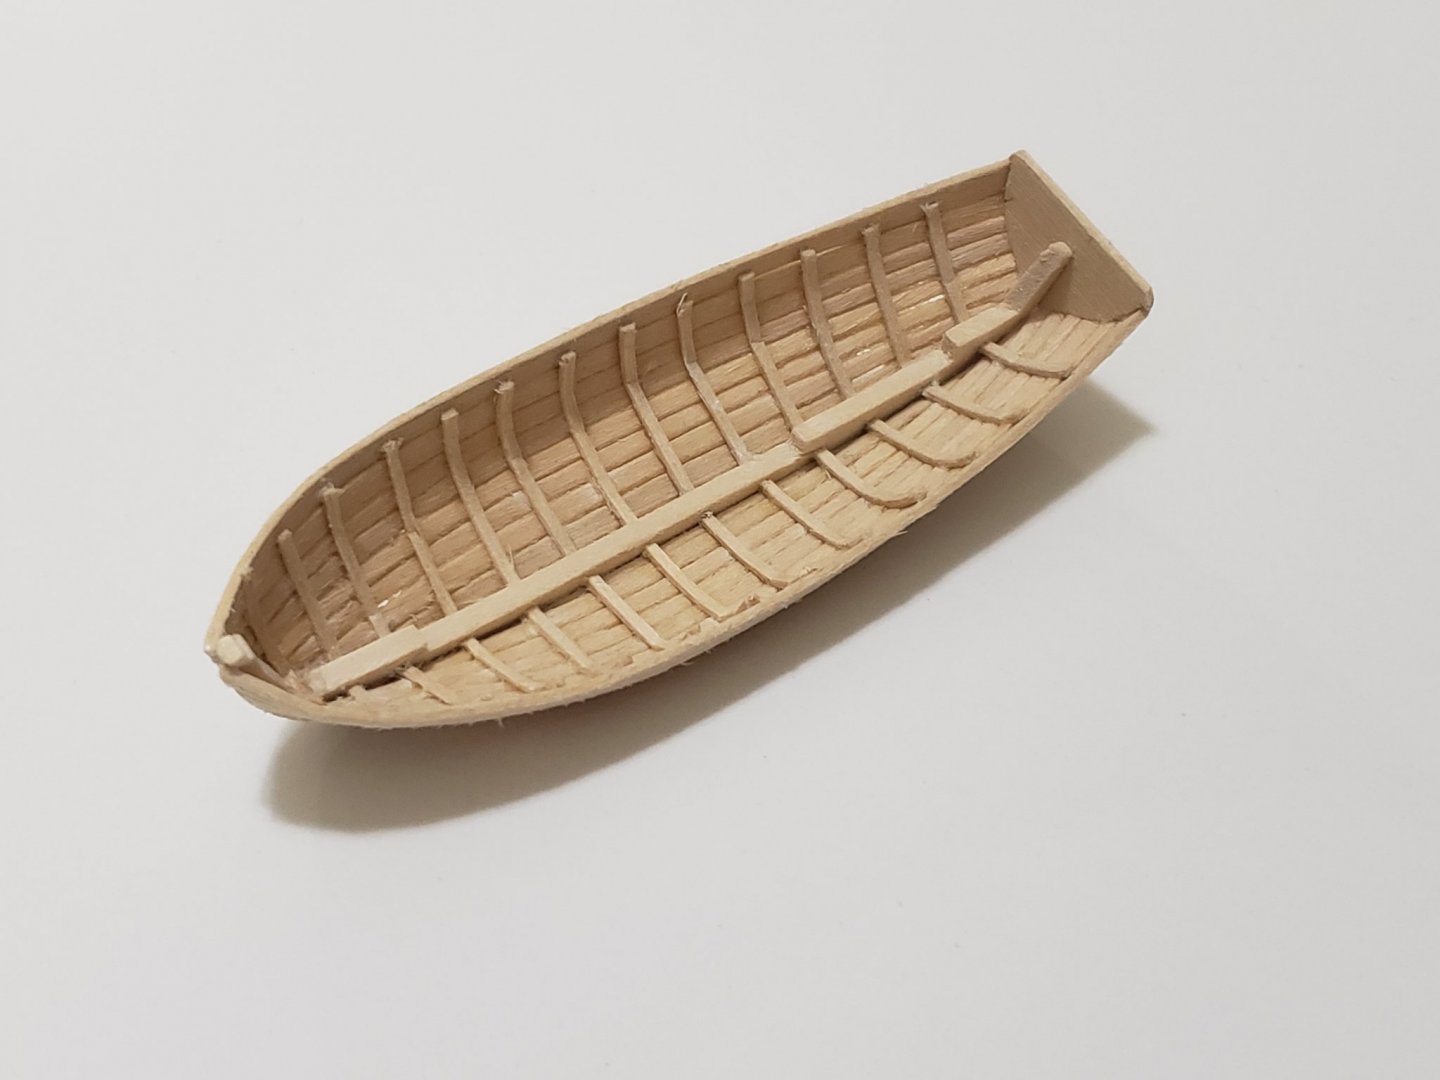
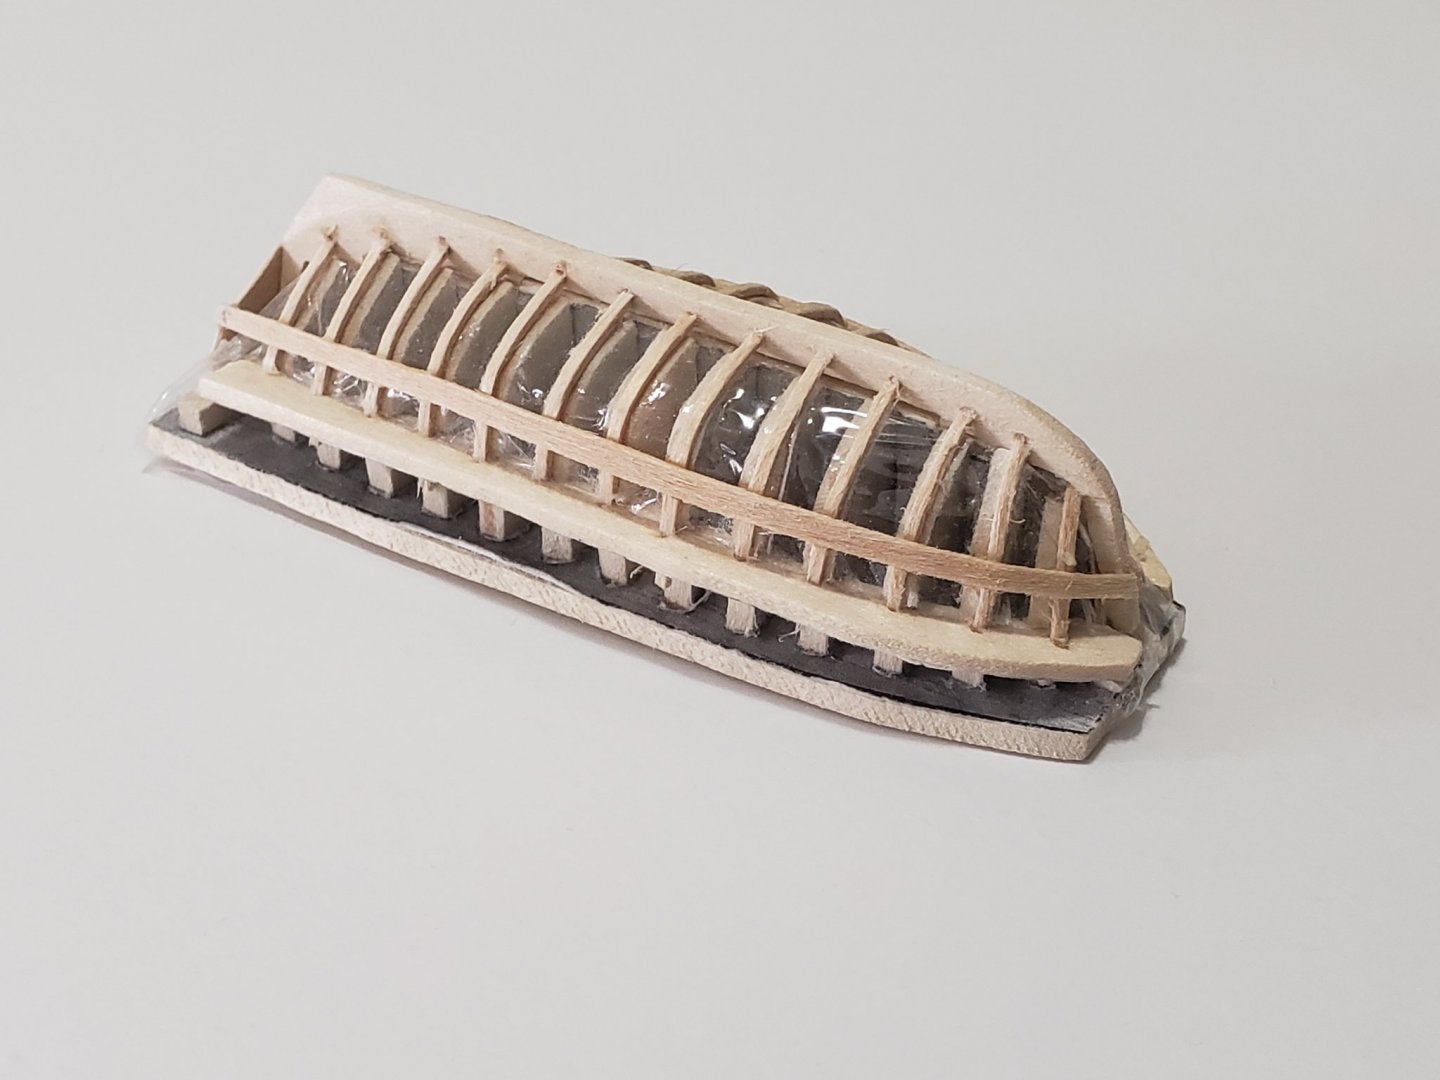
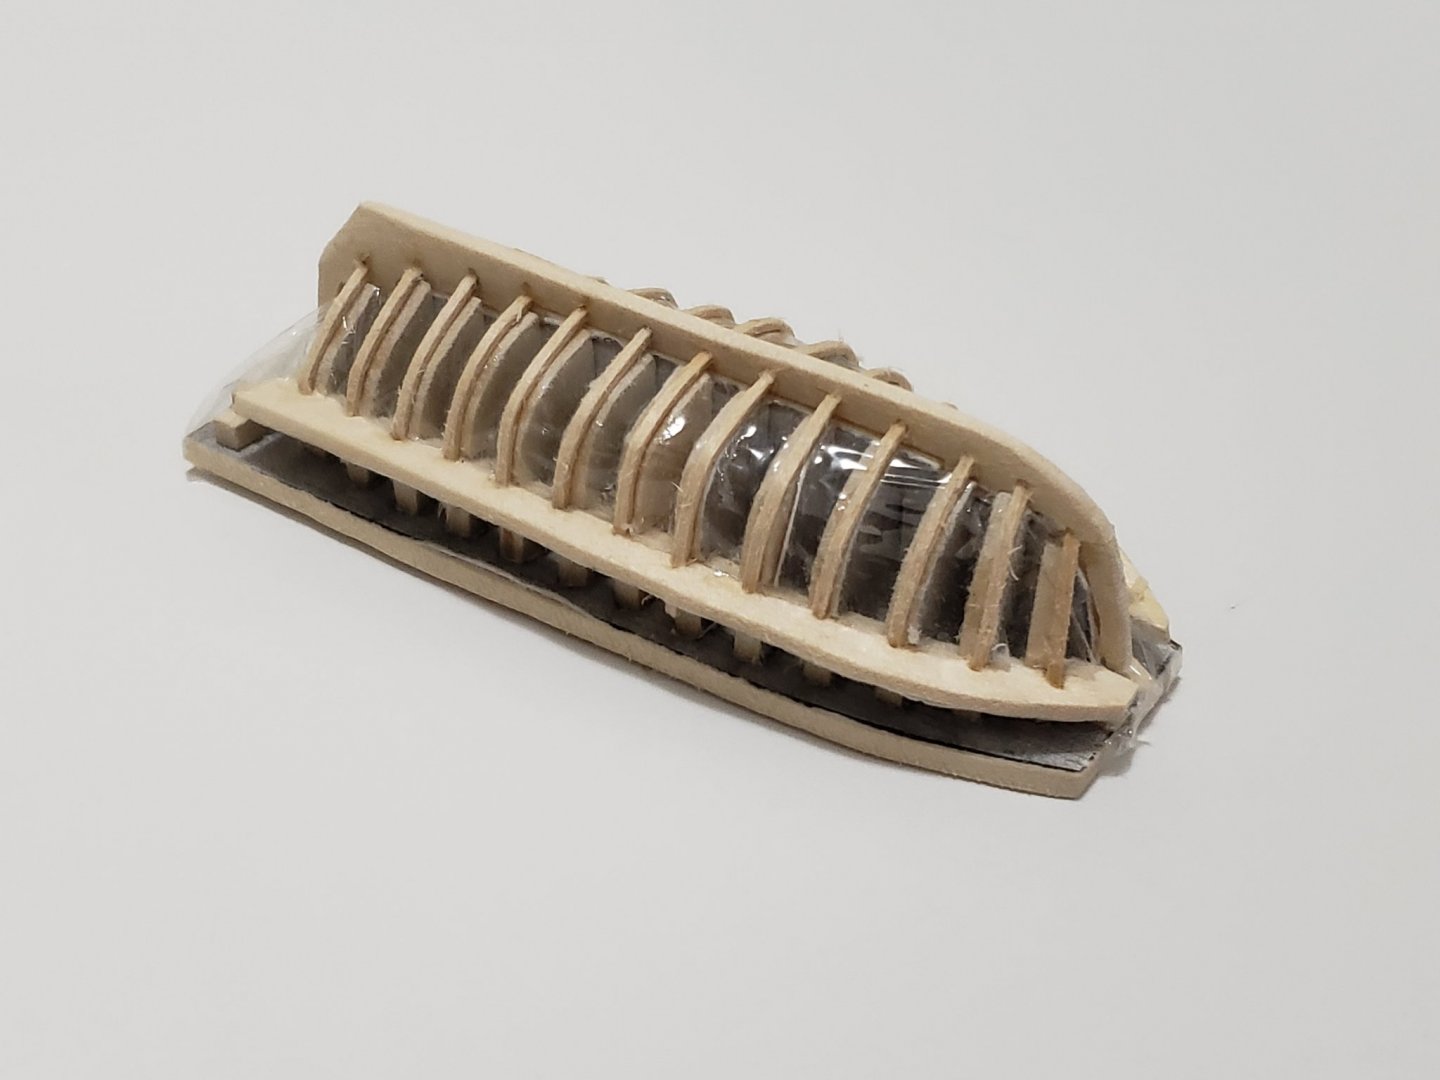
Many thanks for the words of encouragement, Justin! I finished planking today. I couldn't believe I actually completed this step once I removed the boat from the jig. Found it really cool how each of the planks hold their shapes and the entire structure didn't collapse. Especially since it was all scratch made (my first time trying something like this). I thought I'd give up mid planking 😅 The gaps in the planking will be fixed with wood glue and sawdust mixture as advised by @Gahm. I am probably going to paint the outside white to match with the longboat, so the glue+sawdust would also help stop the paint seeping inside the boat. Also before I forget, happy new year to everyone!! 😁

- 950 replies
-
- 13
-
-
- syren
- model shipways
- (and 1 more)
-
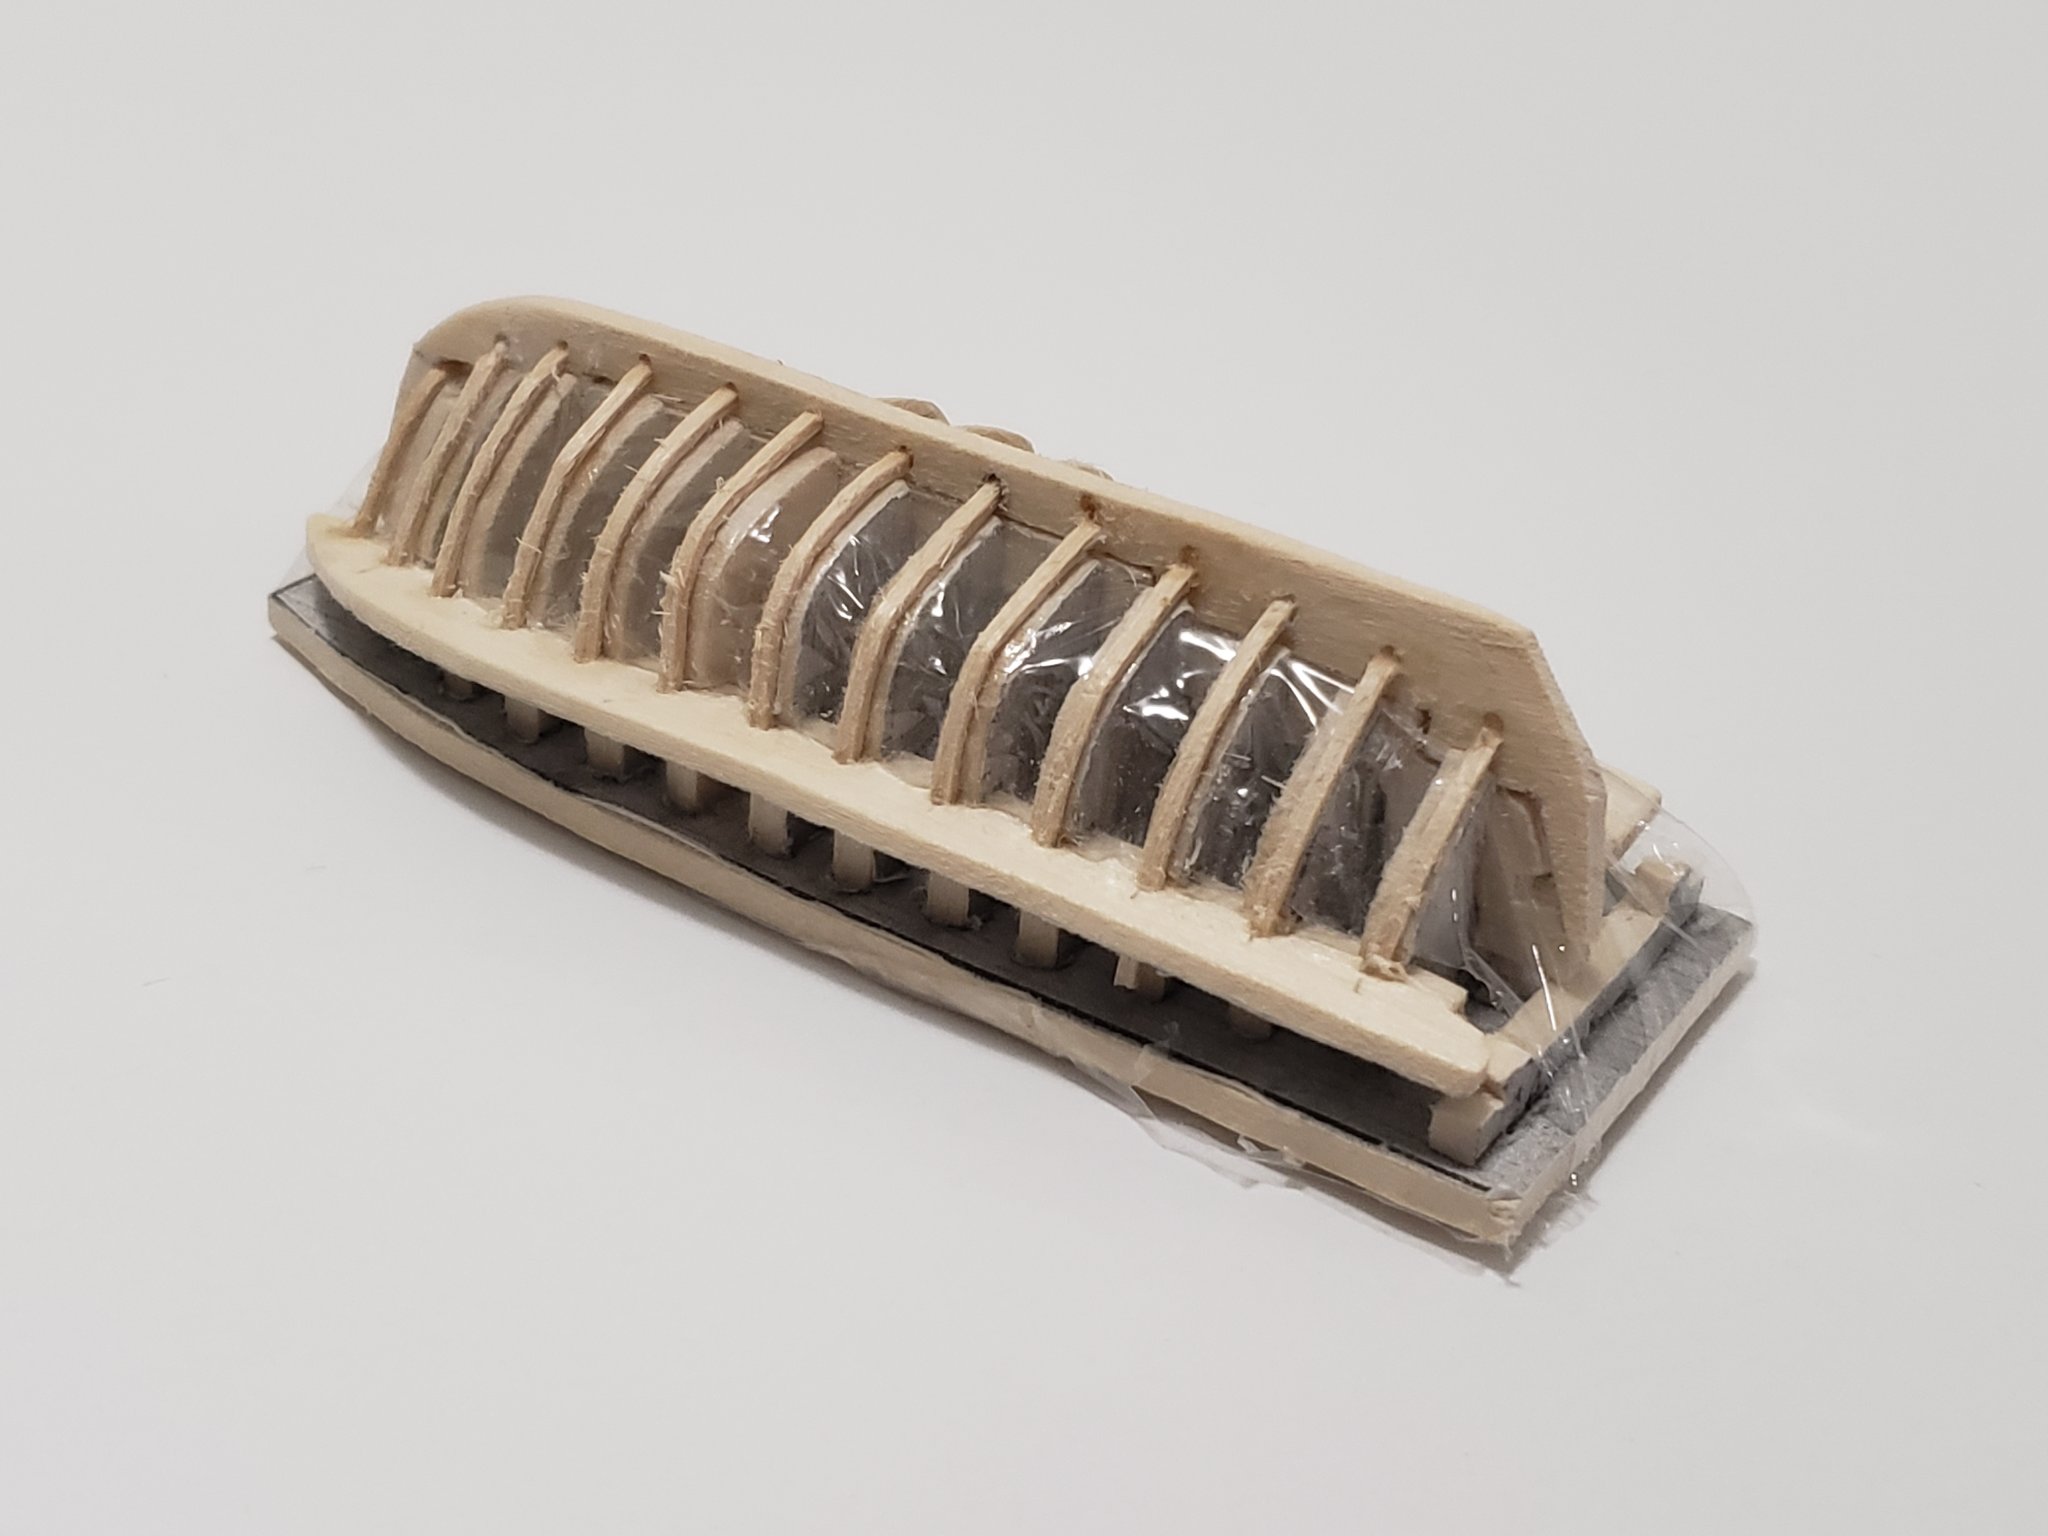
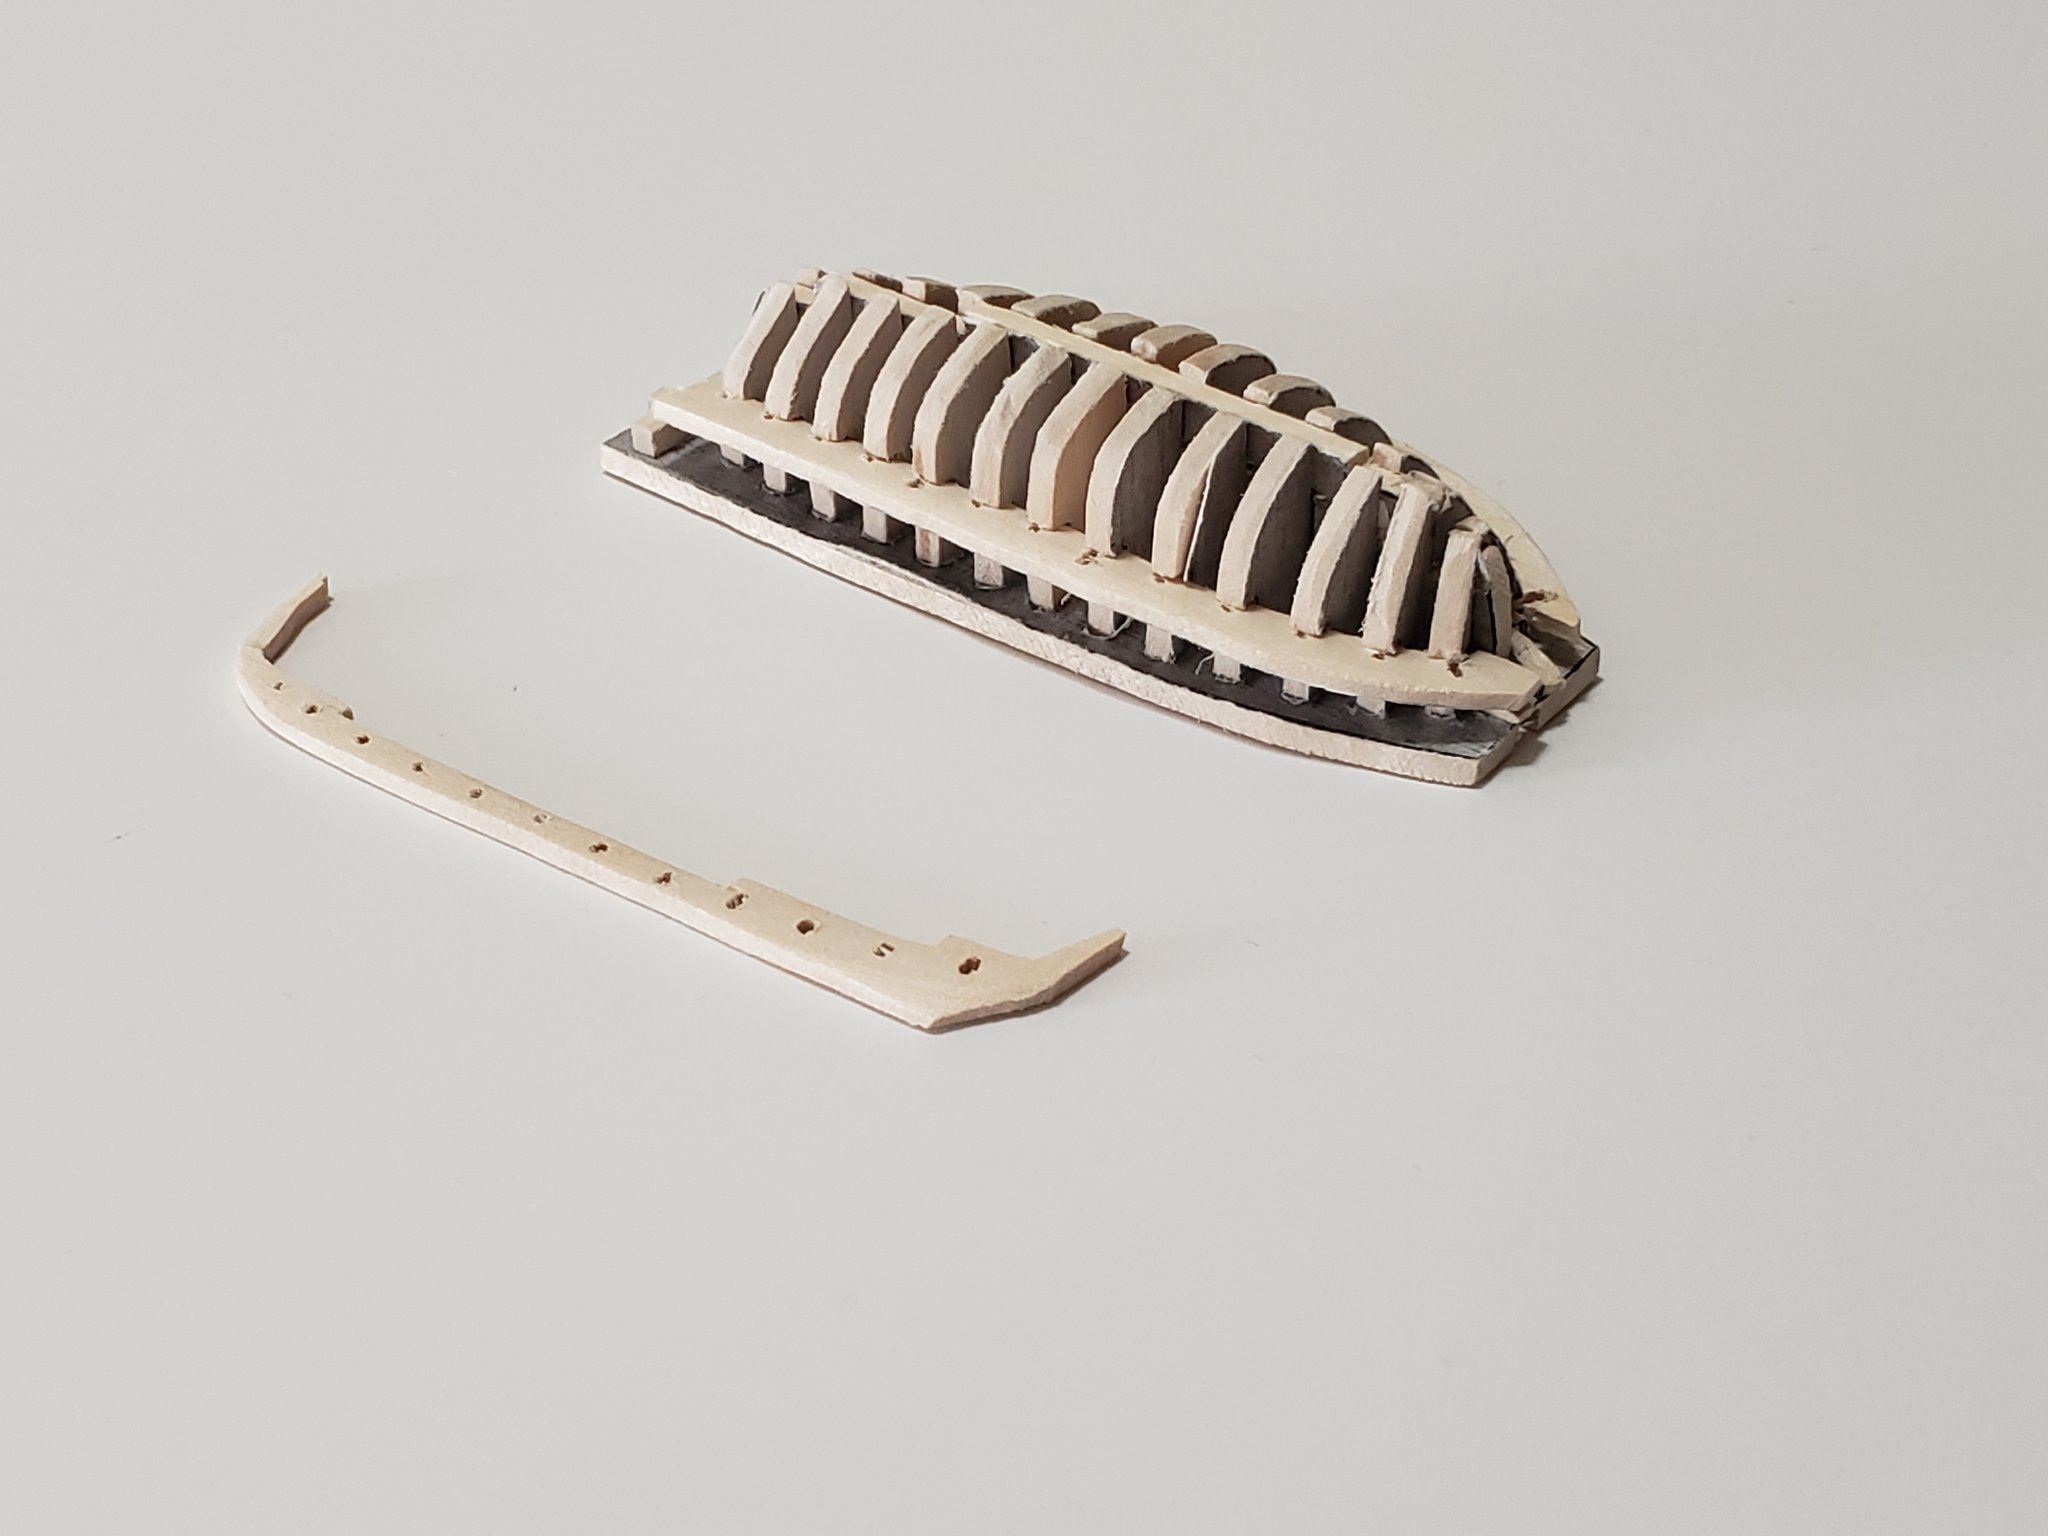
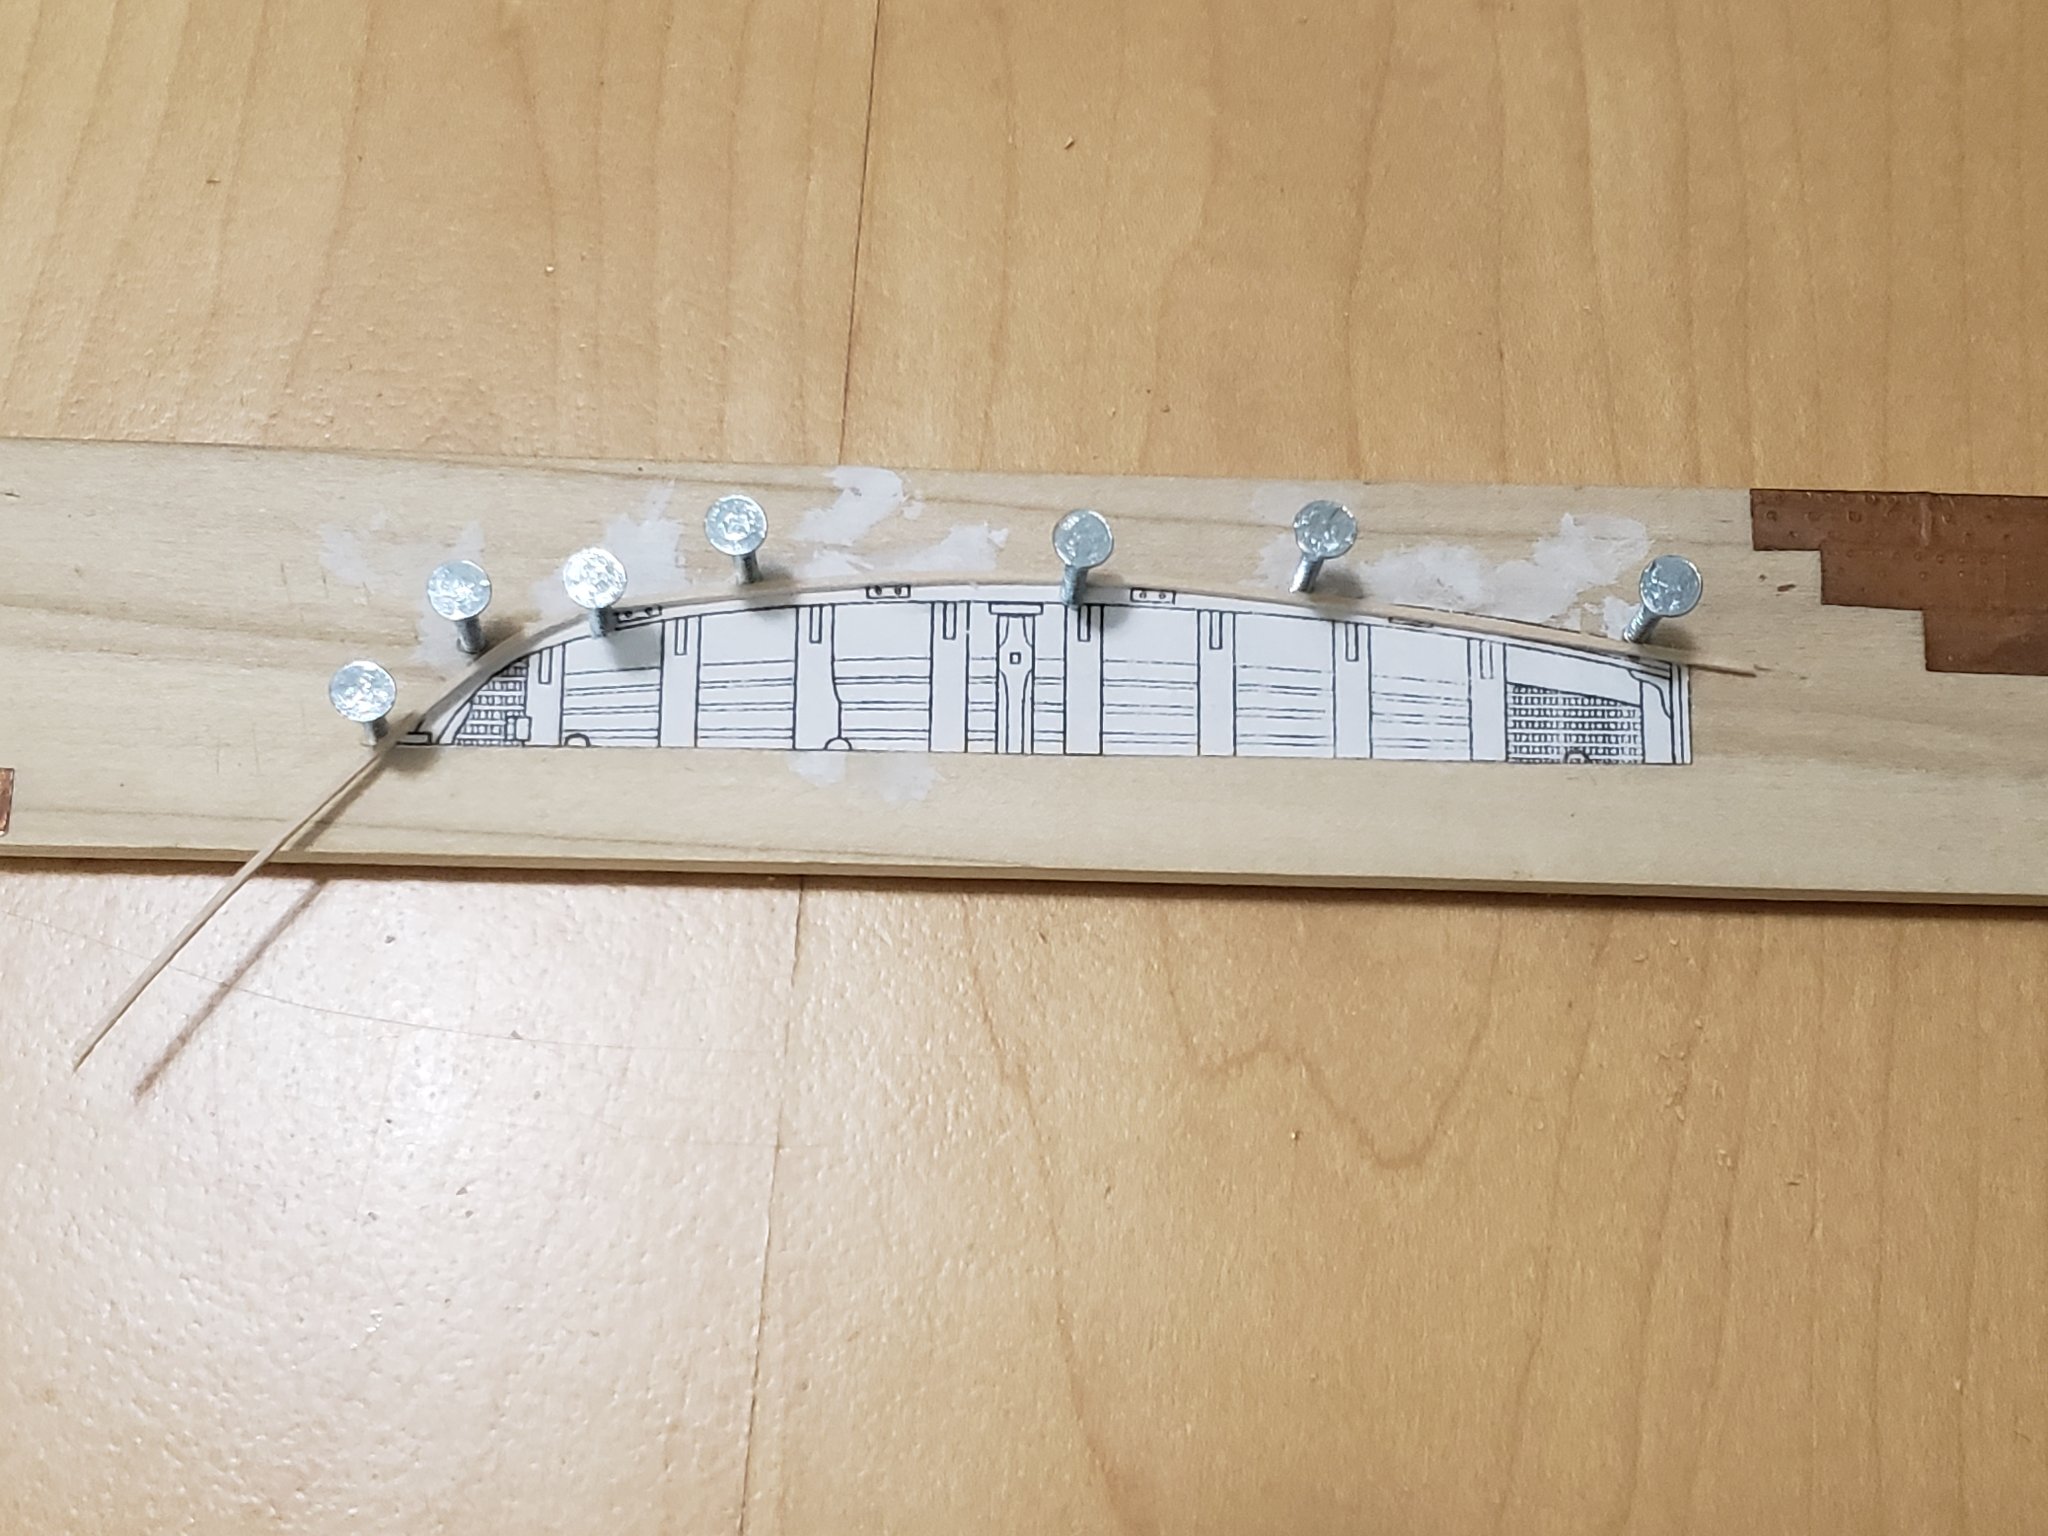
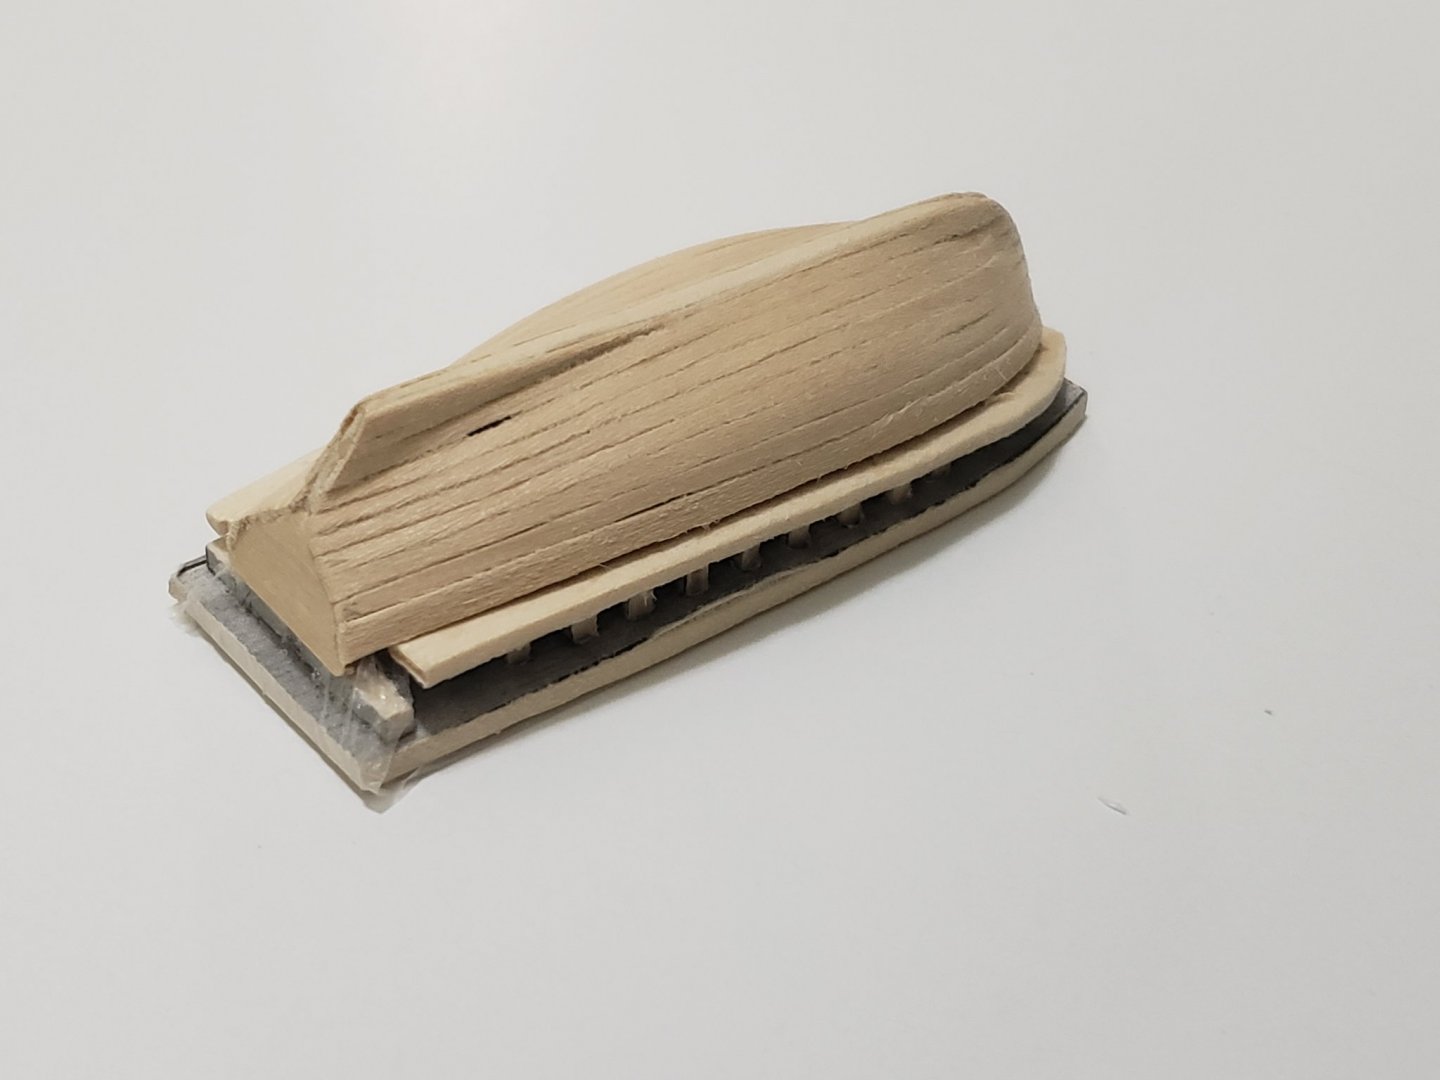
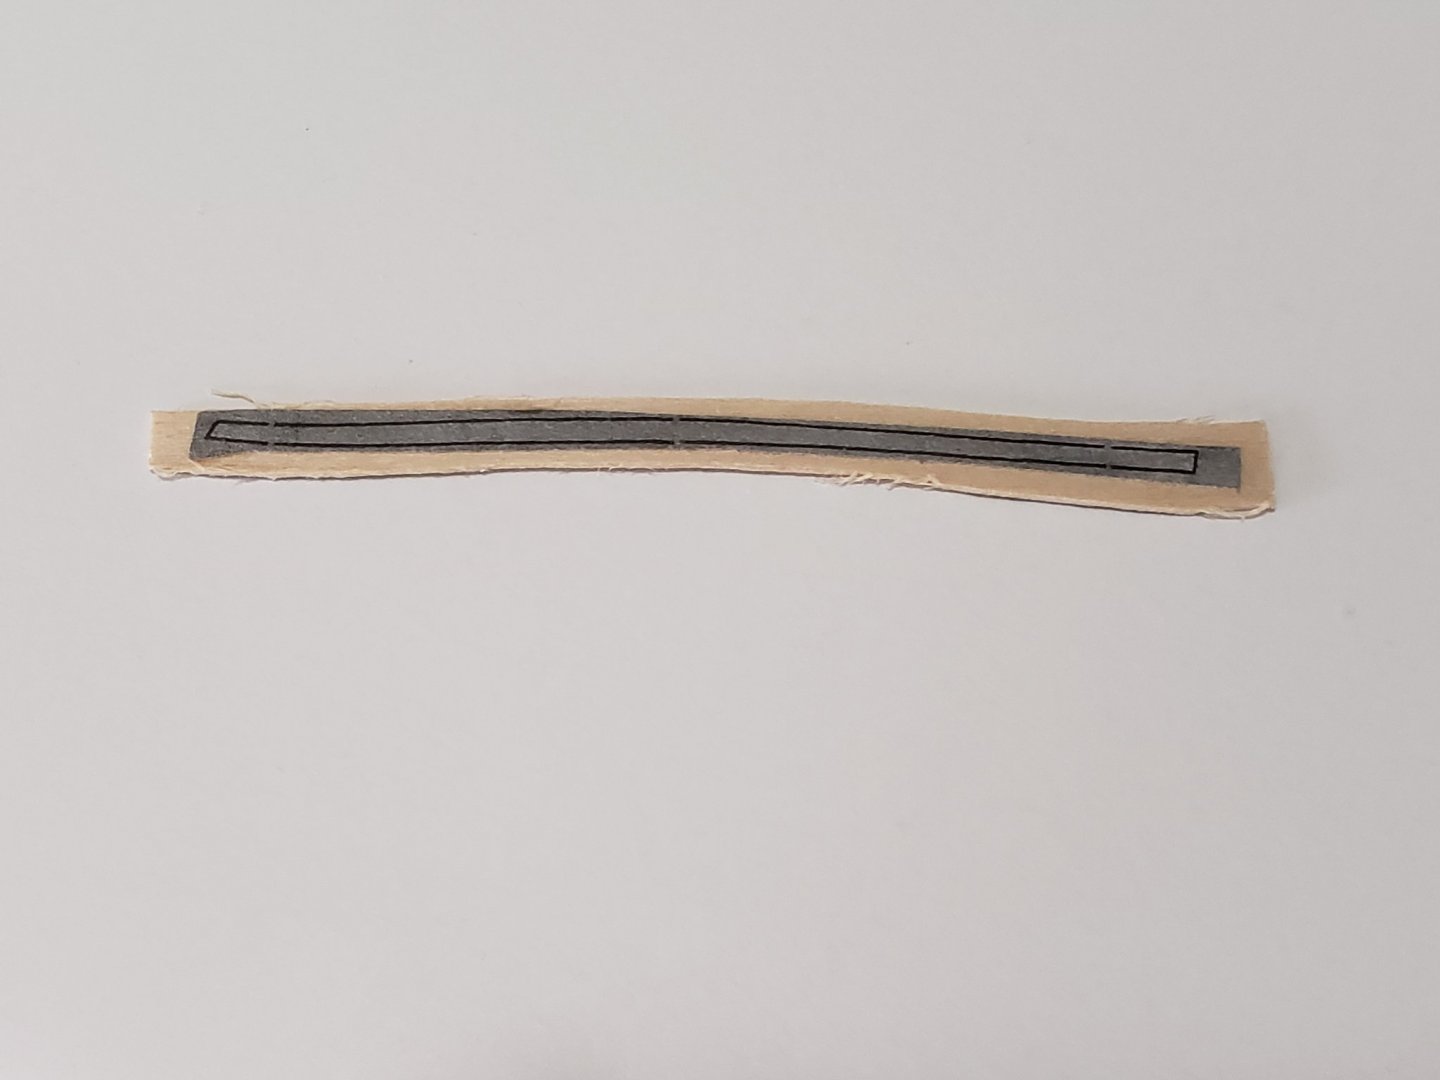
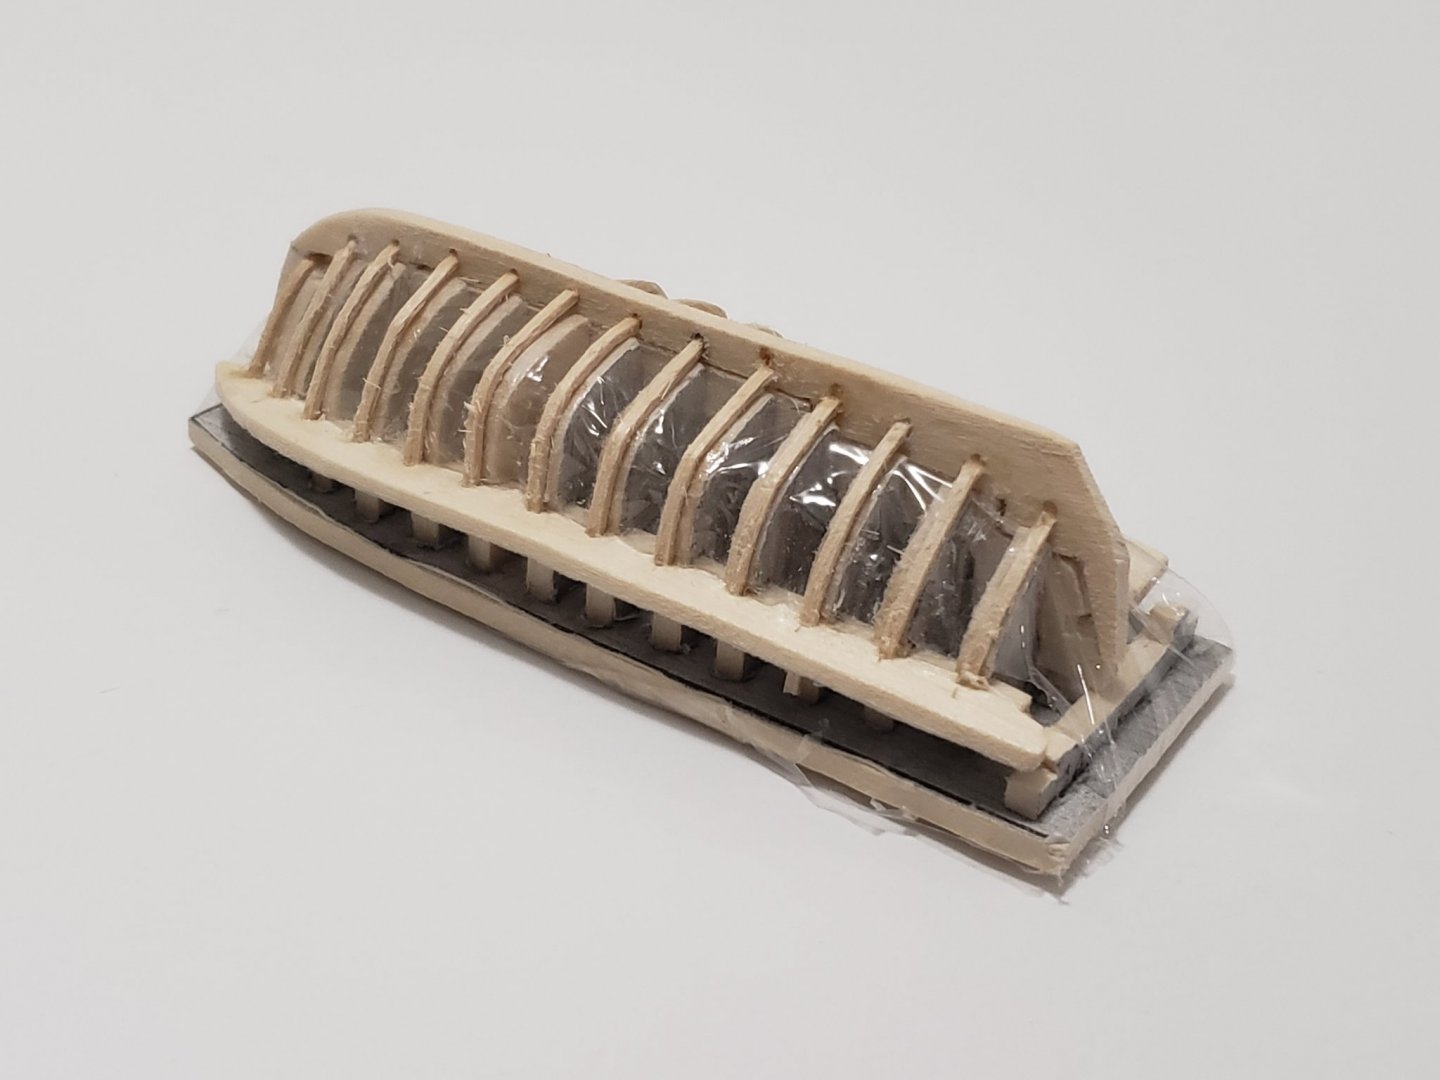
I started planking. It's not too bad (so far at least).. First I cut the jig portion of the template from my photocopy, and marked the locations where this first plank should go. Then I stuck the first plank copy on 1/32" basswood and cut it out with a jewelers saw (photo below shows 2nd plank, forgot to take a photo of the first). Had to make sure this plank is symmetrical since all other planks will follow suit. I found that cutting each plank prior to installing works well since there is no chance of any mixup I can attest that this attempt is going much better than the one I had with the MK kit. With the kit, I messed up the first initial plank, also some ribs were not 100% perpendicular.


- 950 replies
-
- 12
-
-
- syren
- model shipways
- (and 1 more)
-
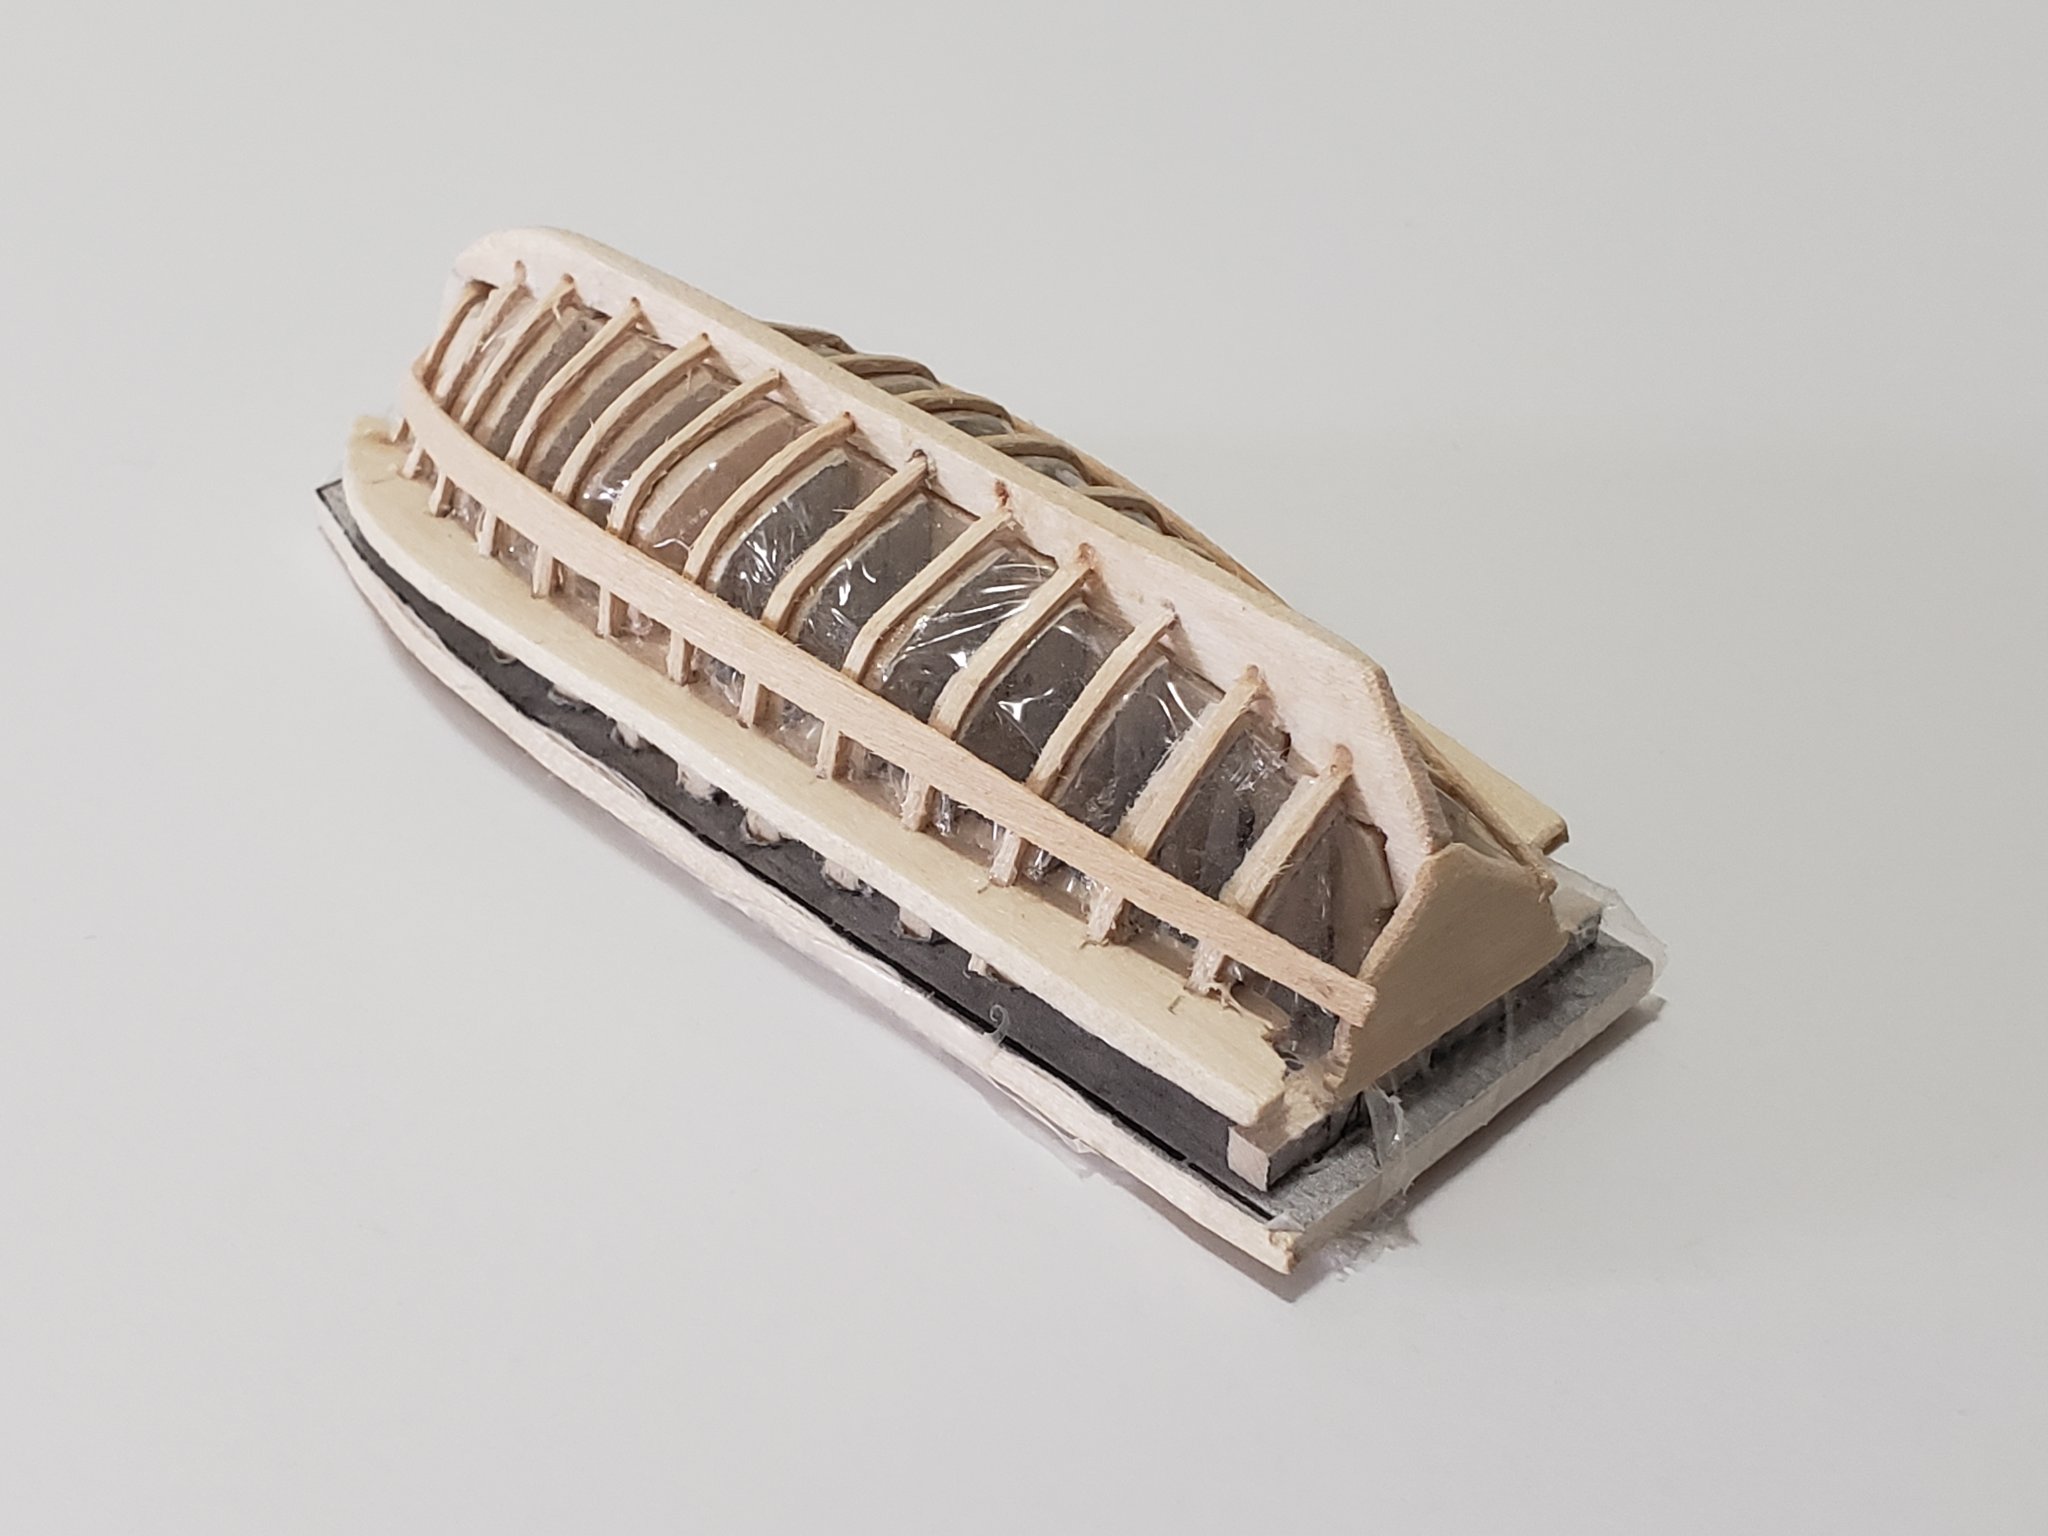
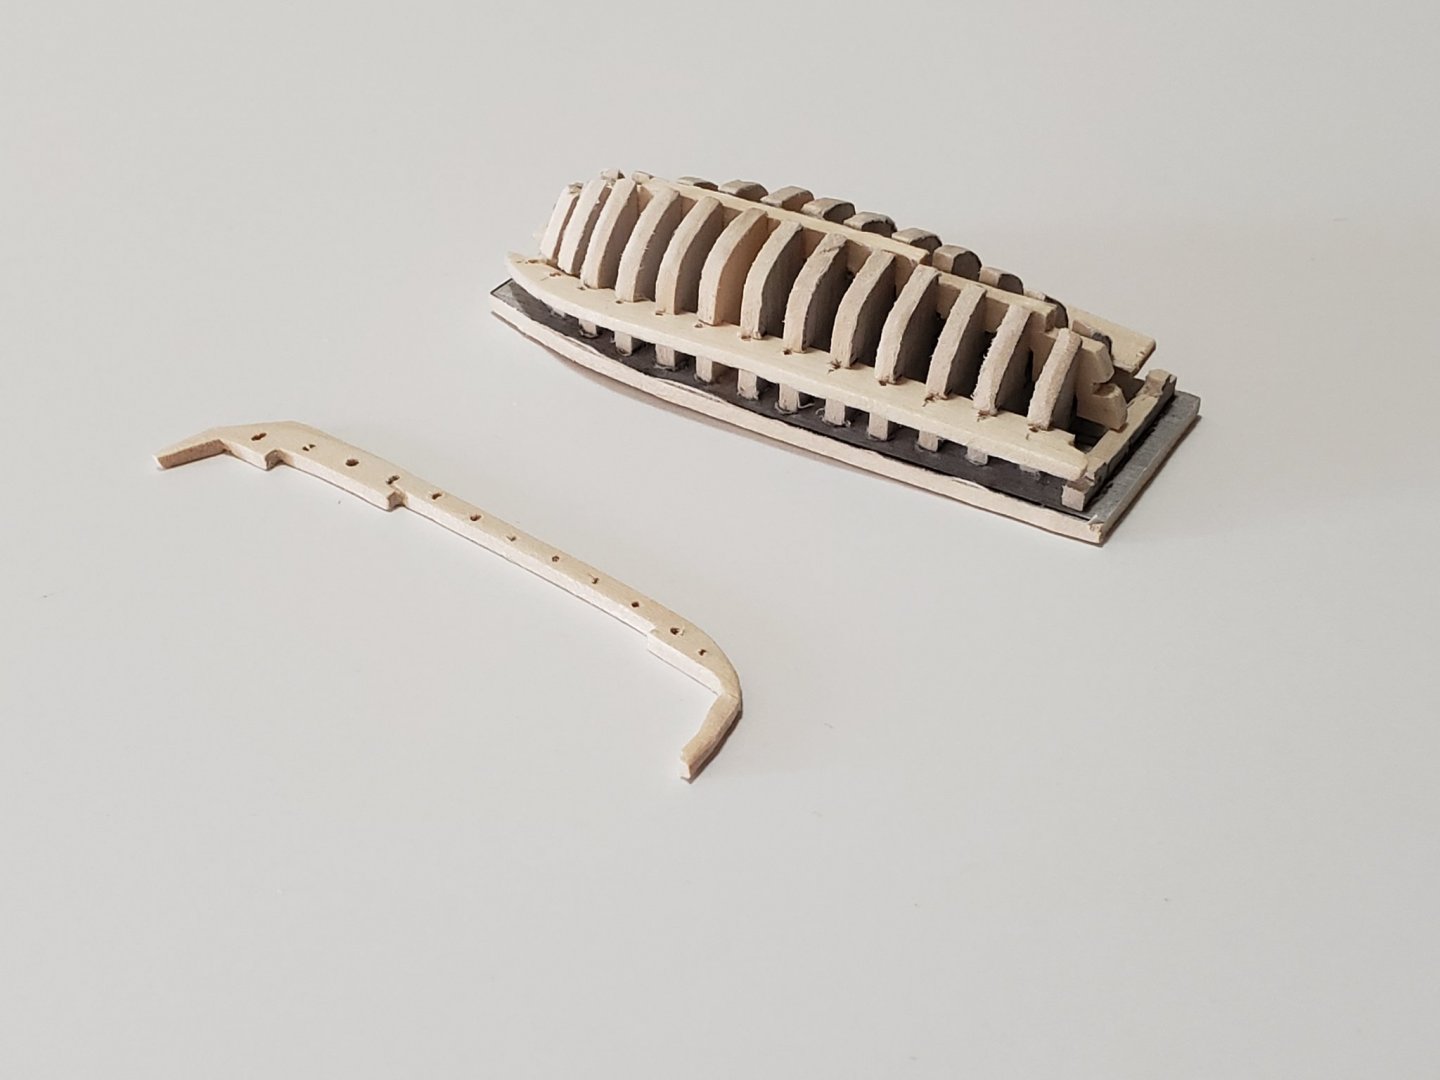
I glued in the ribs, wasn't as bad as I thought.. I hope the same can be said for the planking 😅. Also I forgot to mention, I'm so glad I bought the Dremel workstation as recommended by @NovaStorm. Made drilling holes on the jig a breeze. And no need to worry about them being uneven!
- 950 replies
-
- 10
-
-
- syren
- model shipways
- (and 1 more)
-
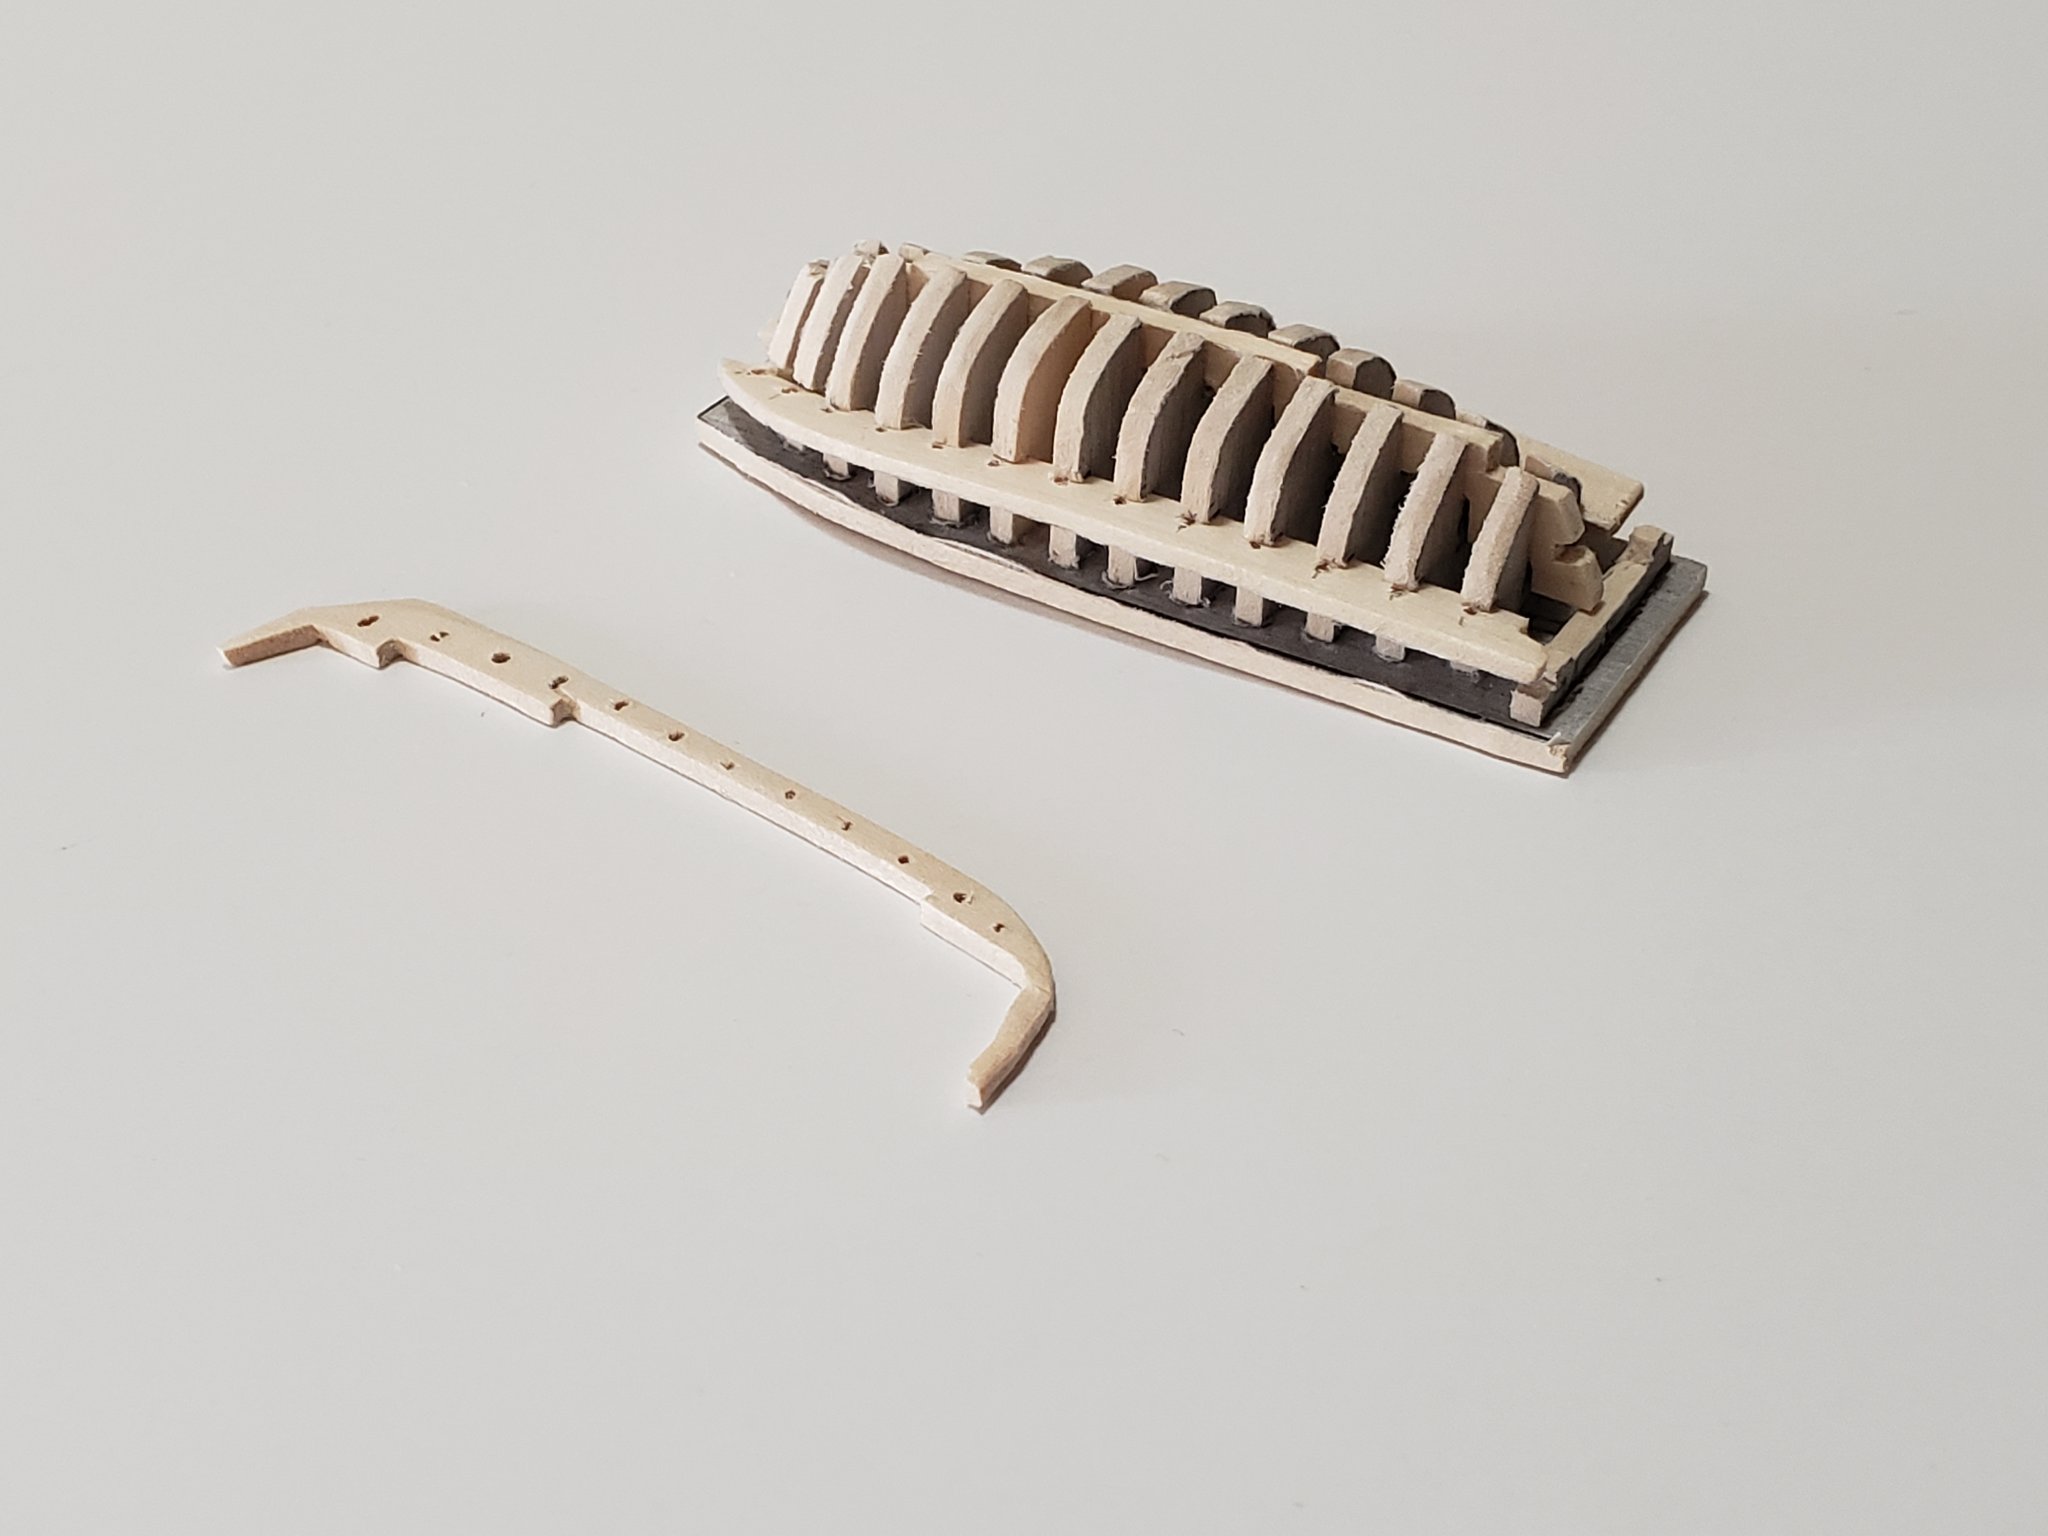
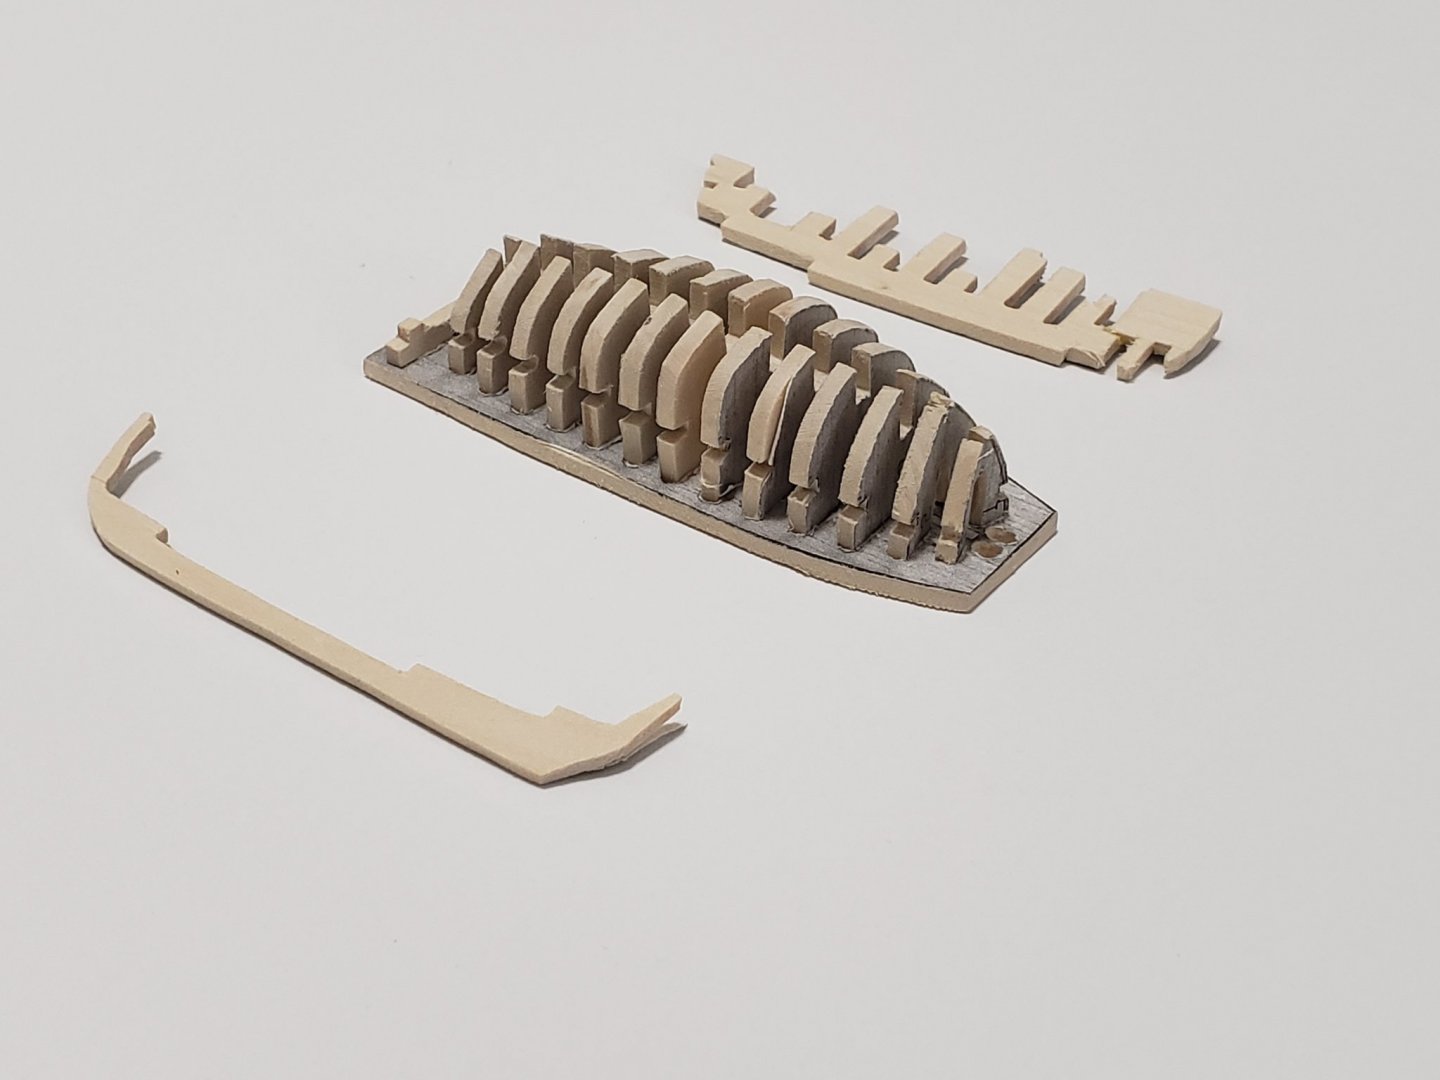
Many thanks Robin! Your words motivates me to not give up too soon!! I finished building the jig. I'll let the pics do the talking: I'll now attempt on fixing the ribs after covering the jig with some plastic wrap.. I'll be using basswood for the ribs, so I hope it goes smoothly and not too many swear words than necessary.....

- 950 replies
-
- 8
-
-
- syren
- model shipways
- (and 1 more)
-
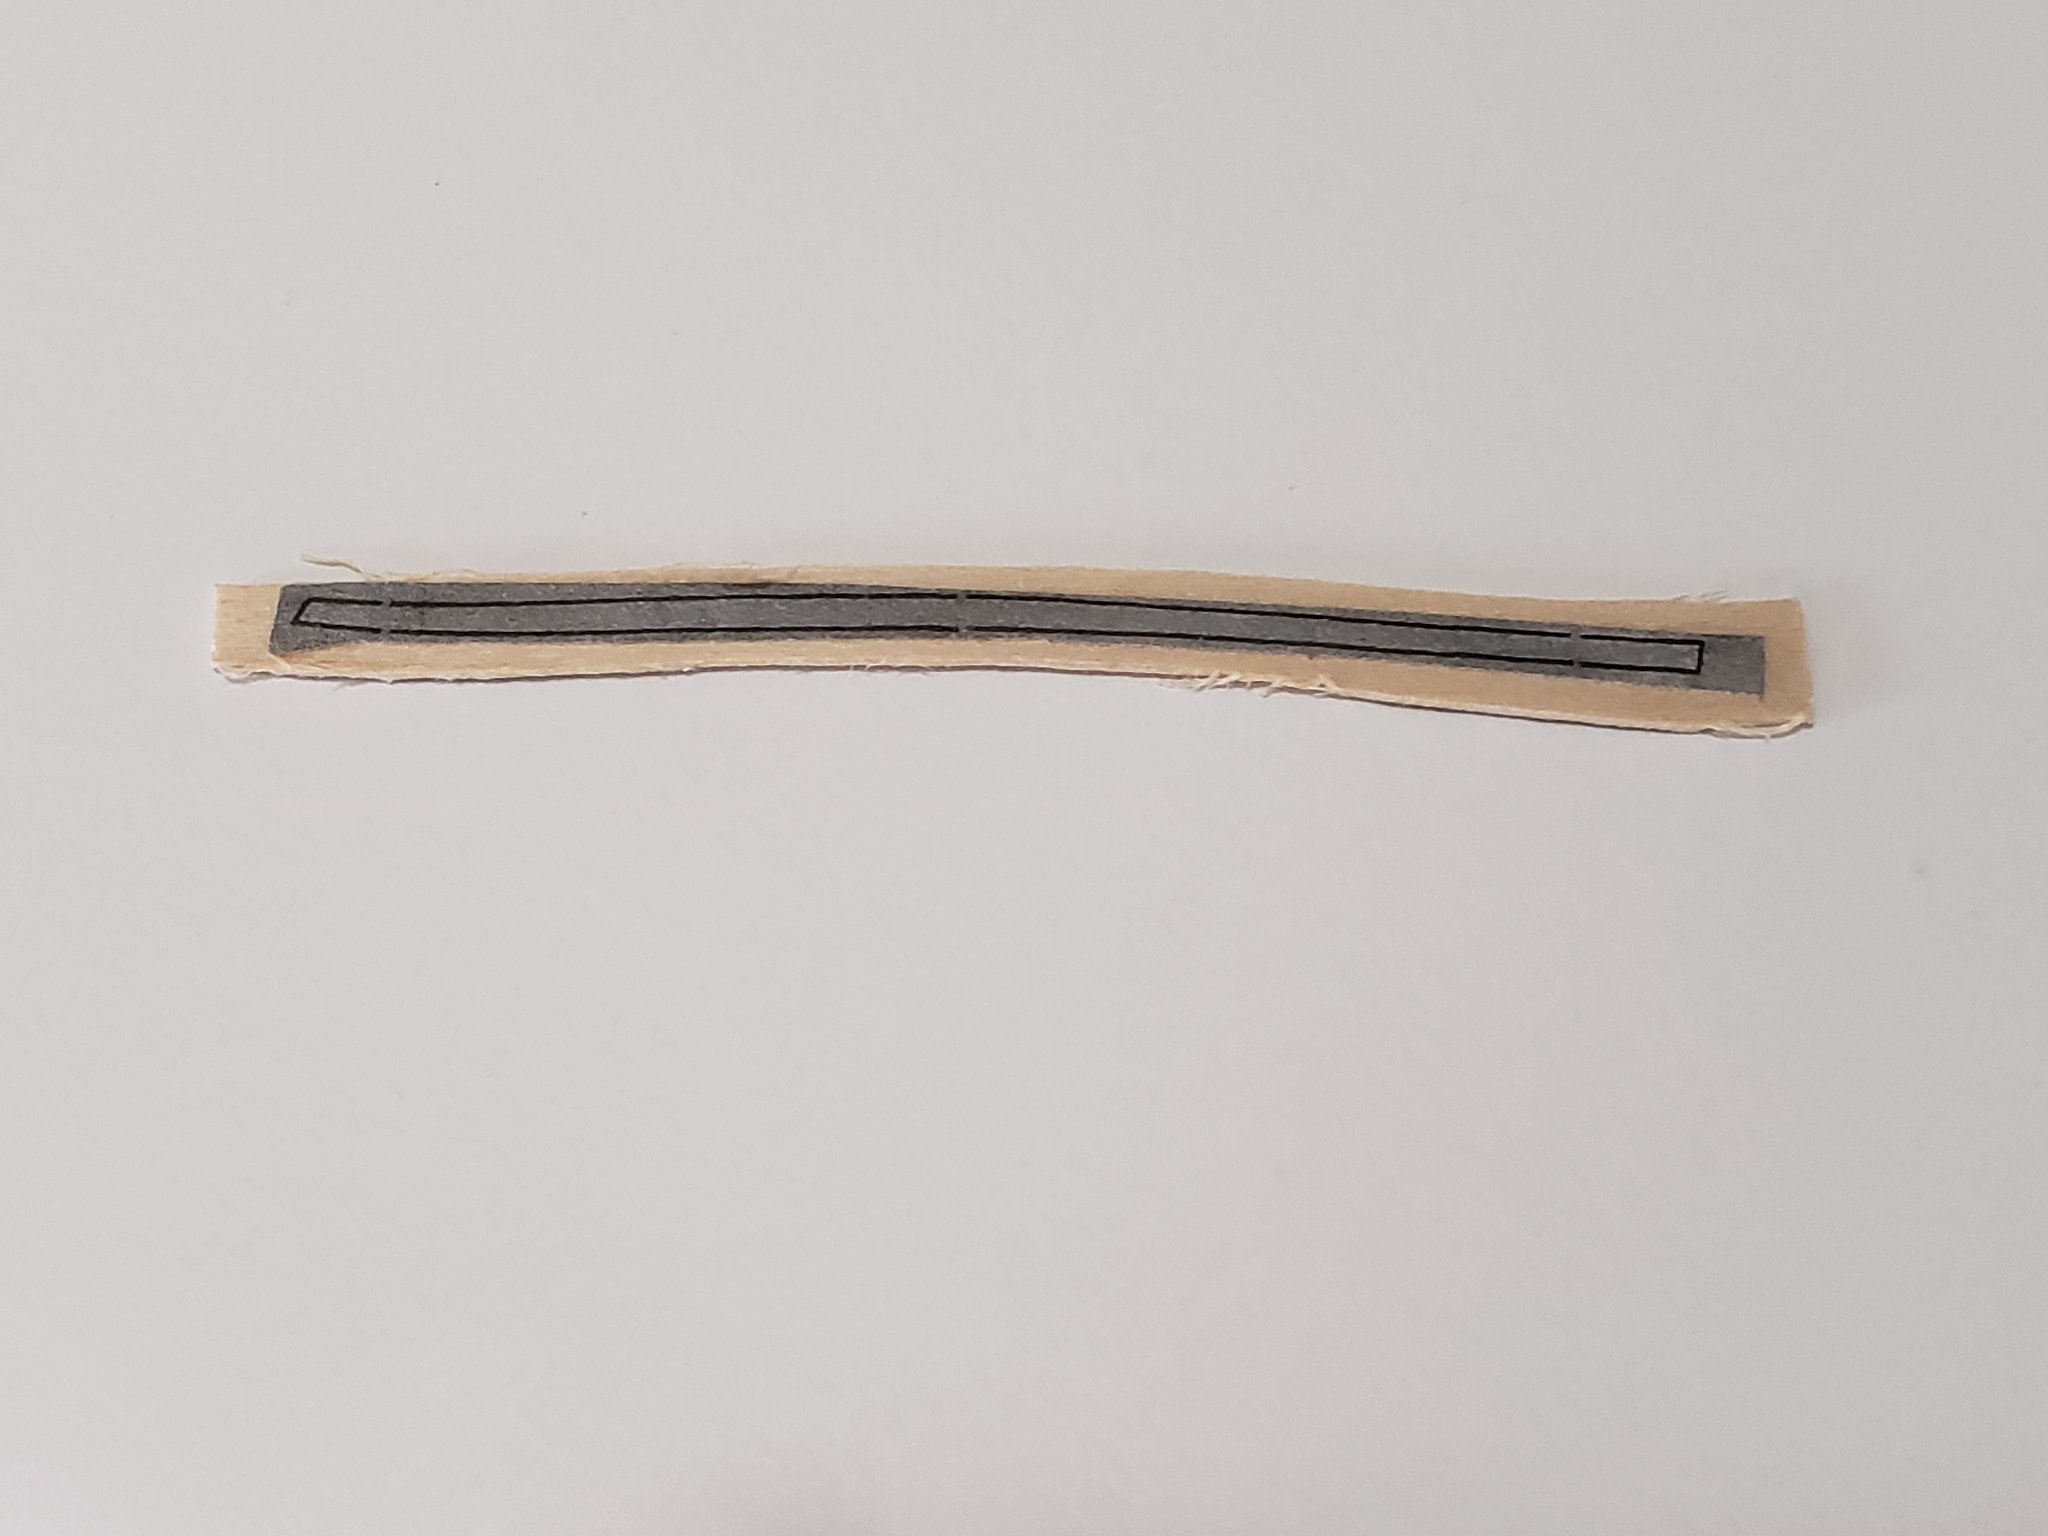
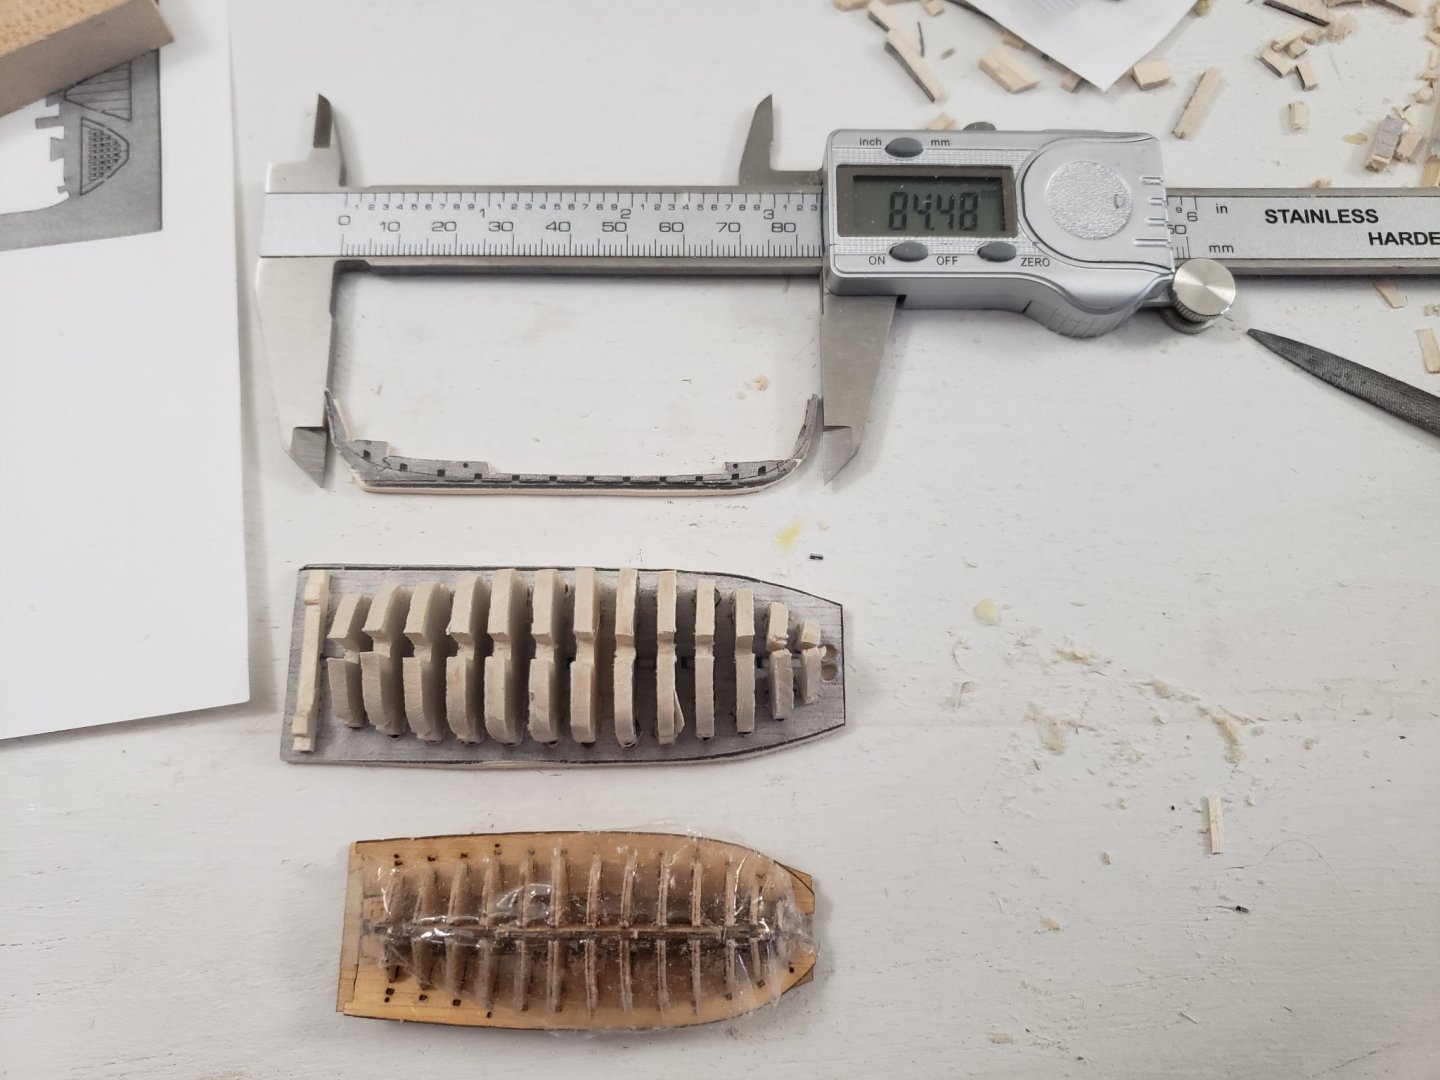
Thank you Hamilton! Thanks Robin! I guess once I finish planking I'll know for sure if it is worth continuing or letting it go 😅. Here is a pic of the scaling (comparing with the Master Korabel jig) if it helps with yours. I measured the length of the backbone as well
- 950 replies
-
- 5
-
-
- syren
- model shipways
- (and 1 more)
-
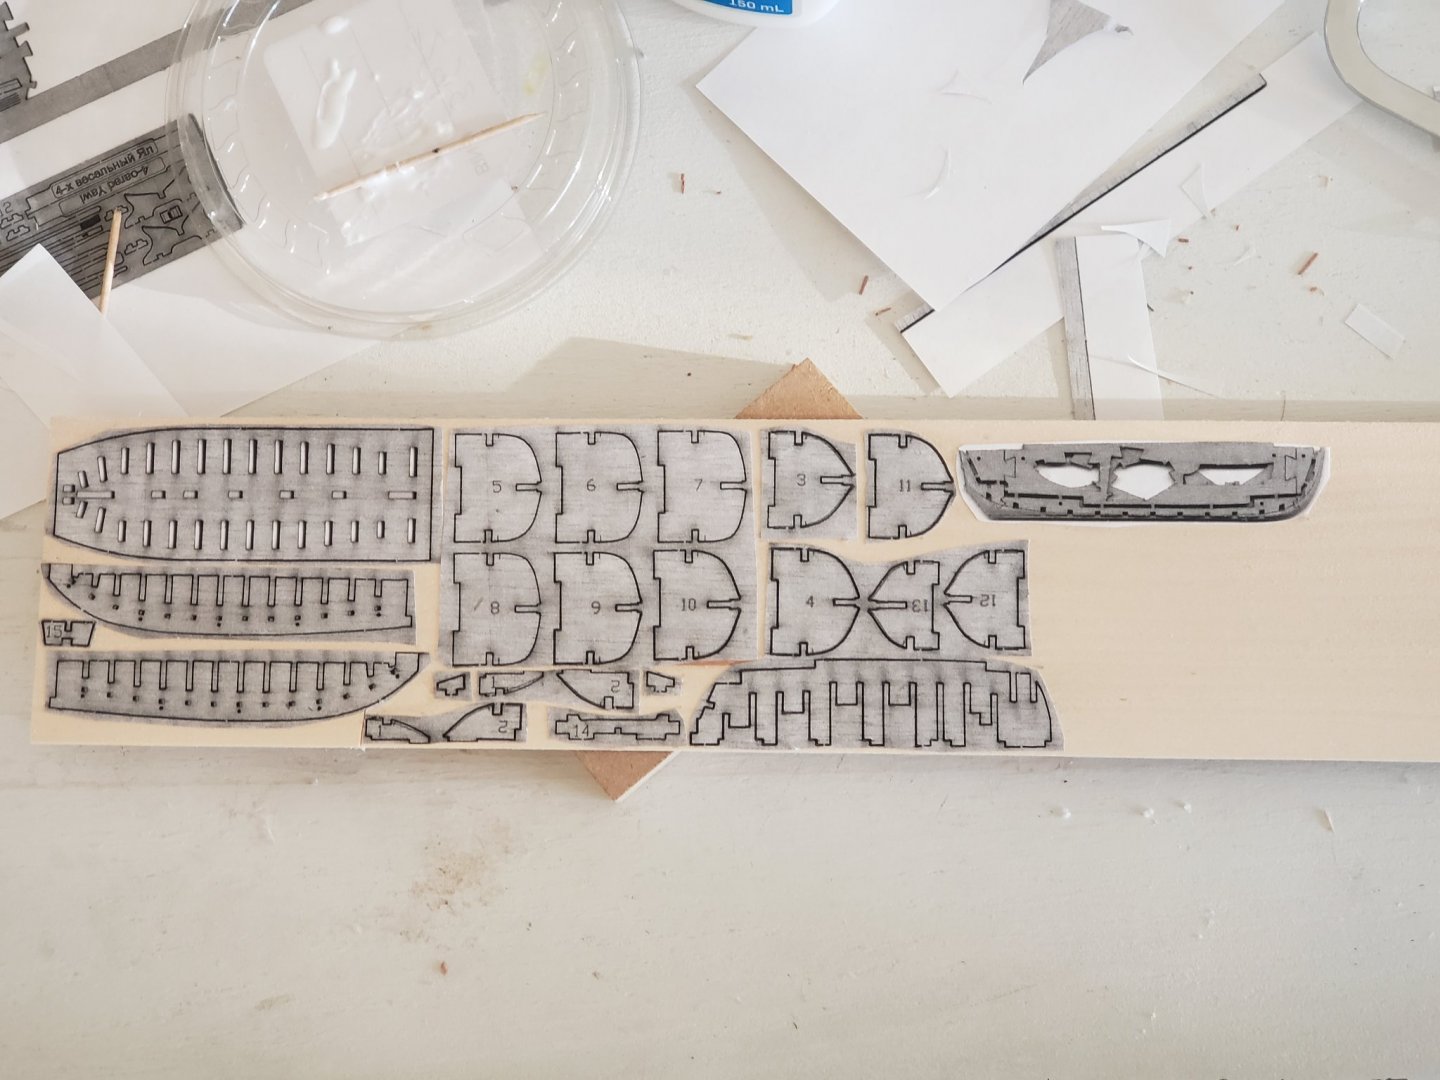
Thanks Justin. I may just scrap the idea of a jollyboat entirely if I feel like I'm struggling too much or don't have good enough results.... 😬 Anyways, I think I'm heading in the right direction so far. Today I started making the jig for planking. I used 3/32" basswood for this and cut everything with a jewelers saw for precision. The photo below shows everything just dry fitted.. Also I should note, I am following what @Gahm did for his jollyboat by photocopying the MK kit's sheets with x1.25 scaling. For the backbone for the boat I may need to reduce the thickness a bit.. P.S. I am thinking of cutting out the pieces jotting out in the center piece (right most part from above) so that it is easier to fit in. This won't affect anything except for the jig being a bit less secure.. Next steps would be to glue the assembly, attach the side curved pieces of the jig, then start on the planking
- 950 replies
-
- 8
-
-
- syren
- model shipways
- (and 1 more)
-
Thank you Steven! Maybe I'm just being too self-critical 😅 I finished assembling the Master Korabel's jolly boat to see how the pieces fit together. The planking was really tough, and I ended up with many gaps between them. I also struggled with getting the inner planks to be symmetric because I messed up aligning the upper most plank. These mistakes could be because the boat is so small... The scratch version of the 1:64 scale boat now seems even more daunting than before, but I'll give it my best shot! Hoping I don't make the same mistakes as this initial attempt..


- 950 replies
-
- 15
-
-
- syren
- model shipways
- (and 1 more)
-
Awesome progress! I'm so glad you were able to fix the thickness issue. Also your decking looks superb! And nice start to the quarter badges. They require a lot of work but is very well worth the effort!
-
If you are ok to wait a bit longer, Amati will produce what would be the best Victory model on the market.. I'm having my eye on that once it is released. Here is a build log of the prototype if you are interested:
-
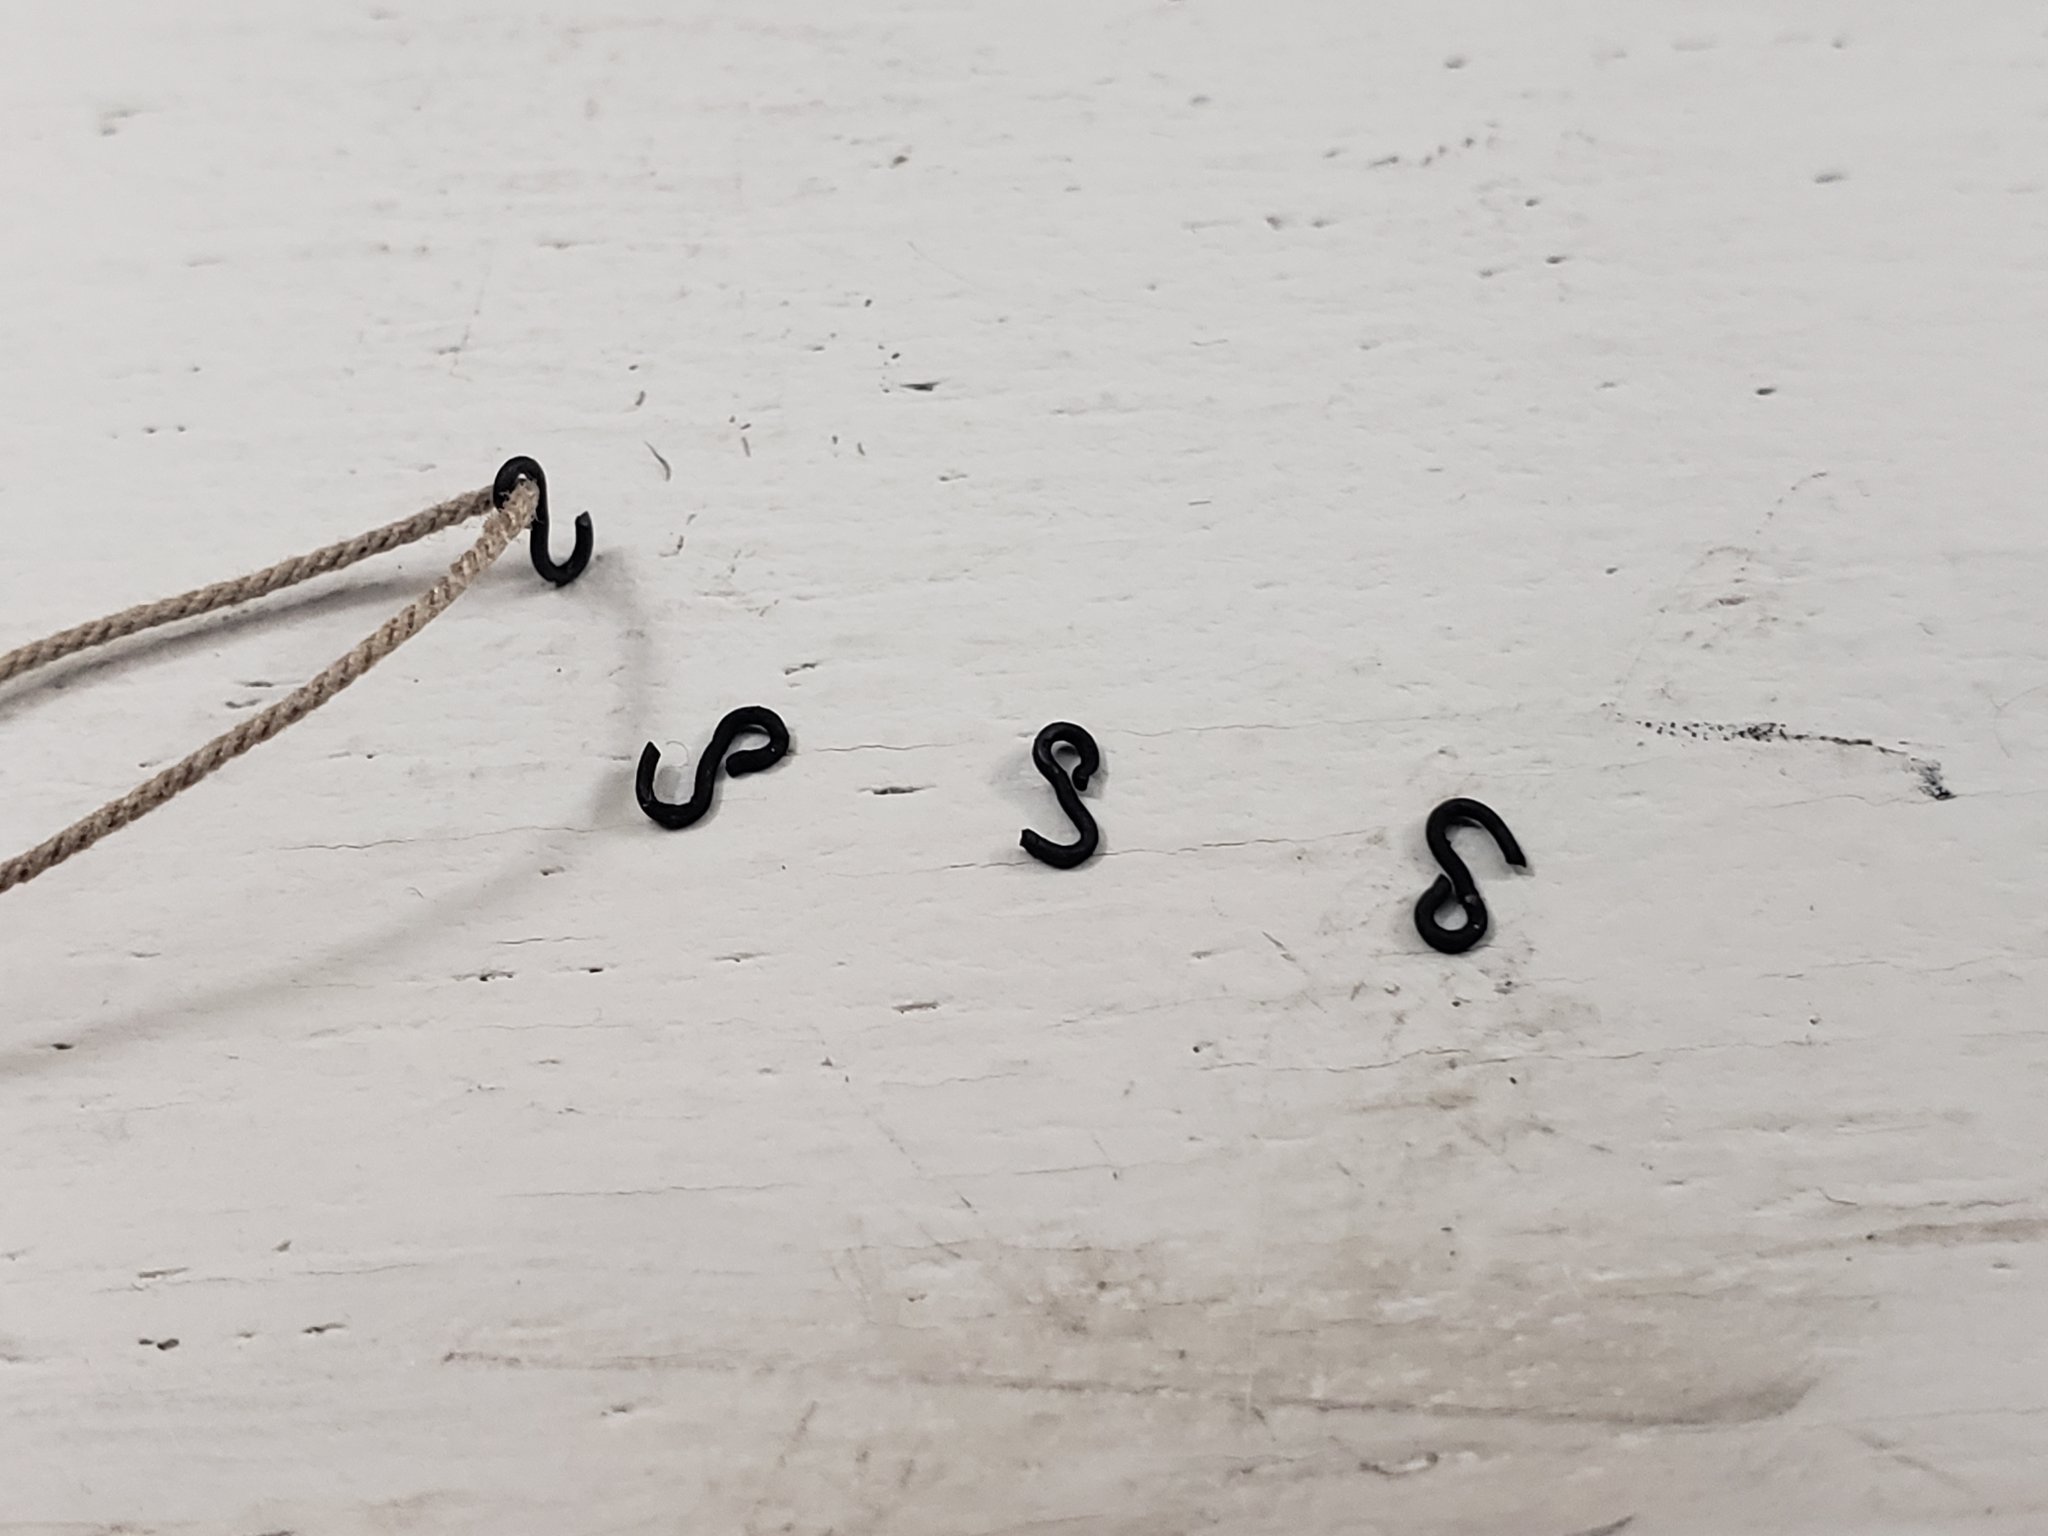
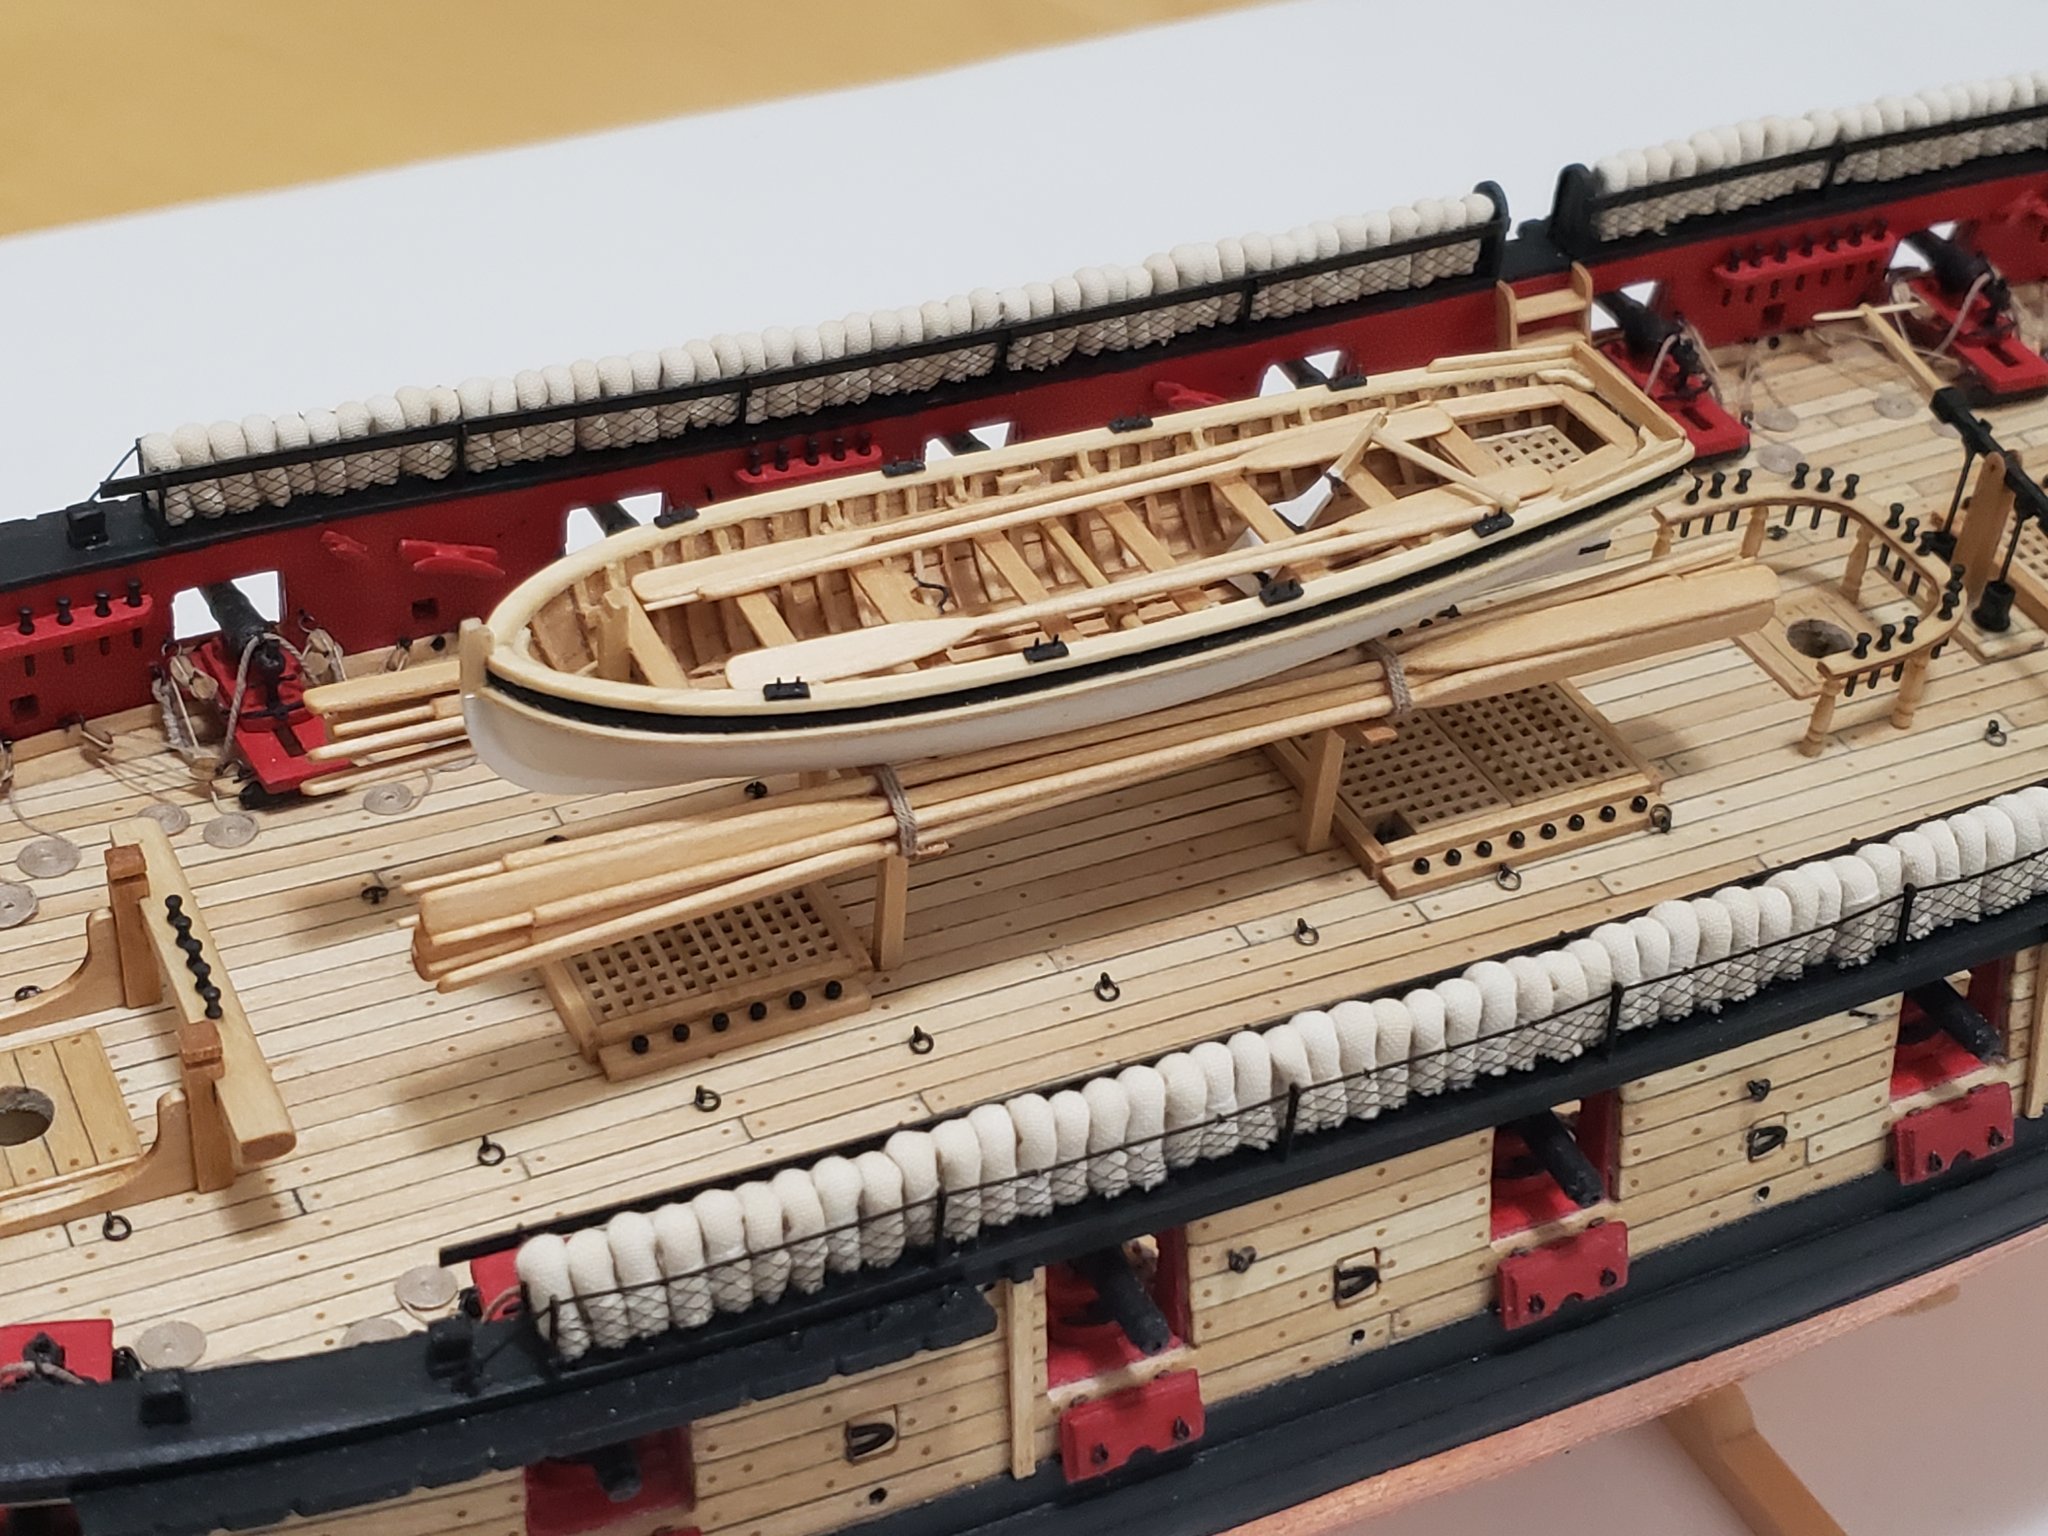
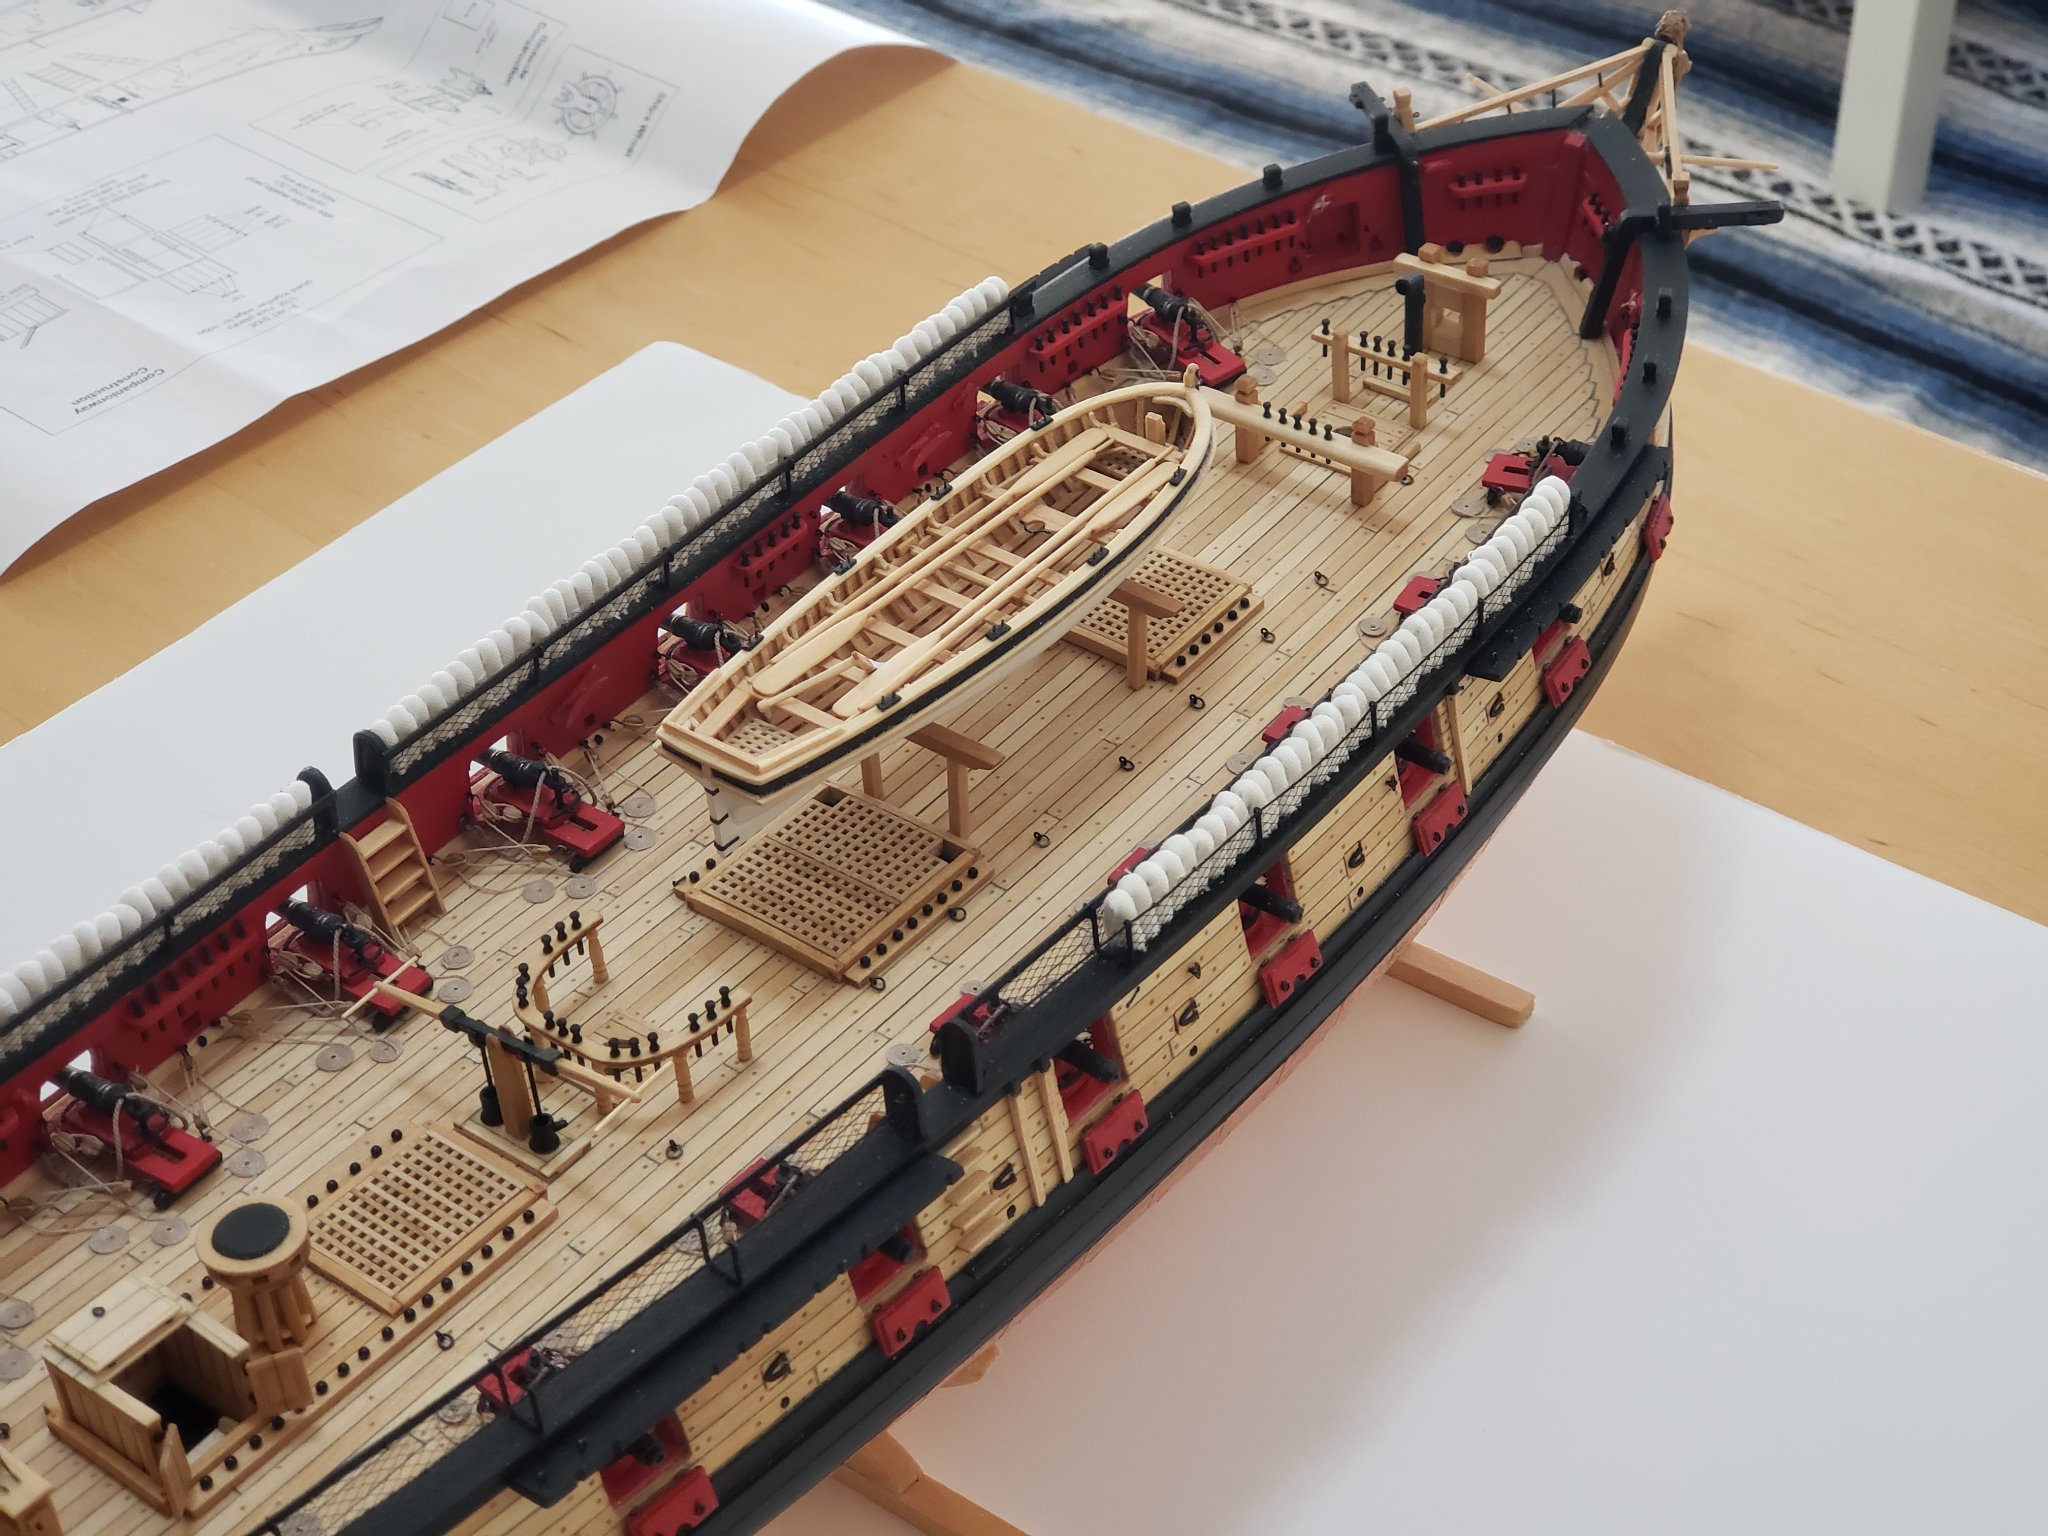
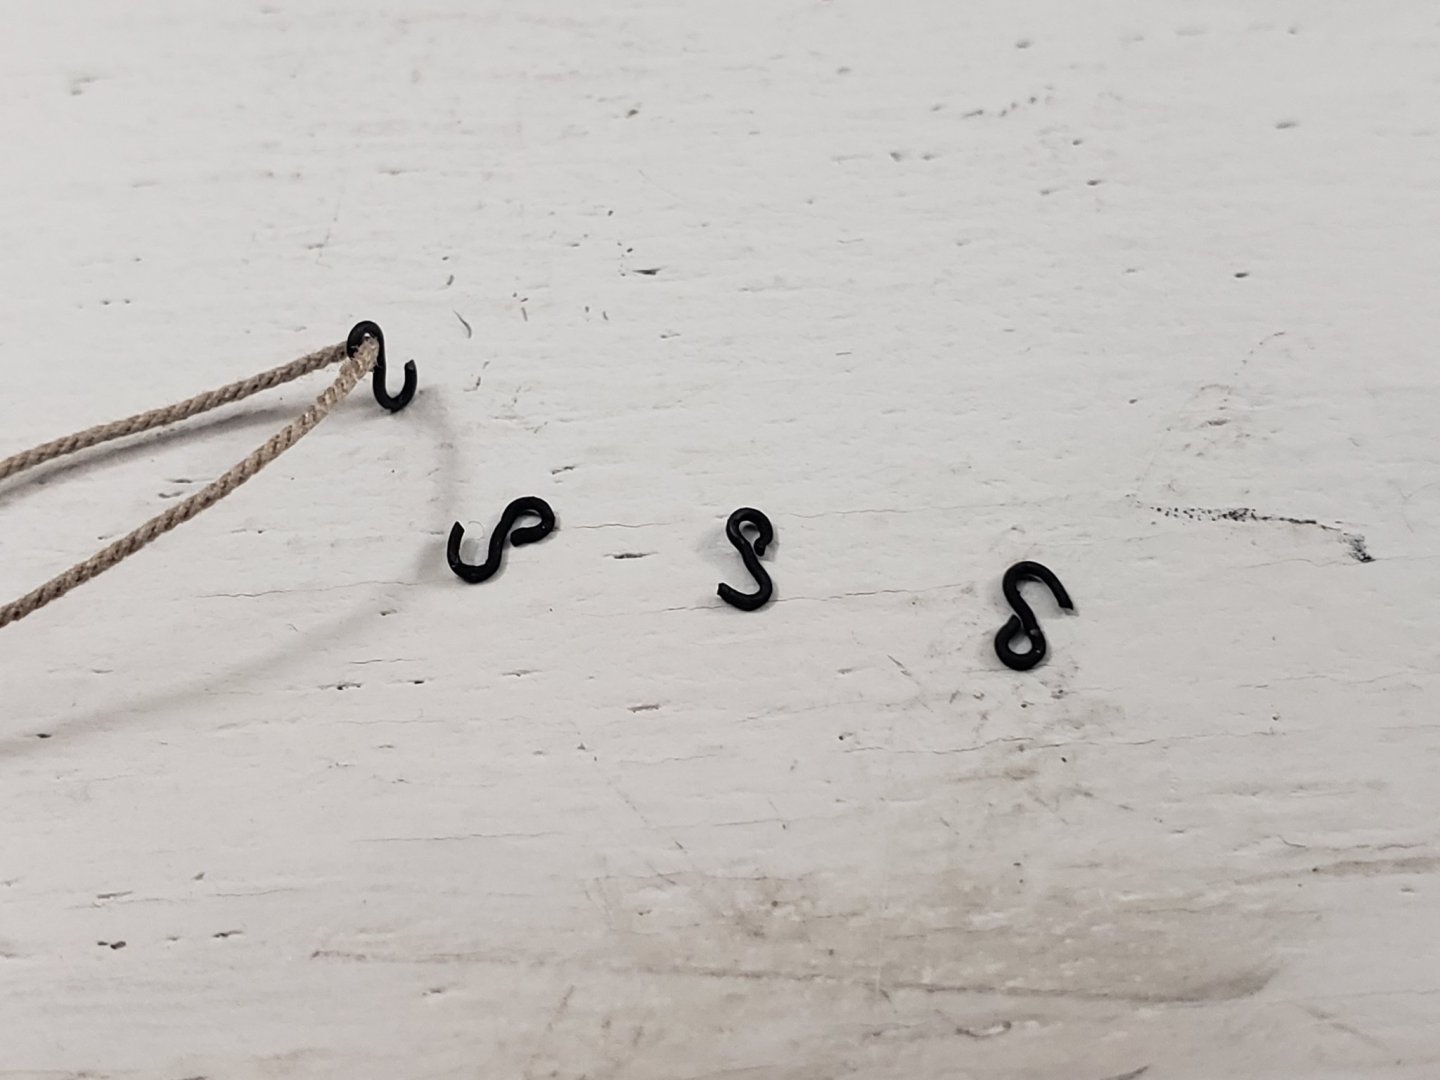
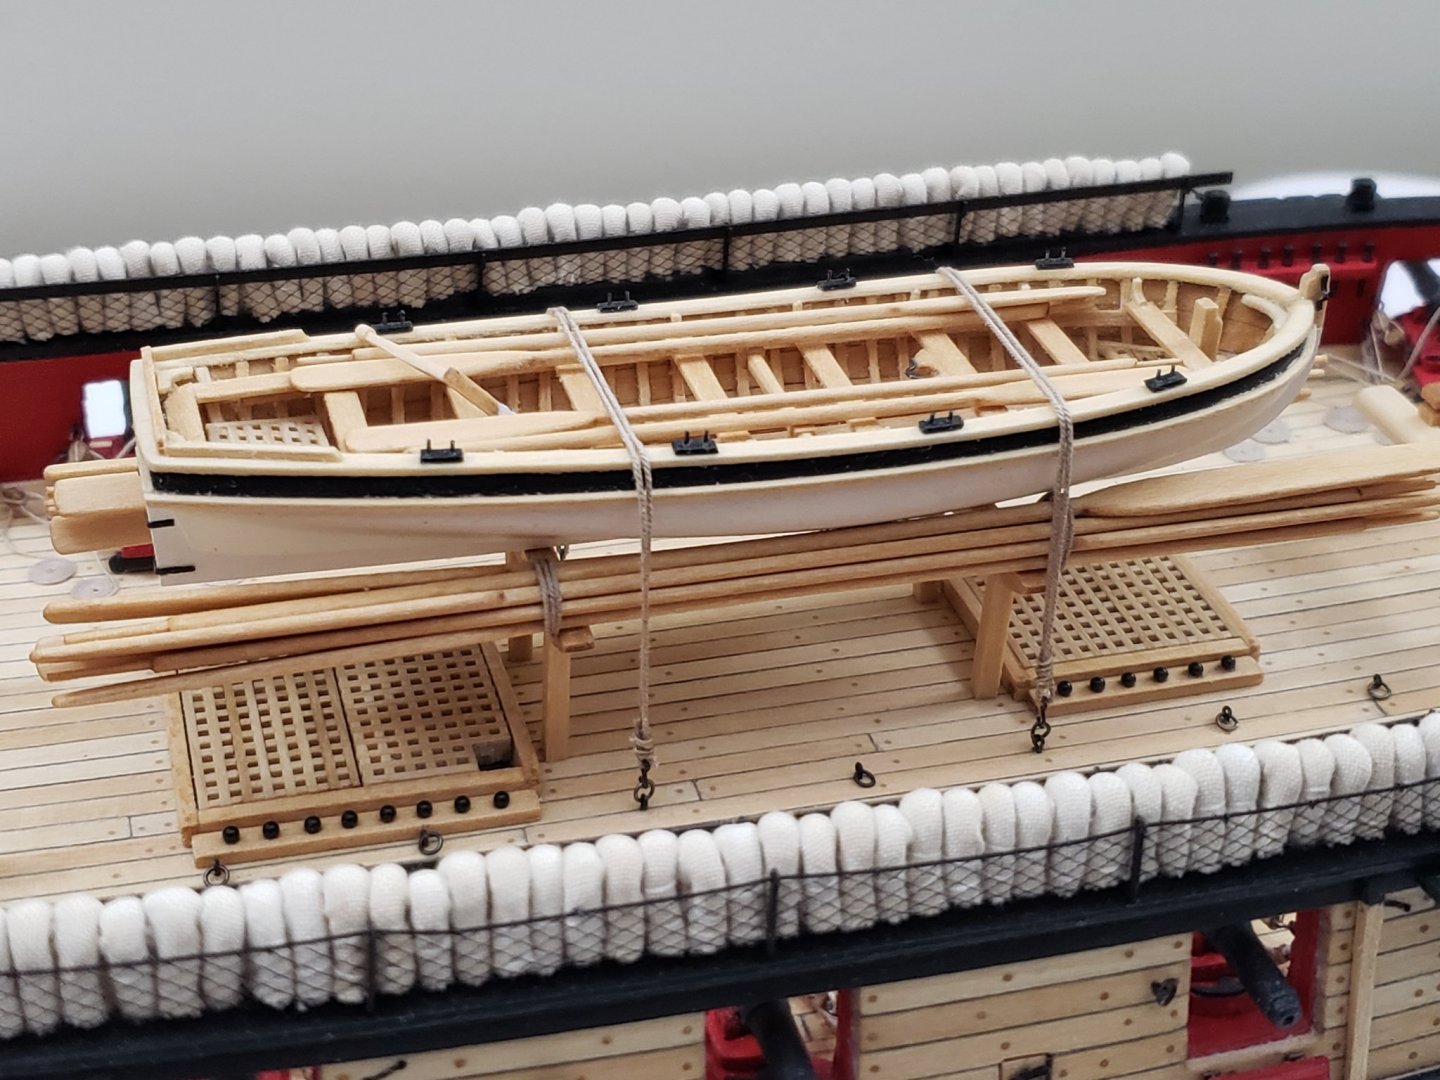
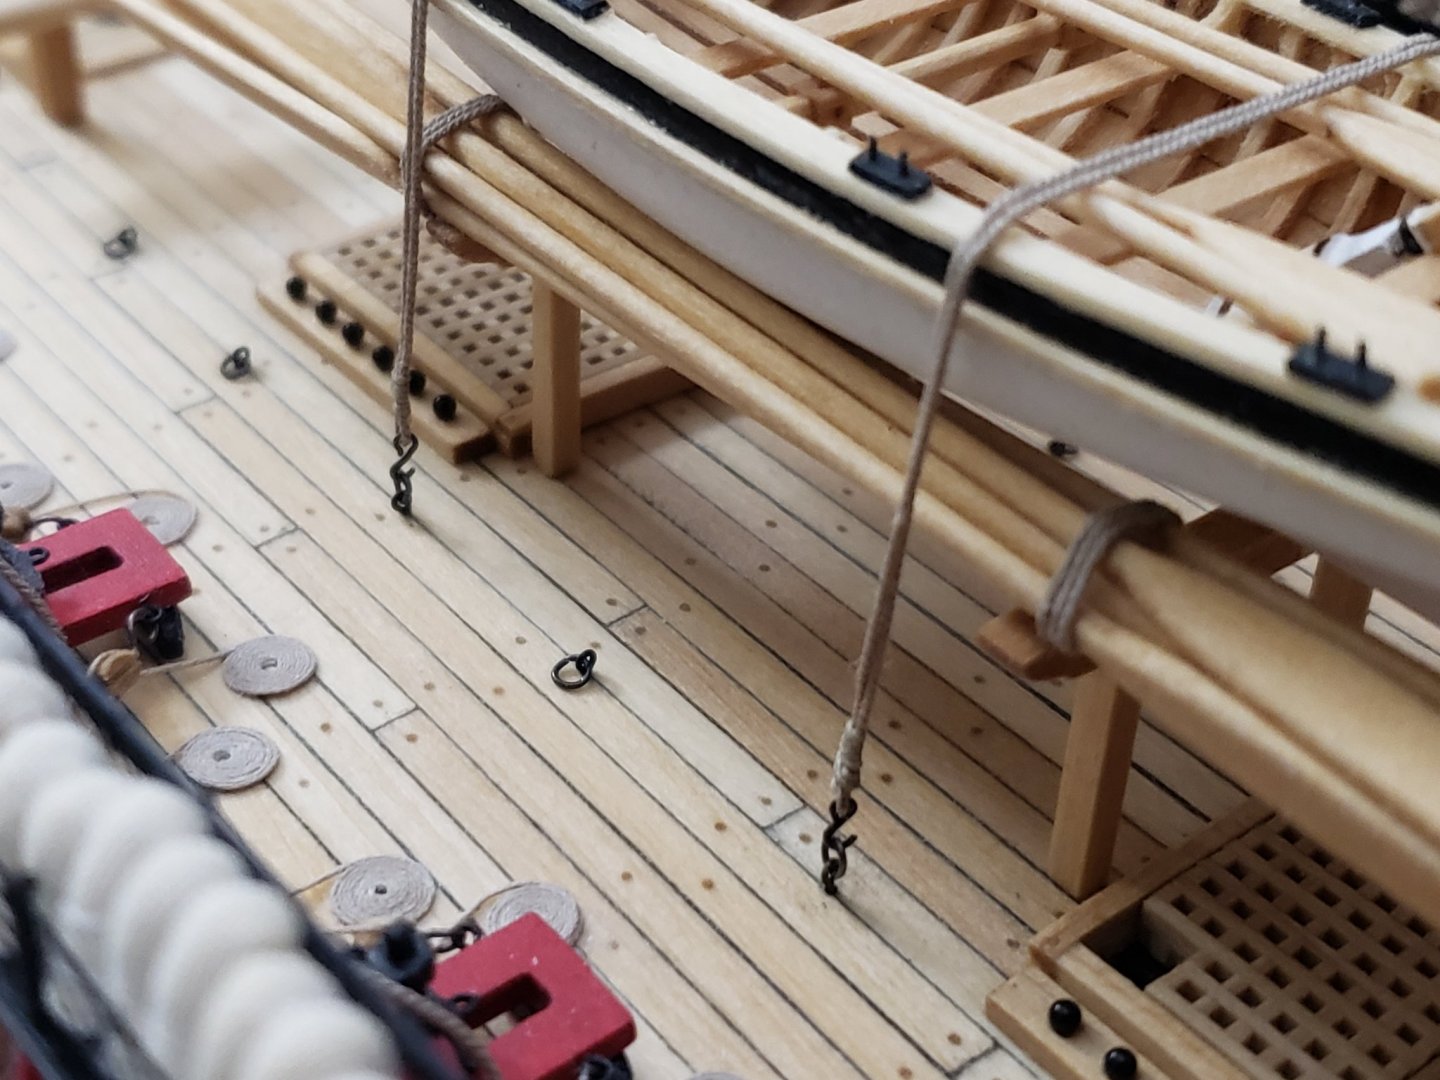
Thank you for the awesome comments Bob and Will!! I lashed down the longboat. This was again a very tricky process..... I used @abelson's method to bend the eye bolts to for the hooks. Very cool trick! Where I think I didn't do as good was serving rope at the hook. I threaded the hook with the thread and used CA glue to hold it in position. Then using aligator clips to secure the hook, I tied a thinner thread around it. The other side was done after I hooked one of the rings and used CA there so it doesn't slip out. The other side was very tricky since I had 3 strands of rope. So I used a simple knot to secure all three ropes using the thinner thread then manually served it using CA inbetween. Then I cut off the excess and the ended up with what looks like a loop of a single thread... No idea if my description makes sense, but it might be of some use to someone. The side where I served the rope off model: Side where I served the rope in the cramped up space. Looks worse but I think I can live with it 😅 All is left is the rudder pendants and the jollyboat, then onto rigging! Wishing you all a Merry Christmas!!

- 950 replies
-
- 20
-
-
- syren
- model shipways
- (and 1 more)
-
Recommend model kit for the USS Constution
WalrusGuy replied to Noblenut's topic in Wood ship model kits
I agree with everyone's advice here. I don't think I'd ever come this far on my build if I didn't have a log. Everyone here has been of the greatest help! -
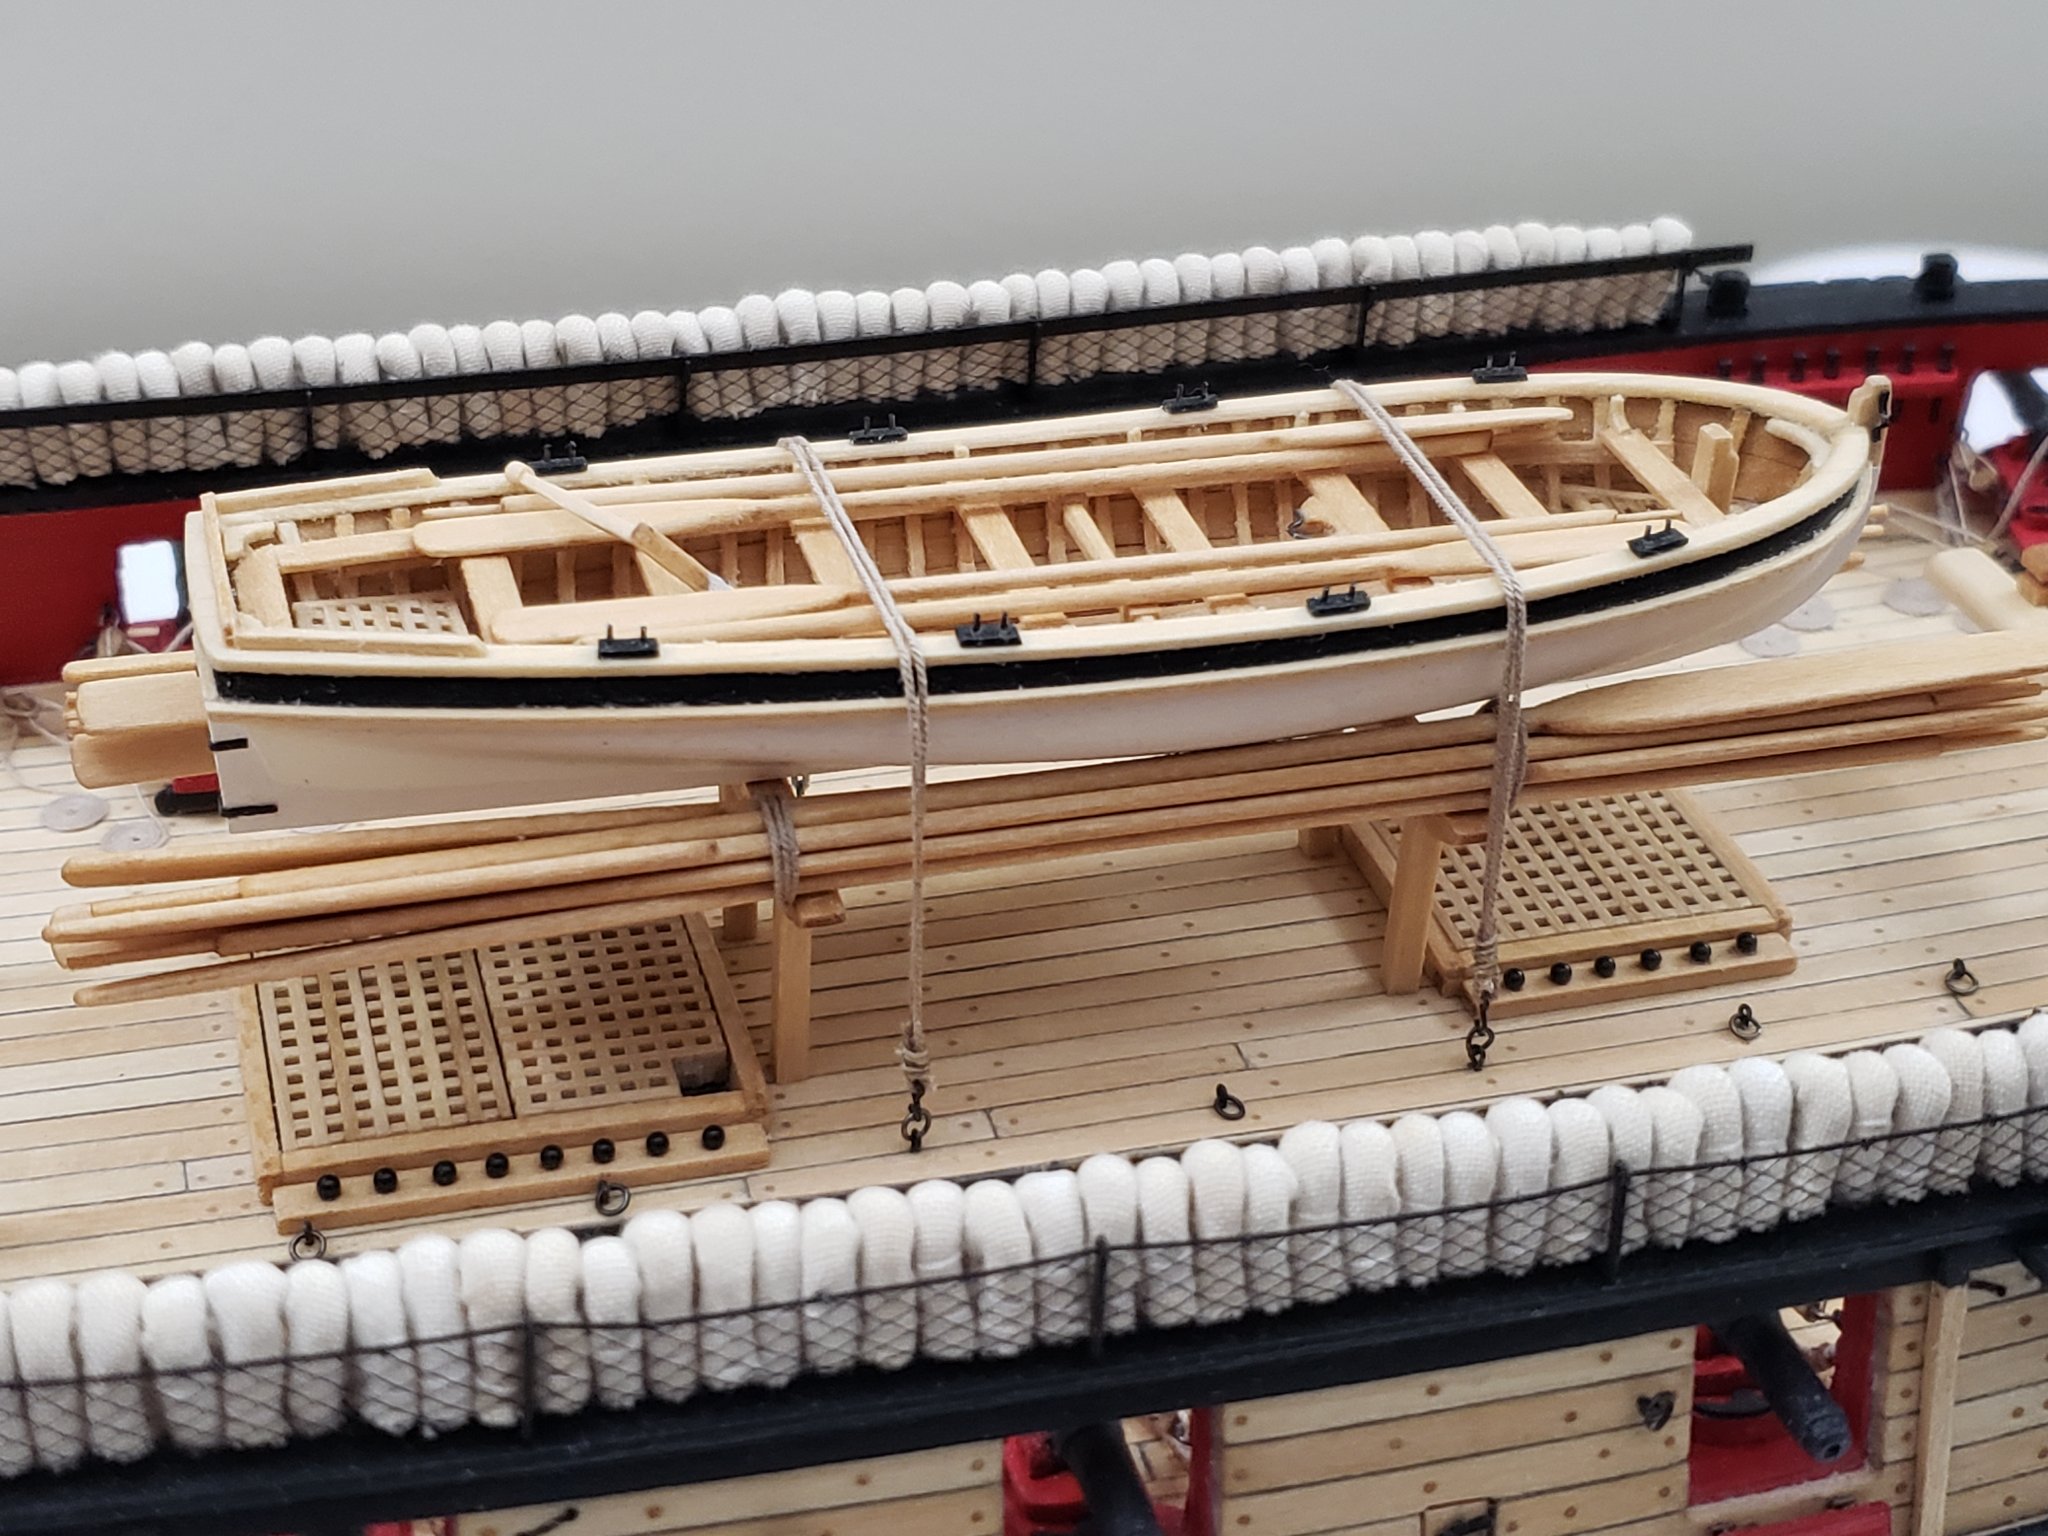
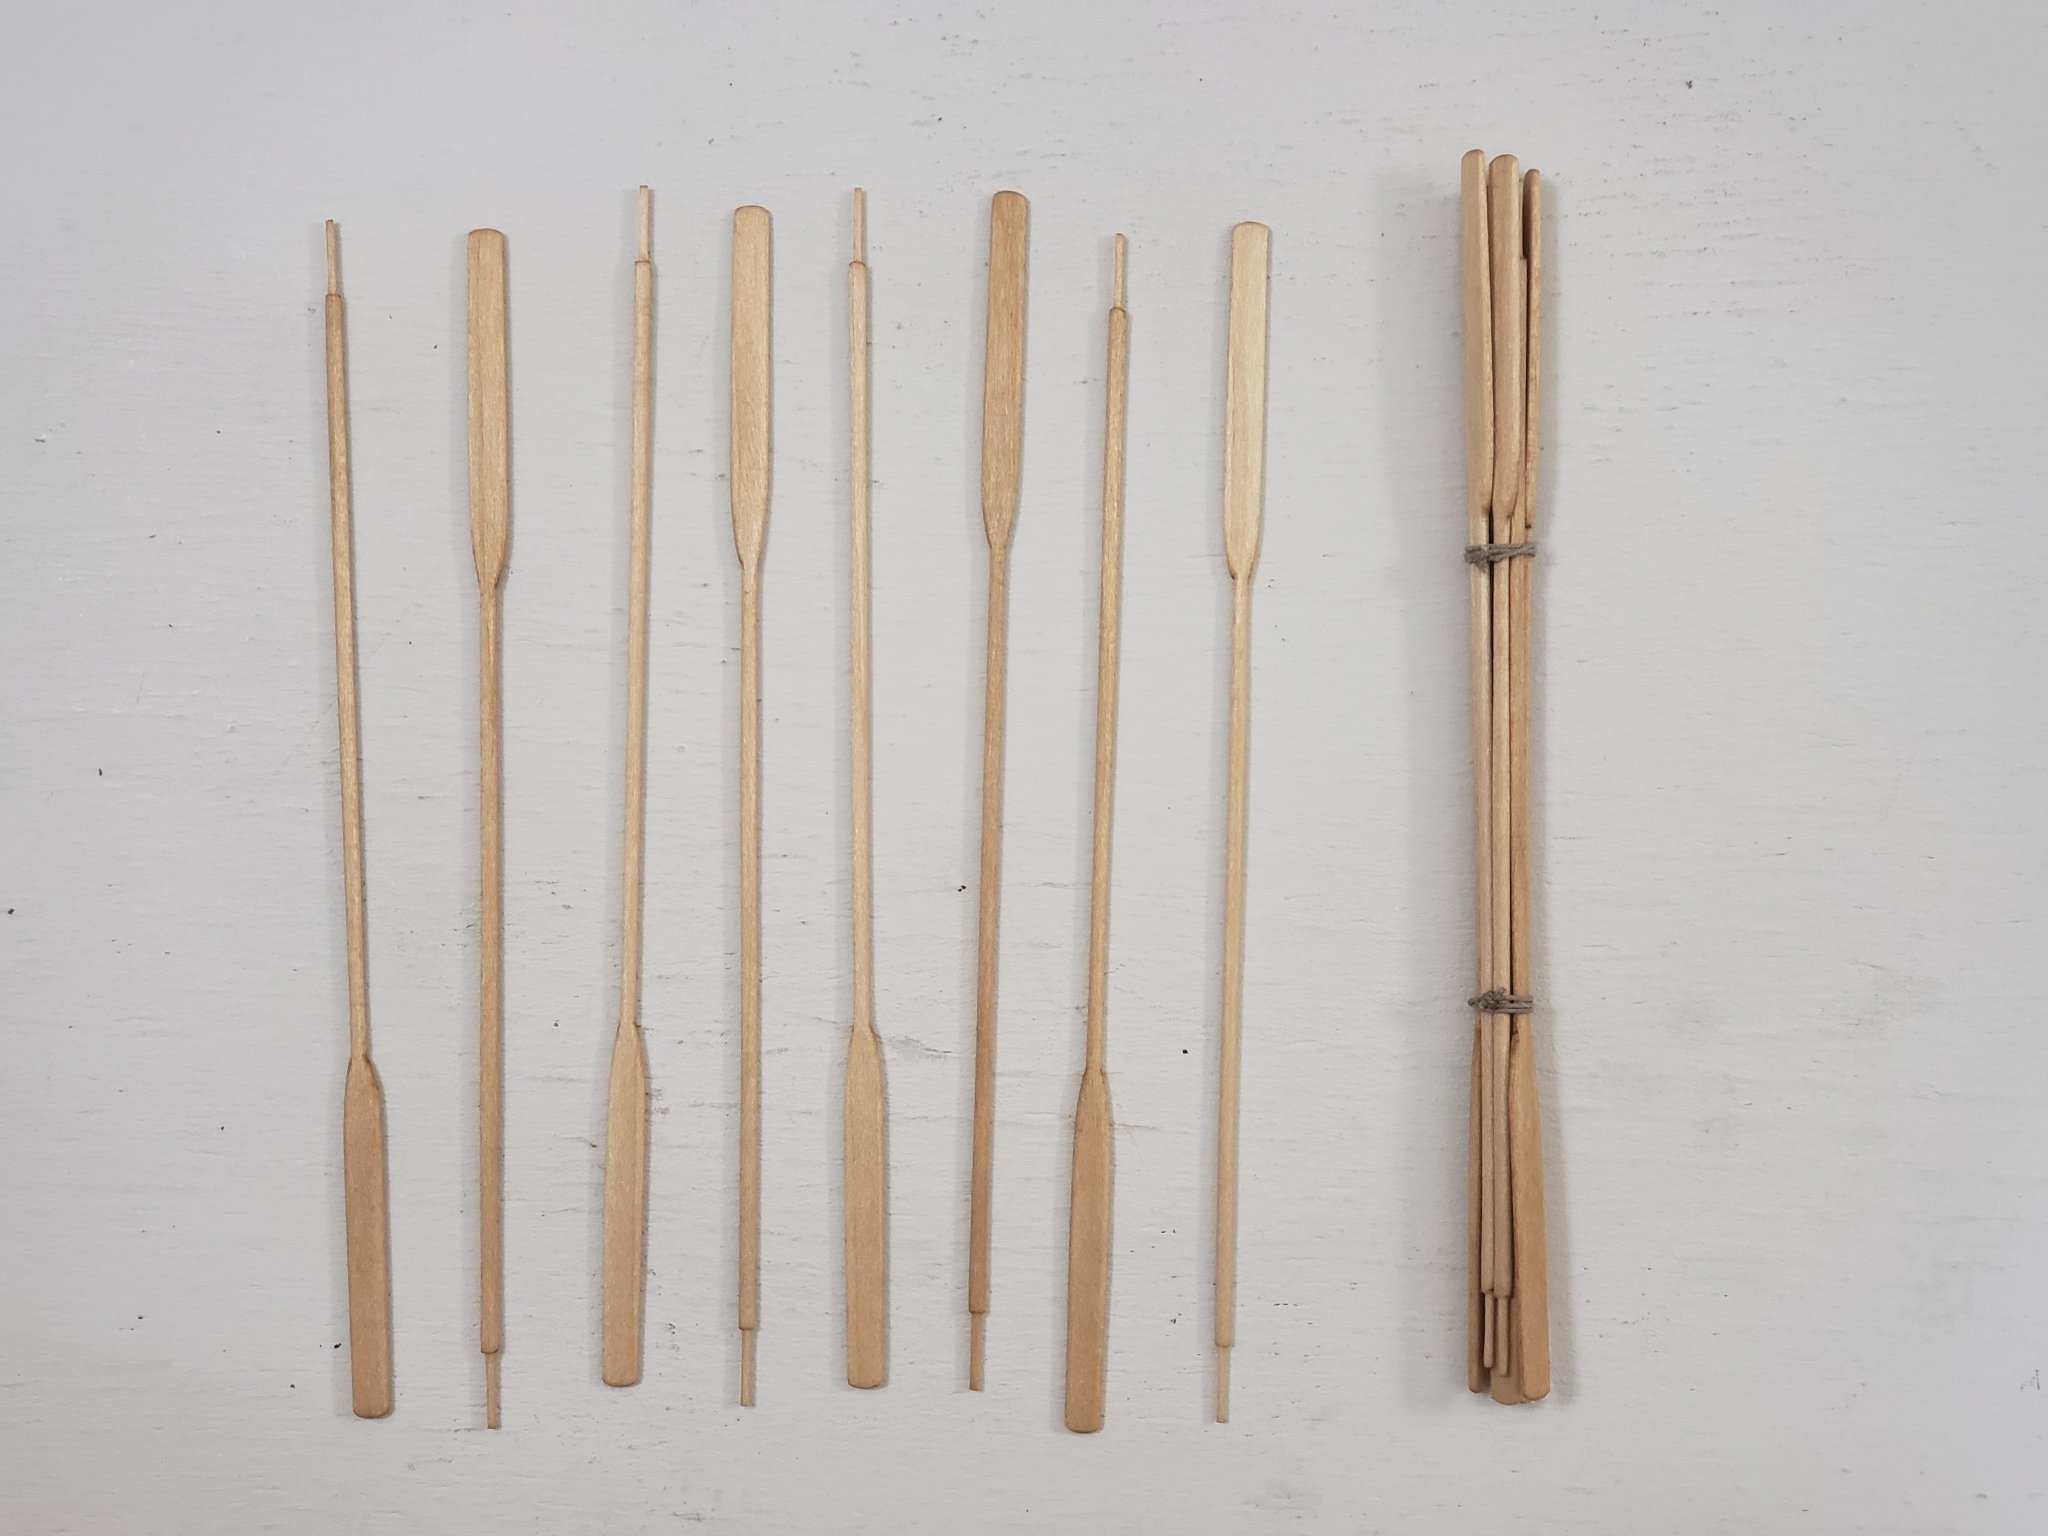
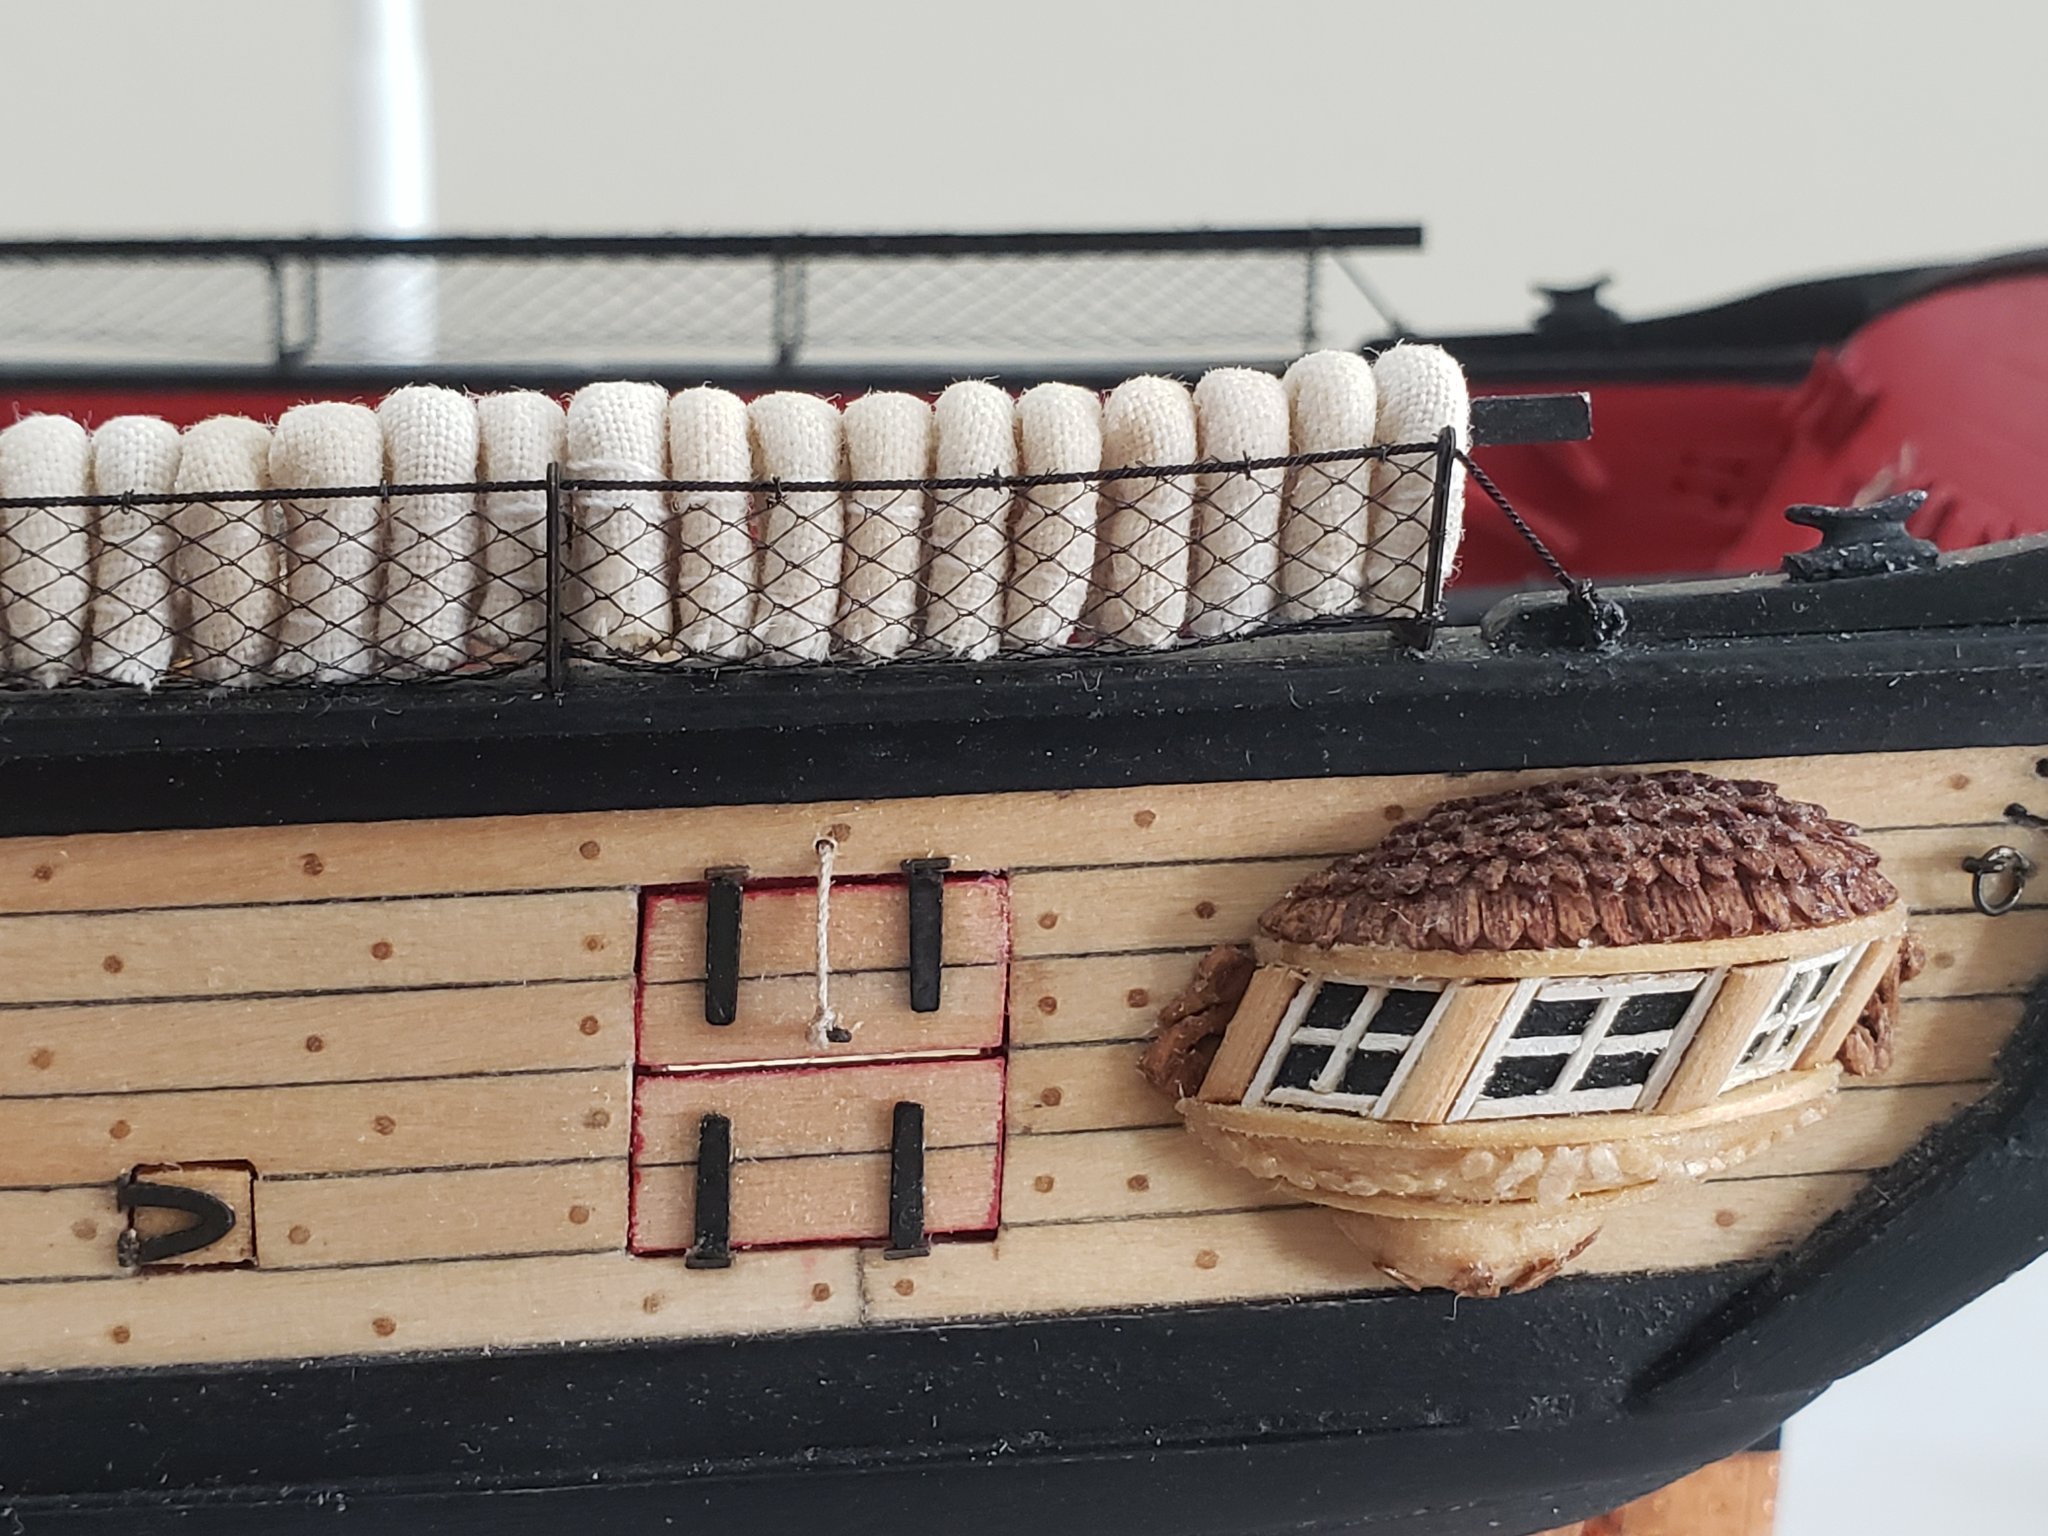
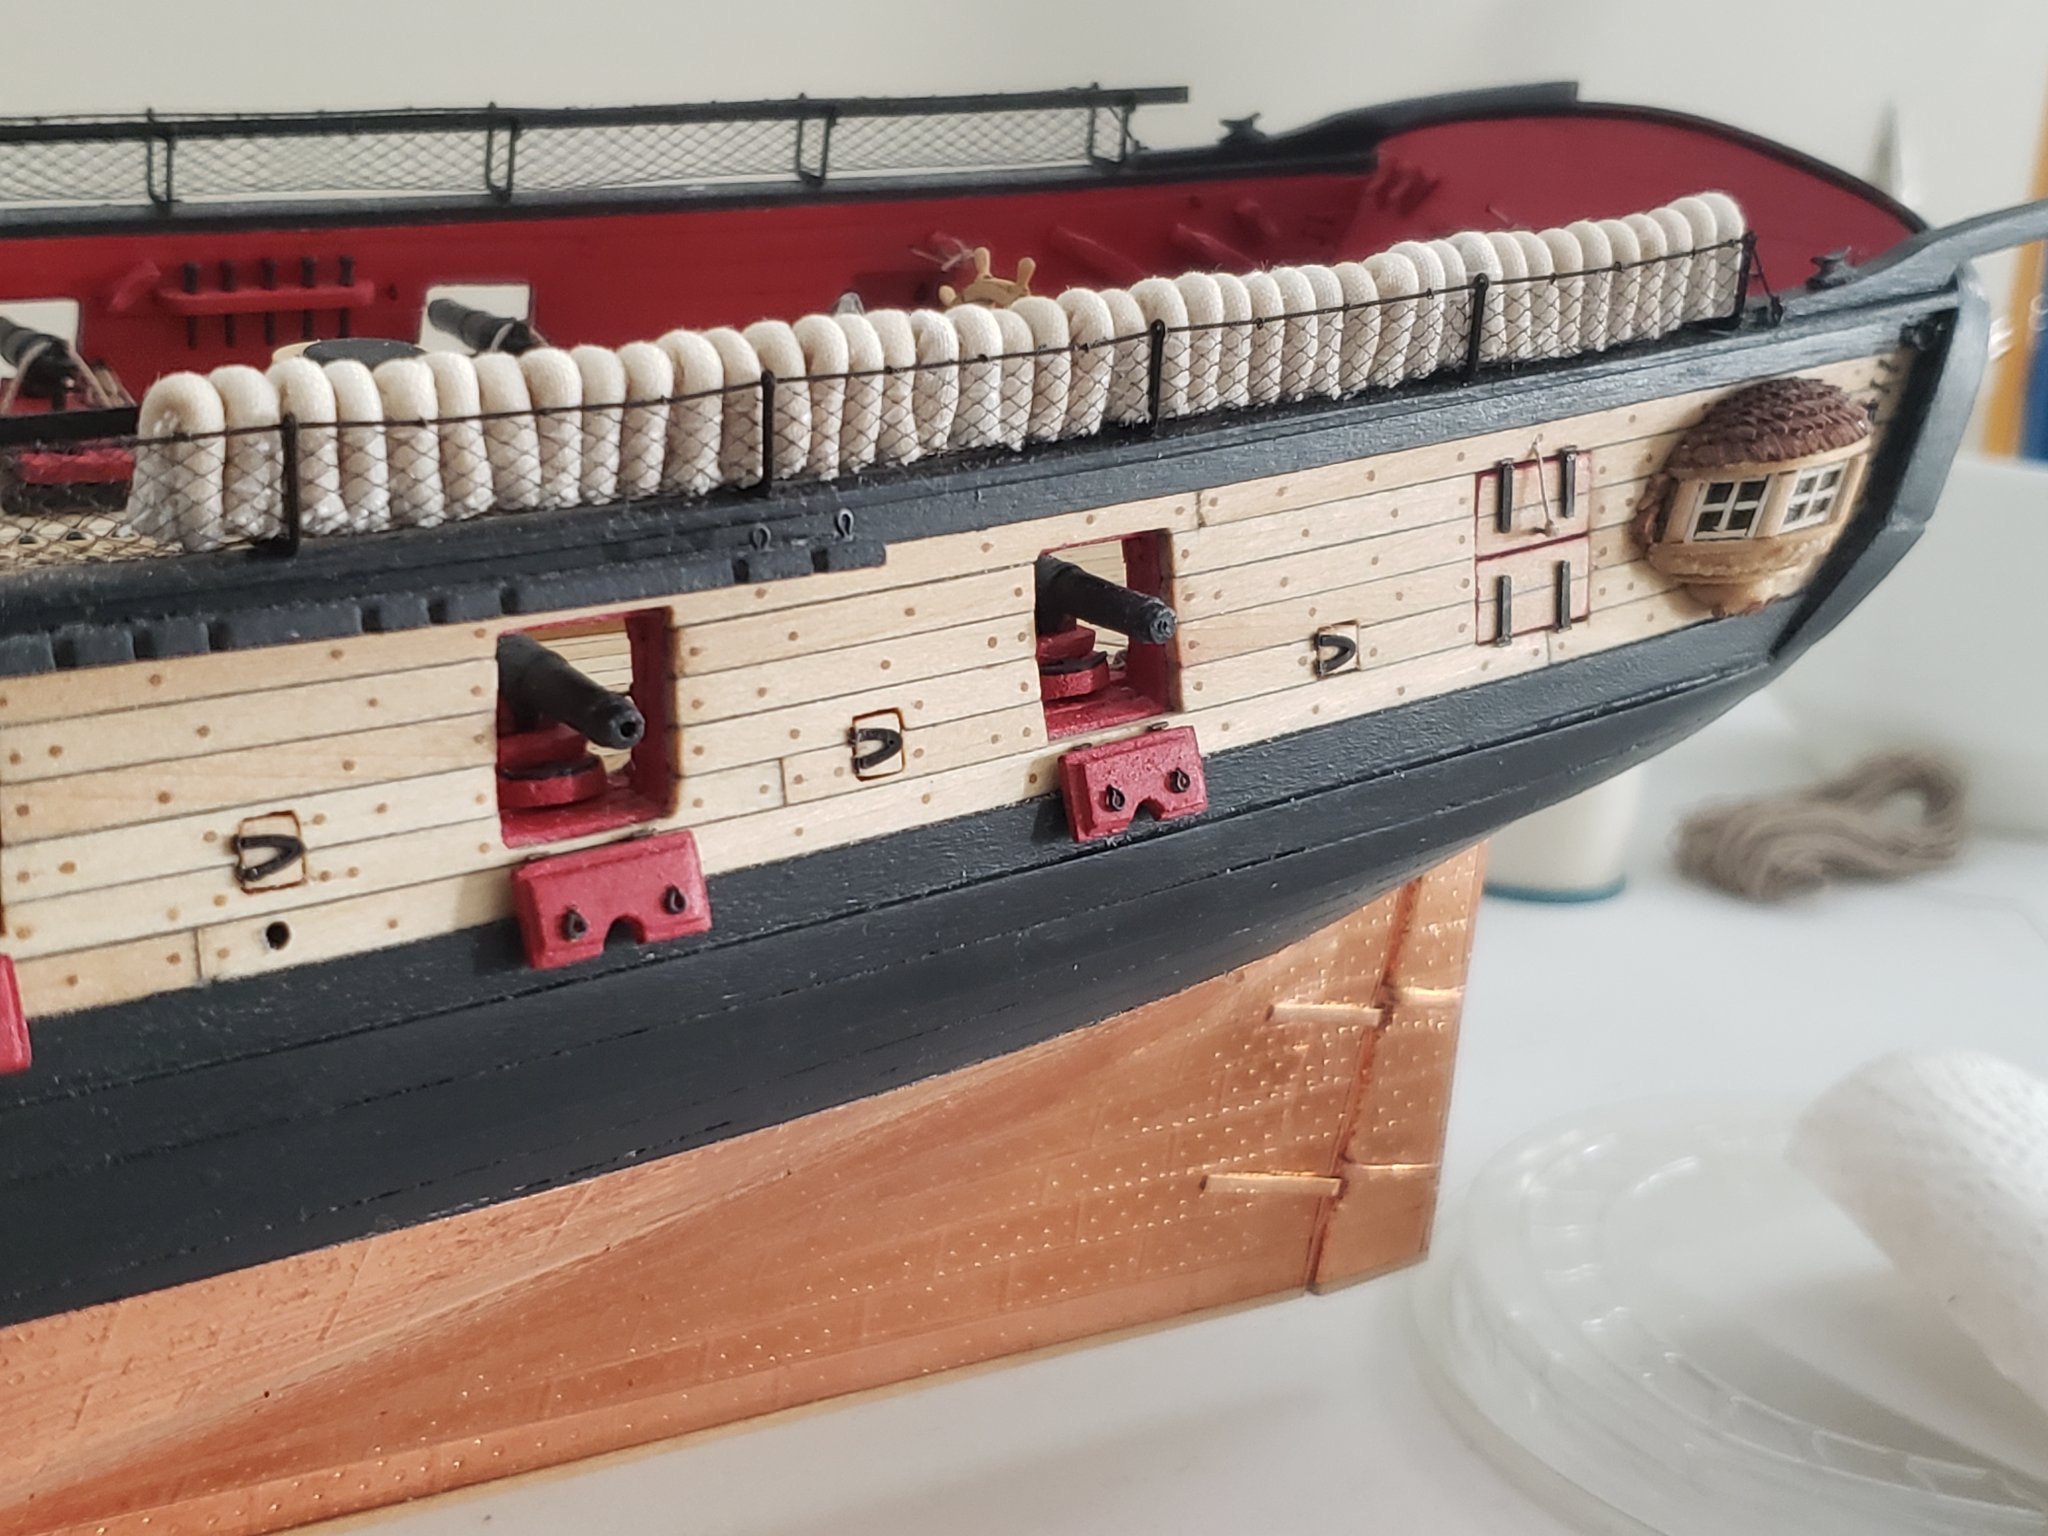
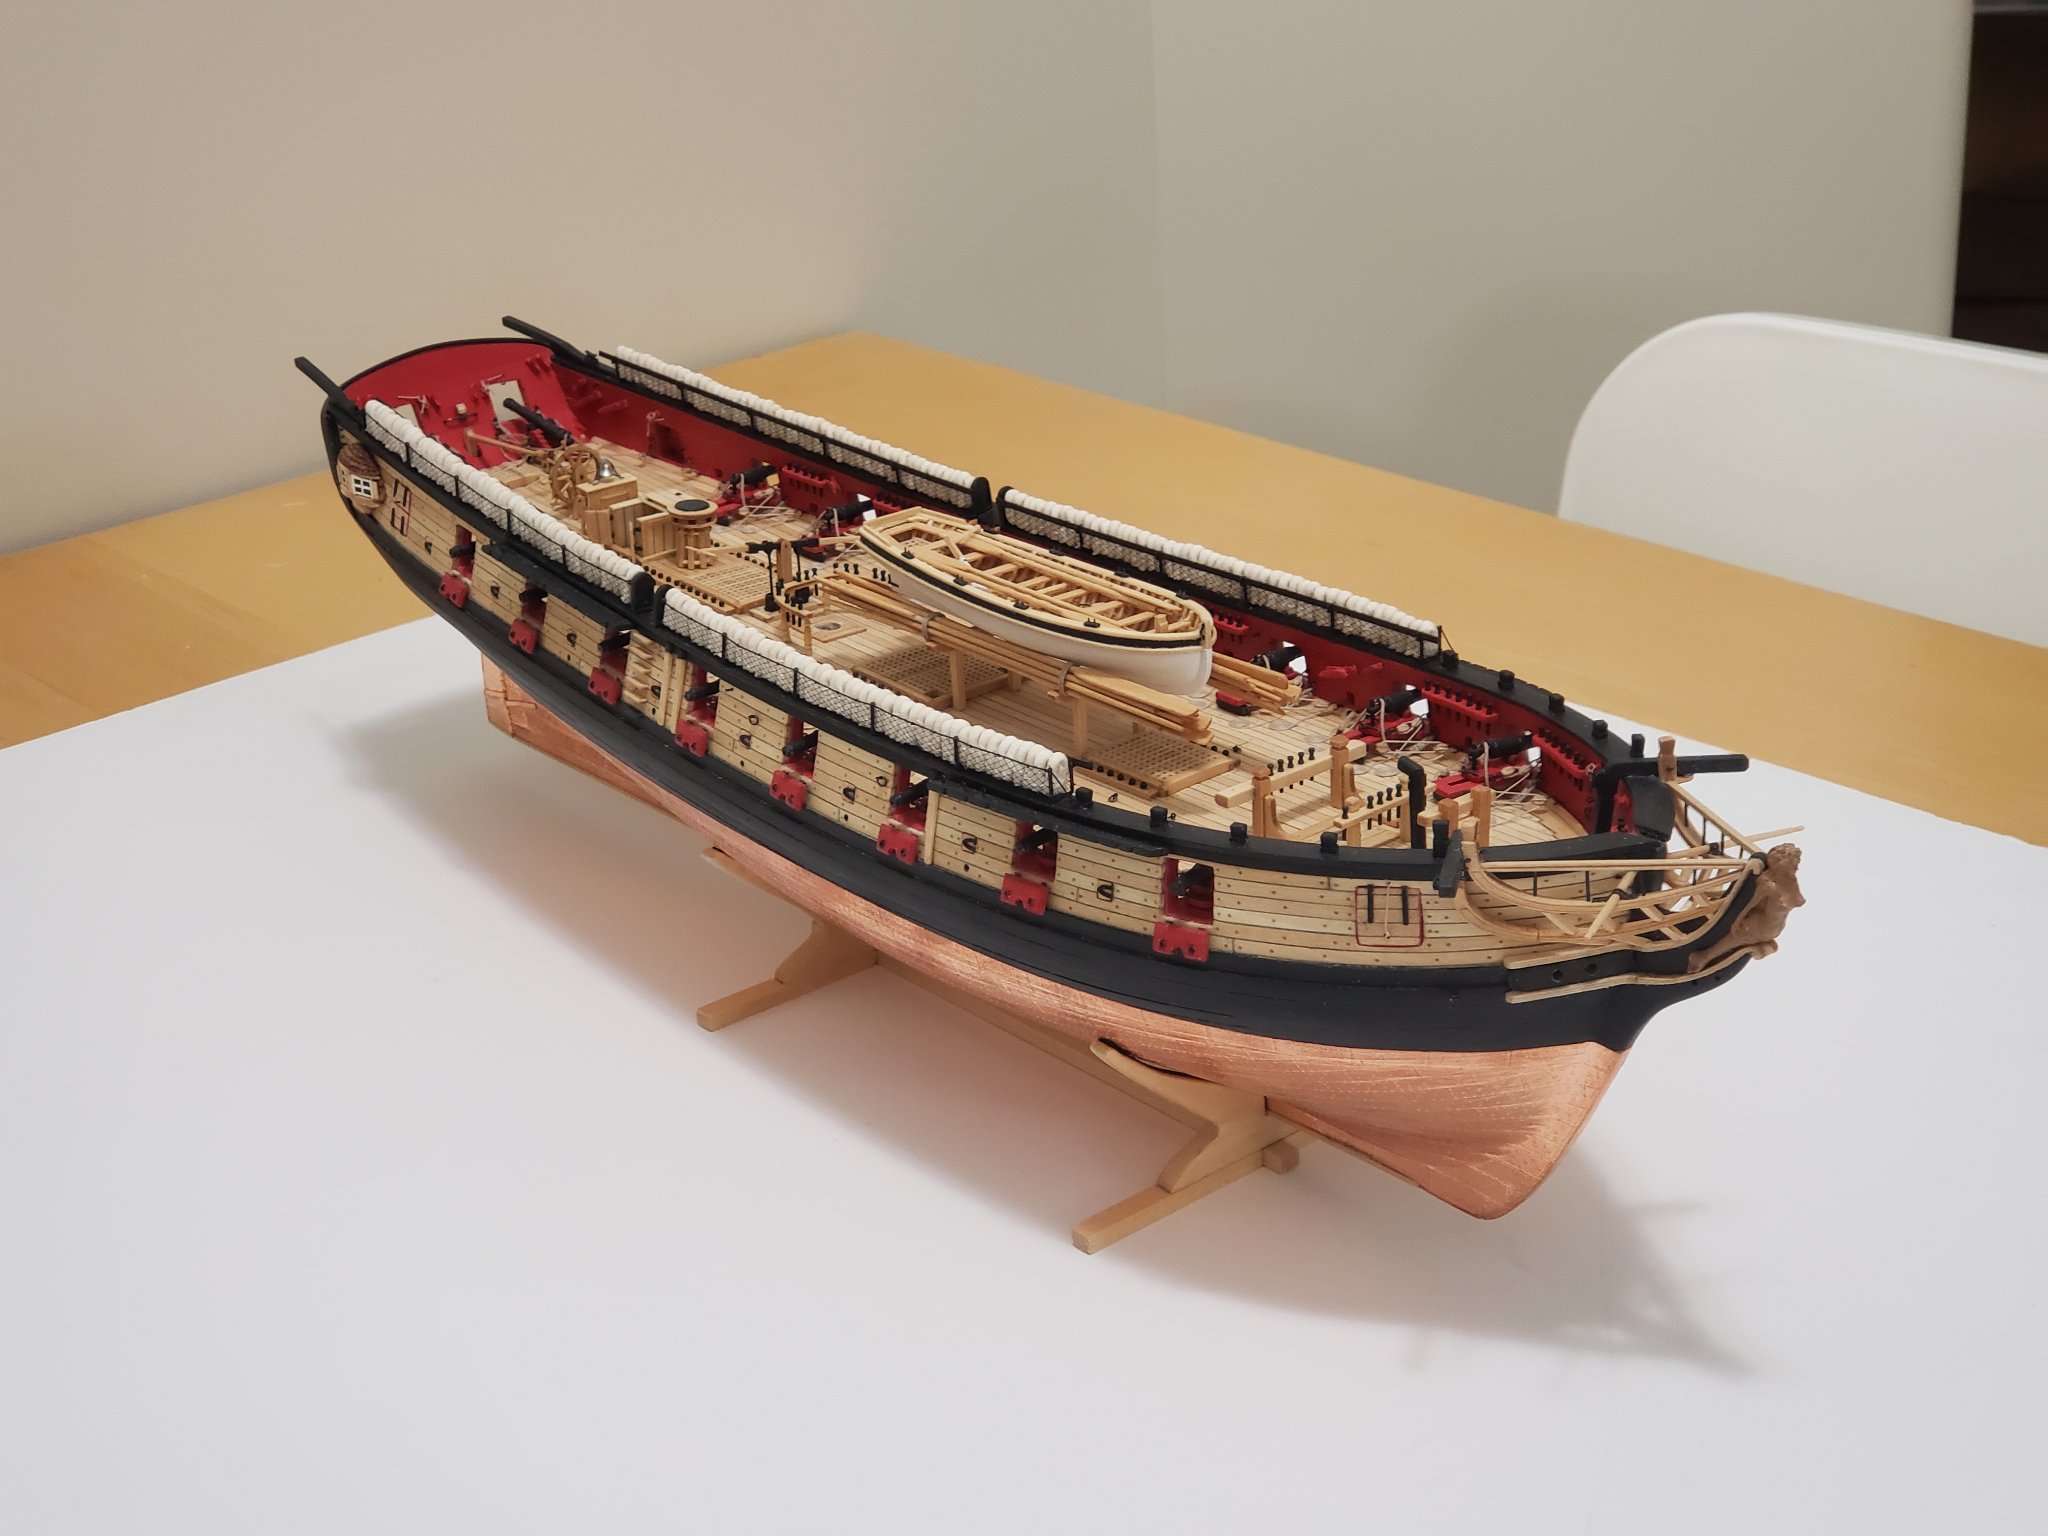
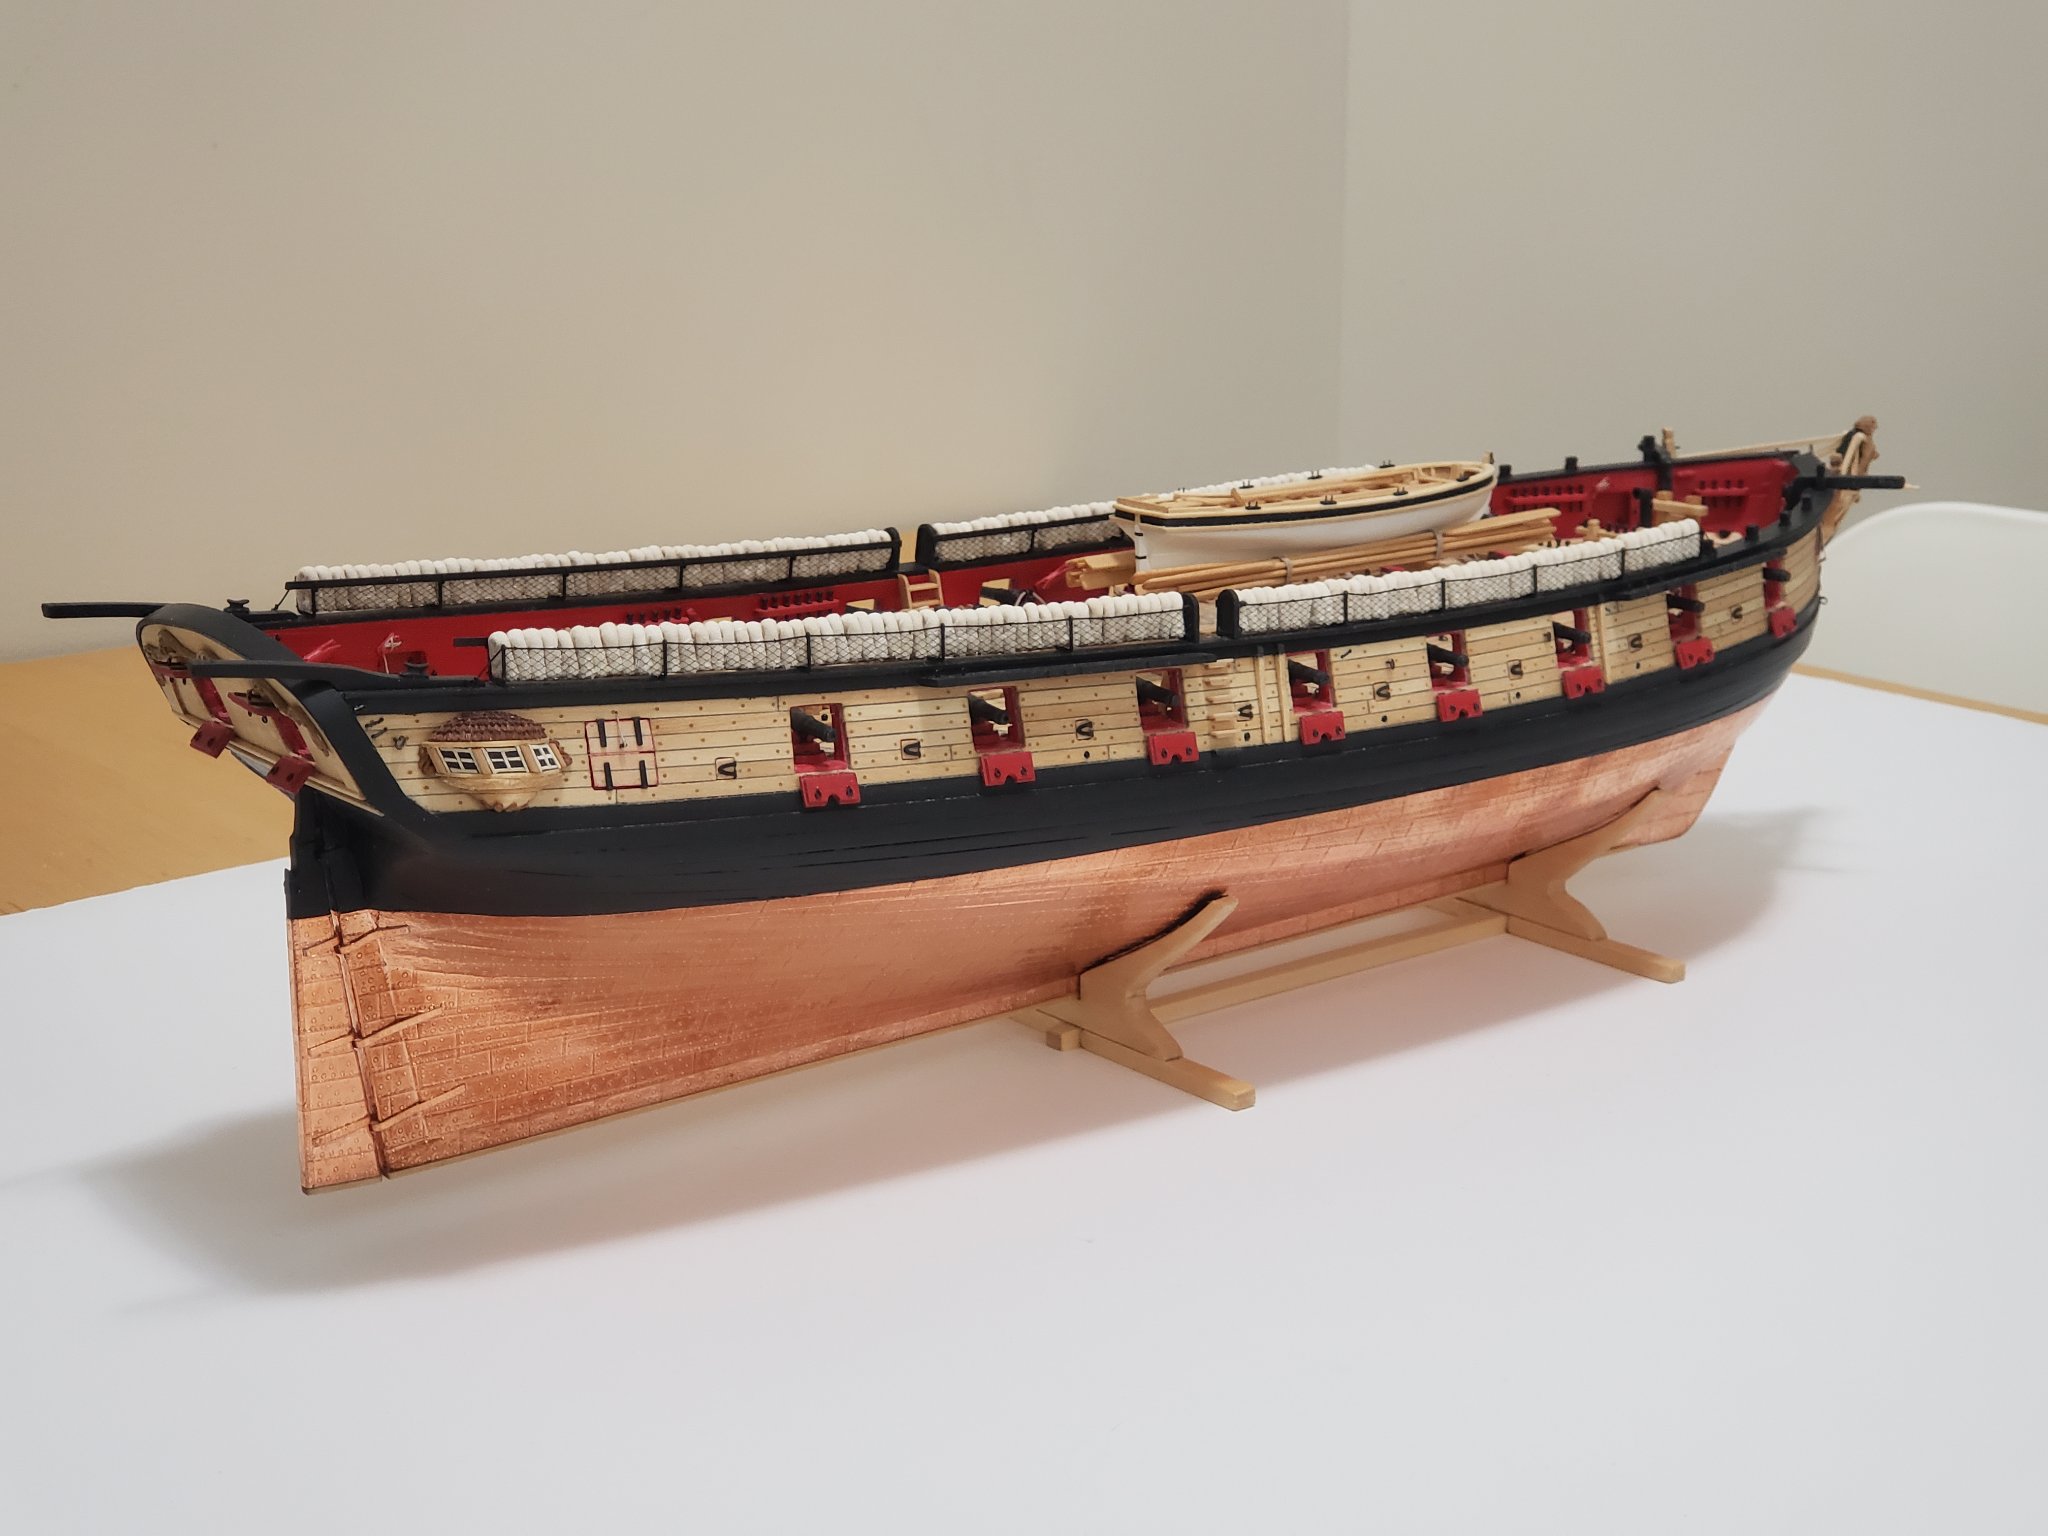
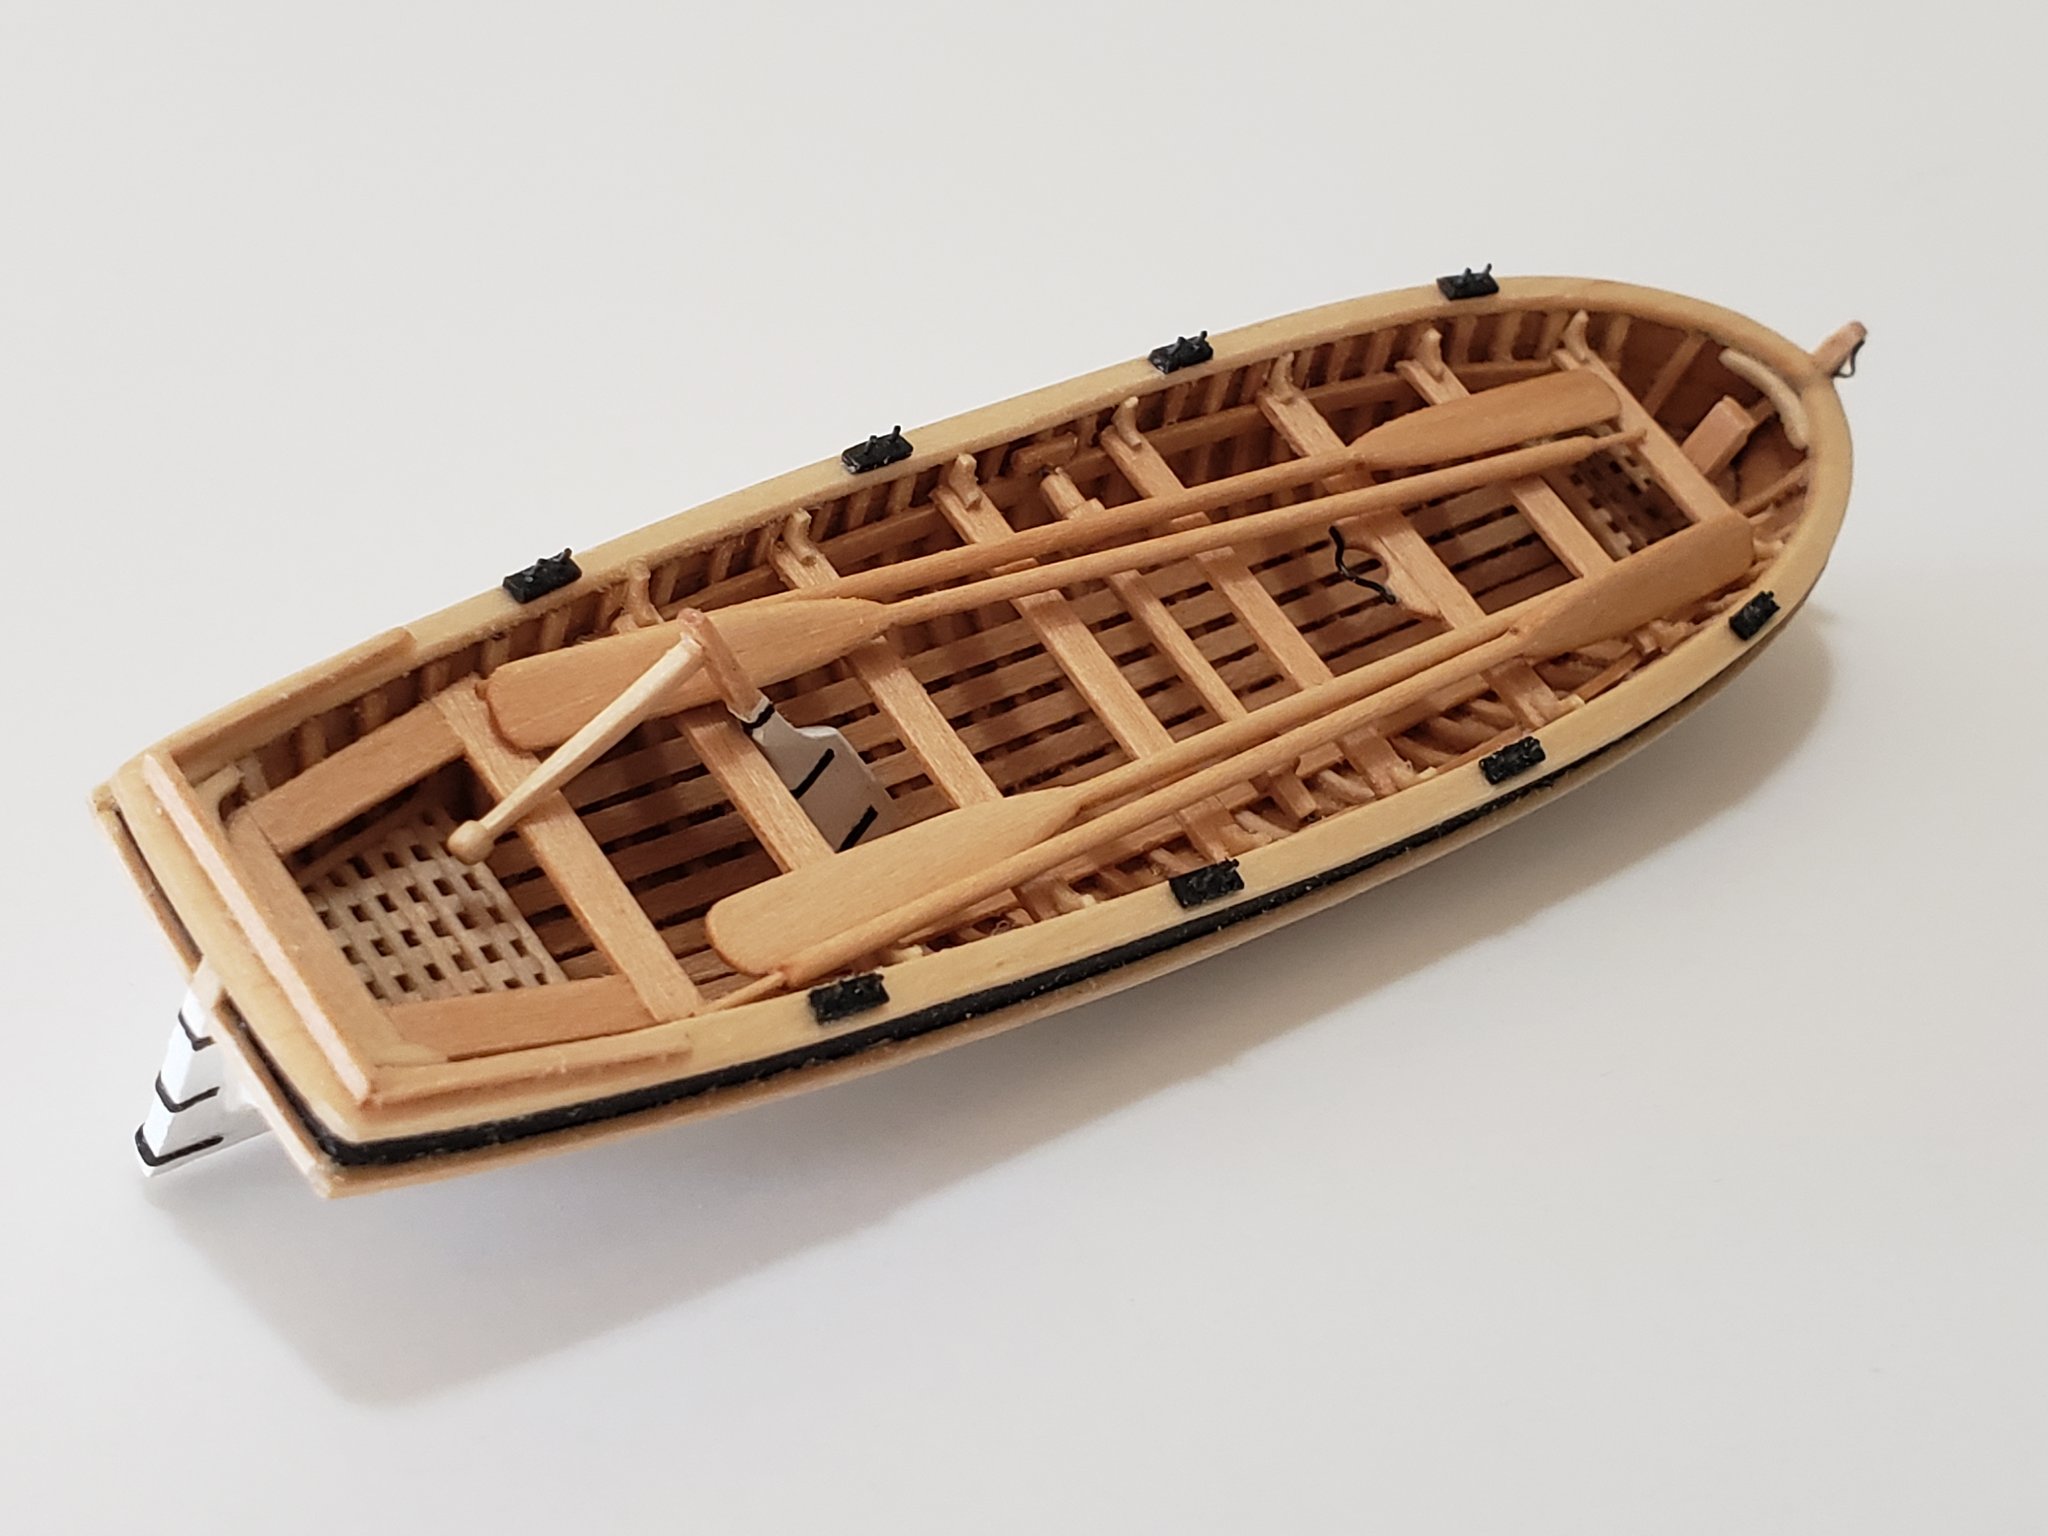
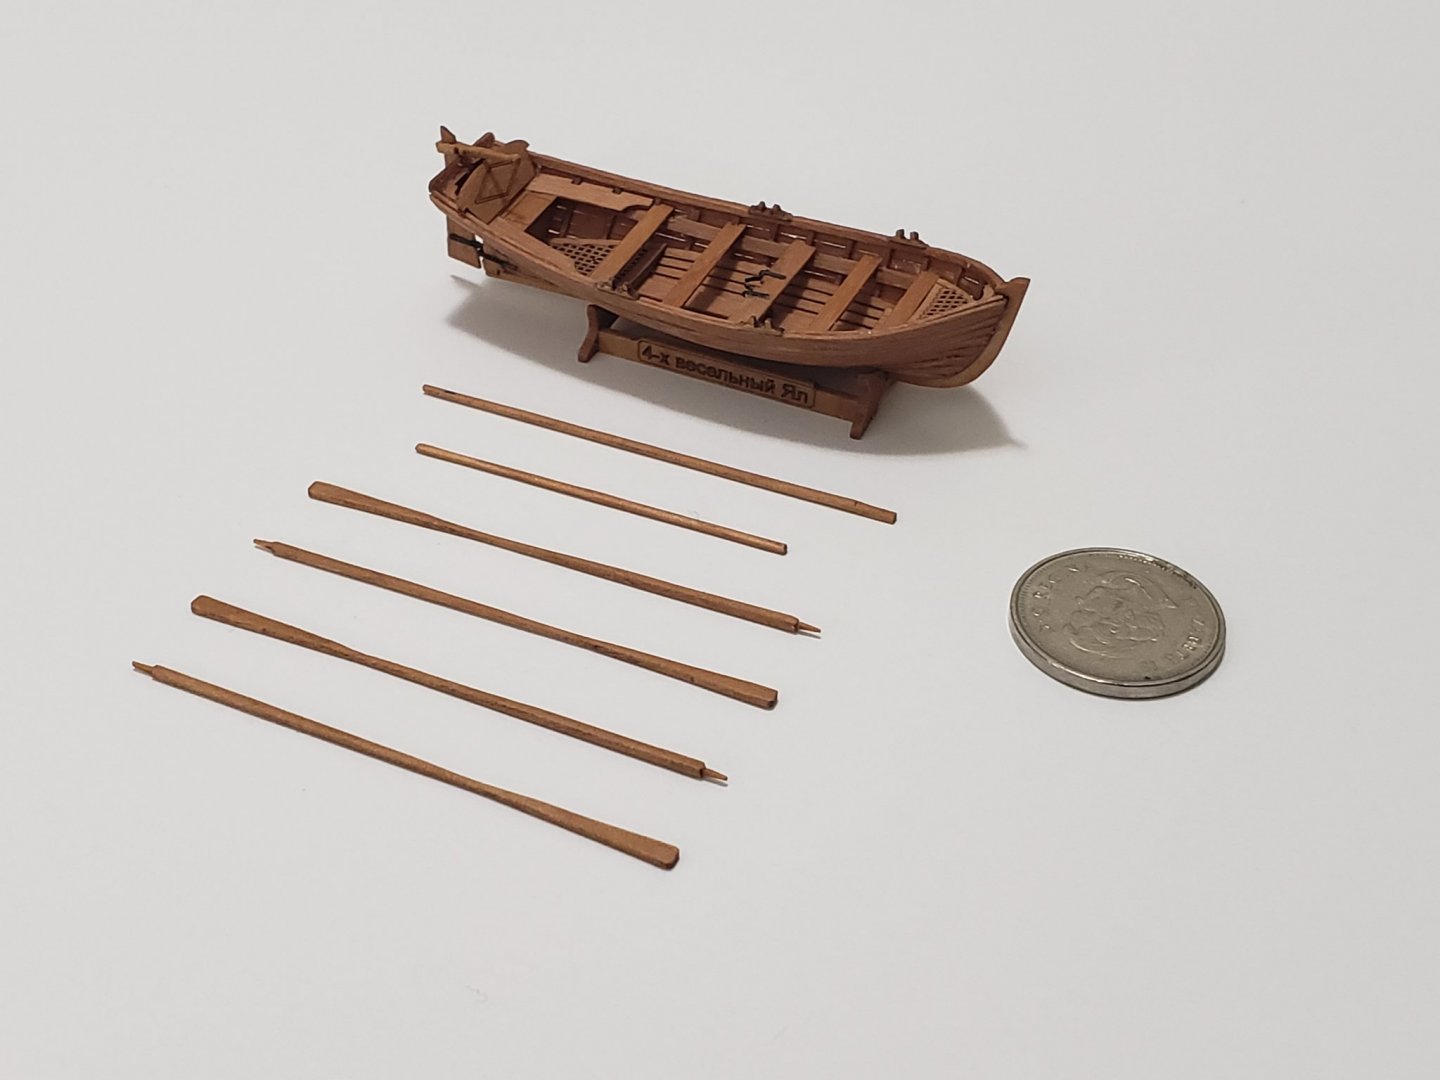
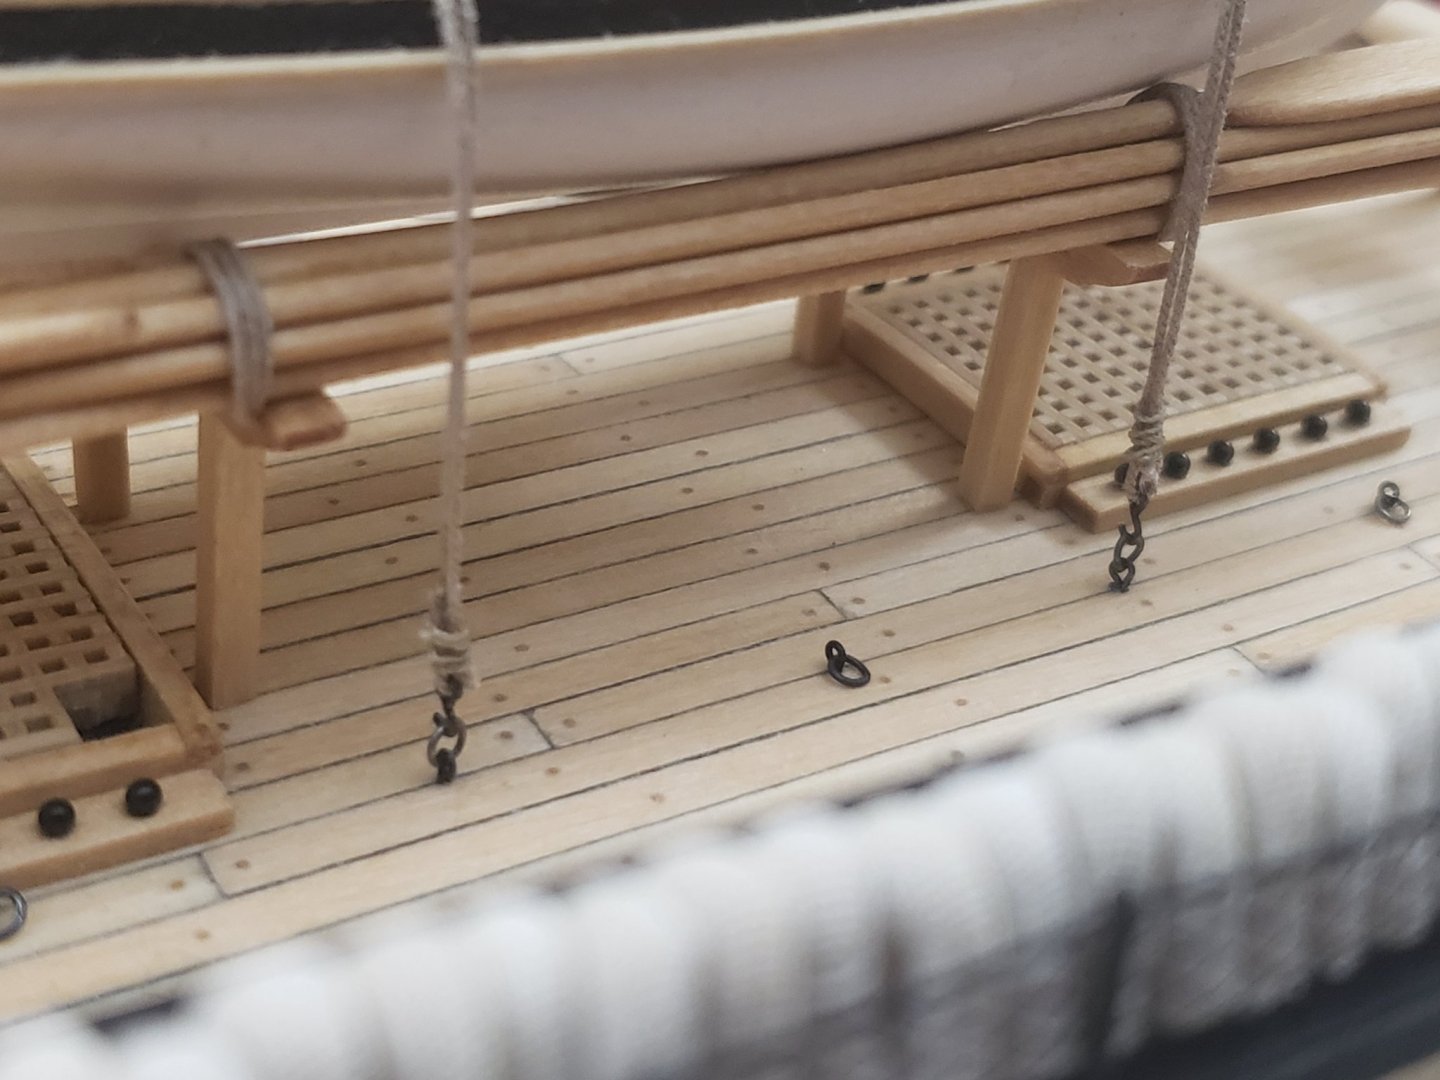
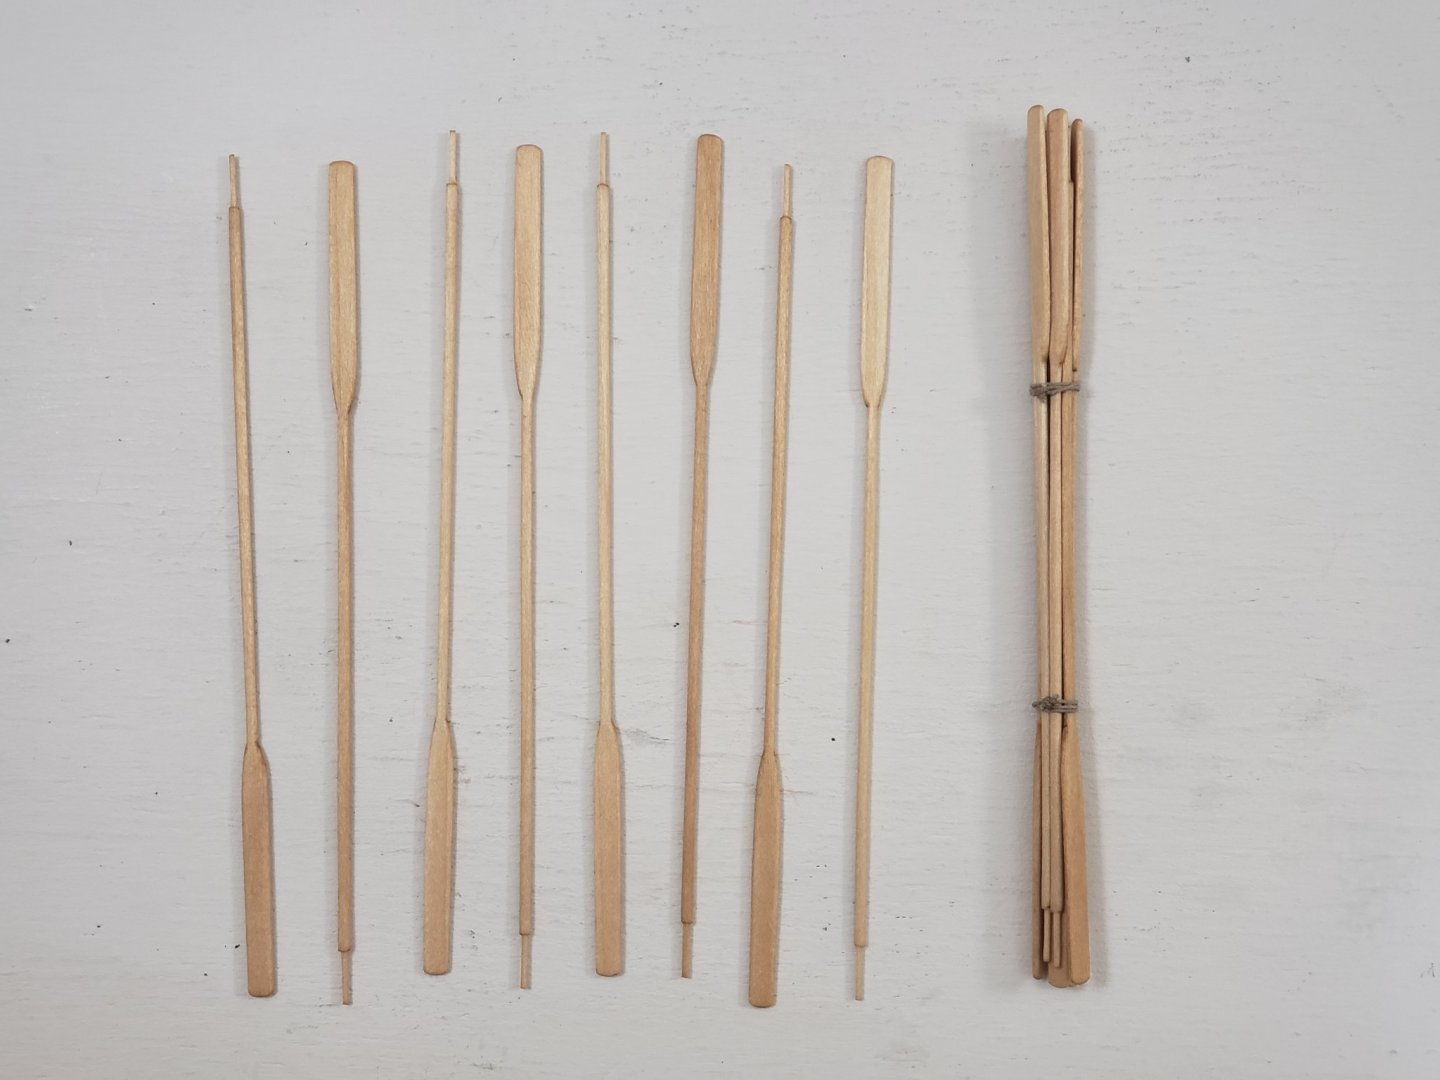
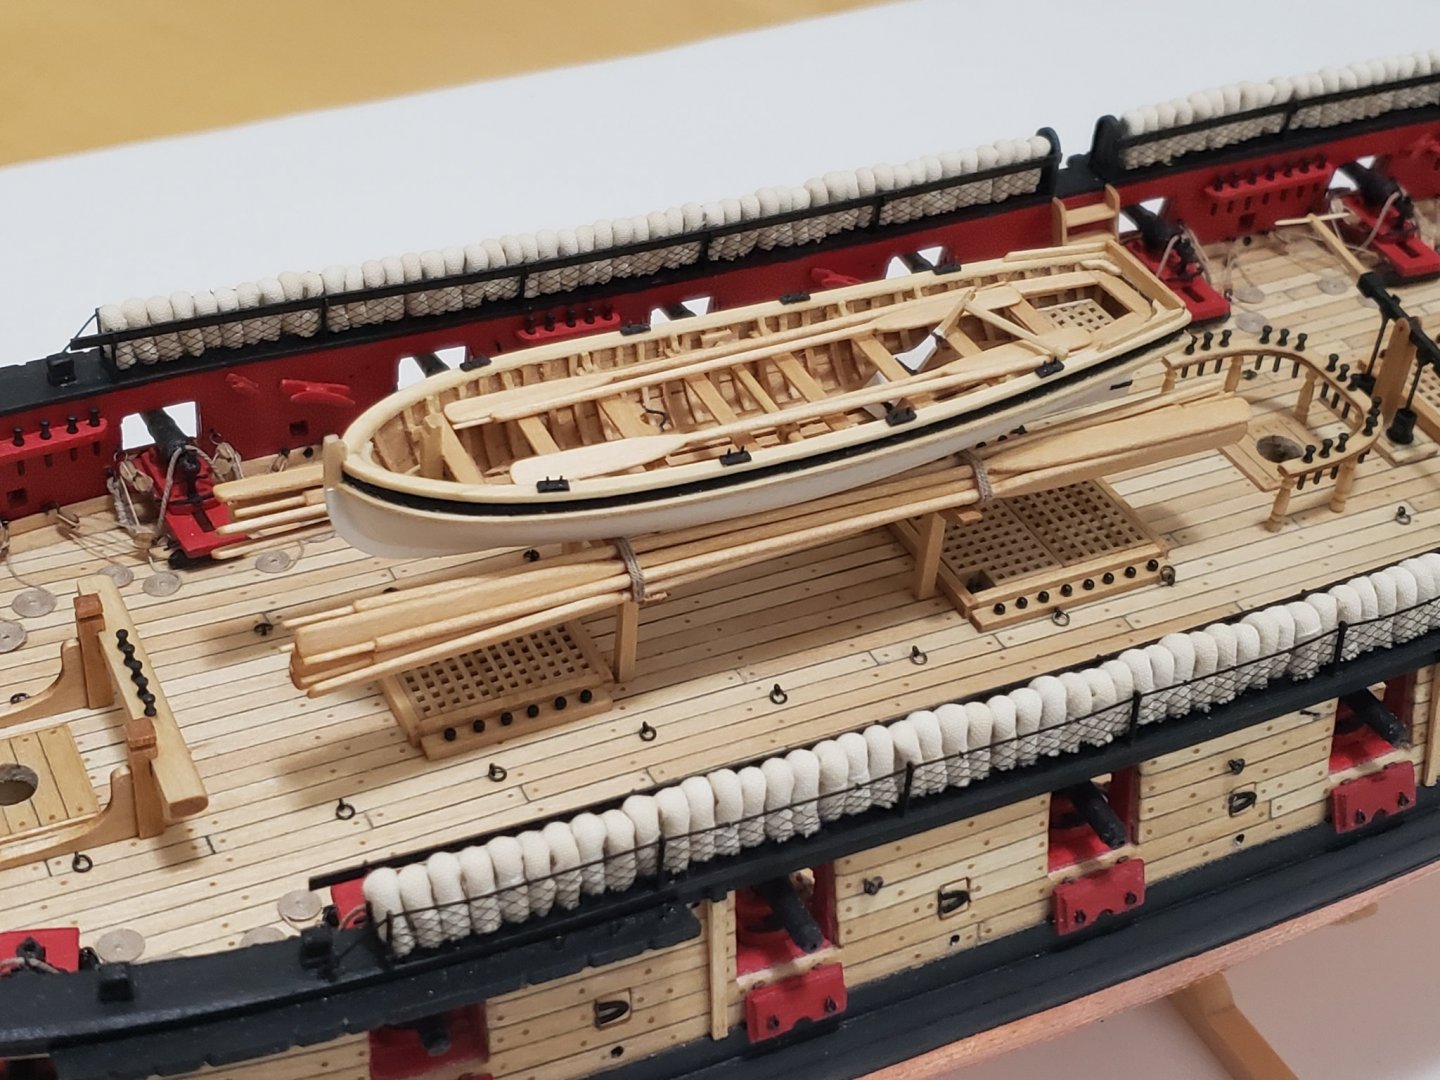
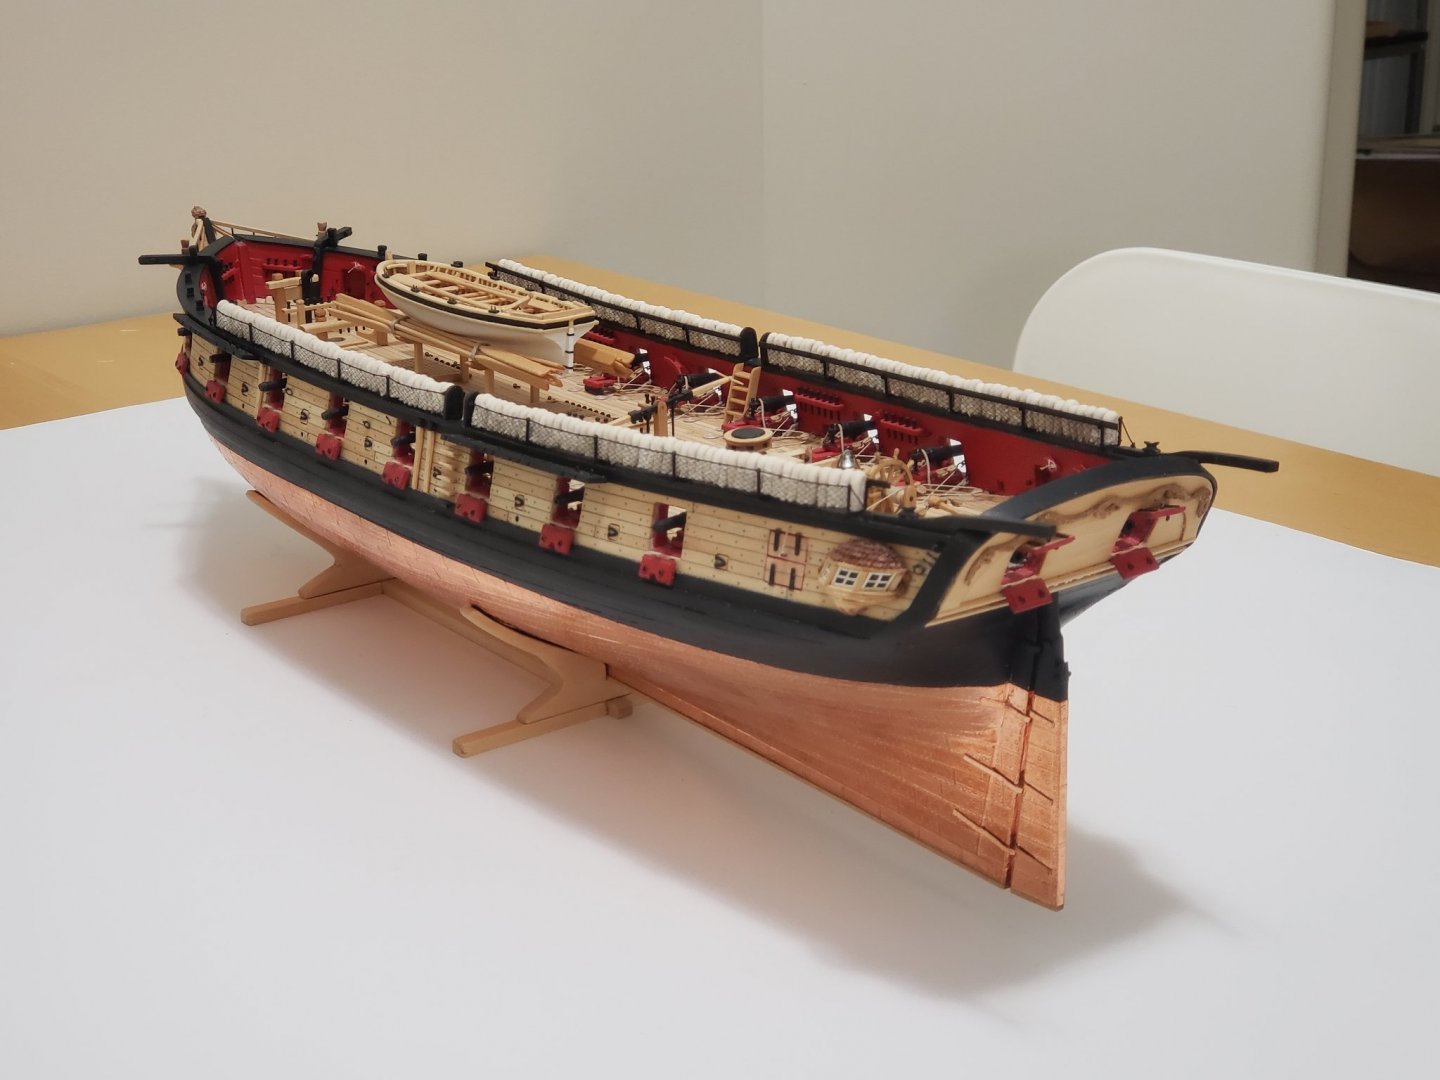
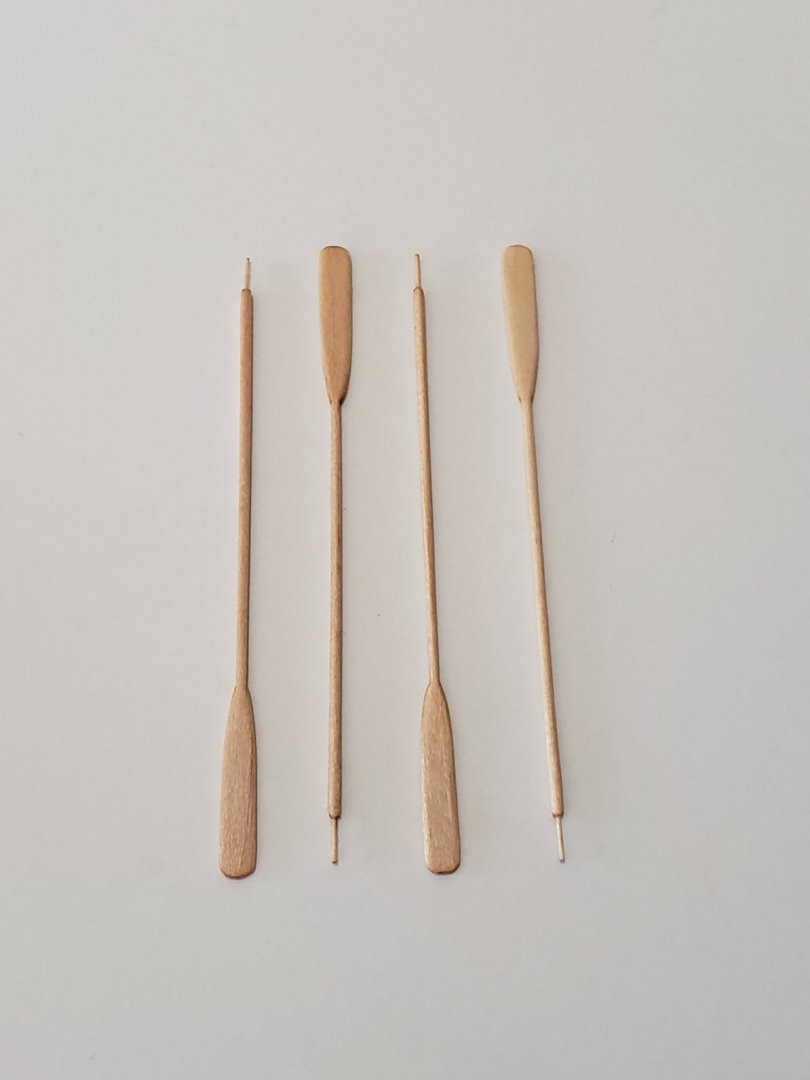
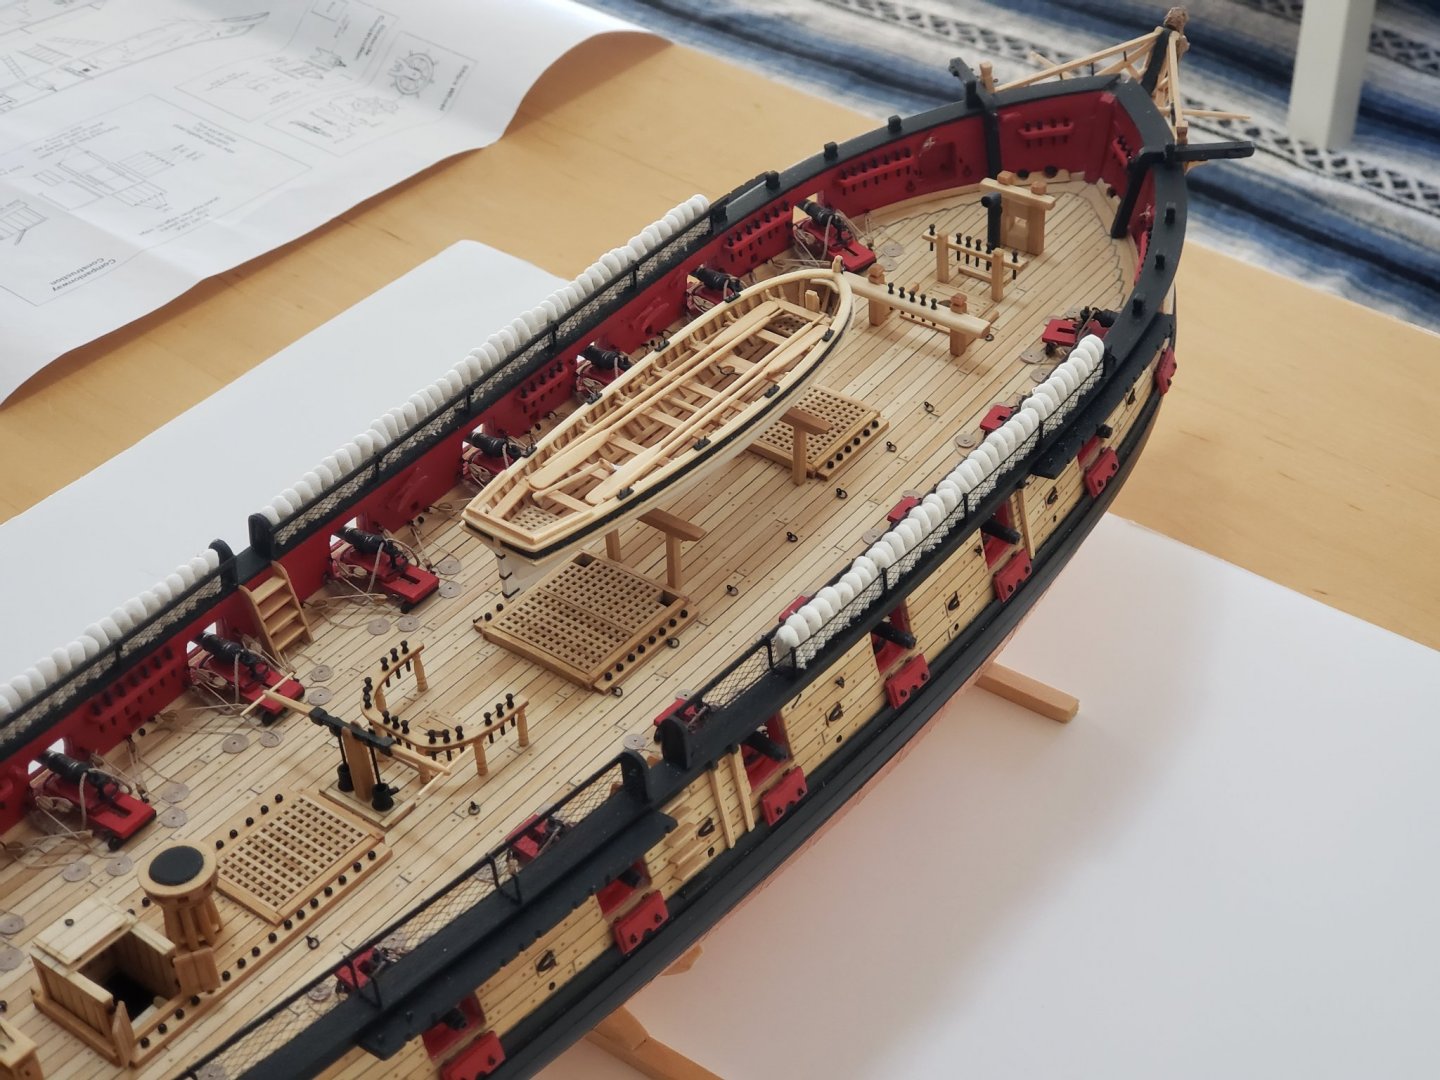
I shaped the sweeps and bundled then as shown: I finished making and staining all the hammocks. I soaked them in some tea and found it was way too dark (almost looked like wood). So I then diluted some bleach in lots of water and poured it over the hammocks which were on a sieve. The color after came out really nice, and blends with the wood and the longboat's white paint. Also doesn't stand out as much as before. Here's how the entire ship looks like currently (very close to getting the hull completed): The oars and rudder have are stuck with just a couple drops of glue. The boat still needs to be lashed. I also did not make the chocks as I found them a bit tricky to shape, and would ultimately be mostly hidden behind the sweeps.


- 950 replies
-
- 22
-
-
- syren
- model shipways
- (and 1 more)
-
Thank you Will! Wishing you Happy Holidays and Happy New Year!
- 950 replies
-
- 3
-
-
- syren
- model shipways
- (and 1 more)
-
So much better than the castings!! Really nice! I was speechless for a moment when I saw your post at first and had to gather my thoughts 😅
-
Many thanks Steven!! Thanks Robin! Merry Christmas and Happy New Year to you too! 😊
- 950 replies
-
- 3
-
-
- syren
- model shipways
- (and 1 more)
-
Thanks so much for the kind words and the likes! It's really appreciated! 😄
- 950 replies
-
- 1
-
-
- syren
- model shipways
- (and 1 more)
-
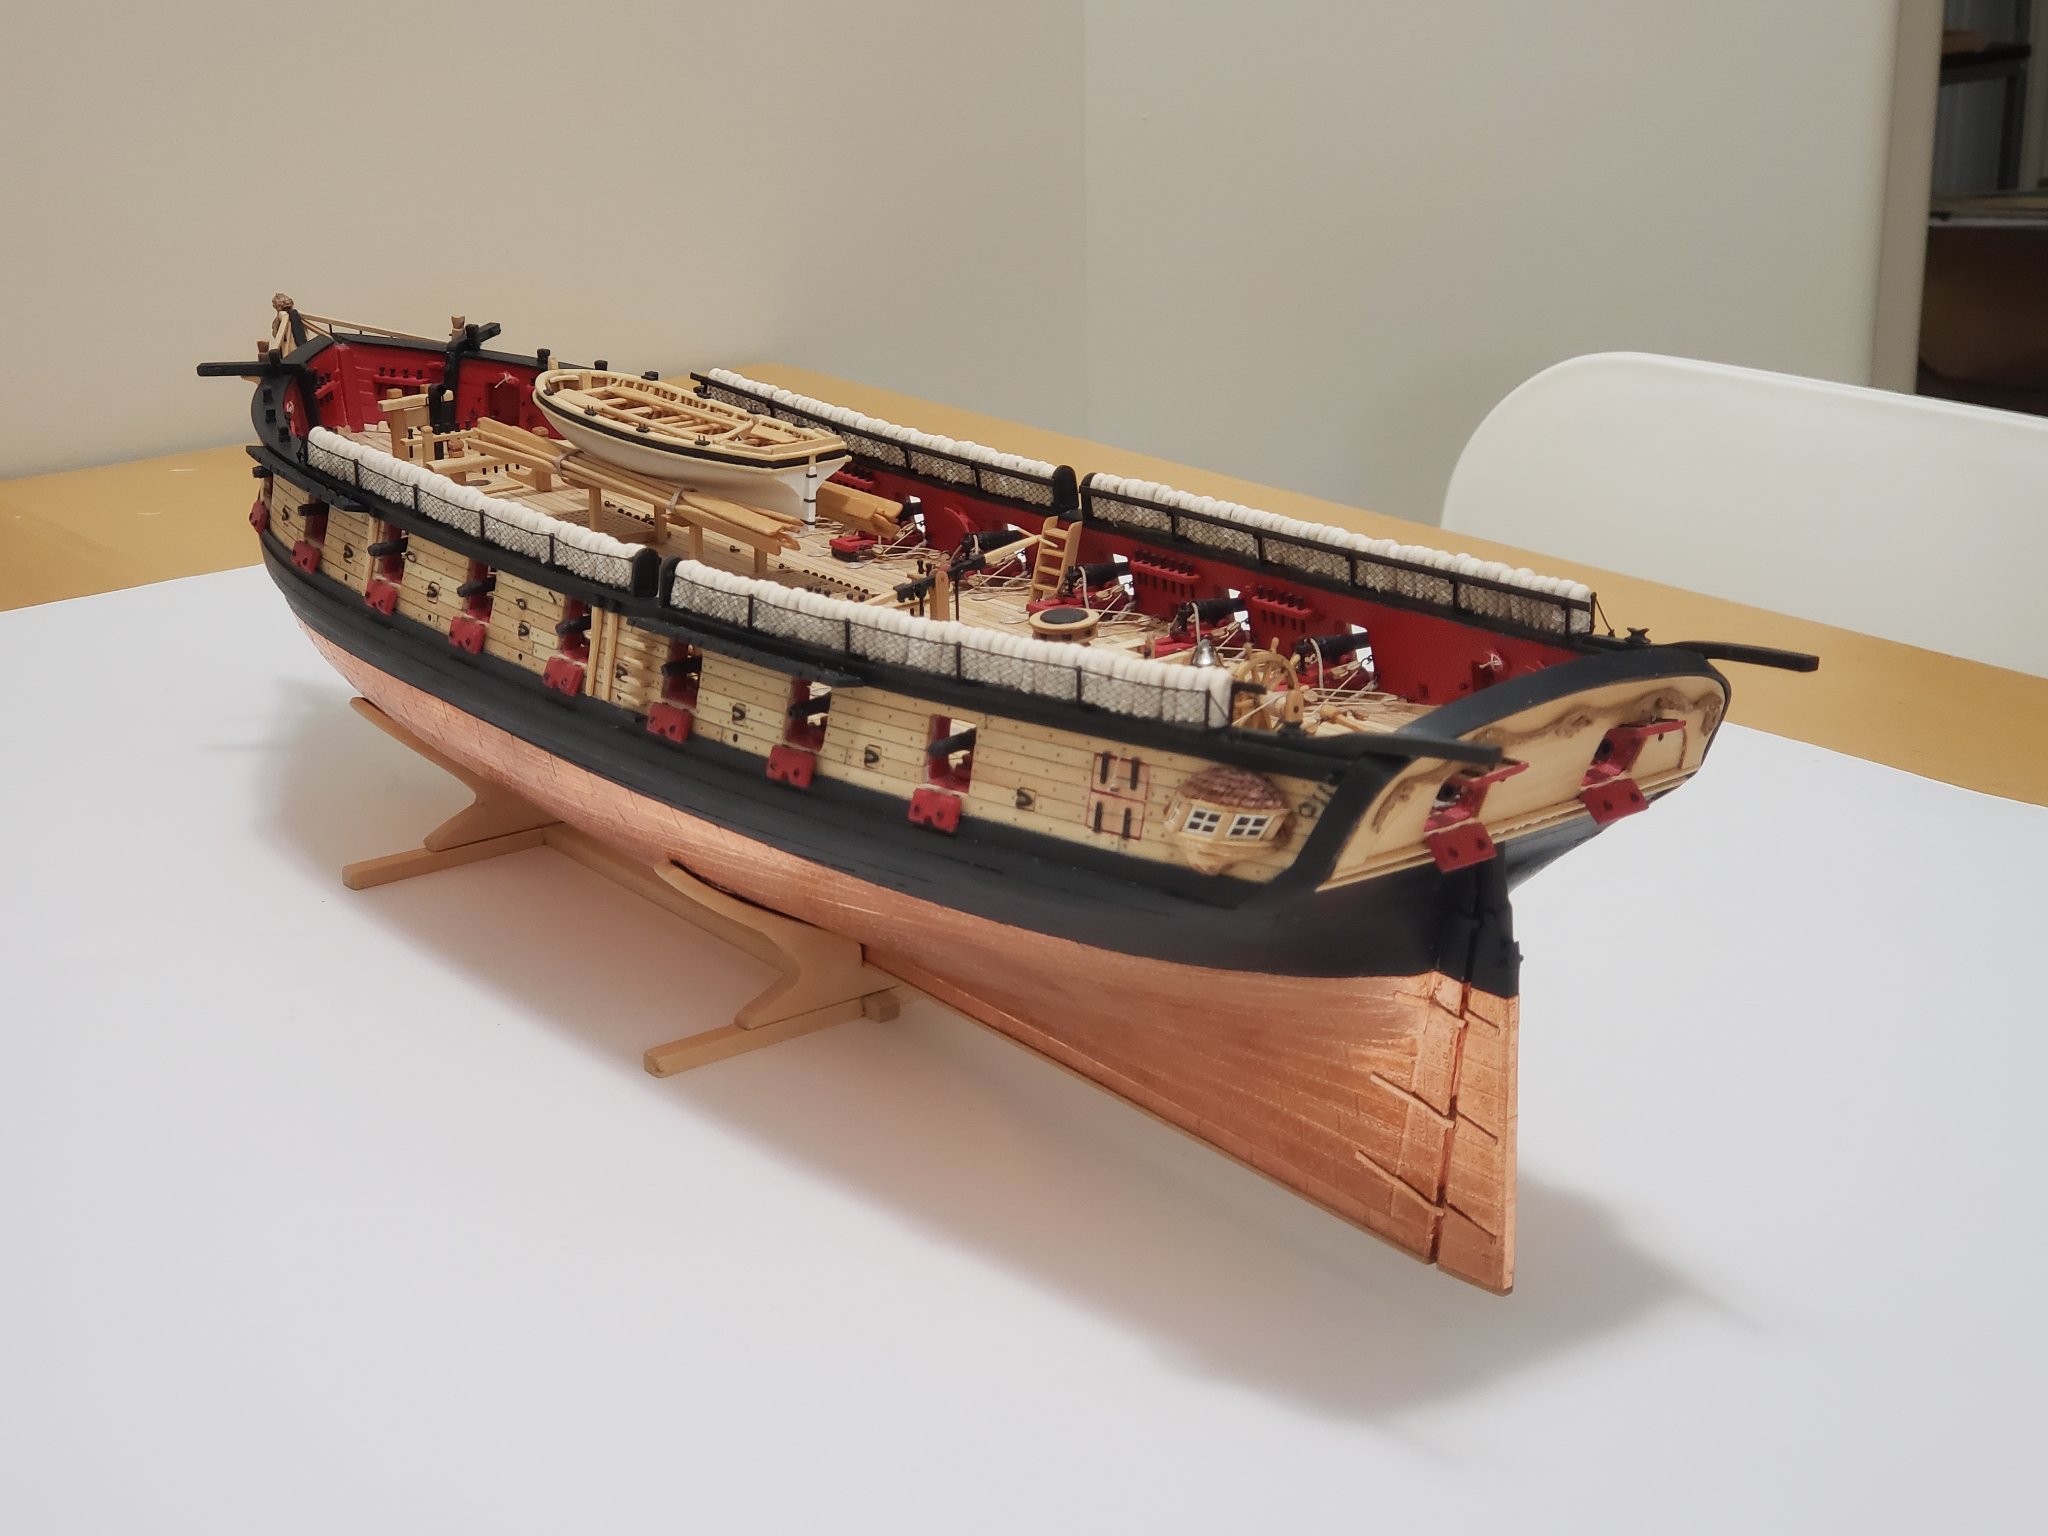
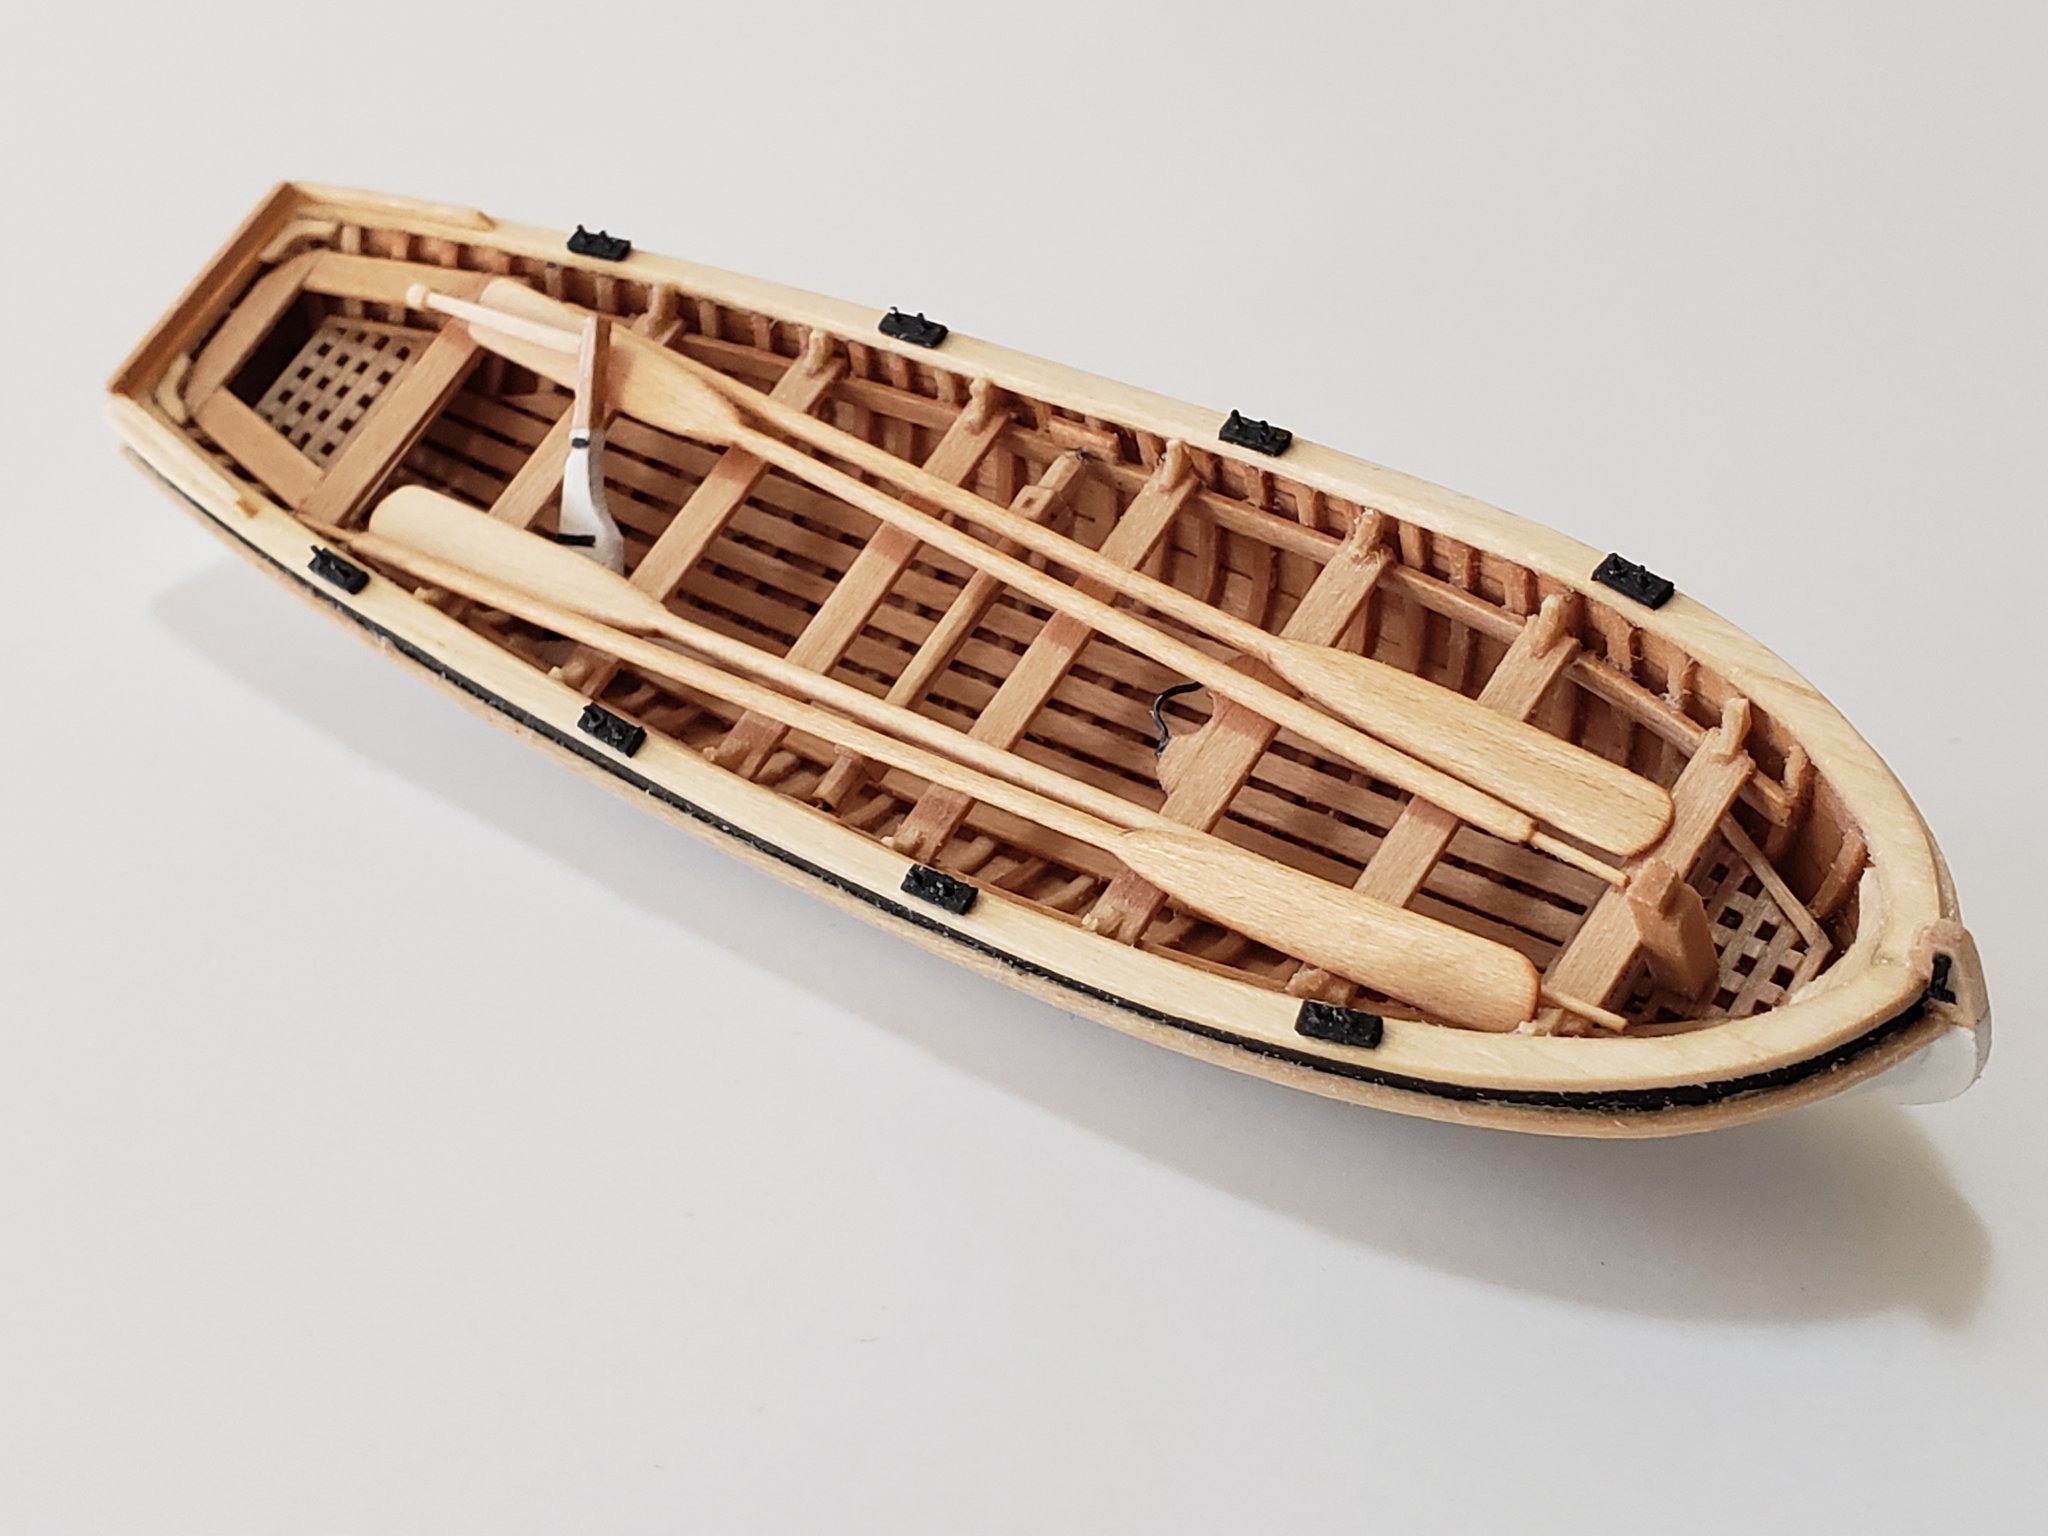
I finished the longboat! Overall it was a tough and challenging project, and now the jollyboat feels even more daunting than it did before! I will start working on that once I lash the longboat on the gallow bitts, and after finishing making the sweeps. I also plan on making the chocks for the boat to rest on. And here it is balancing on the gallow bitts. While I was working on the boat, I was also making hammocks. I plan to stain them with tea (as Chuck advised me) as these look too white. Before I used tissue paper inside the cloth but they seemed too bulky. I found that wetting the cloth with some water then rolling them carefully works better. After they are rolled and folded, I stitched them up with some white thread..


- 950 replies
-
- 17
-
-

-
- syren
- model shipways
- (and 1 more)
-
Thank you for the compliments! Also wishing you all Happy Holidays and a Merry Christmas!
- 950 replies
-
- 2
-
-
- syren
- model shipways
- (and 1 more)
-
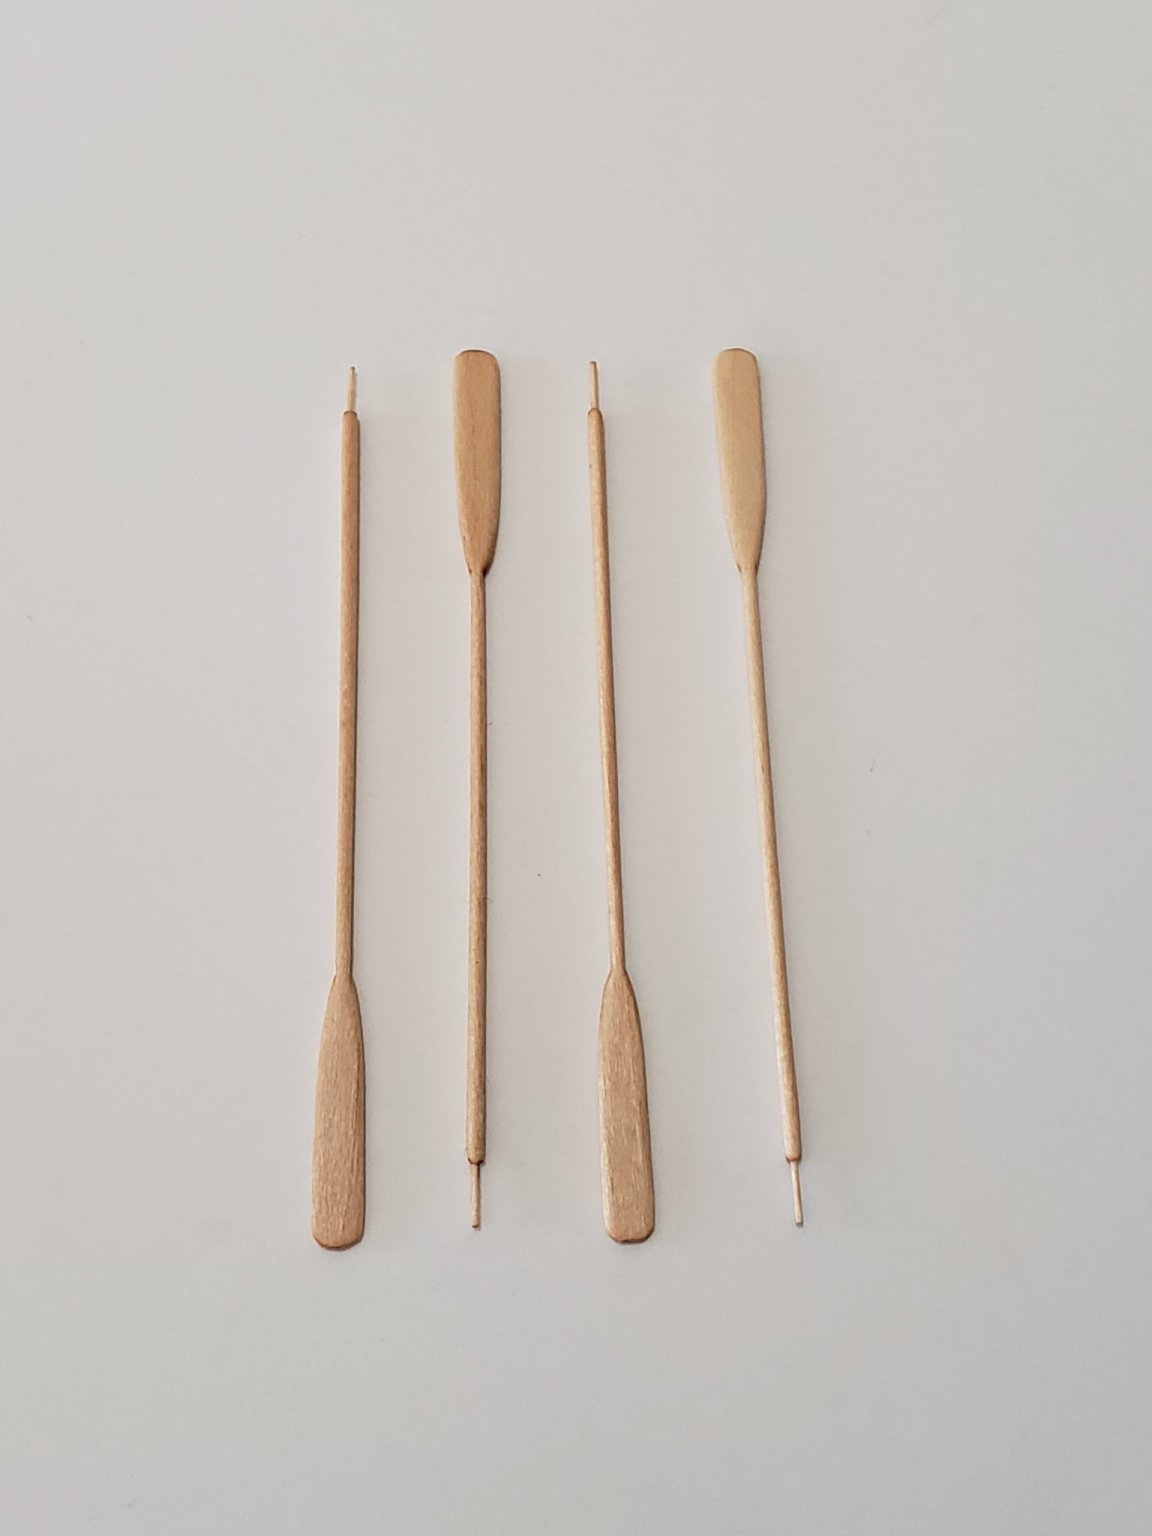
Thank you so much for the nice comments!! It's very much appreciated. Also, thanks all for leaving the likes and looking in! It really motivates me to do better! 😄 Slowly approaching the finish line for the longboat... The knees, bowsprit step, and splash guard have been installed. For the knees I cut out triangular pieces which were then shaped with a round needle file.. Only thing next are the gudgeons and pintles, oarlocks, shaping the tiller, and the oars themselves (which I am hoping to complete for my next post). So yes, lots left to do 😅


- 950 replies
-
- 16
-
-
- syren
- model shipways
- (and 1 more)
-
Longboat is almost done. I finished cutting out the keel, stem and sternpost from a basswood sheet. I also painted the rudder: I pre-bent the molding strip prior to installation. It was still very tricky to glue it and used CA glue in many parts for a quick set. I just hope it doesn't break apart after some time 😅.... It needed some intense bends especially at the bow... Some shots of where the boat is at now:


- 950 replies
-
- 18
-
-
- syren
- model shipways
- (and 1 more)