HOLIDAY DONATION DRIVE - SUPPORT MSW - DO YOUR PART TO KEEP THIS GREAT FORUM GOING! (Only 13 donations so far - C'mon guys!)
×

.jpg.1f80adf1a9b14a937cfcf2ca6af0f0d4.jpg)
WalrusGuy
-
Posts
1,007 -
Joined
-
Last visited
Content Type
Profiles
Forums
Gallery
Events
Everything posted by WalrusGuy
-
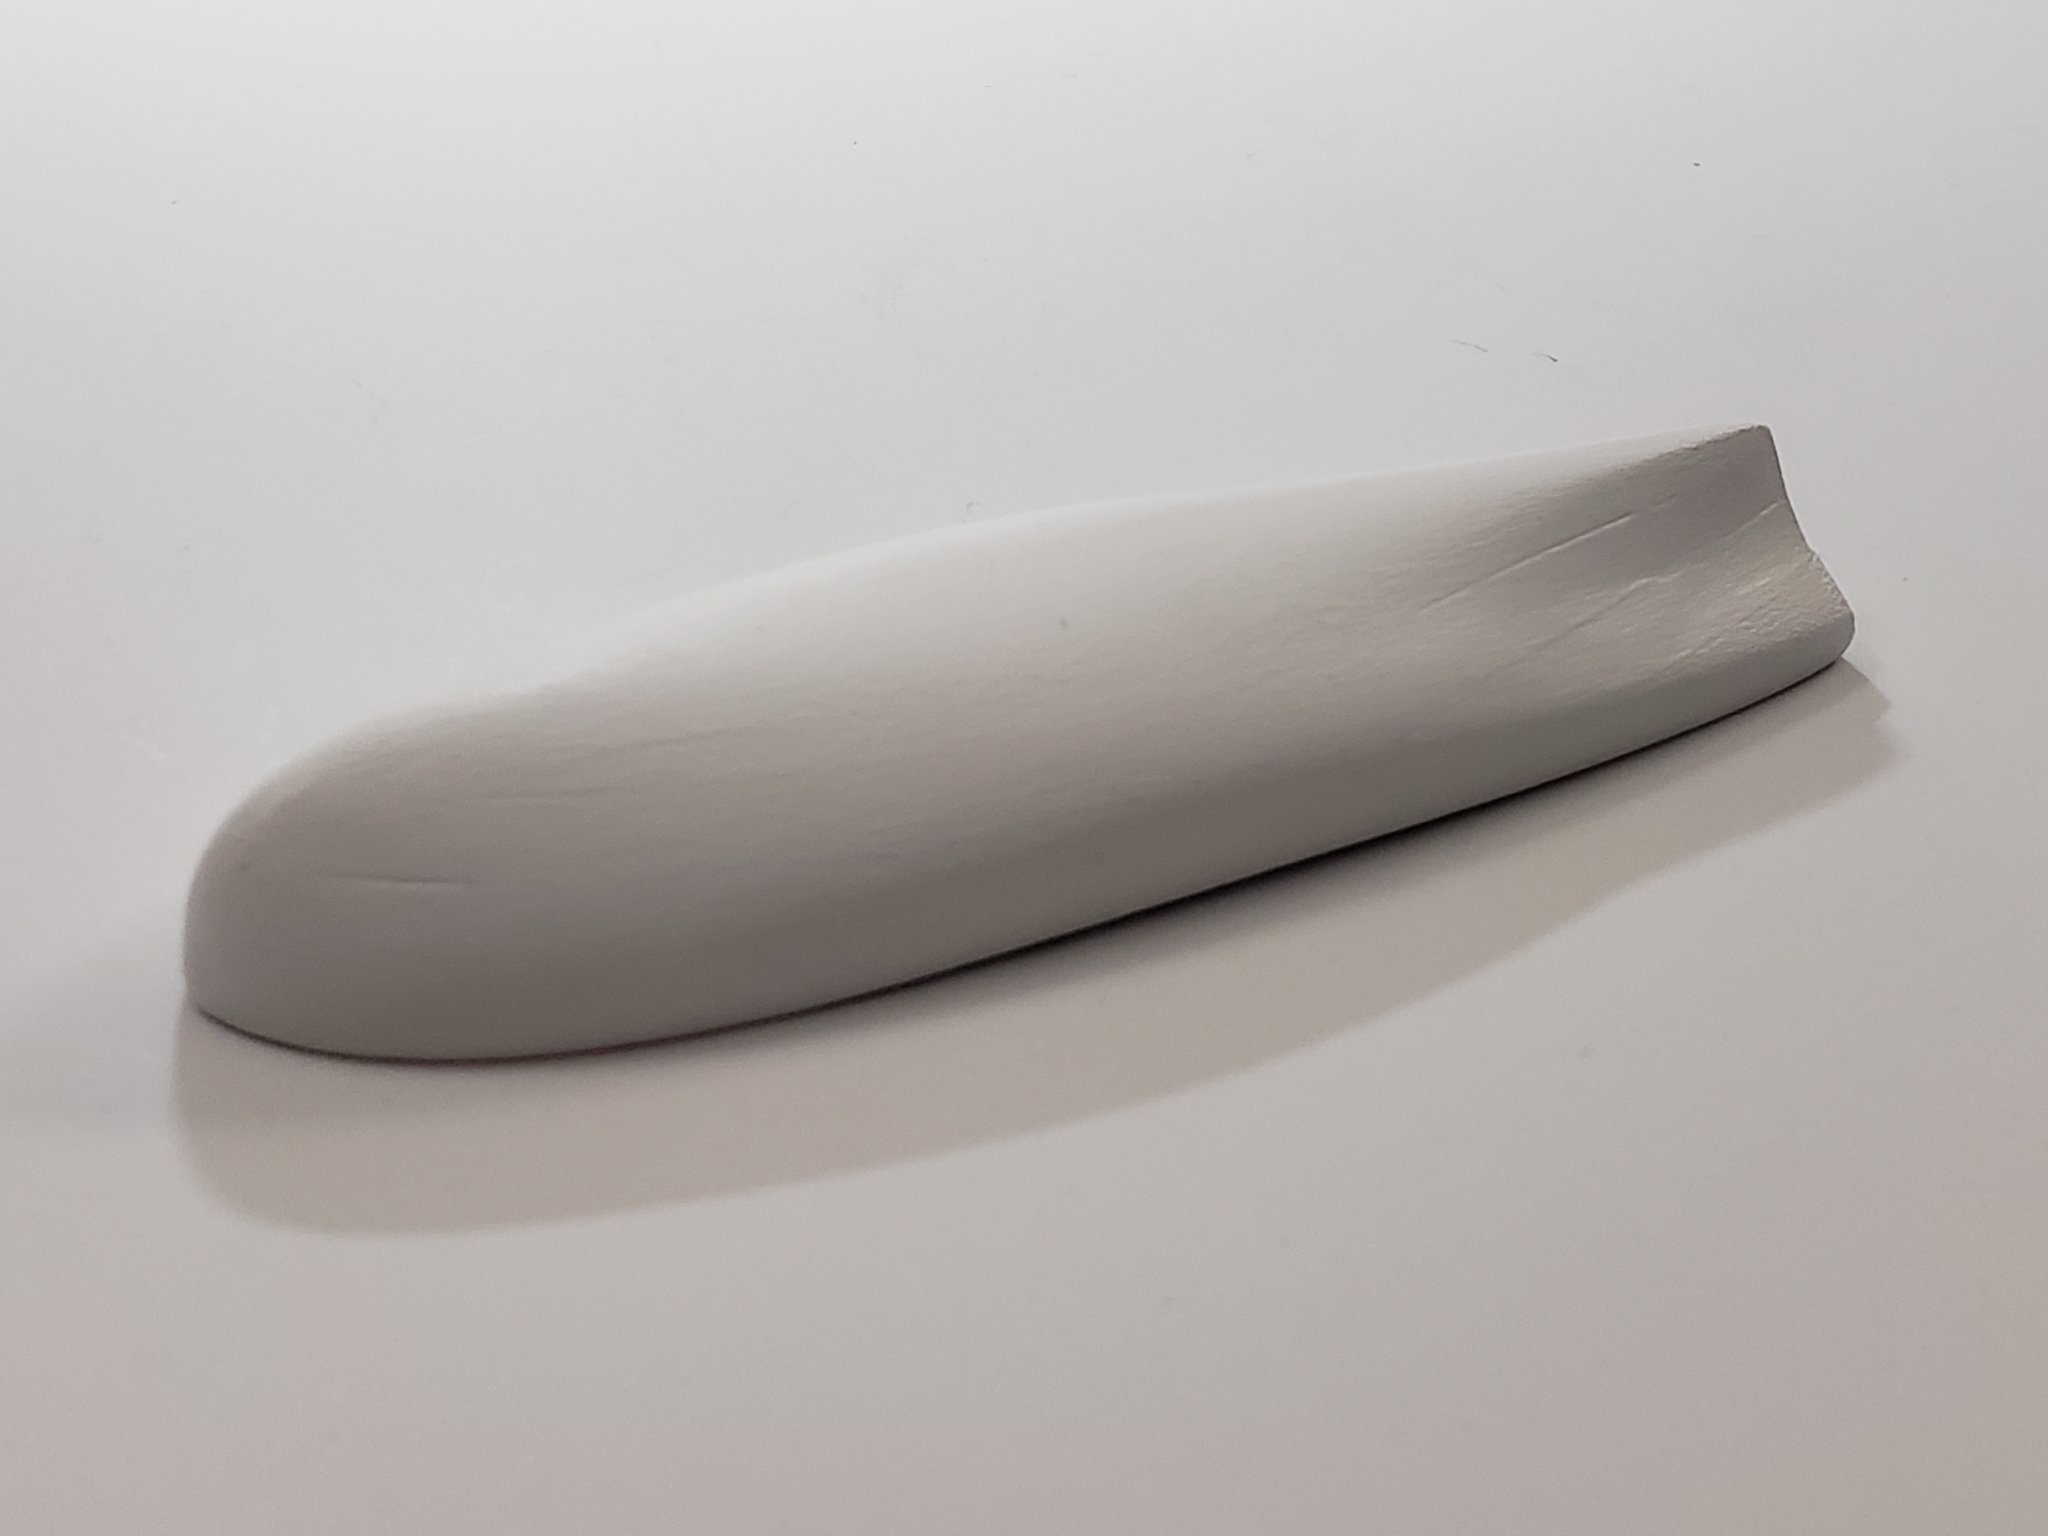
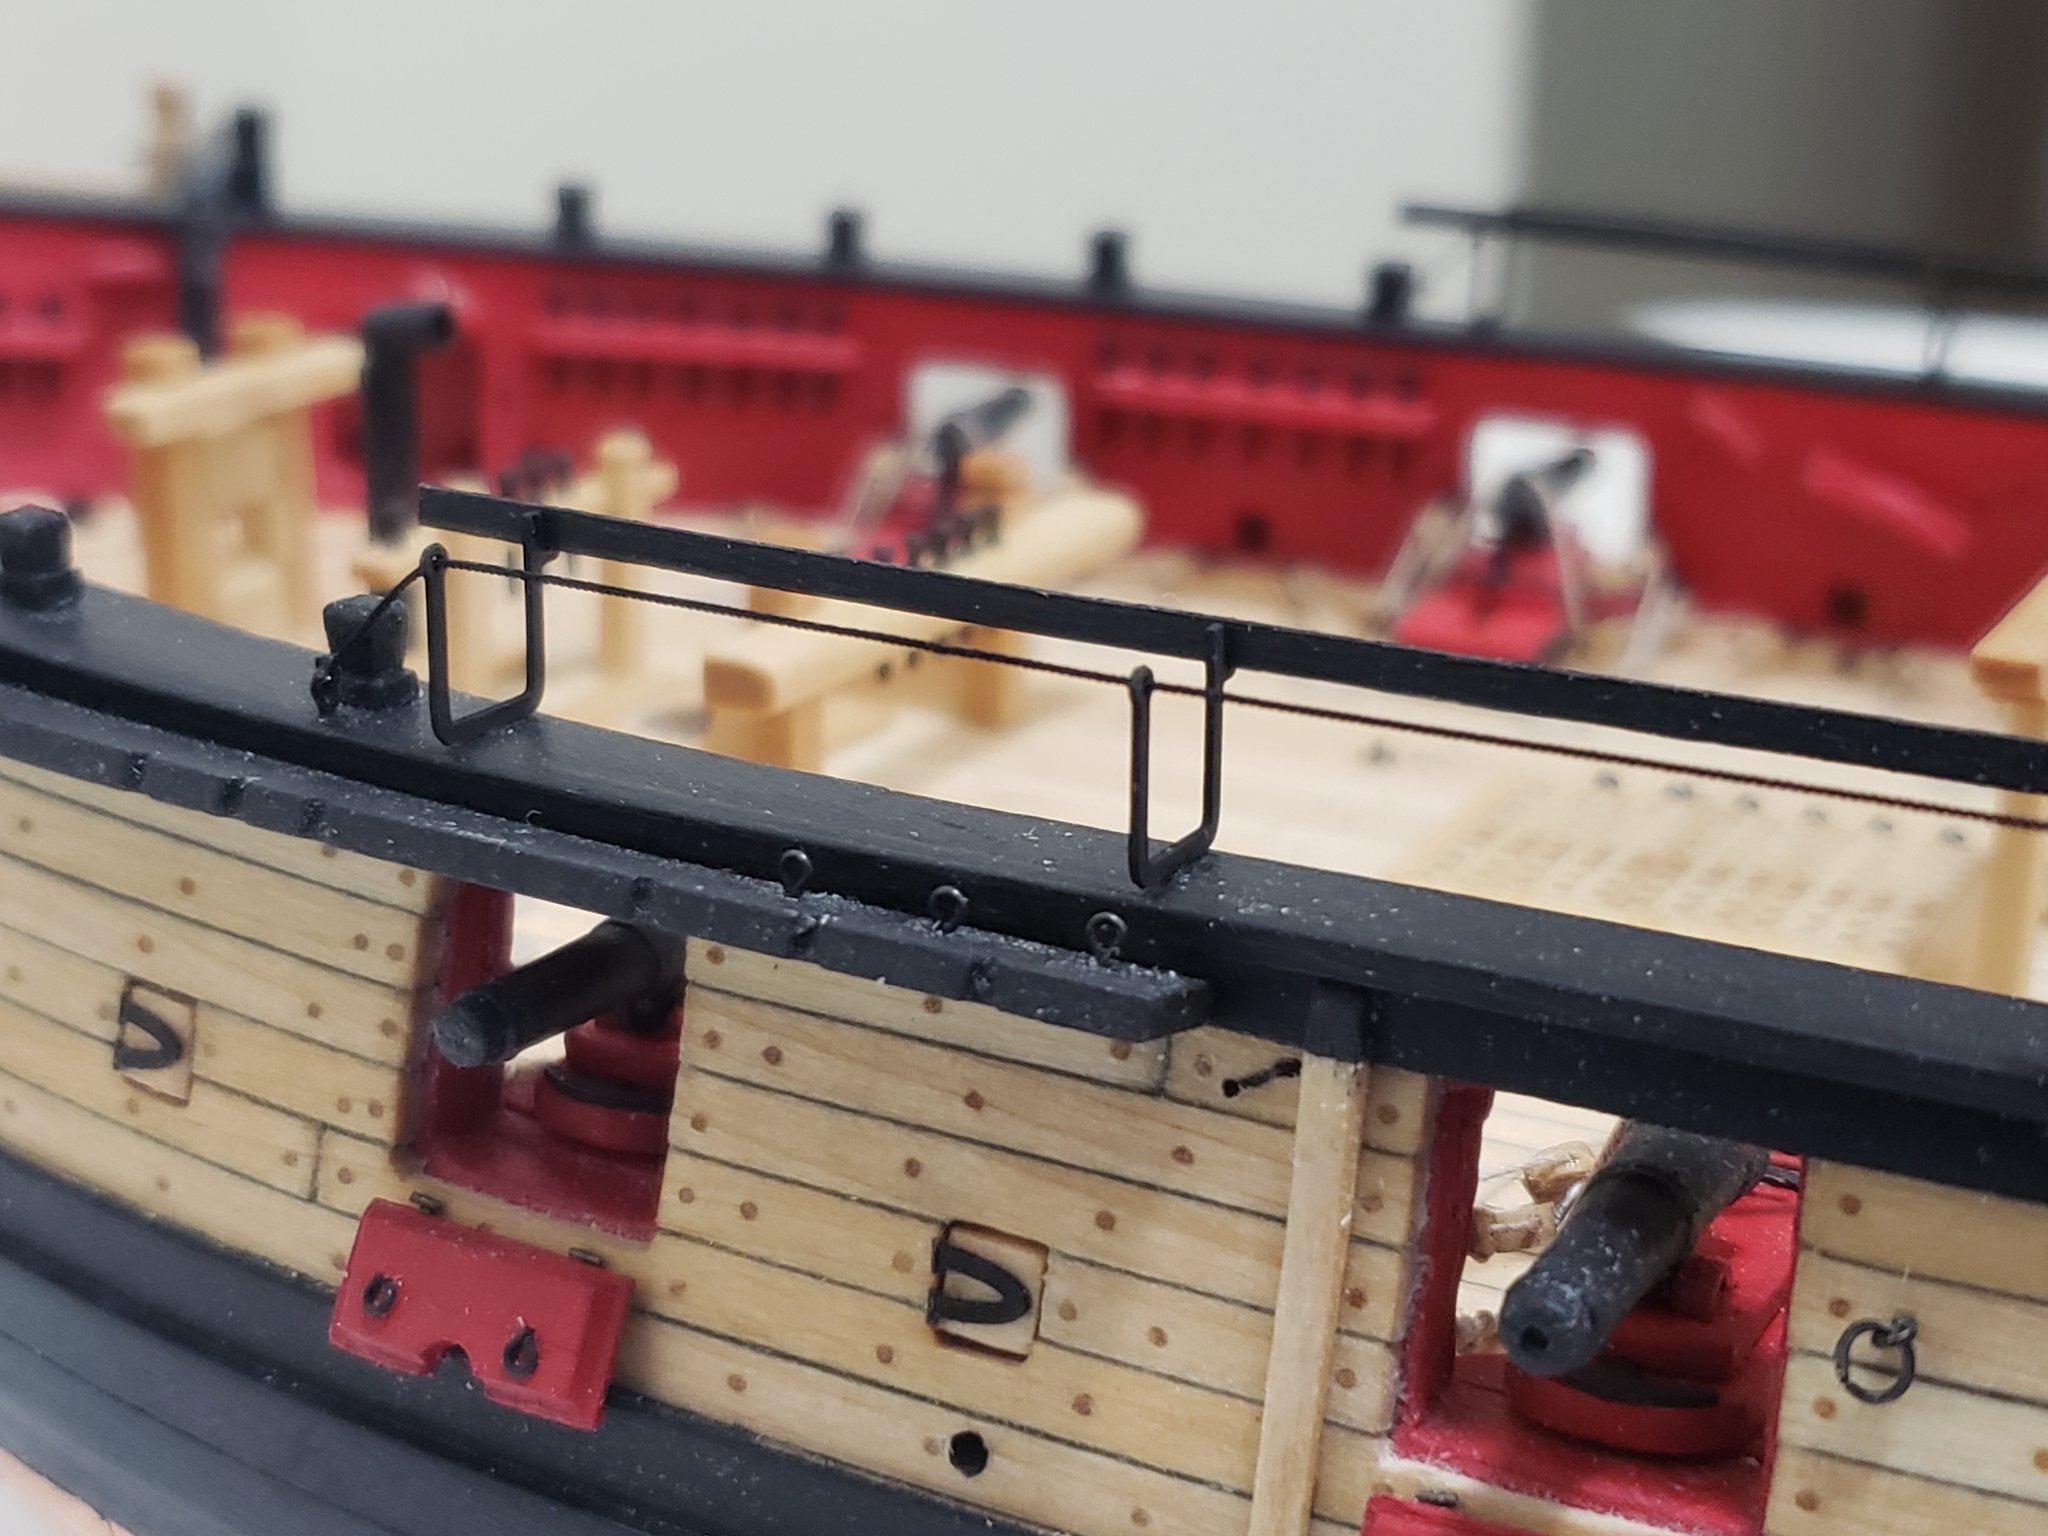
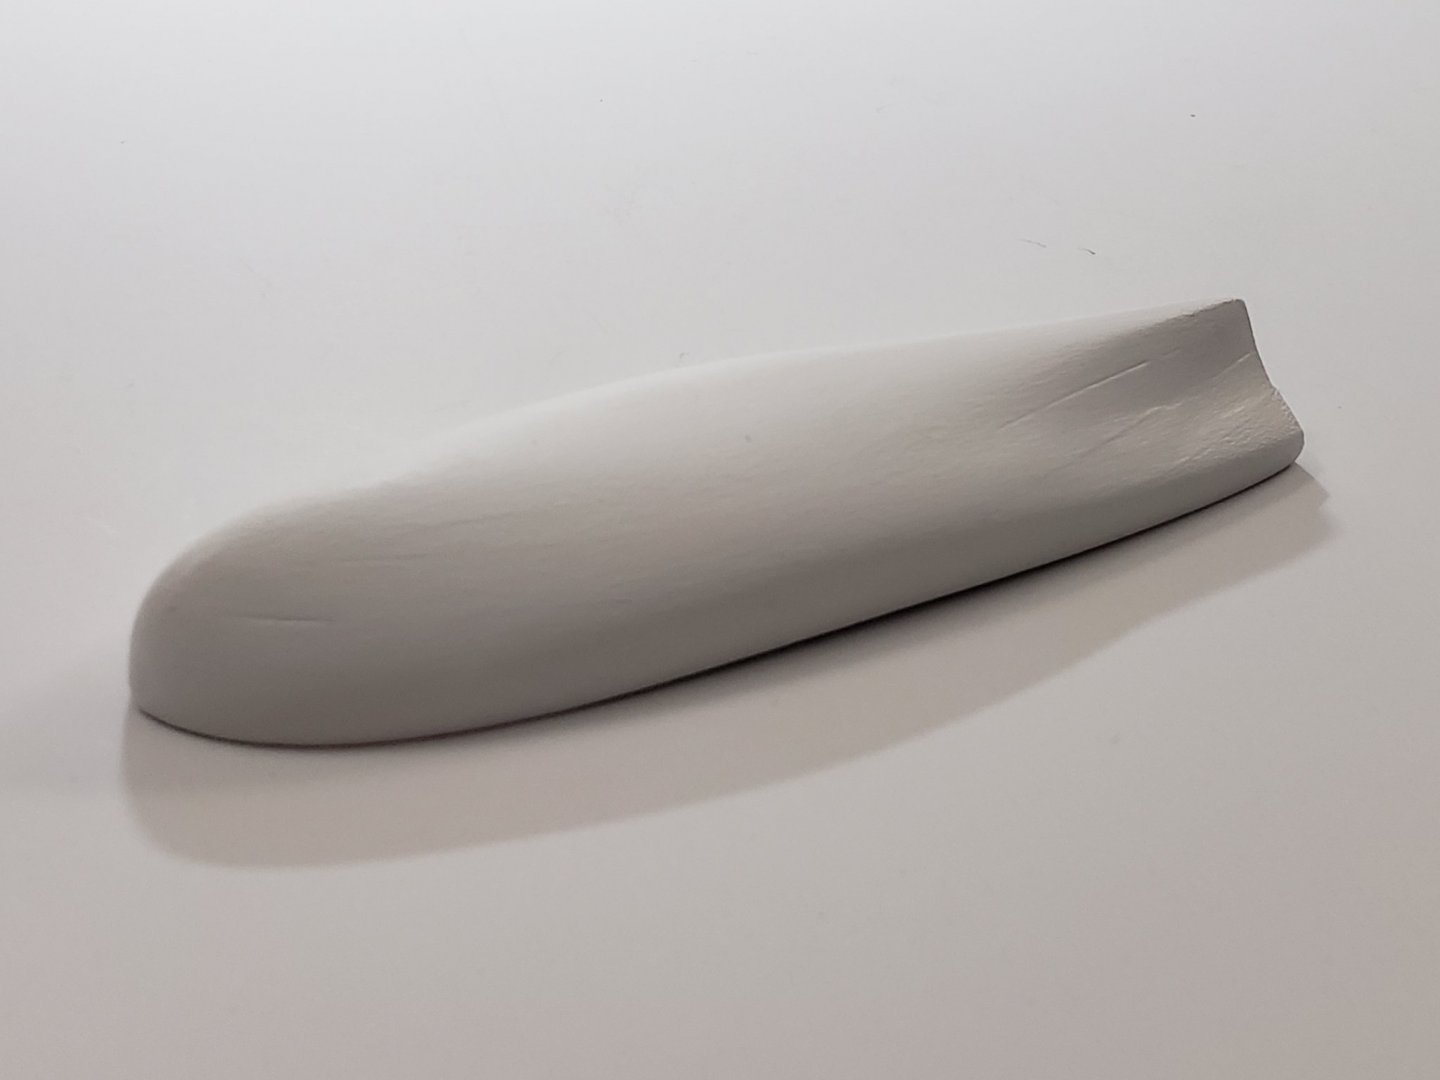
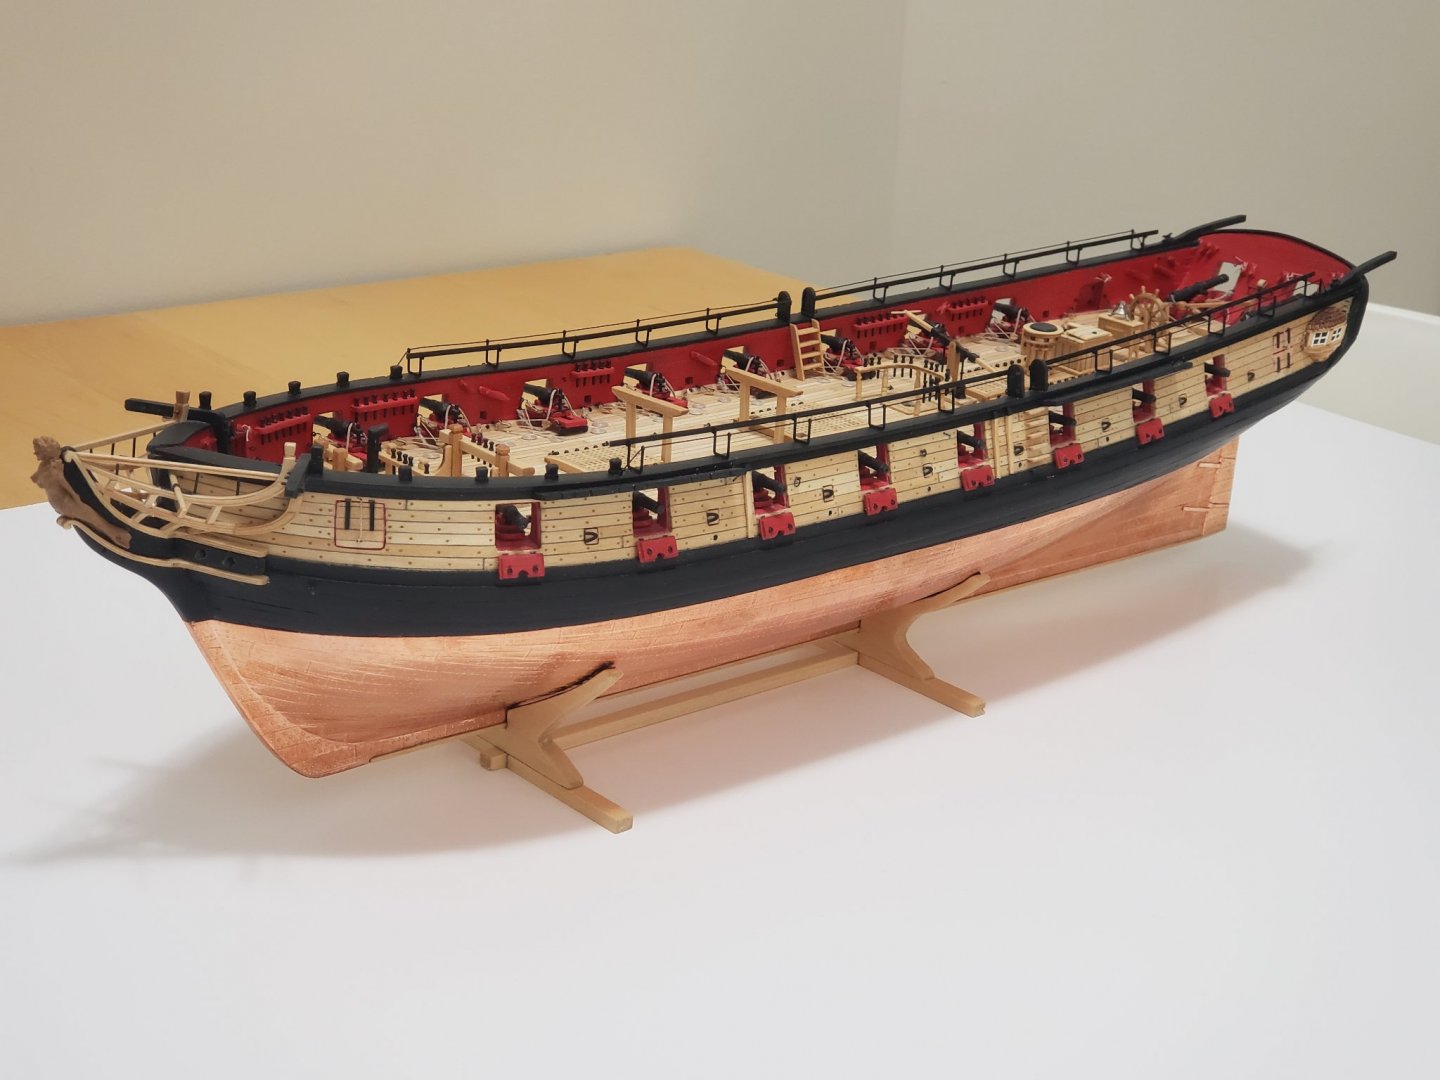
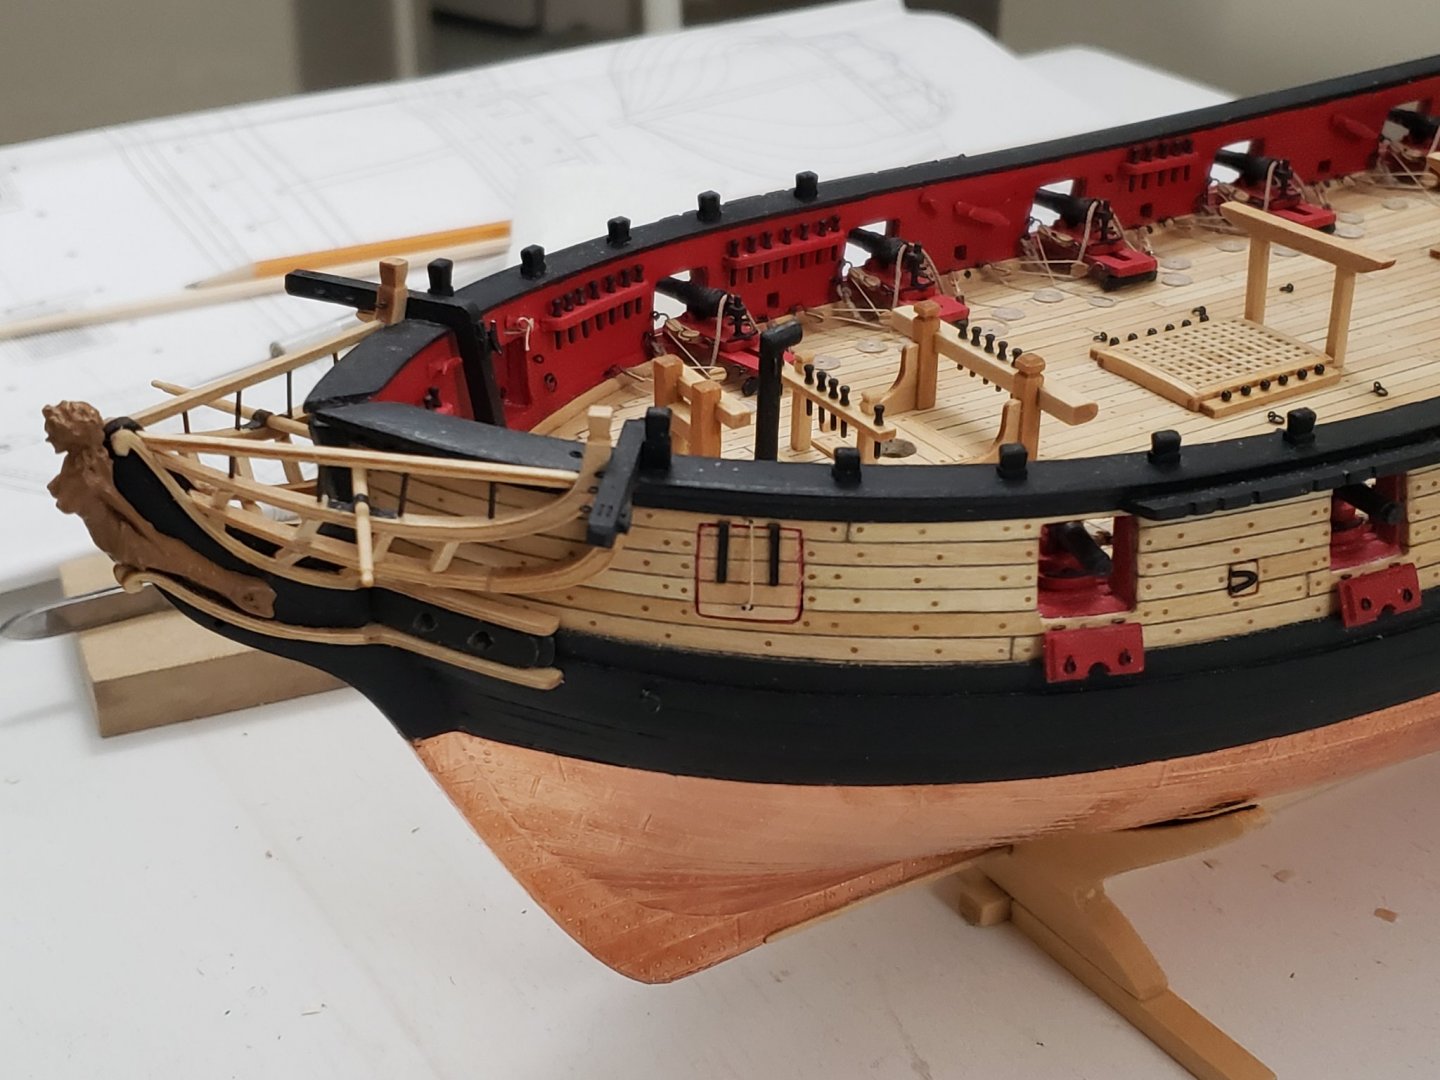
.thumb.jpg.62d1d69fed1f32364417cb1f9cdeb009.jpg) I sanded the cap rail a bit. I don't think I can go any more thinner than this
I sanded the cap rail a bit. I don't think I can go any more thinner than this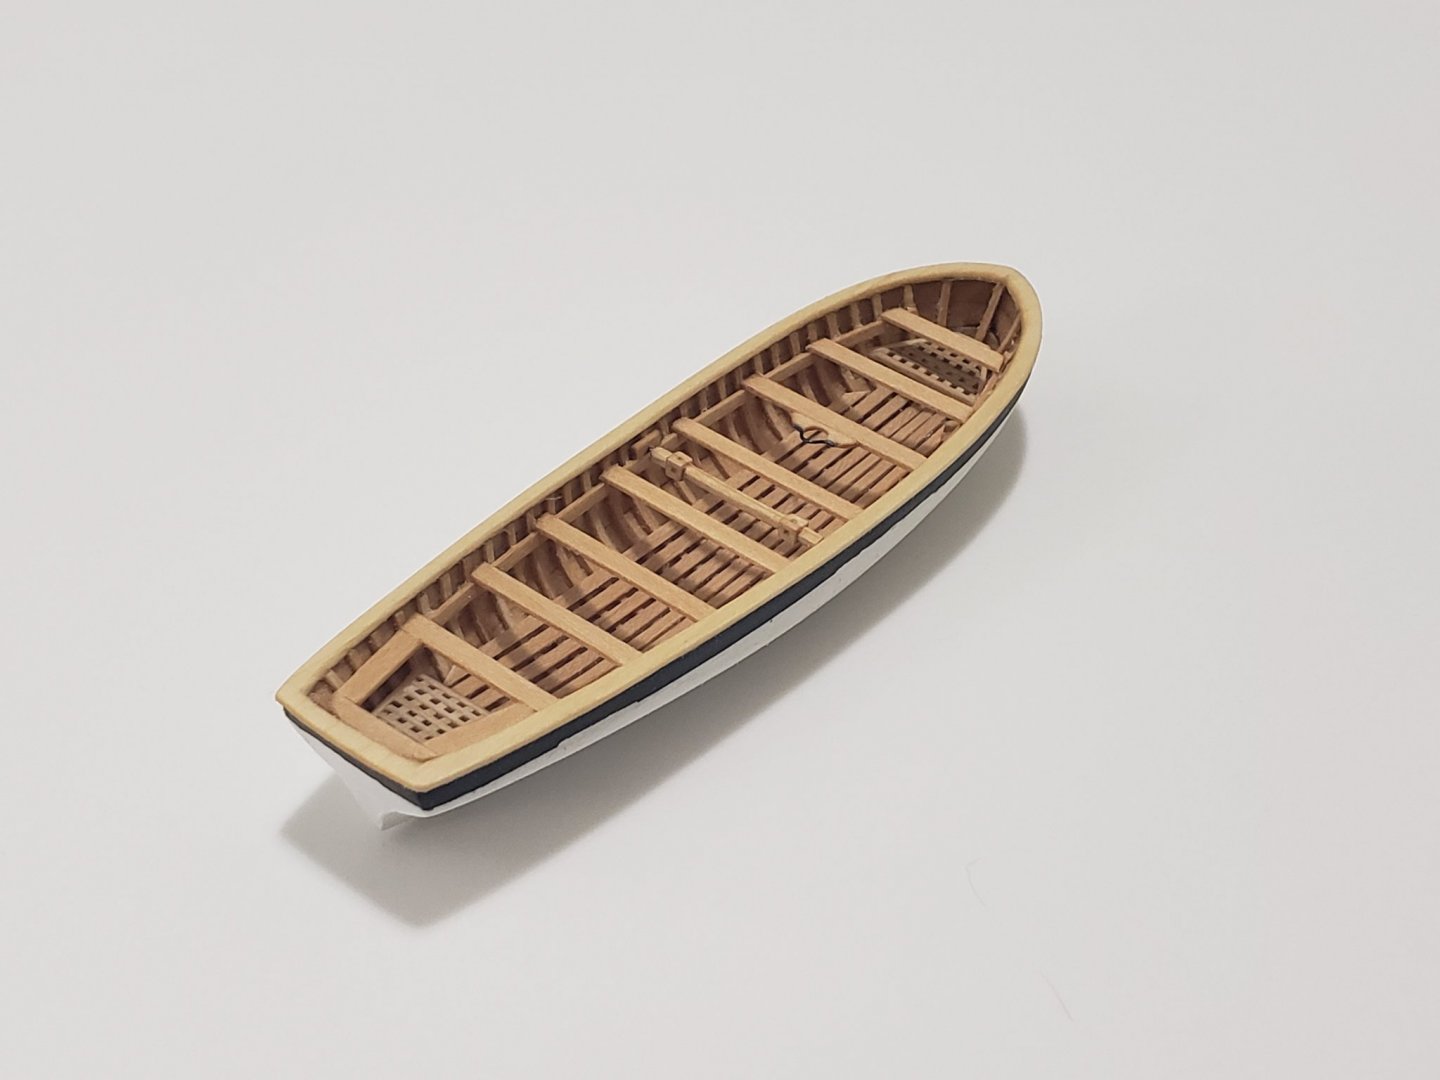

- 950 replies
-
- 14
-

-
- syren
- model shipways
- (and 1 more)
-
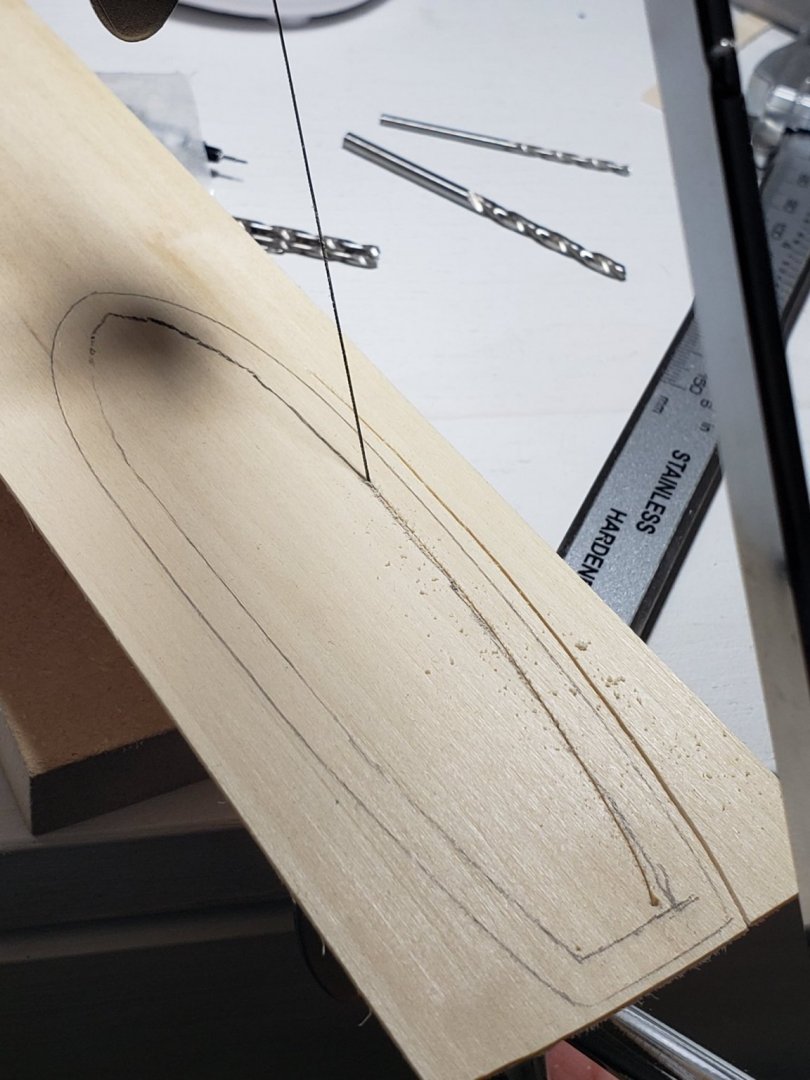
I finished with the cap rail. The laser cut one did not fit well, so had to scratch it from a sheet of basswood: Next I'll be cutting out the keel, stem, and stern posts since the laser cut ones also don't fit nice EDIT: I realize I may have to thin down the cap rail a bit more. I'll try and will post additional photos
- 950 replies
-
- 10
-
-
- syren
- model shipways
- (and 1 more)
-
There was one spot where I sanded it too much and could sense it would flake if I put a bit pressure. But now after painting and adding all the details it should be ok! 😁
- 950 replies
-
- 2
-
-
- syren
- model shipways
- (and 1 more)
-
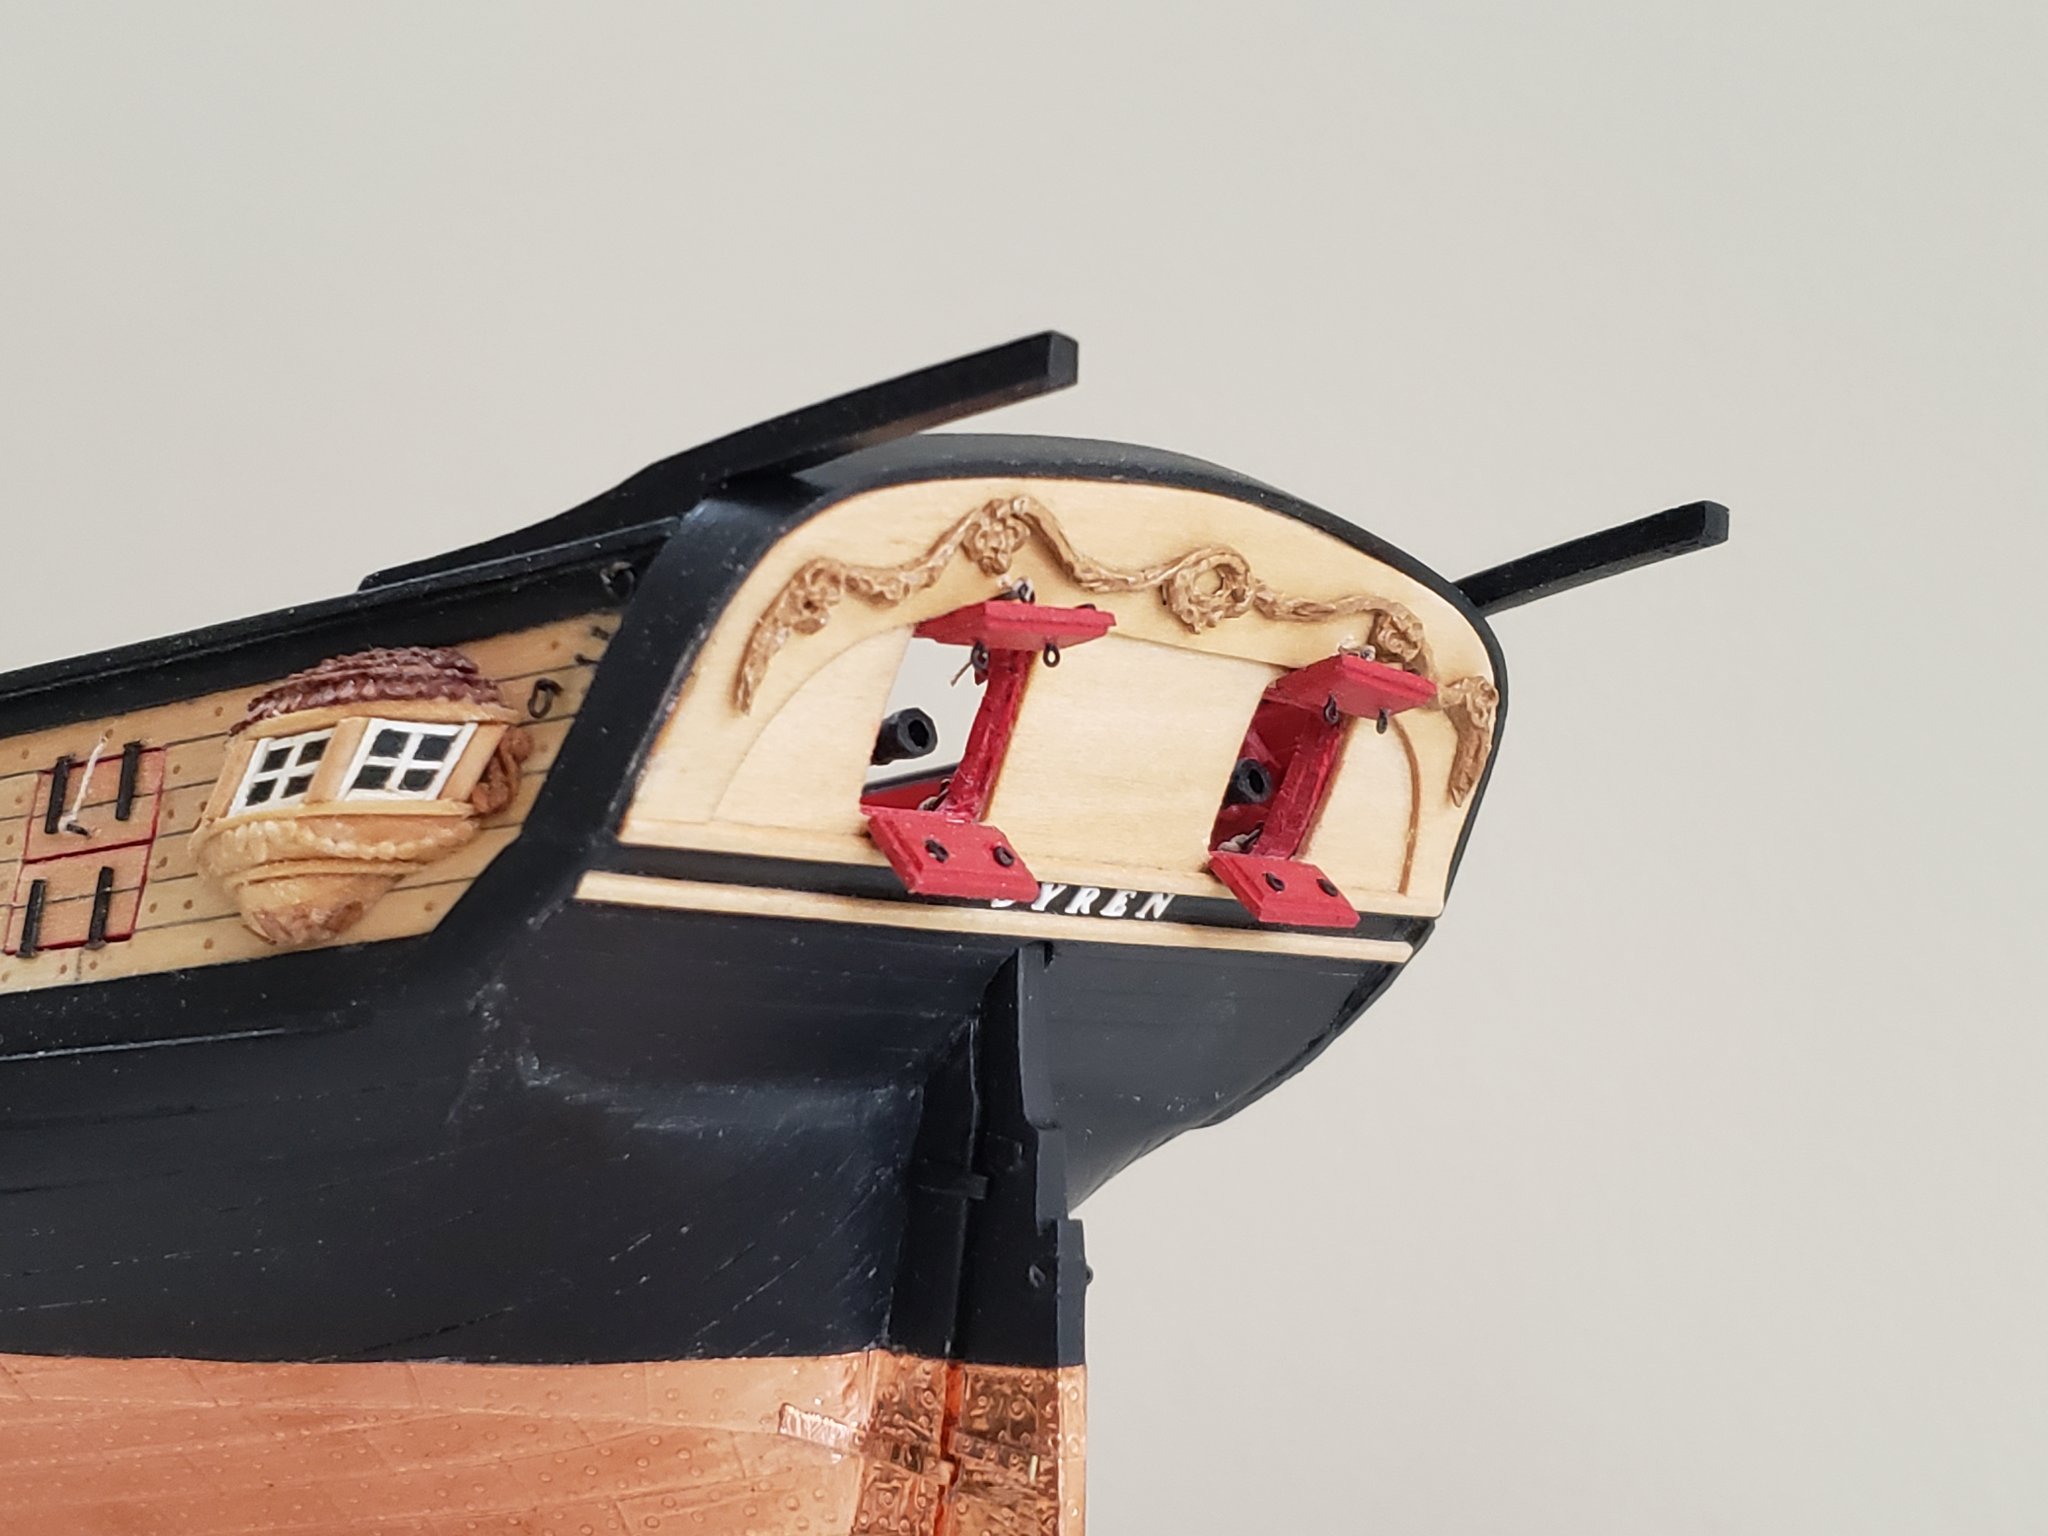
Thanks so much for the encouraging words Thomas and Bob! The windlass has been carved and installed. And I also painted the top section black before I stick the moulding strip
- 950 replies
-
- 14
-
-
- syren
- model shipways
- (and 1 more)
-
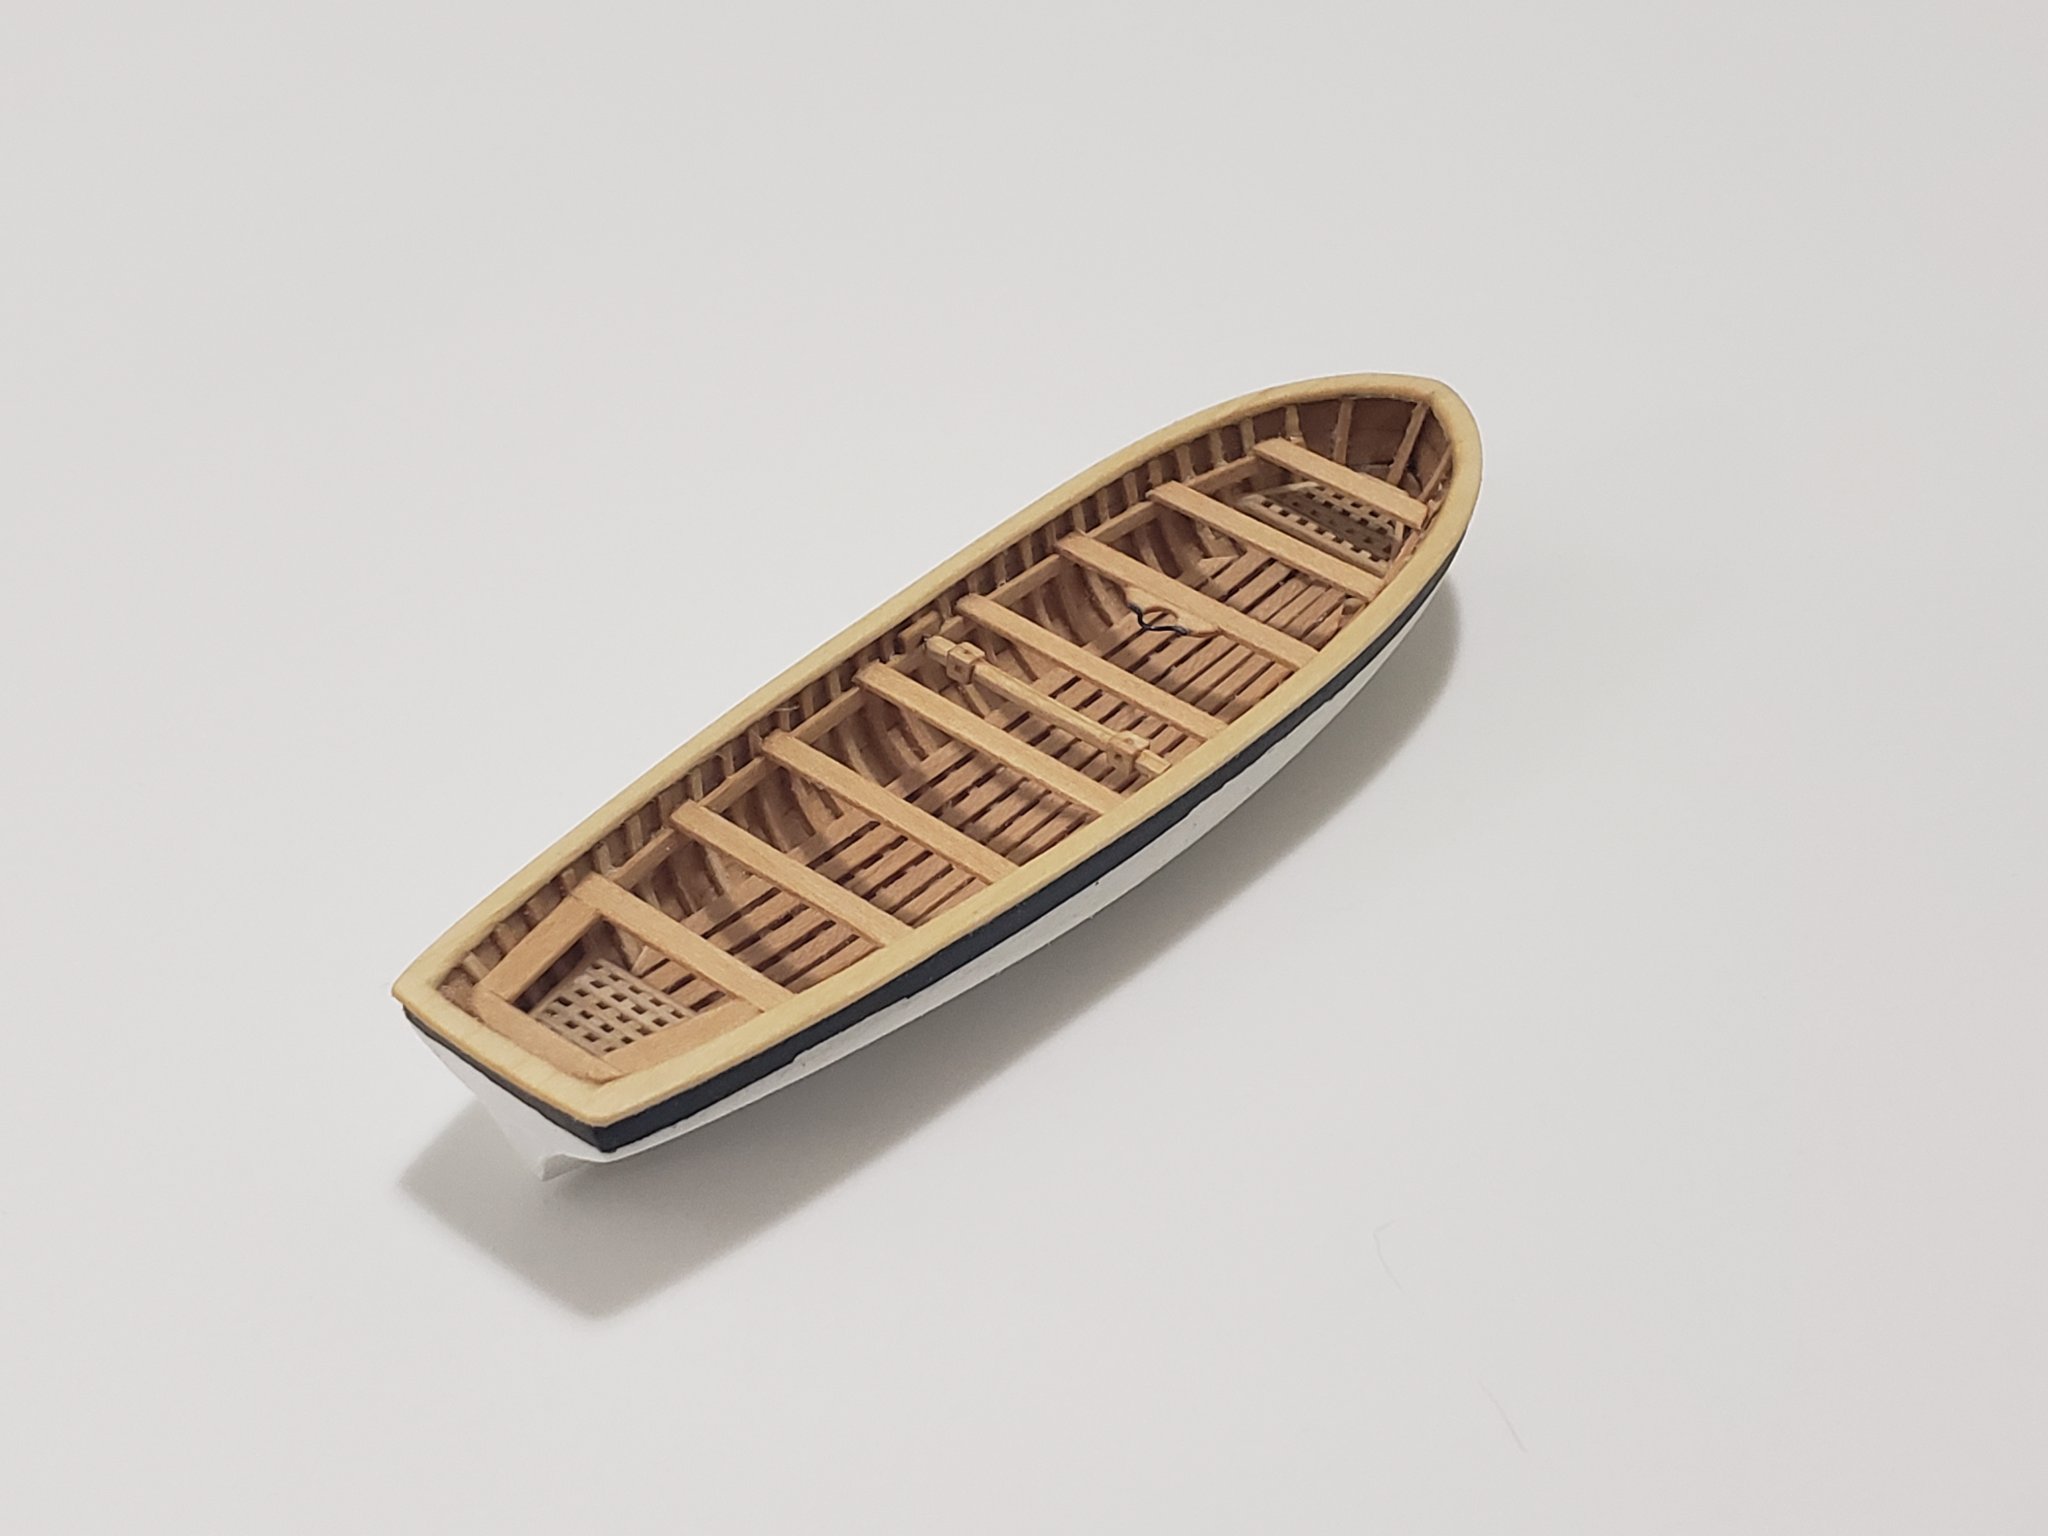
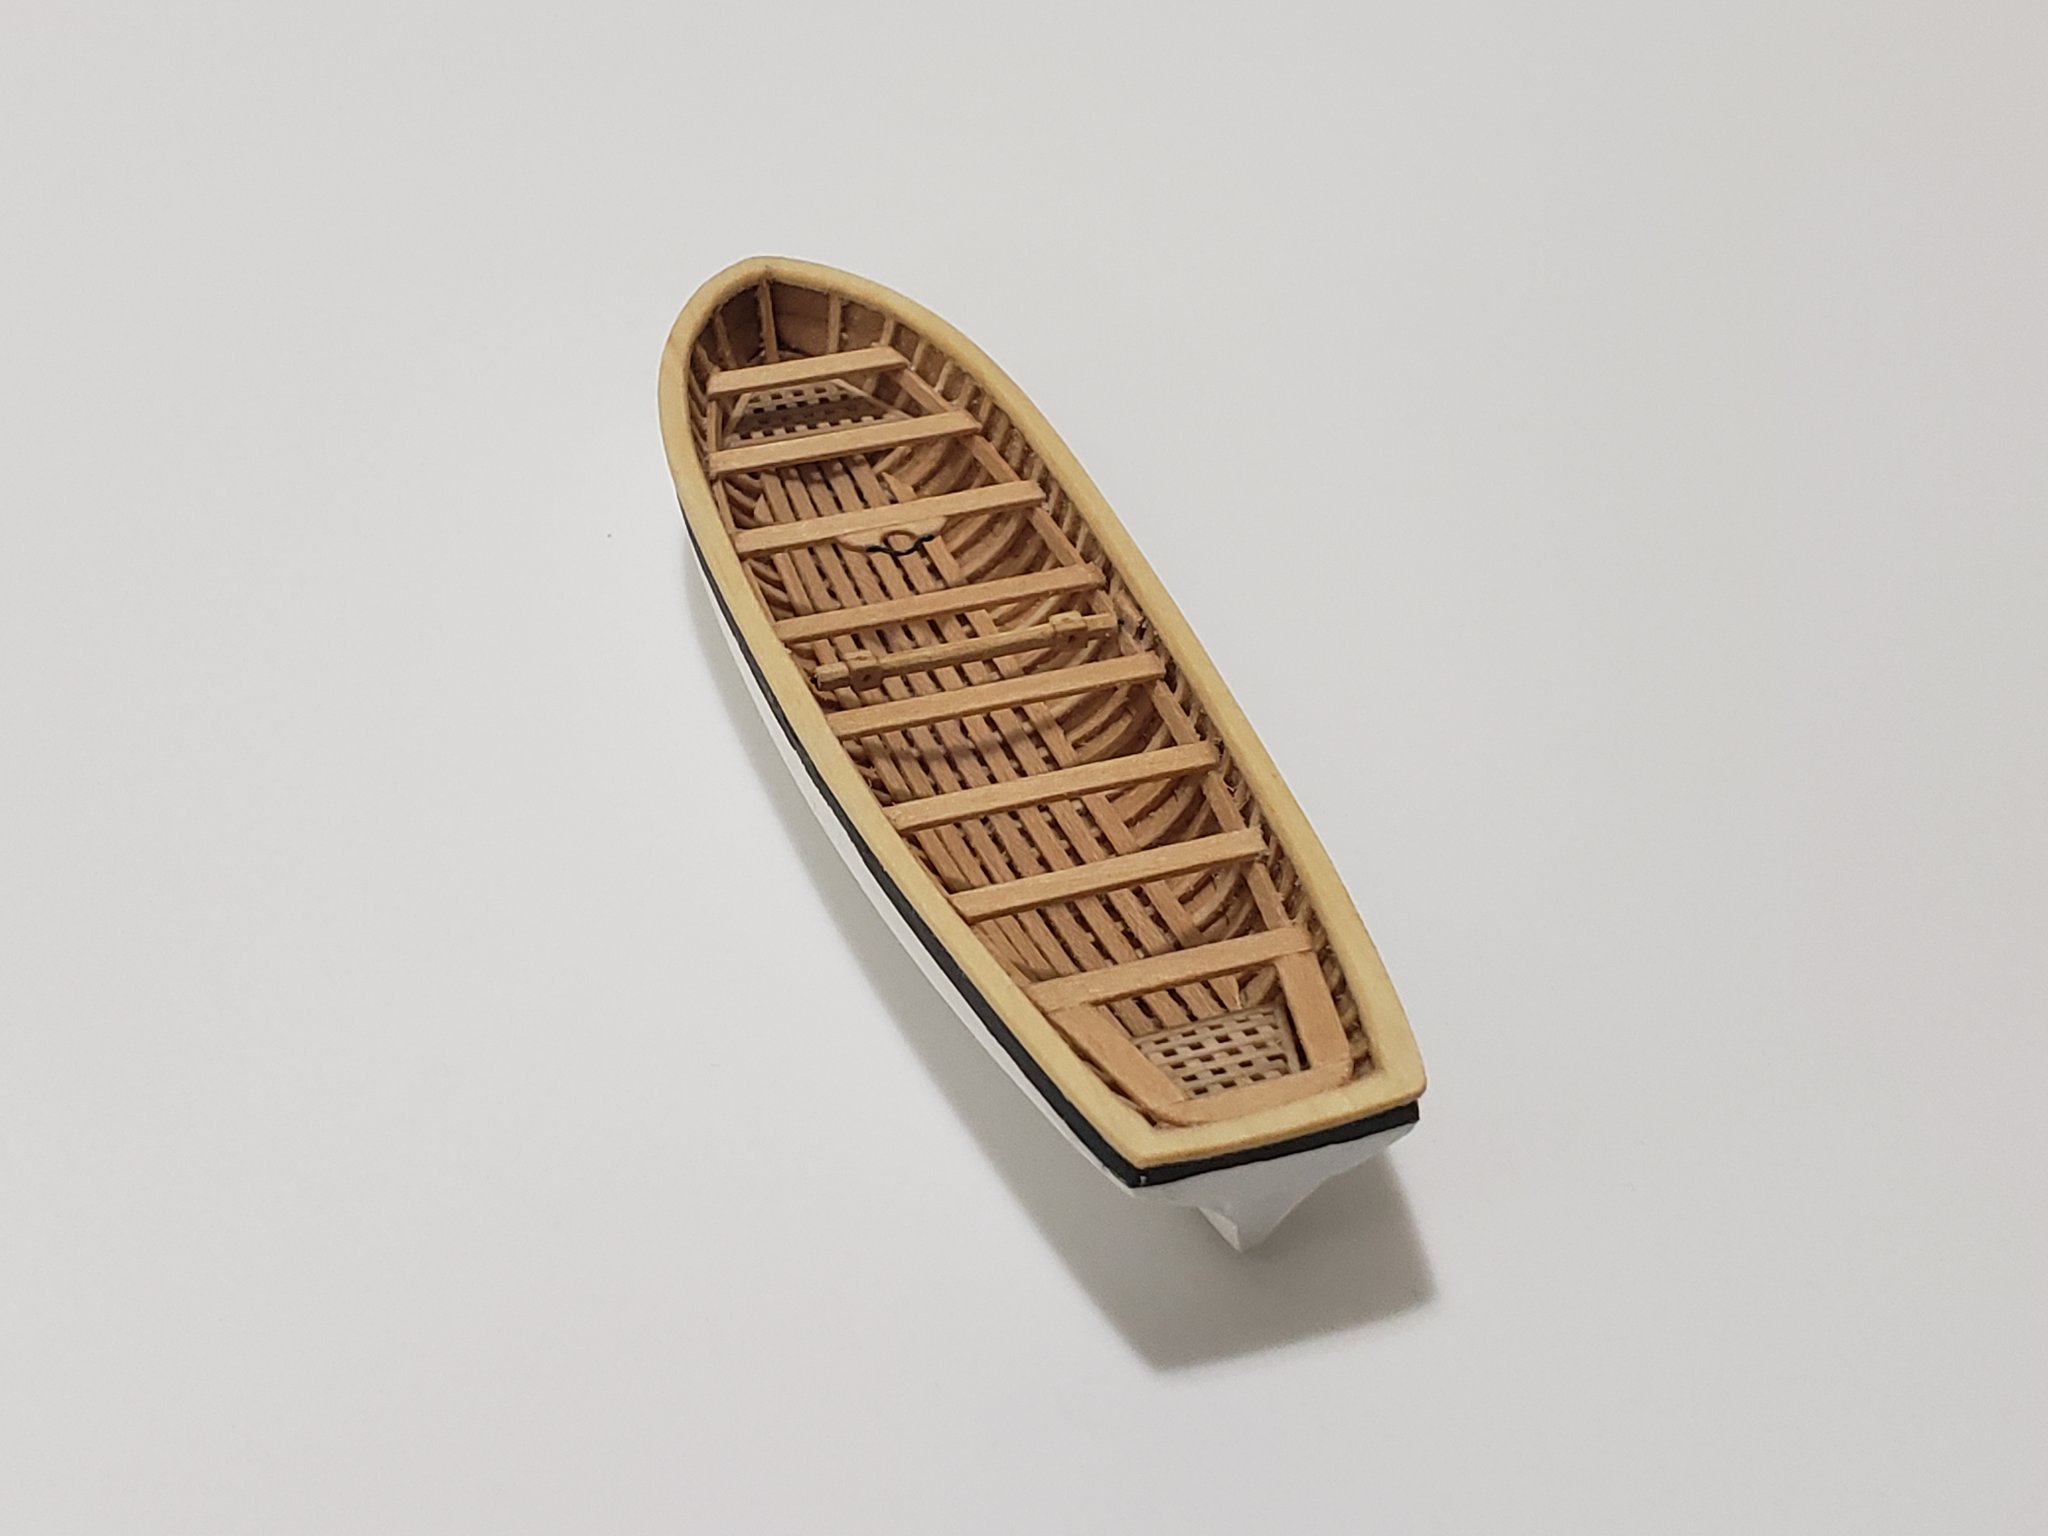
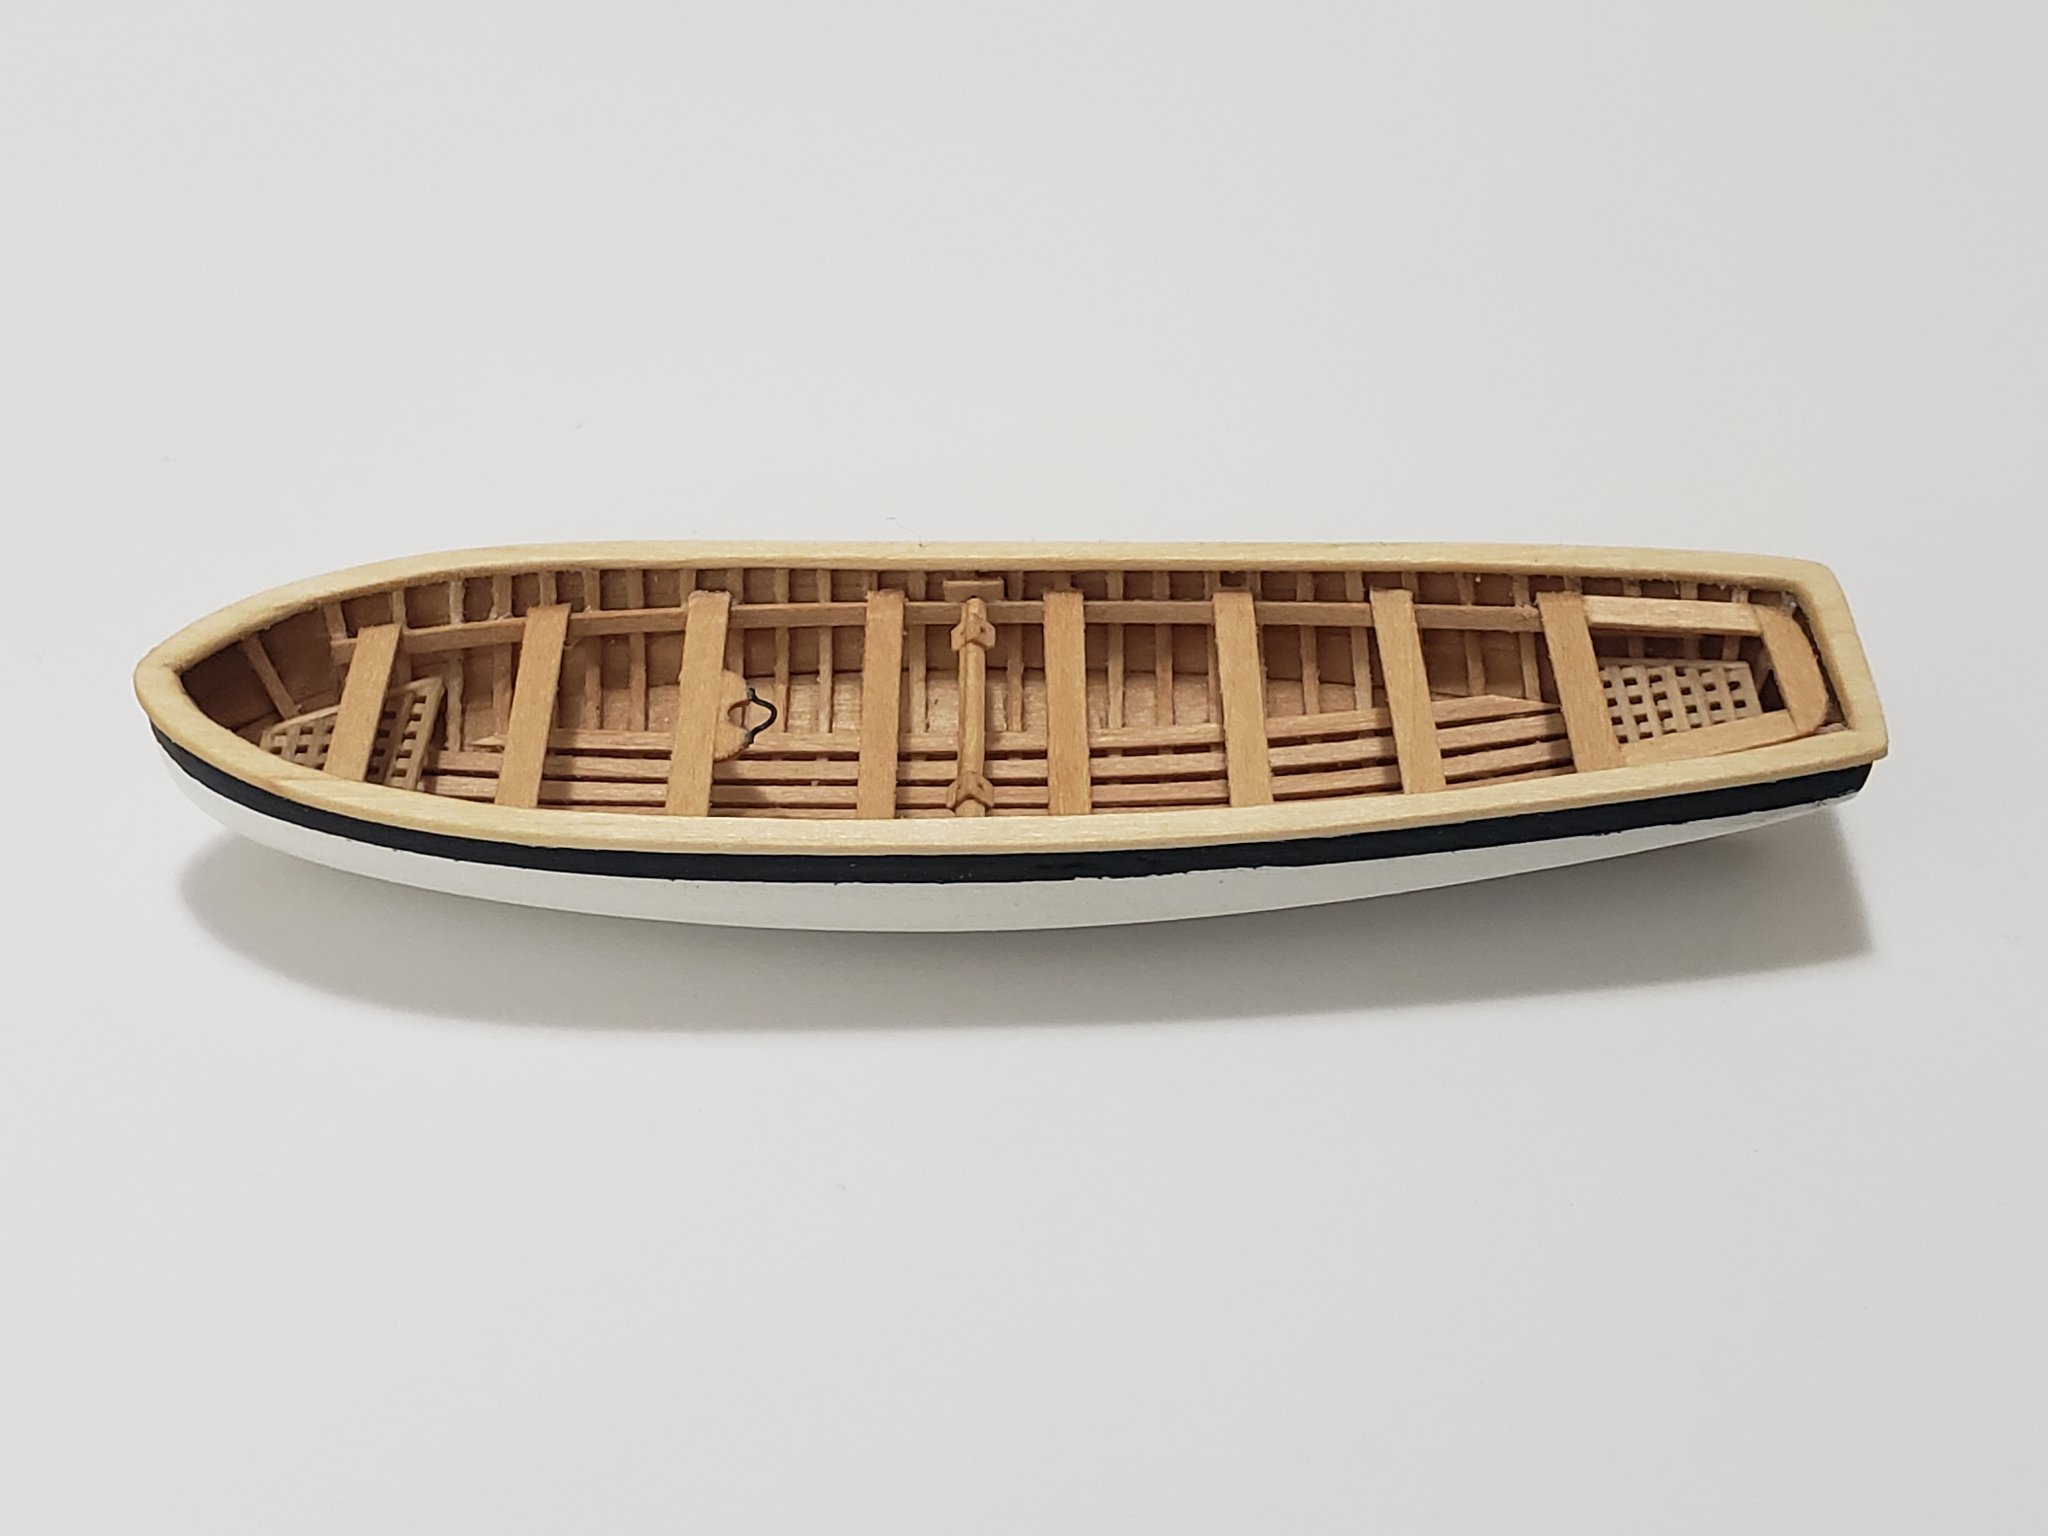
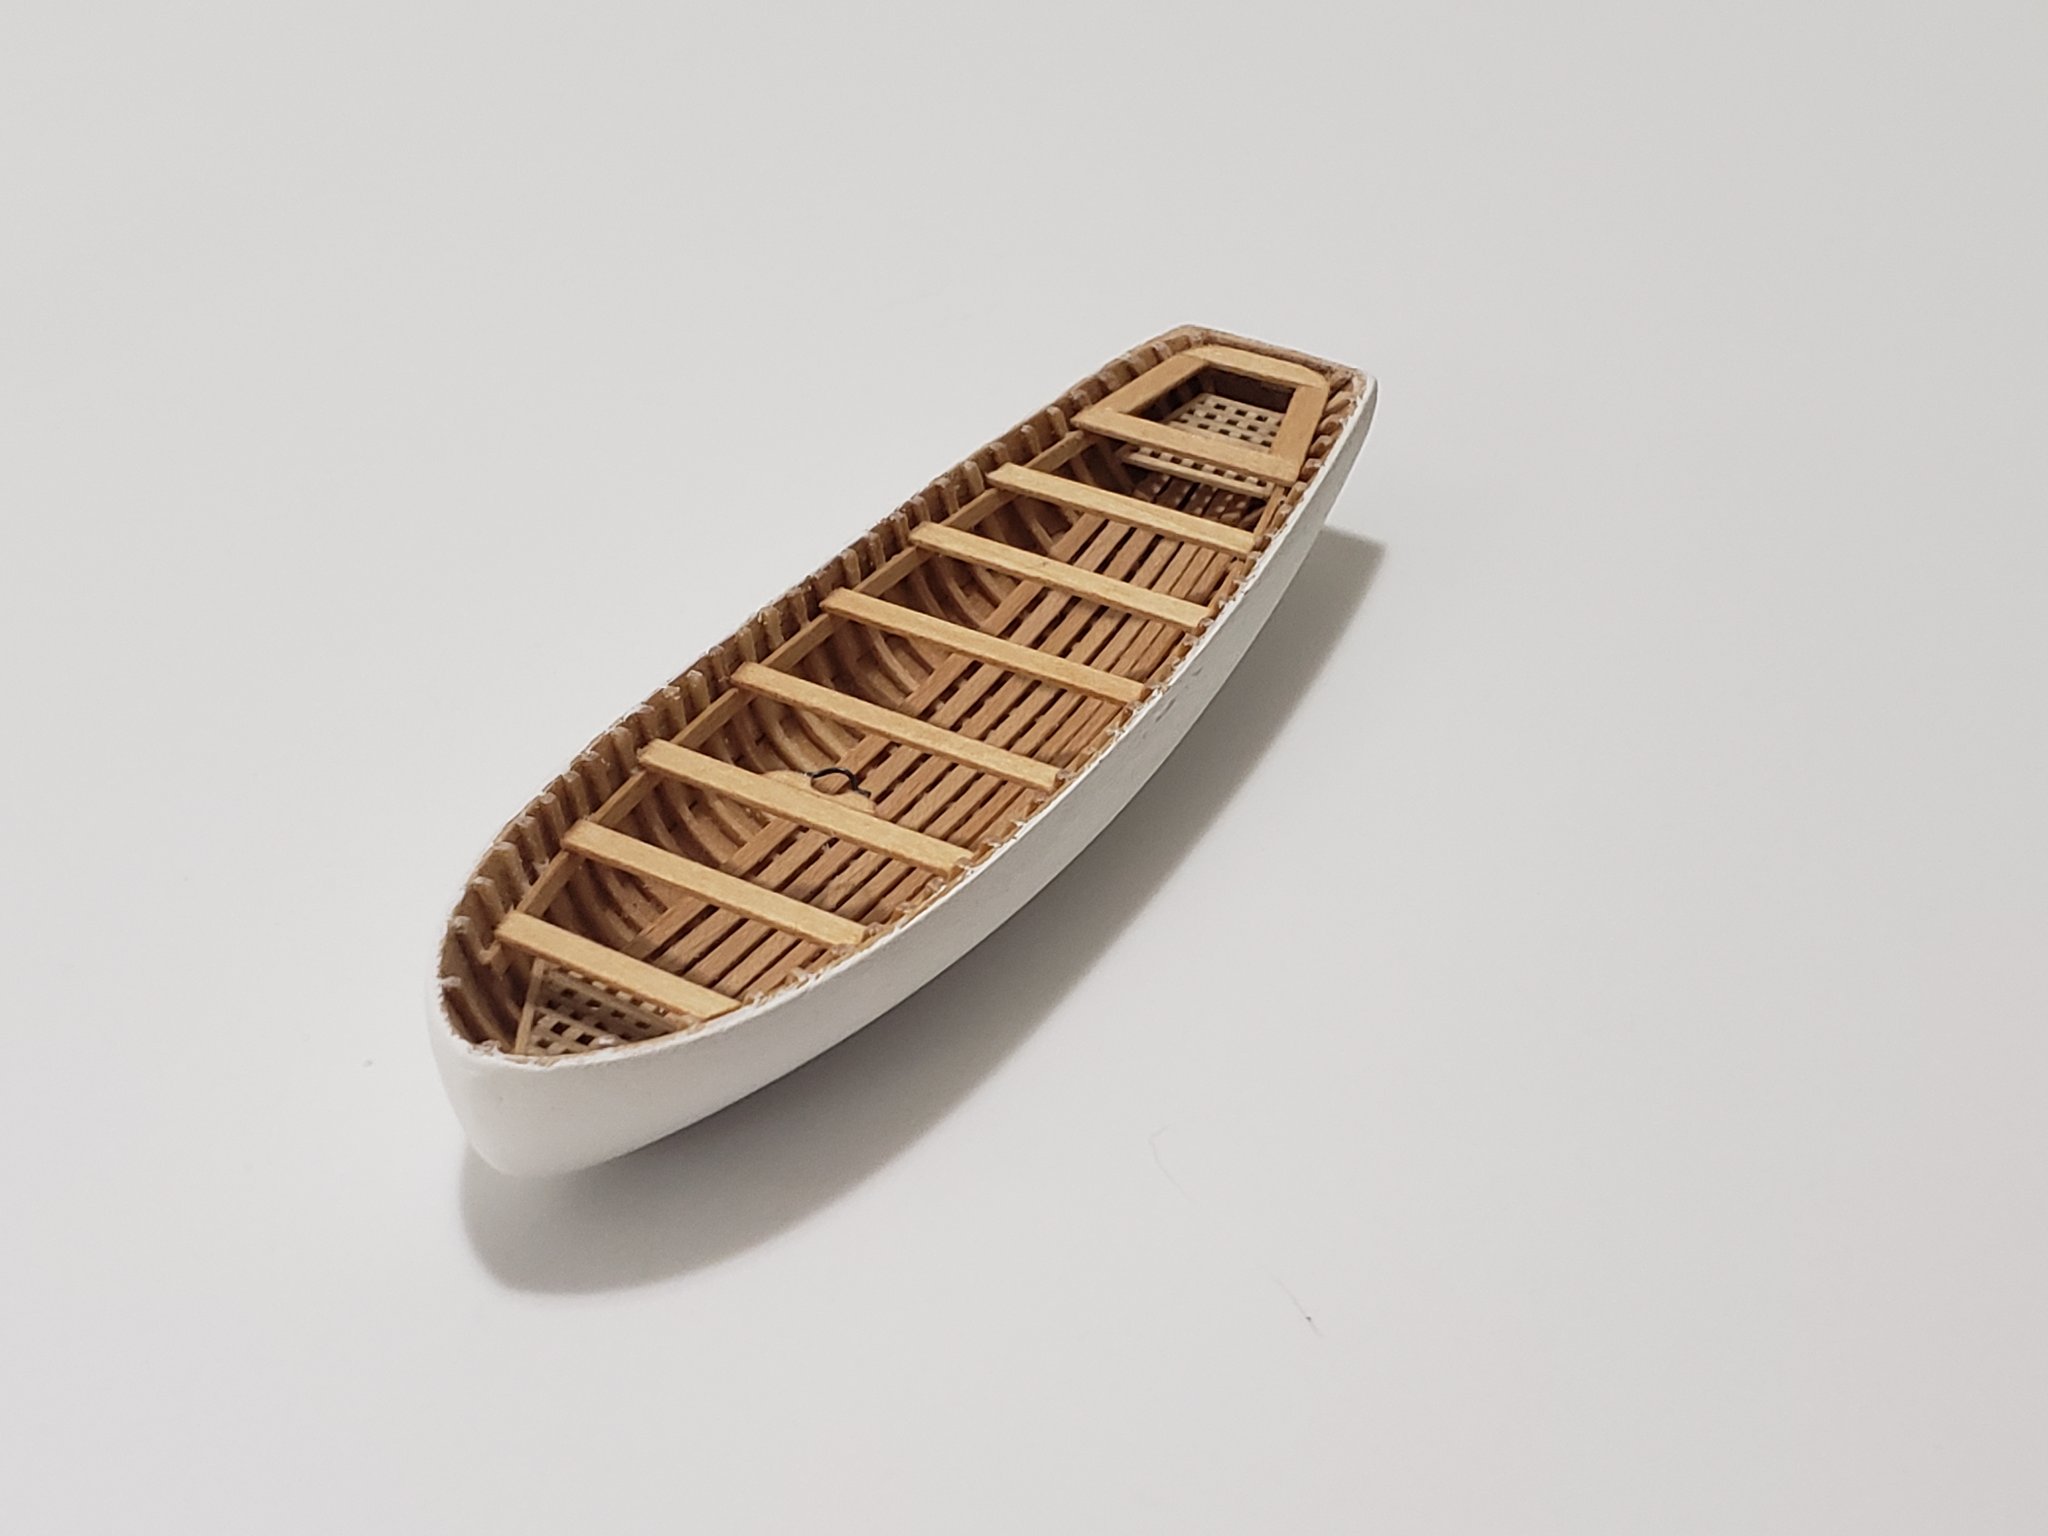
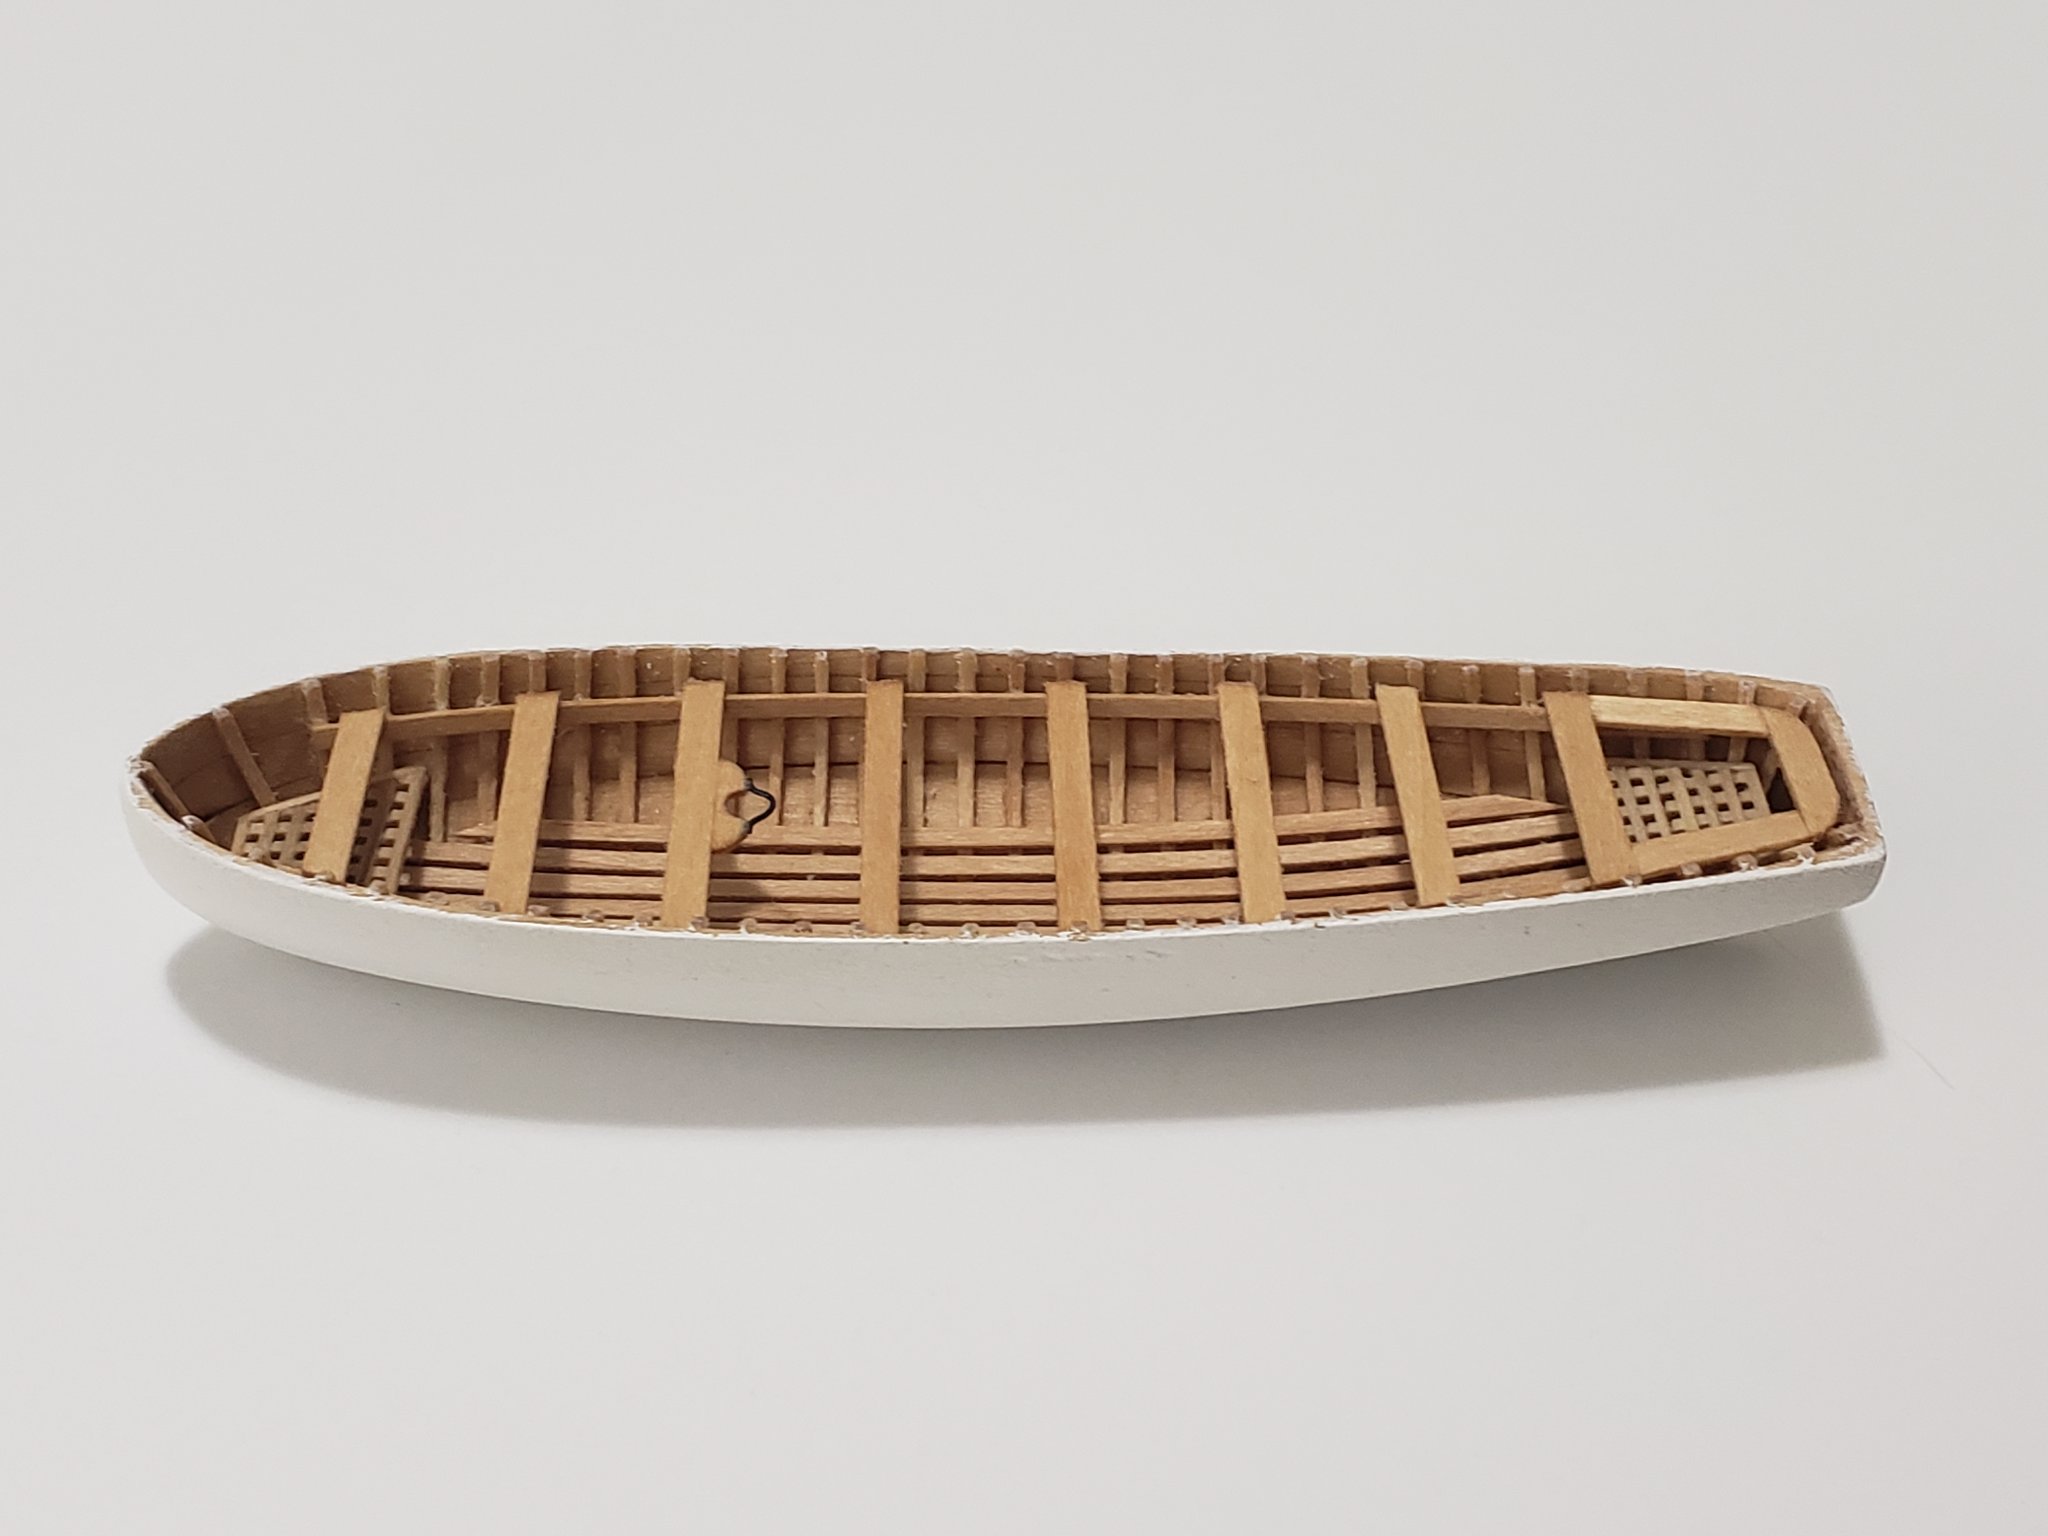
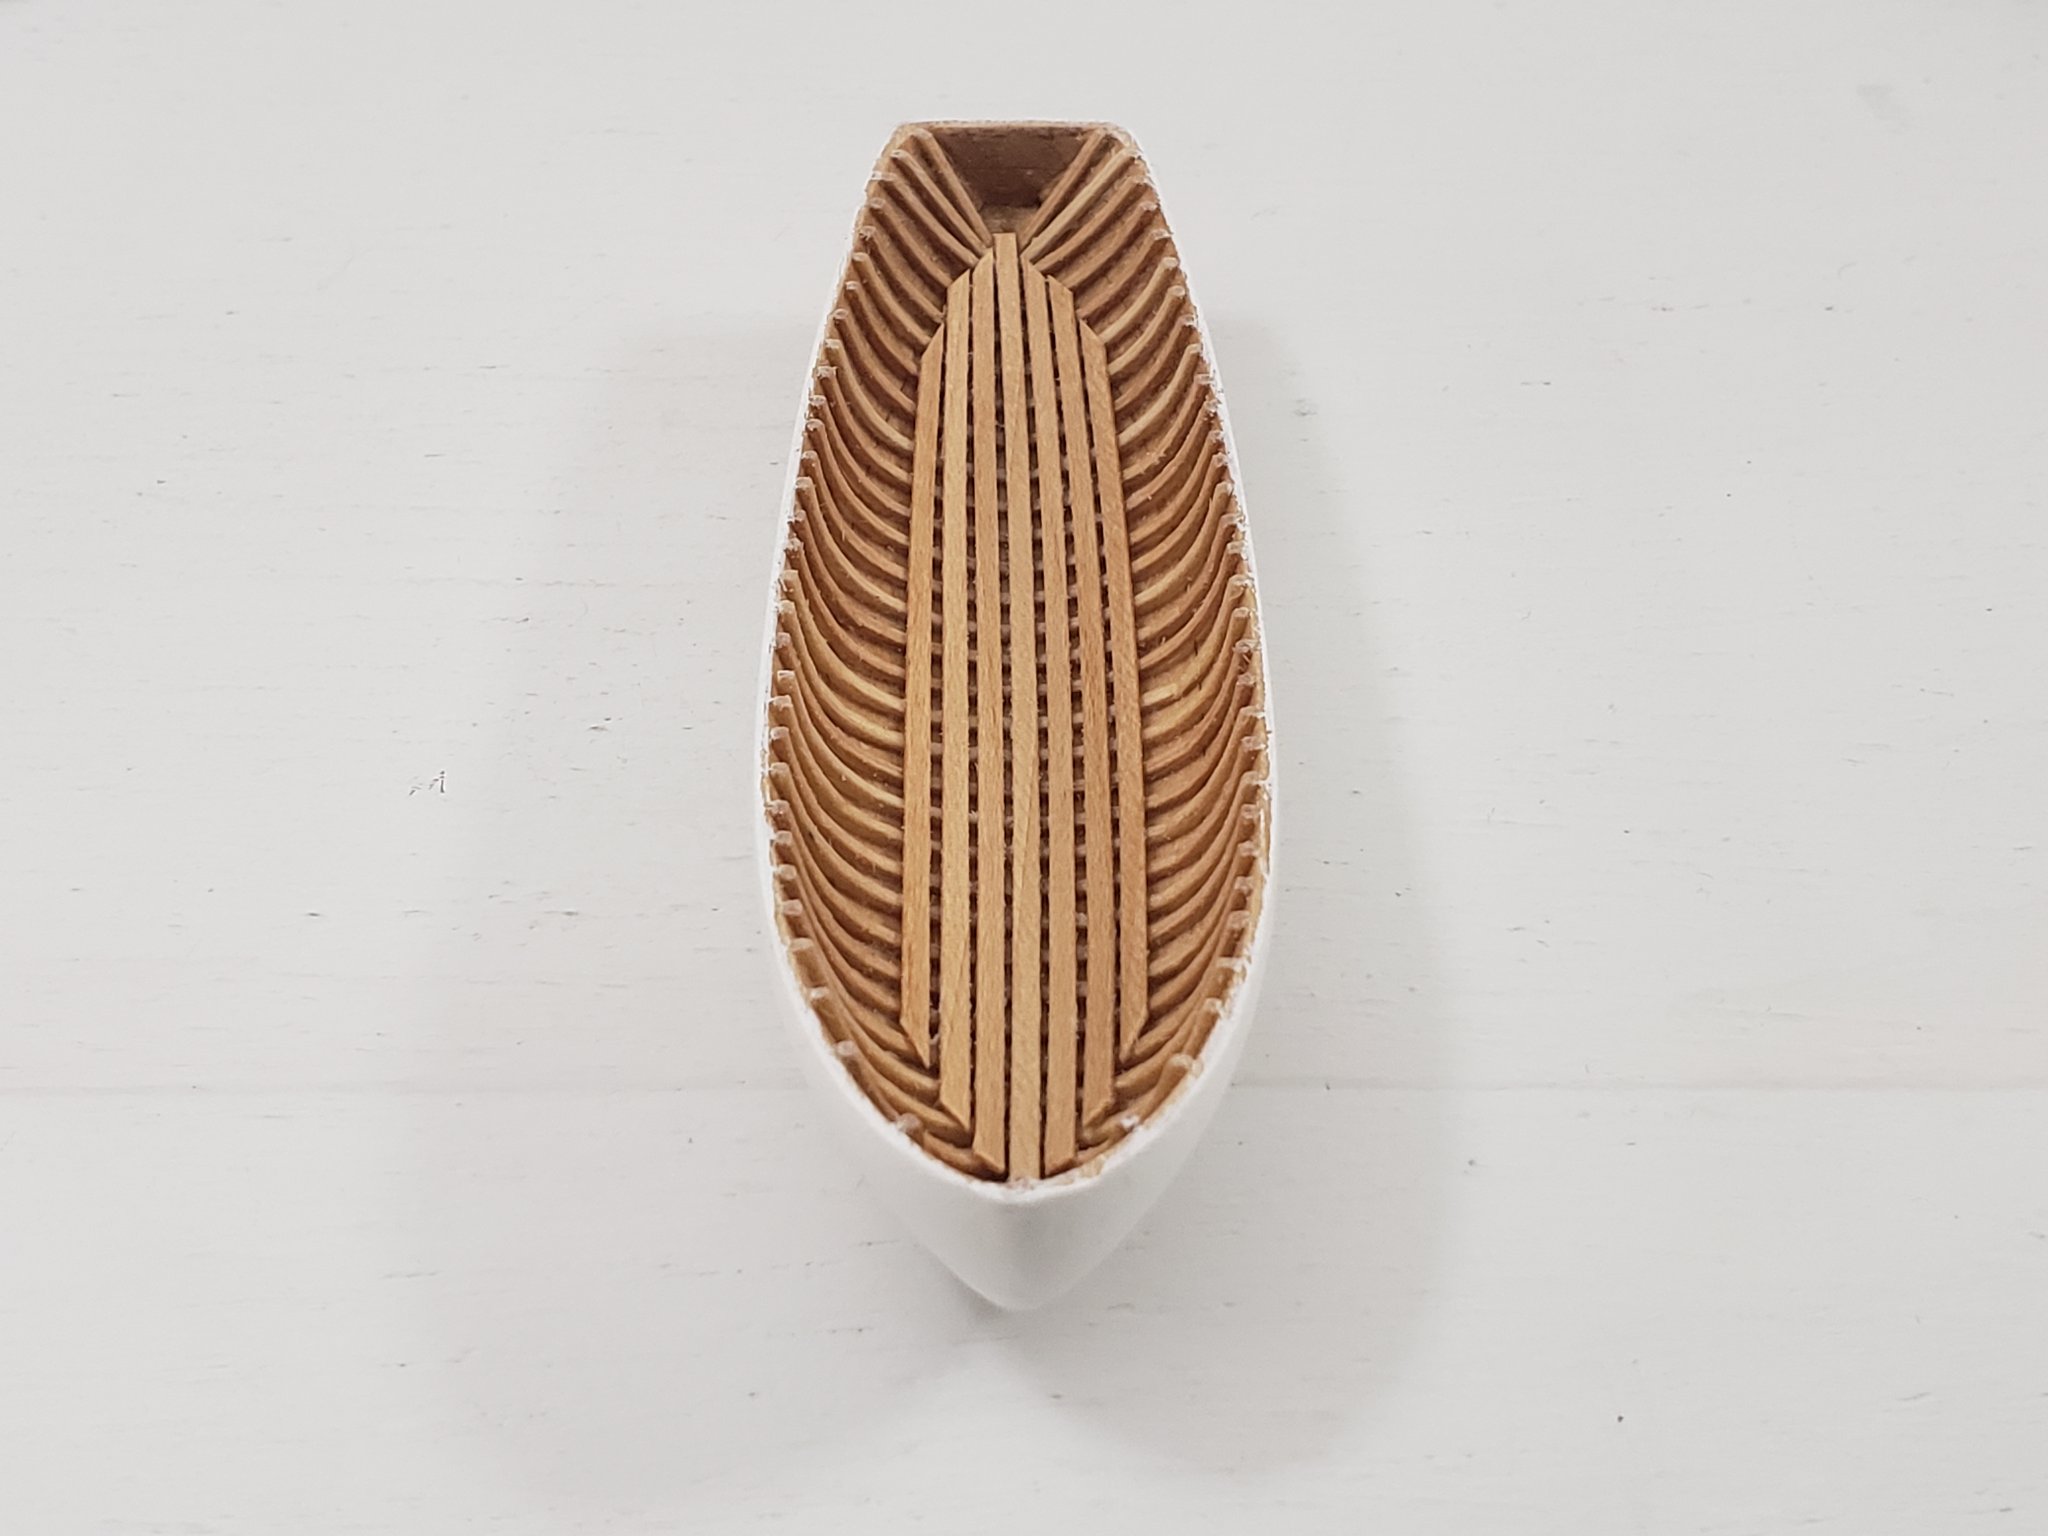
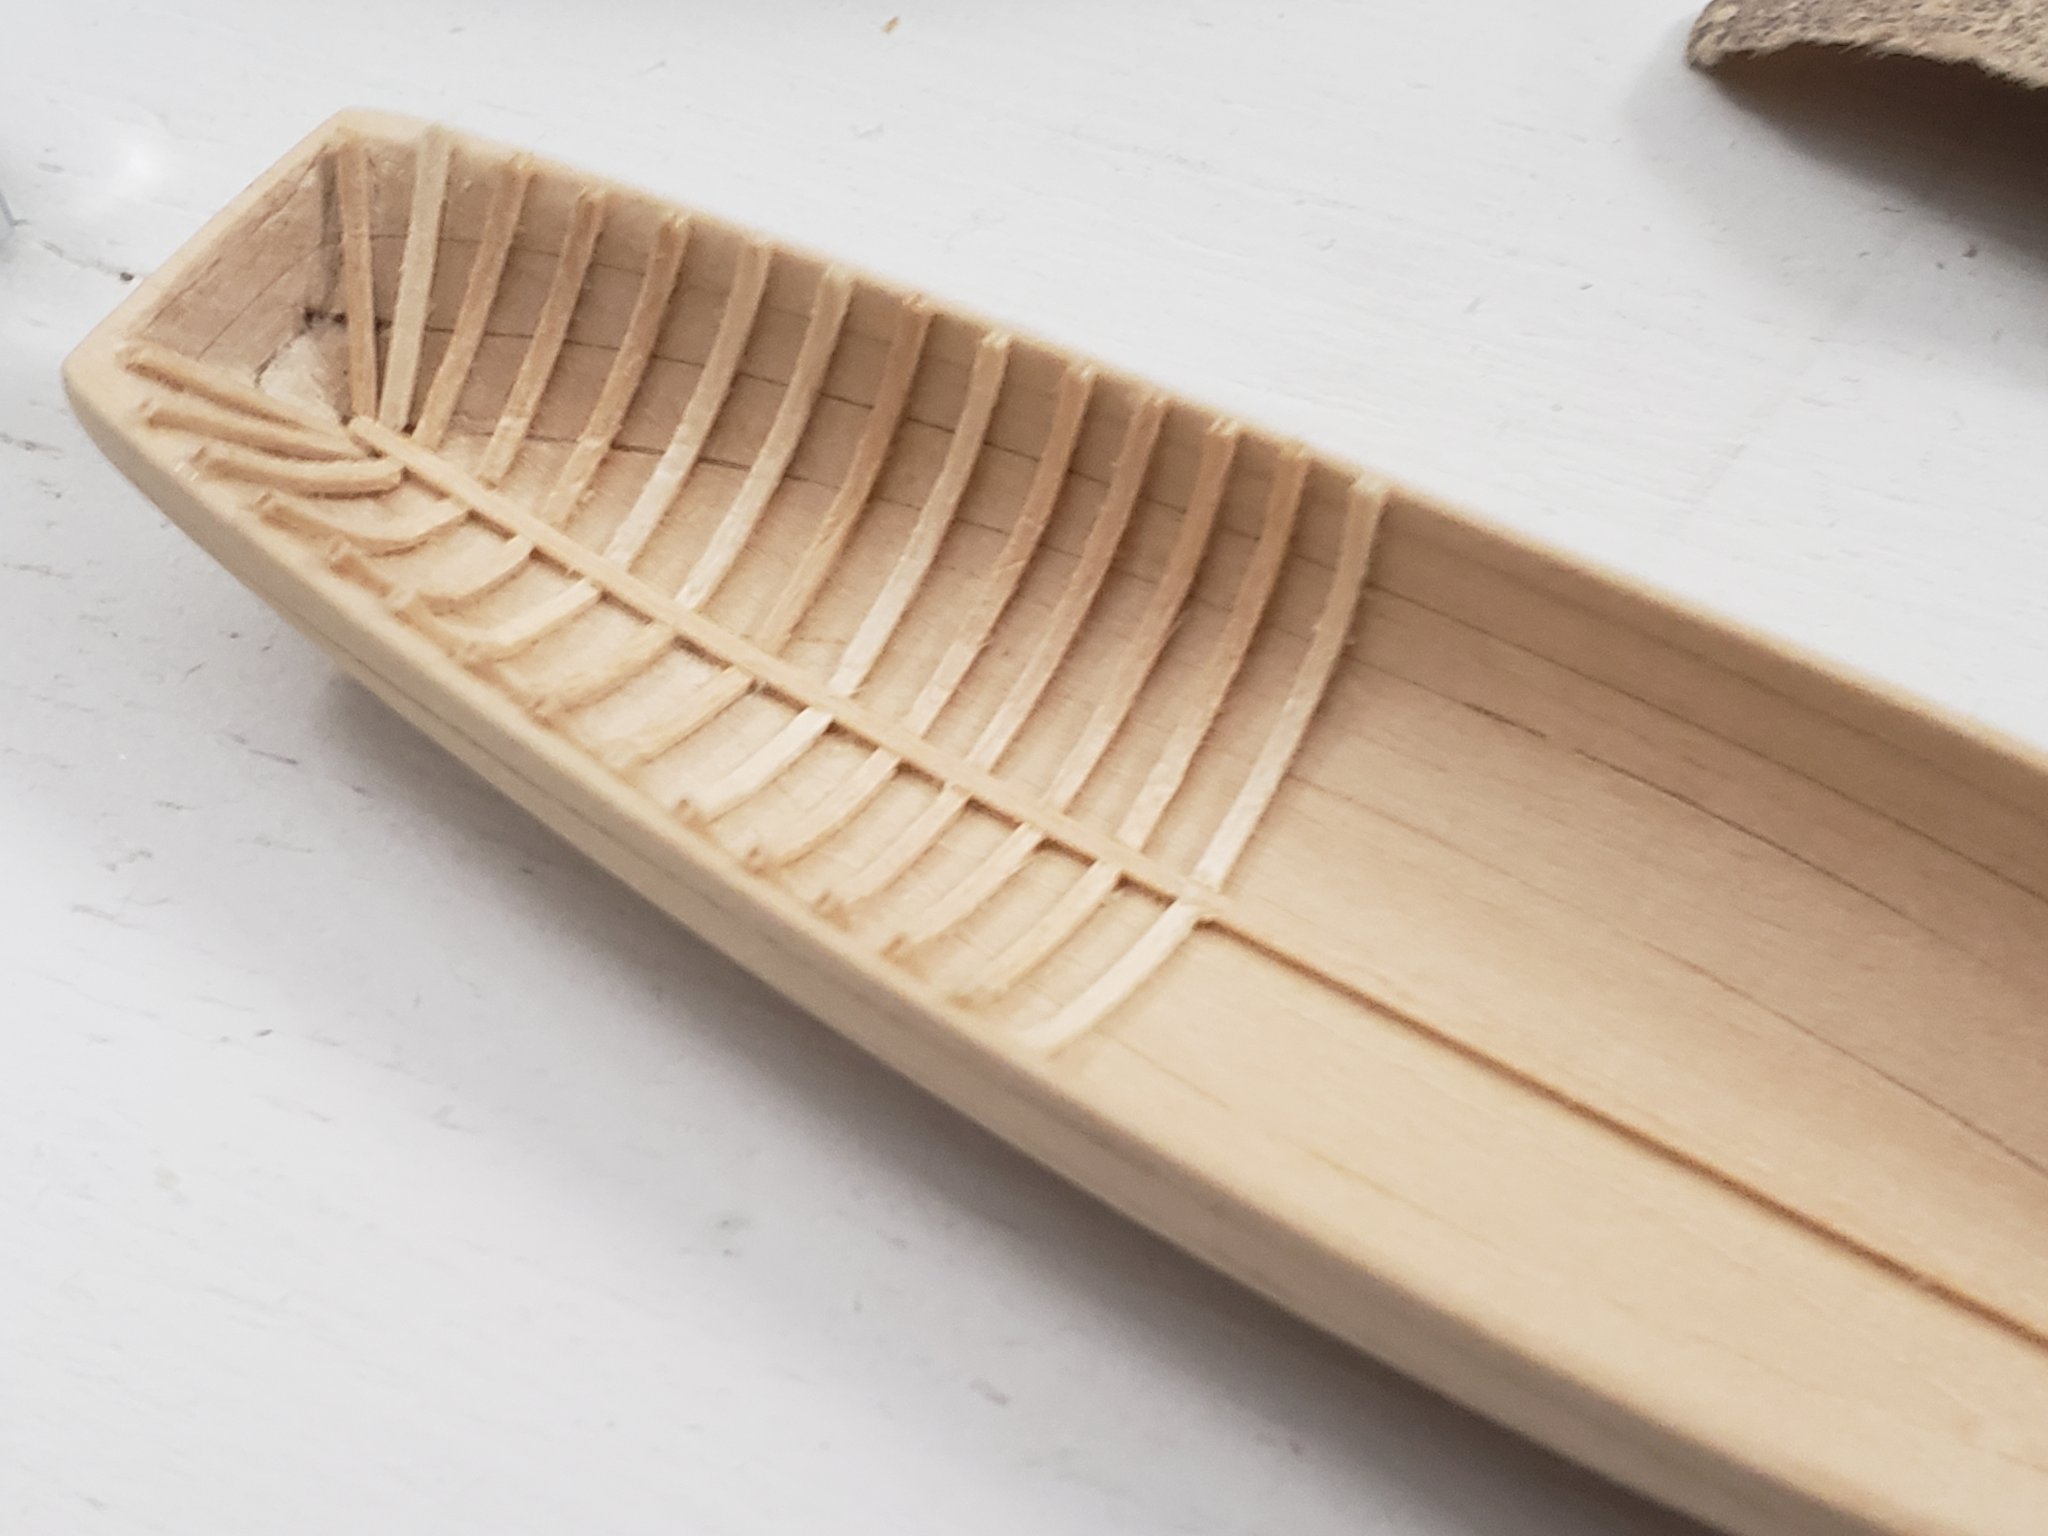
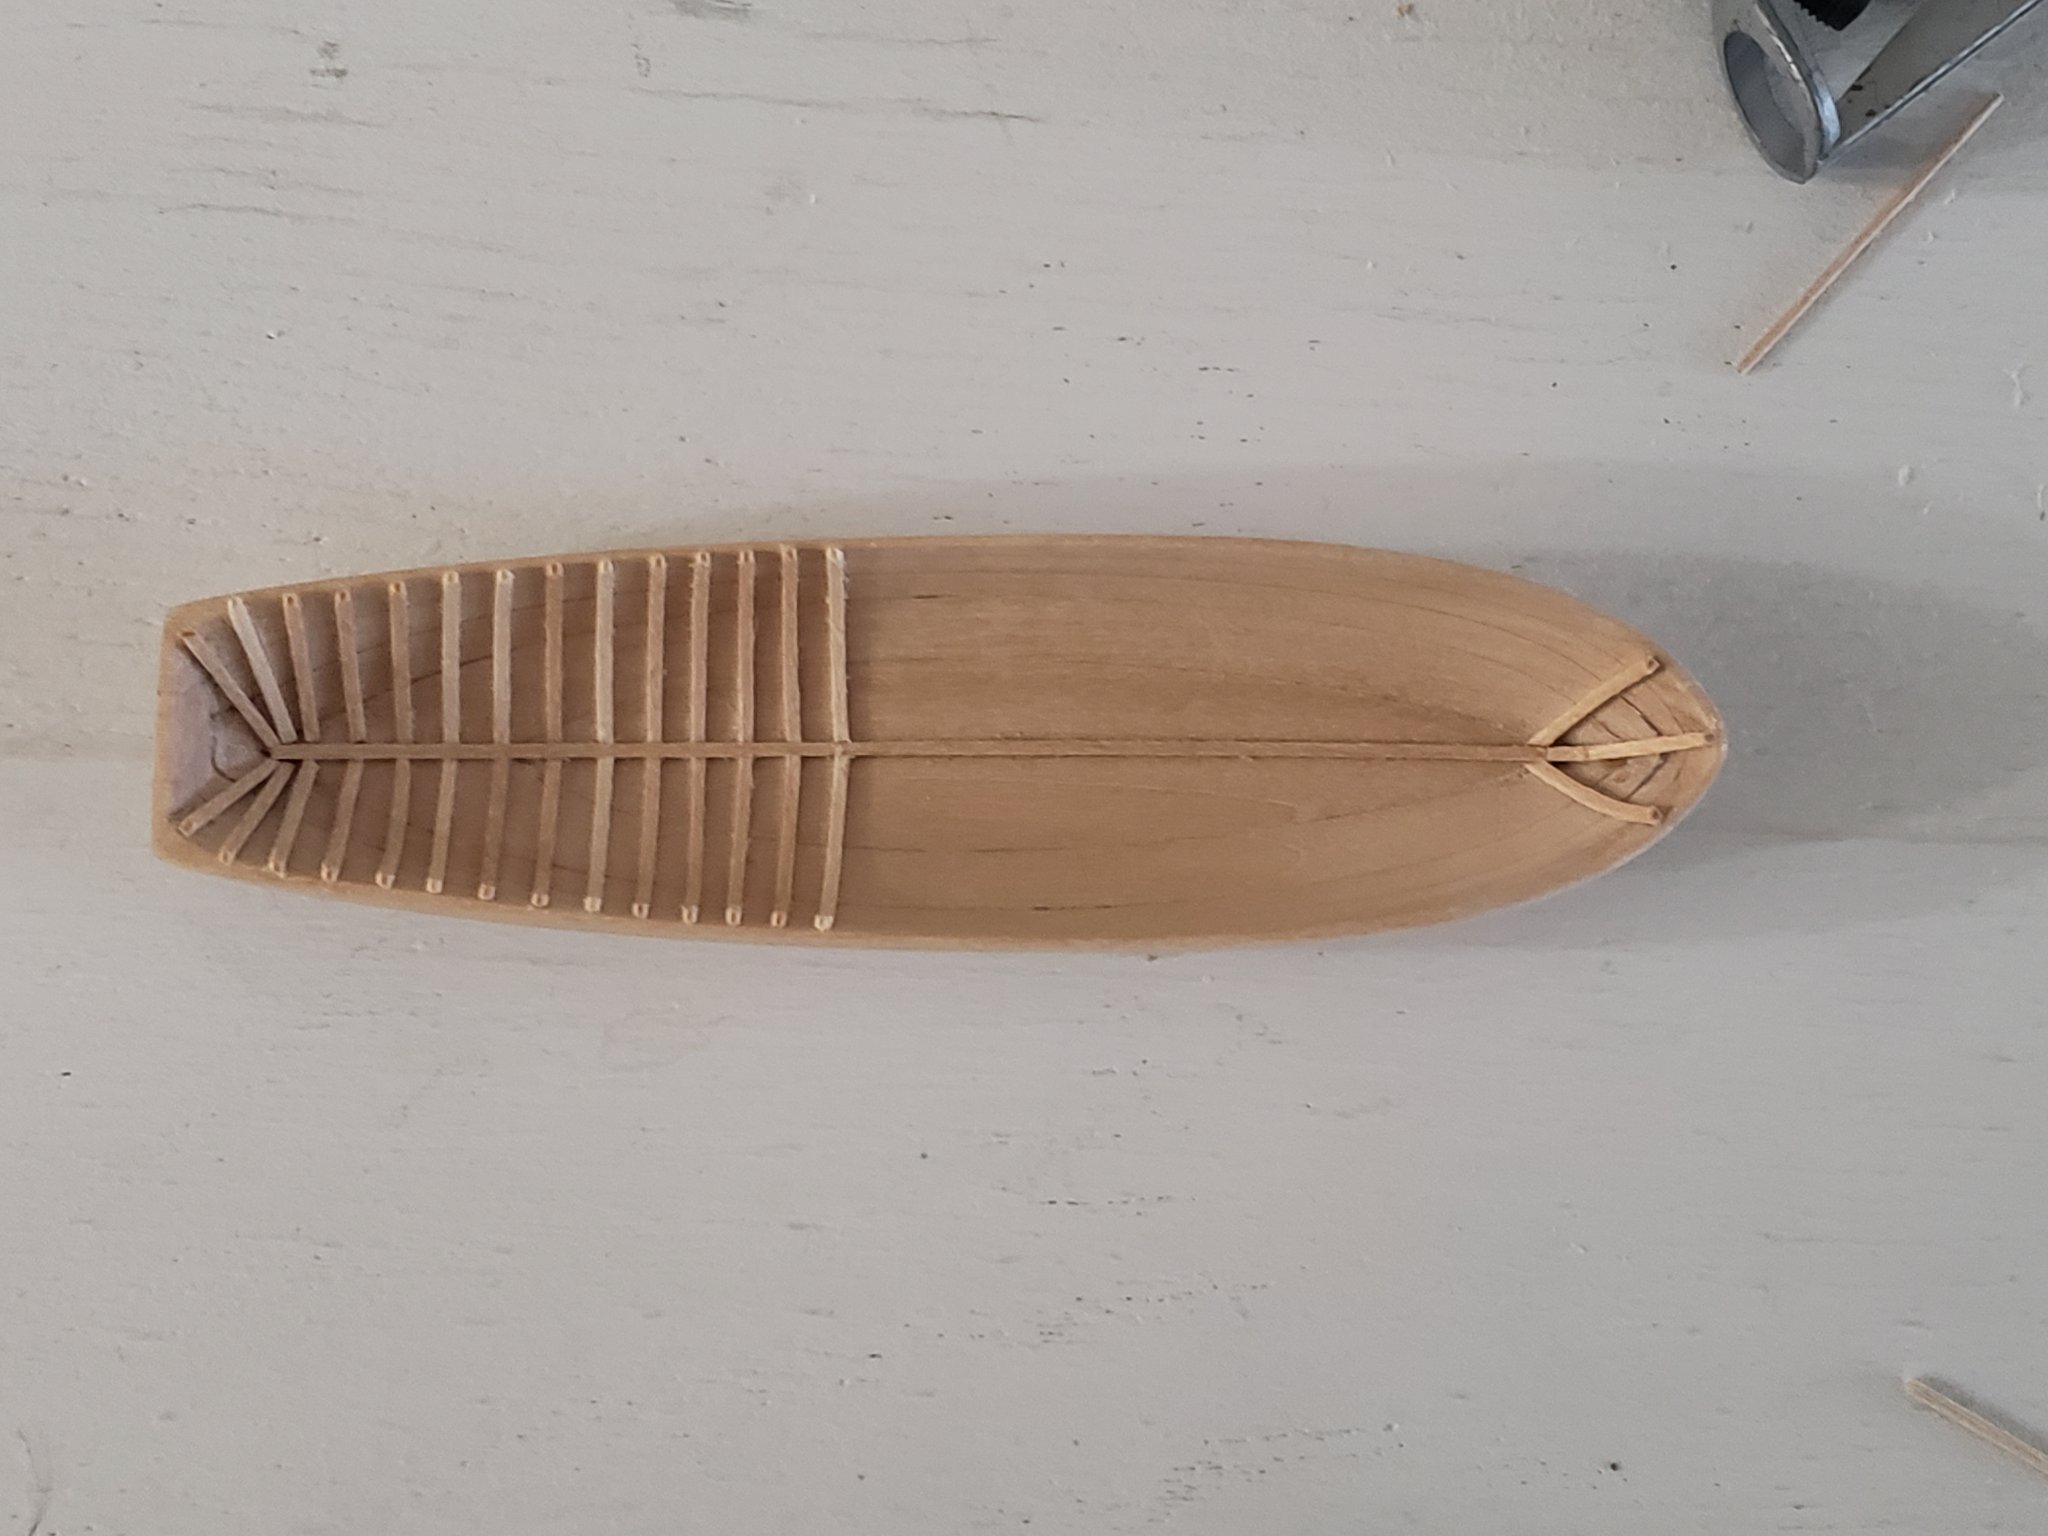
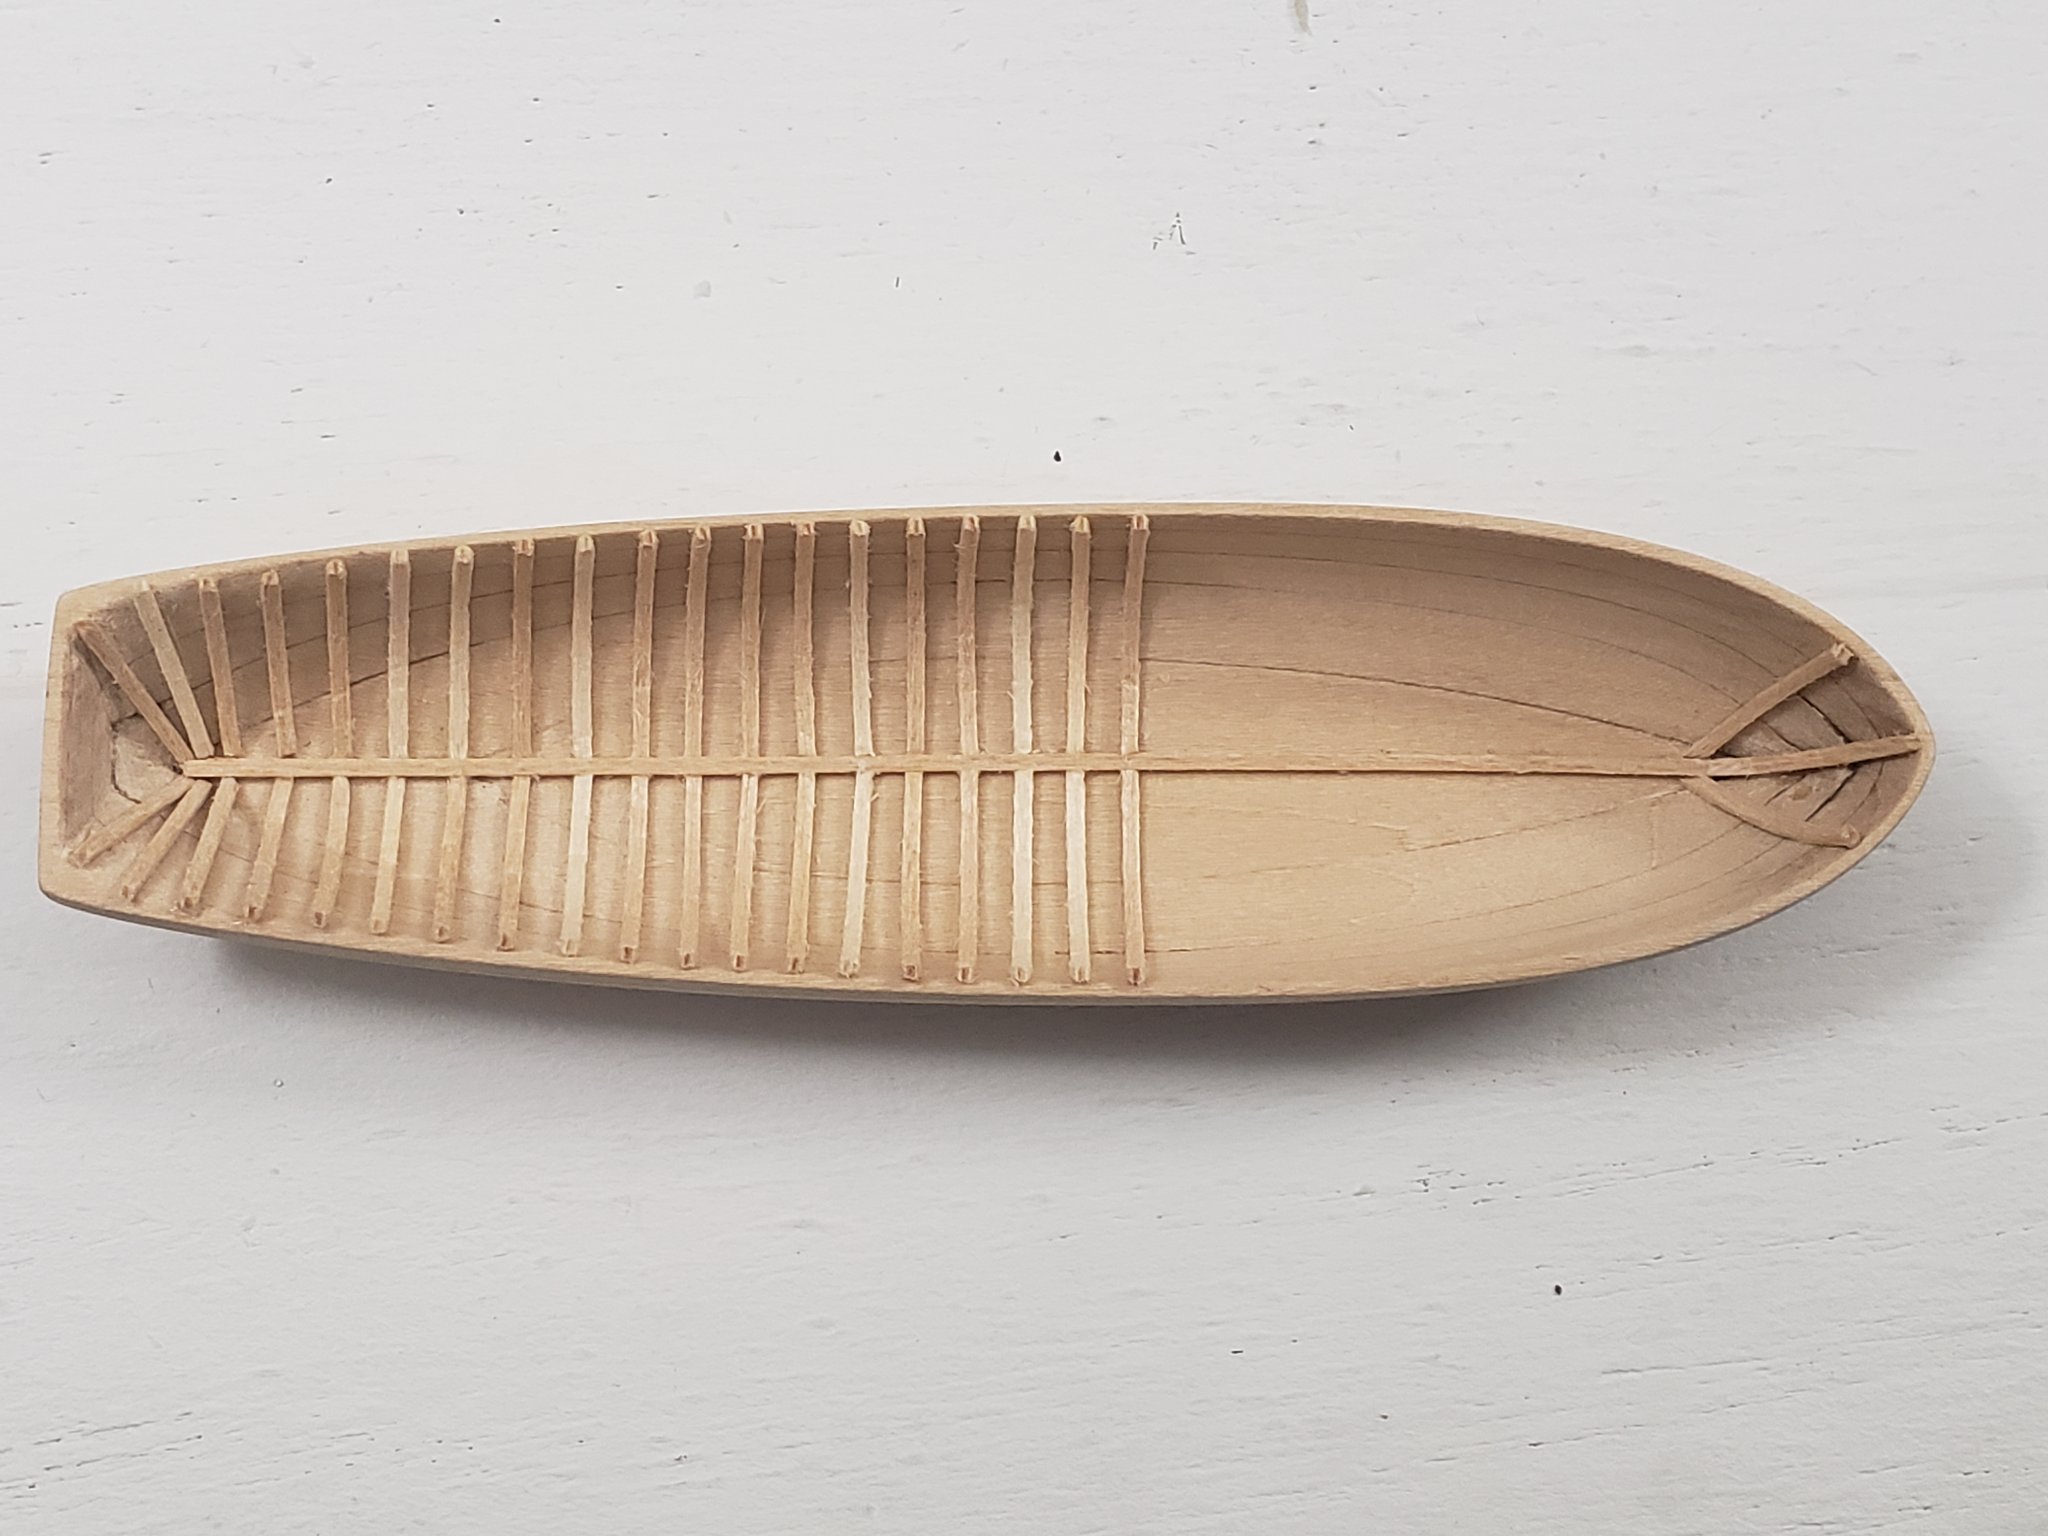
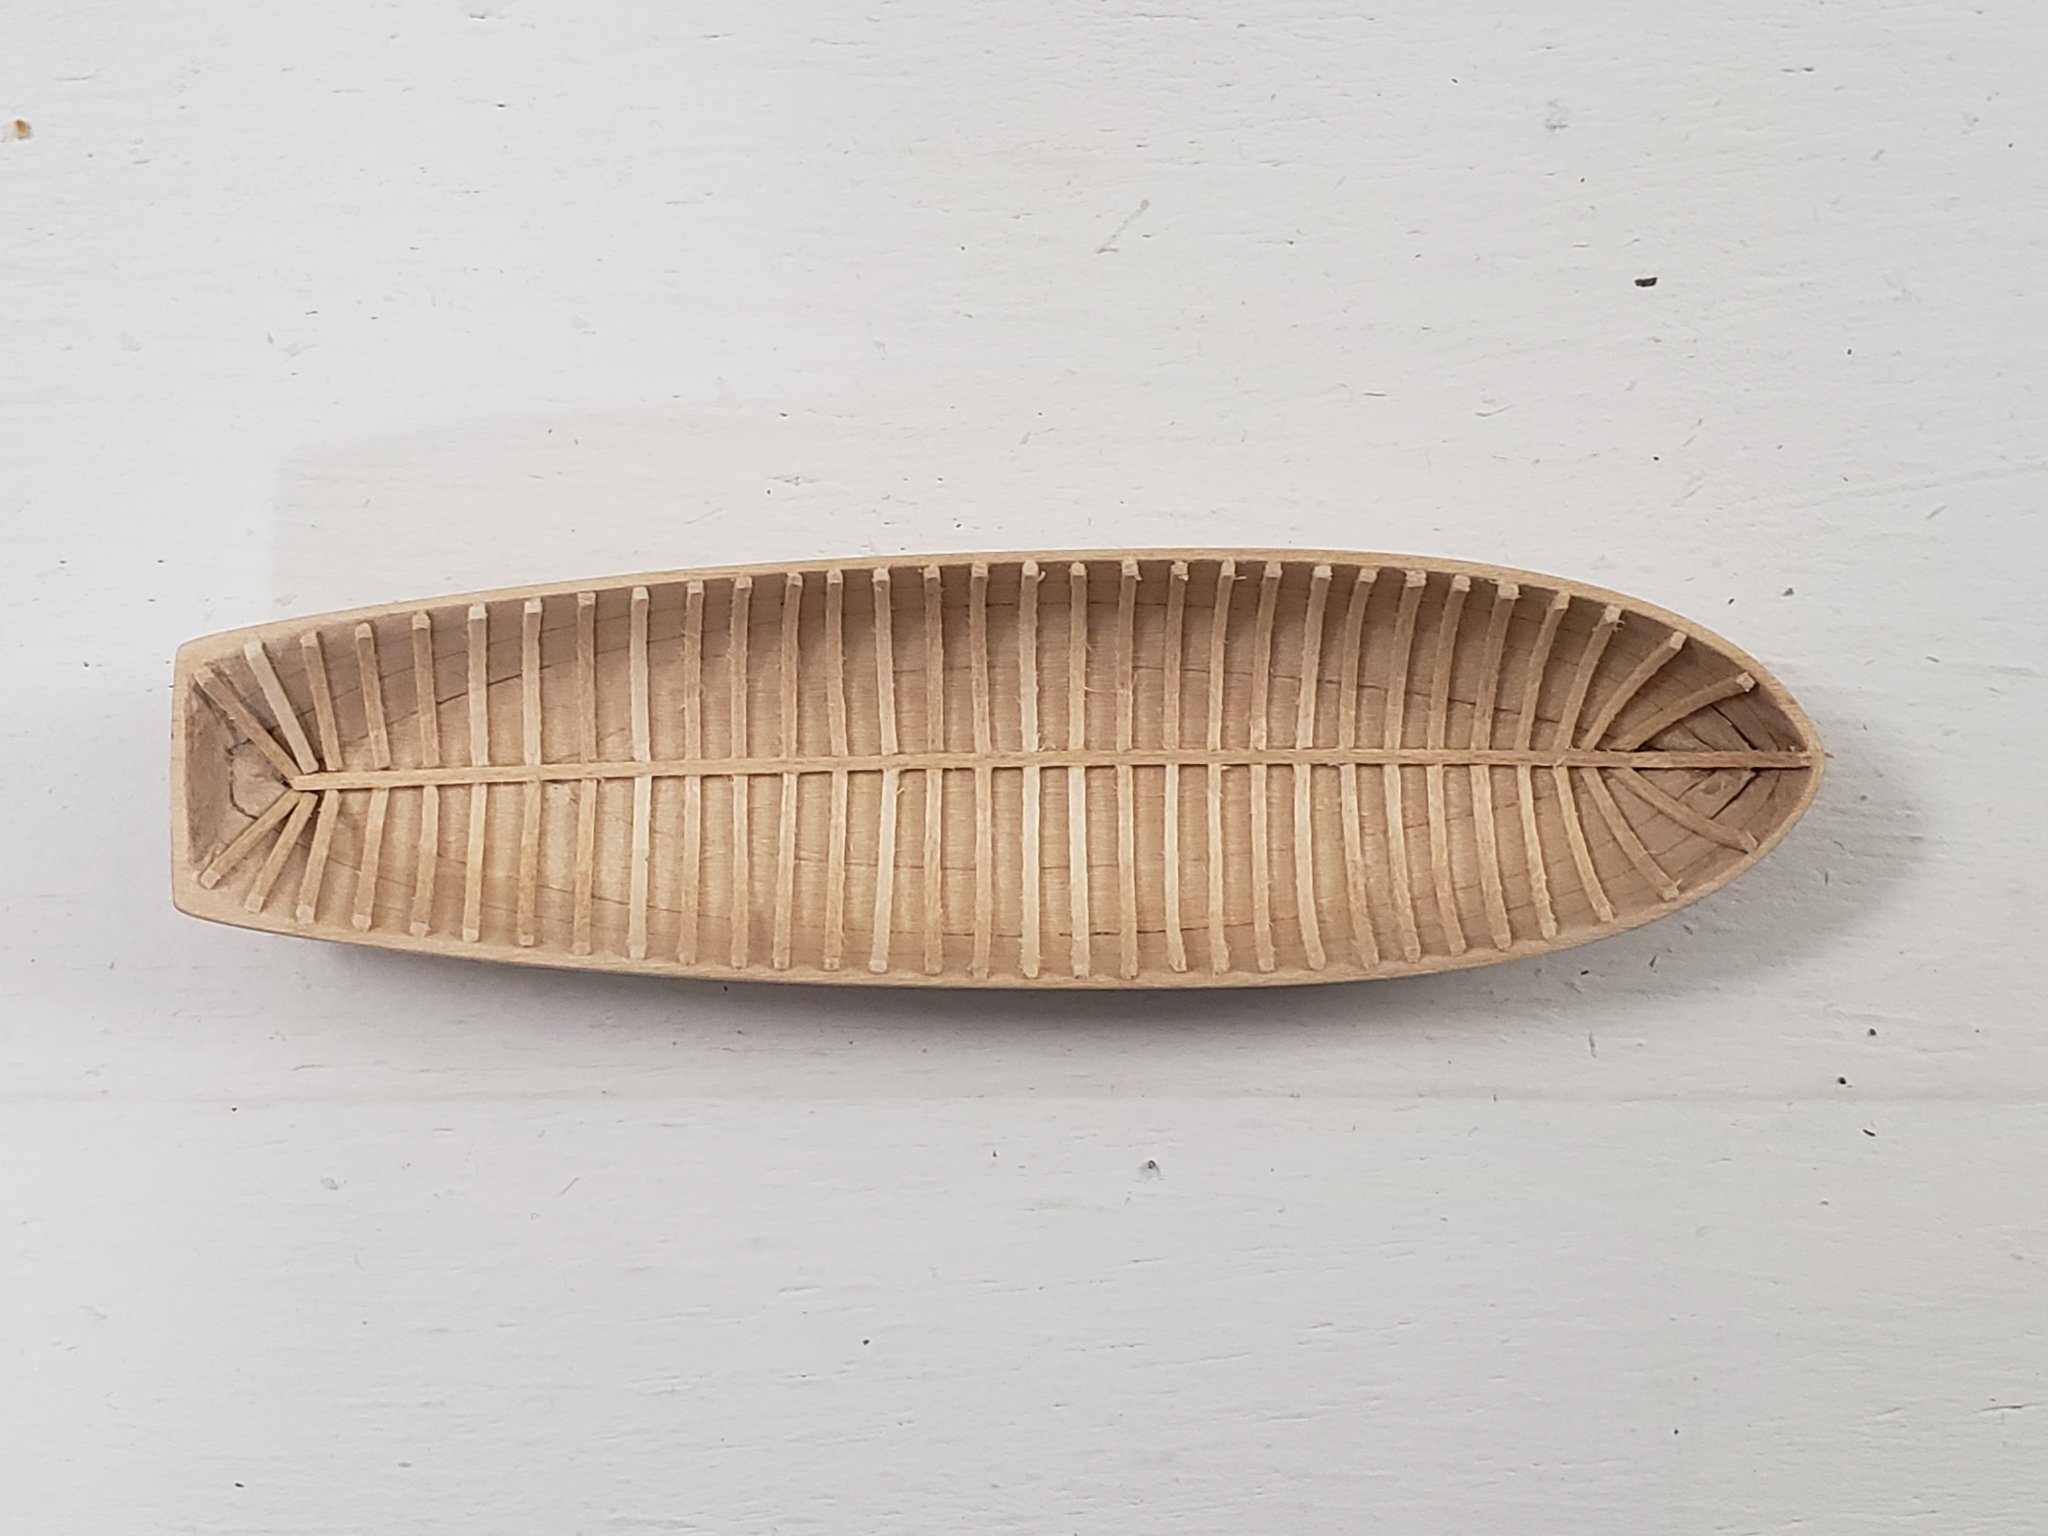
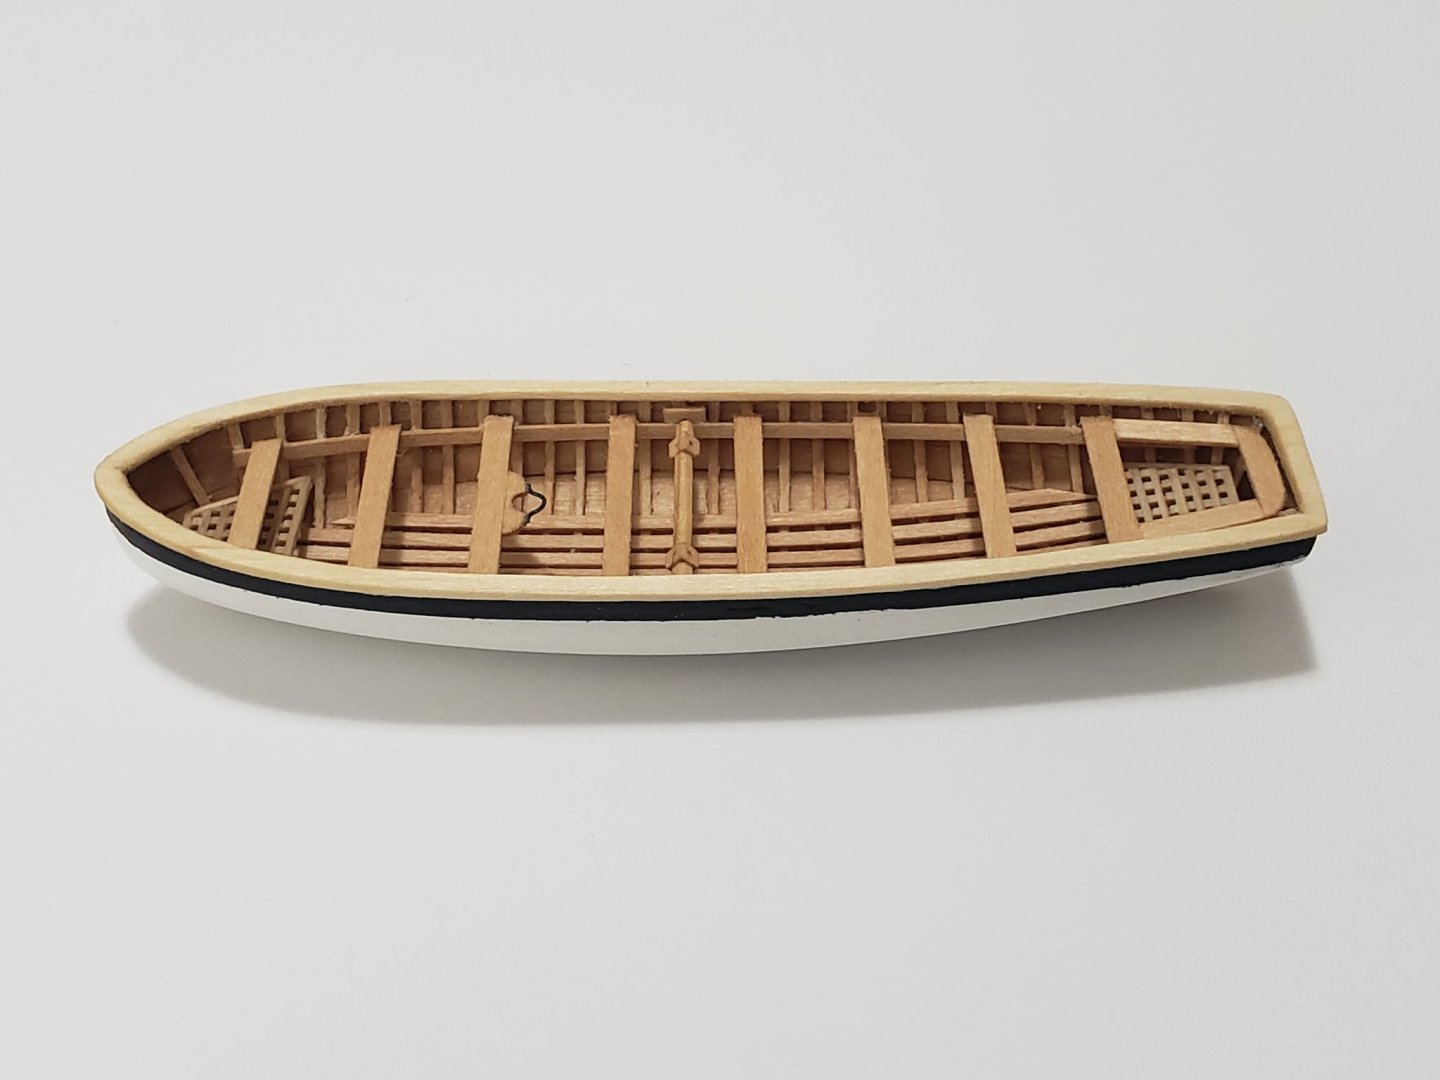
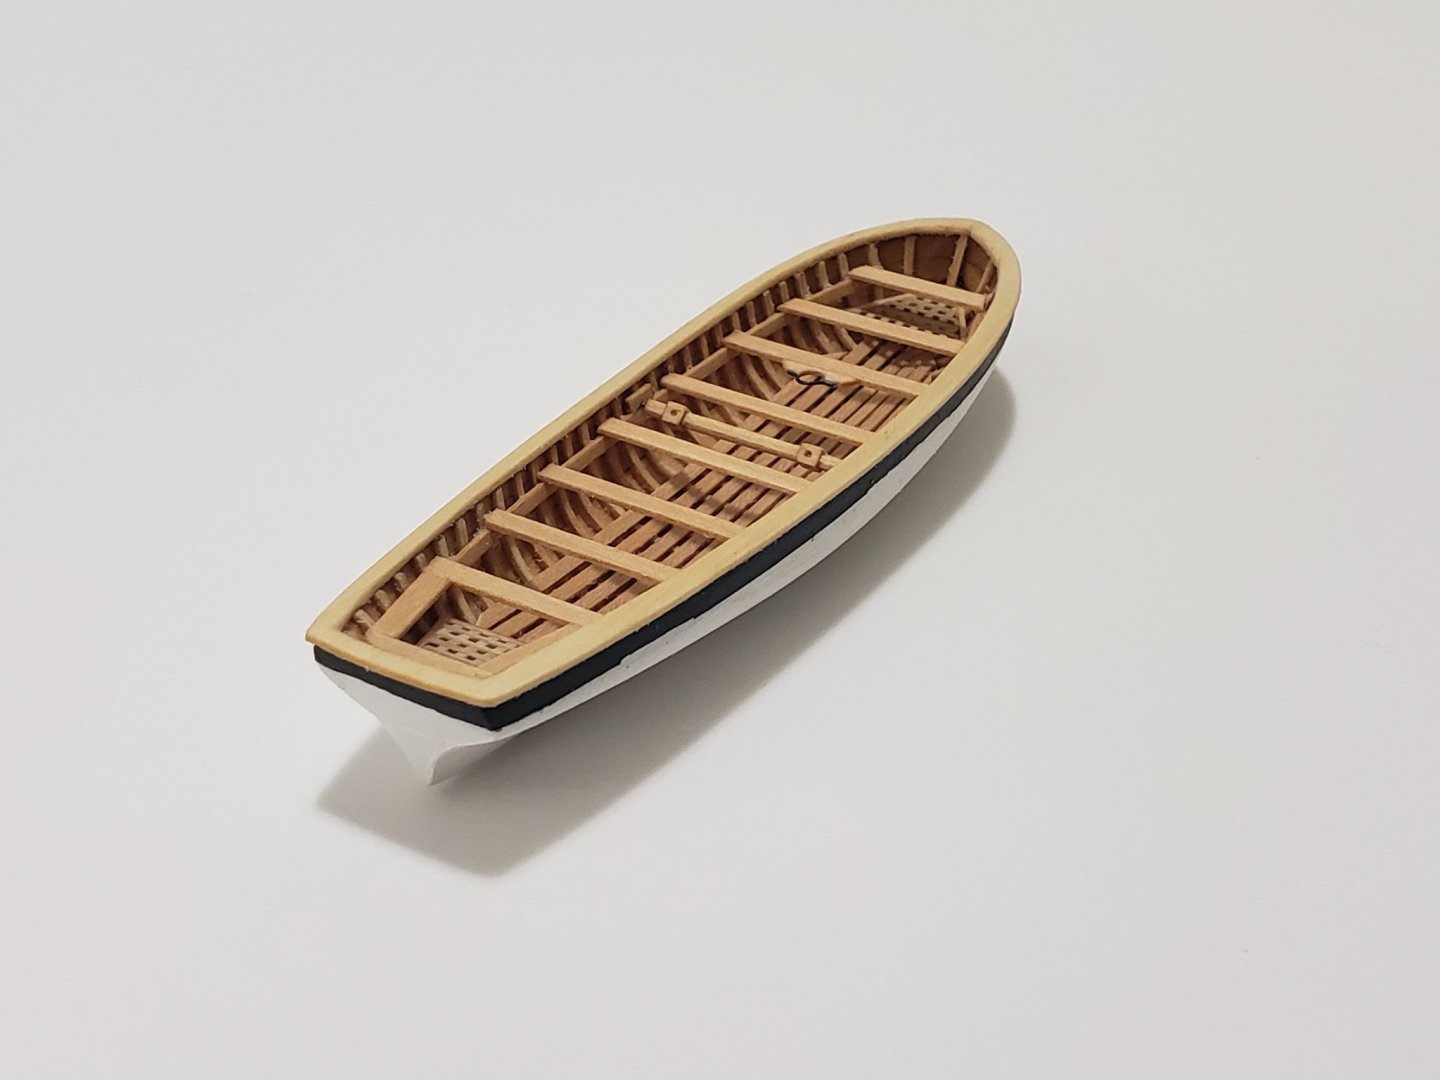
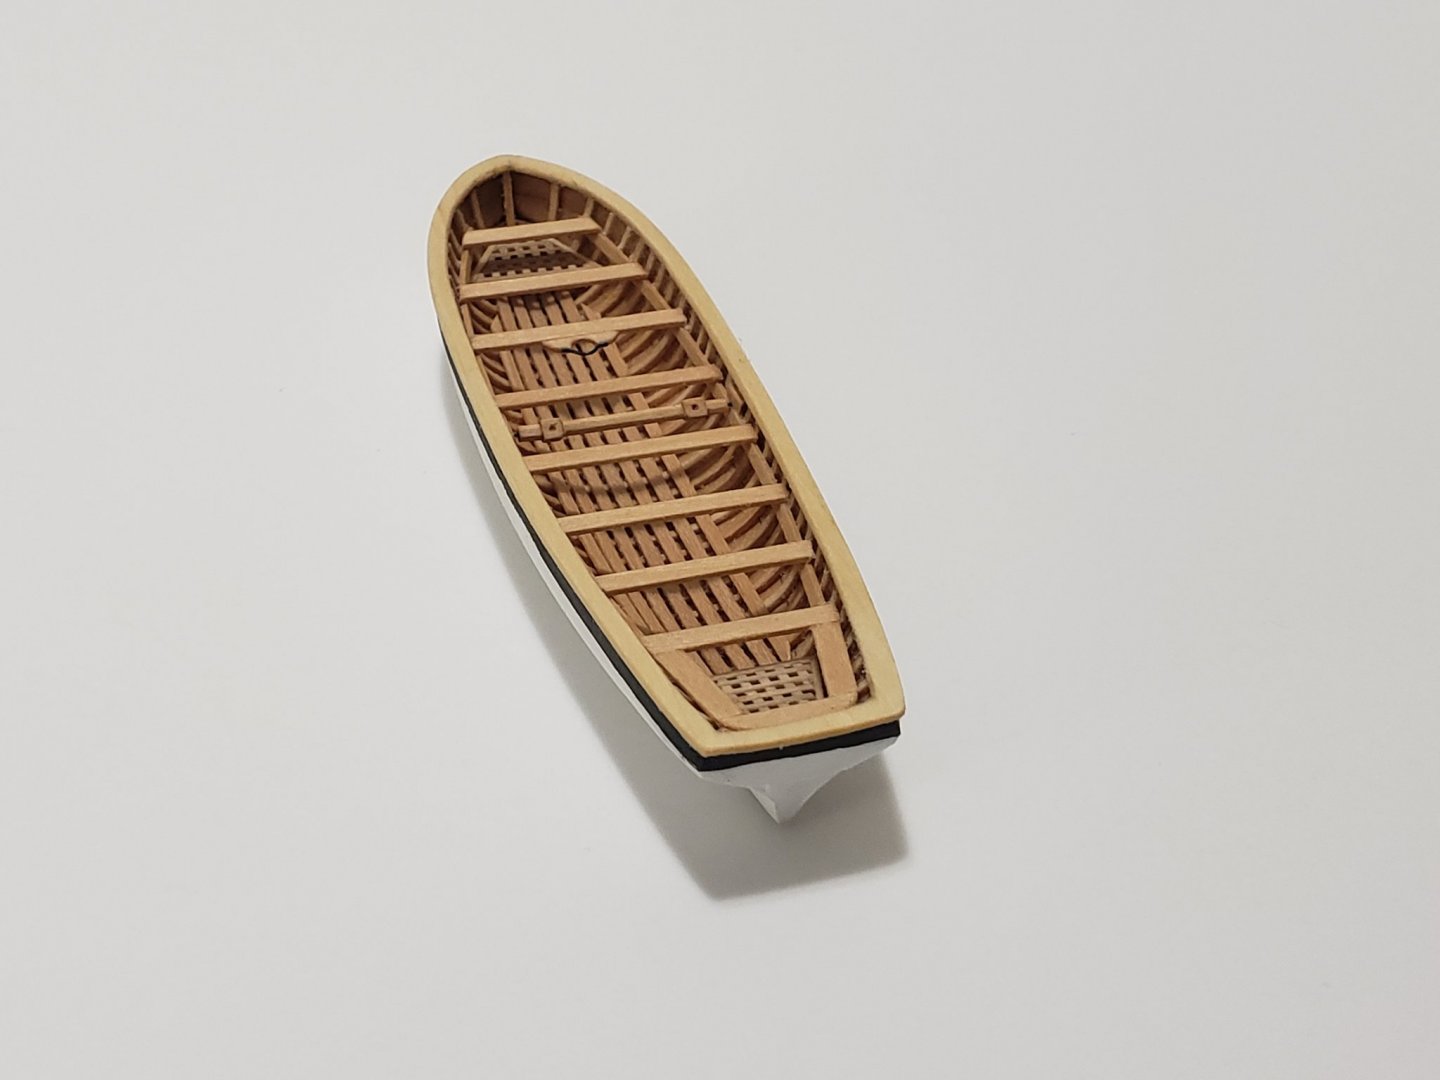
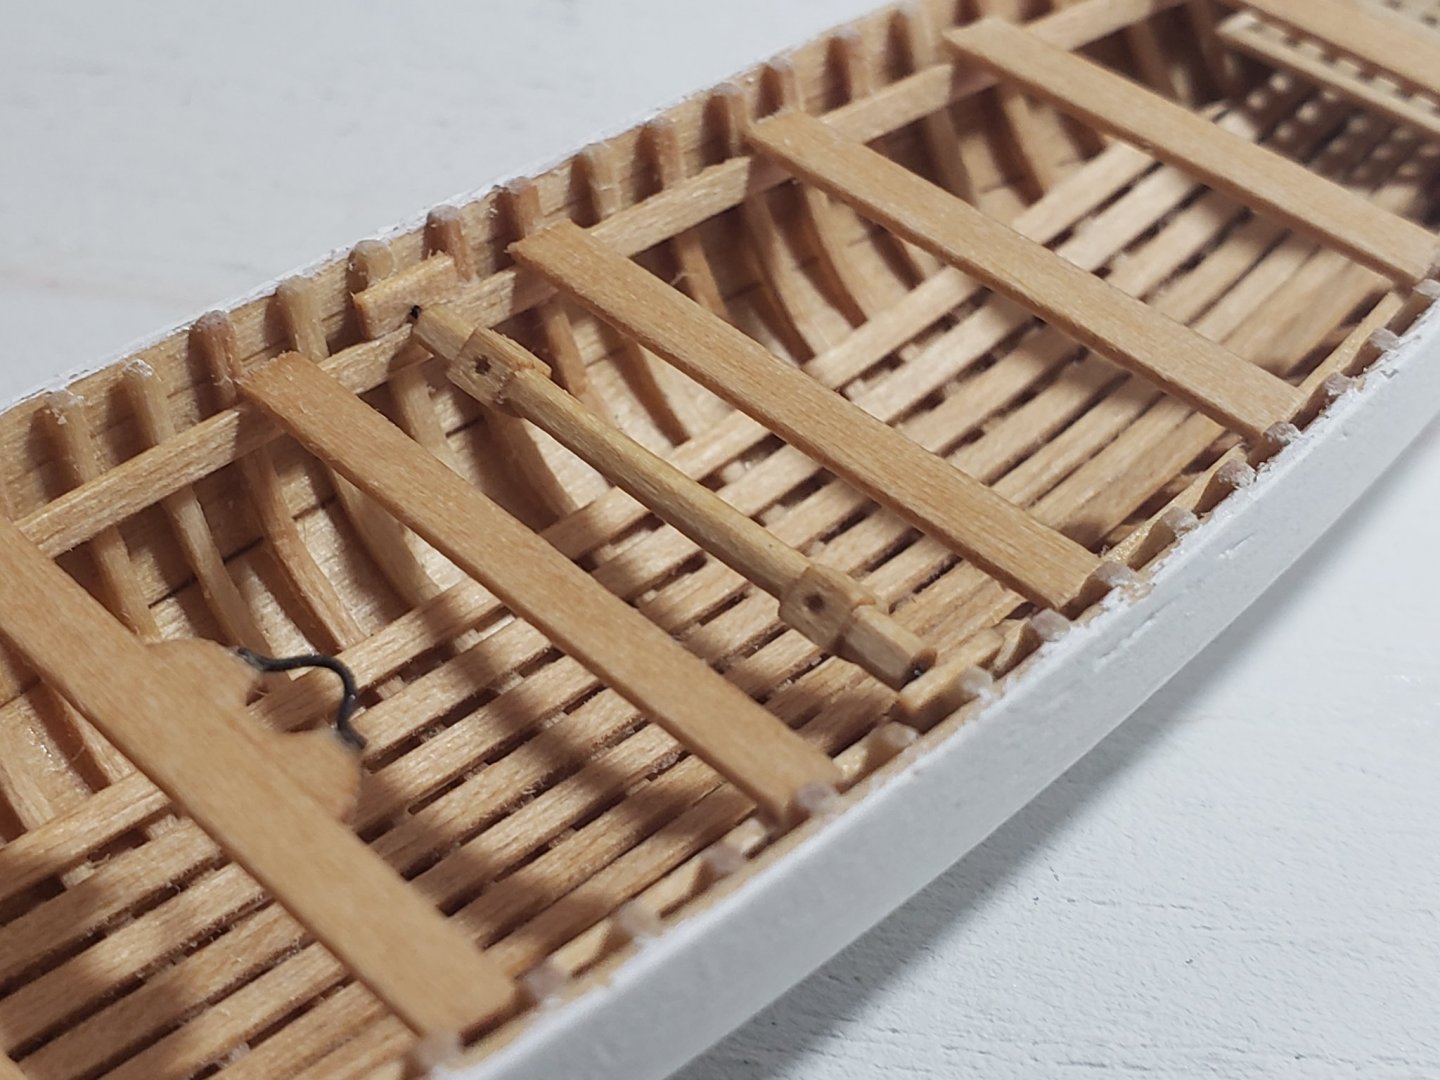
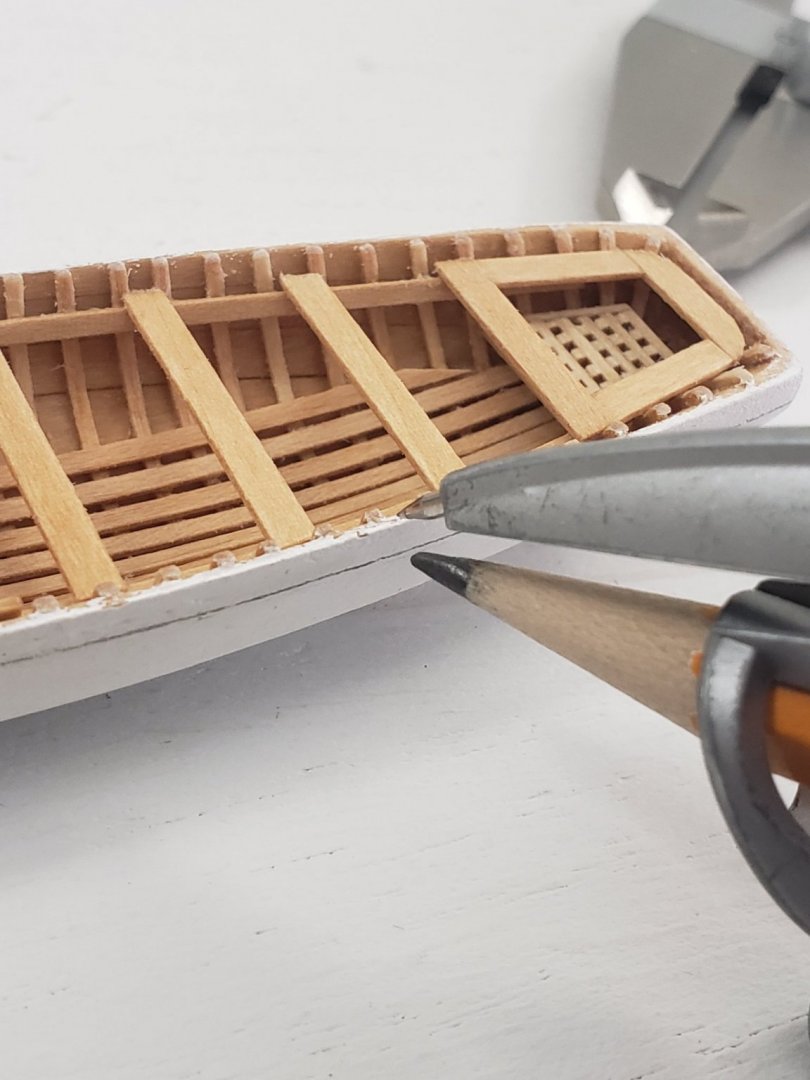
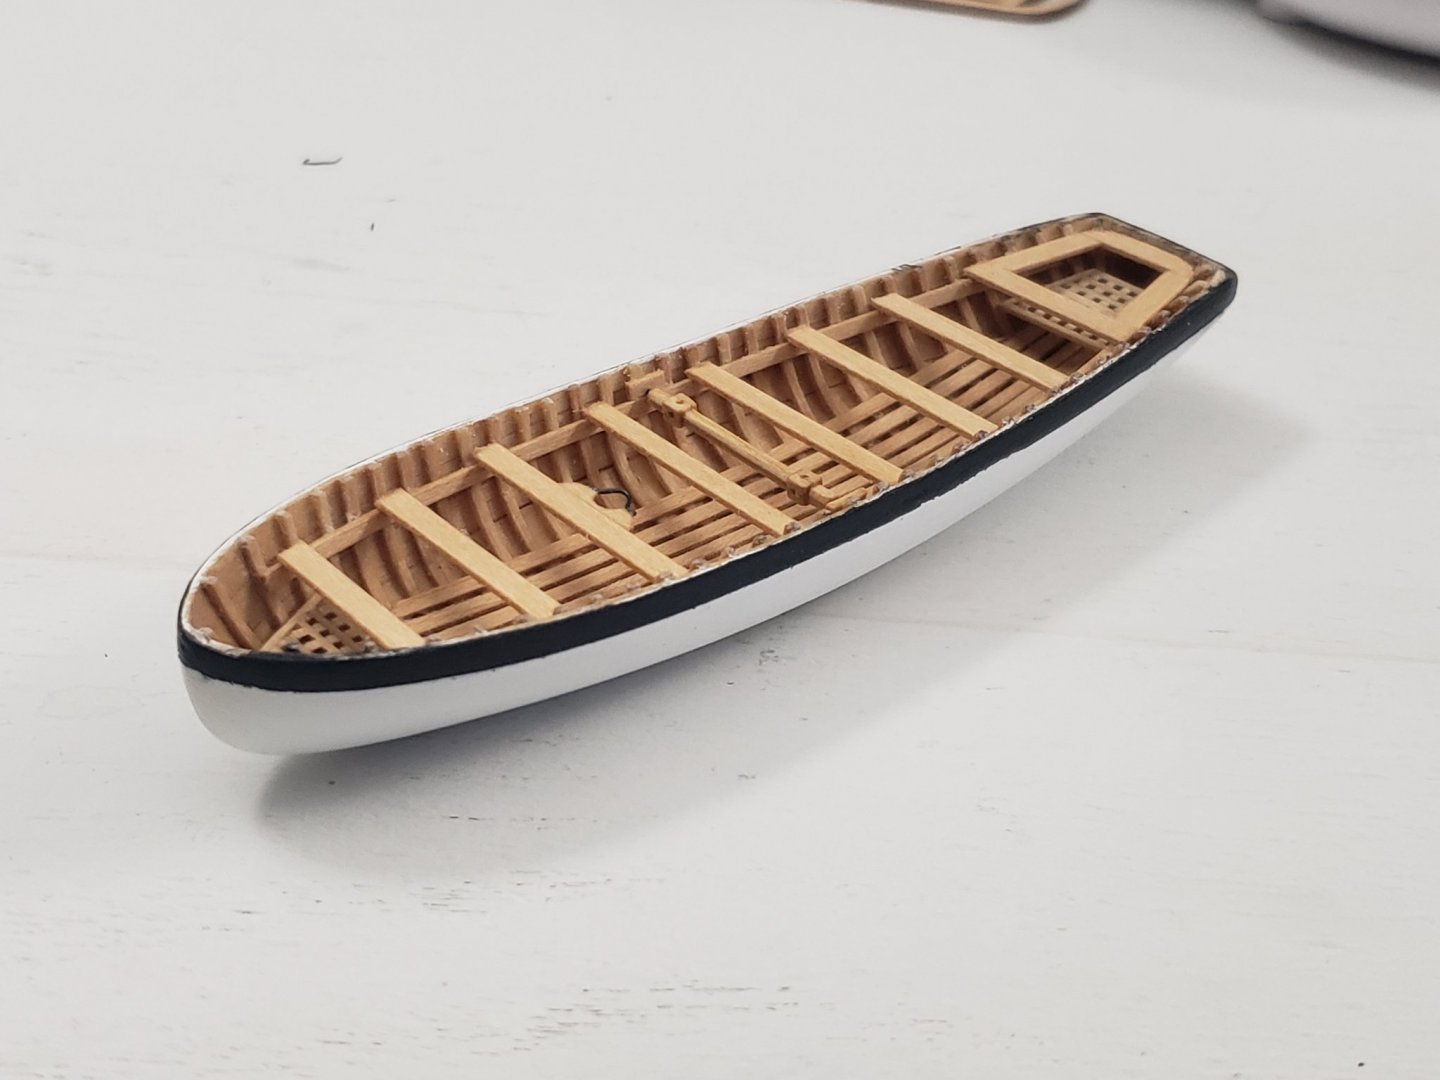
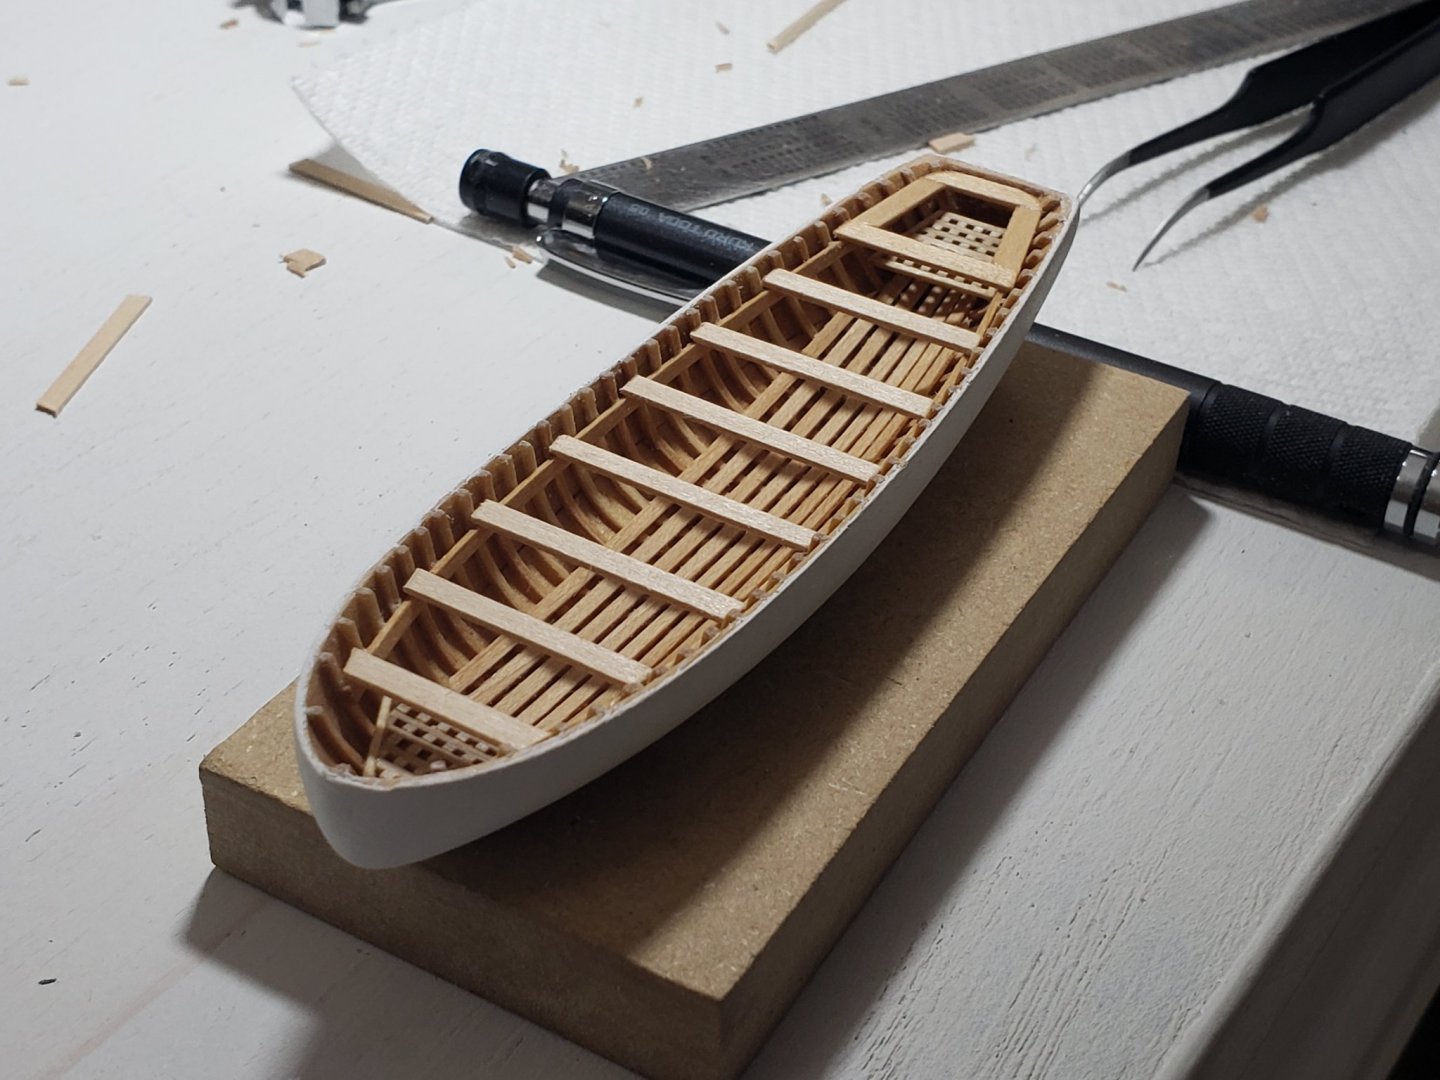
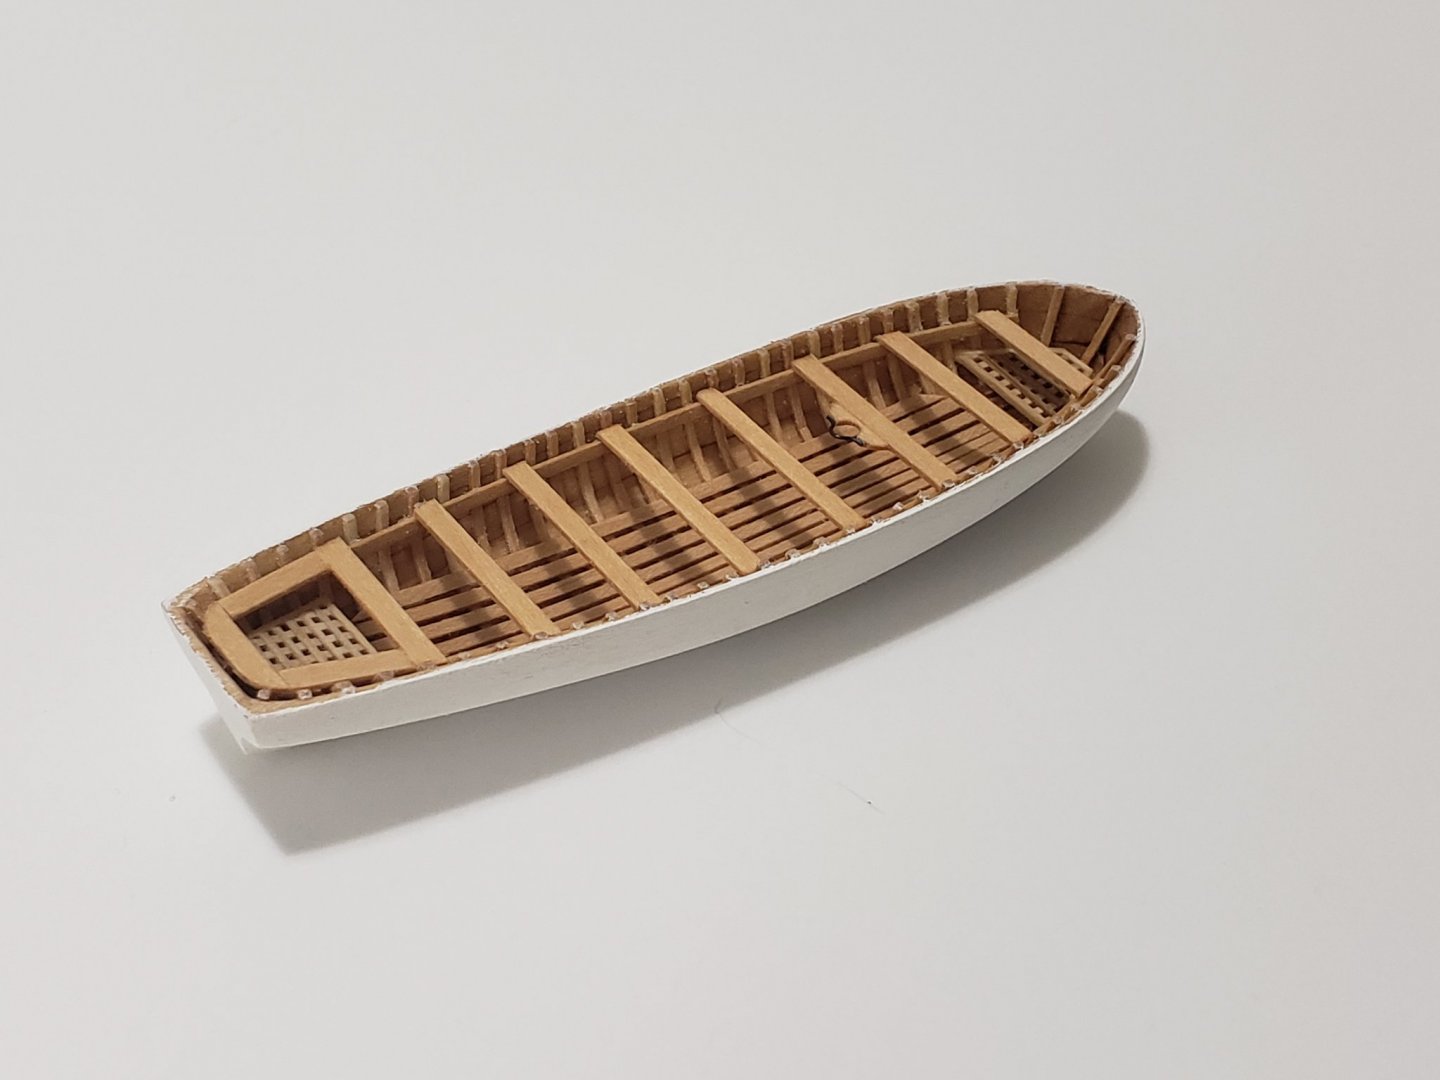
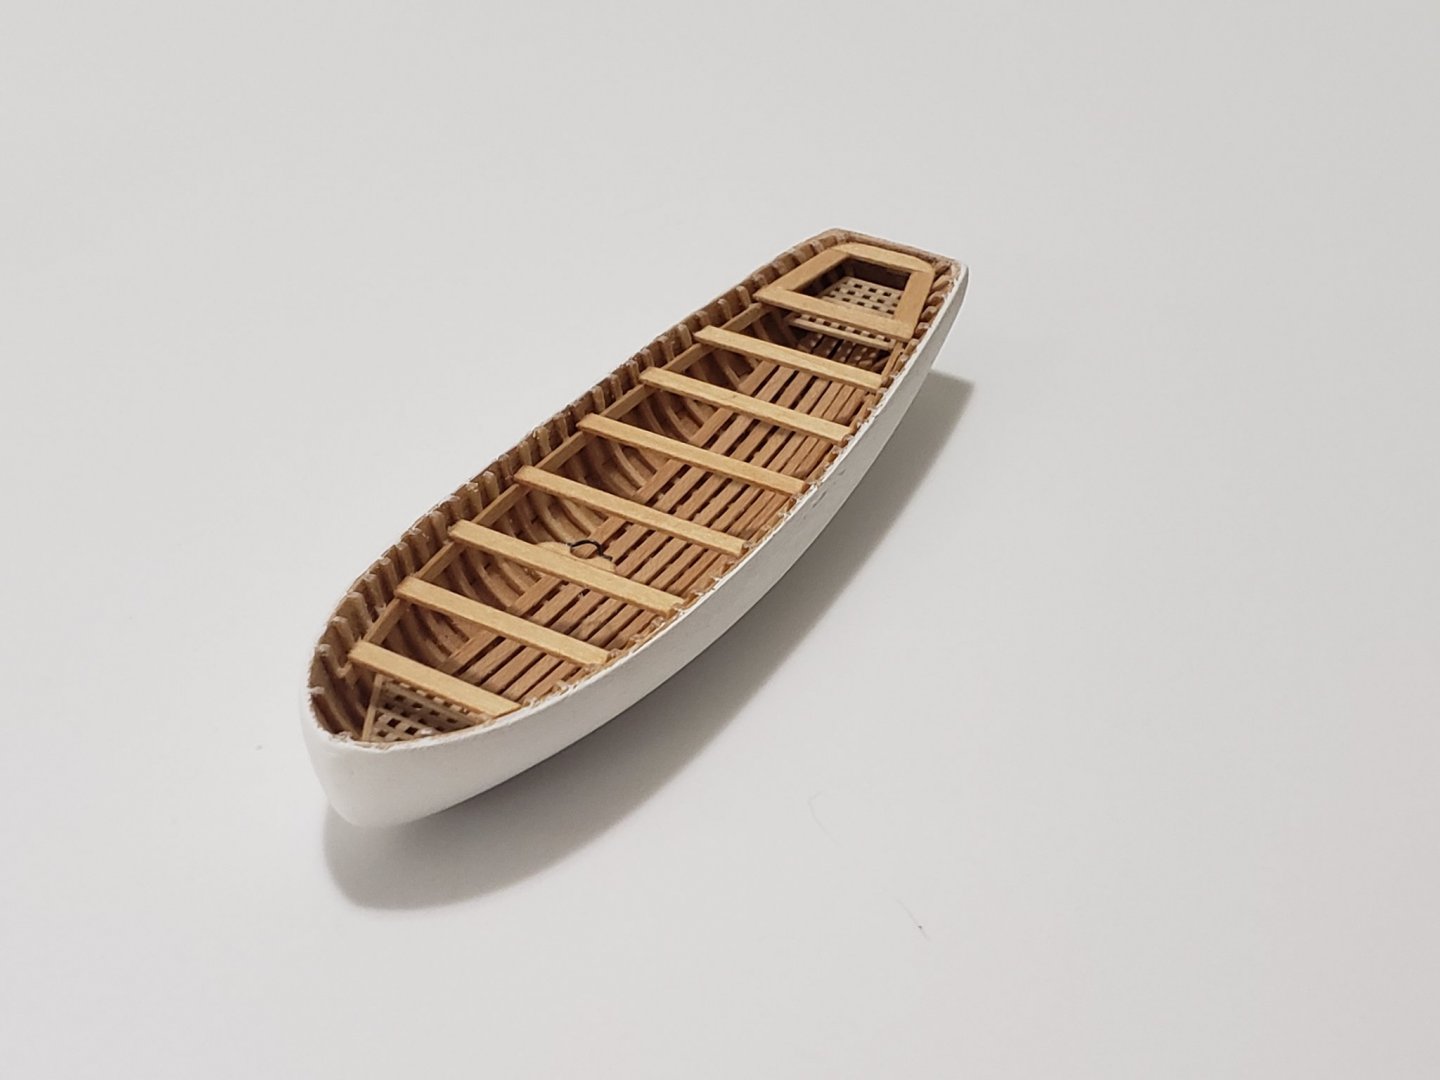
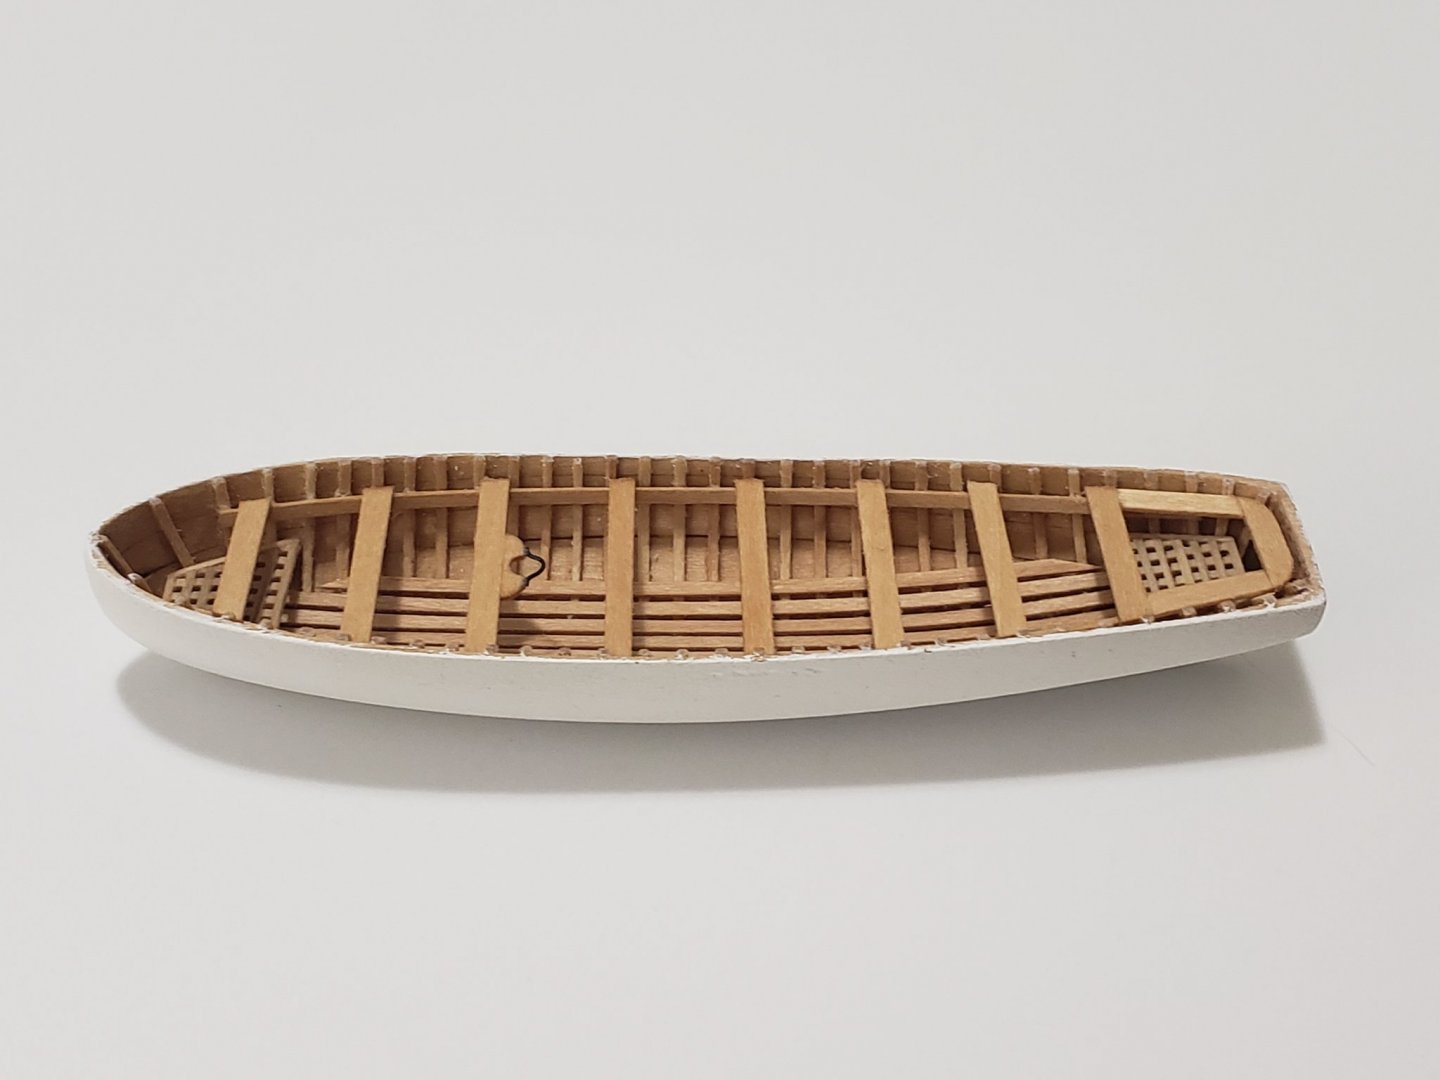
Some more progress with the longboat, I installed the gratings, thwart supports and thwarts. The supports were again a bit tricky to install, and had to use CA glue in some spots

- 950 replies
-
- 15
-
-
- syren
- model shipways
- (and 1 more)
-
Thanks so much Will! I think others also had the same issue with the laser cut parts. I still have to dry fit mine to see if it fits, otherwise I plan to scratch my own ones
-
Thank you Thomas and Steven for the compliments! Today I finished installing the floorboards. These things really transformed the look of the boat. They were a bit tricky to glue because of the curves and bends. I used CA glue on the ends and the wood glue in the middle.


- 950 replies
-
- 13
-
-
- syren
- model shipways
- (and 1 more)
-
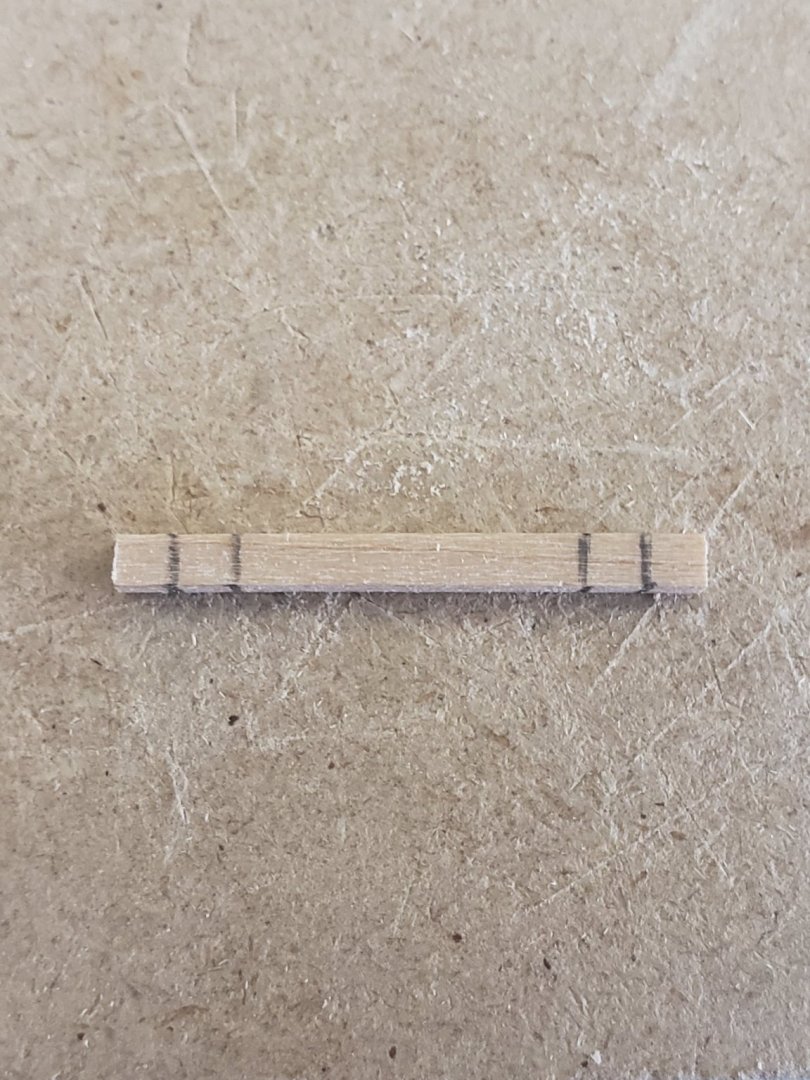
I'm using the supplied 1/32"x1/32" basswood strips. They definitely need some care when bending them to avoid creases or snapping them
- 950 replies
-
- 2
-
-
- syren
- model shipways
- (and 1 more)
-
Beautiful!! The varnish brings the wood to life!
-
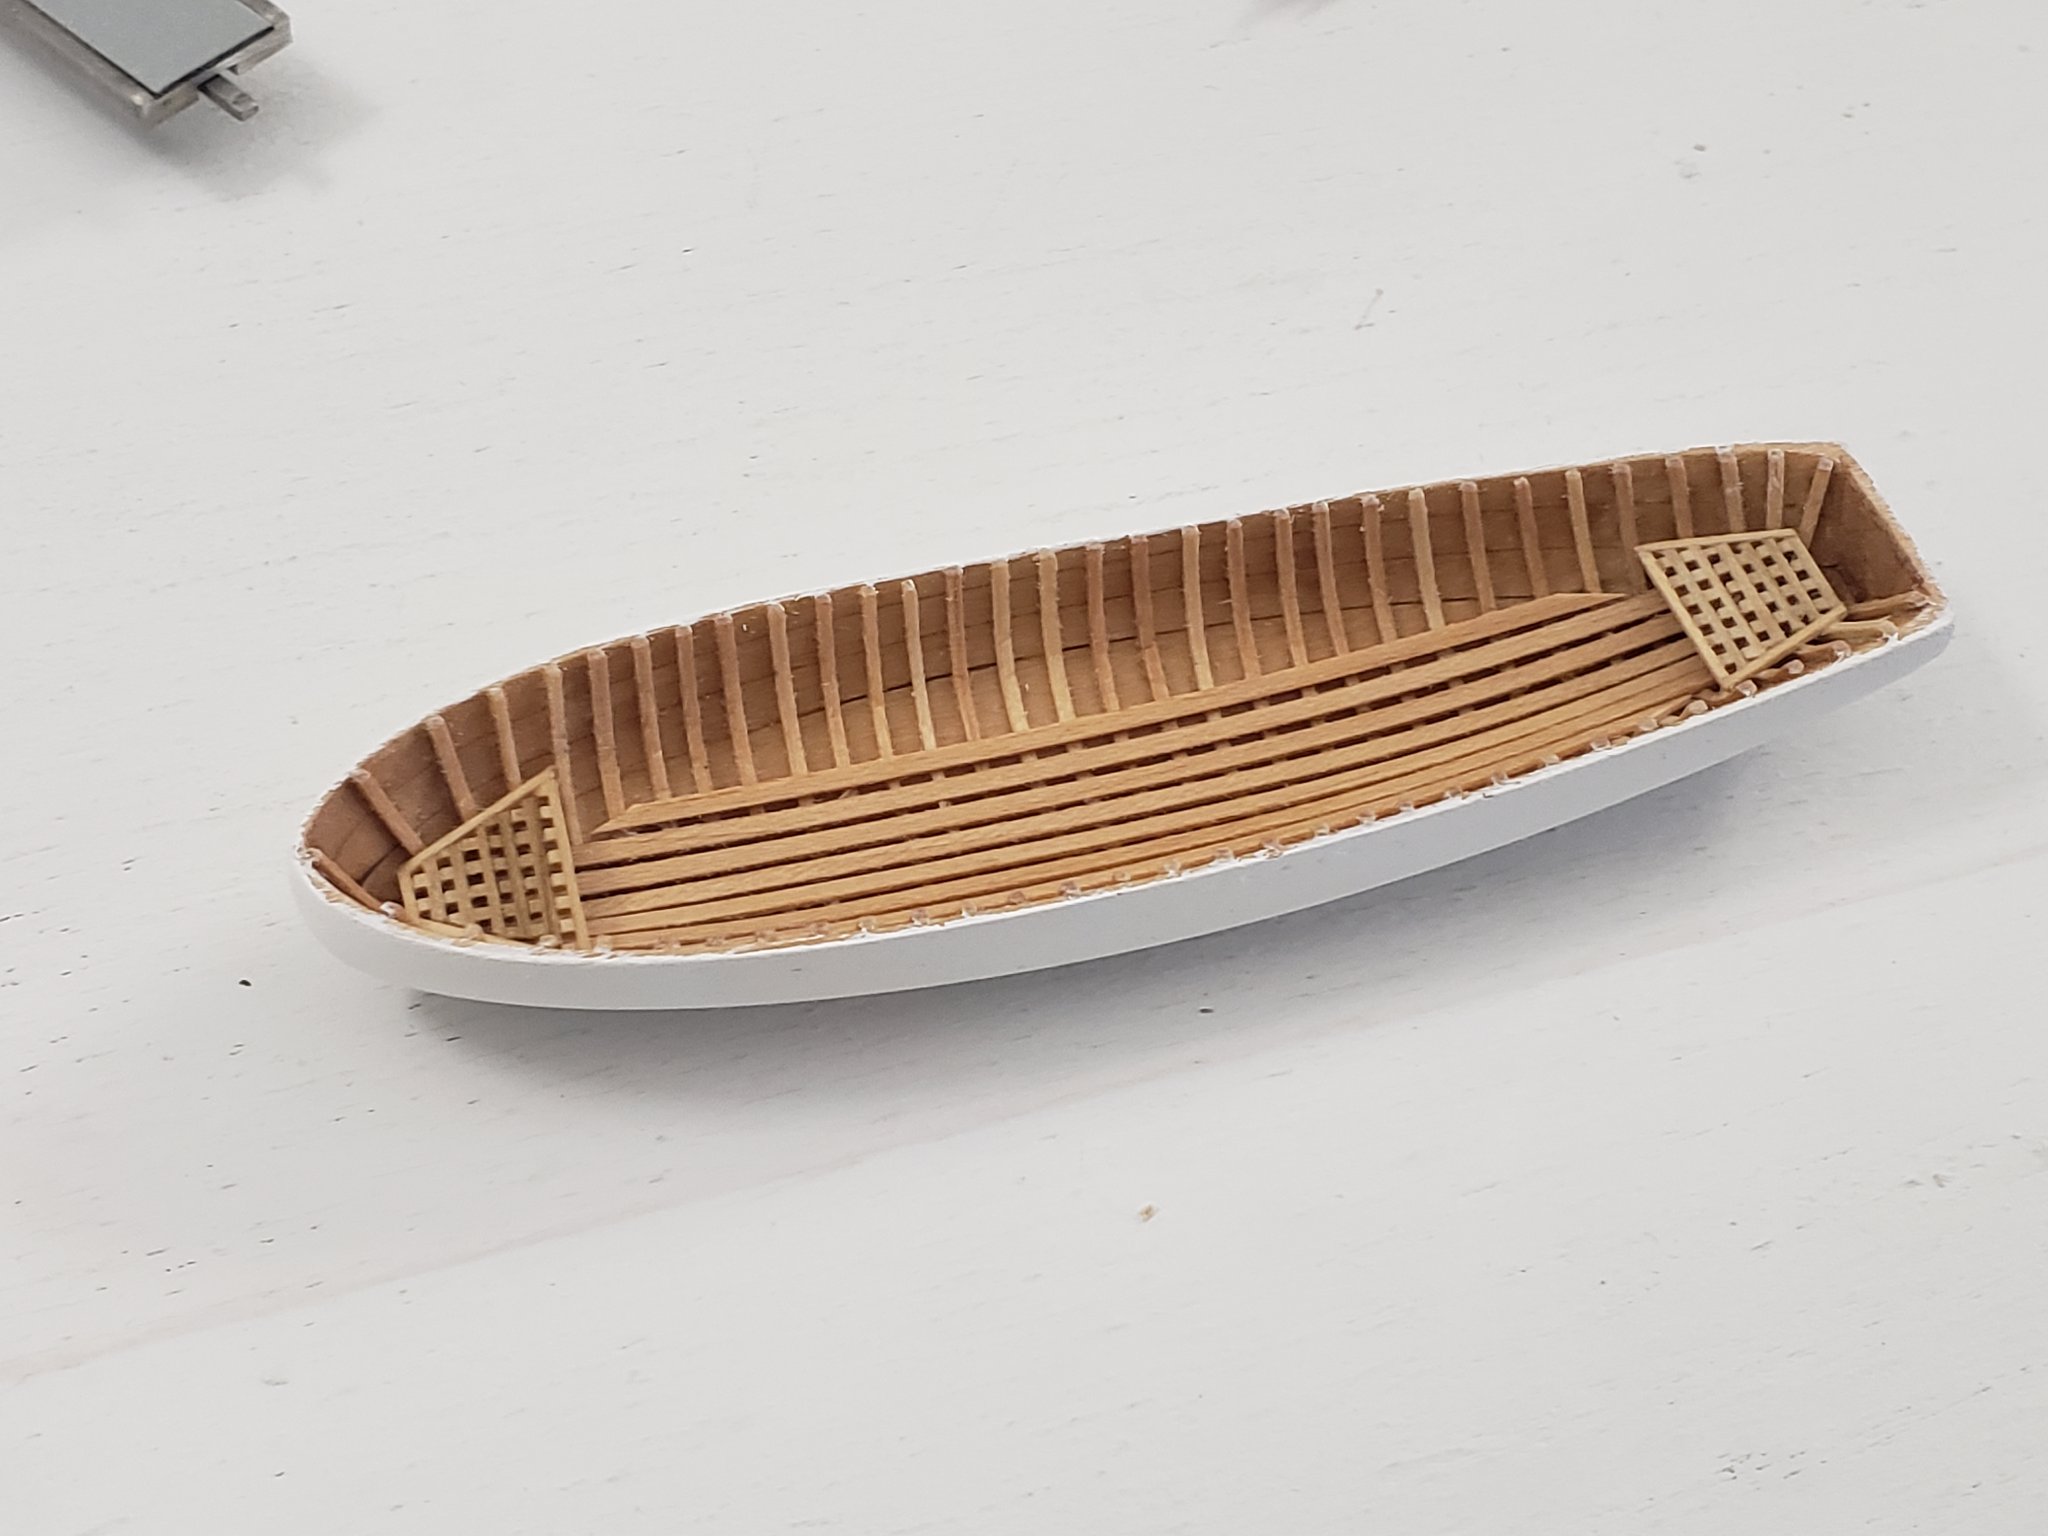
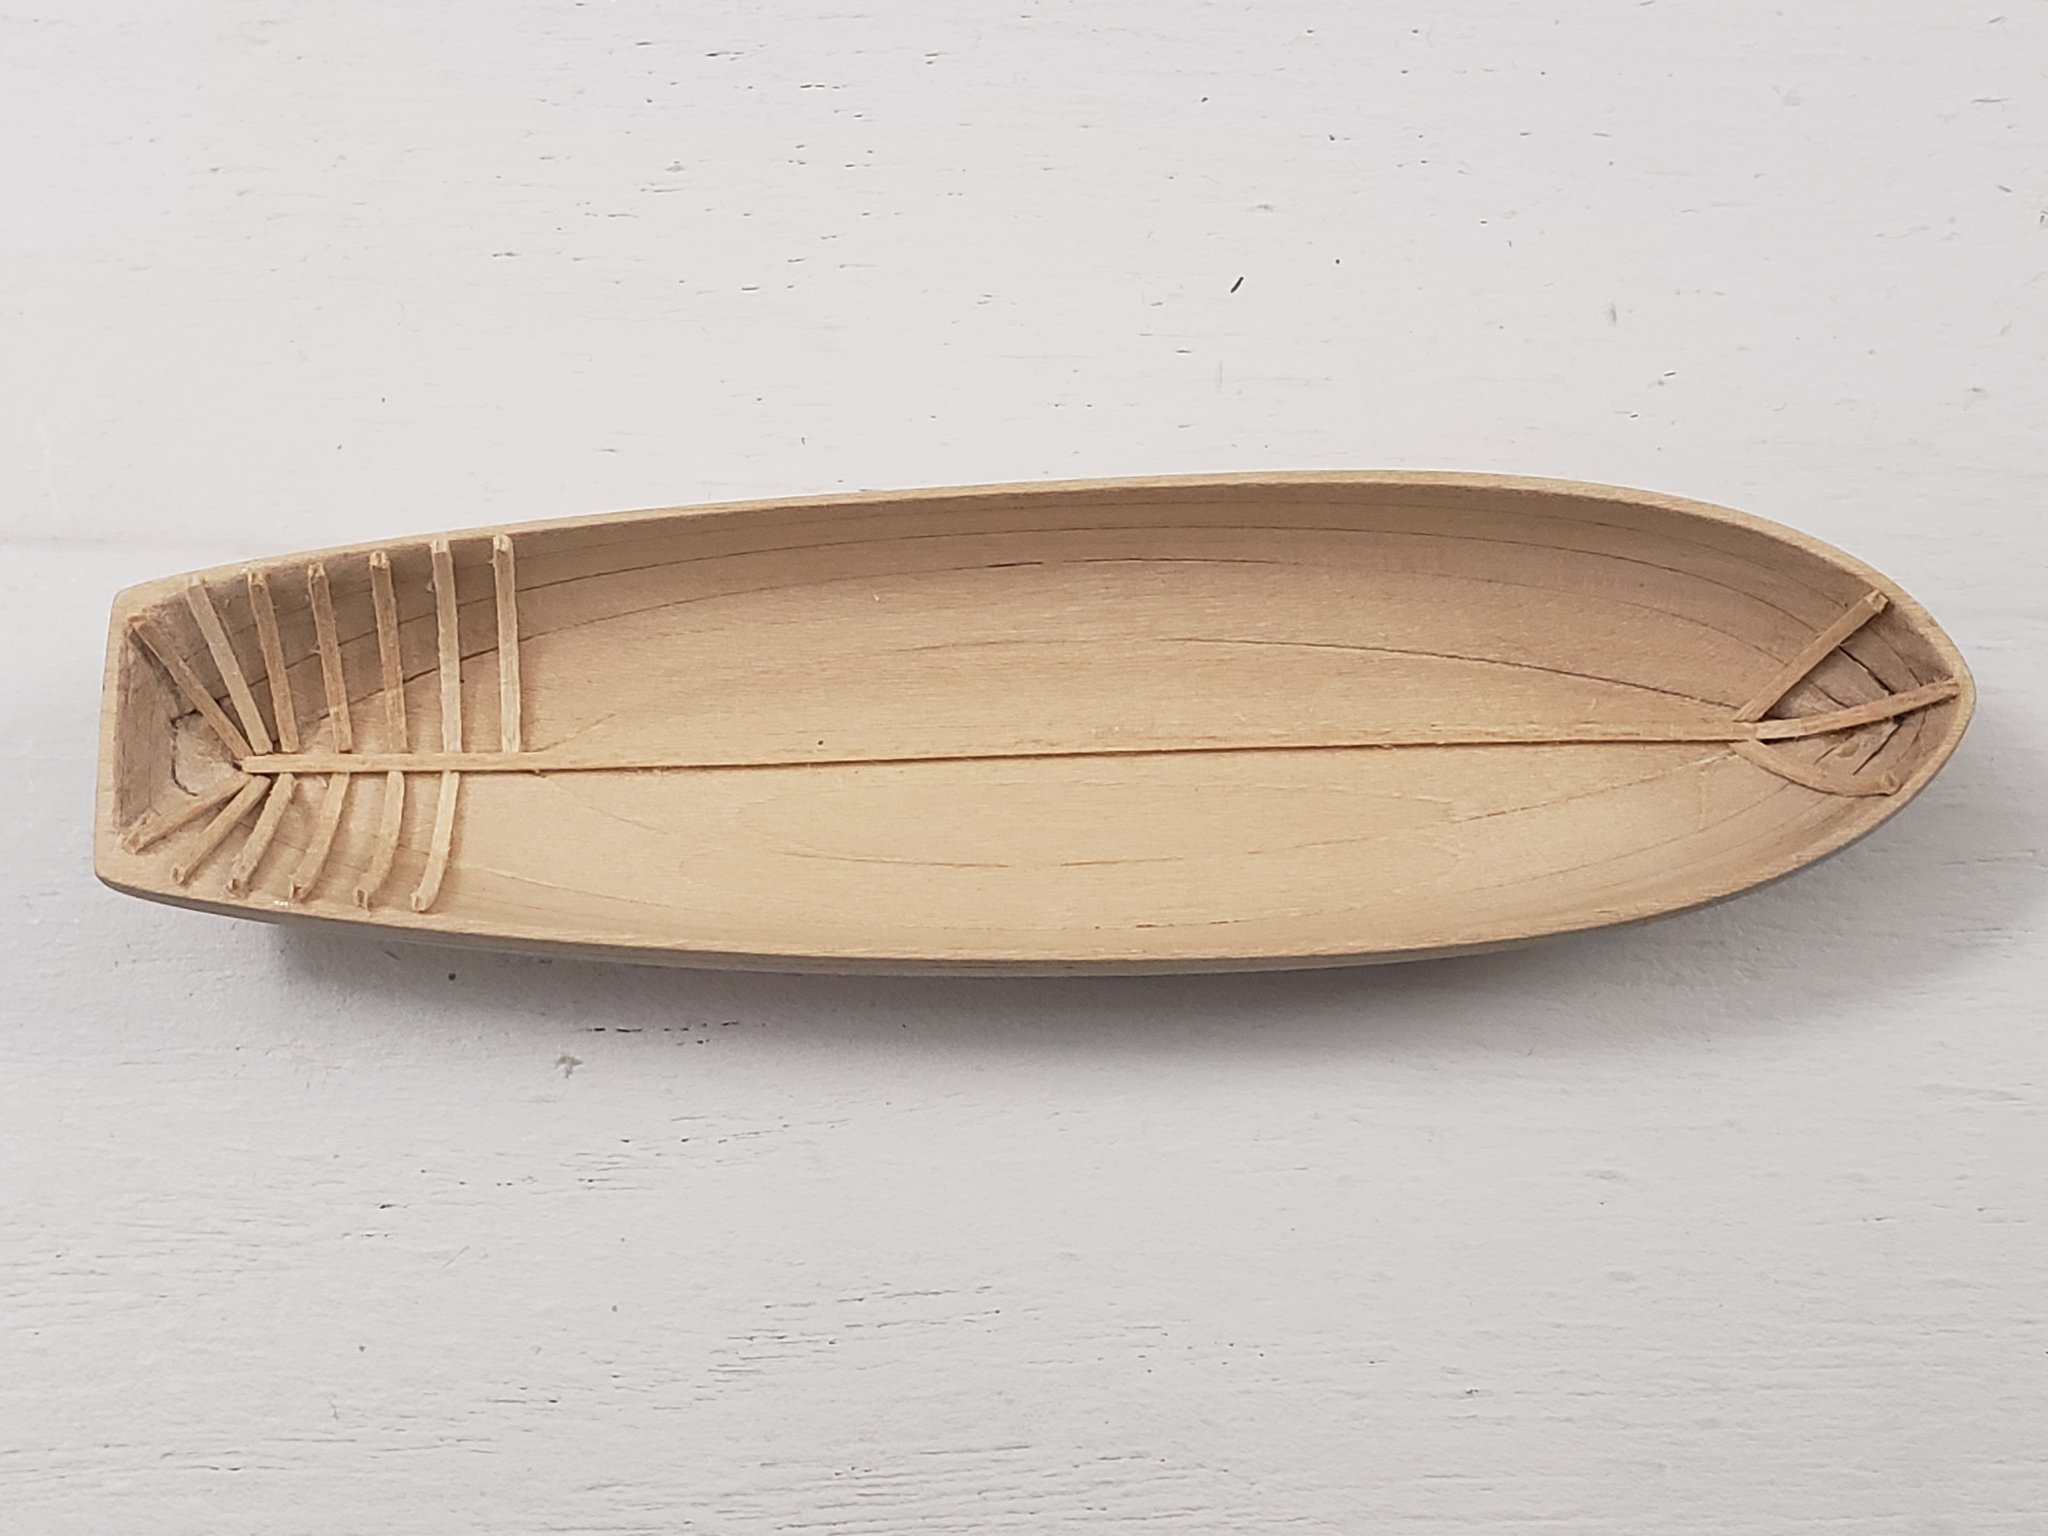
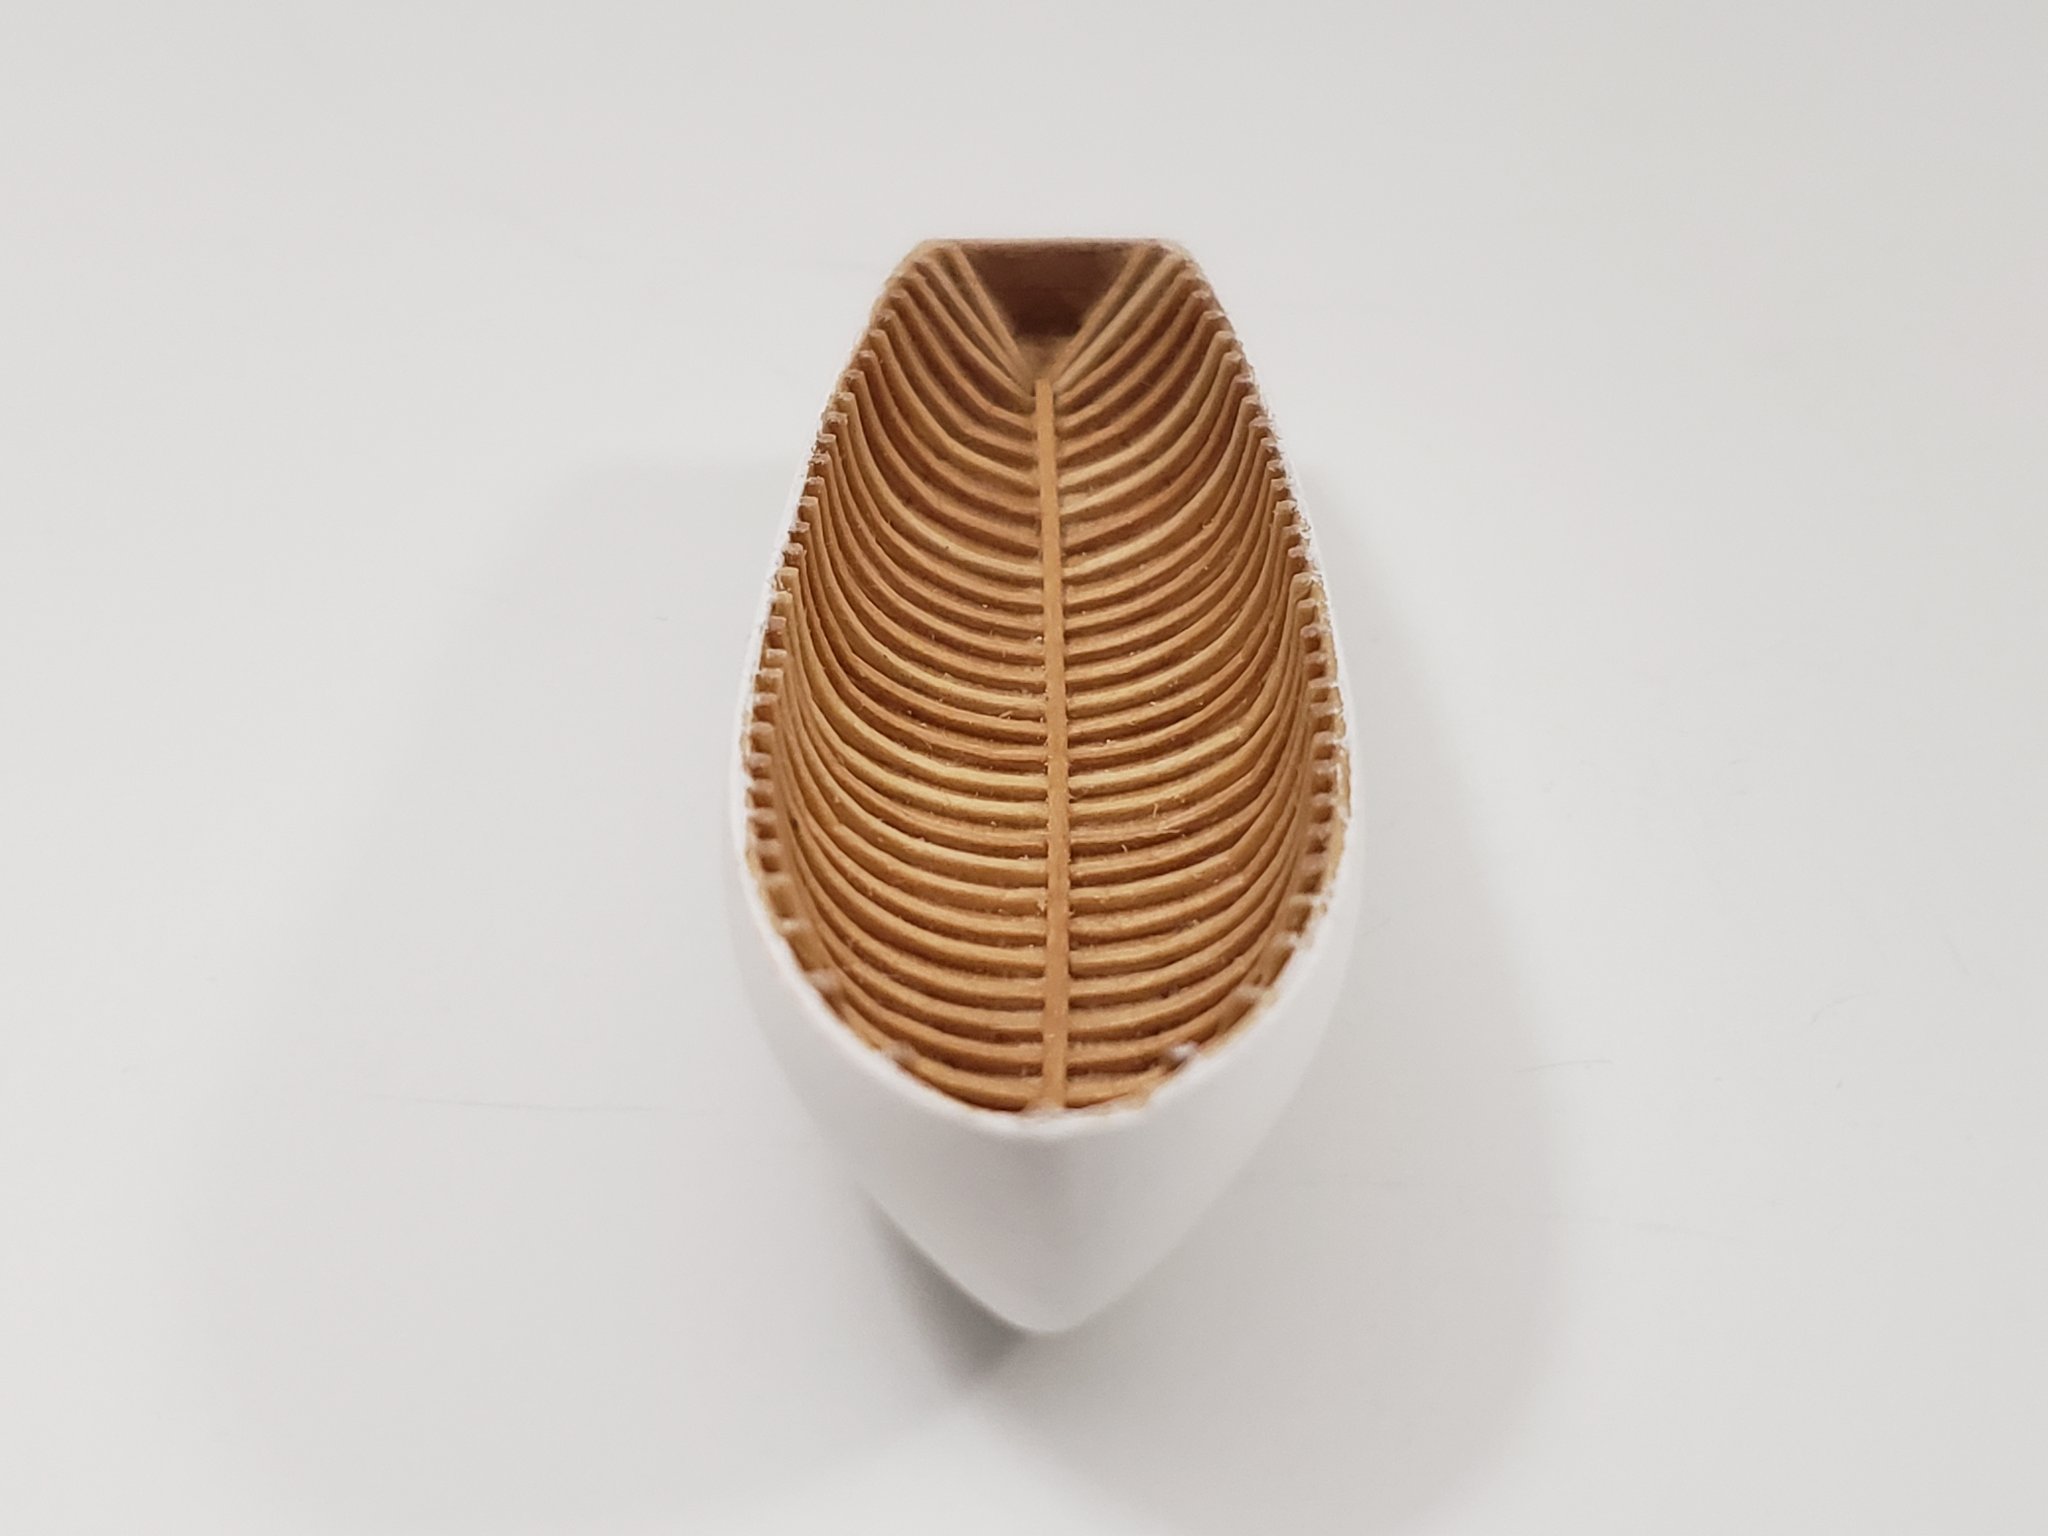
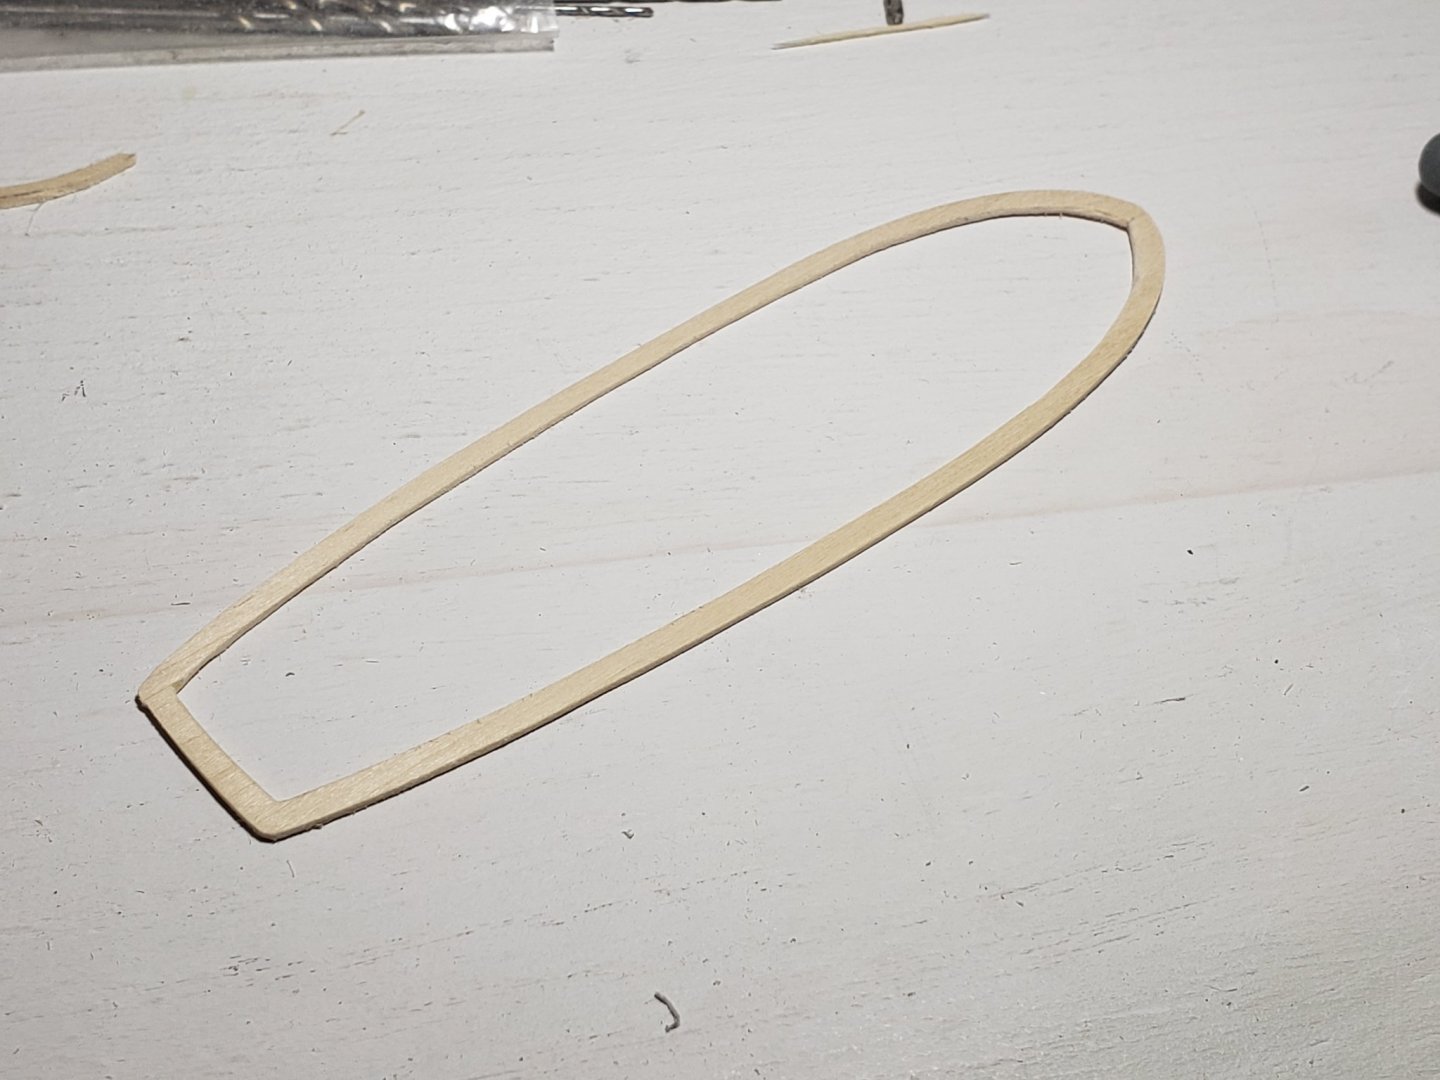
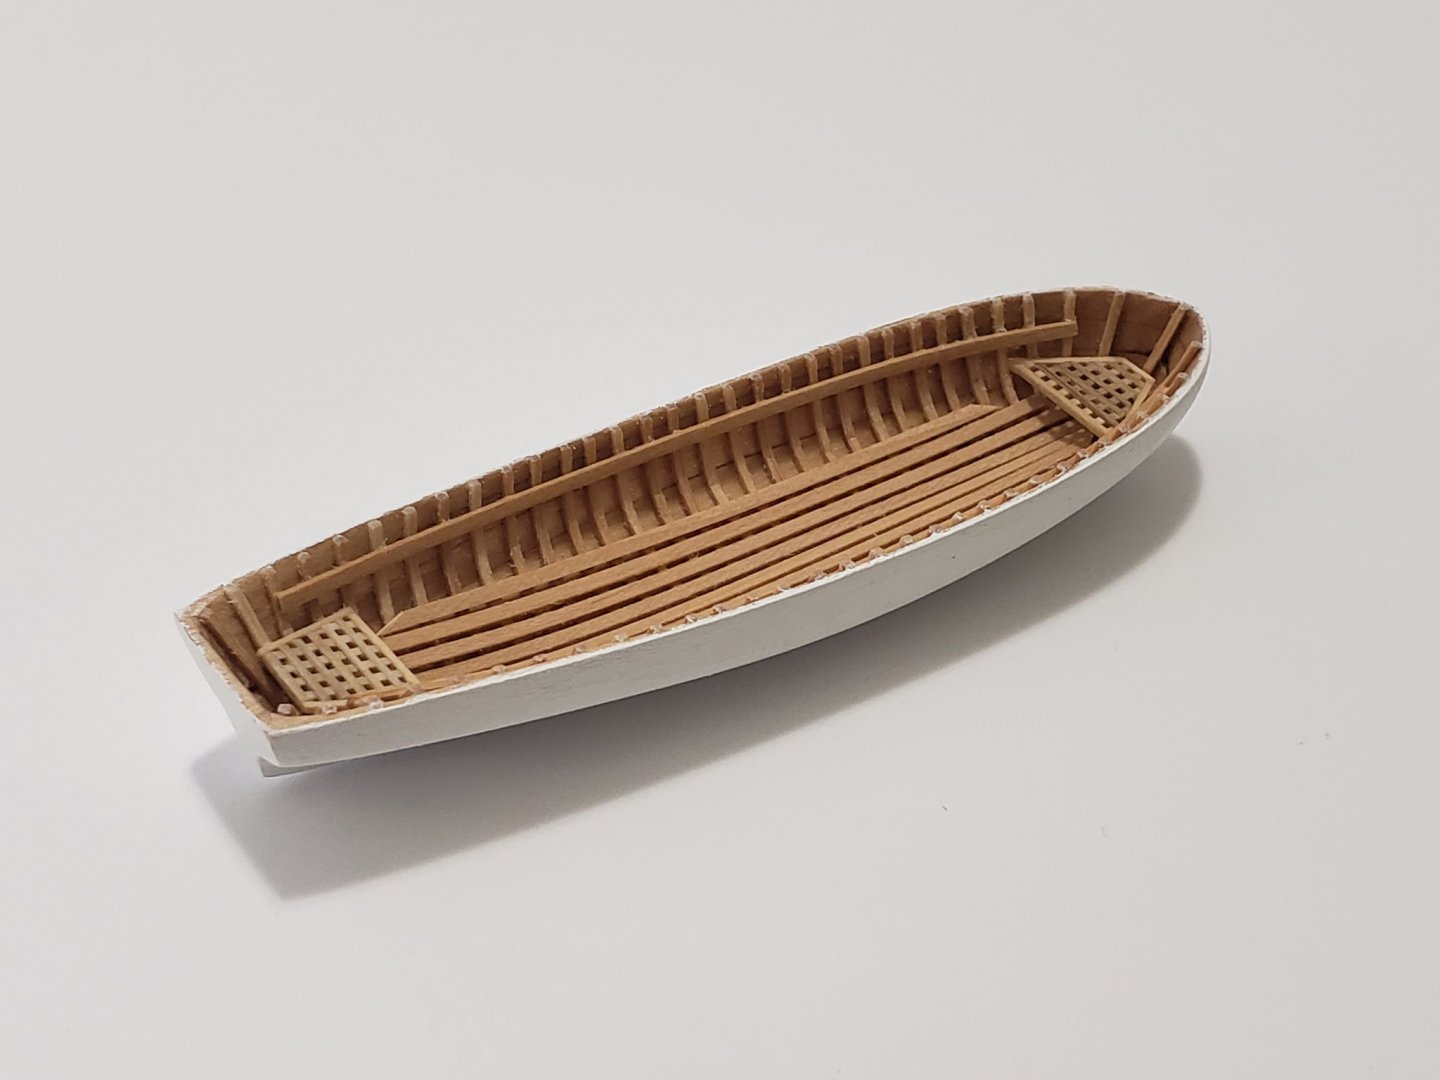
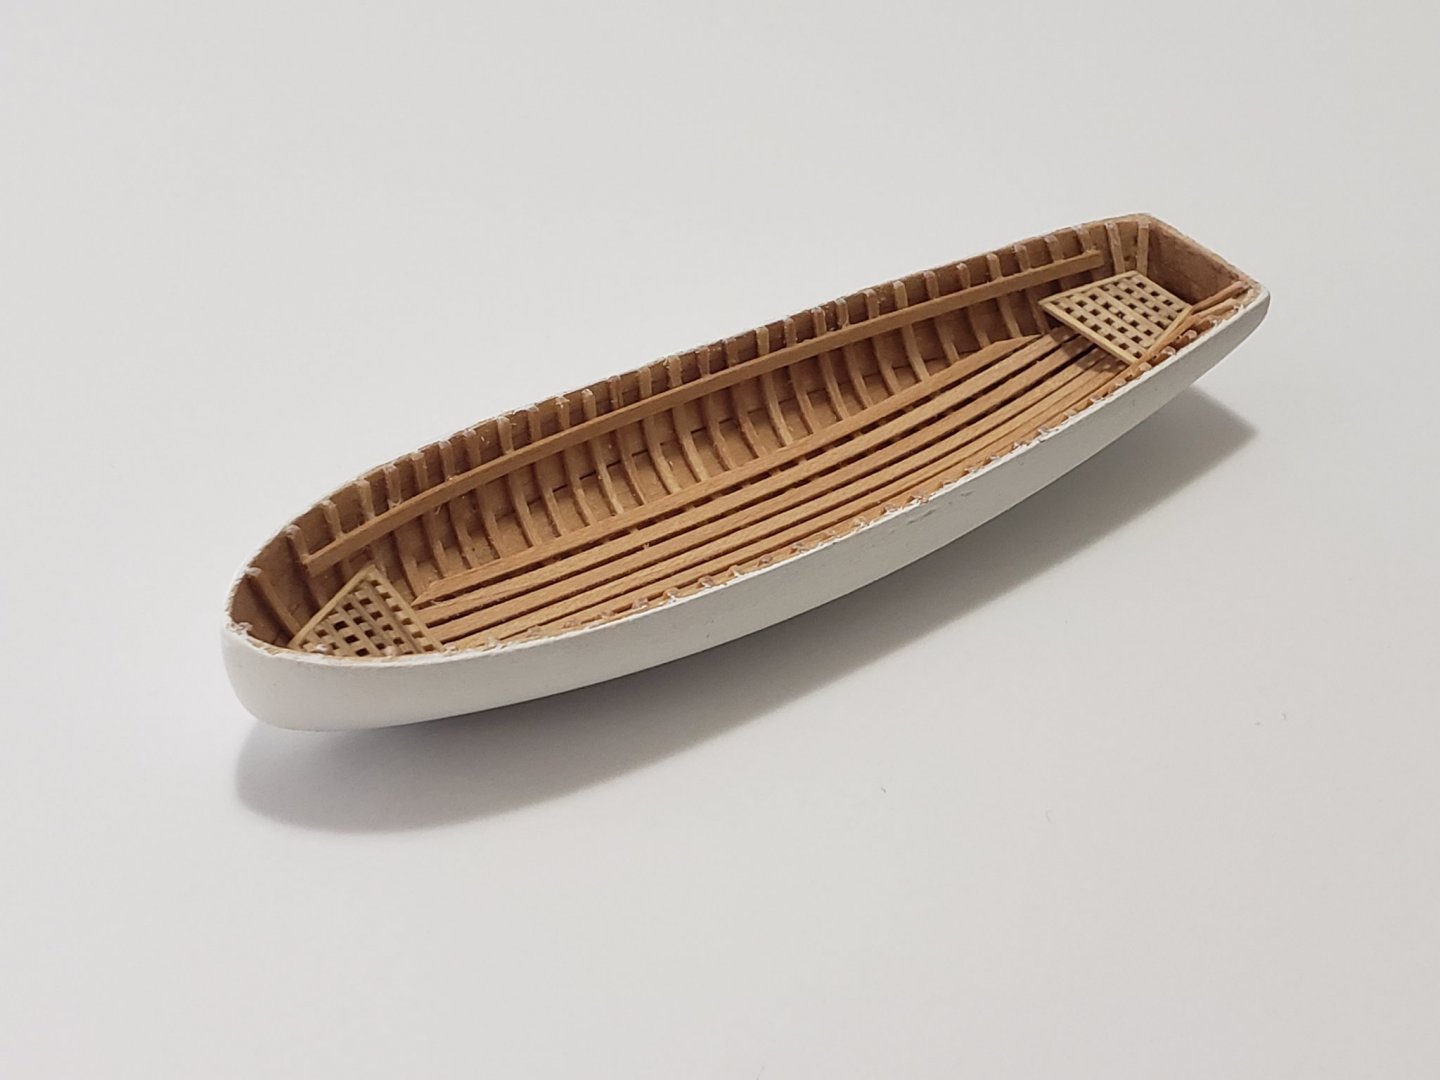
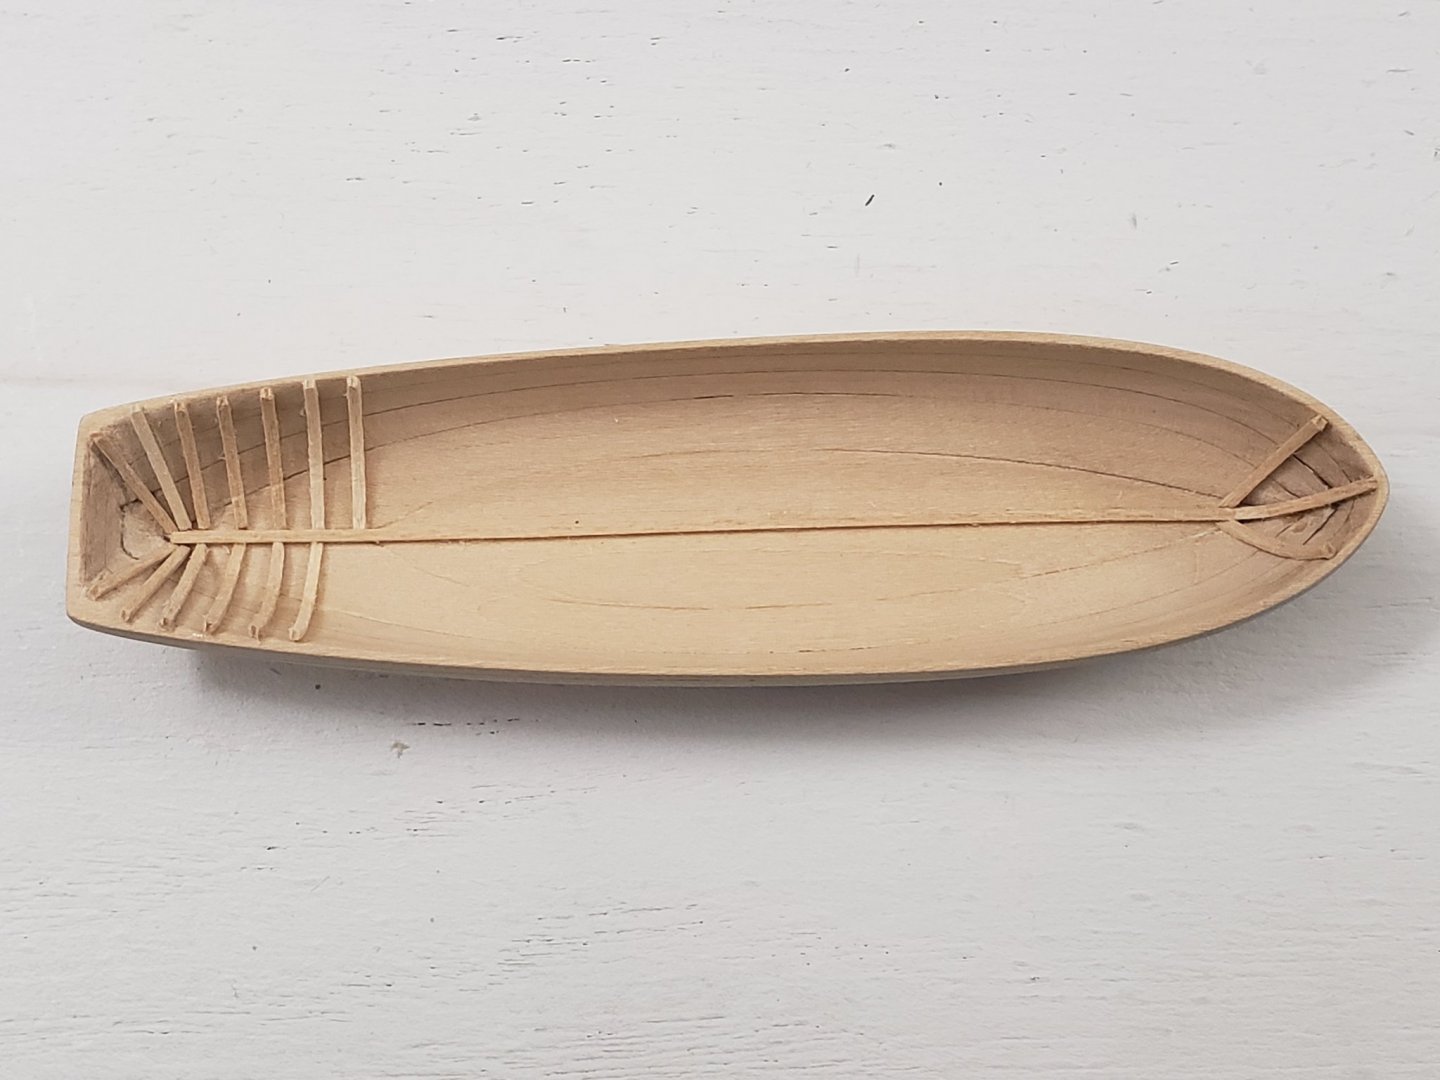
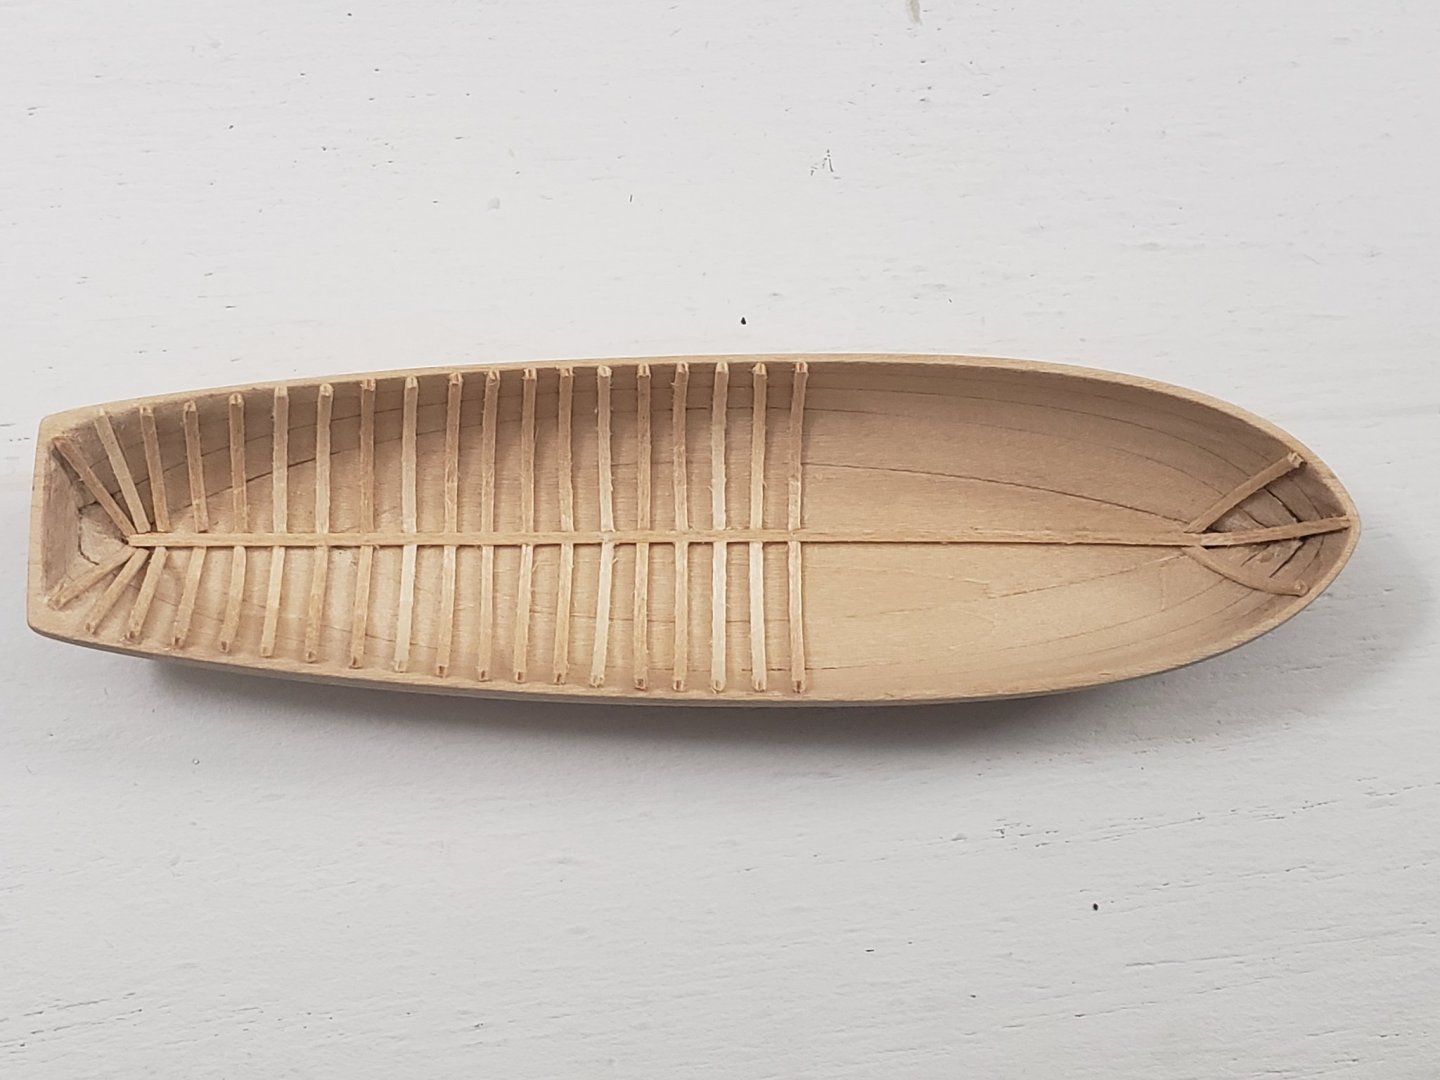
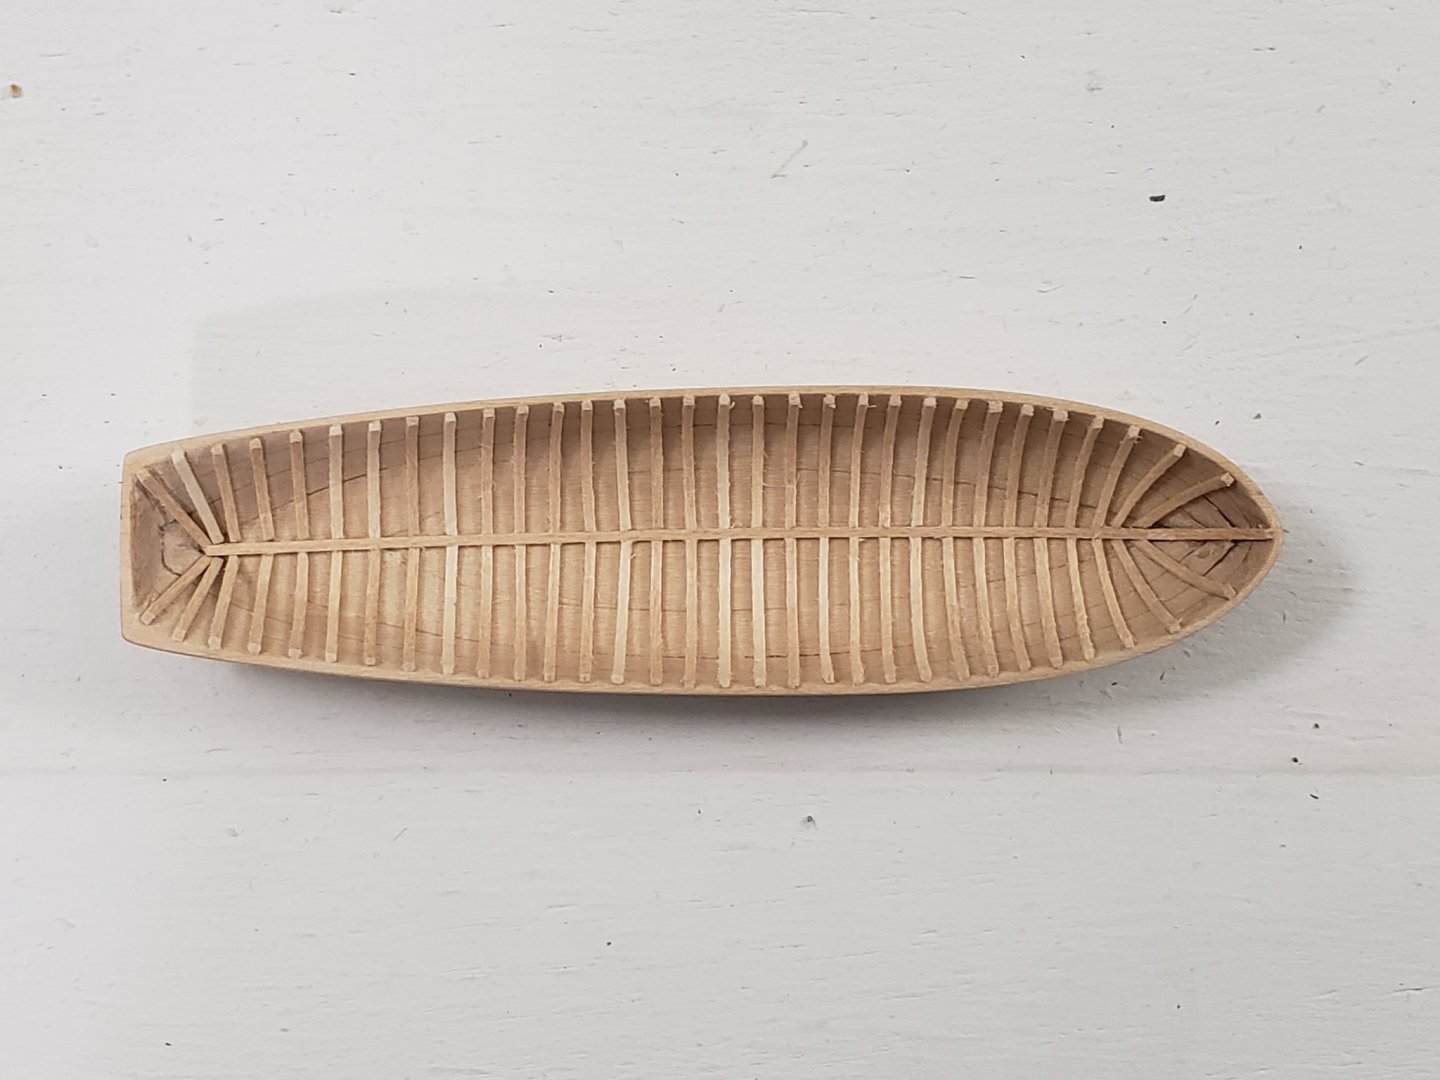
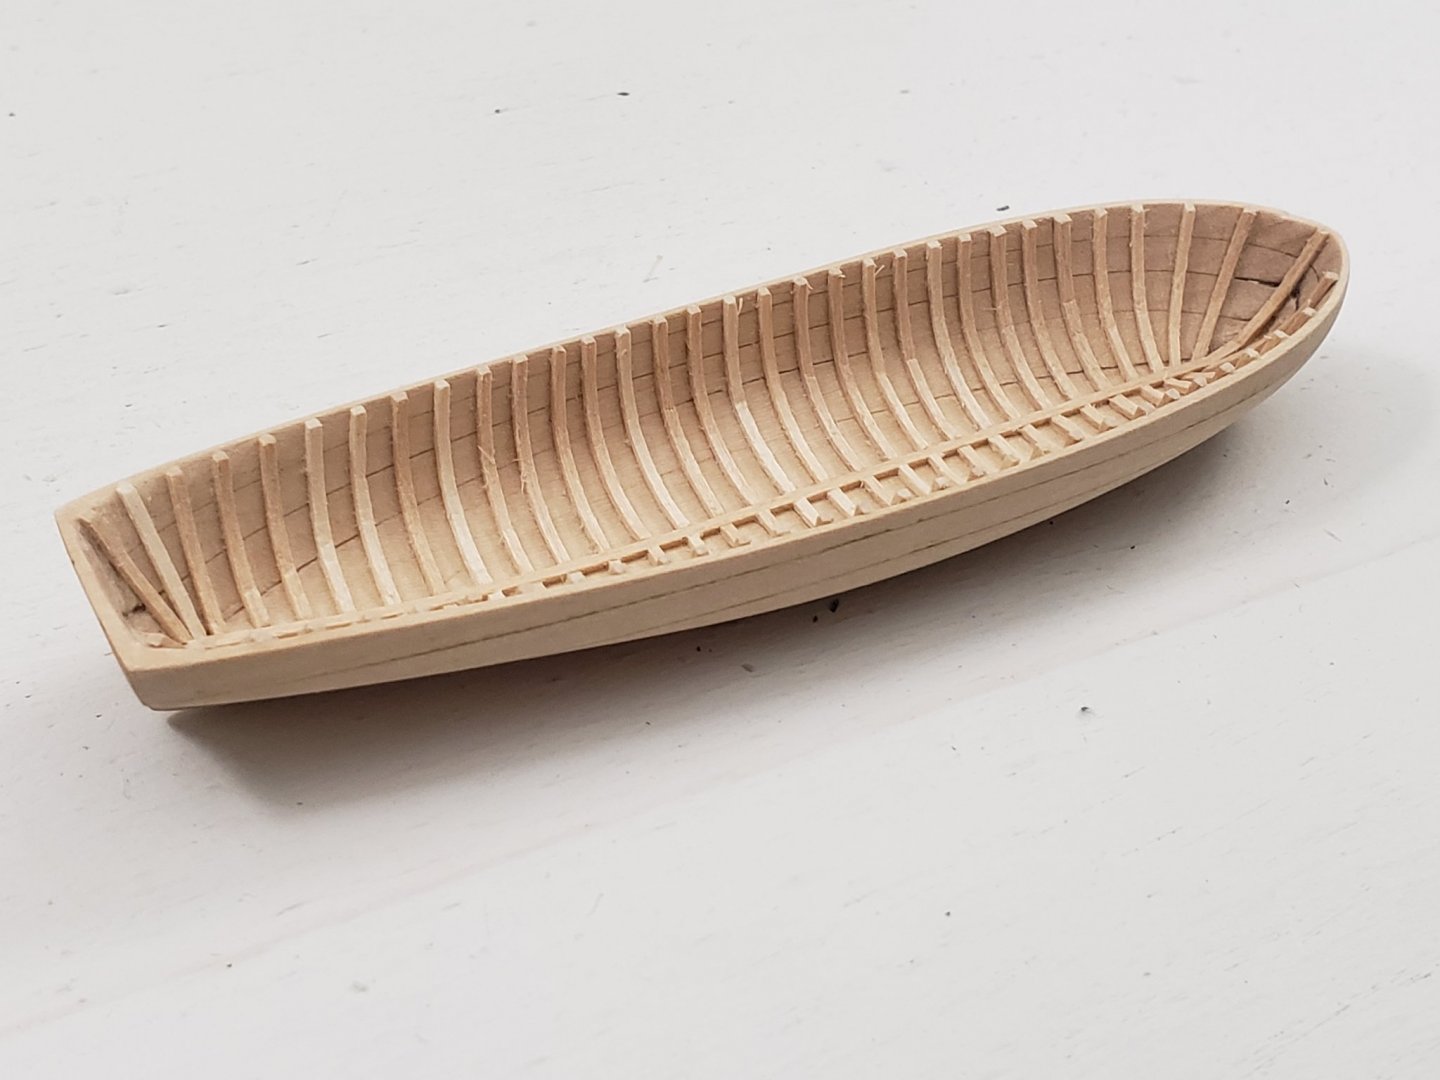
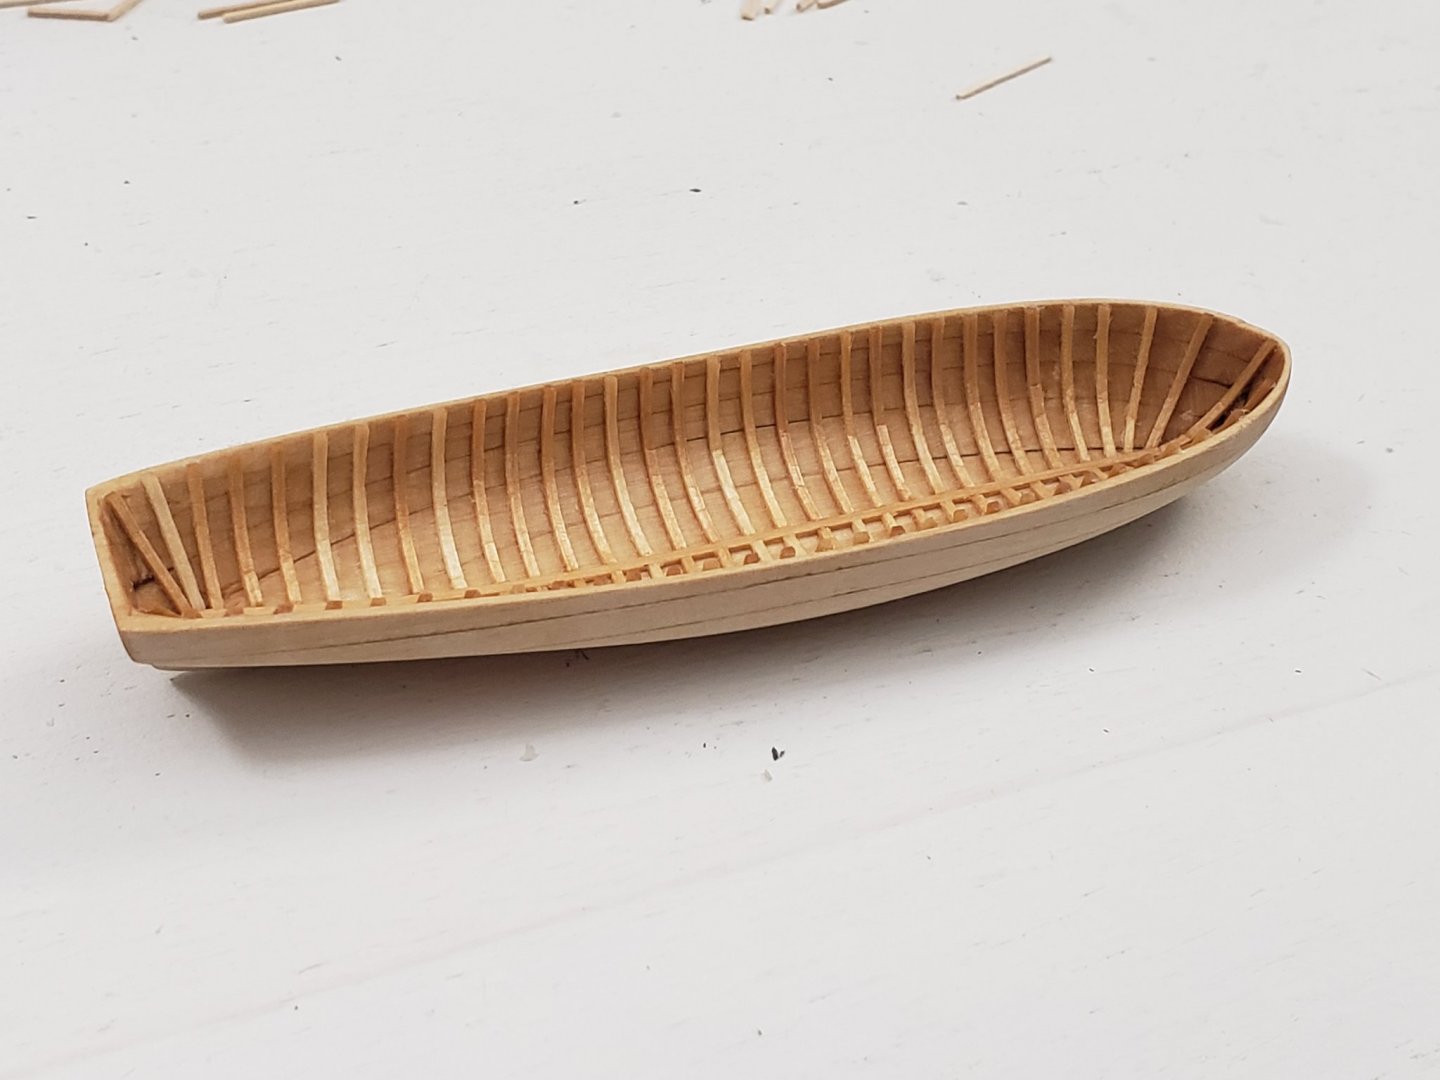
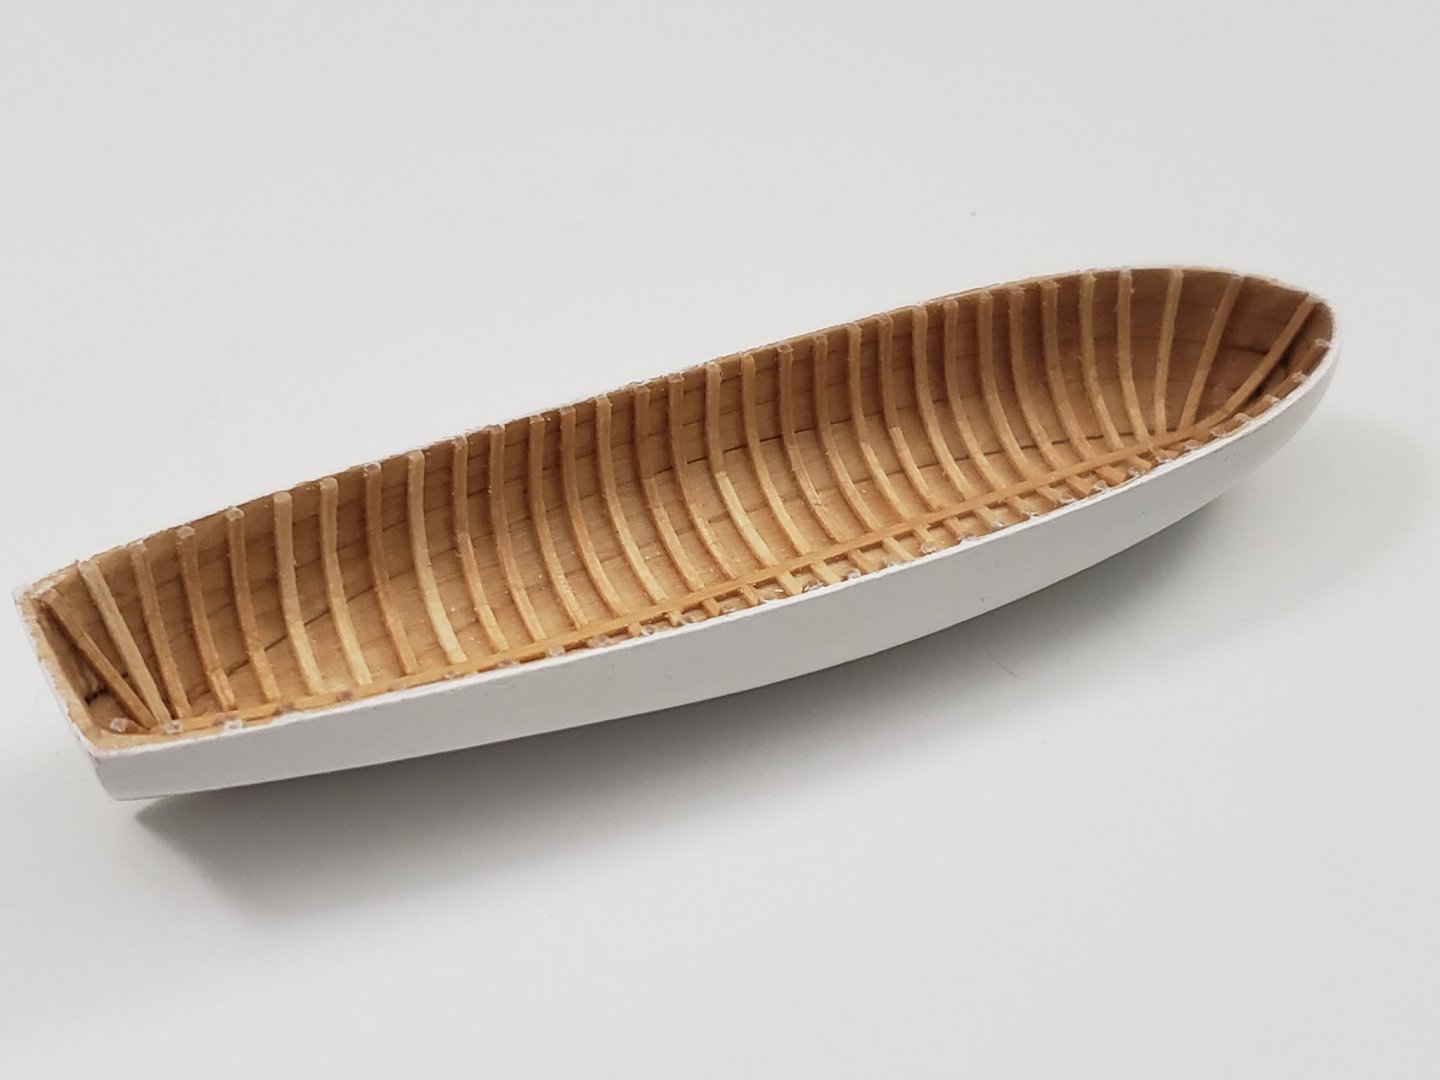
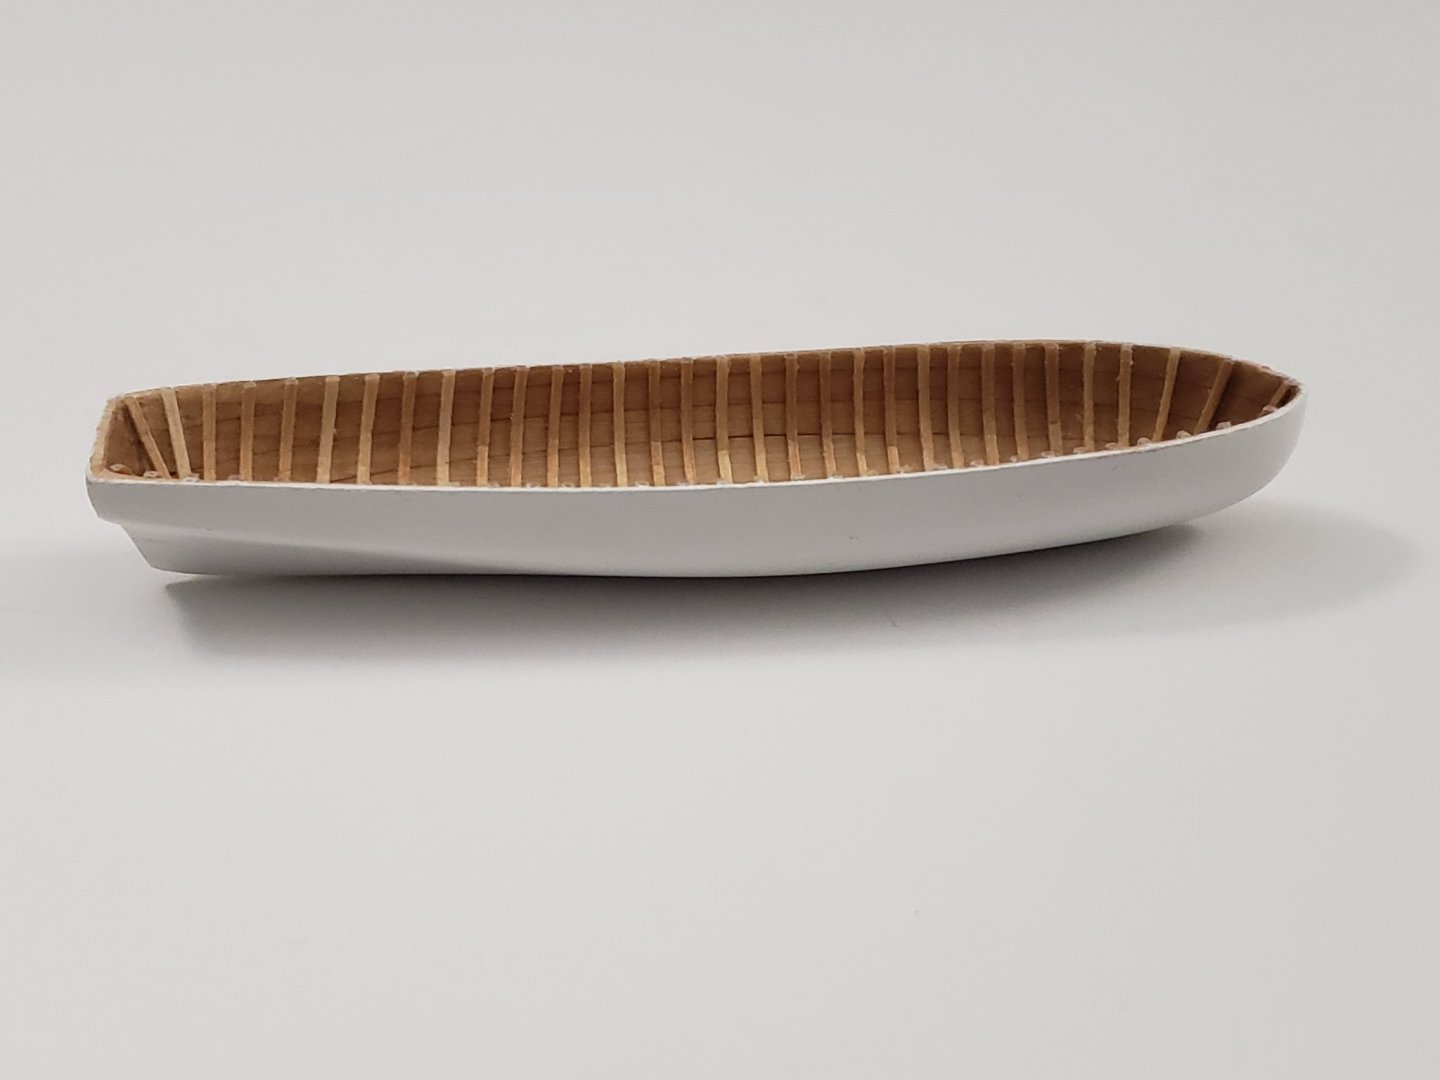
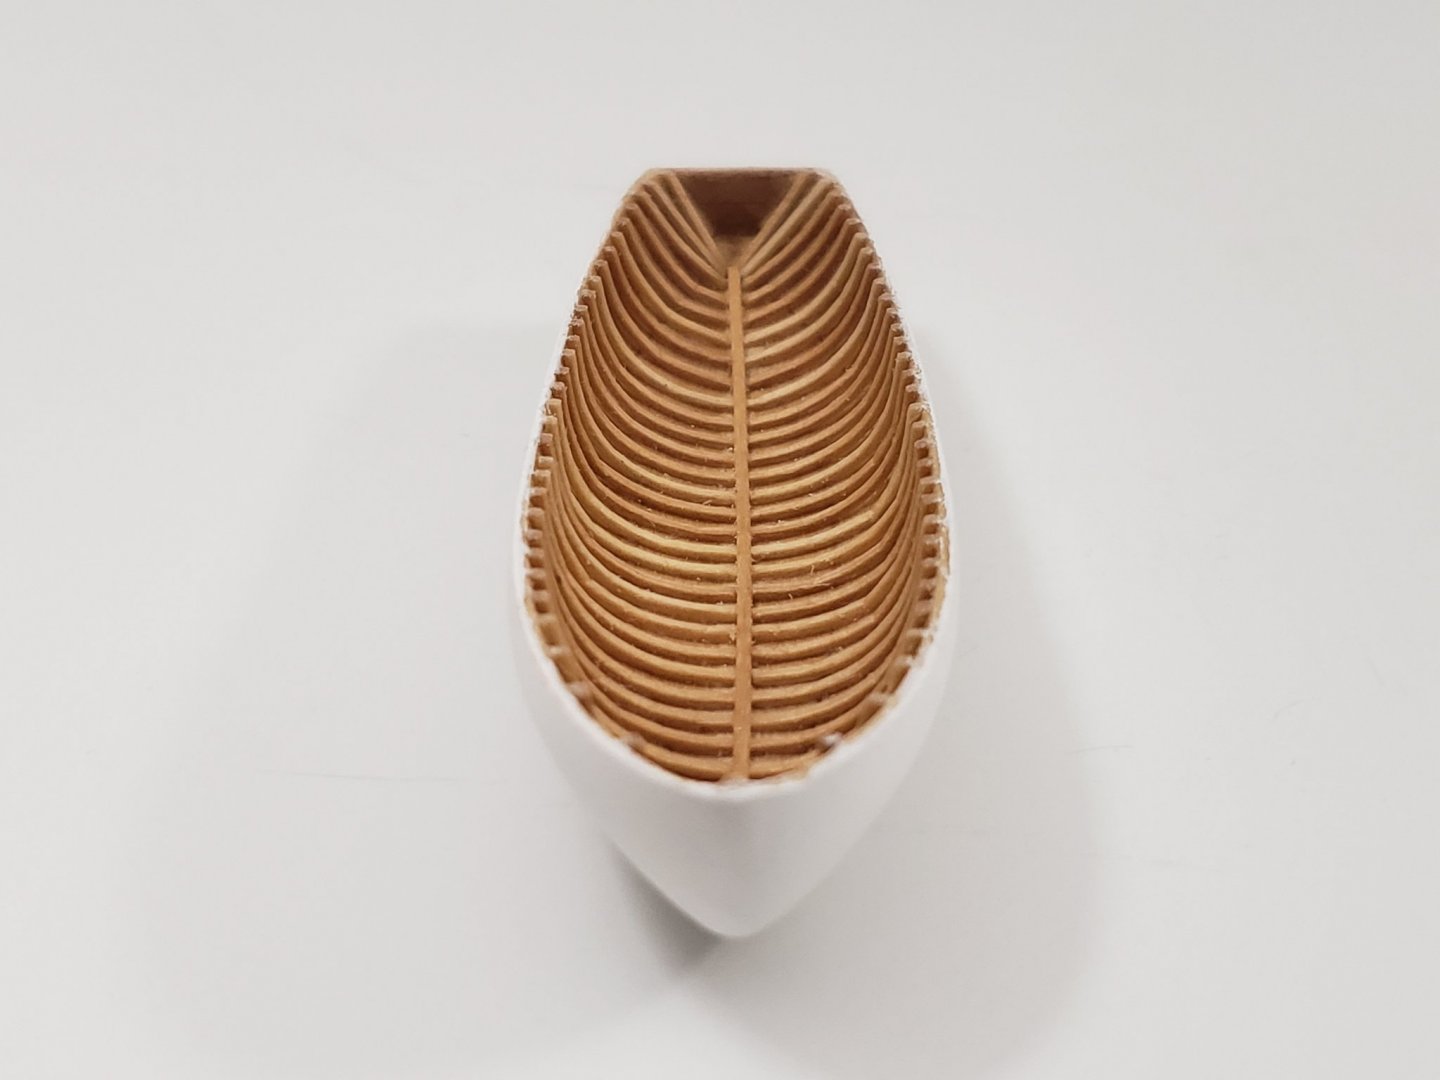
Some more progress with the longboat. I finished constructing its skeleton: First I bent the wood strips (after soaking them in hot water) with a container I found to fit nicely in the boat Then stuck the ones most forward and at the stern first, followed by working from the stern towards the bow Then applied Tung oil on the inside after lightly sanding with a fine sandpaper. Then painted the exterior white (multiple coats of diluted paint)


- 950 replies
-
- 12
-
-
- syren
- model shipways
- (and 1 more)
-
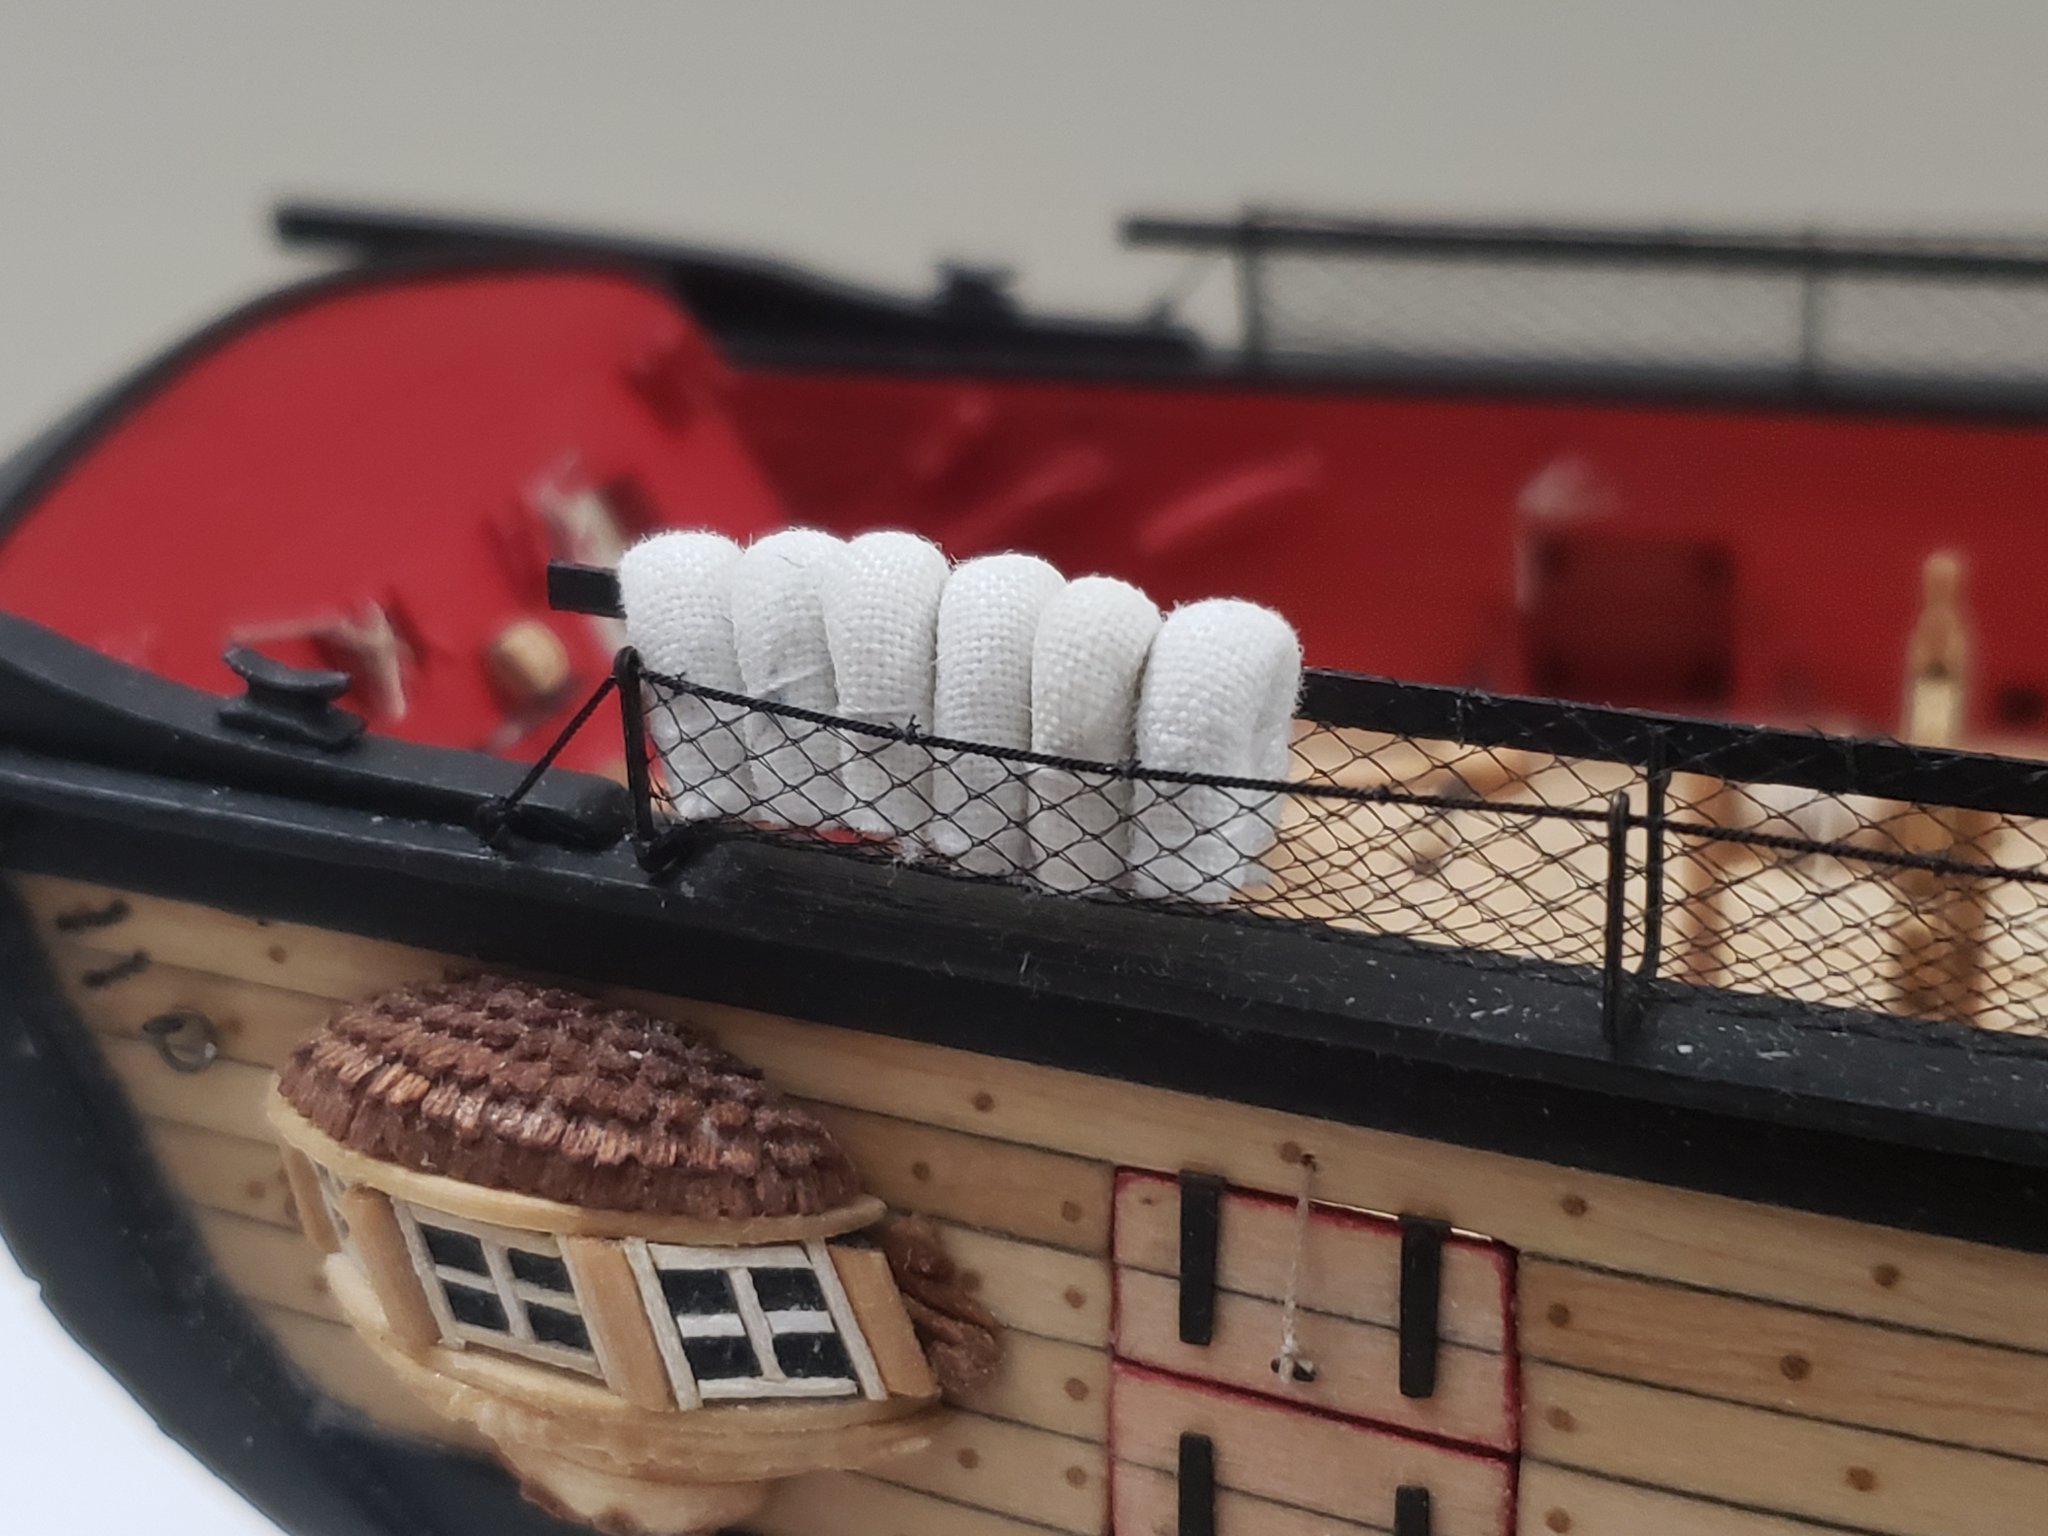
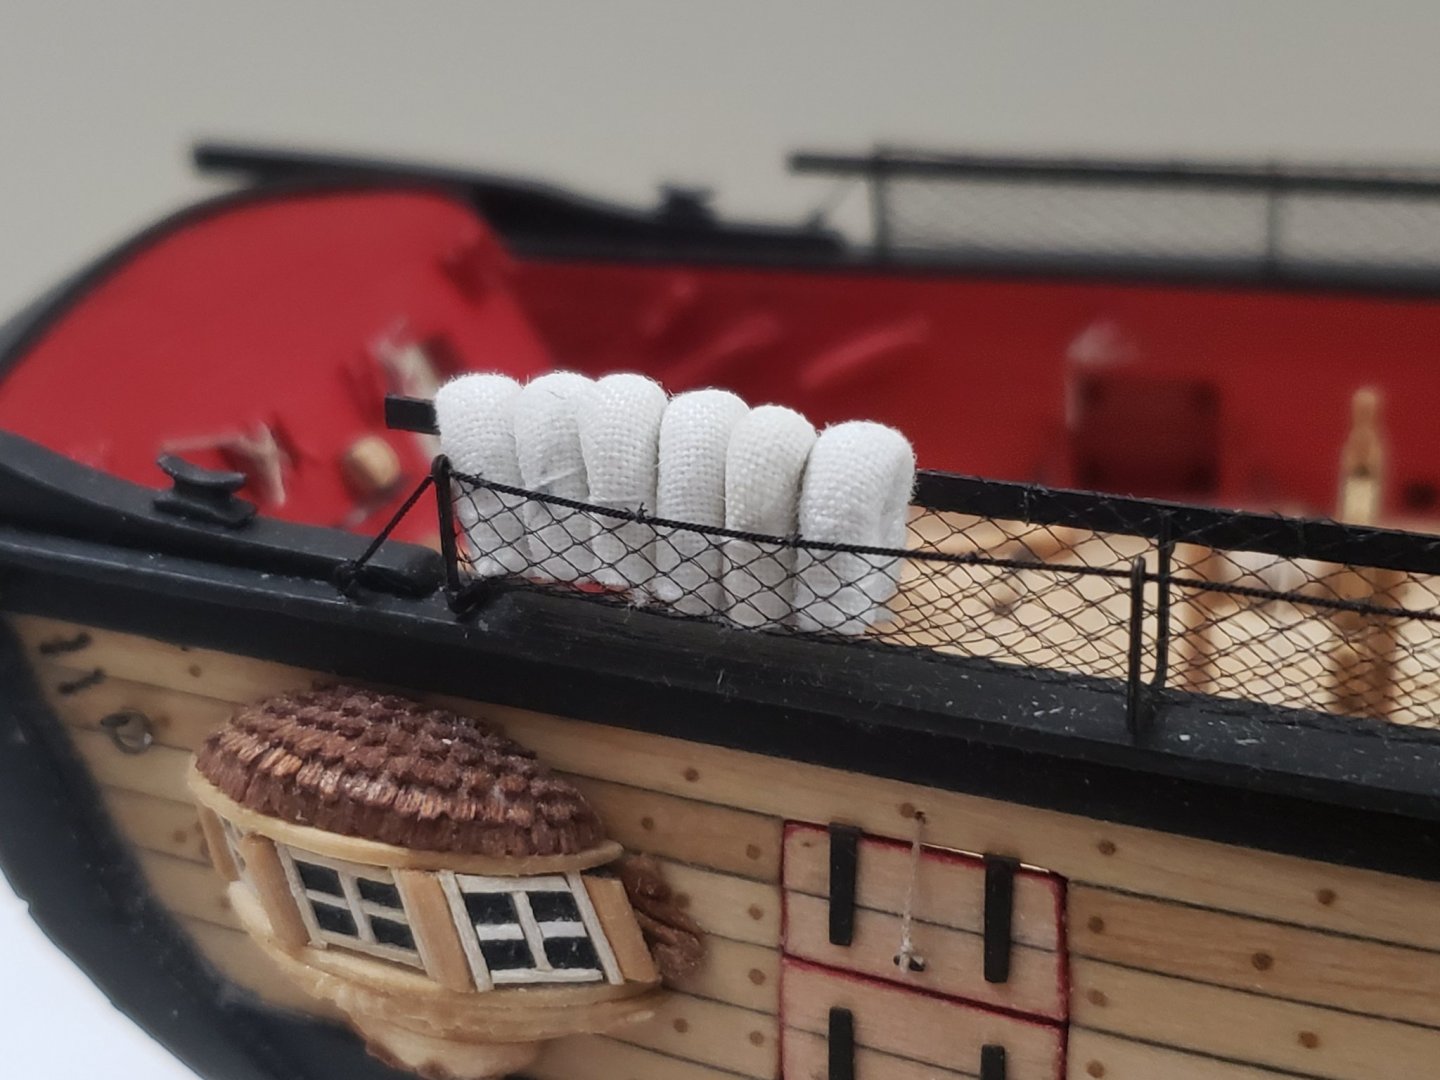
Thanks so much for the great comments and advice! I'll try making slightly smaller ones to appear less bulky. Will also try different color variations (by soaking the cloth in tea or coffee for a bit) to see which ones match the look of the ship. The ship's boats will be white in color, so maybe the really white colored hammocks will match it. Might need to continue on the boat to see how its white turns out.. Somehow I only bent a couple. Thought I would have bent each one twice by now!! I taught myself how to handle the ship right before the cranes were installed to avoid any mishaps 😁
- 950 replies
-
- 6
-
-
- syren
- model shipways
- (and 1 more)
-
Planking looks great!!
-
Many thanks Captain Hook! I'm currently experimenting with making the hammocks. Here I rolled a bit of tissue paper, then rolled a piece of cloth (from an old bed sheet cover) over it and was tied with 50wt string. I'll post pics of the how they were made after experimenting a bit more. But wanted some opinions on how they look first. Hard to find cloth that can resemble hammocks at this scale.. Also another issue I'm having is they appear "floaty" due to the net. I don't think I can fix this though... I also fitted the center strip on the longboat after soaking it in hot water for a bit.

- 950 replies
-
- 14
-
-
- syren
- model shipways
- (and 1 more)
-
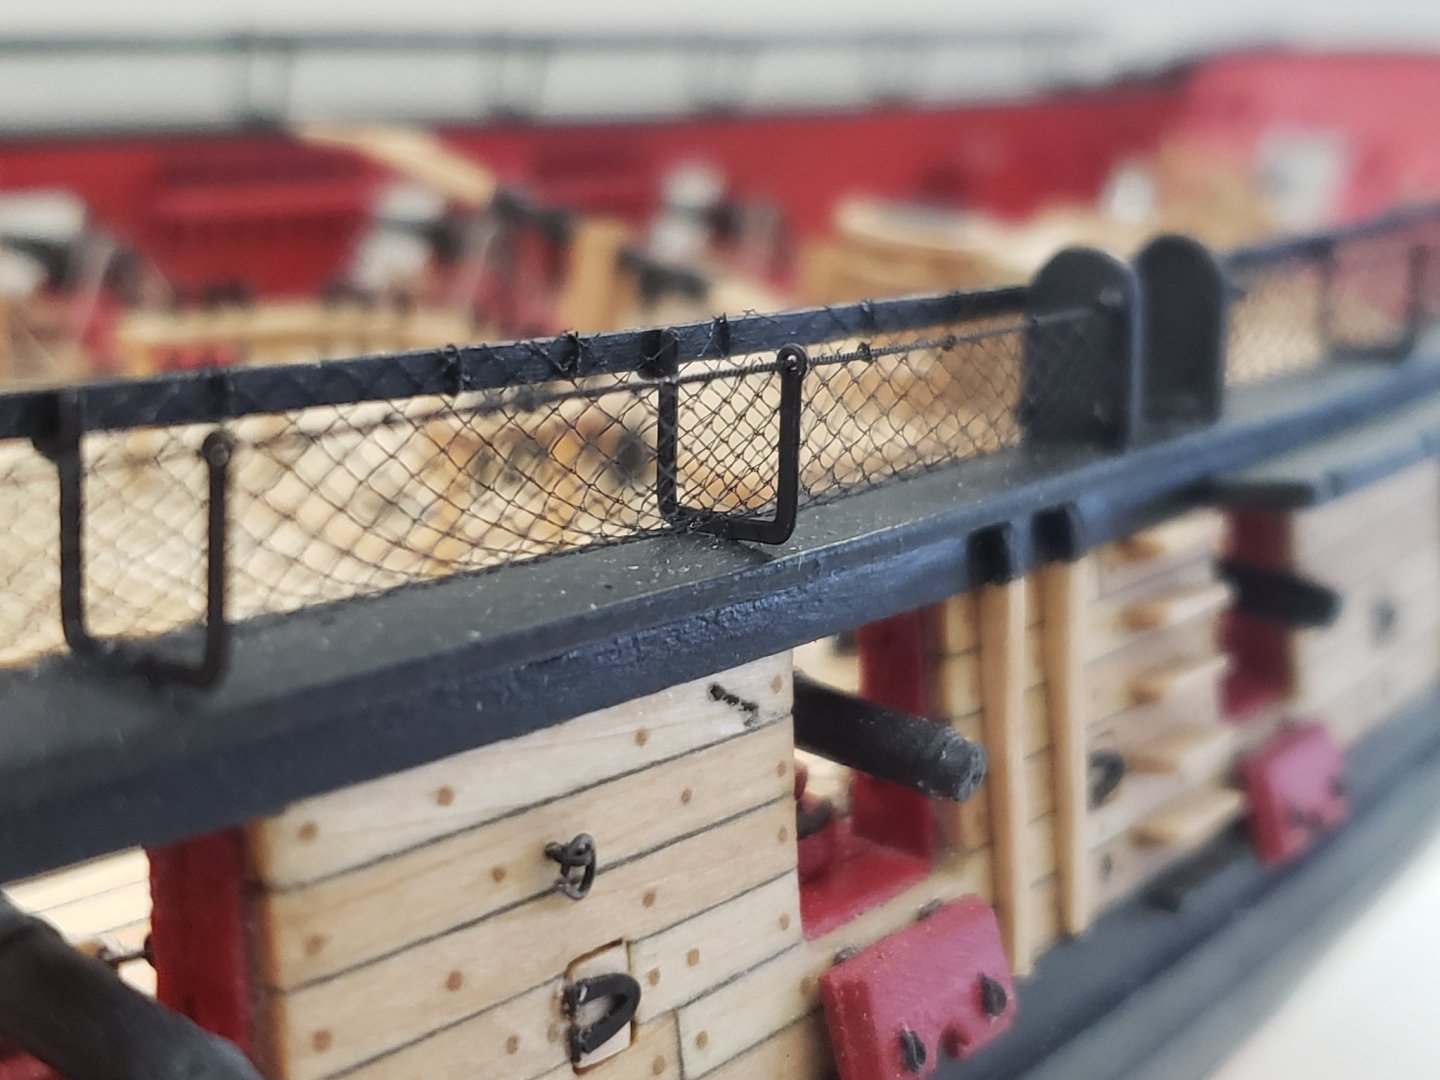
The netting has now been lashed using a 100wt polyester thread. It was a very tricky and time consuming process. I haven't done a perfect job, but I hope the irregularities get hidden once I install the hammocks in them. To lash them onto eyebolts I used a needle threader. For other lashings I used curved pointed tweezers to pull the thread through the net.


- 950 replies
-
- 15
-
-
- syren
- model shipways
- (and 1 more)
-
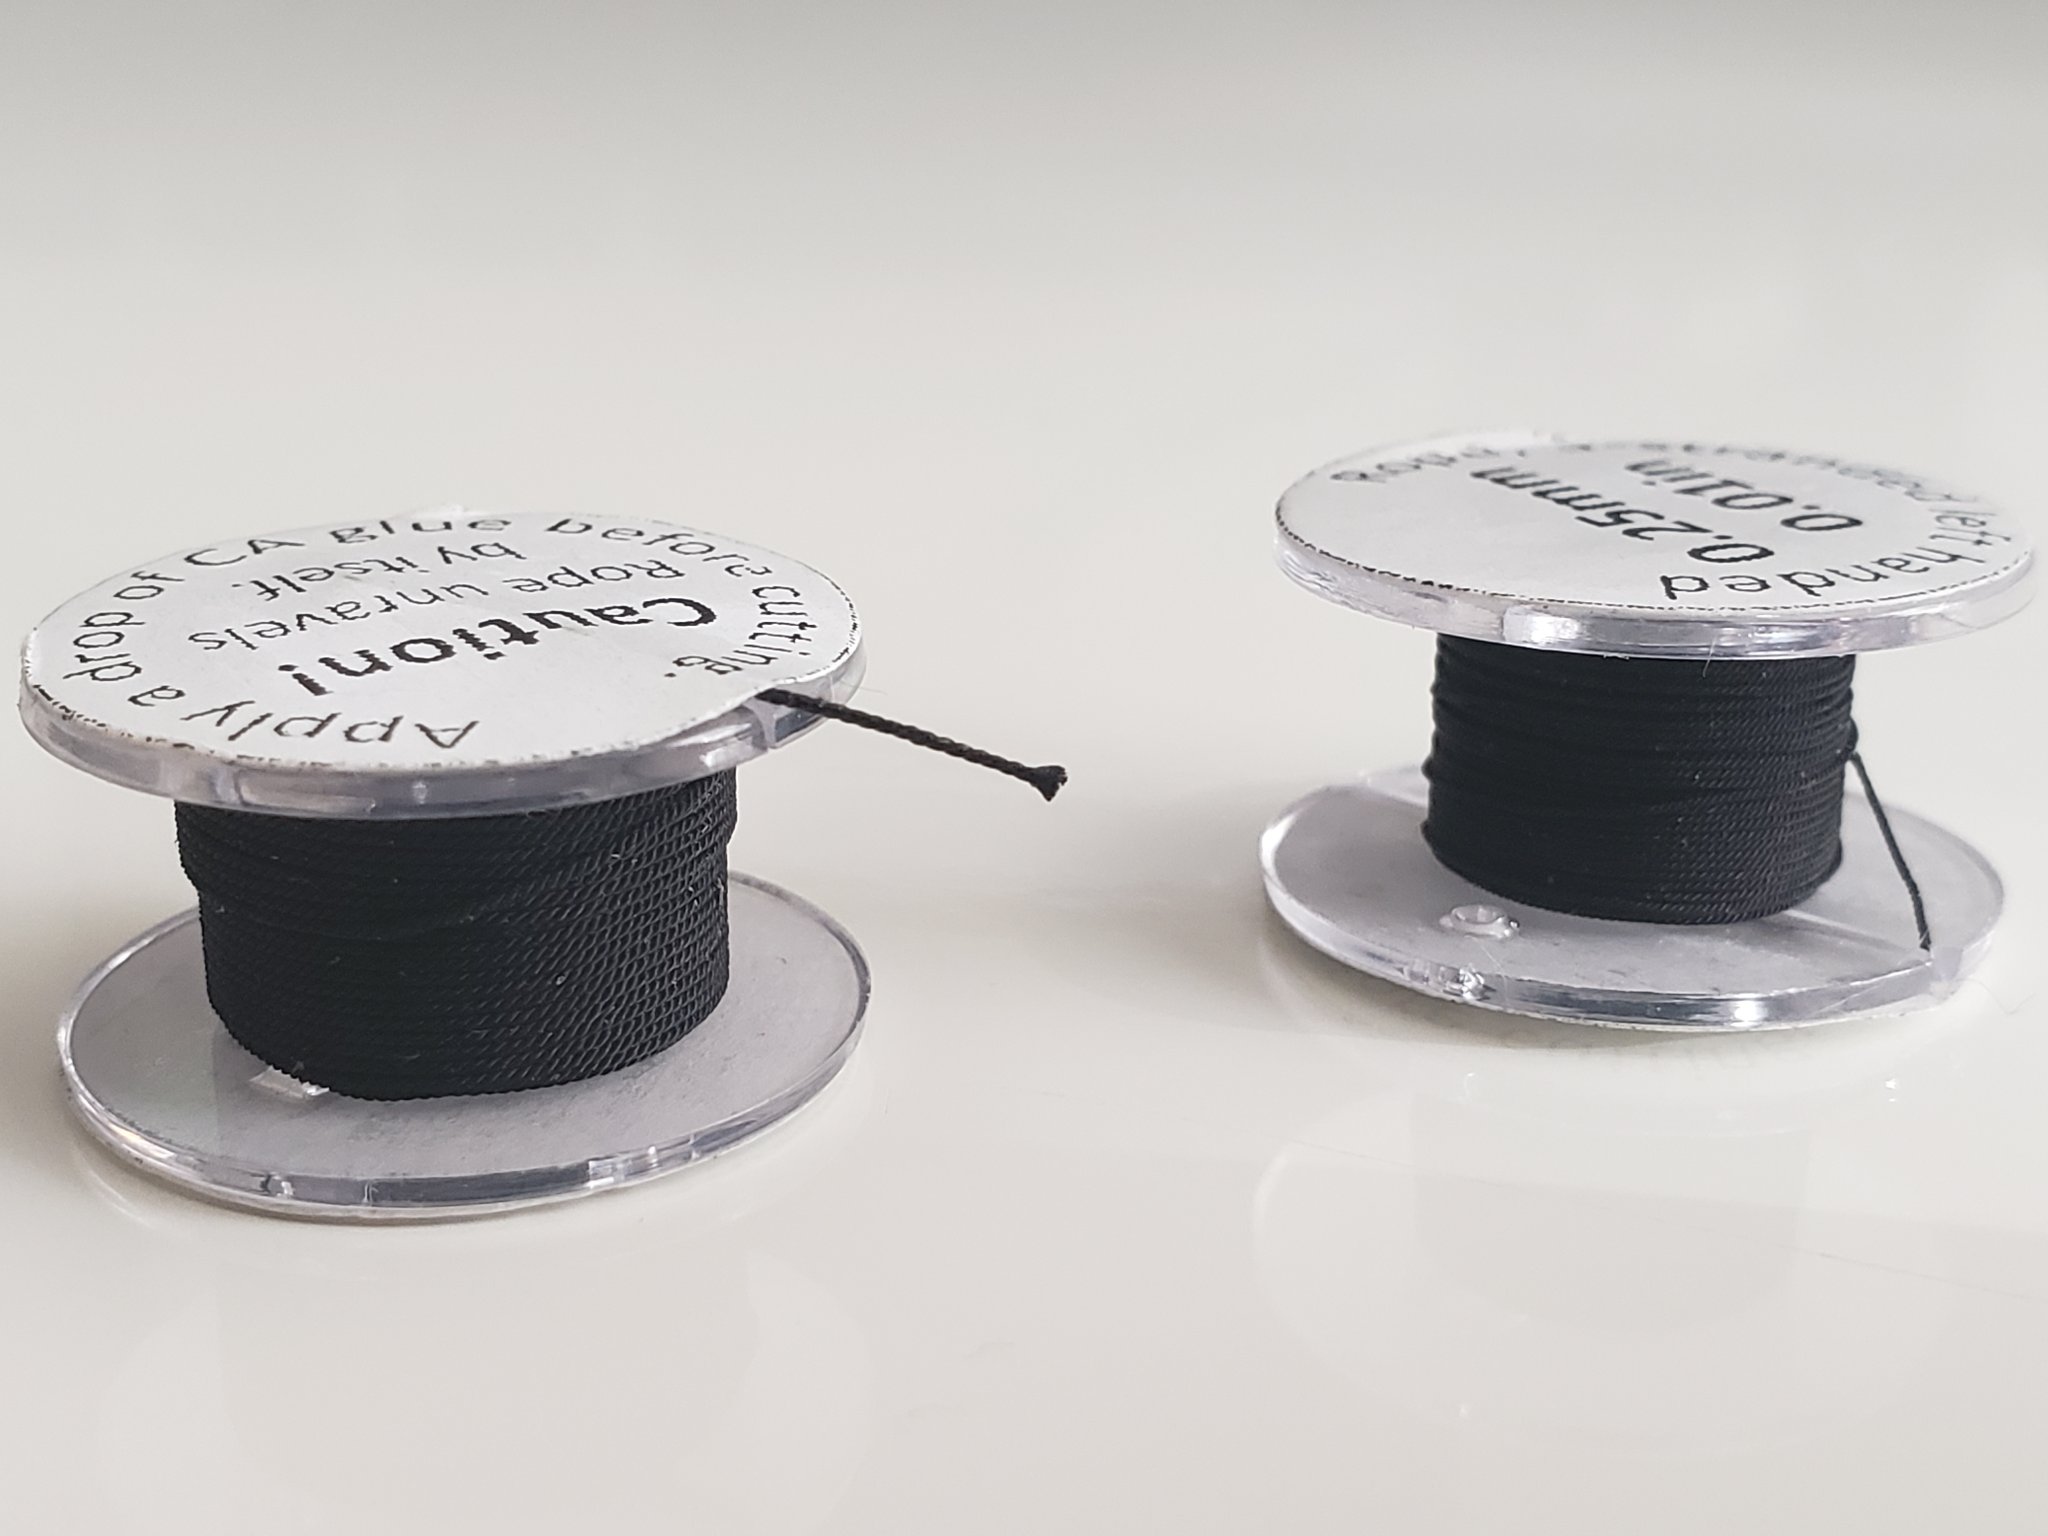
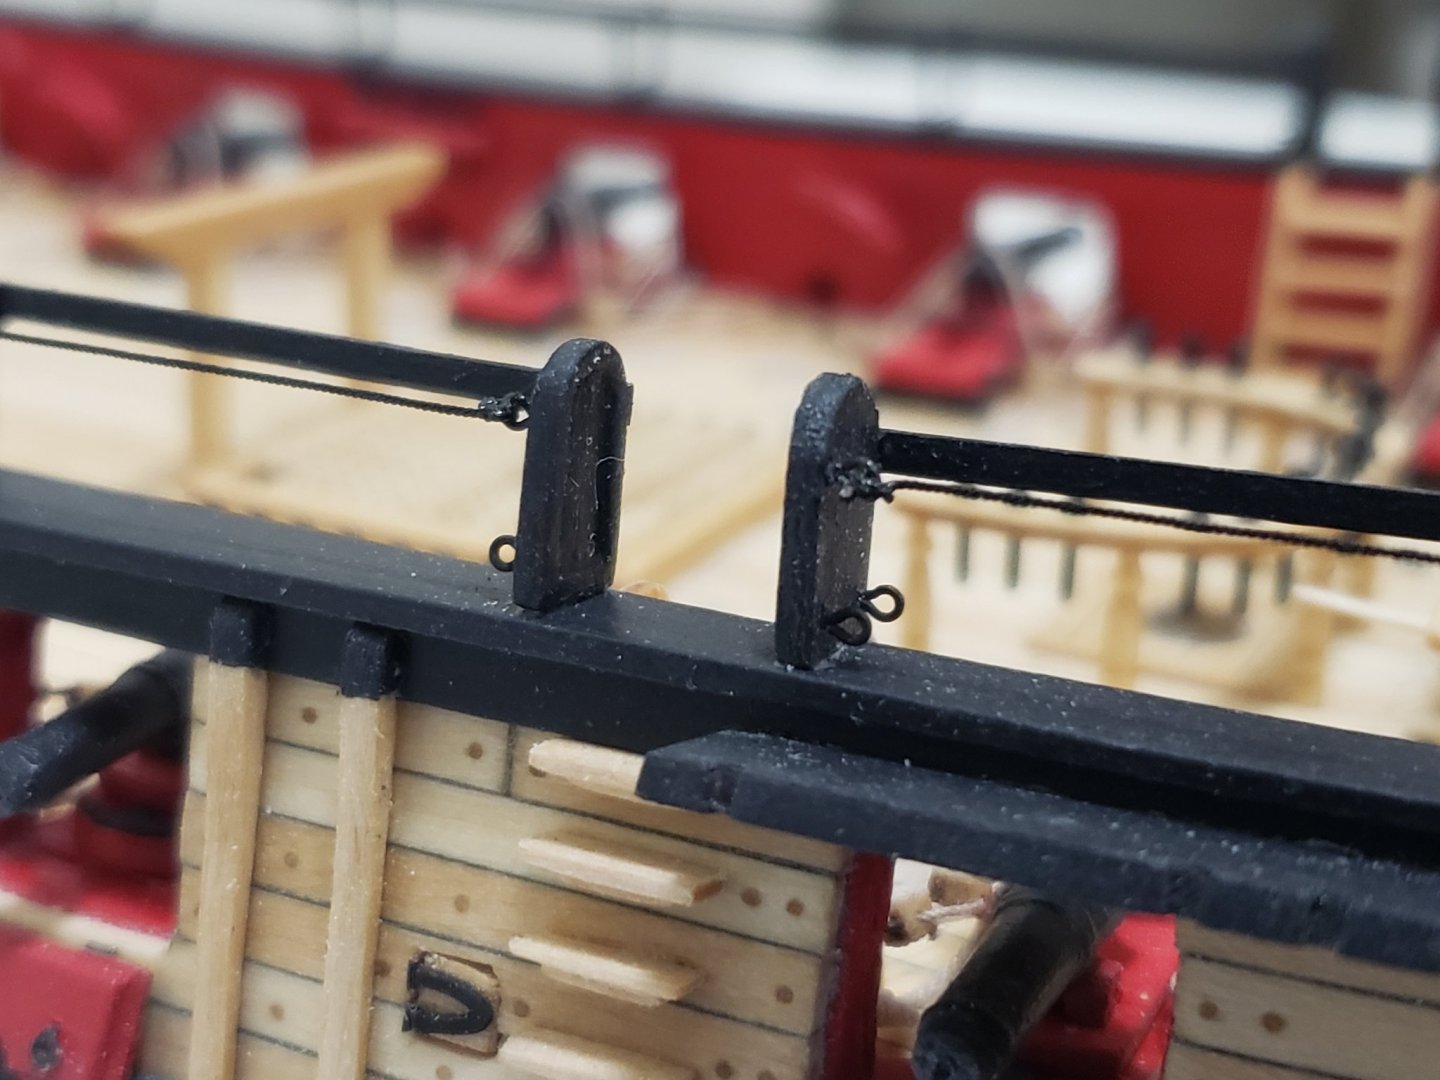
I finished with installing the wood strip in the inner crane hand, and the rope on the outer. I had to sand the wood strip a bit so it fits in the slots. I ended up using the .014" rope from Crafty Sailor, but did not do too good of a job seizing the ends of the rope, it is way too small for me to handle it nicely! Here are some pics (as you can see, not too great seizing...):


- 950 replies
-
- 15
-
-
- syren
- model shipways
- (and 1 more)
-
It feels very daunting! No idea on how my attempt(s) will look, but I'll try my best!
- 950 replies
-
- 2
-
-
- syren
- model shipways
- (and 1 more)
-
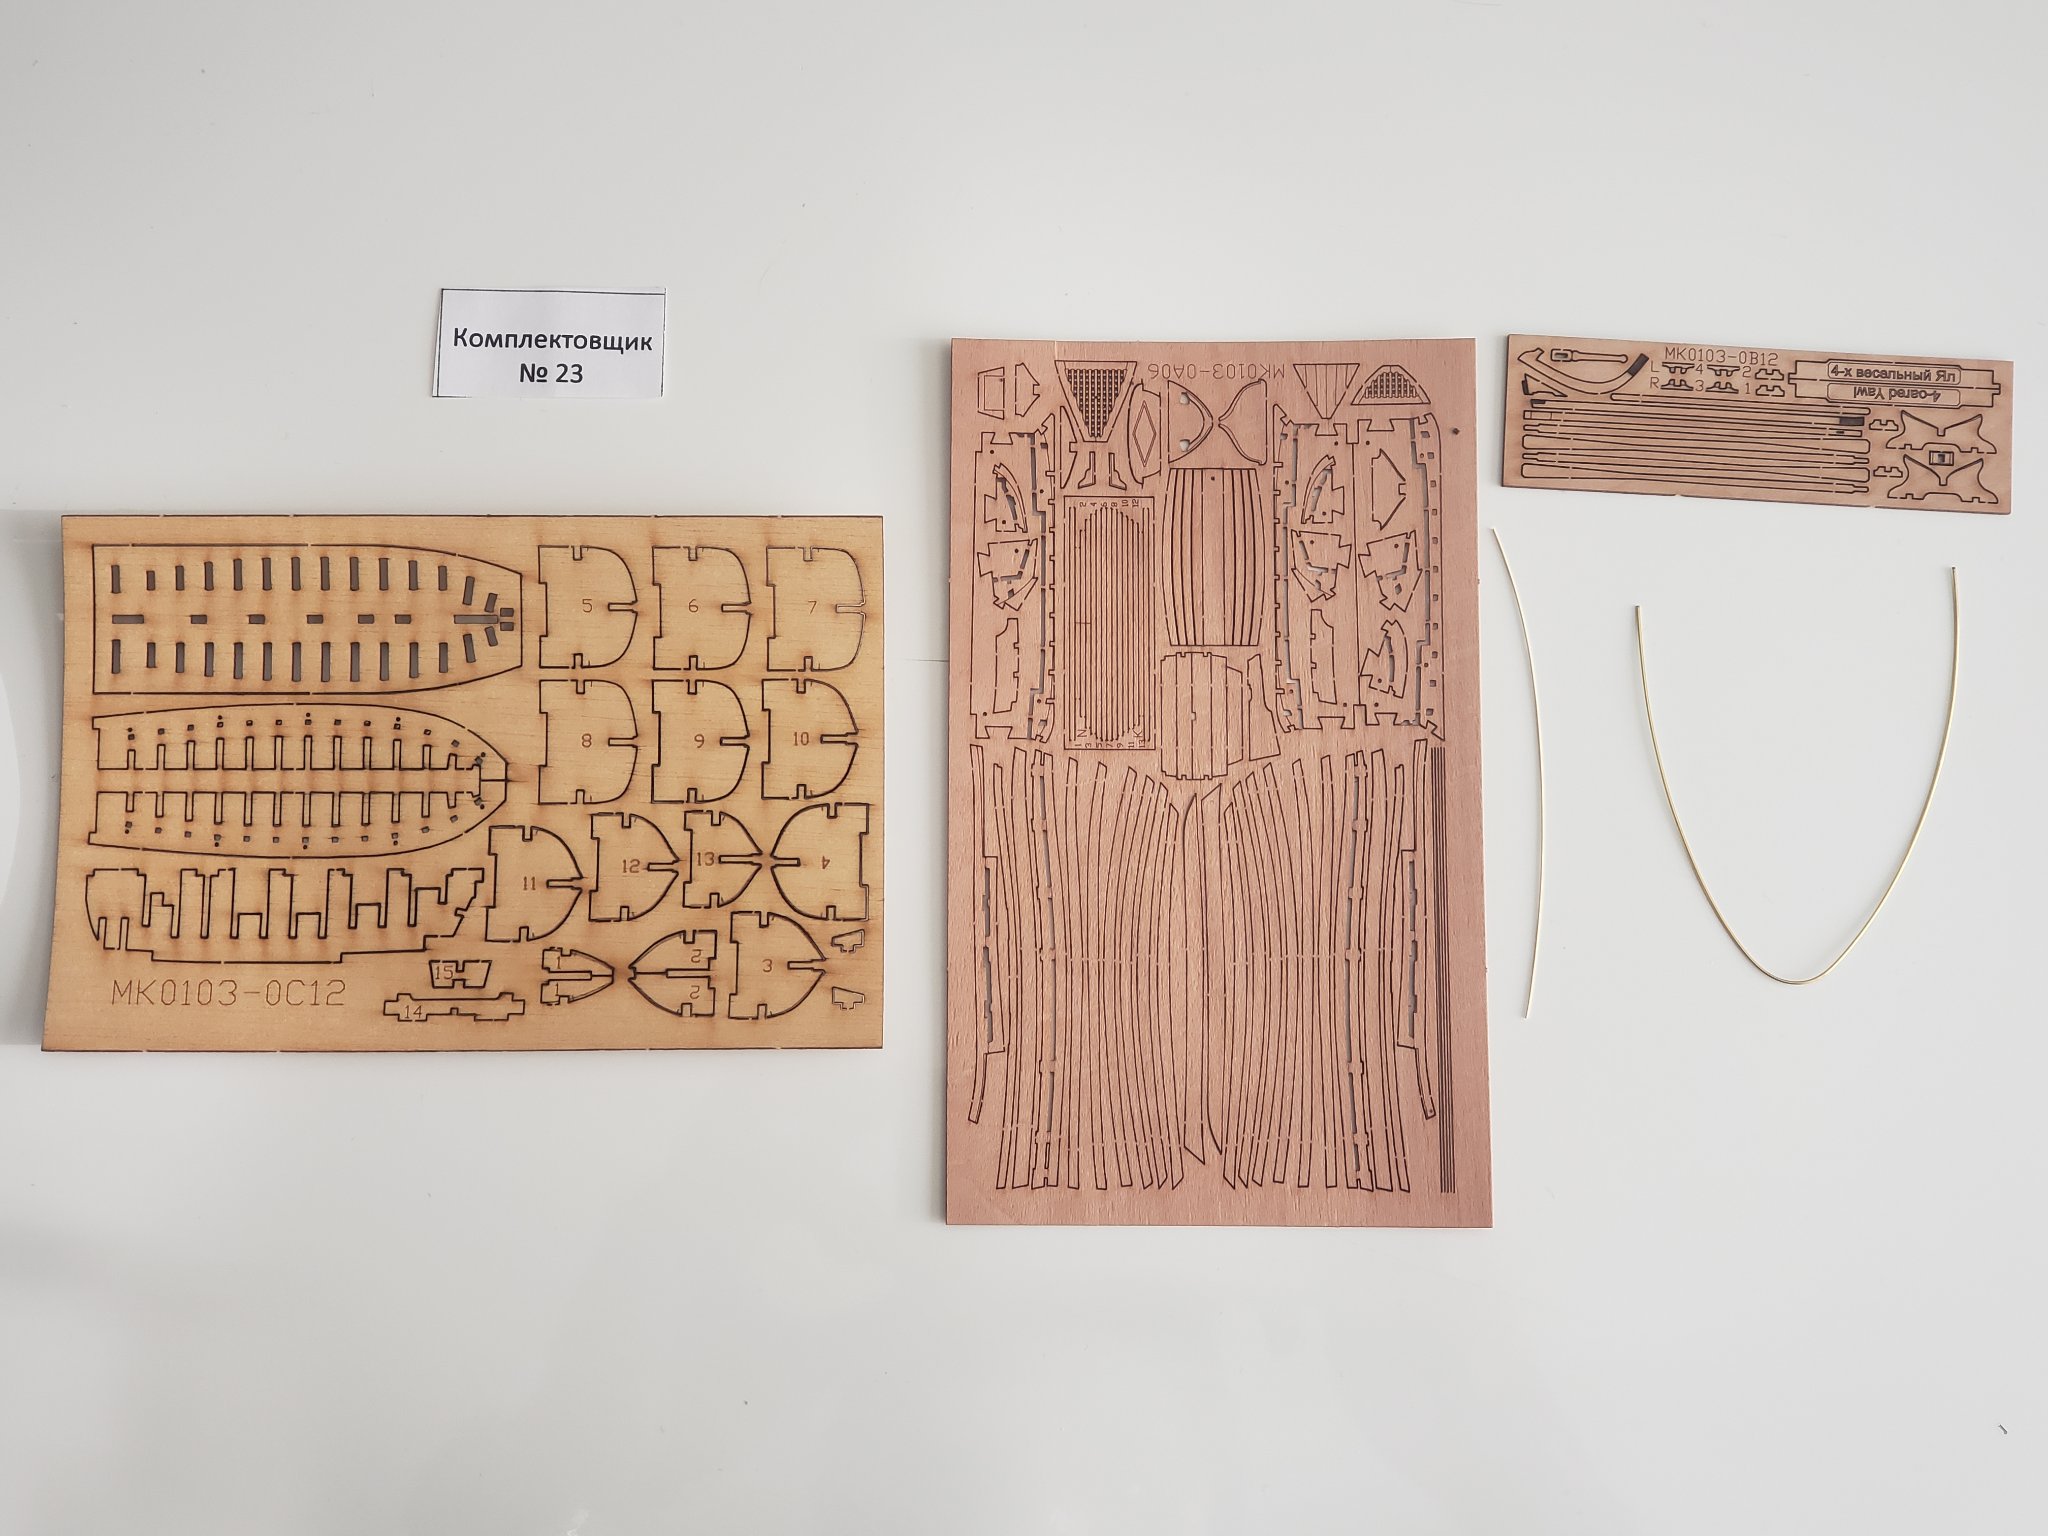
Thanks all for the likes! I purchased the 68mm Master Korabel boat a couple days ago from Crafty Sailor and just received them. I plan to follow what @Gahm did on his build by correcting the scale to 1:64 from the kit's 1:72. Might be a lot of work looking at the number of parts I will need to scratch. I hope I can do a somewhat decent job! I got a 1/32" basswood sheet to do this. Here are is a pic of the kit's contents (as you can see, many many parts...) Also purchased some 0.01 in and 0.014 in black rope which I plan to use for the hammocks' arm rings. I want to try out which one looks better, for now leaning towards the thicker rope. Edit: I will start working on the jolly boat once I finish the longboat (which will be after the cap rail details)


- 950 replies
-
- 9
-
-
- syren
- model shipways
- (and 1 more)
-
Just found this log! Didn't know you were working on a POF build alongside the Syren. I'll follow along! It's looking really nice so far!
-
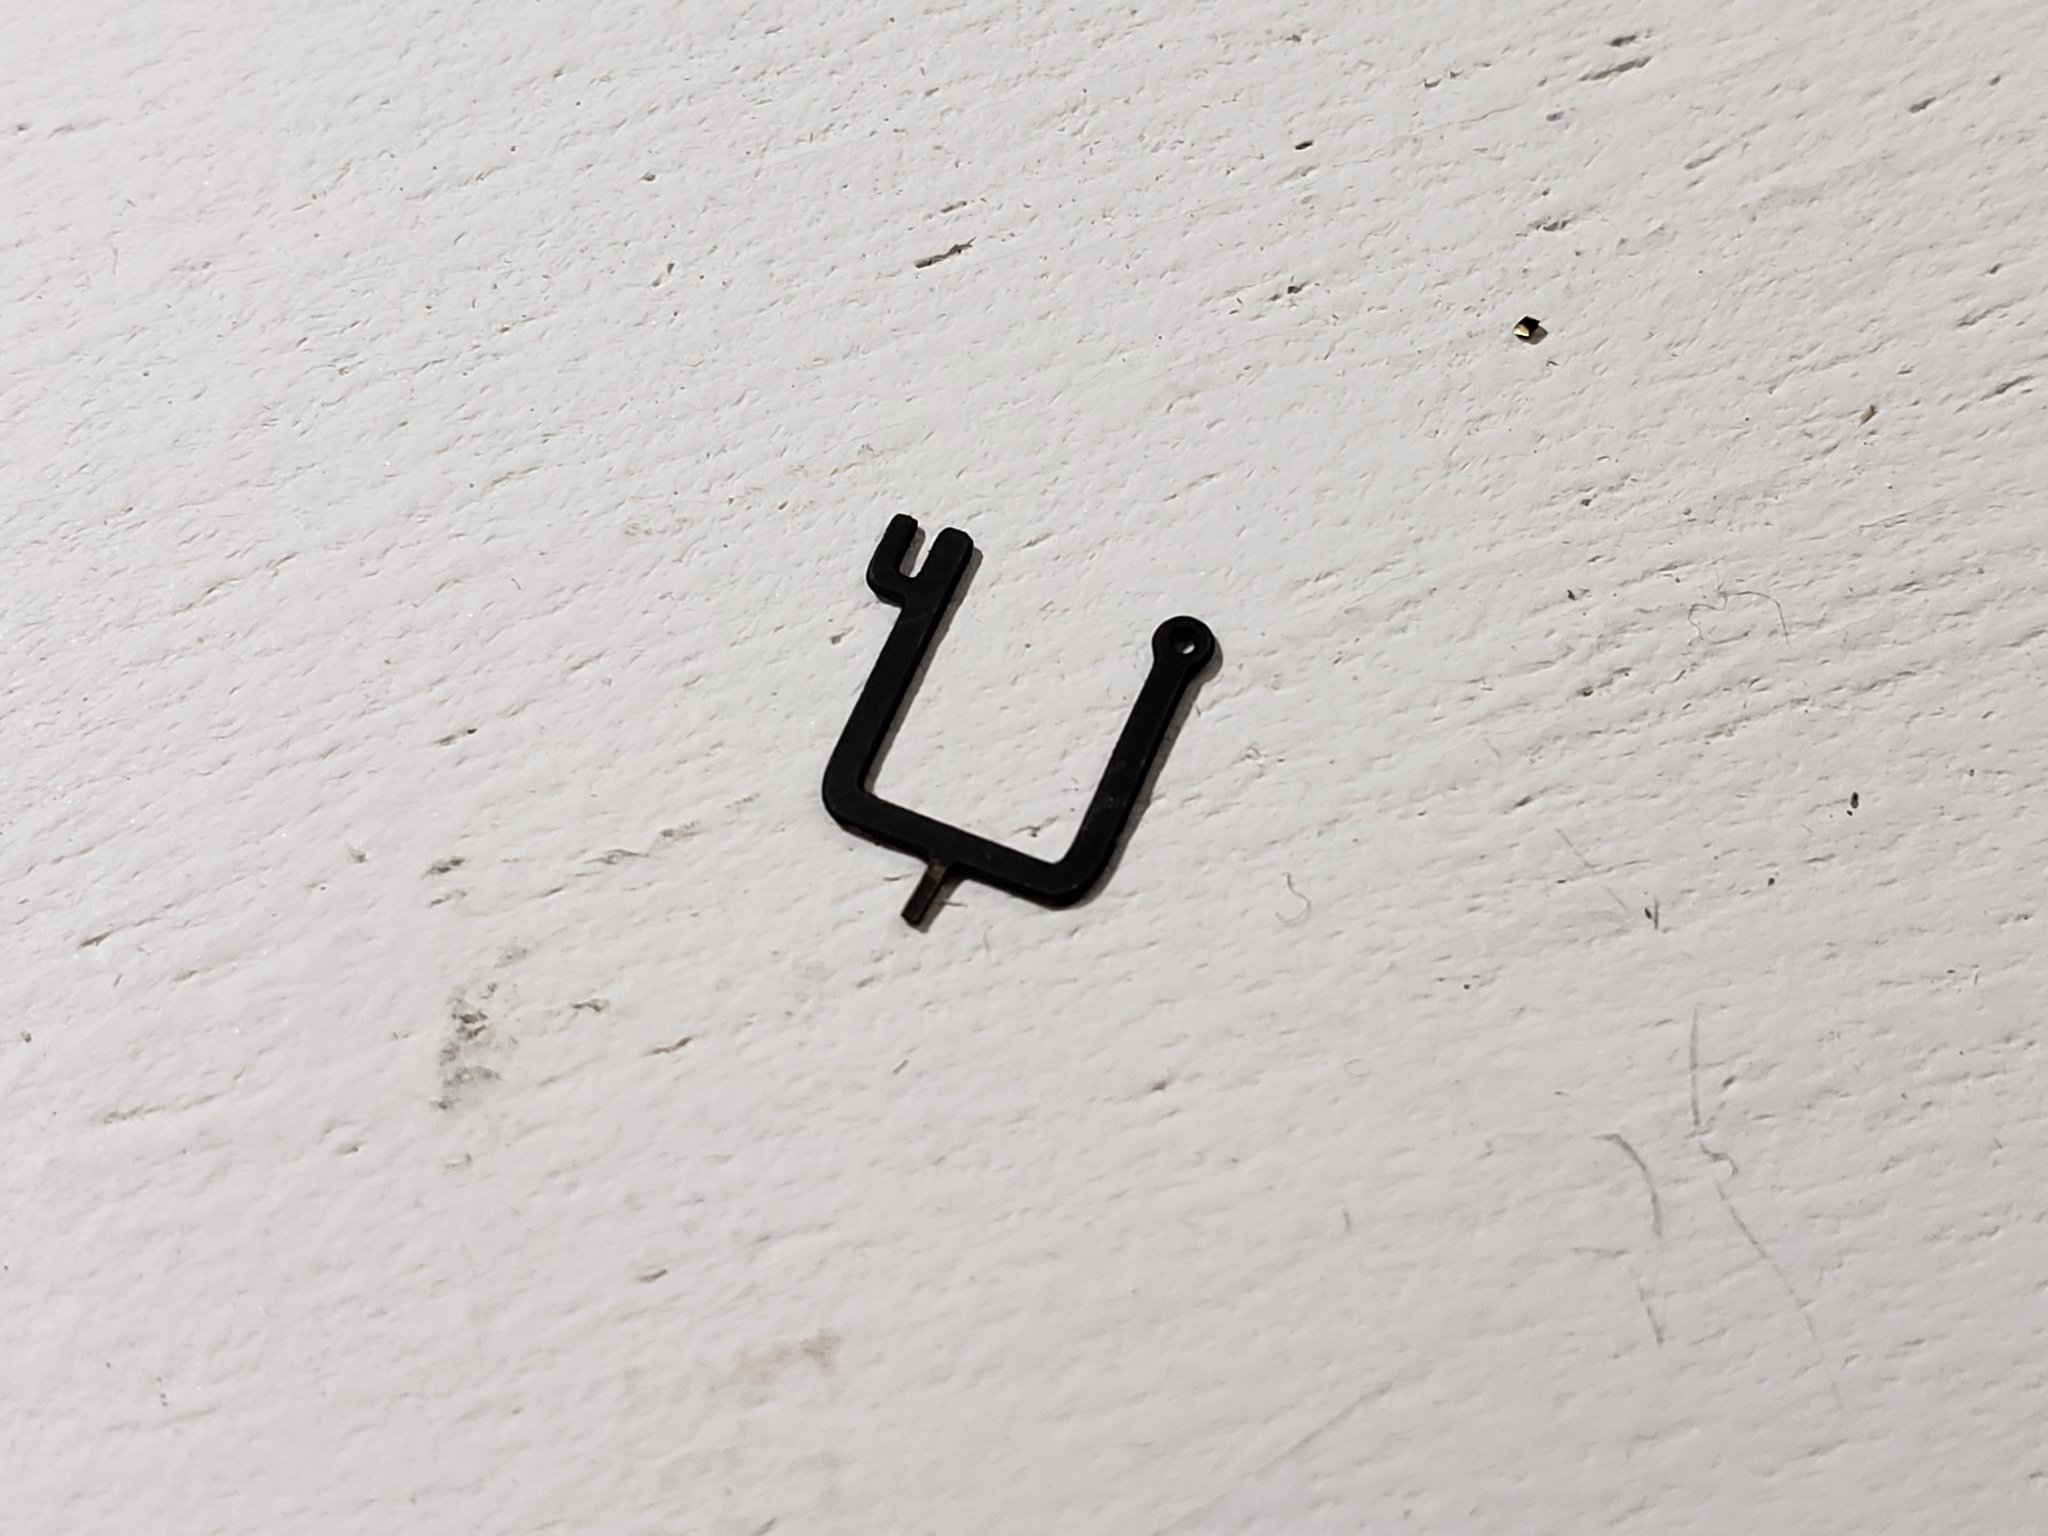
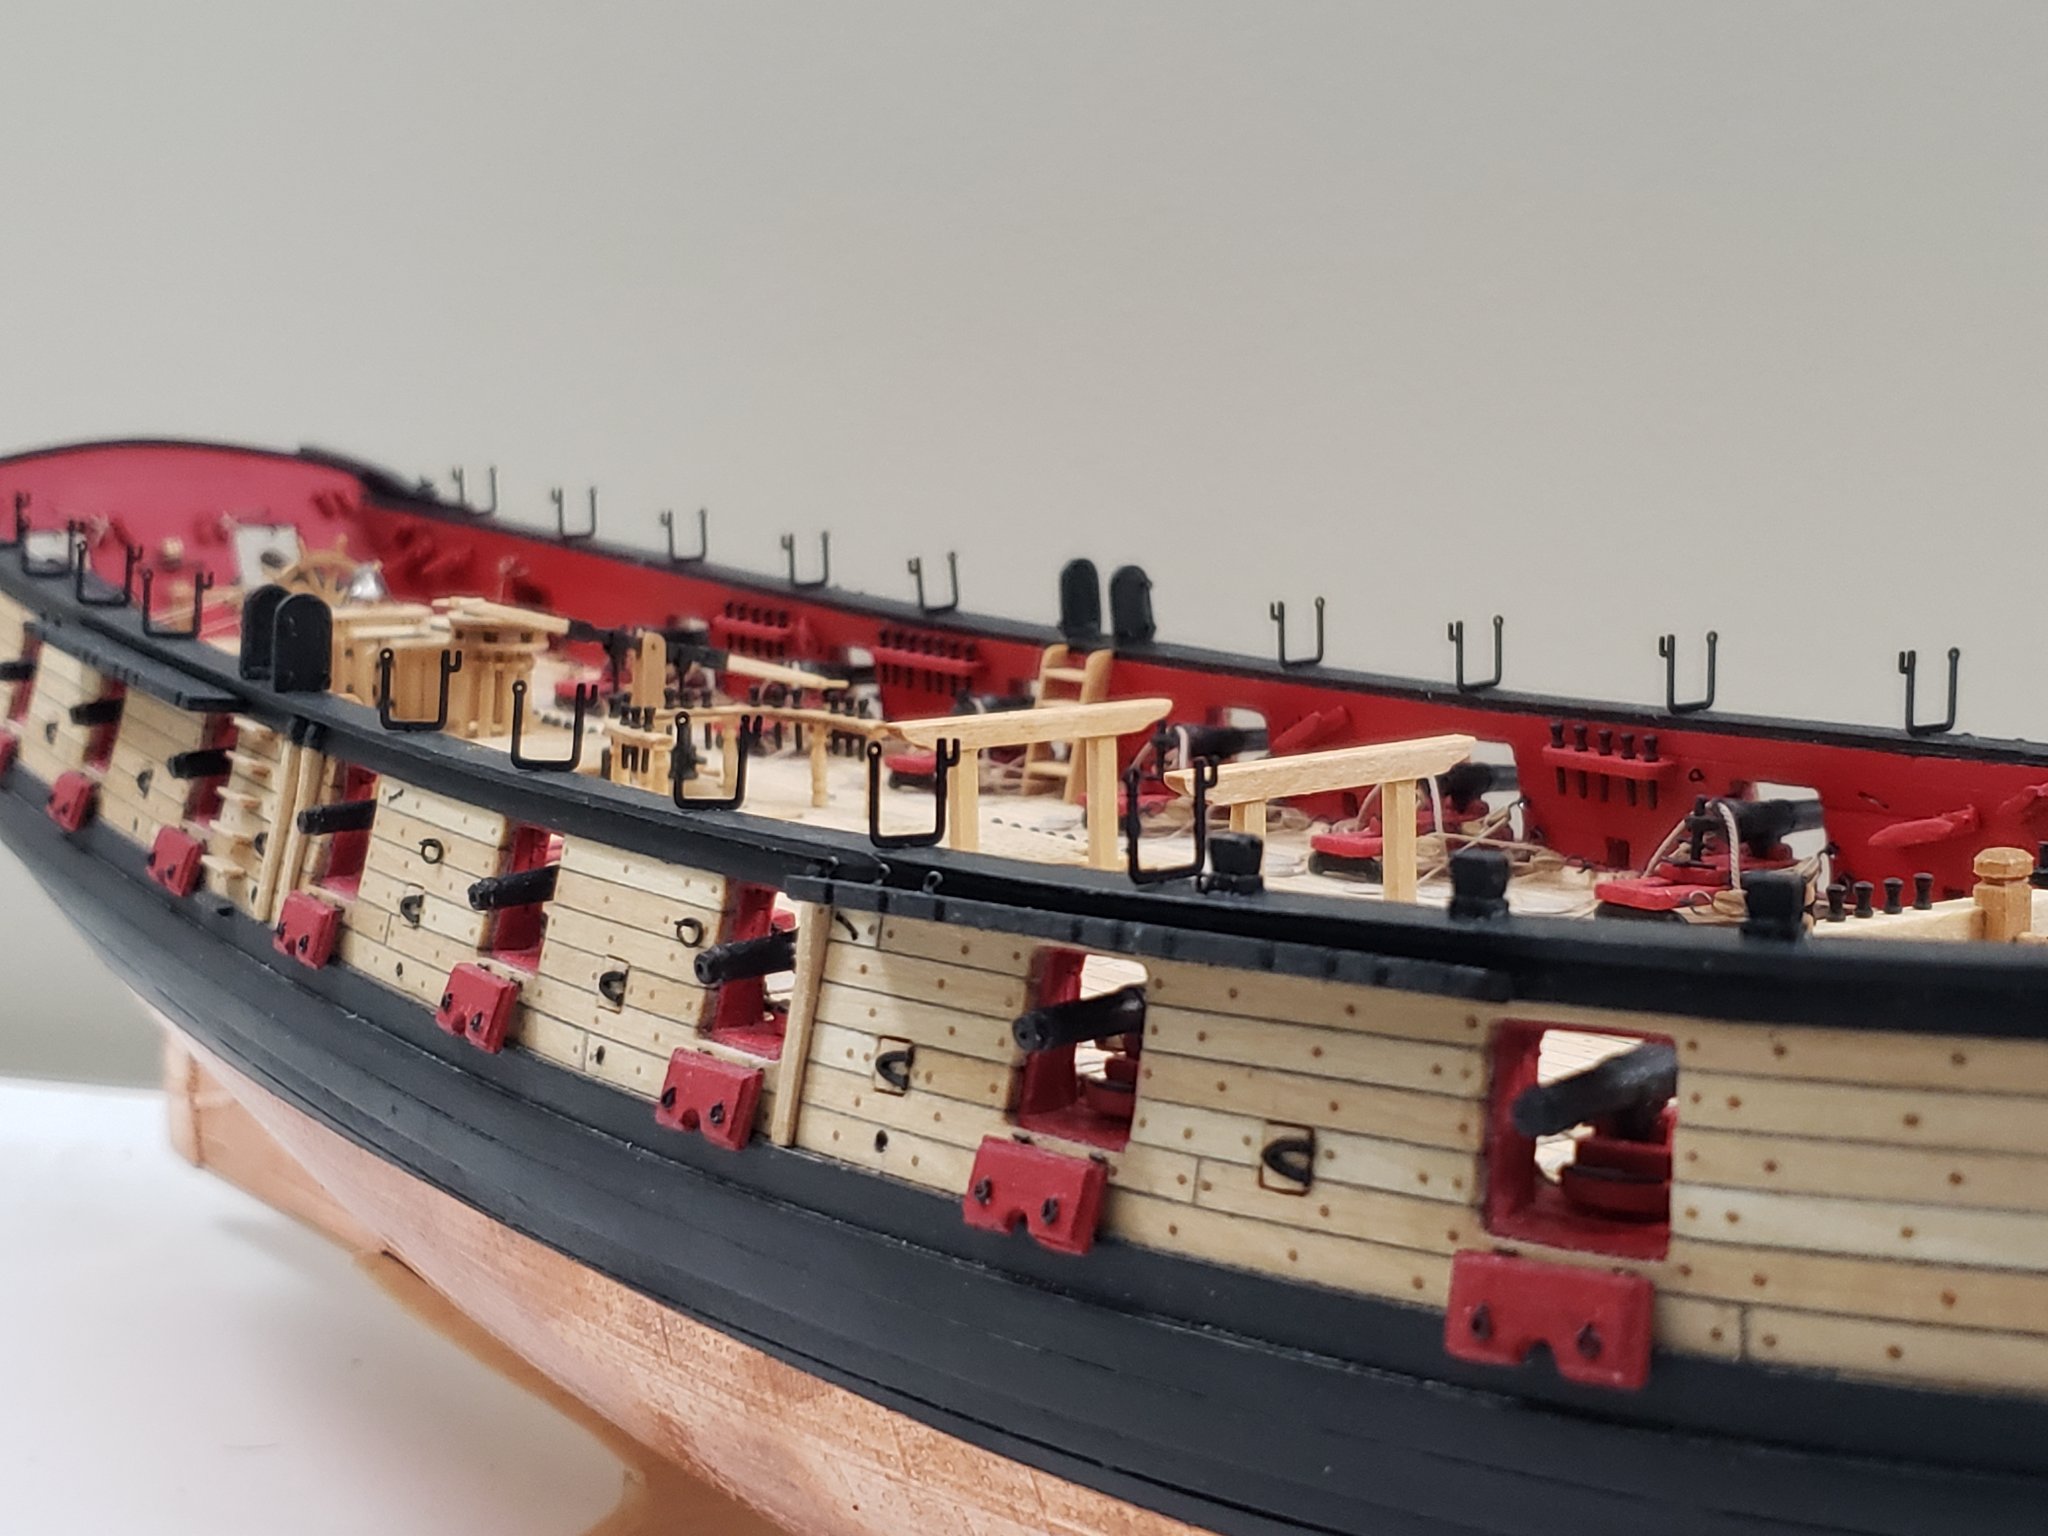
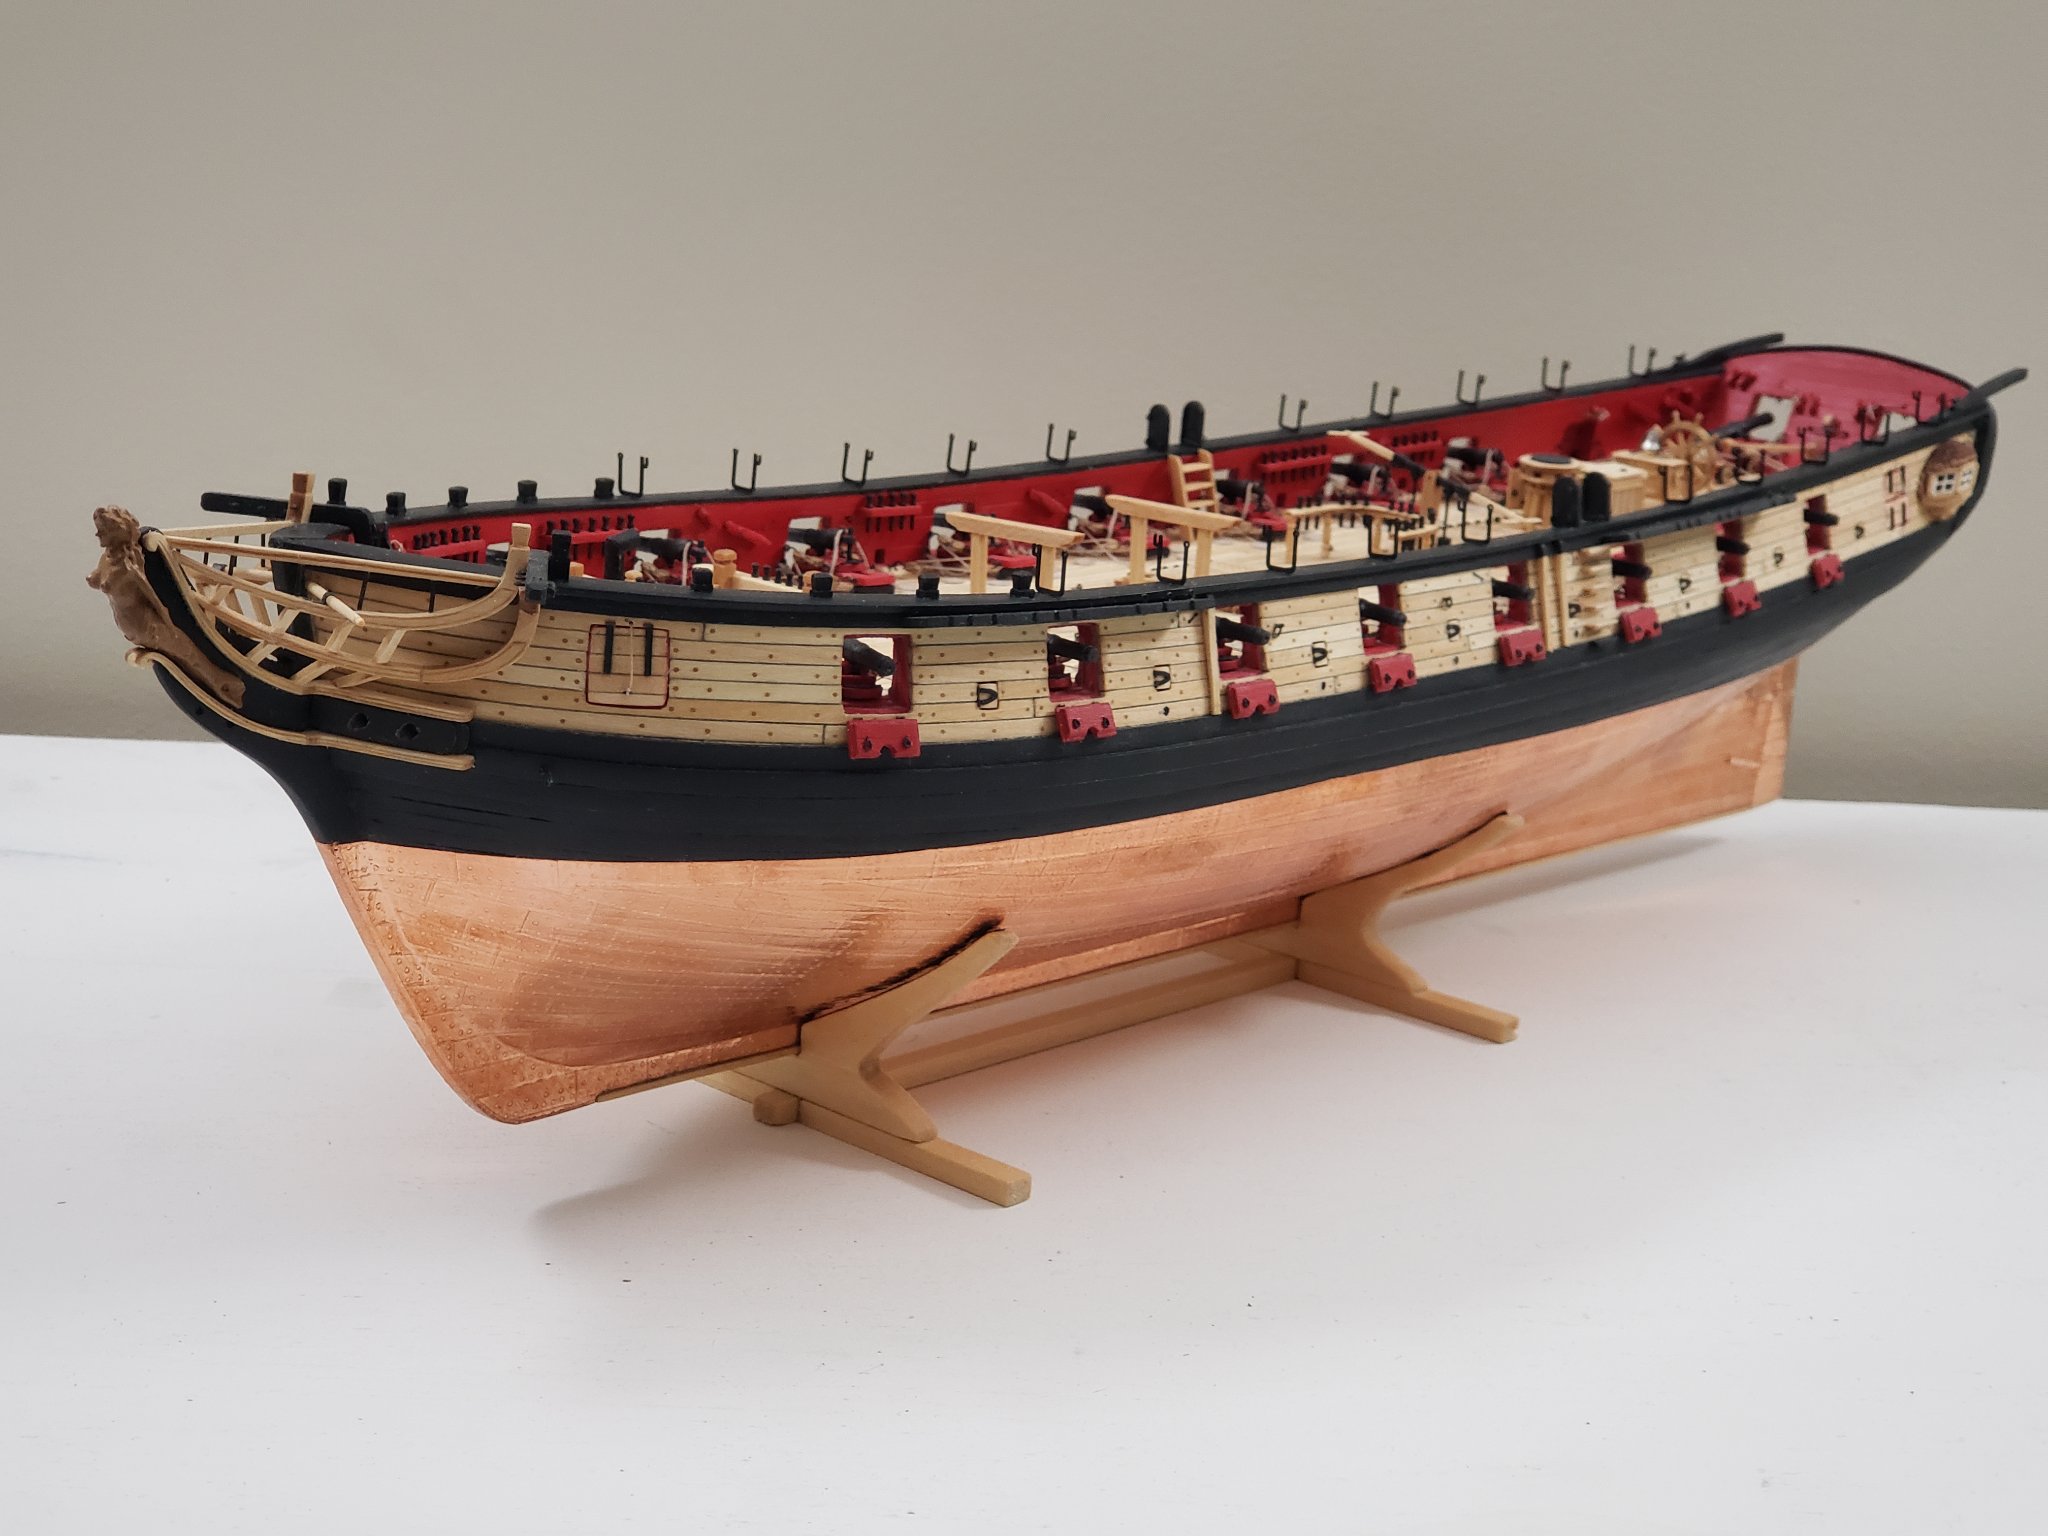
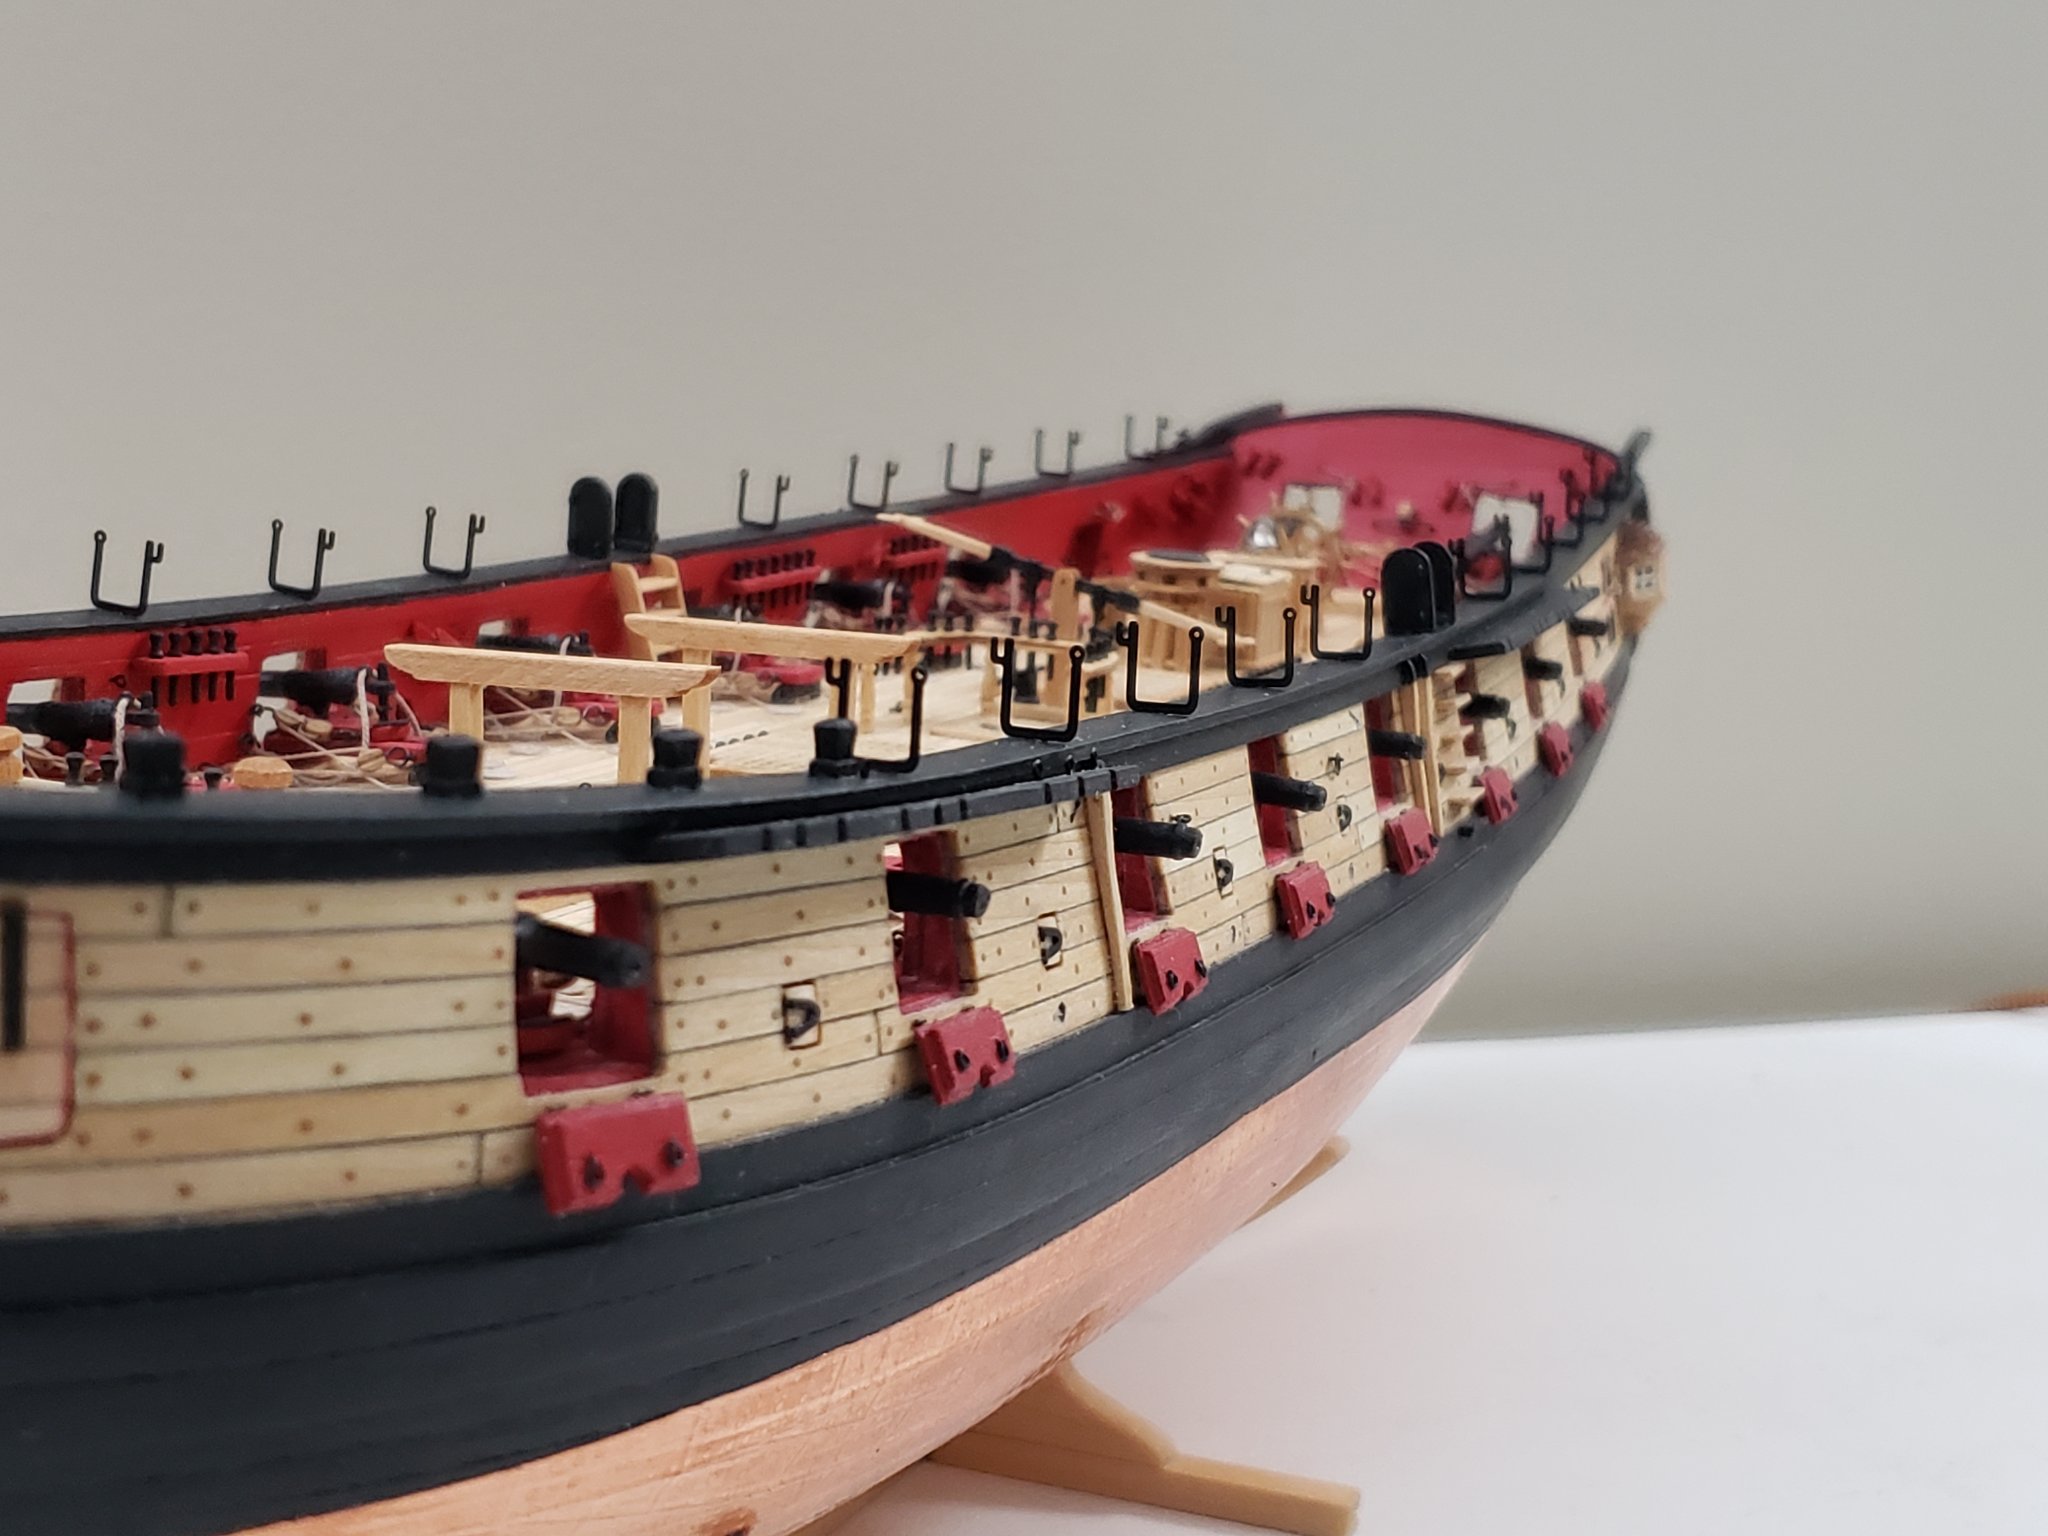
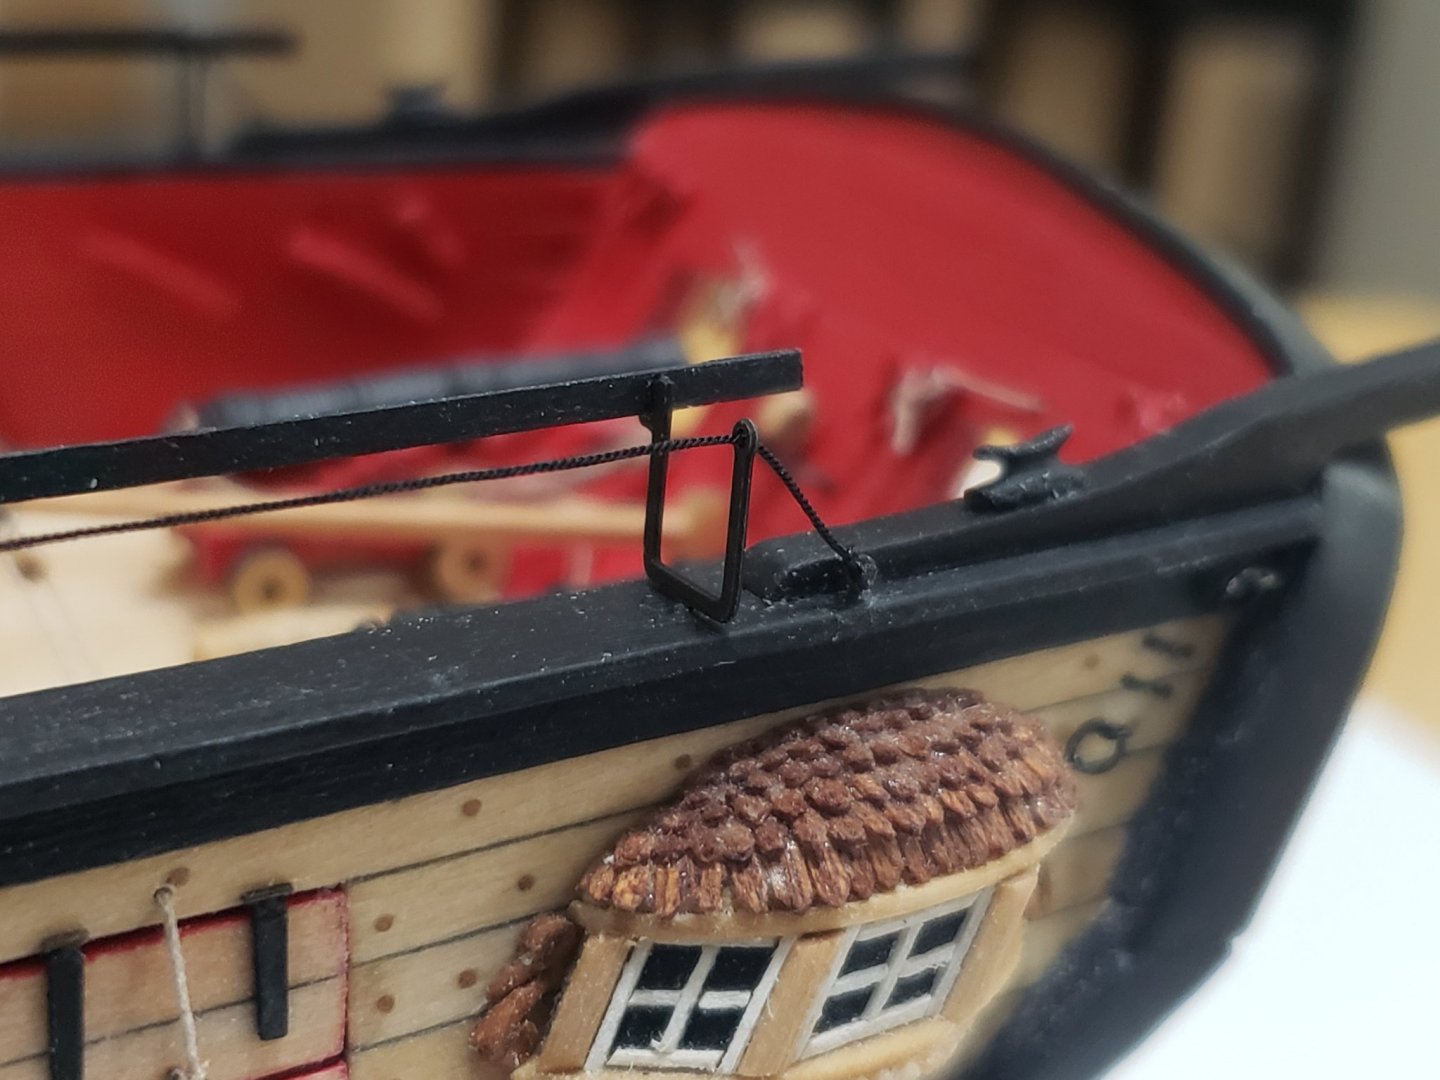
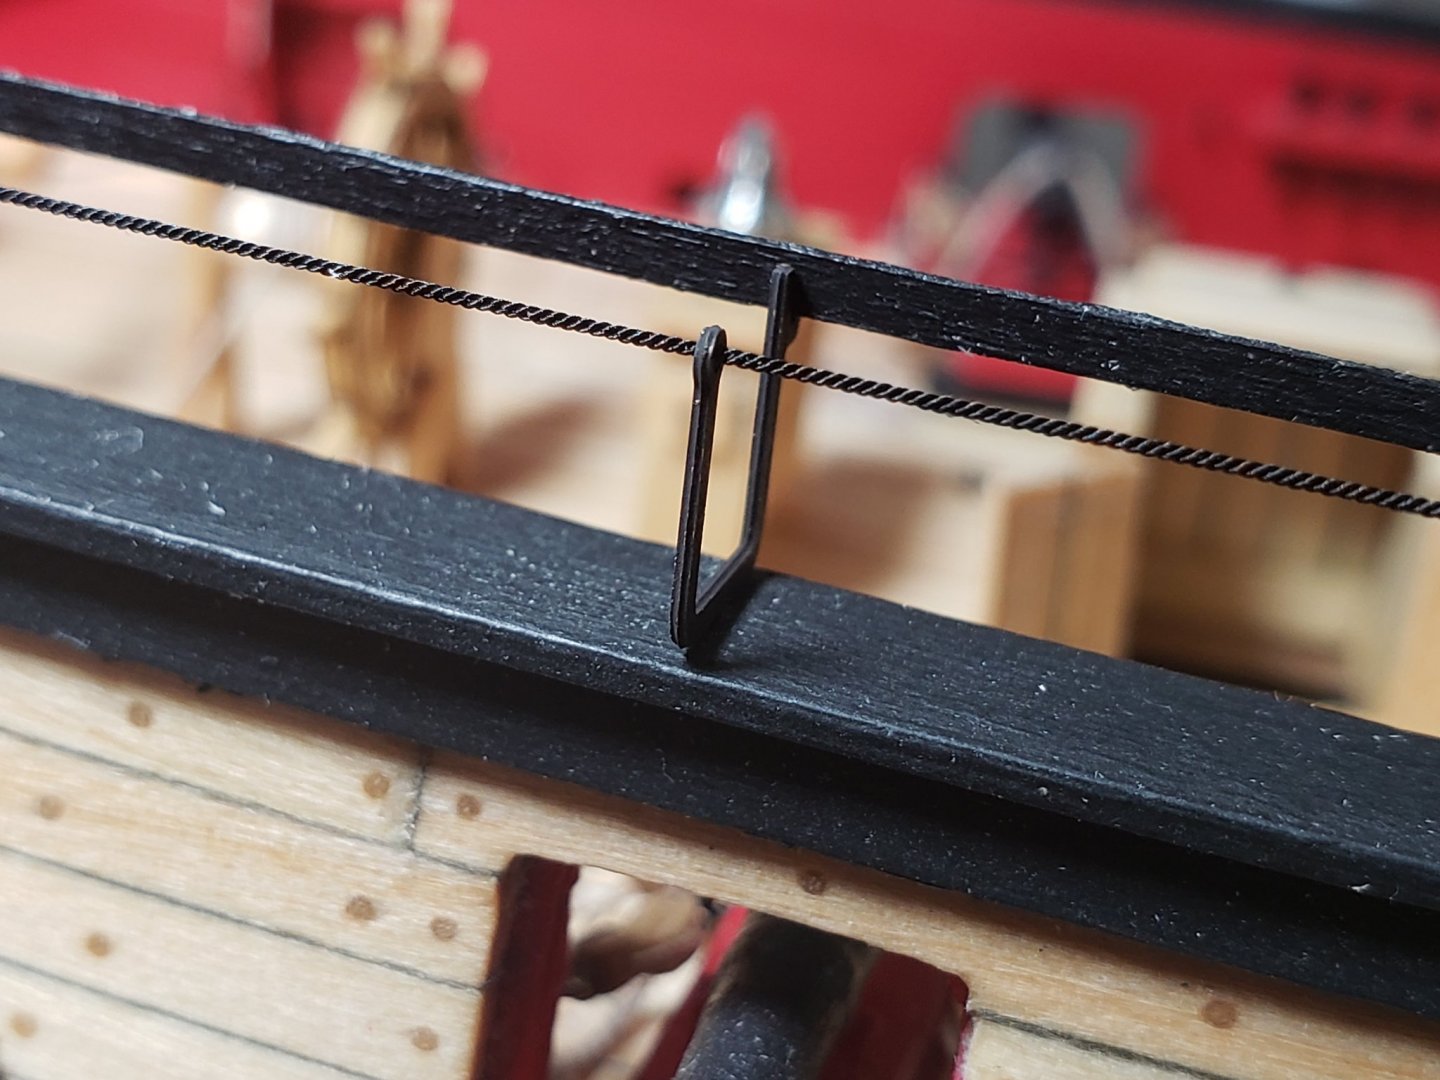
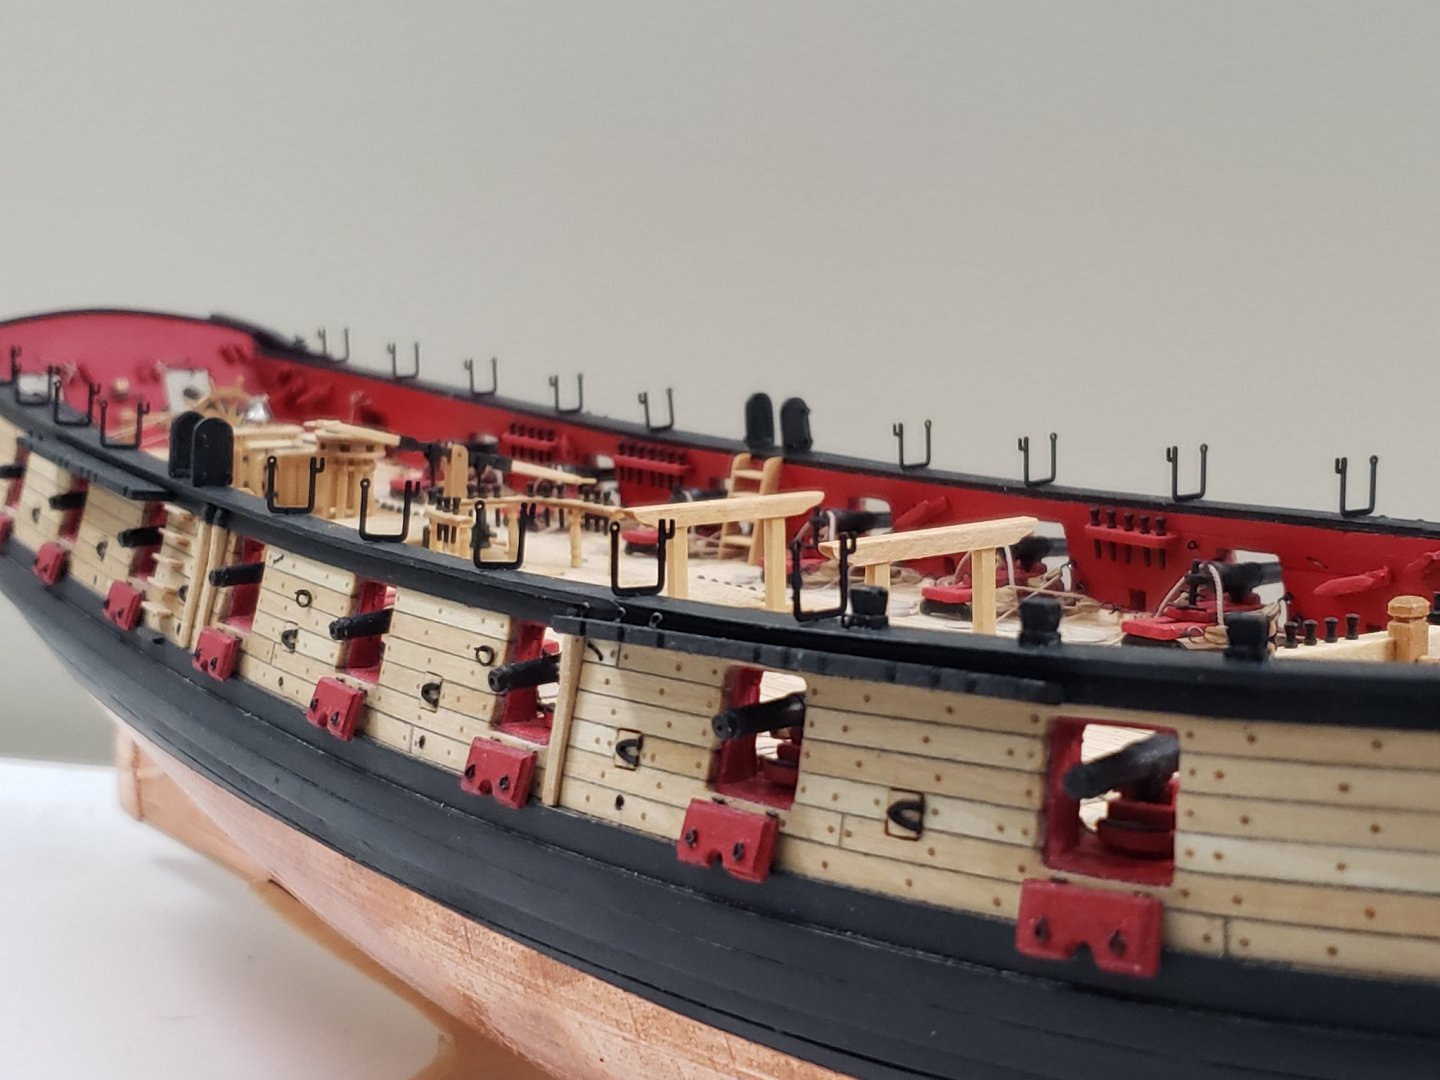
I finished installing the hammock cranes. When removing them from the photo etched brass sheet, I made sure to leave the notch this time 😅 To determine their locations, I first noted down where they start and end, and divided the space equally. Here are some pics of them installed:


- 950 replies
-
- 13
-
-
- syren
- model shipways
- (and 1 more)
-
Great fix!! Really liking the red paint
-
Thank you so much for the nice words! Yes @captain_hook, I am using basswood for my build, and tried my best to randomize the different color variations while planking
- 950 replies
-
- 2
-
-
- syren
- model shipways
- (and 1 more)
-
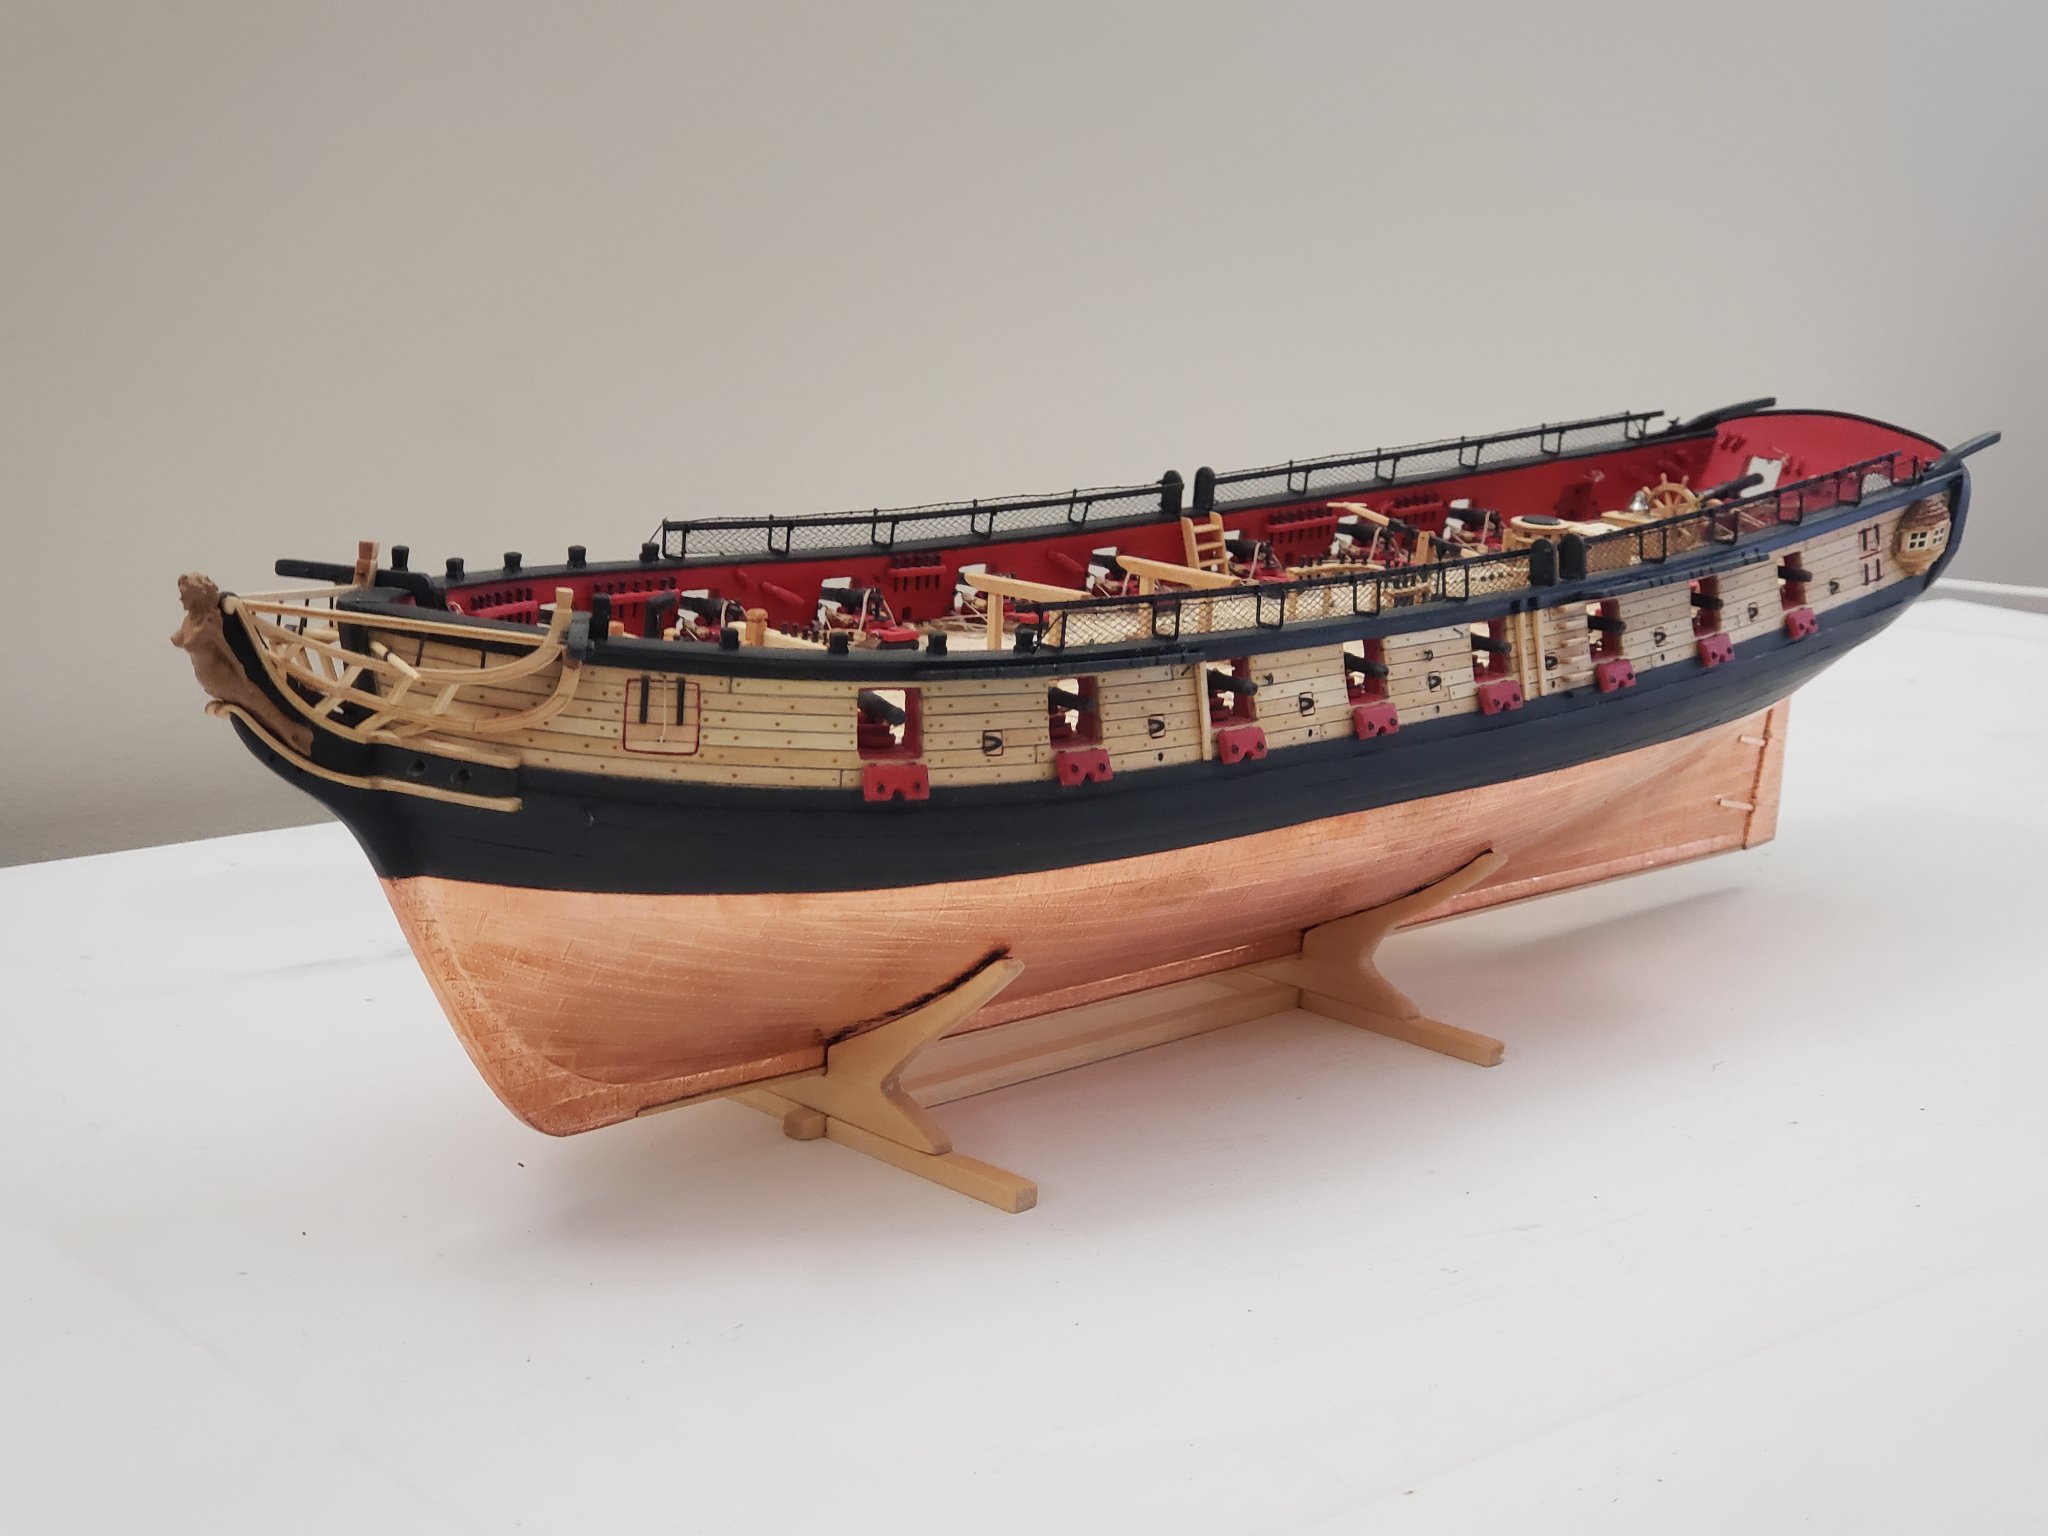
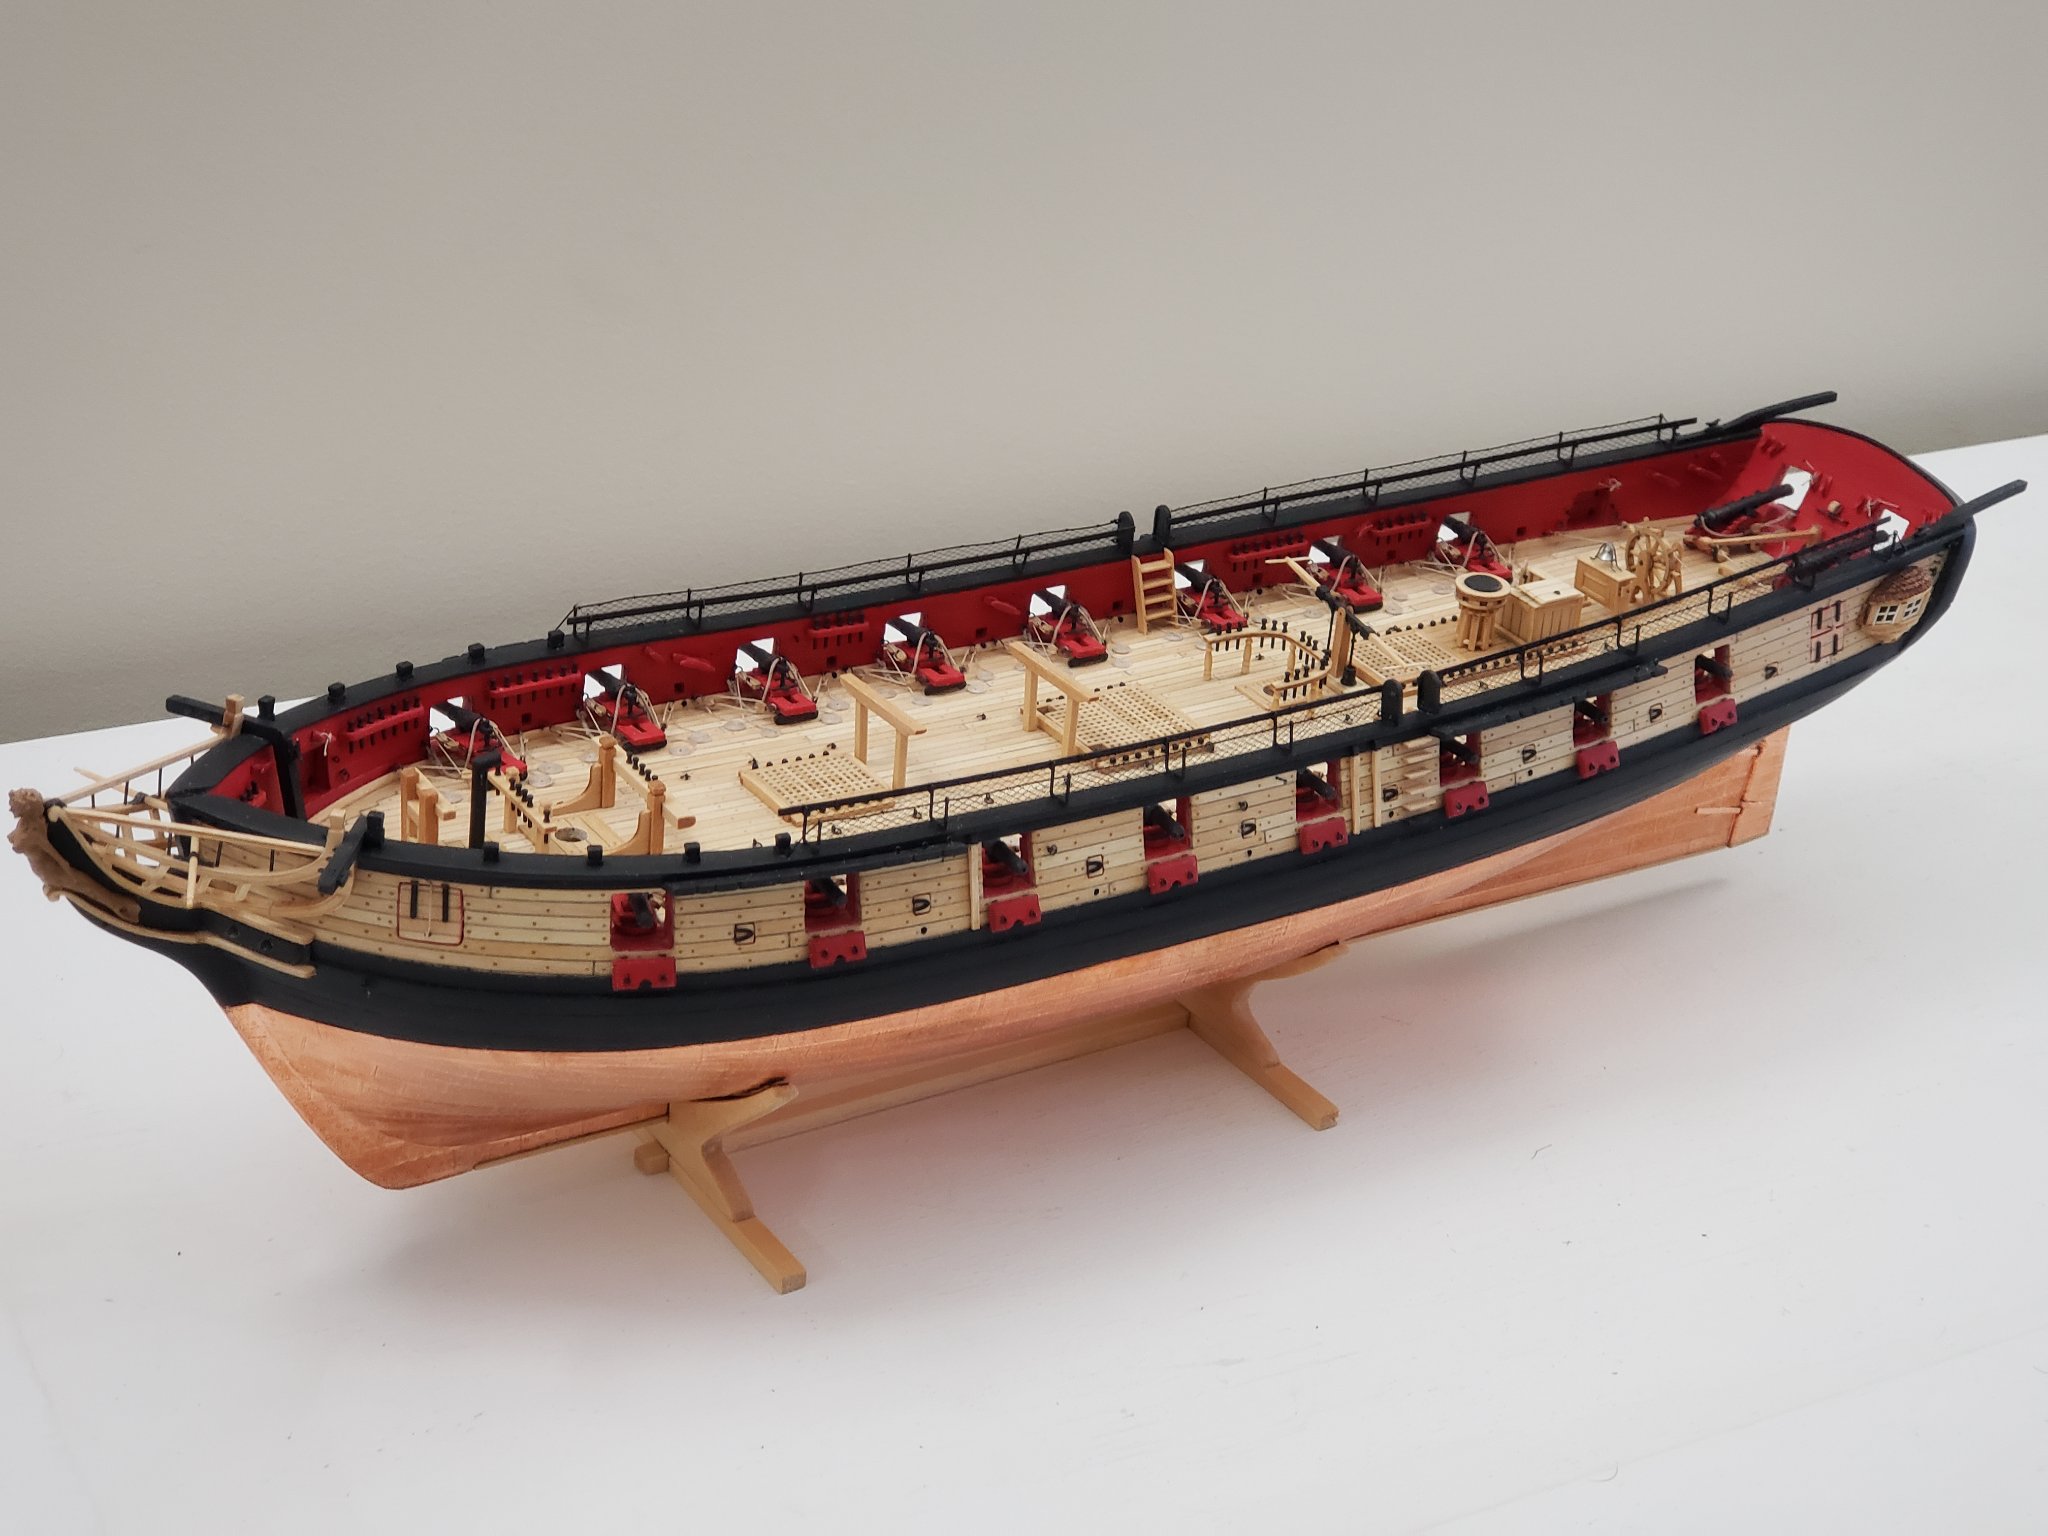
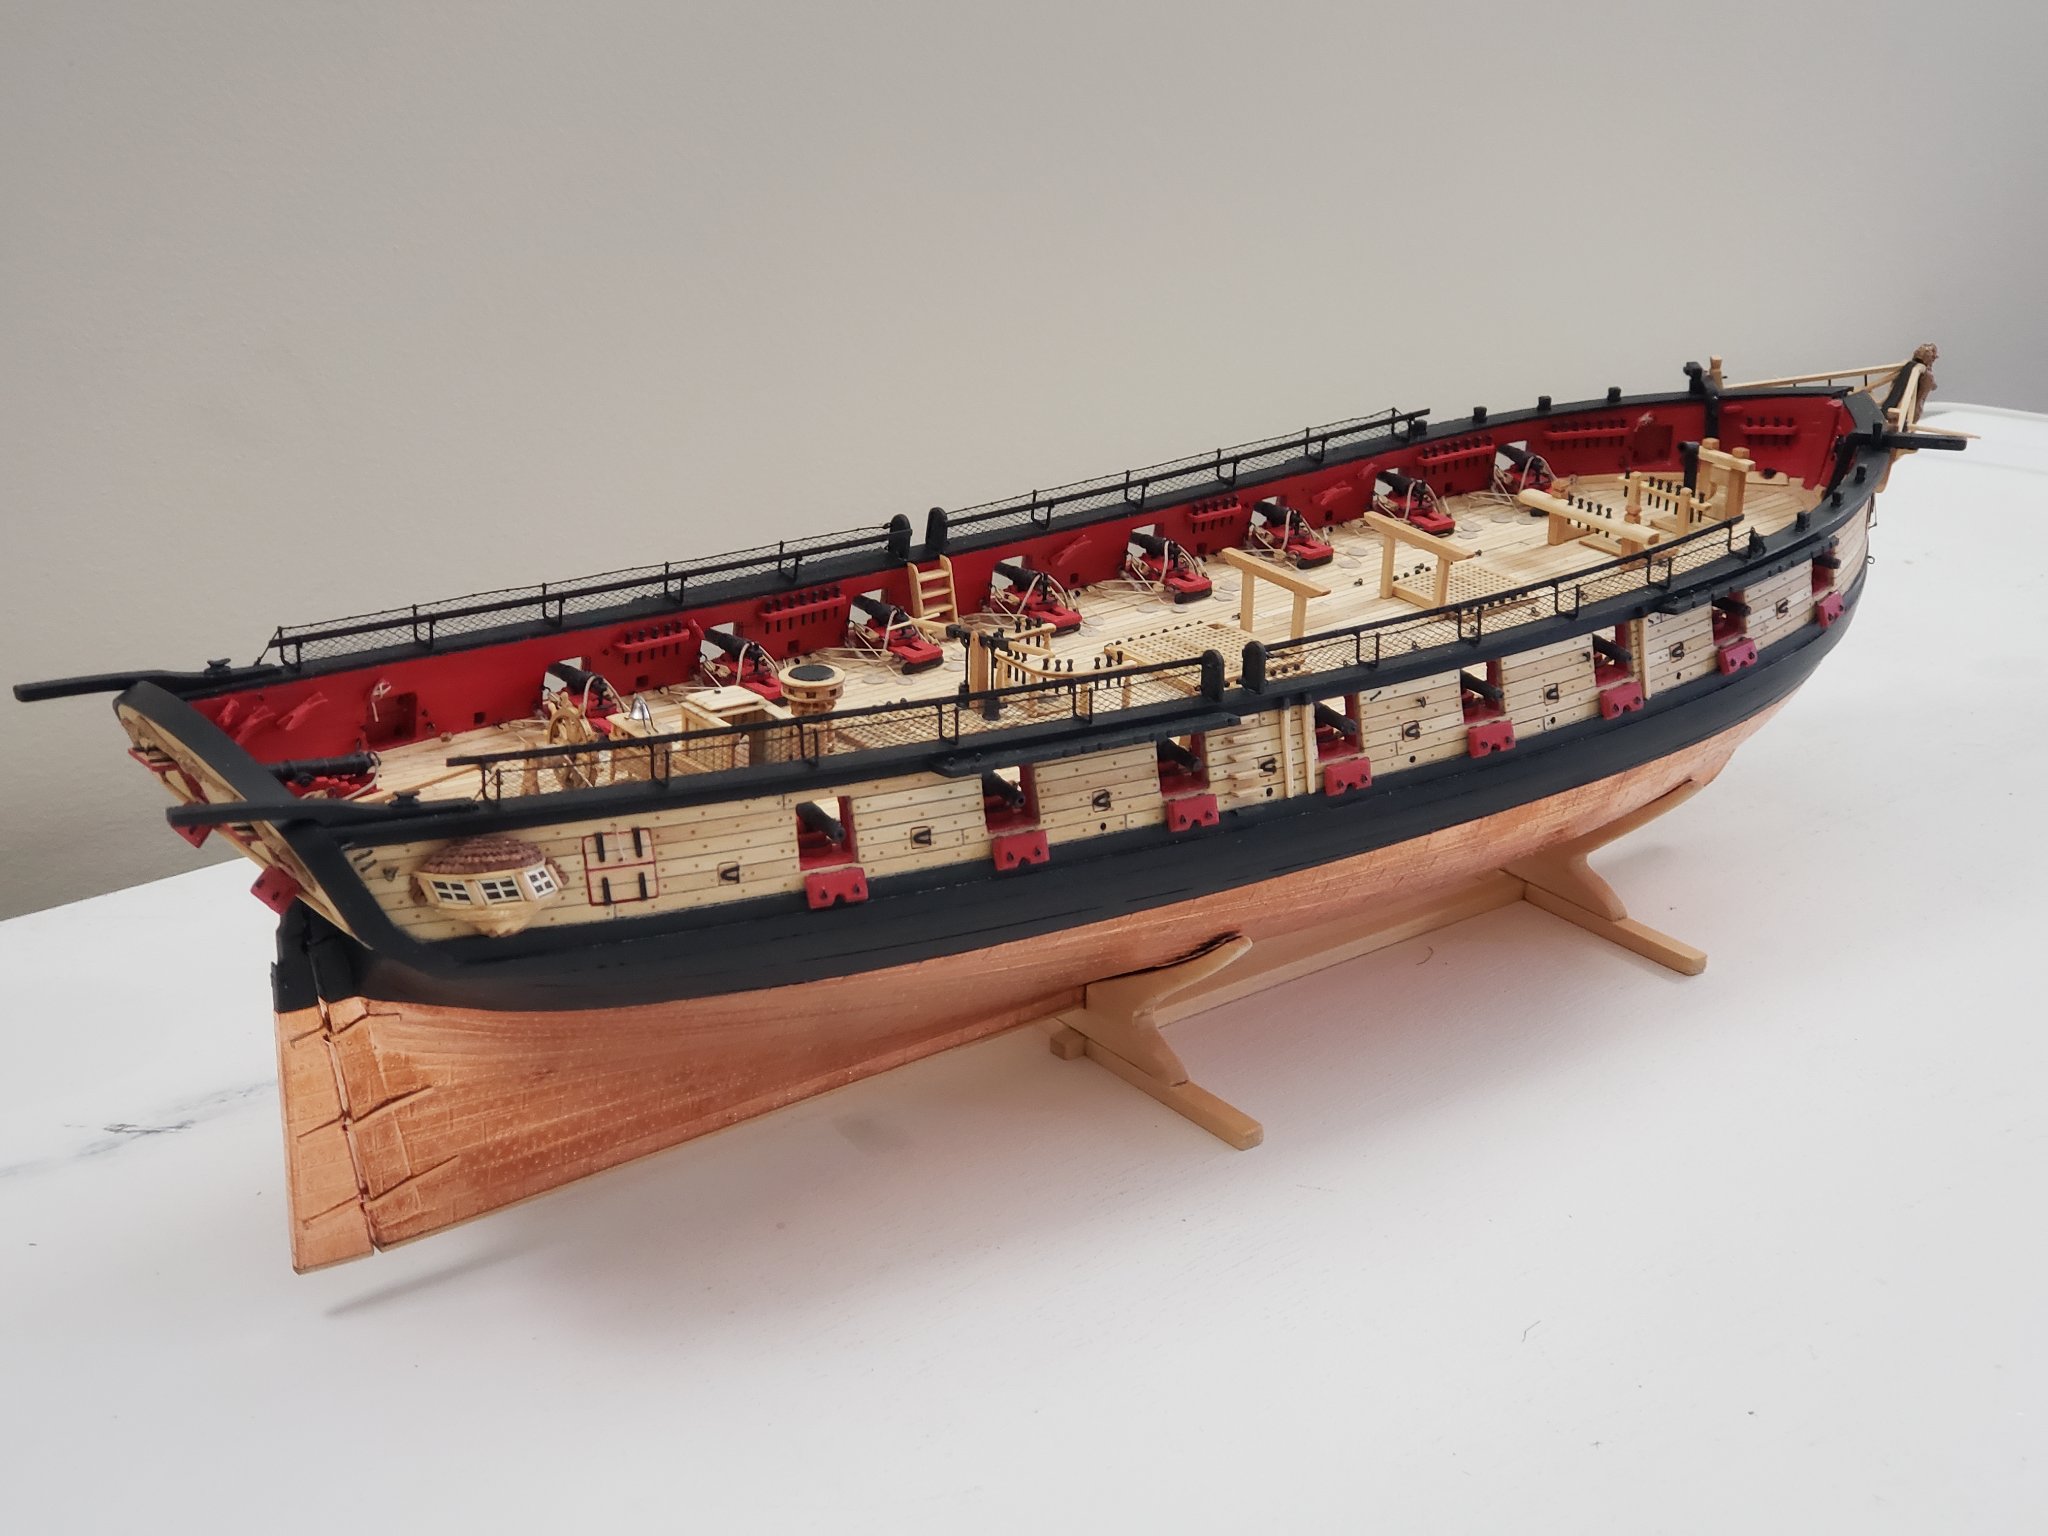
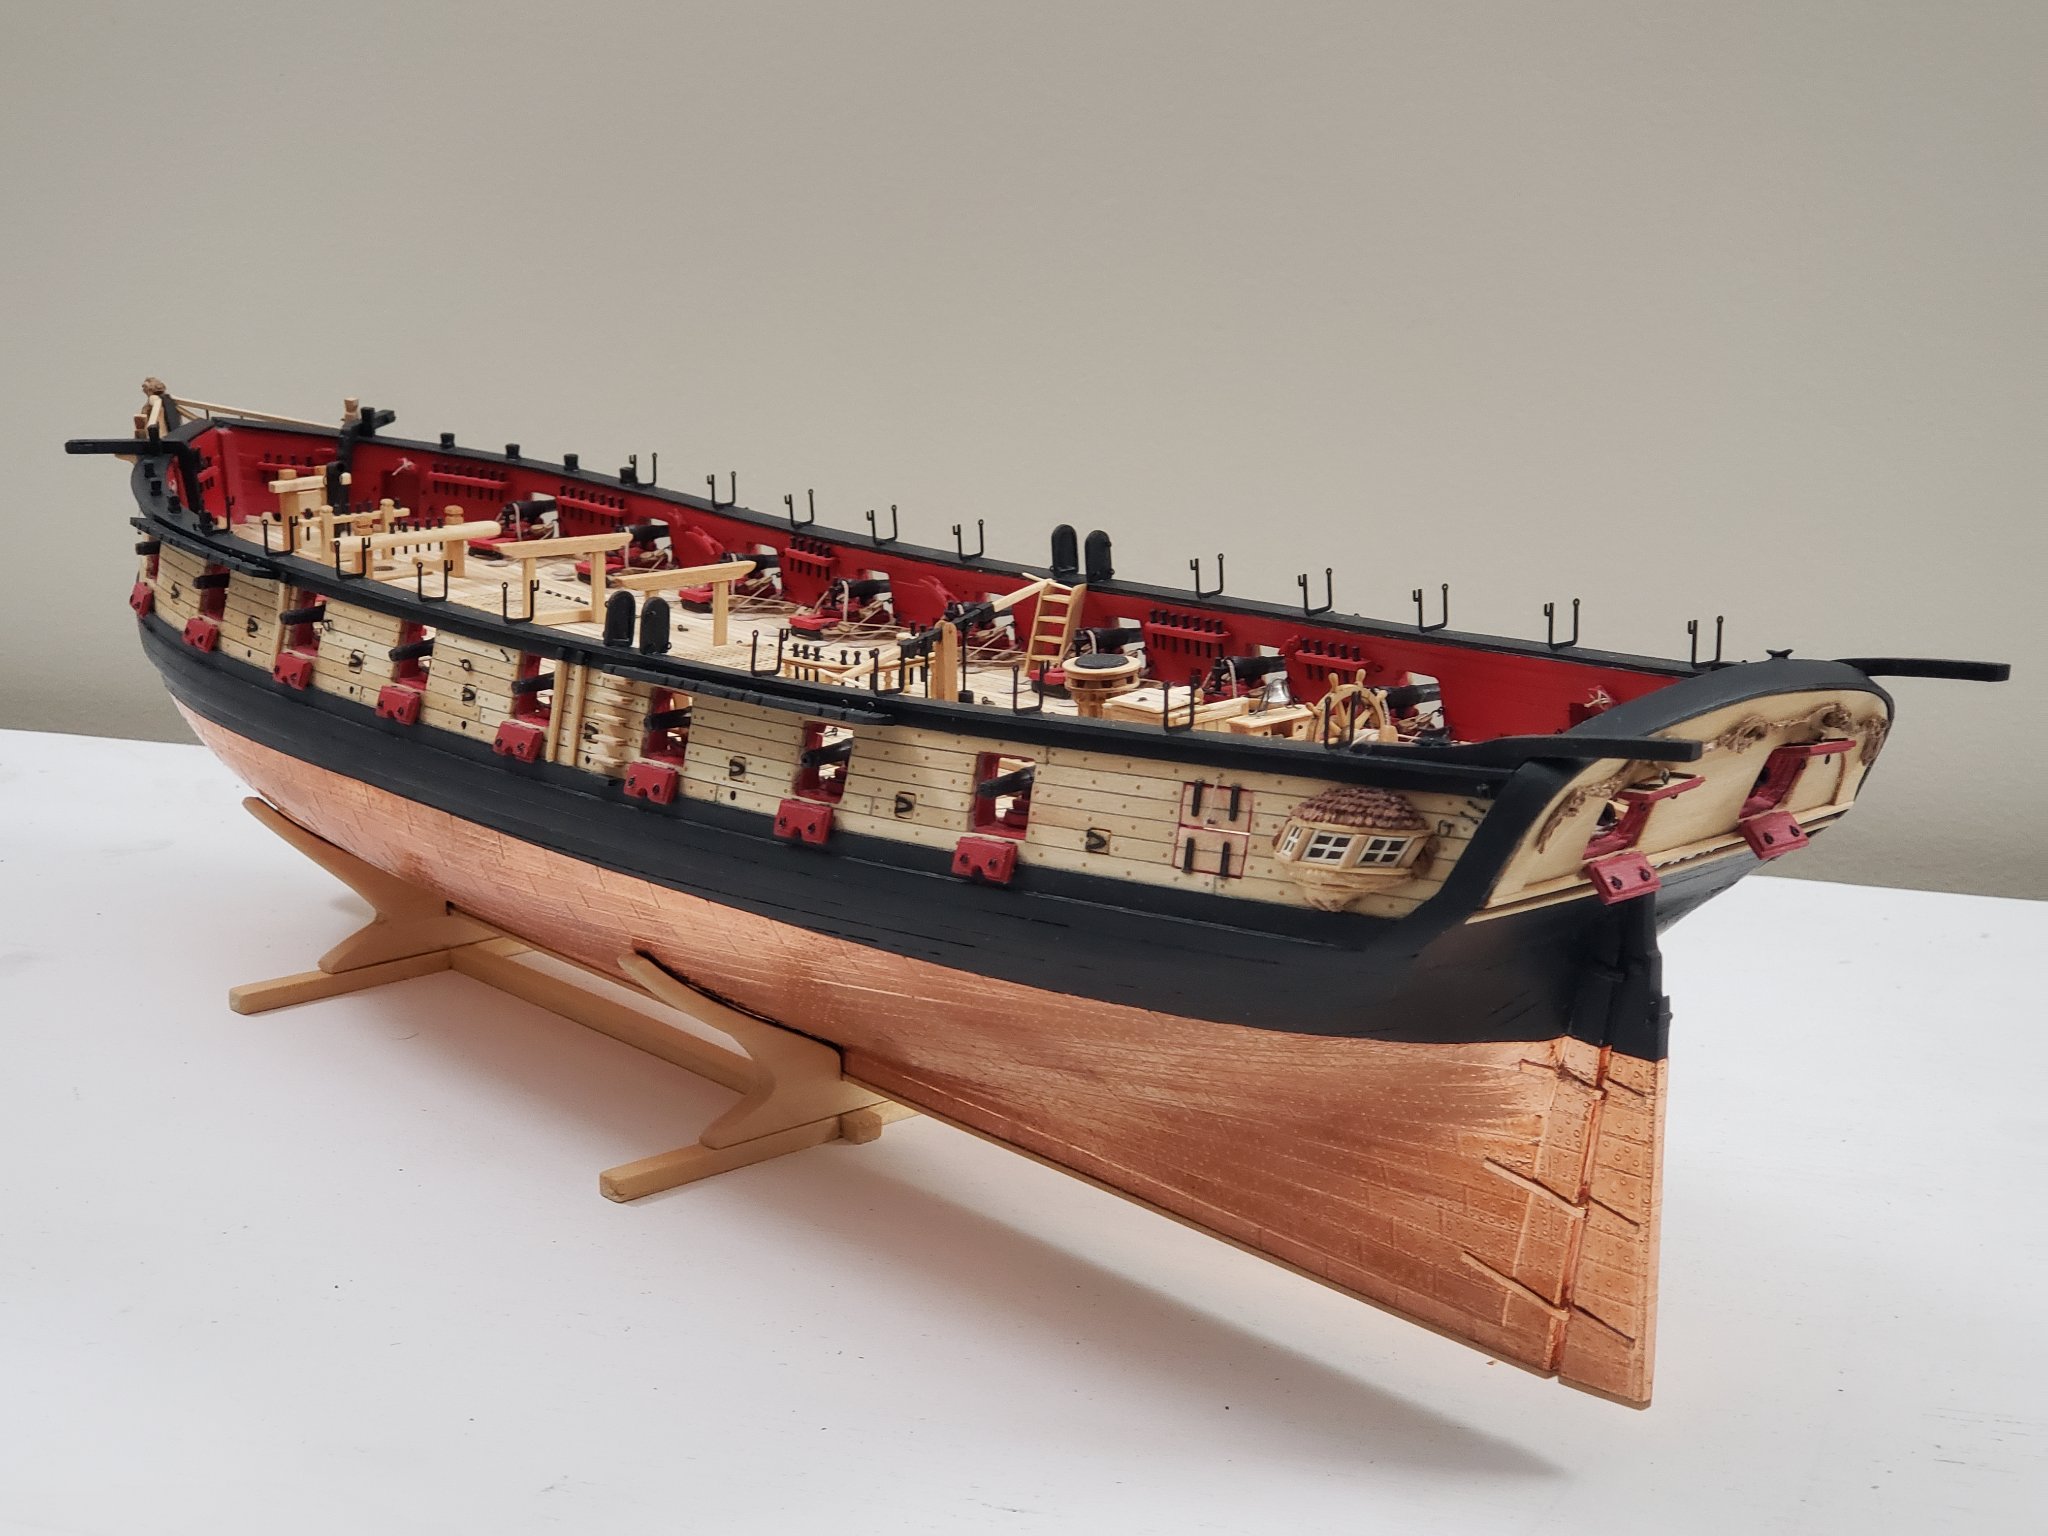
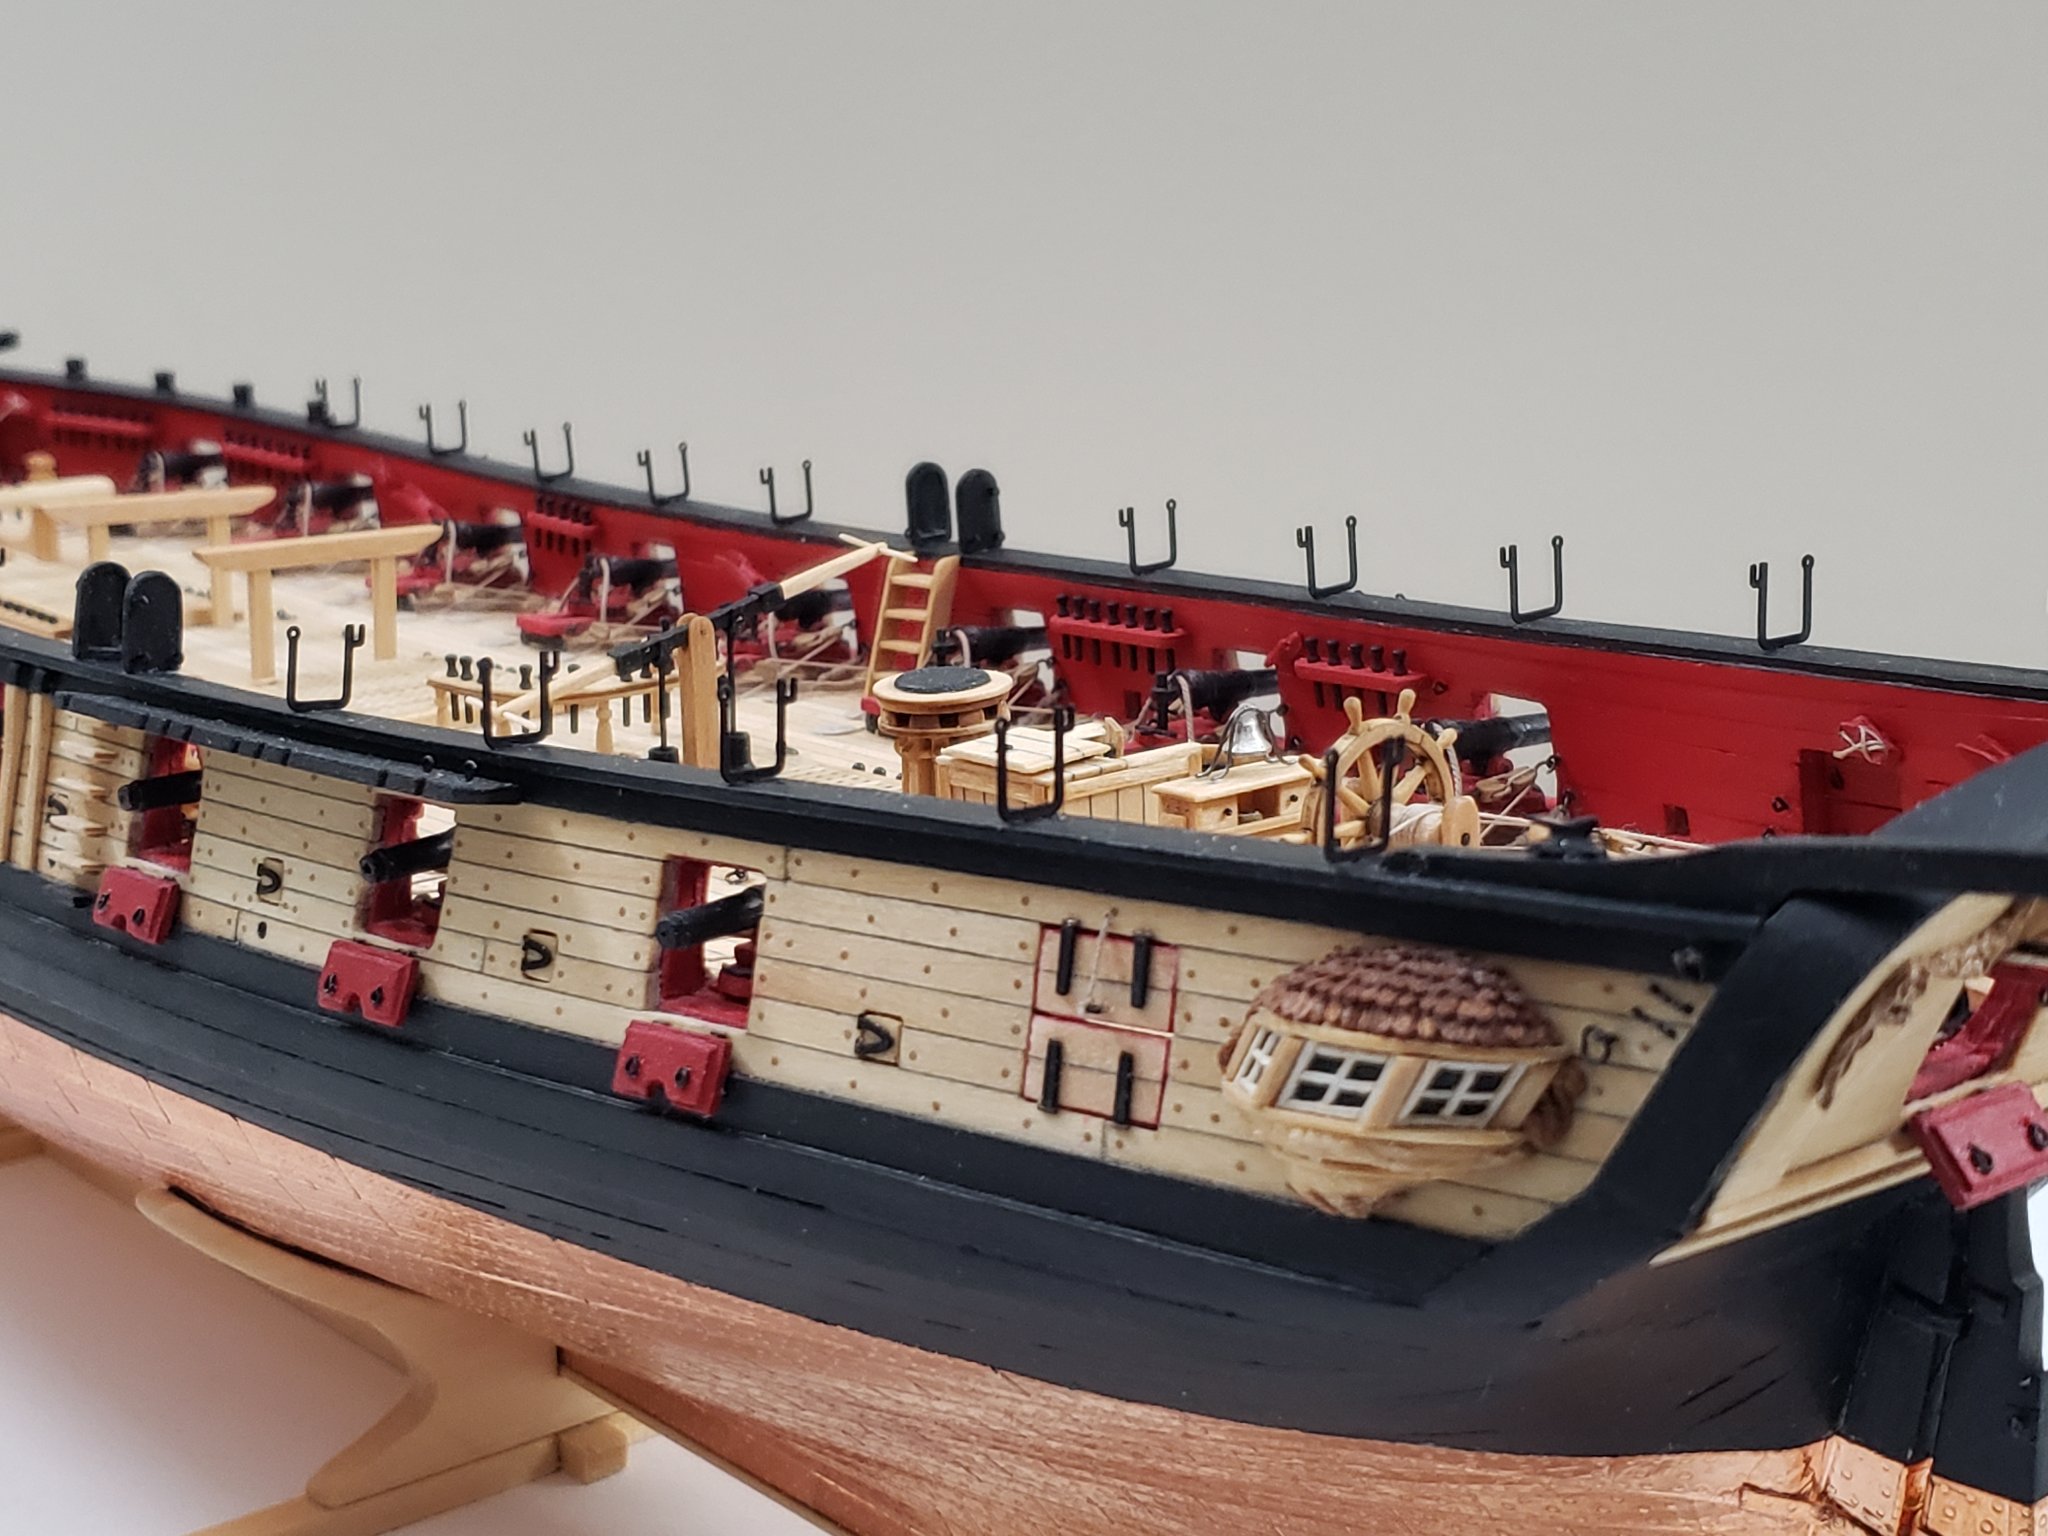
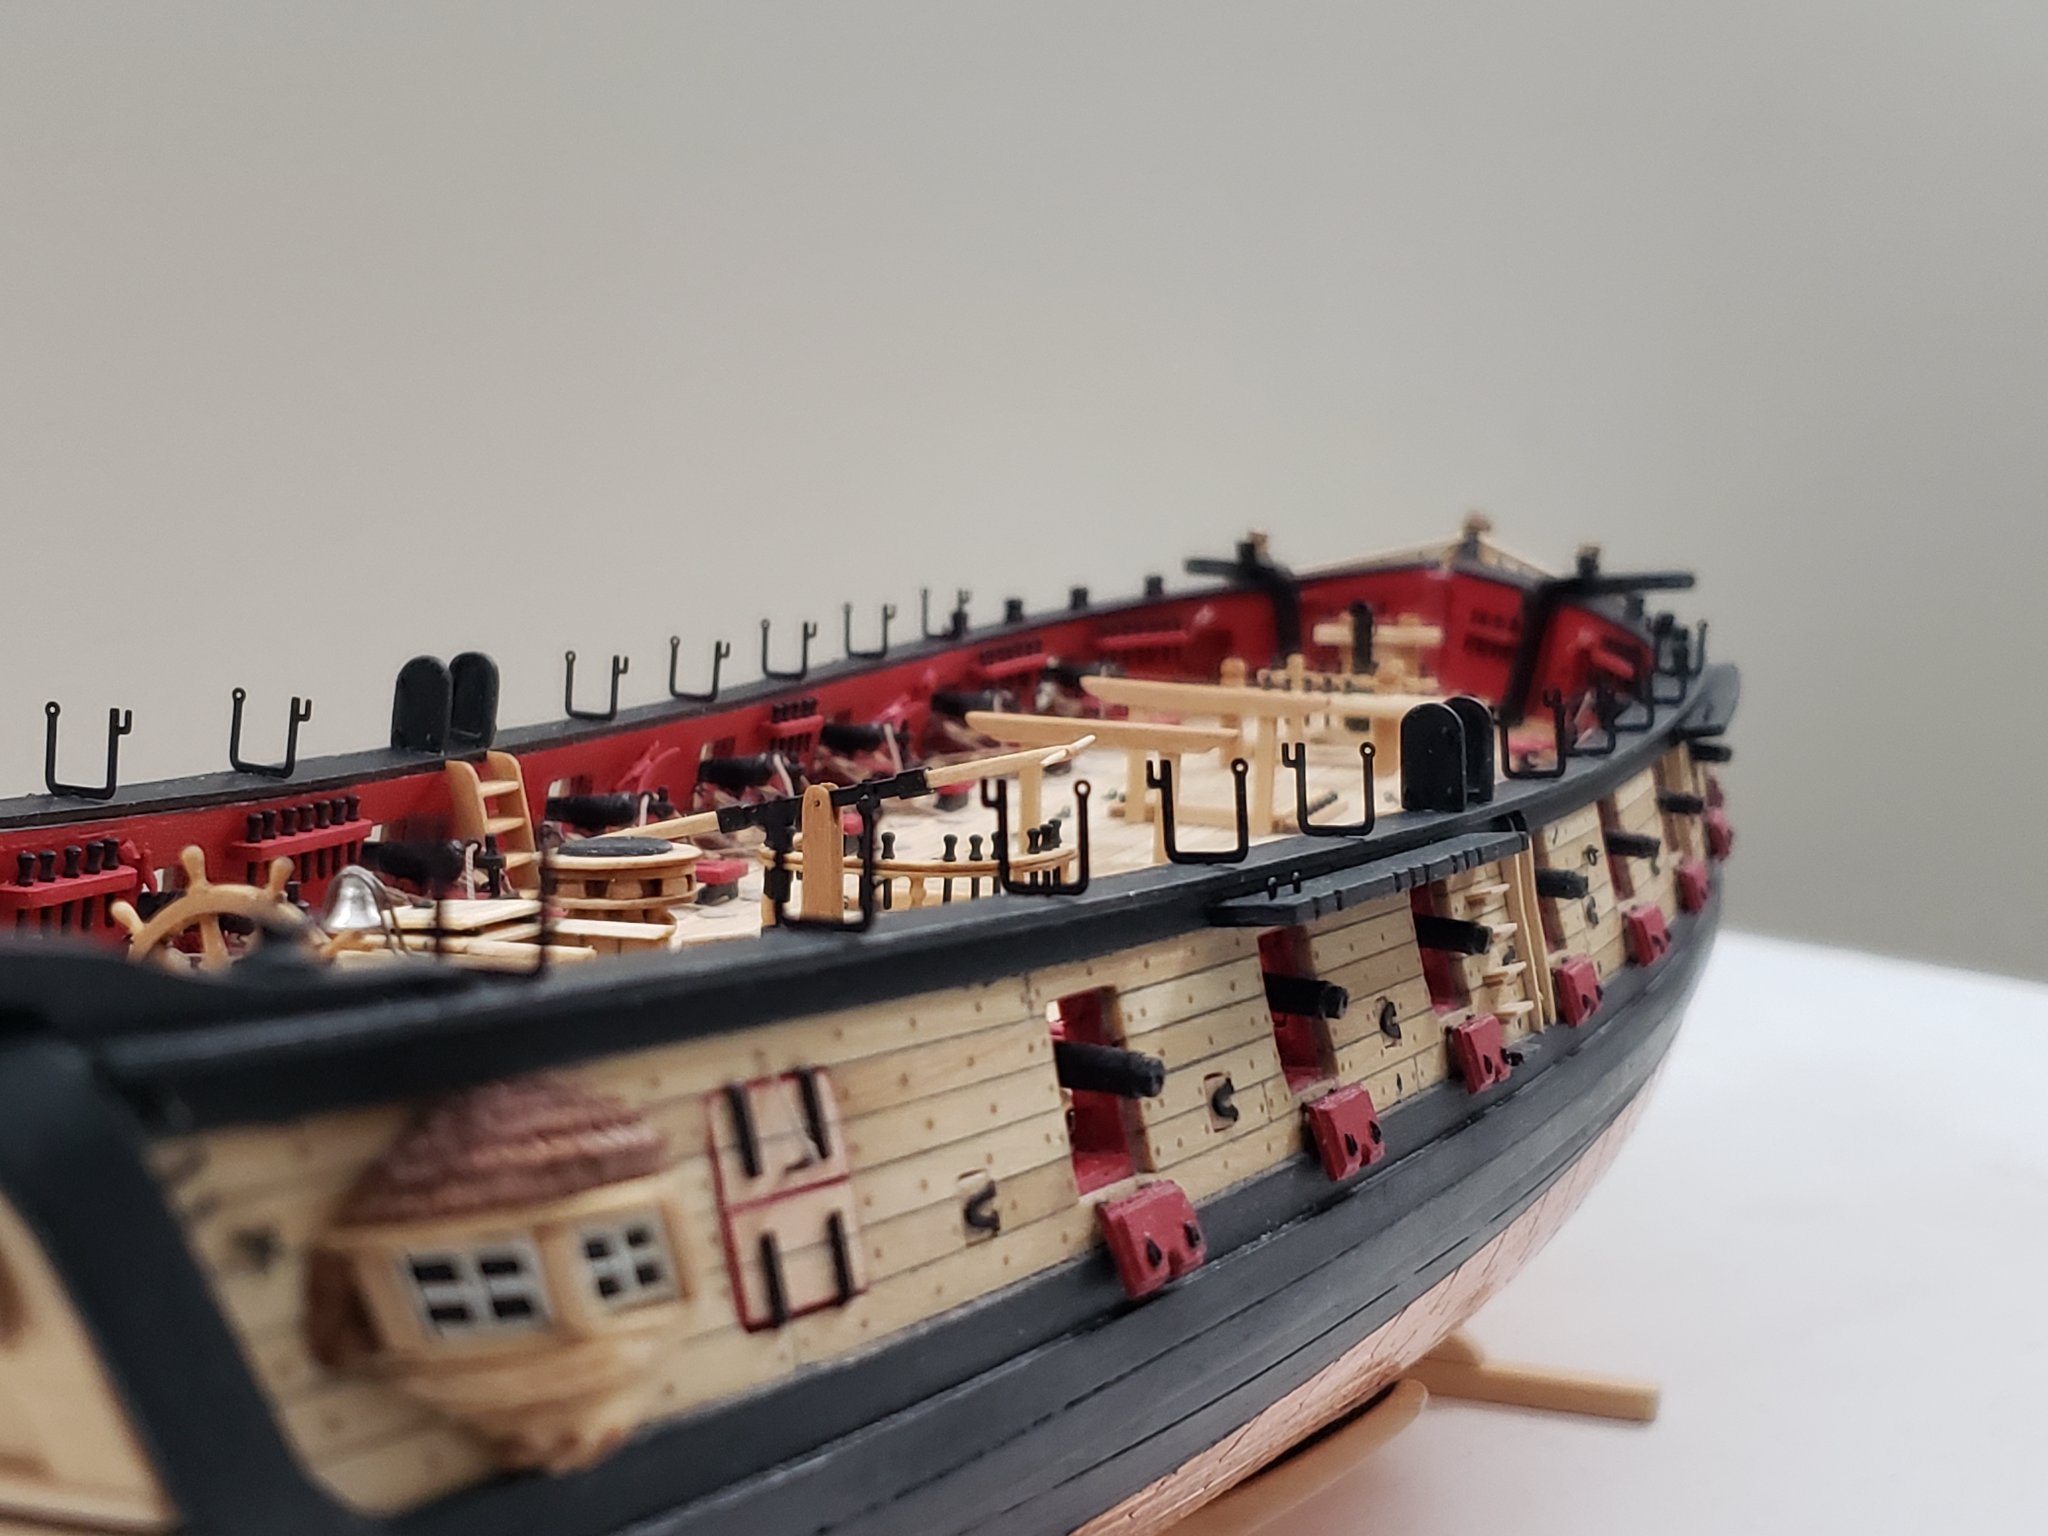
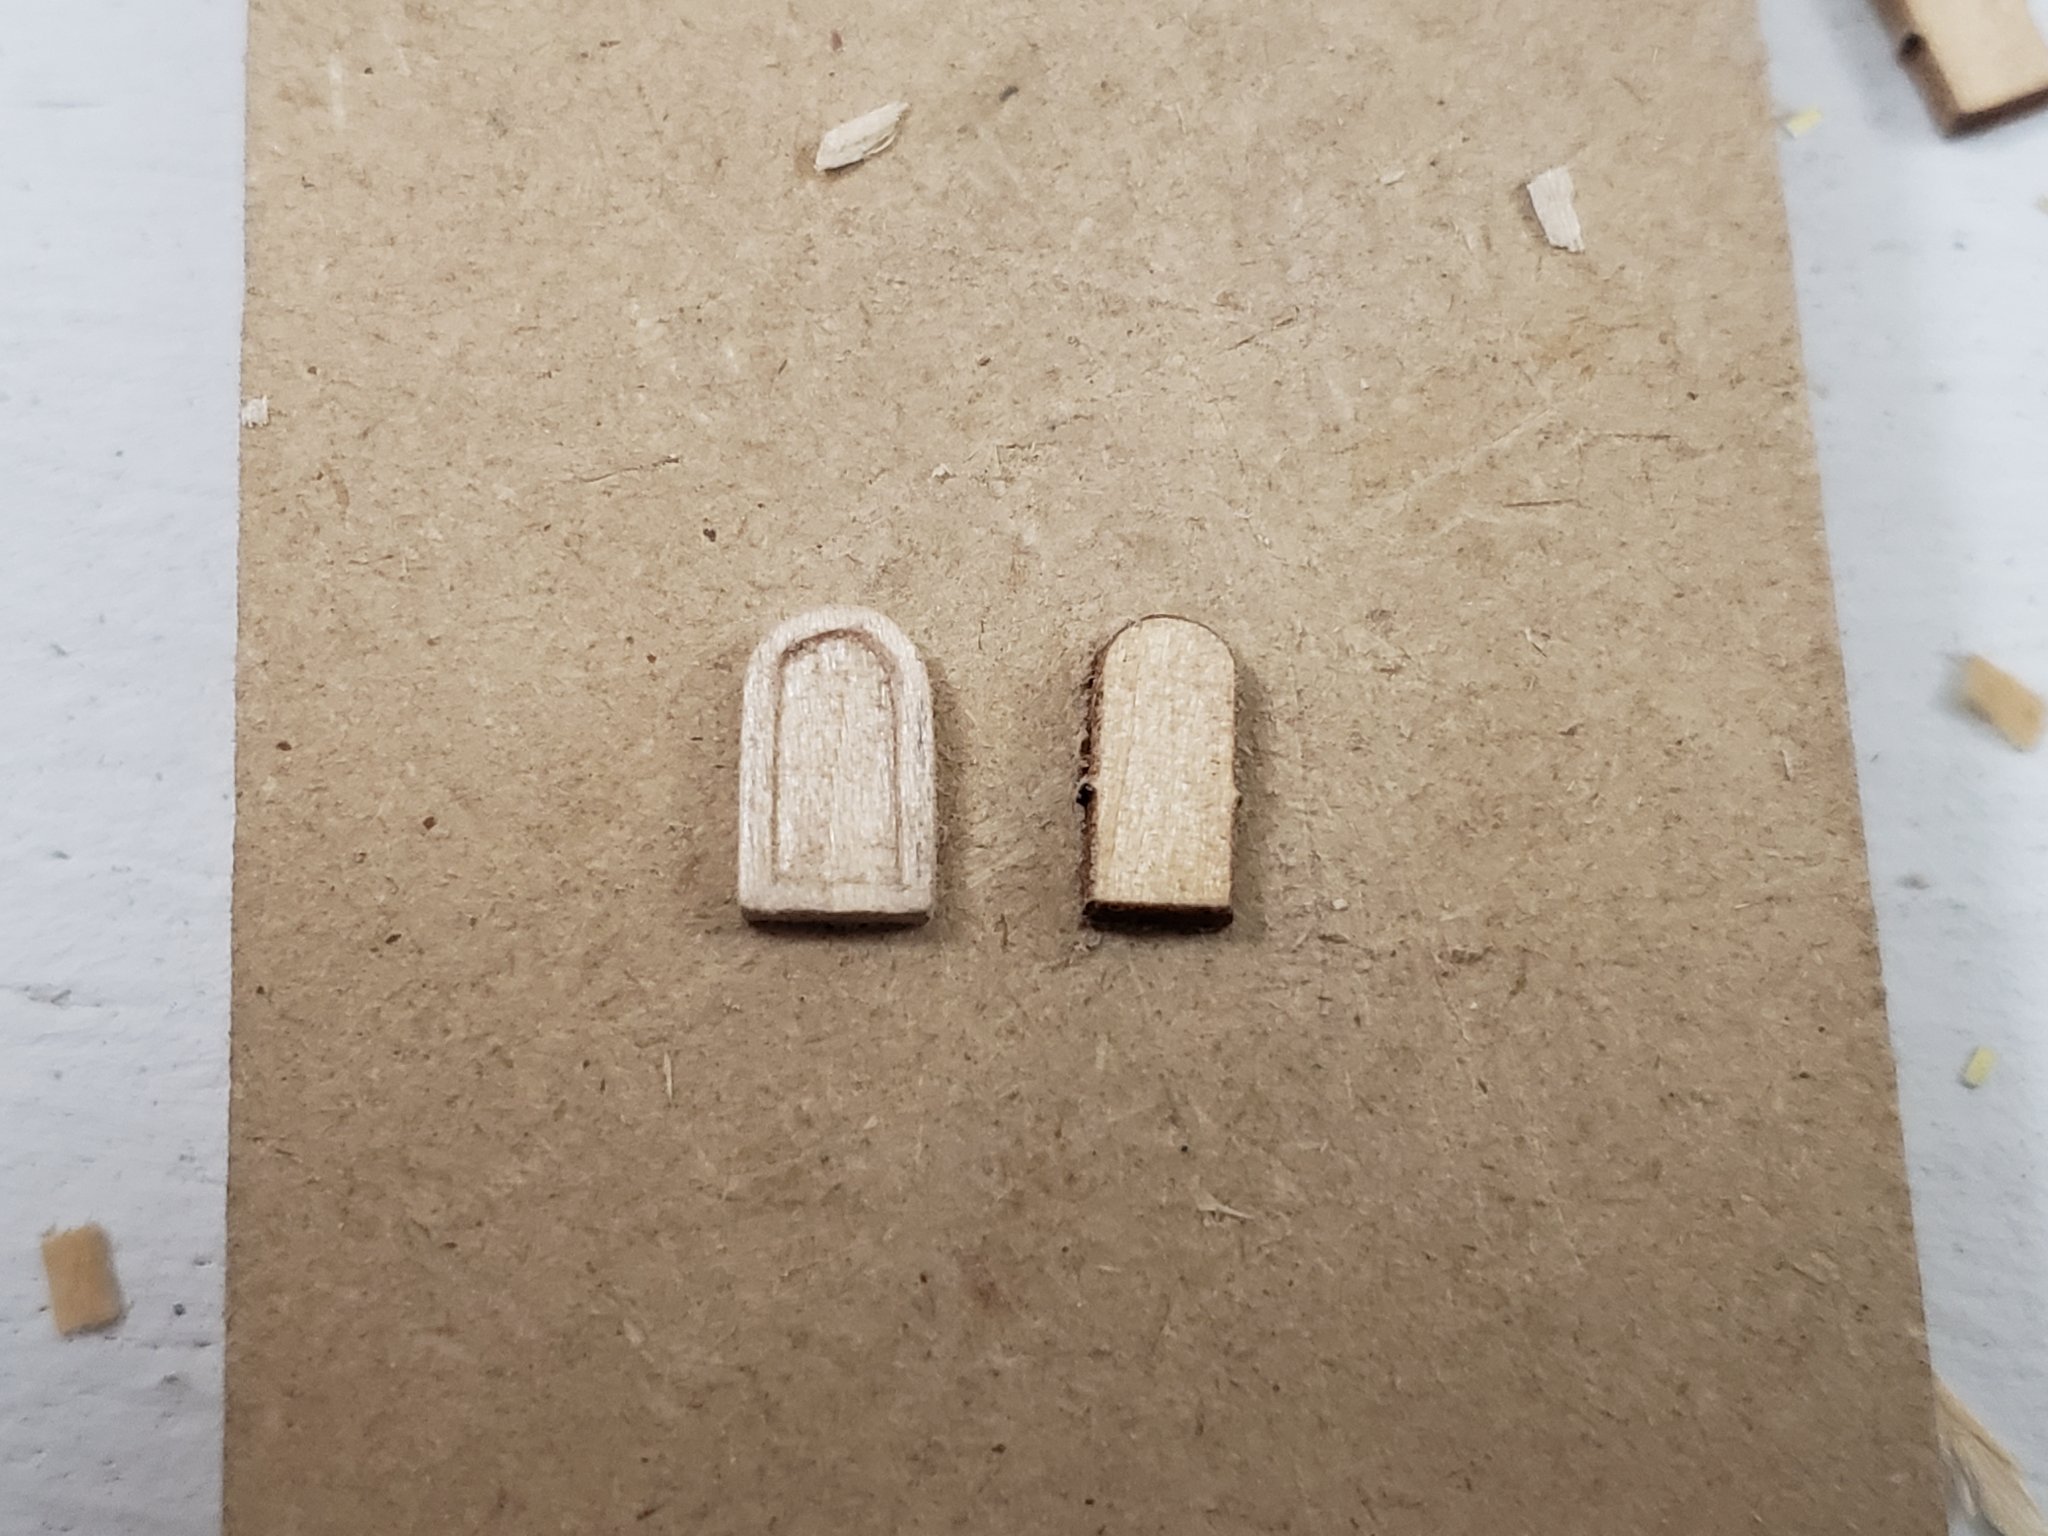
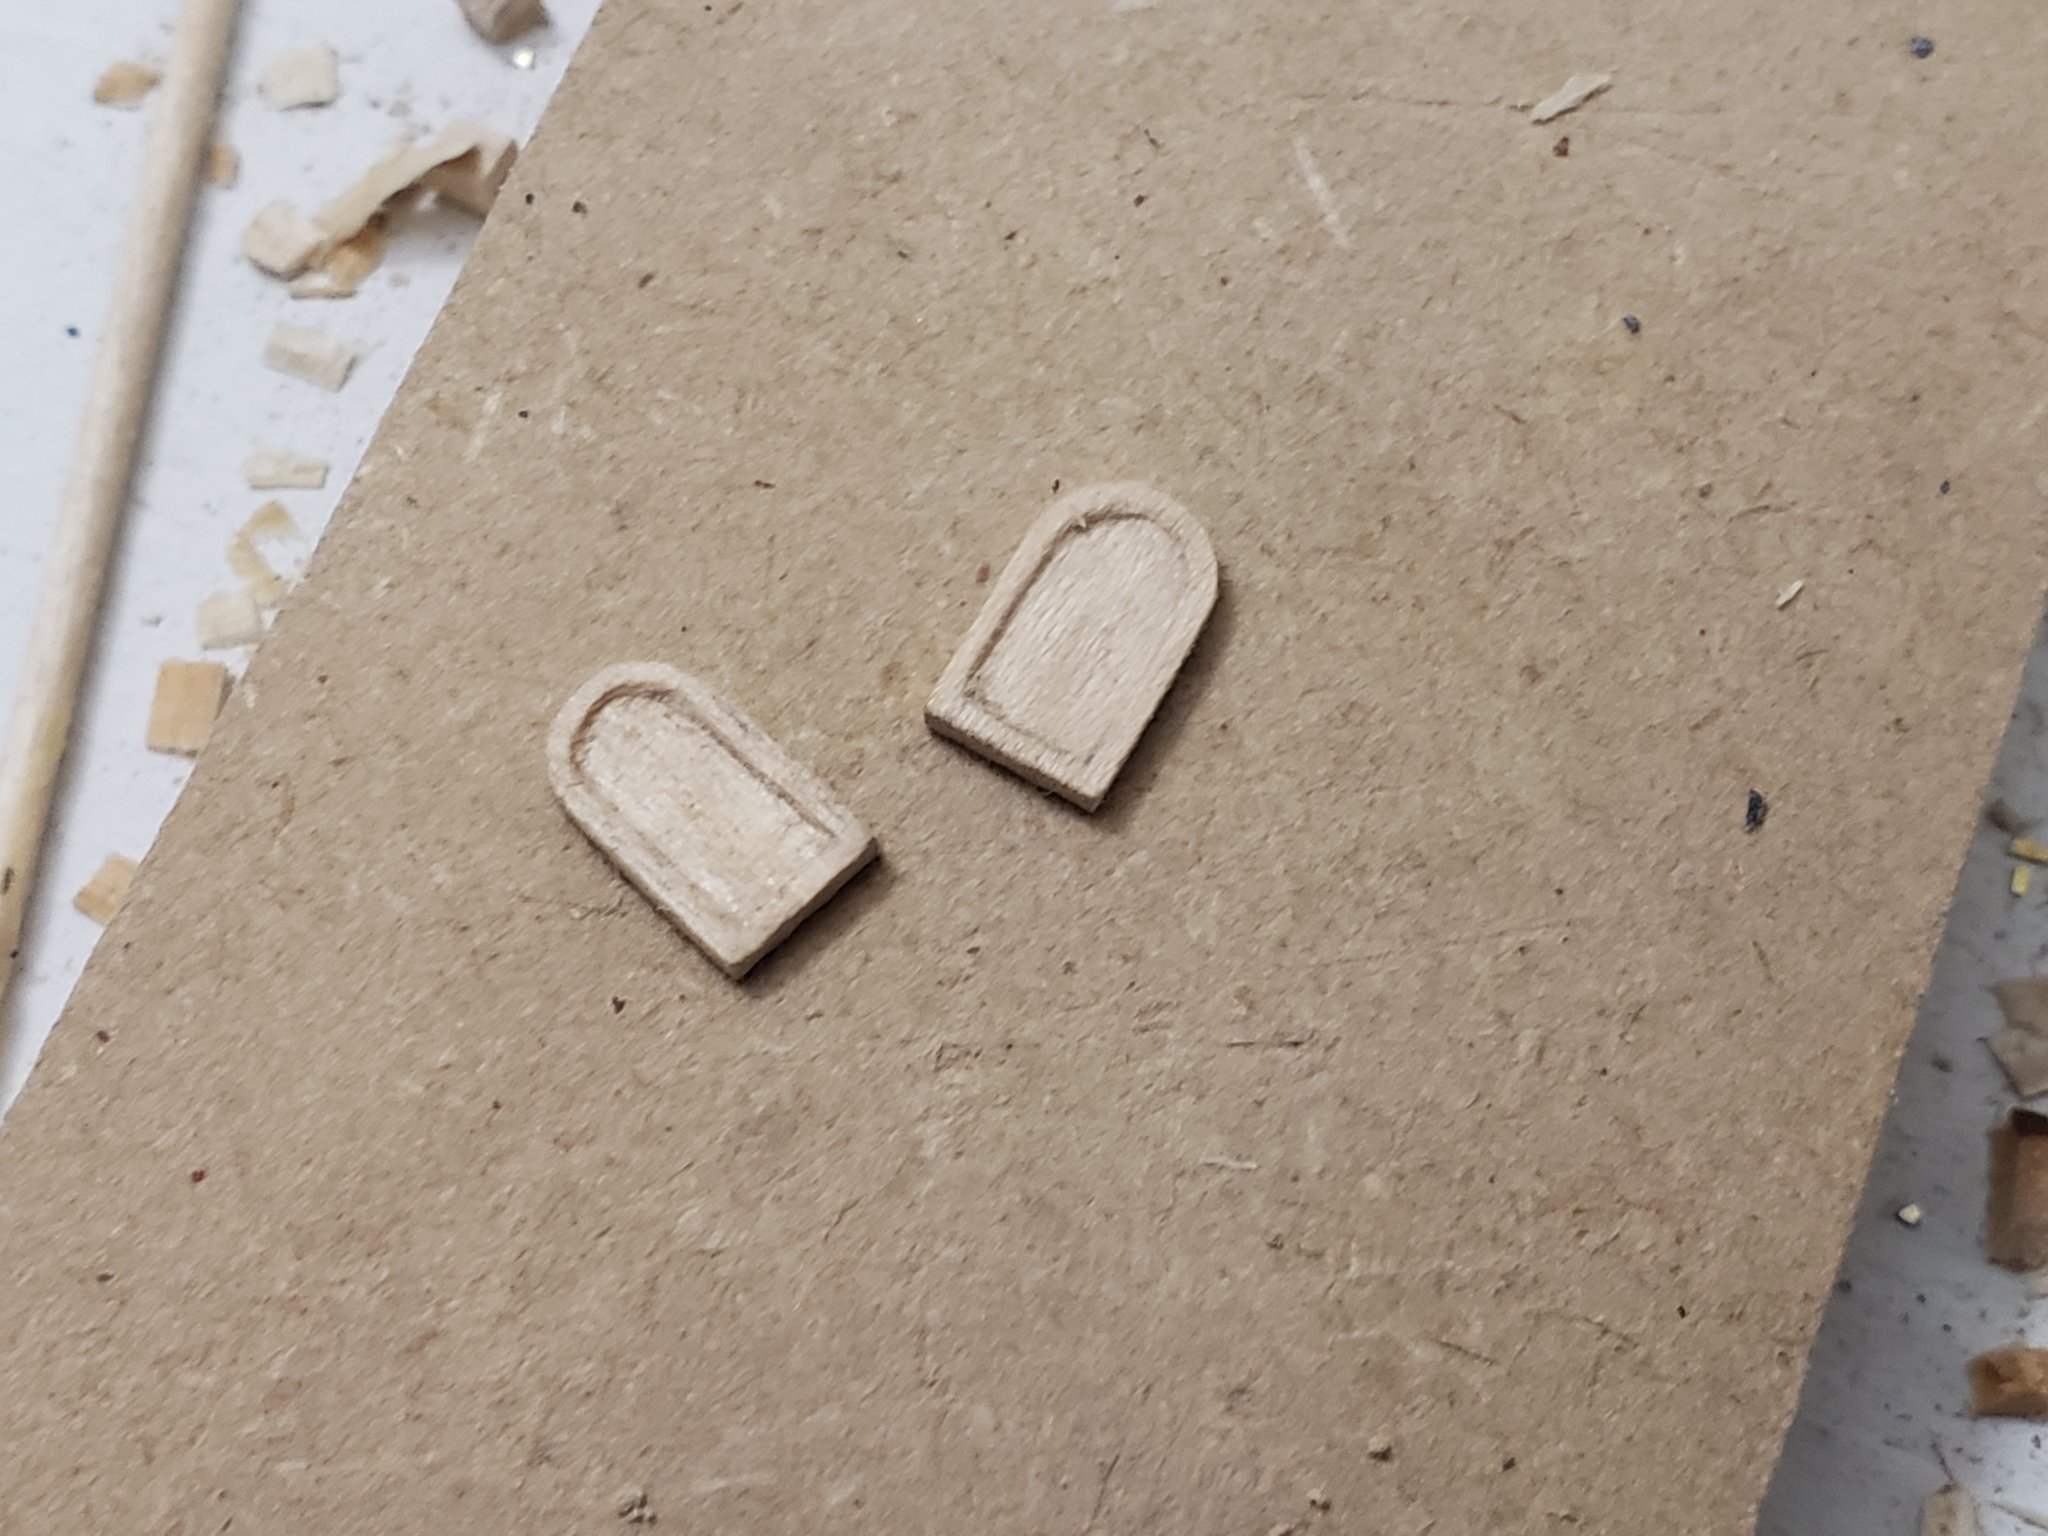
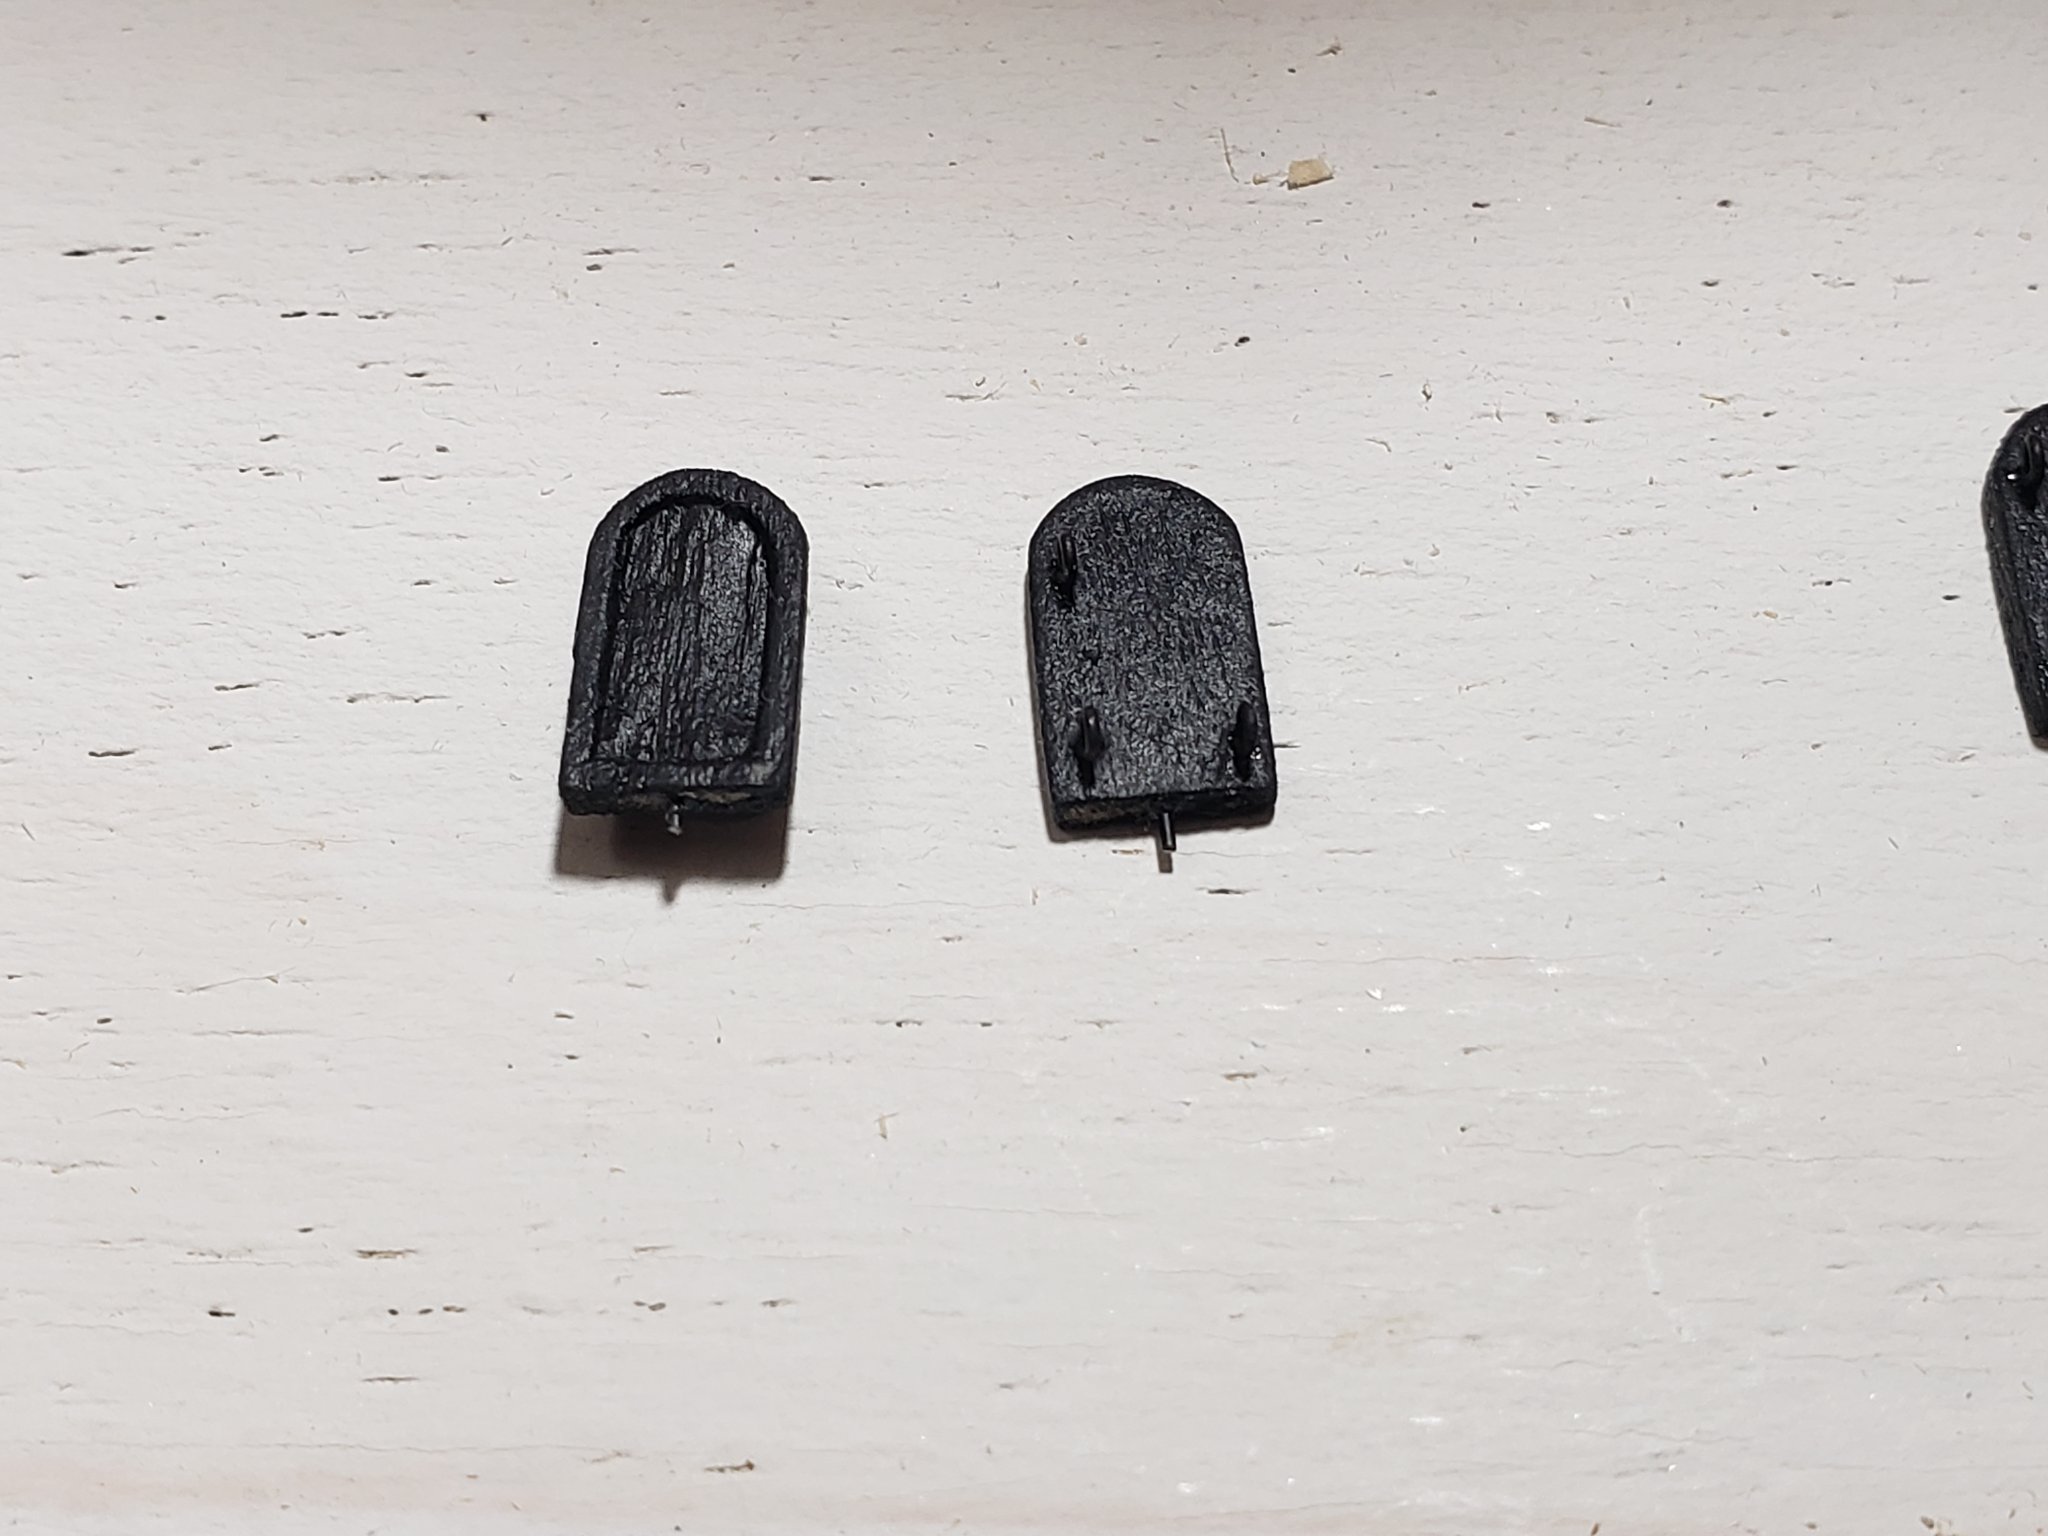
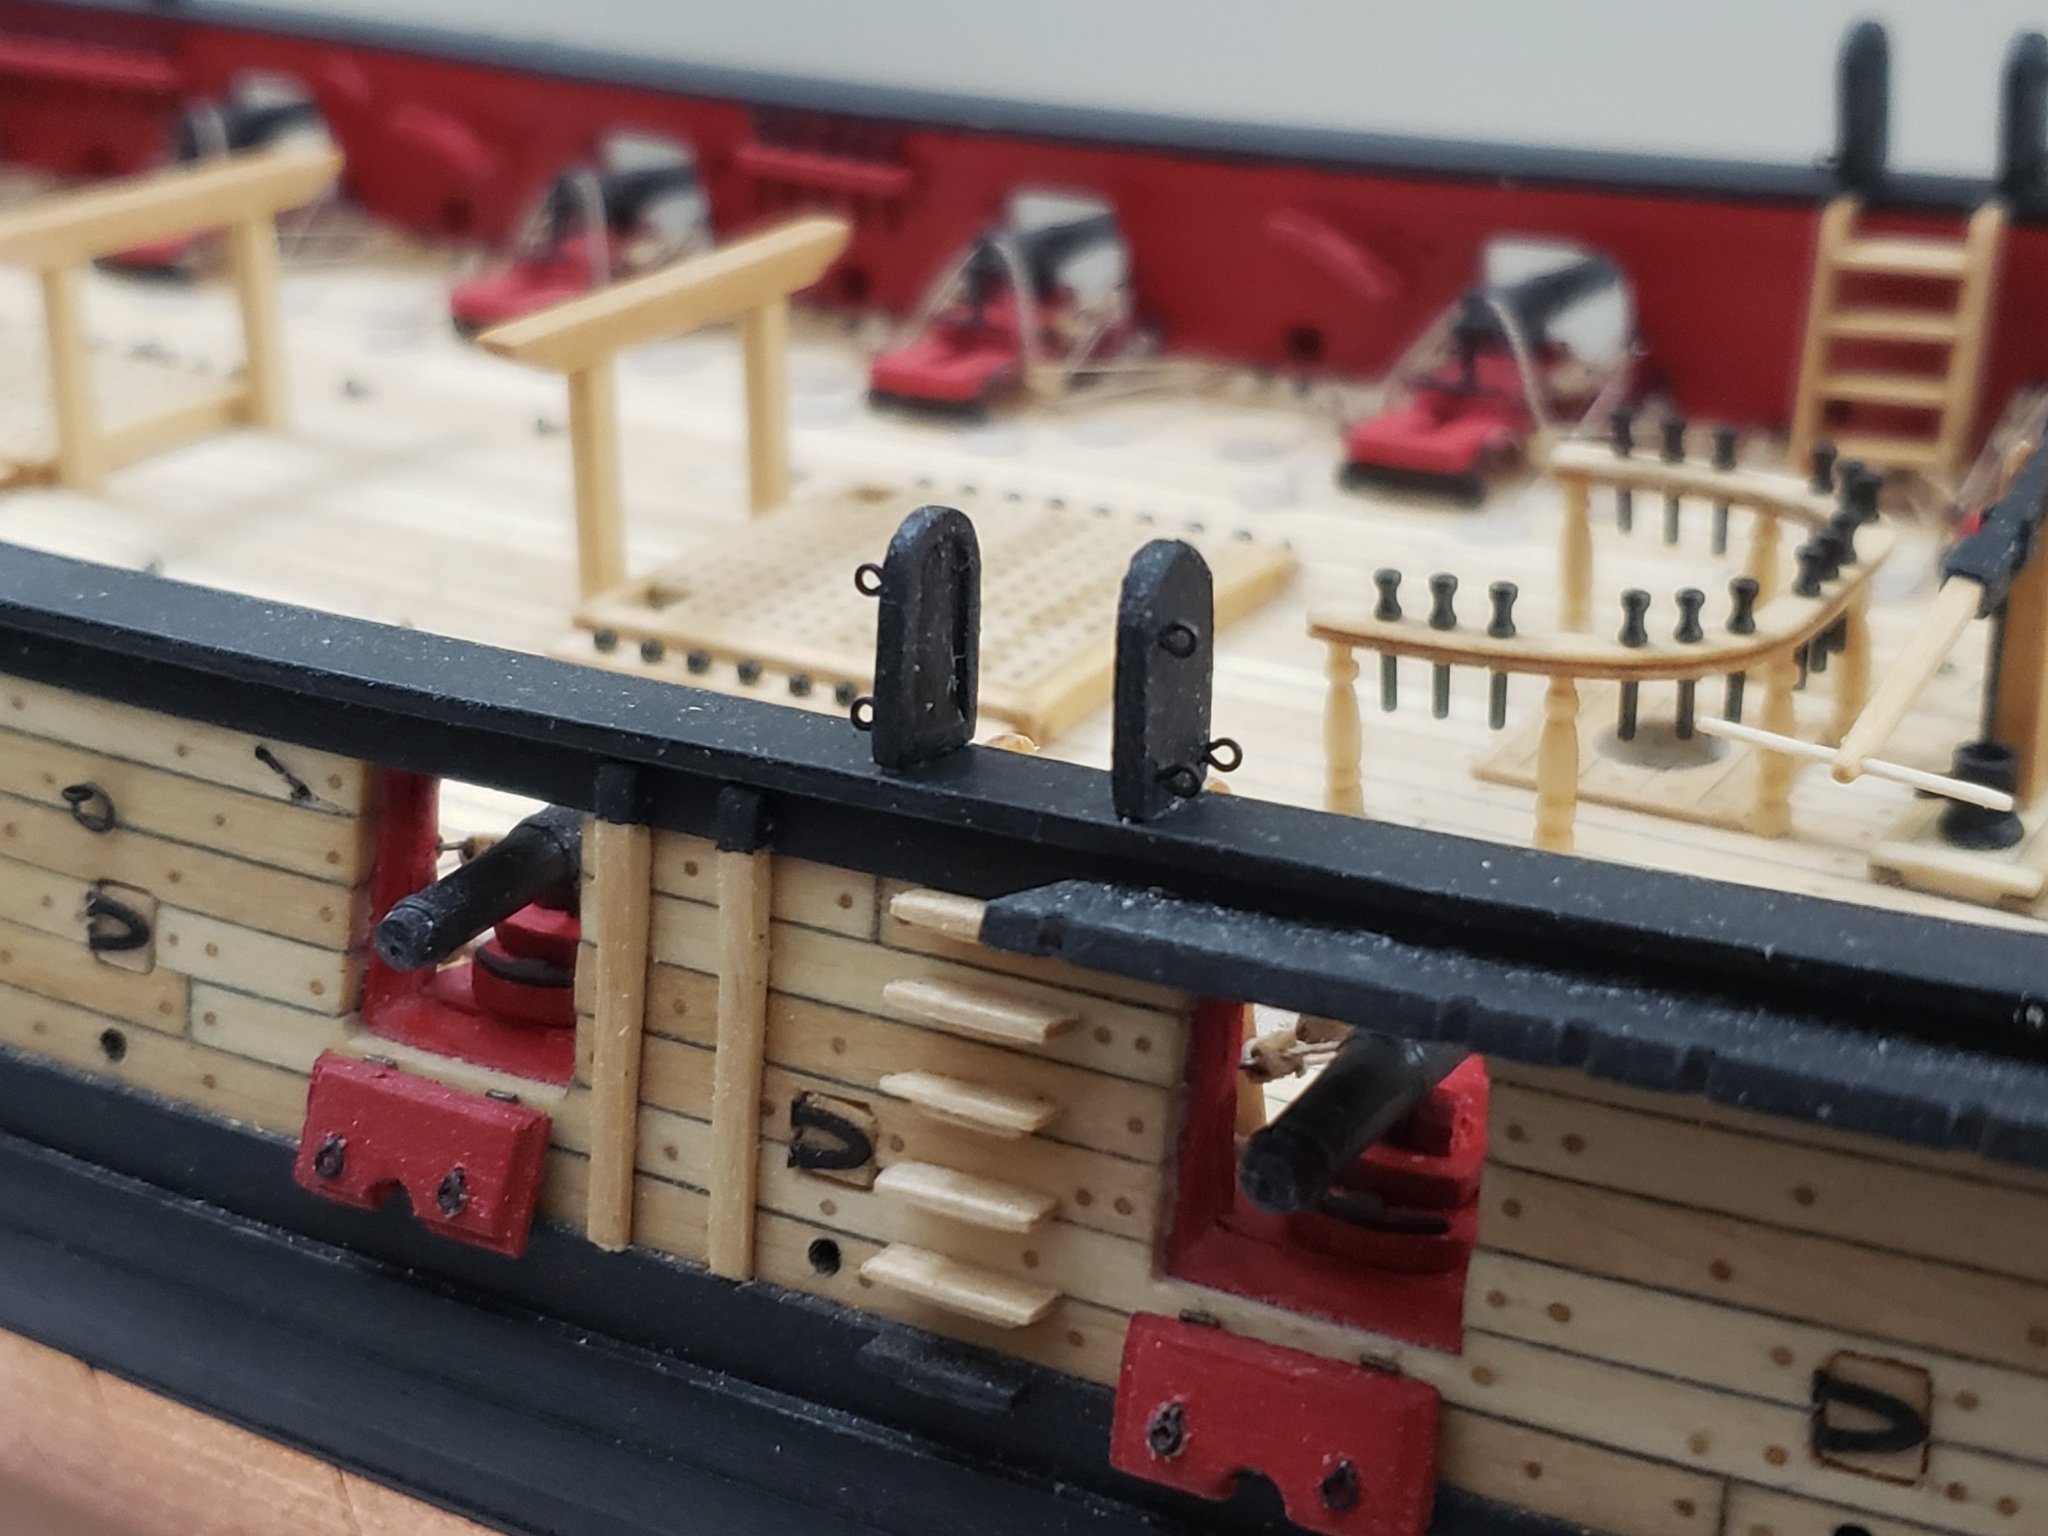
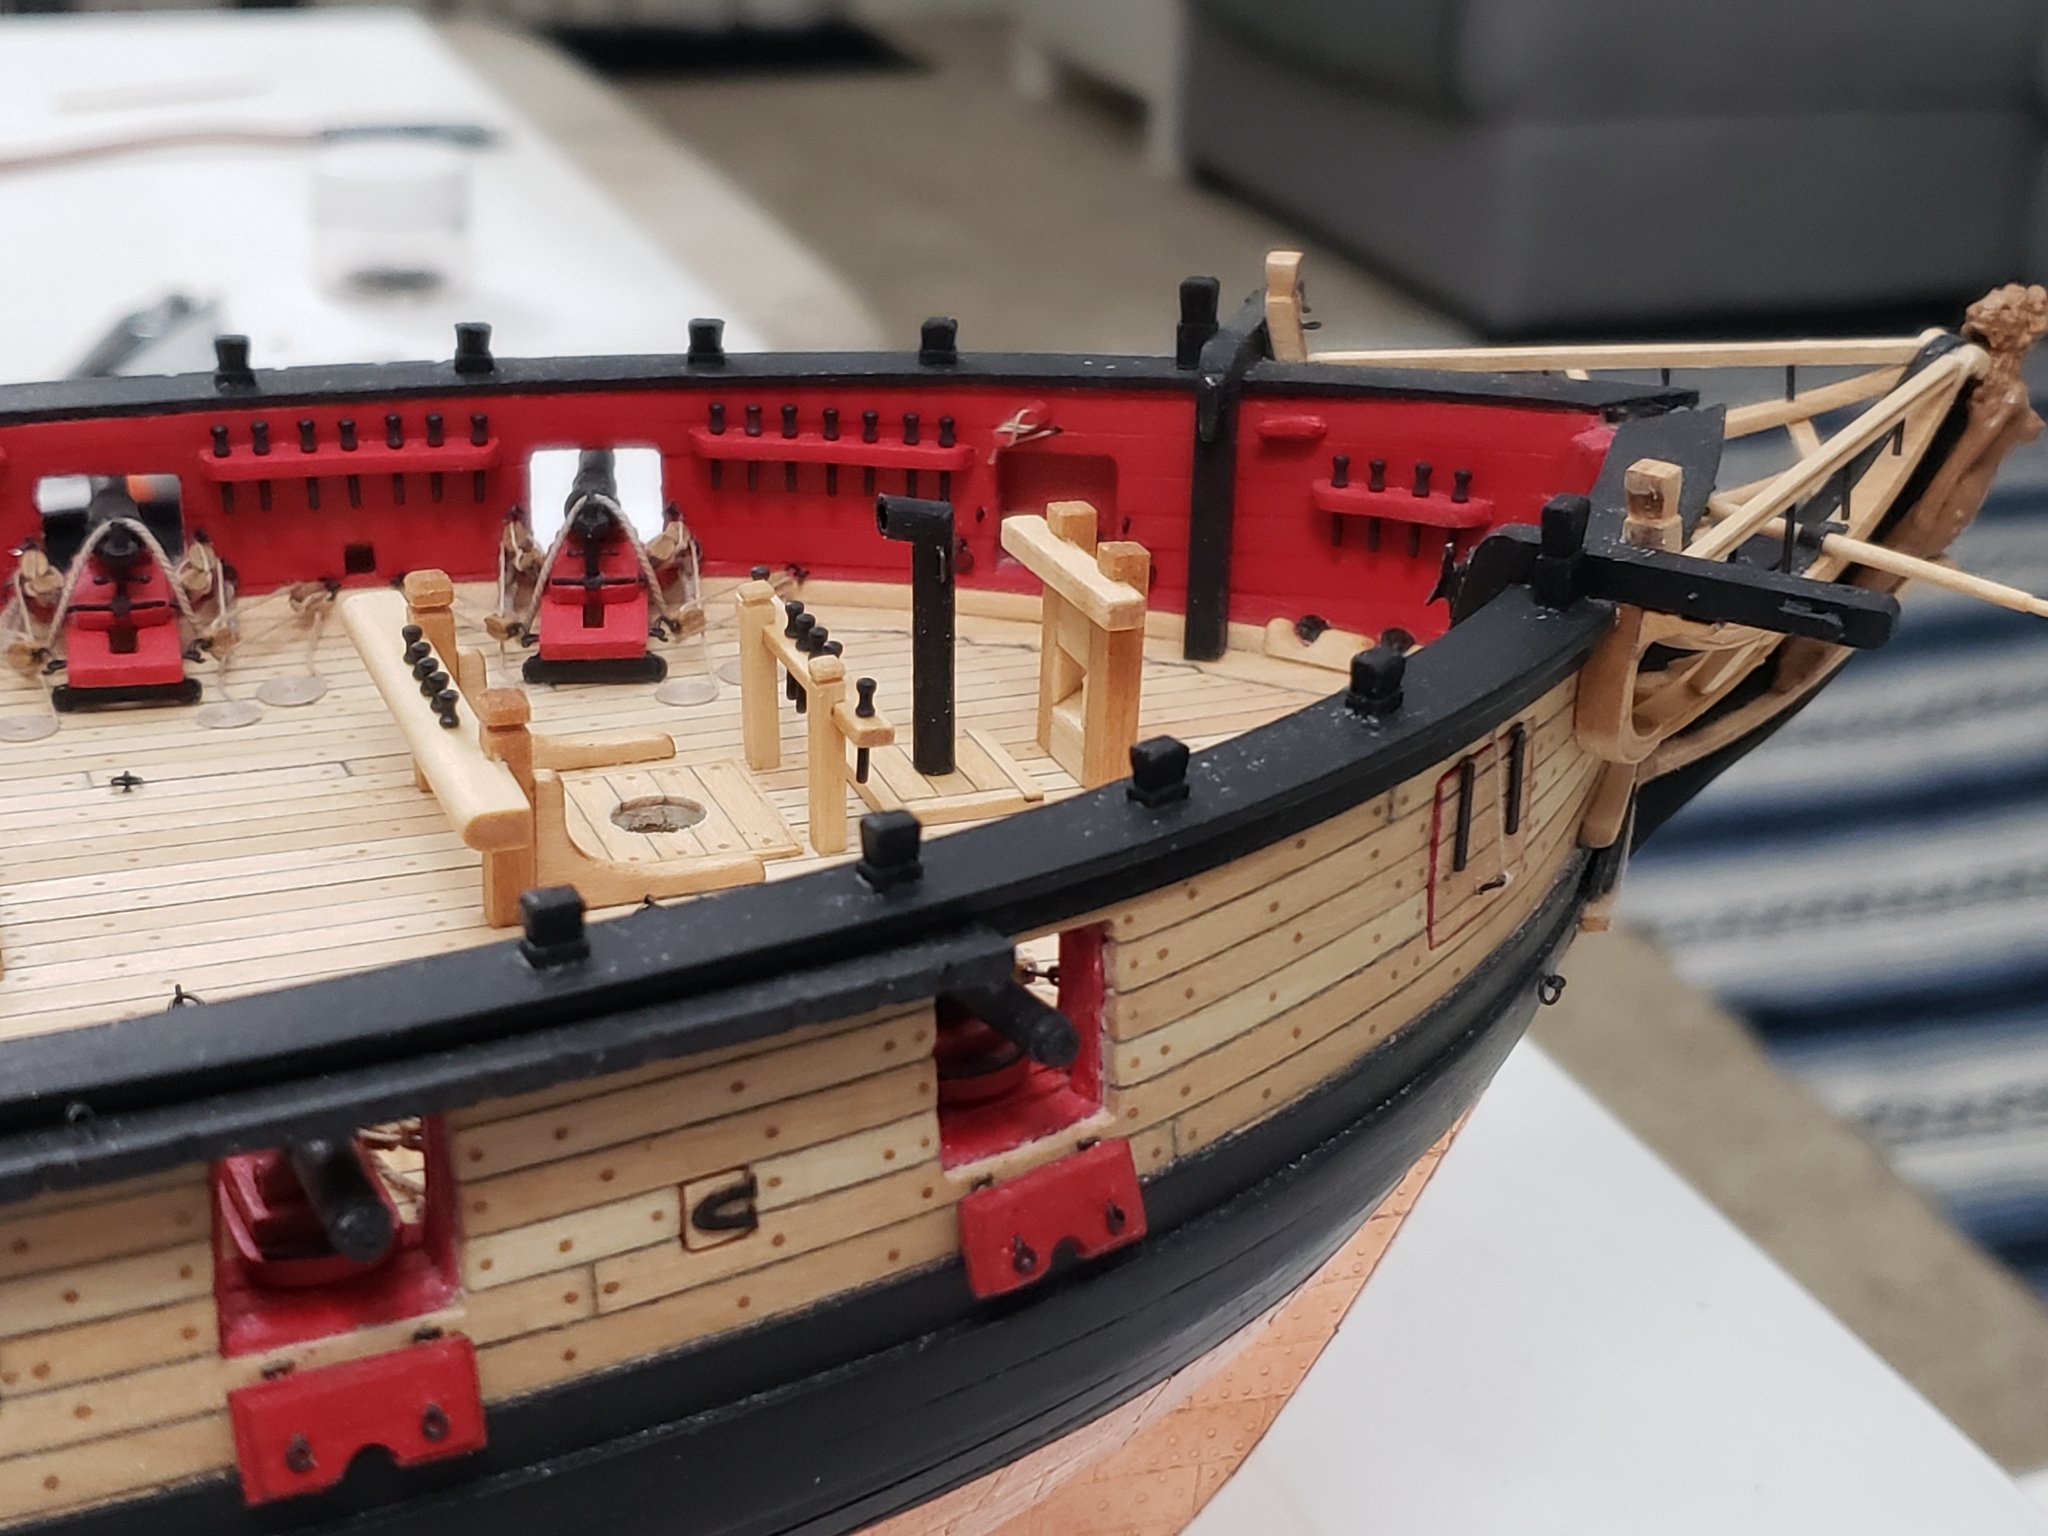
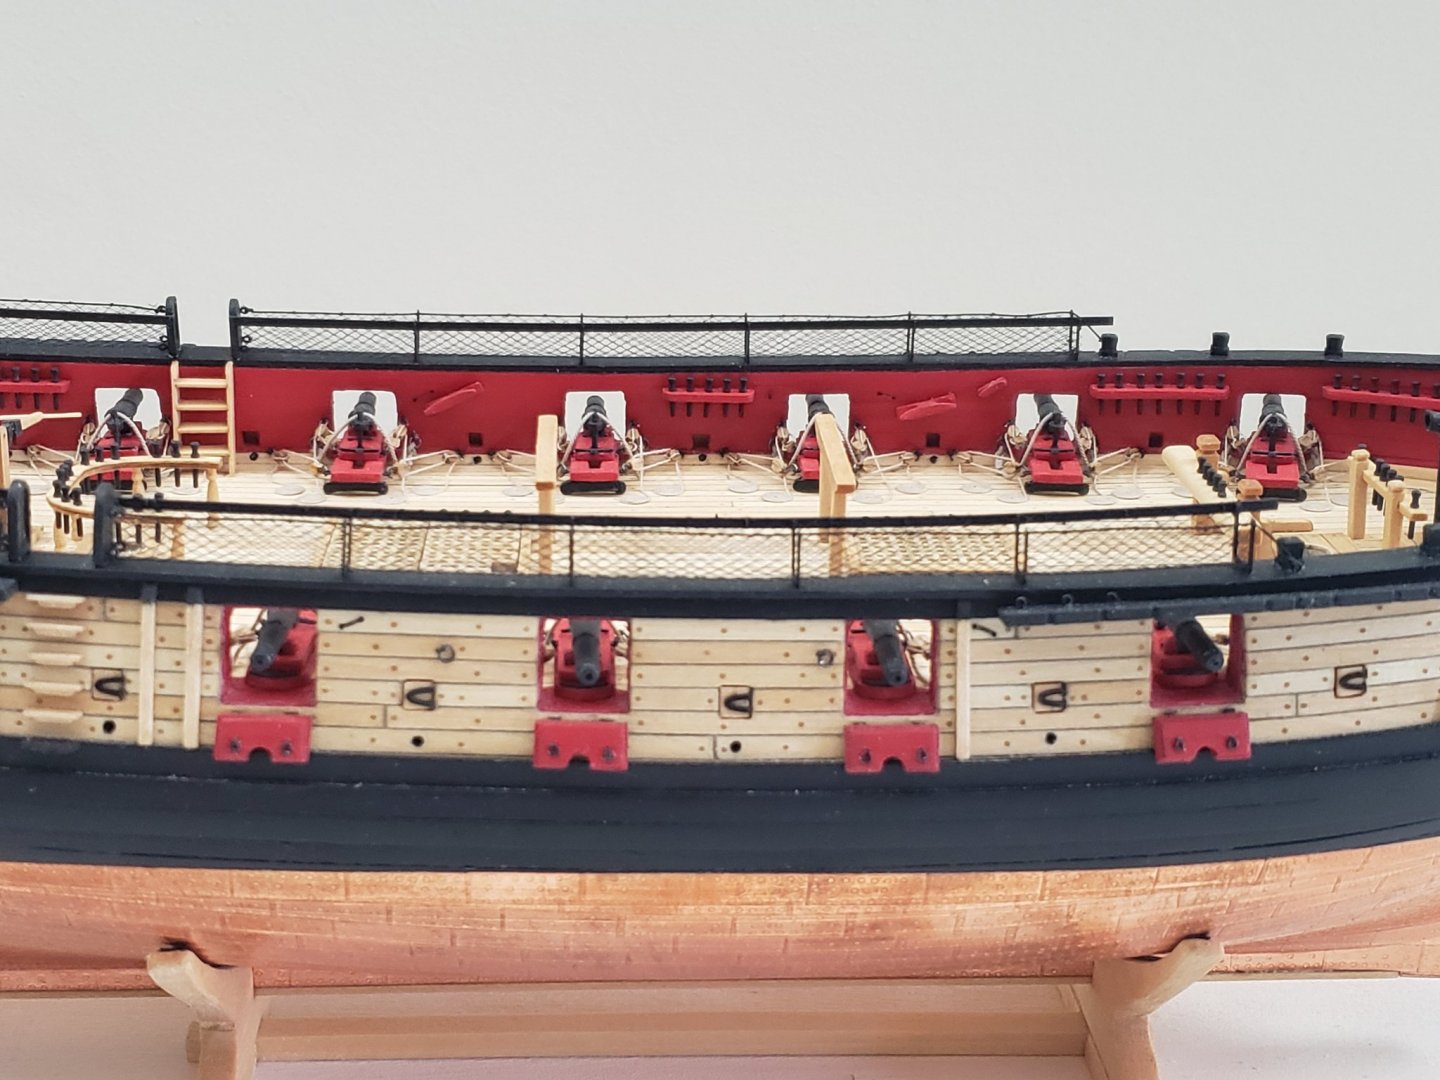
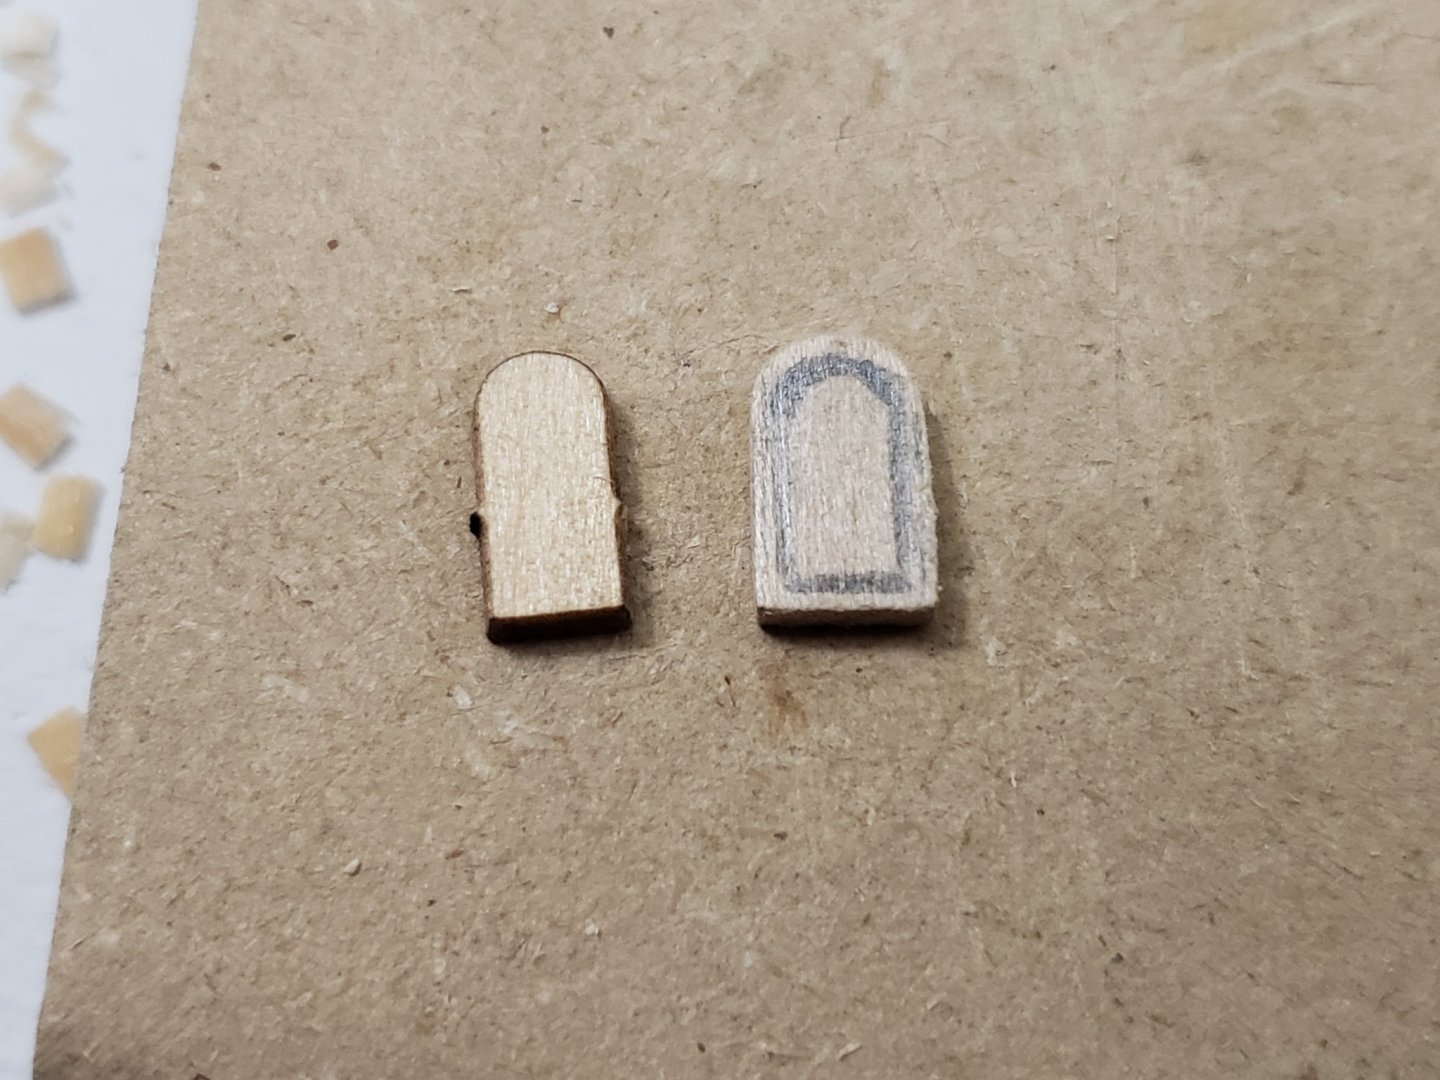
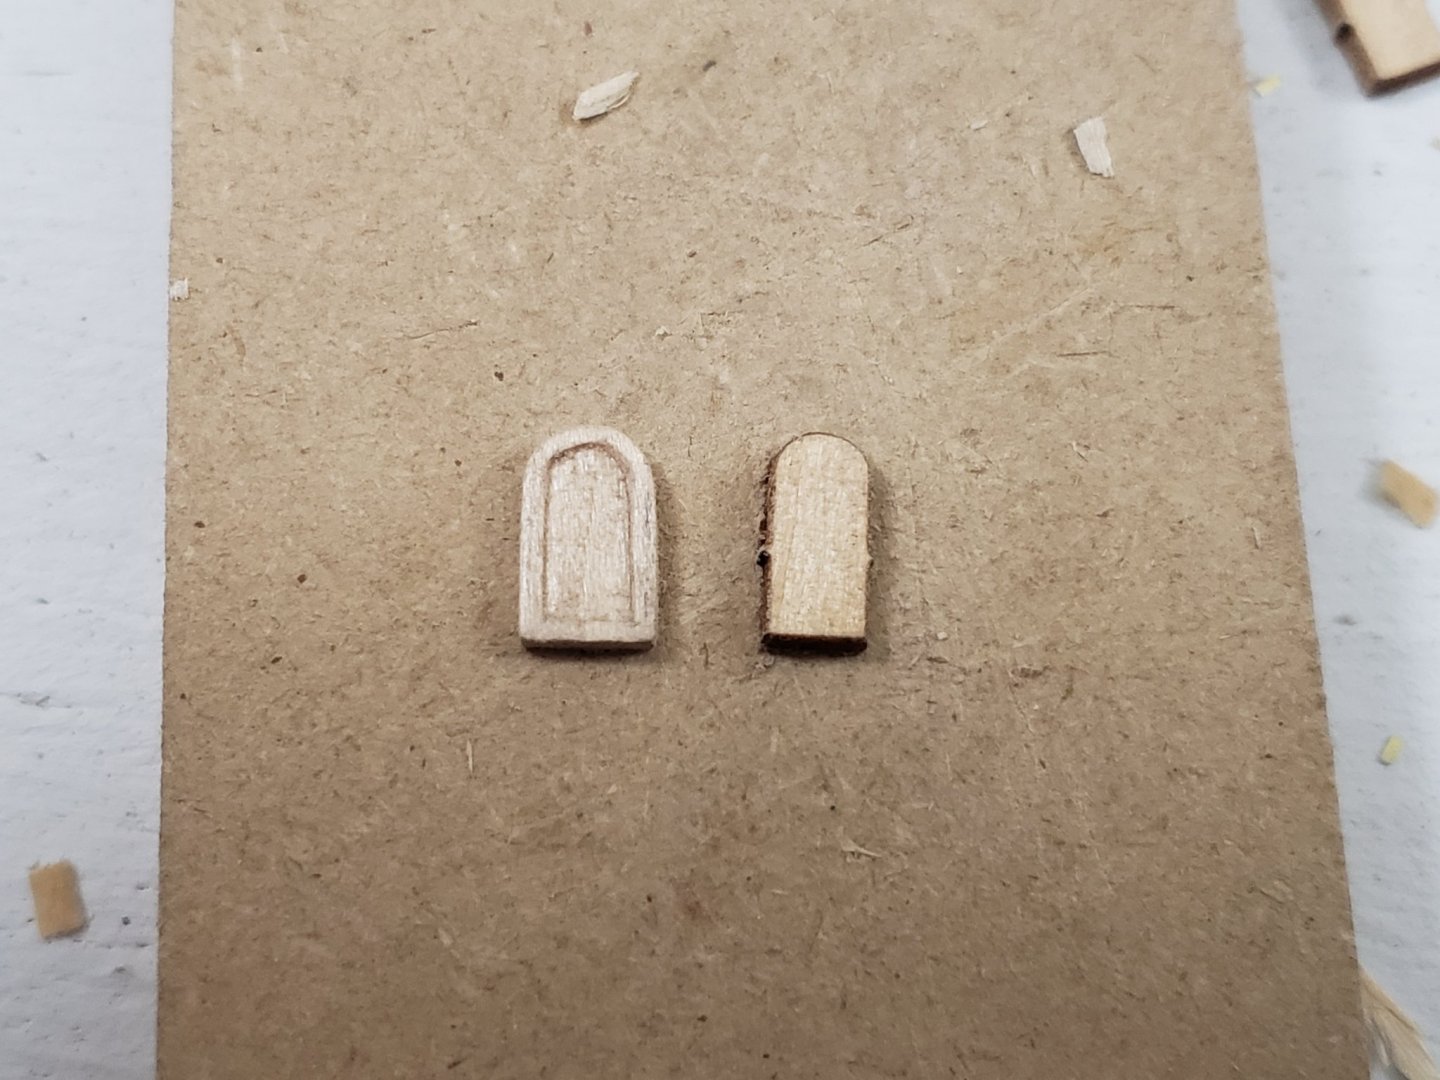
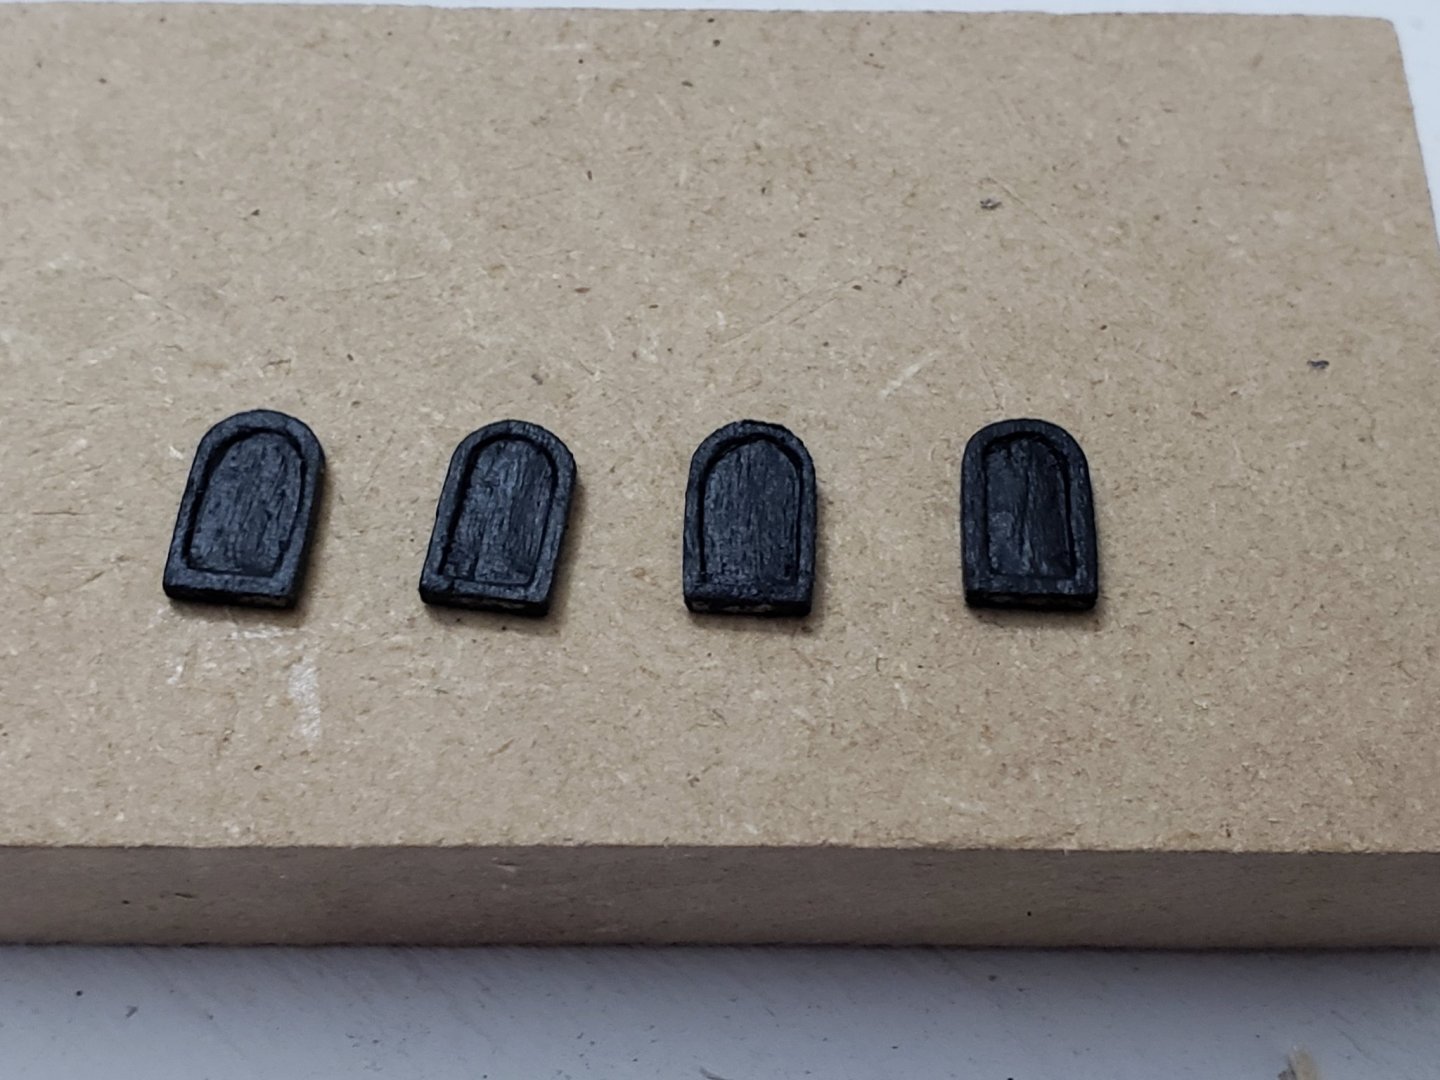
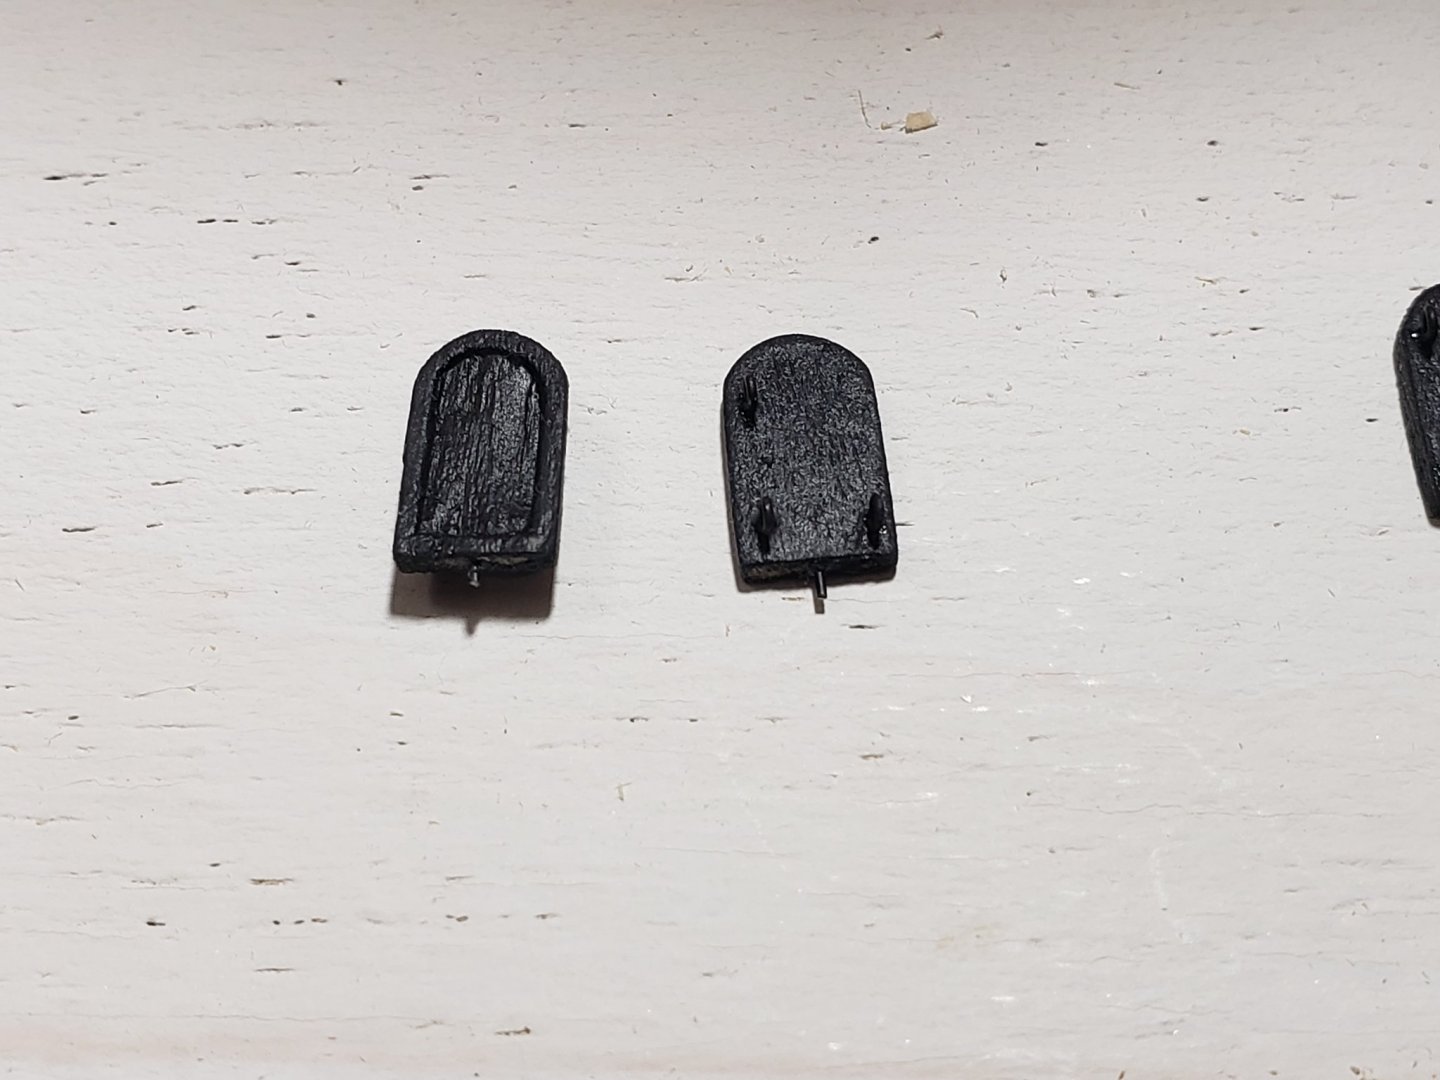
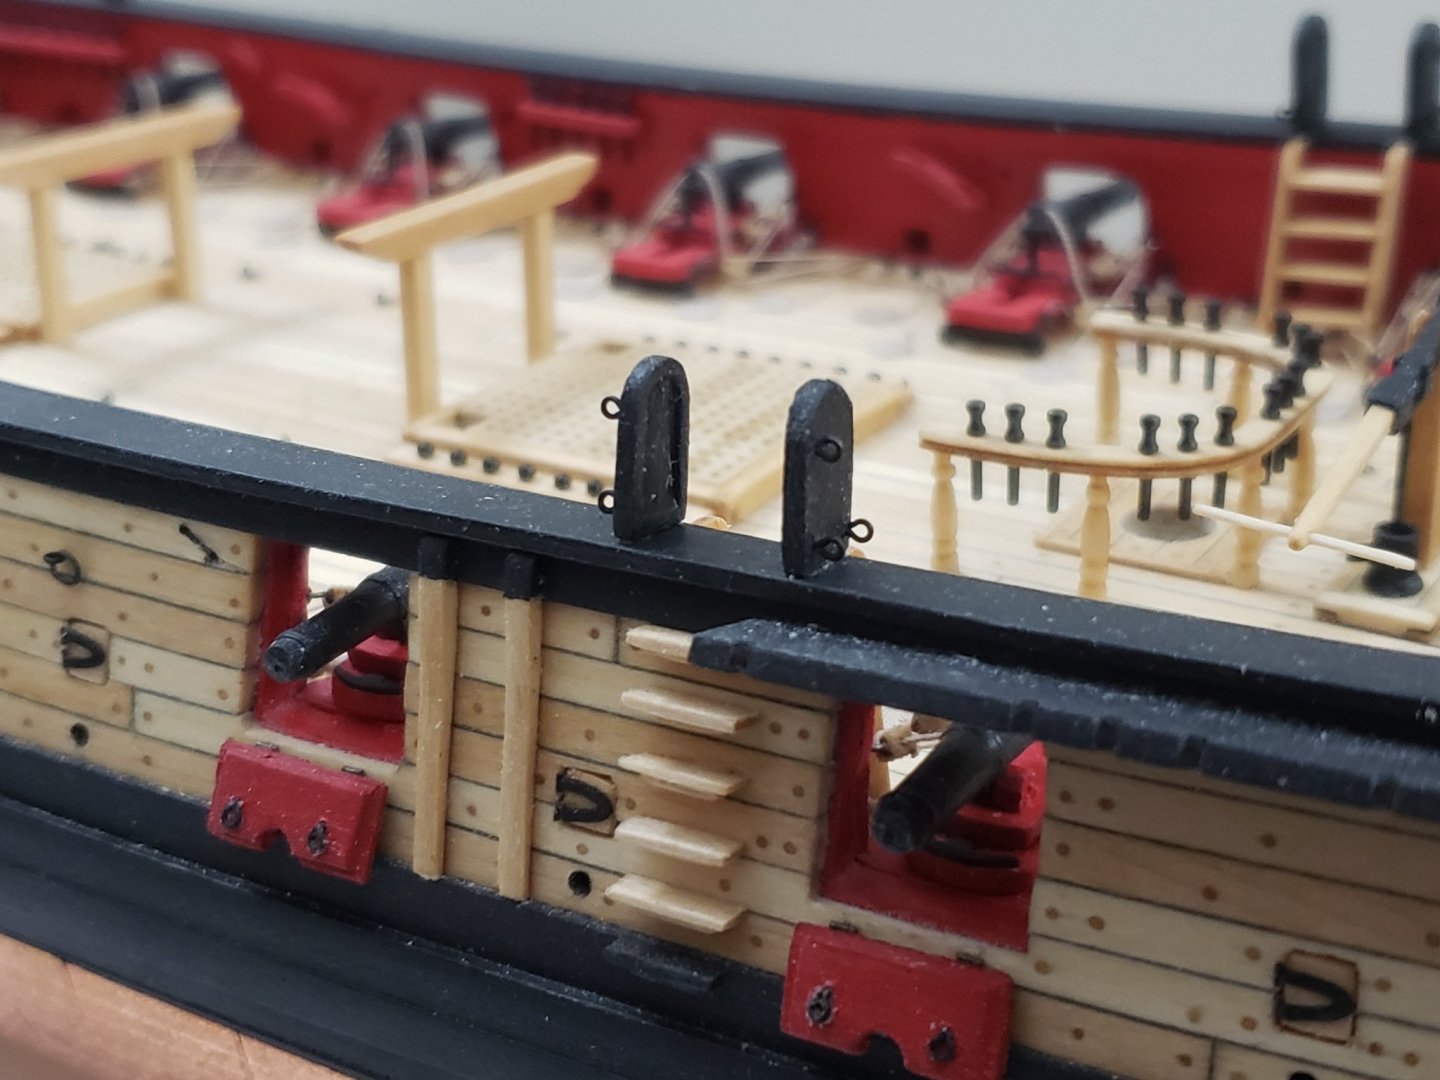
Thank you Robin and Steven for the compliments! And thanks all for the likes!! 😊 Today I finished working on the boarding panels. I used a #11 blade to carve out the inner section (first with a cut outlining the shape, then peeling the wood piece by piece). I also scratch made them and didn't use the laser cut ones as they were too skinny..

- 950 replies
-
- 14
-
-
- syren
- model shipways
- (and 1 more)
-
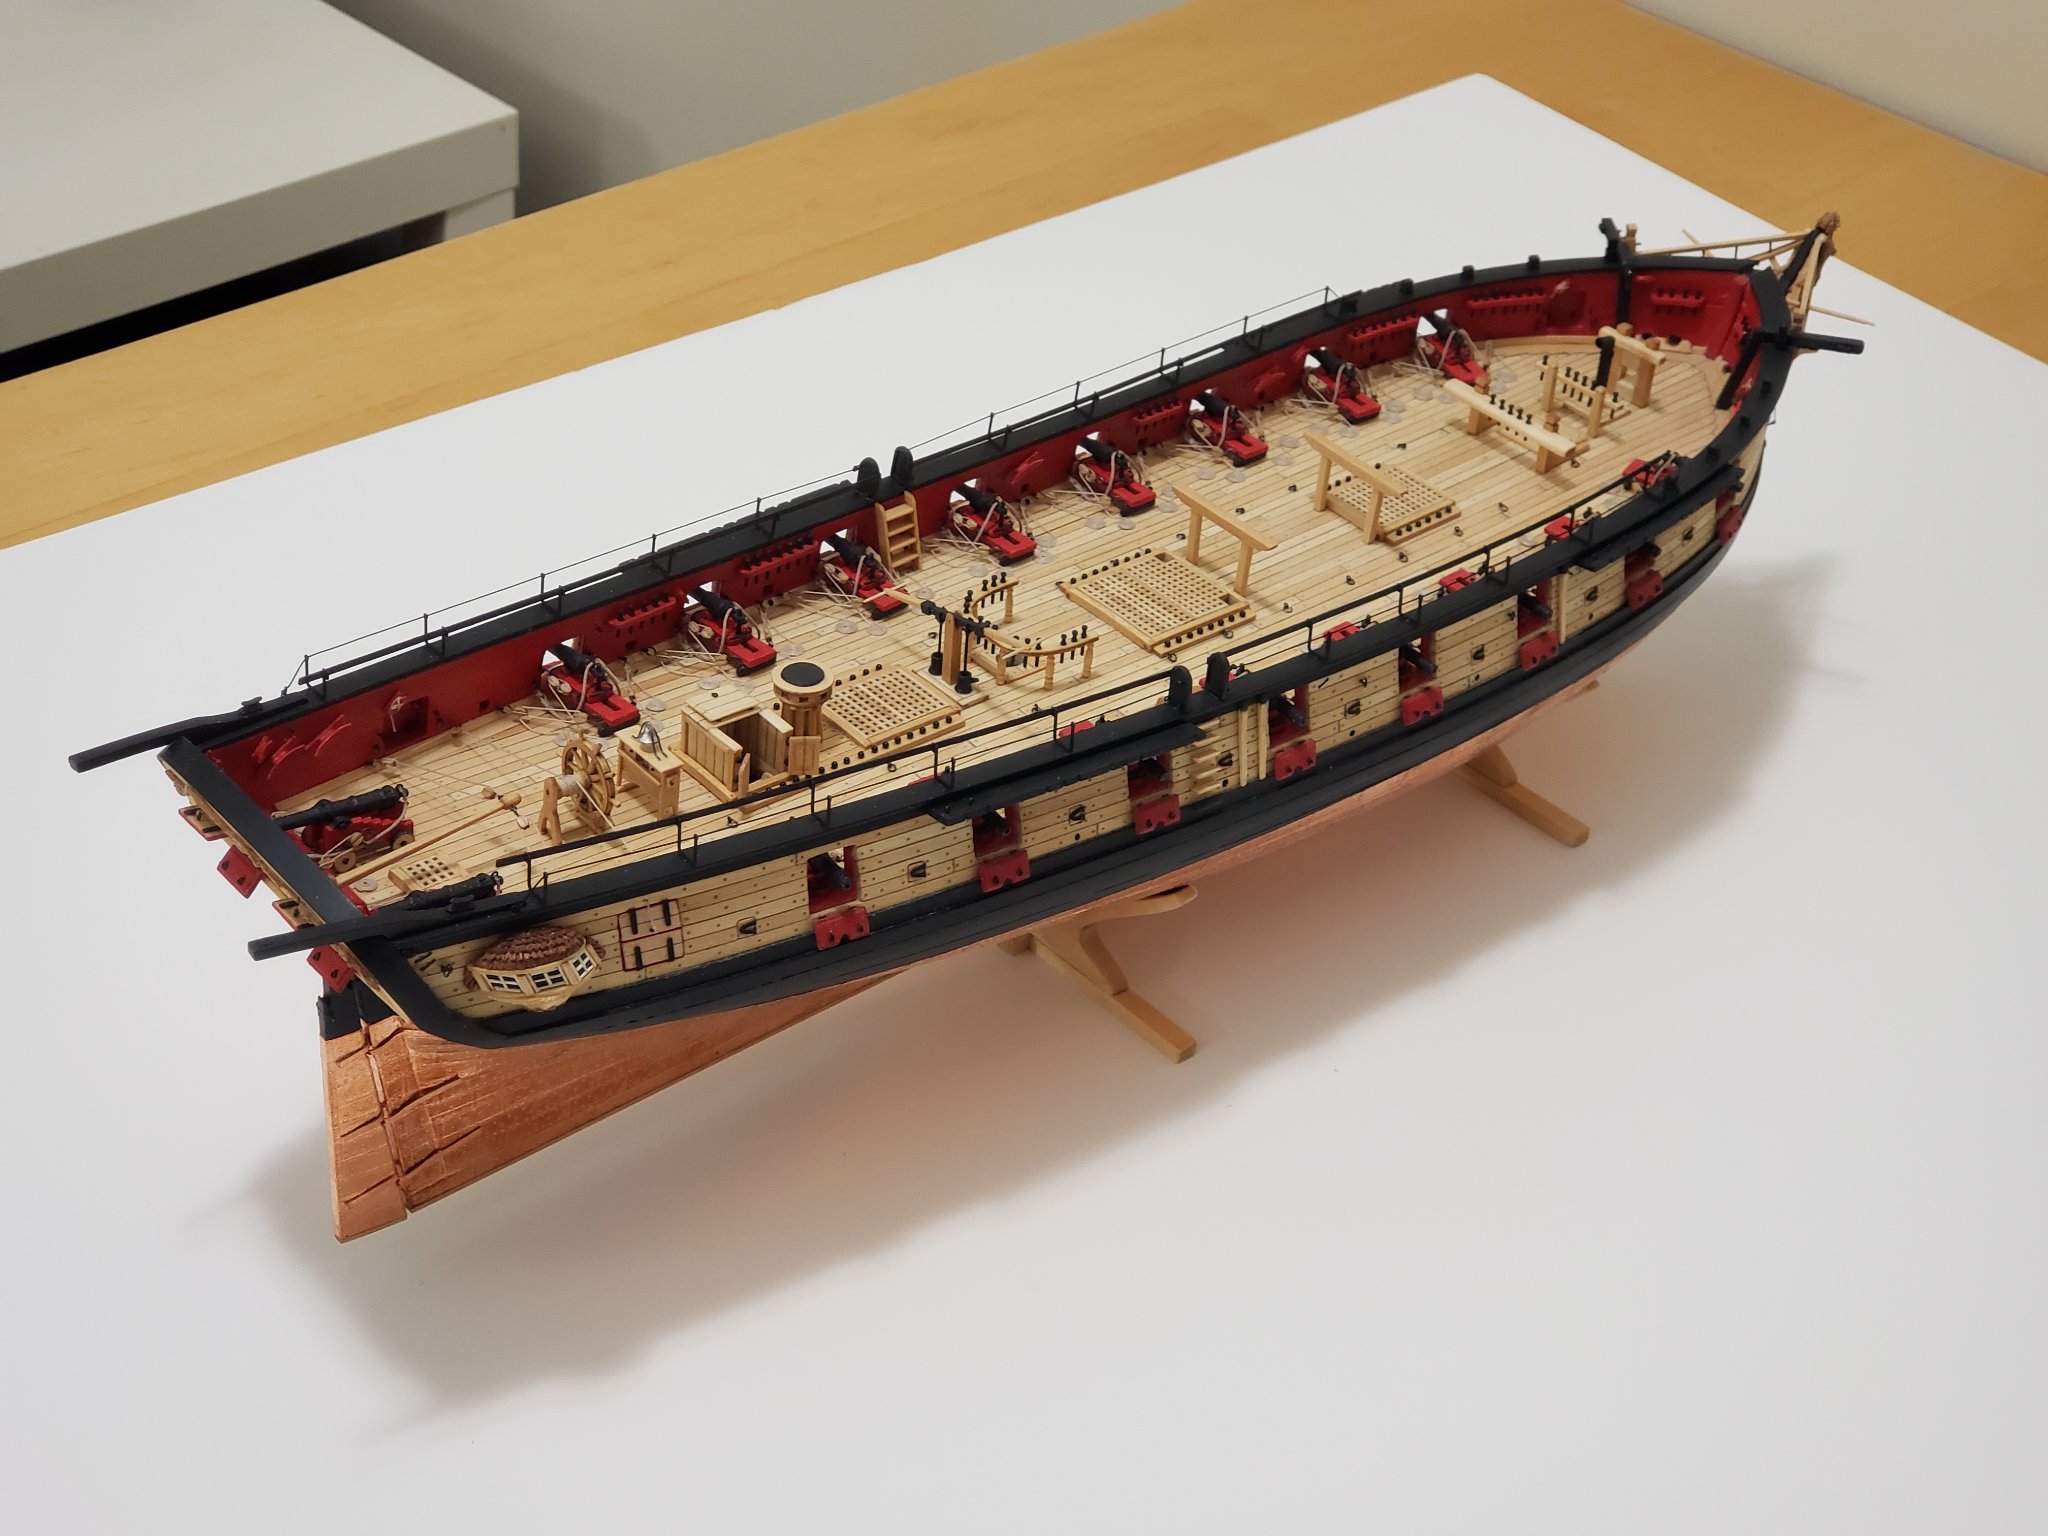
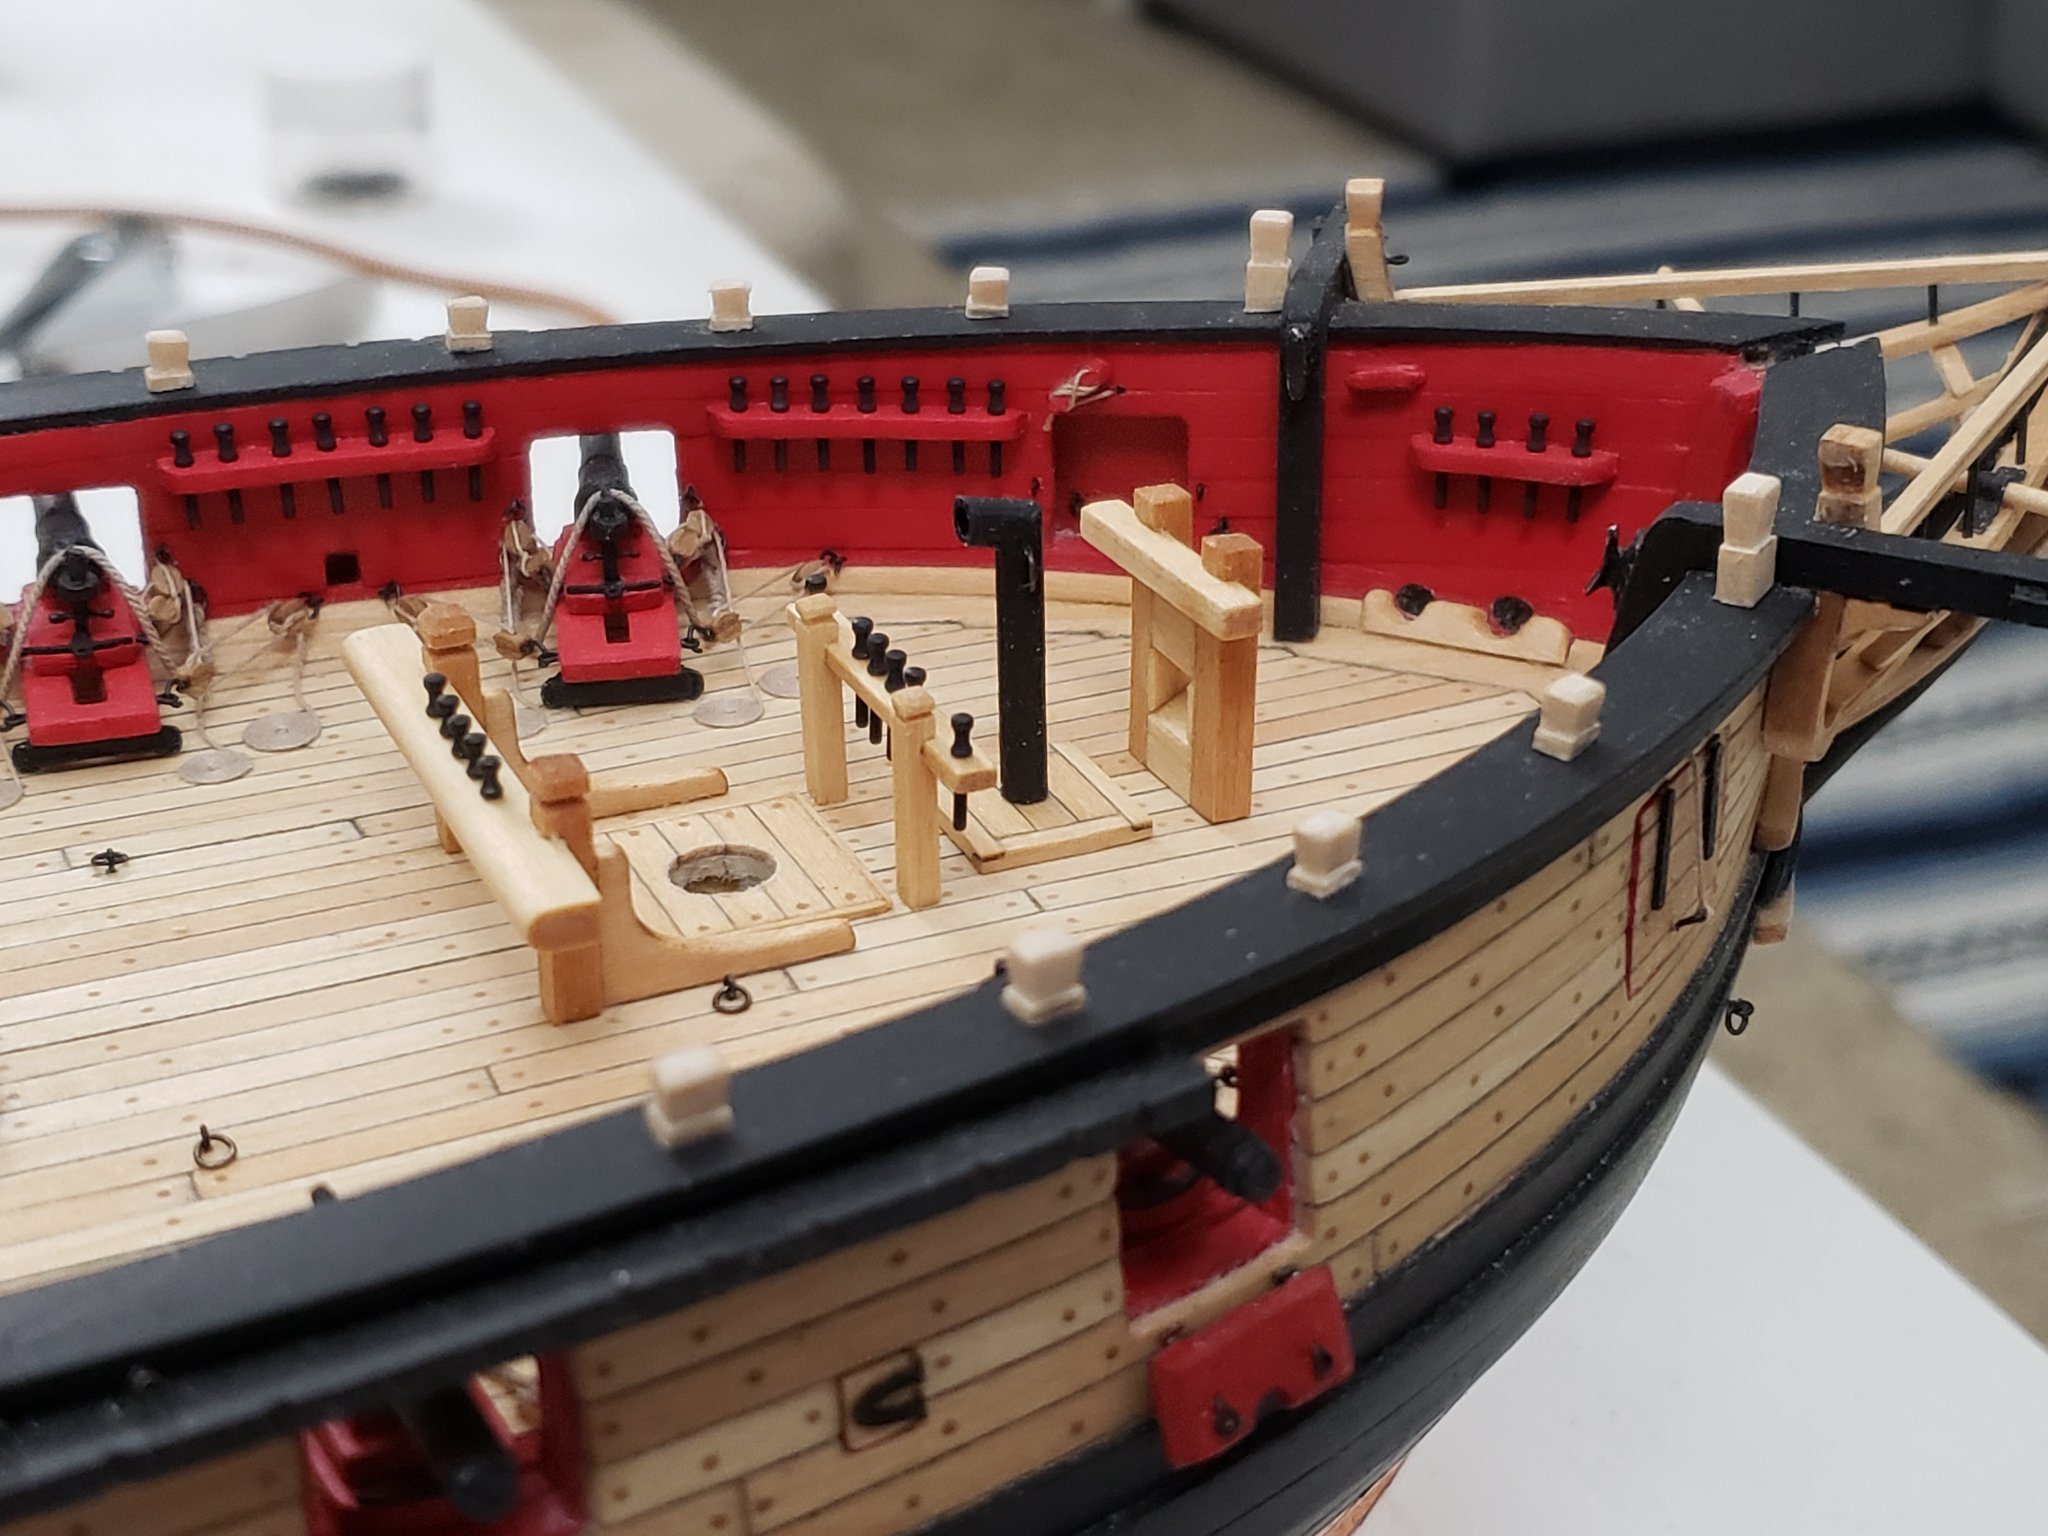
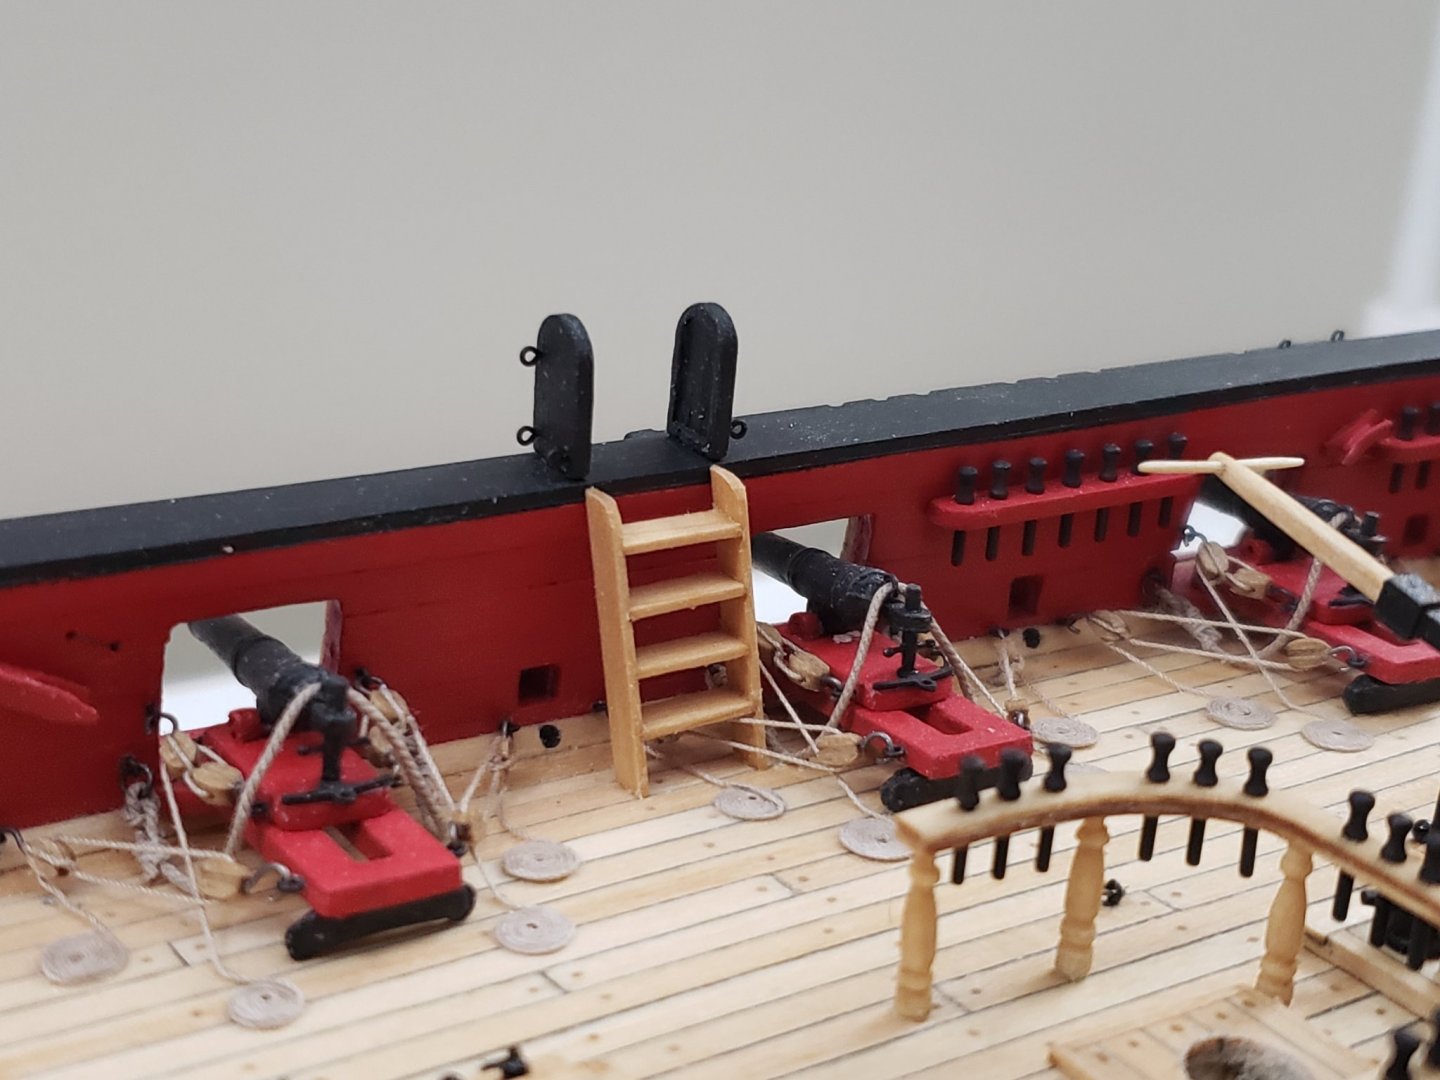
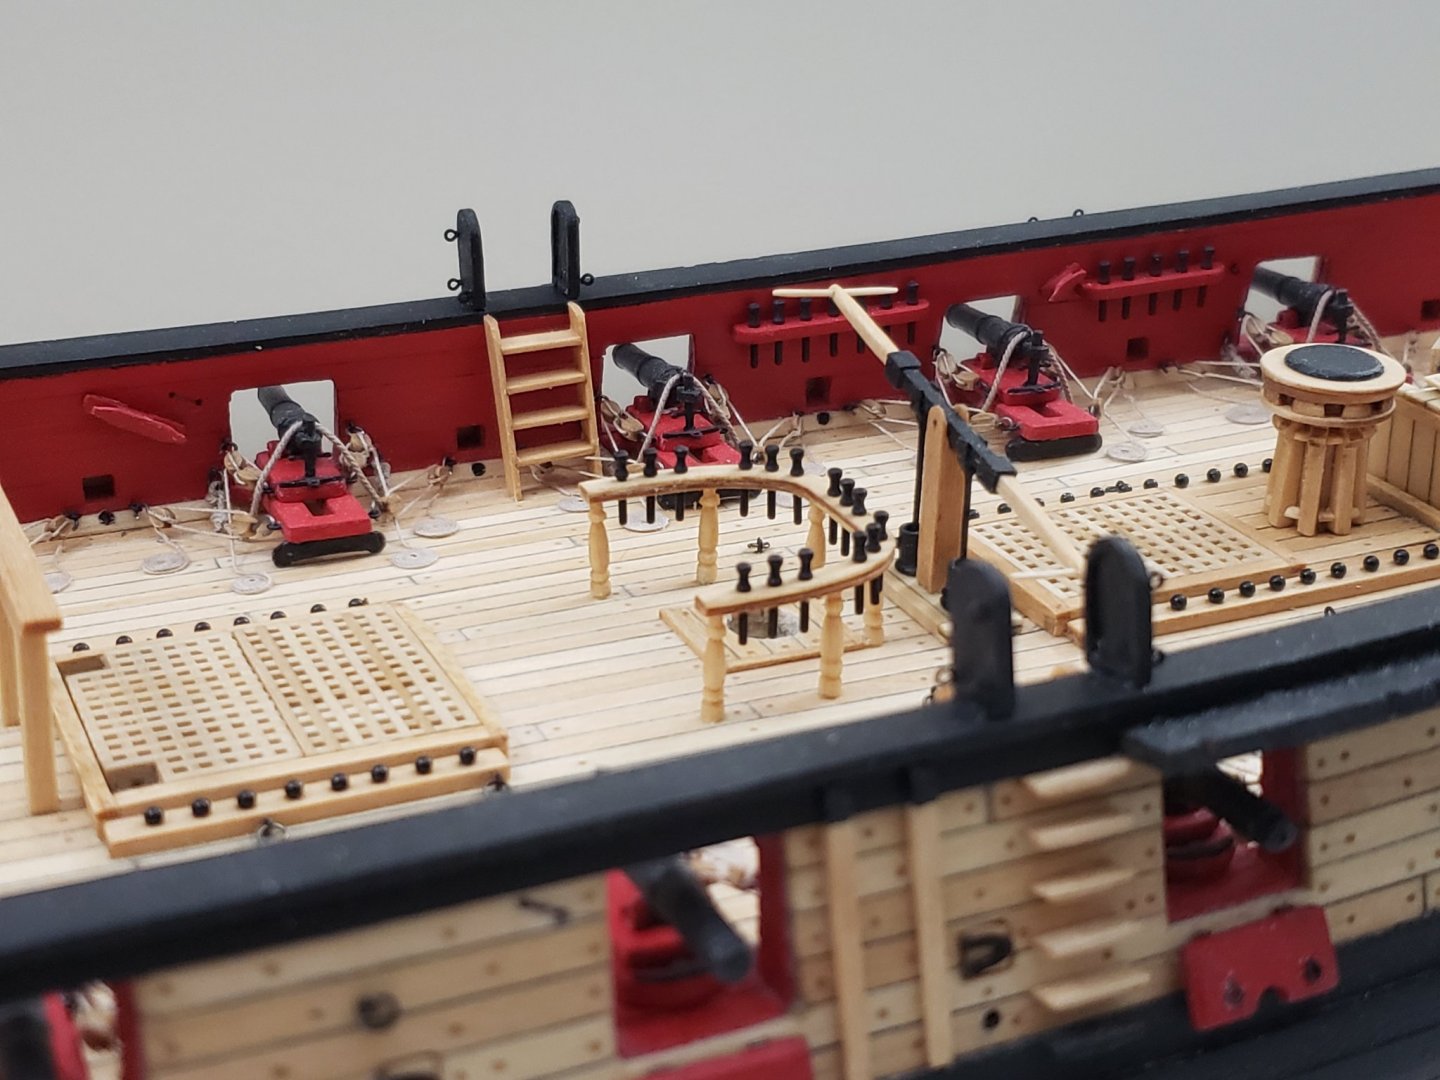
Finished with the timberheads. Not much to report apart from again complaining about basswood at this scale 😅 I tried to line up the timberheads with the treenails as much as I could.

- 950 replies
-
- 16
-
-
- syren
- model shipways
- (and 1 more)
-
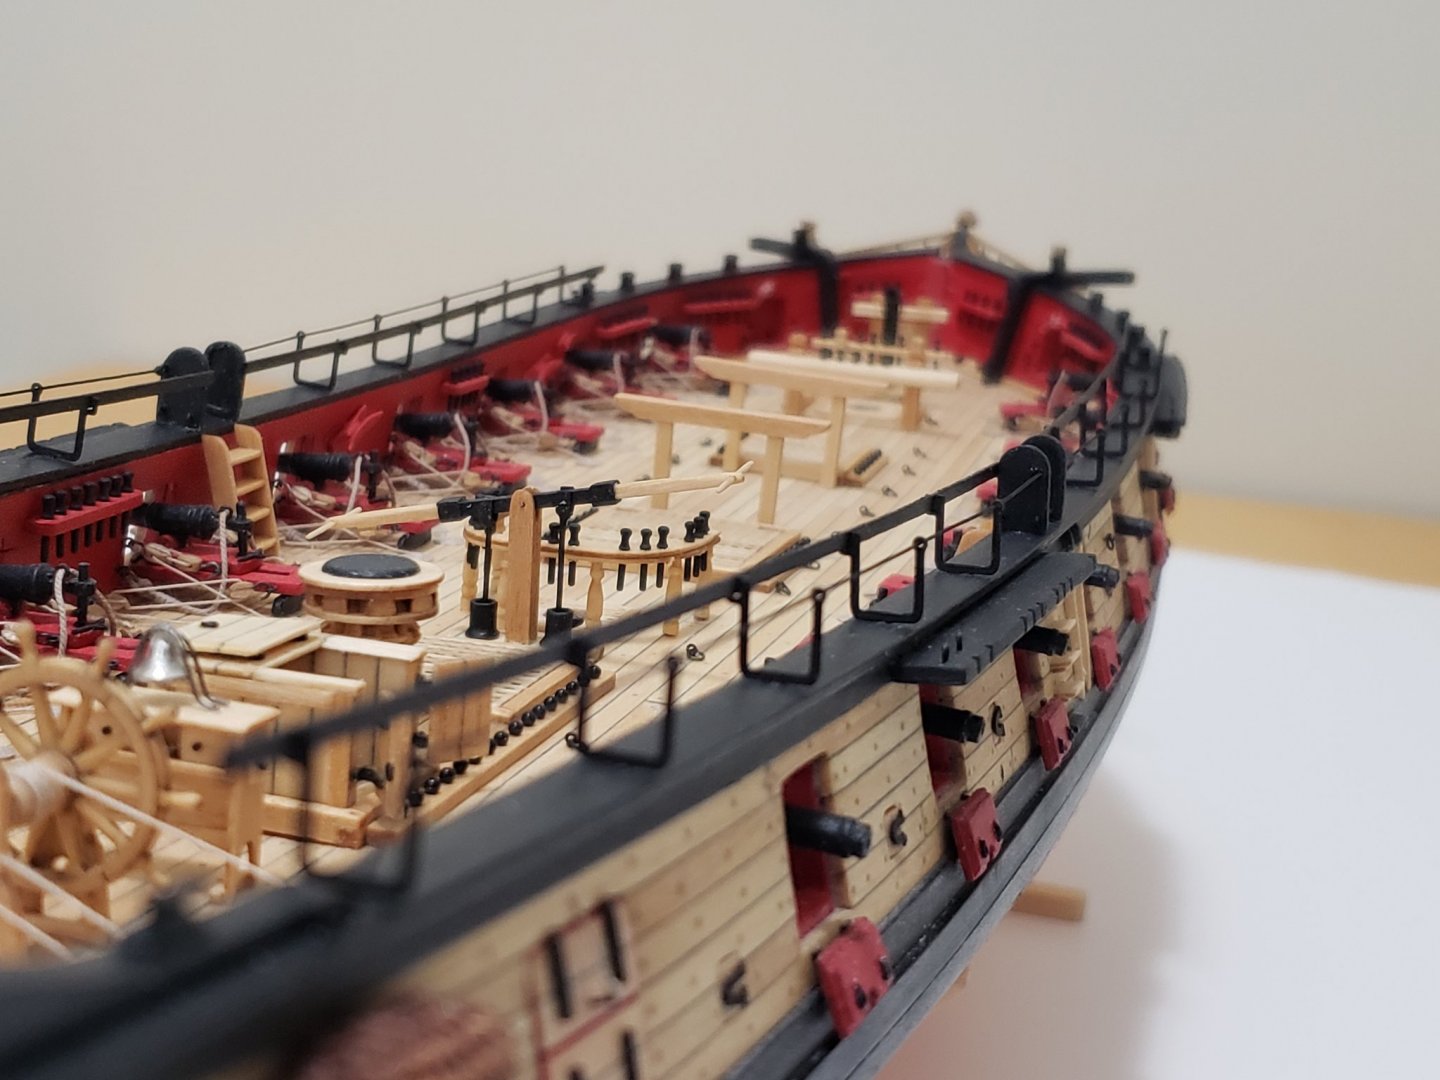
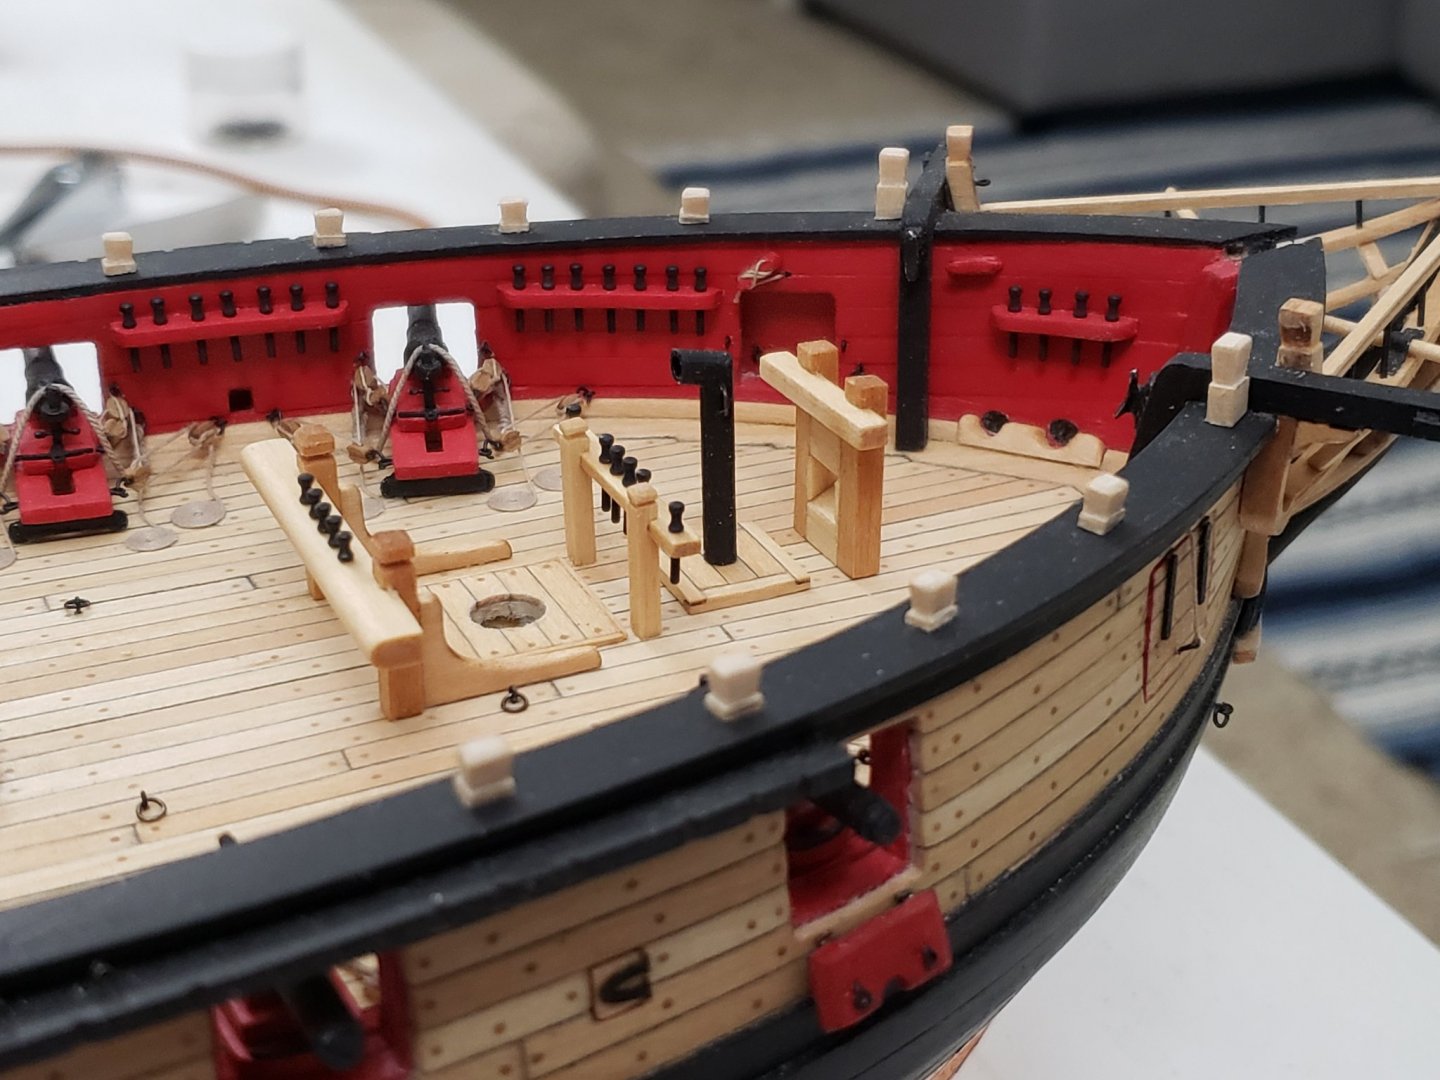
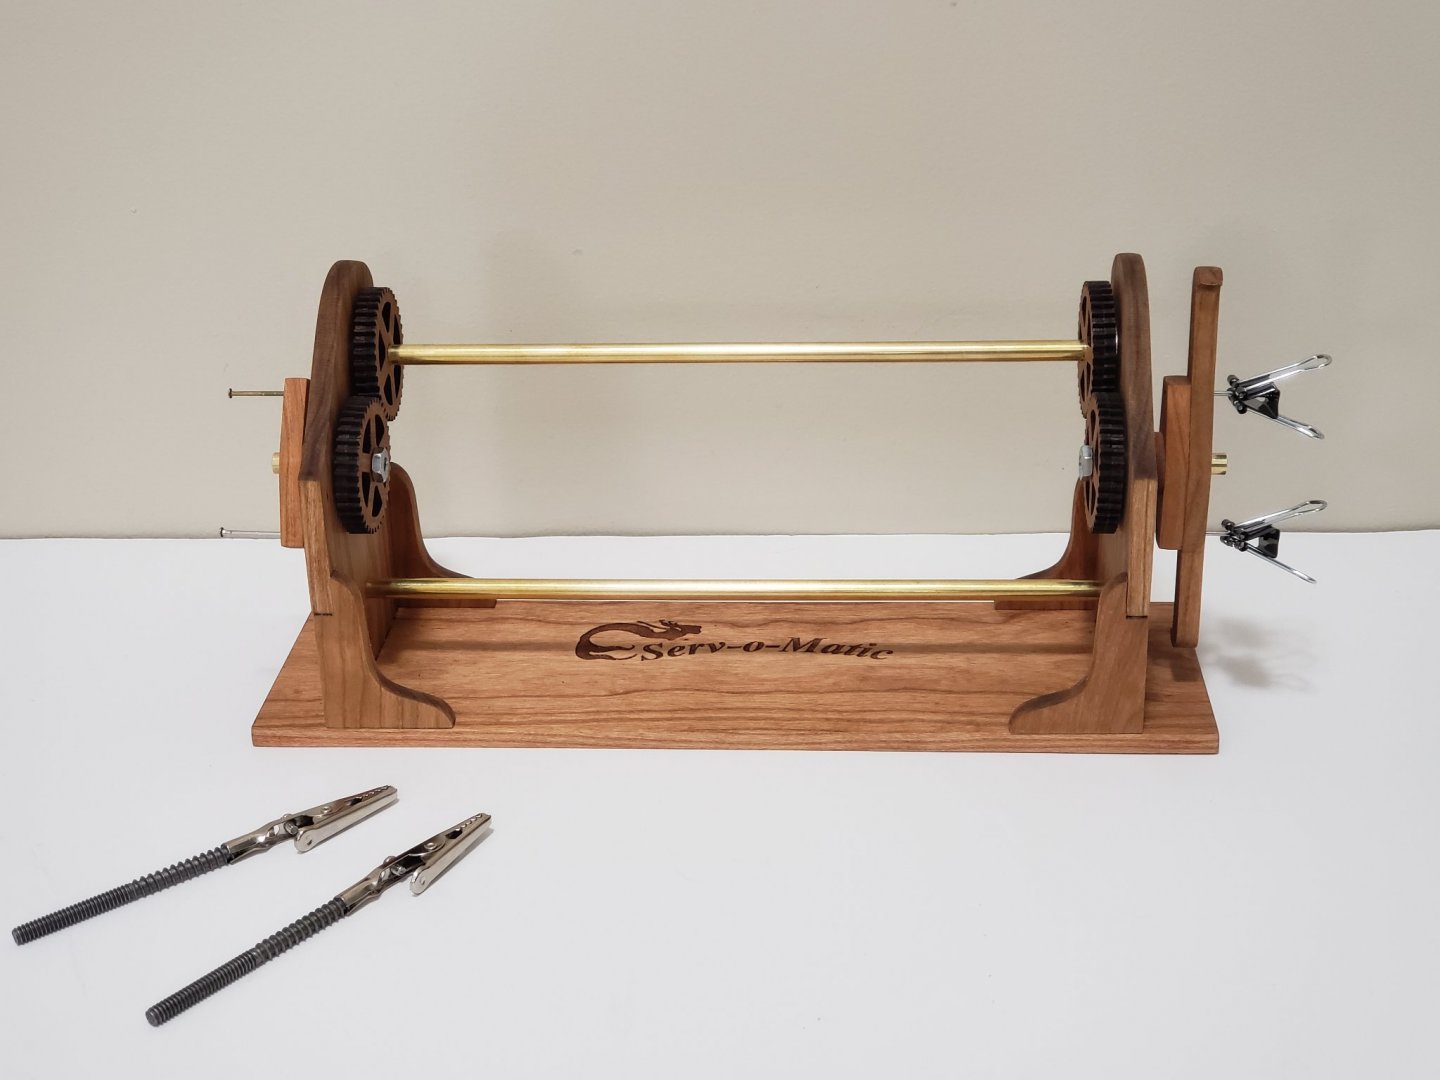
Thanks so much for the great comments! It means a lot!! Last few days have been very busy with school as it was the last week of the semester, and had a lot of assignments due... So ship modelling had to come to a bit of a pause. But I got some free time this weekend so I continued working! Also got the photo etched brass parts arrived last week, so I went back to working on the cap rail details. I keep getting distracted in wanting to work on the ship before the boats... So plan has changed to now finishing up the cap rail details. So far I have installed the stern davits and its cleats. It felt too daunting and nerve wrecking to try notching the transform, so I notched the davits instead. Next I'll work on the timberheads. Also, I finished assembling the Serv-o-Matic. I don't think I did that great of a job since one of the gear pairs seem to tighten up at a particular spot. I just hope it loosens up over time. I slightly modified the machine by gluing nuts on each gear, and glued crocodile clips on the bolts. This would help to serve any other items as well (e.g. blocks, mouse, etc).


- 950 replies
-
- 13
-
-
- syren
- model shipways
- (and 1 more)