HOLIDAY DONATION DRIVE - SUPPORT MSW - DO YOUR PART TO KEEP THIS GREAT FORUM GOING! (Only 13 donations so far - C'mon guys!)
×

.jpg.1f80adf1a9b14a937cfcf2ca6af0f0d4.jpg)
WalrusGuy
-
Posts
1,007 -
Joined
-
Last visited
Content Type
Profiles
Forums
Gallery
Events
Everything posted by WalrusGuy
-
.thumb.jpg.62d1d69fed1f32364417cb1f9cdeb009.jpg) I now fully appreciate the size of this beast. Awesome work!!!
I now fully appreciate the size of this beast. Awesome work!!! -
Thank you Bradley!
-
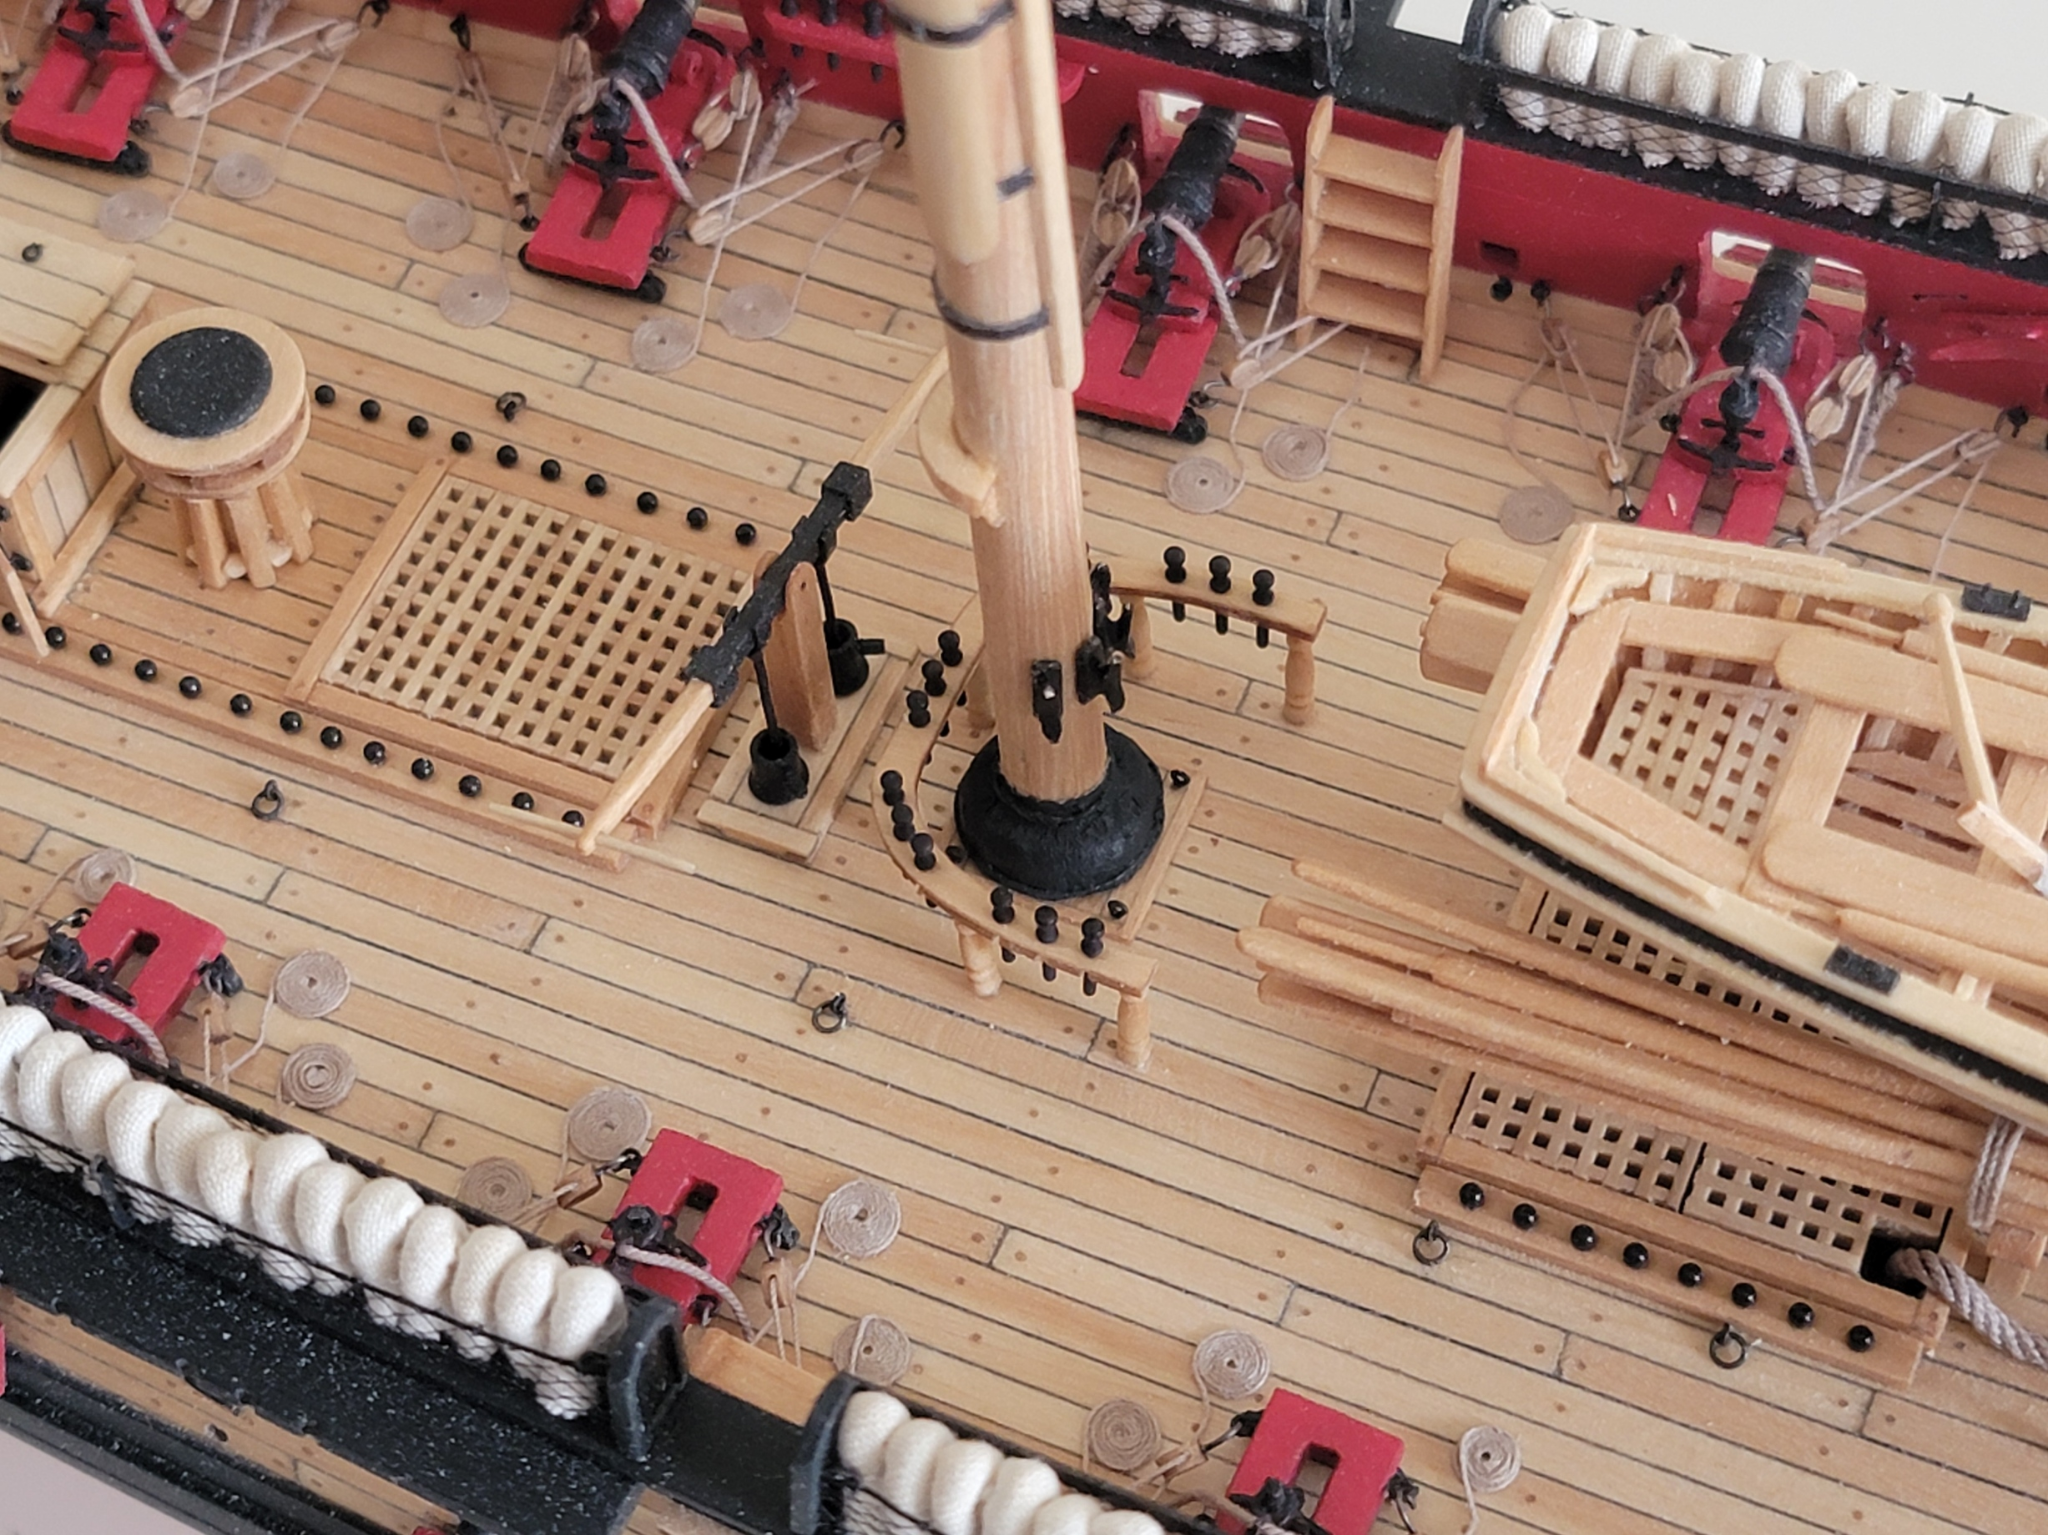
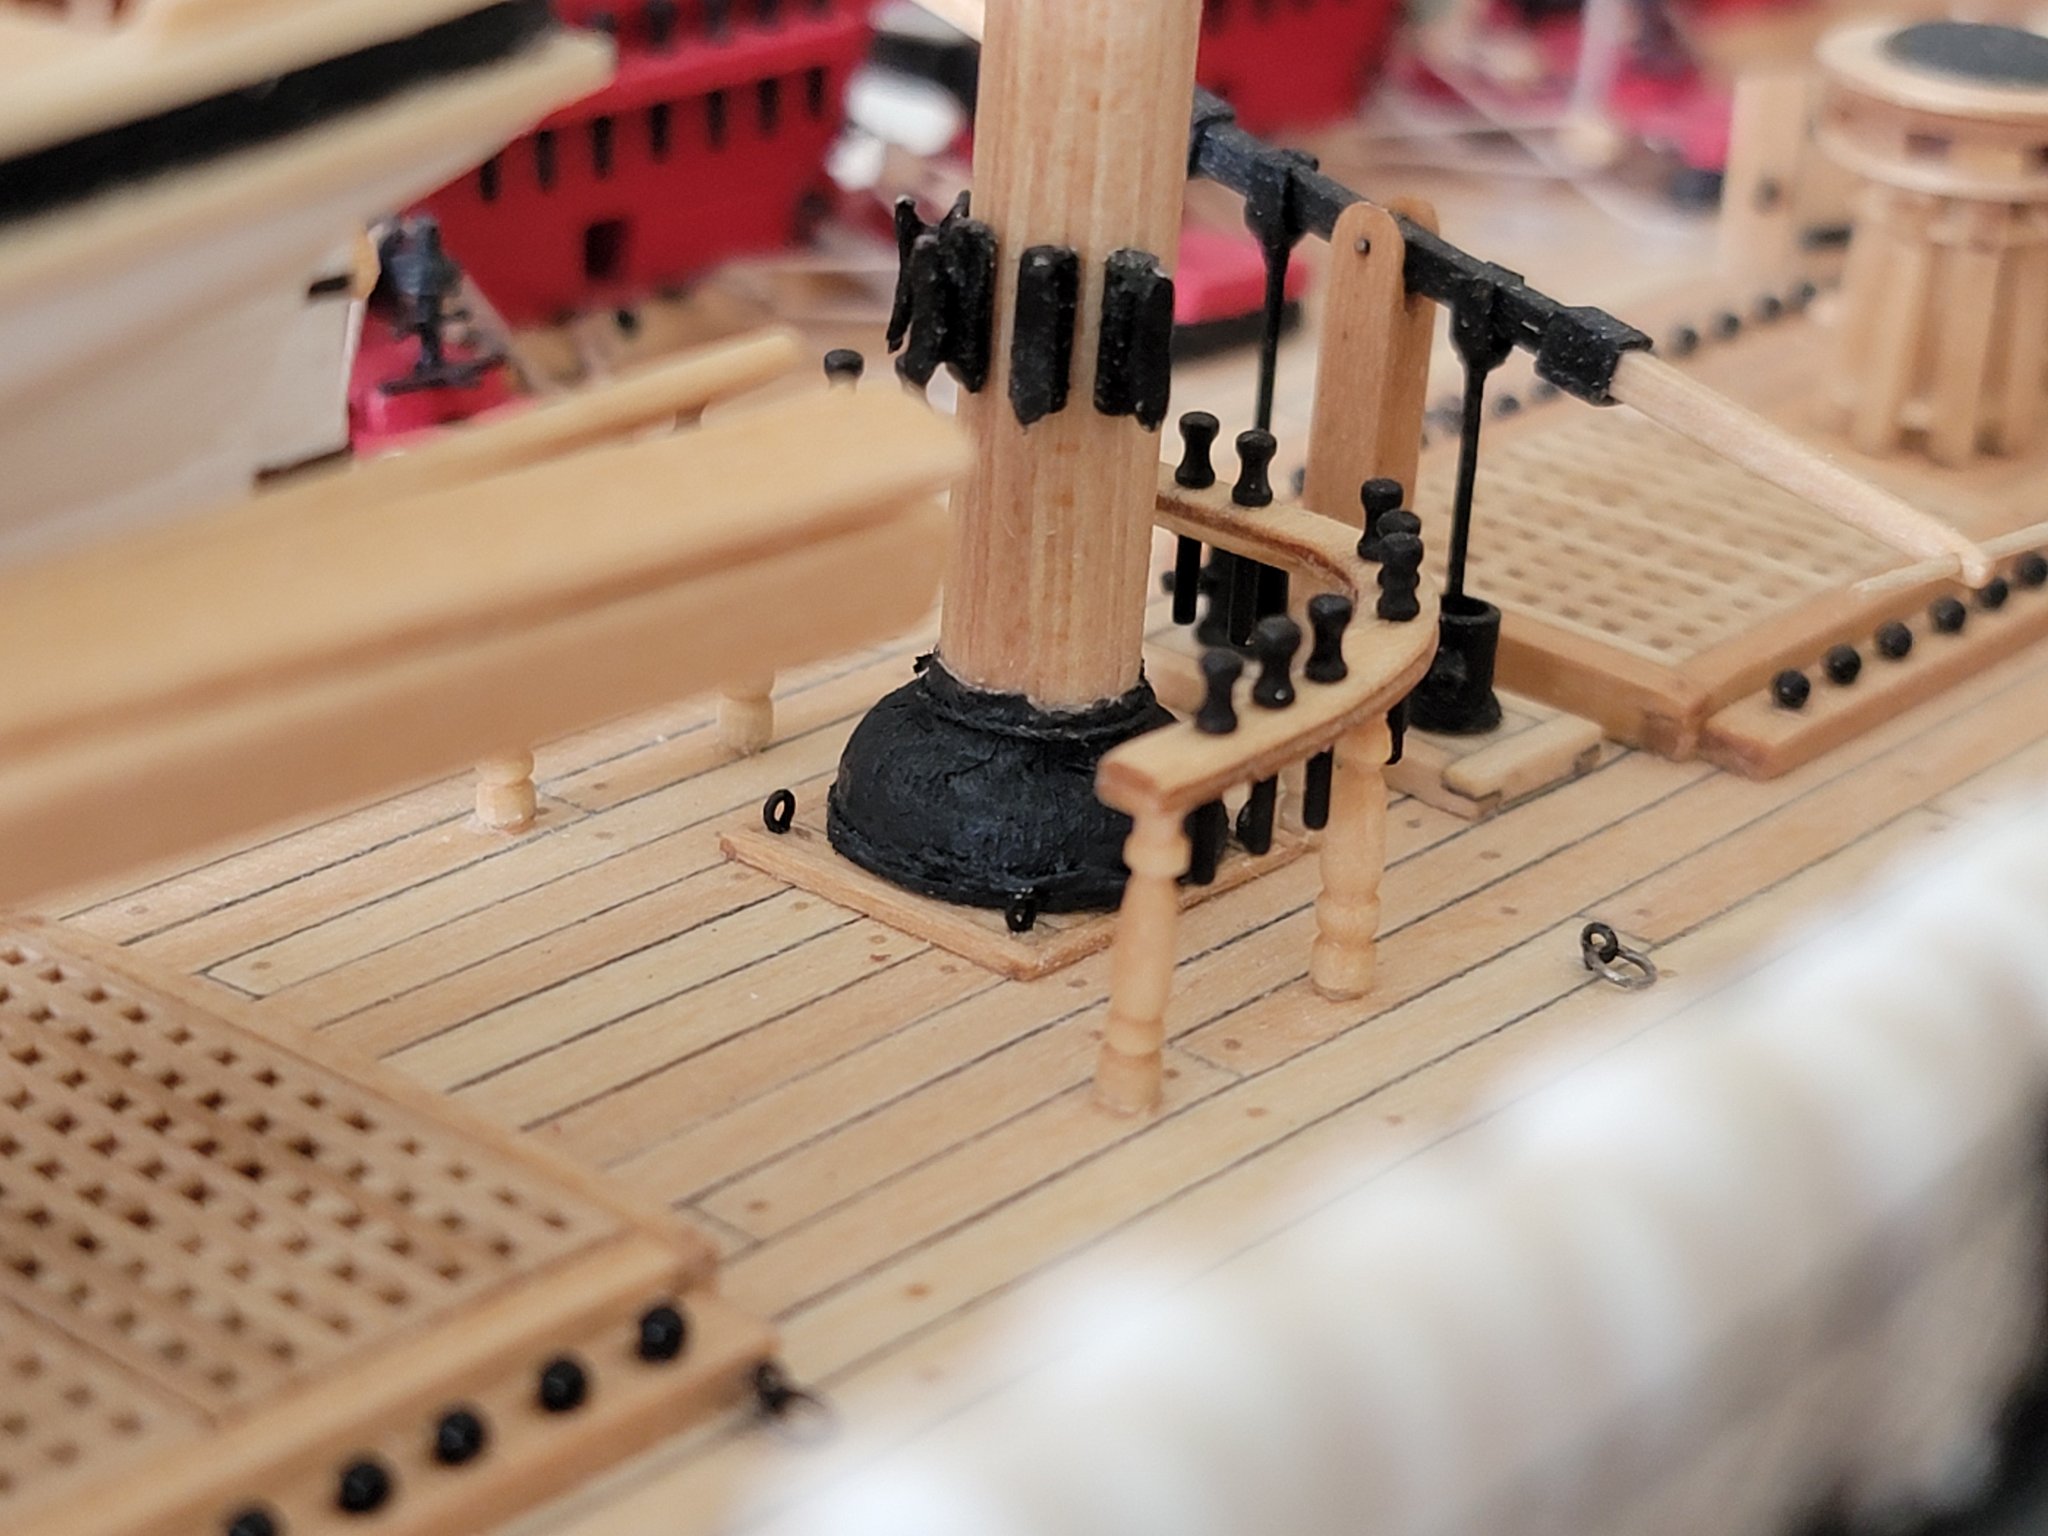
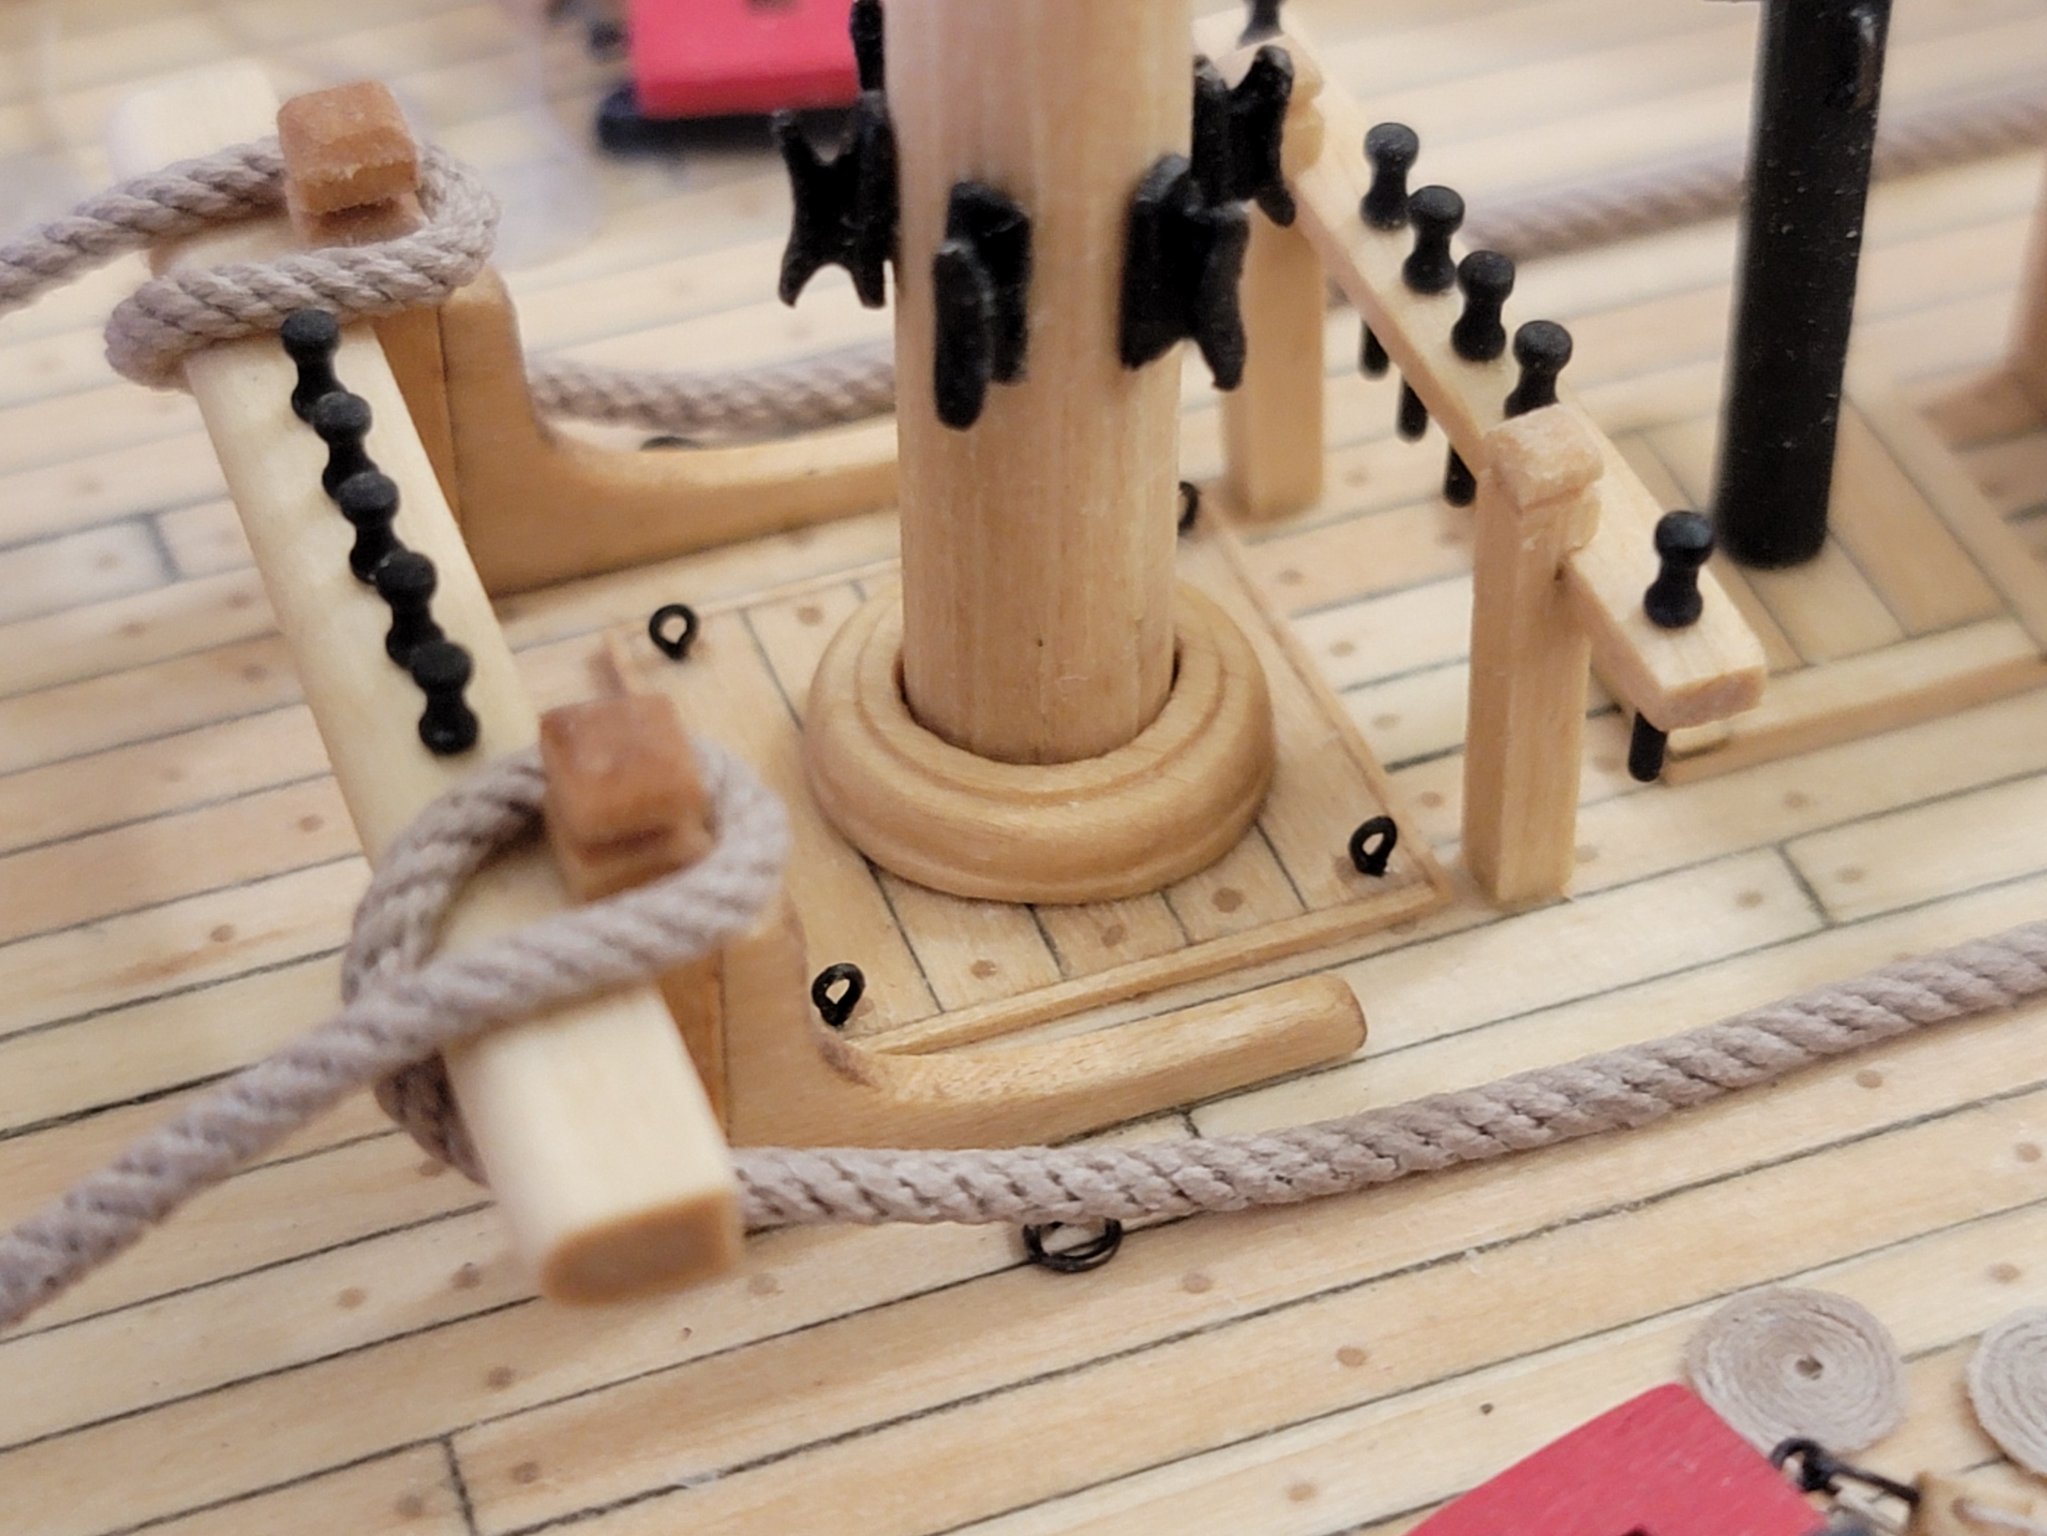
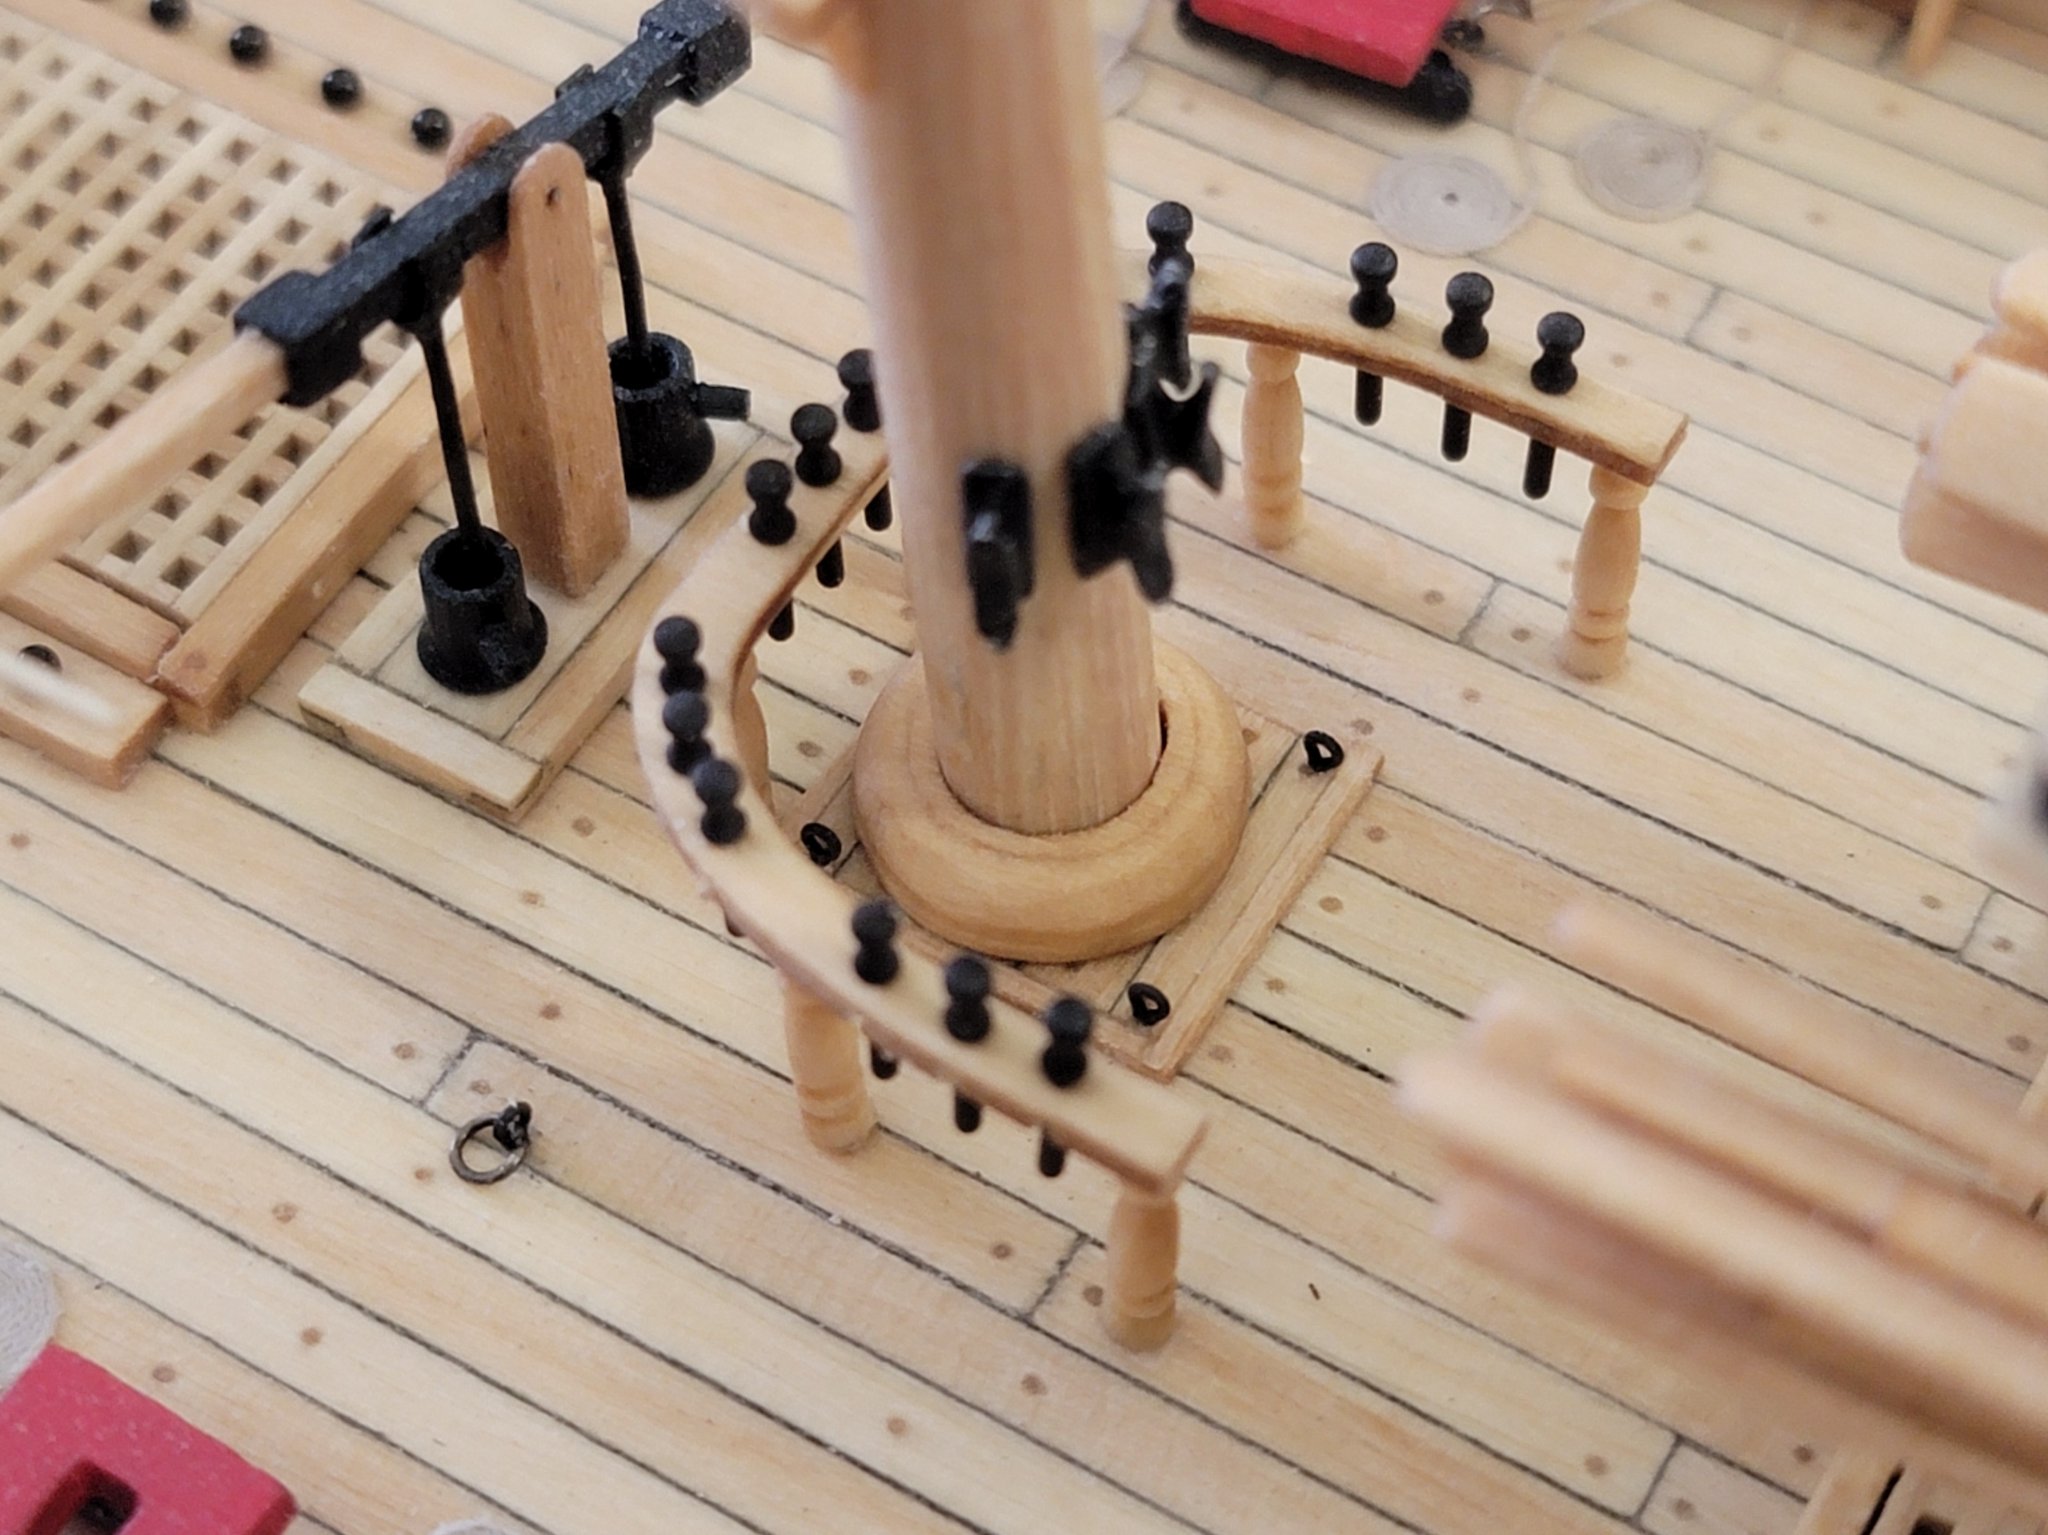
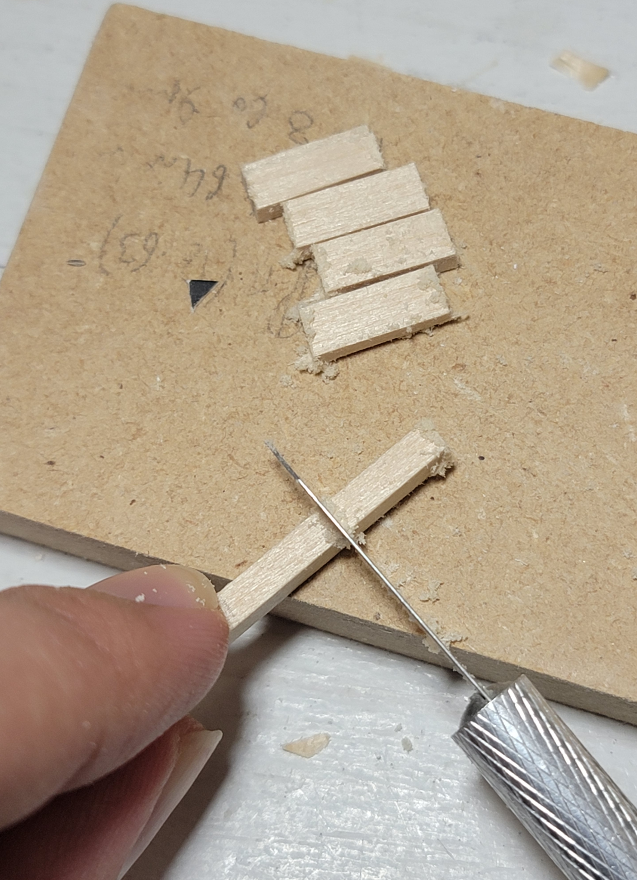
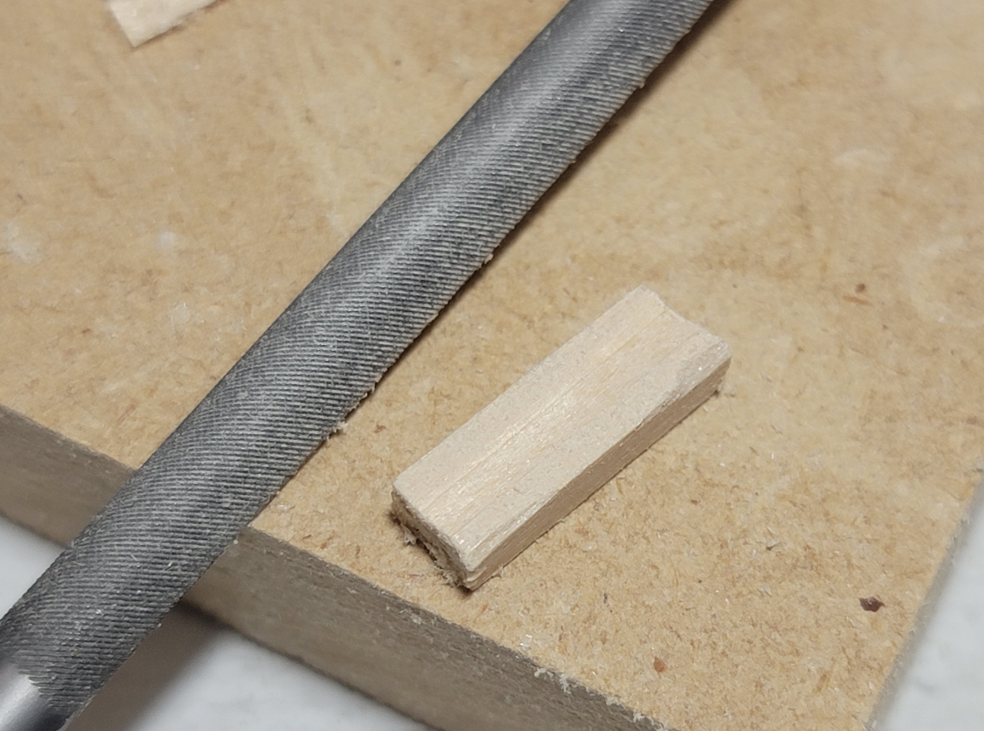
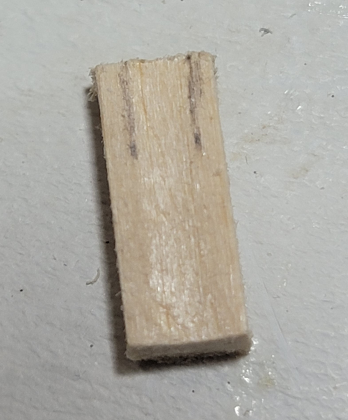
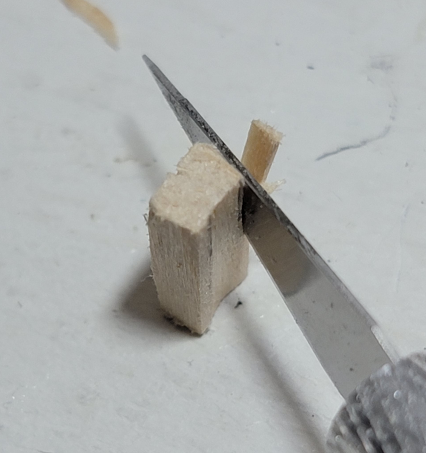
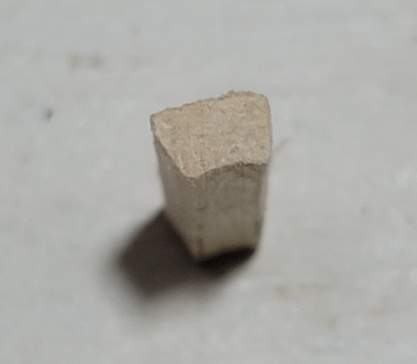
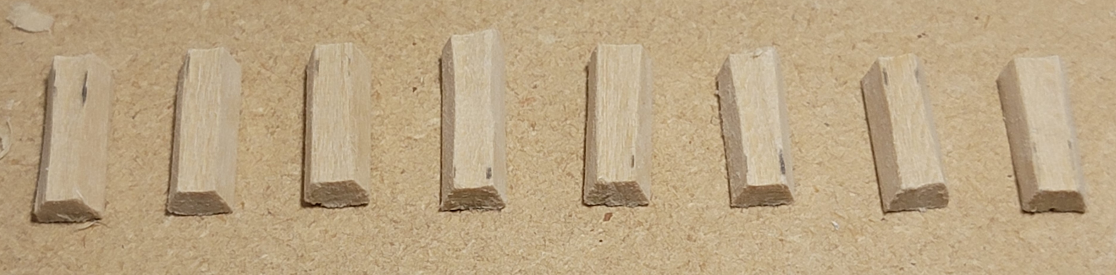
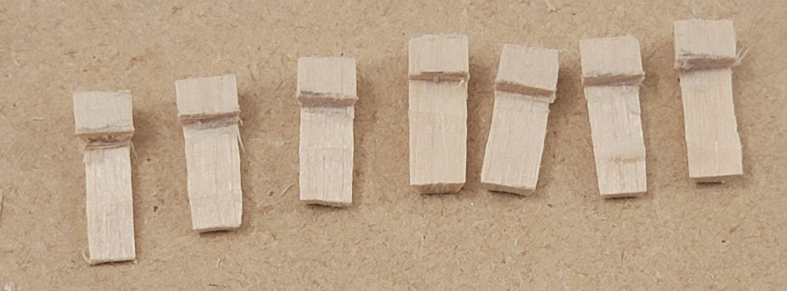
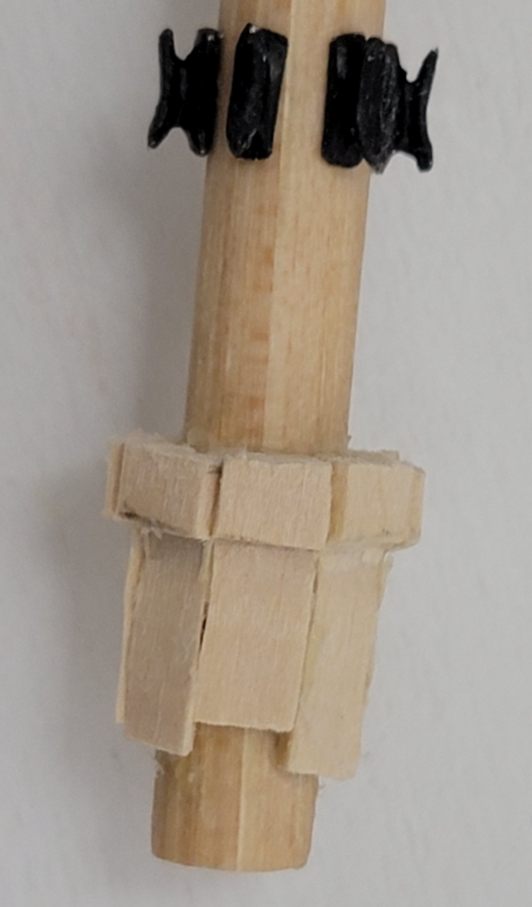
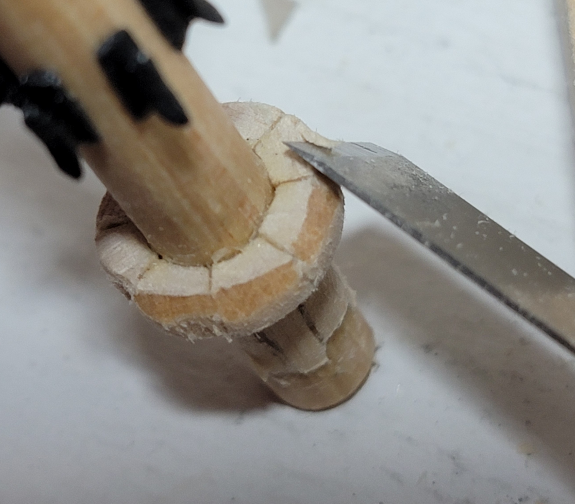
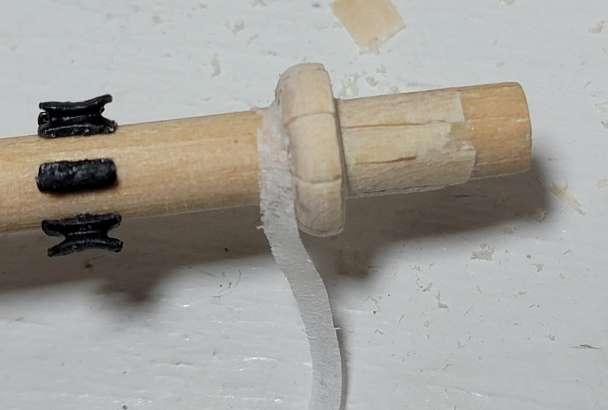
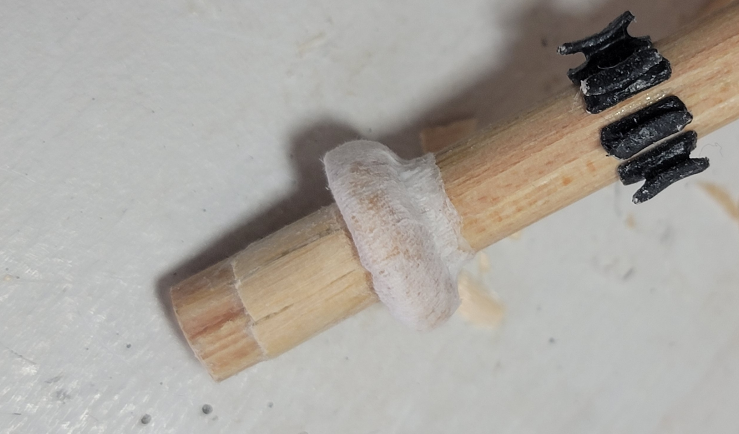
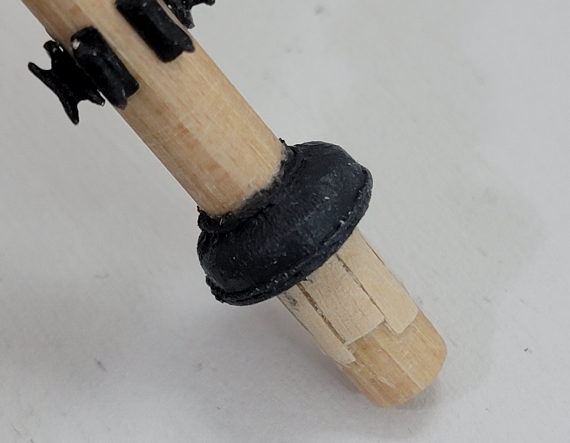
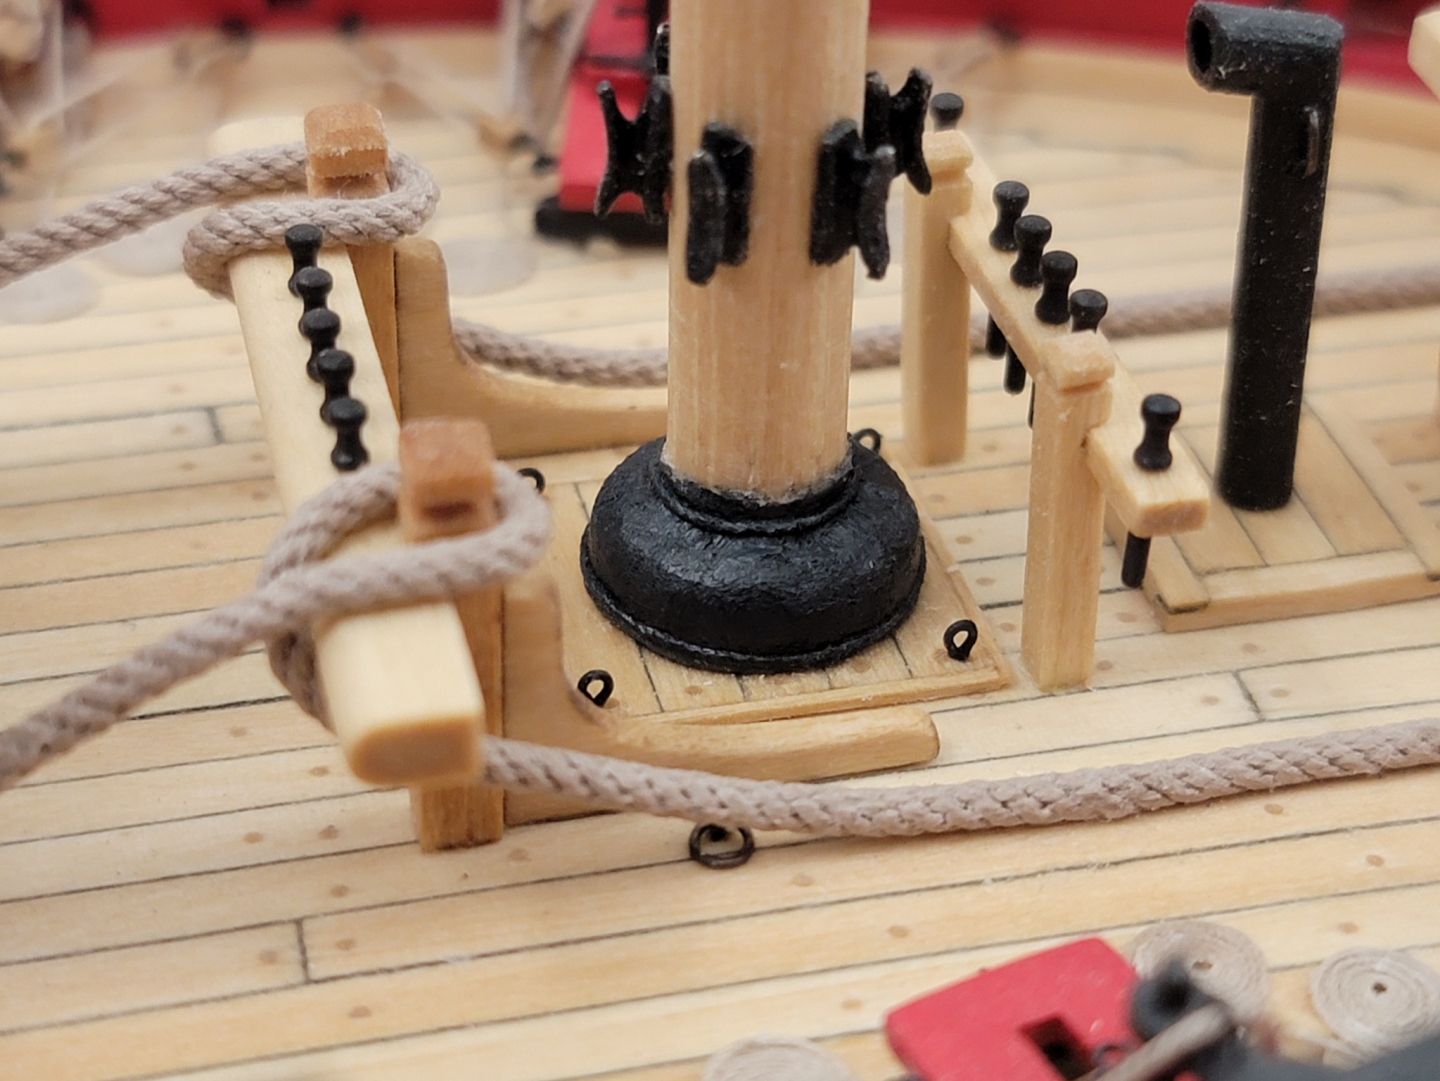
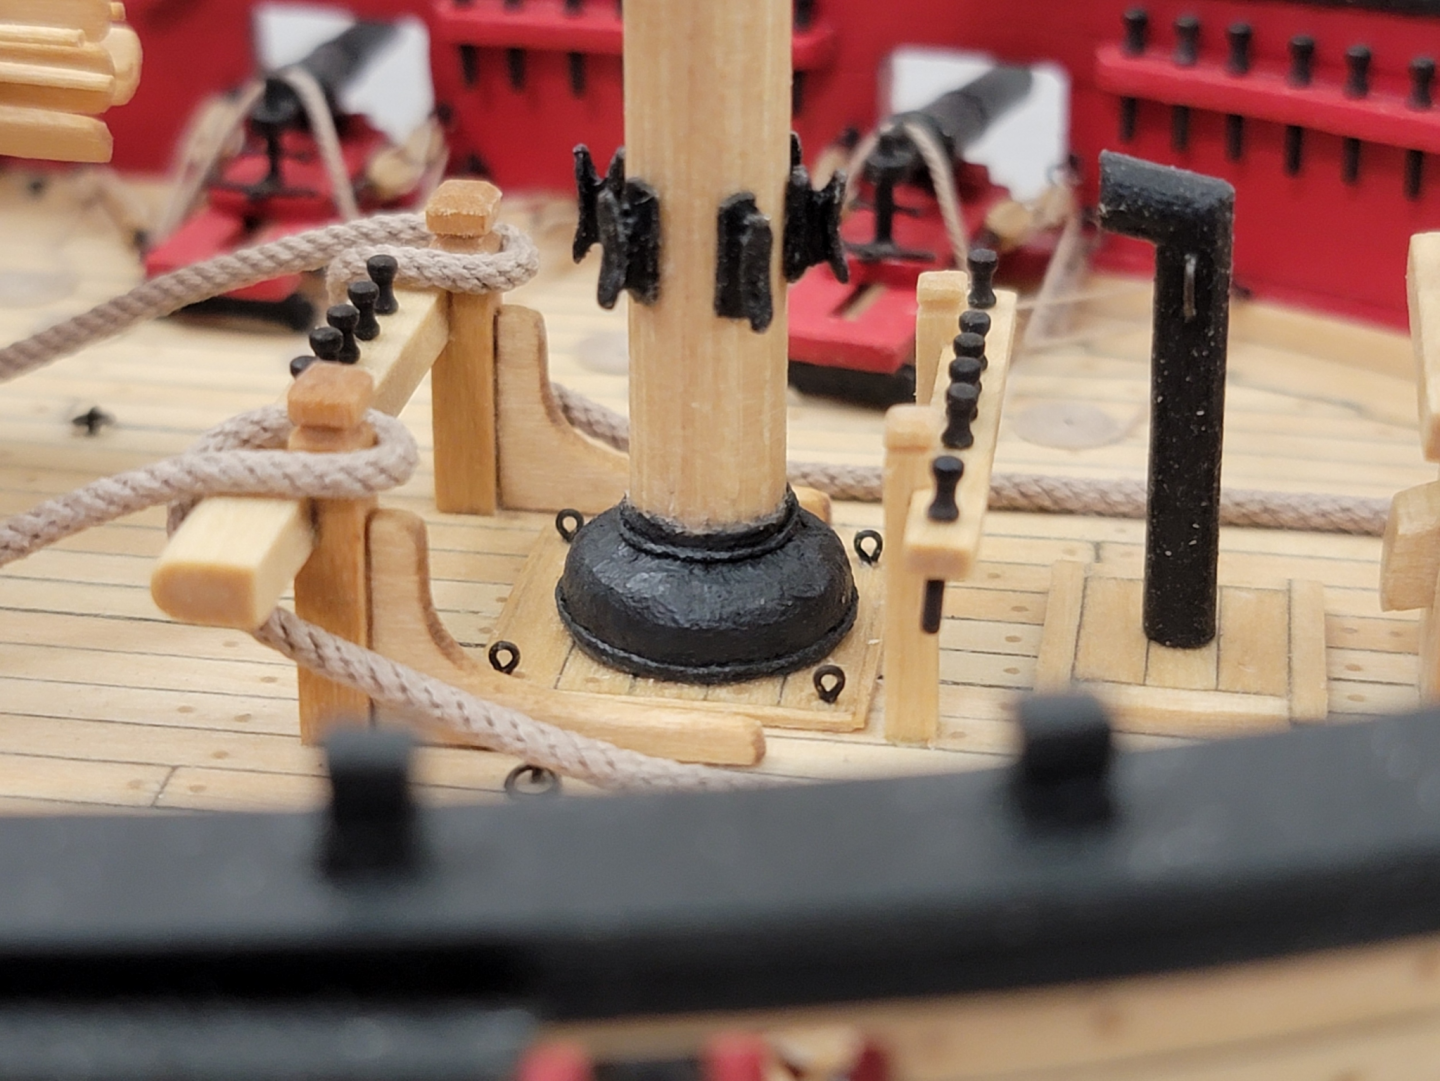
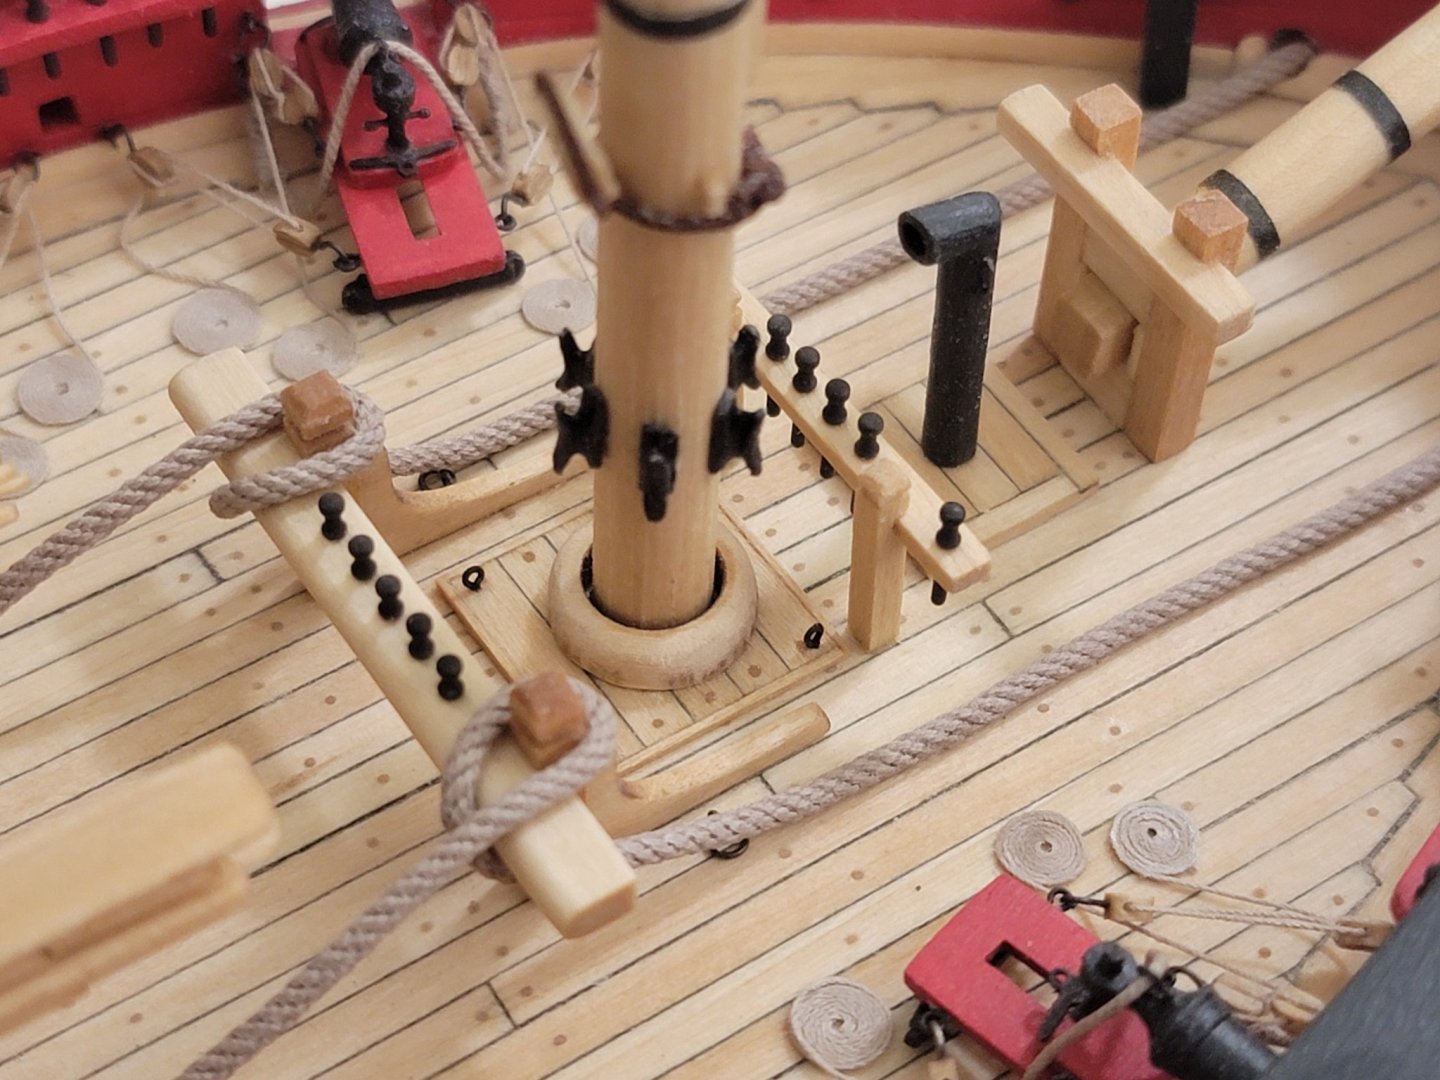
Thanks so much for the great comments!! I decided to try making the realistic ones, and ended up using that one instead of the simplified wood carved one. I believe this is a very important detail to include. Michael helped me understand their purpose. The wedges help the mast from shifting after it was stepped through the deck, and the canvas coat would protect the wedges from water leaking into the hull. Learning this, I just had to (or attempt to!) create the accurate representation. I followed Ed Tosti's method for parts of the coat in his Young America log (linked here). I also used some of the descriptions from TFFM vol 1 to understand how they were assembled, then went by making the wedges by what I felt worked best for my case. They required a lot of careful work, but I really enjoyed making them. This will be a long entry, but here goes!! I first cut each of the wedges from 1/8" x 3/16" dimensioned wood. I didn't measure their length, and just eyeballed: Then used a rounded needle file to make the shape of the inner part of the wedge. This was so that the wedge can have maximum adhesive surface to glue onto the mast: Did some quick math to find out how much of I needed to cut so that all the wedges fit nicely around the mast: Marked the location on the "curved" side using a caliper, and sliced with an Xacto knife: Next I marked the location where I want the notch, and chiseled to that point: The location where they need to be glued on the mast was then drawn and the base of the notch was aligned to that line when being glued: The mast hole was also enlarged a bit. Then the bottom of the wedges were sanded so that it can fit snug: The top of the wedges were chiseled, then sanded to be round: Now, I followed Ed's procedure.. The canvas was simulated with tissue paper. I used diluted wood glue to stick it on the wedges. A card was cut at the base: I then used 0.012" rope at the top and base. To simulate the tar, the canvas was painted a dark grey color, and finished with very dilute black paint. And that's it!!! Here it is (the mast still dryfitted) With this method, the masts are much more stable and snug than before, but still a bit of wiggle sideways (since the bottom of the mast has room to move in the larger spacing below the wedges). So I am thinking of just gluing the bottom of the coats once I decide its time to fix them in


- 950 replies
-
- 19
-

-
- syren
- model shipways
- (and 1 more)
-
Hi Luc, any chance you can share the pdf for this frame? My plans also have the same issue where it has two of frame 7 and no AC5.
-
So sorry for your loss, Michael. She went peacefully, after living a long life being loved by you and Judy
-
I am still pondering whether I should go the more realistic route with the canvas covering the wedges, but so far I am leaning towards the simple representation. Thank you, Michael. It's nice to see them side by side for comparison! Thank you for your nice words! I'll be looking forward to seeing your build log if you decide to set that up. It is highly recommended since you'll get invaluable advice on your build! Good luck!!
- 950 replies
-
- 1
-
-
- syren
- model shipways
- (and 1 more)
-
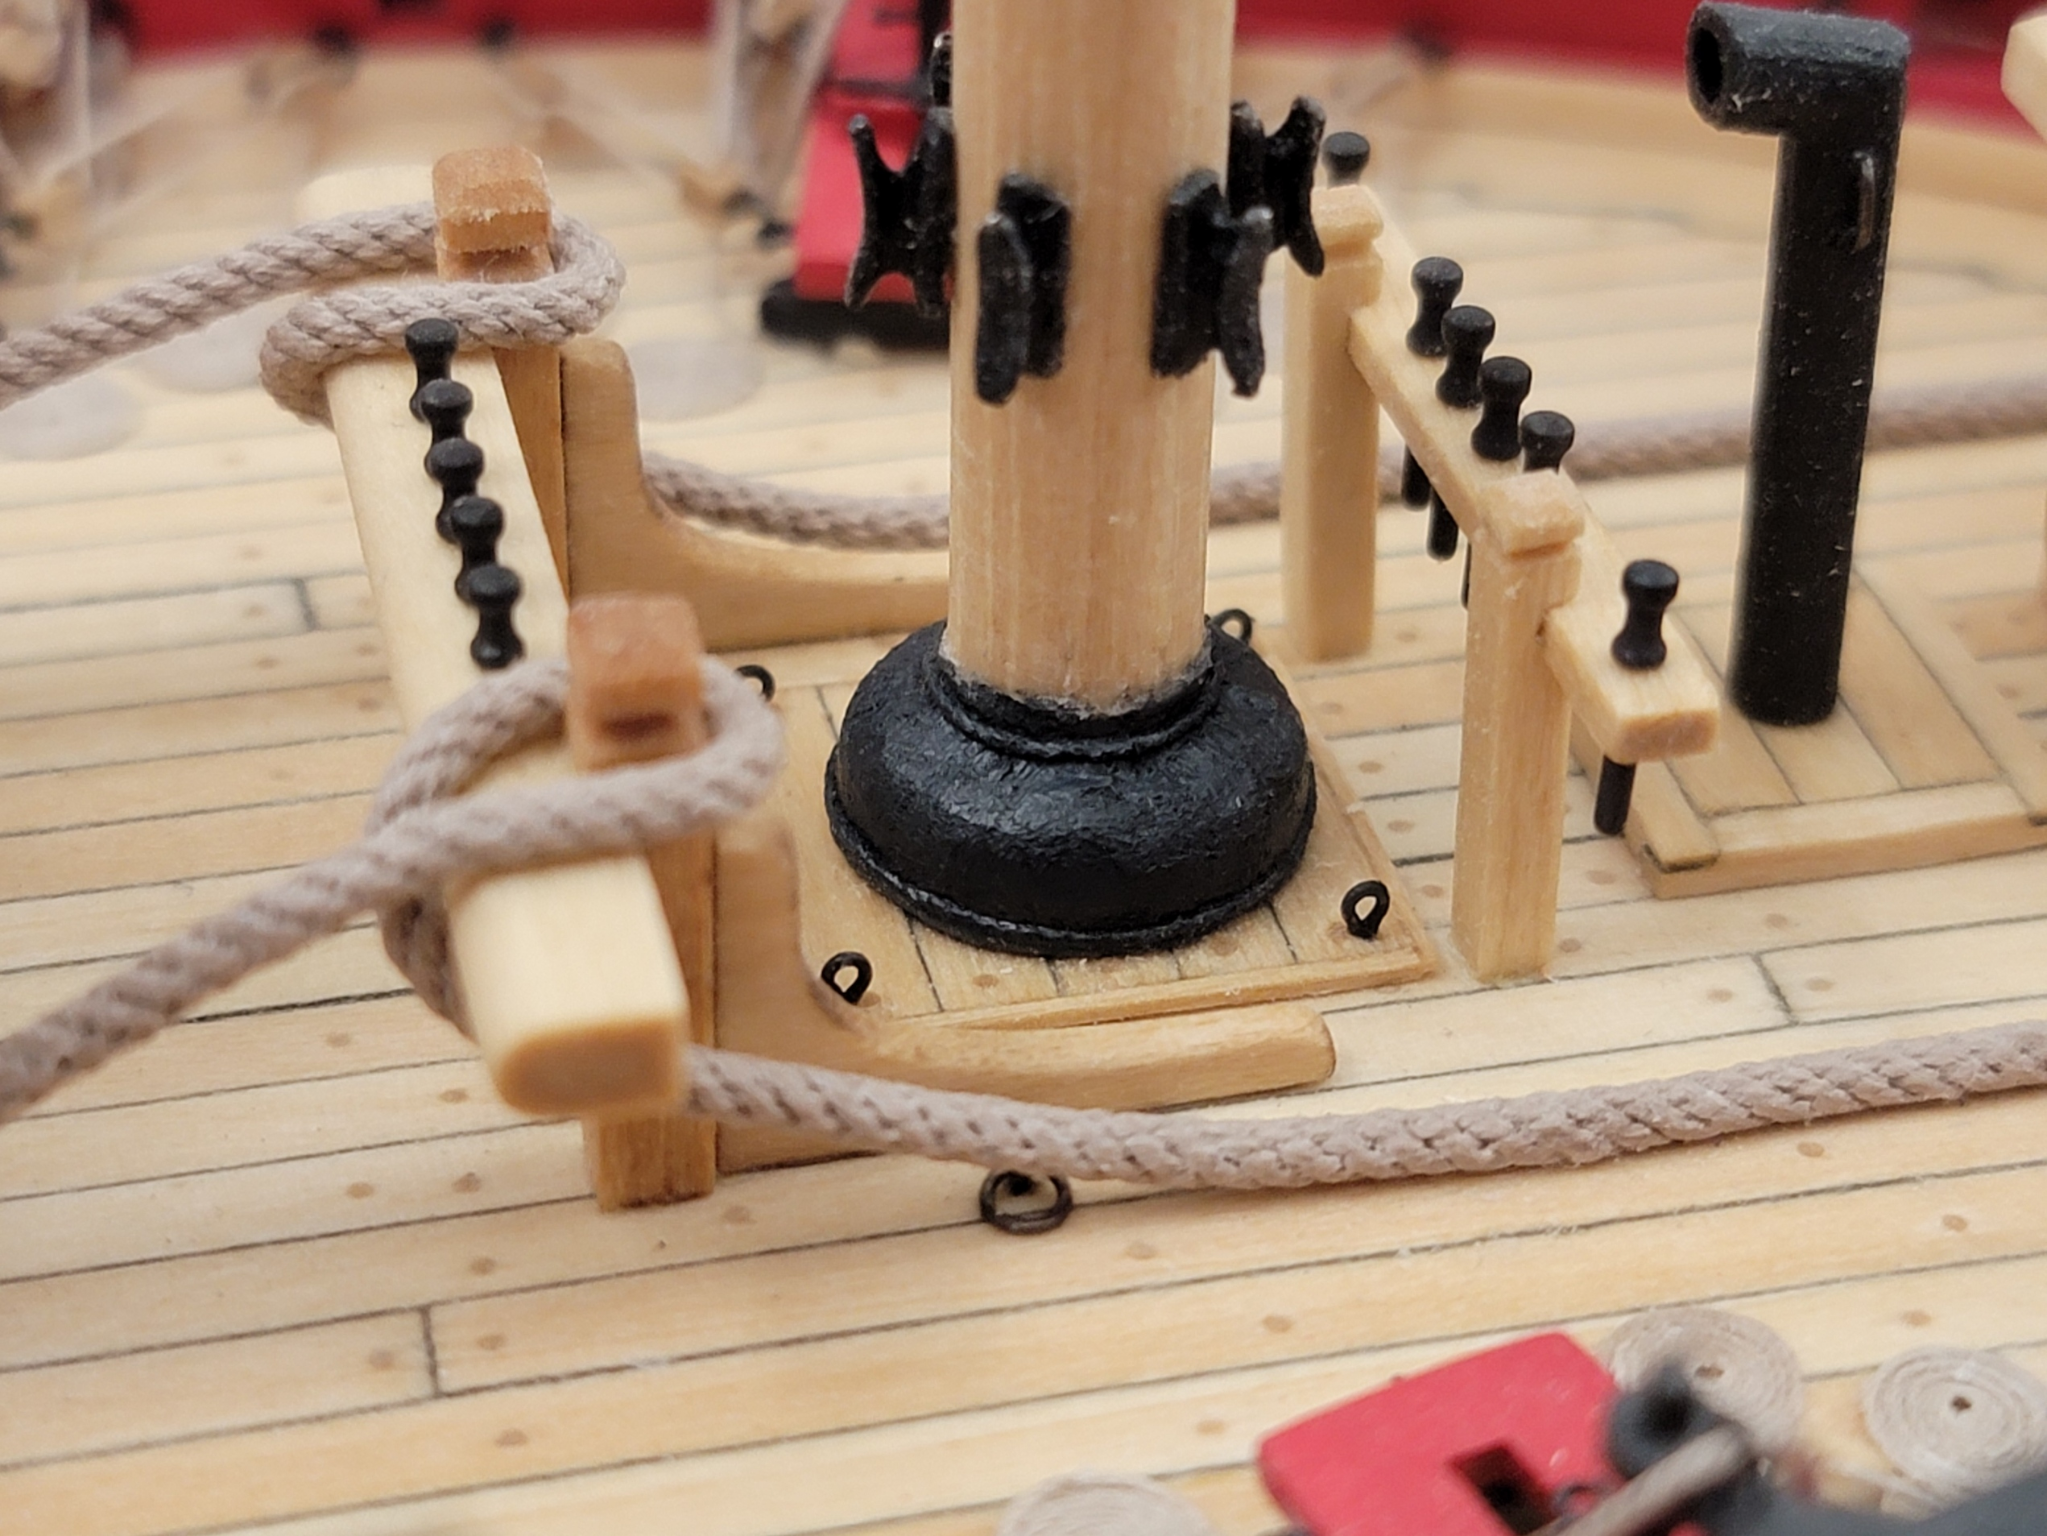
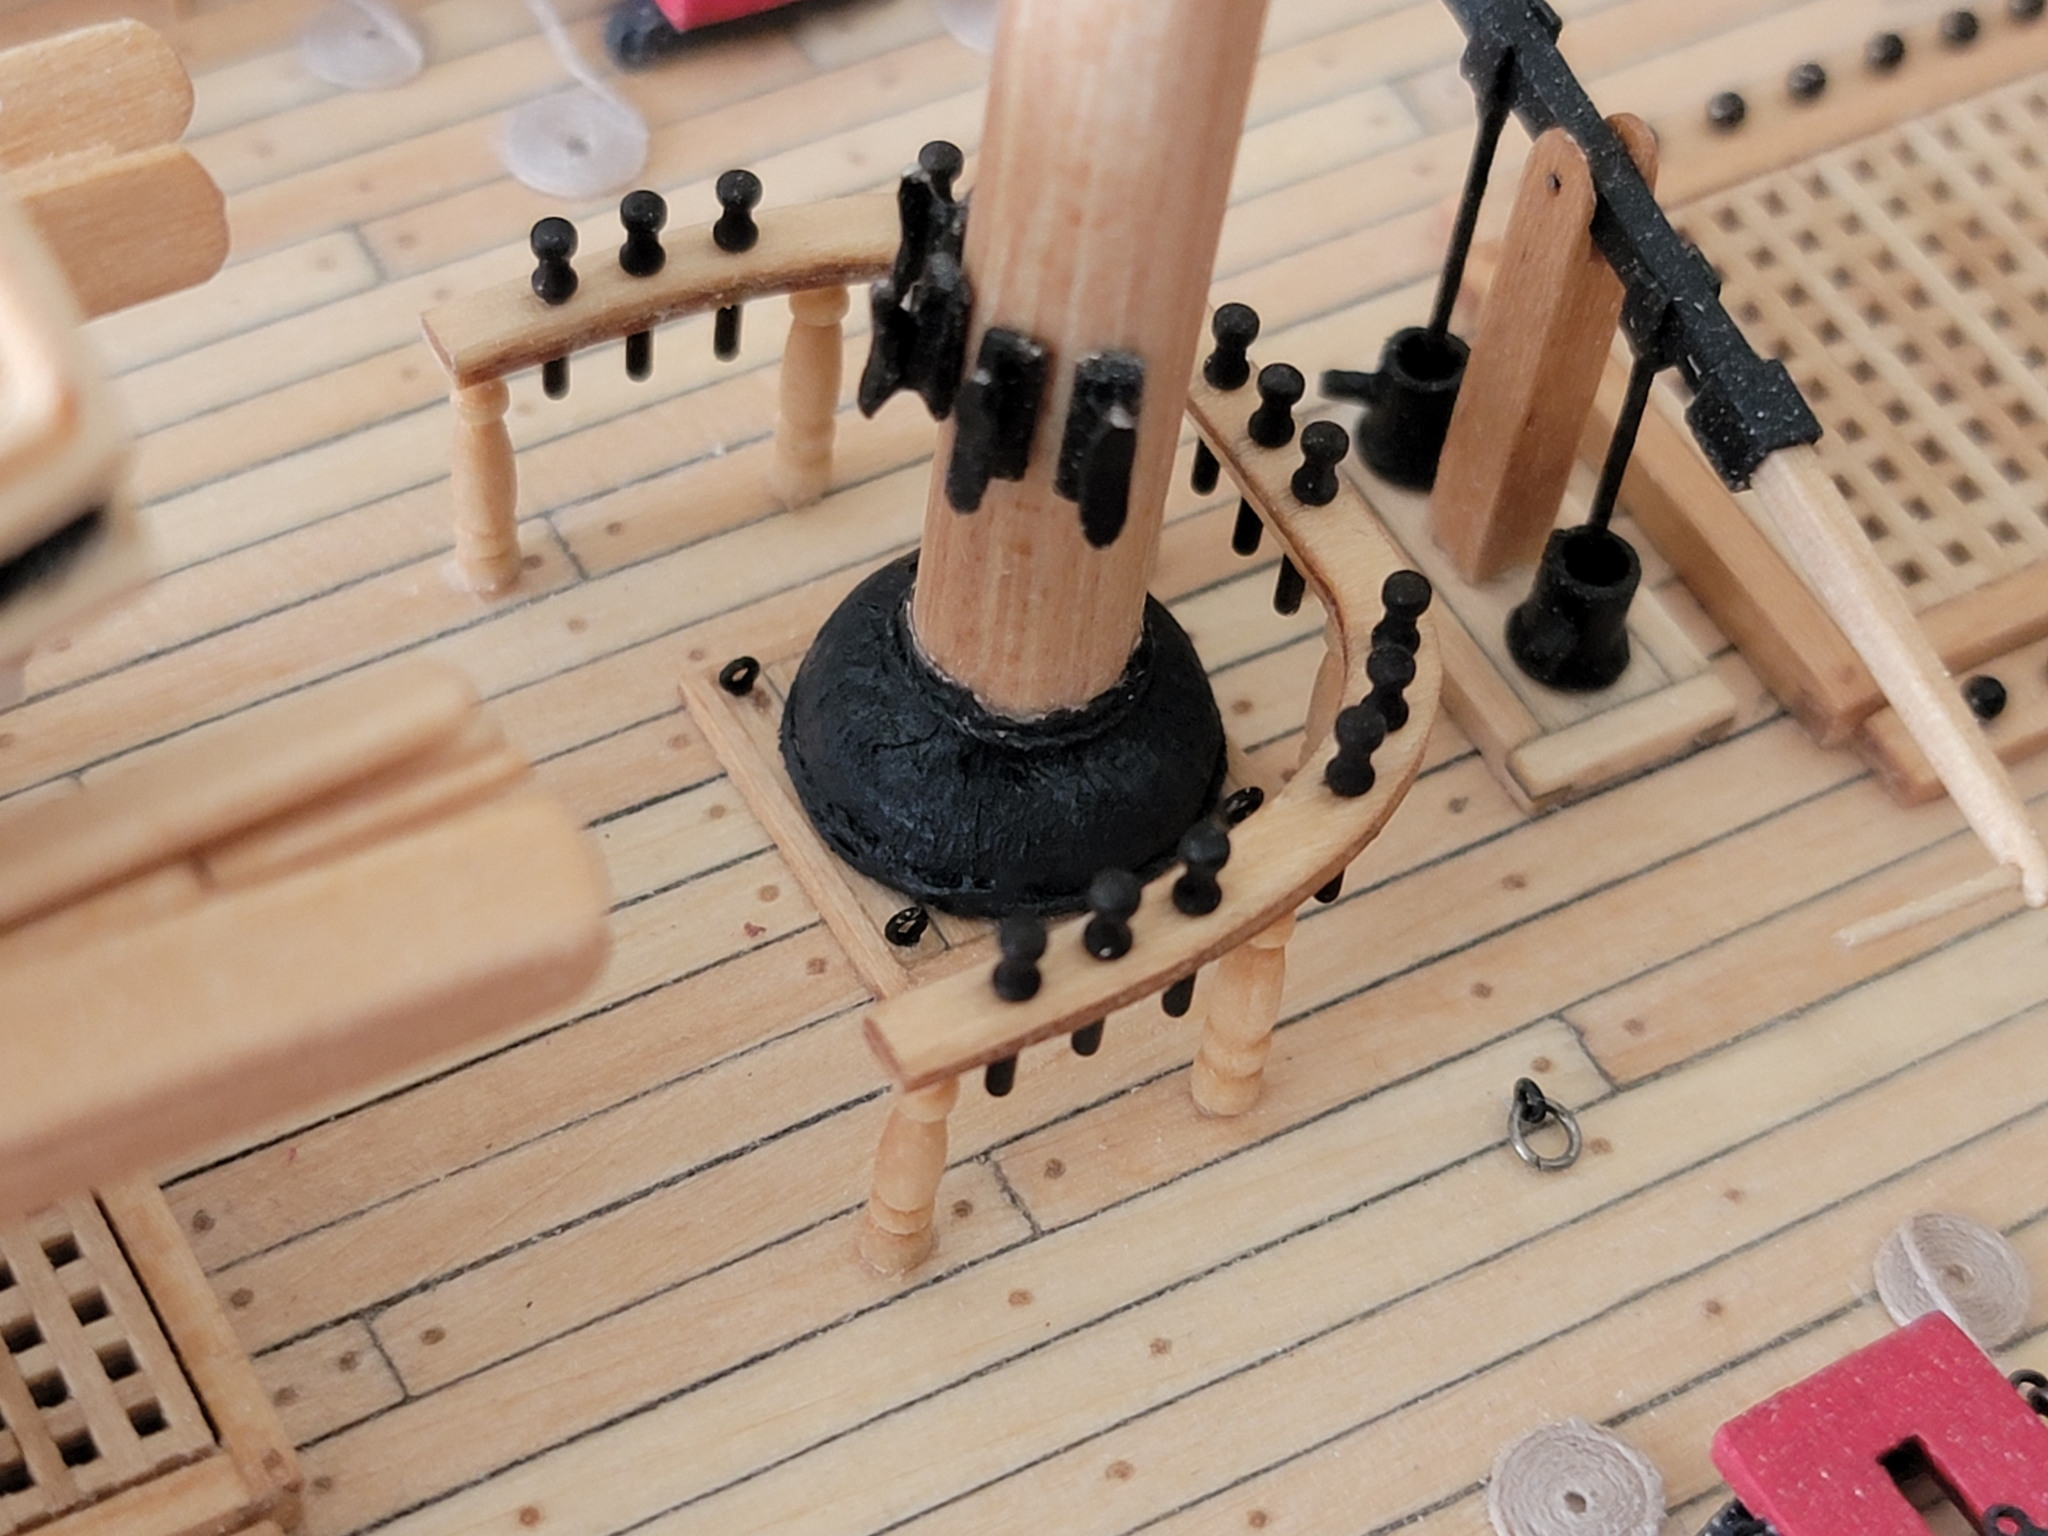
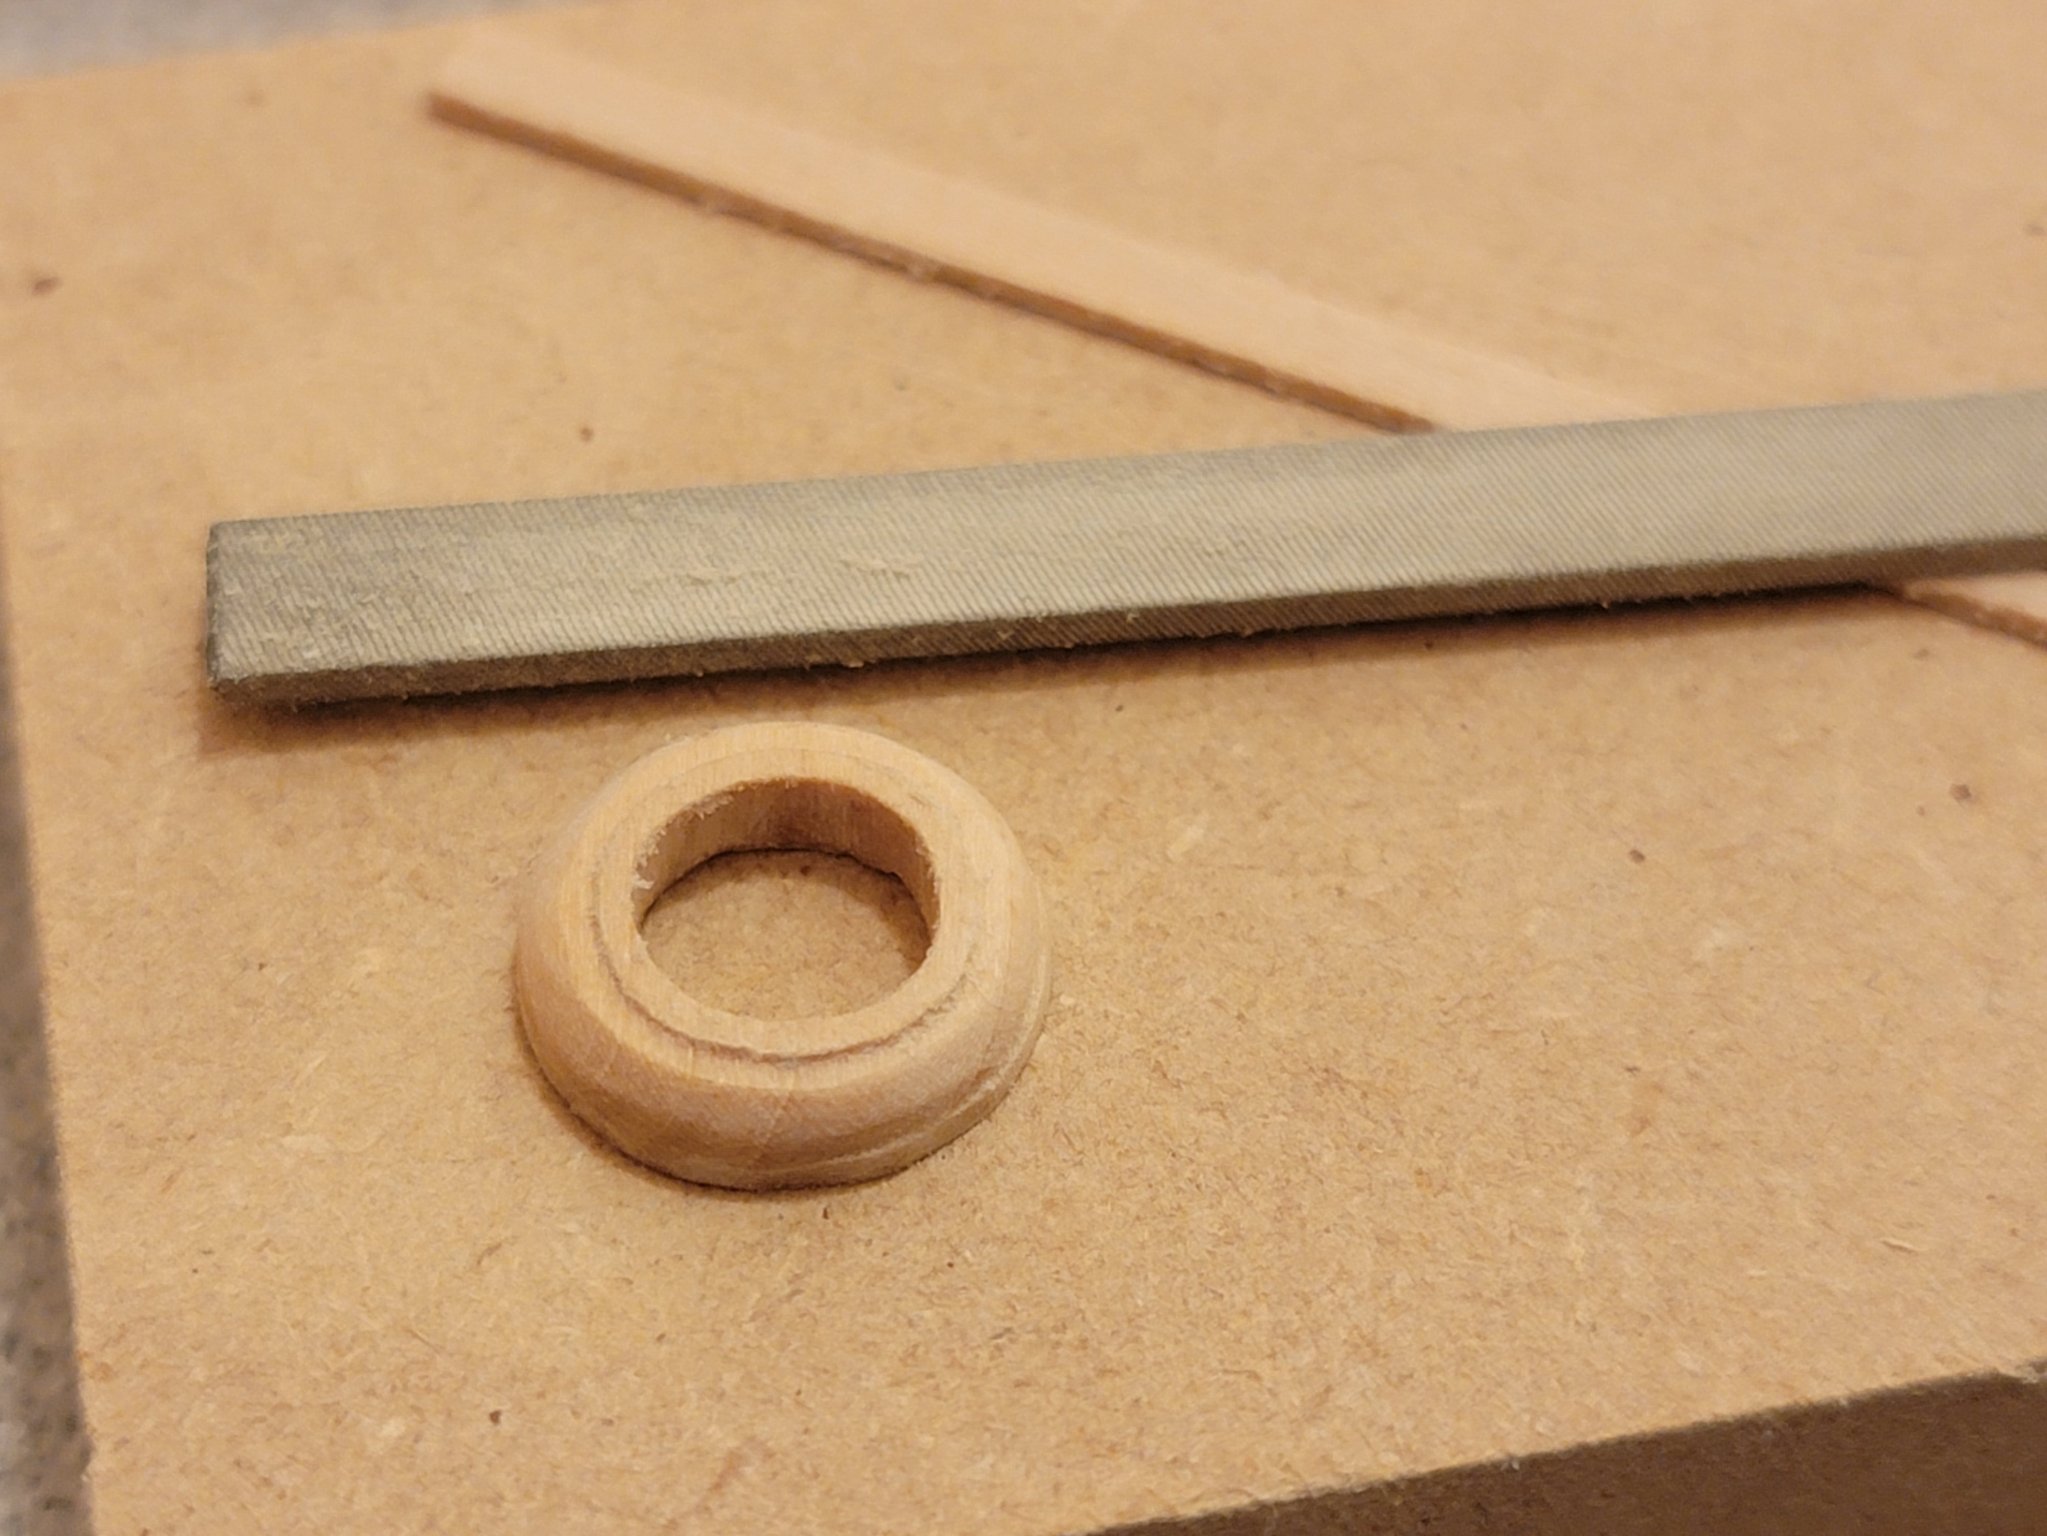
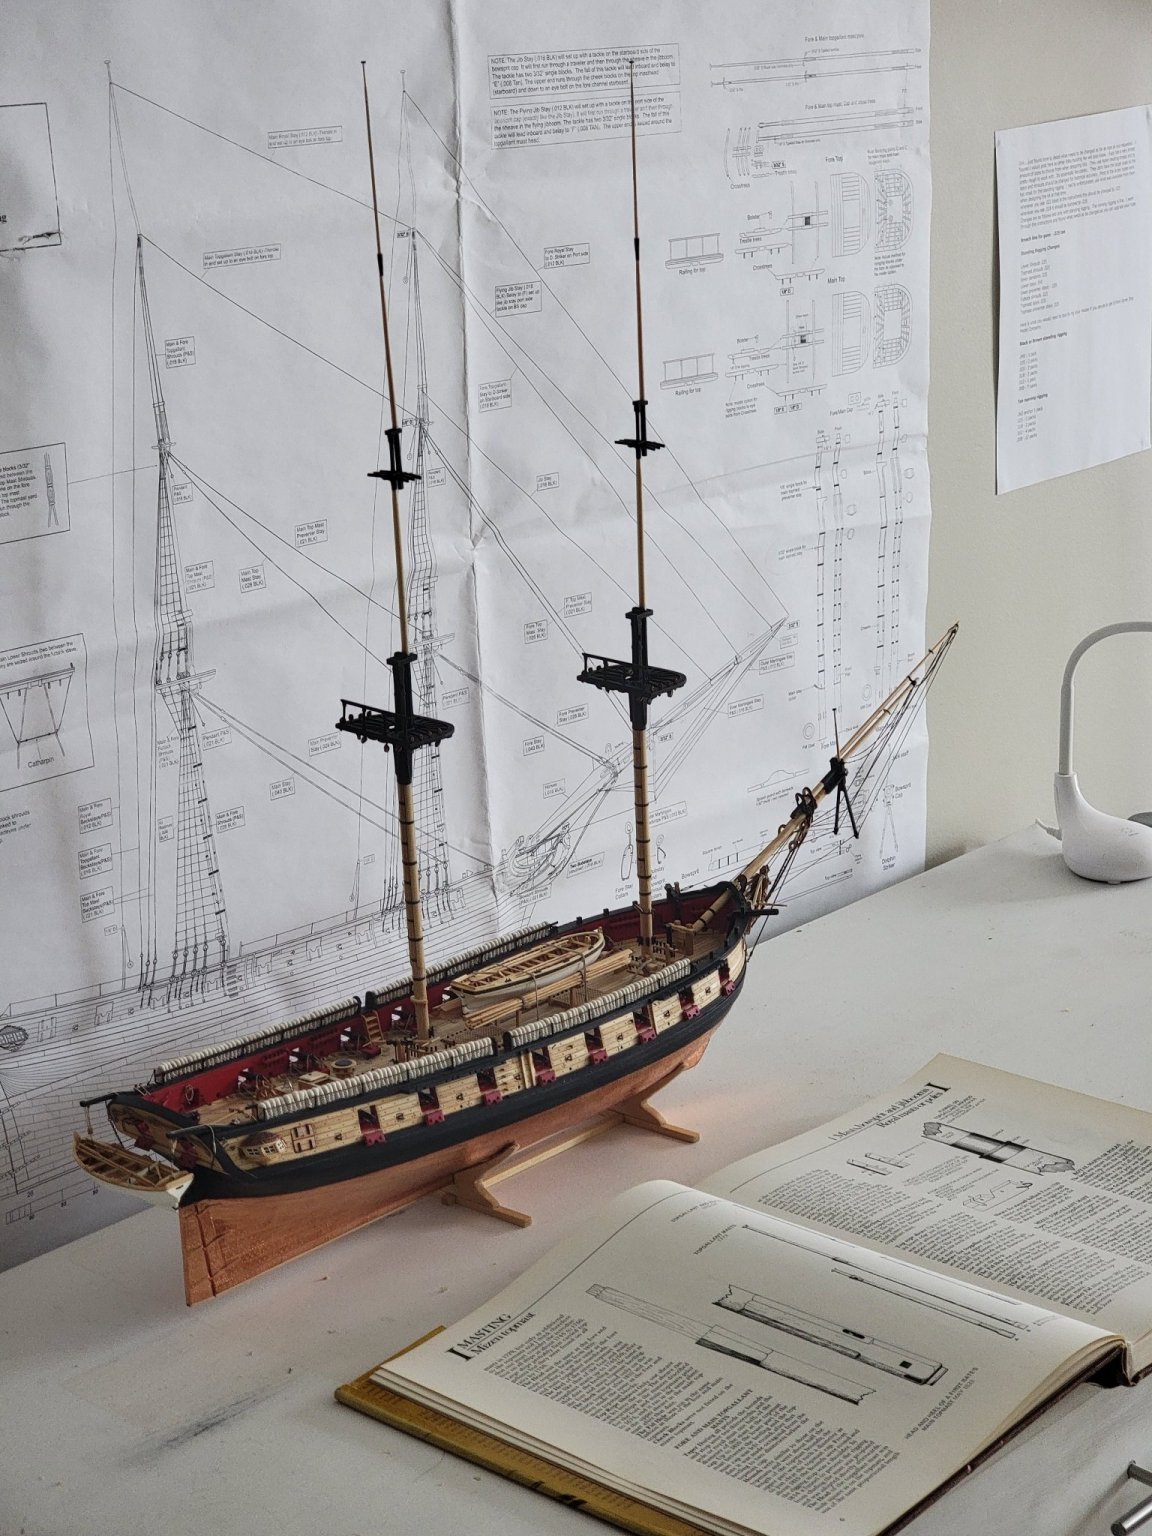
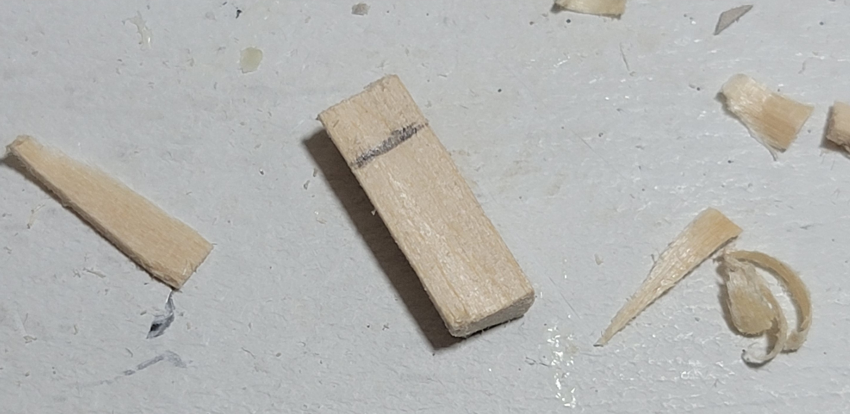
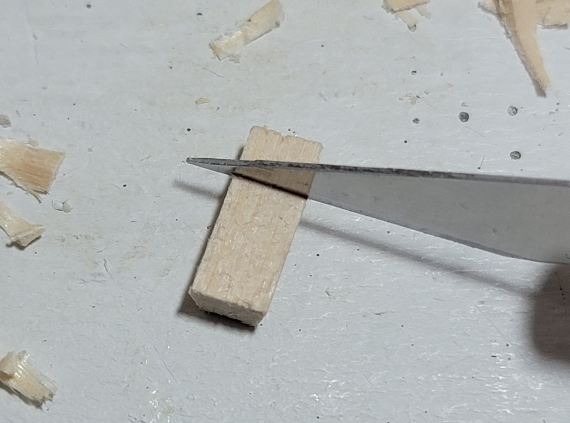
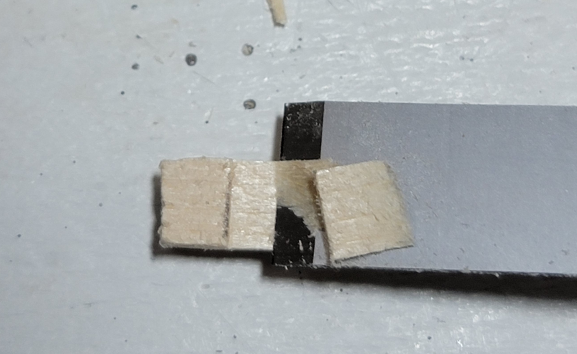
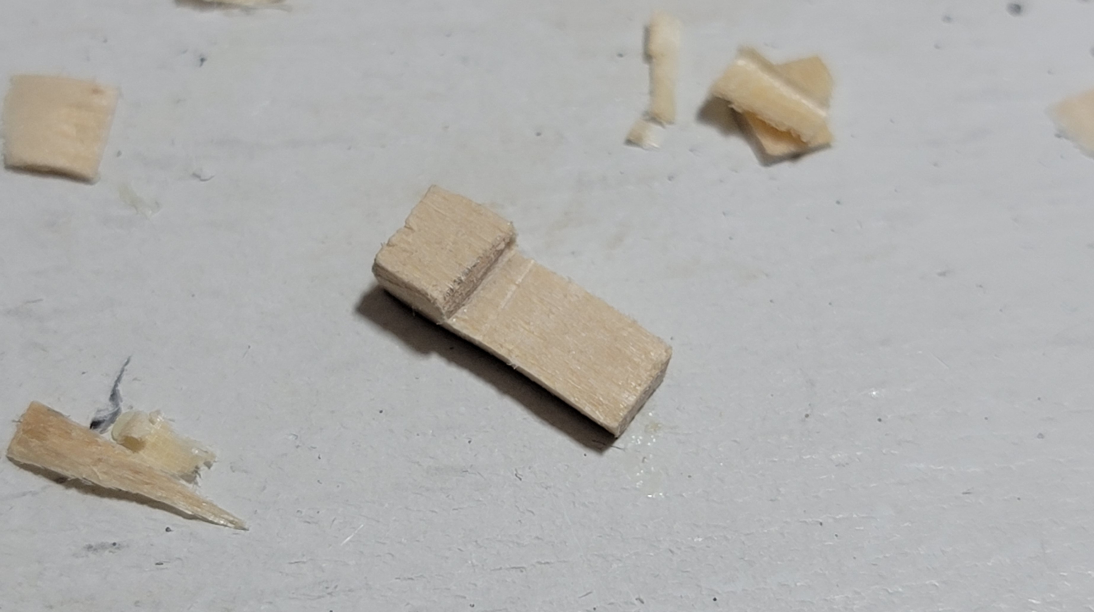
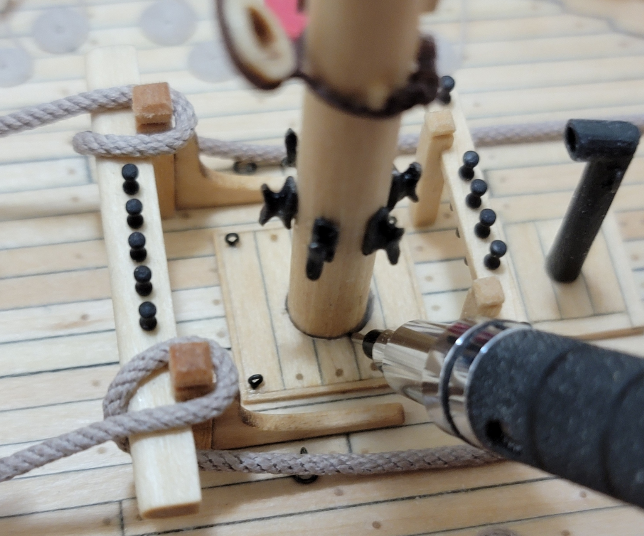
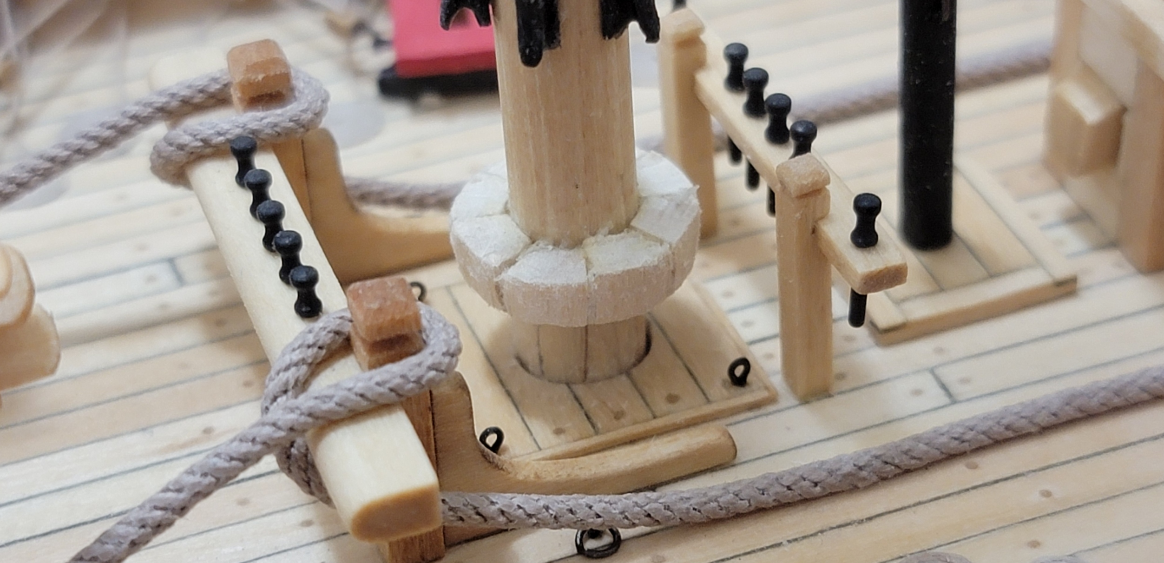
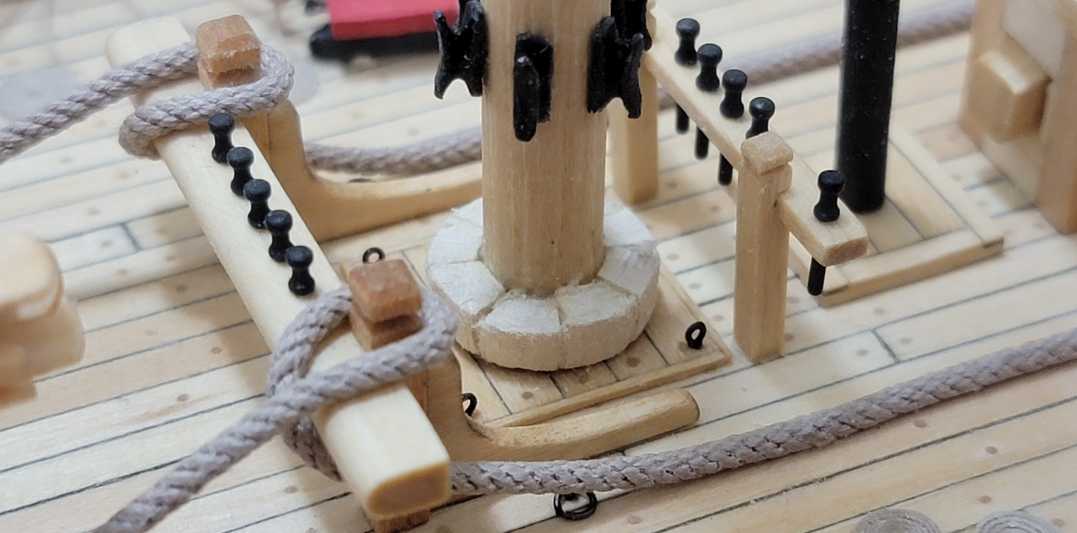
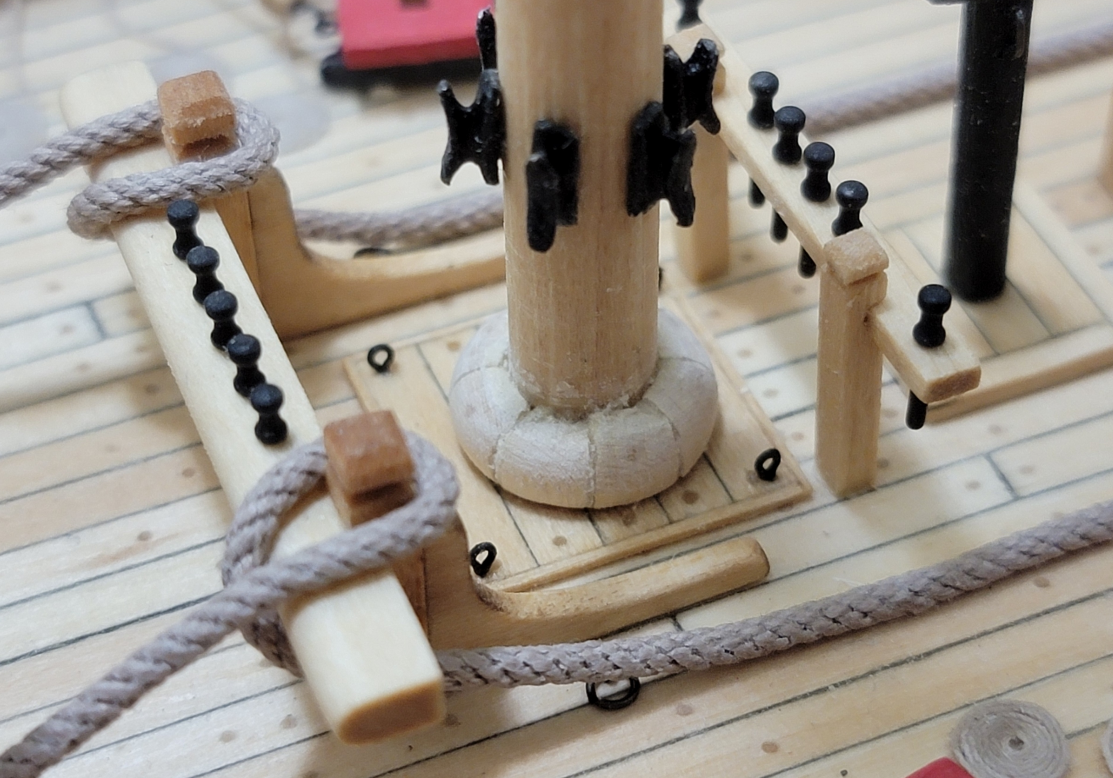
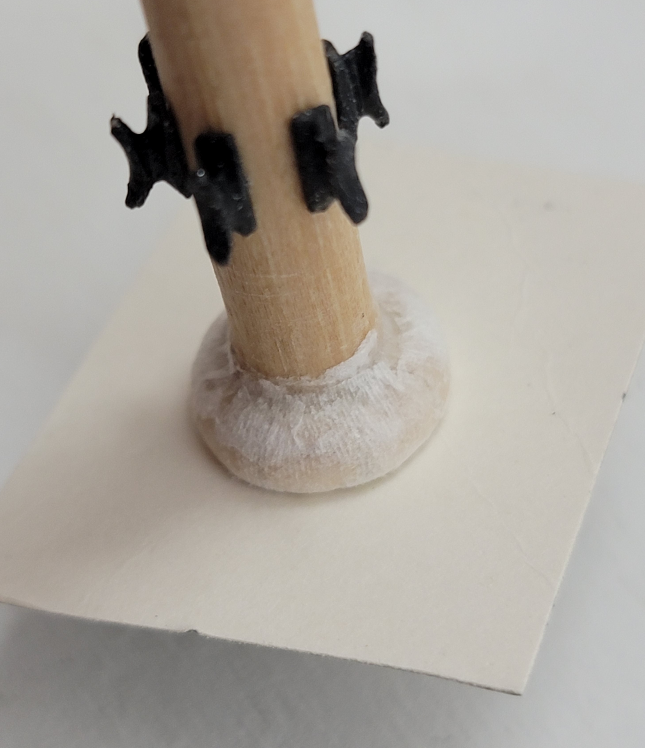
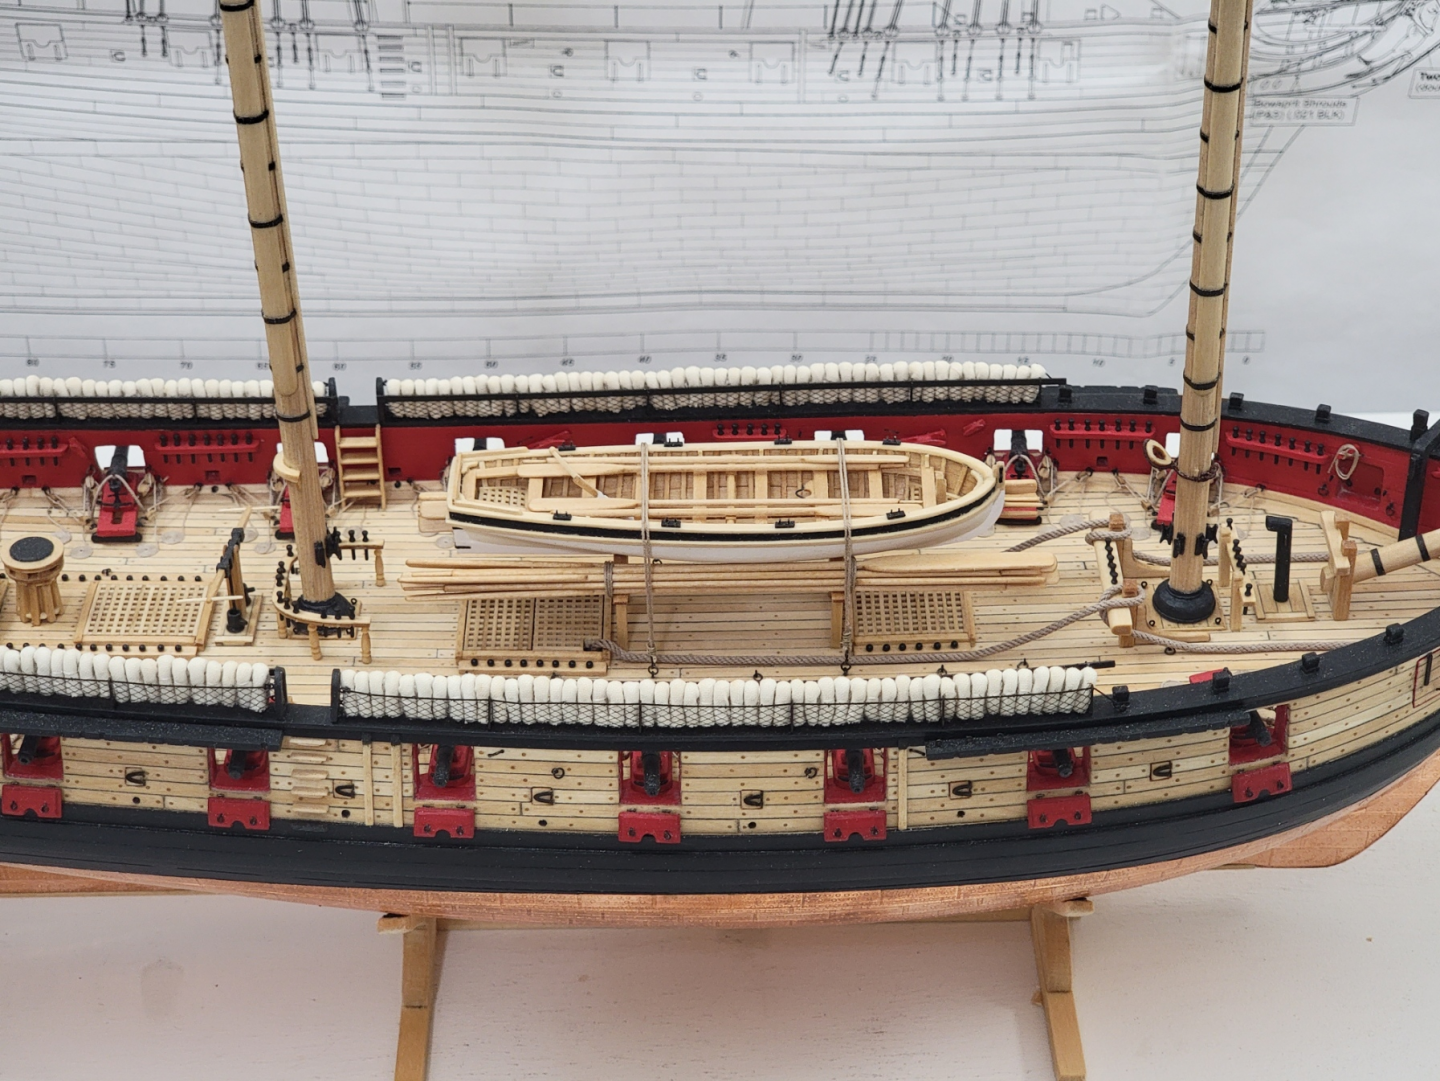
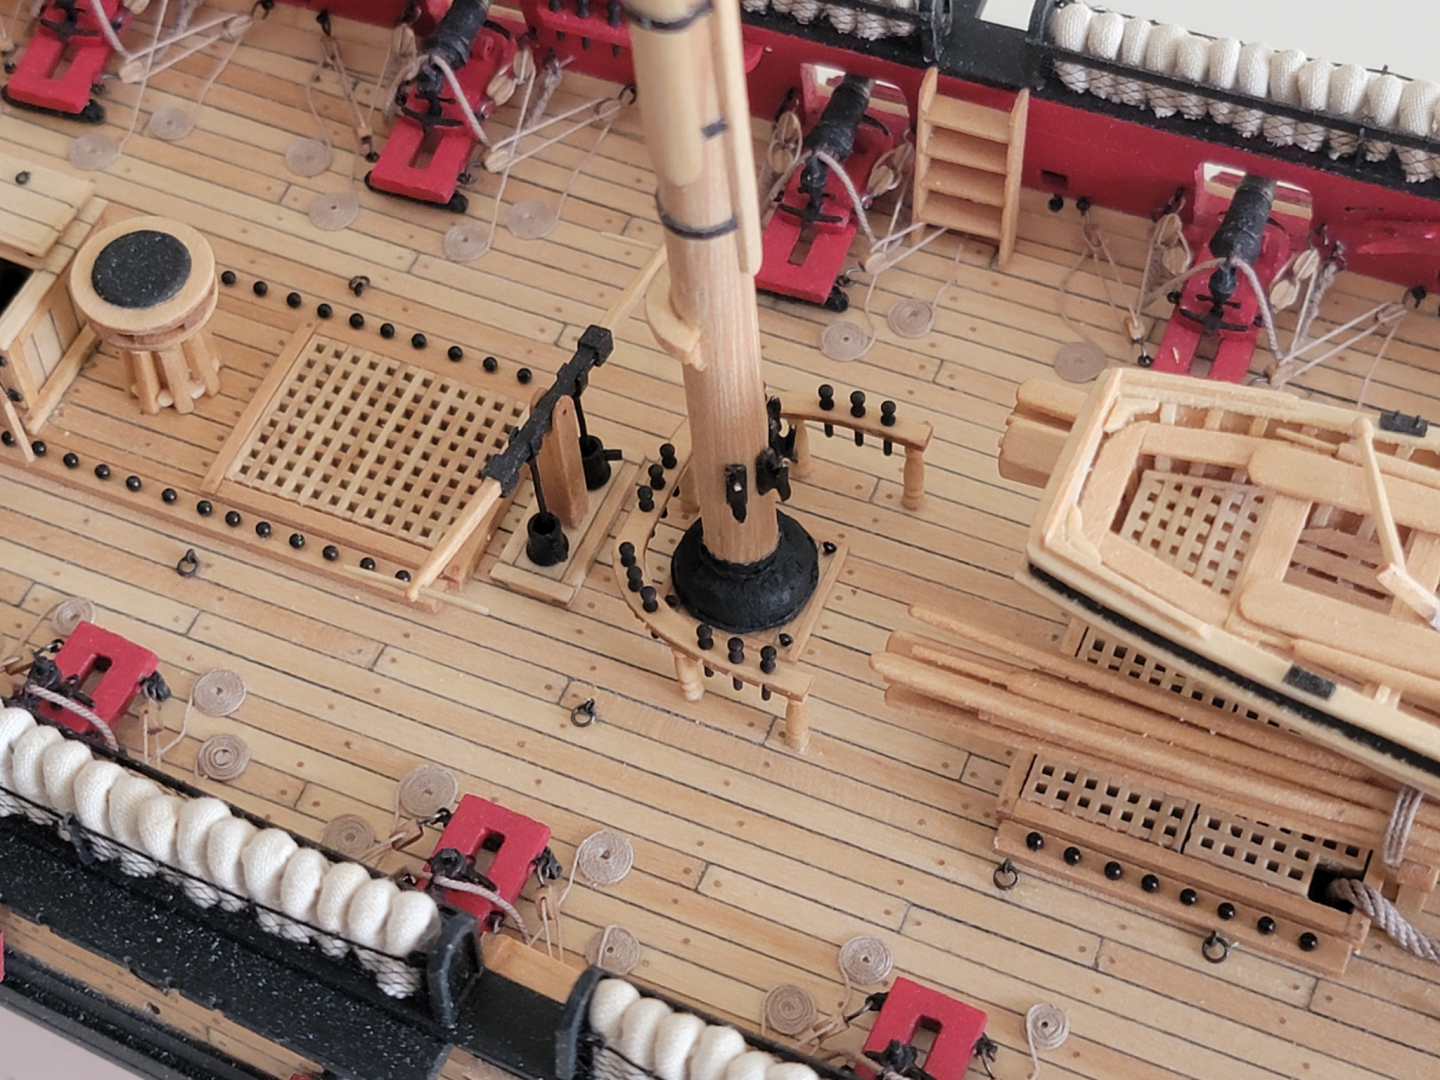
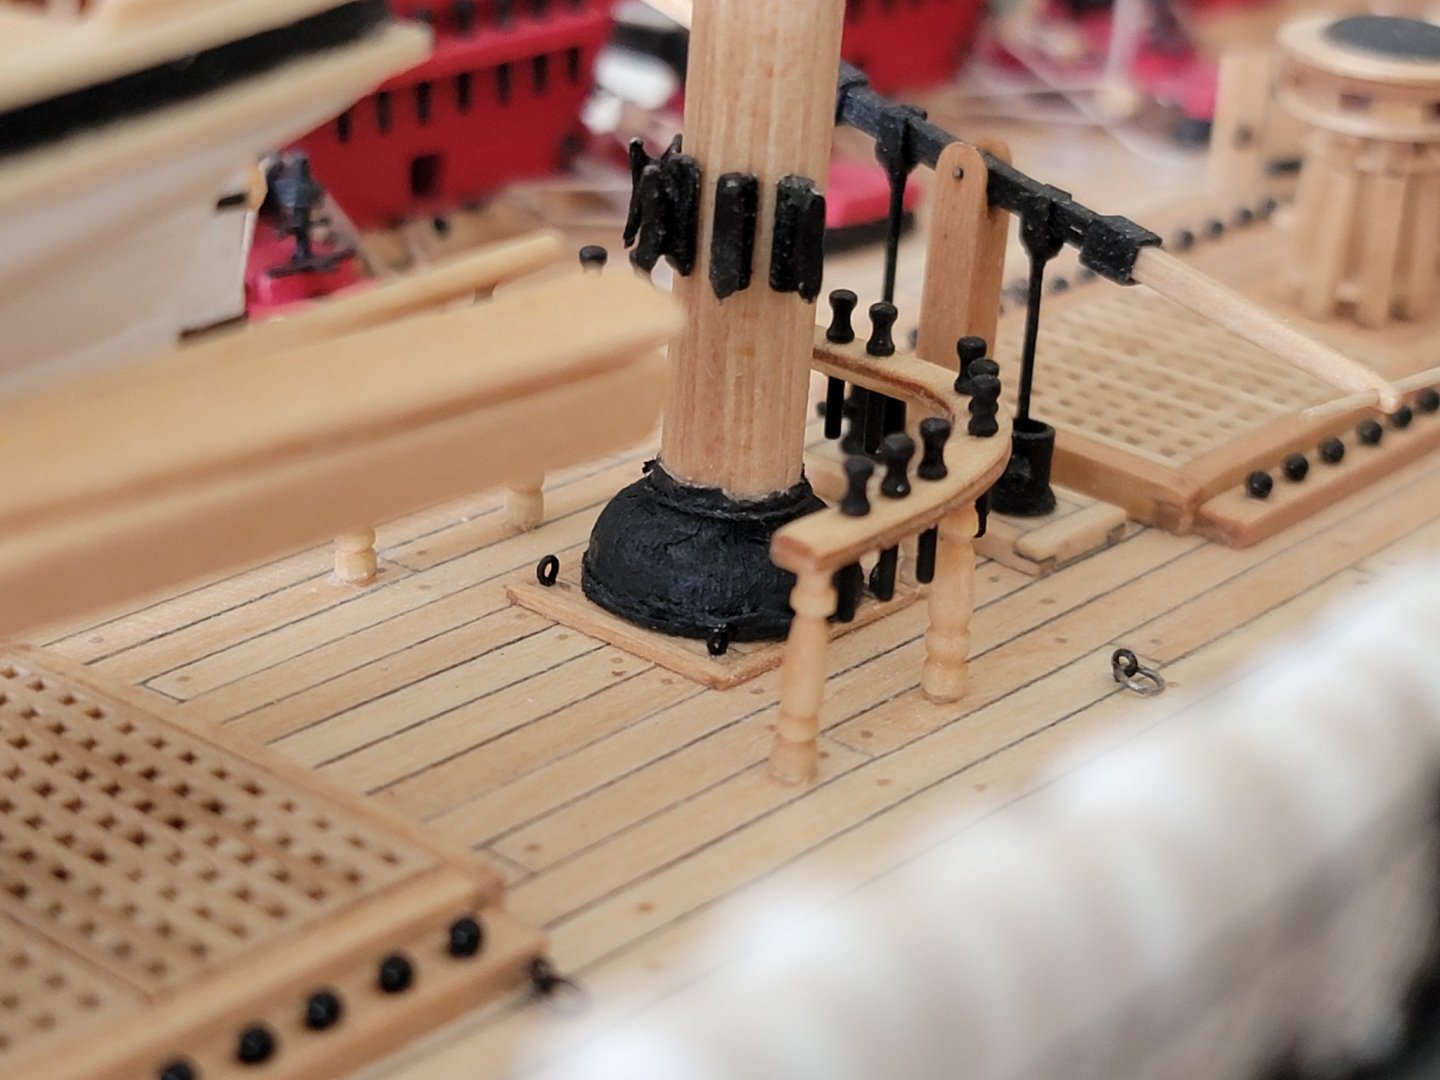
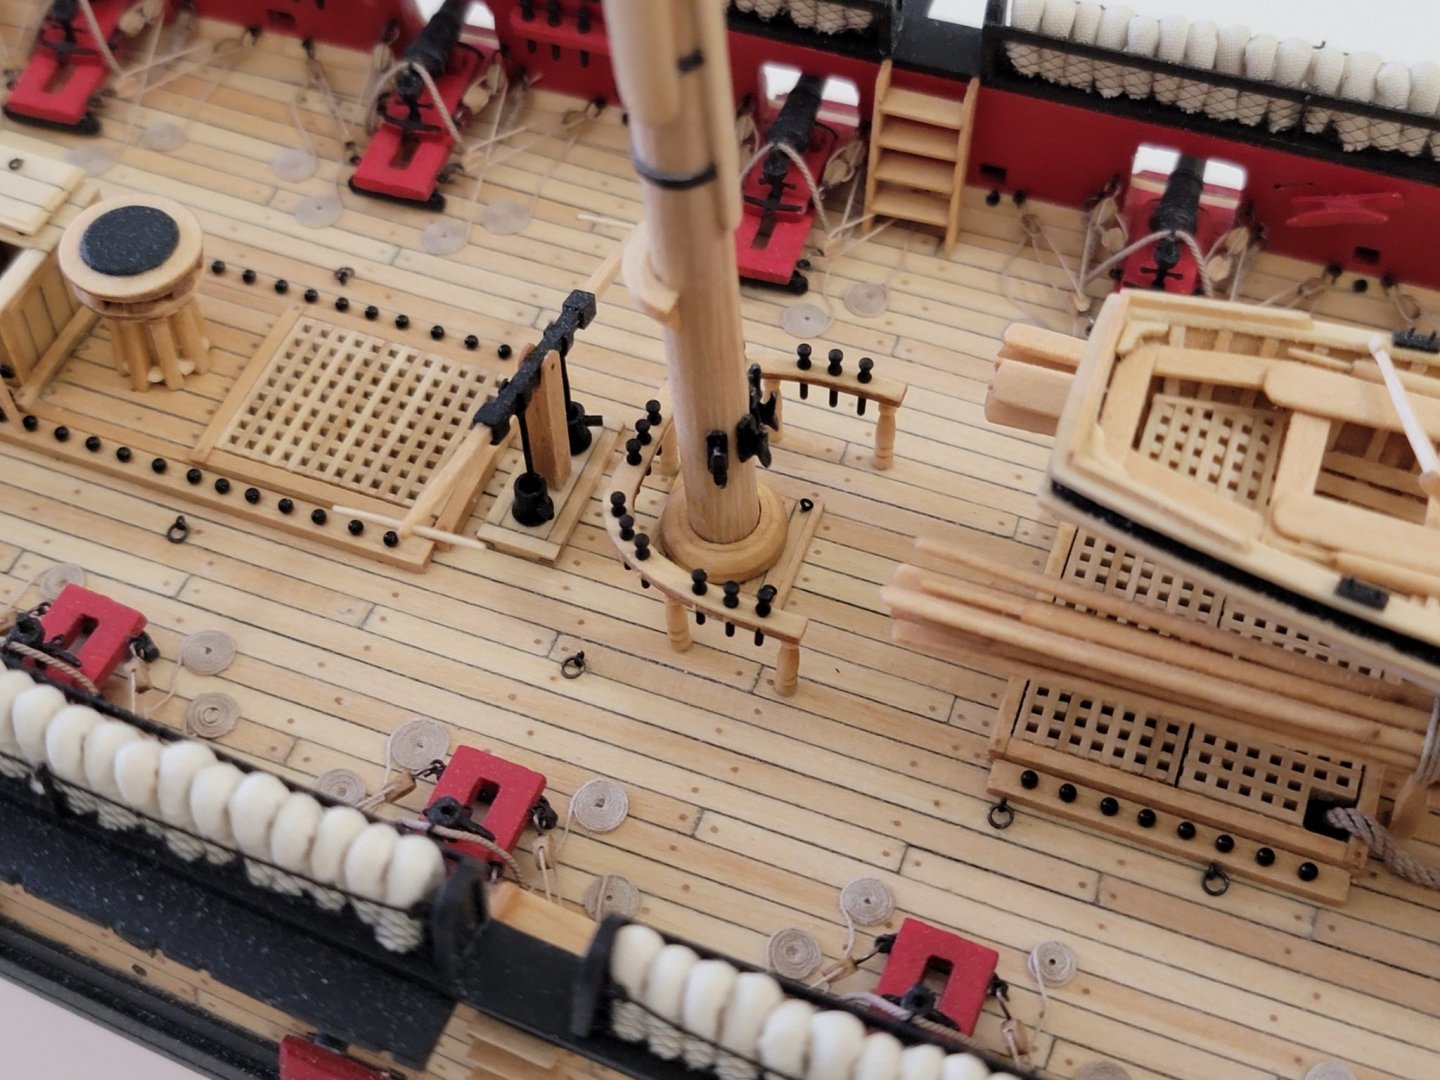
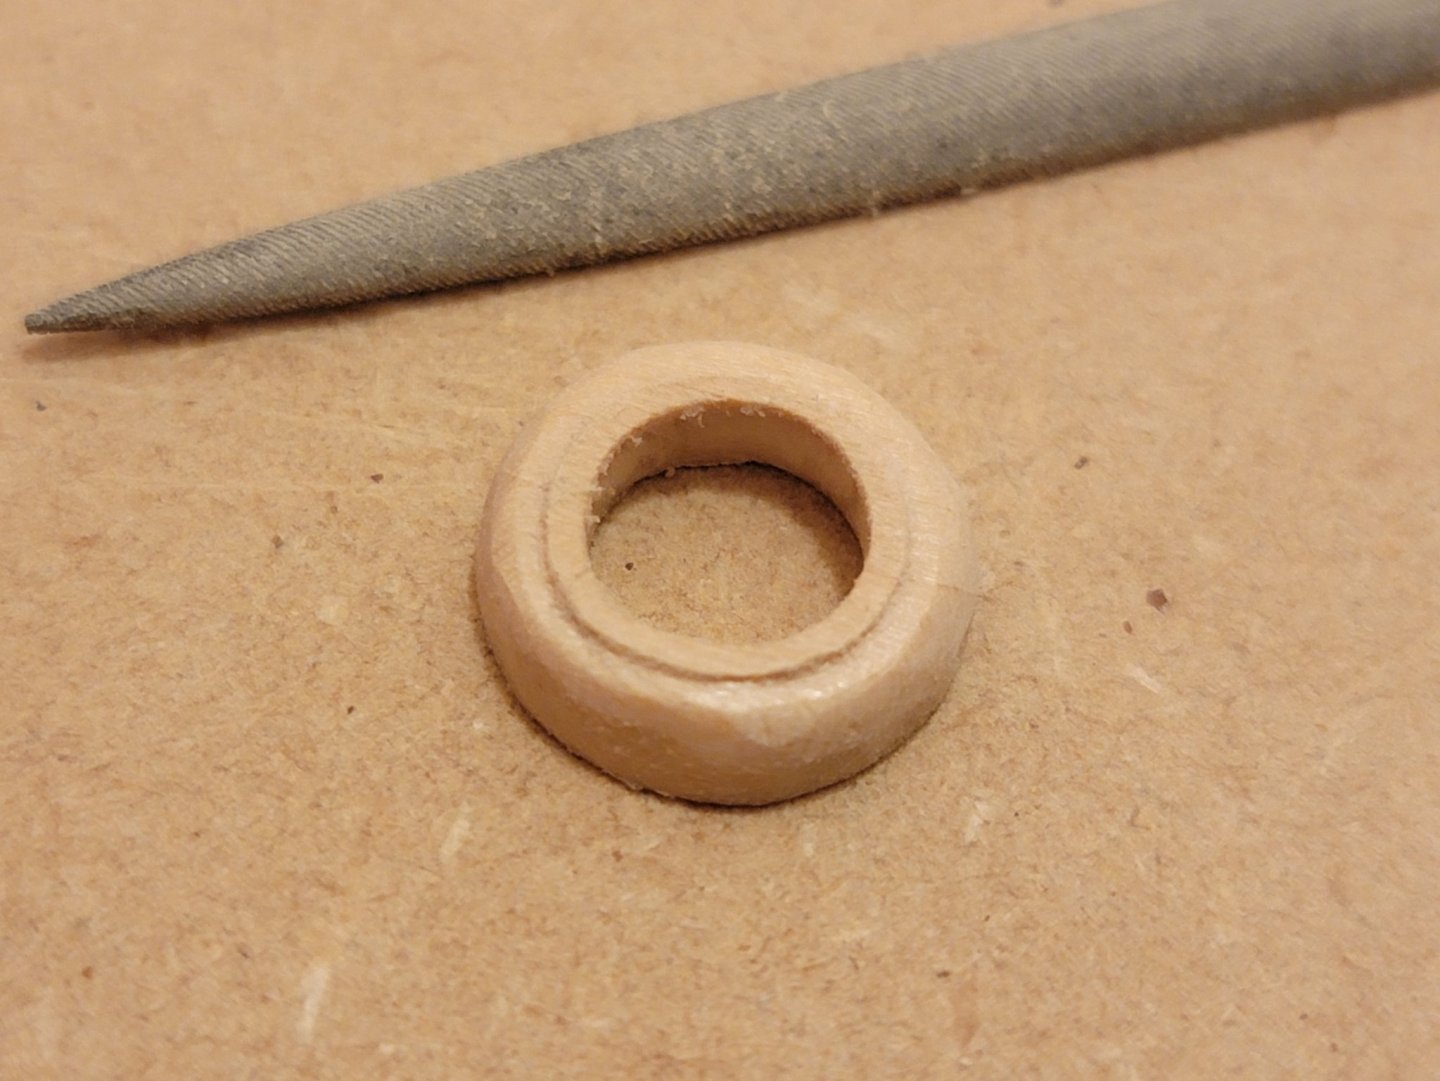
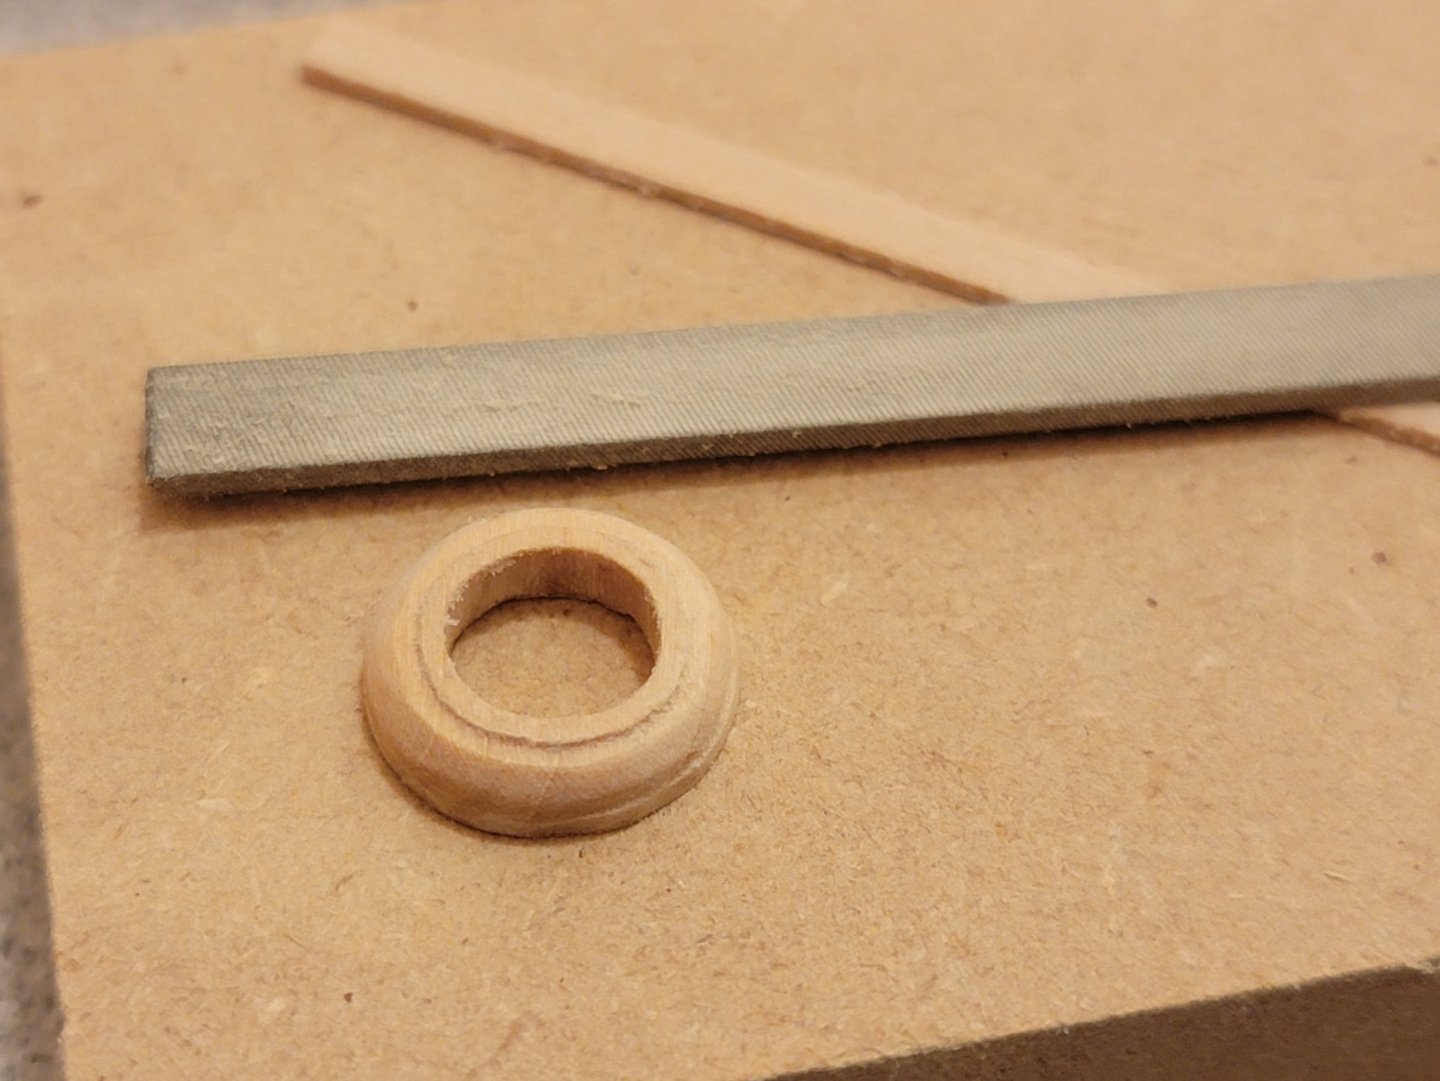
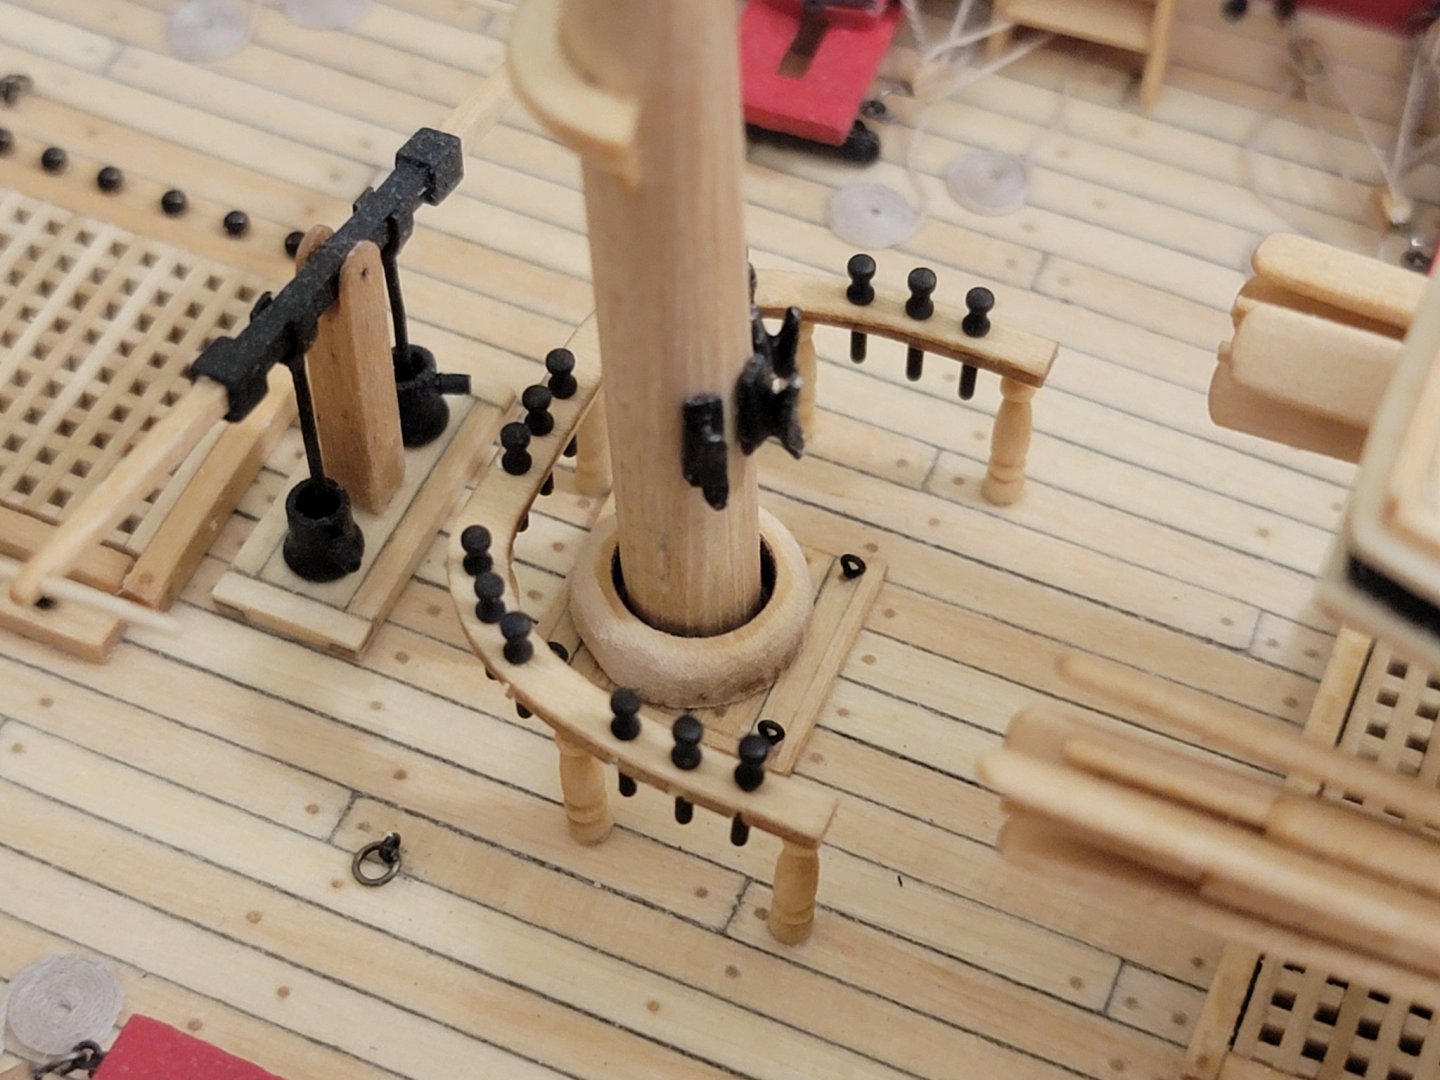
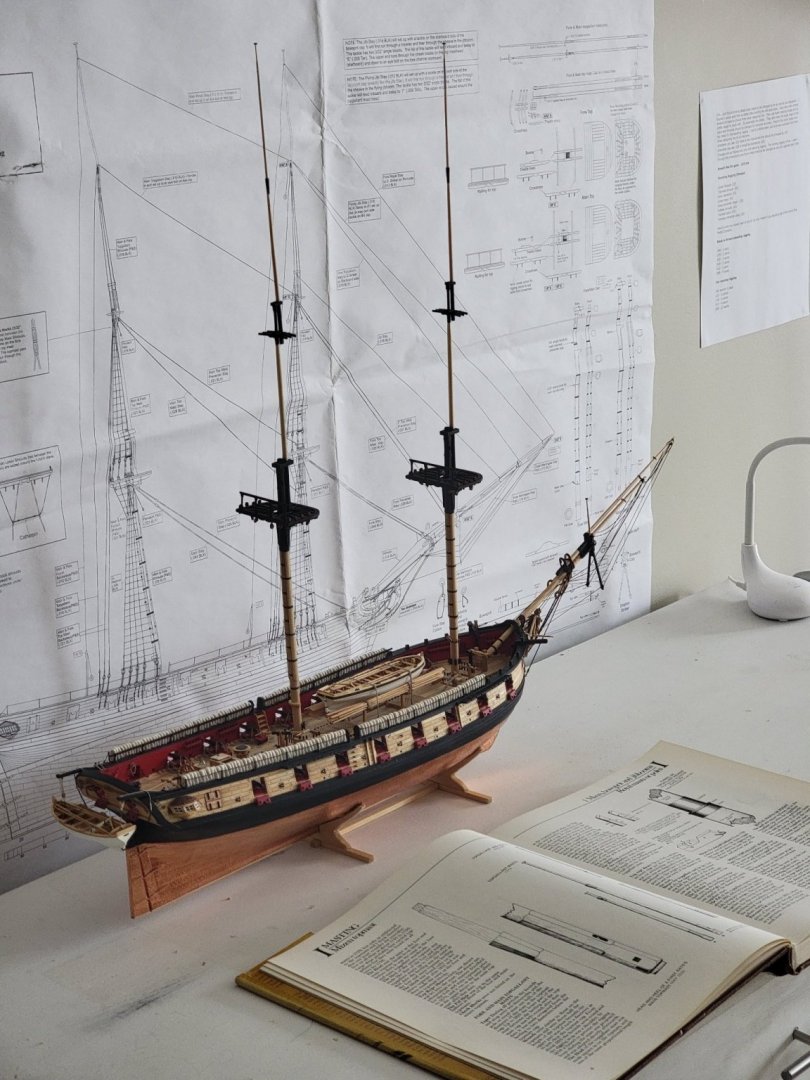
Thank you for the helpful comments! @desalgu, I have seen some images on the forum where the plans have been used on a display base, as shown here. In my case I just used the plans to work on the model since I can easily look at or measure something quickly. They are just attached with Blu Tack temporarily. But feel free to go ahead to use this idea, it would look much better without all the creases! I have seen many other builders here use the same technique Thanks again for the nice words. Your model is brilliant, I have been admiring the progress showed in your log. She's a real treat! I did a bit of research on the wedges, it seems like they were used for this sized ship. I found this link where it mentions they were used for keel-stepped rigs, which the Syren was. I guess they were just meant to keep the mast steady and not shift all over the place, and the stays and shrouds did most of the heavy lifting to keep the masts stable. Chuck's instructions on the Cheerful mentions they were "plain ugly", so this may suggest that wedges were used 😄. He also mentioned that contemporary models had fancy profiles on their coats. So this could be where some artistic freedom can be applied Anyhow, I managed to make some with the fancy profile. Before, I was thinking of painting them black, but now because of the profile I will keep natural Here is the process I used to create them: First, I did what desalgu suggested, by drilling a hole for the mast to fit snug in 1/16" basswood sheet. I do not have drillbits of this large diamater, so after drilling to a smaller hole size, round files were used to enlarge the hole. Using a jeweler's saw, I cut out the circular profile Next I smoothened the outside circular edge, then rounded it using needle files: After seeing the Cheerful's lovely coats, I wanted to try out shaping it some more, so using the flat edge of a half round needle file (For the sharp edge), I sanded off sections of the top to create a 'step': Then, using a thin piece of wood as a guide, I sanded off the middle section so that a step at the bottom can be created: Finally, it was sanded smooth, and tung oil was applied. Here it is dry-fitted on the deck:


- 950 replies
-
- 18
-
-

-
- syren
- model shipways
- (and 1 more)
-
That makes sense! I never knew that's what's done in actual practice.. I checked other logs of the Syren and it seems that it fitted snuggly on all of them. I also prefer the clean look. If I struggle too much with it or if my attempt fails, I may opt for having it loose for wedges to fit in based on the reference pictures provided.
- 950 replies
-
- 1
-
-
- syren
- model shipways
- (and 1 more)
-
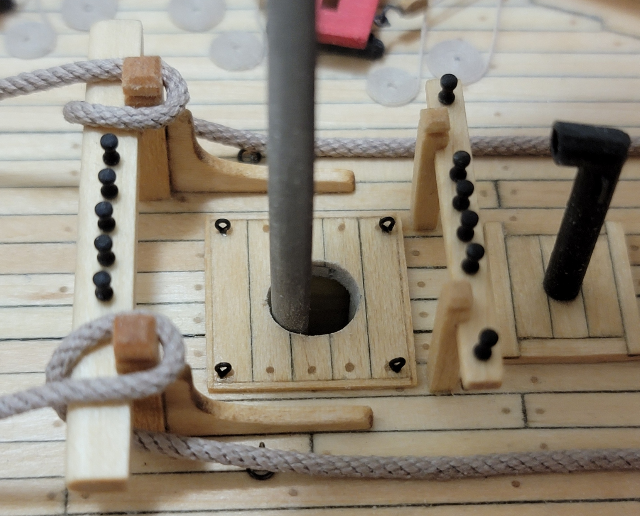
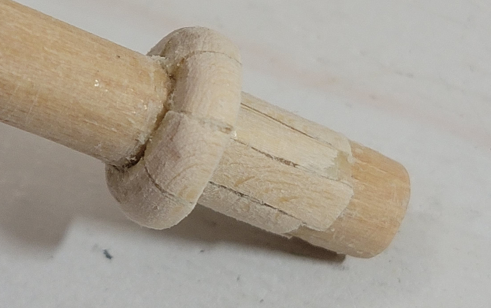
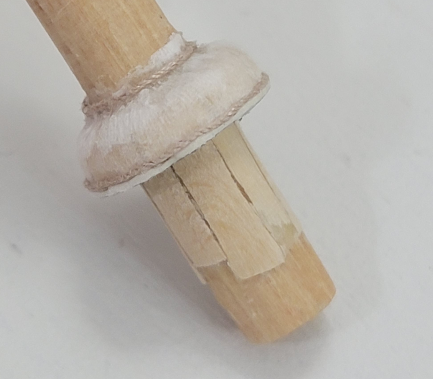
A mast coat update 😥: The ones from the kit are very loose (as shown below), so will need to scratch them. I'm thinking this might be much harder than it looks, especially without a lathe!! I guess I'll start with the hole, making sure it is snug with the mast, then cut around the hole and sand to be a circle
- 950 replies
-
- 7
-
-
- syren
- model shipways
- (and 1 more)
-
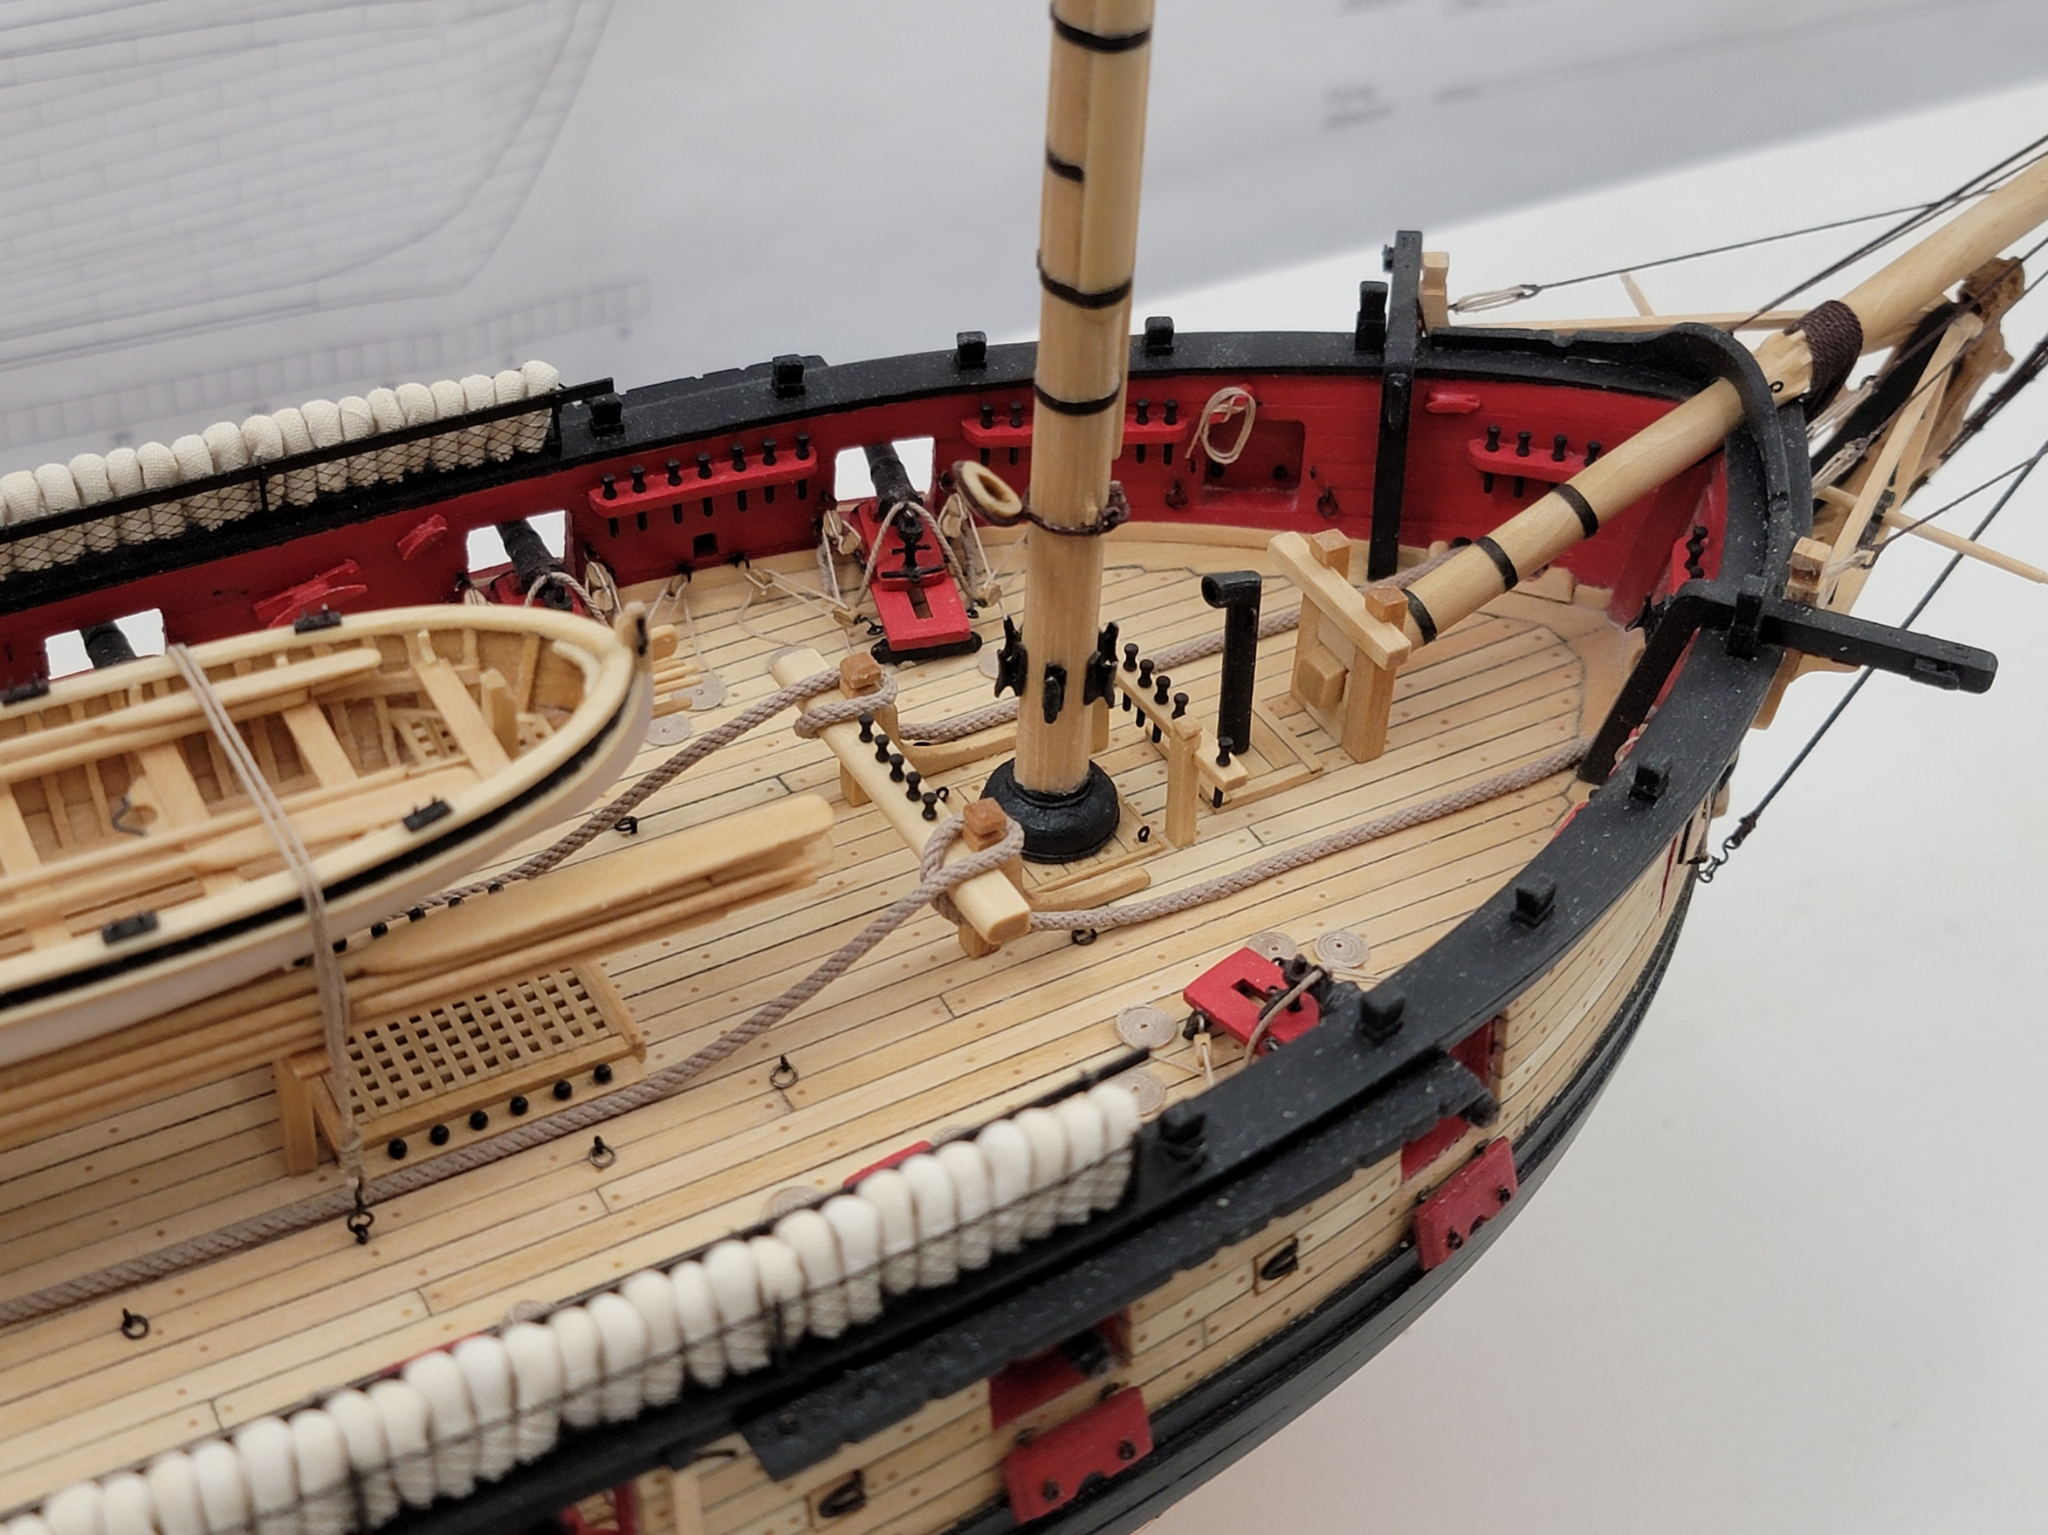
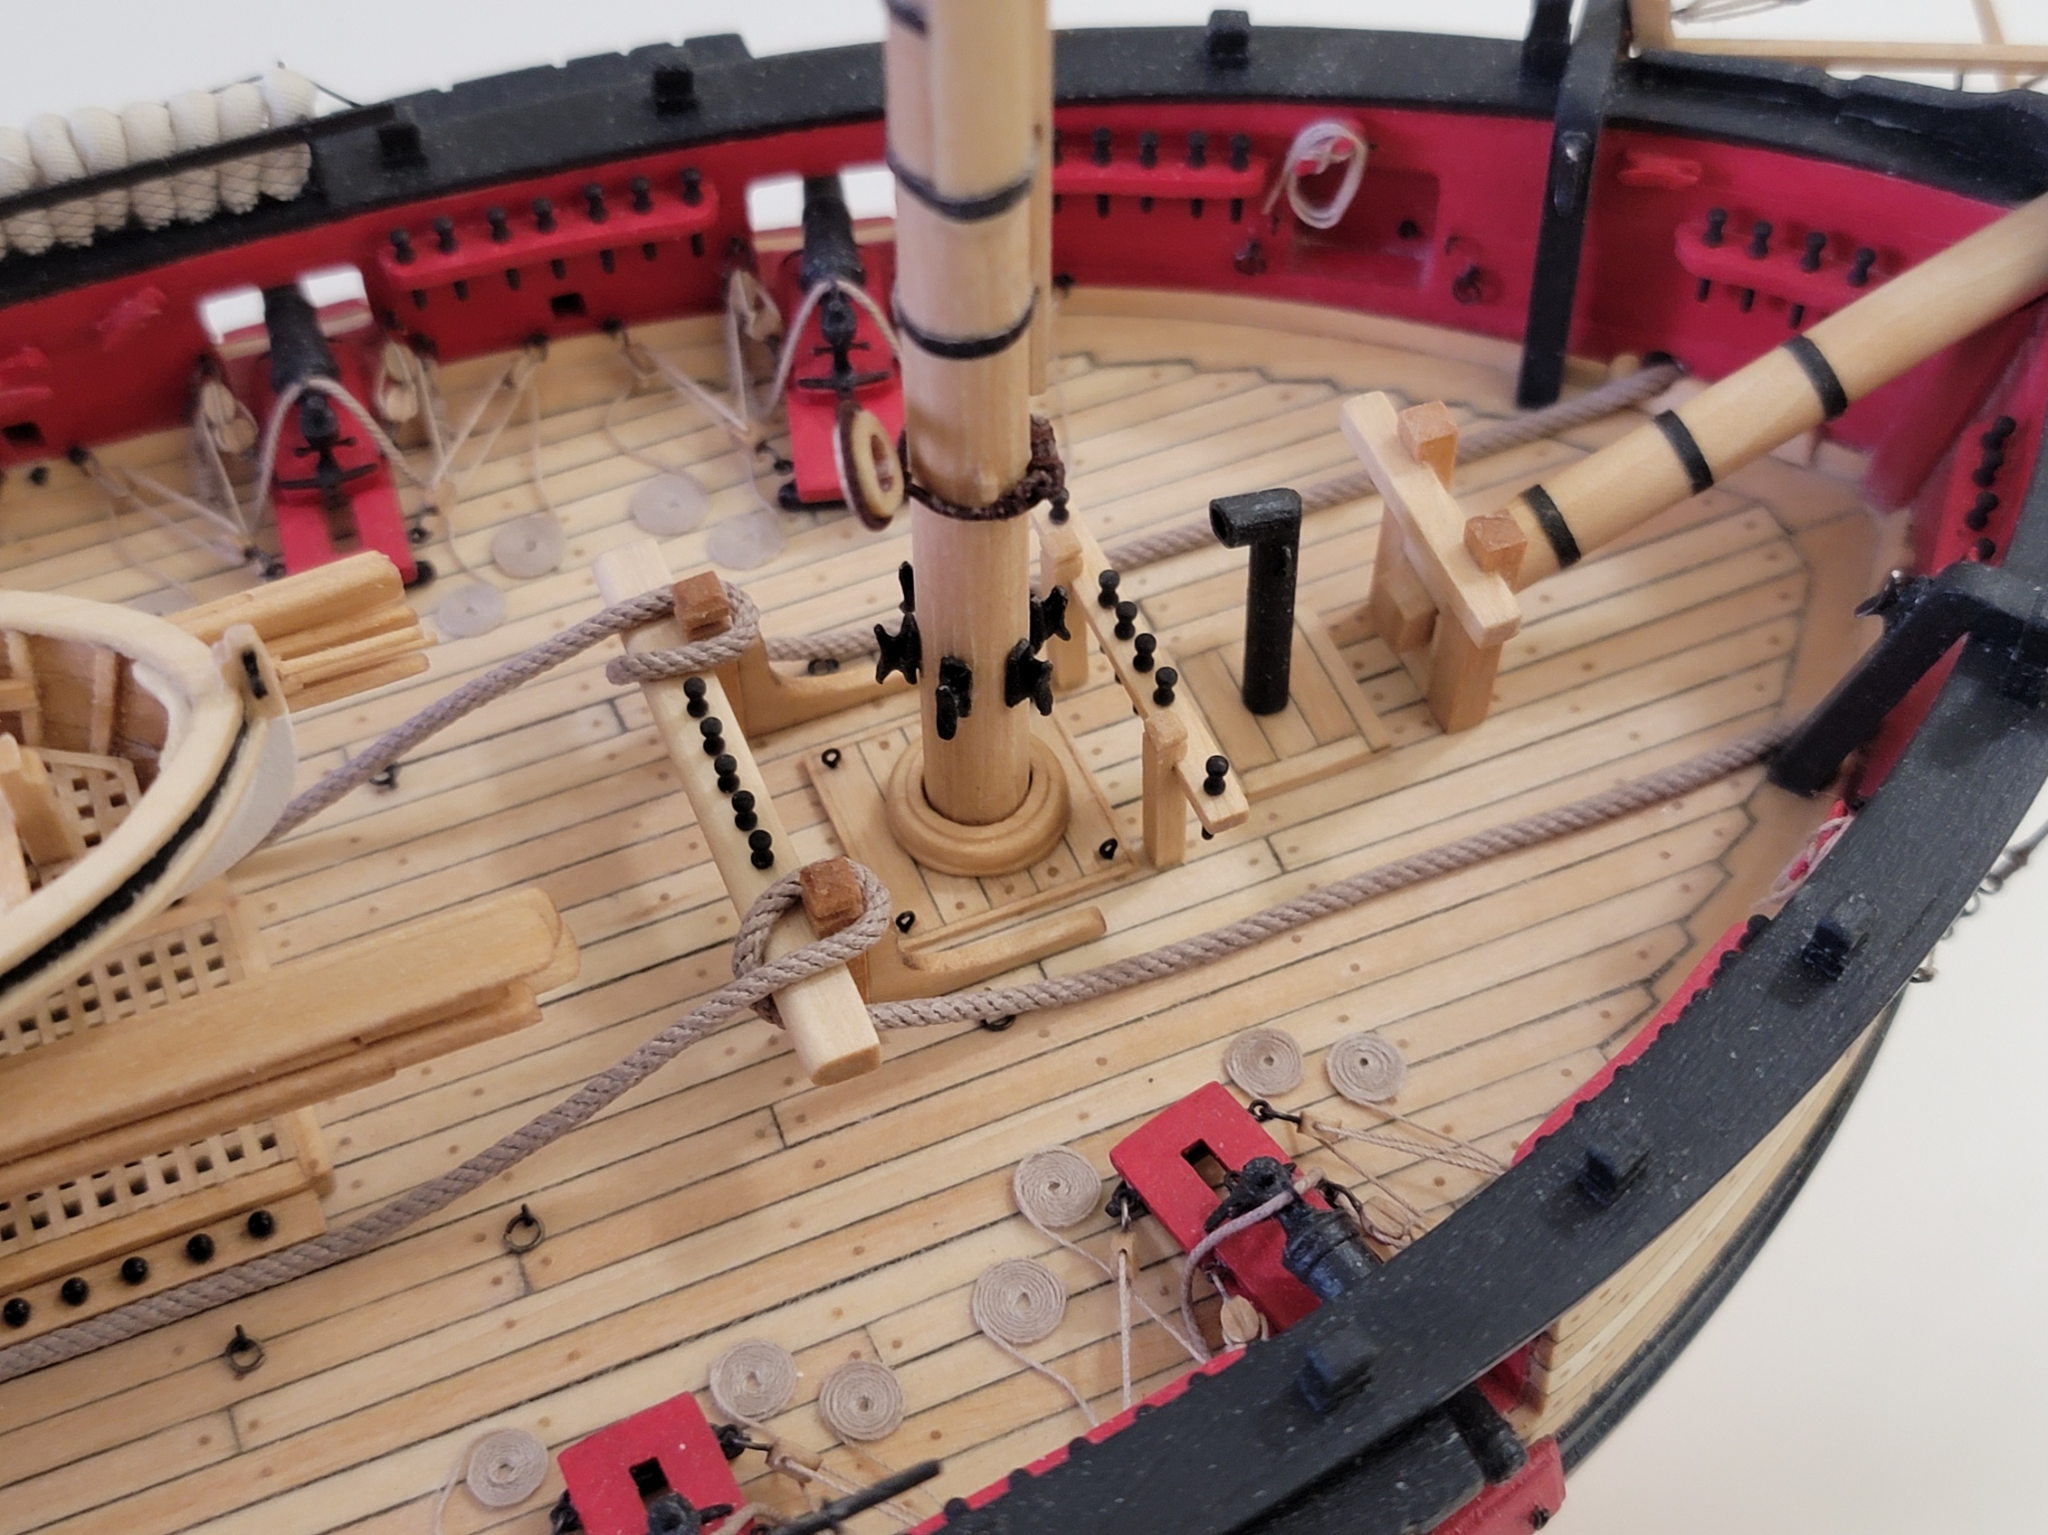
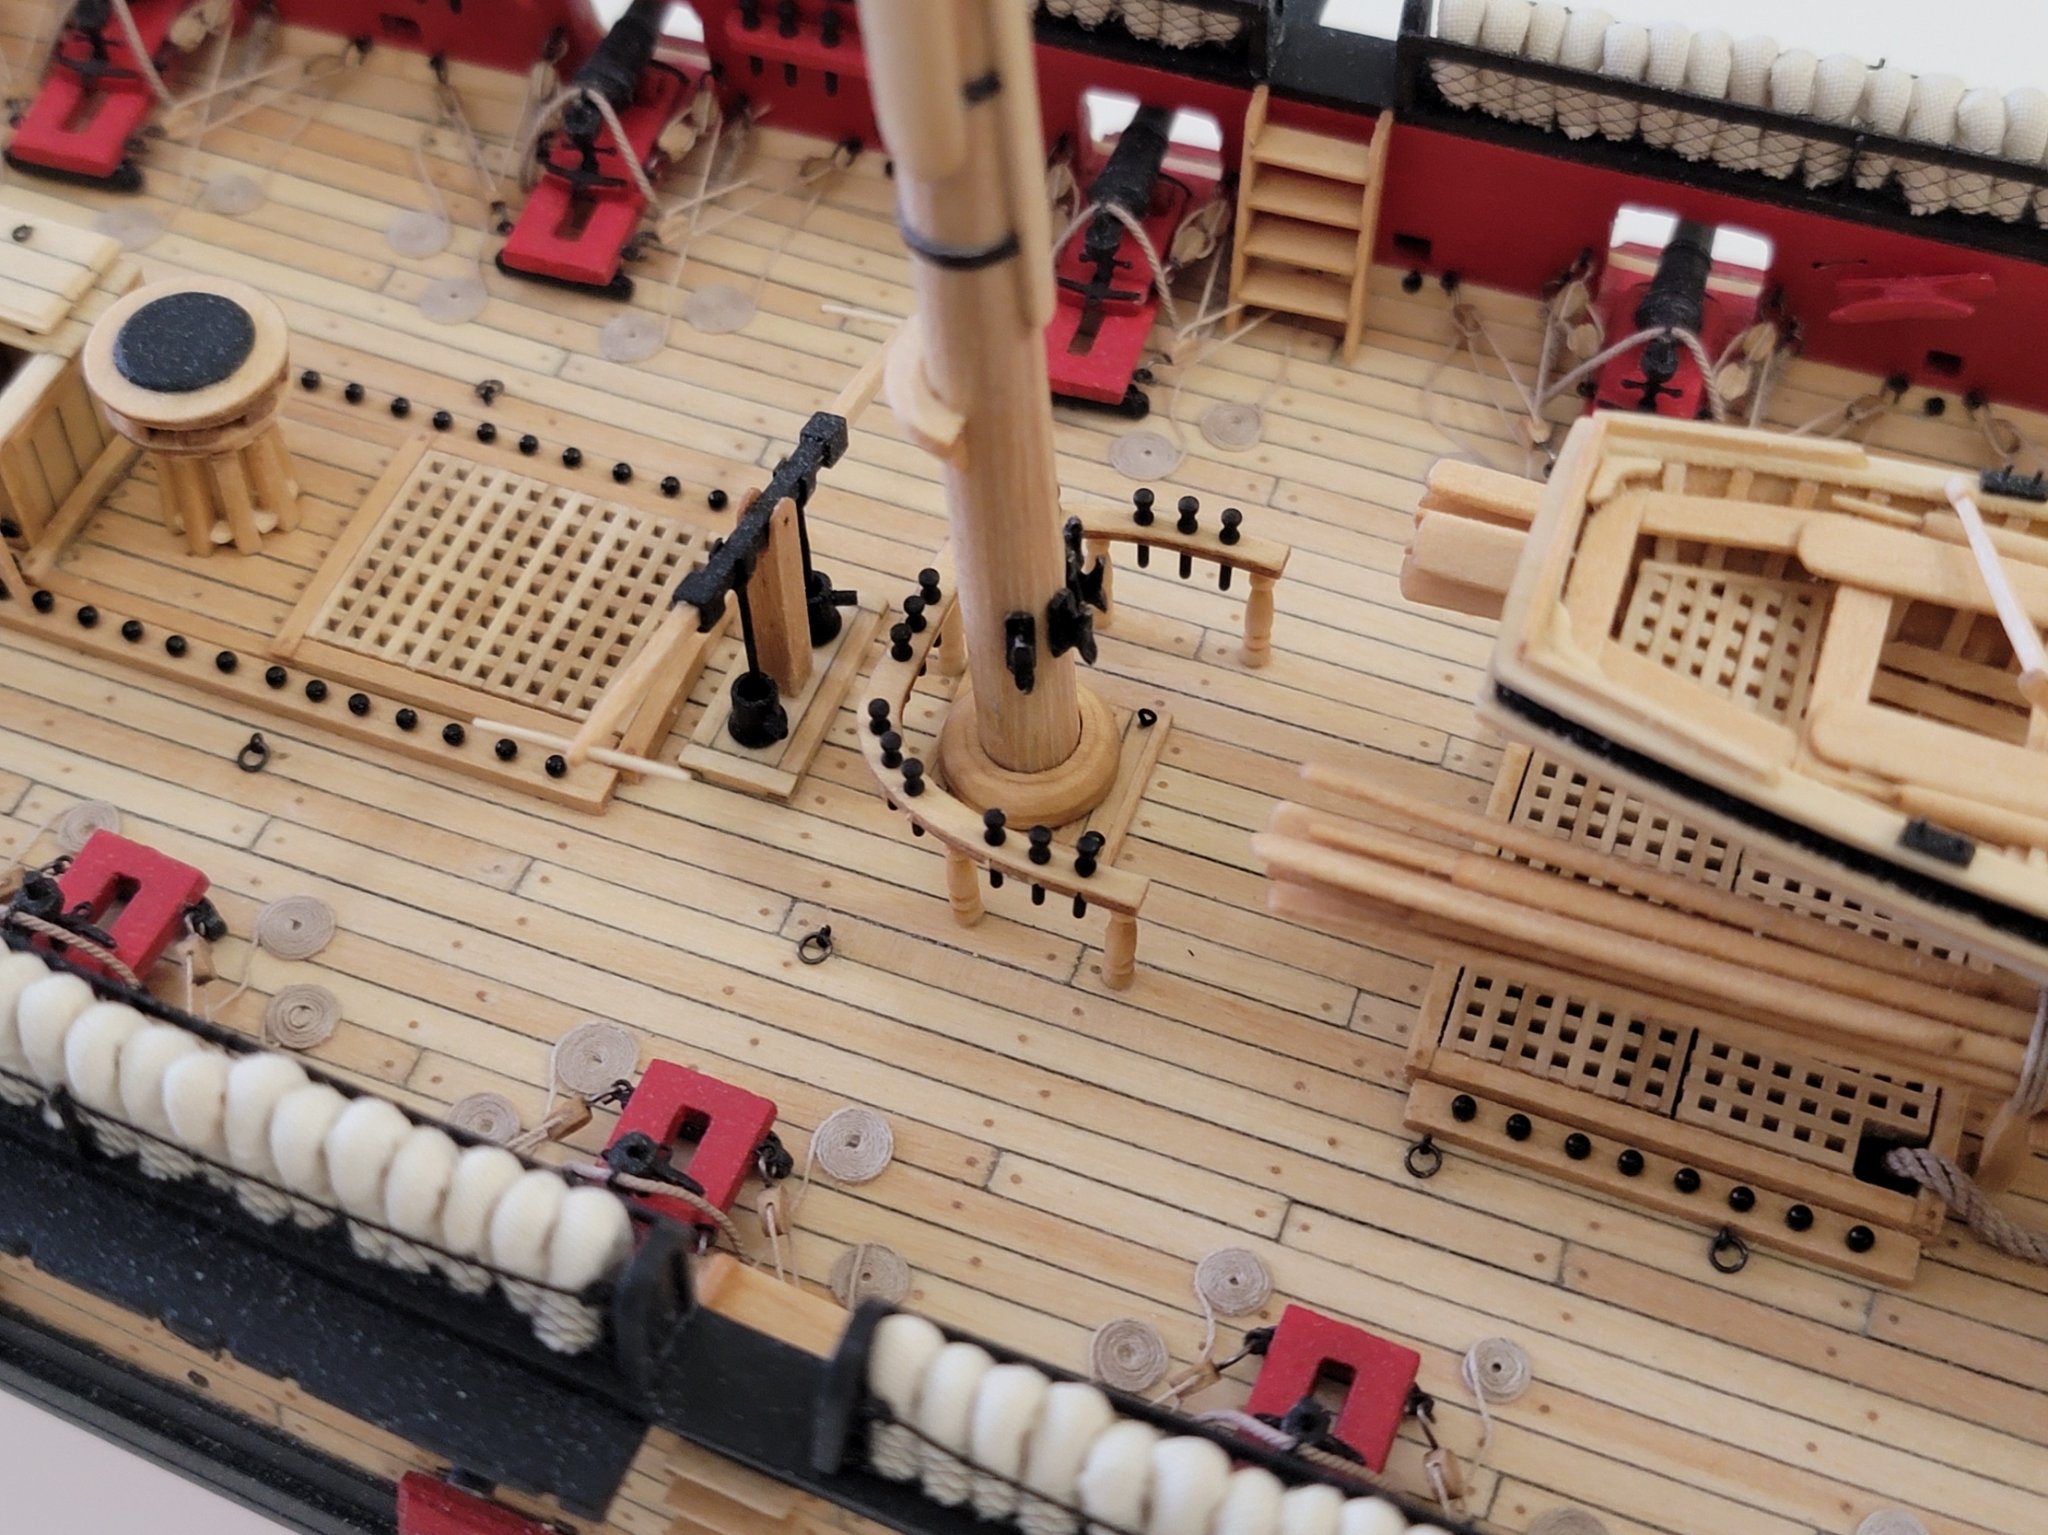
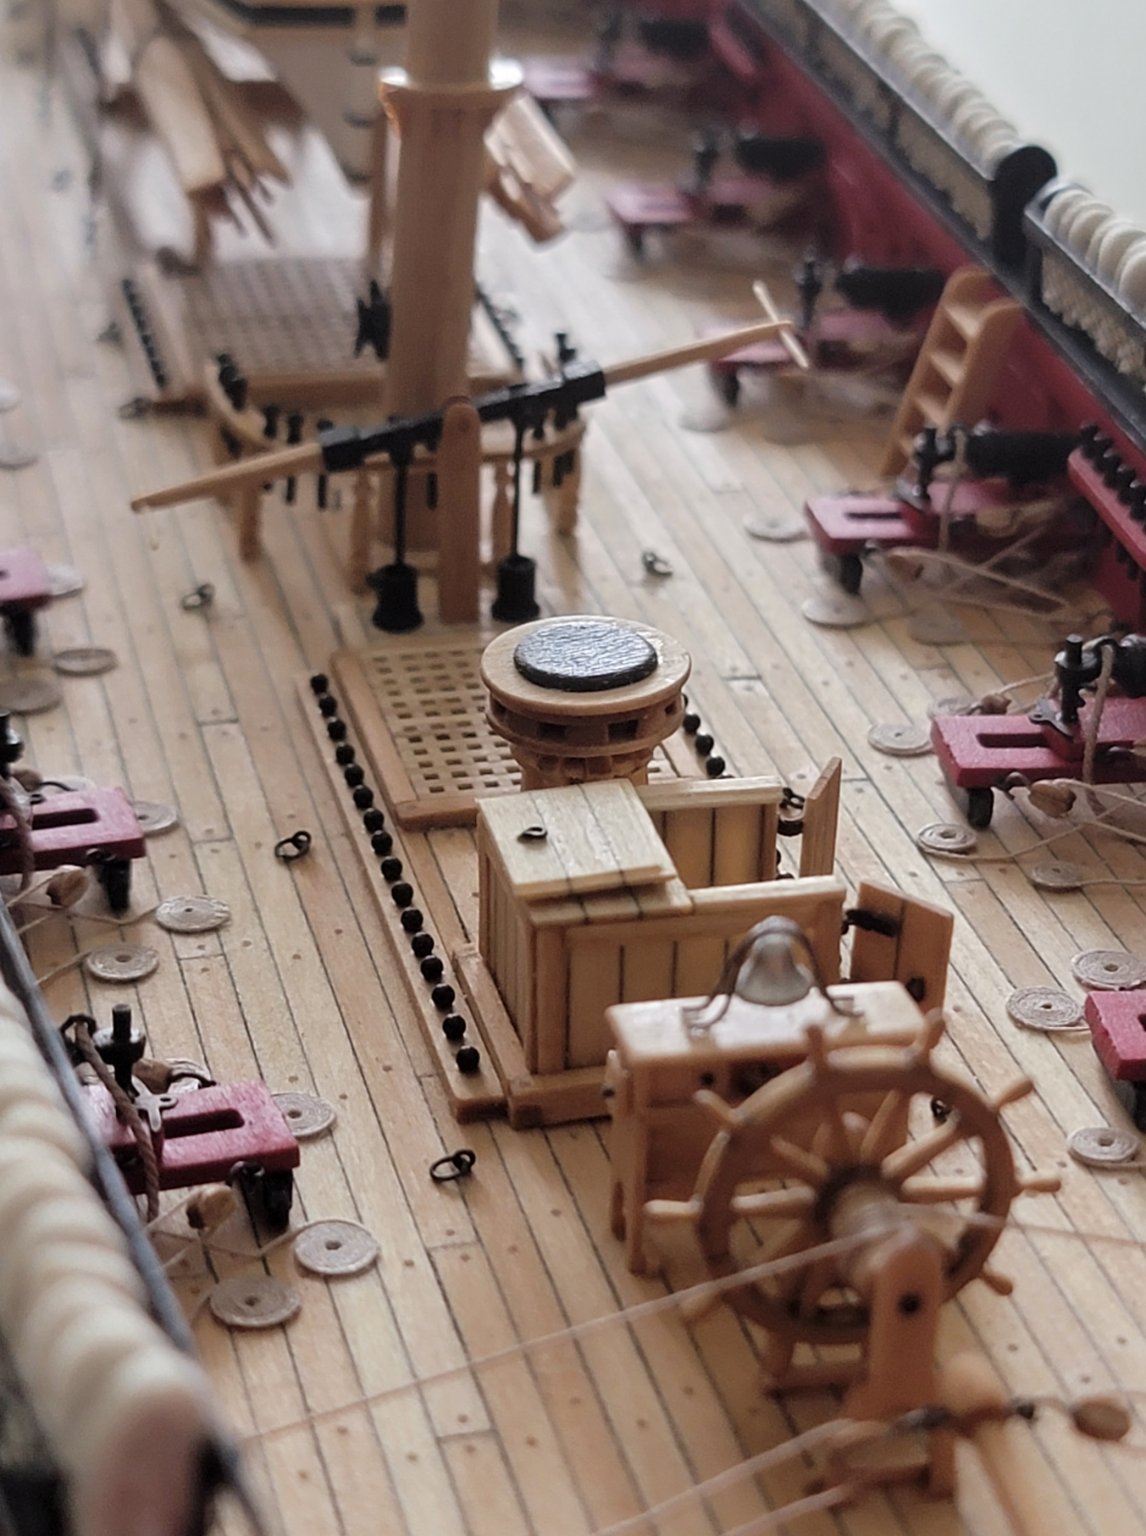
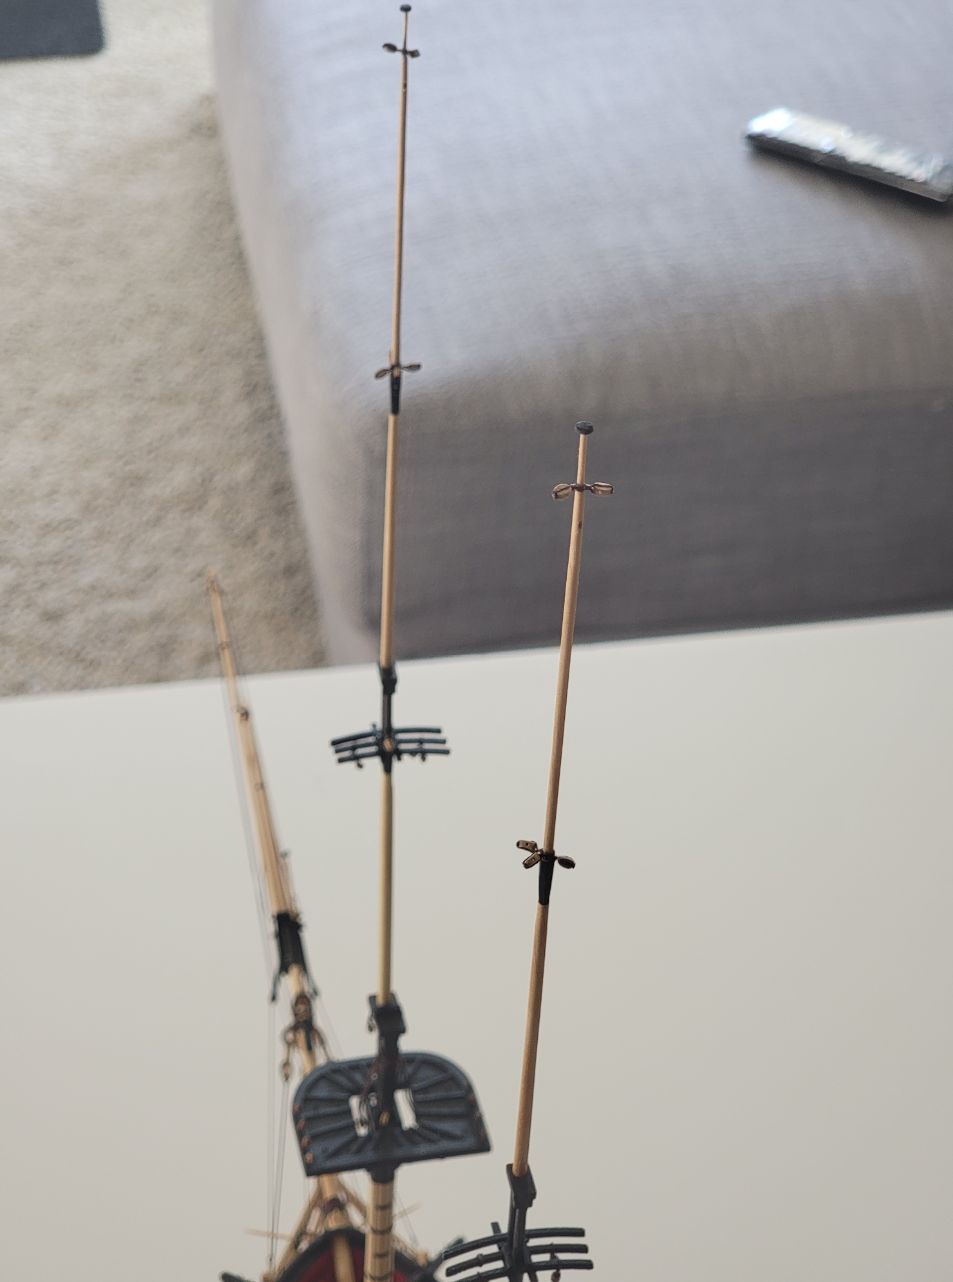
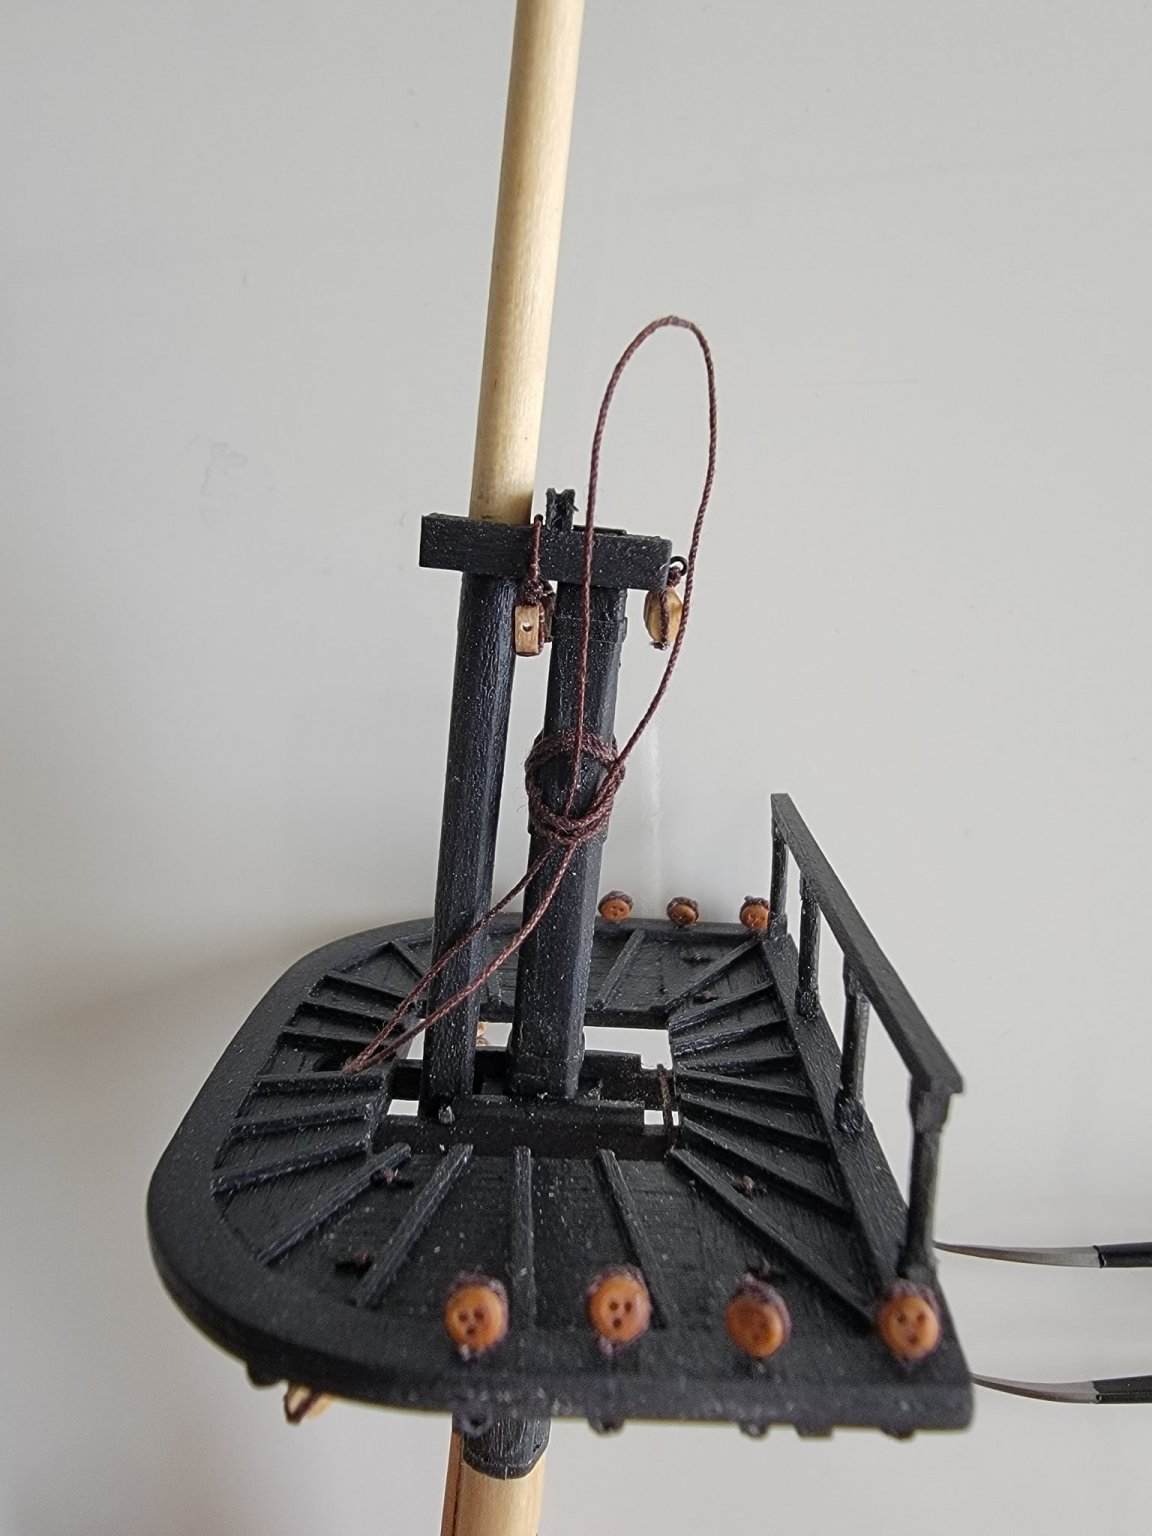
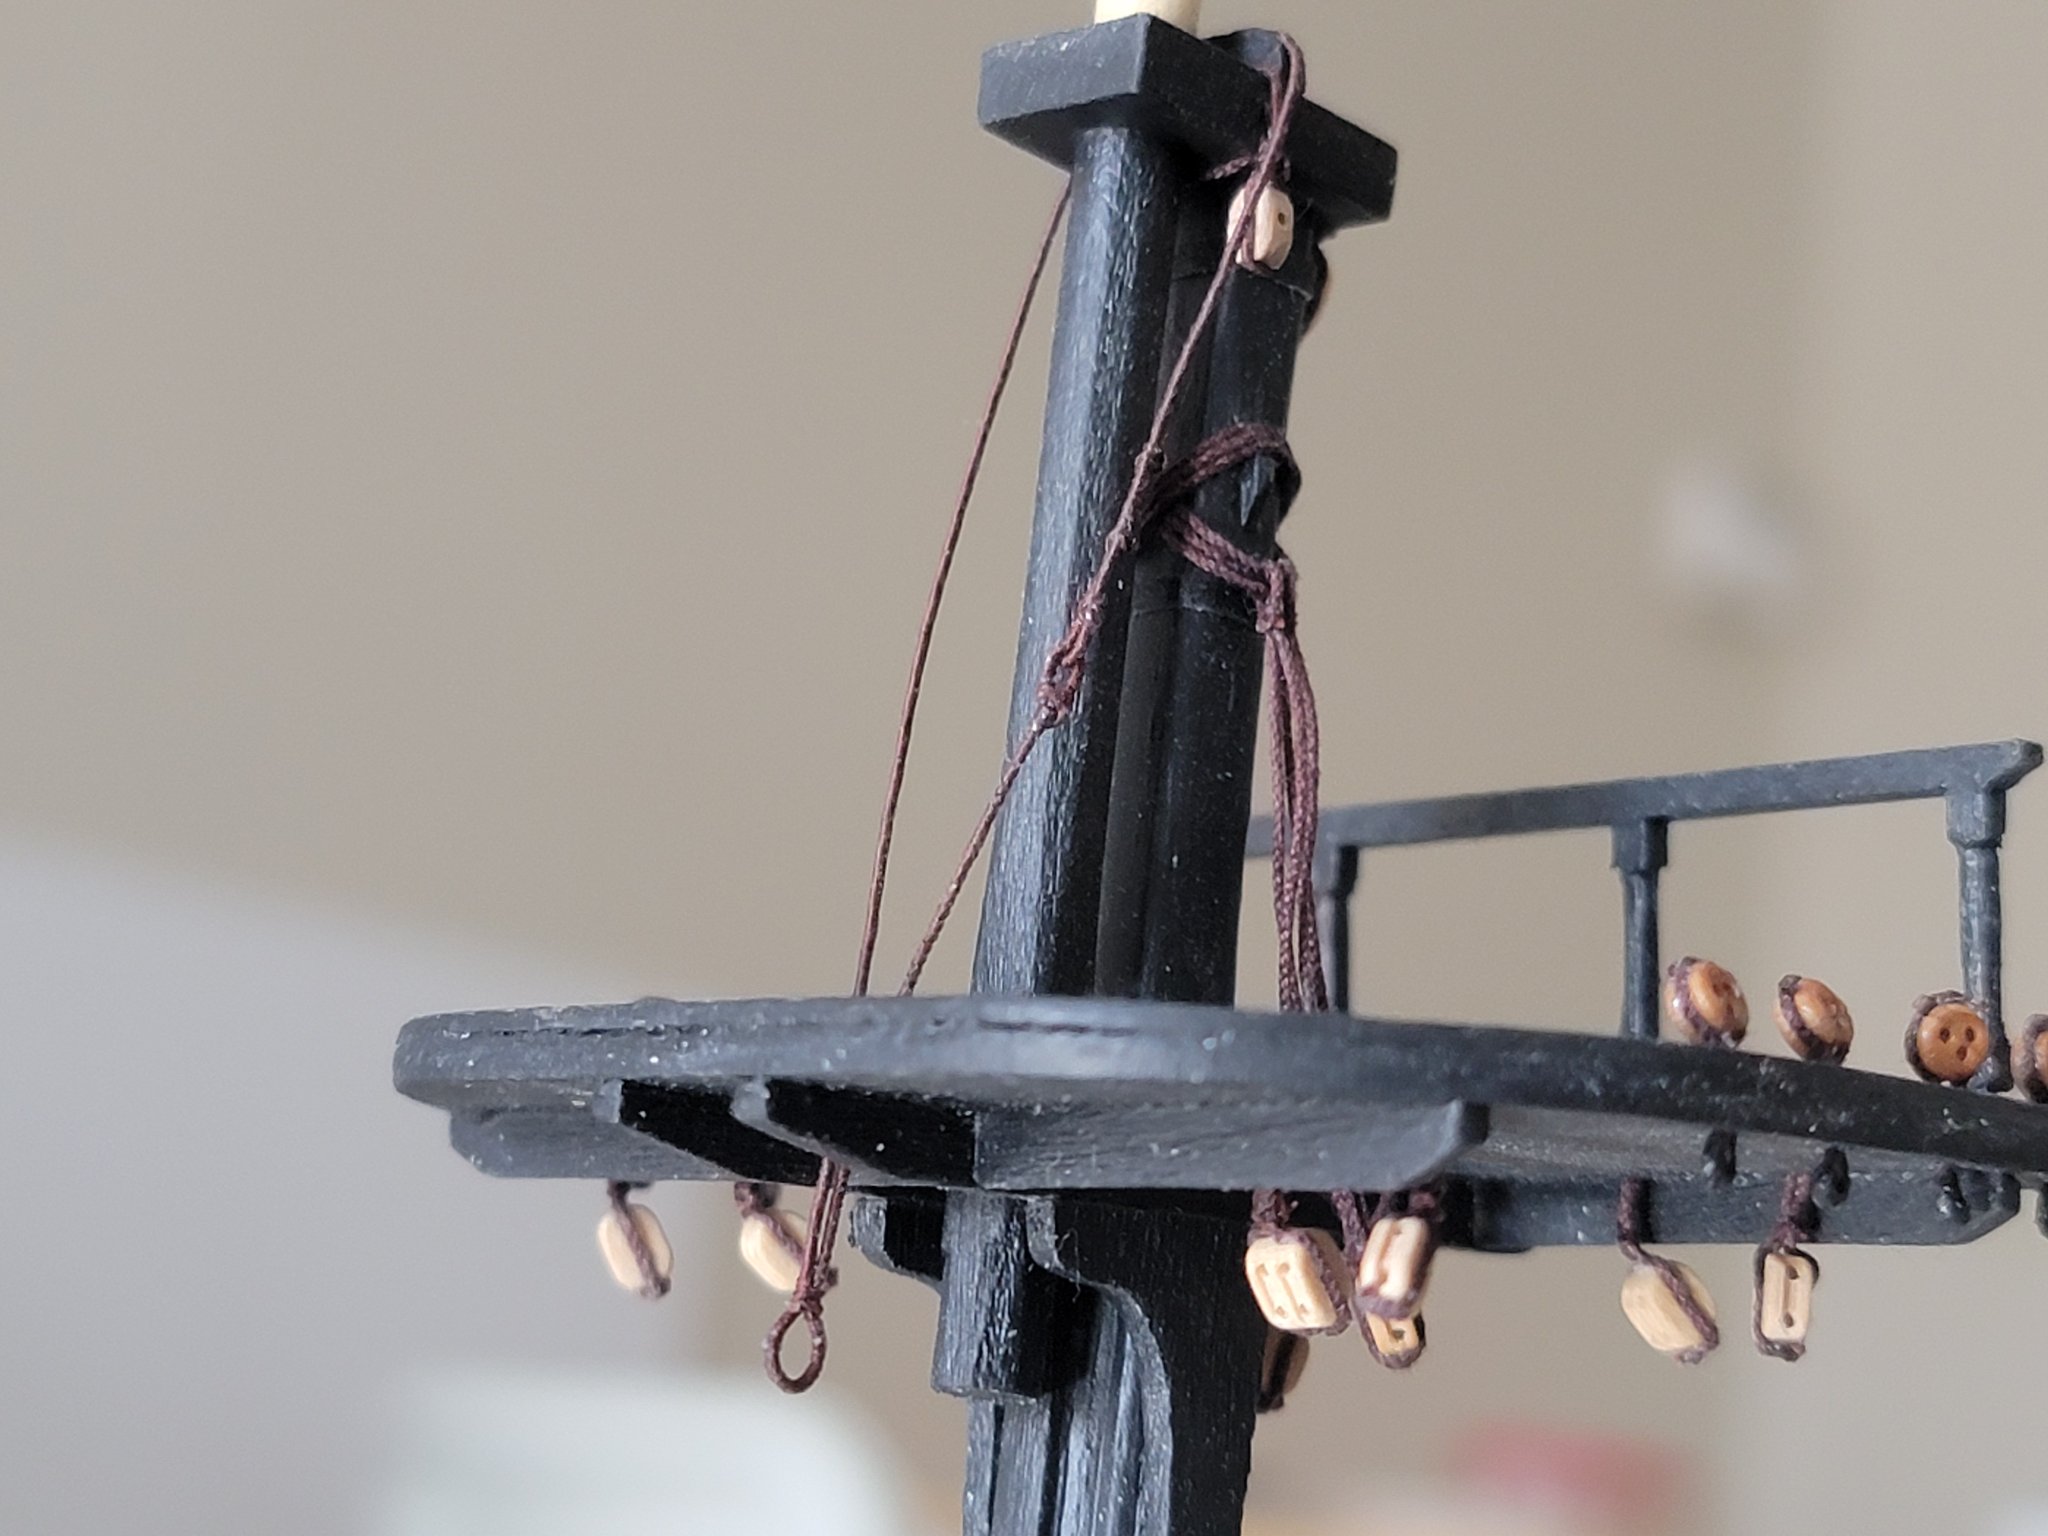
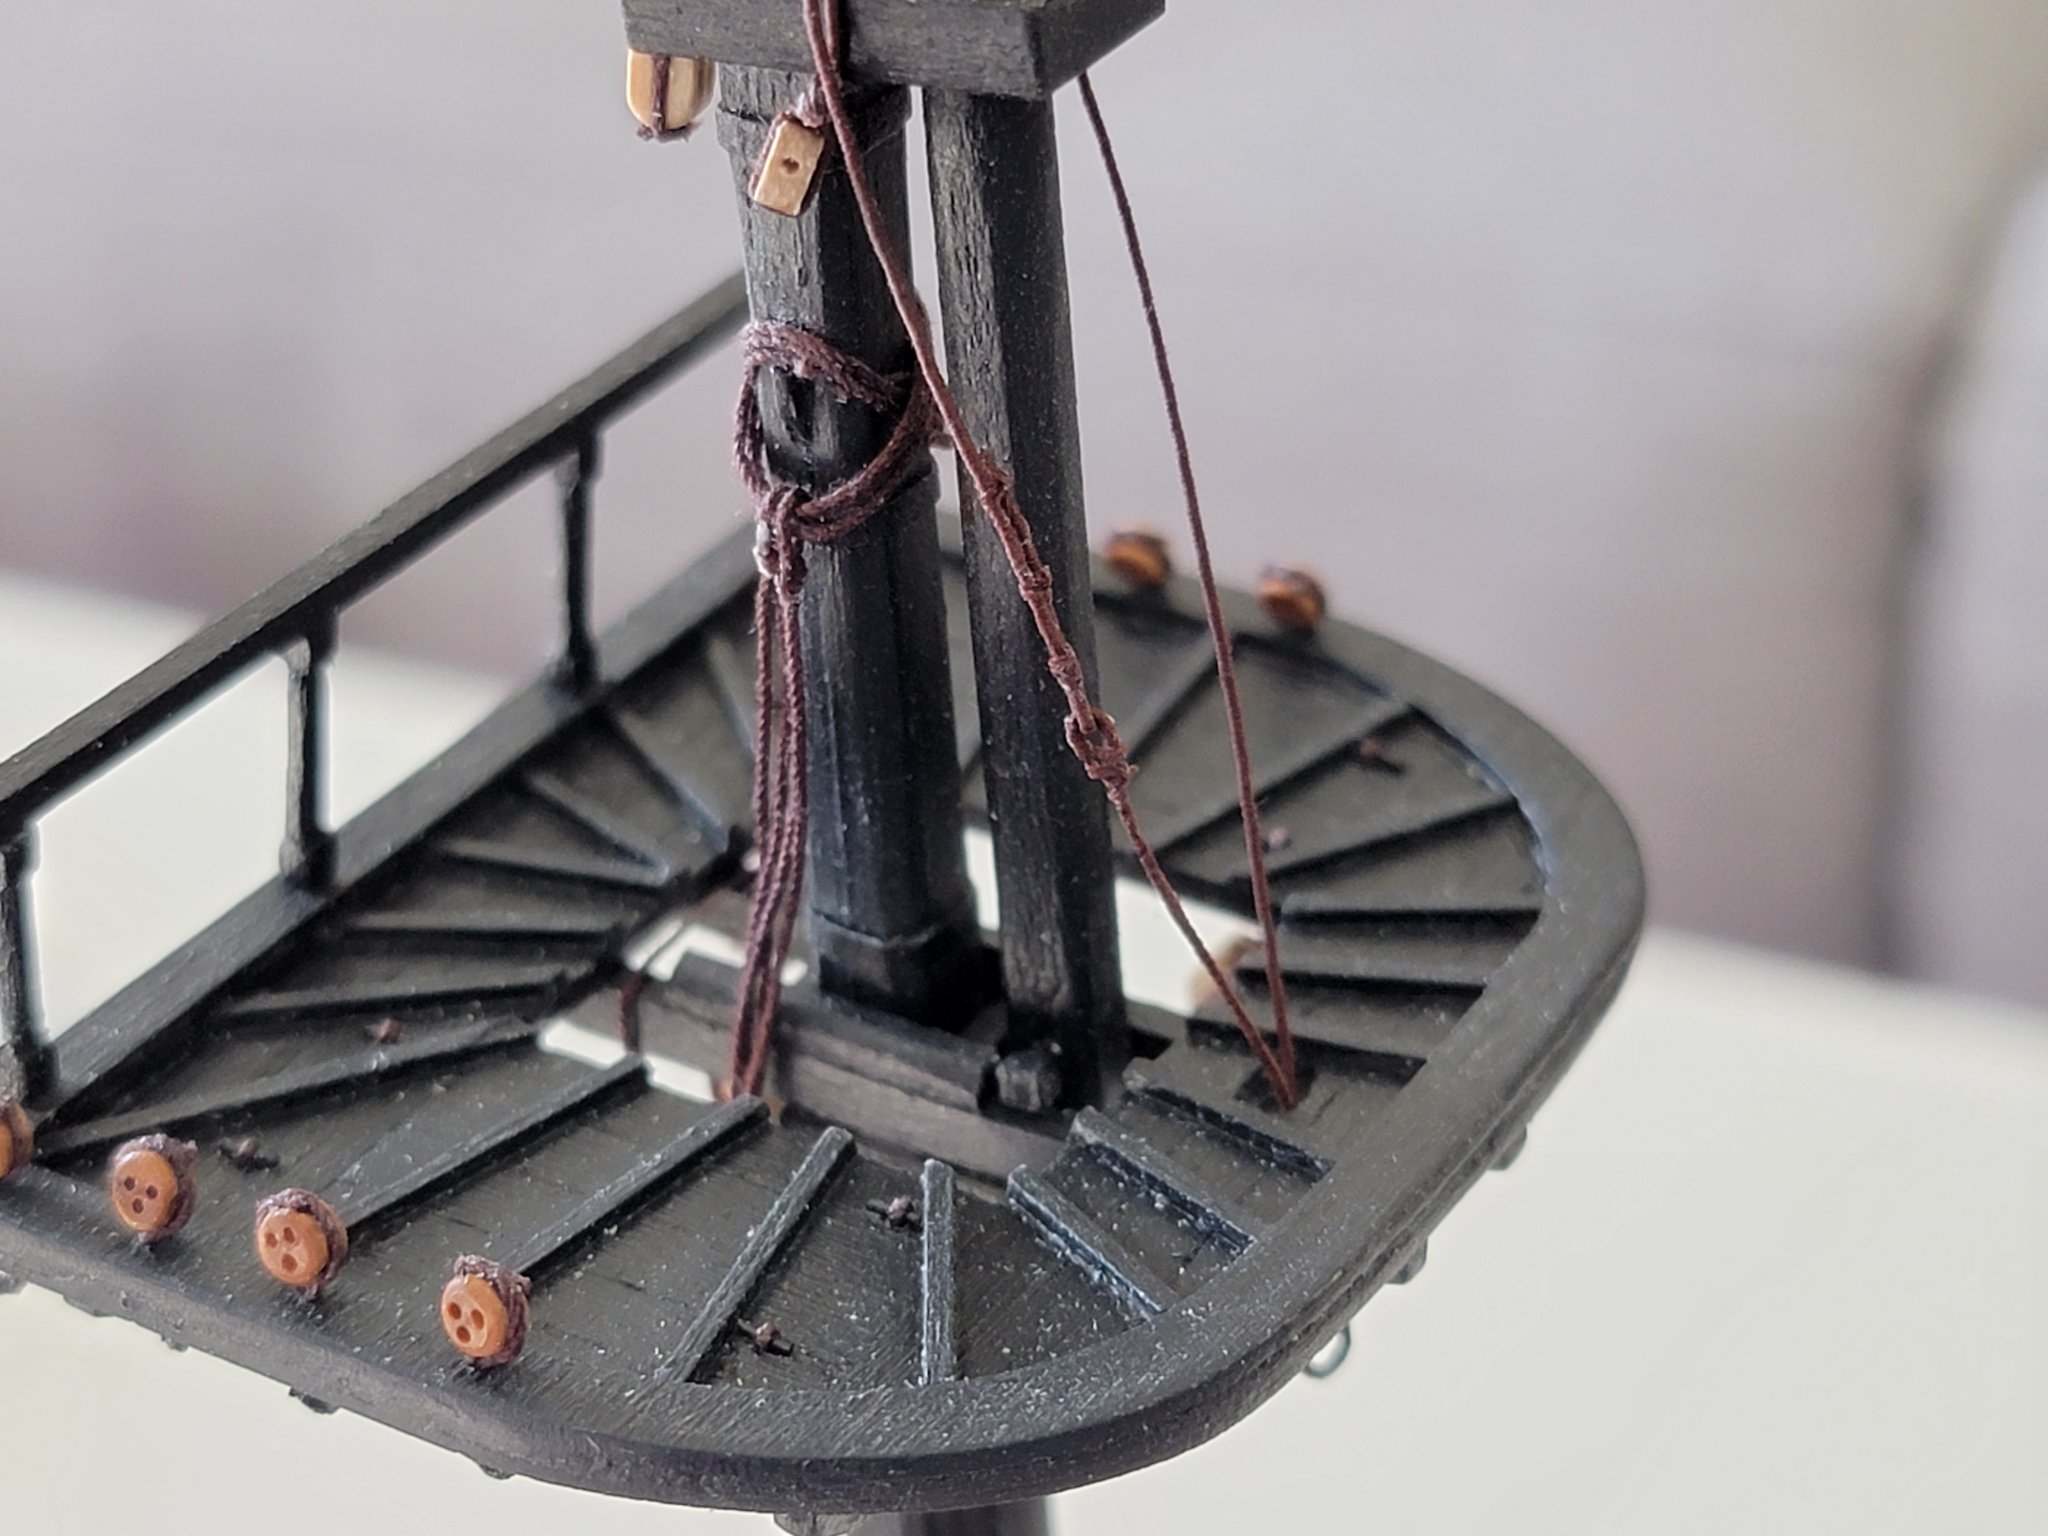
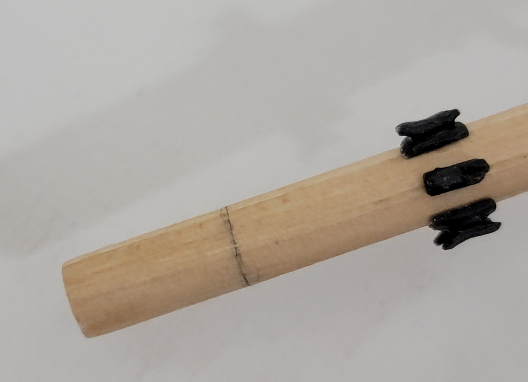
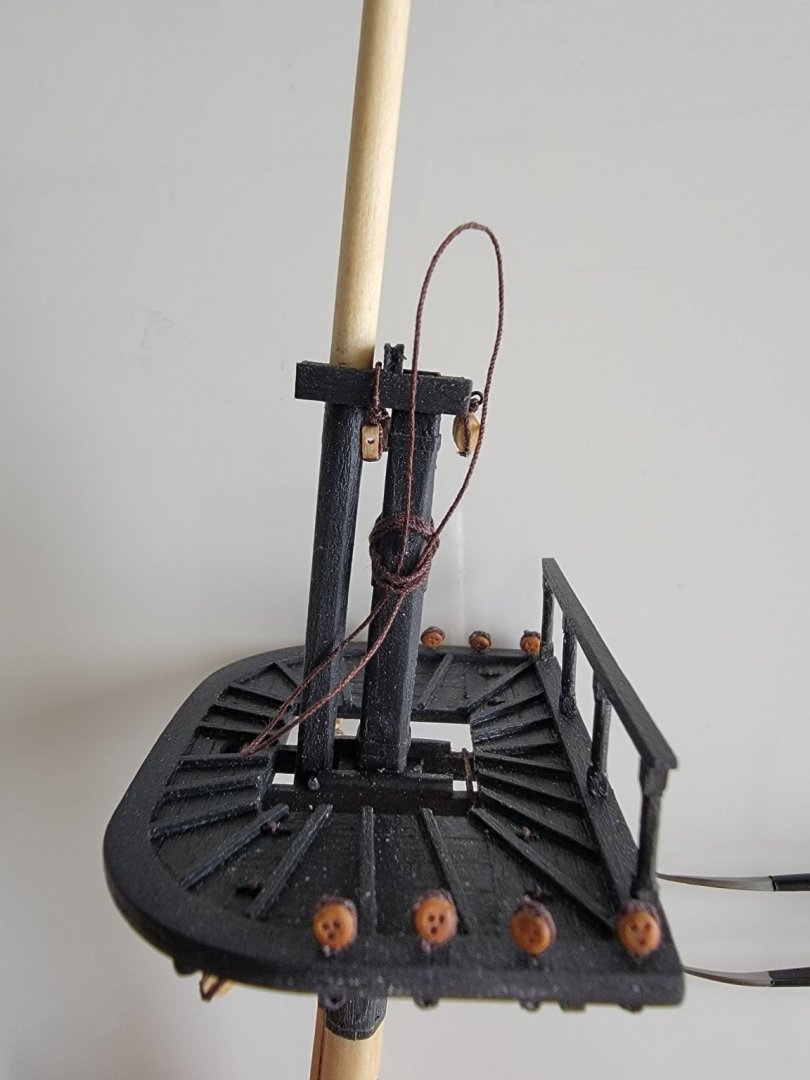
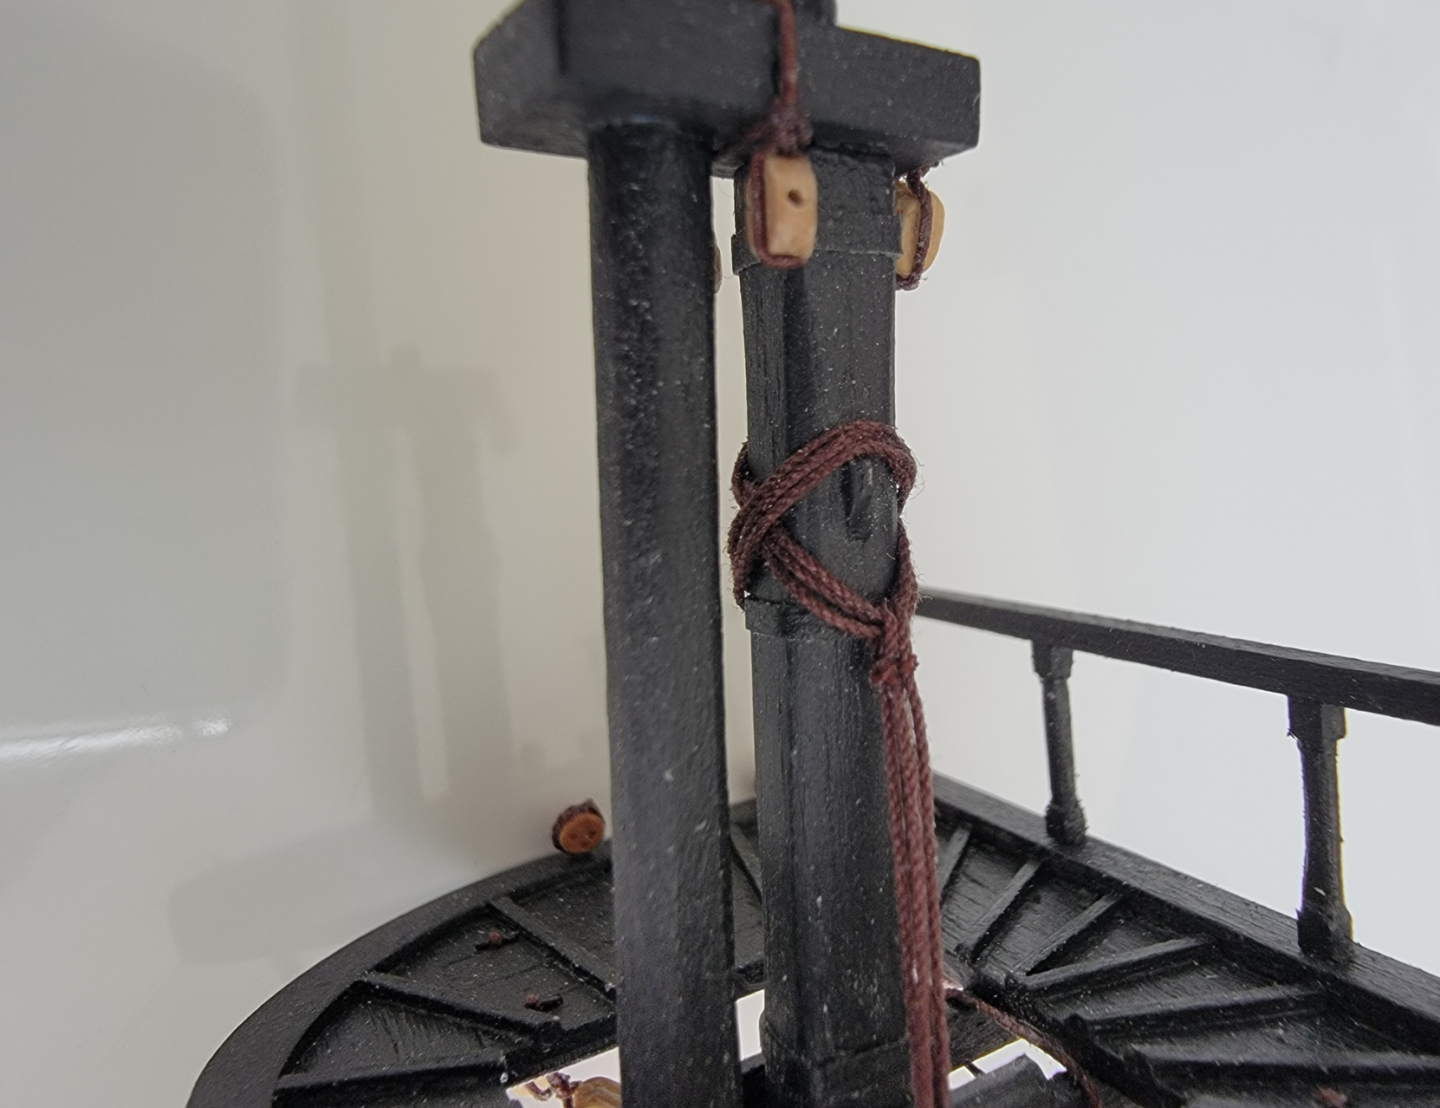
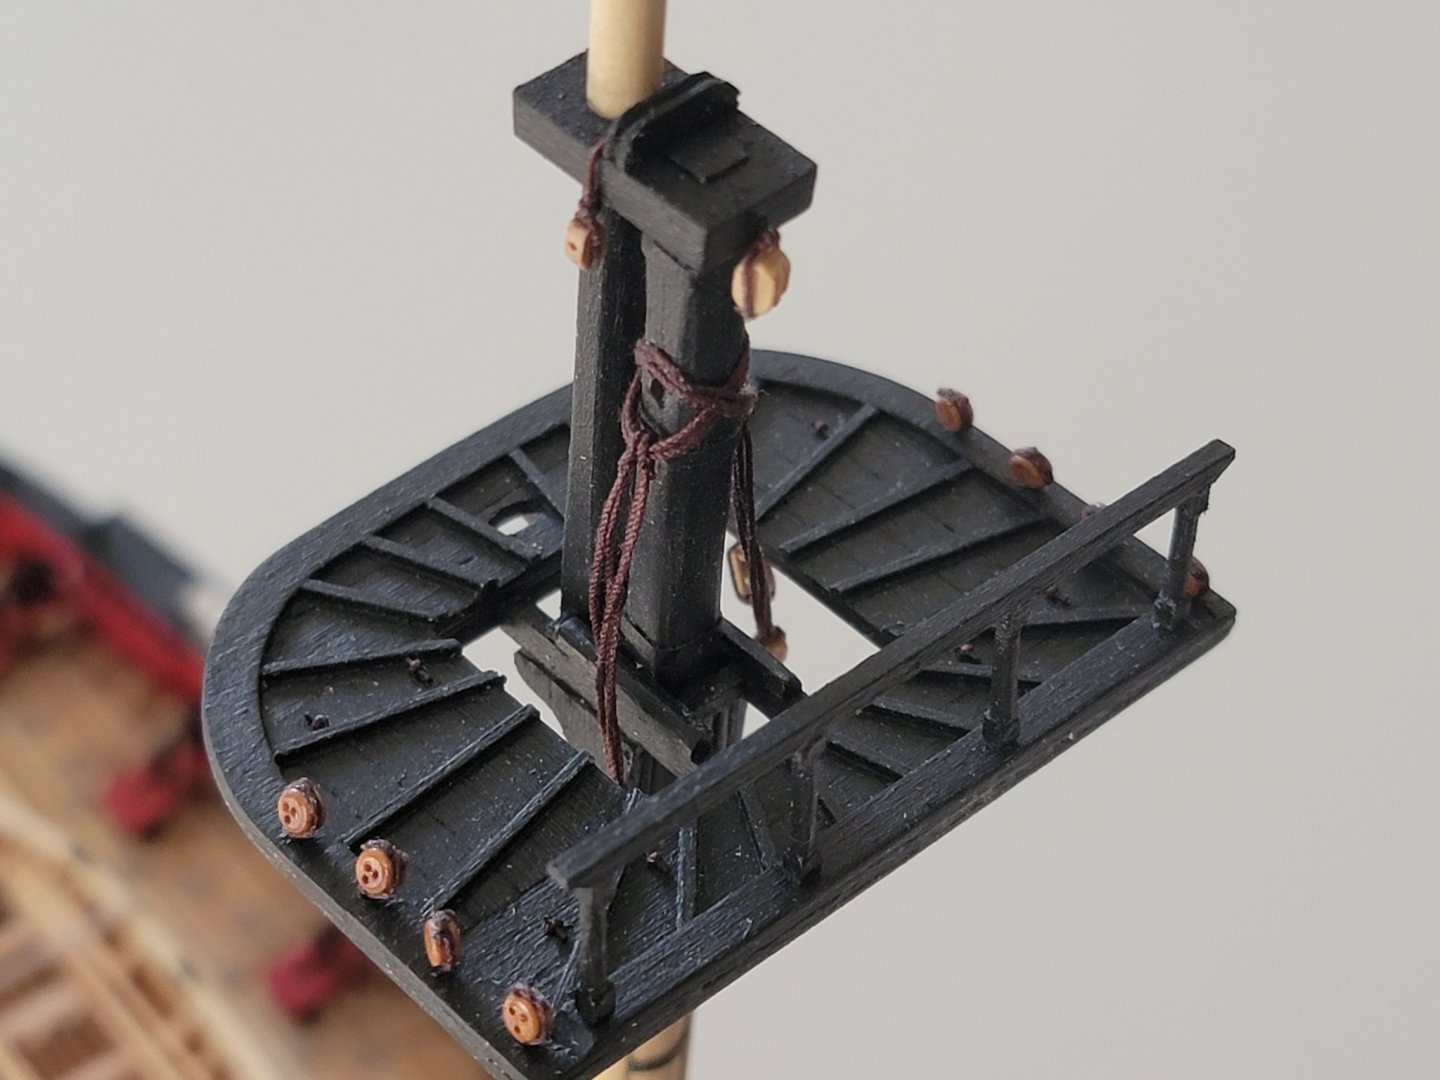
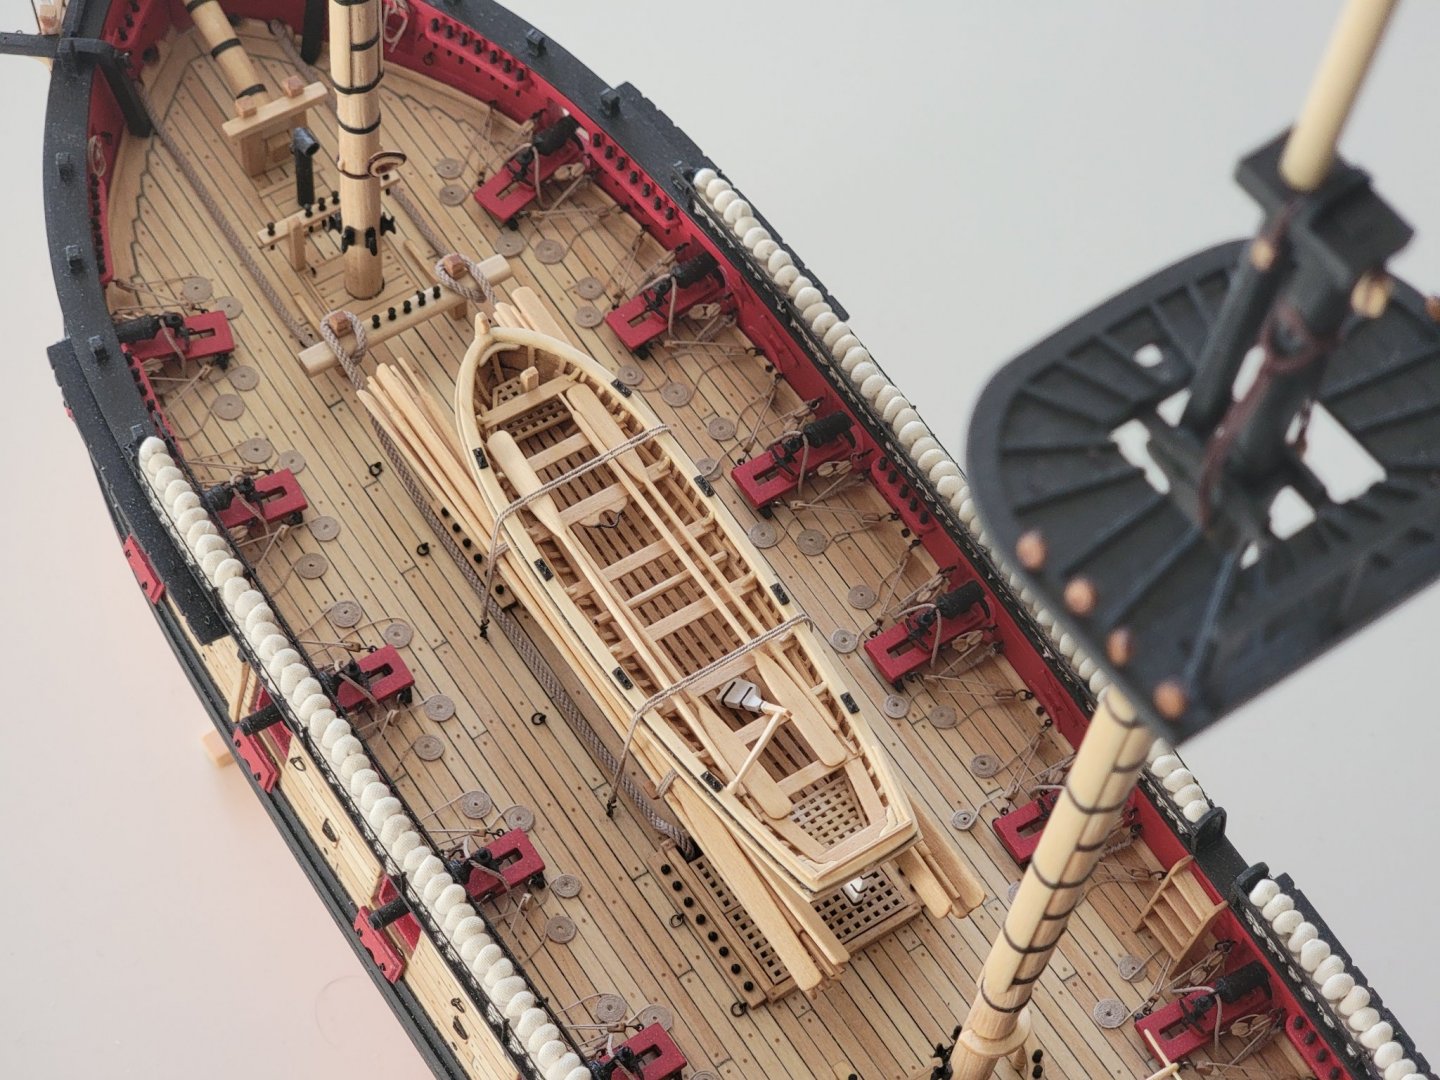
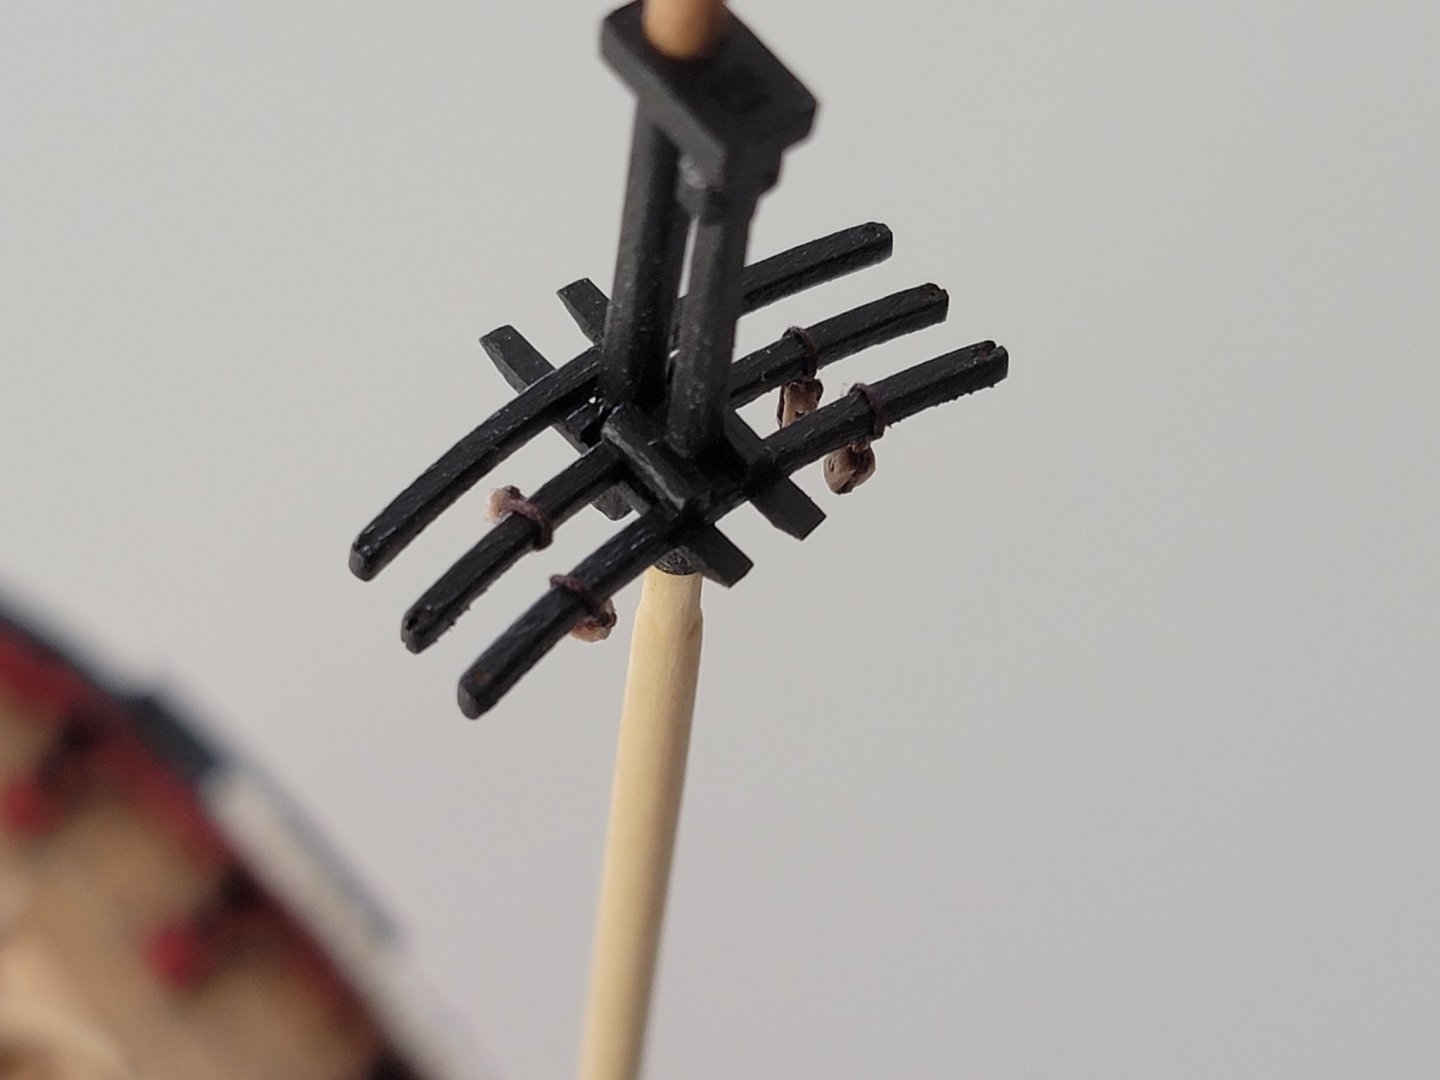
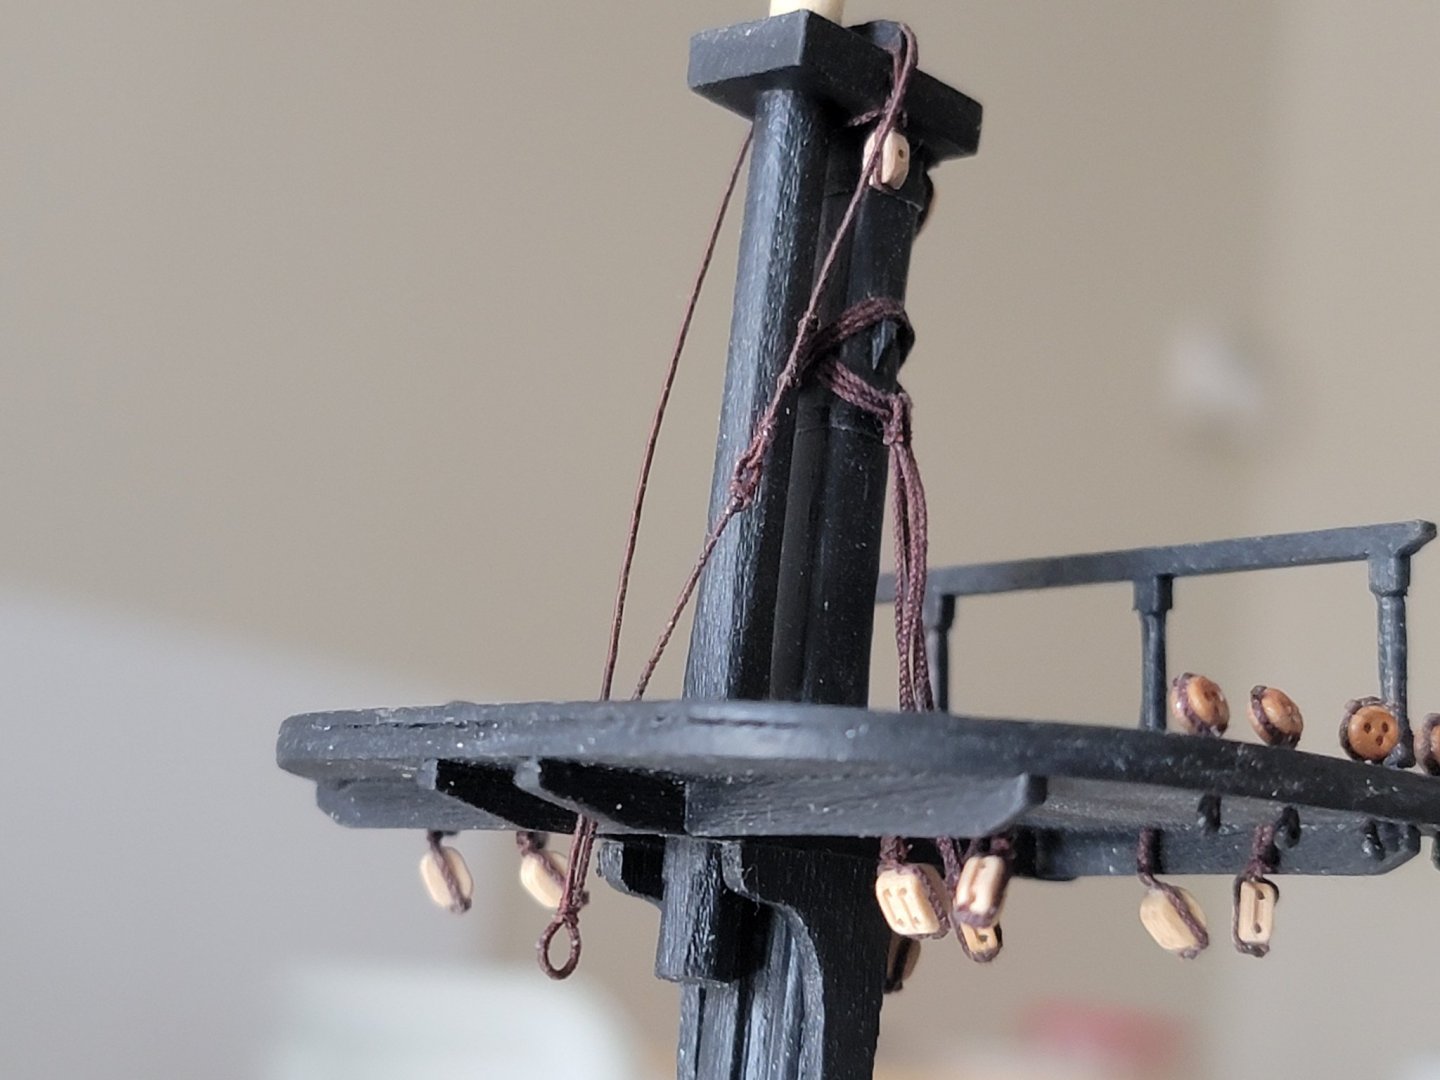
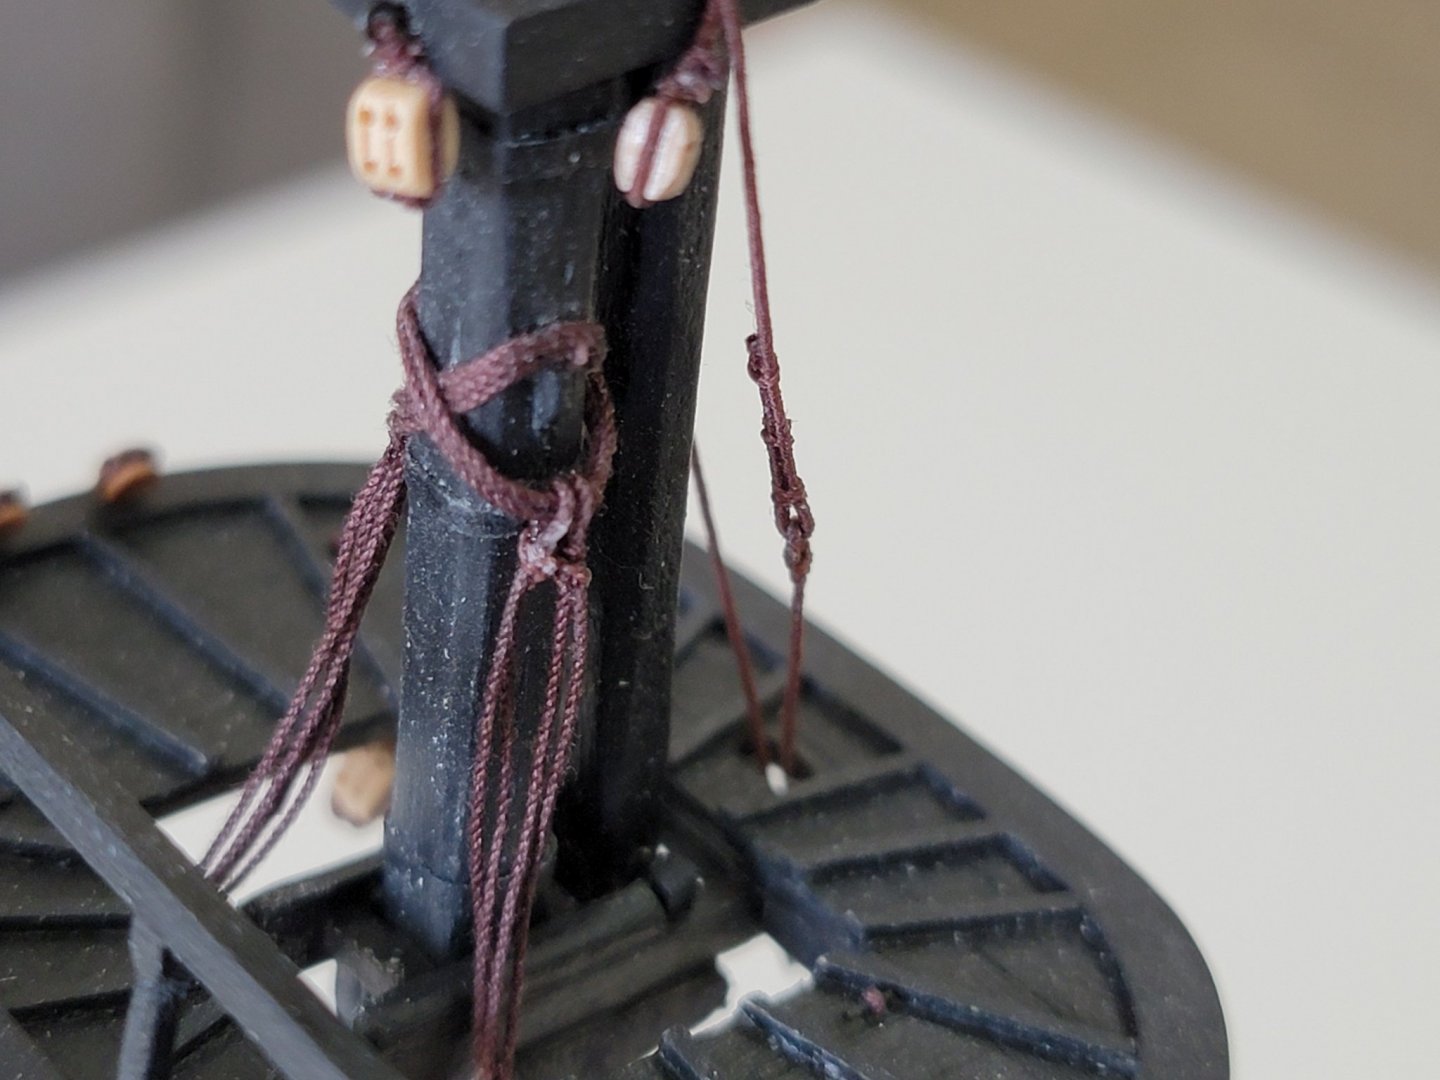
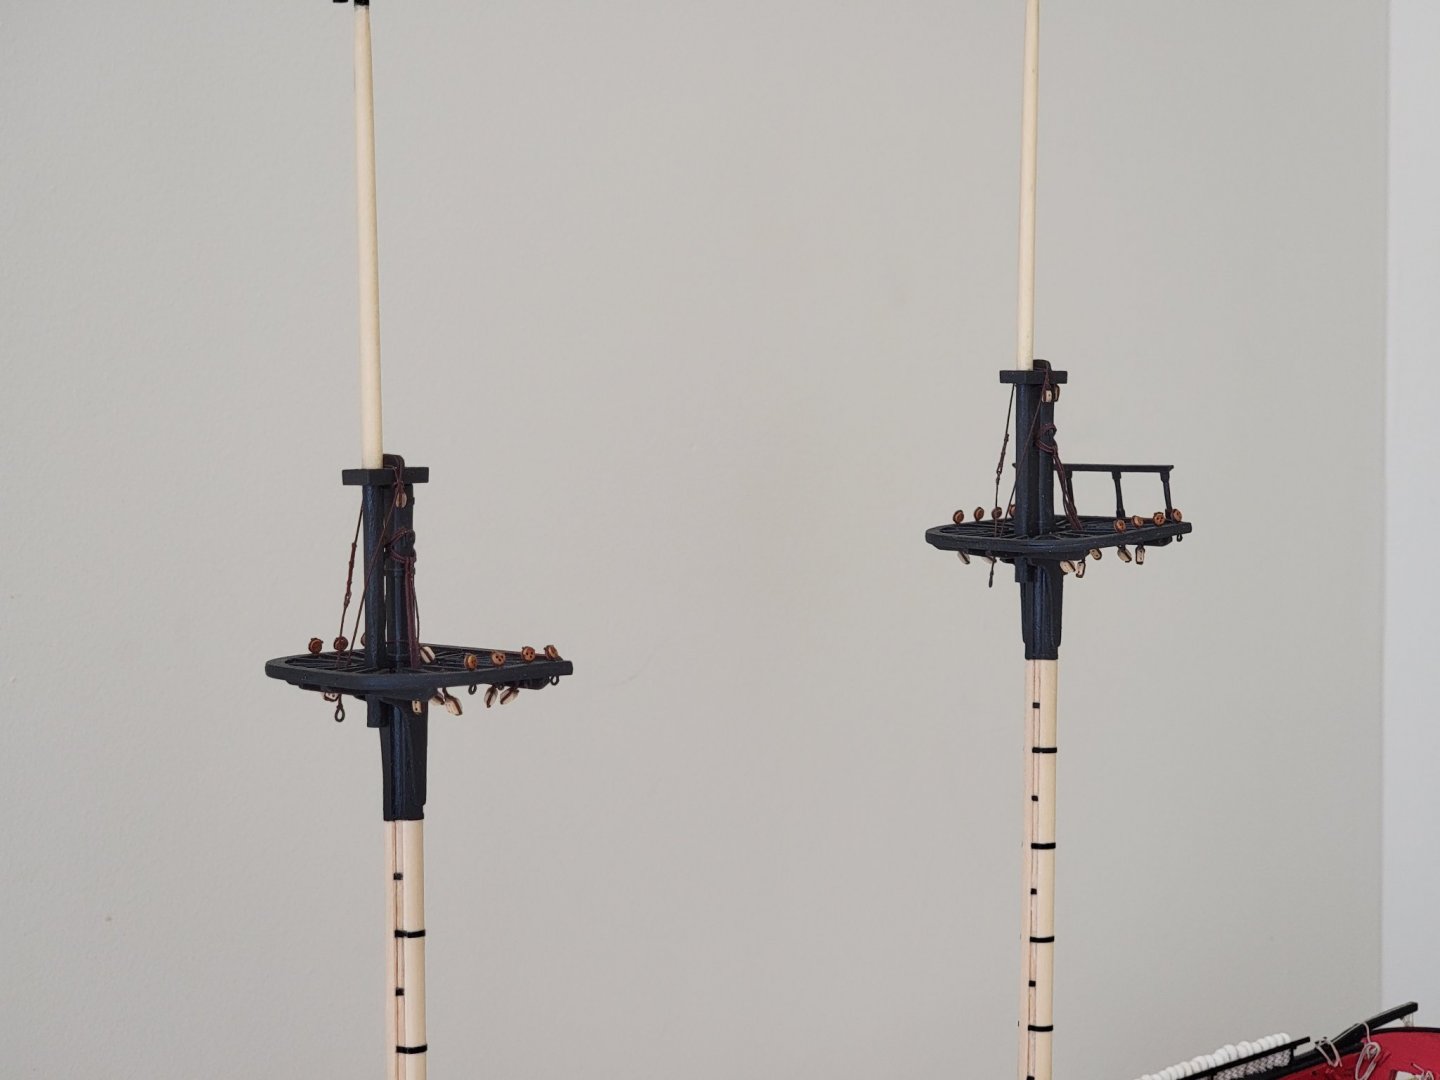
Thought I'd share some progress after a couple days of attaching the blocks and other accessories on the masts. The only block left is the 5/32" single block. I found it a bit weird that the parts list did not include this size, so had to order it a bit late in the build, and is currently on the way here. Also ordered the 5/32" double since it is used for the anchors After attaching all the relevant blocks, the upper thread of the lower lift blocks were served and glued in position. I would have also served the bottom attaching string, but since I stepped the masts permanently, this was a bit difficult. Learnt my lesson for next time!! Then started working on the jeer tie and blocks. For the blocks I double ringed the jeer strop, where each were 13.5cm in total length. This was done based on TFFM vol 4. For the strop I made a ring of the 13.4 length inserted it in the jeer tie, then tied the relevant sections to make the rings, and to hold the block in place: Here I pulled the blocks a bit to see how it would look under tension: Versus being free to hang And finally, the sling was made. For this part I served 14.5 cm of rope, and made an eye splice on one end, then threaded the other end through it and tied it. After a bullseye was simulated with super glue, shaped with a toothpick, and painted black. This 14.5 cm was a bit long, so after test fitting I cut the excess length (around 0.5 to 1 cm) Unrelated to the progress, I took pics in some good lighting so just wanted to share! Onto the mast coats! 😁


- 950 replies
-
- 9
-
-
- syren
- model shipways
- (and 1 more)
-
Taking mental notes. I know I'll be using this technique in the future!! Thanks!
-
This is where I'm at with my build. I'll definitely make sure to check I have added all of them. They just don't seem to end!
-
I think I just got lucky with it. I remember when using the smallest drill bit I almost messed up and had to try drilling a new pathway with a bigger bit. I also remember it was very tricky and scary 😬
-
What a beautiful shot!! Completely took my breath away. I am really liking the walnut hull
-
Yeaup those will be hidden, but I am sure it must have been very annoying and frustrating!!! In my log I went into a bit of details where I drilled pilot holes (very small diameter) on the inside and outside parts of the ship, until they met. Then increased the diameter slowly after
-
That's some top notch planking!!! She's truly gorgeous
-
Your model in her early stages is beautiful, Desalgu. Eagerly waiting to see how she currently looks in the near completion state
-
The deck came out beautifully Patrick! I was also eagerly waiting for you to apply the finish 😁
-
That's an awesome jig! I'll make sure to remember that for next time
-
Thank you for the compliments, Michael! I sent you a PM 🙂
-
That makes a lot of sense!! Thanks for the additional pics. It's a really beautiful model
-
This photo (and all other closeups) looks like a computer rendered image. Everything is just perfect and very crisp. One can assume Angus is a full sized man (please don't tell him I mentioned this) How are you fitting the camera inside the model btw? From the model pics the slots seem a bit small for a camera to enter
-
I may have to switch over the admiralty style models if I see these tall ships are taking over the entire space!! 😄 Thank you Hamilton! That would be great!!! The Syren is really a fun model to build. In my opinion, that's what makes these models extra special. I don't think anyone else could notice the mistakes apart from ourselves! Thanks for letting me know about the stays, I'll keep an eye out if I experience similar problems. And thanks again for the great comment!! I really can't wait to finish the masts and spars so I can finally start working with the ropes. Currently still attaching blocks to the masts, and that's getting old really quick! I think I'm about half way there... Looking forward to see your model once you set up your log! 100% agree. I constantly find myself browsing my own log if I needed to double check something, or read the feedback/advice from other members. I can also see myself referring back even when working on a different model. Lots of the content can be transferred to other builds
- 950 replies
-
- 1
-
-
- syren
- model shipways
- (and 1 more)
-
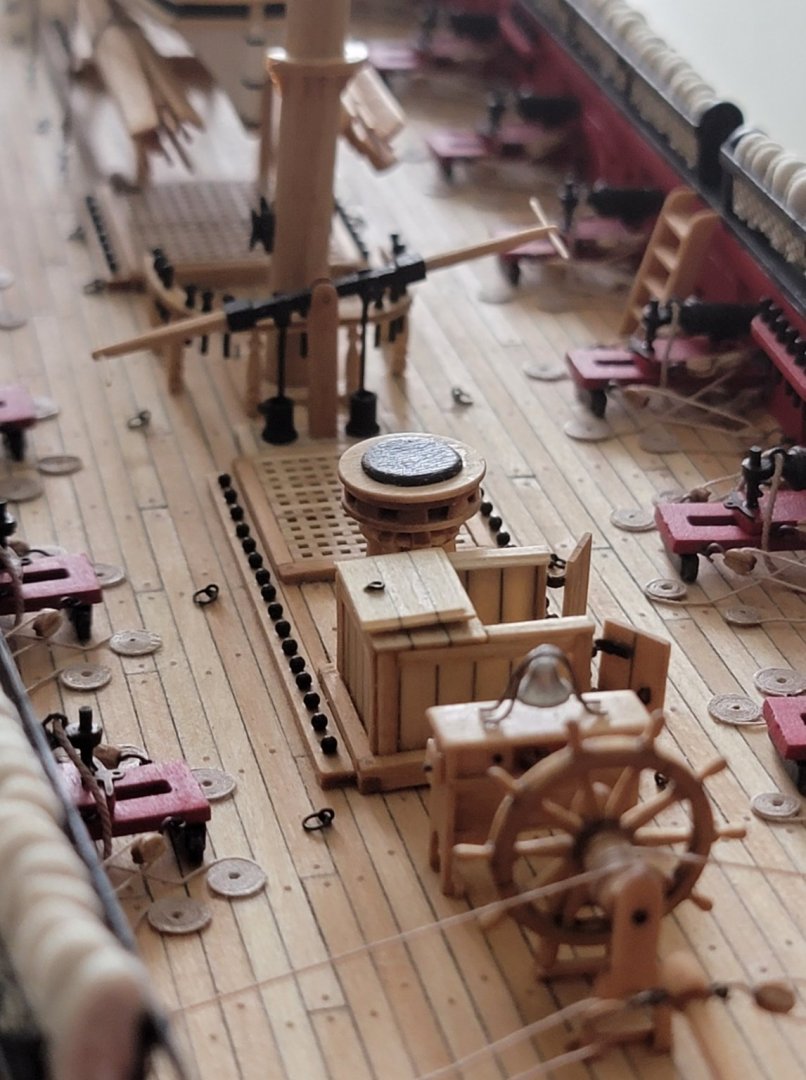
Thank you for the comment and the compliments! It is very much appreciated! The only reason I progressed a bit fast is because I had a nice break after finishing undergrad. This coupled with the quarantine going on, I had a lot of time since I was at home with nothing to do for a few months 😄. Progress has slowed down a bit after I joined grad school, but I find bits of time here and there to do work on some small steps. This also serves as a great stress reliever! For the belaying pins I chemically blackened mine using Birchwood Casey Brass Black. It gives a nice even finish, better than what paint could accomplish I think. I upgraded all my rope from Syren Ship Model Company, as well as some of the blocks. Shaping them into coils was very easy due to the nice material. I soaked a bit of thread in diluted white glue and then dried them to shape using a jig (shown here). I would love to see your build log, especially with the walnut hull bottom. I don't think I have seen anyone else on the forum do their hull this way. You can find out how to set up a build log here. For the Syren, you'll want to set up the log in the correct era section (https://modelshipworld.com/forum/145-kit-build-logs-for-subjects-built-from-1801-1850/). Also, feel free to post an introduction about yourself in the New Member Introductions section. You'll receive a lot of warm welcomes, and also some guidance on setting your log!
-
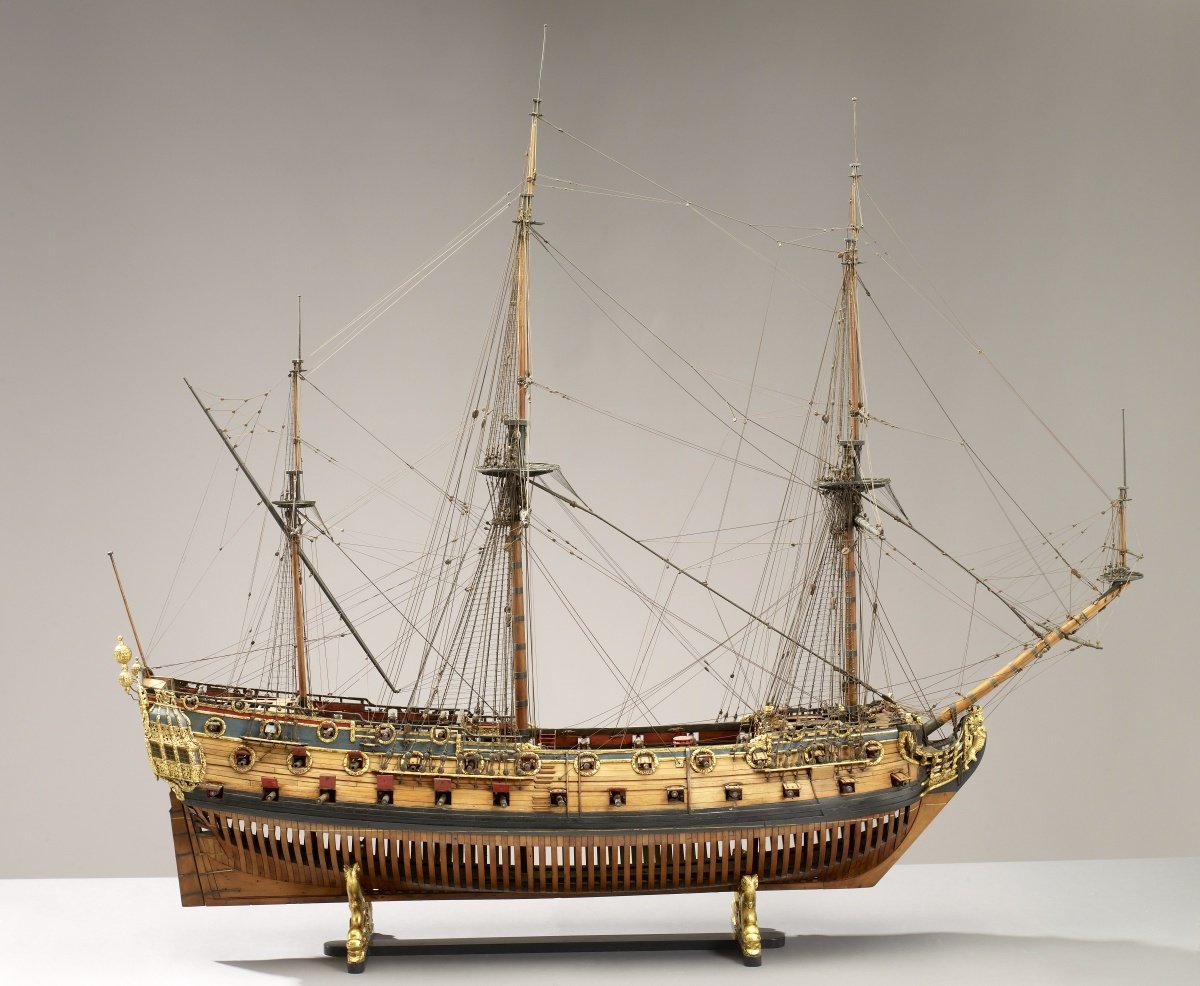
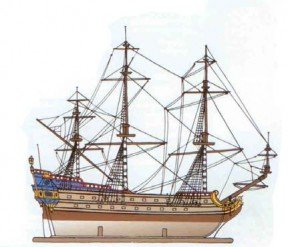
Watching the TinTin series sparked my interest in model ships, so I'll be keen to follow along From a Google search it seems that the Unicorn resembles the Thomson Collection’s Breda (images below from https://ago.ca/agoinsider/tintin-and-thomson-collection-ship-models). There could be plans out there for this ship, but I am not sure...