.jpg.1f80adf1a9b14a937cfcf2ca6af0f0d4.jpg)
WalrusGuy
-
Posts
1,007 -
Joined
-
Last visited
Content Type
Profiles
Forums
Gallery
Events
Everything posted by WalrusGuy
-
.thumb.jpg.62d1d69fed1f32364417cb1f9cdeb009.jpg) Congrats Desalgu!! She's gorgeous! The flags look realistic as well 🙂
Congrats Desalgu!! She's gorgeous! The flags look realistic as well 🙂 -
The carronades look great, Will!!
-
Looks great! Very crisp!! 🙂 I really like how the red looks! You may want to consider slightly bending/shaping the ones at the bow to follow the same curvature as the neighboring planks. I did not know that this is what was actually done in practice when I was working on them (and thus its too late for me to try it), but came across this in Chuck's build log of the Winchelsea. Maybe in 1:64 scale this would be difficult to do, but just wanted to throw this idea out there in case you want to try it out. Here is the link:
-
Thank you Captain Hook, much appreciated!! Thank you for all the likes as well 🙂 Got to admit, I'm really enjoying this part if the build! Next up is the main stay and main preventer stay. Never made a mouse before so this will be a bit interesting 😄
- 950 replies
-
- 3
-

-
- syren
- model shipways
- (and 1 more)
-
I'm so sorry to hear what happened Justin. I'm sure your next attempt will be much better since you learnt and honed all the skills to come this far. I also read somewhere that Greg Herbert had to restart his Swan class build after a year of progress. From what I recall his second attempt had no errors since he learnt from his mistakes, and also refined the needed skills.
-
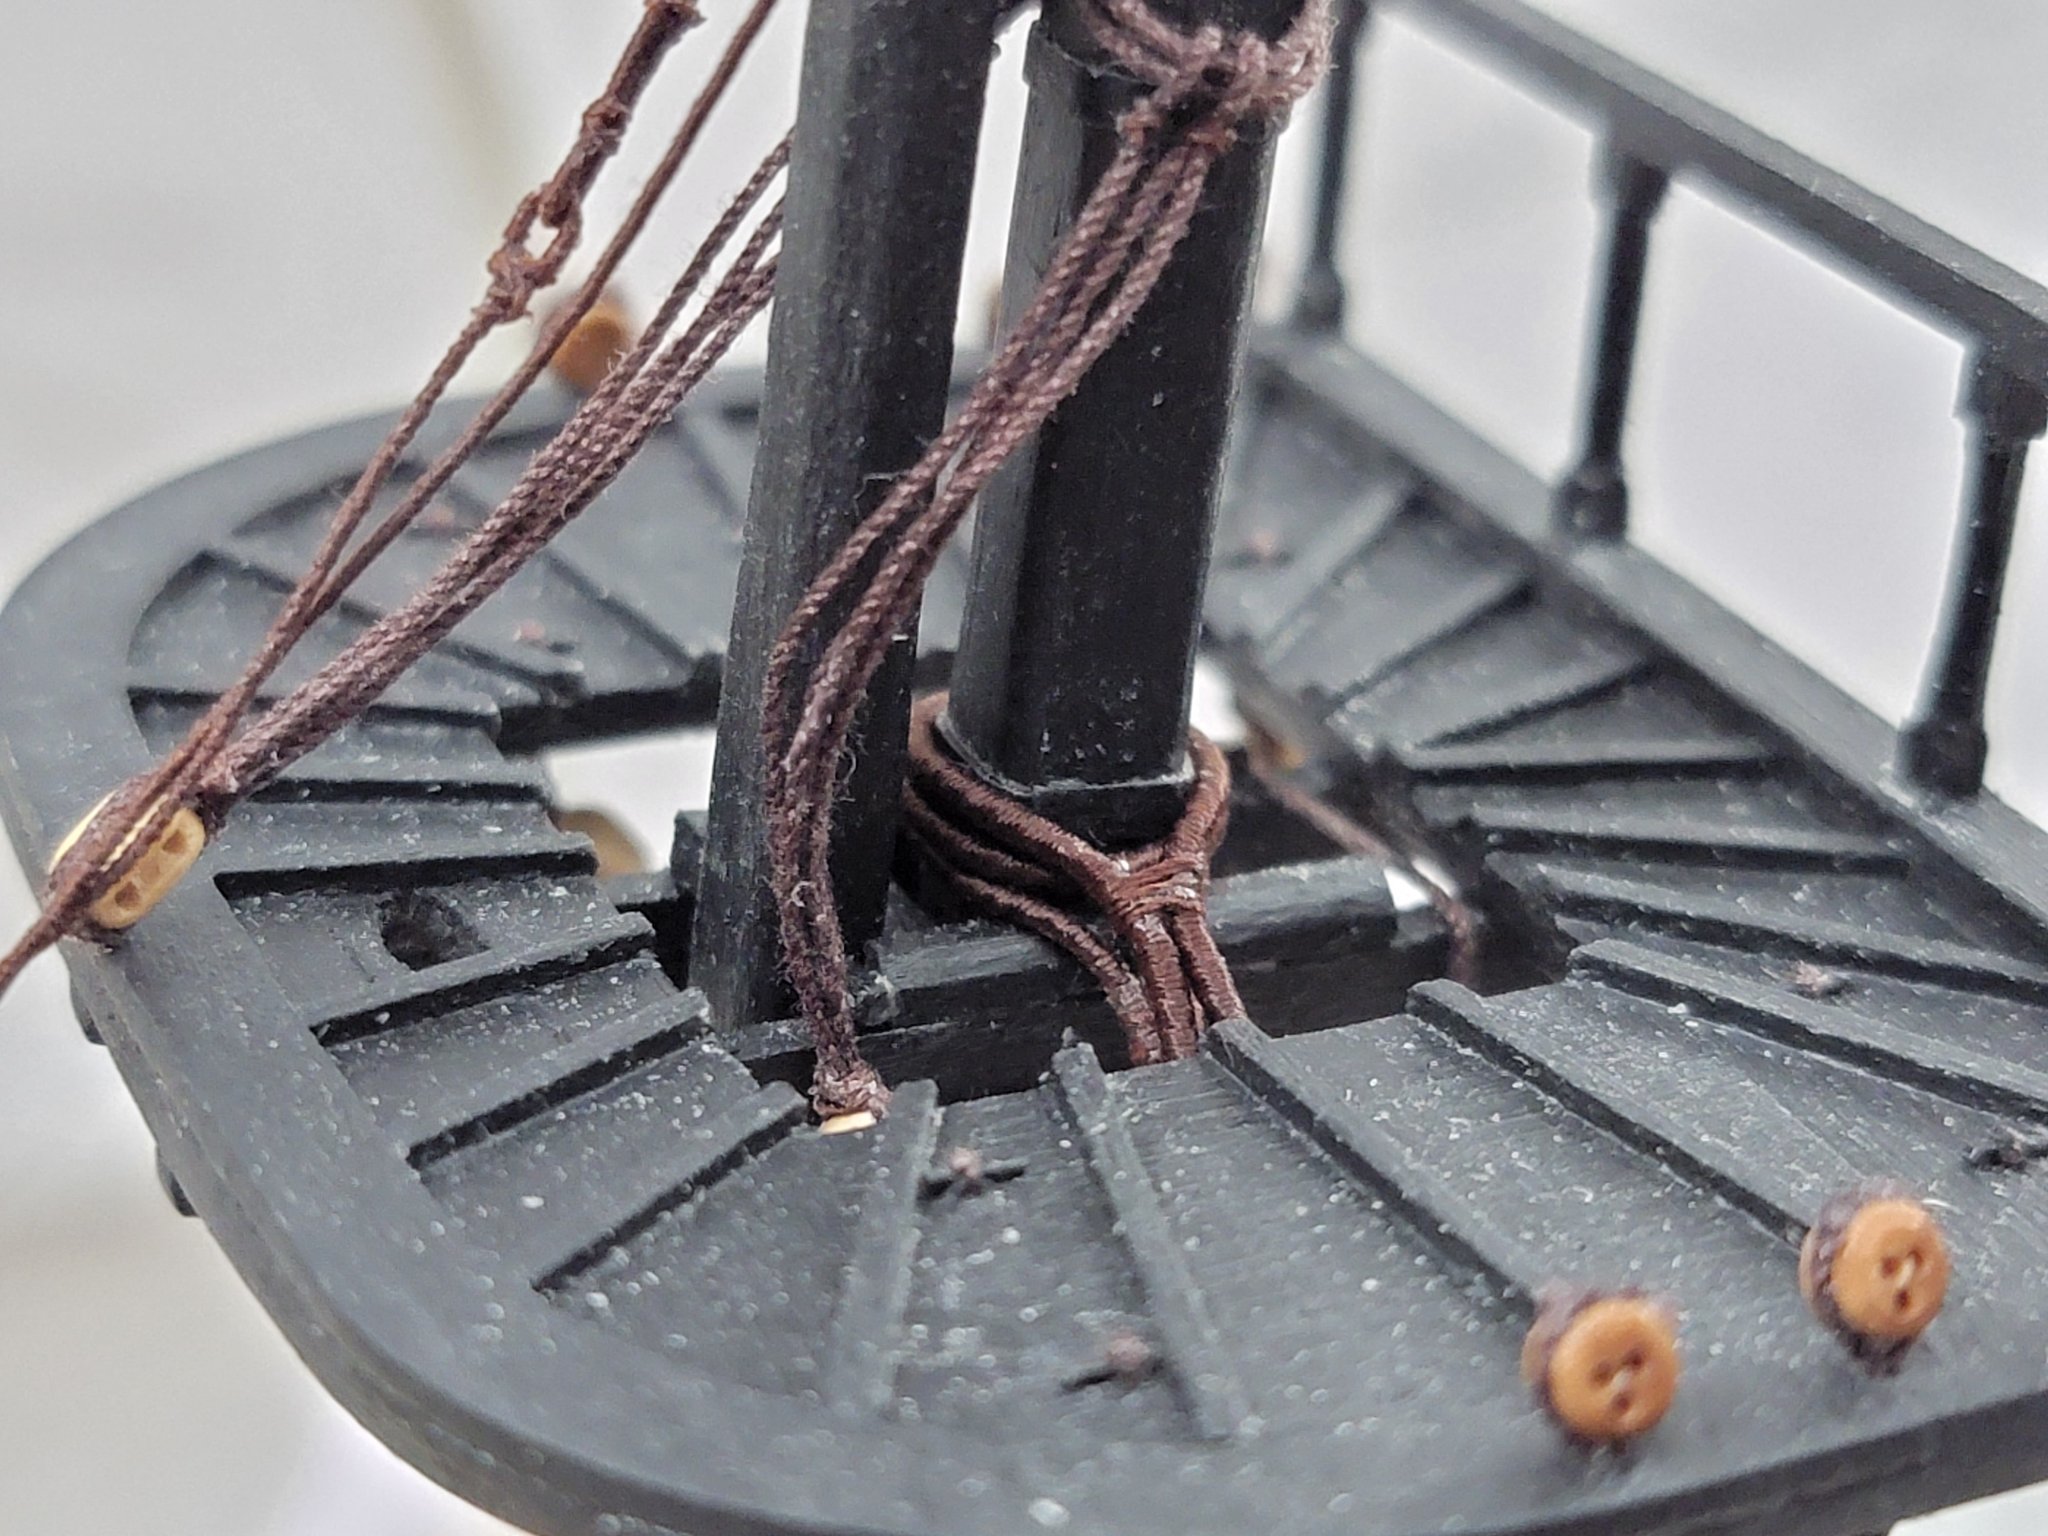
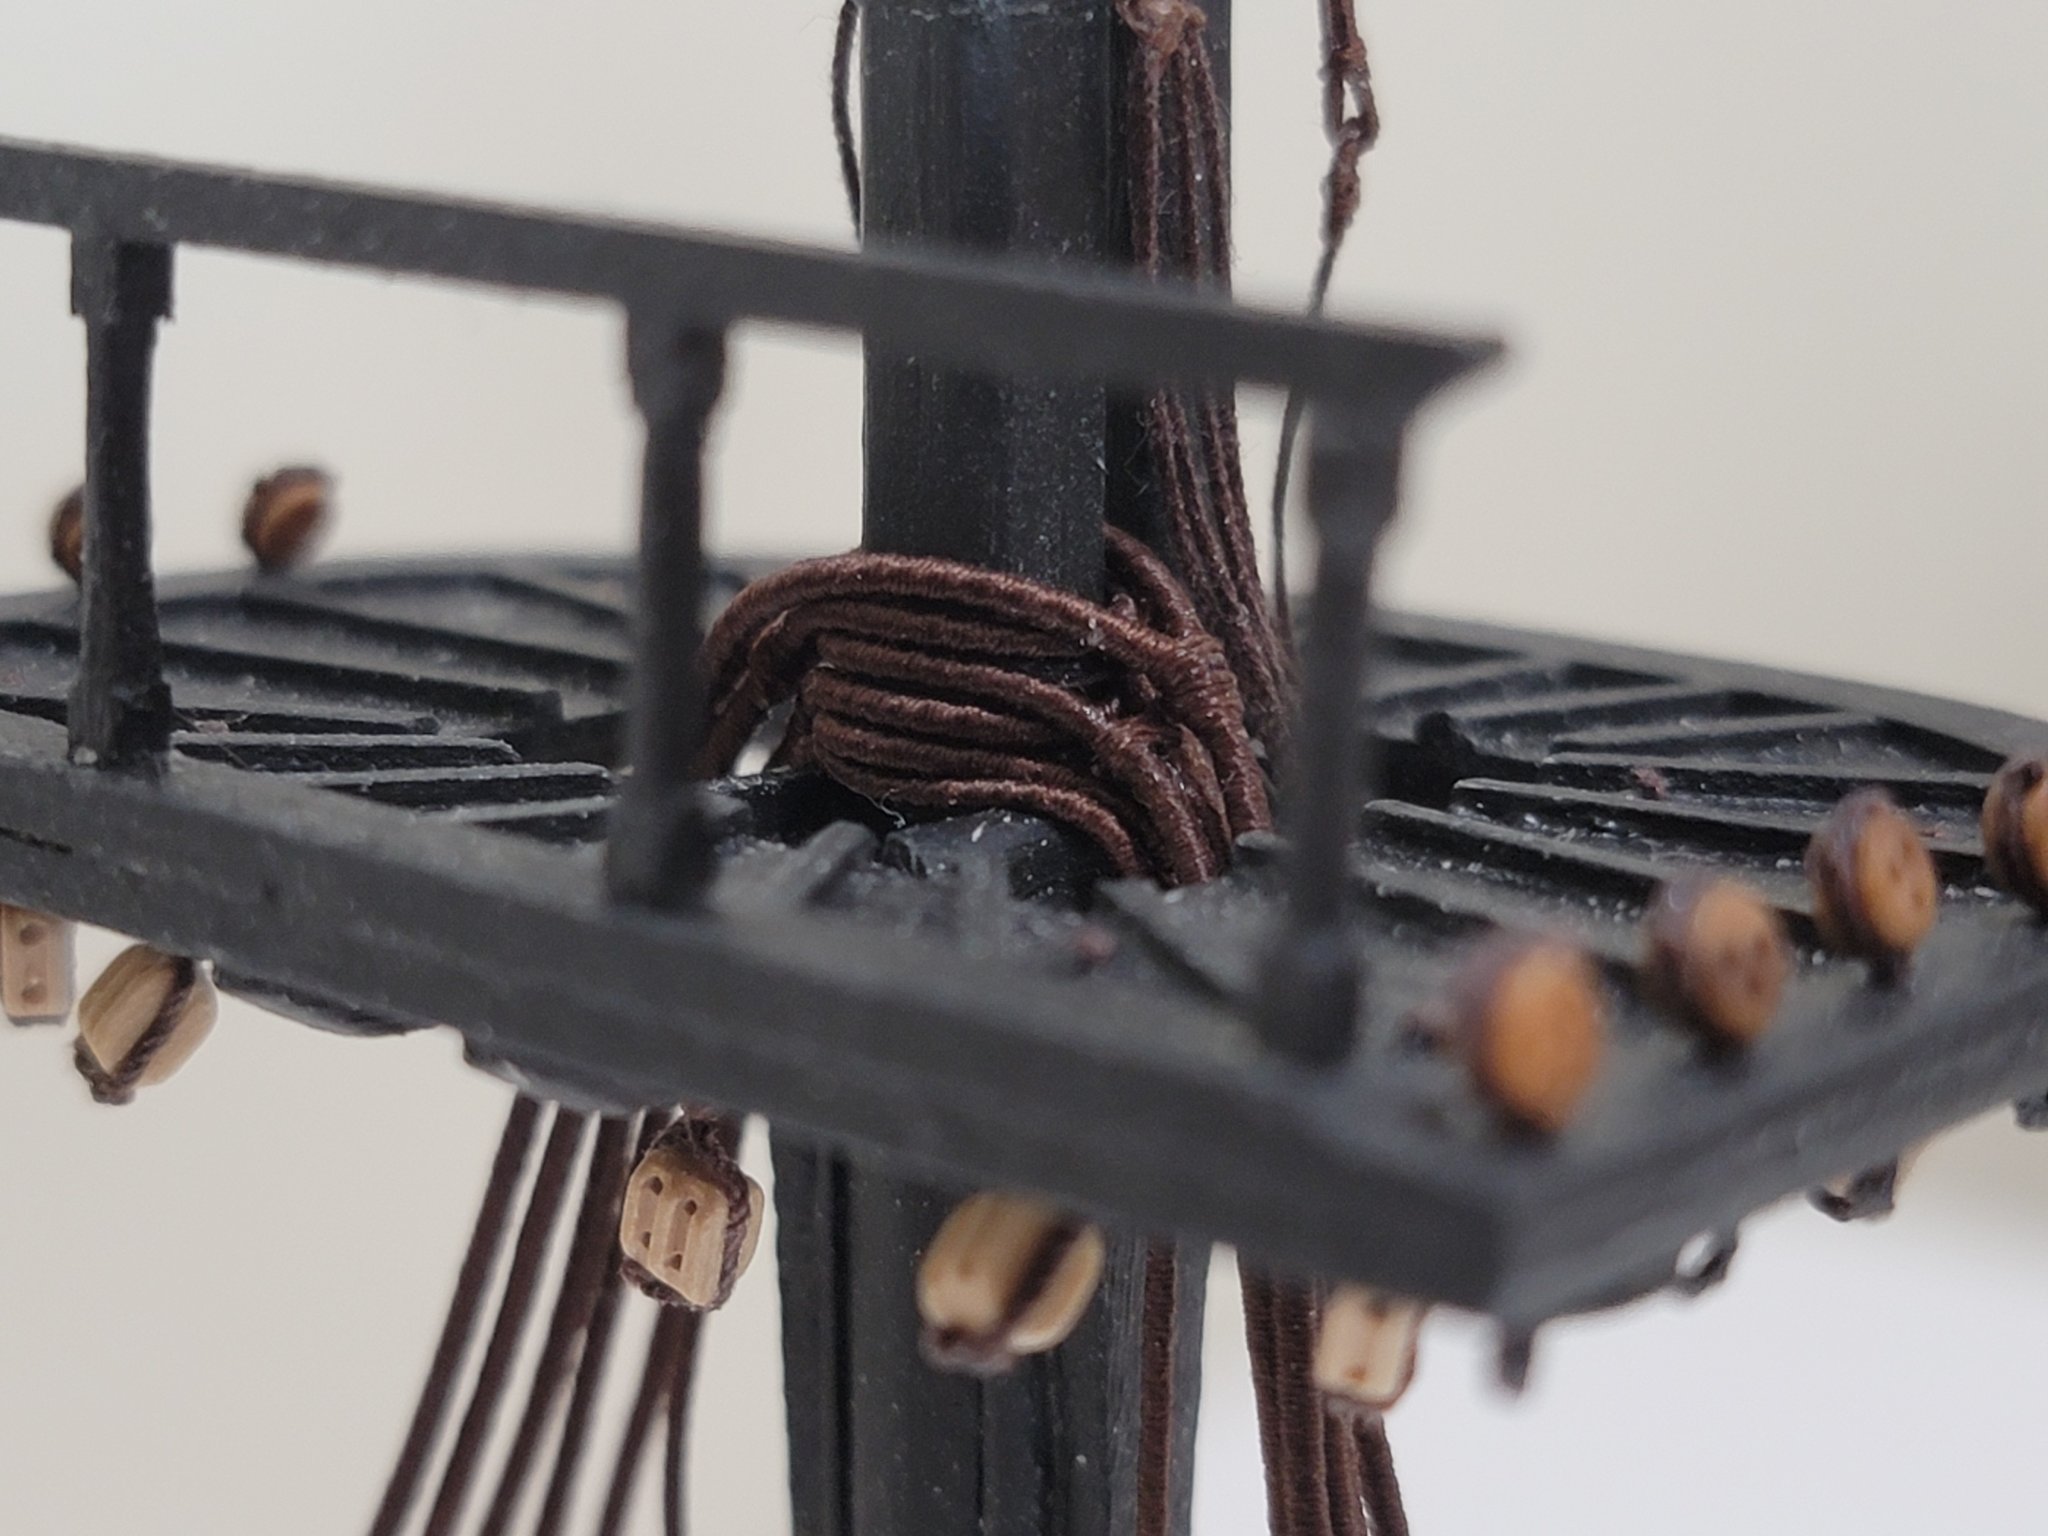
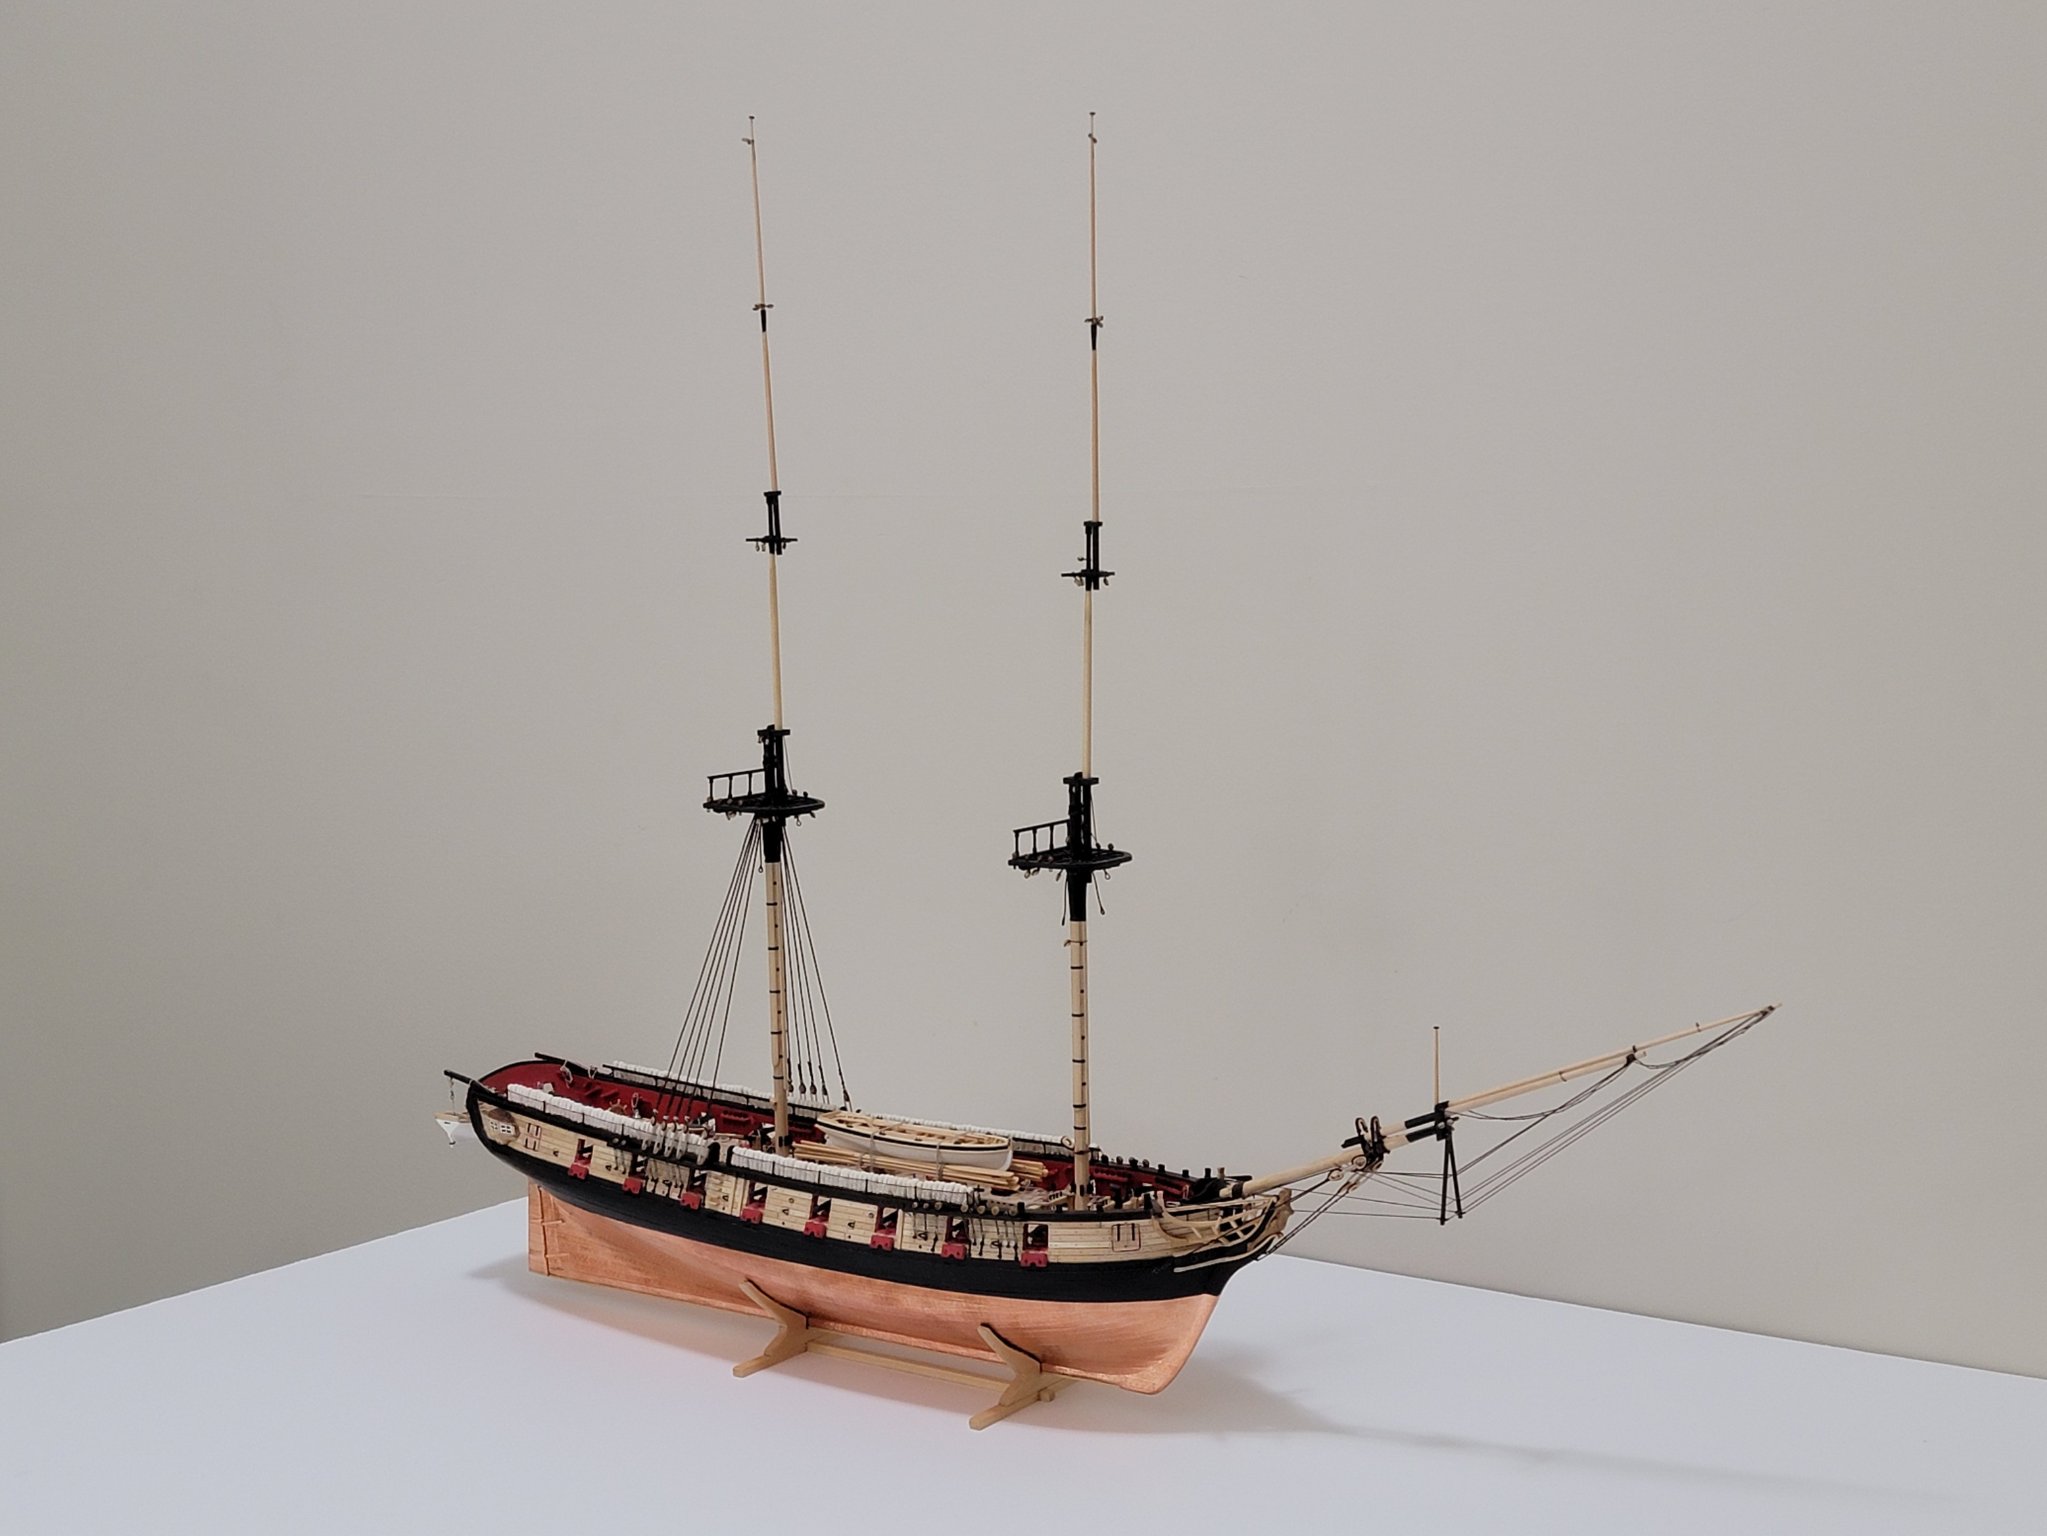
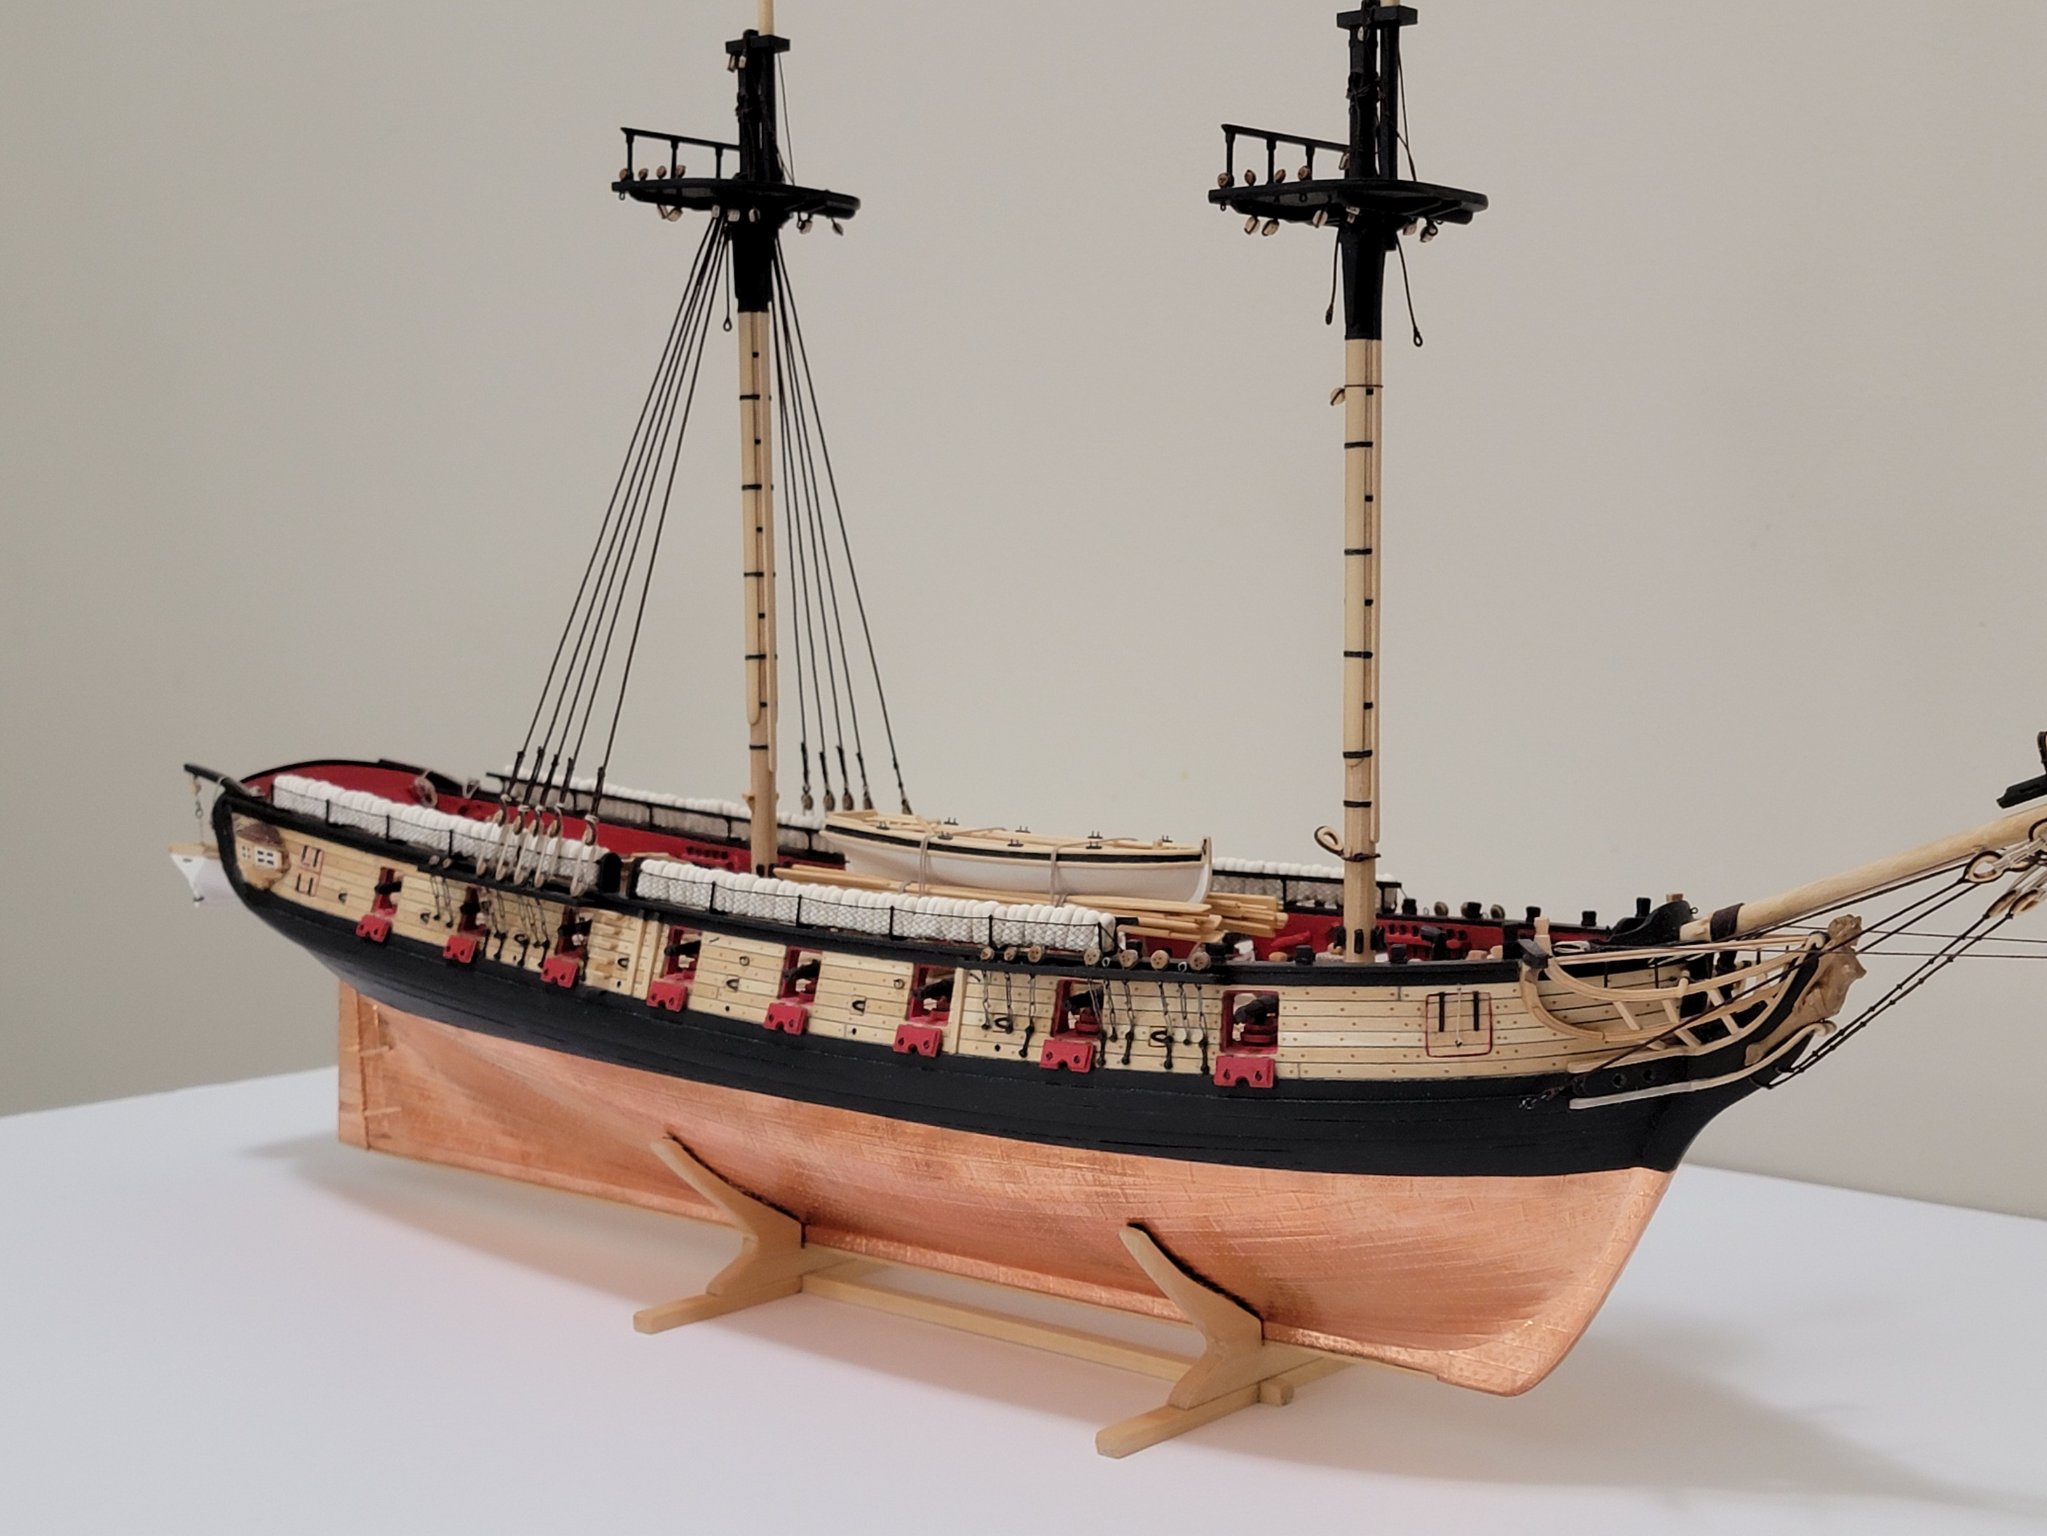
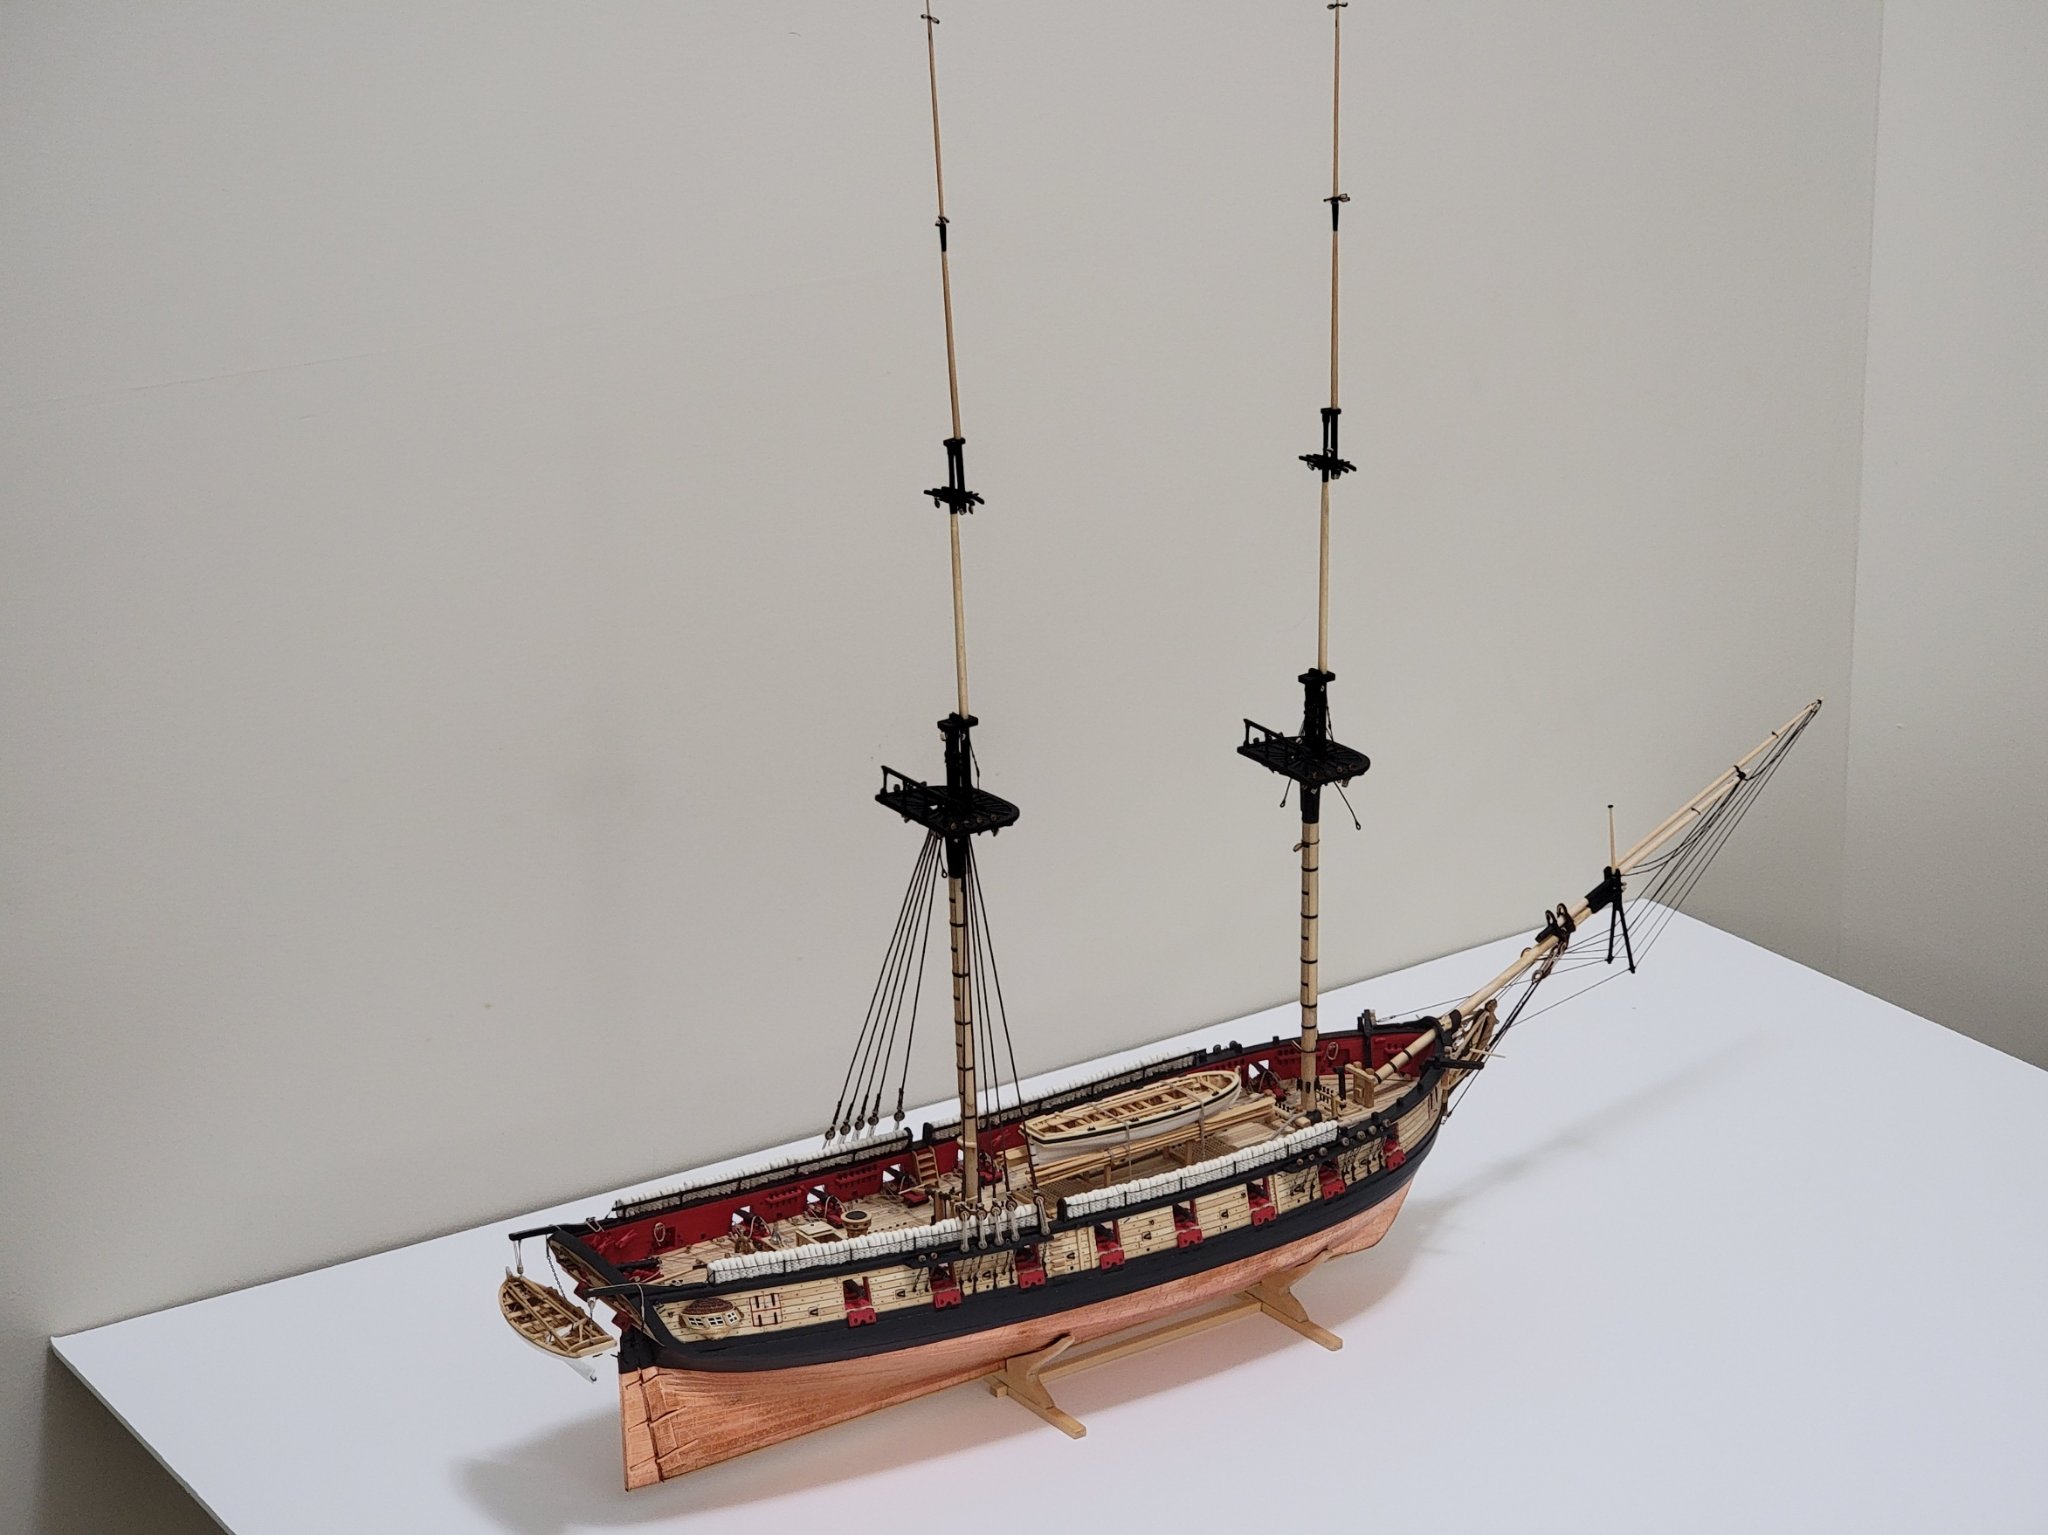
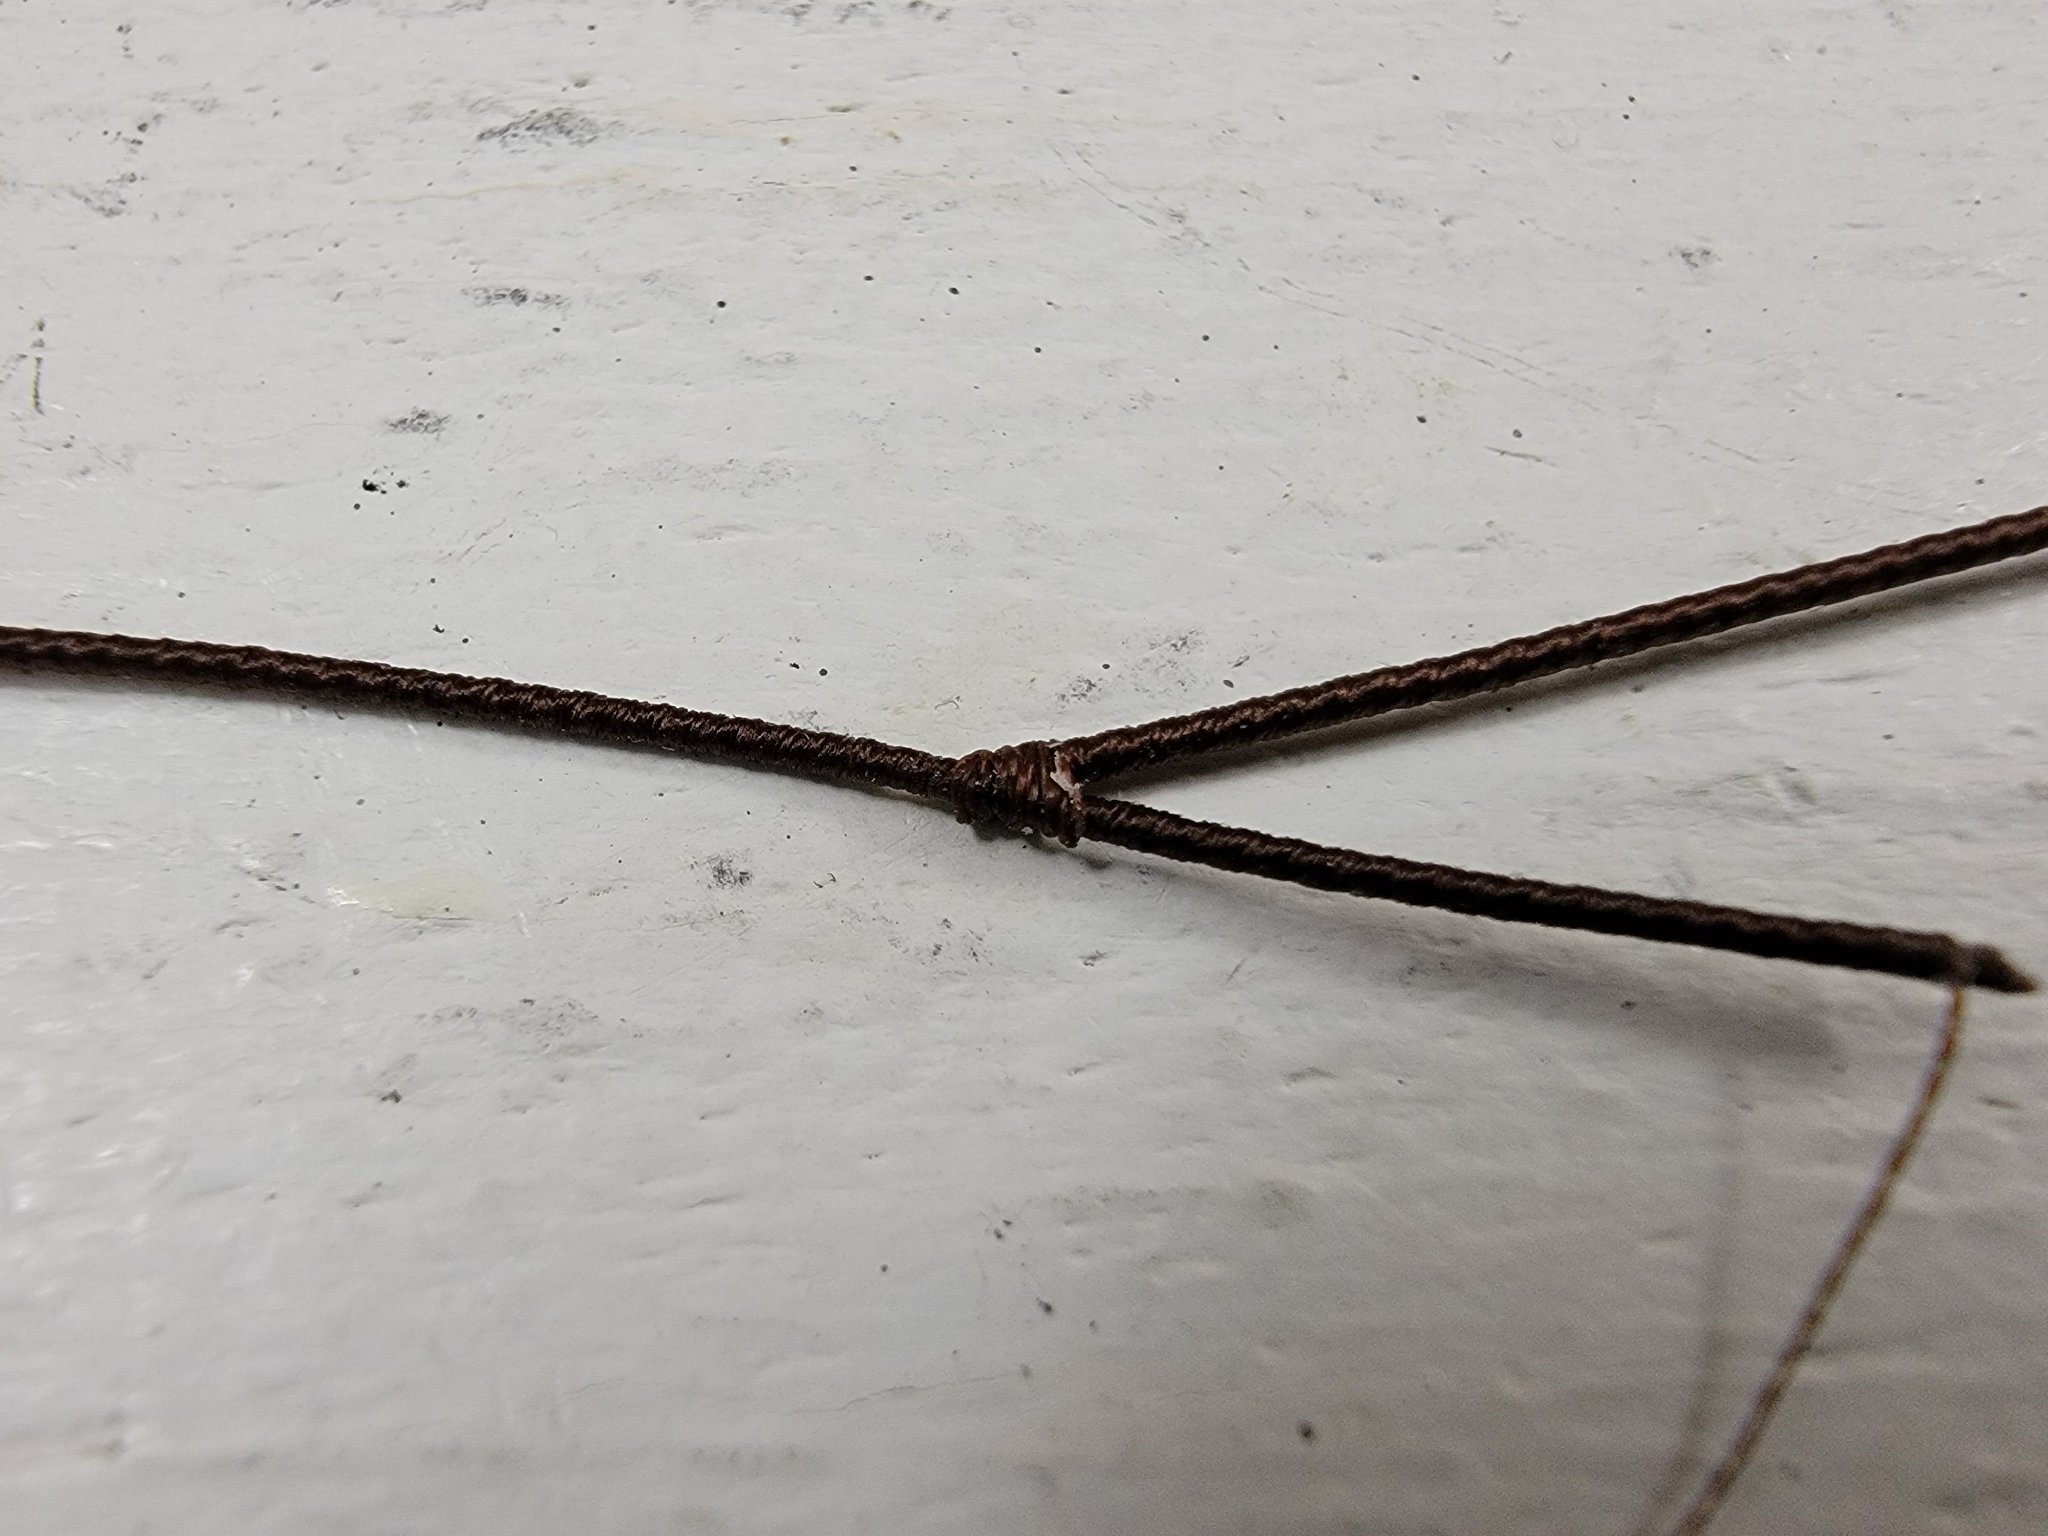
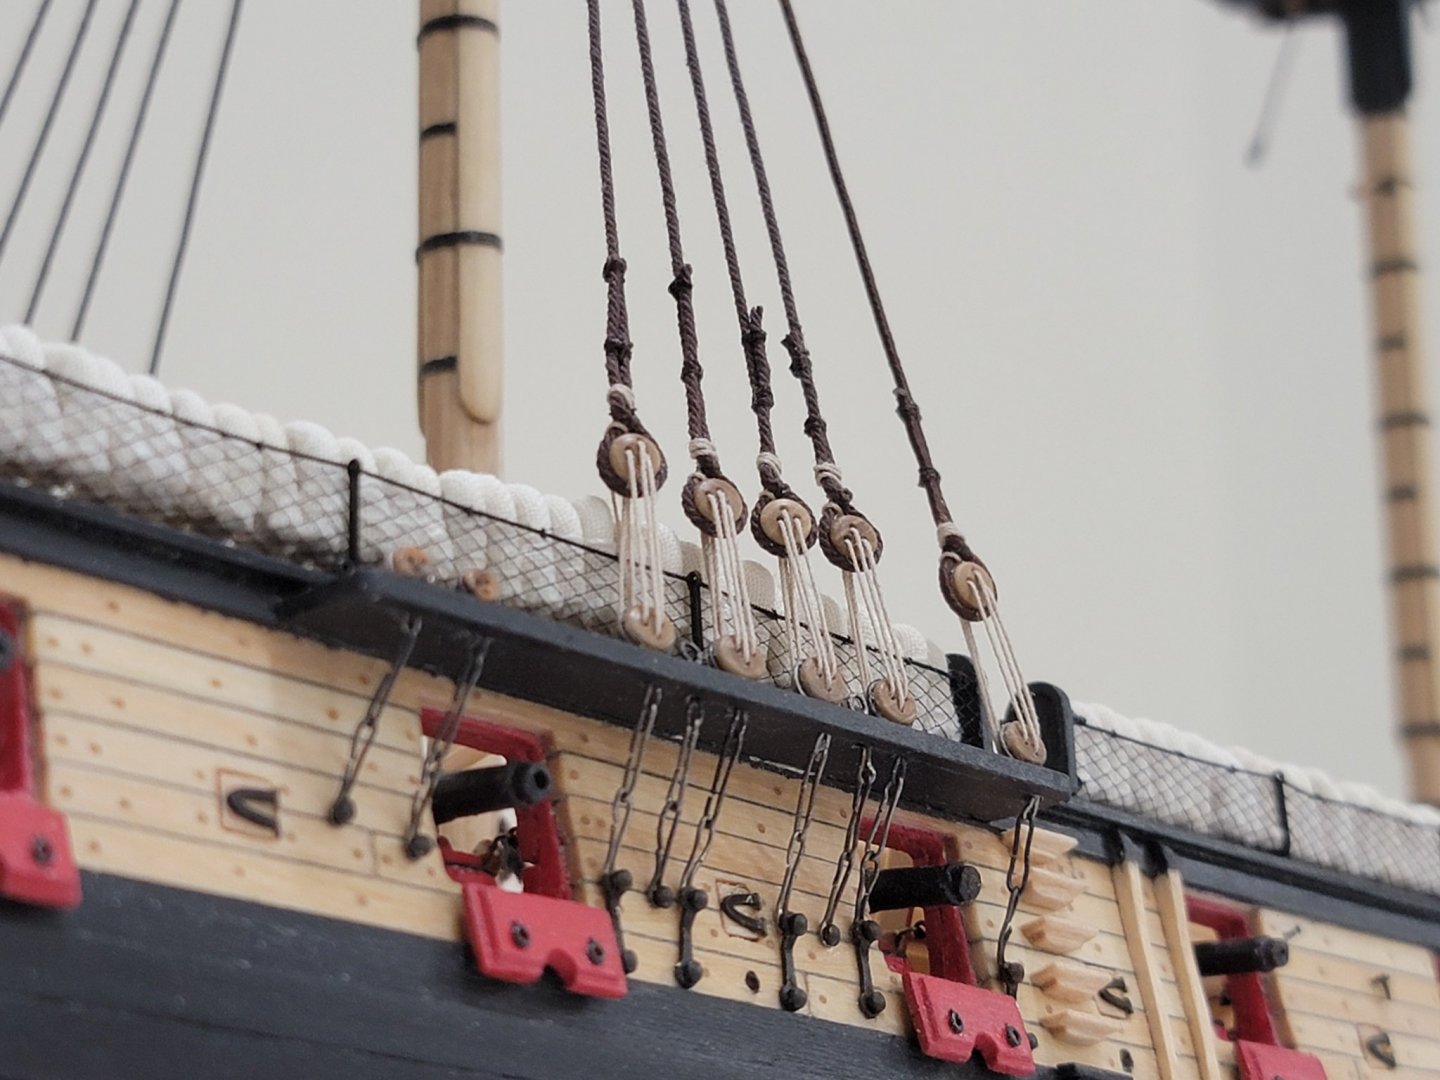
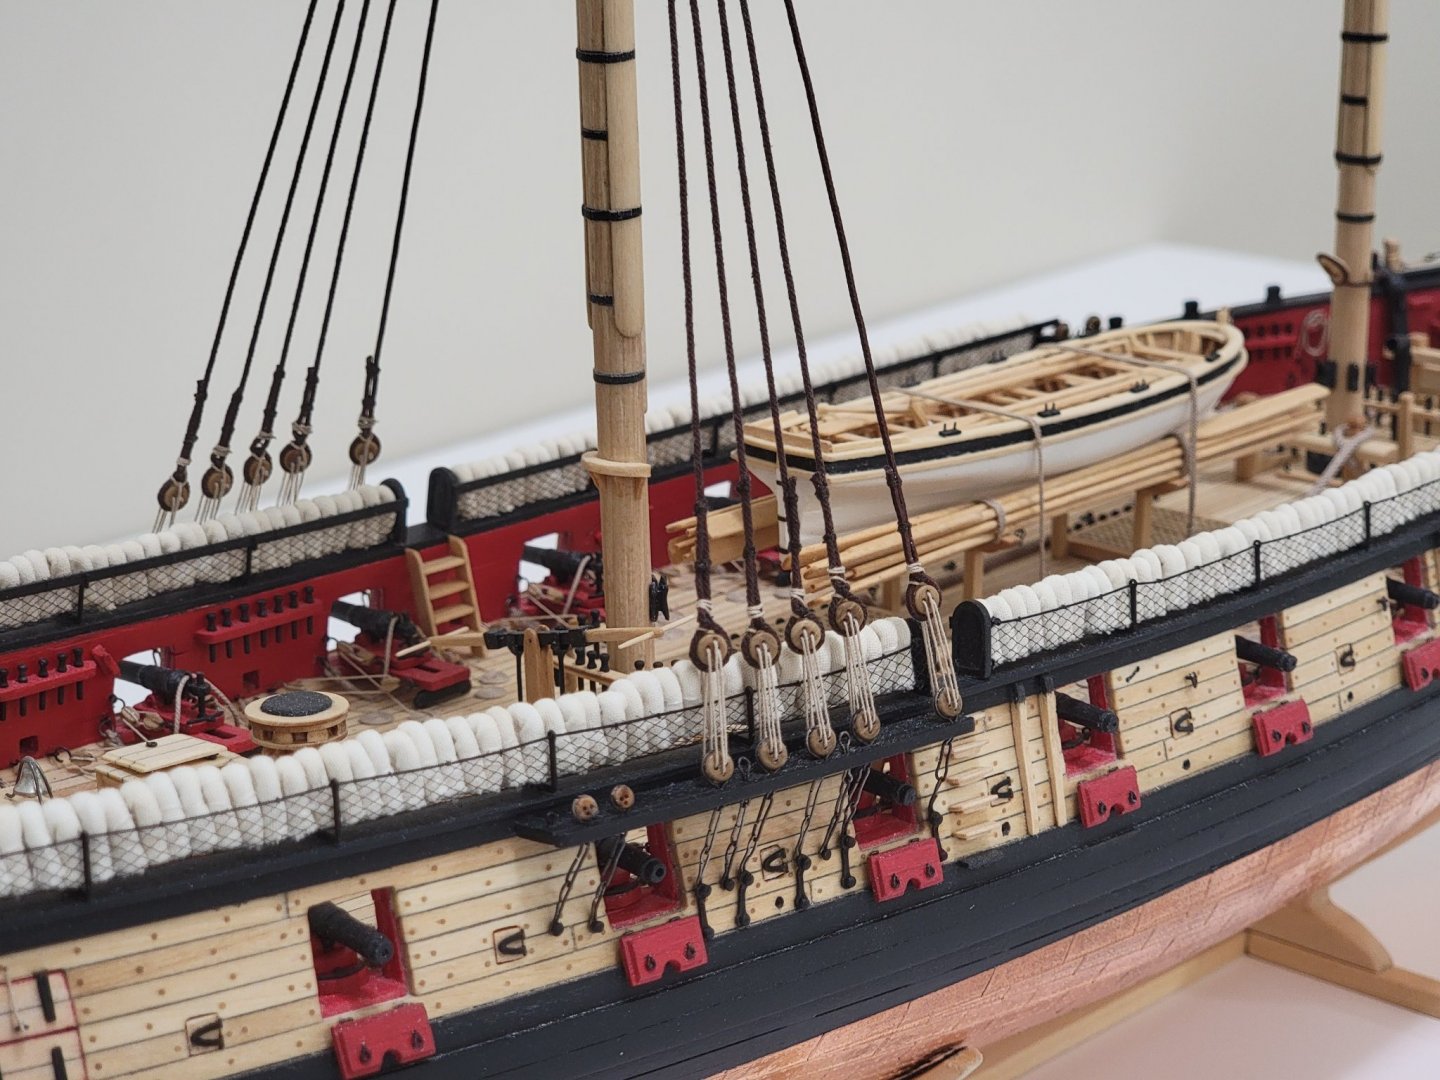
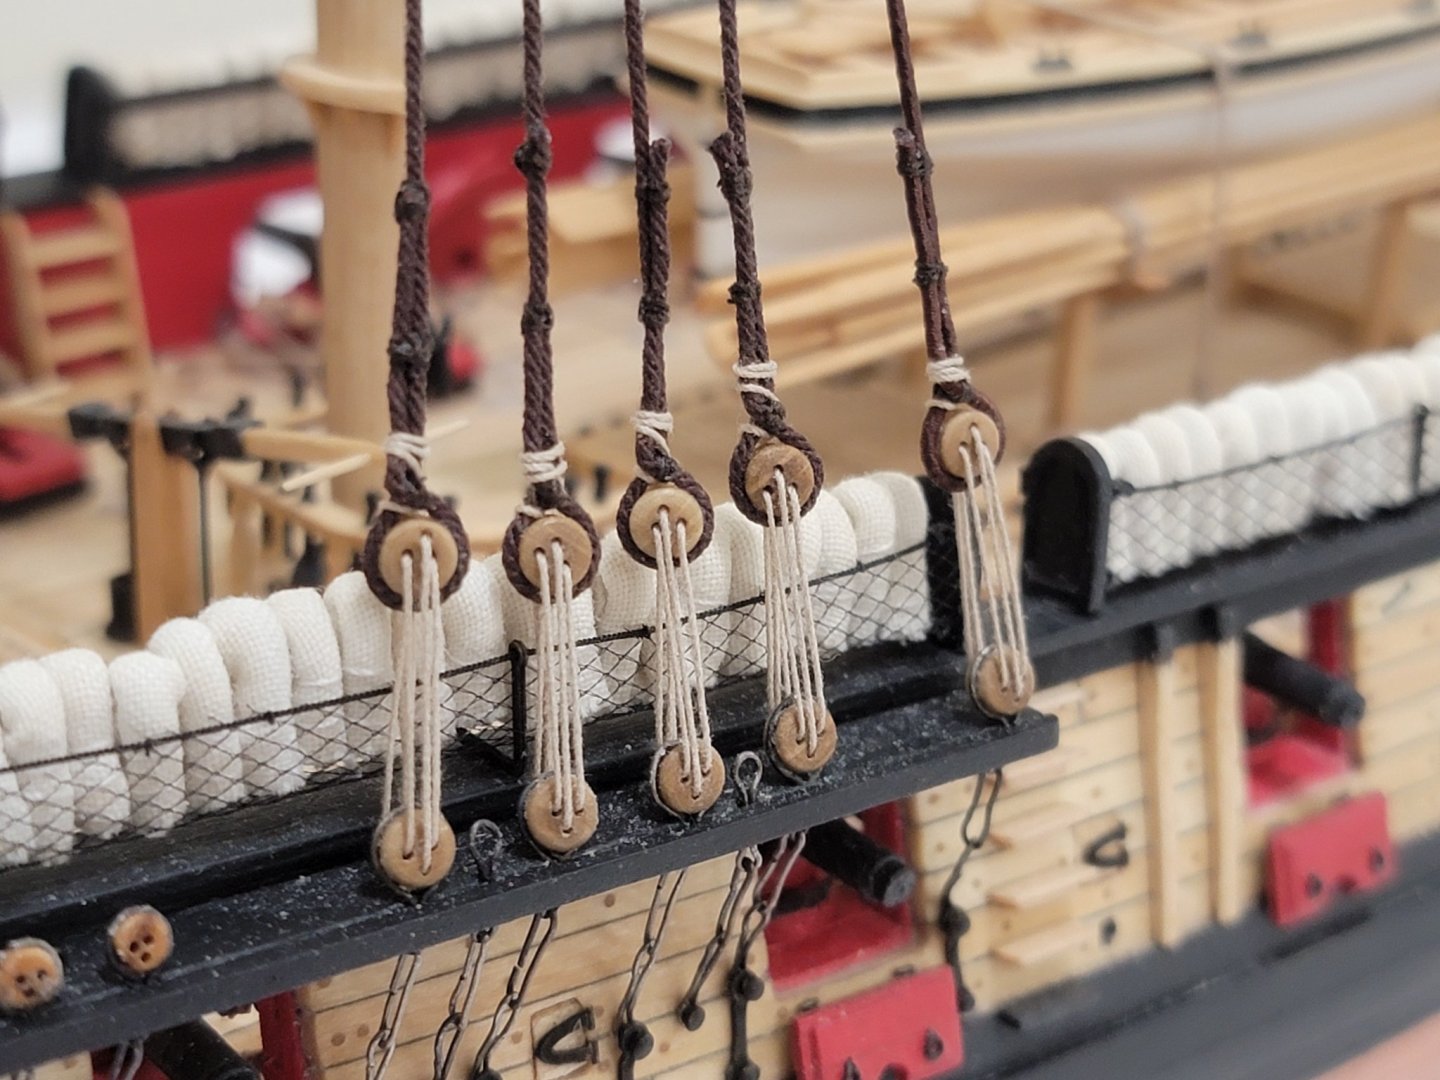
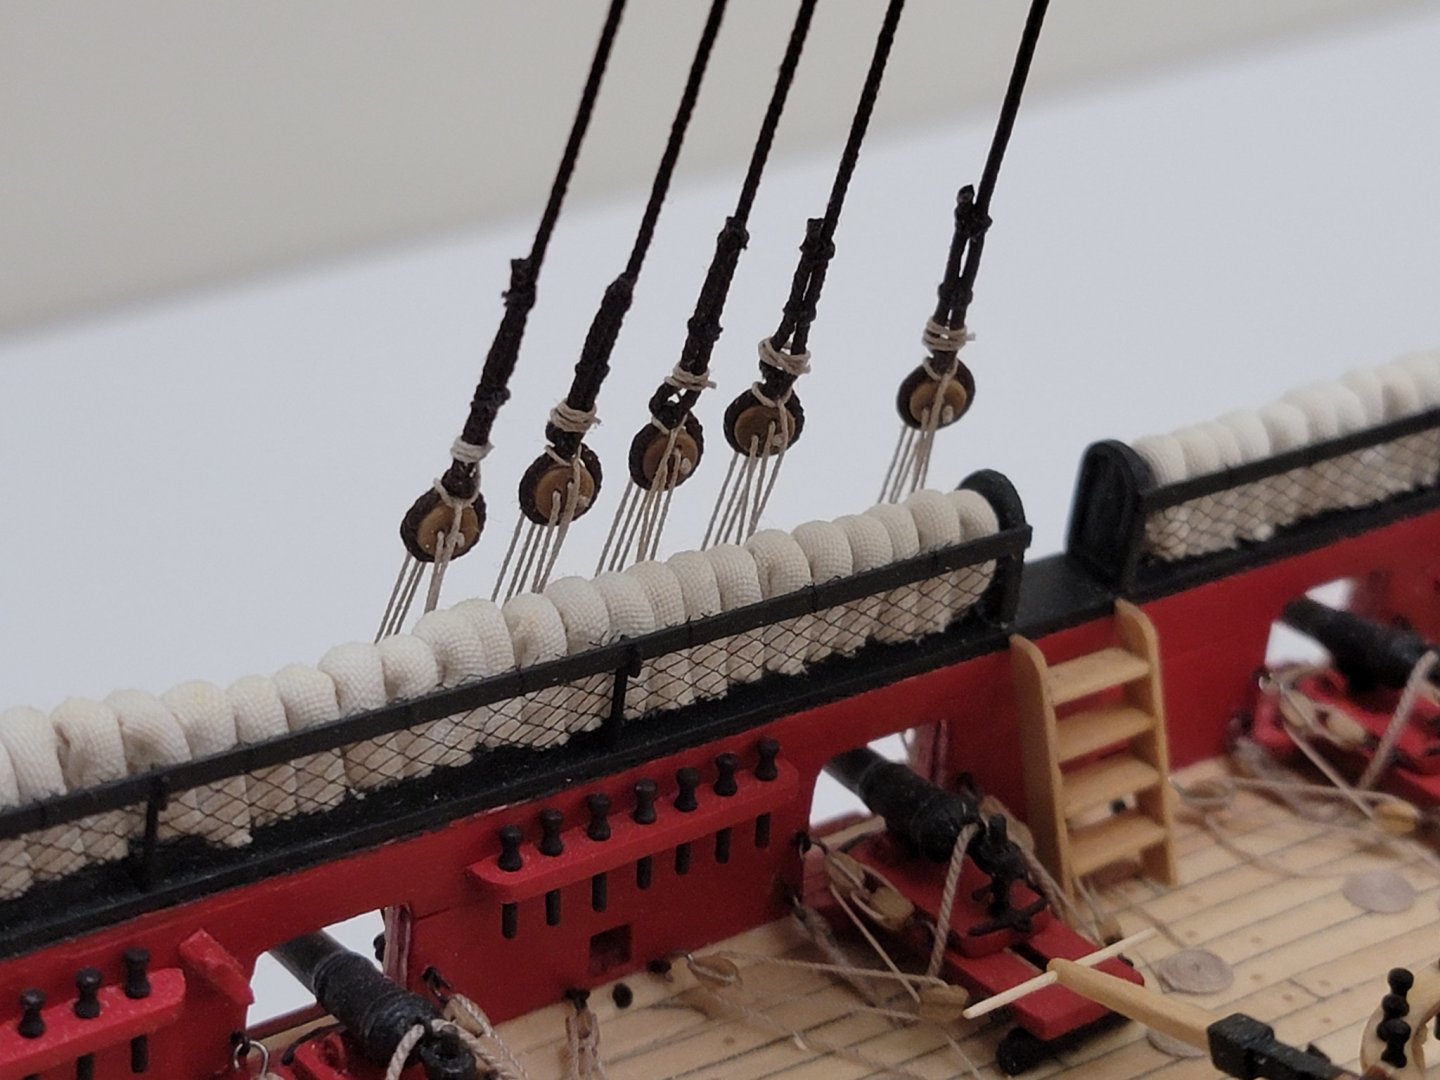
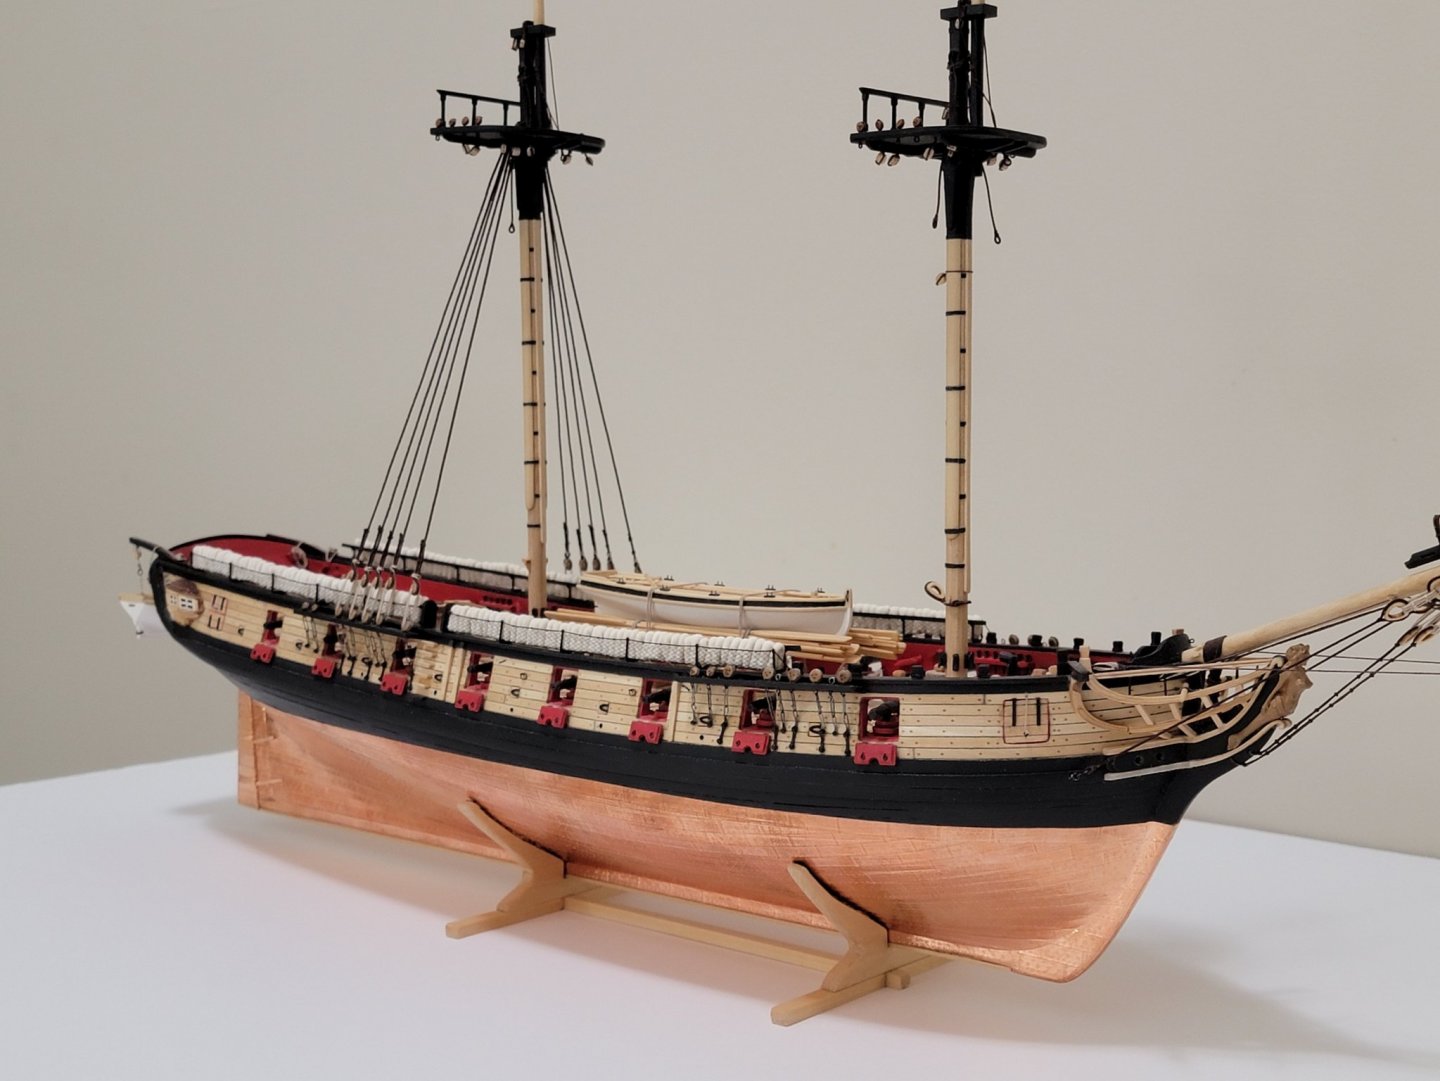
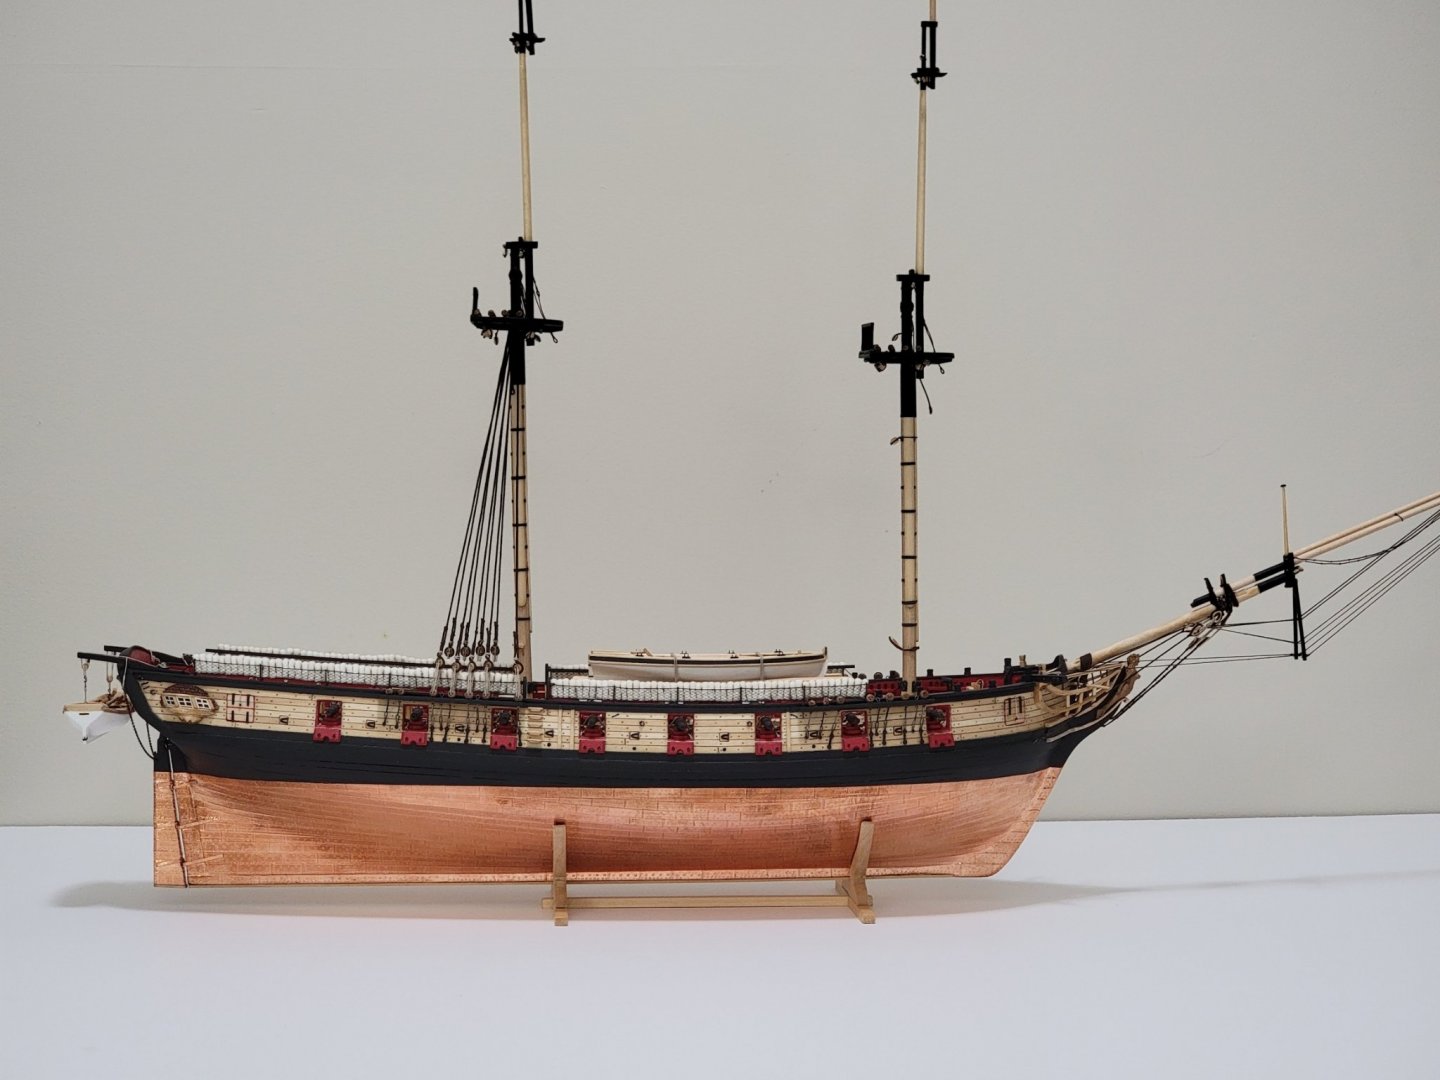
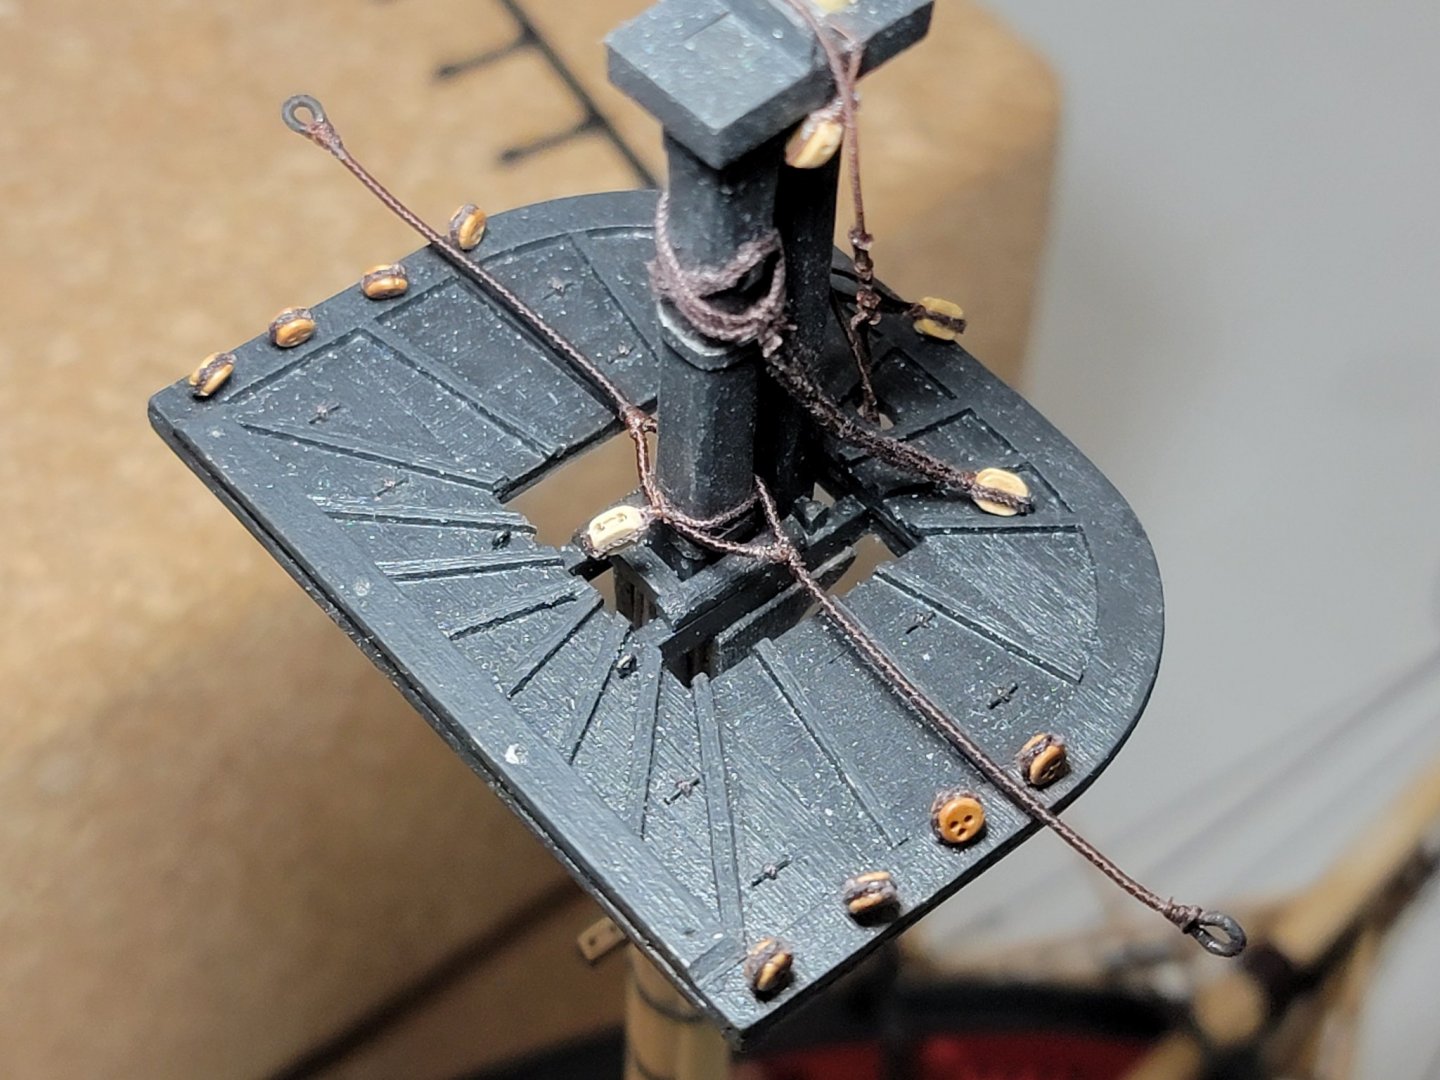
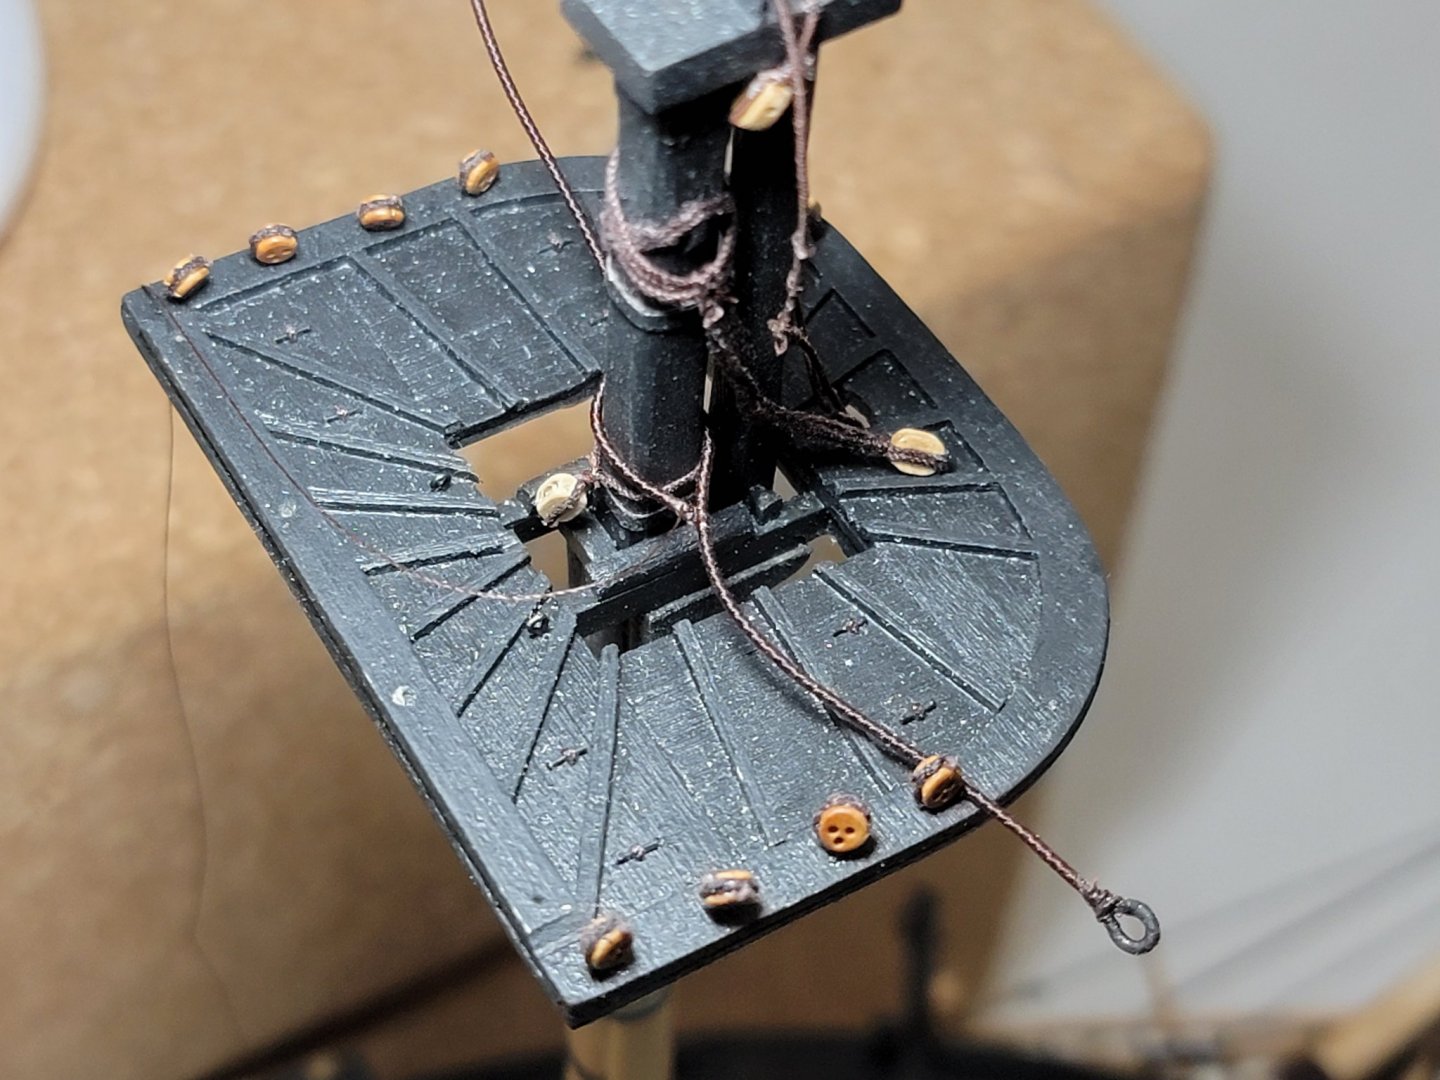
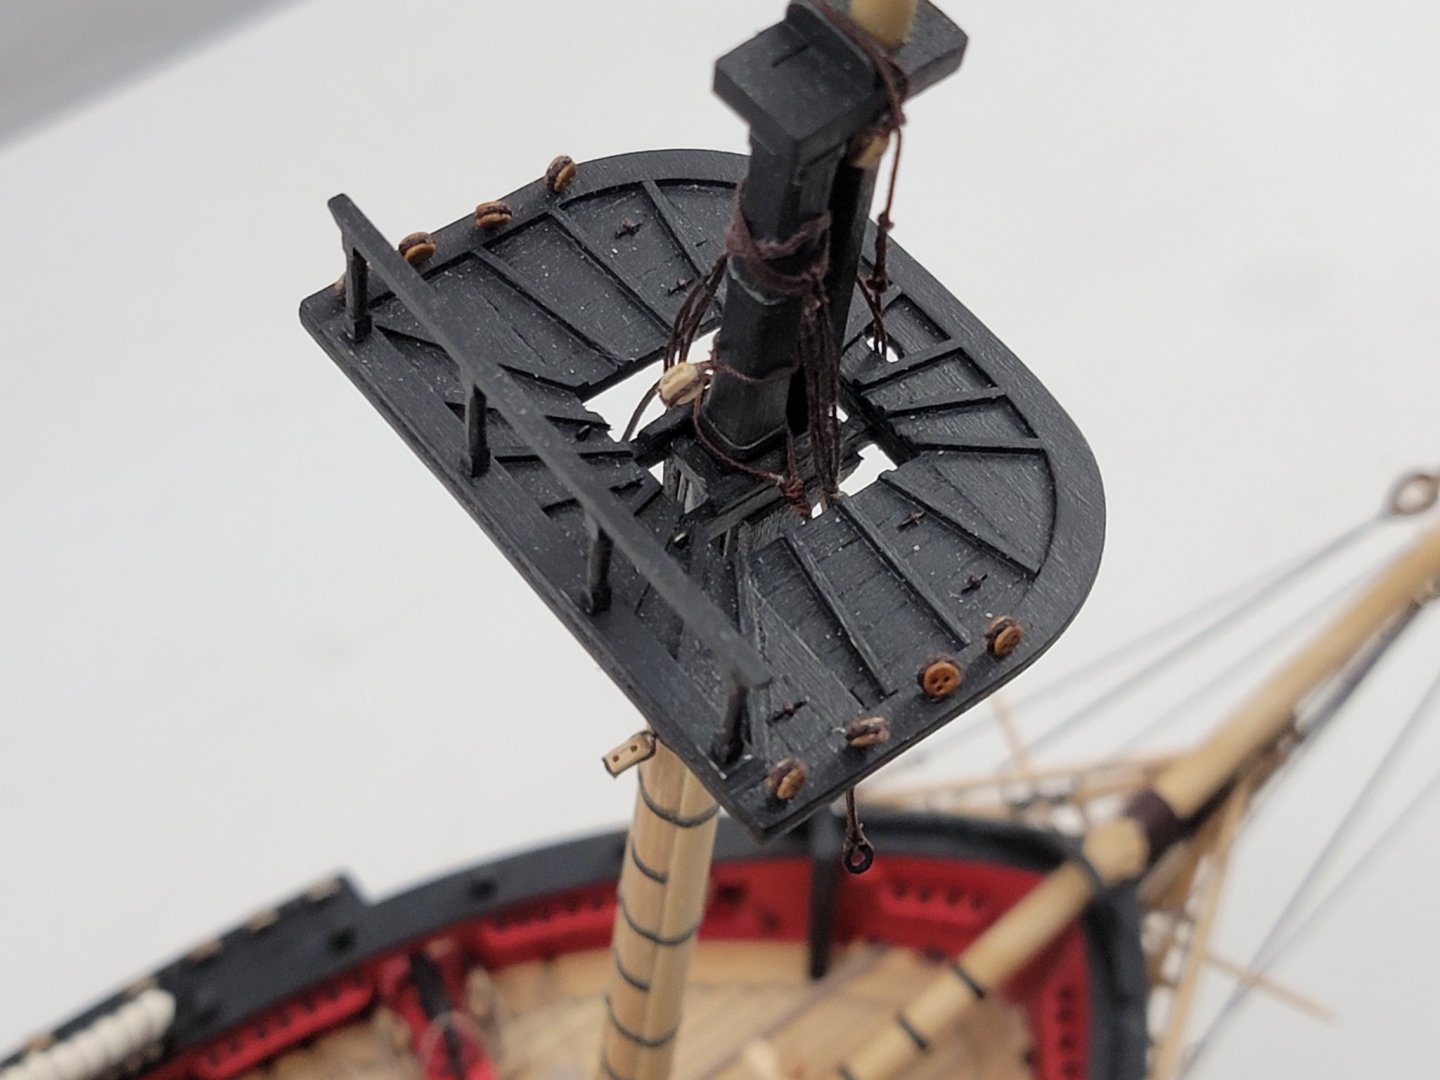
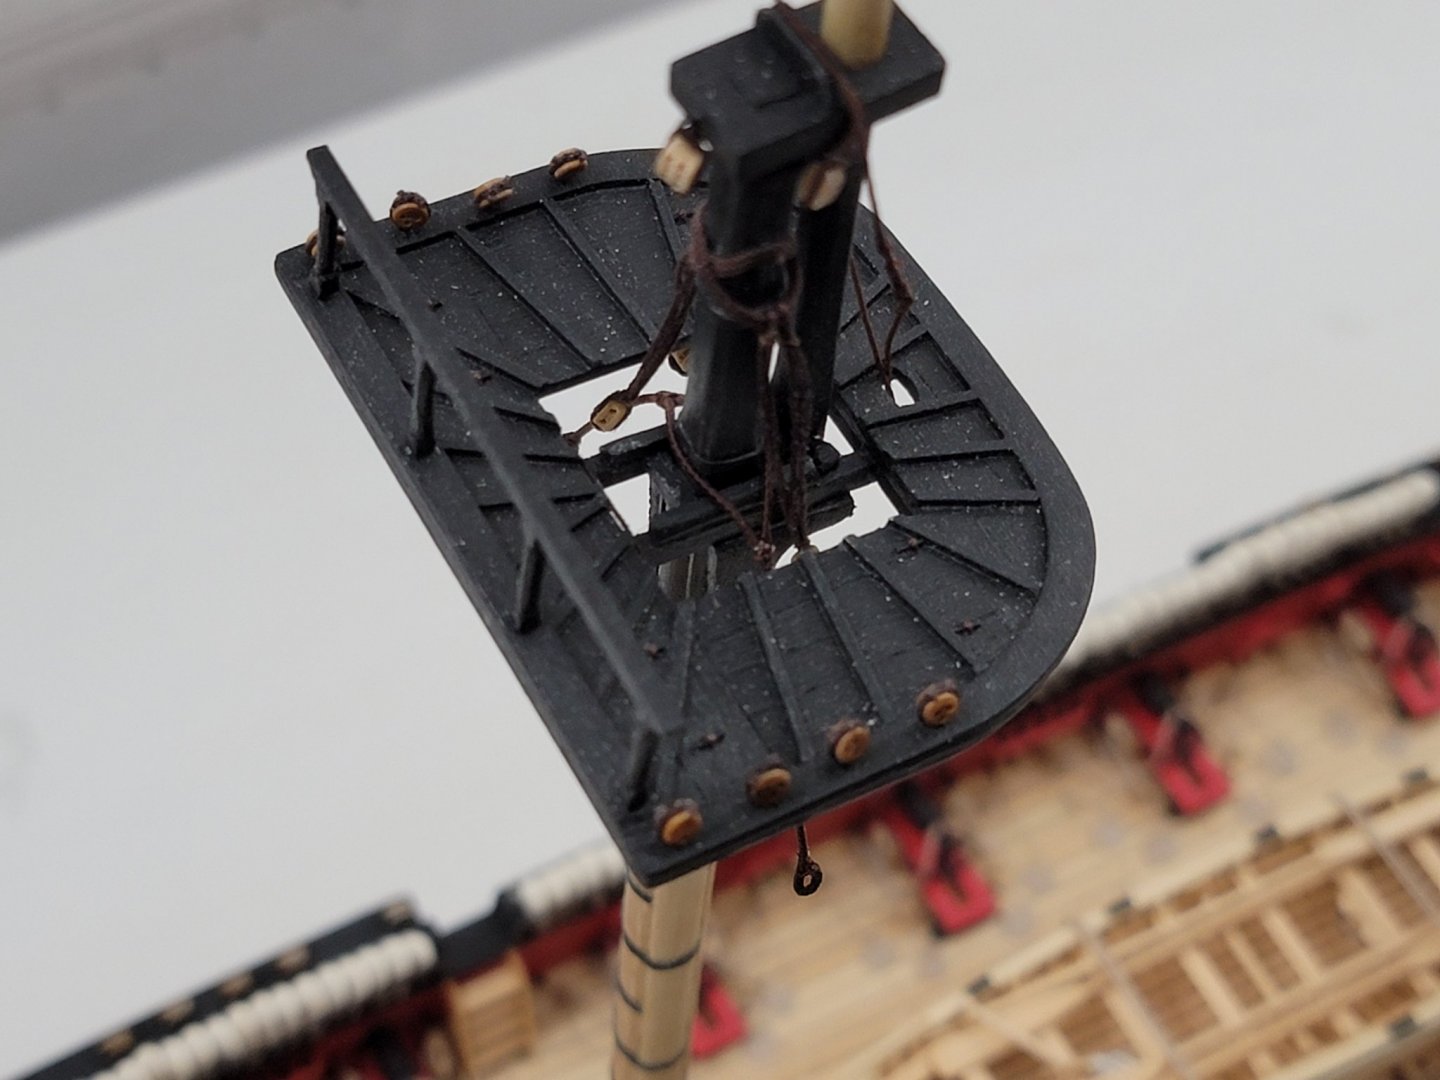
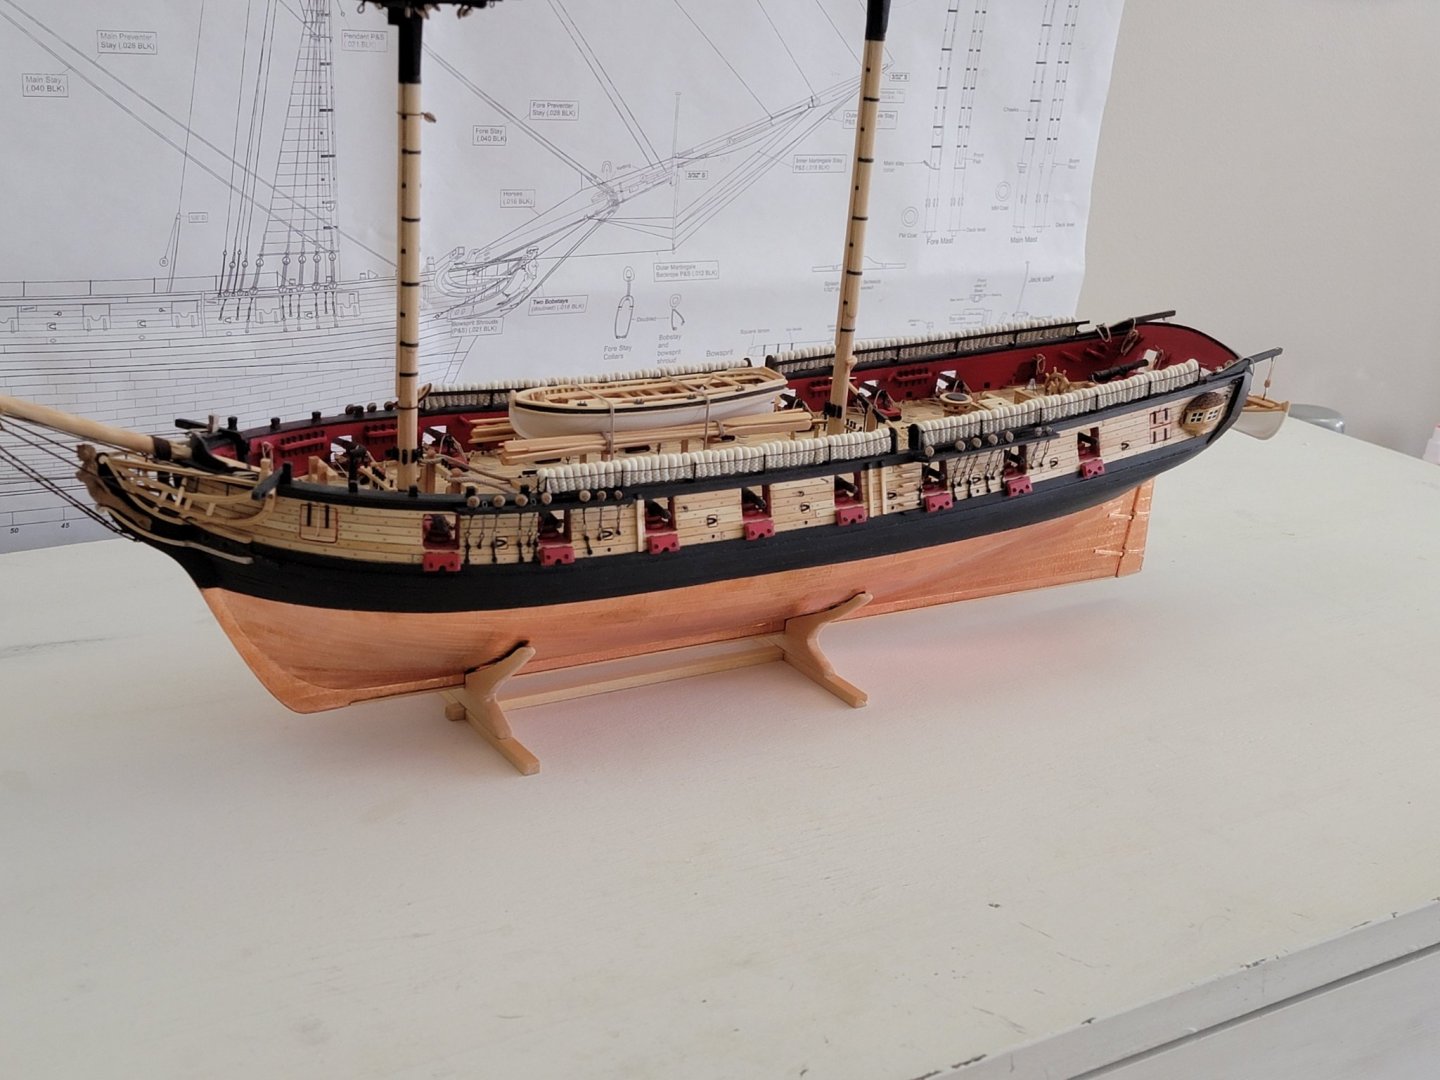
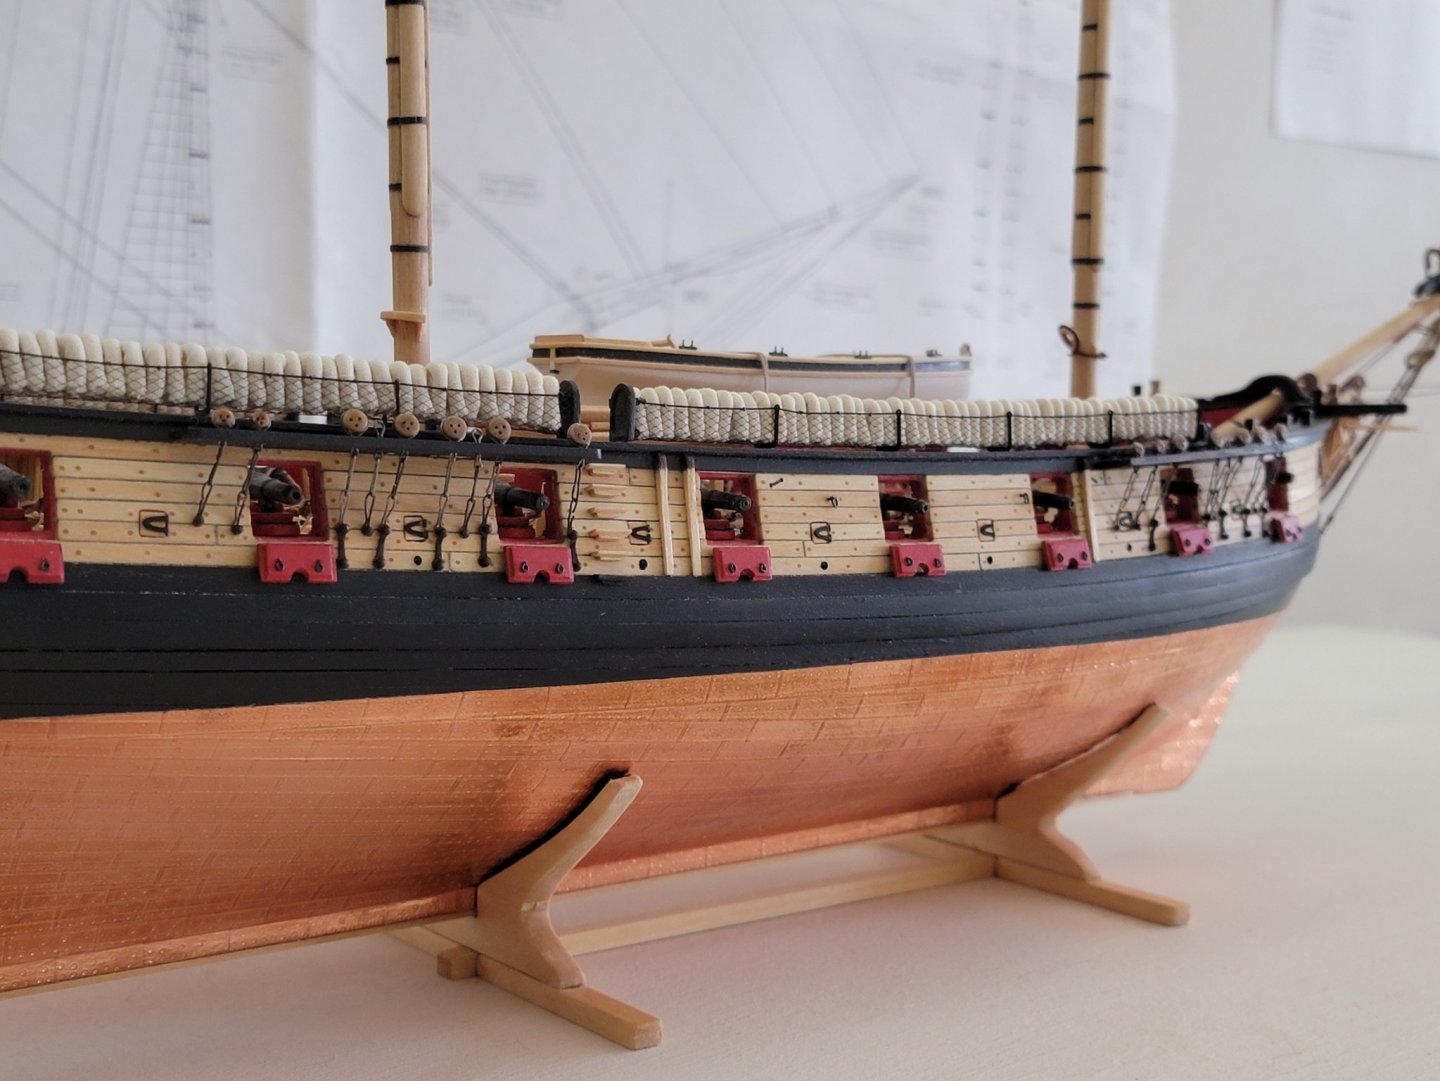
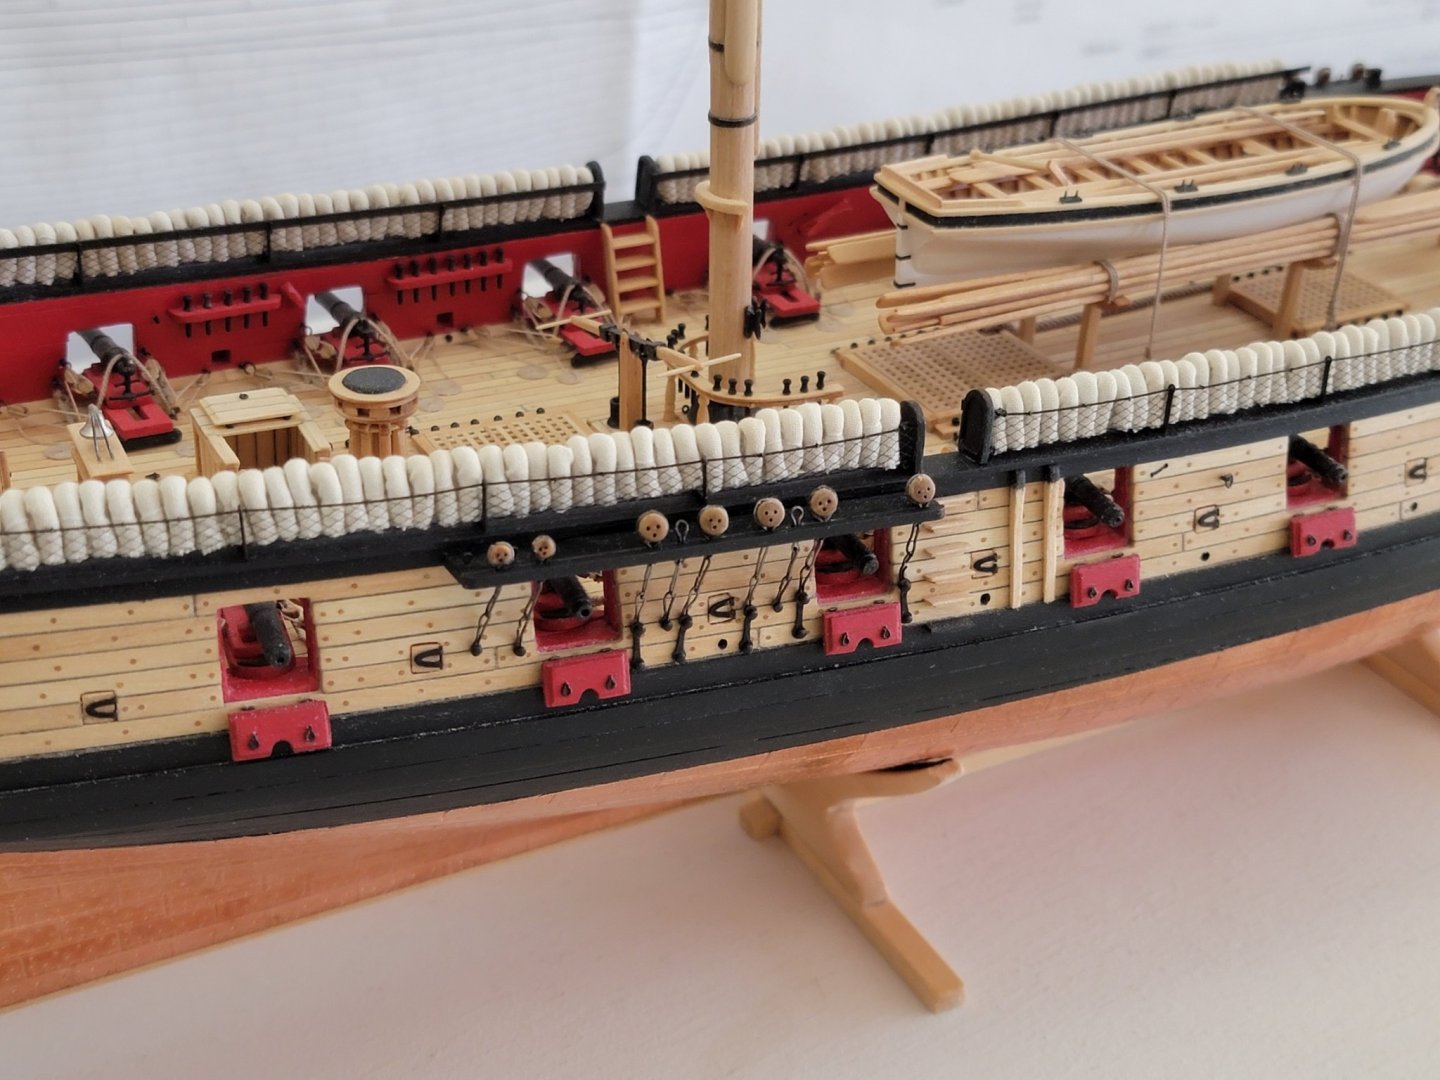
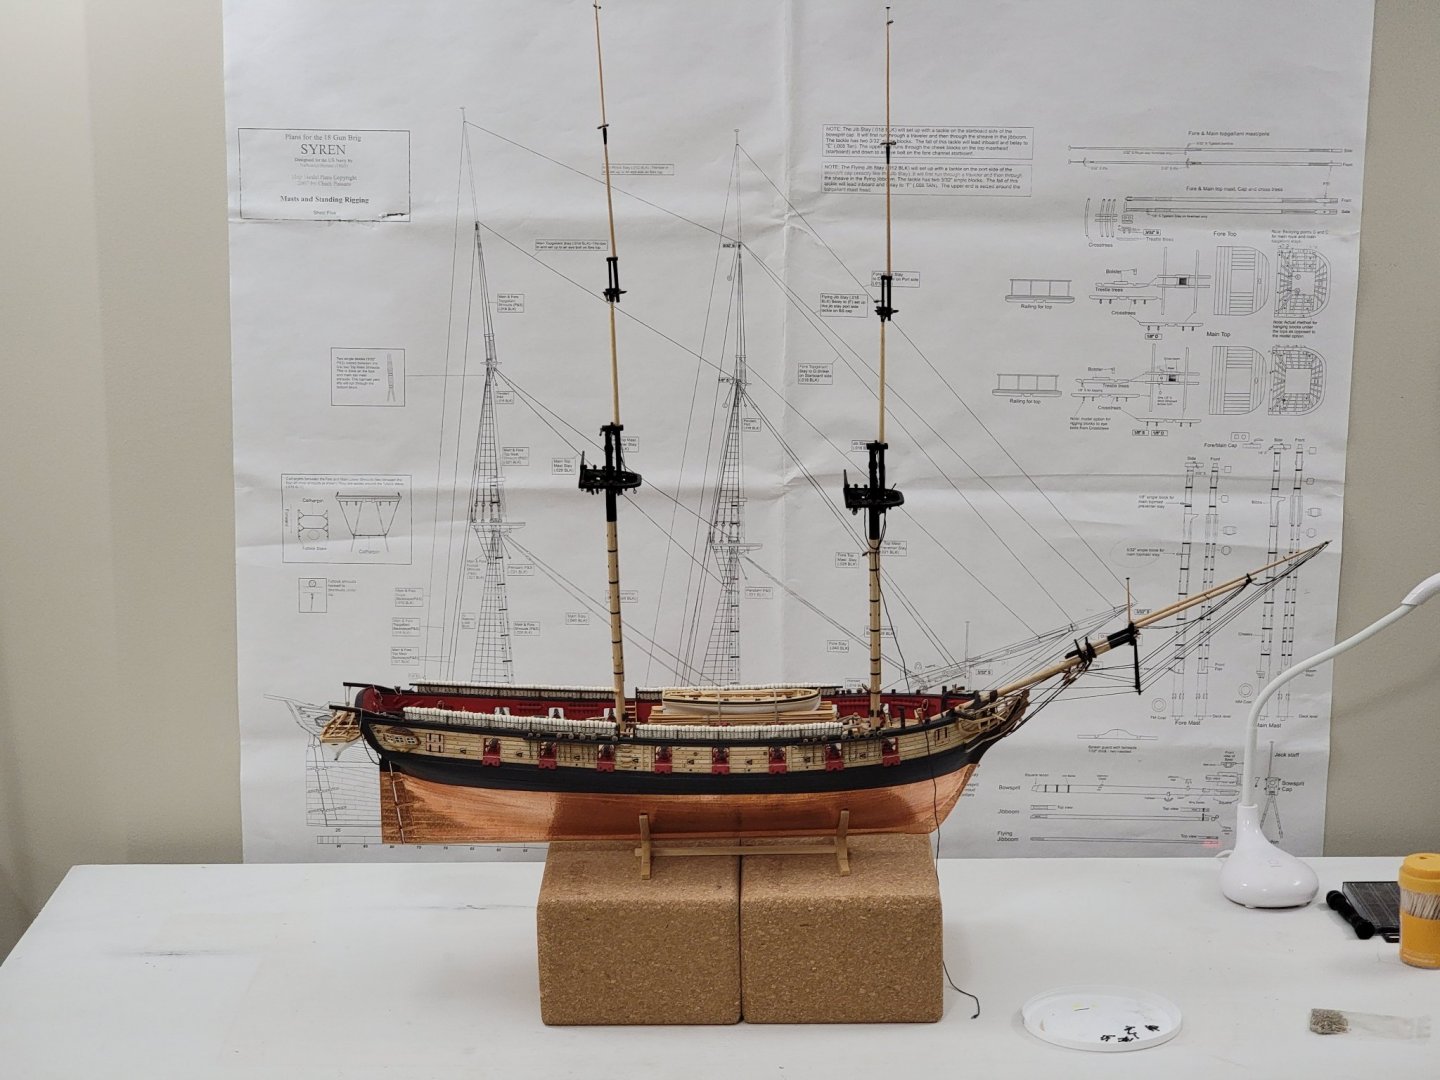
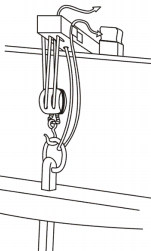
Spent most of the weekend on the main mast shrouds.. I had no idea how long it takes to make one. I fully served the foremost shroud, and the rest were partially served where they overlapped.. To get the right distance between the deadeyes I used a "claw" as shown below. Even with this there were some slight deviations in the lengths of the lanyards. I guess this makes it more authentic 😁 Here are some pics of the first few shrouds wrapped on the mast: And here are a bunch of pics to mark this small milestone: Shining some light to capture the served ropes (may try to retake these in the daylight). And of the overall ship:


- 950 replies
-
- 20
-
-

-
- syren
- model shipways
- (and 1 more)
-
Looks great, Desalgu!!
-
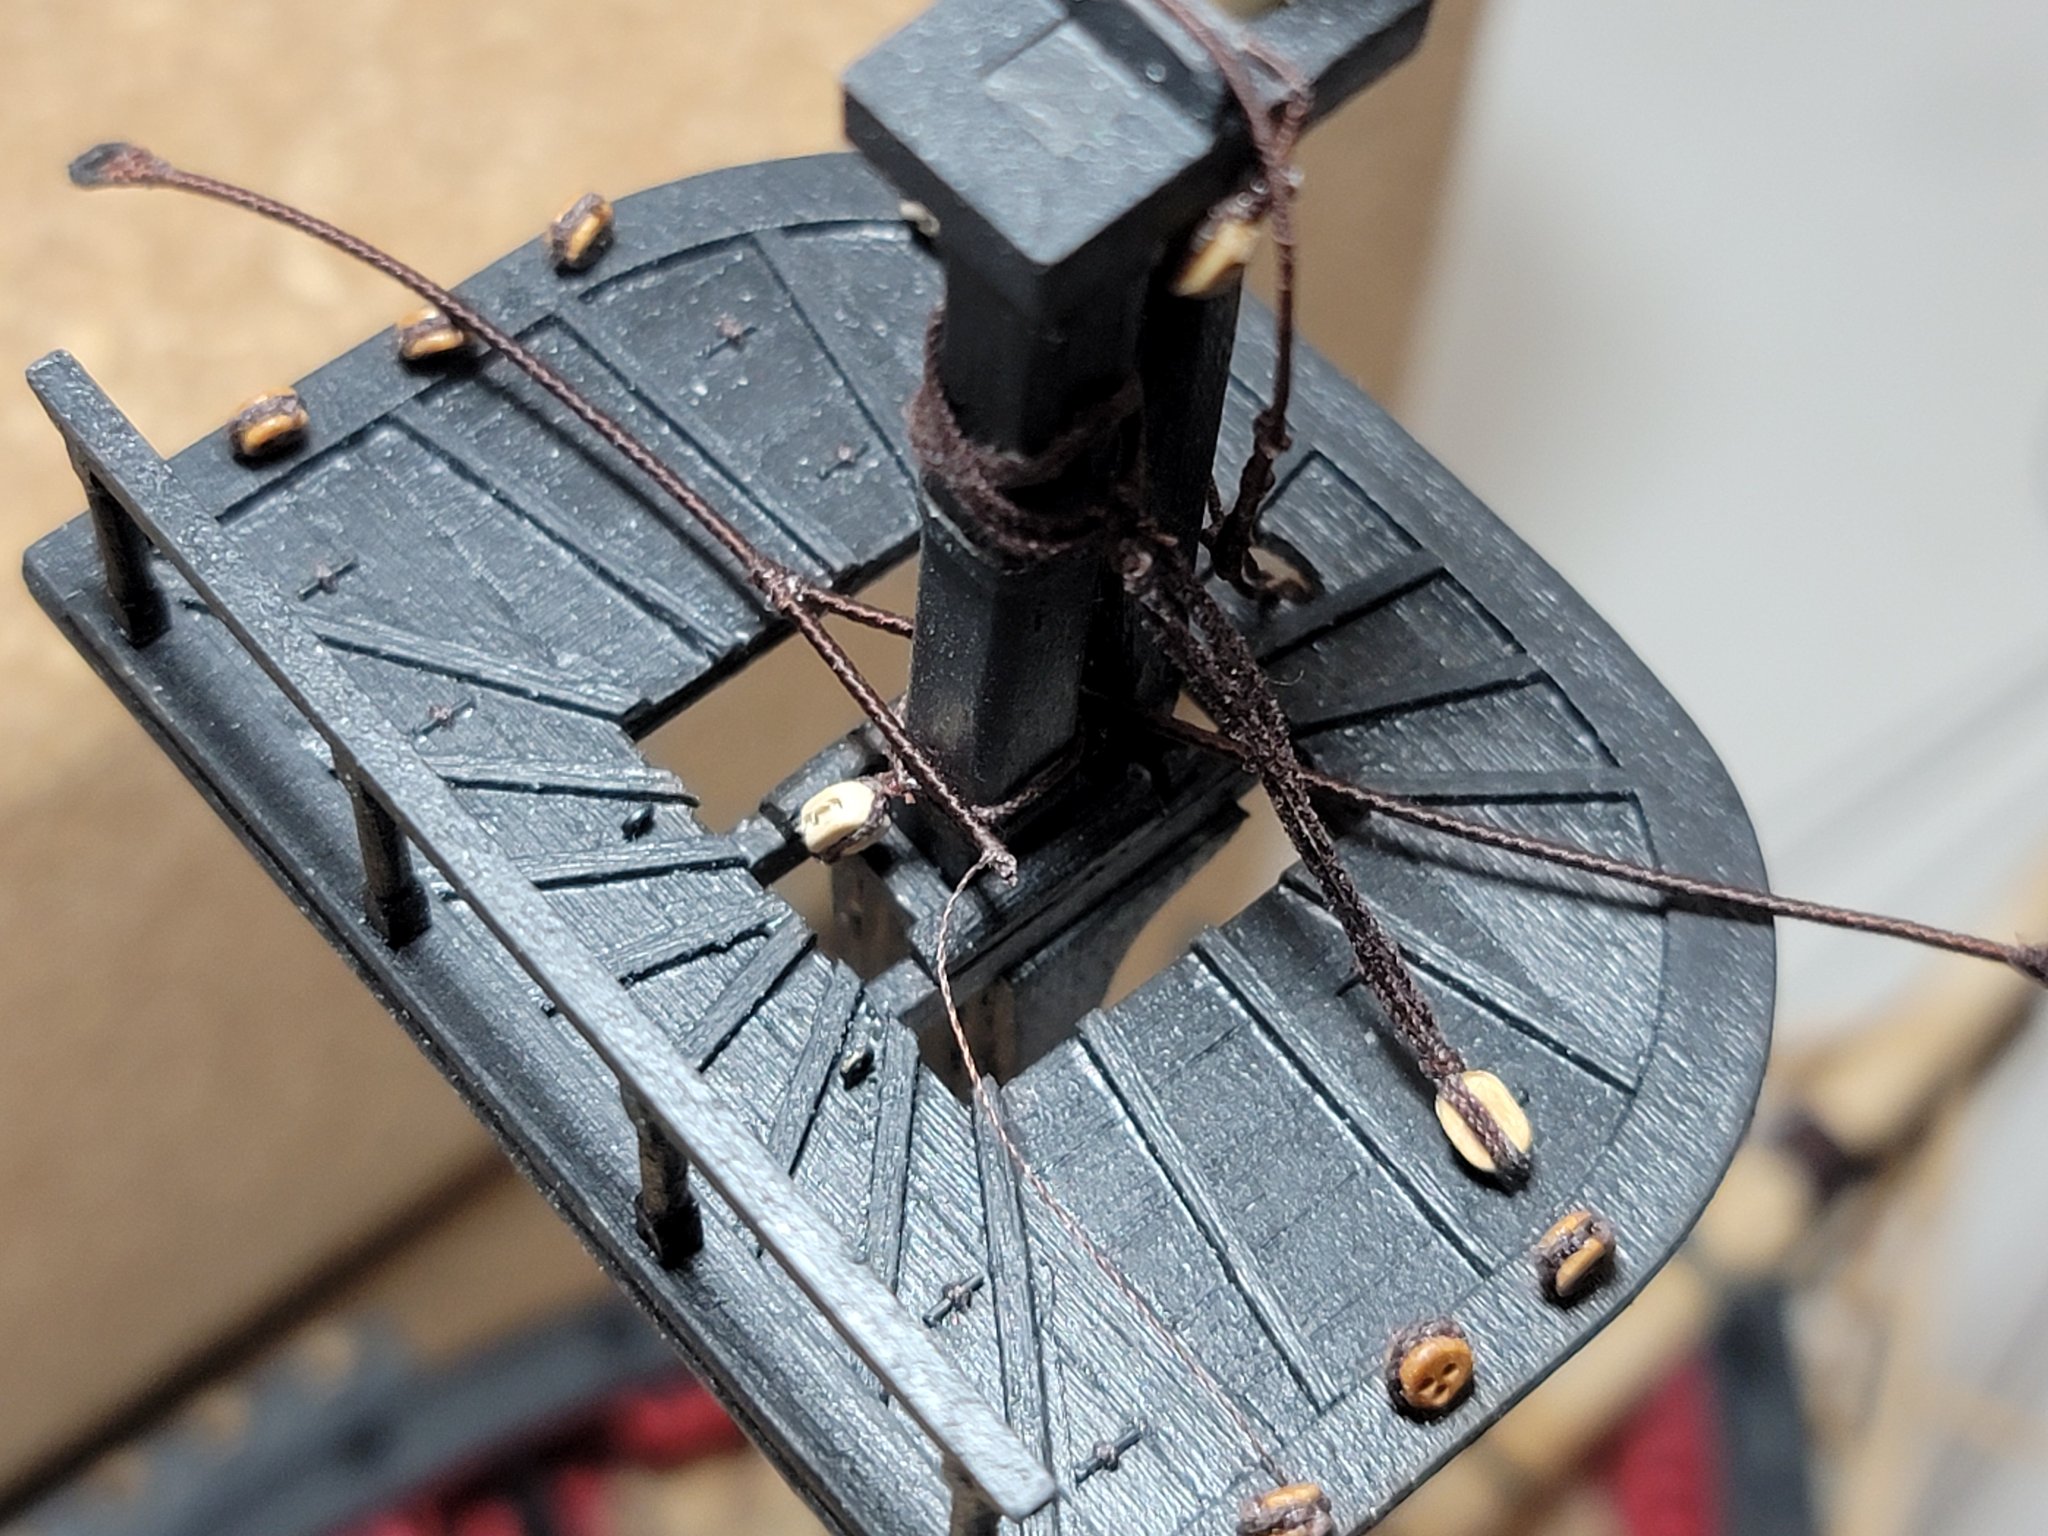
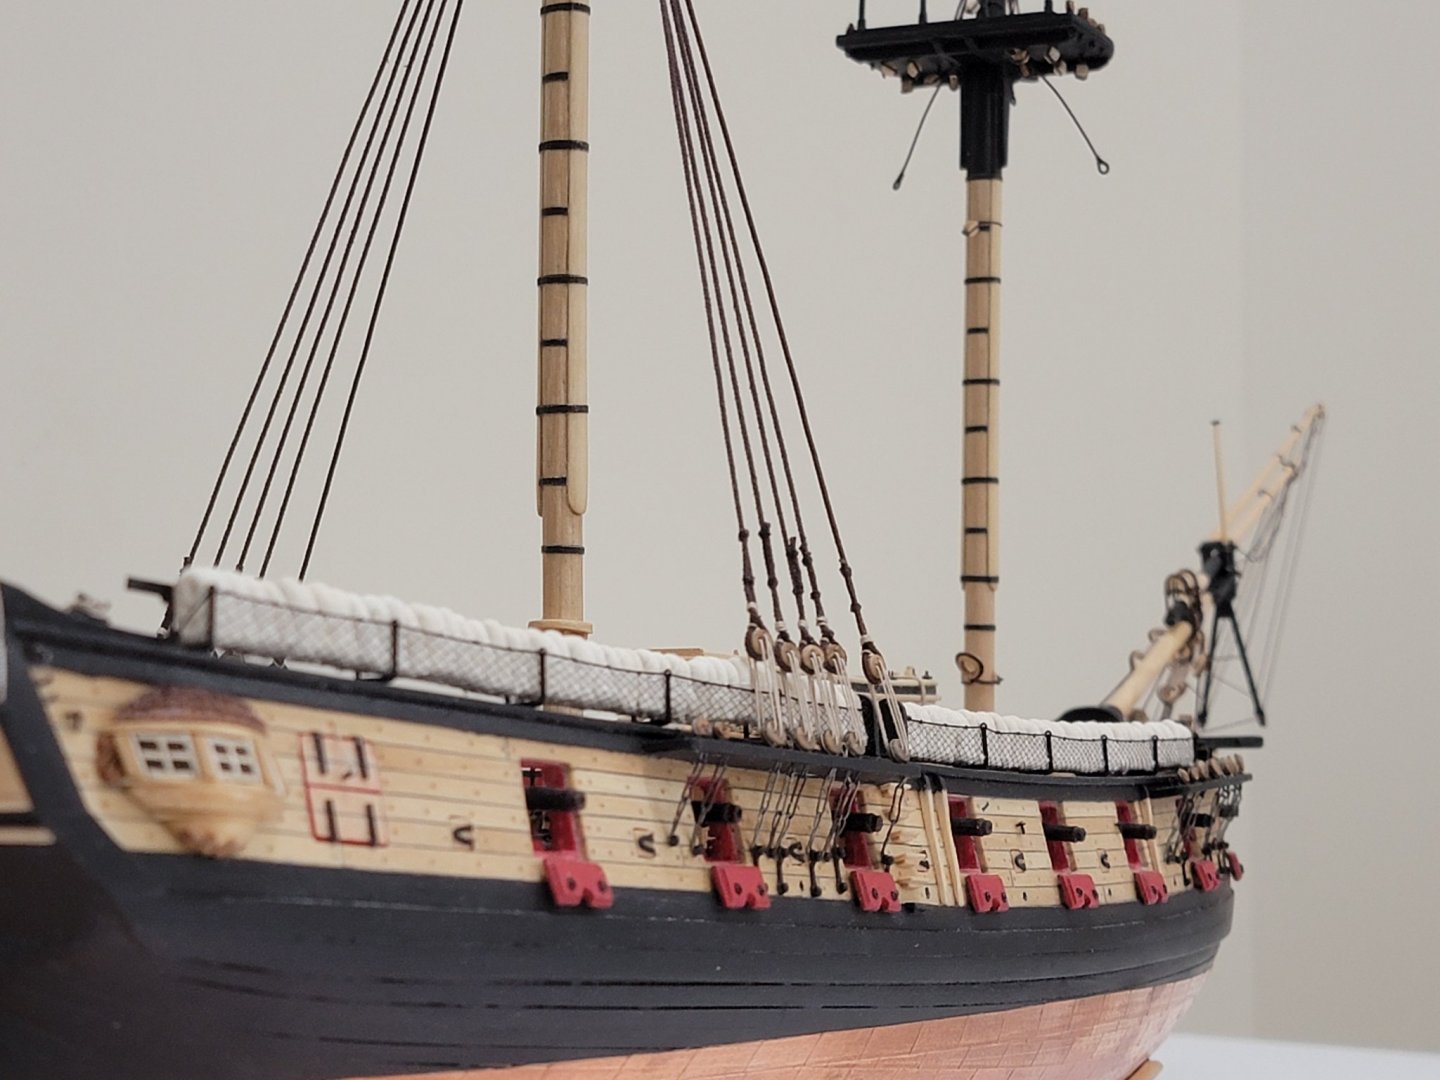
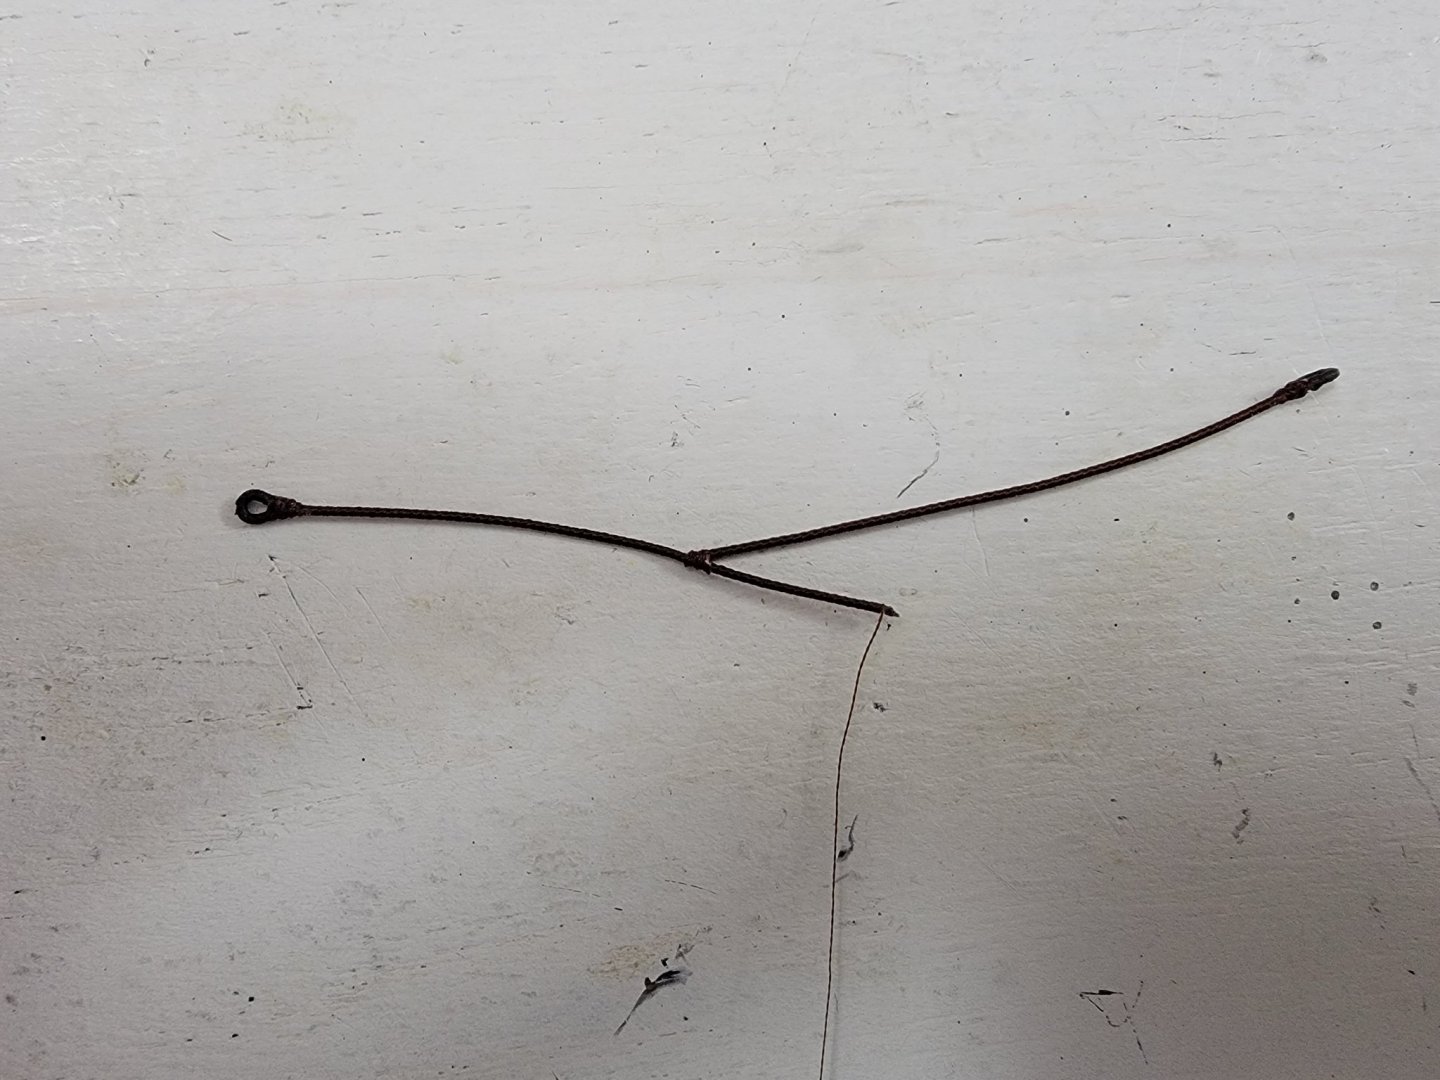
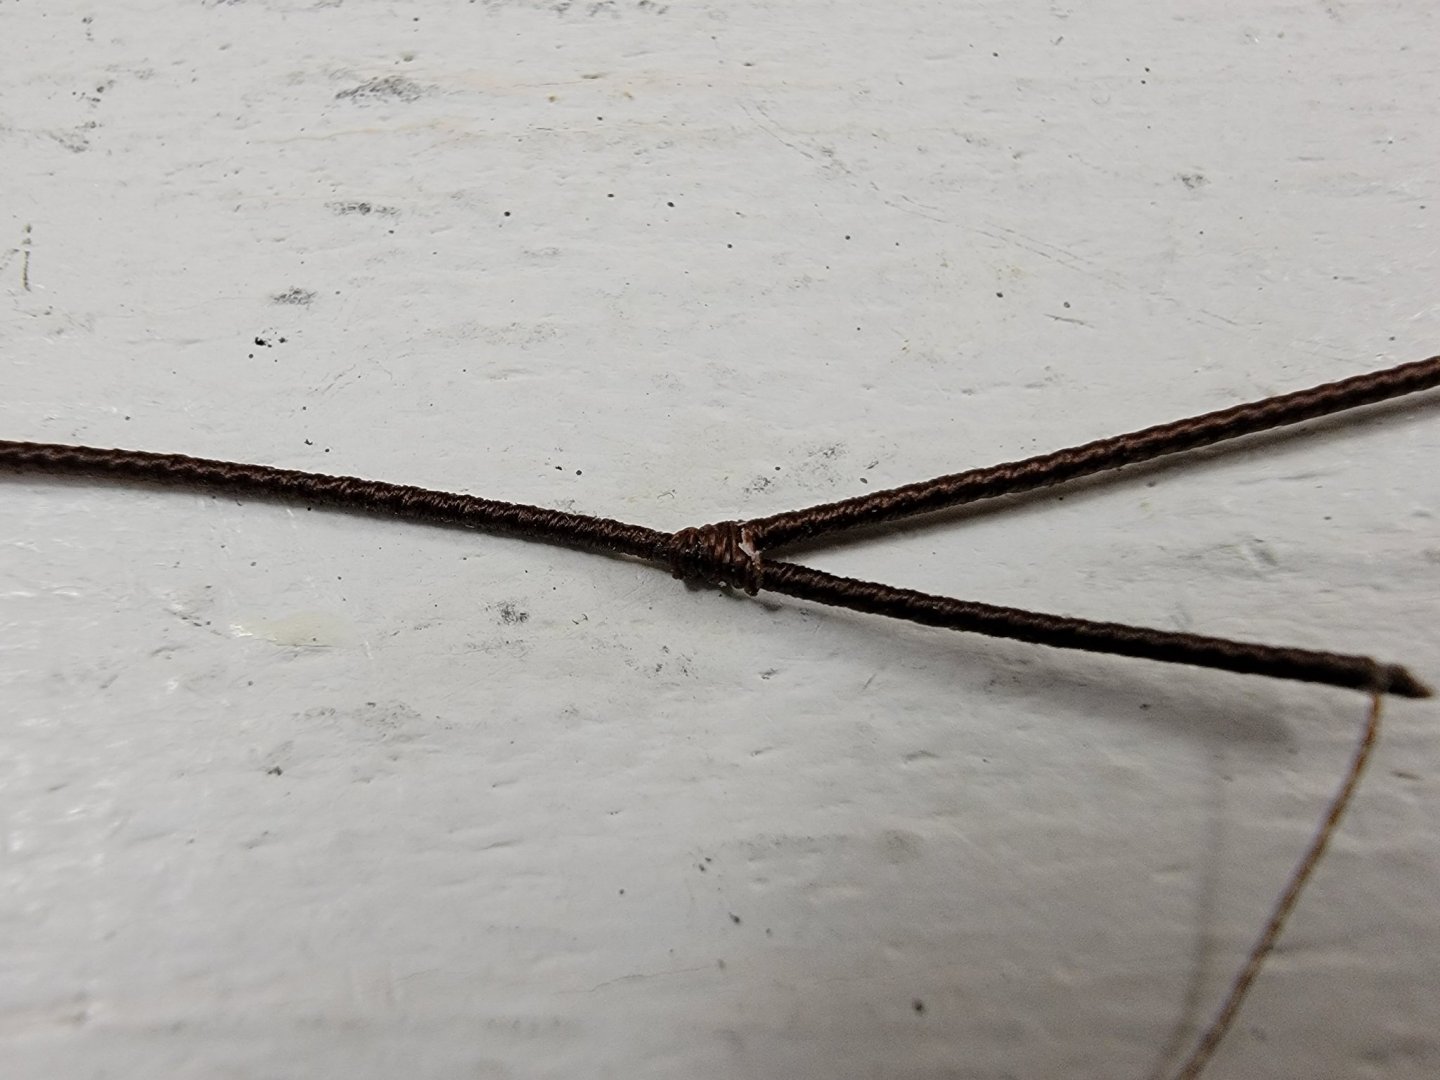
I have finished with the two lower pendants. Note for future builders (and future Walrus): step the masts after these and the shrouds are installed... To wrap these around the masts were not very easy I first served 5.5 cm line. I got this measurement by measuring the distance of the pendant in the plans (3.6 cm) and measured the length of line needed to wrap around the mast (3.2 cm), which was divided by two for the two lines needed (3.2/2=1.6). The remaining length was needed for the eye splice at the end of the line. After this was served, the eye splices were made and painted black, then a slant cut was made at the other ends. One of the lines were glued to the other line making sure there was at least 1.6 cm left to wrap around the mast. I made it a bit loose by leaving 0.2 cm additional length on the ends. Then it was wrapped around the mast, glued and served. This would have been a lot neater if I could make these off the model then slide them to place. Next I'll work on the lower shrouds for the main mast. Been waiting for this moment for months now. Really eager to see how I perform in this. Hoping no major mishaps!! 😅


- 950 replies
-
- 7
-
-
- syren
- model shipways
- (and 1 more)
-
Doing grad studies at home definitely helps!! 😄 Also with most things closed here, this is the only thing keeping me sane. Glad I could help out, that's what this forum is all about 🙂. I also didn't know of any of these books before until I read some of the reviews and recommendations here. I don't know where I'd be without this forum, all the members are very friendly and always give great advice and suggestions whenever I'm stuck or need help.
- 950 replies
-
- 1
-
-
- syren
- model shipways
- (and 1 more)
-
Thanks Justin! Glad to be done with them. They were very fiddly and tiny to work with!!
-
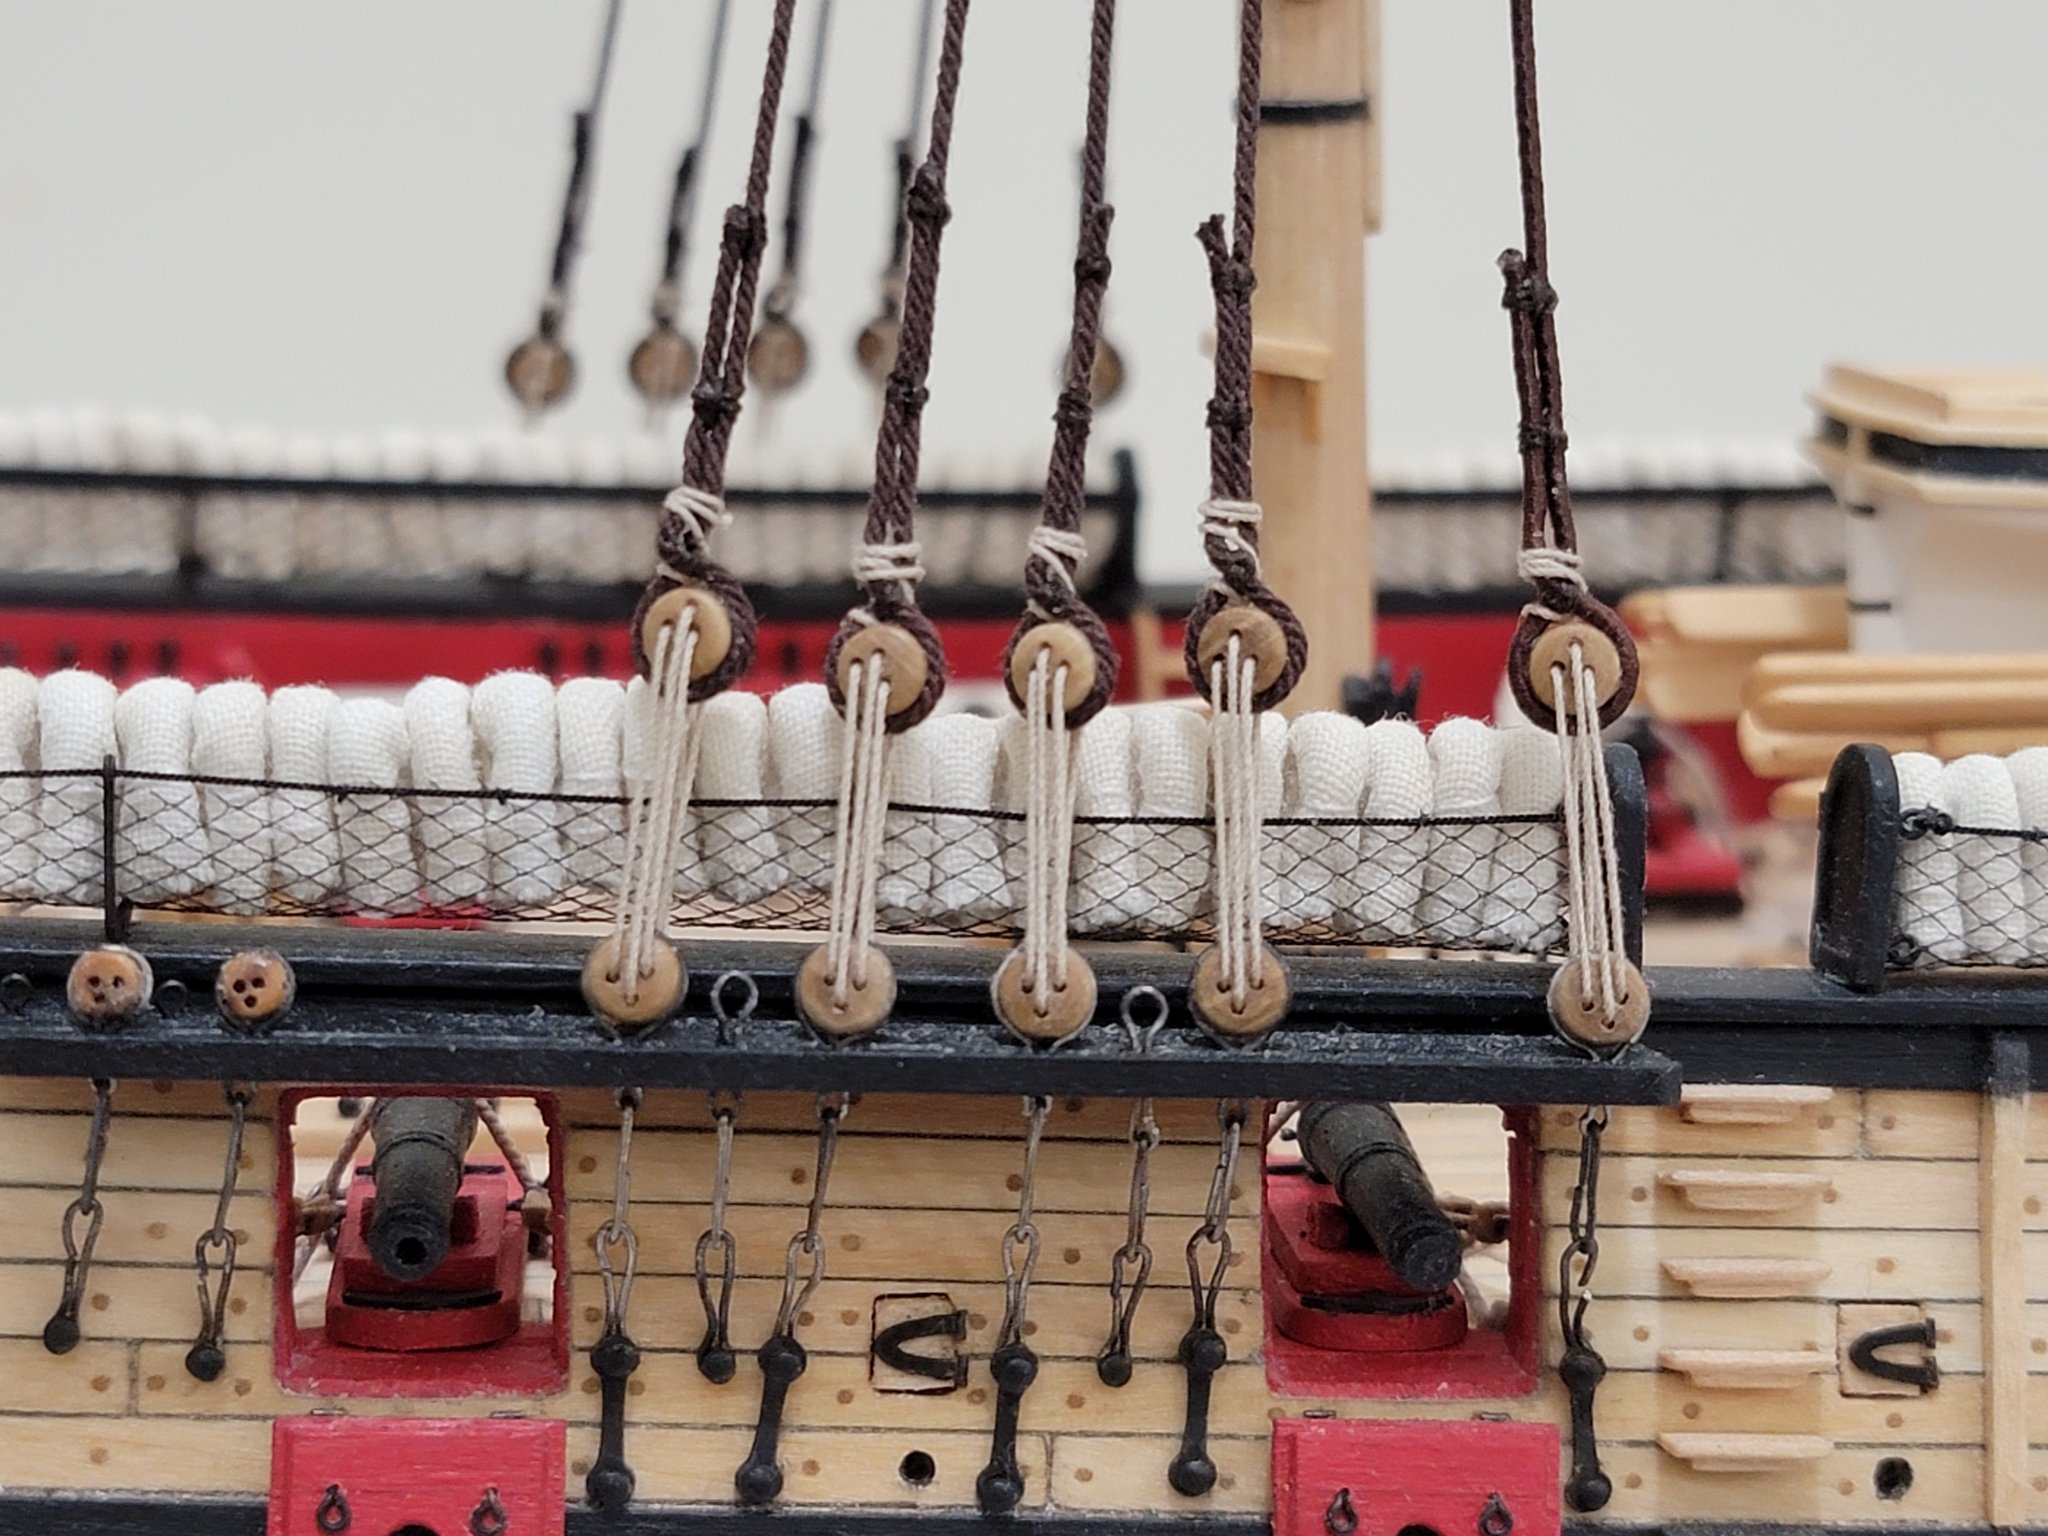
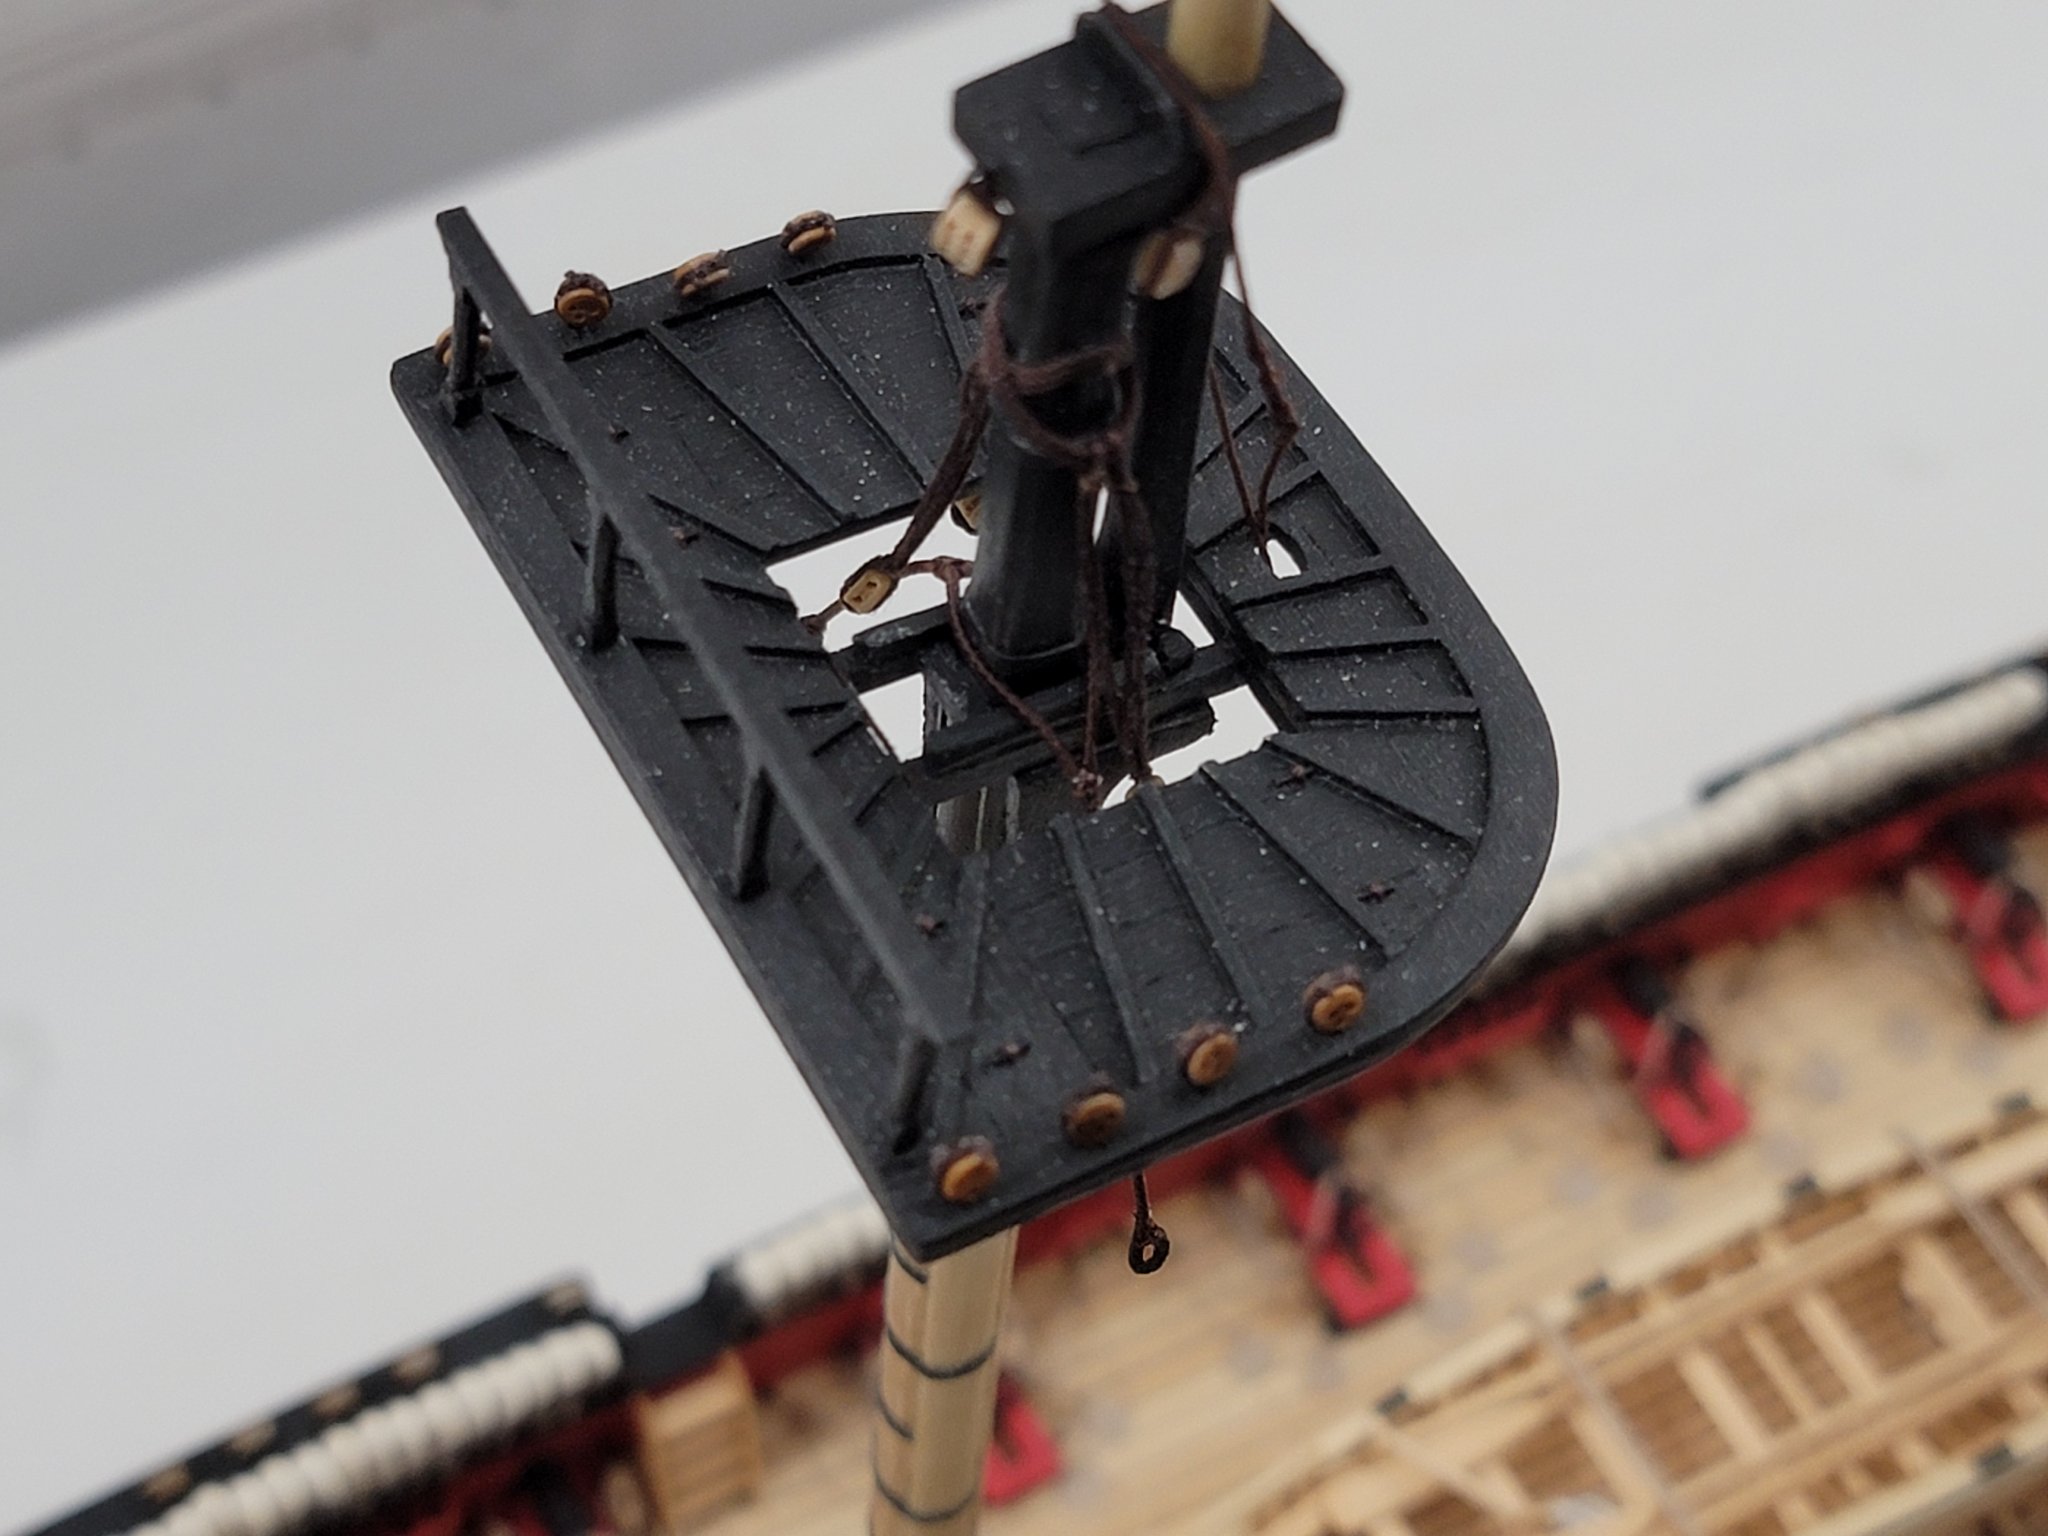
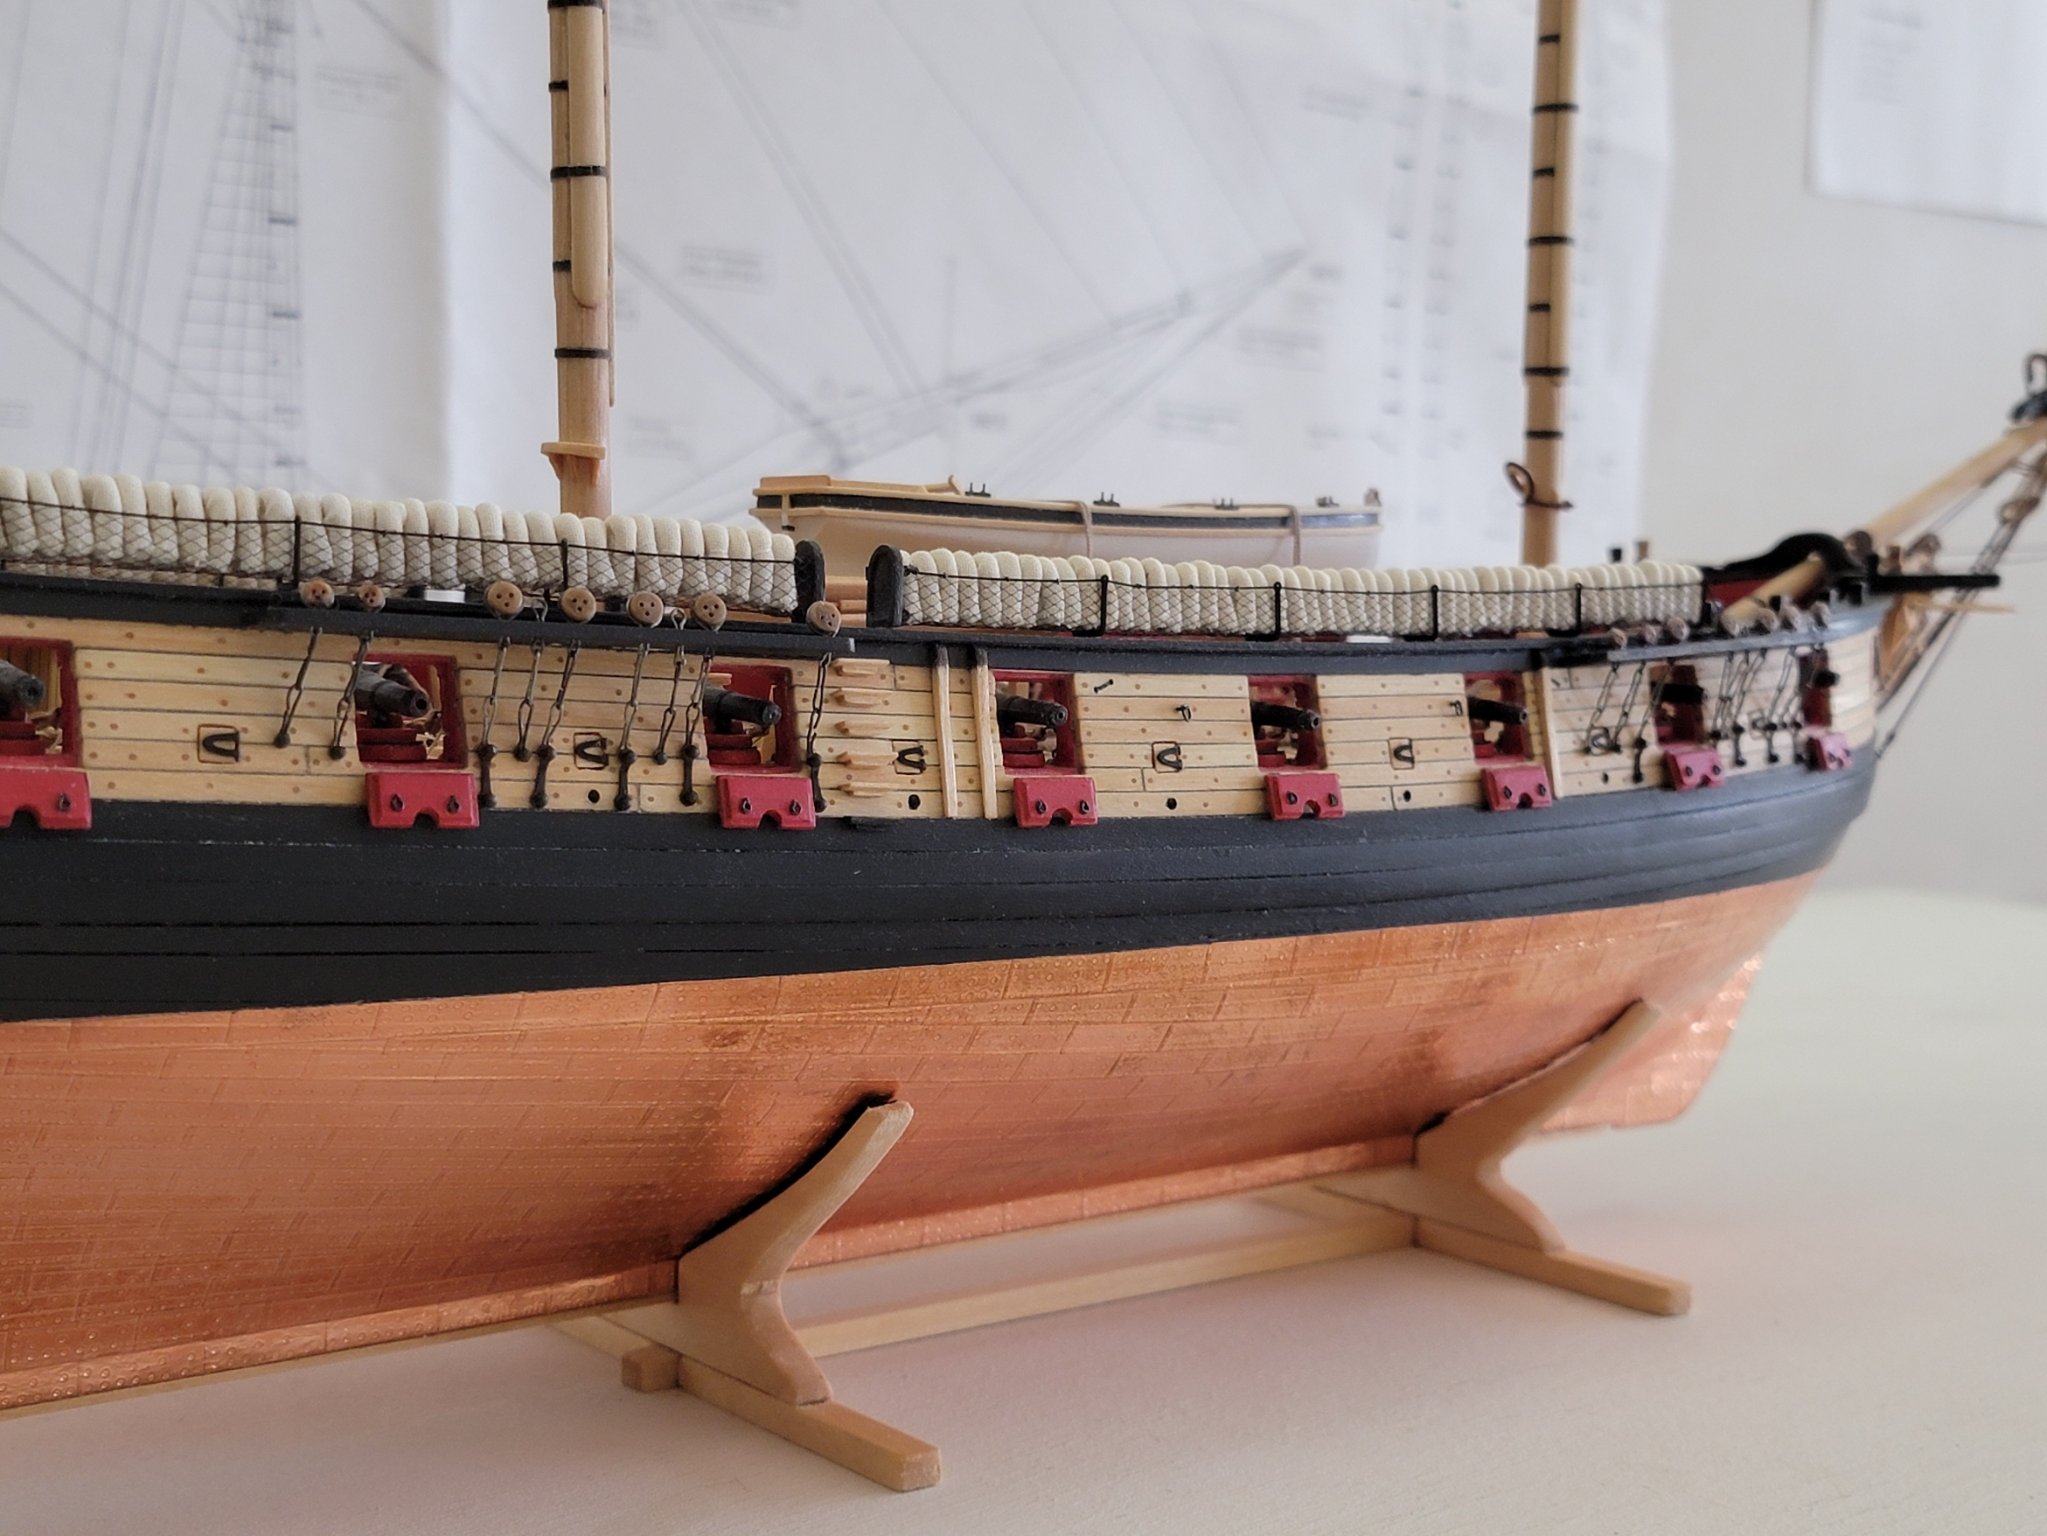
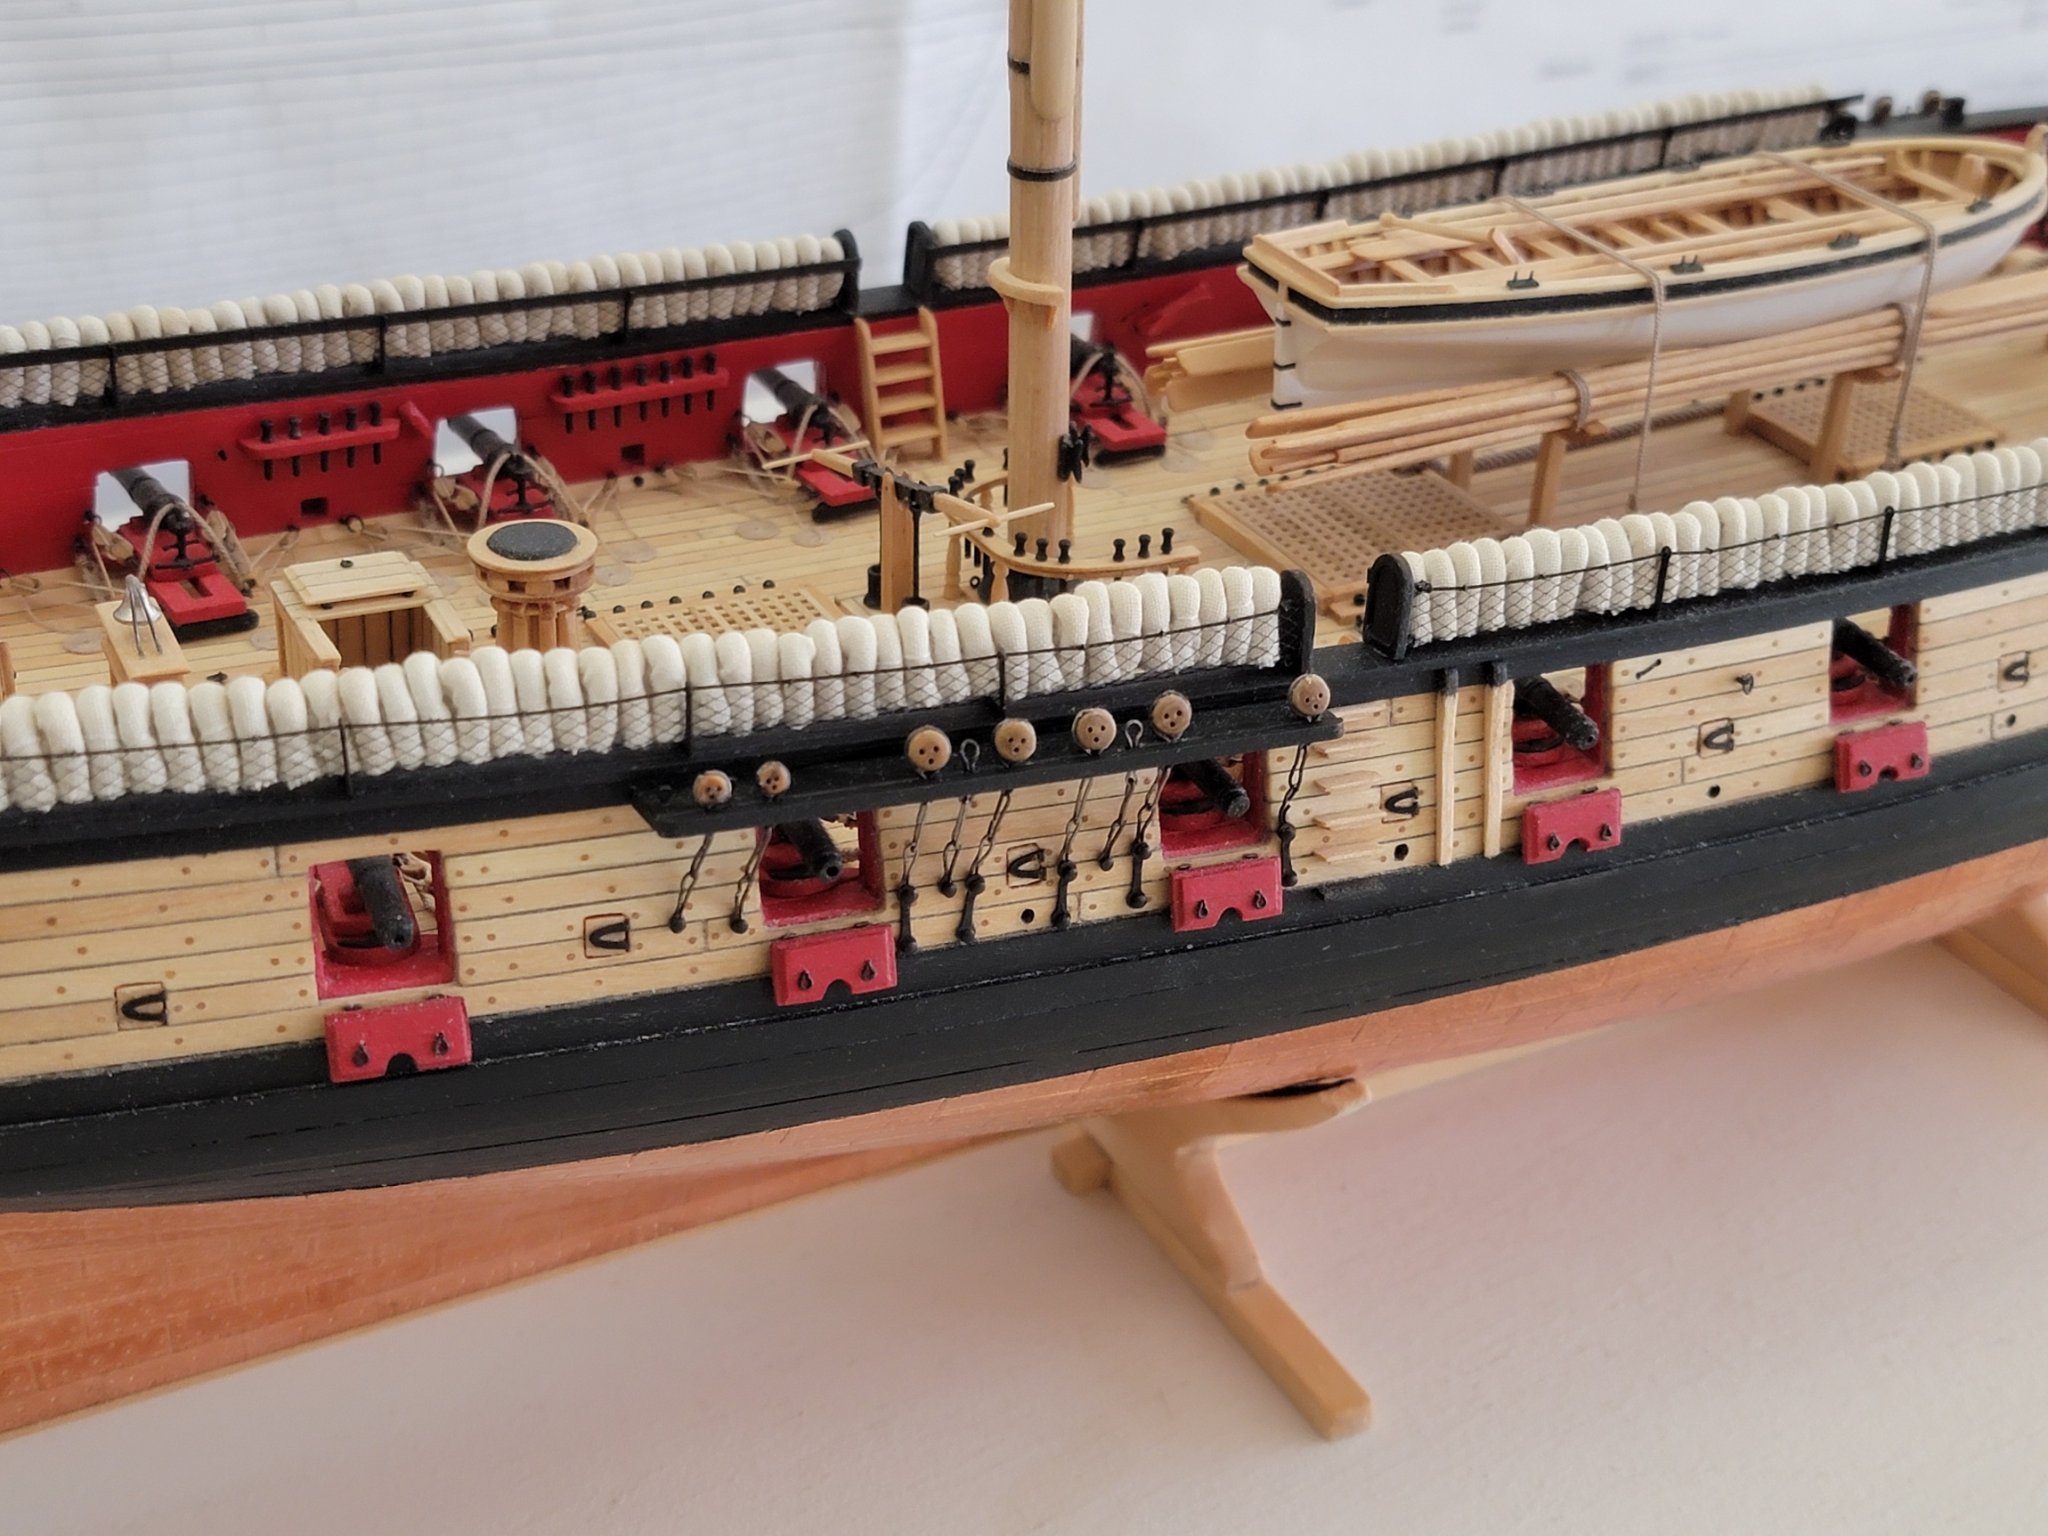
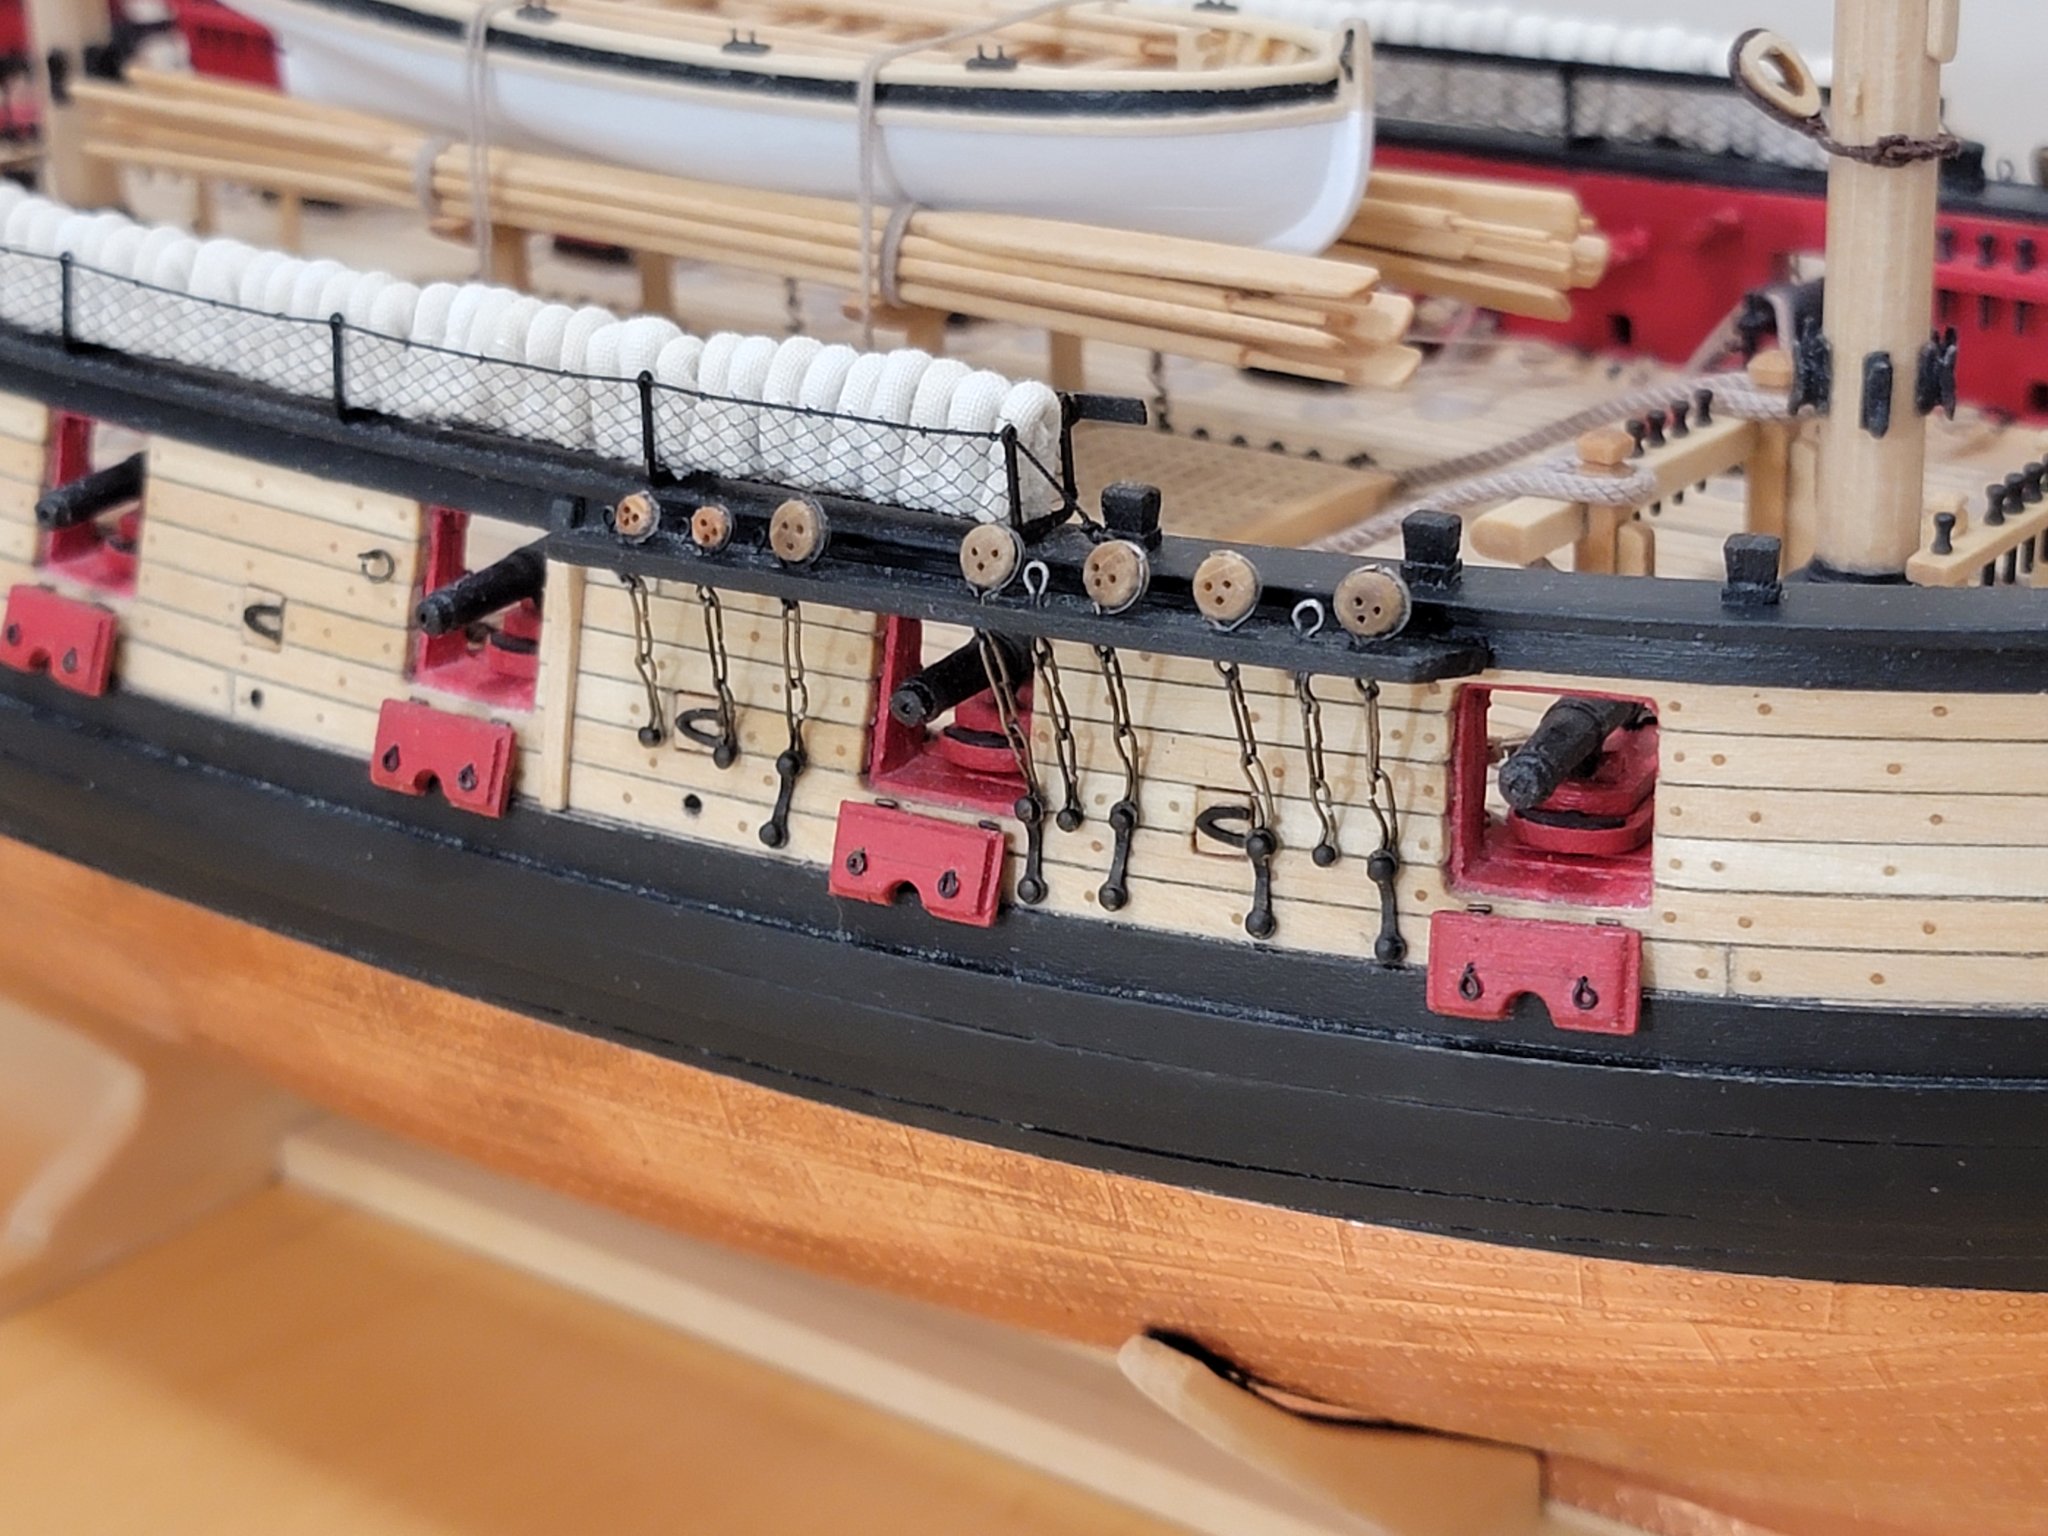
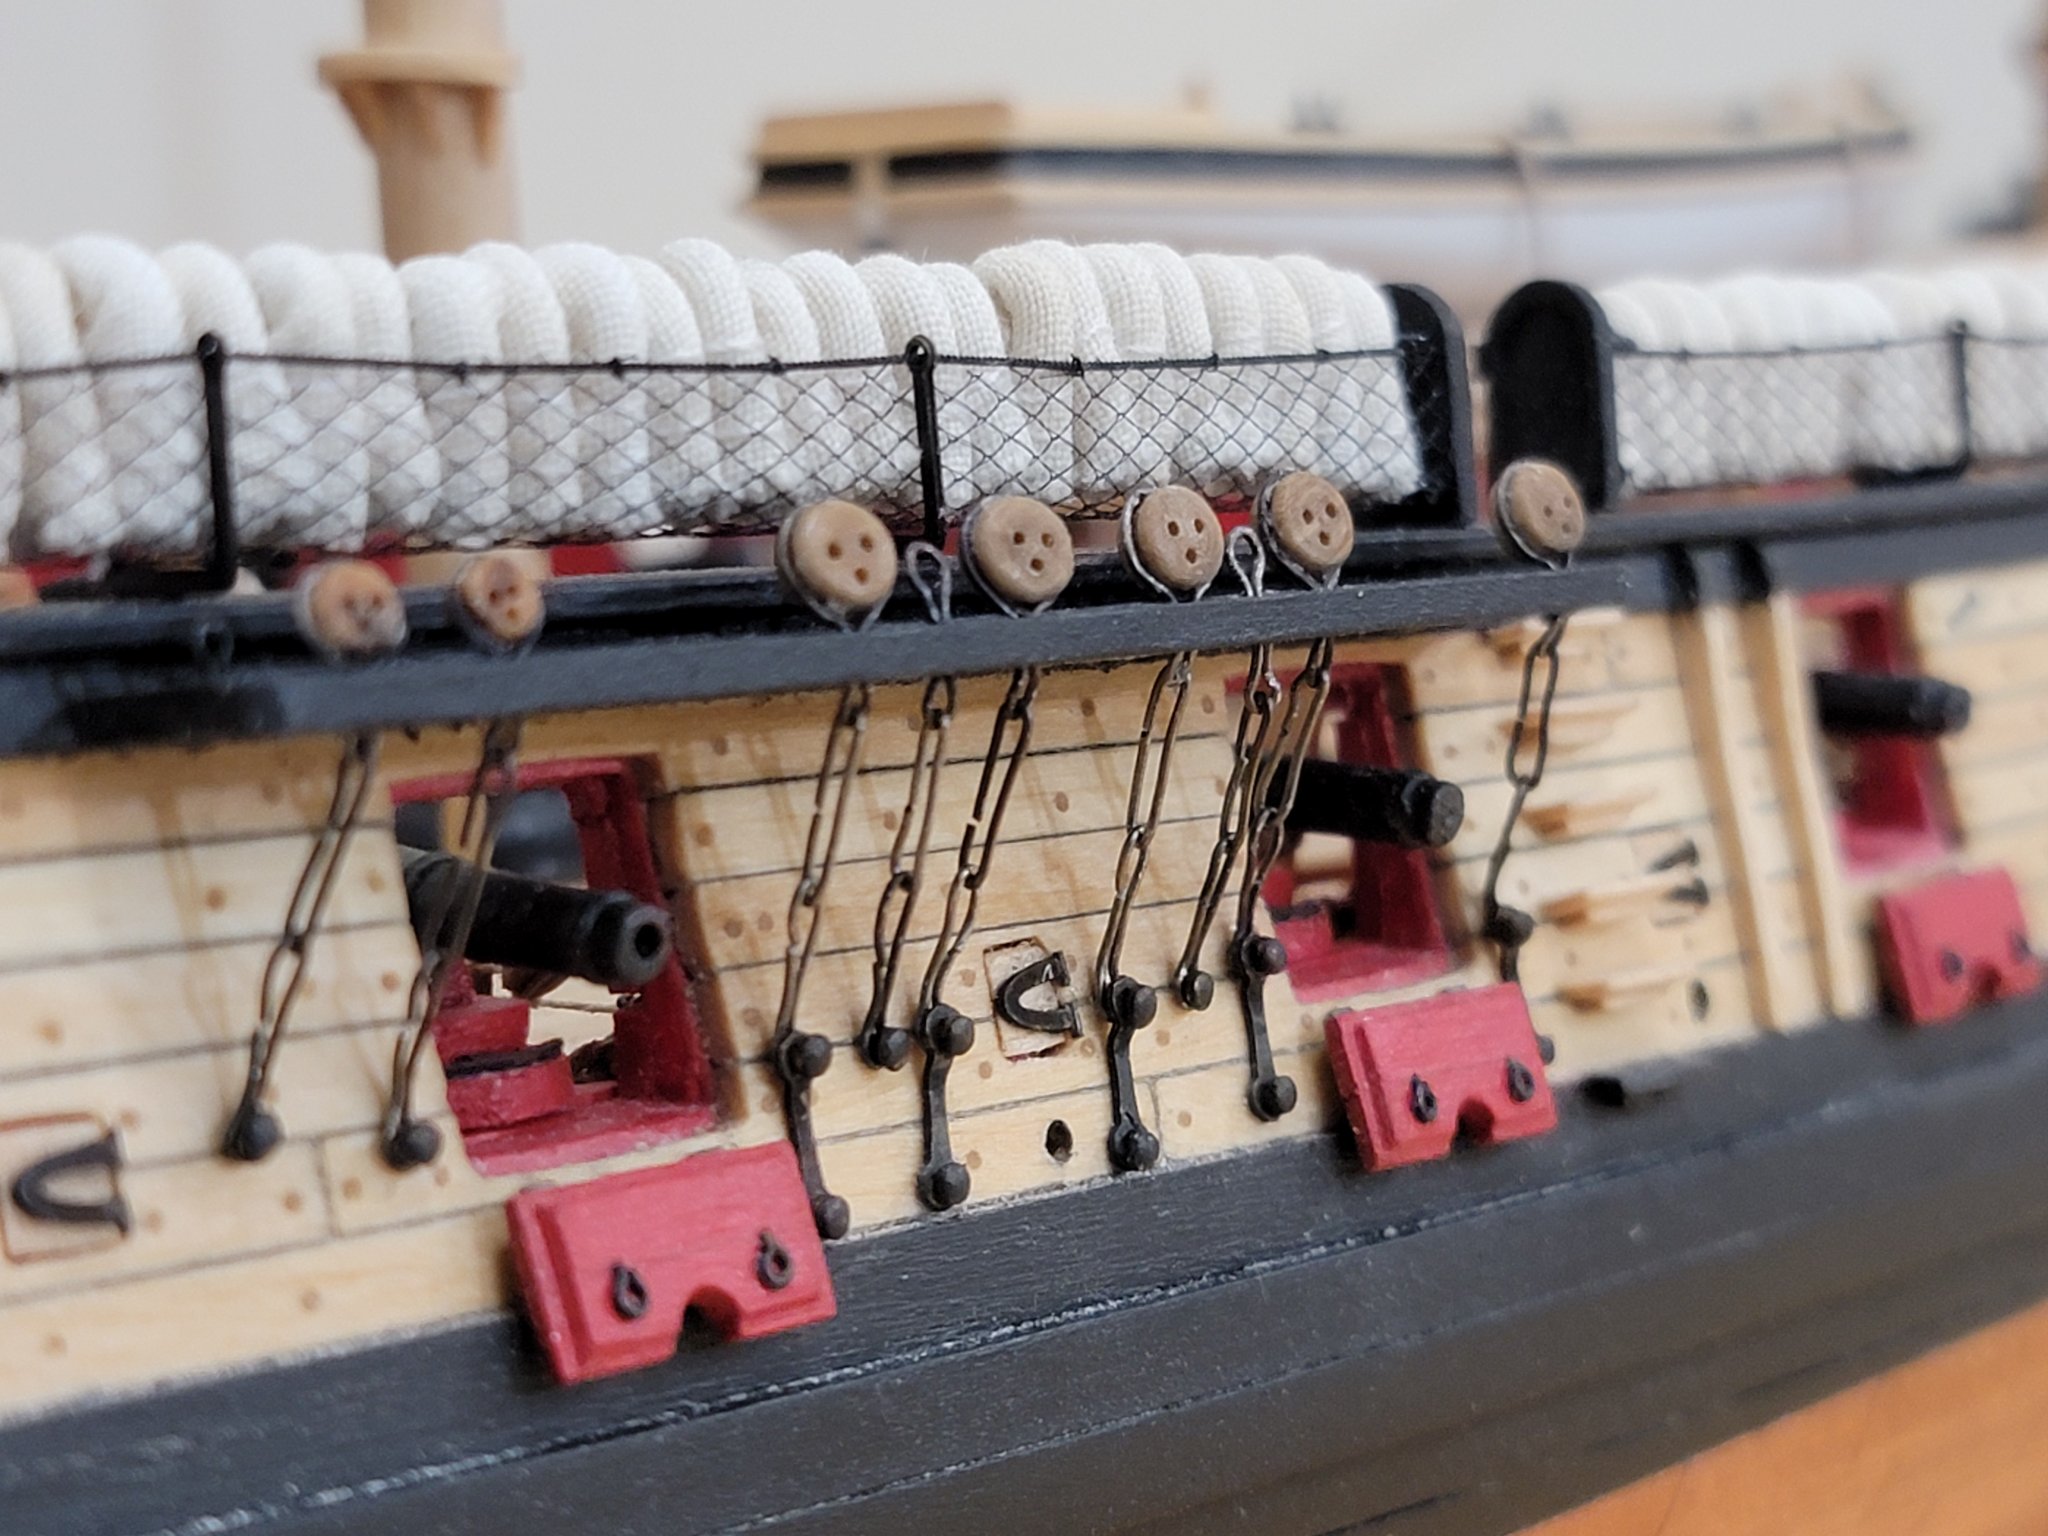
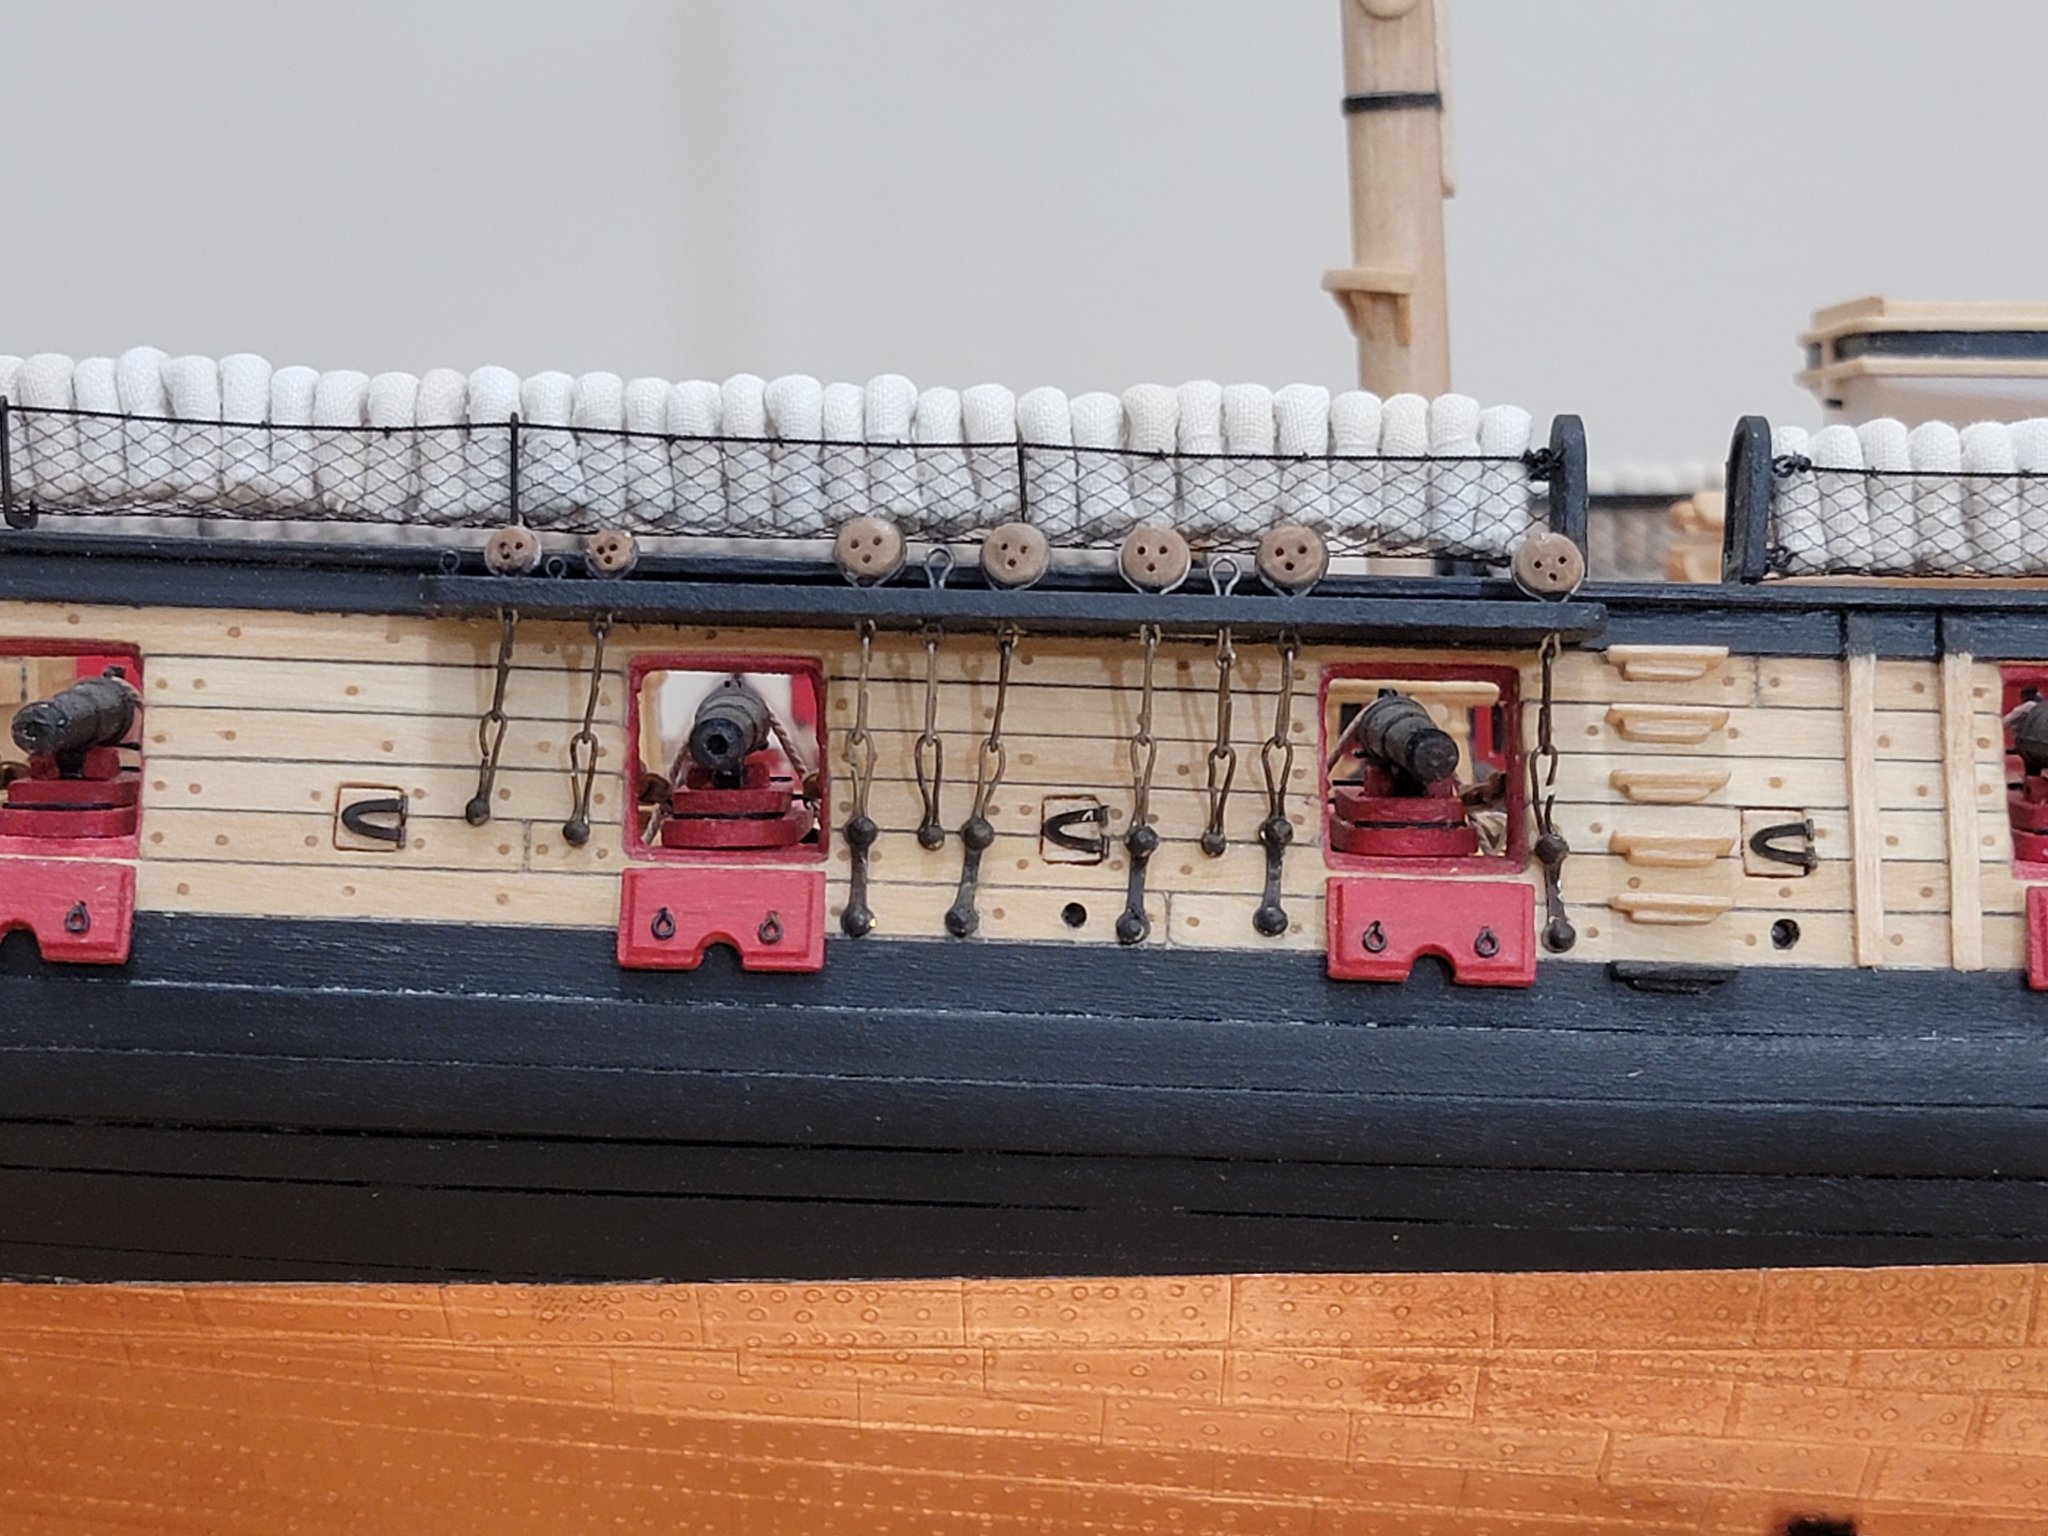
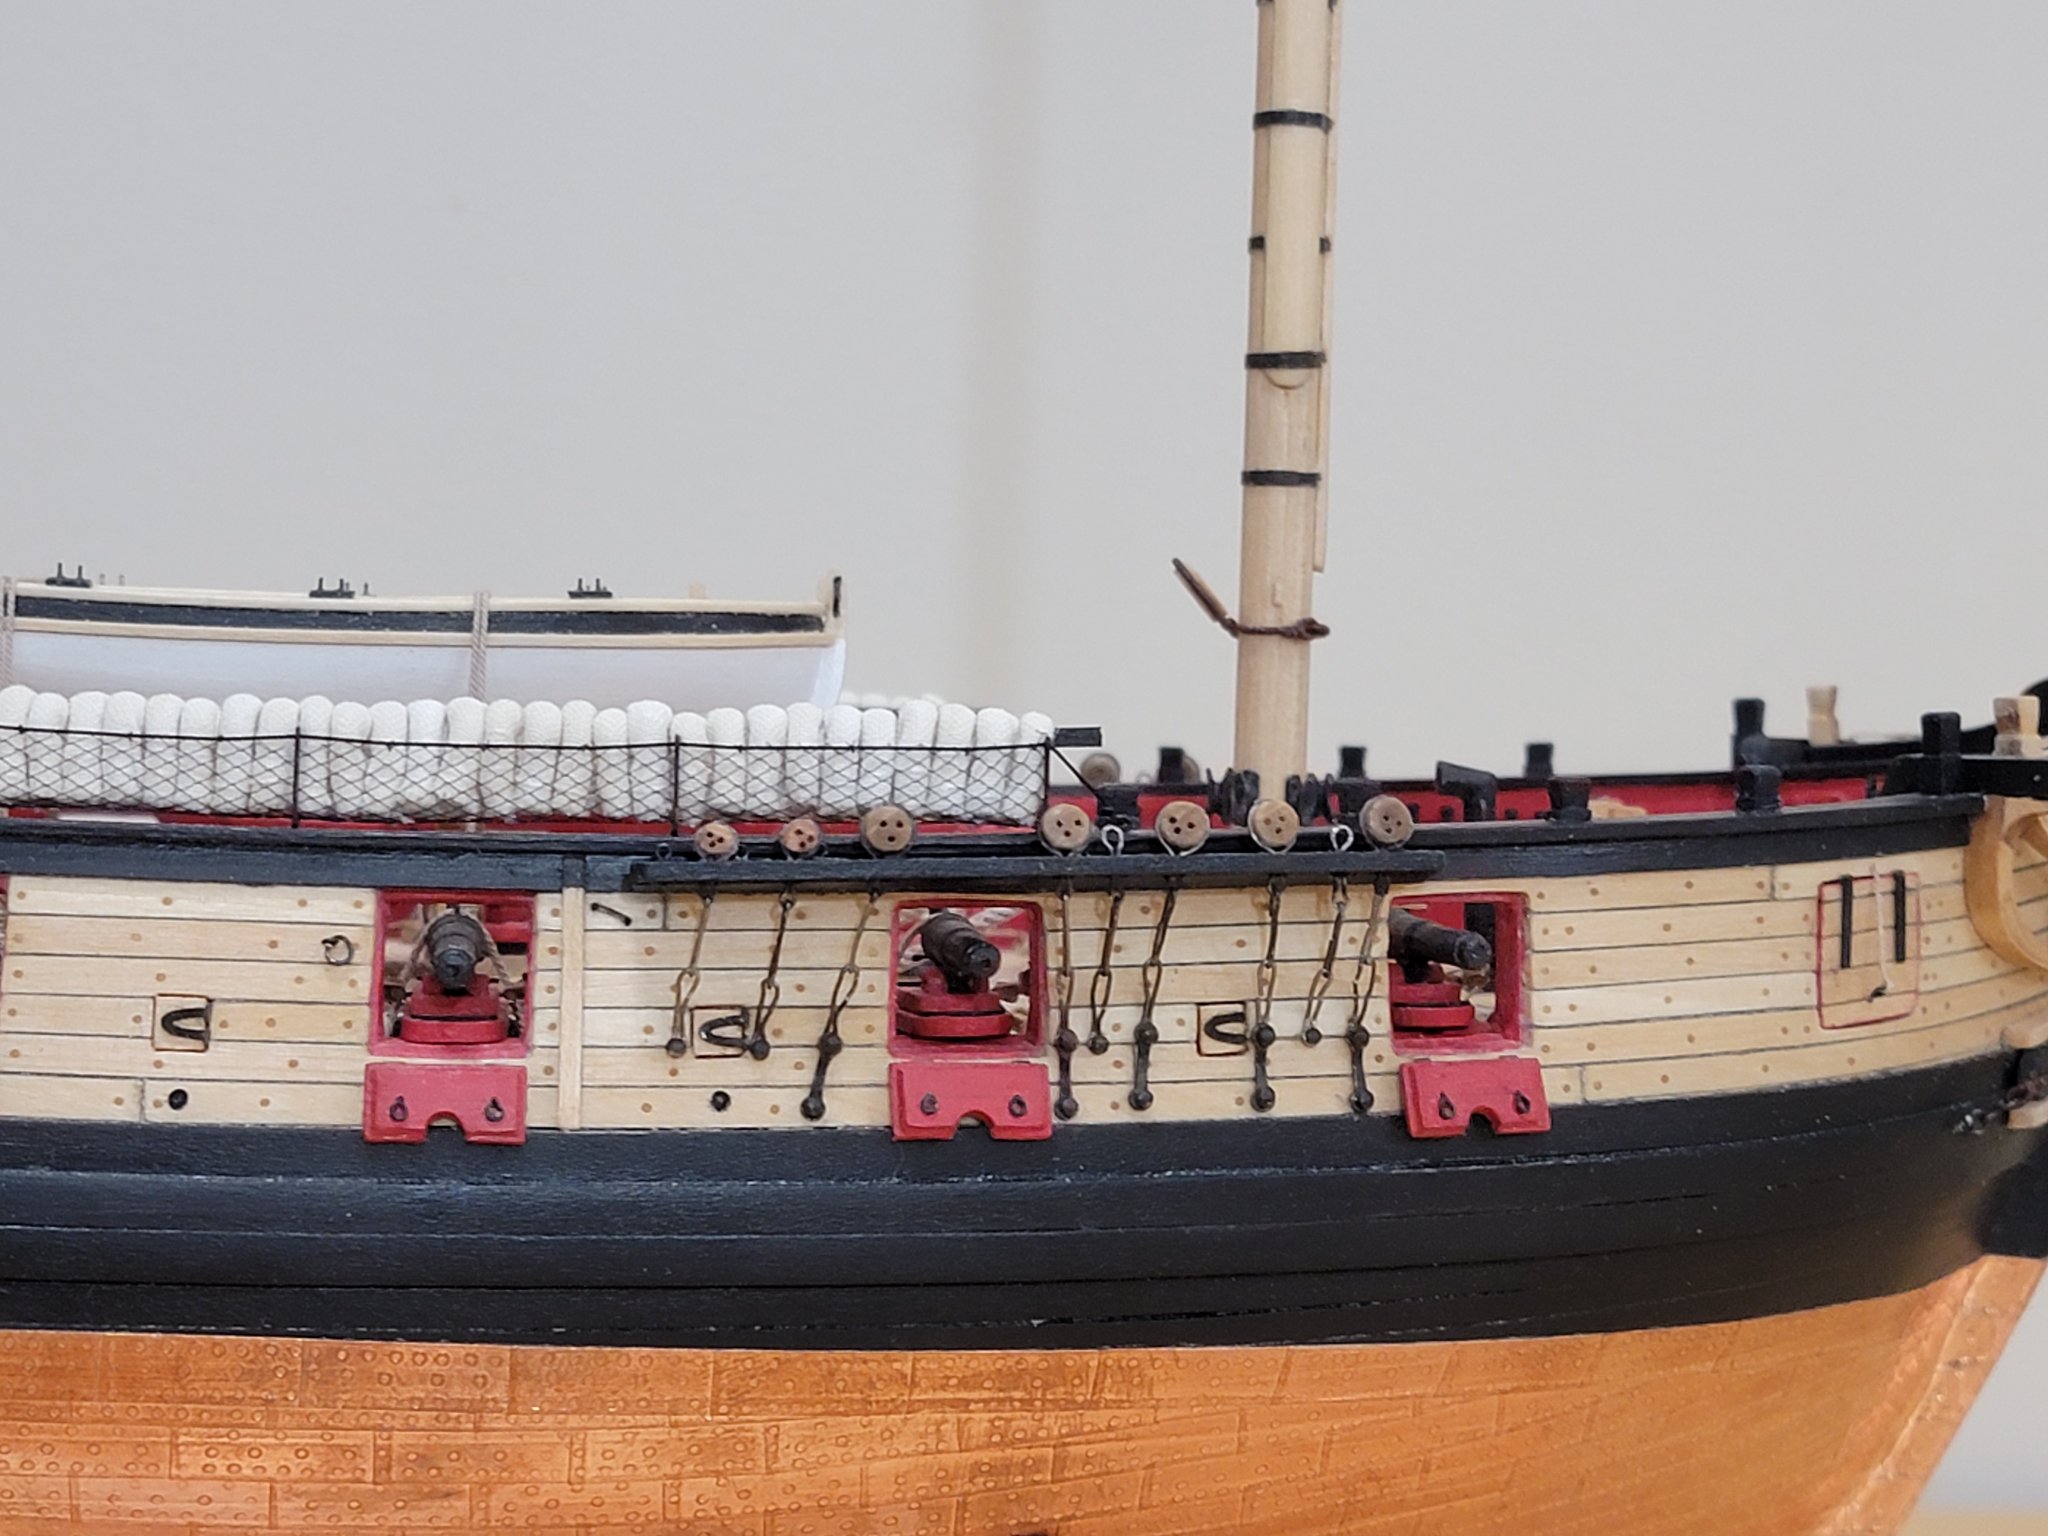
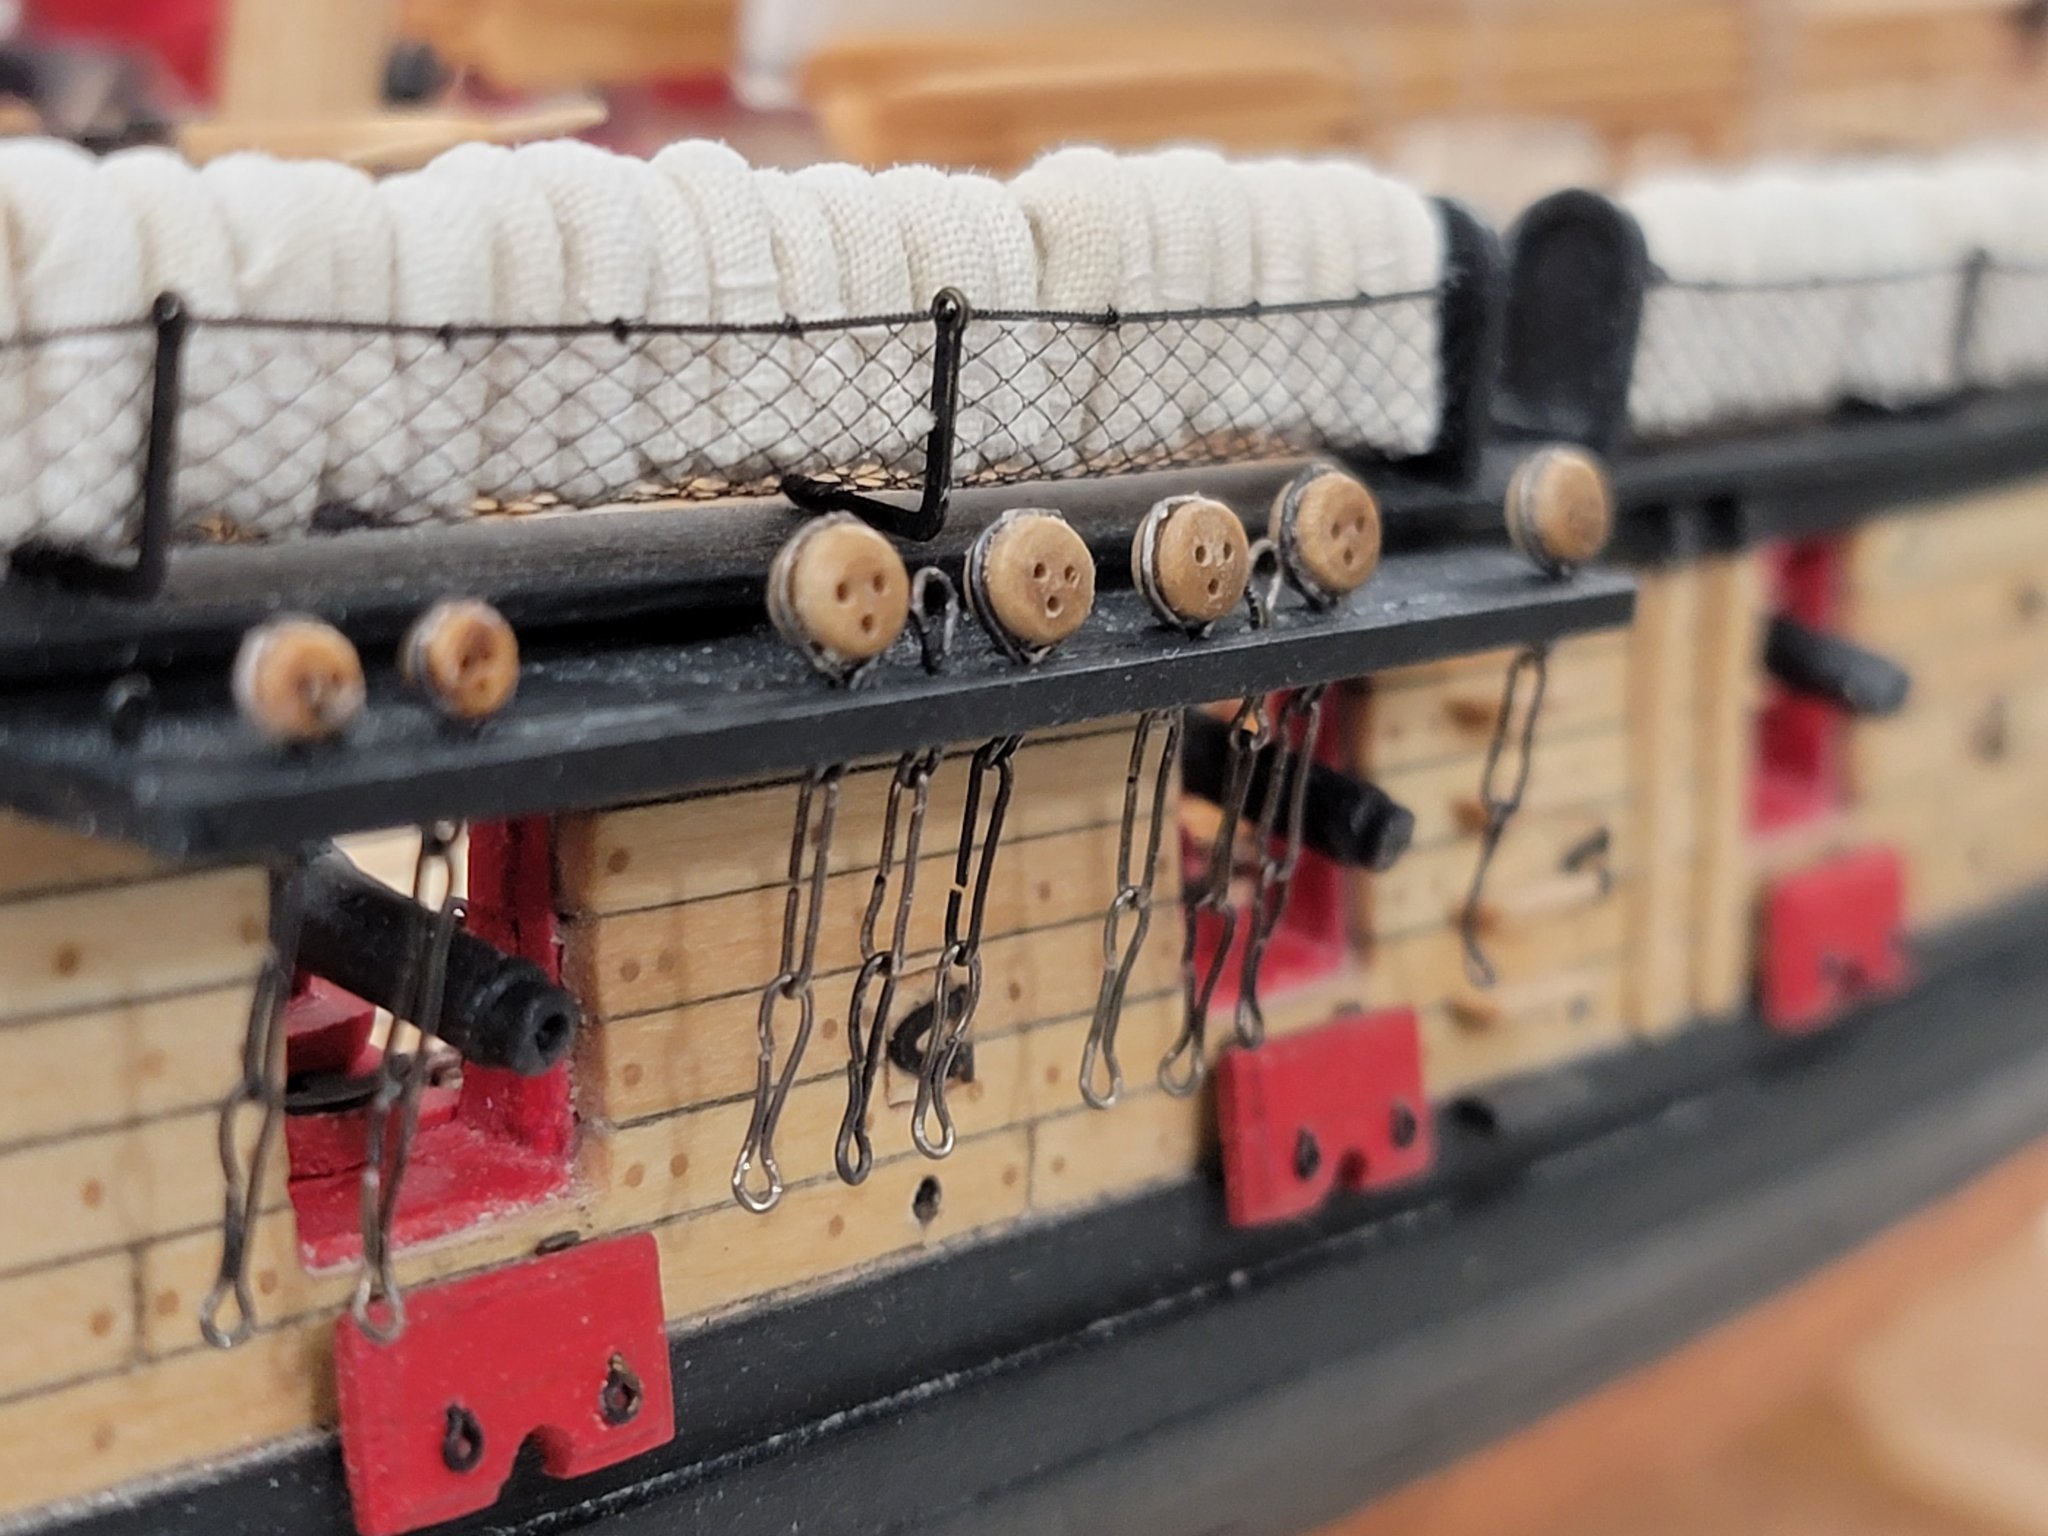
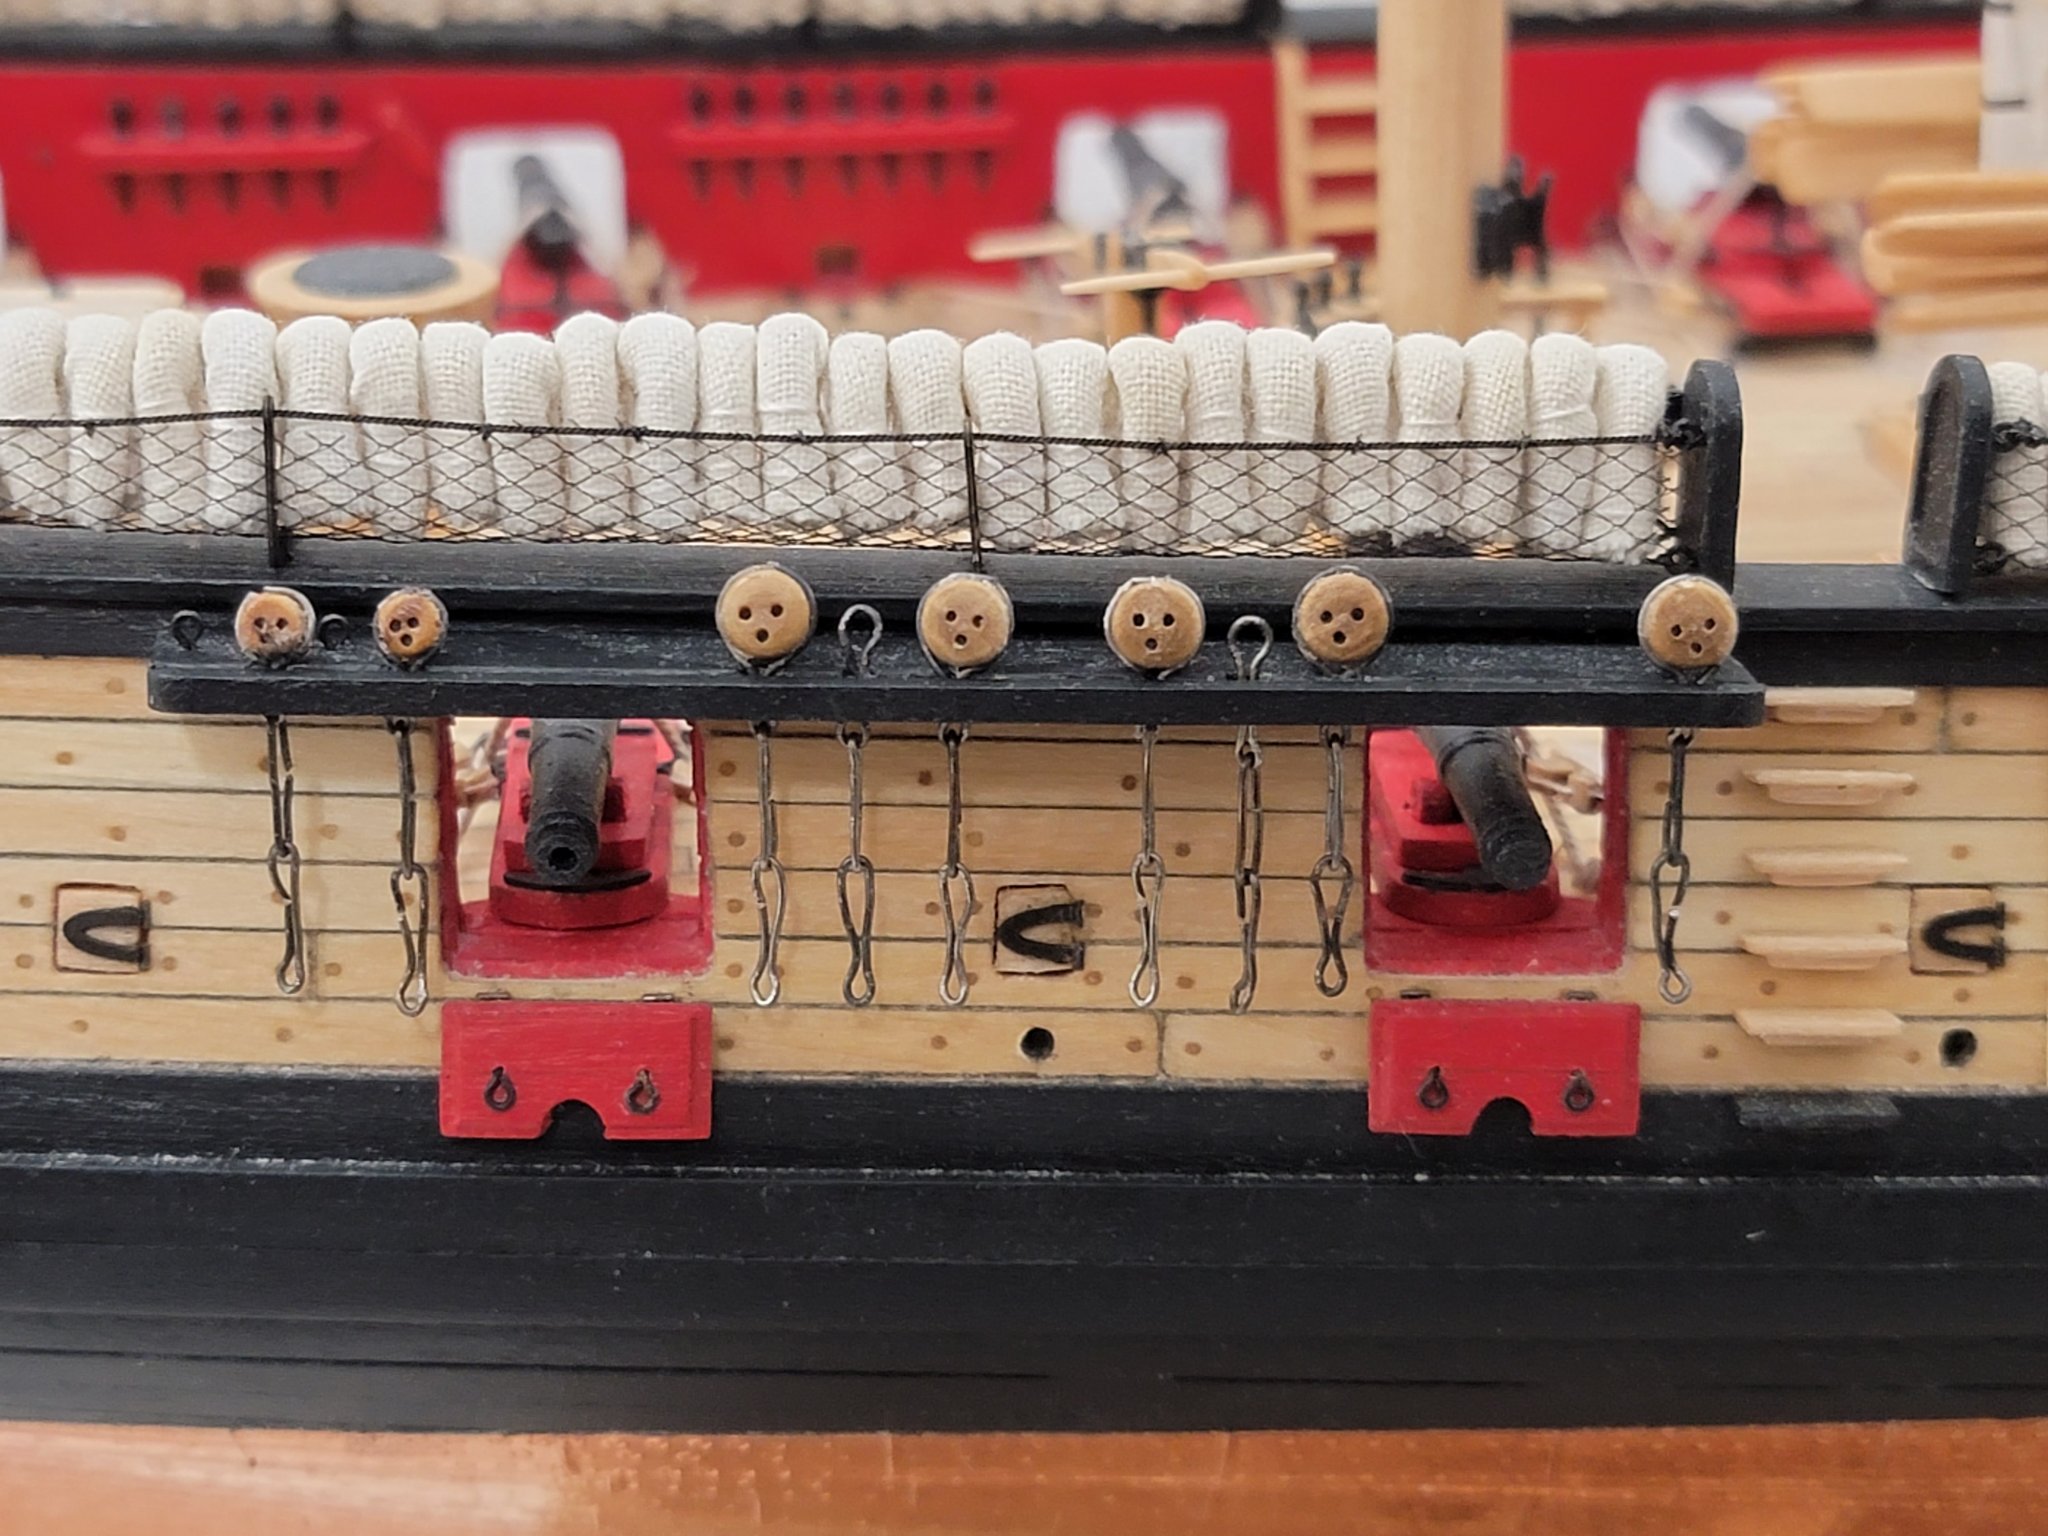
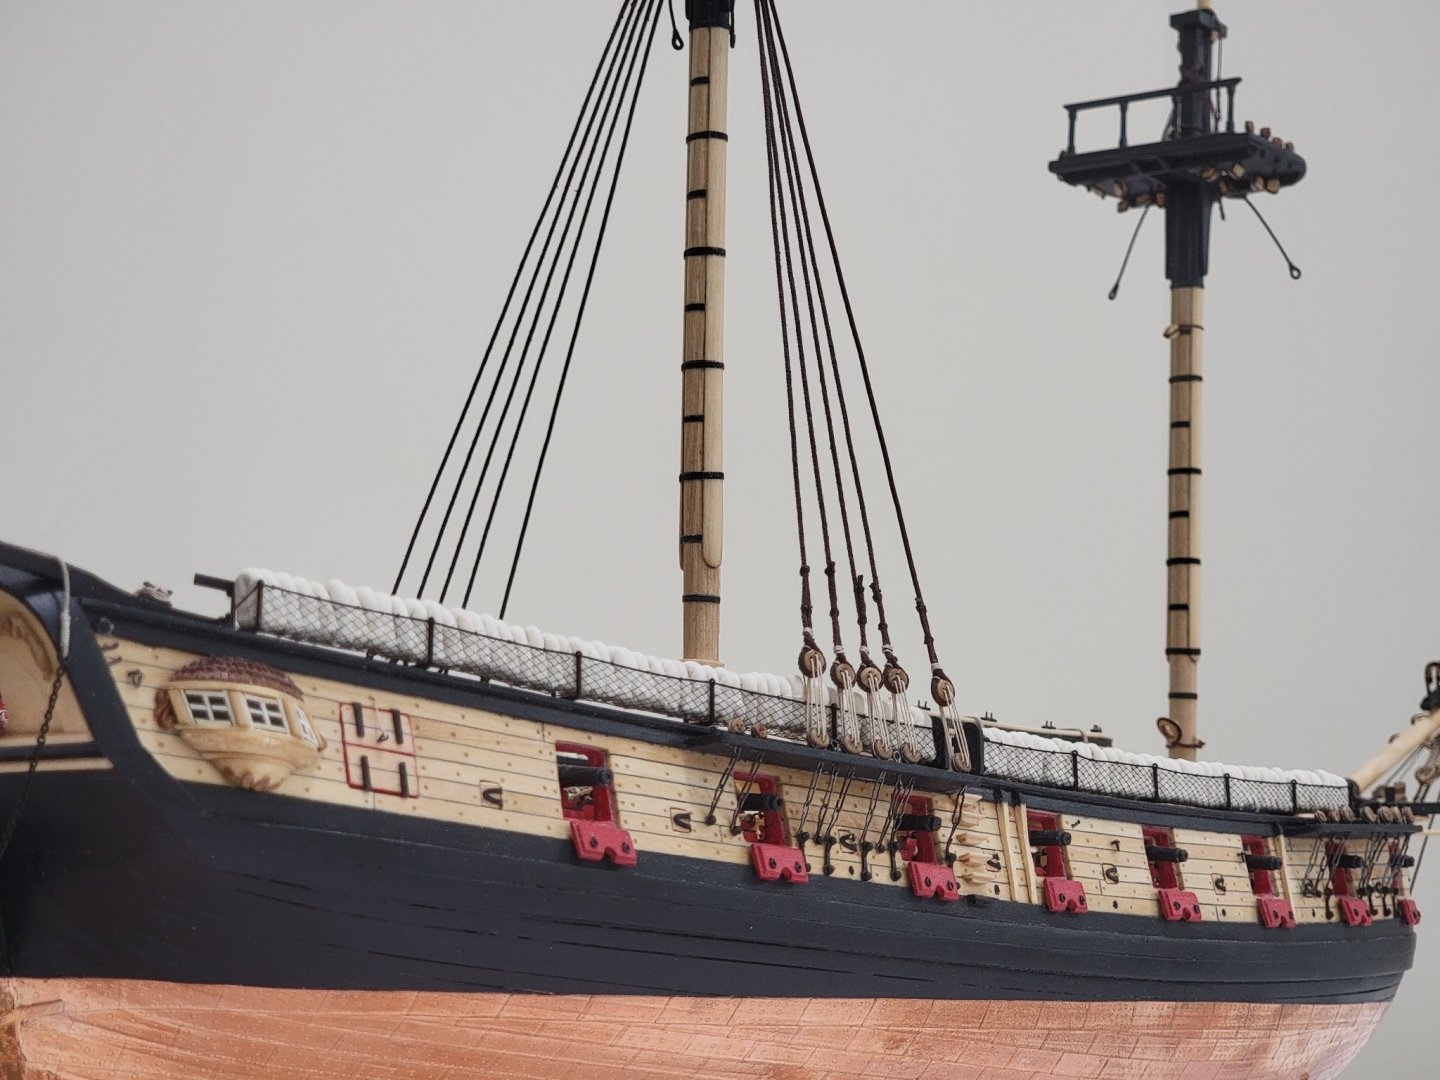
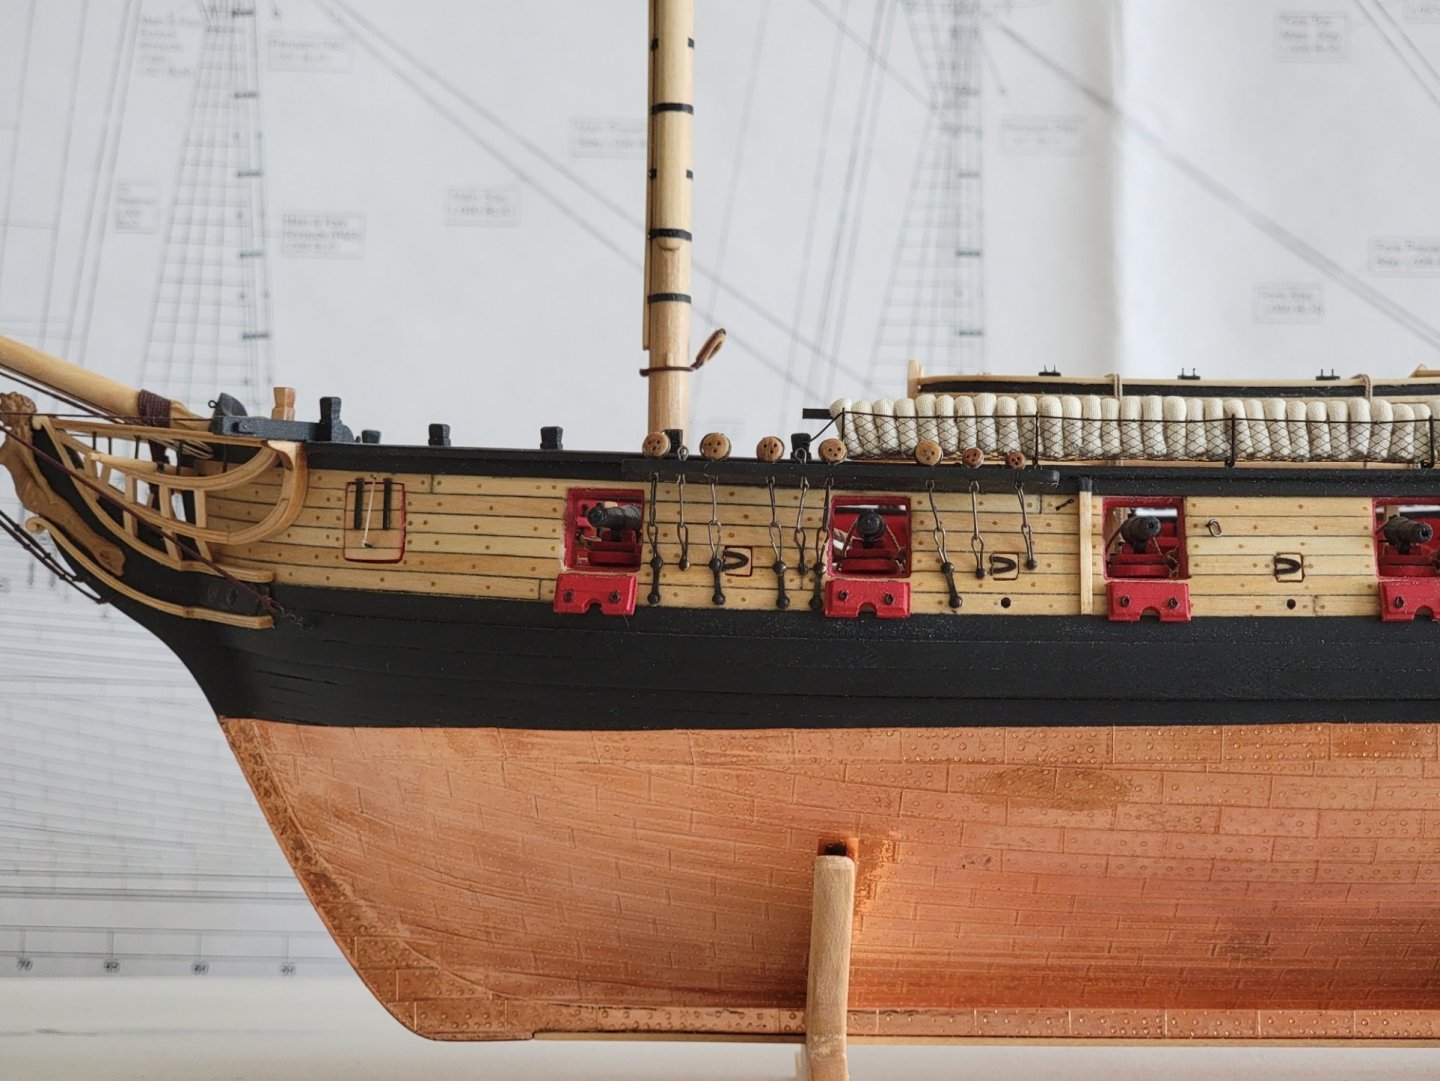
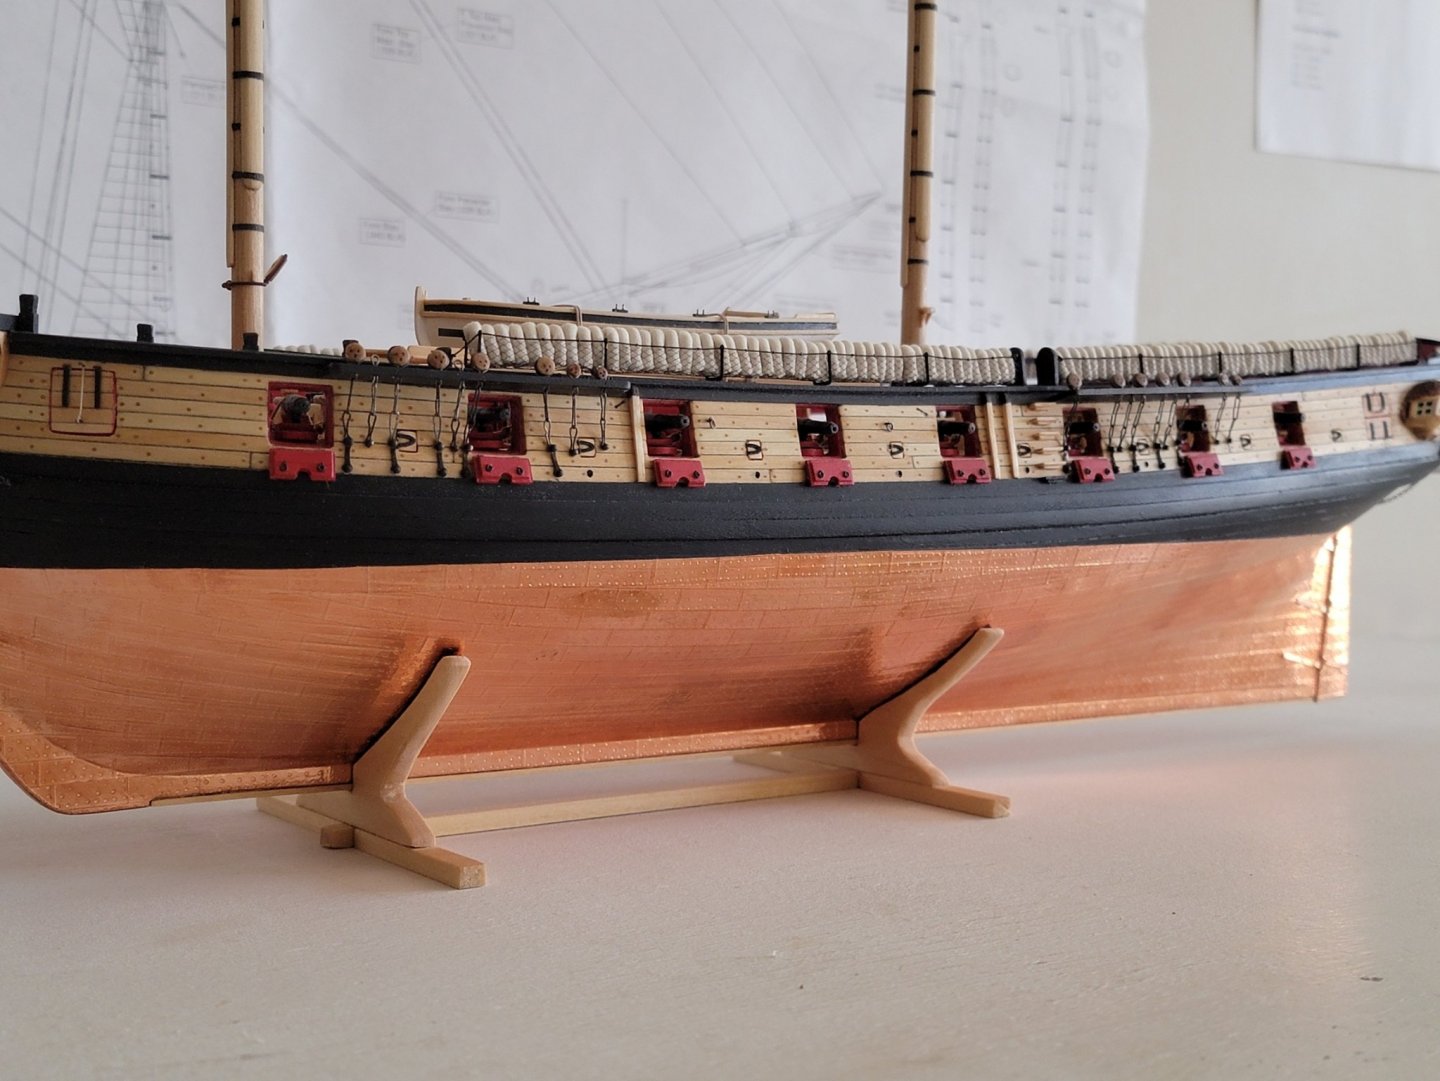
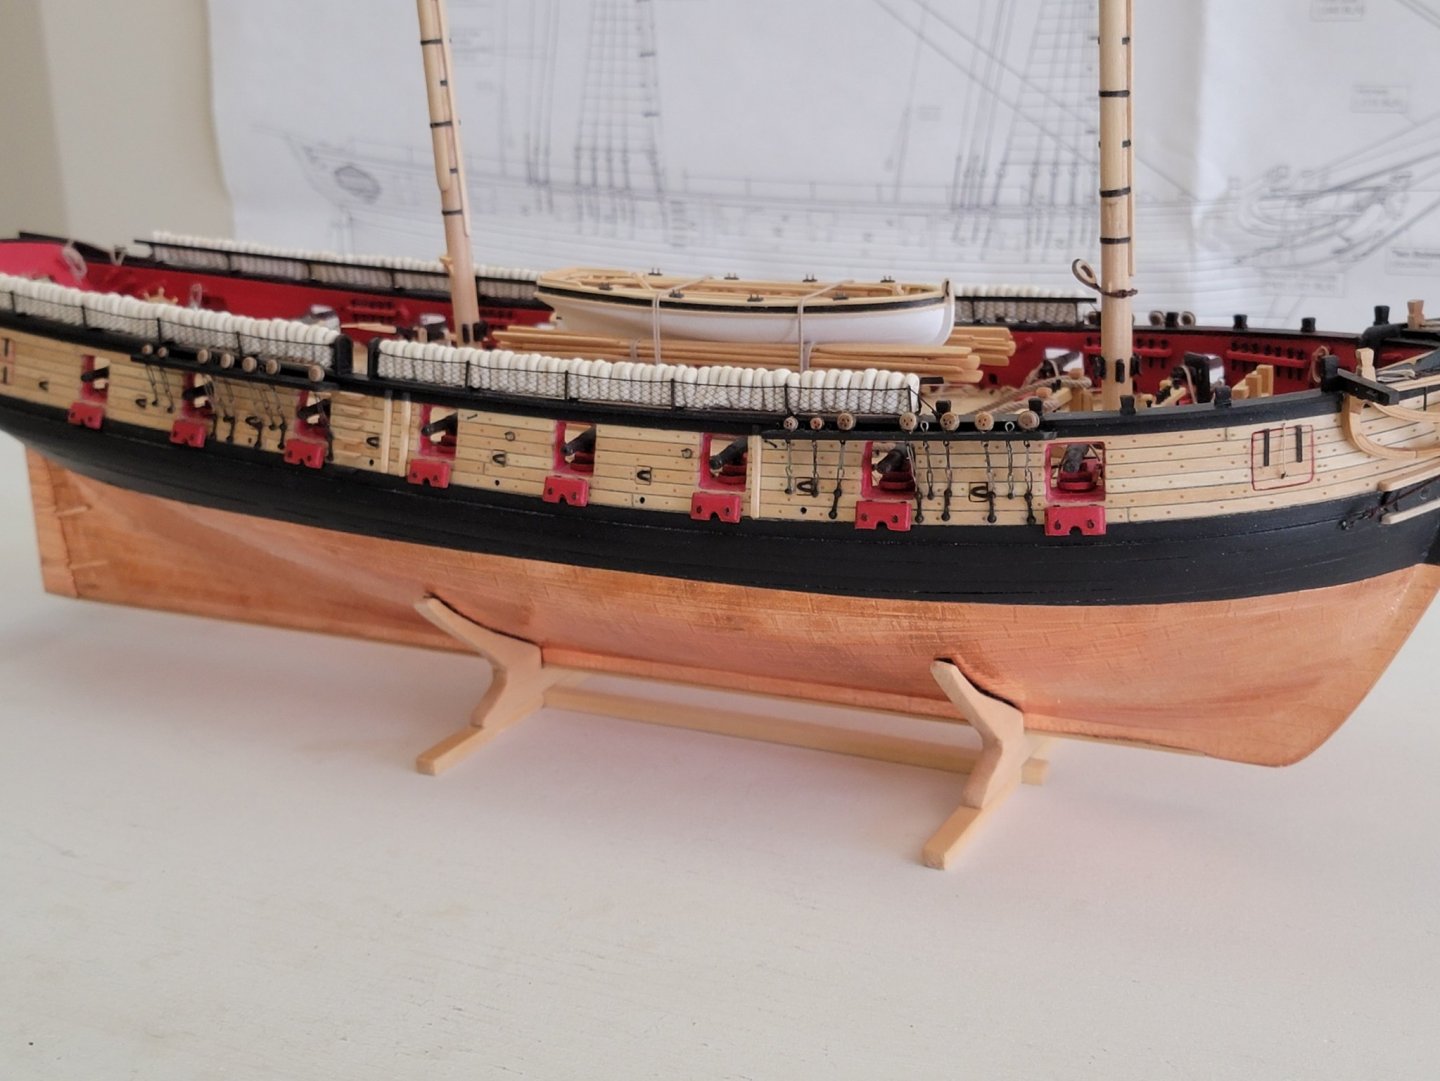
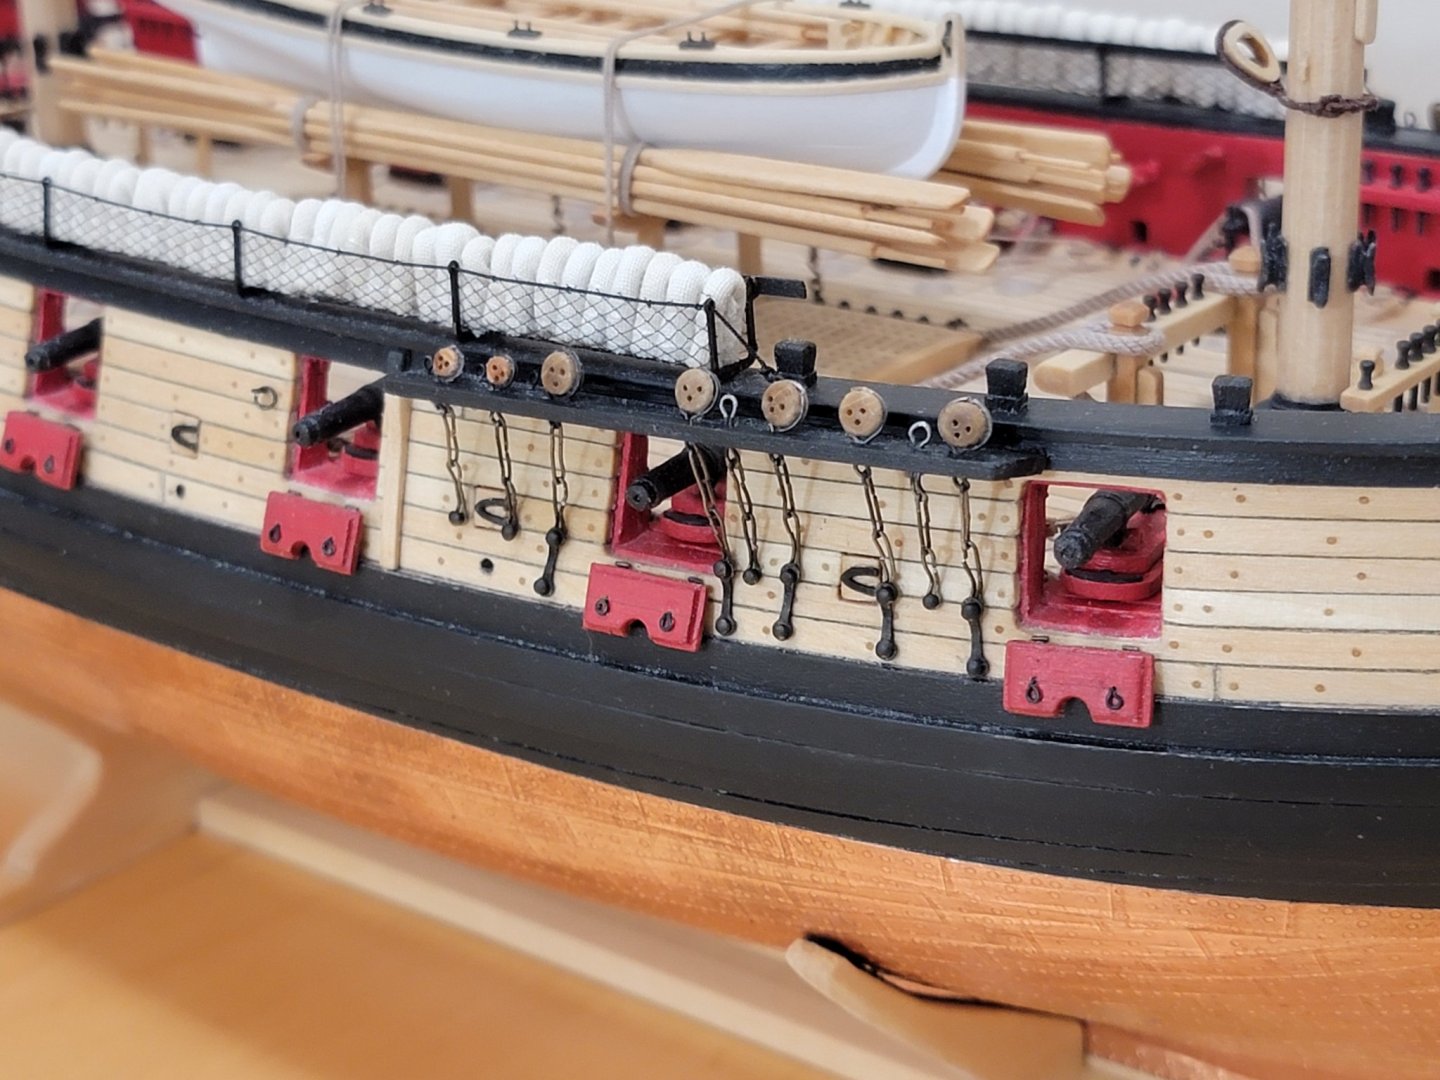
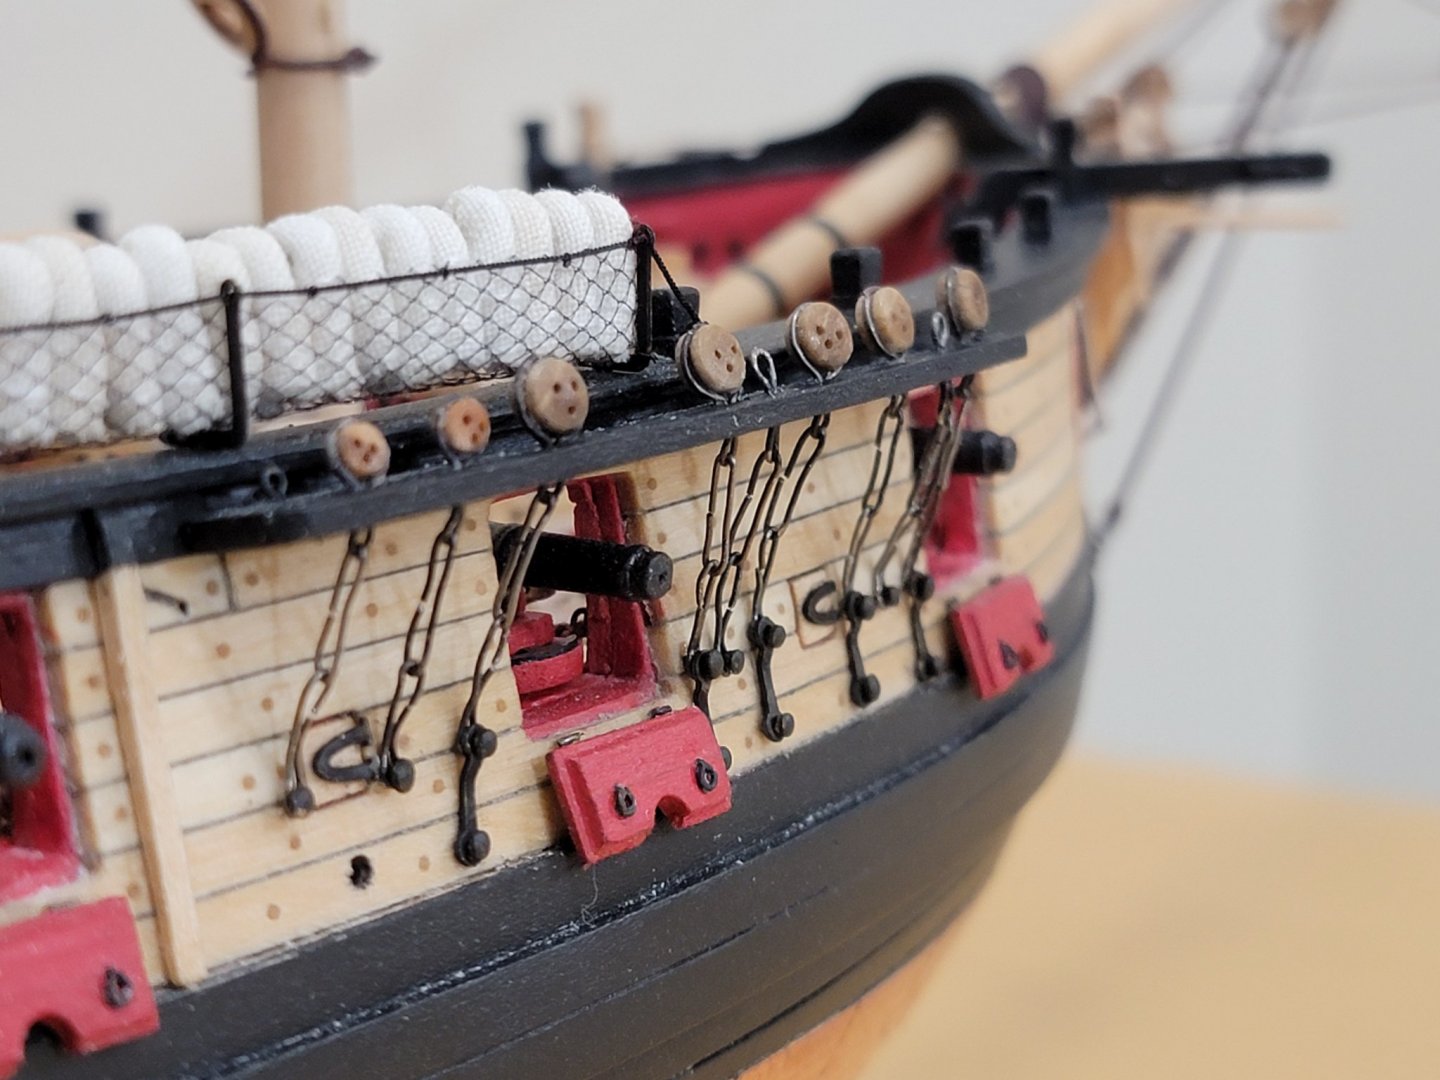
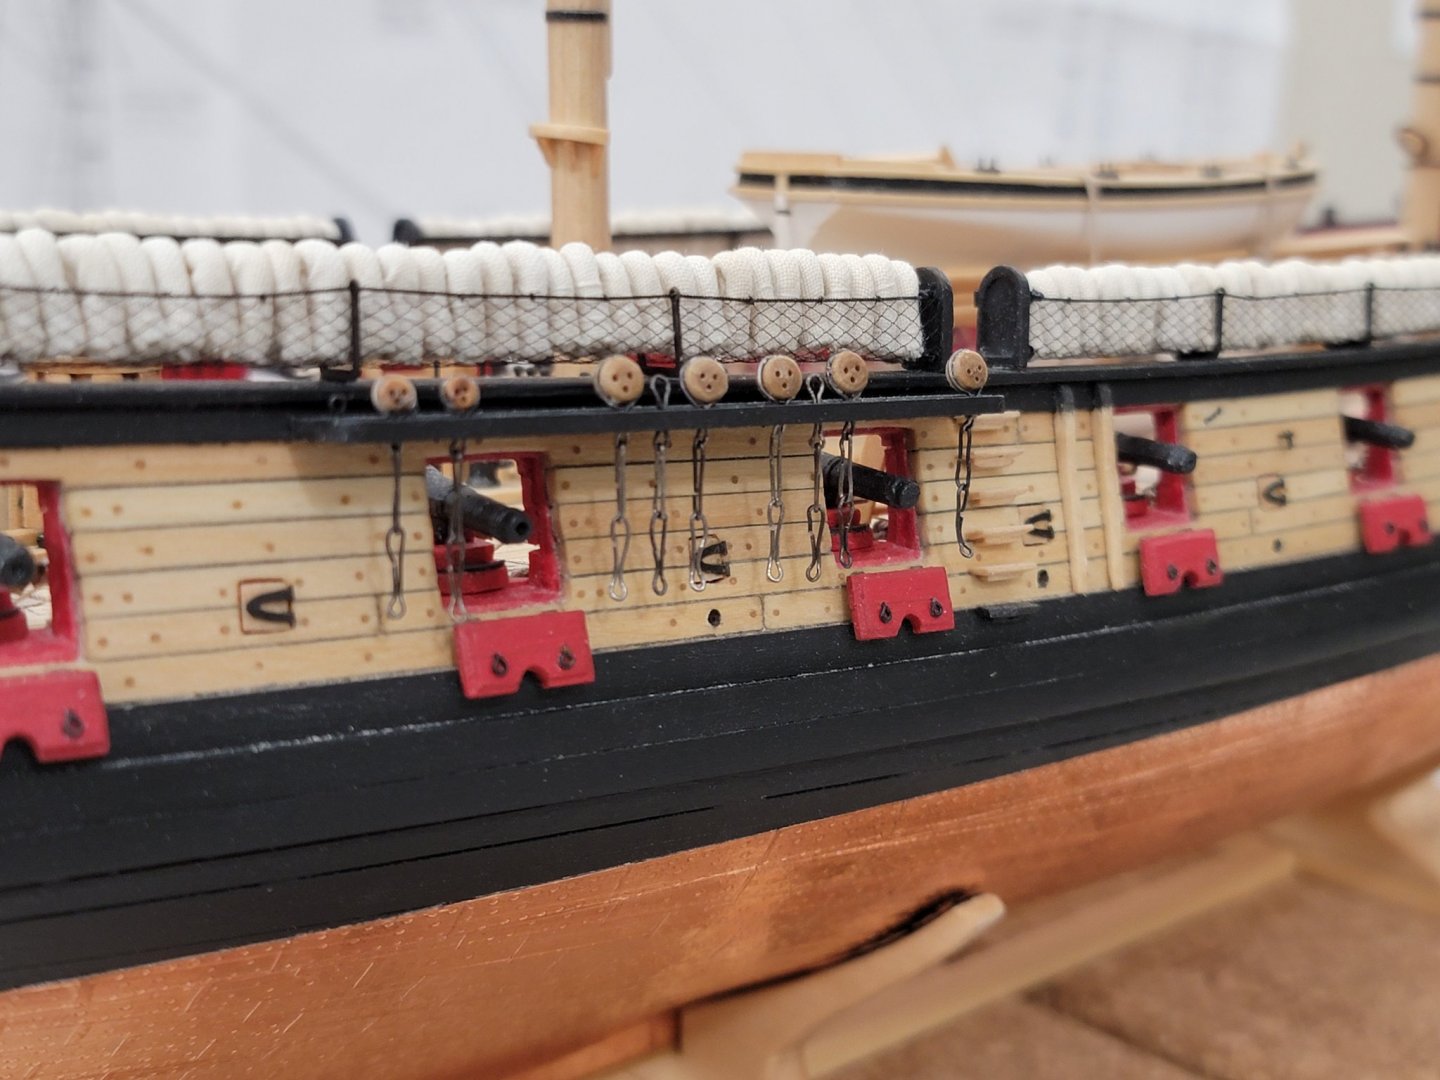
I finished installing the portside chain plate assemblies! Thought I'd share some more pics before she gets all tangled up with ropes!! 😄 I'll start with all the pendants then work on the lower shrouds

- 950 replies
-
- 18
-
-
- syren
- model shipways
- (and 1 more)
-
Thanks for the comment Desalgu! I think I may skip putting CA on the links (for now) since some of them are a bit too wide apart and some are not in line with the partner link, so putting CA in these sections may magnify these flaws. The only way to fix this would be to try to move the individual links to be in line, which would be a bit difficult since all of them are already mounted on the hull, and have a bit of tension on them. I'll for sure keep this in mind for next time where I will make the seamless fitting before mounting them.. Also from the naked eye it is a bit hard to find these gaps, only with the camera with the close ups I can see them as you mentioned. TFFM stands for The Fully Framed Model series. There are 4 volumes in total which cover everything to do with building a fully framed Swan class model from scratch. They can be found from SeaWatch Books (https://www.seawatchbooks.com/SWBTitles.htm). The plans that the books refer to are available from Admiralty models (http://www.admiraltymodels.com/Plans.html) There are a lot of tips and tricks that can be used on other models as well. Vol 1 and 2 cover the hull construction, Vol 3 is a build log with a lot of photos, and Vol 4 is on rigging. For the rigging I have been following the 4th volume very closely to see which lines would be served, how to lash, make splices, etc. They are a bit costly but are very well worth every penny! I also plan on building a Swan class sloop in the future once I get the space to put power tool and such, which will most probably be after I graduate. These books would be essential for that. Another book I recently got is James Lees 'Masting and Rigging of English Ships of War,' which is another very handy reference for rigging. Rigging Period Ship Models by Lennarth Petersson is also very nice, it breaks down rigging into simpler steps. That book only has images and no text accompanying them.
- 950 replies
-
- 1
-
-
- syren
- model shipways
- (and 1 more)
-
Thanks for directing us here from your other build log. I'll follow along with a lot of interest!
-
Thanks so much for the compliments and advice, Tom! I'll try using that technique on some scrap wire first, not sure if the black paint would appear "too black" on the wire. If it blends well I'll do it on the model. Thanks again!! And thanks all for the likes as well 🙂
- 950 replies
-
- 1
-
-
- syren
- model shipways
- (and 1 more)
-
That's just pretty! I look forward to your catboat build! I hope to be one of the first to follow your log (if you decide to set one up), just can't wait!! 😄 I just searched it up, she looks very beautiful
-
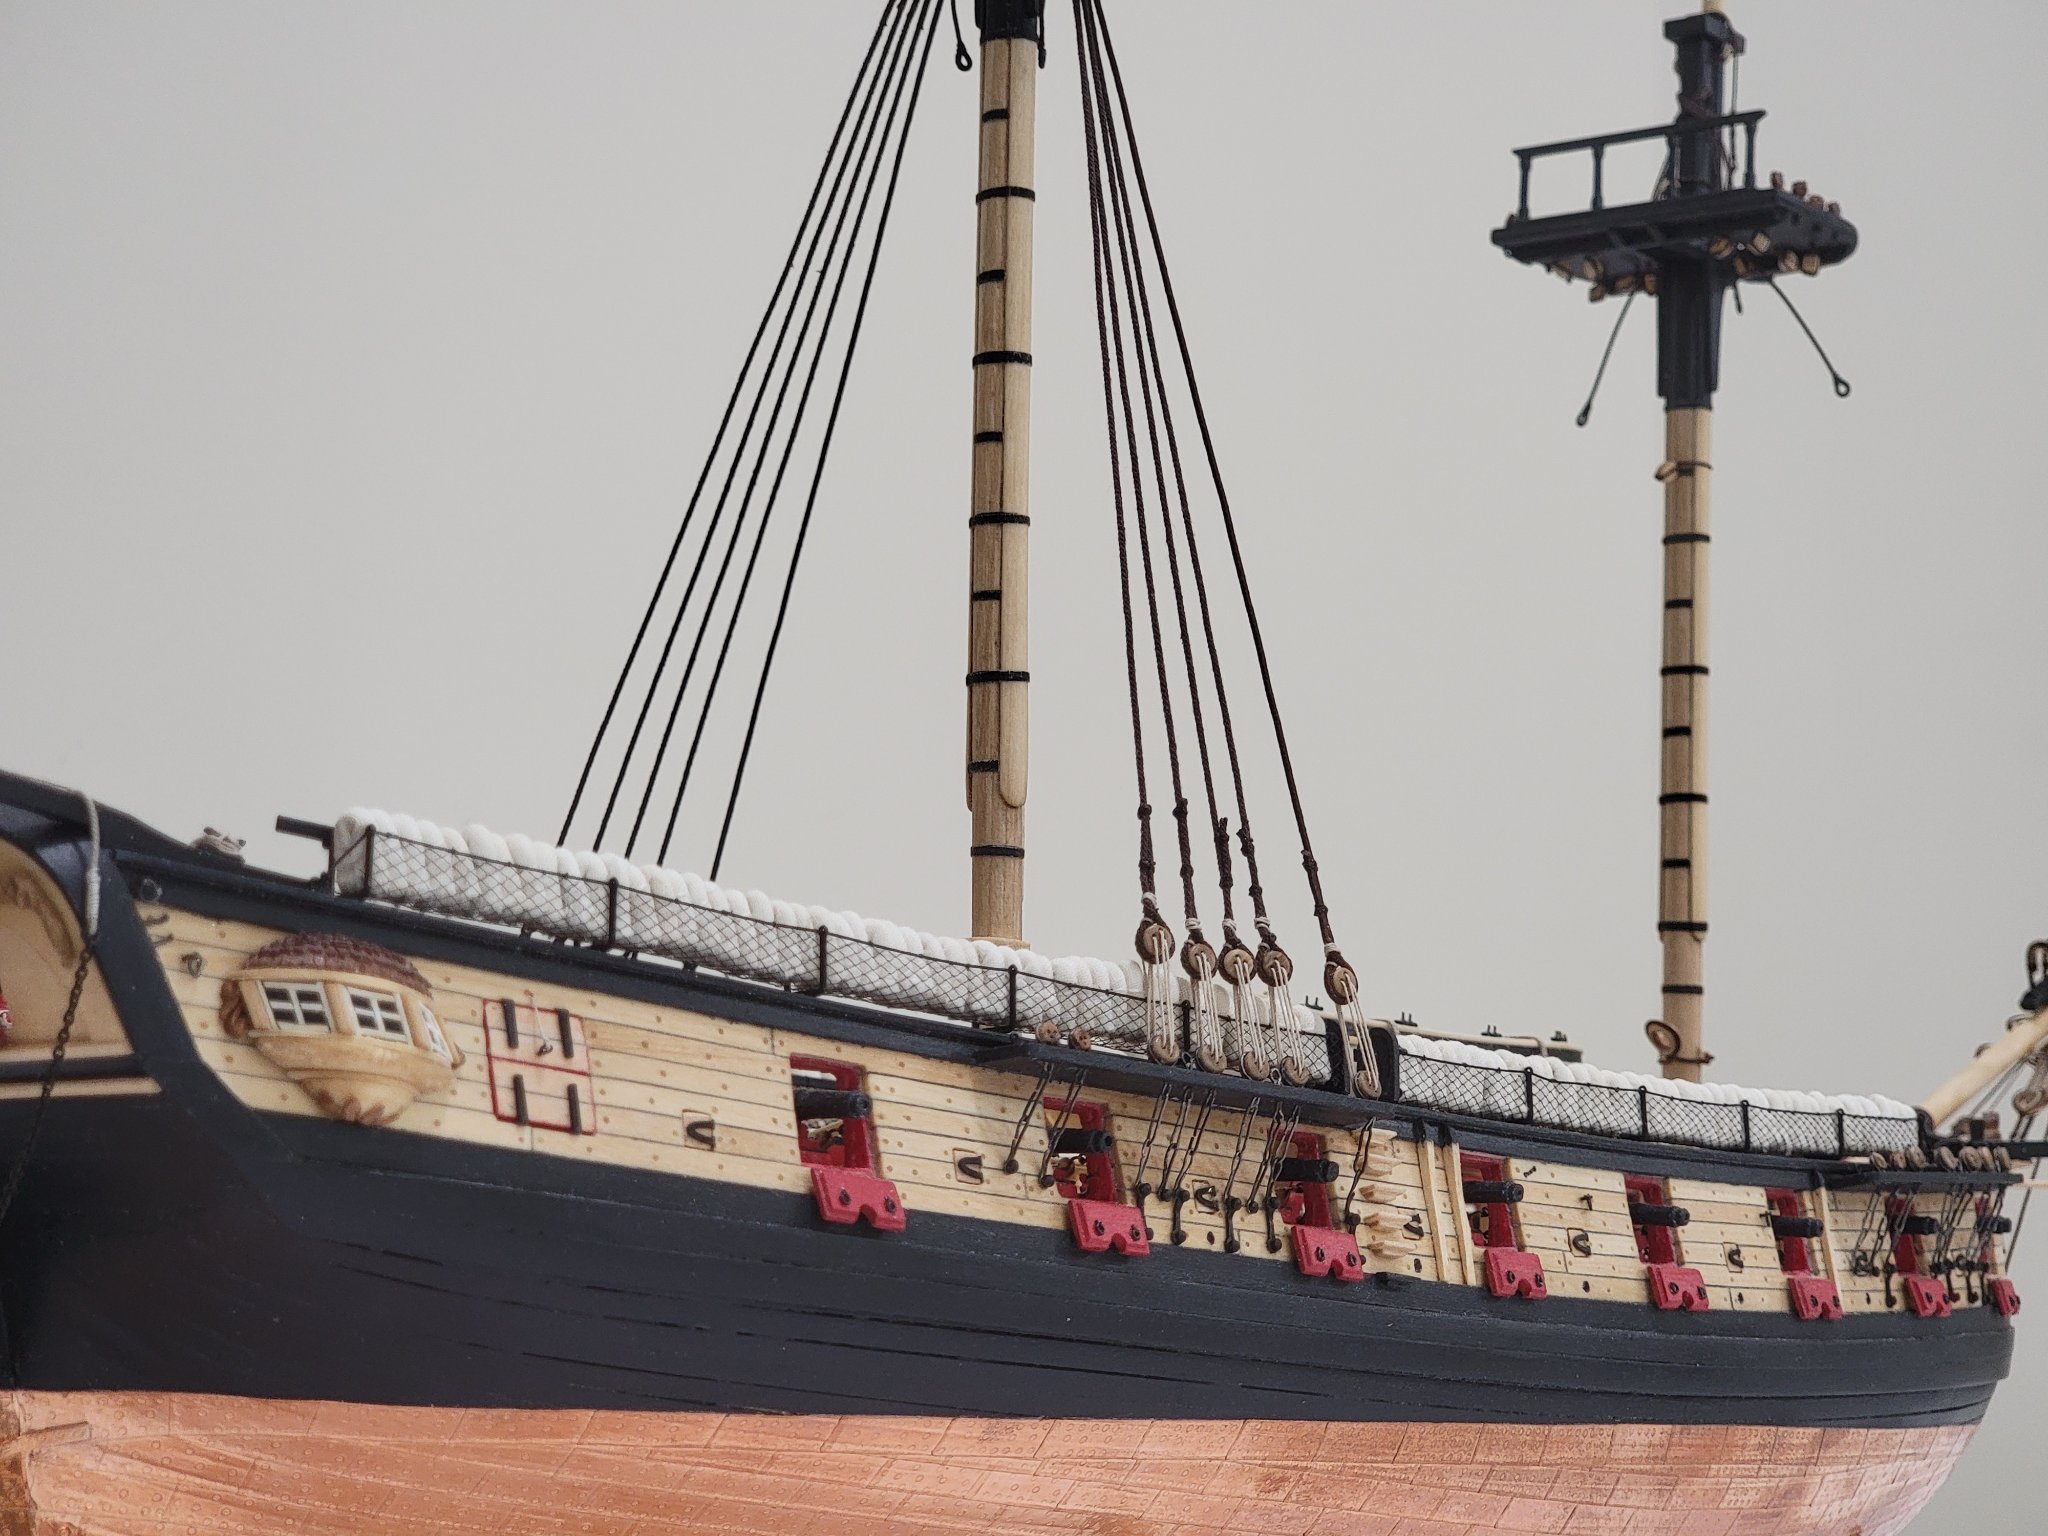
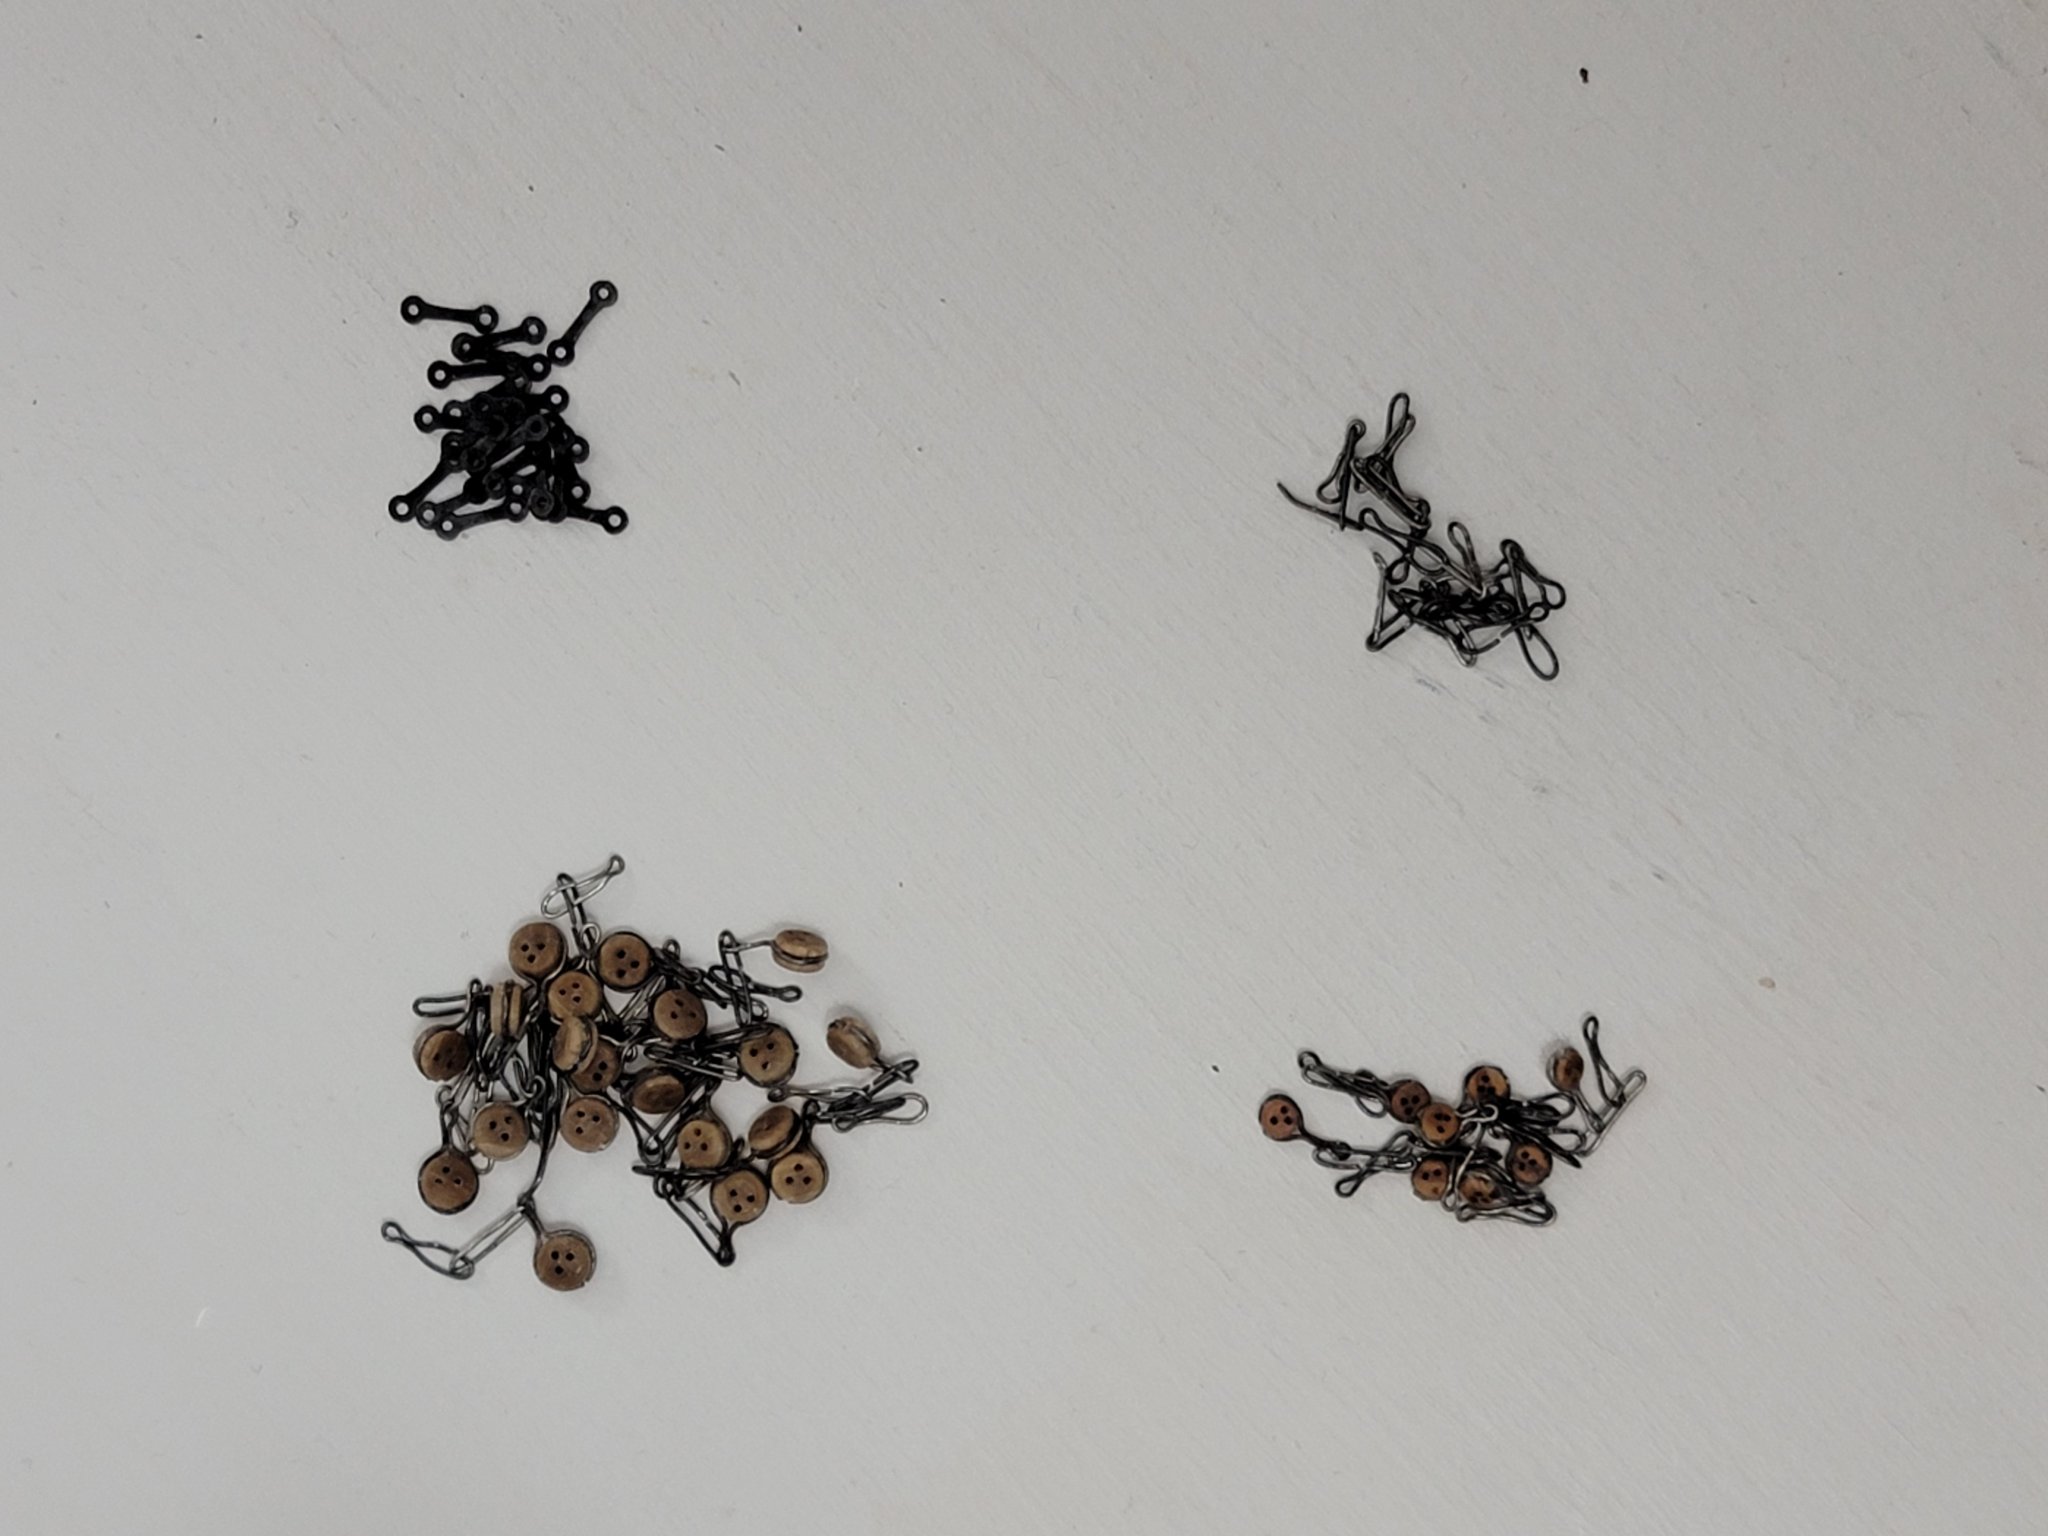
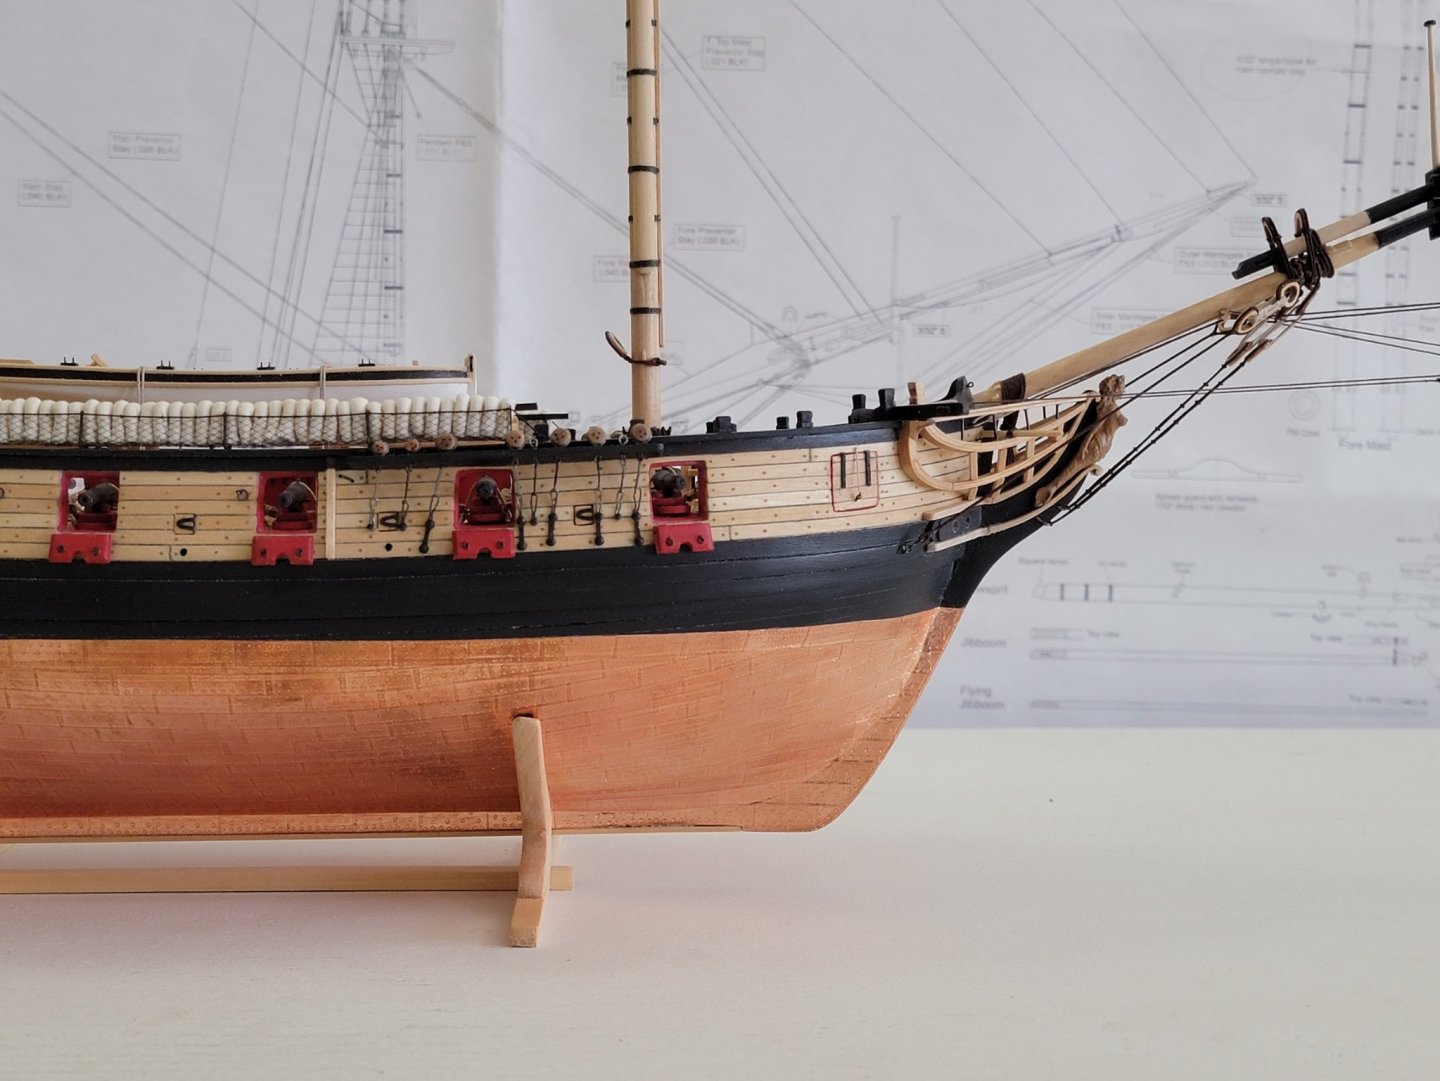
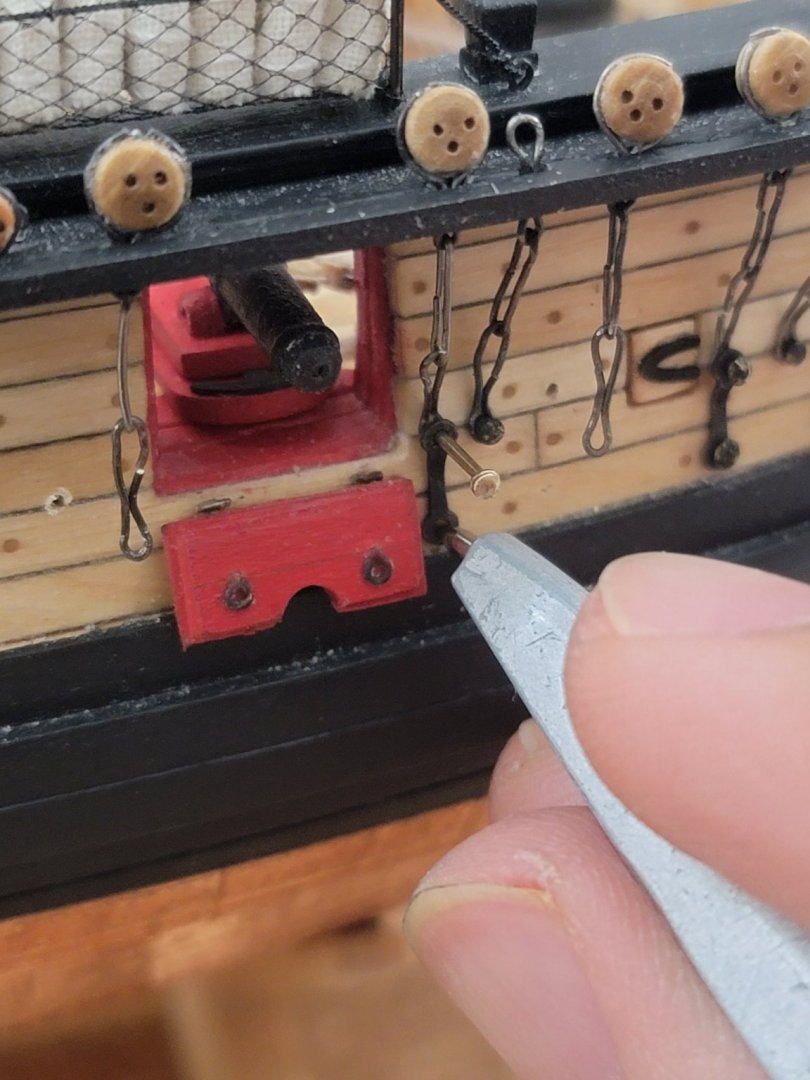
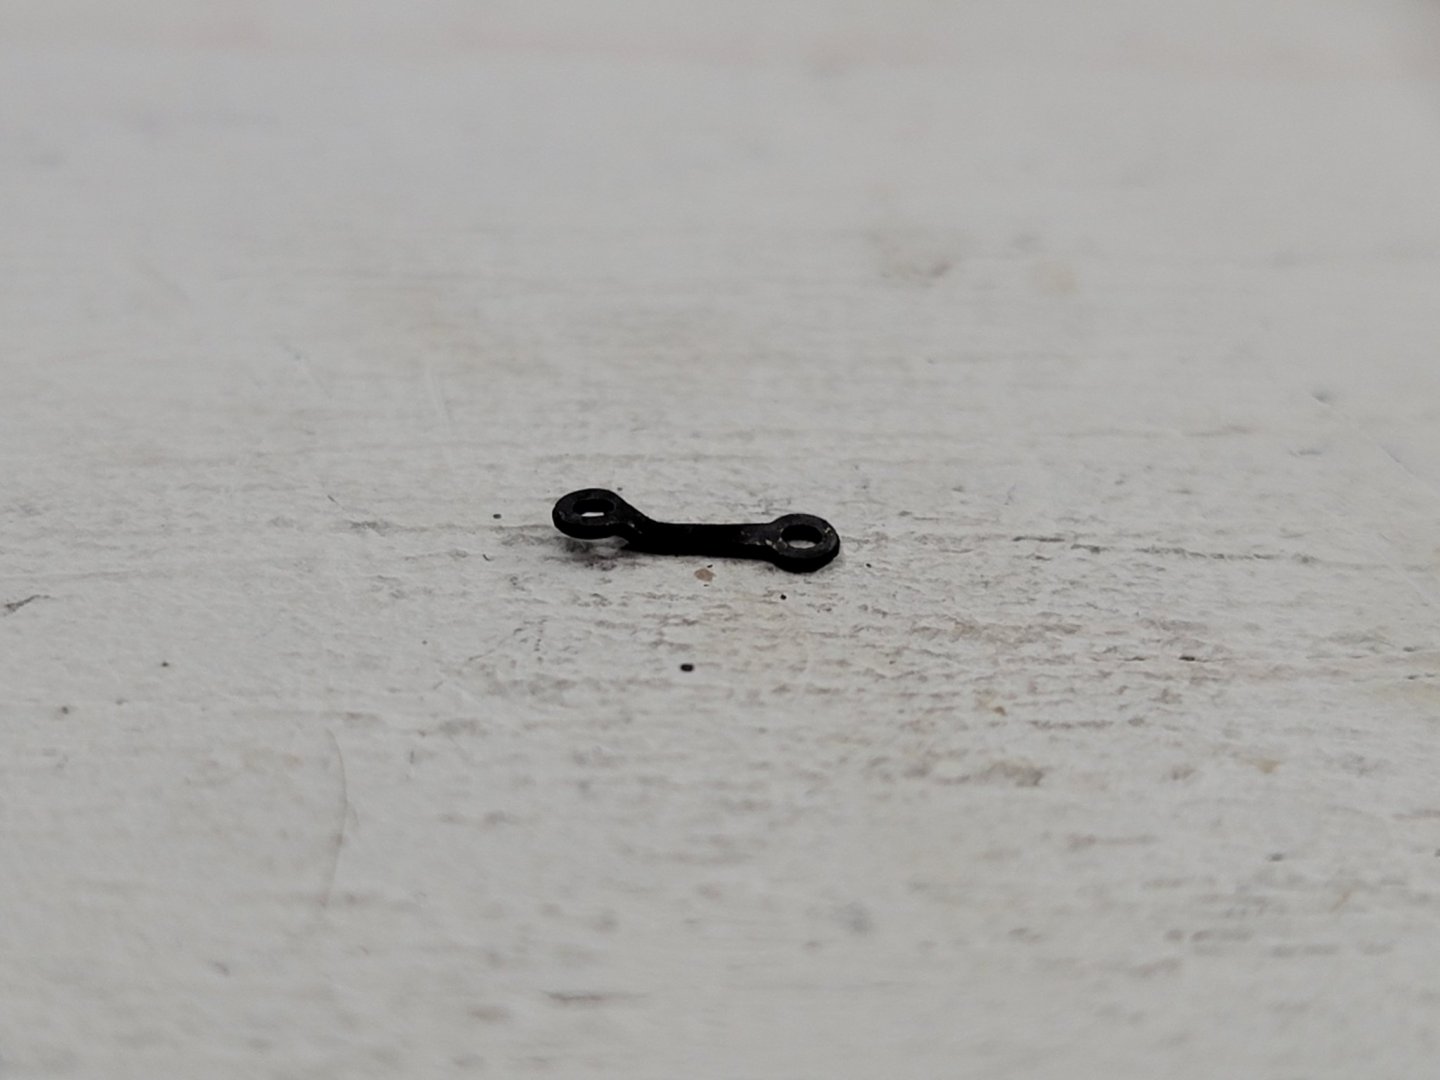
I finished installing the preventer links on the starboard side. They were really fun to put on once I figured out the process! 😁 I first inserted a pin in the eye of the toe link to mark the position of where the hole is to be drilled. The holes were drilled with a small bit then increased until I could fit a brass nail. I tried blackening the nails but it was very blotchy, so I ended up painting them after they were stuck with some watered down black paint. Also had to cut the nails in half since they were too long.. Here are some pics: For future projects I'll try to silver solder the loose ends of the links so they are seamless. Next step is to finish installing them on the other side, then I can finally start some rigging!!


- 950 replies
-
- 17
-
-
- syren
- model shipways
- (and 1 more)
-
I agree with Keith. Both of your builds are nothing short of amazing. I always look forward to seeing the progress you and Bitao make. The handle design looks great btw!! 🙂
-
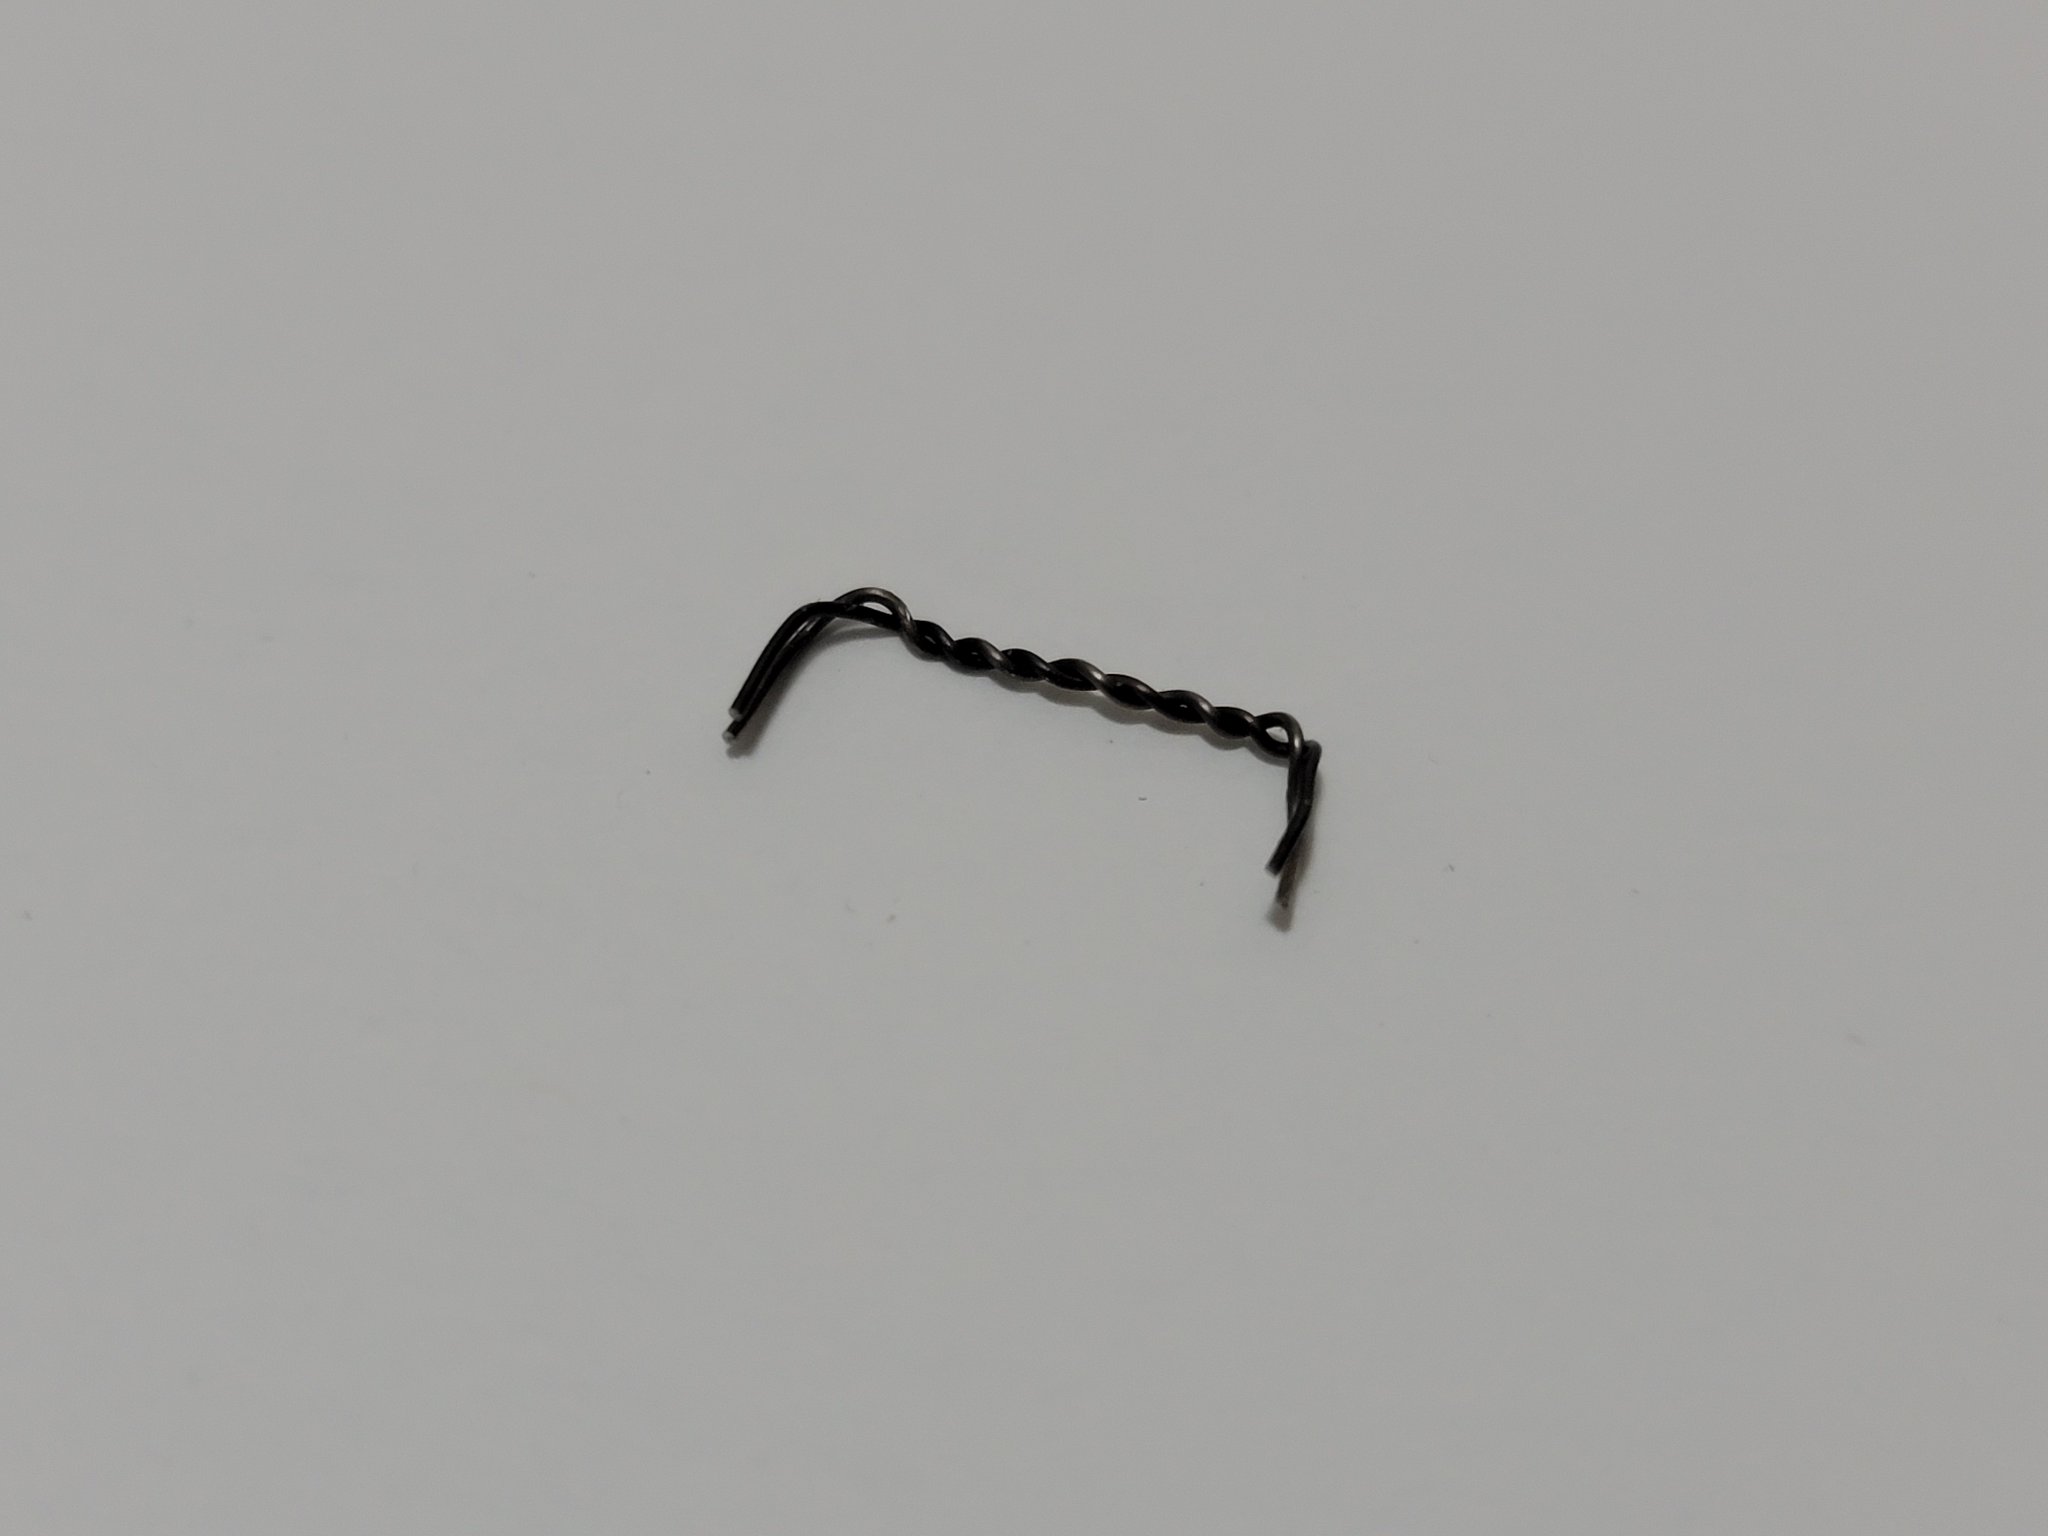
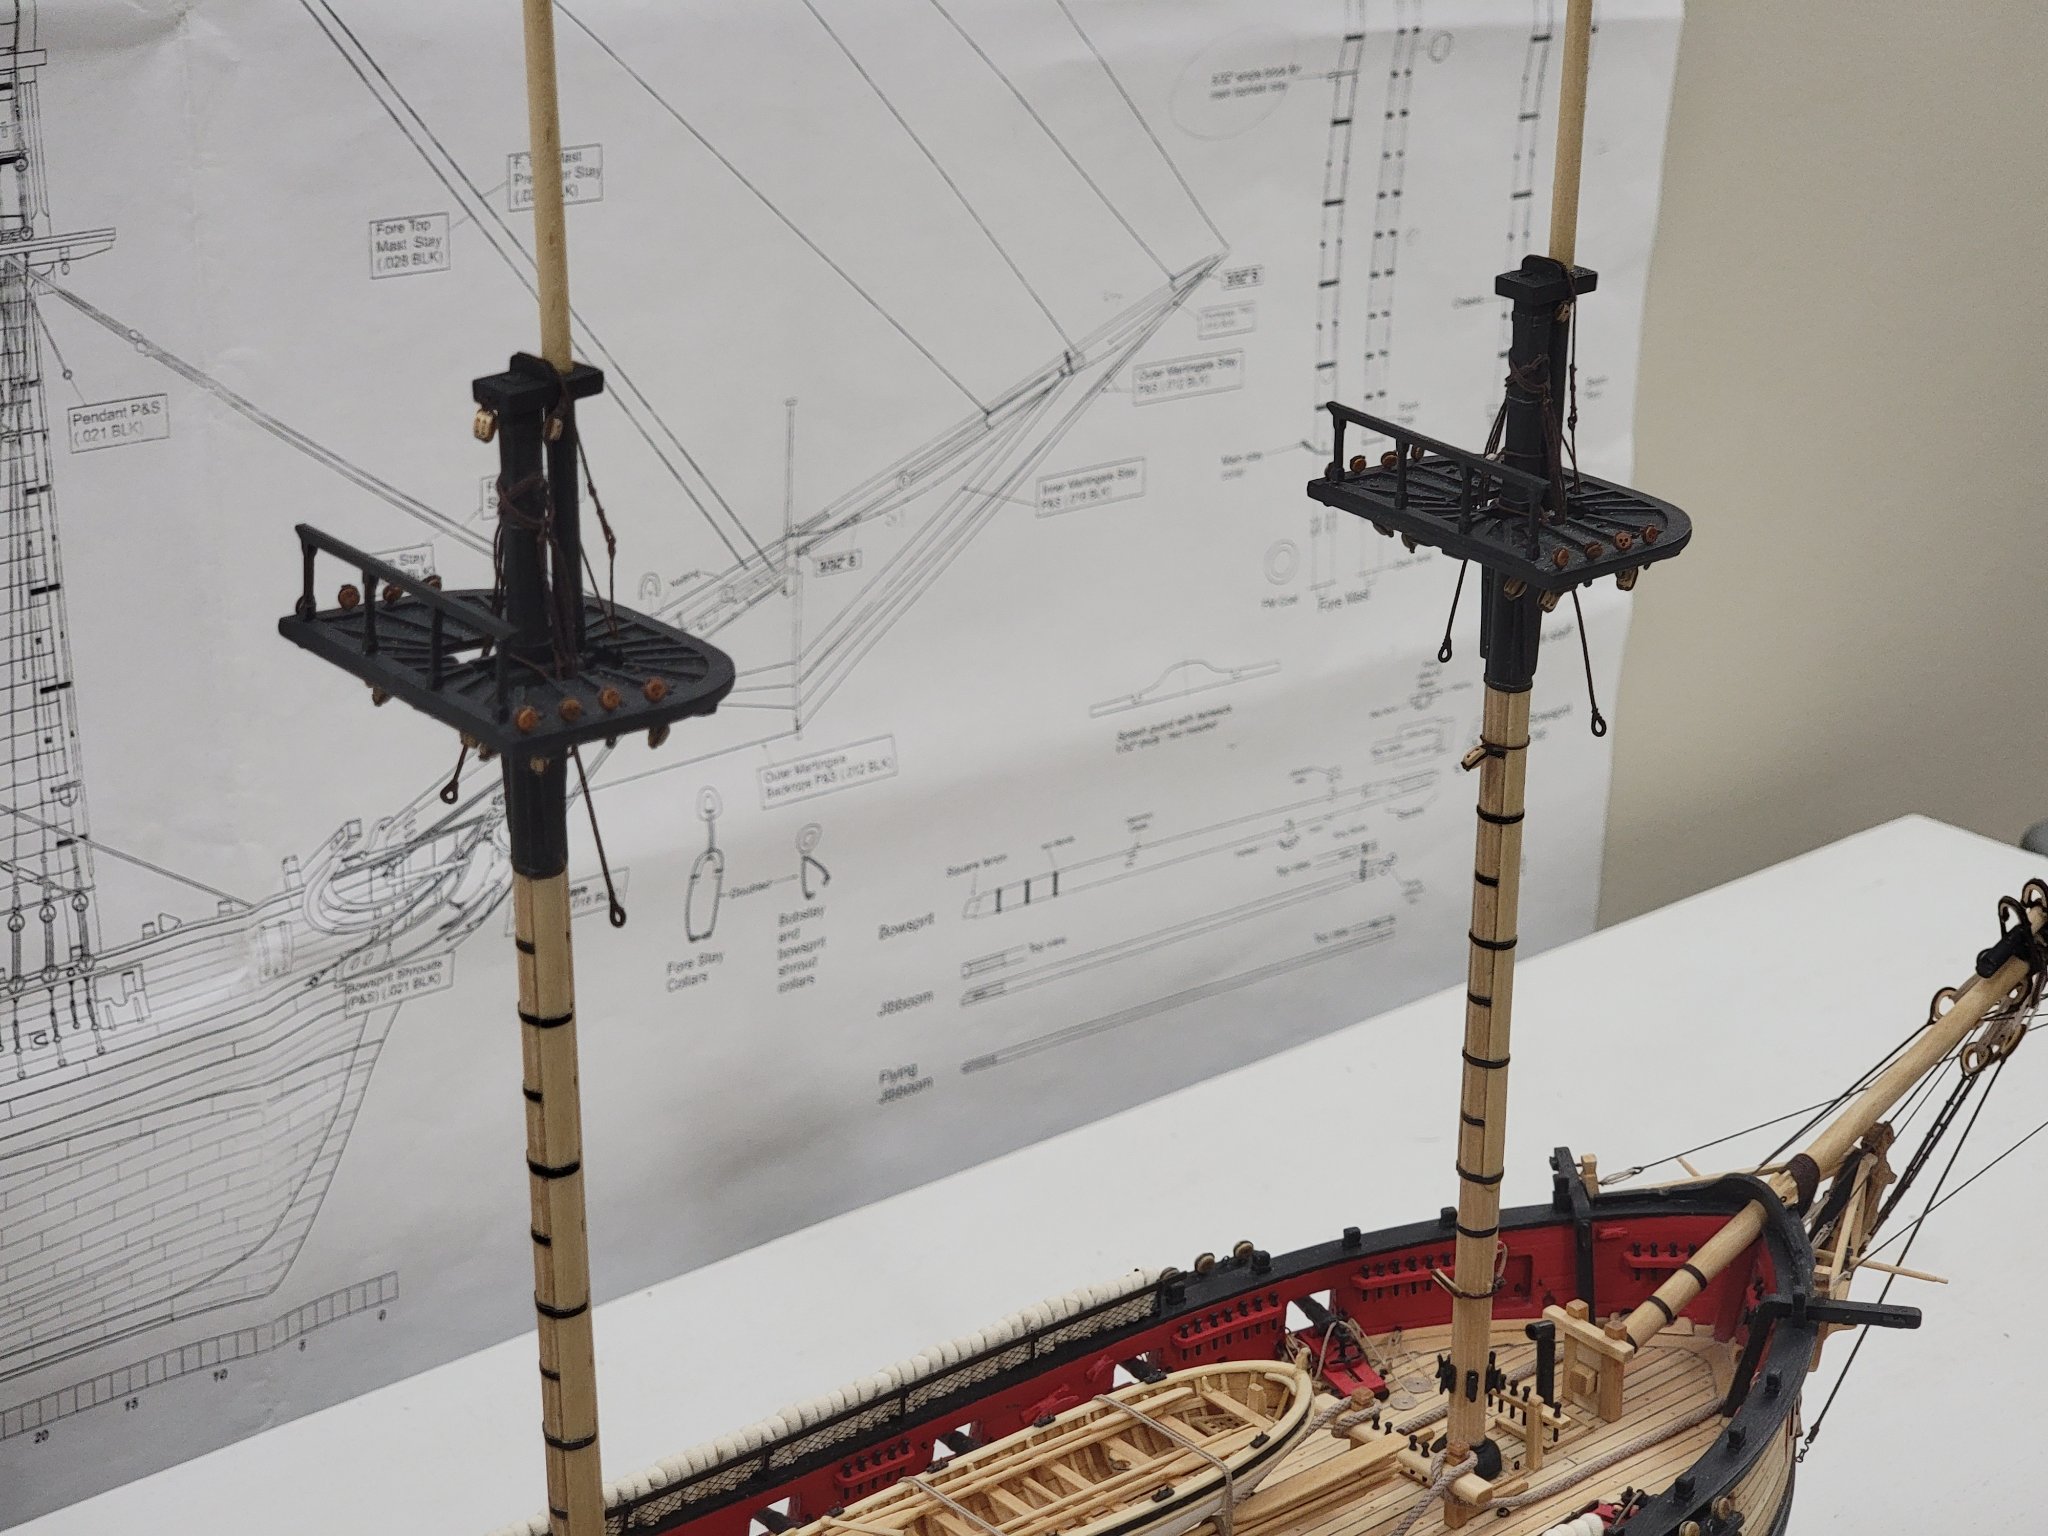
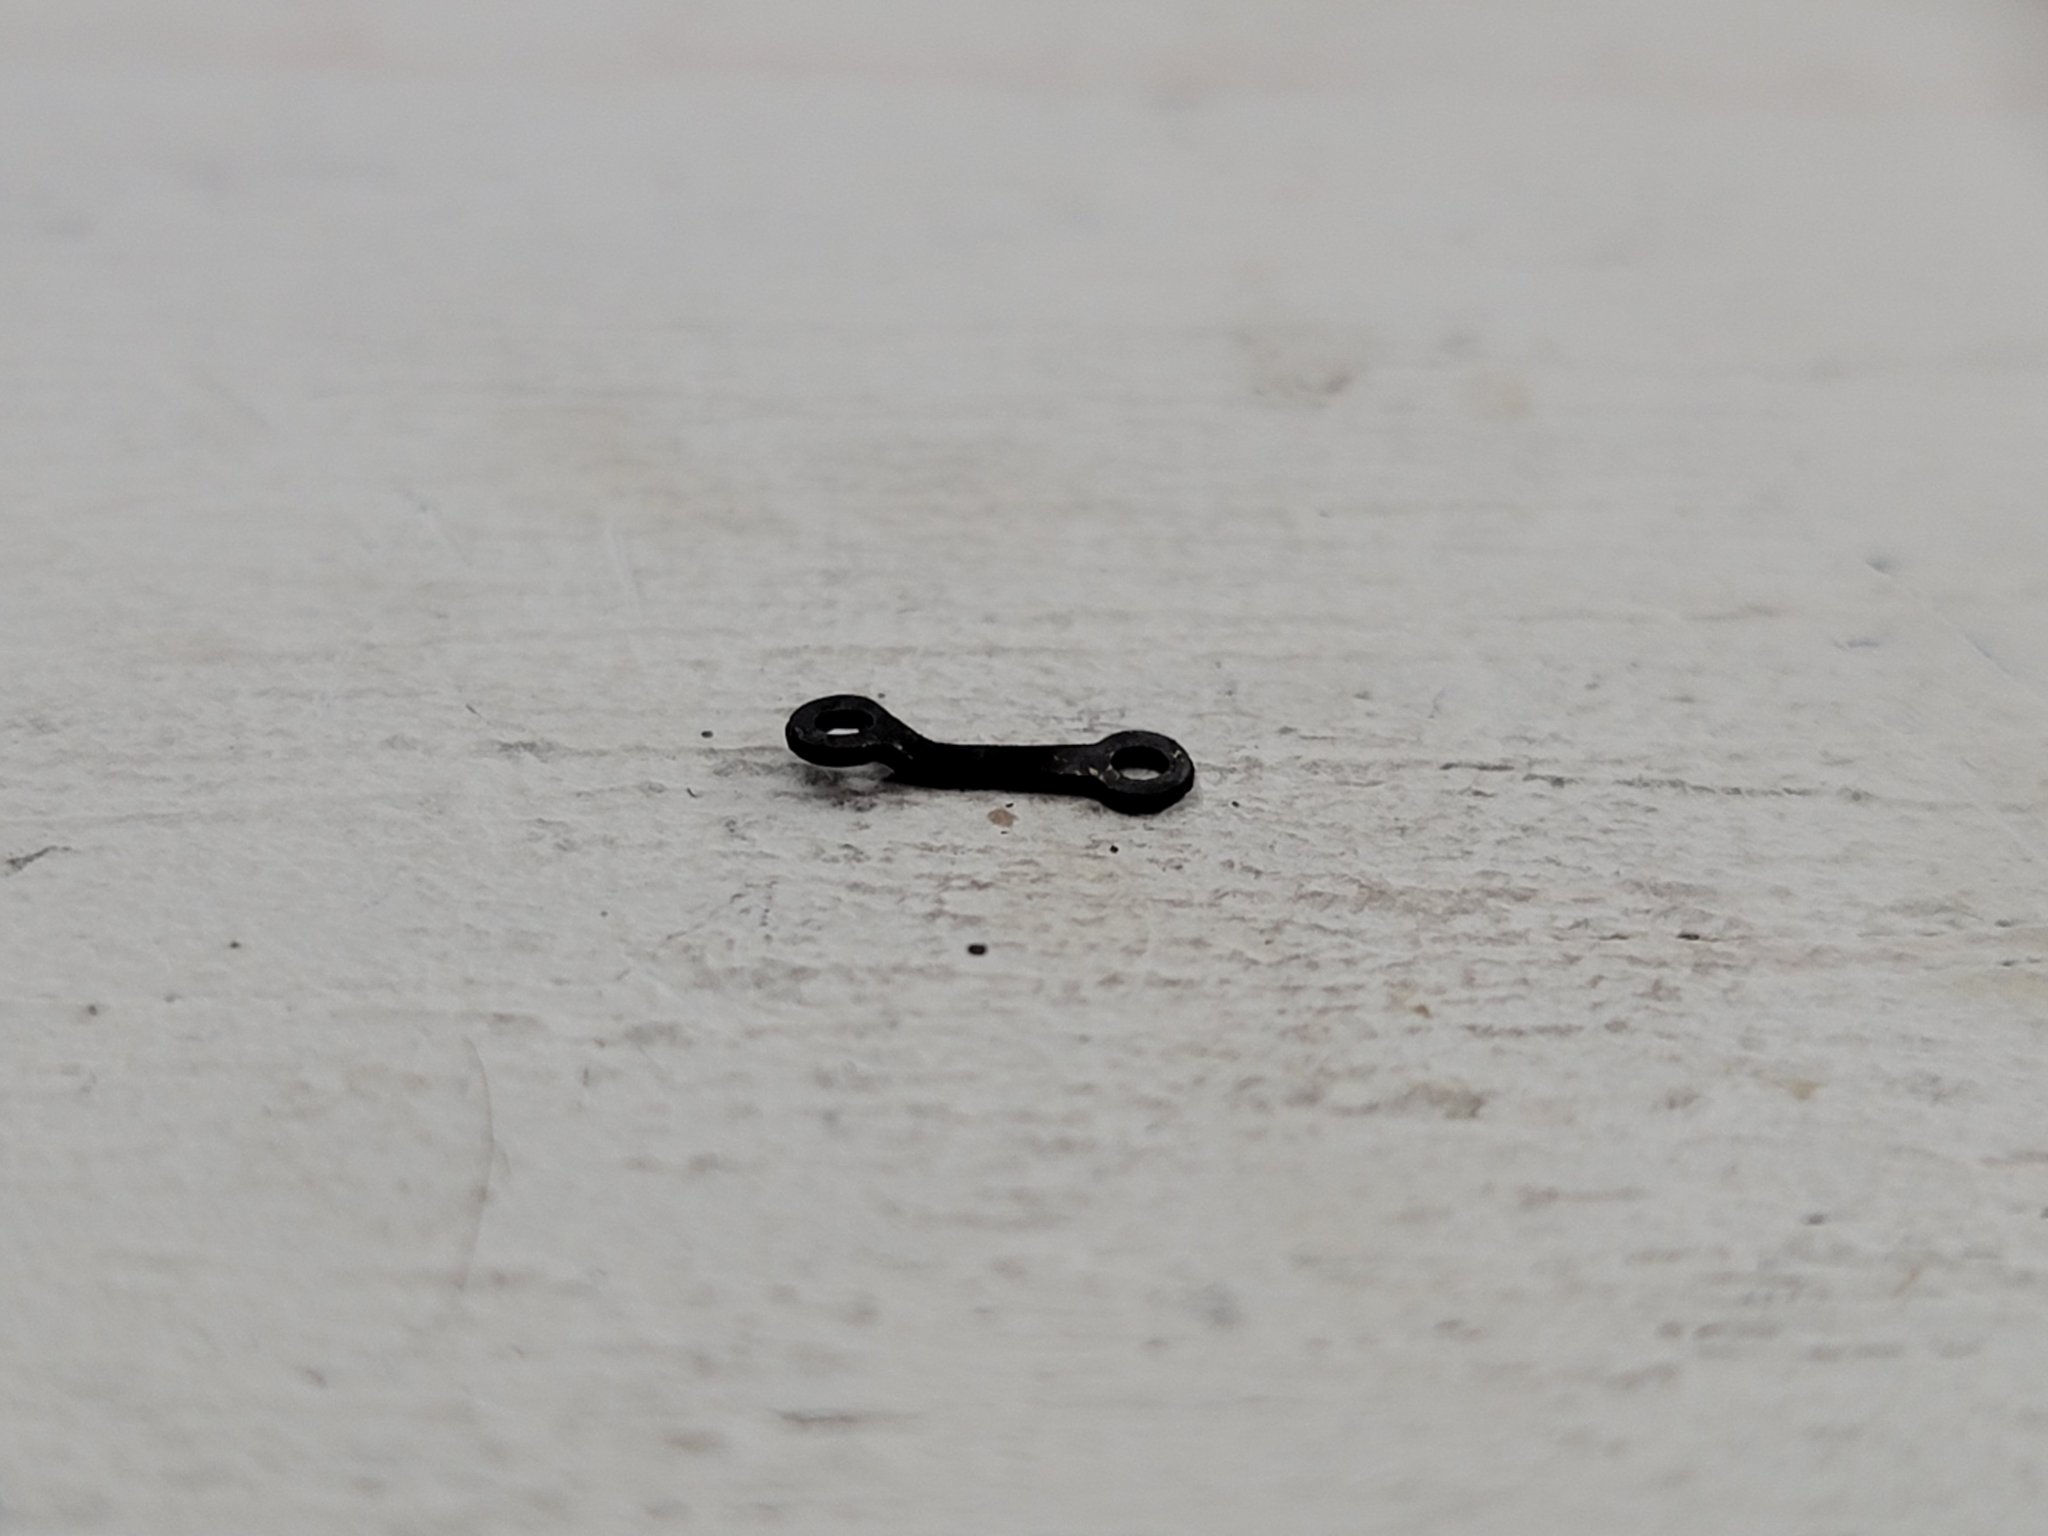
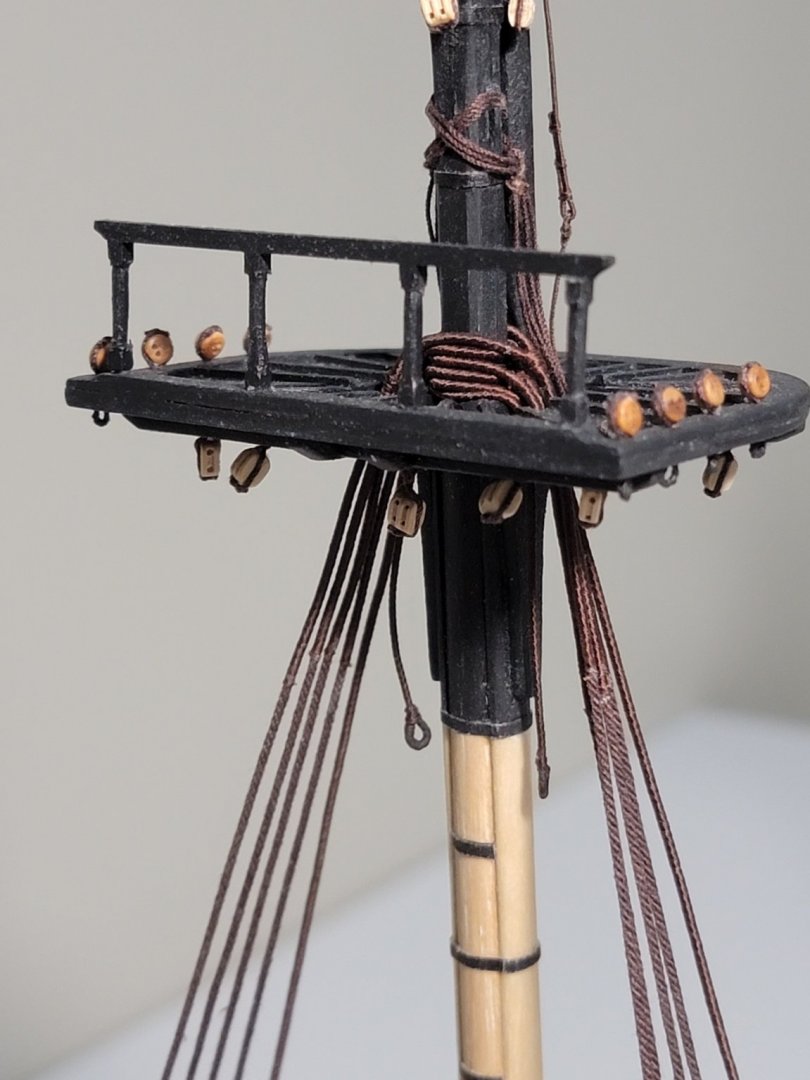
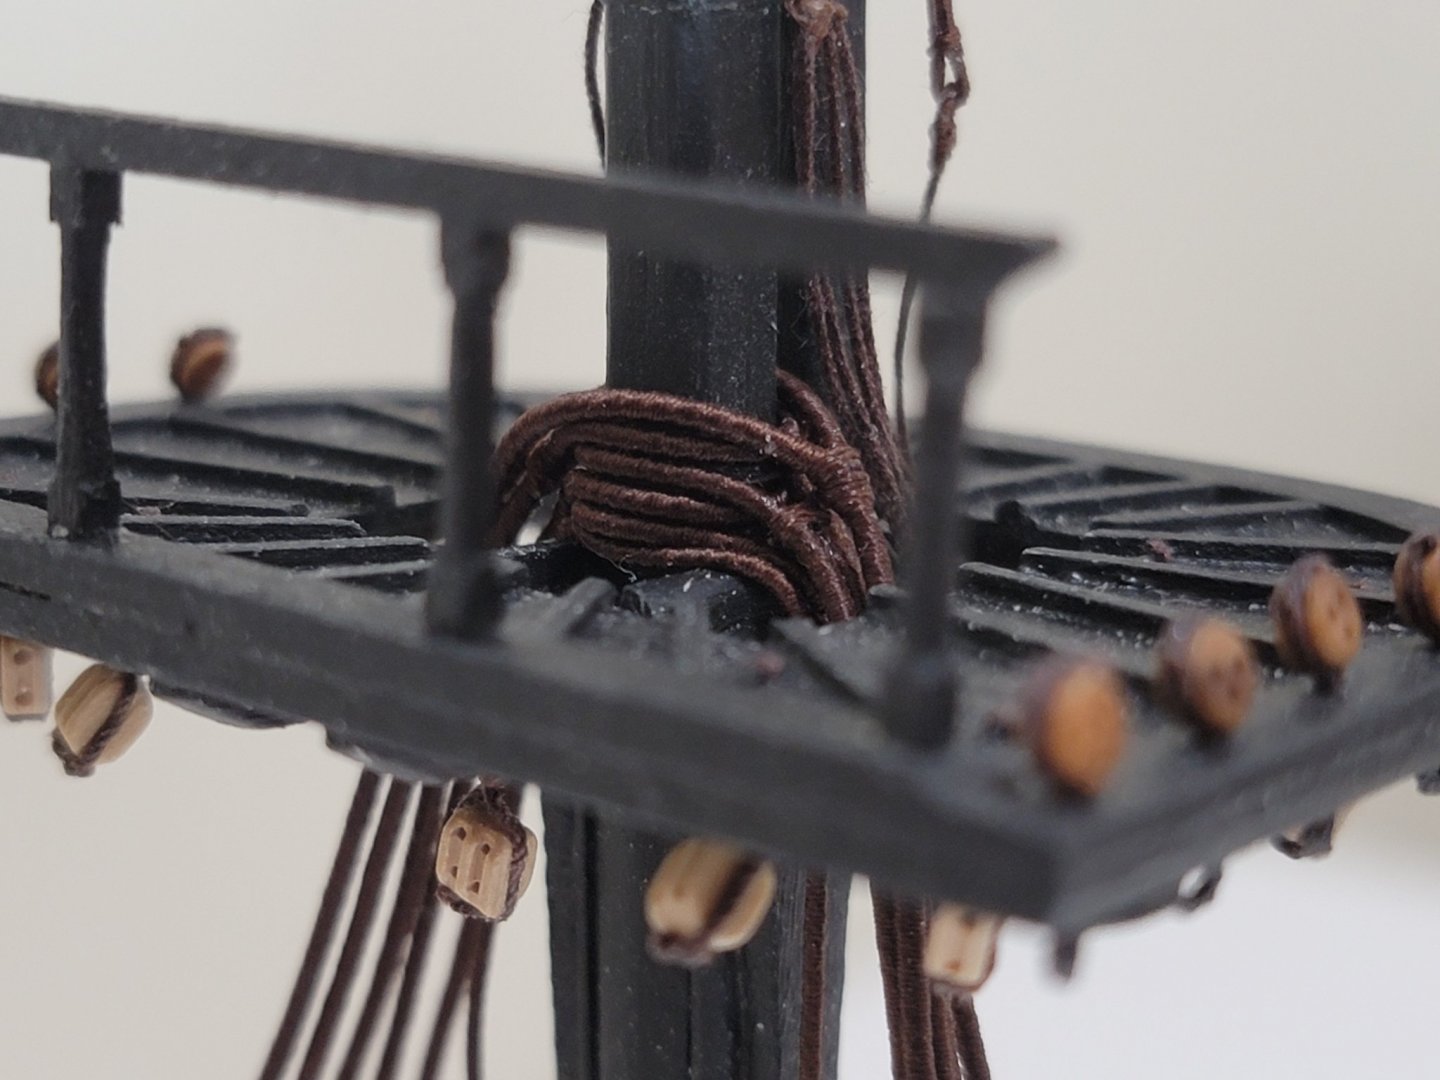
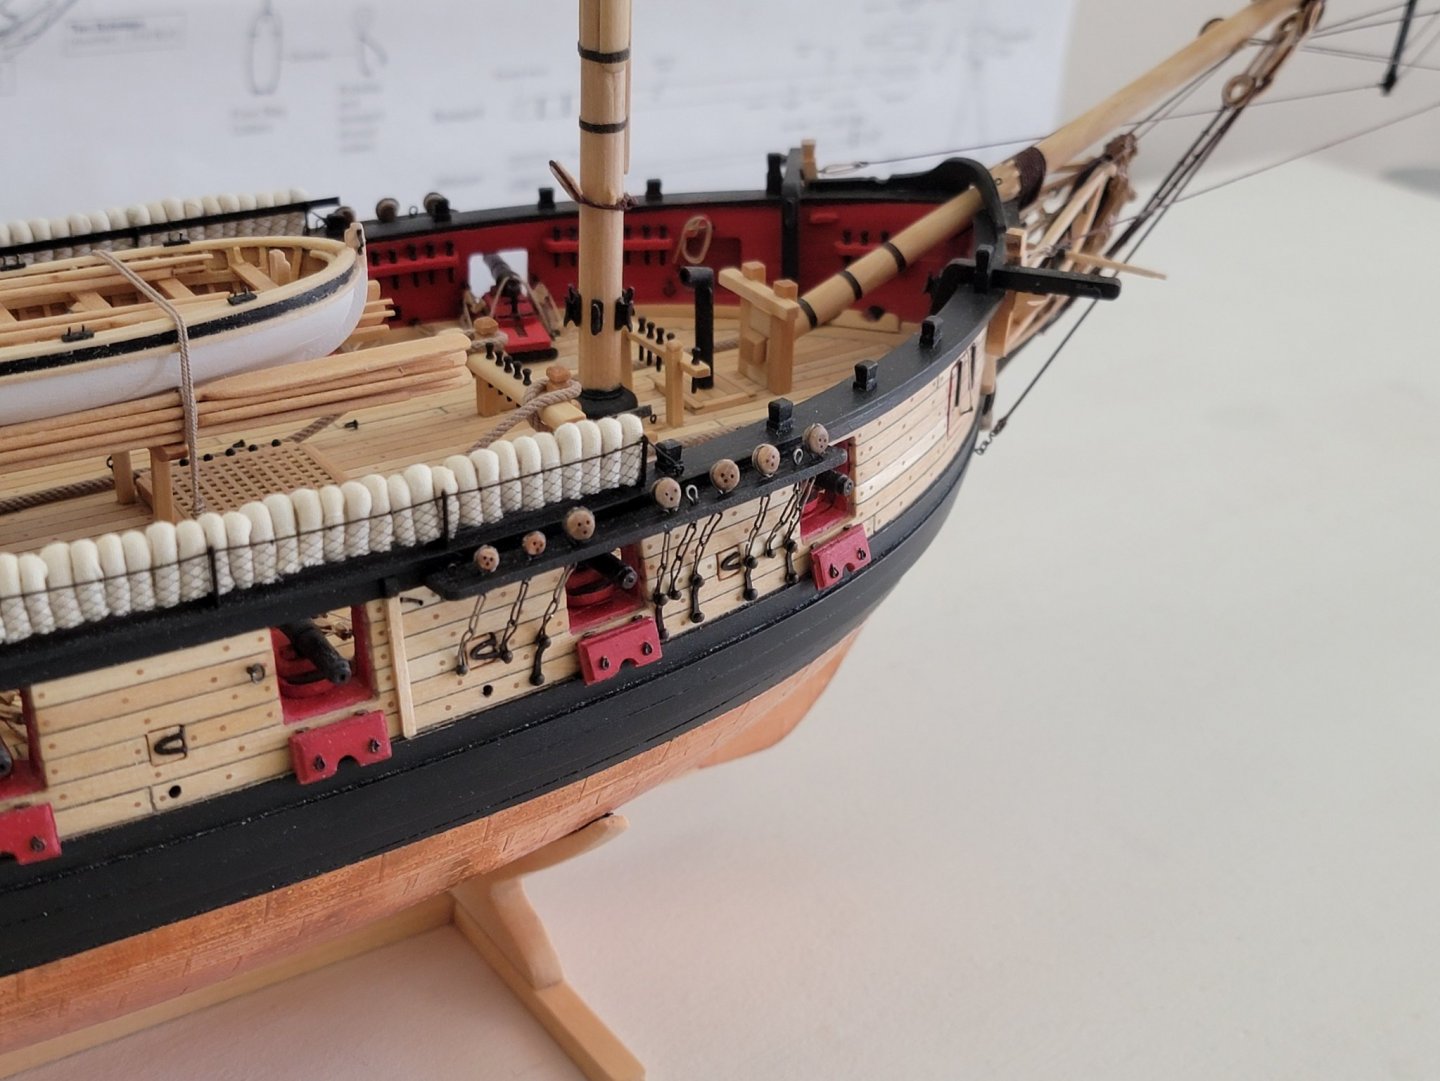
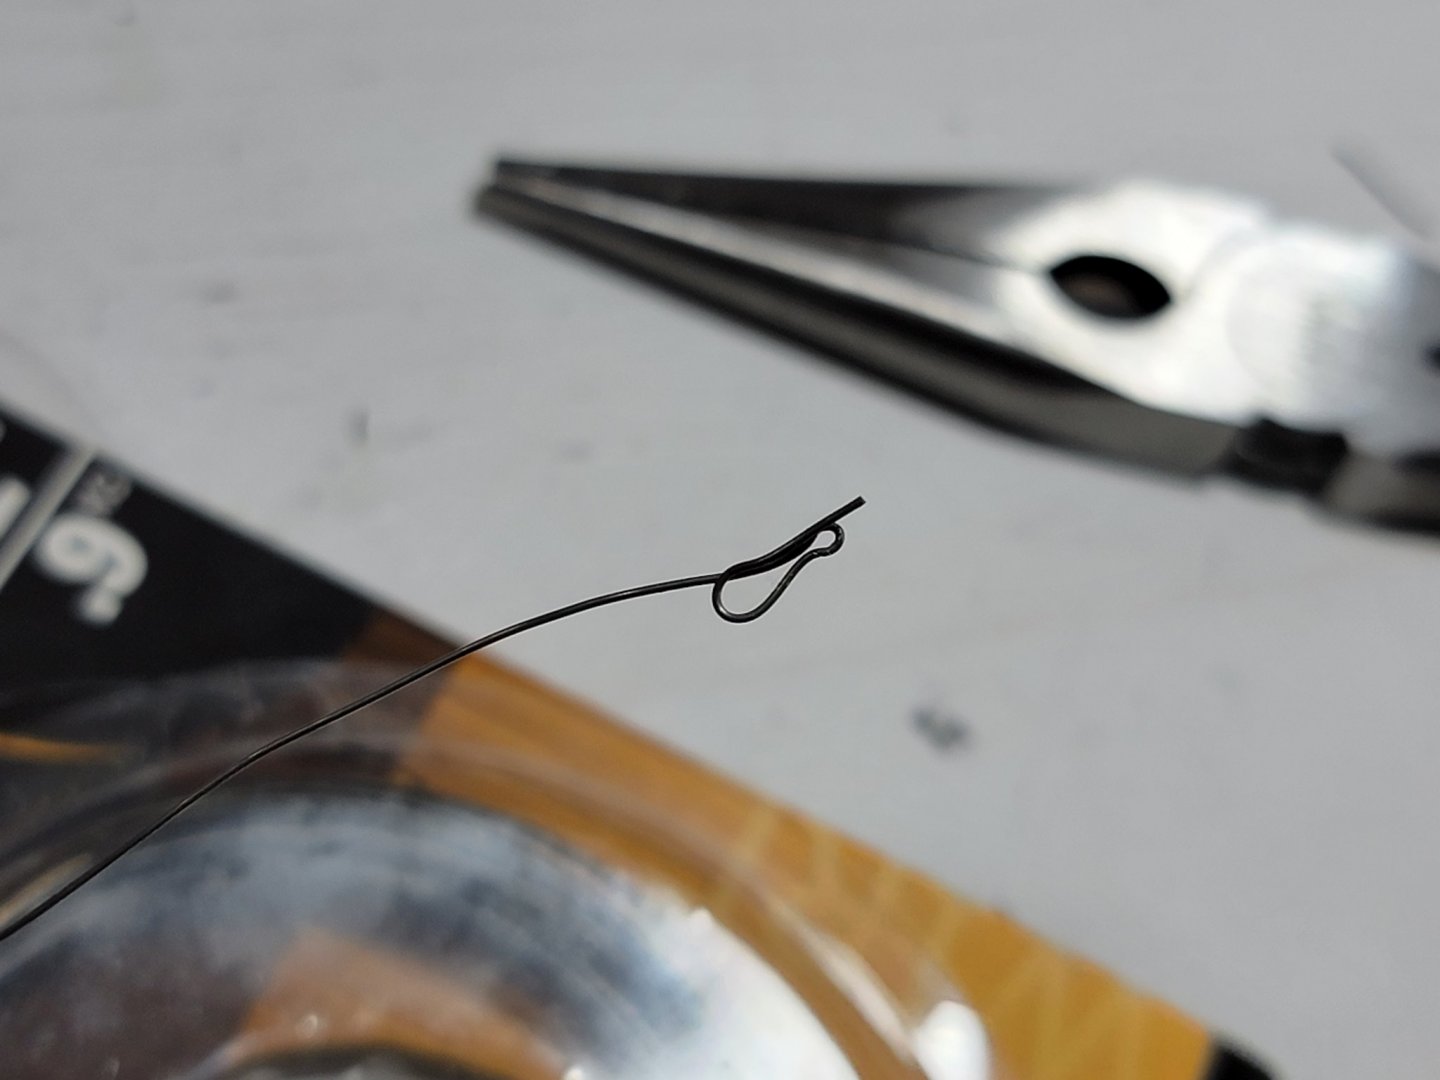
Making some slow but steady progress 😄 I deviated a bit from the instructions when making the chain plate assemblies. I didn't make a jig to bend them. I instead used a combination of pliers, fingers, pins of different sizes, and a caliper. At first my work was very sloppy, but after making a couple I got the hang of it. Here is a pic of the toe link before being cut off. It's a bit hard to describe the process used in detail, since I just did it based on what I felt was intuitive. It just involved lots of bending and squeezing! Some other deviations included bending the bottom part of the toe link to be flush against the hull. I also bent the bottom part of the deadeye strop so as to be pulled by the other links. I am going to use the brass photo etched plate preventer links instead of using wire after reading TFFM vol 2. These should be made of square metal plates and not round. I bent these to accomodate for the spacing for the toe link. Overall, this part of the build was very tricky... At first, I didn't enjoy at all since I don't like working with wires and metal... I had to force myself to work through it.. I was very close on settling on the links I finished. Then I took a few days break, read a few logs and the TFFM books on these assemblies, and came back with a freshened mind. I decided I needed to correct some items. These being: 1) squeezing the wider part of the toe link thinner, so as to immitate it being stretched under tension from the shrouds; 2) making sure all the toe links look similar to each other (before they were slightly different sizes) ; 3) shortening the middle links by a snudge, so all the preventer links can fit above the wales and are roughly the same height; and 4) increased the respective slot size so they fit nice and flush. Here are some pics of what they look now with the moulding strip holding the assemblies in place; I will next install the preventer links. I increased the working height using some yoga blocks so I don't have to bend to see where to drill the holes I also received the 5/32 in single block, and have attached it to the mast. Now the masts have been glued lightly in position. Before I was thinking of getting started on the yards, but now since everythings very close to be ready for standing rigging, I want to do that first. I've been looking forward to this part of the build for a long time!! Maybe doing yards later on would be a nice break from all the rope work! 😁


- 950 replies
-
- 12
-
-
- syren
- model shipways
- (and 1 more)
-
Looks great Richard!!
-
I'd say try to redo it if the twisted piece with filler looks off. I know the feeling of redoing work, especially one that wasn't enjoyable to begin with (similar story for me with the chain plate assemblies... I'm close to finishing that stage and I'm not liking it as much as the wood work). But after finishing the model with it looking accurate, I'm sure you'll feel happy that you spent a bit more time. Also ModelExpo has a free replacement policy if you do plan to redo that piece. Btw your model so far is looking real nice! I've been referring to your log when I get stuck.
-
Looks like the beginning of a fantasy/medieval movie. Just awesome!!! It would be cool if you could build a mini robot with a camera to take us on a tour of the village! Maybe after that you could film a whole movie in it 😁
- 789 replies
-
- 12
-
-
-
She's a beauty, Bossman! I am very impressed on the quality and speed you have taken to build her. I have this model on my 'to do list' and will be referring back to your log as I progress.
- 127 replies
-
- 1
-
-
- confederacy
- model shipways
- (and 1 more)
-
That's very nice and clean work! It's very motivating to seeing your progress Did you use any other jigs to cut this straight line? Or was it purely done with the jewellers saw?
-
You would just love to hear that silkspan, a common material used in model planes, is also used in model ships for sails! You are so close to the finish line!! Does this help? I found it in the instructions. I tried looking in other sources, but could not find a clear answer. You could also check out some of the finished logs of the Syren to see how they did this (linked here) Also heard it's getting cold in Texas, it was in the news here a couple days ago. It's actually starting to get a bit warmer here, last week it almost reached a windchill temperature of -50 deg c! Thank you Michael! I also had a lot of fun building them. 😄
- 950 replies
-
- 1
-
-
- syren
- model shipways
- (and 1 more)
-
The frames look really good!!