.jpg.1f80adf1a9b14a937cfcf2ca6af0f0d4.jpg)
WalrusGuy
-
Posts
1,009 -
Joined
-
Last visited
Content Type
Profiles
Forums
Gallery
Events
Everything posted by WalrusGuy
-
.thumb.jpg.62d1d69fed1f32364417cb1f9cdeb009.jpg) Thanks for the suggestions! I should have diluted the glue more, but I guess it's too late since all the coils are done 😅, I'll try if the pastel method works, otherwise I'll just try scraping off the shiny bits lightly with a wet toothpick.
Thanks for the suggestions! I should have diluted the glue more, but I guess it's too late since all the coils are done 😅, I'll try if the pastel method works, otherwise I'll just try scraping off the shiny bits lightly with a wet toothpick. -
Many thanks for the comments Eric and Matt!! The only issue I am having with the coils is that there is a bit of a shine from the dried glue from certain angles.... Seeing the shine is driving me crazy!!! I think lightly scrubbing it with a toothpick might solve this issue. Anyhow, I have finished all the carronades, will post some pics later in the day!
- 950 replies
-
- 1
-

-
- syren
- model shipways
- (and 1 more)
-
Very nice!! Basswood would 100% snap at that angle for that thickness (that's the reason I had to thin mine down). I'll definitely try out the microwave technique for sharp angles next time!
-
I don't know of any good sources external to this forum. I just came across it from posts on MSW back when I was finishing up my Virginia model. Here are a couple:
-
The pics make me feel like I am looking at an actual ship, looks very realistic!! Btw, have you glued in your coils yet? I could be wrong, but should the coils be oriented in a clockwise direction? Or does it not matter at all?
-
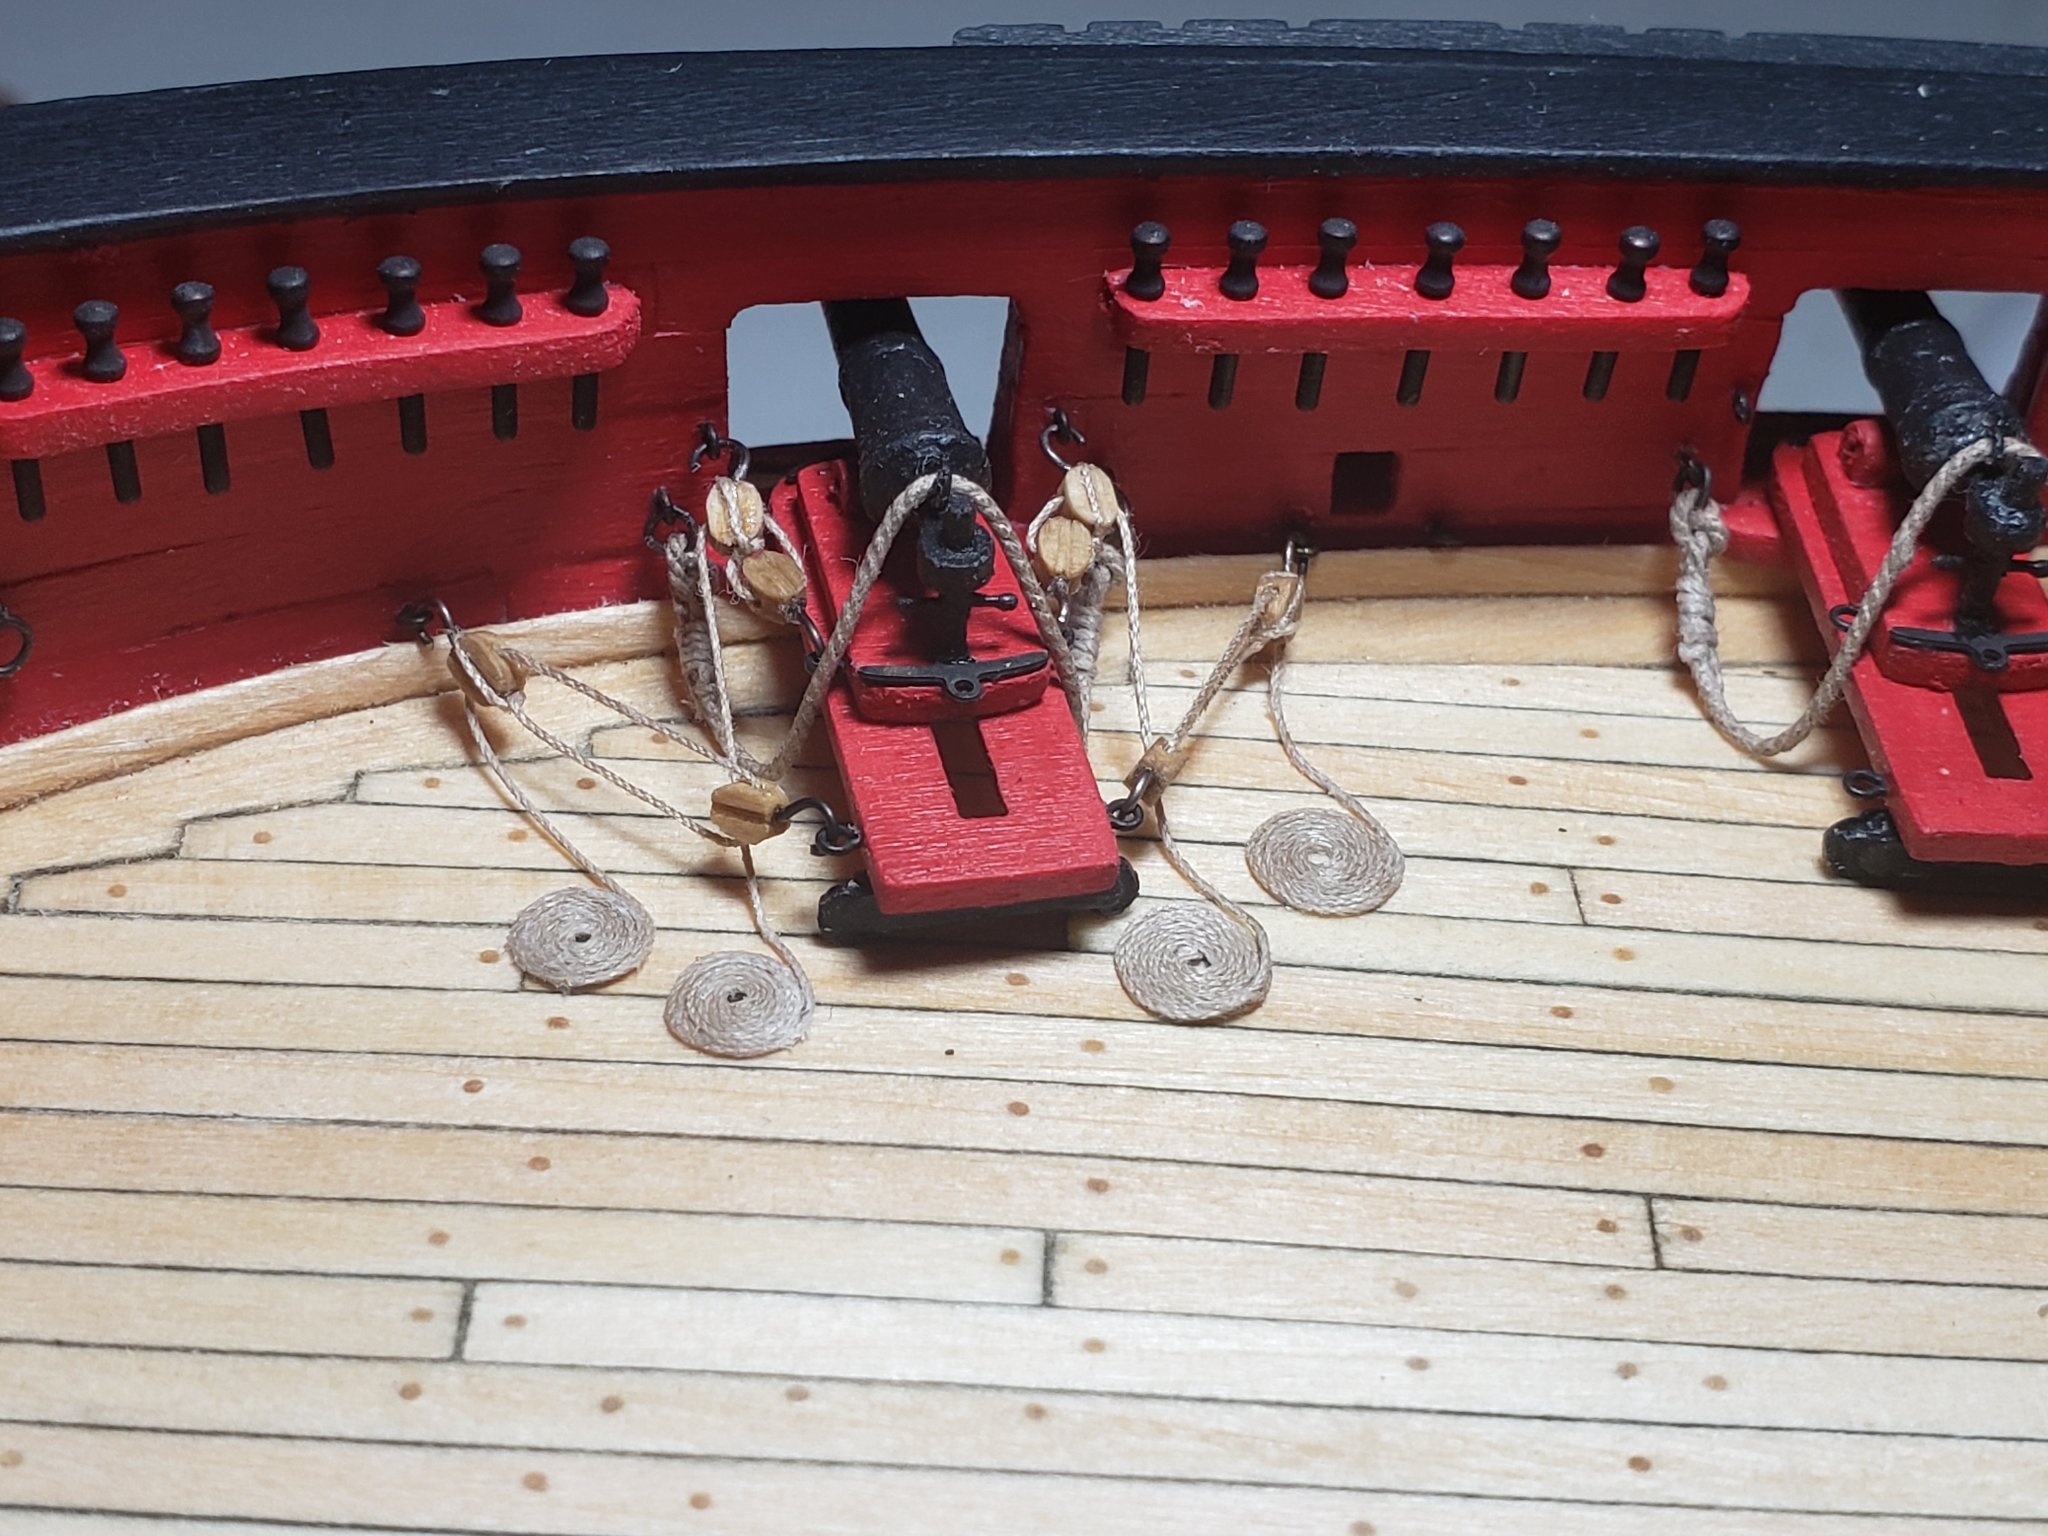
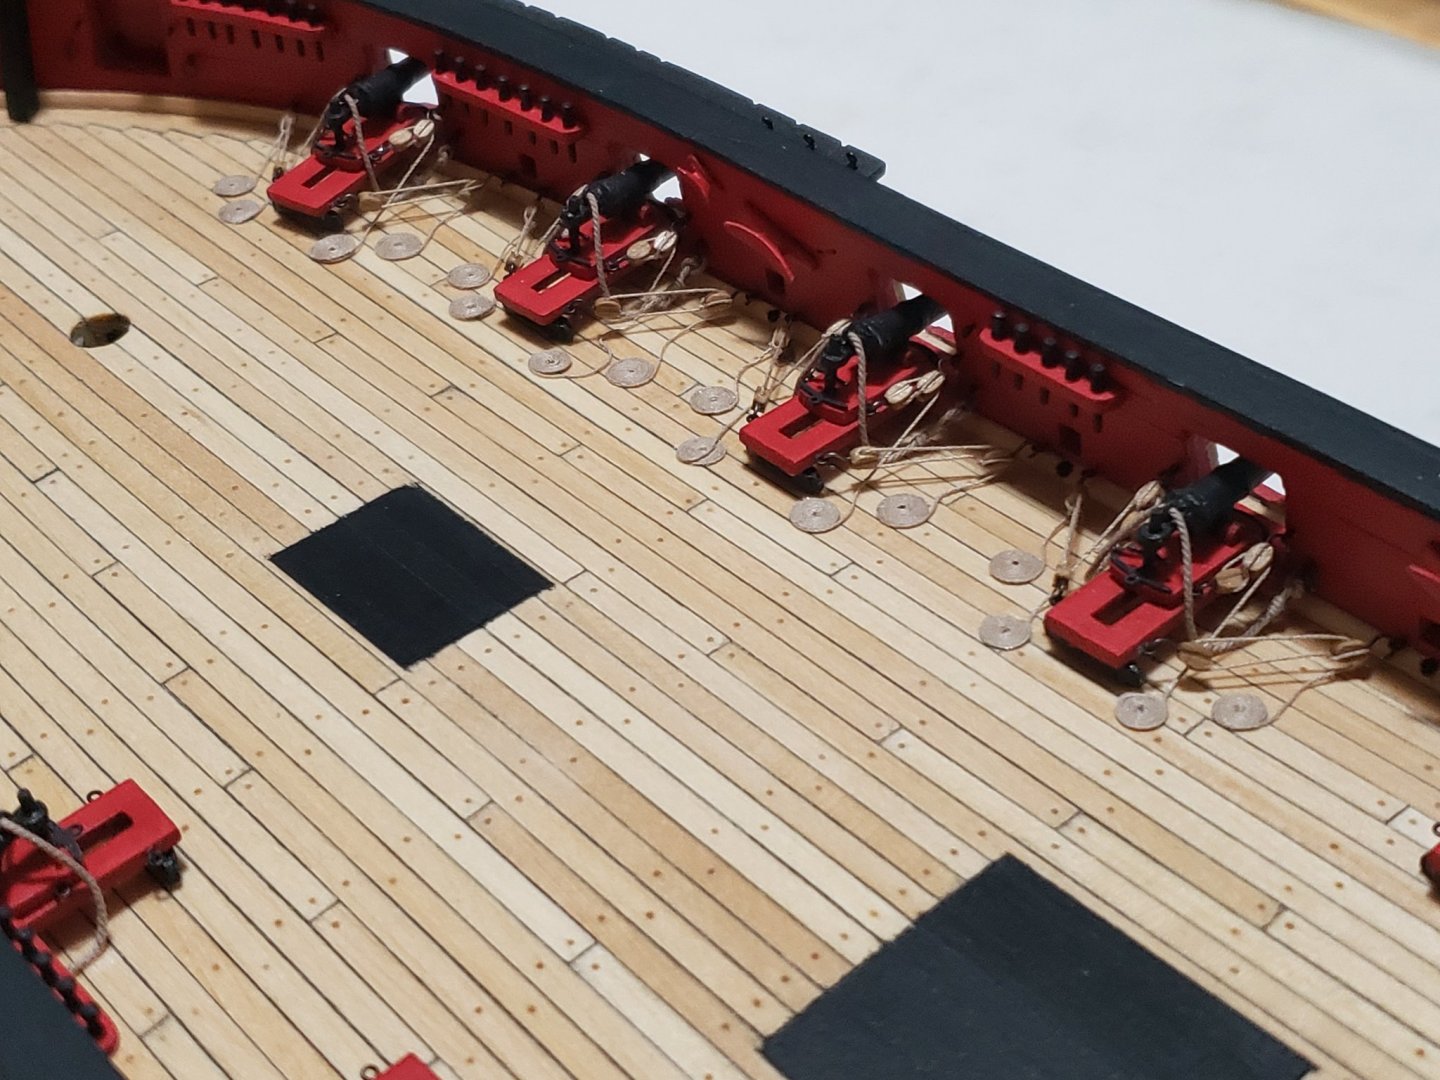
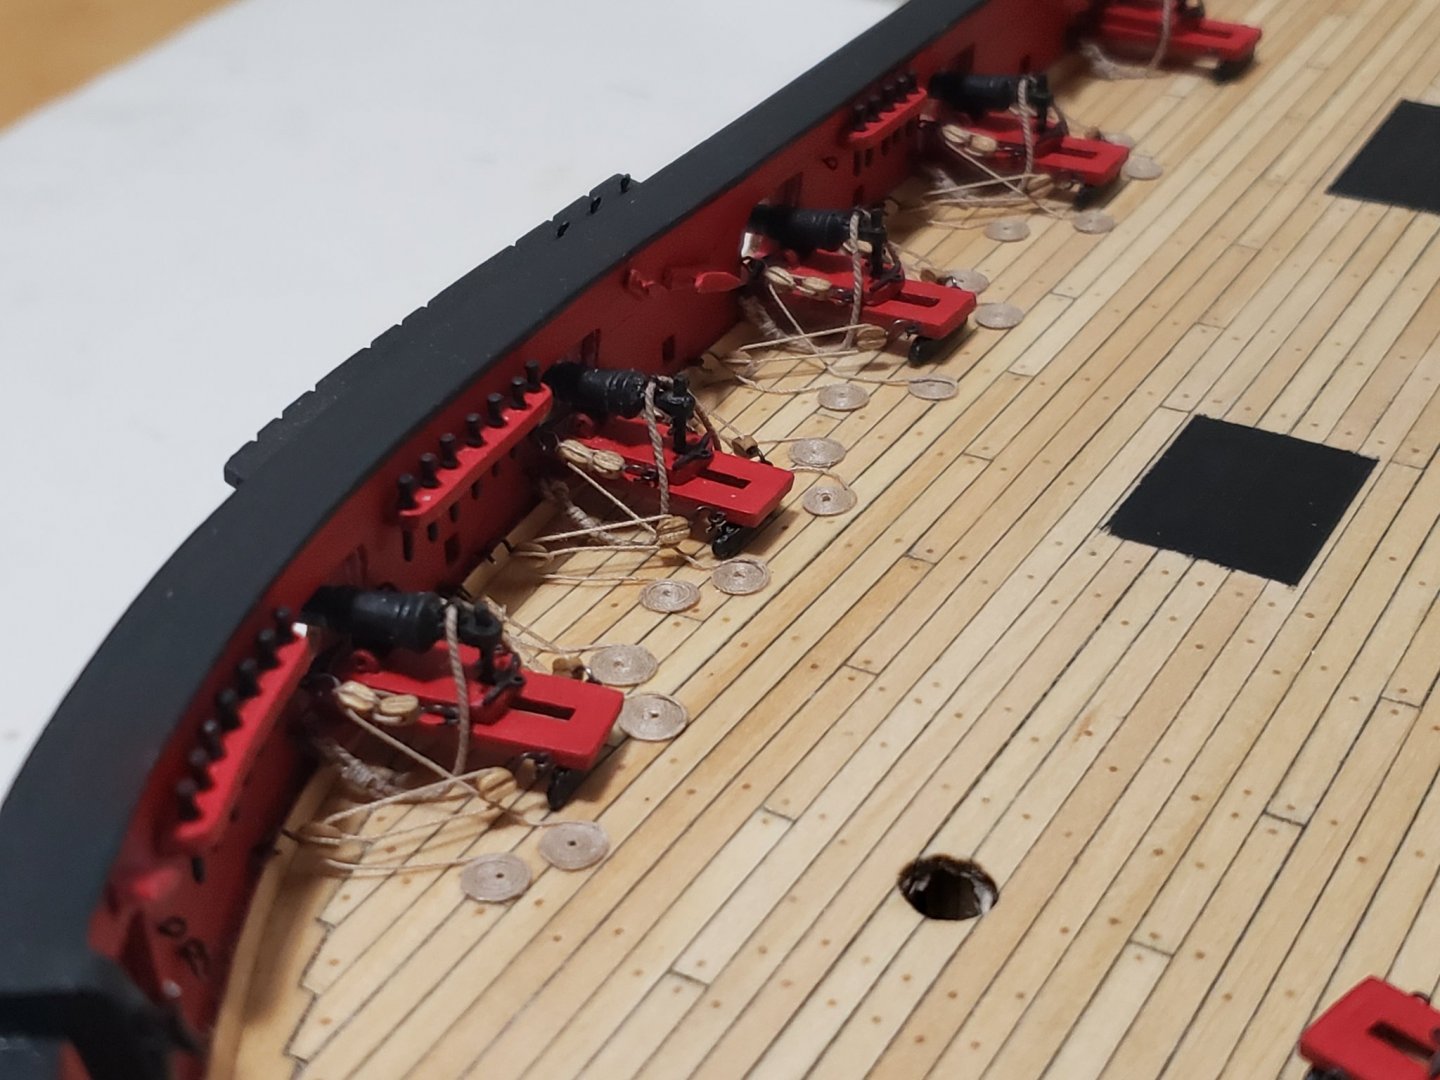
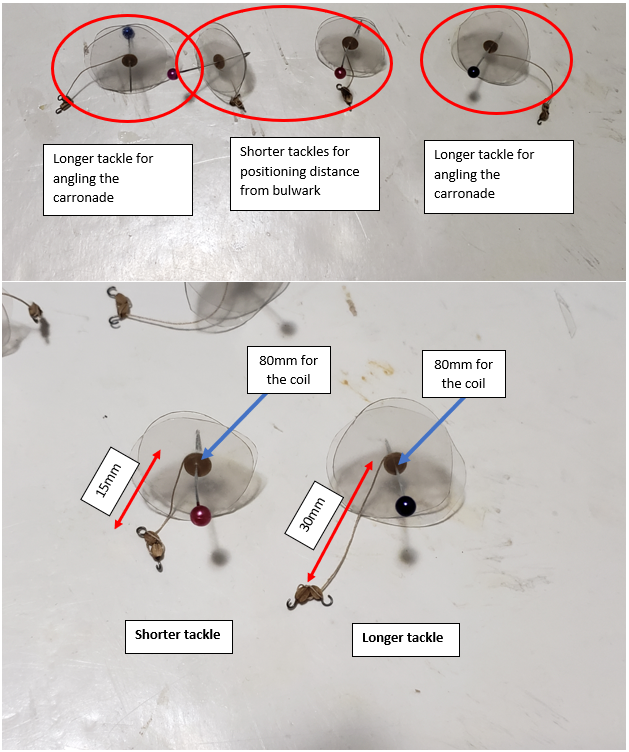
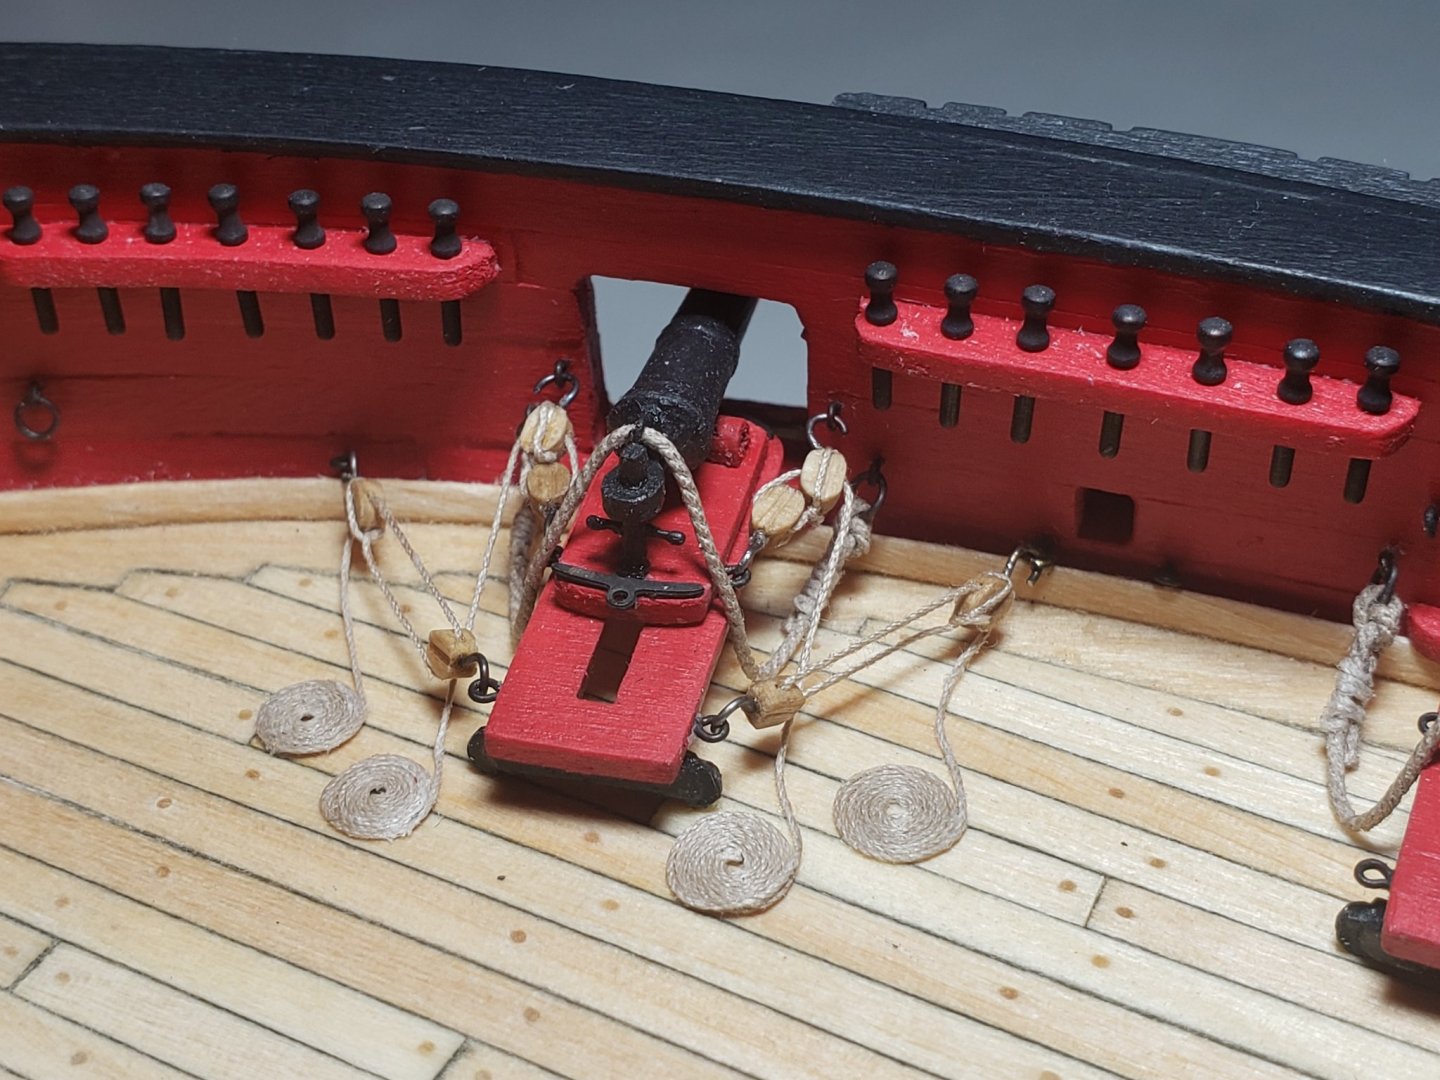
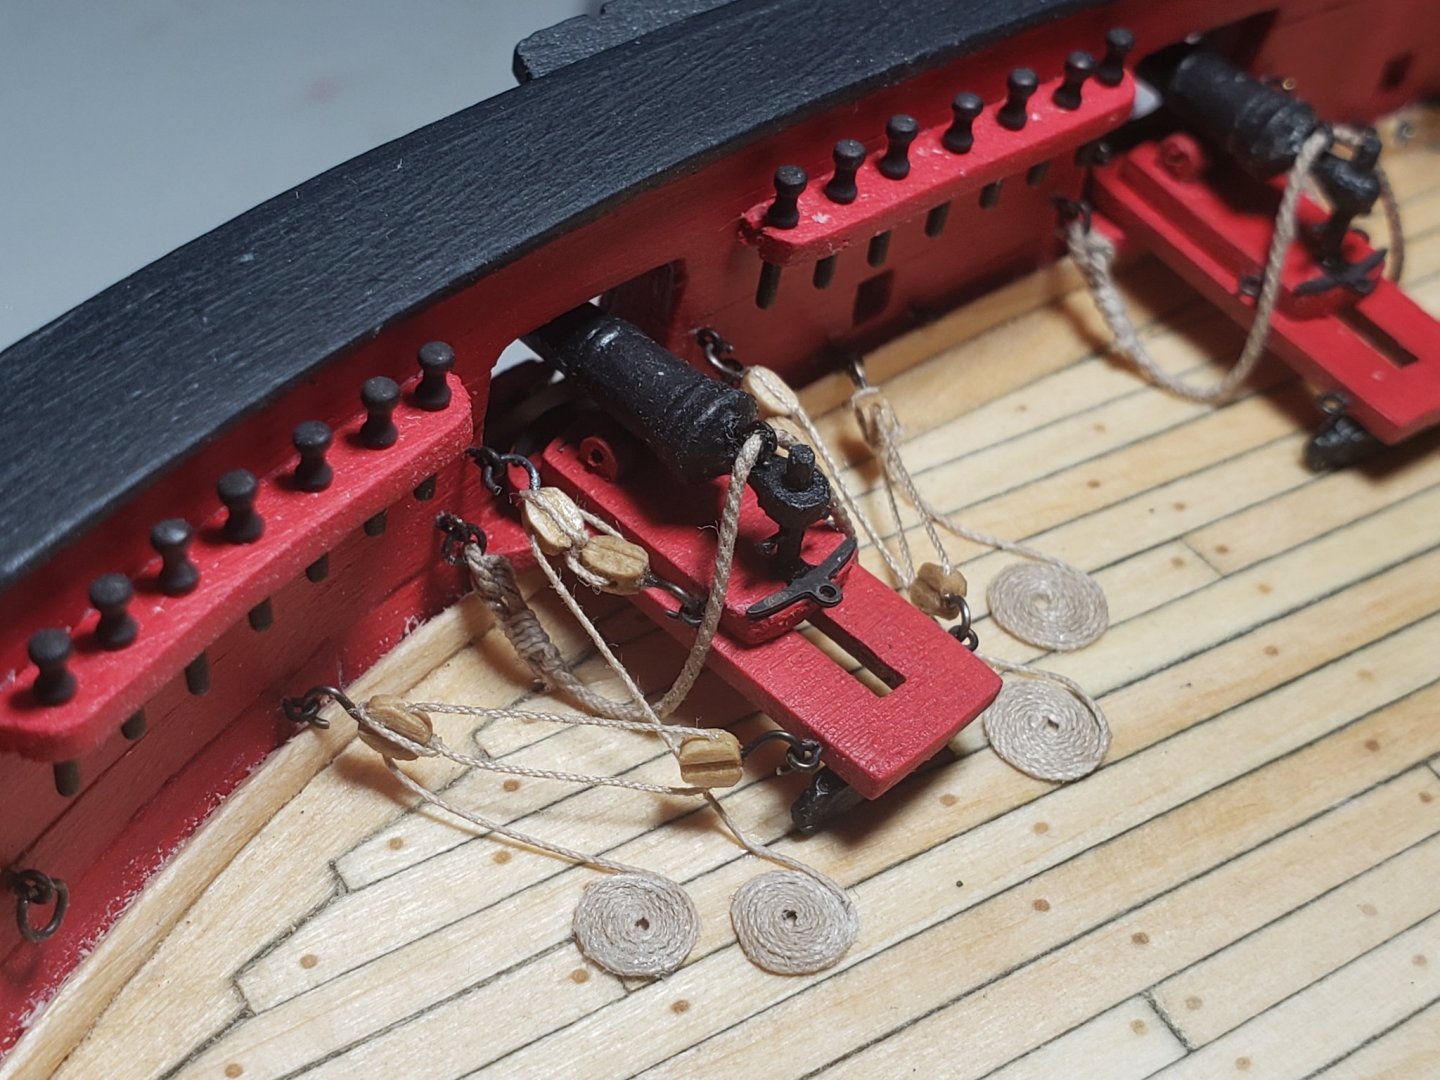
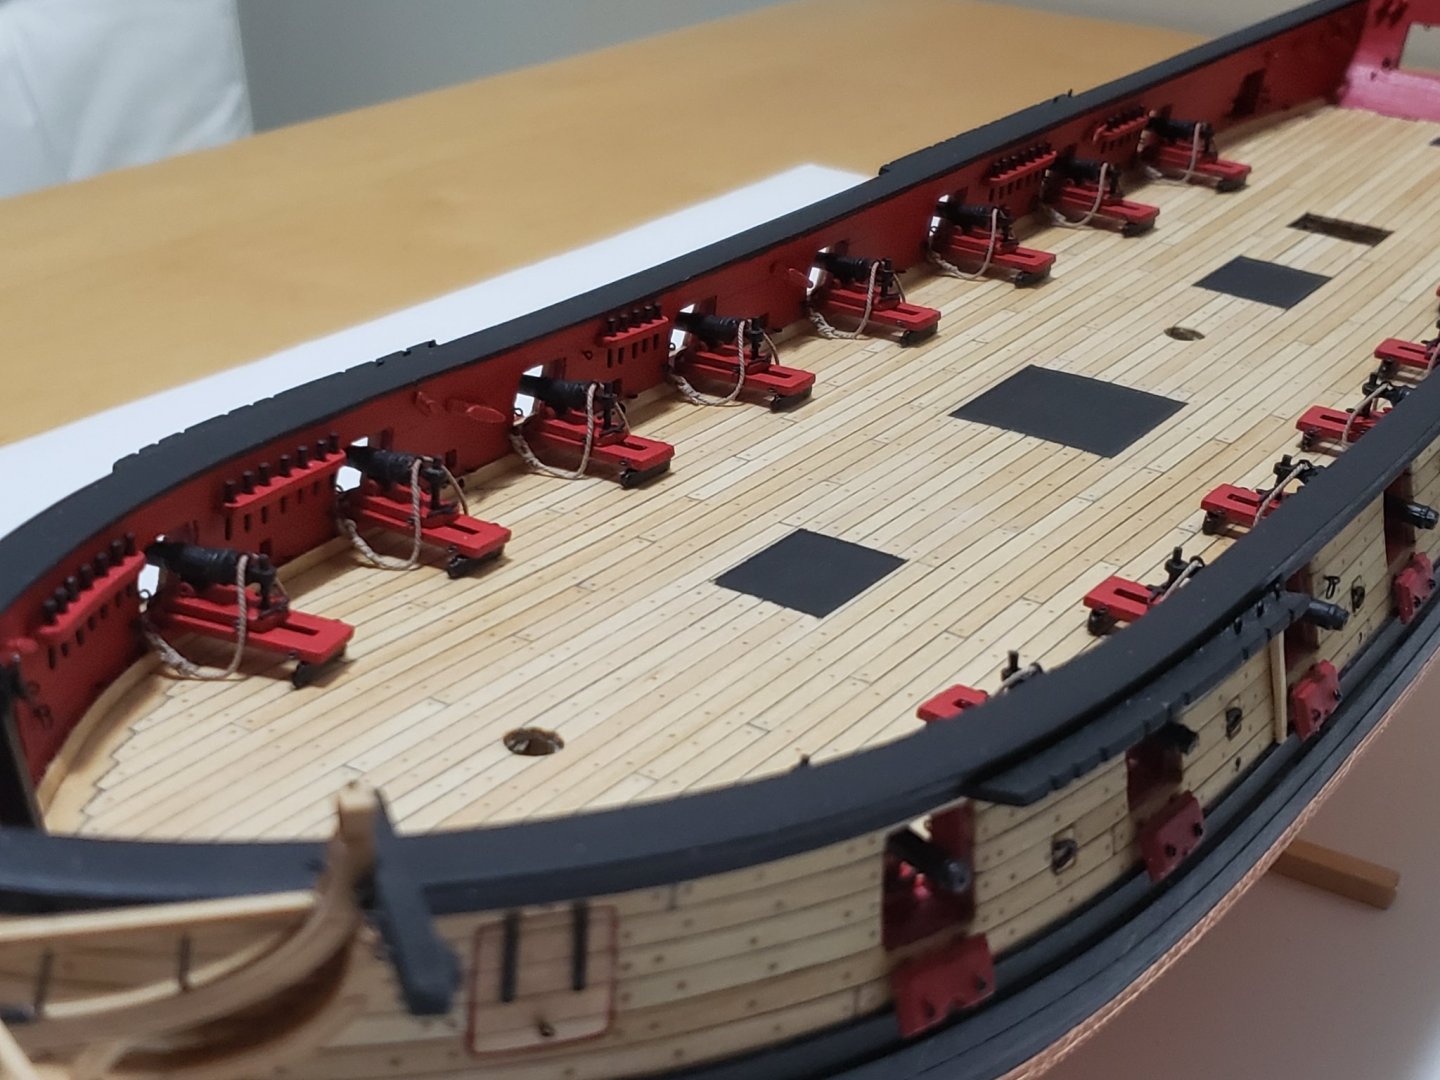
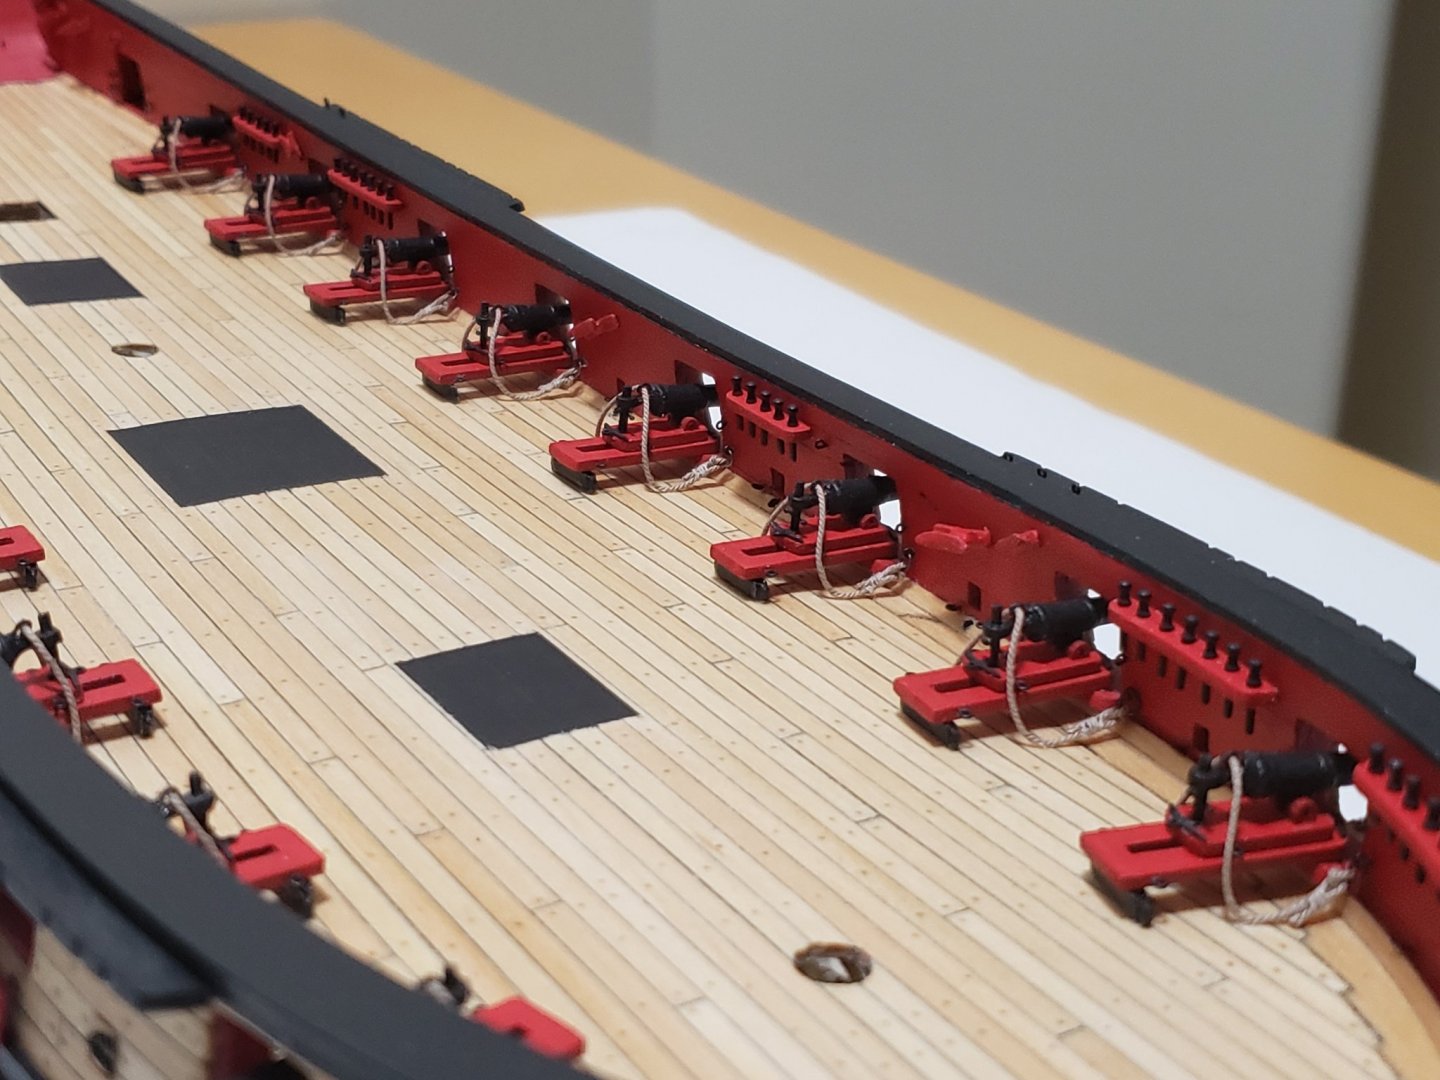
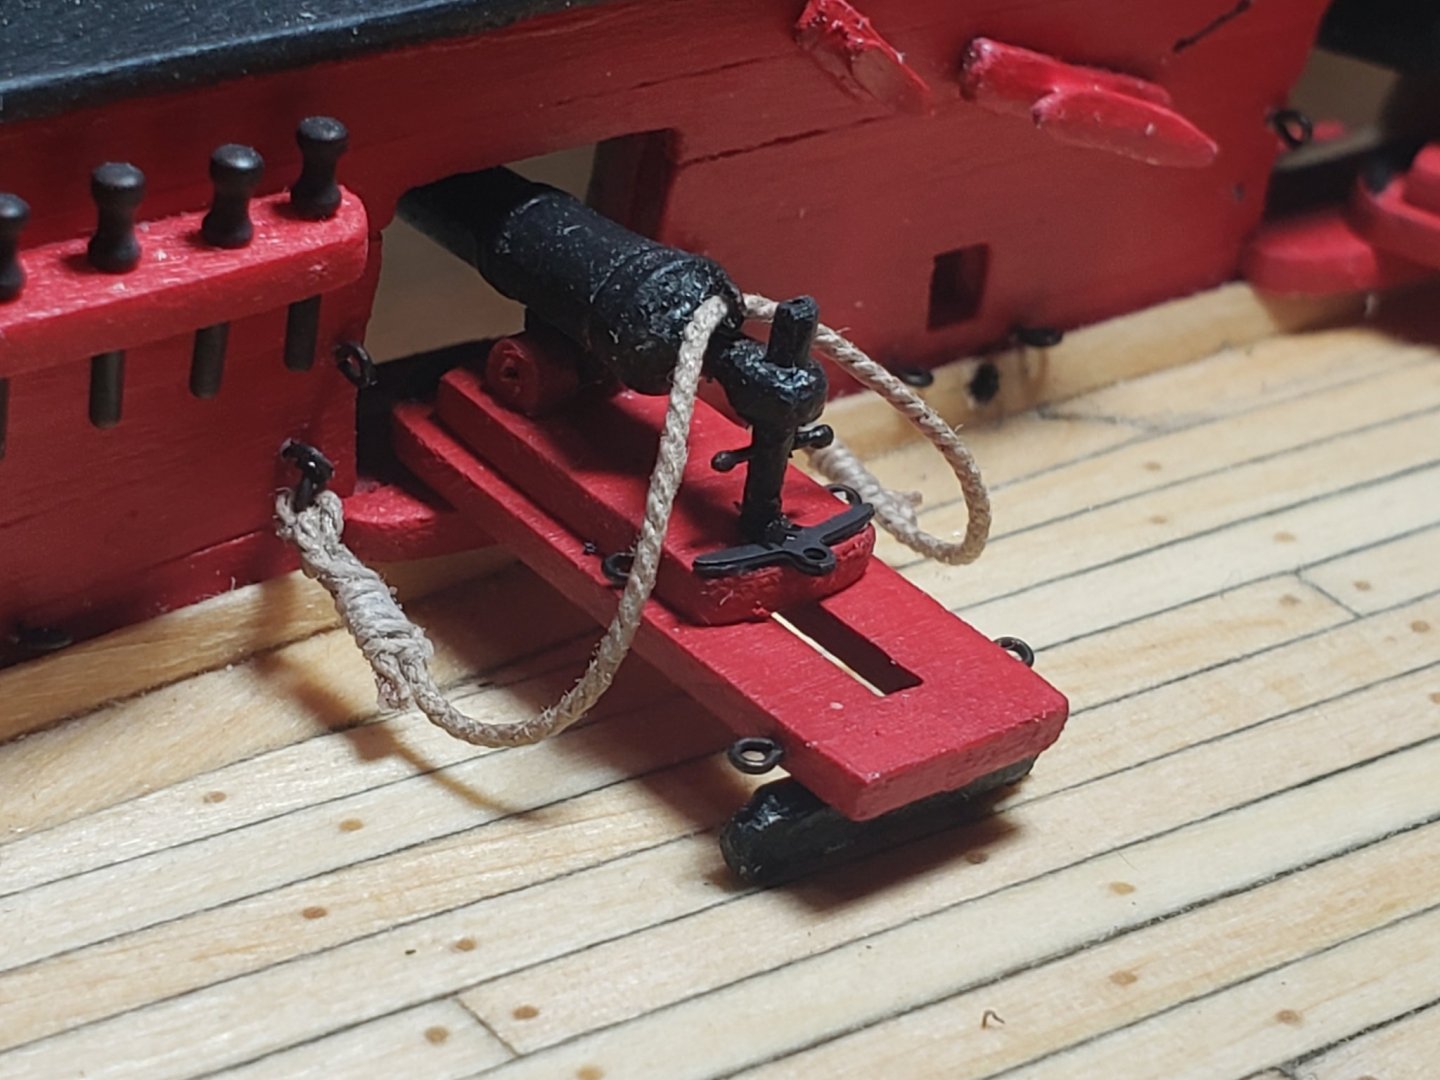
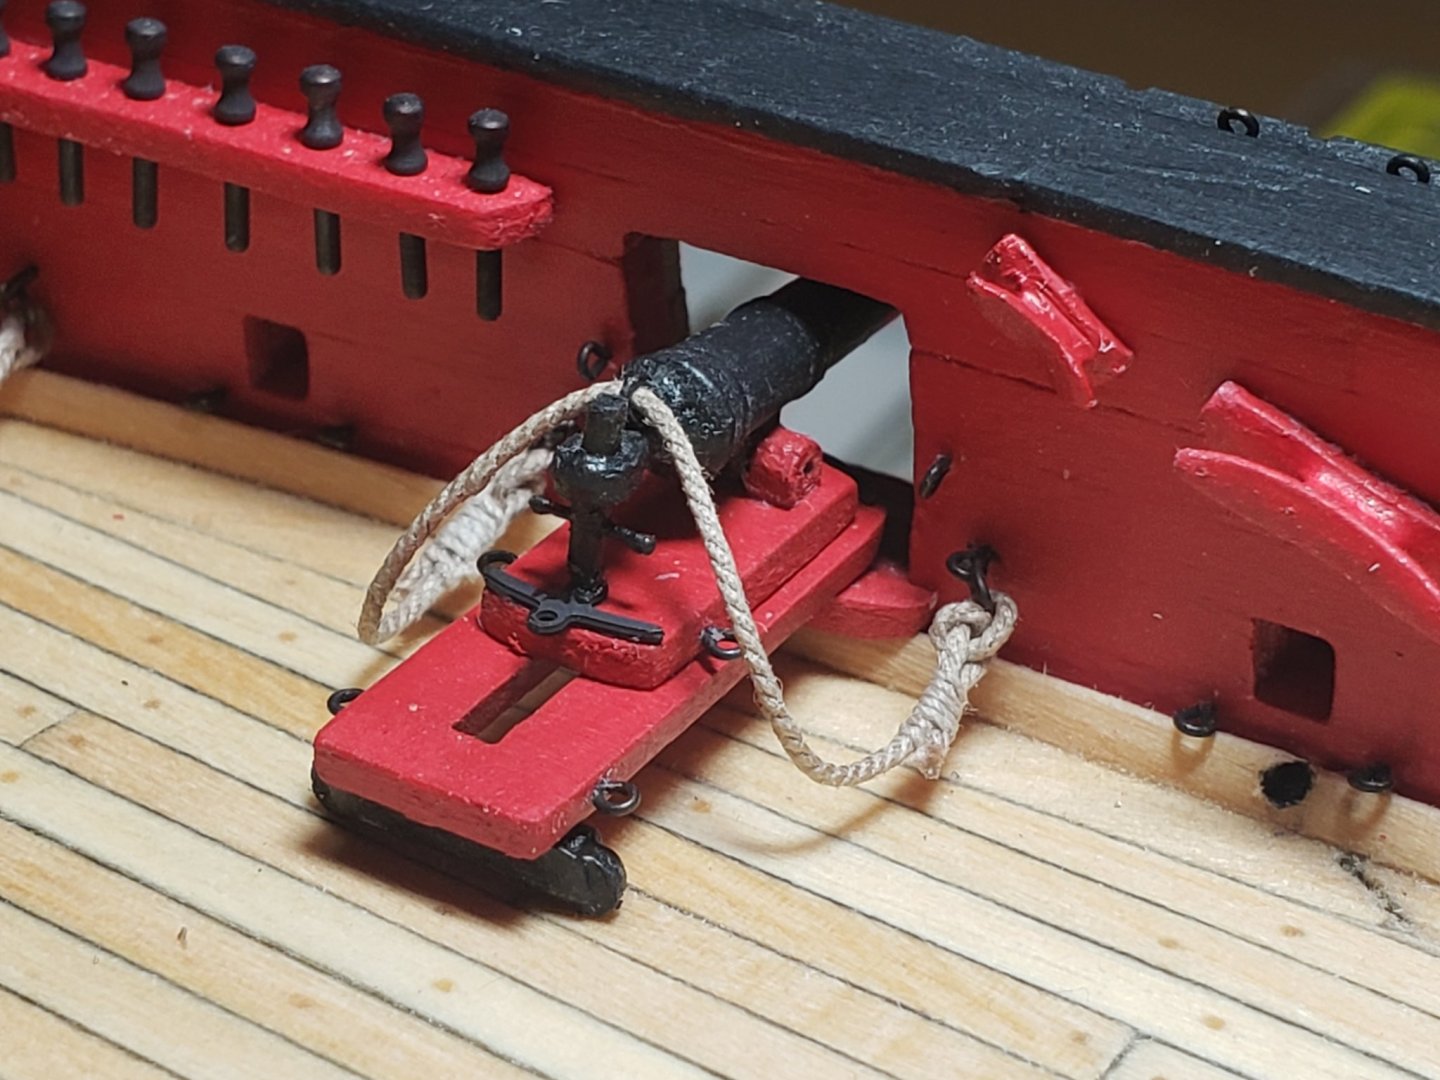
After finishing a couple more carronades, I think I got the process down for the tackles. Since I did not explain before, here it is: First, a simple overhand knot secures the line on the first block, then the thread is inserted into the other block using a needle threader, and back to the first block. I did some experimenting to find the right length of the tackle + coil. I found that having a coil of around 80mm was a good size, and needed a bit of extra thread for the rigging part. The extra thread length was longer for the tackle pair used to swivel the gun (30mm) than the pair to adjust the distance from bulwarks (15mm). For the coil I briefly soaked the 80mm end in some diluted white glue and twirled it around a pin sandwiched between two hard clear plastic sheets (which I got from a spinach container 😁). Here is an image that probably explains the lengths better: Here are some progress photos of where I have reached (25% done)
- 950 replies
-
- 14
-
-
- syren
- model shipways
- (and 1 more)
-
Thanks Robin!!! 😃
-
Thank you Hamilton!!
-
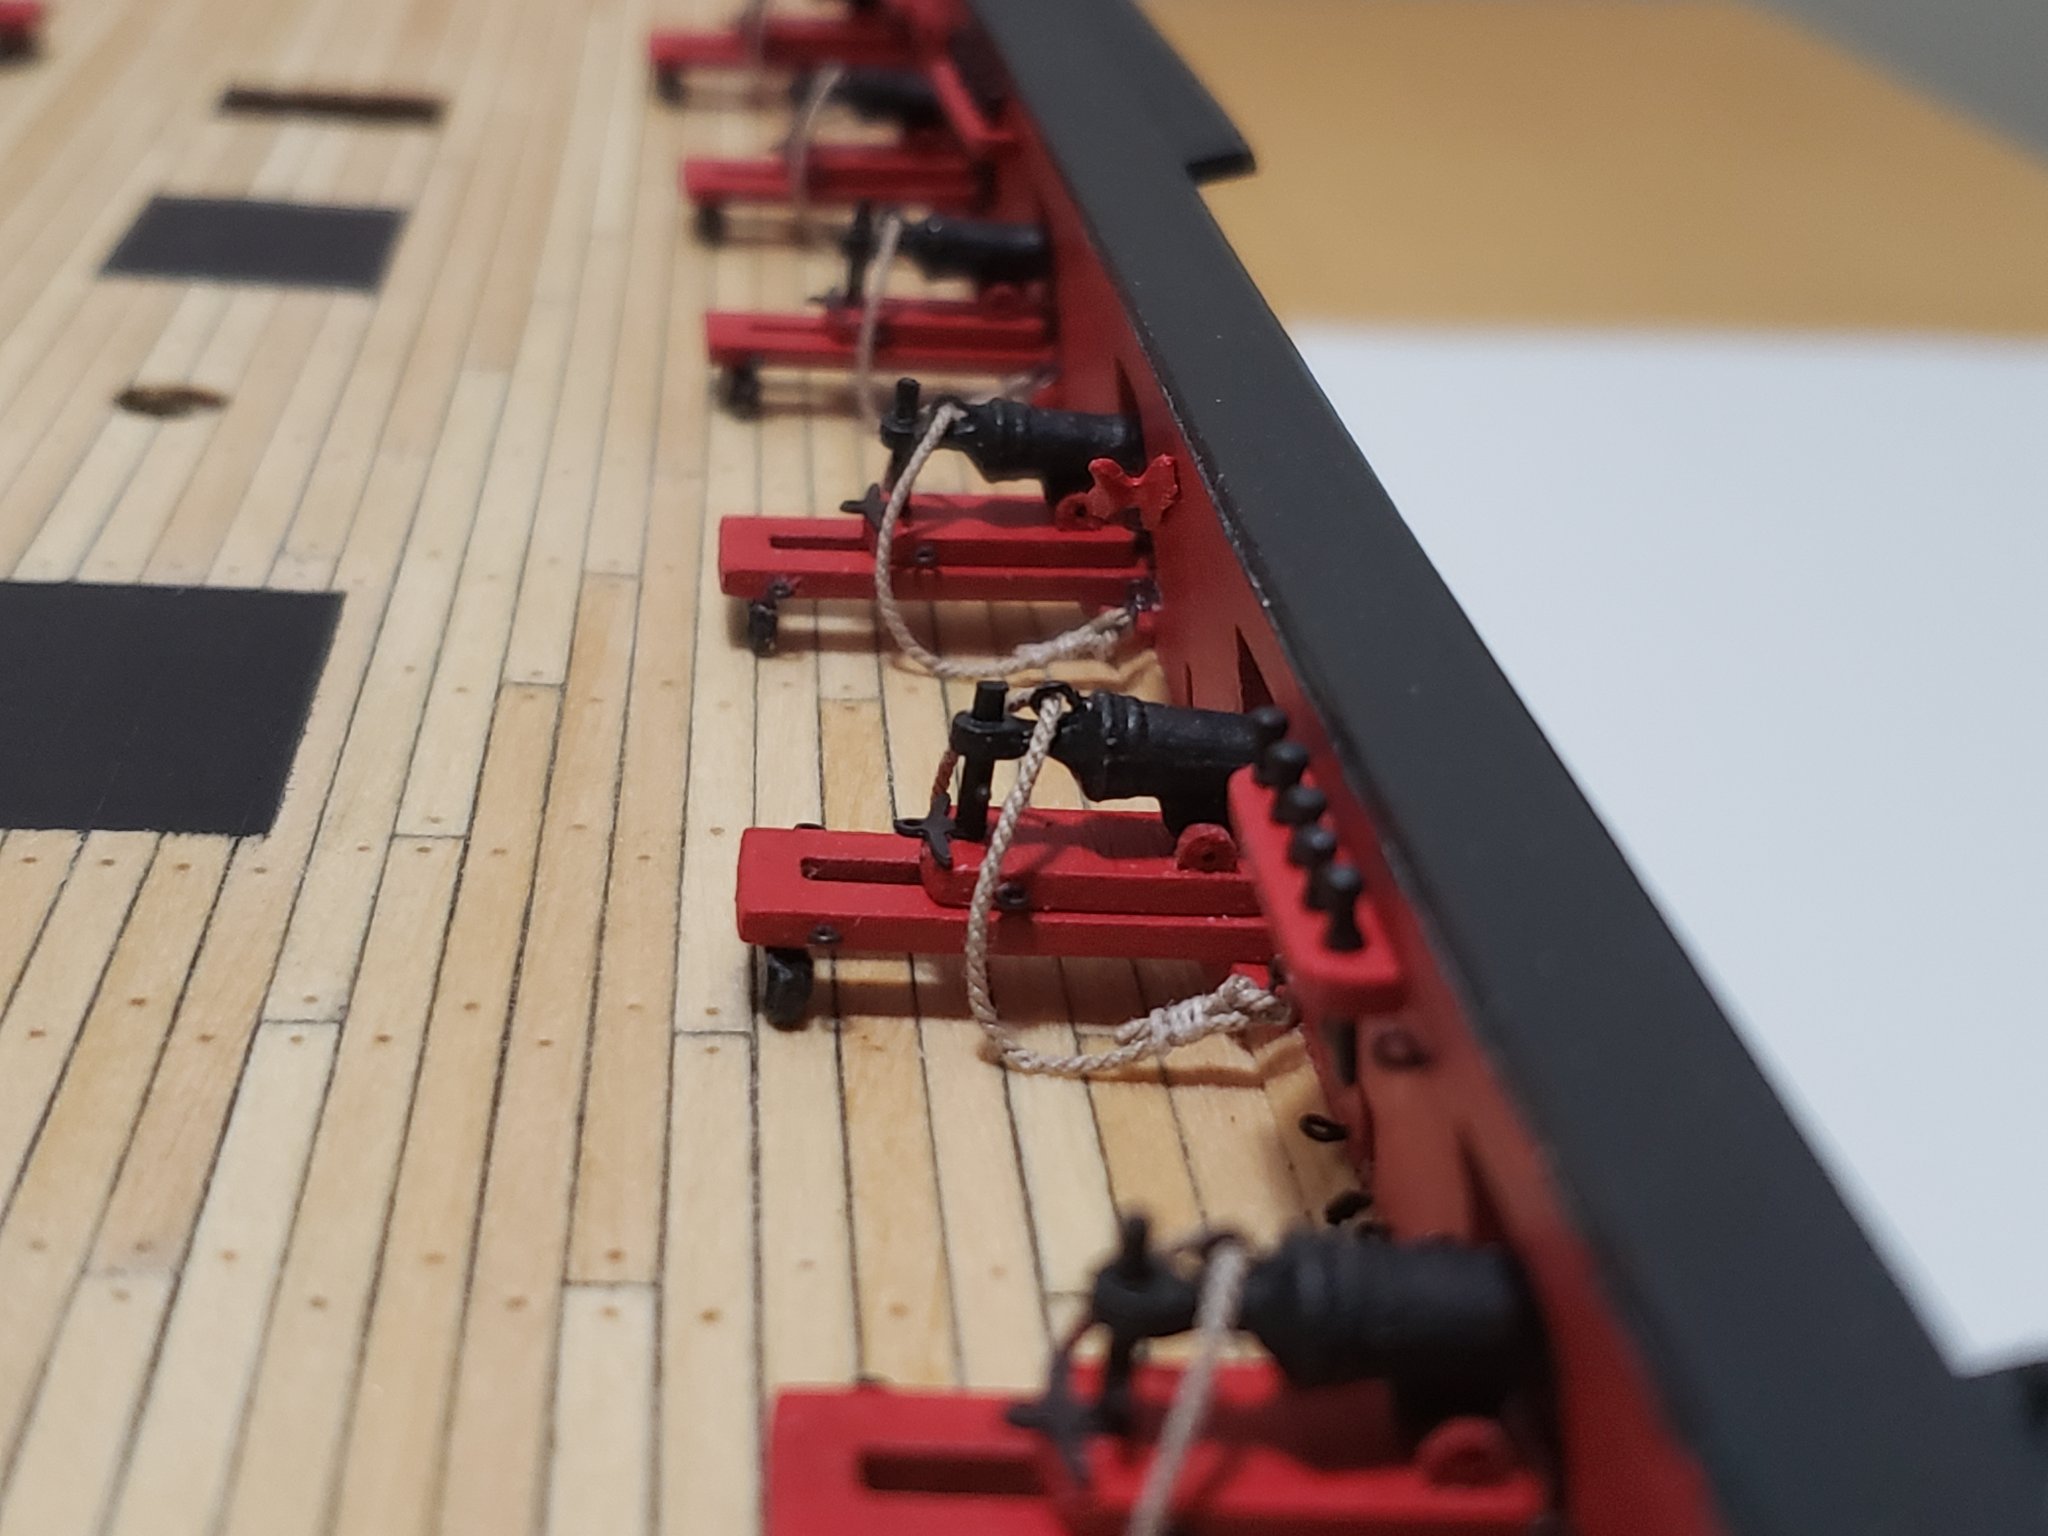
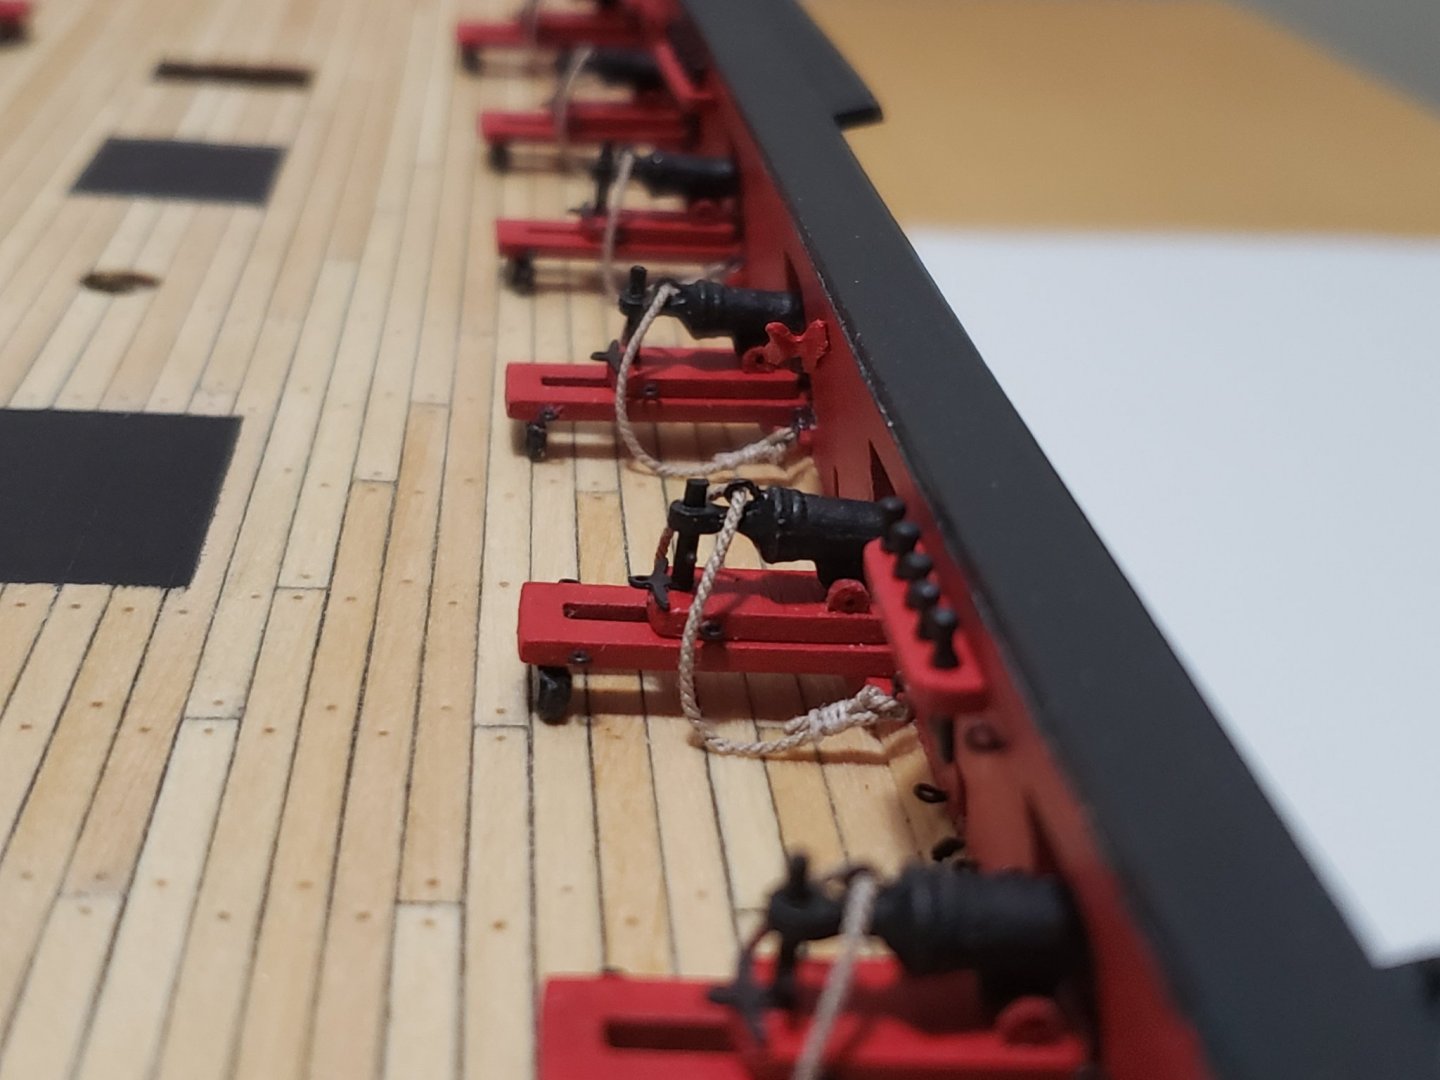
Tackles for one carronade are done 😁 Idk if it's too soon, but I've already stuck all the coils since I was happy with how they turned out. Now 15 more left

- 950 replies
-
- 9
-
-
- syren
- model shipways
- (and 1 more)
-
Thank you for the compliments!! I also struggle a lot with knots and it took quite a few tries before I was happy with the results
-
Thanks Patrick!! For sure! From what I found out, there's multiple ways to approach the breech lines
-
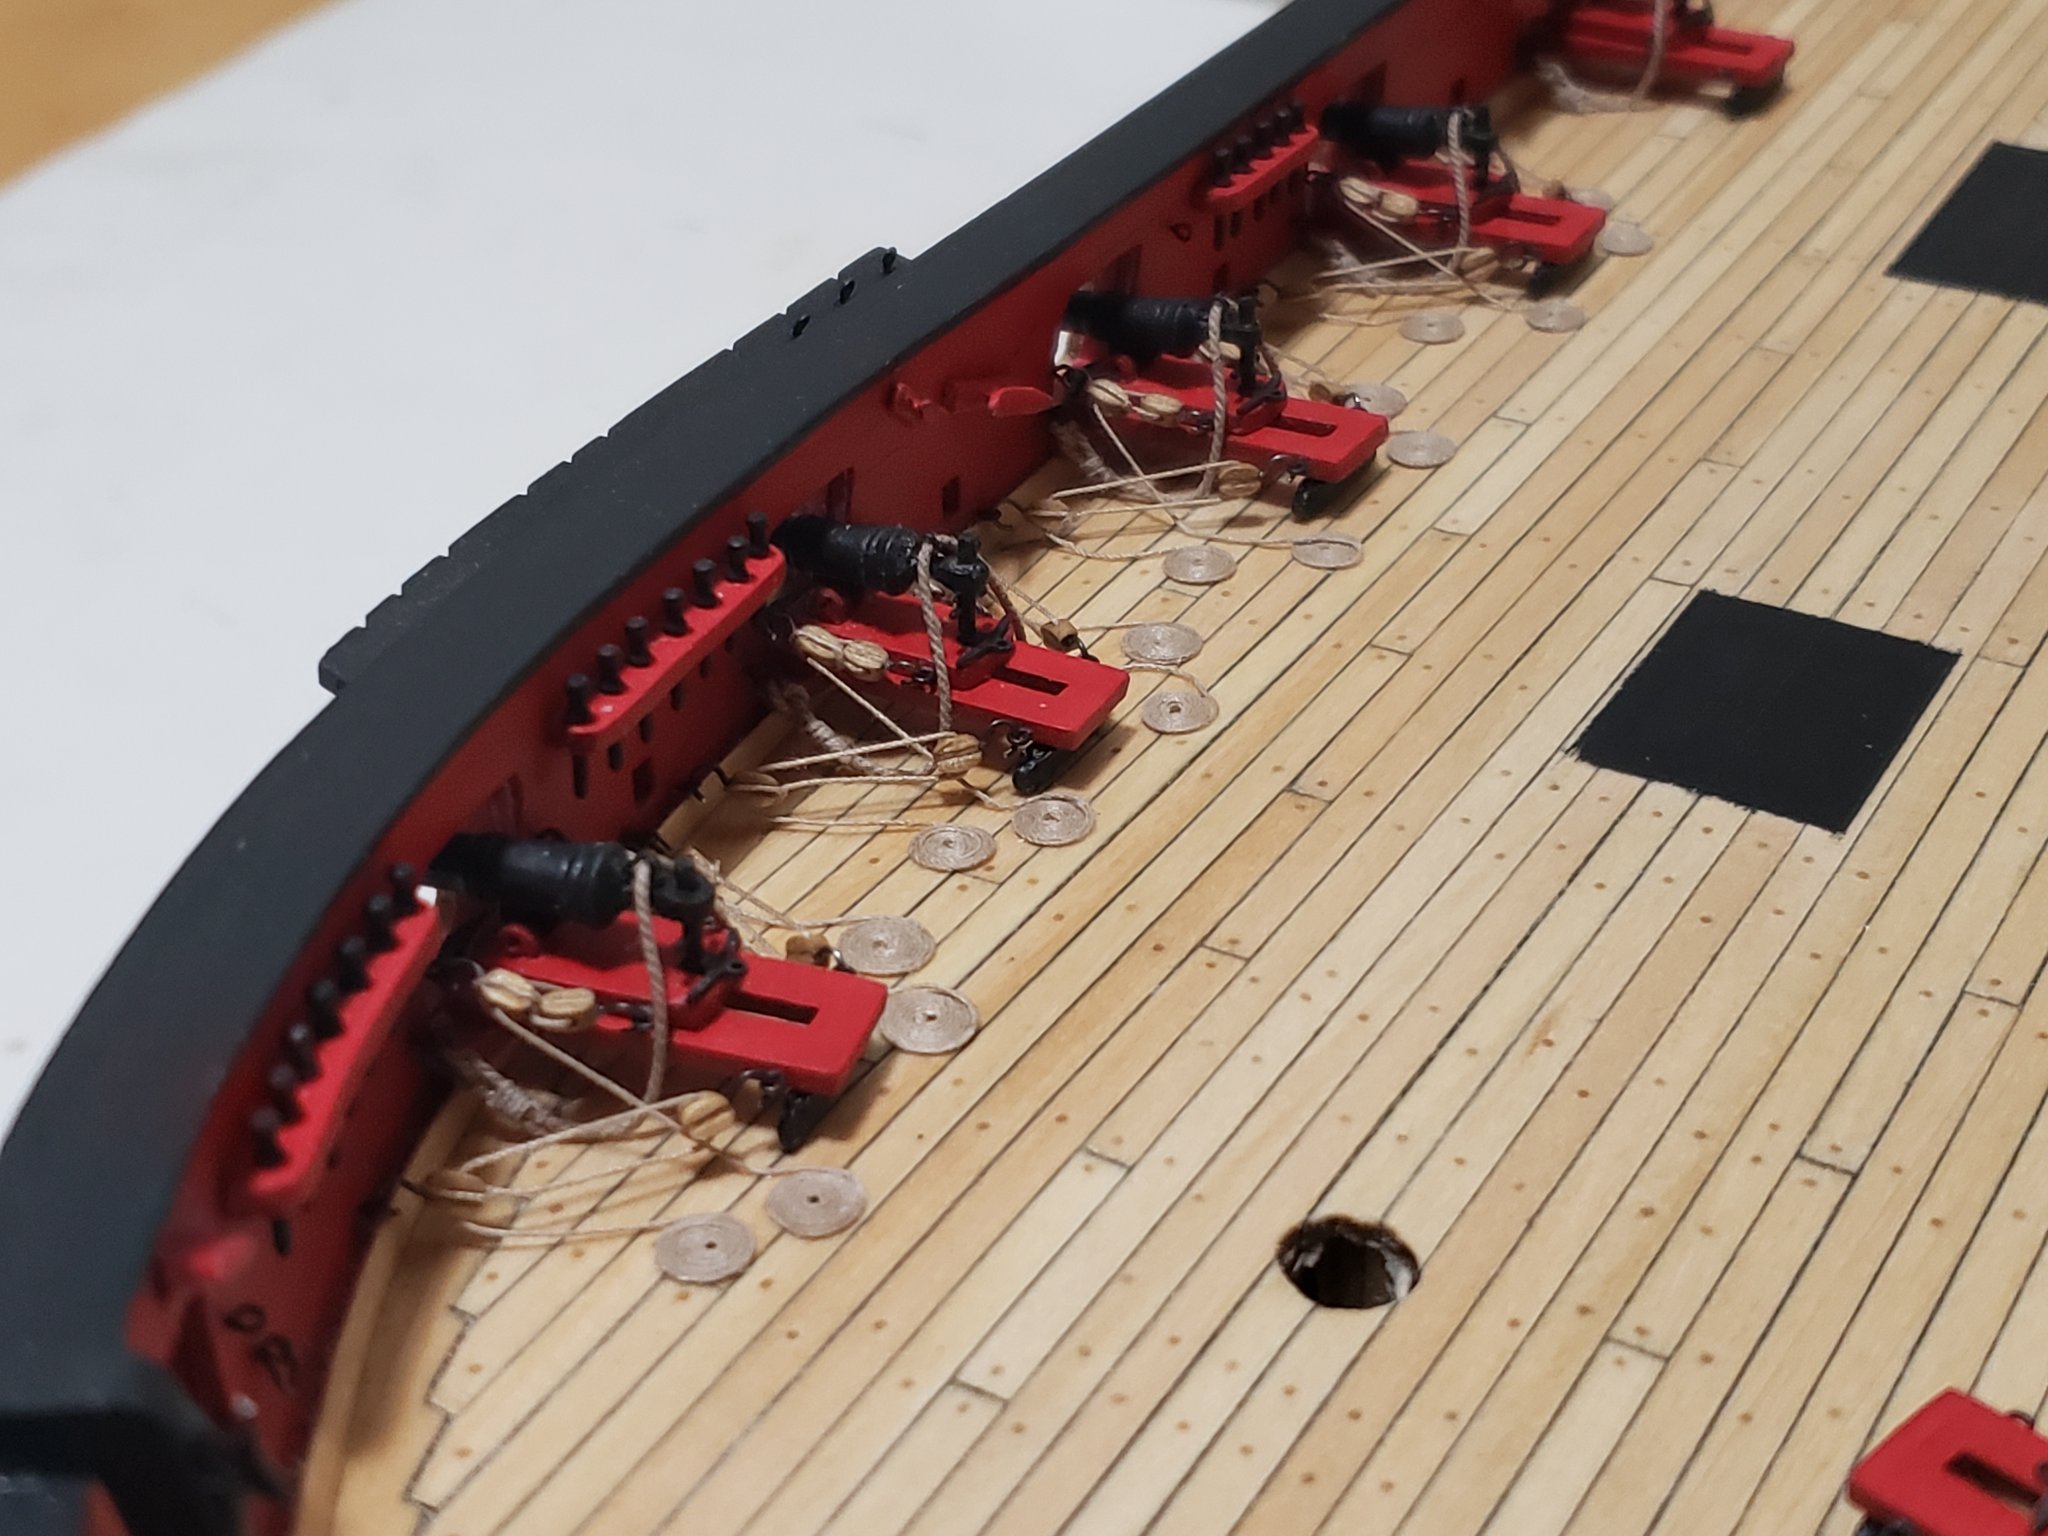
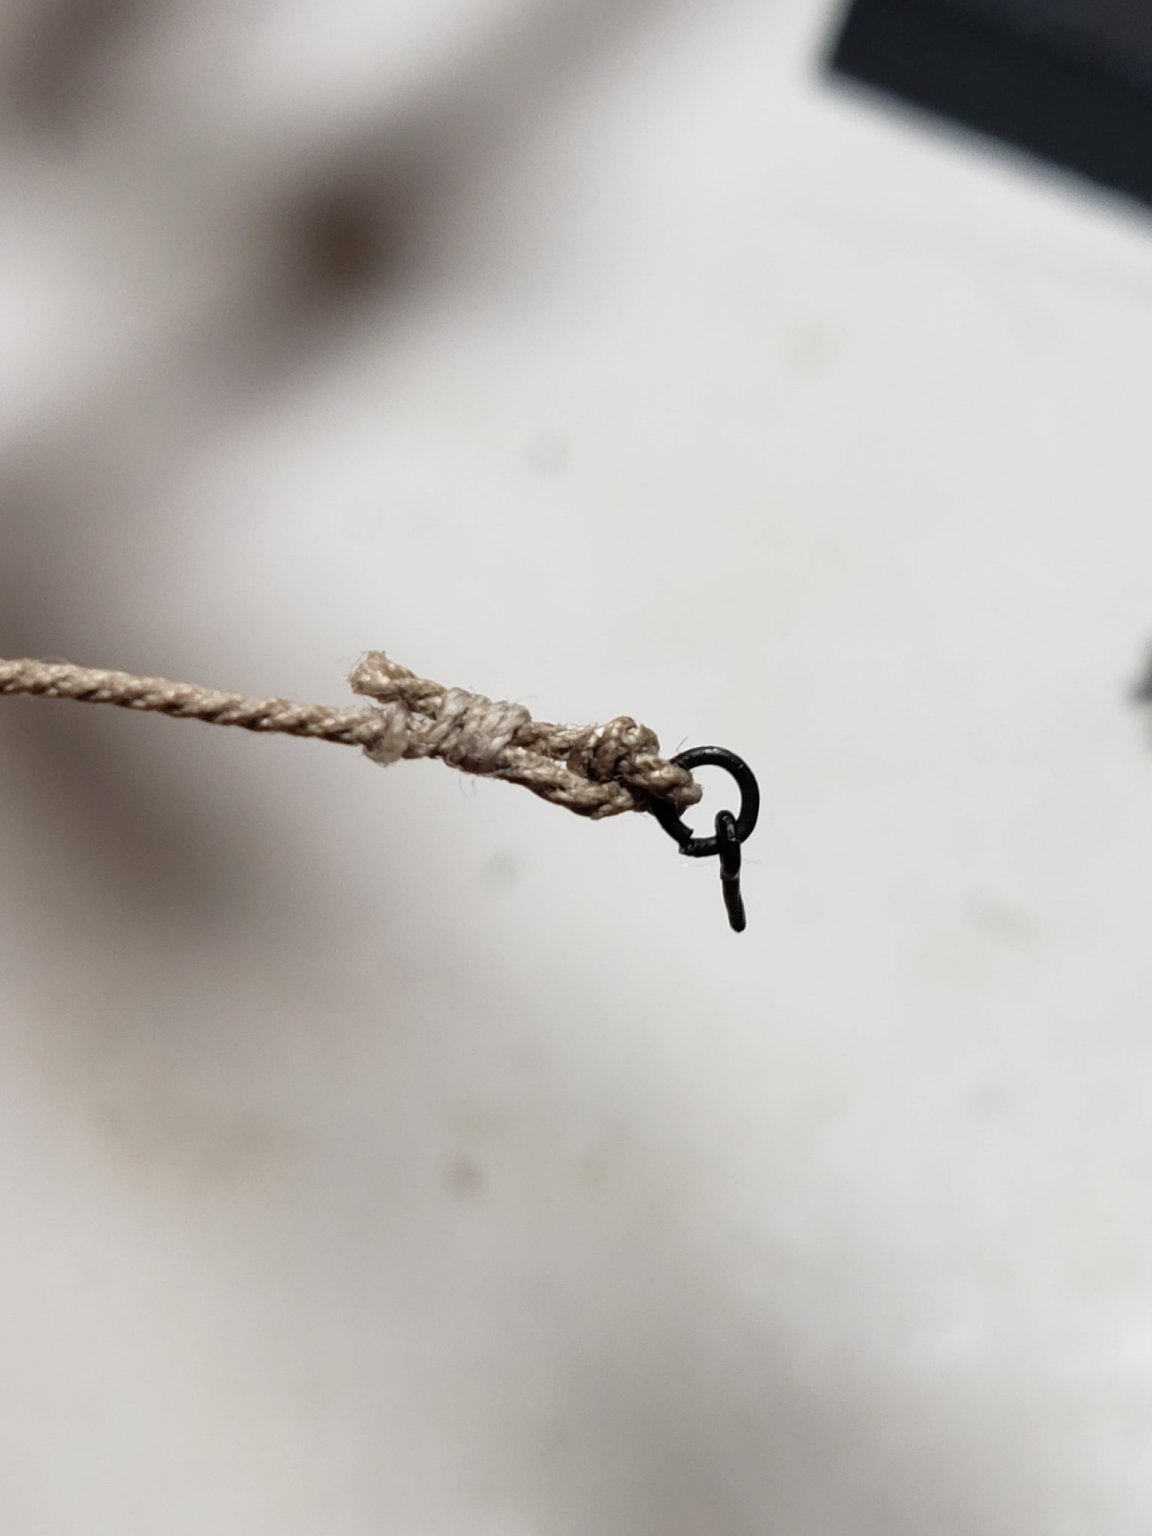
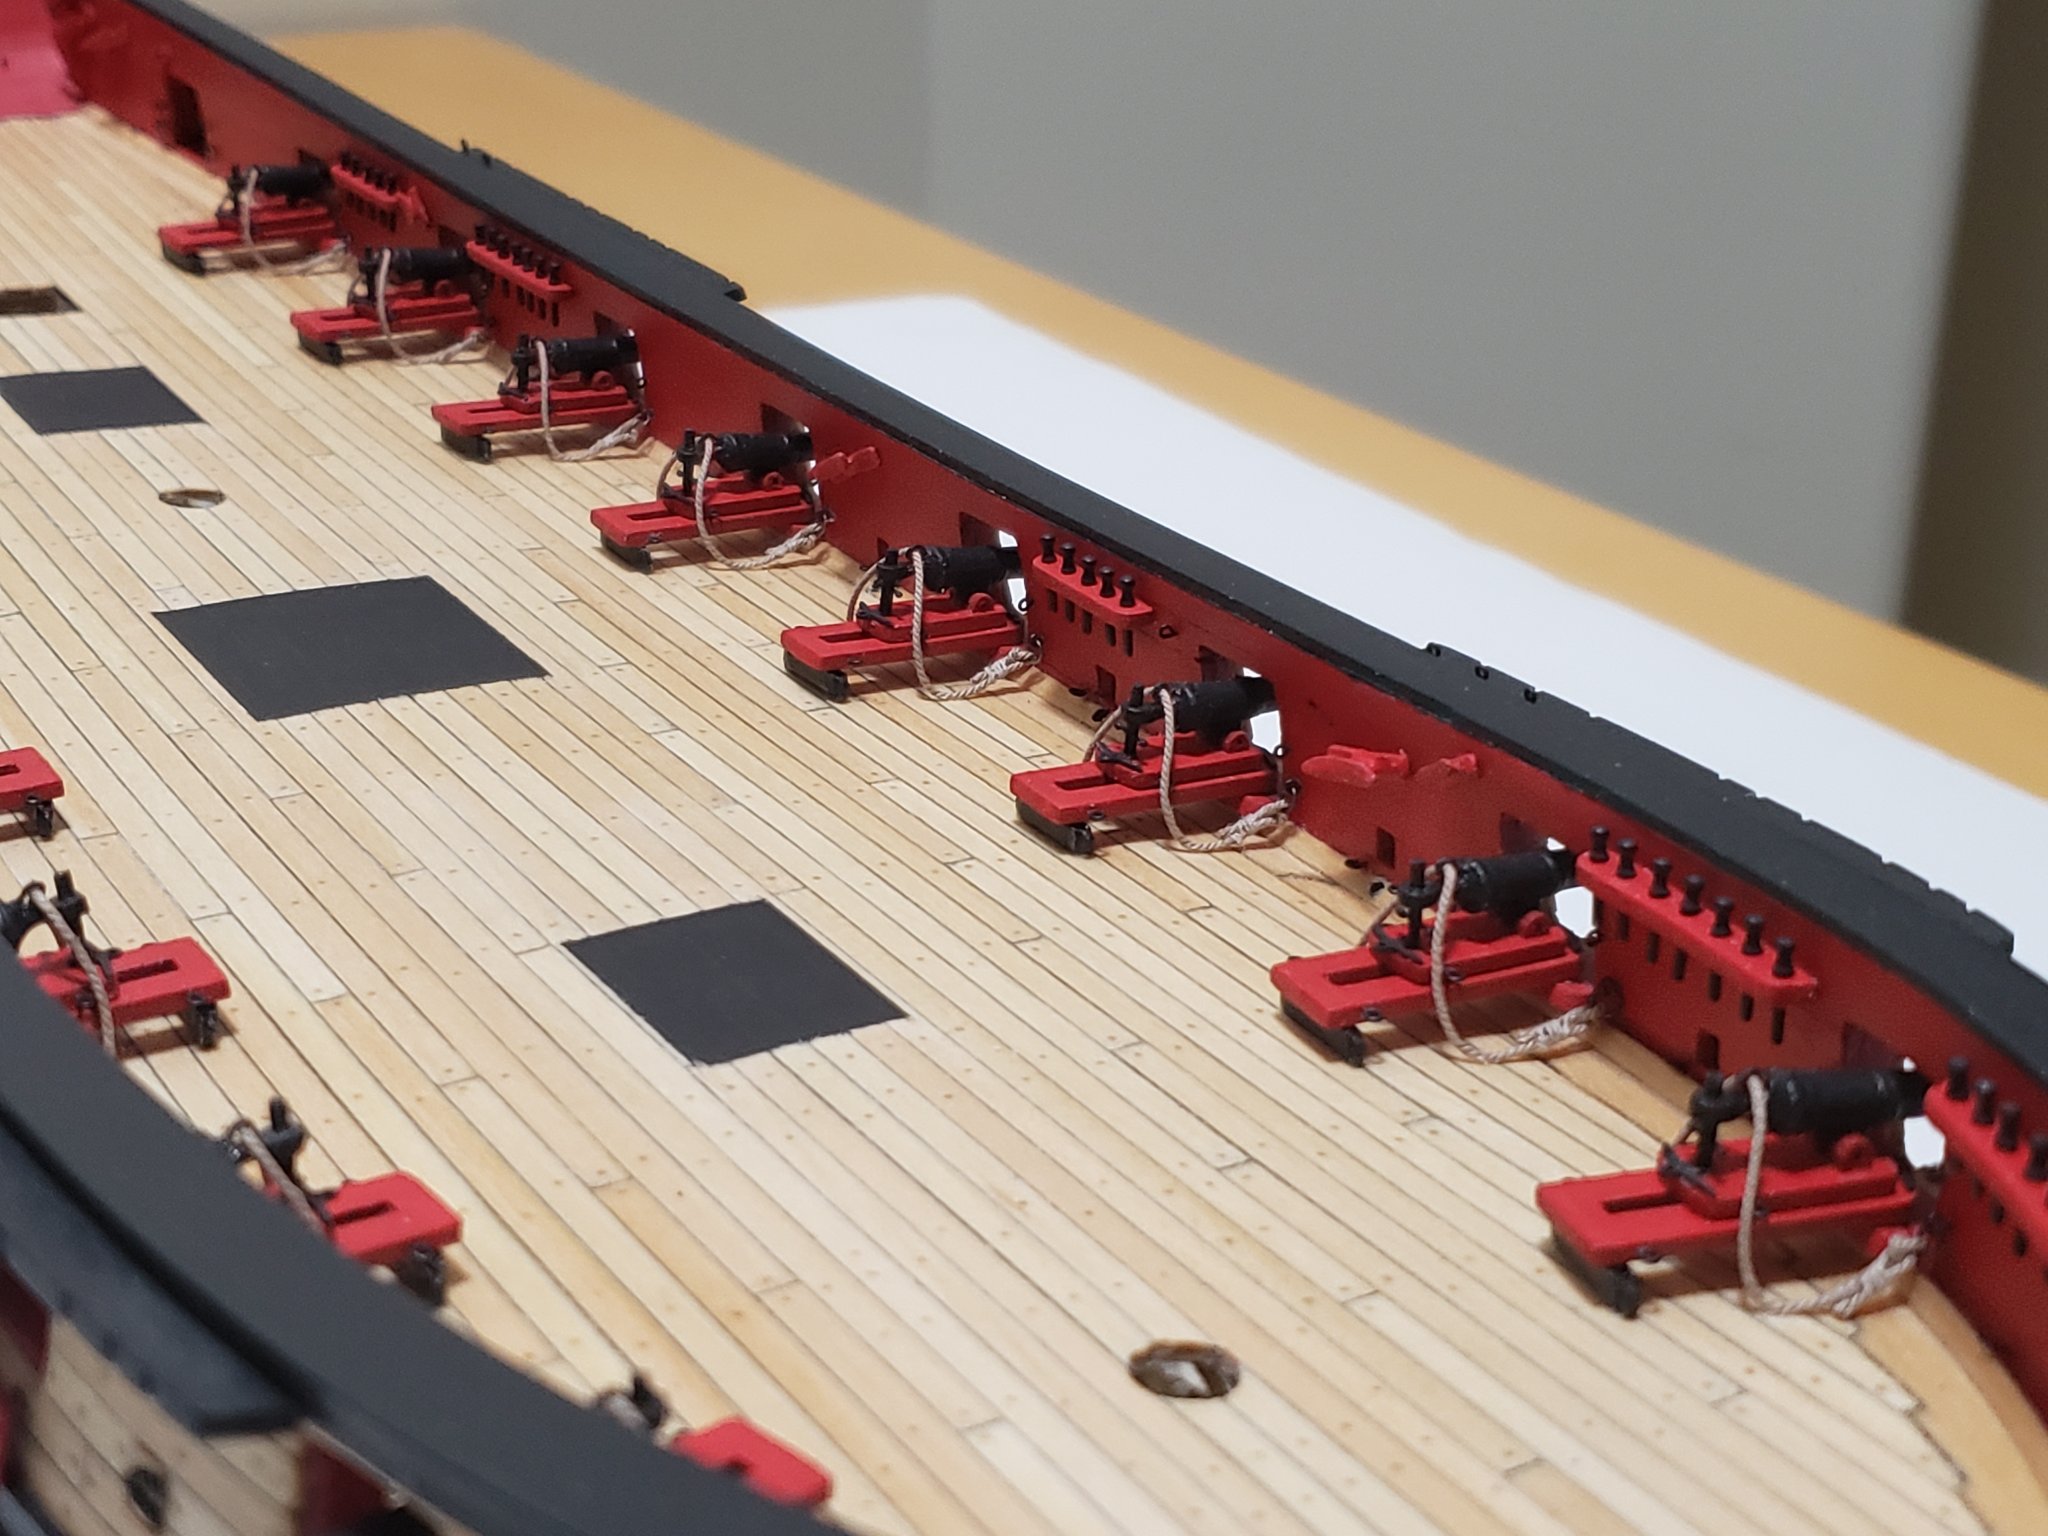
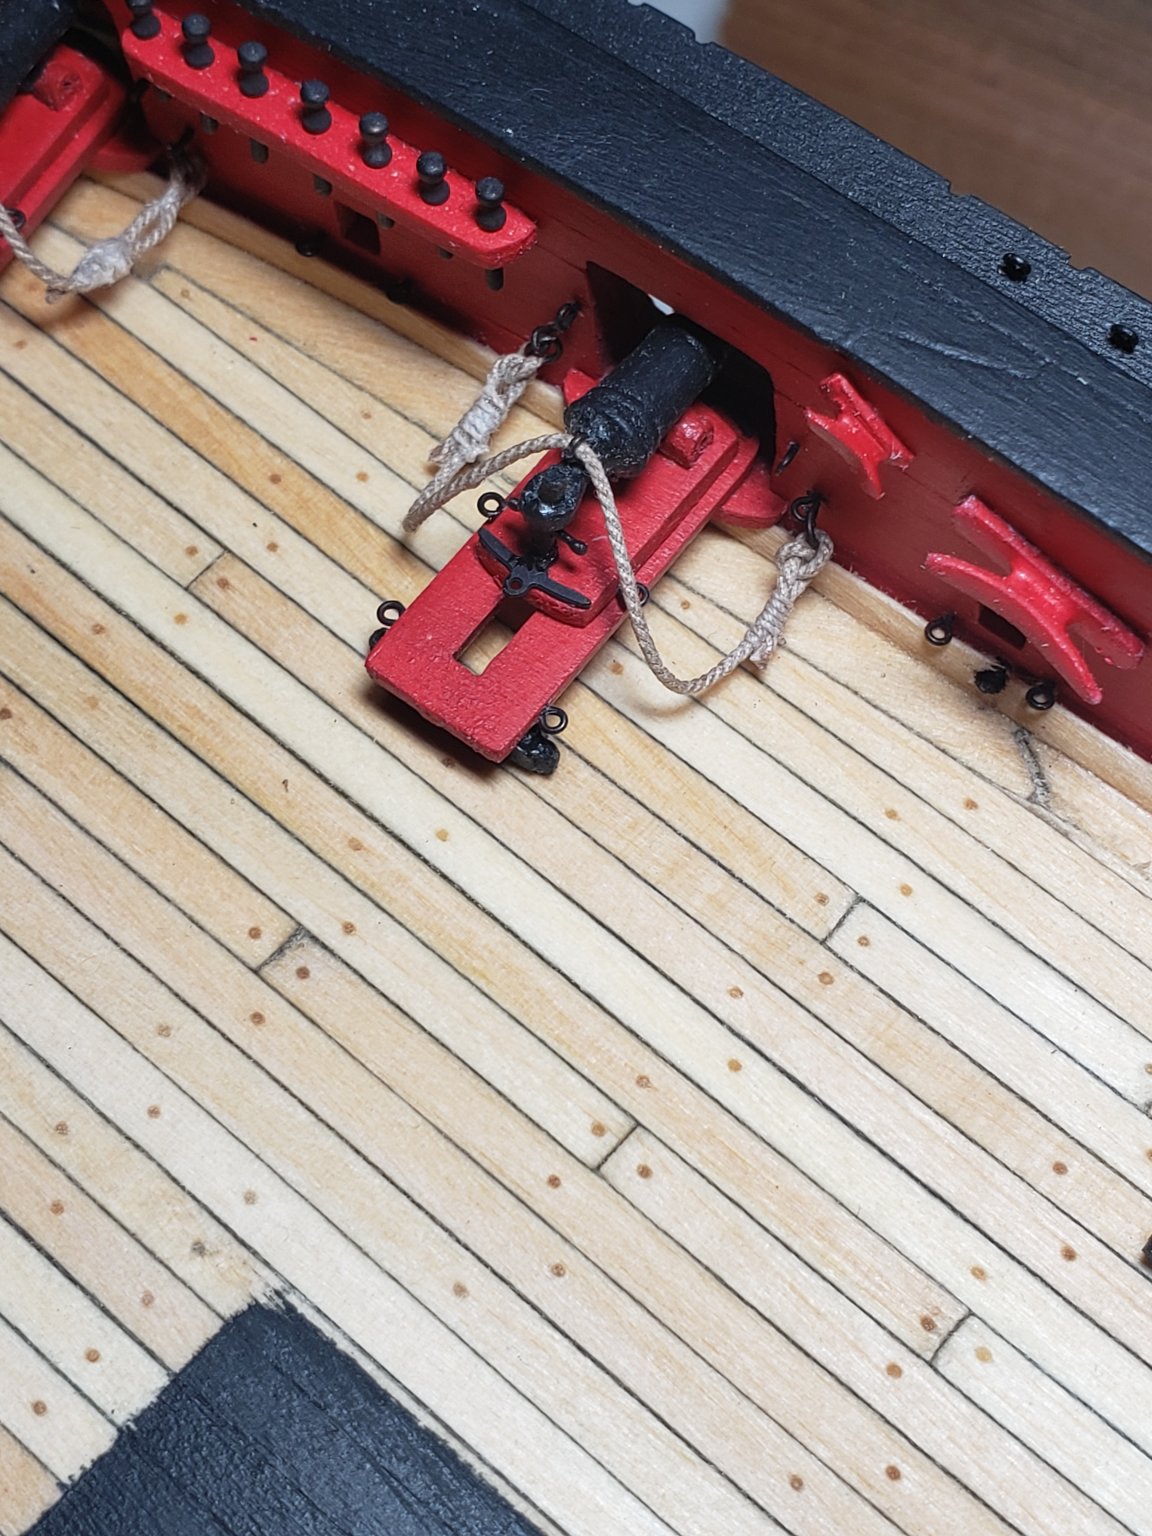
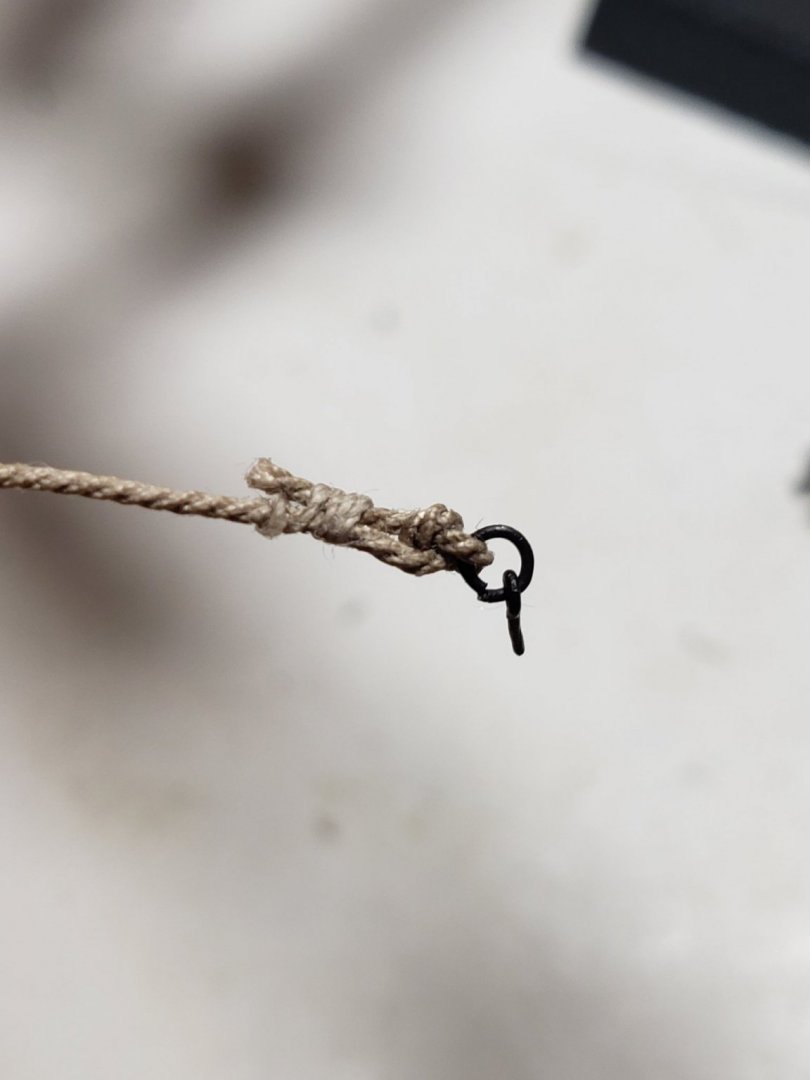
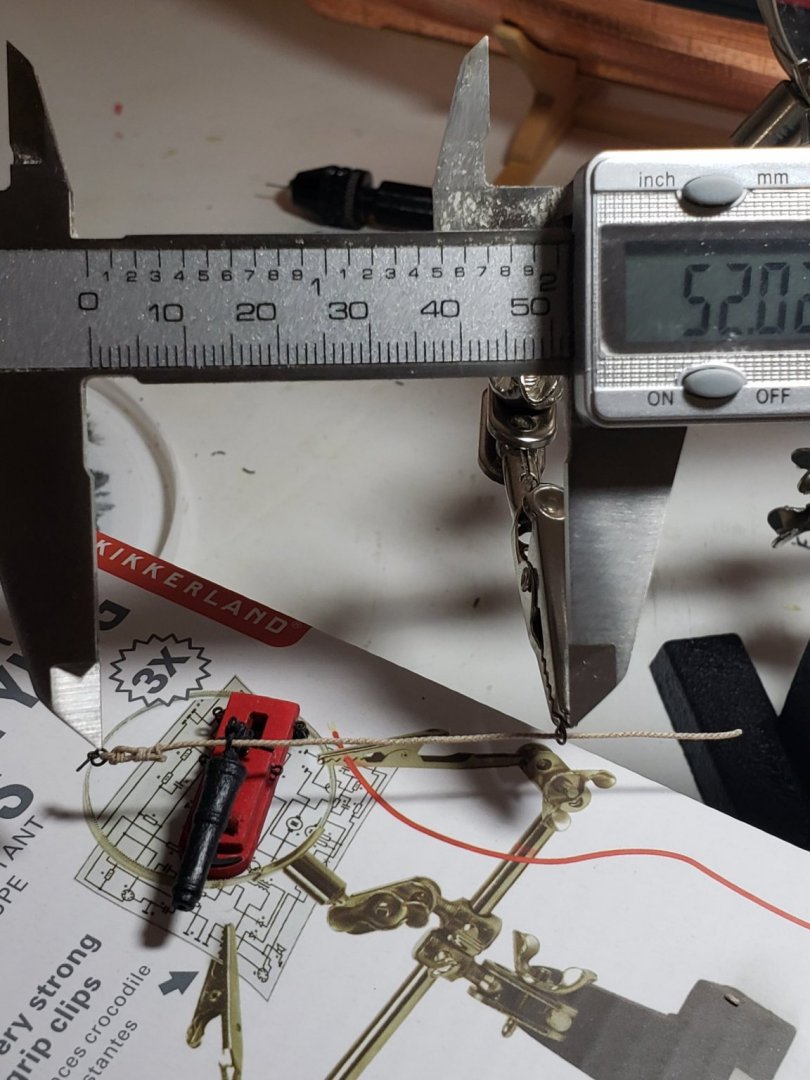
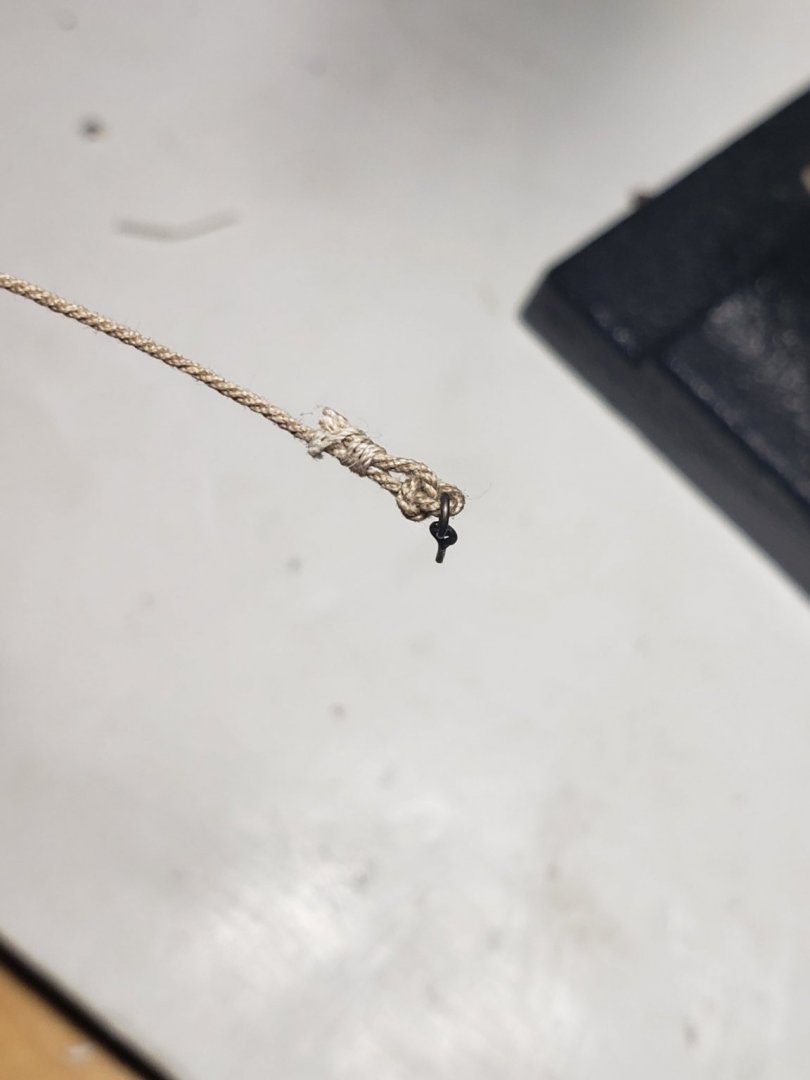
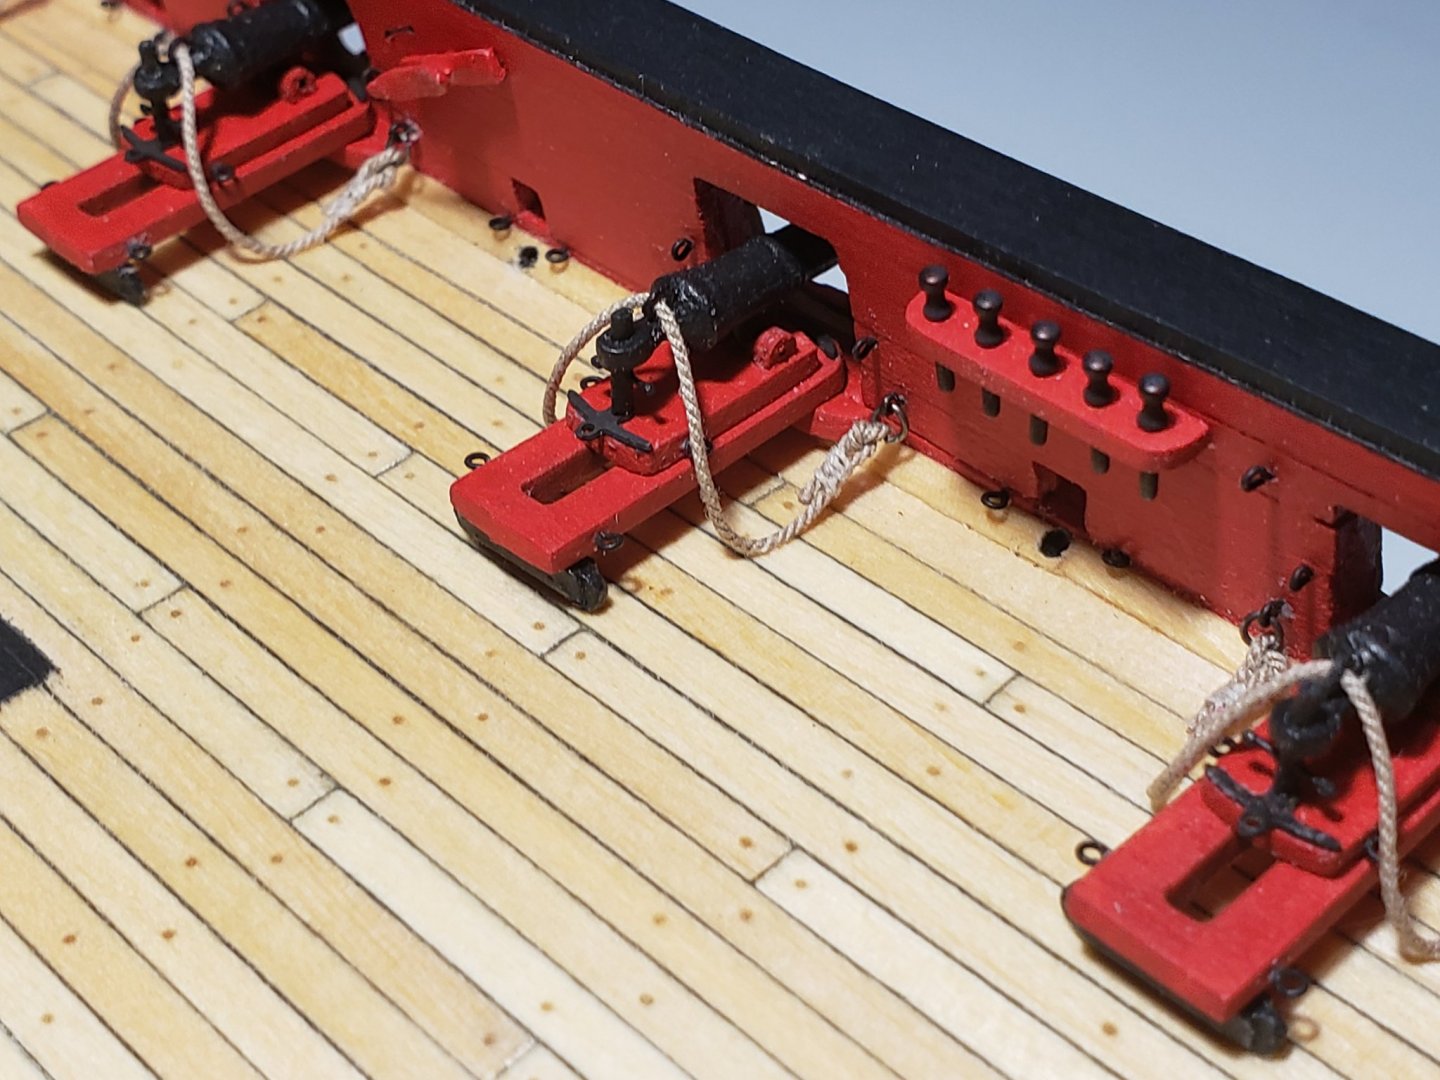
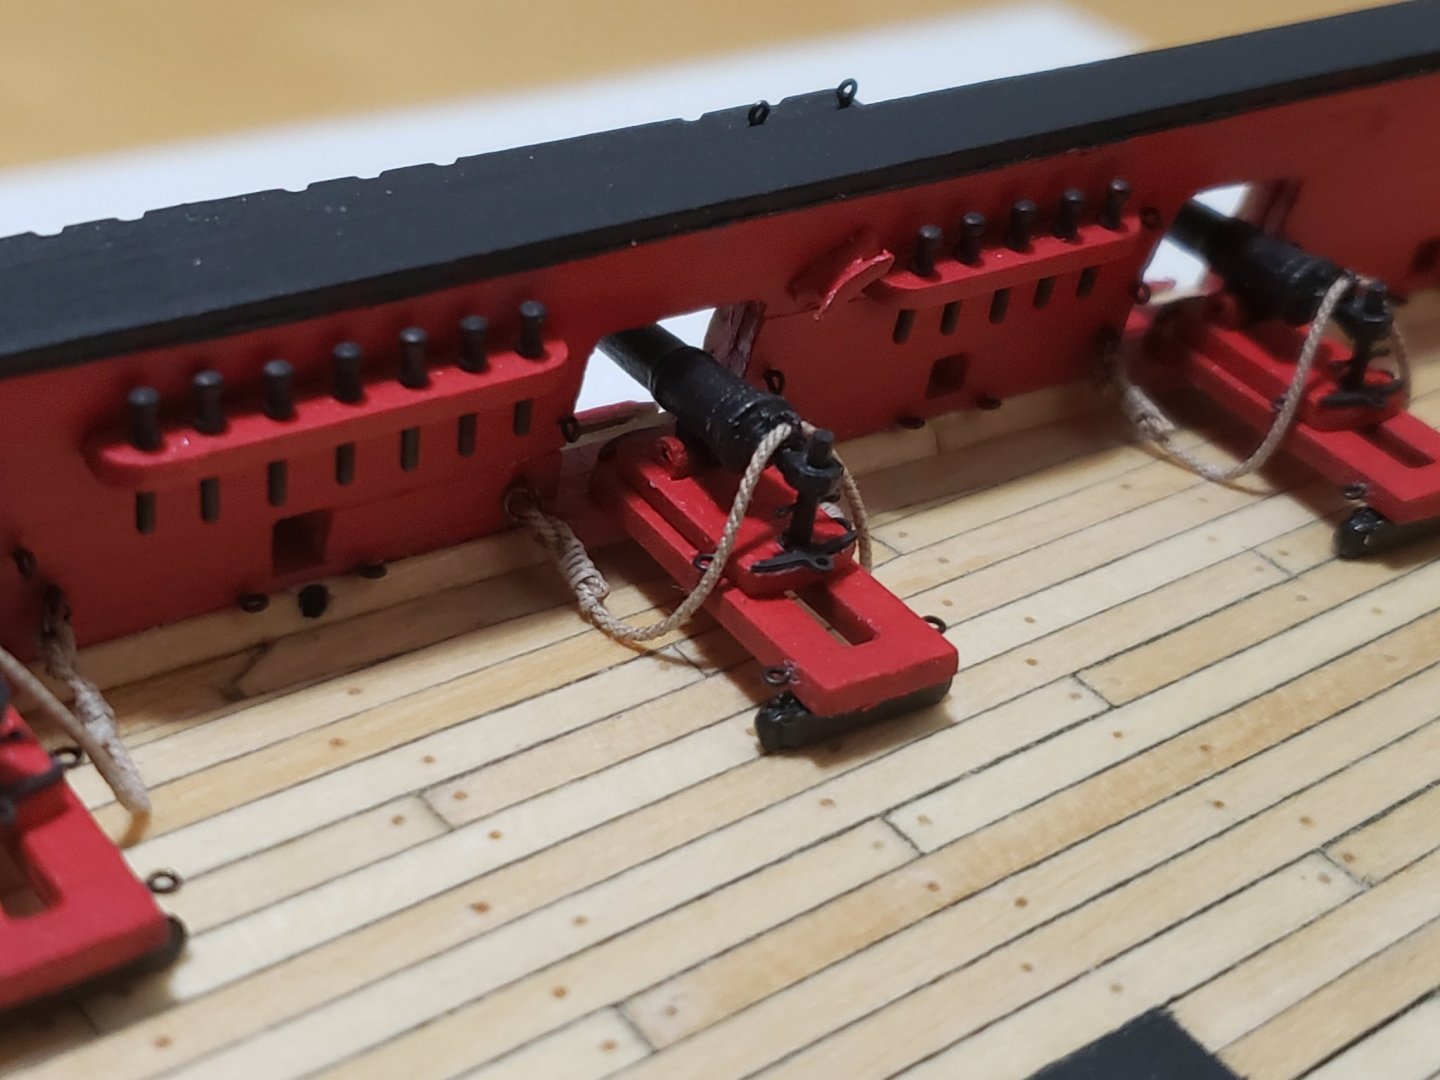
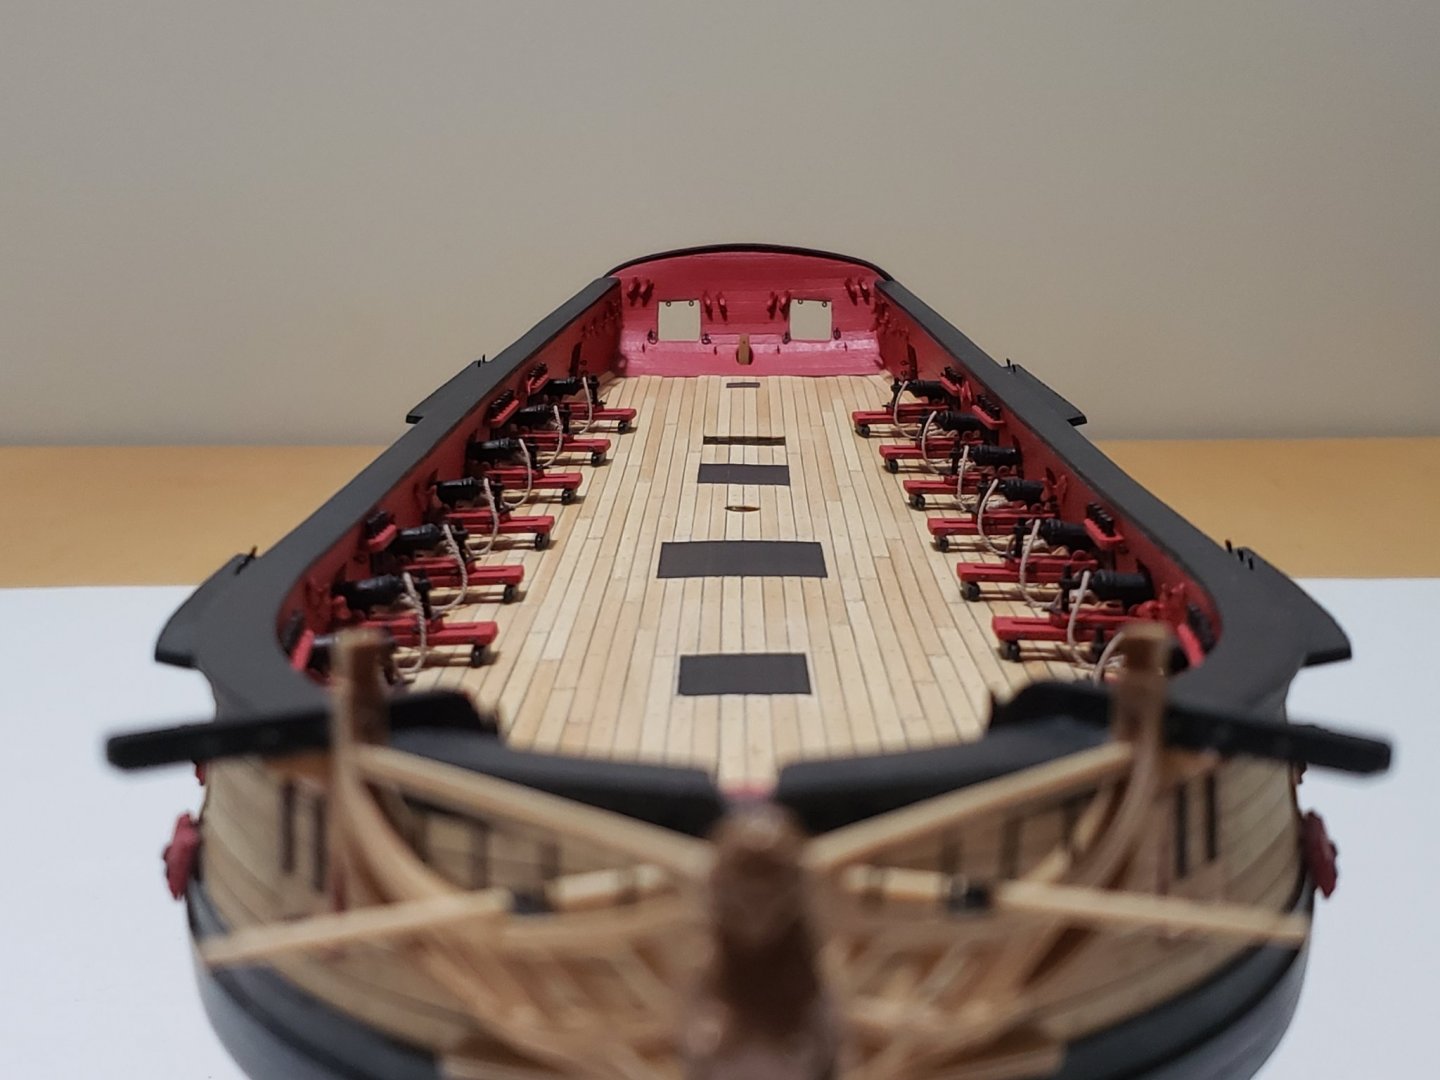
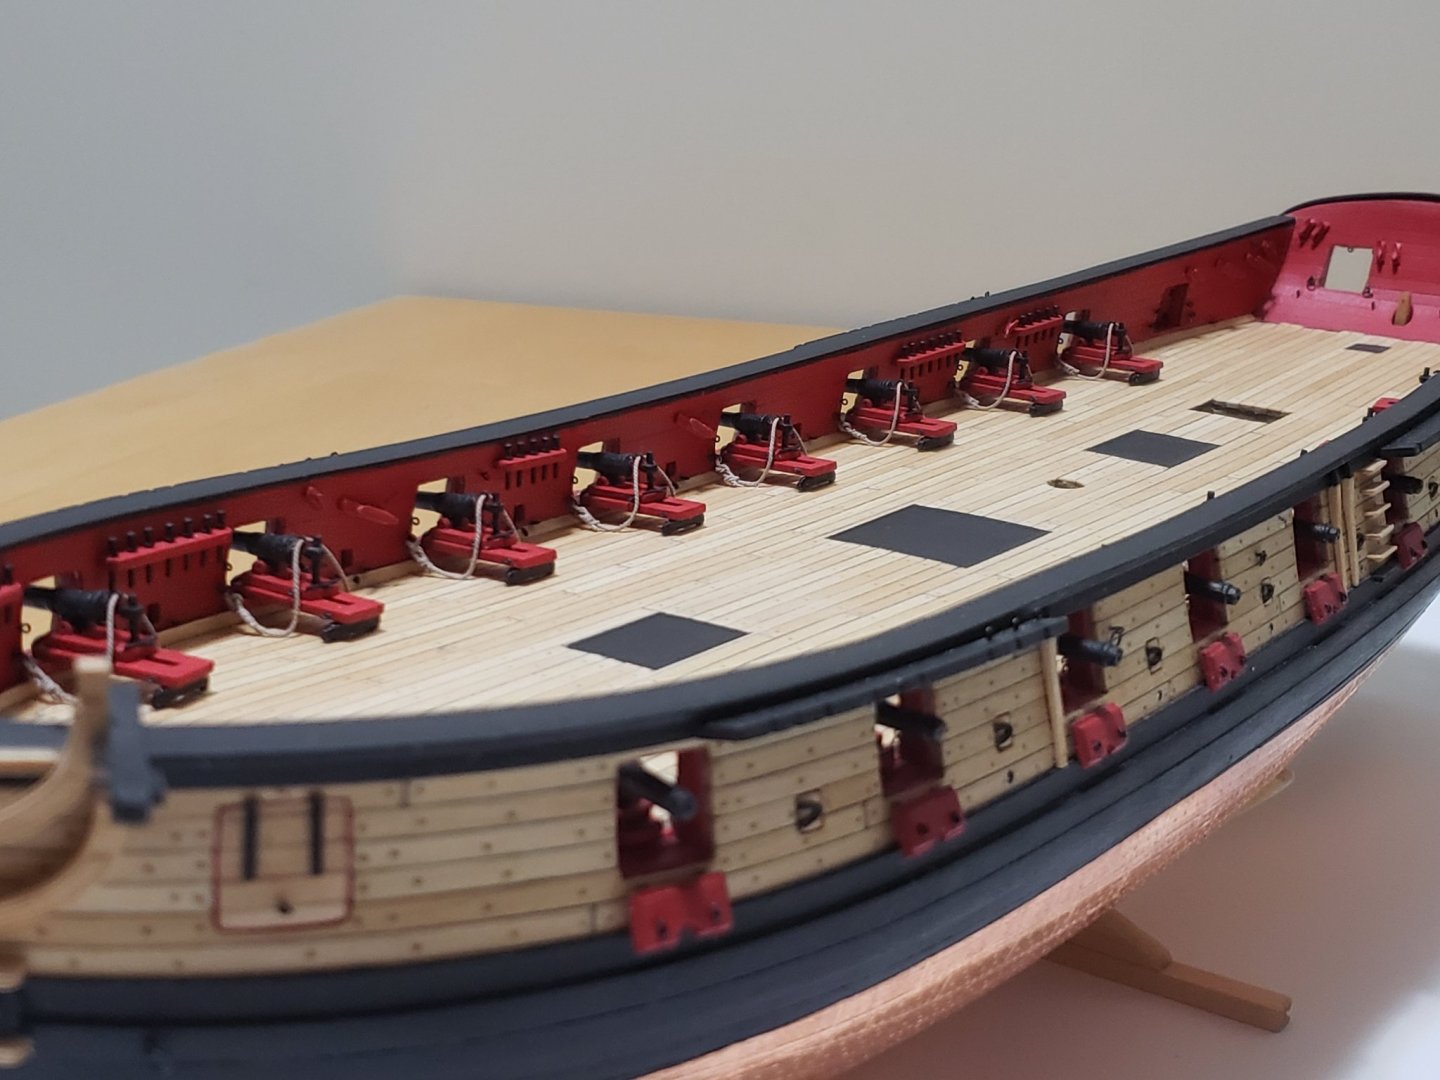
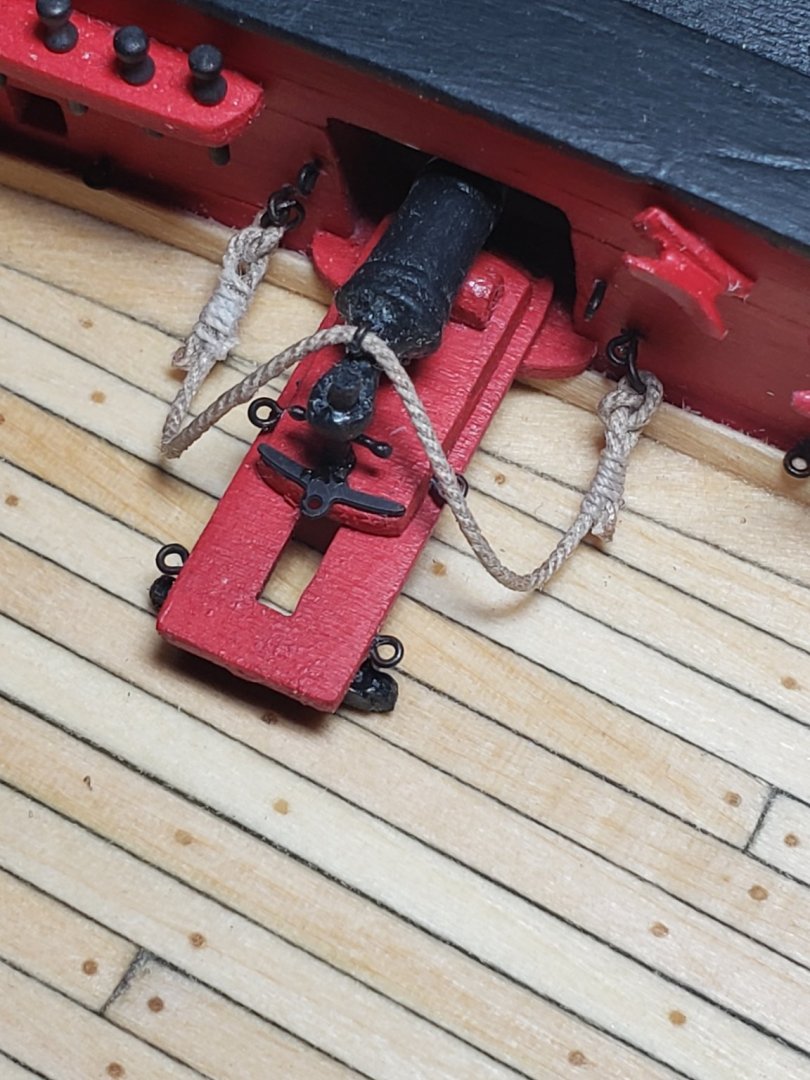
All breech lines are finally complete and have been installed on the carronades. Here is a close up photo of the knot I used: The distance between the hooks that I used was 52mm. I don't think I explained the process I used to attach them to the guns, so here is what I did: After measuring the 52mm, I made the knot in that side and seized it with the small thread. This was done for all the guns. Here are some follow up photos with all the carronades glued to the deck: Next I'll be working on the tackles. This might also take a while 😅
- 950 replies
-
- 15
-
-
- syren
- model shipways
- (and 1 more)
-
Sure! They are available from Syren Ship Model Company linked below: https://www.syrenshipmodelcompany.com
- 950 replies
-
- 1
-
-
- syren
- model shipways
- (and 1 more)
-
It's looking great Robin!! Did you glue the carronades onto the deck? Or will you do this as you install the tackles?
-
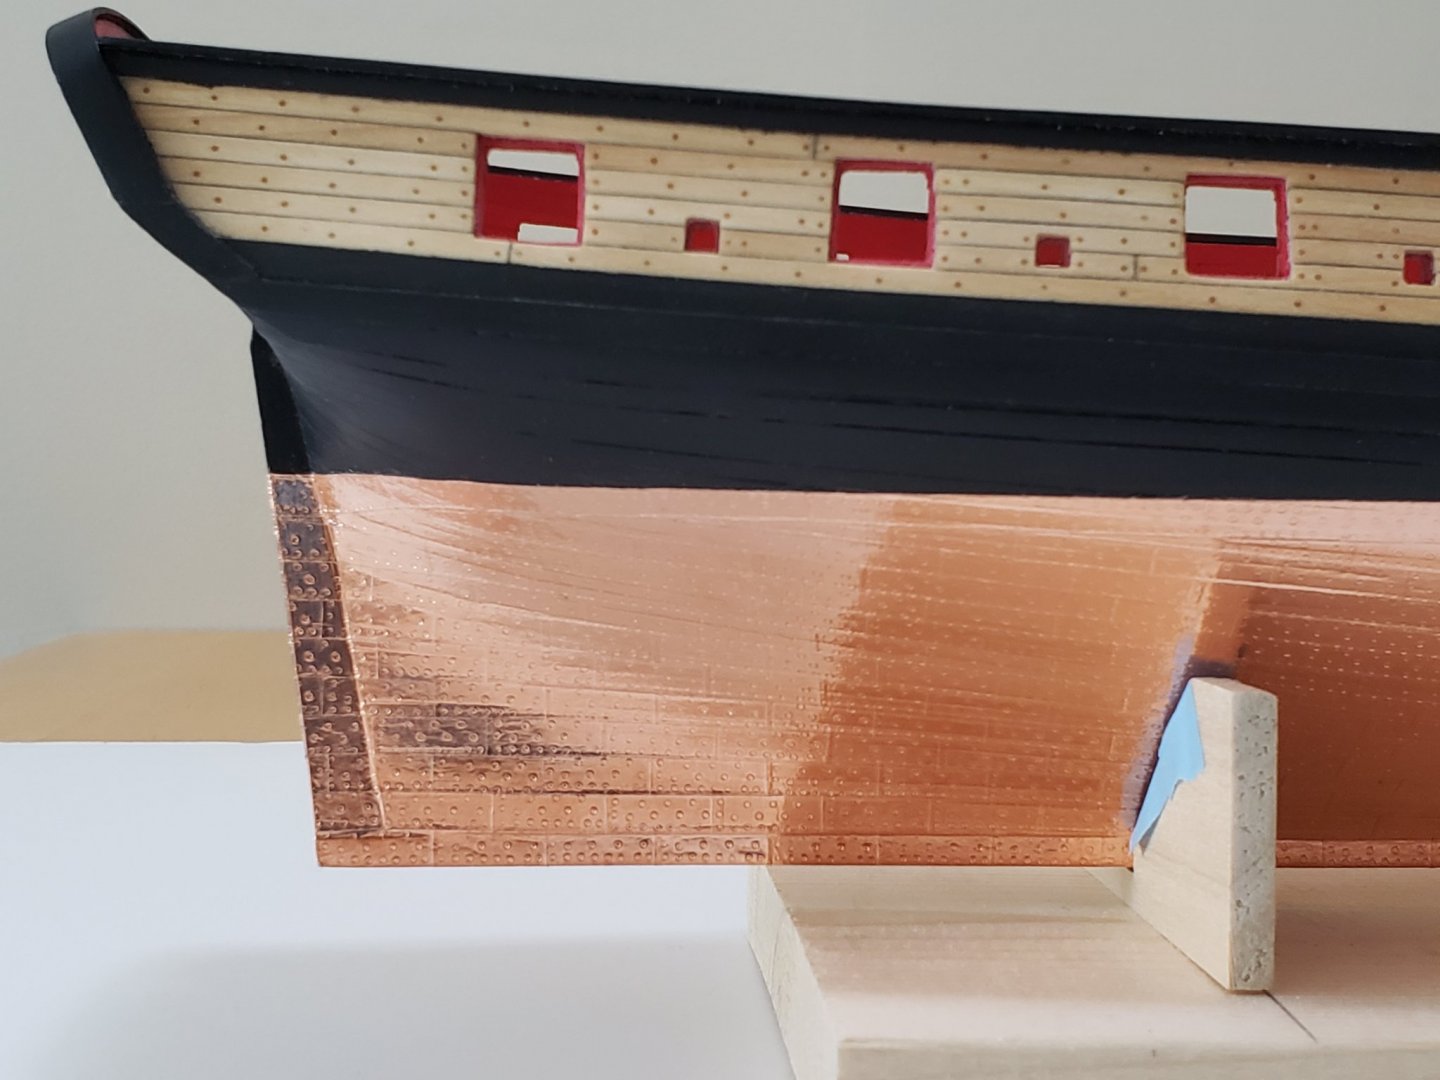
Congrats on your first grandson!!! That did happen during my first tries, but if you get the blade right between the strip and backing with a sliding motion, there is no crease whatsoever. And if a tiny crease did happen, it would be hidden away by the overlap of the next plate 😁
-
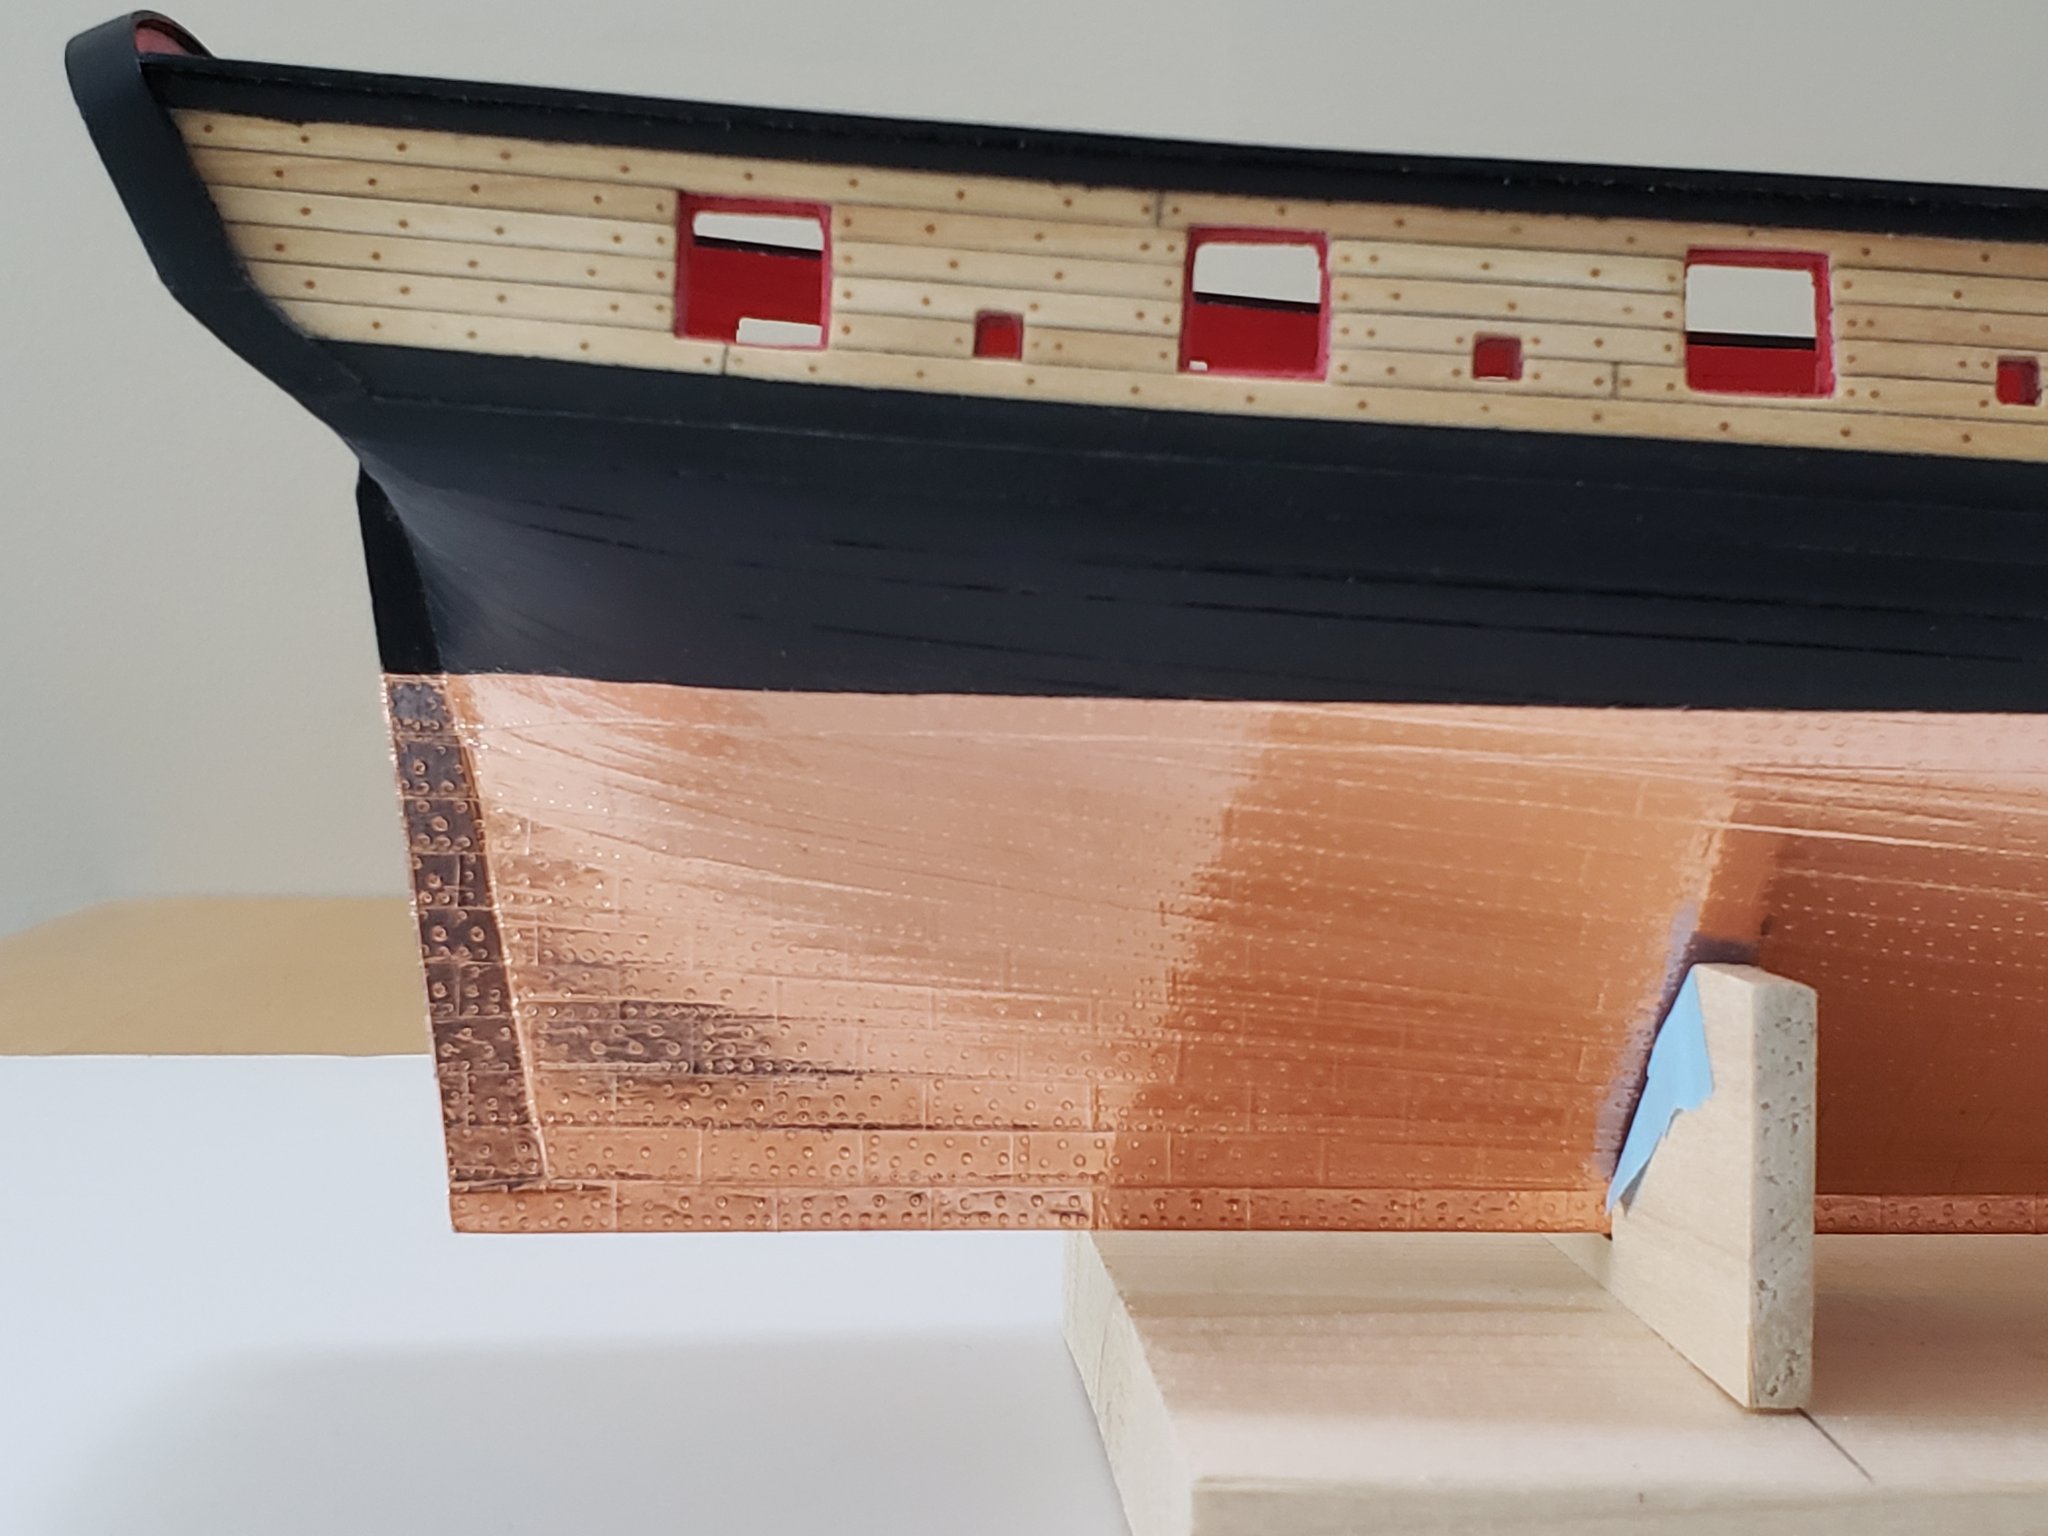
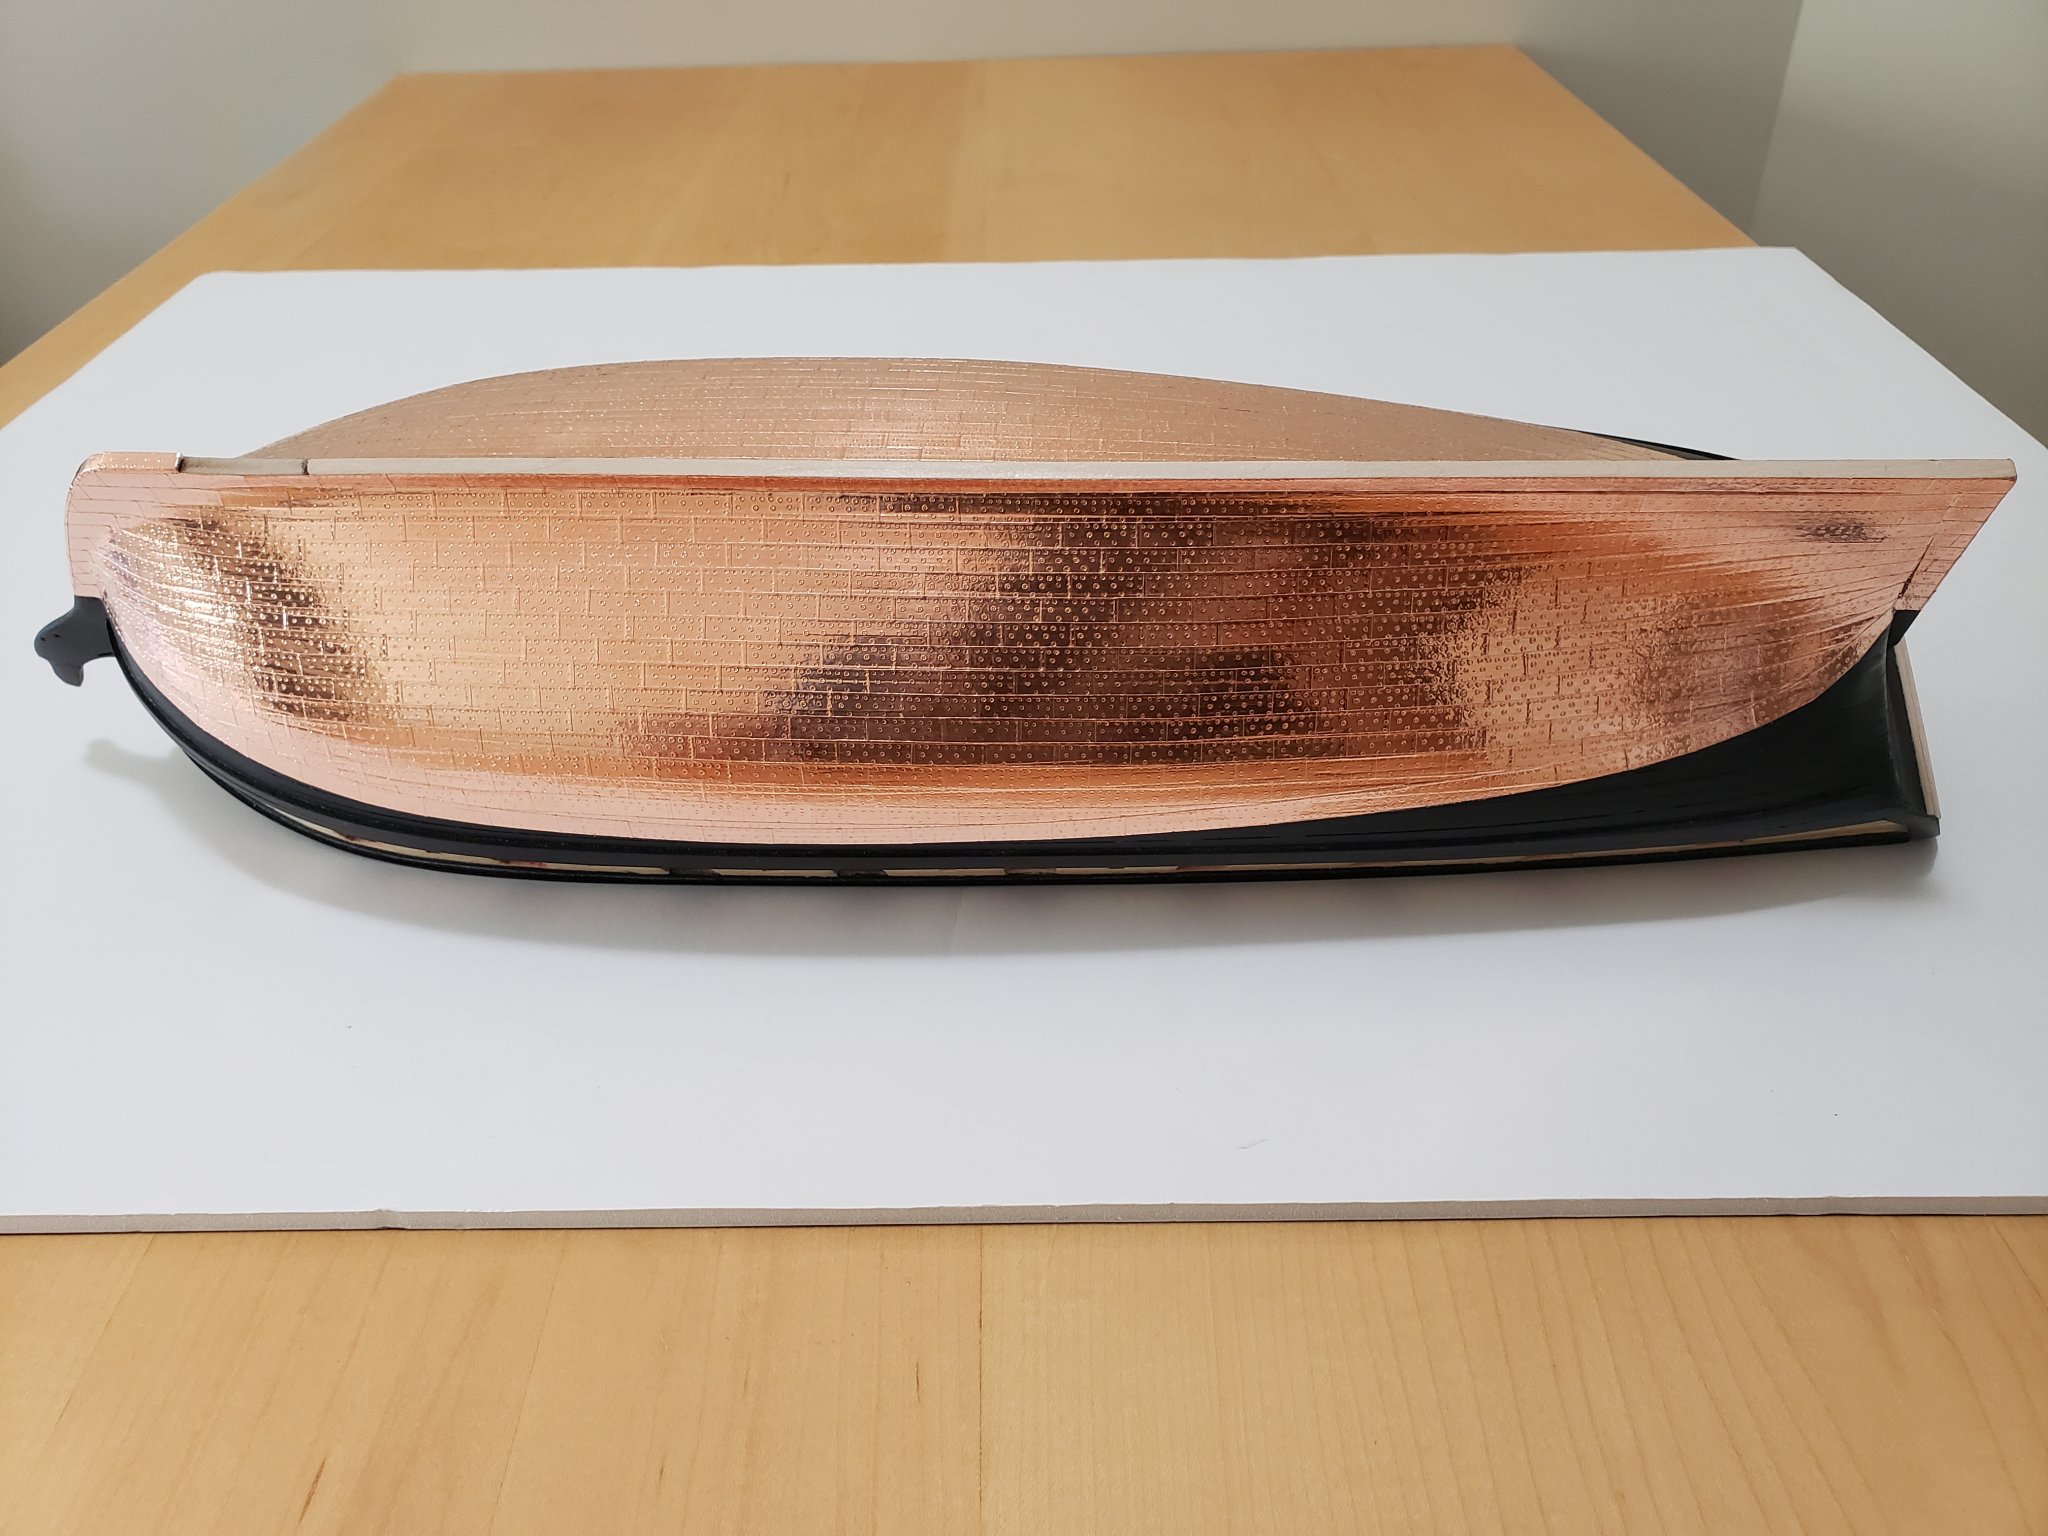
I made a video on this yesterday! I hope this helps you out. There will be minimal creases in the copper plate if you follow this method: http://imgur.com/a/Q8zkf0b It takes a while to get used to that method. Also wear gloves when working with plates!! I was just lazy to wear gloves in the example video. If you work barehanded, fingerprints will show up when it ages. The instructions for the Syren Brig model ship are excellent, you can view the copper plating instructions here: https://modelexpo-online.com/assets/images/documents/MS2260-Syren-Instructions-Chapter-08.pdf You basically start from the stern at the keel and work towards the bow and up And for the jig to stamp the copper plates here: https://modelexpo-online.com/assets/images/documents/MS2260-SYREN-Addendum-CopperJig.pdf Here is how my copper plating turned out after I followed the Syren instructions:


-
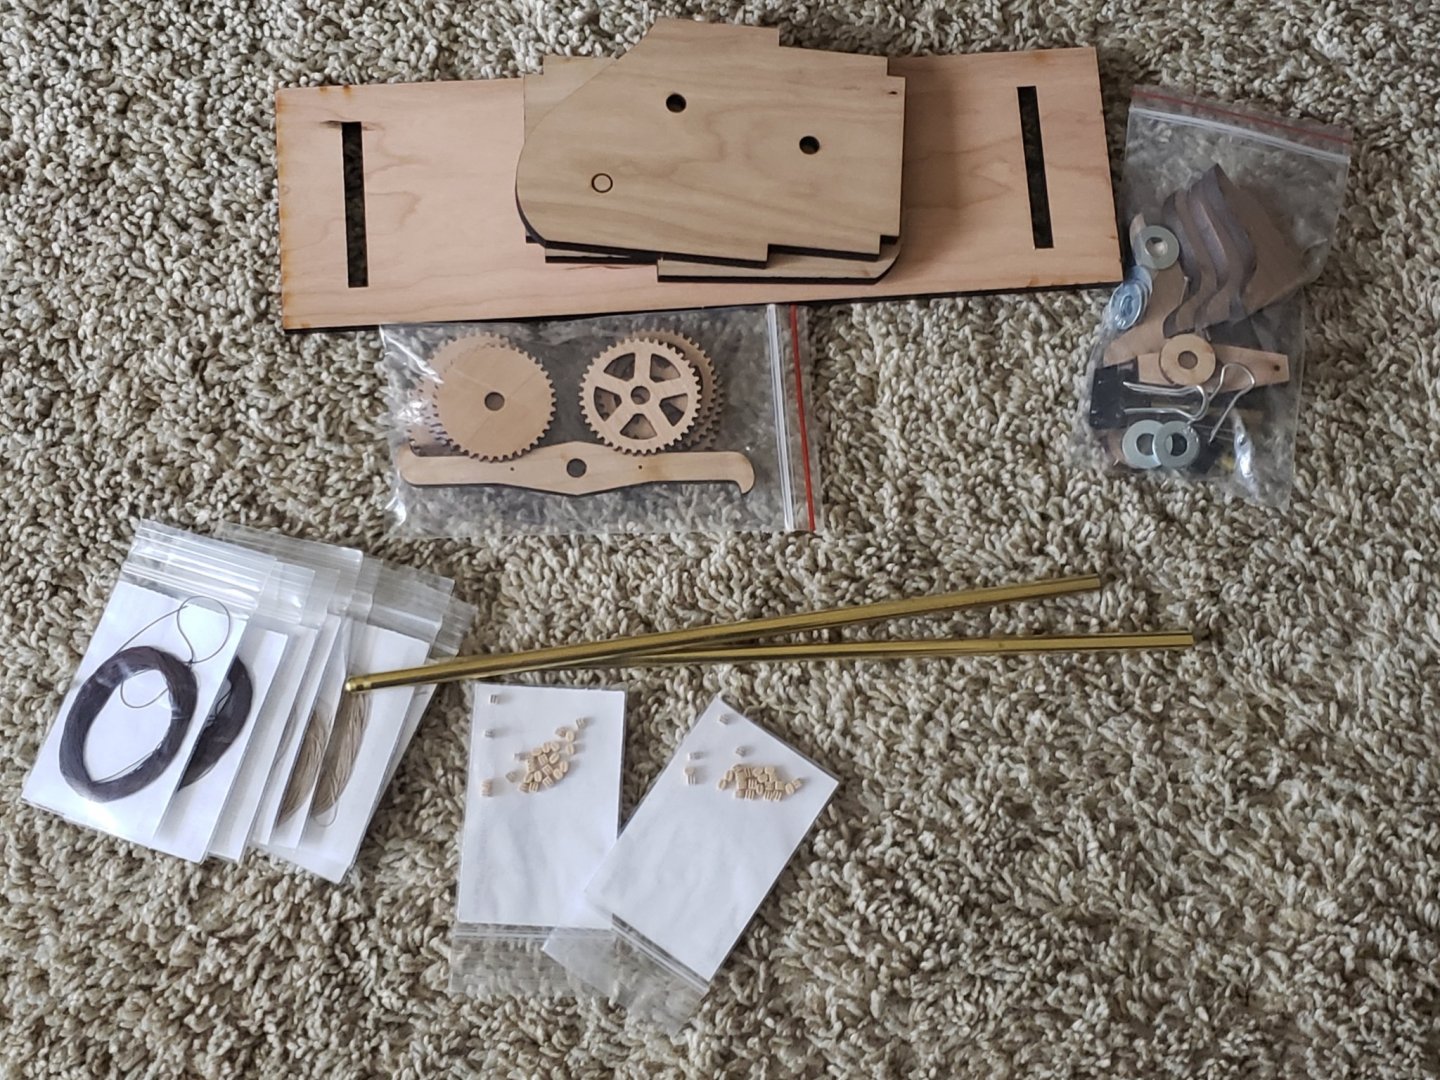
Another small update, just received more goodies from Syren Ship Company! So for now I've received all the items I need to get the ship done. So for anyone keeping track, I'm replacing the following kit items with Chuck's: 1) all the ropes 2) all blocks except for the dead eyes and the small 3/32" single blocks 3) steering wheel (15/16") Also bought the serving machine in case it comes useful down the road
- 950 replies
-
- 13
-
-
- syren
- model shipways
- (and 1 more)
-
No worries! After you get more practice, it gets much quicker too!!
-
K so I don't think its easy to explain with words and pics without overcomplicating the process, so I took a video instead 😄 http://imgur.com/a/Q8zkf0b (Let me know if you are unable to see it from that link and I'll try uploading it differently) Also wear gloves when doing it, I was just lazy to grab gloves for the example video, but if you touch it without gloves, fingerprints will come up. Hope this is sufficient P.S. it has been a while since I did the coppering, so its not perfect, but after 10 or so tries of this method I think you can get the hang of it. Coming to think of it, if the video works on your end, I may put such GIFs in my future posts to explain tricky processes better 😁
-
Quite the opposite, keep the photos coming!! I find myself also posting a lot of pics 😅 It's looking crisp and symmetric!
-
Oh yea I forgot you used basswood for the hidden stuff. That's really smart and I may do something like that if next time I get that wood again in a kit. Also, if I haven't mentioned it before, the hull is looking gorgeous!!
-
This made me lol 😂😂 I did this too and the thought did come every now and then I used Minwax Sanding Sealer for mine and it sealed all the wood pores of the basswood nicely. Not sure how it'll work with boxwood though.
-
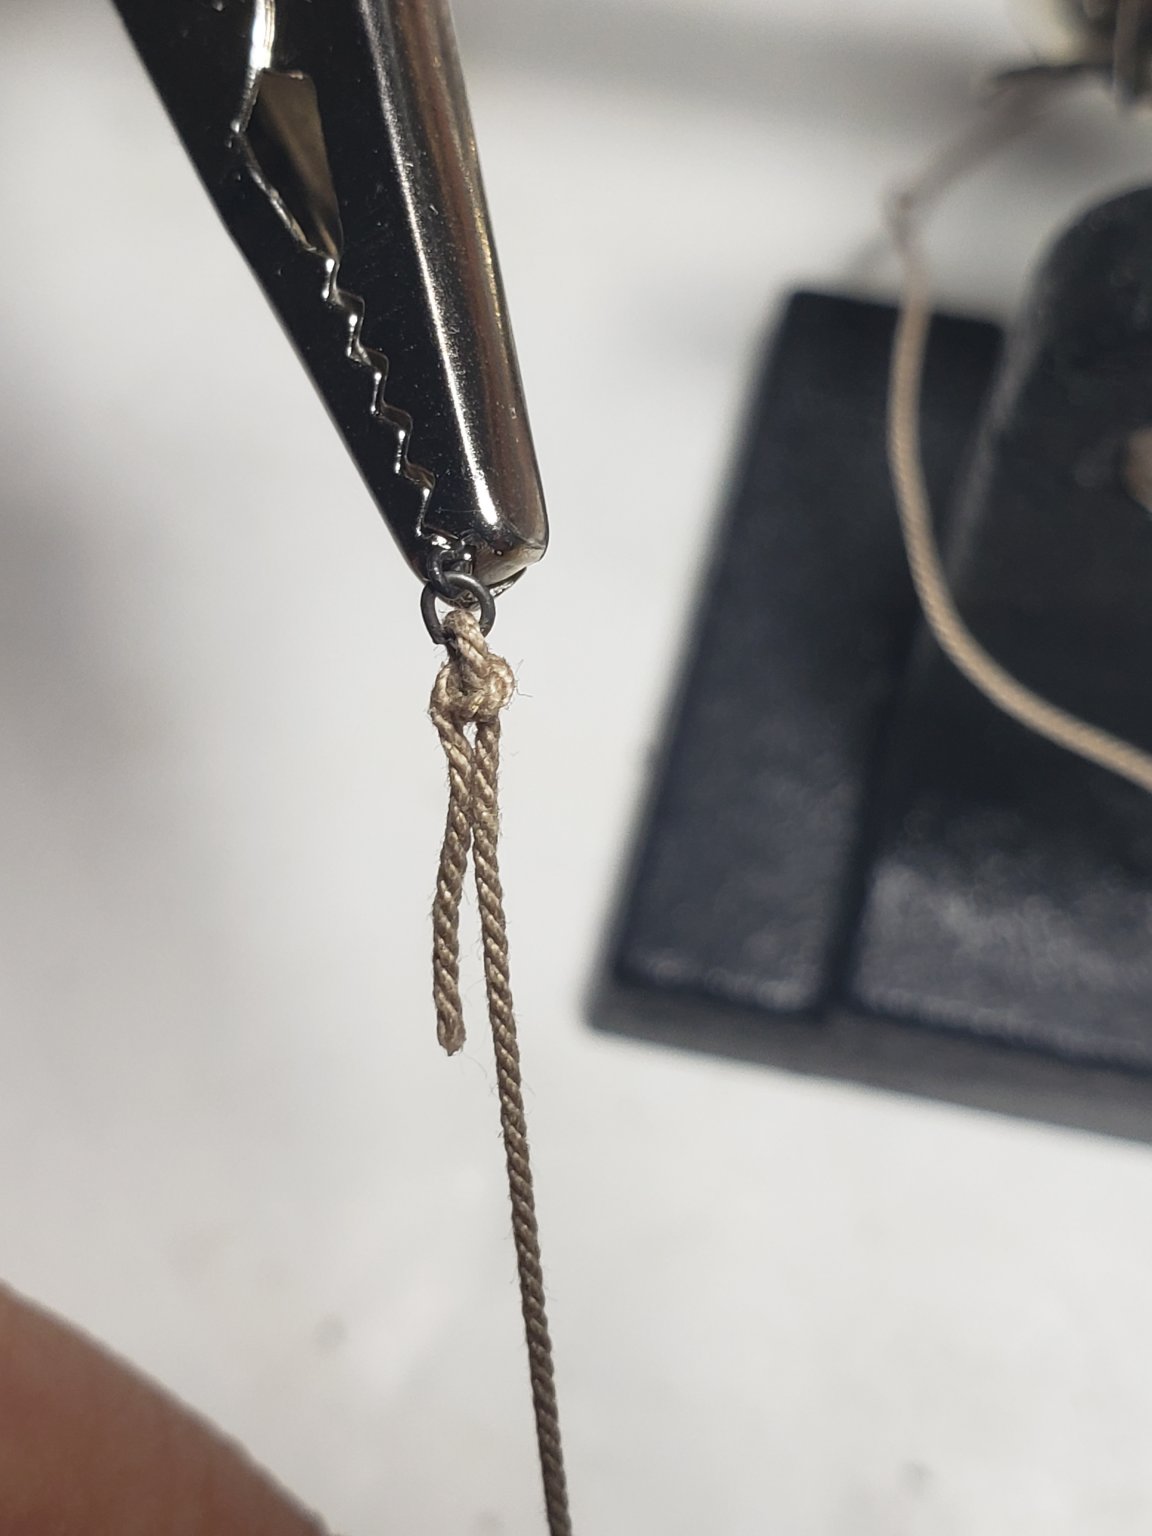
I think I found the one I like the most 😁 Right now the rope appears a bit floaty, but it'll will glued to the deck later on. To make it I attached the pins to crocodile clips and pulled the threads when I made the knot so it has the more distinct shape used in real ships. I used CA to "lock" it in place, both on the knot itself and and the section after it where it is seized by the smaller thread As always, any comments or suggestions for improvements are most welcome!!


- 950 replies
-
- 9
-
-
- syren
- model shipways
- (and 1 more)
-
Thanks Will and Robin. I never knew there's so many ways to approach this. I guess that's what makes each model unique in their own way.
-
Thanks Justin! Can't wait for the next chapter for all the other deck details!! This helps so much! The reference photos are very helpful. Thanks Thomas. I think I might follow the method you used. I'll set up another test line to see how it compares. Thanks again!! In the case for the Syren, click on "start new topic" in the 1801-1850 section of "Build logs for ship model kits" forum. Before doing so check out this link to see more detailed instructions in starting and naming your log:
- 950 replies
-
- 1
-
-
- syren
- model shipways
- (and 1 more)