HOLIDAY DONATION DRIVE - SUPPORT MSW - DO YOUR PART TO KEEP THIS GREAT FORUM GOING! (Only 13 donations so far - C'mon guys!)
×

.jpg.1f80adf1a9b14a937cfcf2ca6af0f0d4.jpg)
WalrusGuy
-
Posts
1,007 -
Joined
-
Last visited
Content Type
Profiles
Forums
Gallery
Events
Everything posted by WalrusGuy
-
.thumb.jpg.62d1d69fed1f32364417cb1f9cdeb009.jpg) Looking at this I really need to invest in a soldering iron. Great job!!
Looking at this I really need to invest in a soldering iron. Great job!! -
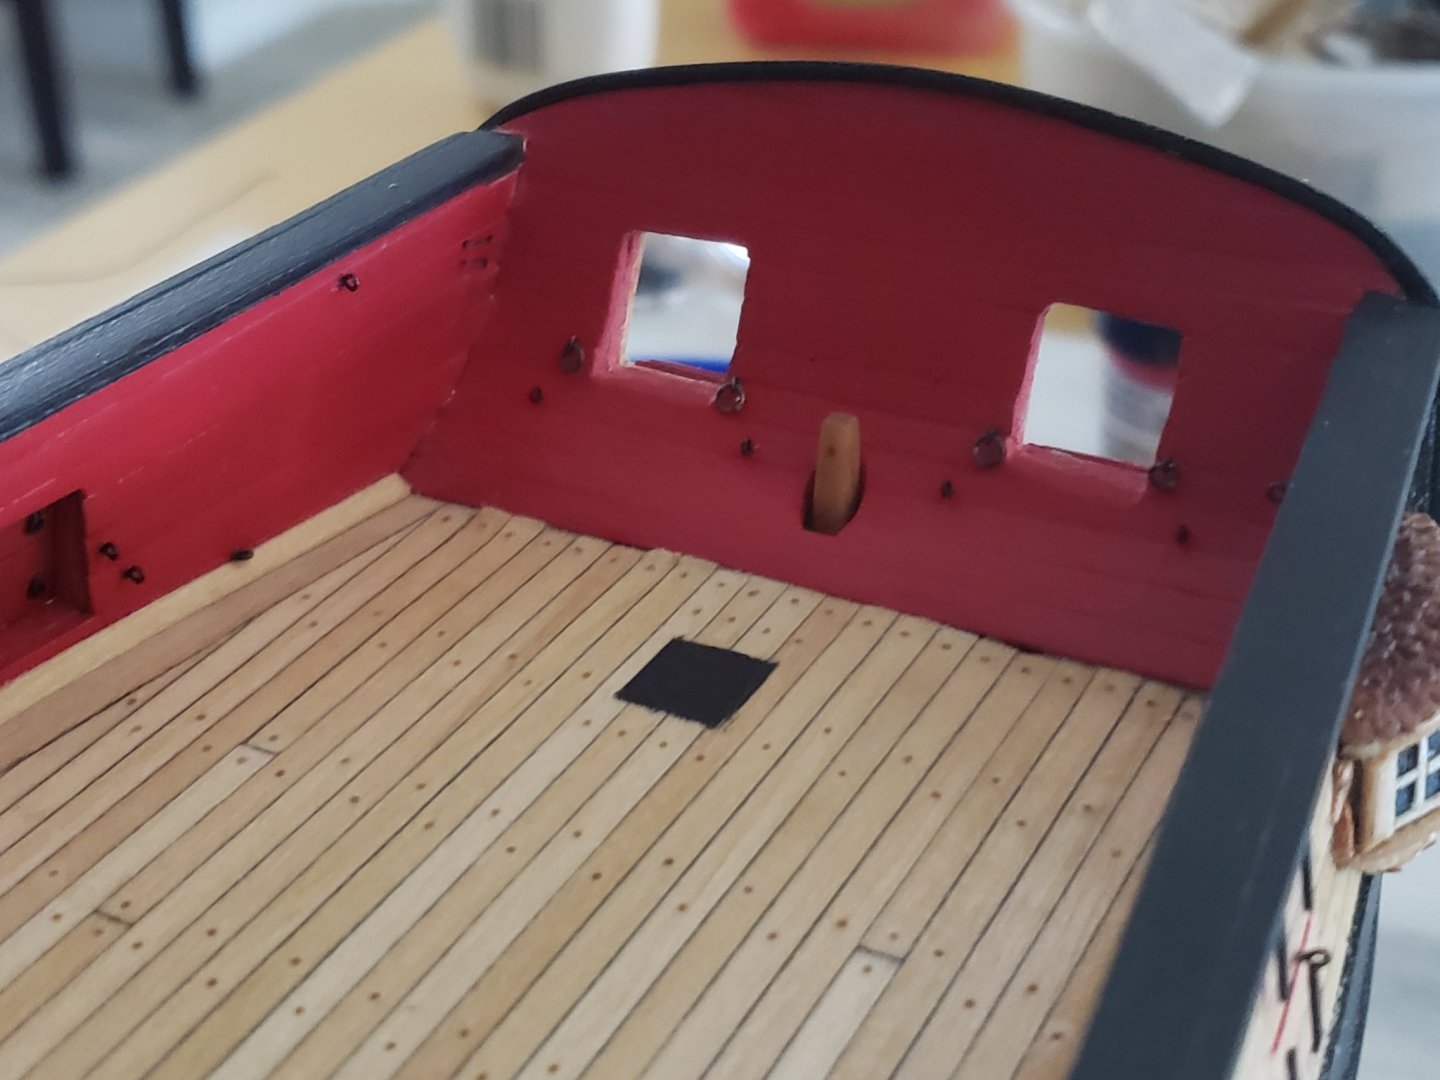
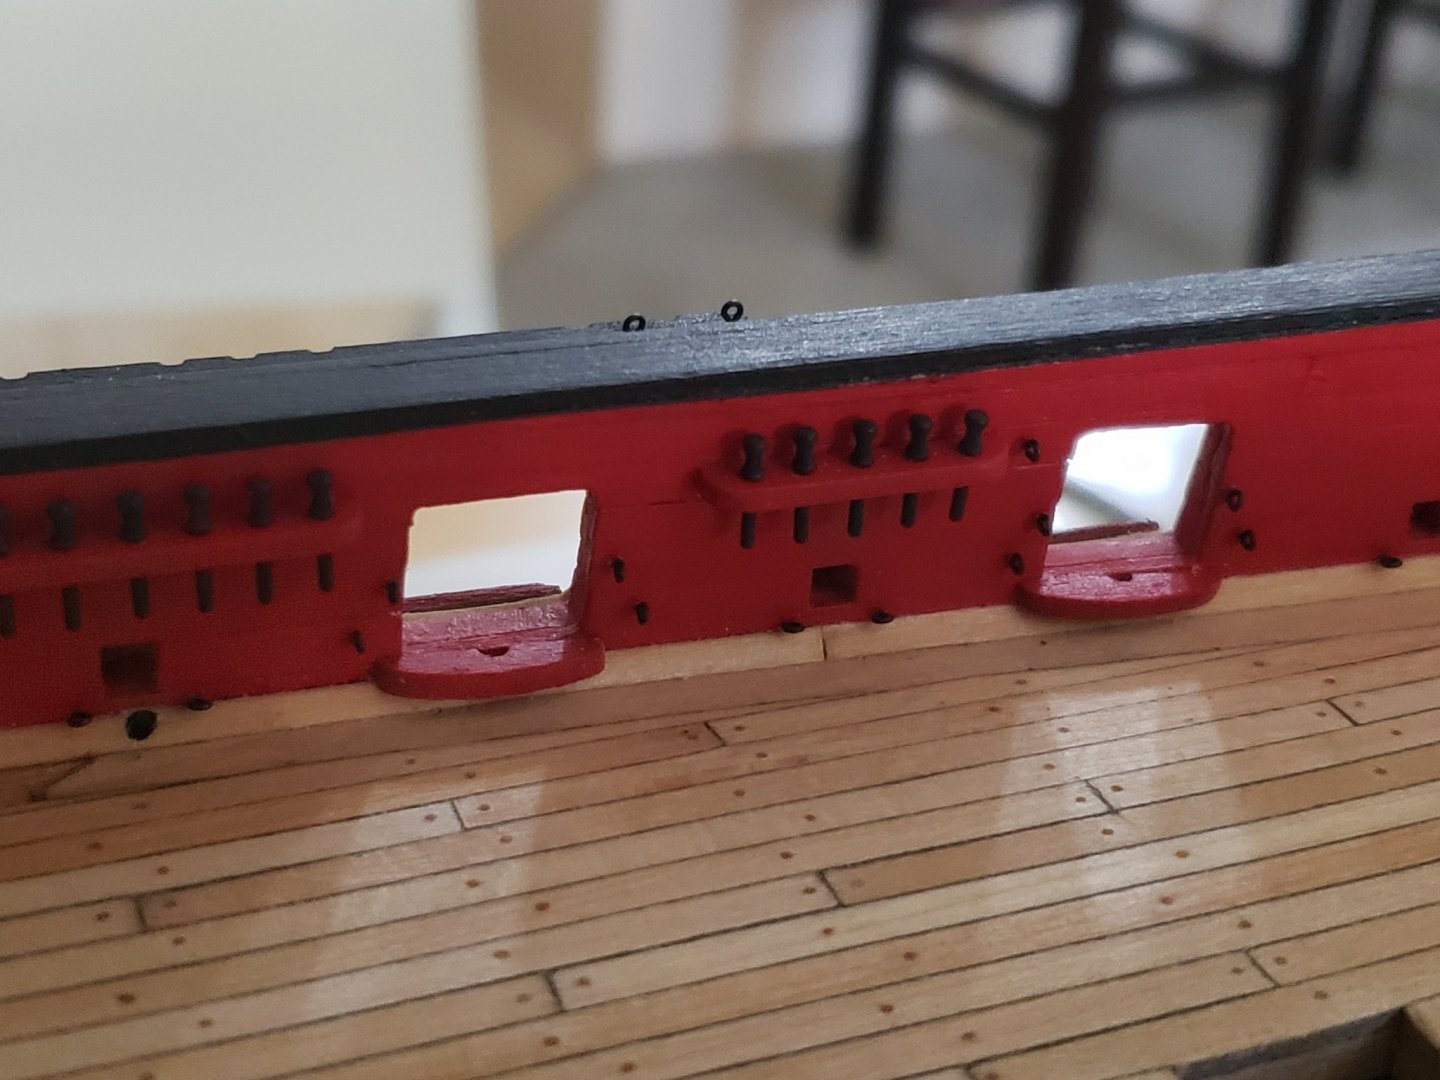
Thank you Robin and Eamonn for the great comments 🙂 I think the inboard side of the hawse holes will be detailed later so I haven't touched it yet. But you're right, I should clean it up so photos look better 😁
- 950 replies
-
- 2
-

-
- syren
- model shipways
- (and 1 more)
-
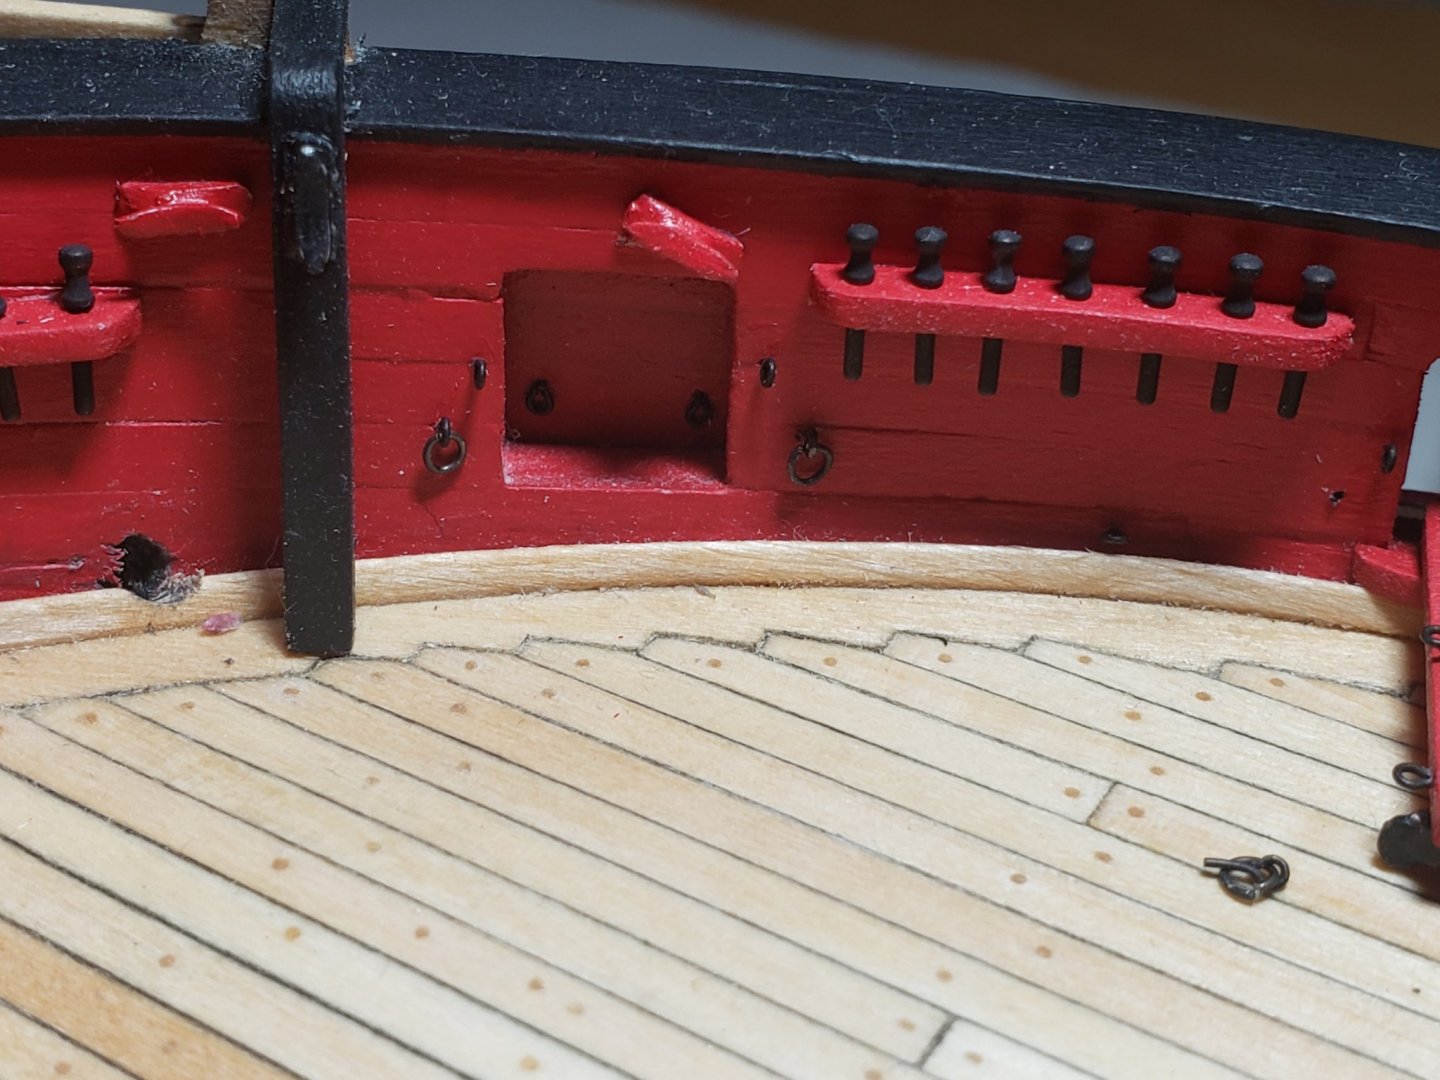
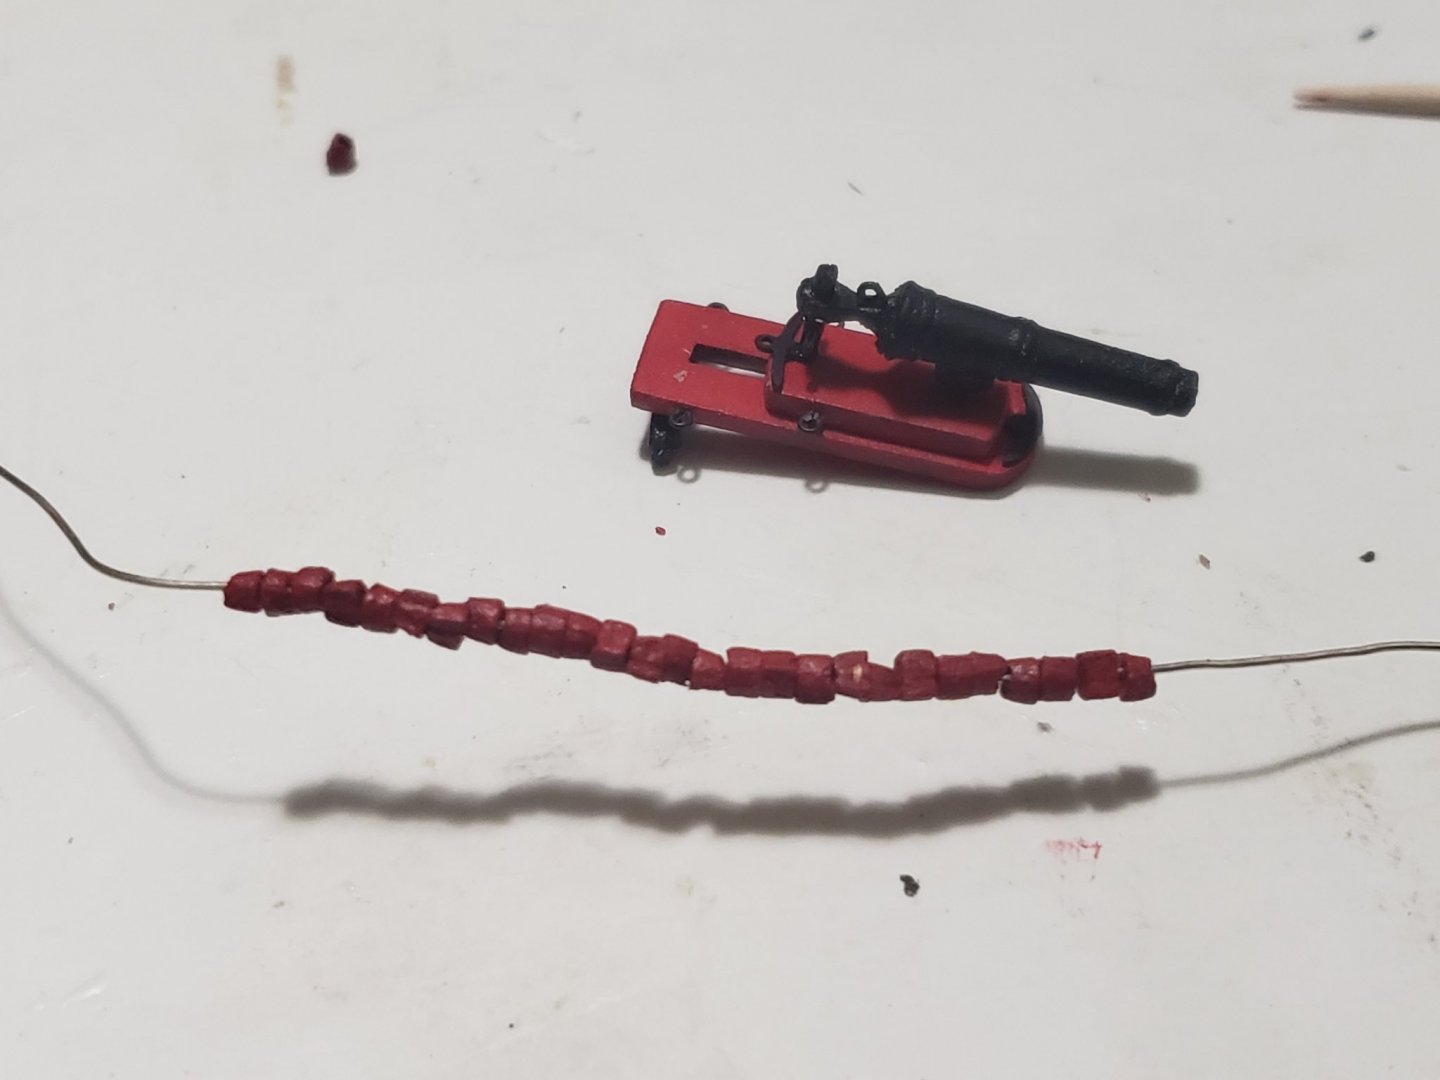
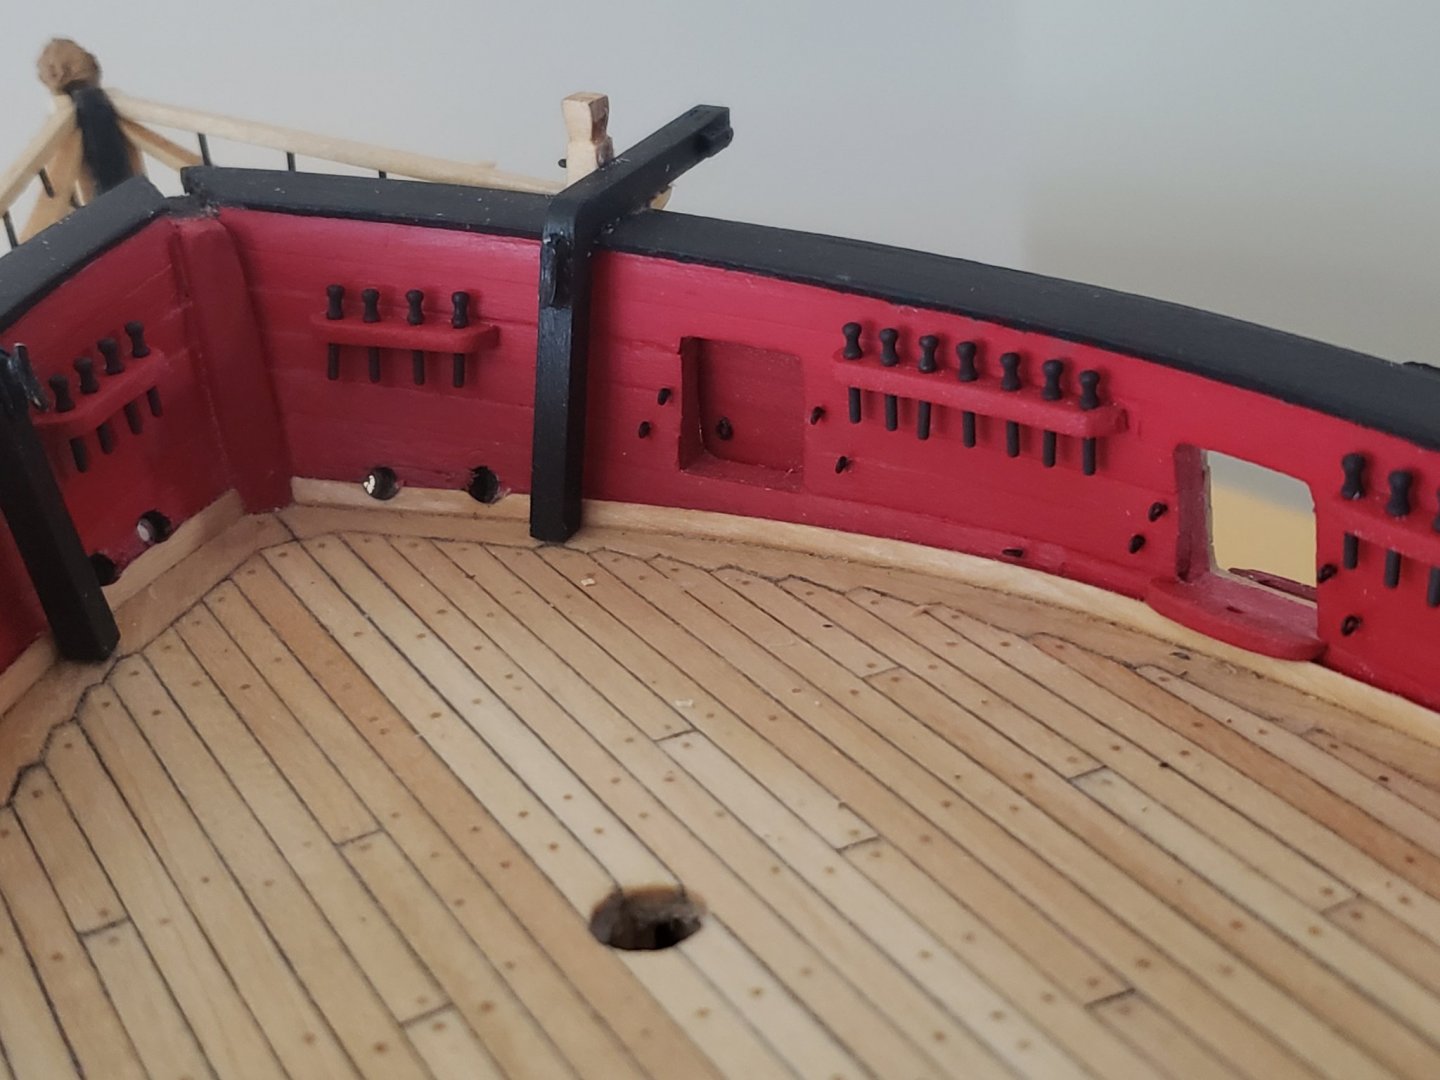
A very small update before starting the rigging I decided to make rings for the breech line as opposed to making the eye bolts bigger. I guess this is the more accurate way of doing things. Many other Syren builders also did this. Here are the bridle and aft most ones installed: All the rings have been made and I can finally start rigging 😁

- 950 replies
-
- 14
-
-
- syren
- model shipways
- (and 1 more)
-
Thanks Abelson! I used the 28 gauge wire that came with the kit.
- 950 replies
-
- 1
-
-
- syren
- model shipways
- (and 1 more)
-
Thank you Havelock and Bob! 🙂
-
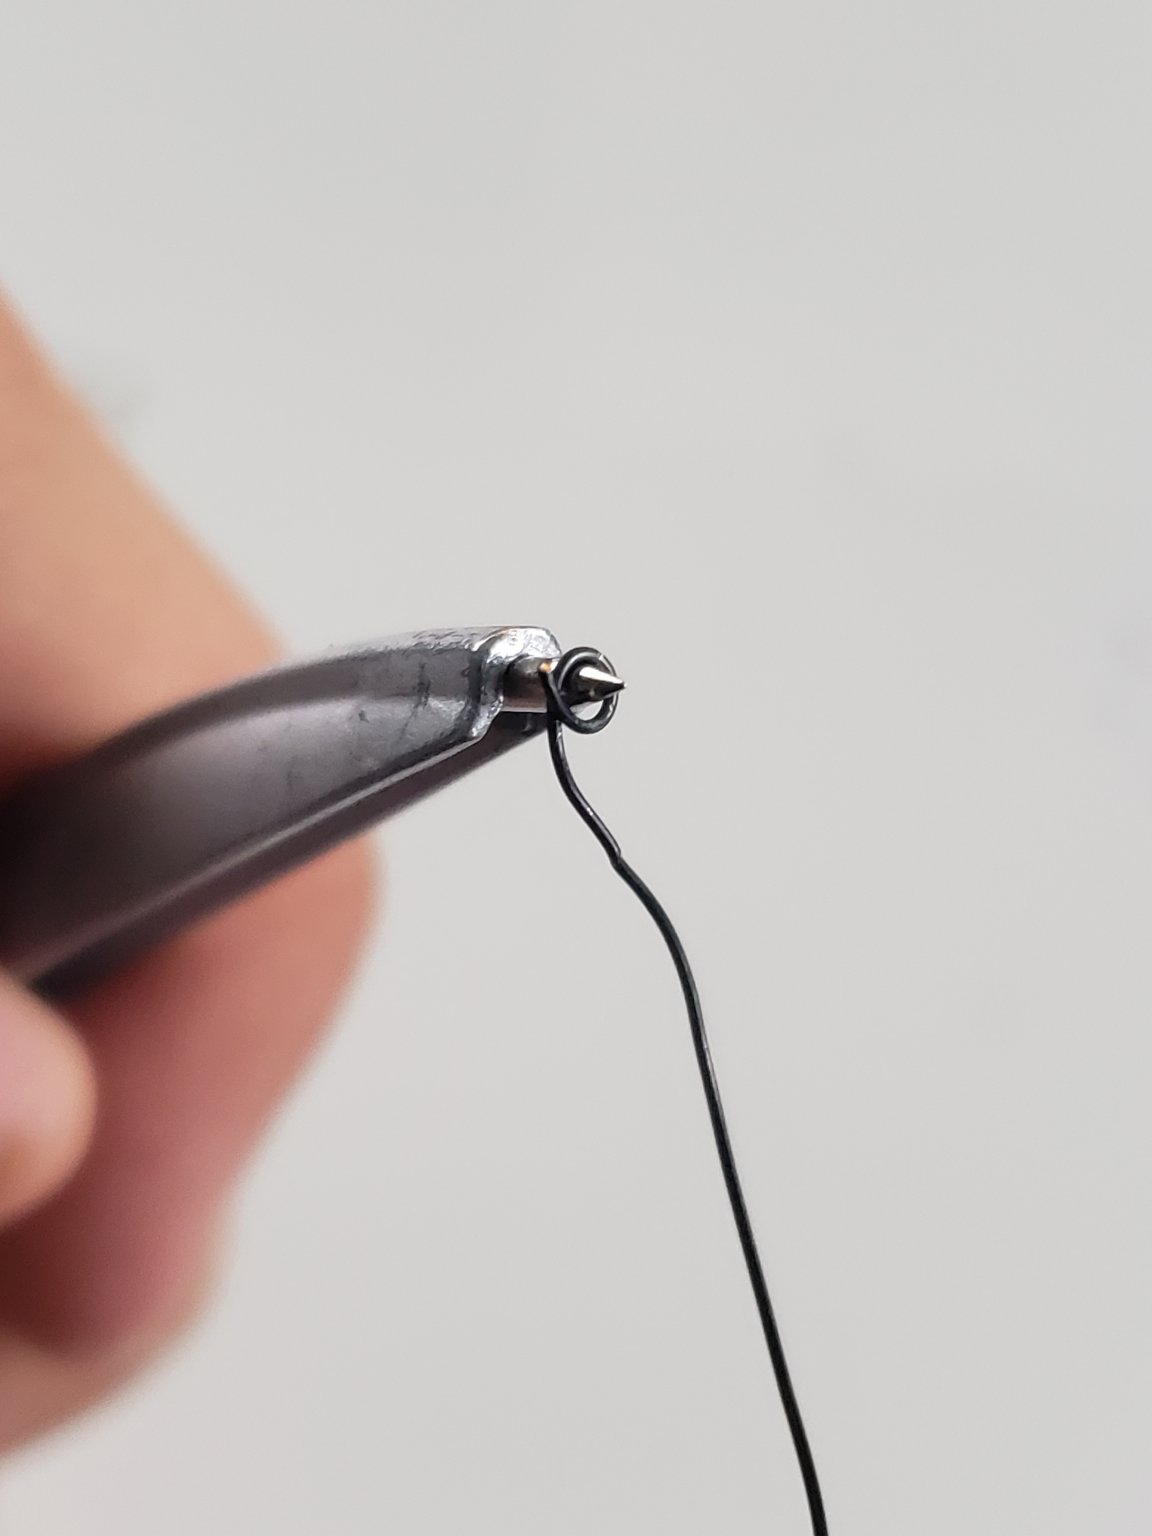
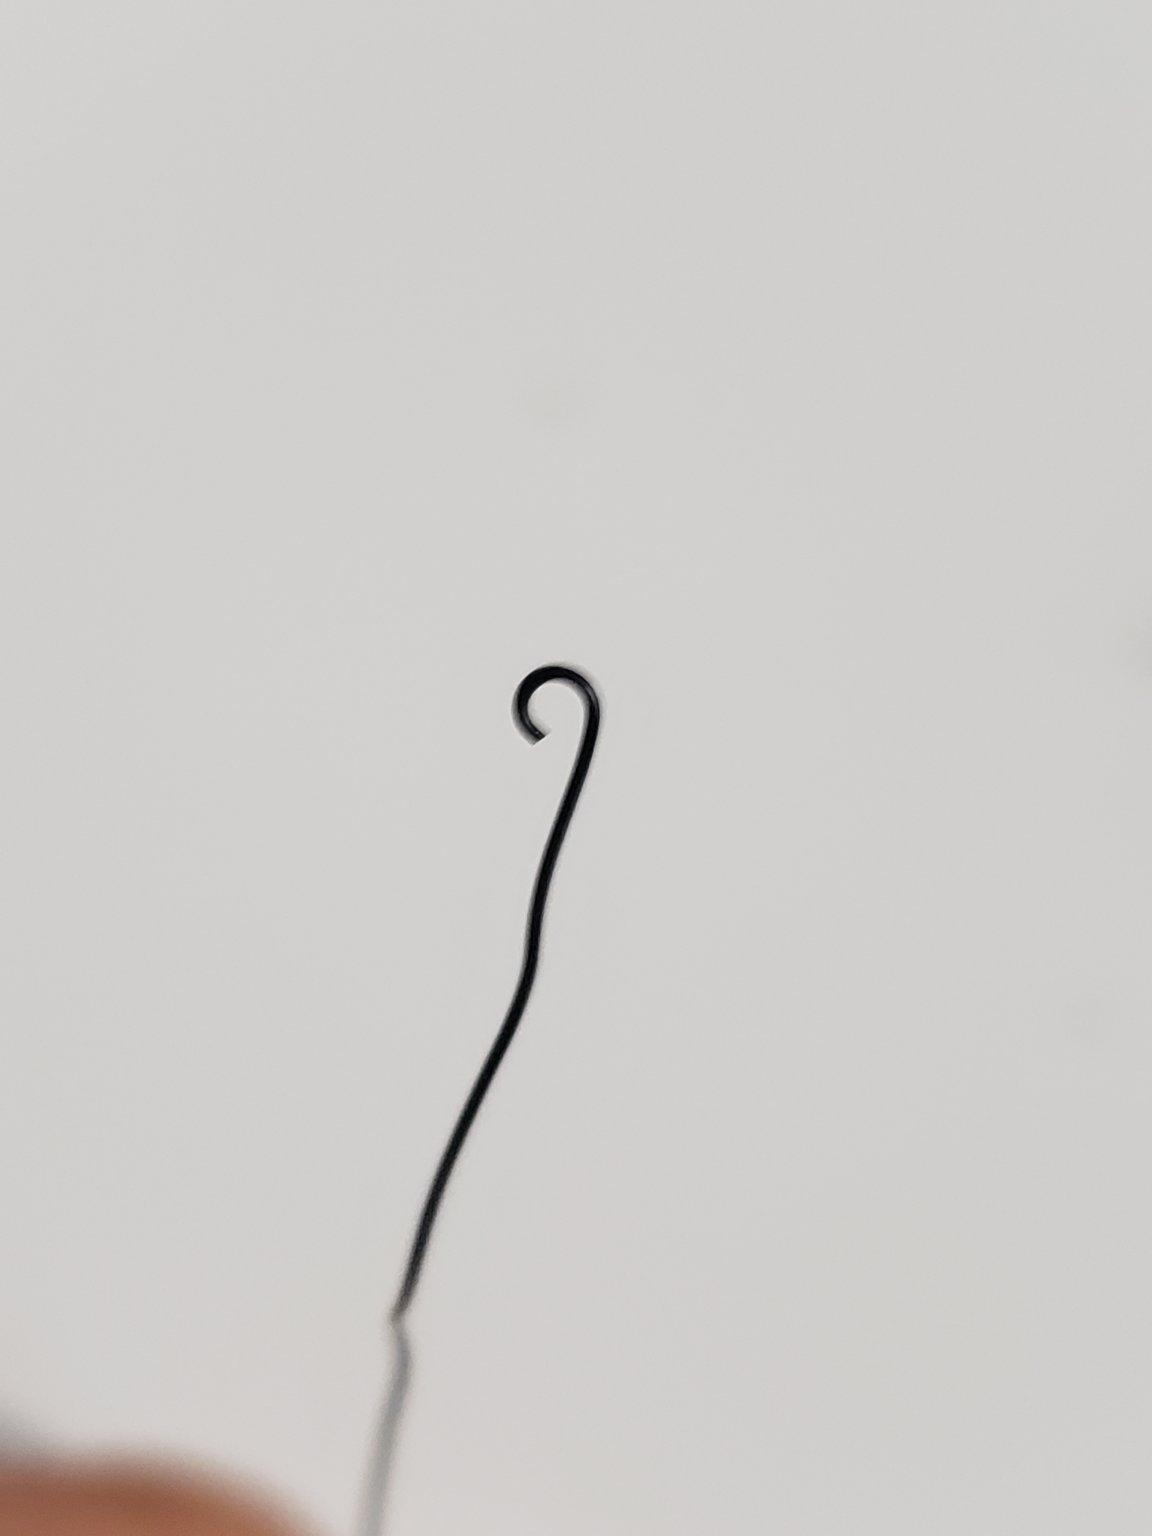
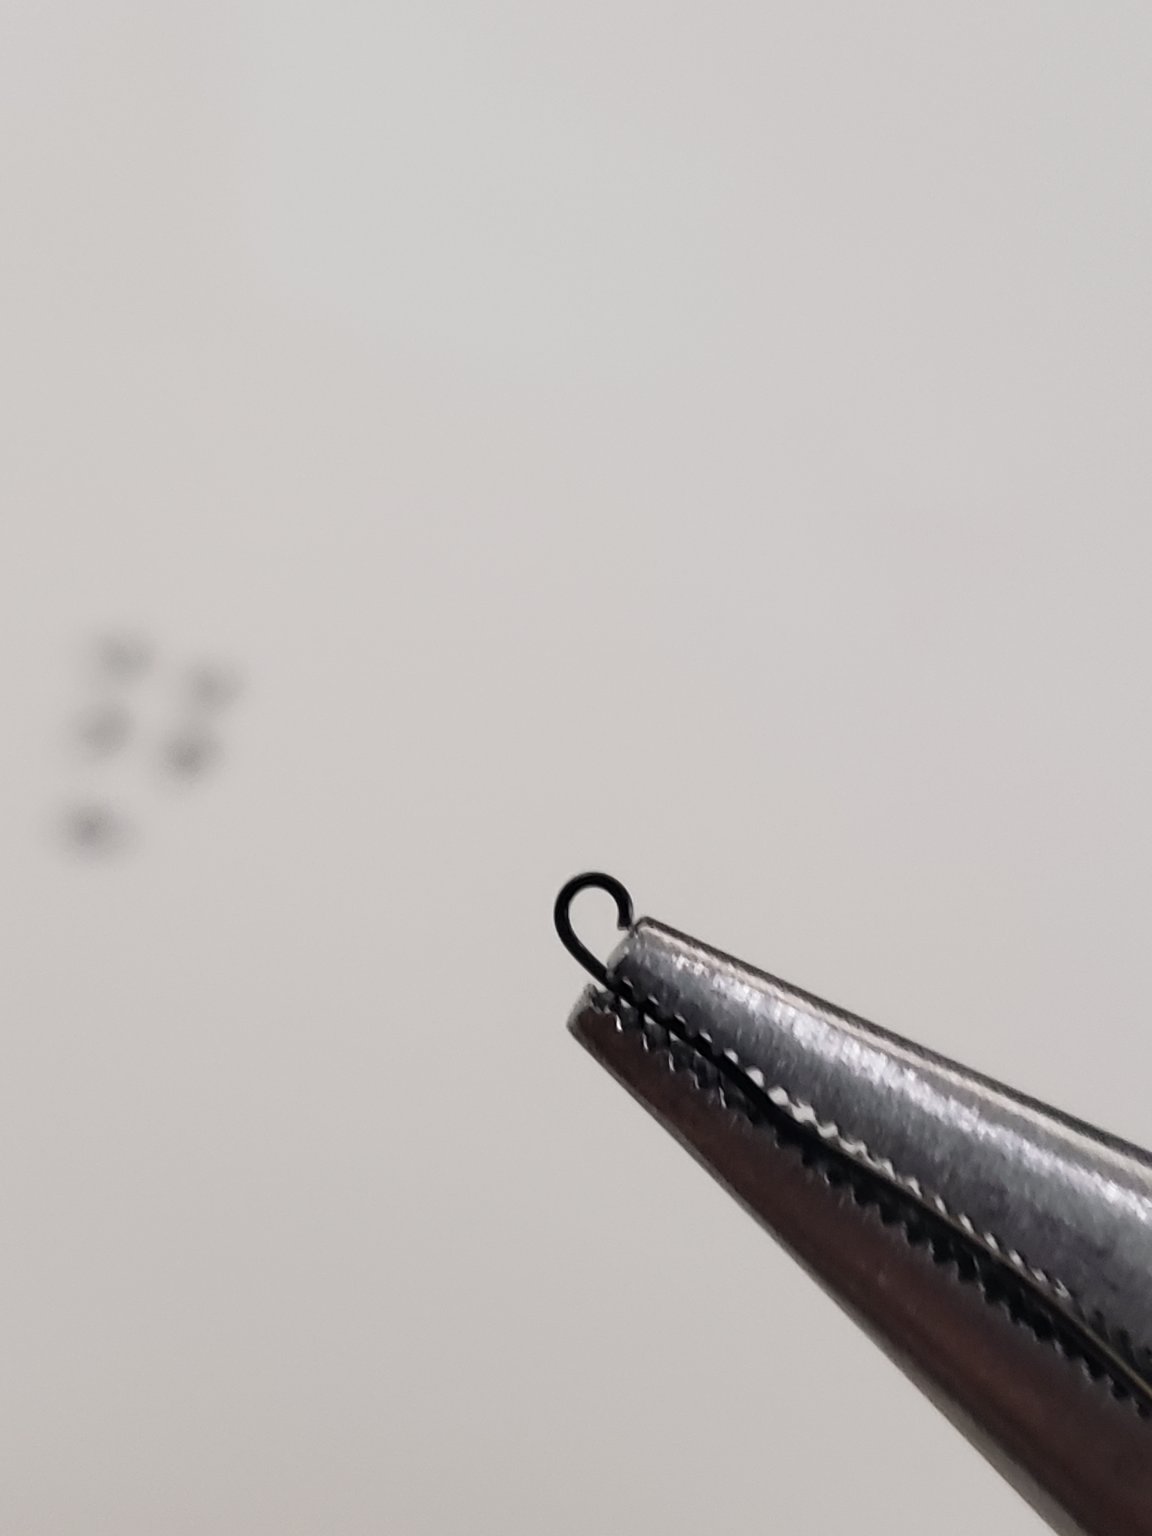
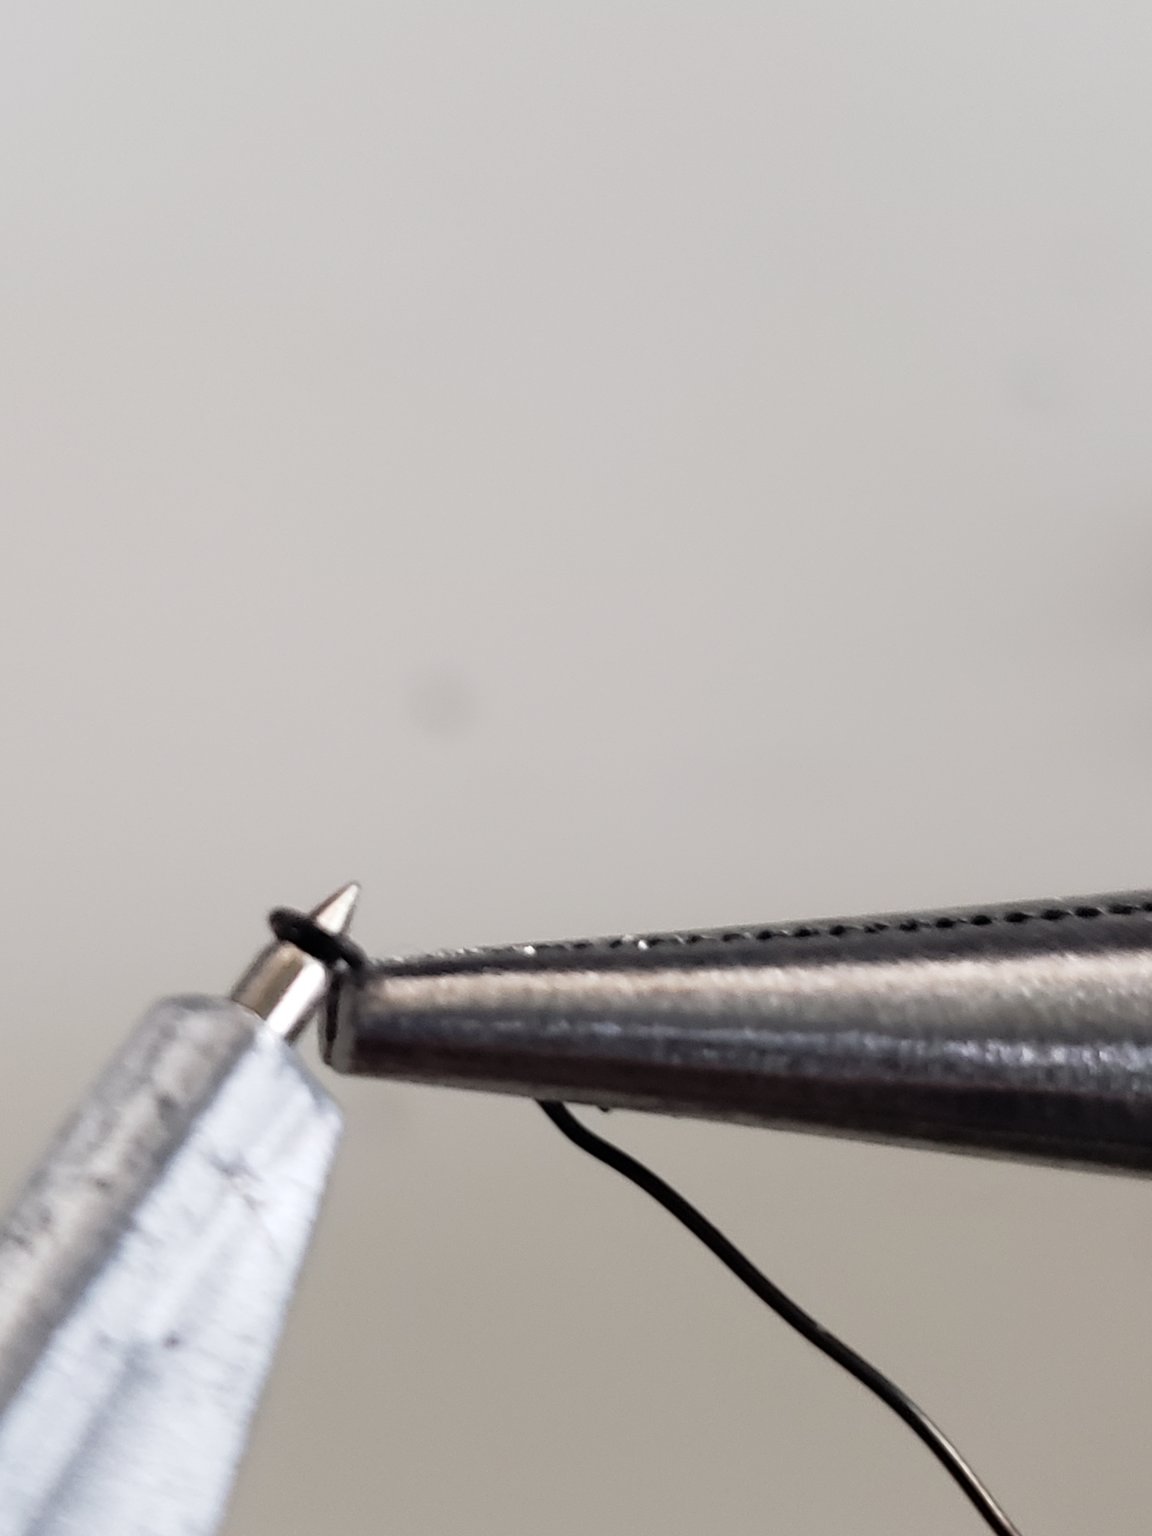
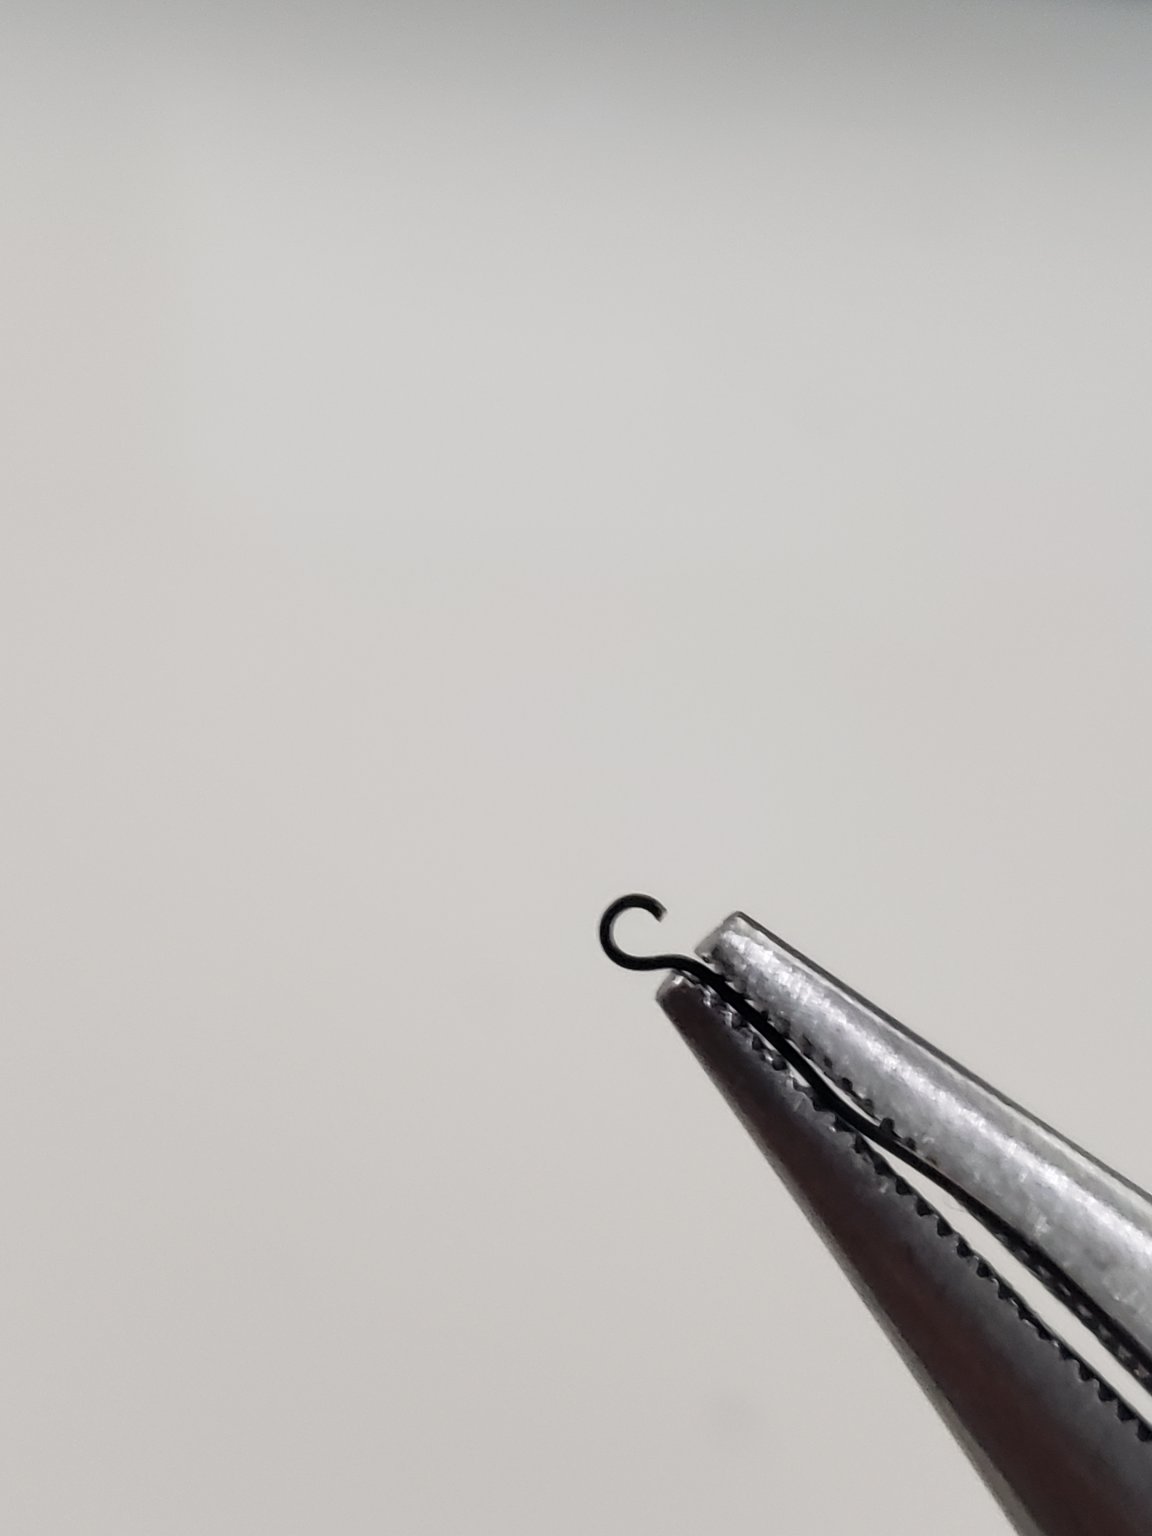
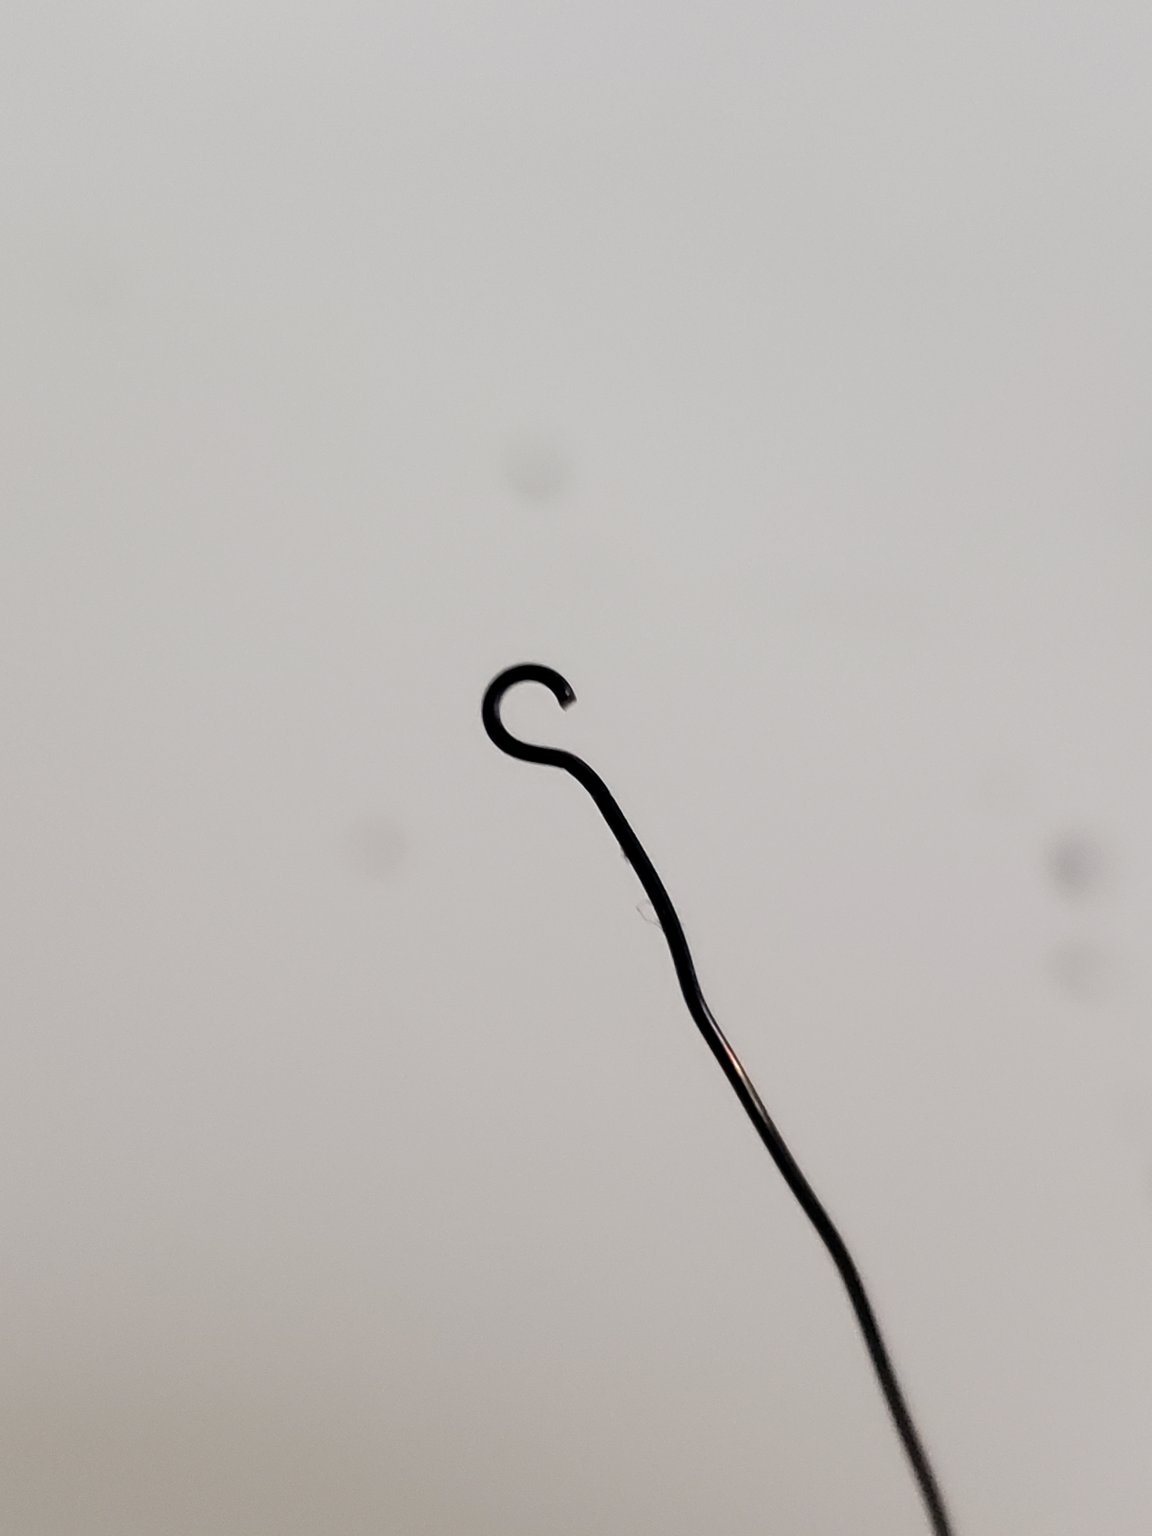
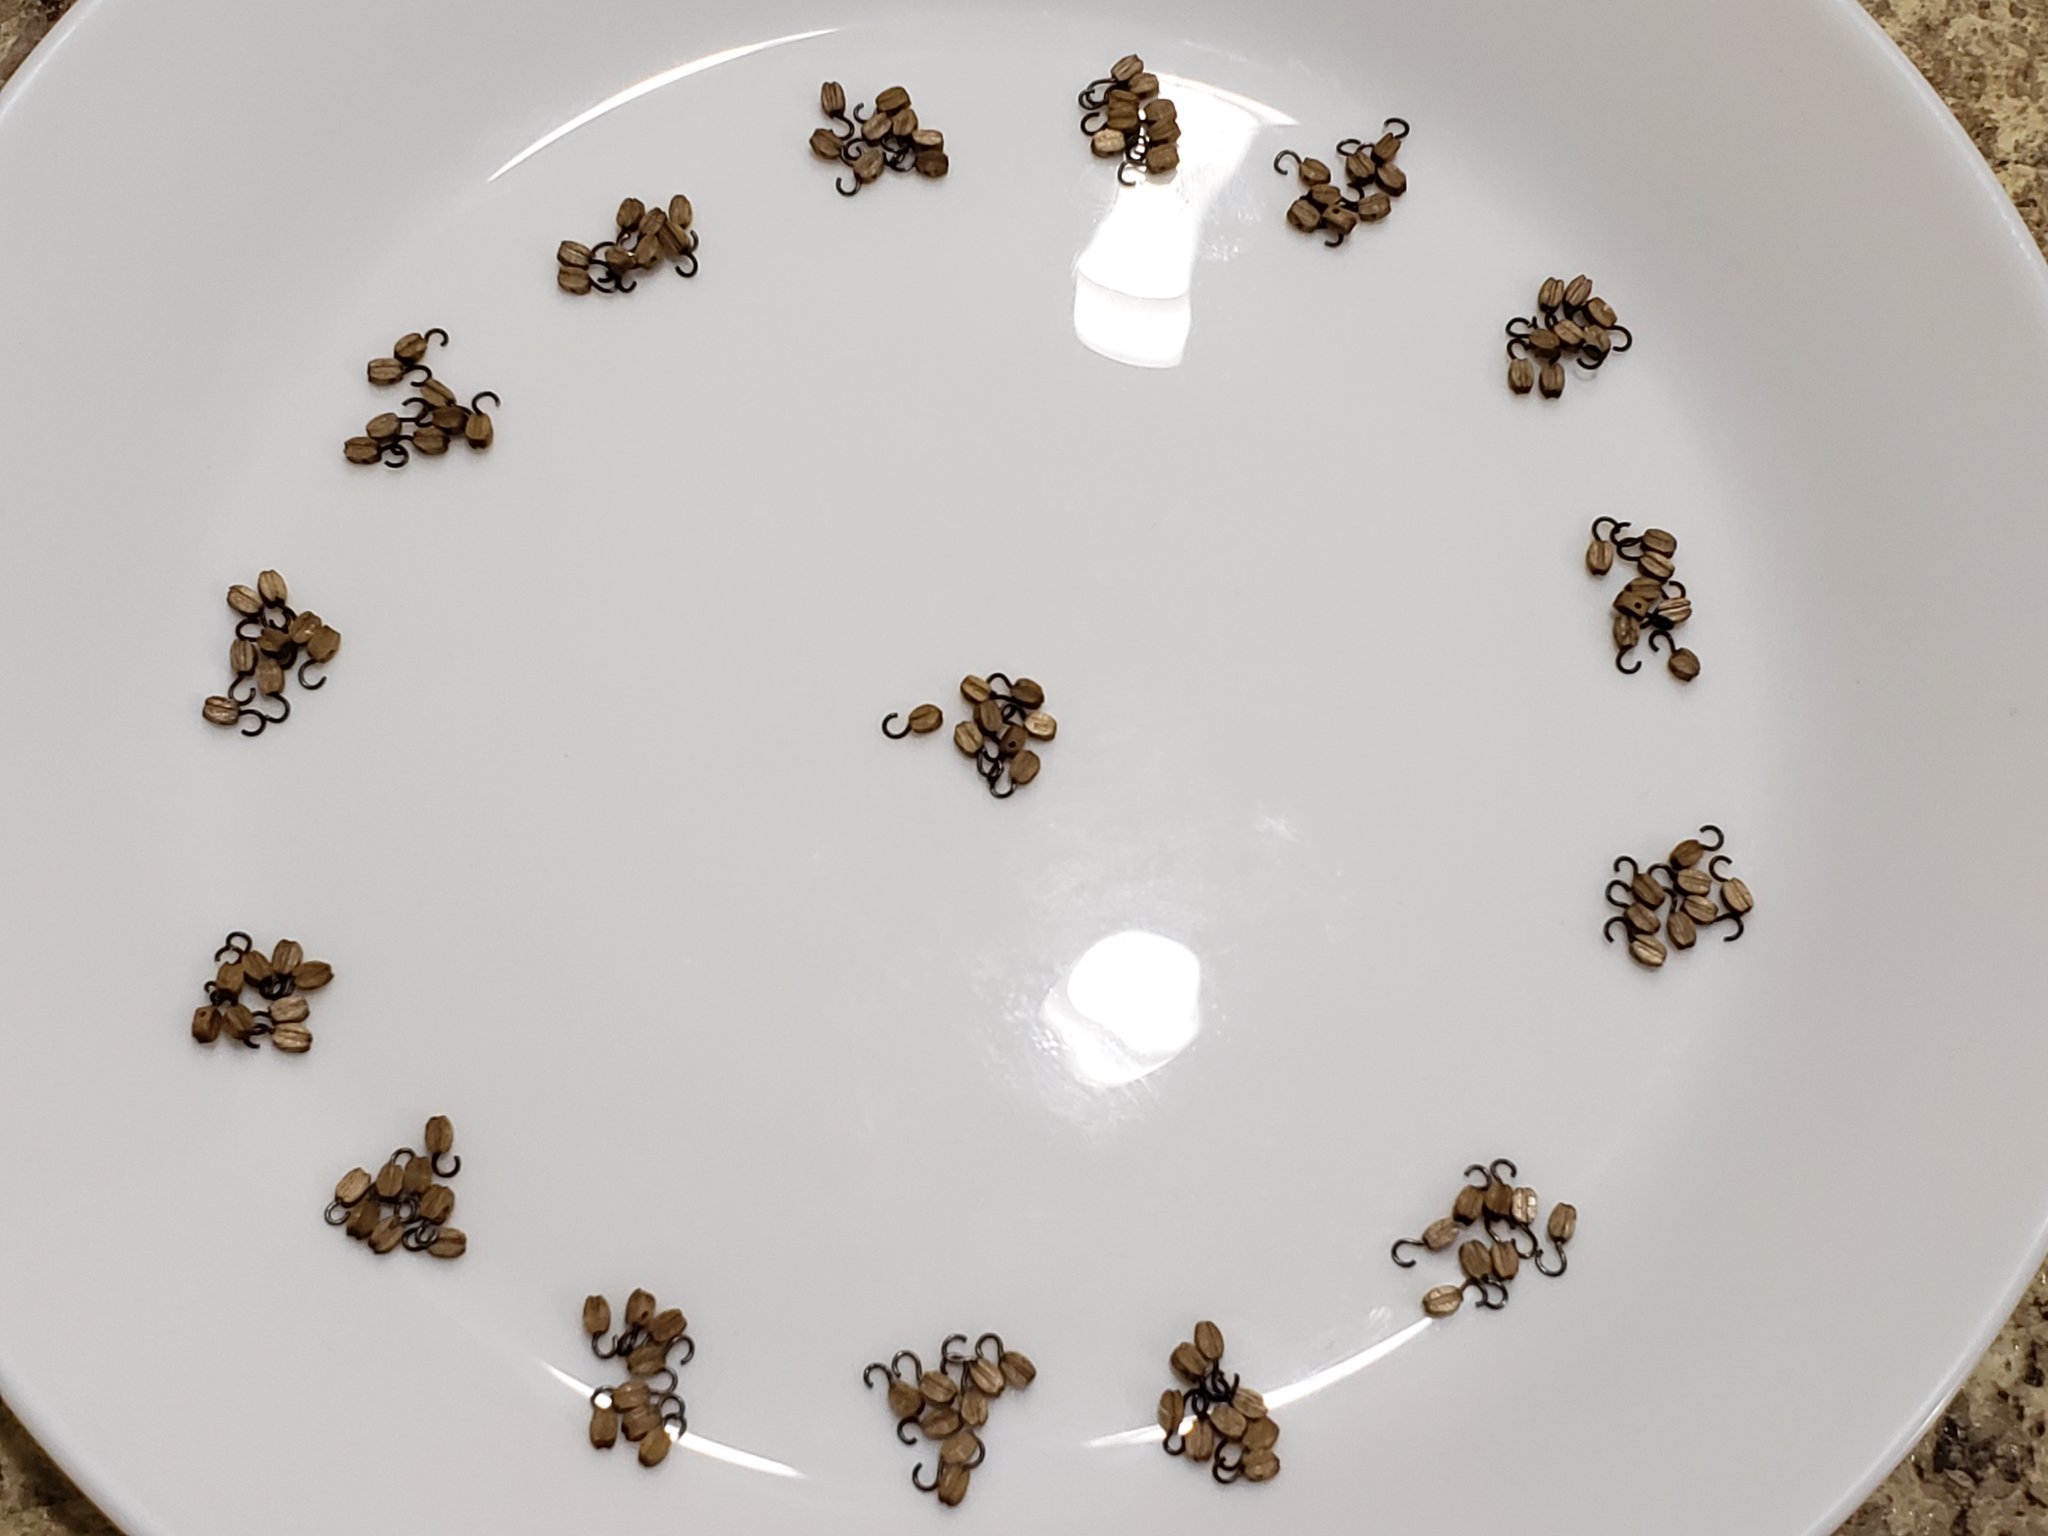
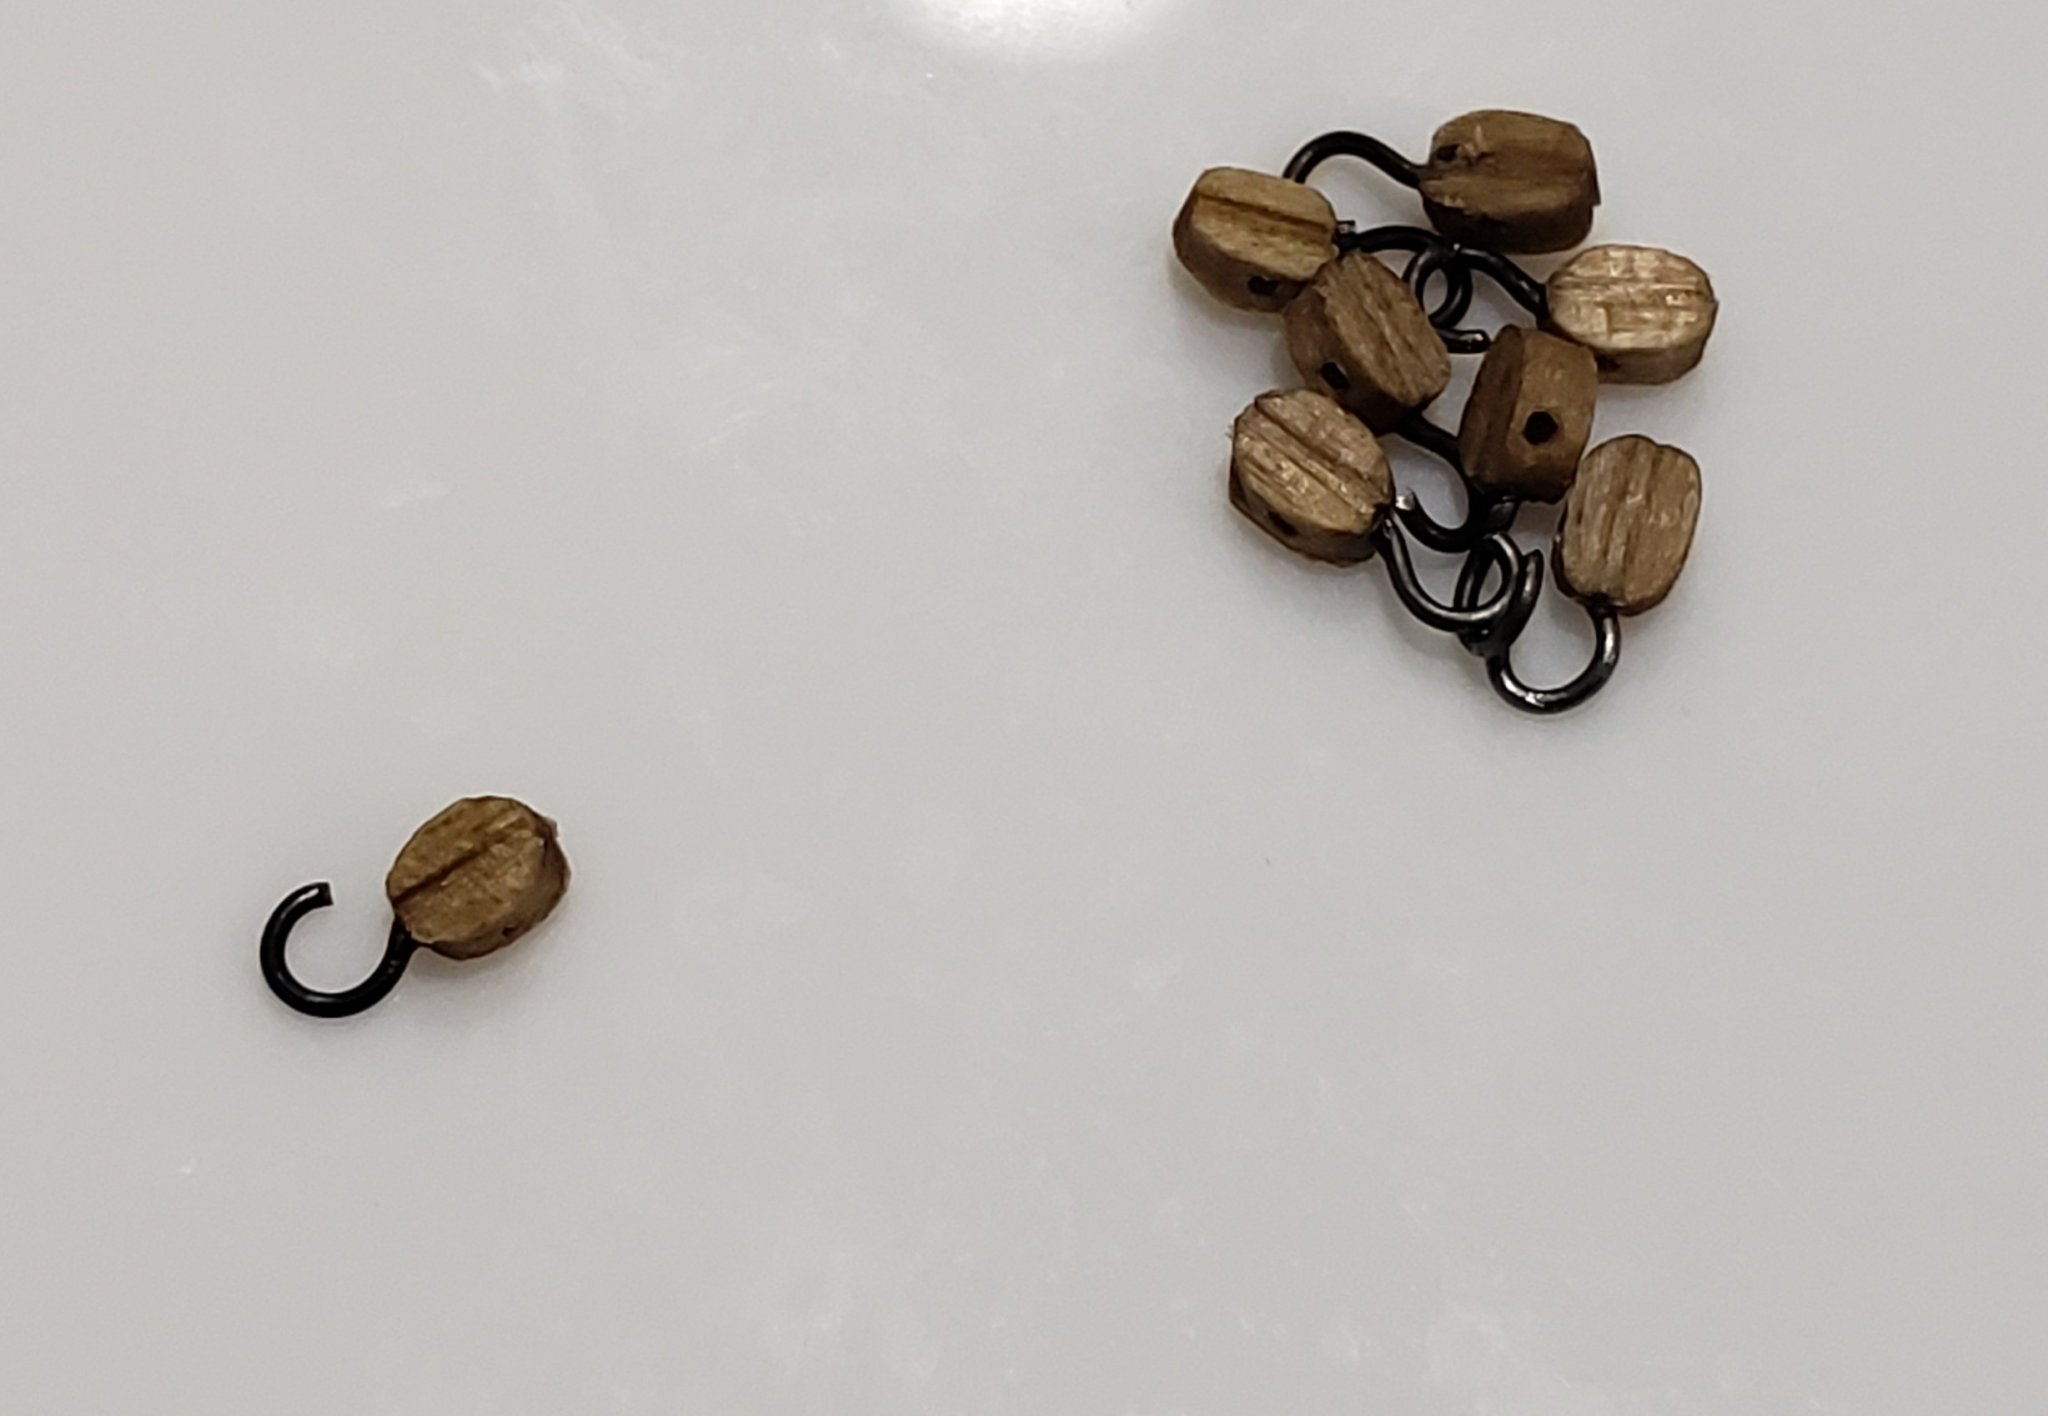
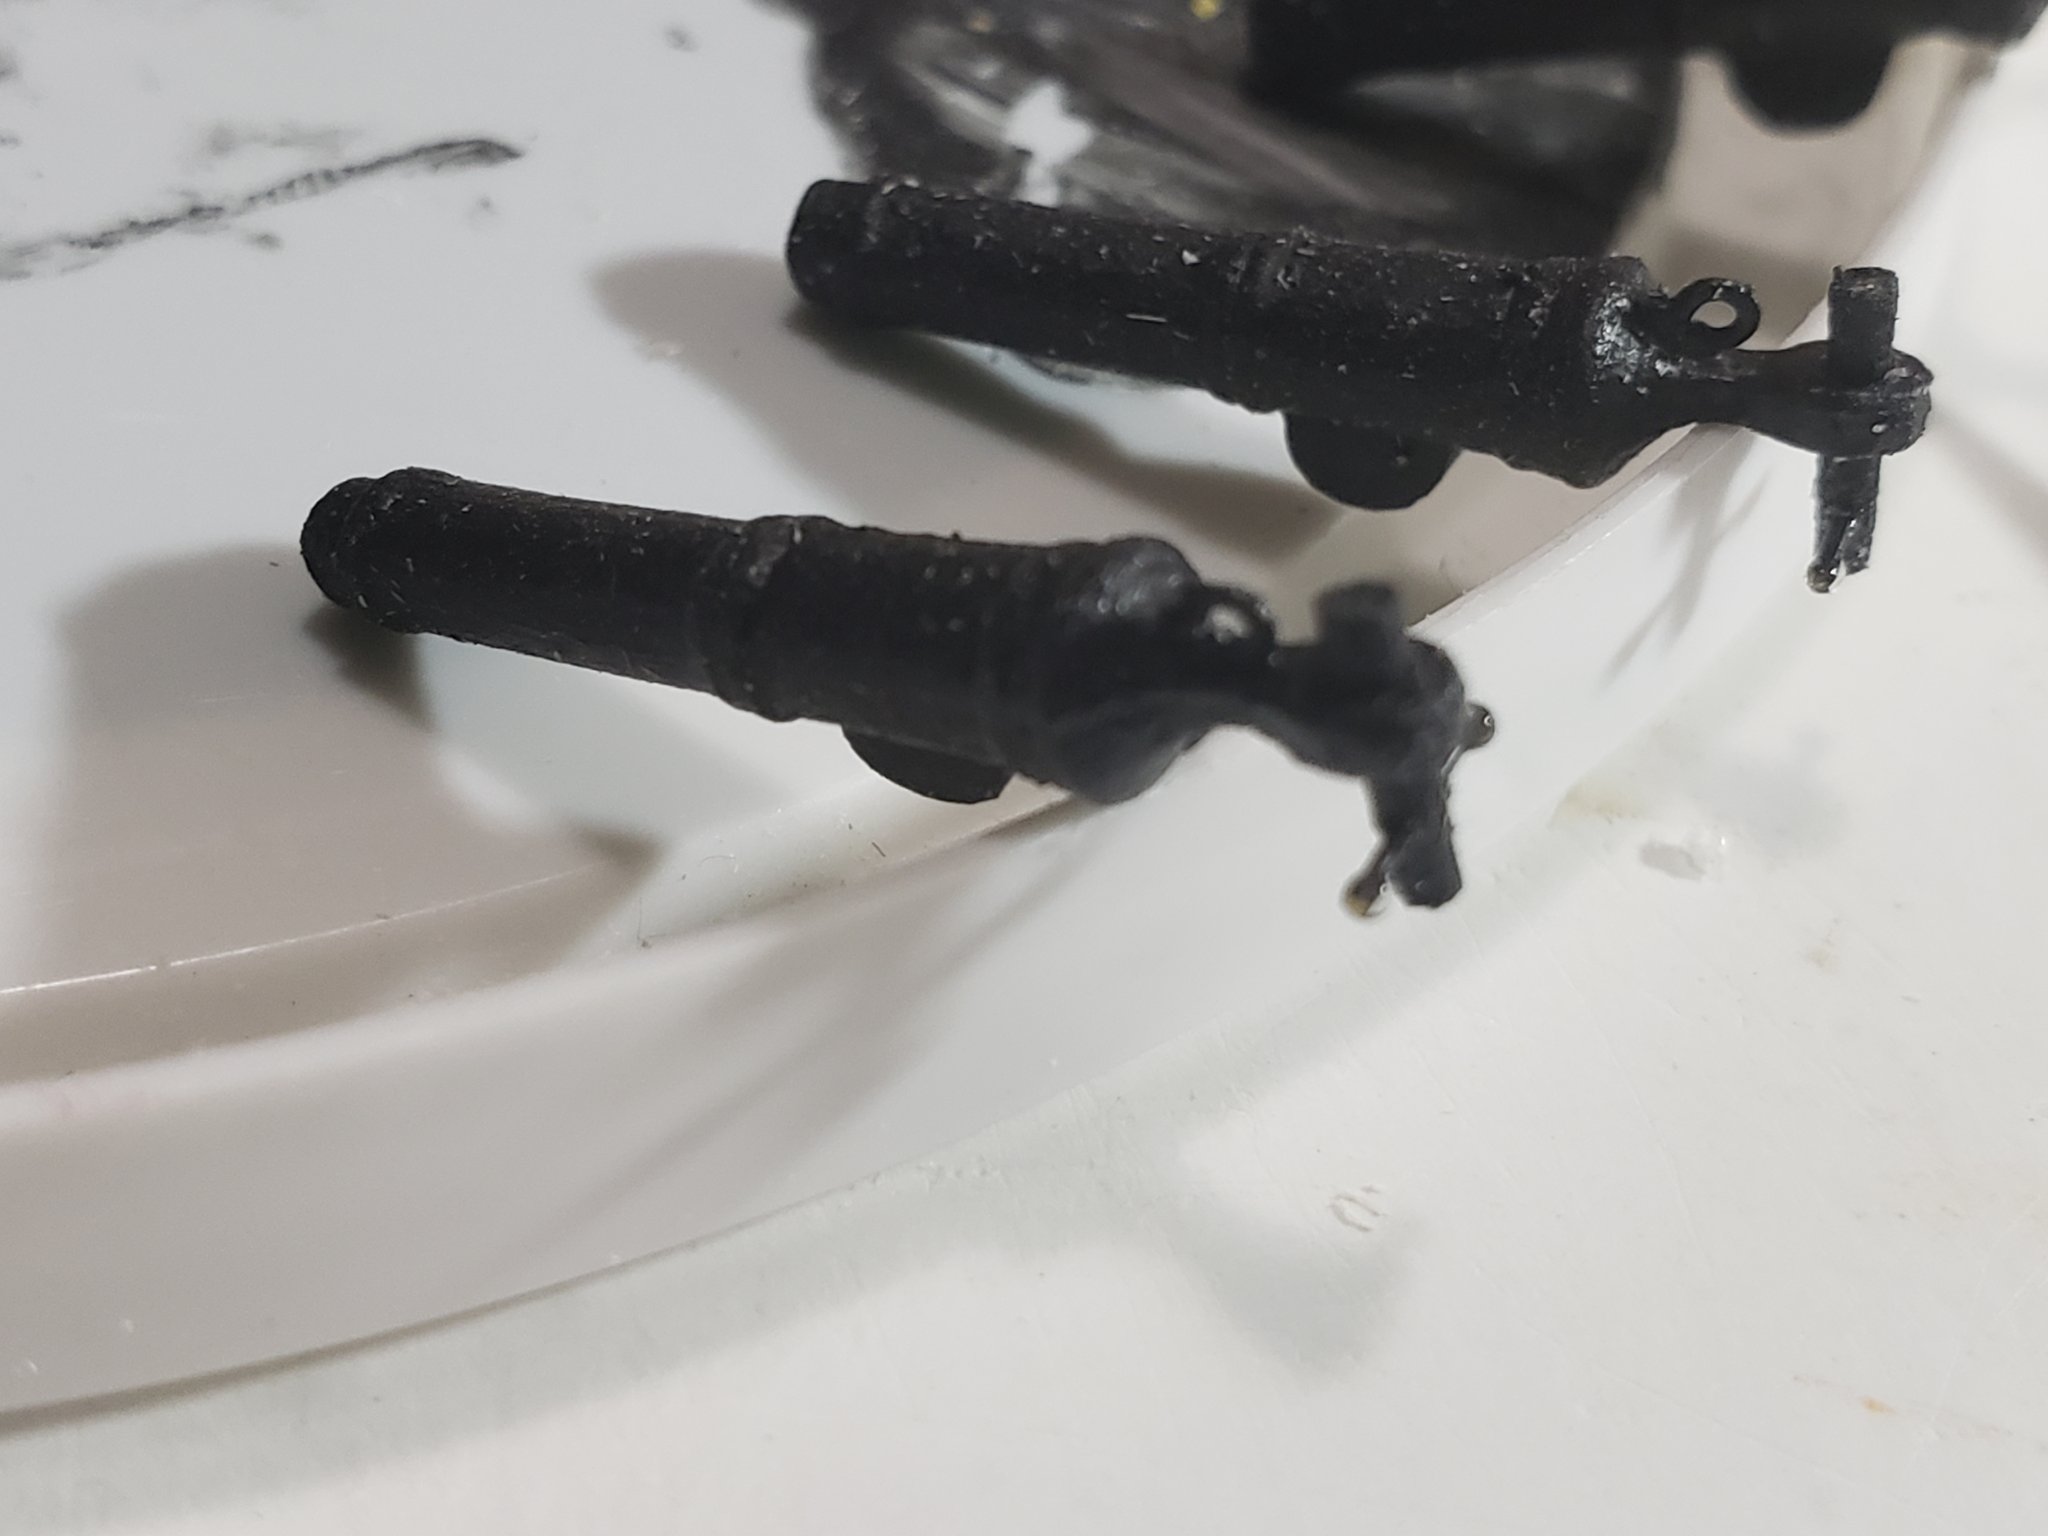
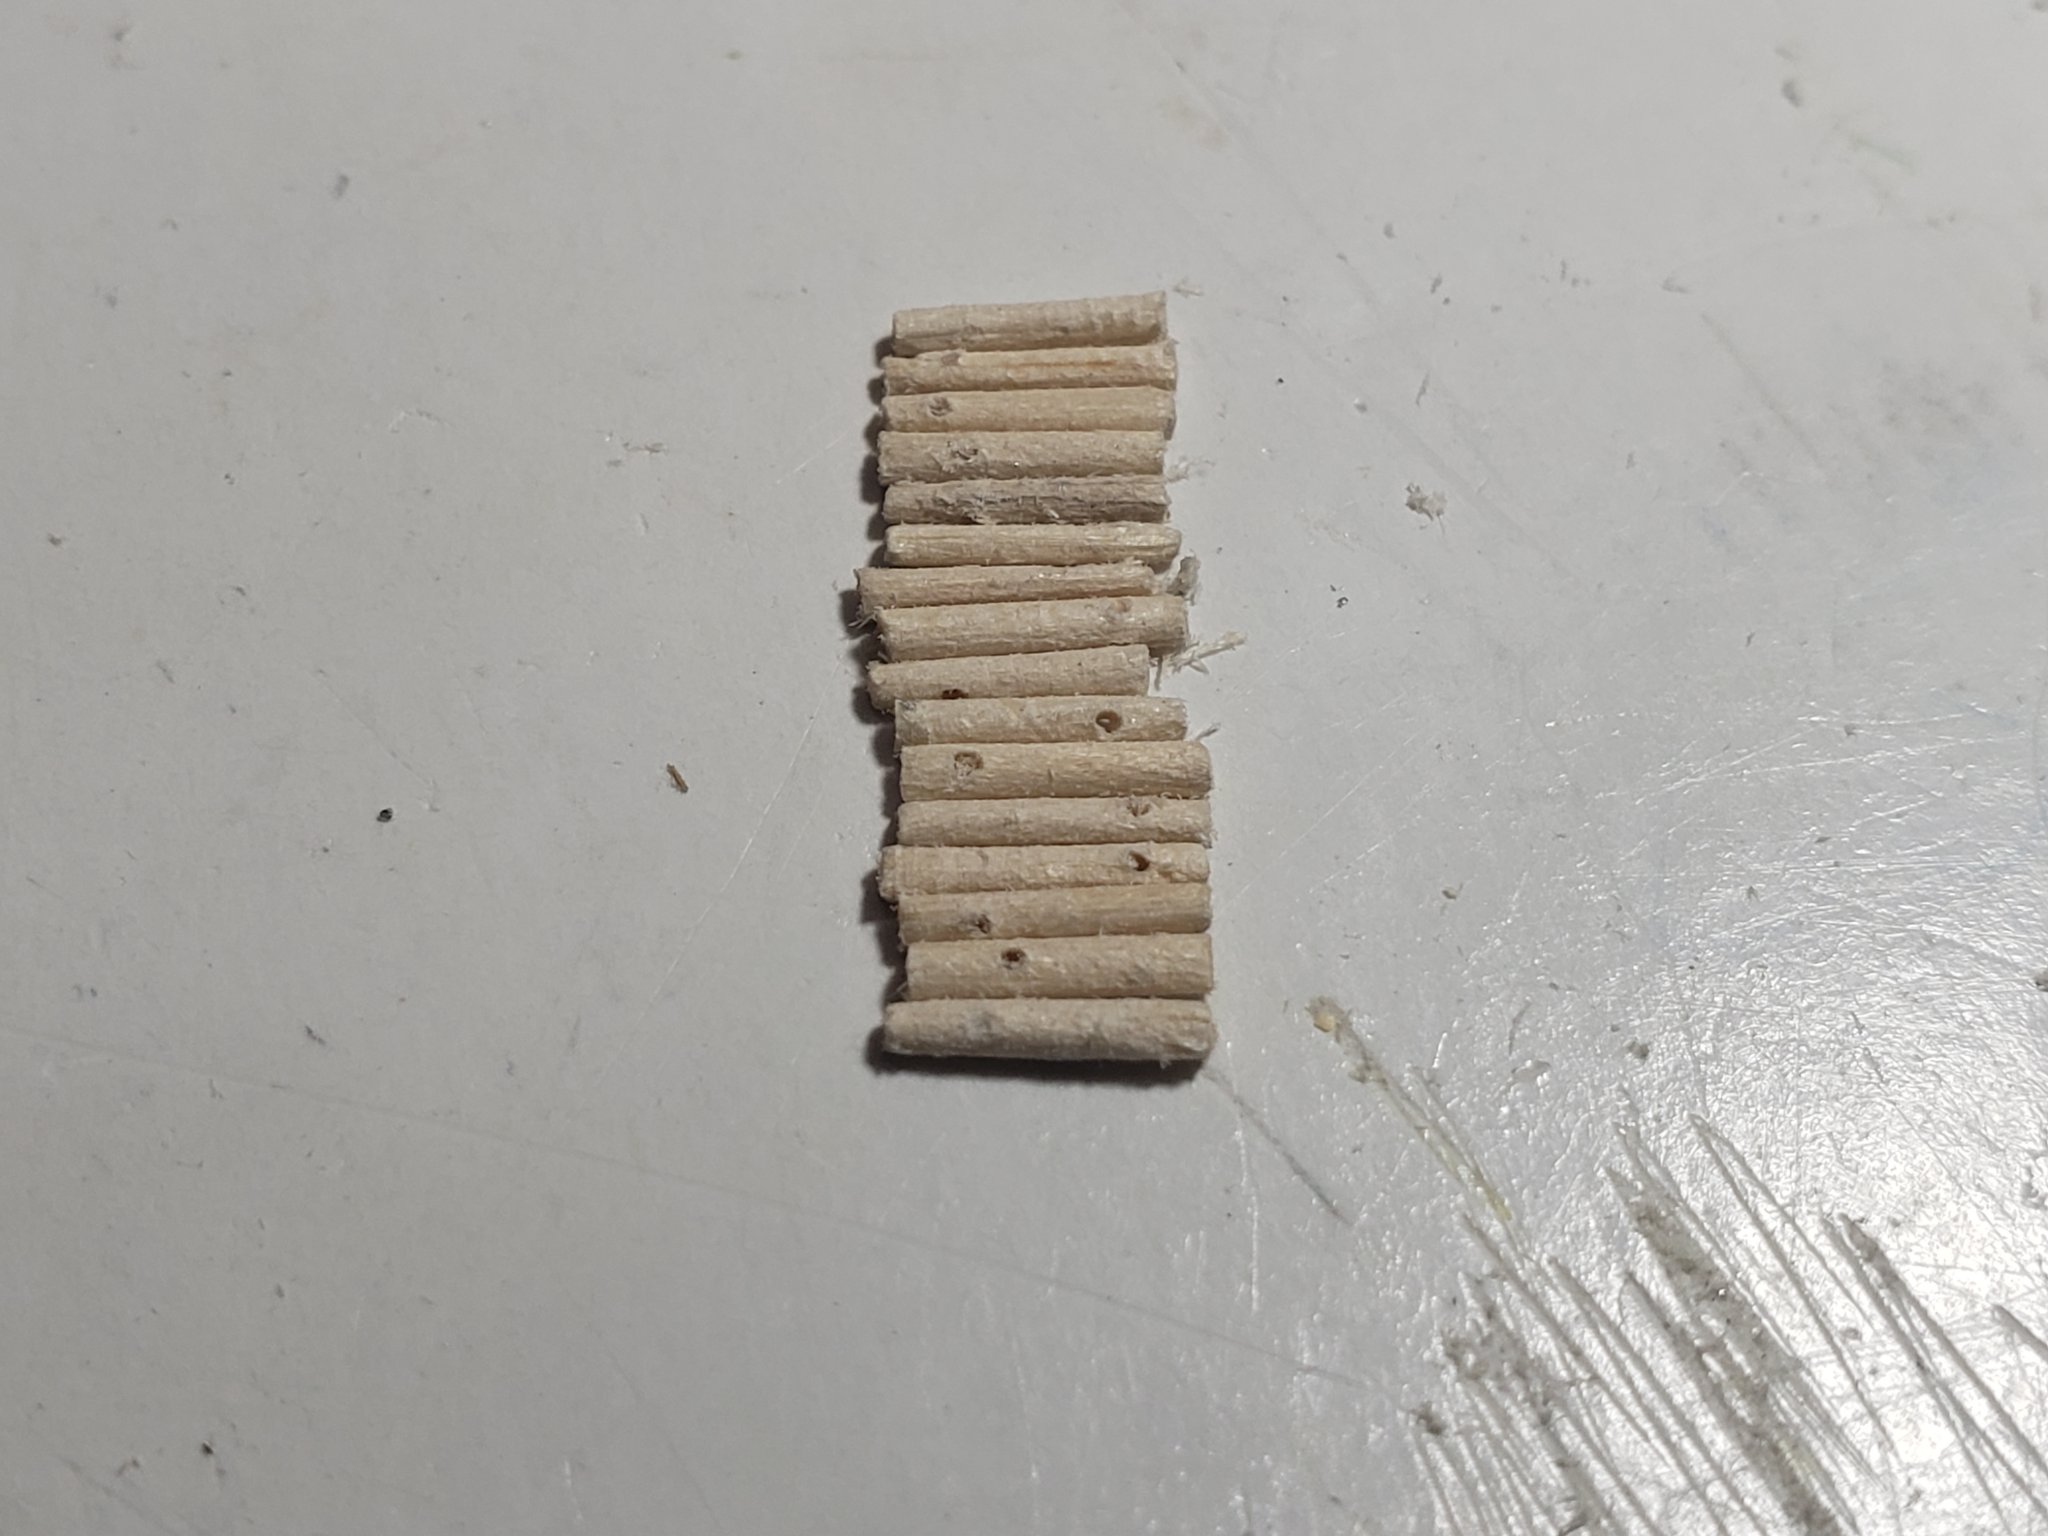
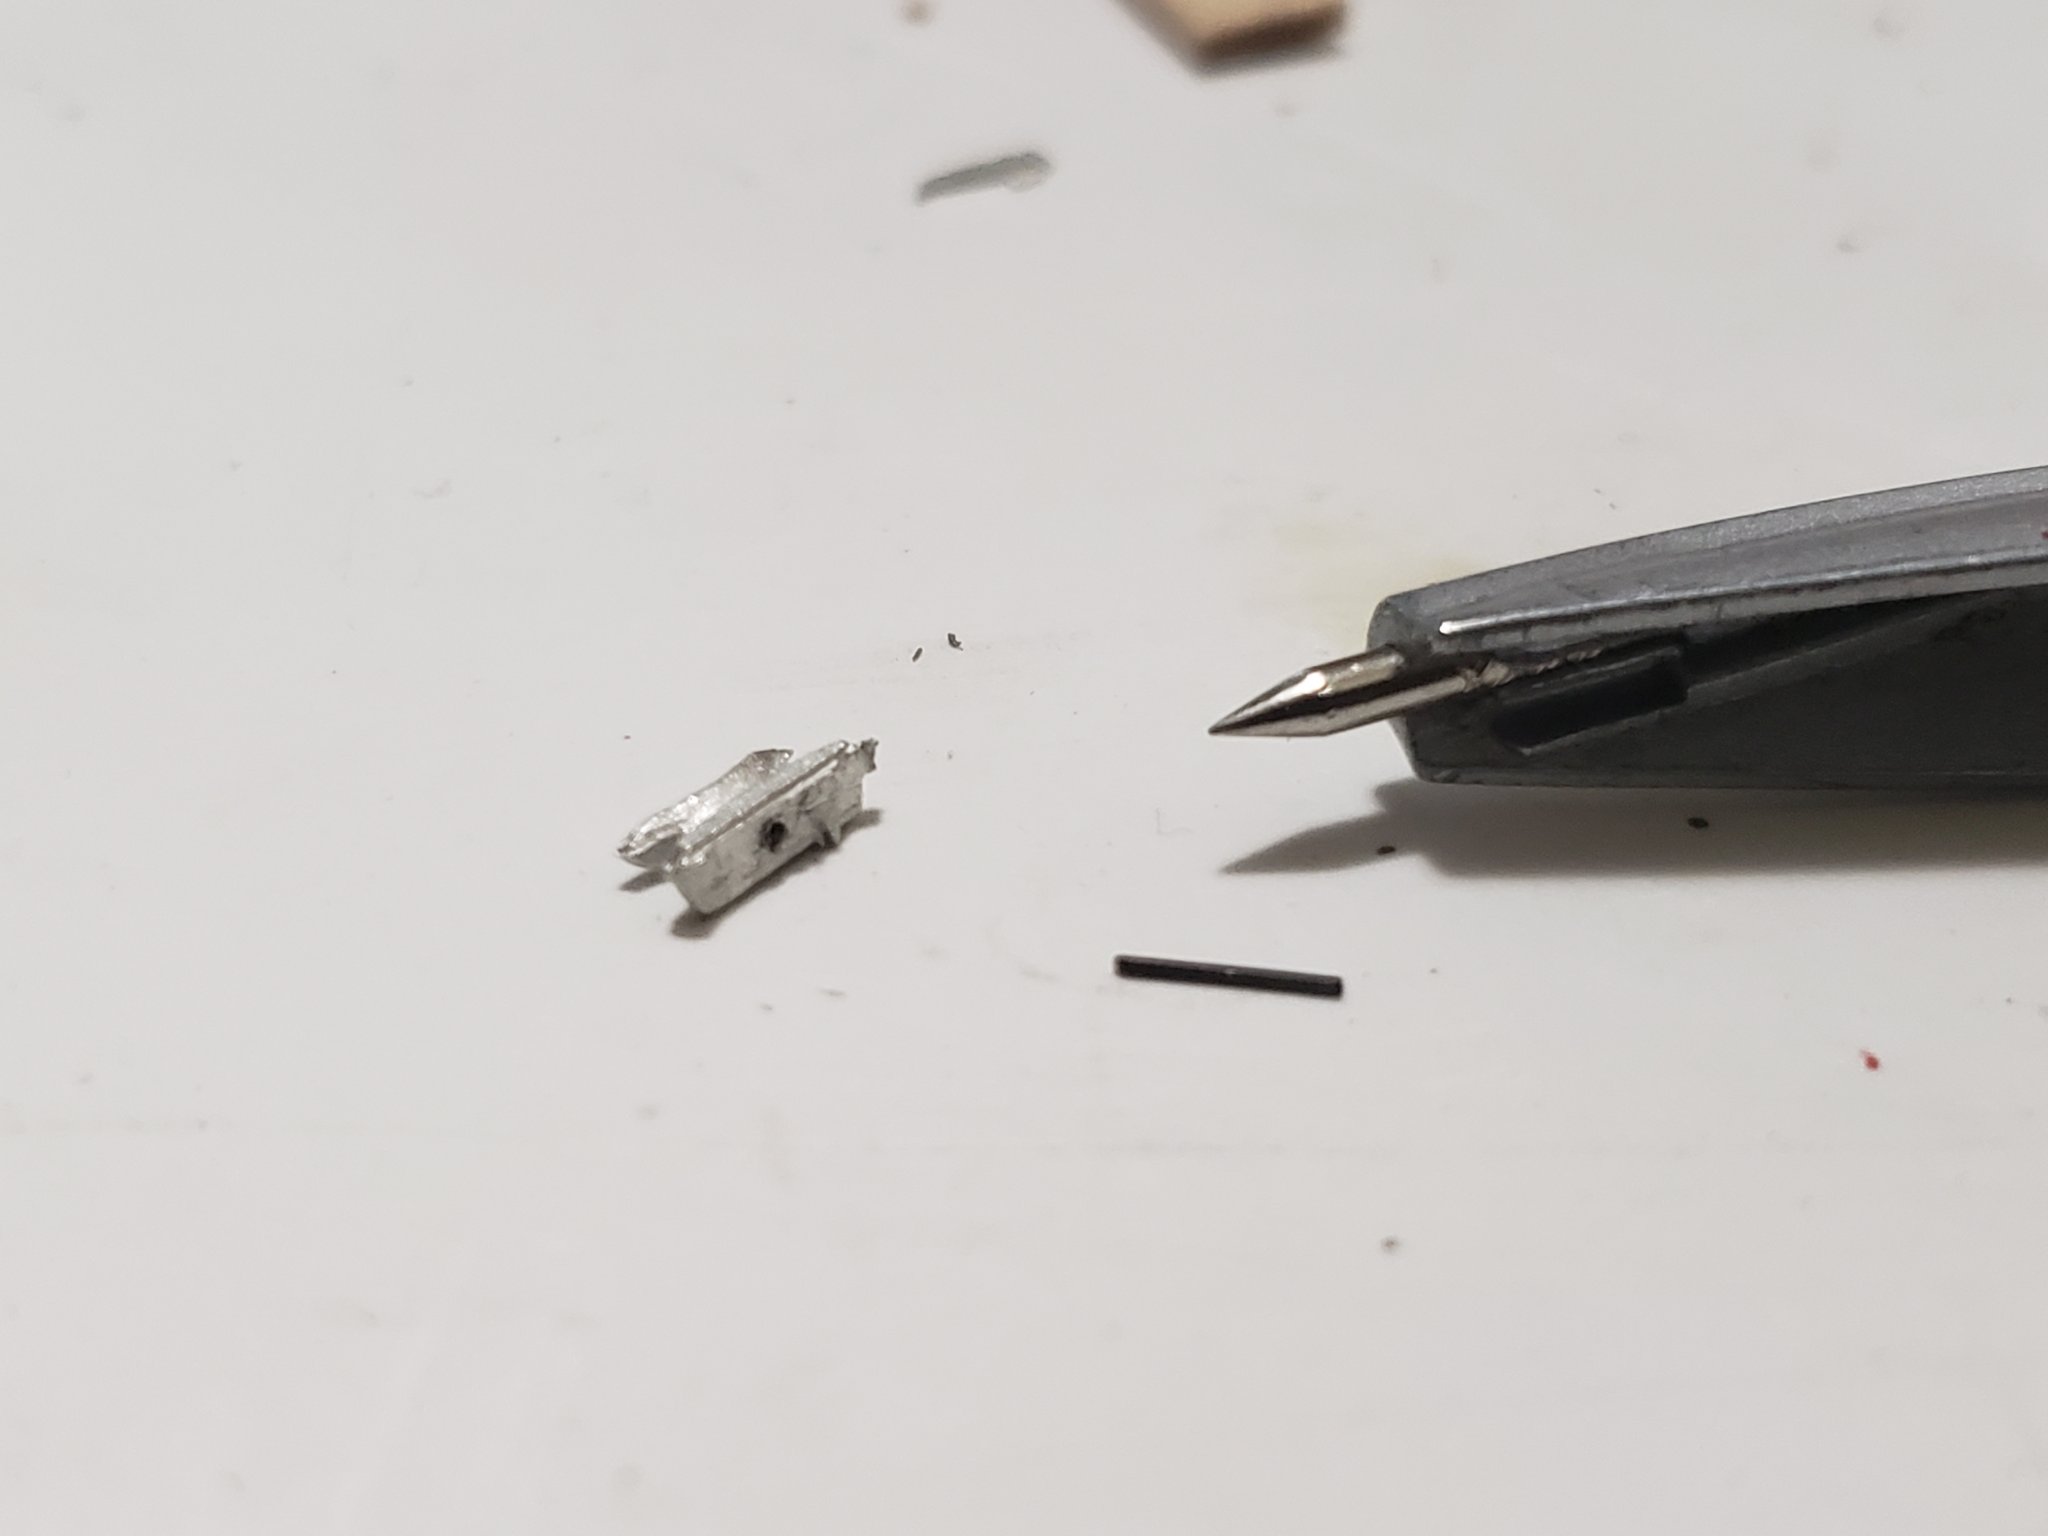
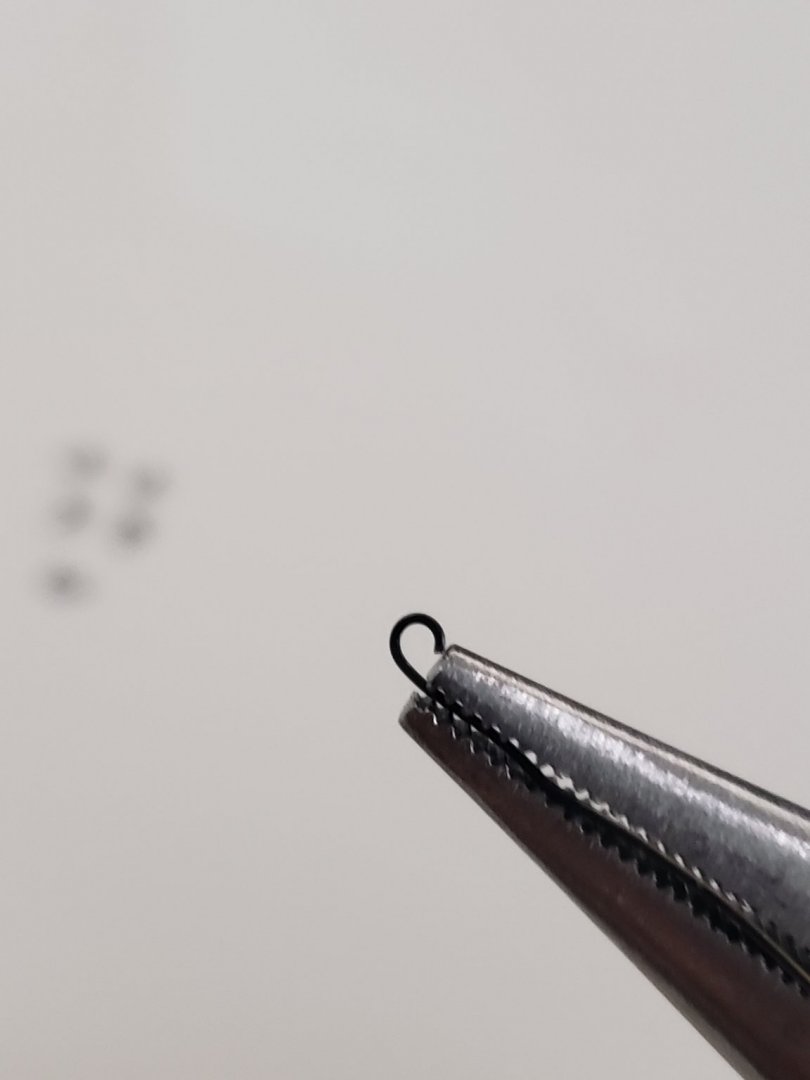
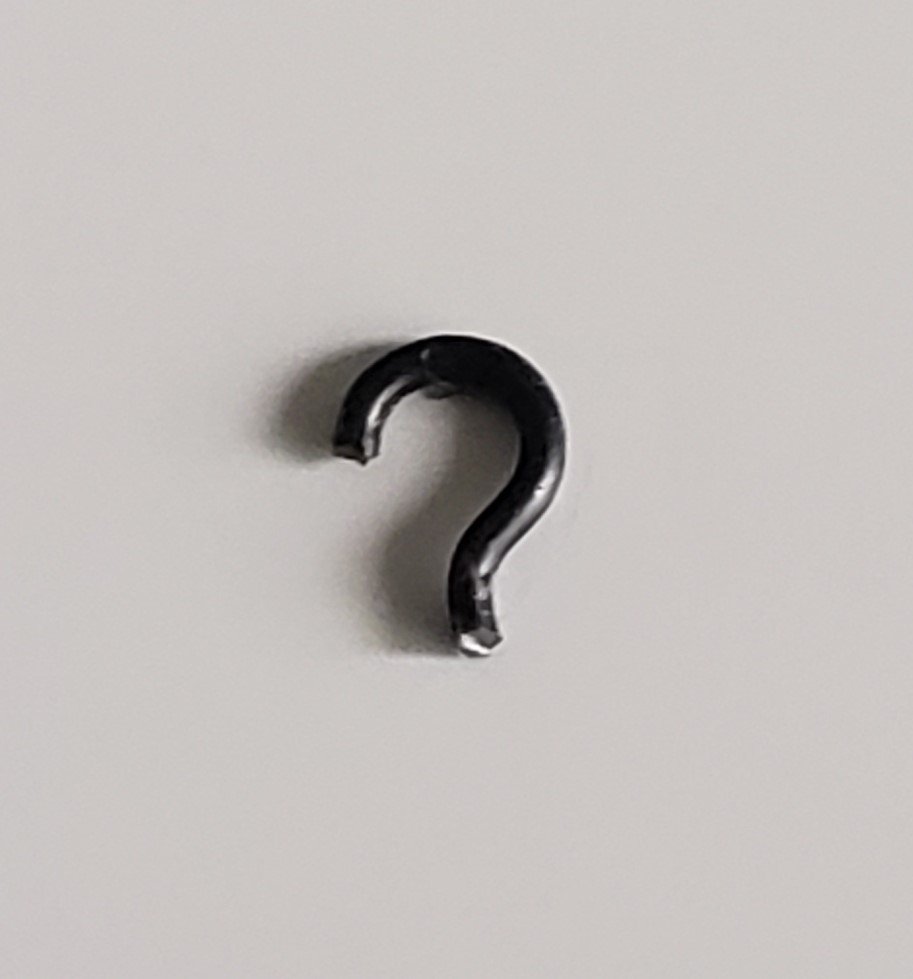
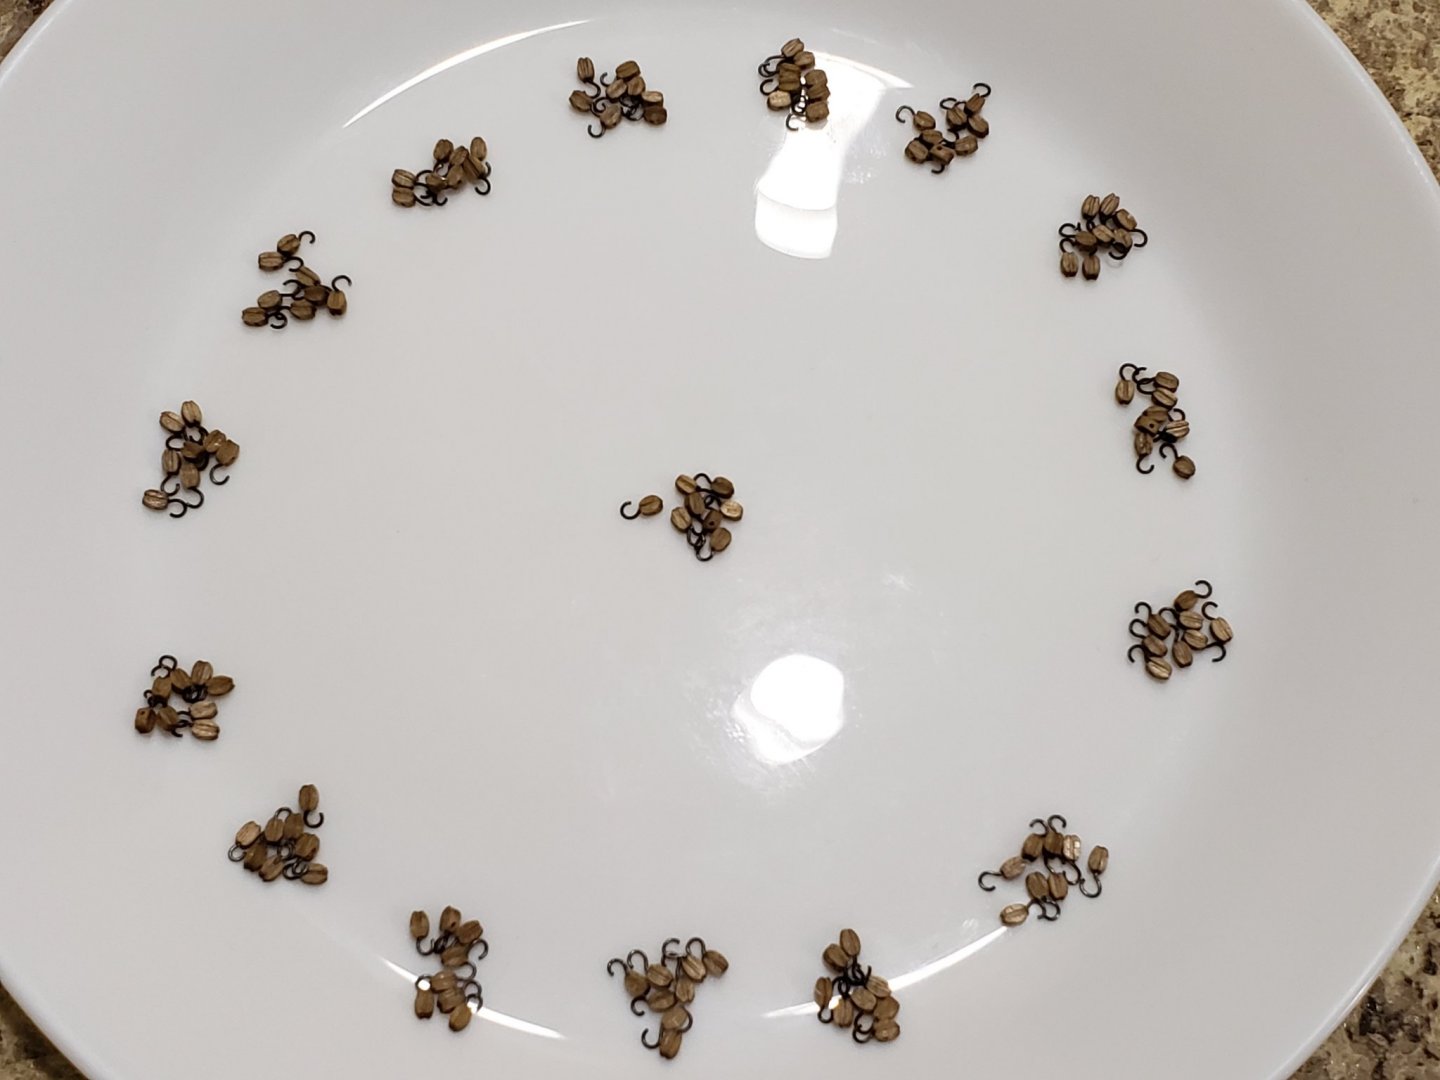
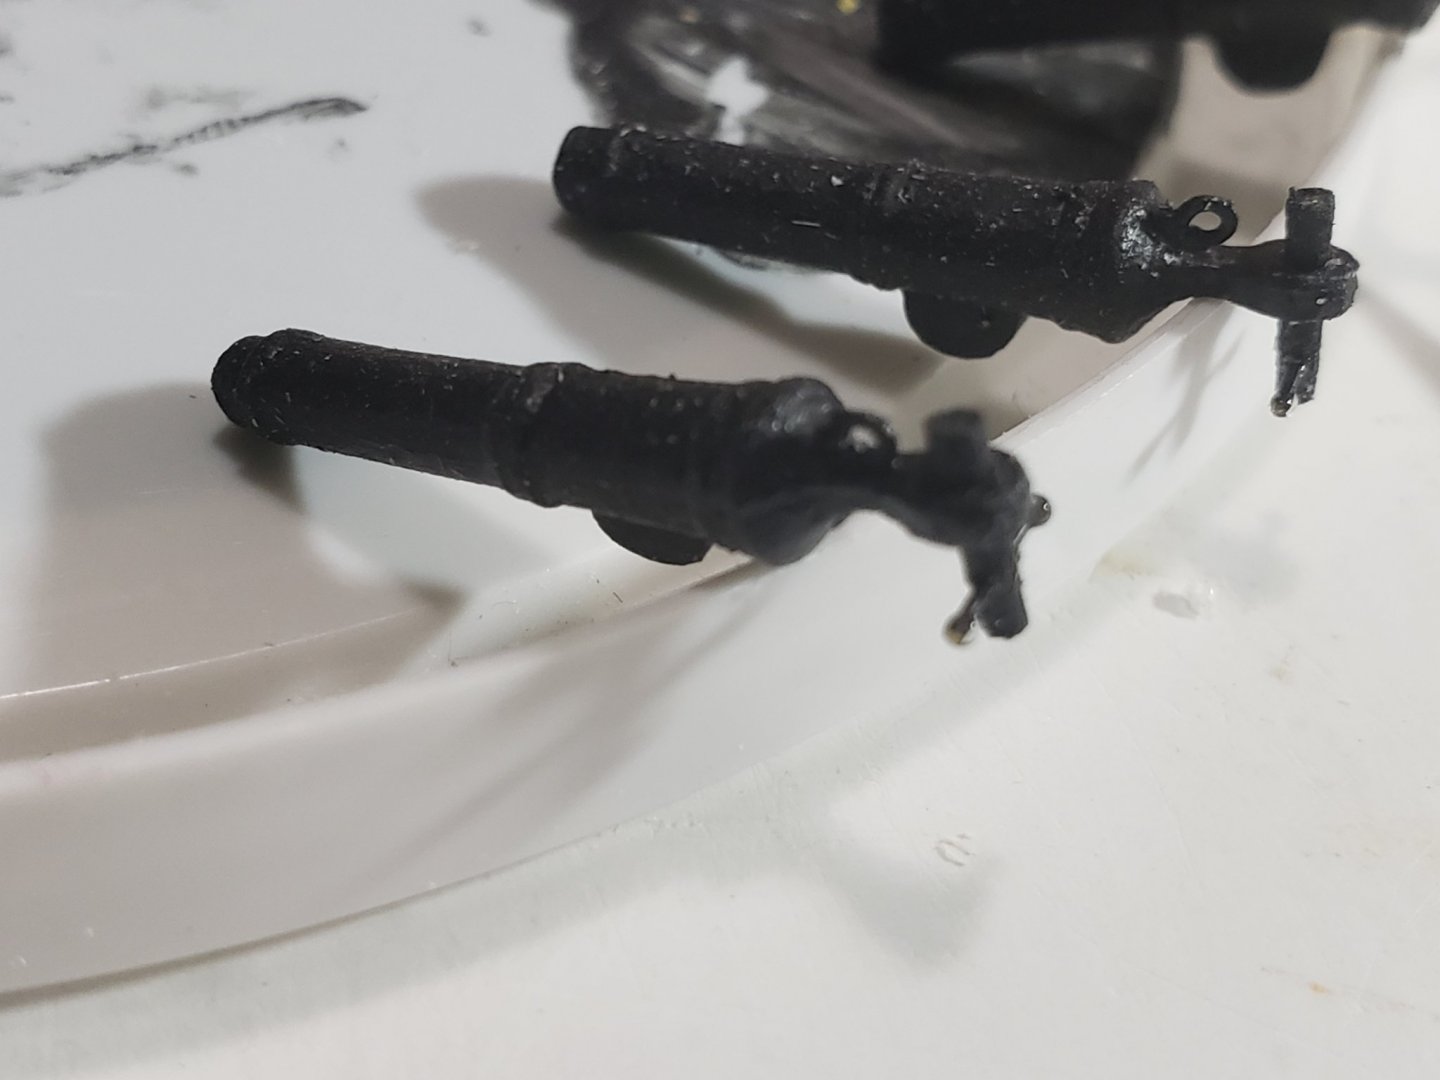
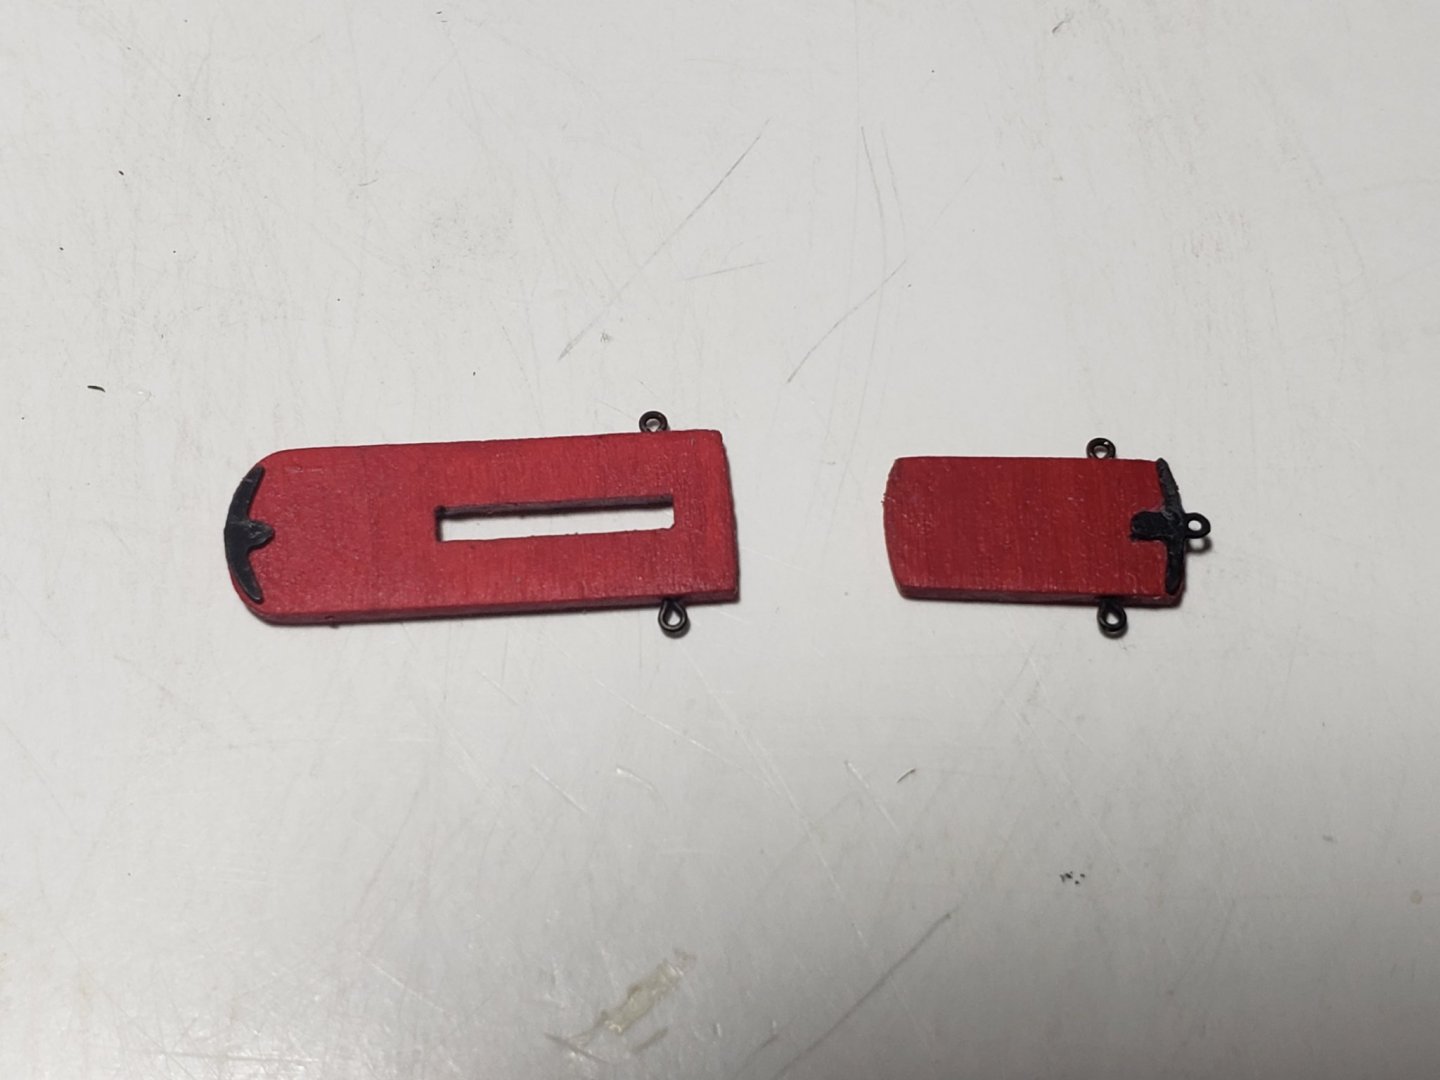
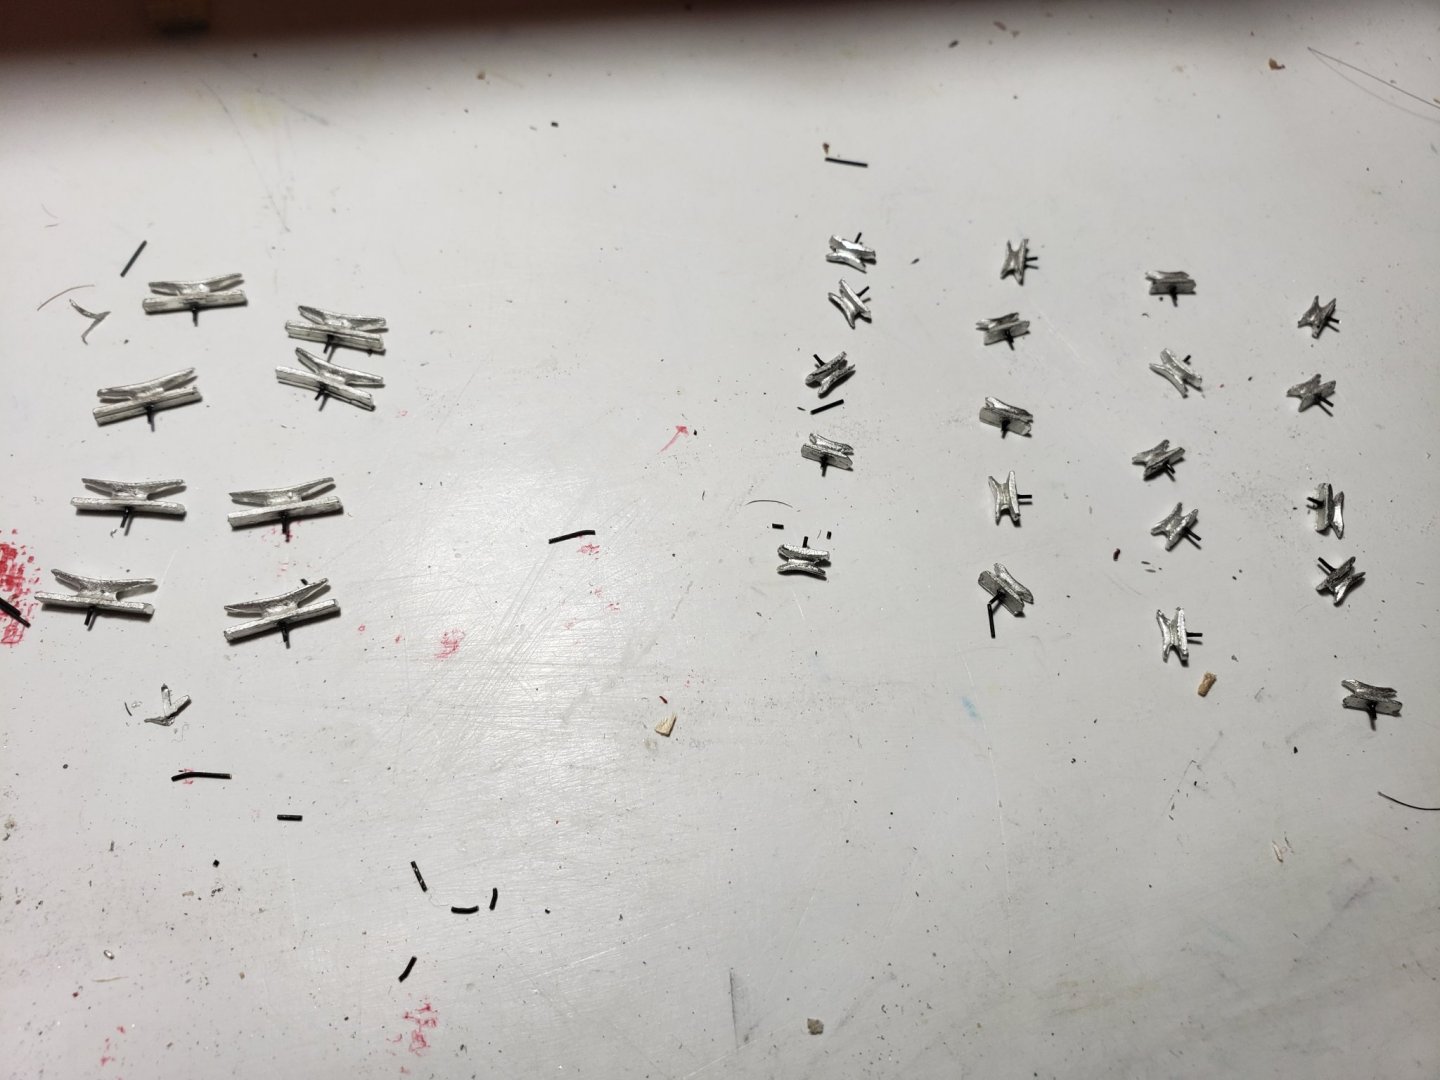
I finished preparing the blocks for the tackles. This was a task I would not like to do again 😅, especially sanding each of the 128 blocks to be rounded, and hand-drilling a hole on each one (using a pin vice 😬). Good thing I distracted myself by watching one of the greatest shows created, the Sopranos! To finish up the blocks, I brushed them with a bit of tung oil (the untreated blocks looked a bit unfinished imo). To create the hooks, I used the pin of a compass and some pliers. Hopefully the following sets of images can explain the process better: The tail bit was then cut off: Then used pliers and the compass pin to bend it: This process was time consuming at first, but got quicker as I got more practice making 127 more of these 😄 The hooks were then glued to the blocks using a bit of superglue: Lastly, I found that the eyebolts glued to the canons were too small for the breech lines. So... I had to deconstruct these parts, use the compass pin again to make them larger, then glue them back. I will also need to do this to the bottom eyebolt pairs on the bulwarks. After this is done, I can finally start the actual rigging!


- 950 replies
-
- 14
-
-
- syren
- model shipways
- (and 1 more)
-
She is definitely starting to look deadly Thanks for the great comment Patrick!
-
Looks really good! Definitely can't tell that it's your first time planking. This still seems like magic to me, it might be a while until I try something with exposed single layer of planks
-
Thank you all for the very nice comments!! It's very much appreciated! 😊
-
Thanks for the component Voyageur! Yeaup, I started grad school this week, so I have less modelling time. Progress has really slowed down
- 950 replies
-
- 1
-
-
- syren
- model shipways
- (and 1 more)
-
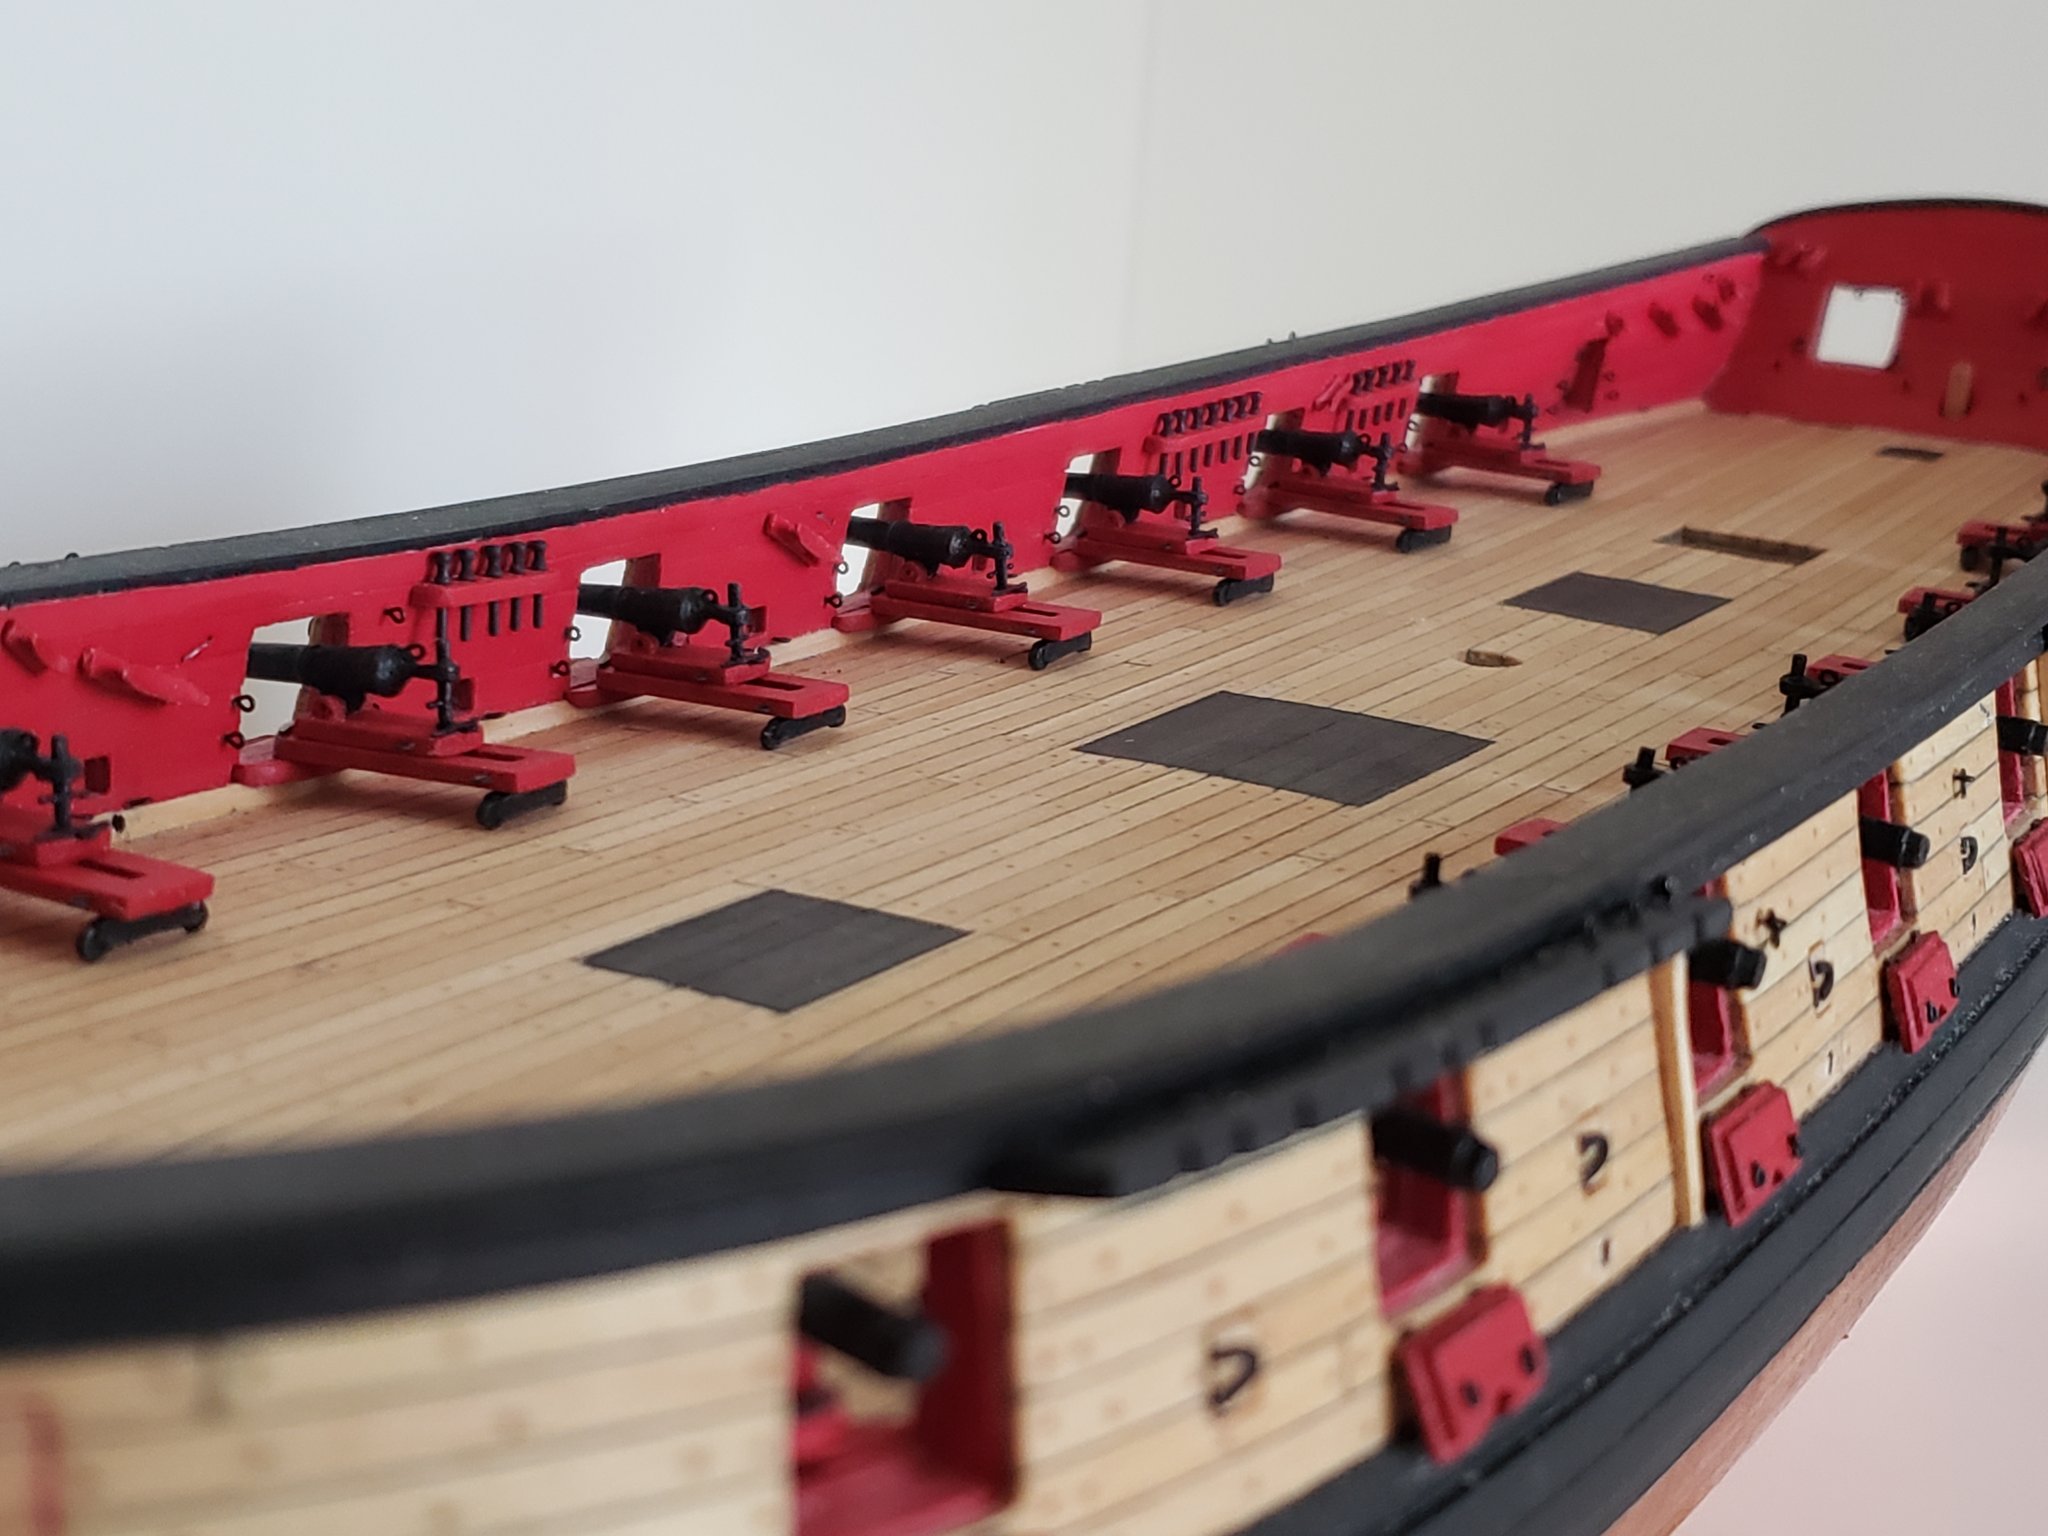
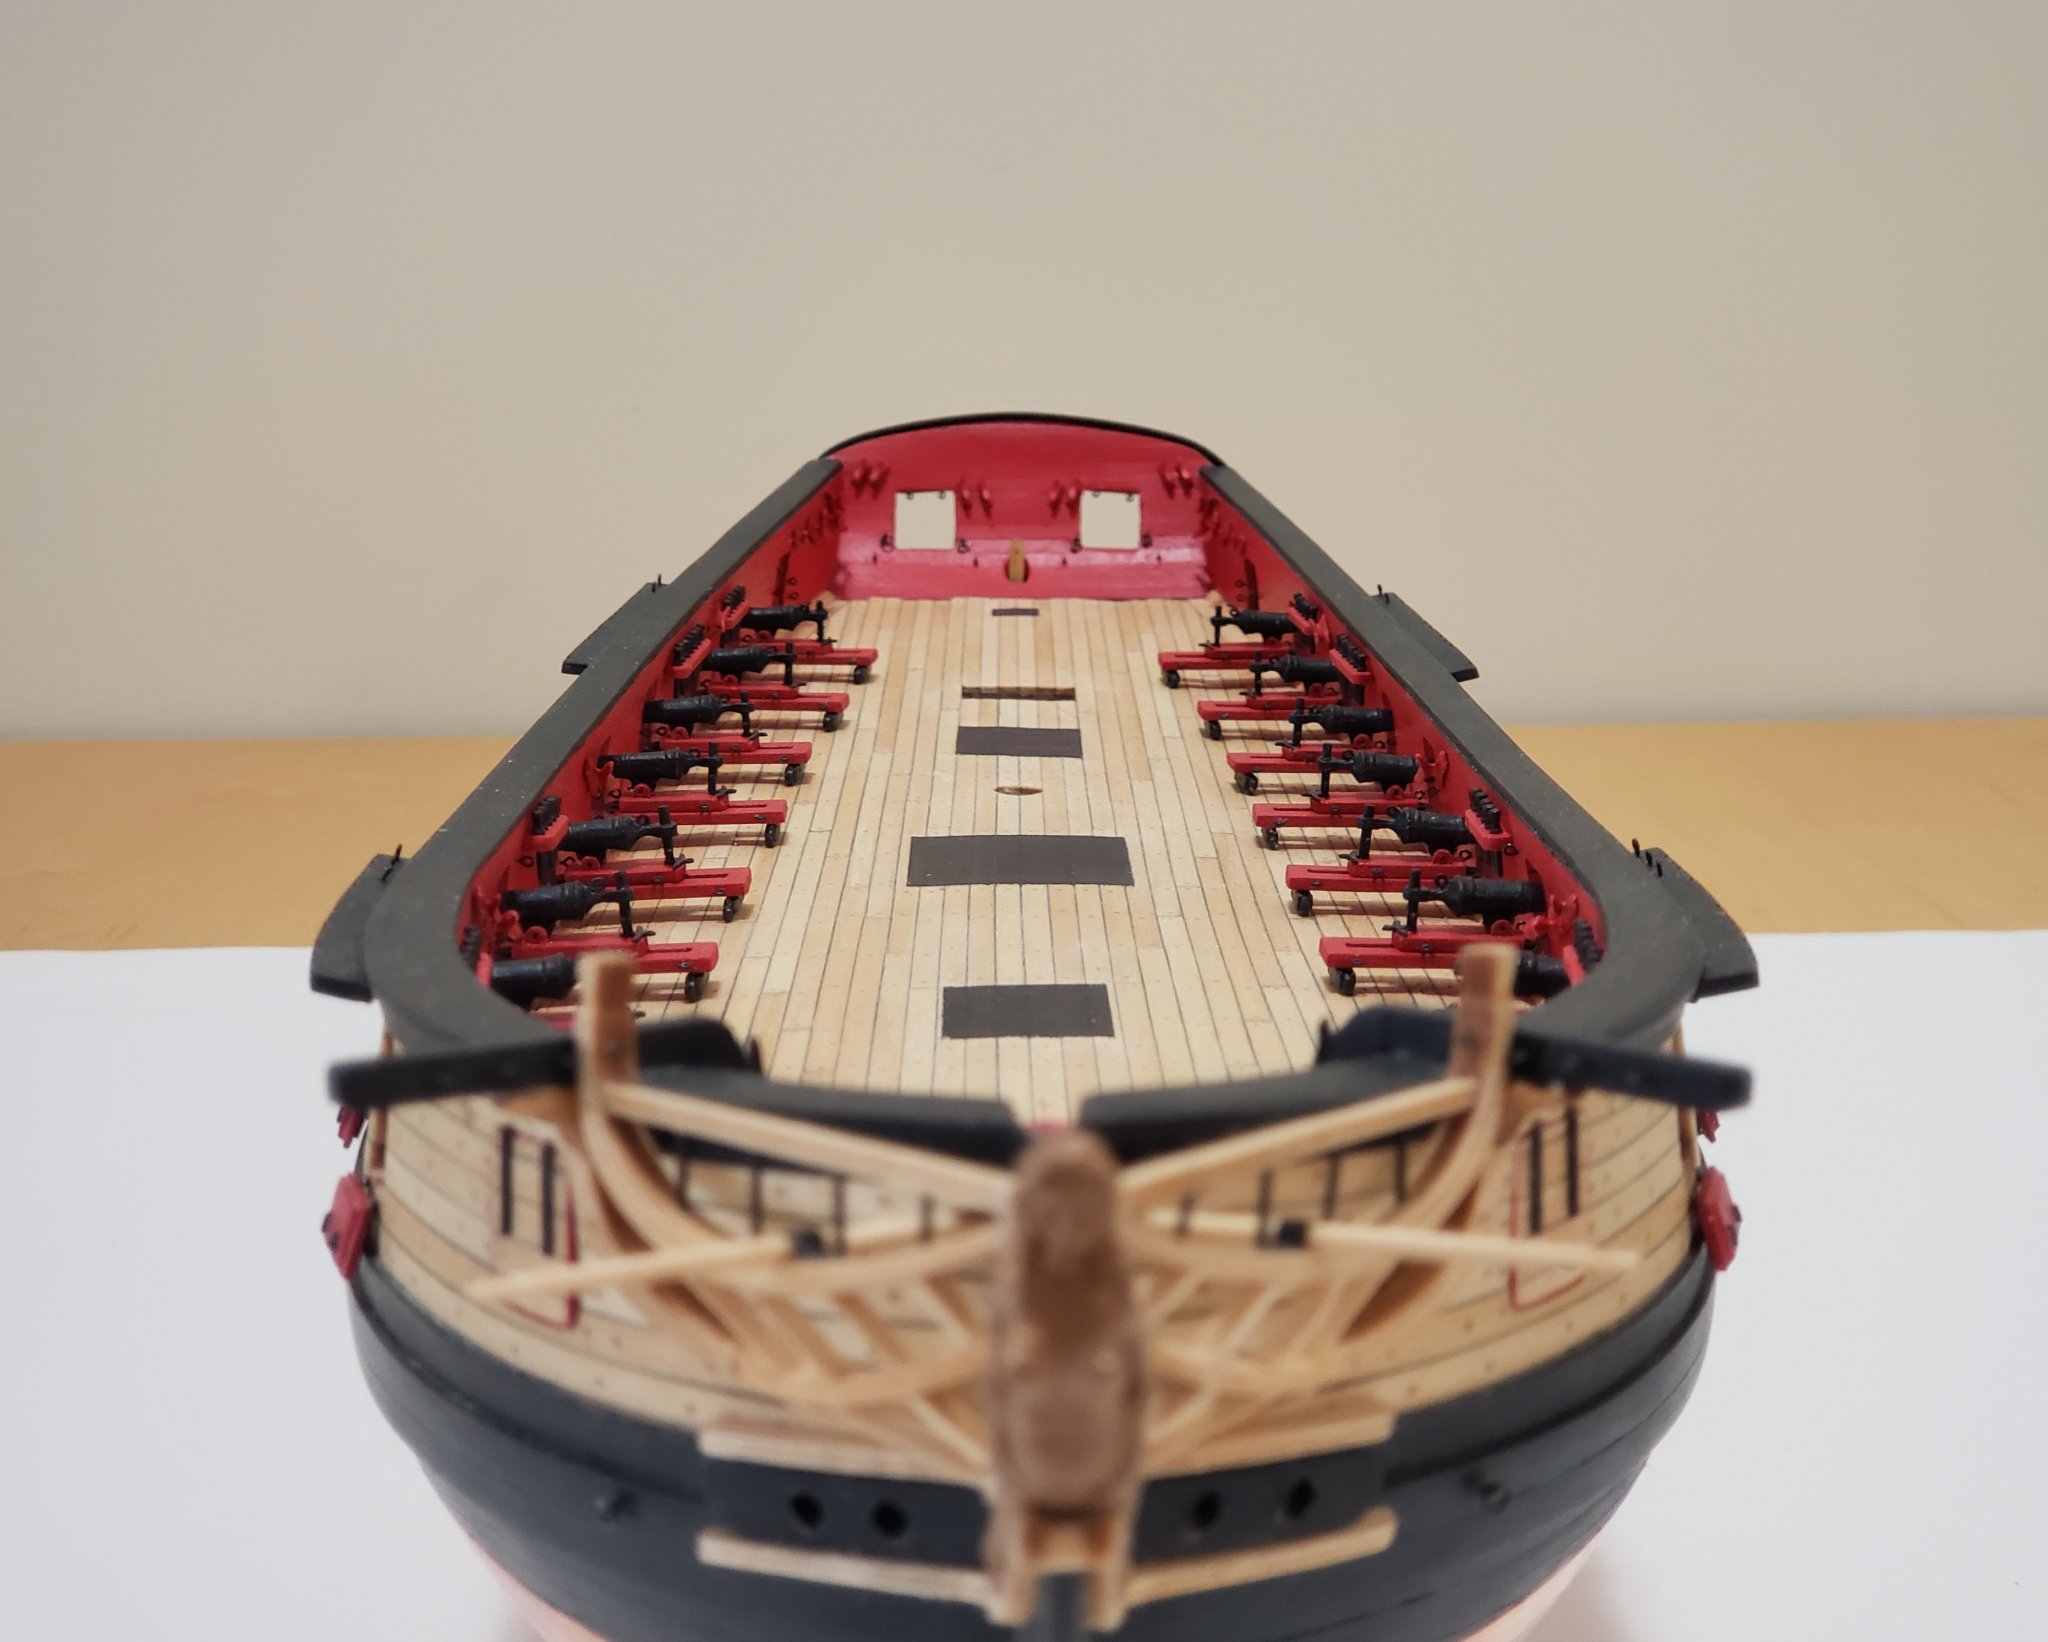
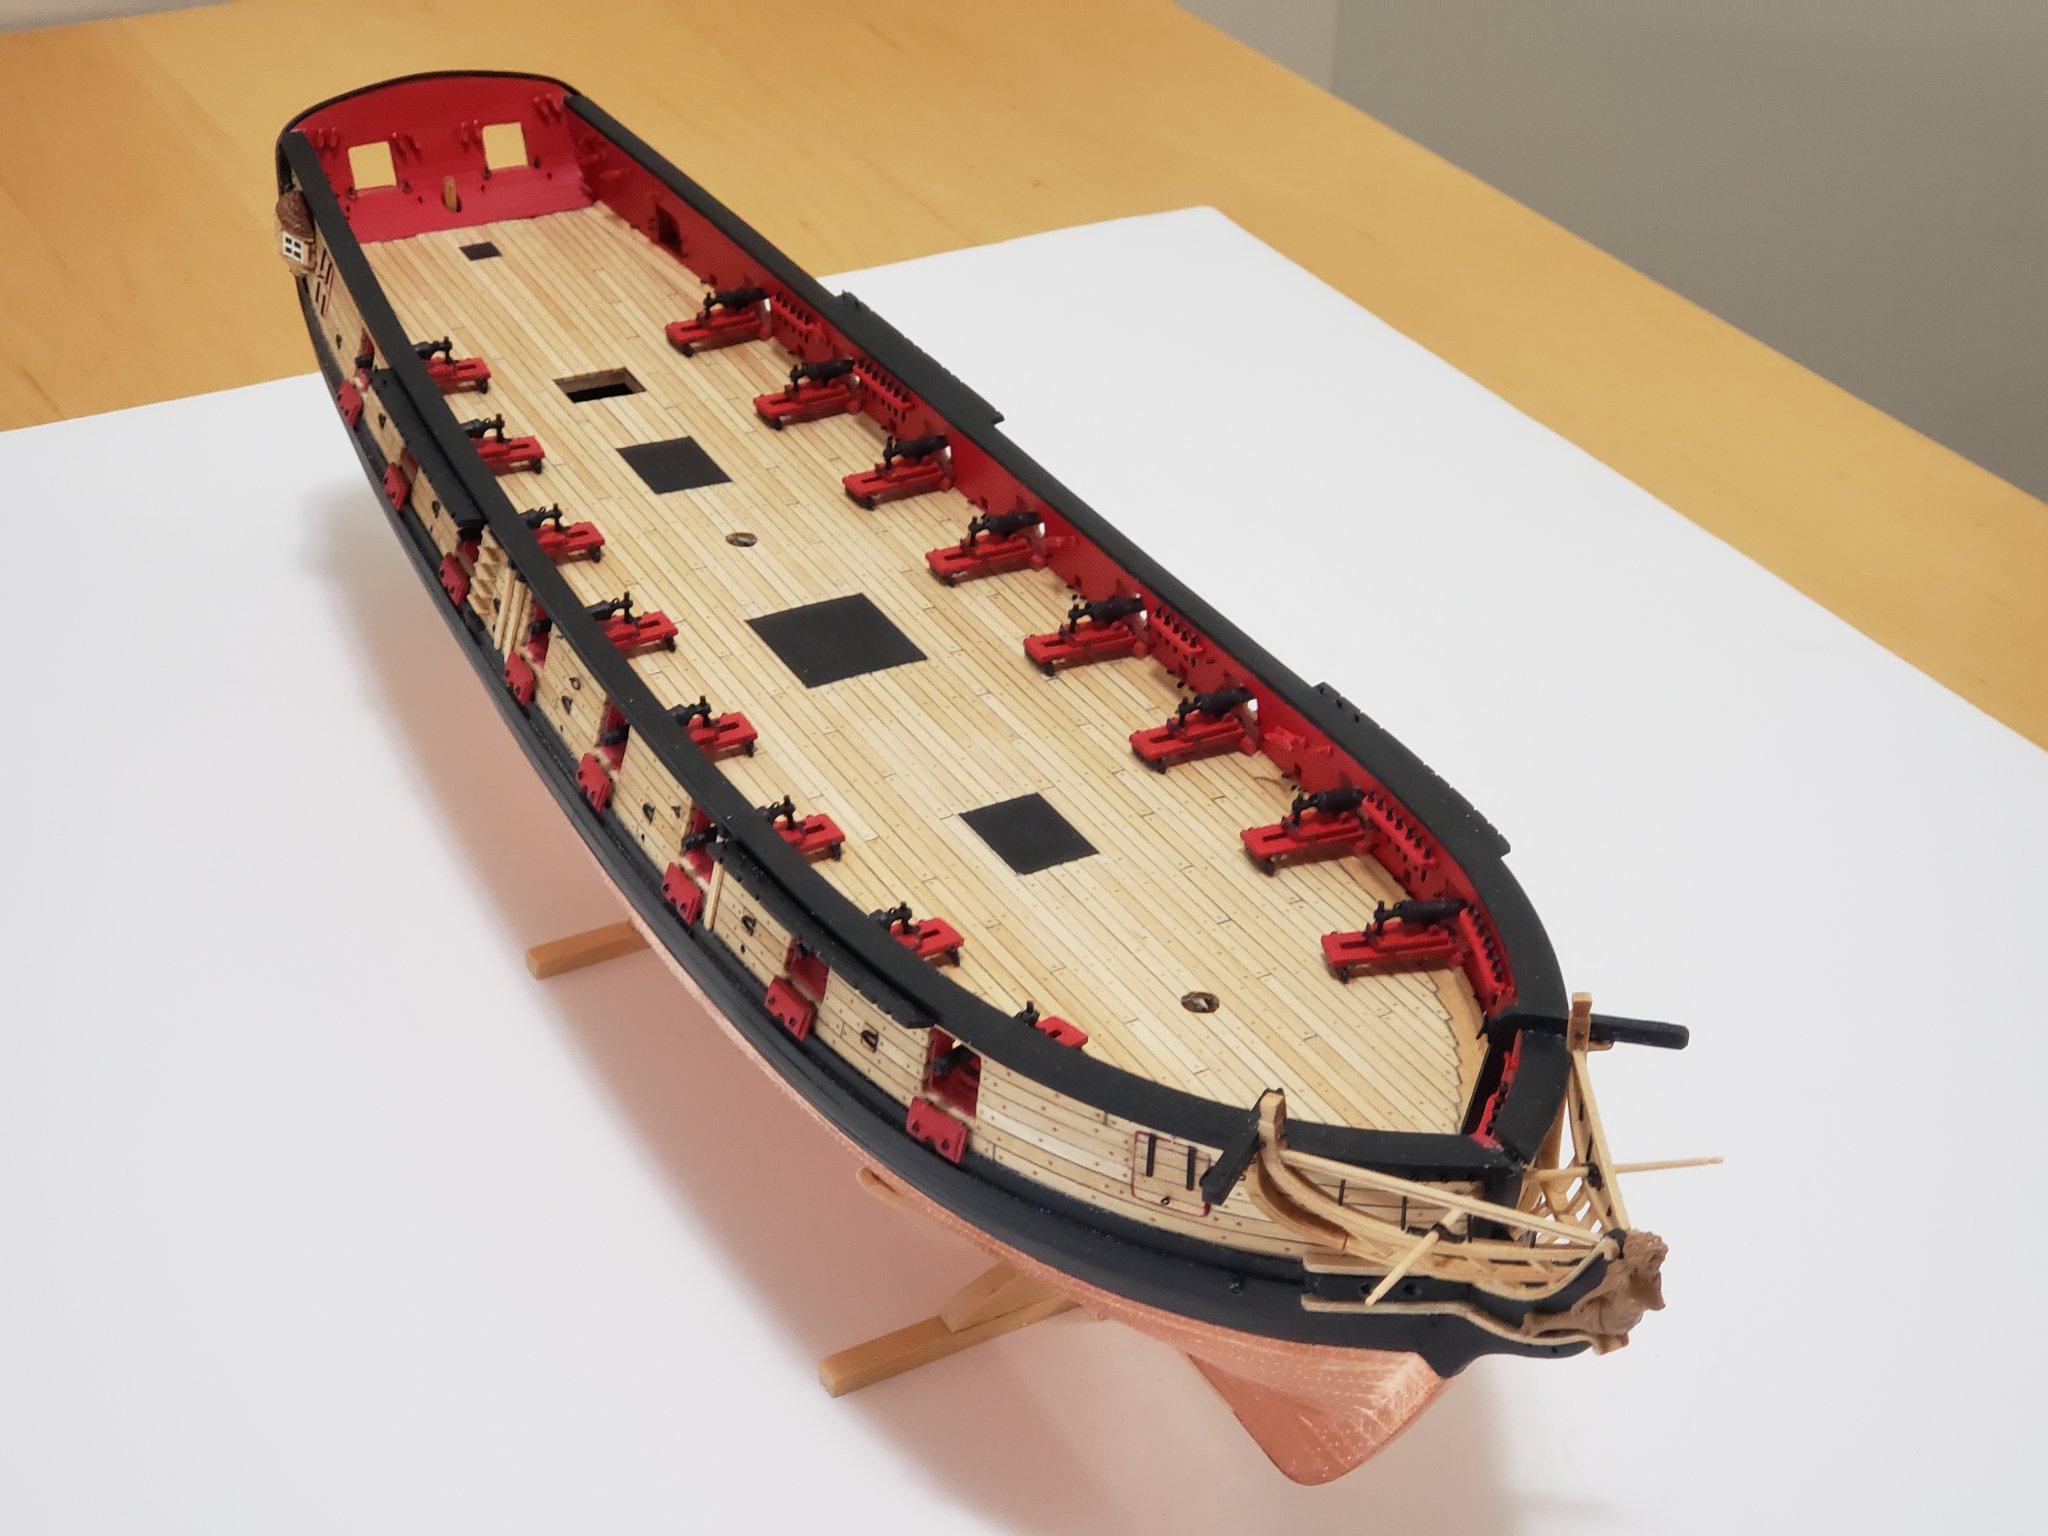
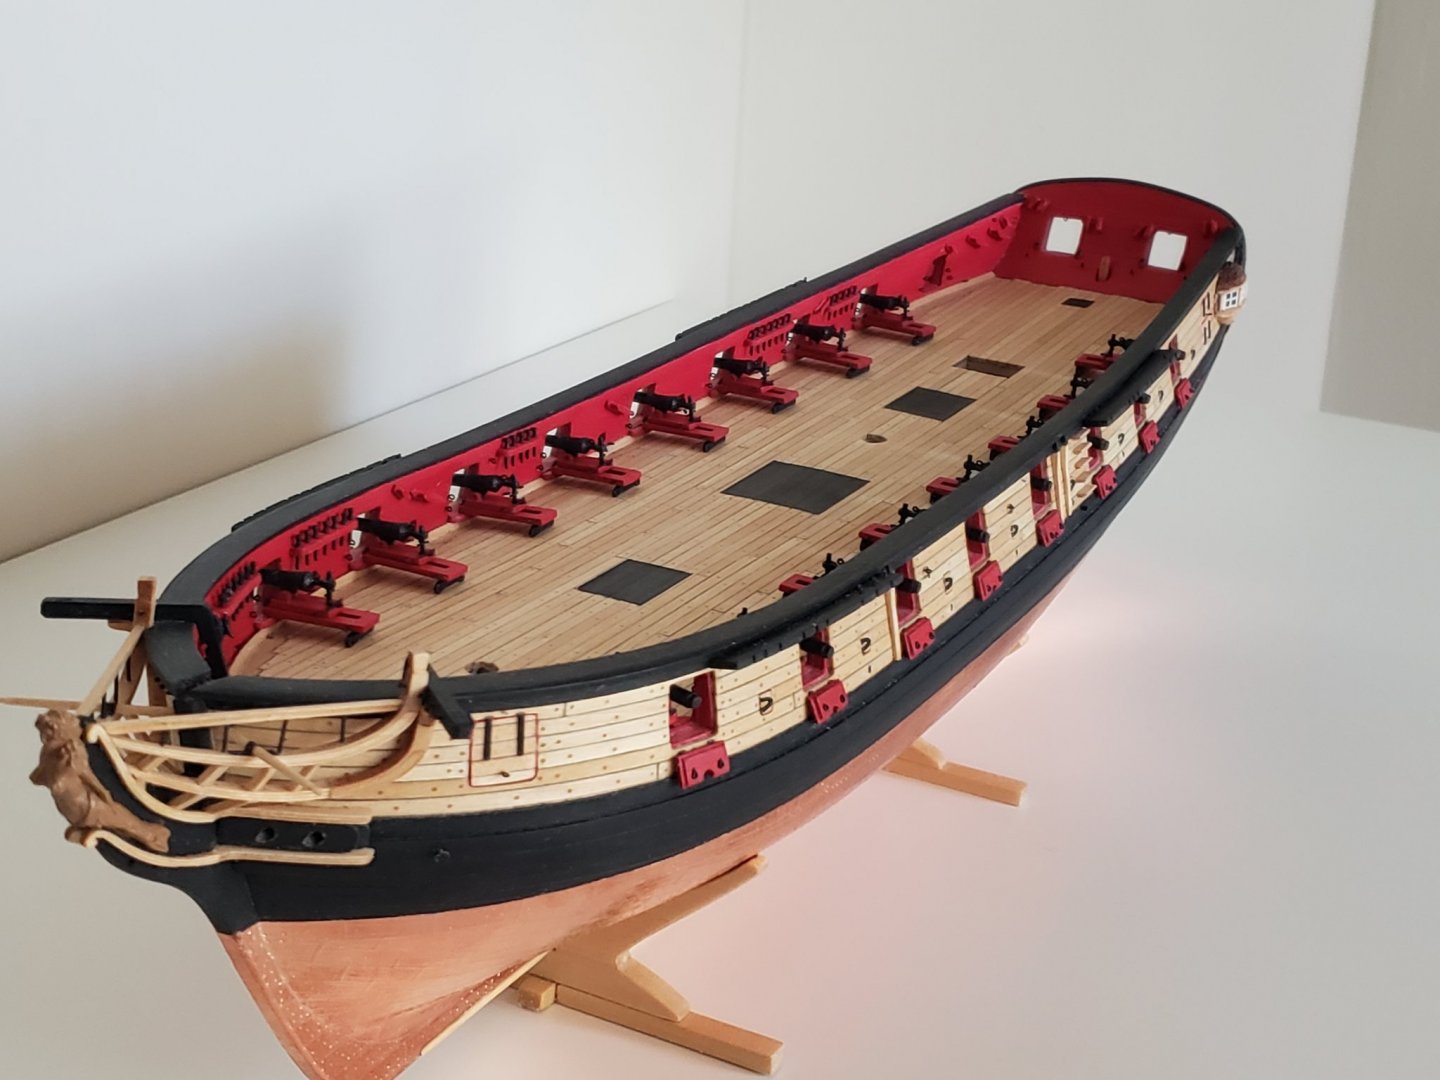
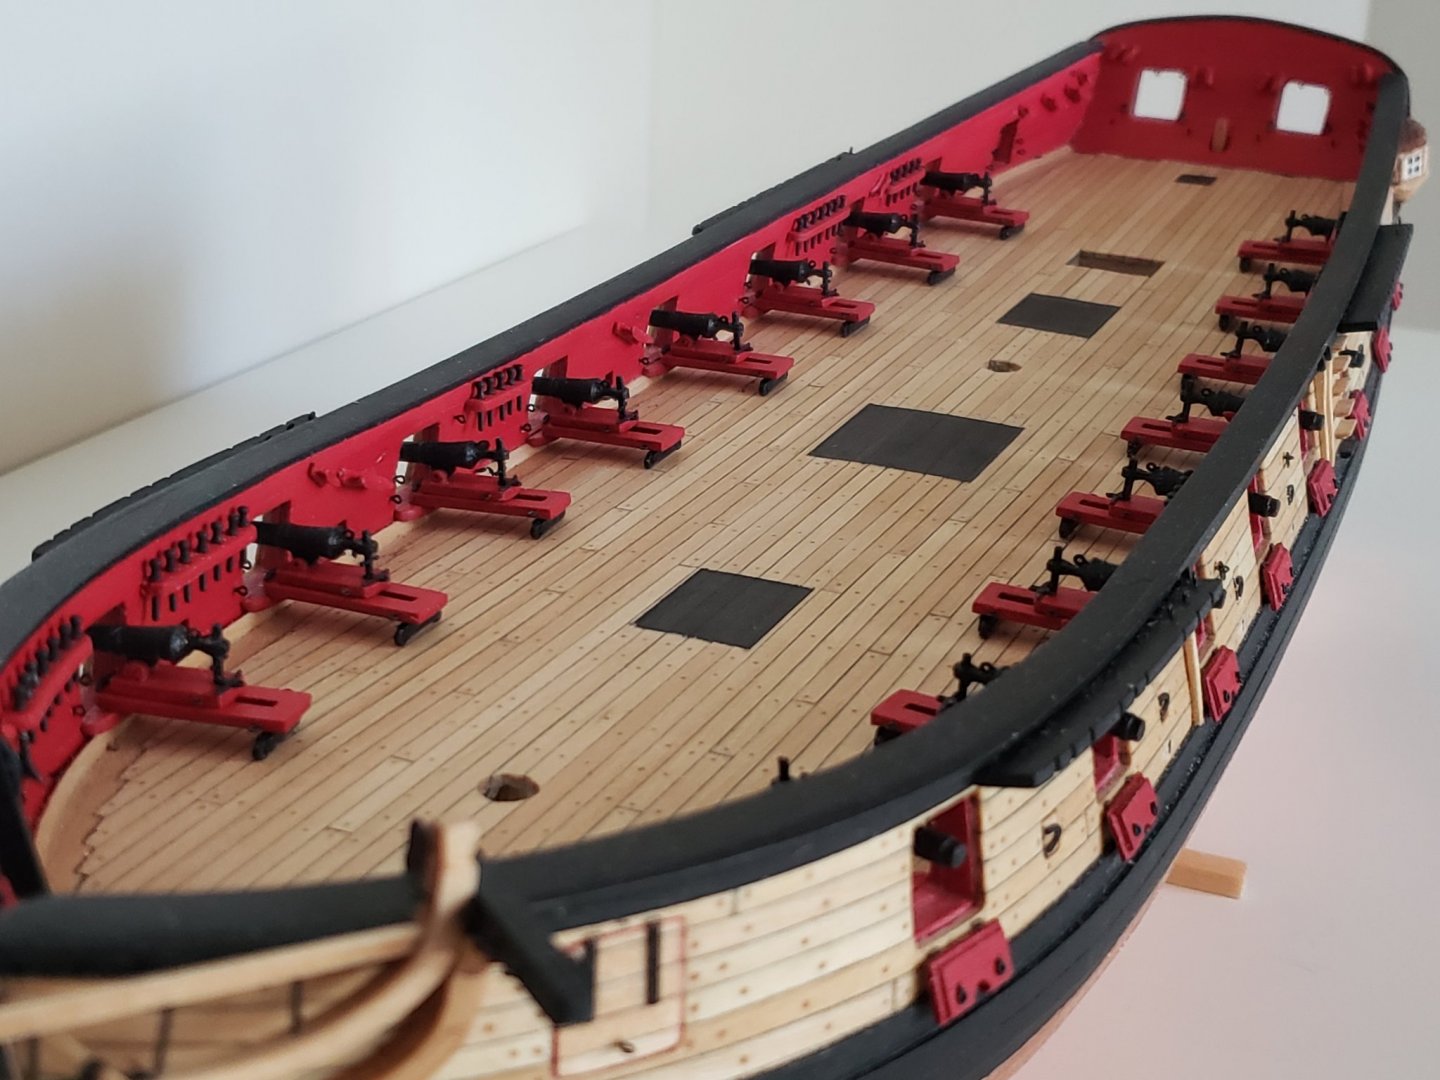
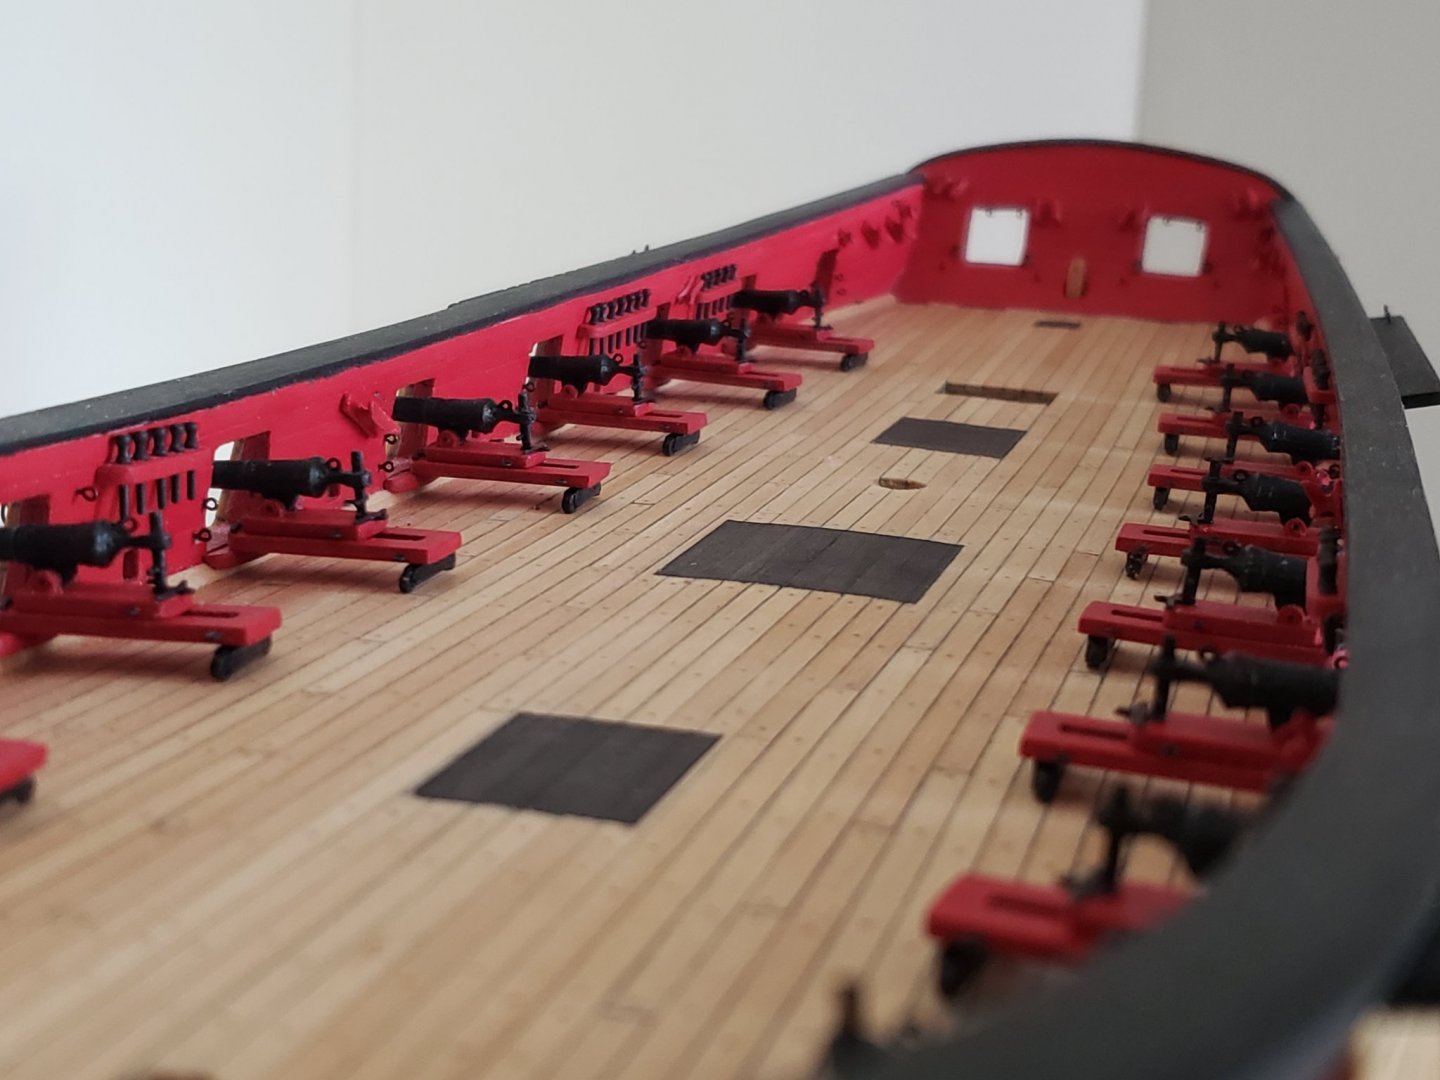
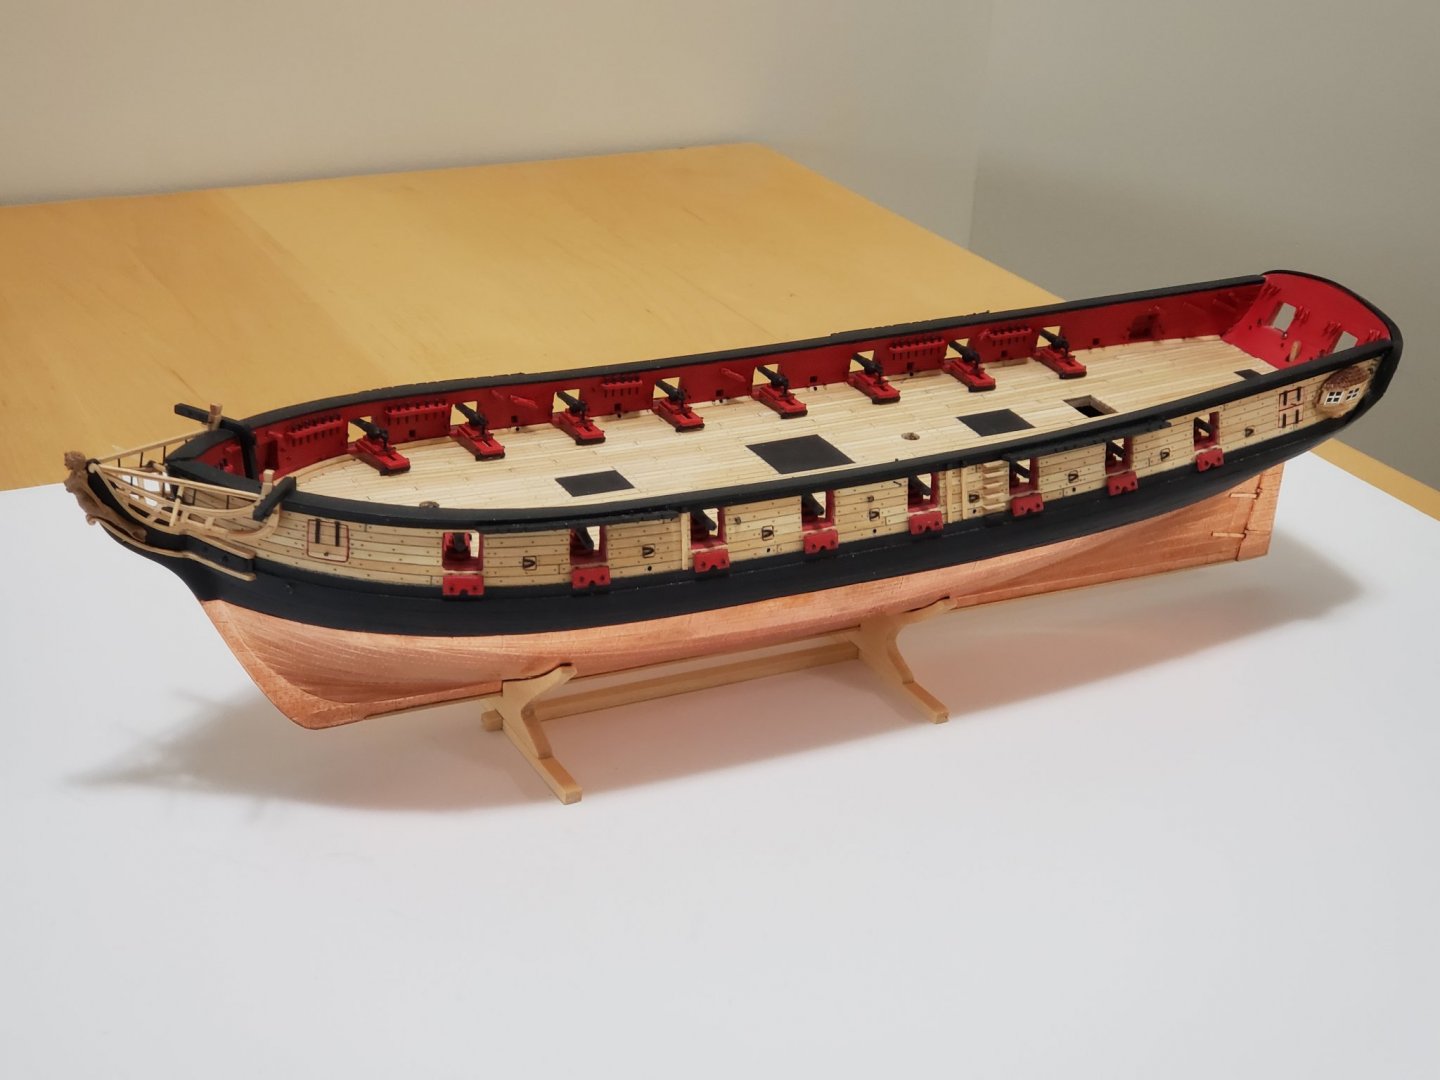
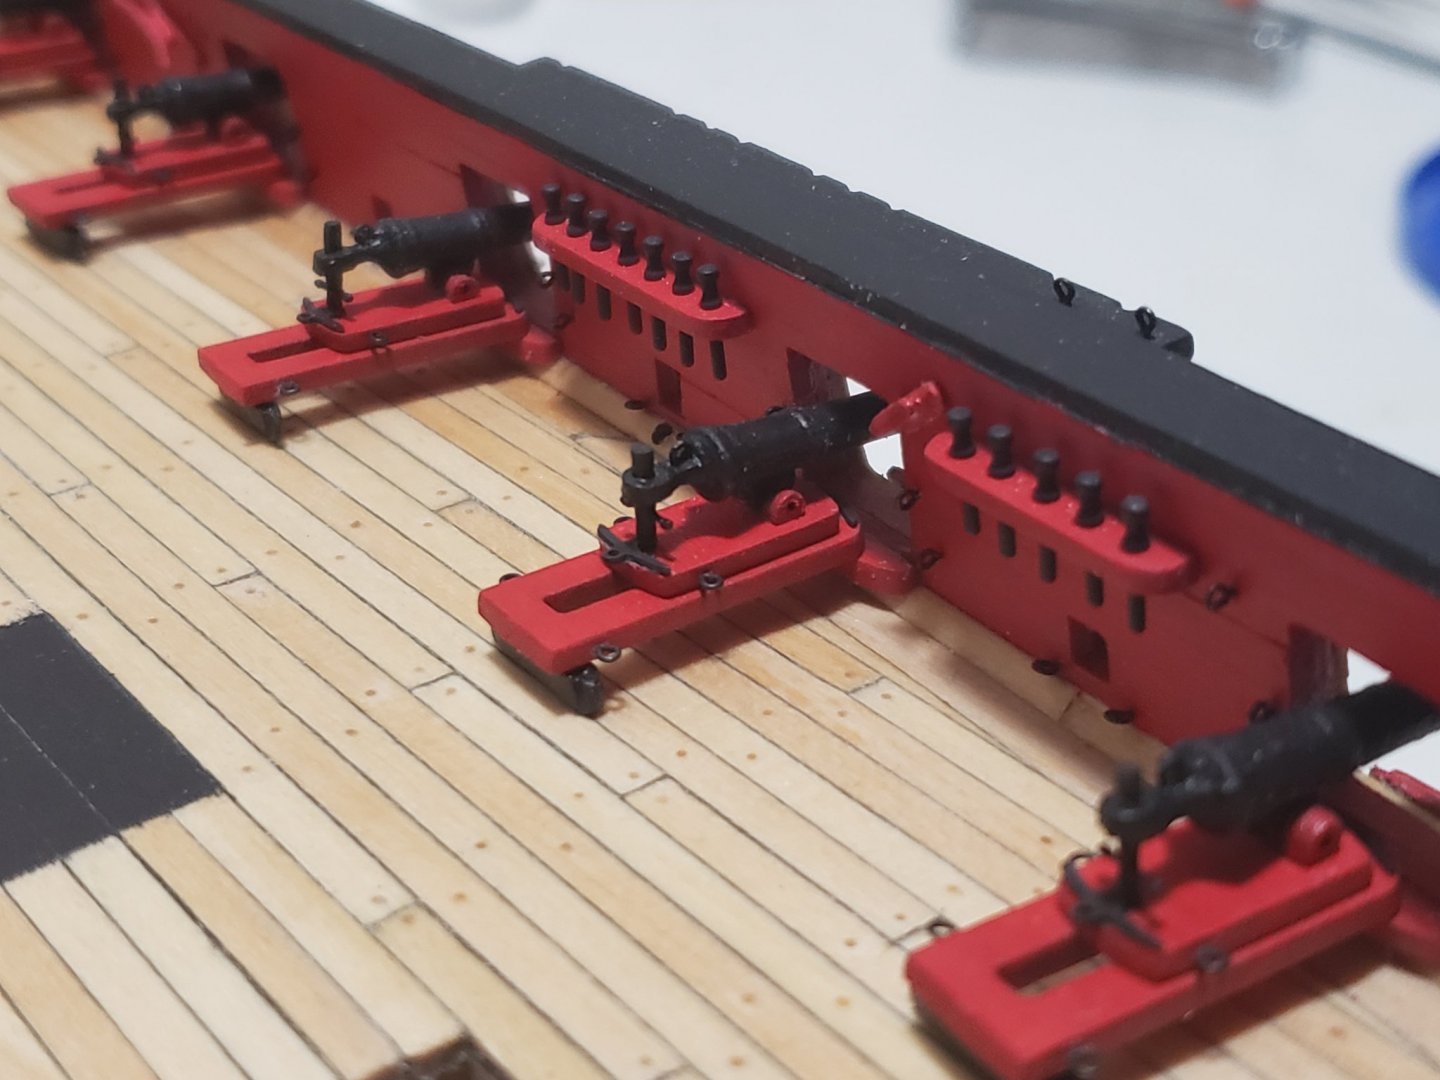
I finished assembling all the carronades. I tried to adjust the angle of the guns so they are more in line with each other. Here are some pics Next I'll be rigging them, and will glue them in place as I progress with the rigging


- 950 replies
-
- 17
-
-
- syren
- model shipways
- (and 1 more)
-
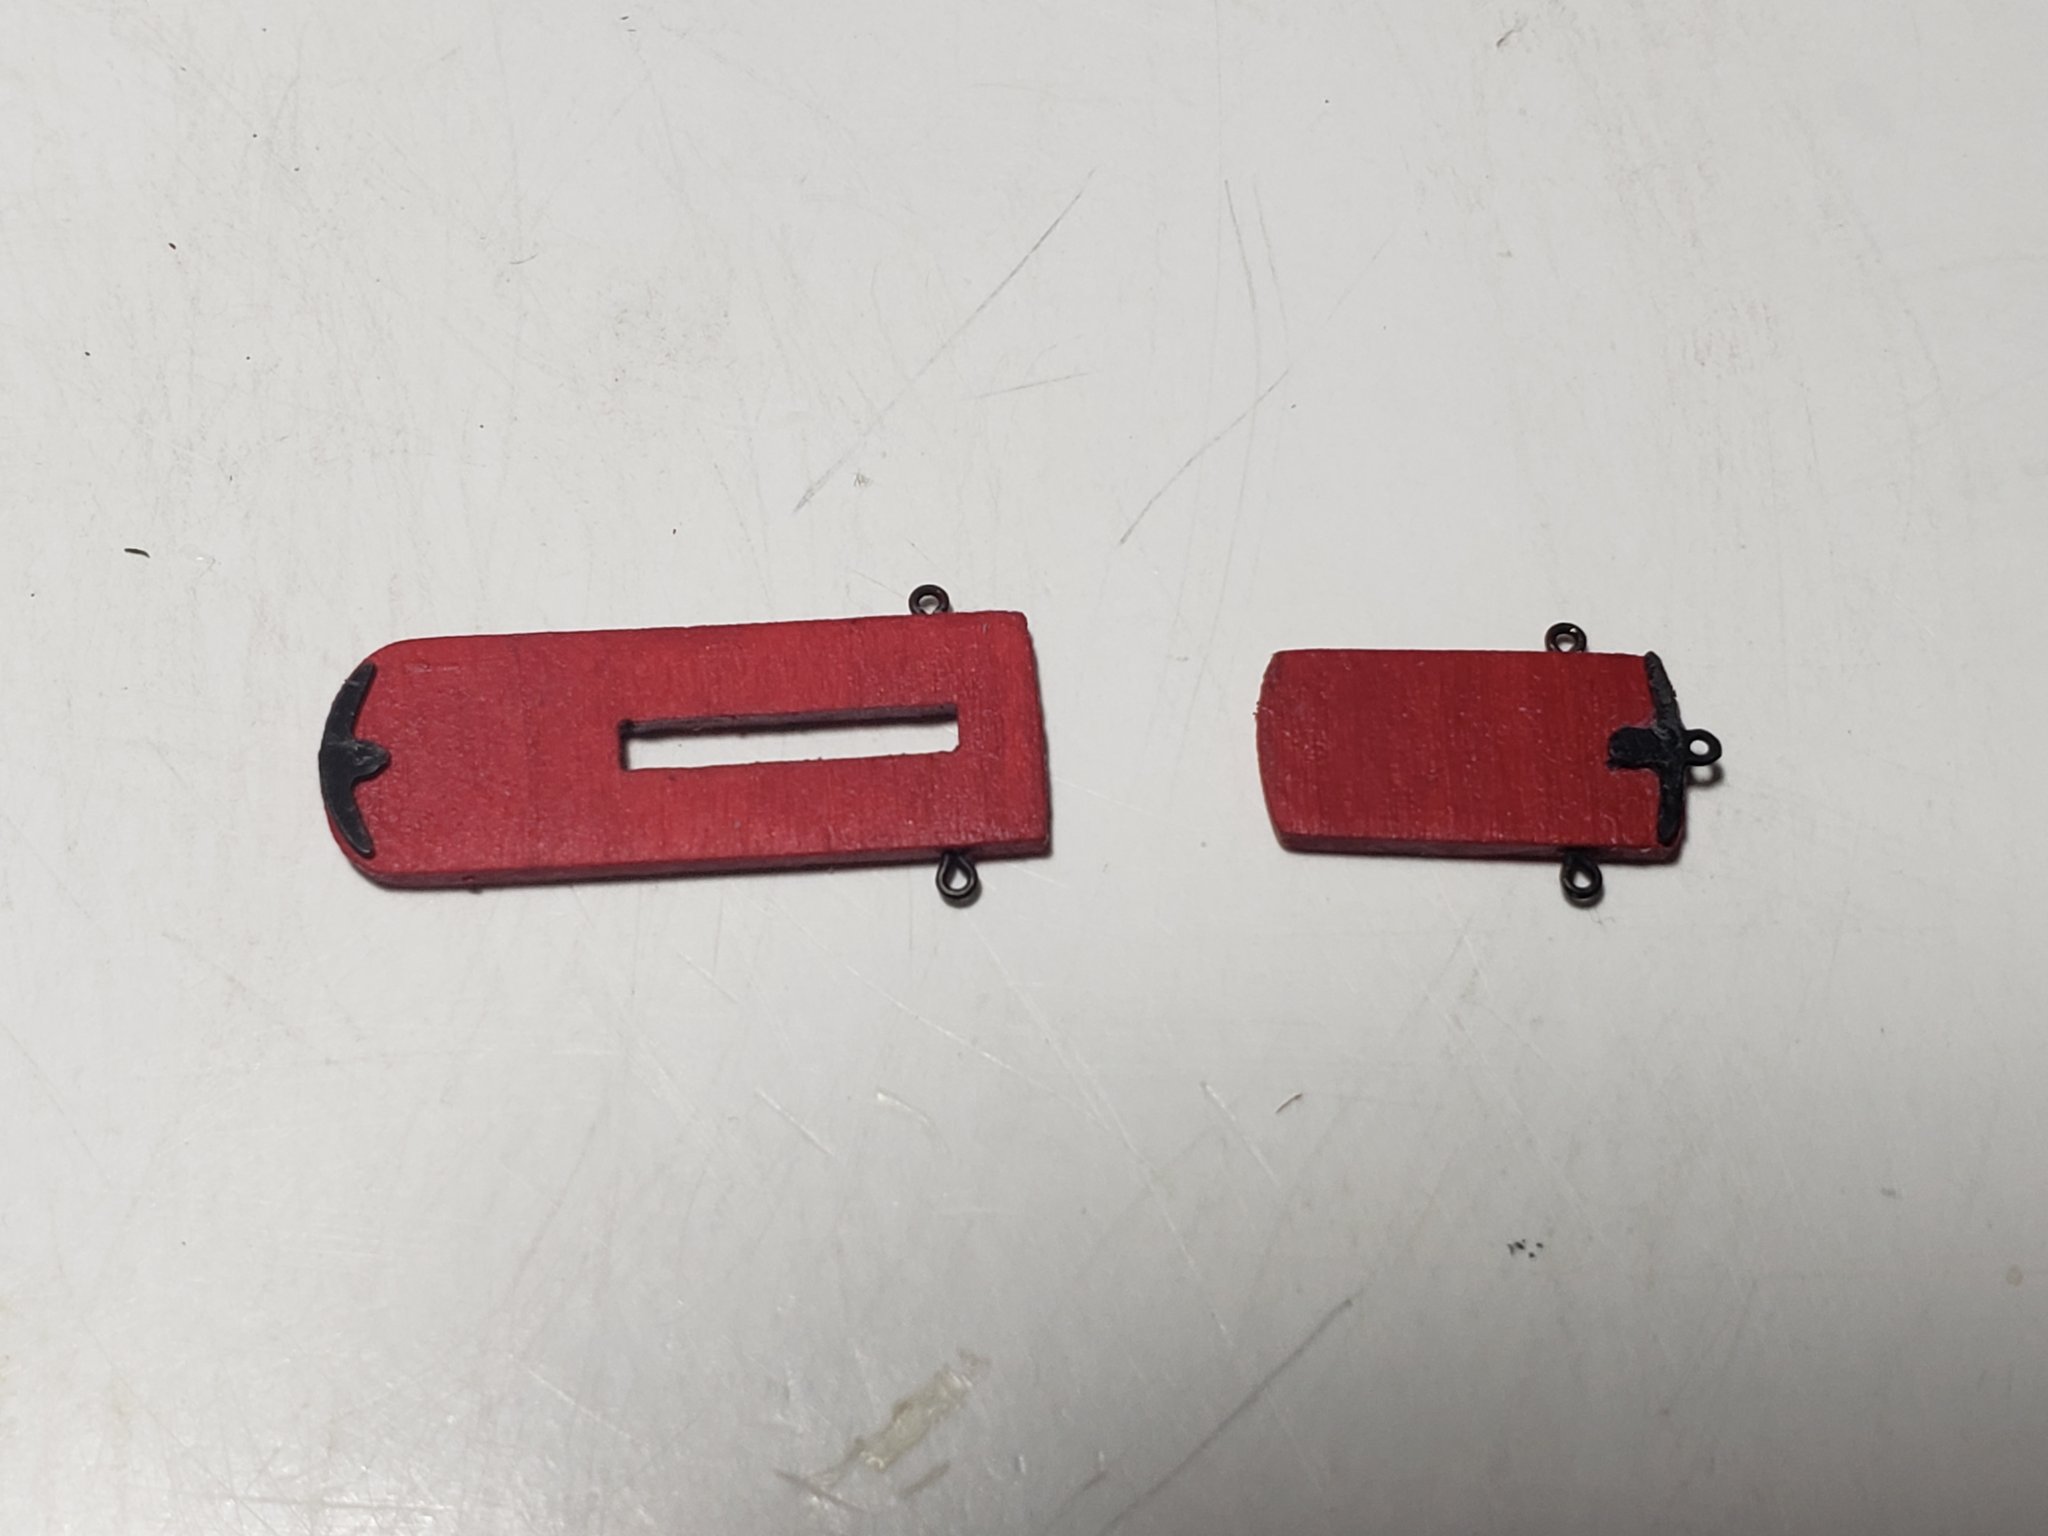
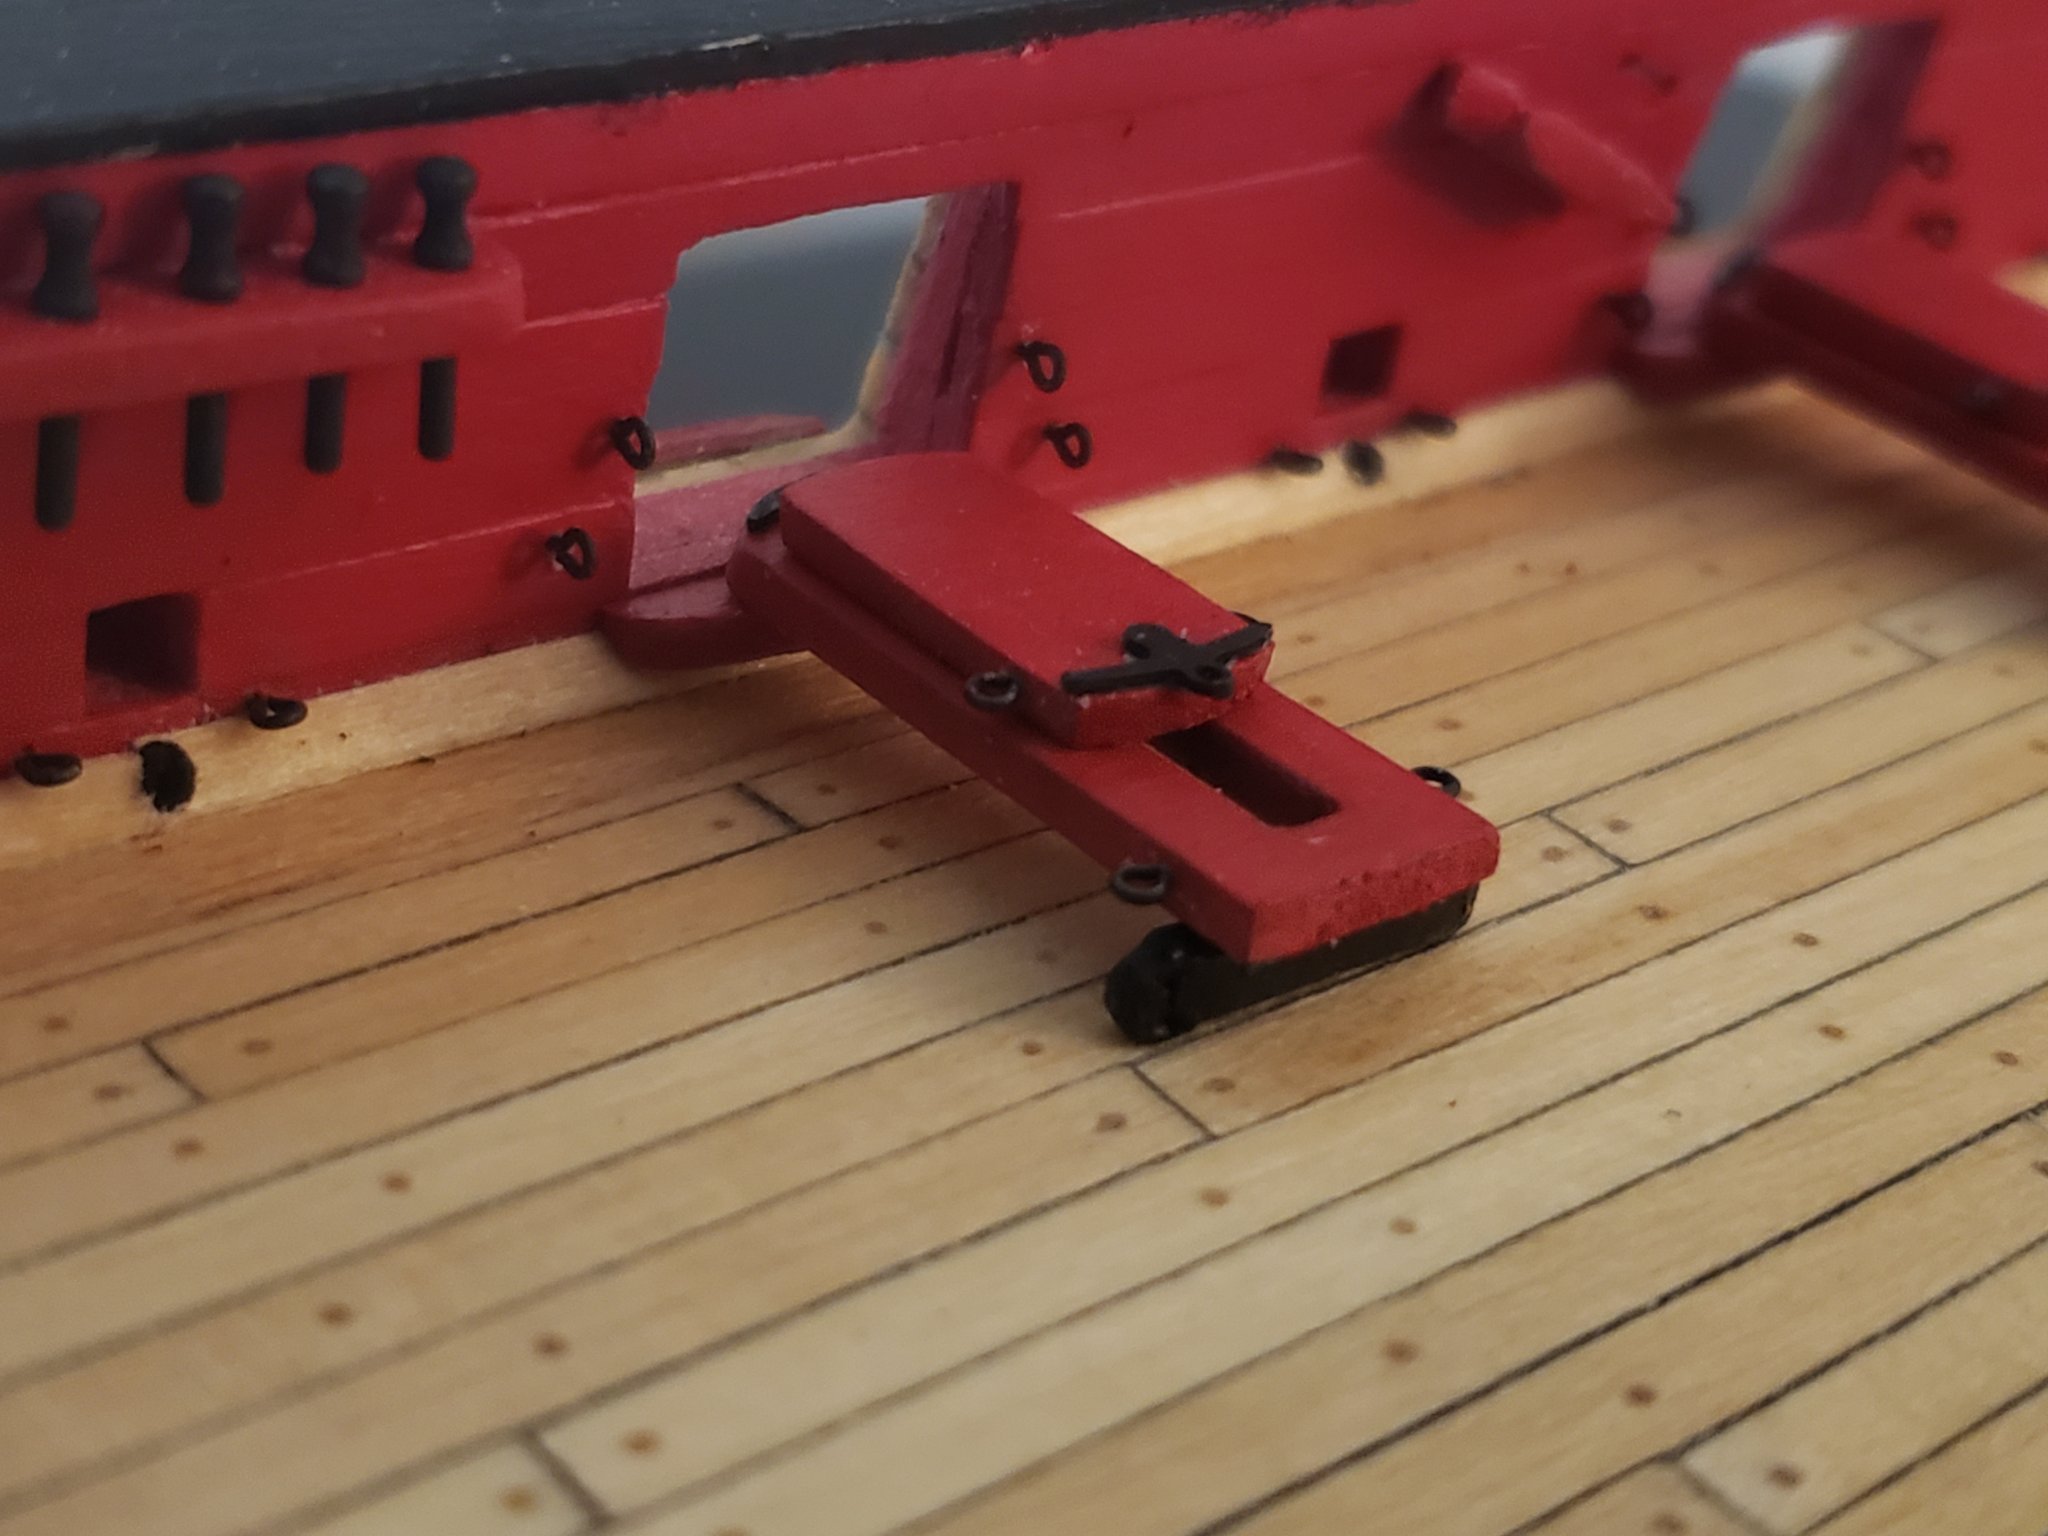
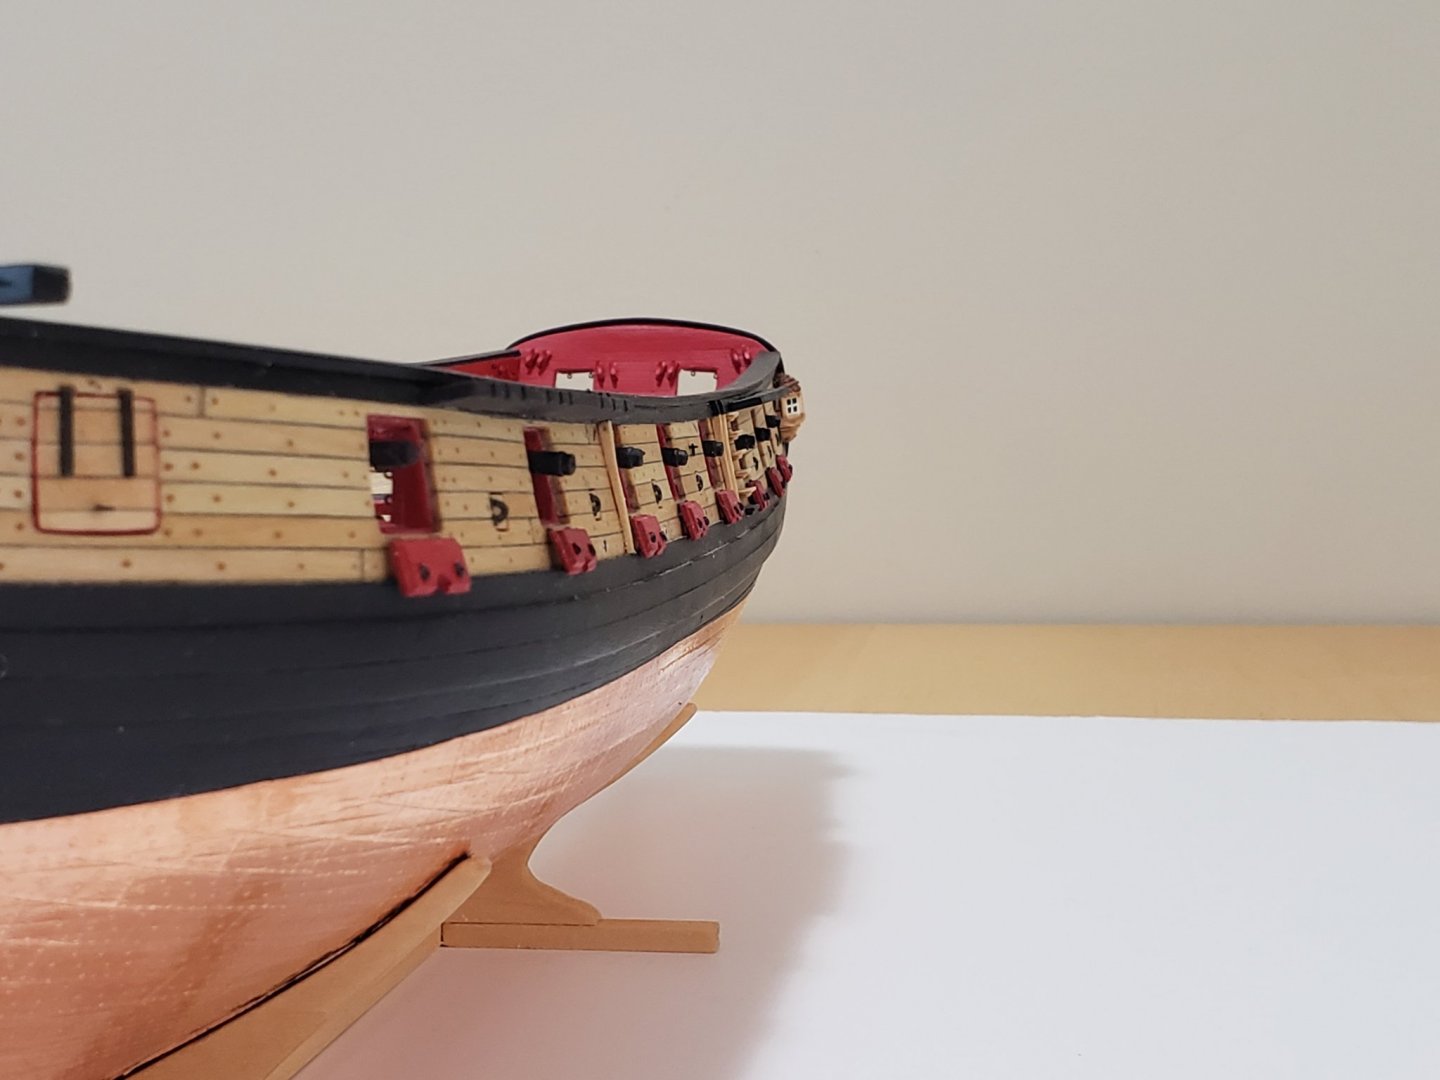
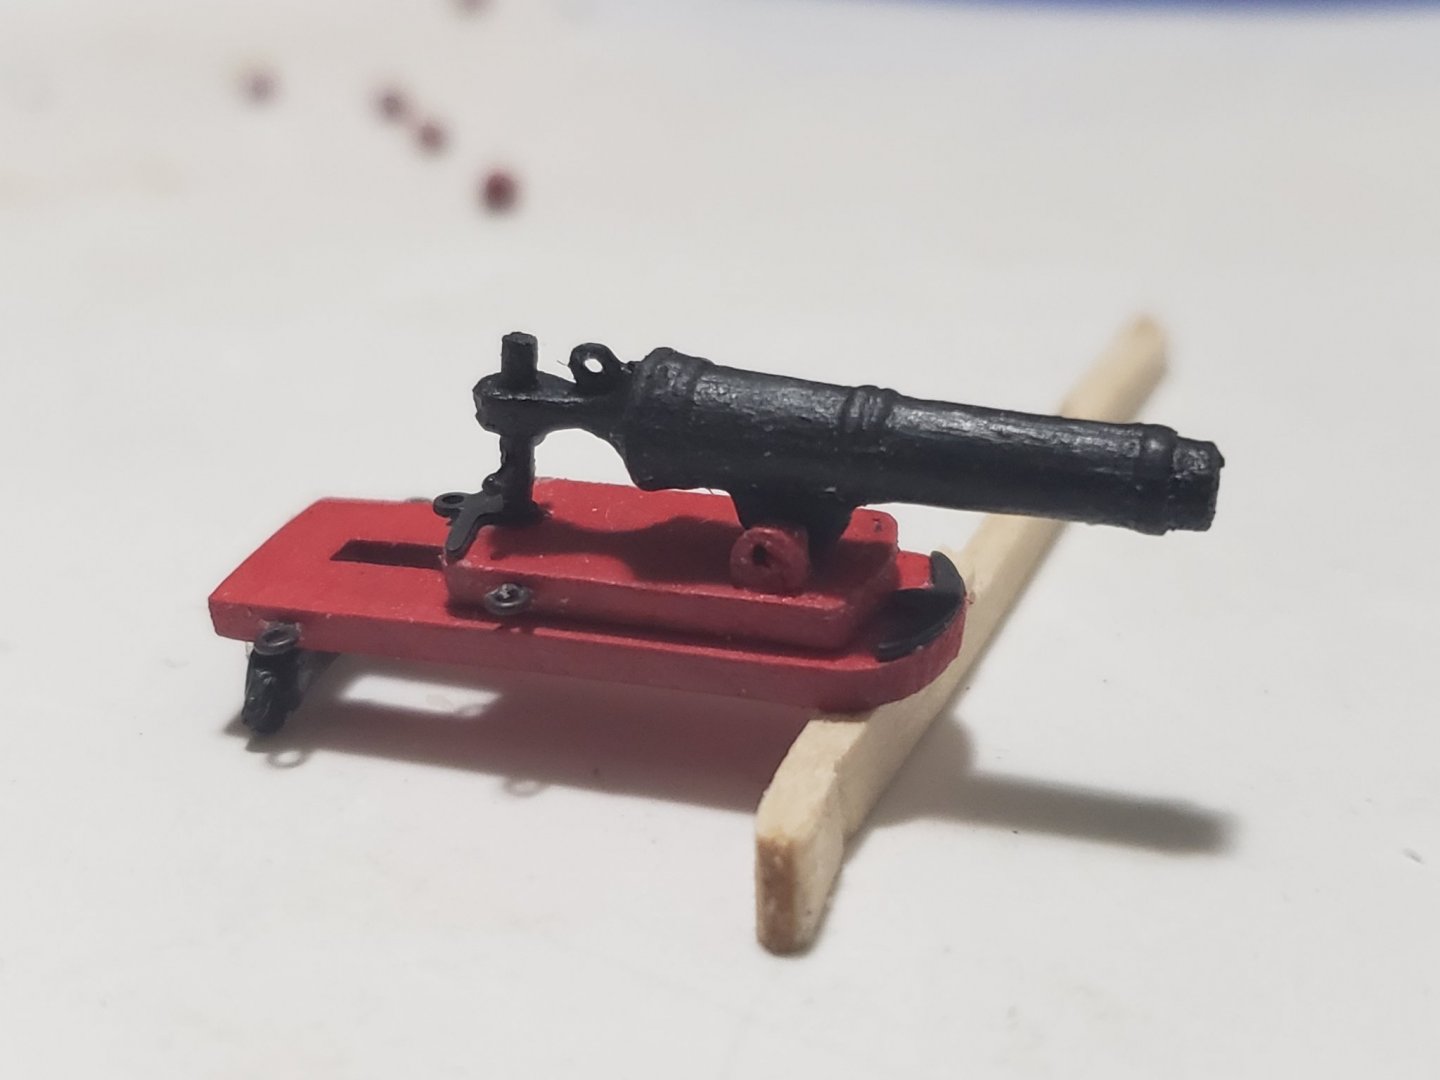
Some more small bits of progress. I have started to stick the carronades on top of the sleds. I'm still deciding whether it is worthwhile to install the pivot pin.. To paint the lugs I just "beaded" them through a wire and painted with watered down red paint to quicken the process To simulate the elevation screw, I used toothpicks which were sanded down to fit the corresponding holes, and 0.45mm holes were drilled through them to accept the wire for the handle. I deviated from the instructions a bit where I installed the elevation pin, then the lugs. This was done just to make sure I have the same angle on all the guns. The lugs were then glued once the guns were installed to ensure they rest flat on the sleds So far the starboard side of canons have been assembled. Looking outside the hull, the carronades can be seen to not be completely in line with one another. I may have to stick a small strip of wood below the sleds in which the guns seem to be lower than the rest. I hope this fixes the issue...


- 950 replies
-
- 9
-
-
- syren
- model shipways
- (and 1 more)
-
Treating rigging blocks prior to installation
WalrusGuy replied to WalrusGuy's topic in Masting, rigging and sails
Thanks all! I think I'll try using tung oil on some test pieces then go from there. -
It's looking real good! Thanks for the detailed explanation, definitely going to be reading this again once I reach this stage. Just throwing this out there if you decide to glue the fittings. I think the cannorades were rigged prior to the fittings so your fingers can have ample space to move around. I'm sure the gratings would not affect this, but the larger fittings might.
-
Treating rigging blocks prior to installation
WalrusGuy posted a topic in Masting, rigging and sails
I'm planning to lightly sand each block to have a smooth curve as mentioned in the Syren's instruction manual, which would expose some bare wood. Do I need to treat the blocks with tung oil (or varnish) before installation? -
There were some bulkheads which did not lie 100% with the template. I think the instructions also mention that this may be the case since each kit is slightly different. The first time in placing it is just to see how everything will come together, but you will still use the template for the framing That is what I used, but if you have a thinner scrap strip at your disposal, that might work better since it can bend better I don't remember which ones I used, may have just been some small nails I found in my hardware box. Maybe you could try clamping it on instead of nailing it since it is only temporary (Novastorm advised me this during this stage). Try seeing if office paper clamps work:
-
Thank you for the compliments Matt and Adam , and thanks all for the likes!
-
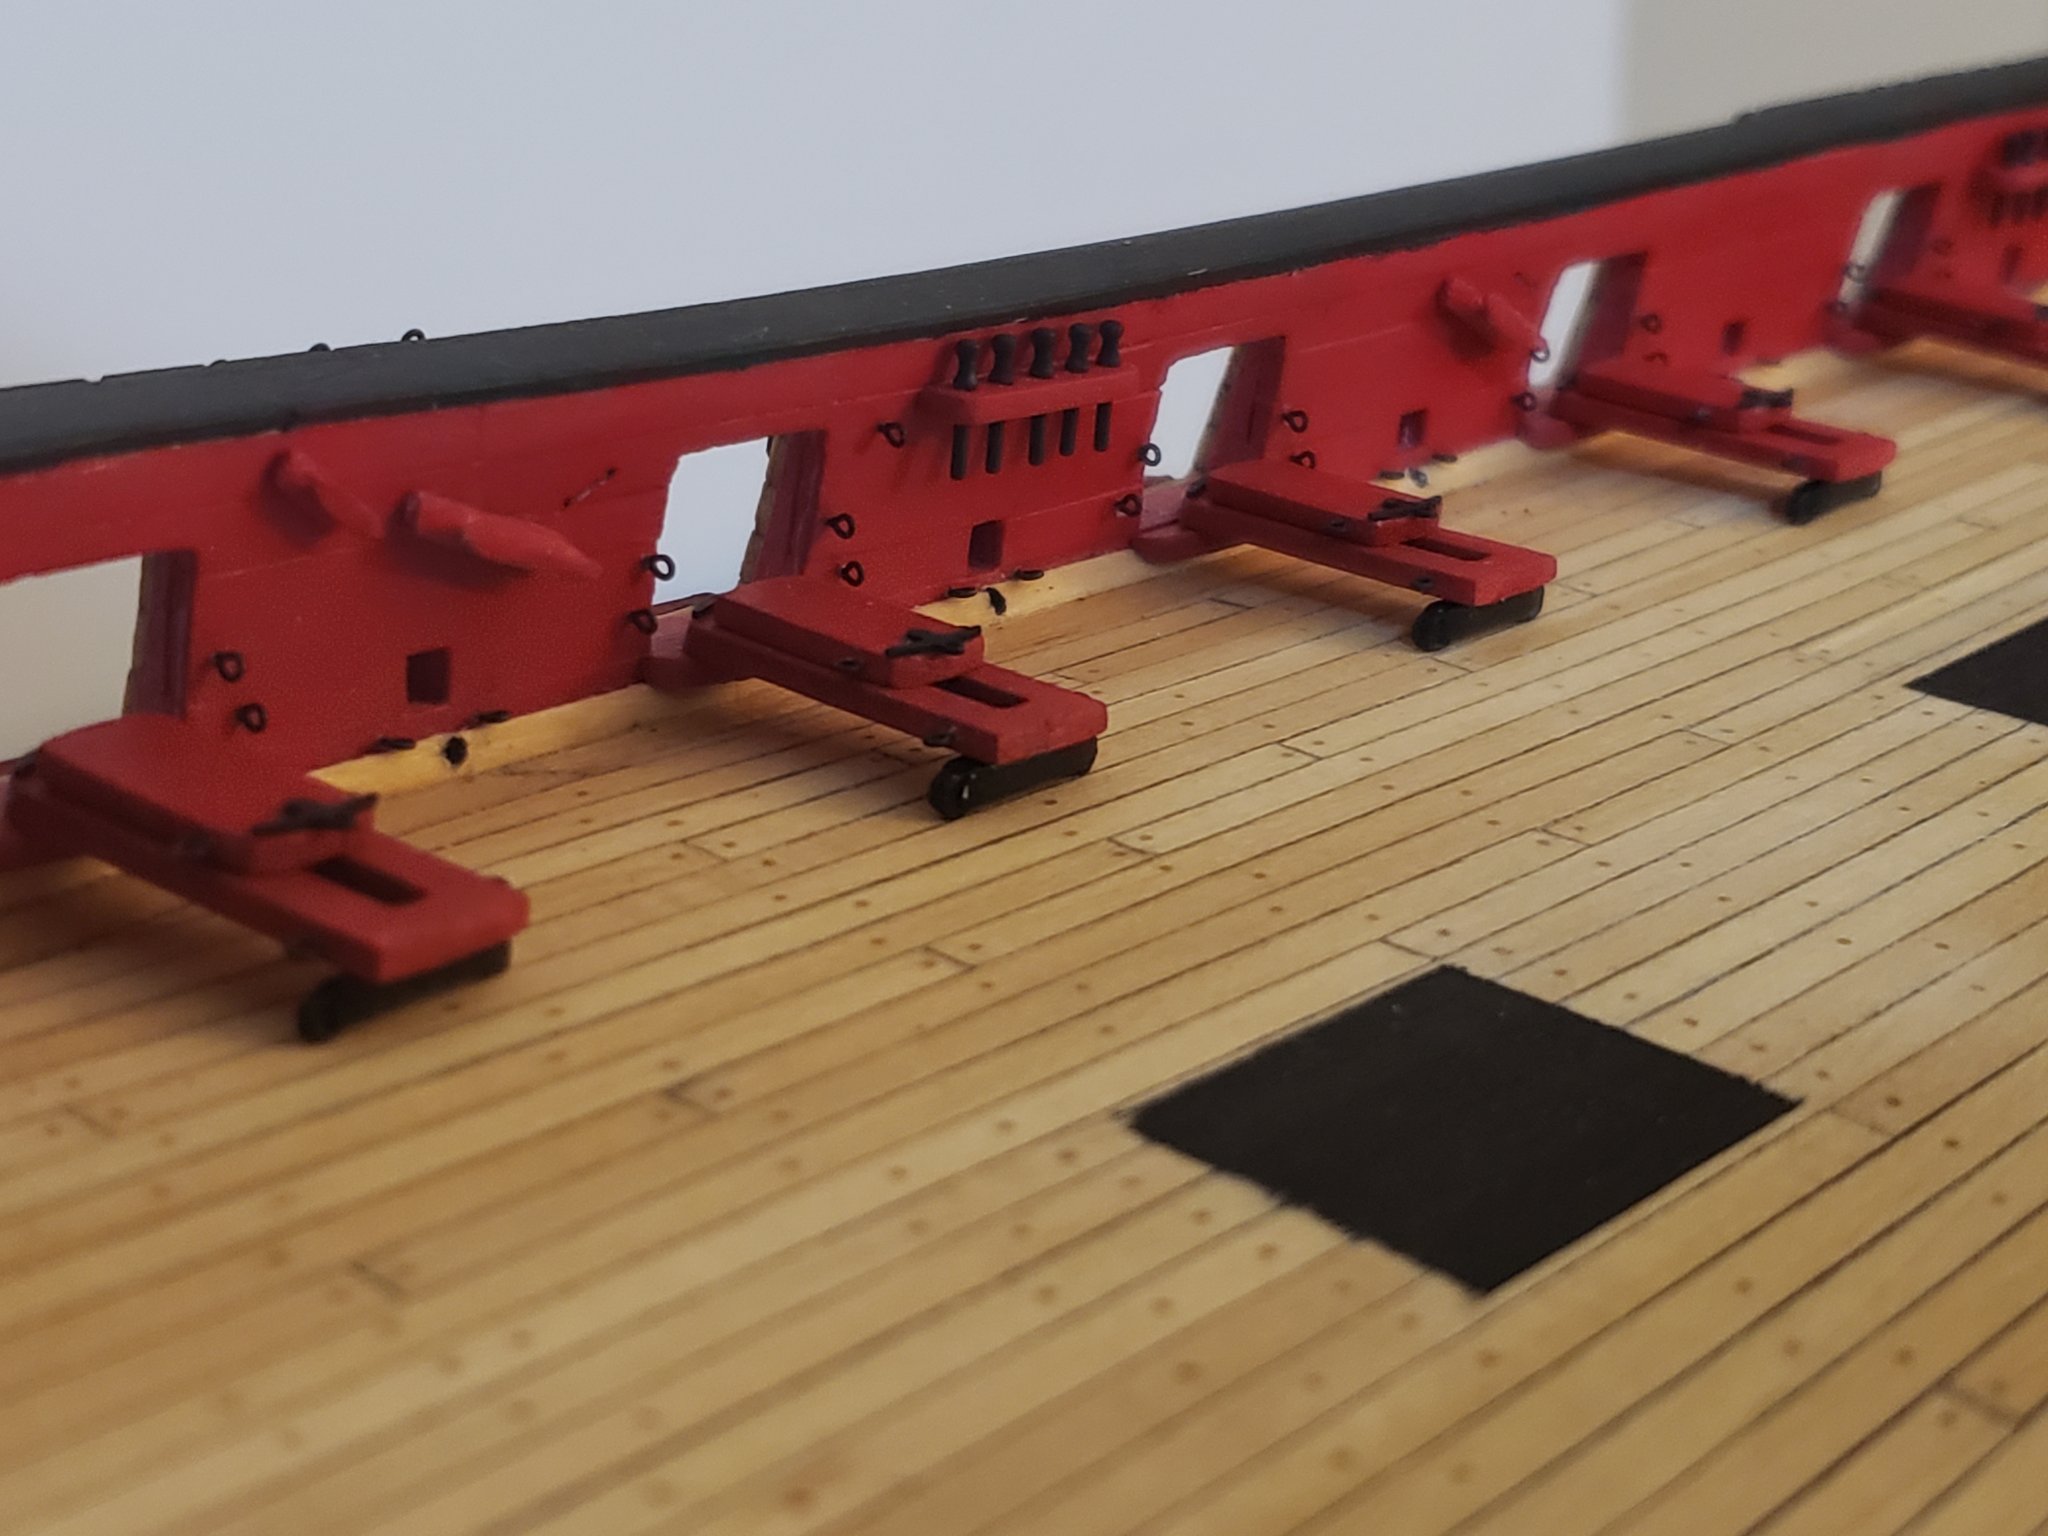
The carronade sleds have been assembled. They did get a bit tedious after the 10th one, so I'm definitely not looking forward to the carronade rigging section 😅.


- 950 replies
-
- 16
-
-
- syren
- model shipways
- (and 1 more)
-
This is how I also feel in this hobby. There's a lot to learn and I've only yet dipped my toes... I'm not too sure about this one, maybe you could ask in one of these following forums: https://modelshipworld.com/forum/21-painting-finishing-and-weathering-products-and-techniques/ https://modelshipworld.com/forum/20-wood-discussionwhere-to-use-it-where-to-get-it-what-types-are-best-how-to-finish-it/ There are many experienced modellers who could offer some advice there.. Again, I'm not too sure about this one (I'm still very novice in this hobby 😅), but it may come down to personal preference and/or following what the model was based on. For example the Syren was copper plated, so you'll see a lot of models which are also copper plated. I've also seen some models where bare wood is used. In this case the hull is just left wooden and not plated on top. Maybe also ask this in one of those forums I mentioned or this one: https://modelshipworld.com/forum/13-discussions-for-ships-plans-and-project-research-general-research-on-specific-vessels-and-ship-types/
-
Wish I did that on mine. It'll look very neat once the rigging is done..
-
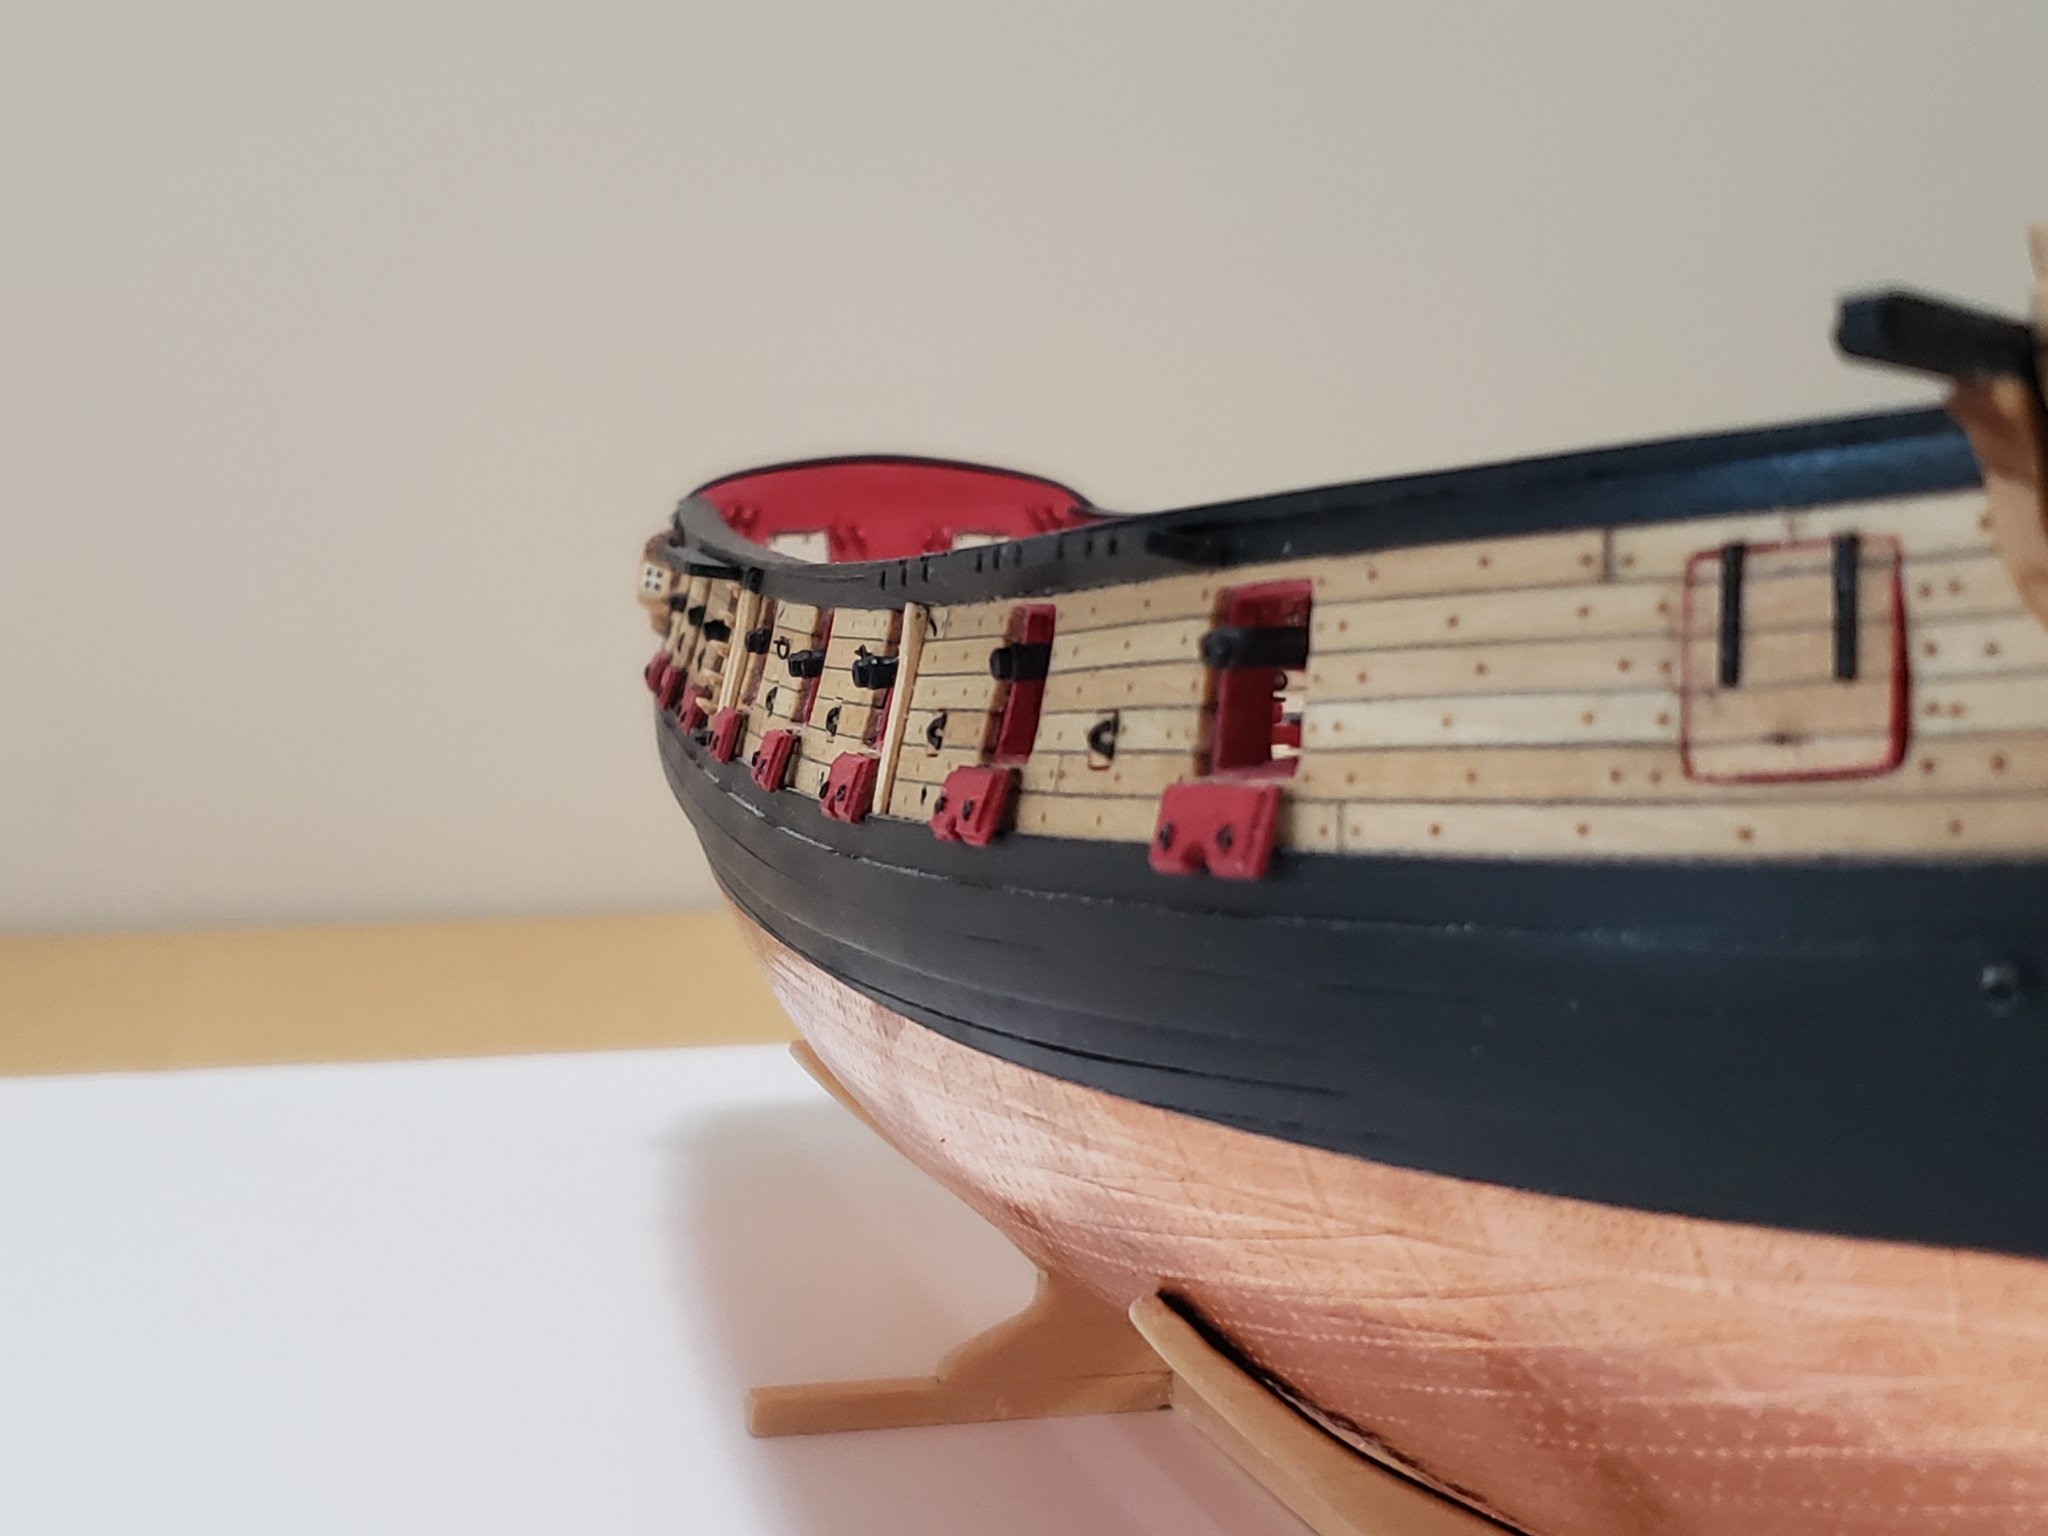
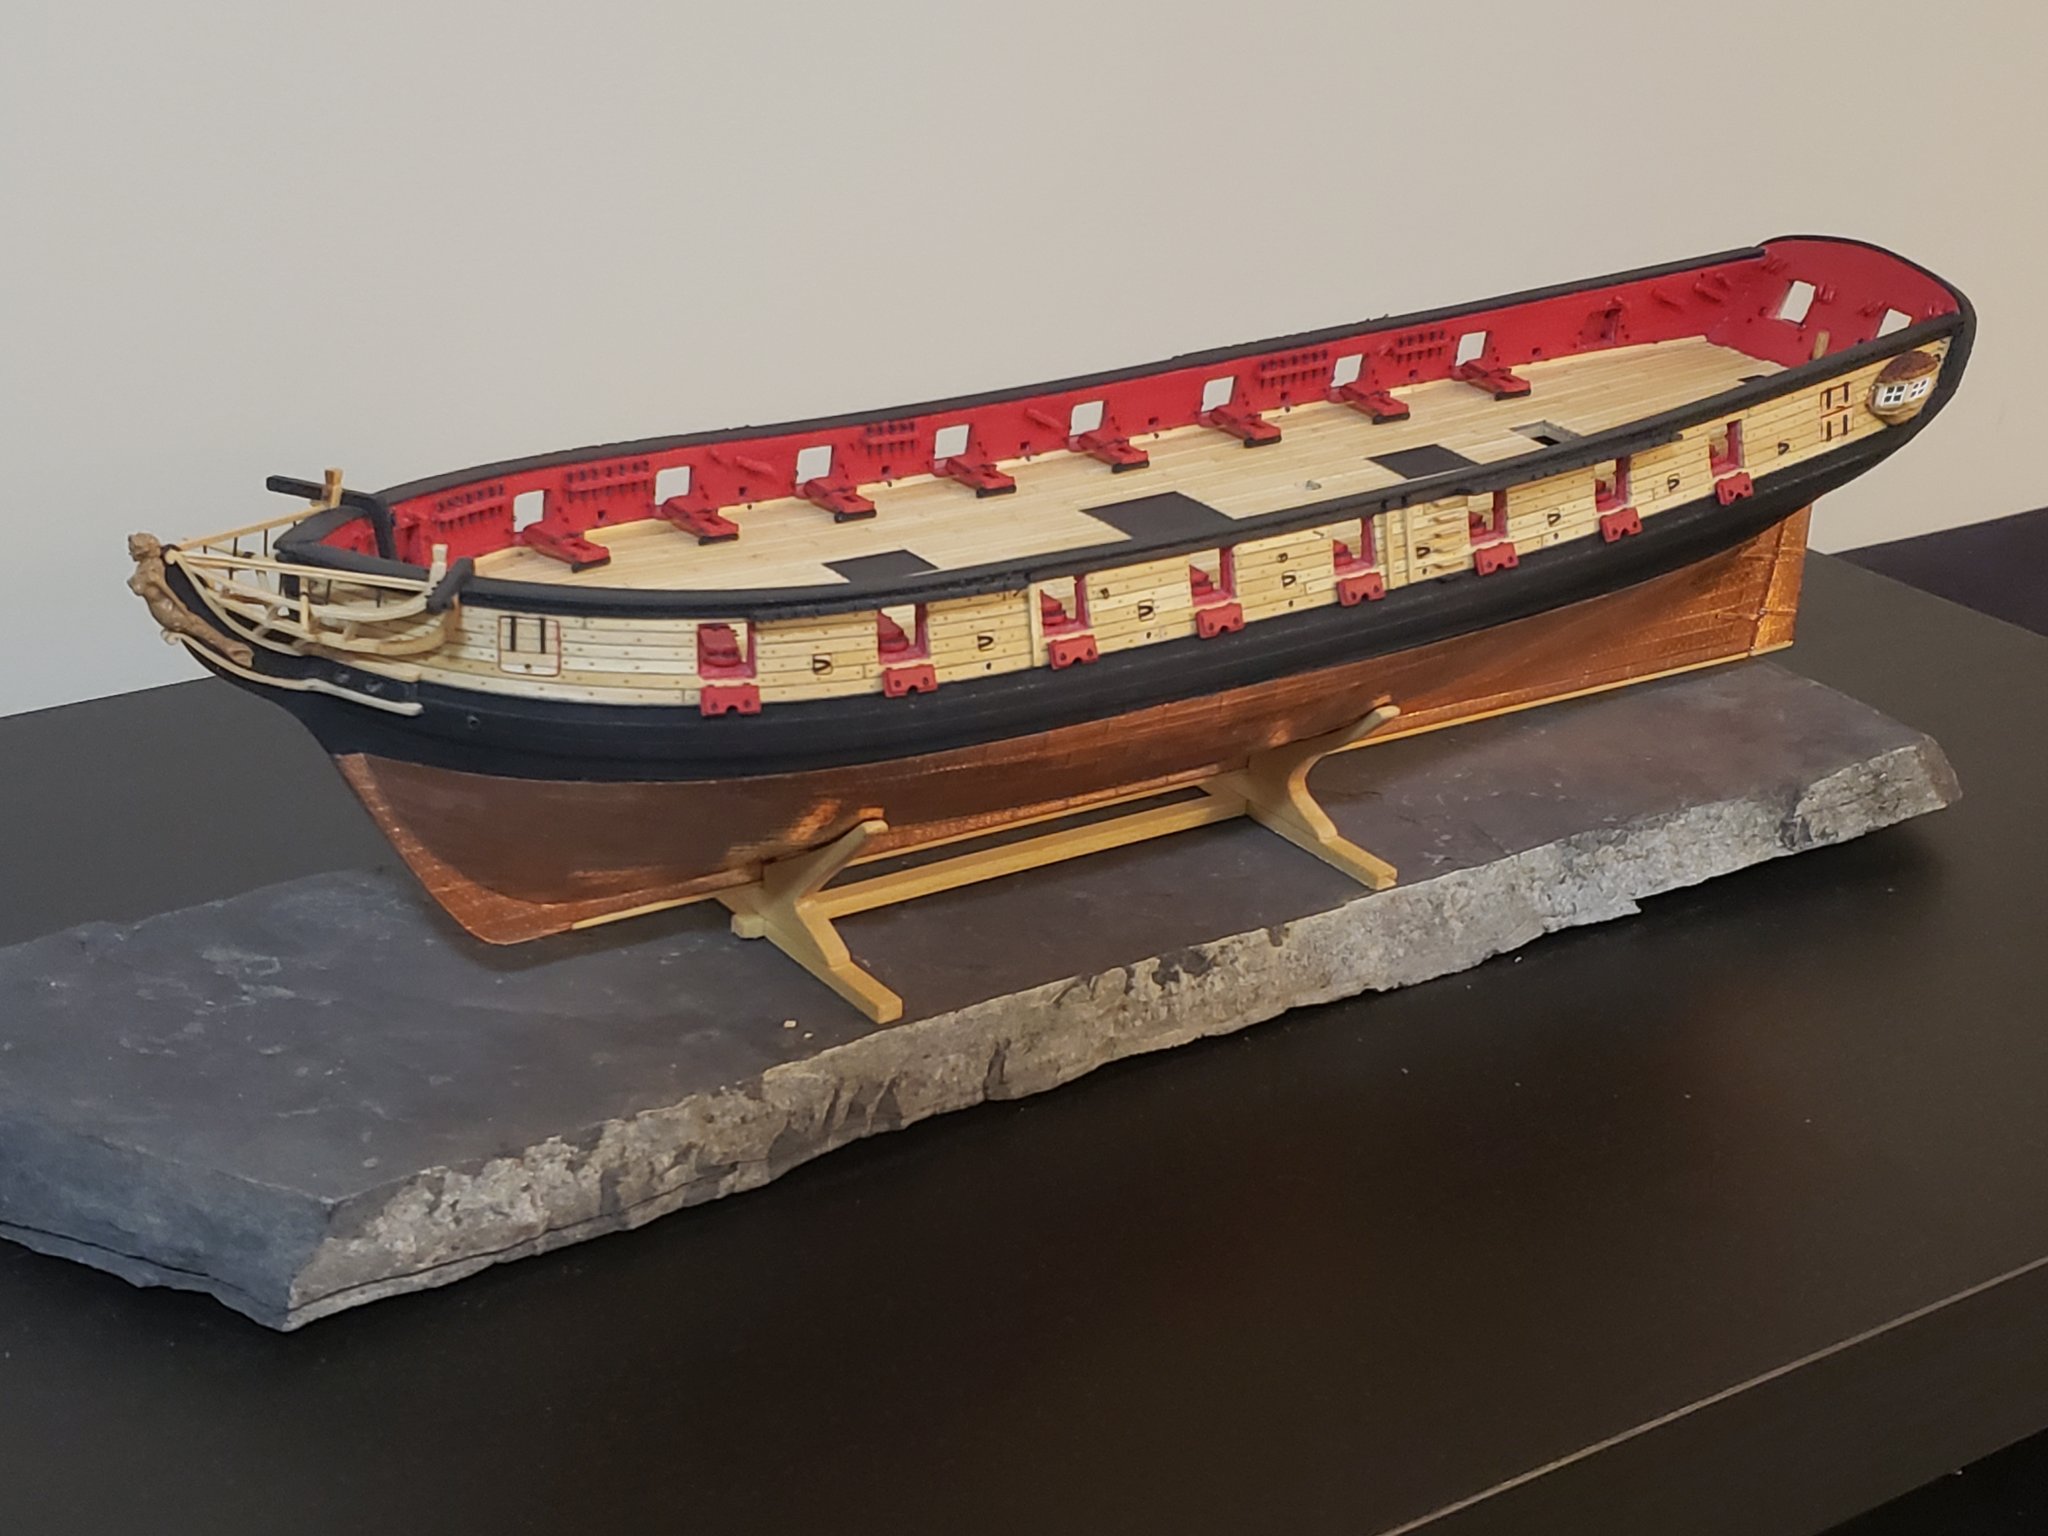
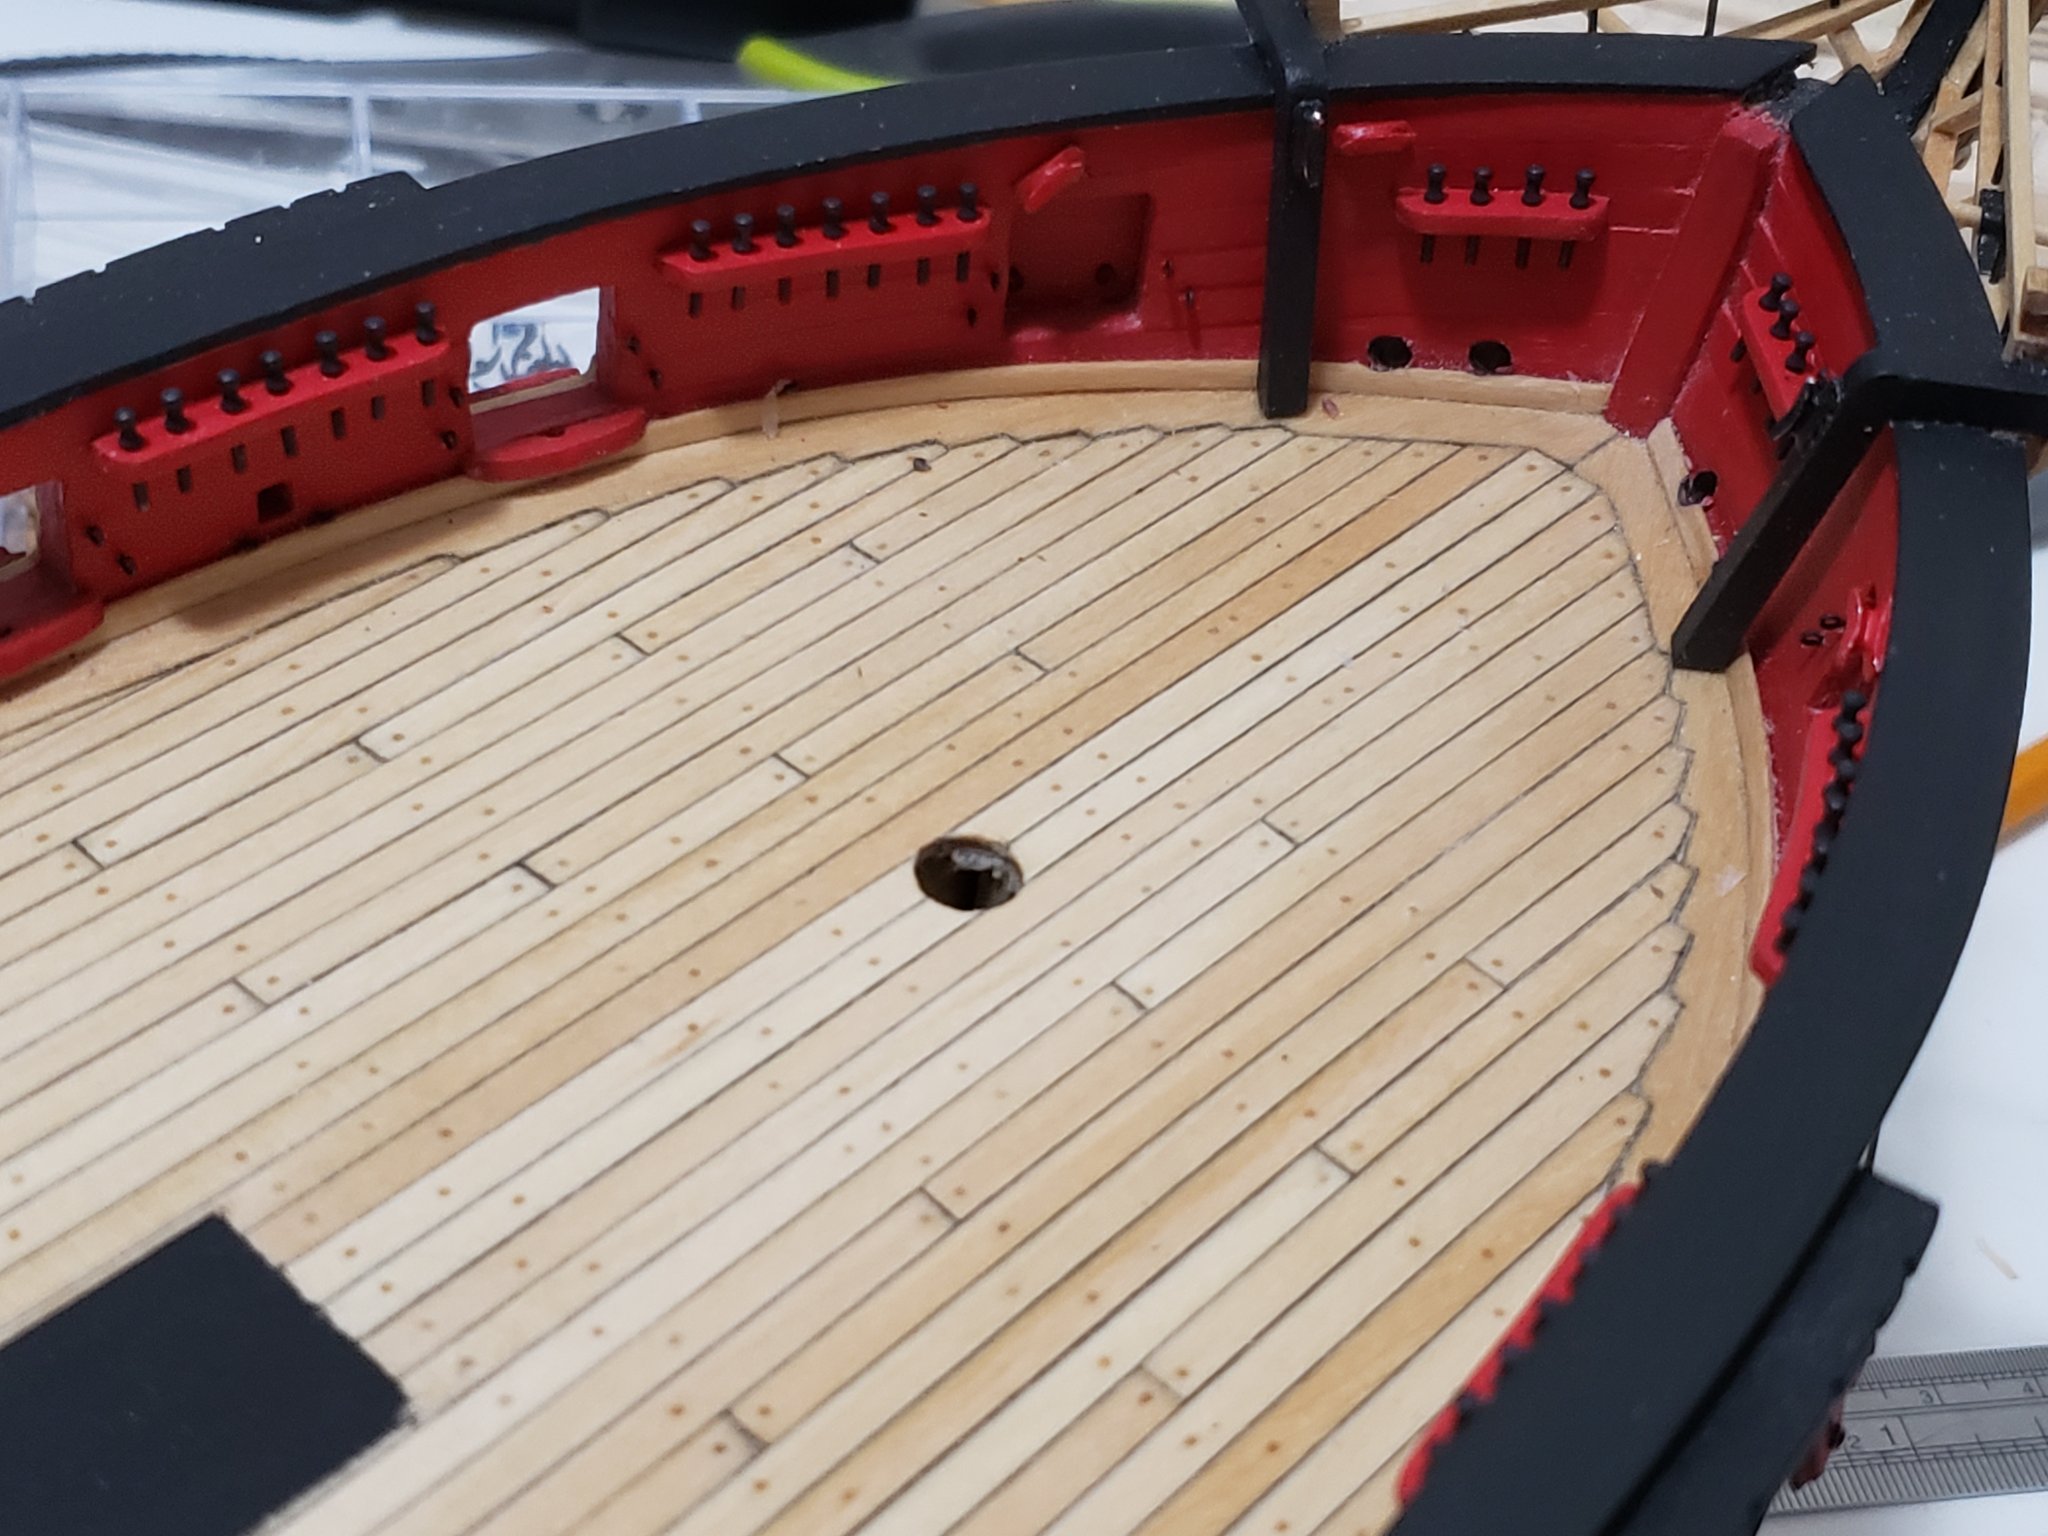
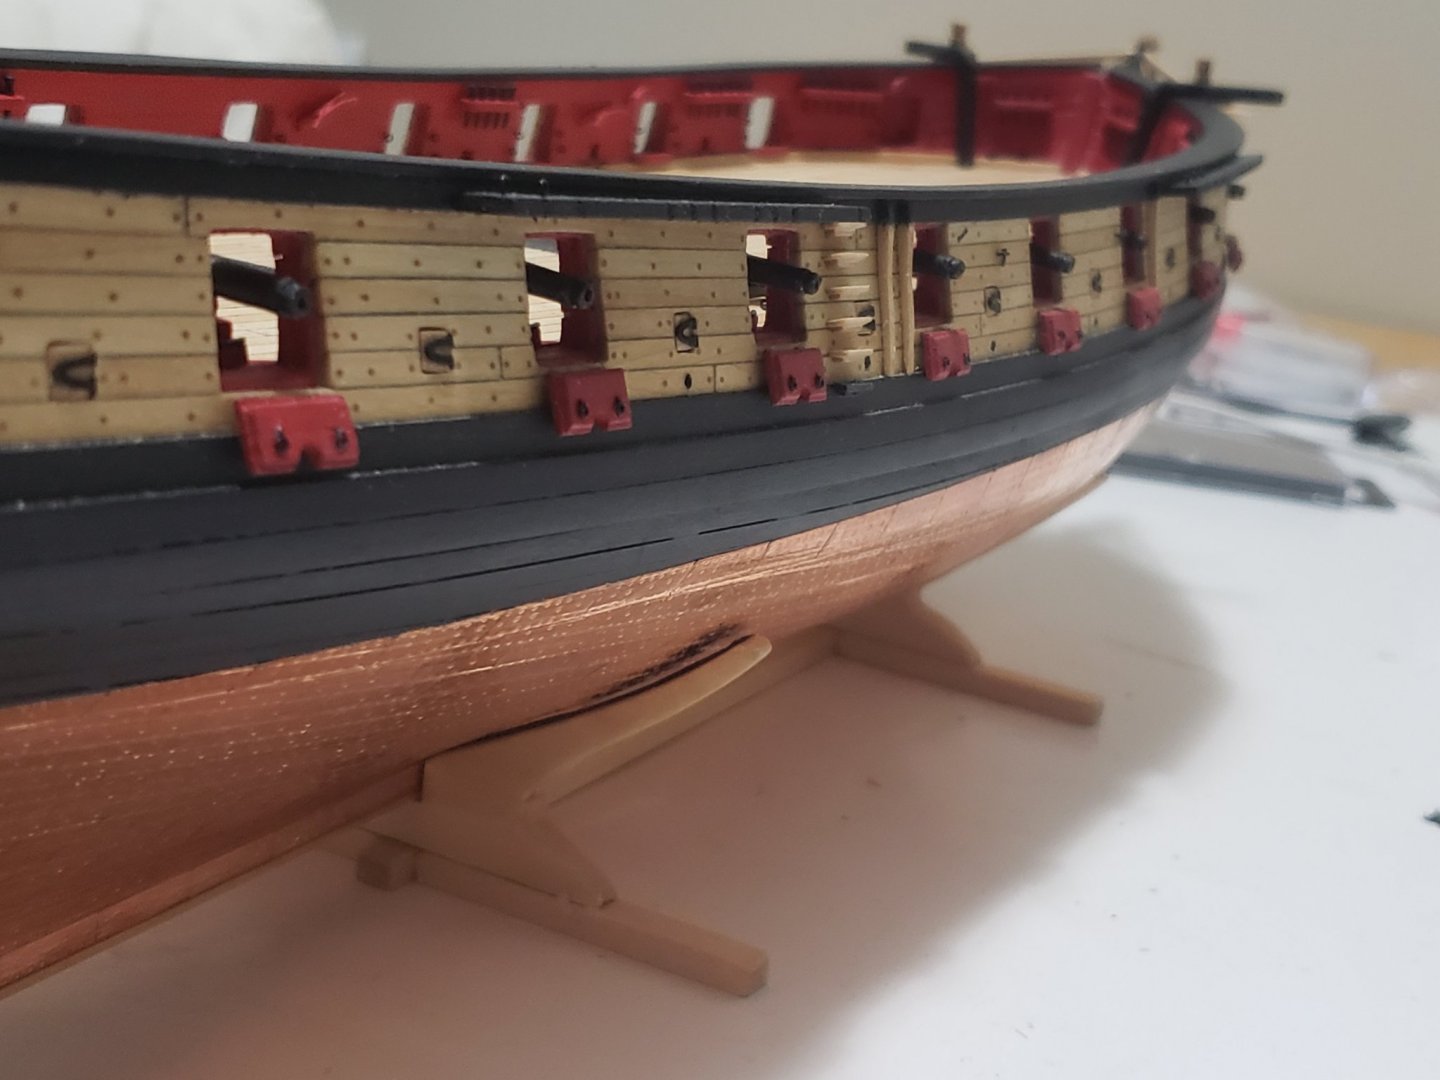
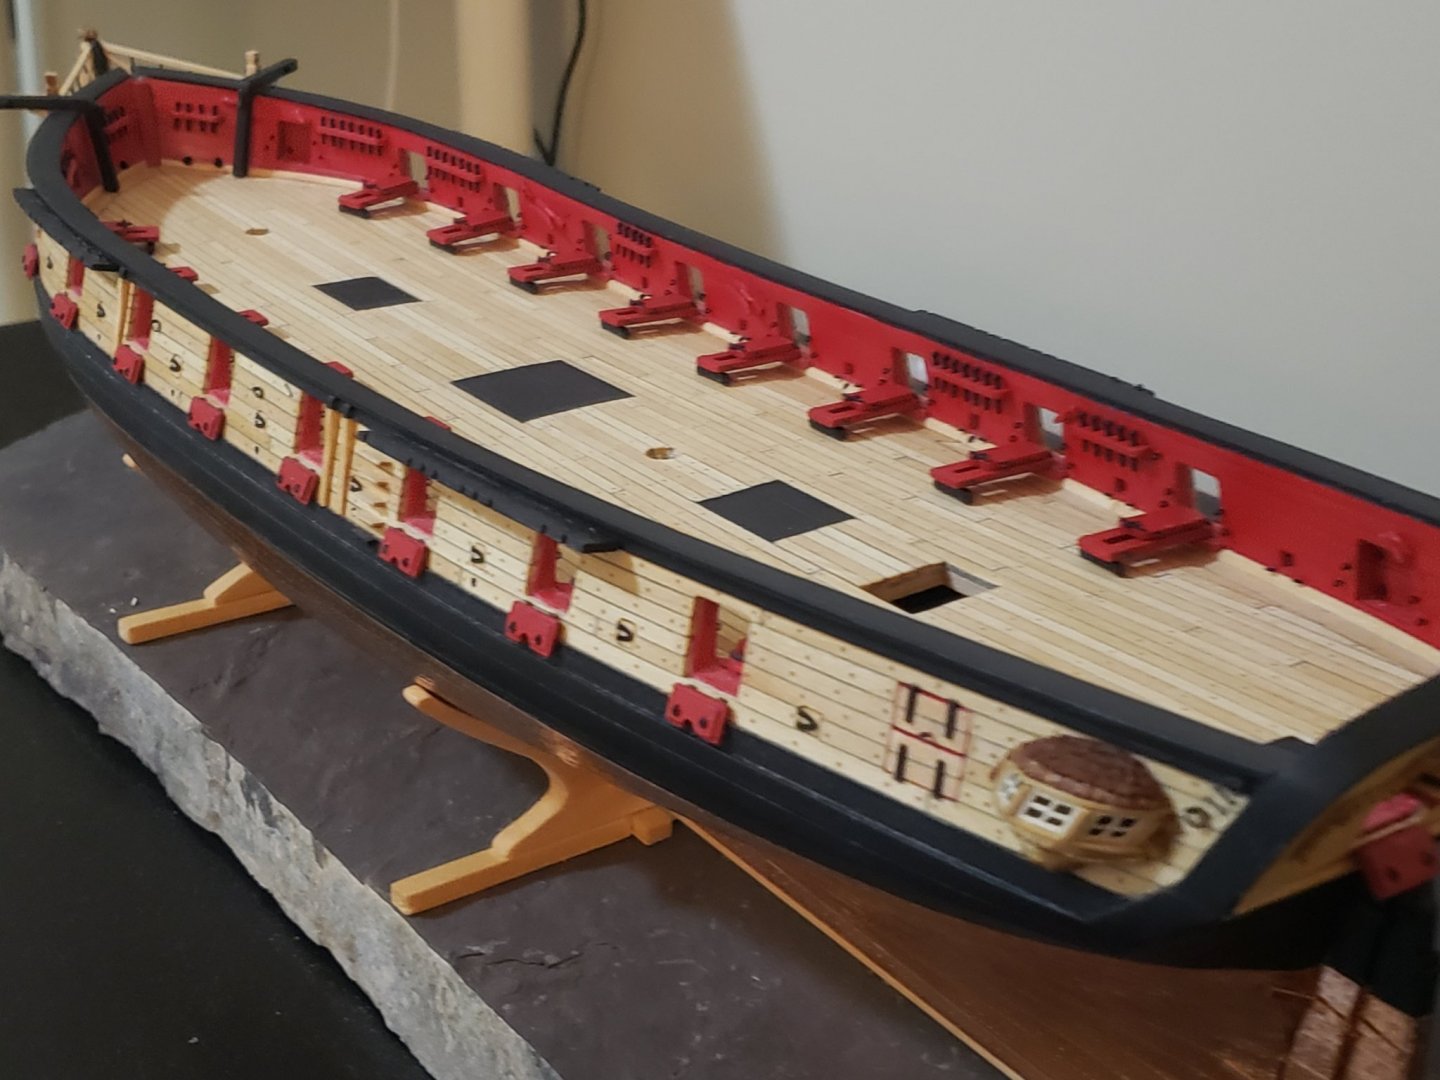
I finished gluing in the cleats. I used a caliper to determine the locations. I had to file each cleat so they are smooth. Next I'll be working on the guns.


- 950 replies
-
- 12
-
-
- syren
- model shipways
- (and 1 more)
-
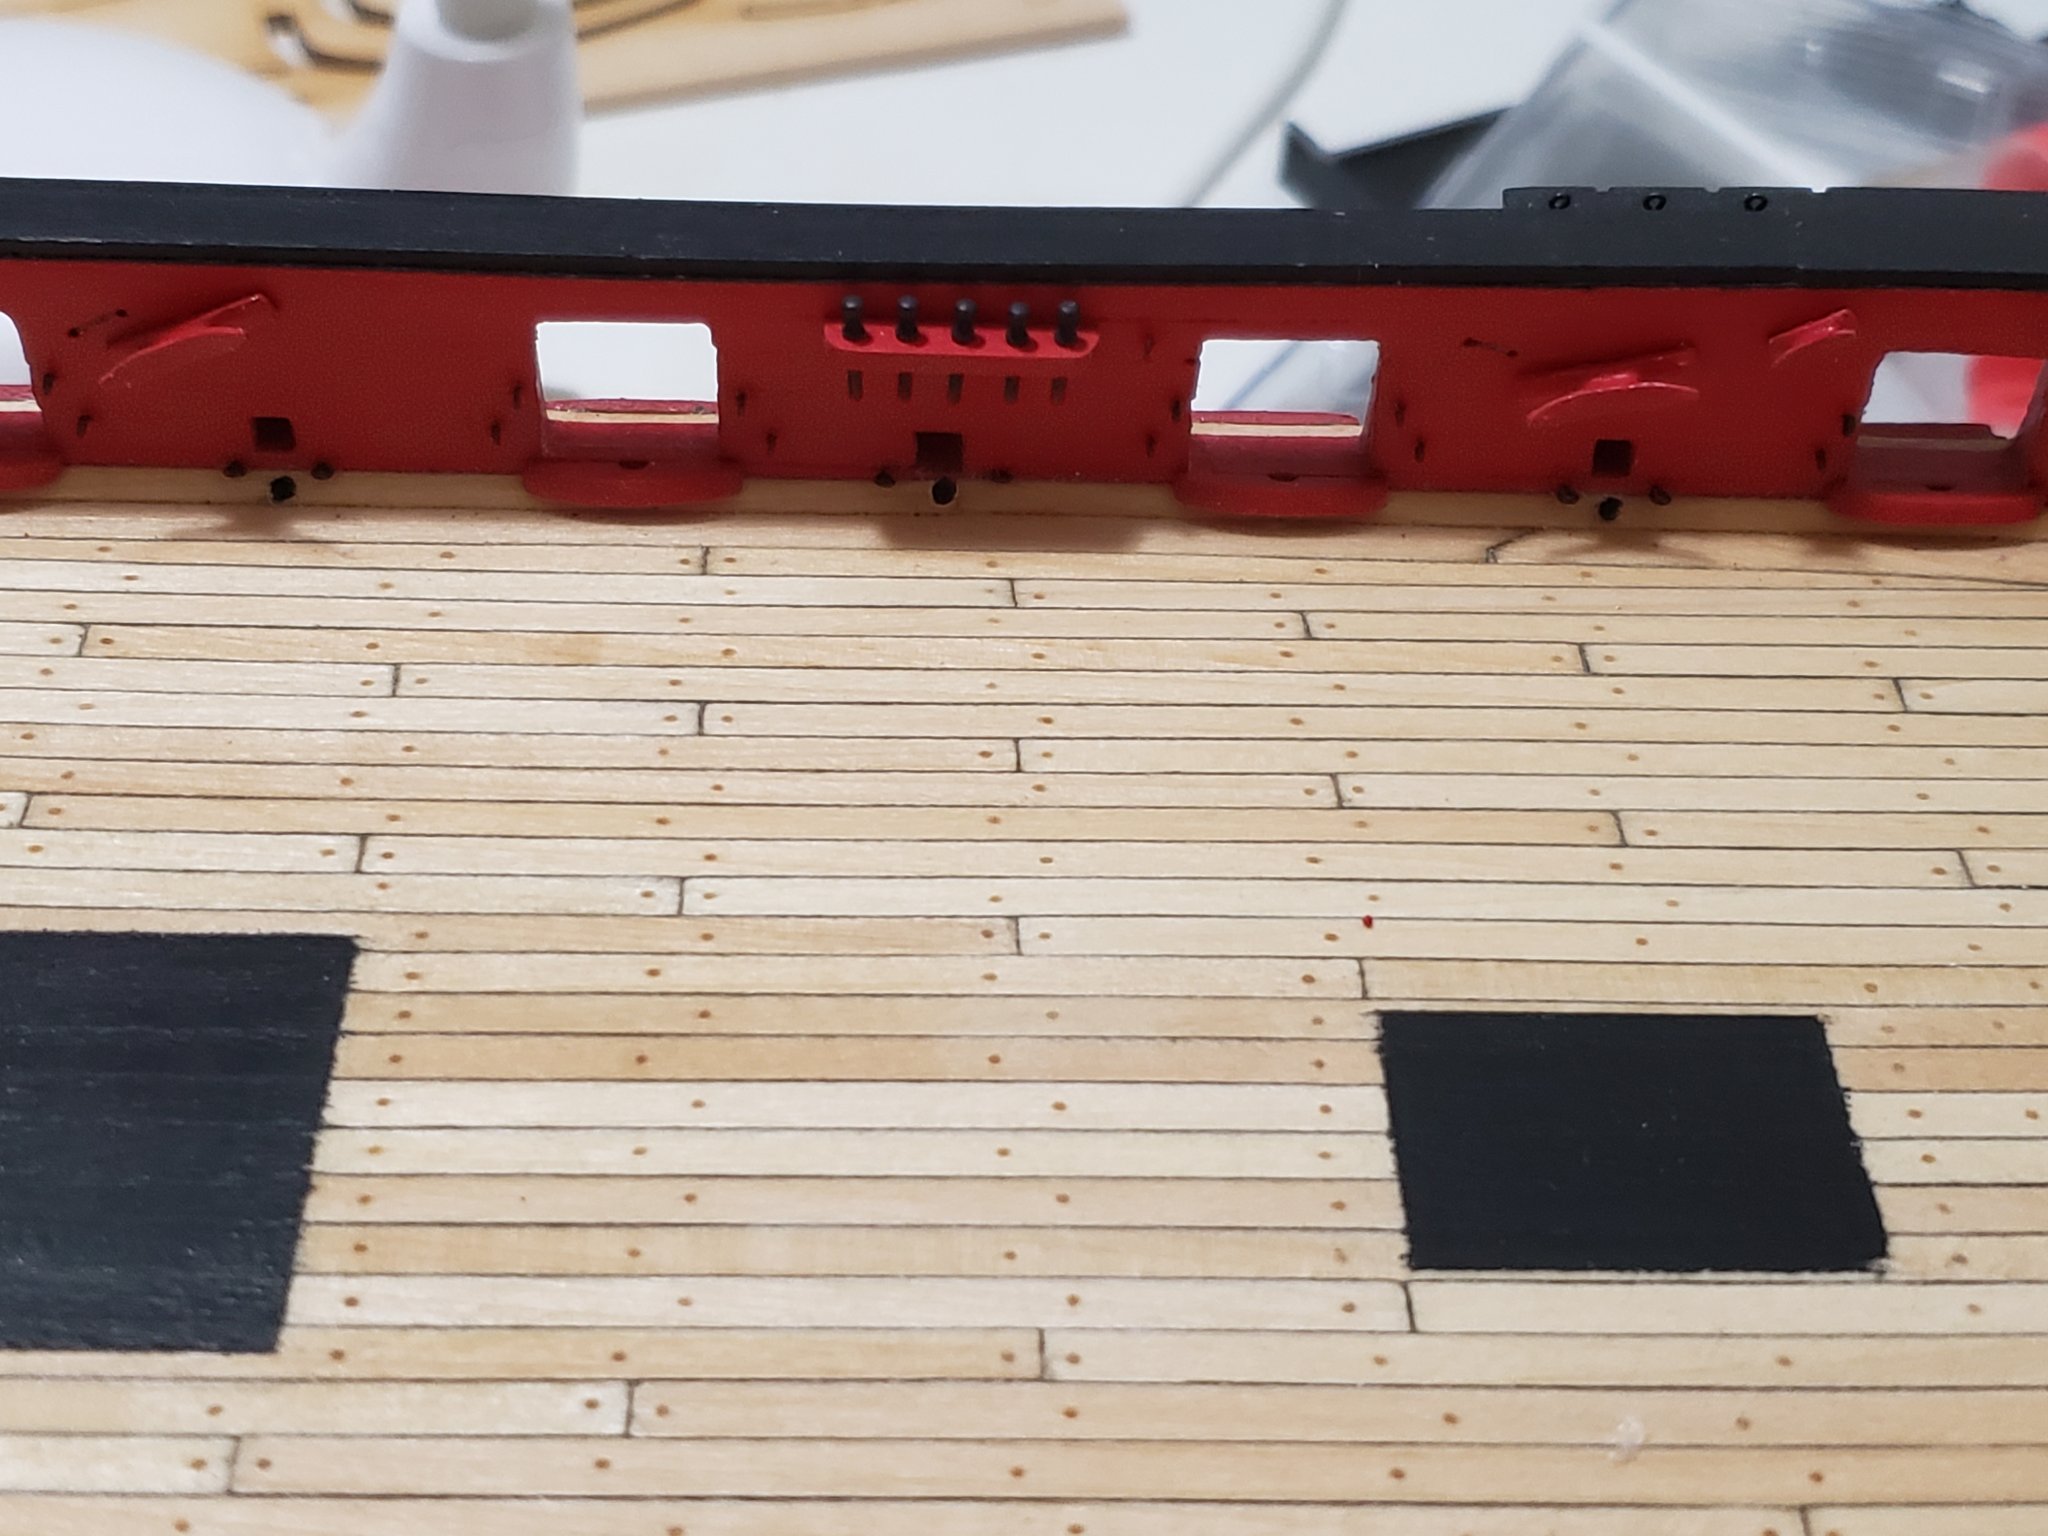
Thanks so much! Your advice worked!! I guess I didn't apply much pressure to indent before but this time I put more pressure. Here's a pic and the indent tool I used. The black strip will be used to support it. Thanks again!

- 950 replies
-
- 10
-
-
- syren
- model shipways
- (and 1 more)
-
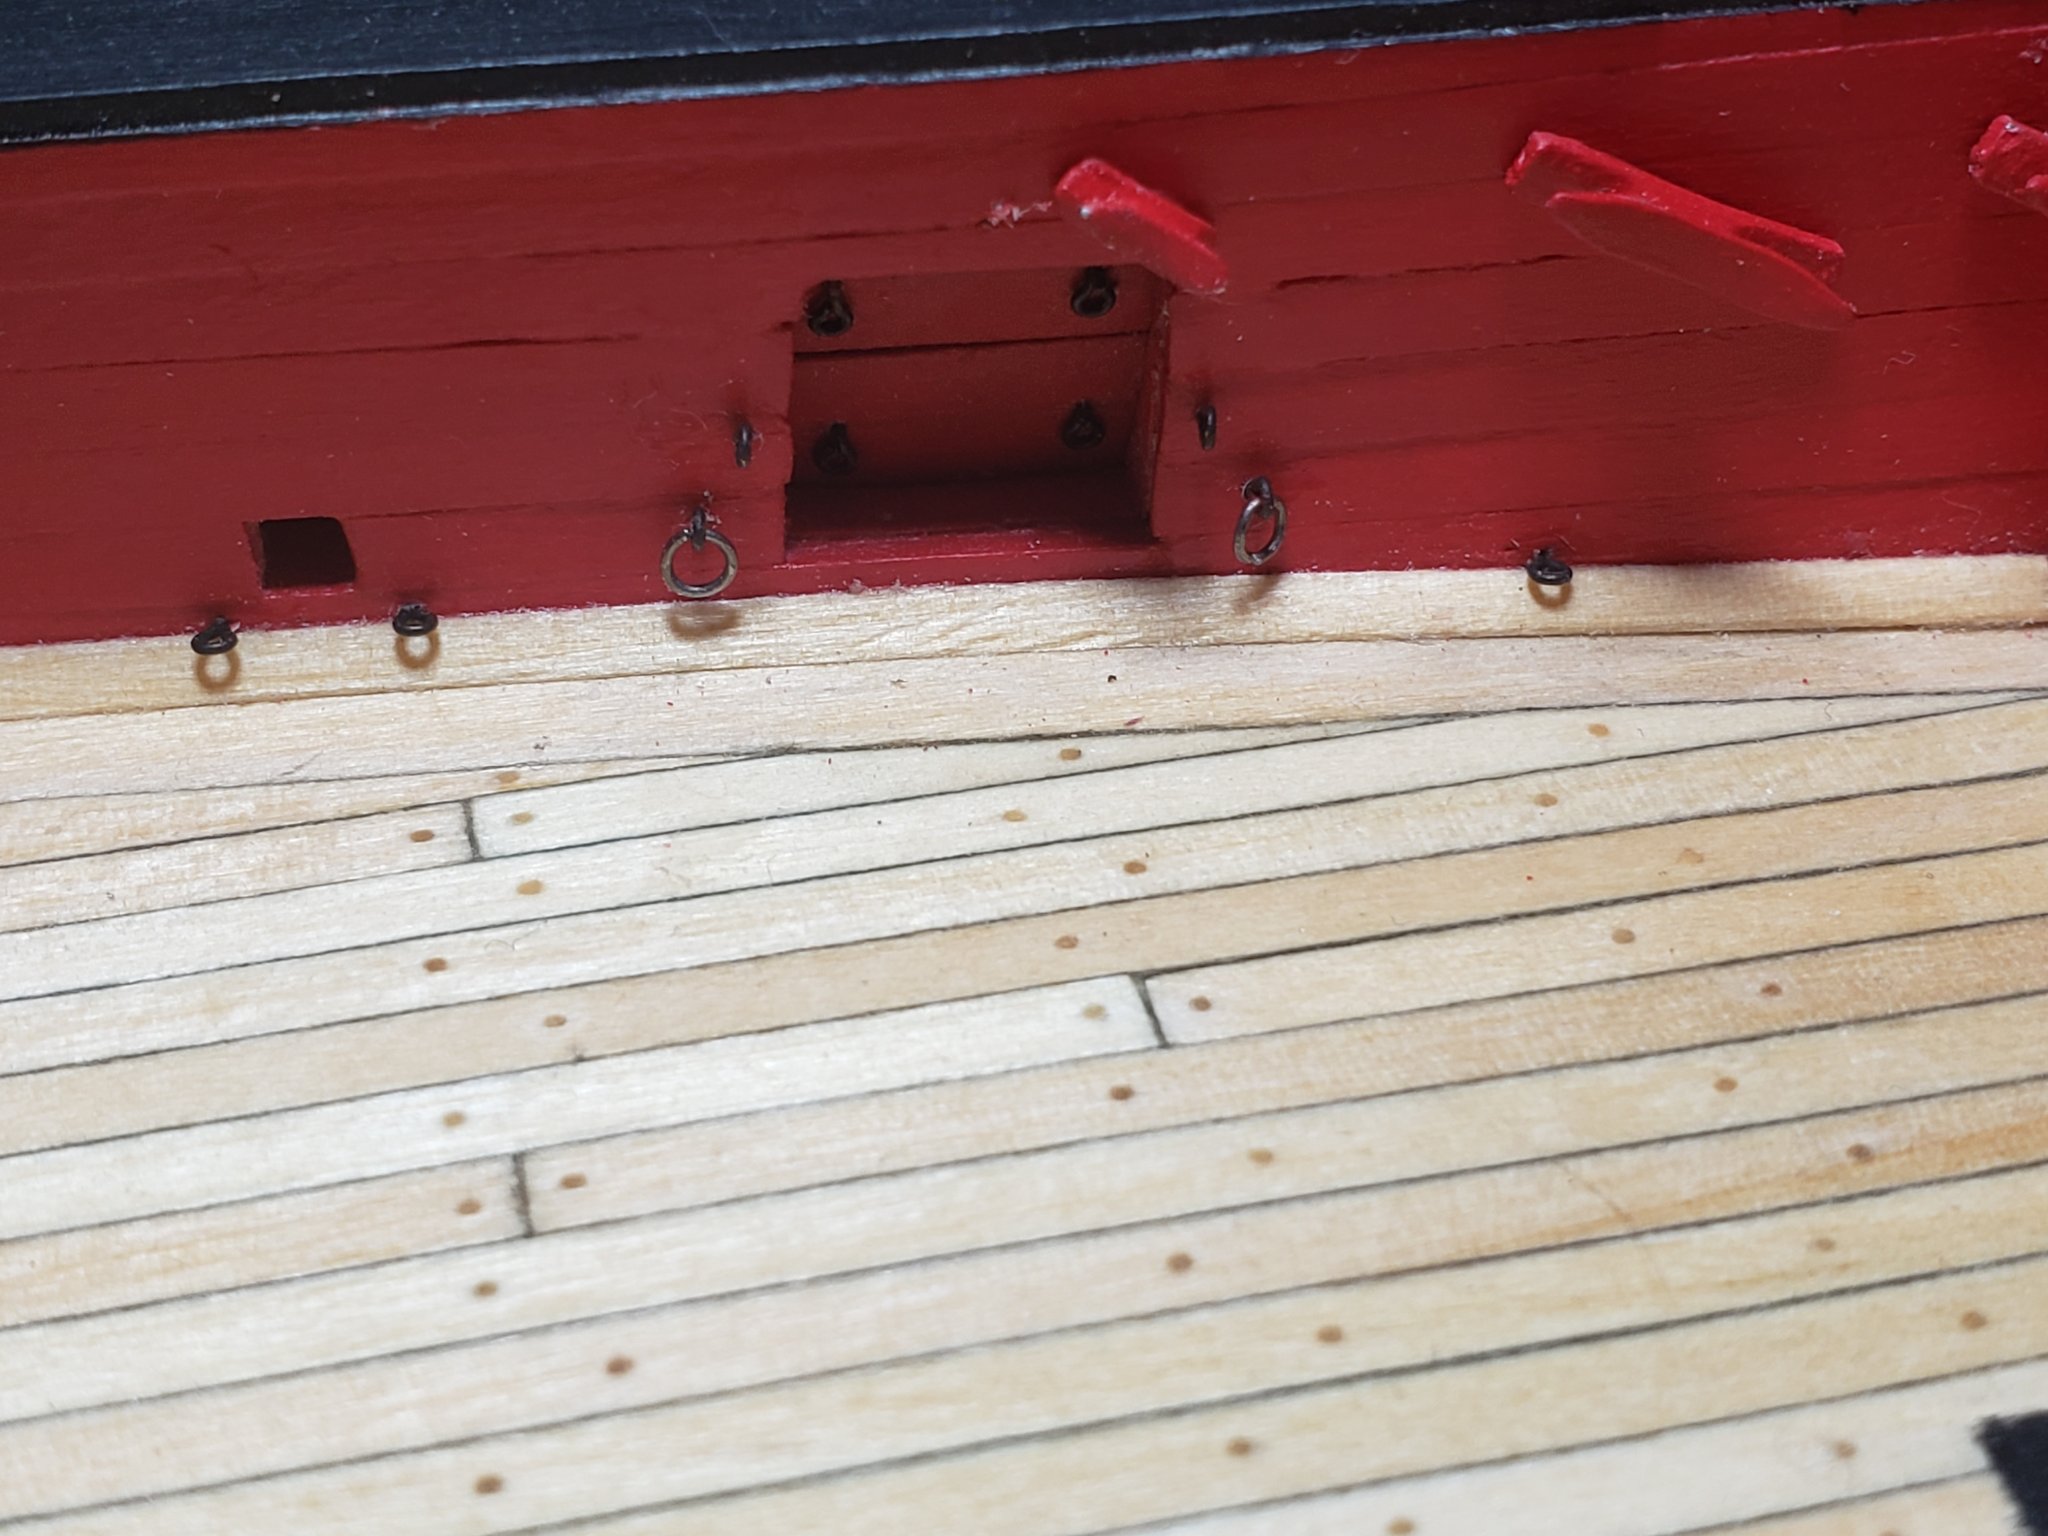
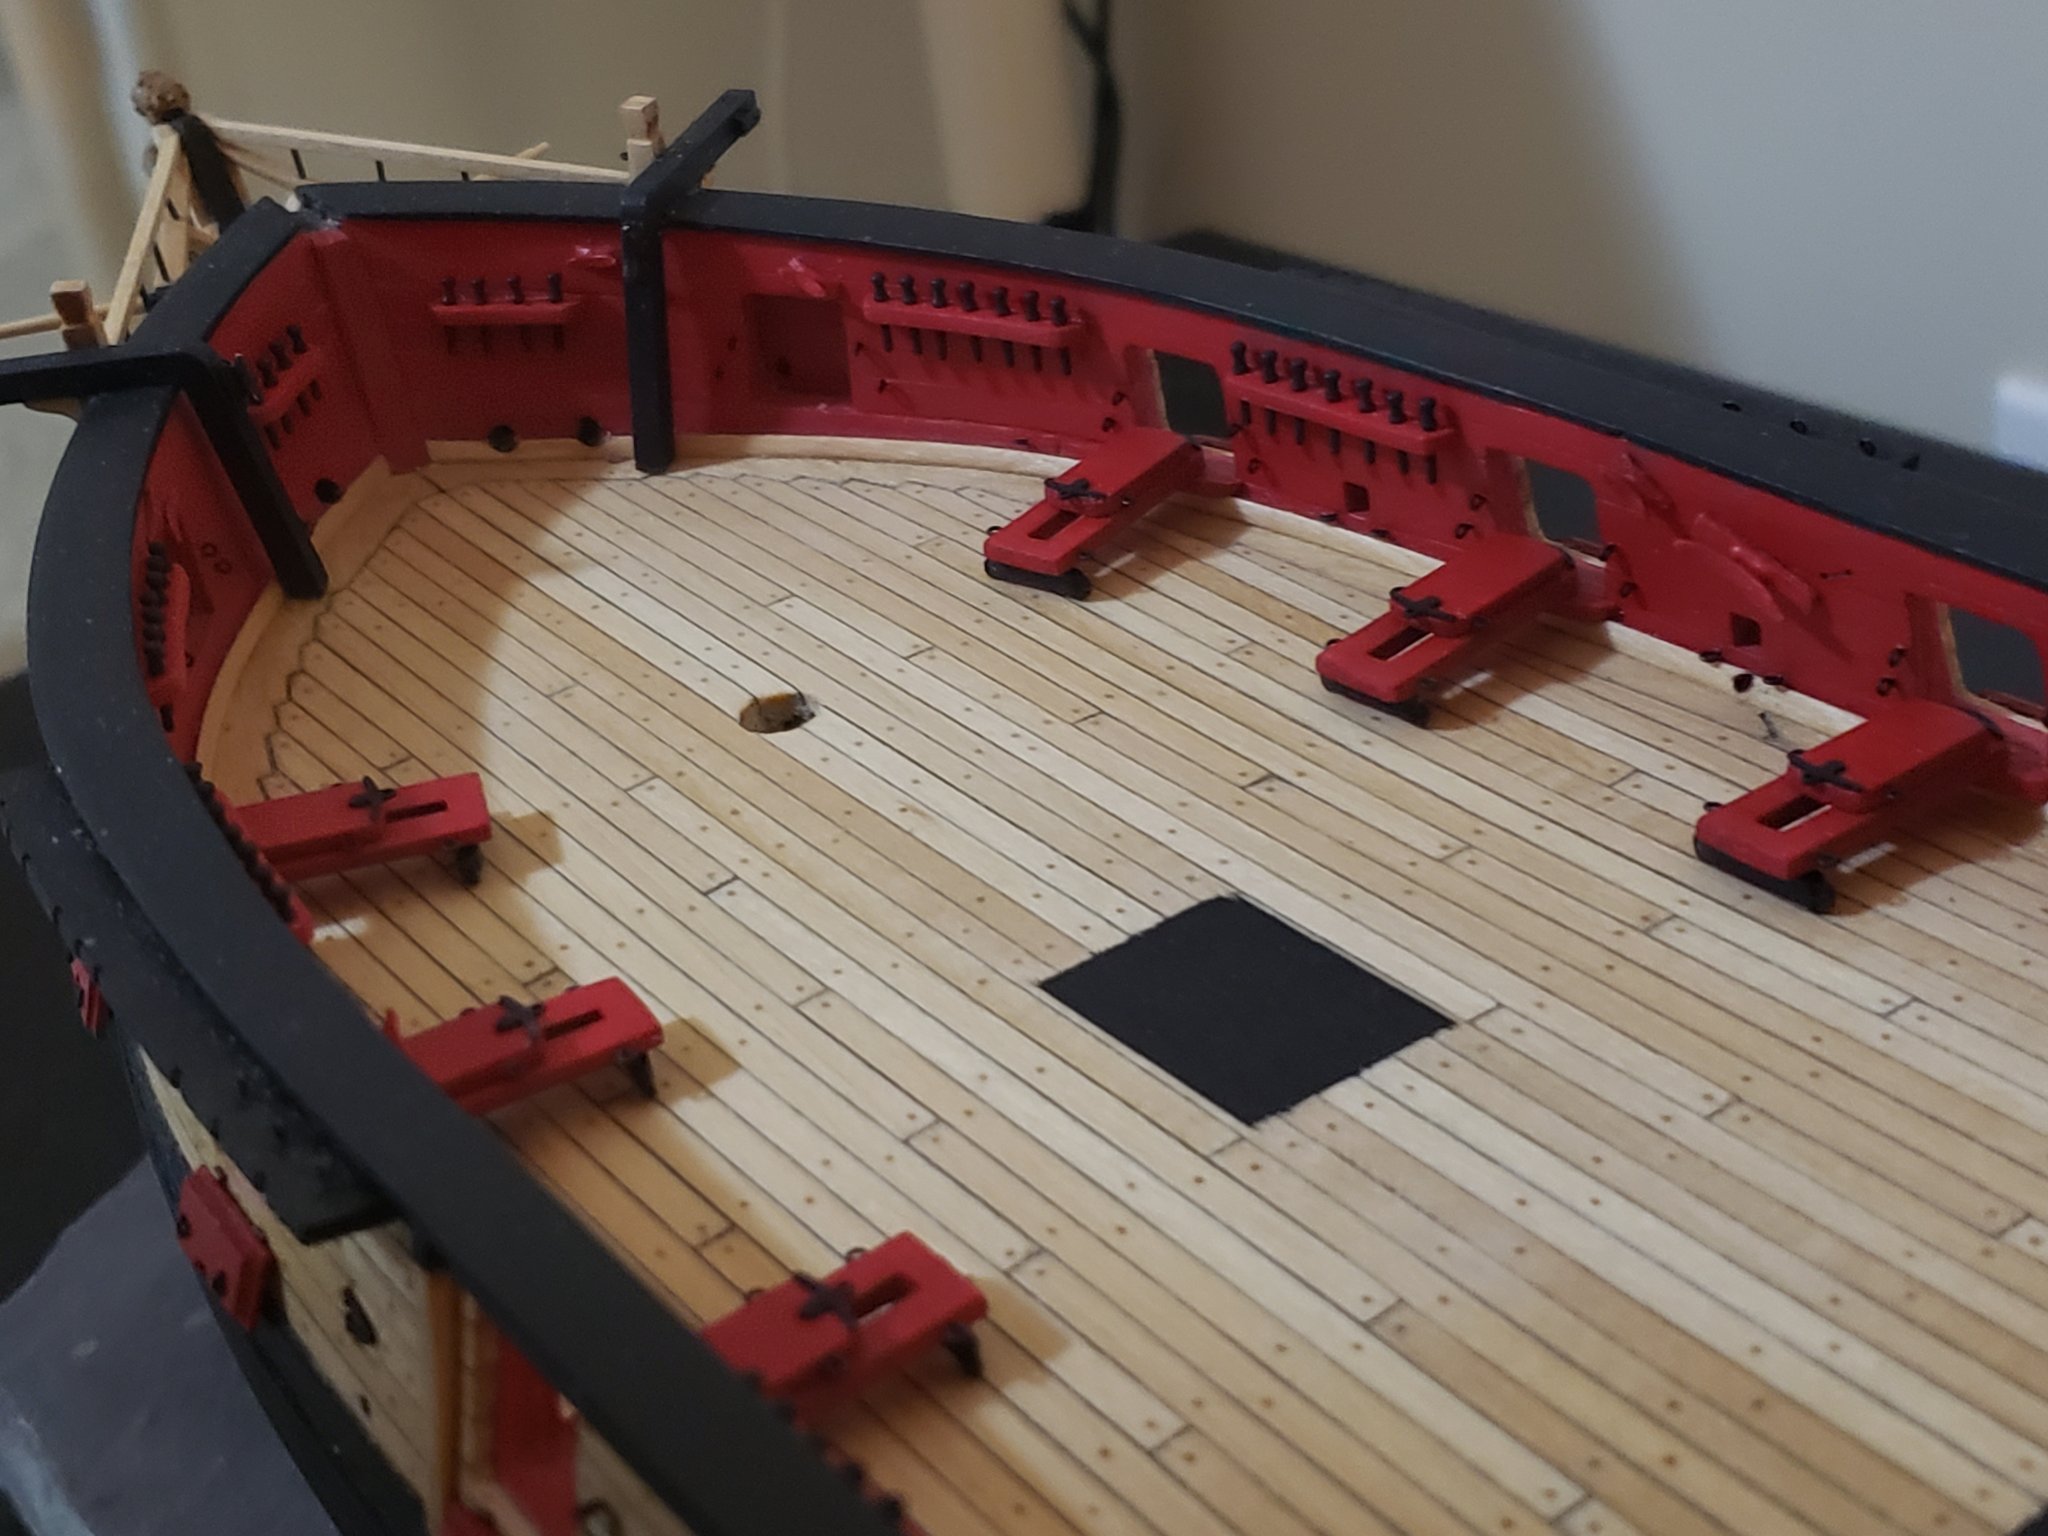
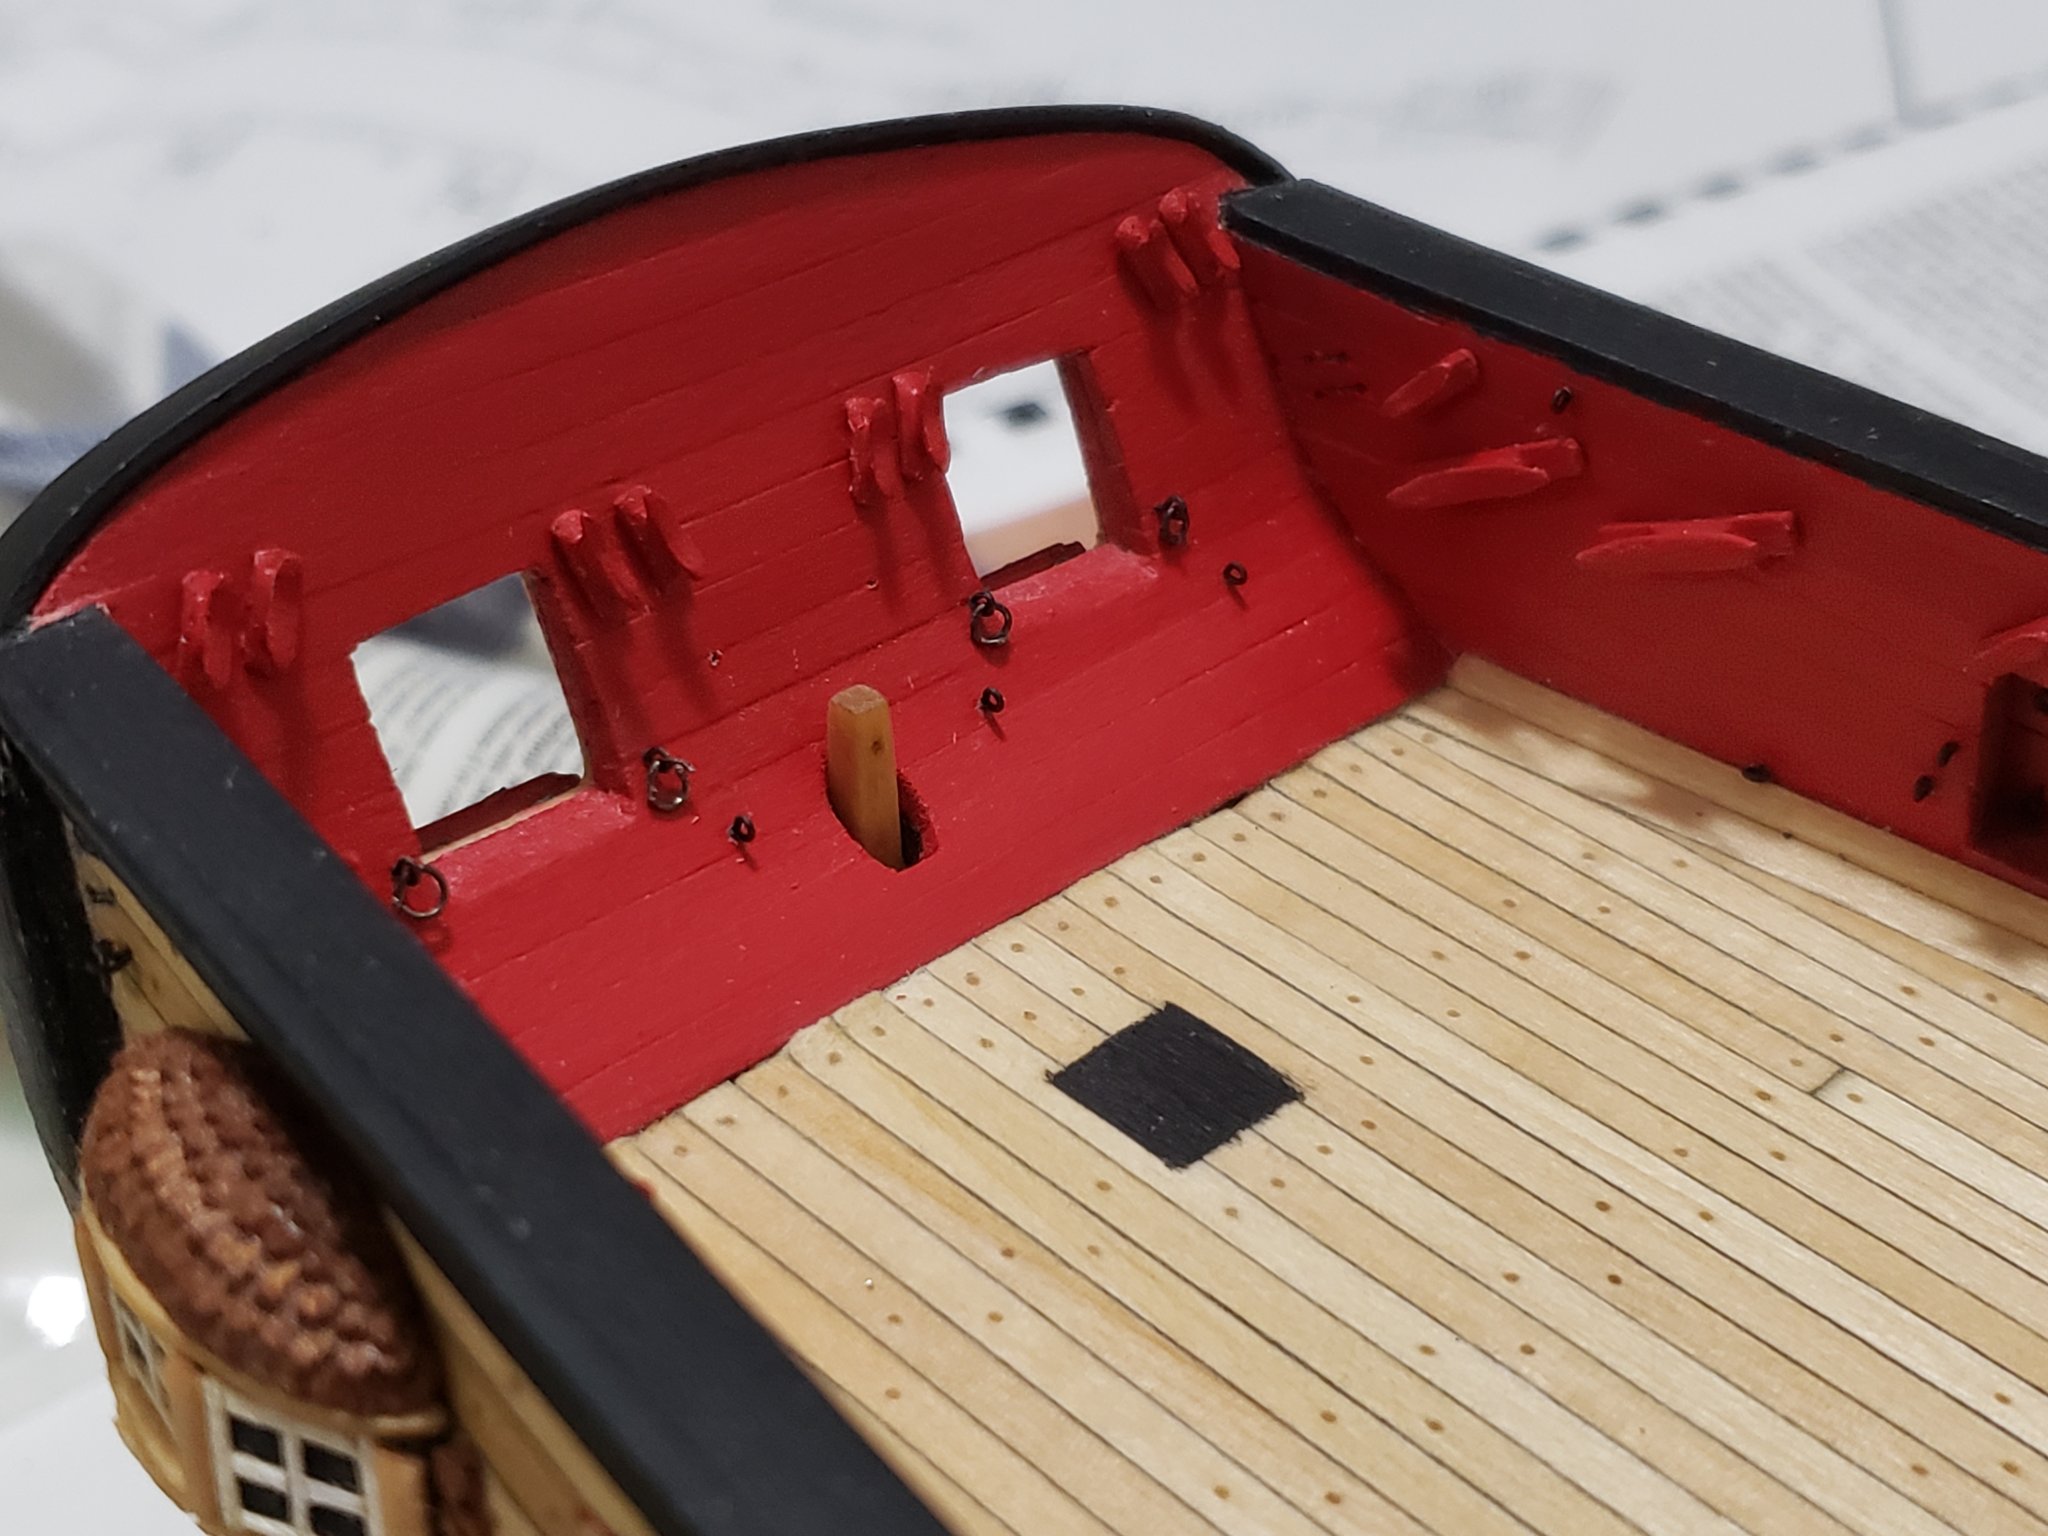
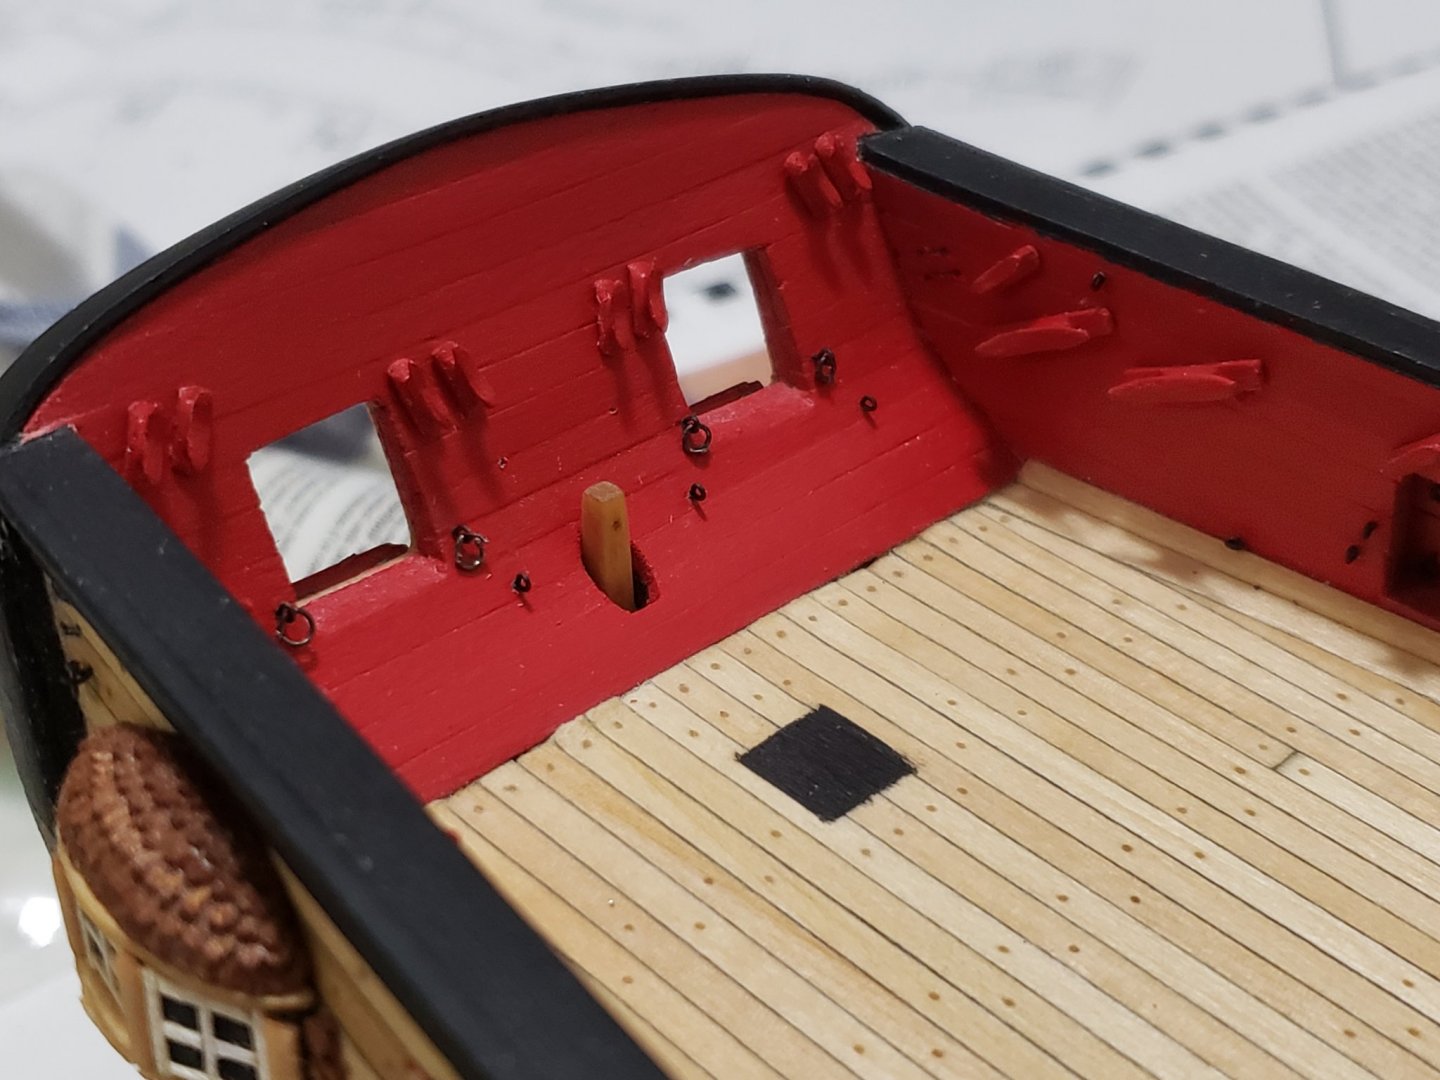
I finished gluing the eyebolts into position. Not much to describe here, so here are some photos: Next is the cleats. I have no idea how to drill holes by hand (using a pin vise) into the cleats to pin them for a secure fit. The drill bit just keeps sliding.... I guess I will just glue them without the pin and try to treat them delicately
- 950 replies
-
- 9
-
-
- syren
- model shipways
- (and 1 more)
-
Thanks Steven! I also liked your idea of using the plans as a template to mark locations of the details. I was too lazy to photocopy them so I just eye-balled their locations..... probably not the best way to do things 😅, but I did use a caliper once in a while 😁
- 950 replies
-
- 1
-
-
- syren
- model shipways
- (and 1 more)
-
K, just placed the order for some blocks and more rope 😁 I think I'll just purchase all the blocks except for the 3/32" single blocks since it got too pricey. I also saw the instructions for the deadeyes and it seems that a block tumbler is needed to assemble them, so I'll just use the kit ones for this. I believe Peter also did the same for his Syren, and it turned out spectacular!
- 950 replies
-
- 3
-
-
- syren
- model shipways
- (and 1 more)