HOLIDAY DONATION DRIVE - SUPPORT MSW - DO YOUR PART TO KEEP THIS GREAT FORUM GOING! (Only 13 donations so far - C'mon guys!)
×

.jpg.1f80adf1a9b14a937cfcf2ca6af0f0d4.jpg)
WalrusGuy
-
Posts
1,007 -
Joined
-
Last visited
Content Type
Profiles
Forums
Gallery
Events
Everything posted by WalrusGuy
-
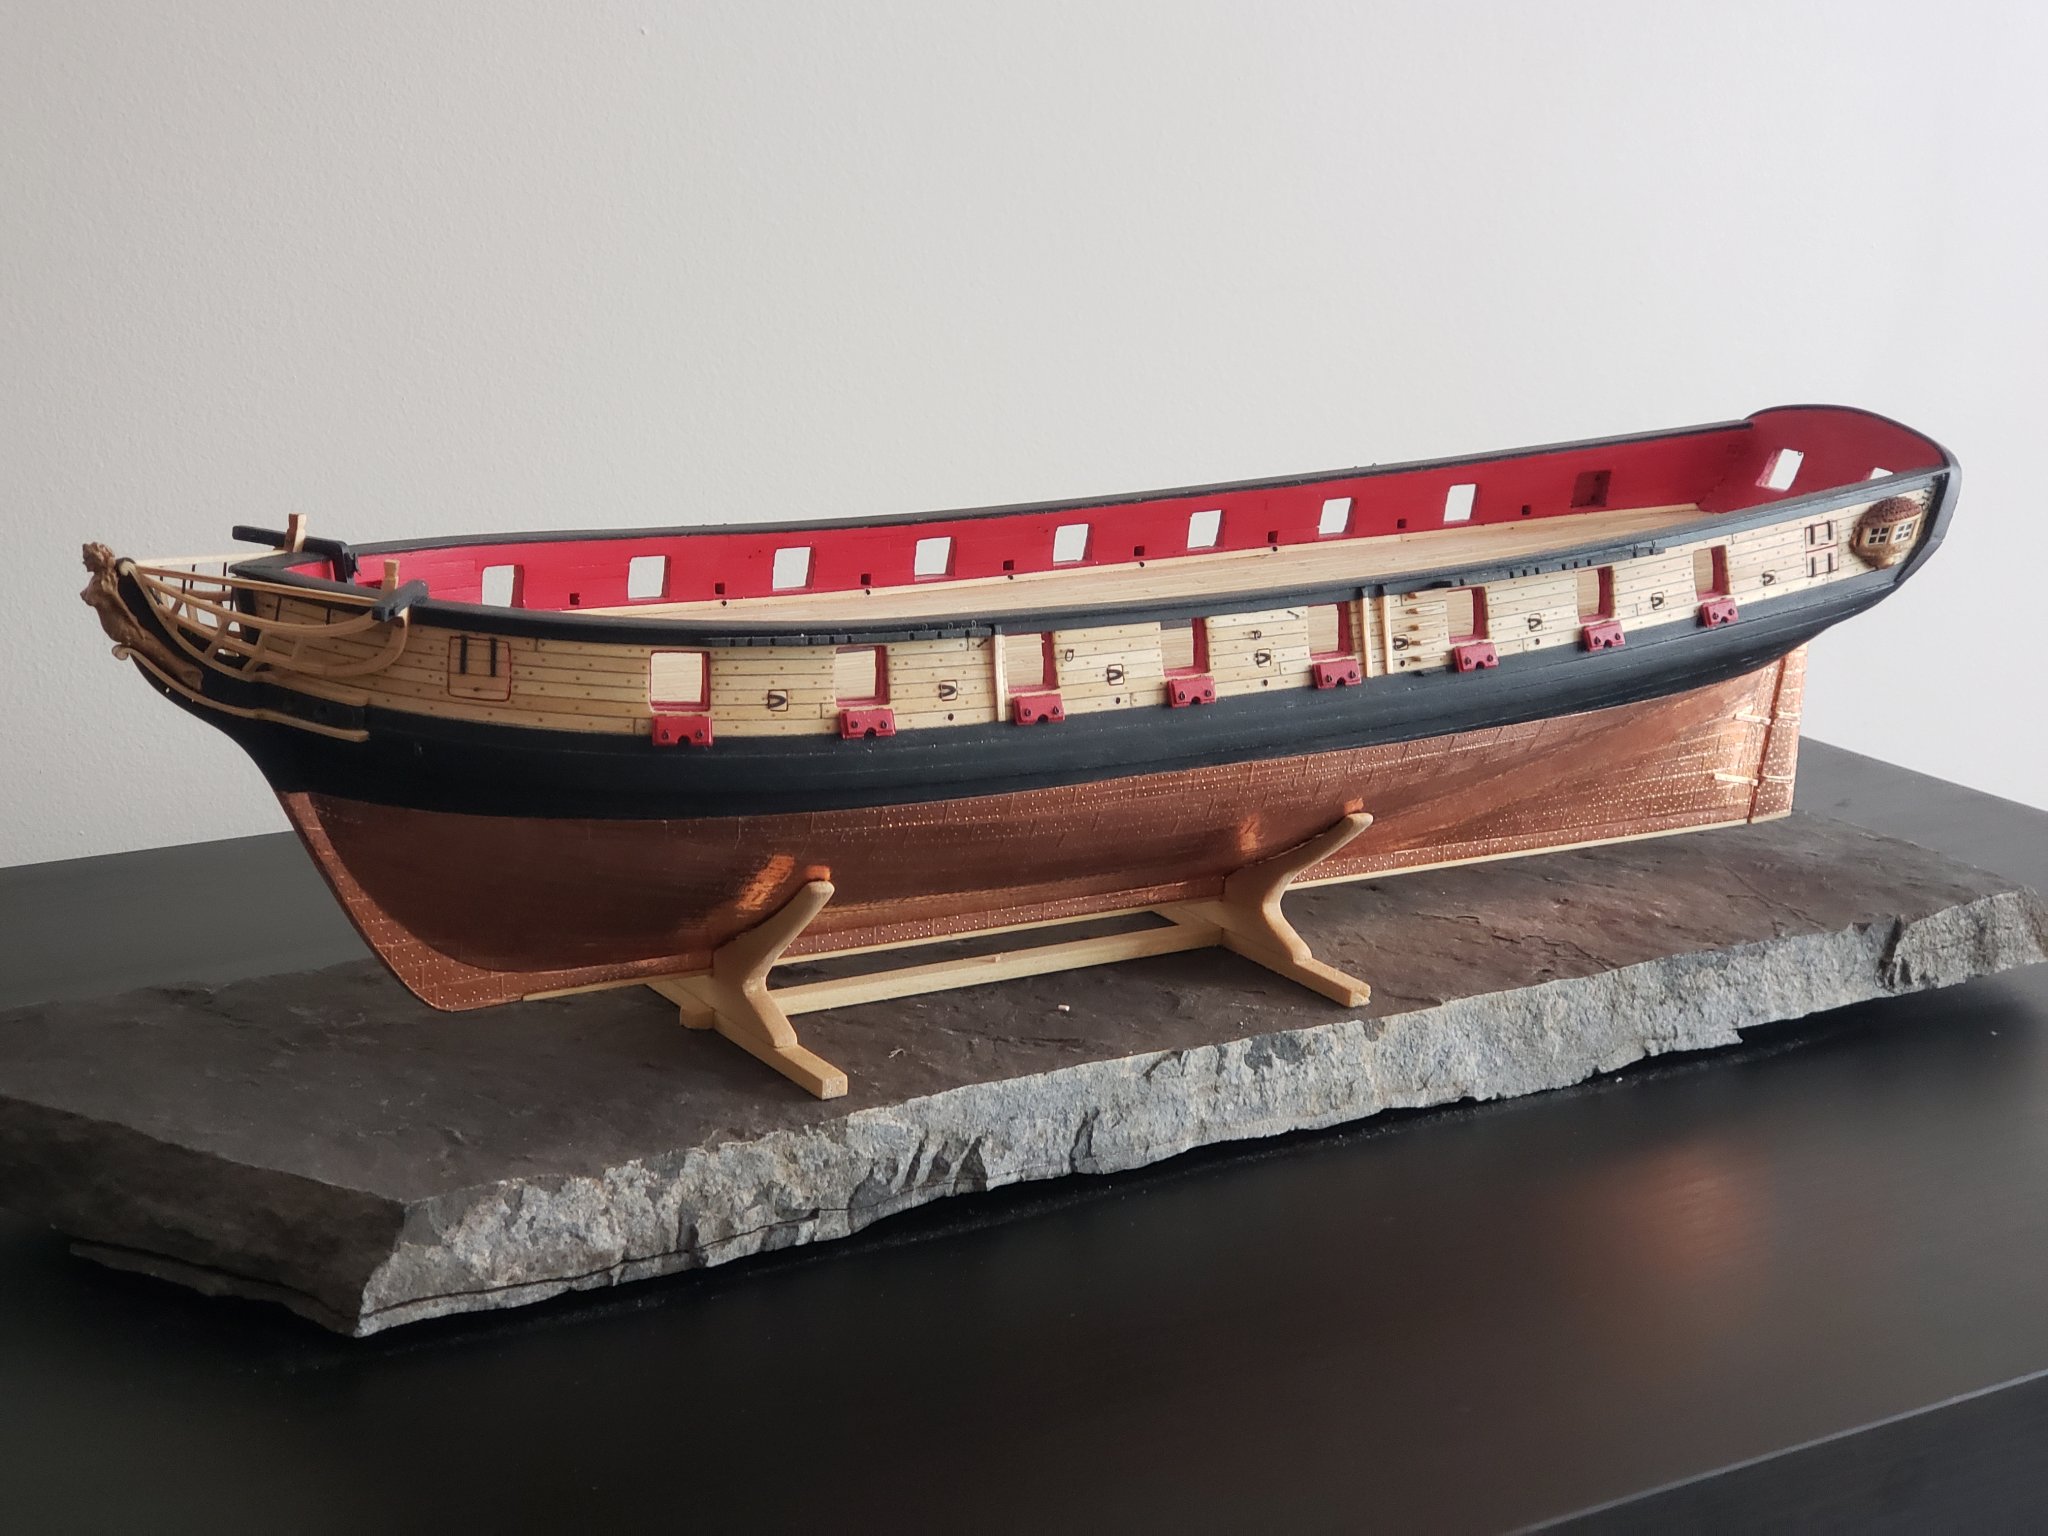
.thumb.jpg.62d1d69fed1f32364417cb1f9cdeb009.jpg) Just received my order from Syren Ship Model Company for some ropes and wheel. This is just about half the ropes I need since they were out of stock when I got them, so I'll order more once I start the rigging section which probably take a while 😅 Still deciding on whether to order blocks or just use the kit supplied ones
Just received my order from Syren Ship Model Company for some ropes and wheel. This is just about half the ropes I need since they were out of stock when I got them, so I'll order more once I start the rigging section which probably take a while 😅 Still deciding on whether to order blocks or just use the kit supplied ones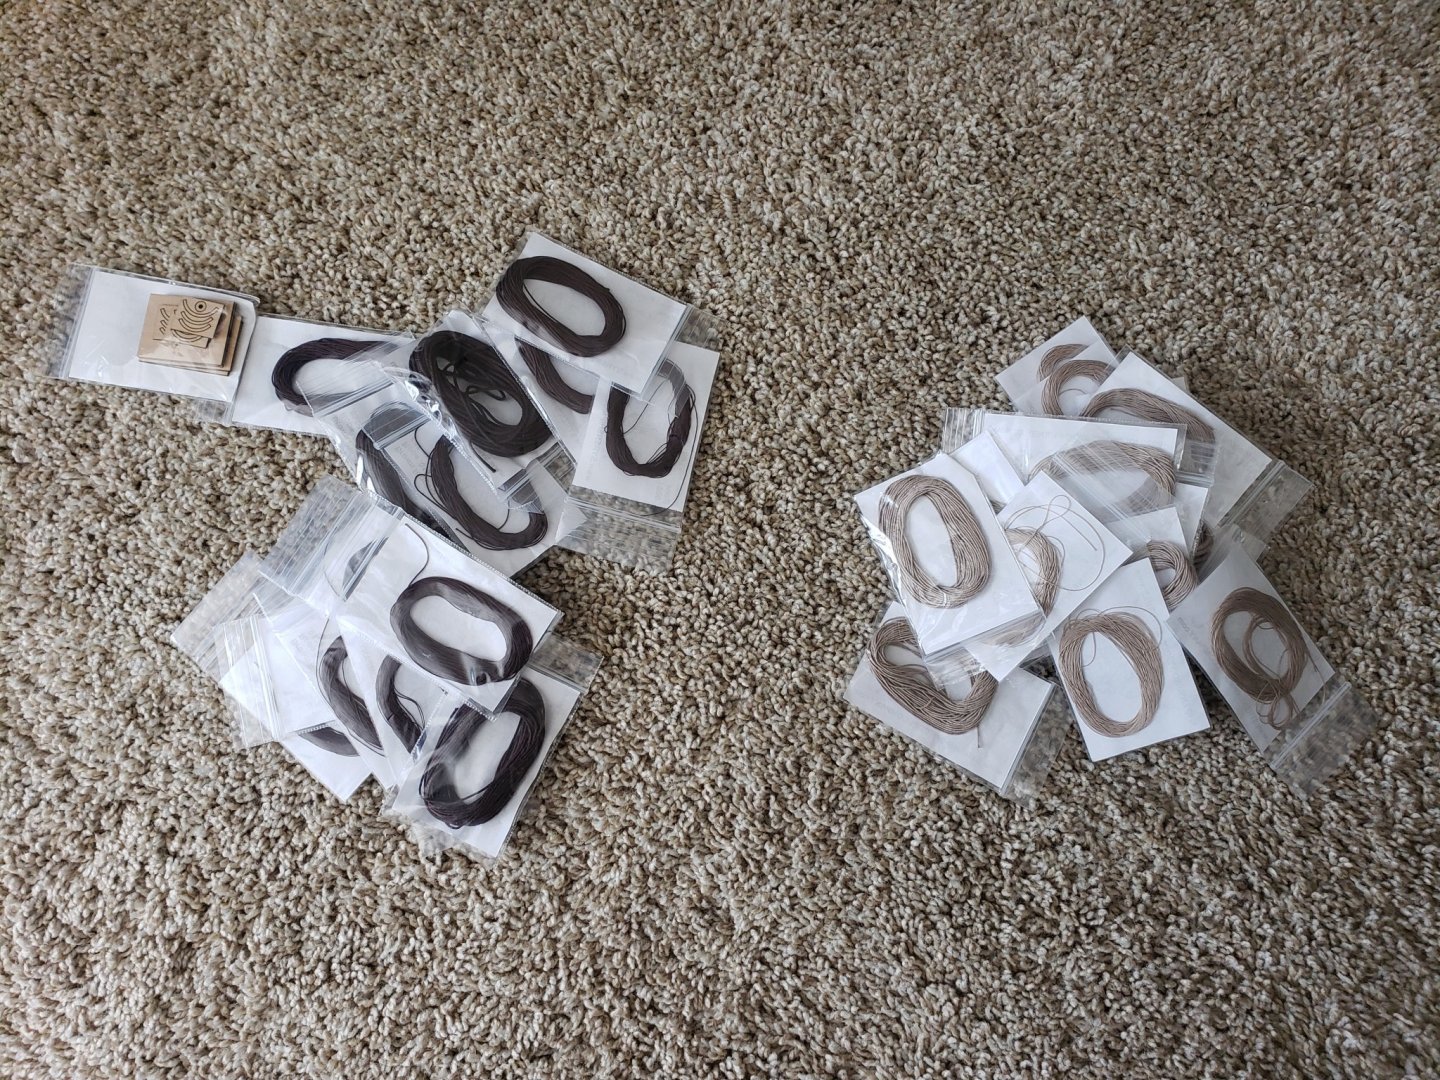
- 950 replies
-
- 4
-

-
- syren
- model shipways
- (and 1 more)
-
Thanks Justin! Glad to have you back 😁
-
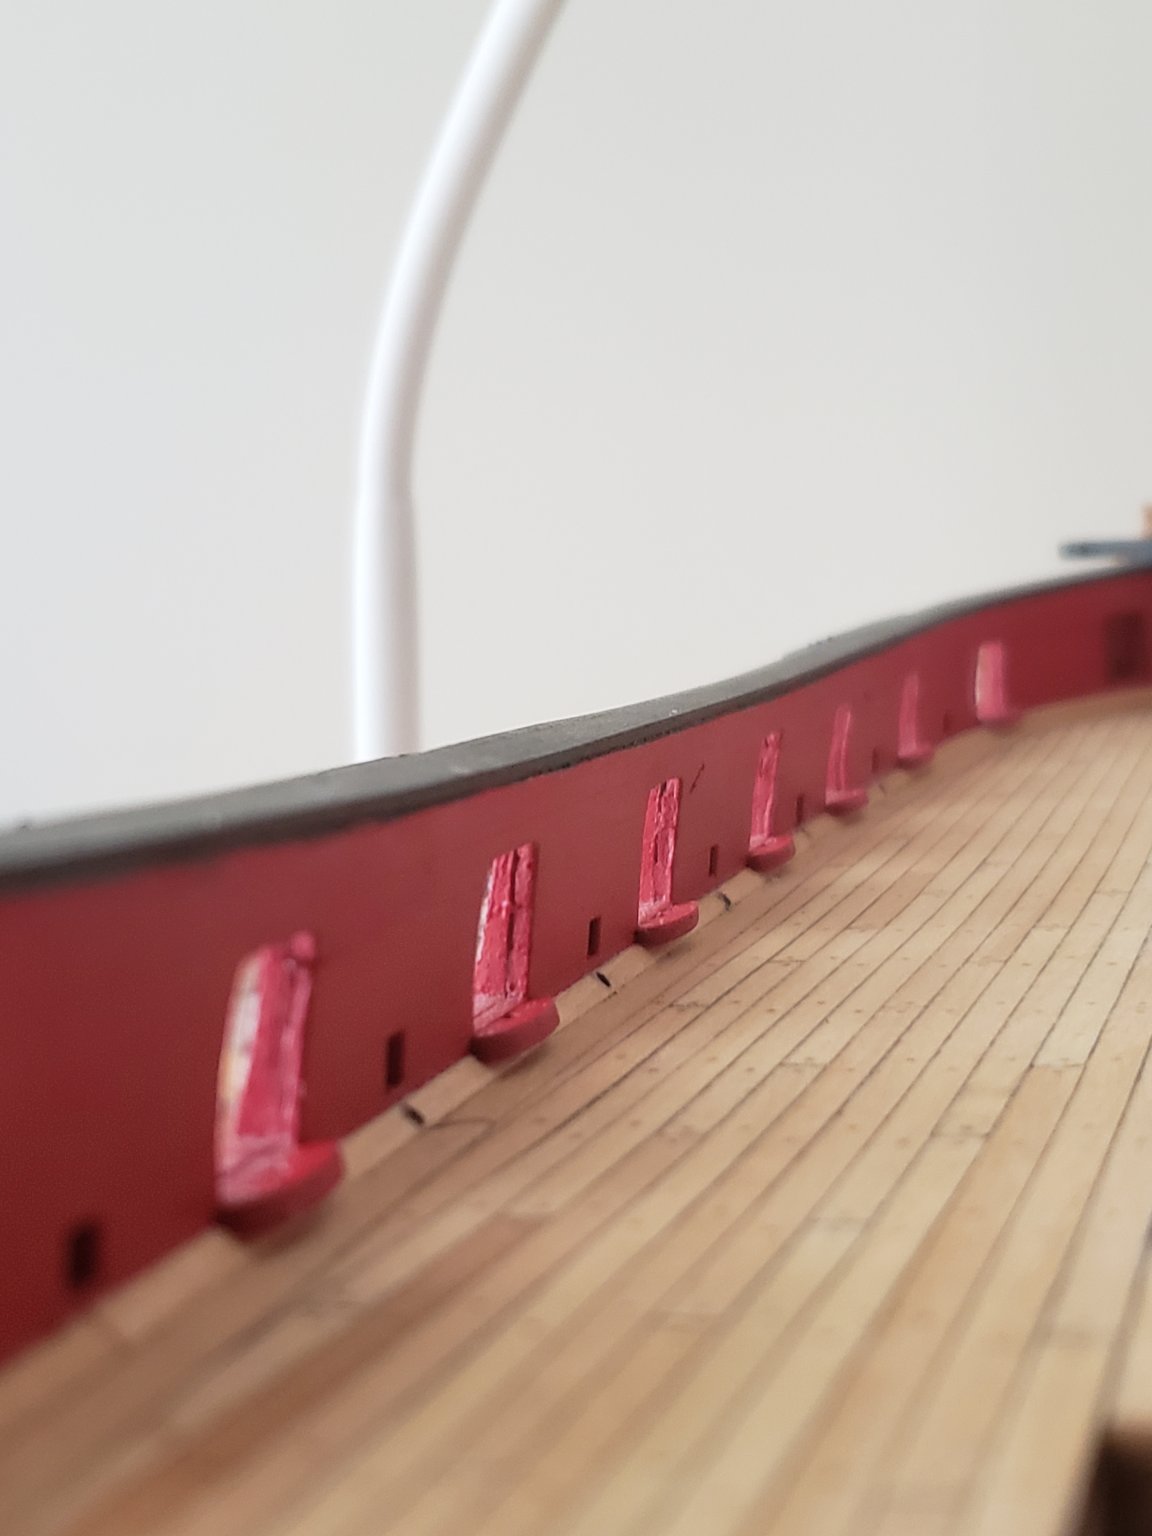
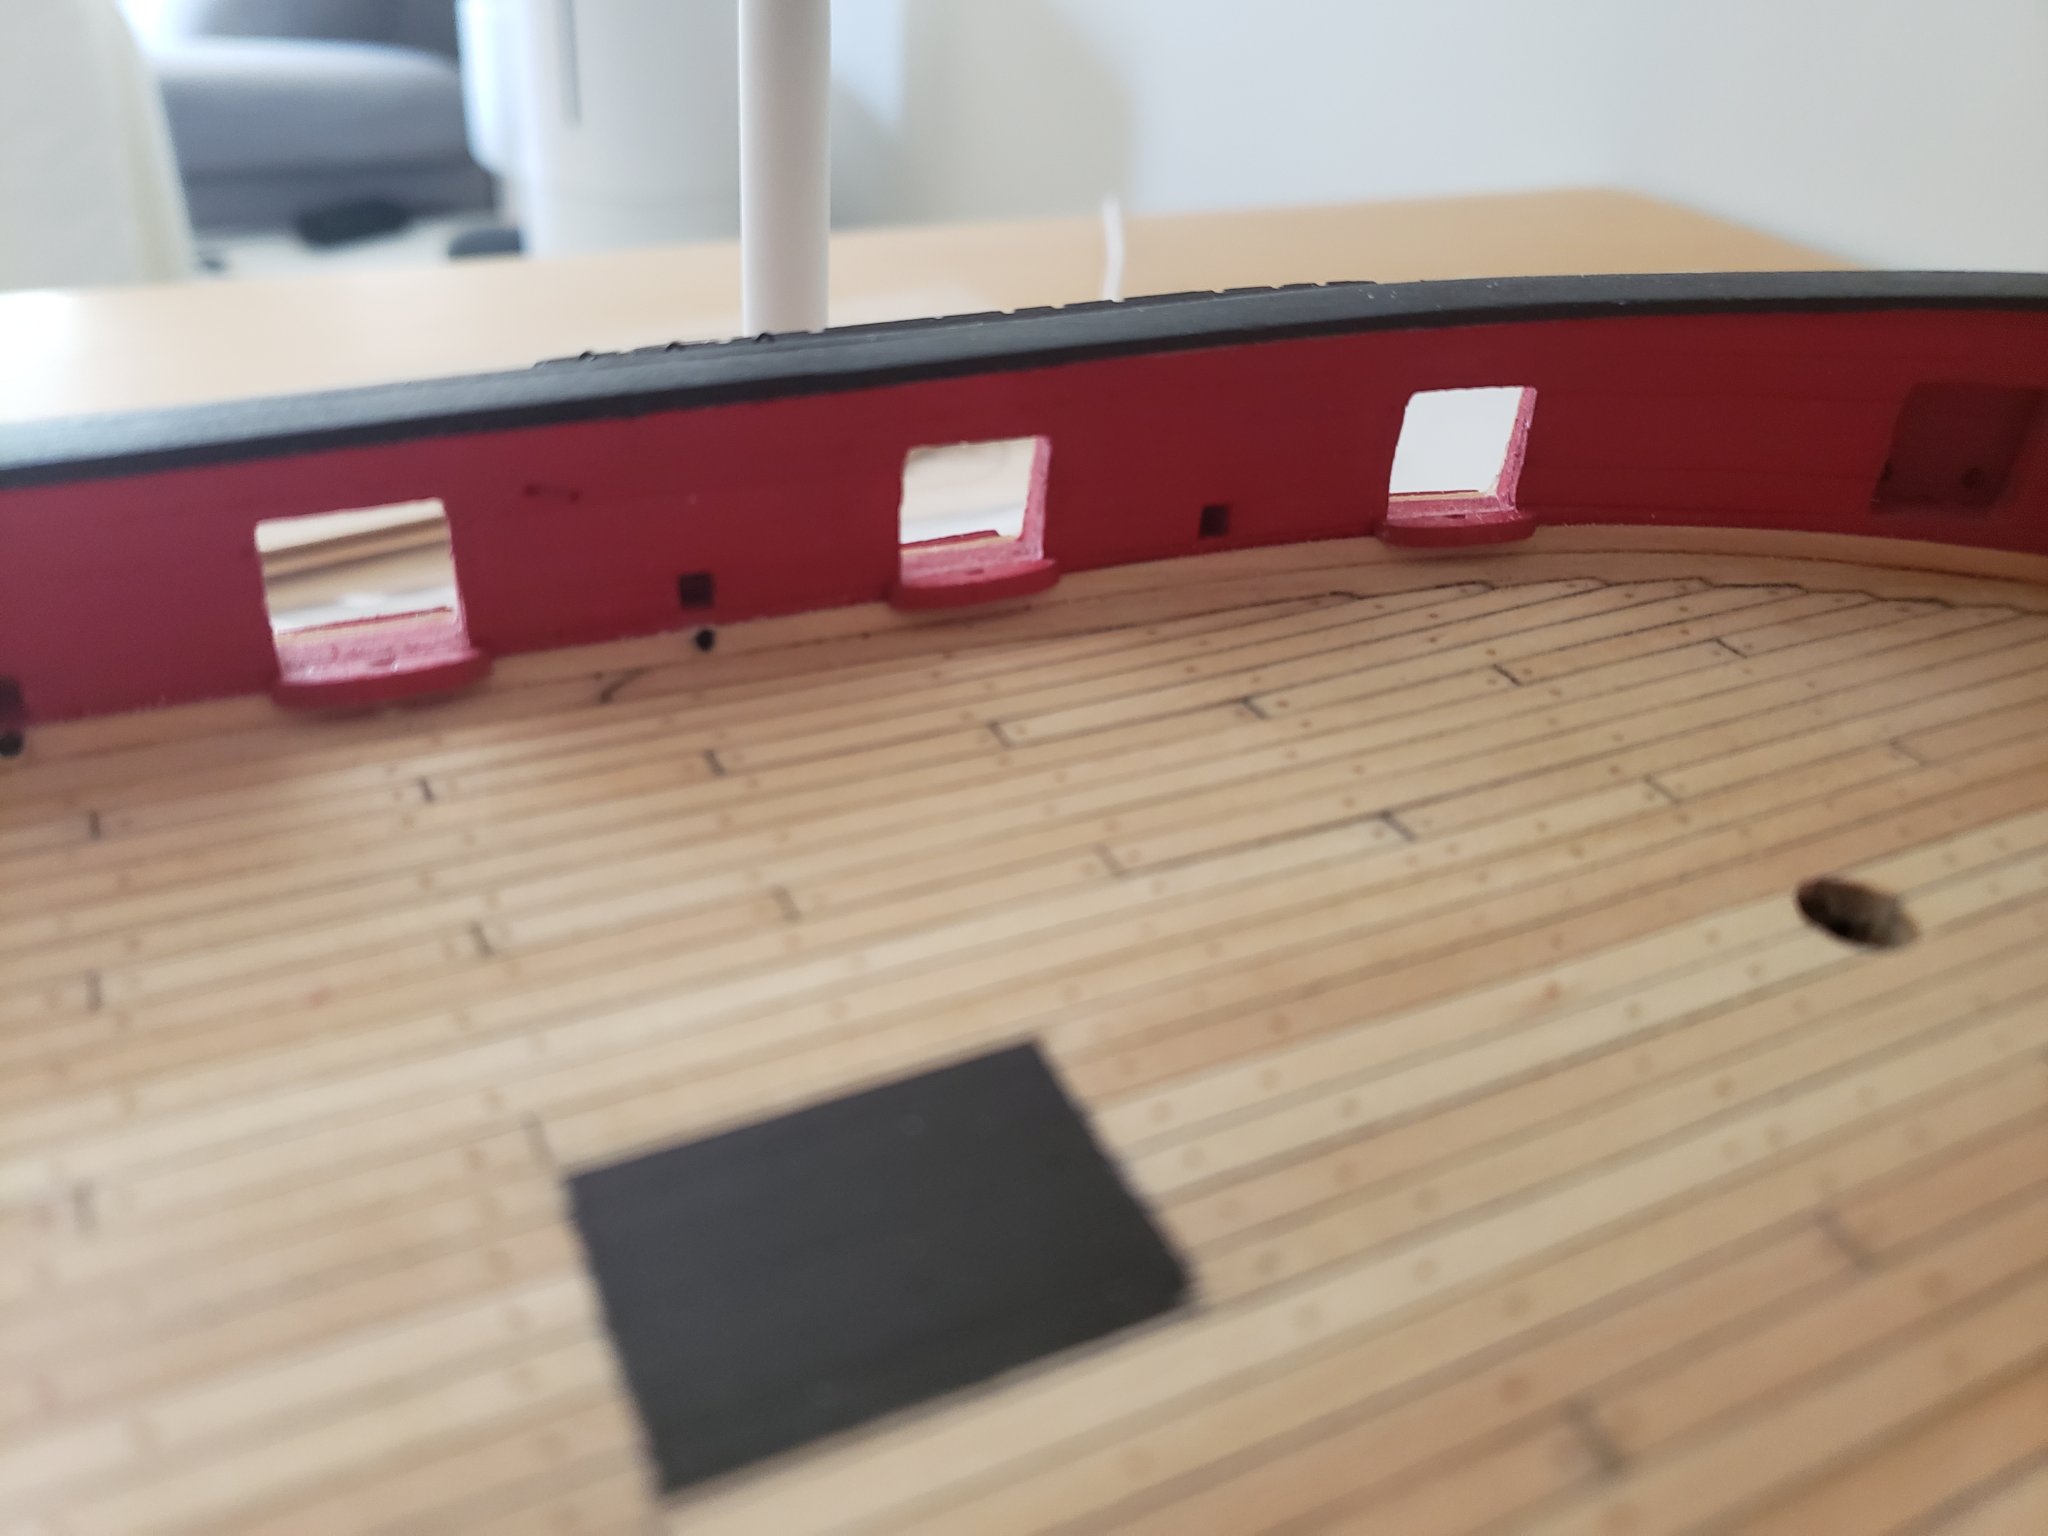
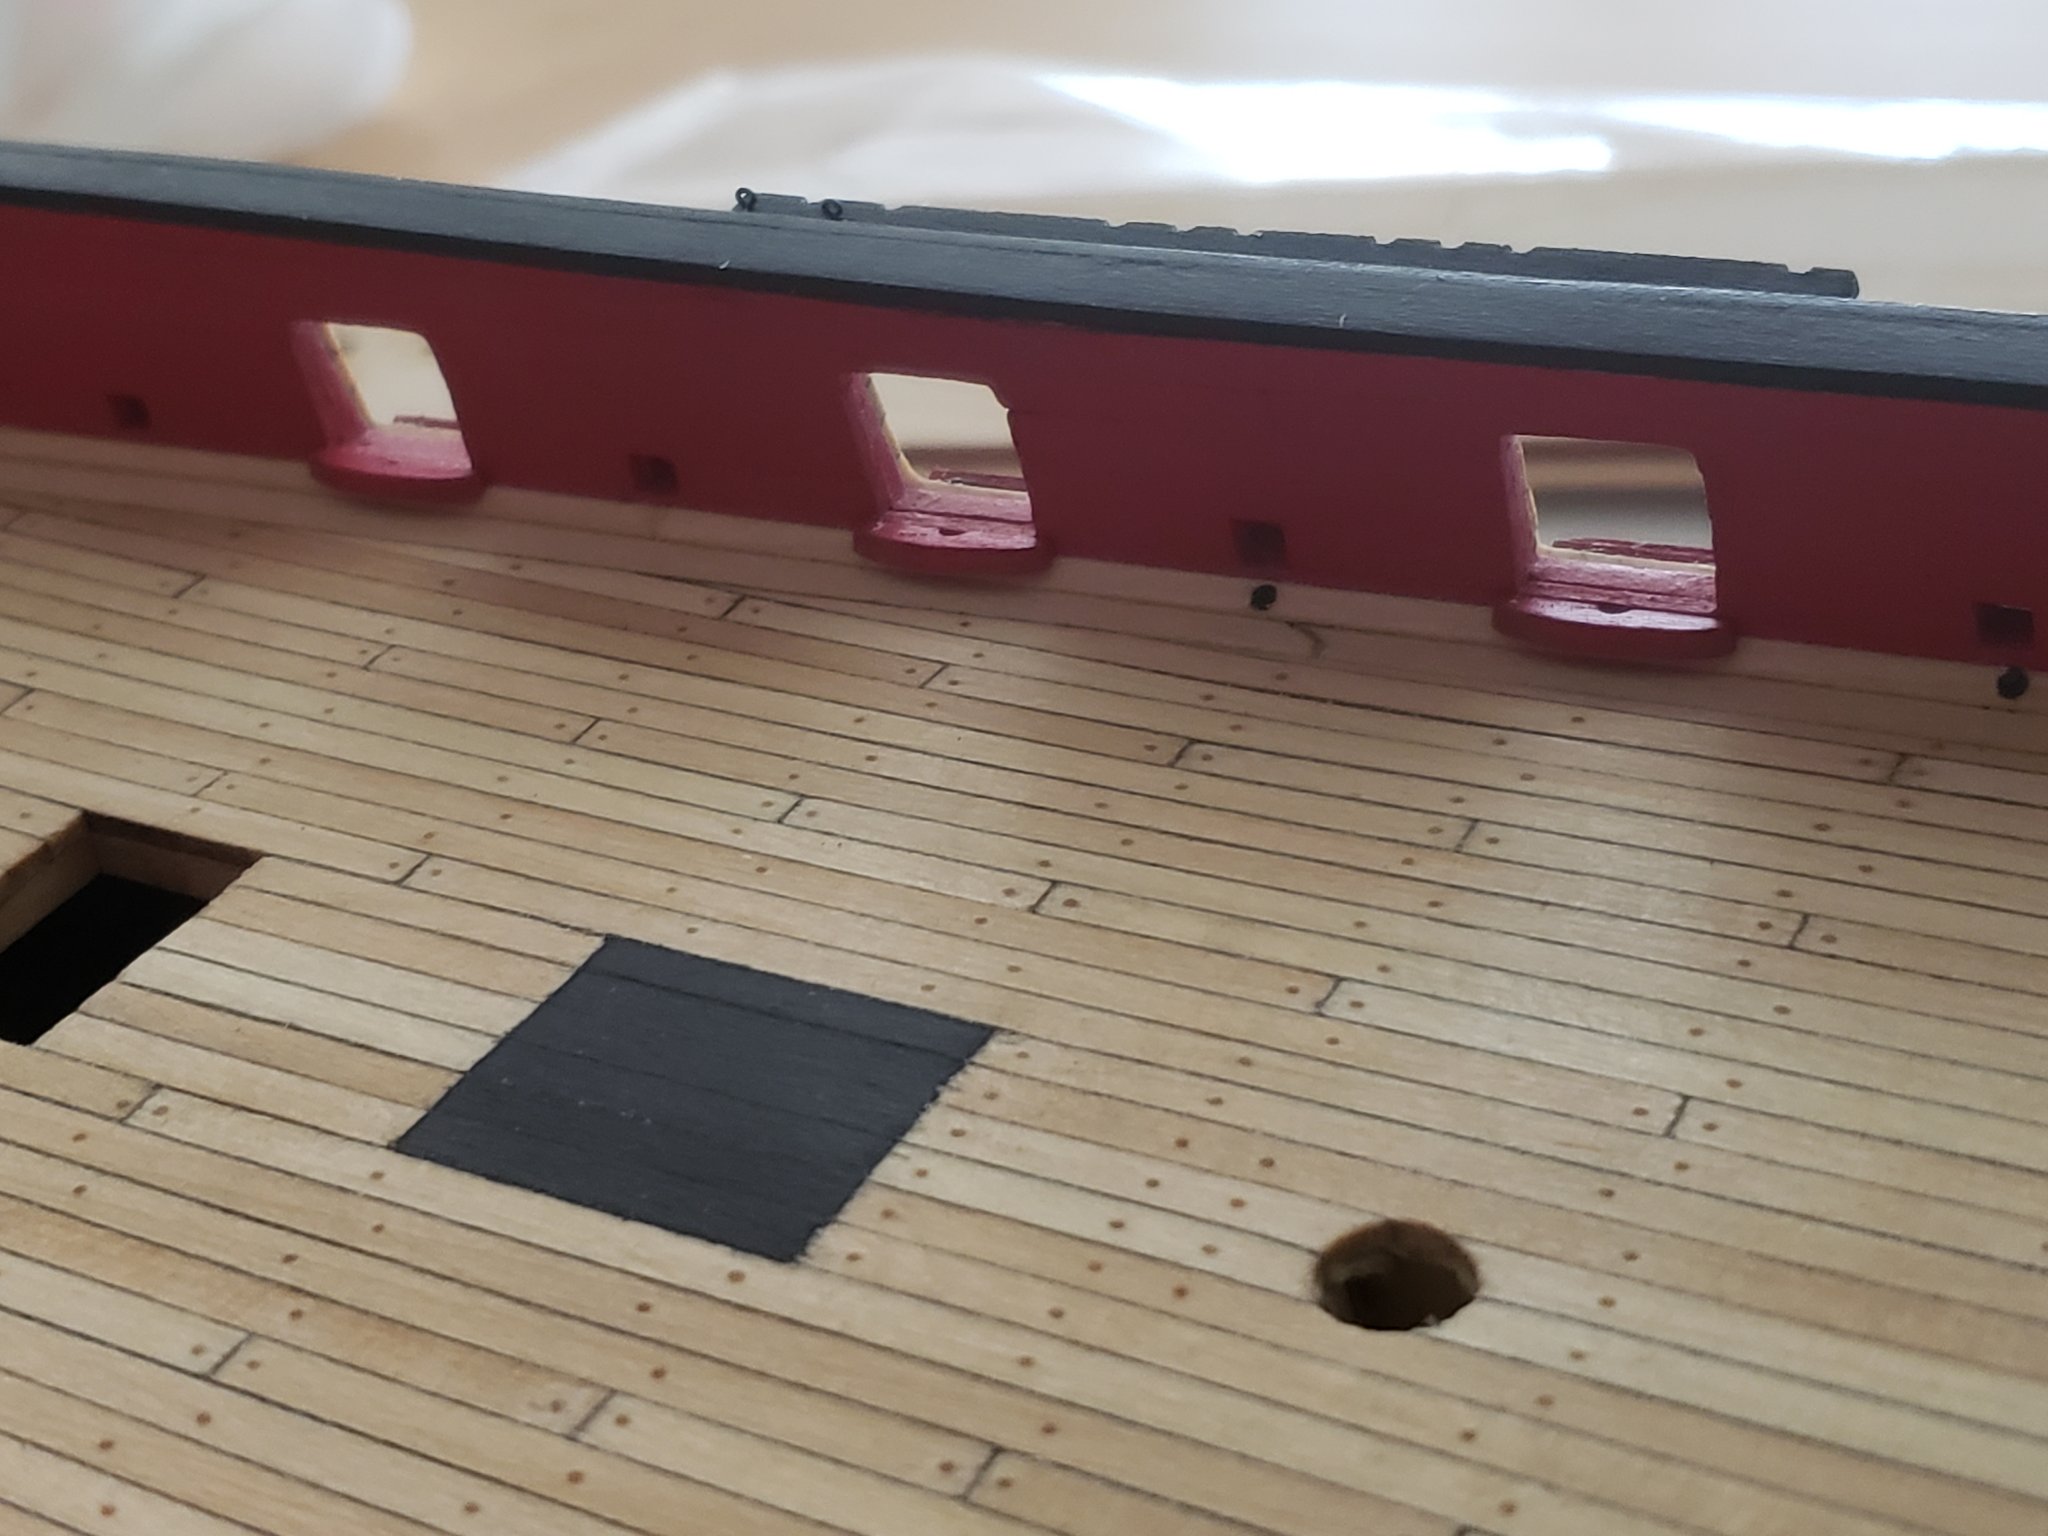
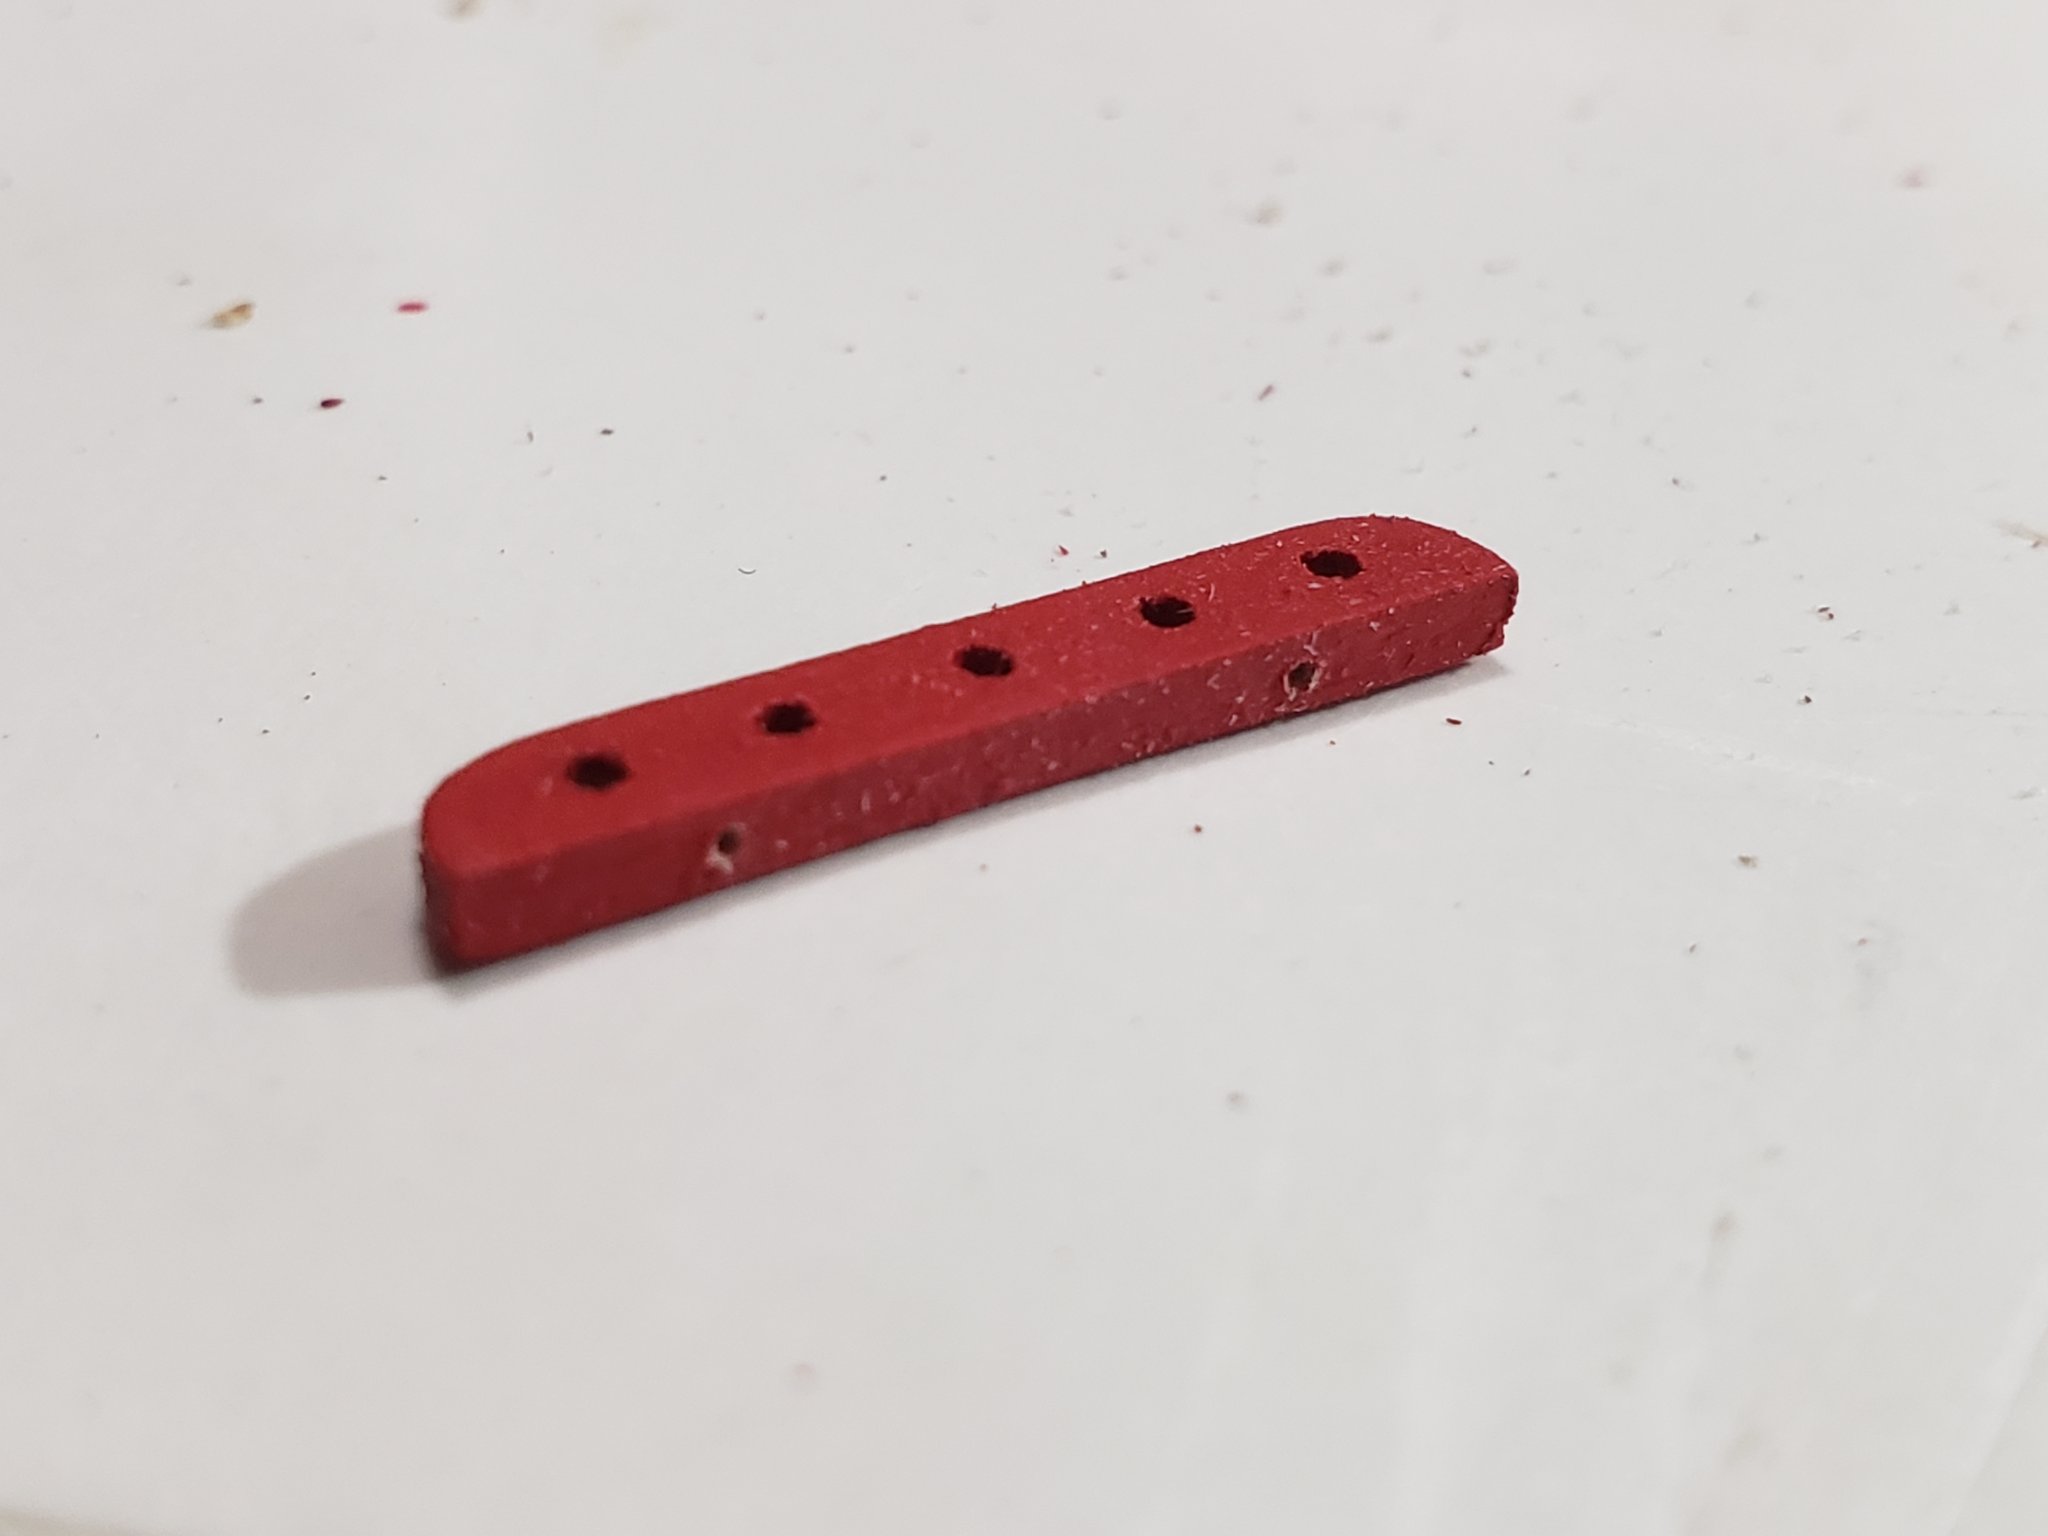
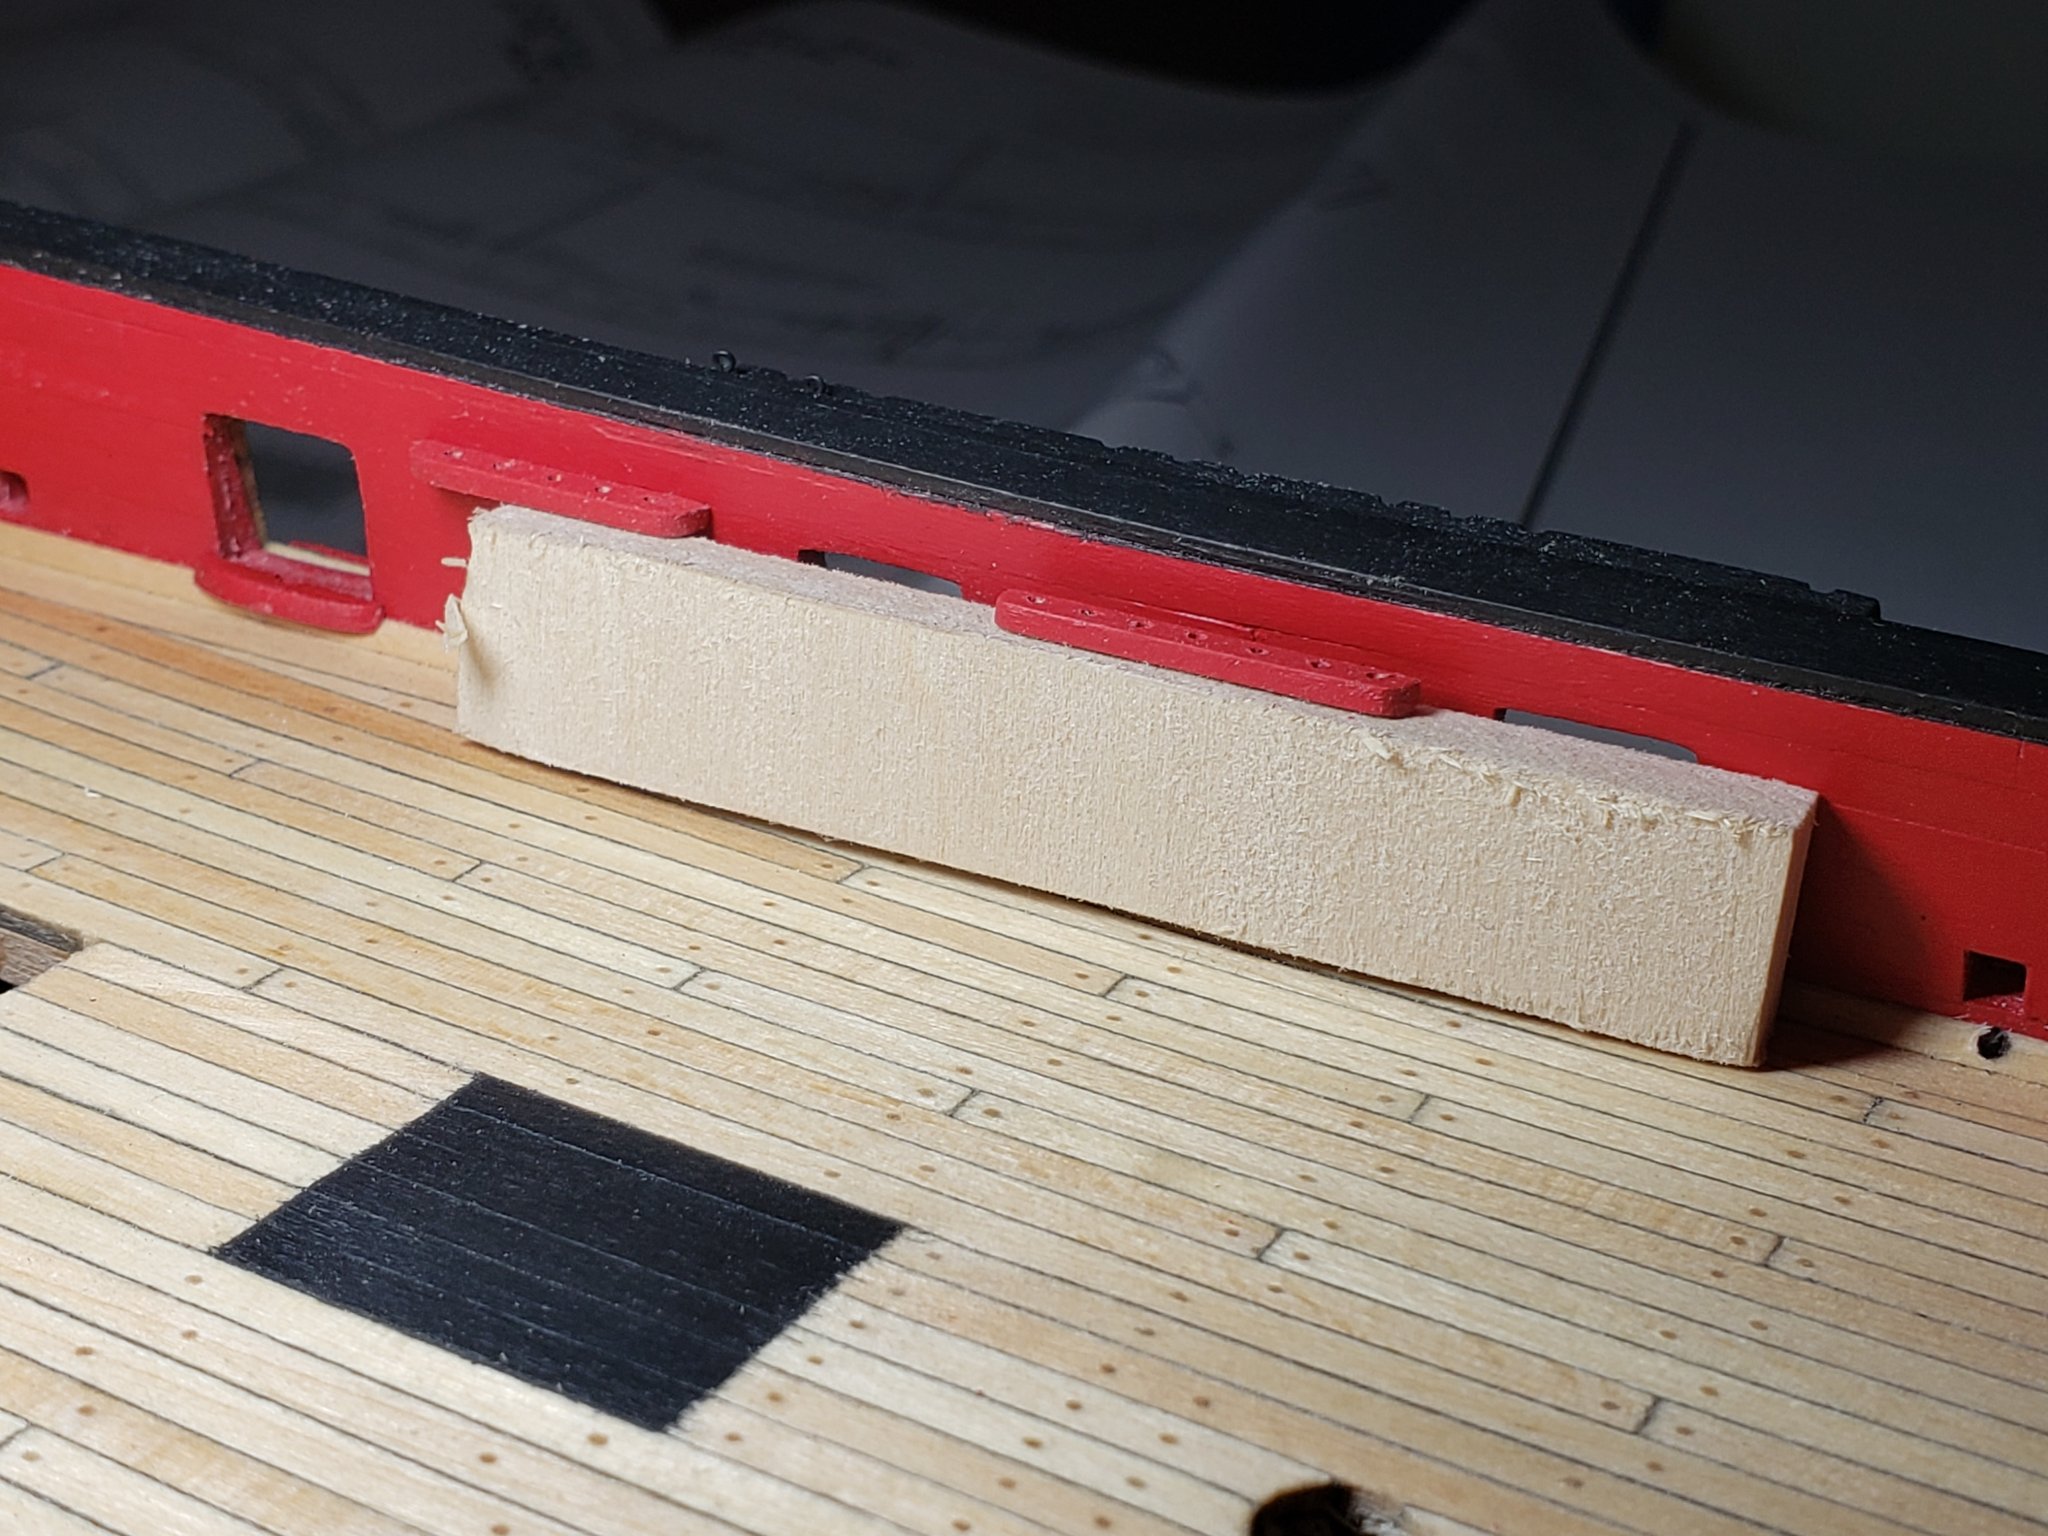
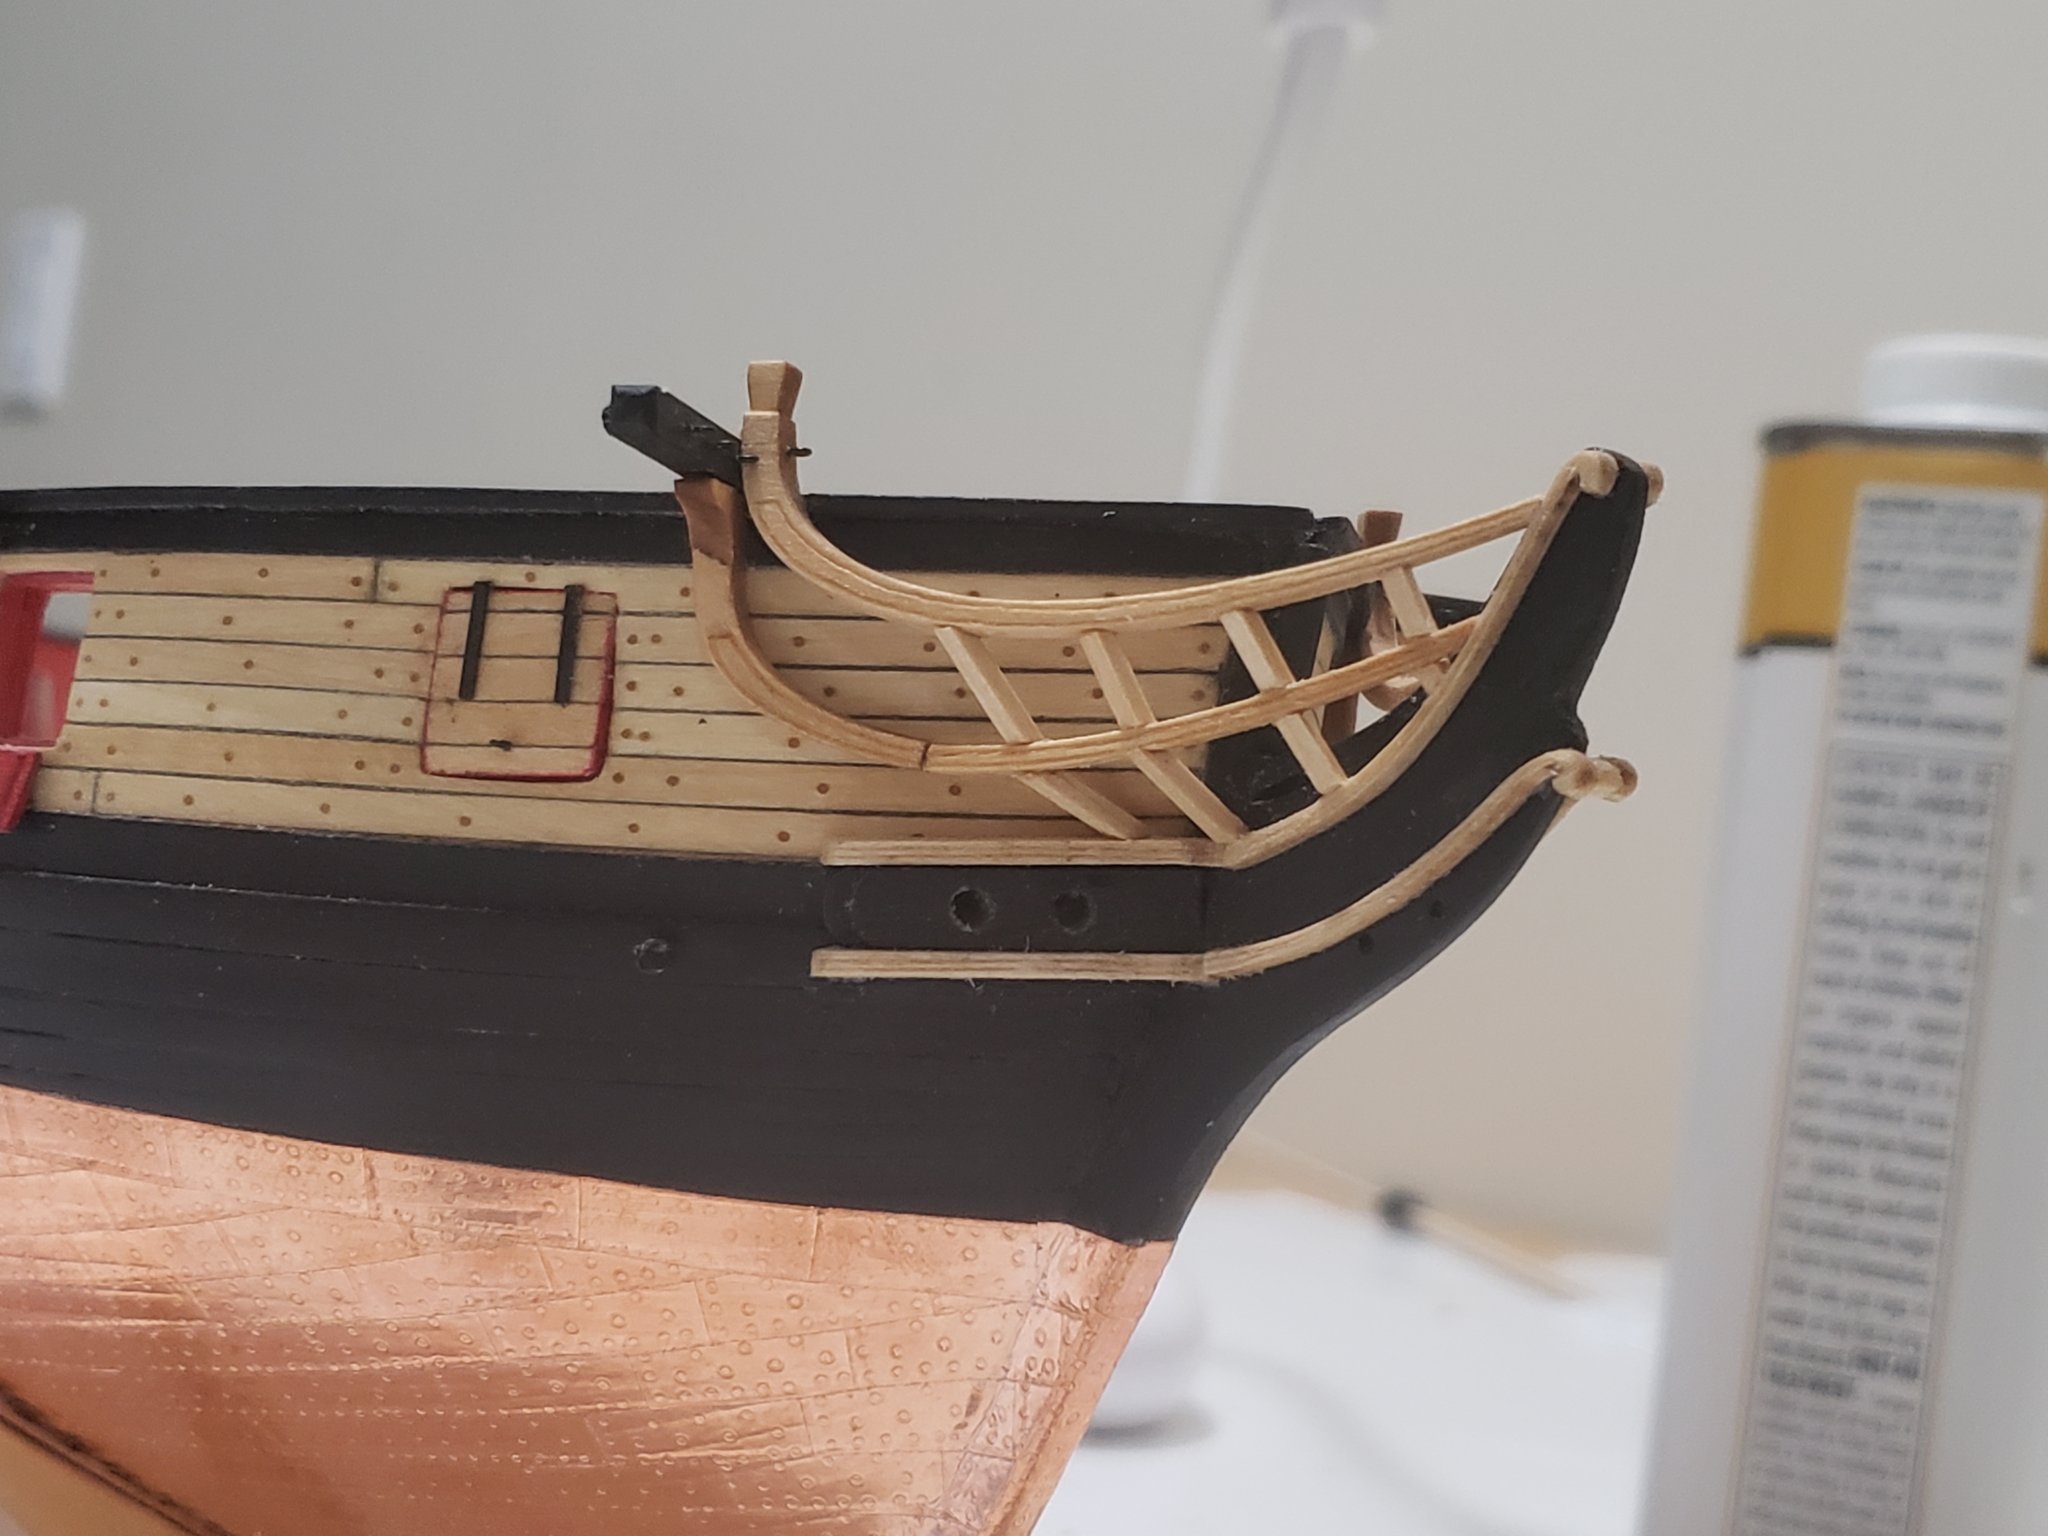
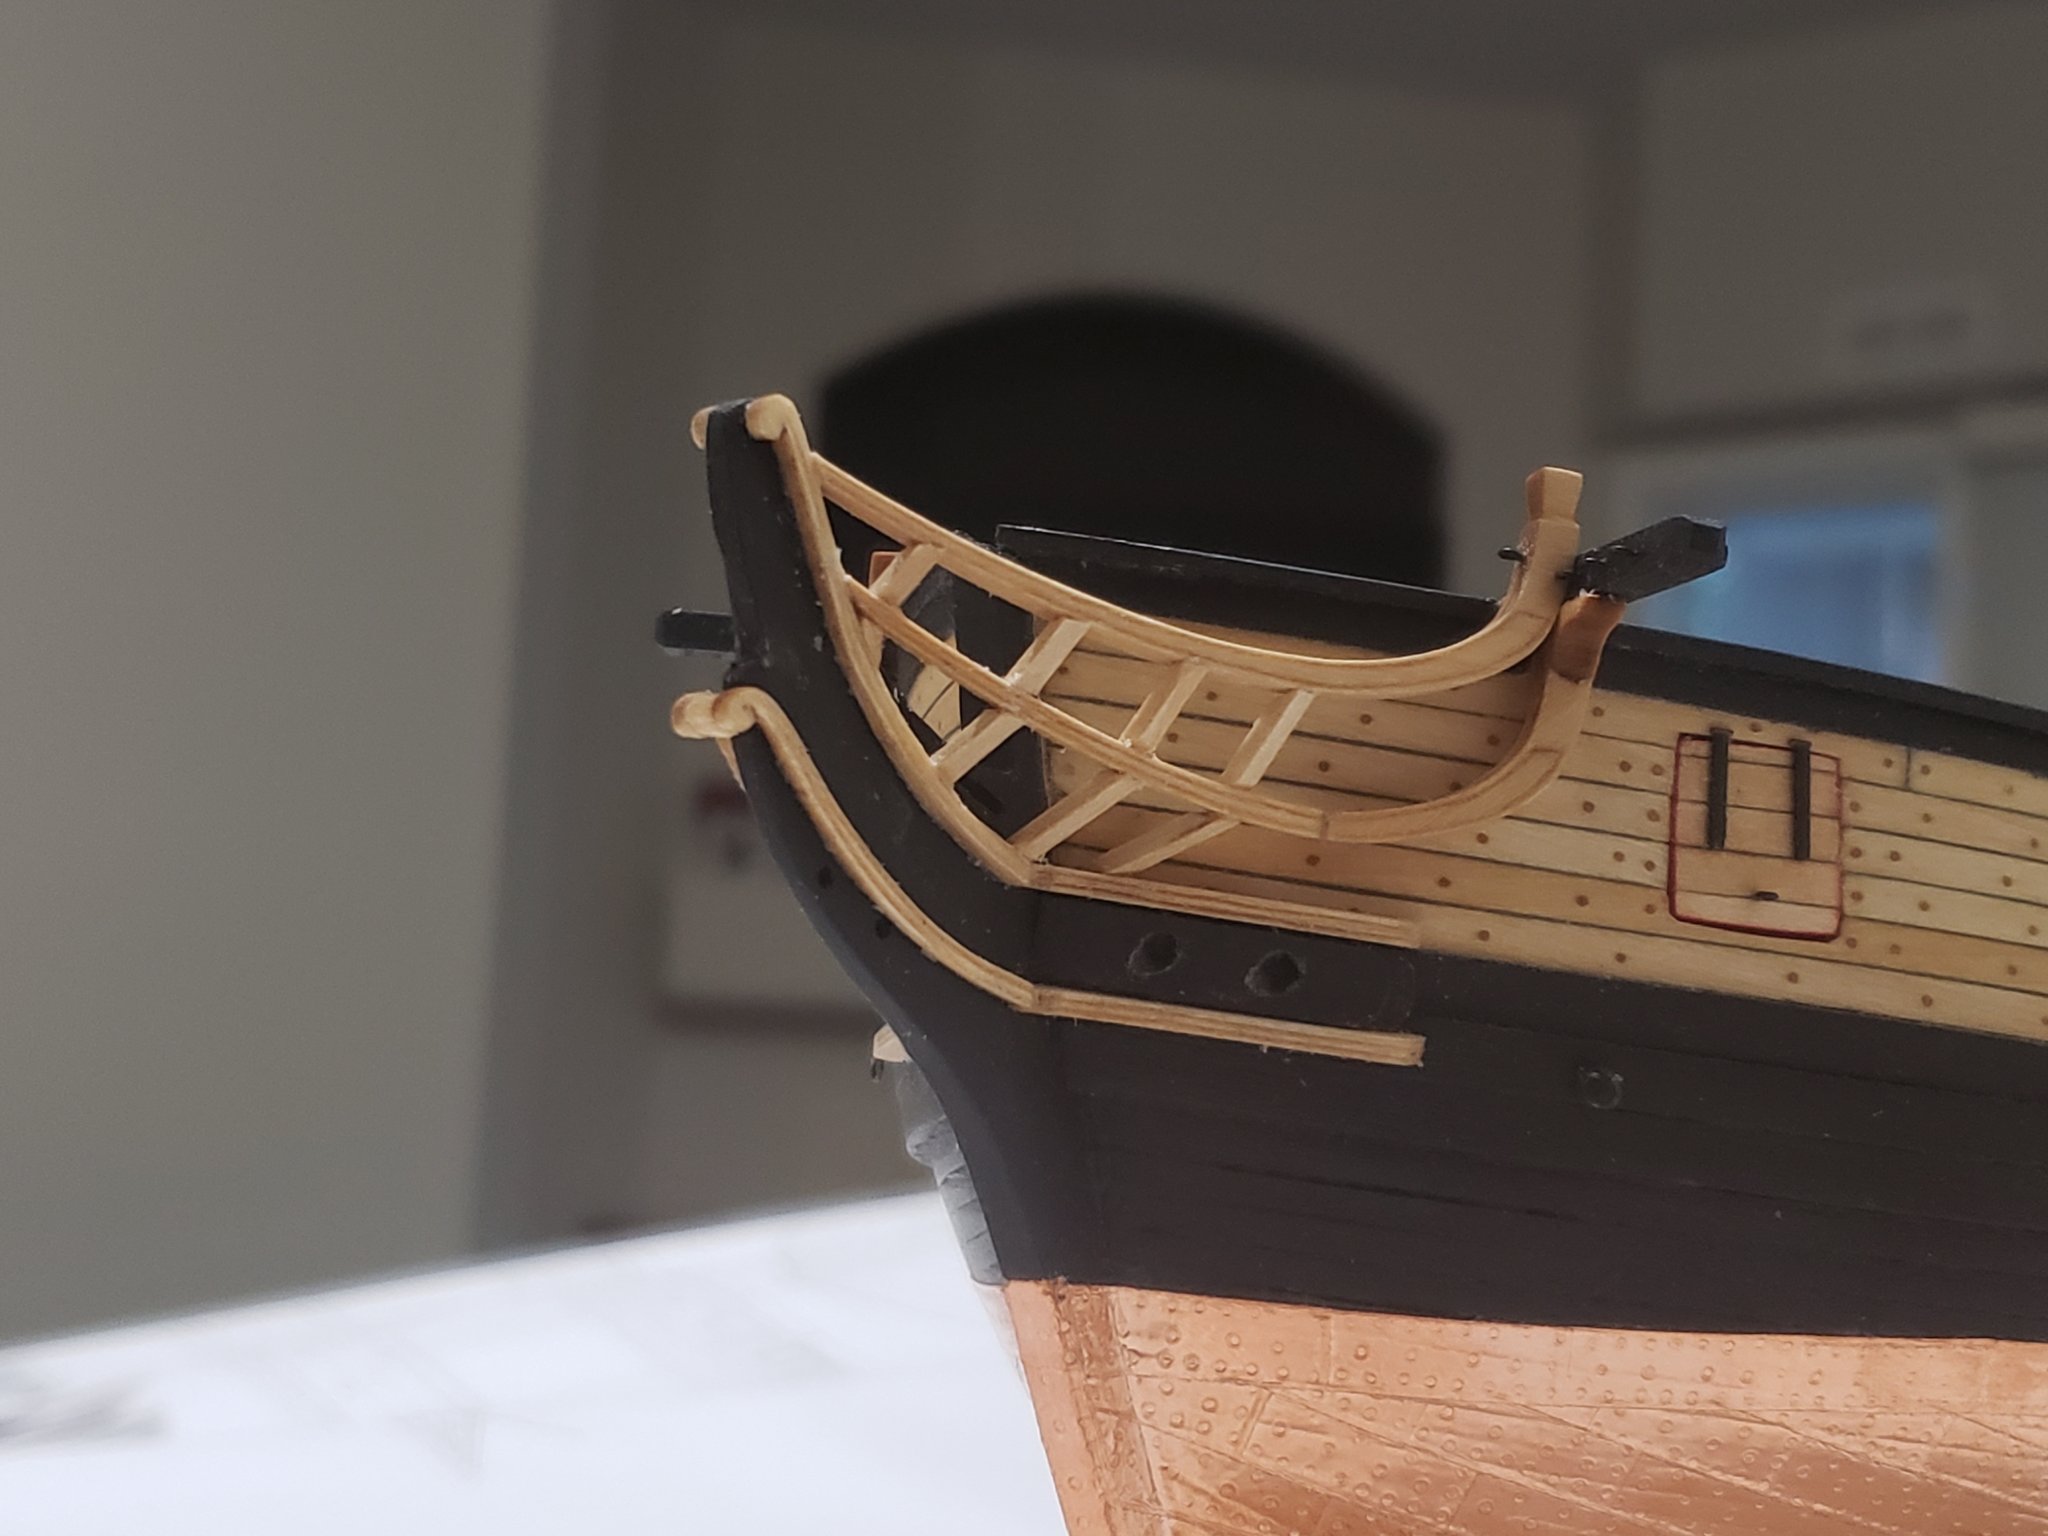
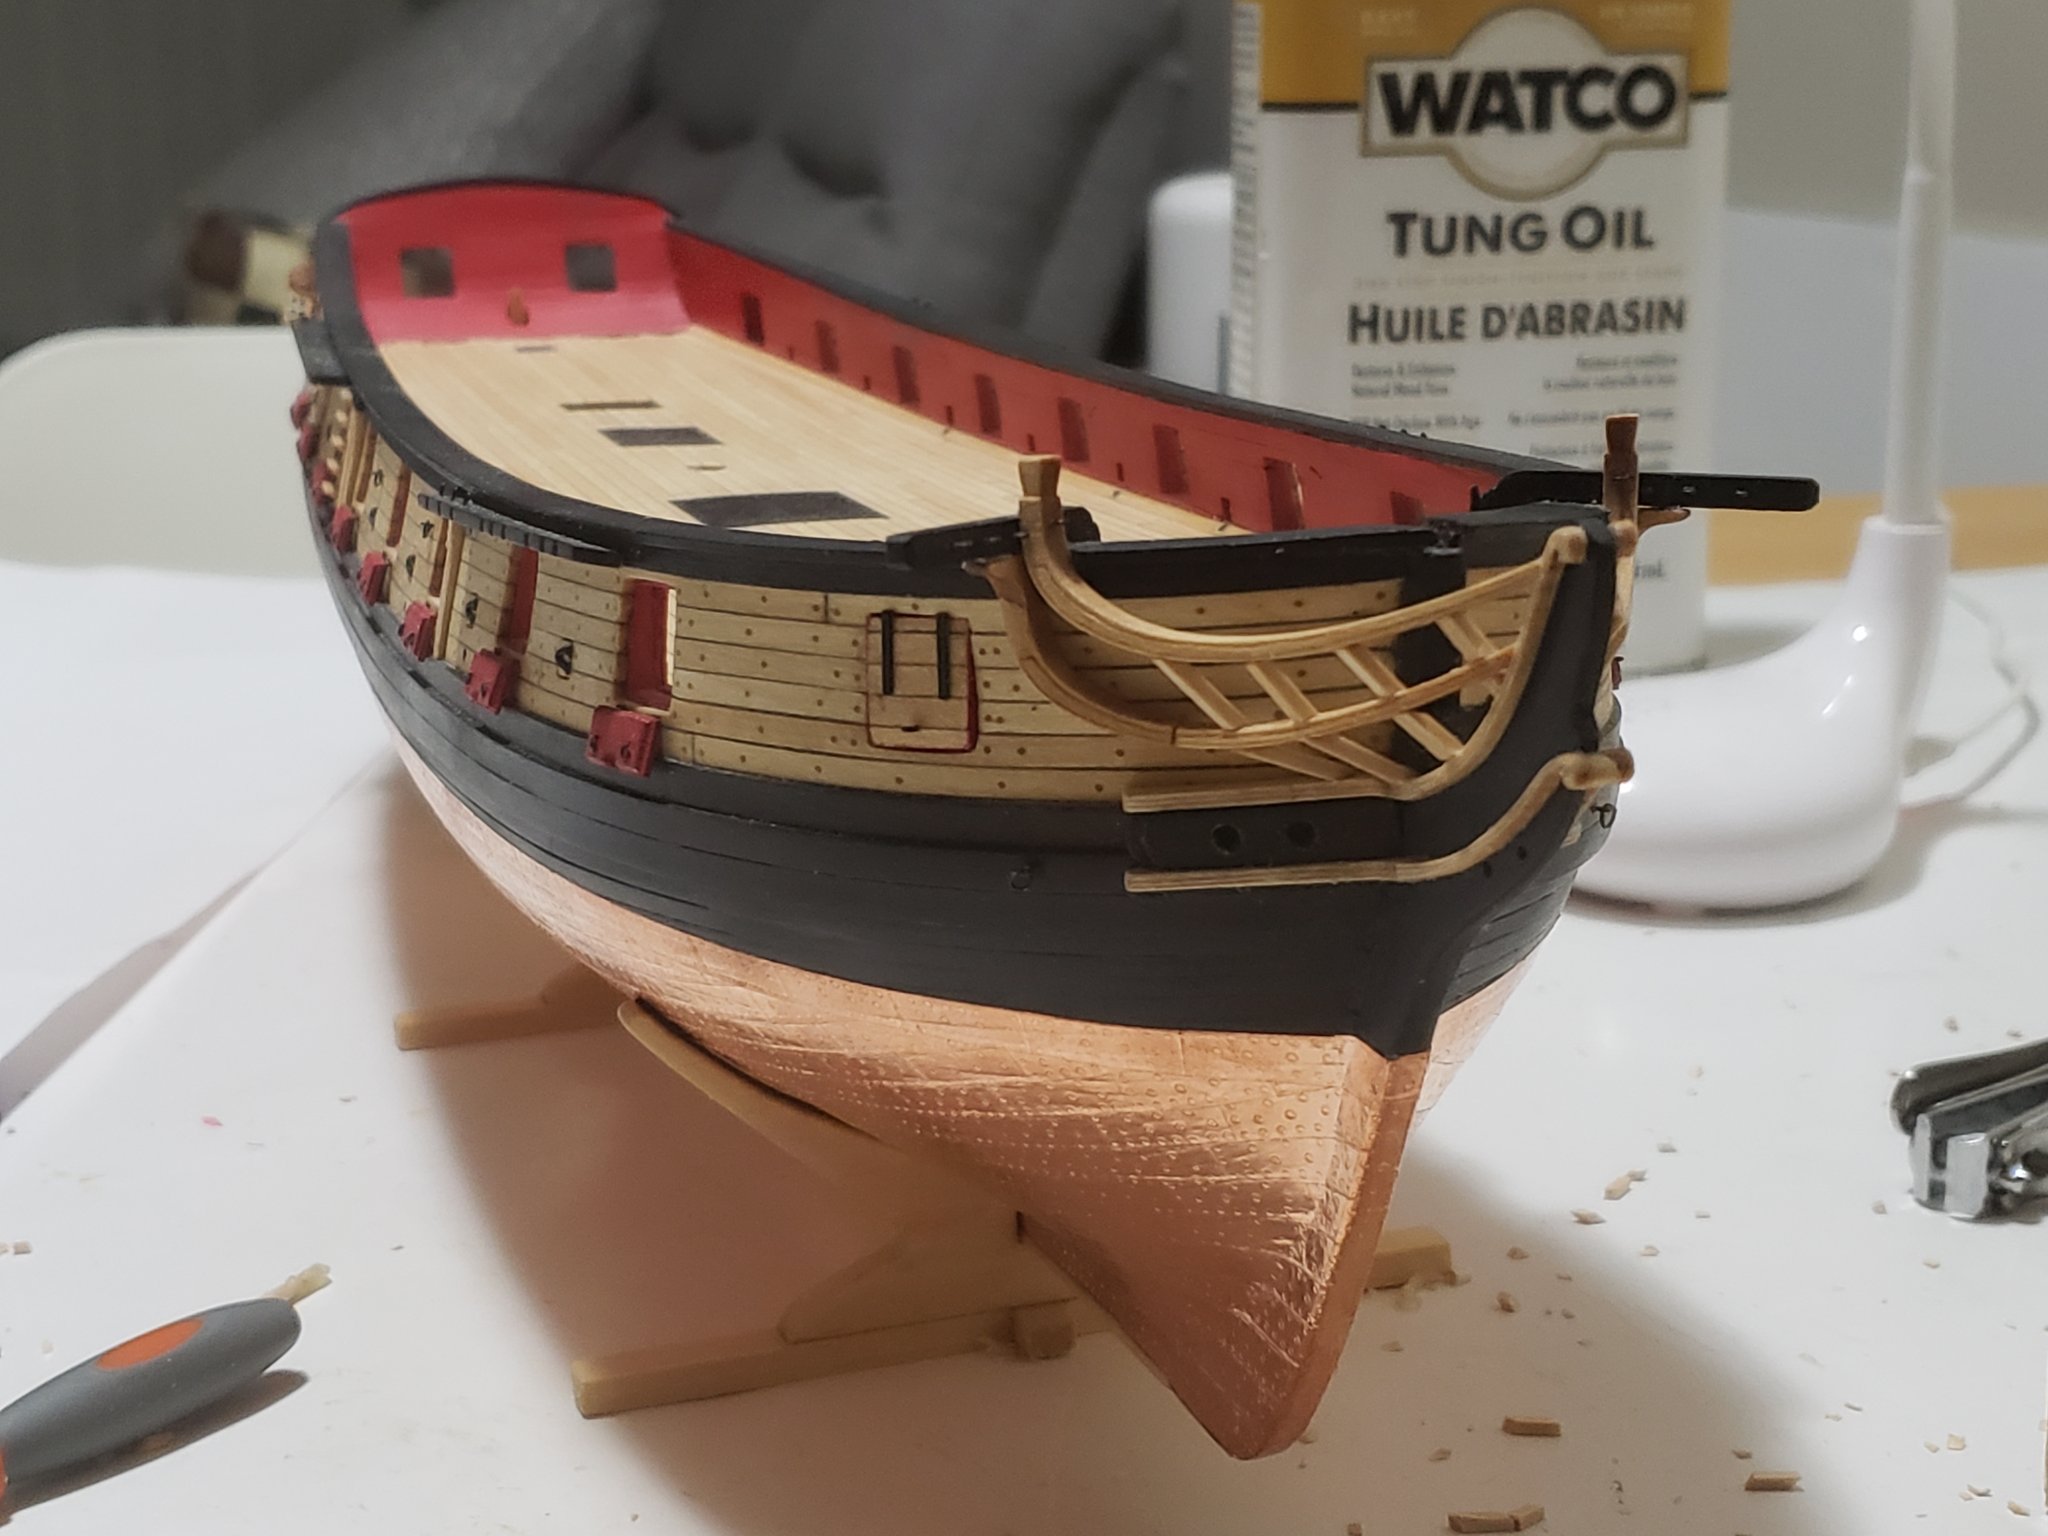
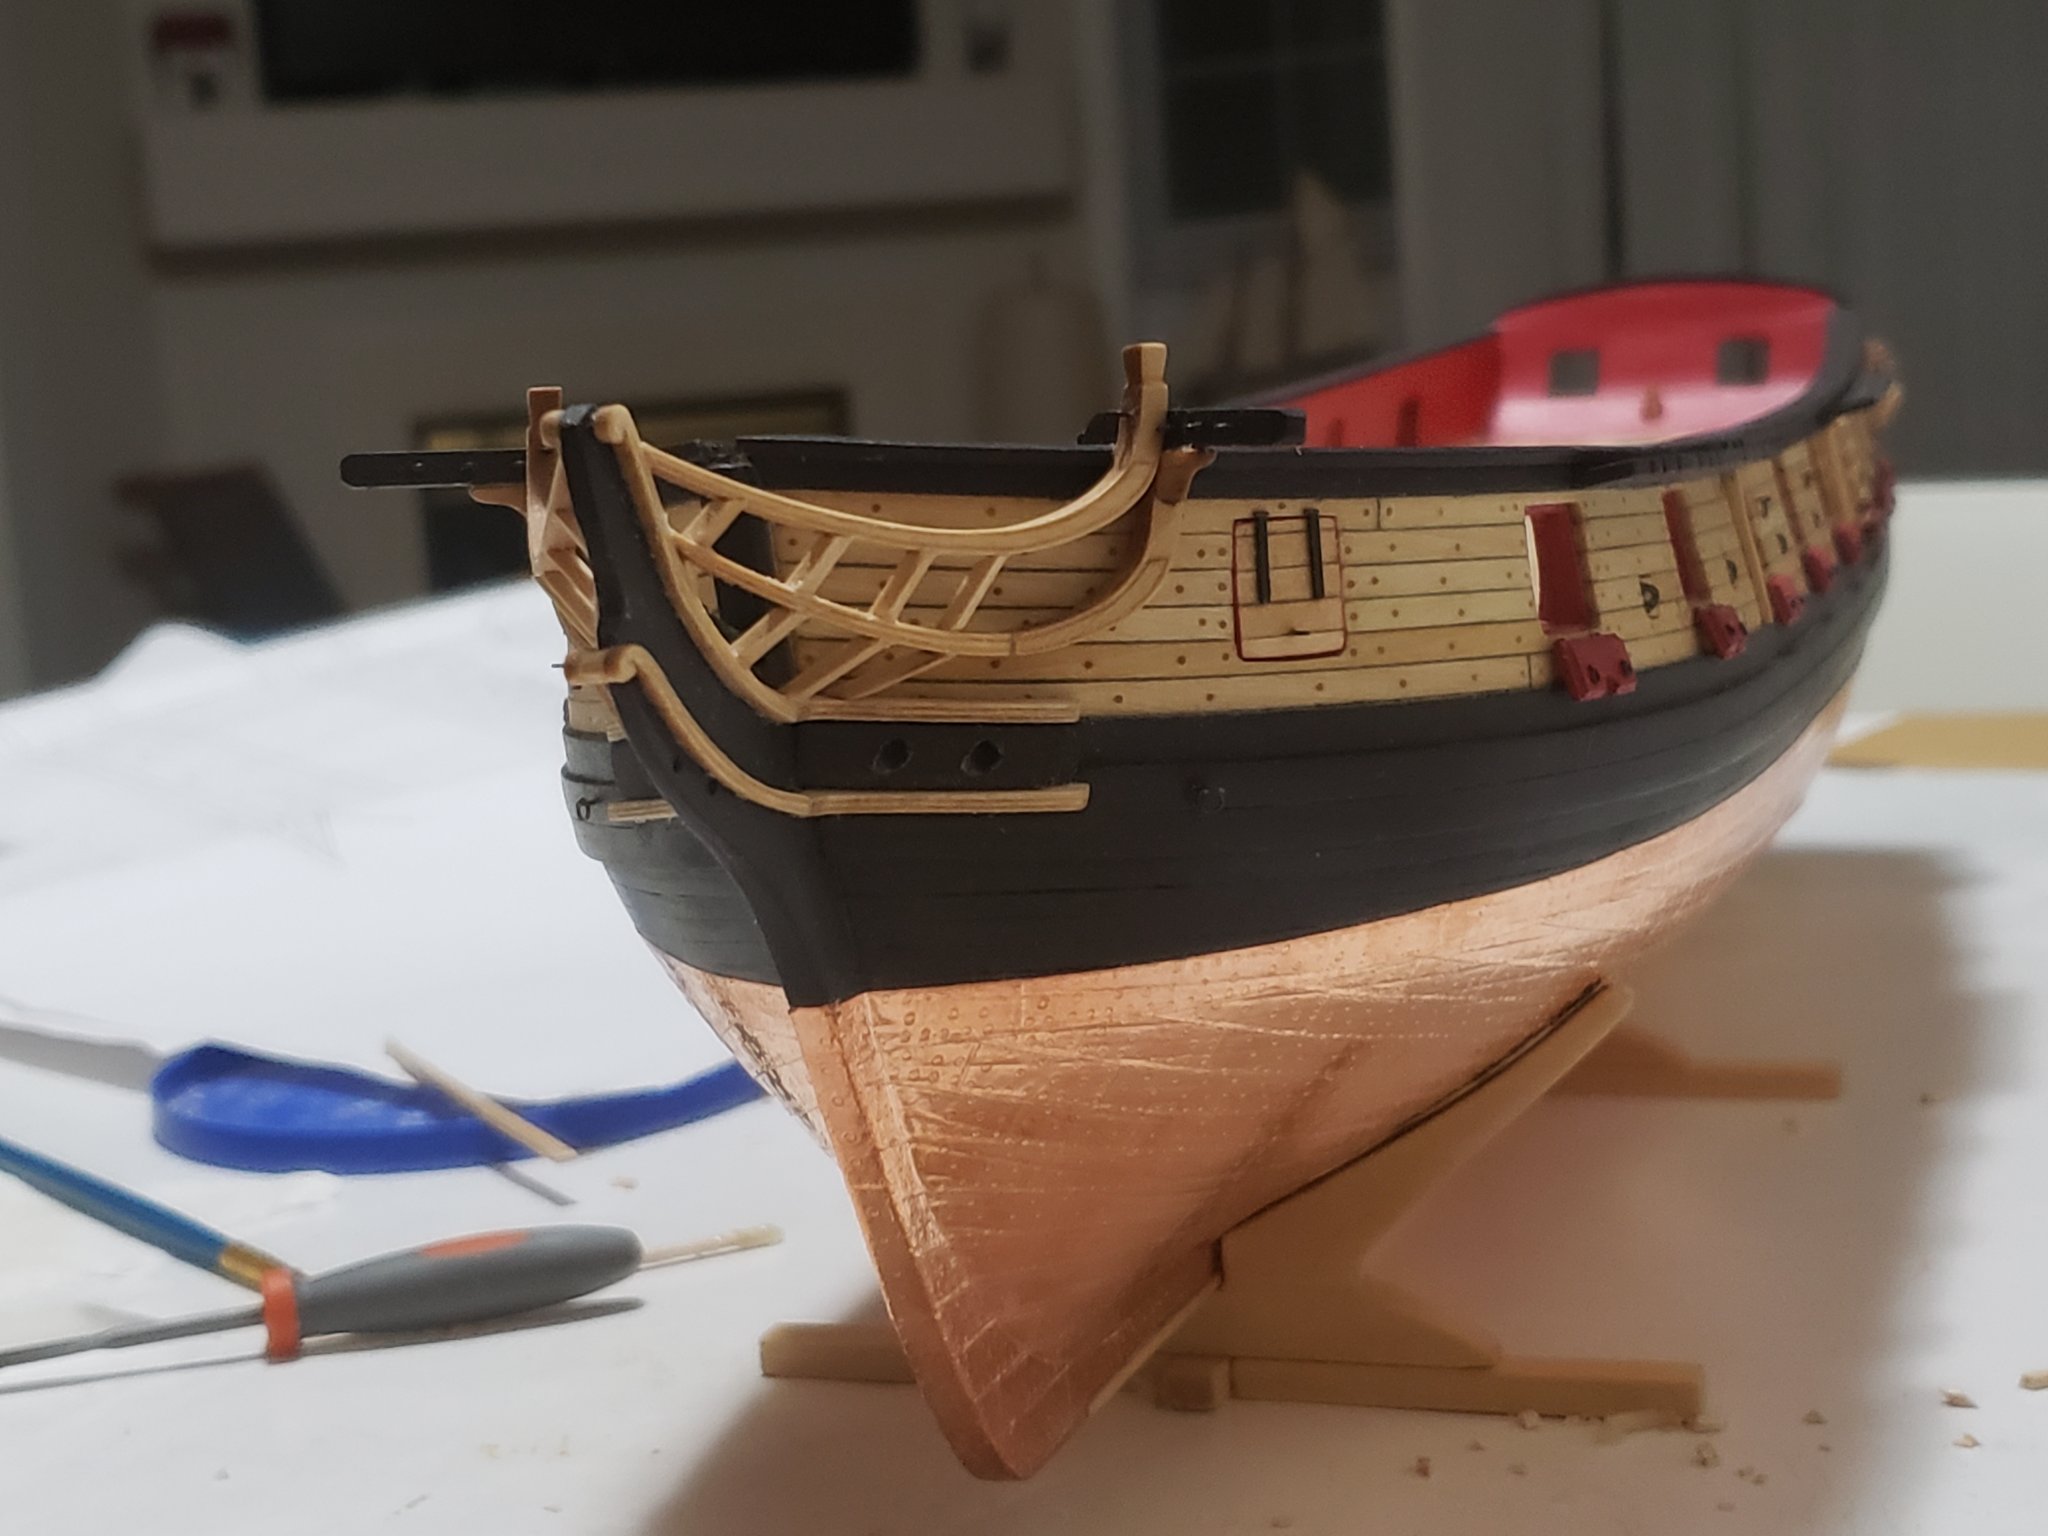
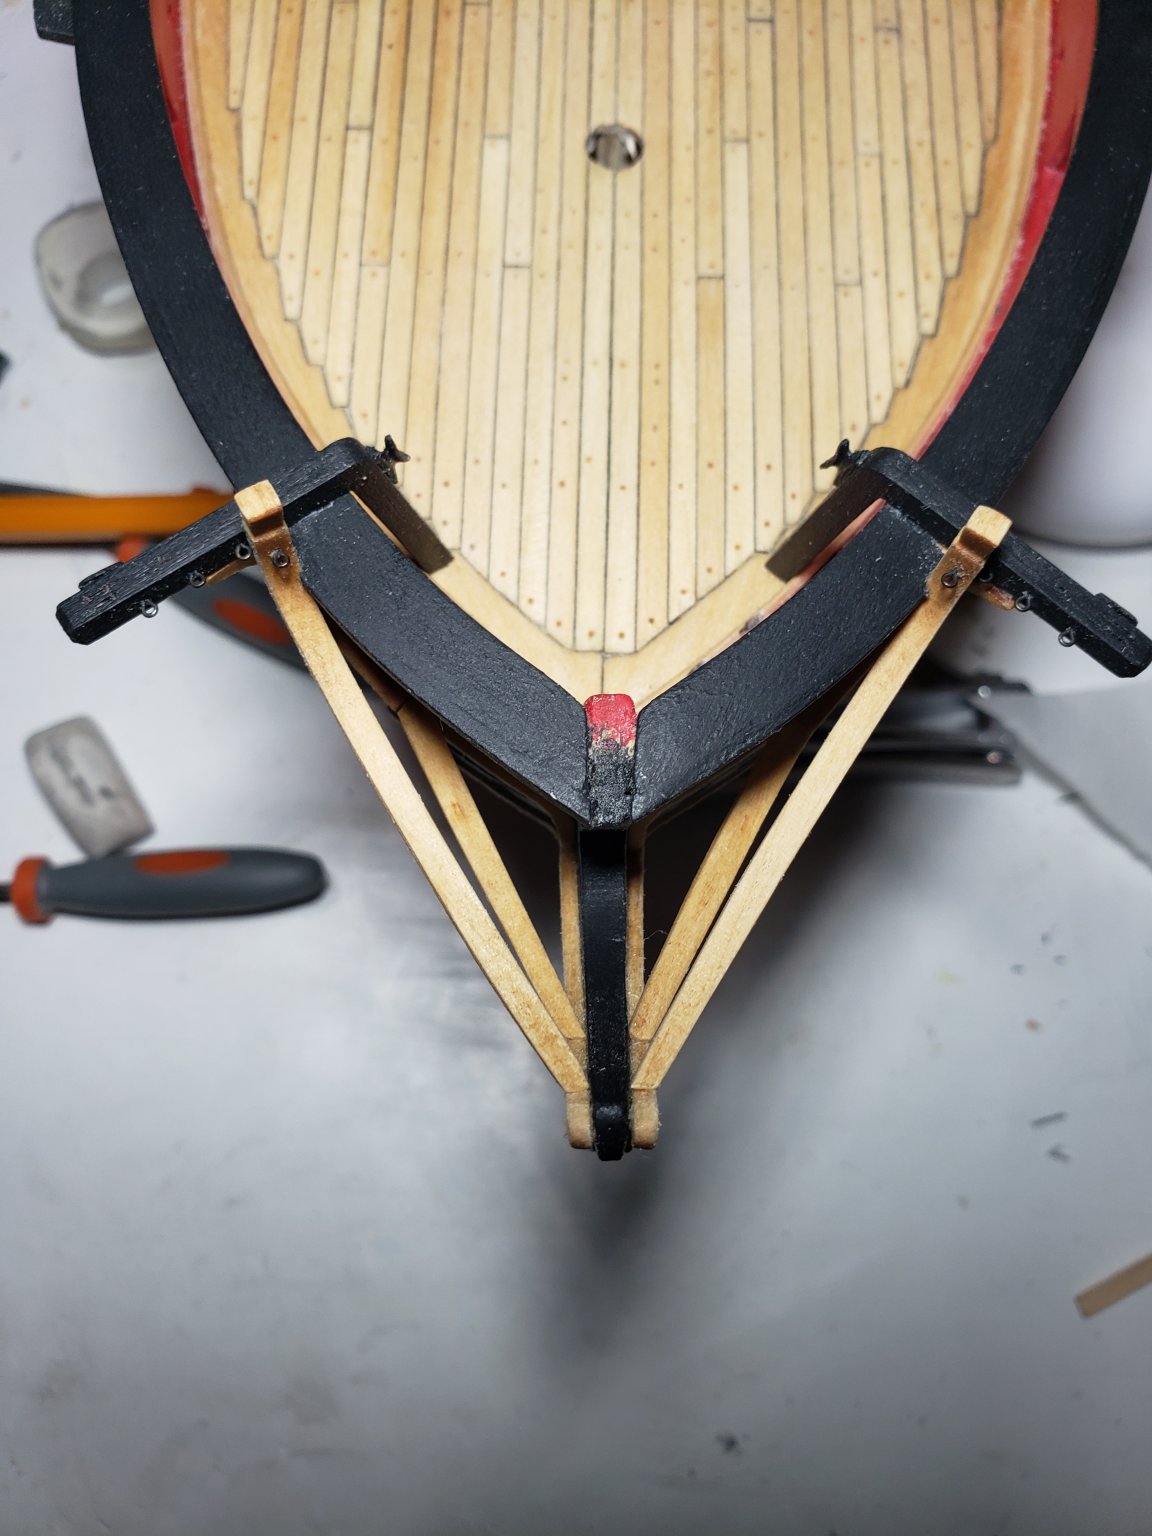
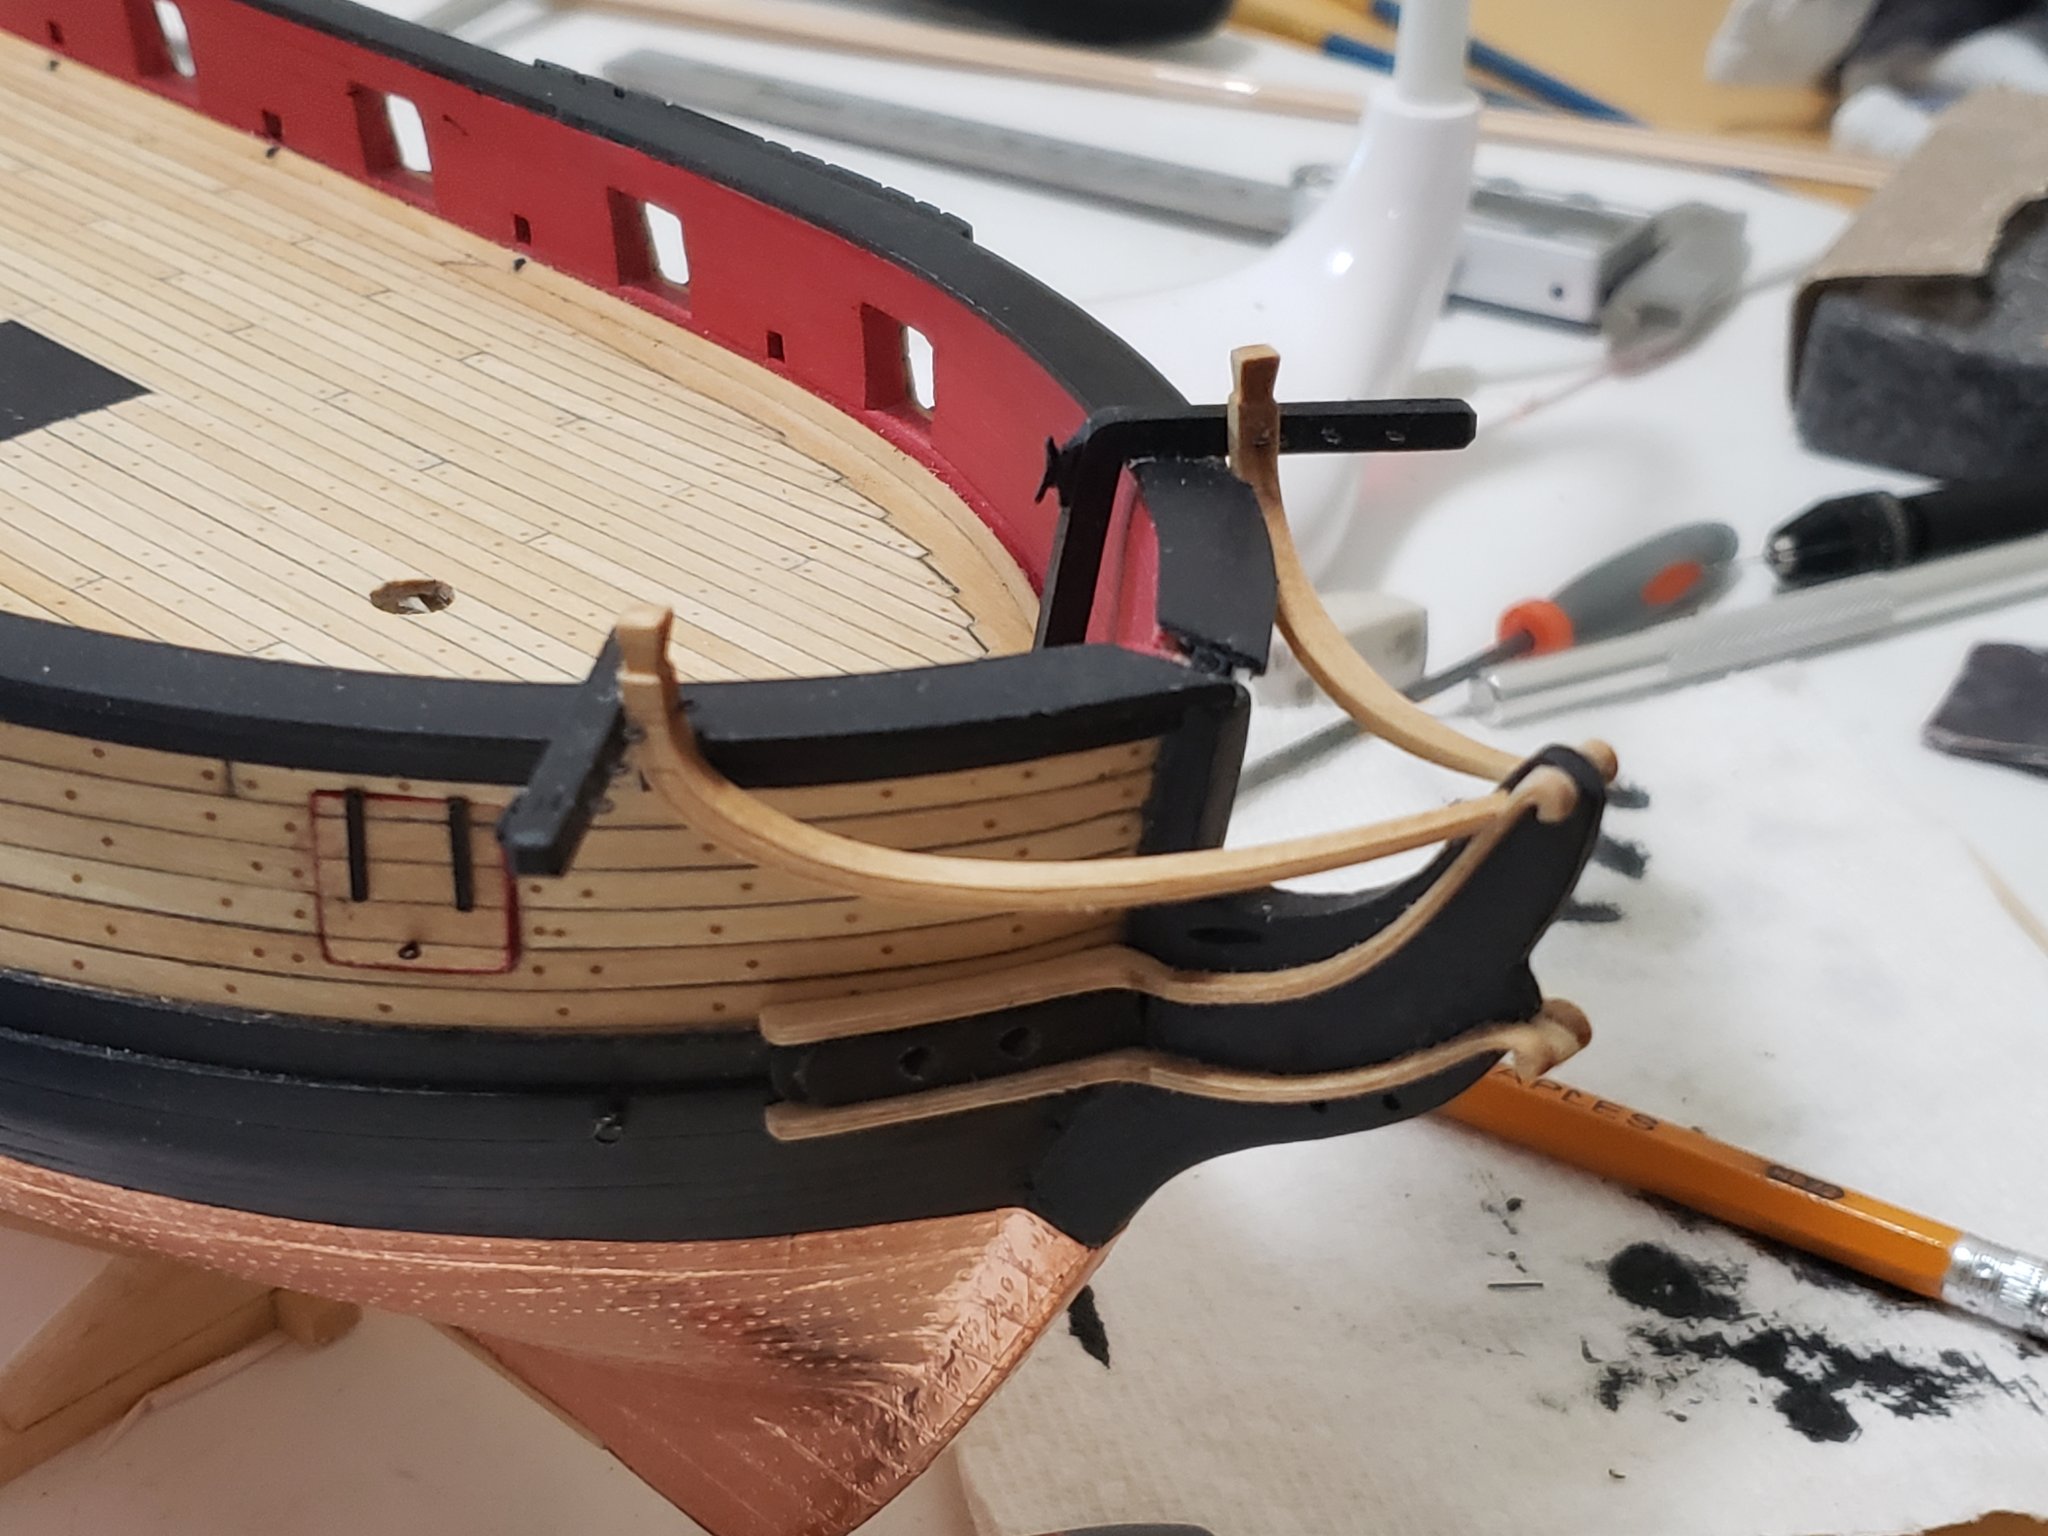
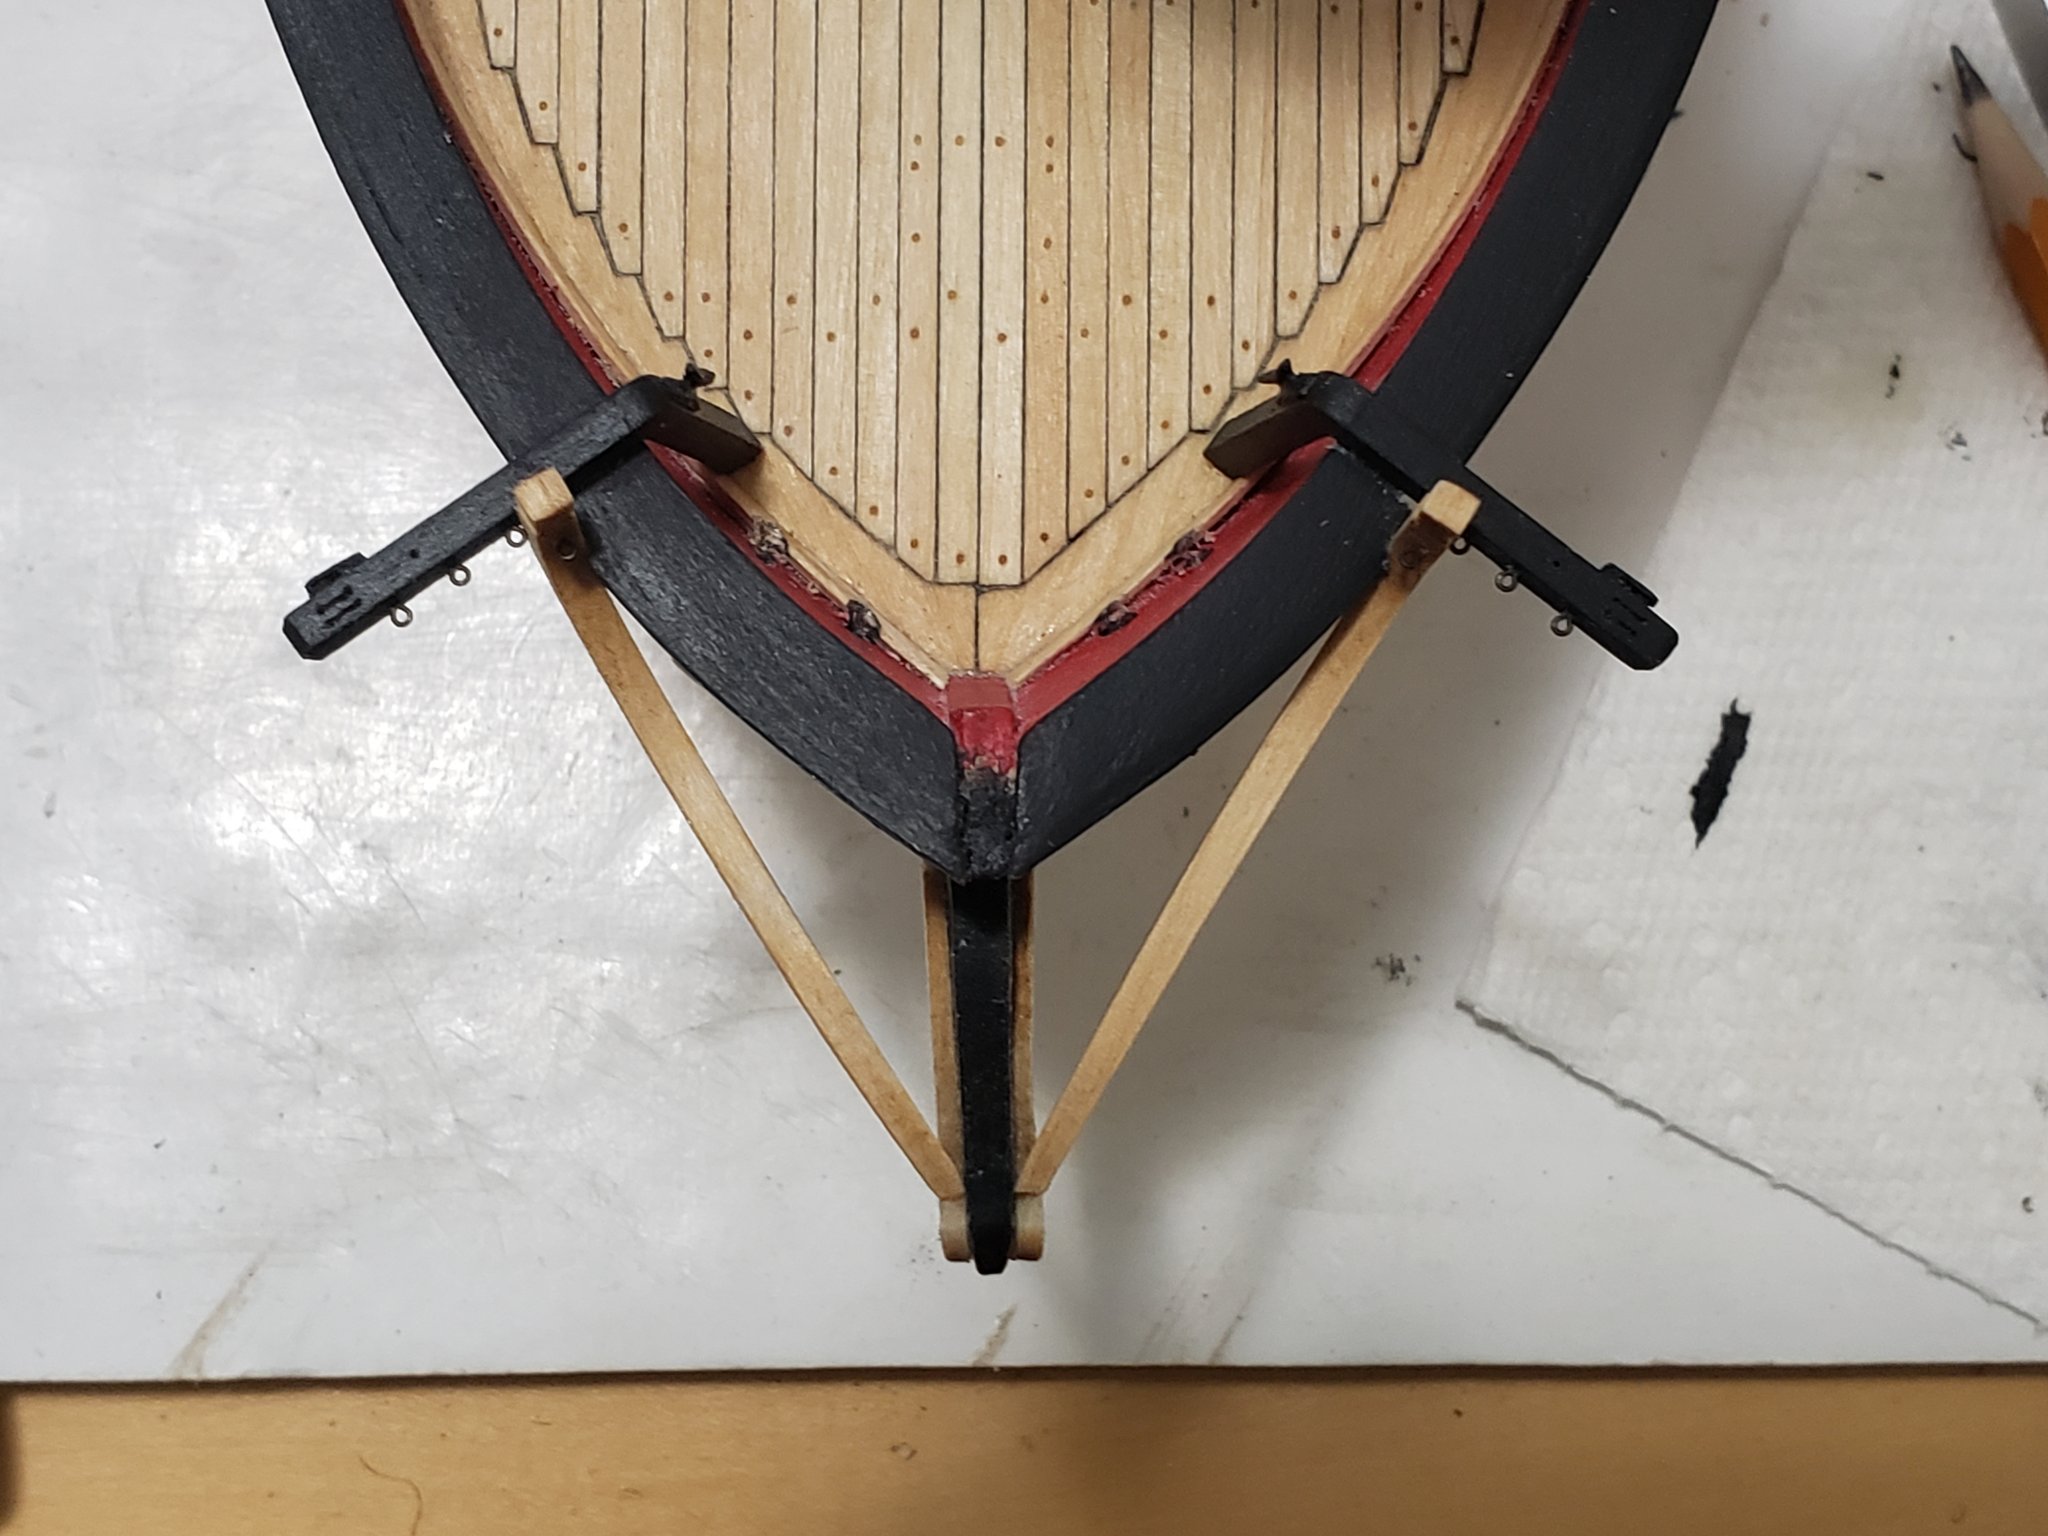
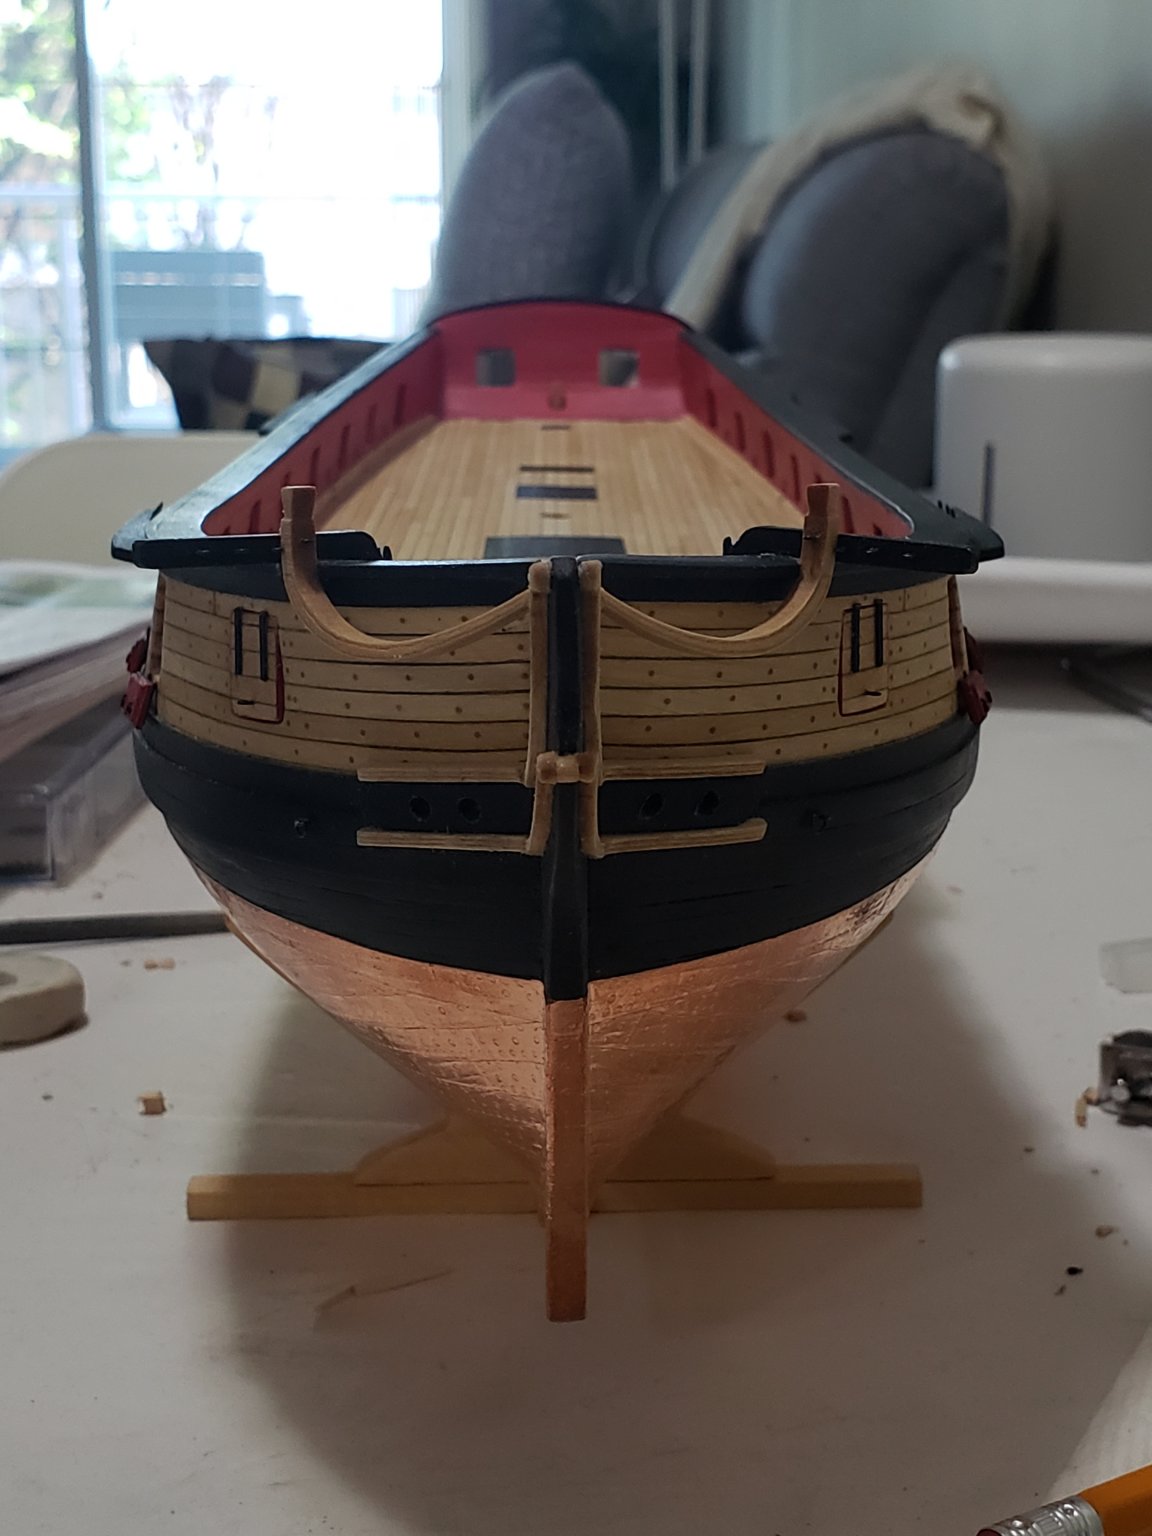
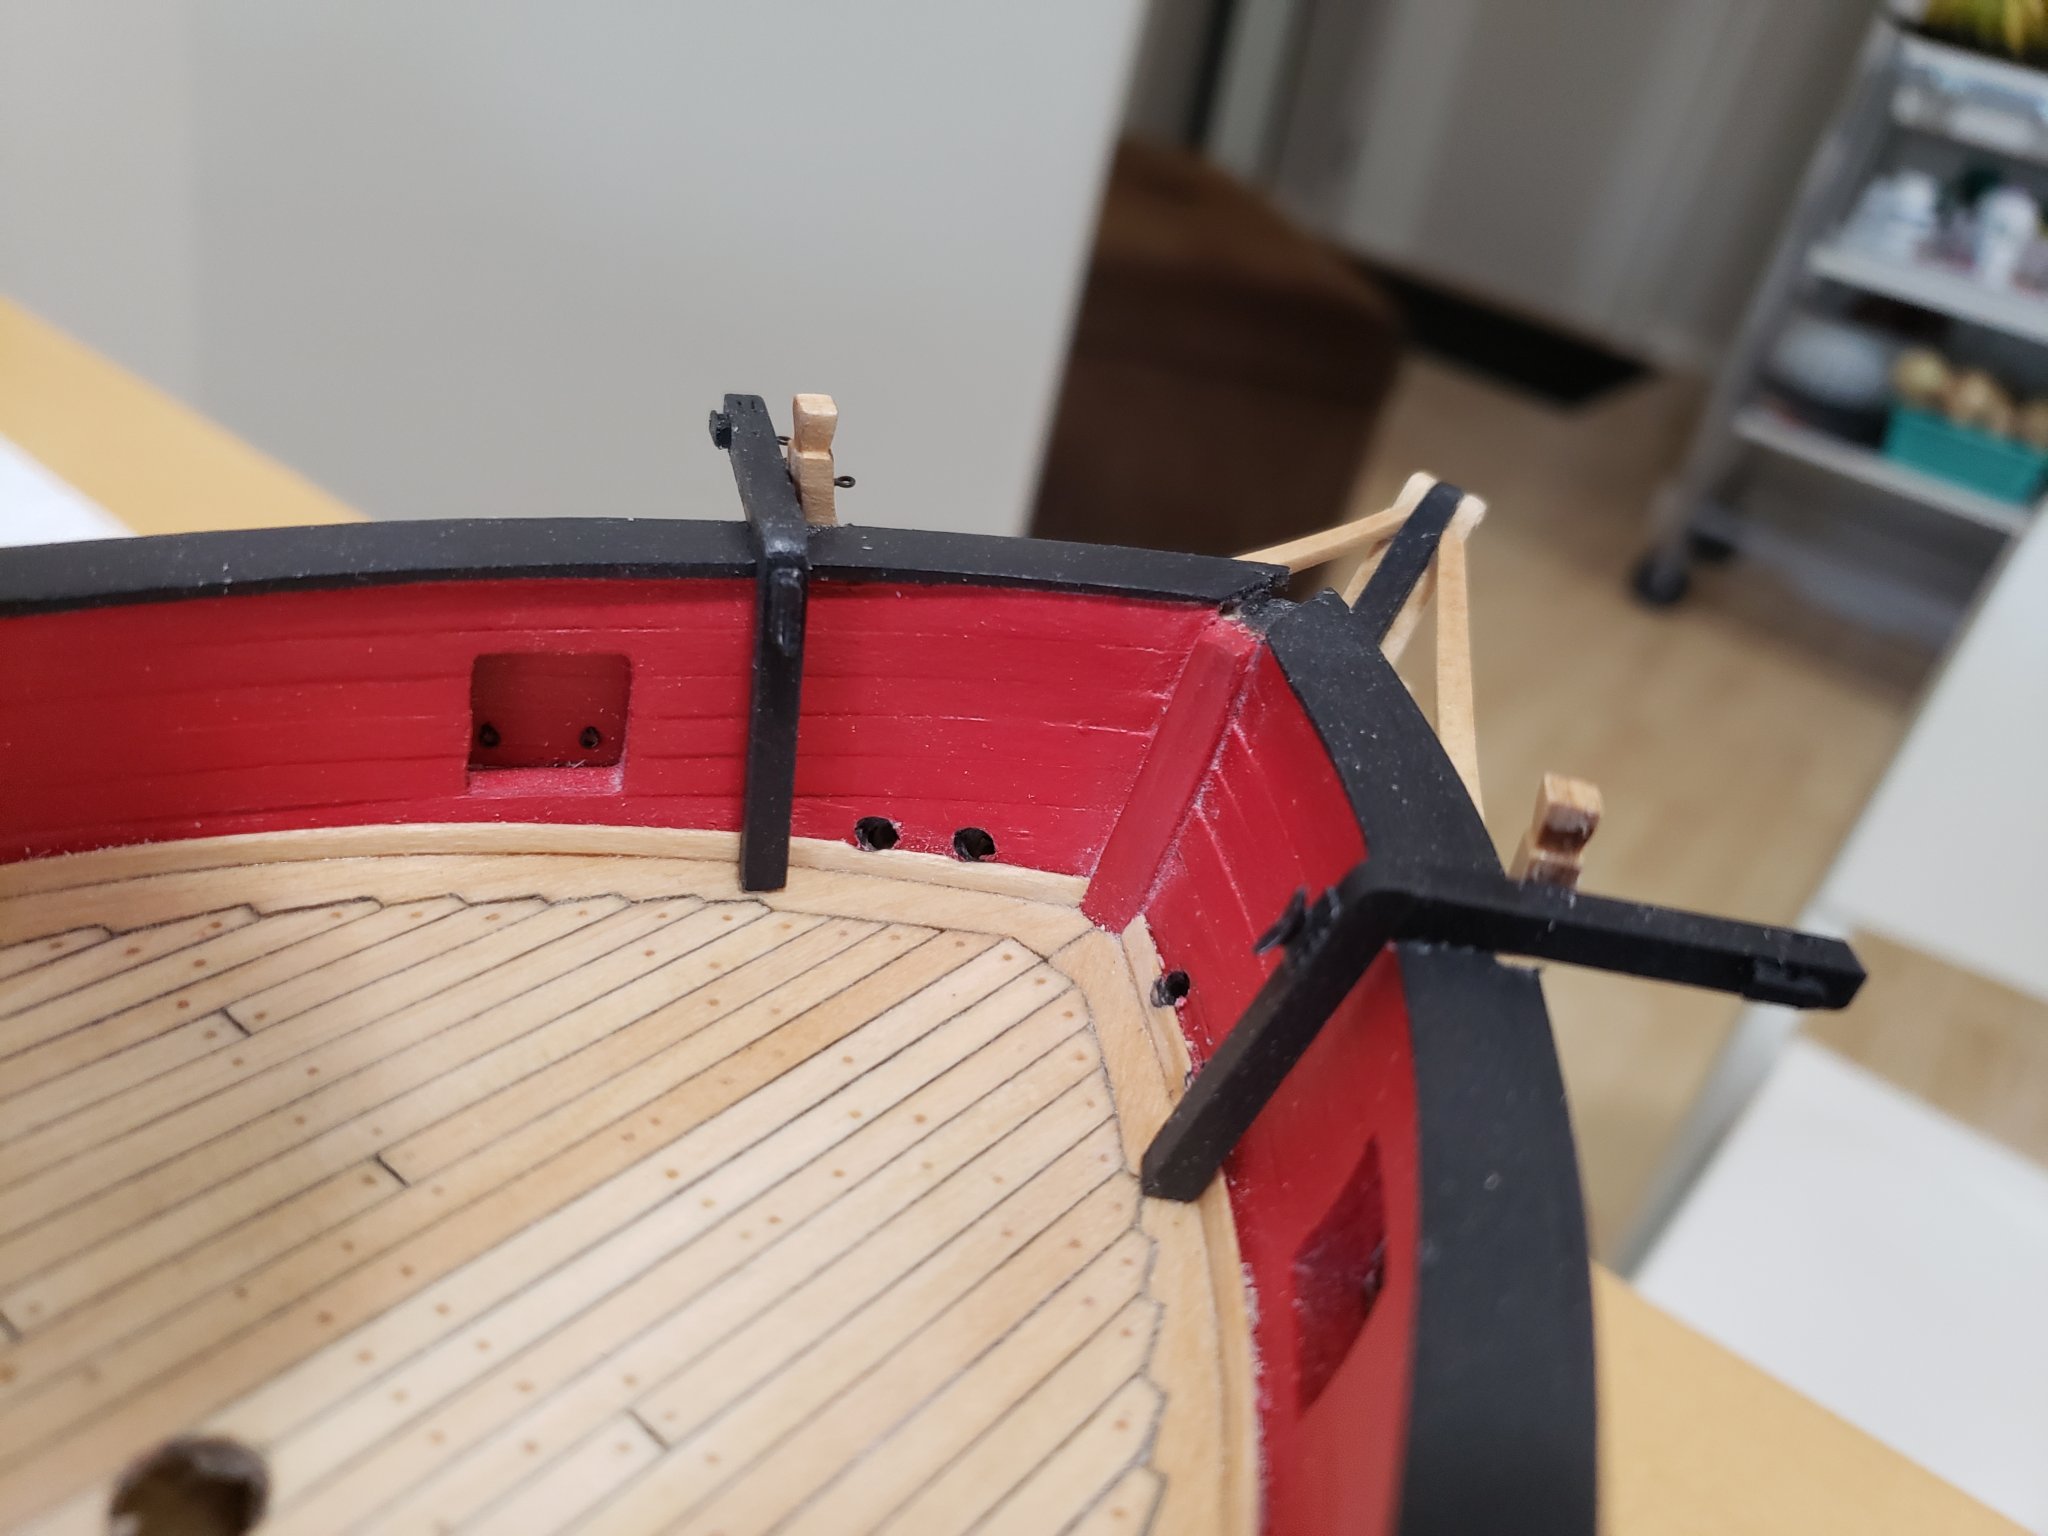
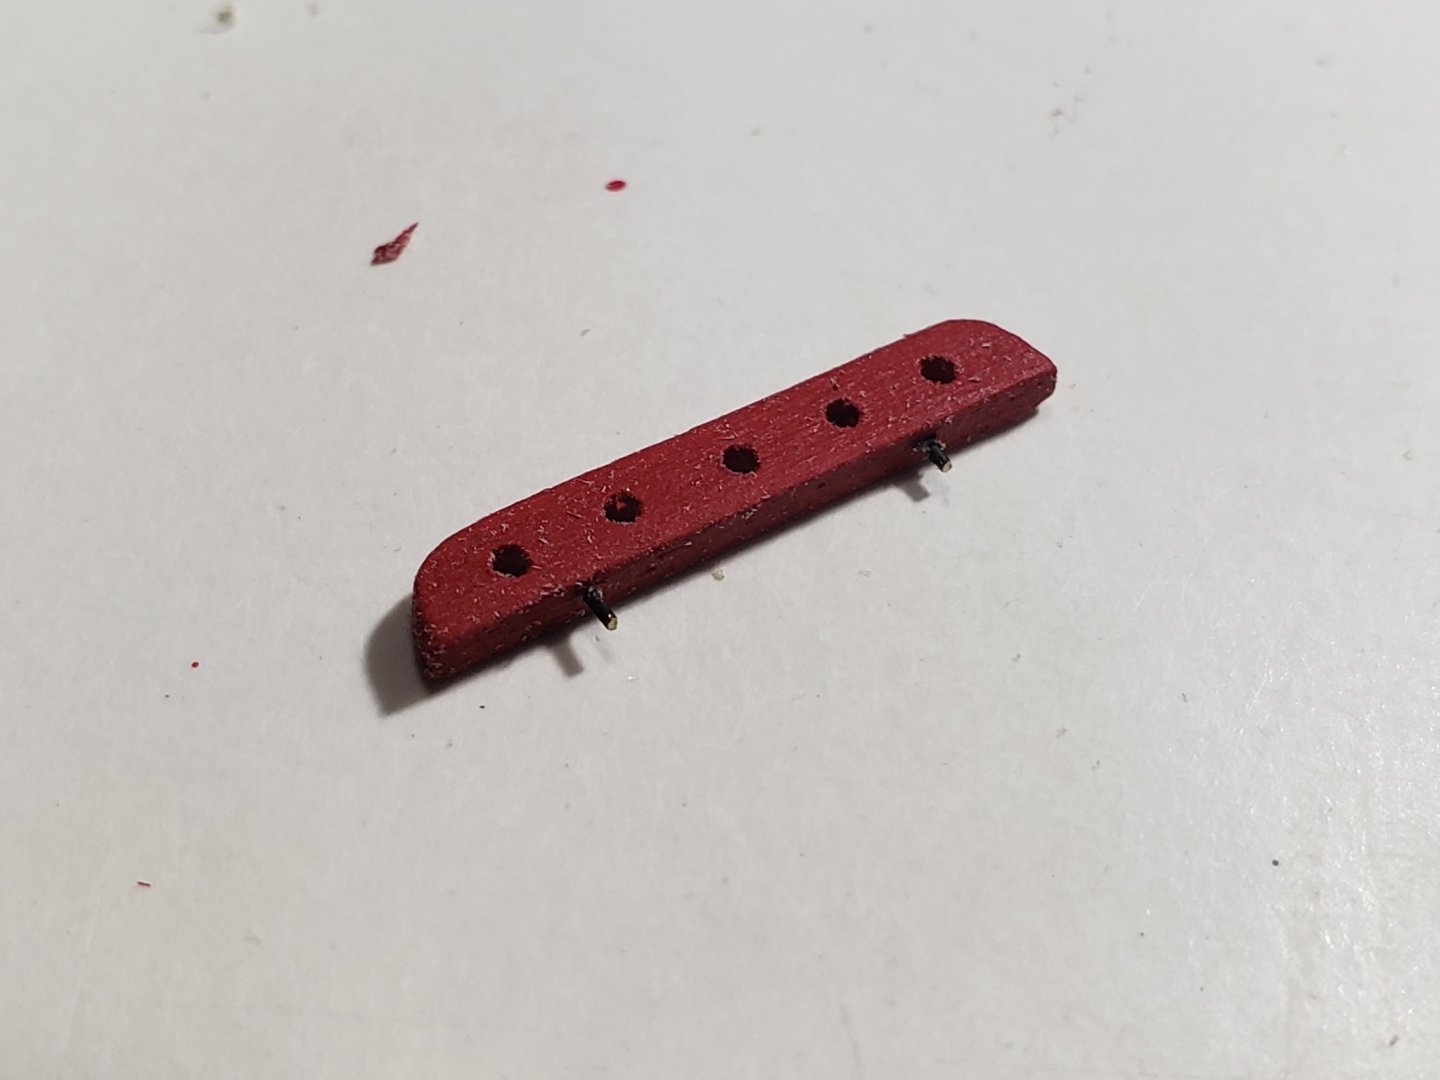
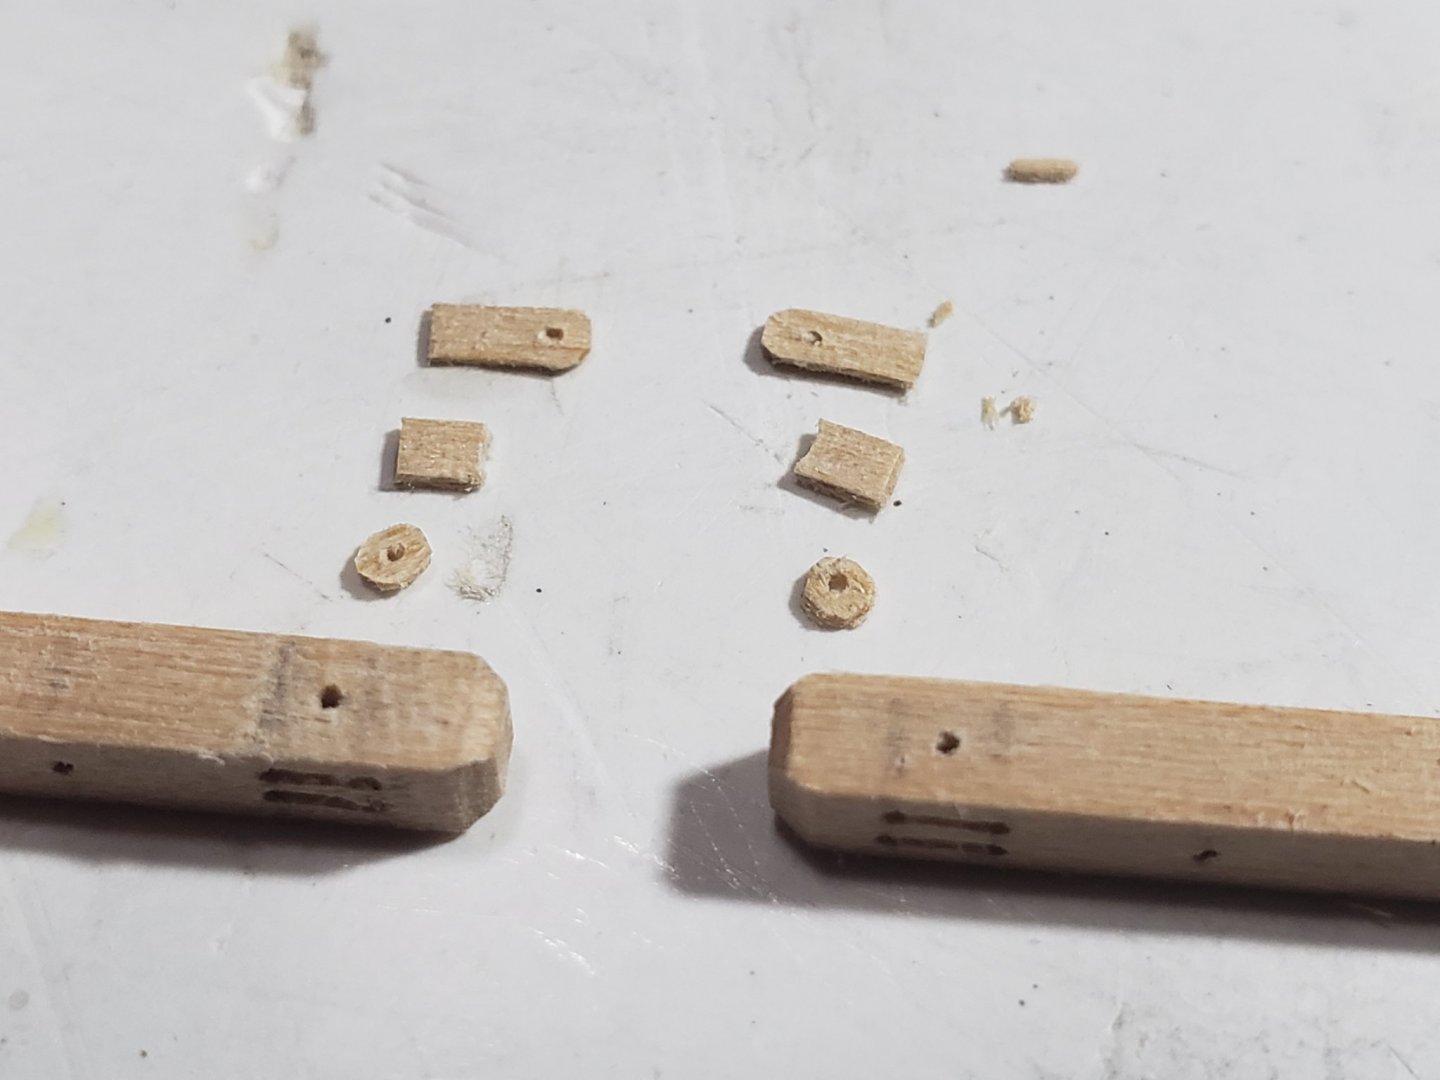
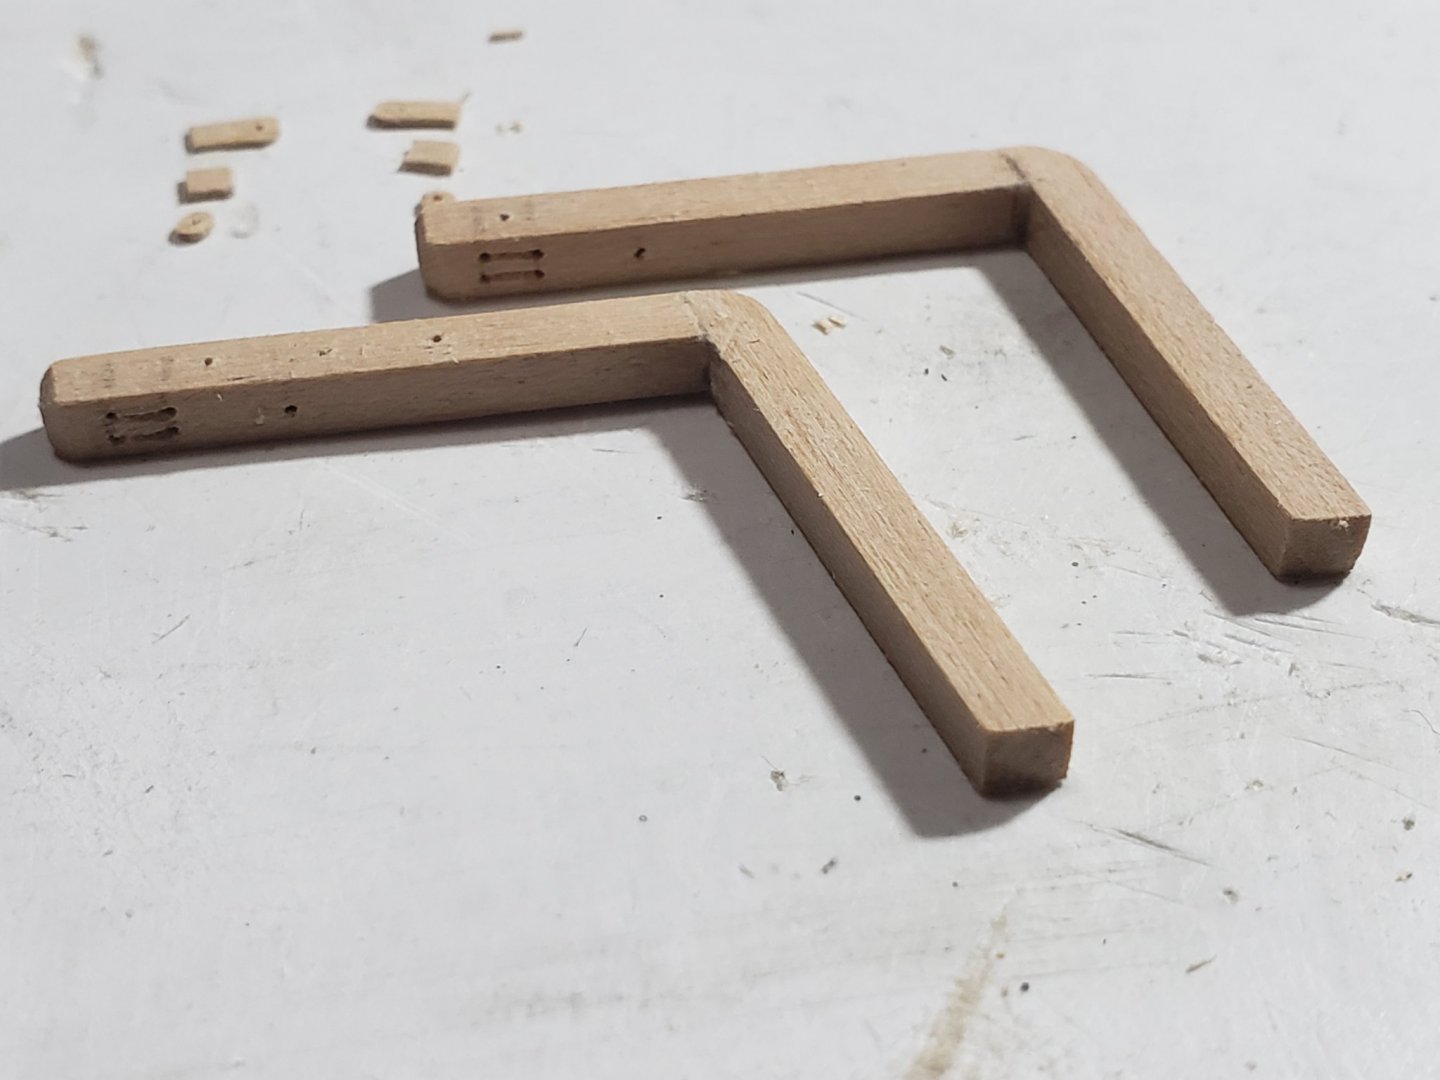
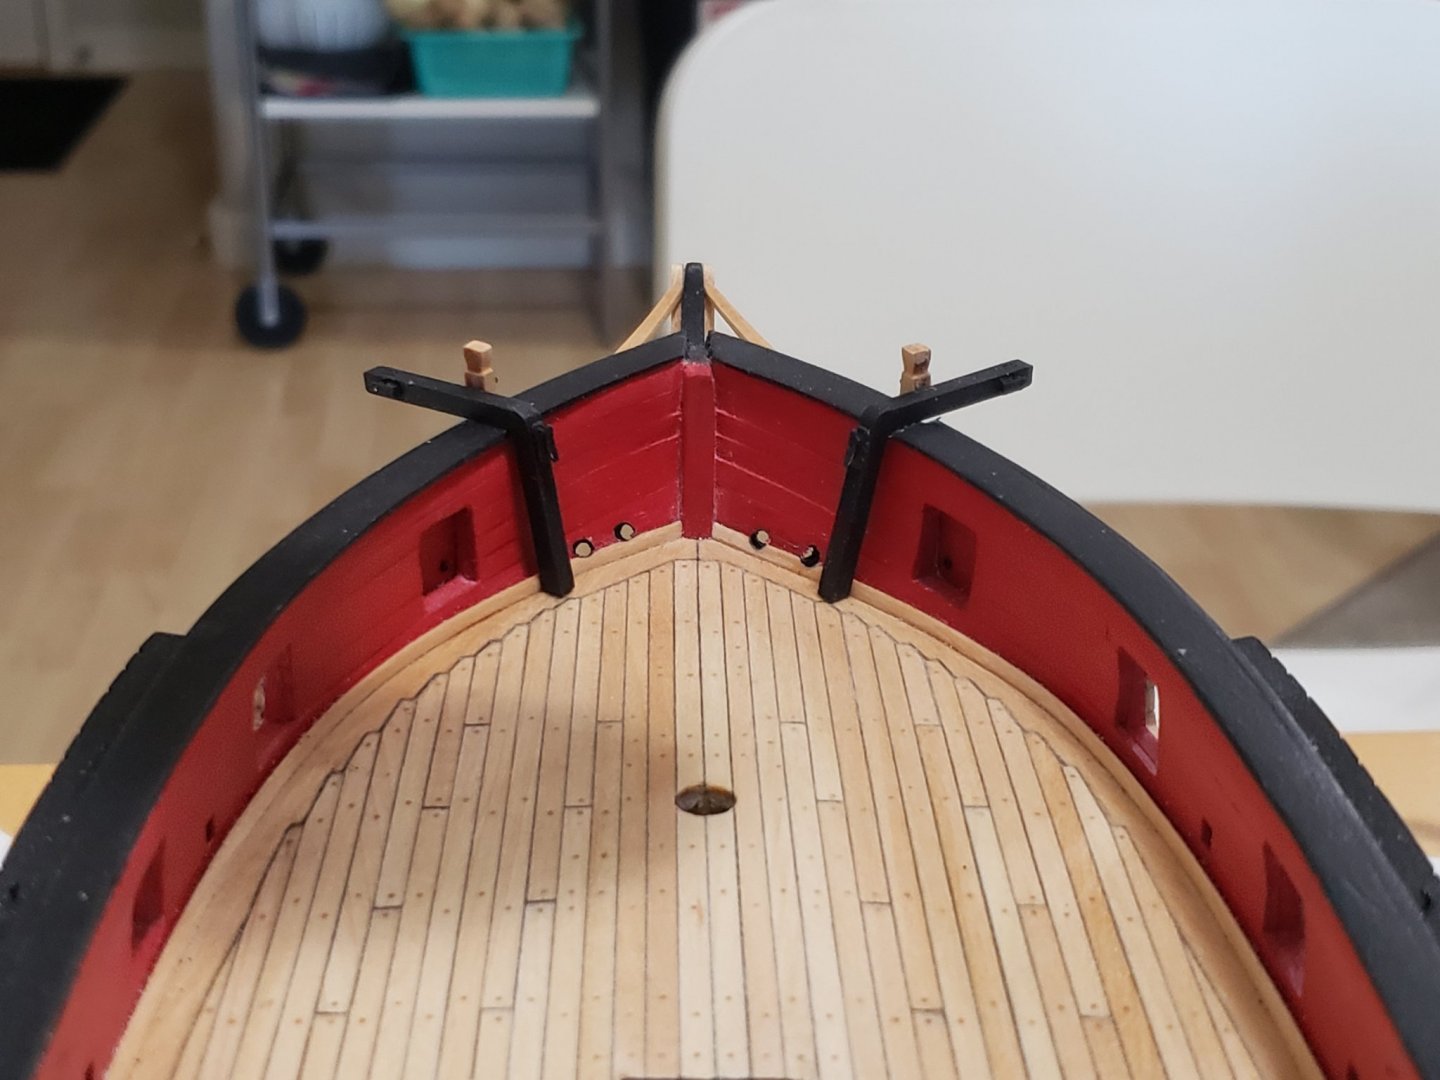
After a bit of a break, I started to work on Chapter 11. So far the swivel brackets, pin rails and belaying pins have been installed. For the swivel brackets, I did not have 1/16" between the top of the port sills and waterway, it was more so 1/32". Because of this, I had to bevel the edge so that the brackets can be flush to the sill. For the pin rails at the bow, I used the curved laser cut margin plank which I did not use for the decking. Made life simpler as the curve for a small section fitted nicely, and I did not have to try to make a curve to fit 😁 For a secure fit, I pinned them down using the extra bit of rod from the eye bolts as they were thin enough to insert (I drilled 0.45mm holes for these pins). And I used a 1mm drill bit for the belaying pins holes. To ensure all the rails are inserted at the same level, I used a scrap wood which happened to be the exact height I wanted: The belaying pins are just dry-fitted. They are somewhat of a snug but loose fit if that makes sense.. Here are some photos of how she sits right now: Next on the agenda is installing a lot of eye bolts and cleats 😄


- 950 replies
-
- 8
-
-
- syren
- model shipways
- (and 1 more)
-
Loving the photos! I also remember sanding took me ages to do, especially doing it by hand.. For the caulking I just ran an HB pencil along the edges of each plank then gluing to the model. You can try different graphite scales, I've been reading 2B also works well. Maybe do a test section to see which one you like? After they are glued, make sure to sand them so they are nice and level with all the planks. Then use a fine sandpaper to make it smooth. Then stain. The caulking will show this way even though the pencil mark is on the edges. For staining I used tung oil on my model.
-
Thanks Svein!! I've been looking over your log and it looks very nice! I'm sure the timbers will look amazing 😁 Many thanks Richard!!
-
If it wasn't for this I would have missed the first pin rail closest to the bow, completely missed that on the plans 😅 Btw, did you glue the belaying pins or were they just dry fitted? Also the carronade looks really good! I wish the kit provided the guns you used. The ones they have are very skinny and not true to the plans.
-
Looks like a render! Very crisp..
-
Looks so much better than the sails provided with the kit!
-
Thanks so much for the detailed response! I'm glad I found this log as I've learnt so much already. I'll take a look in that sub forum for some more learning. And apologies @Devildog36 for hijacking your build log, I'll try to do better 🙂 A clipper is in my to-do list, so I will definitely follow along to see how she progresses. So far she's coming along very nicely!
- 74 replies
-
- 3
-
-
- mantua
- thermopylae
- (and 1 more)
-
Thanks Jim and Louie! You guys really have an eye for detail. I wish one day I can also notice these things. I hope I'm not hijacking this build log, but does one gain this knowledge through experience in building models or through reading books?
- 74 replies
-
- 1
-
-
- mantua
- thermopylae
- (and 1 more)
-
Apologies if this is the wrong place to ask, but what gives it away as a work of fiction?
- 74 replies
-
- 1
-
-
- mantua
- thermopylae
- (and 1 more)
-
Many thanks Edward and Abelson, and thanks all for the likes! It's very nice to hear you are enjoying my posts Edward 😄
- 950 replies
-
- 1
-
-
- syren
- model shipways
- (and 1 more)
-
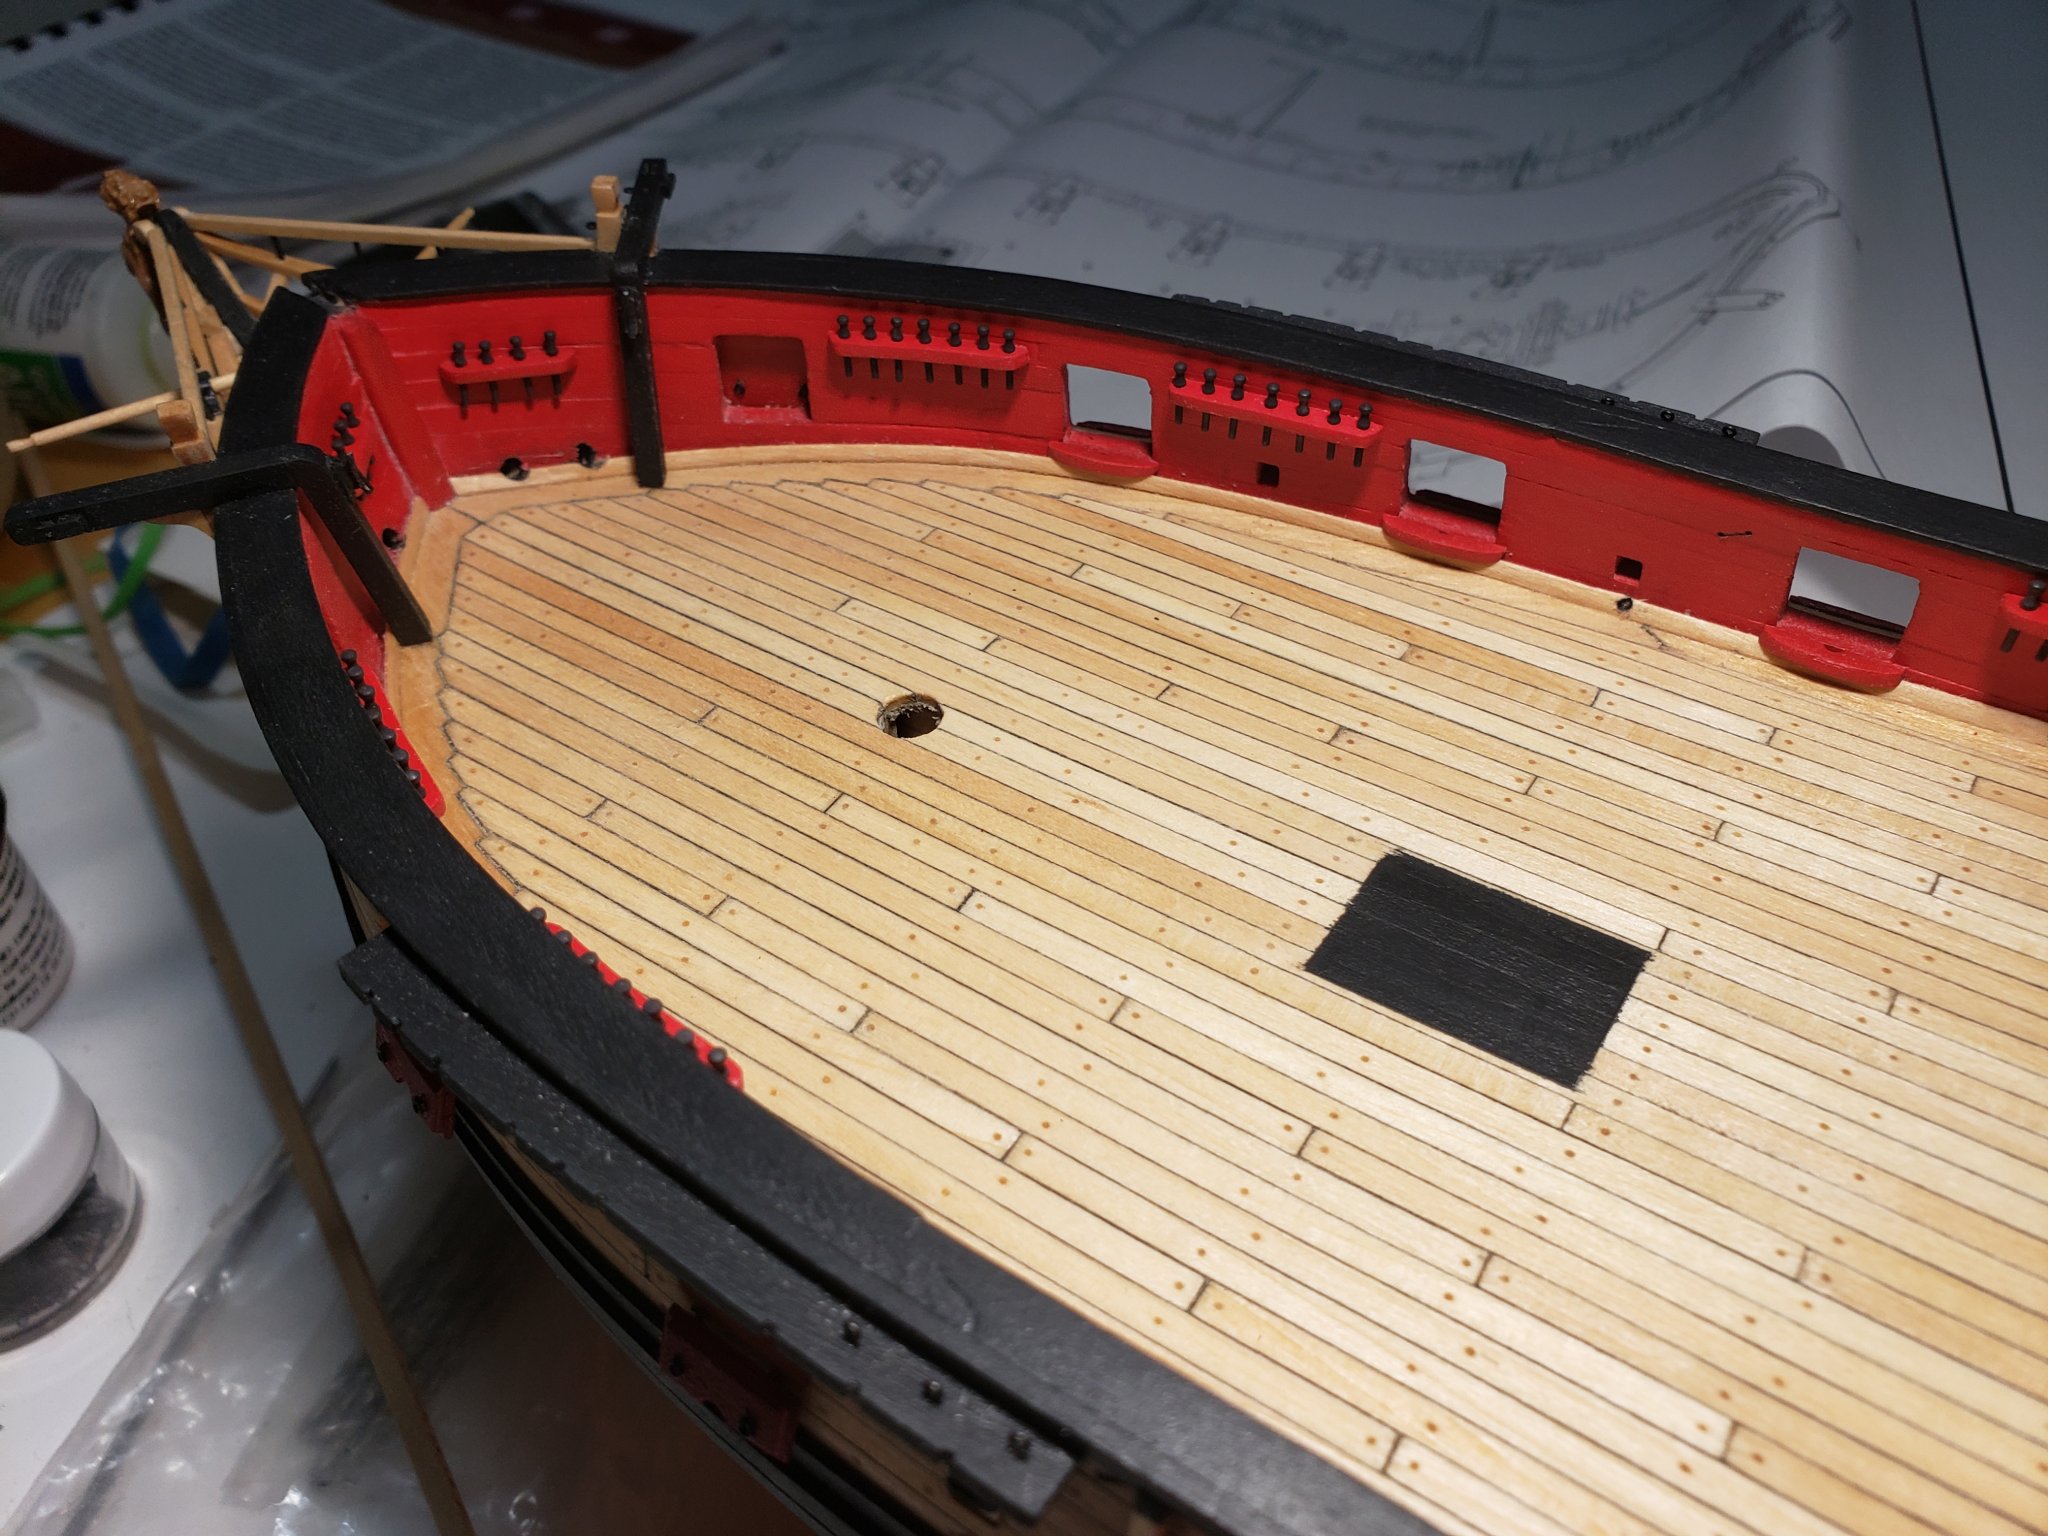
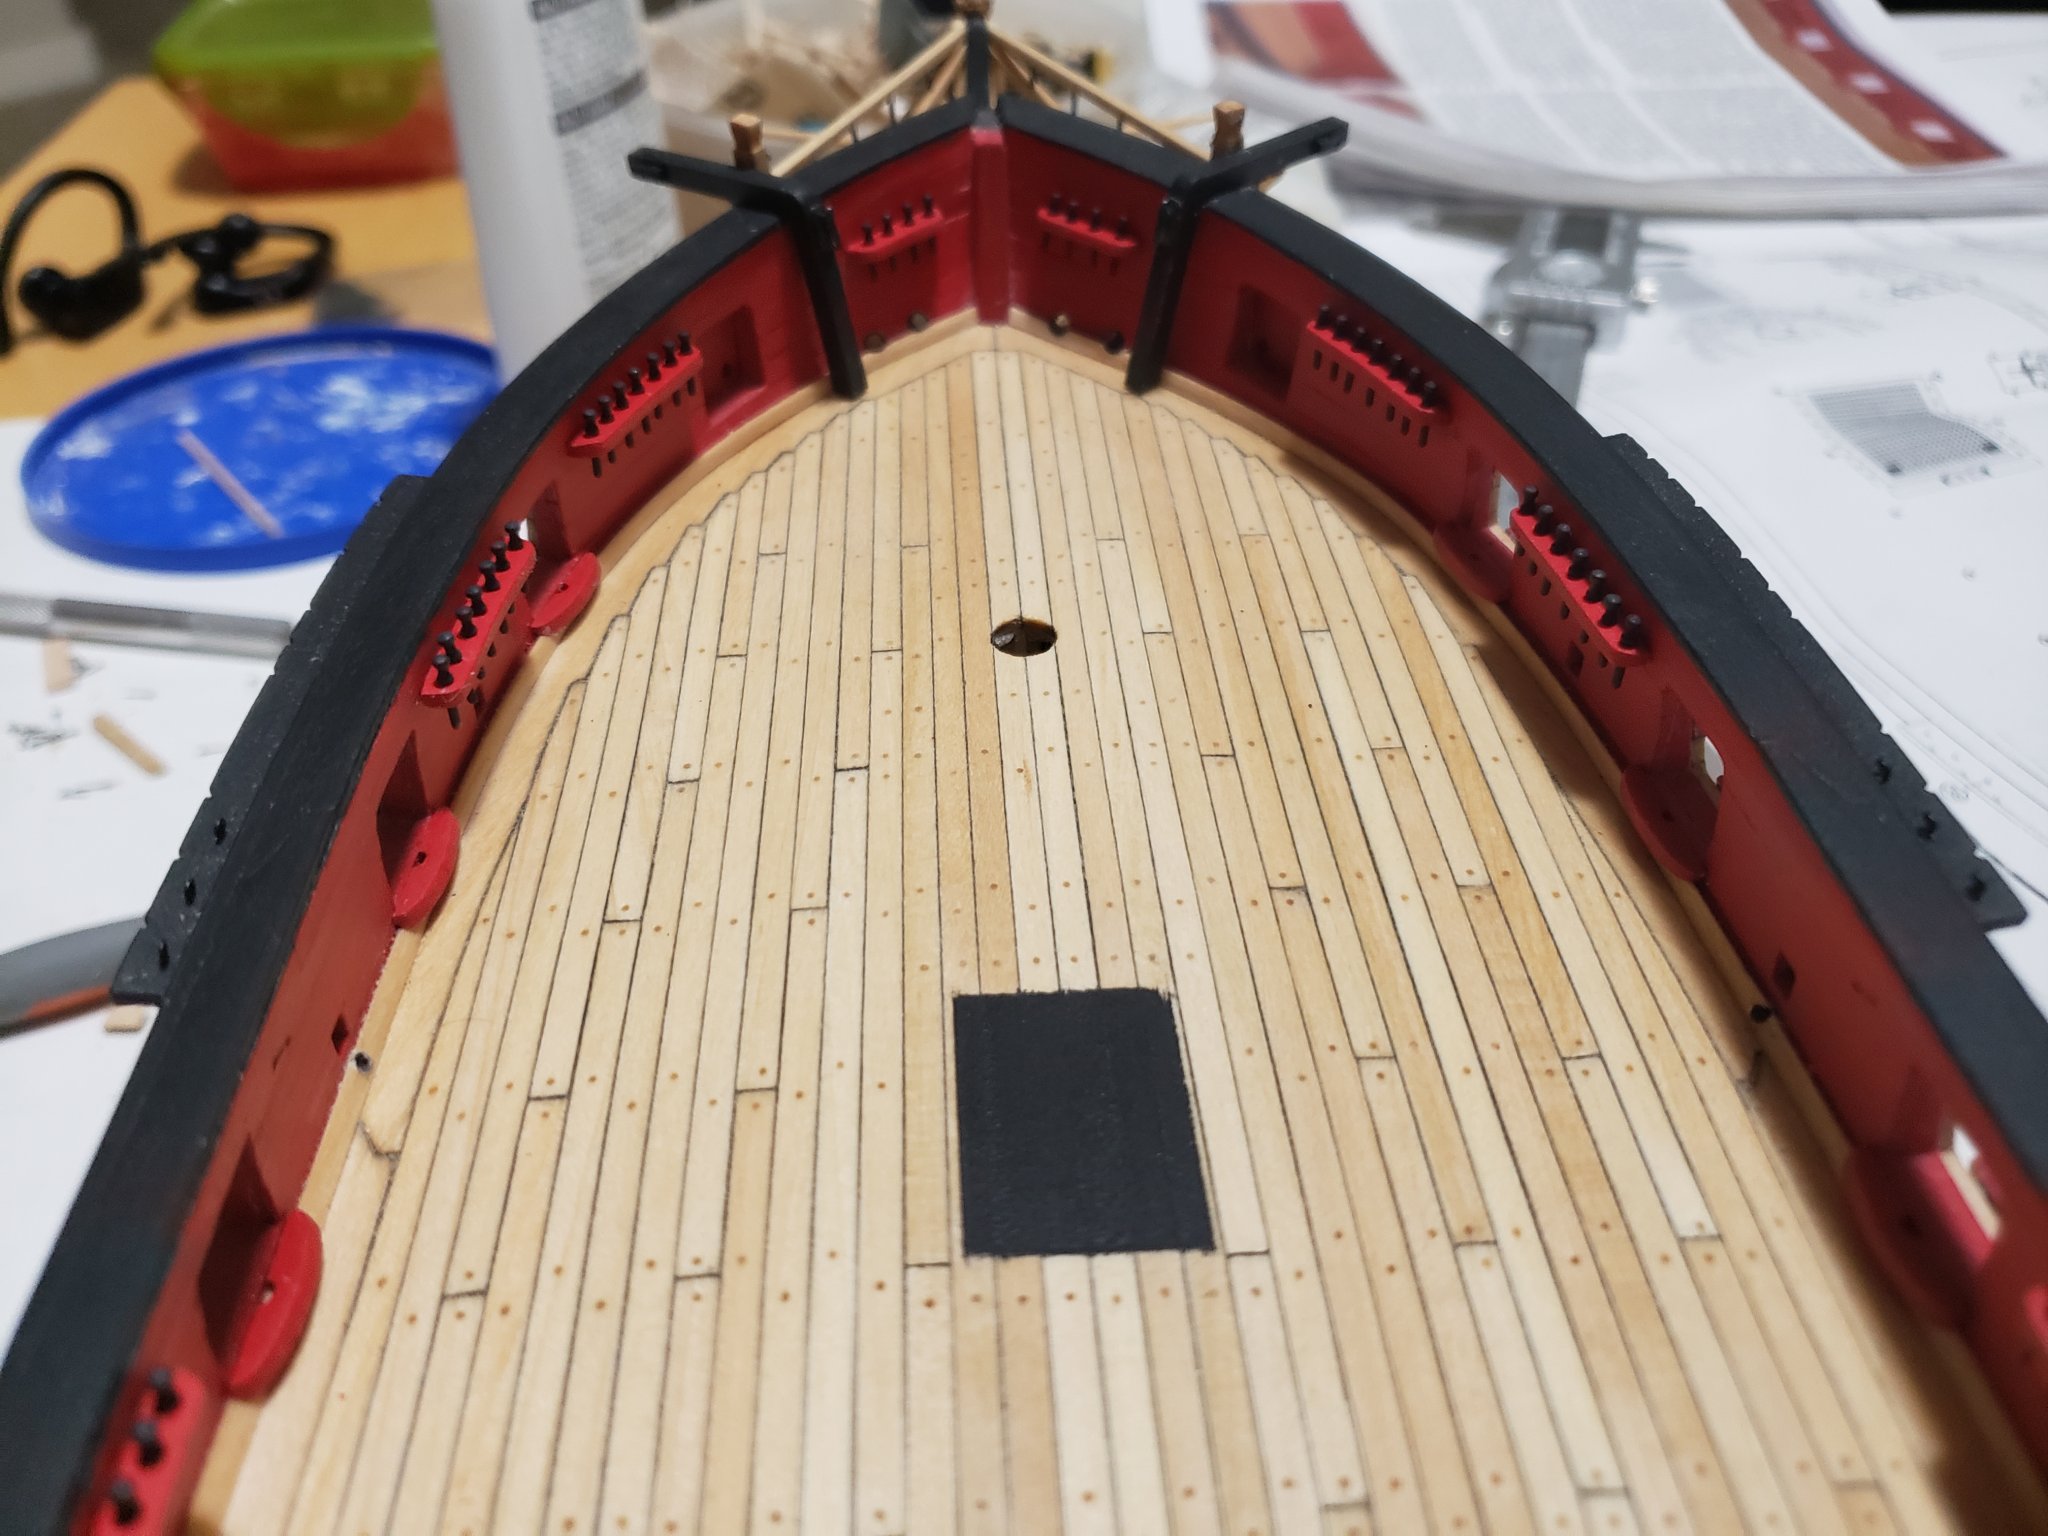
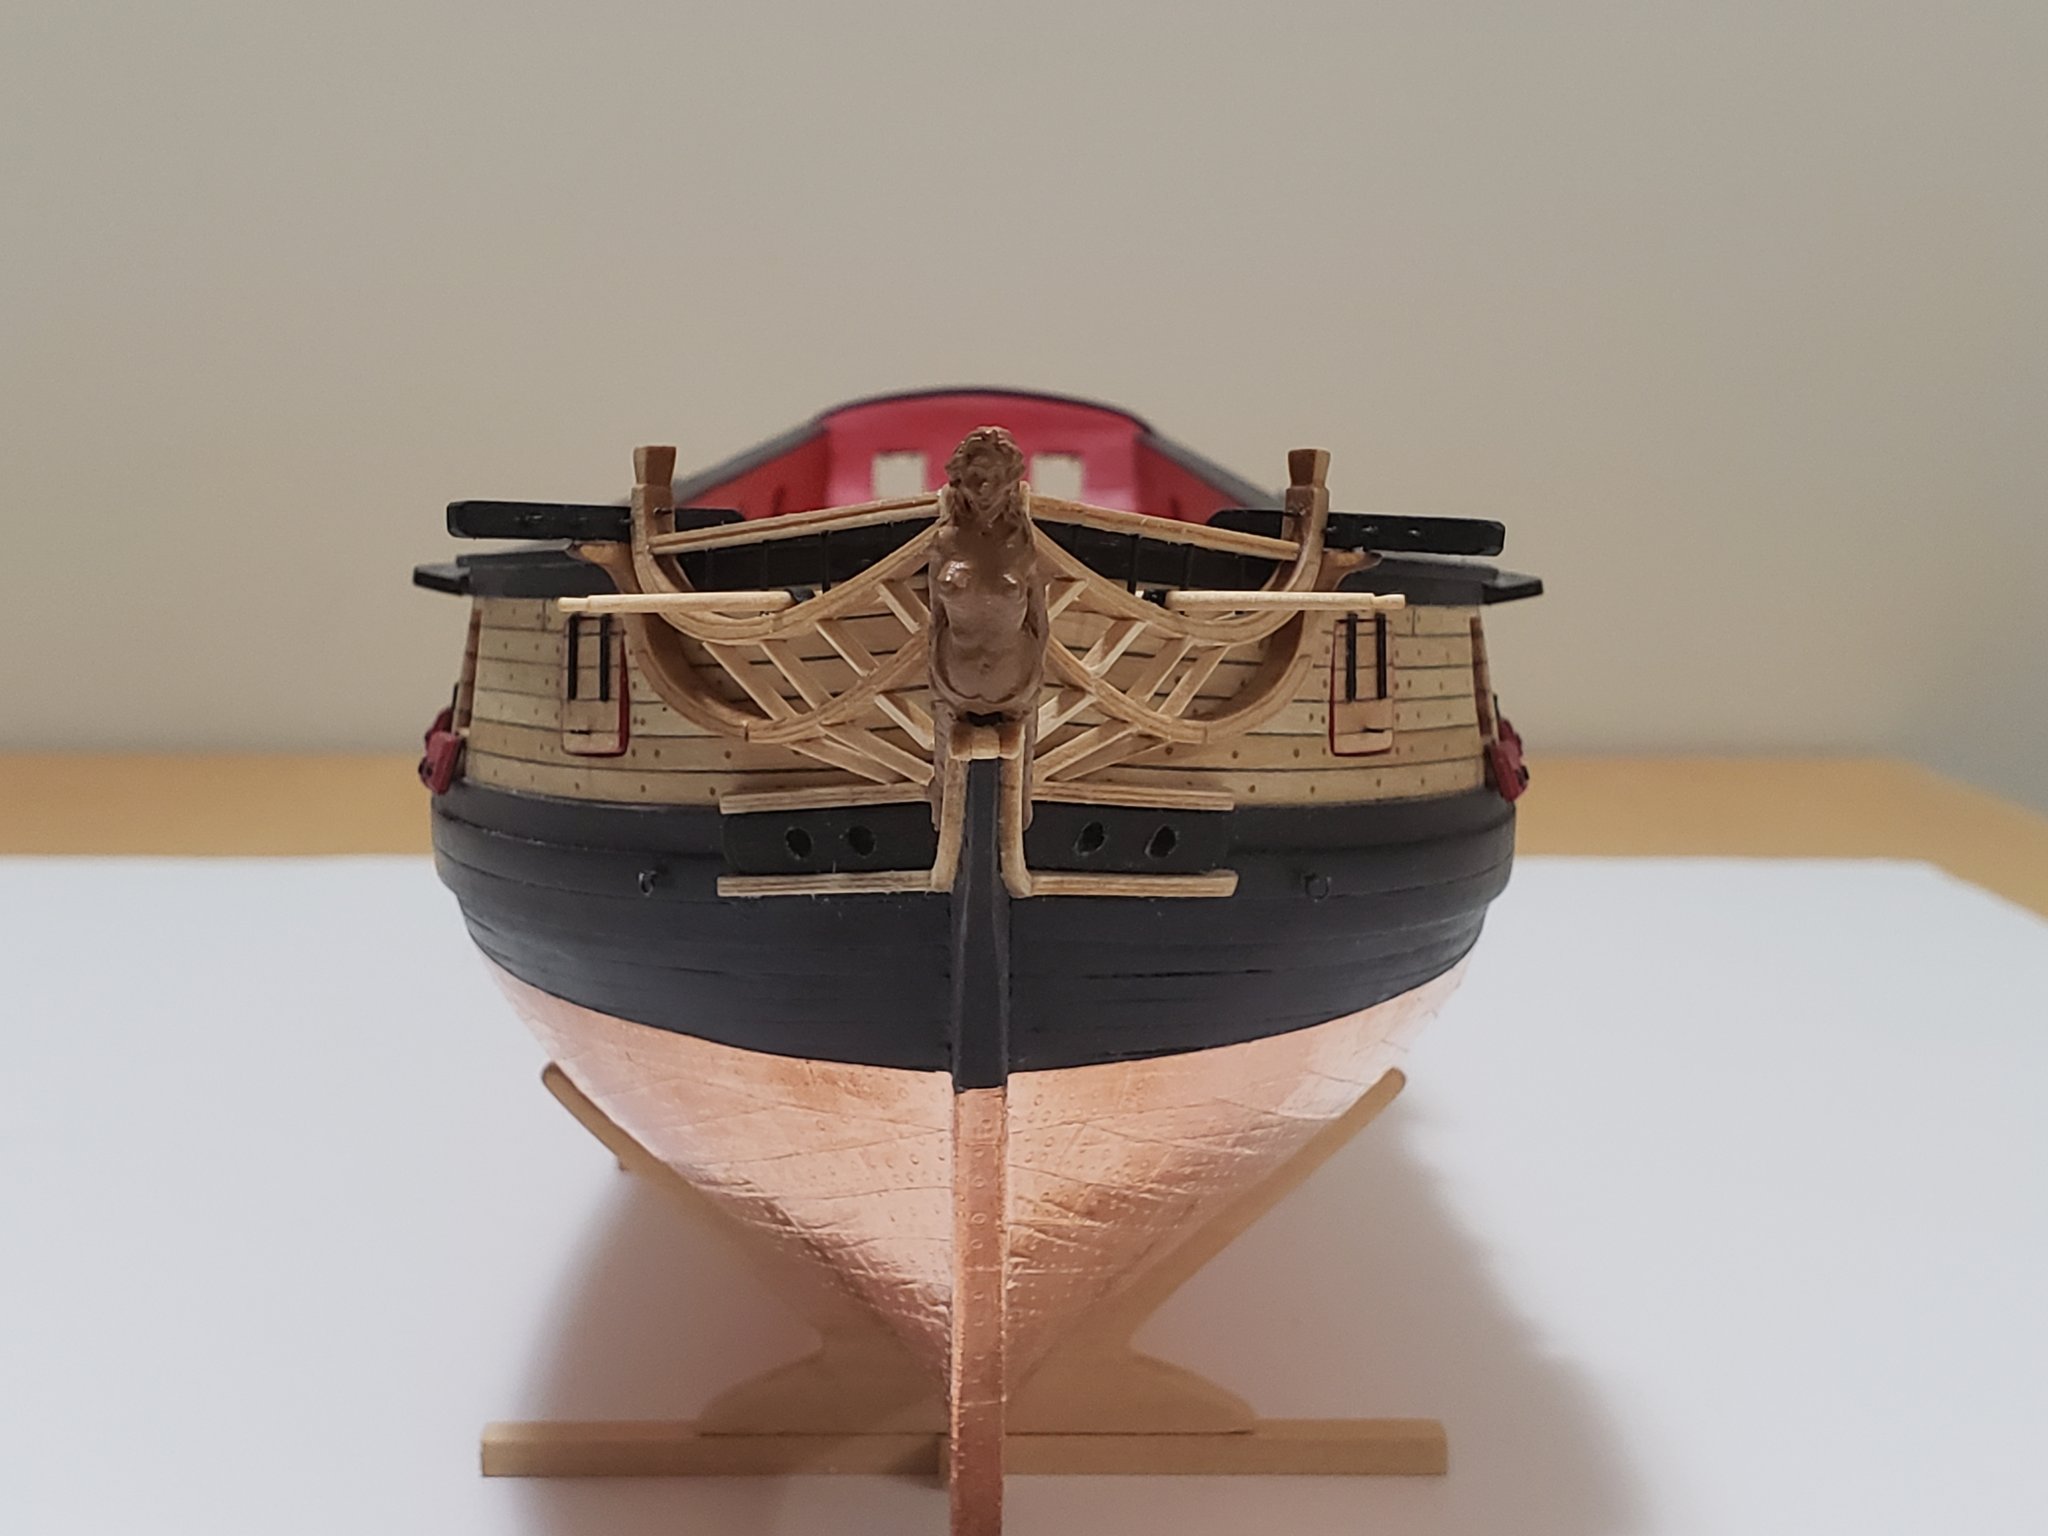
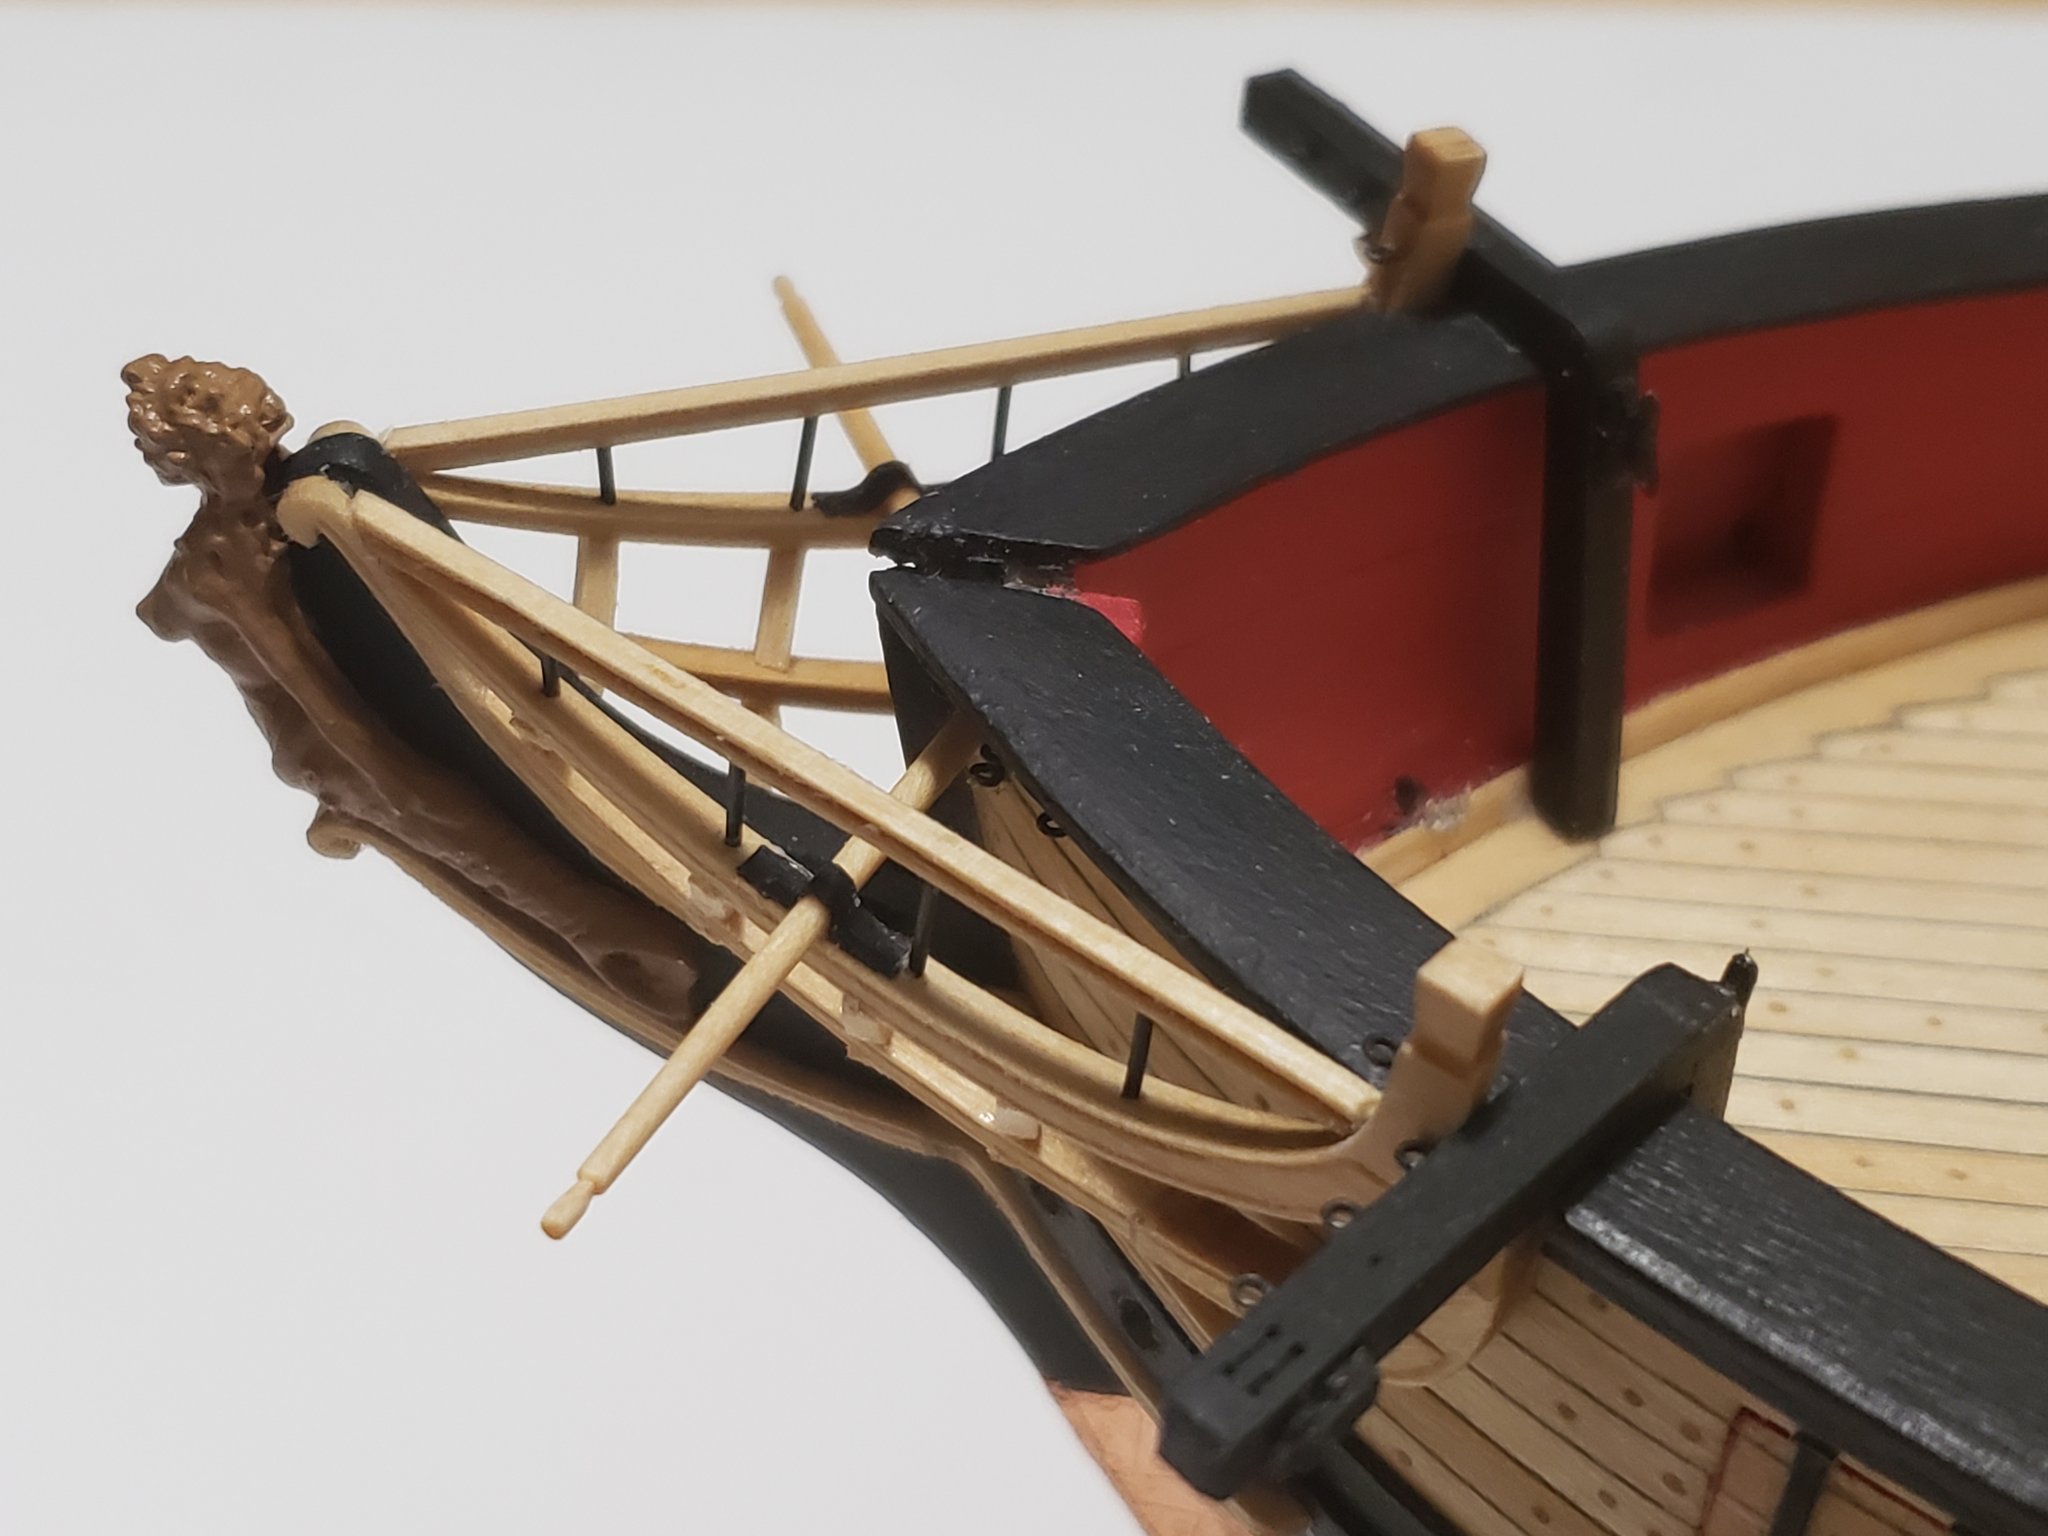
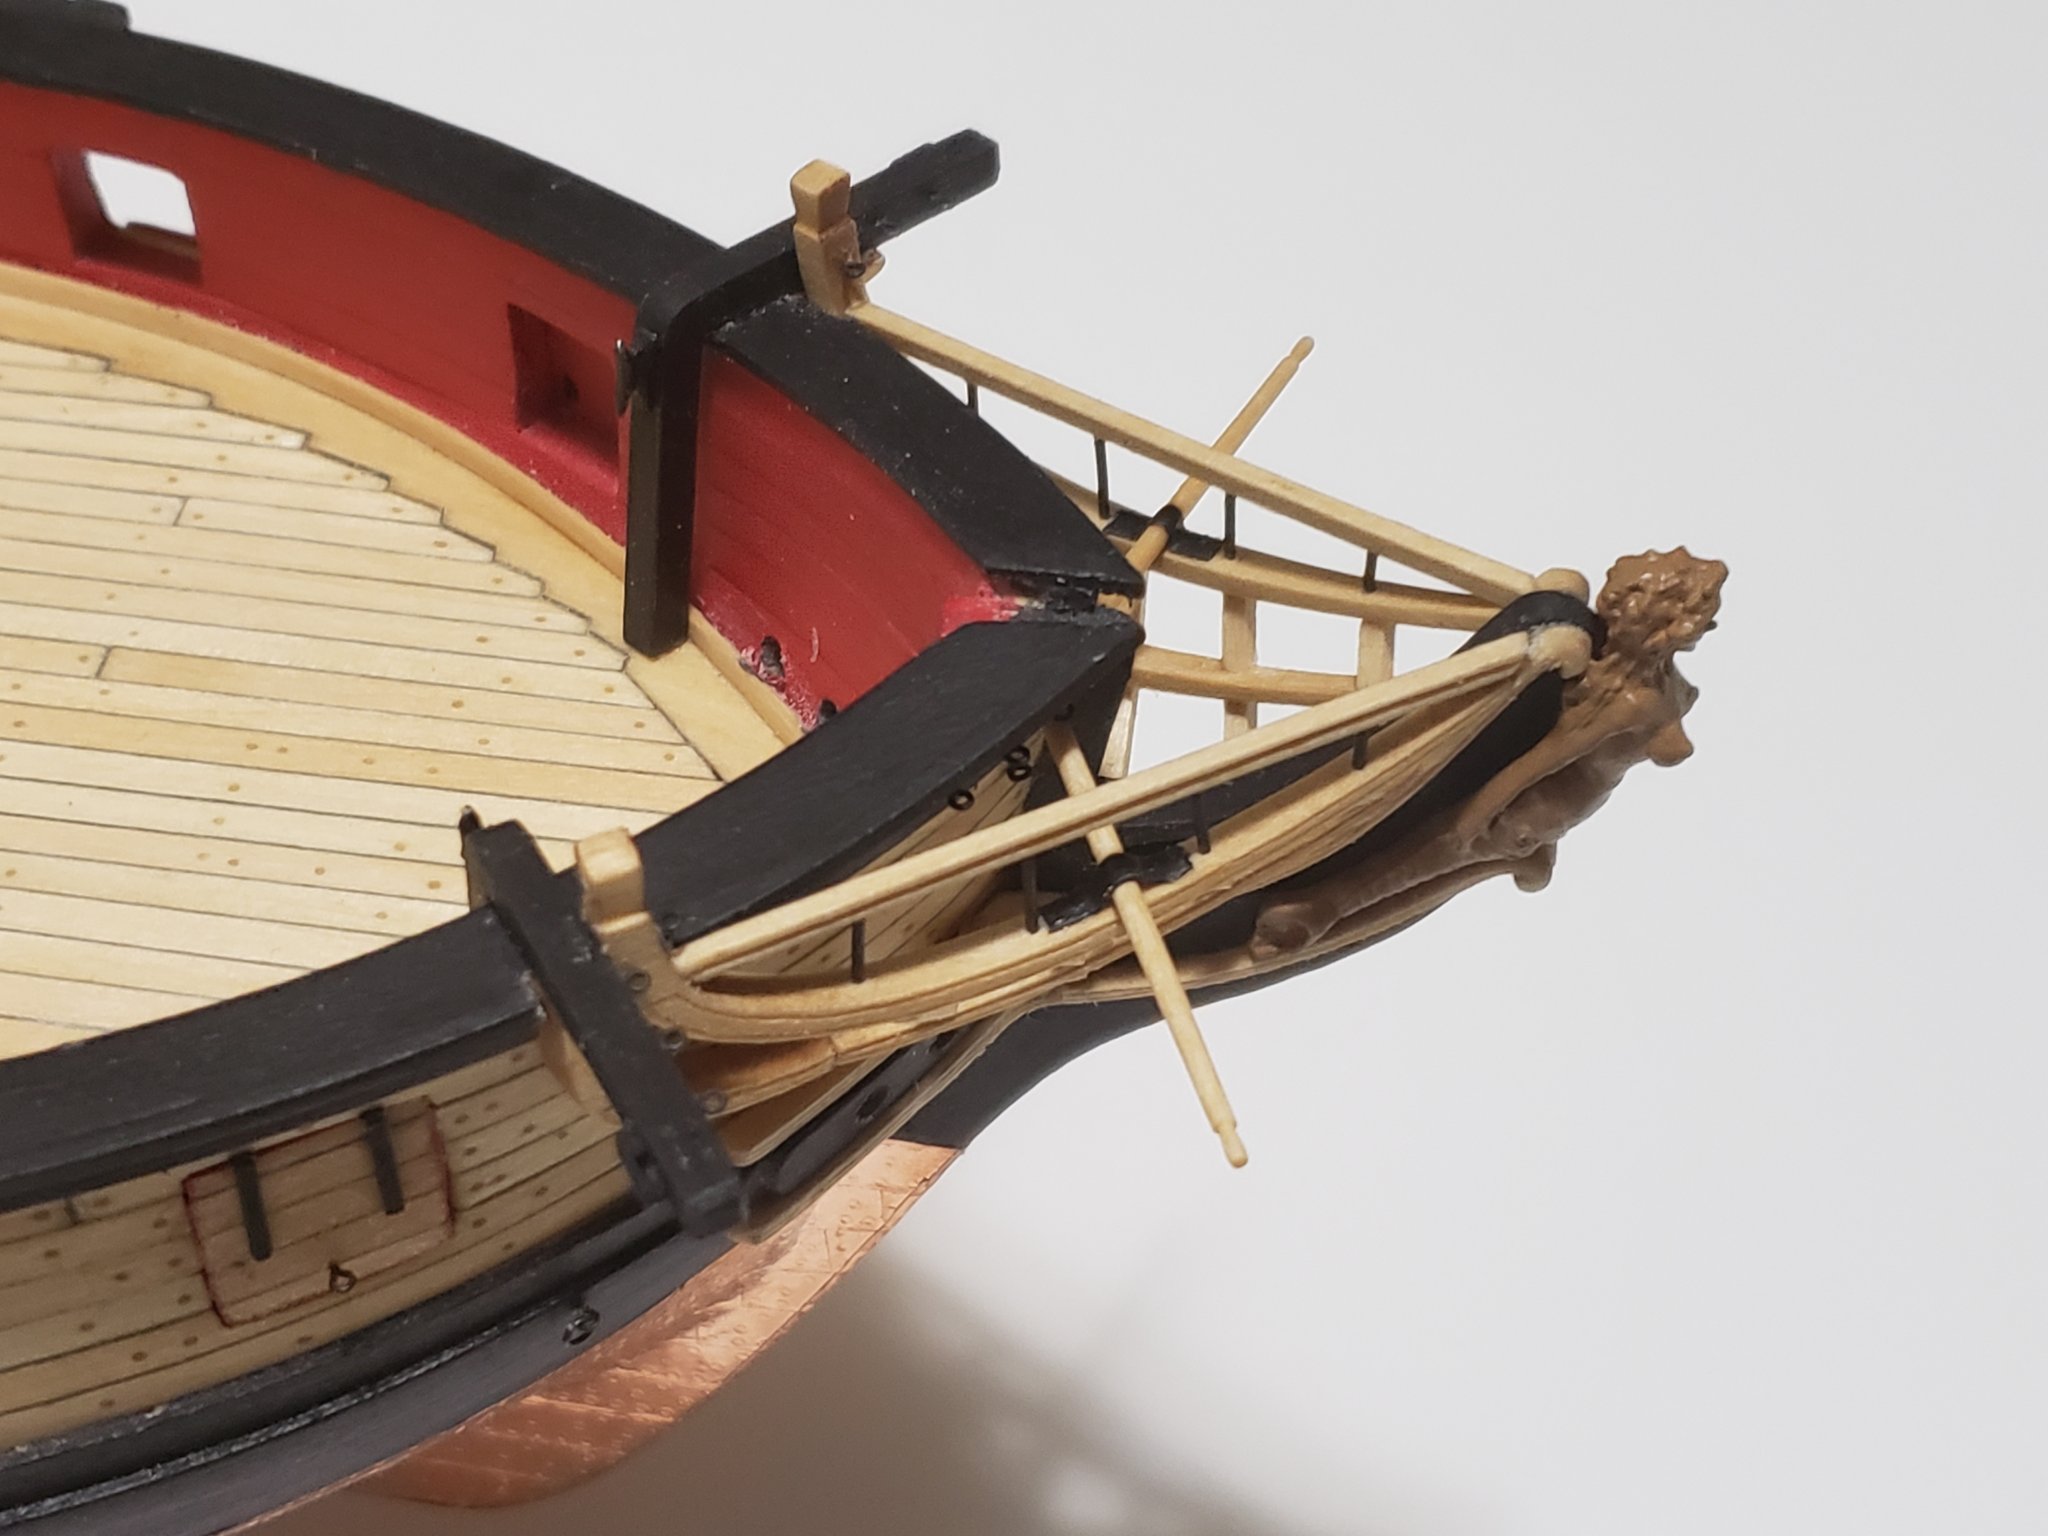
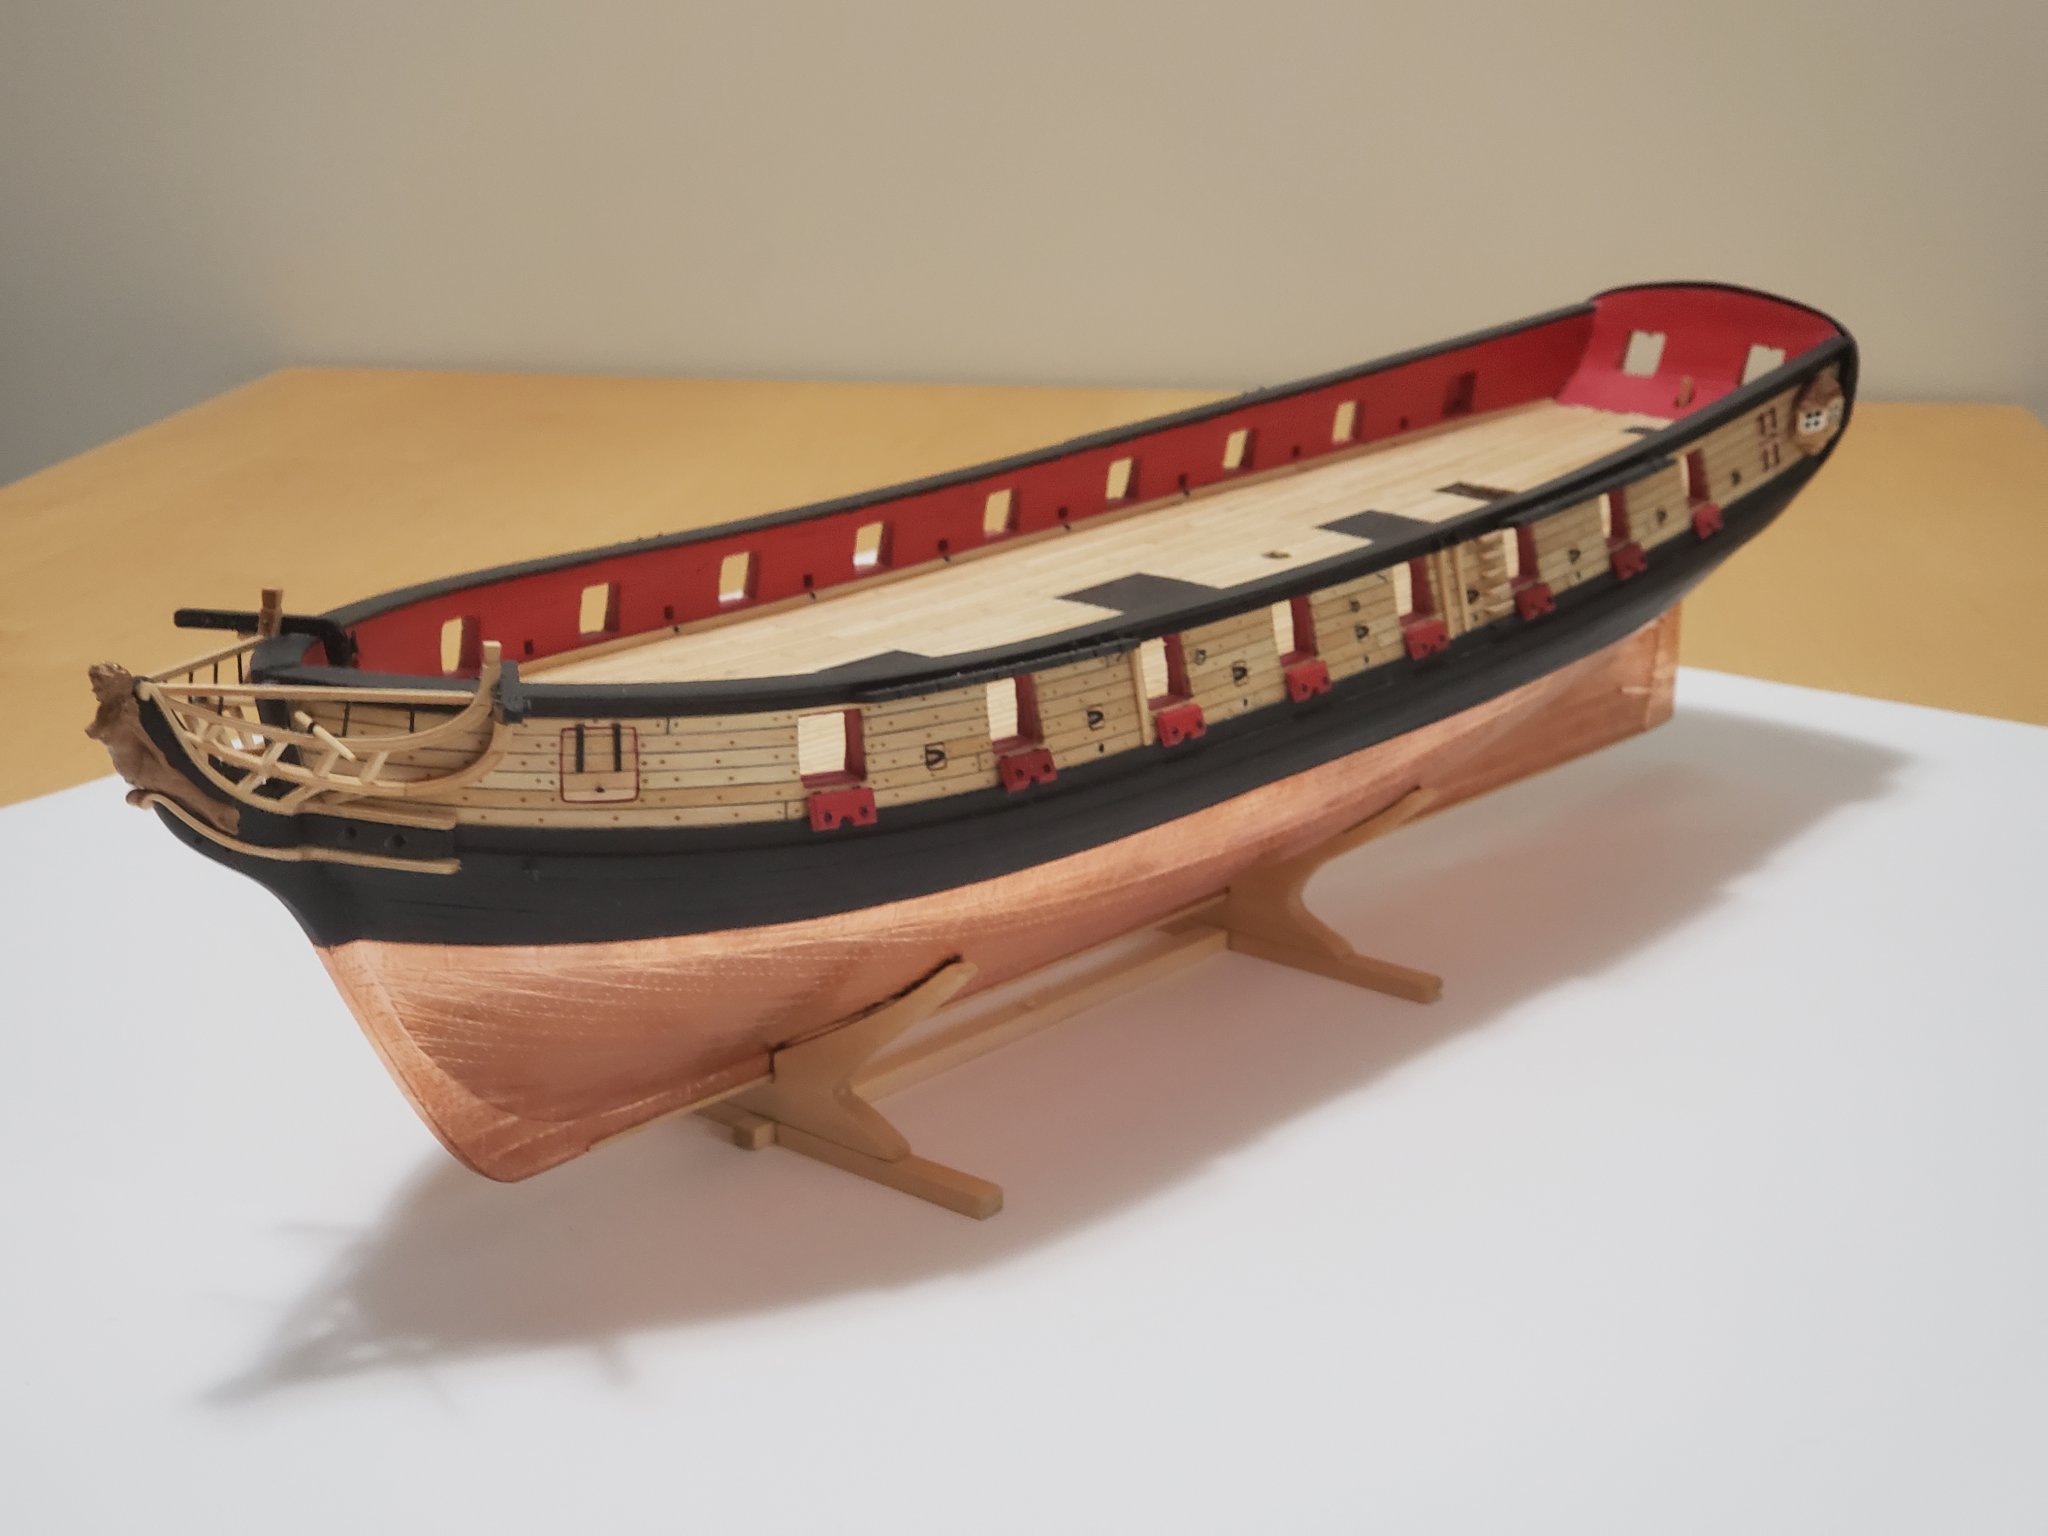
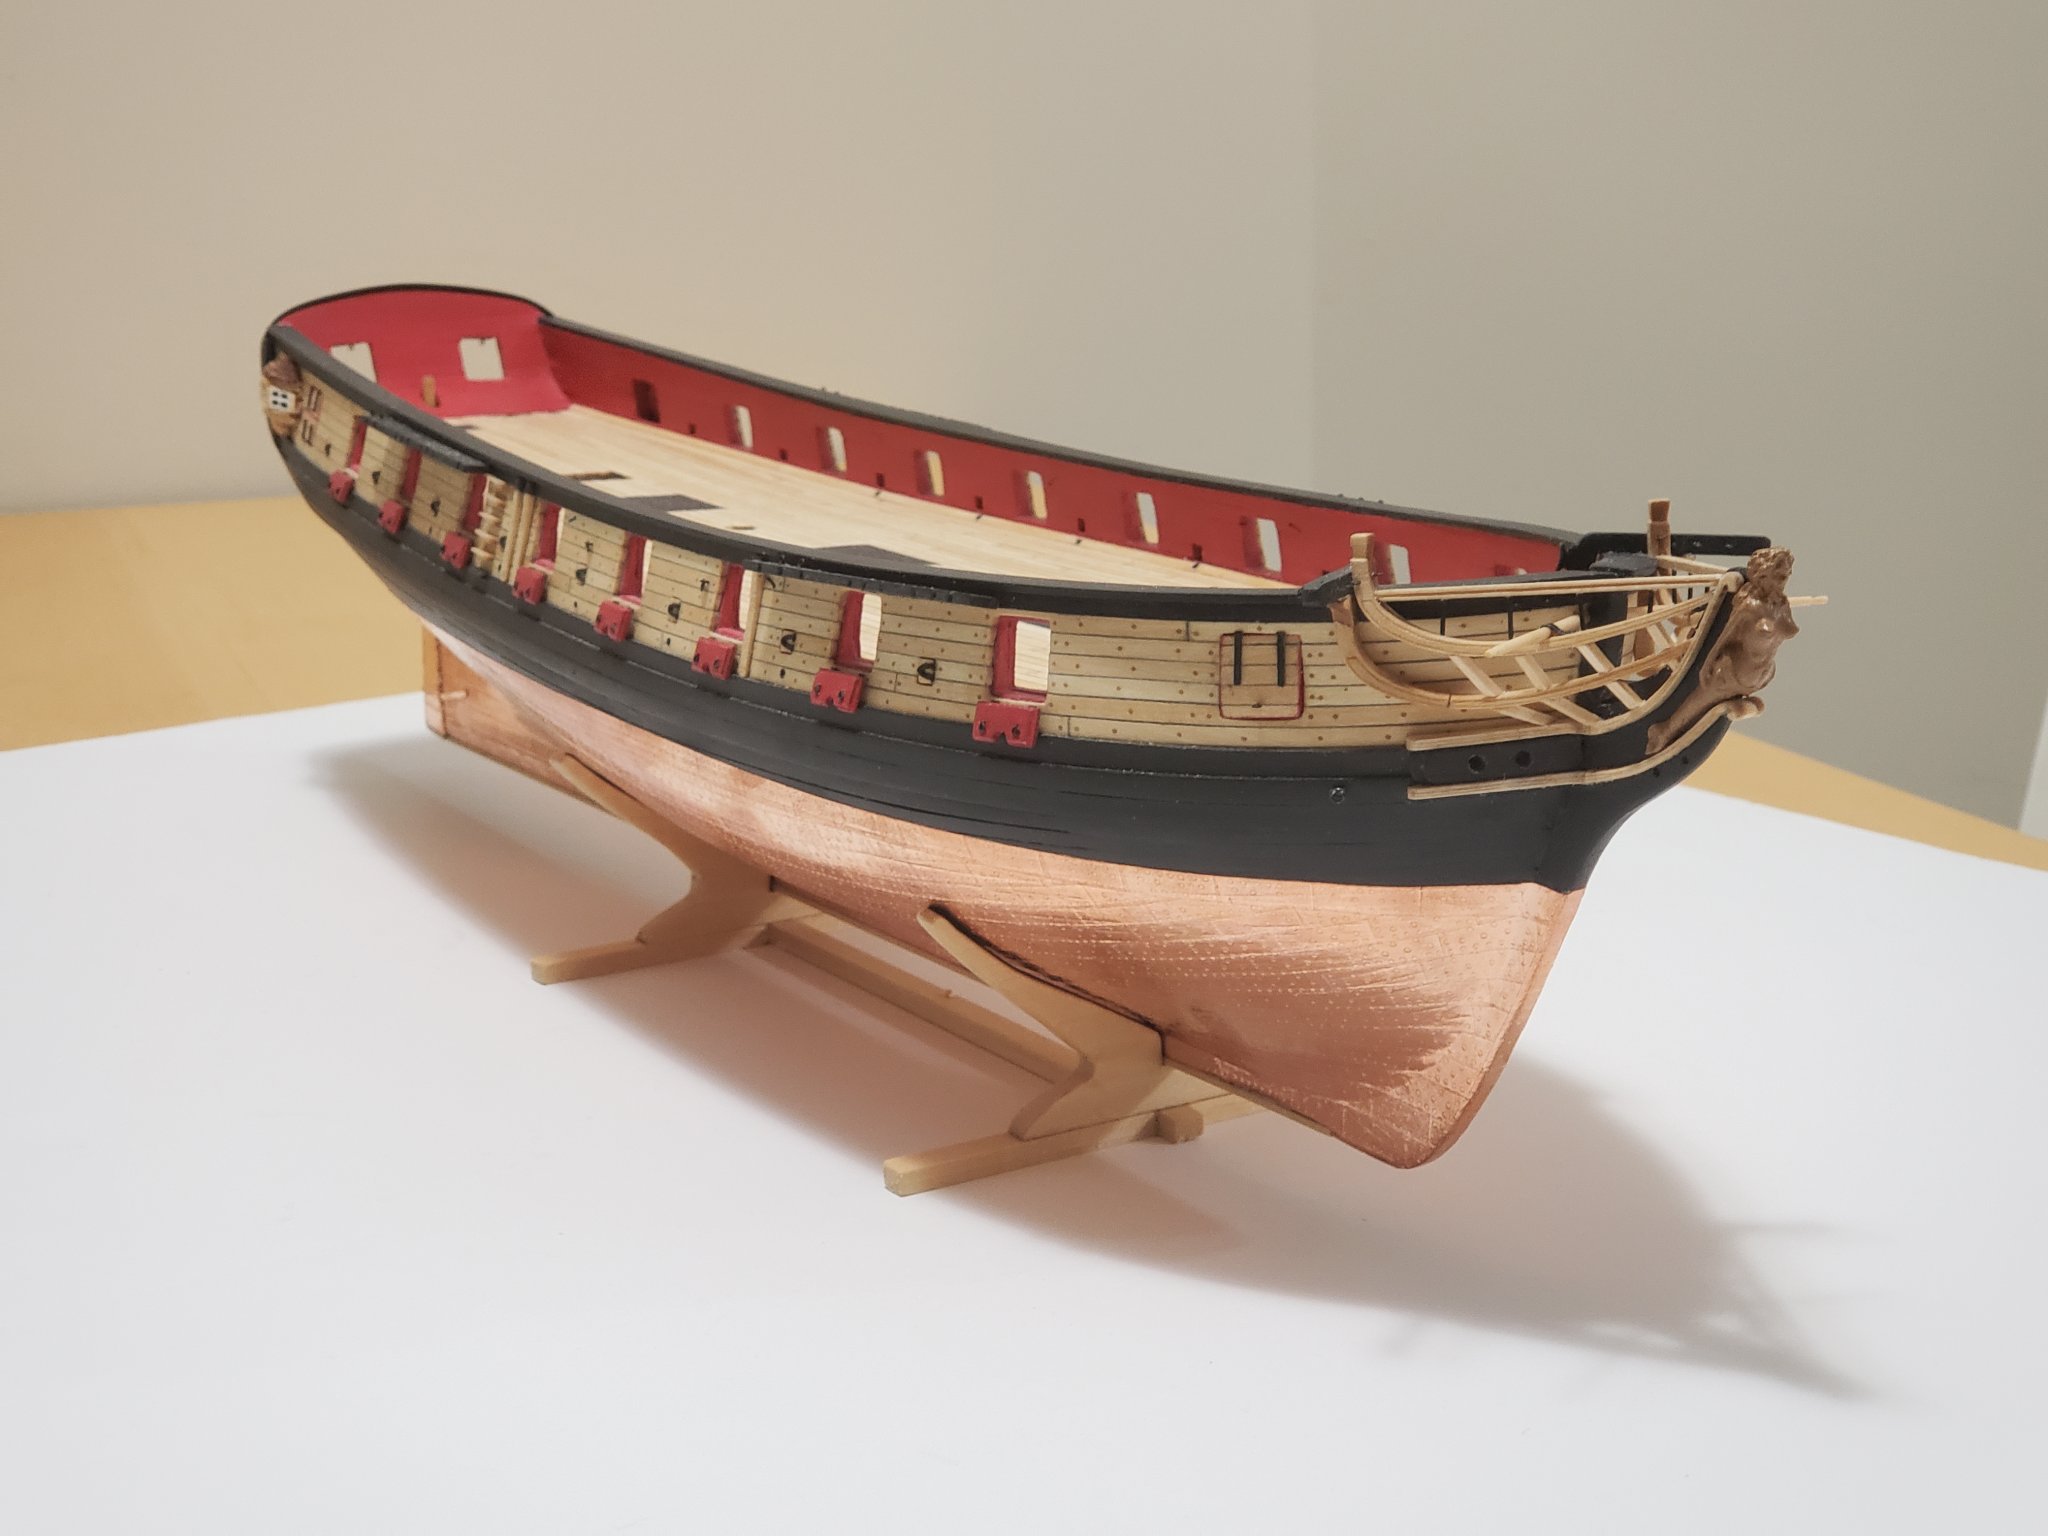
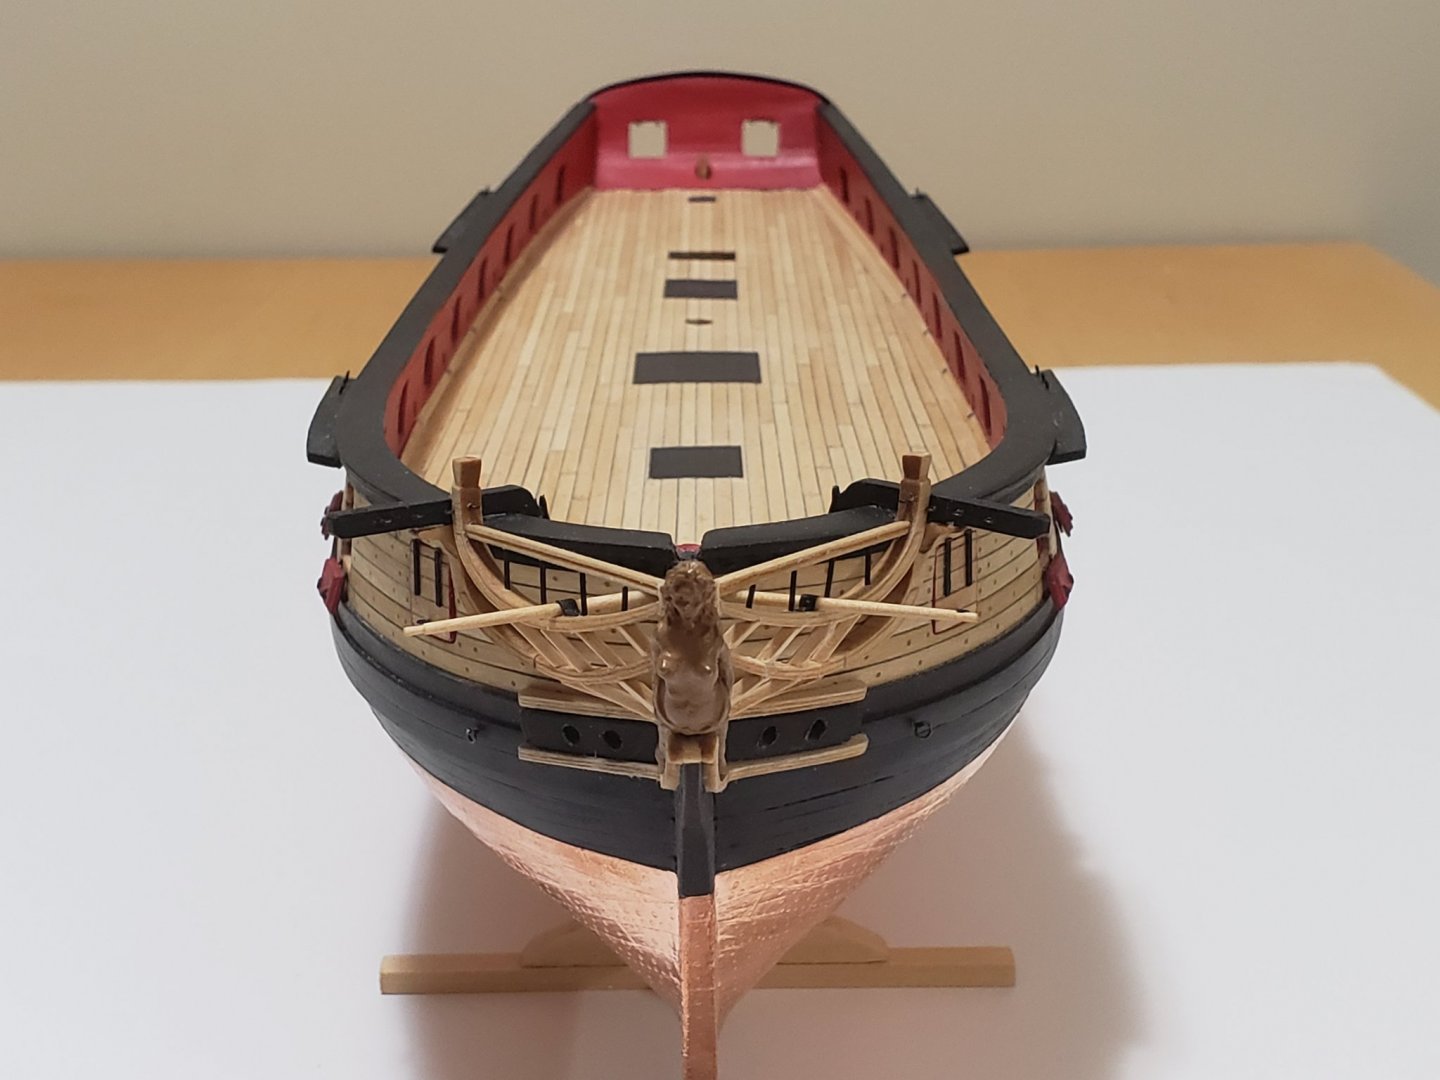
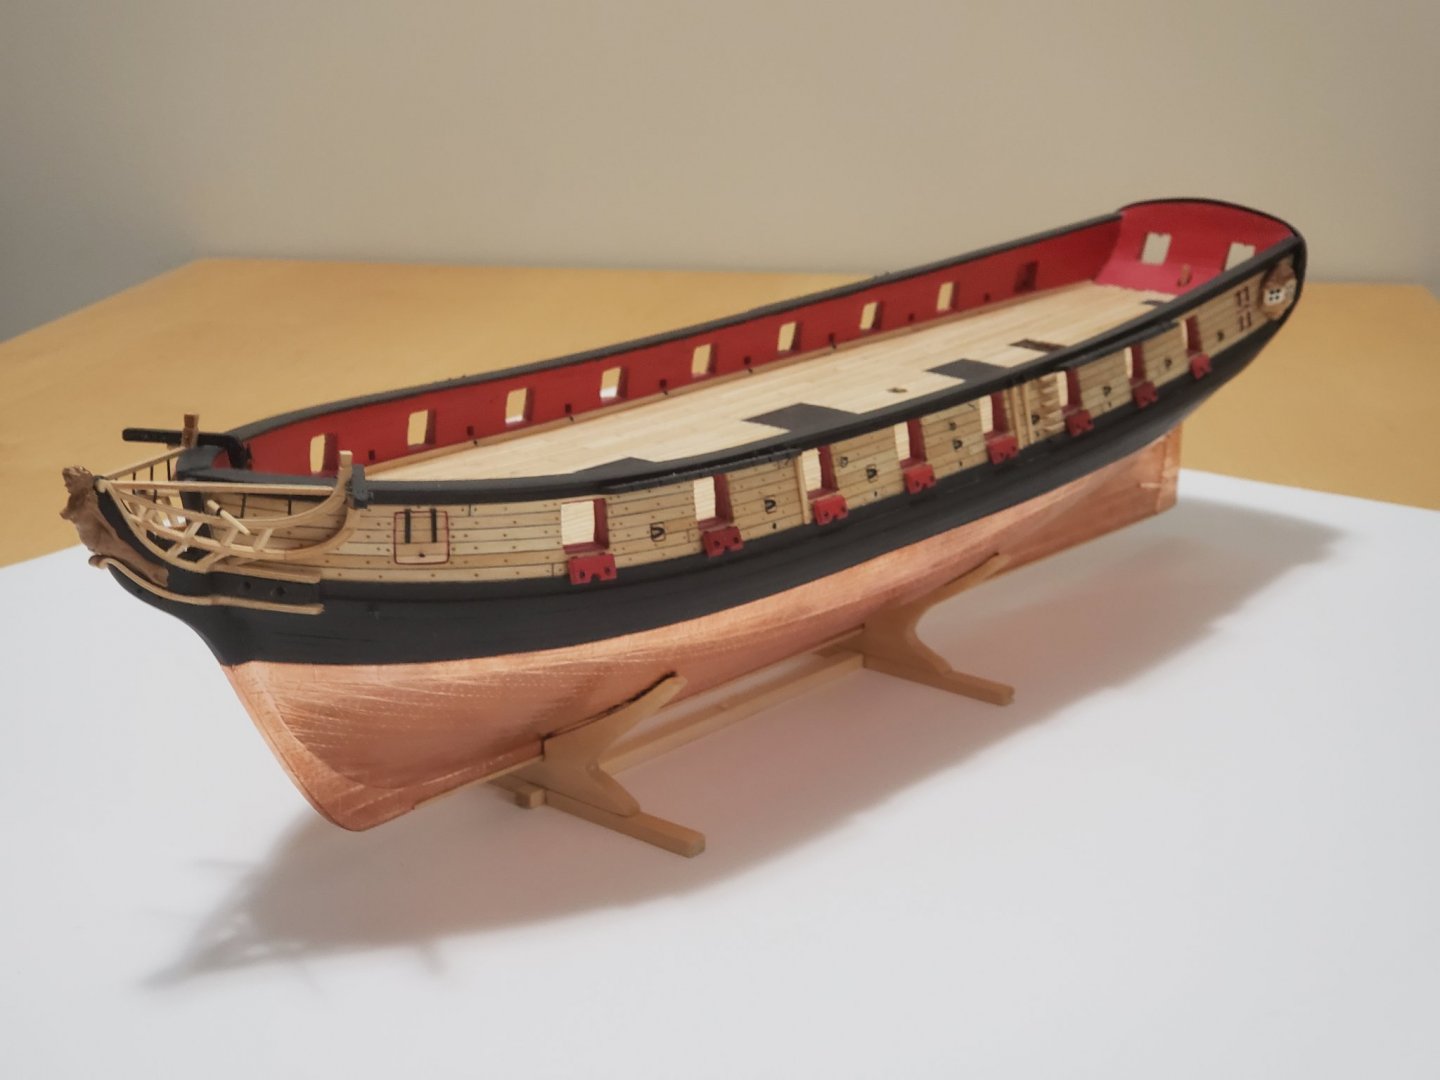
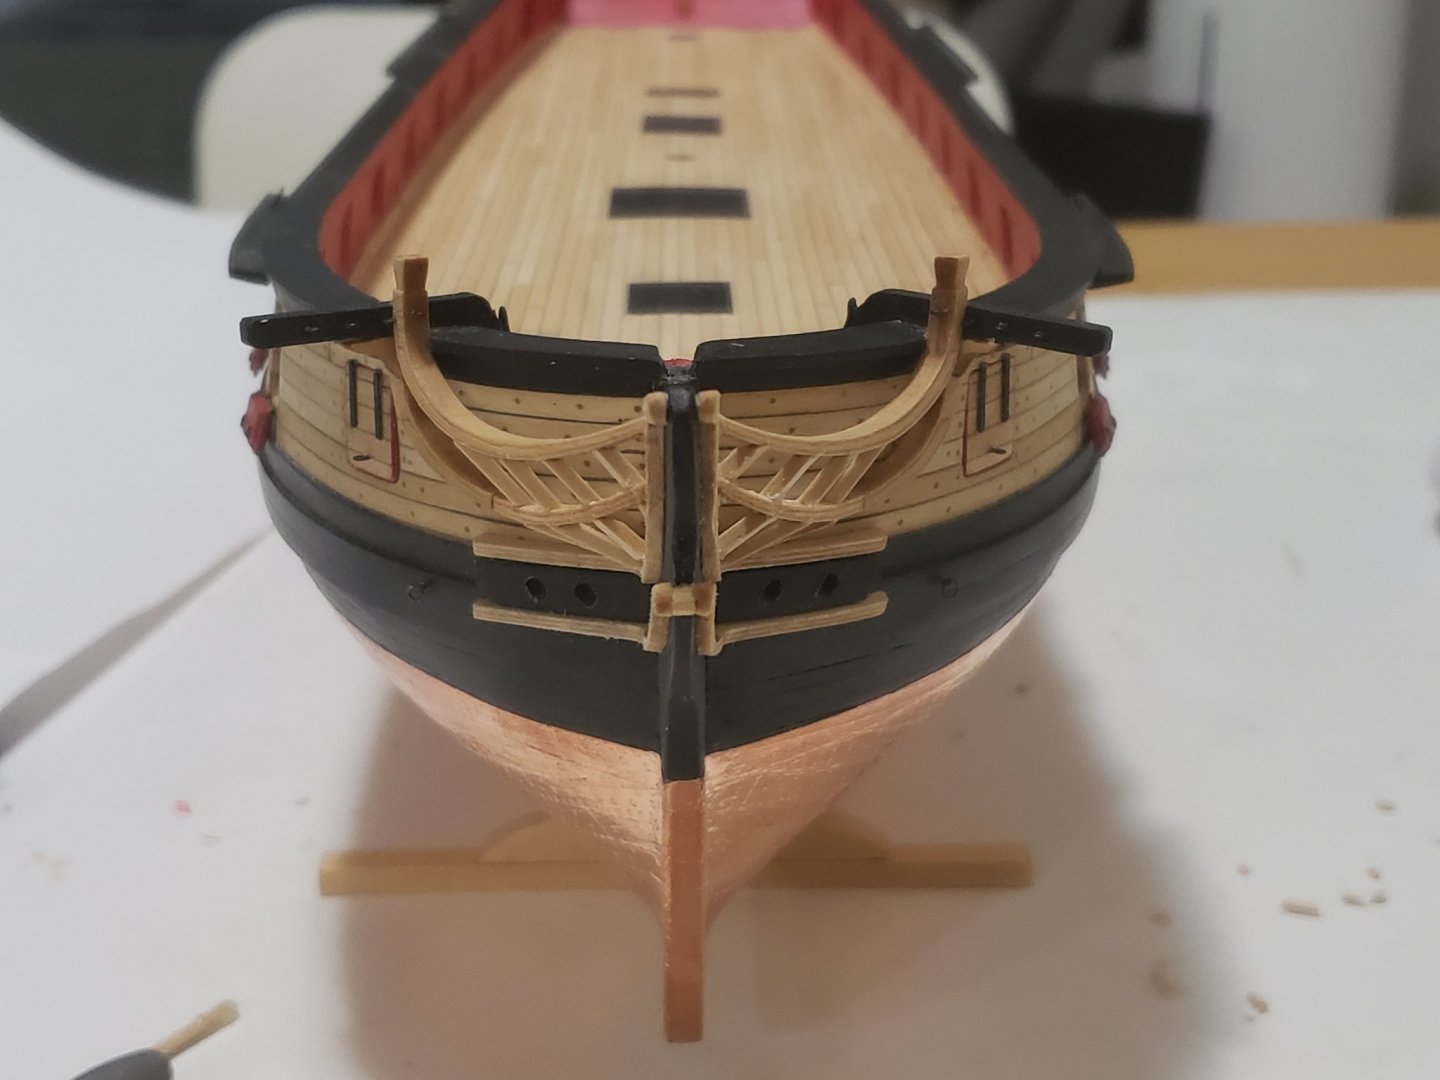
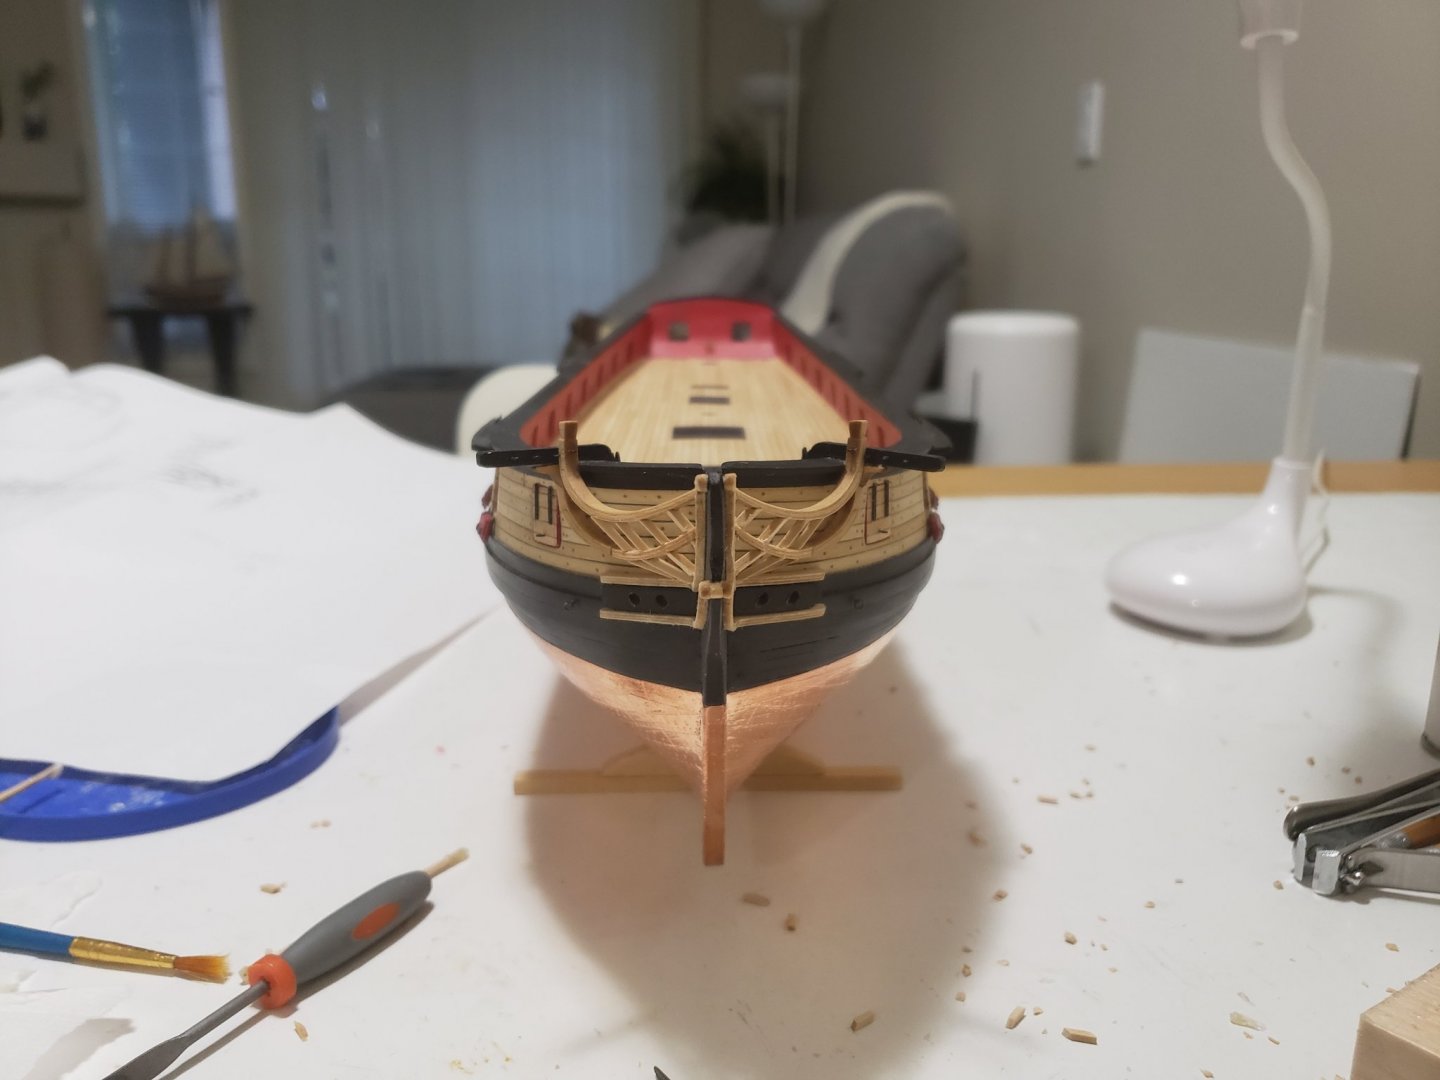
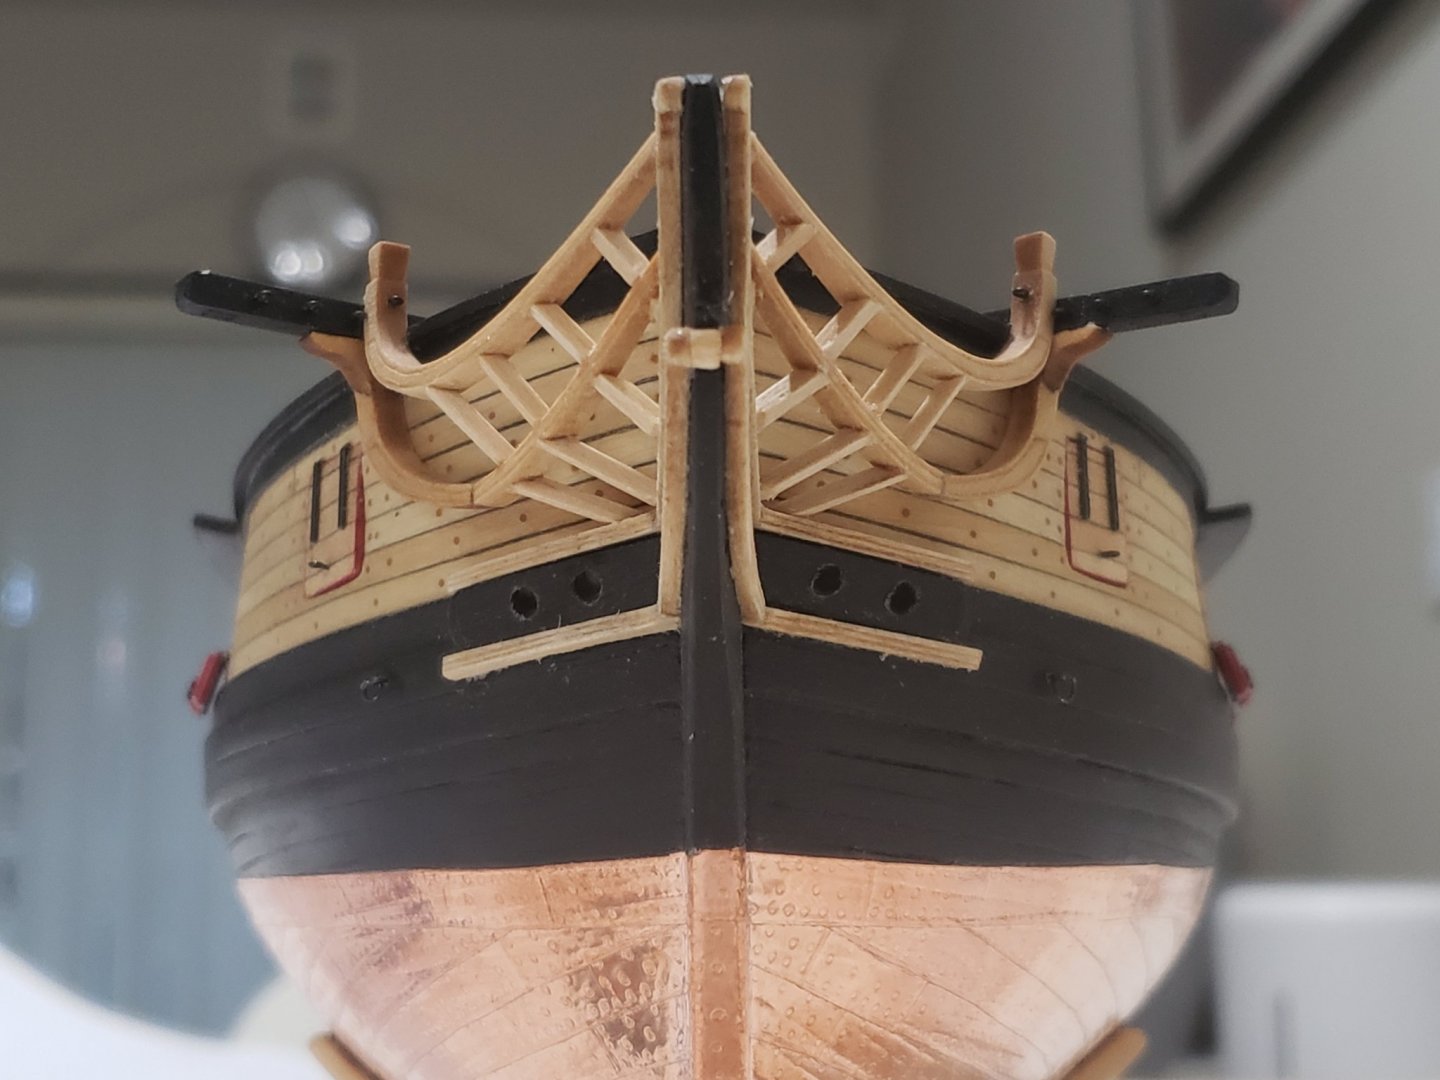
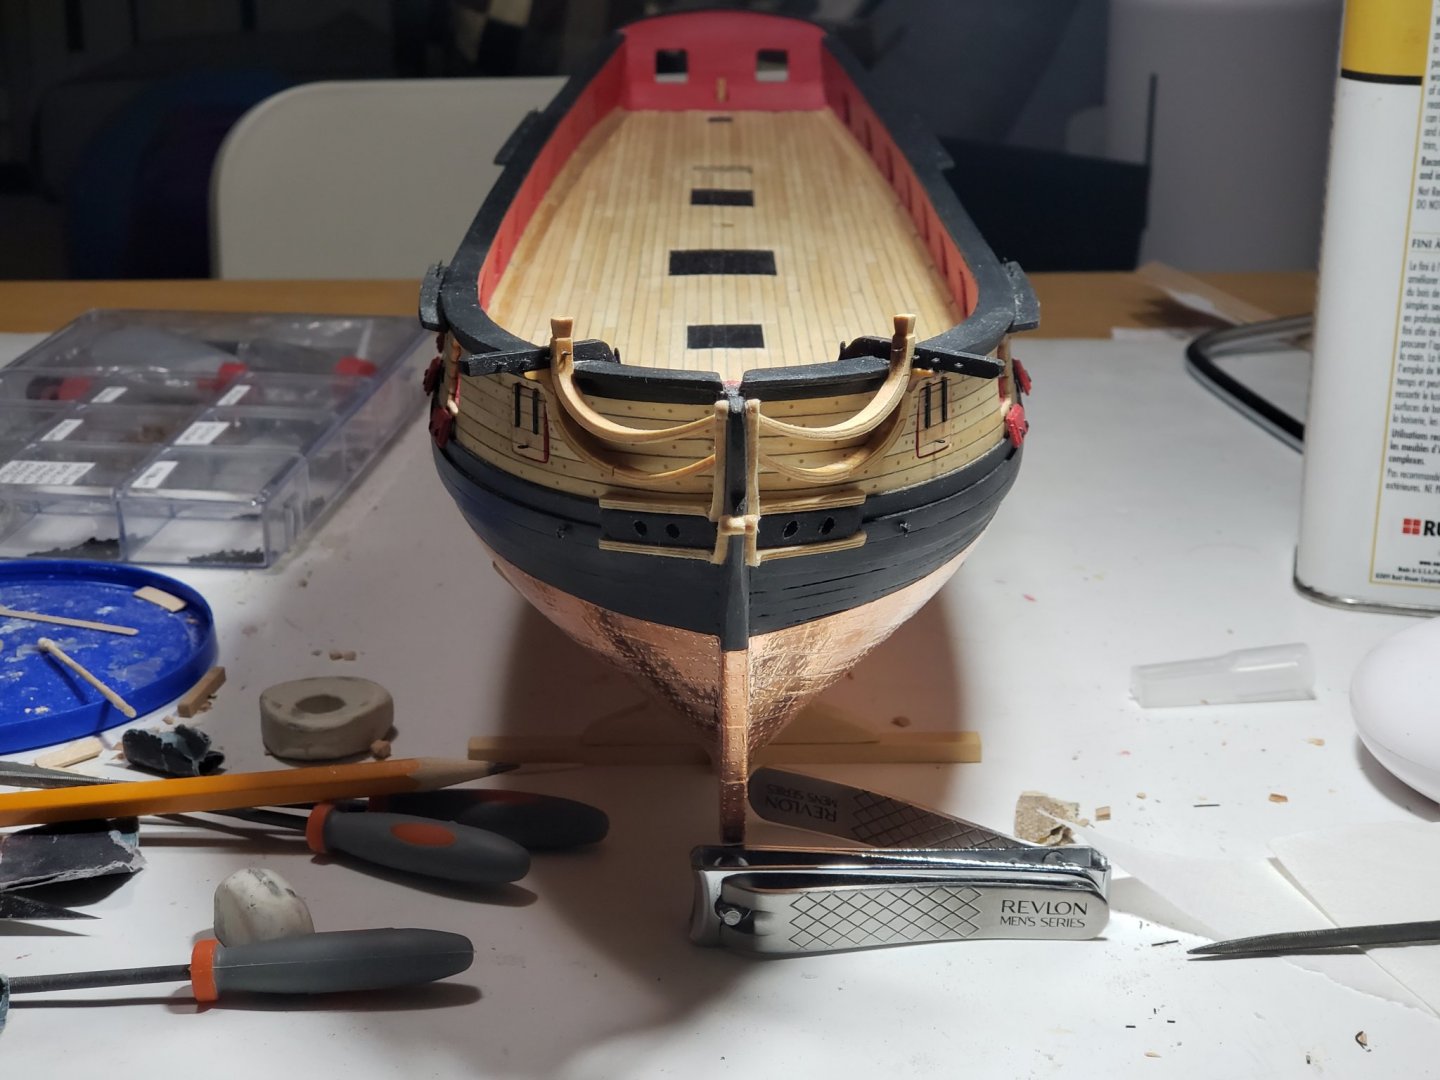
I have finally finished Chapter 10. Glad to have this done with 😁 For the top rail, the tricky part was getting the holes in the upper rail. I did not do too perfect of a job since I can see some of the stanchions are not completely parallel to each other... Another thing I'll have to live with I guess 😅 Another thing to note, my drillbit could not fit to make the hole for the bumpkin, so had to glue it without pegging it with a pin. Hope this remains a secure fit and does not come out when I do the rigging. Anyways.. Here area bunch of pics to mark this milestone of the build:


- 950 replies
-
- 17
-
-
- syren
- model shipways
- (and 1 more)
-
Thanks so much for the compliments Will, Thomas and Abelson! Having the pieces perpendicular to the keel added to another layer of complexity 😅
-
Mine was about 2mm, but I don't think the depth matters as much as all the nails being in the same level. Try to file the nails so its flat instead of pointed. I just used a pair of sharp scissors, although that was not a very accurate way of doing this
-
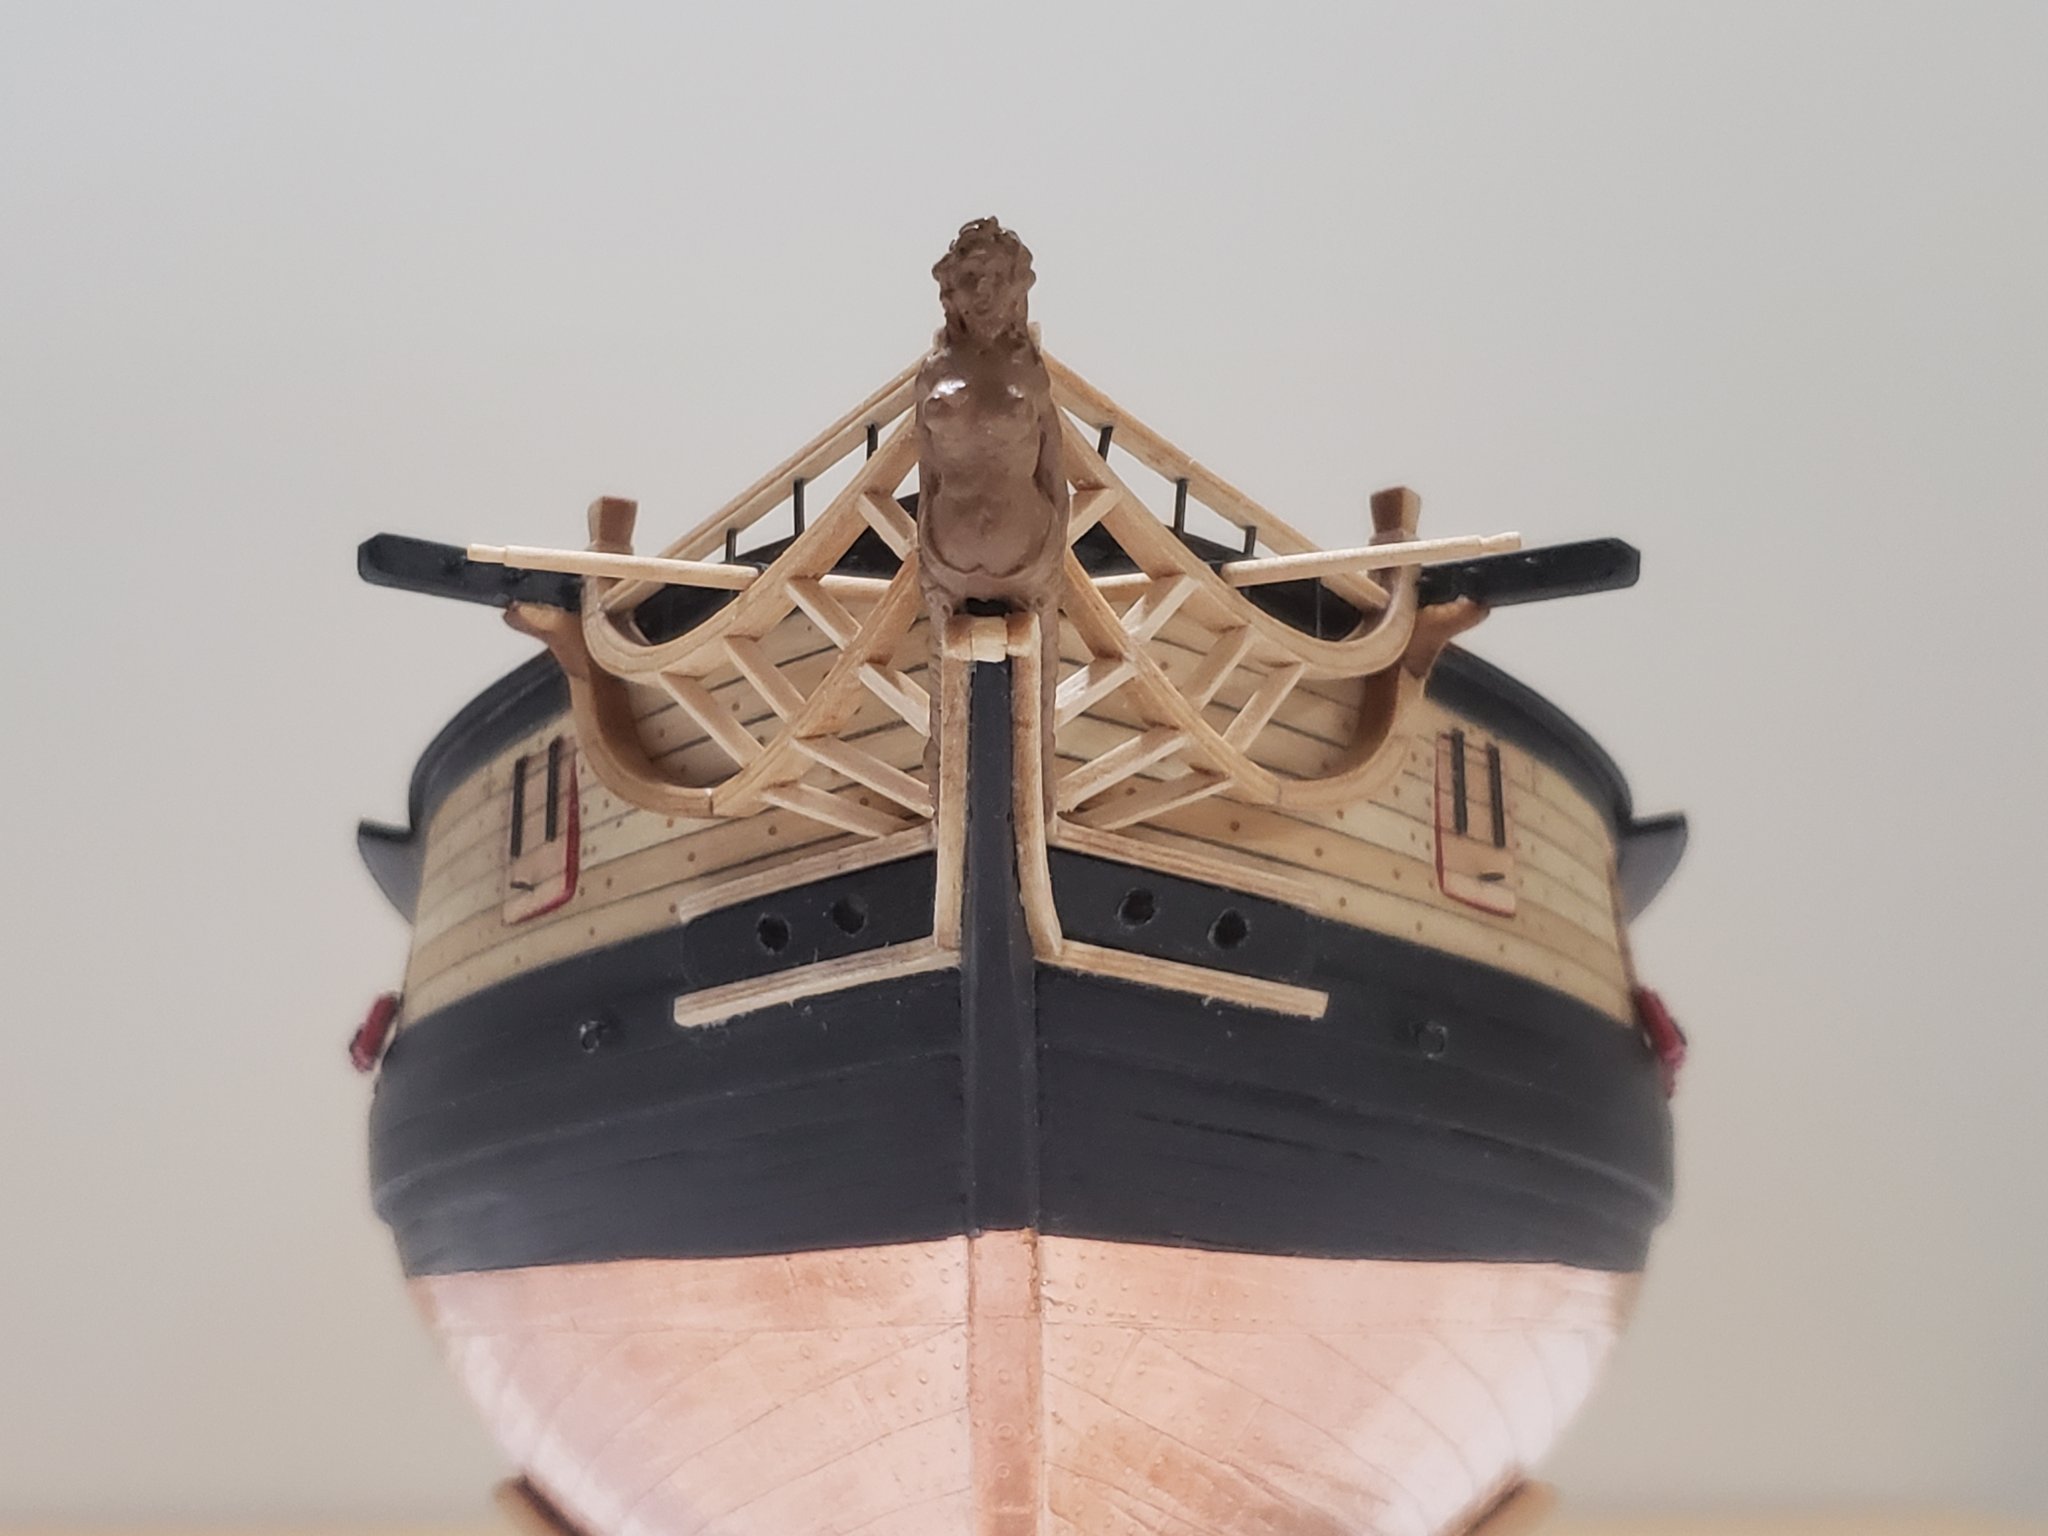
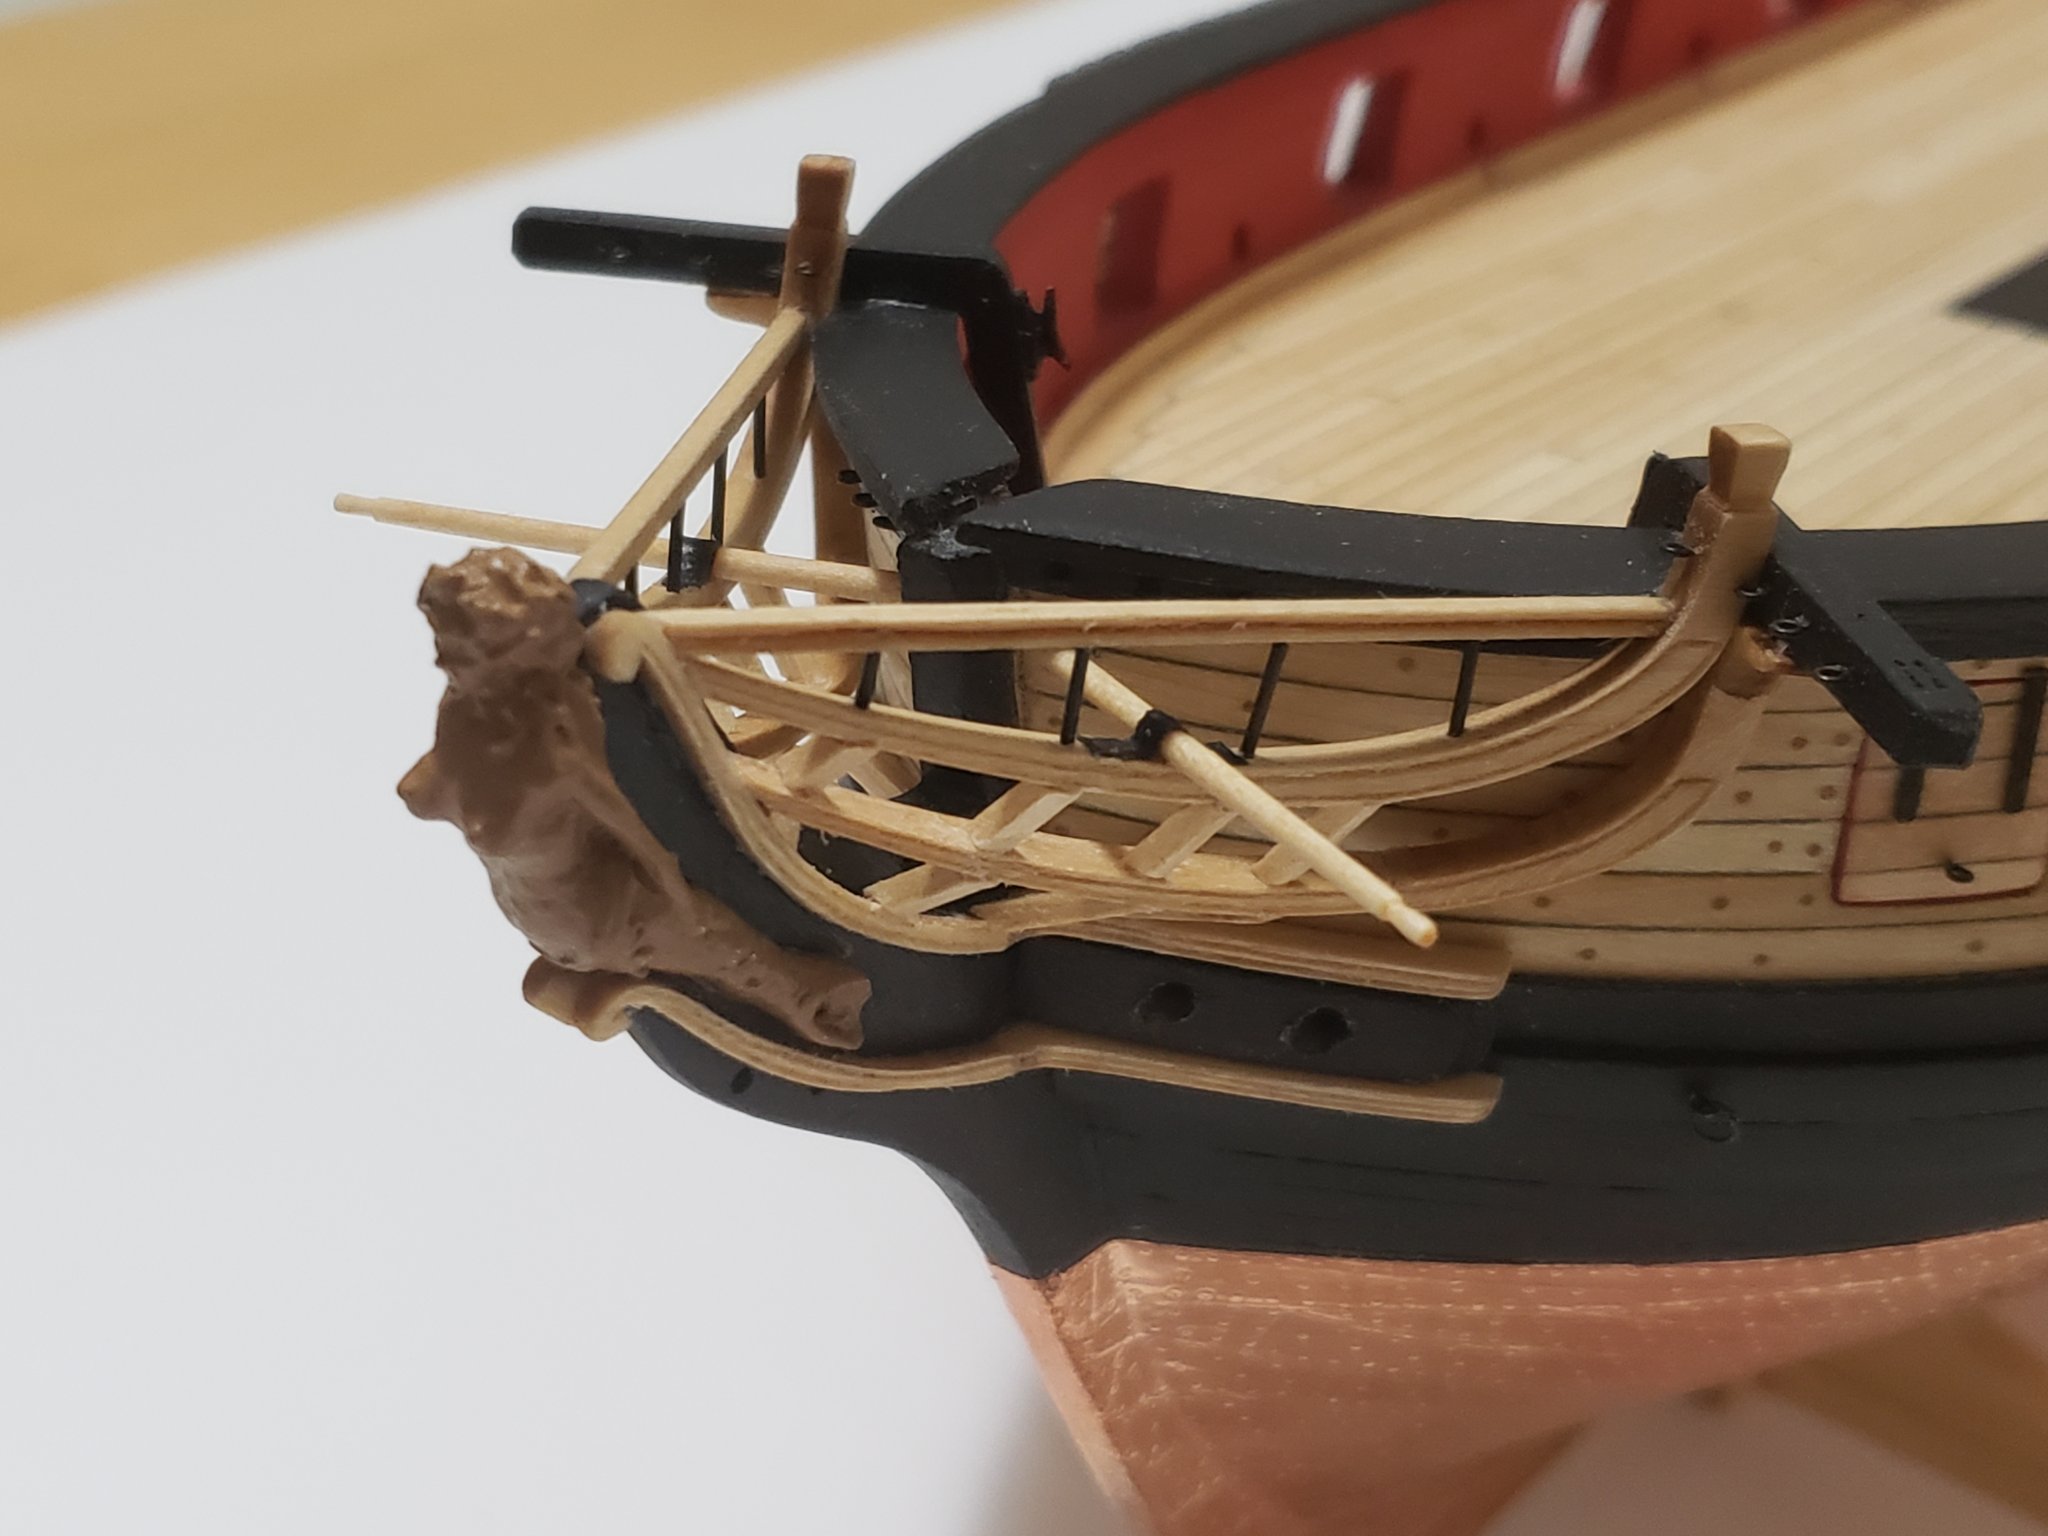
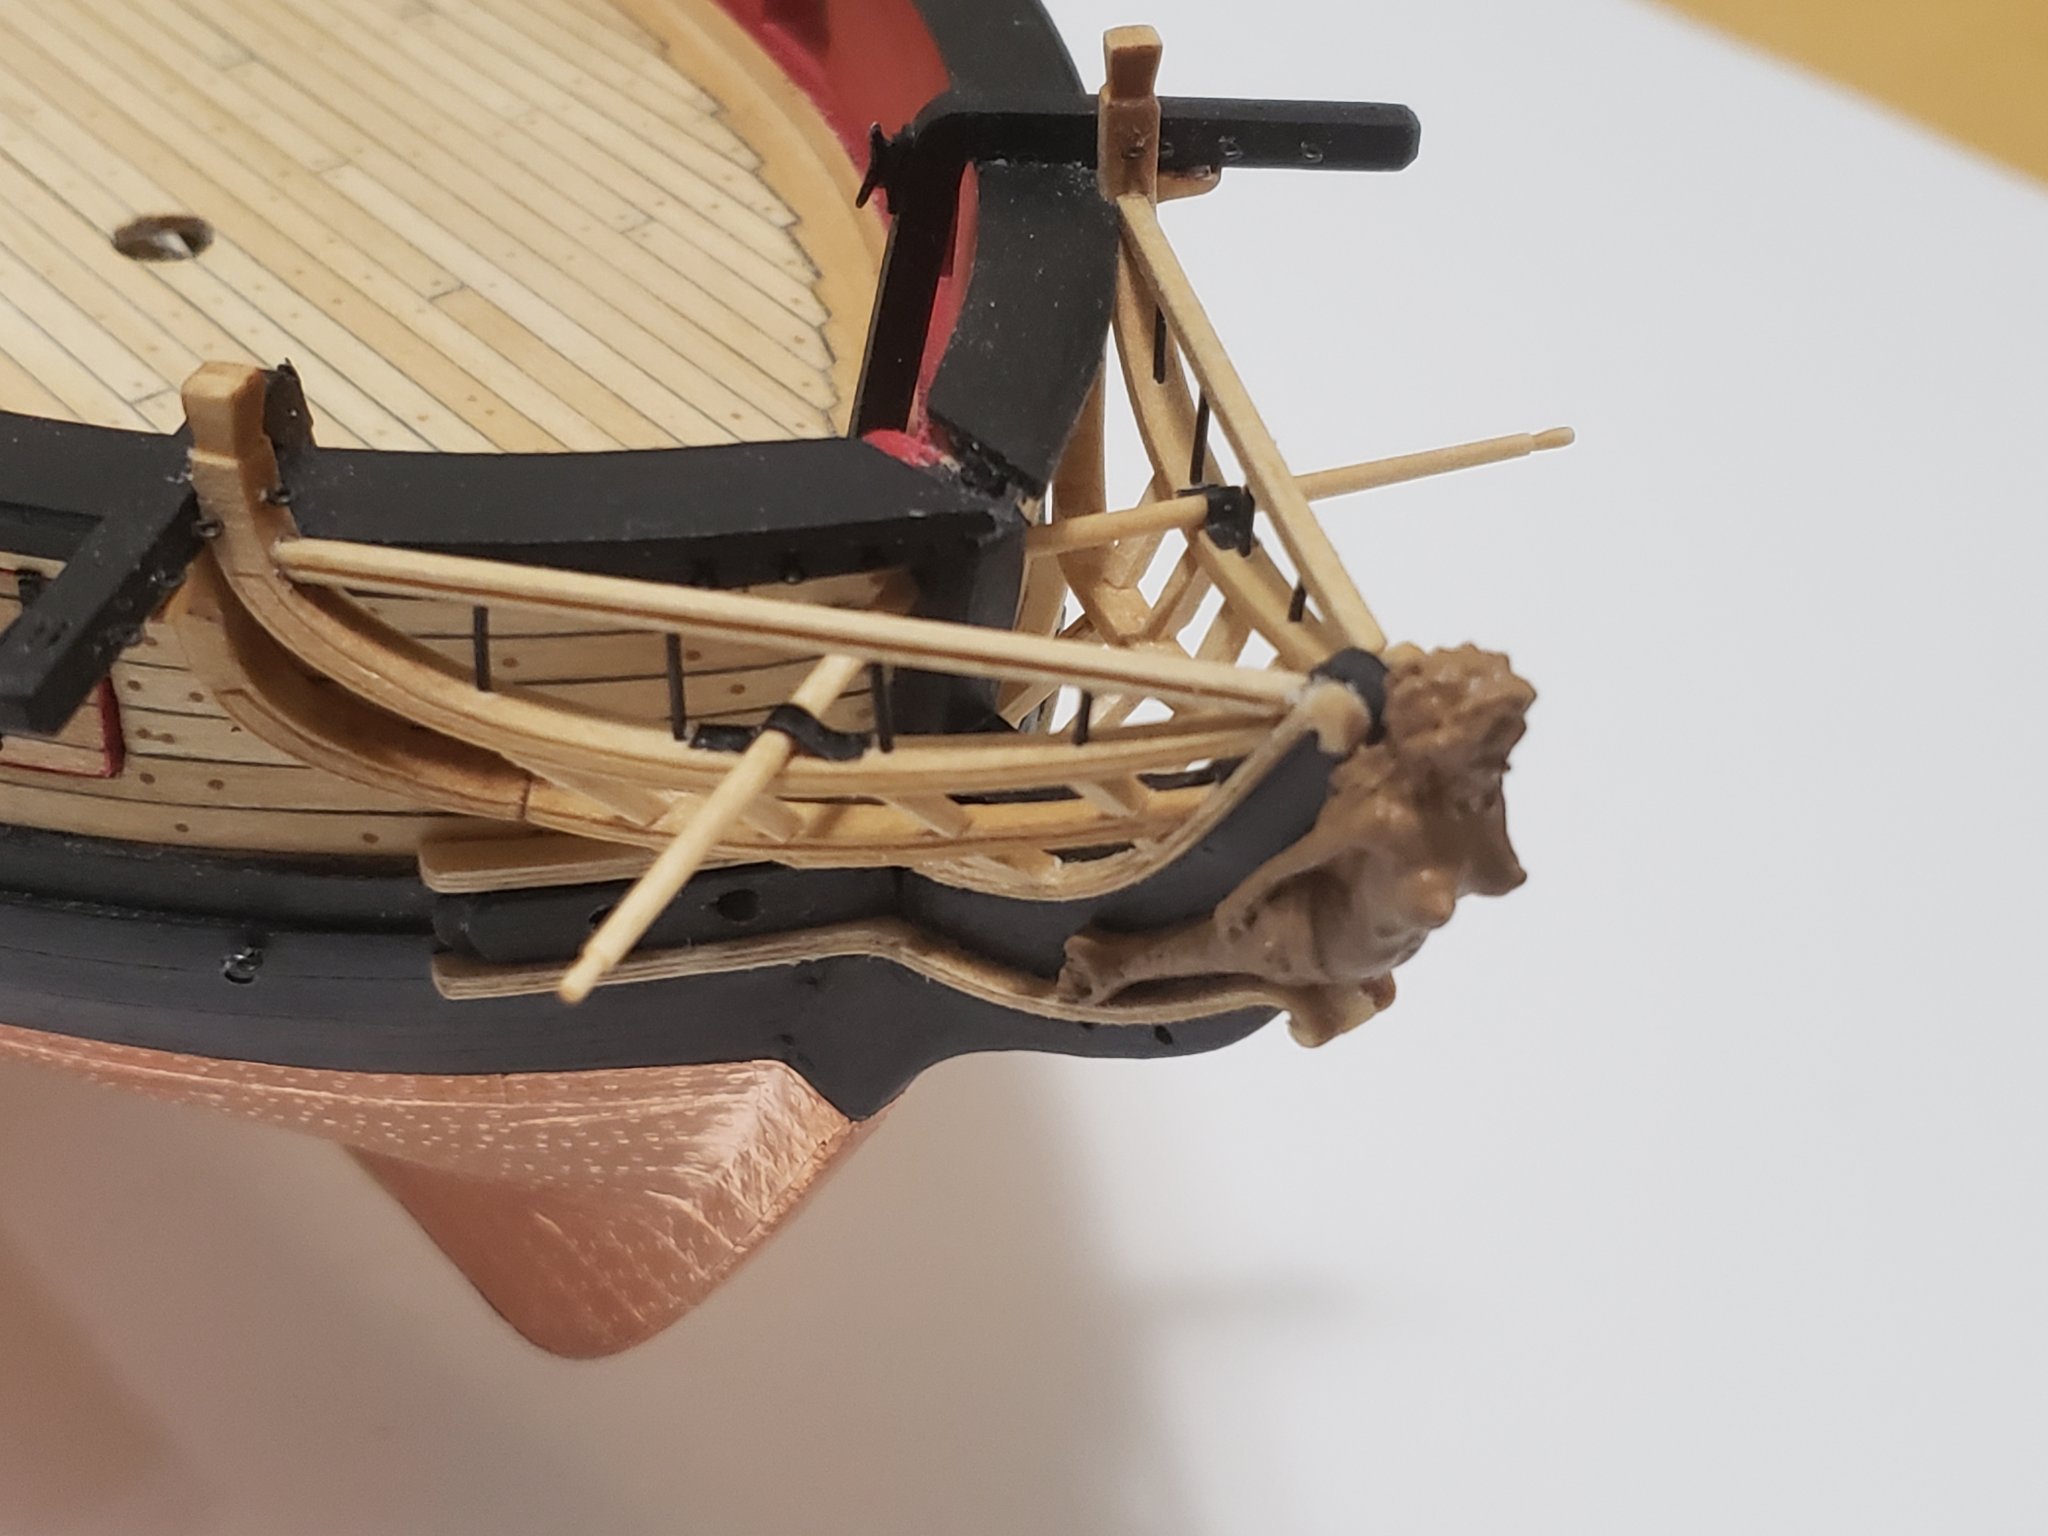
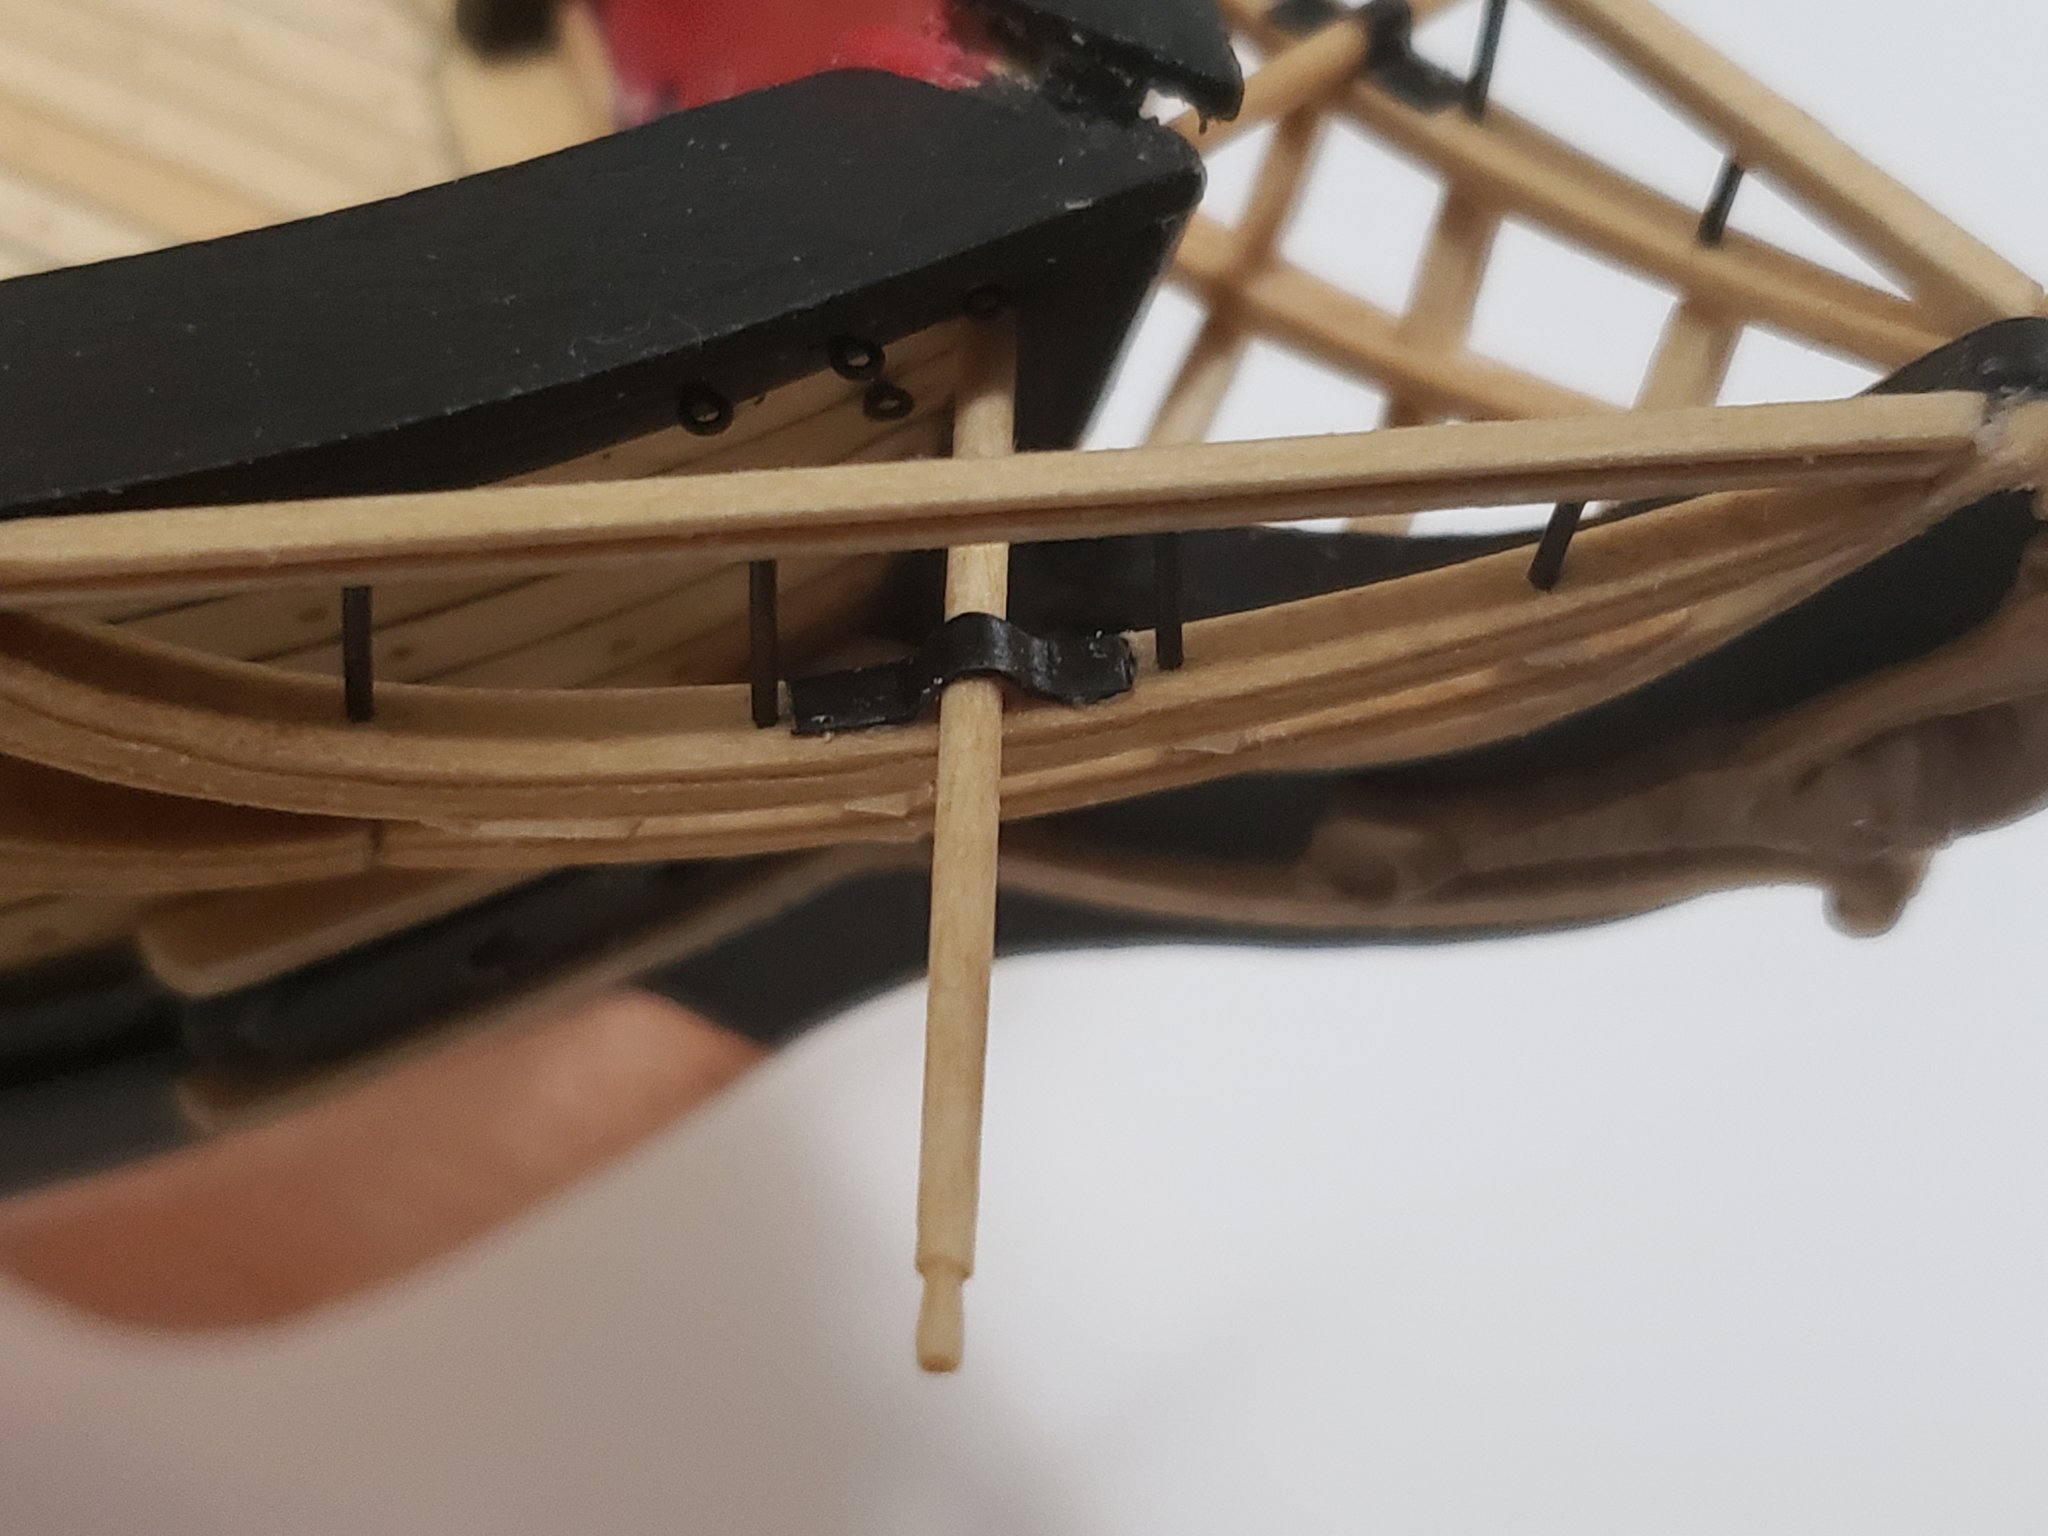
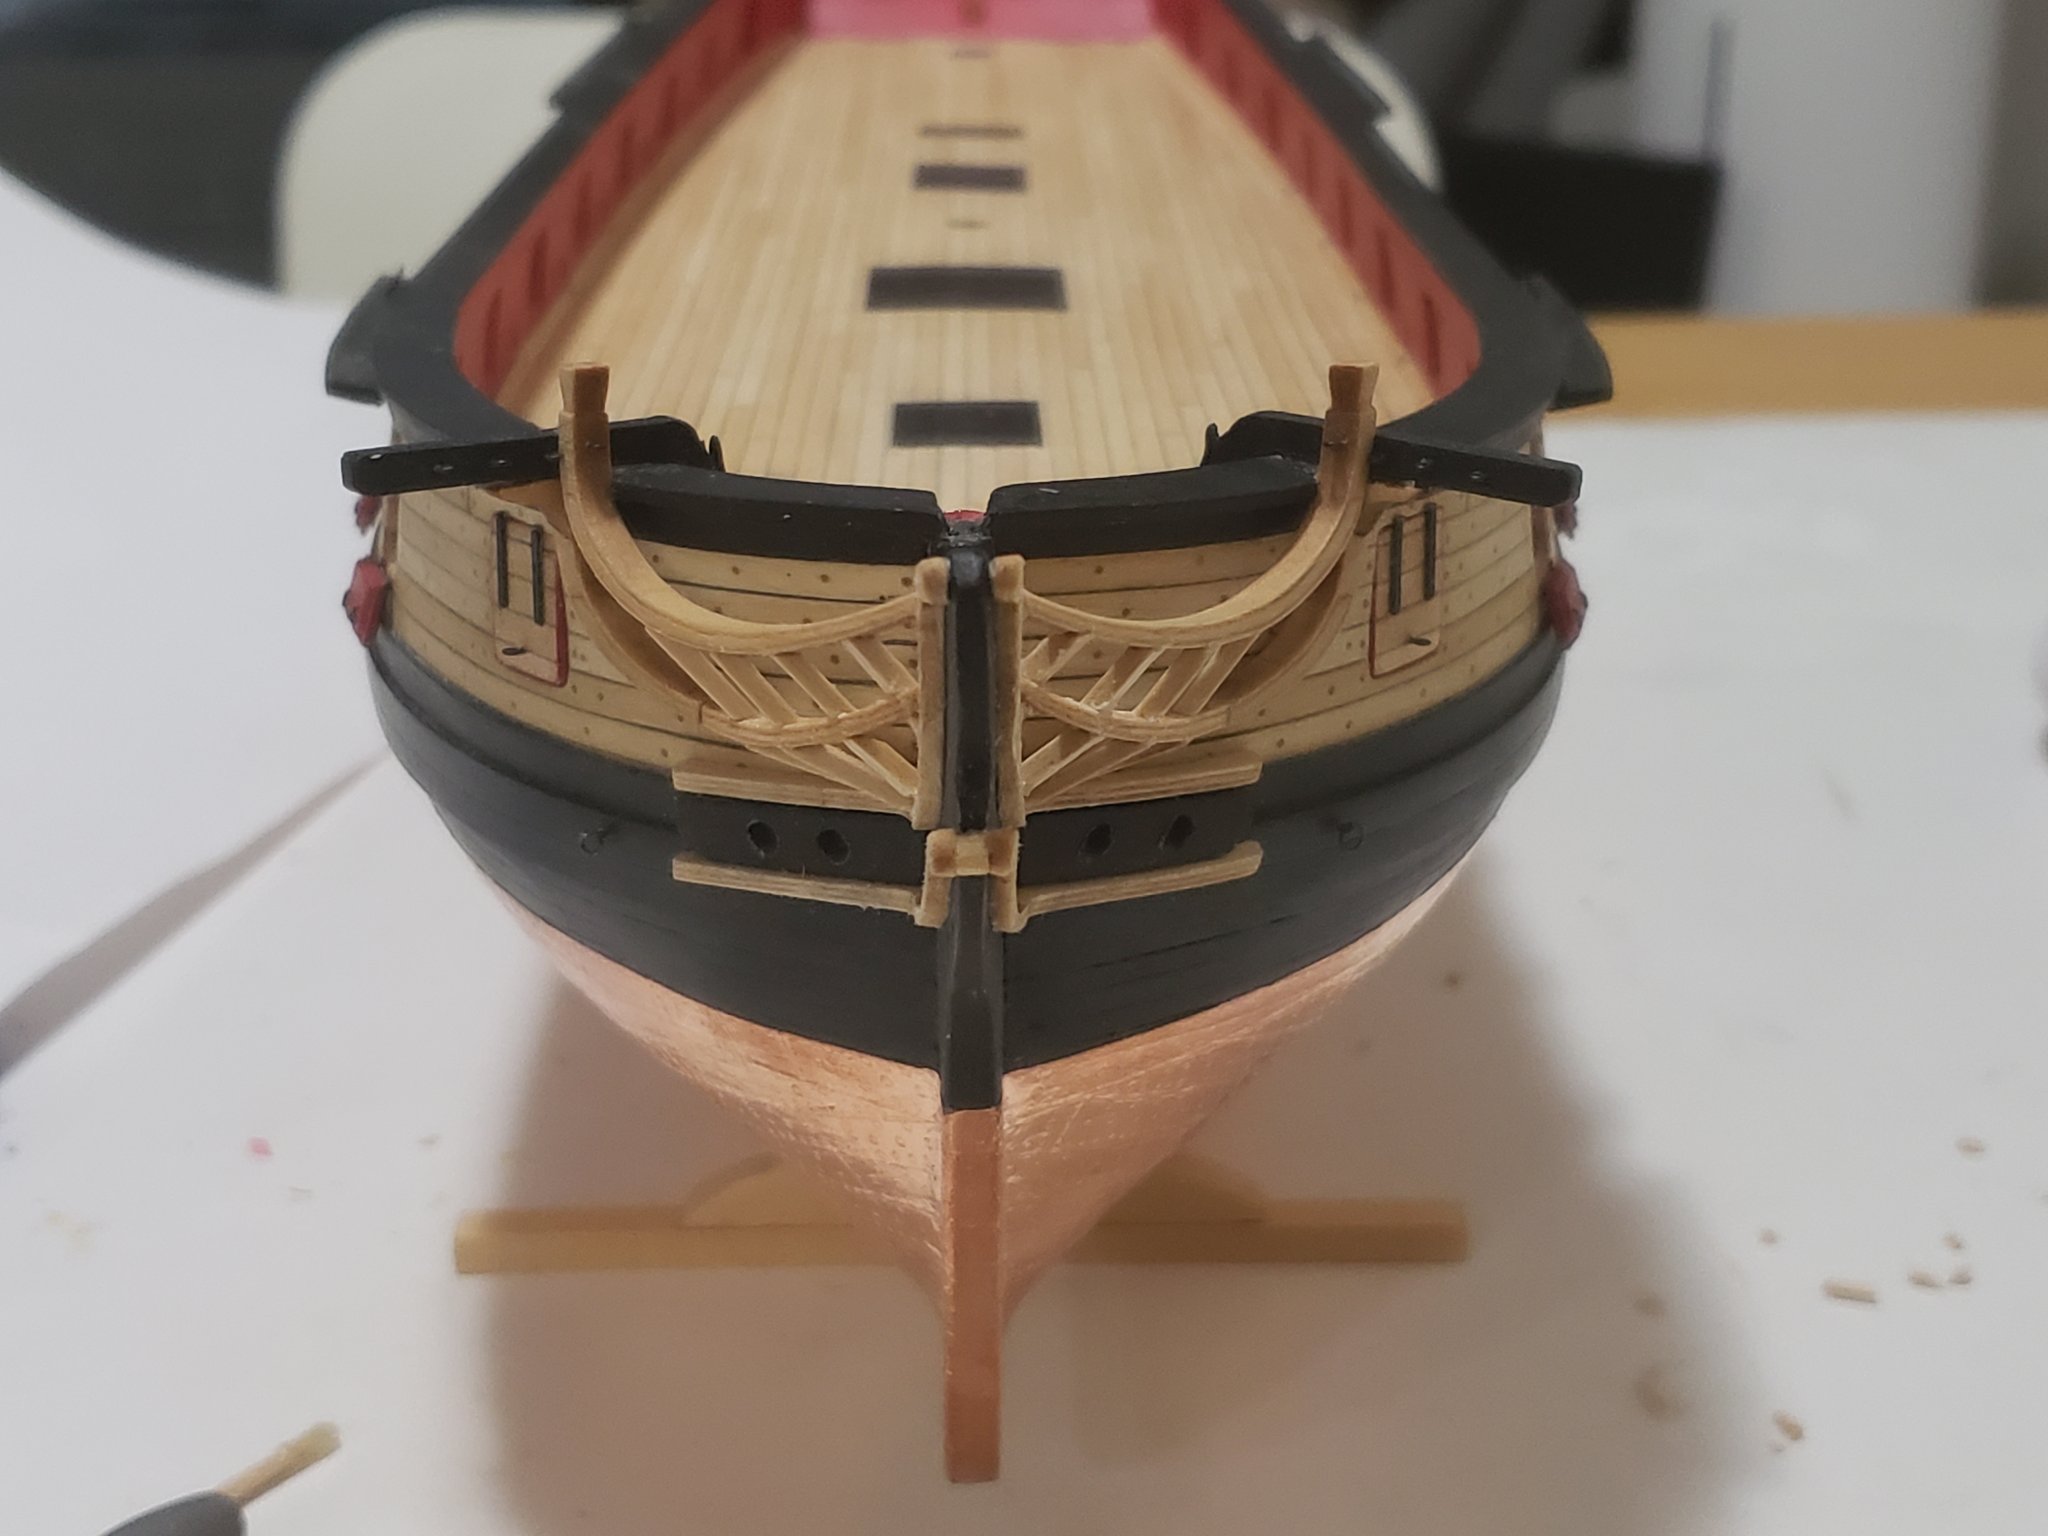
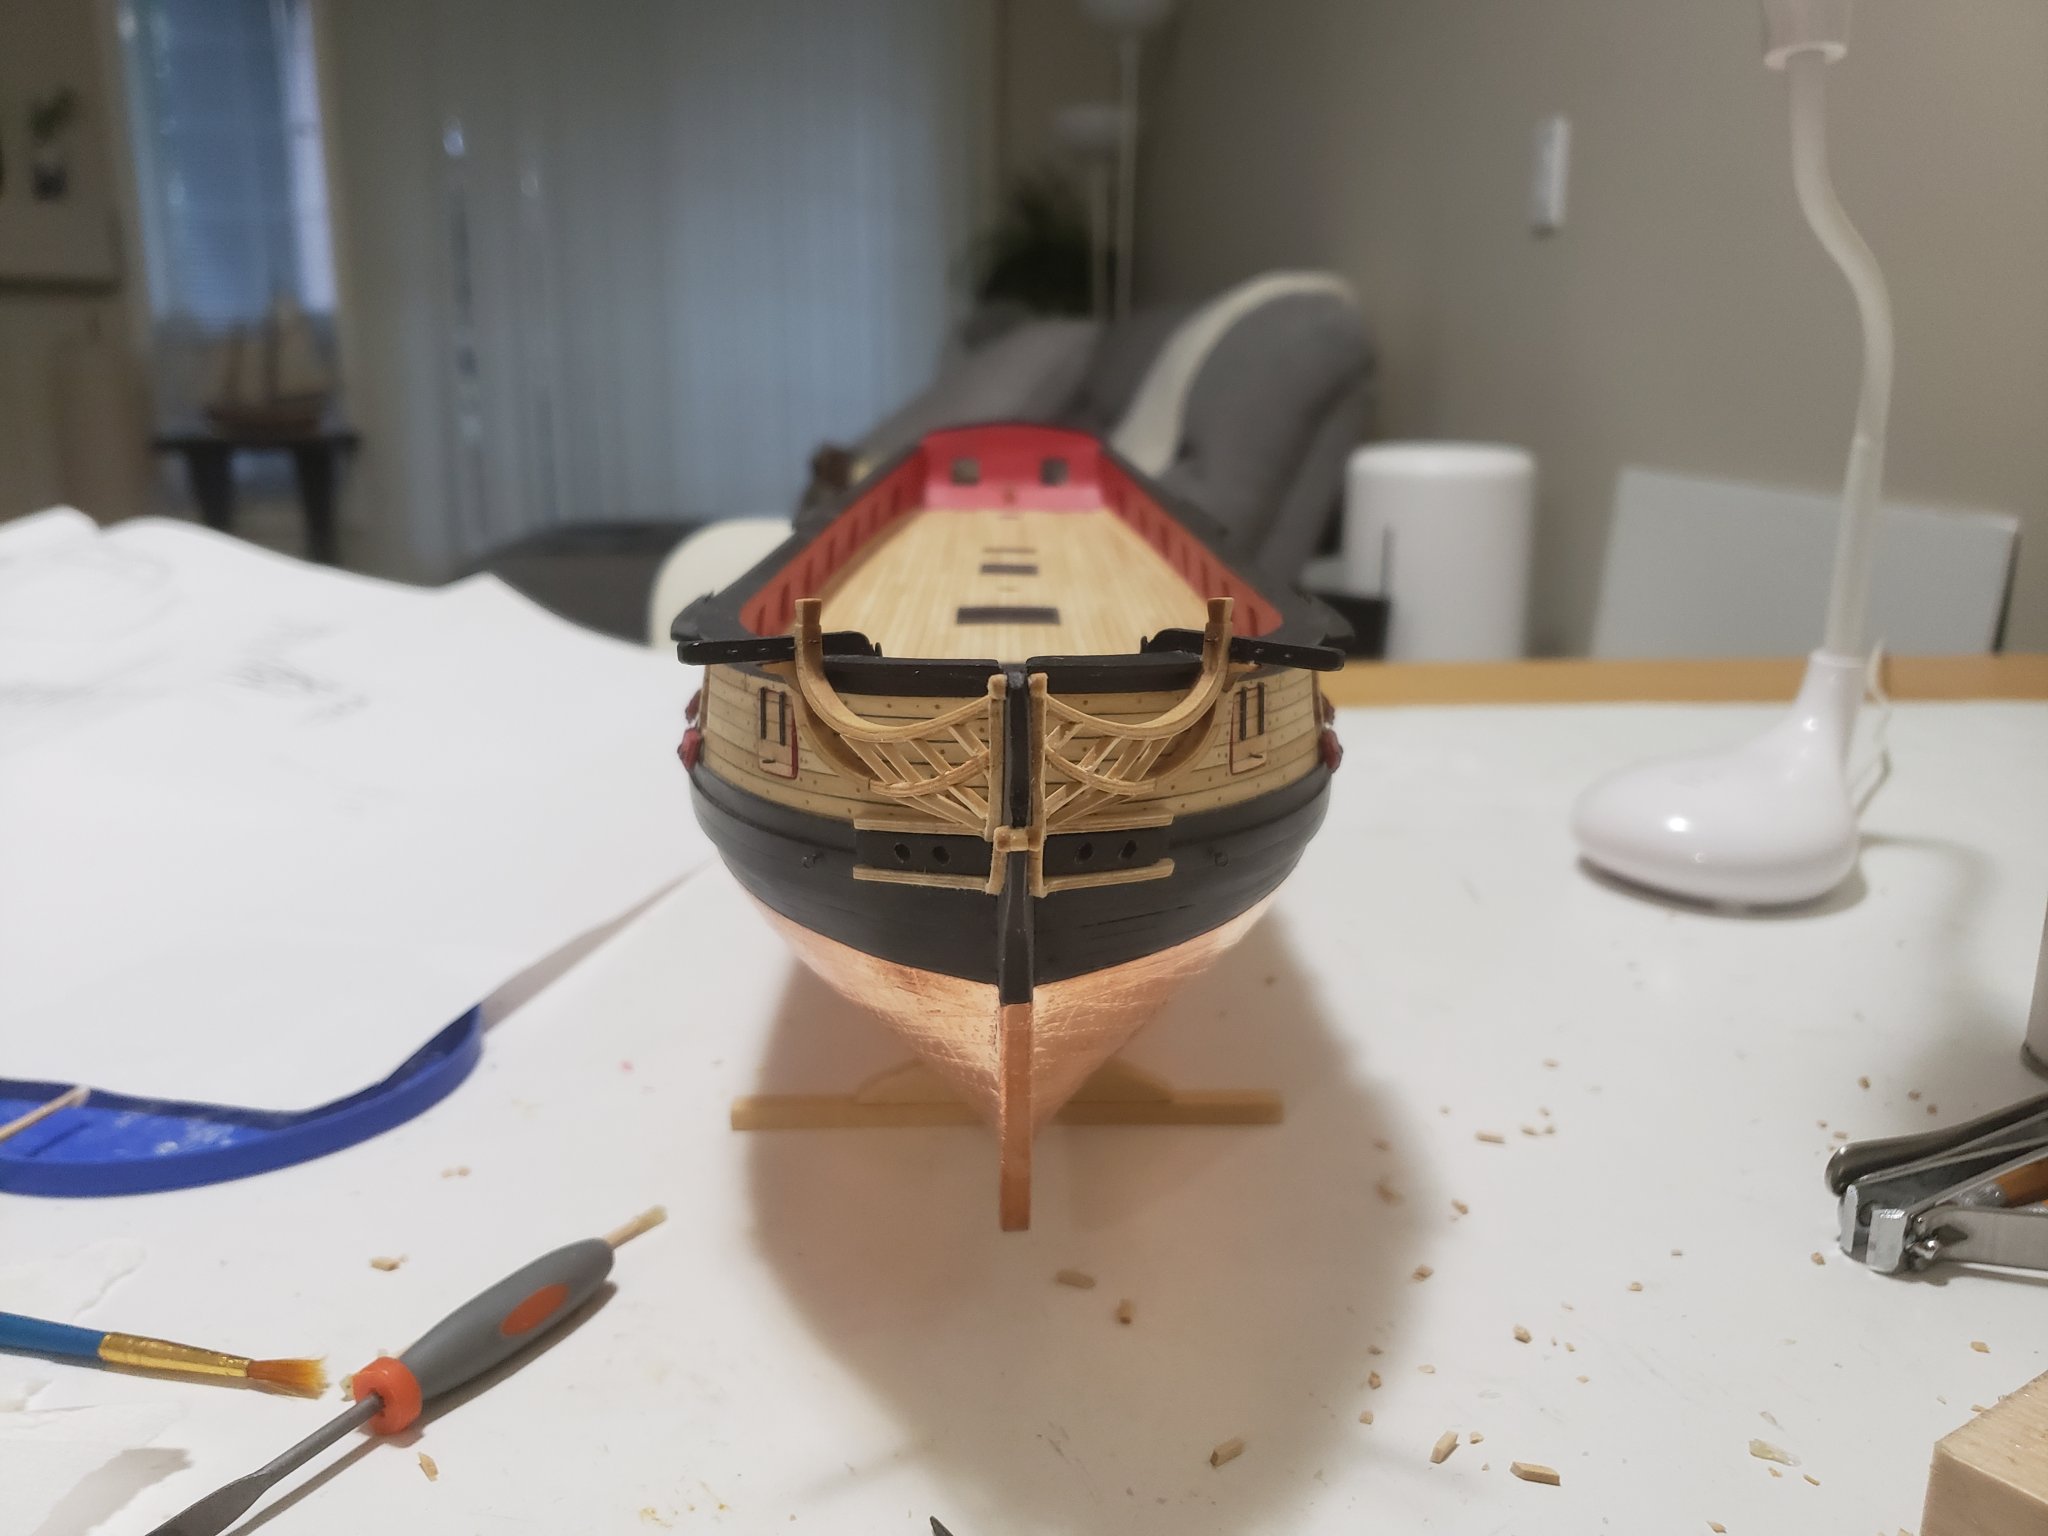
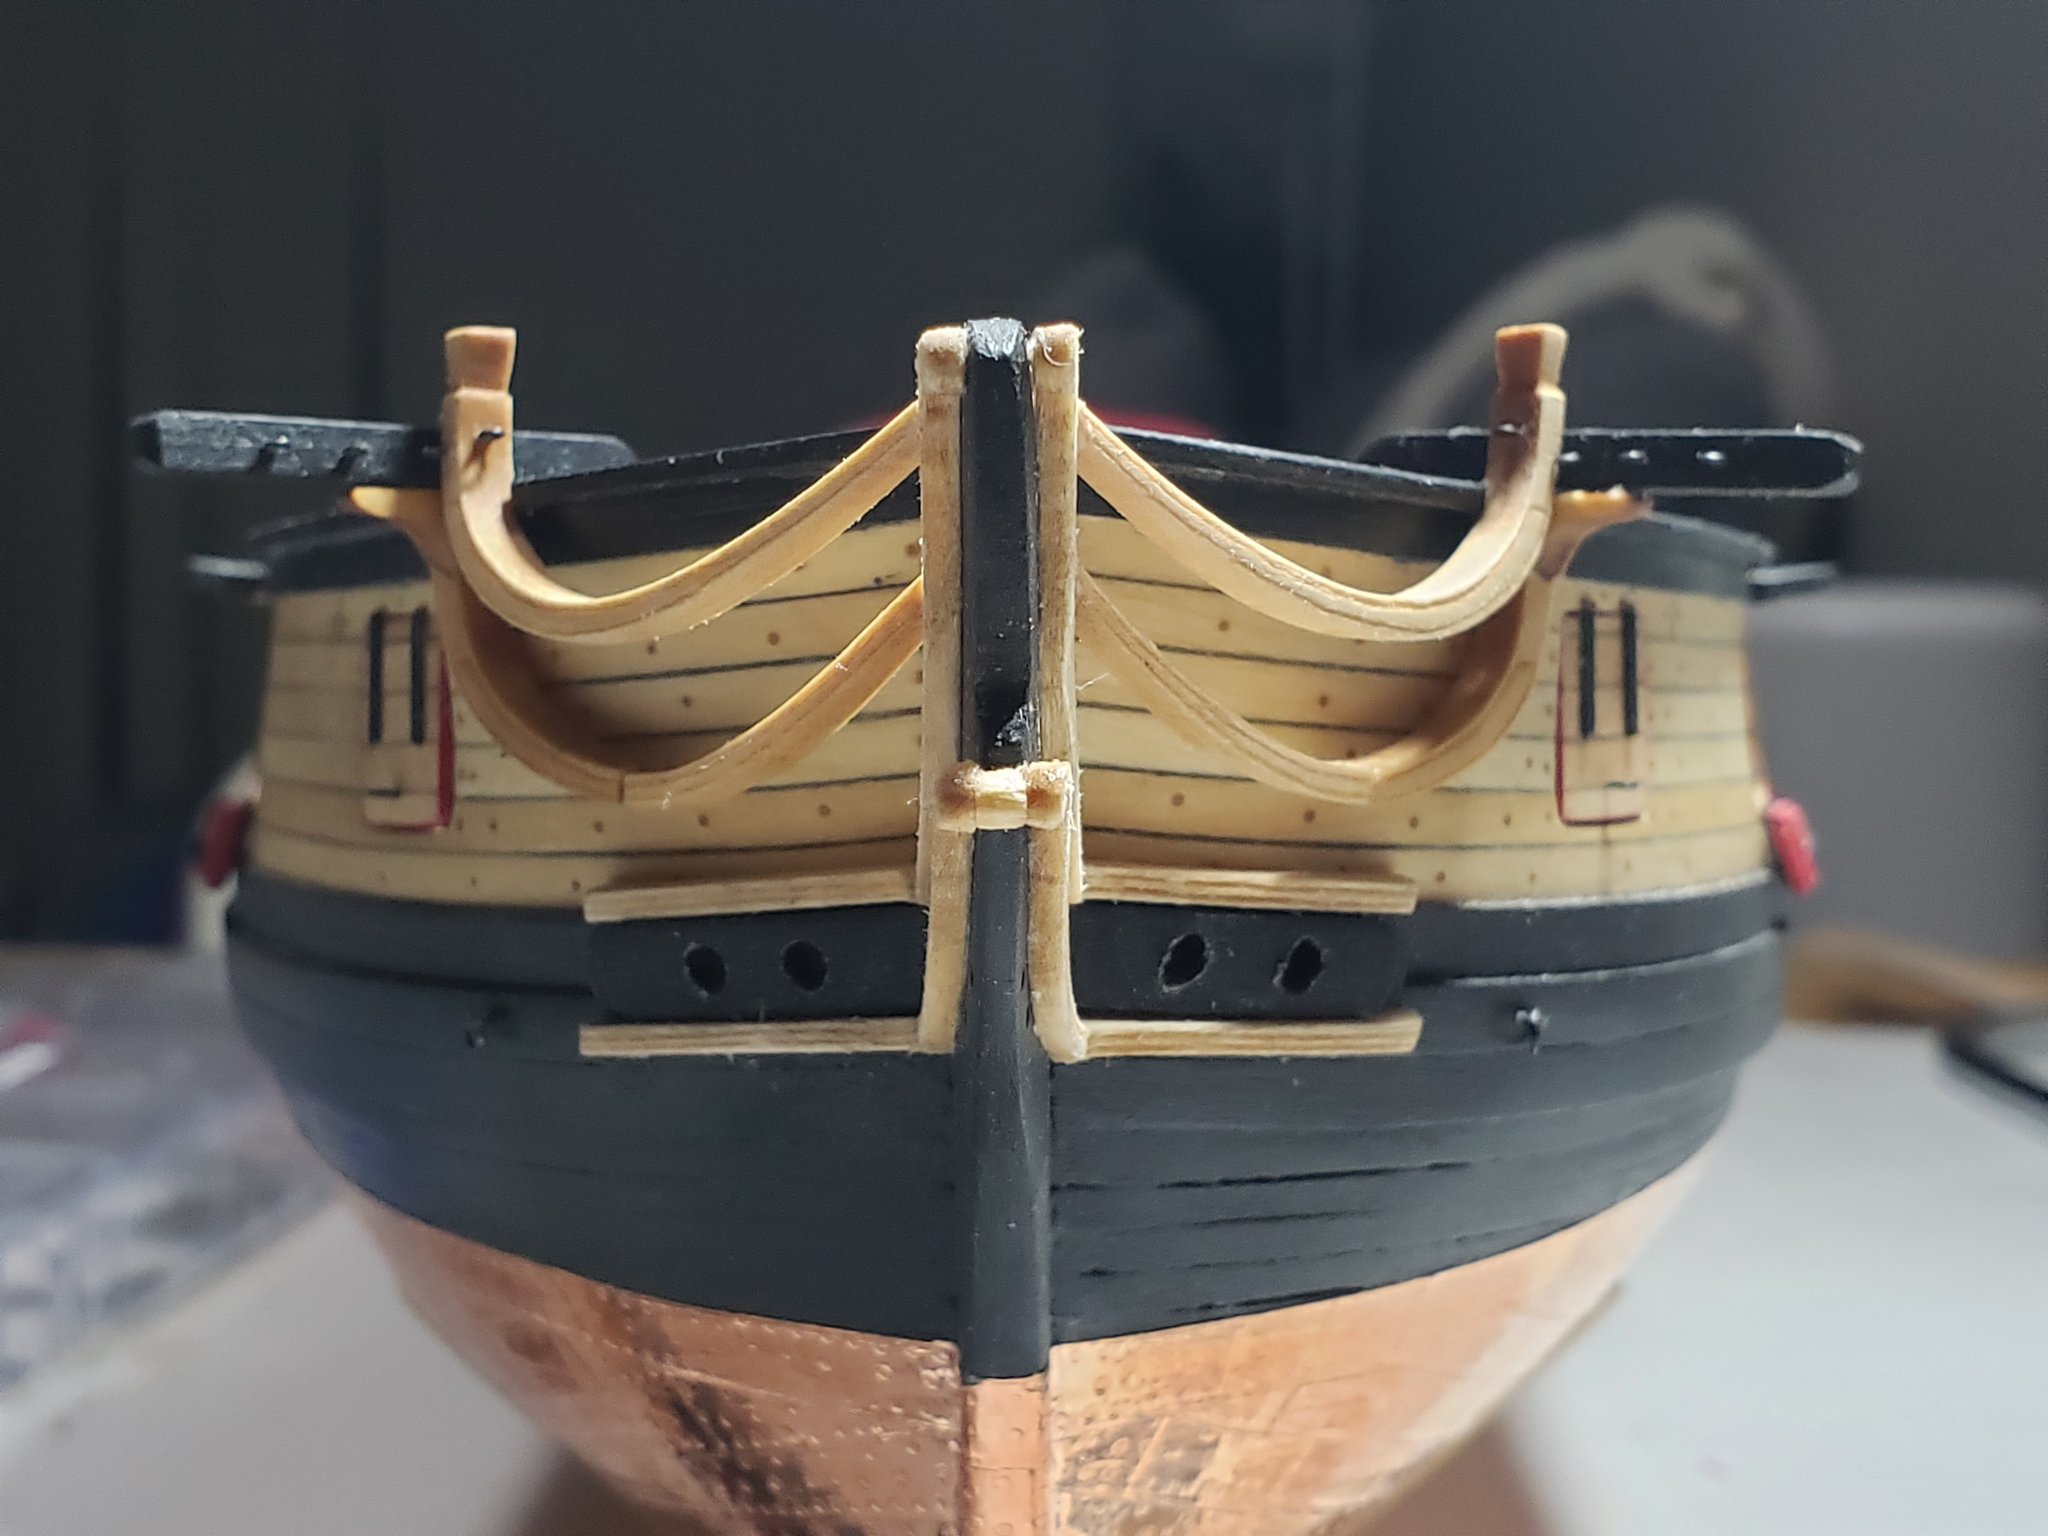
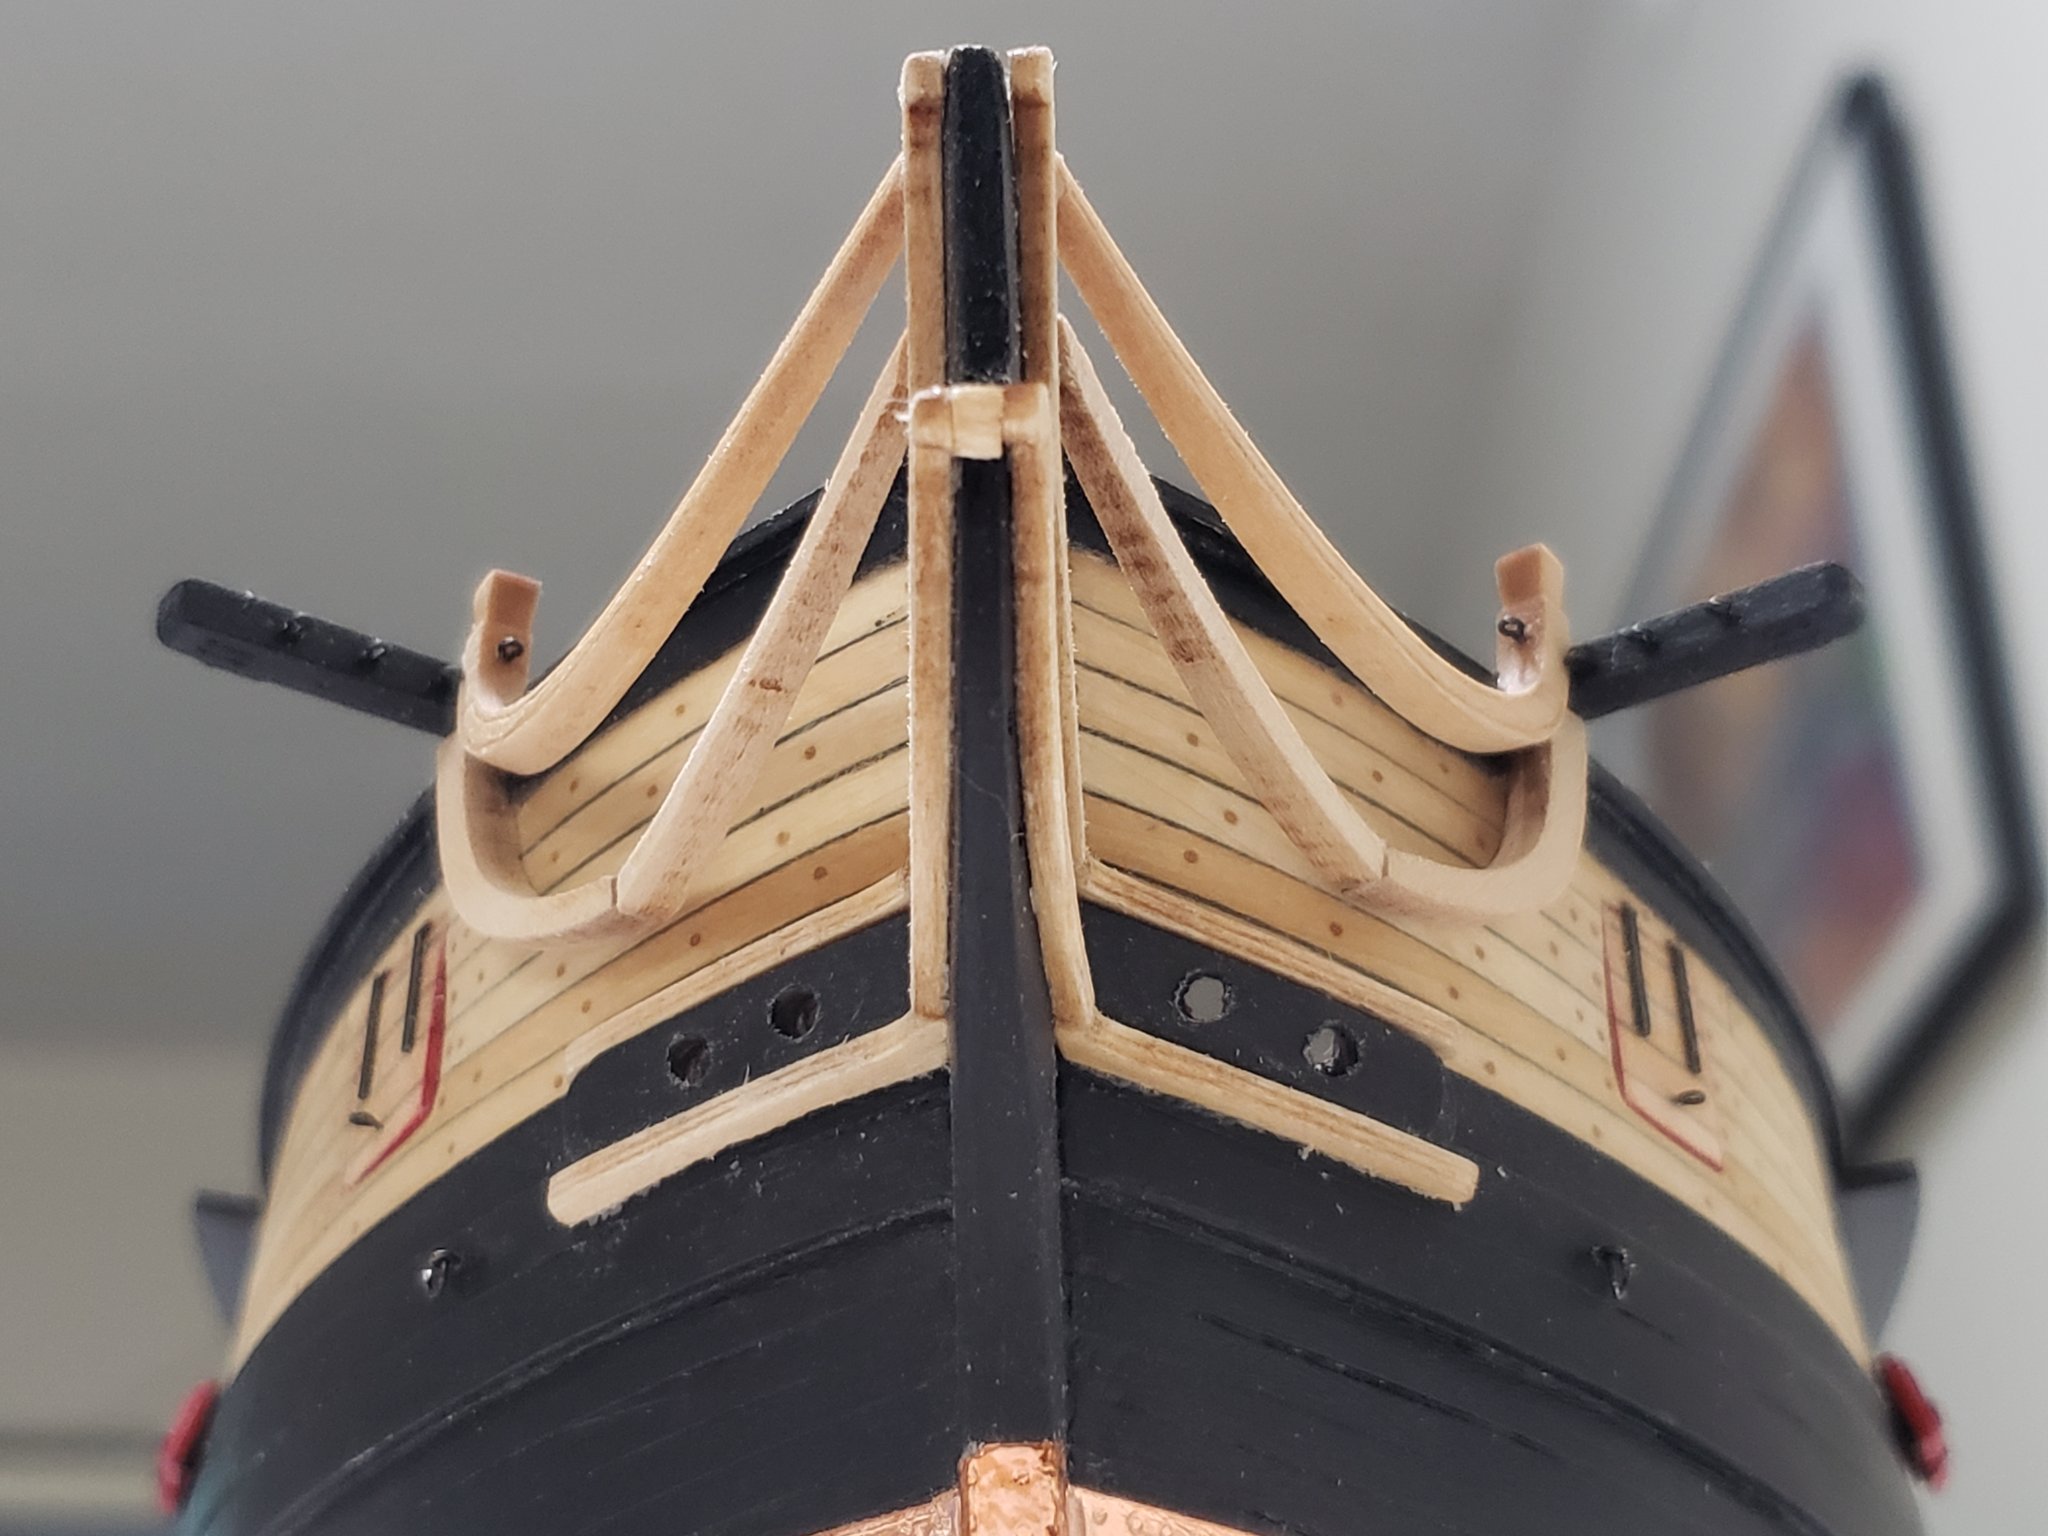
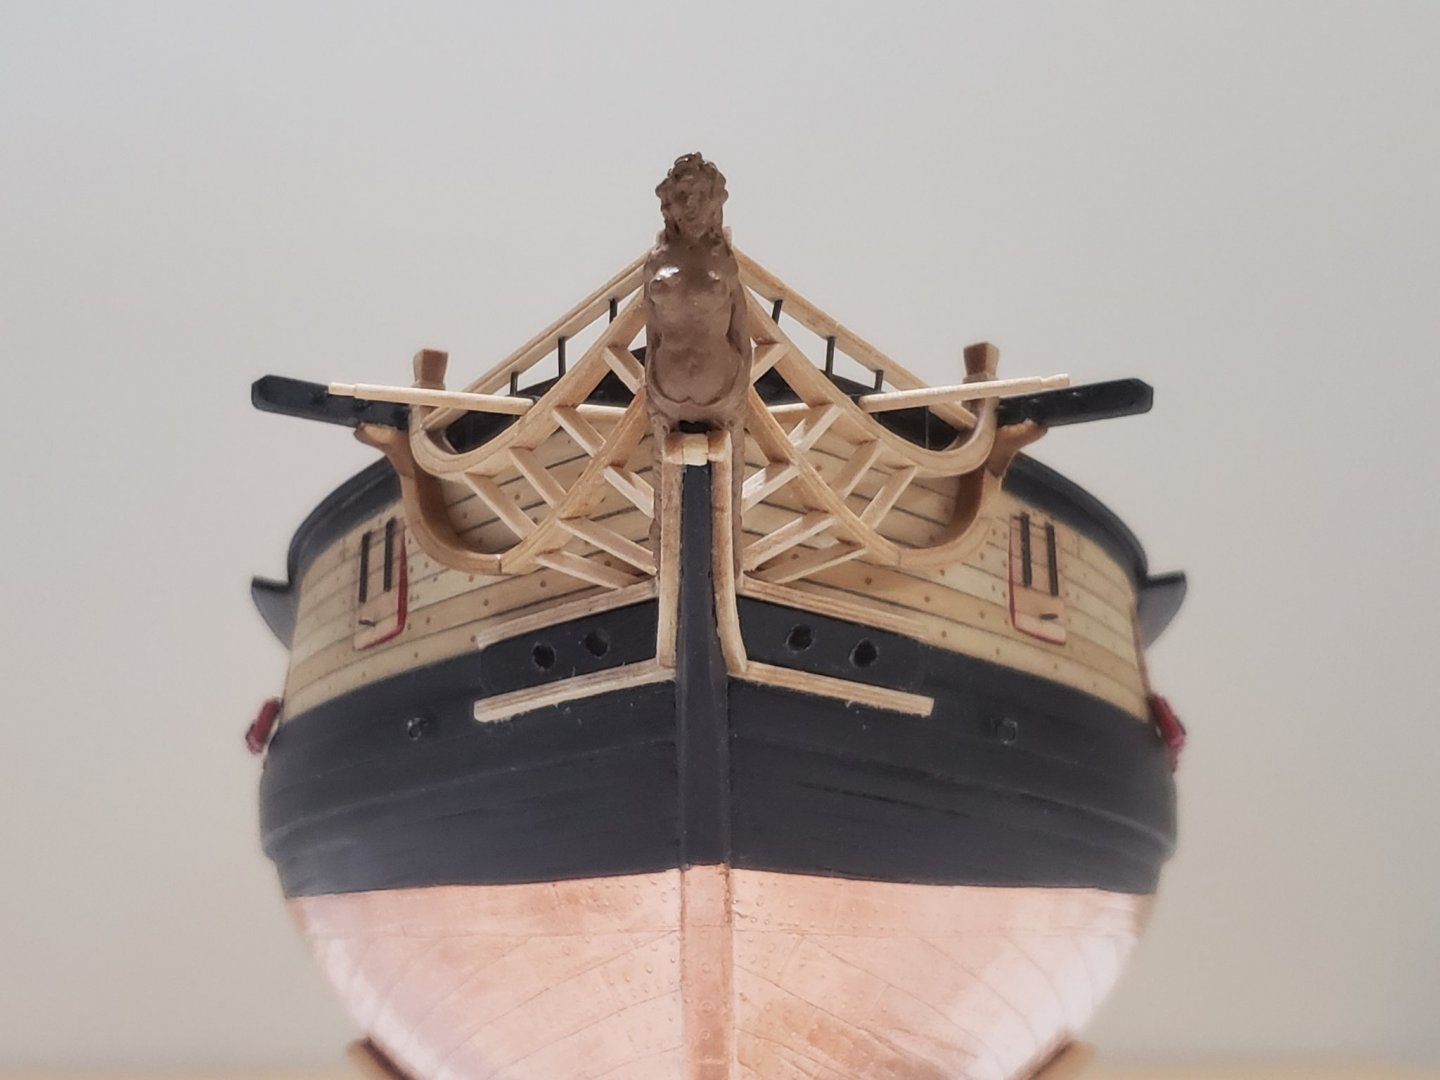
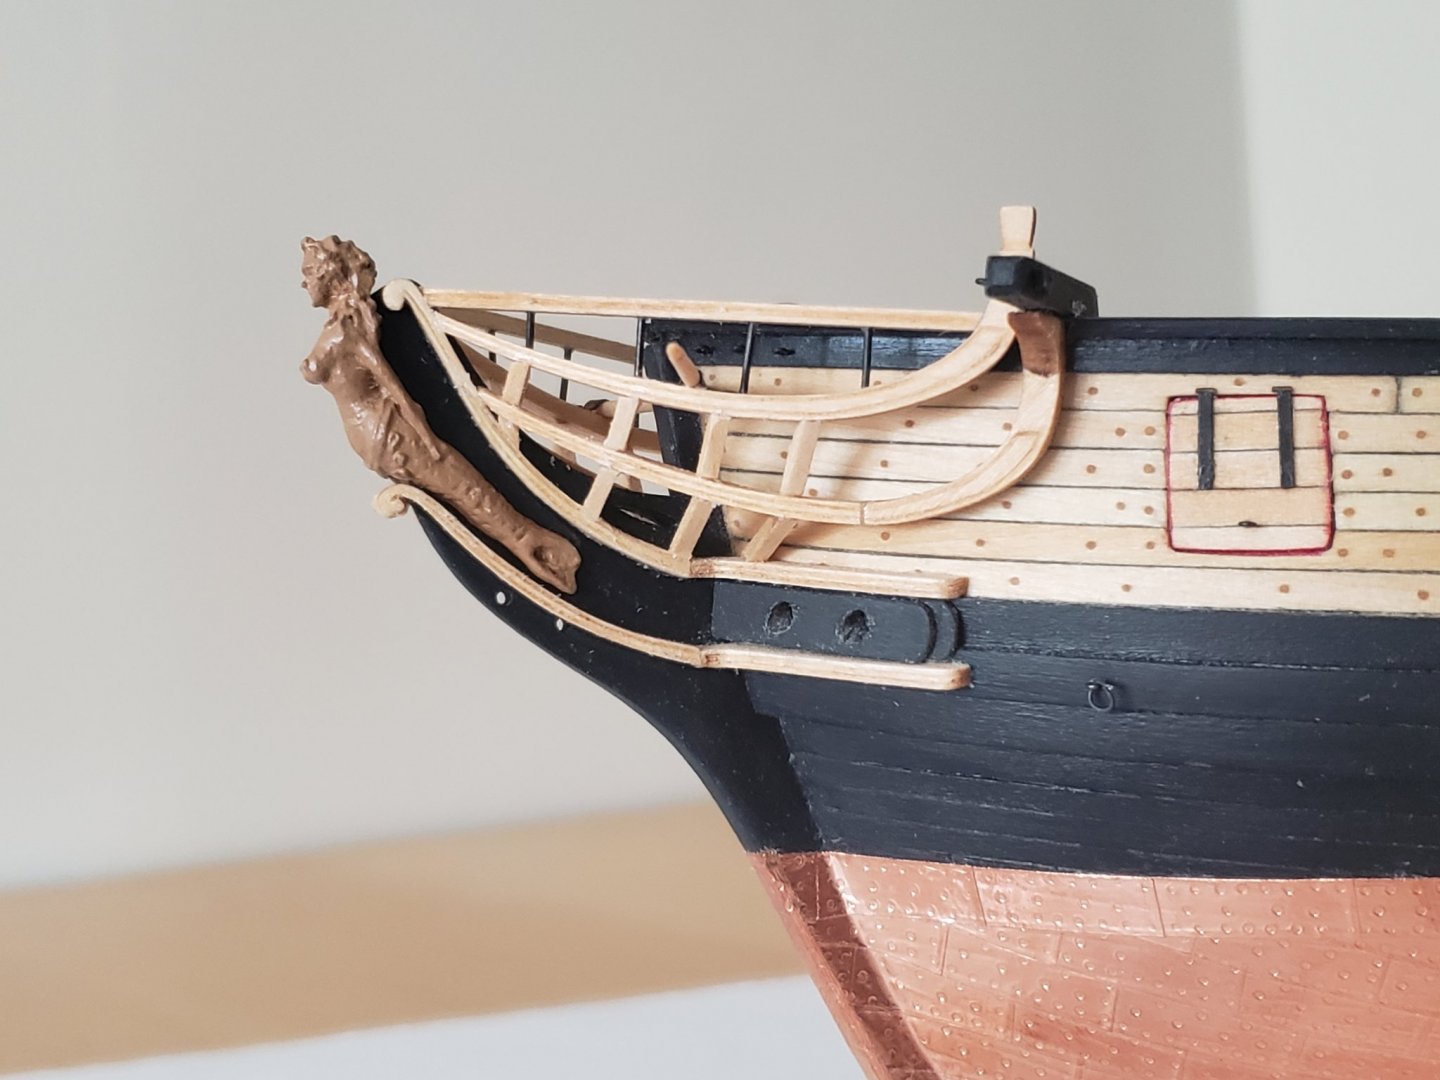
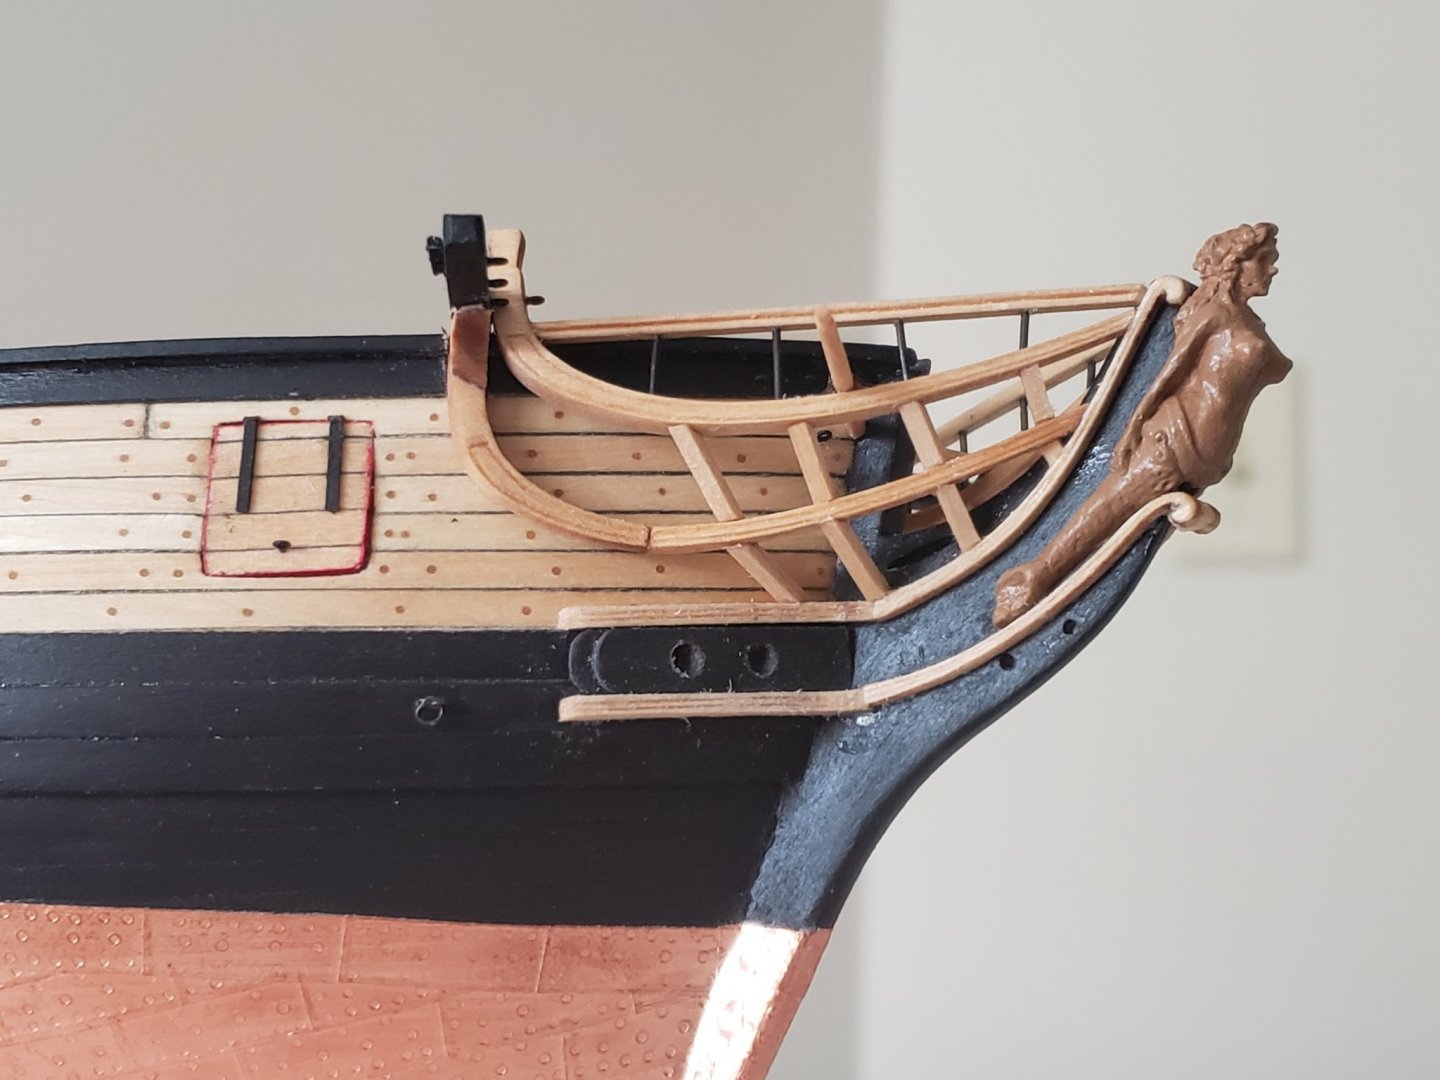
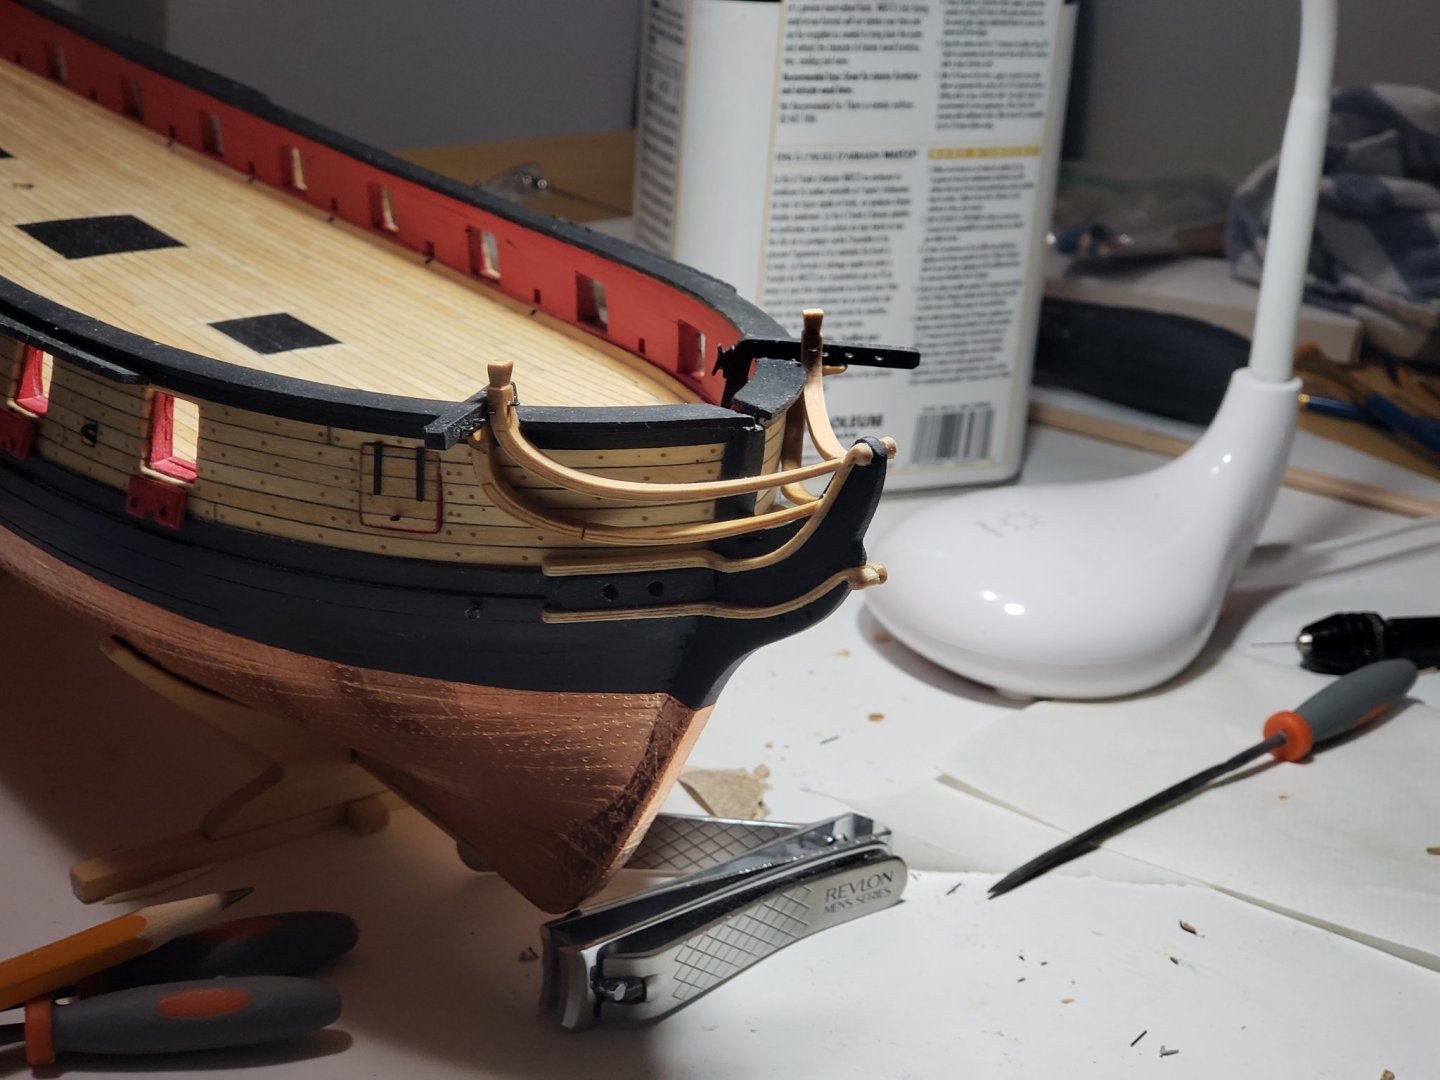
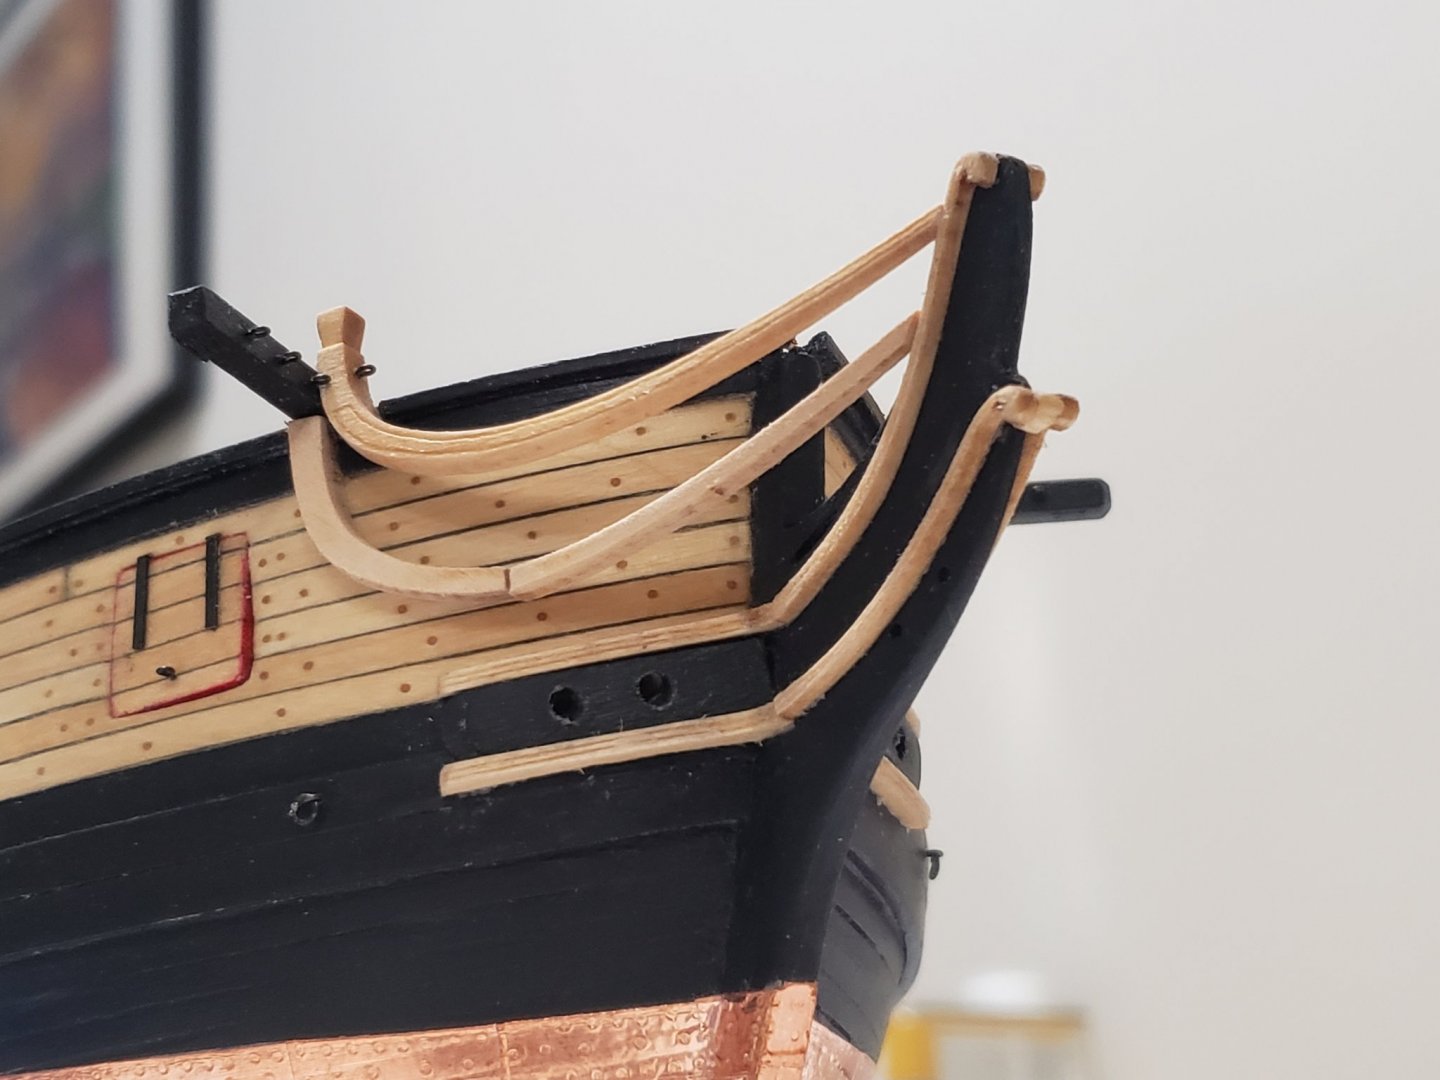
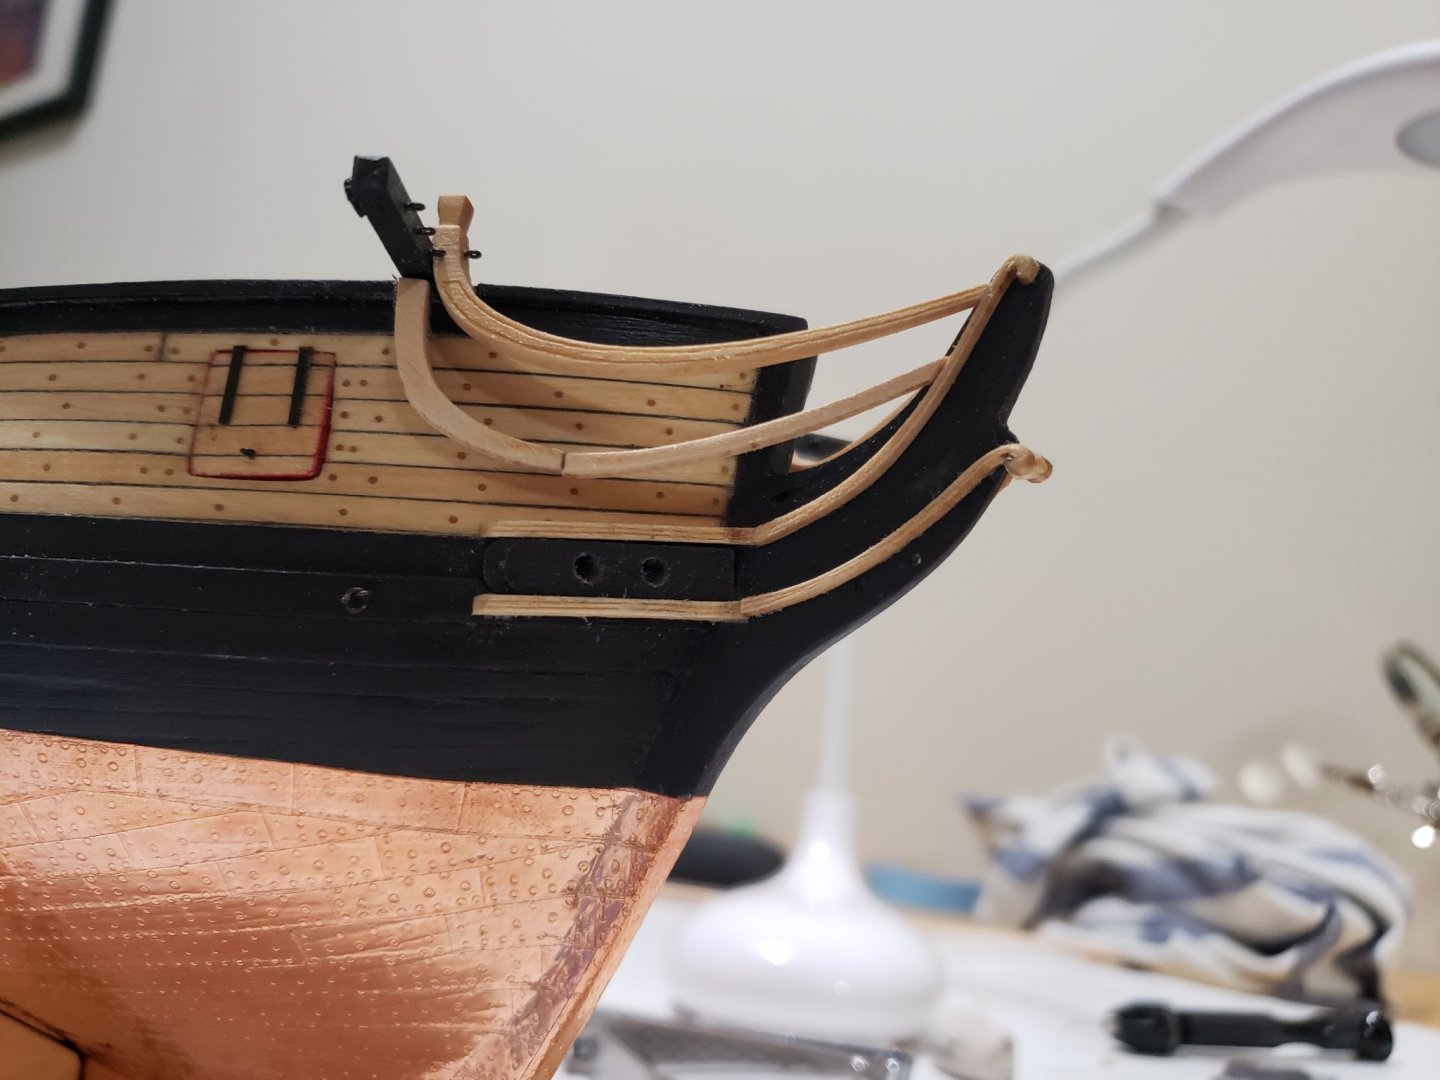
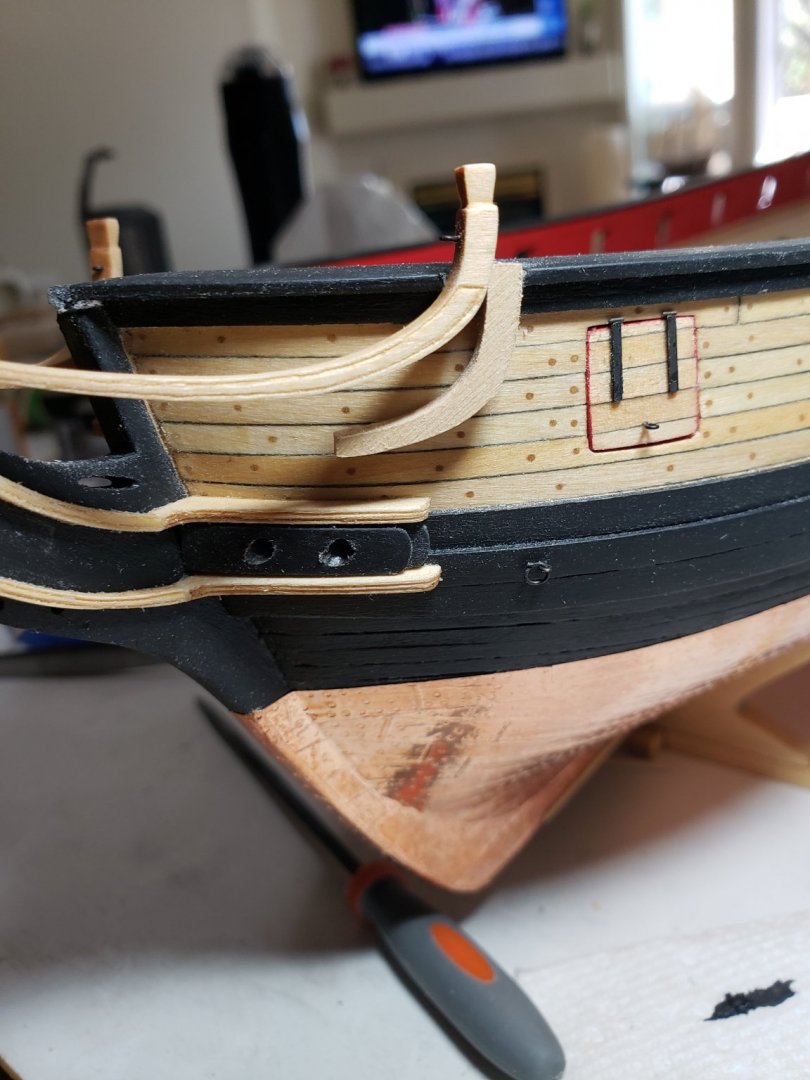
Finally finished the head timbers!!!! Glad it's done...... You're right Robin, I had to take so many breaks when doing it and as a result took very long.. It's not a perfect job, in fact far from it. Lots of mistakes. But I guess it's ok for a first attempt. I'll say it again.. This was by far the most frustrating bit of the build, especially when the bits fall off while trying to test fit. I realize that my middle head rail is not positioned closer to the keel, but I do not know how I could have achieved that with the laser cut pieces. I think the only solution was to scratch build my own ones with the curved section 2 to be longer so that section 1 can be positioned more inwards. I may try to reattempt doing this but for now I will just go on with the build... Really don't want to redo these steps again LOL


- 950 replies
-
- 15
-
-
- syren
- model shipways
- (and 1 more)
-
Thanks all for the kind comments 😊 When I first started building the Syren I thought your username was a cat head (ie 🐱), didnt know it's an actual part until recently 😄 Also, started working on the head timbers and I now understand the frustration. This could very well be the trickiest part of the build so far. I'll keep trying but so far none of the pieces I made fit nicely
- 950 replies
-
- 2
-
-
- syren
- model shipways
- (and 1 more)
-
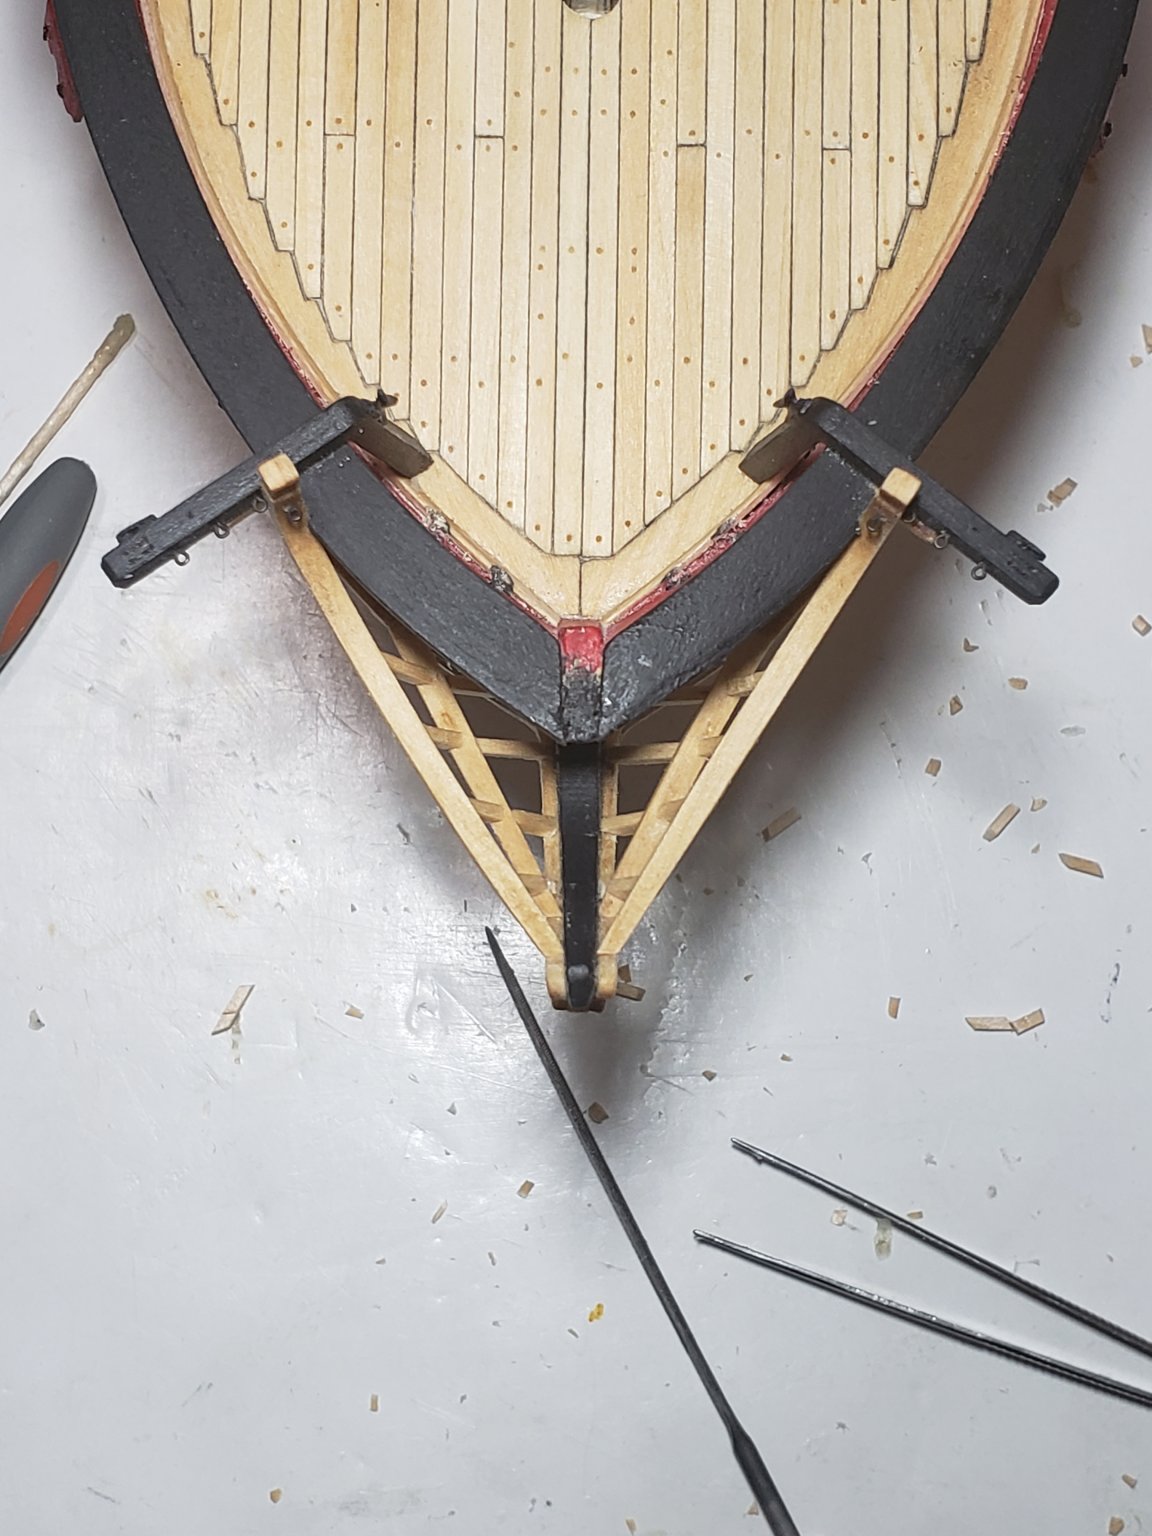
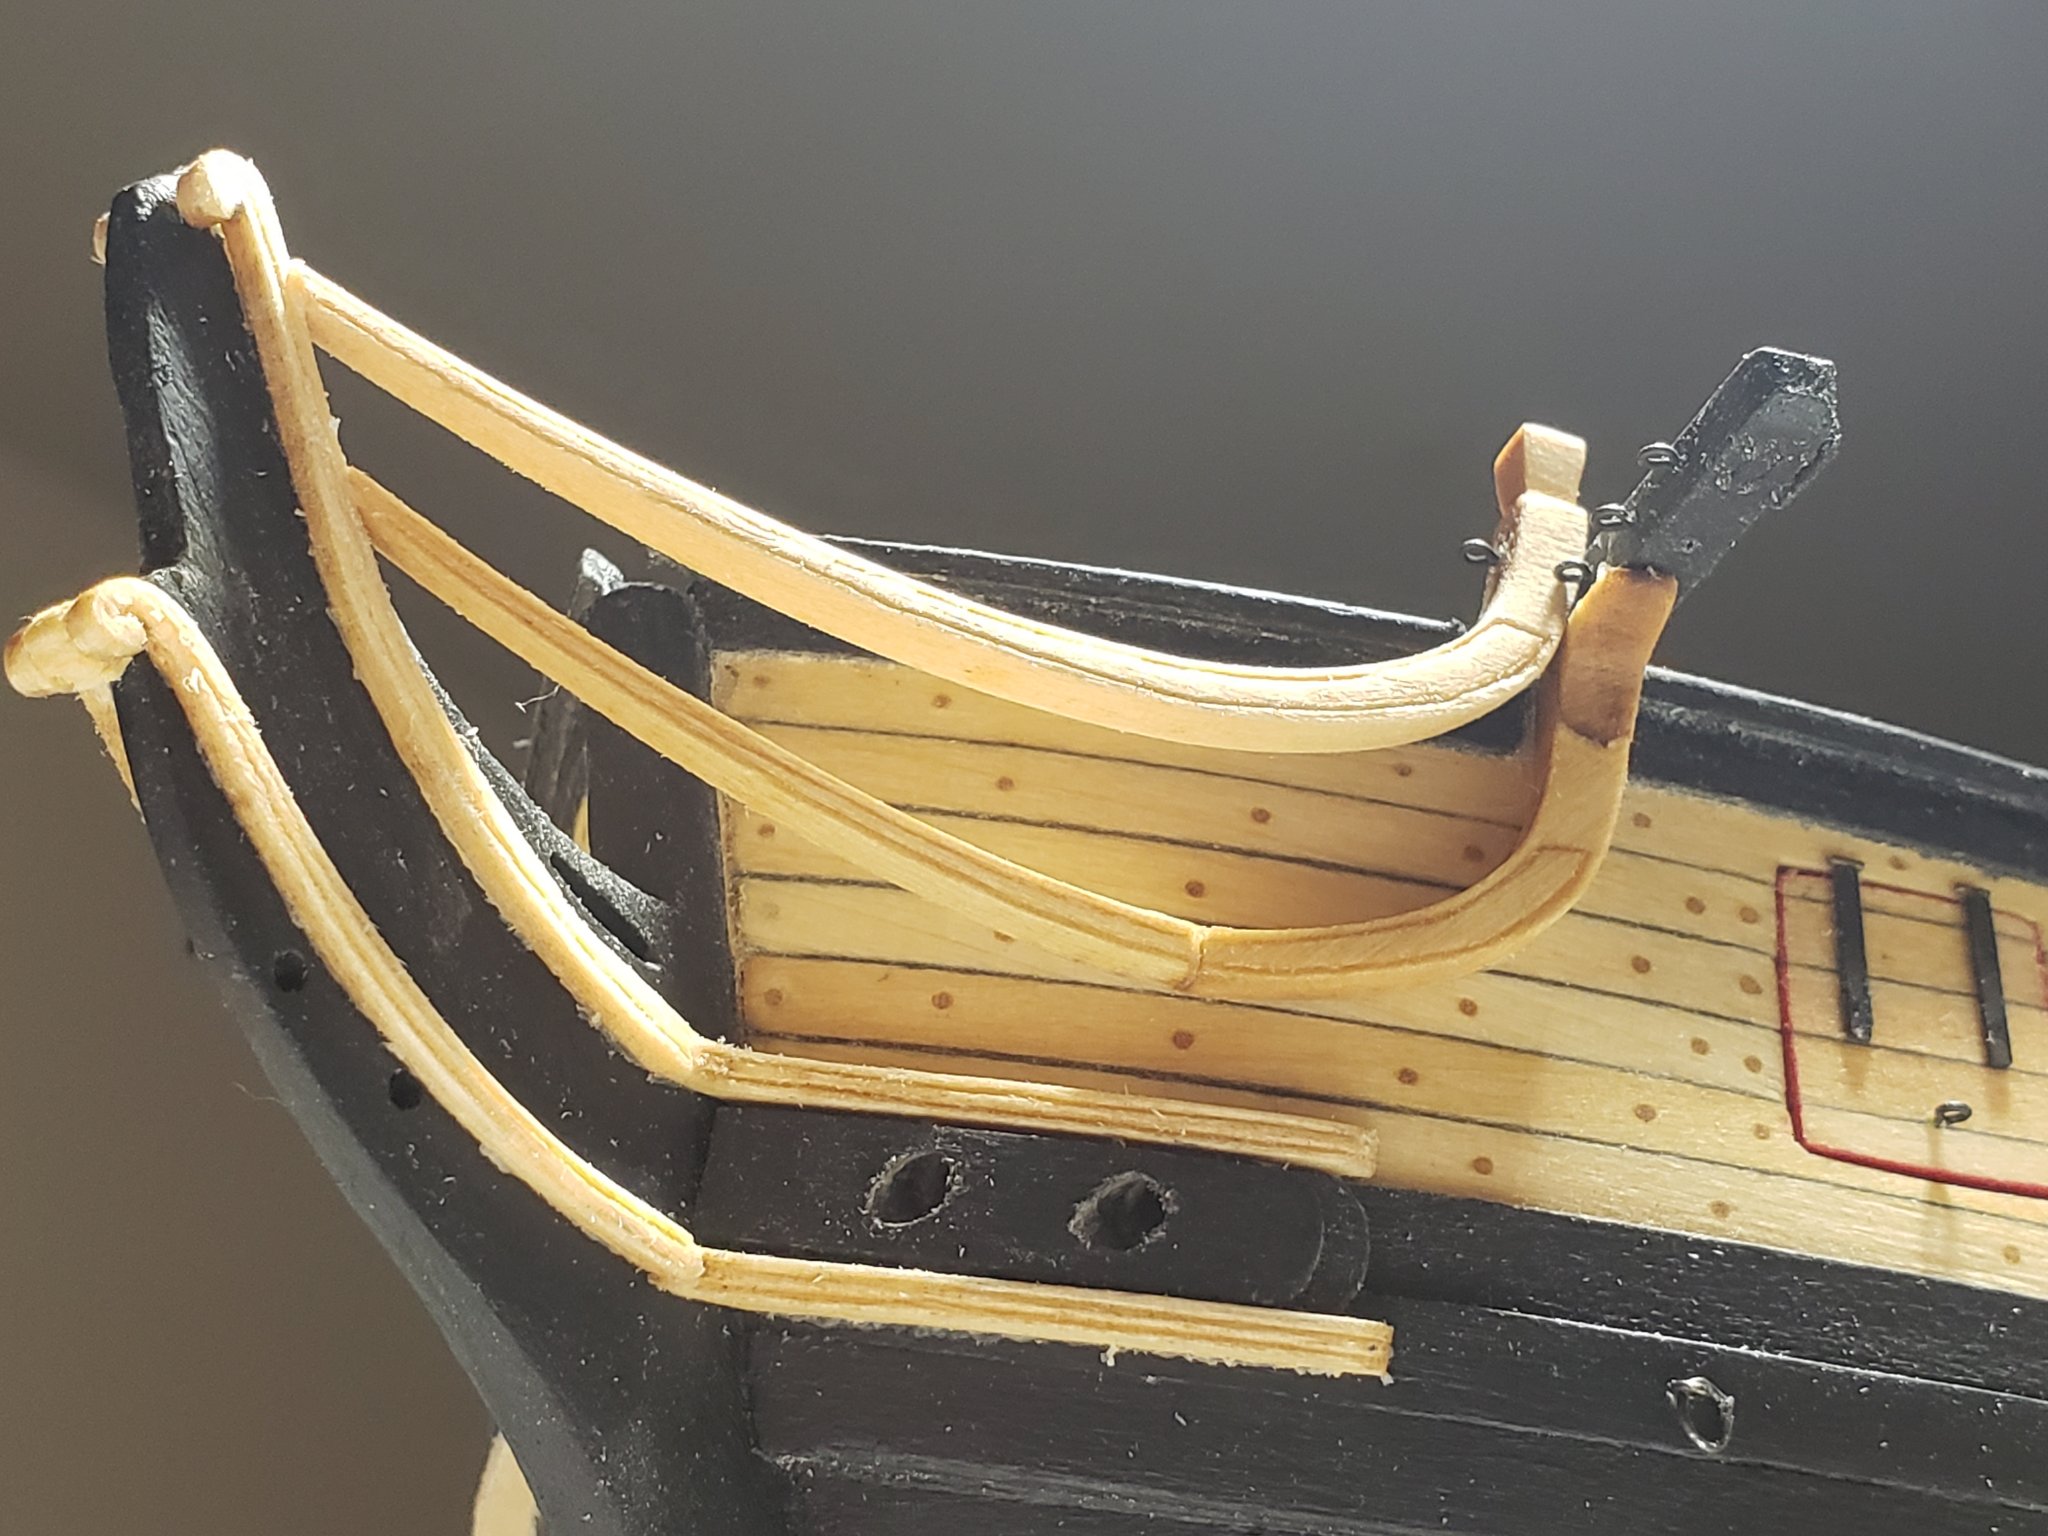
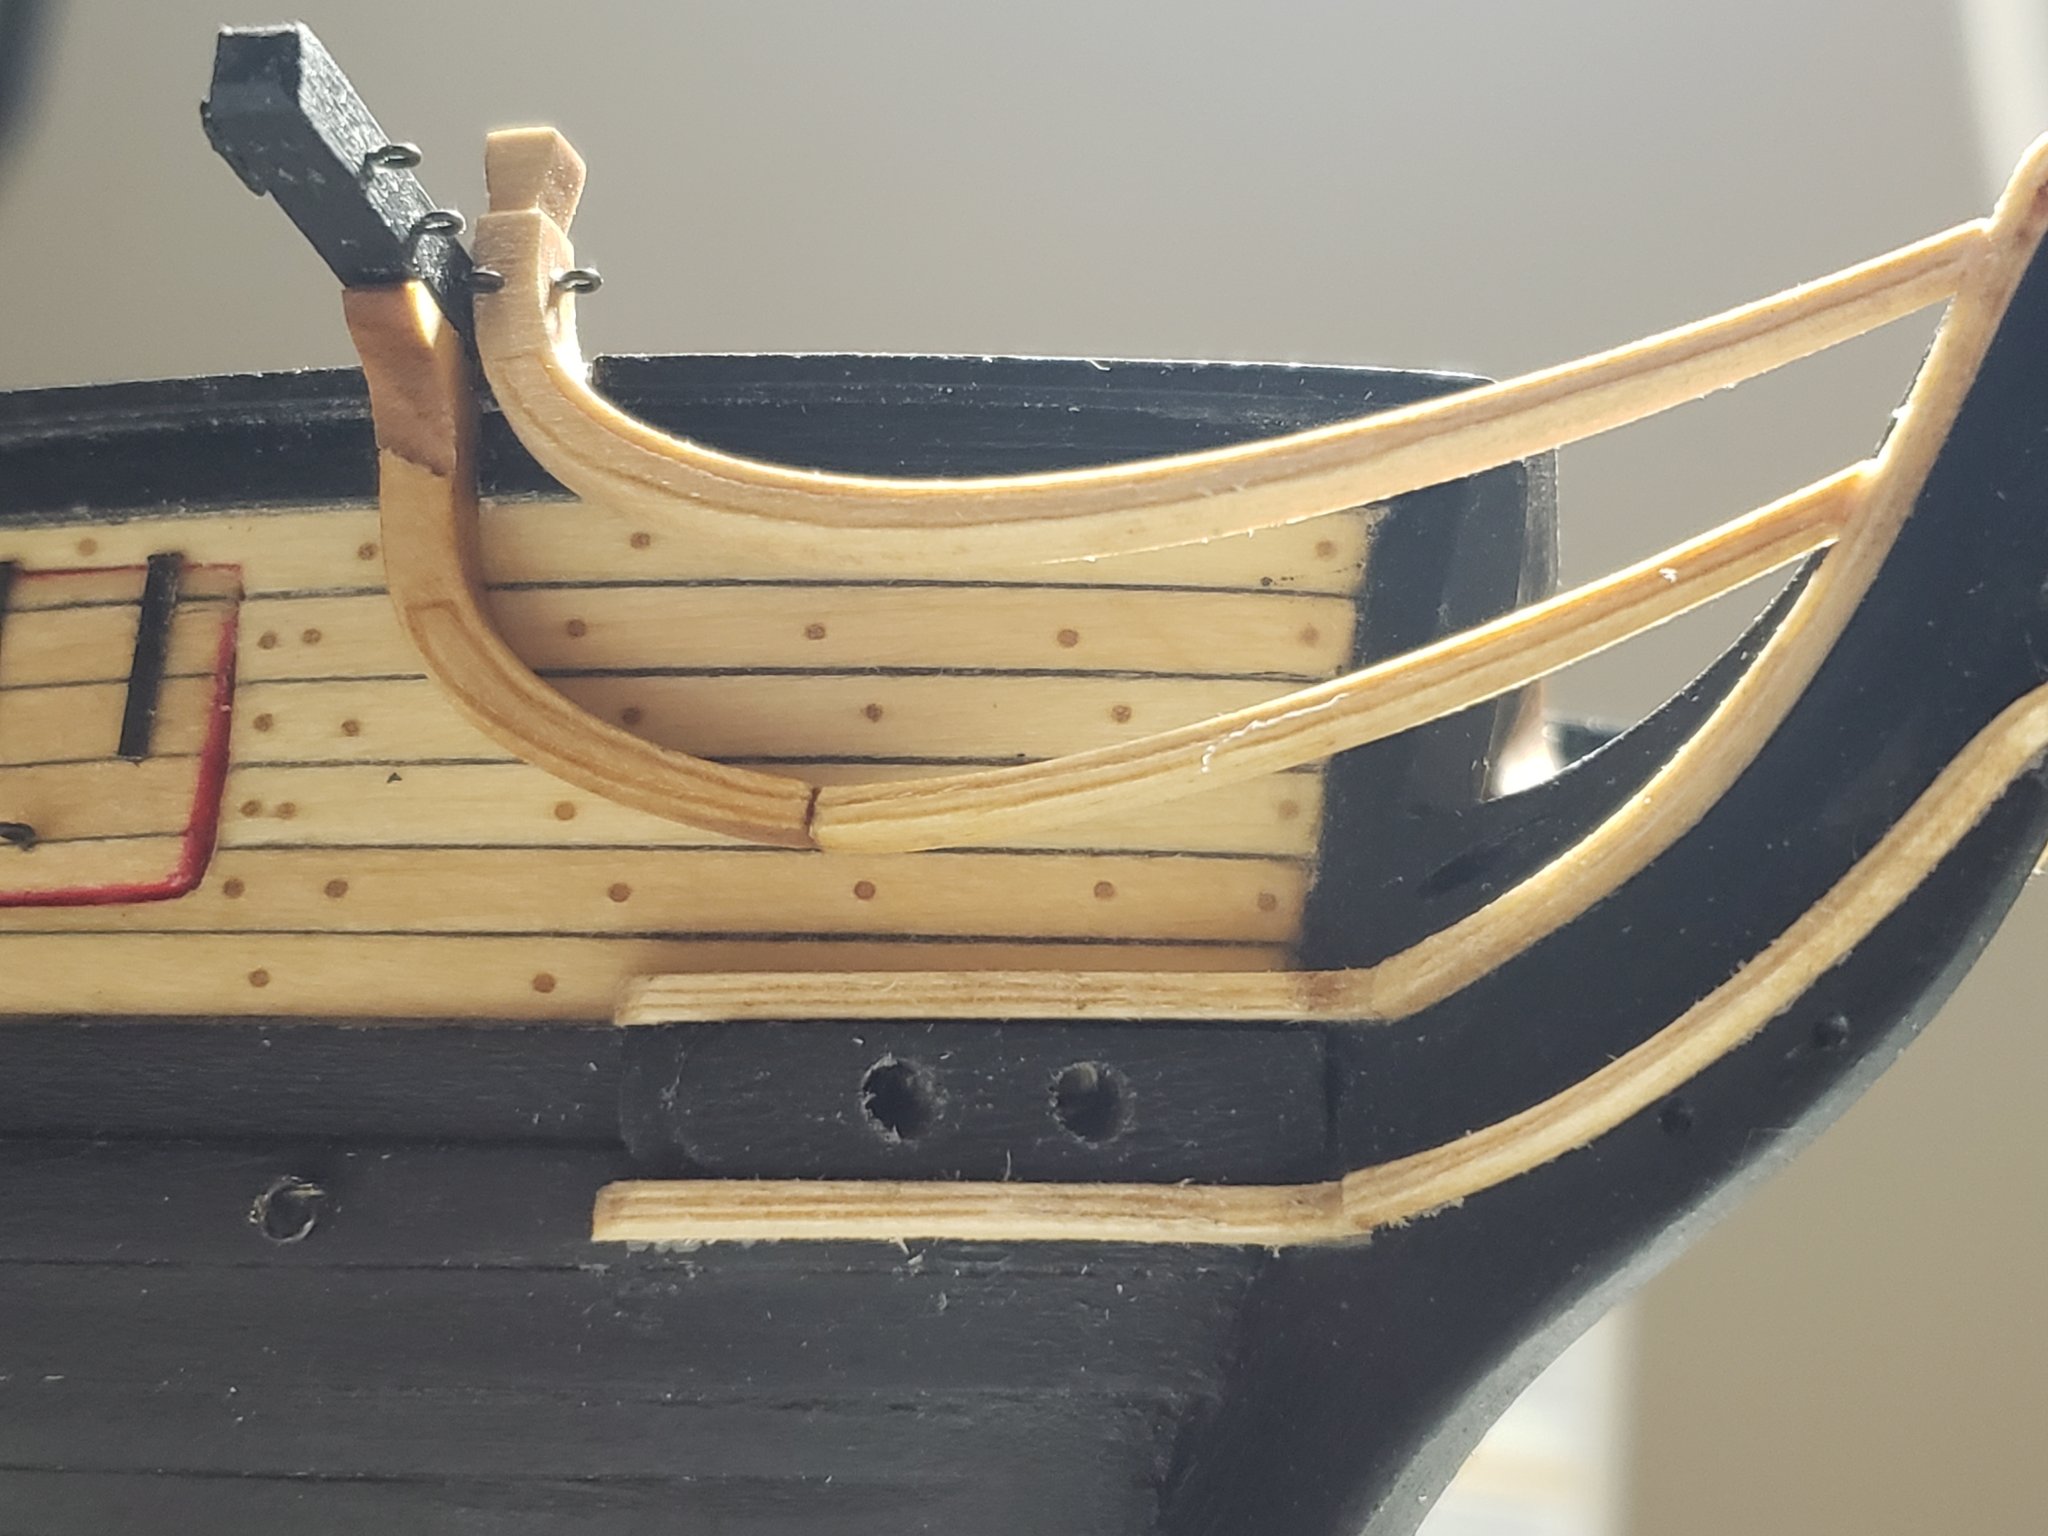
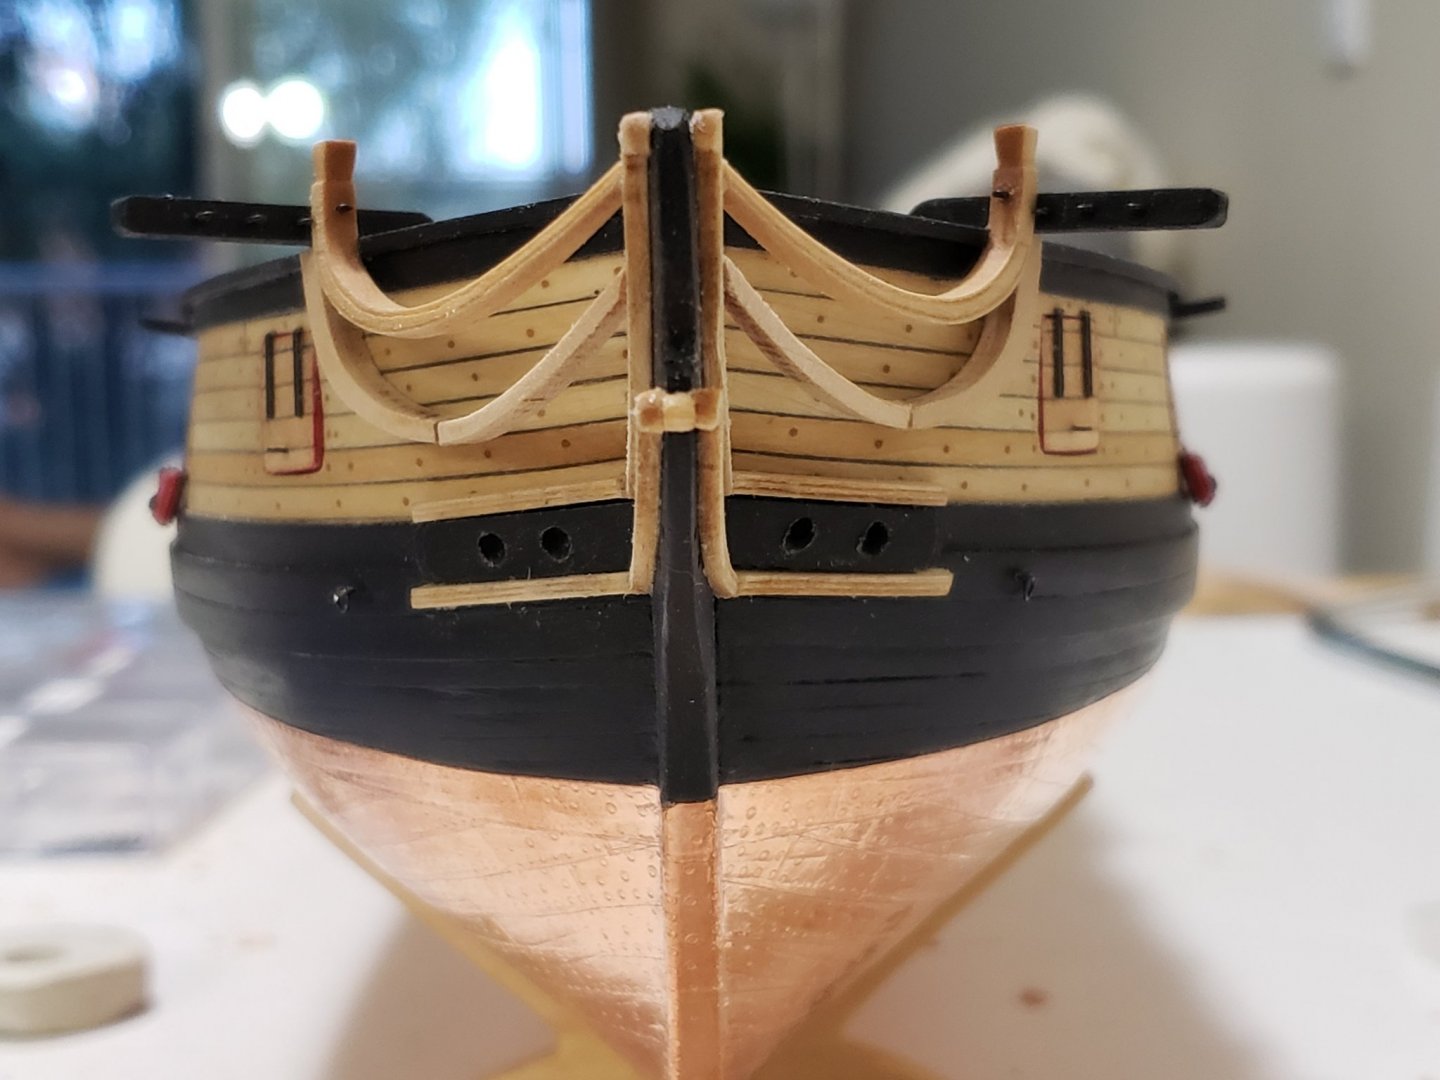
I somehow managed to finish the middle rails today. If anyone spots any mistakes or sees room for improvement, do let me know.. better to fix it now then later on (especially if it's an easy fix 😄😅) Some photos:


- 950 replies
-
- 14
-
-
- syren
- model shipways
- (and 1 more)
-
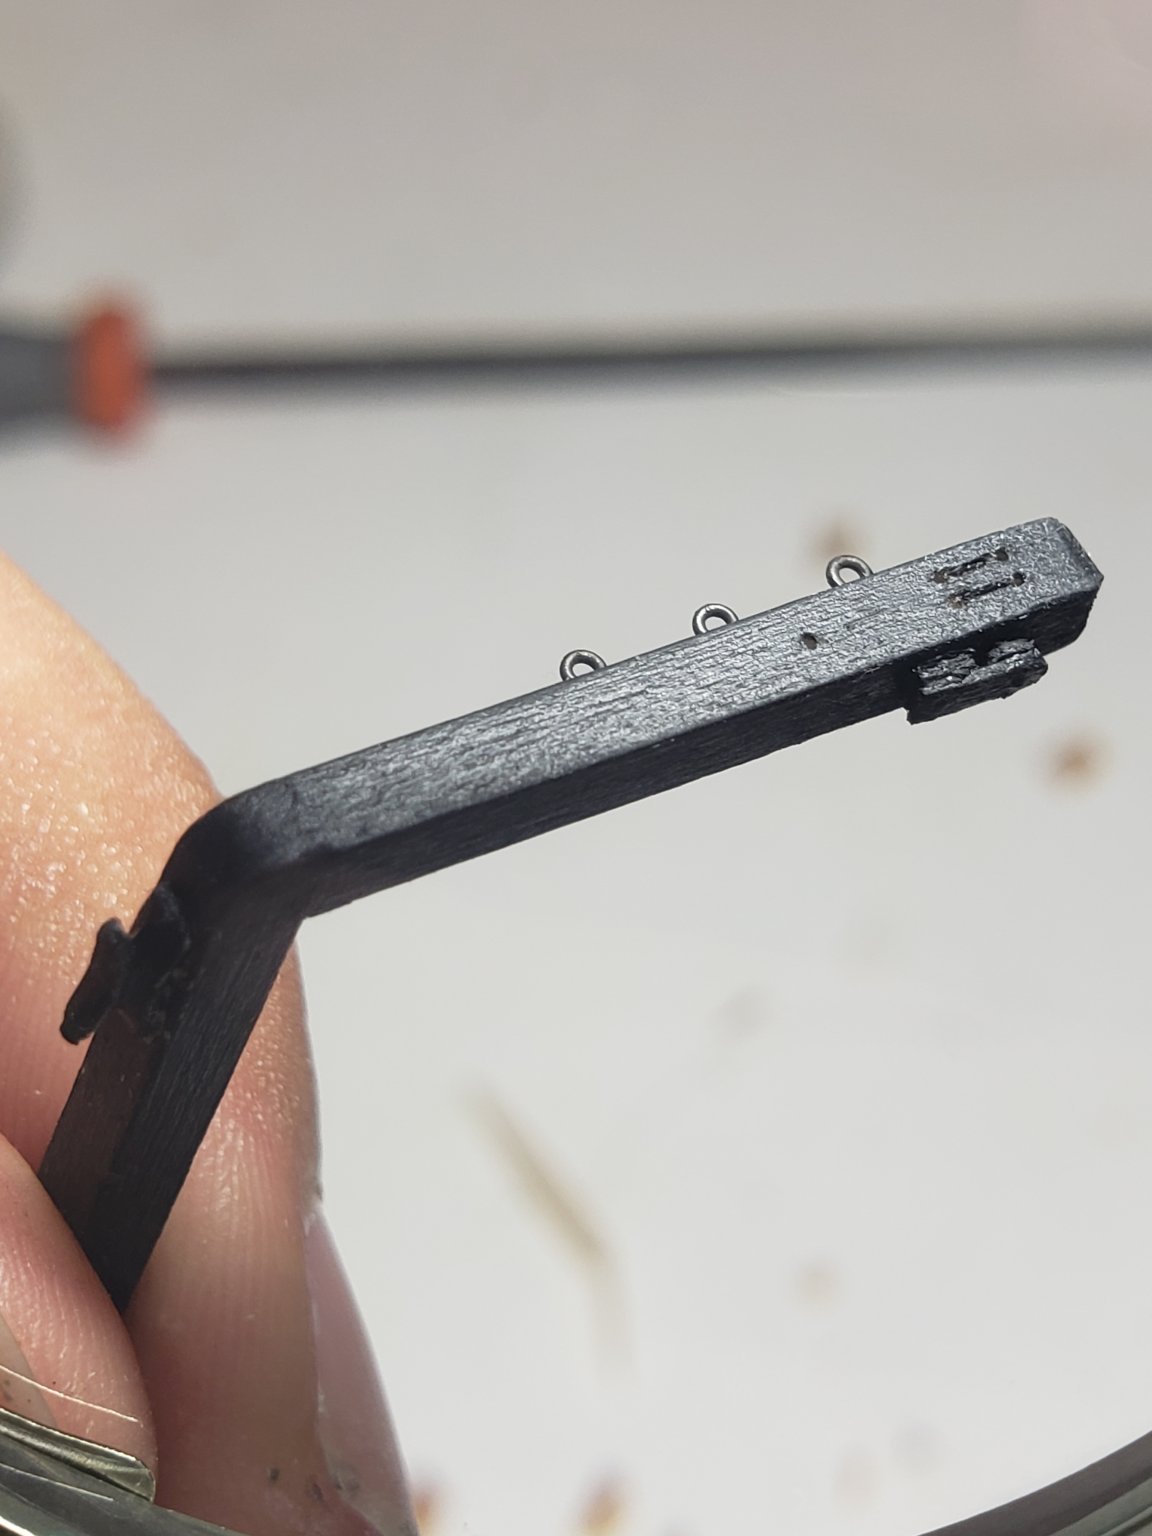
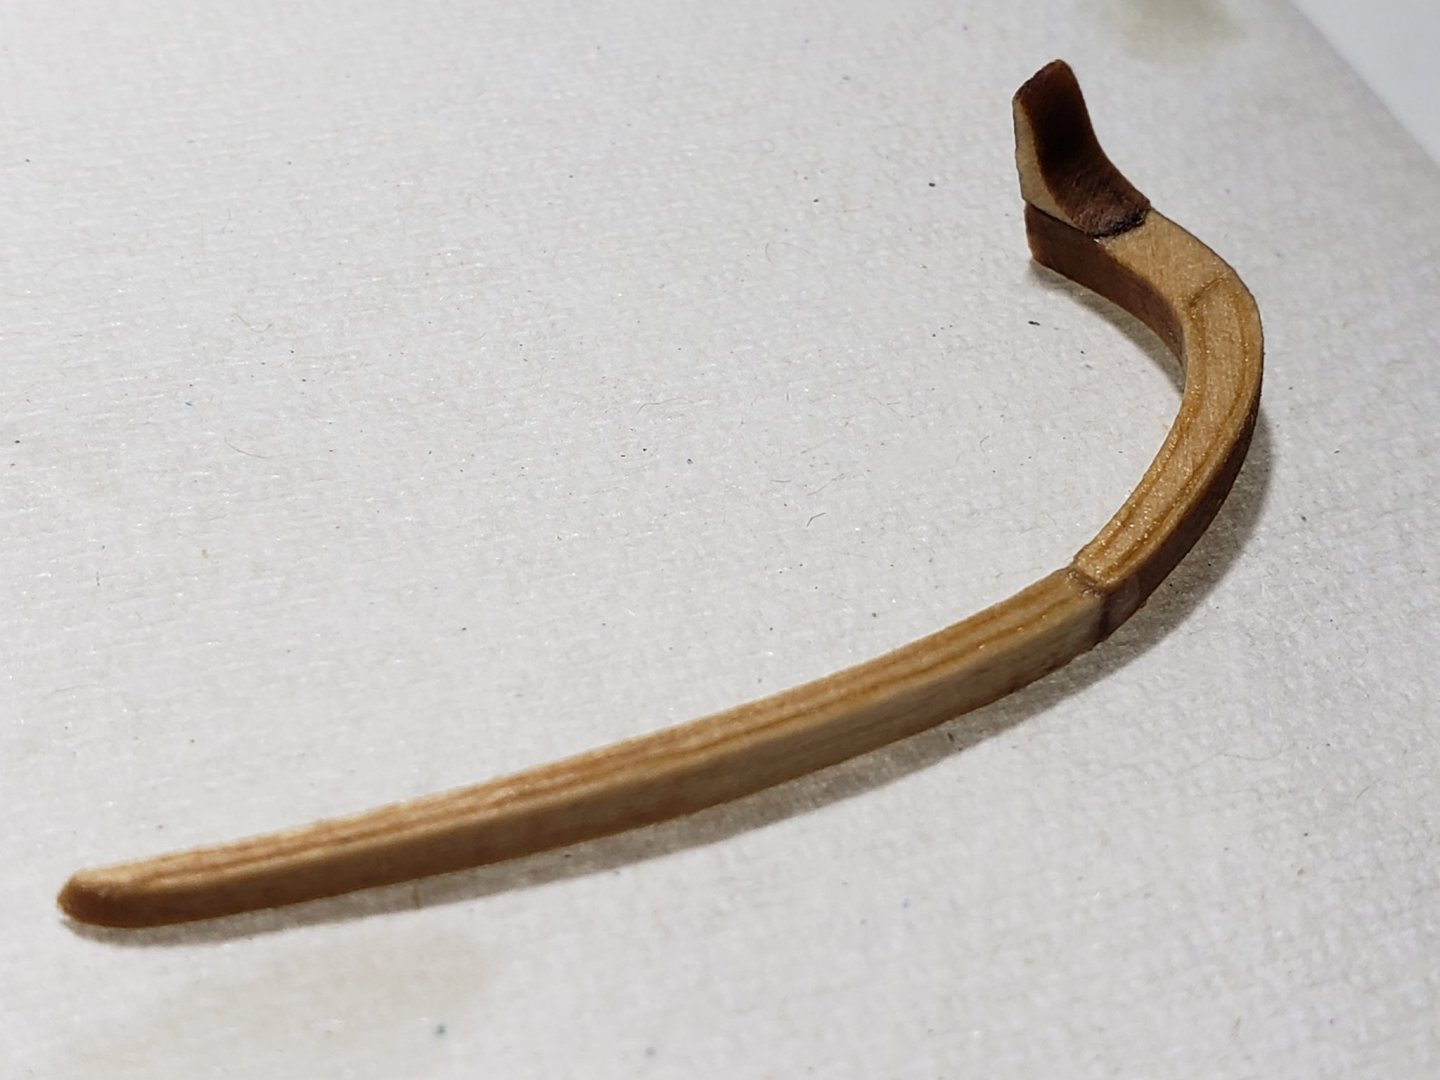
The middle rail has been dry-fitted. To do this I first dryfitted piece 2 (the curved bit below the cathead) then cut piece 1 (the long skinny piece) to length and angled the butt joint so that it meets the stem at the right spot. I tried to the rails to be closer to the stem but I couldn't because of the geometry of piece 2. Next is sanding the burnt marks completely off, carving the rails then installing them.


- 950 replies
-
- 9
-
-
- syren
- model shipways
- (and 1 more)
-
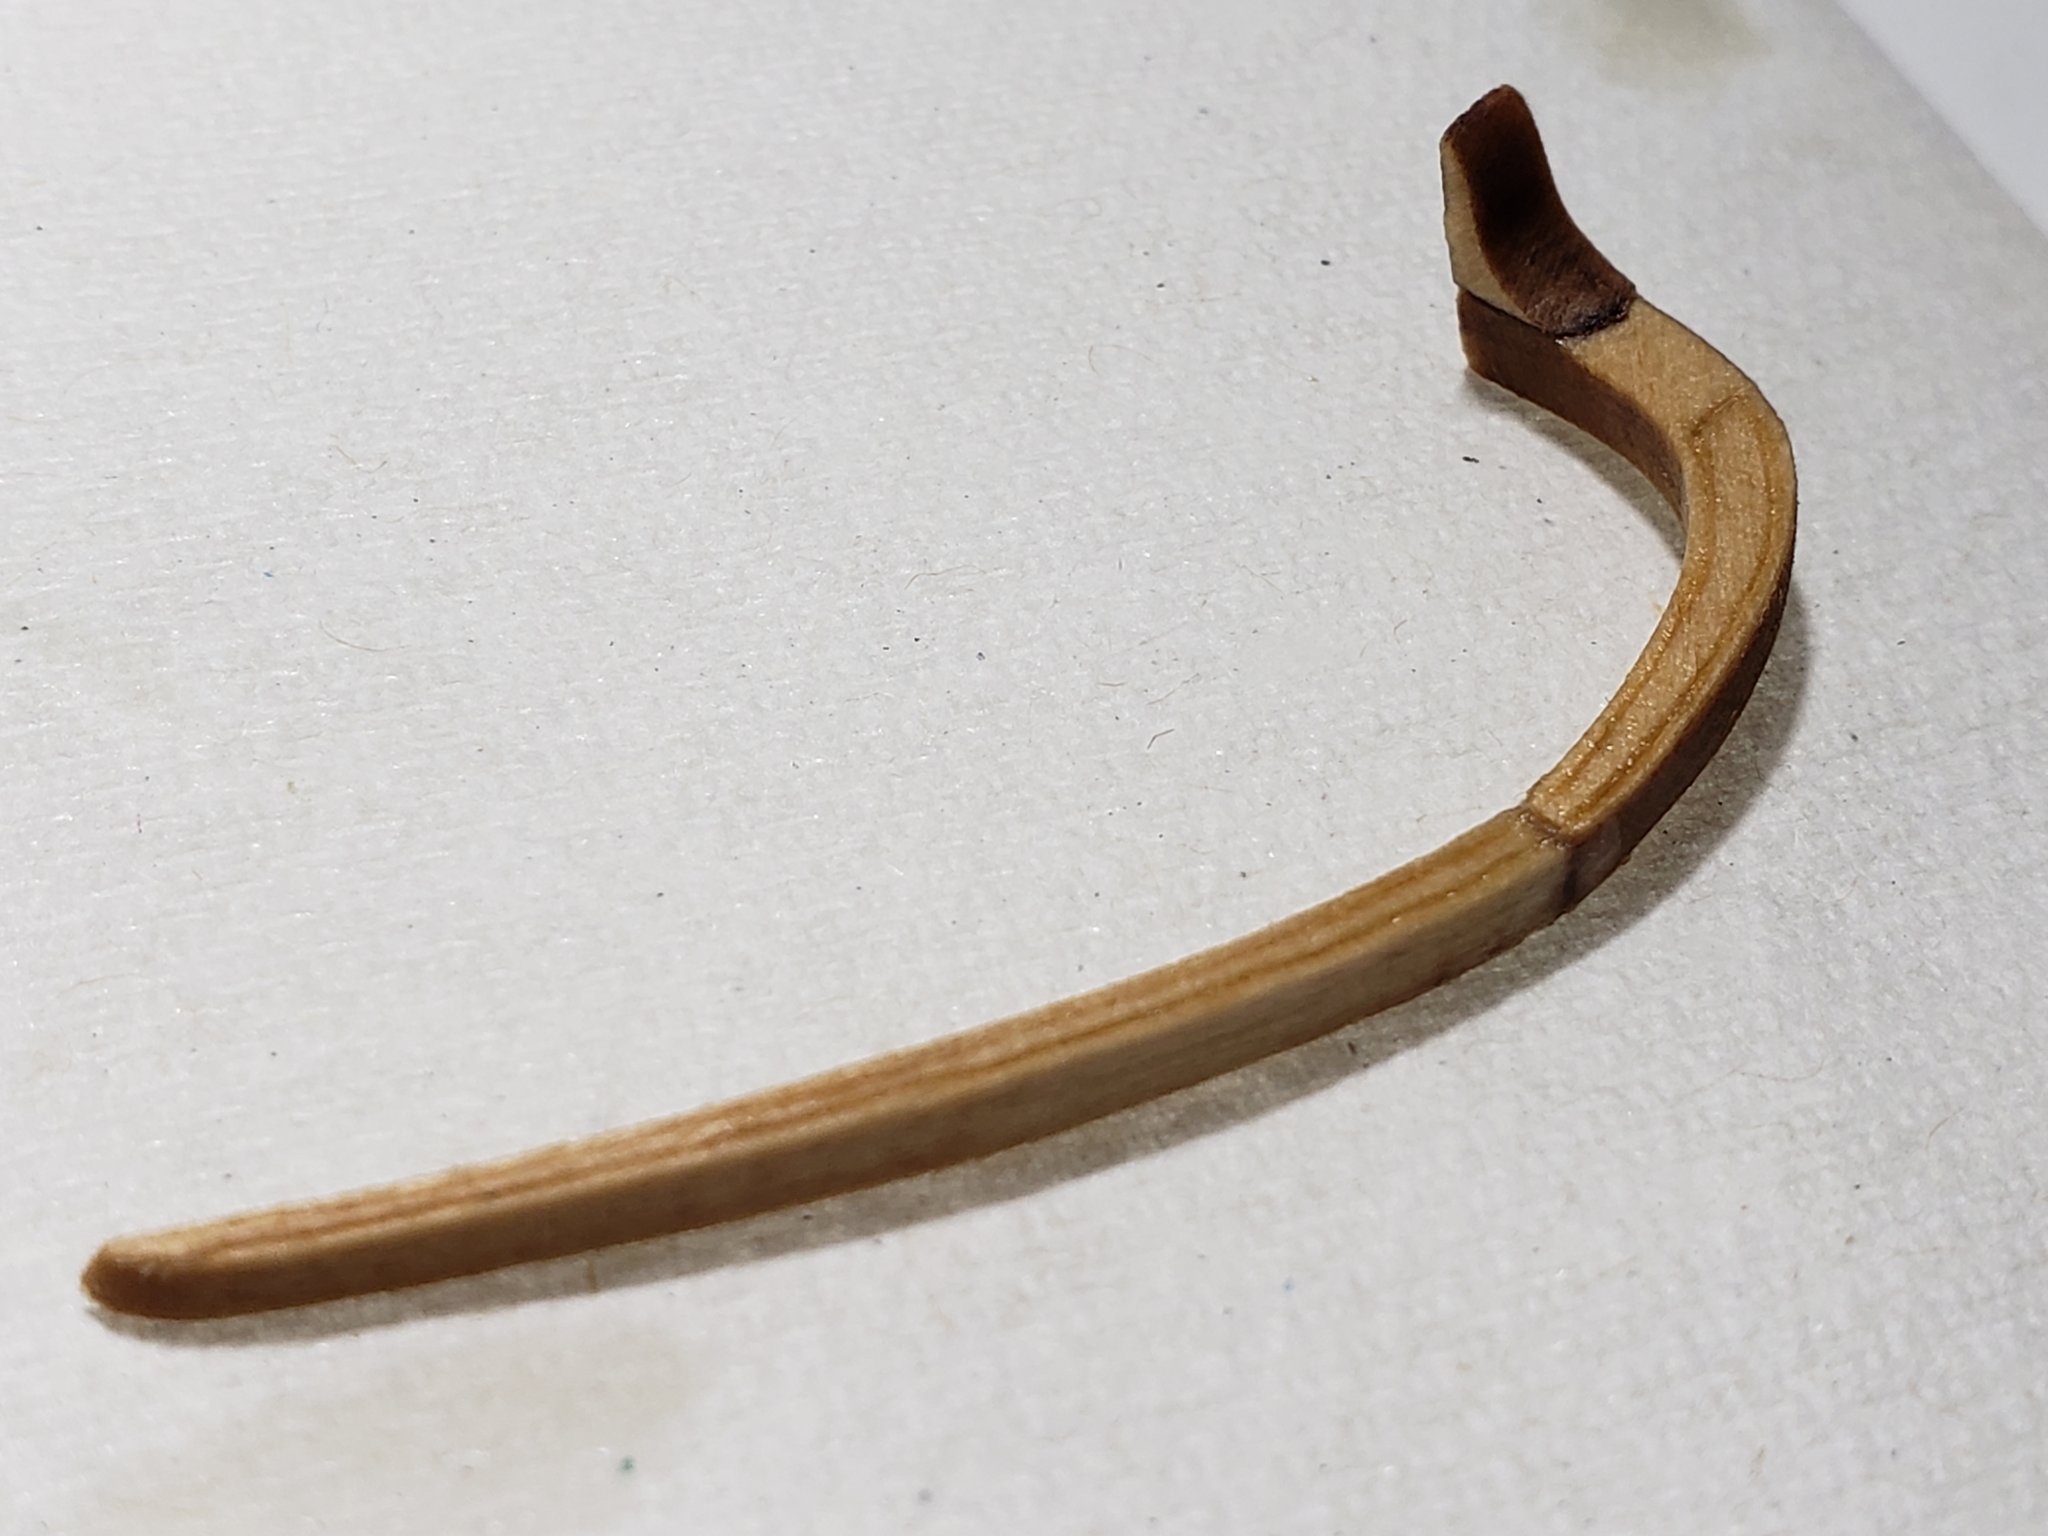
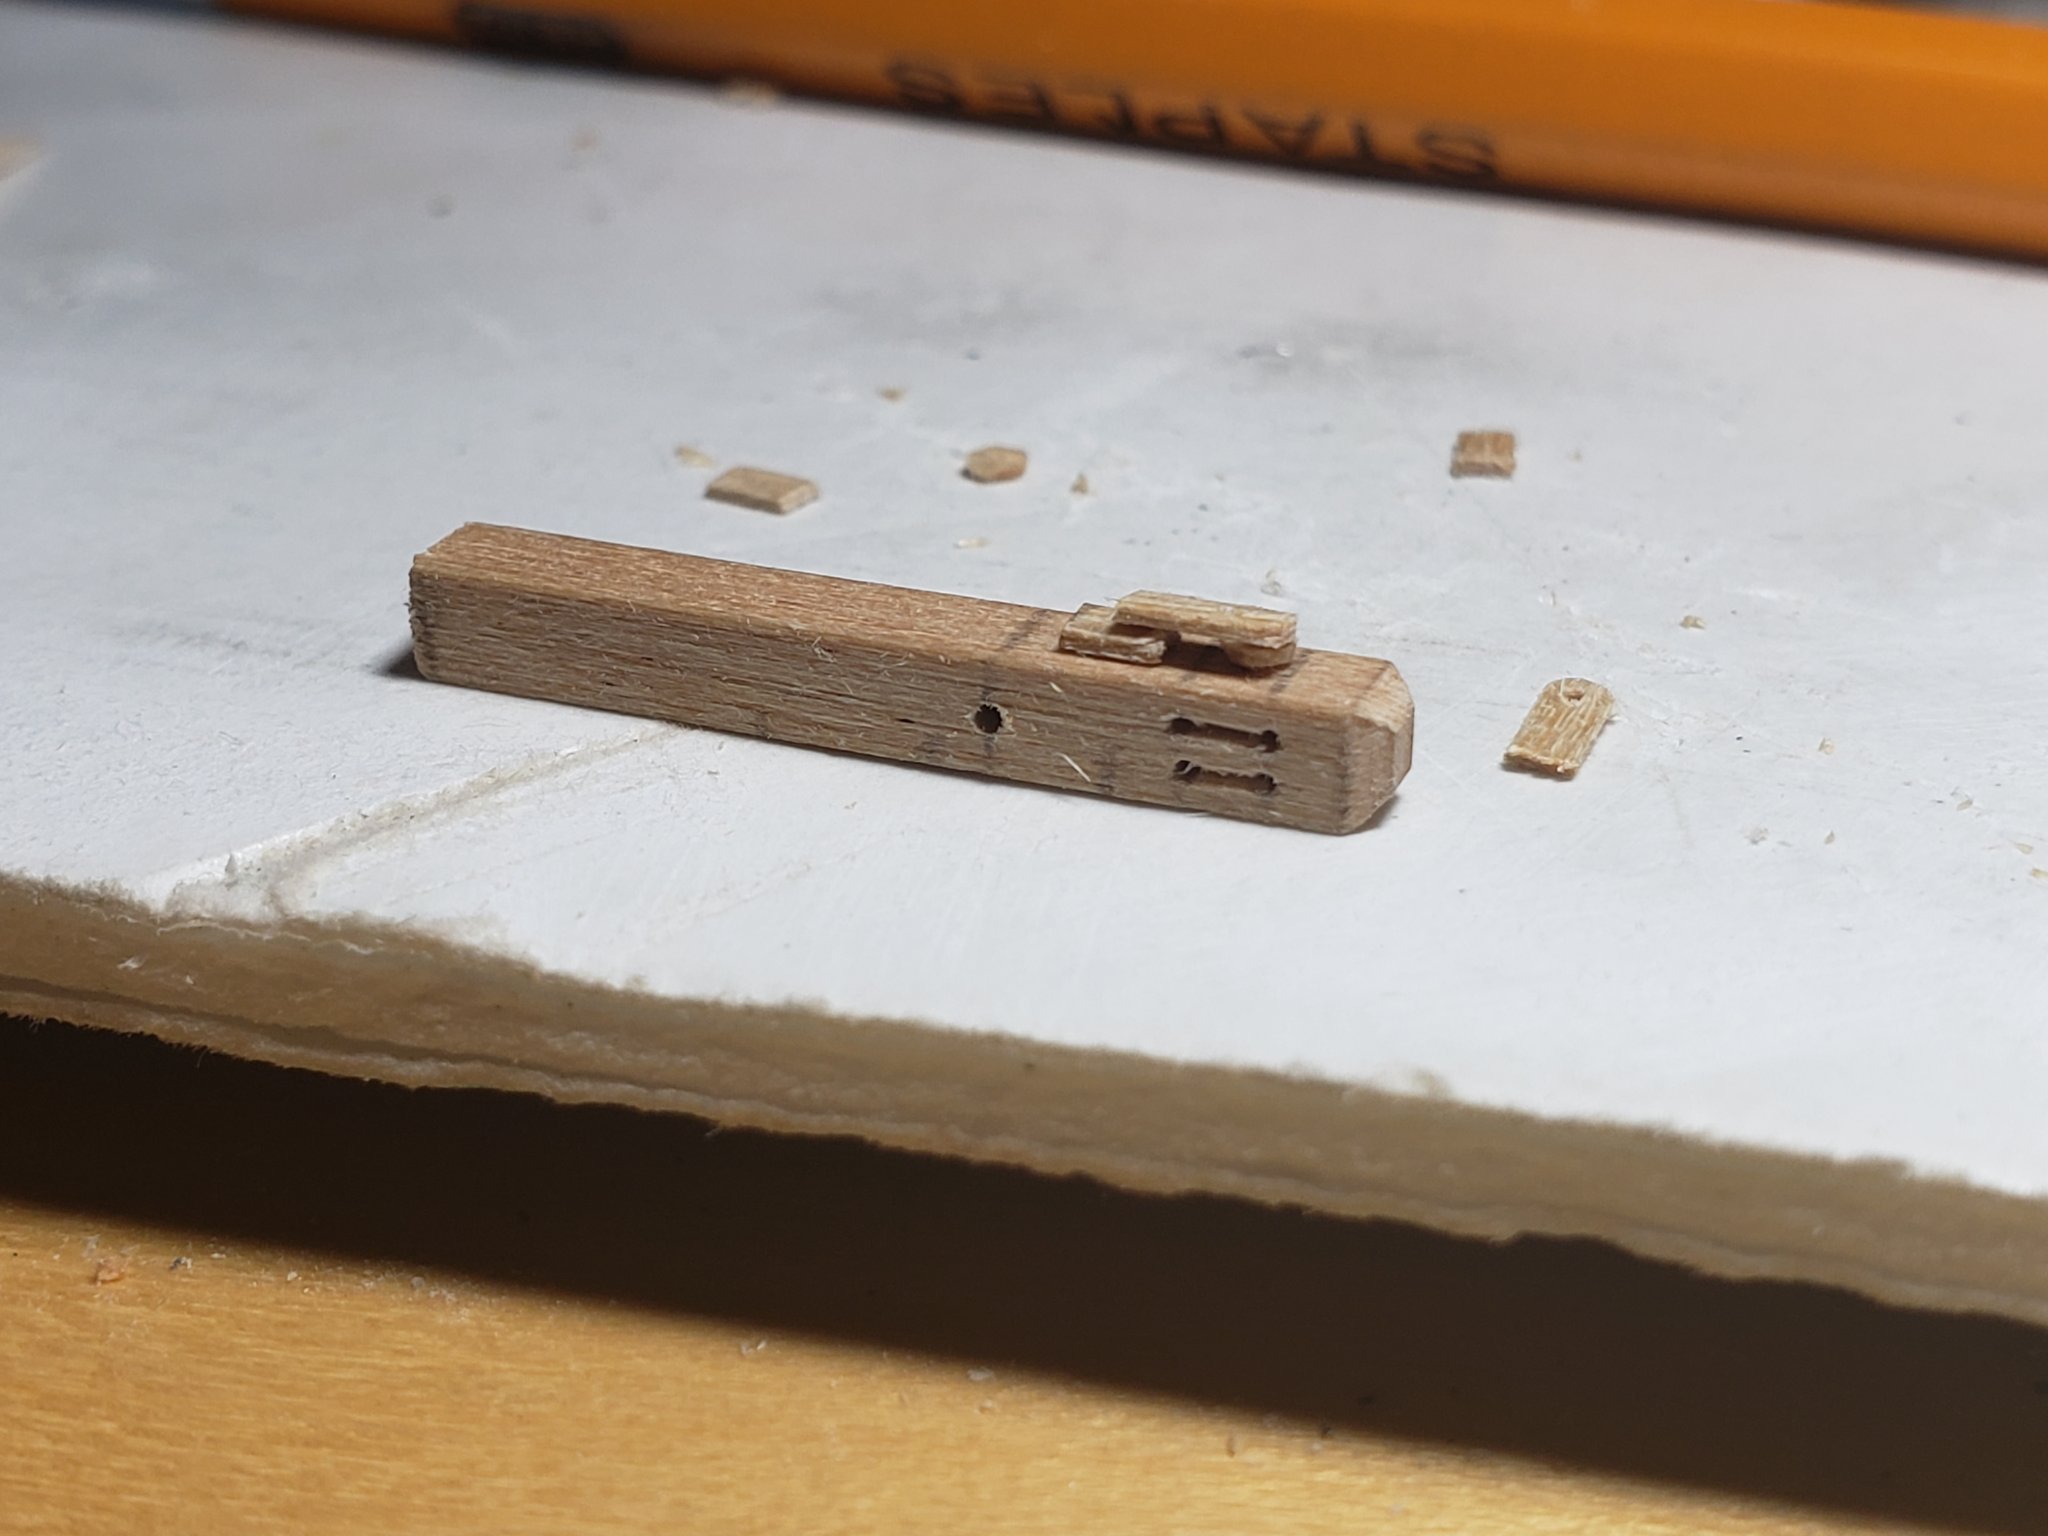
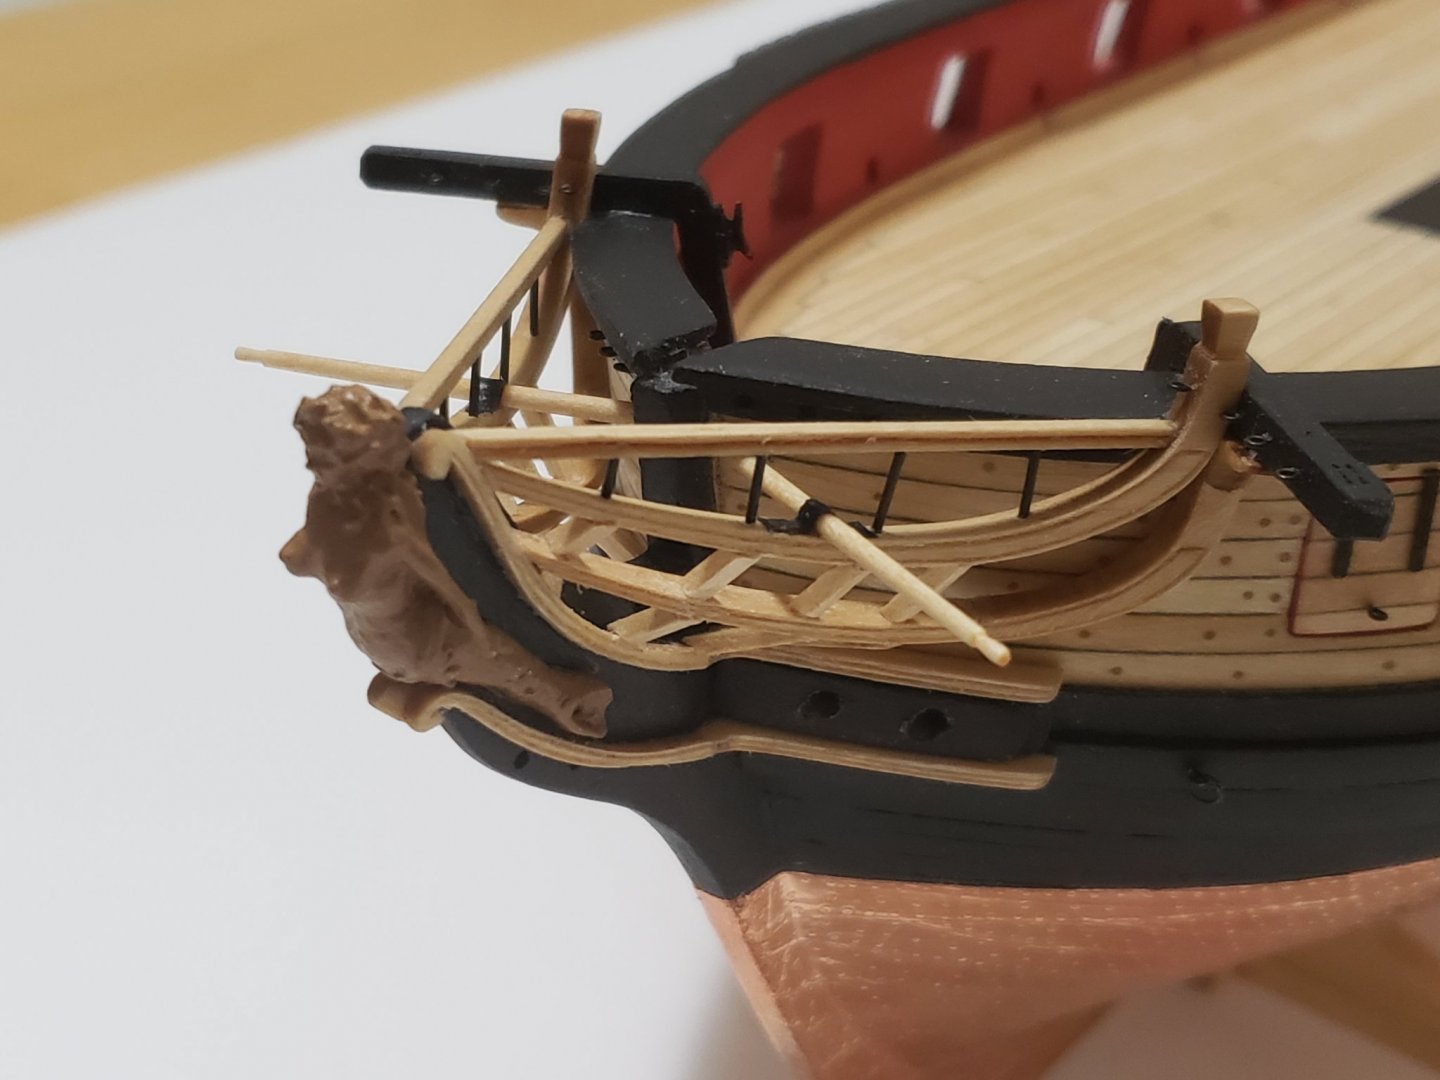
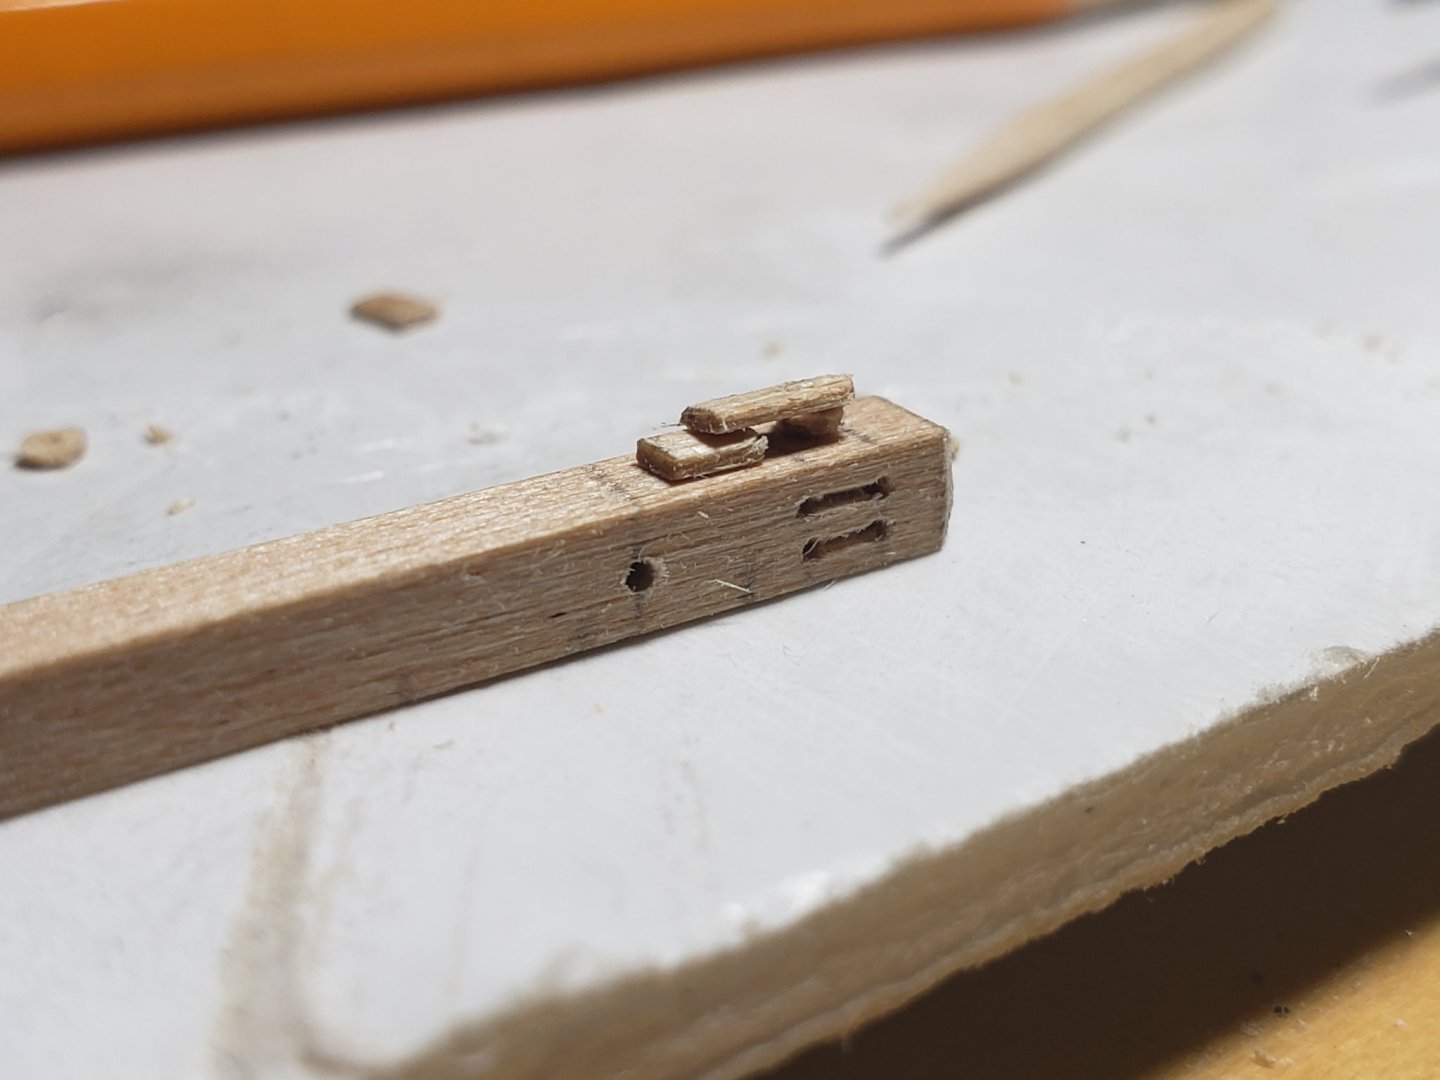
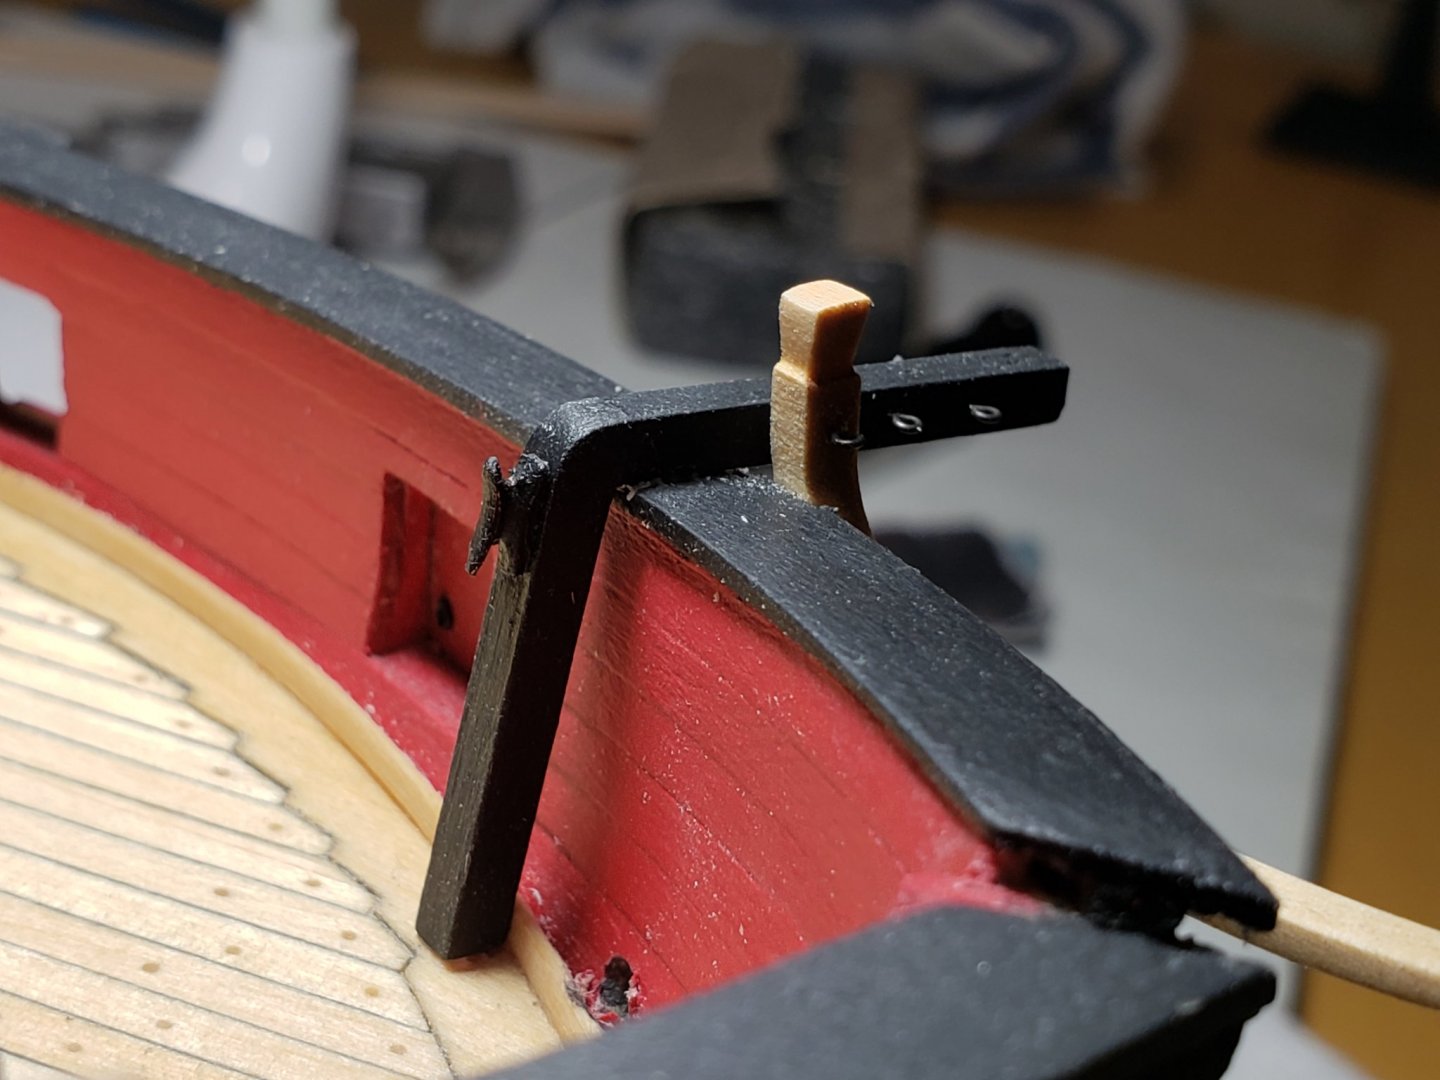
Finished making and installing the cathead. This was installed after making the notches for the middle rail. And I just used wood glue to secure the cleat onto the cathead. Here are a bunch of pictures 😄 Now for the middle rail (most nervous about this step...)


- 950 replies
-
- 7
-
-
- syren
- model shipways
- (and 1 more)
-
I also struggled with this. I tried using clamps at first (which did work initially) then had to move on to just using my hands and patiently waiting. I also found a neat trick of using superglue at the end with wood glue for the rest of the plank. The superglue acted like an internal clamp since it stuck super quick. Hope this helps!! Btw your planking work is very neat!
-
Thank you Richard, Thomas and Will for the great comments! And thanks all for the likes! 😄
- 950 replies
-
- 1
-
-
- syren
- model shipways
- (and 1 more)