HOLIDAY DONATION DRIVE - SUPPORT MSW - DO YOUR PART TO KEEP THIS GREAT FORUM GOING! (Only 13 donations so far - C'mon guys!)
×

.jpg.1f80adf1a9b14a937cfcf2ca6af0f0d4.jpg)
WalrusGuy
-
Posts
1,007 -
Joined
-
Last visited
Content Type
Profiles
Forums
Gallery
Events
Everything posted by WalrusGuy
-
.thumb.jpg.62d1d69fed1f32364417cb1f9cdeb009.jpg) Hi Eilelwen, hope you've been well. Would love to hear if you've made more progress on the planking!
Hi Eilelwen, hope you've been well. Would love to hear if you've made more progress on the planking! -
Thank you Patrick and Steven! The deck details are a lot of fun so I'm trying to savor it all by working through it slowly bit by bit 😁
- 950 replies
-
- 1
-

-
- syren
- model shipways
- (and 1 more)
-
I can't notice that discrepancy from the photos, but with all the fittings and details that will be added, I'm sure it would be impossible to tell. And the shape looks really nice! As for the guns, I wish I also googled some options instead of settling with the kits ones Ah well, it's all part of the process I suppose. I'll definitely do my research for next projects!
-
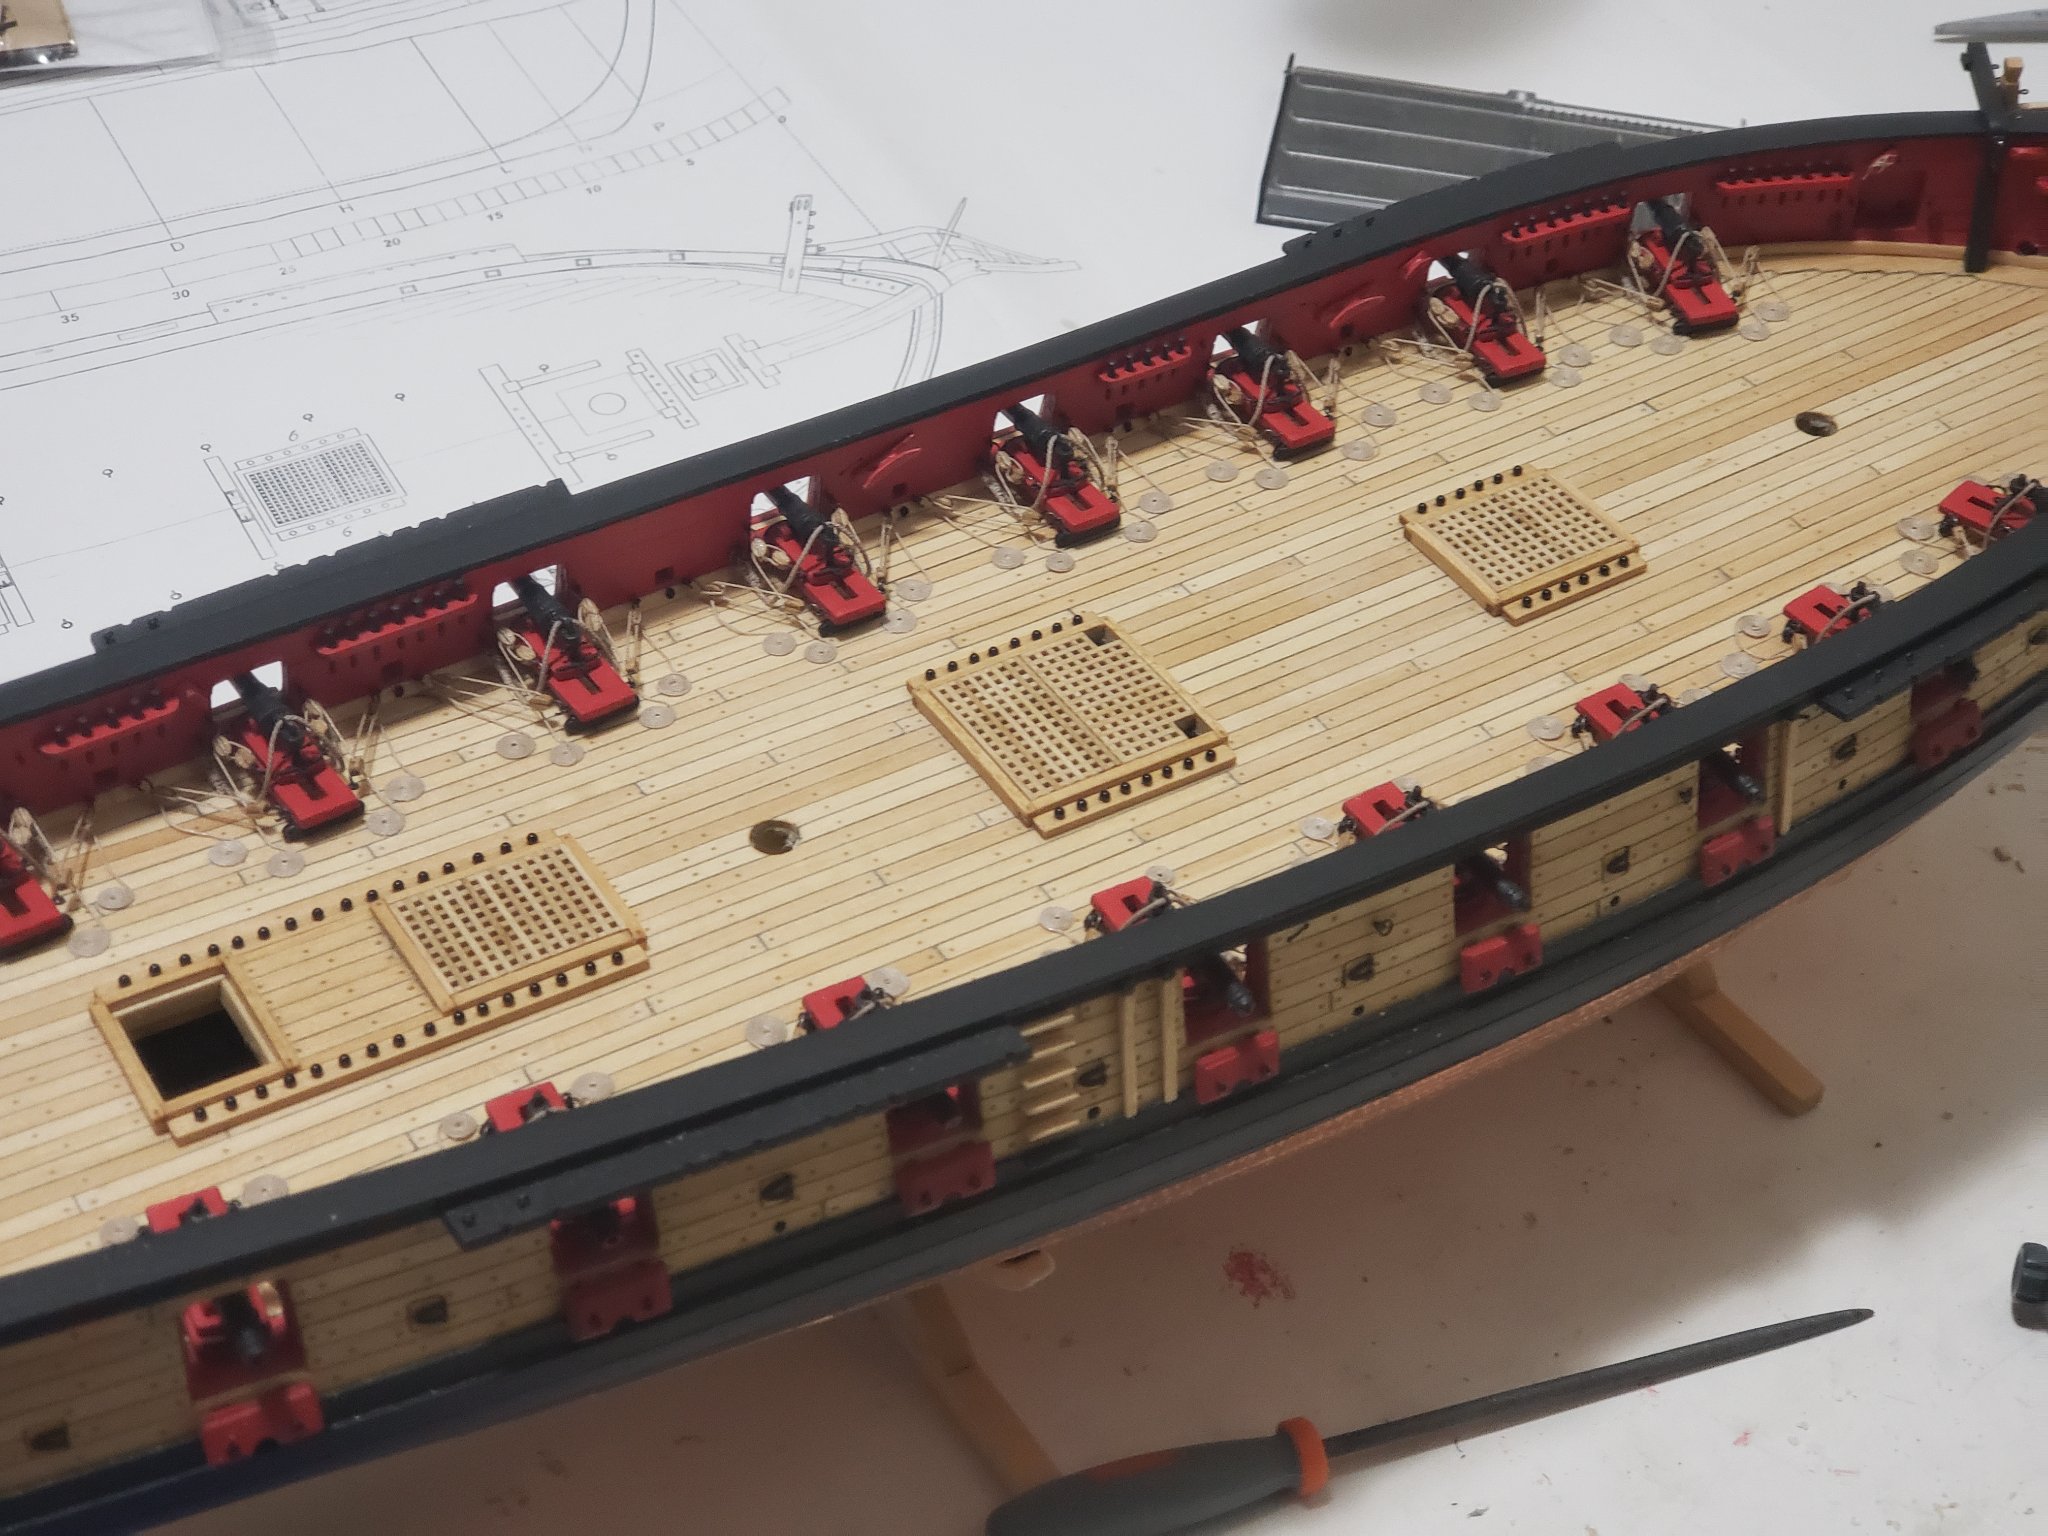
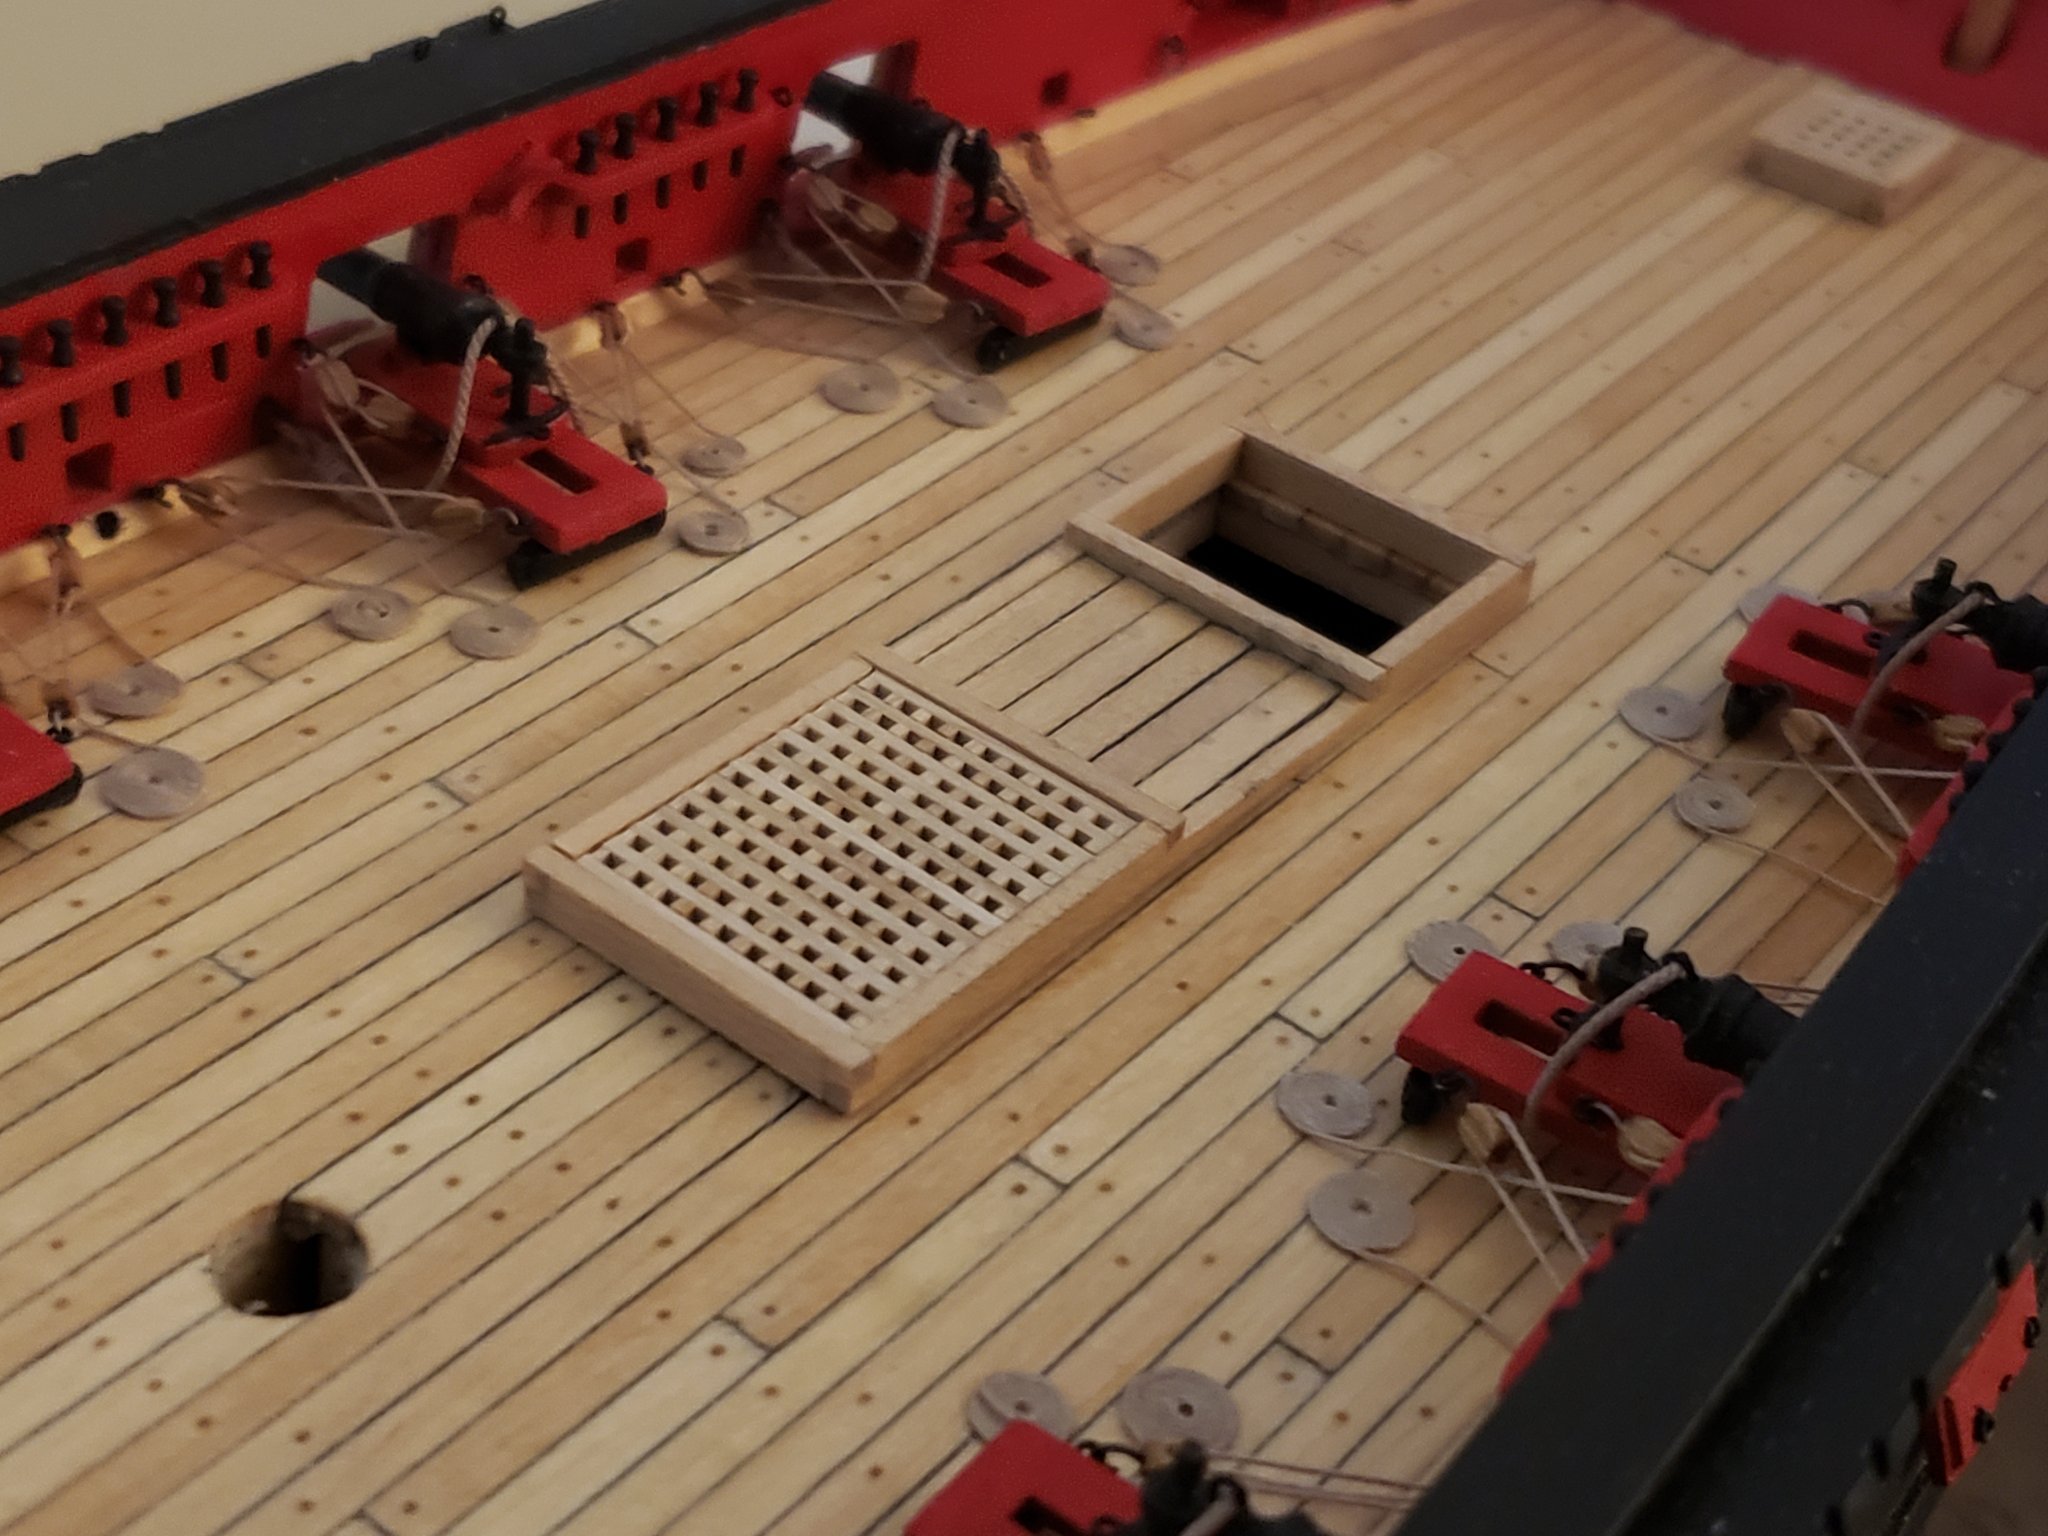
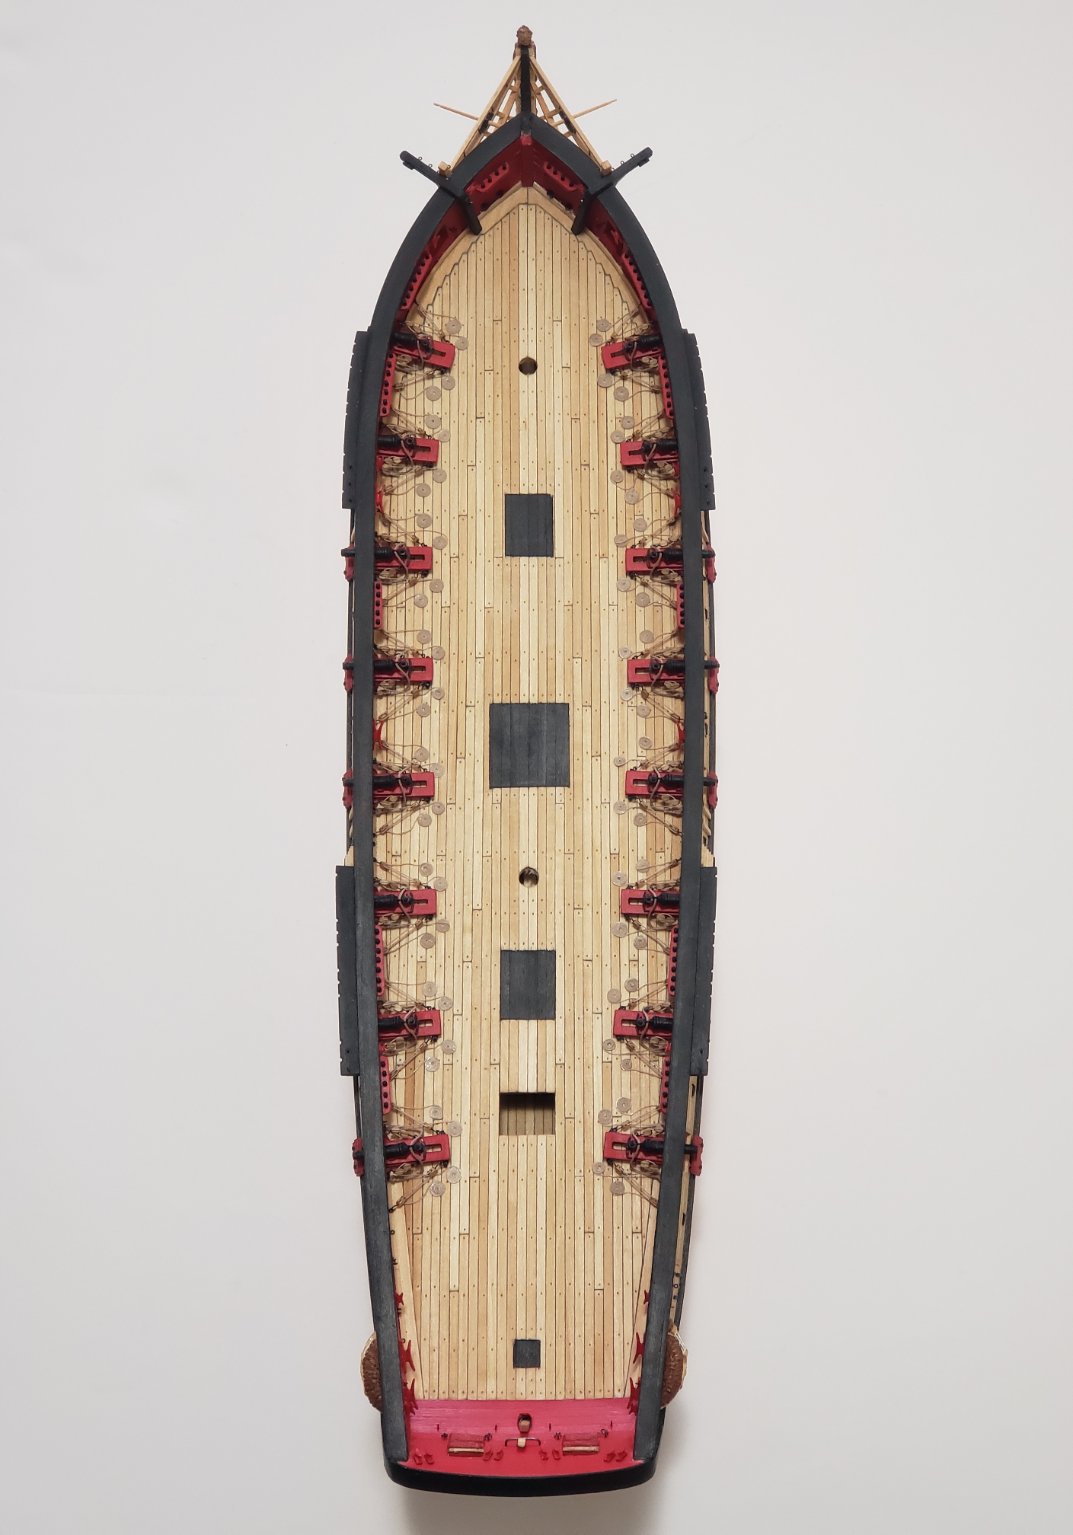
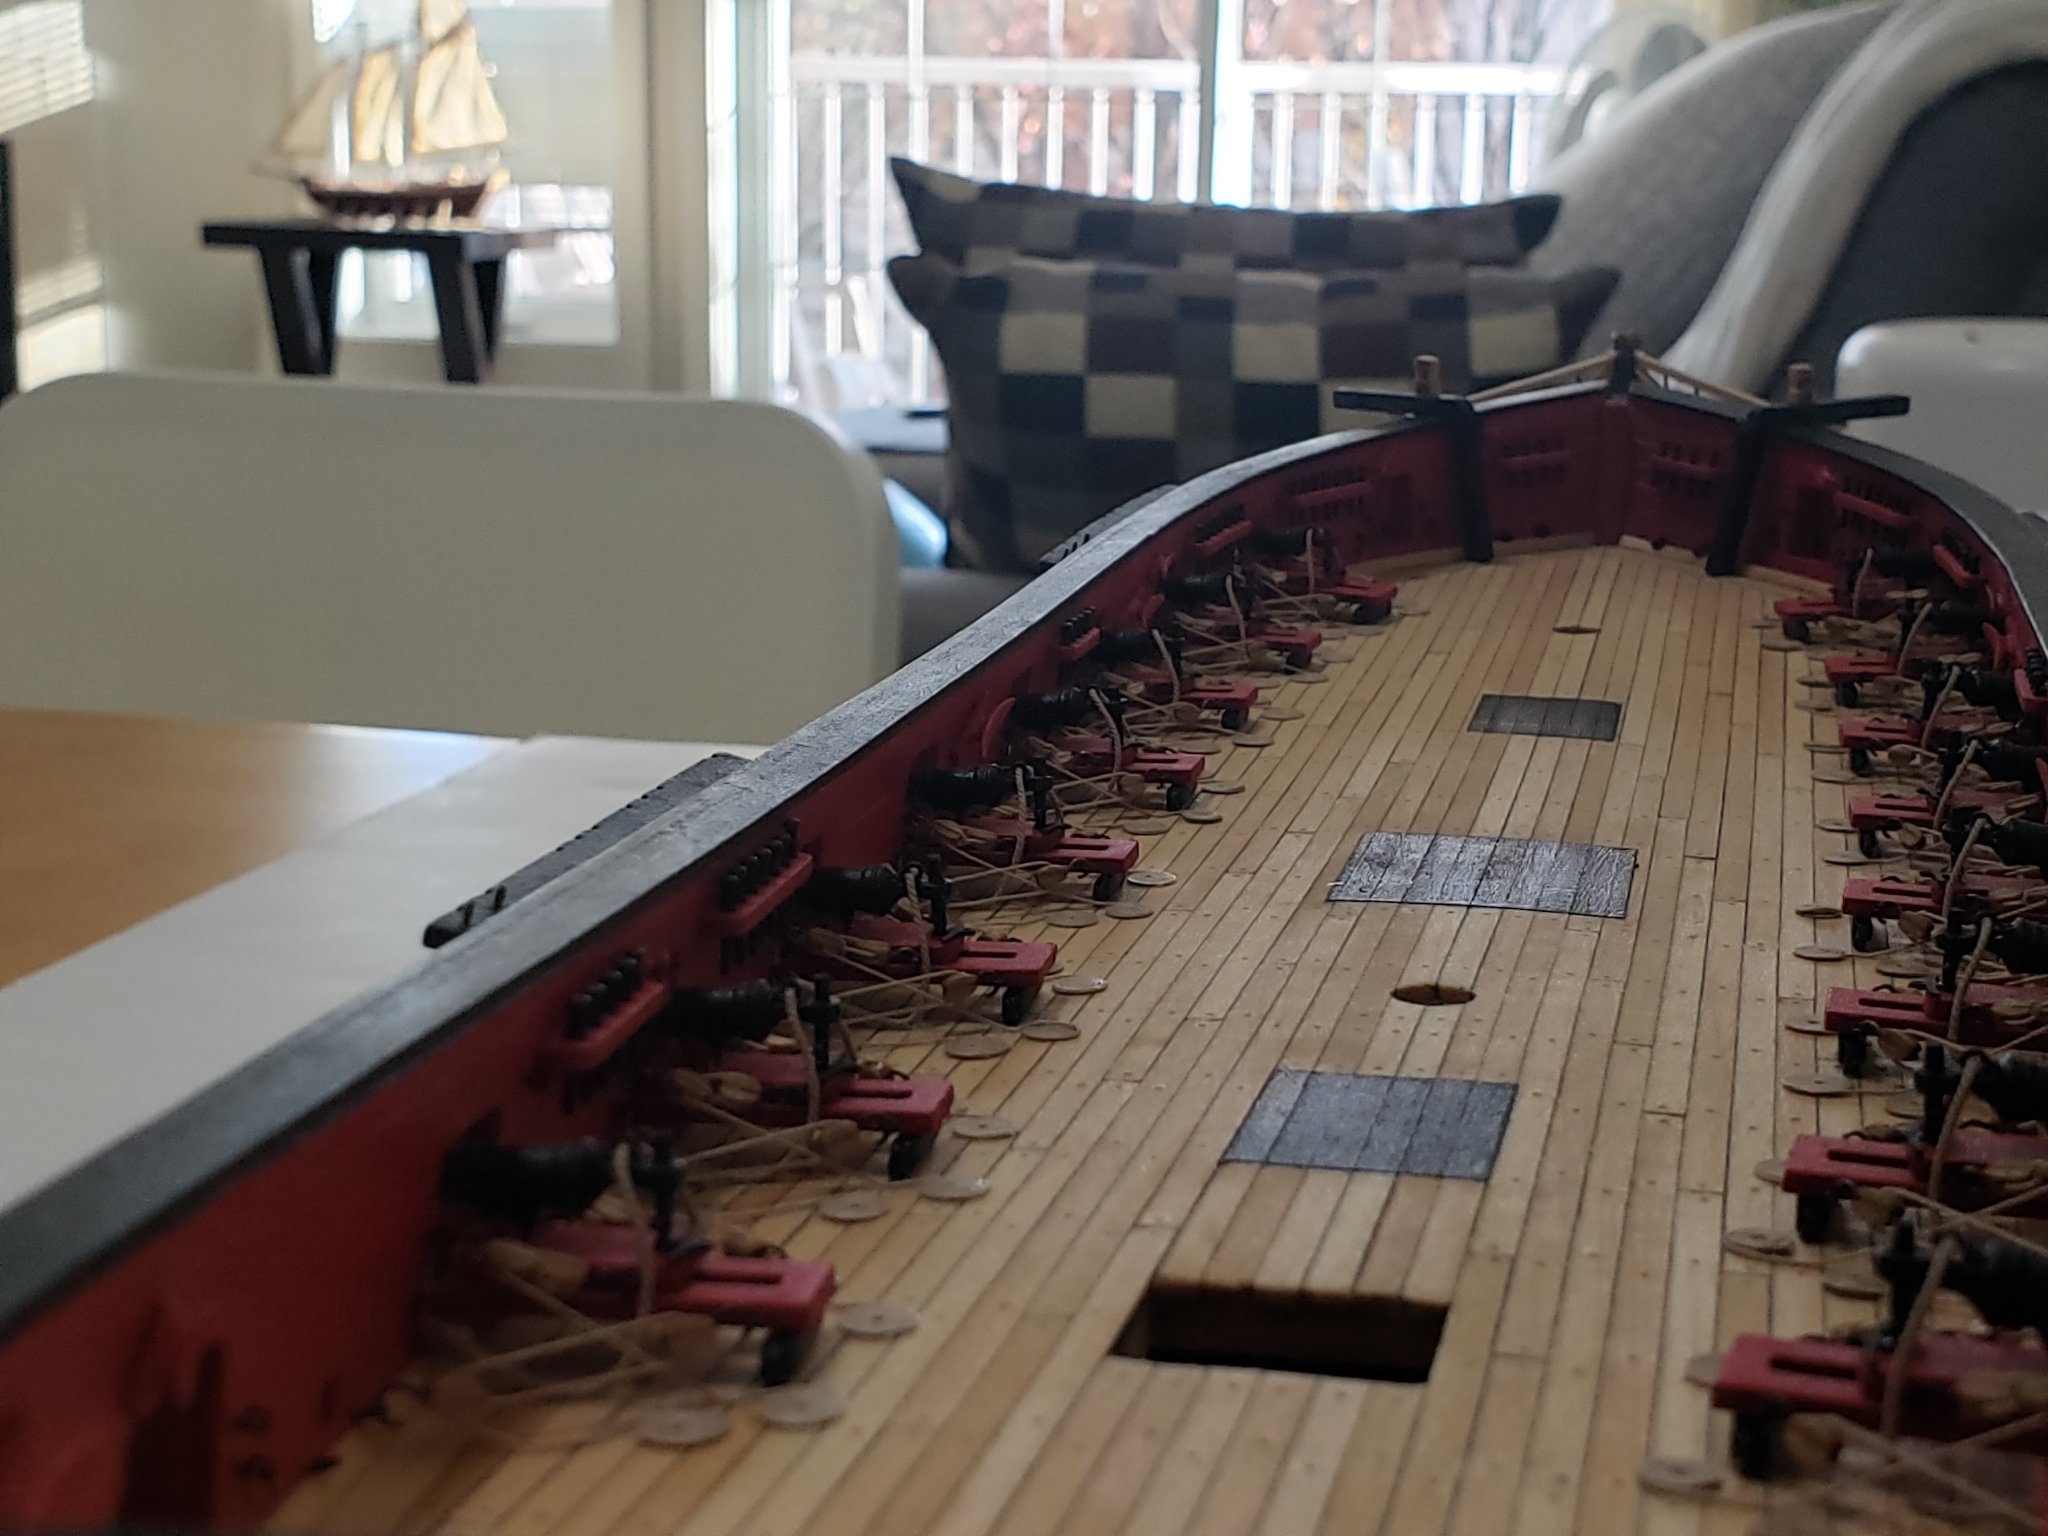
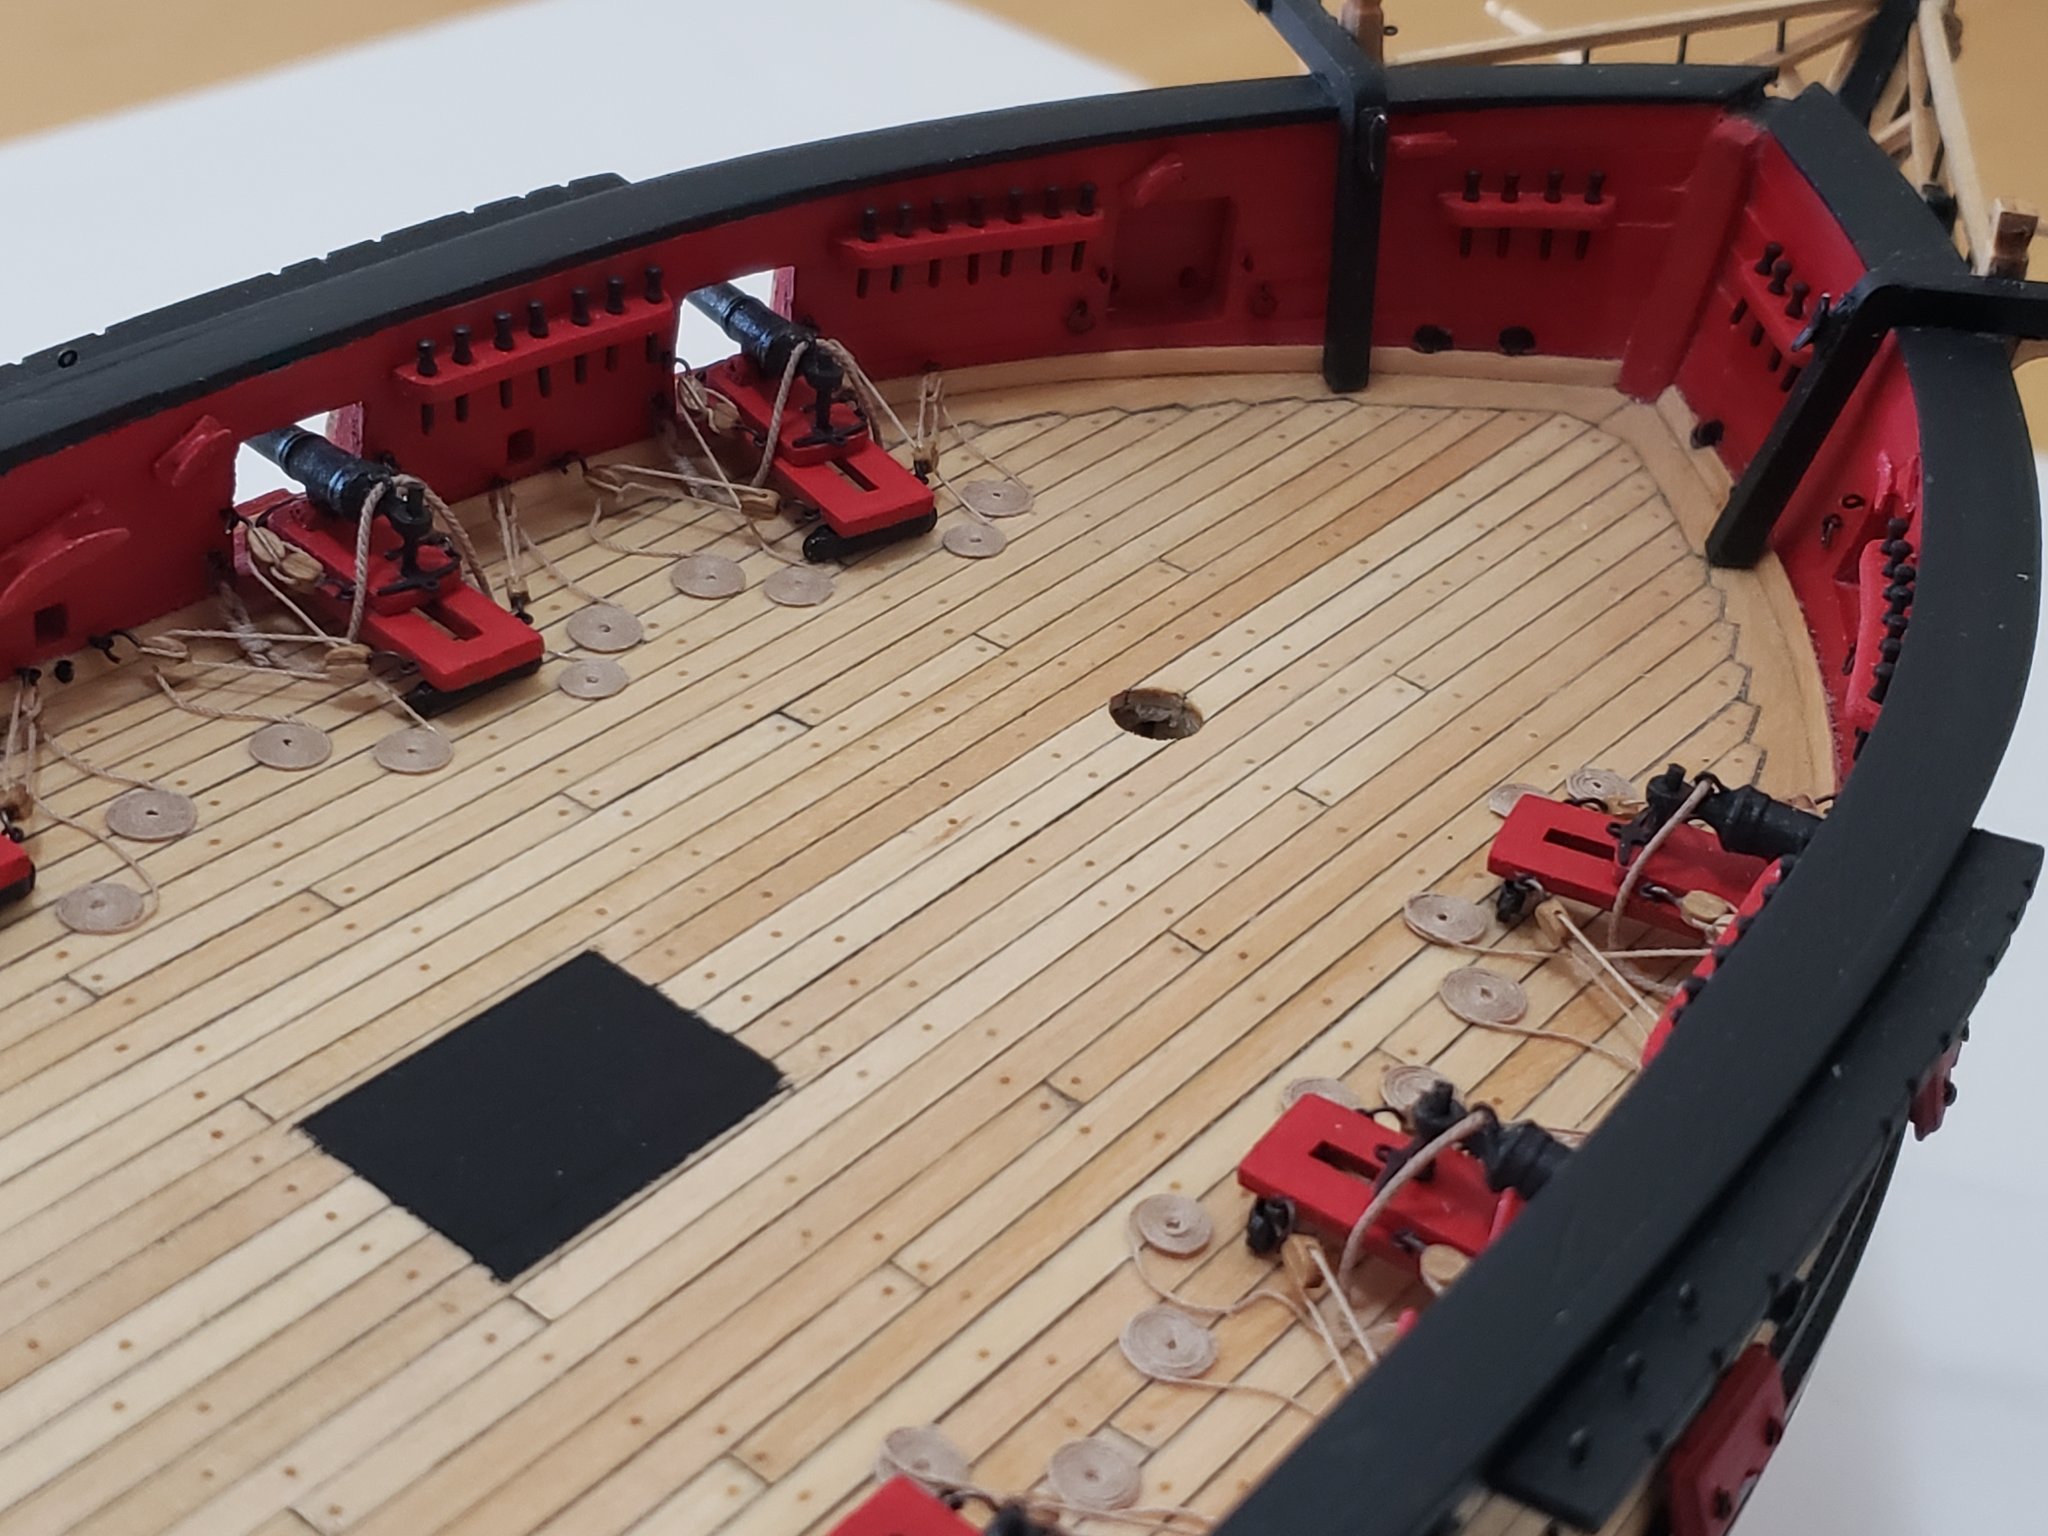
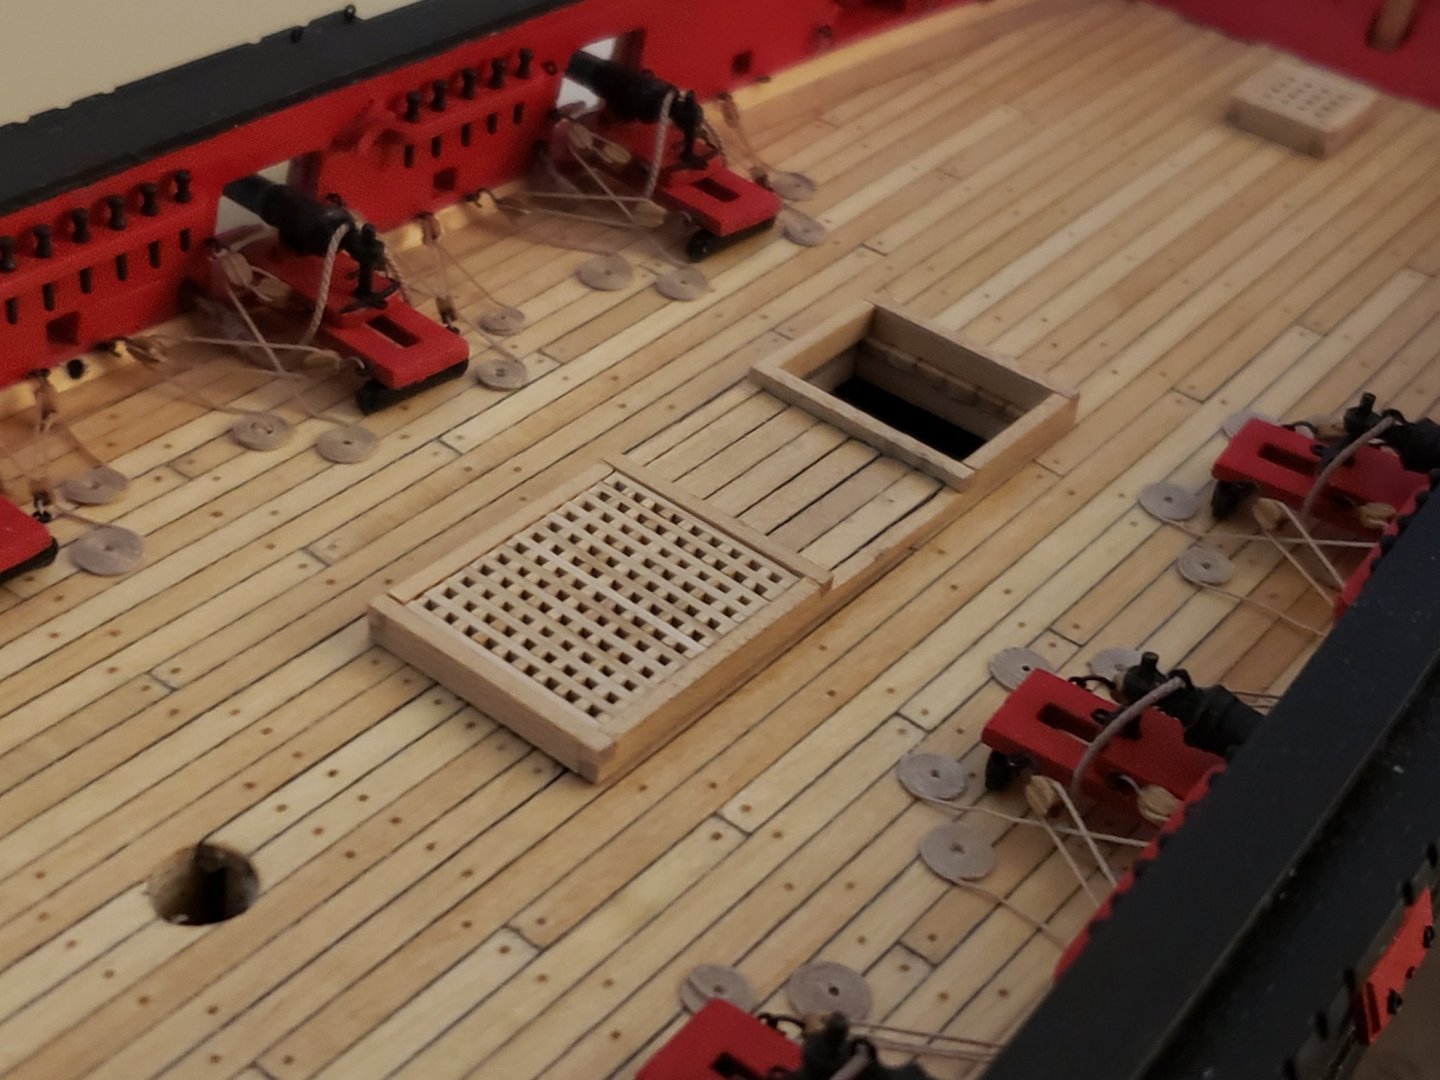
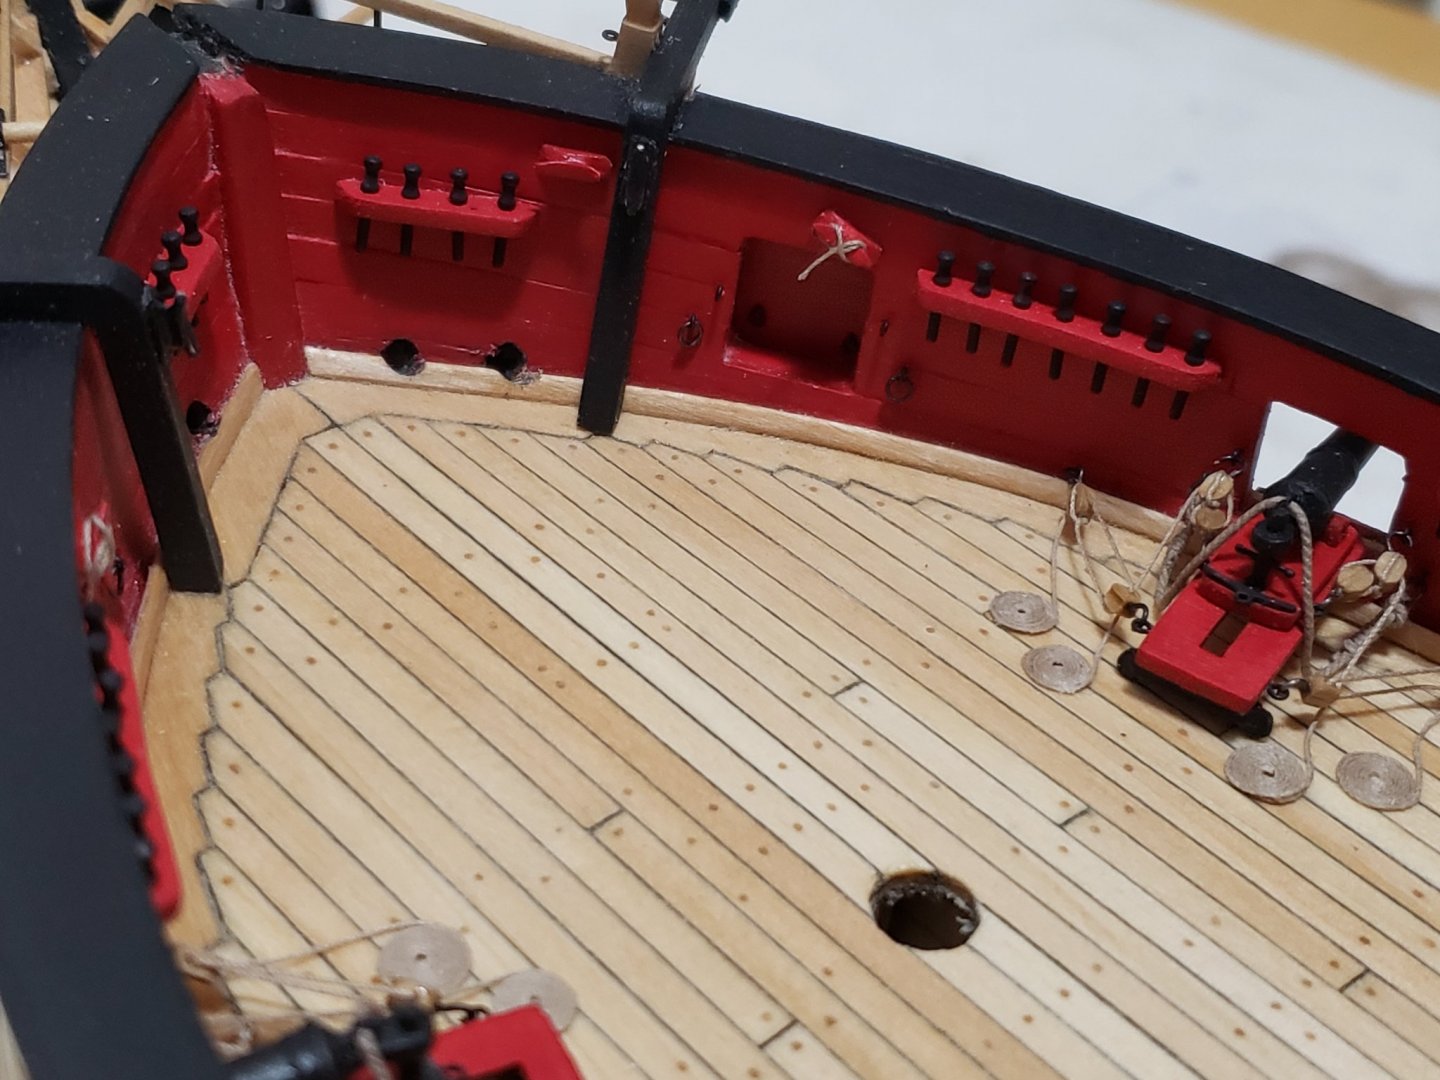
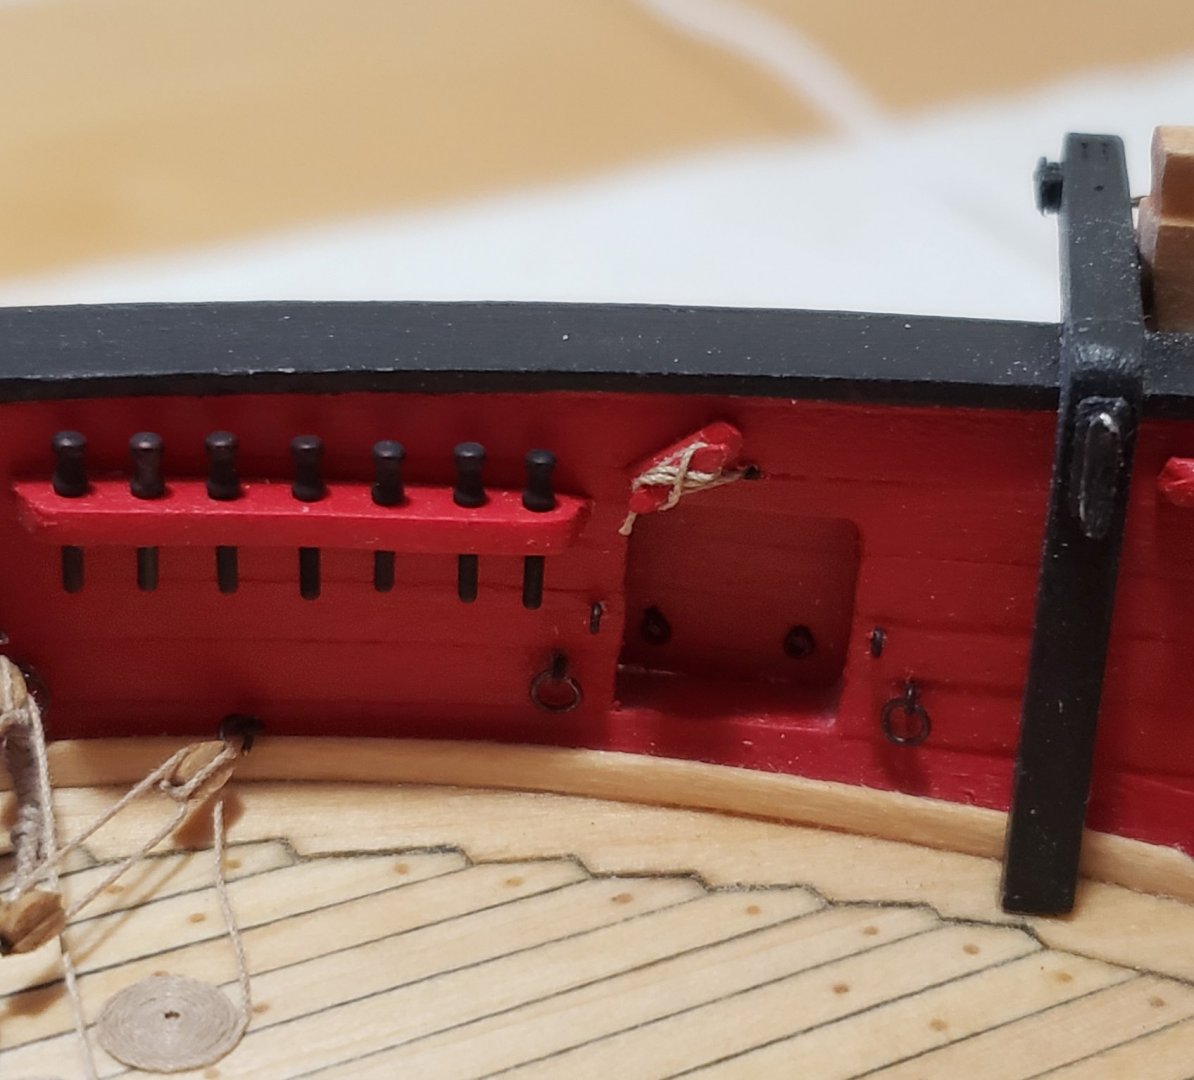
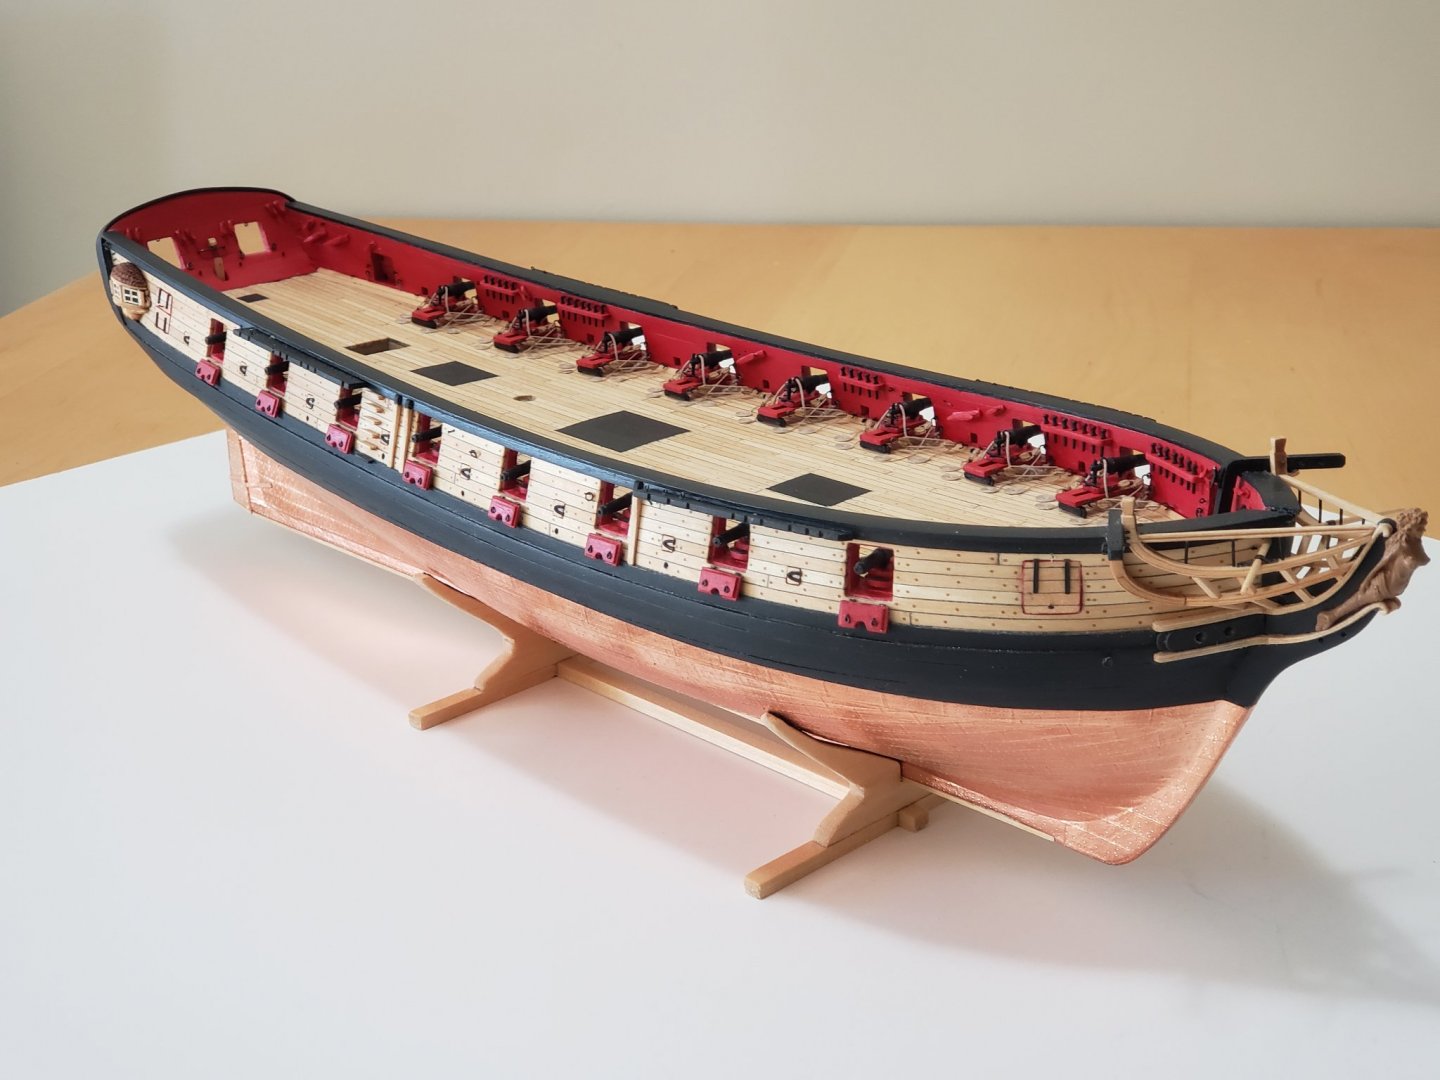
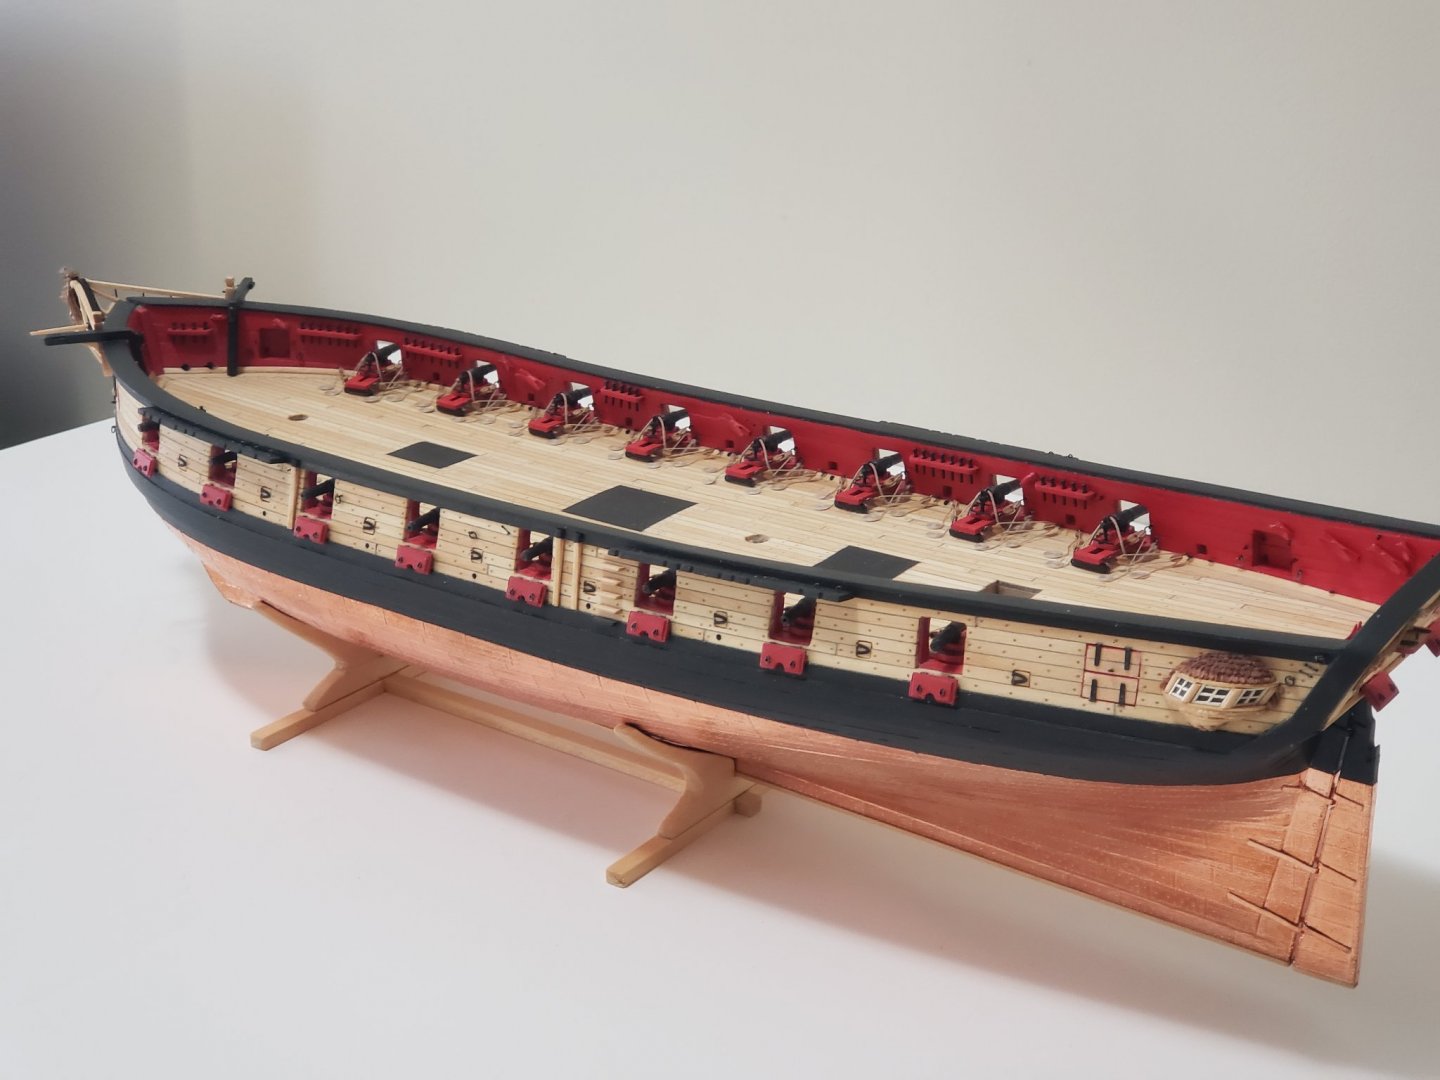
Thank you Keith!! 😊 And thanks for all the likes!! I didn't realize that the deck details chapters had been split into the aft and forward parts of the ship, so I totally missed that I had to drill the anchor holes prior to gluing the gratings 😅. Glad I could still do this with them glued, but eventually the gratings popped out when drilling the holes so it made life easier (only used a couple drops of glue on the gratings if I had to remove them if needed 😁) So, holes were drilled, painted, and gratings stuck back on: All shot racks were also completed and glued to the deck. To align the cannon balls in a straight line took some getting used to. Basically, I dry fitted them on the shotrack, made a note on which ones were out of place with a tiny arrow on the wood to which direction they should be, and sanded with a round needle file accordingly. This ensured I ended up with somewhat of a straight line.


- 950 replies
-
- 11
-
-
- syren
- model shipways
- (and 1 more)
-
This was basically it hahaha I just roughly sanded the majority of the material off with the dremel tool, and finished off by hand using small bits of sandpaper. It wasn't very fun since the entire structure kept getting weaker so had to use less and less pressure. This made the entire process seem like an eternity... Once the outer hull was planked i could finish up sanding the inside with a bit more pressure since everything was held firmly with the planks. Sanding is probably the least fun part but its got to be done...
- 436 replies
-
- 2
-
-
- Syren
- Model Shipways
- (and 1 more)
-
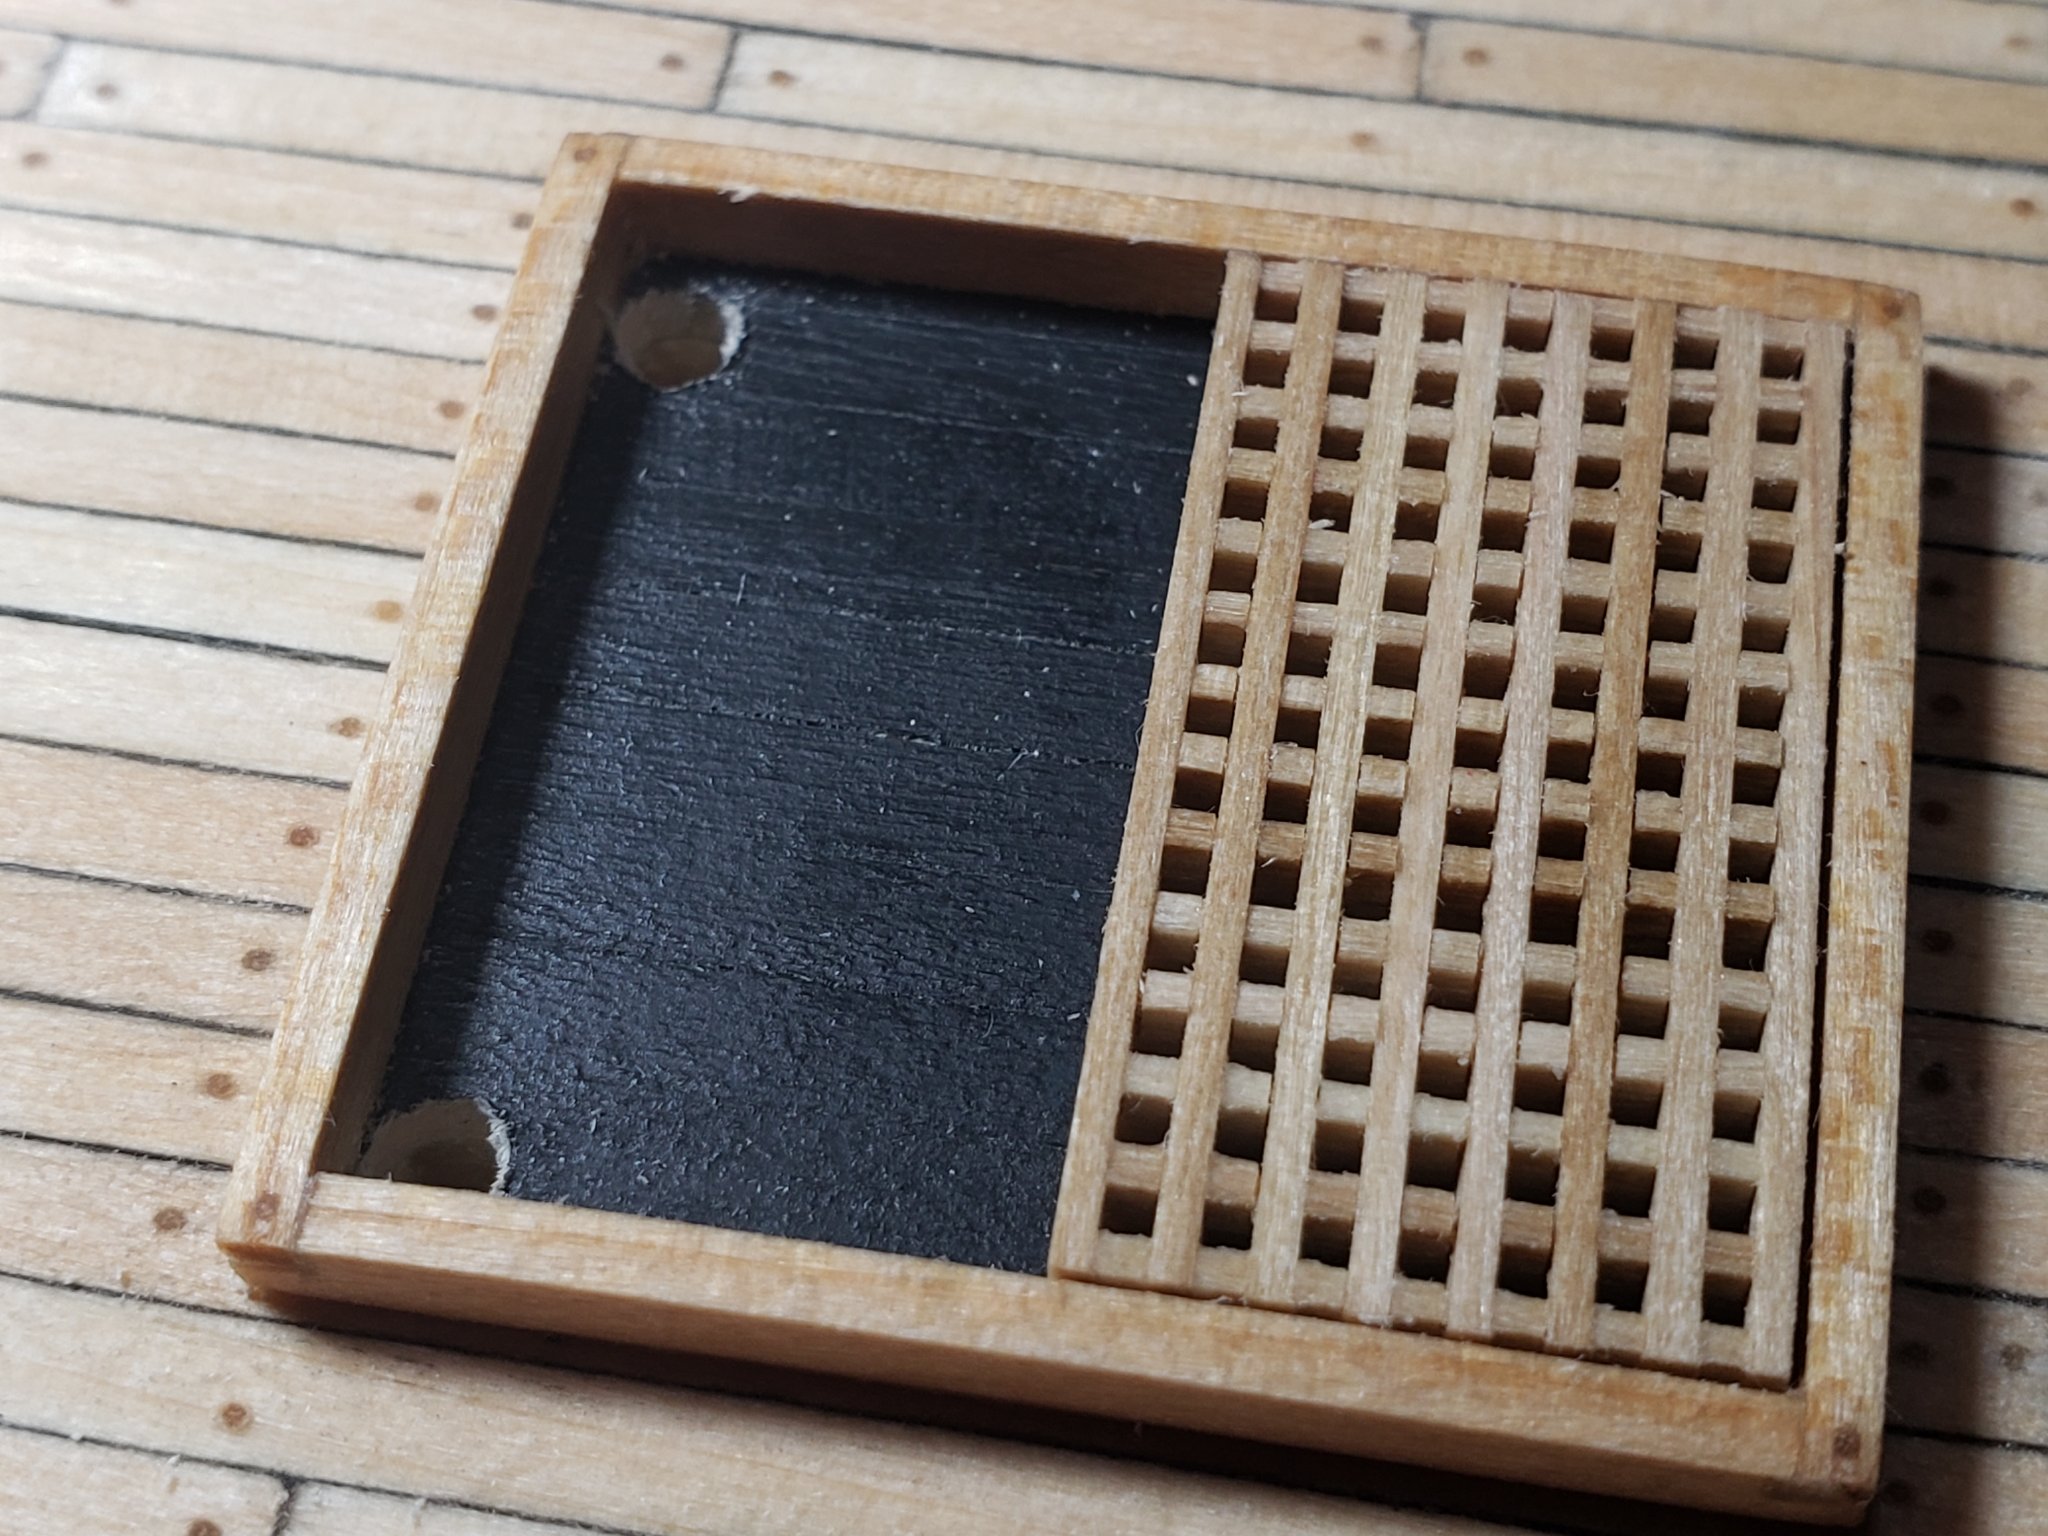
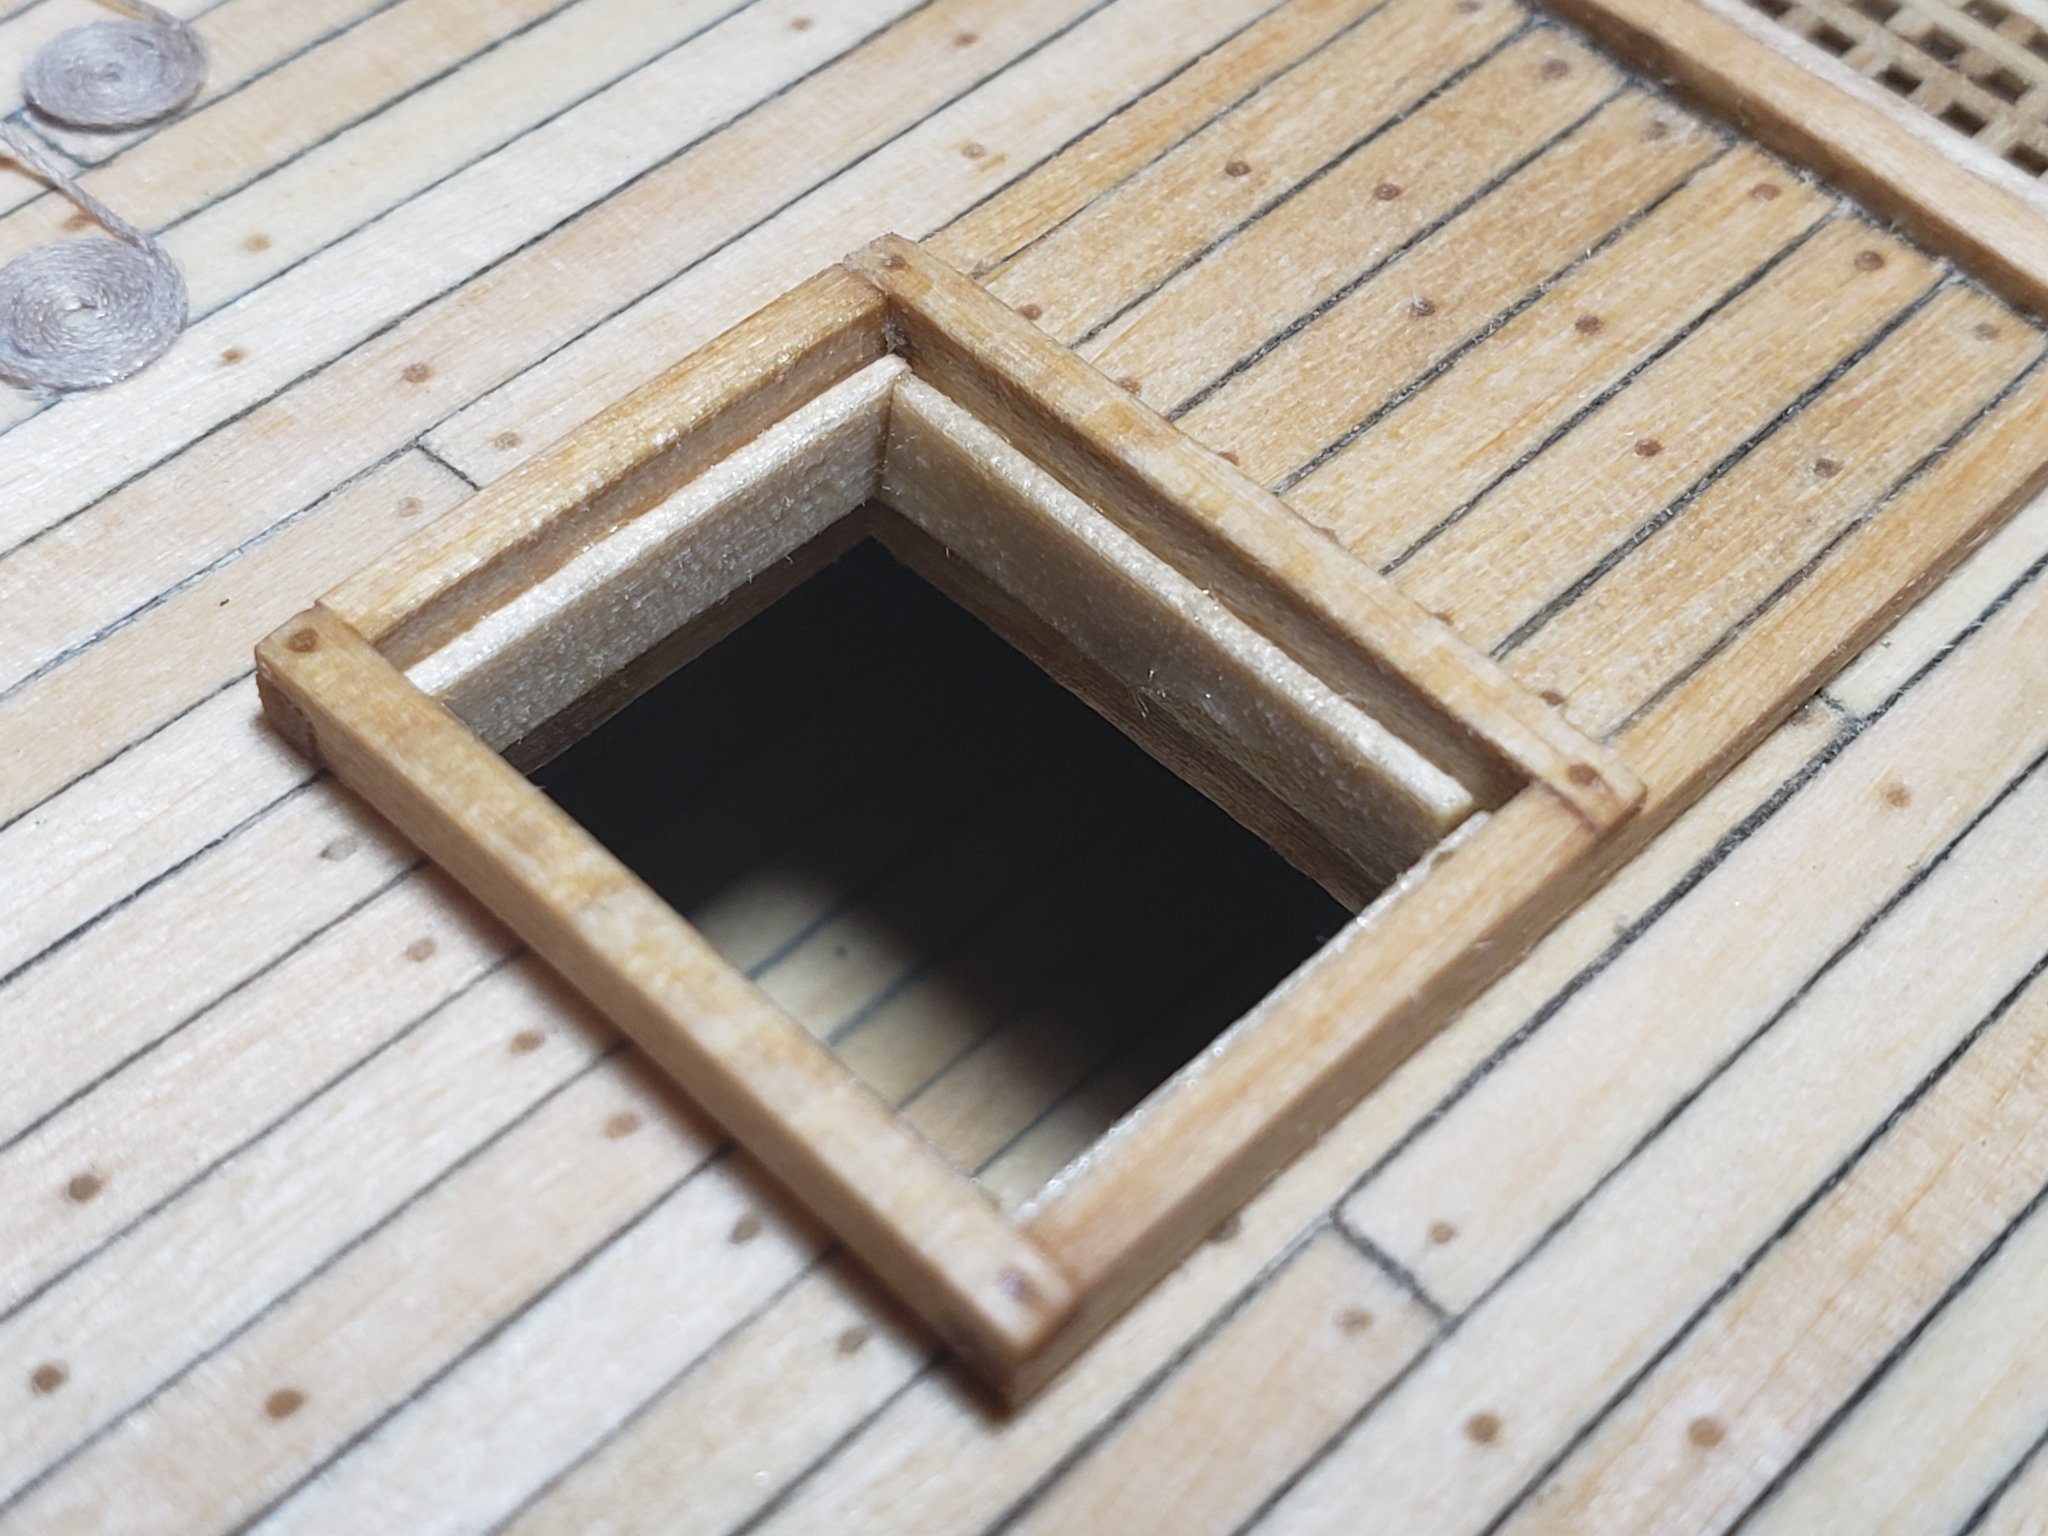
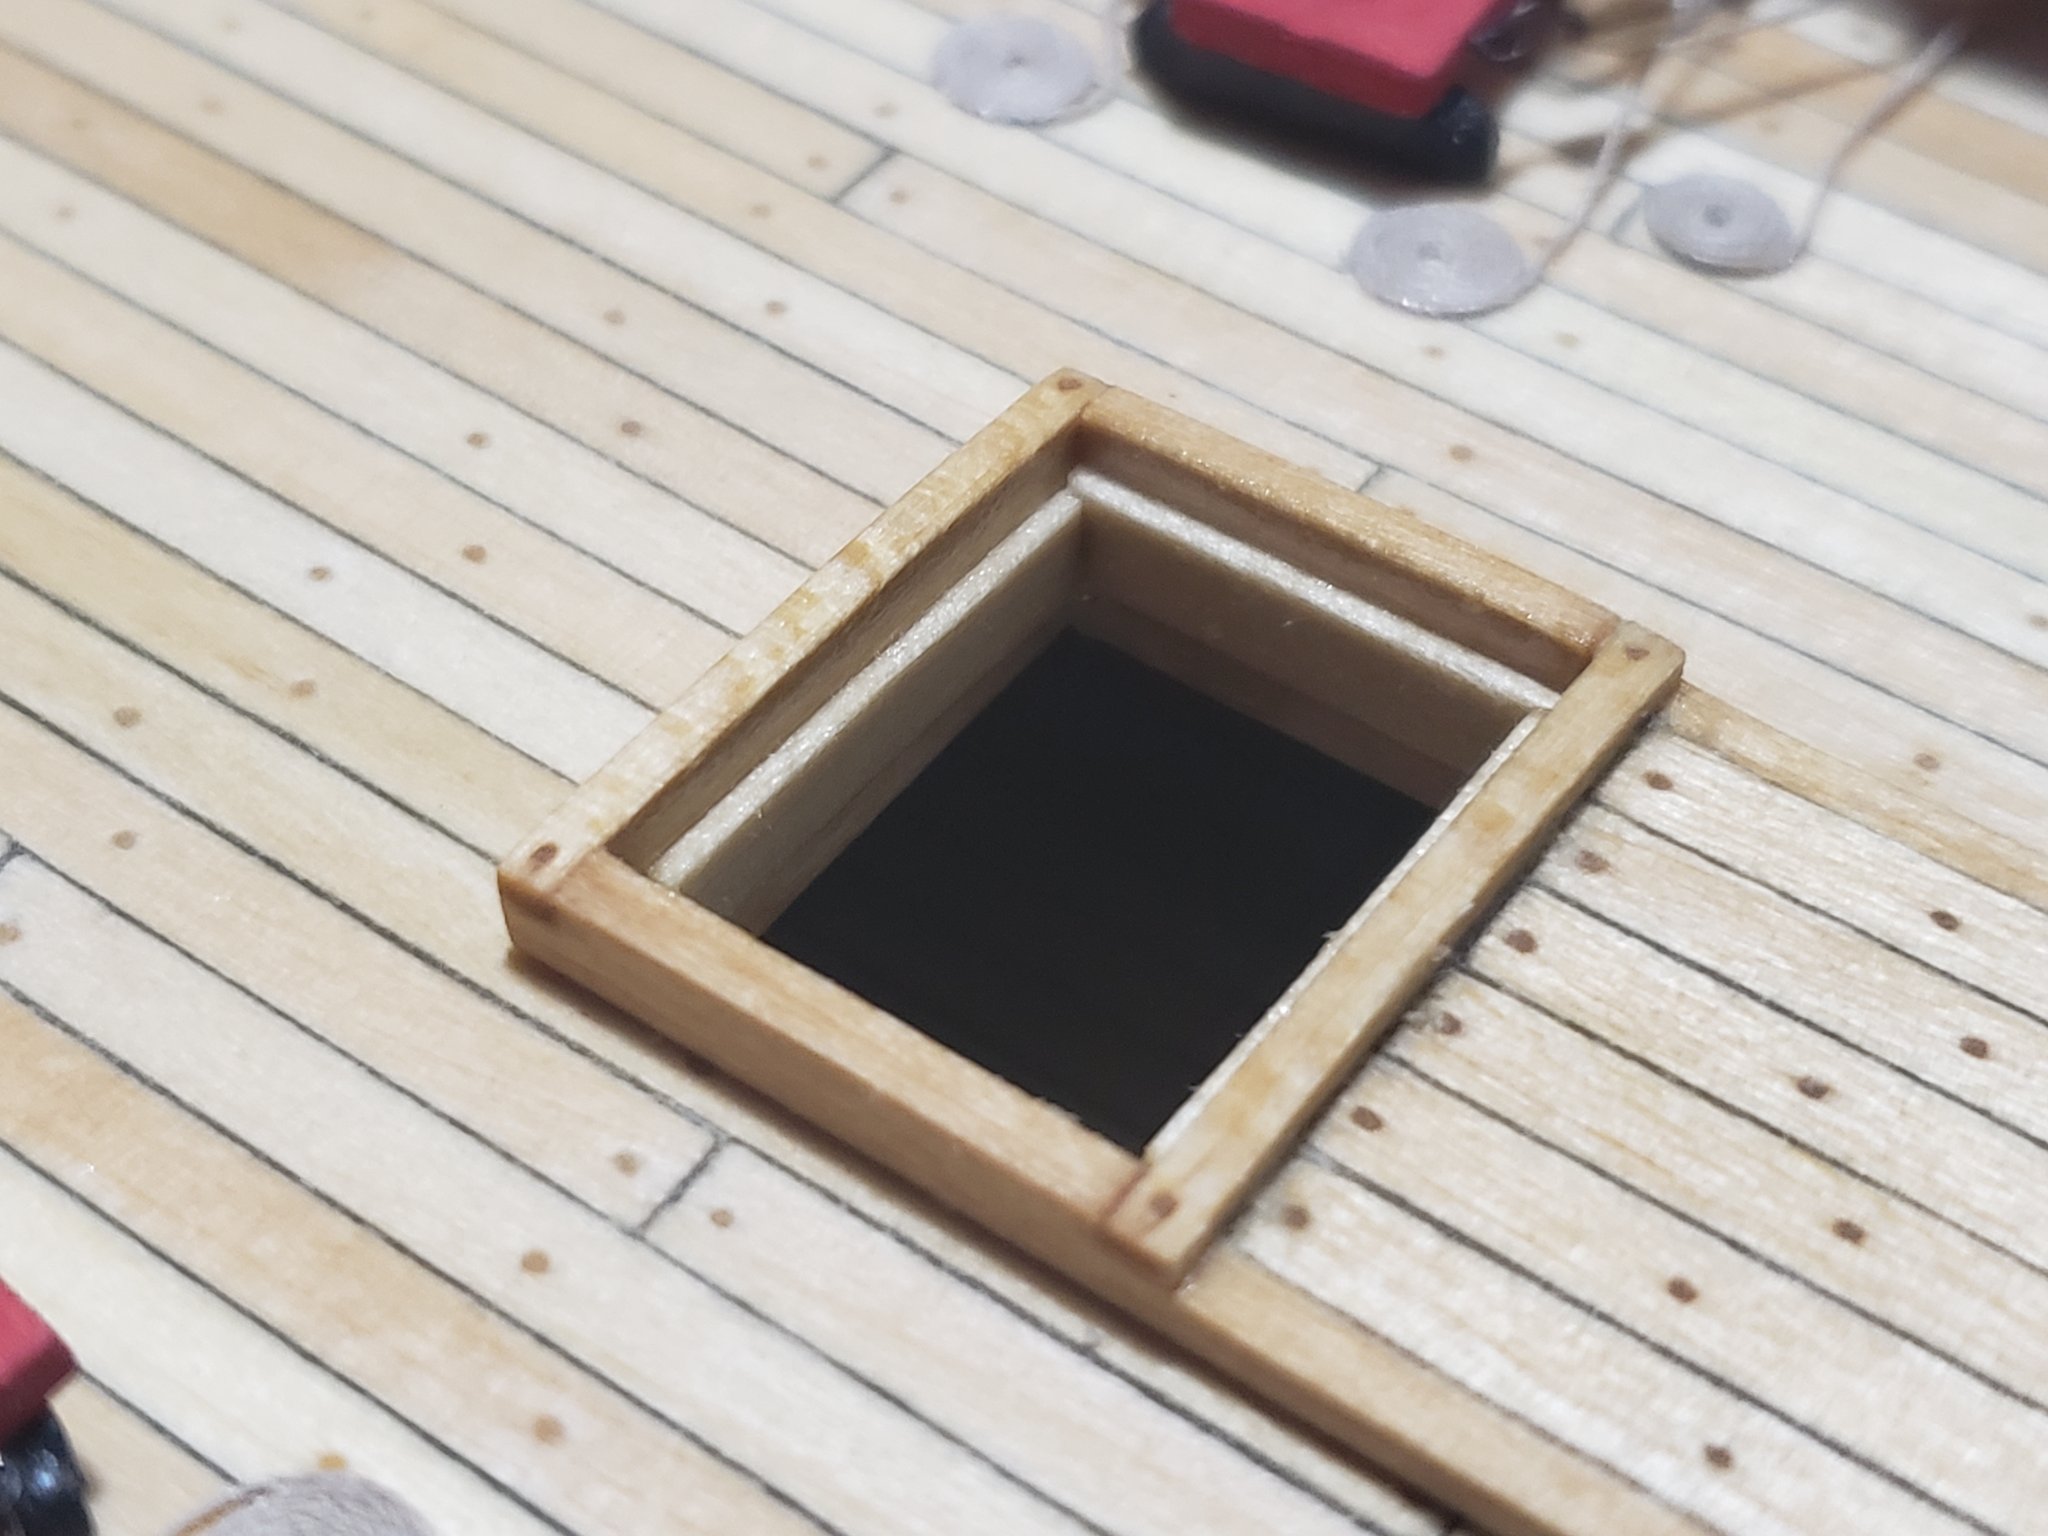
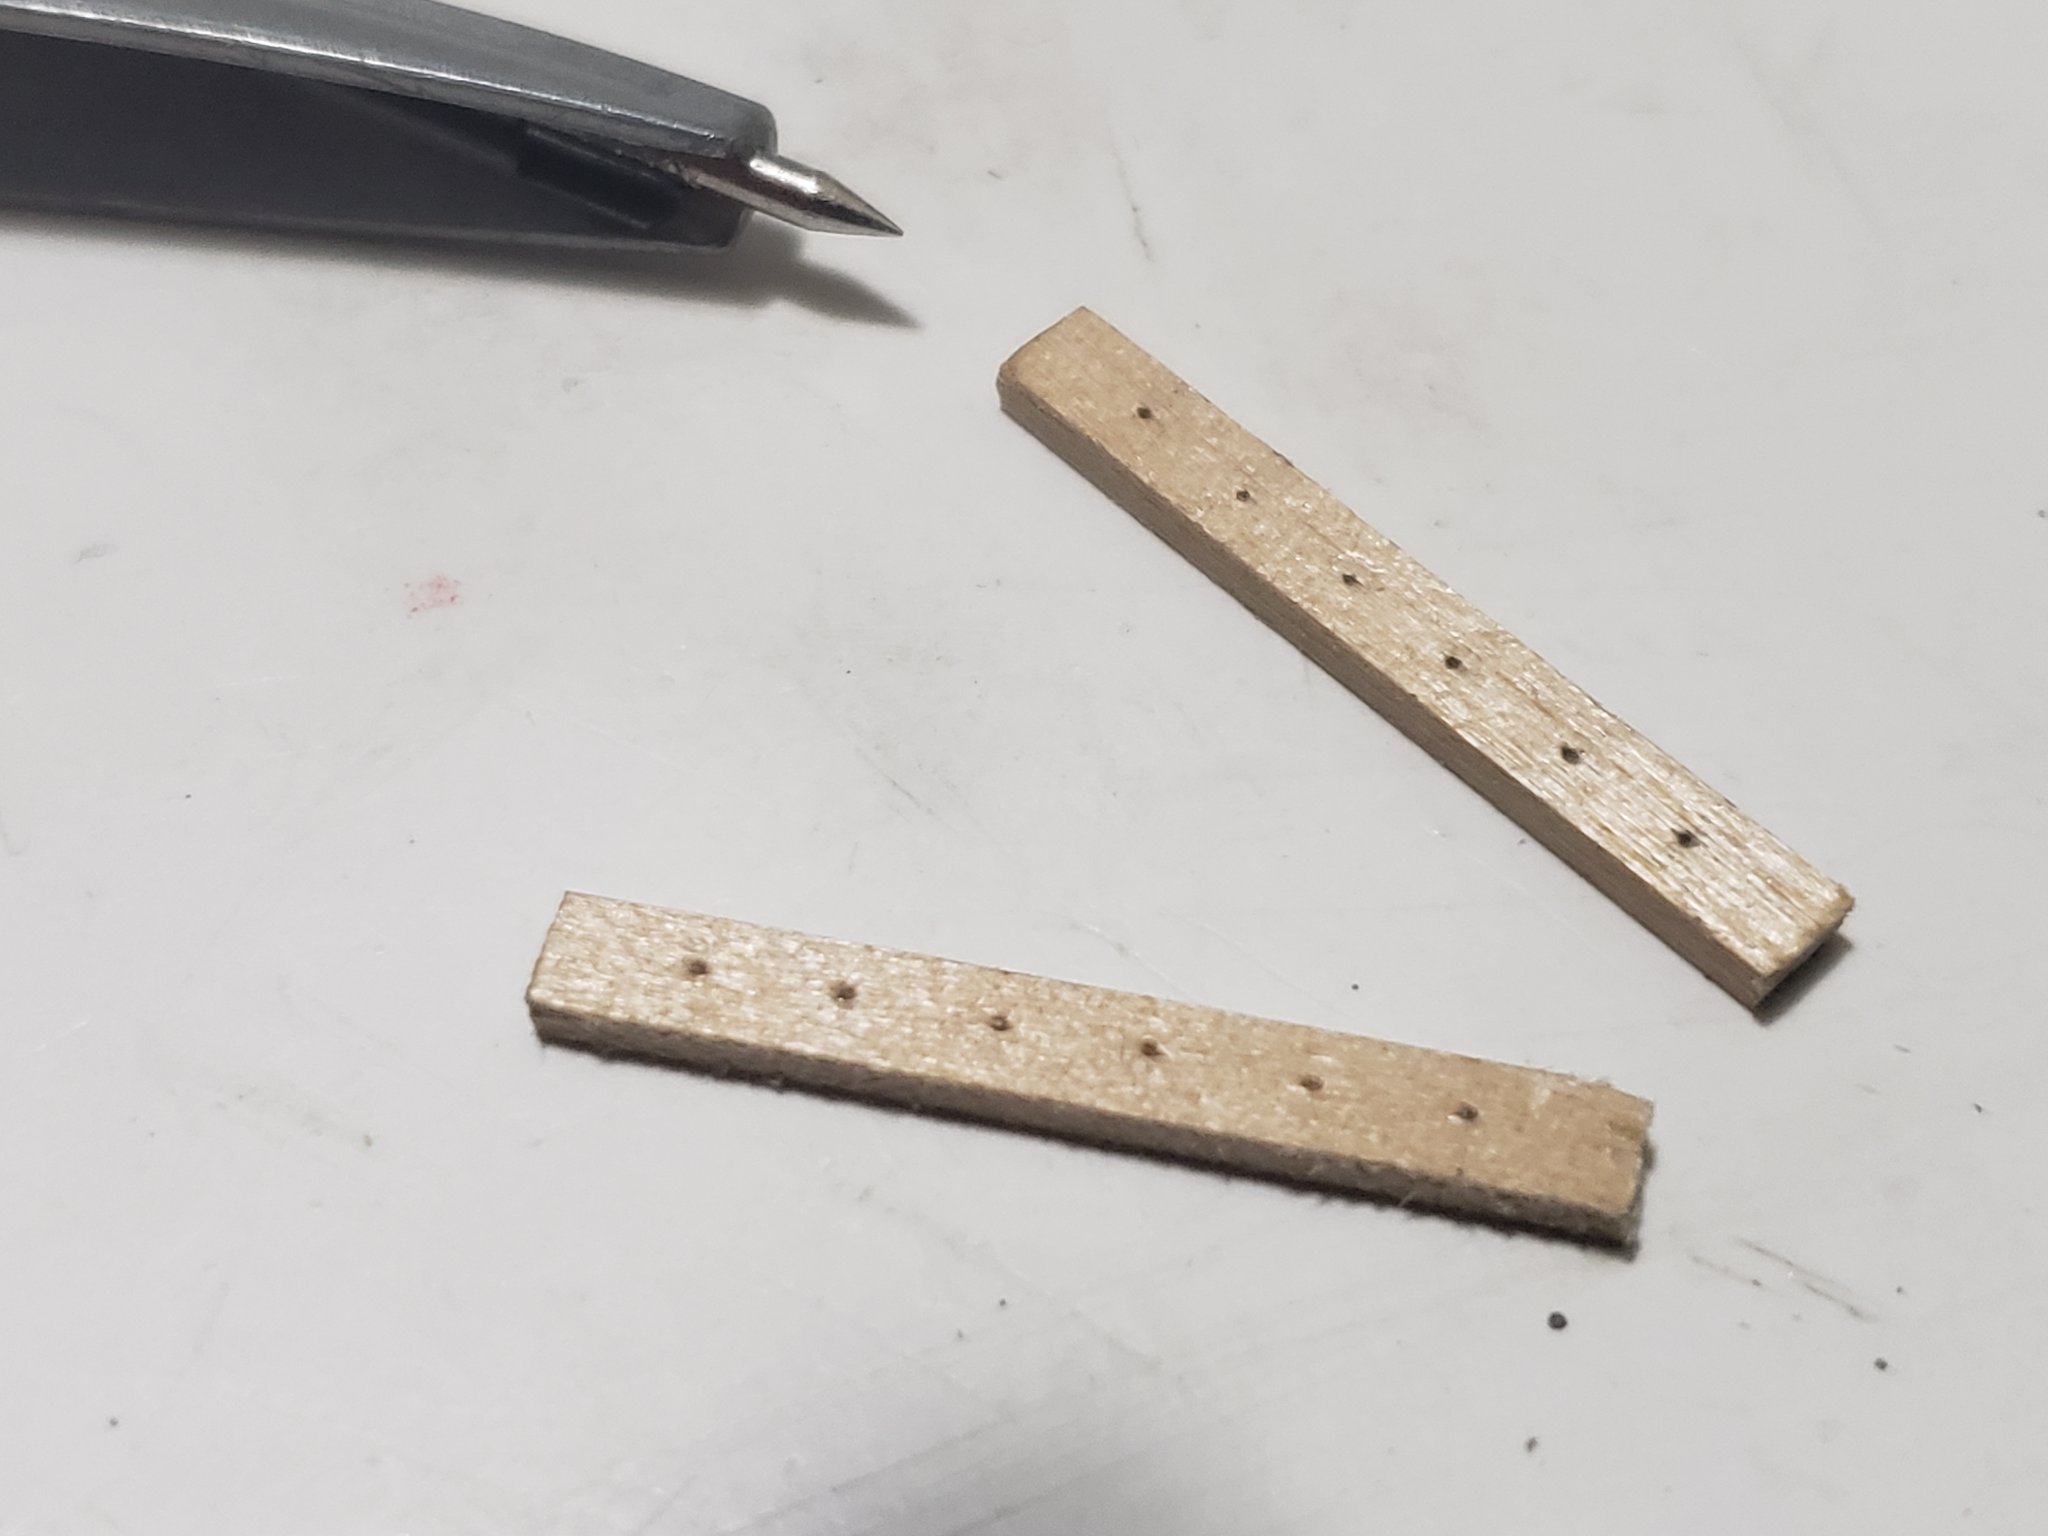
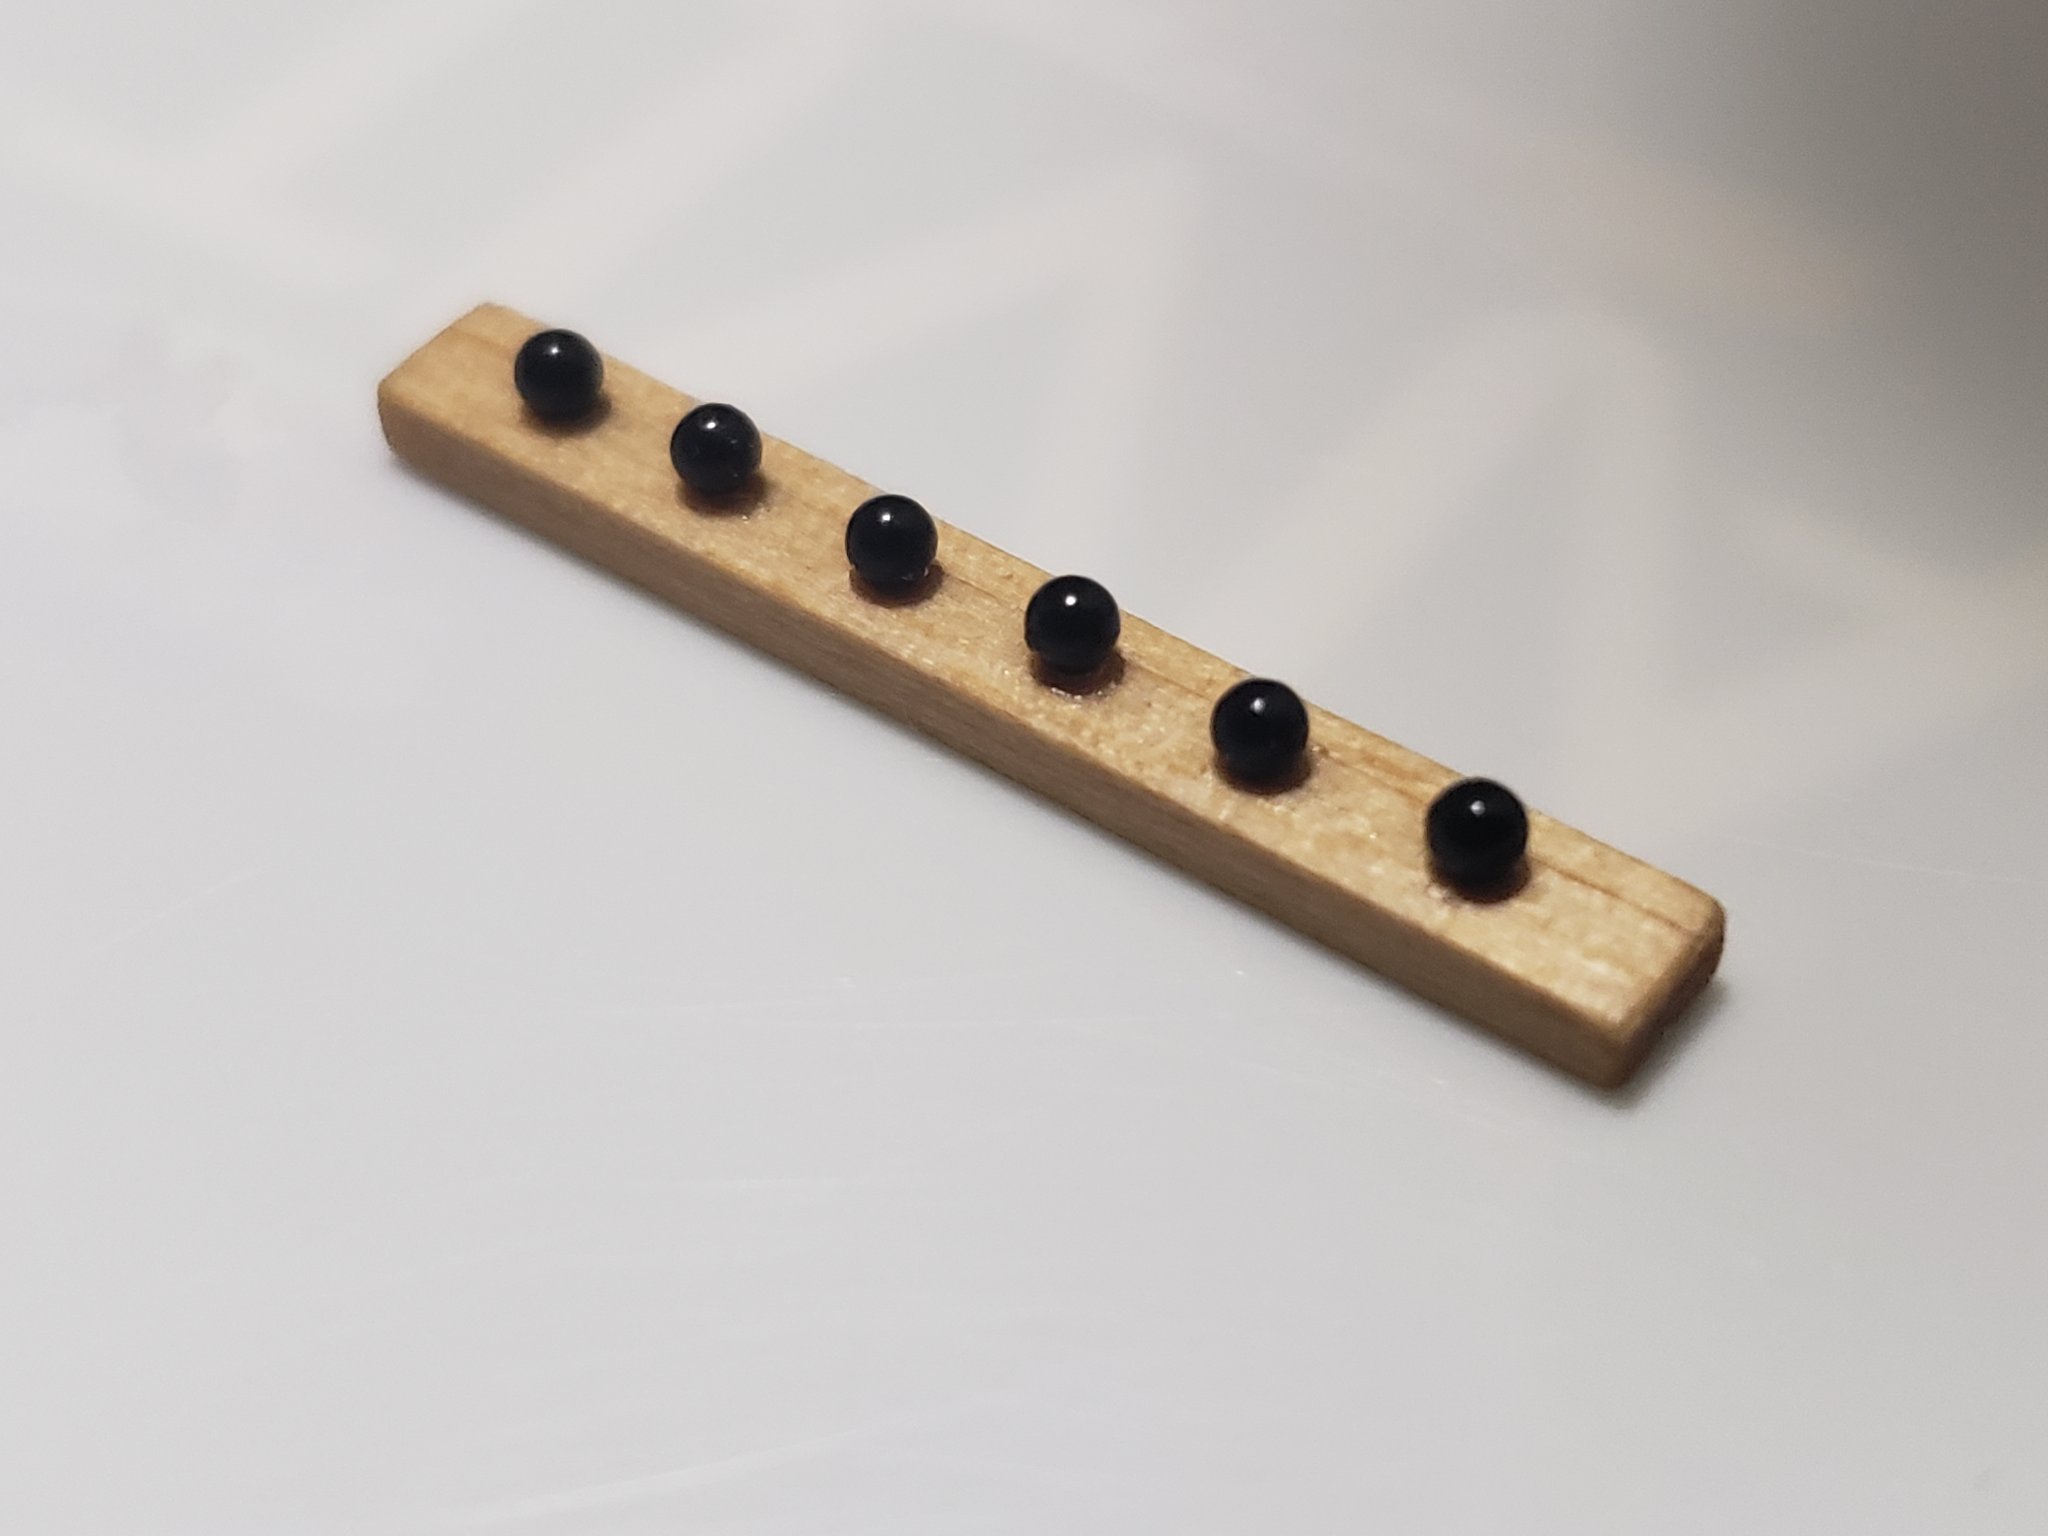
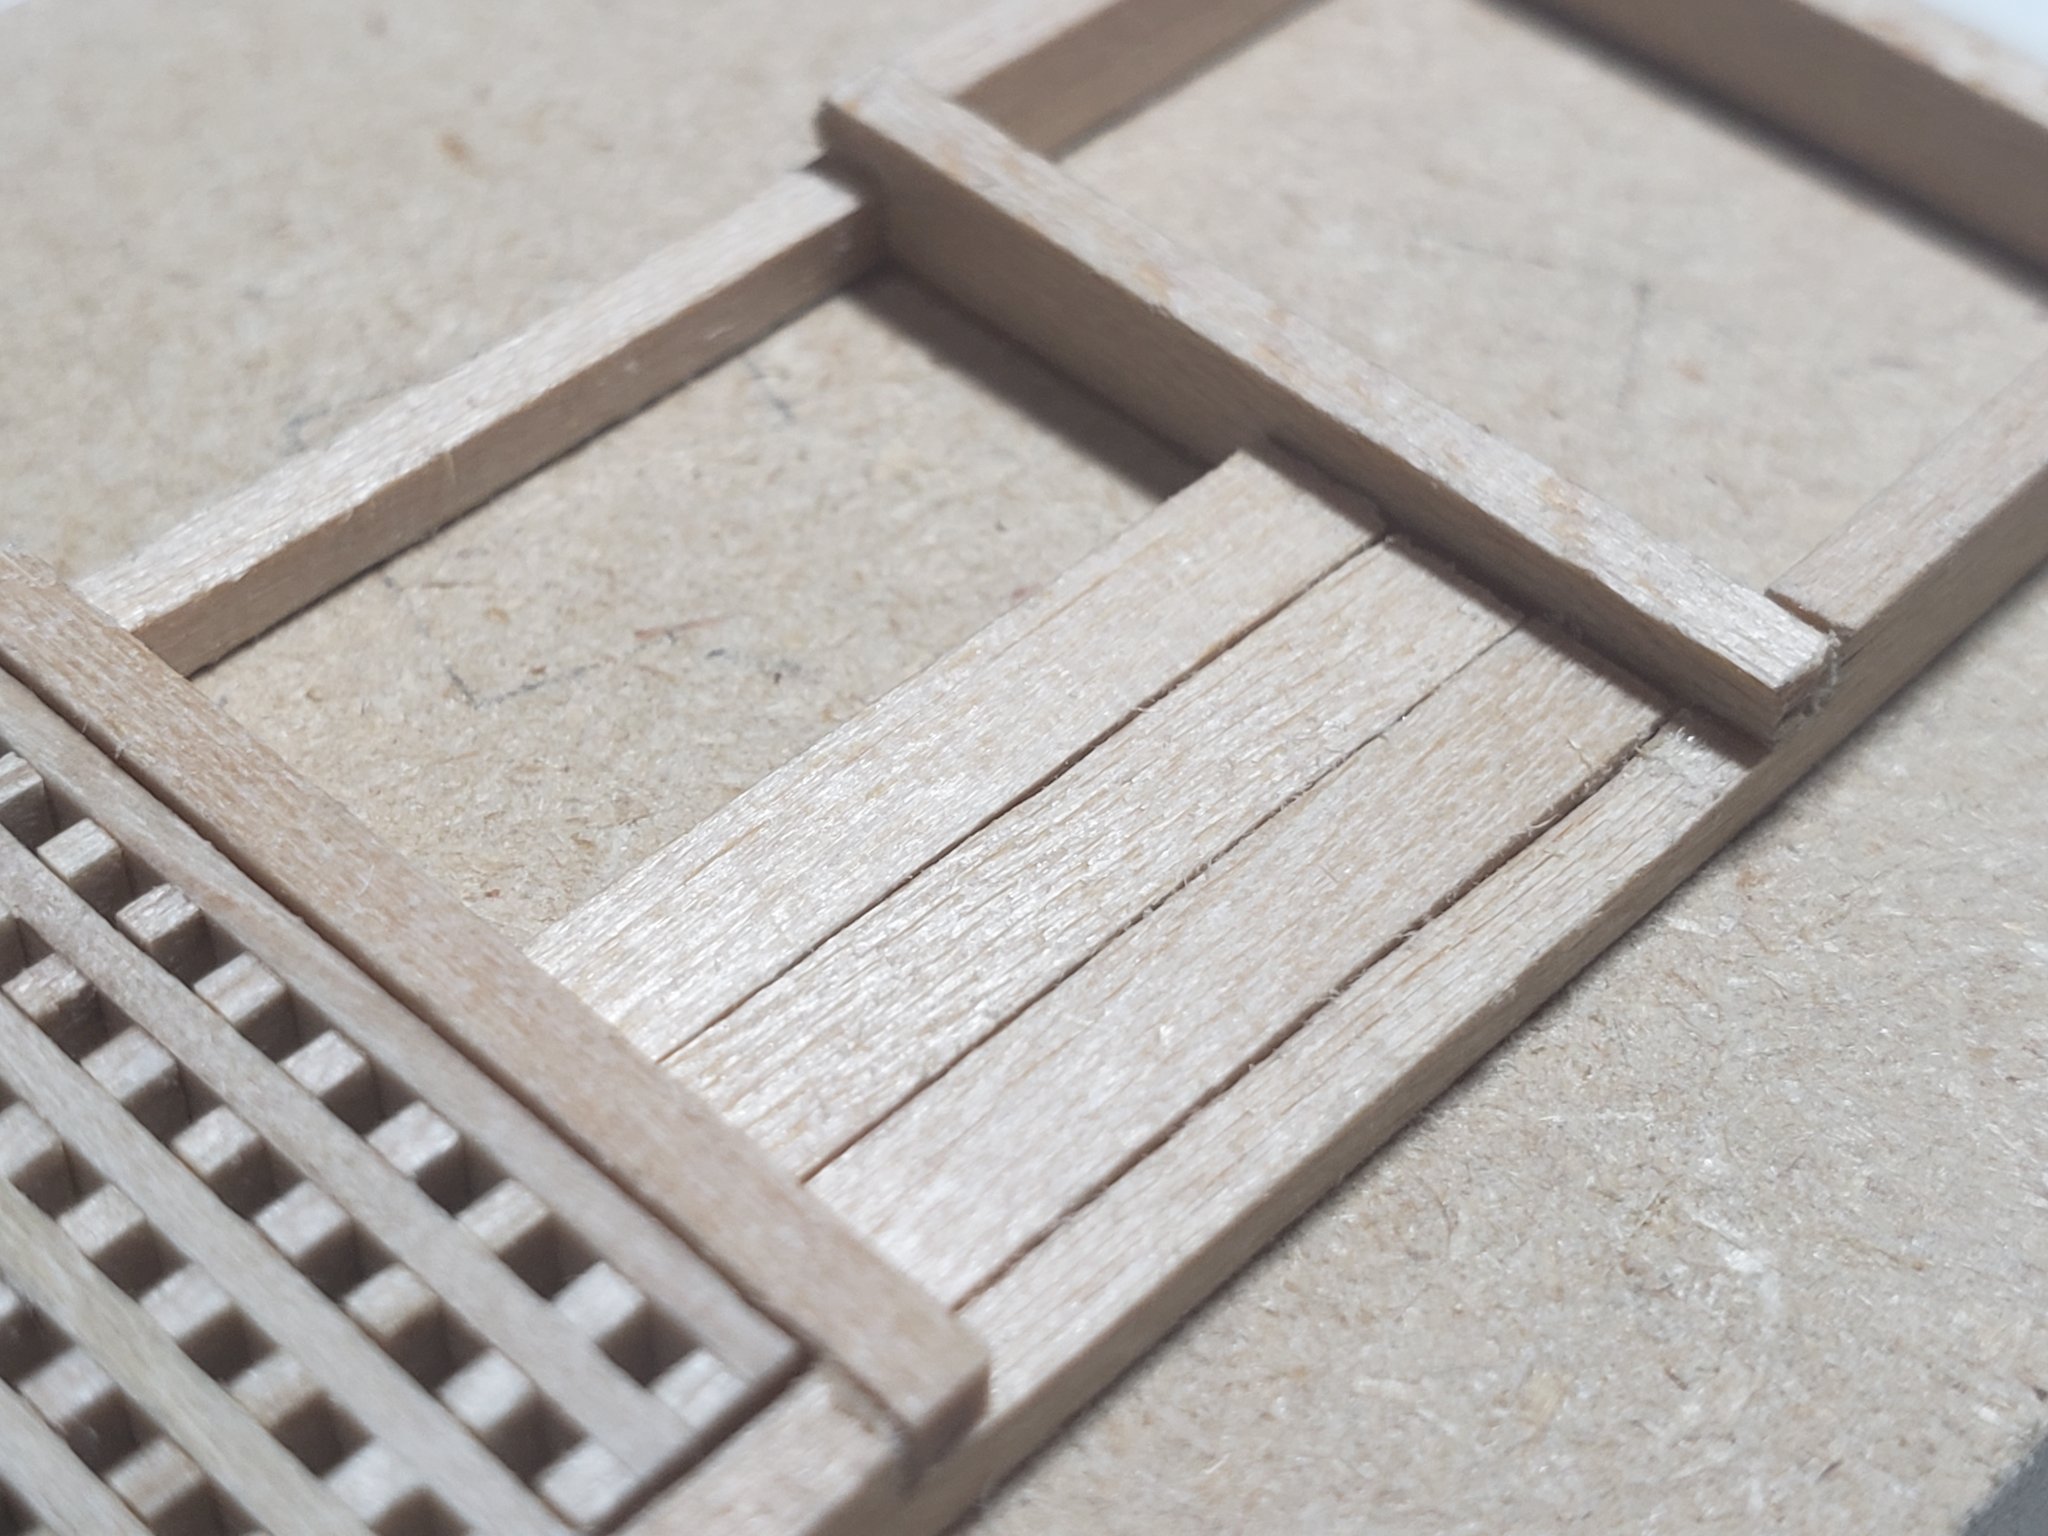
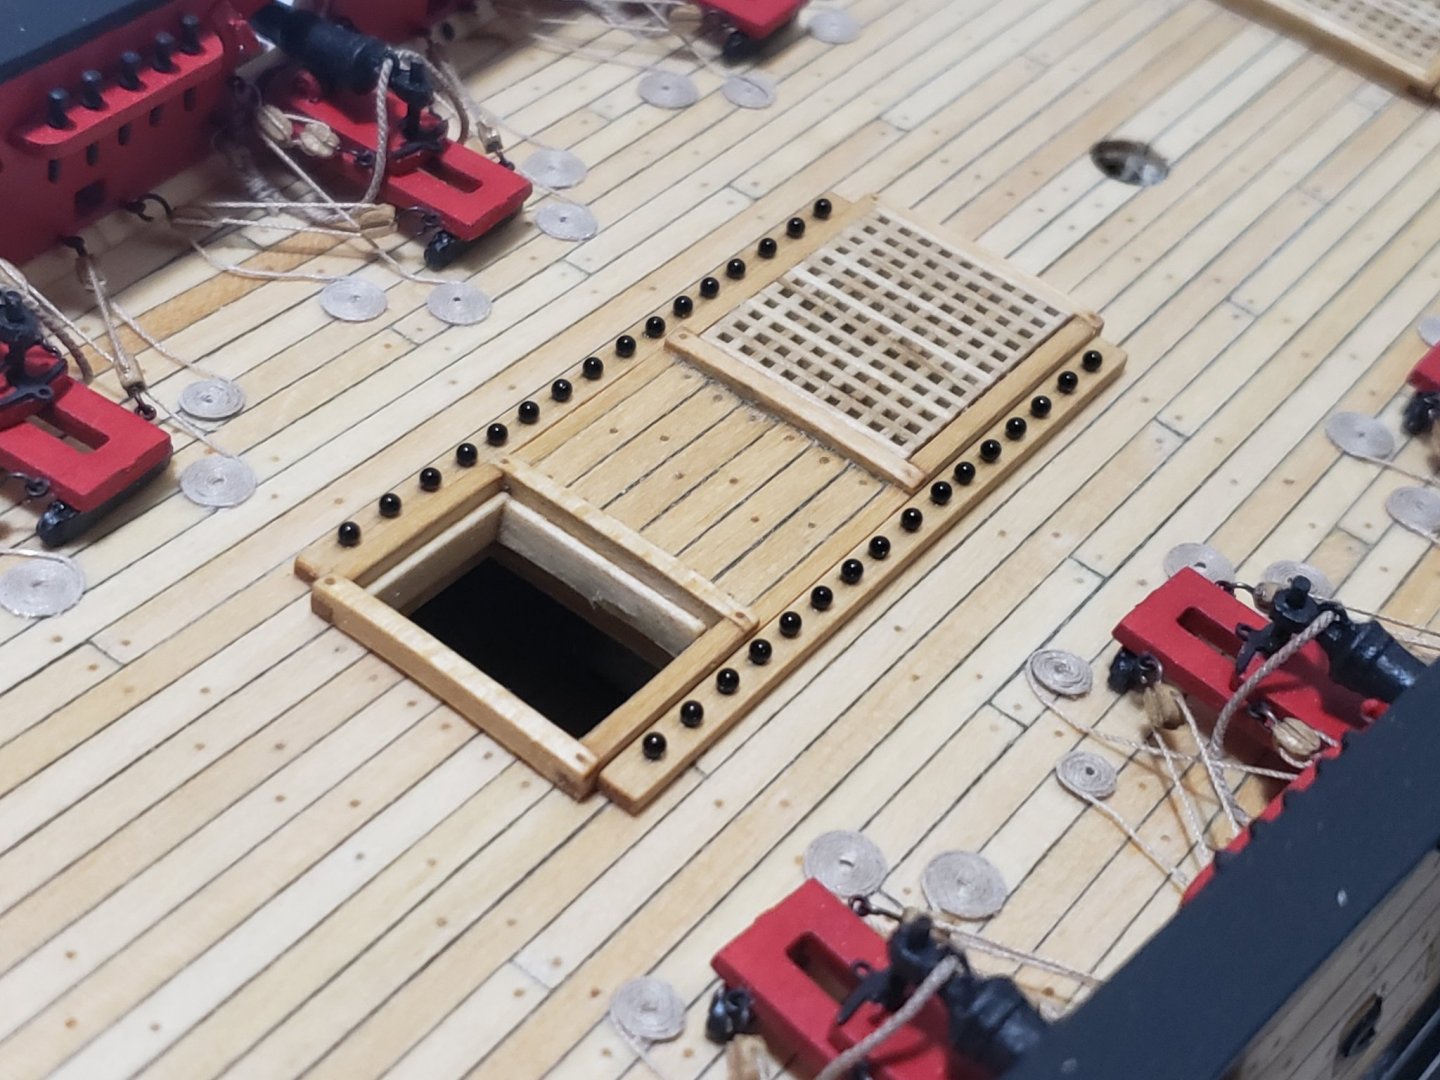
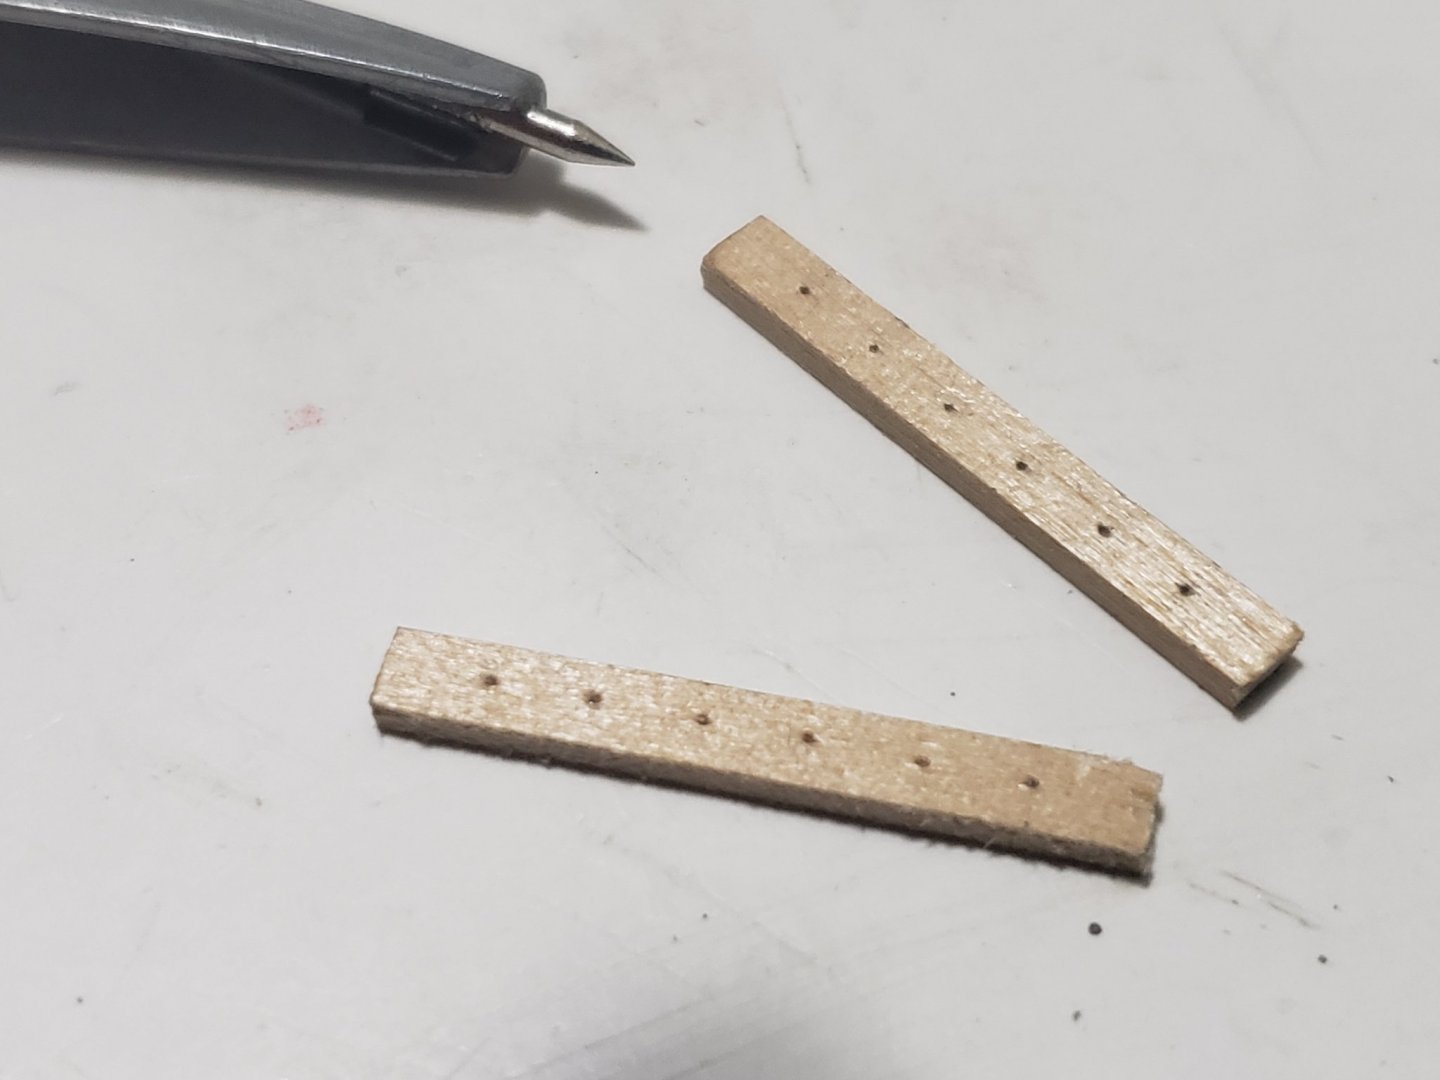
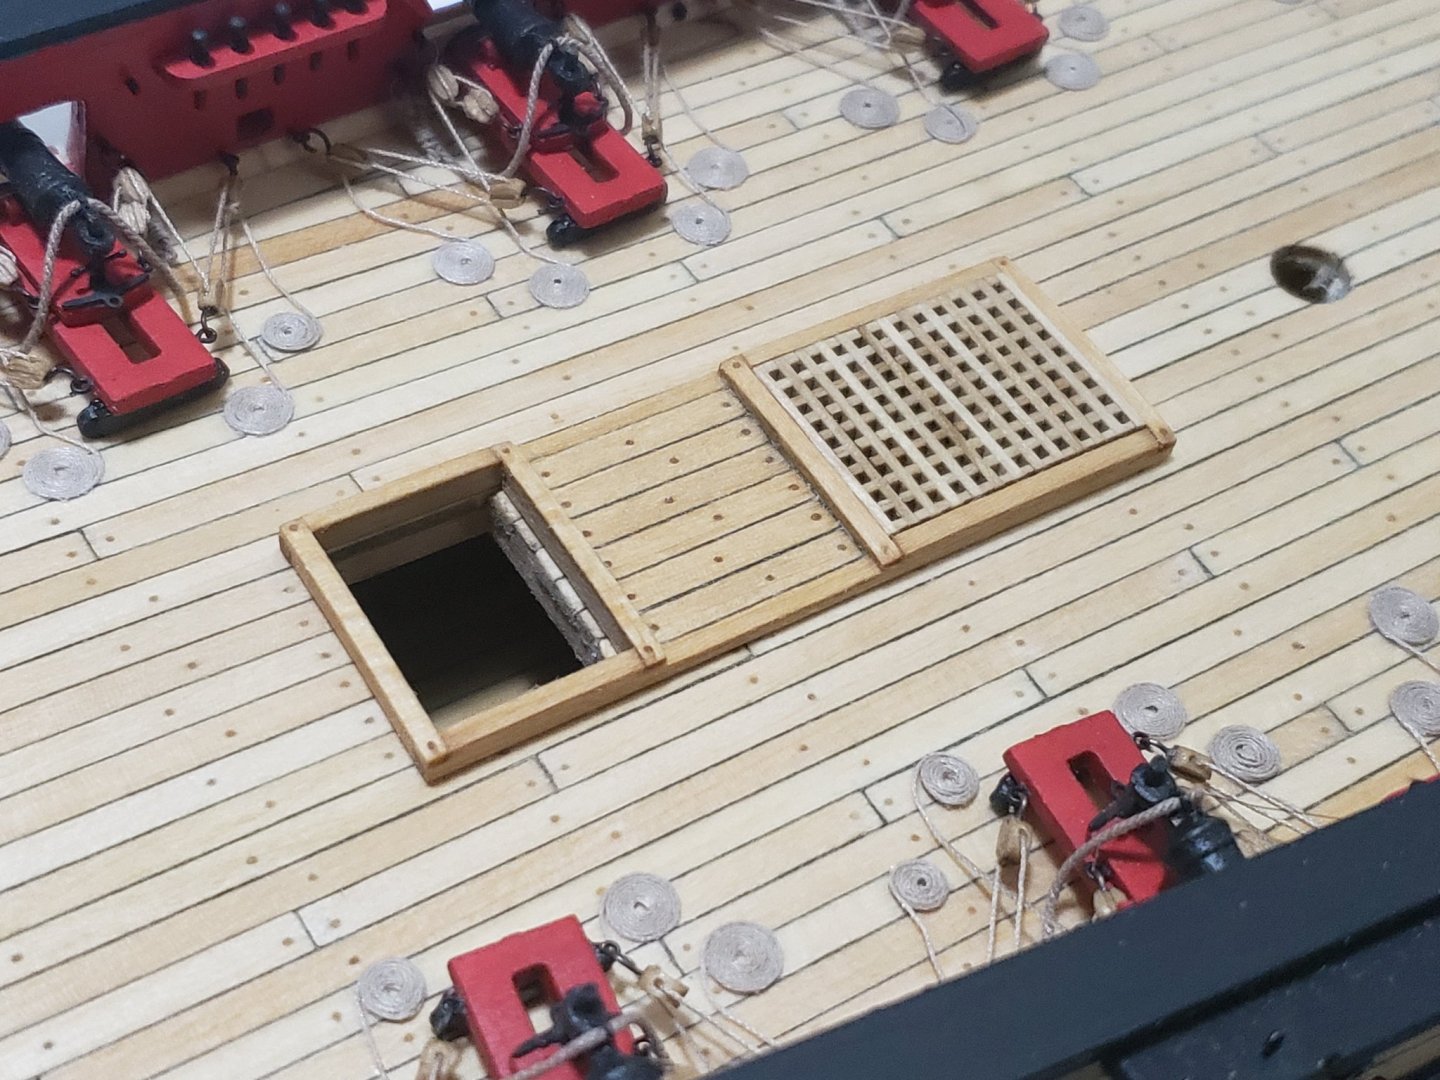
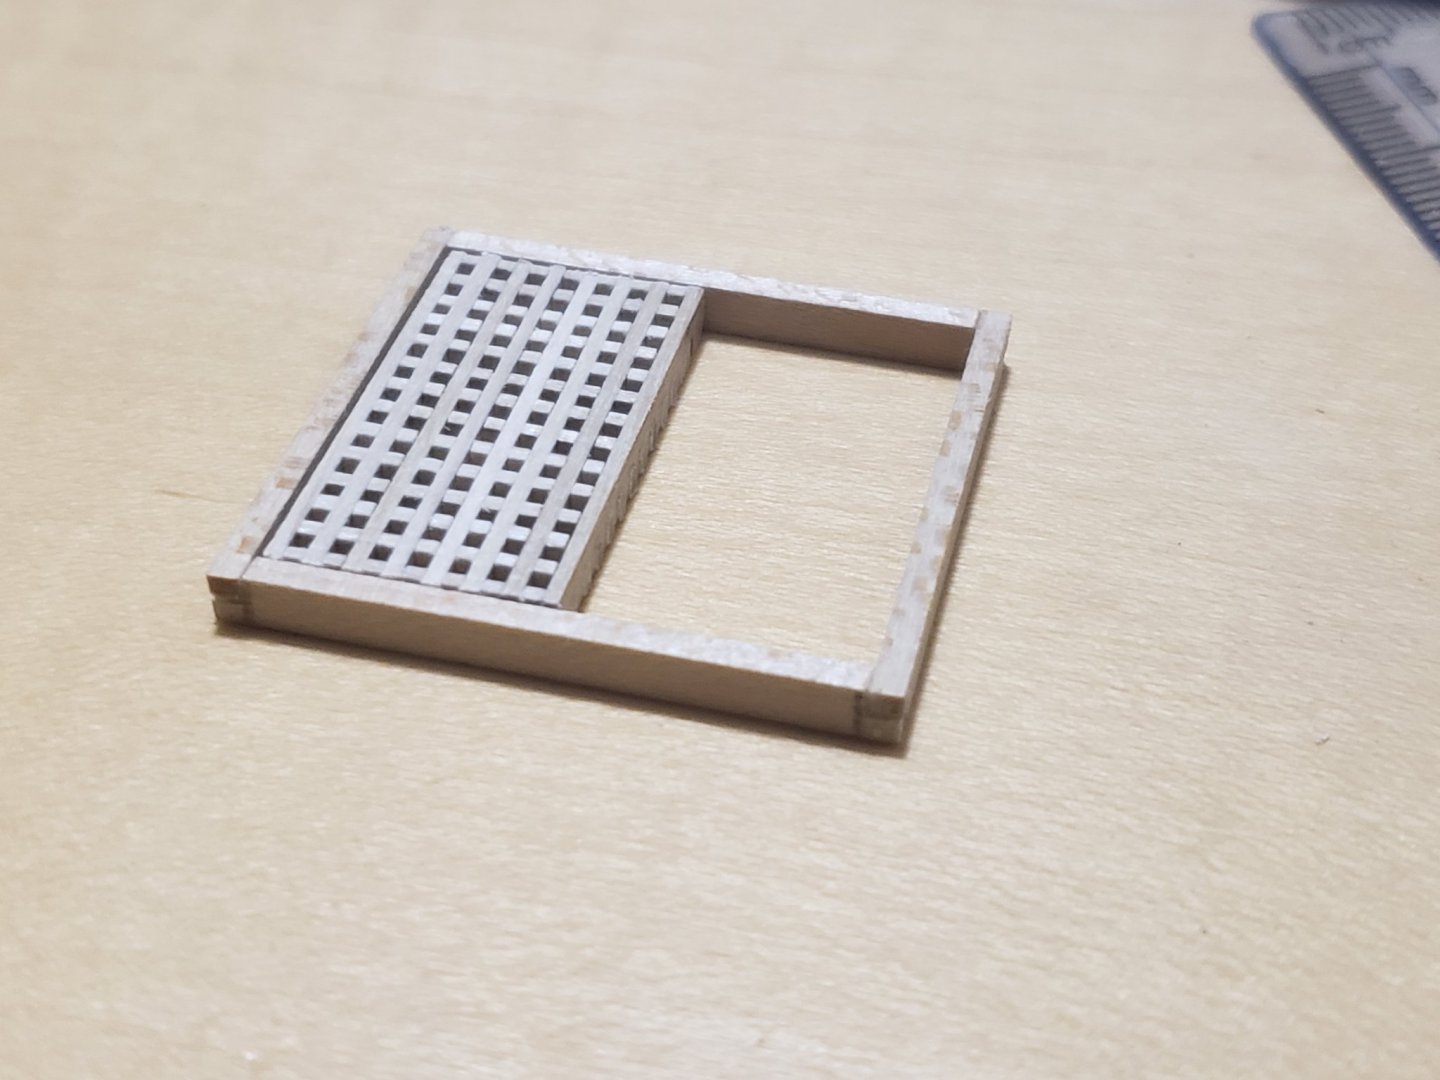
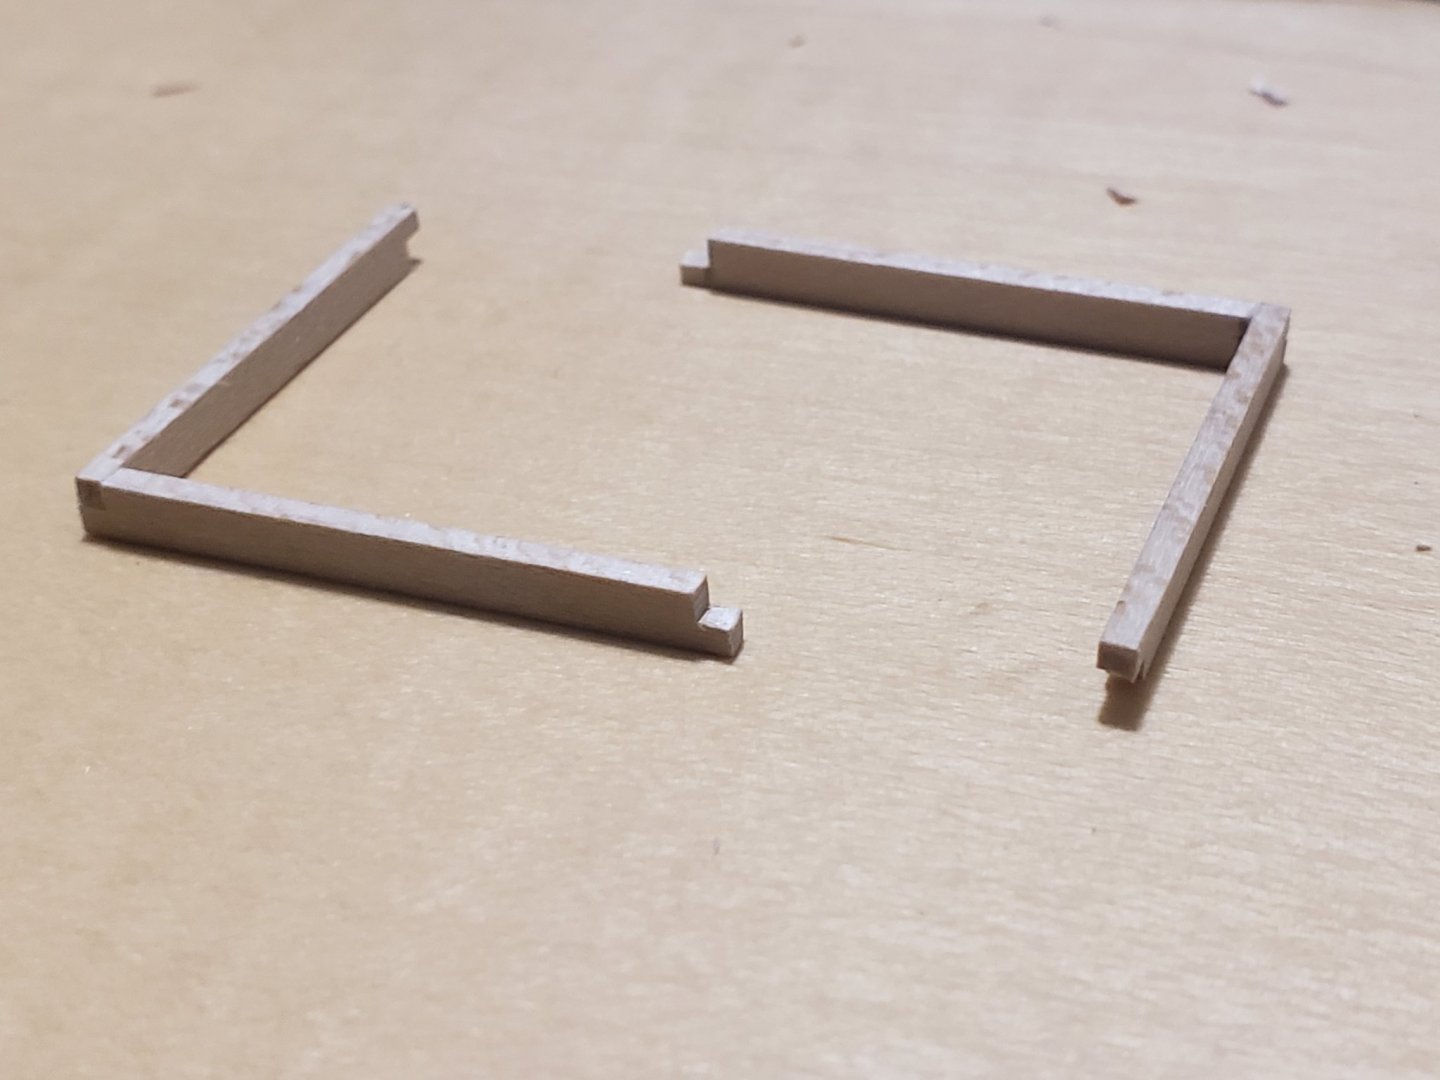
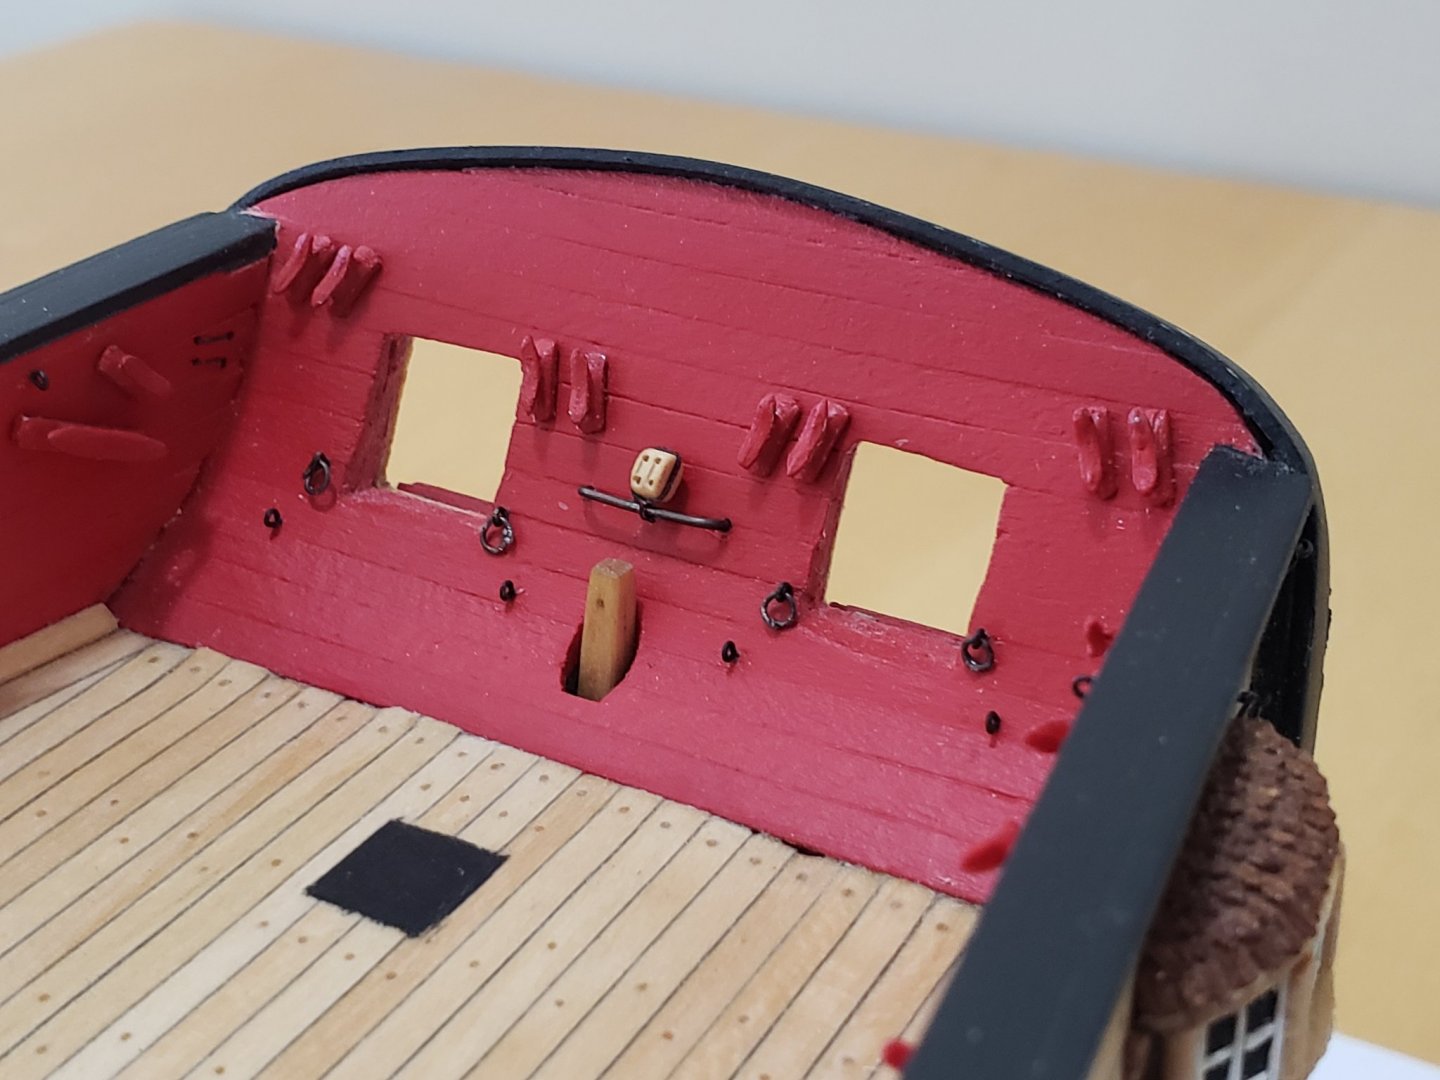
Slowly working through the deck fittings. Strips have been glued on the inside edge of the open hatch: Also prepared one of the shot racks (getting the small holes straight by hand is trickier than I thought...) Then used a round needle file as opposed to a drill to make the divots bigger, applied tung oil, then glued the cannonballs in place:


- 950 replies
-
- 10
-
-
- syren
- model shipways
- (and 1 more)
-
They already look much better than kit ones!!
-
Thanks Robin, working on the deck details is a nice change of pace!
- 950 replies
-
- 1
-
-
- syren
- model shipways
- (and 1 more)
-
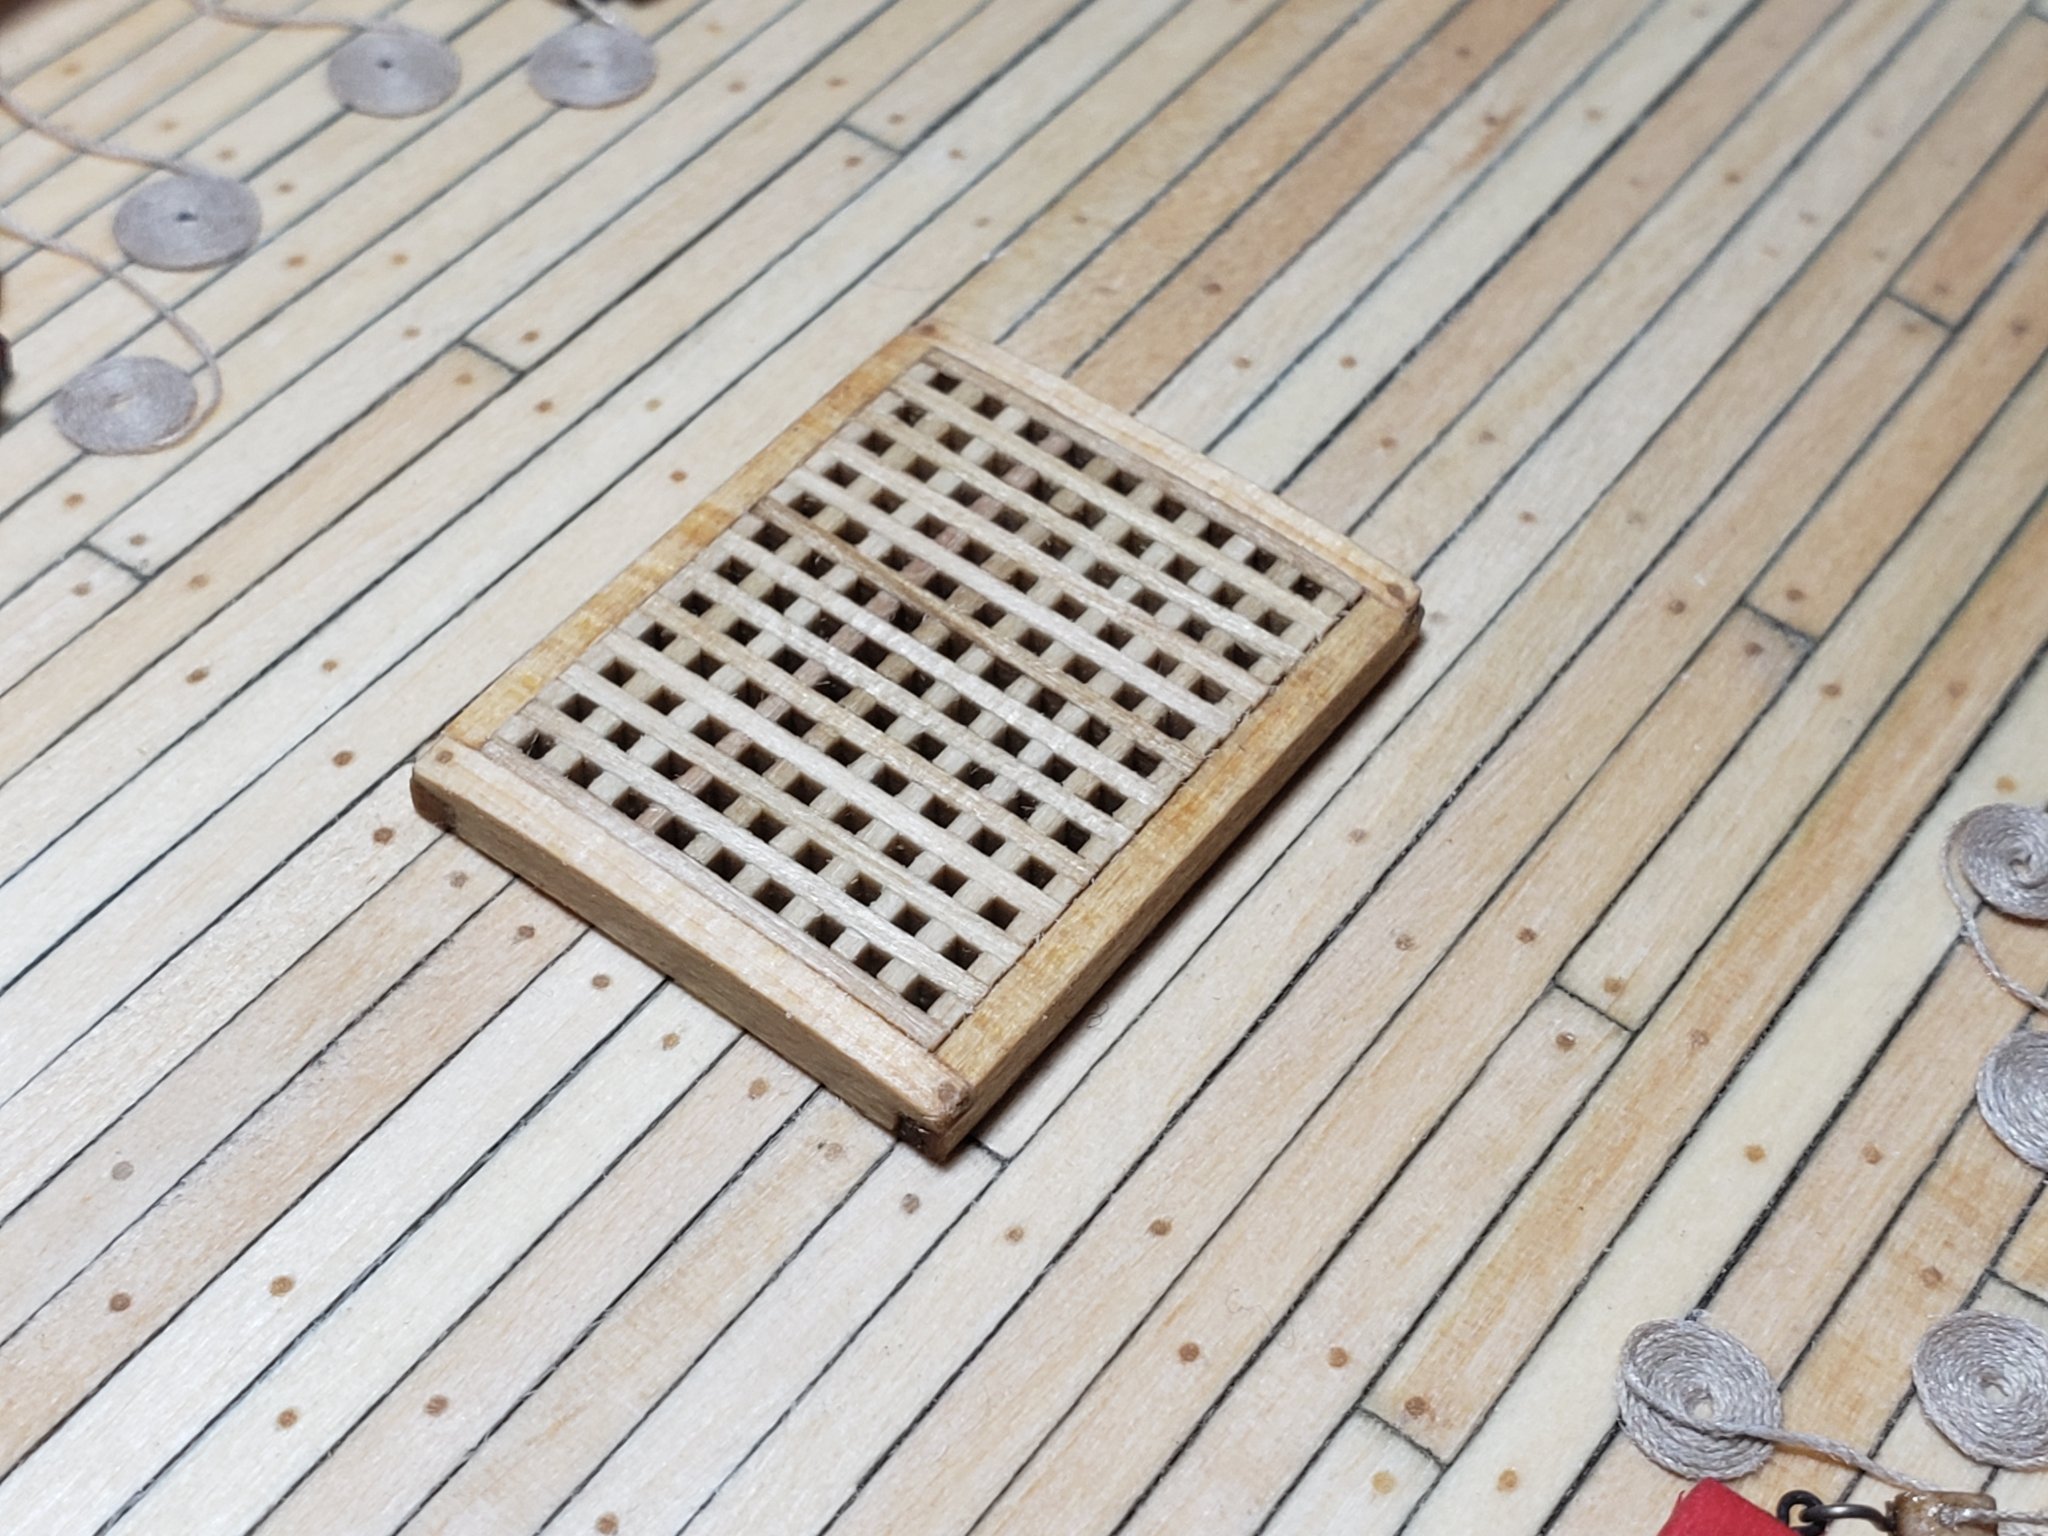
Just going through your log again. Got to mention how great the gratings look. Loving the contrast with pear wood.
-
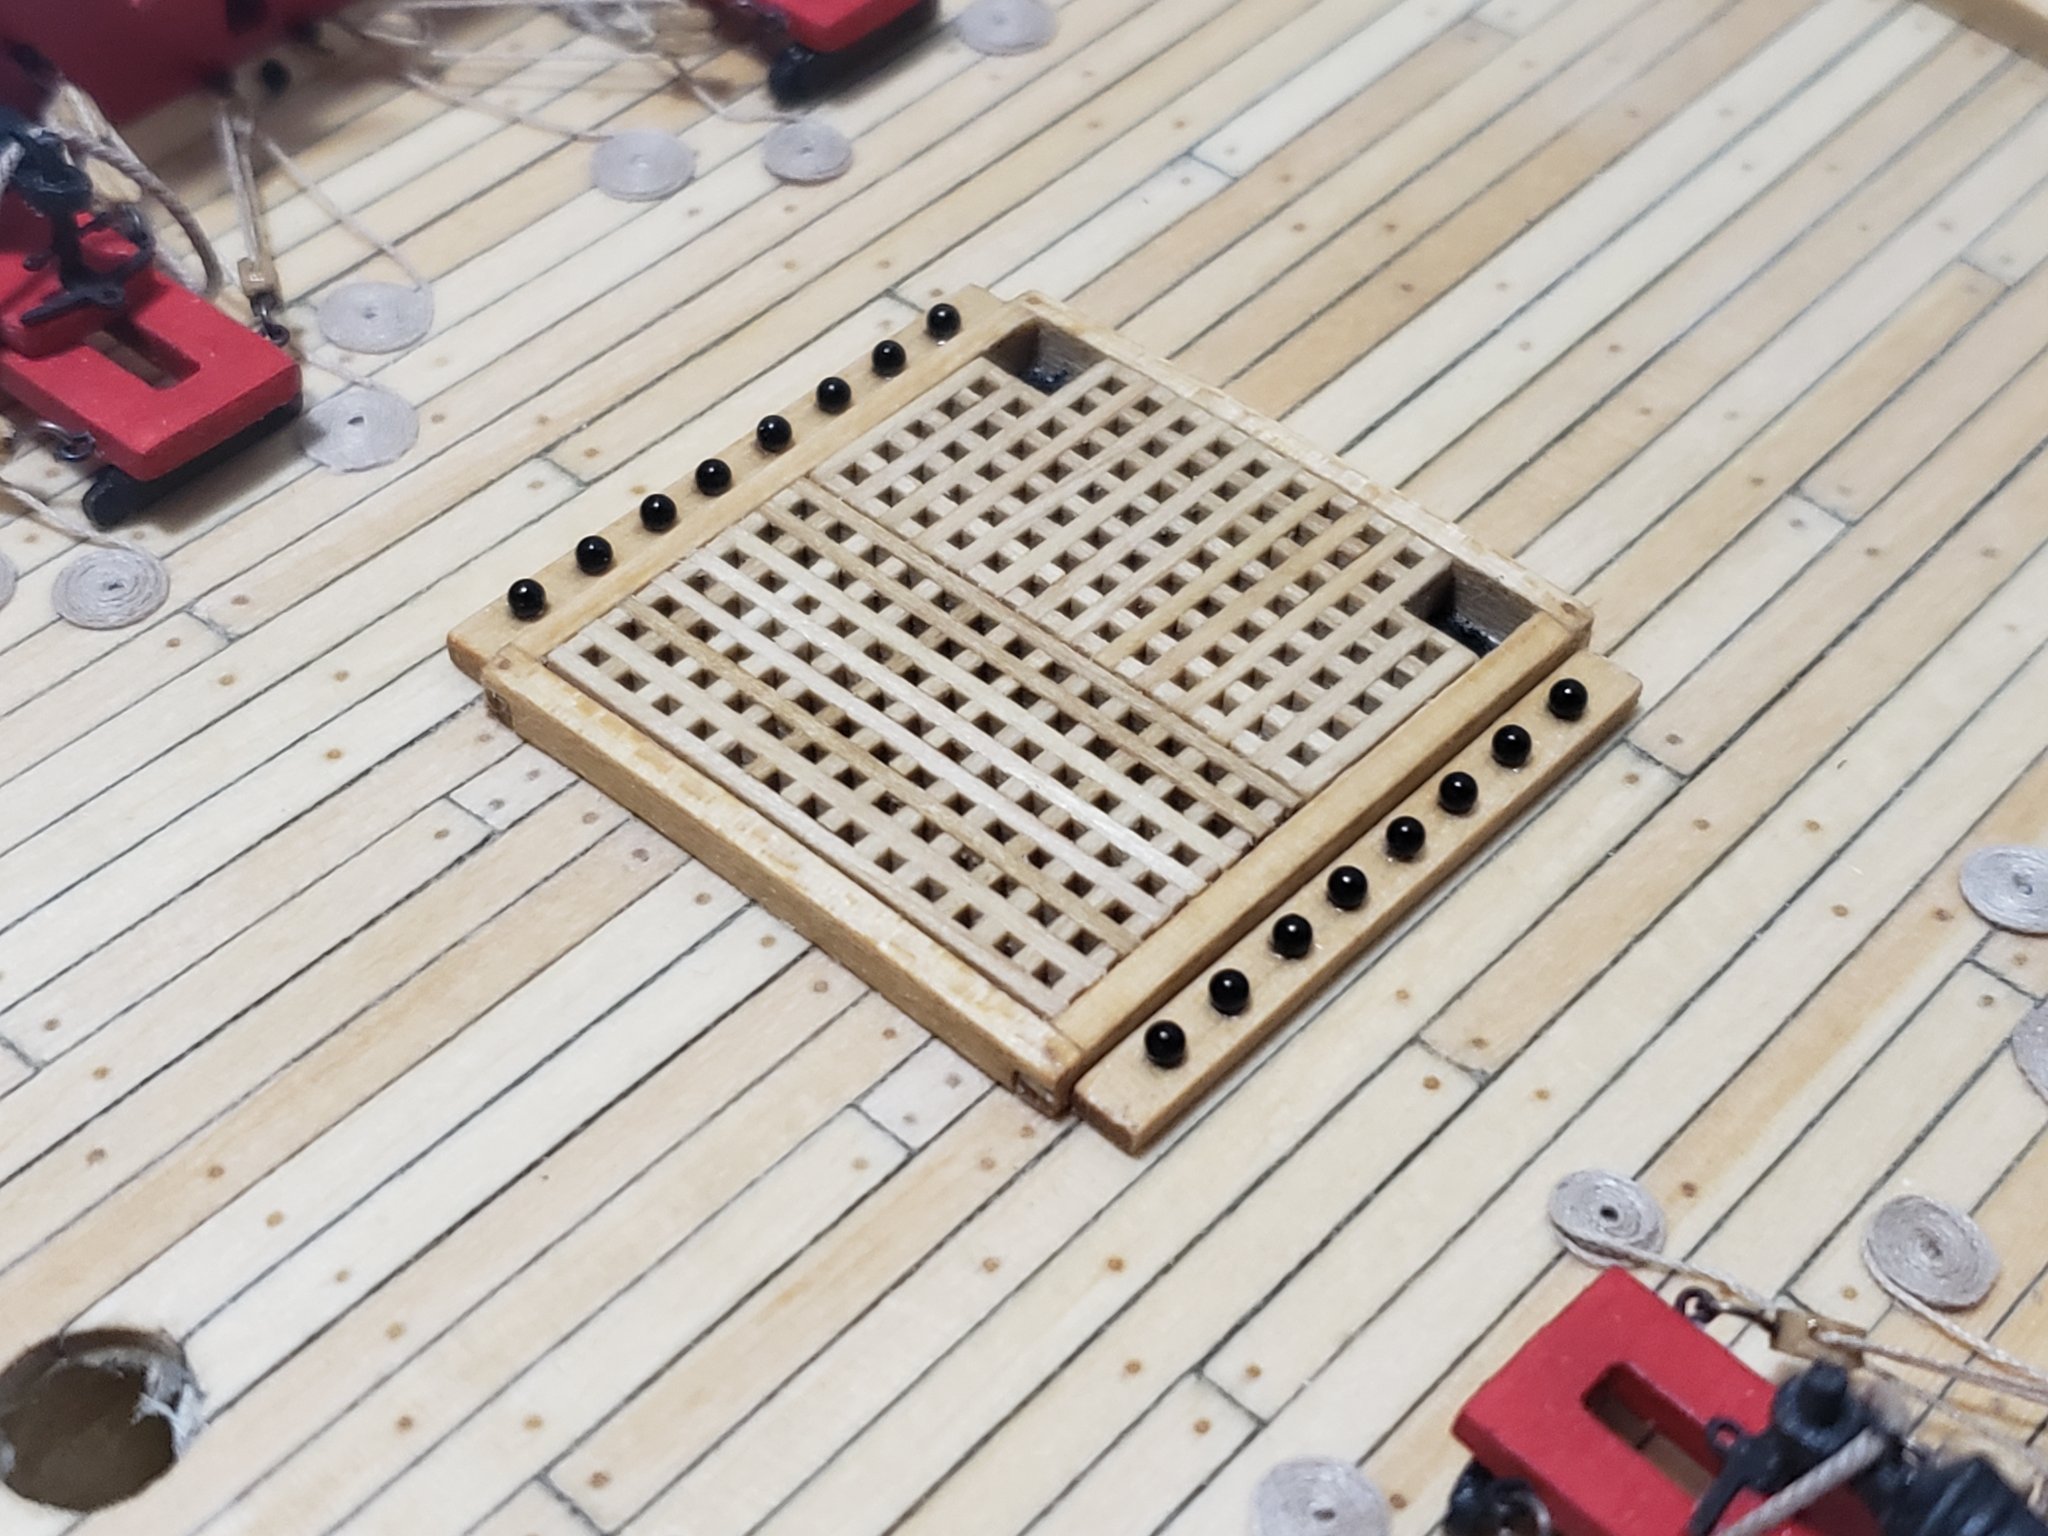
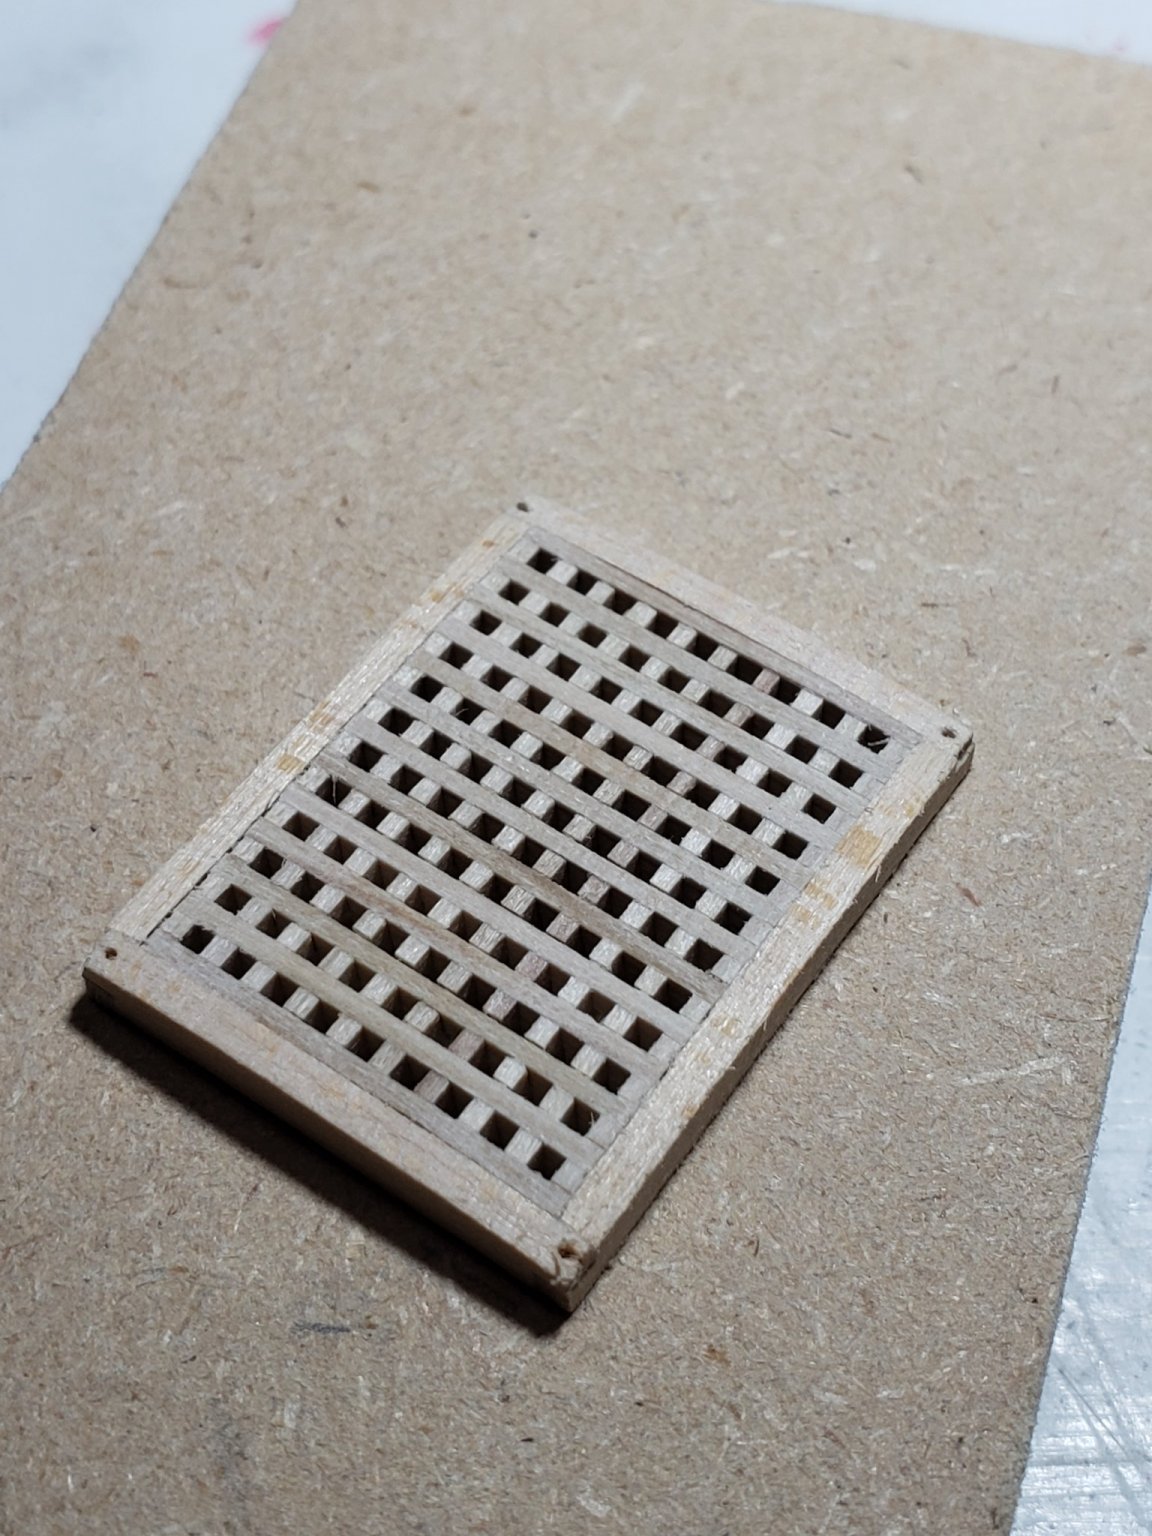
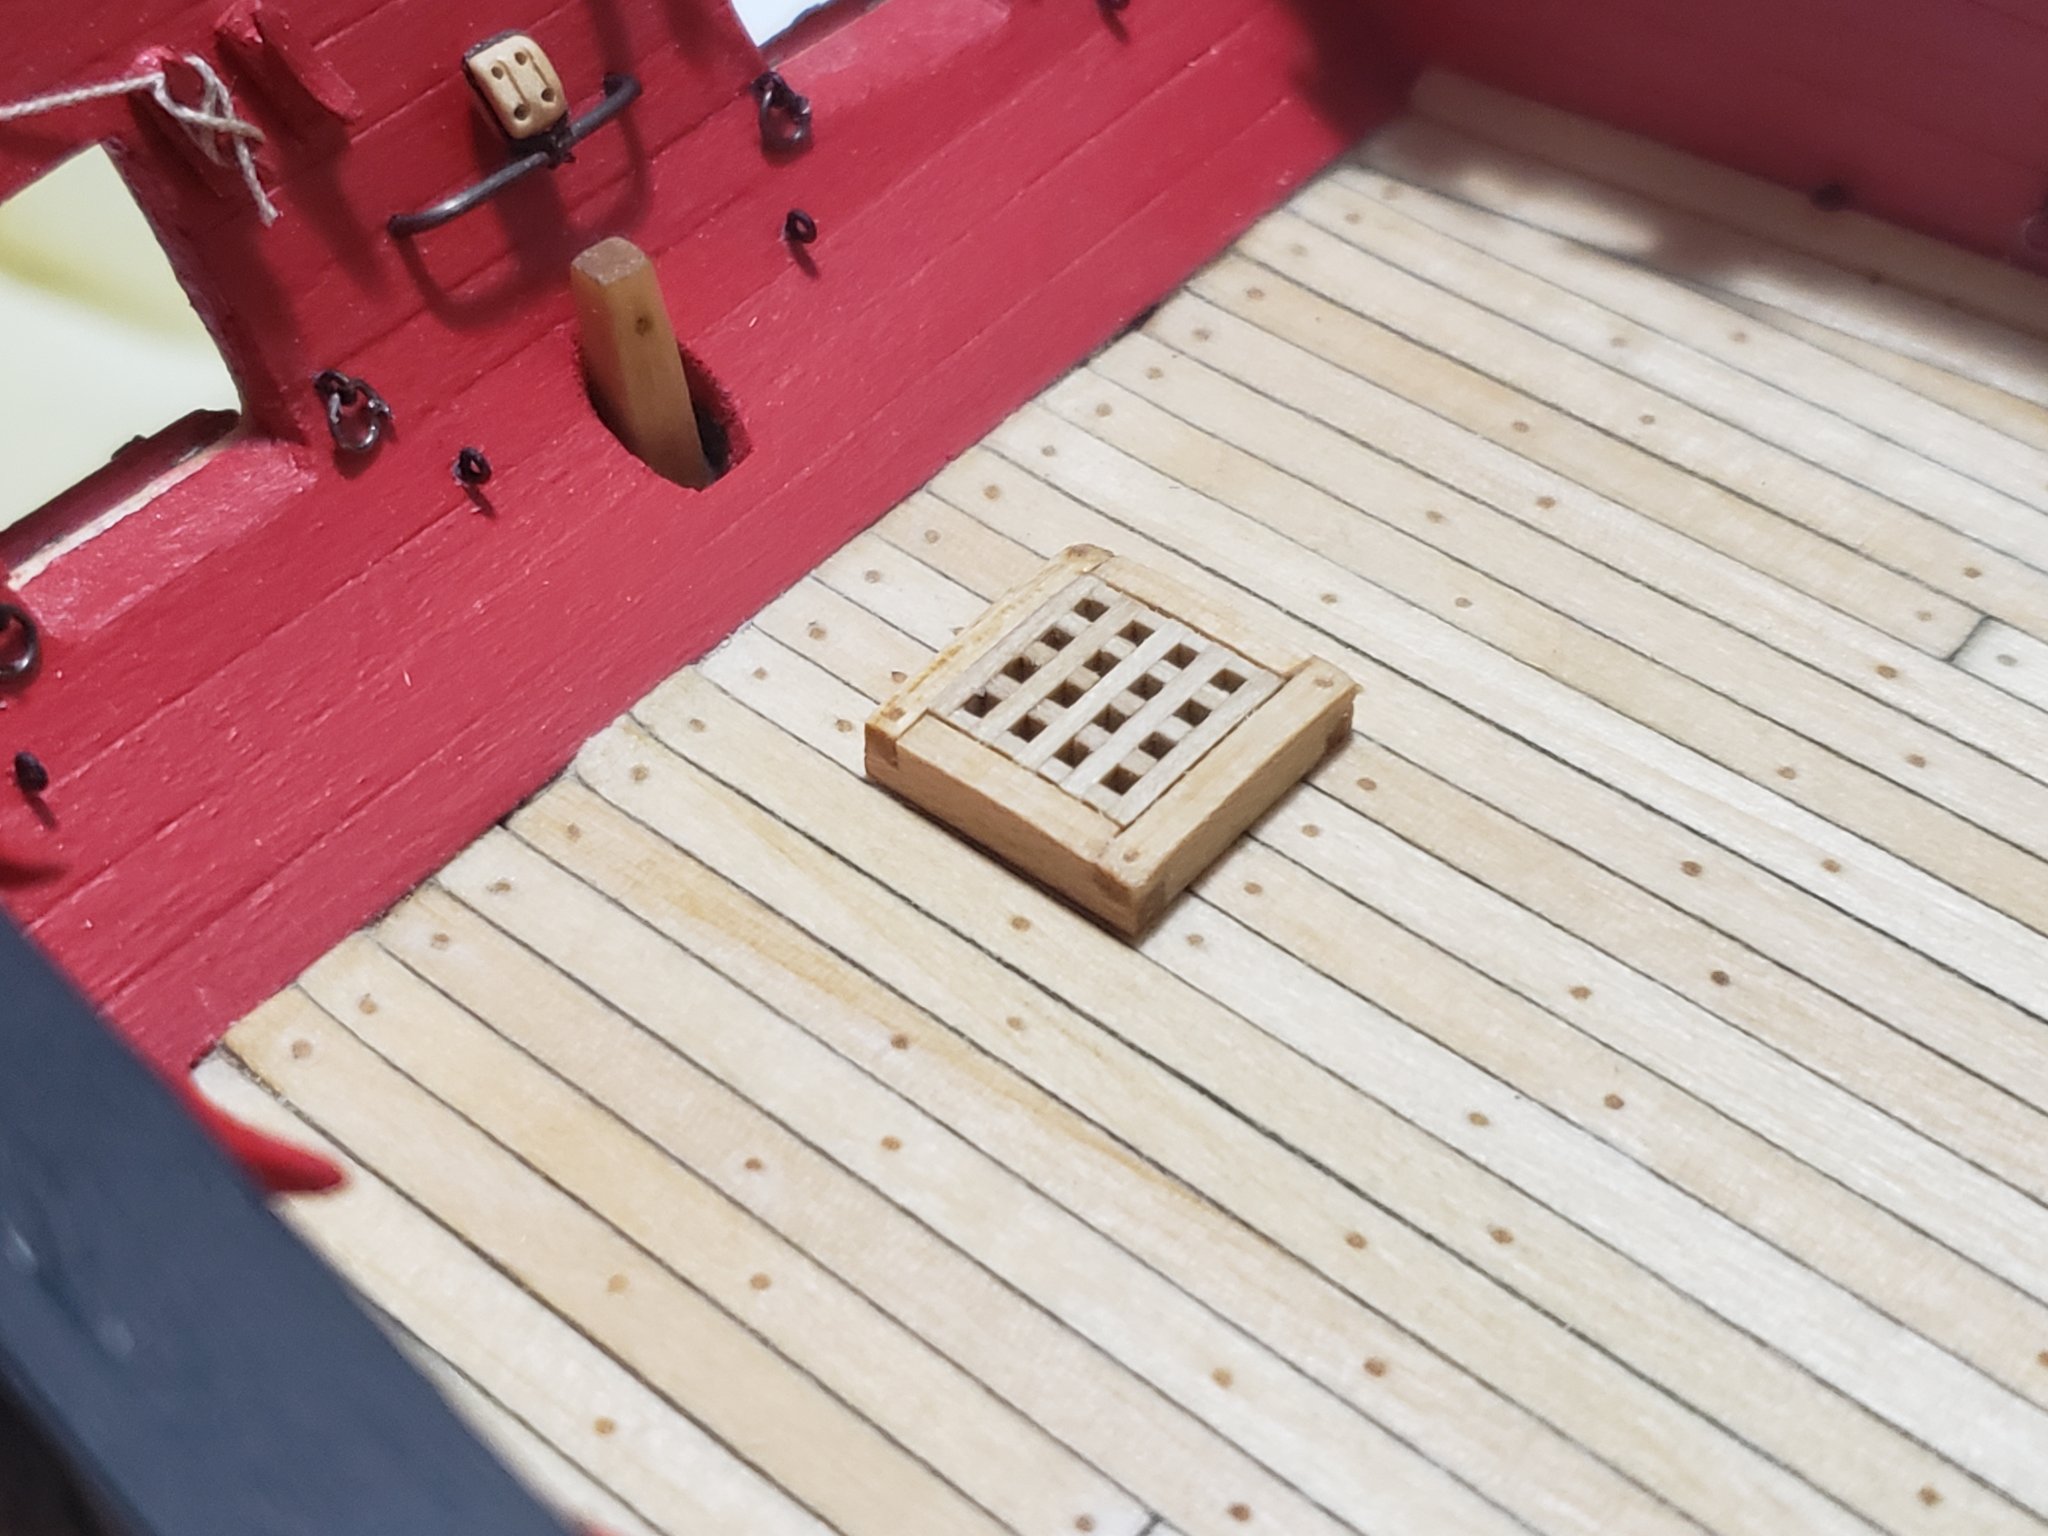
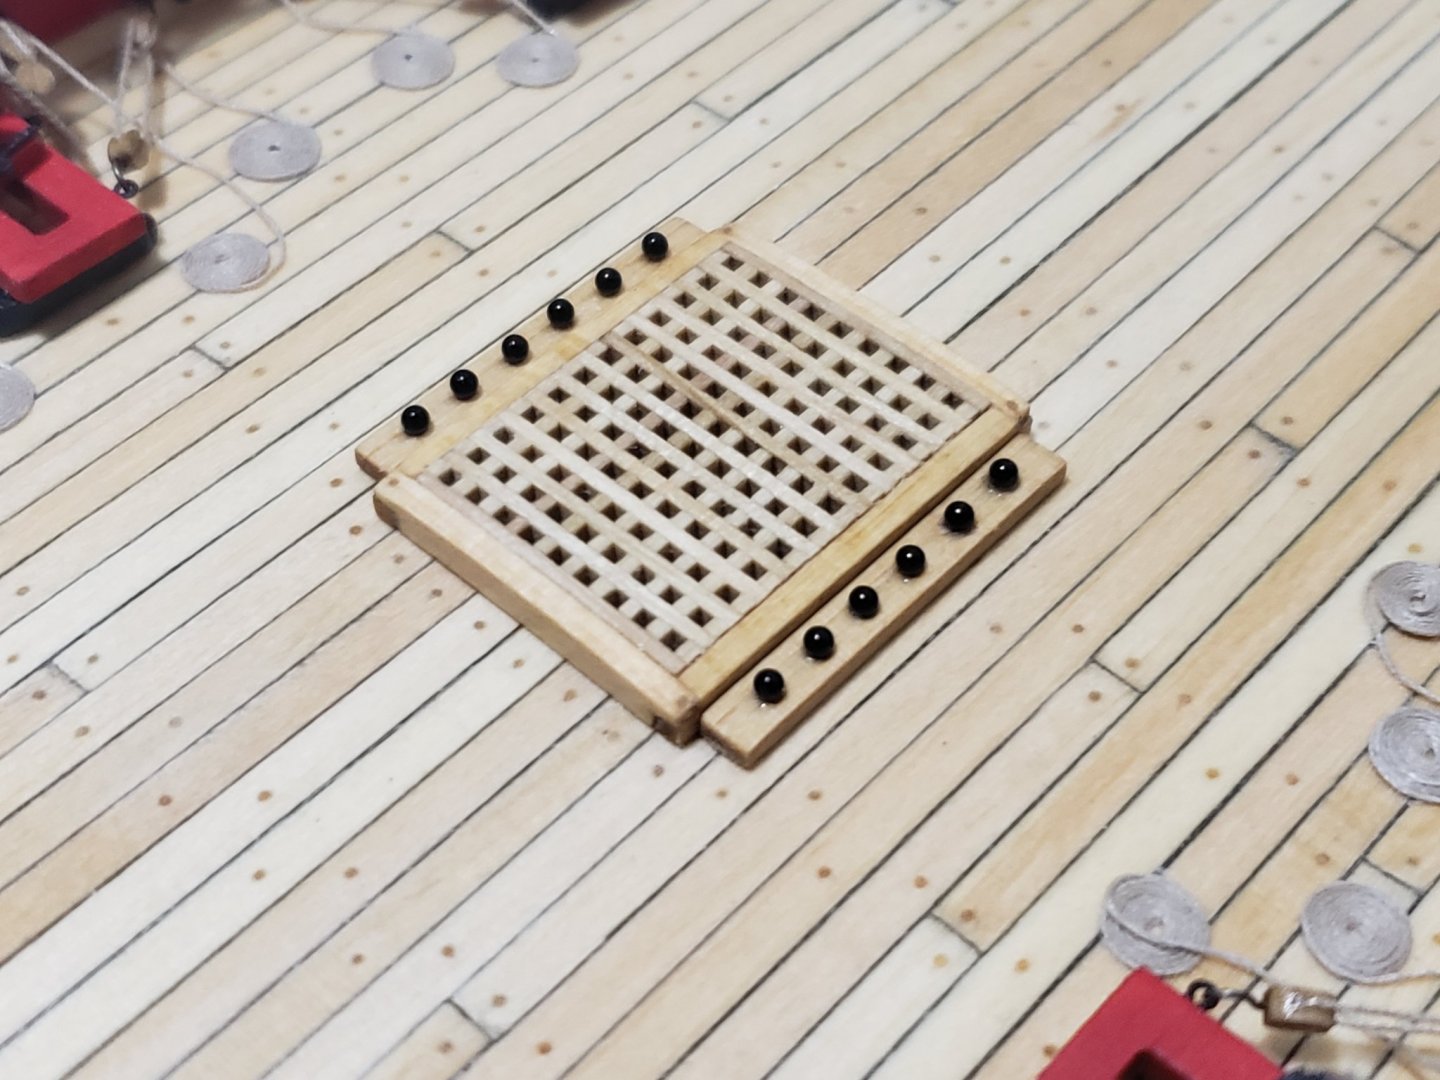
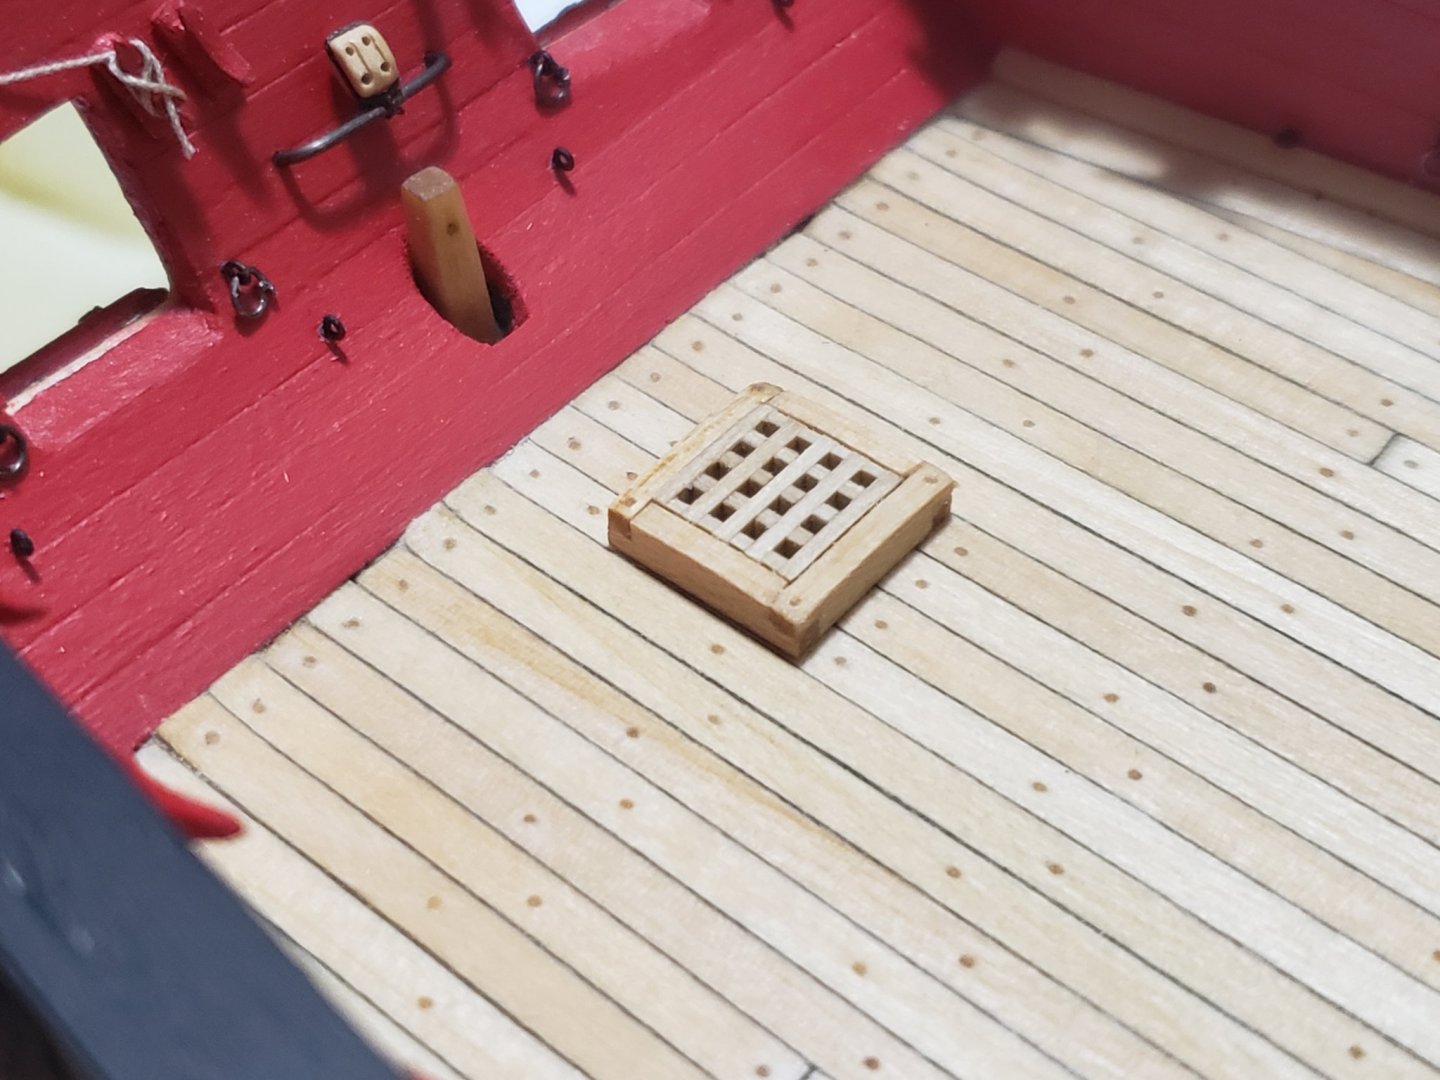
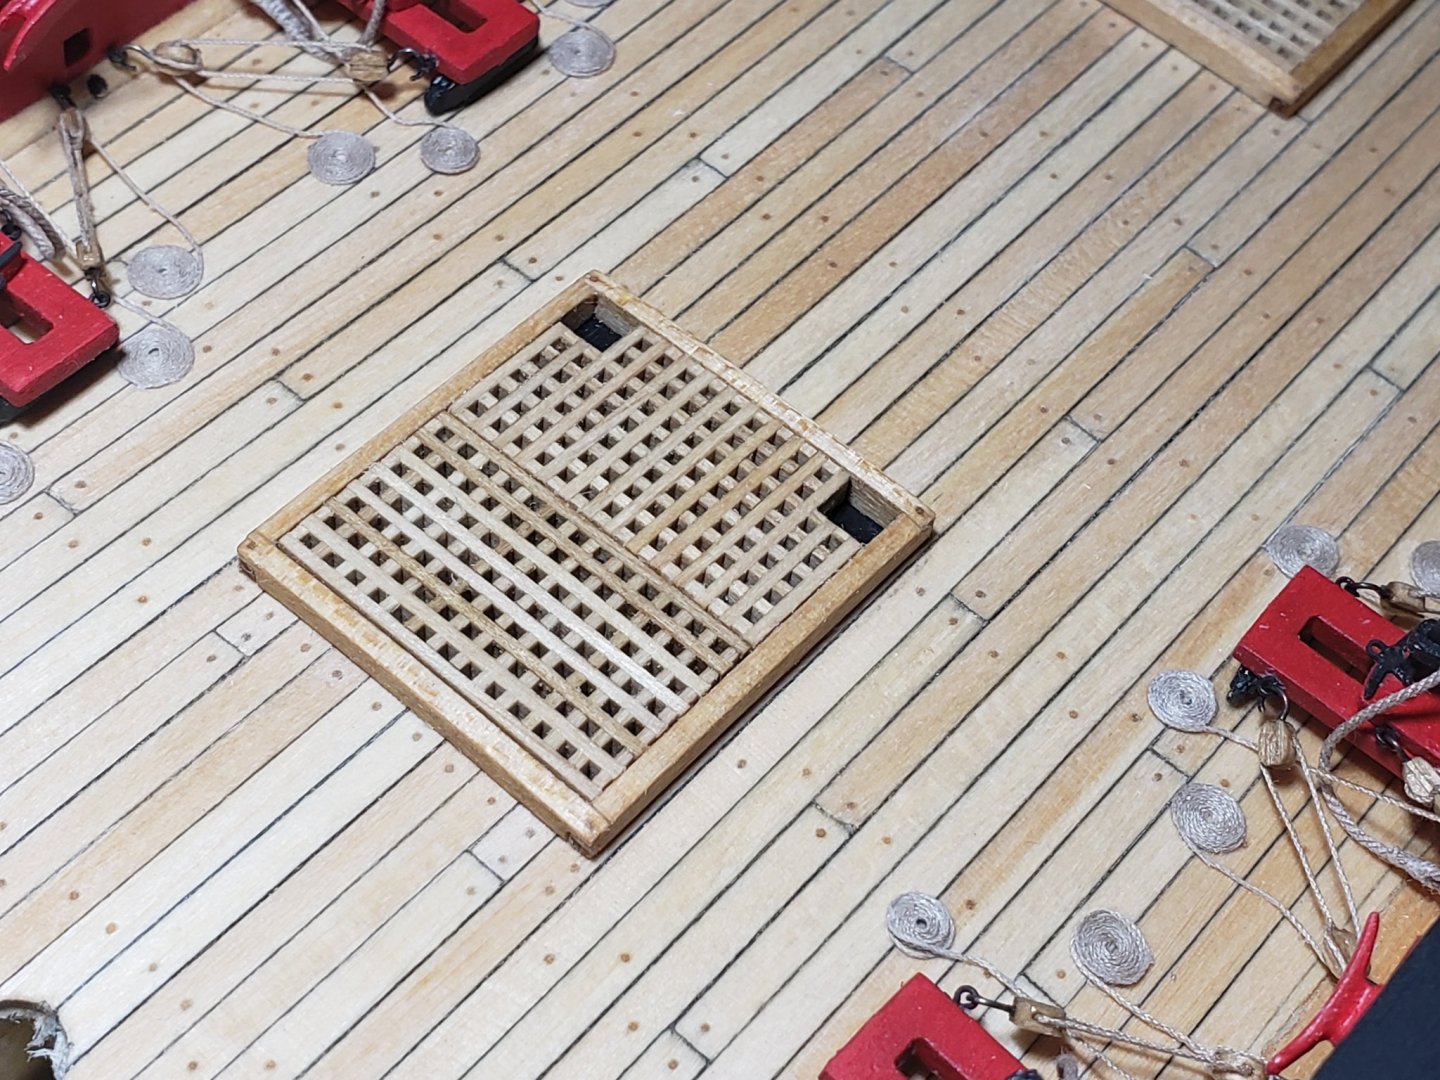
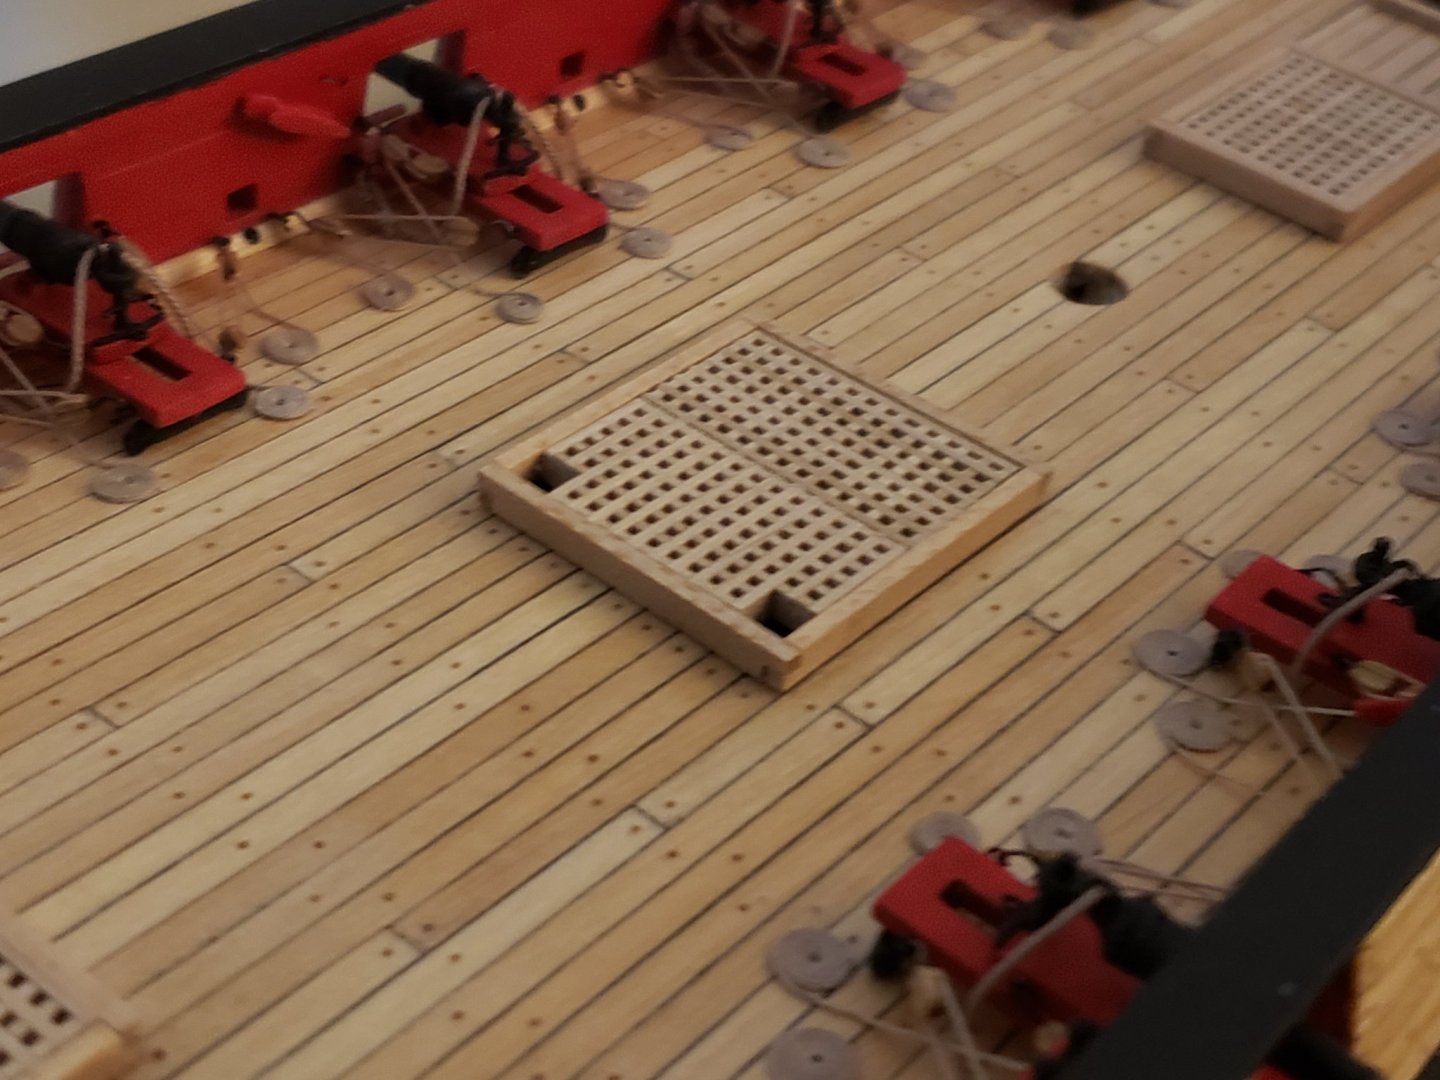
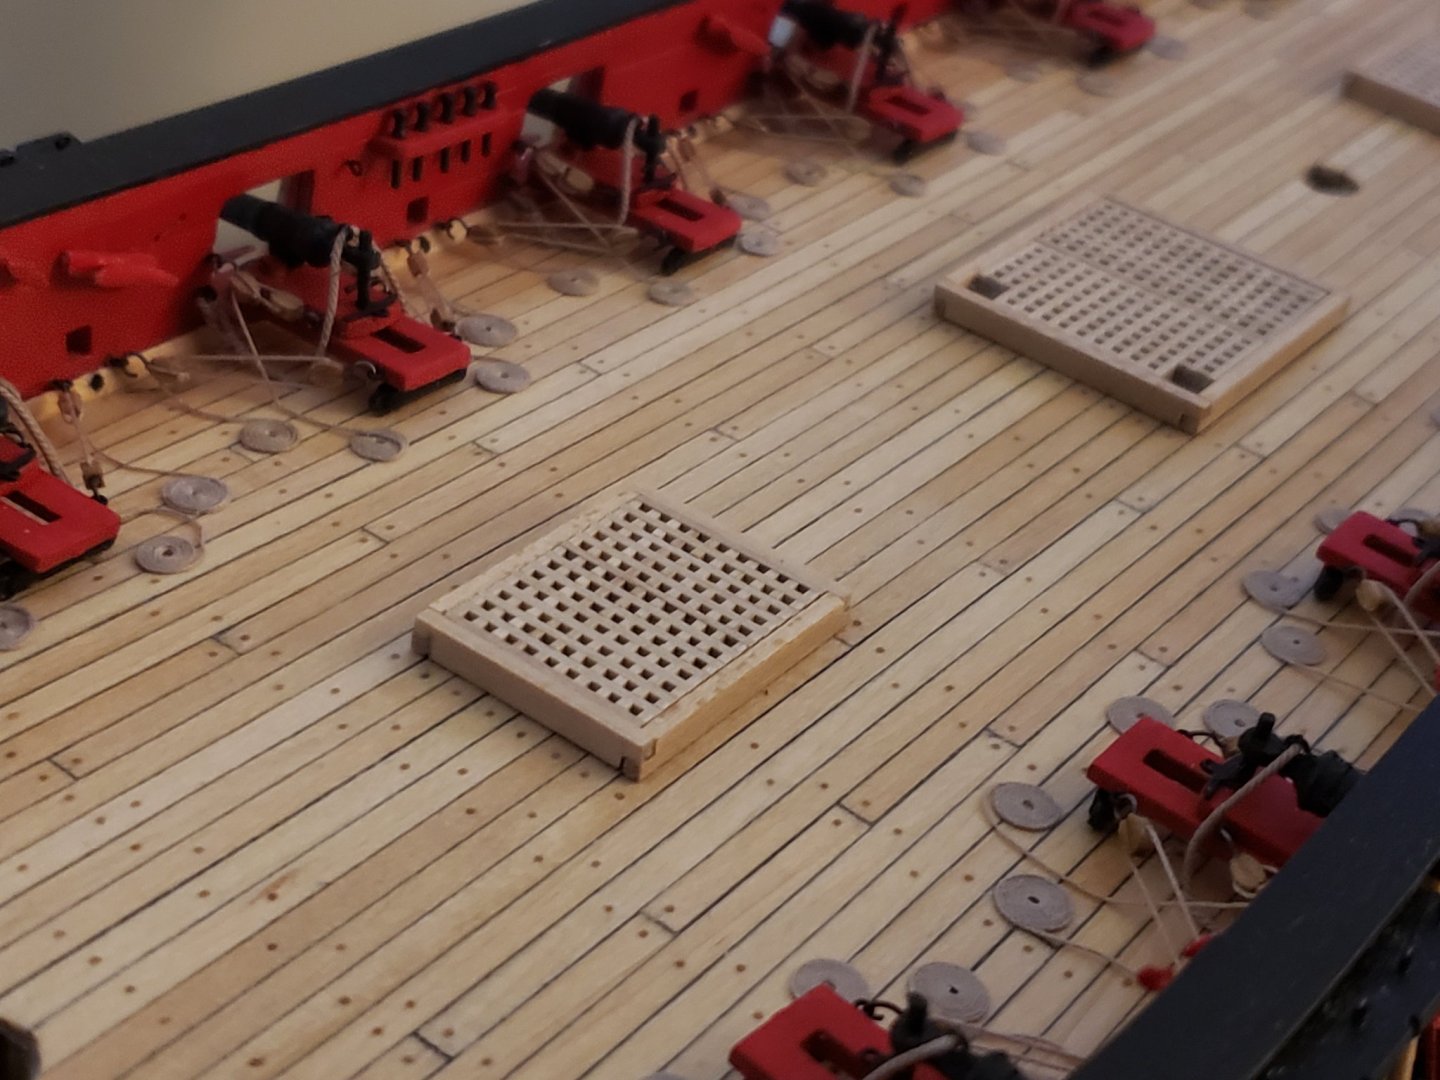
Finished curving and detailing the coamings and gratings. For simulating the treenails, I used the same method I used before for the decking using sharpened toothpicks with 0.5mm holes drilled. Some pics: Glued to the deck:


- 950 replies
-
- 12
-
-
- syren
- model shipways
- (and 1 more)
-
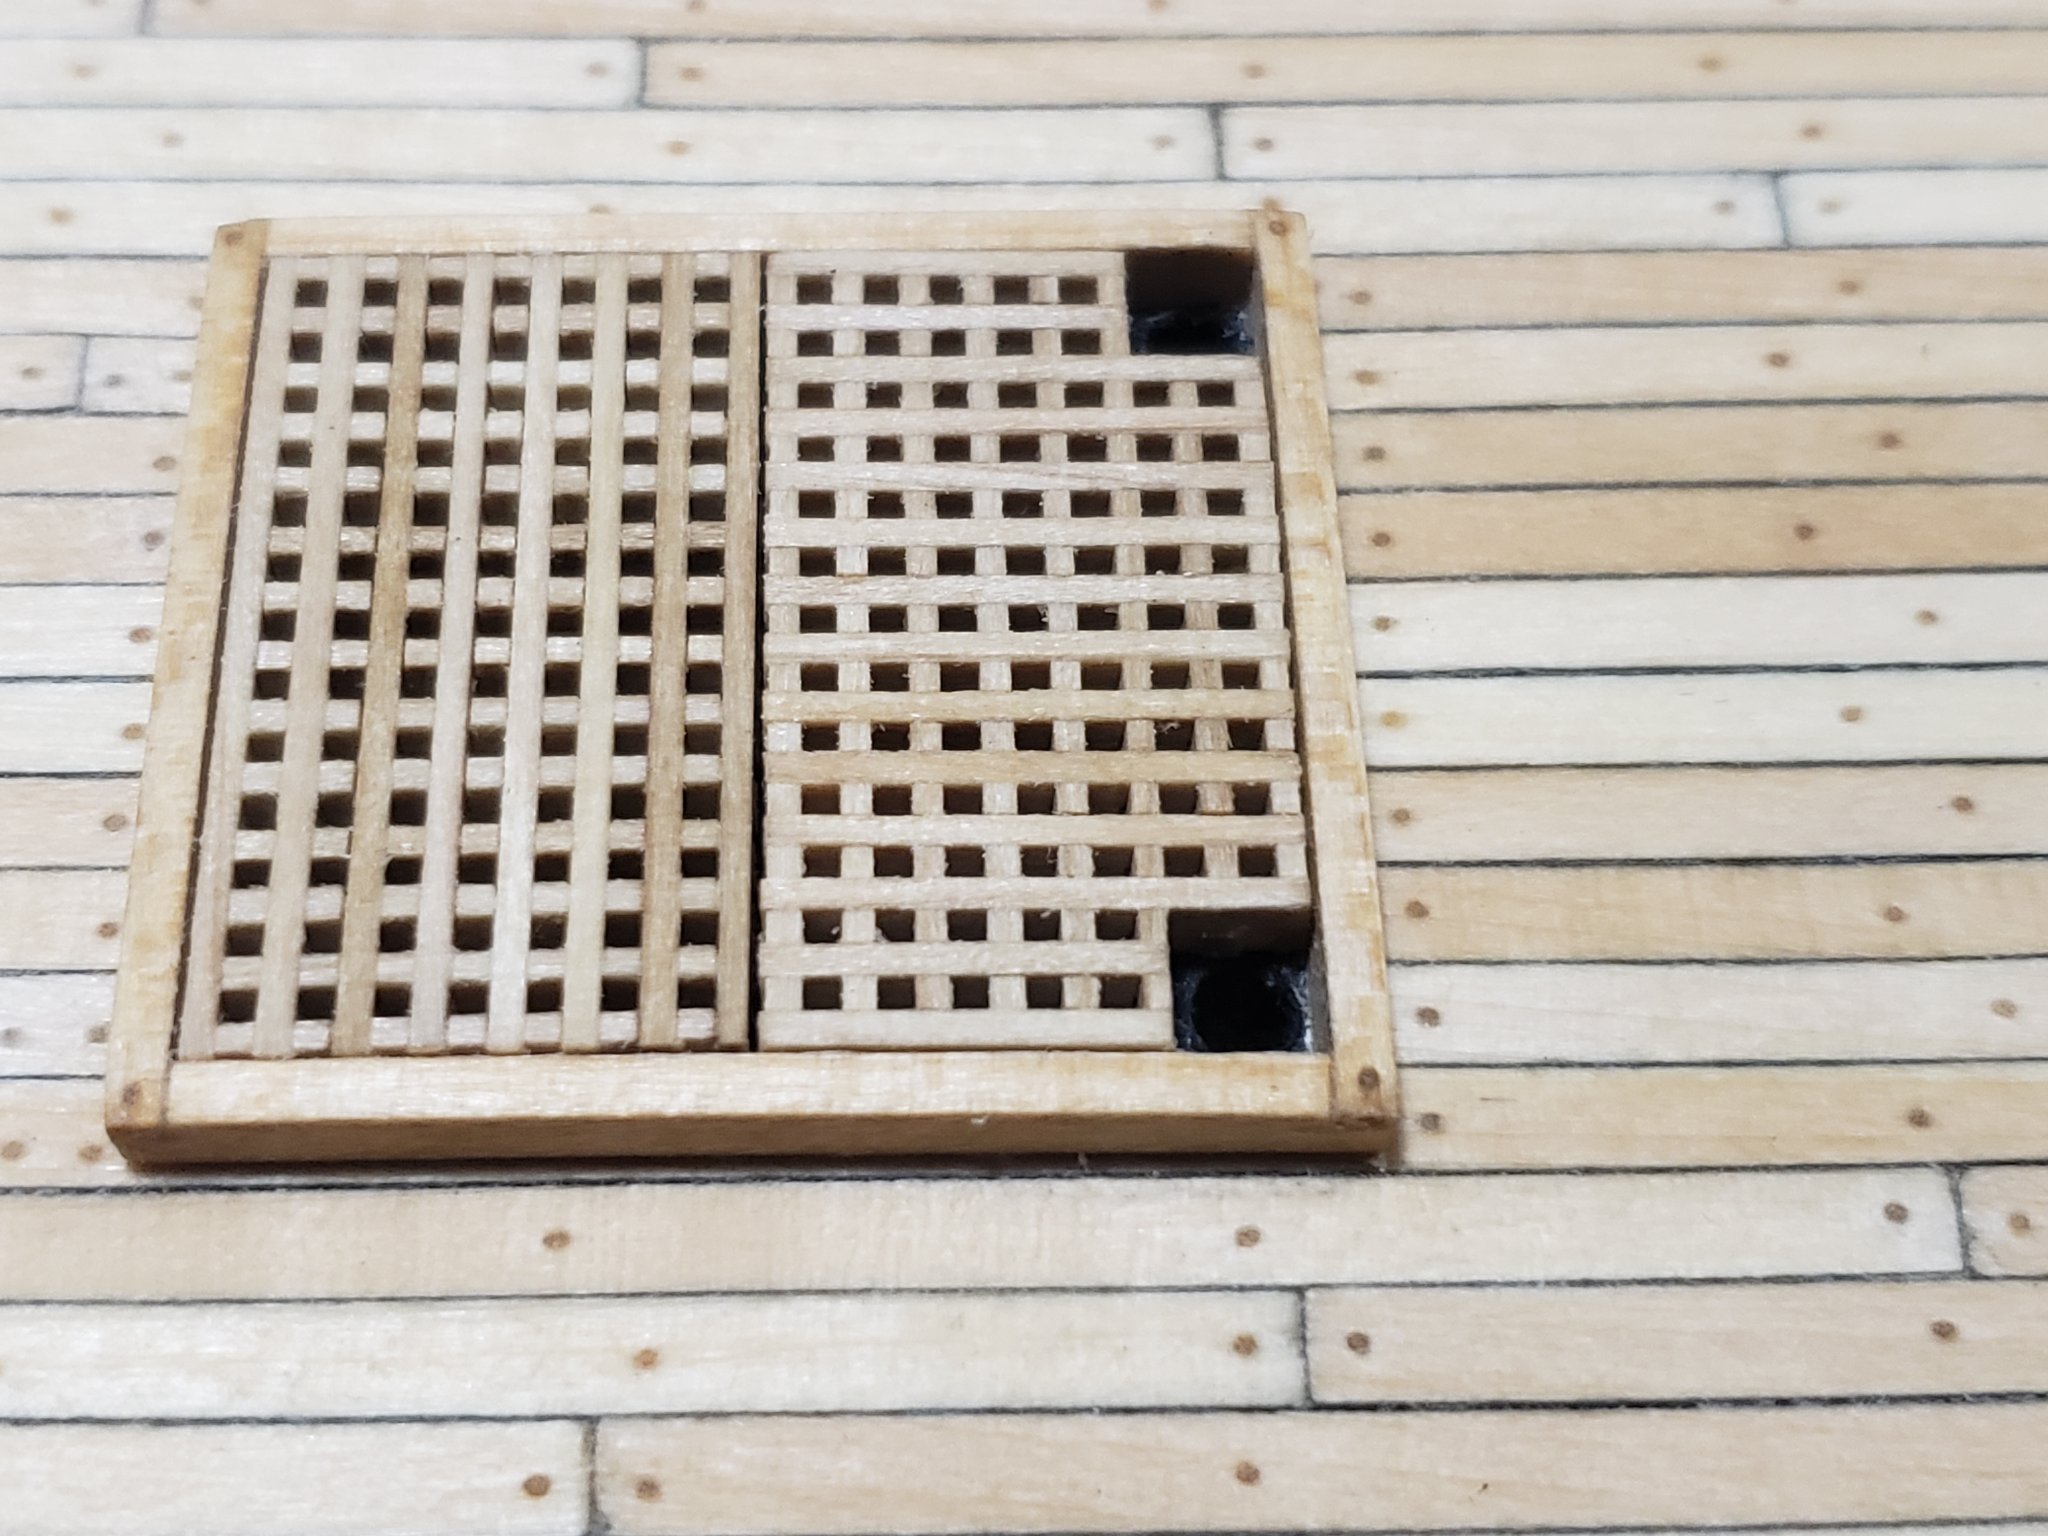
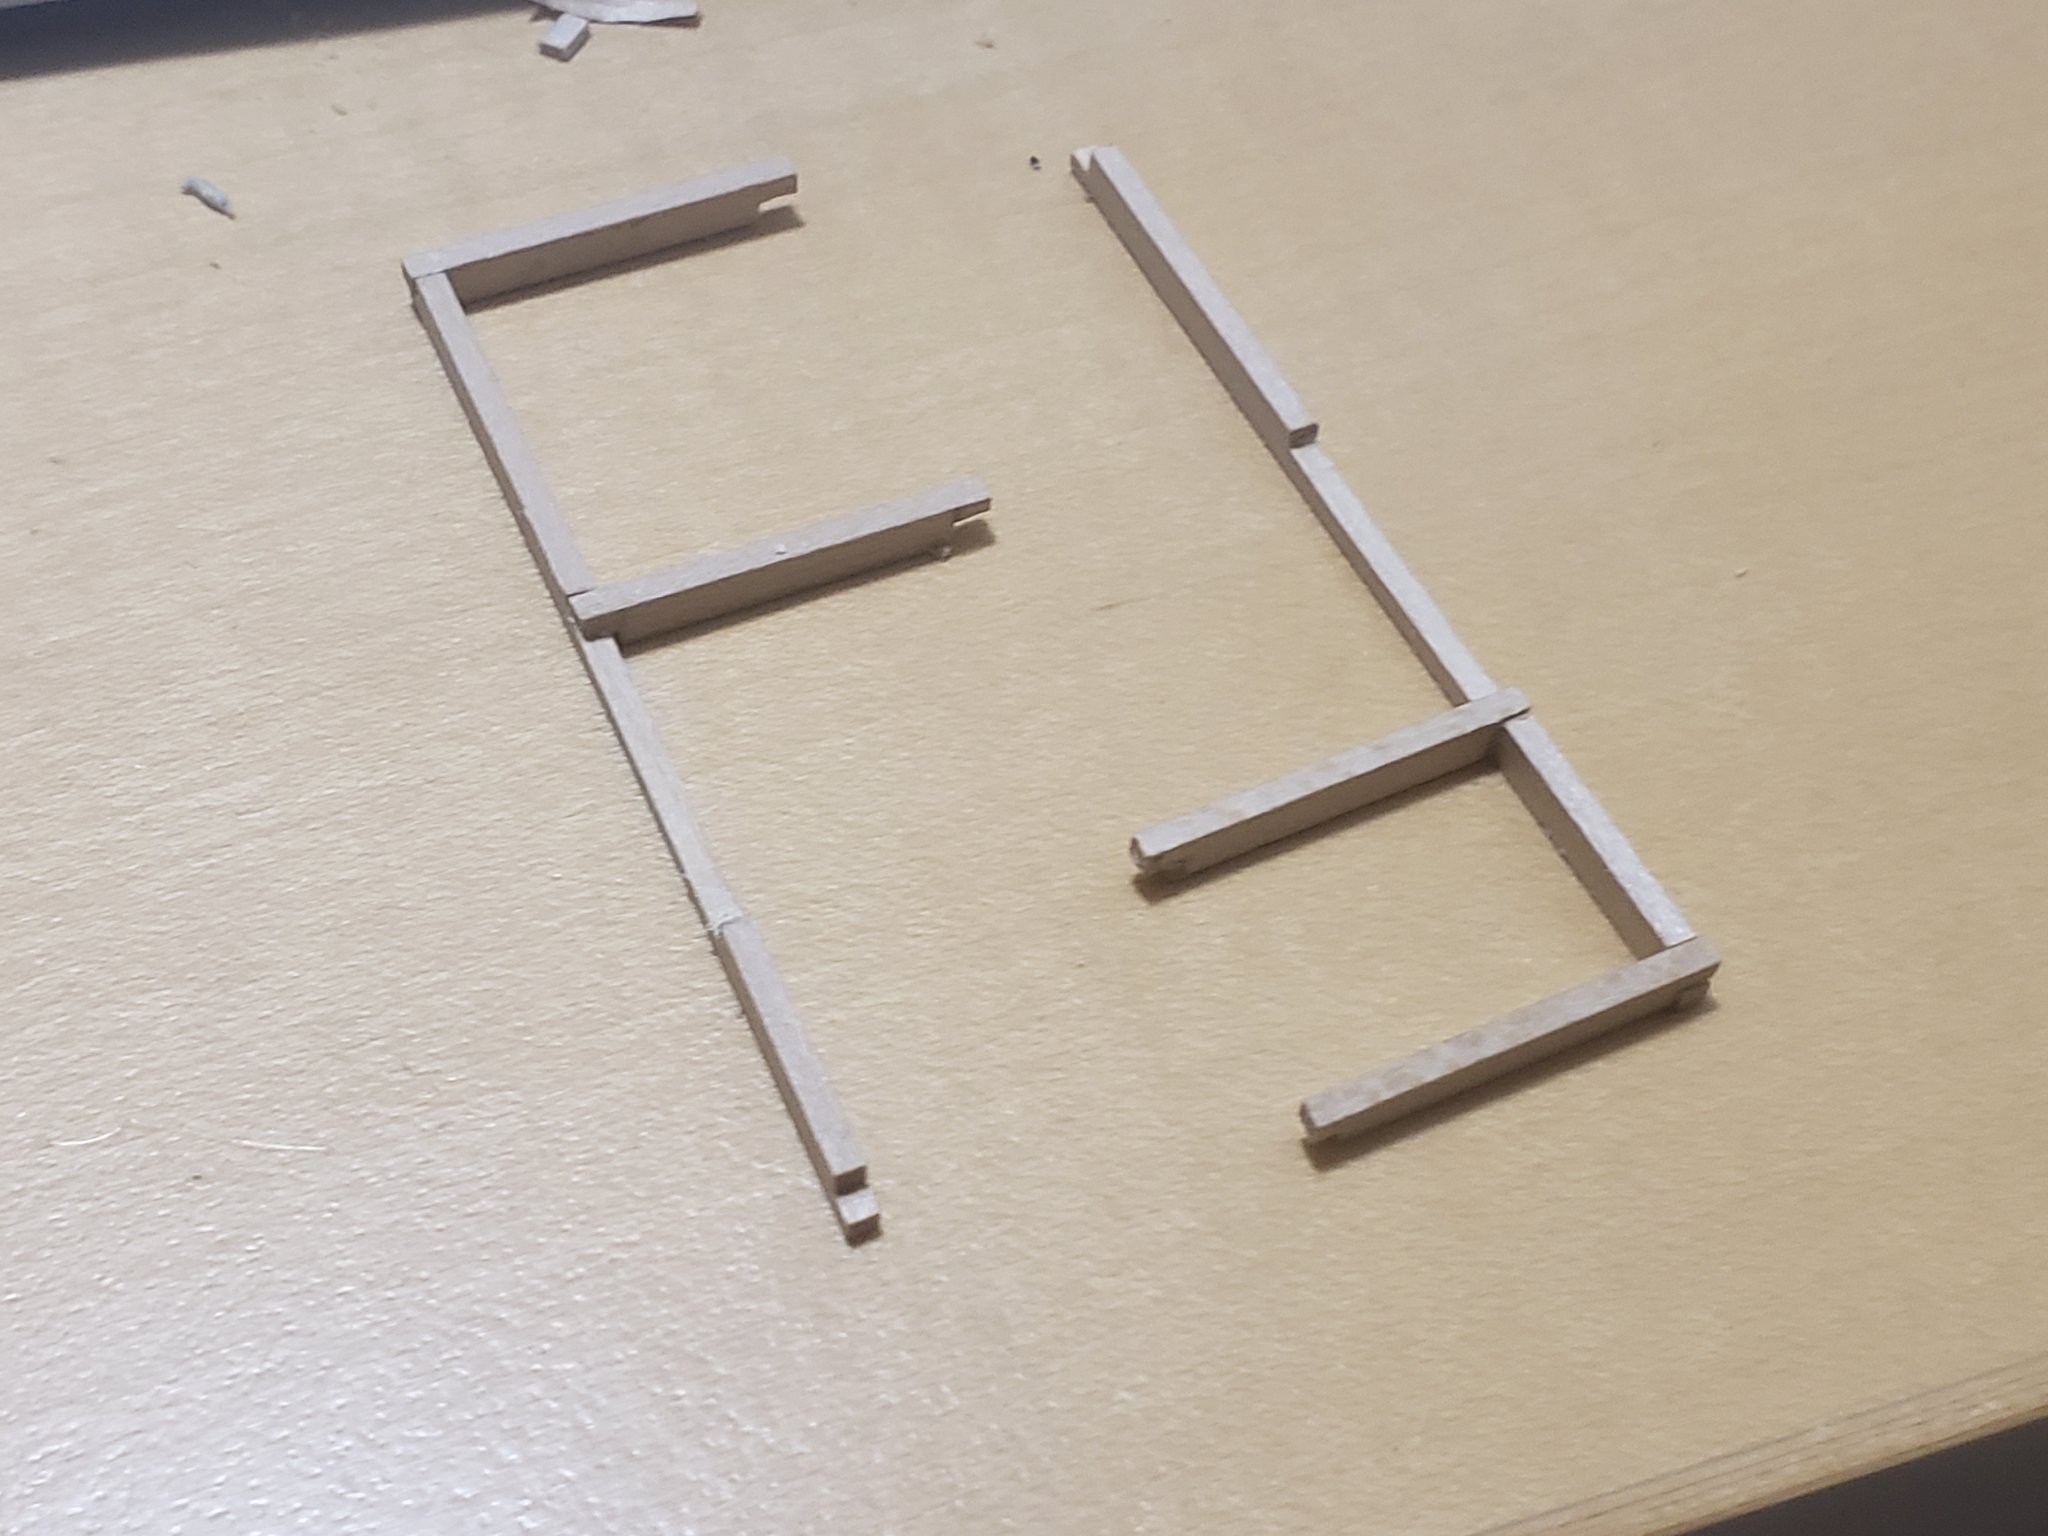
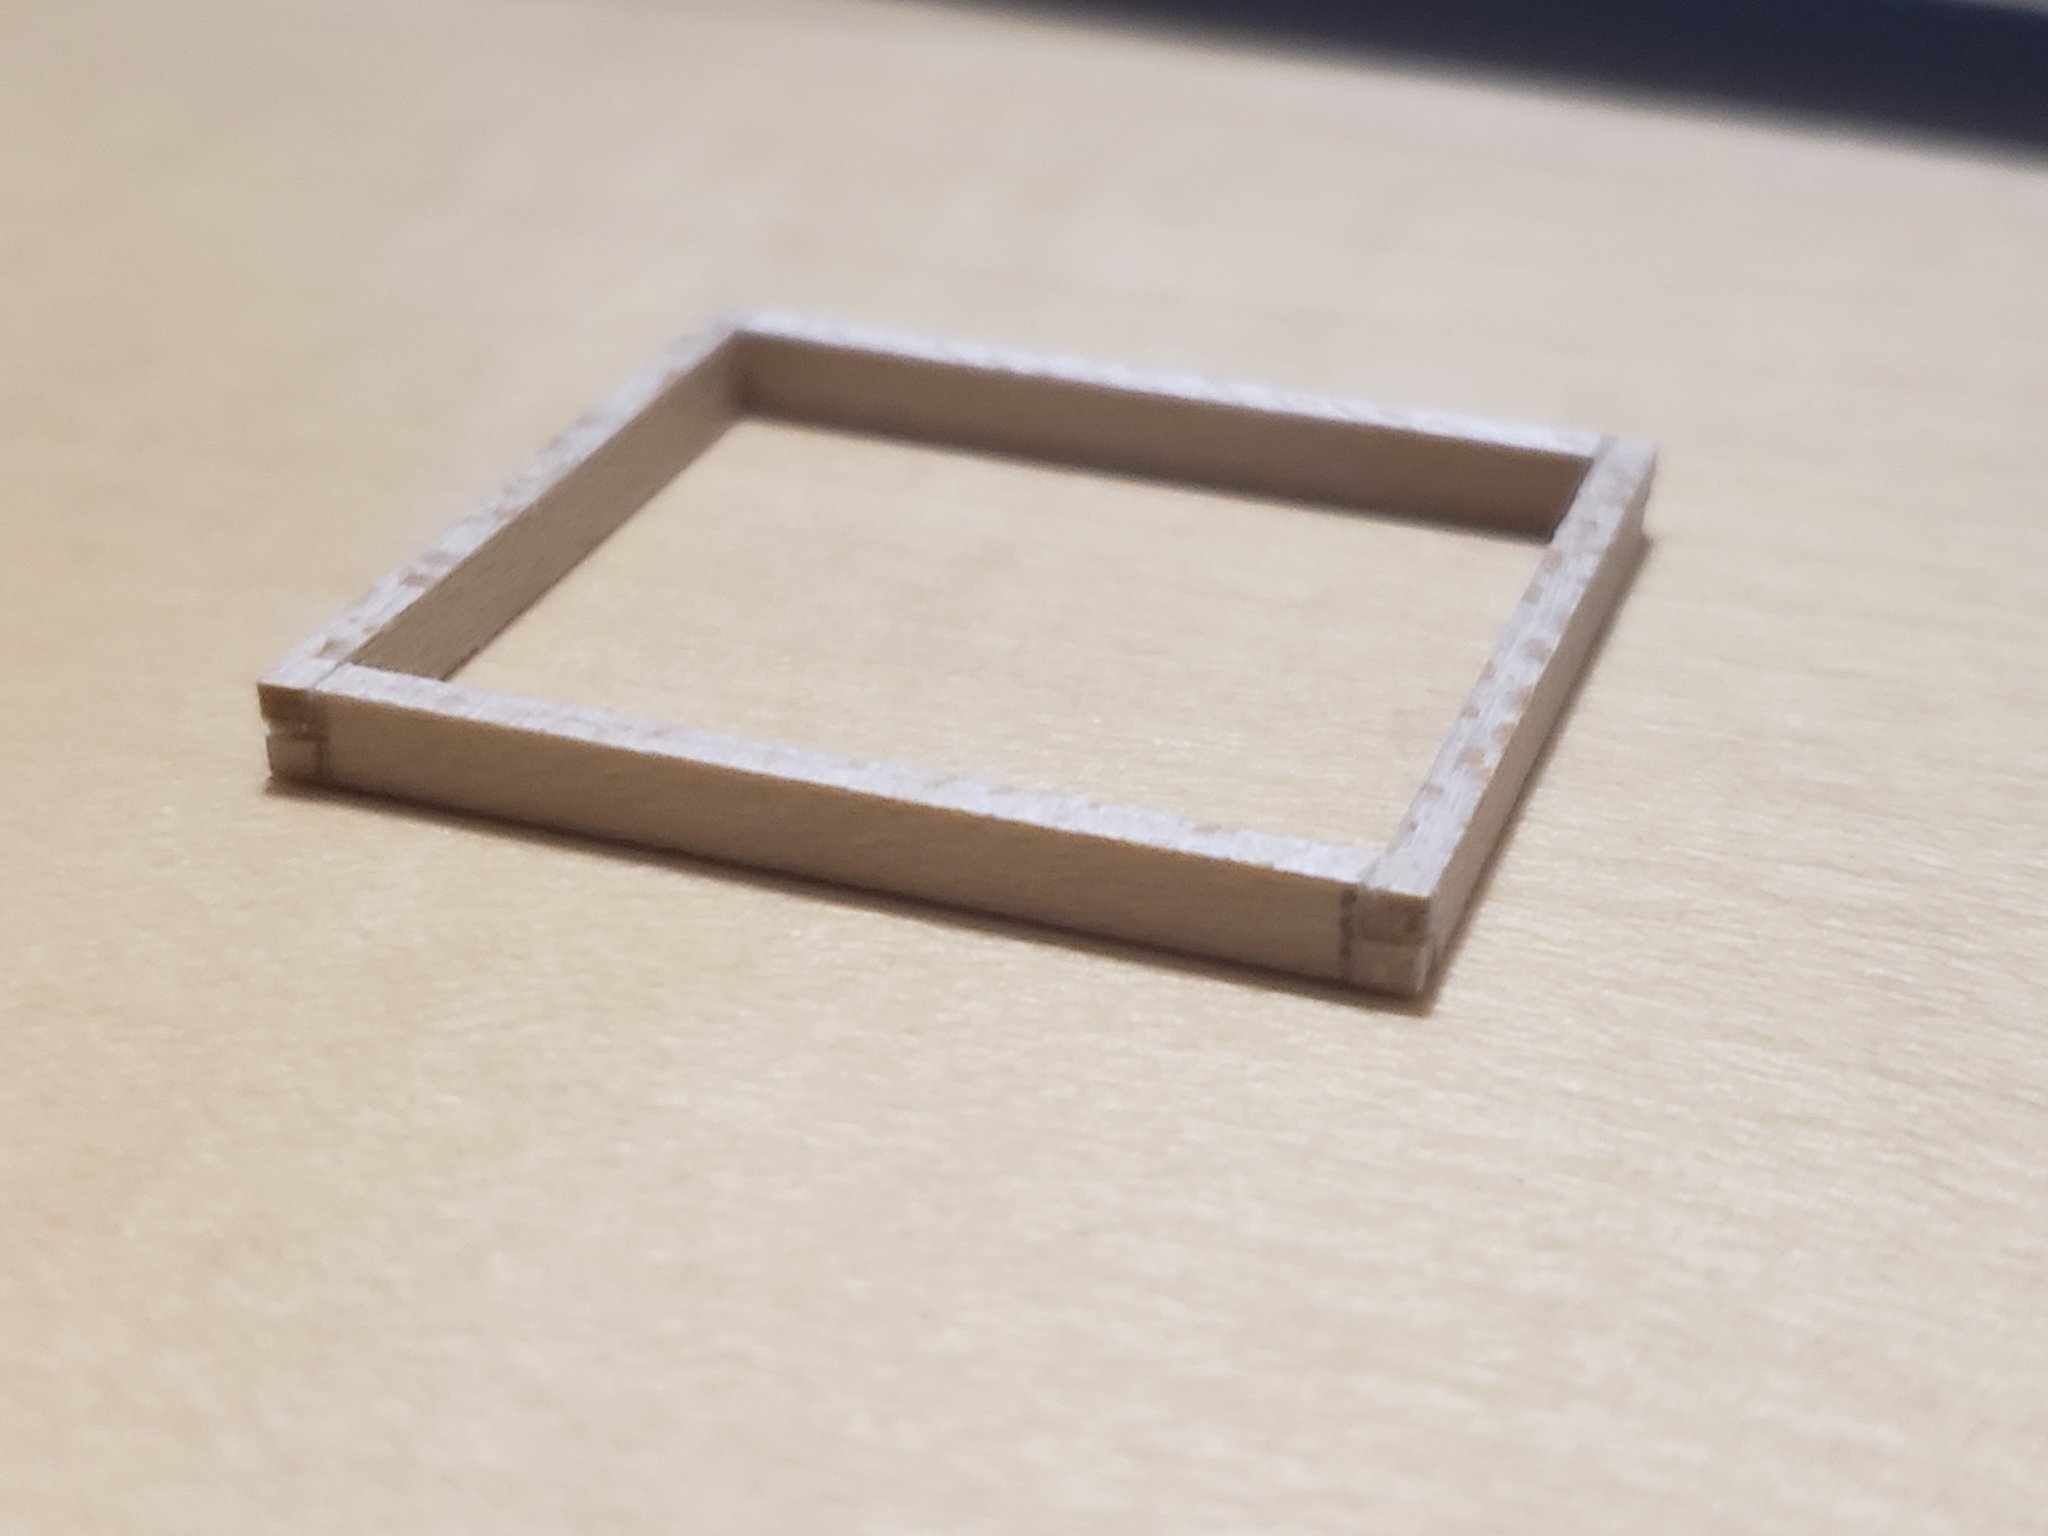
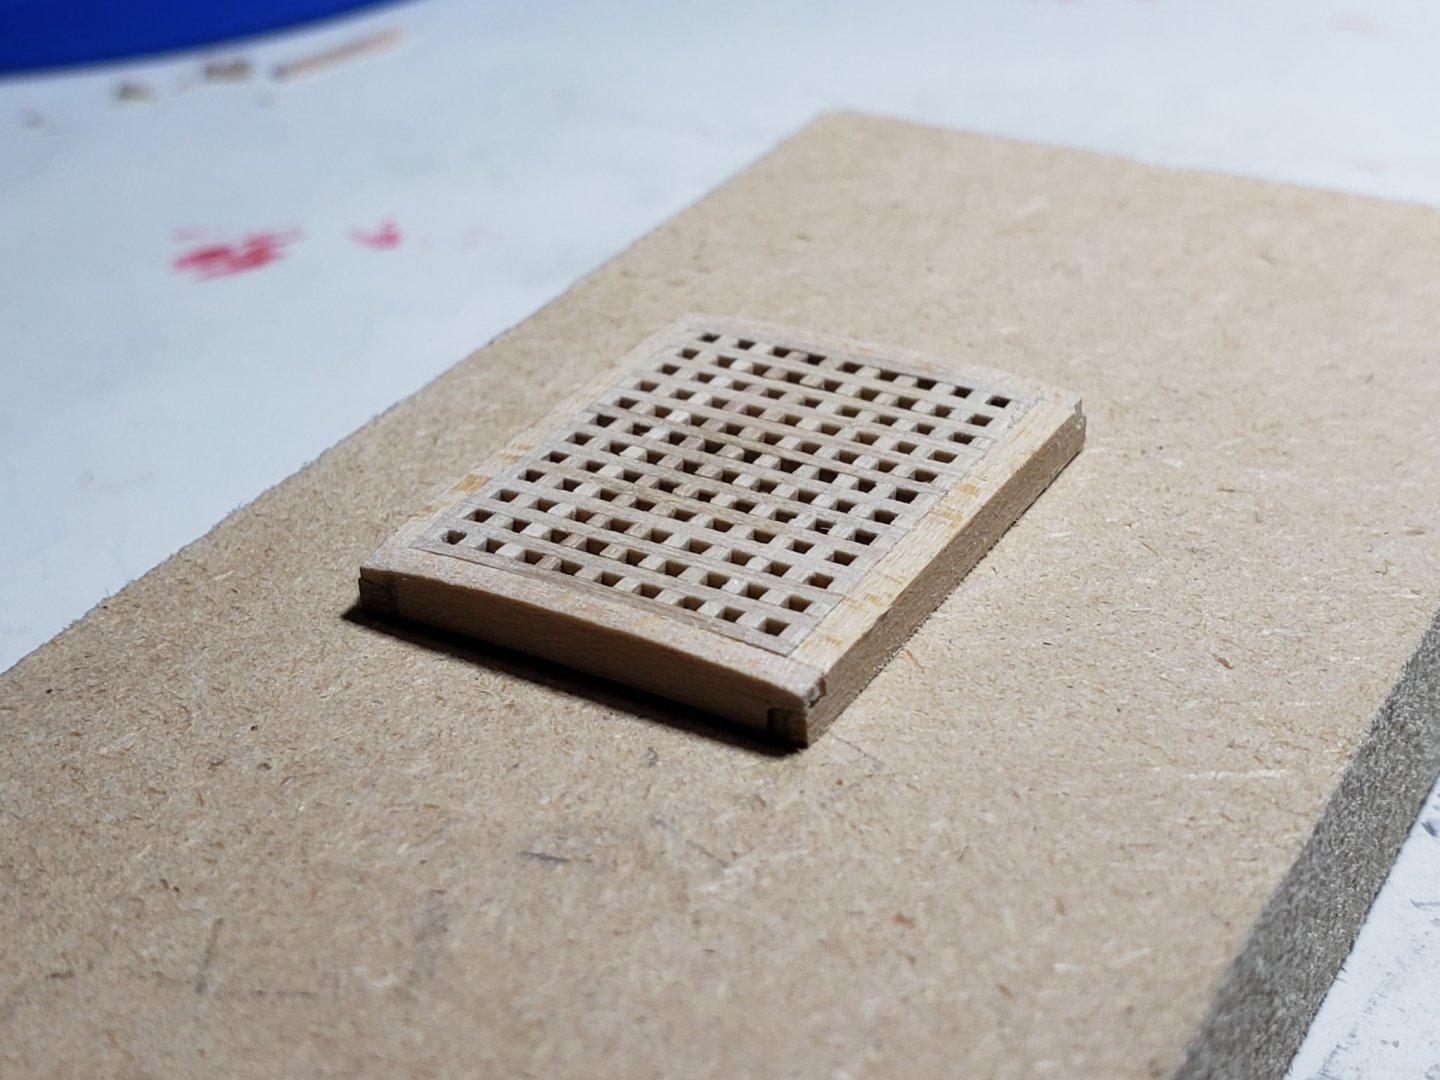
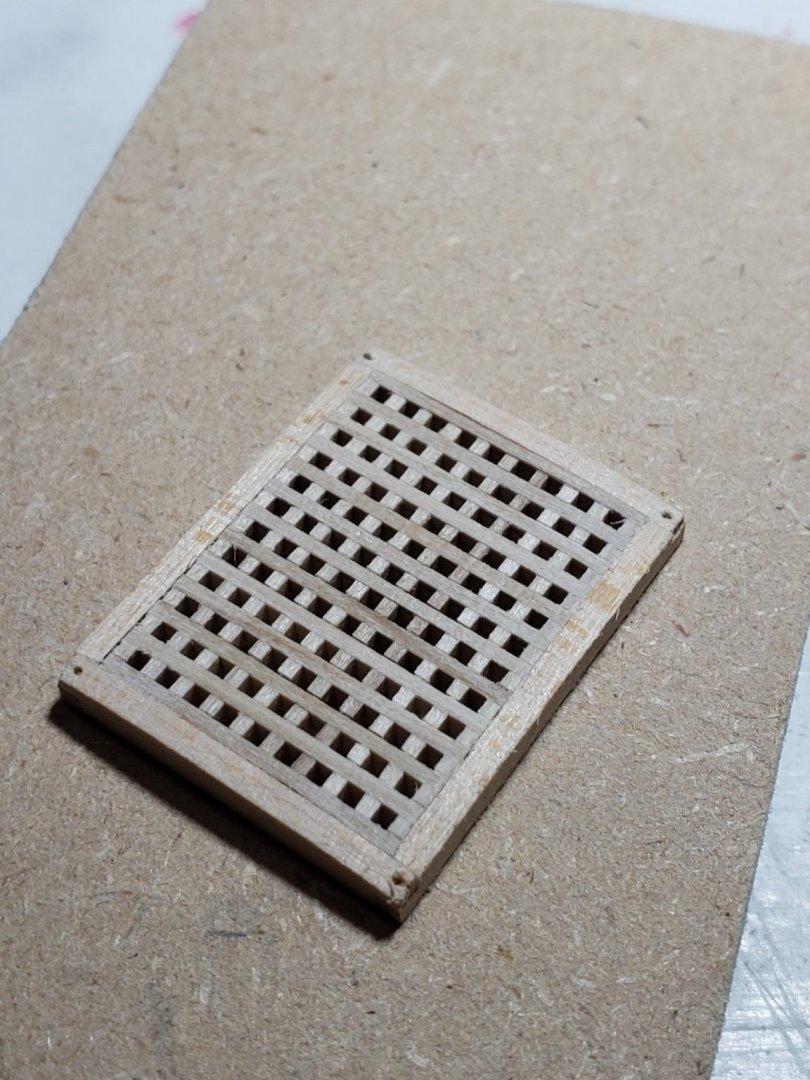
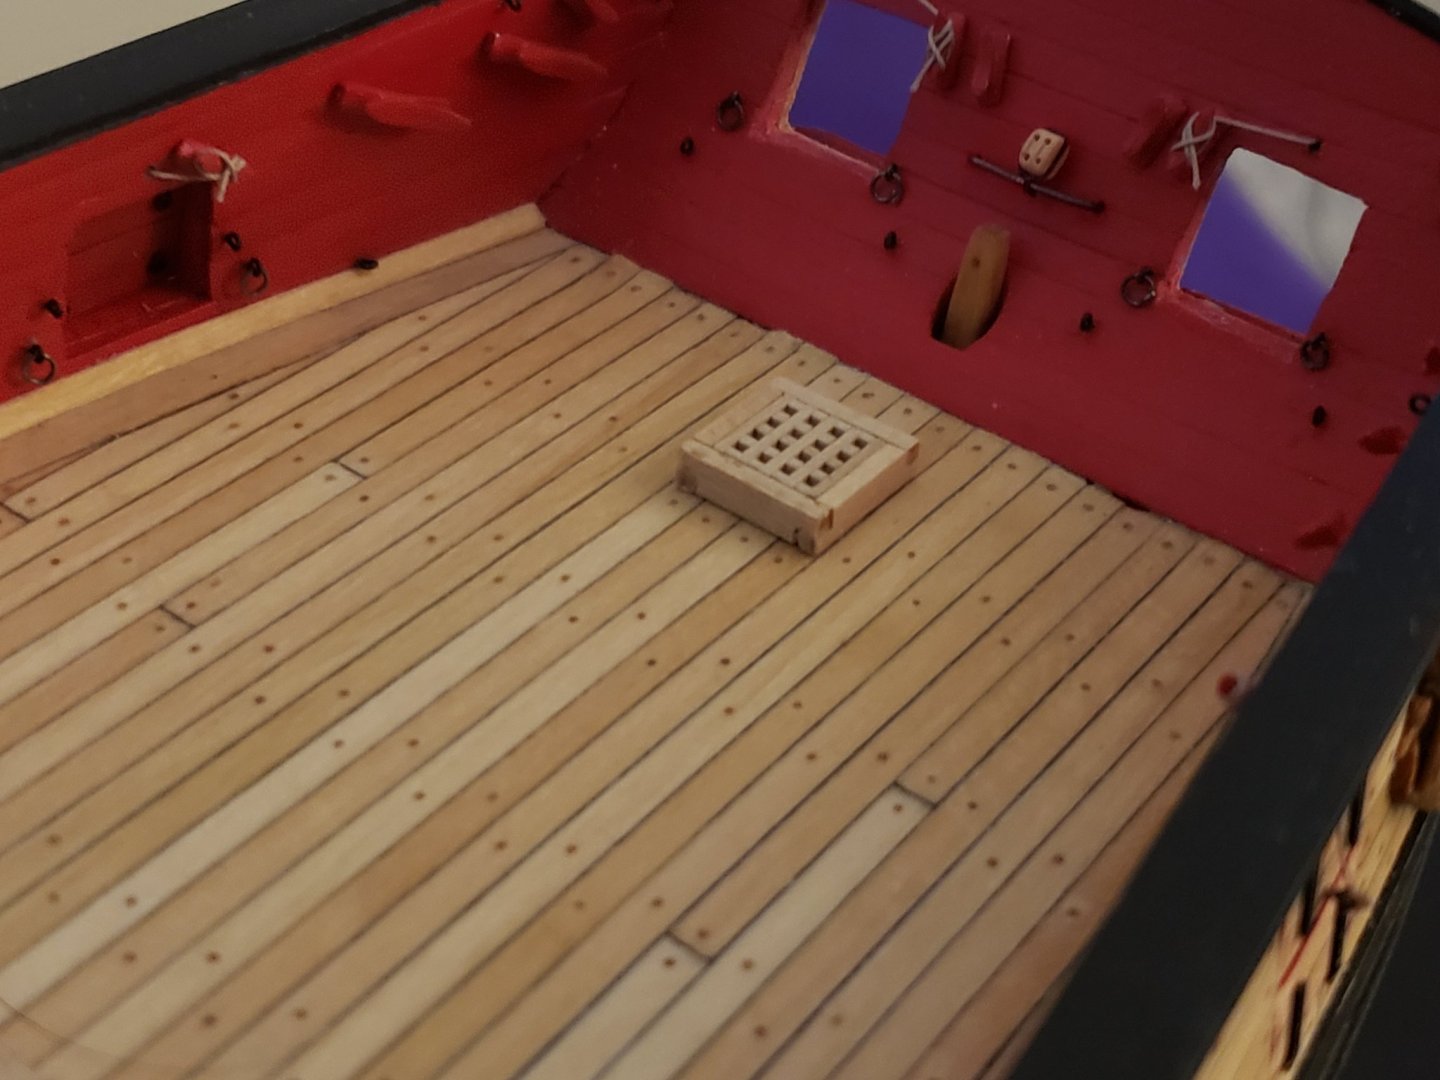
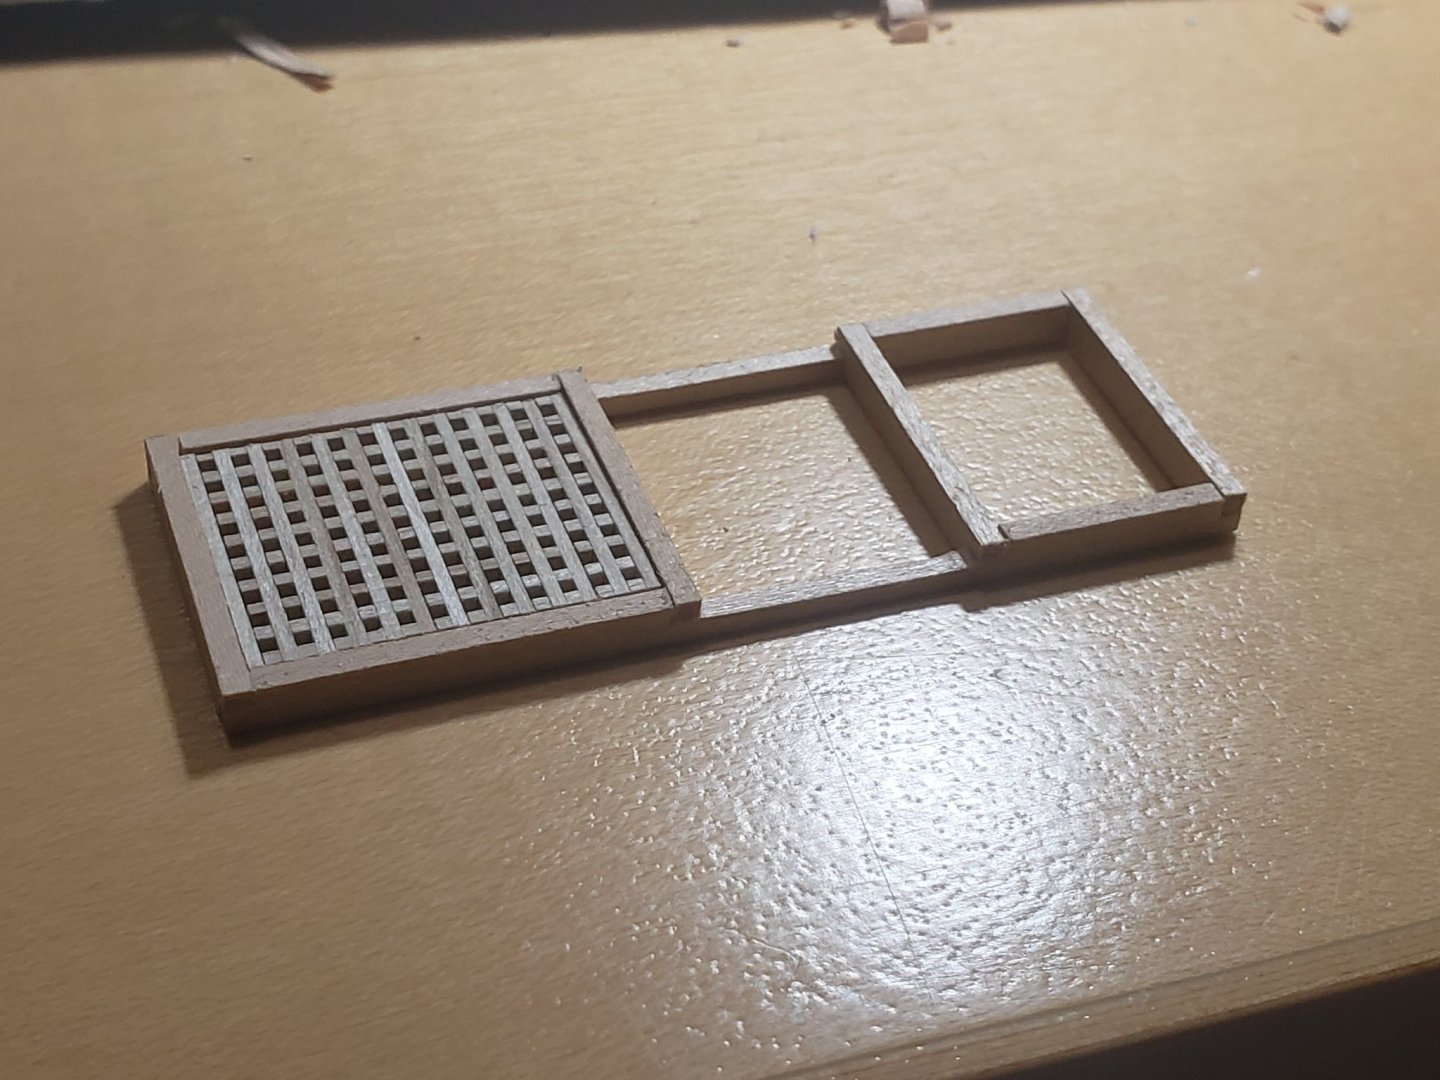
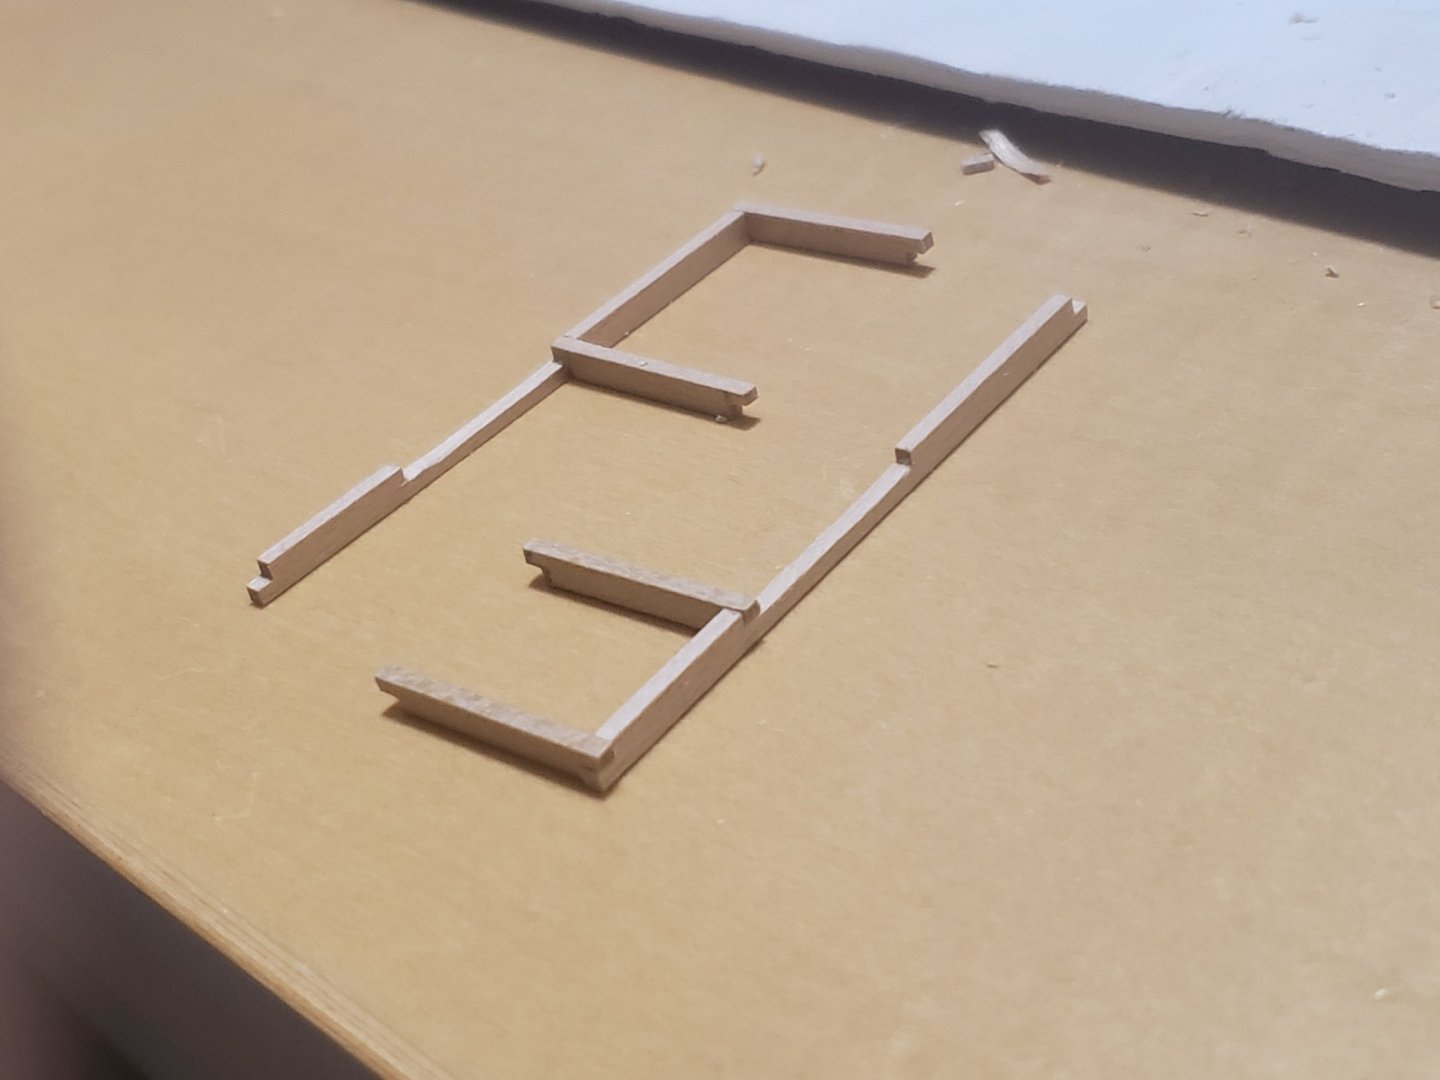
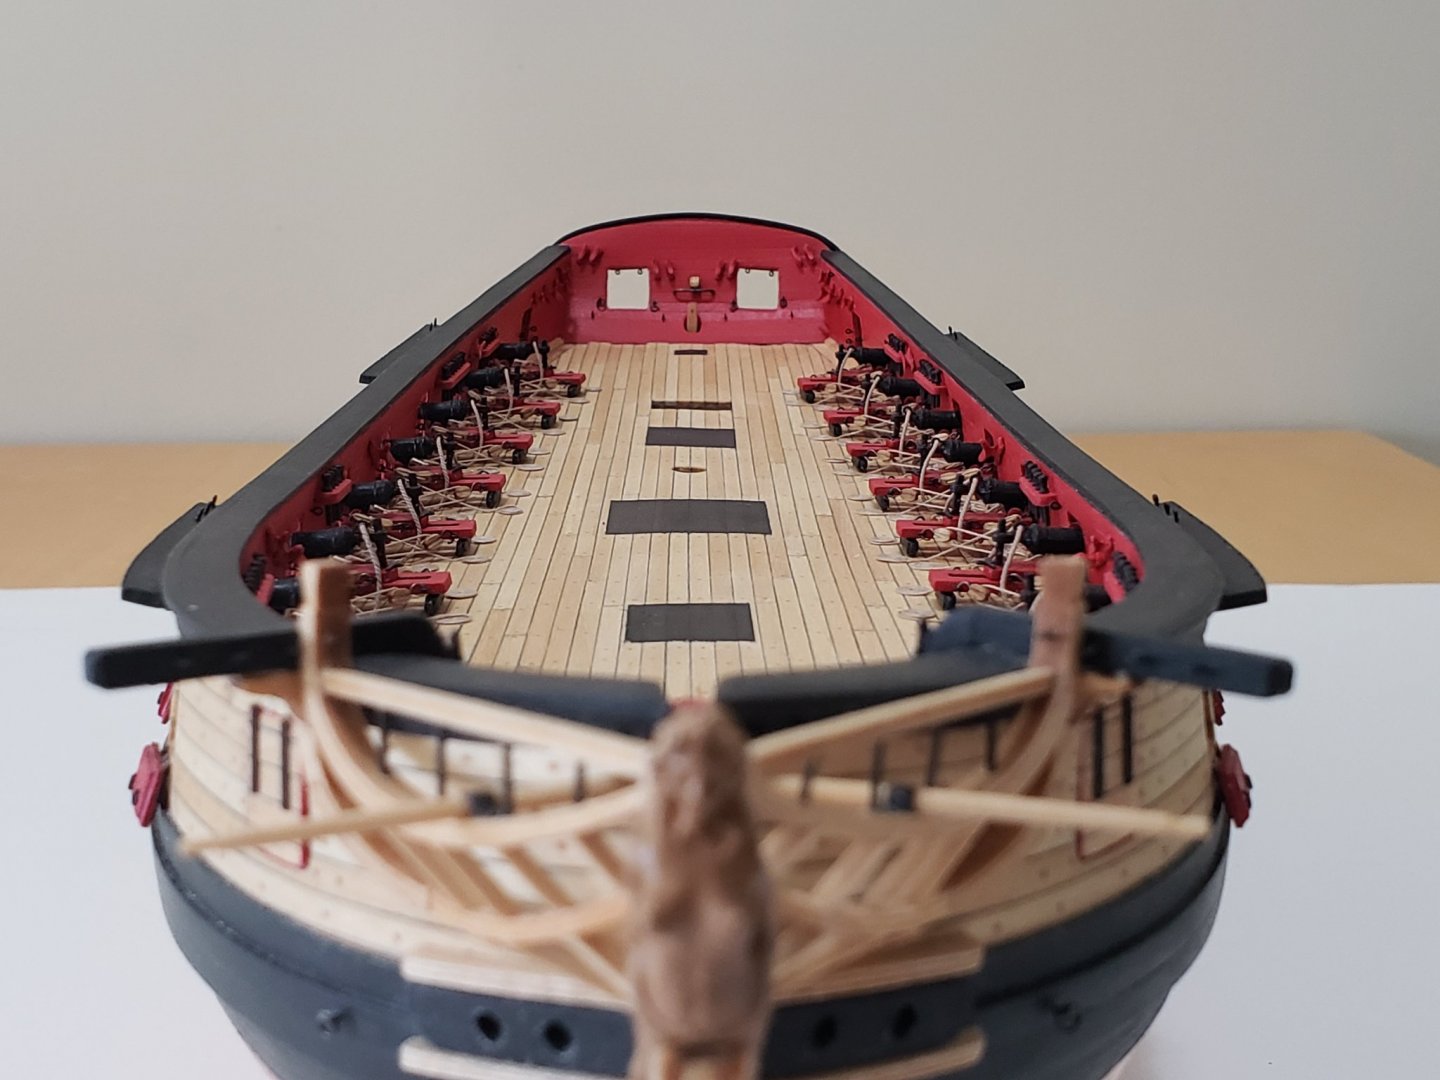
Making very slow progress with the deck details. Finished making all the coamings and gratings. The gratings were very fun to put together. Reminded me of lego 😁 Here are some pics: Here they are dry fitted on the deck: Next step is to put in the treenails on the deck section and on each corner, curve the coamings and gratings to fit on the deck, and lastly apply tung oil.


- 950 replies
-
- 7
-
-
- syren
- model shipways
- (and 1 more)
-
Thanks Richard!!! 😁
-
Looking gorgeous!!!! I may follow your steps in redoing my stand for the Virginia. Looks really nice
-
I don't remember what I had done with mine for that one, but I don't think the orientation matters. I think the letter orientation is just so that the dotted line on the edges lies correctly (dotted lines show where they will need to be beveled). The middle one with the O and X won't need to be manually beveled with a blade since it will naturally have the correct curve once you fair the hull with sandpaper.
- 436 replies
-
- 1
-
-
- Syren
- Model Shipways
- (and 1 more)
-
Thank you Thomas for the encouraging words!! I have been using your log as a reference and it helped a lot for the rigging 😃
-
Oh yea the treenails were also nerve-wracking for me. I misplaced one trunnel on the bullwark and I can easily locate it (might be almost impossible for someone else to see it though). At the time I was cringing at my mistake, but now I consider it as my signature 😁 Yeaup! All holes drilled manually with a pin vise. I don't think I have used my electric hand drill for this build (except for making pilot holes bigger in some cases eg. rudder hole).
- 950 replies
-
- 1
-
-
- syren
- model shipways
- (and 1 more)
-
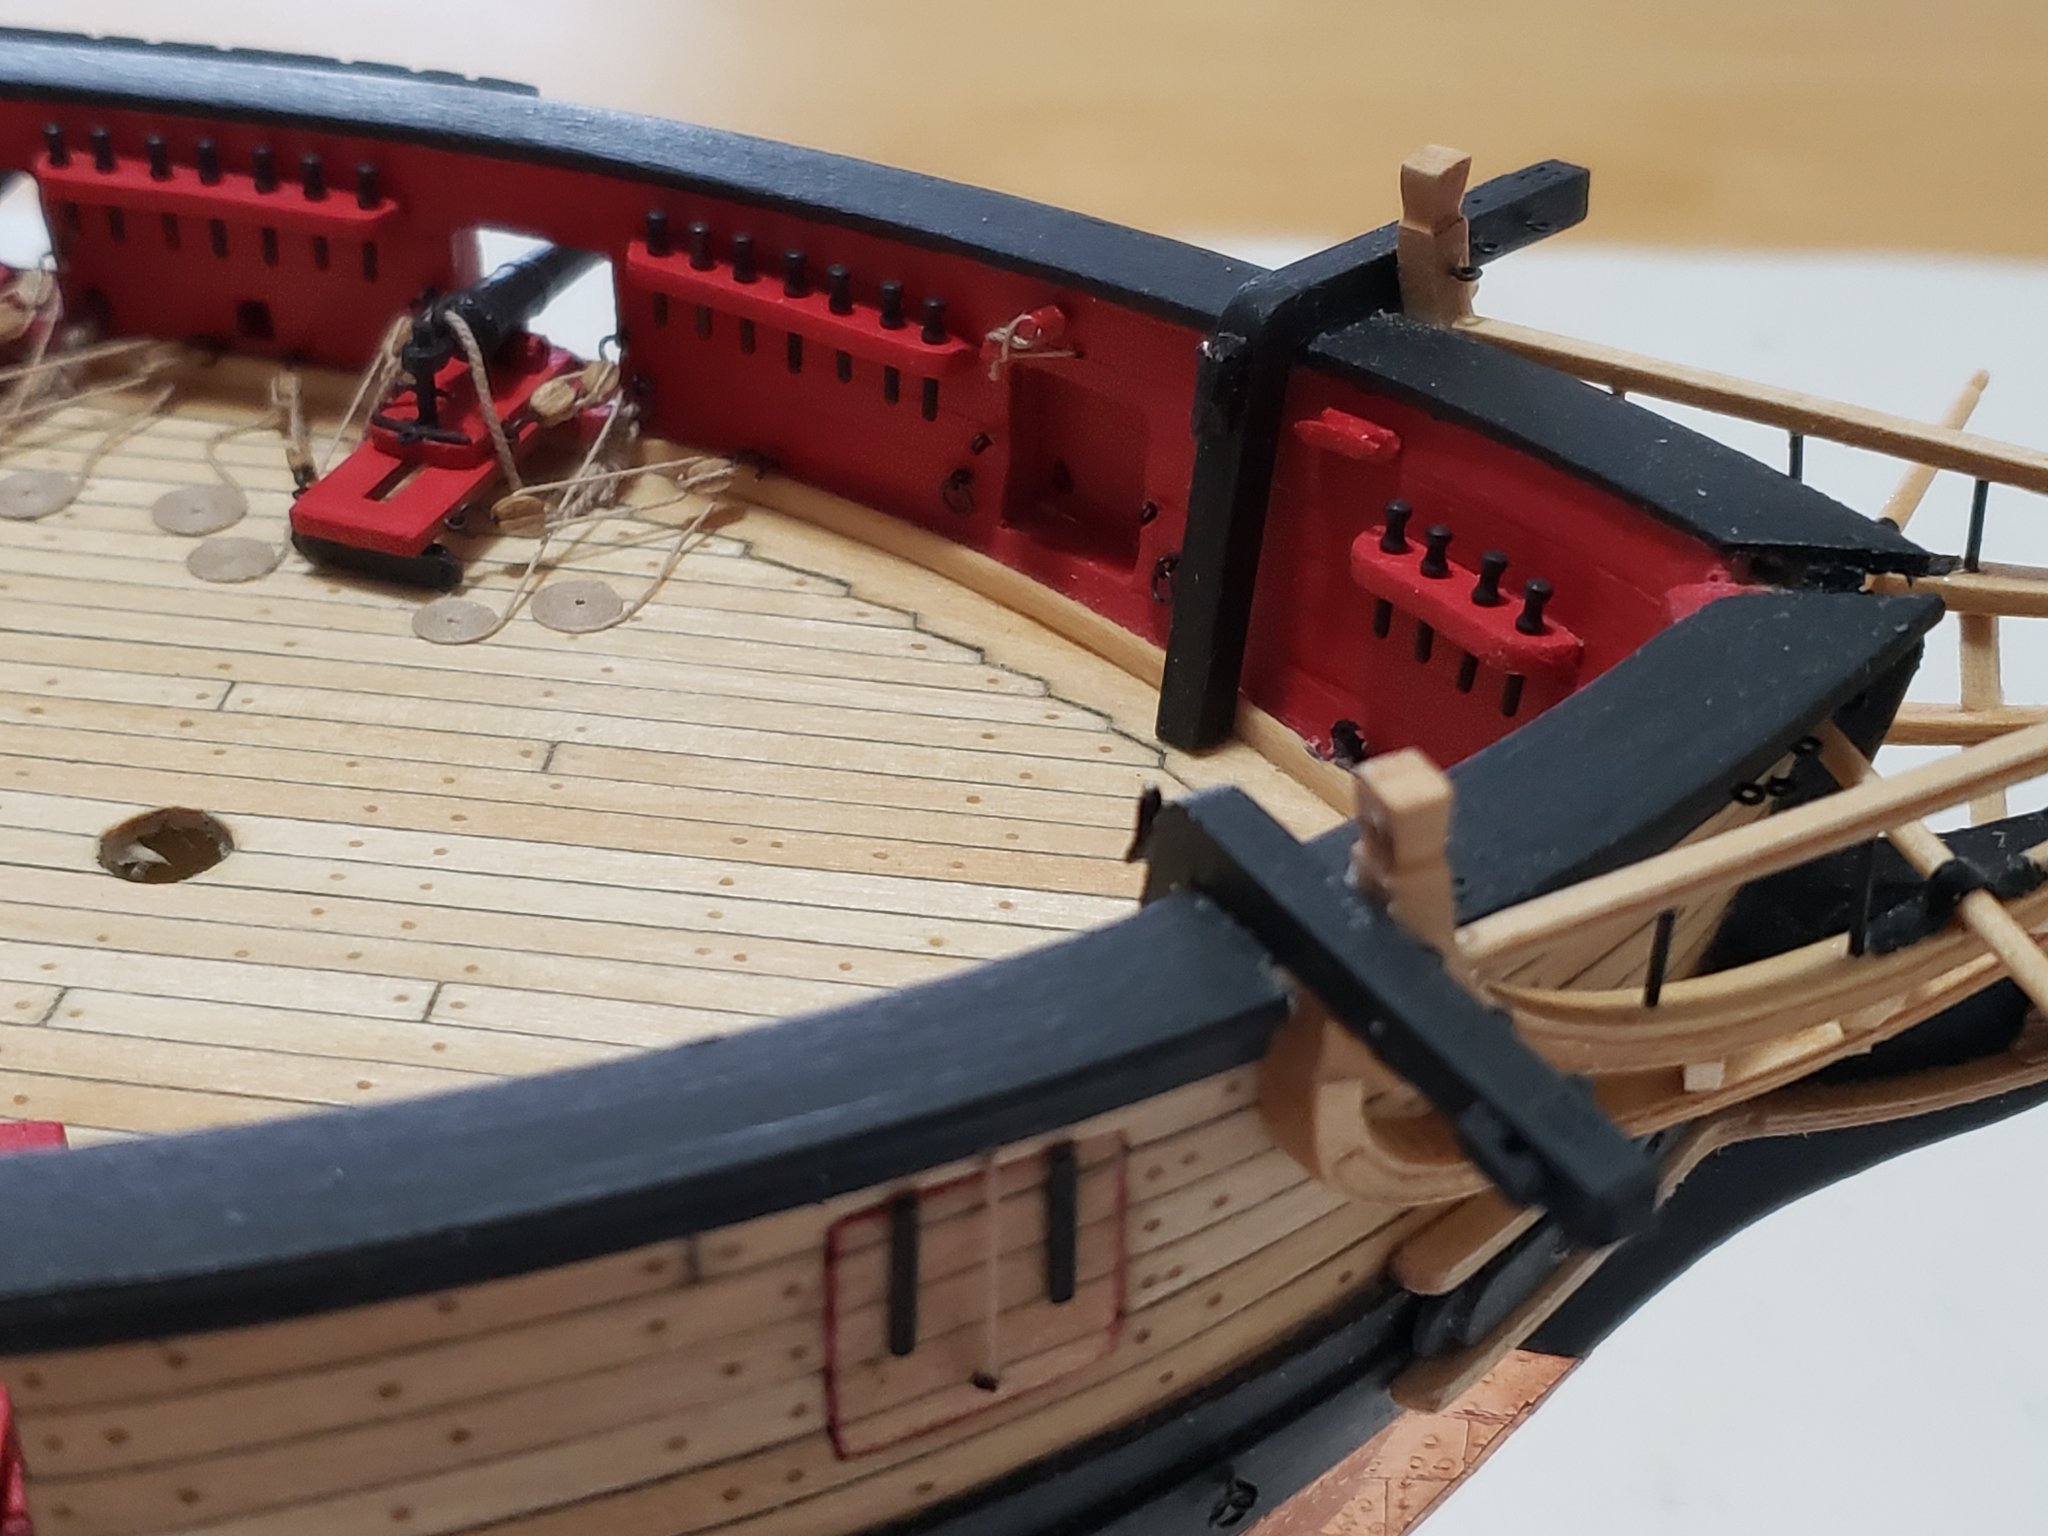
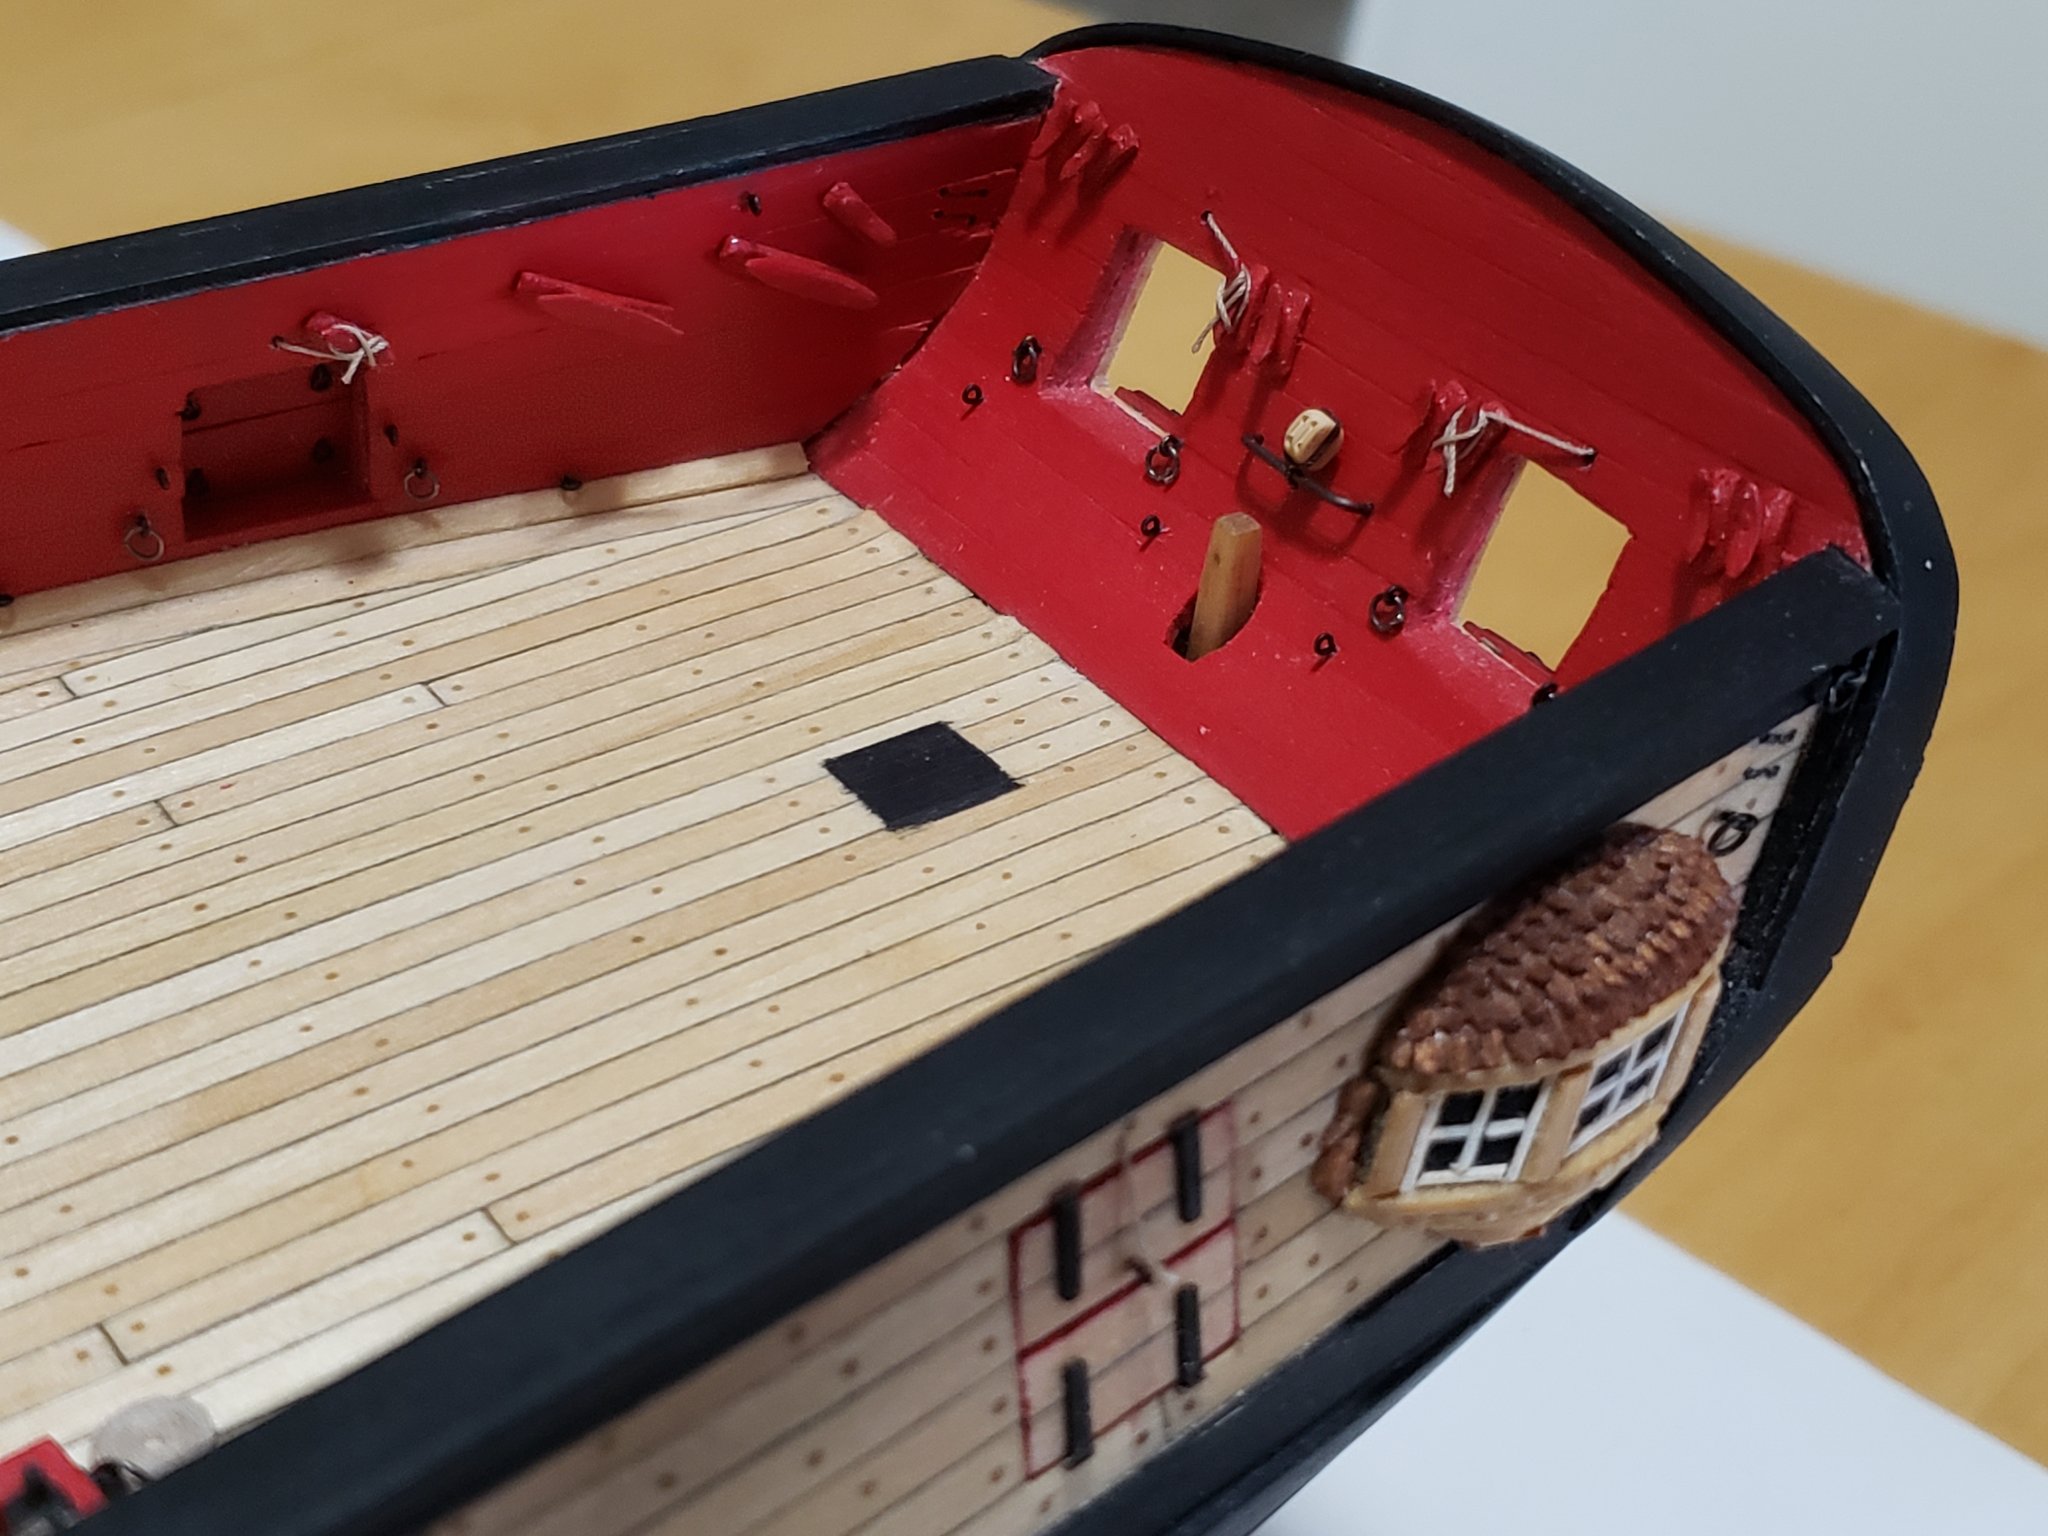
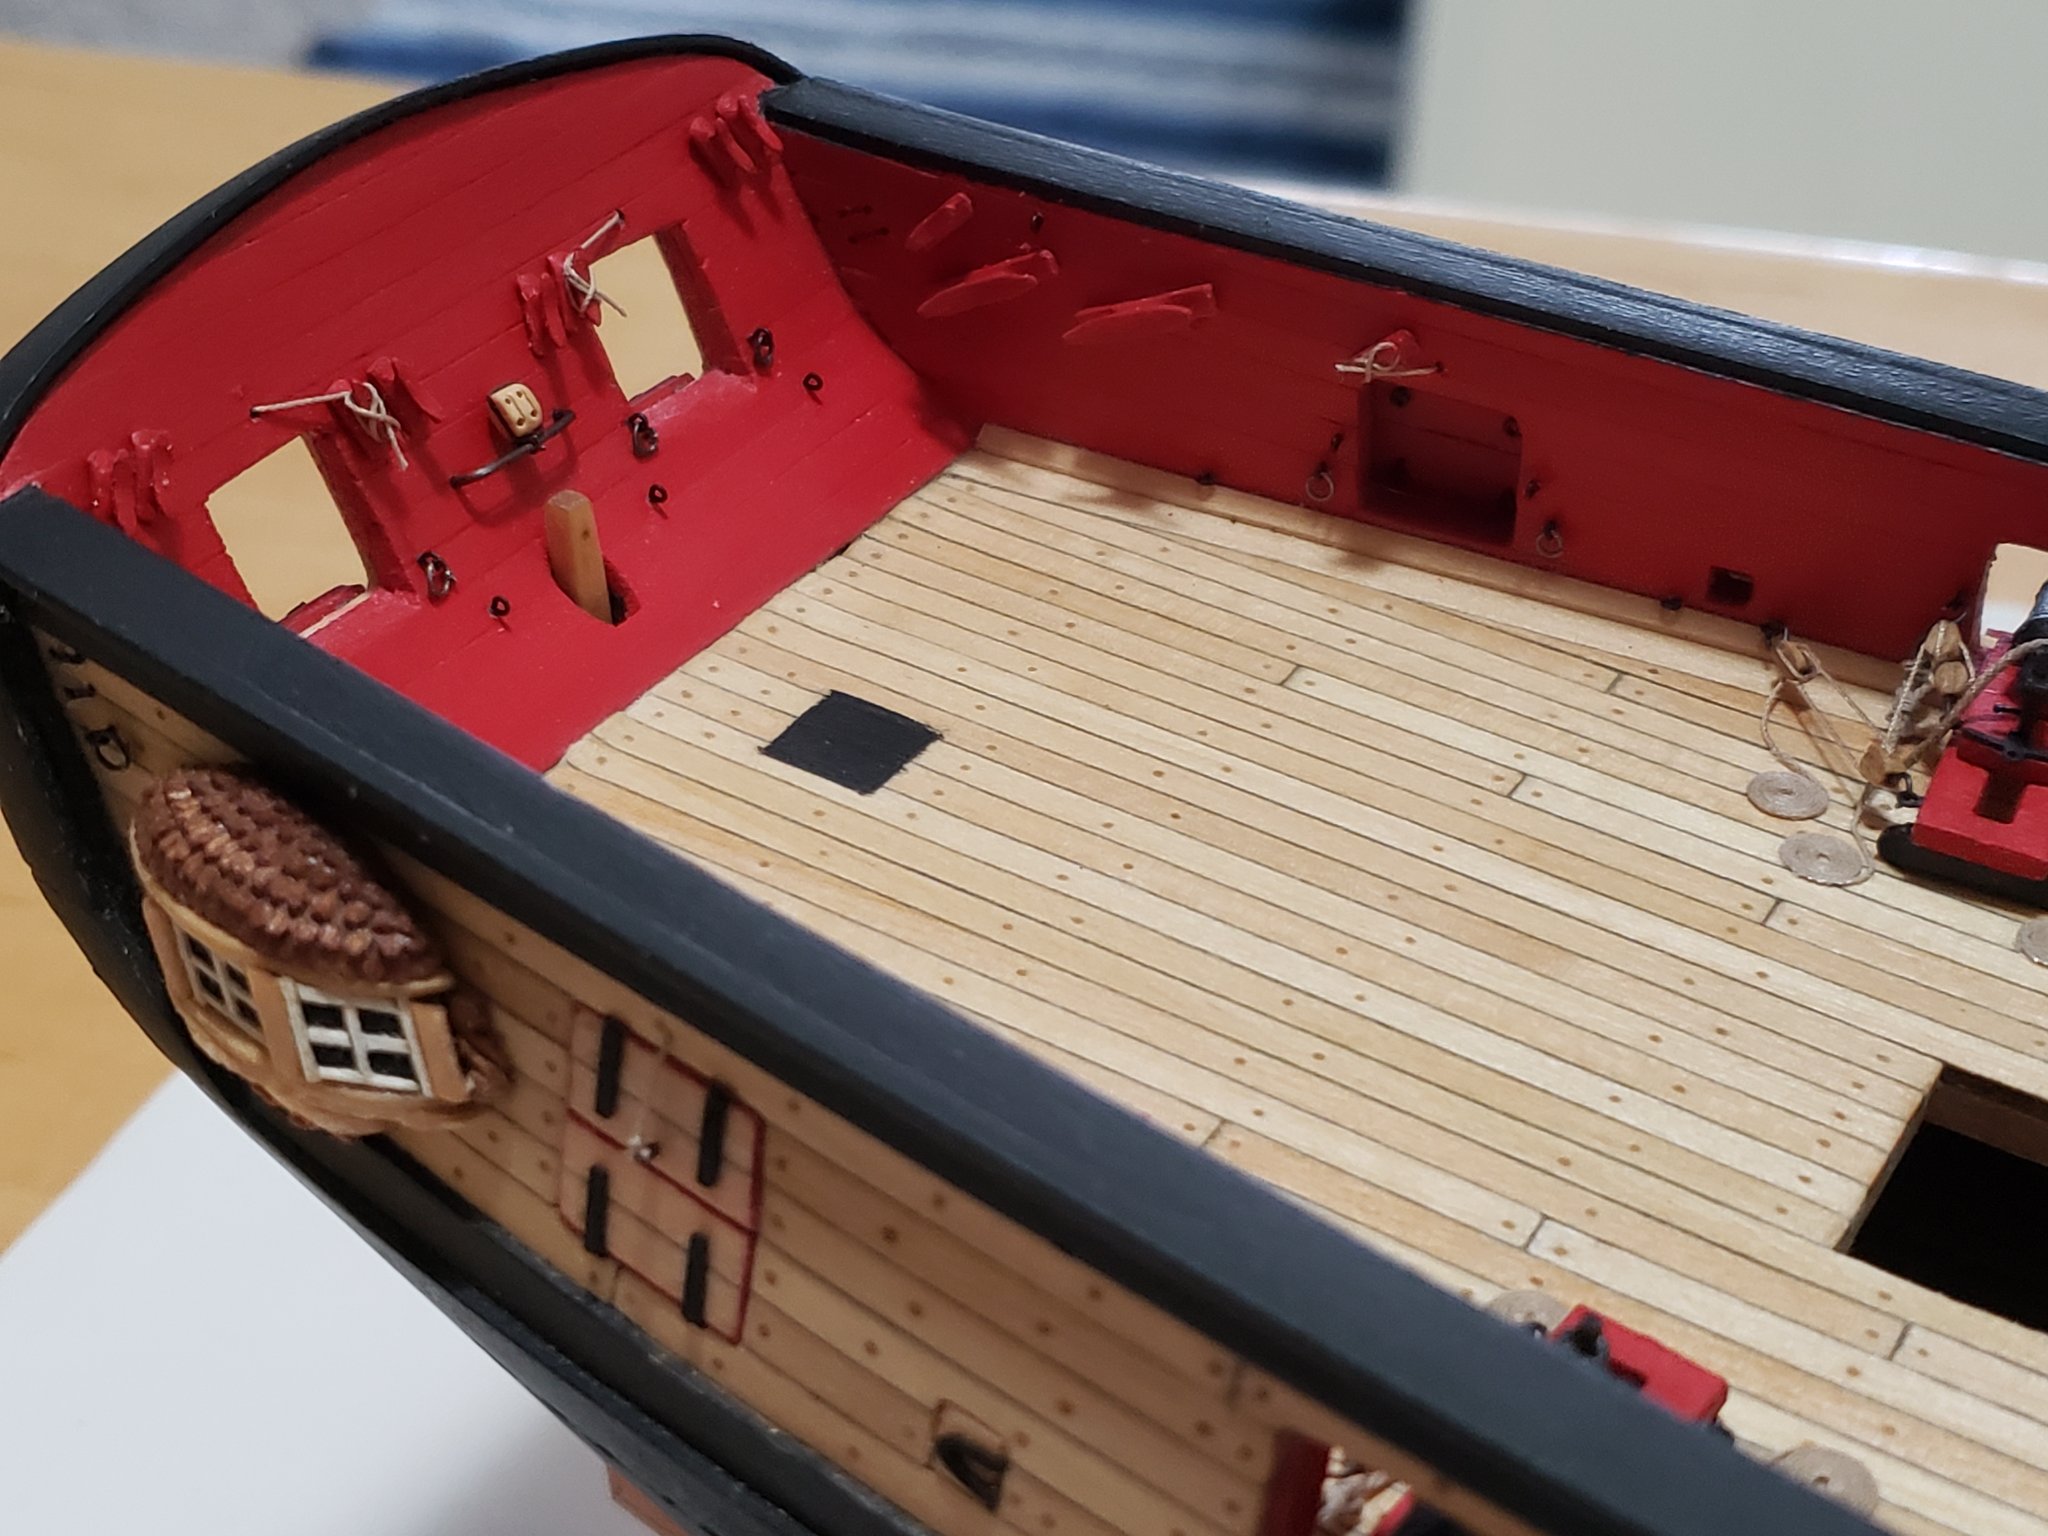
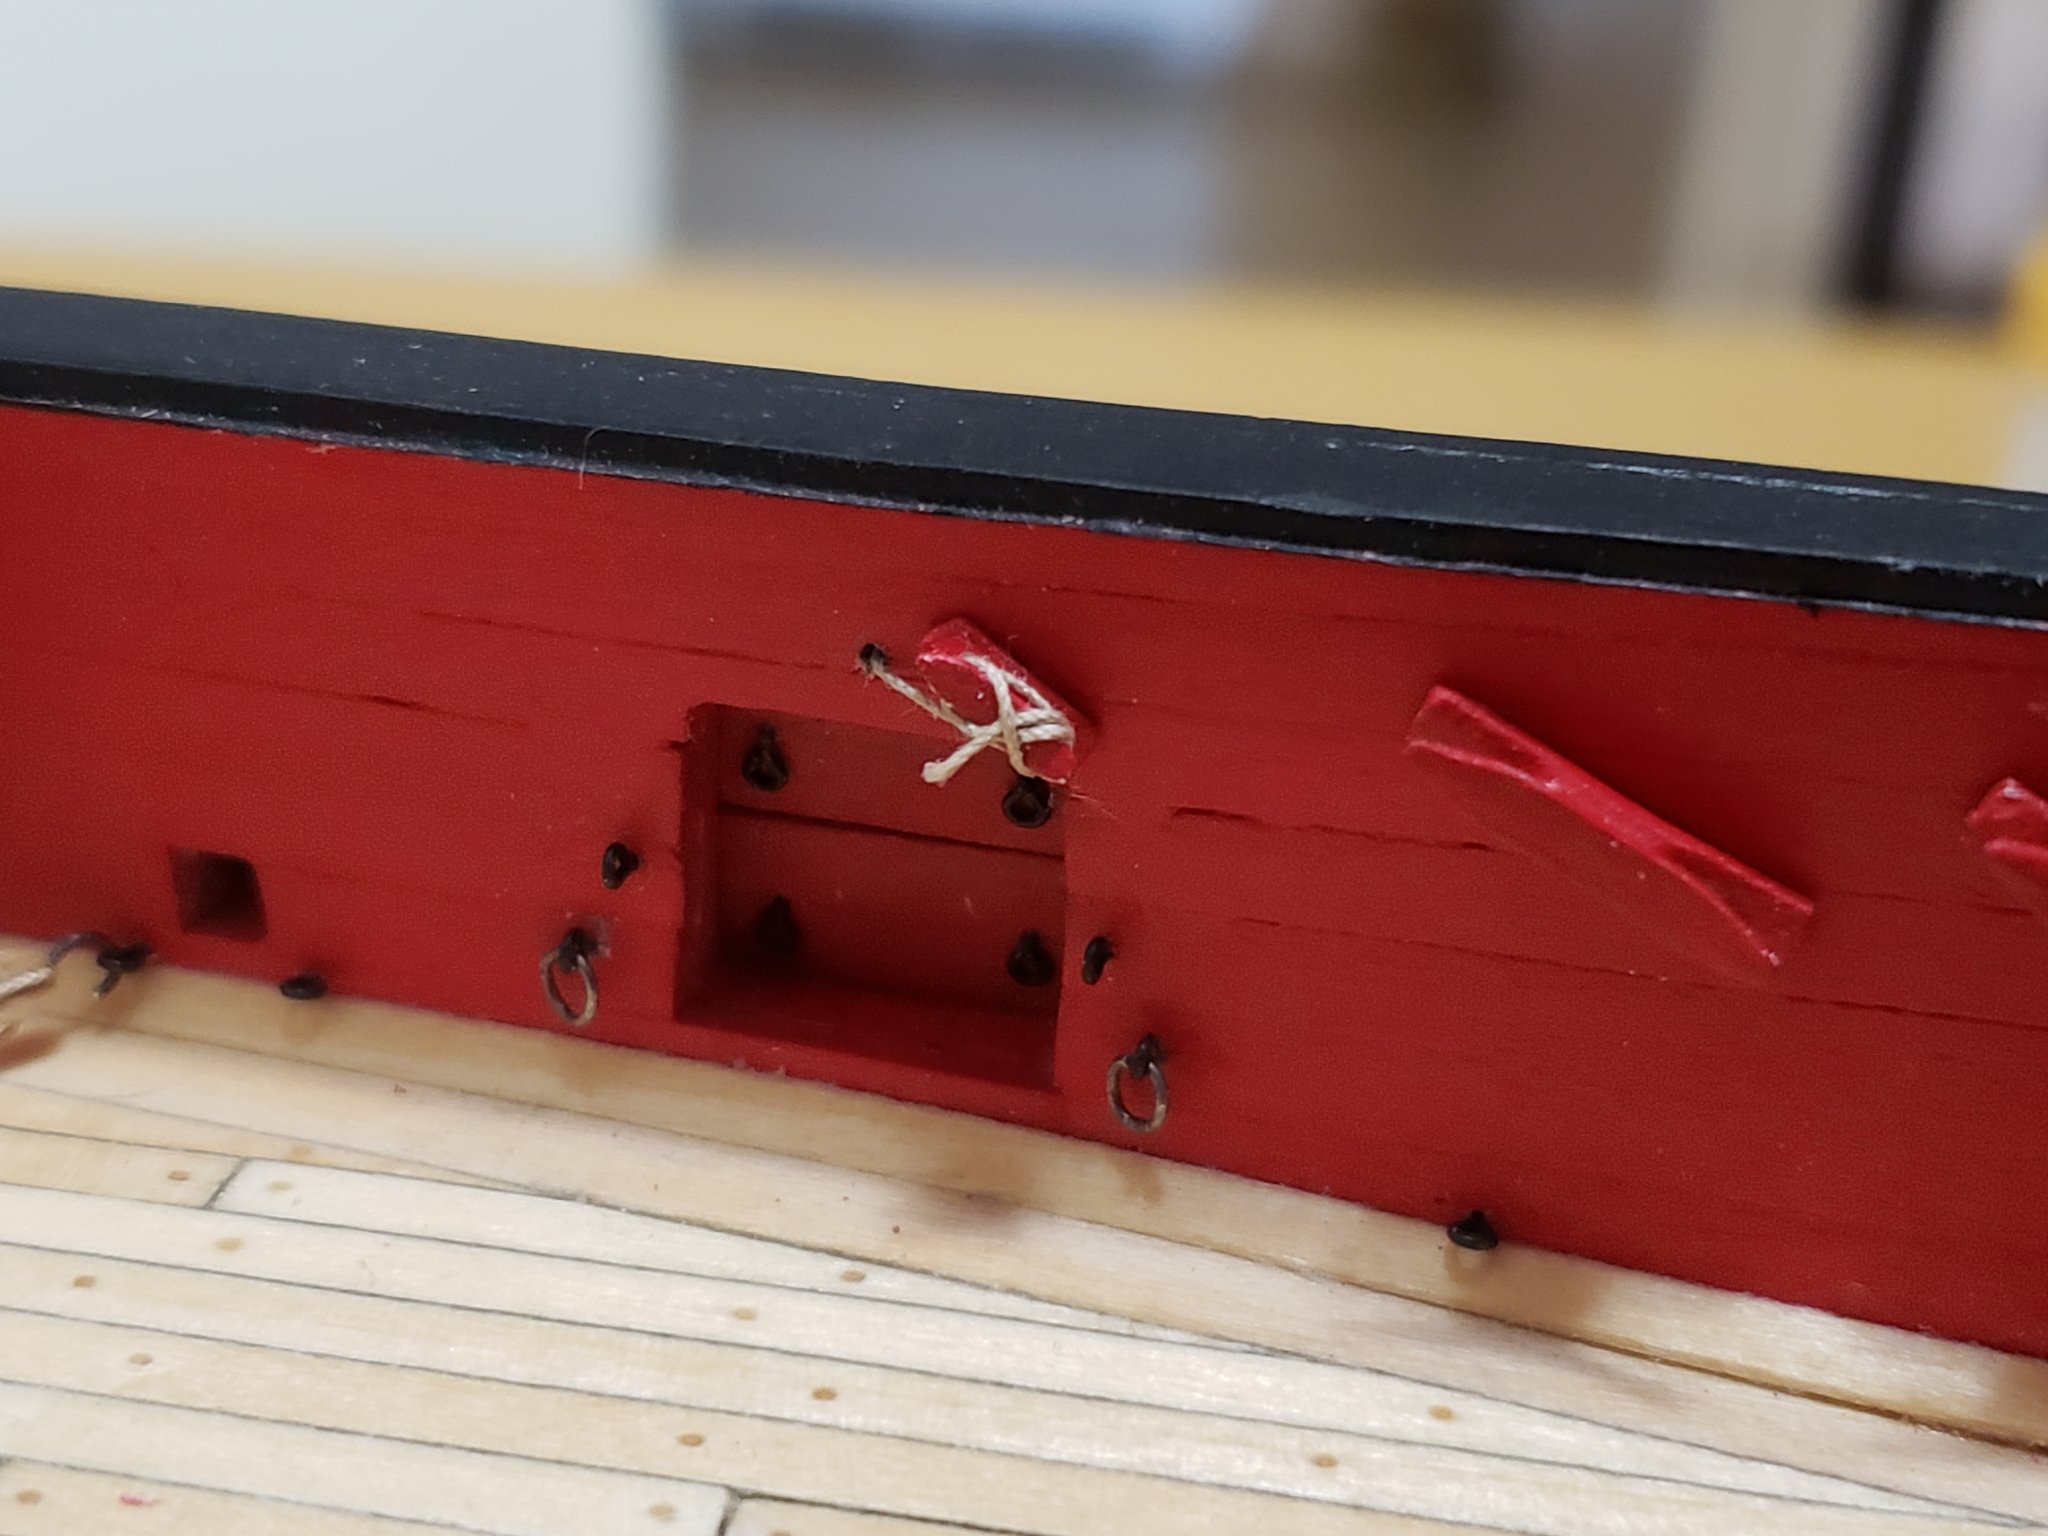
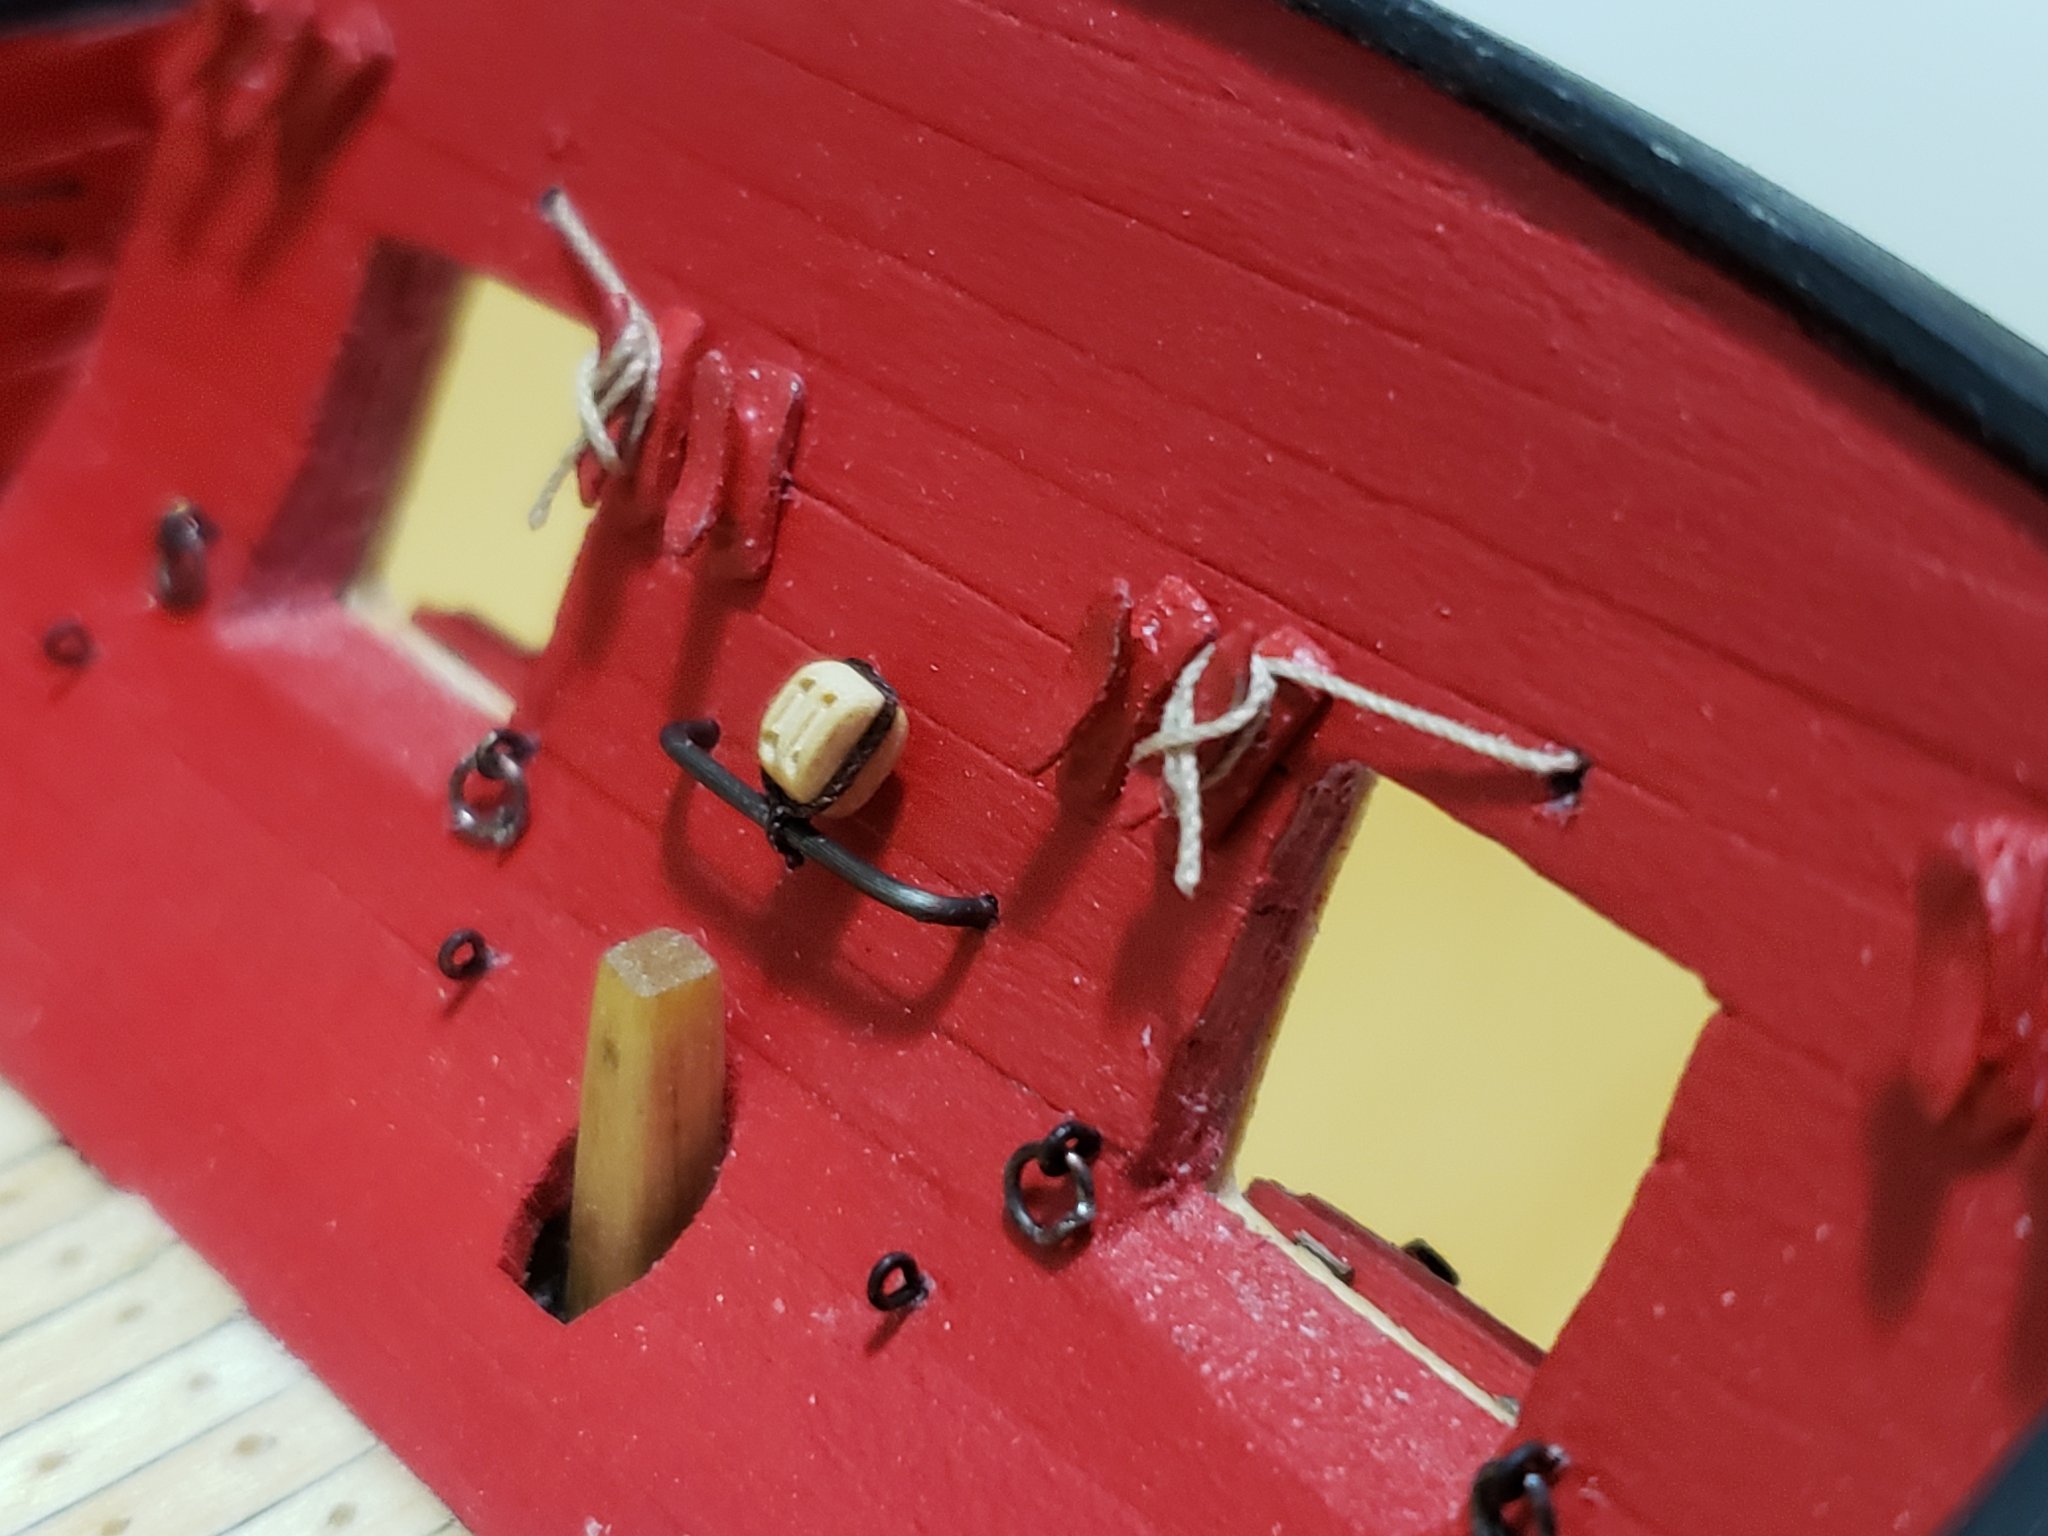
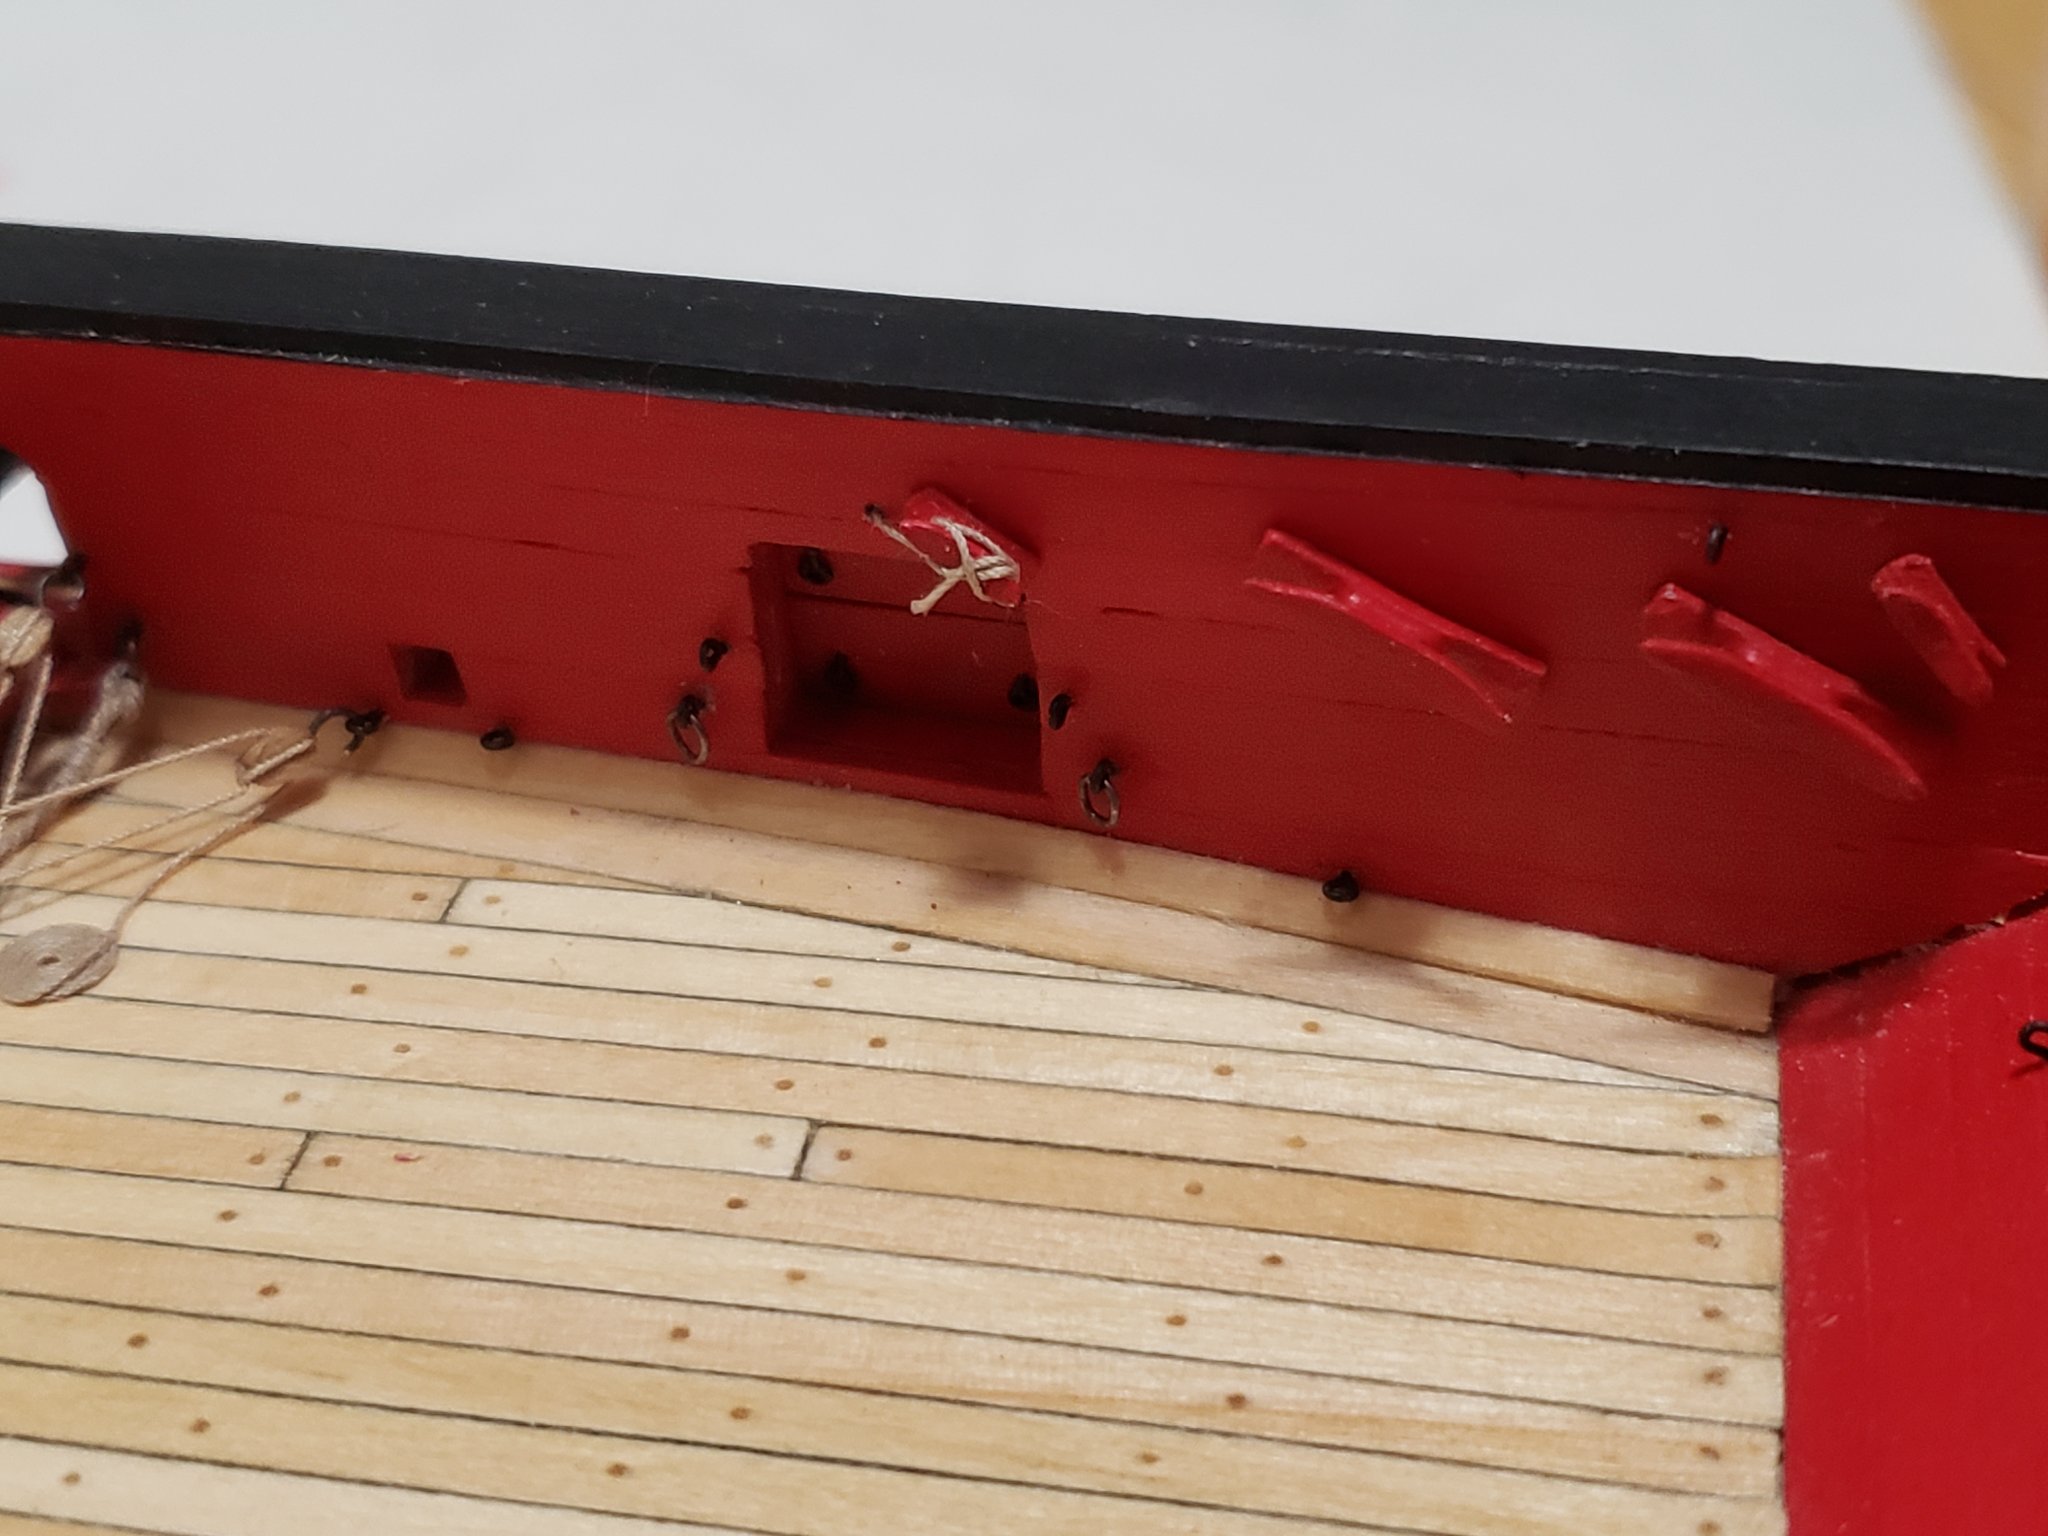
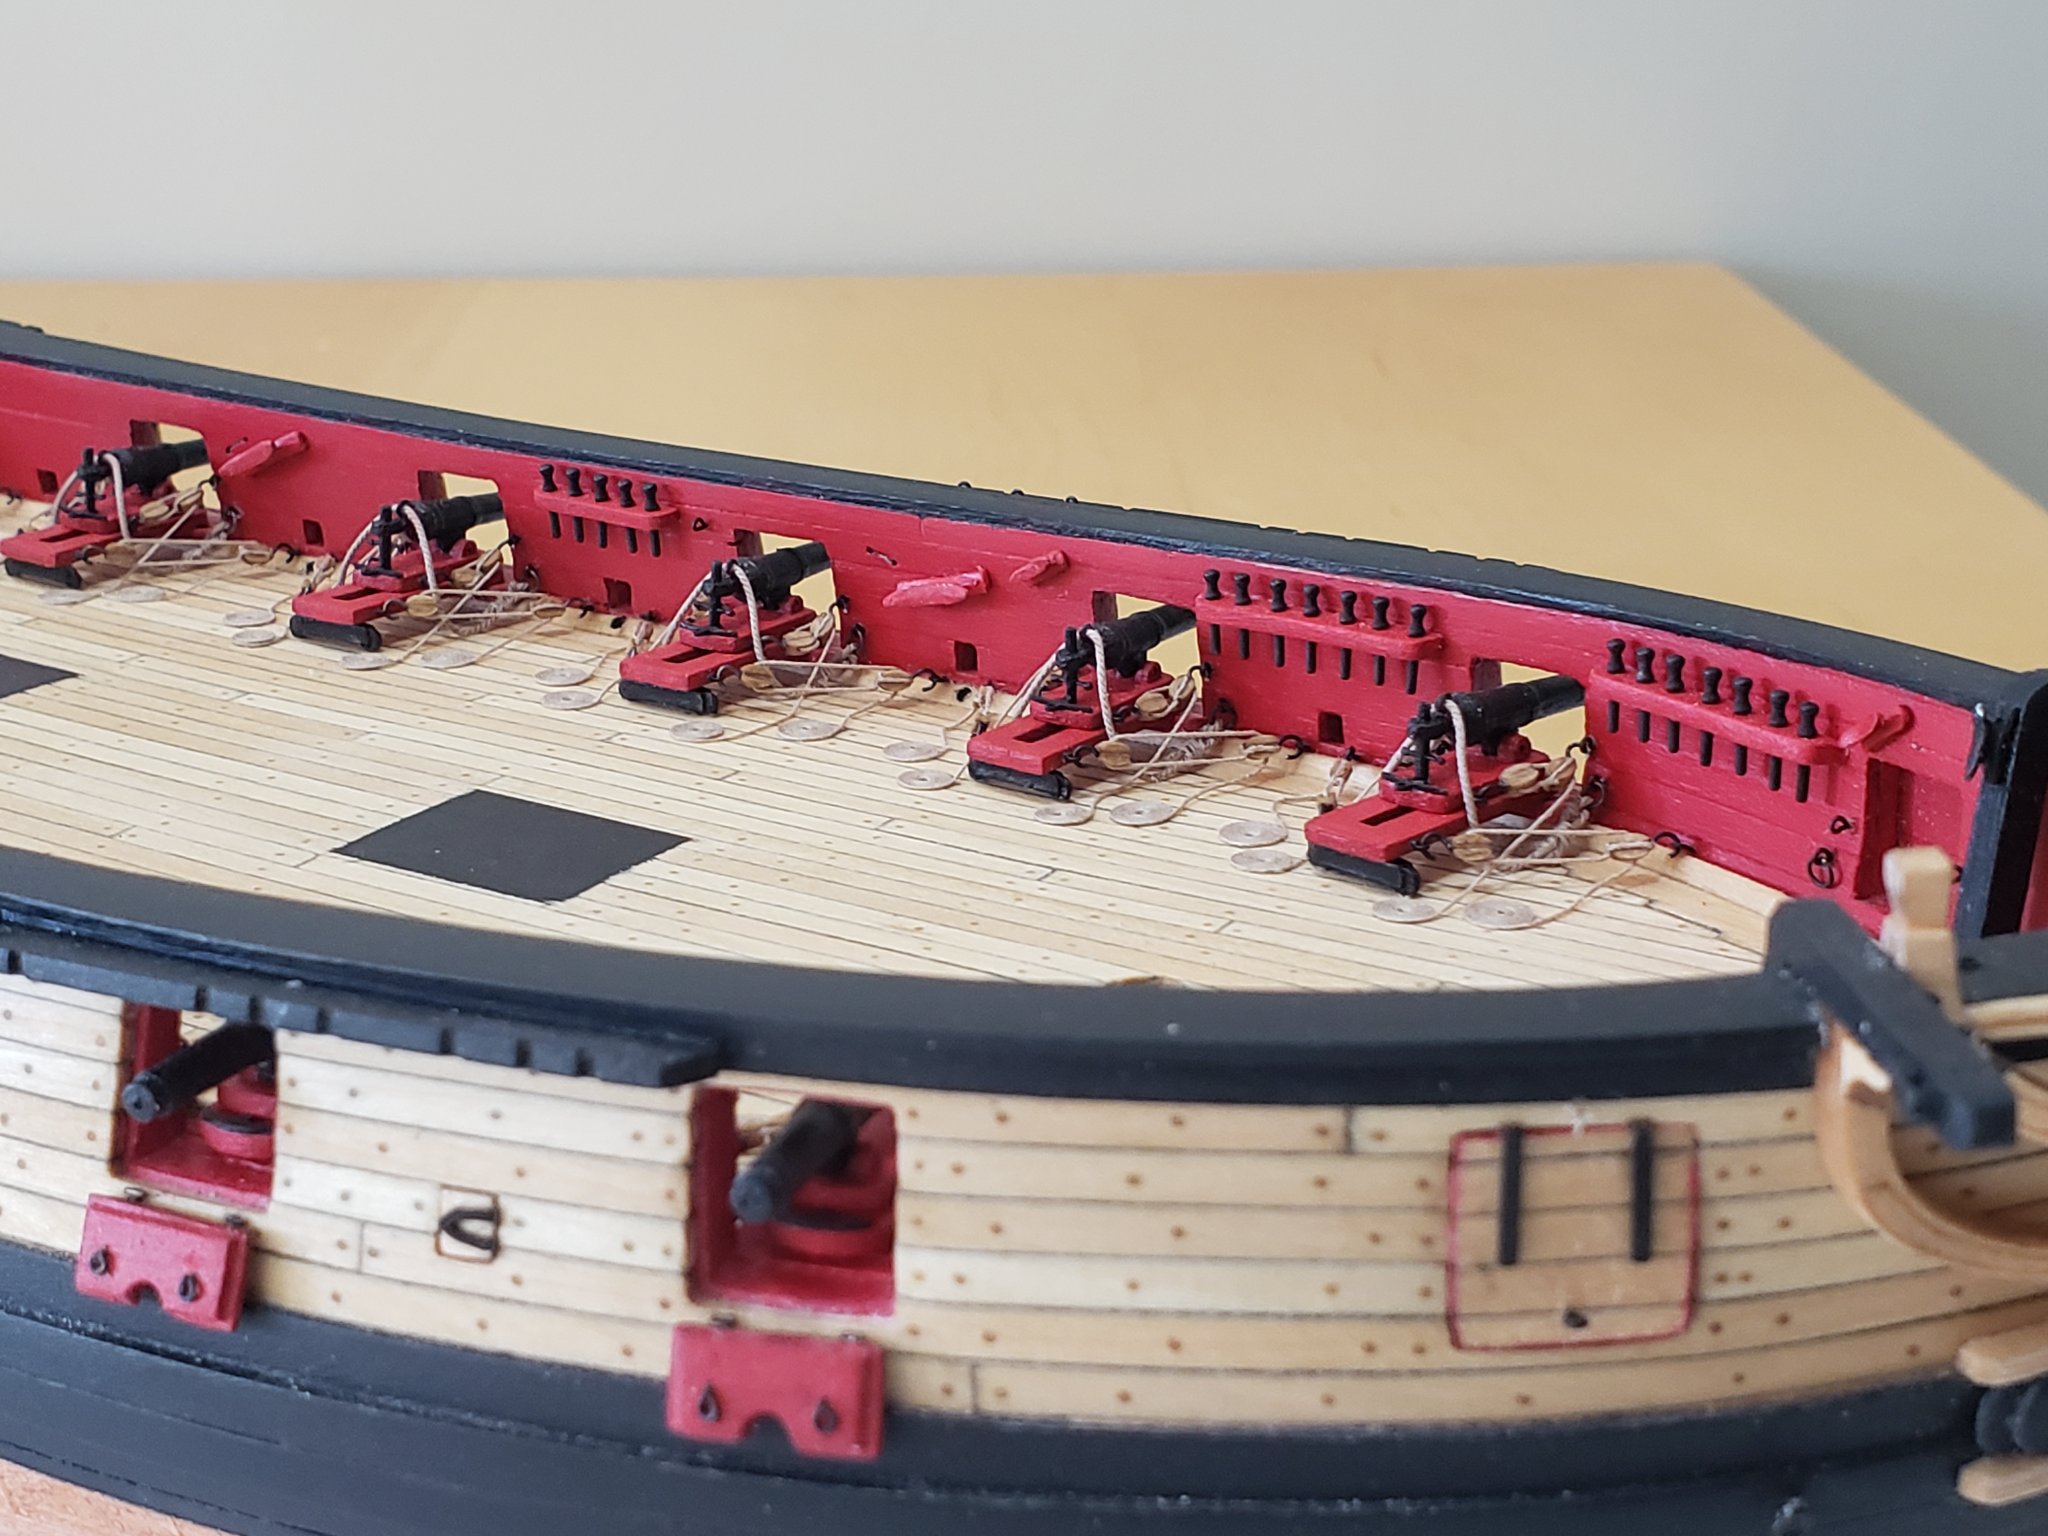
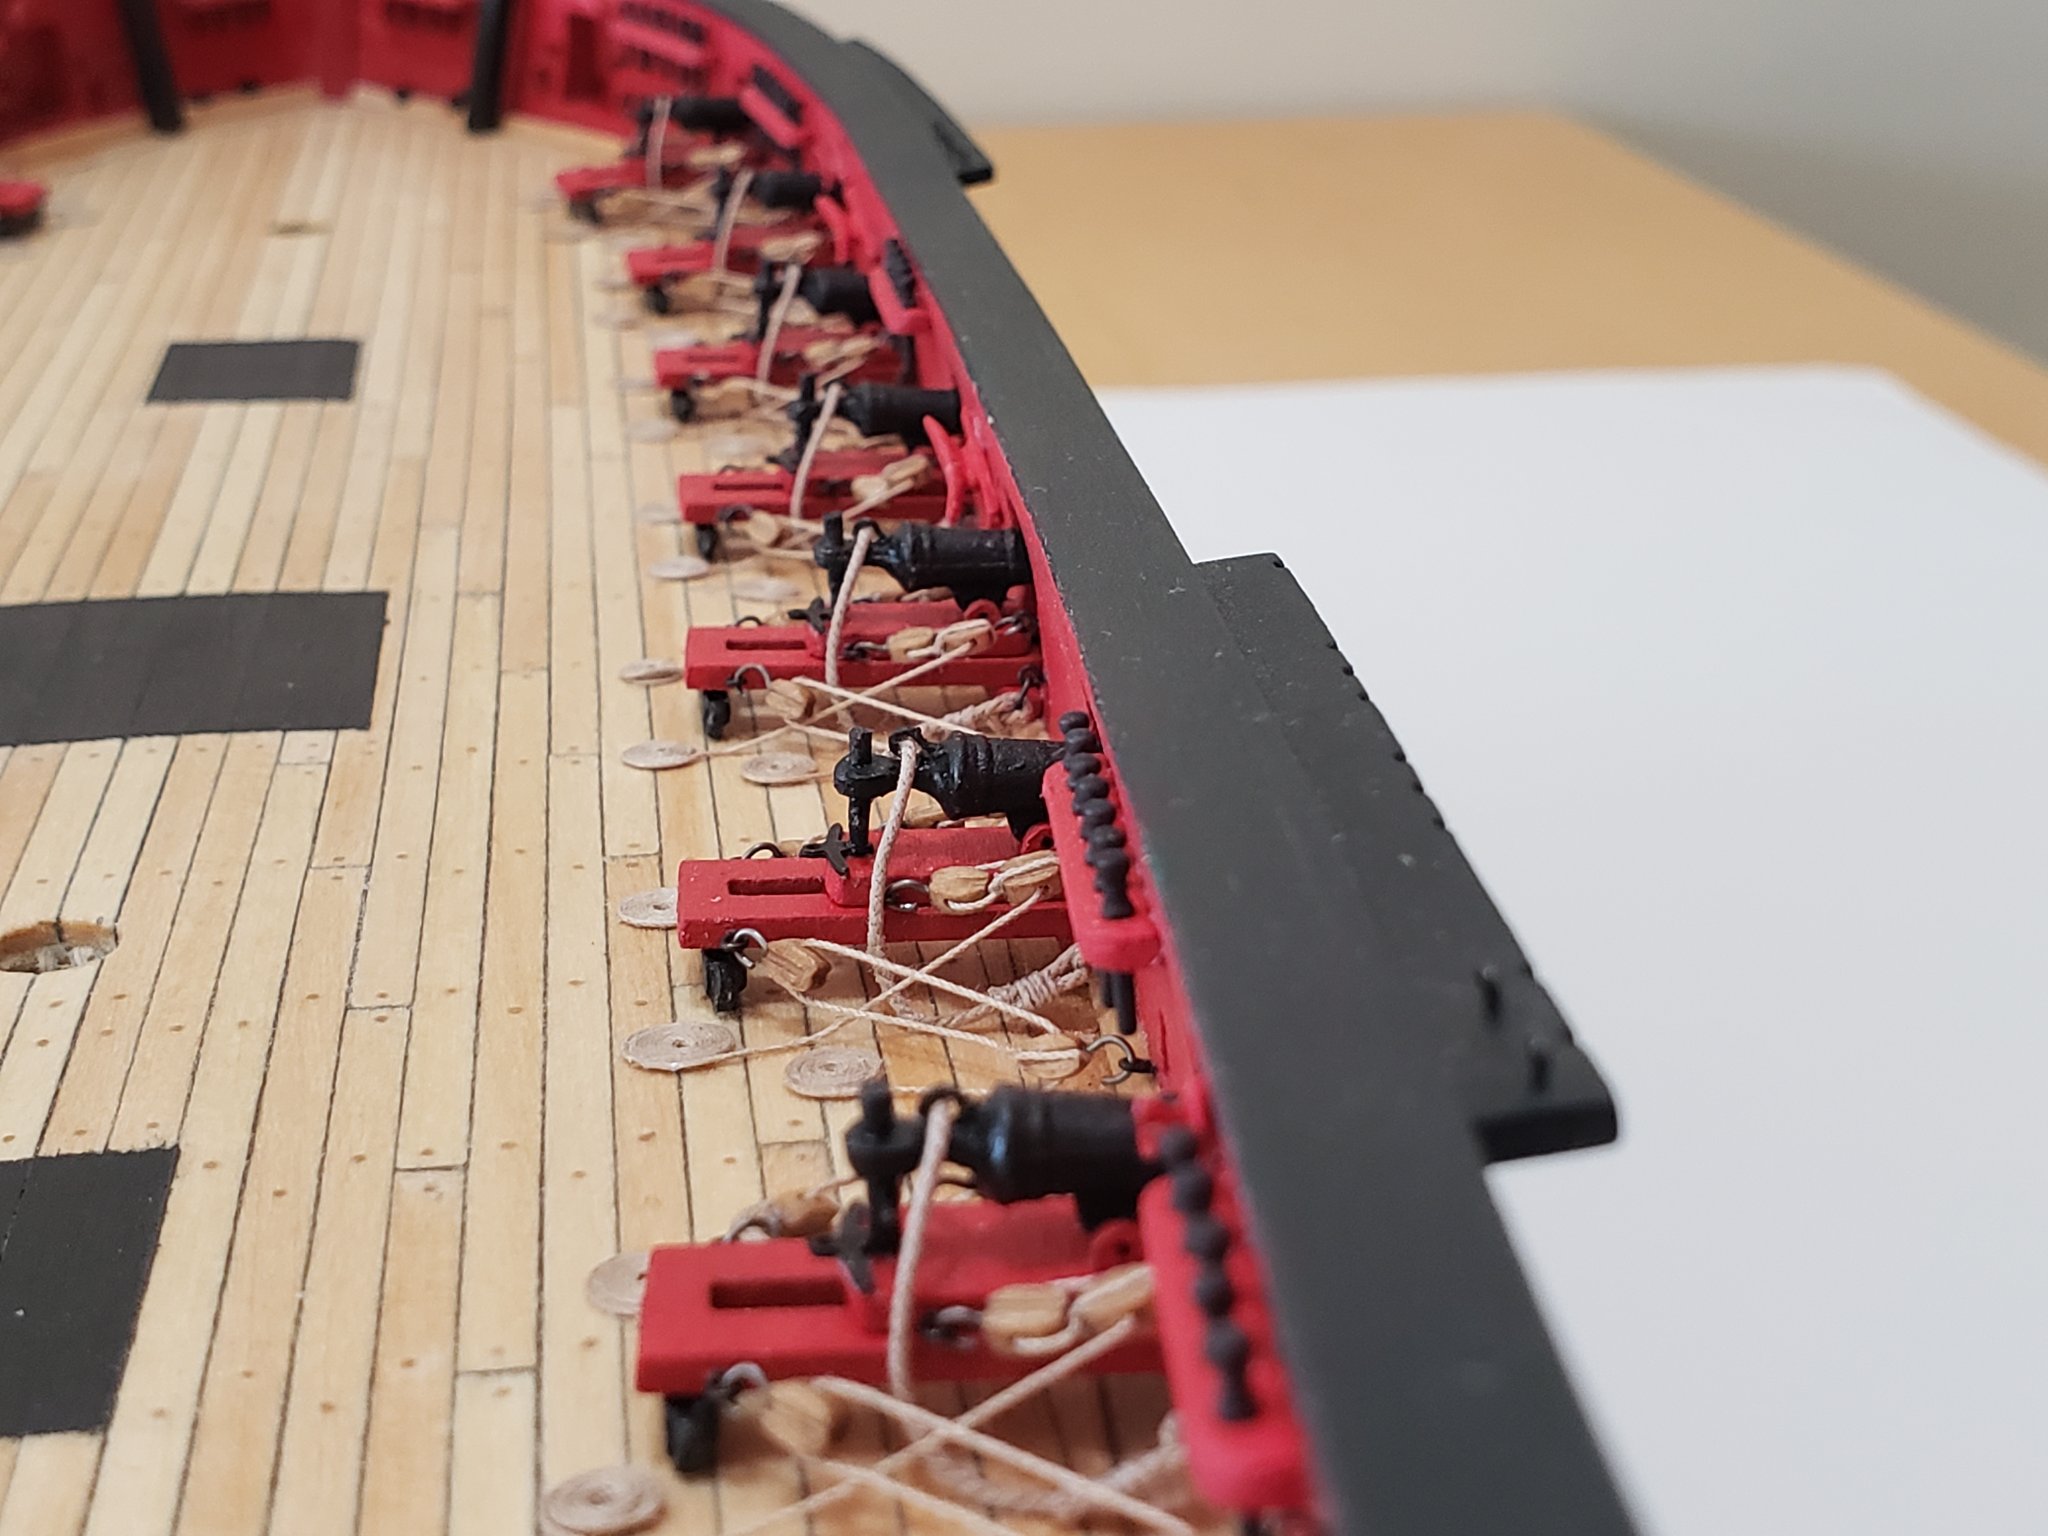
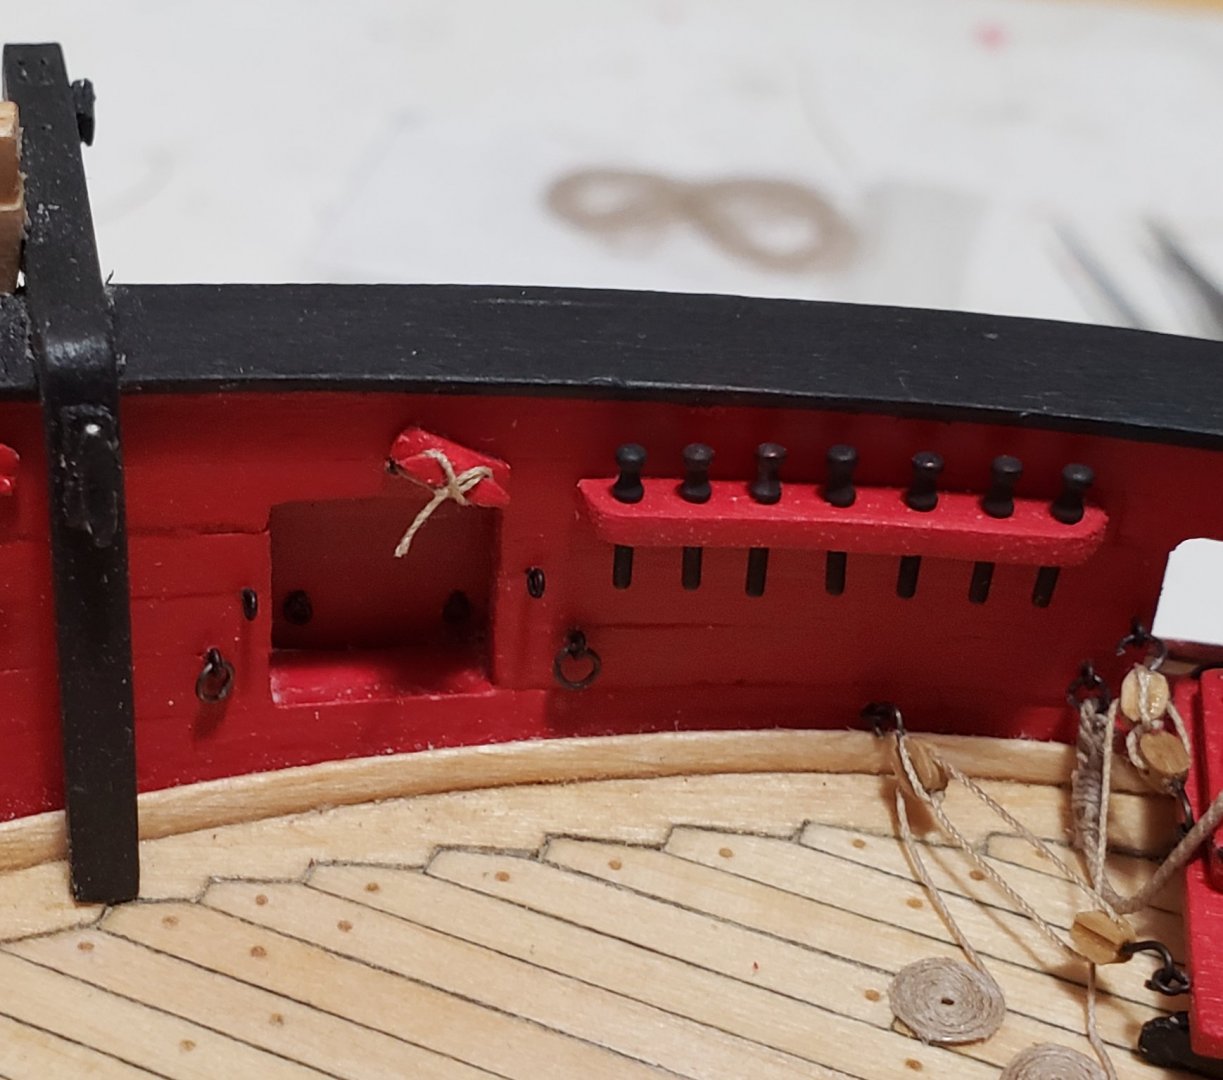
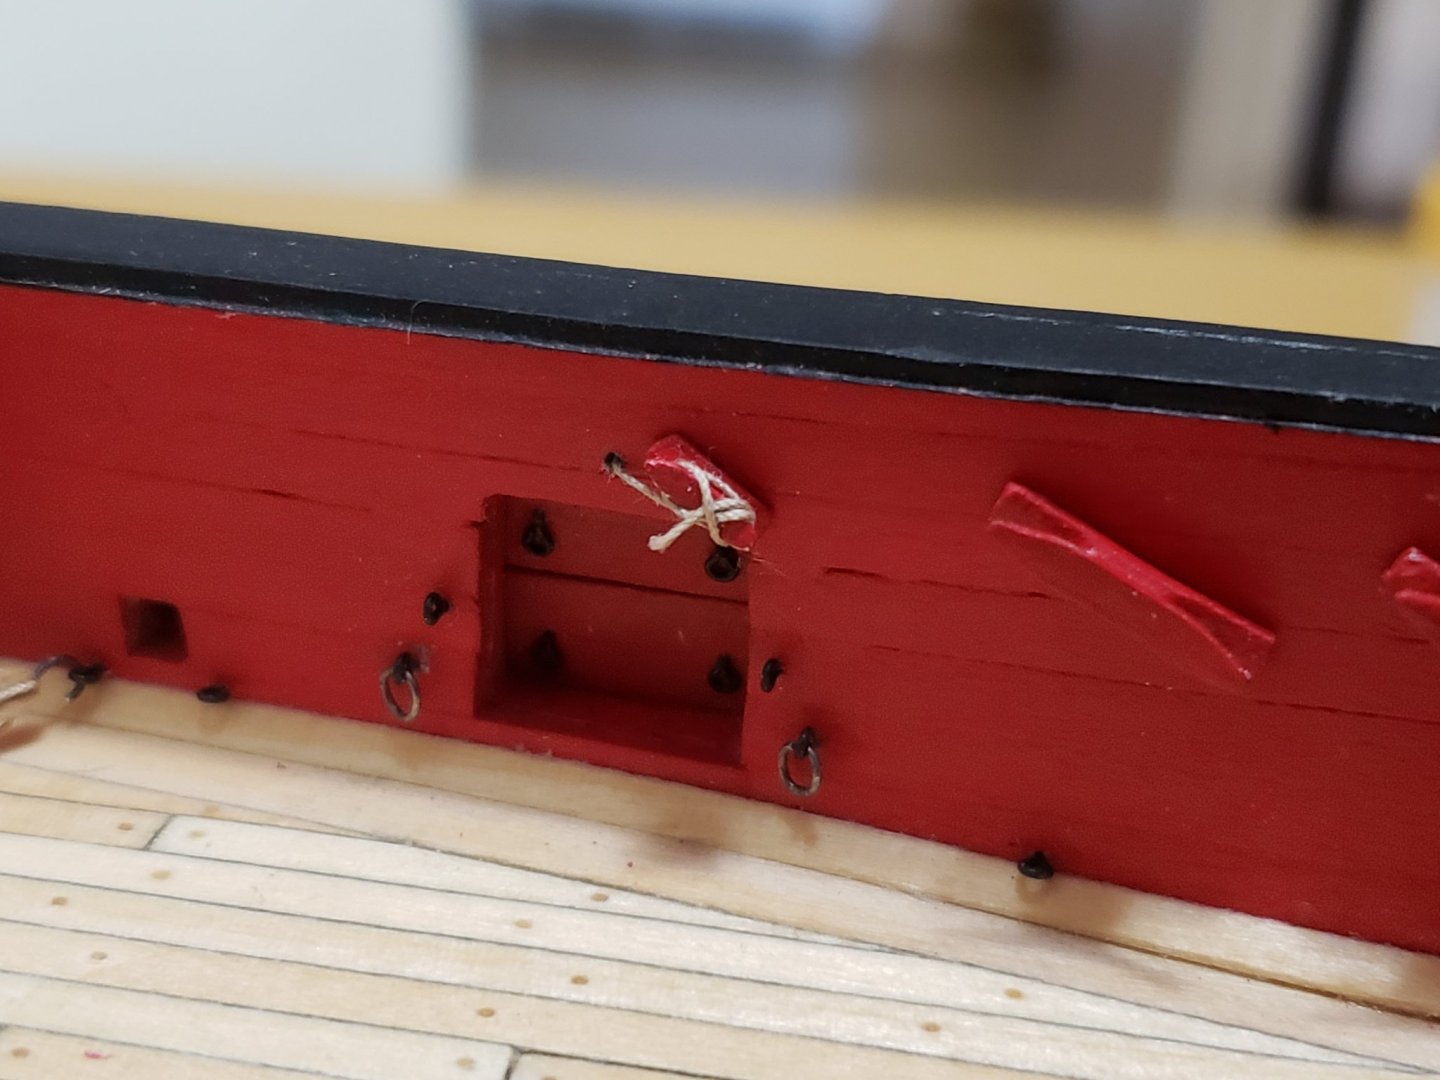
Many thanks for the compliments Jean-Paul and John!! I have belayed the lines attaching to the port lids. I have just tied them without glue (except for the portside bridle port since it was the only one giving me a tough time 😅). For that one I used a very miniscule amount of superglue to help secure the thread so I can loop correctly. Wanted some opinions and thoughts on how they look. Anything I should change? And are rope coils supposed to be added to them later? P.S. drilling the holes in the bulwarks was very scary!!!


- 950 replies
-
- 10
-
-
- syren
- model shipways
- (and 1 more)
-
The slipway is coming out beautifully!
-
Thank you Chuck and Bob!
-
Thanks so much!! The video explained it very clearly. Also, I didn't know it was called belaying 😅
-
Thank you for the comment! Congrats again on your grandson!! 😊 I'll follow your log with interest and I'll try to help where I can. Good luck on your build!
-
Very nice start! Those tools will come very handy. I'm eagerly looking forward to see how she progresses. Good luck!!
- 436 replies
-
- 1
-
-
- Syren
- Model Shipways
- (and 1 more)
-
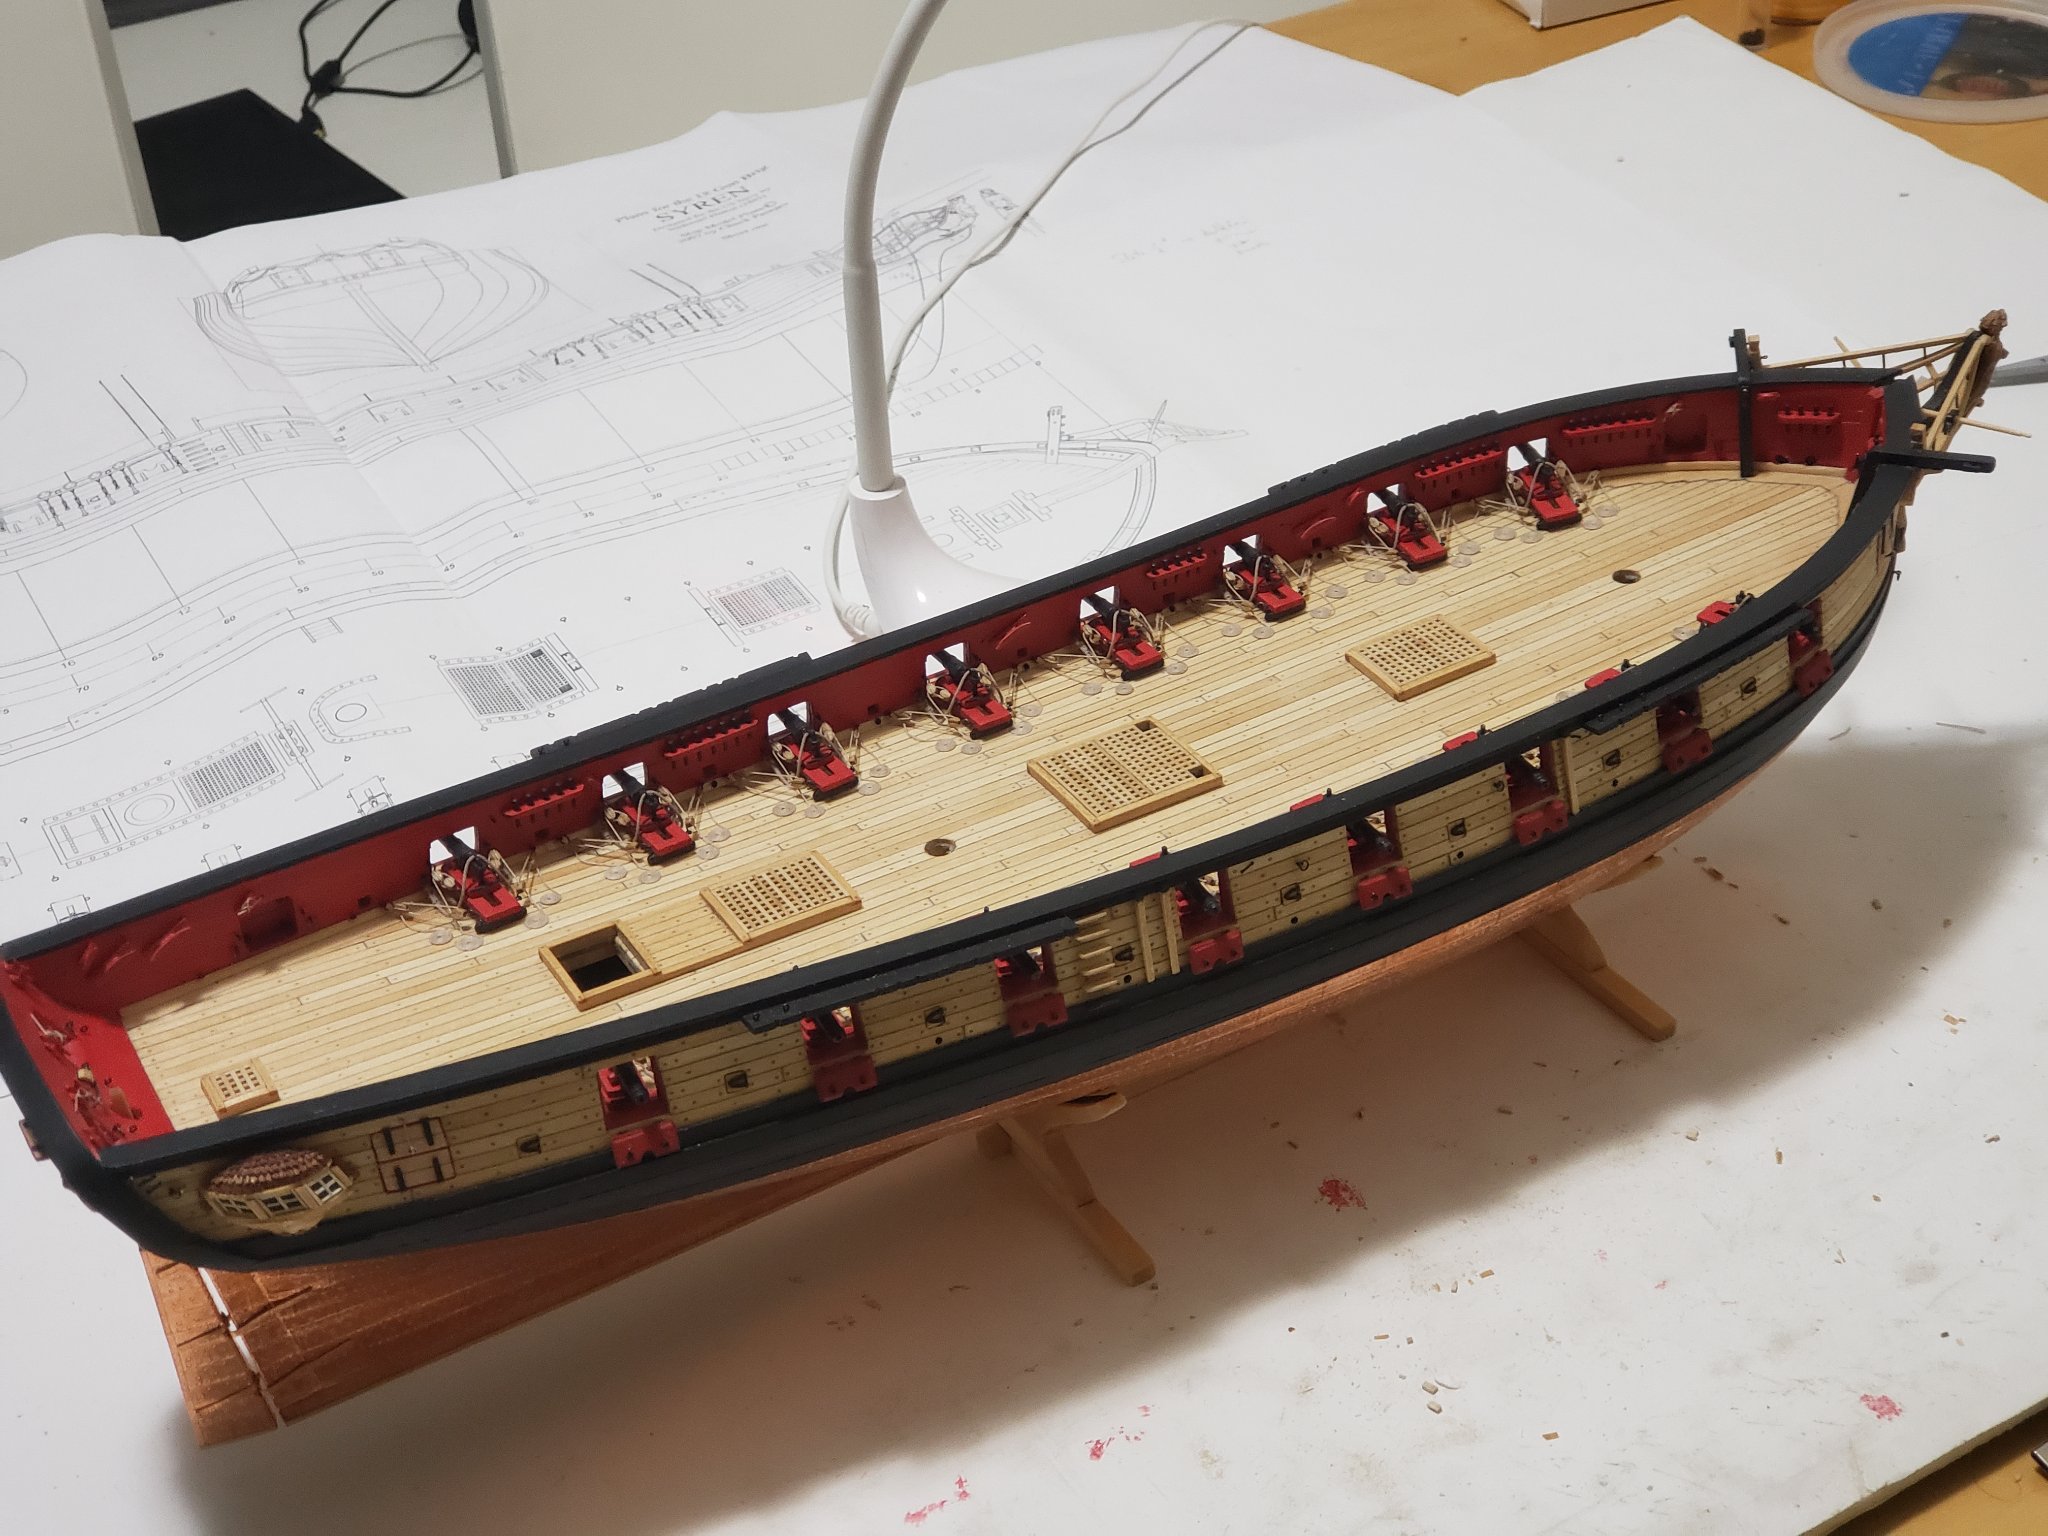
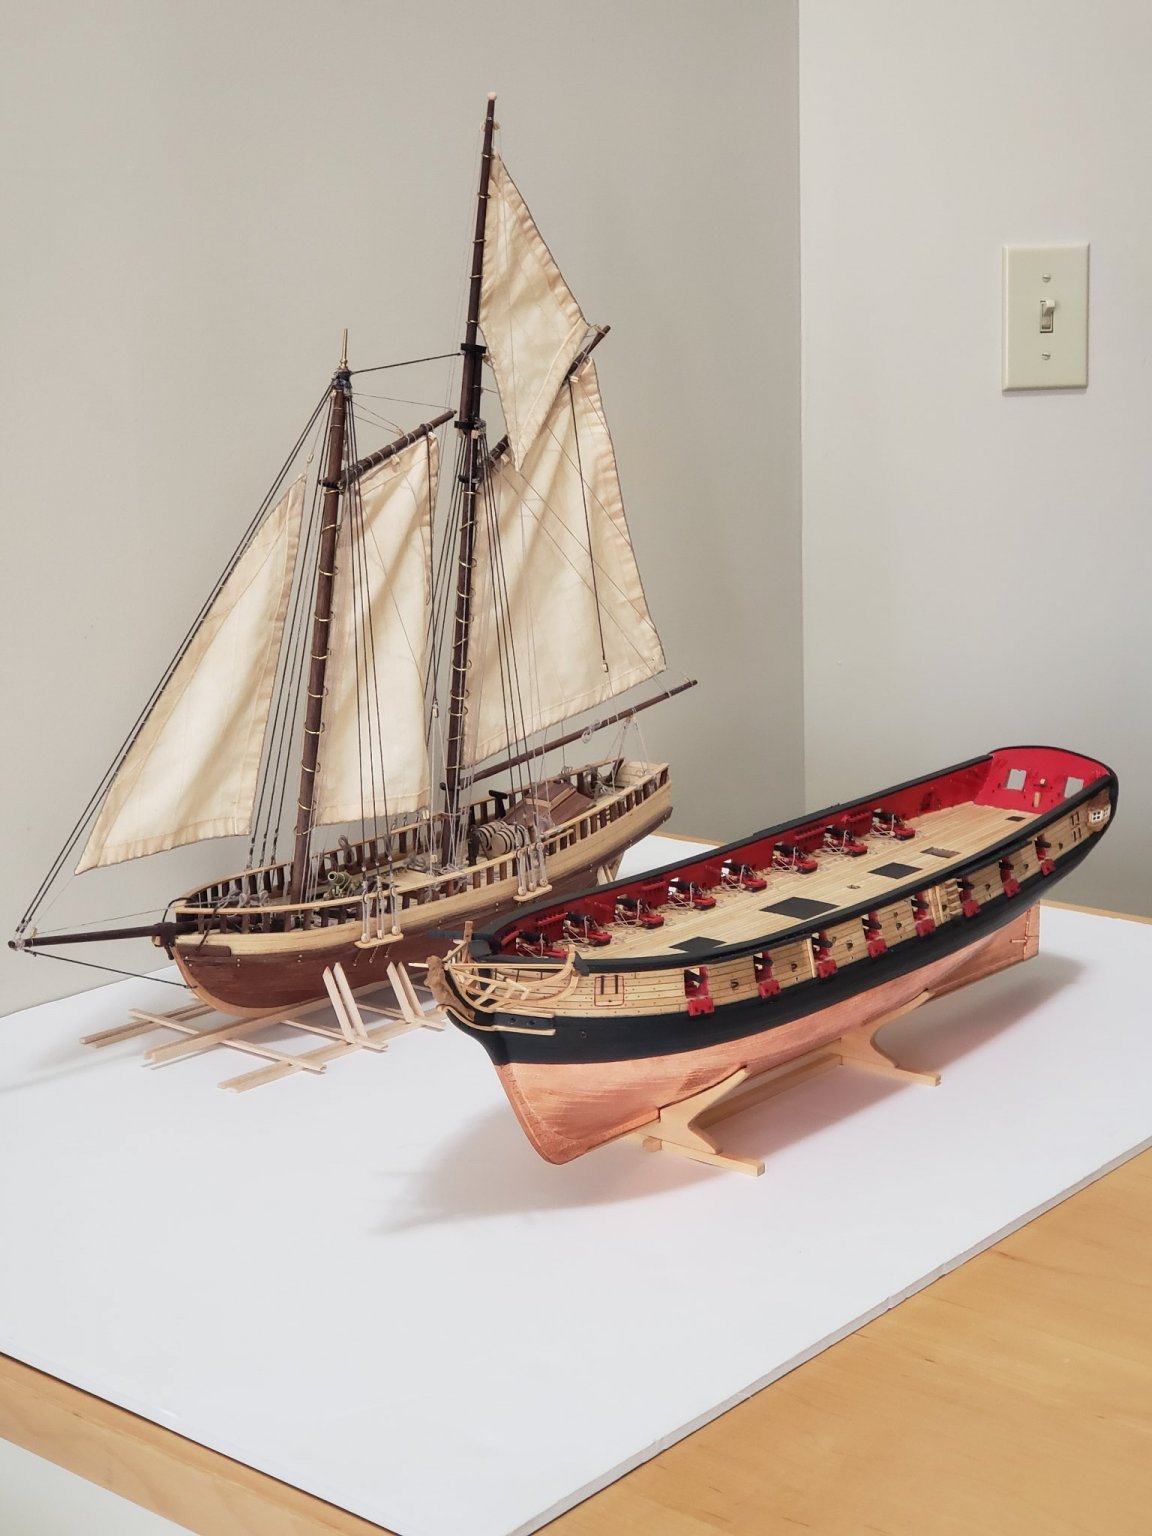
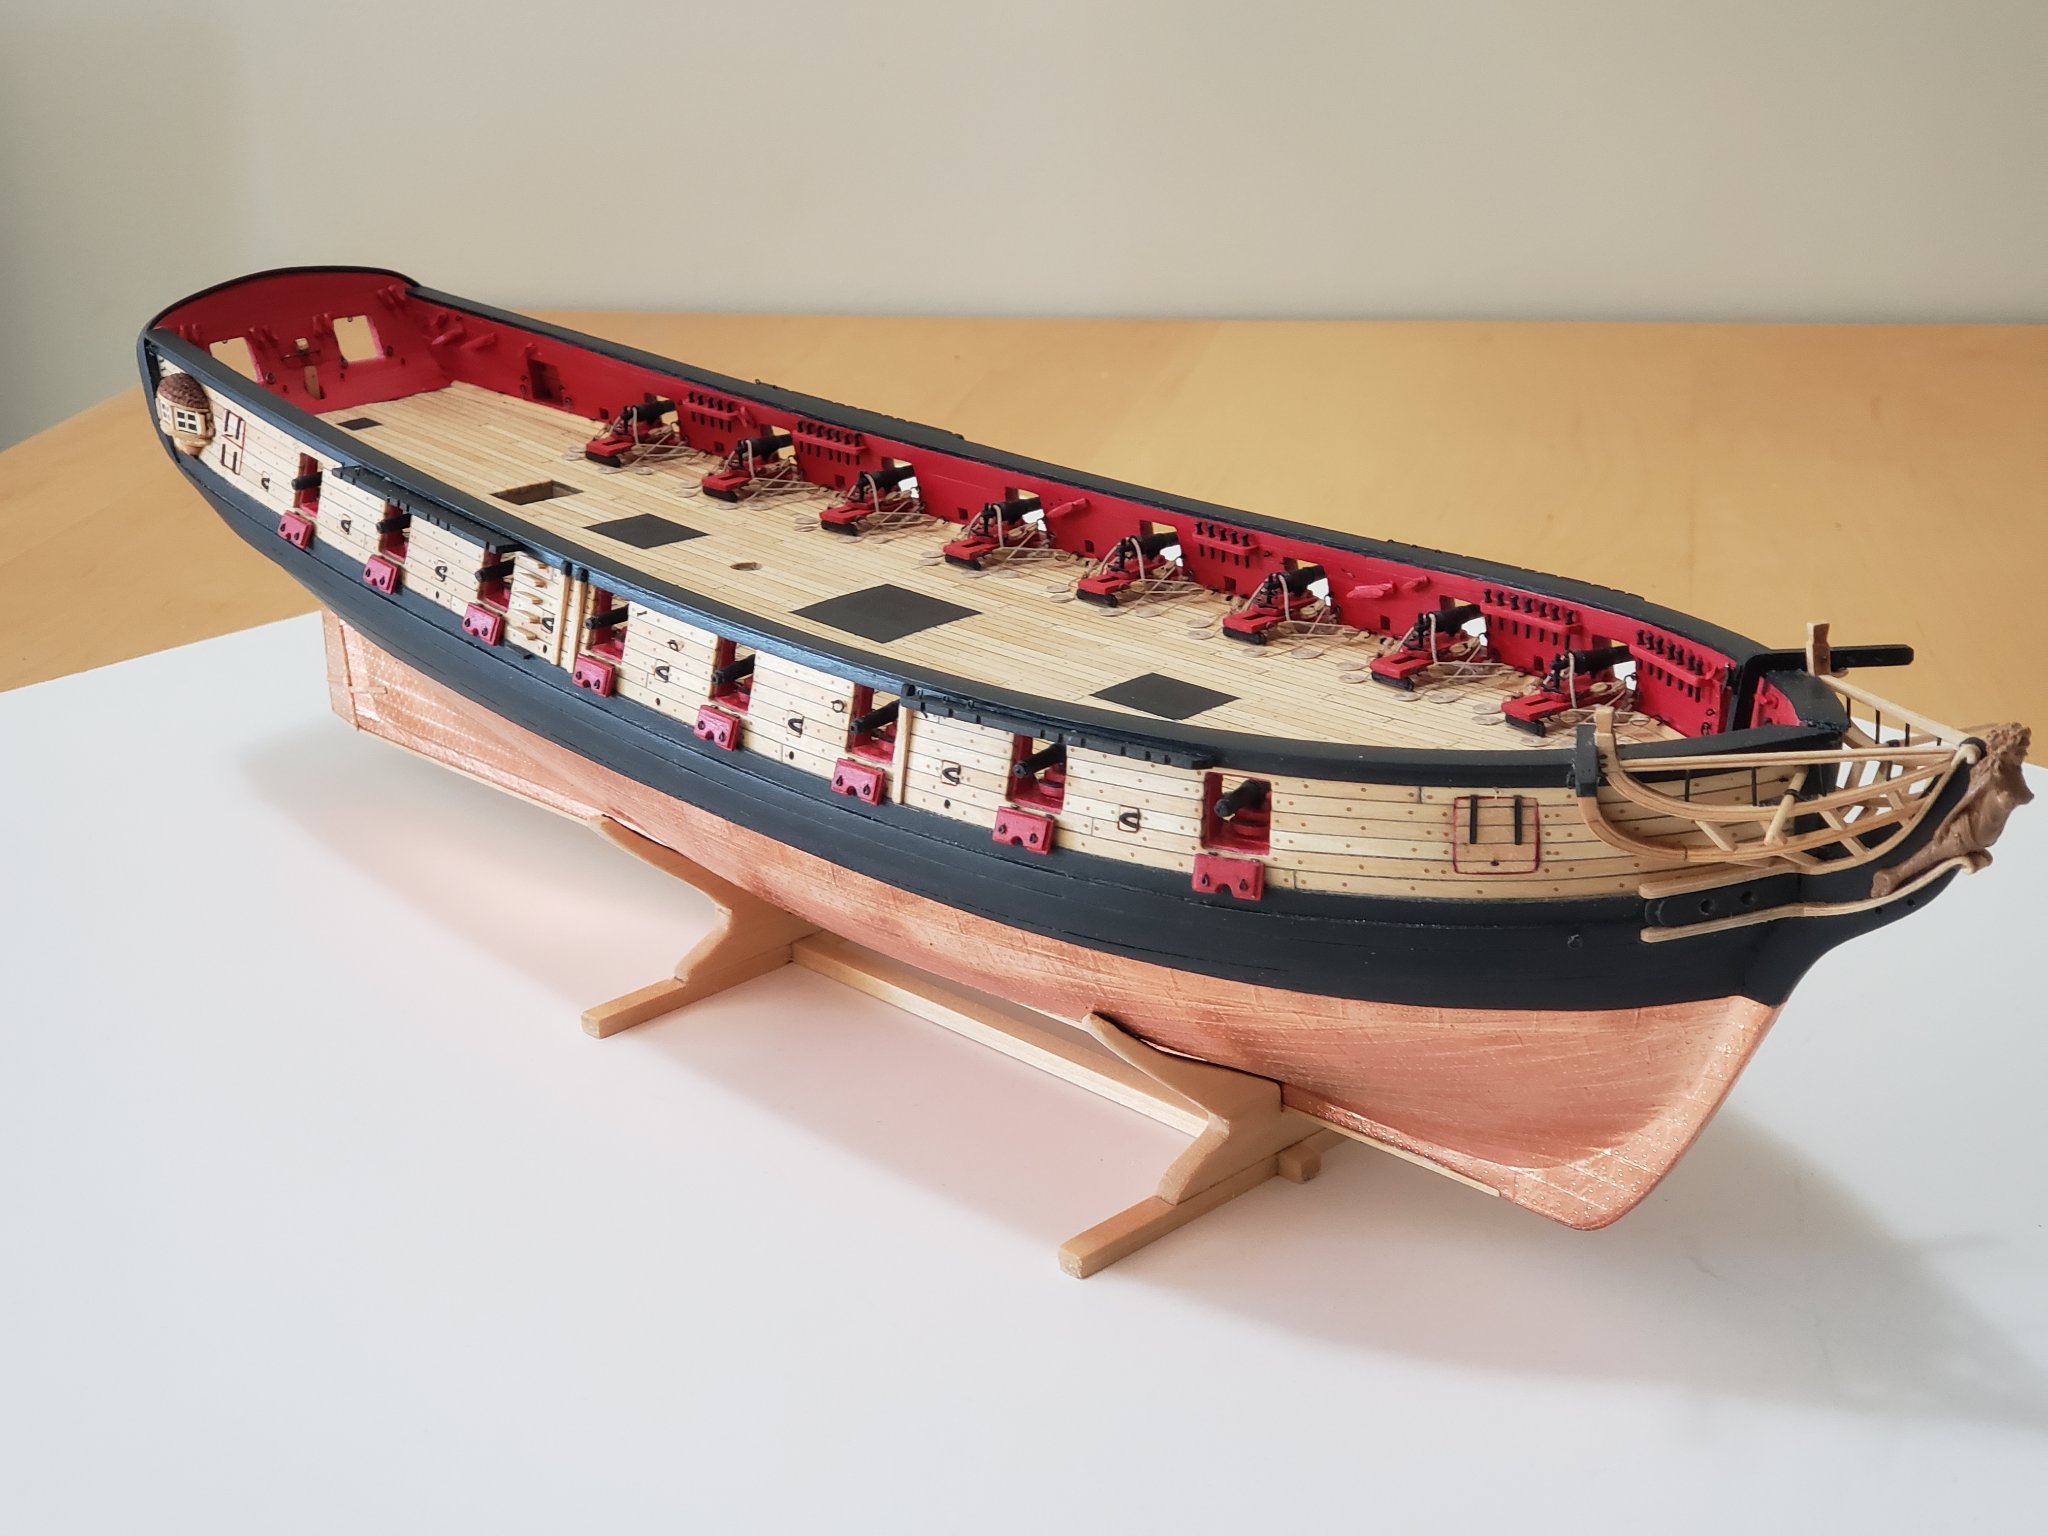
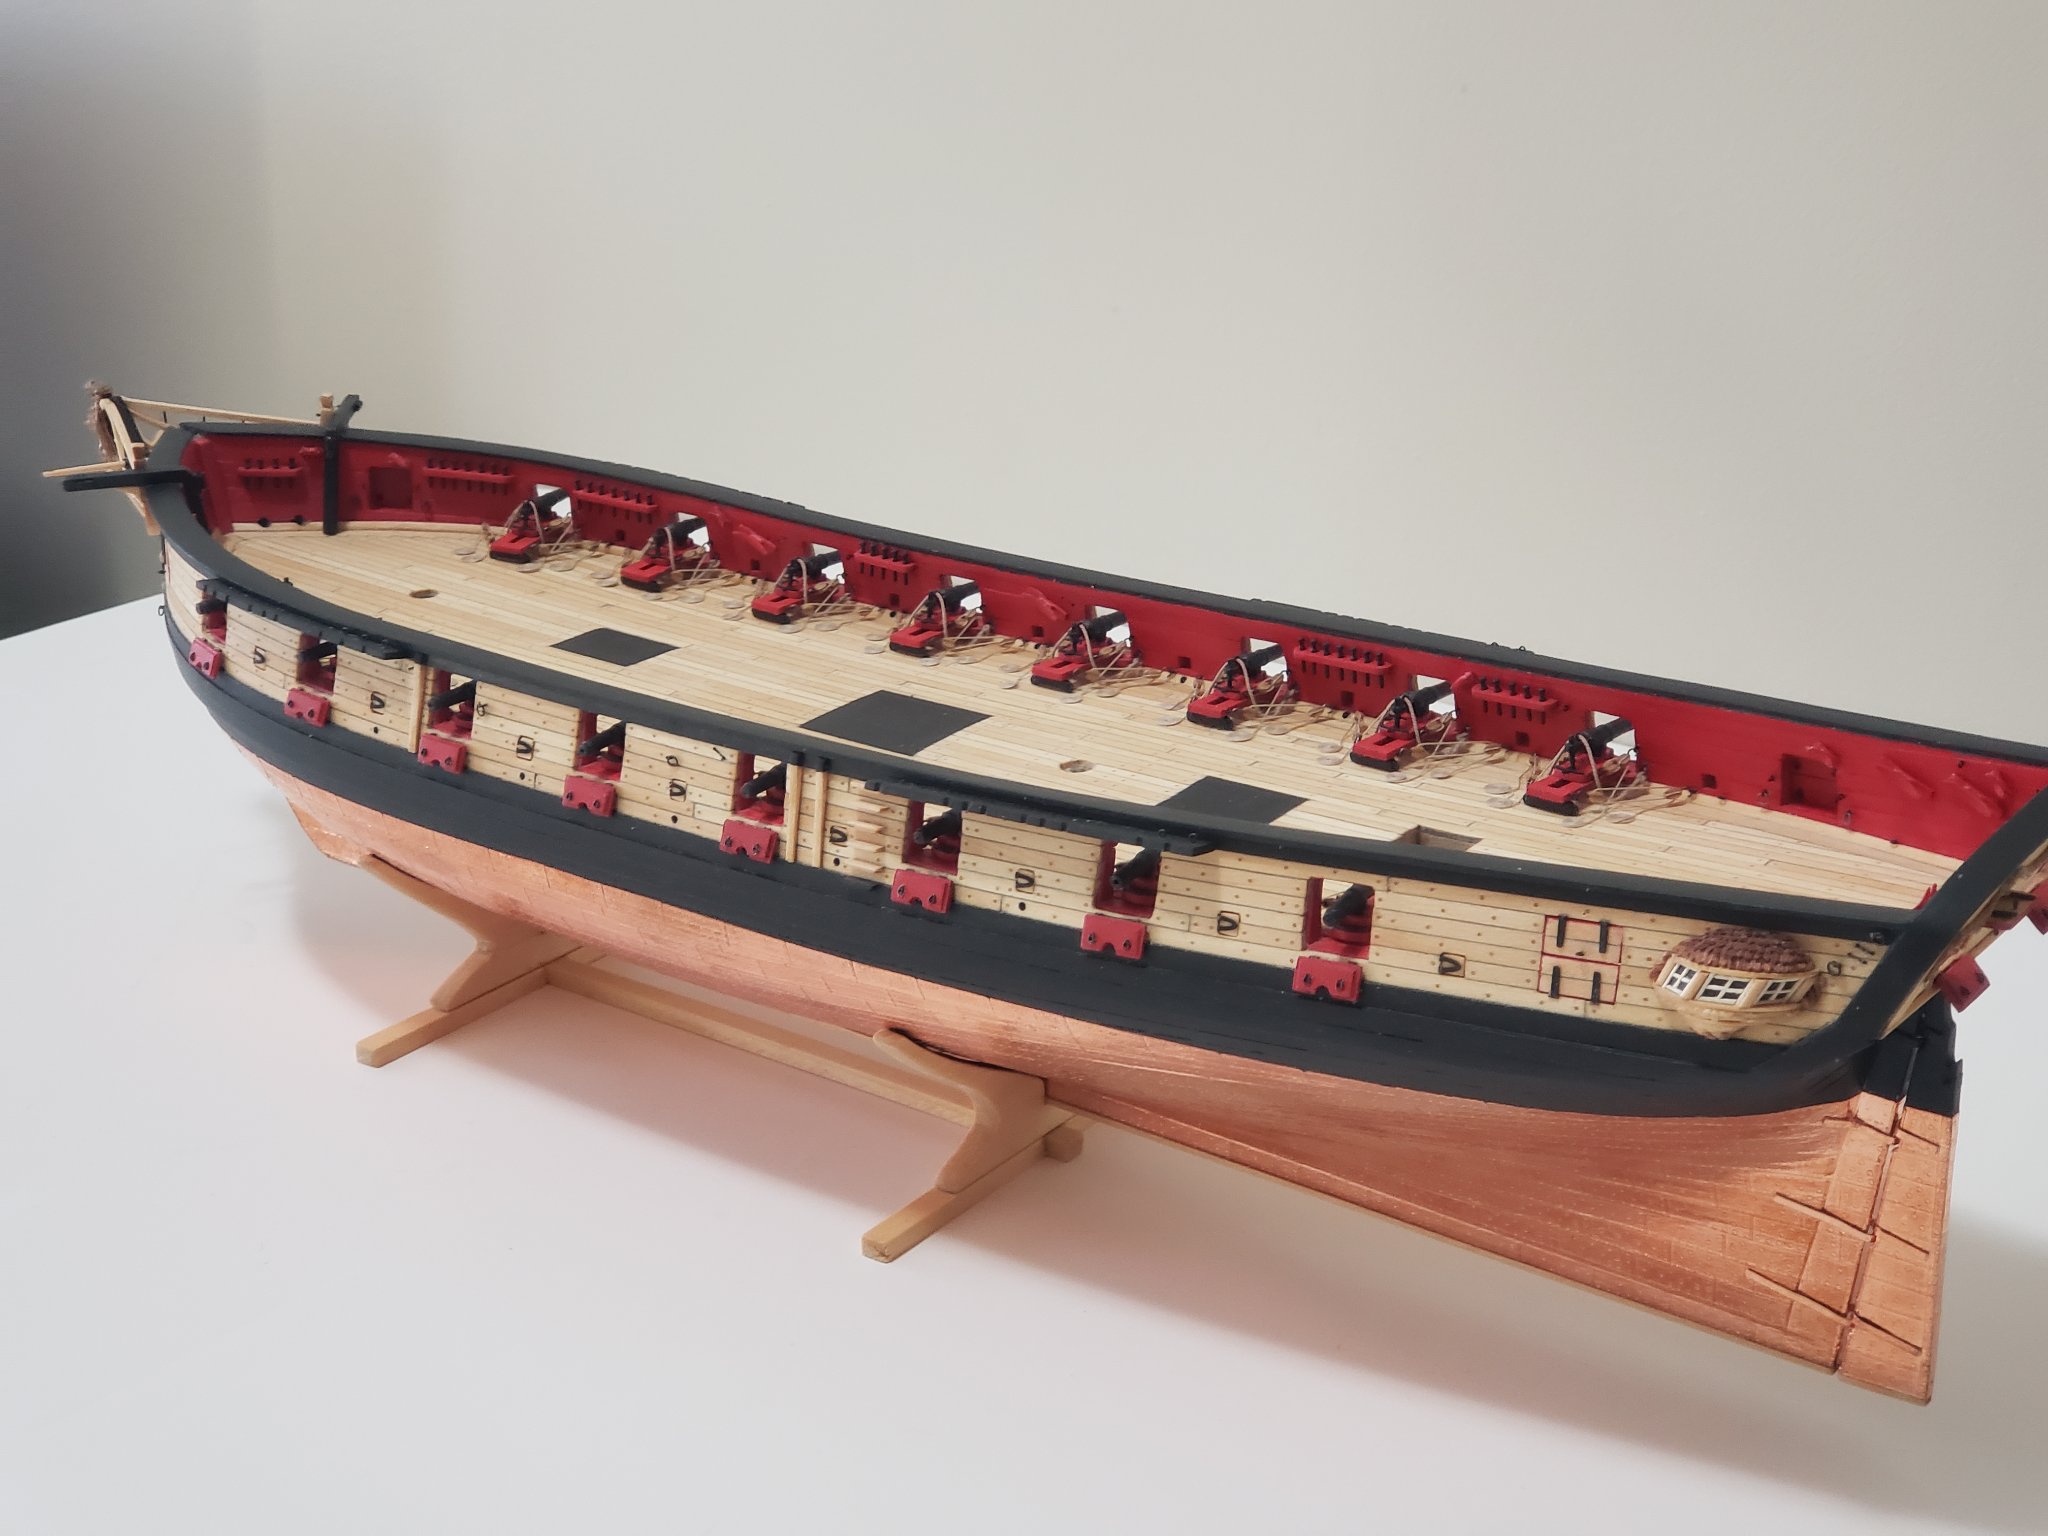
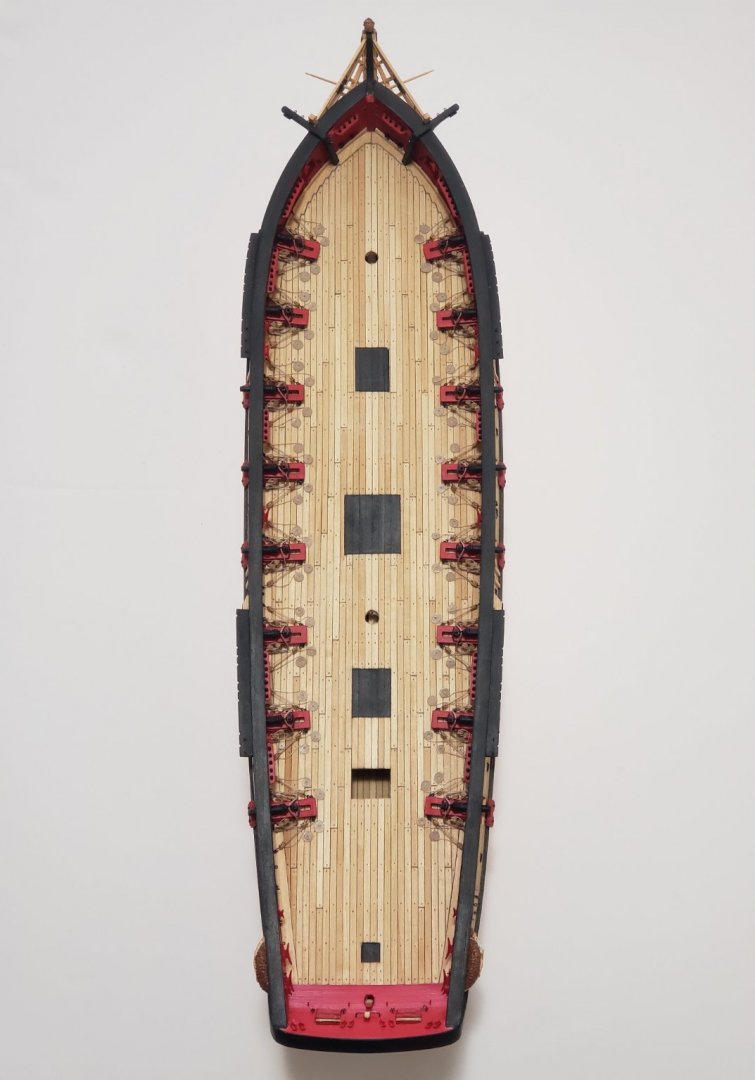
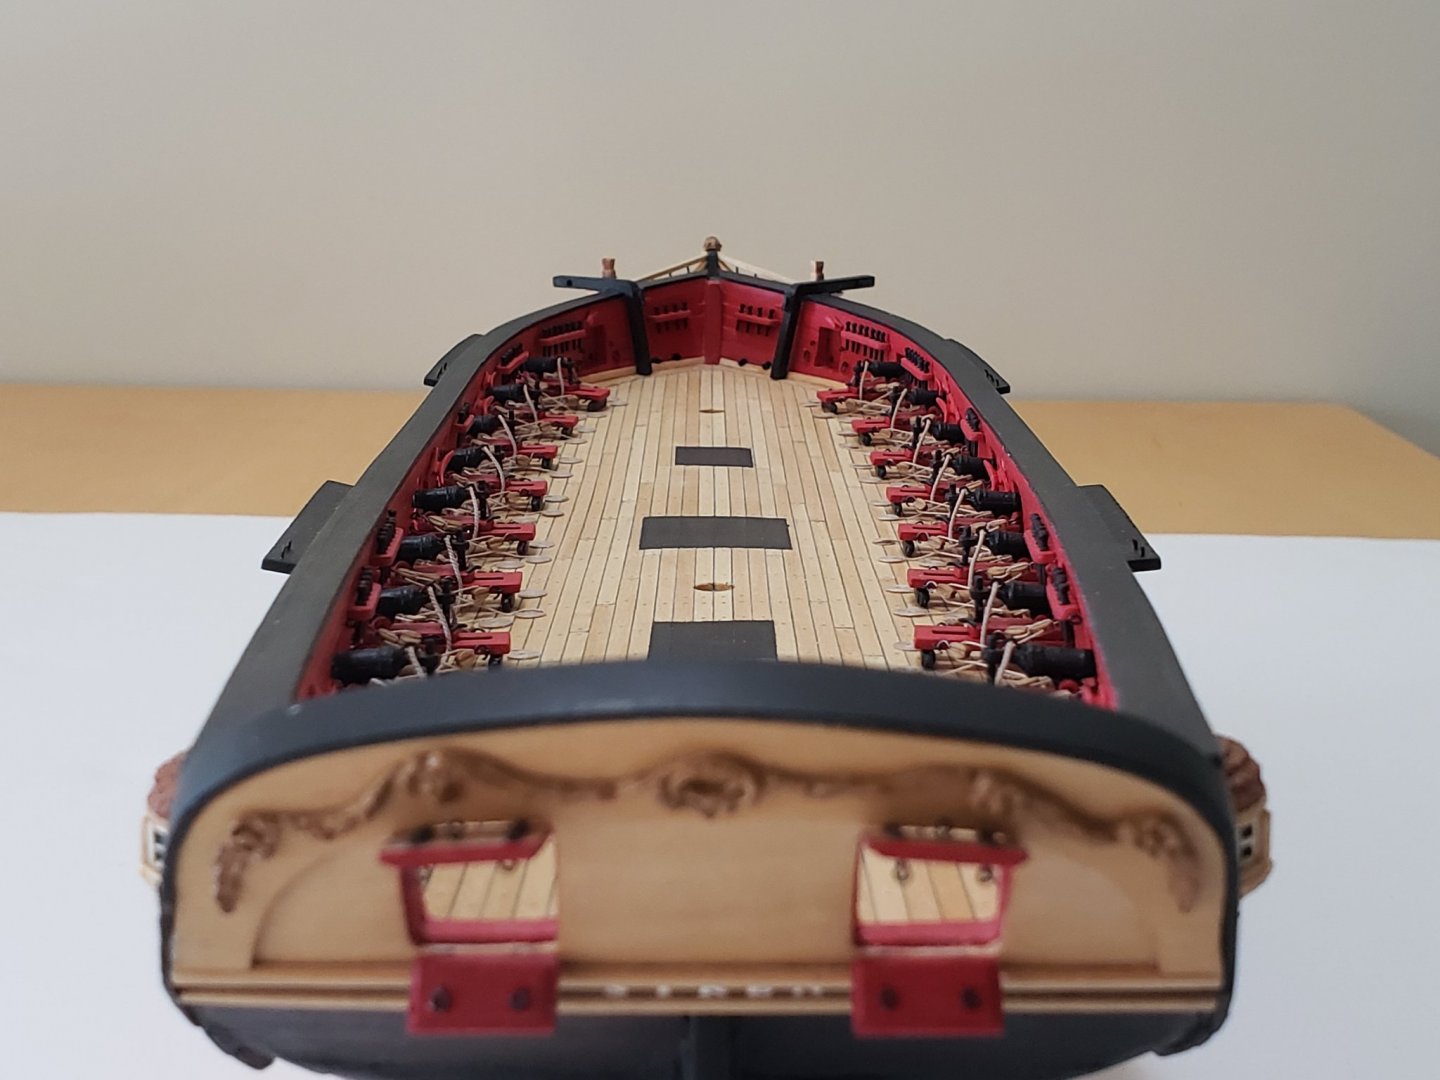
As promised, here are the pics!! I consider it to be a another milestone of the build since this section took a while haha. Here is the Syren with my first build, the Virginia. Before I proceed with deck fittings, I want to seize the line attaching to the bridle, rear, and stern gun port lids onto the cleats. Does anyone know how to do this? I guess it is seized in a 8-like pattern, but would like to see how it is done exactly. Any suggestions are much appreciated!


- 950 replies
-
- 14
-
-
- syren
- model shipways
- (and 1 more)
-
Thanks for the suggestions! I should have diluted the glue more, but I guess it's too late since all the coils are done 😅, I'll try if the pastel method works, otherwise I'll just try scraping off the shiny bits lightly with a wet toothpick.
-
Many thanks for the comments Eric and Matt!! The only issue I am having with the coils is that there is a bit of a shine from the dried glue from certain angles.... Seeing the shine is driving me crazy!!! I think lightly scrubbing it with a toothpick might solve this issue. Anyhow, I have finished all the carronades, will post some pics later in the day!
- 950 replies
-
- 1
-
-
- syren
- model shipways
- (and 1 more)