HOLIDAY DONATION DRIVE - SUPPORT MSW - DO YOUR PART TO KEEP THIS GREAT FORUM GOING! (Only 13 donations so far - C'mon guys!)
×

.jpg.1f80adf1a9b14a937cfcf2ca6af0f0d4.jpg)
WalrusGuy
-
Posts
1,007 -
Joined
-
Last visited
Content Type
Profiles
Forums
Gallery
Events
Everything posted by WalrusGuy
-
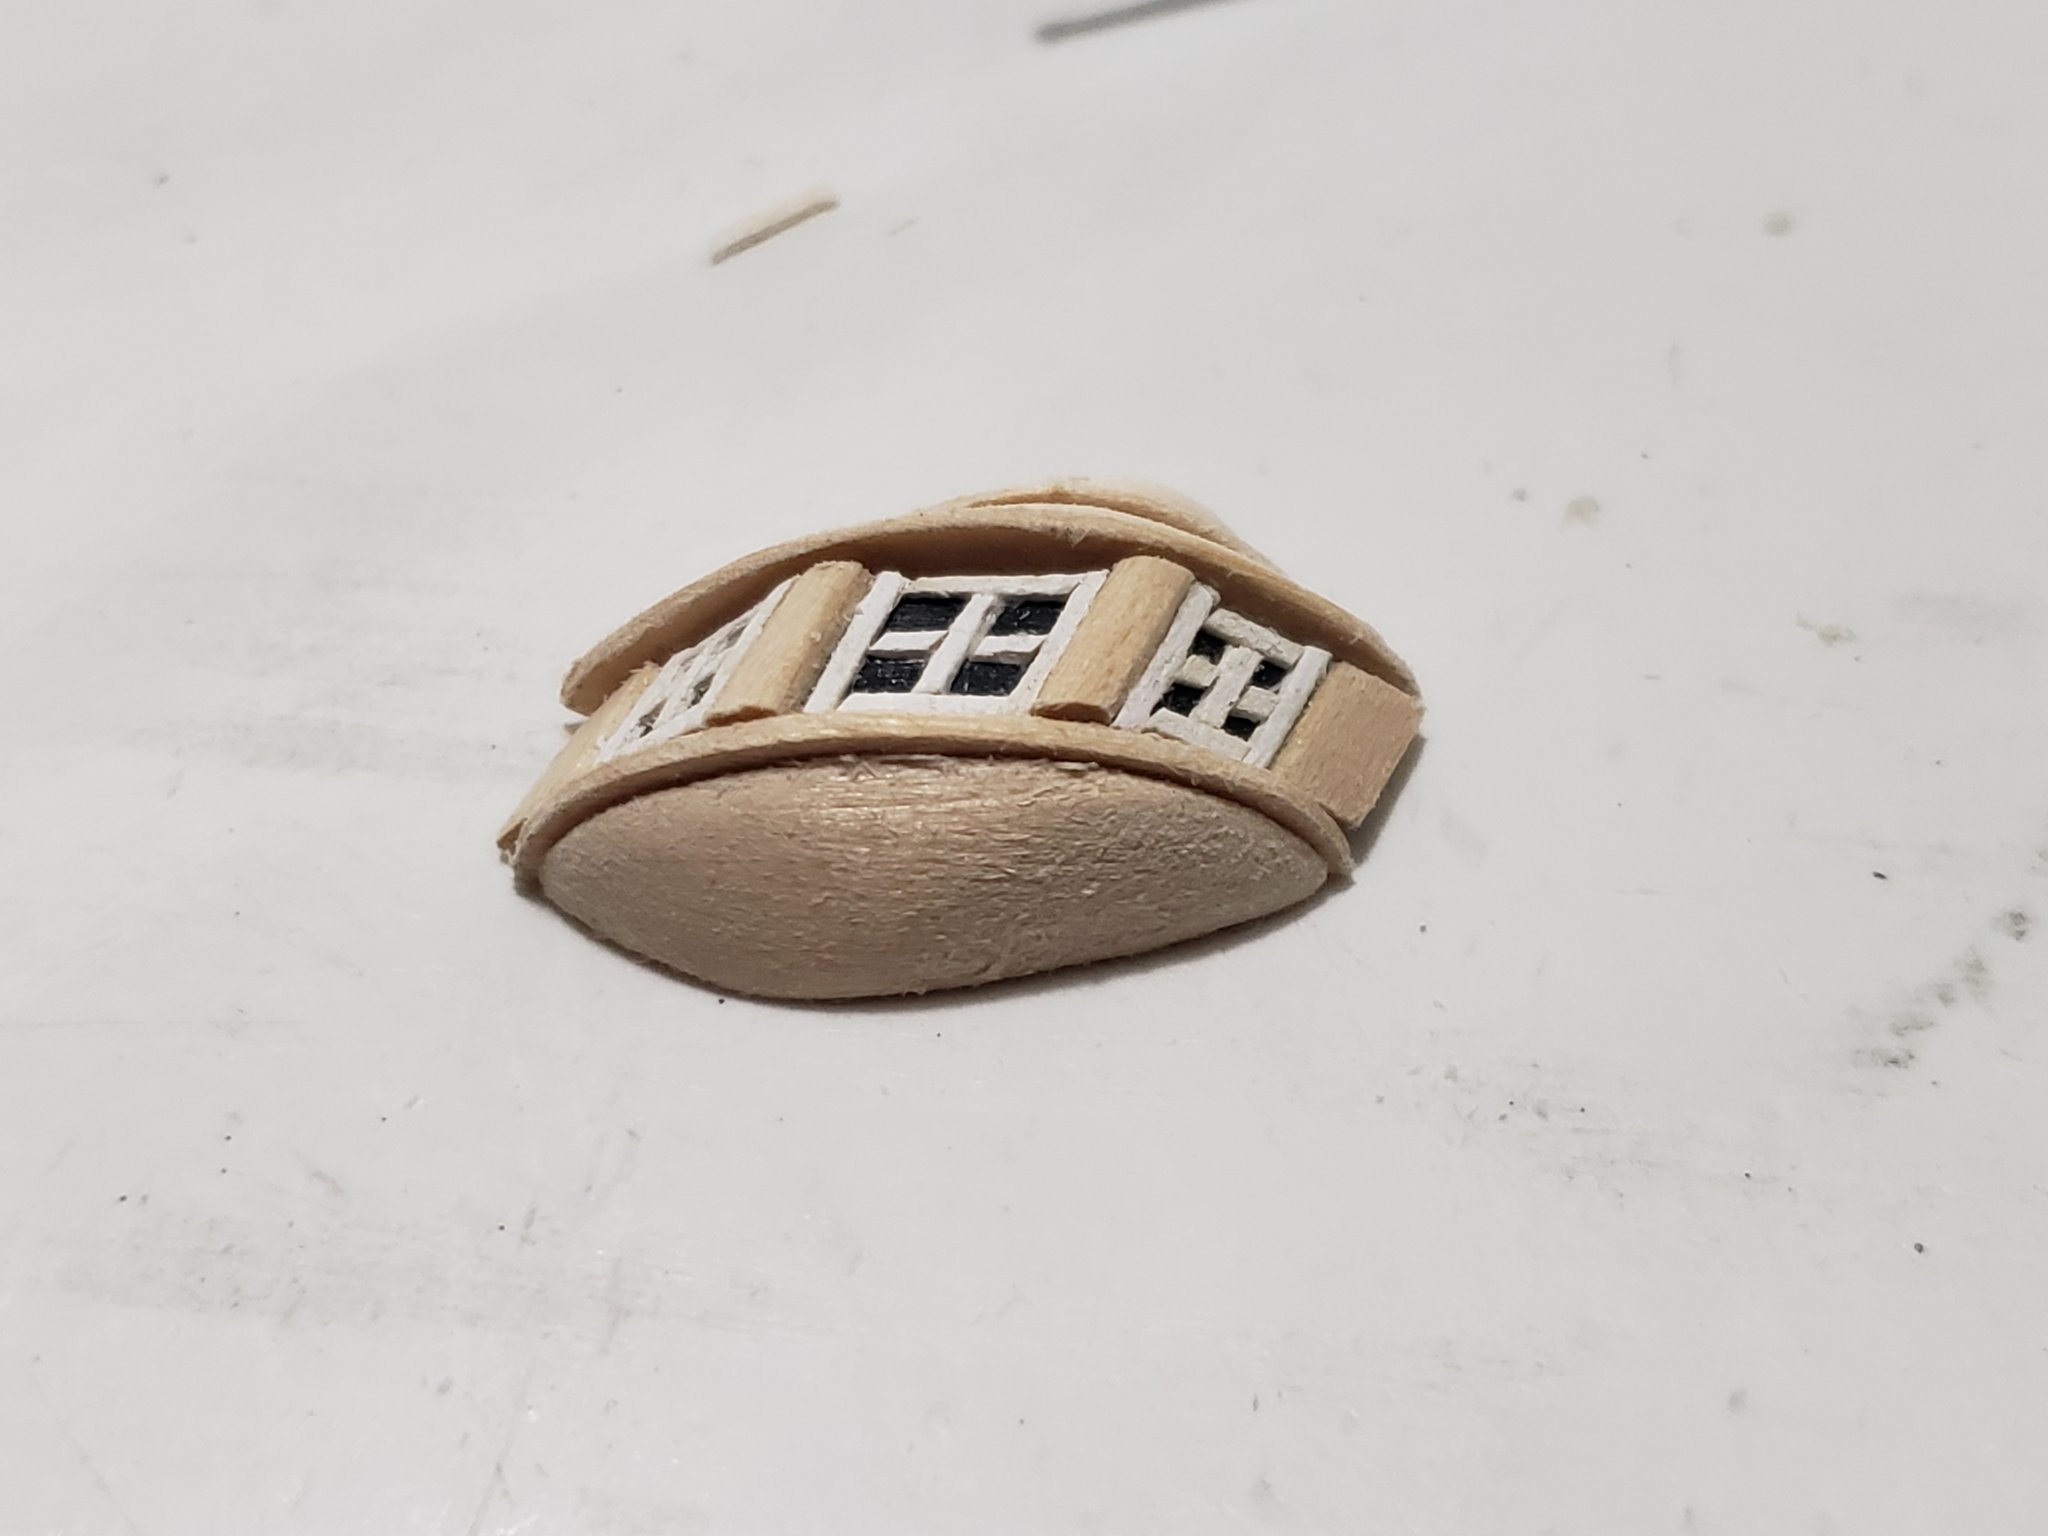
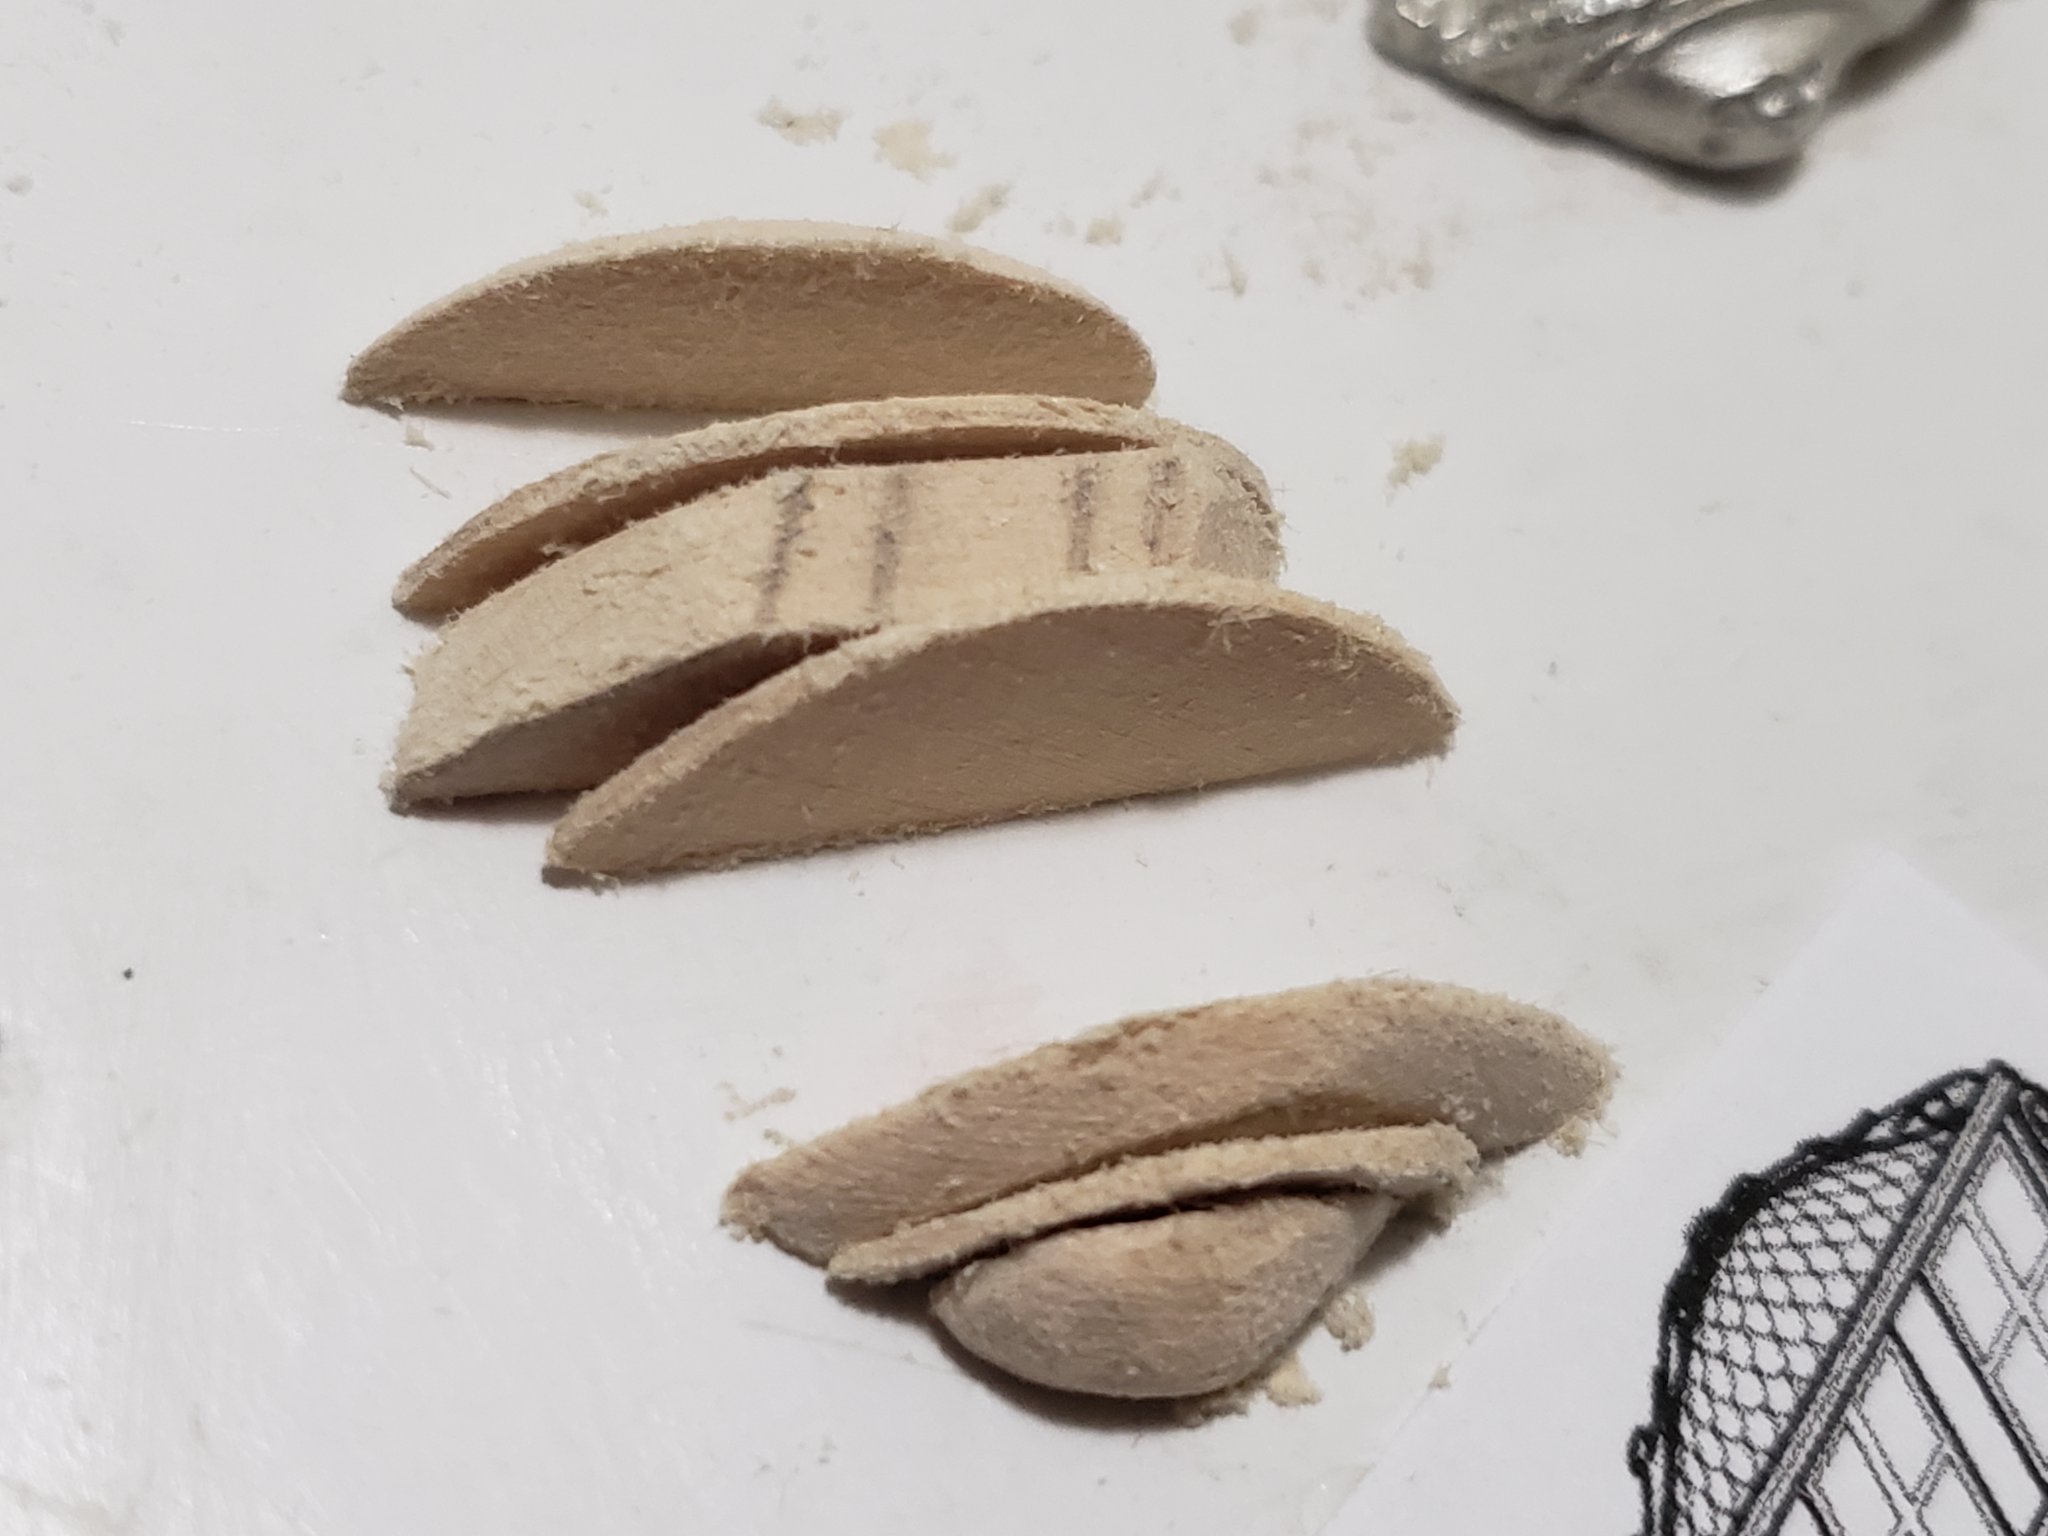
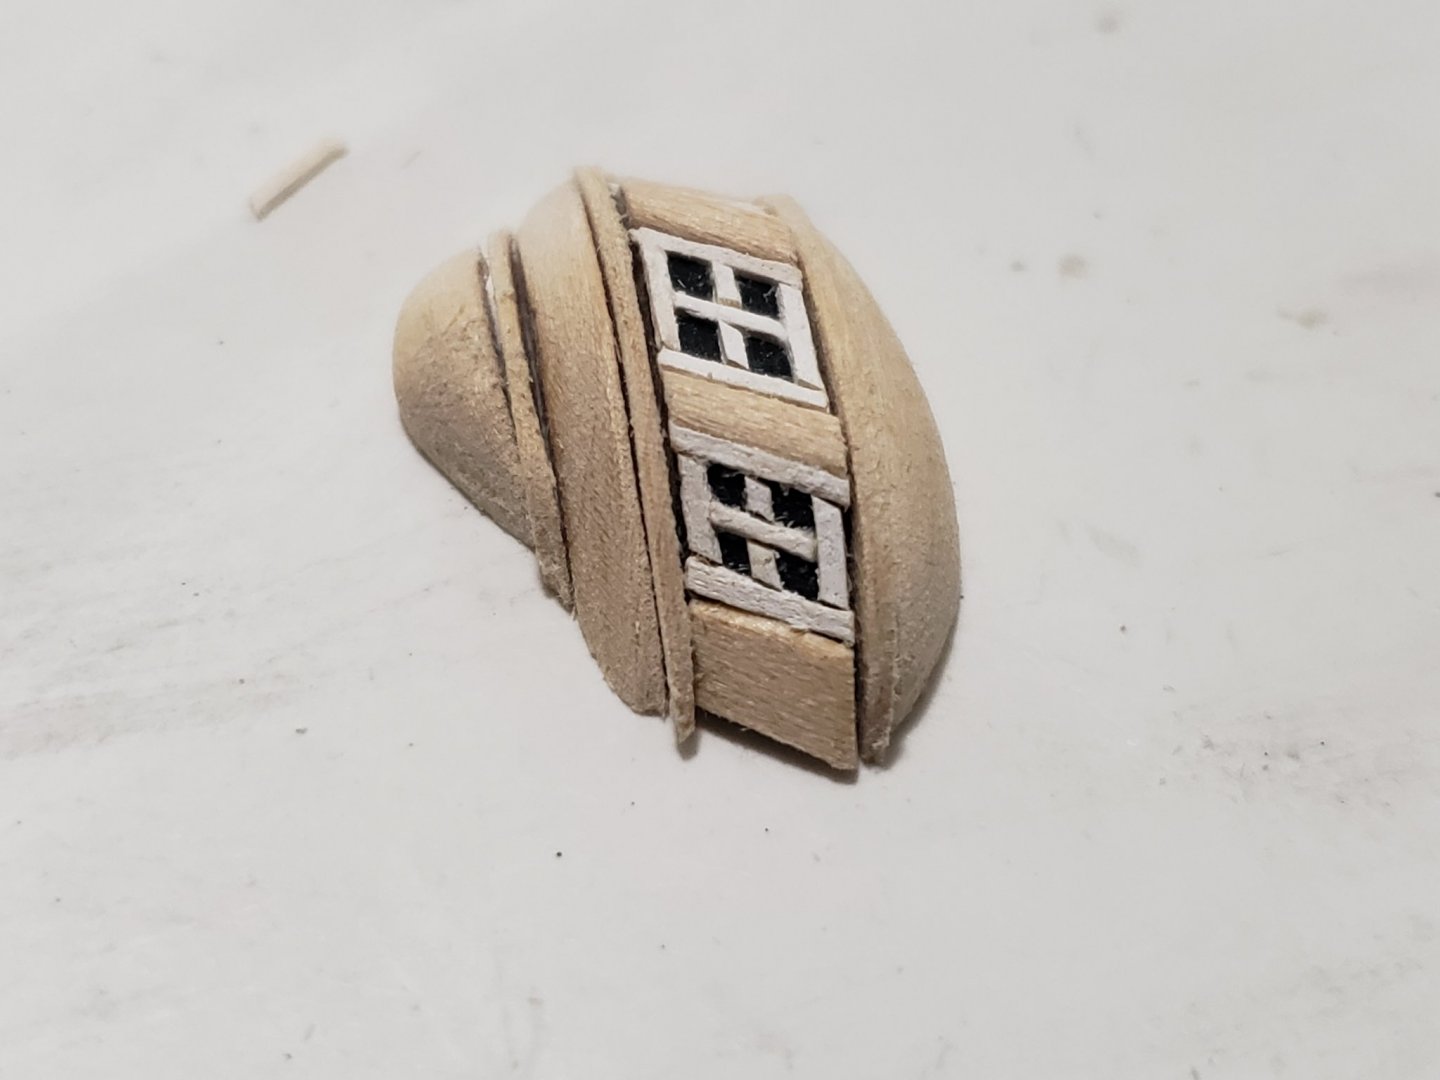
.thumb.jpg.62d1d69fed1f32364417cb1f9cdeb009.jpg) I made the window frames thinner and also done the carvings for that layer. The thinner window frames look way more sleeker and crisp than the ones I had before, but took longer to glue them in place because they were harder to grip with the tweezers. What do you guys think of the side carvings? They are still basswood. Are they worth keeping or should I discard them and still order some pear wood instead? The only reason I am reluctant to get pear wood is the wait time... Shipping might take a few weeks coming from the US. I really want to get this part of the build done since it seems like I am taking forever! I know if I take a very long break from it now I won't have the motivation to come back to finish it off lol! The Calgary guys have not emailed back to me so I might give them a call to ask if they stock it. I am presuming it will only take them a couple of days to deliver to Edmonton, but I will also check this. If they have it in stock I will definitely order it! And in the meantime I am also keeping an eye out on local stores if I can just go and pick them up. This would be the best, but least likely option 😥
I made the window frames thinner and also done the carvings for that layer. The thinner window frames look way more sleeker and crisp than the ones I had before, but took longer to glue them in place because they were harder to grip with the tweezers. What do you guys think of the side carvings? They are still basswood. Are they worth keeping or should I discard them and still order some pear wood instead? The only reason I am reluctant to get pear wood is the wait time... Shipping might take a few weeks coming from the US. I really want to get this part of the build done since it seems like I am taking forever! I know if I take a very long break from it now I won't have the motivation to come back to finish it off lol! The Calgary guys have not emailed back to me so I might give them a call to ask if they stock it. I am presuming it will only take them a couple of days to deliver to Edmonton, but I will also check this. If they have it in stock I will definitely order it! And in the meantime I am also keeping an eye out on local stores if I can just go and pick them up. This would be the best, but least likely option 😥

- 950 replies
-
- 13
-

-
- syren
- model shipways
- (and 1 more)
-
Here's how mine looked if it helps with yours:

-
Yes it was extremely tight on mine. It made it very hard to plank that area, but it's doable with some clamps and some patience. I also had to hold it for 30 mins at some times to make sure the glue was set. The shape looks good!
-
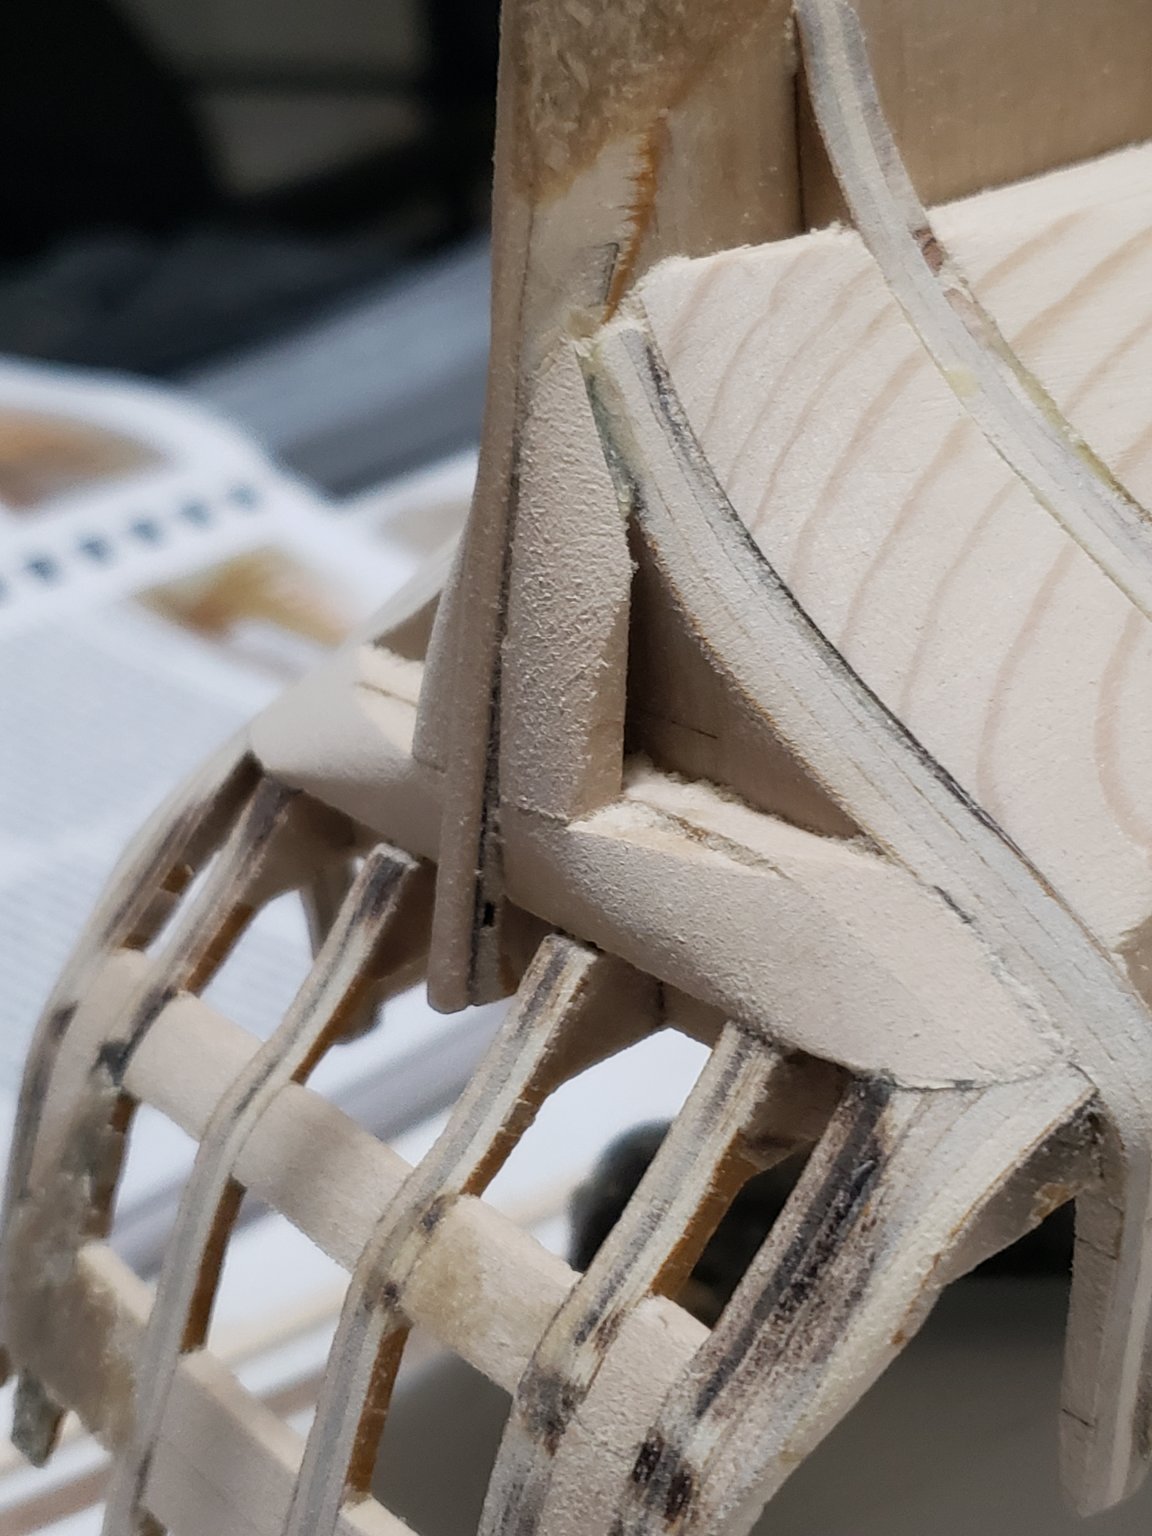
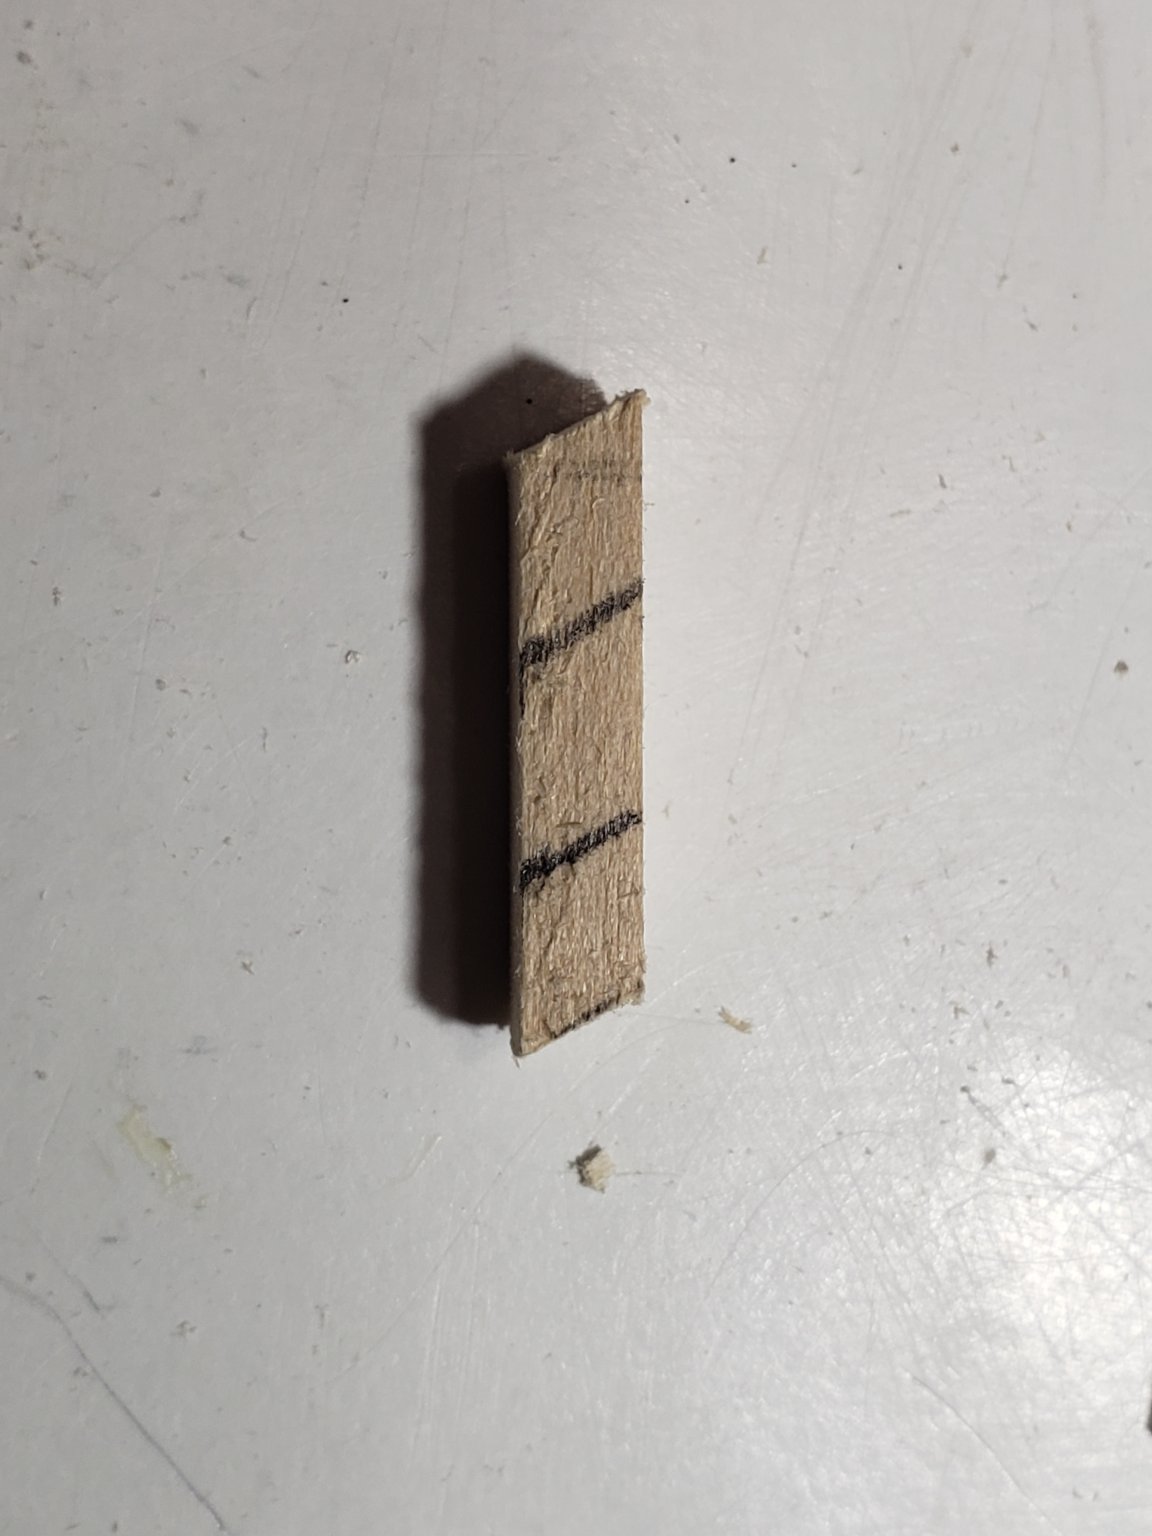
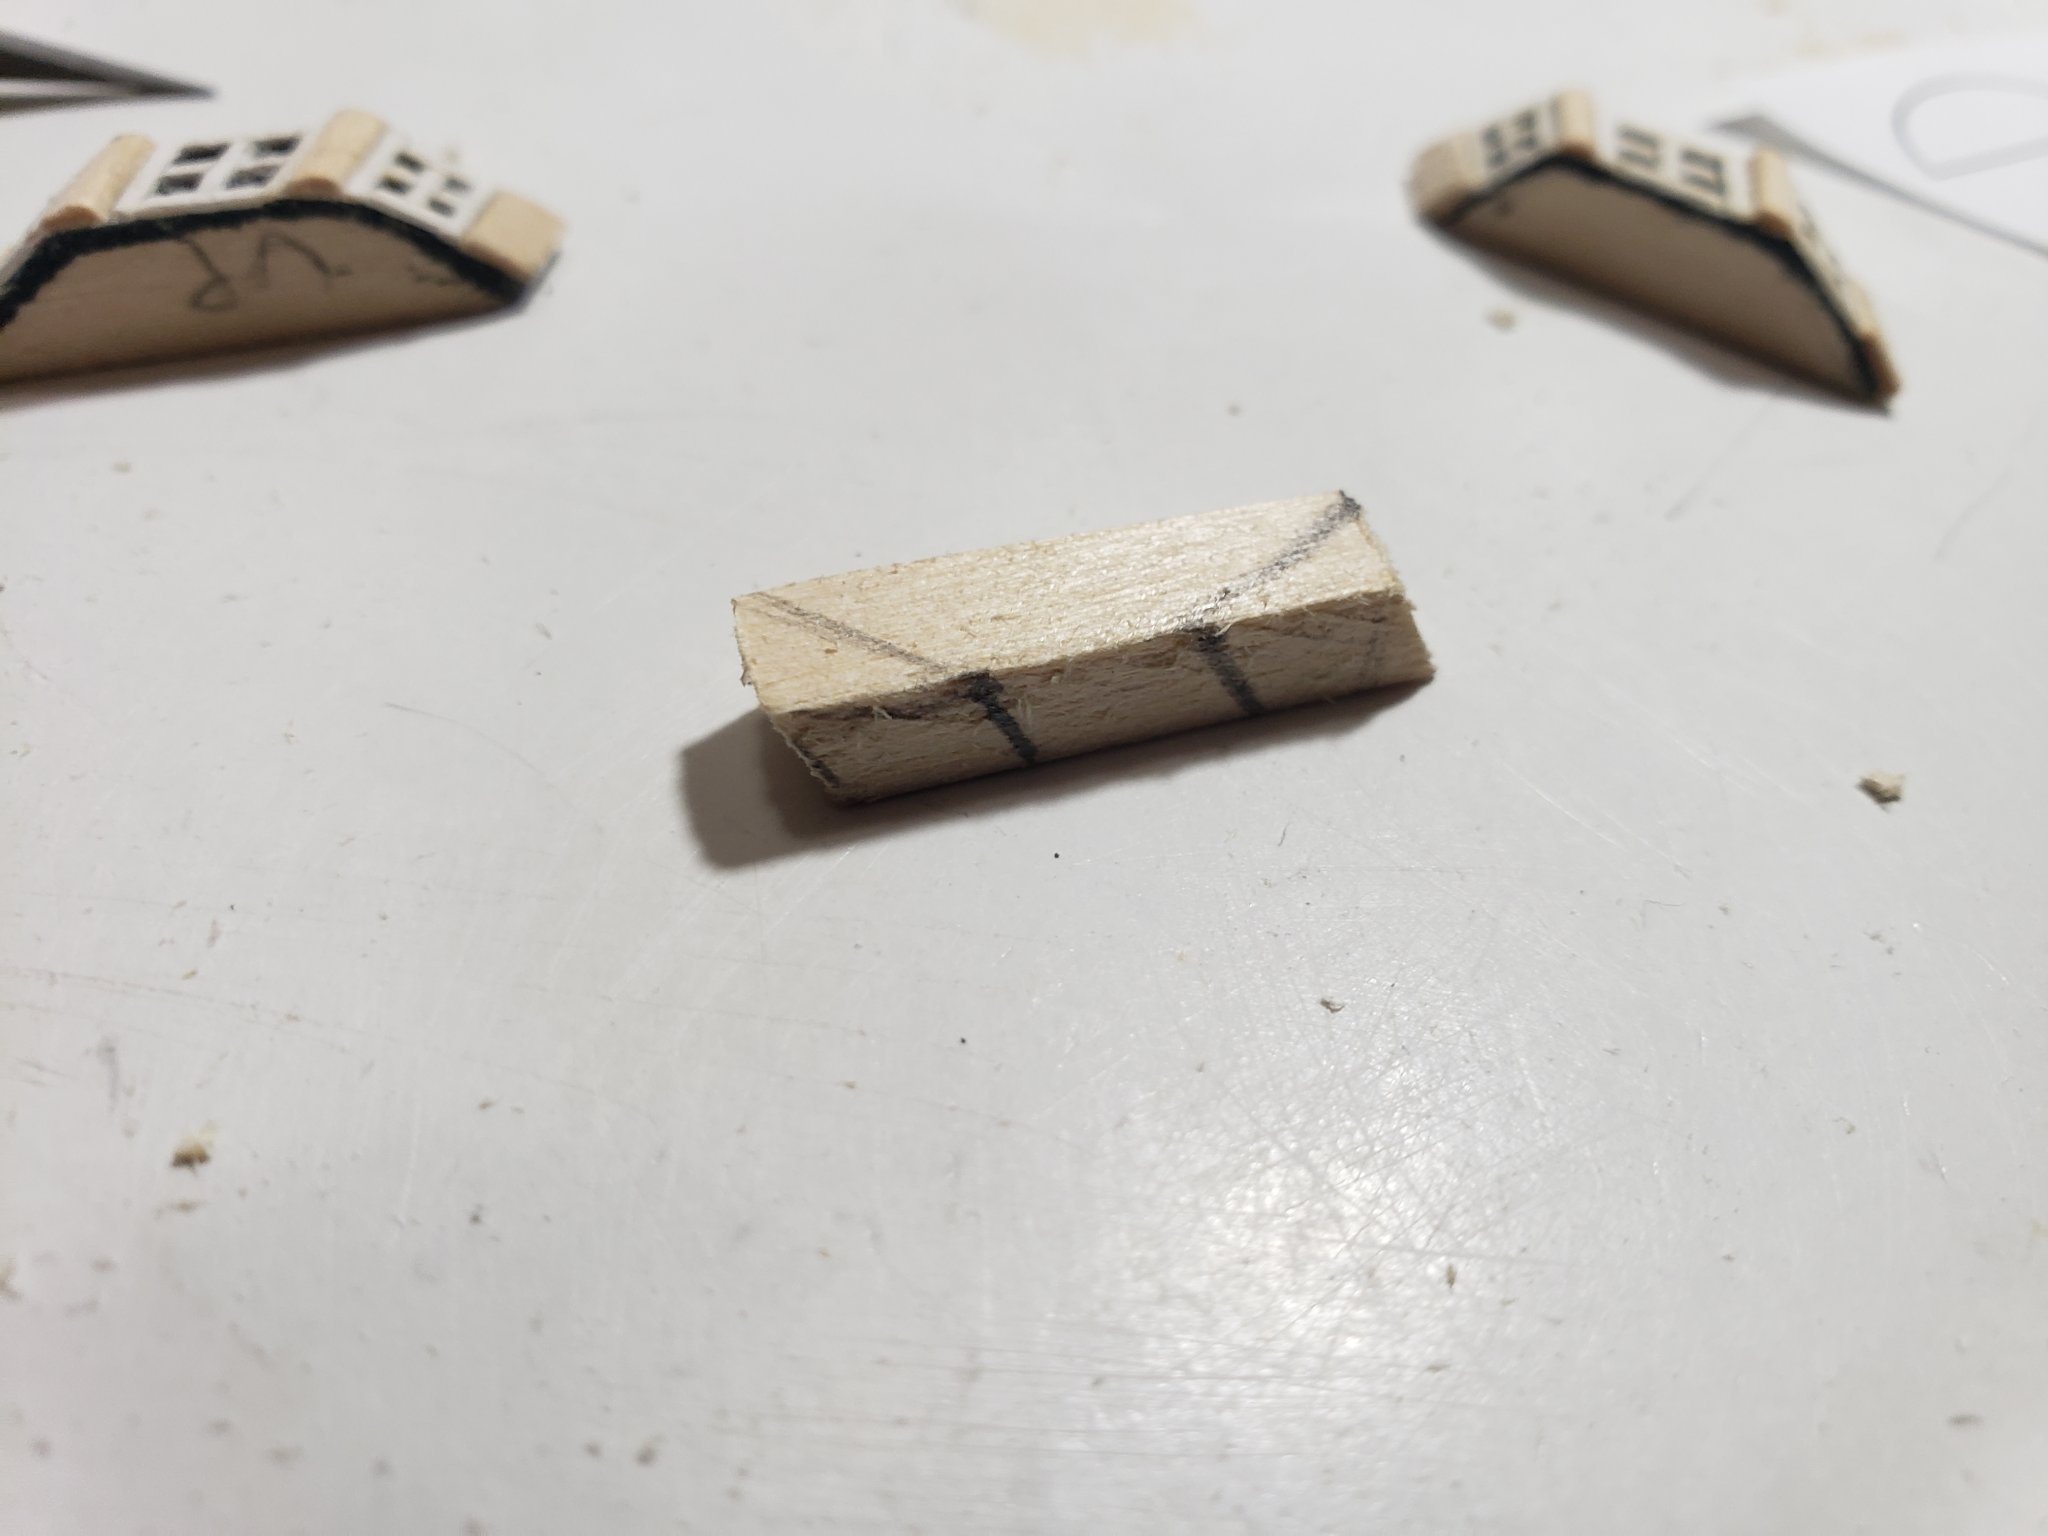
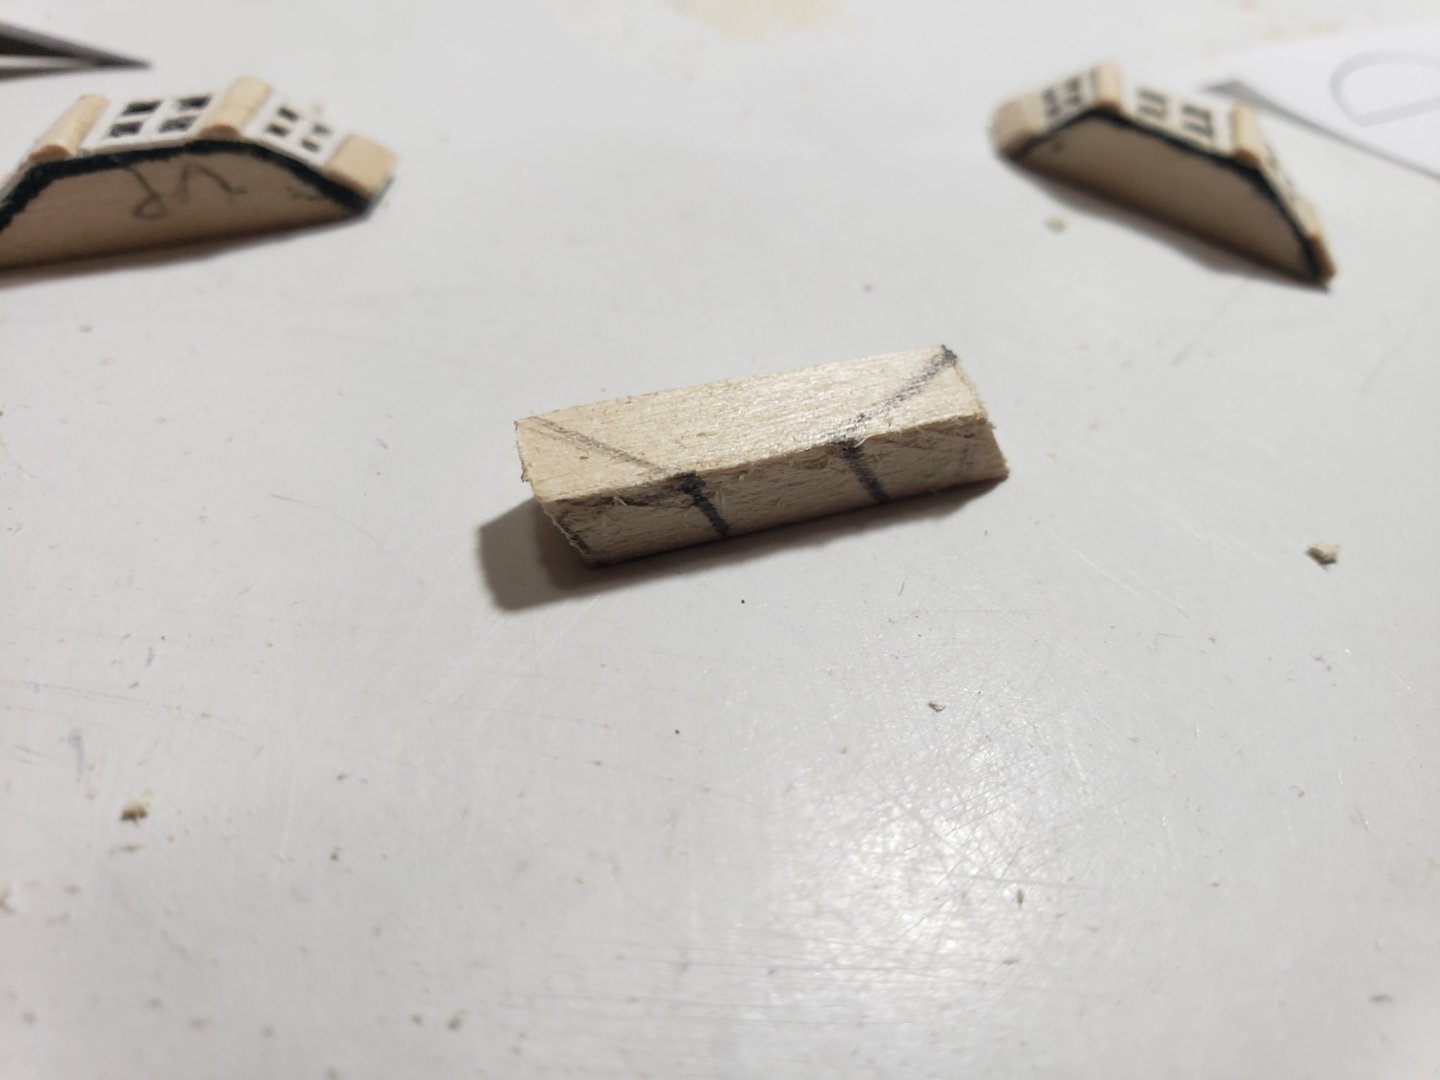
Thanks Richard!! I've emailed them to see if they have pear wood or similar. Let's see what they say.. I also wanted to delay this step but also wanted to get it out of the way before attempting the fun stuff, so I decided pulled the band-aid quick and get it over with (although progress with this is going slow 😅) Also, here are some photos of what I did to carve the window frame layer, in case it helps with yours, or anyone else's quarter badge. I forgot to take these photos before, but remembered now since I am making another set of window frames: 1) I first cut out the general shape (traced lines from the plan) and drew in some lines of where the windows will be located 2) Then, on the other face, I drew a connecting line from the previous line to the respective corner: 3) I sanded the corner starting on the edge until I reached the lines I drew: As for the roof, a similar process is done but with curves. I traced a partial circle on the top, and the plan's roof silhouette on the side and sanded the curve from there. You should get a slanted roof with the correct angles. The bottom is more tricky where I just free-handed it , and that's why it does not look as good as the roof 😅. I got the general badge profile from Chuck's post in Dirk's build log here. I have also attached the quarter badge profiles in this post as it was great use to me. qbadges.pdf Here are some photos if it helps explain my steps: Hope this is of some use!


- 950 replies
-
- 6
-
-
- syren
- model shipways
- (and 1 more)
-
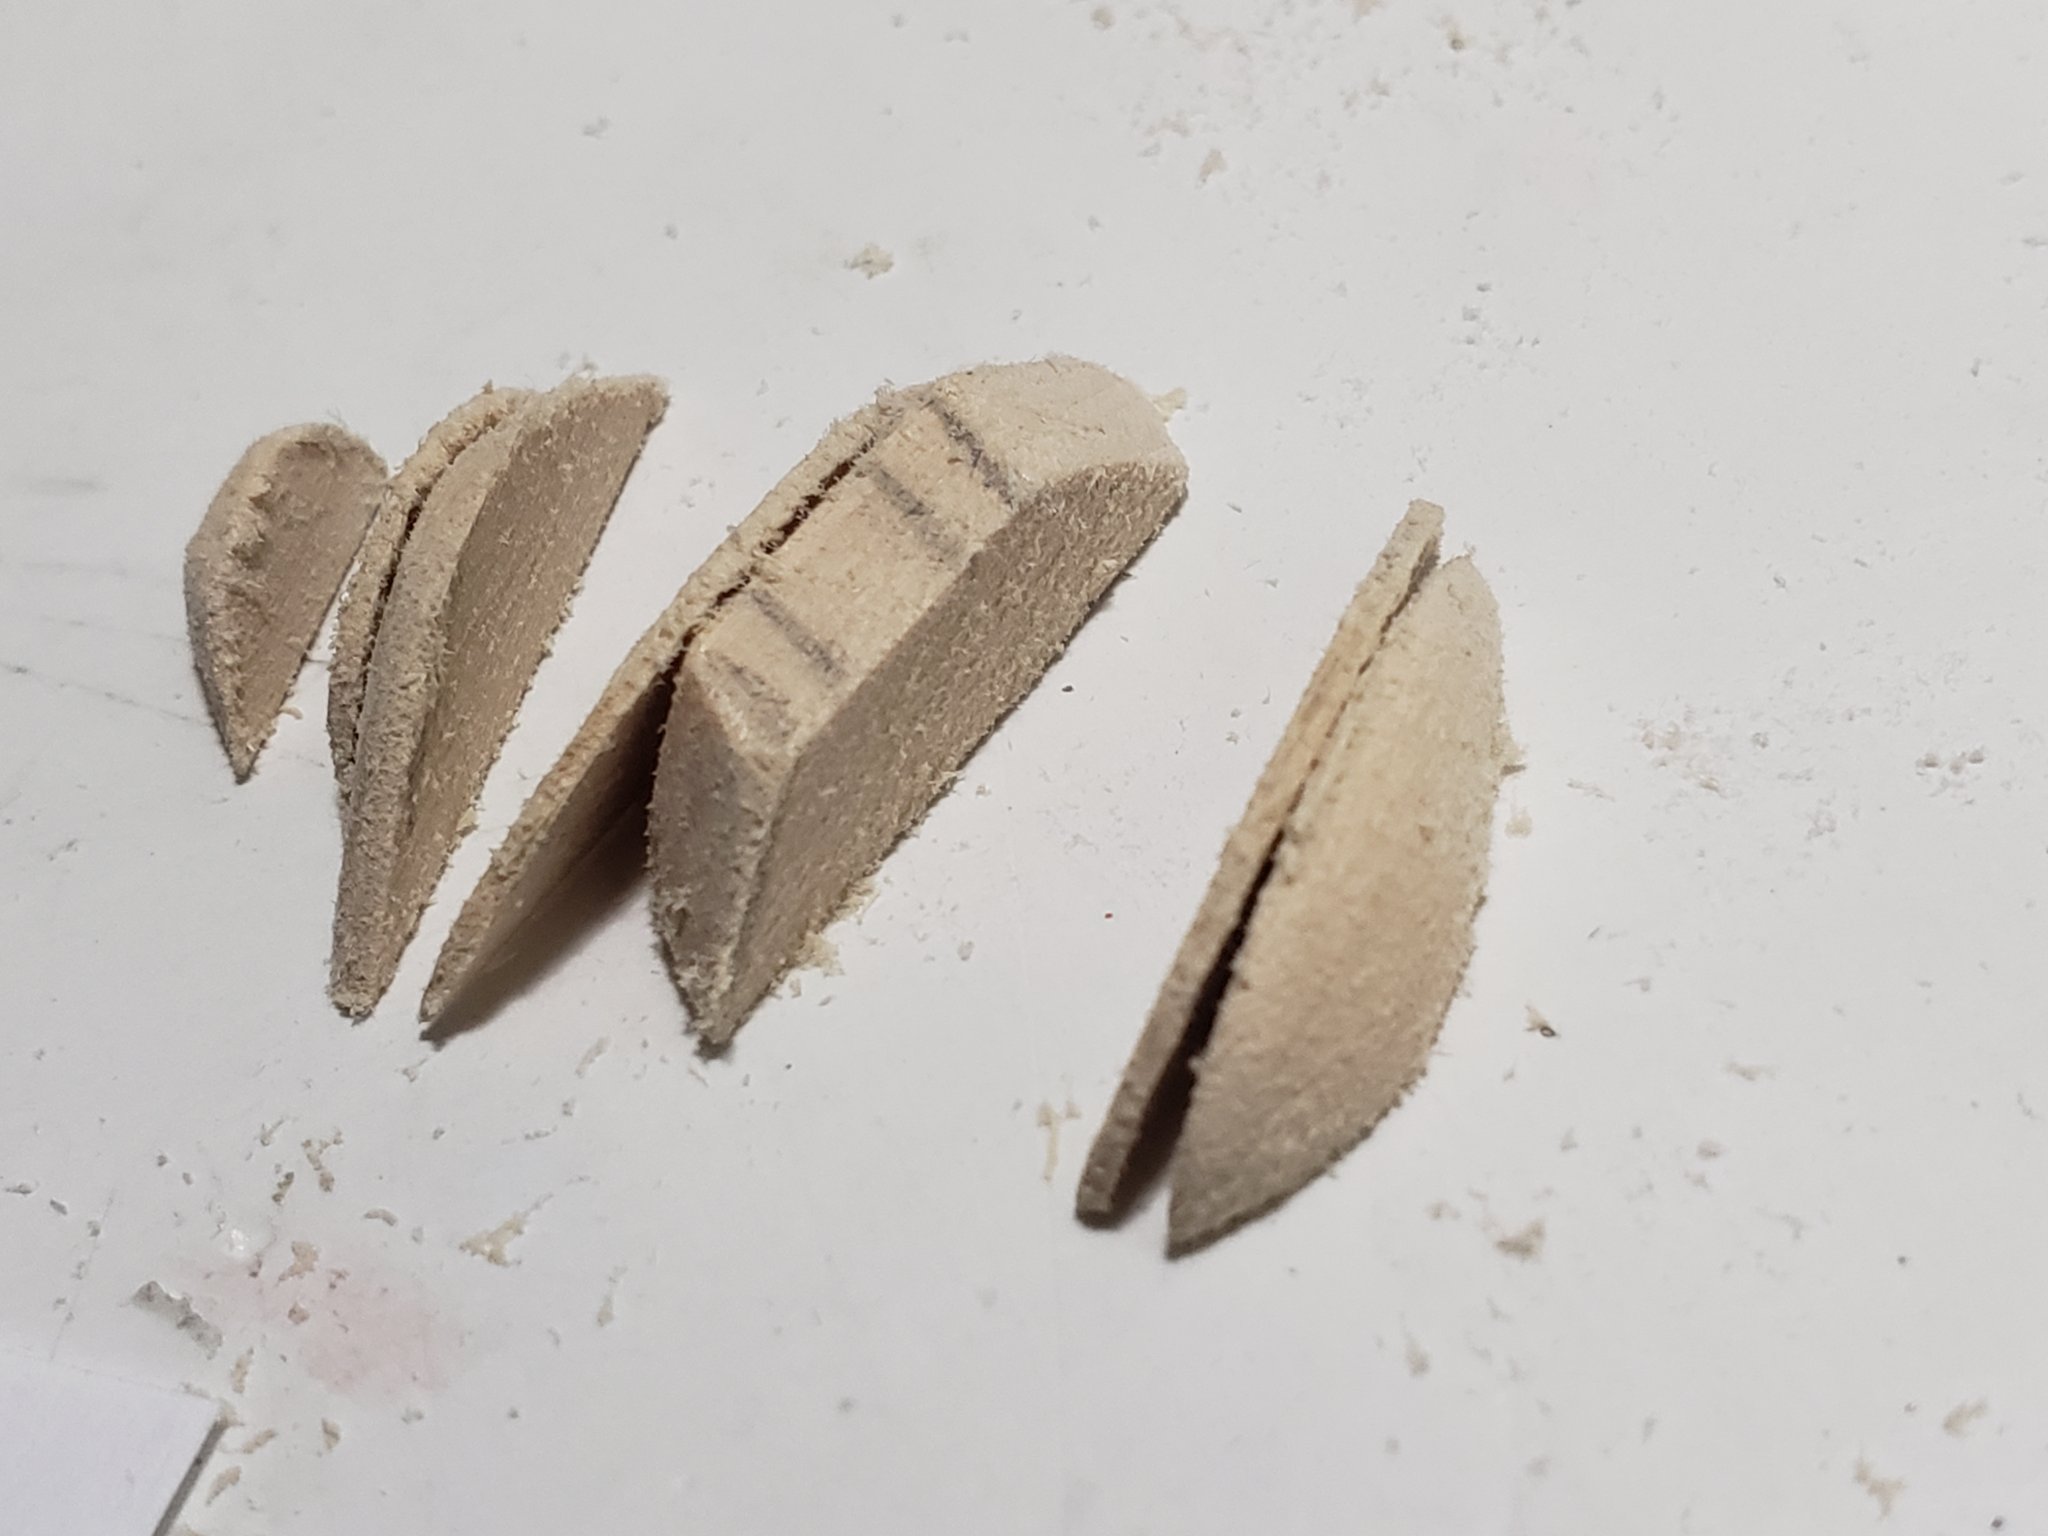
Tried a bit of carving with basswood. I now fully understand some of the frustration of miniature carving with this wood, but I think it's doable. Here is my first attempt: Contrary to my precious post, I am thinking of redoing the windows to make the frames thinner (as per Chuck's advice). Might as well spend more time in this stage, especially since I am trying to improve the quality from the castings. For my next post I will have the window layer redone, and finished the rest of carvings for the window layer. Notice how I'm still delaying the tiles 😅


- 950 replies
-
- 5
-
-
- syren
- model shipways
- (and 1 more)
-
Looking spectacular!! Eagerly waiting to see how it'll look with the figurehead 😀
-
Thanks for the compliment and tips! I might try that but I'm not sure how good I'll be with etching it on the wood. It won't hurt to practice a bit. I'll also try the putty if I can find a similar color to the basswood somewhere.
- 950 replies
-
- 1
-
-
- syren
- model shipways
- (and 1 more)
-
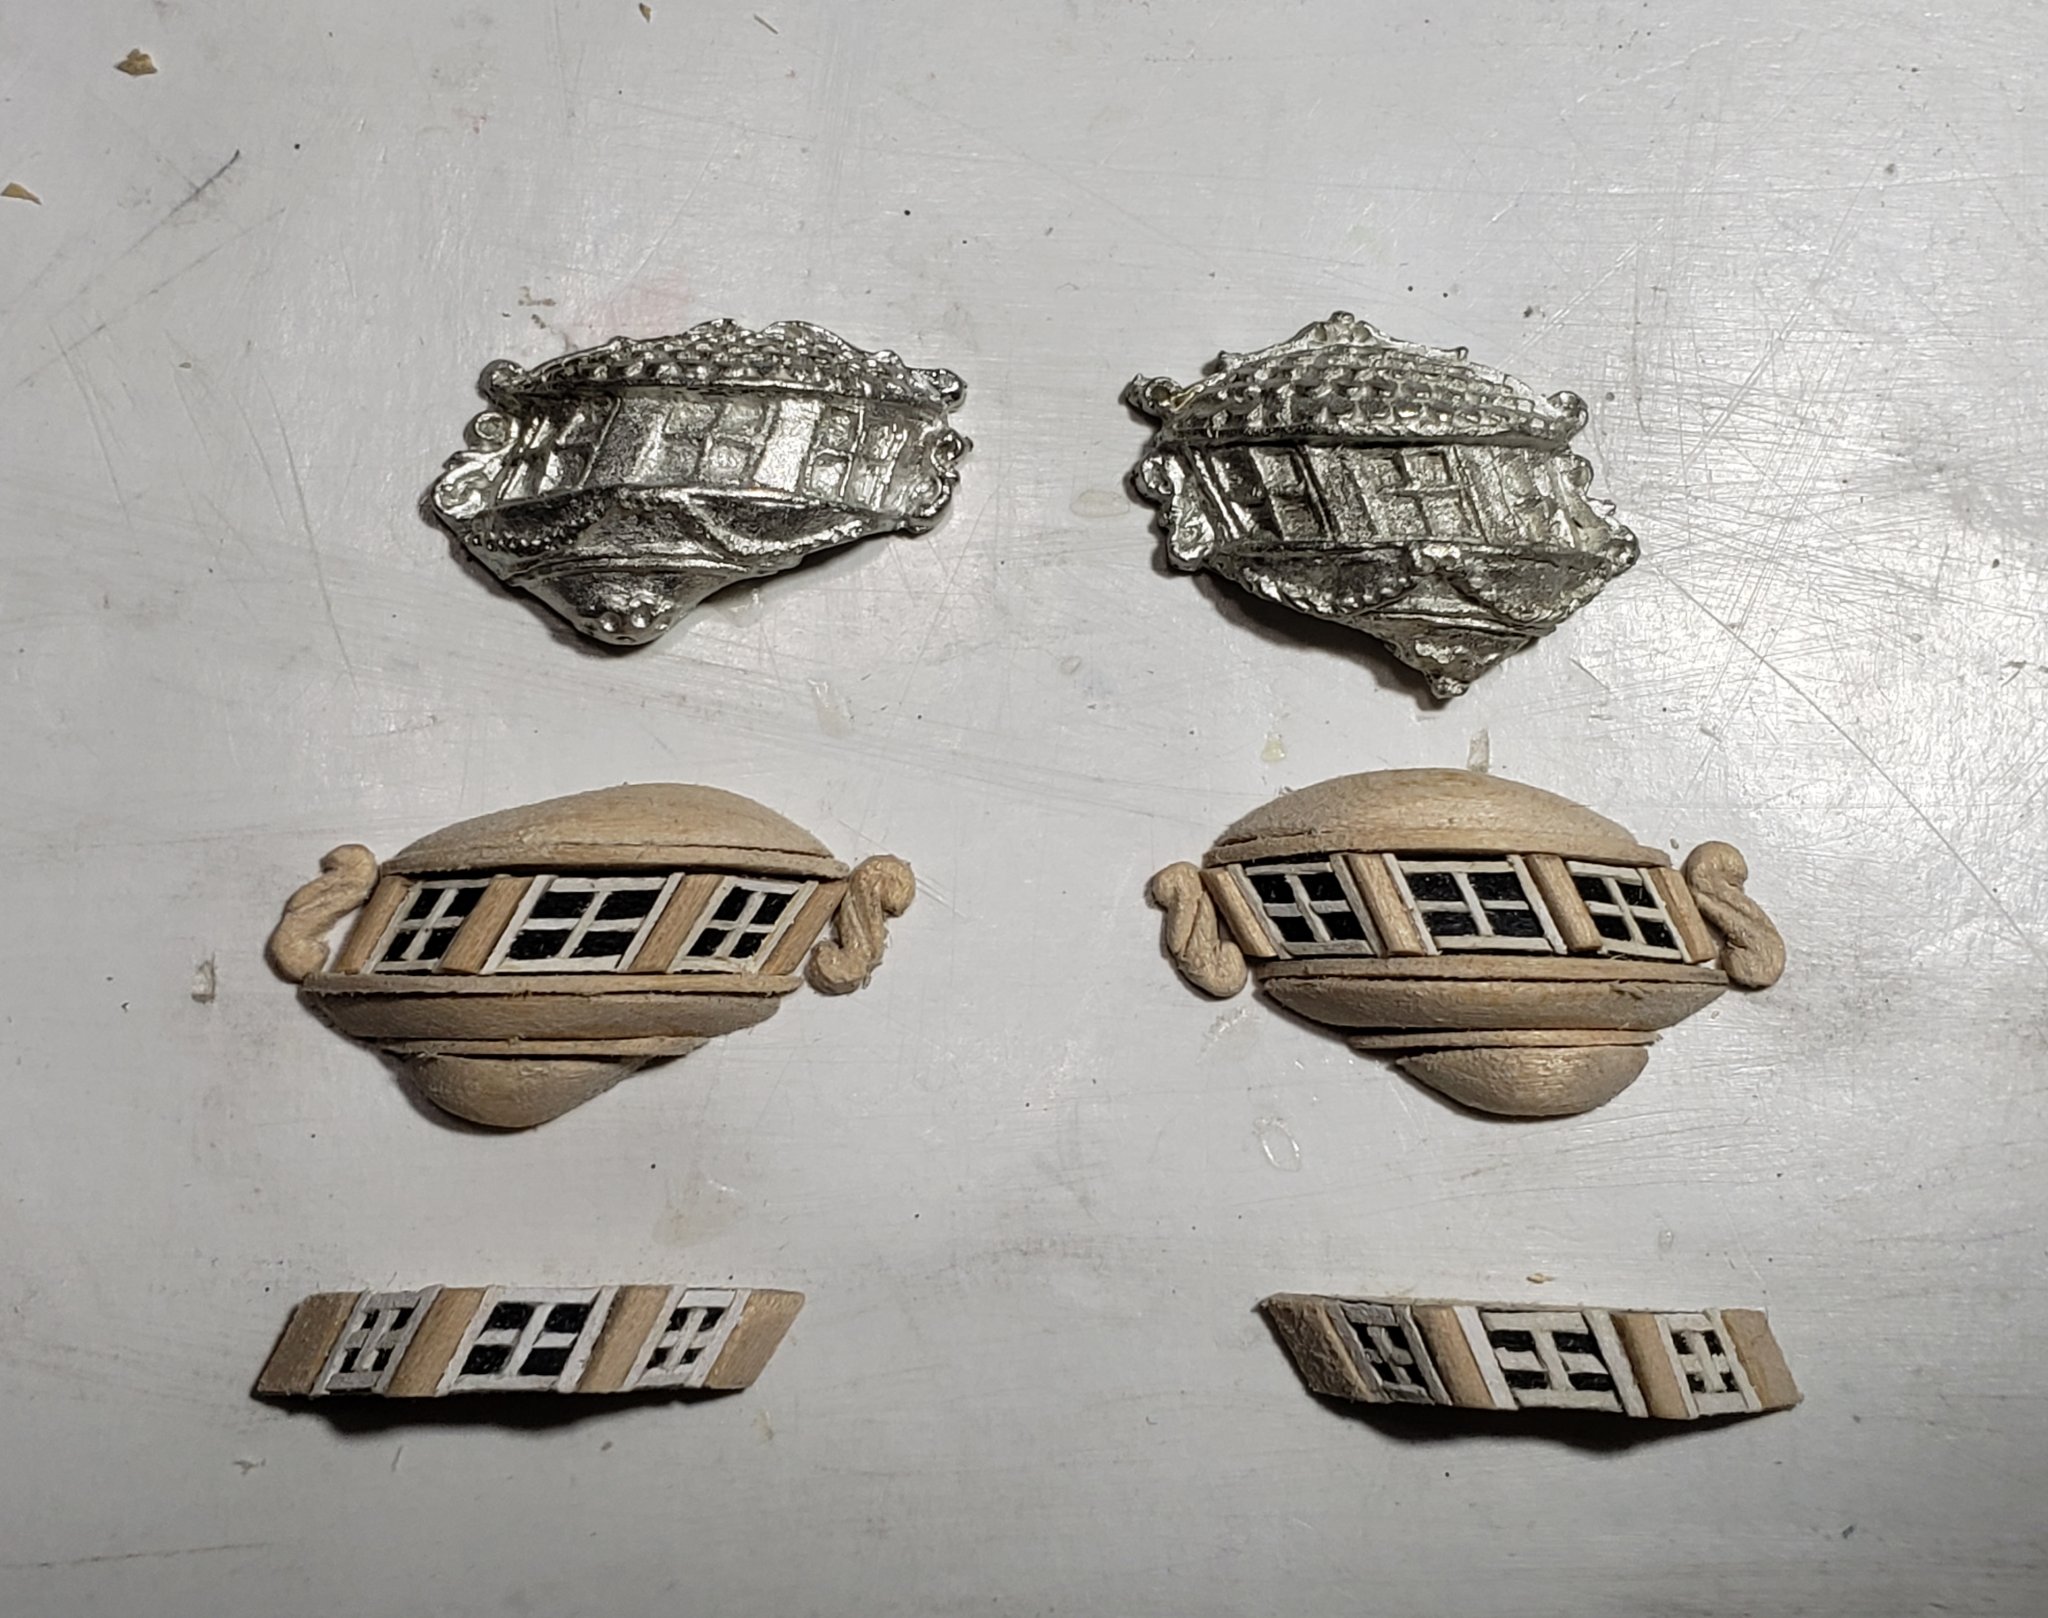
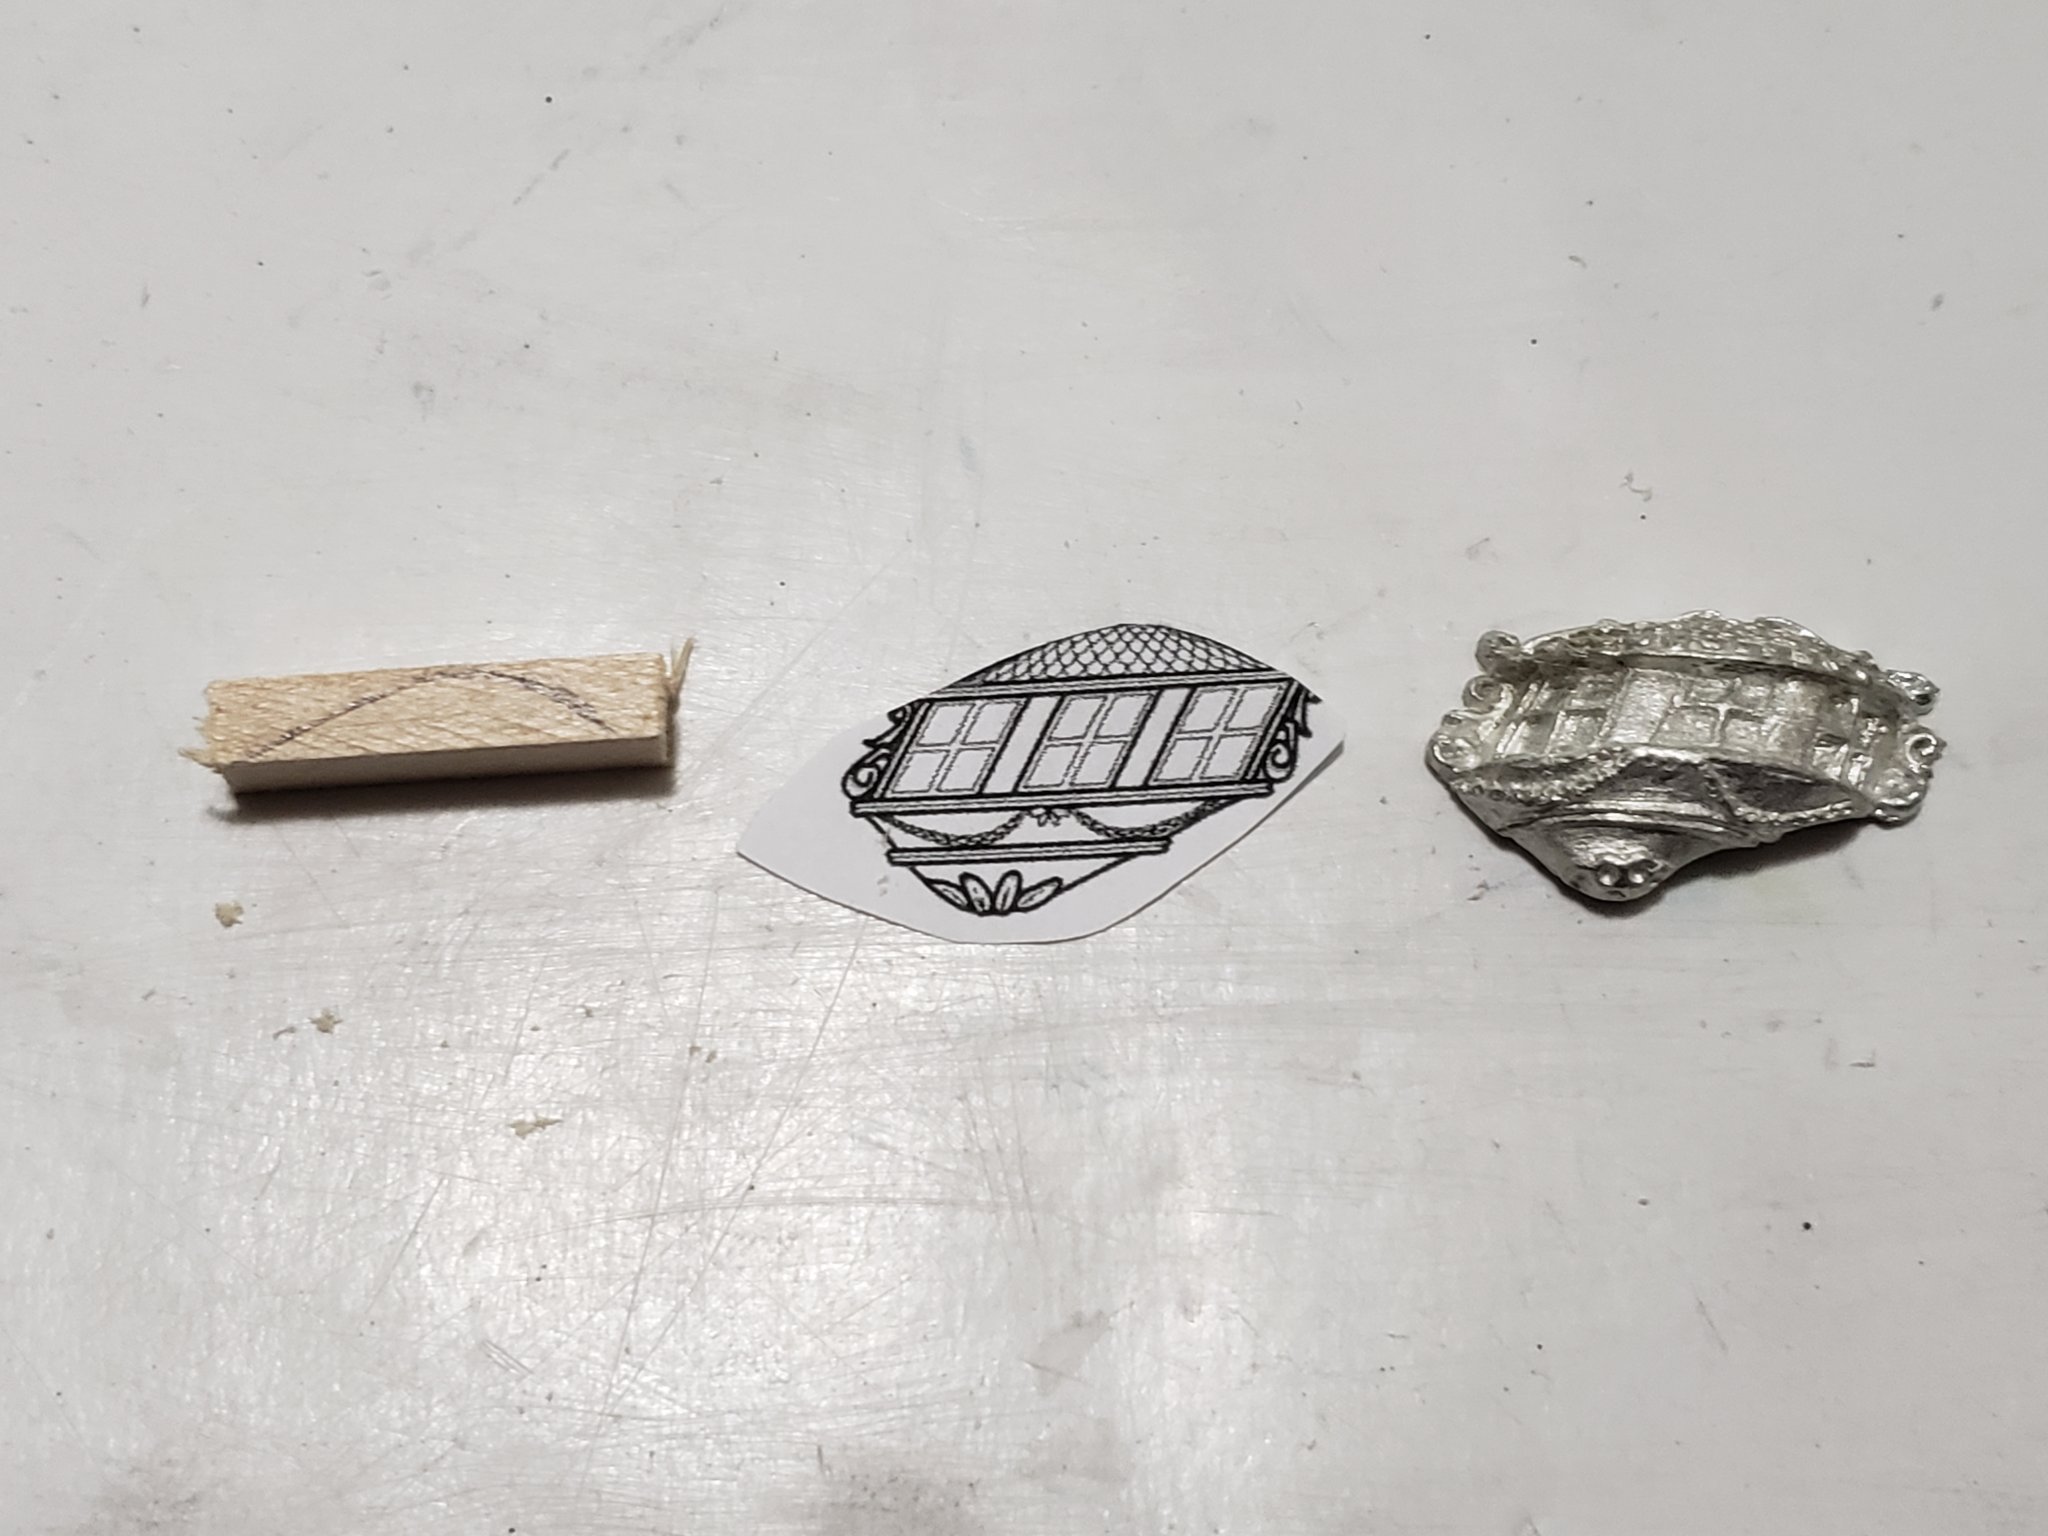
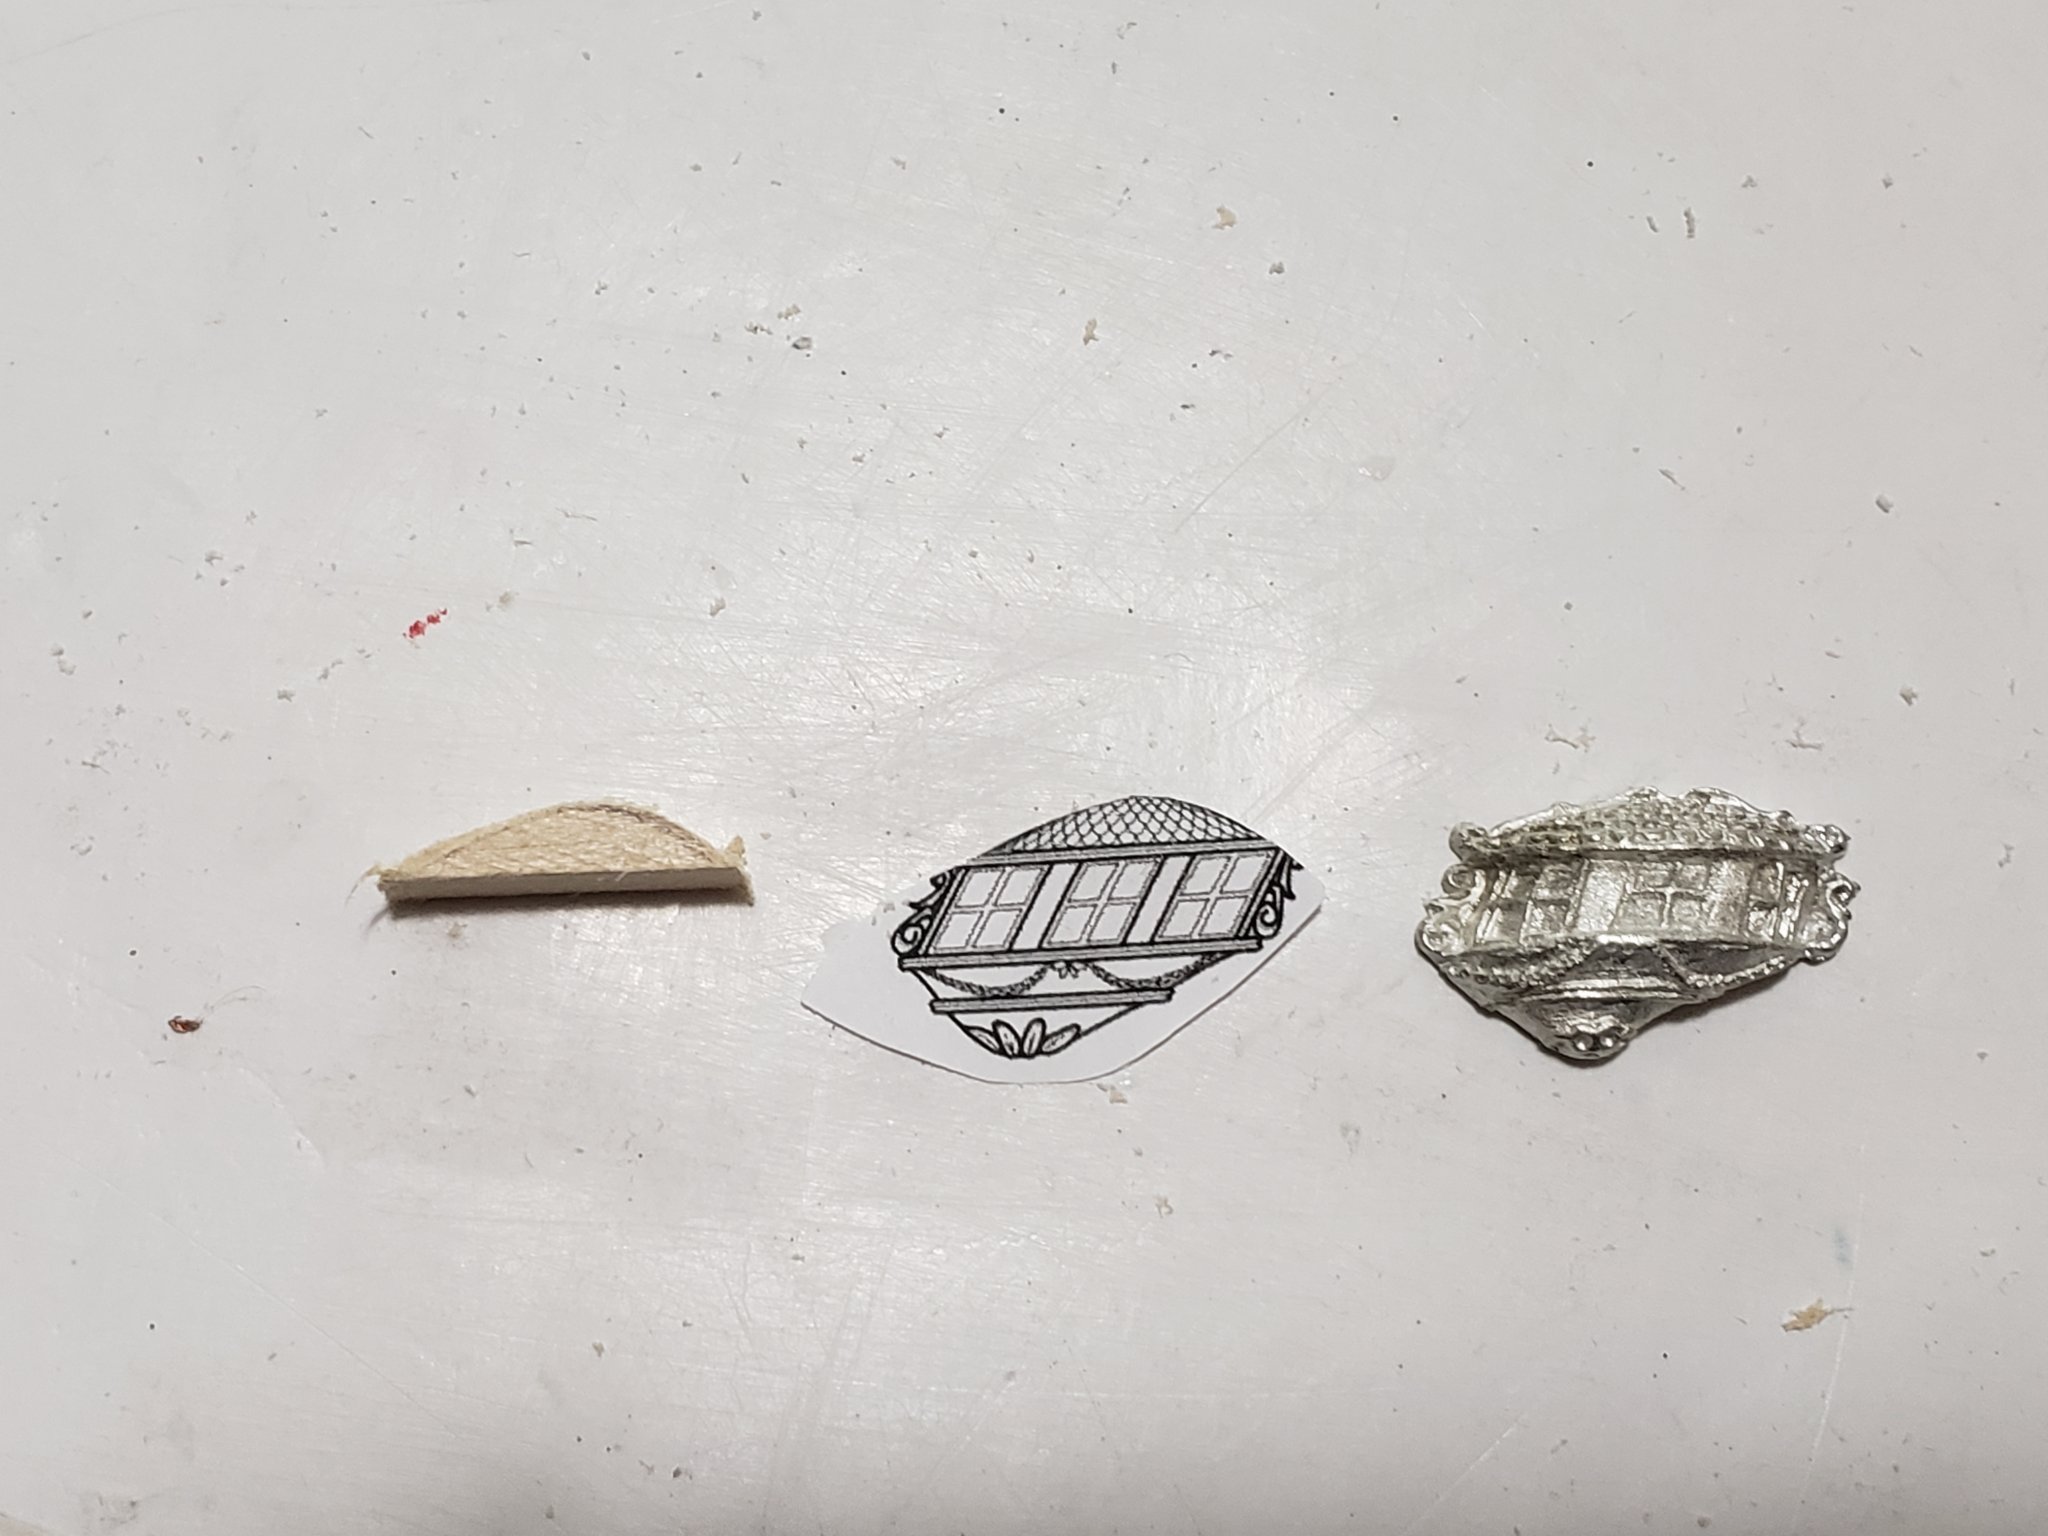
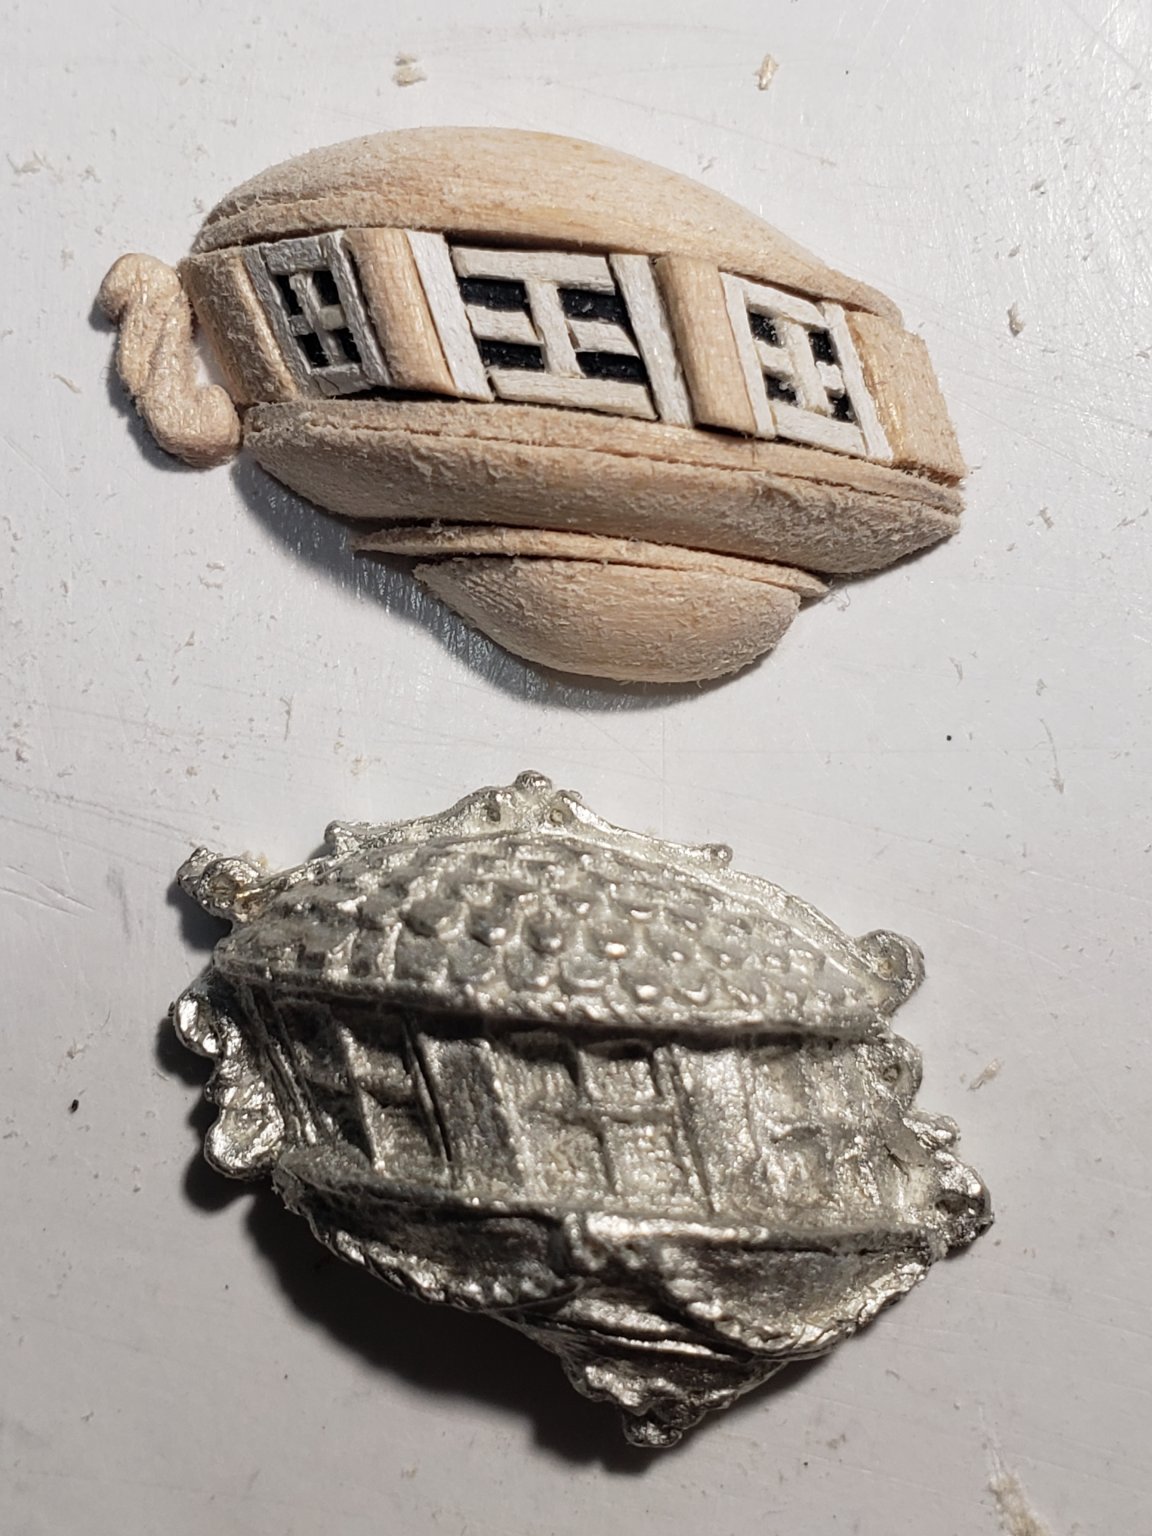
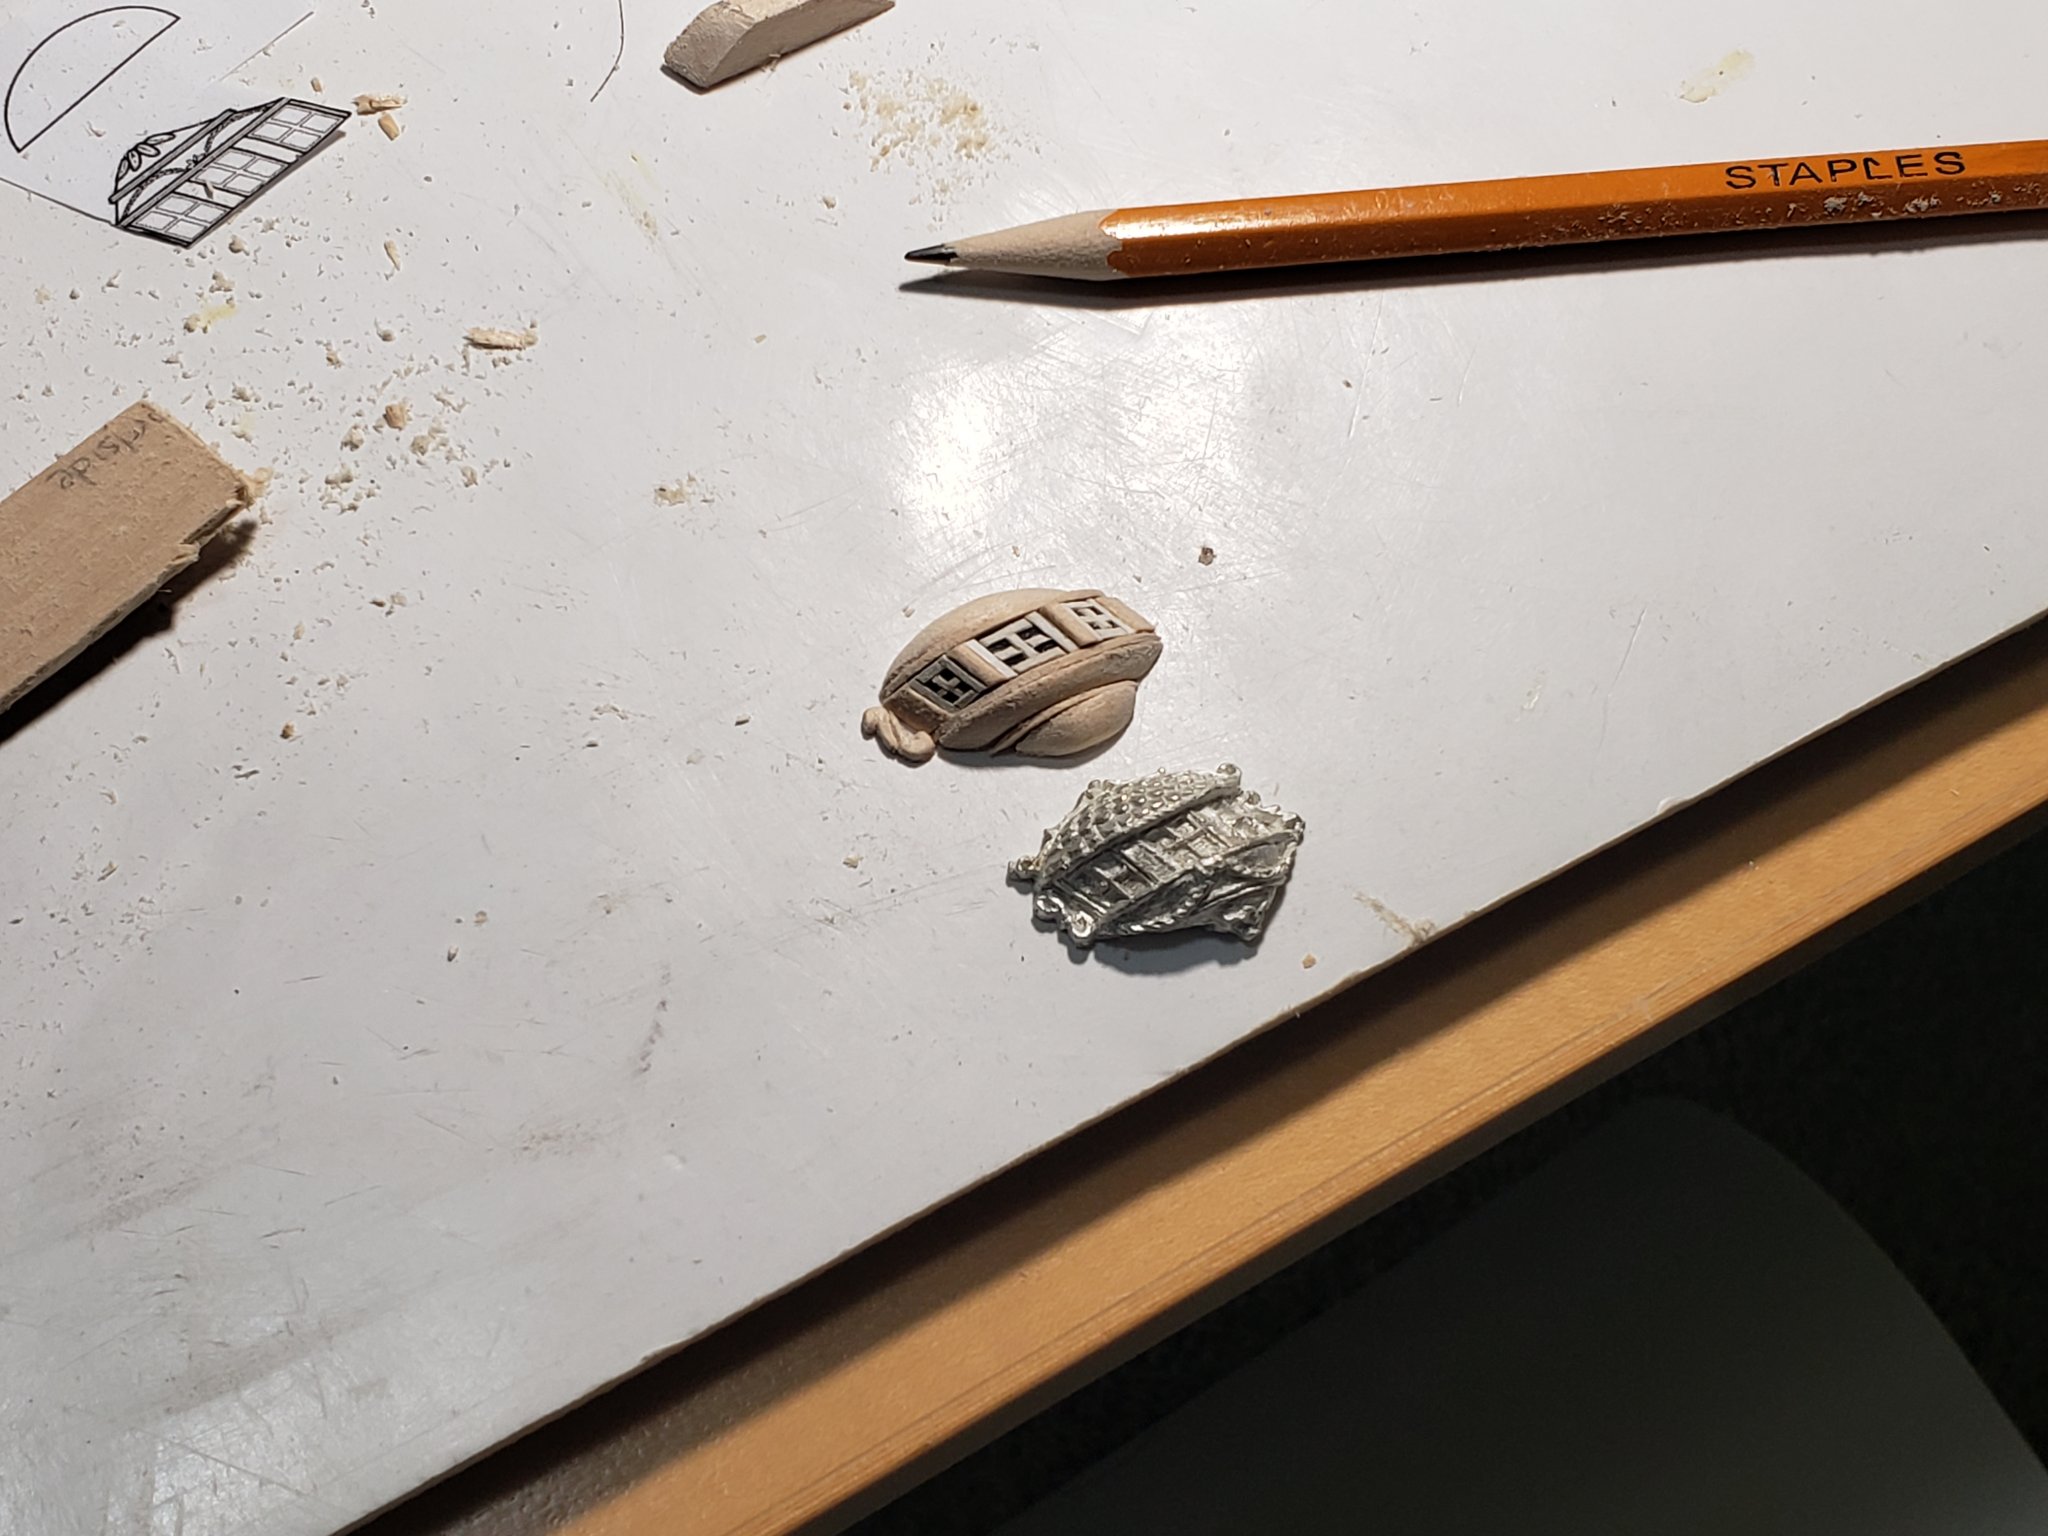
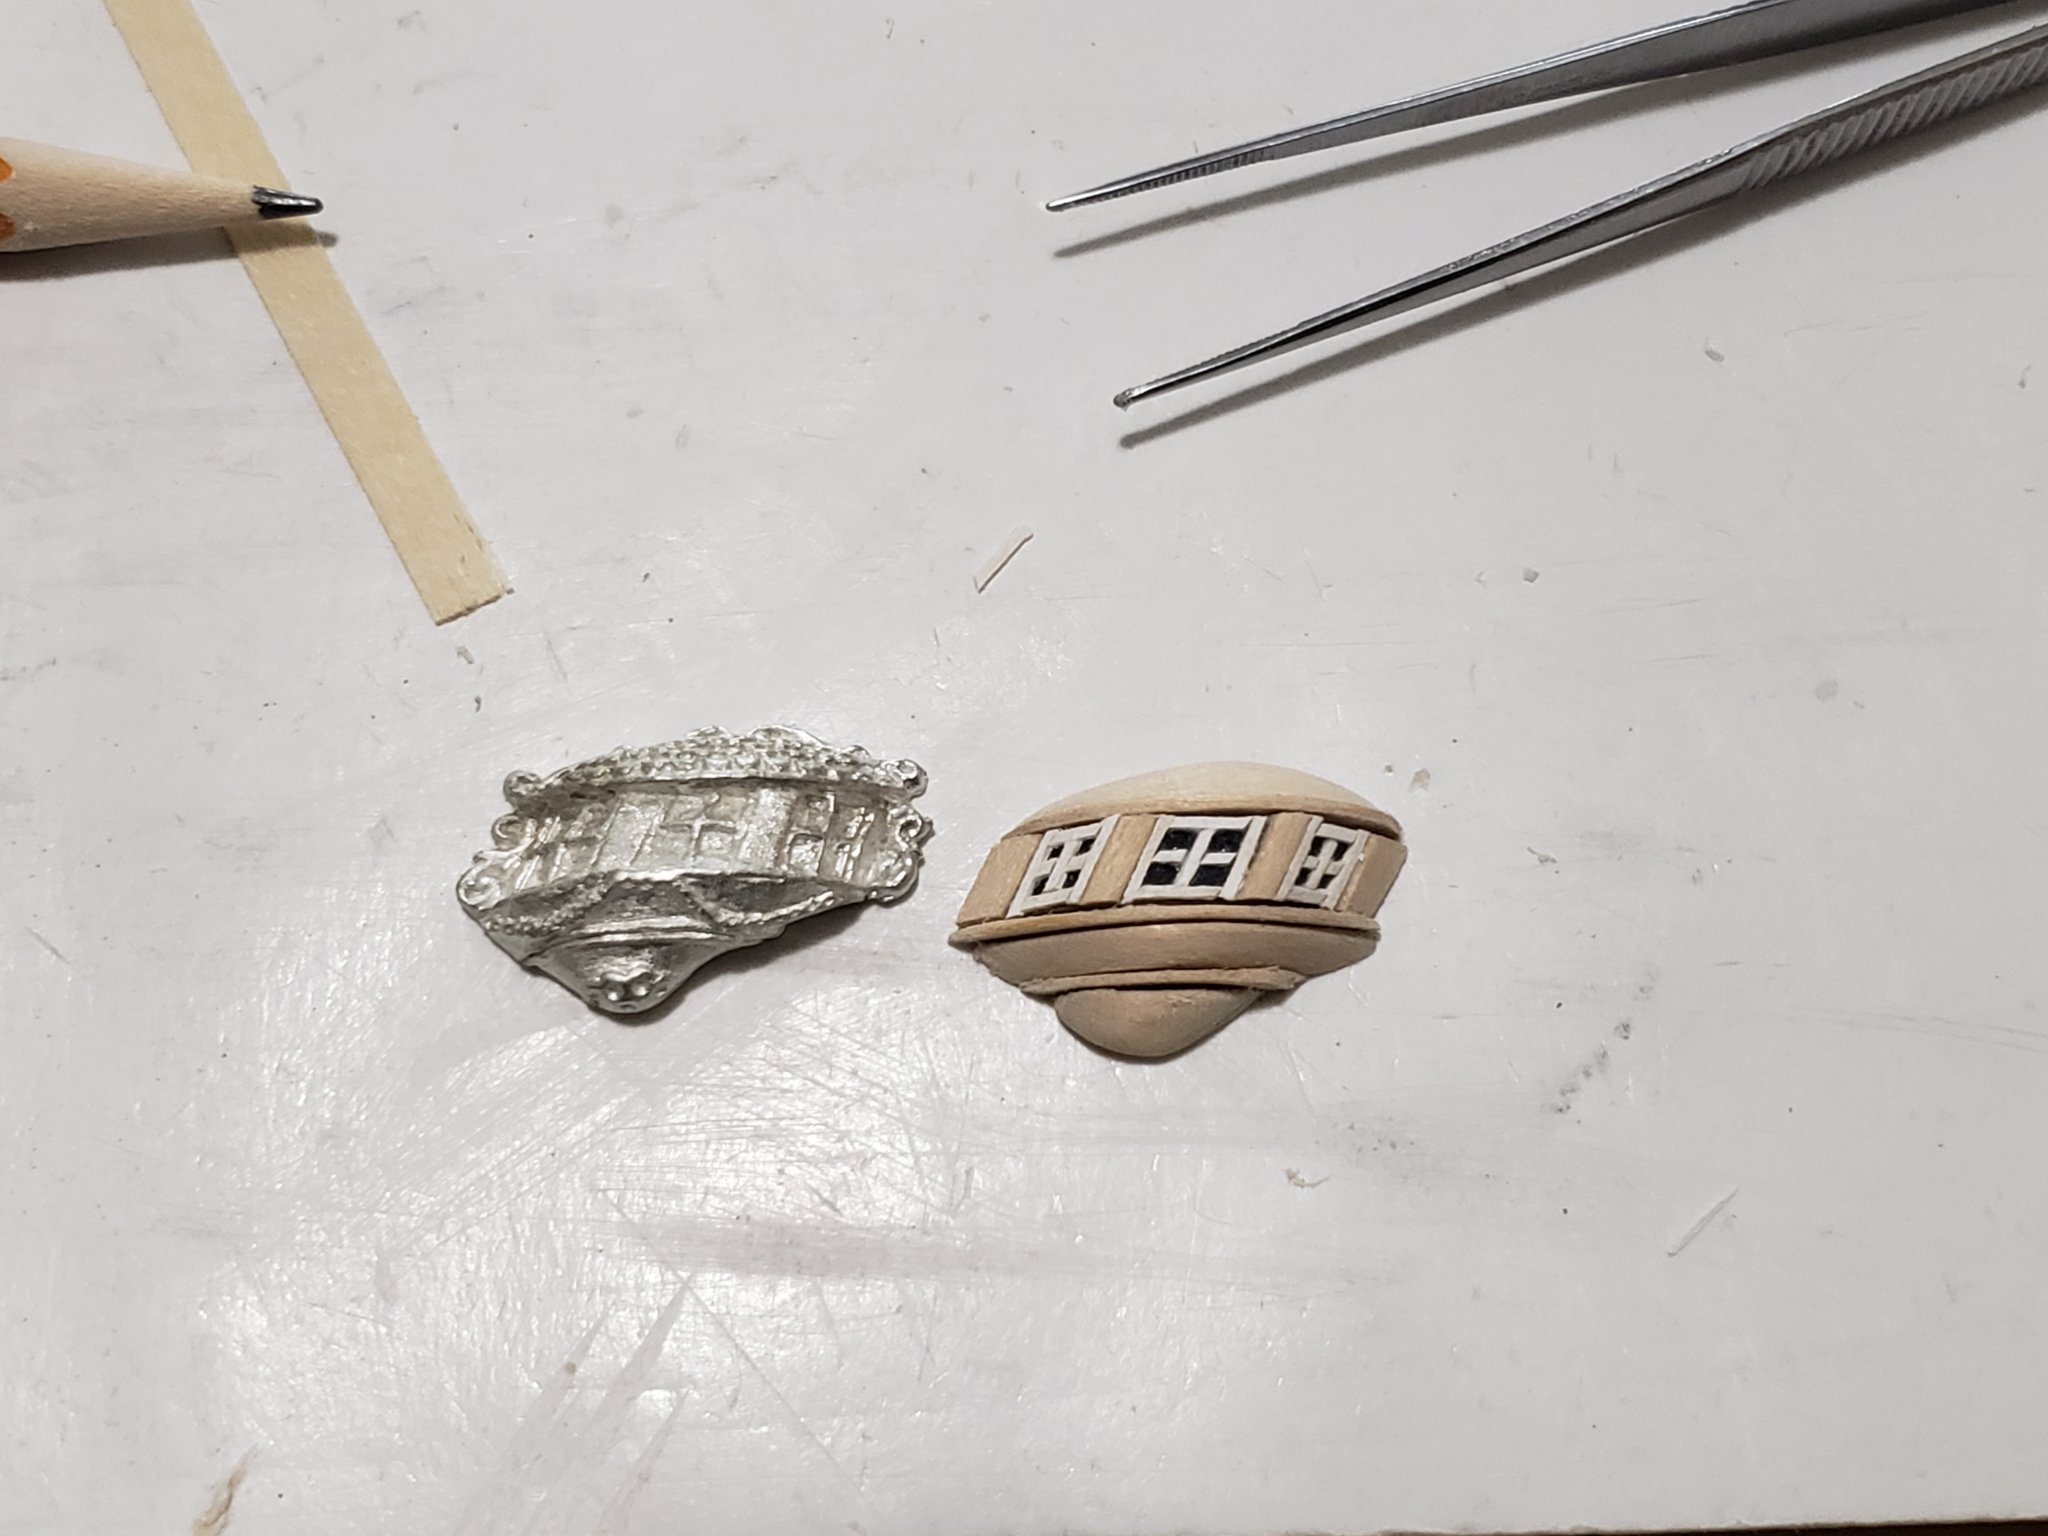
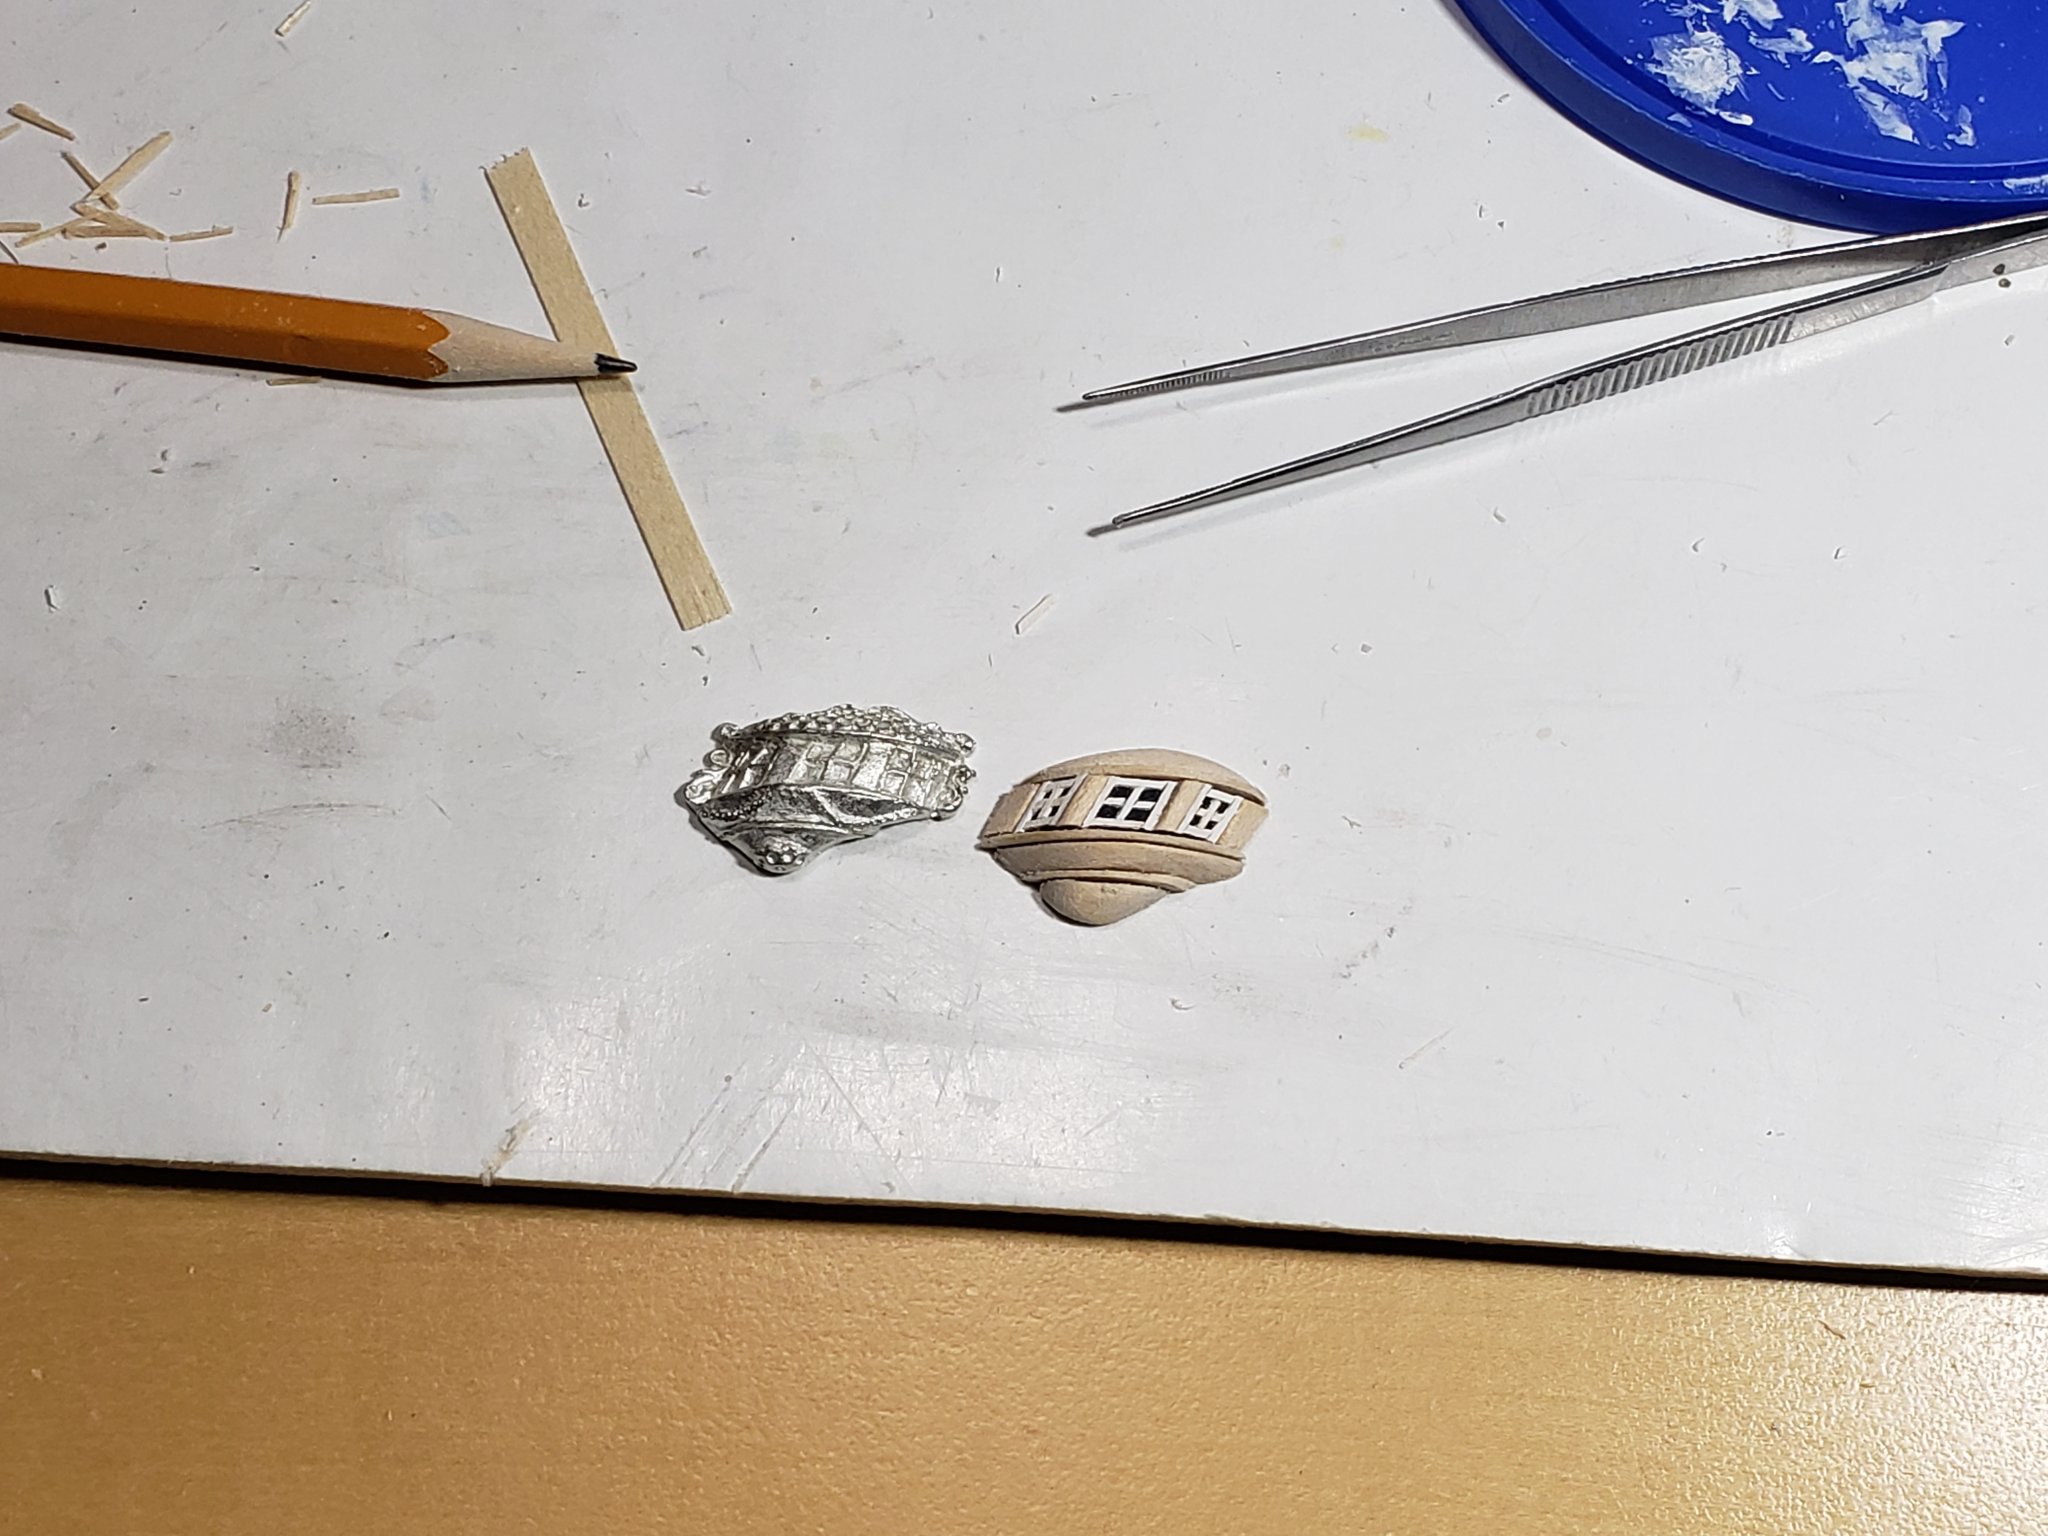
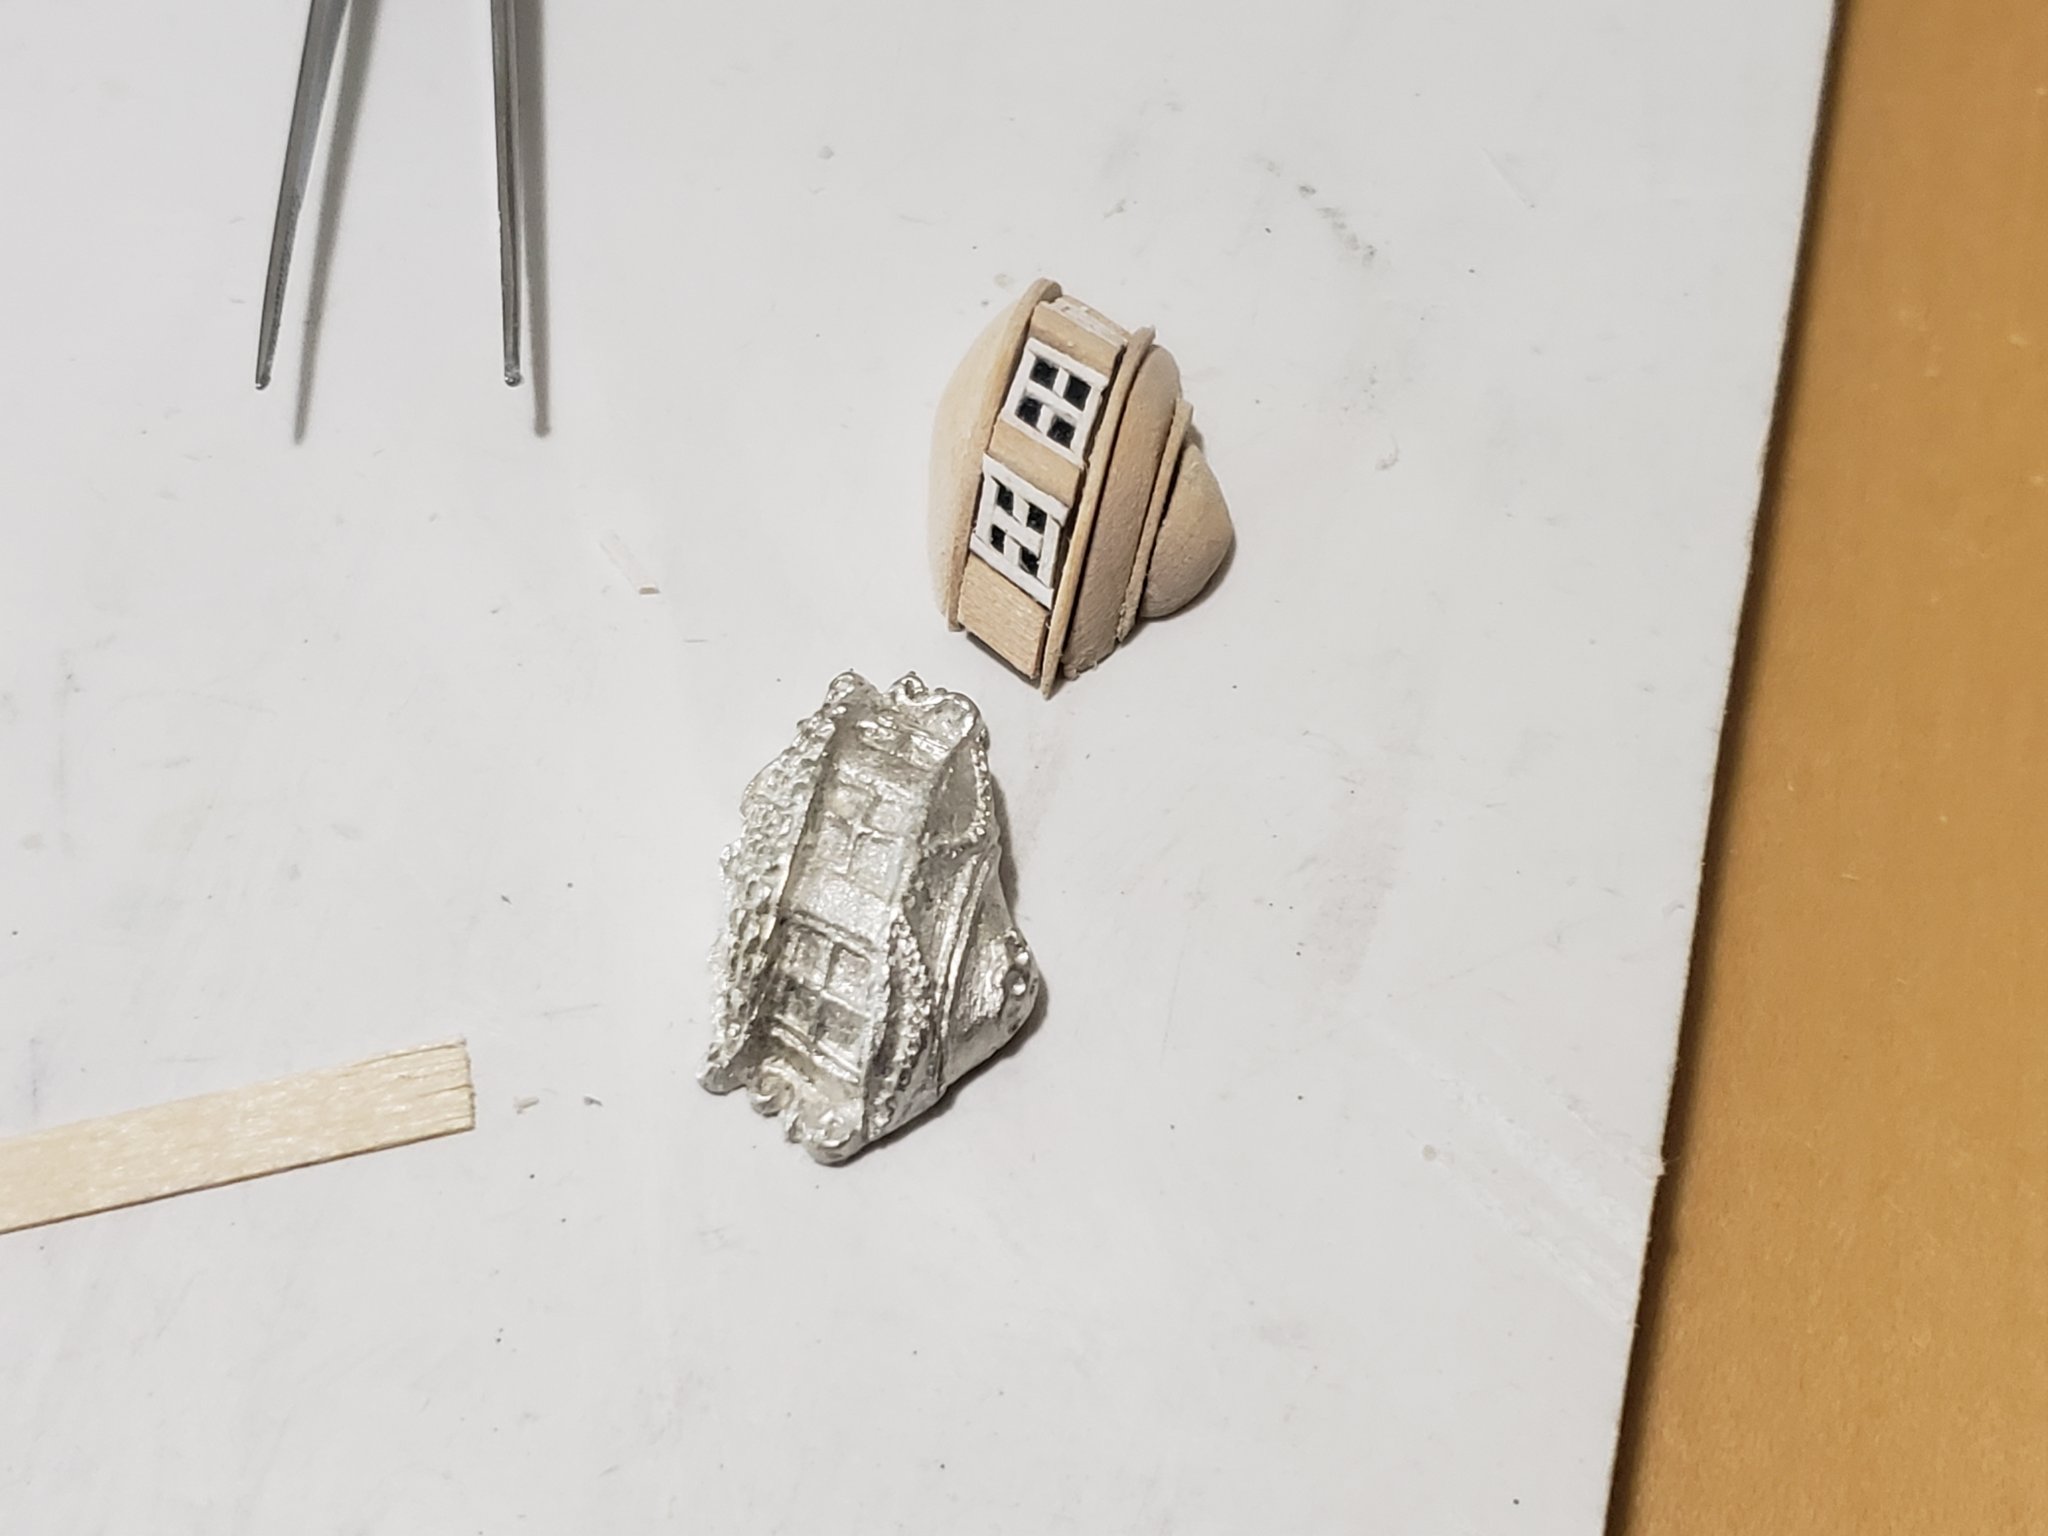
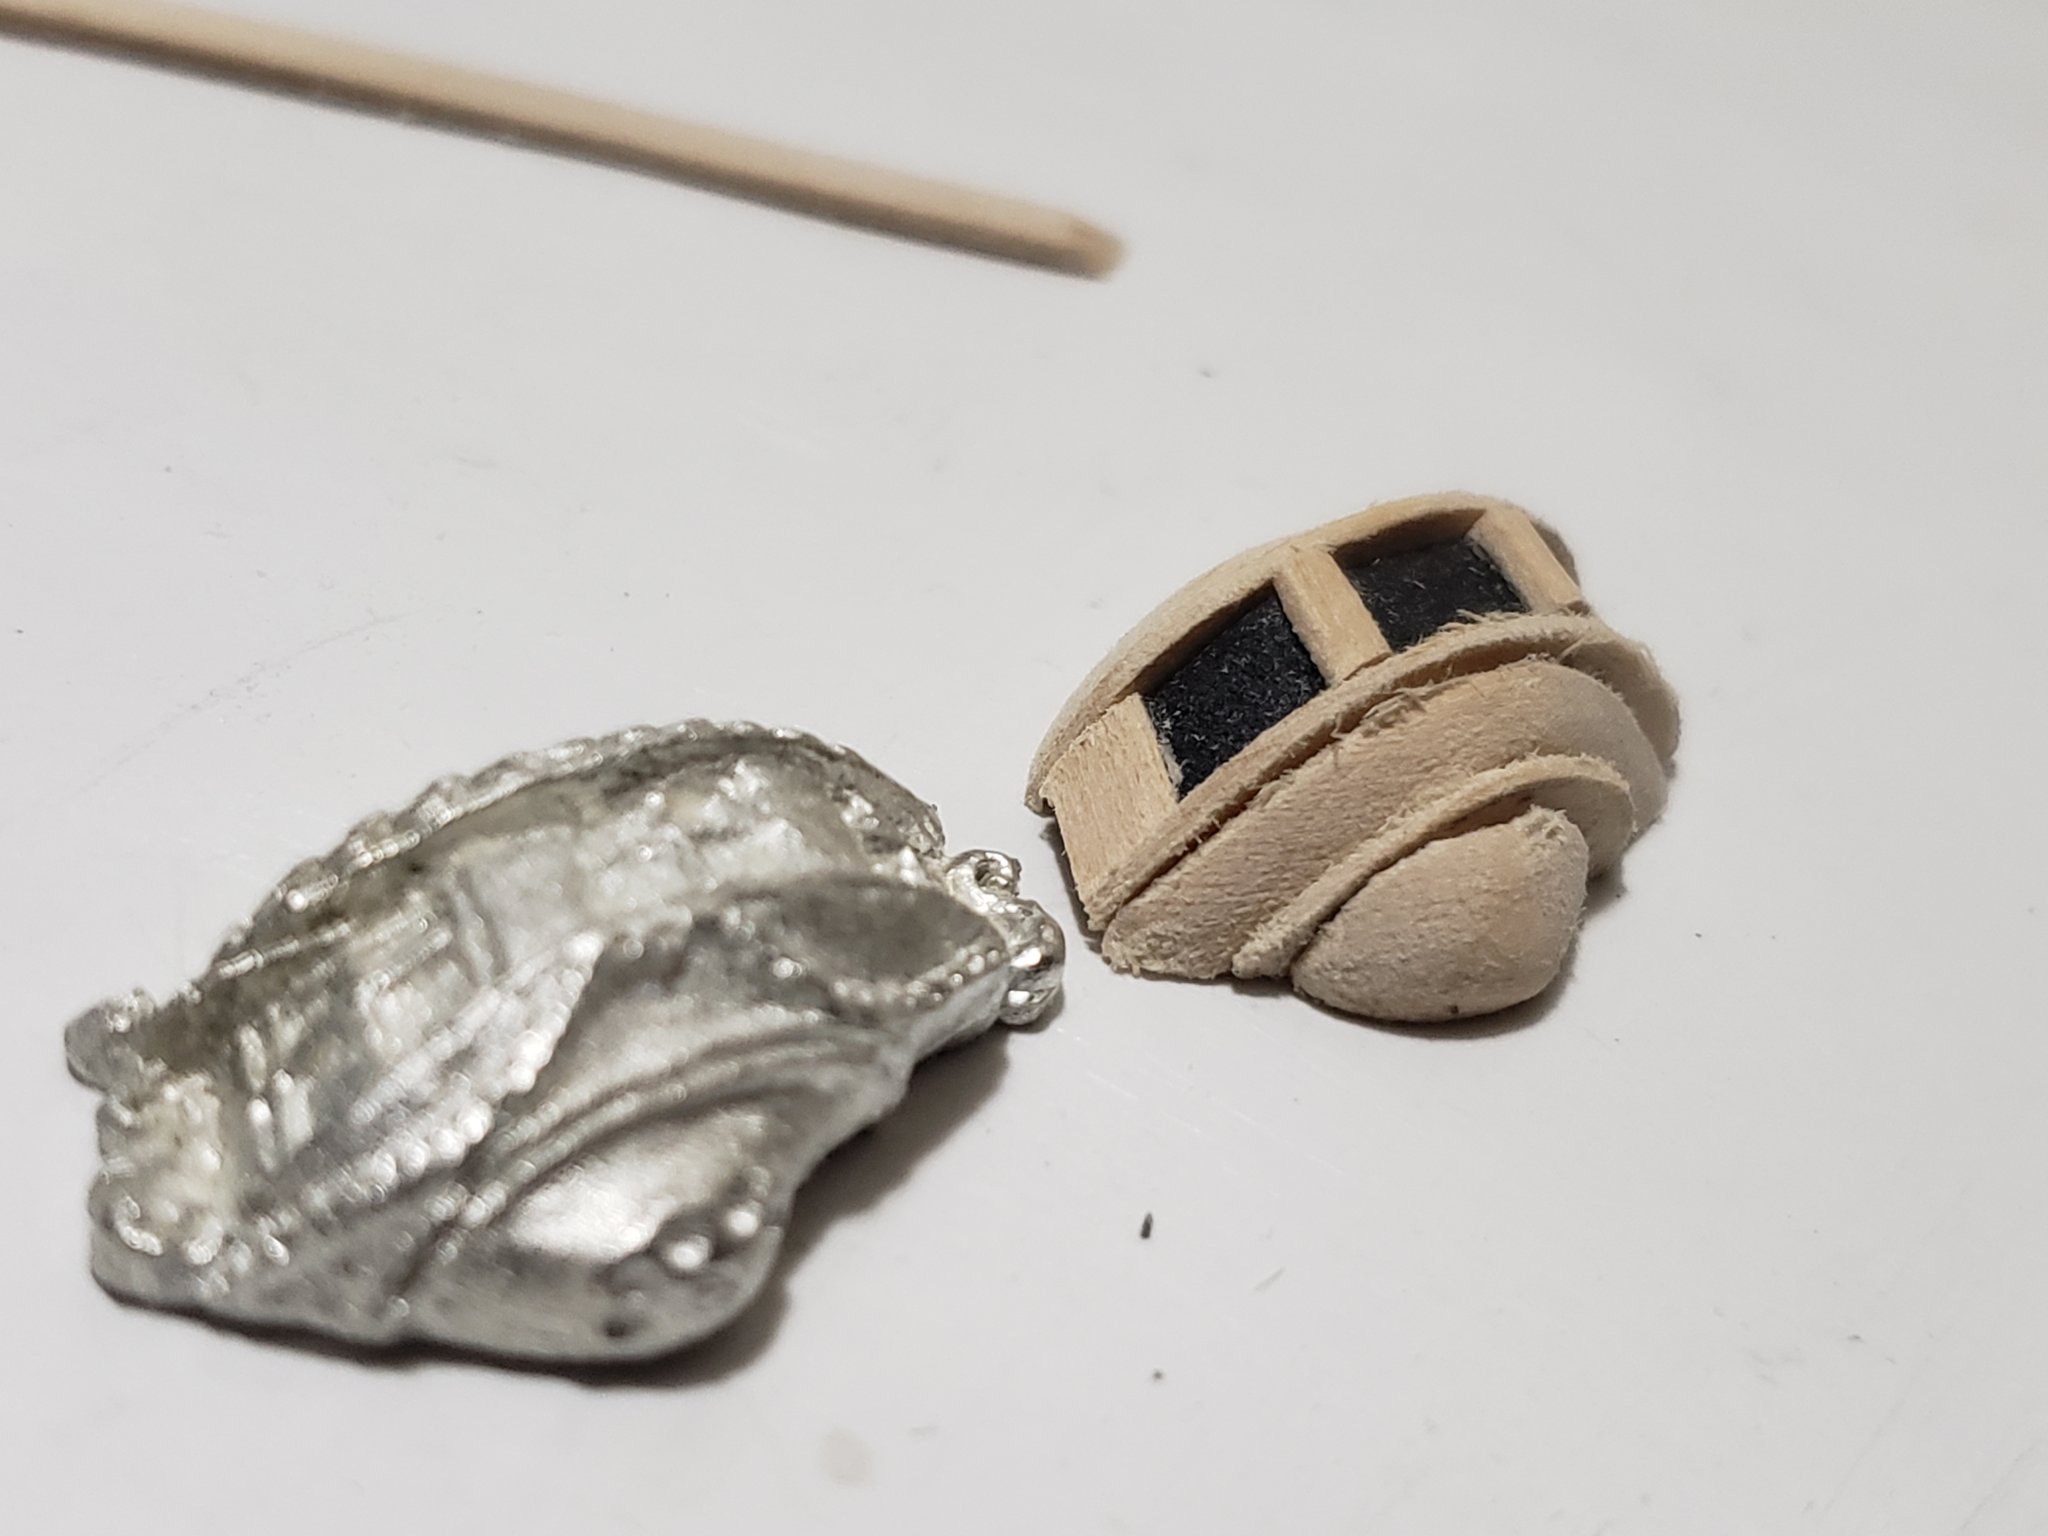
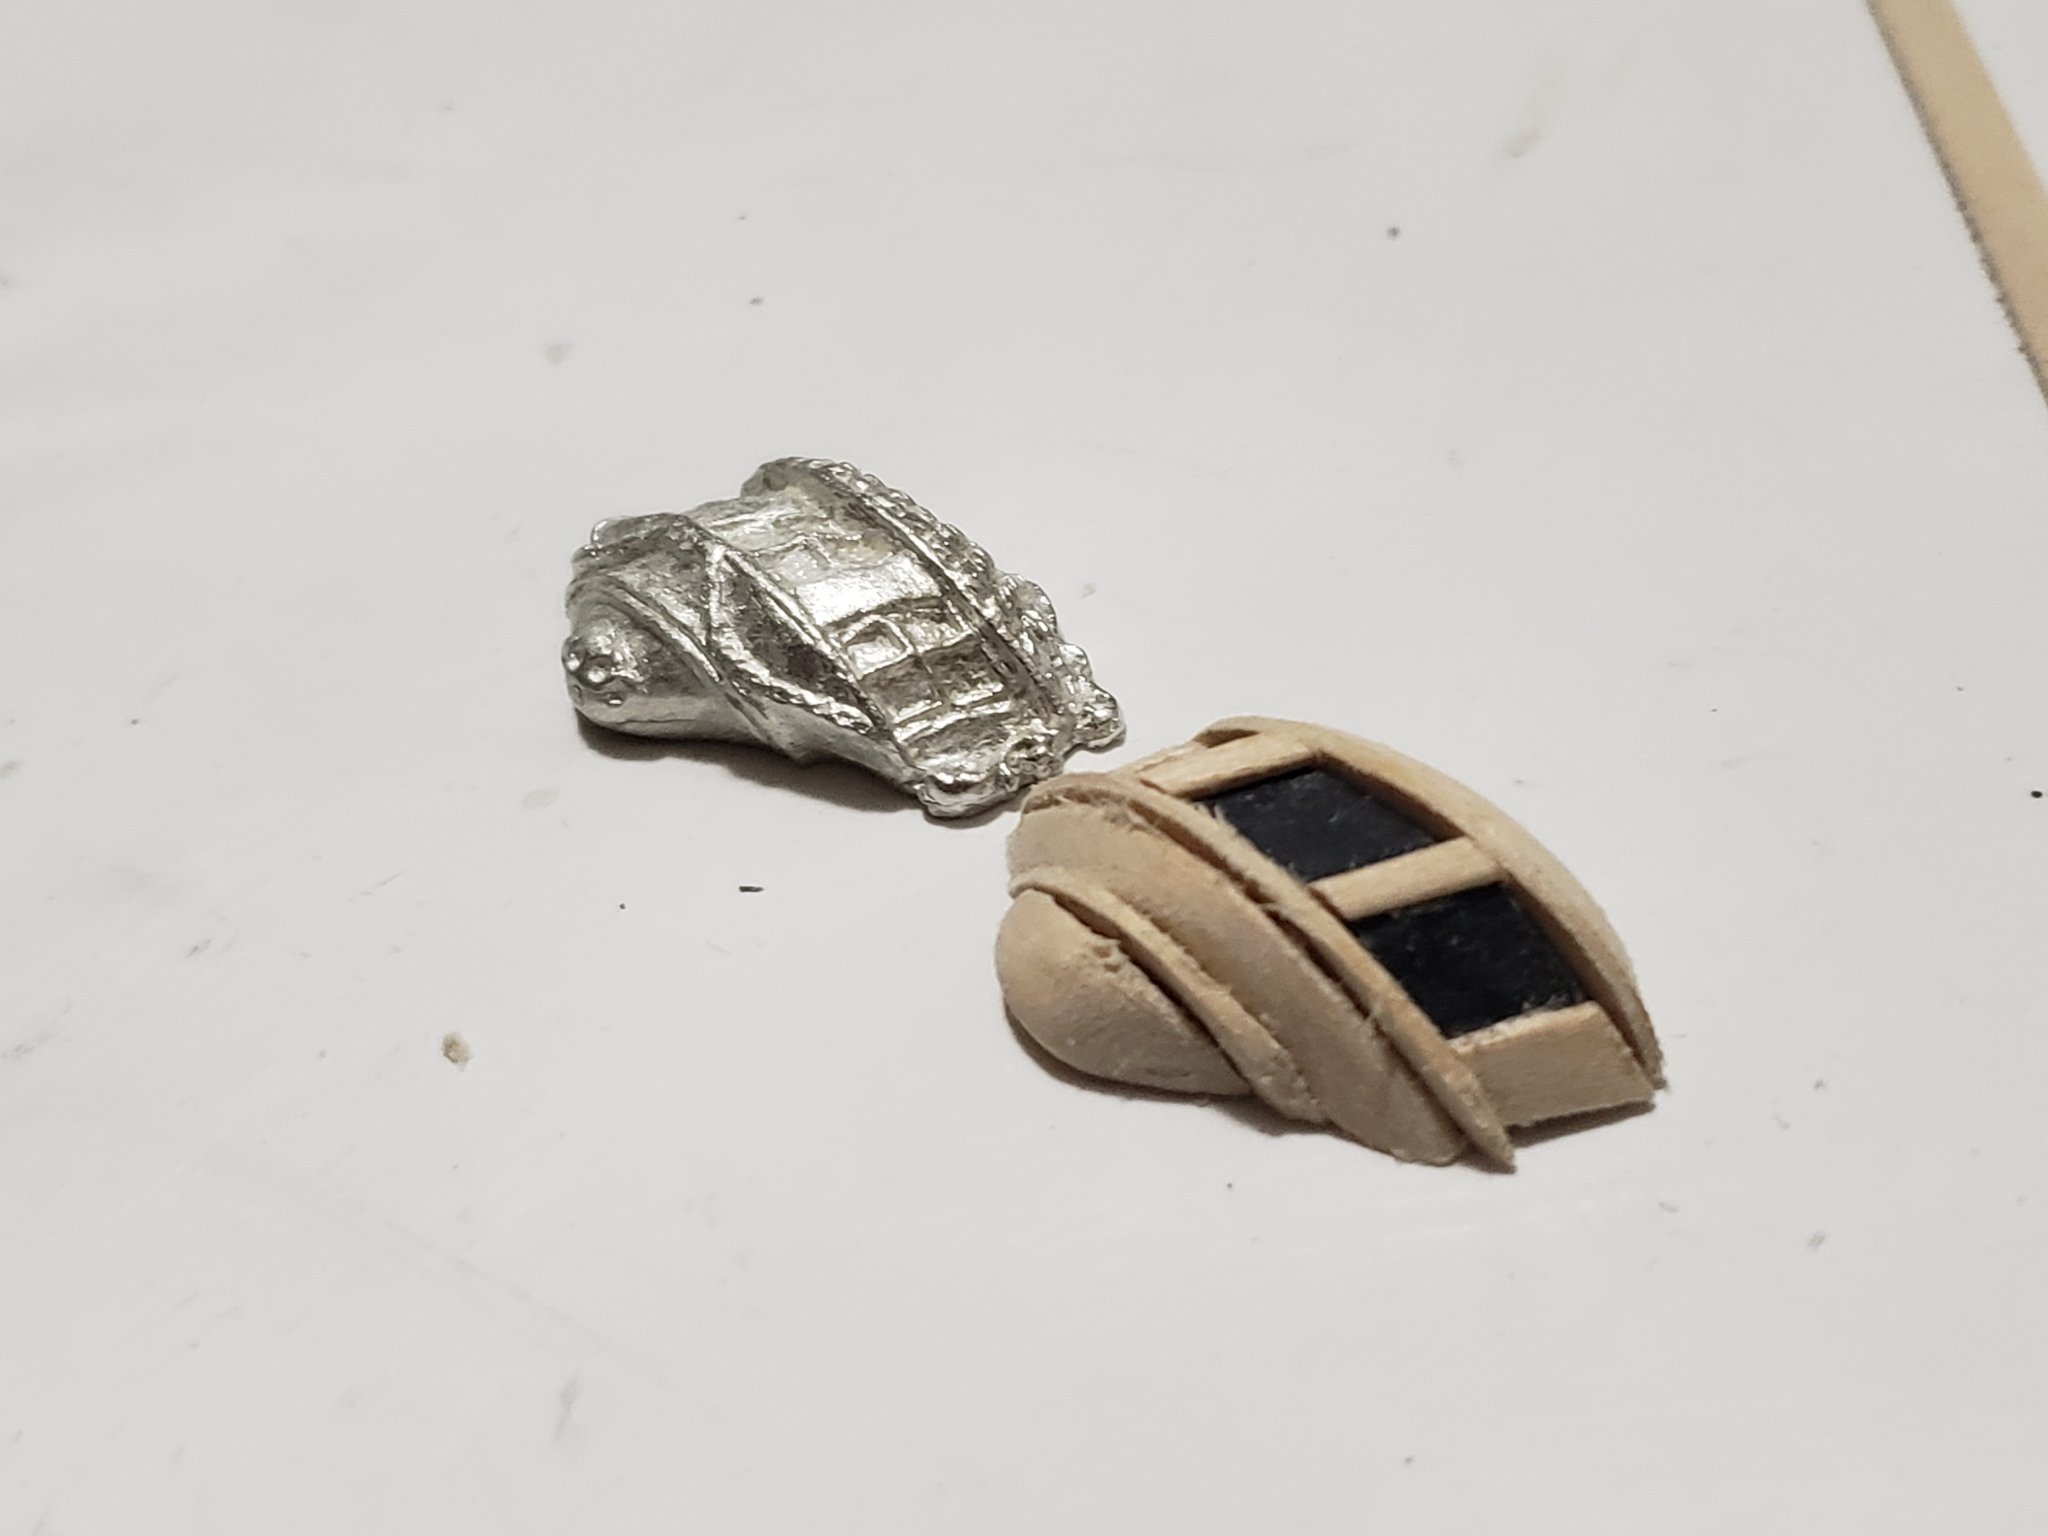
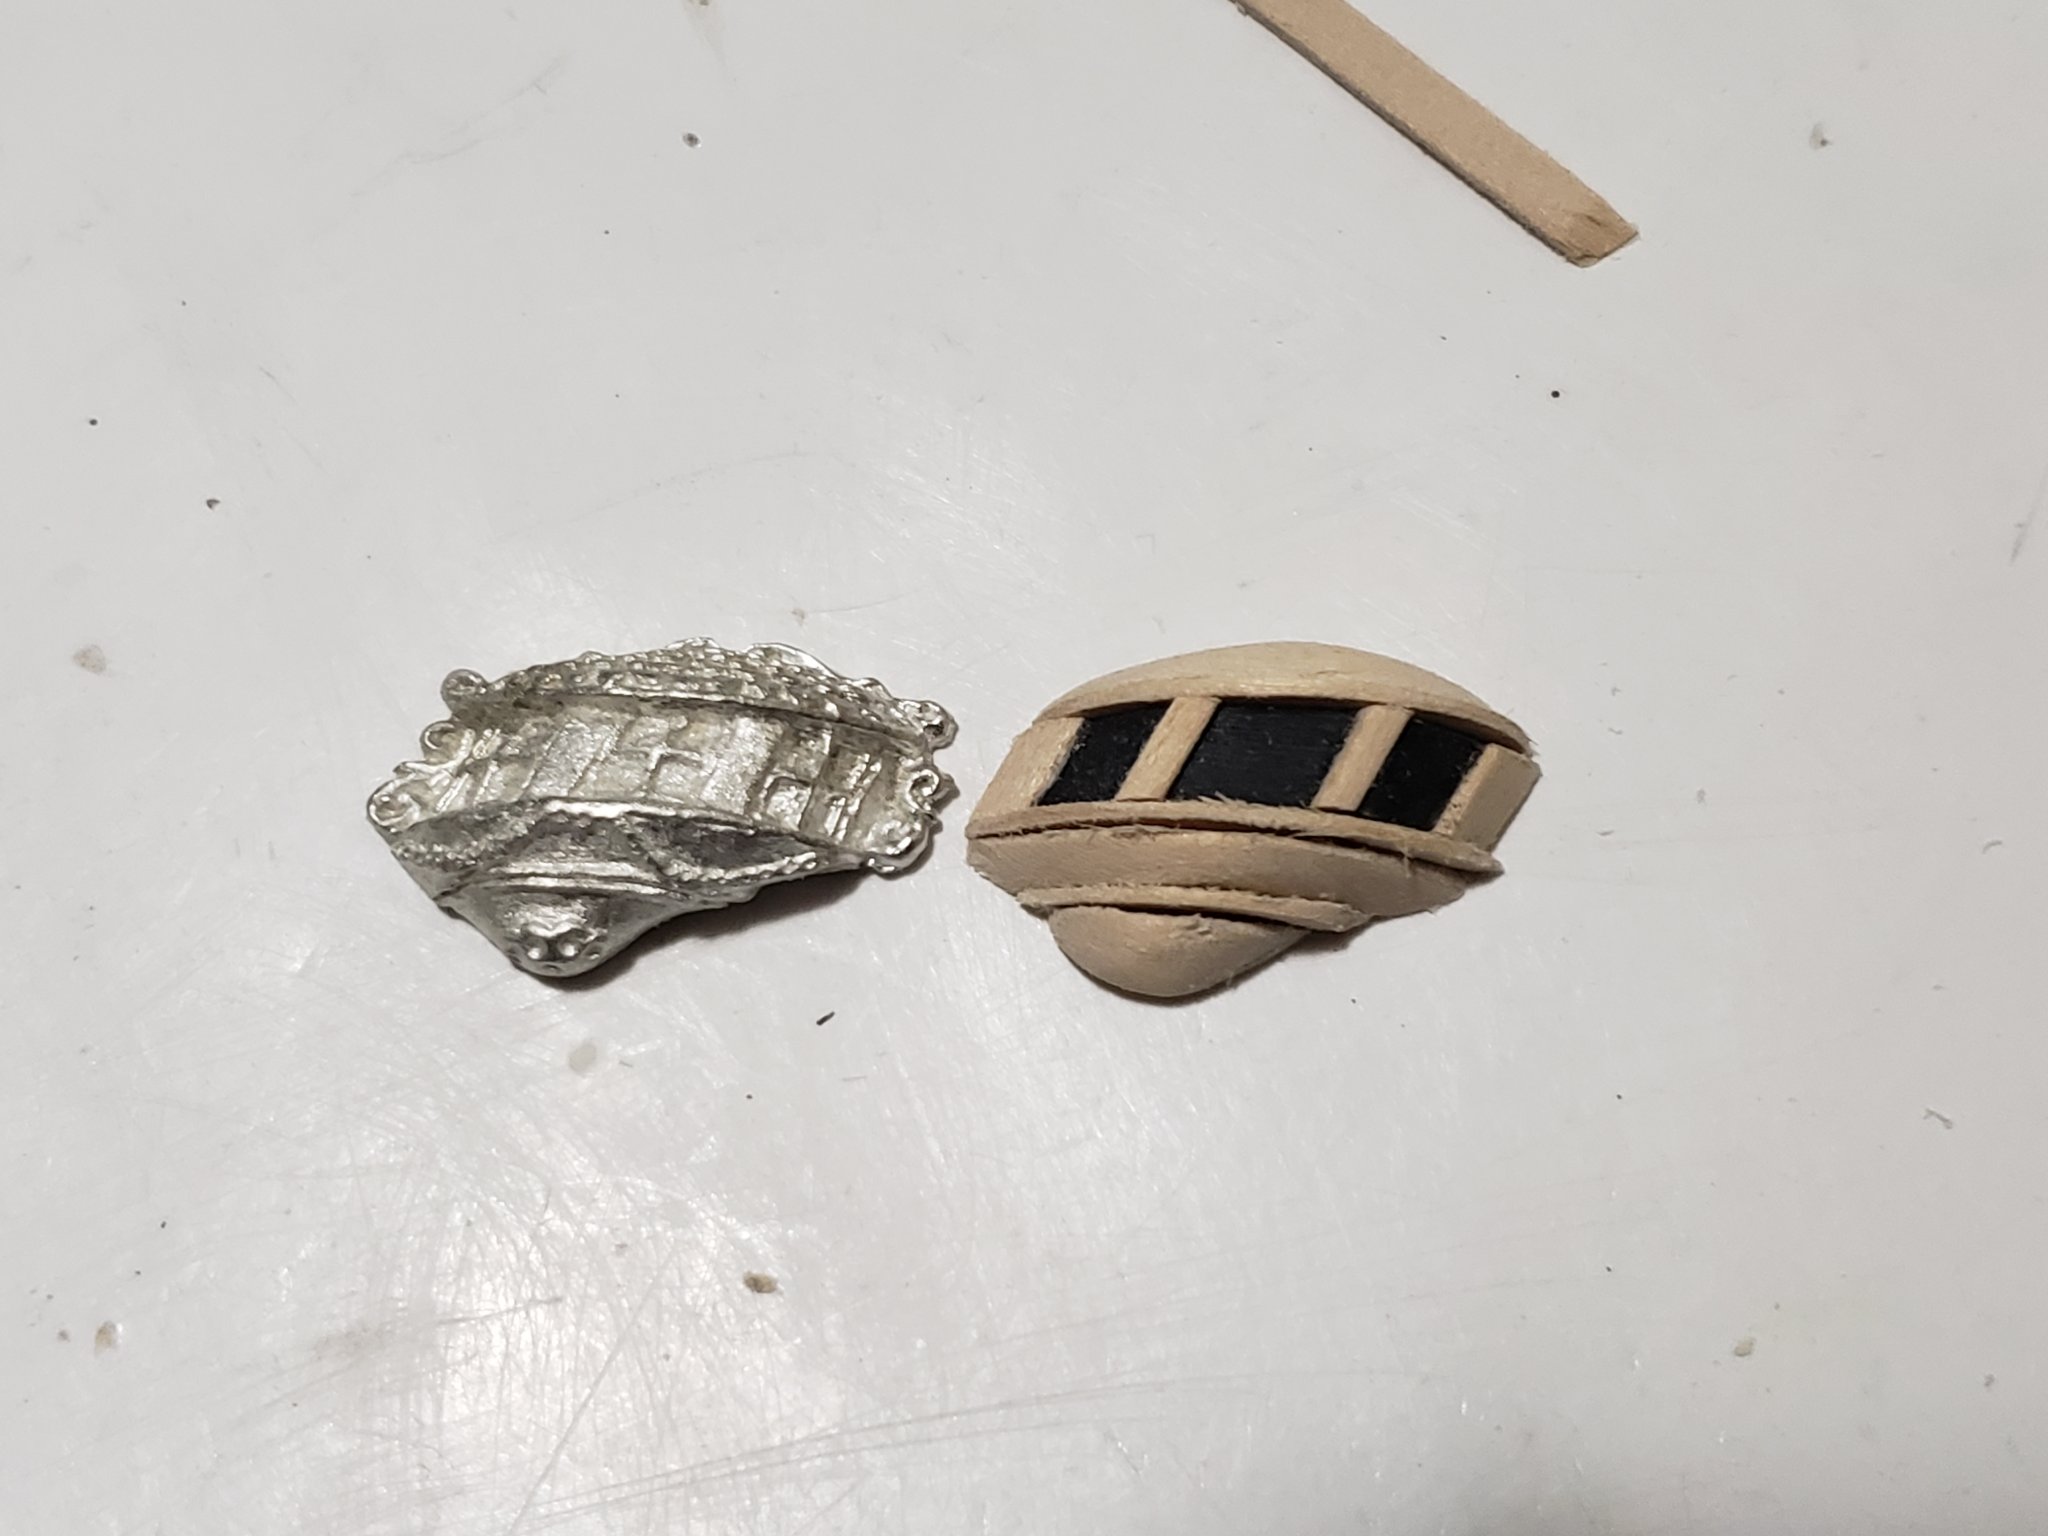
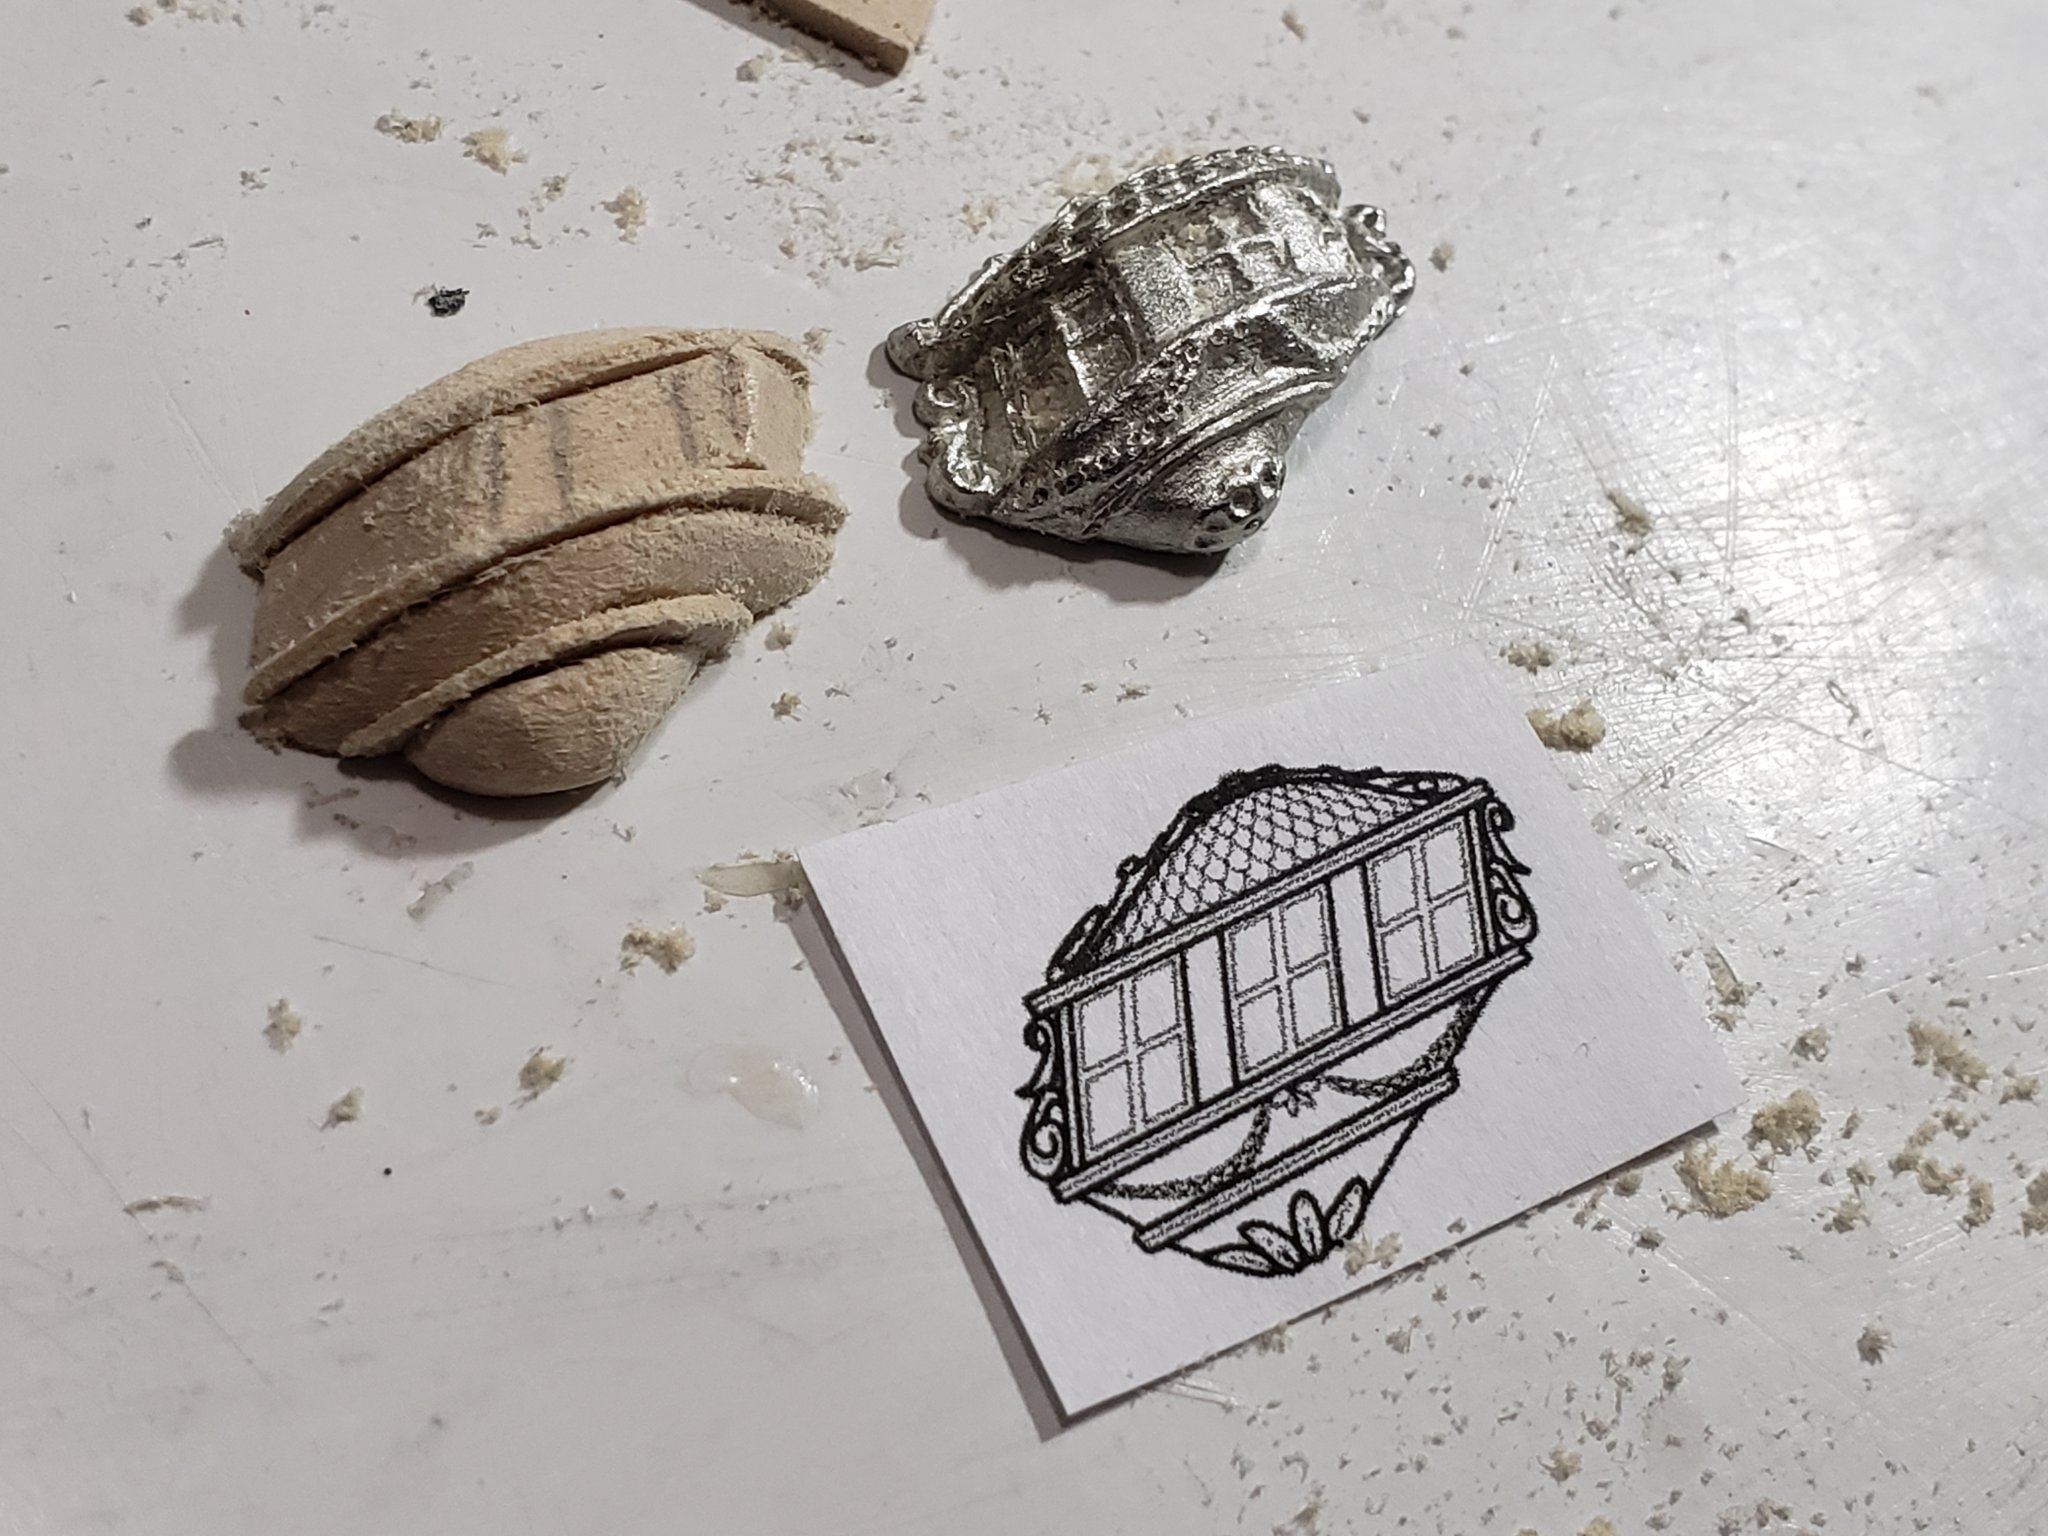
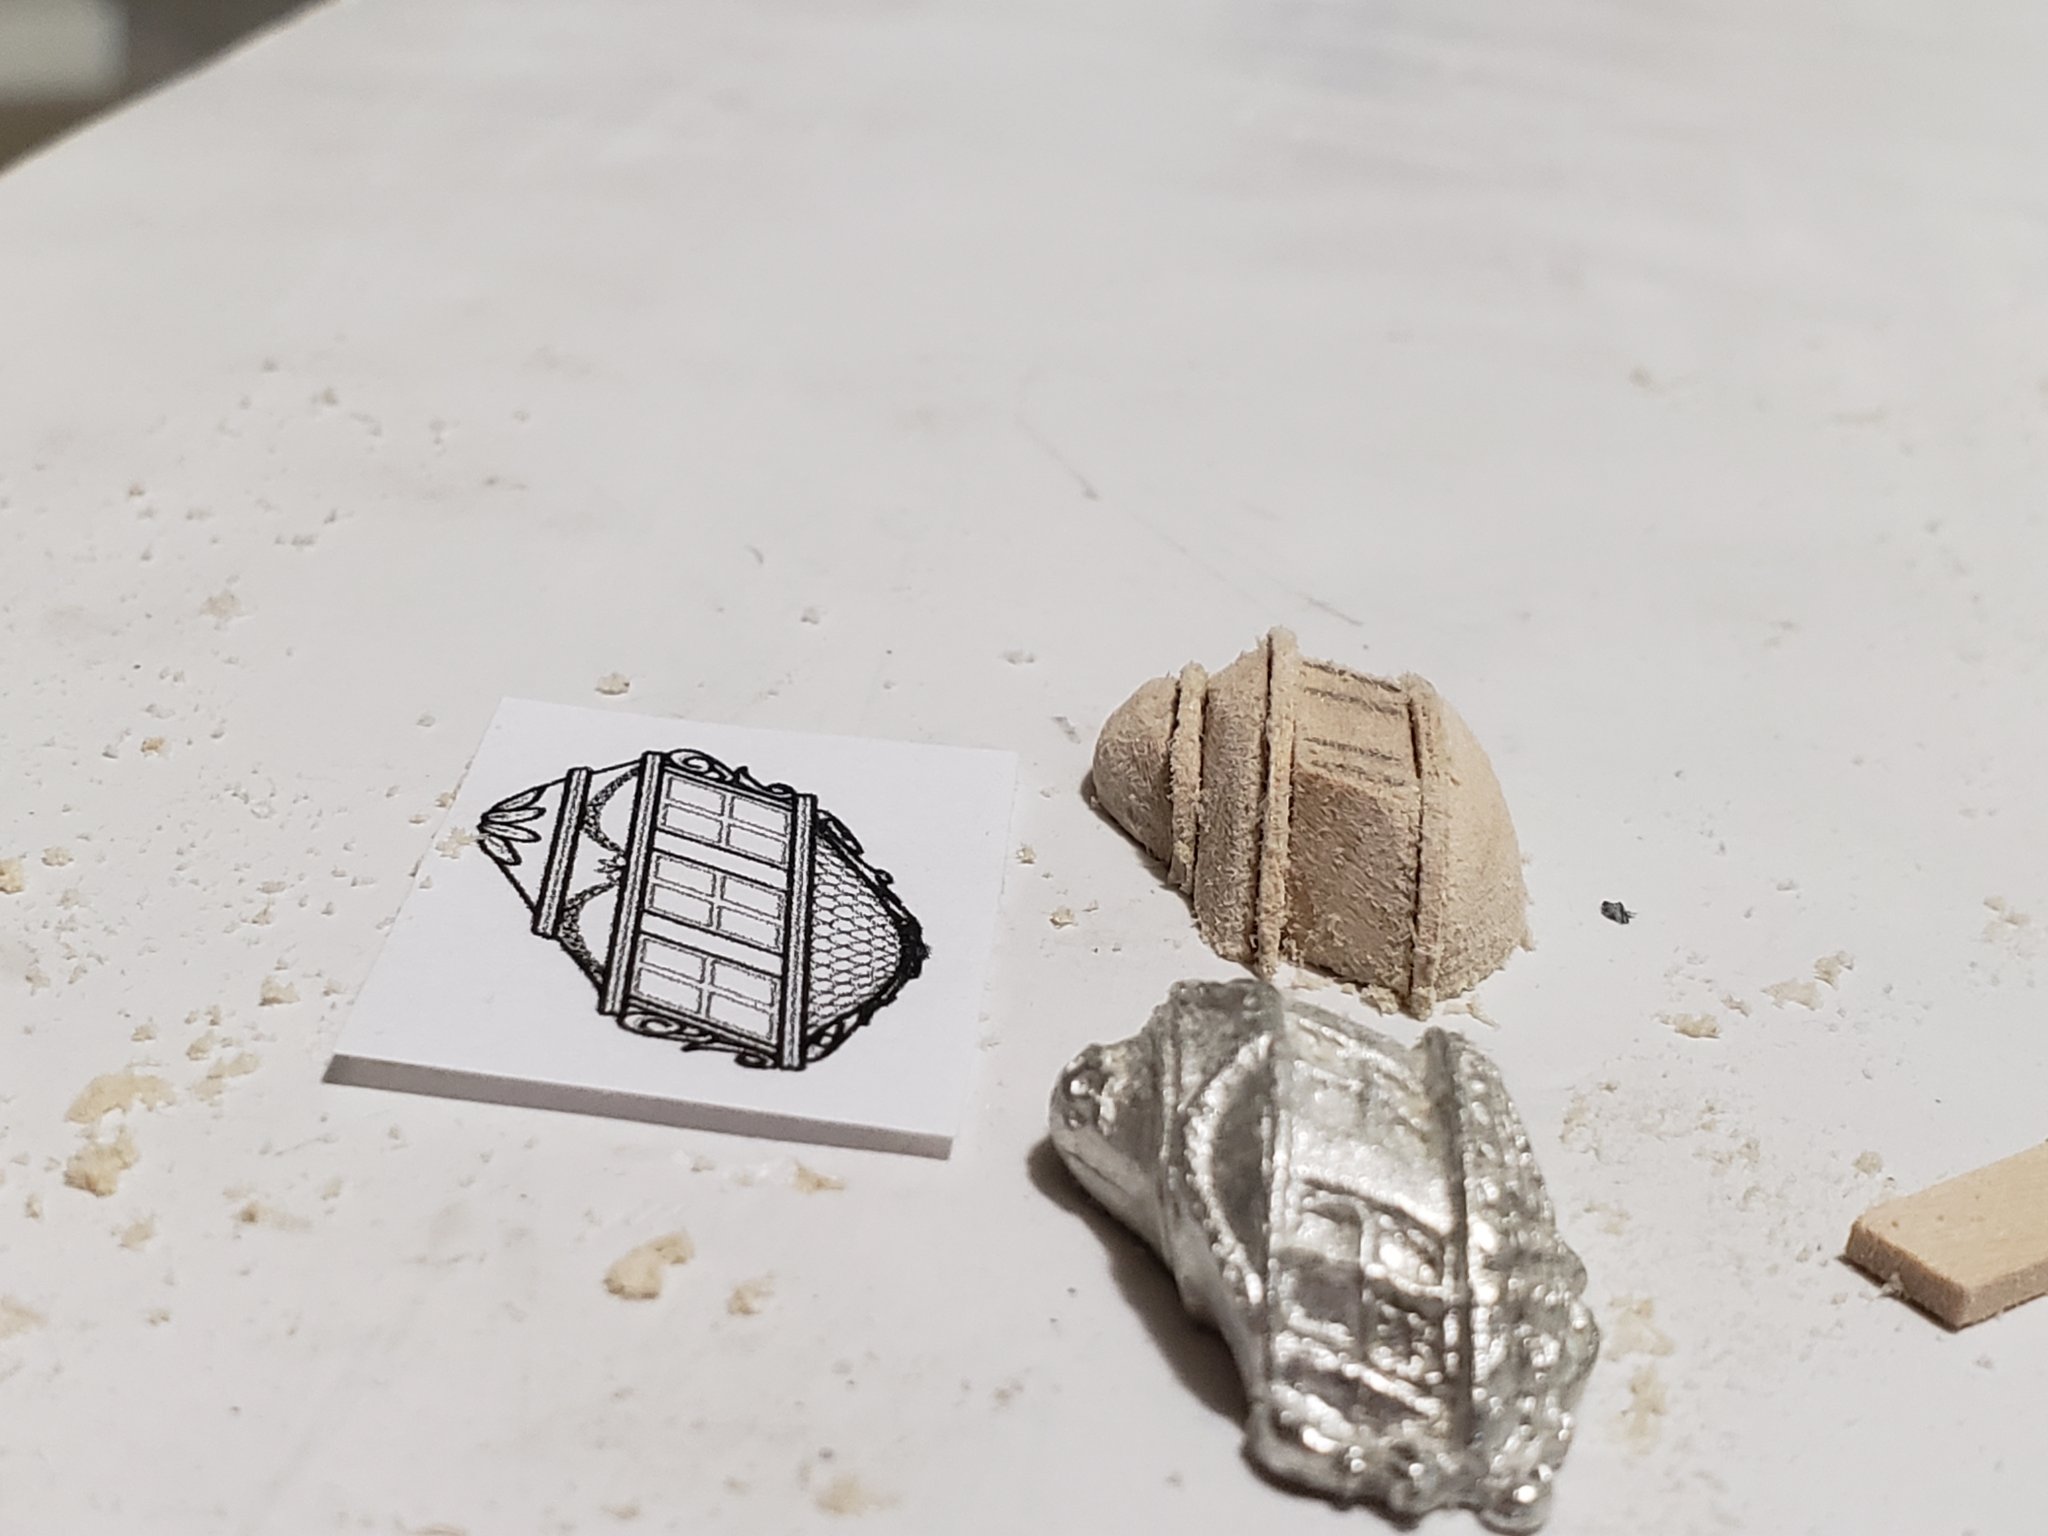
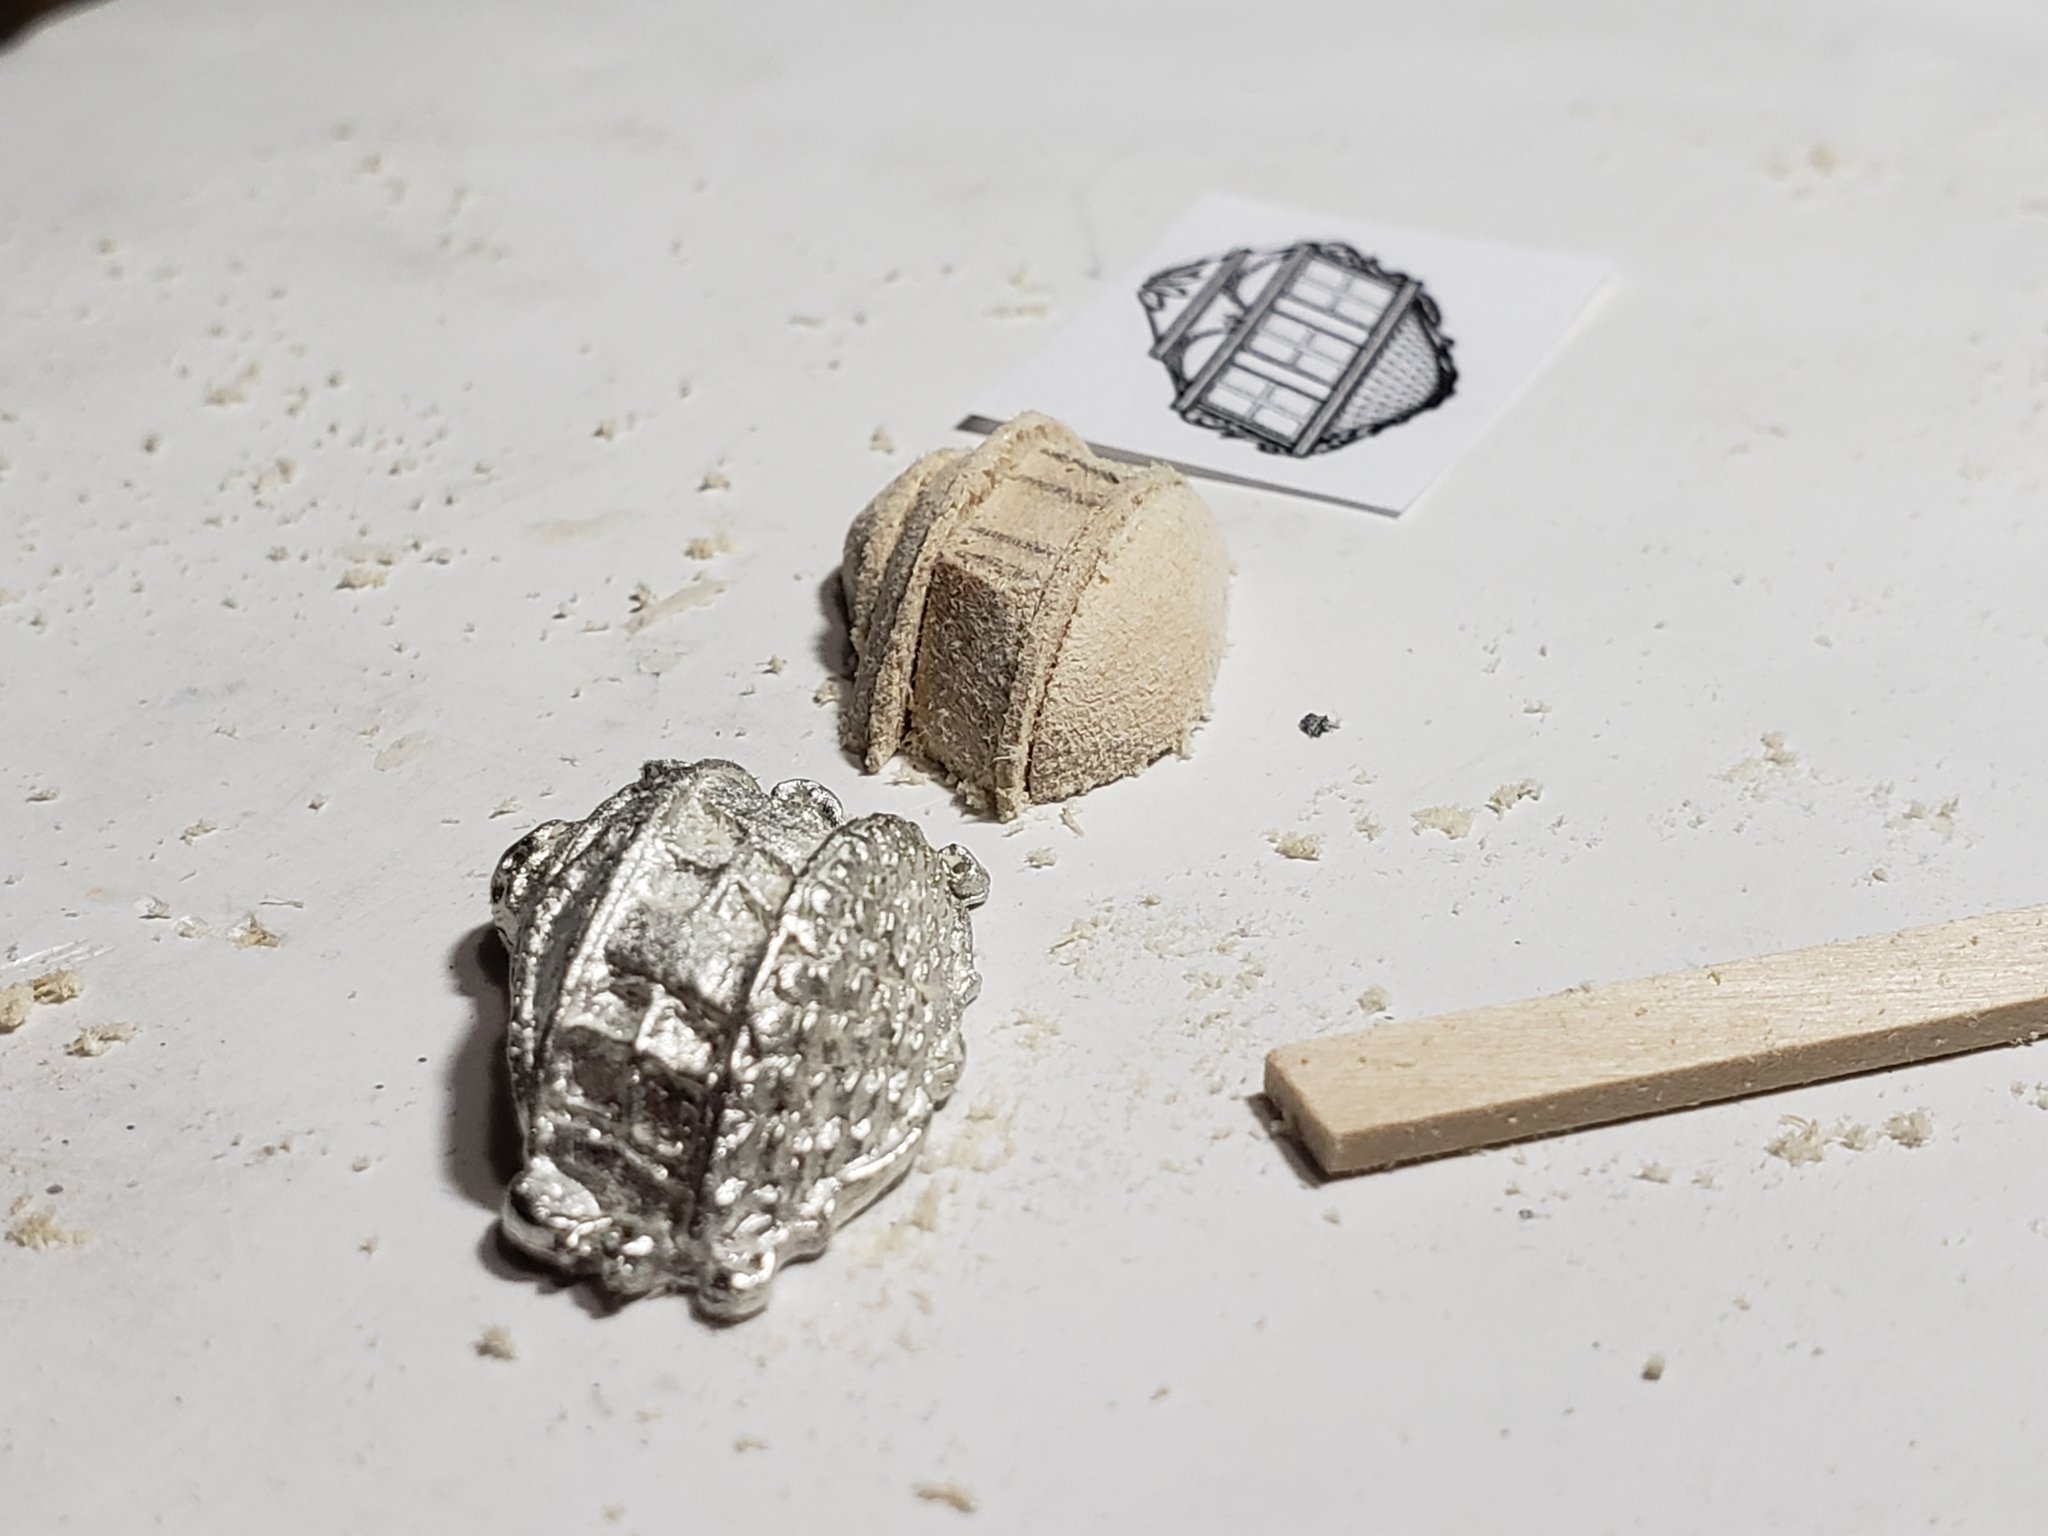
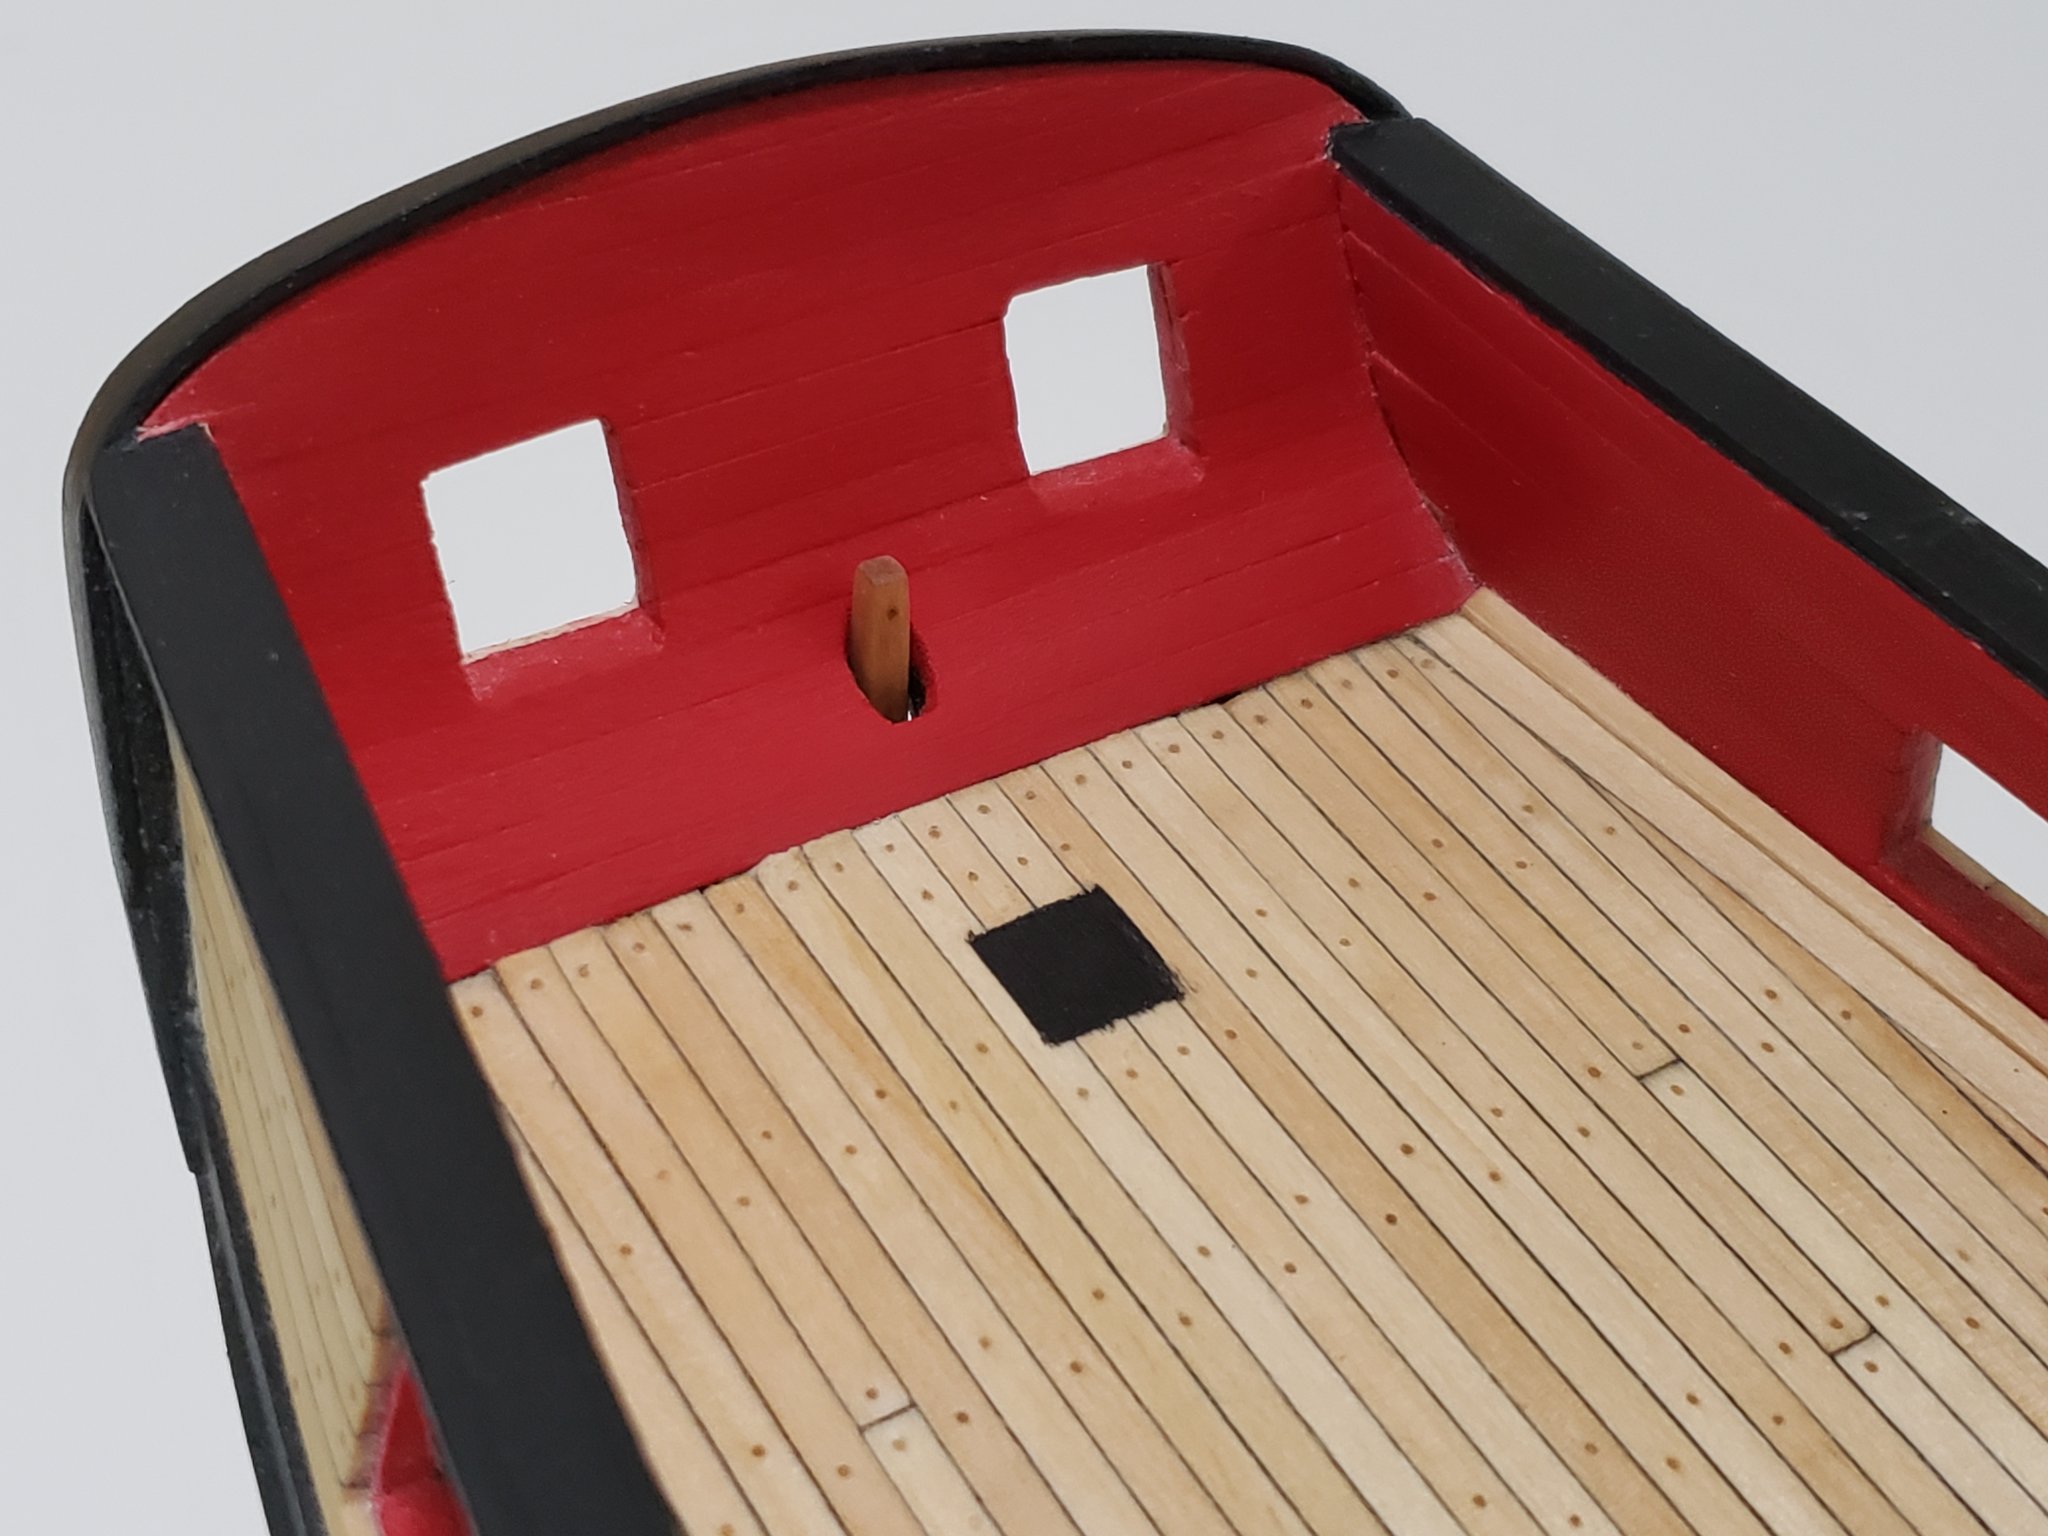
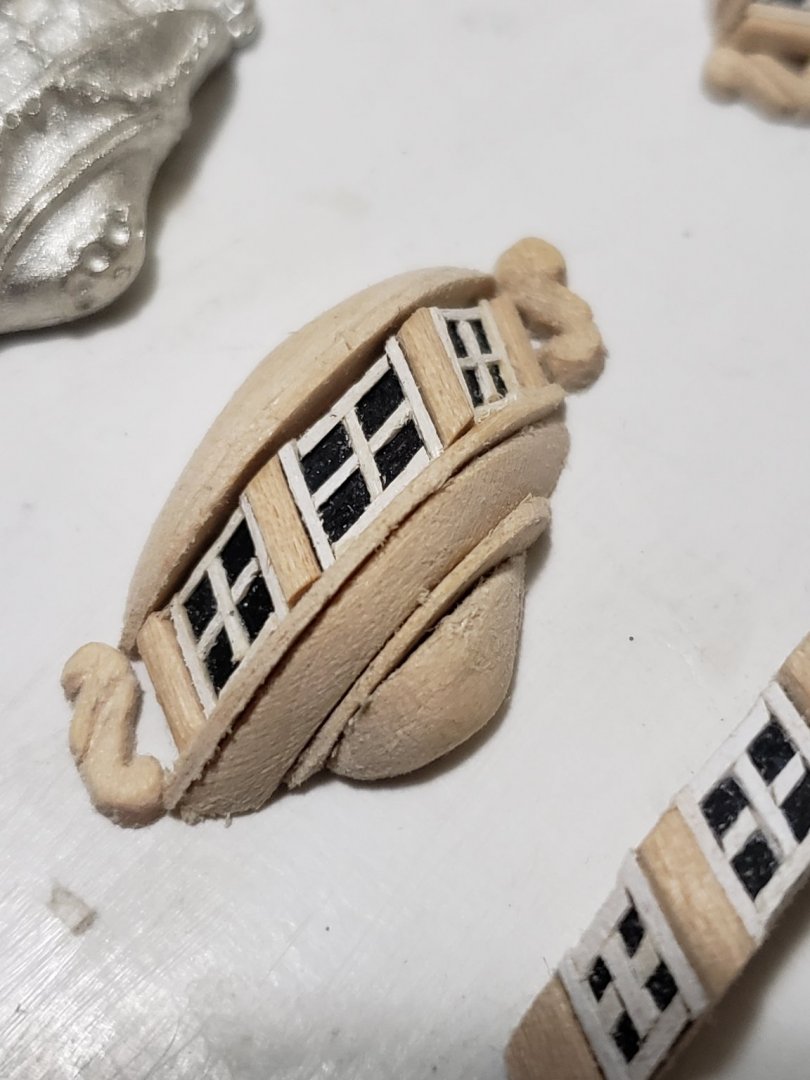
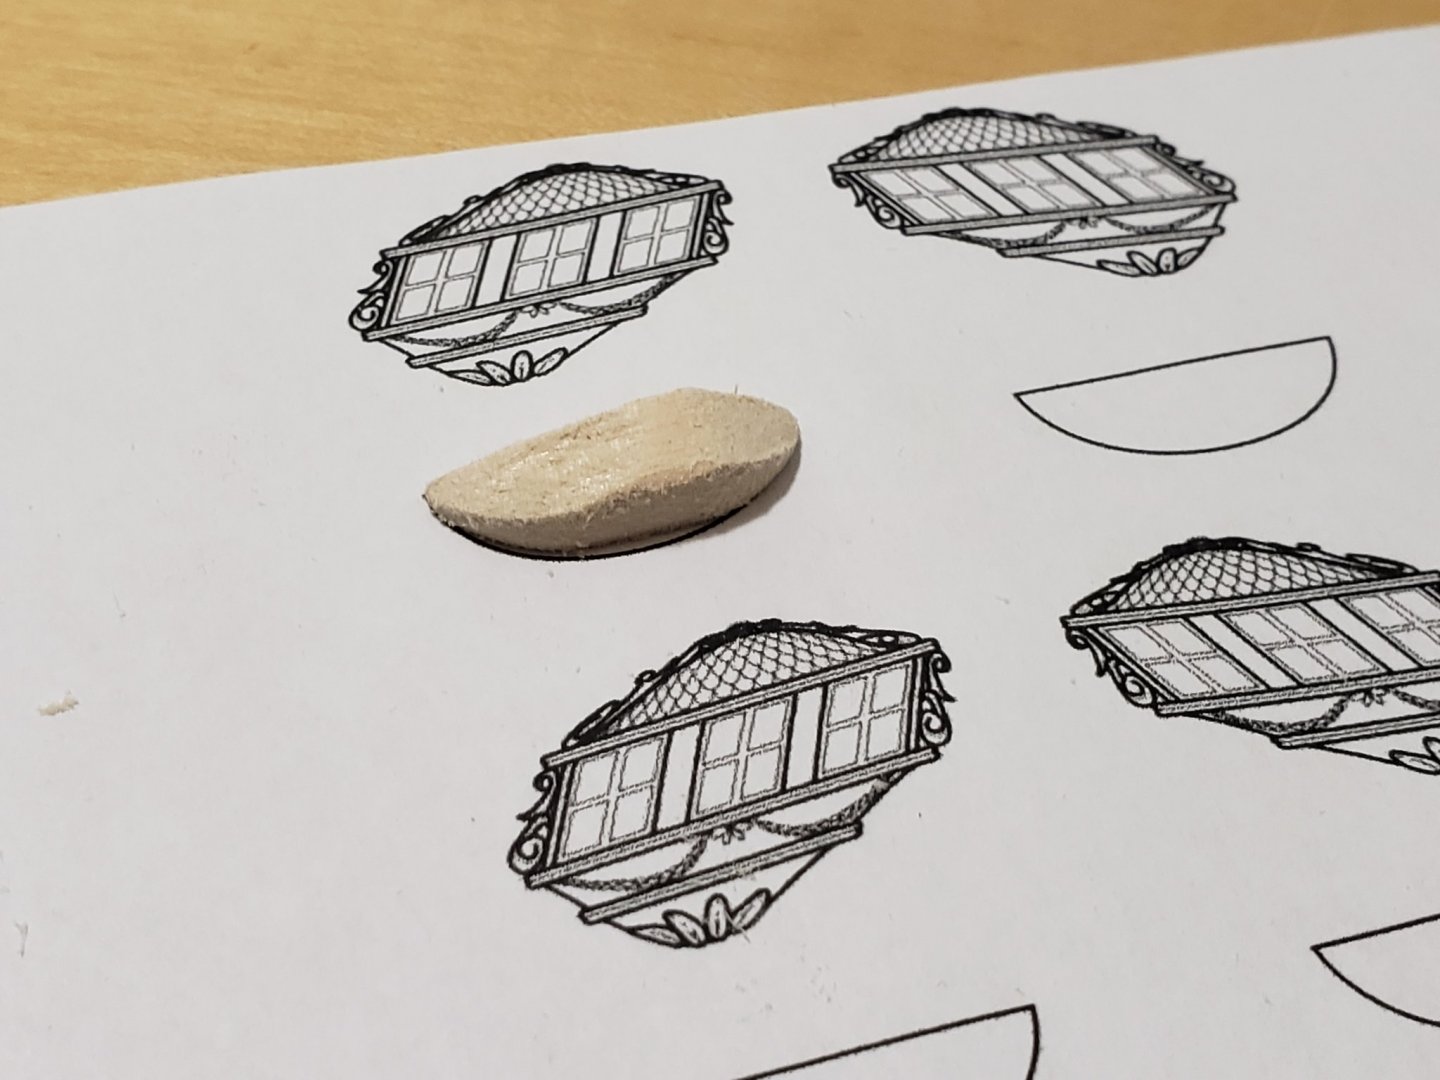
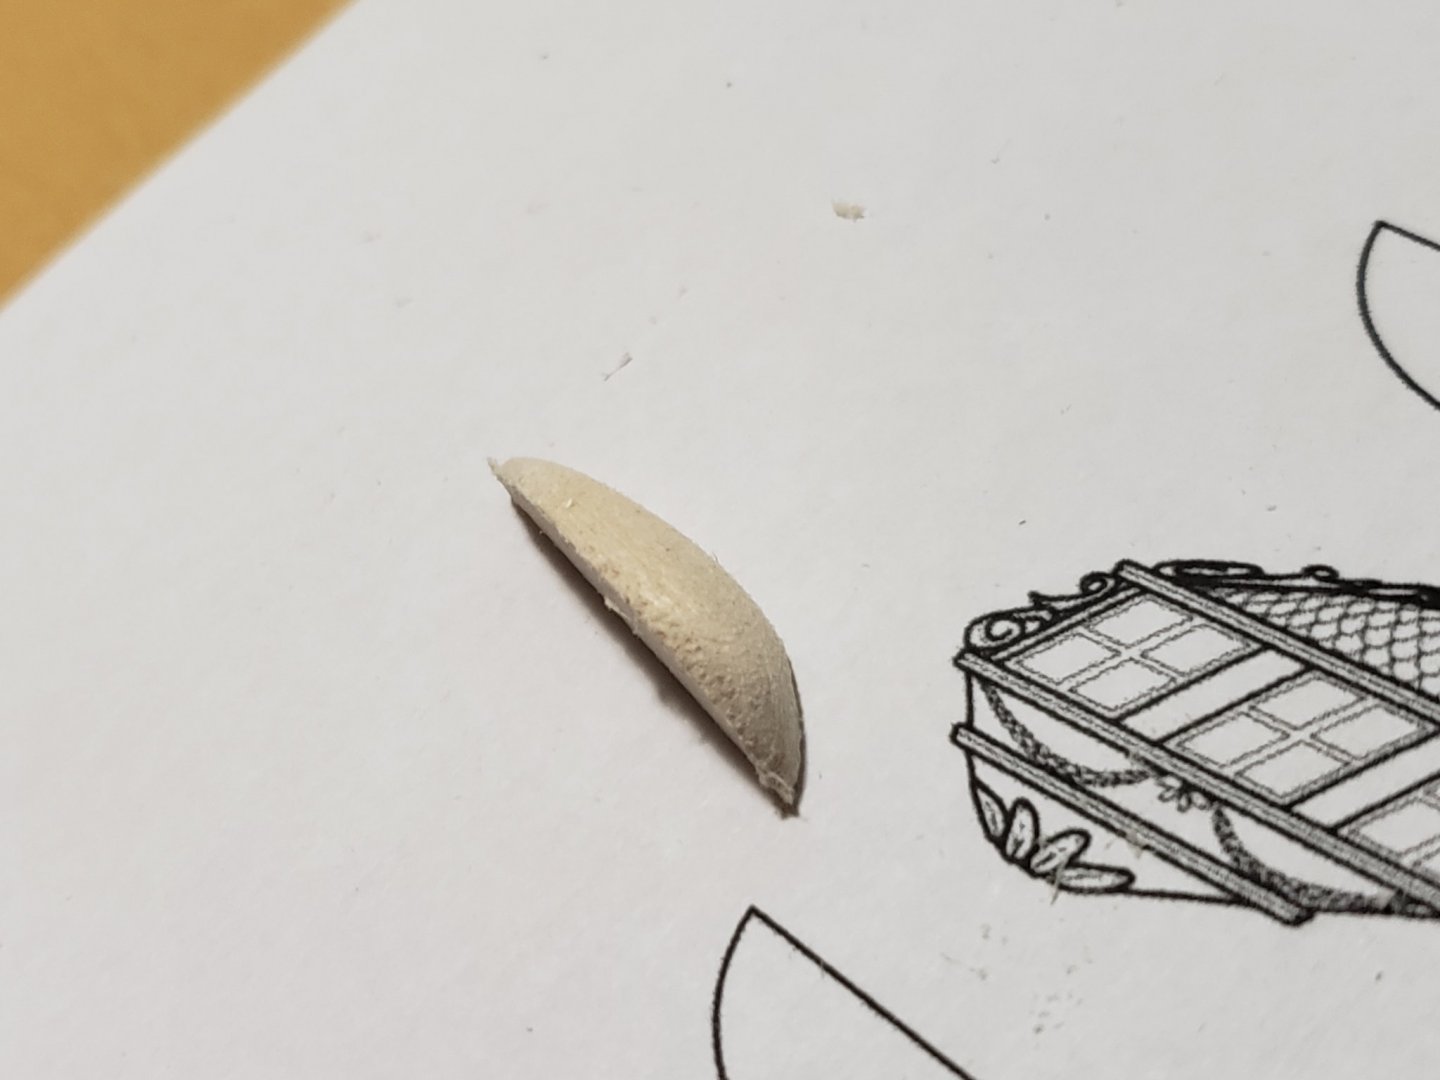
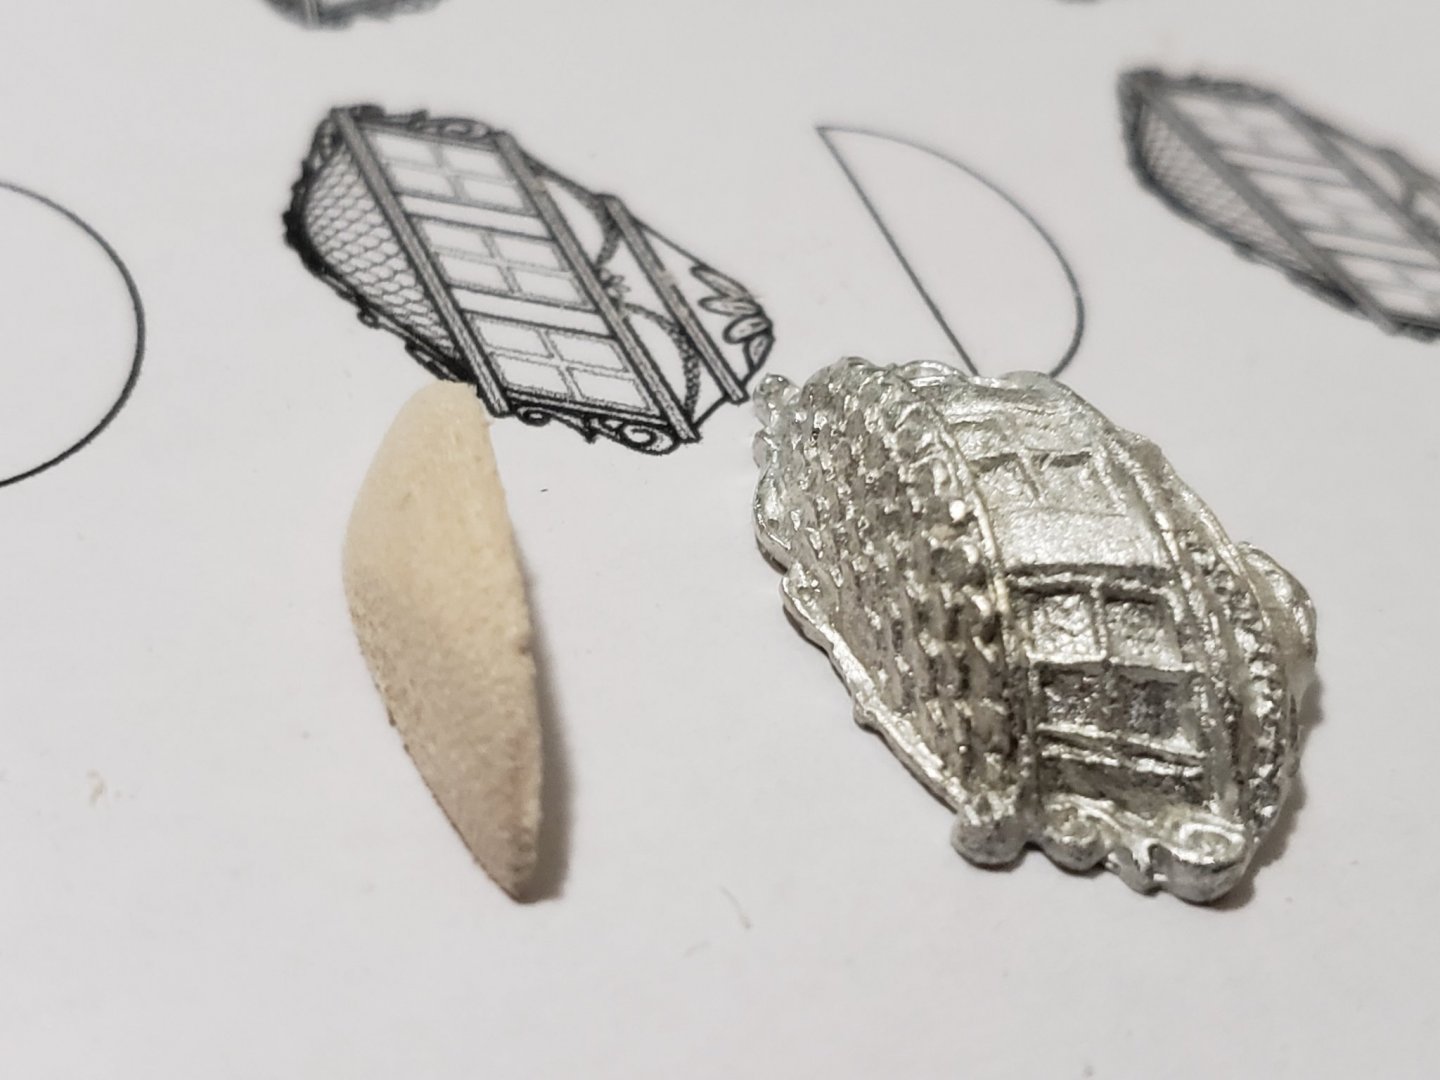
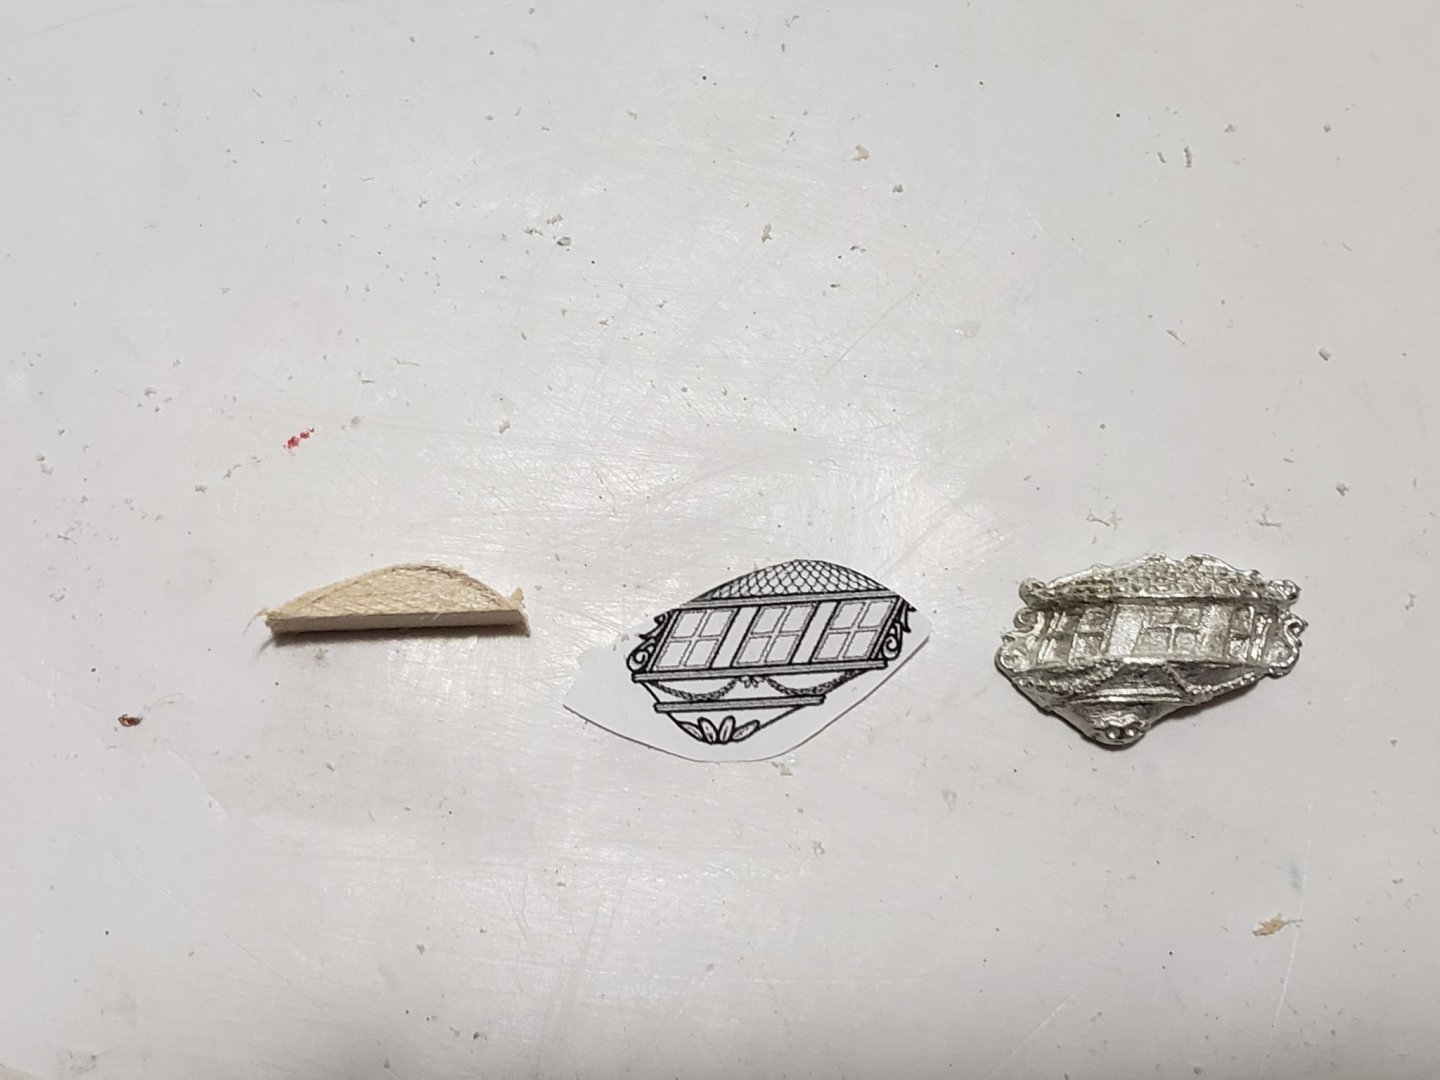
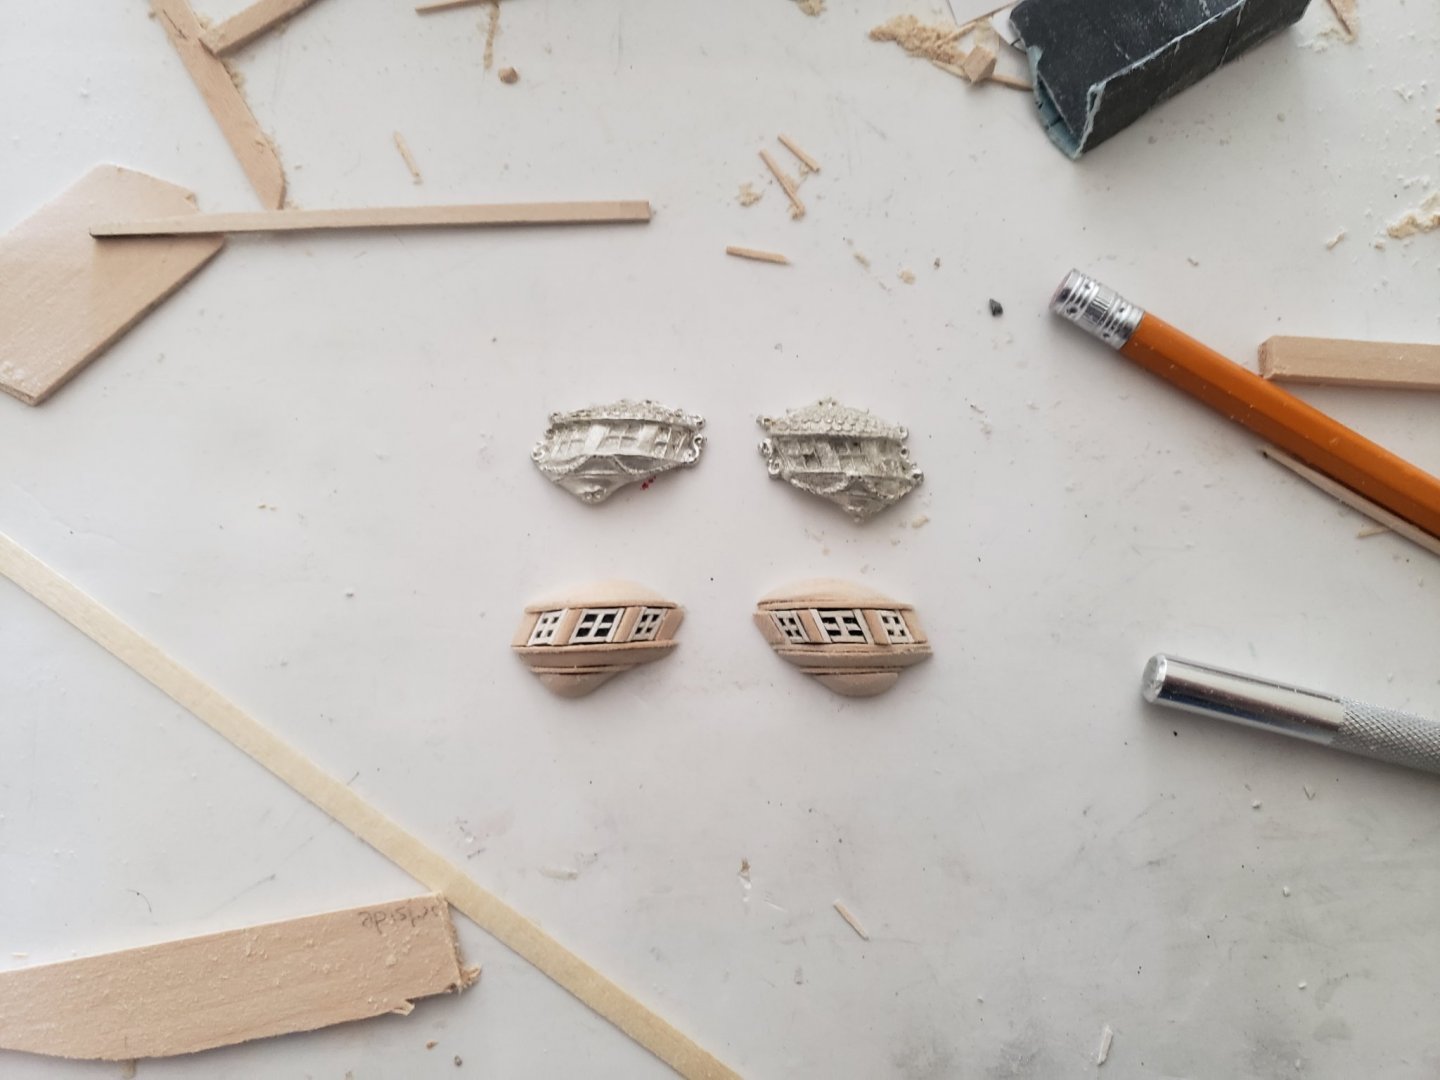
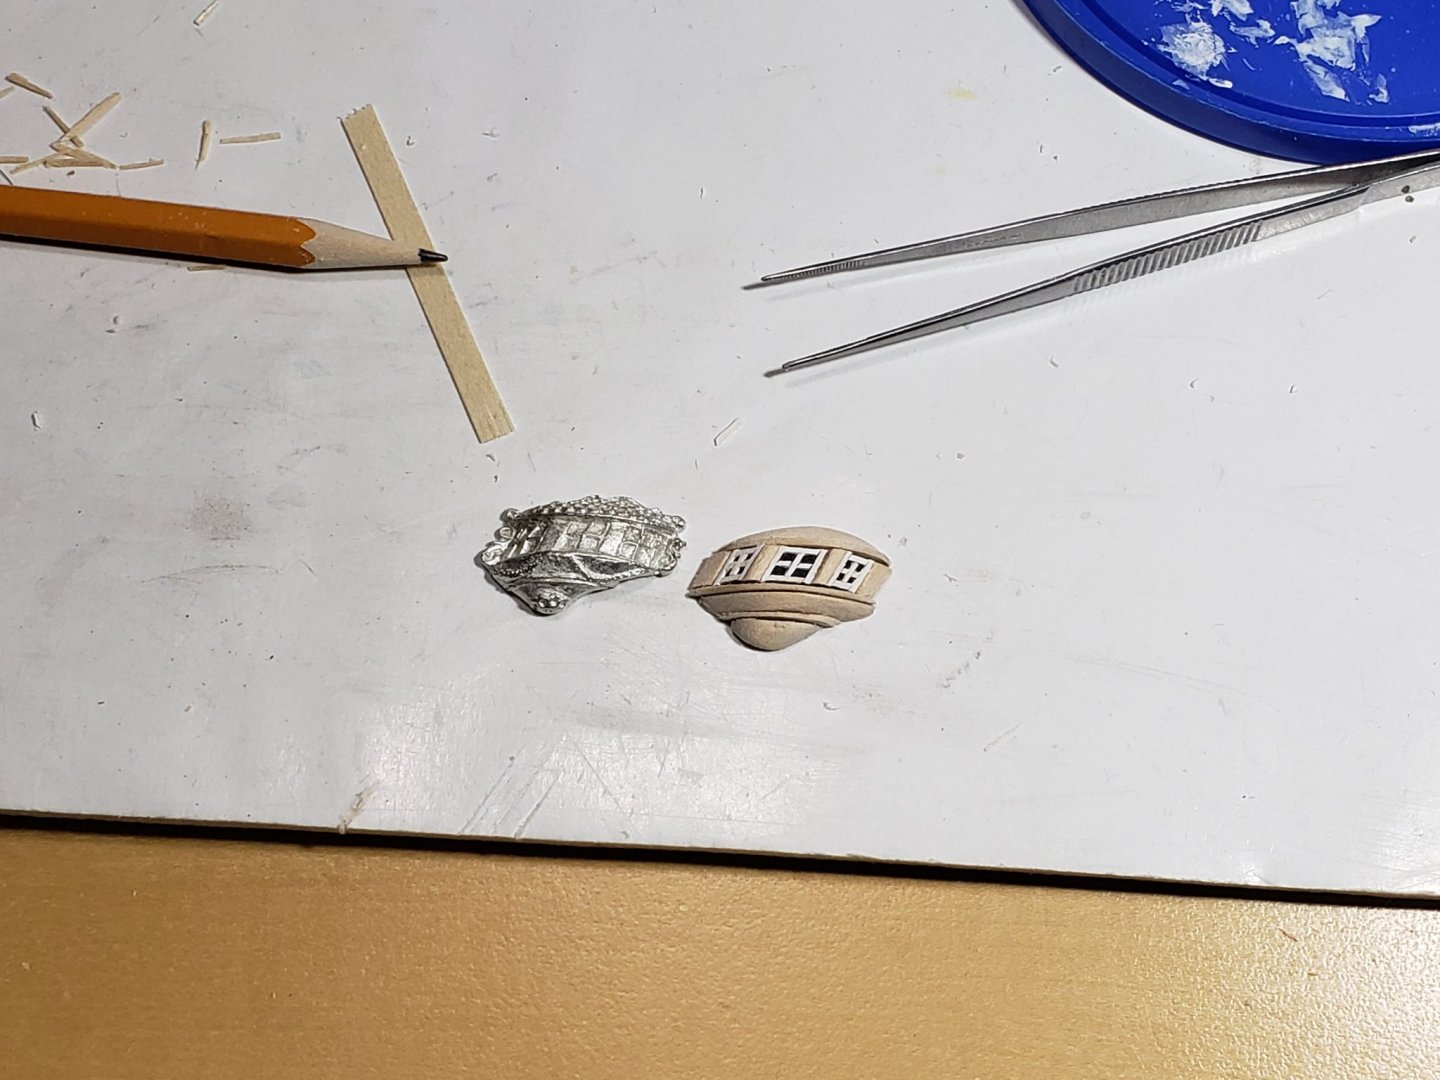
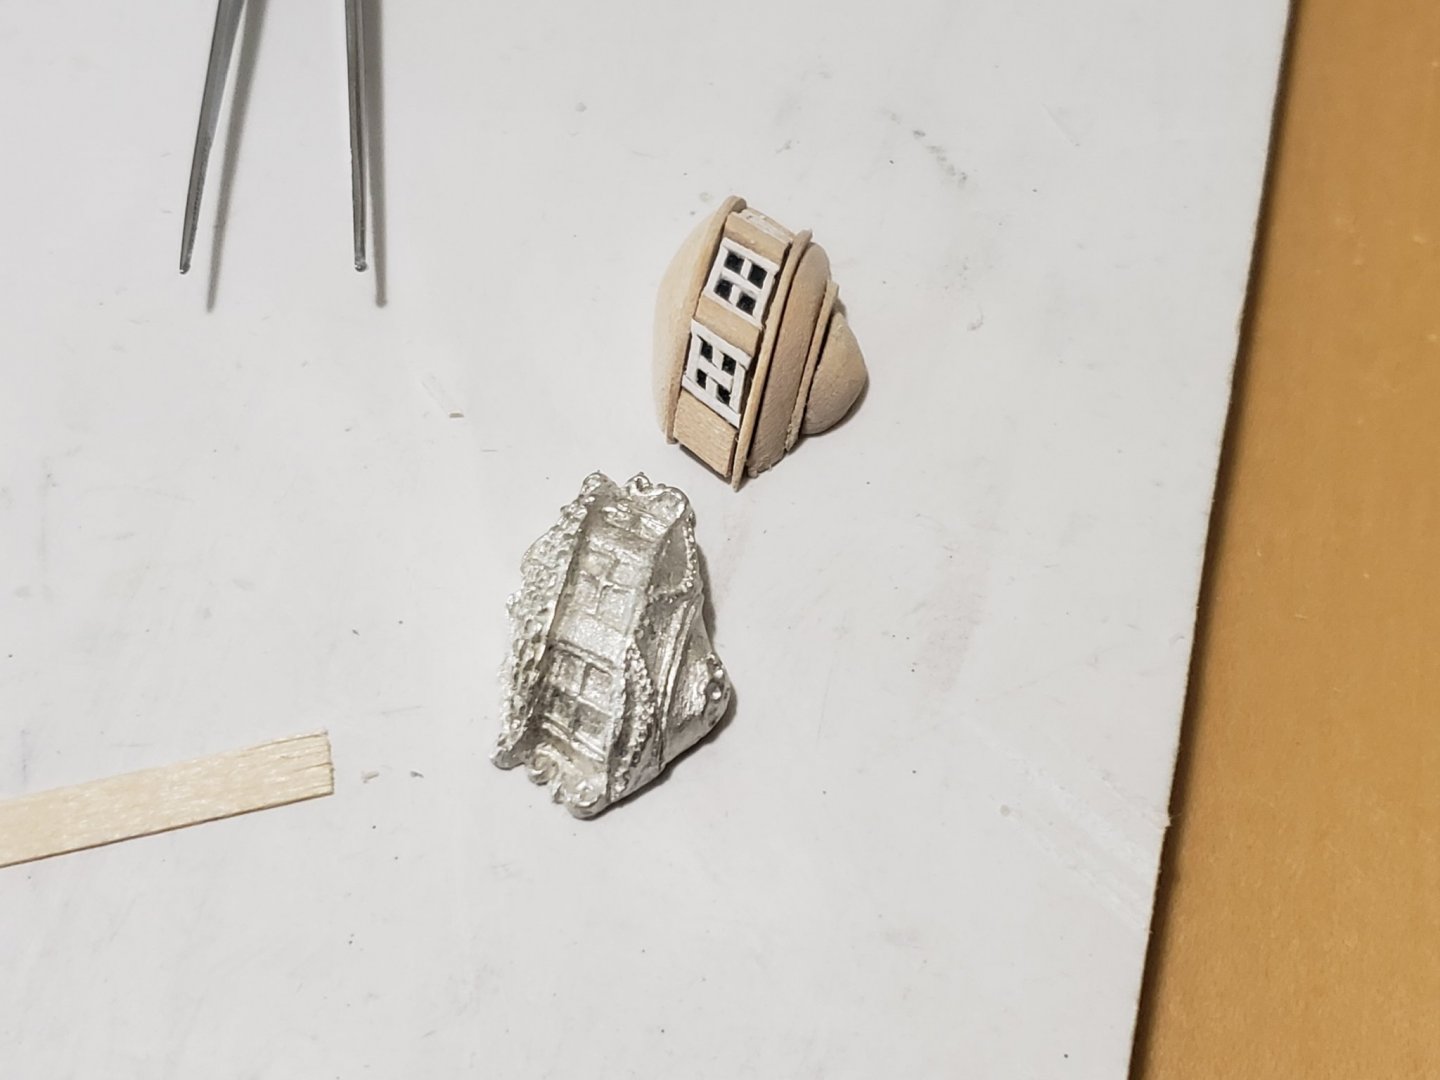
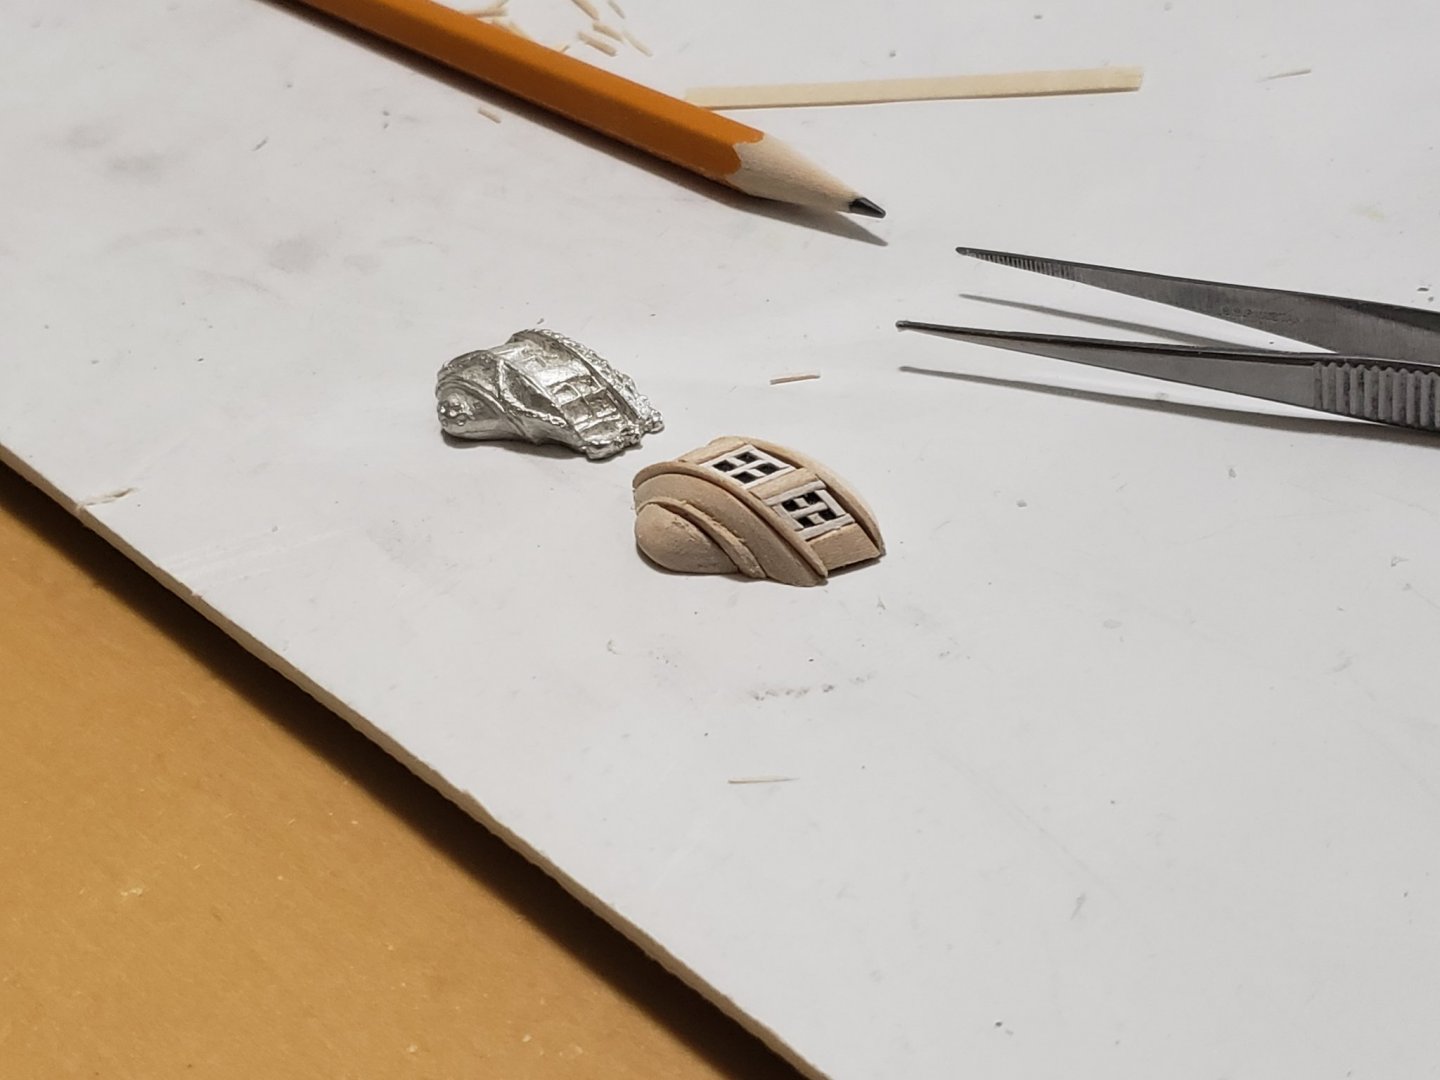
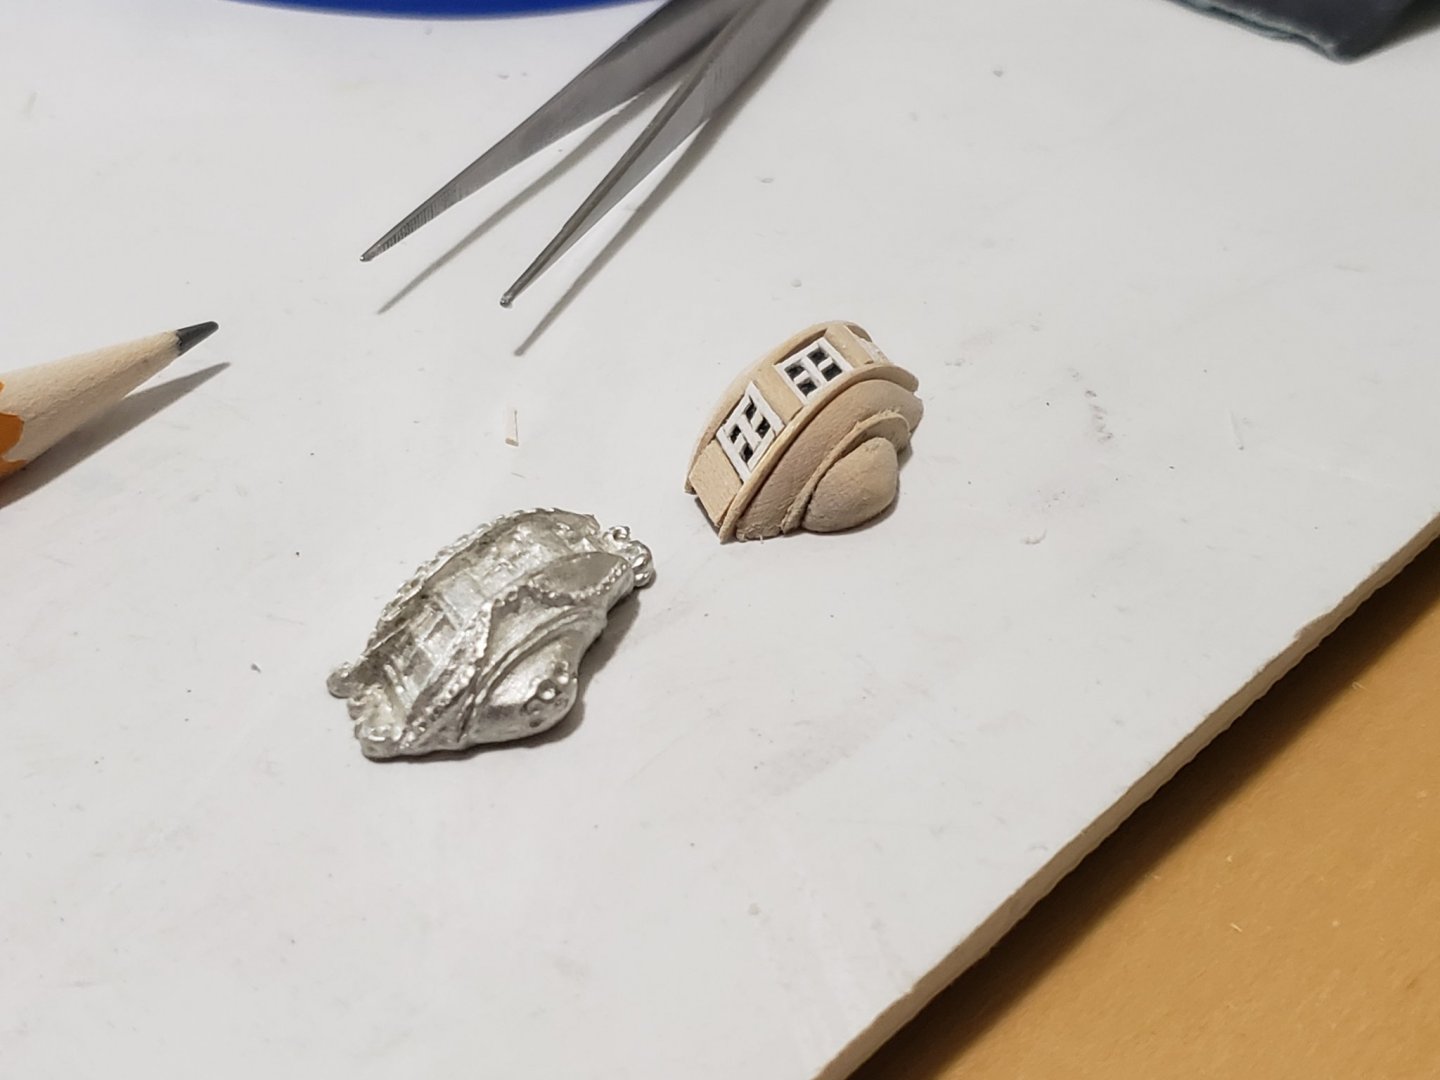
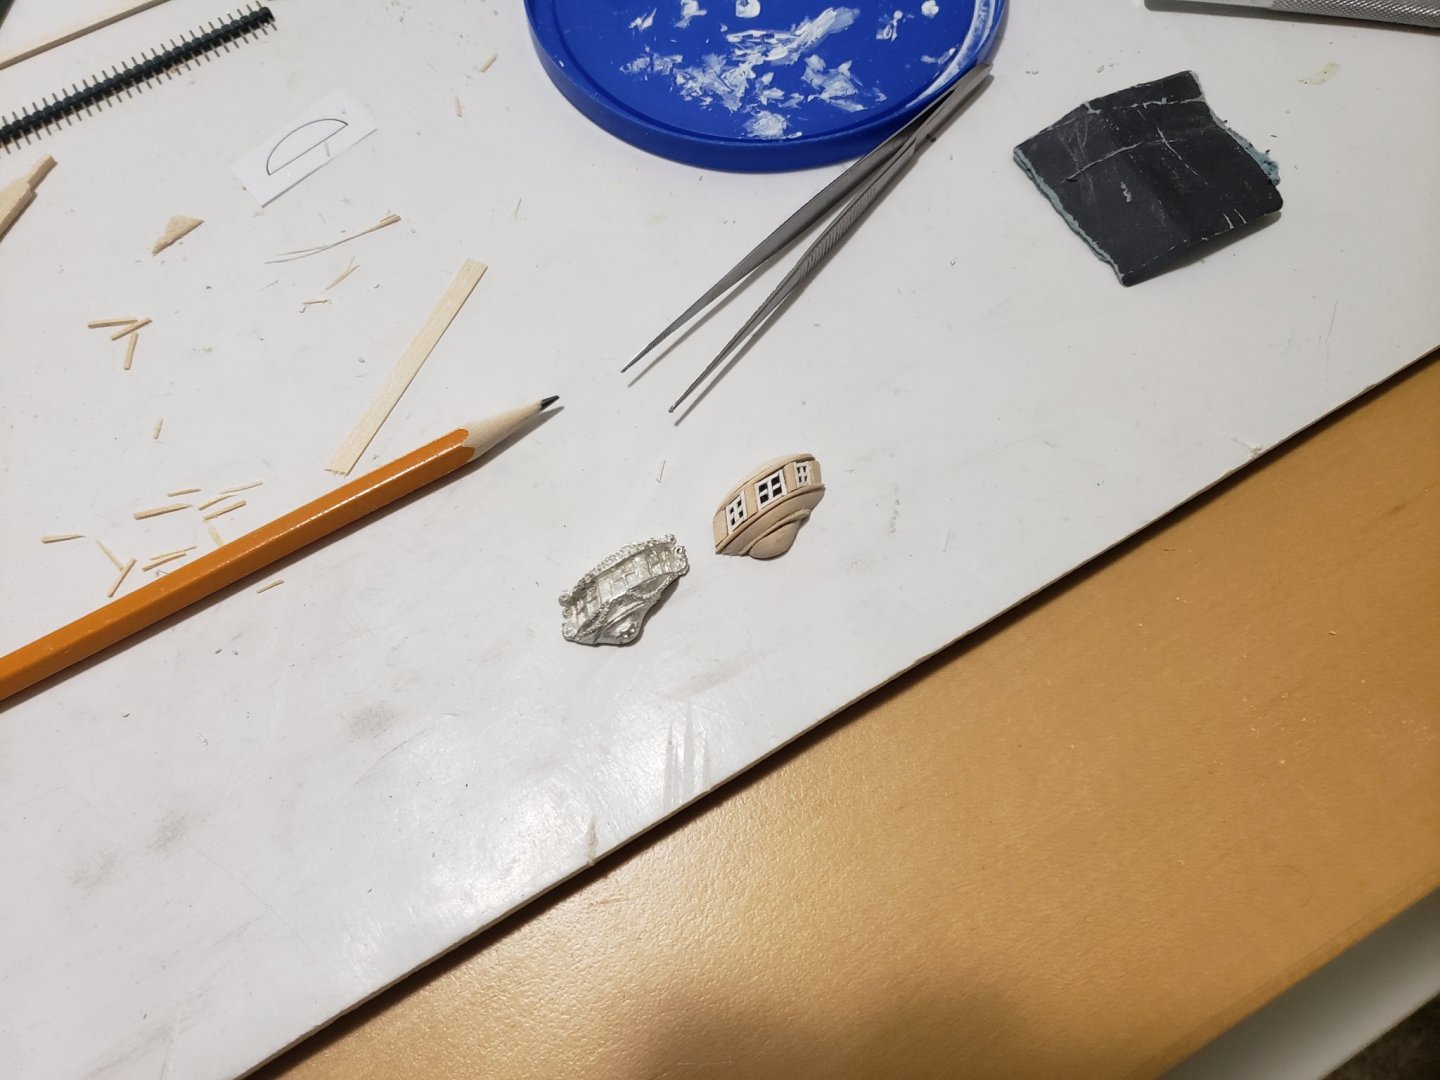
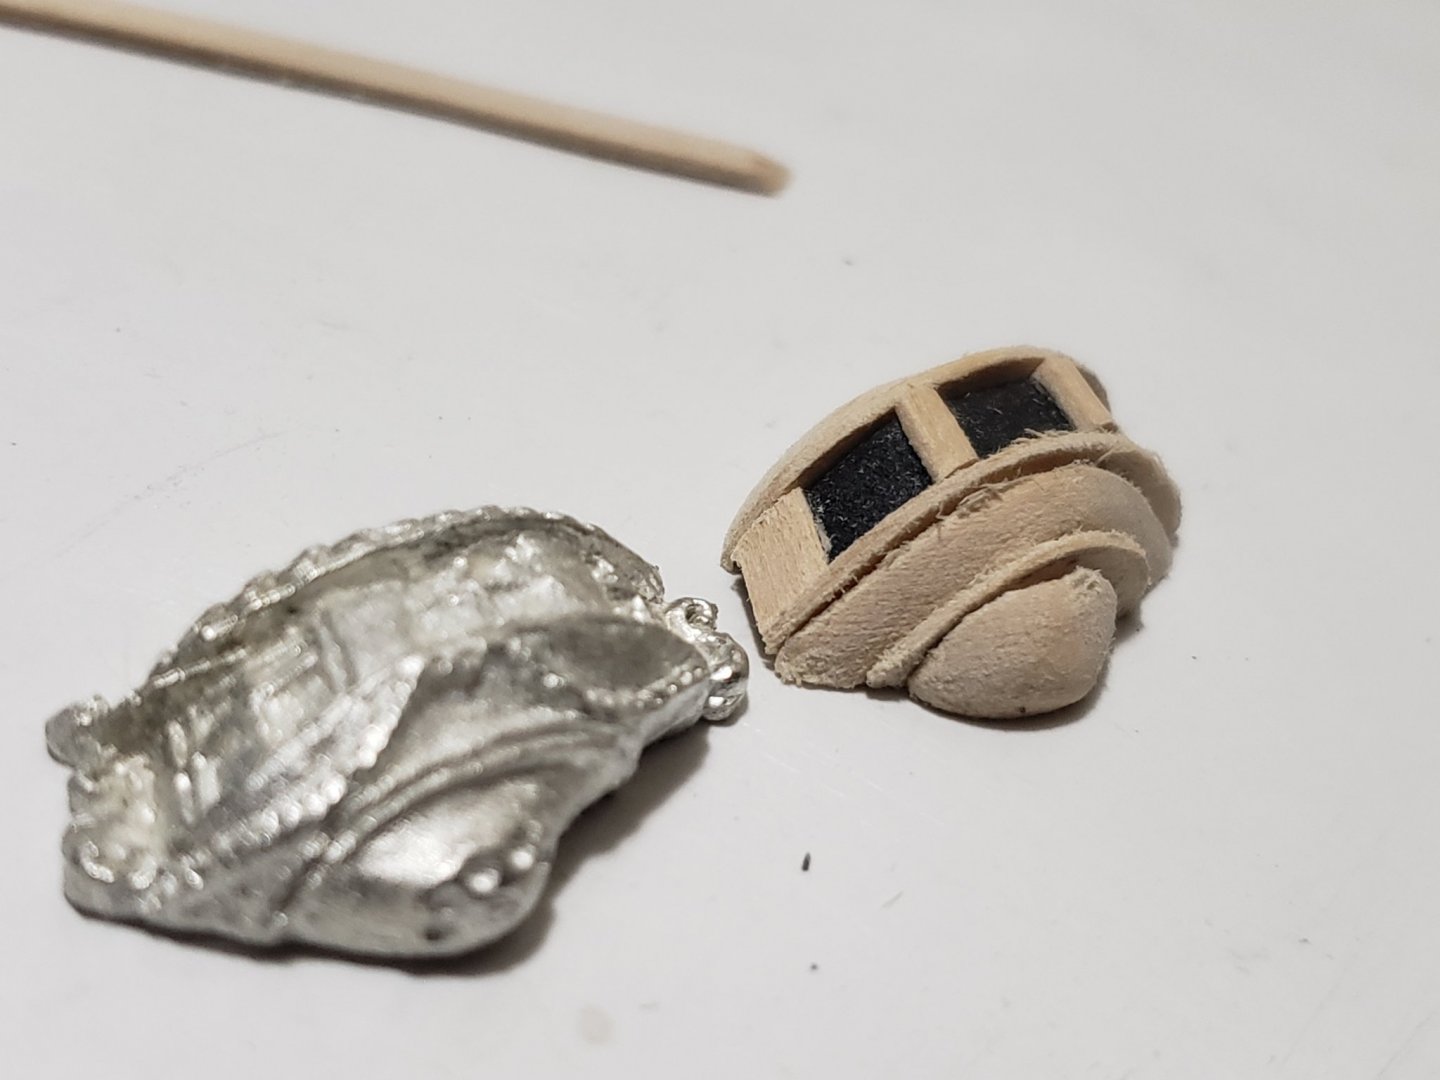
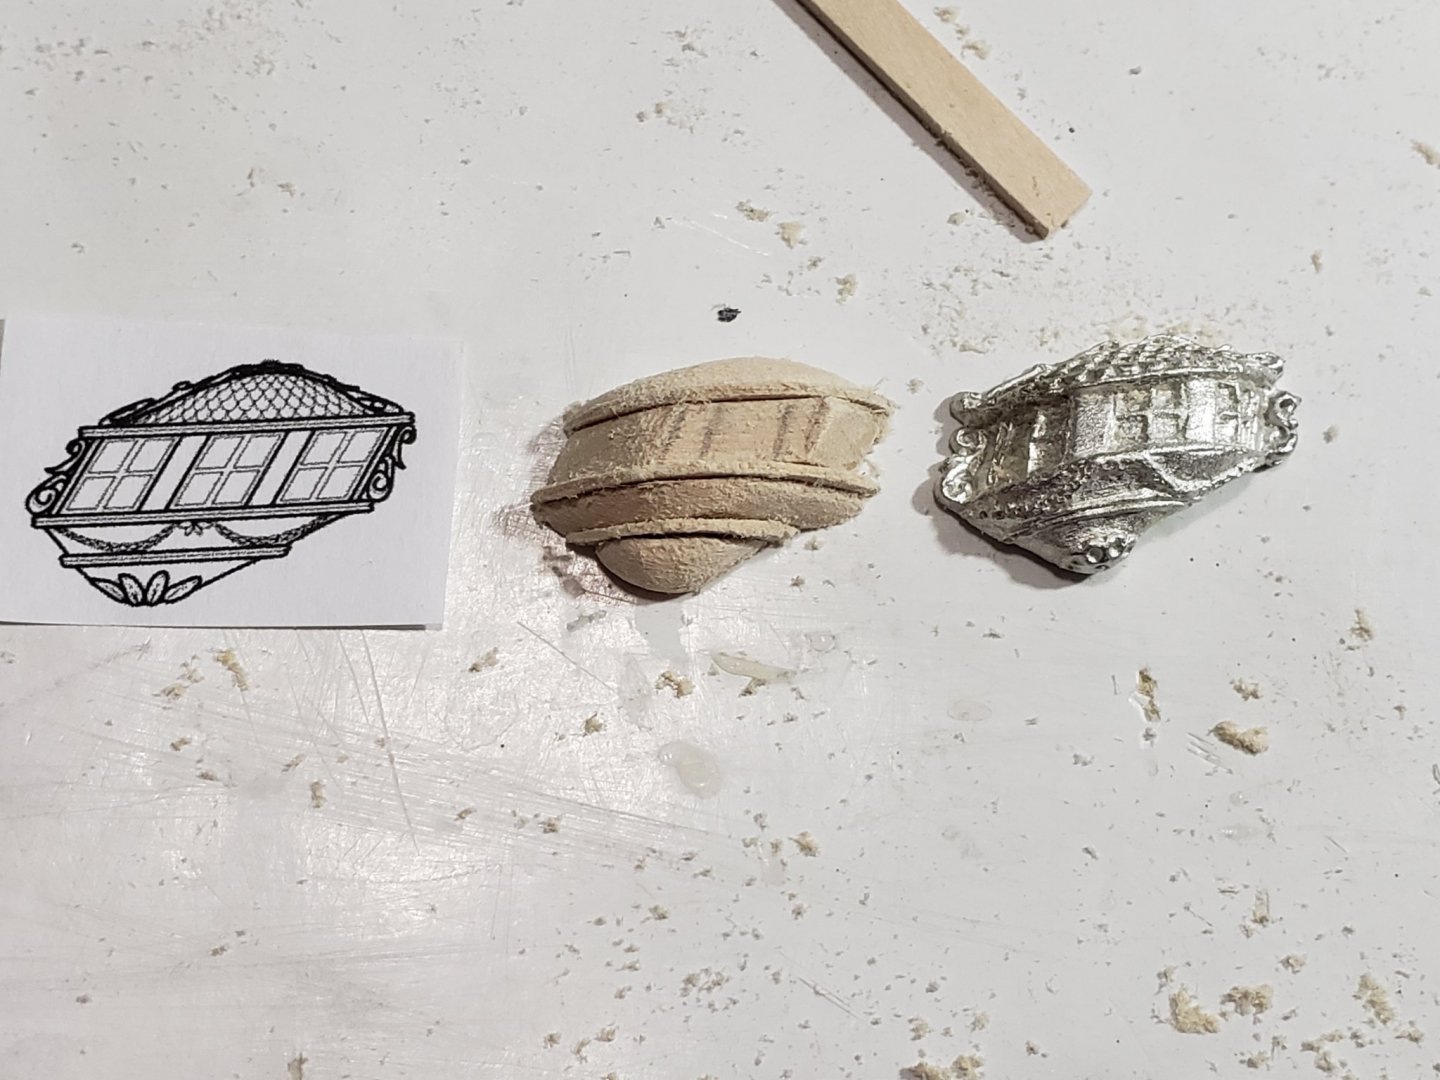
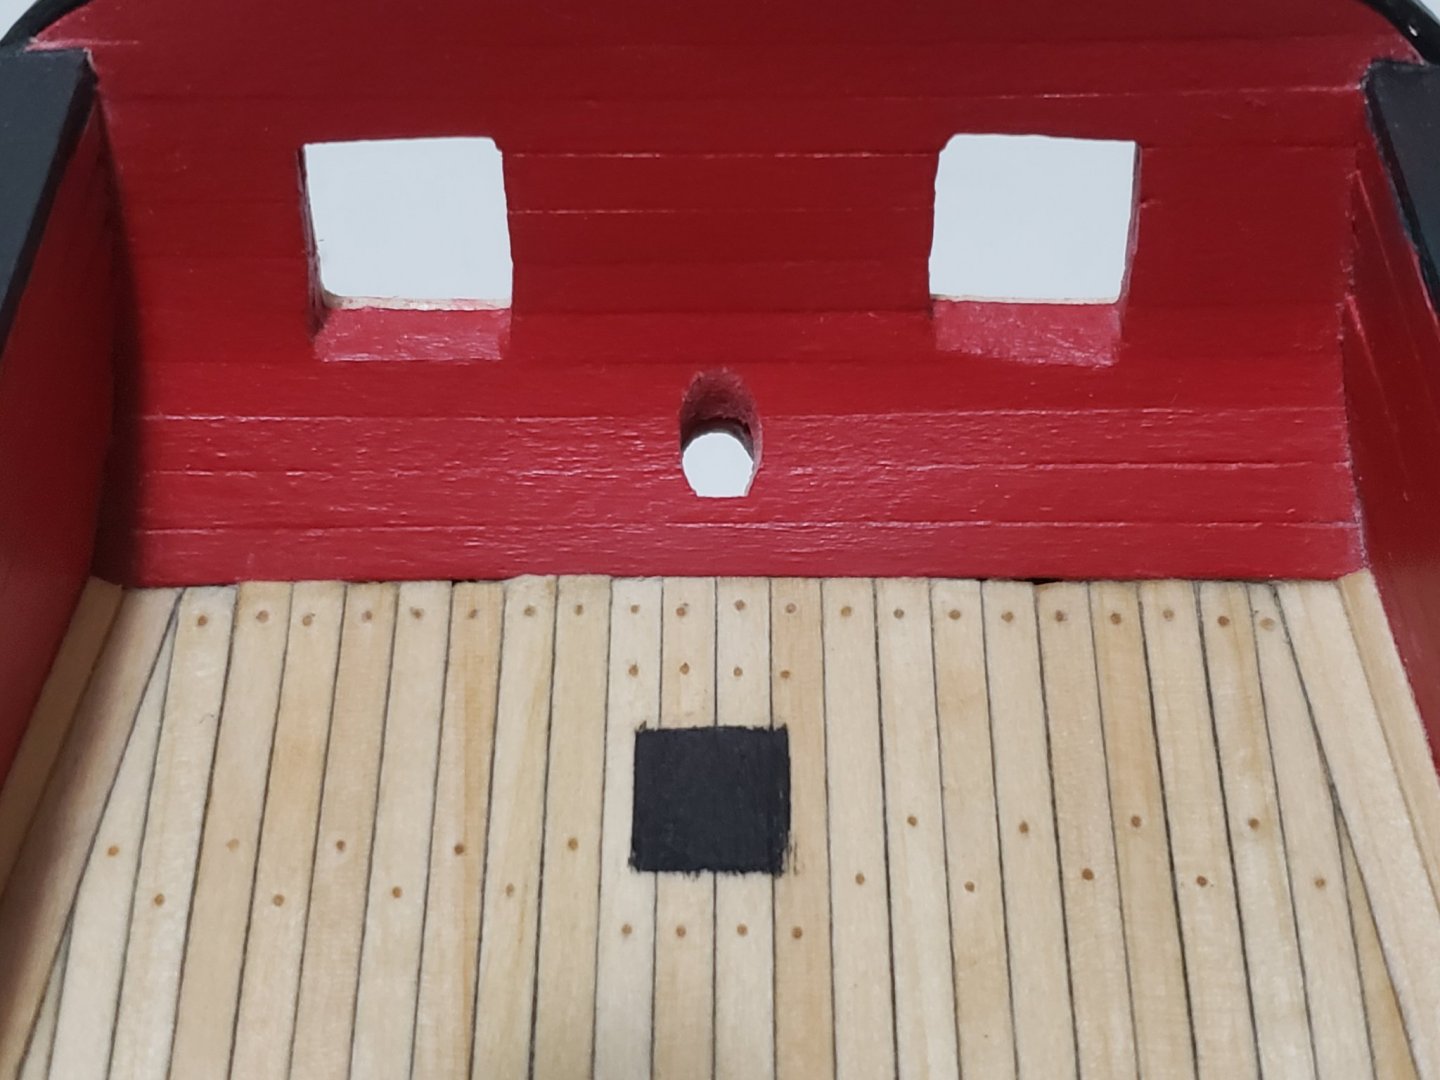
The starboard quarter badge is now on par (progress wise) with the port side badge. The starboard middle window frames are ever-so-slightly wider than the other side (probably less than 0.2mm thicker), and it is a bit apparent, espicially in photos and less in person. I am thinking when they are installed on each side of the hull, the difference in thickness will be even much less noticeable. If I am still bothered by it when I finish up with the badges I will just deconstruct (as Dirk says) and redo it. I don't really feel like doing that since each window takes about 20-40 mins to do... (I'm a very slow builder lol). Now on to the dreaded roof tiles. I'll try using basswood to see how it treats me. If it looks horrendous I will order some pear wood from The Lumberyard. I will probably order the thinnest 2" wide sheets they have, I think it is 1/16", but will also inquire if they have 1/32" available. On a side note, the supplied quarter badges really need to be improved upon. I noticed the differences between each side when I worked on the starboard quarter badge. They are not even symmetric with each other! The height of one of them is longer than the other and the roof shapes are also different, where one side's roof is slanting more than the other. I think even the angles of slope are slightly different. I think you can see this in the above image. The carvings also differ from each other (the bottom flower pattern and the roof carvings). Wish they improved this part of the kit, it is an awesome kit with great instructions and design (thanks Chuck!), but this one part the manufacturer did not do so well. I know this has been discussed already countless times on other build logs, but I wanted to express my disappointment as well. I really hope my scratch built ones turn out better than the castings as I don't want to use them, unless I really have to...
- 950 replies
-
- 5
-
-
- syren
- model shipways
- (and 1 more)
-
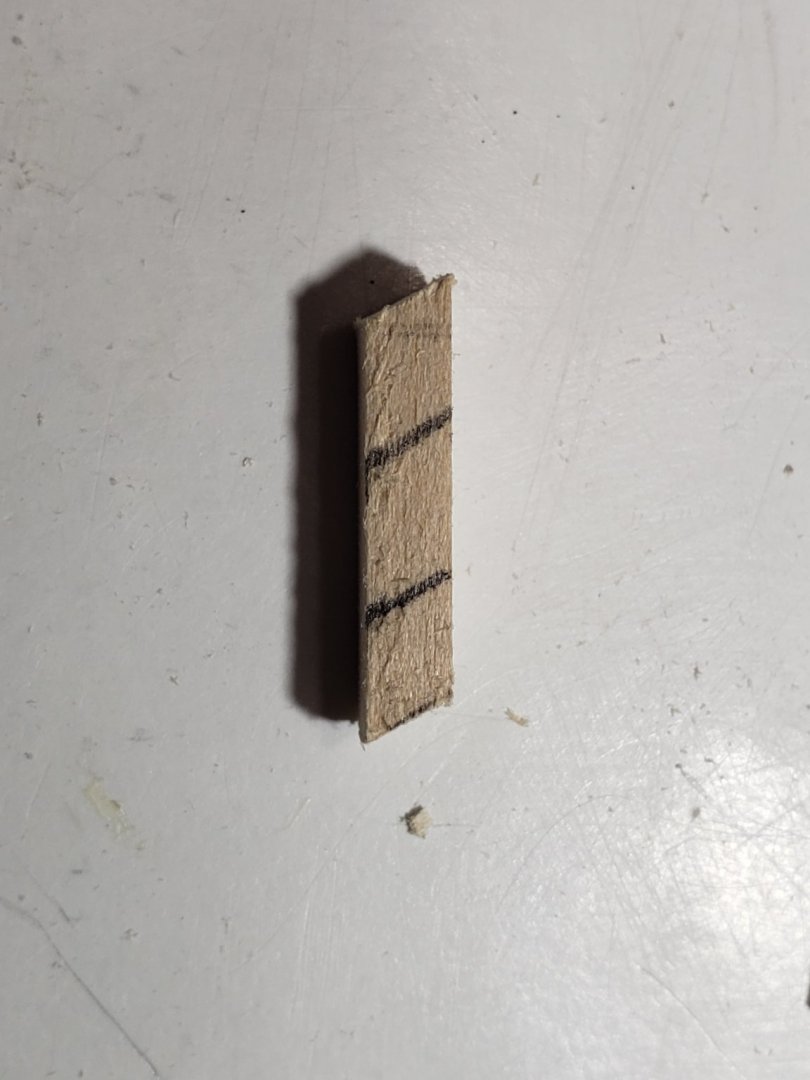
No worries!! No need to apologize! Thinking of it, I wish Model Shipways offered an upgraded kit with better quarter badges and different wood options. Thanks Thomas, I might be purchasing some pear wood from that site after trying out some carvings with the basswood. Thanks again for the website! Also, forgot to mention, for the window frames I used leftover wood from my Virginia kit, I think it is applewood? Not too sure, but they are the very thin lightly colored strips that have almost parallel grains, so I can cut straight lines easily with a hobby knife.
- 950 replies
-
- 1
-
-
- syren
- model shipways
- (and 1 more)
-
Never thought of it that way, I guess you can think of each layer as a project upon itself. Got very excited until I also checked my parts list, it says the same.. Maybe they are boxwood in disguise 😄?
-
Wanted to do some practice with the basswood as I still search for better wood species. If the practice version turns out somewhat decent (ie. better than the castings) I may just end up using them 😄 I completed making the window frames. The other parts are still dry fitted. I think I will glue them after finishing the details in each part. A shot from a bit further away: Bonus photo (if the others were not enough 😄) - The window section by itself: I'll work on the starboard structure next before making the roof tiles. I guess its just an excuse to delay that step 😅. I think it also helps in seeing if each piece is symmetric to the other side's pieces at this stage.


- 950 replies
-
- 9
-
-
- syren
- model shipways
- (and 1 more)
-
Thanks for the suggestion! I will first look if I can find something locally before ordering some sheets. Also I am looking for some scrap pieces/strips of those wood species since that is what I have been using so far with basswood 😄.
- 950 replies
-
- 1
-
-
- syren
- model shipways
- (and 1 more)
-
I think this is how you can search for only build logs. First click on the tag of model ship you are interested in under index. This should bring you in a page like this: Then click on 'Topics' and under 'Forums' click on the era you are interested in. This becomes a very powerful search engine to search the types of vessel you want. Here is the corresponding search result: Hope this was what you were looking for. Otherwise if you are just looking at build logs of different ship models, select the era you are interested in:

-
Thanks Thomas! I'm not sure where to get those types of wood in Canada, but will look around before proceeding. Just verifying, did you use bass wood for your underlying structure then pear wood for the carvings, frames and tiles? I'm thinking of doing something similar if I happen to find some pear wood or box wood. Thanks Voyageur!
- 950 replies
-
- 1
-
-
- syren
- model shipways
- (and 1 more)
-
I really like the videos! There aren't many build videos on YouTube so I wish I started my Syren after you, would have helped a lot in visualizing the steps 😄
-
Don't know if I have the patience to make more than one per side 😂. But yeah I 100% agree that this detail is one that will take time but is worth the effort. Let's see how the first attempt turns out. I'll probably ask for opinions again before installing it on the hull or making a second batch. It did seem like fun only until I realized how small of a scale it actually is. I think I've spent more time looking for a dropped piece than actually working on it 😄 😅 Anyways thanks for the compliment! I continued to work on it after reading yours and Justin's comments. I painted the middle piece black and glued on the frame pieces. The rest of the pieces are still dry fitted: I'll next work on the white window frames then the carvings. I'll probably do an awful job at the carvings but I'll give it a shot.


- 950 replies
-
- 6
-
-
- syren
- model shipways
- (and 1 more)
-
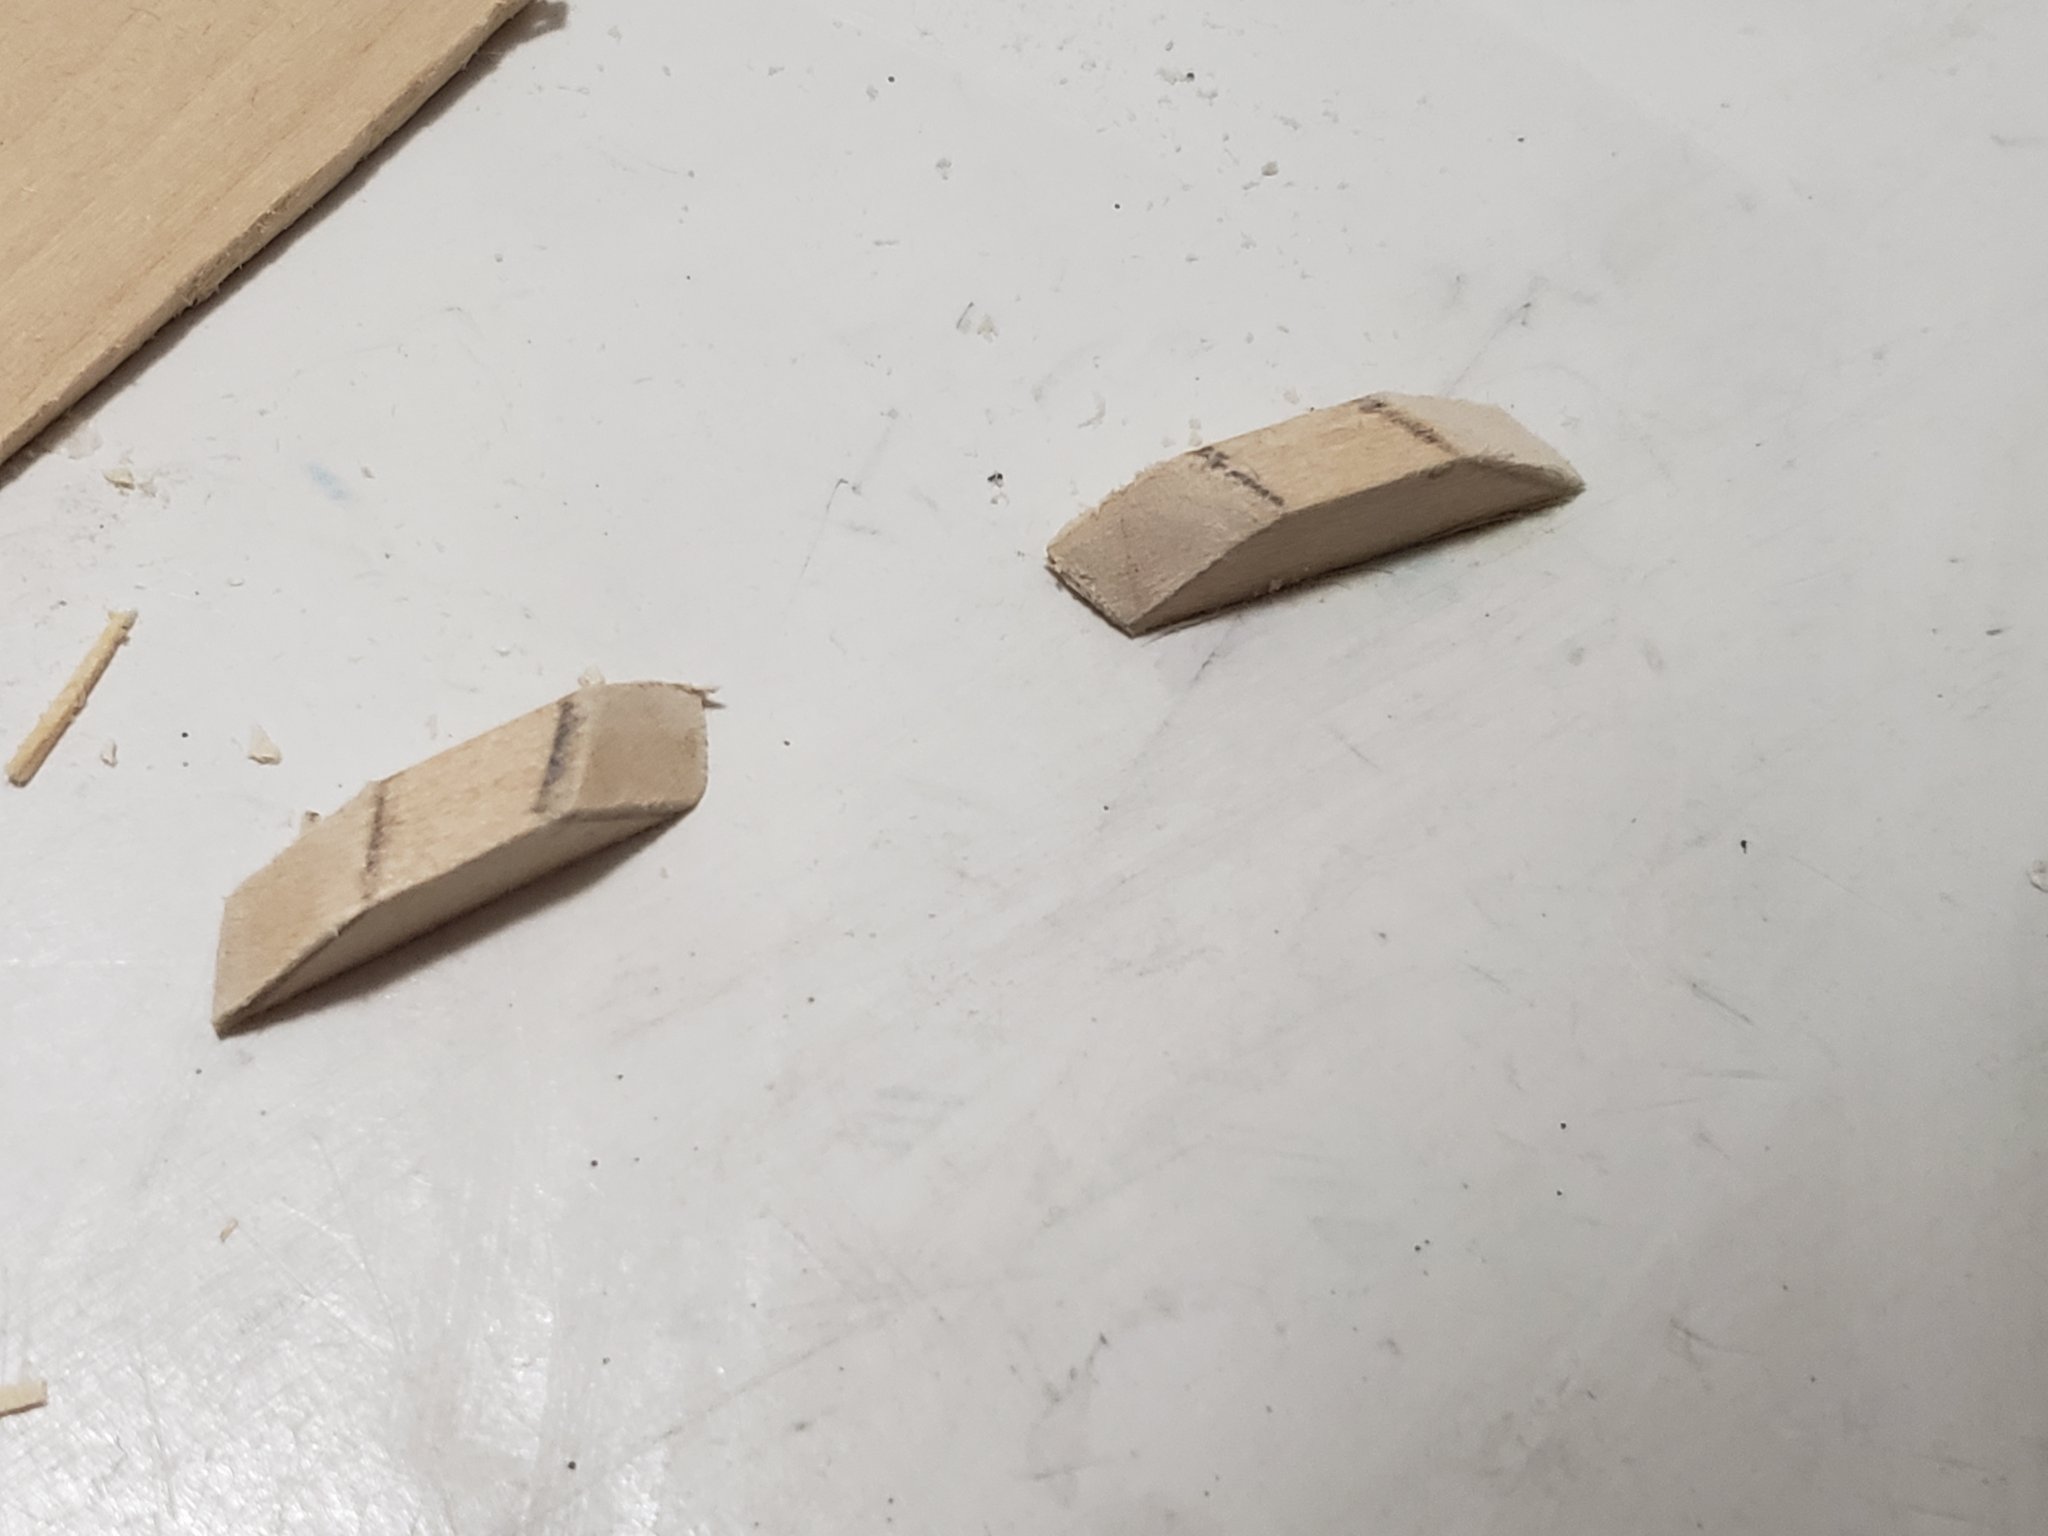
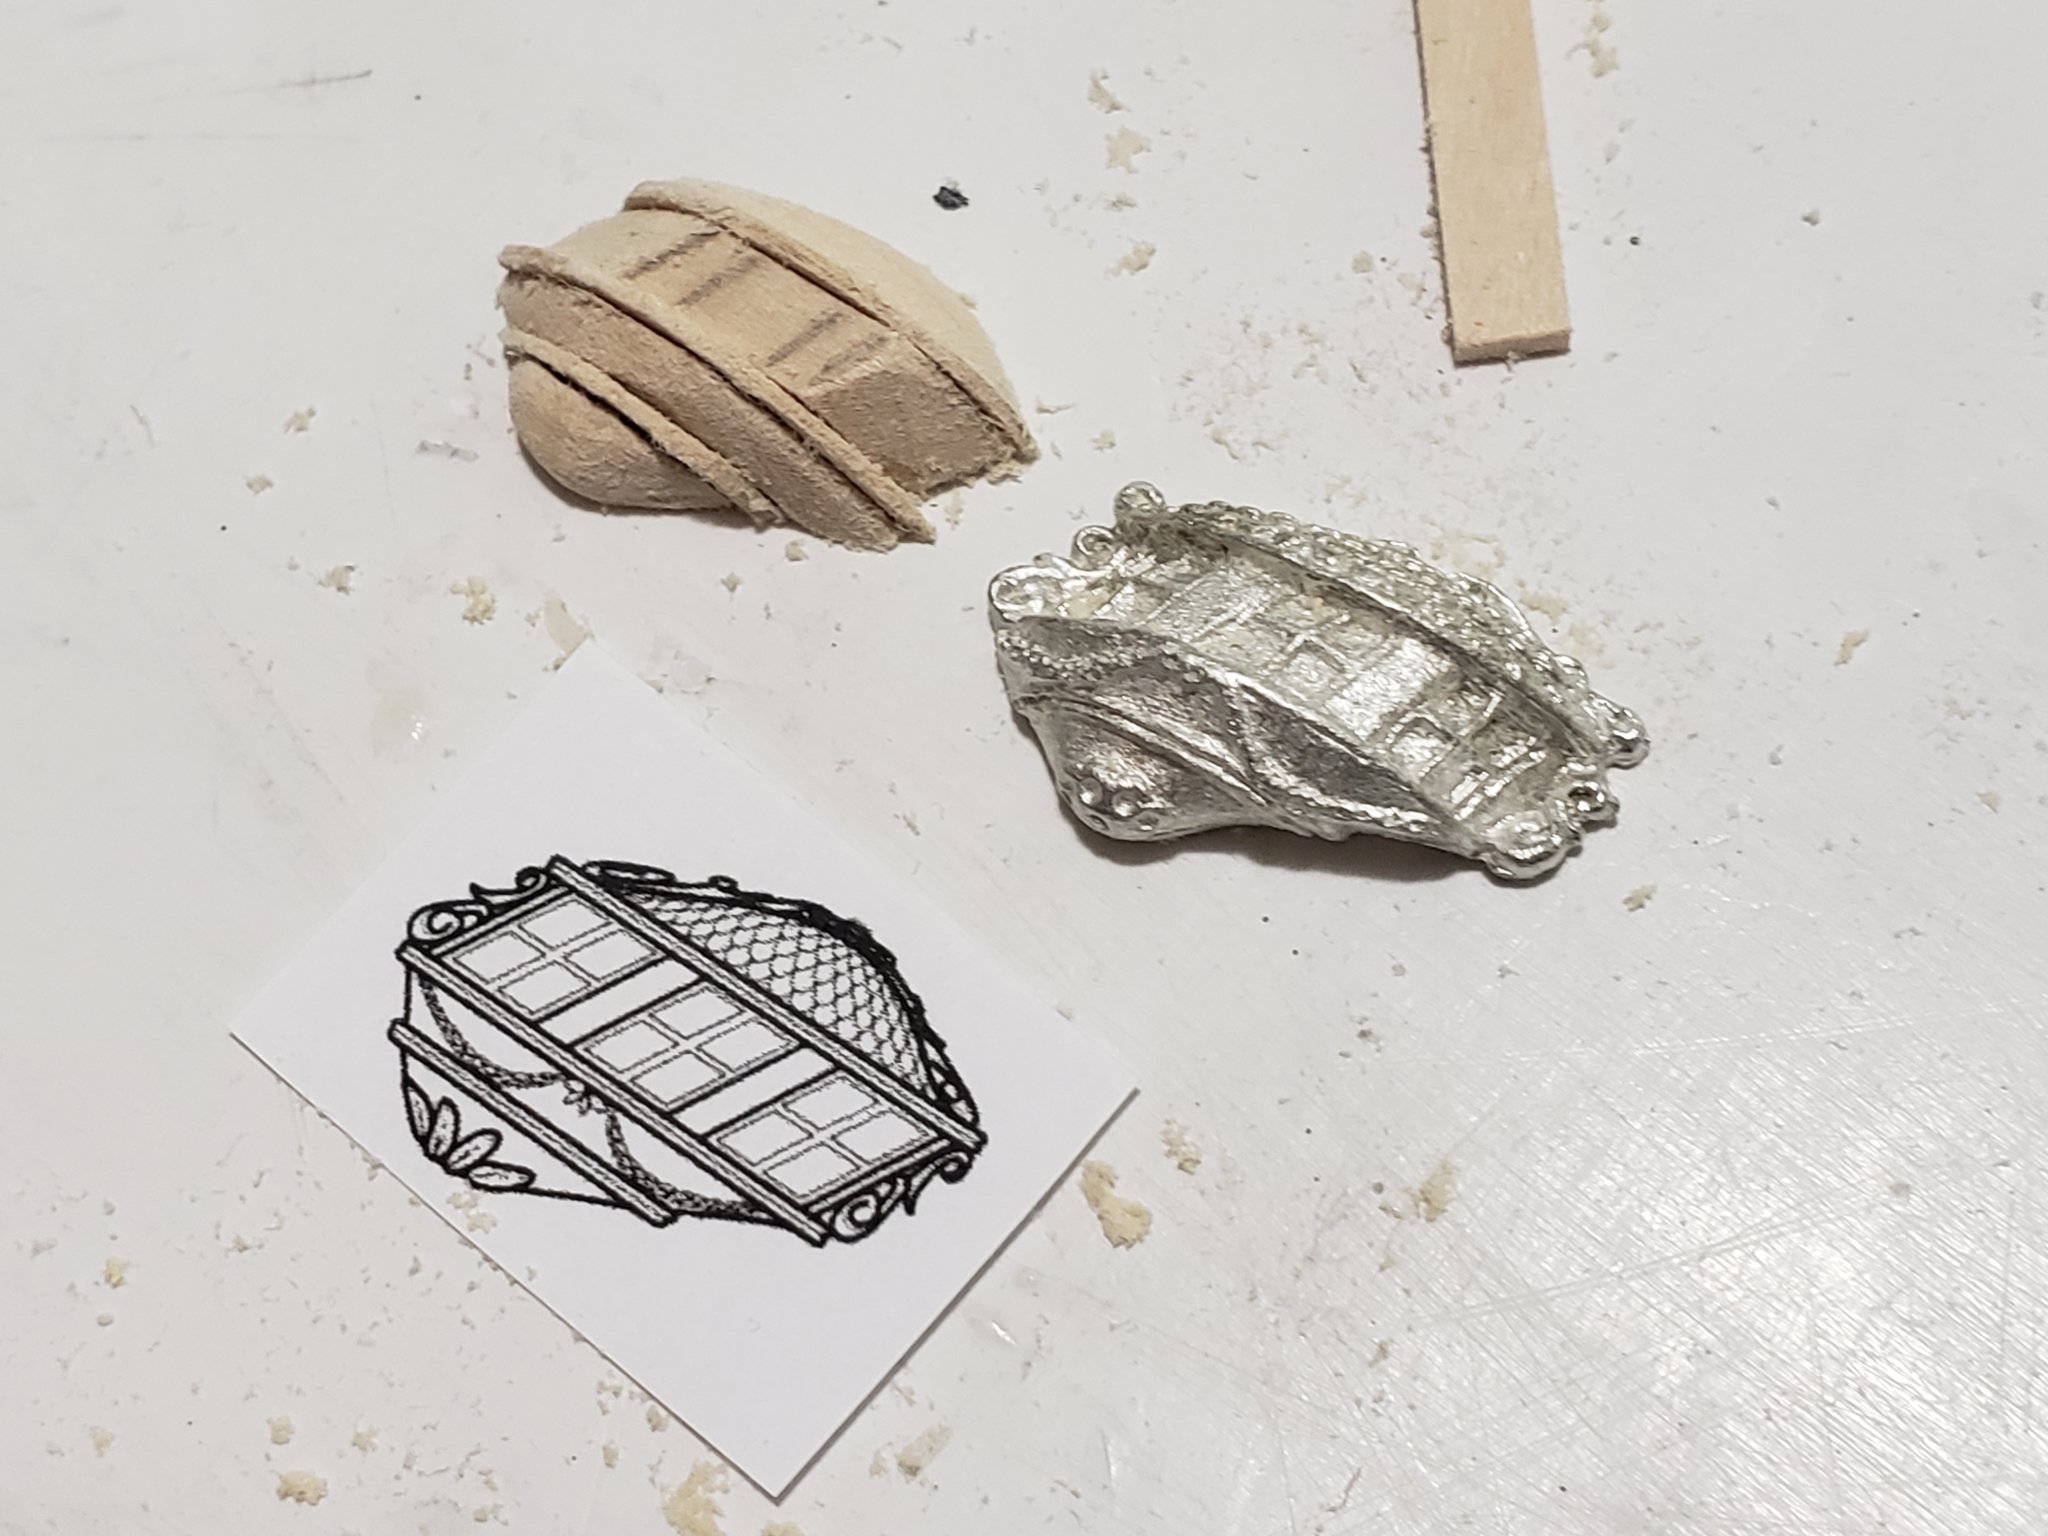
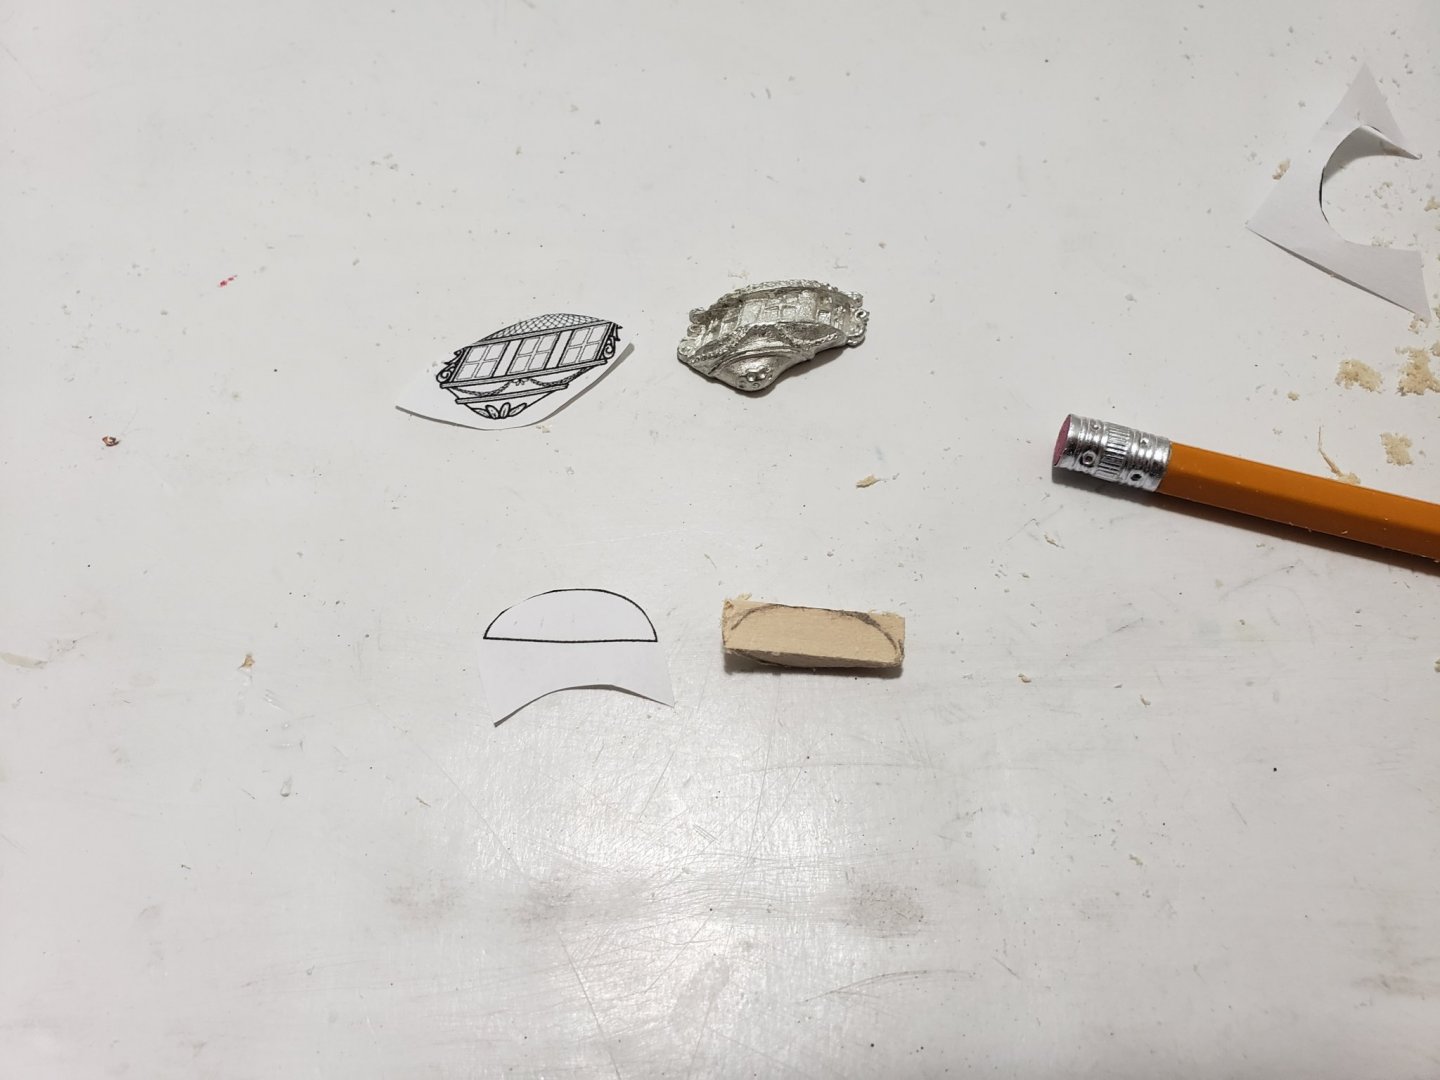
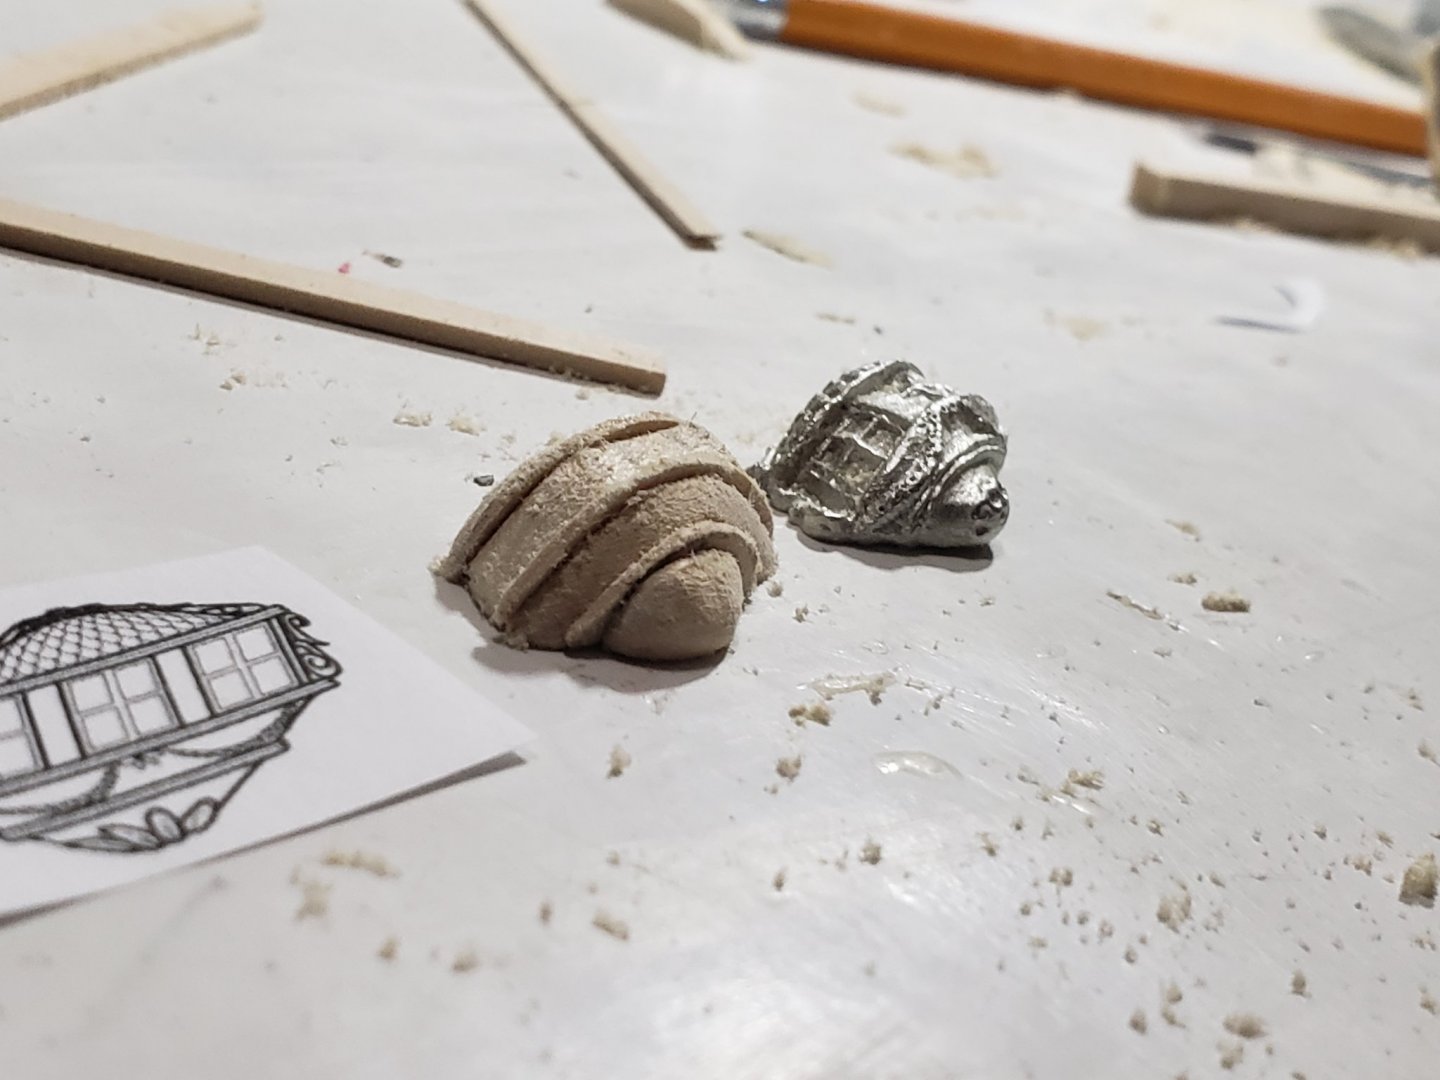
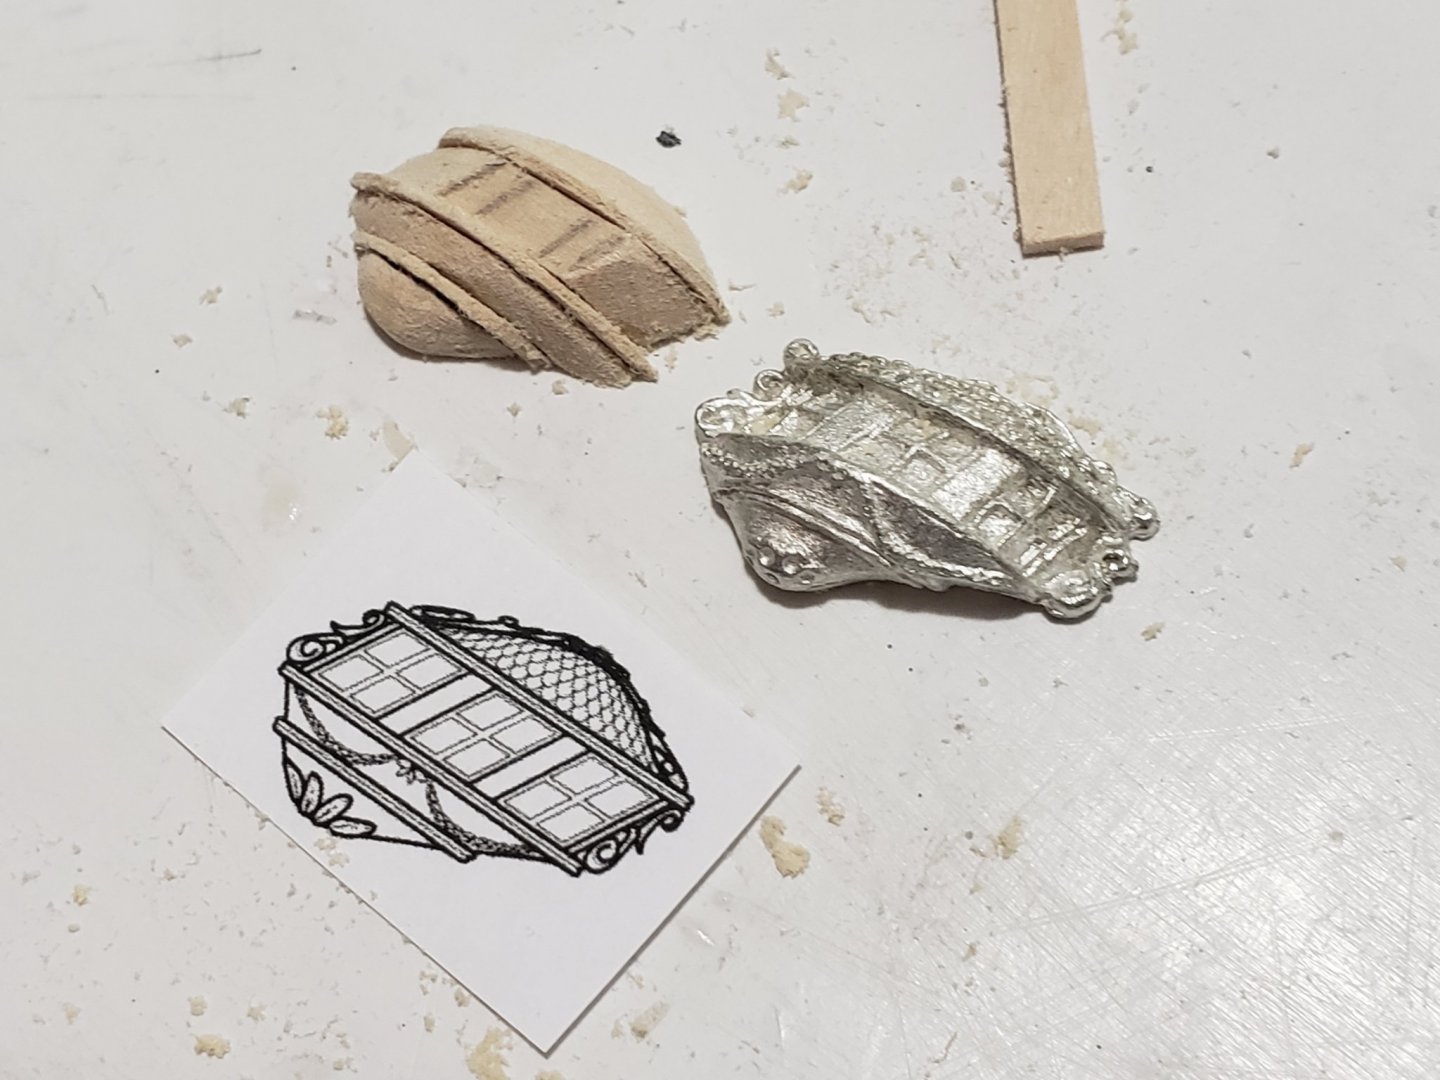
I started carving the quarter galleries. I am using photos and the description from Thomas Gahm's log as reference when doing it (post #5 and #58). I don't think I can come close to his though 😄 I also found some tips written by Chuck on Dirk's log (post #620). As I progressed through the starting stages of the portside quarter badge, I realized this is way above my skill set. So far I have just made the base structure (still dry-fitted) and will try some detailing next (windows, roof tiles, and carvings, in that order). All I have is basswood so that's what I used. Please let me know your thoughts, it would be greatly appreciated 🙂. As I mentioned before, I may just scrap all this and use the castings, but really want to try getting this right. I won't feel bad if you guys think it does not look good, so please let me know if I should continue or just use the metal castings. Keep in mind, I used a rough piece of sandpaper to shape it, so it will (hopefully) look smoother once I sand with a finer one. I took many photos so the shape can be seen from different angles: Here it is unassembled in case it assists someone to see what shapes and pieces I used: I would love to hear some of your thoughts on this. And again I won't feel bad if you think I should just carry on with the castings, so please do let me know! 🙂


- 950 replies
-
- 5
-
-
- syren
- model shipways
- (and 1 more)
-
Thanks all for the kind comments and the likes, means a lot 🙂. Dirk, do you mean bronze was used in the real ship? This is something I'll keep in mind for future builds Patrick, yes the alignment was also a bit tricky. I think the rudder itself needs to be treated as a separate individual project.
- 950 replies
-
- 2
-
-
- syren
- model shipways
- (and 1 more)
-
The planking so far looks very good! That's unfortunate that none of those methods worked to bend the wood with ease. By any chance did you try bending it very slowly? The slower it is bent the less likely it is to break. If the hull will be painted or covered with a second layer of wood, you could try using basswood for the rest of the planking. I've been using the supplied basswood for my Syren and it bends very nicely after being soaked in hot water. Otherwise someone else might have another suggestion. Btw you can also try asking in this forum for planking tips: https://modelshipworld.com/forum/14-building-framing-planking-and-plating-a-ships-hull-and-deck/ Hope you find something that works. Keep us updated!
- 29 replies
-
- 3
-
-
- constructo
- prince
- (and 1 more)
-
Those stern framing pieces really do scream those words. I dropped my clamp on the frame at this stage but luckily nothing major broke... It's looking very nice. Loving the red color.
-
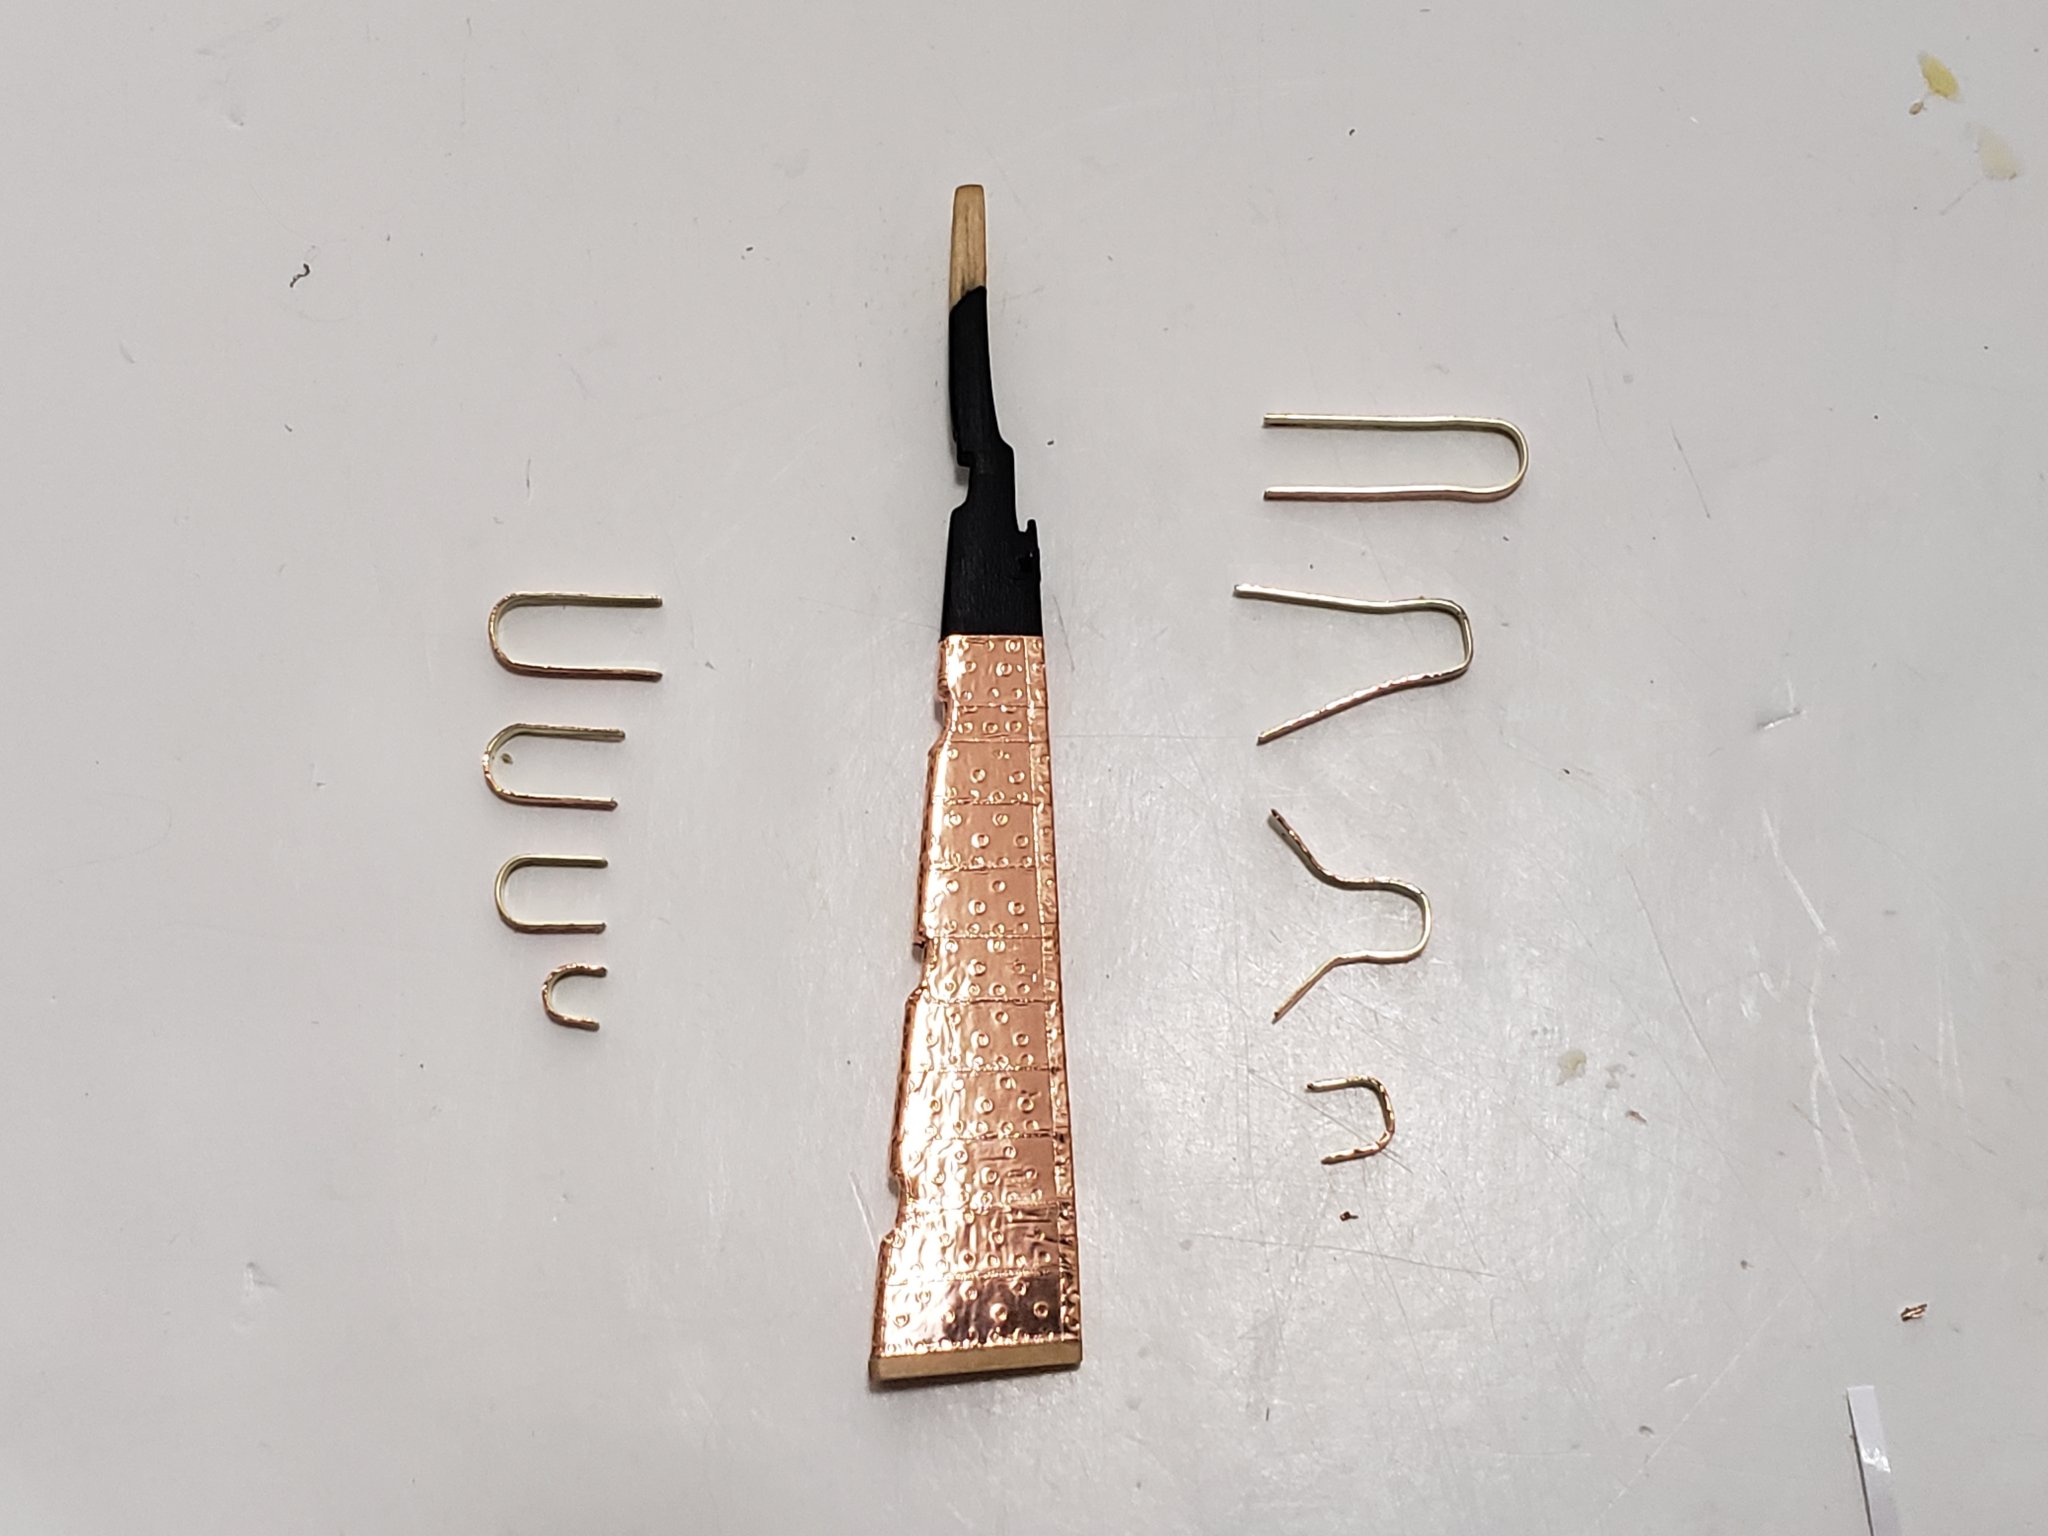
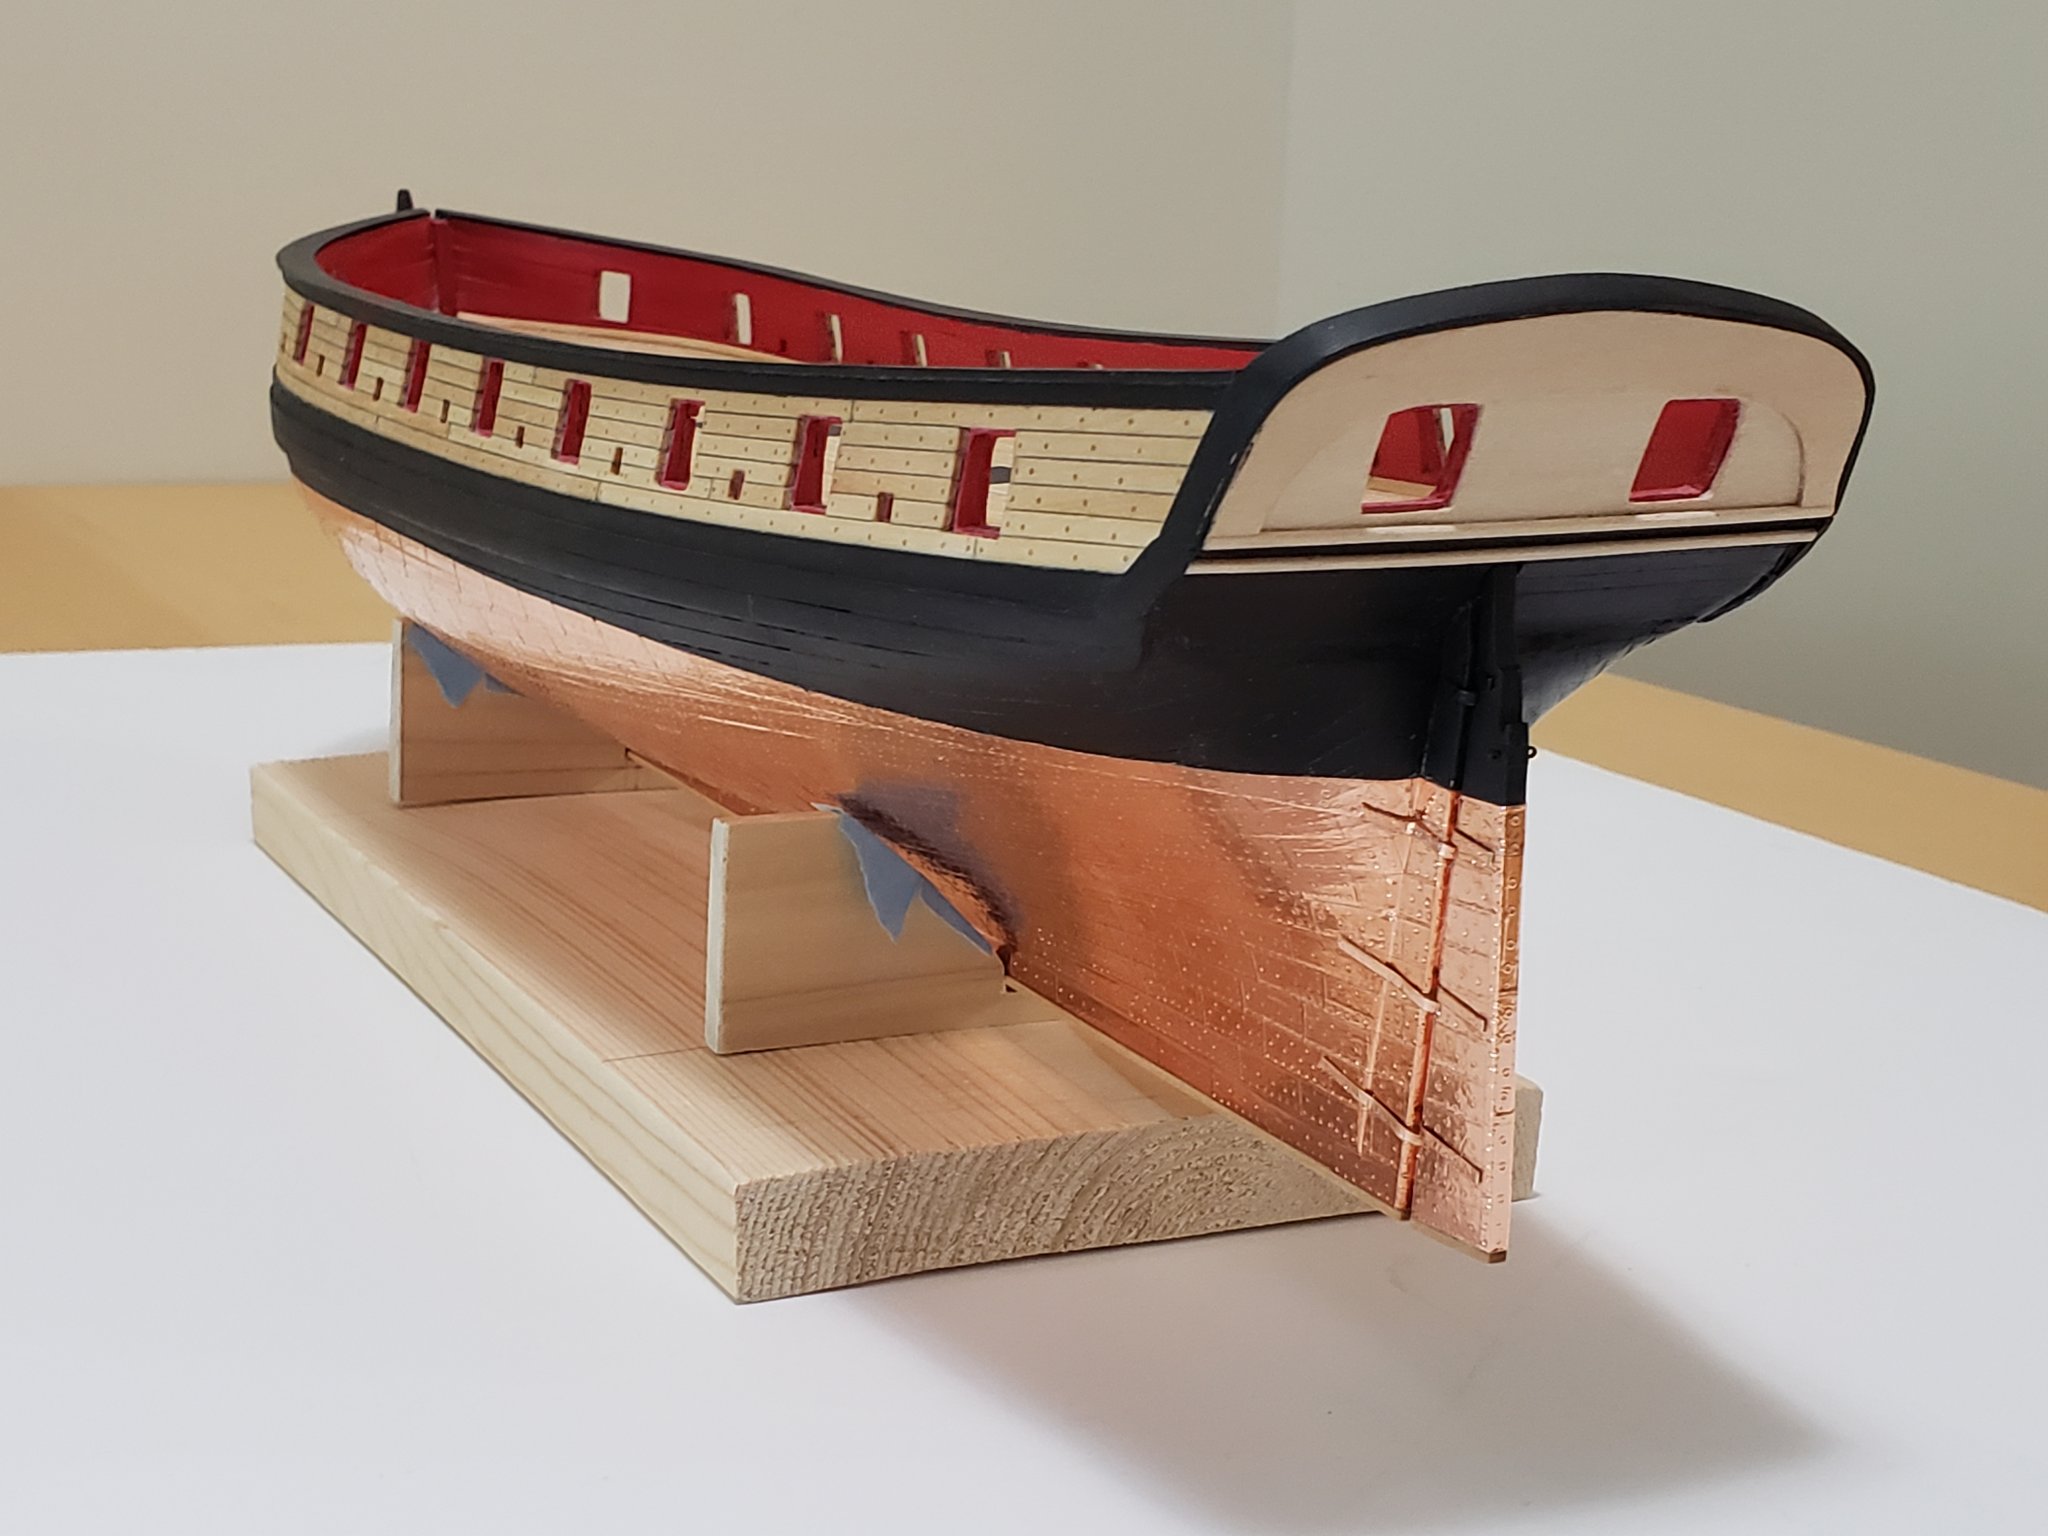
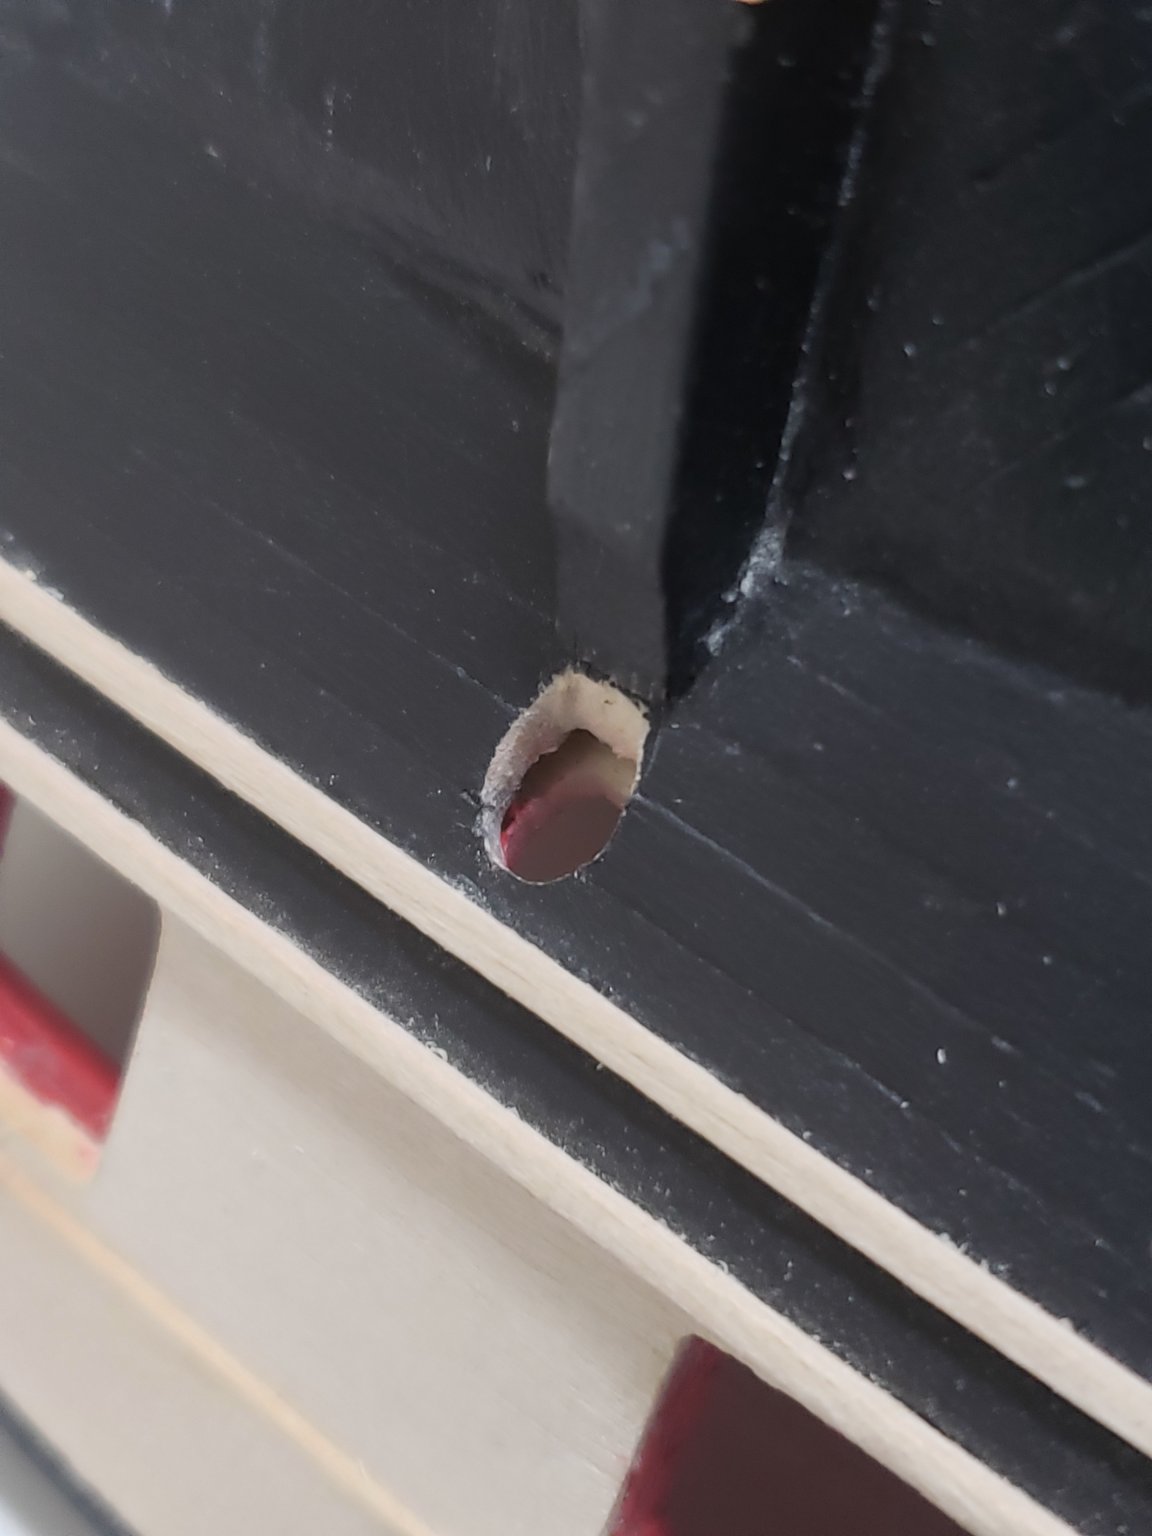
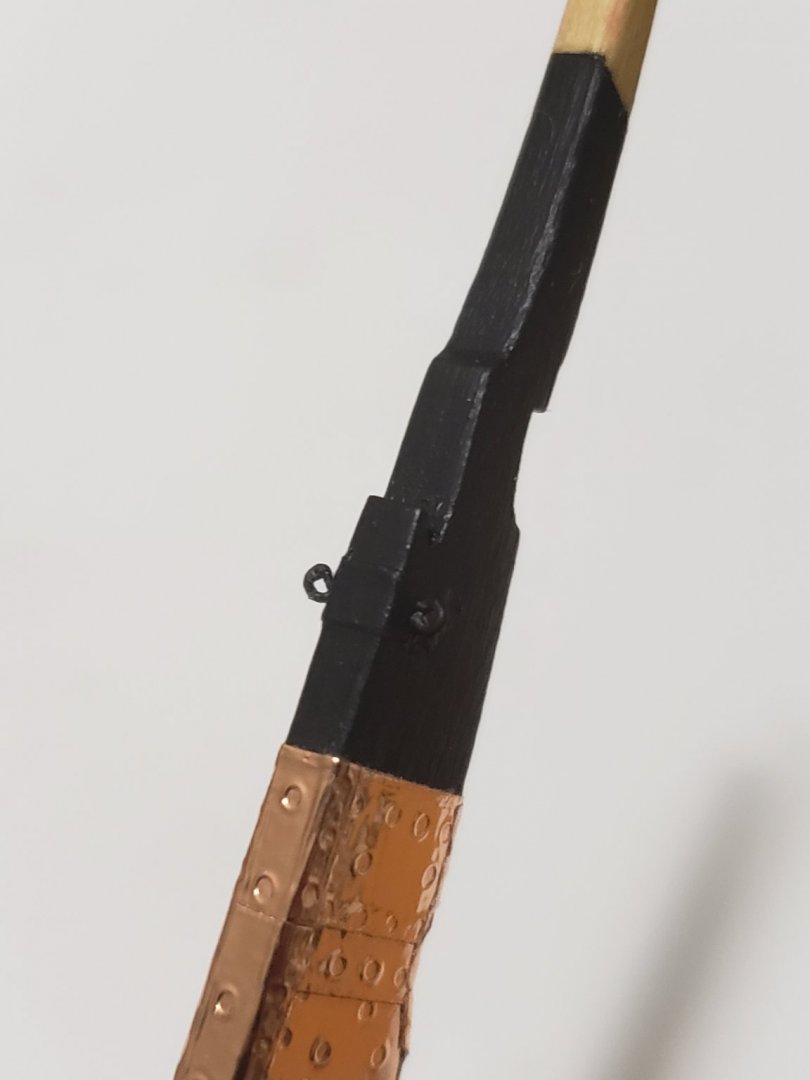
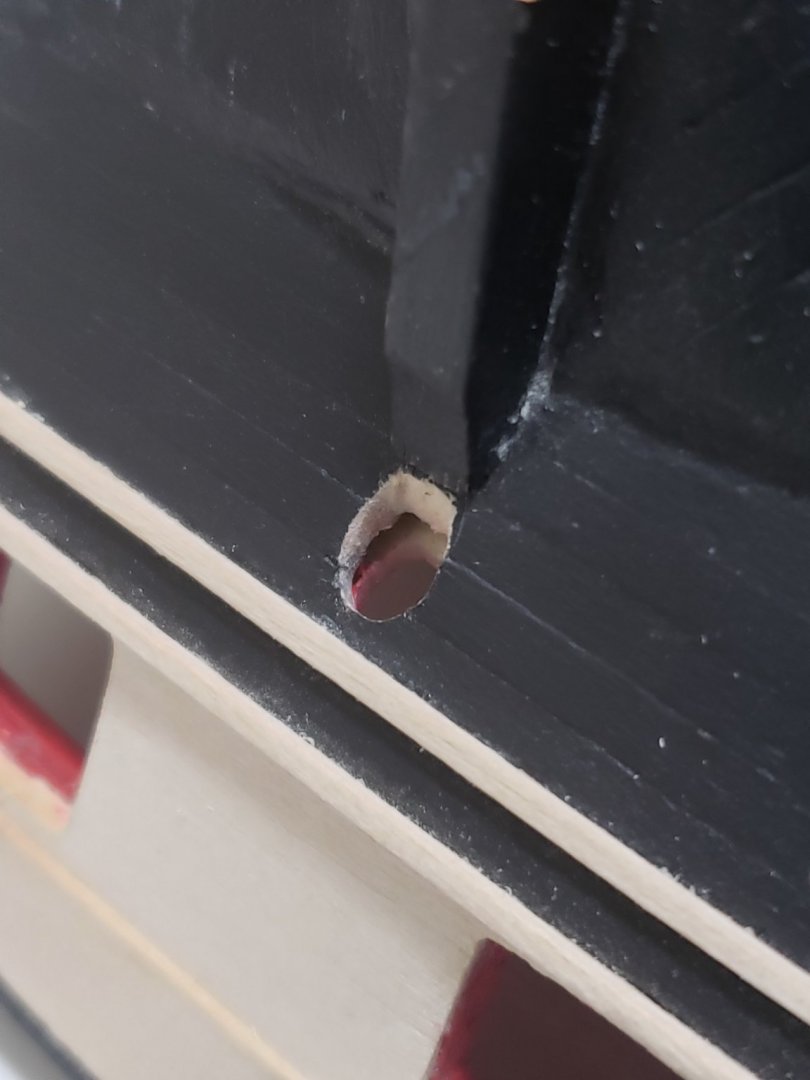
Finished Chapter 8. As expected, I found installing the rudder to be tricky just like in my previous model. There were a few places where the pintles slipped when I was gluing it on the rudder, which caused CA to smudge in some spots. I quickly grabbed nail polish remover and tried to remove the smudges with a cottonbud, but don't know if I removed all the glue. I hope this does not become very apparent when the plates begin to develop a patina. If it does show in the coming weeks I will need to purchase some ethanol to get rid of the glue (unless someone has better alternatives). That's enough rambling from me, here are some progress pics: Gudgeons and pintles were shaped, and small bits of a steel wire were glued on the pintles using epoxy and CA glue... I don't have a soldering iron so could not make a stronger joint. This looks very messy, but was all hidden after installing everything: After attaching the pintles and gudgeons on the rudder, the entire assembly was installed on the hull: Next is the hull details. I am going to try to scratch build my own quarter badges but I may have to use the metal castings if they don't turn out good 😬.


- 950 replies
-
- 12
-
-
- syren
- model shipways
- (and 1 more)
-
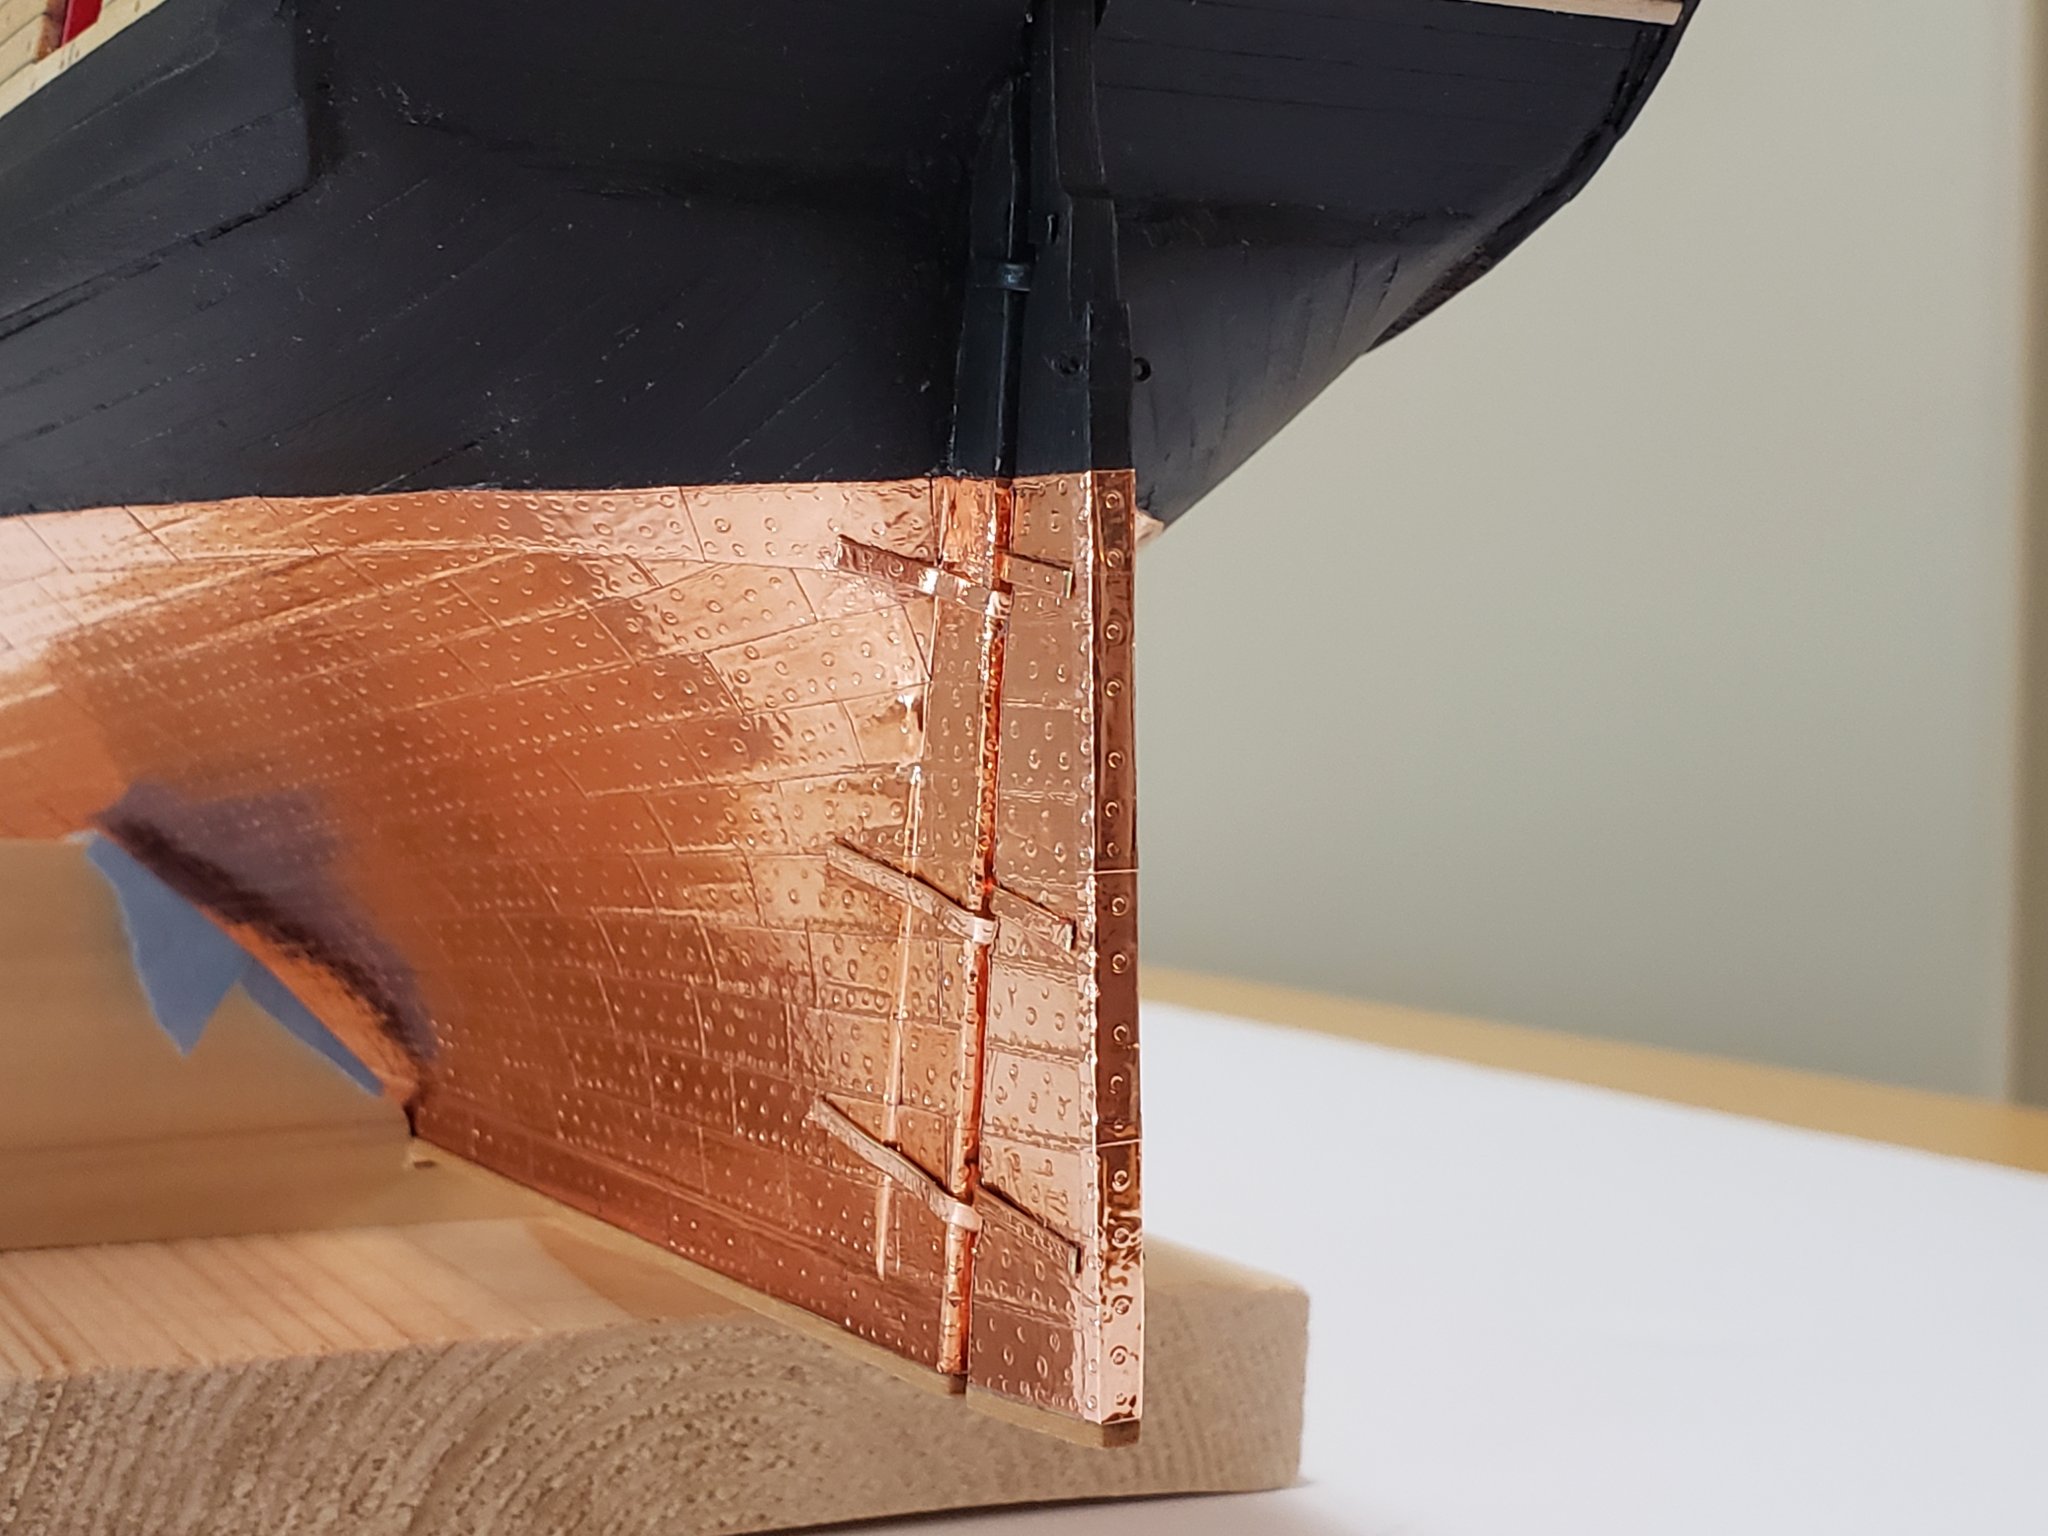
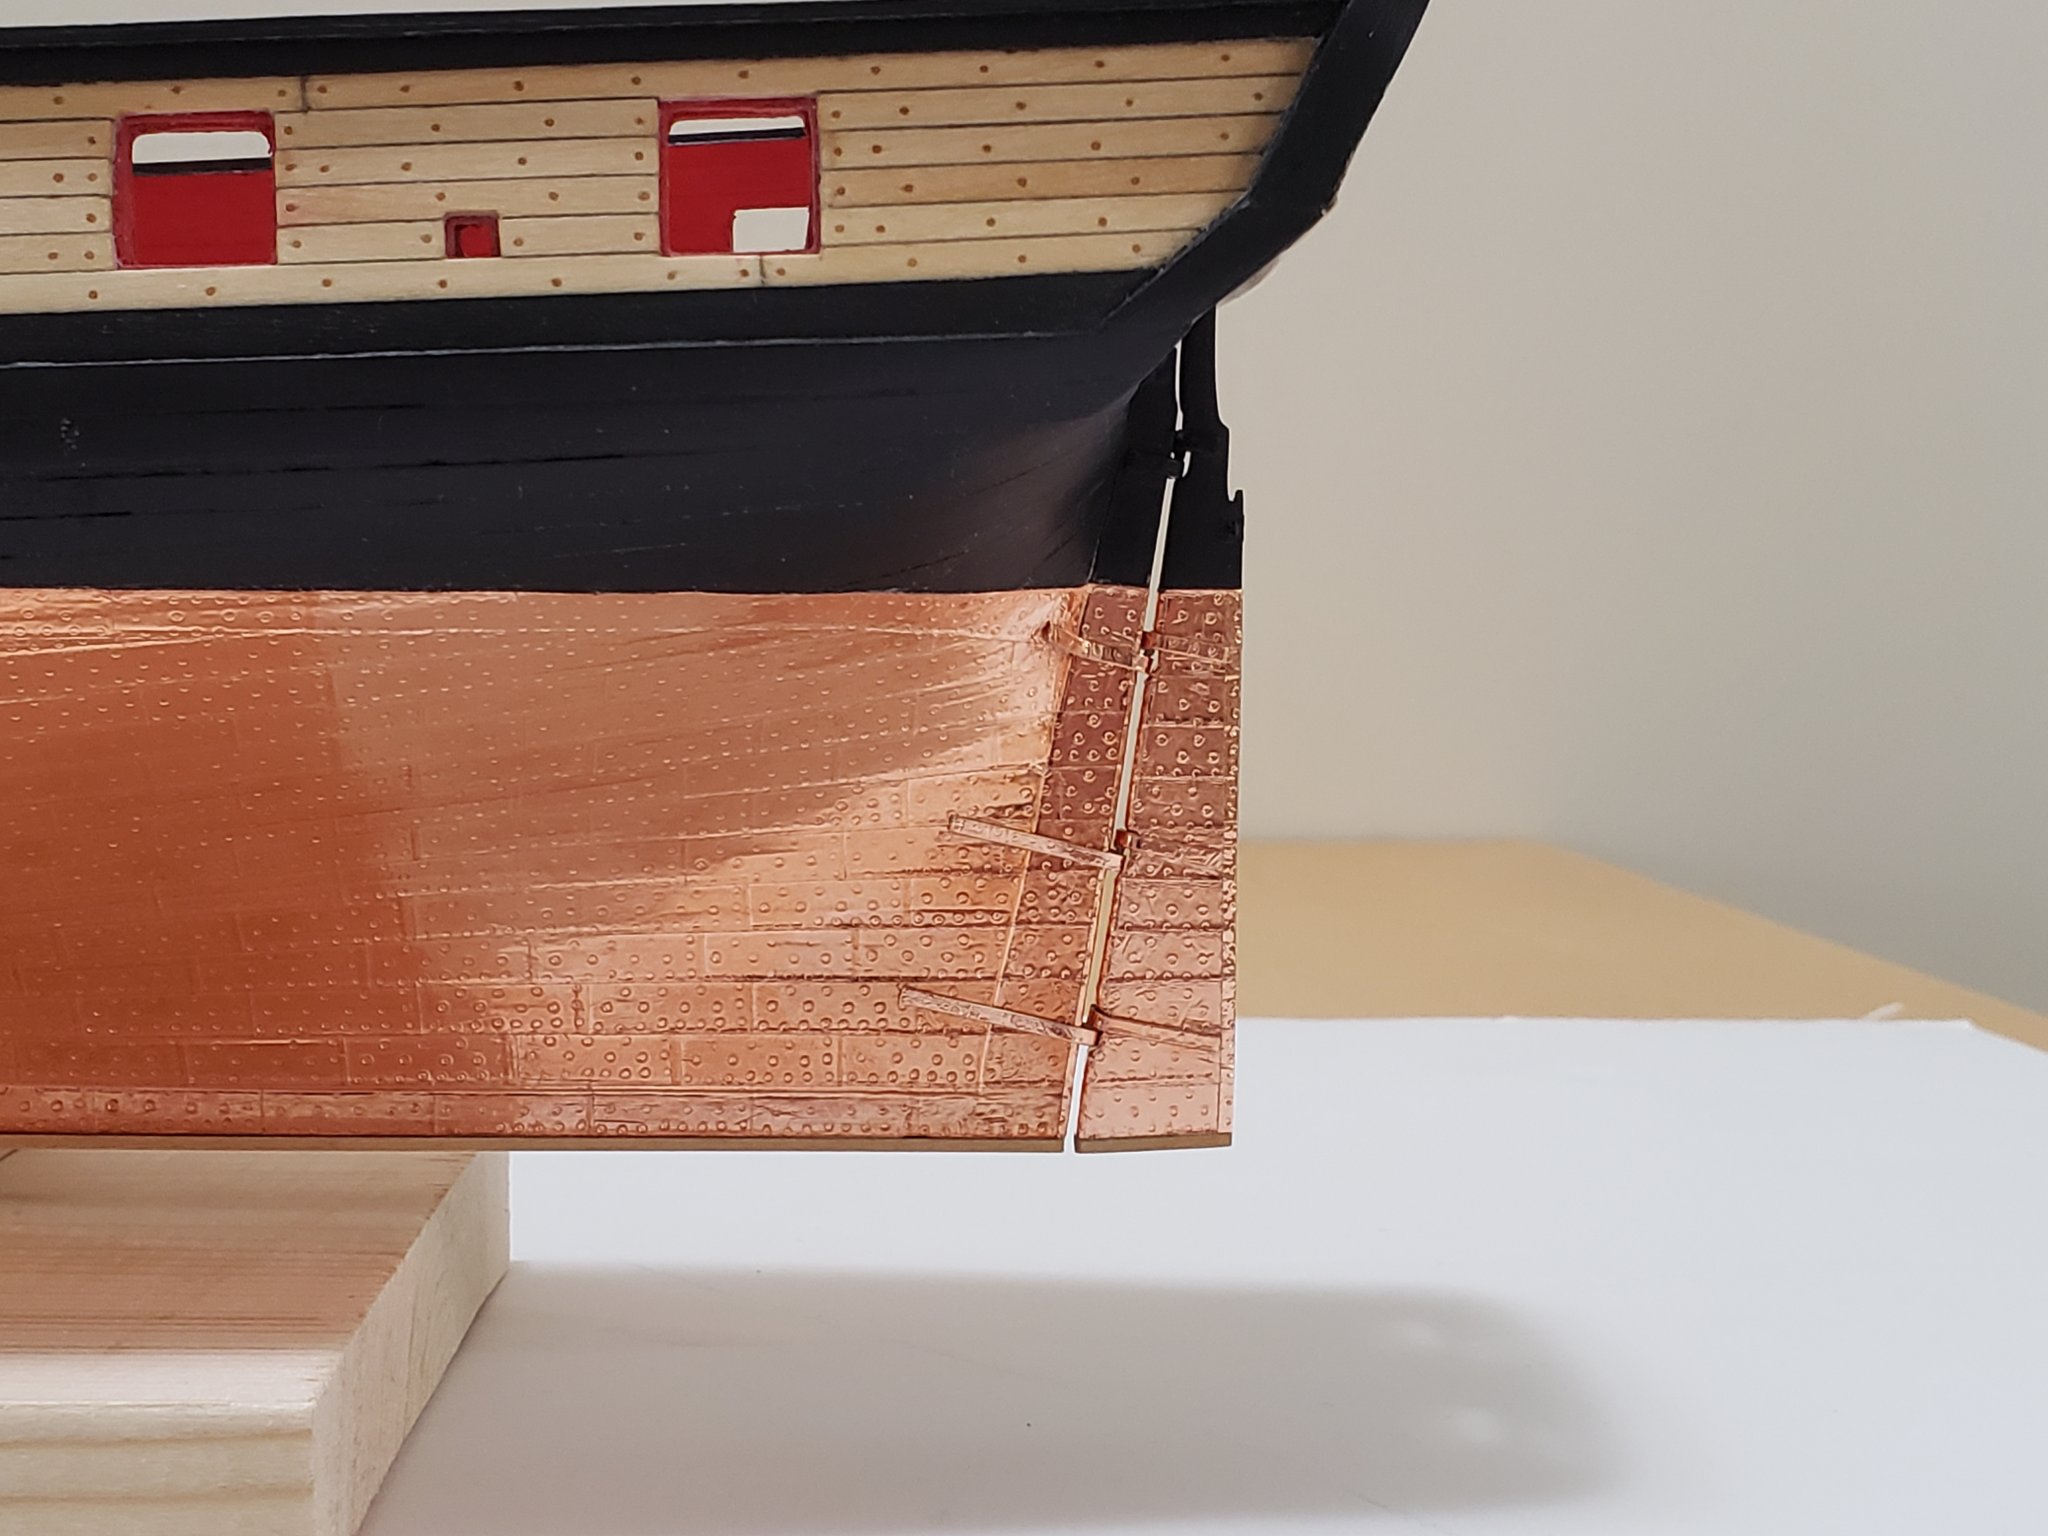
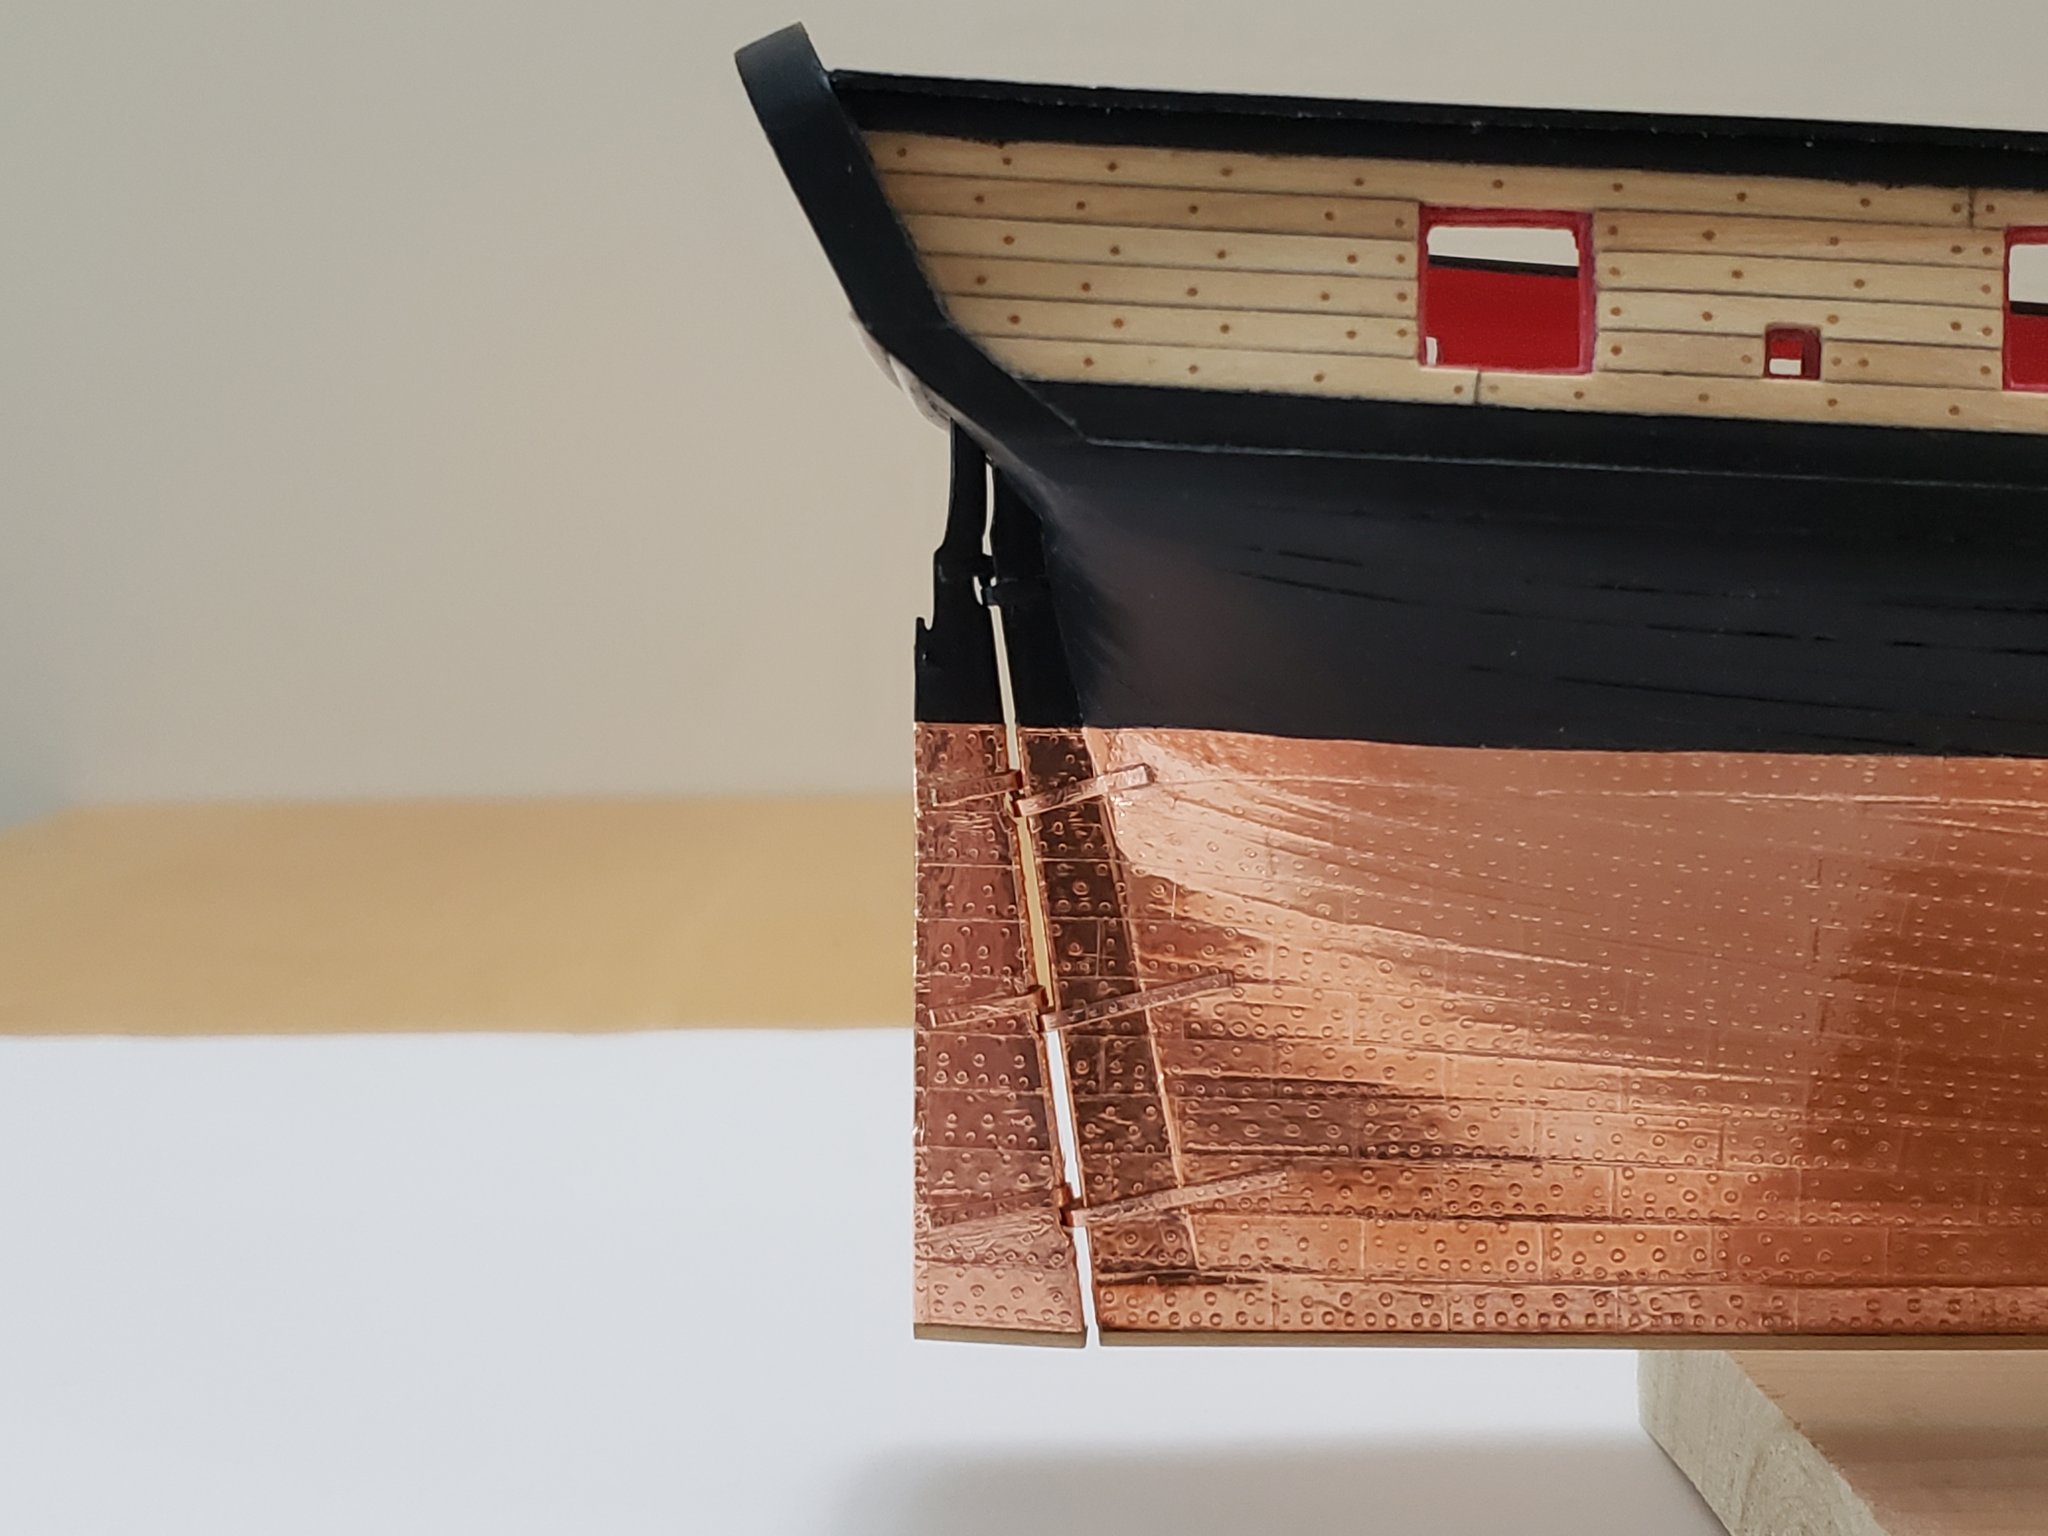
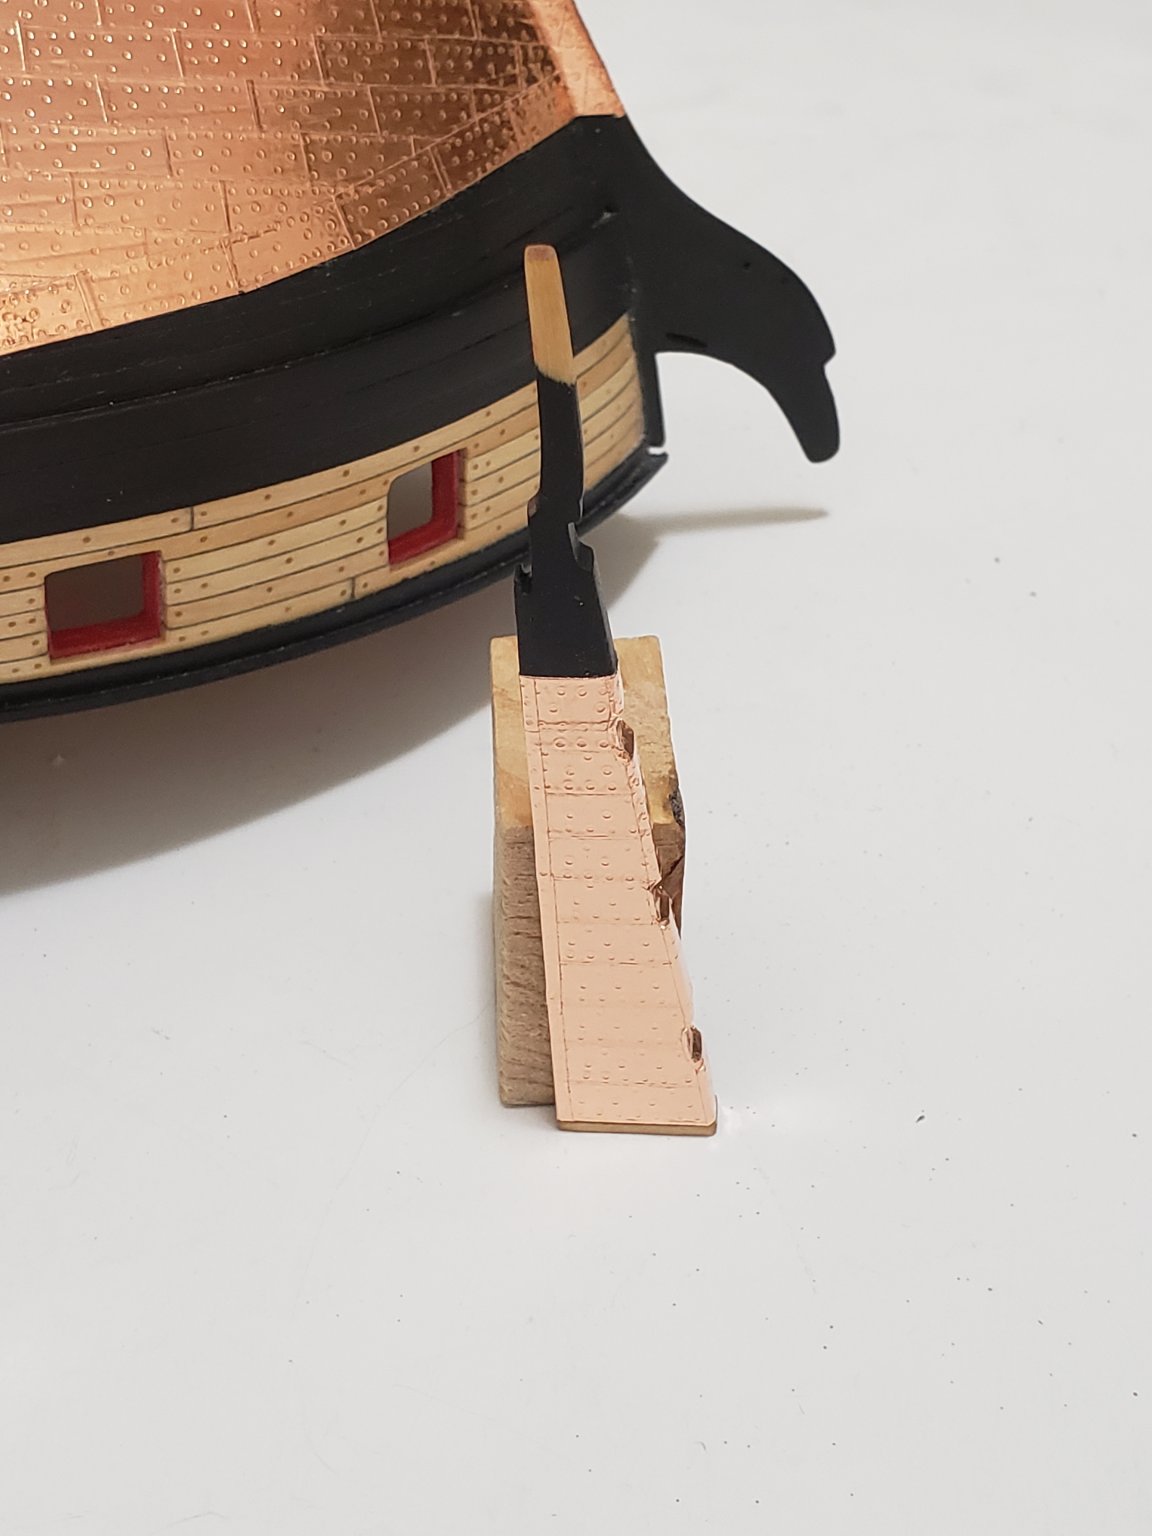
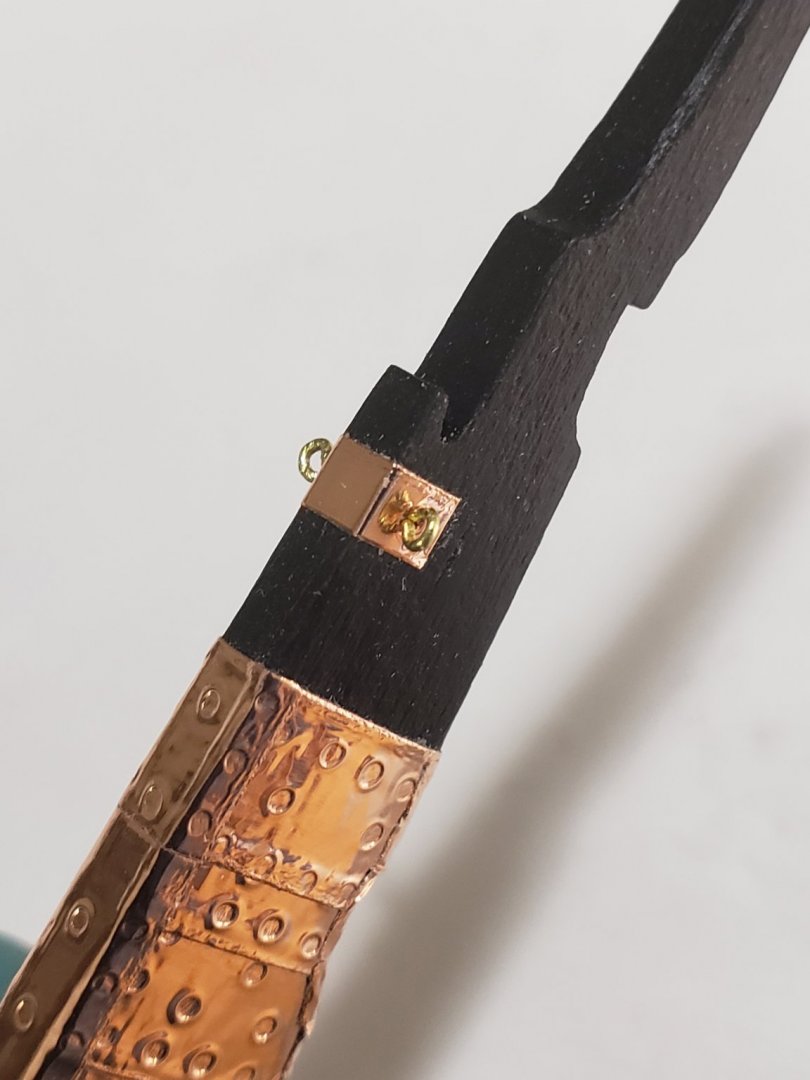
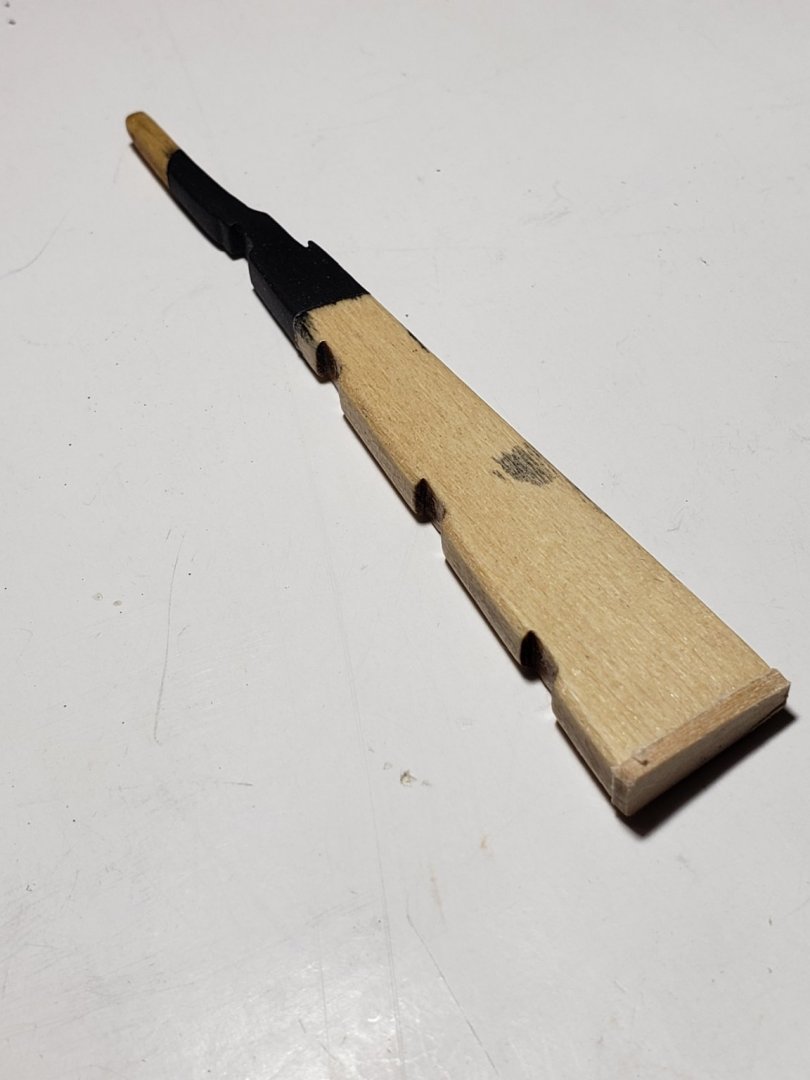
I also finished installing the piece of copper plate to simulate the iron strap and the two eyebolts onto the rudder. Here are some closeups 😬 Put some primer on it: Painted it black: Only item left to finish this chapter is the gudgeons and pintles. Another item I am a bit nervous about since I did not have that good of an experience with installing them on the Virginia, my previous (and first) model.
- 950 replies
-
- 10
-
-
- syren
- model shipways
- (and 1 more)
-
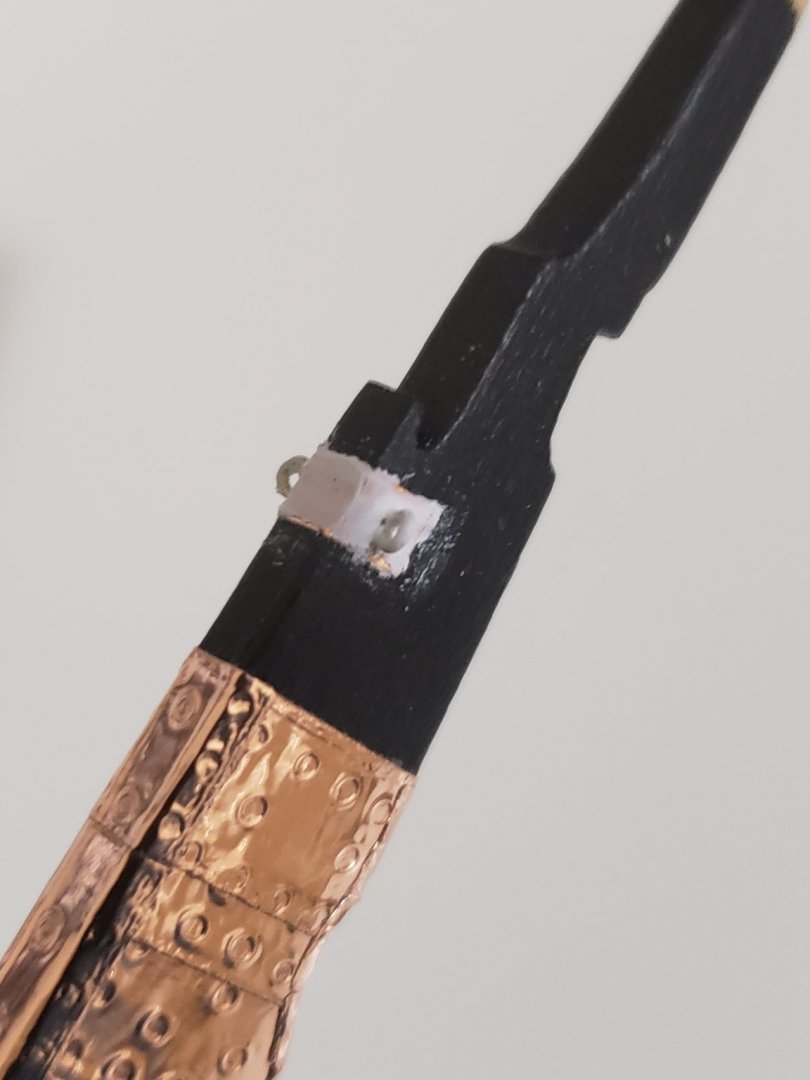
Thanks Chuck!! Is this better? The rudder can now swing much more easily than before.. P.S. Just learnt that I hate taking closeups... Shows a lot of imperfections that I can not see with the naked eye. Guess its all part of the process 😅. Hope it gets better with more and more experience.

- 950 replies
-
- 7
-
-
- syren
- model shipways
- (and 1 more)
-
I have not built the Badger but looking at the US Brig Syren's instructions (can be found on the ModelExpo website) I would think that the cannons can be installed after detailing the hull and the inboard bulwarks.
-
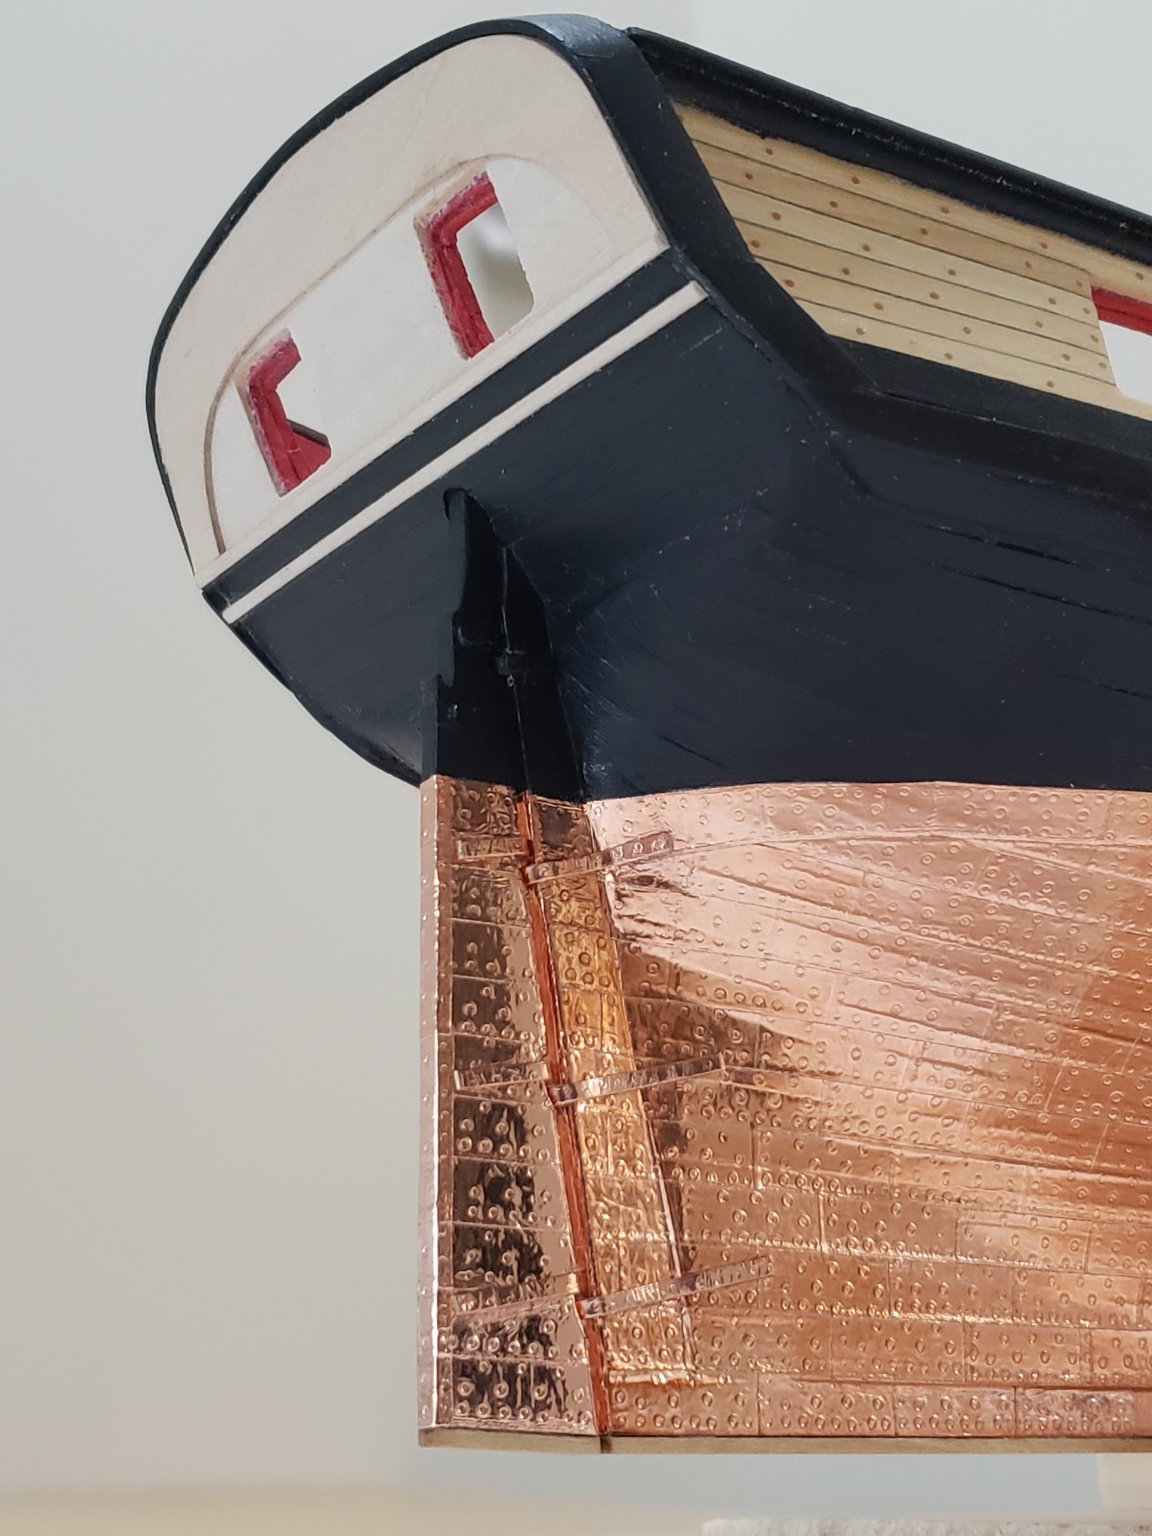
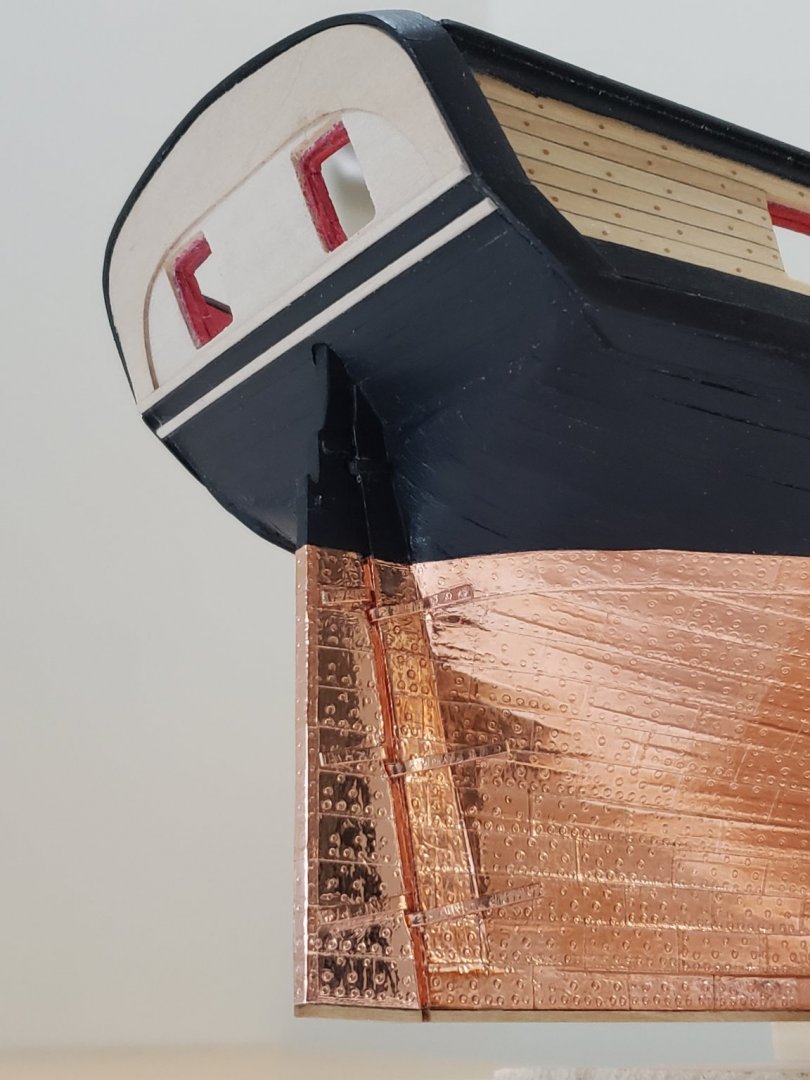
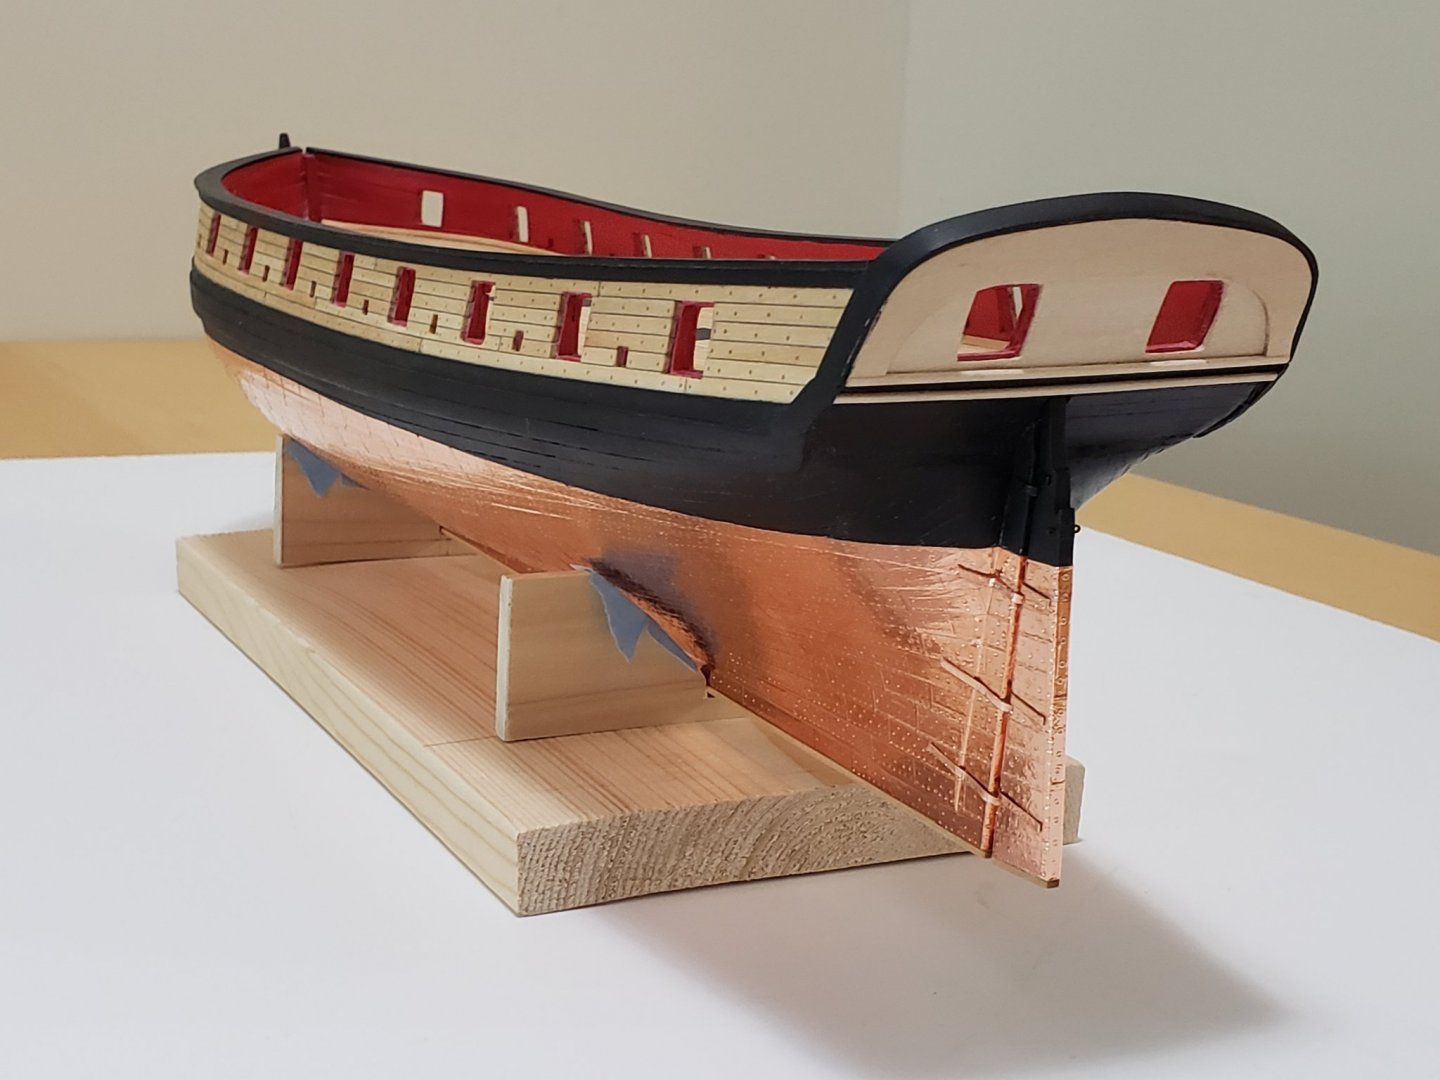
Thanks guys 🙂 Some more progress on the rudder: Painted the middle black, the tung oil was applied to the top, and sanding sealer was applied at the bottom. Also glued and sanded the false keel. And finally it was copper plated. Just a few days and the copper from the hull already looks much darker than the fresh plates on the rudder. Next is the eyebolts for the pendants and then the gungeons and pintles.


- 950 replies
-
- 9
-
-
- syren
- model shipways
- (and 1 more)