
Bruma
-
Posts
179 -
Joined
-
Last visited
Content Type
Profiles
Forums
Gallery
Events
Everything posted by Bruma
-
 Before moving on, I realized I still have to rig the spencer gaff and sail. And again, I need your help. I have no idea how to rig them. Longridge sais: "the sheets were arranged, like the sheets of the headsail, with egg-shaped blocks to pass over the mizzen stay, with a tipping line to facilitate the operation". How do you interpret that? One or two blocks? And, more important, where is supposed to start and end the line passing thought the block-blocks? For the gaff, the only reference I was able to find is on Campbell's plan. He says "3" hemp Vang P&S and 5" block". But again, not mentioning the running part. The question is always the same: where is supposed to start and end the line passing thought the blocks? Any help will be greatly appreciated! Thank you!
- 399 replies
-
- 1
-

-
- cutty sark
- revell
- (and 2 more)
-
Nice job! If I remember correctly, there were discrepancies between the placement of the deadeye suggested by revell and the placement shown in cambpbell's plans. Obviously, you can place yours where you want, I just want you to be advised about that, correcting later on will be almost impossible...
- 481 replies
-
- 1
-
-
- Cutty Sark
- Revell
- (and 2 more)
-
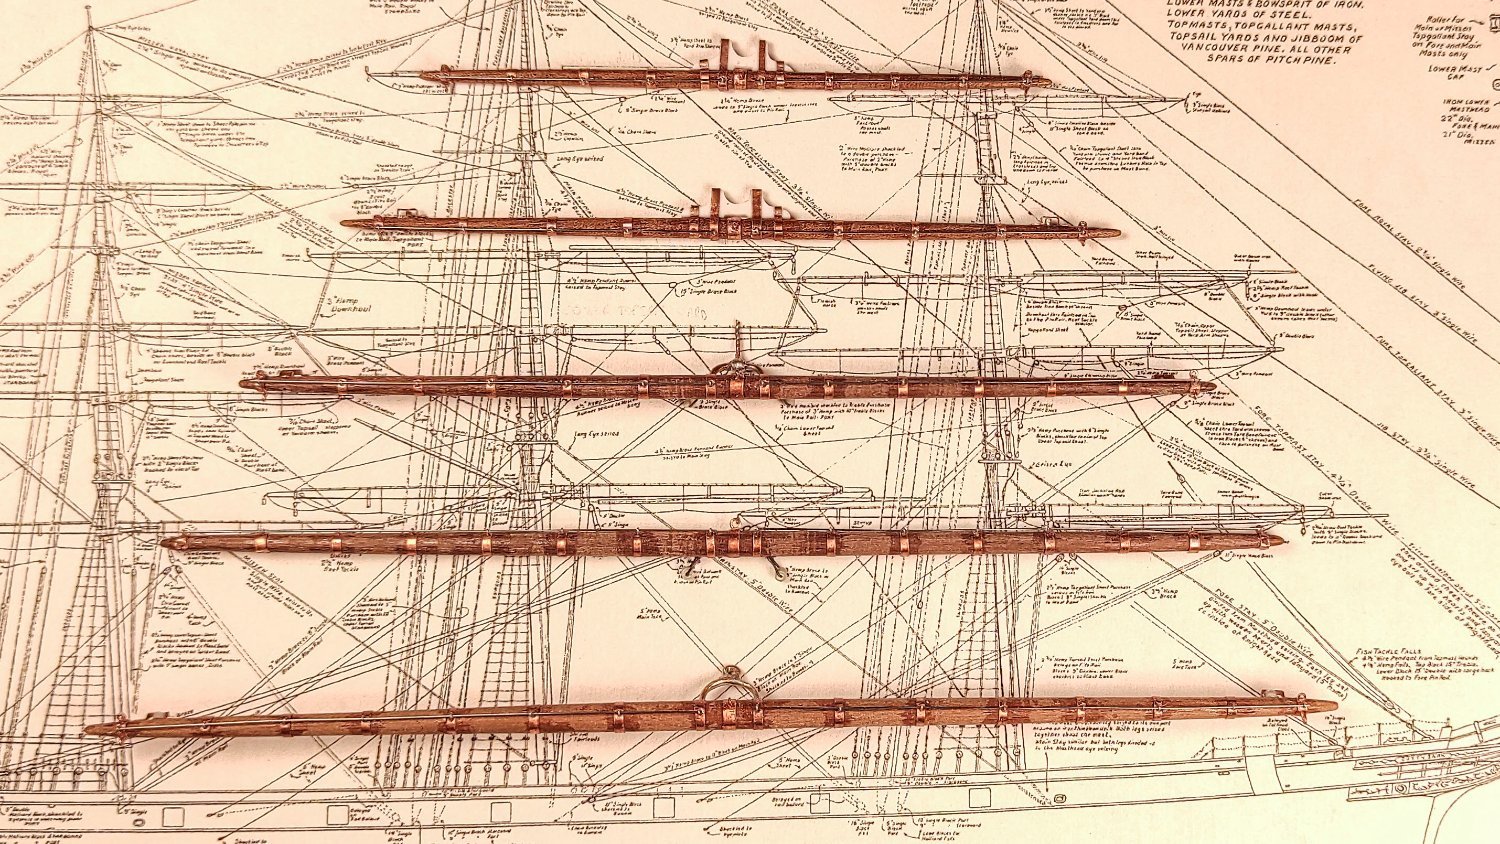
Thank you, John, for the quick and precise answer! Thank you! Yes, they are all hand made. And yes, I will paint them. Surely the details stands out better now, but I want to replicate the real ship as close as possible. And all the yards of the fore mast are already painted and installed, so, I will keep dooing the same.
- 399 replies
-
- 2
-
-
- cutty sark
- revell
- (and 2 more)
-
Thank you all for the comments and likes, I really appreciate your feedback! In my previous post there was a question, but for some reason it was not at the end of the post as I want it to be, but somewhere in the middle, and it can be easily lost in between all the images. So let me write it again here, hoping to get some help from you clipper's fan: Next step will be the rigging of the mainstay sails. Here I still have some doubts about the sheets: for the jib there are two sheets, one for each side in order to allow the change in tack. For the main and mizzen stay sail there is only one sheet (at least according to Underhill). How can they manage the tacking process? You have to untie the sheet on the deck and pass it over the stays, which seems to me at least impractical if not impossible… Any information about that is very welcome! Thank you again for the great support!
- 399 replies
-
- 4
-
-
- cutty sark
- revell
- (and 2 more)
-
Rob, you are doing a wonderful job! I like your furled sails, very well done!
-
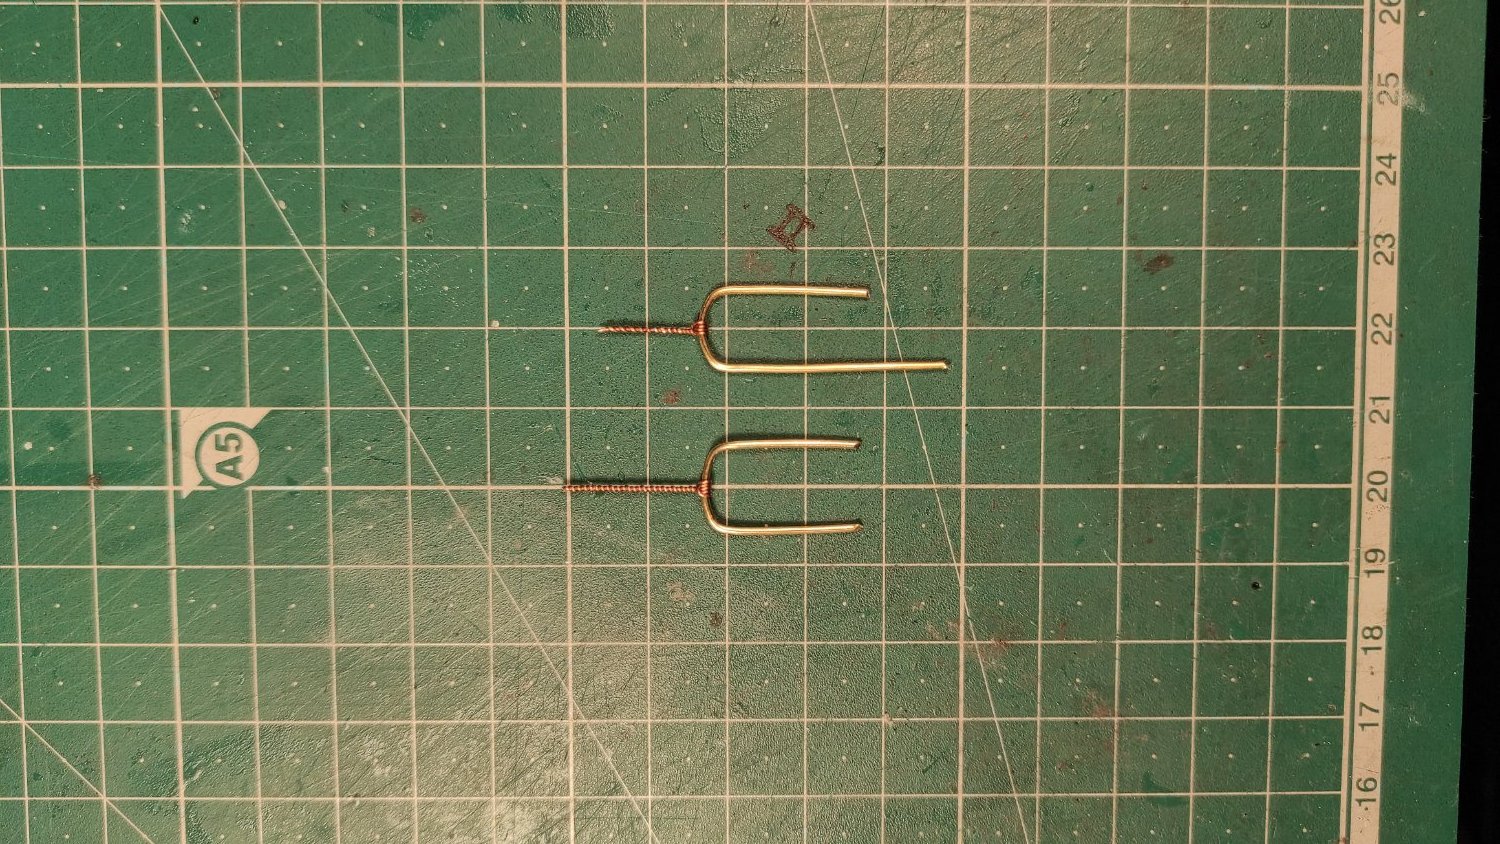
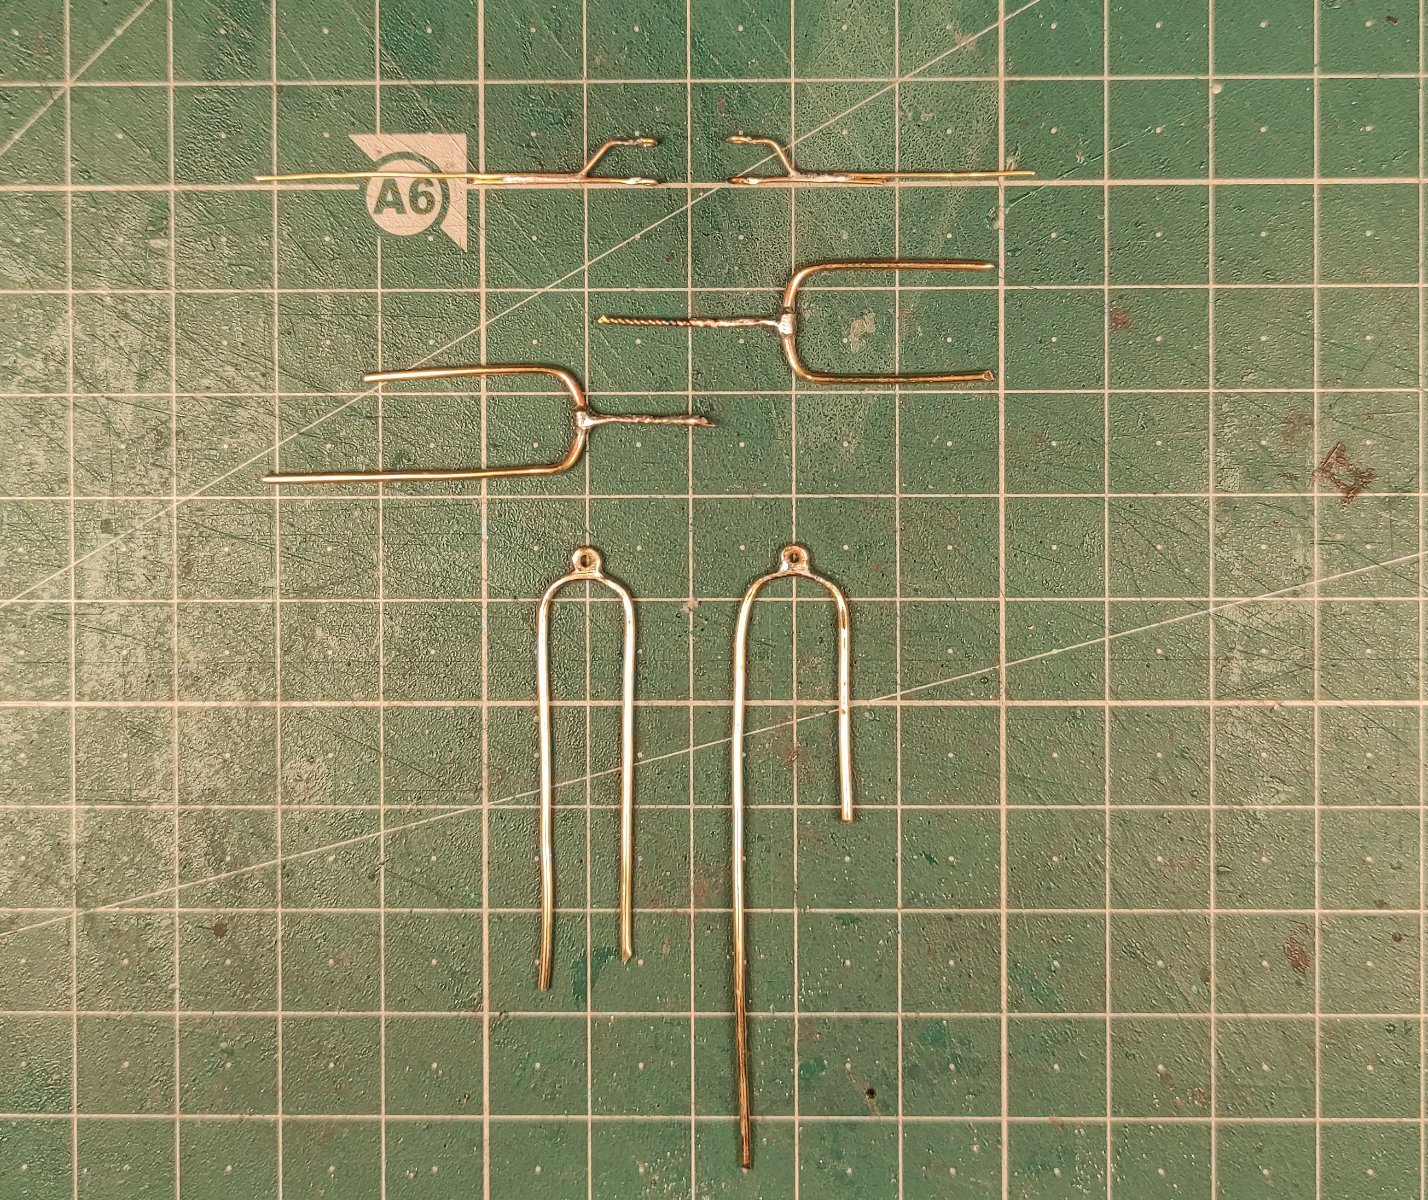
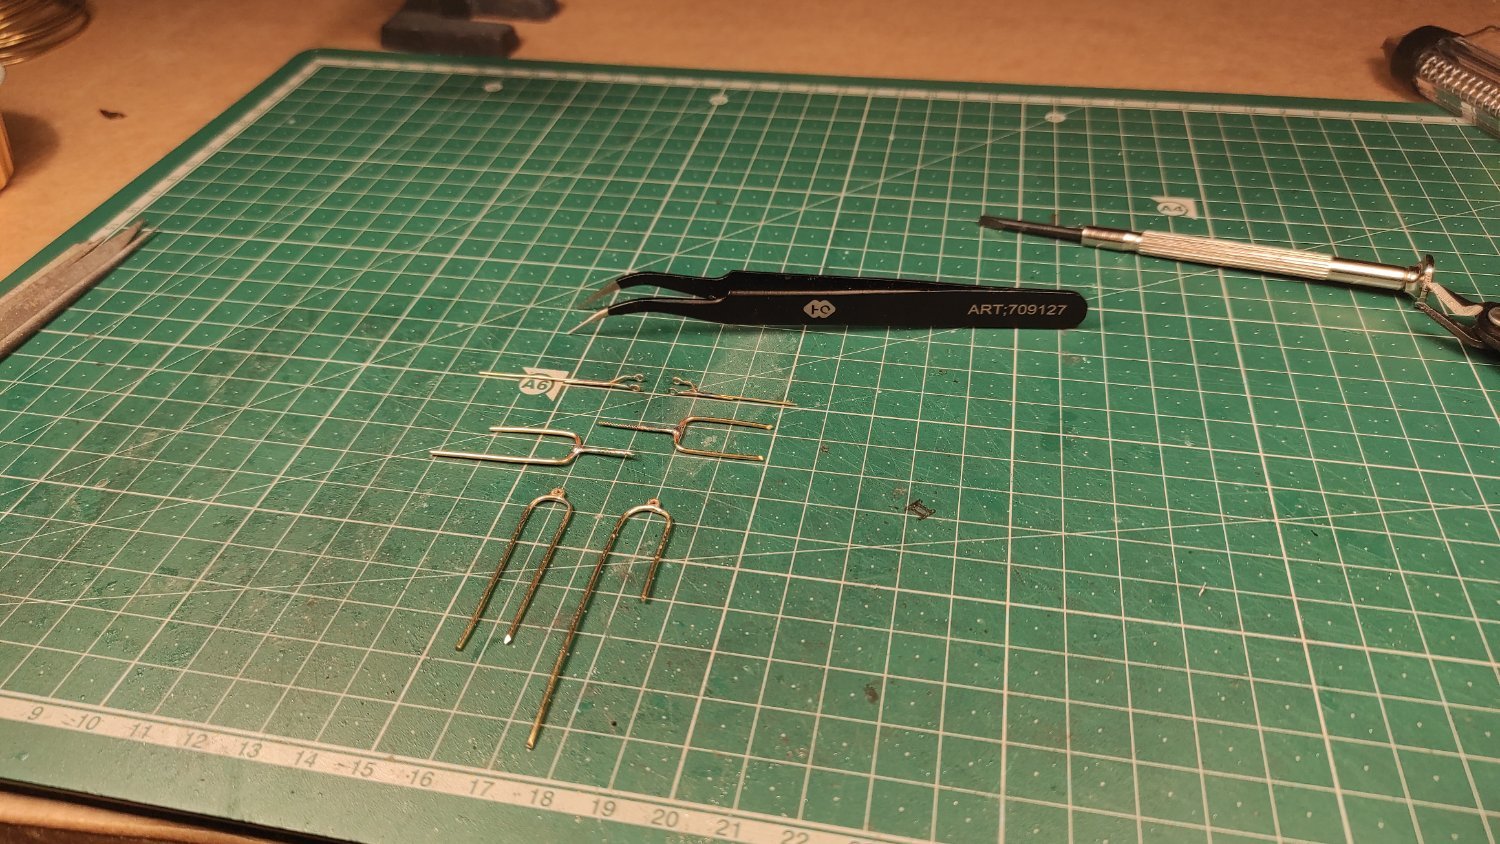
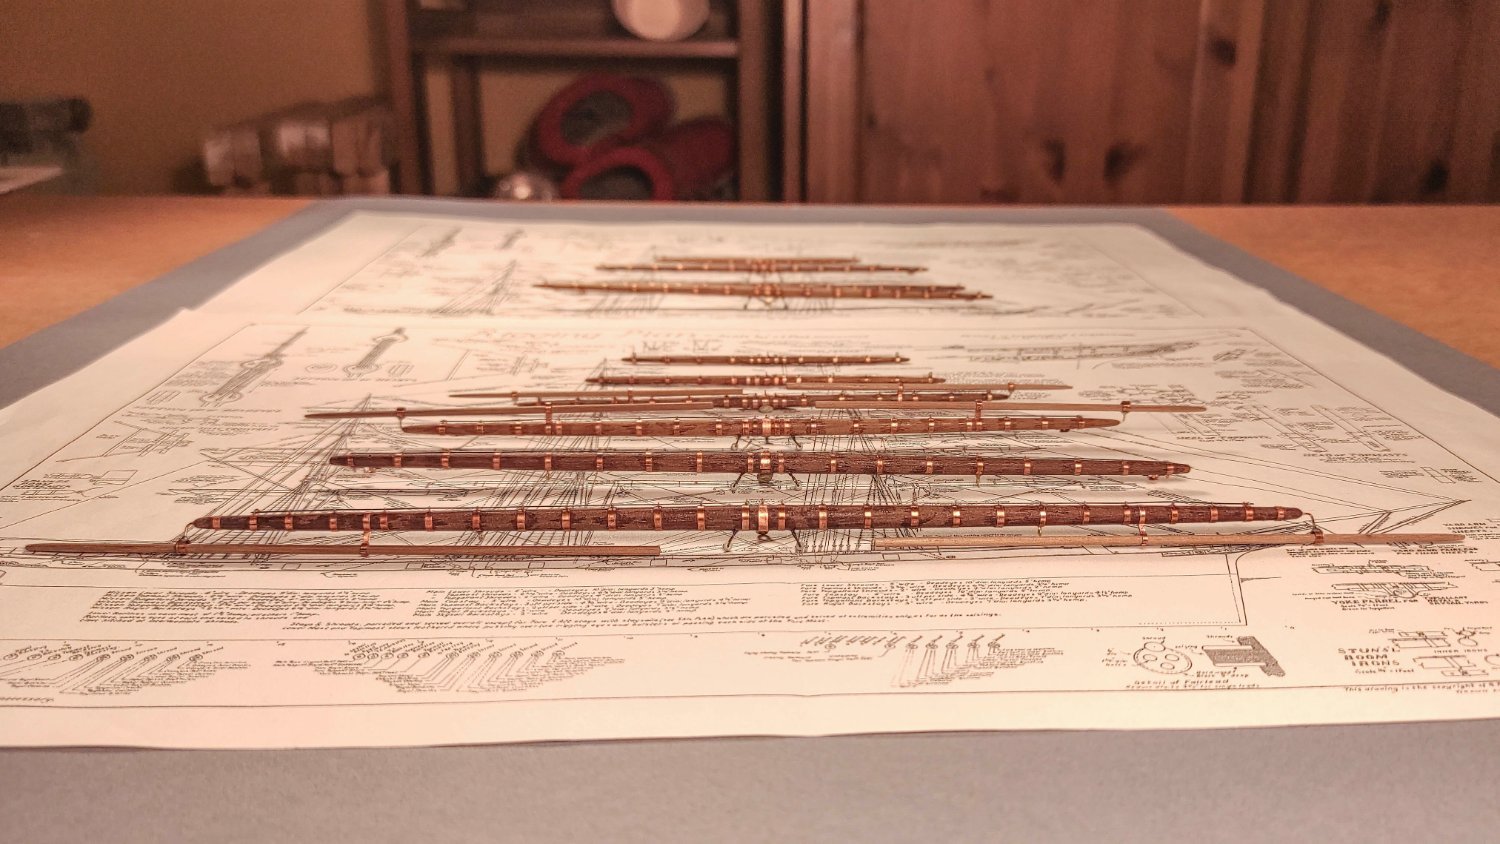
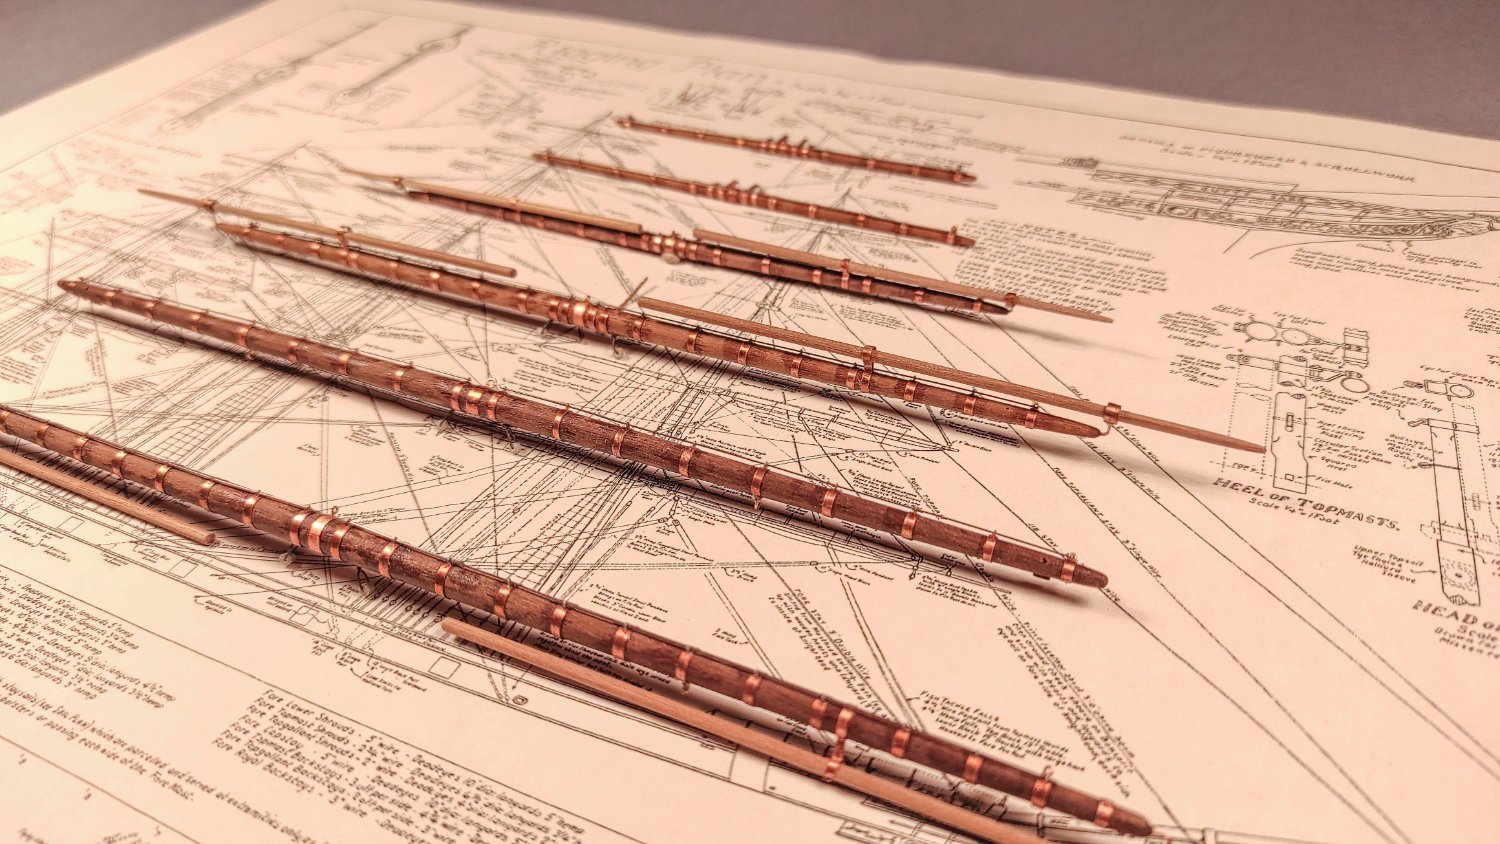
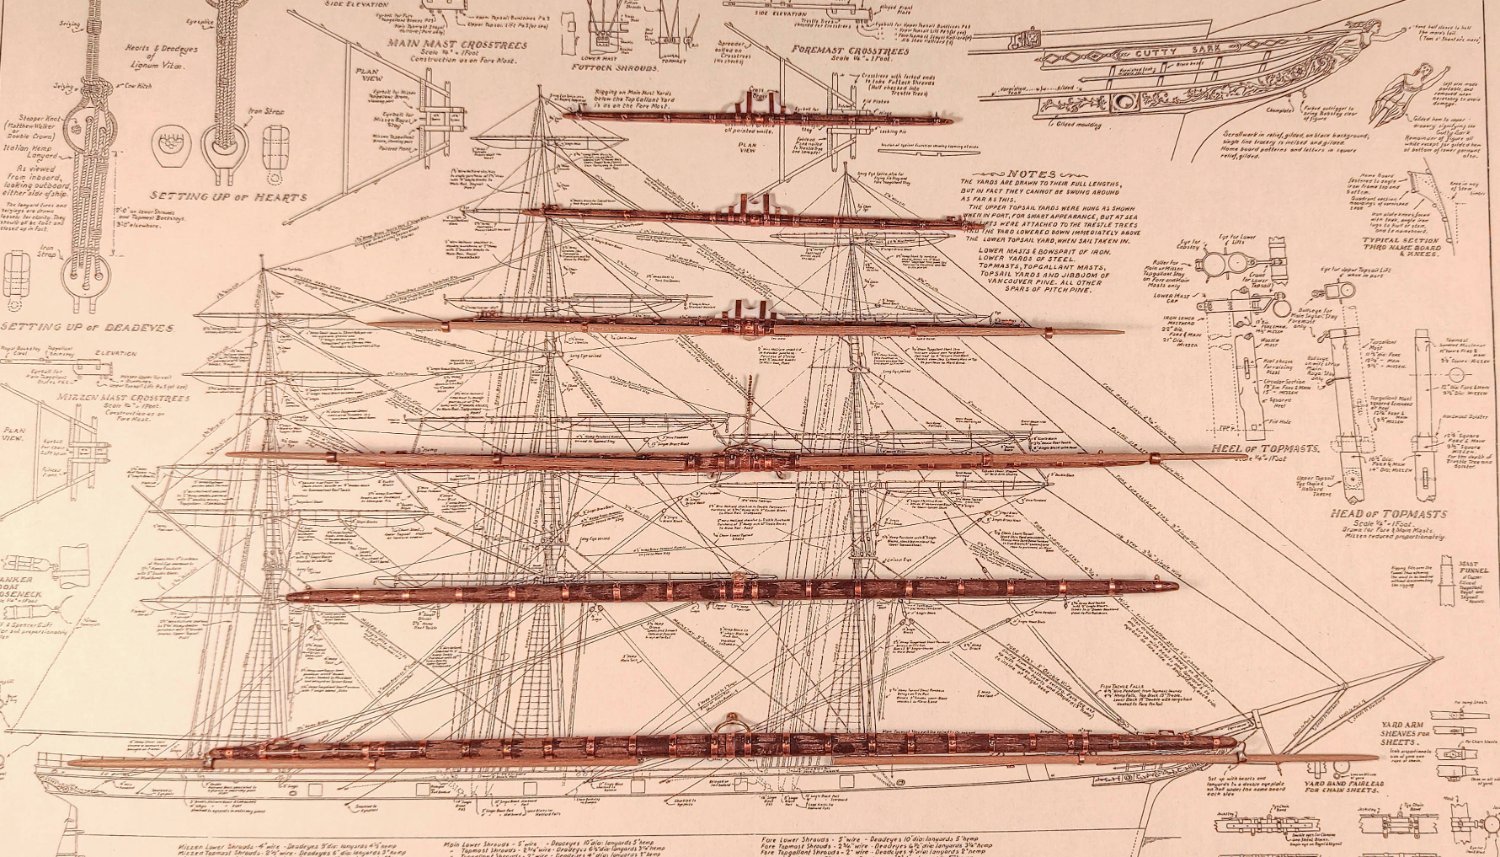
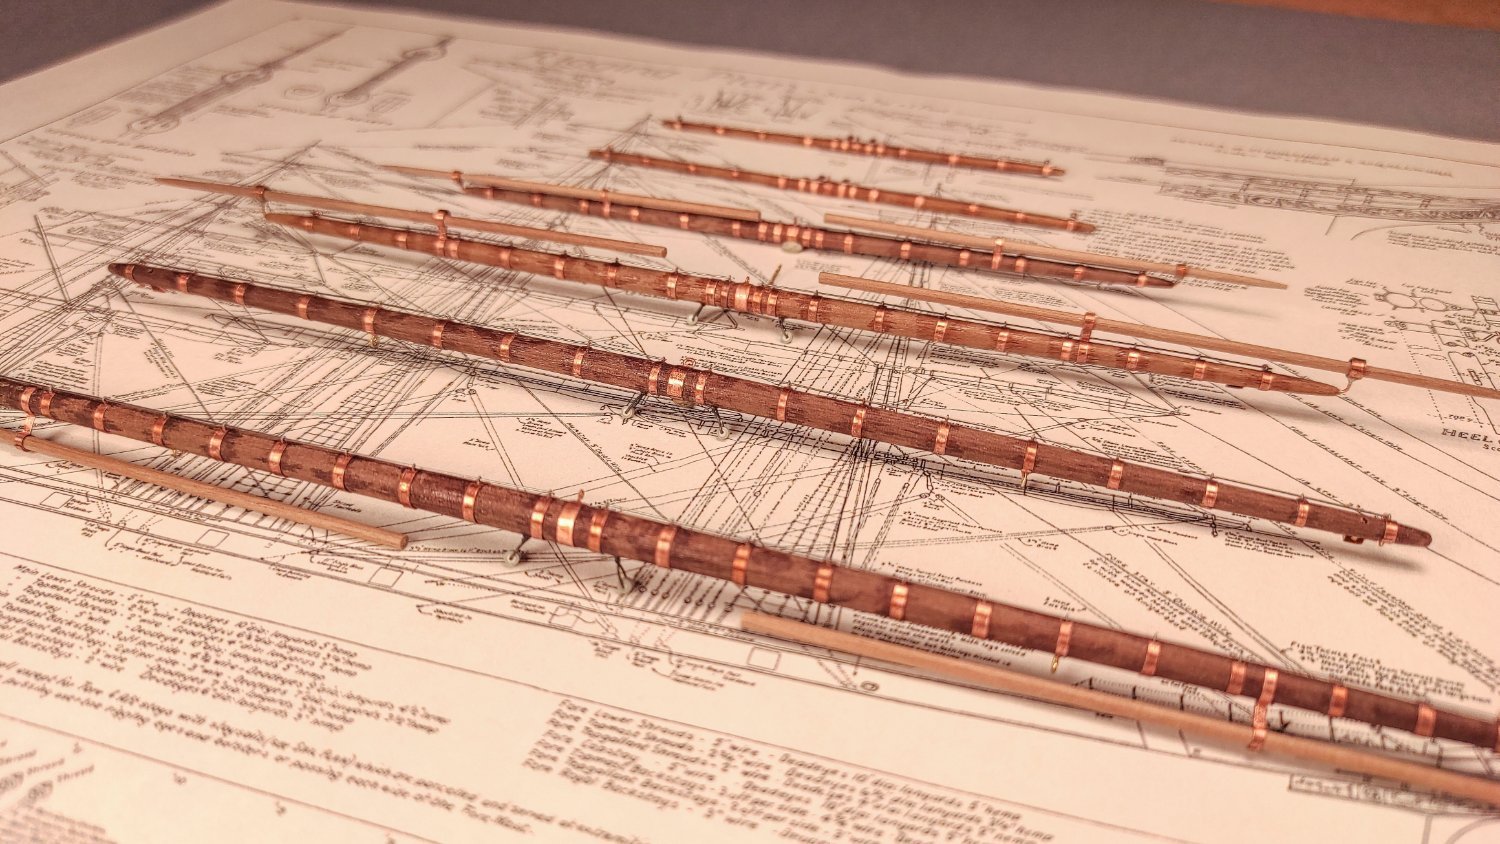
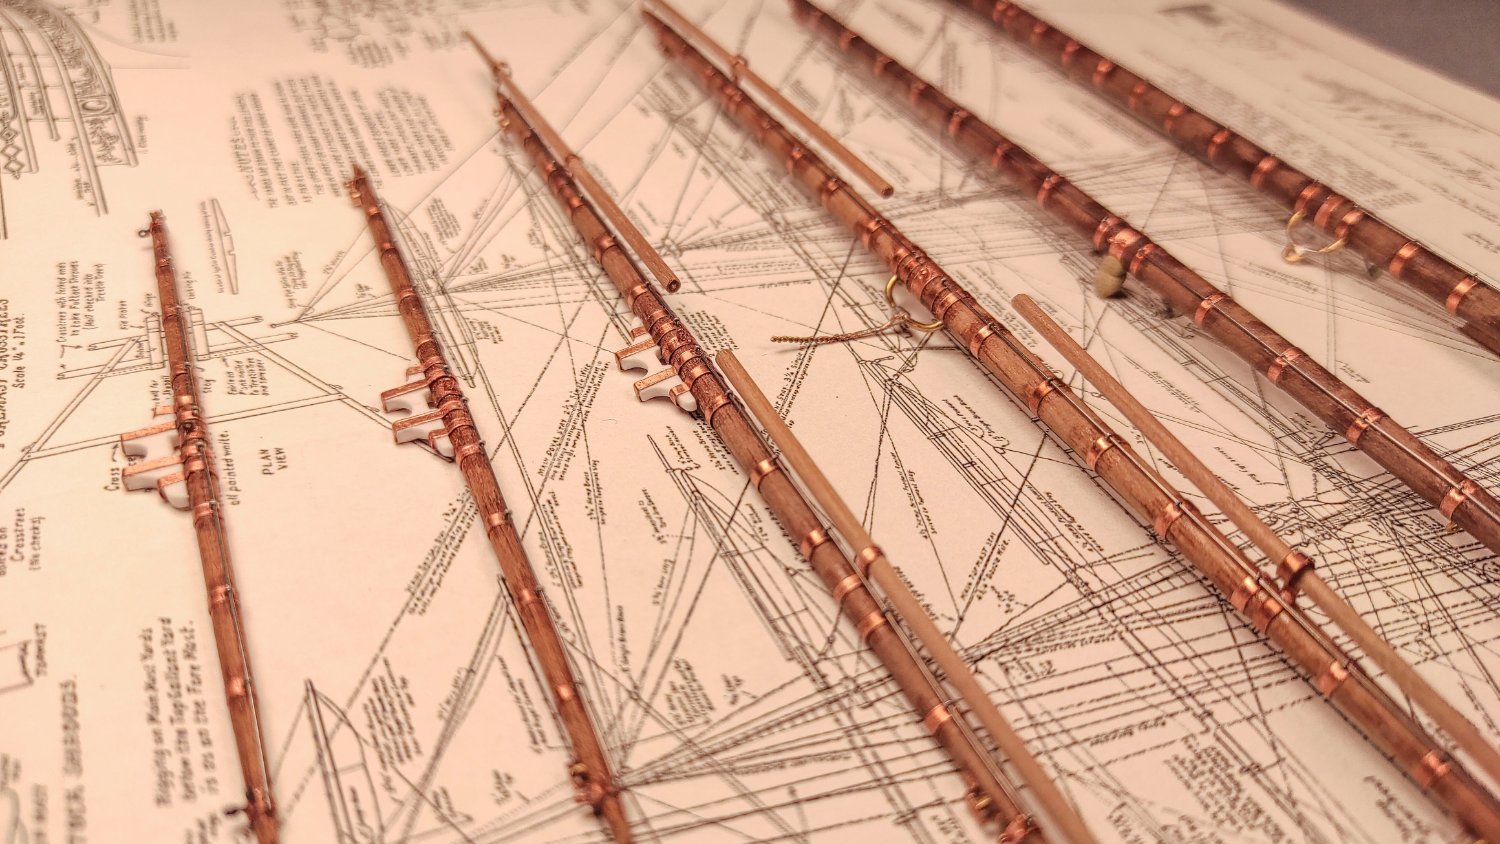
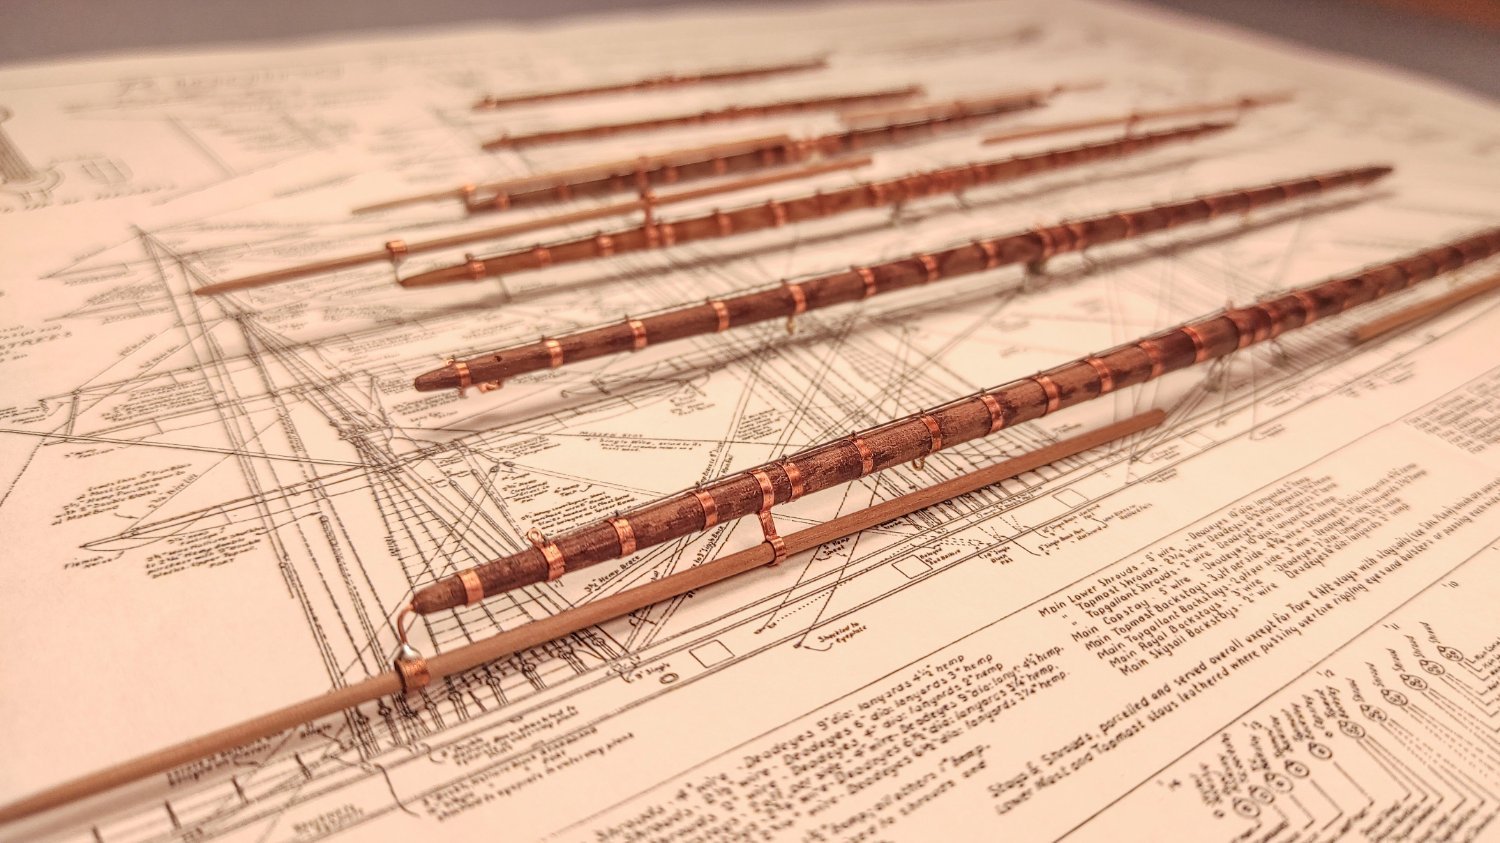
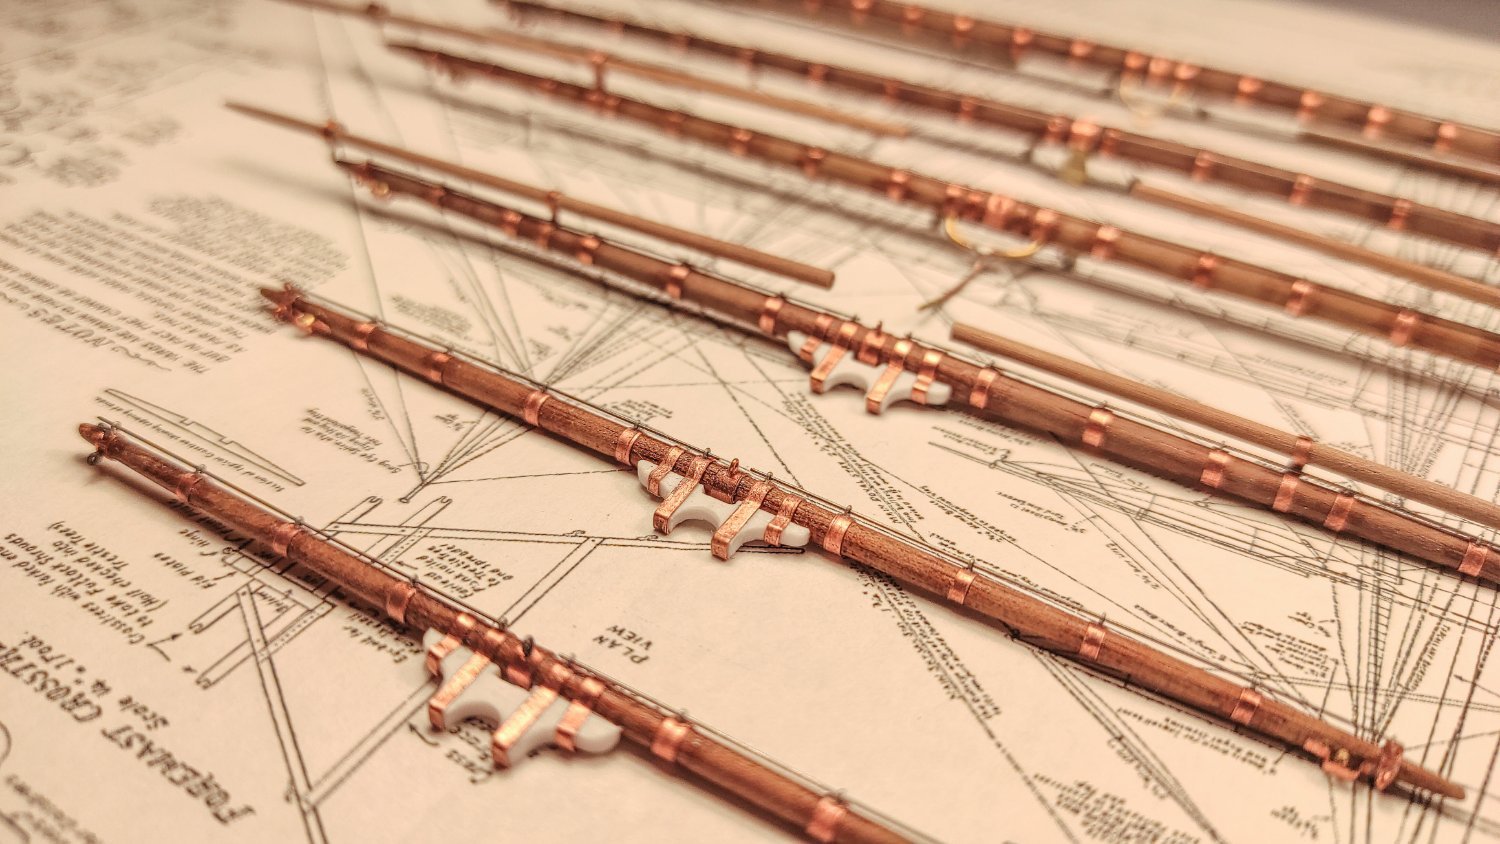
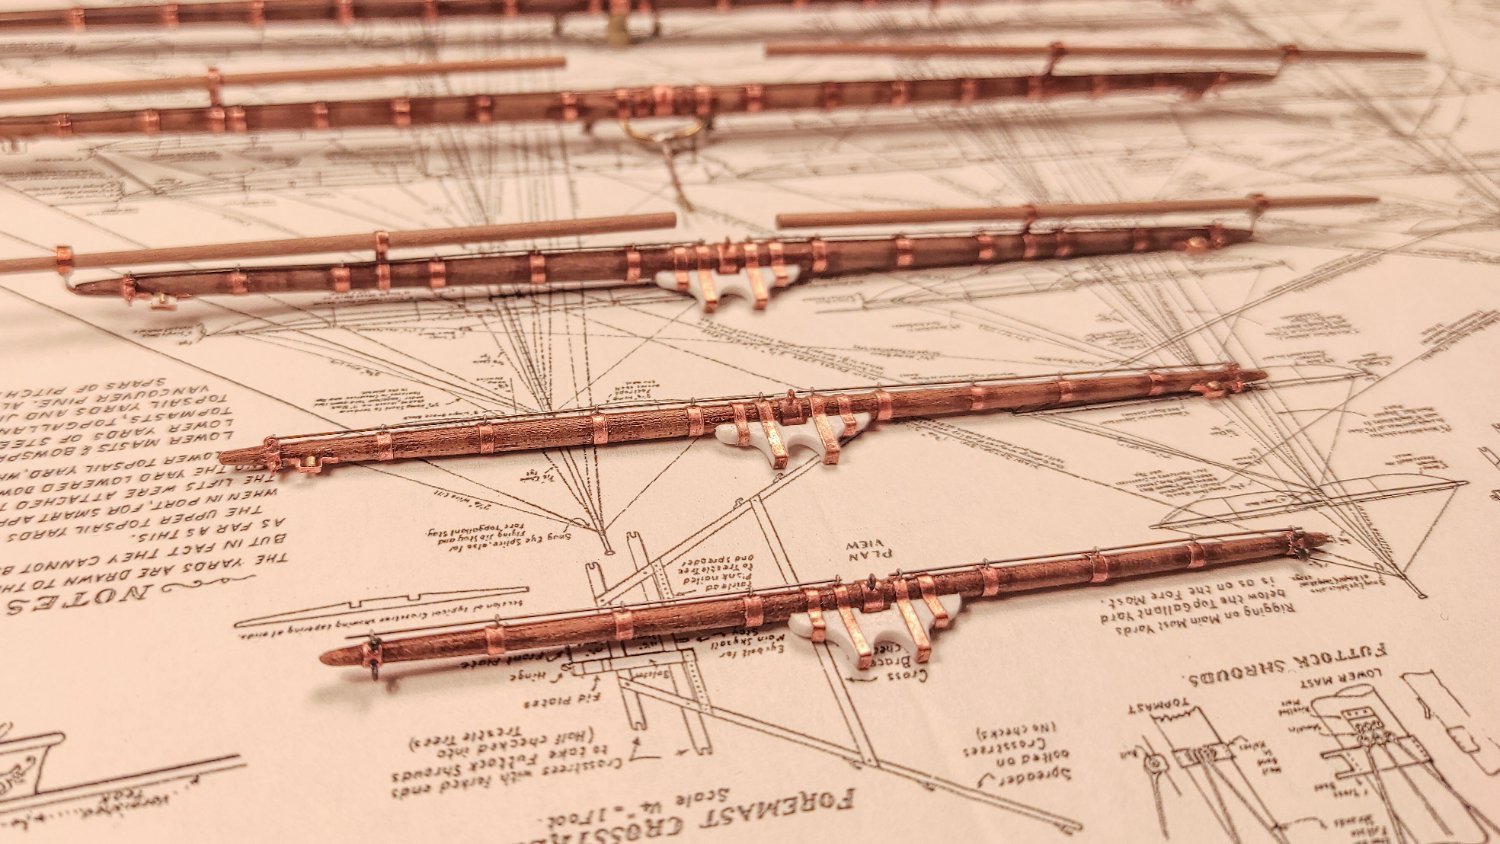
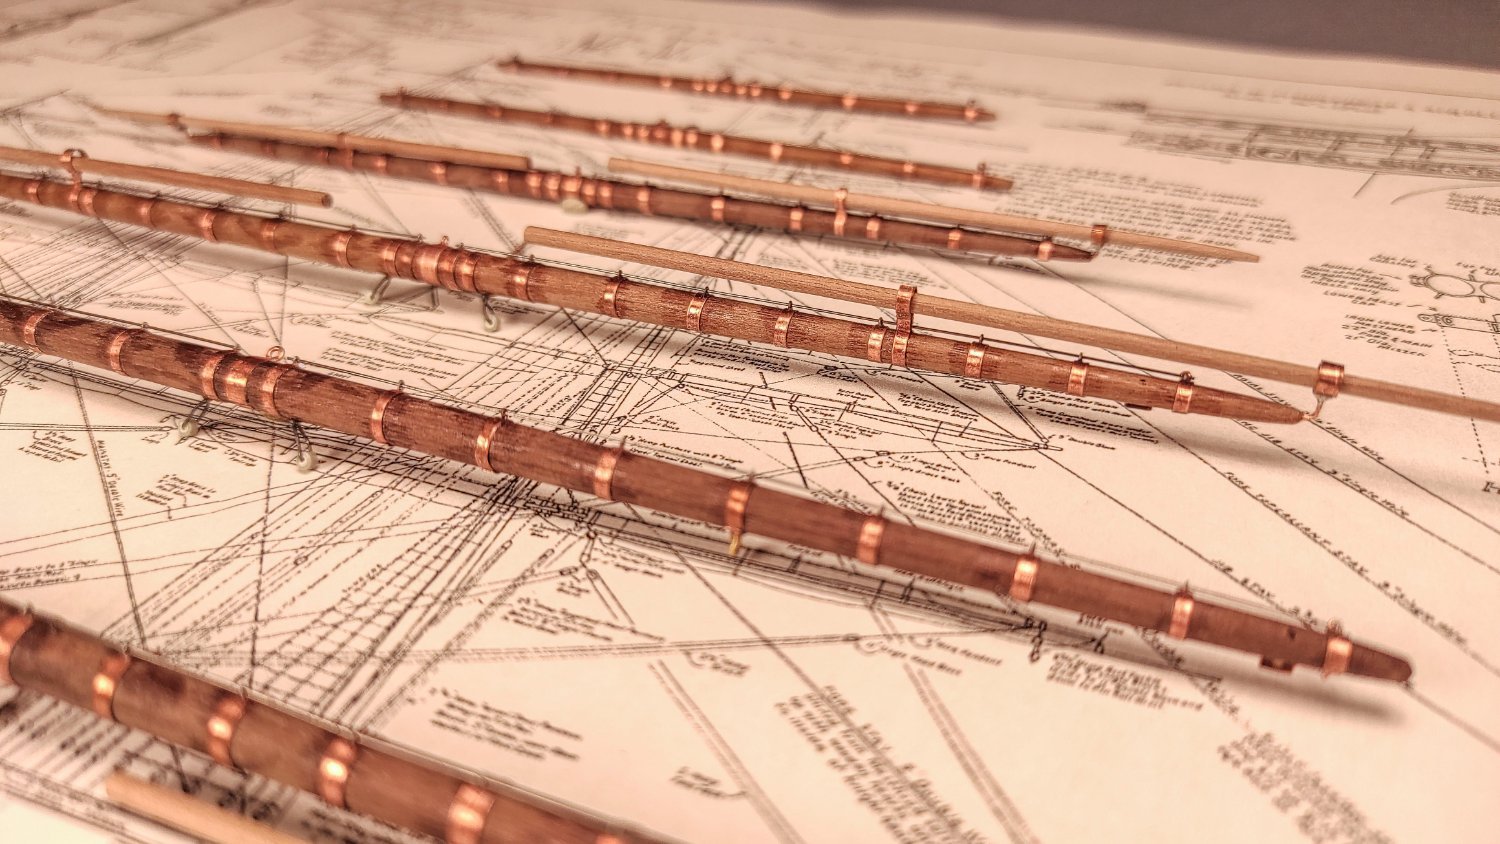
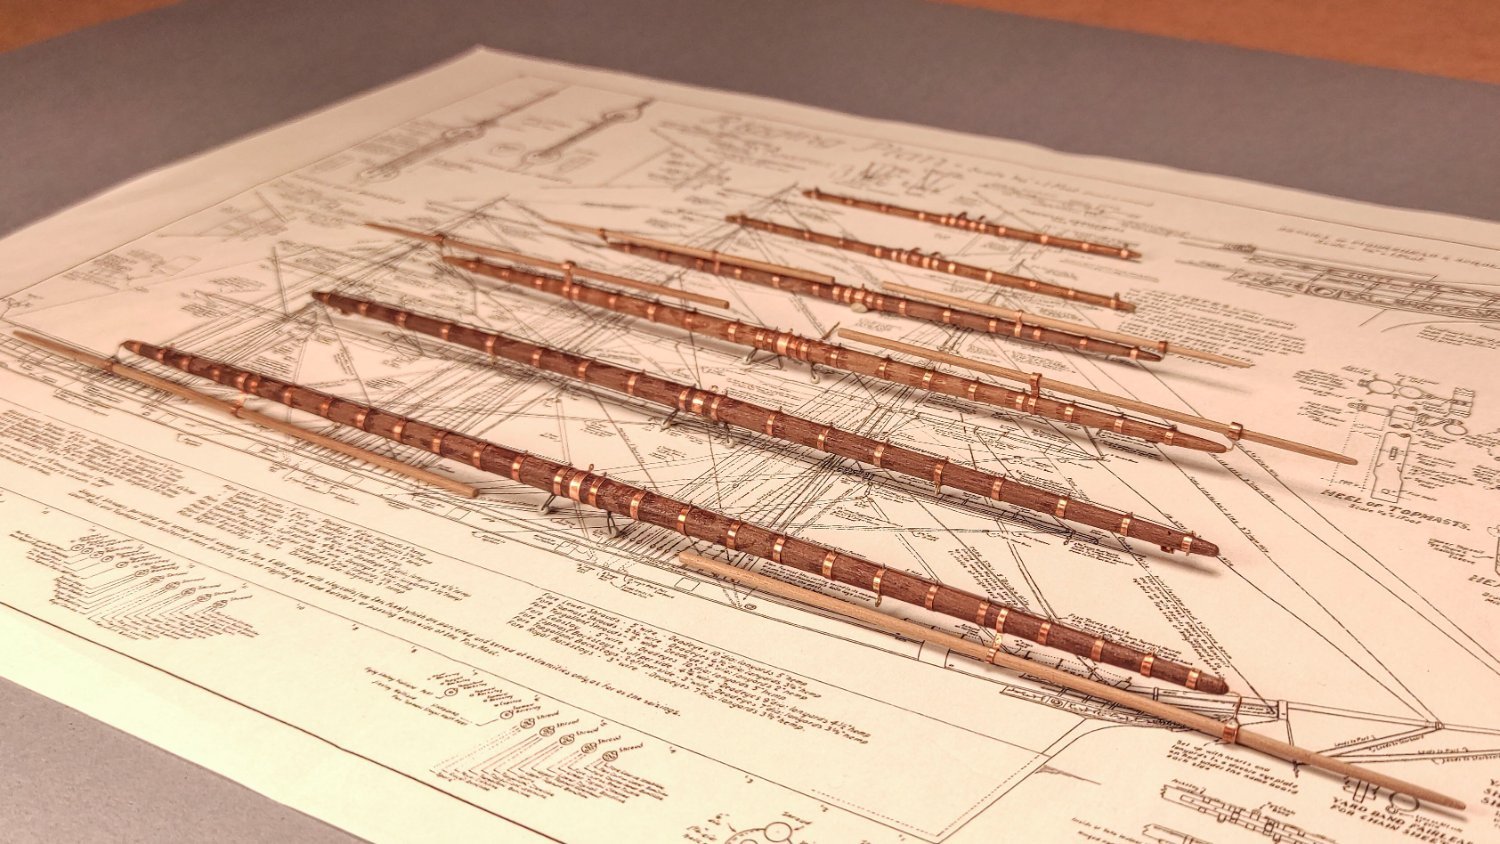
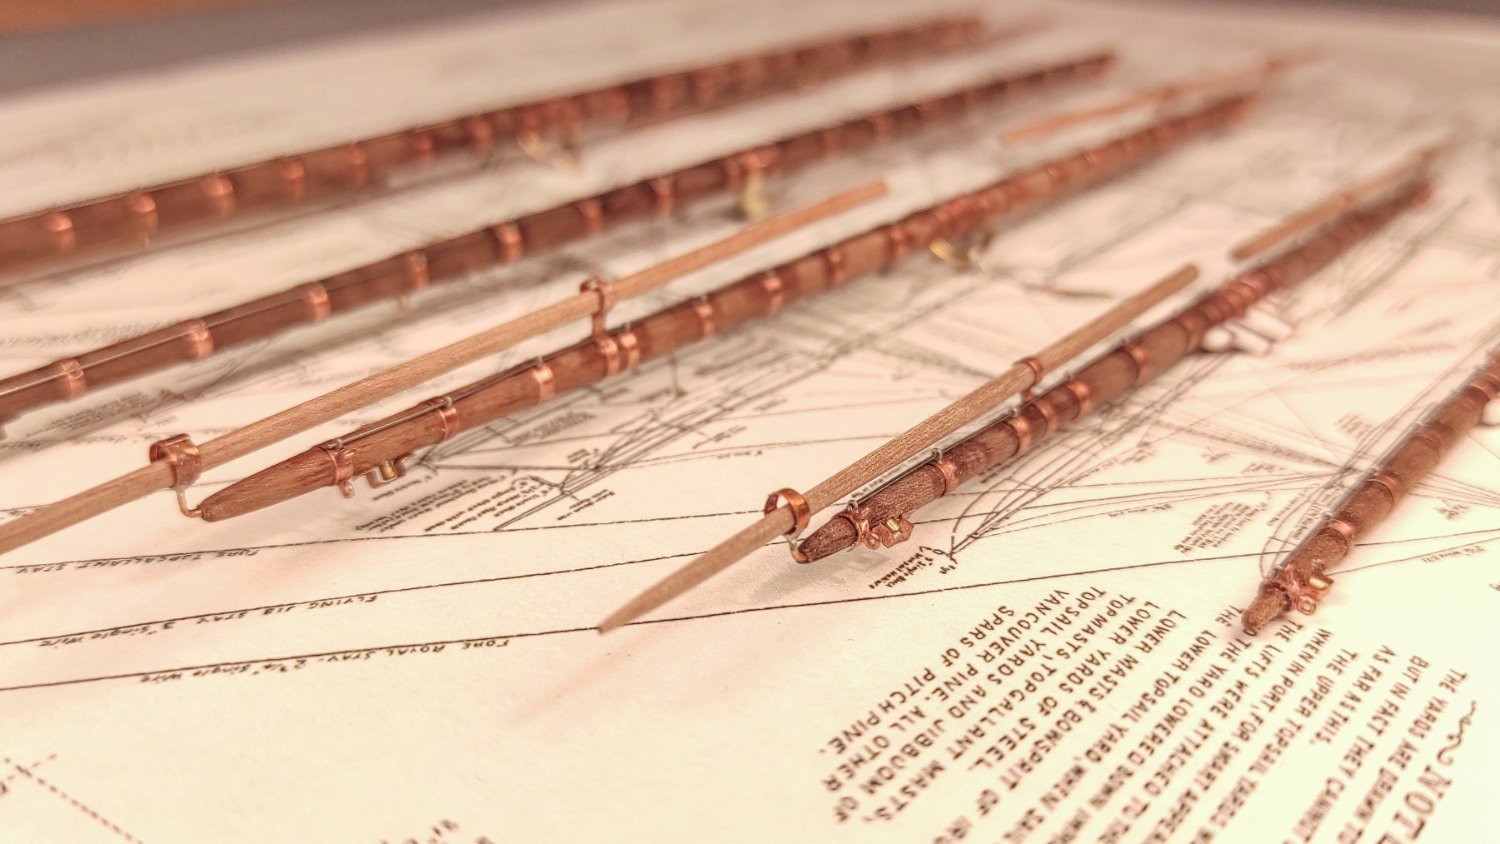
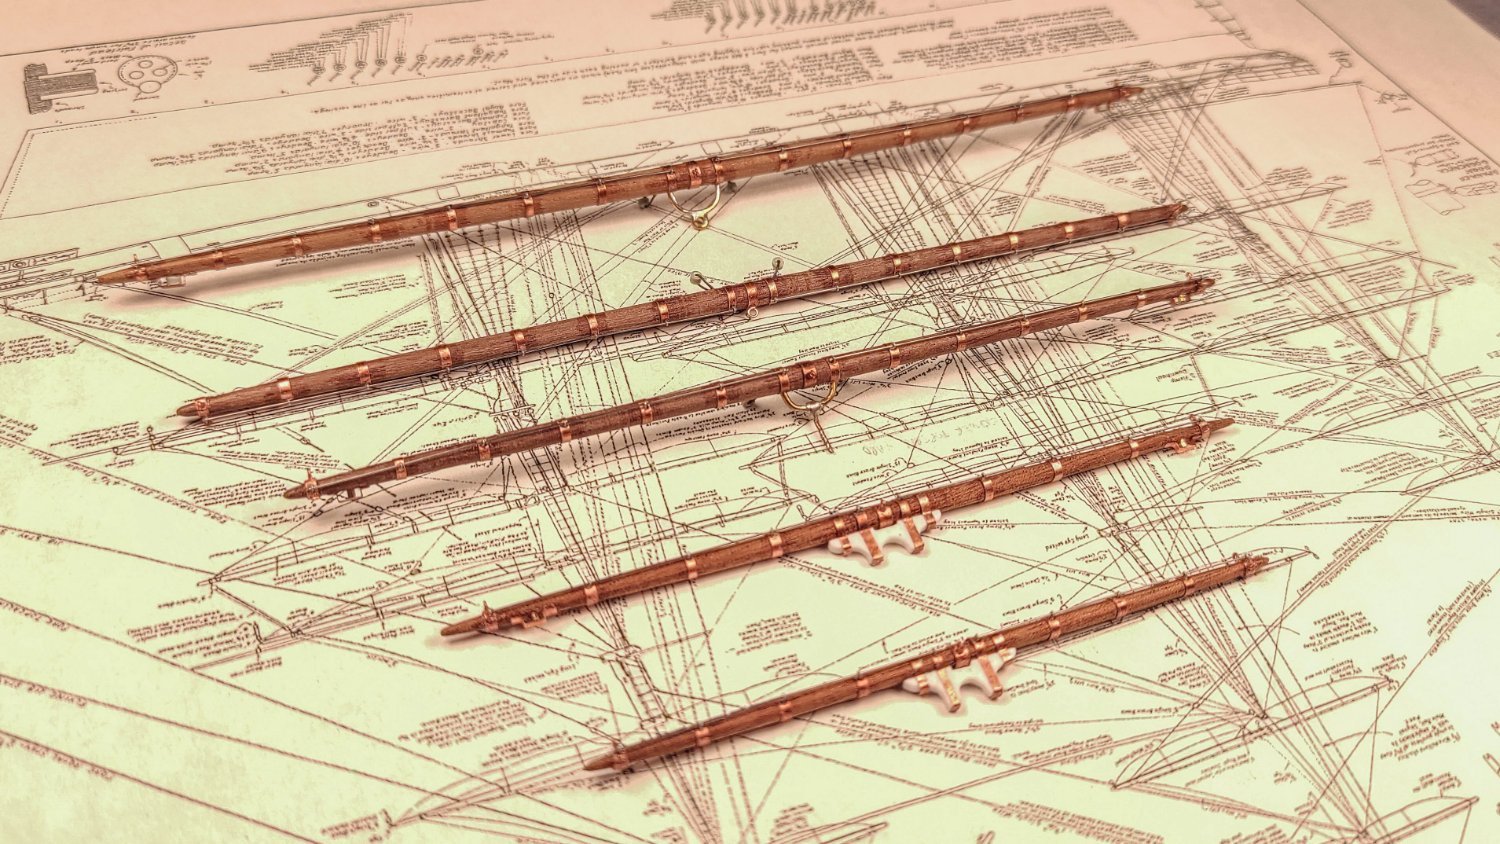
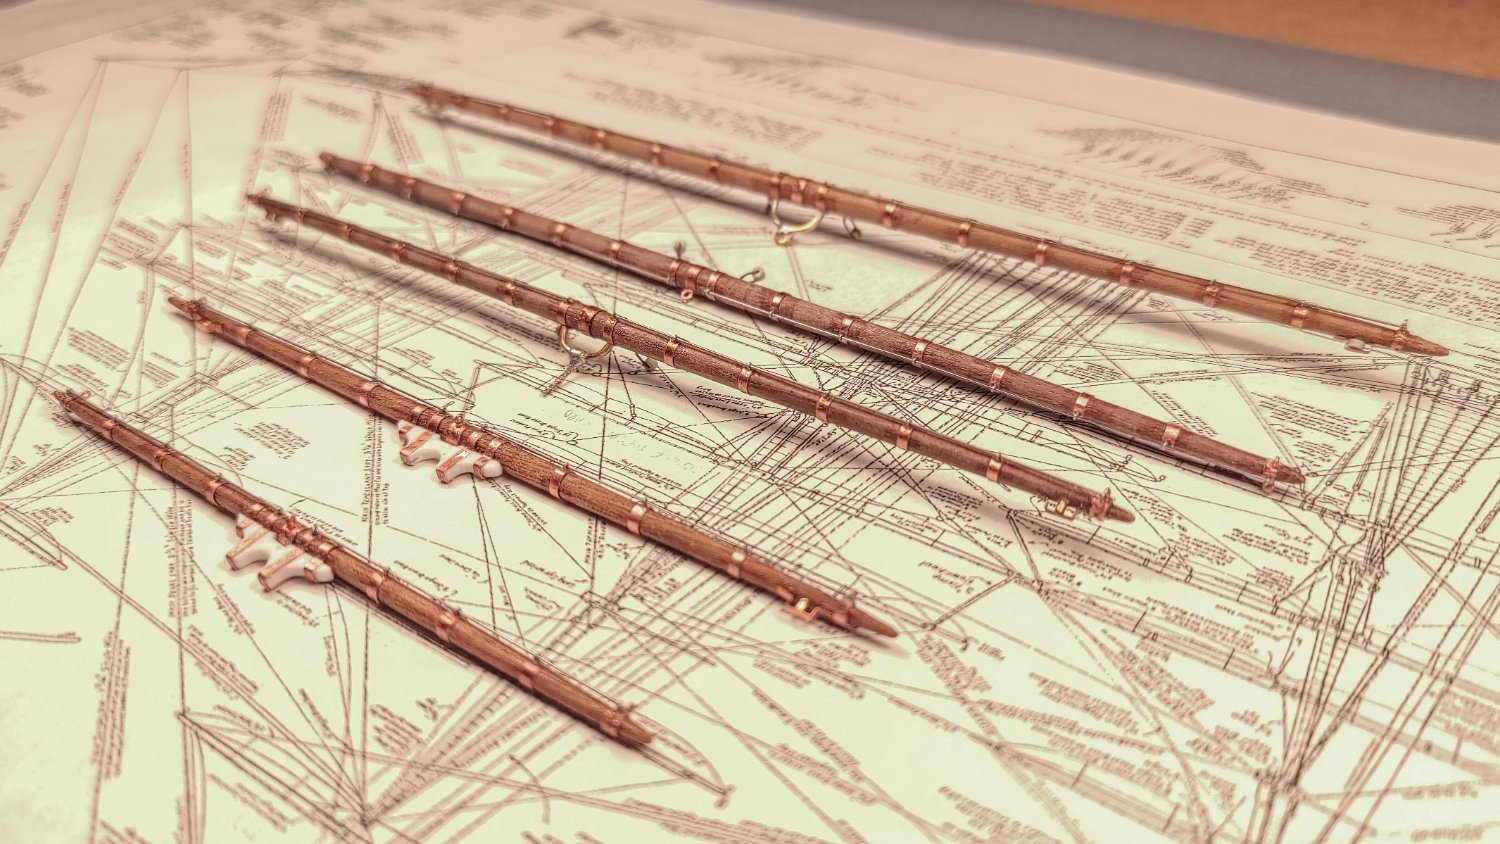
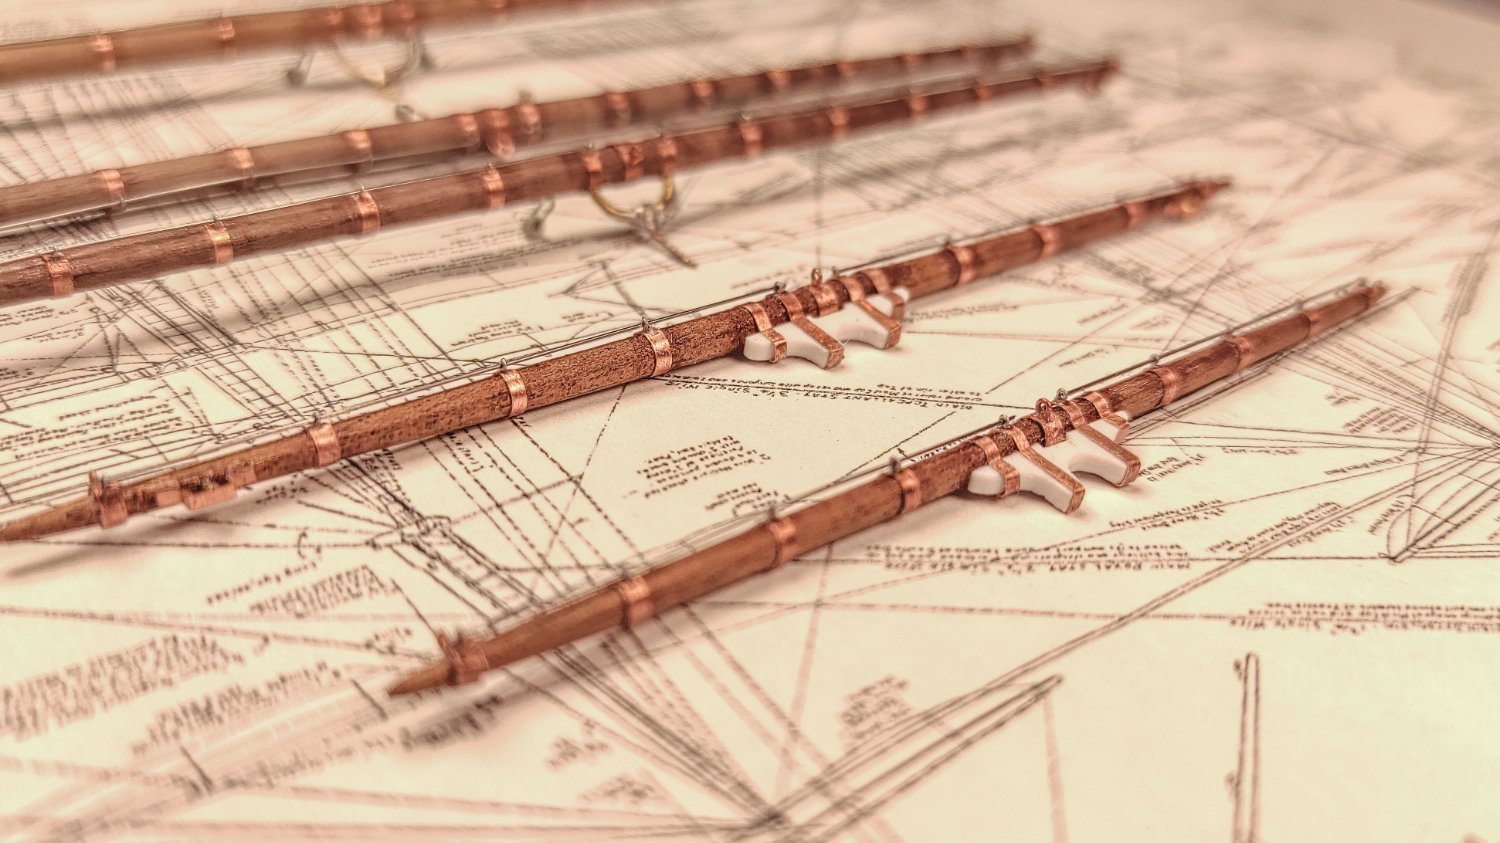
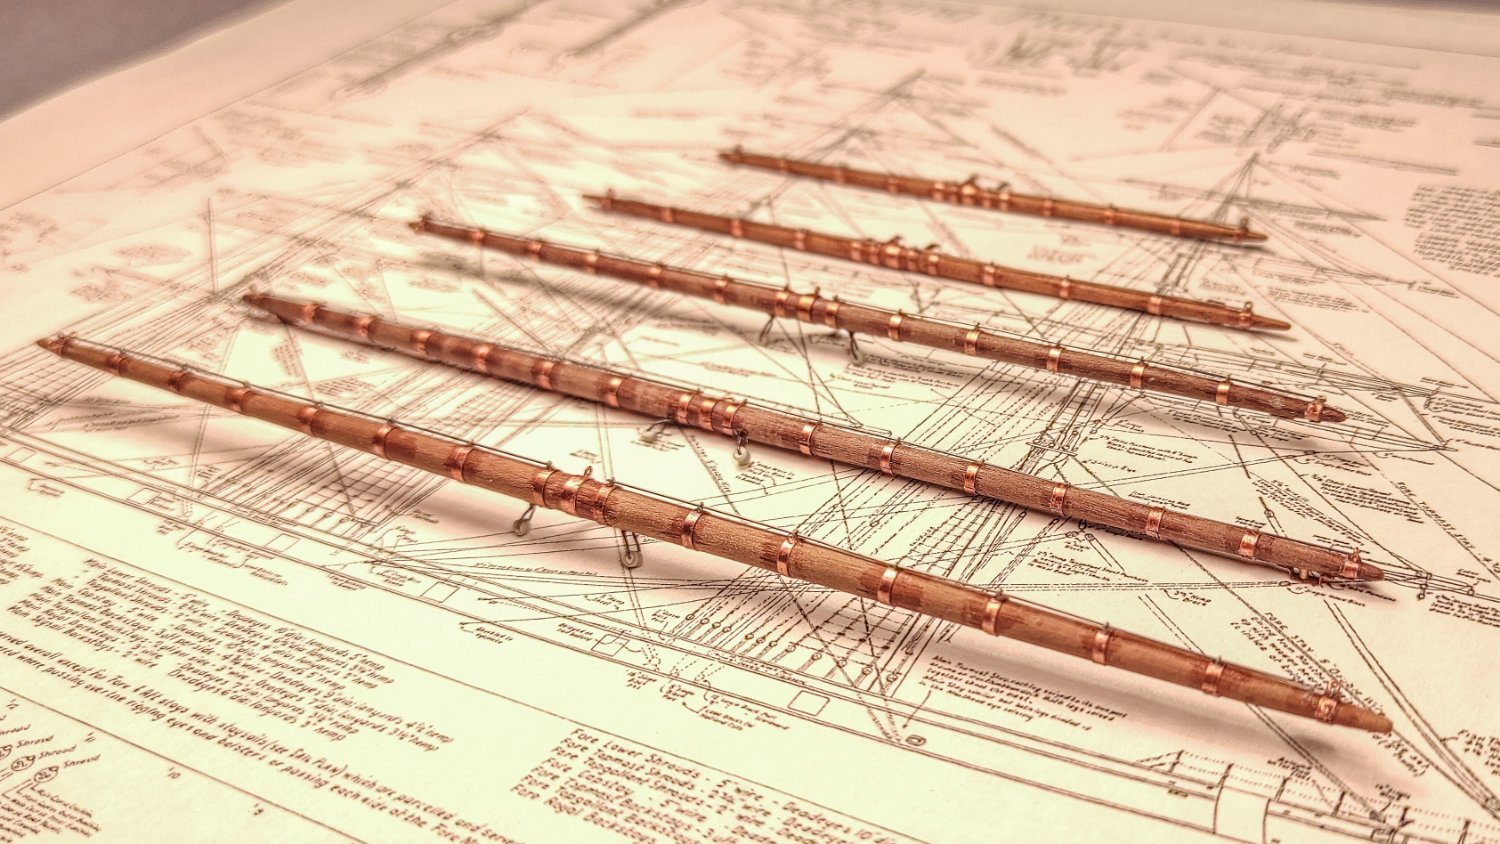
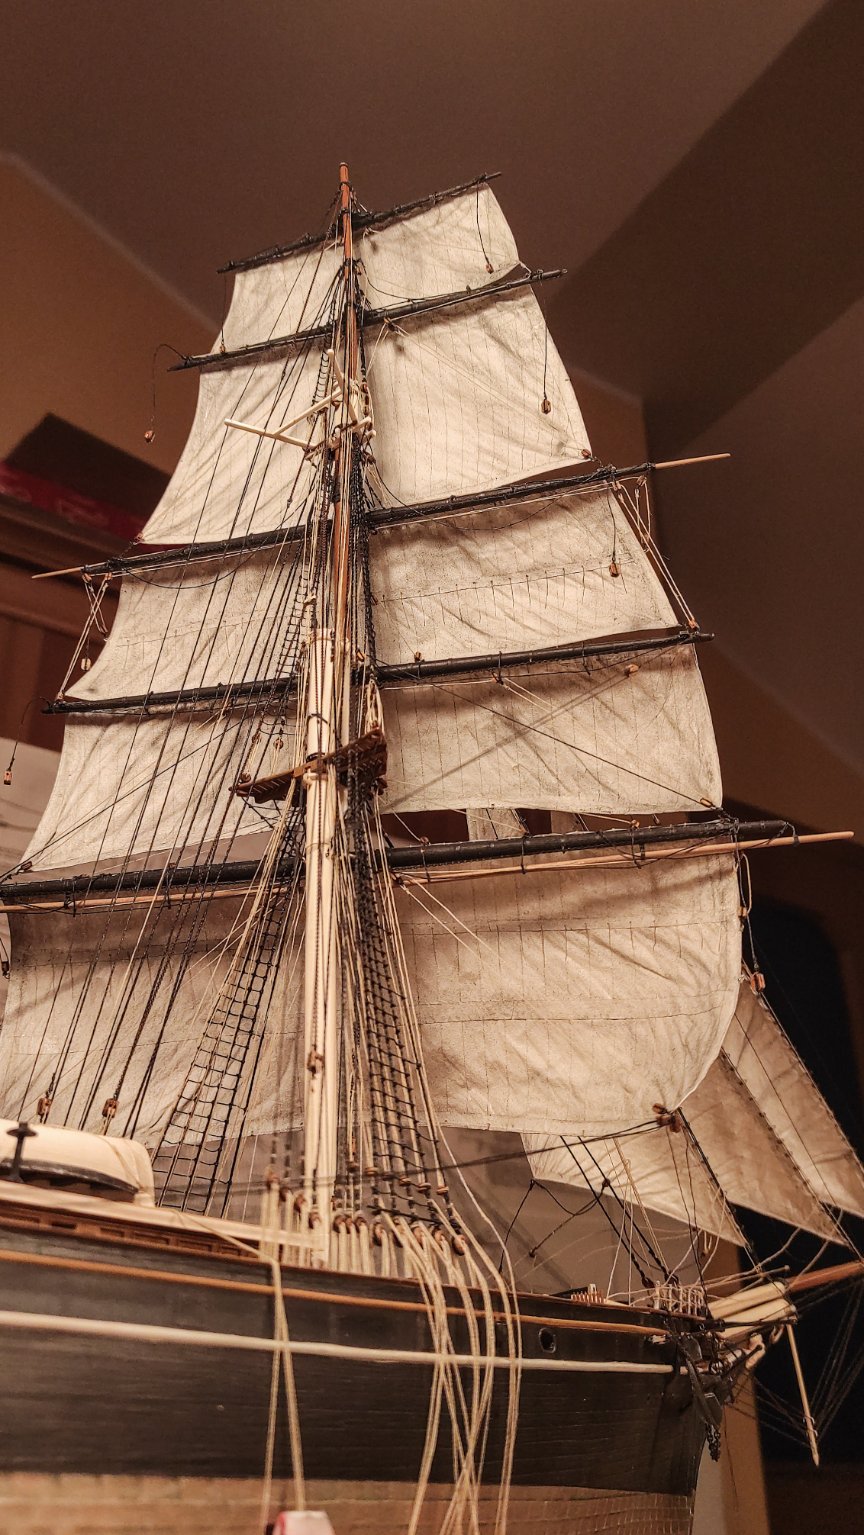
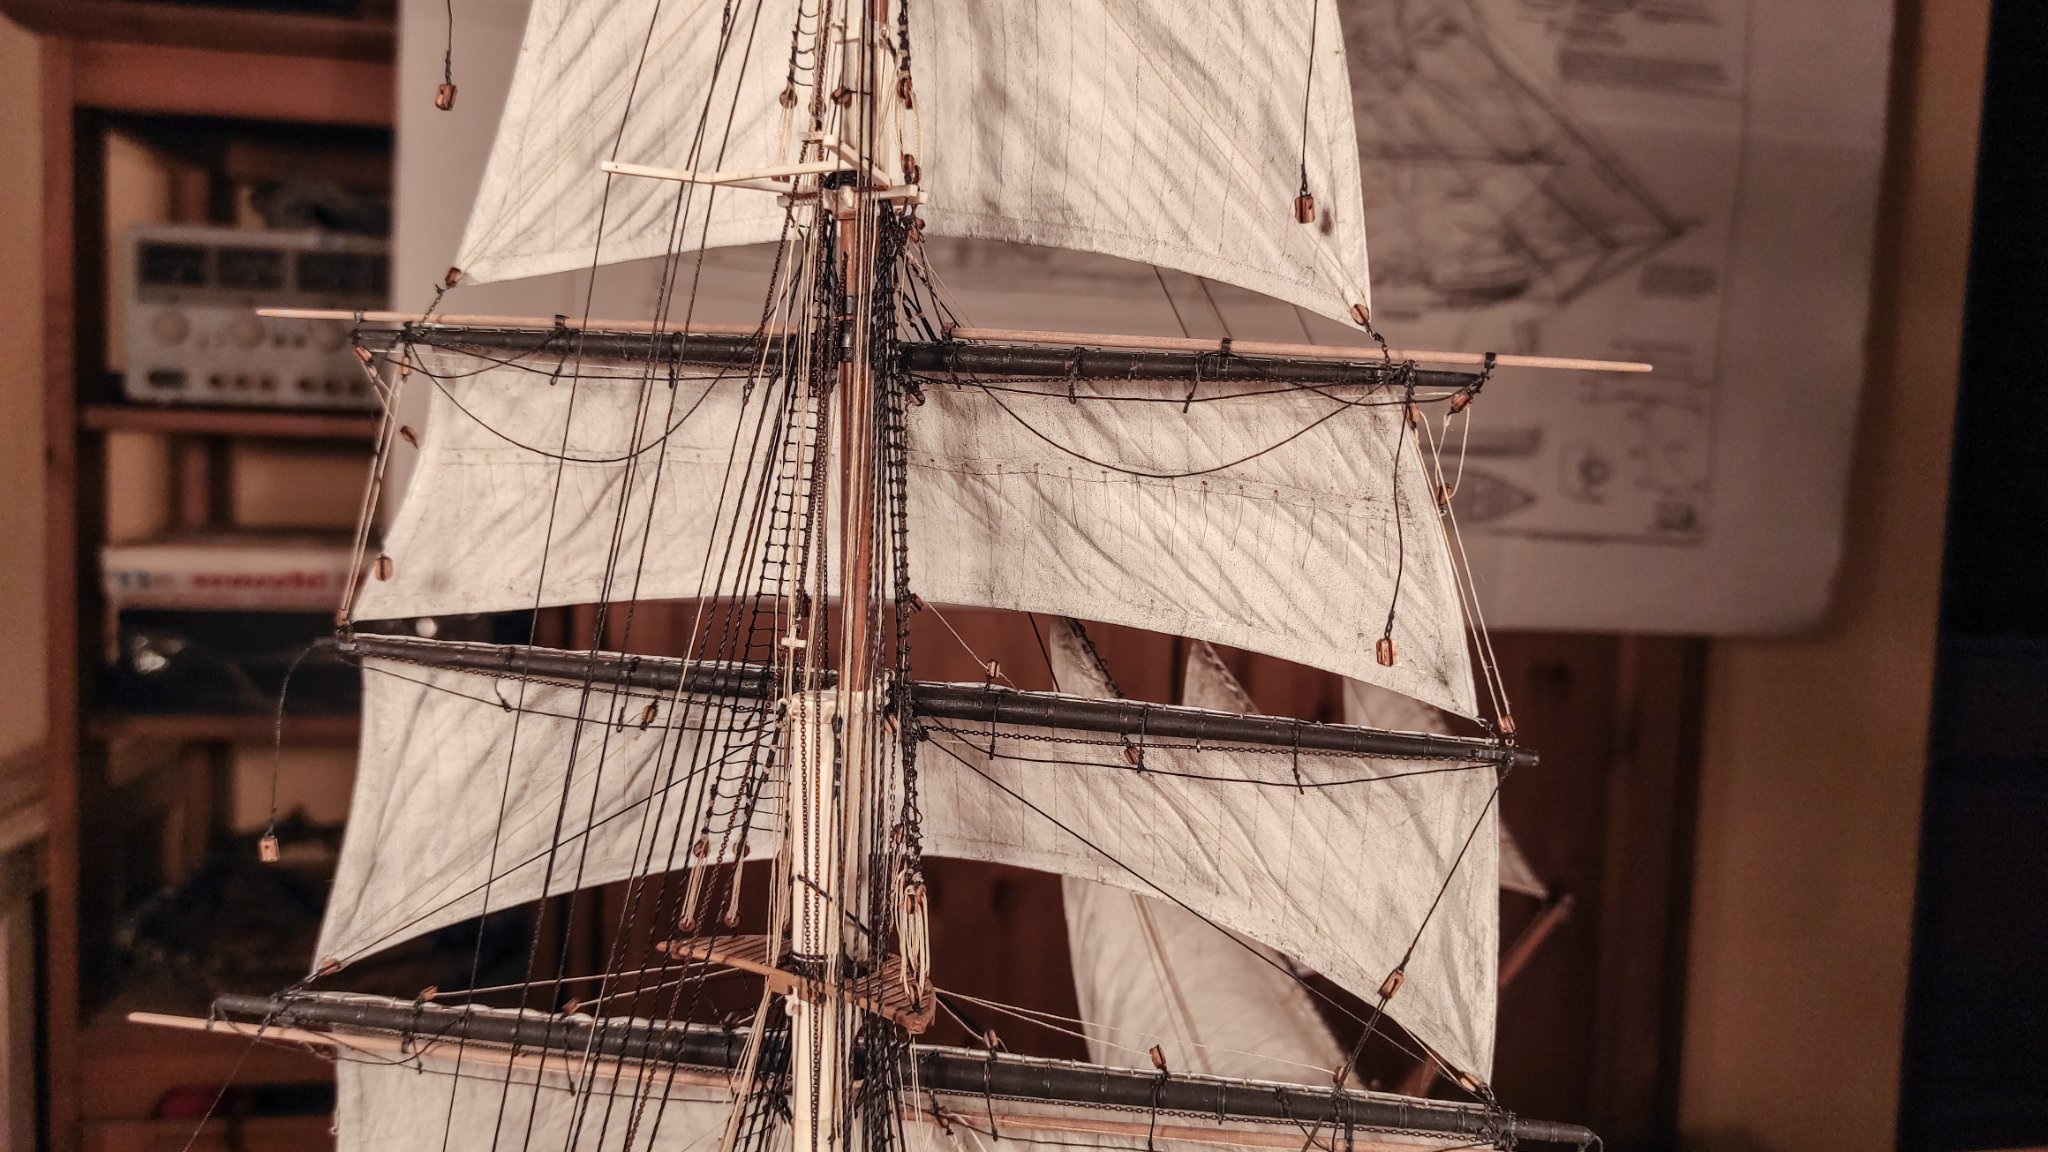
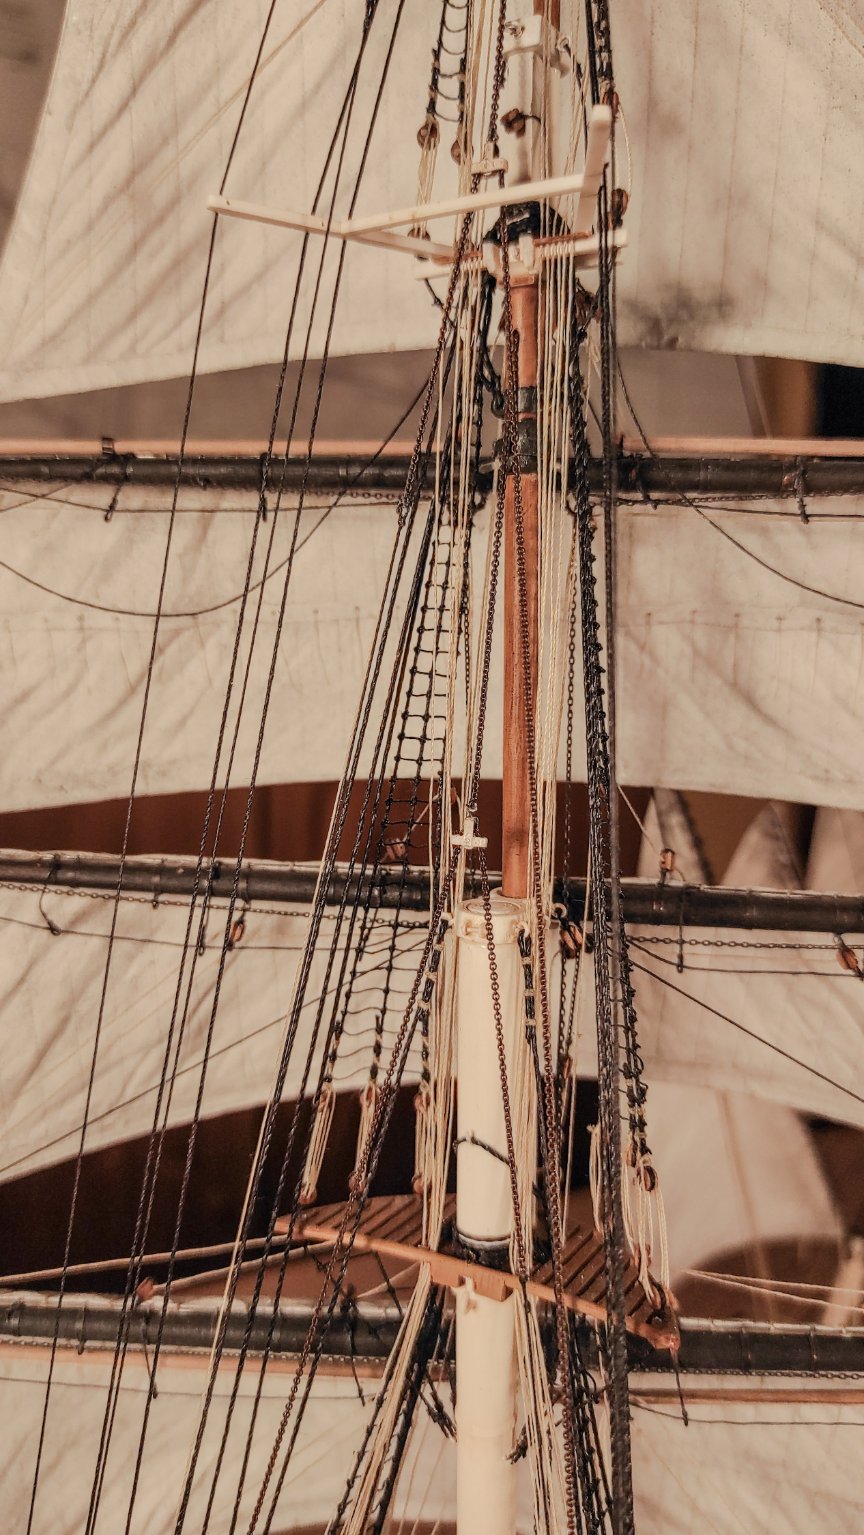
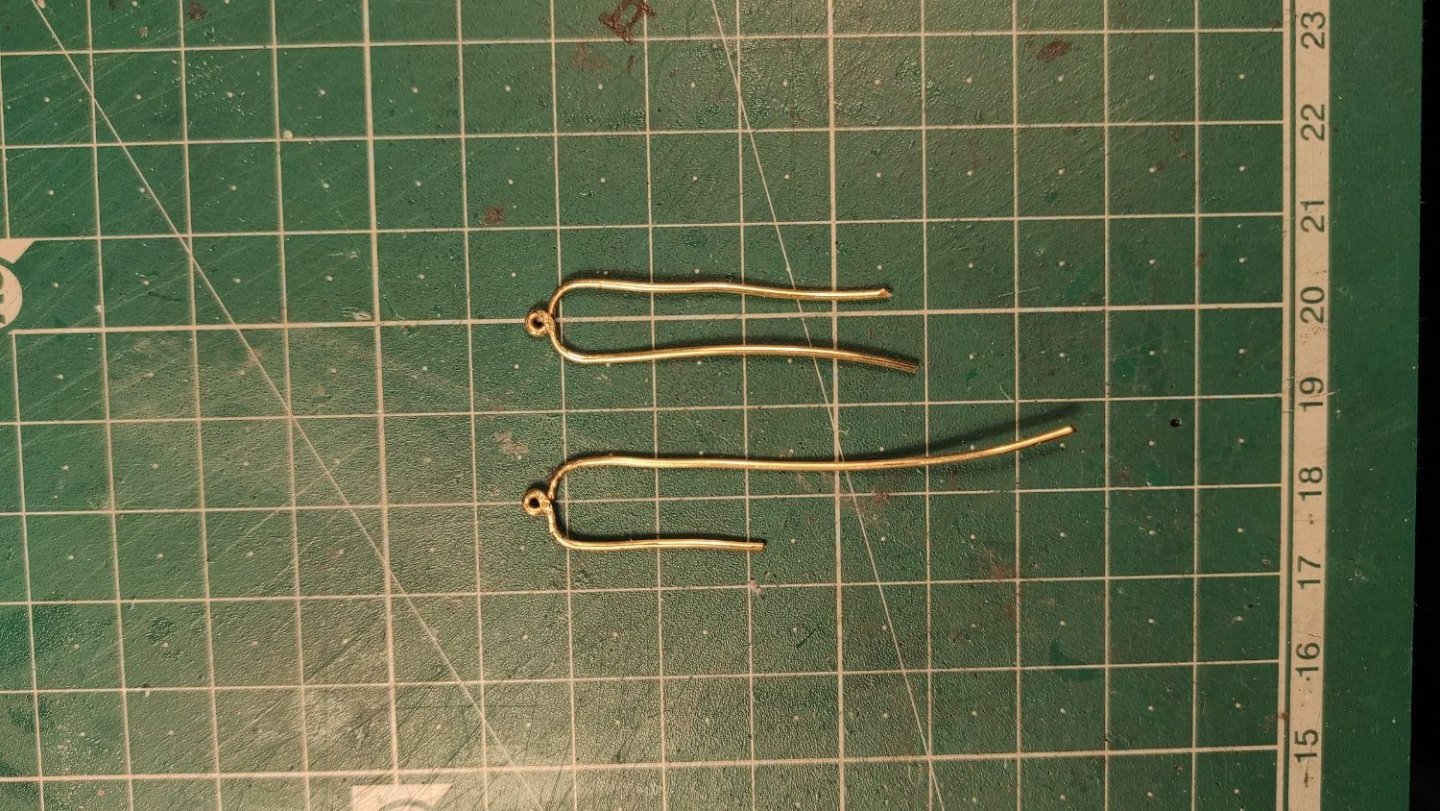
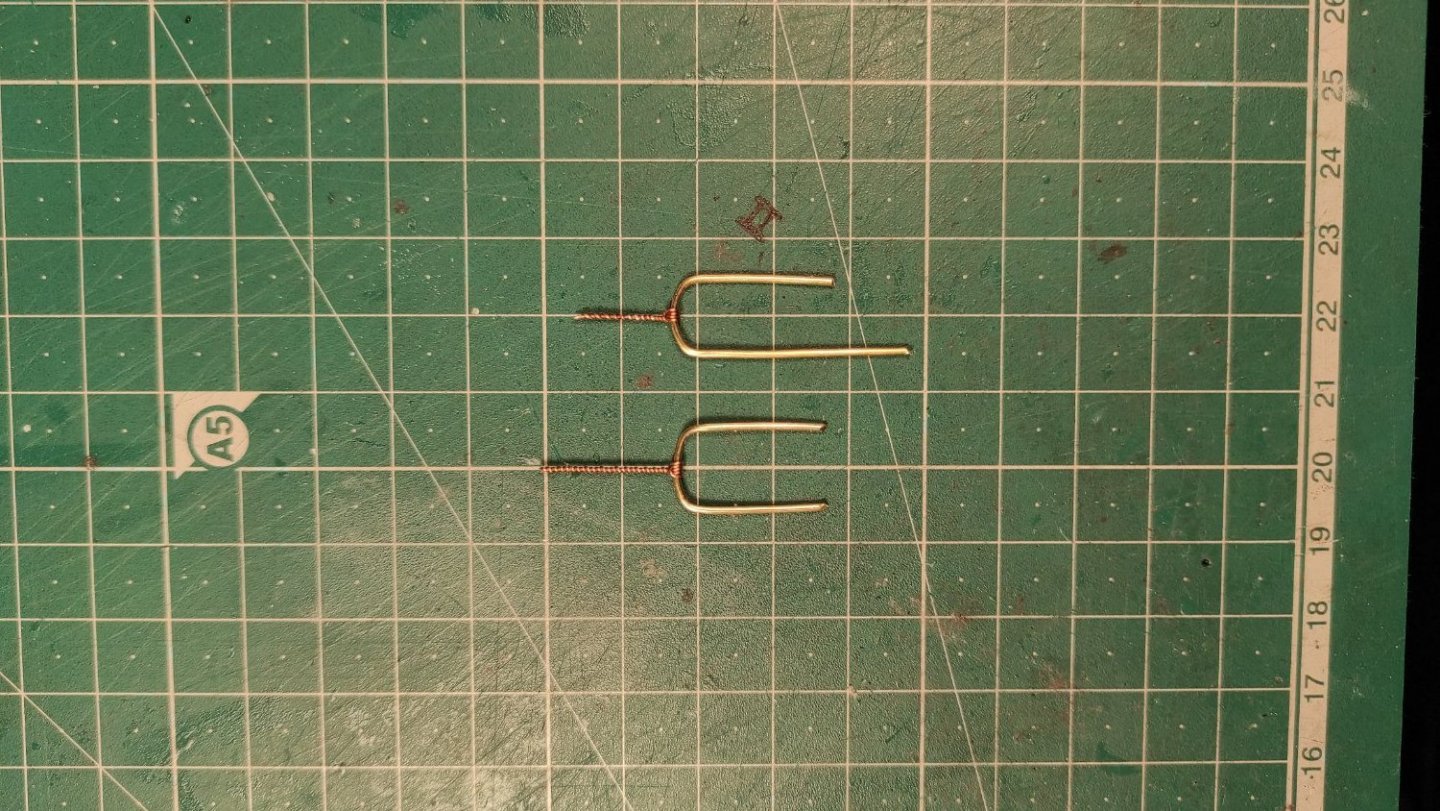
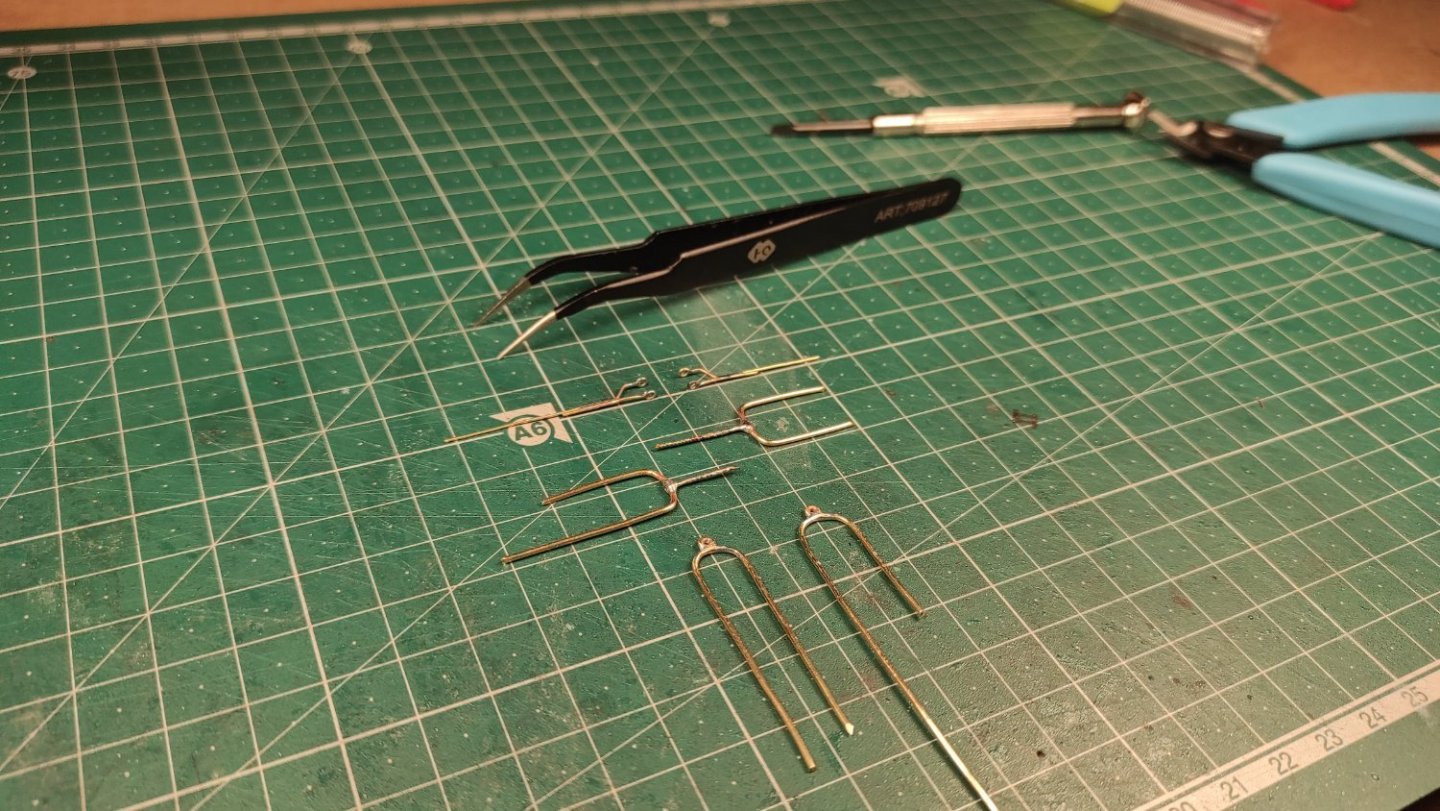
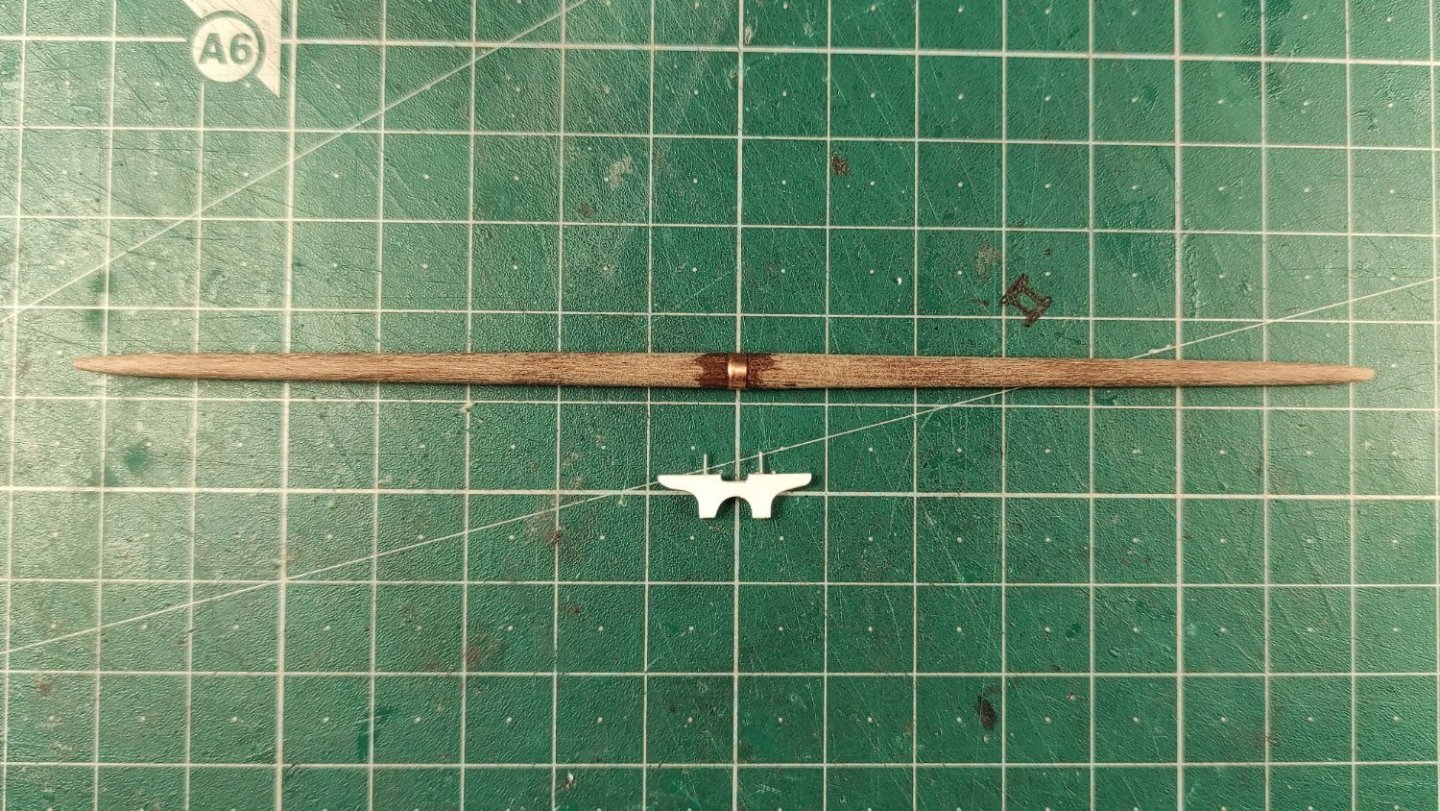
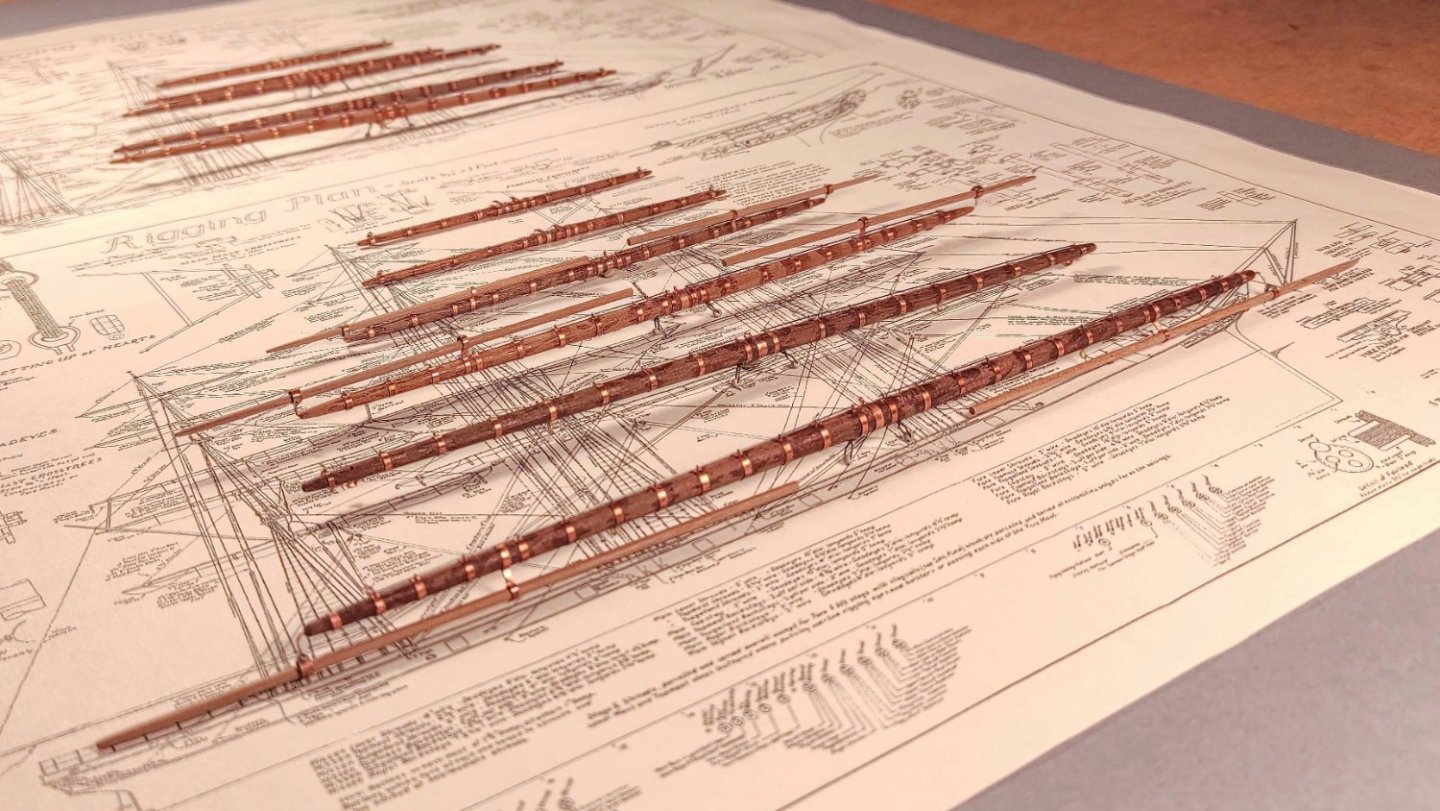
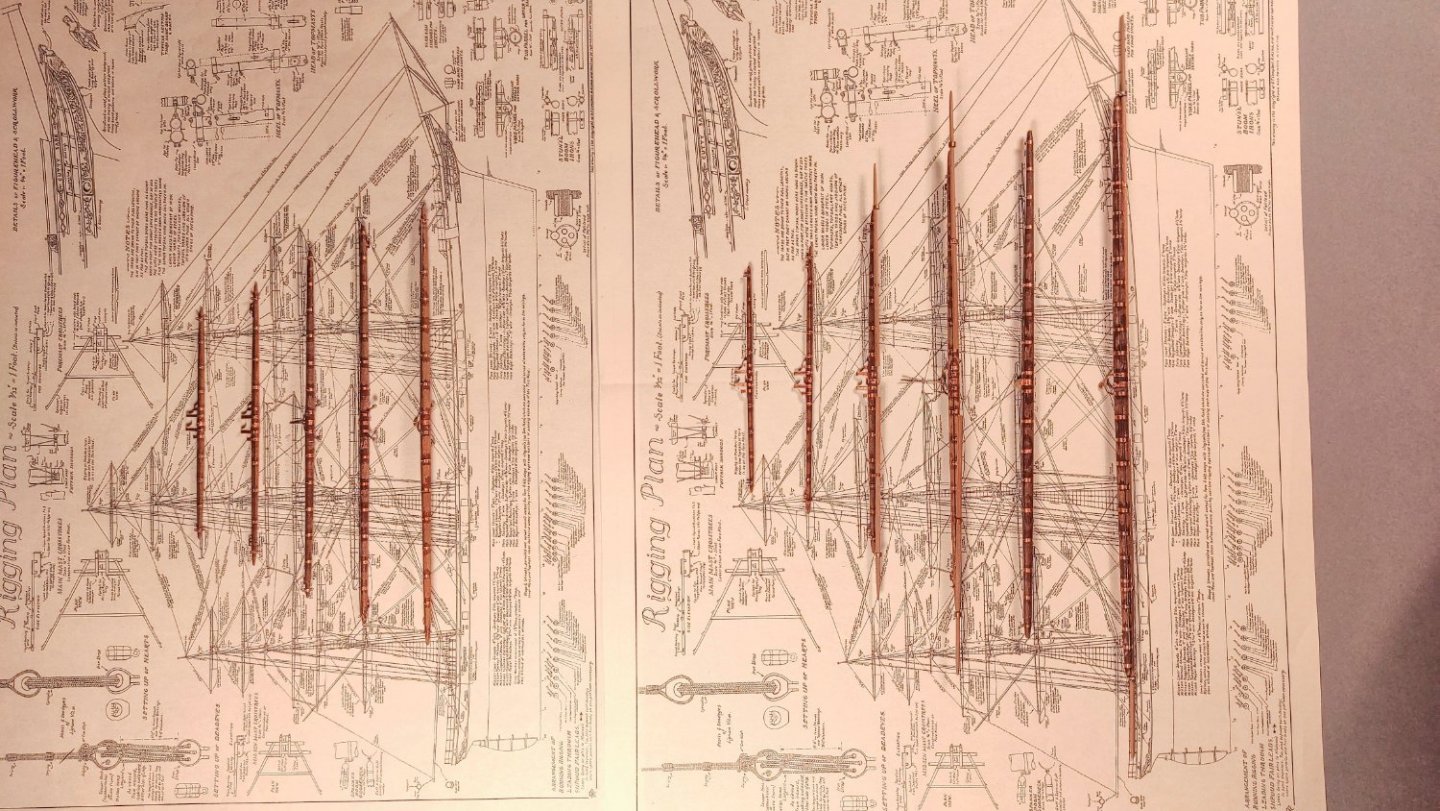
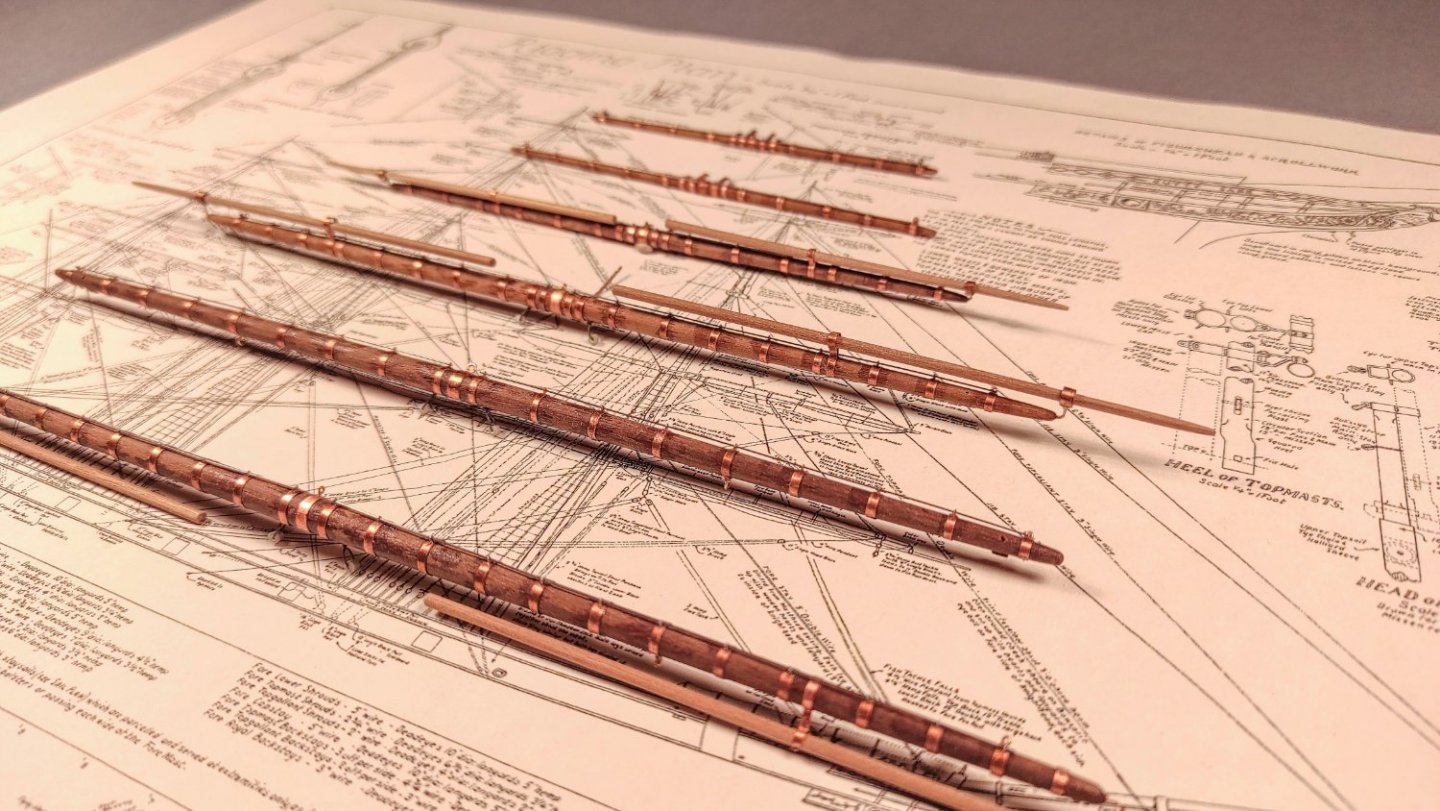
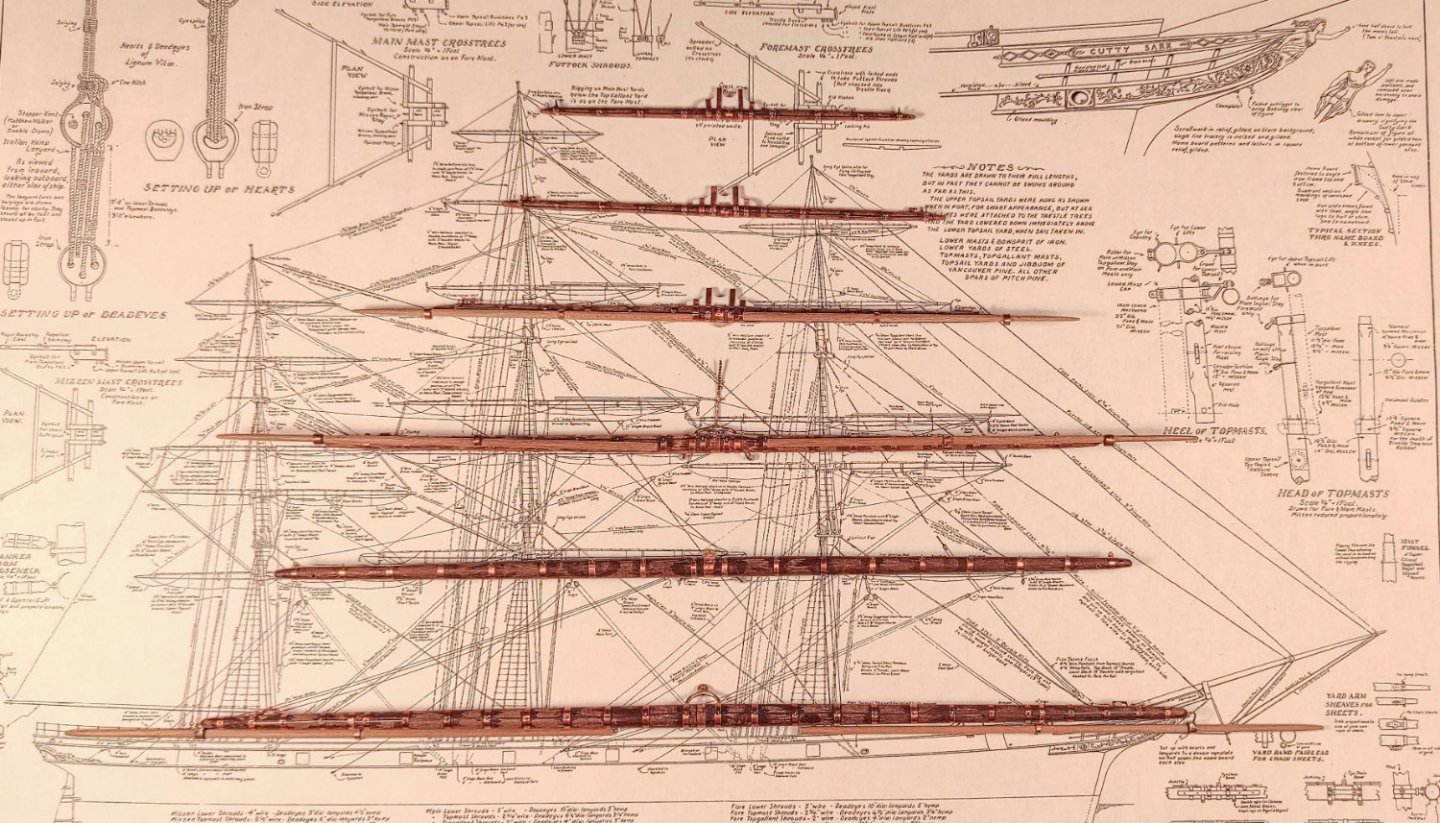
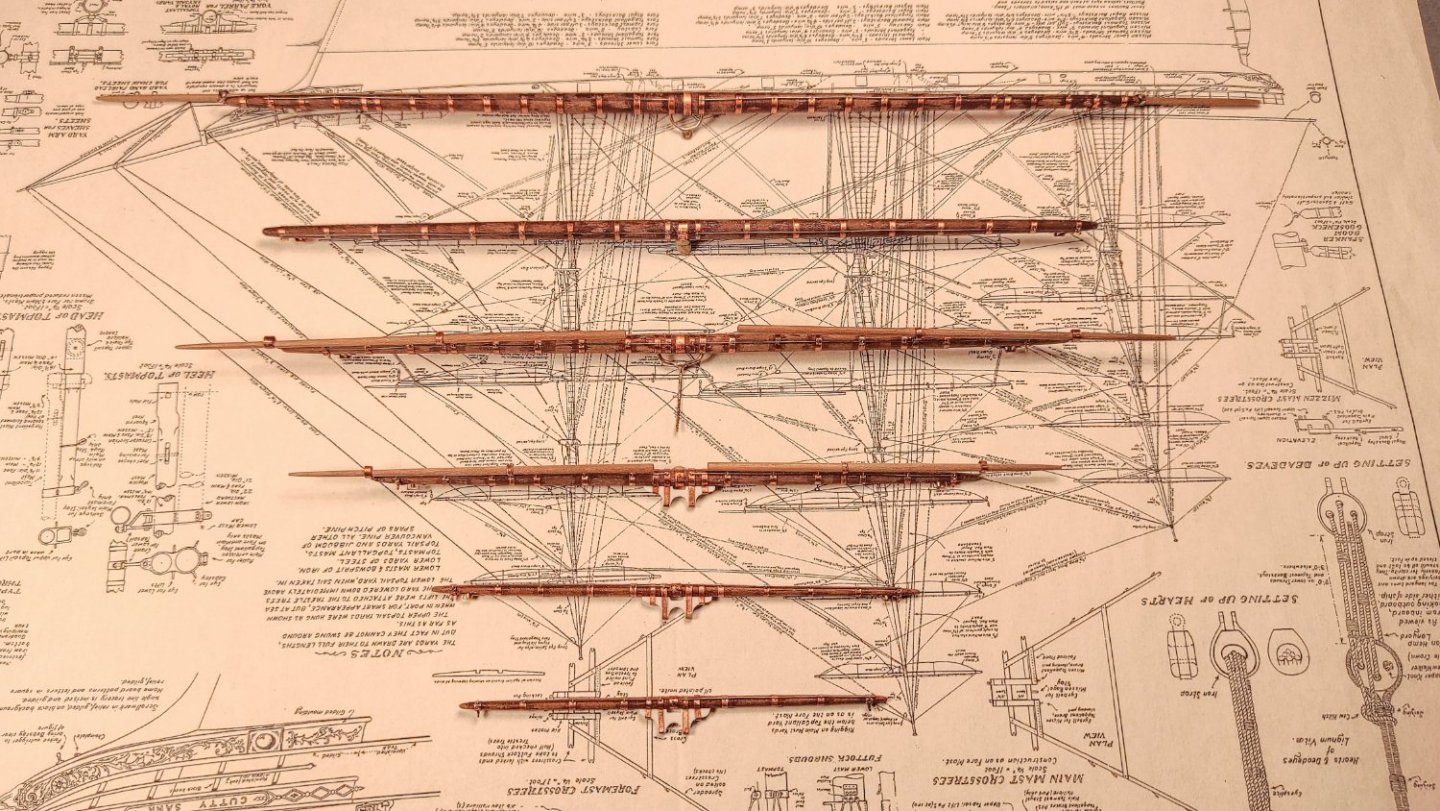
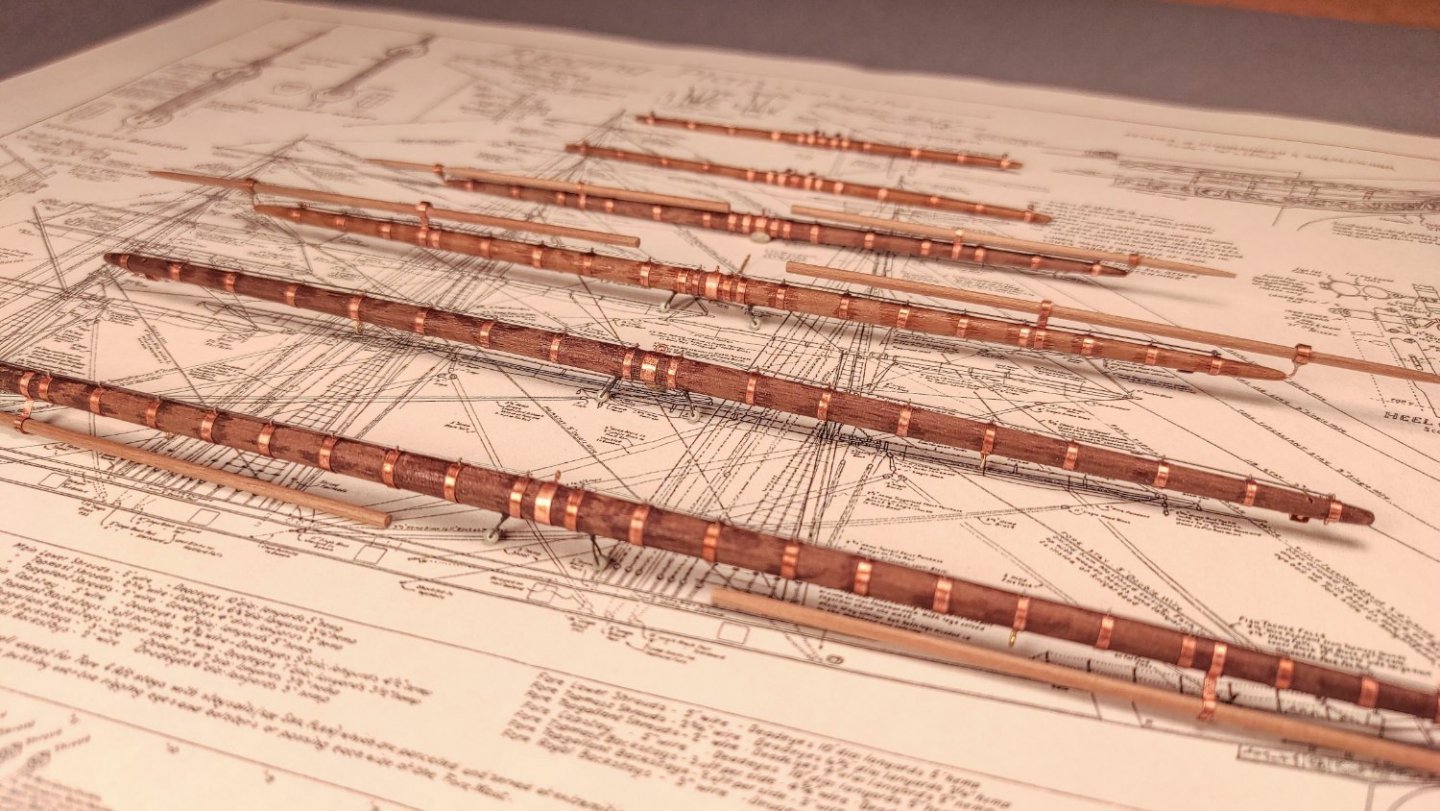
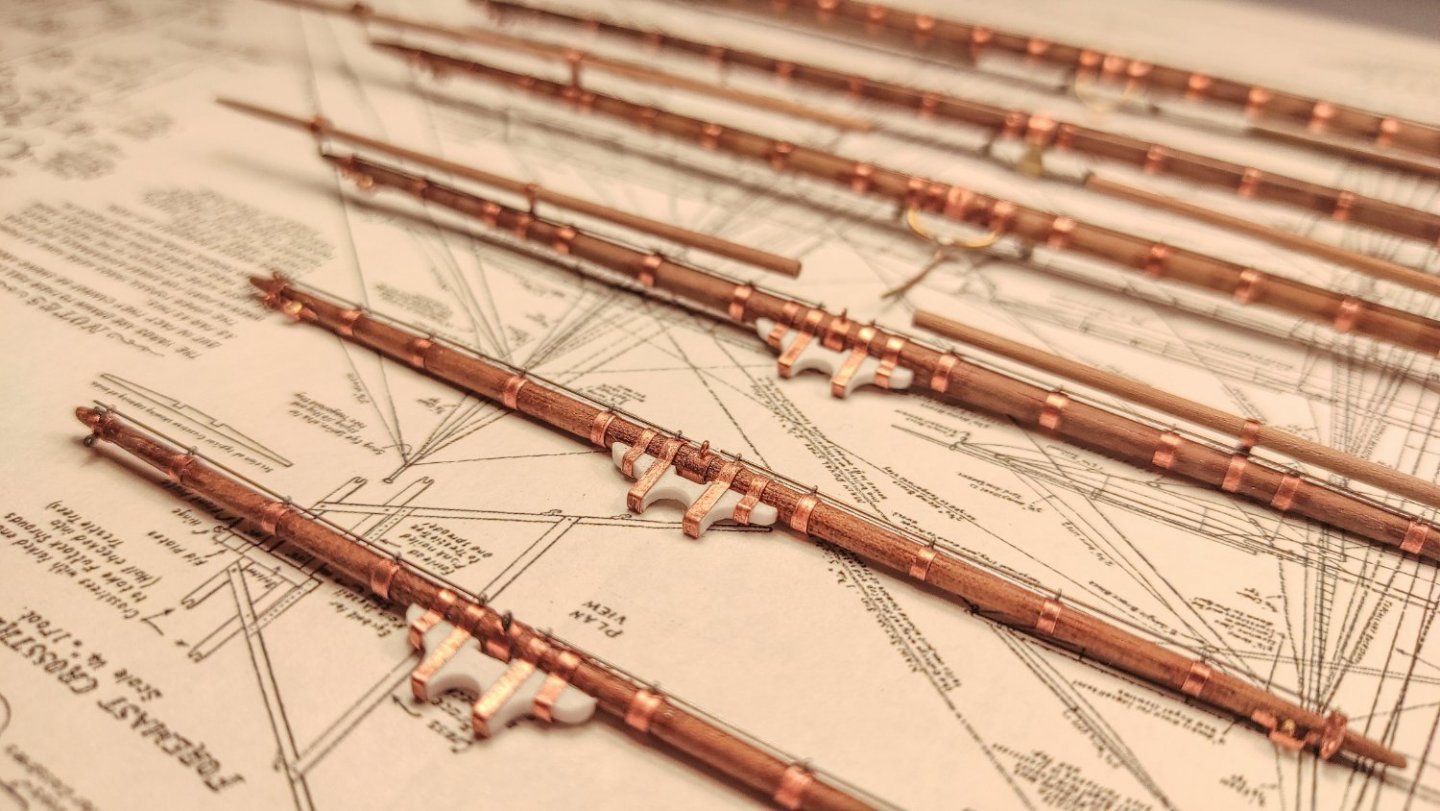
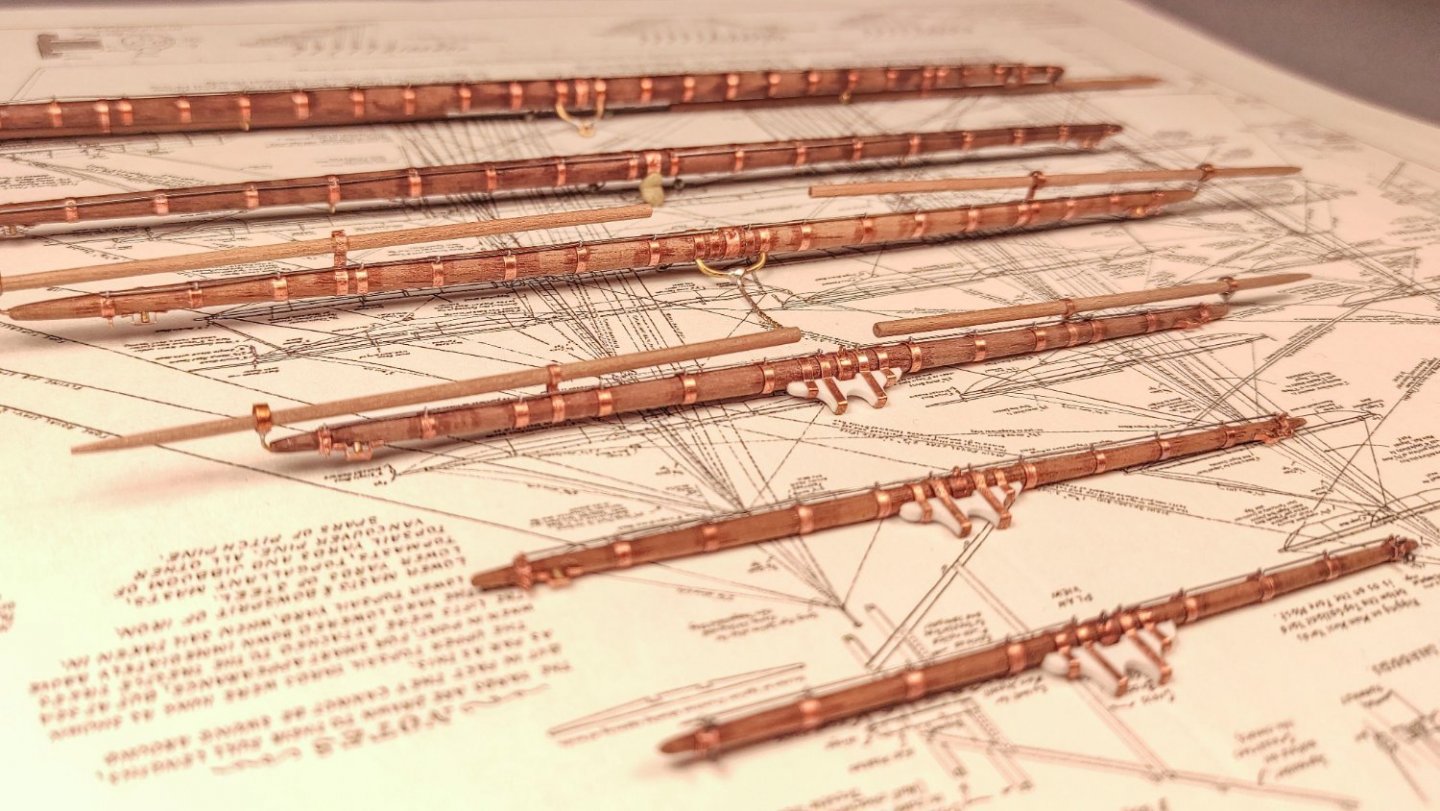
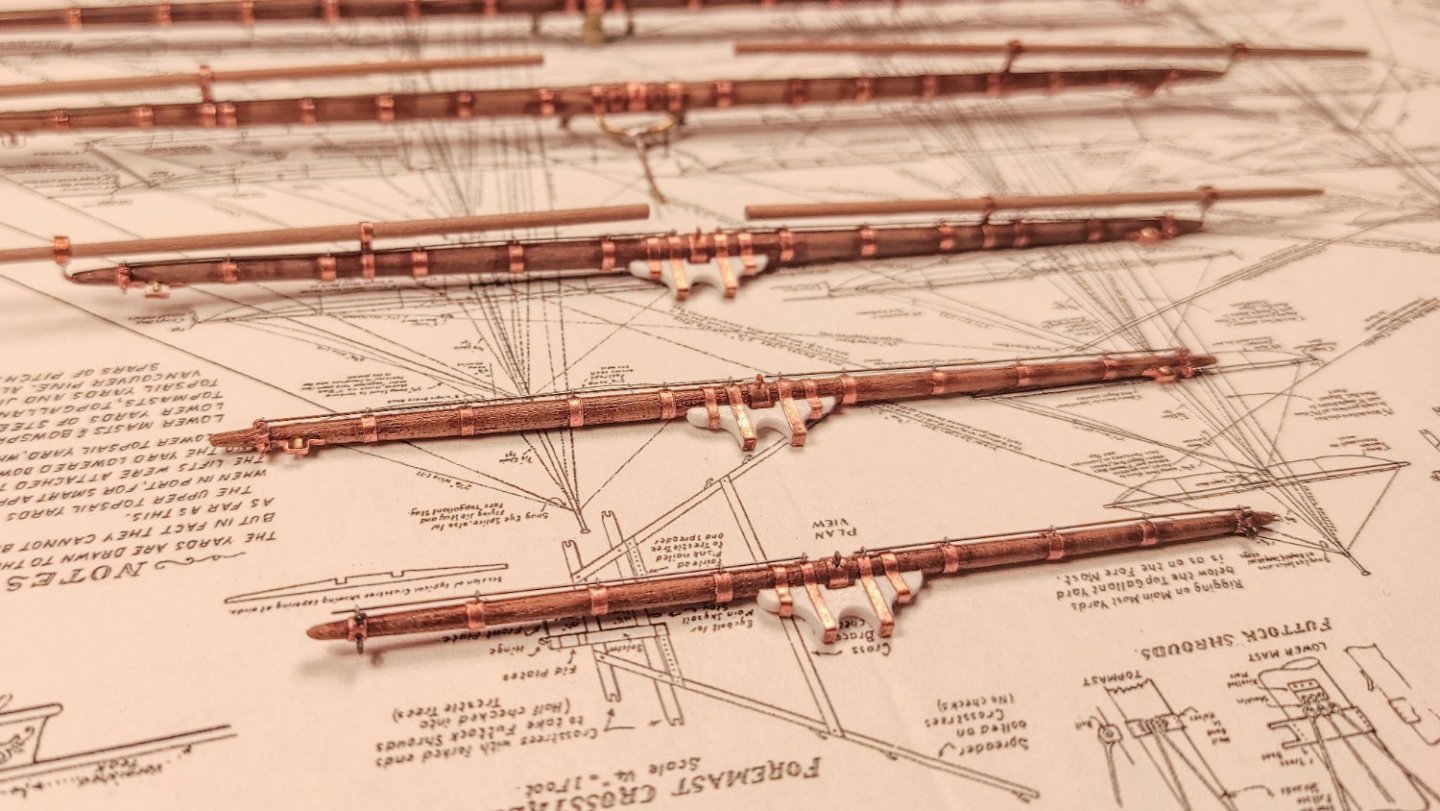
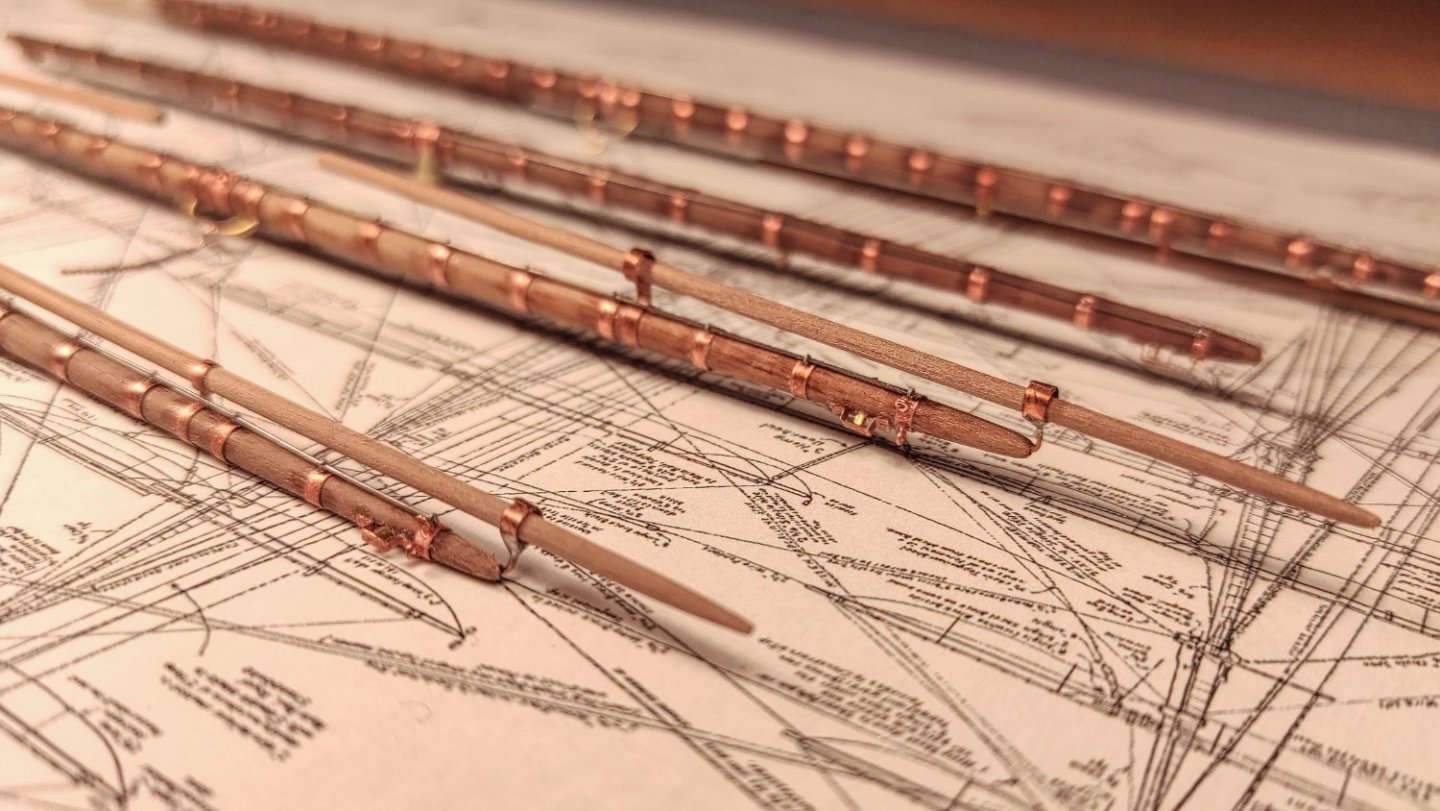
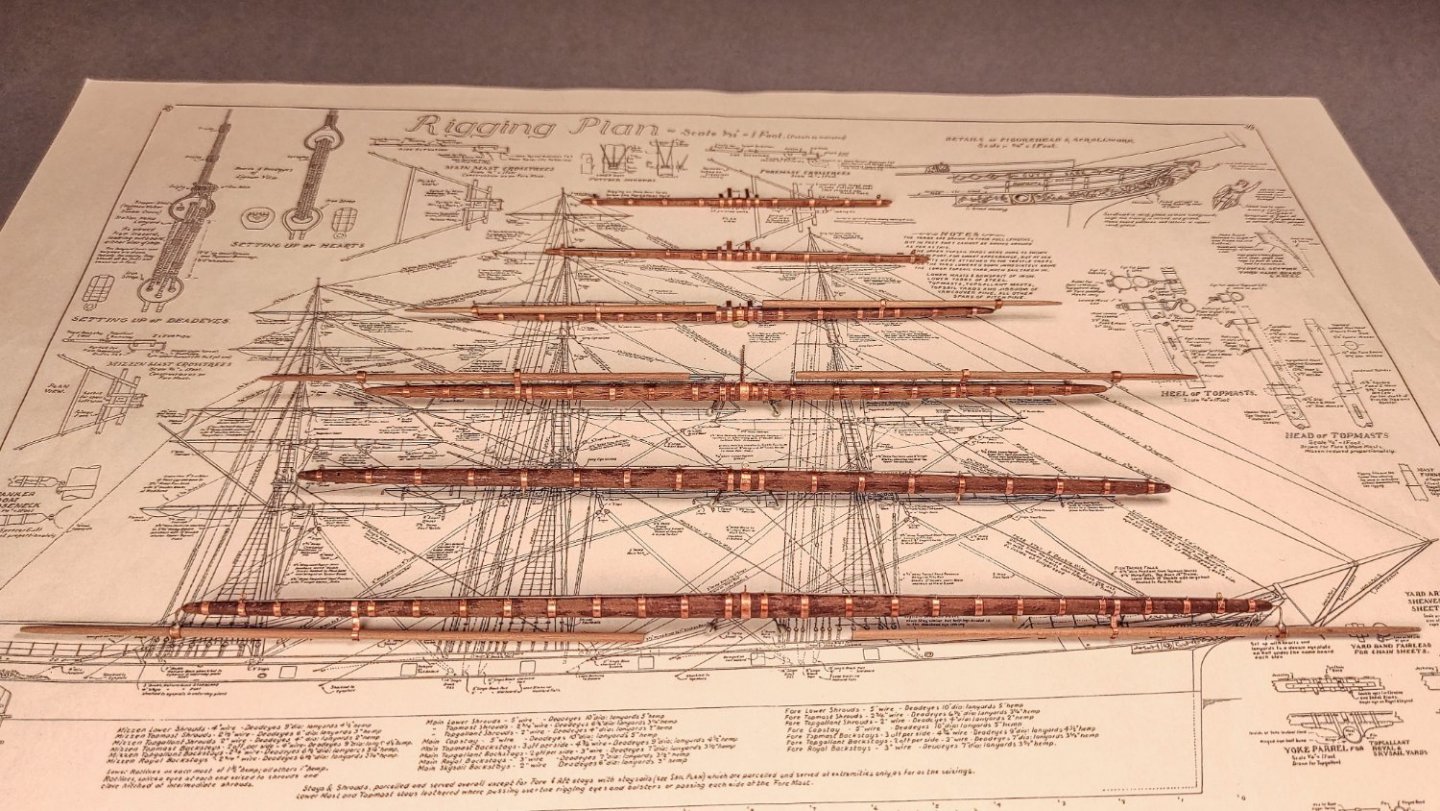
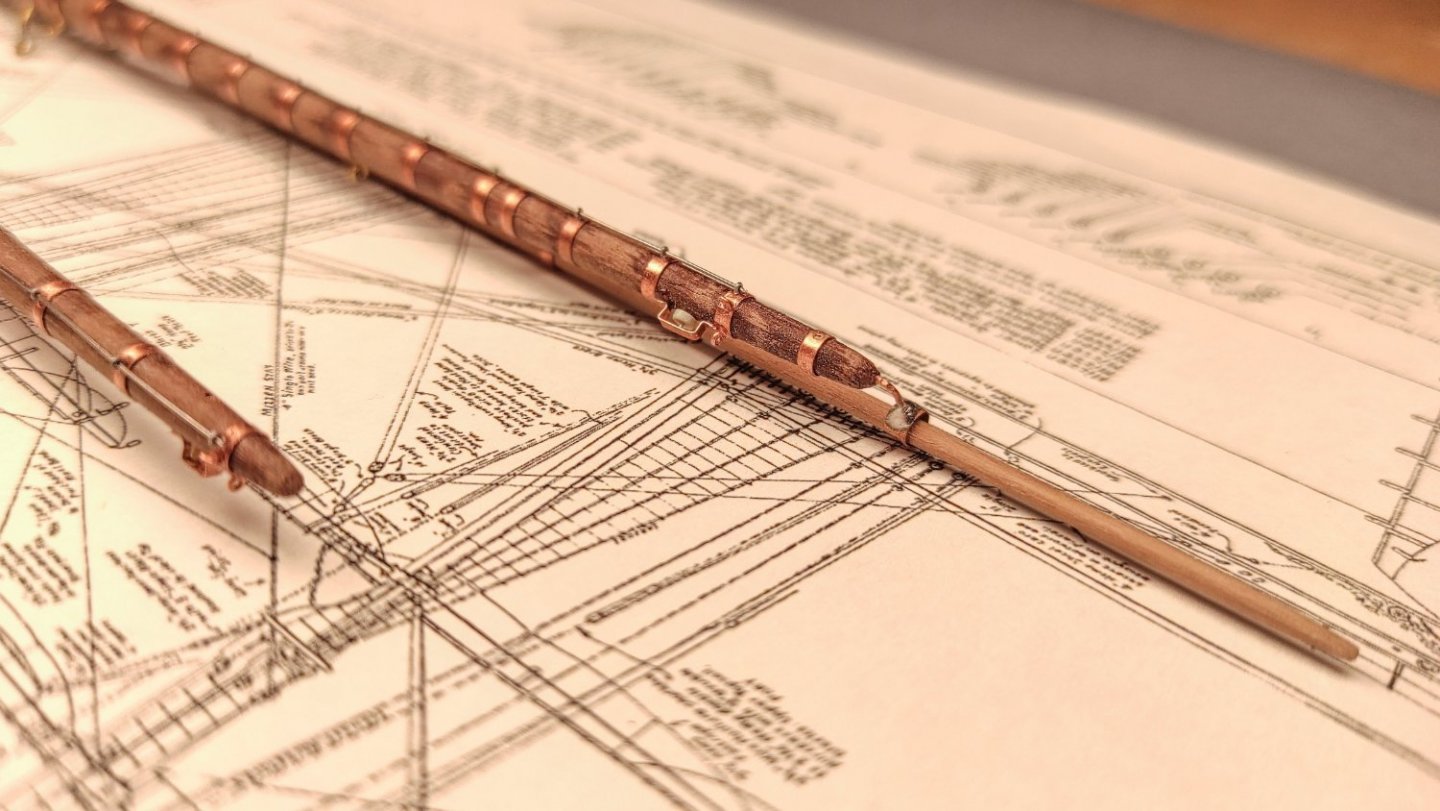
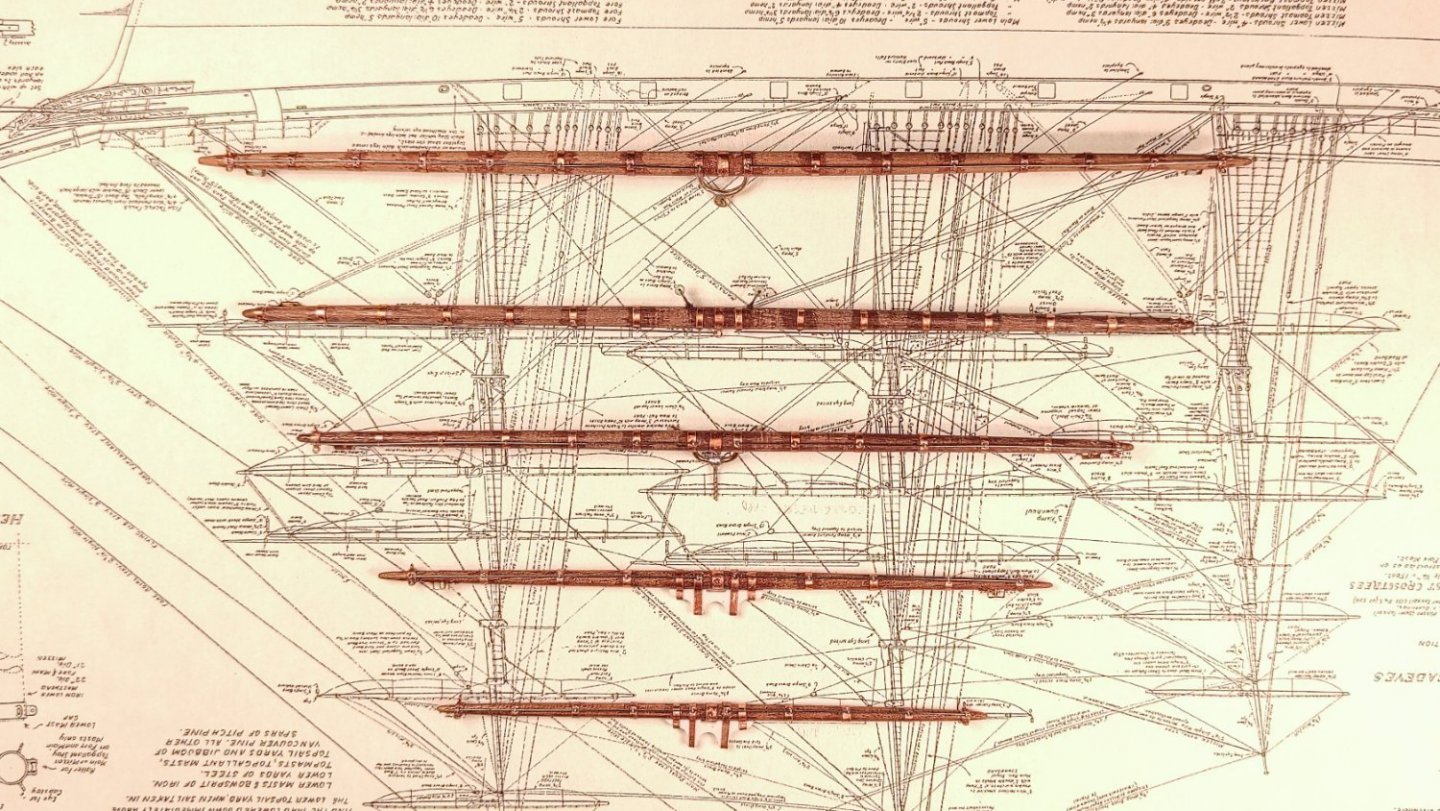
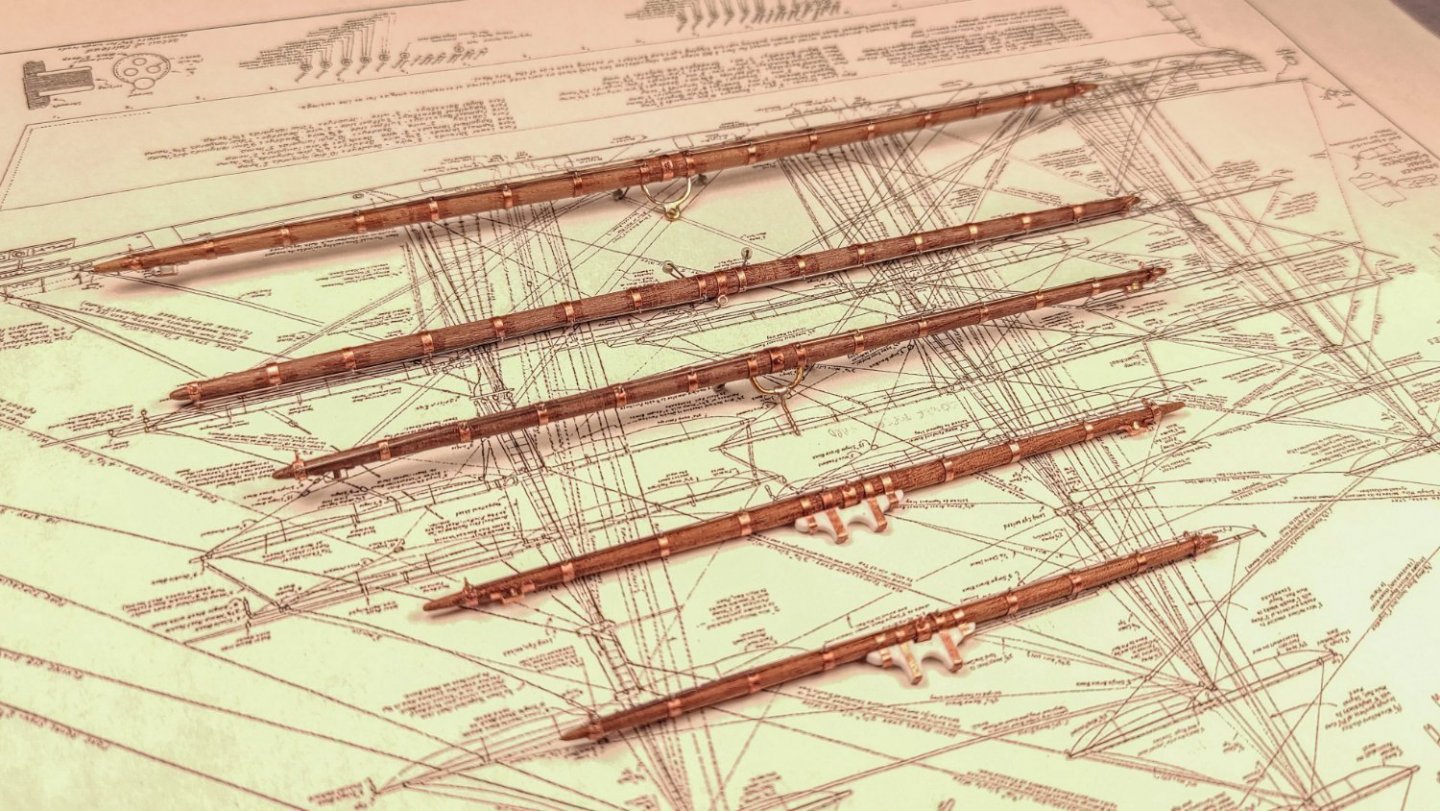
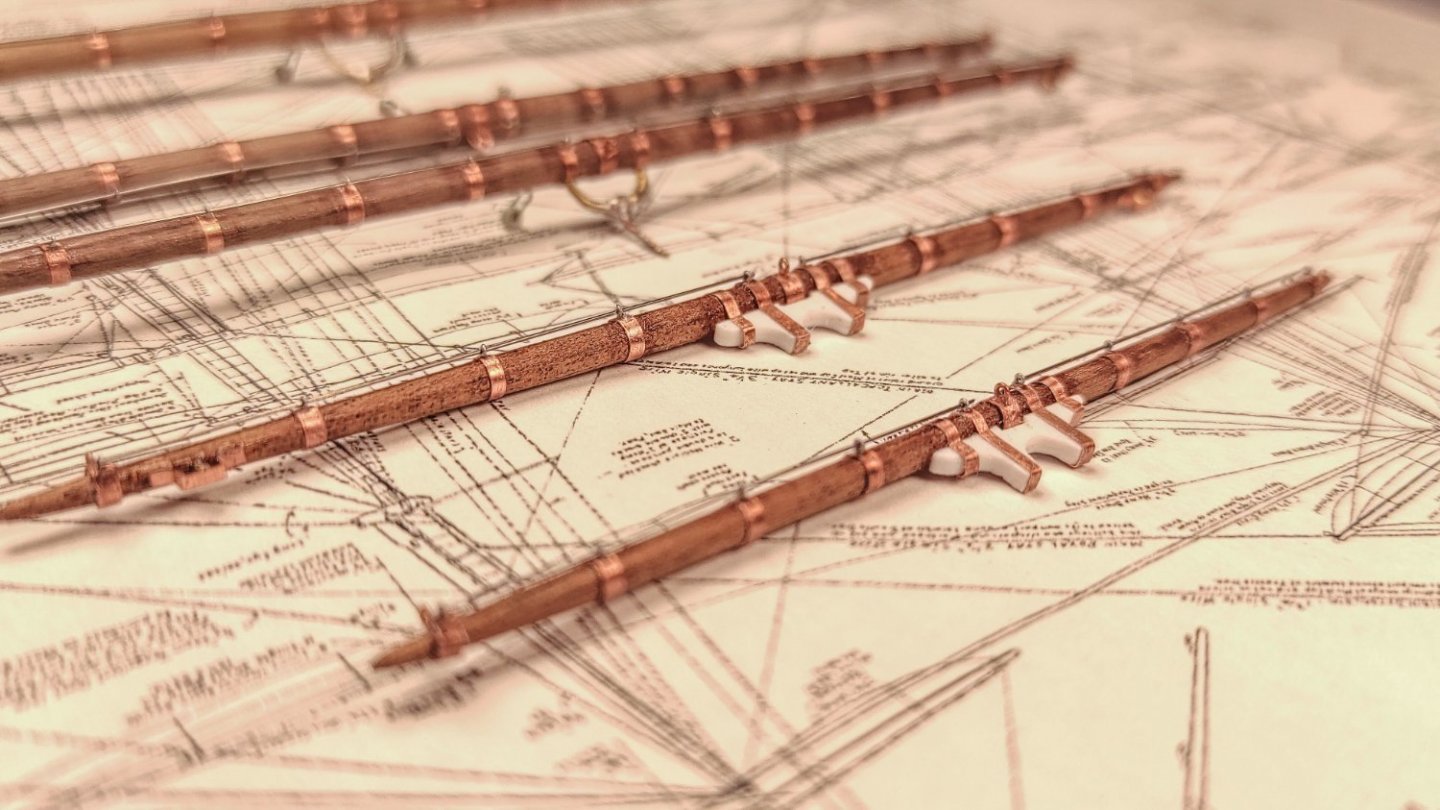
Hello everyone! Again a long time since my last update, sorry about that and thanks to wemattson and Joe100 for their recent comments. But now, it’s finally update time! Main and mizzen yards After stepping and rigging the main mast, I have been working on the main and mizzen yard. Since the process is incredibly time consuming and, after a while, boring, I decided to build them all in one shot, hoping to be a little bit faster. Here you can see the making process of some of the metal parts. And here they are almost finished, with the lower topsail crane fashioned with brass as well. Here the mizzen’s yards tapered and prepared for the metal fitting: In this is image you can see the making process of the parrel yoke for topgallant, royal and sky yard: And the way I used to secure them to the yards: Then I started with the metal stripes on the yards, a very long process, only surpassed by the eyebolts making and fitting. In order to better understand my mental disease, here you have some numbers. For the main and mizzen yard I have fashioned and fitted: 216 eyebolts, mainly in two different sizes; 197 metal stripes 22 pulleys 22 jackstays And the best of all this is that, once painted in black and fitted, many of the small details will not be so easy to spot… But I know they are there and I hope they will make a good impression! Now enough talking, some images (I hope not too many), of the finished yards: Here the main yards: And here the mizzen yards: I hope you like them! Next step will be the rigging of the mainstay sails. Here I still have some doubts about the sheets: for the jib there are two sheets, one for each side in order to allow the change in tack. For the main and mizzen stay sail there is only one sheet (at least according to Underhill). How can they manage the tacking process? You have to untie the sheet on the deck and pass it over the stays, which seems to me at least impractical if not impossible… Any information about that is very welcome!


- 399 replies
-
- 13
-

-
-

-
- cutty sark
- revell
- (and 2 more)
-
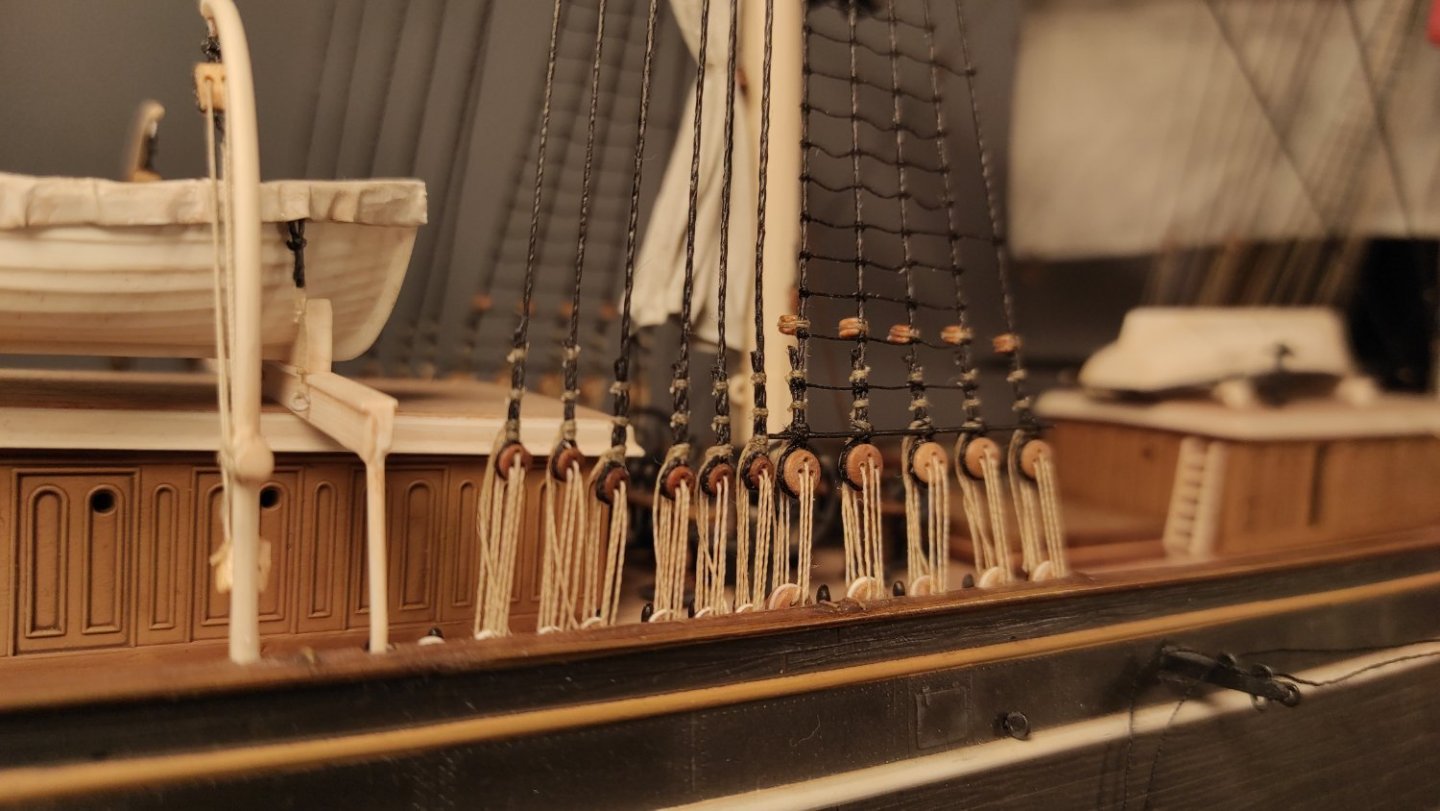
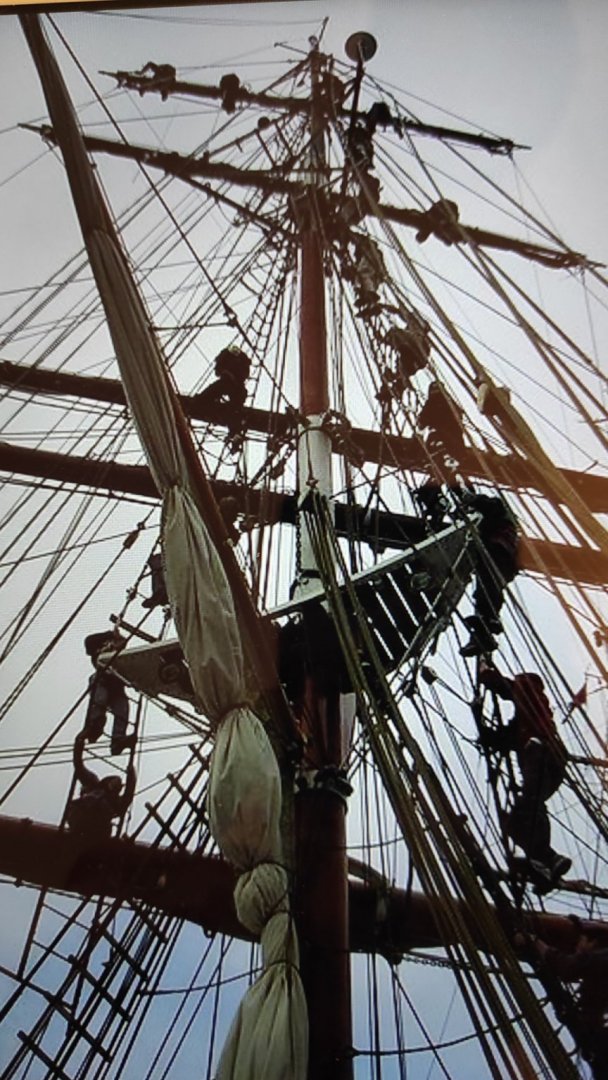
I tried to place the pin rail holes in the position shown by Campell’s plan. They are correct on the fore-stern line, but, as you noticed, they should have been placed further away from the hull. The reasons are mainly two. The first one is the deadeye size. Mine are slightly bigger than needed. At that time I didn’t have a resin 3d printer and I had to use what was available on the market but they interfere with the pins if placed correctly. The second was to have a safer anchoring point for the backstays. Moving the deadeye holes further away from the hull increases the leverage and the risk of detaching the pin rails once tension is applied. Another point that should be considered is that the pin rails provided by revell are larger than the original, so the pins itselfs should be closer to the hull. There are so many things that I should have done better that looking back at the beginning of the build I am almost ashamed… What a great learning process it was and still is… The biggest issue I had was to find space for rigging the yard's halliards down to the pinrail itself. If you plan it from the beginning, you will have less headhake in the future. Thank you Shipman! The chain you see in the first picture of my previous post are from trumpeter master tools, article number 08010, “30 cm Universal Fine Chain” 2x 30 cm chain in each packet. Hope this helps! @ Kirill and Snug Harbor Johnny: Thank you both for the incredibly useful pictures and paintings! Meanwhile I did my homework and foun some great video on youtube, here you have one of them: https://www.youtube.com/watch?v=Ft3EPJC-FtU&t=1072s Starting from 15:07, the video shows seamen furing sails! Thank you all again for the help and support.
- 399 replies
-
- 6
-
-
- cutty sark
- revell
- (and 2 more)
-
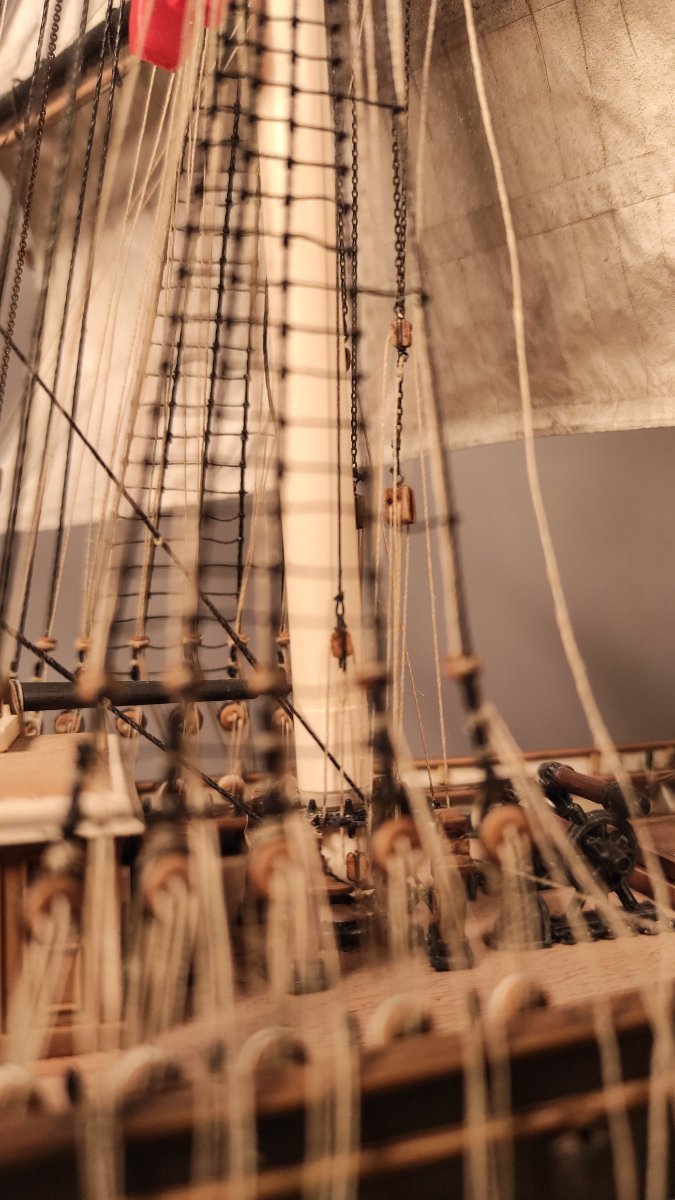
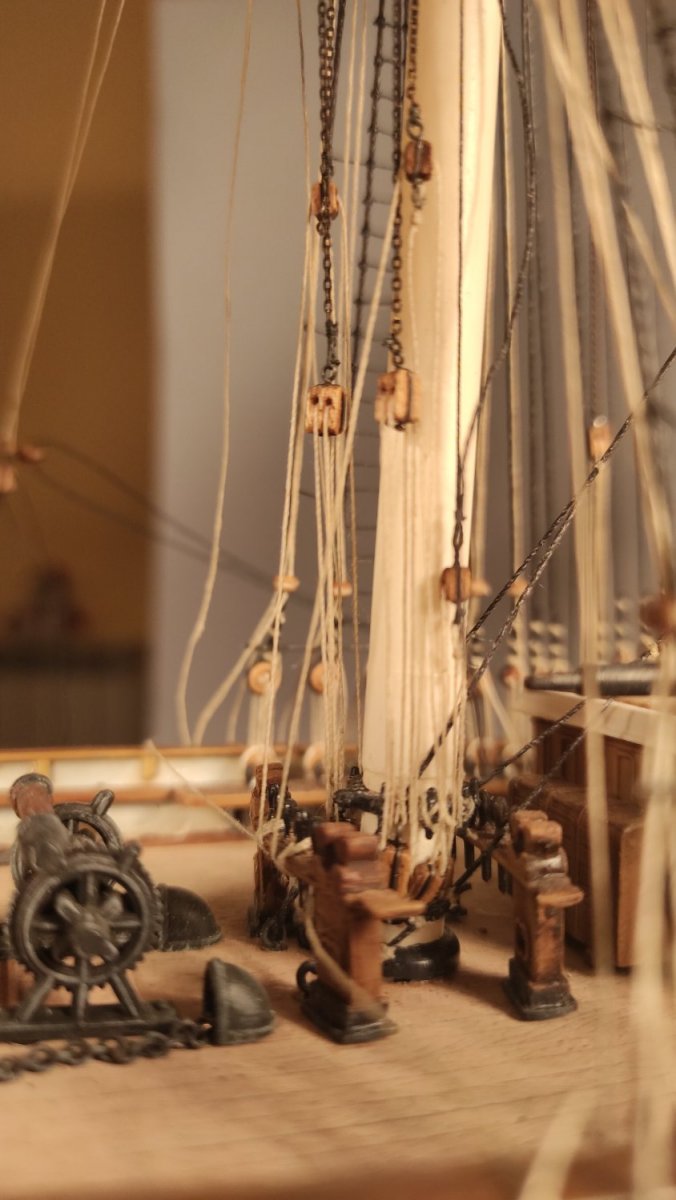
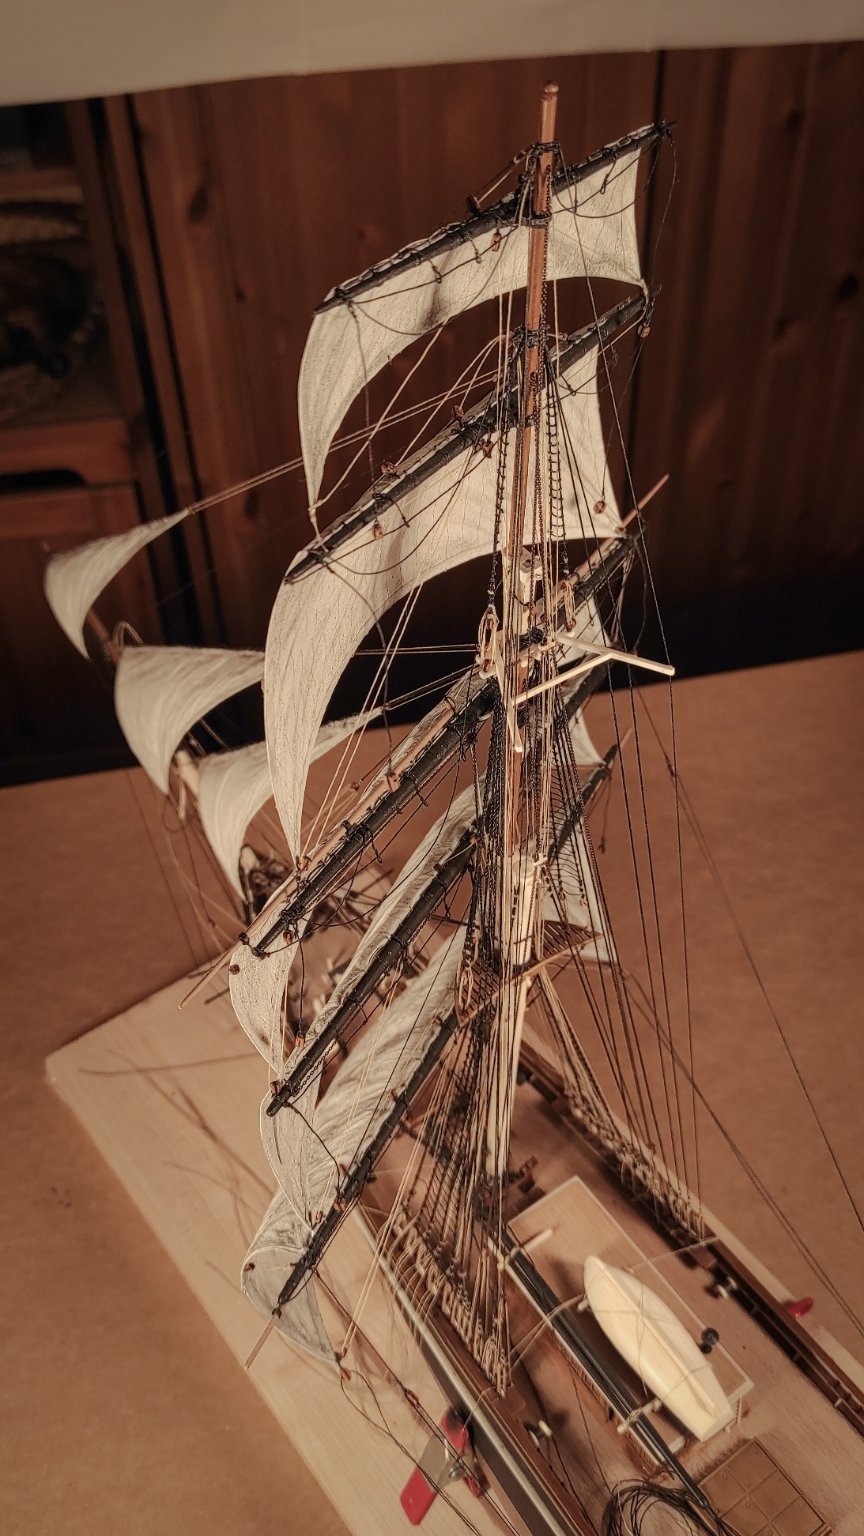
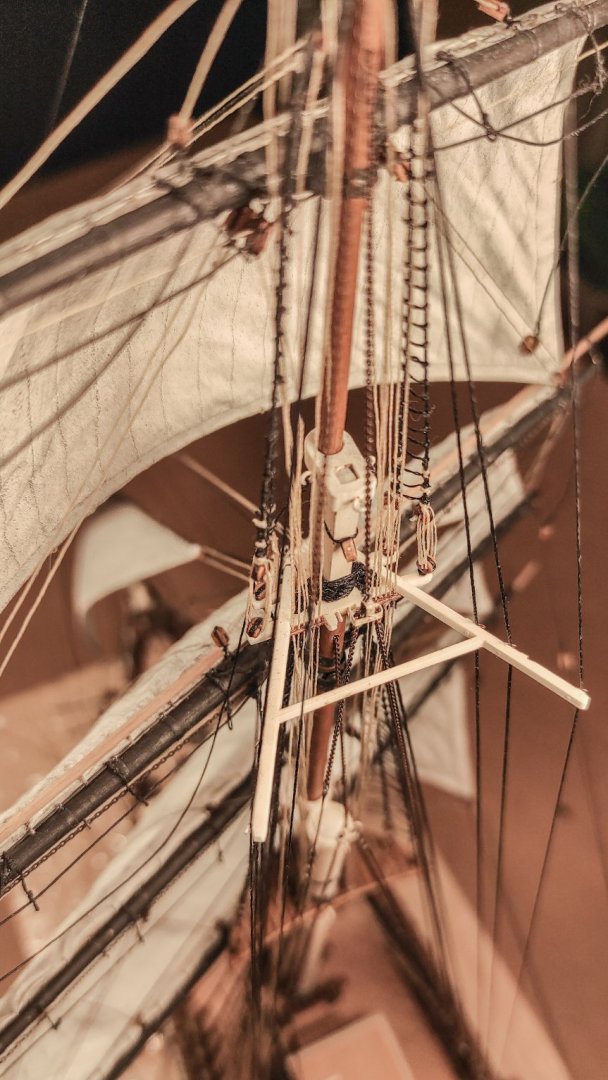
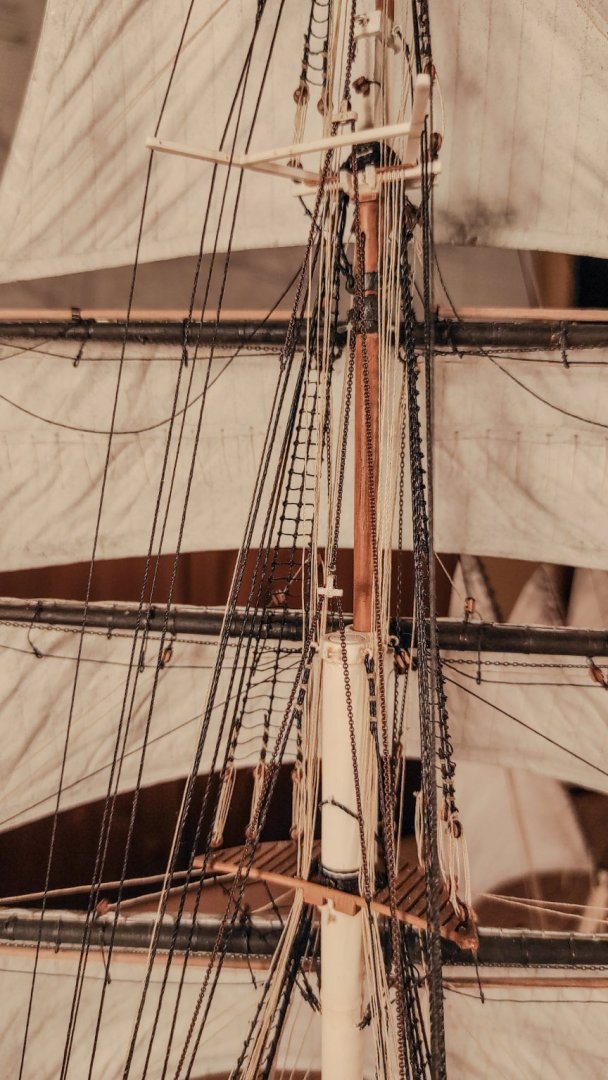
Thank you all for the kind comments and suggestions, I really appreciate all of them! @Snug Harbor Johnny: Thank you for the idea! It will surely come handy for my mizzen cro’jack: it will be furled. Talking about furled sails, if you or anybody else has some picture of real clipper-like sails furled, it will be really helpful. I’m struggling to find good pictures to use as reference. That being said, you mention: Well, I quite like this detail! Here it is my attempt to replicate the jackstay on the main course yard: So that I can also answer to a question posed by Rwiederrich: Yes indeed! And I hope the wires are visible in the previous picture. I really like all those little details, they reveal the incredibly complex nature of those sailing pieces of art. Thank you for posting your masterpiece. I already know your creature, they were part of the inspiration that brought me to the Cutty Sark, and I really like the diorama idea! Update time: Main mast stepped and the standing rigging (of the main mast) almost completed! Since the process is almost the same as the fore mast, I will just put some pictures! Just a side note: royal and skysail back stays are still missing, as are some fairleads. Before stepping the mast, I prepared the tackles for the main course yard lift. They are in a quite tricky and crowded location. This area will be a lot more crowded, but all the other tackles have to be fitted once the yards are in place. I hope the job is visible from this pictures: Talking about crowded areas, the foot of the main mast is one of them and to make things even worse, the mainstay and the main topmast stay needs to find her way in this intricate forest… I already tied them on the port side, but the line needs to go up to the main mast and come back to the fore mast, starboard side, tied to the eye bolts on deck. In doing so, they have to pass between the mast and the tackles (tree for each side, one for the lift, another one for the lower topsail sheet and the last one for topgallant sheet). Well, long story short, it was not so relaxing. But I’m glad I did it. The result is barely visible, but I know I did it, and that’s enough. Here you can see the mainstay and the relative cleat: And here the whole (I hope ordered) mess: Well, that’s all for today's update, please critique and point out errors or anything you don’t like, I really appreciate all your feedback!


- 399 replies
-
- 10
-
-
-
- cutty sark
- revell
- (and 2 more)
-
Great to see another glorious revell kit coming to life! I also really like your 3d printed details!
- 444 replies
-
- 2
-
-
- Cutty Sark
- Revell
- (and 2 more)
-
Thank you all, I’m really happy to see you are still with me! The hinges are all rigid. They are a simple piece of brass wire inserted in the boom and then bent. To mimic the real hinges, I just applied two small disks on both sides of the wire, pretending to simulate a cylindrical hinge. I hope it’s clear enough, if not please write me, and I’ll try to take some more close-up pictures!
- 399 replies
-
- 3
-
-
- cutty sark
- revell
- (and 2 more)
-
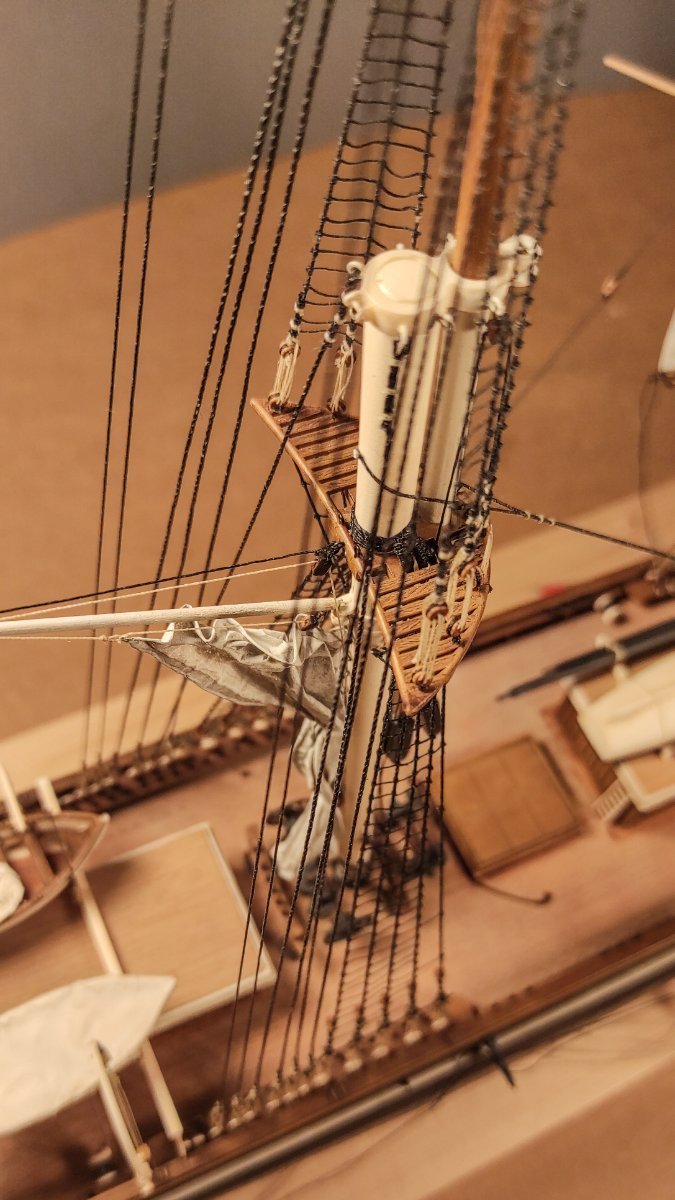
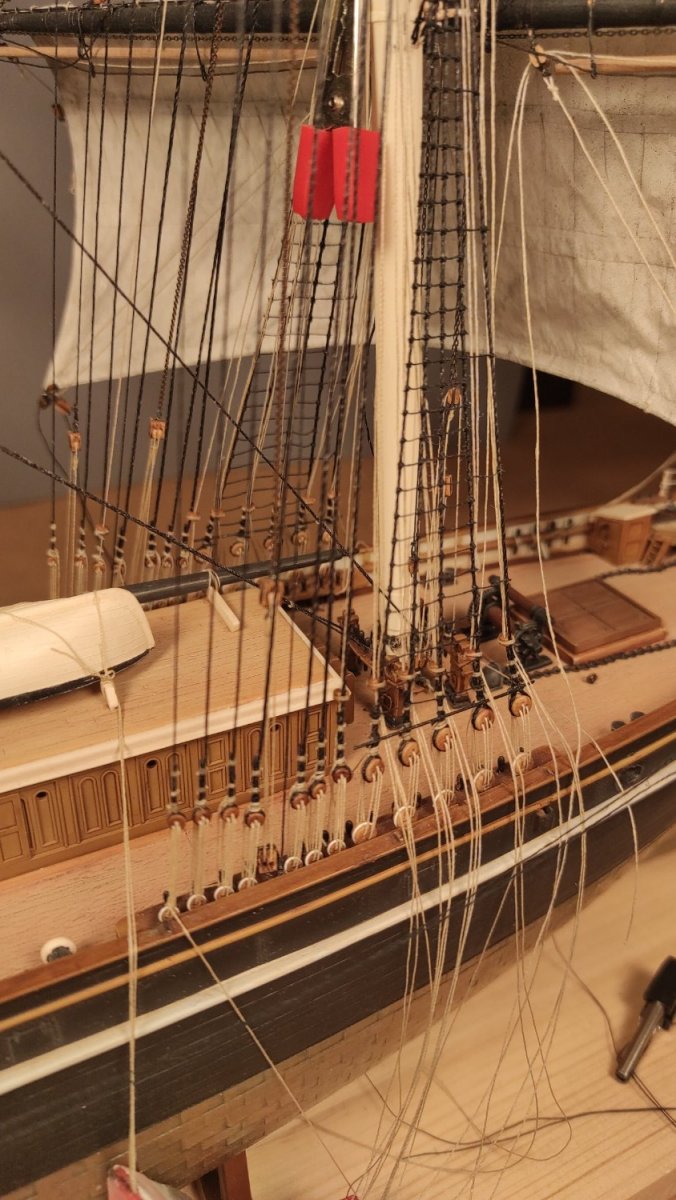
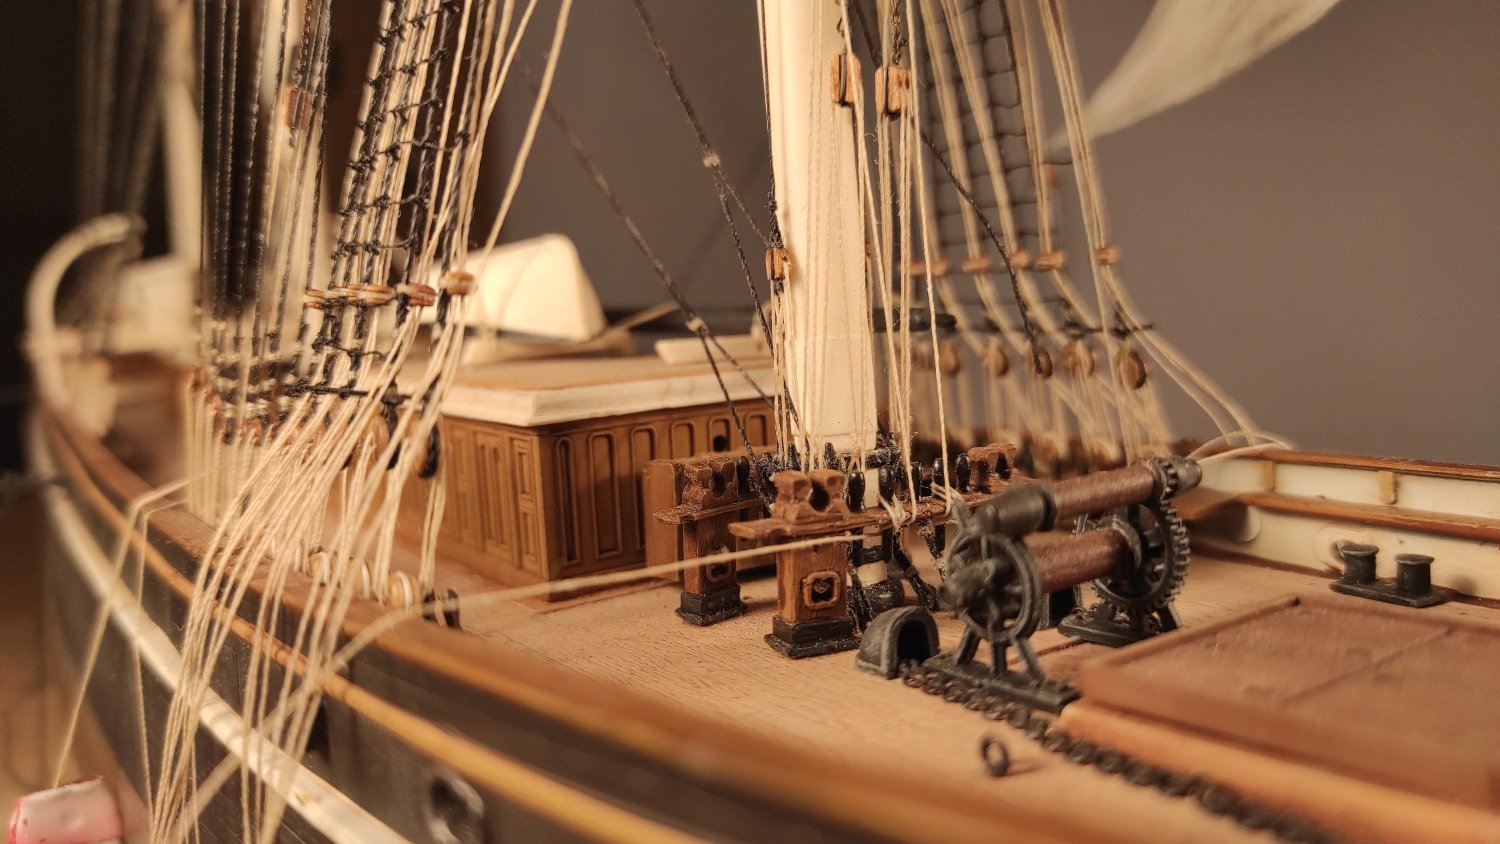
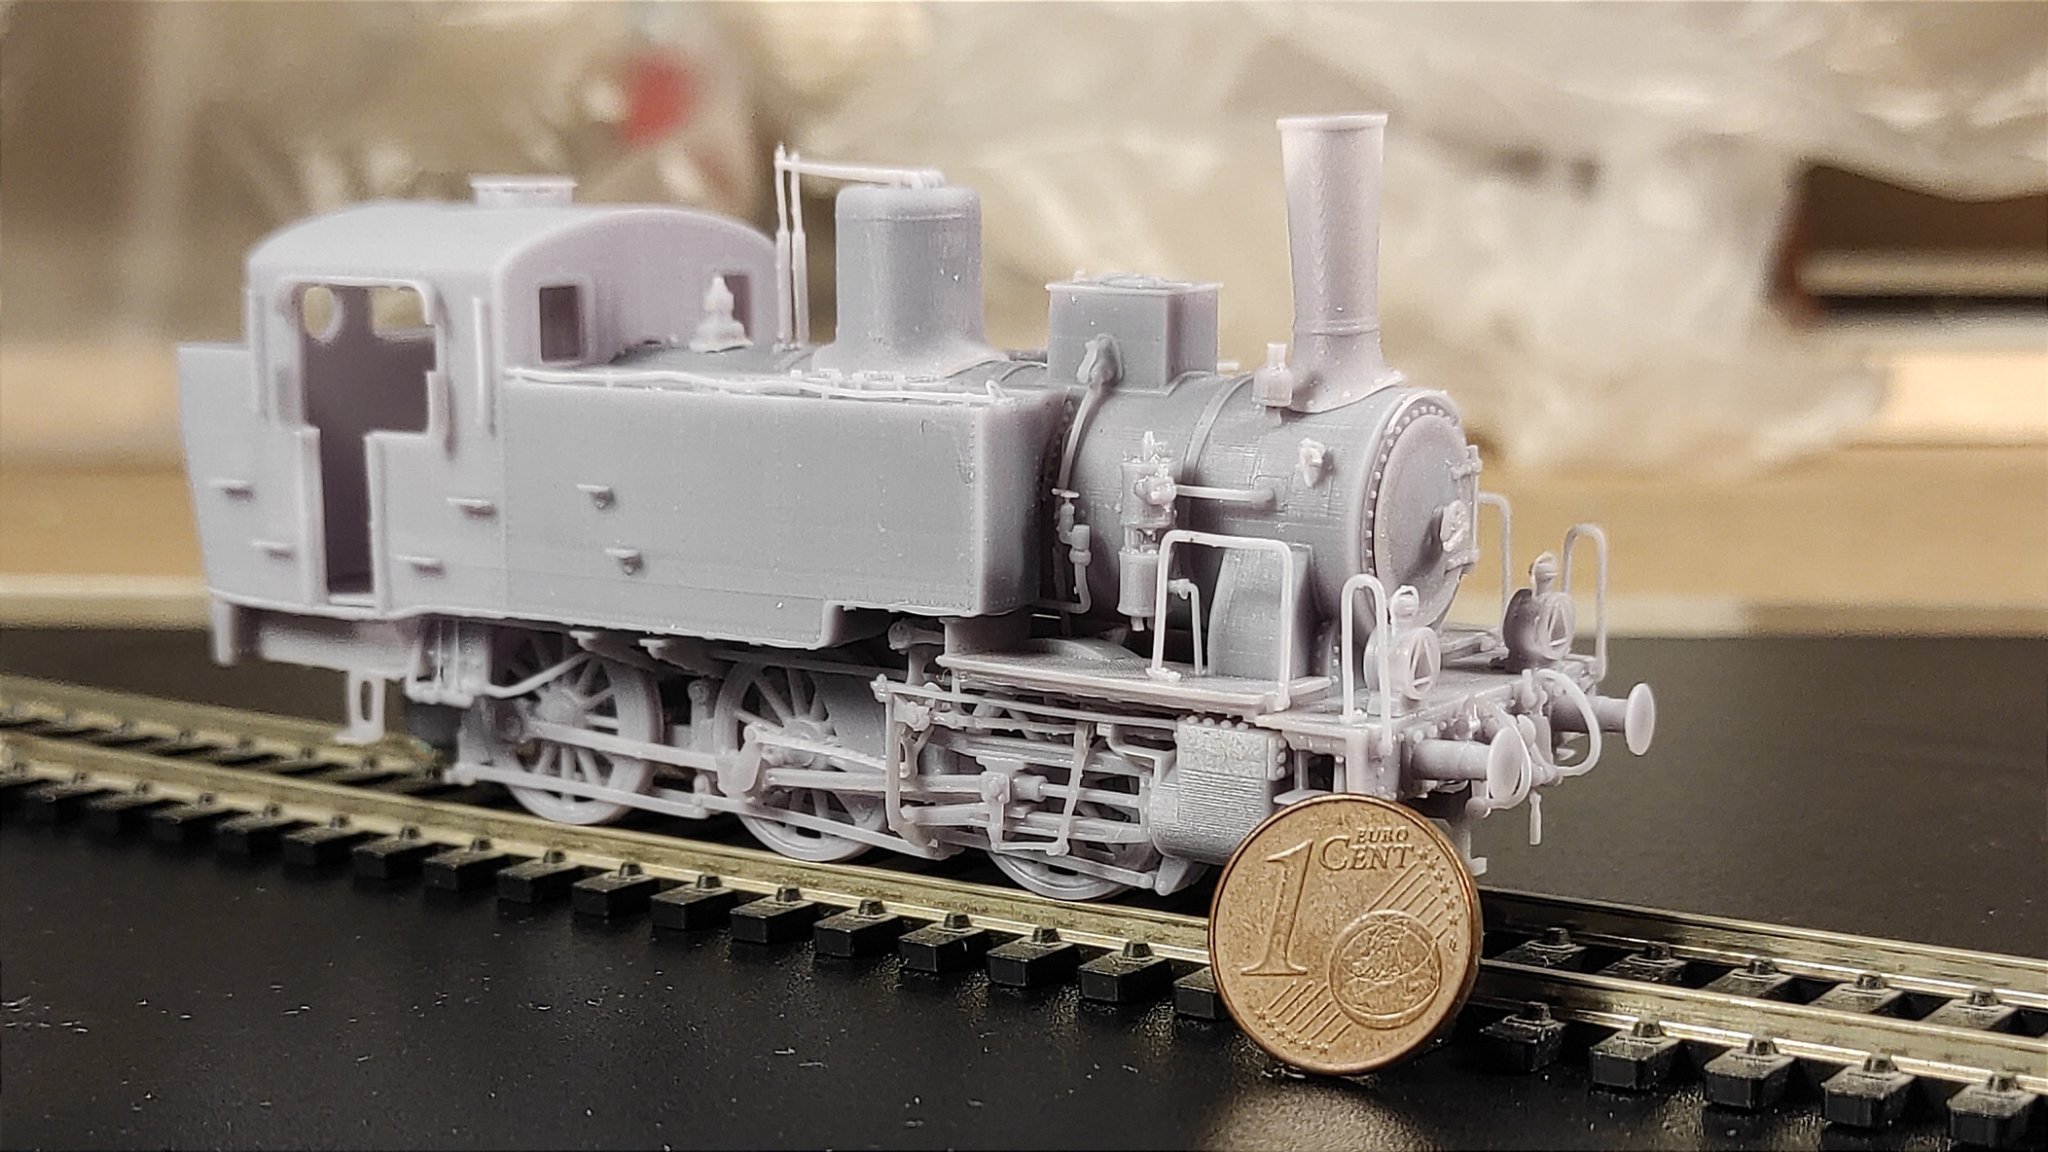
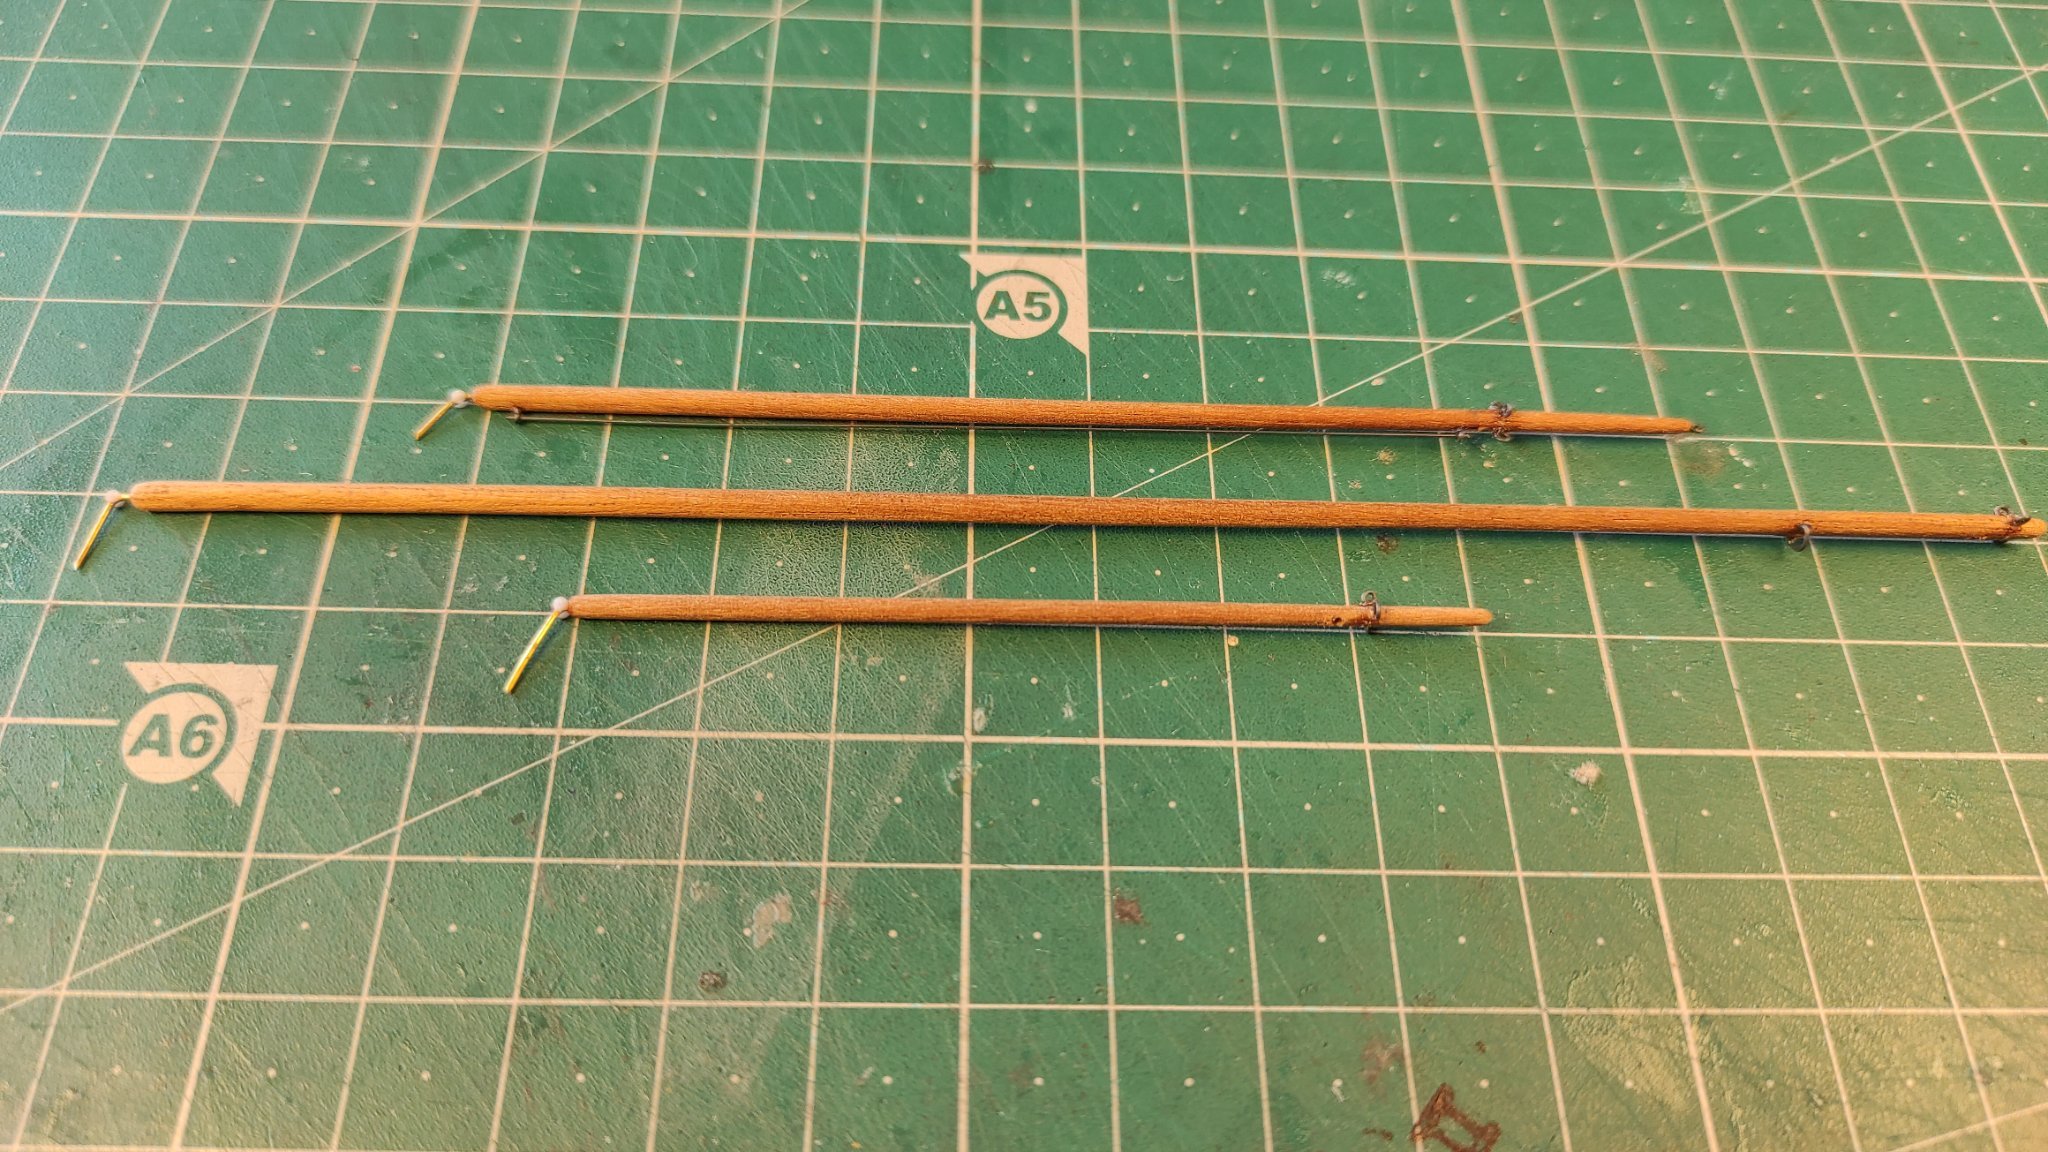
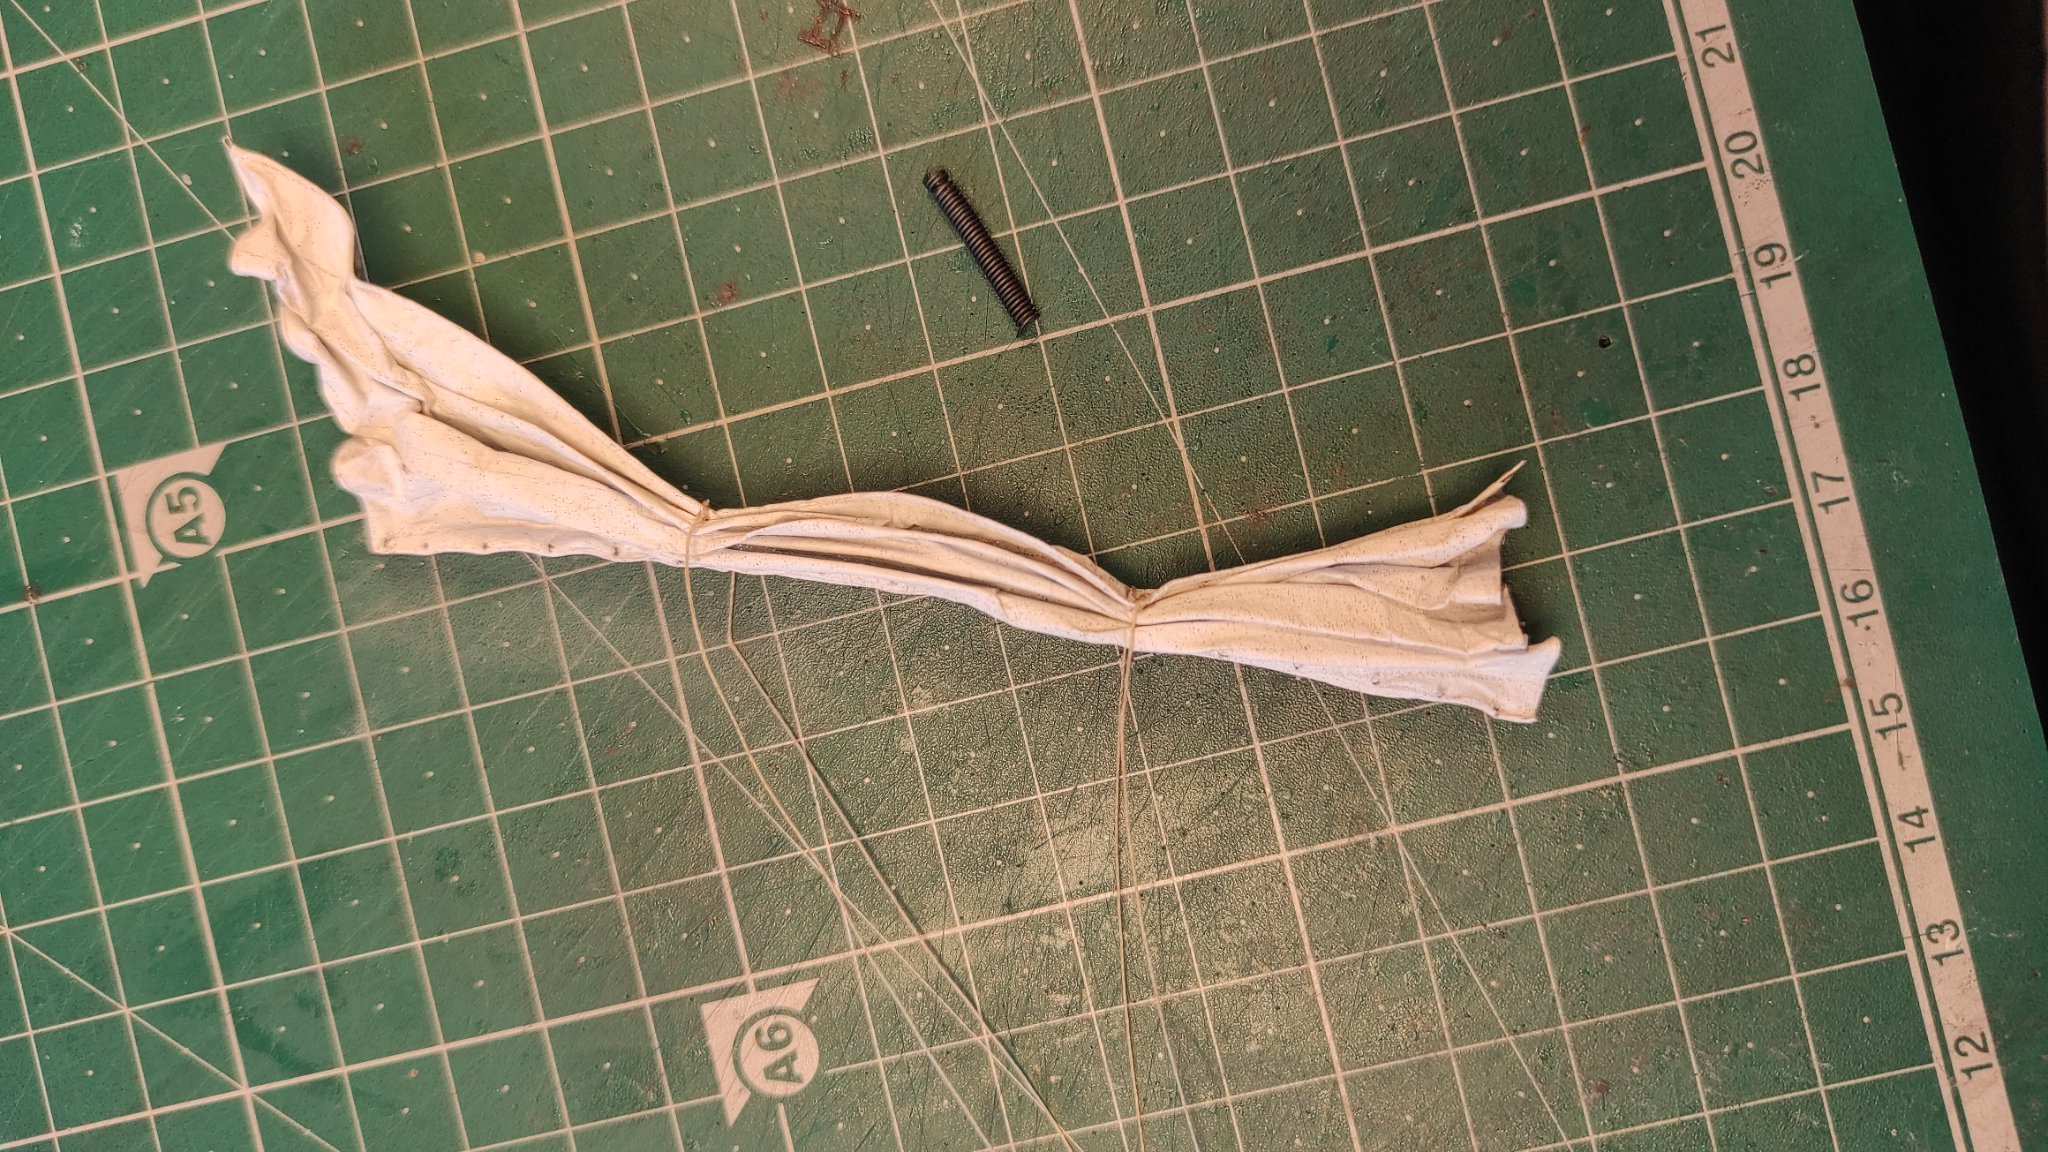
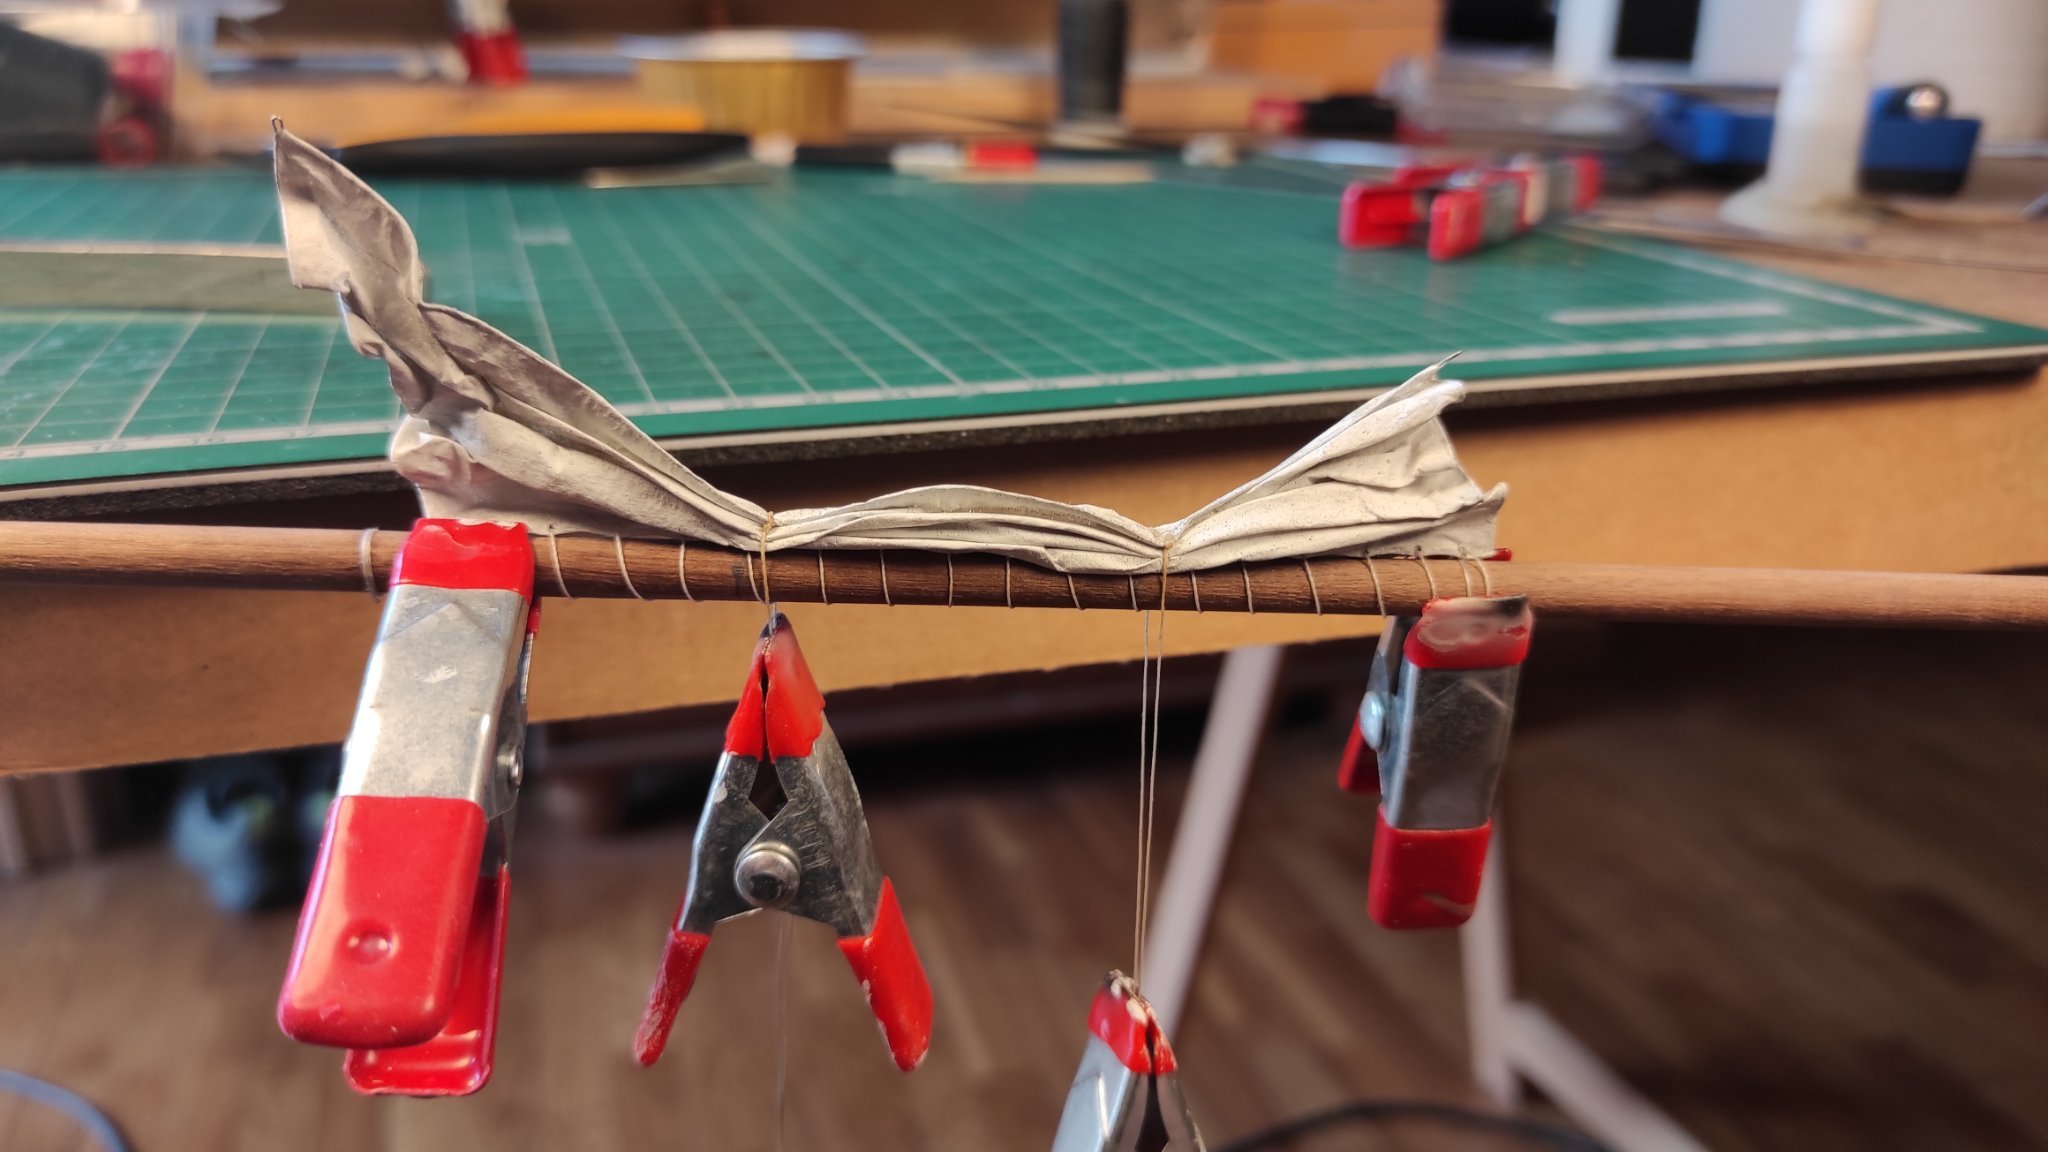
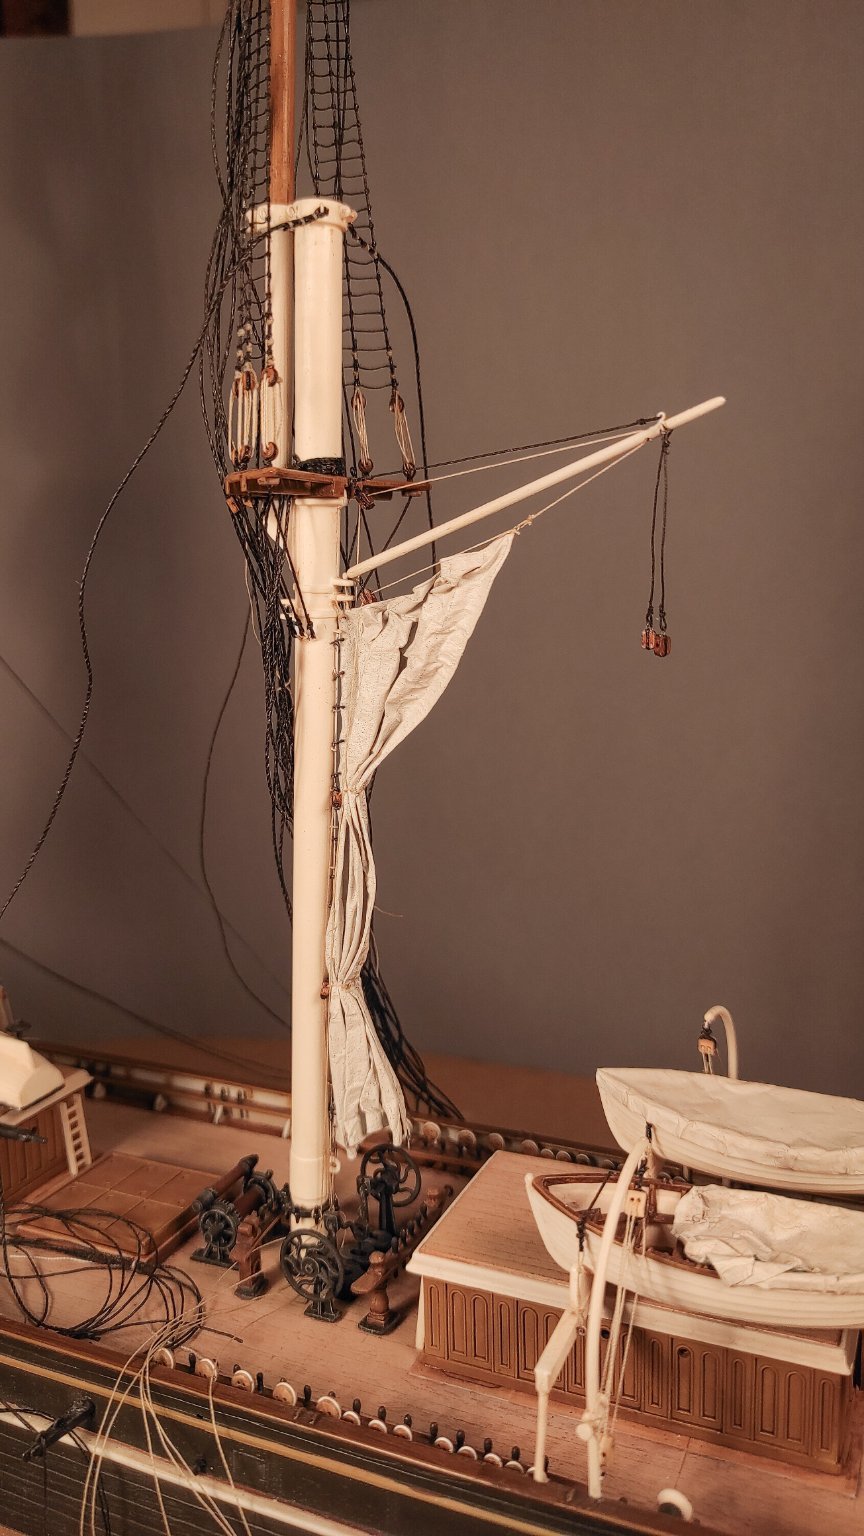
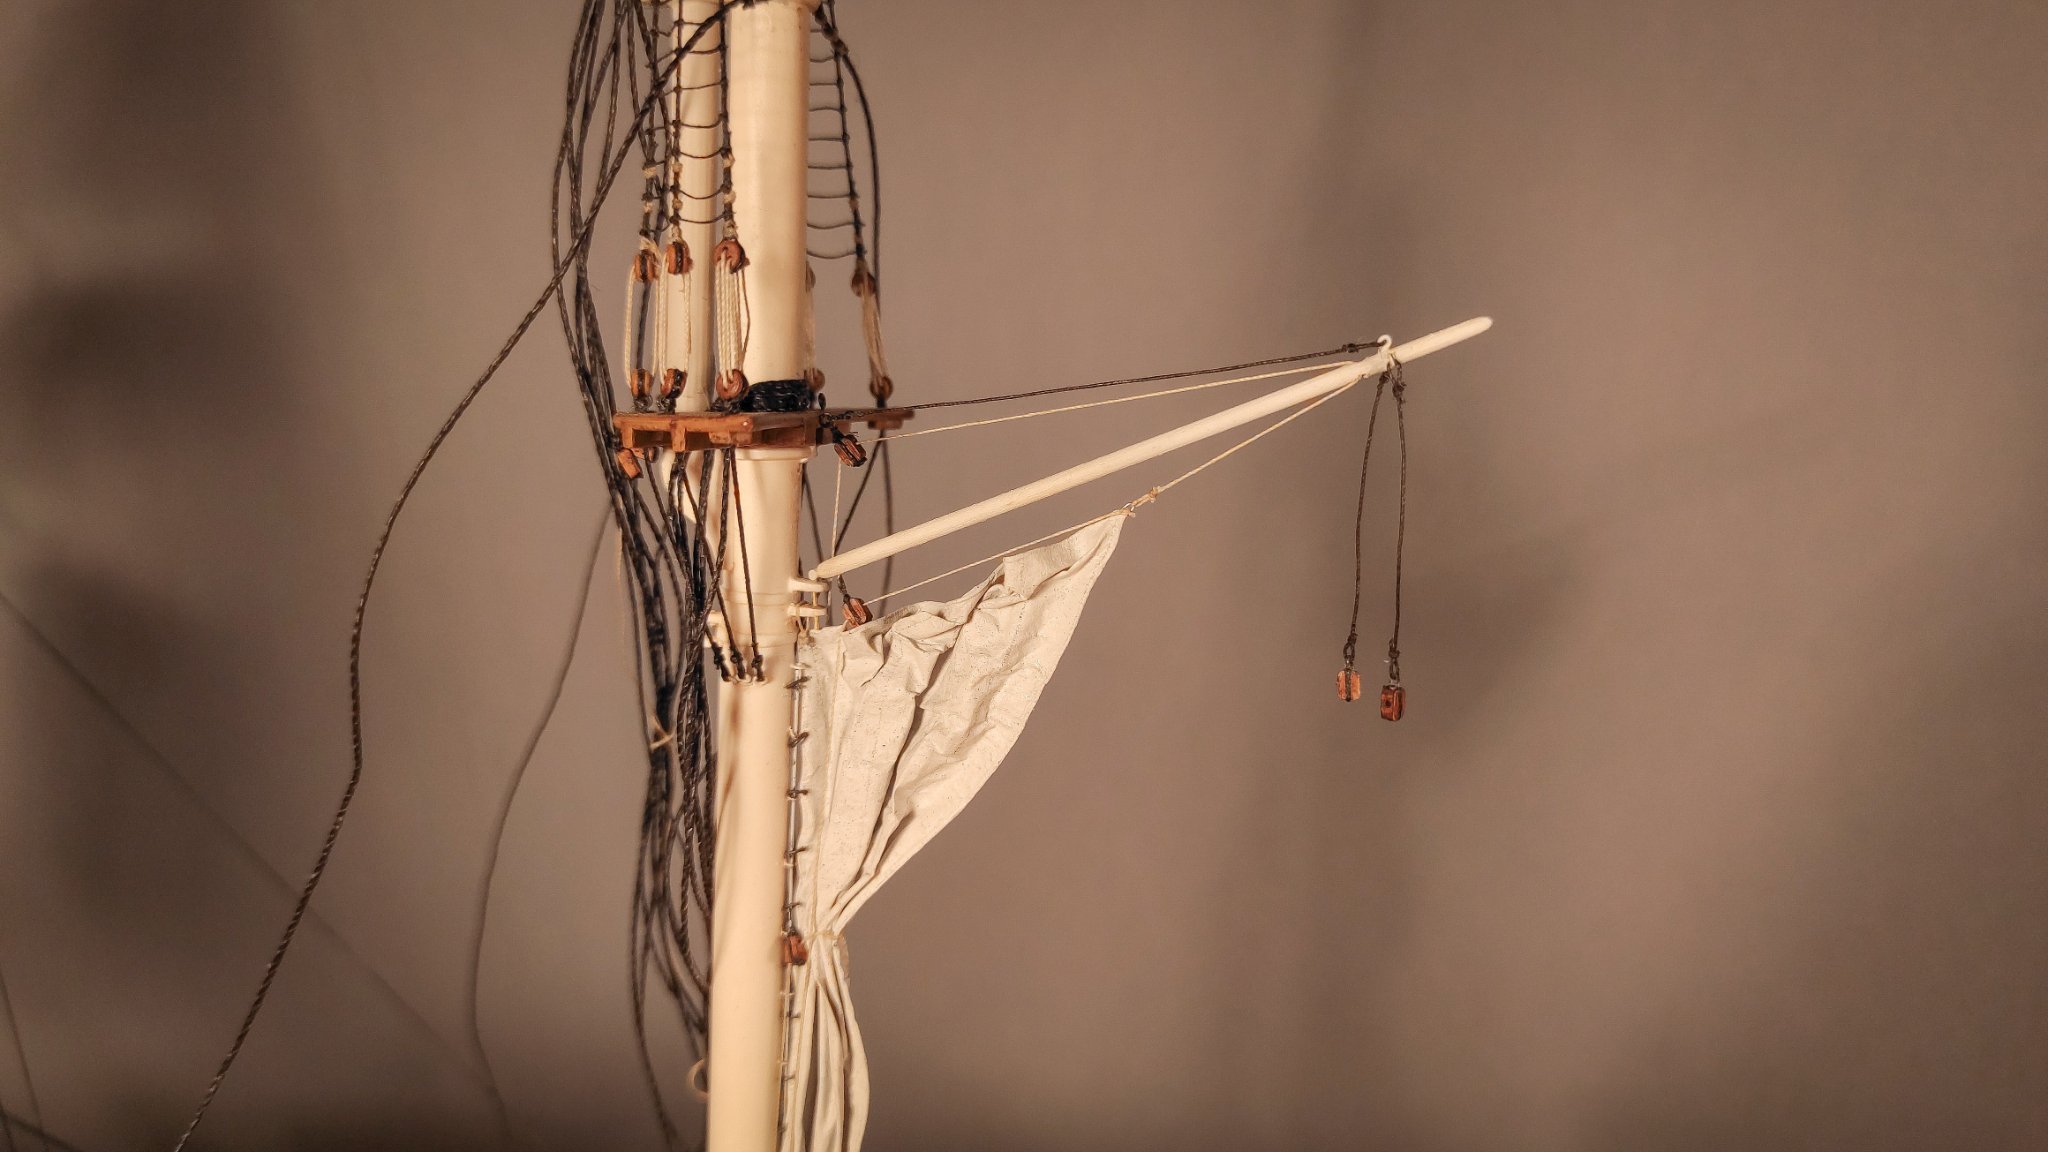
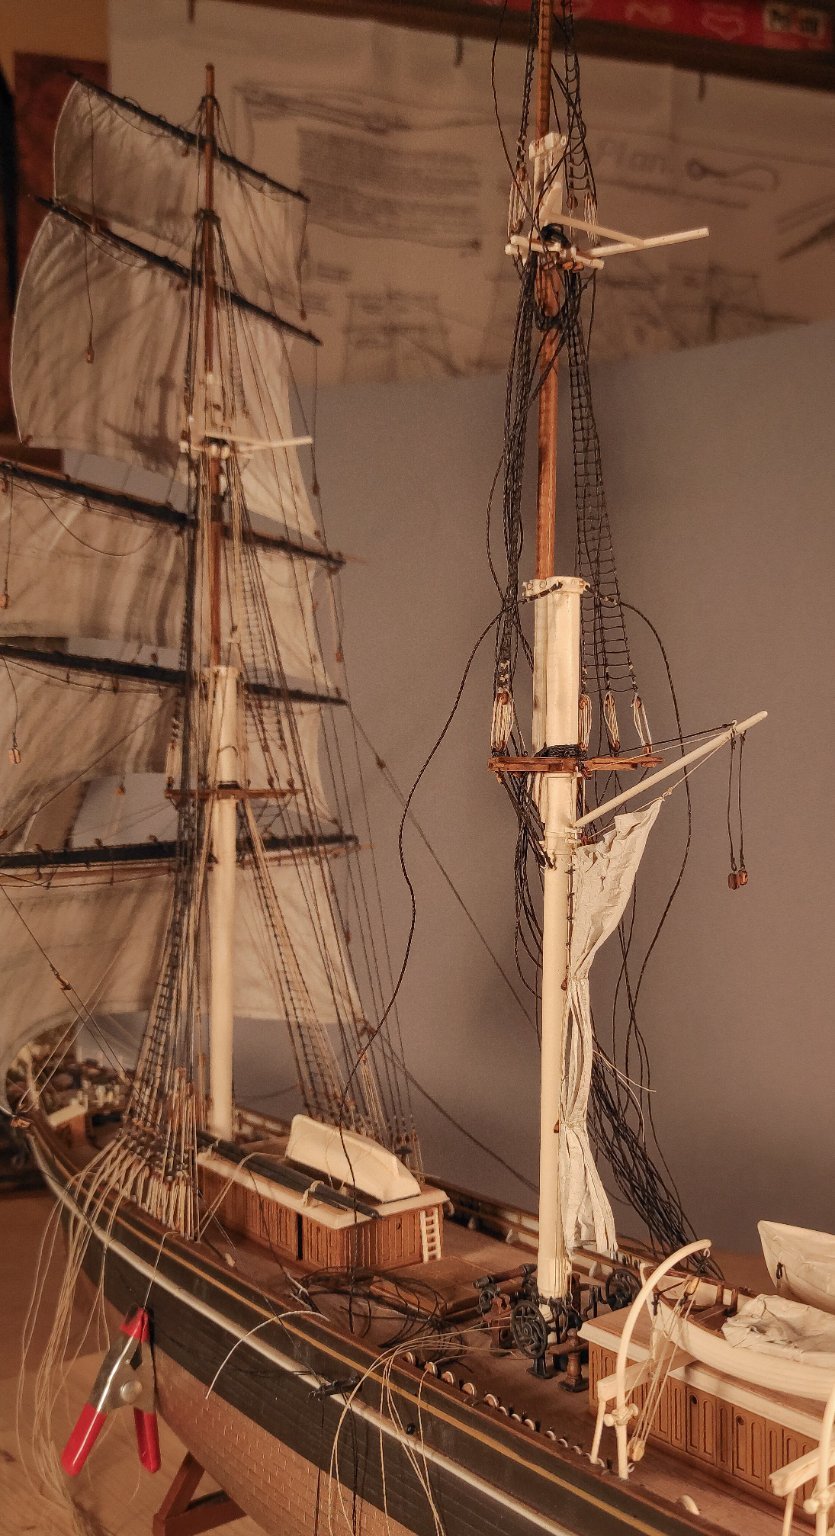
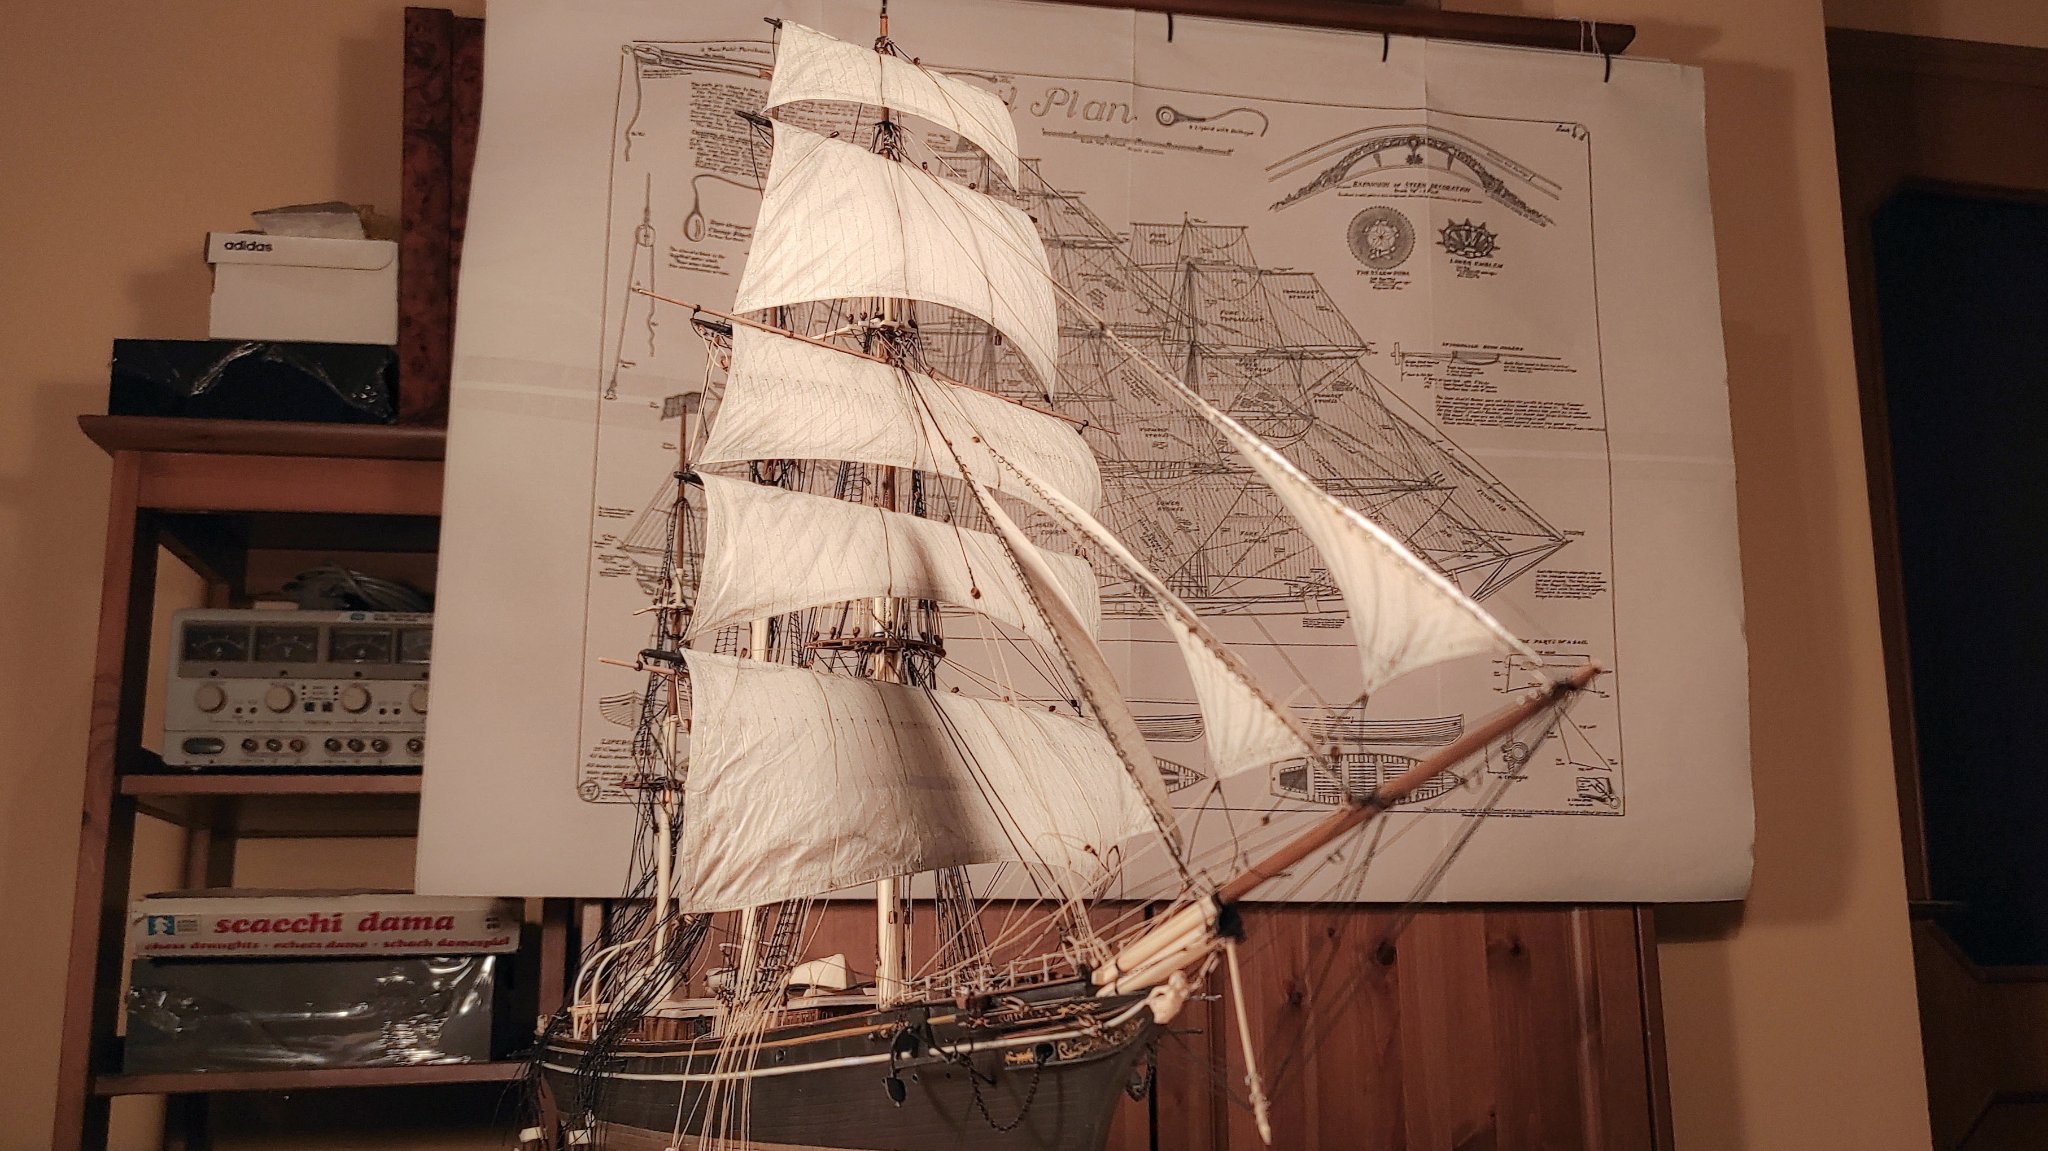
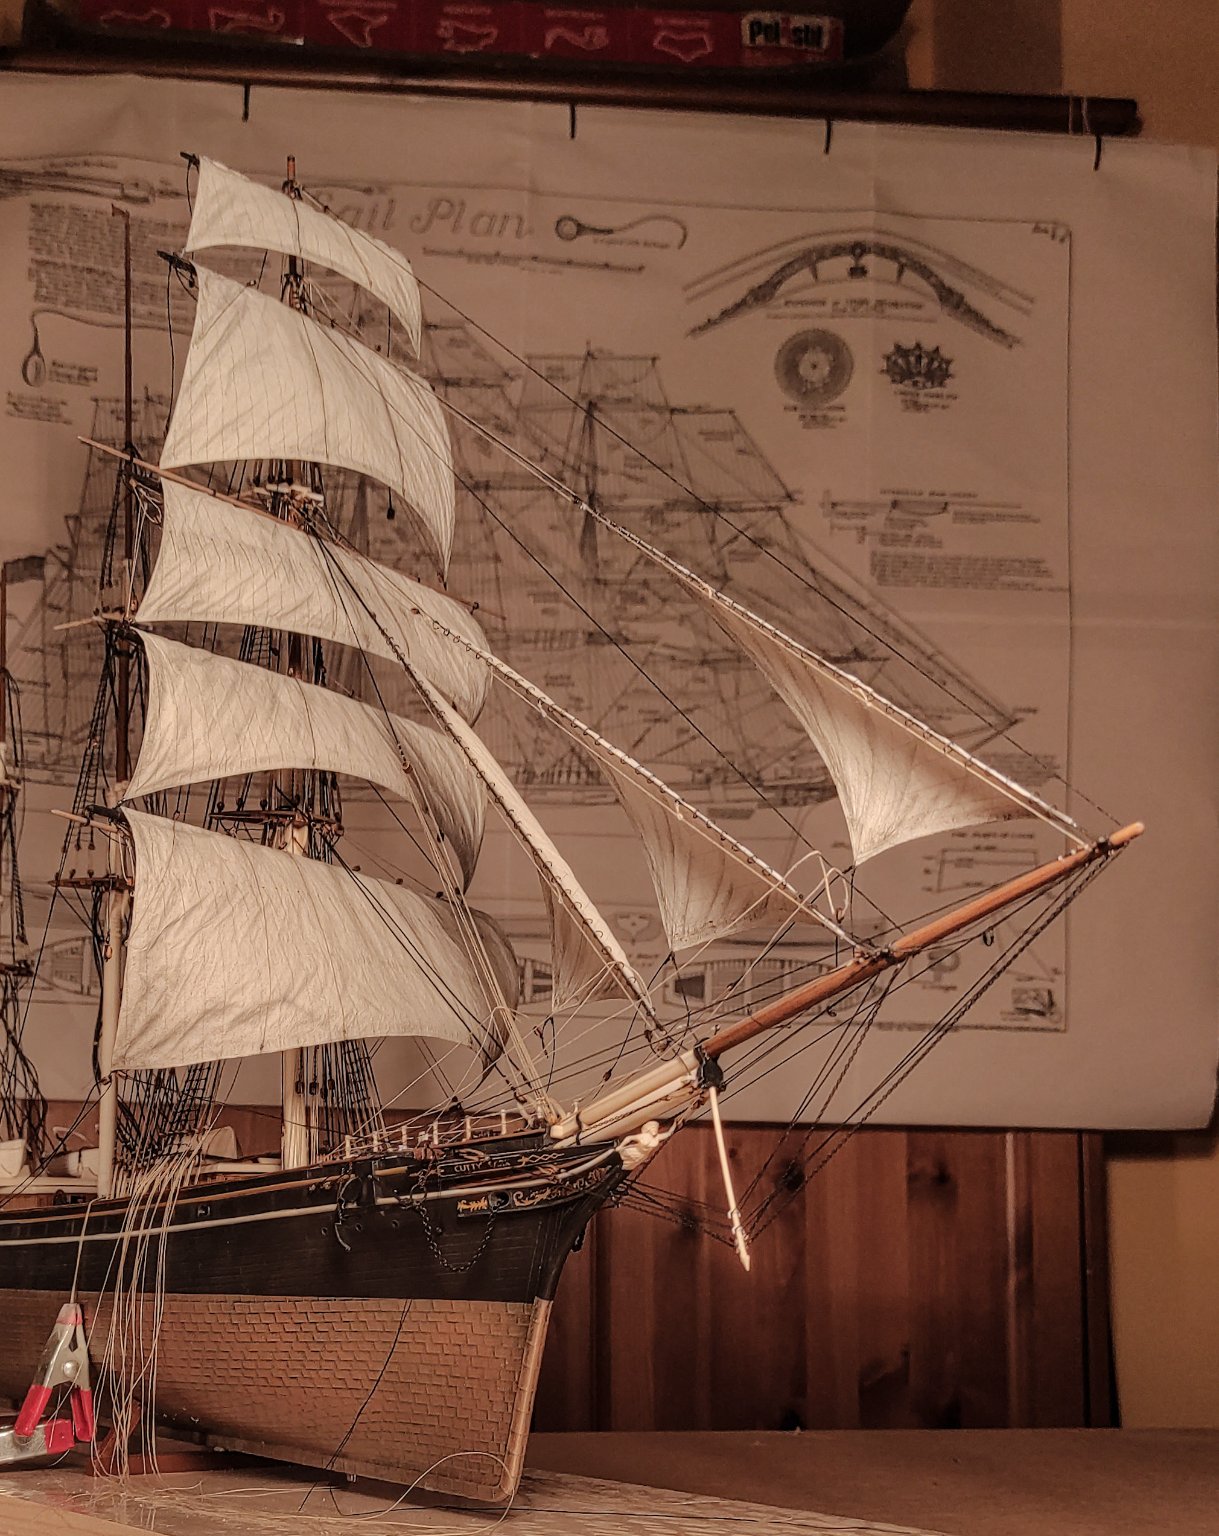
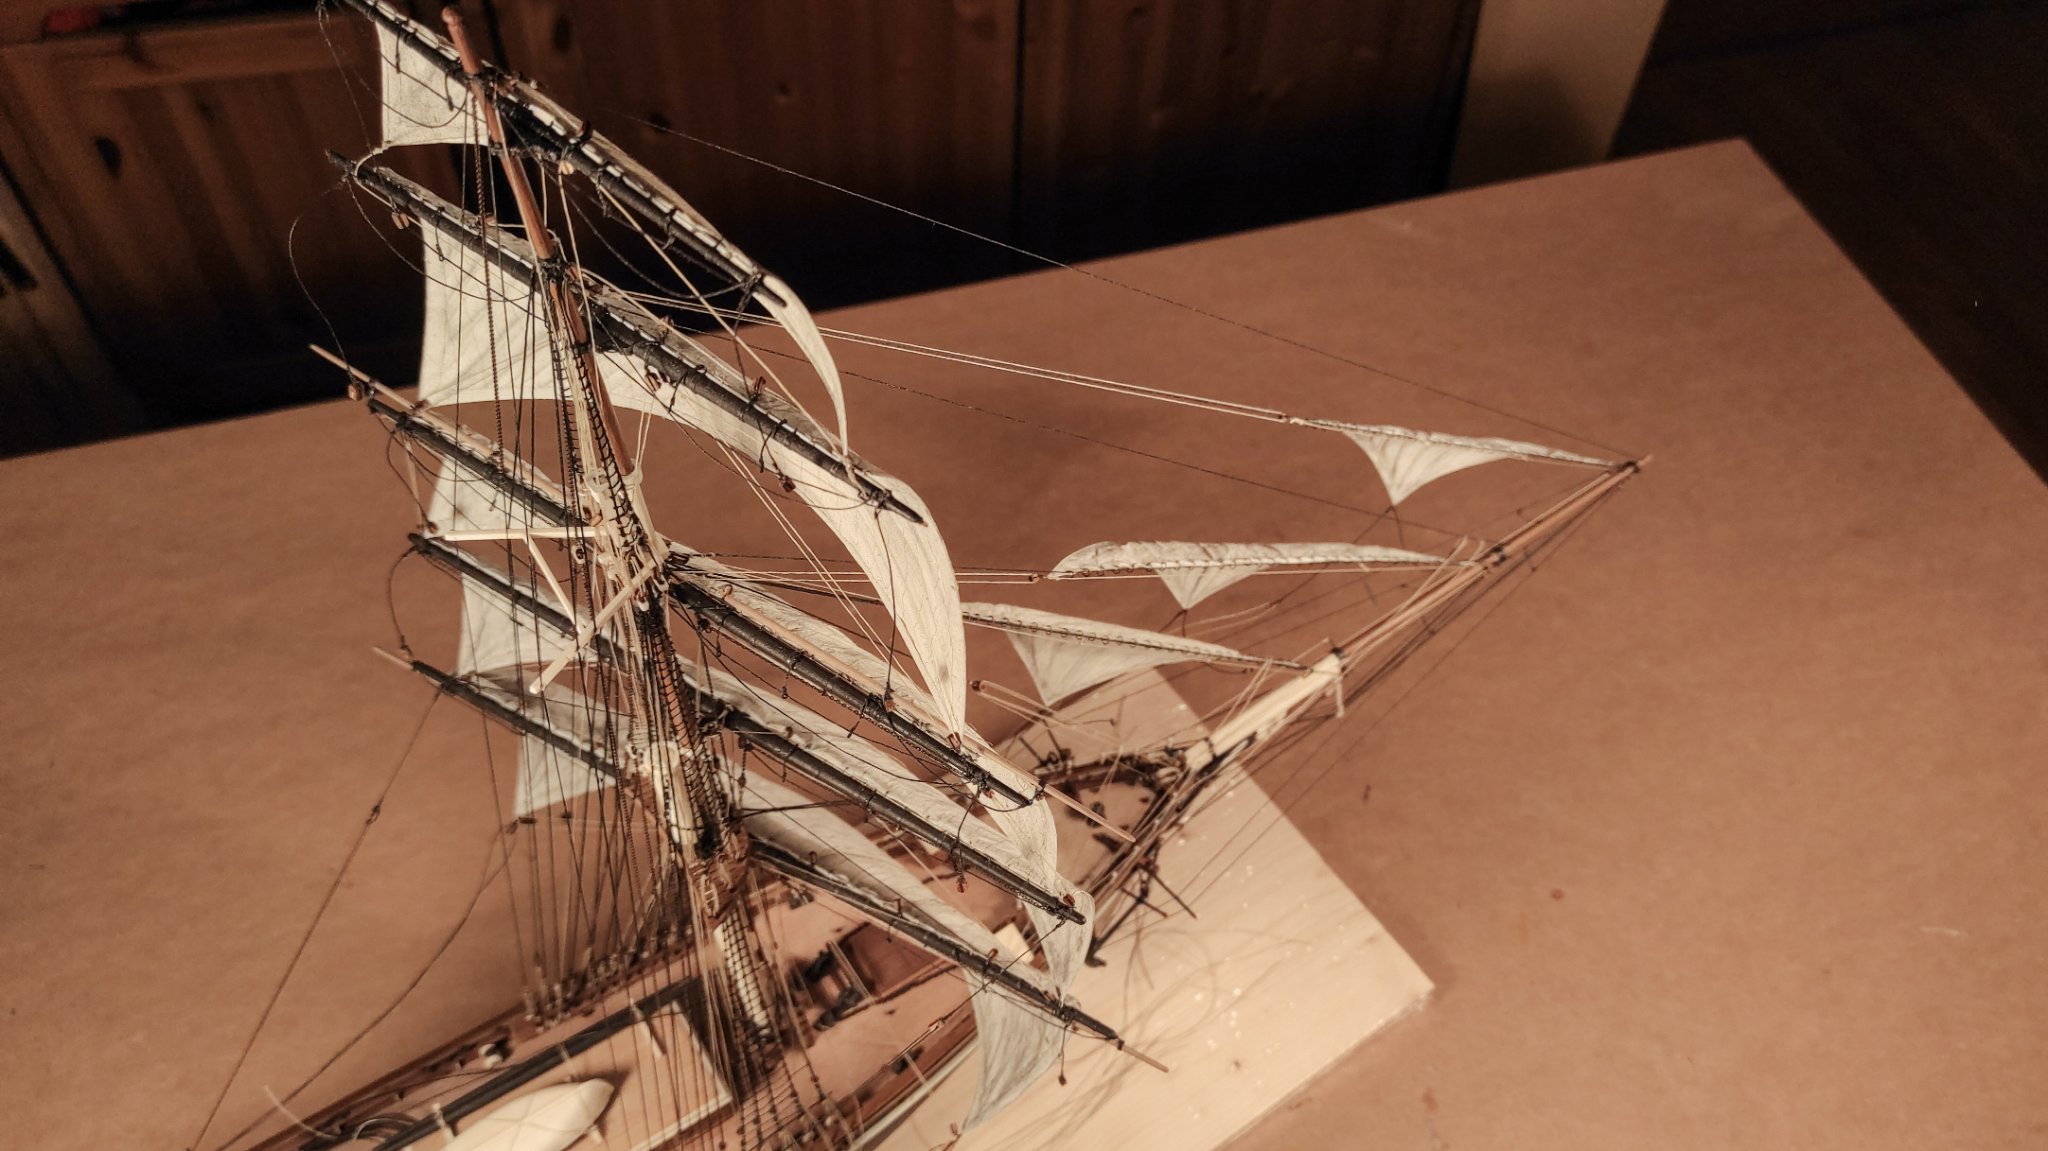
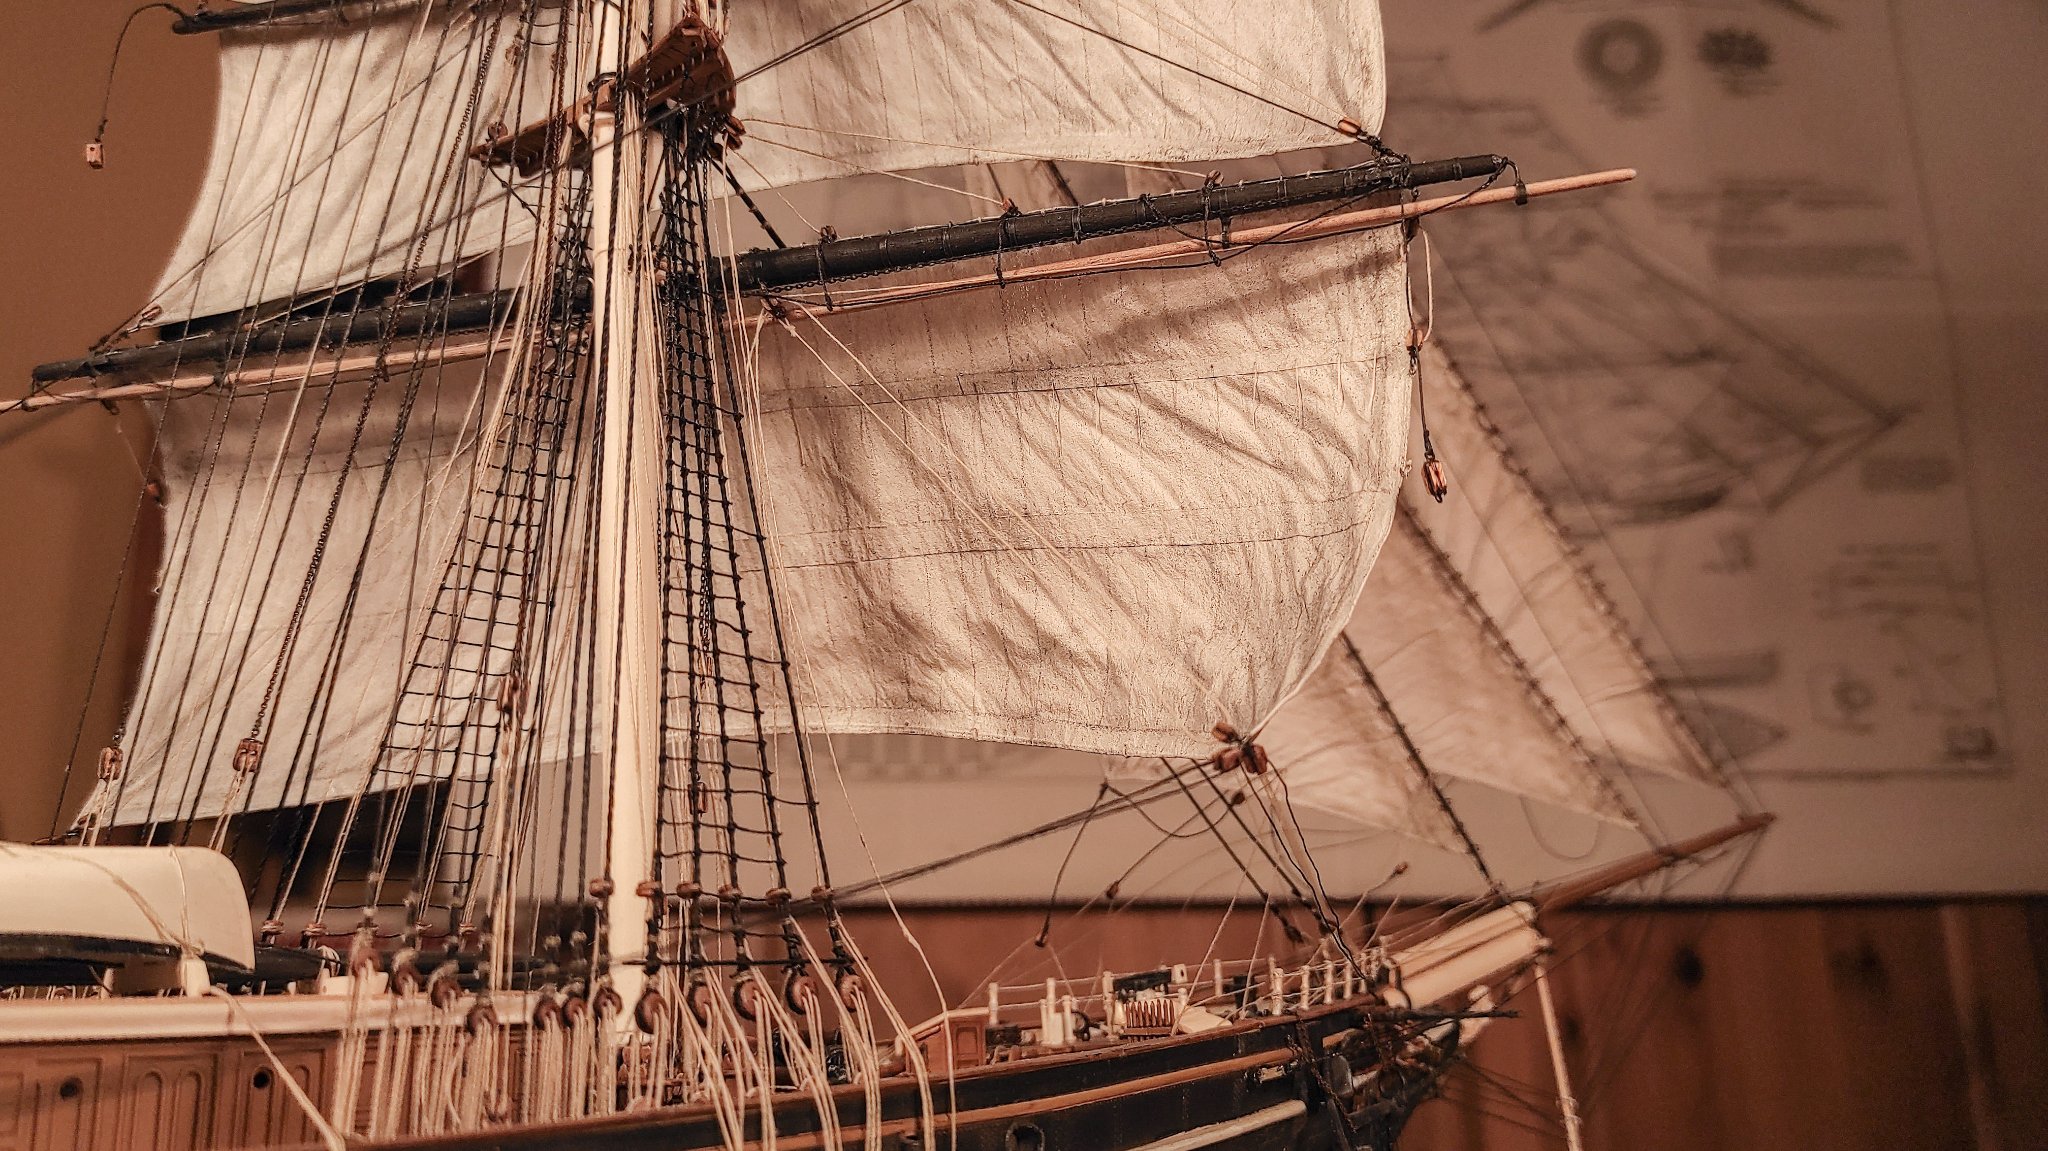
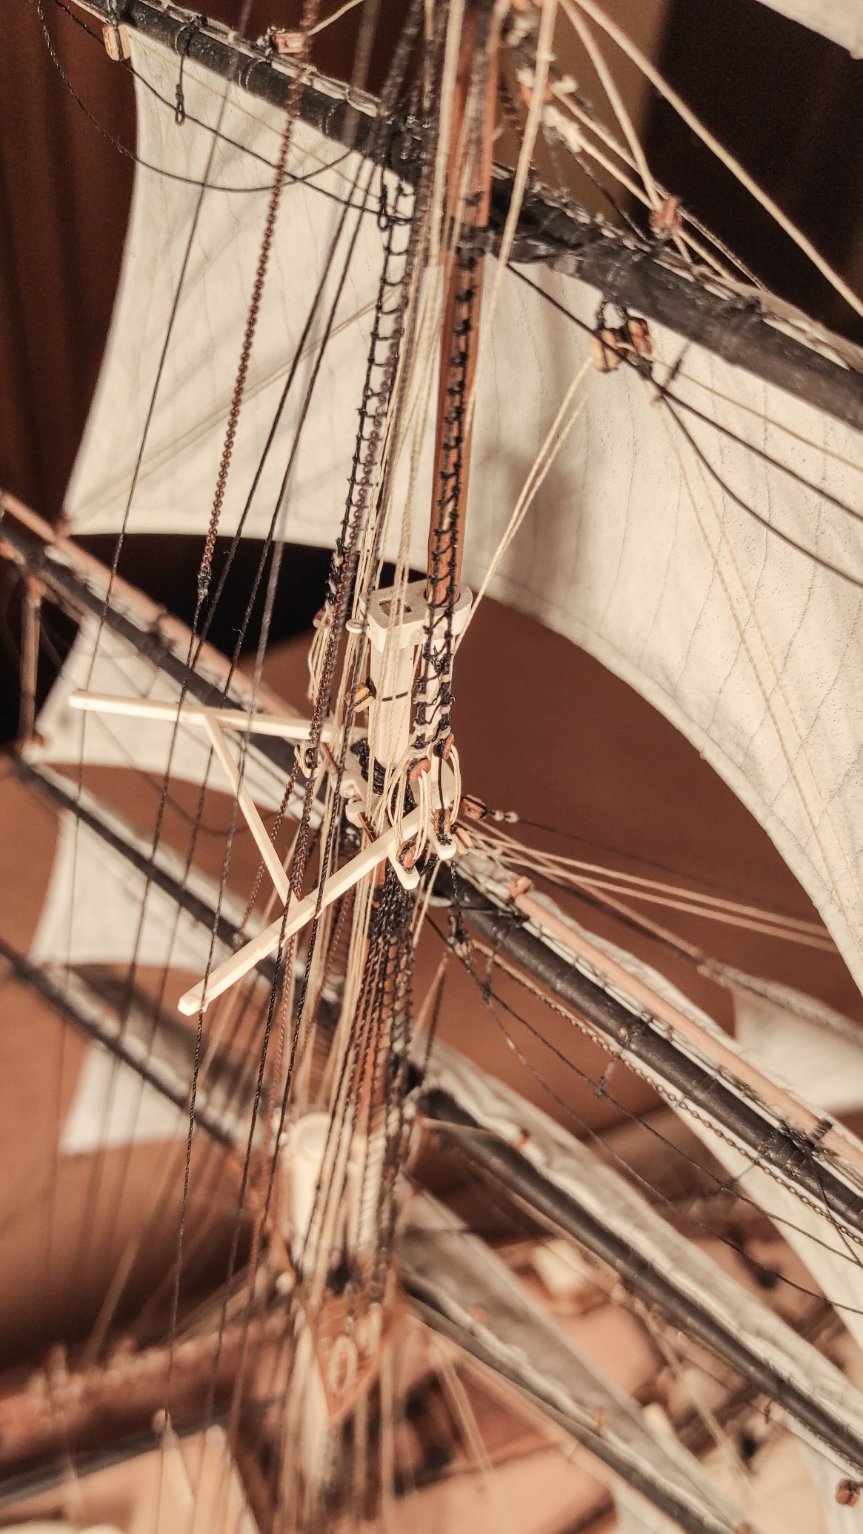
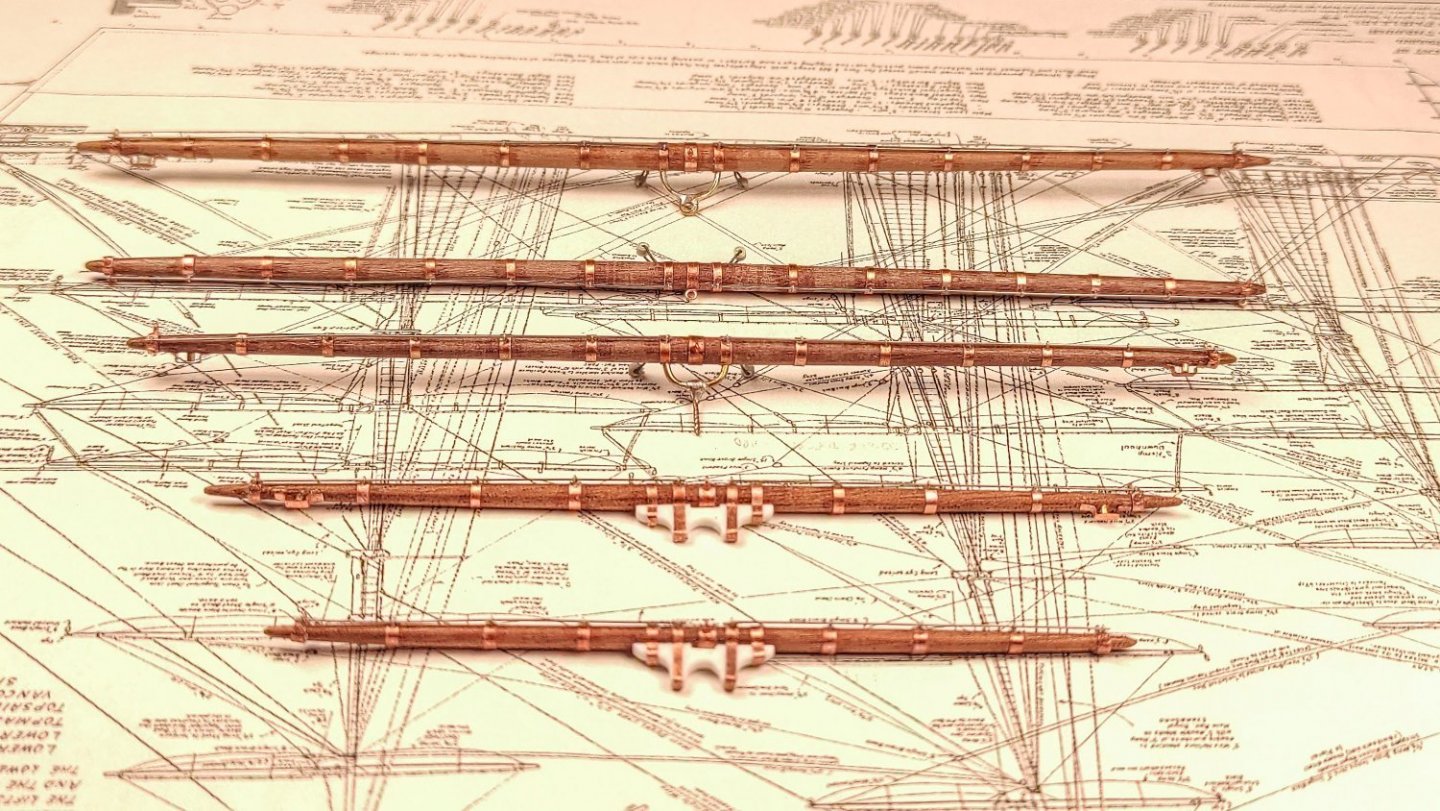
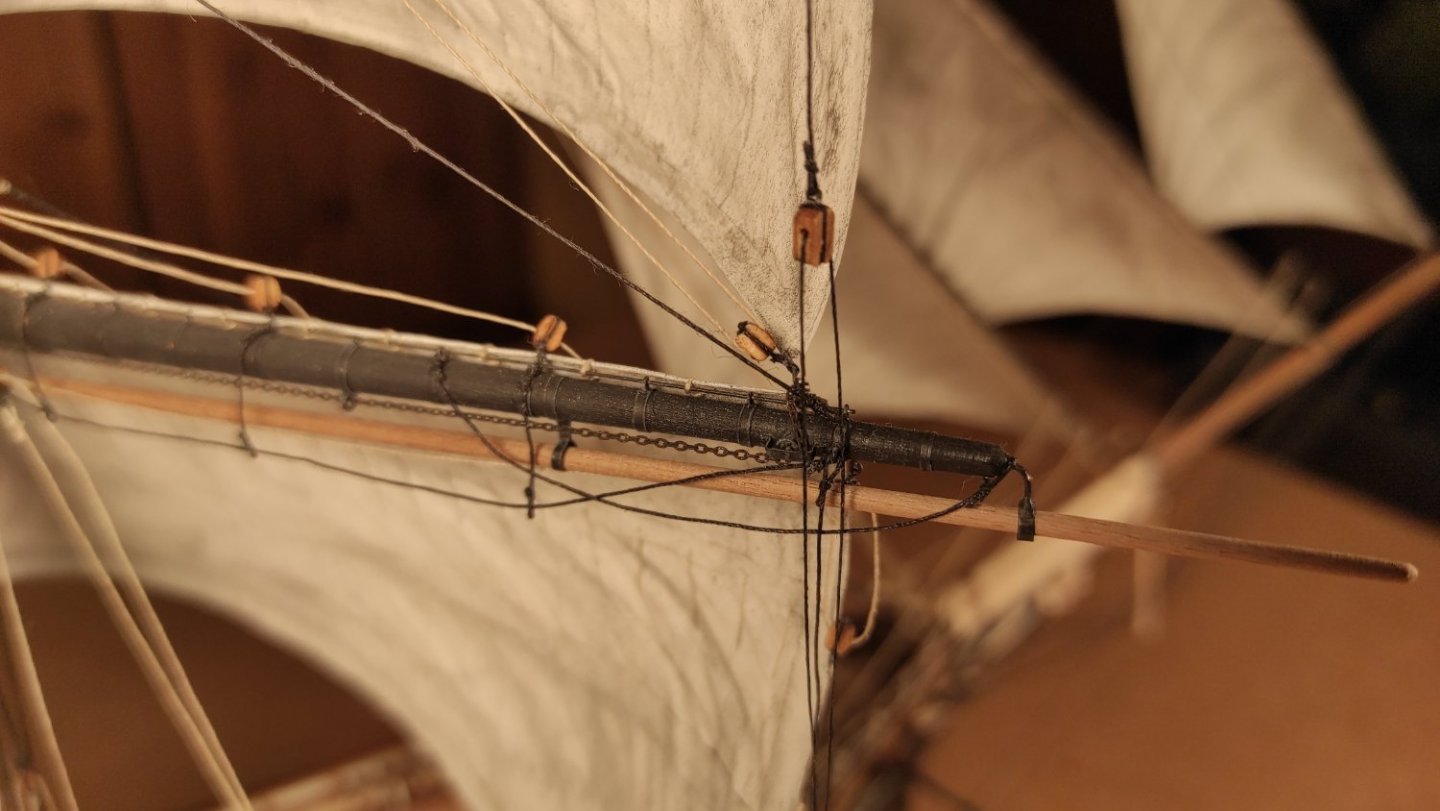
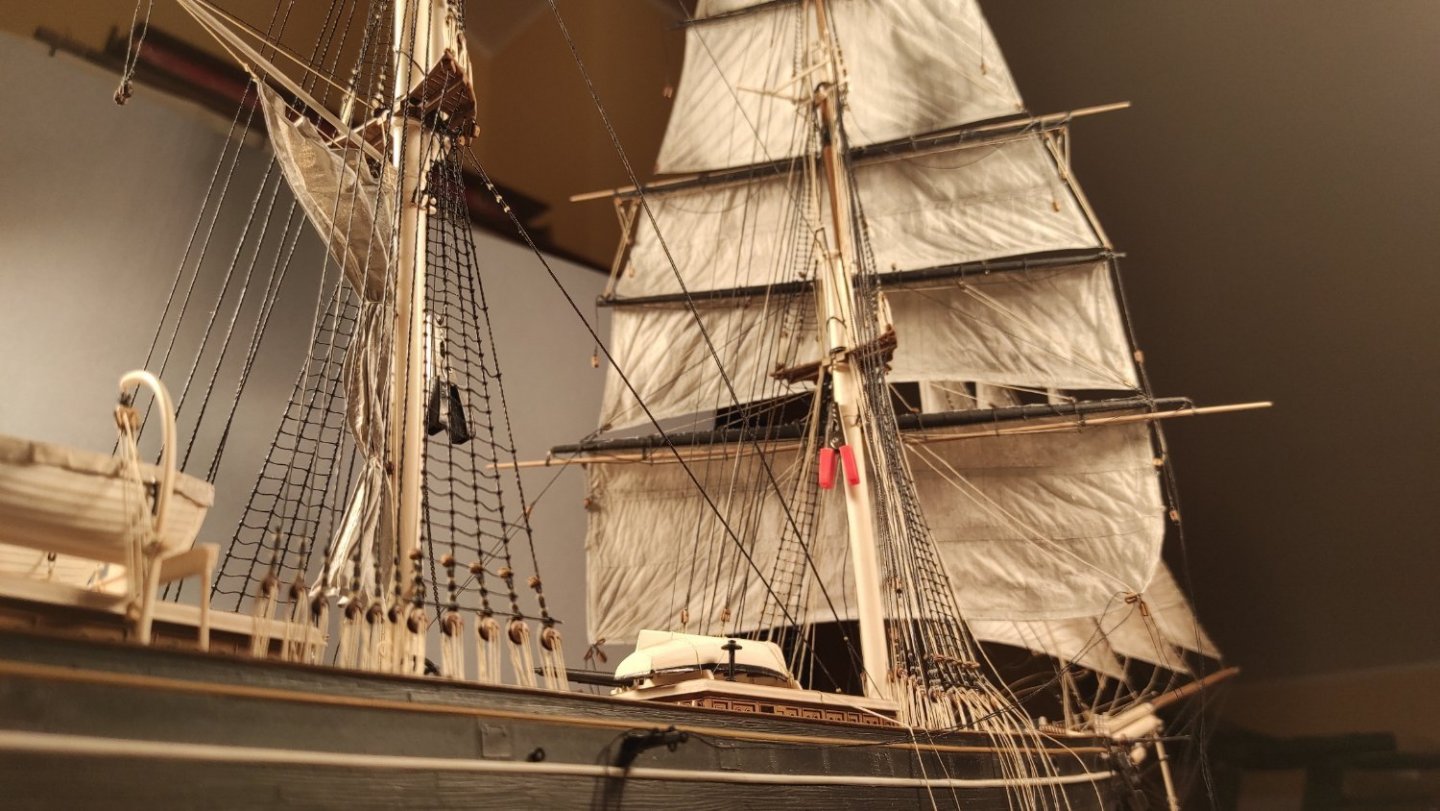
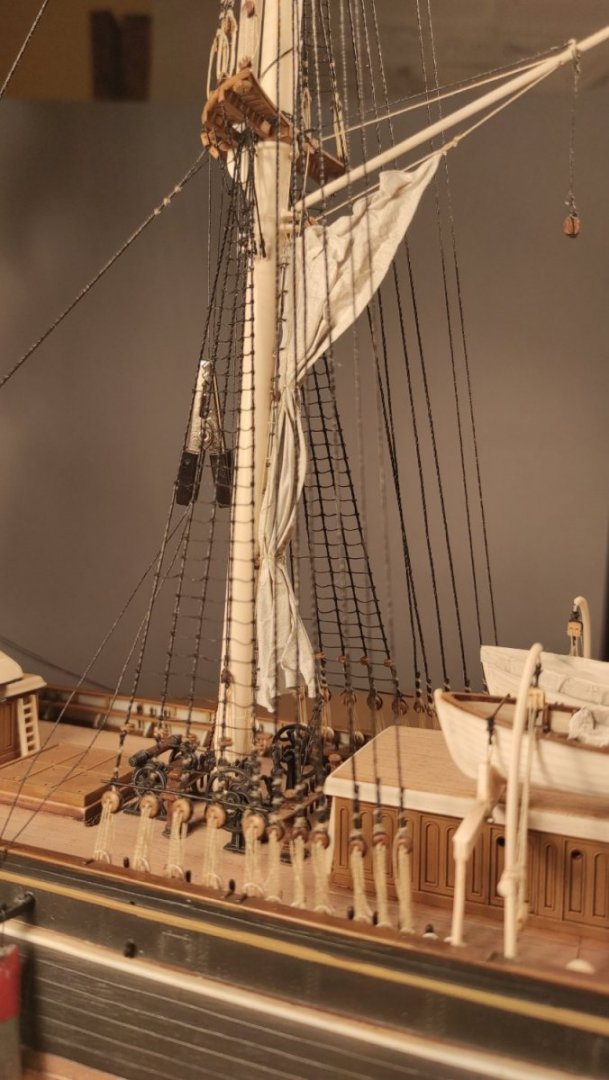
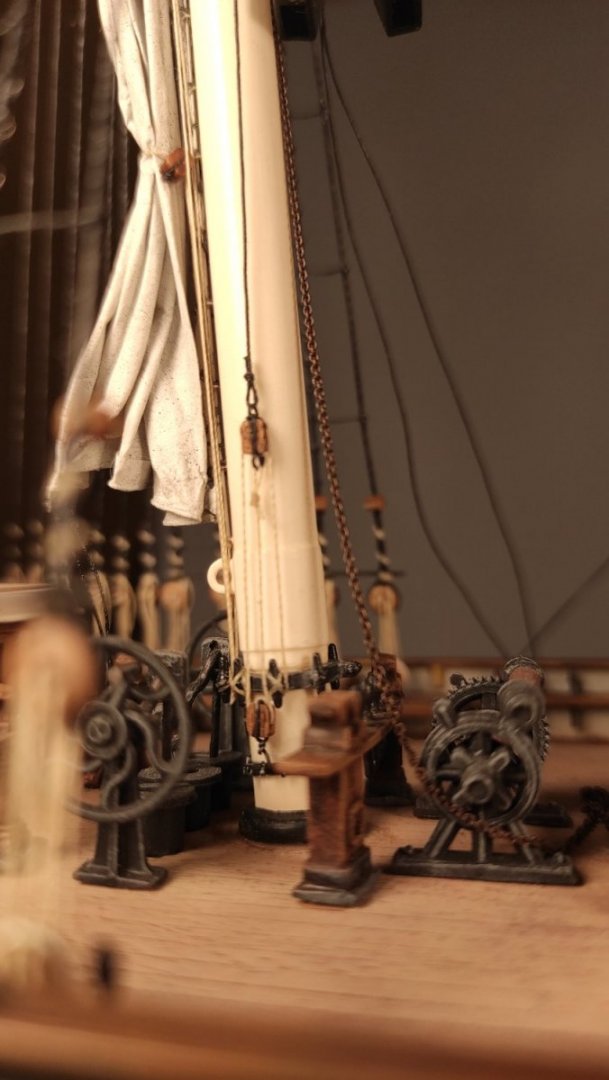
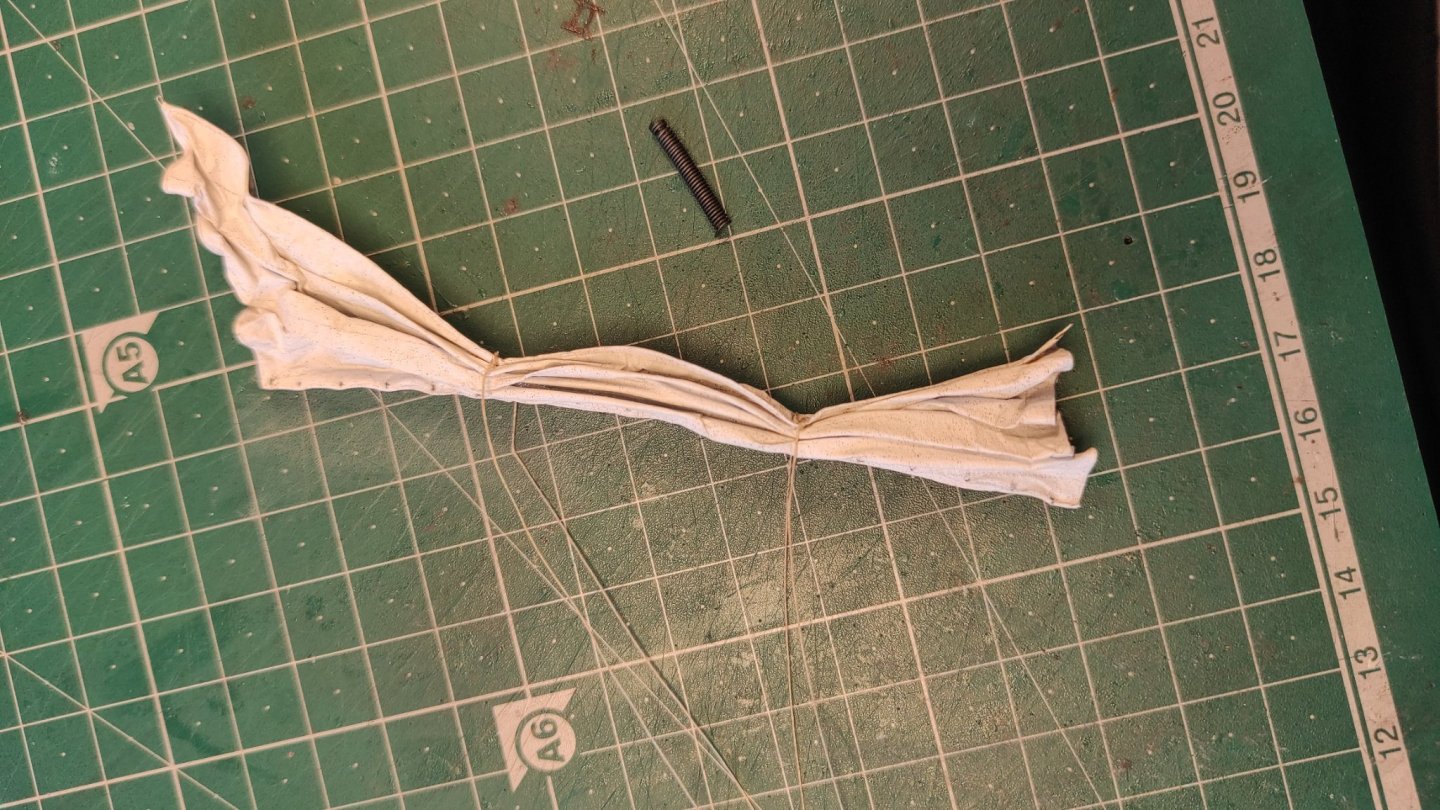
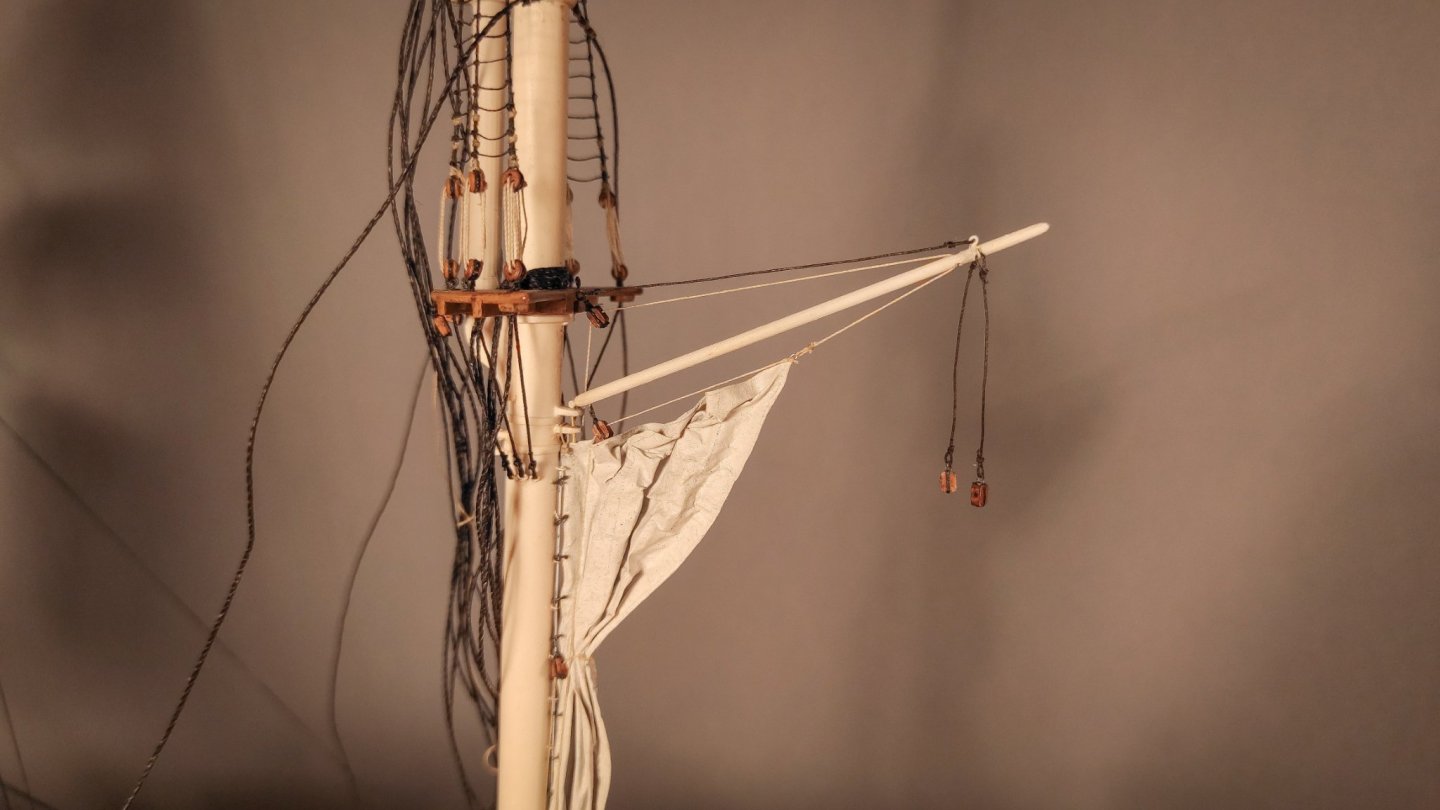
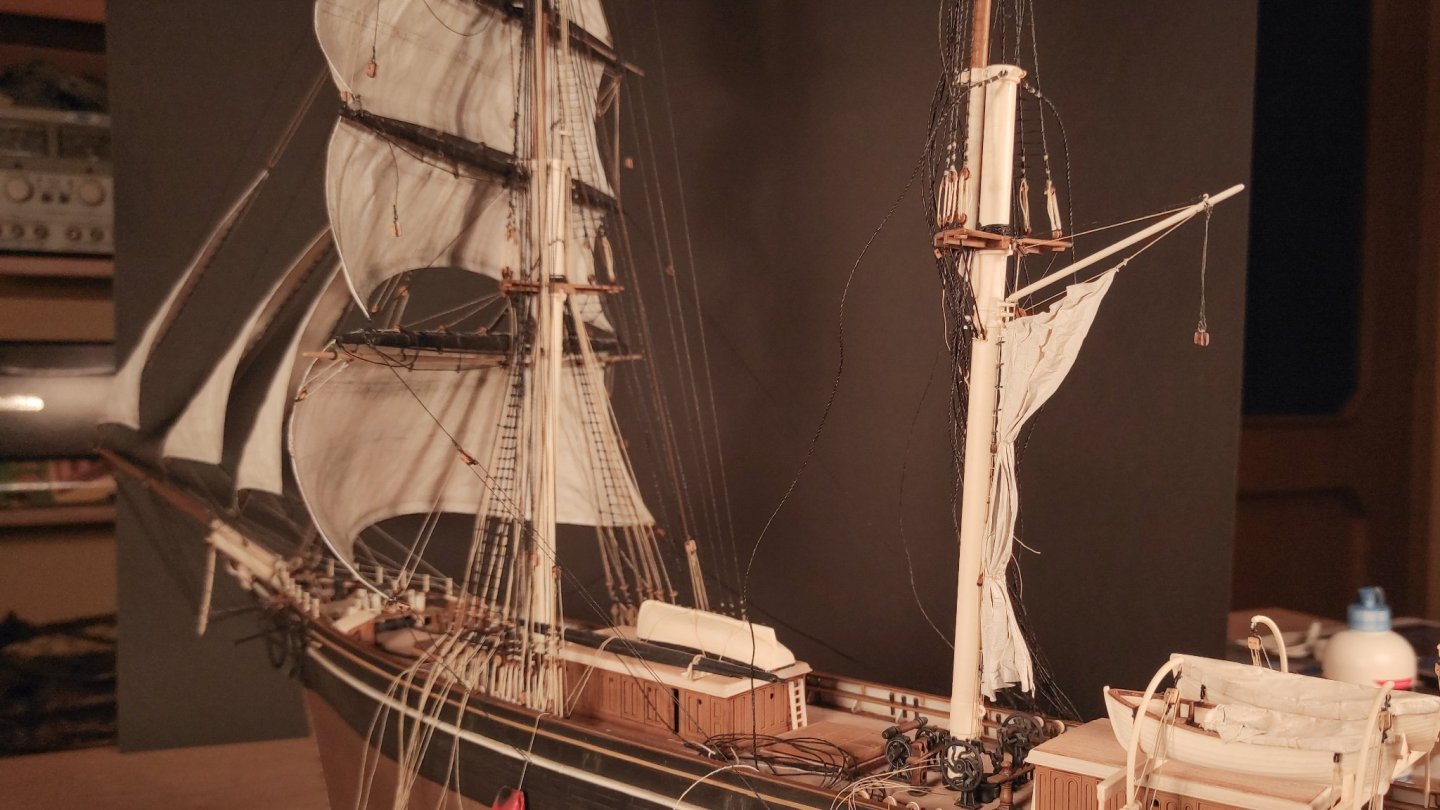
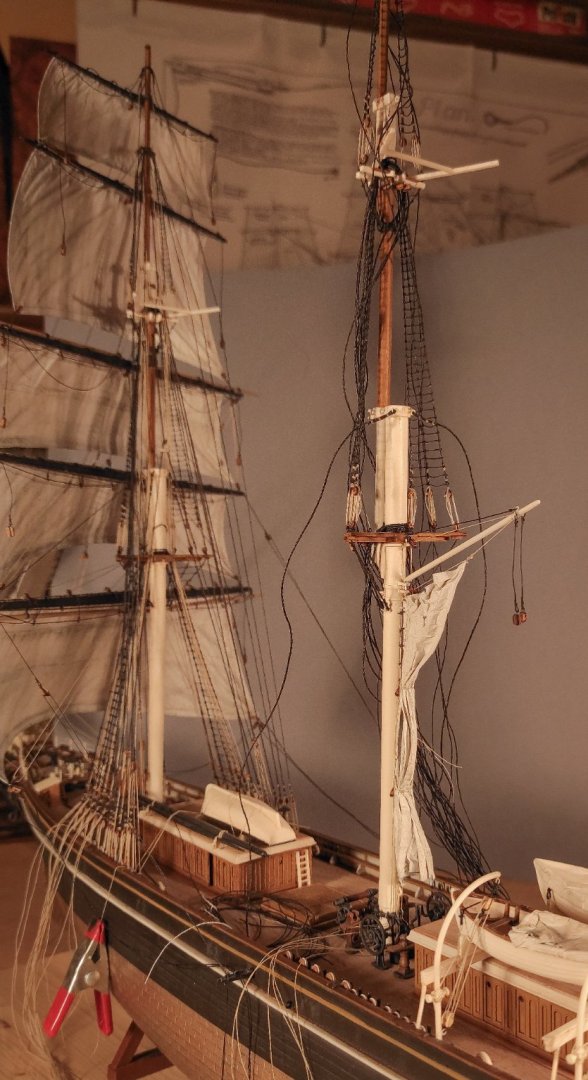
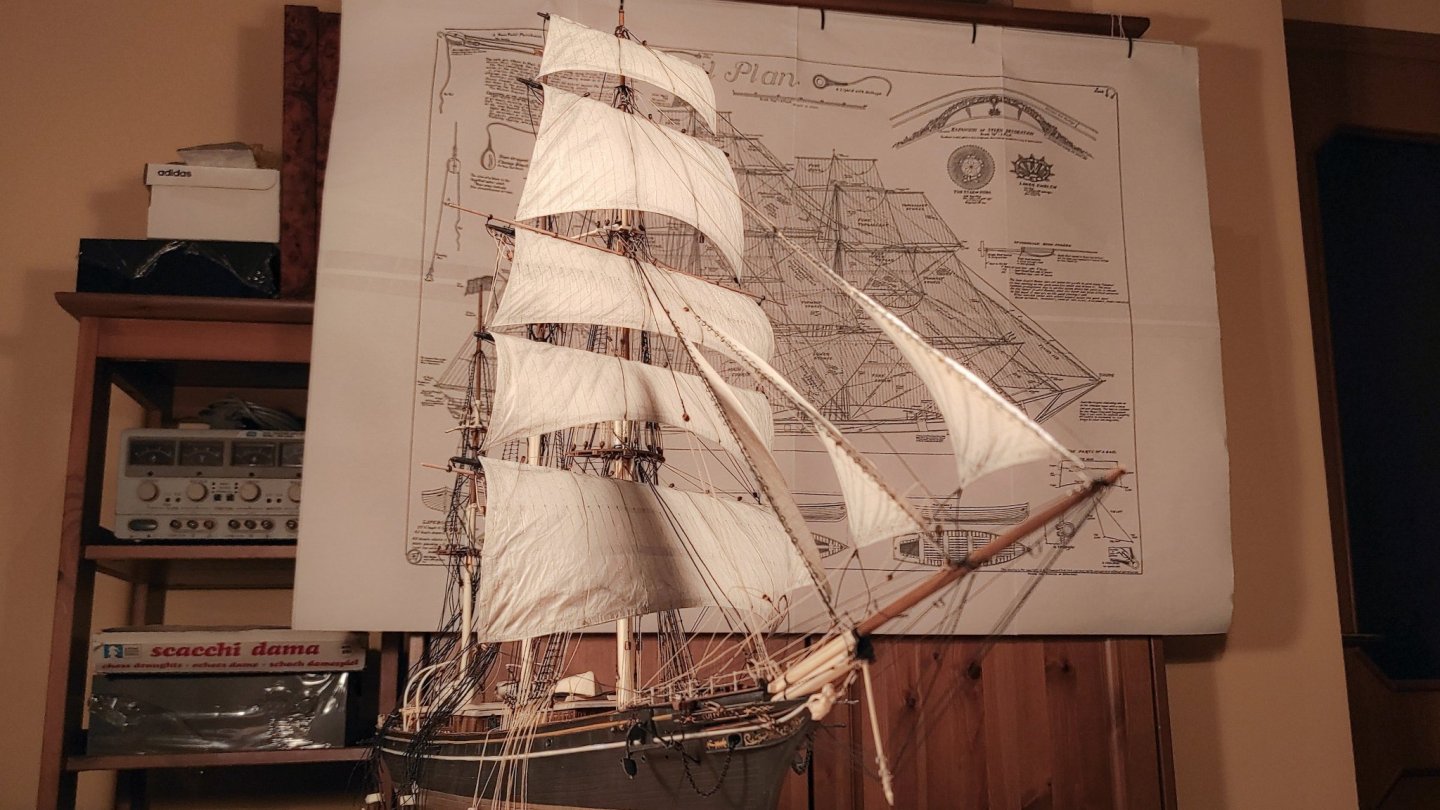
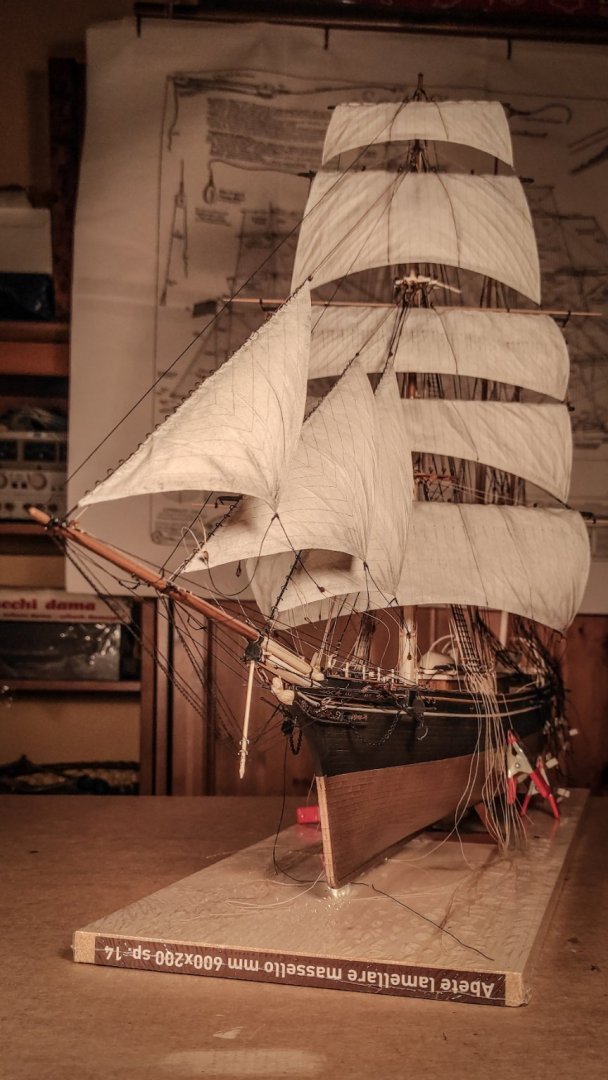
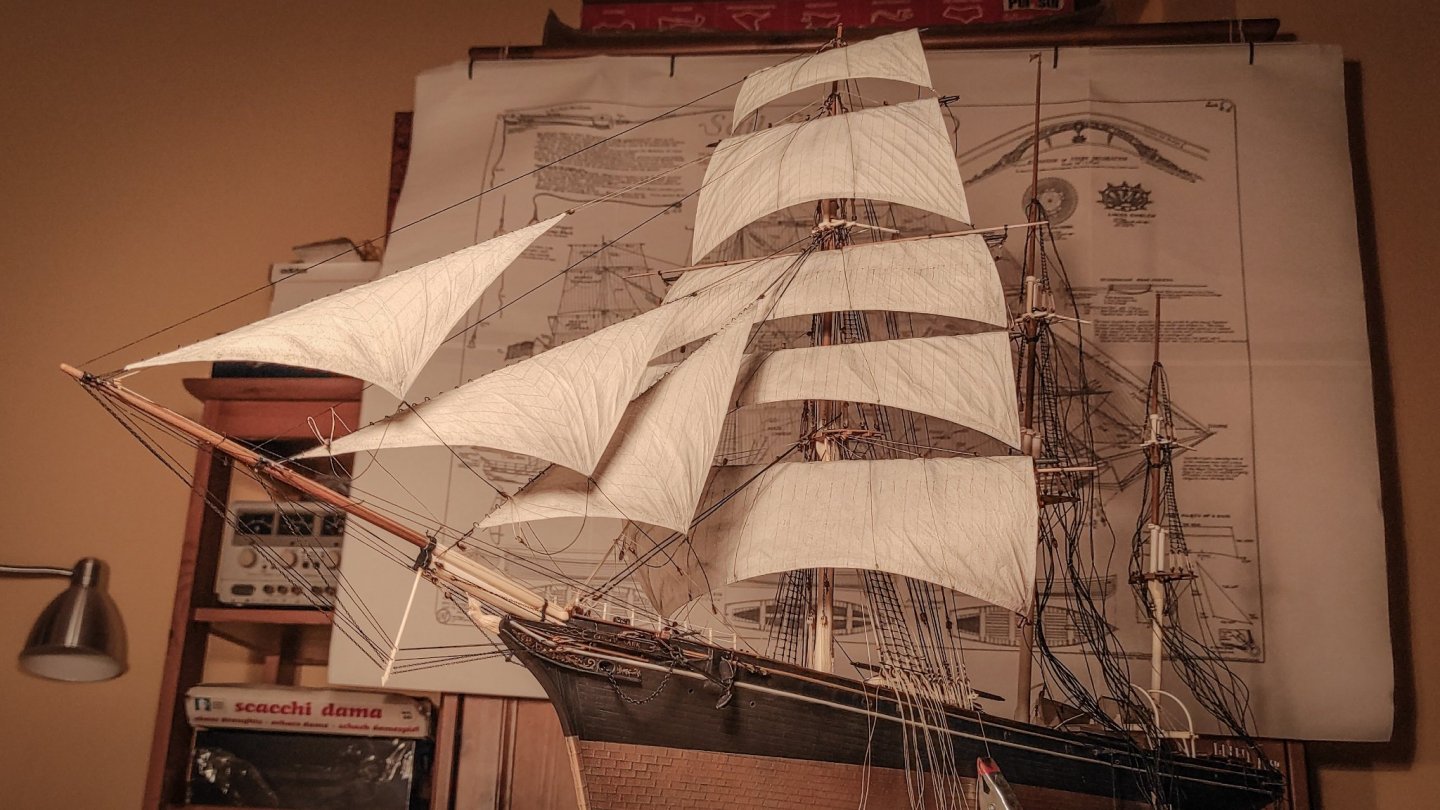
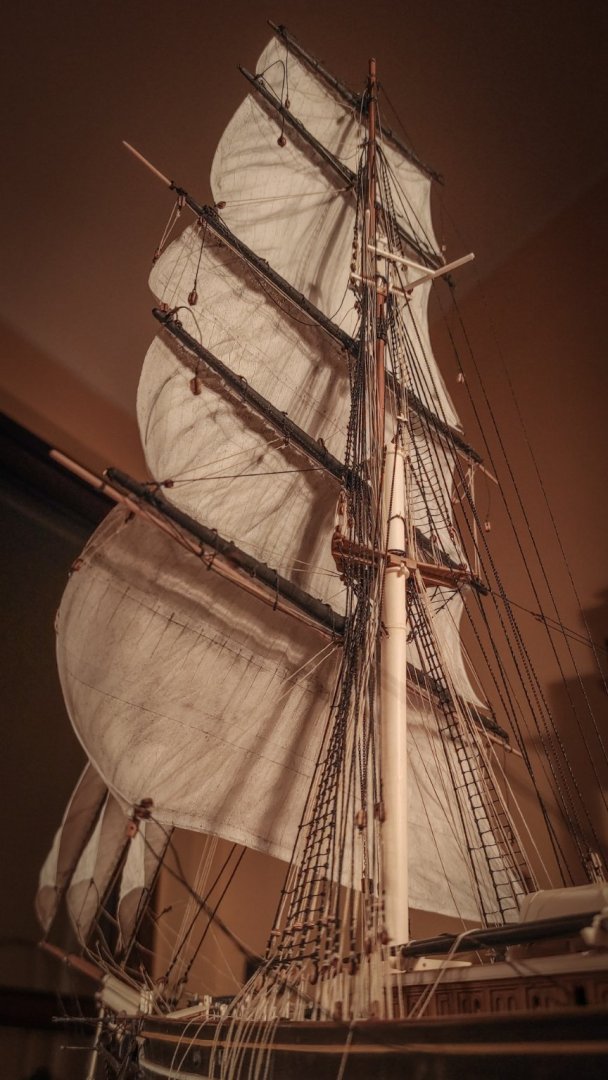
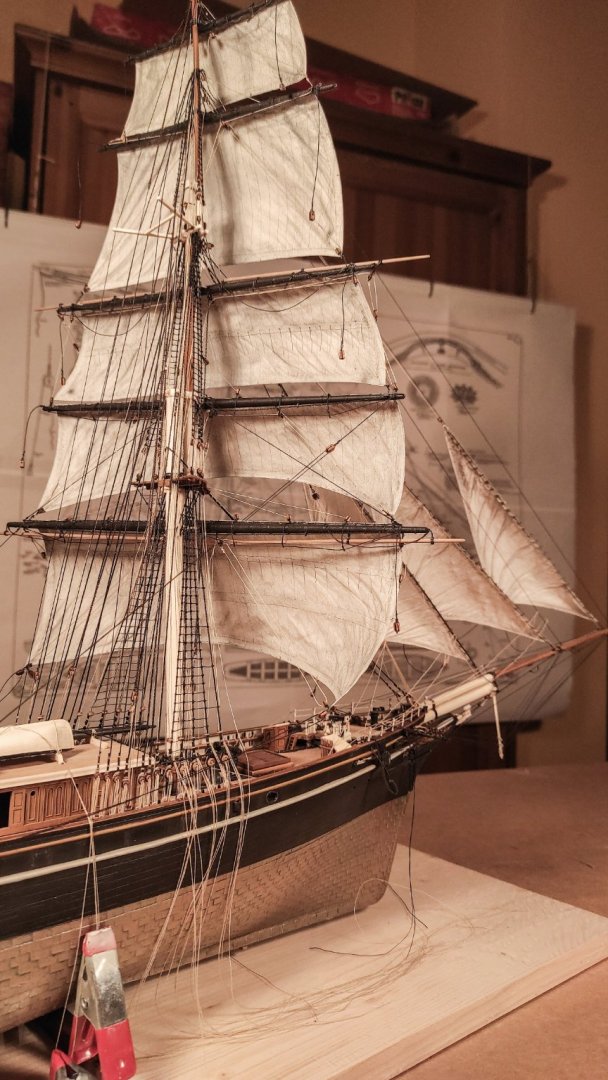
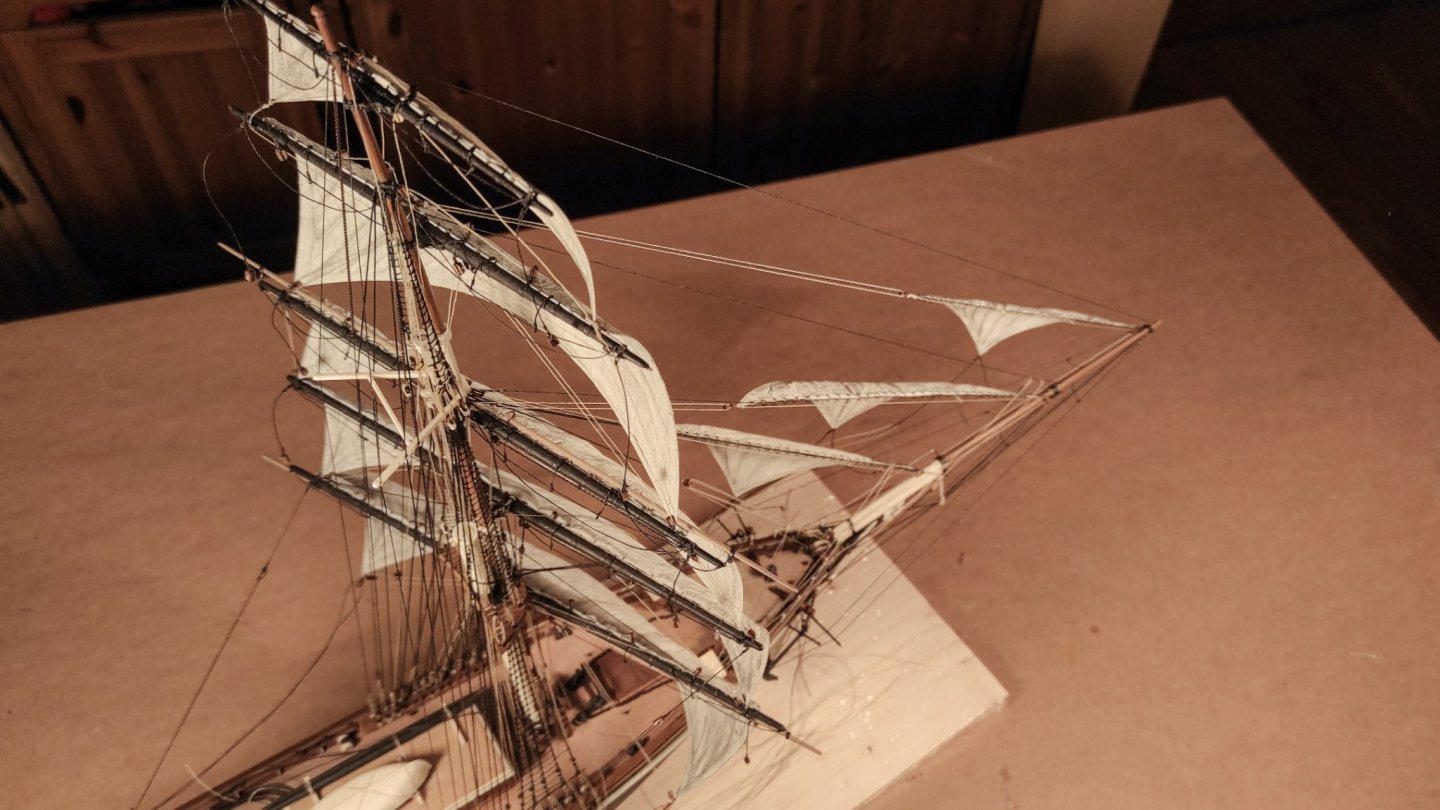
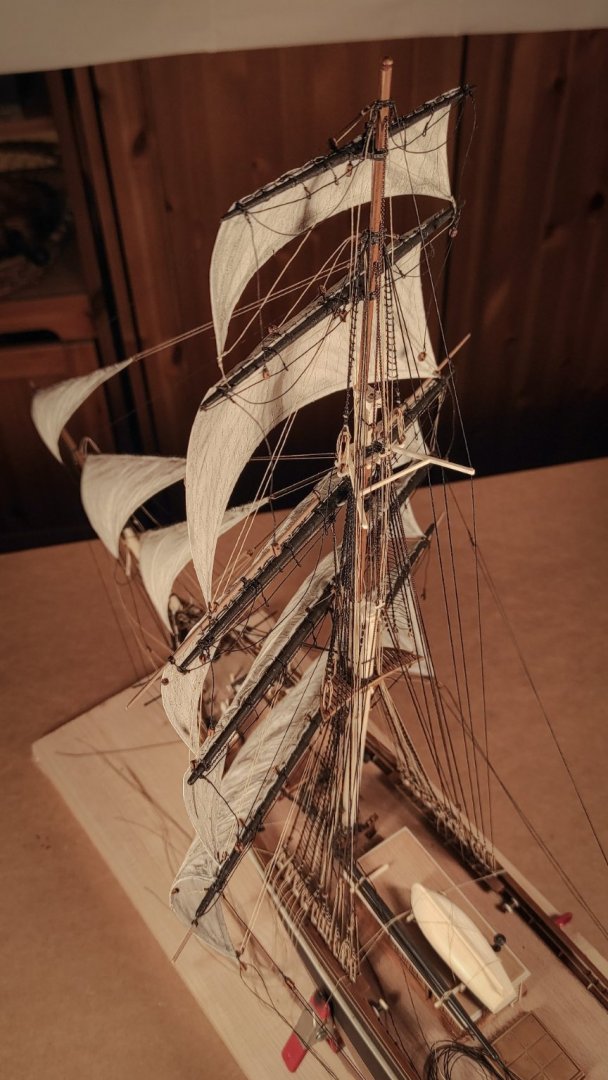
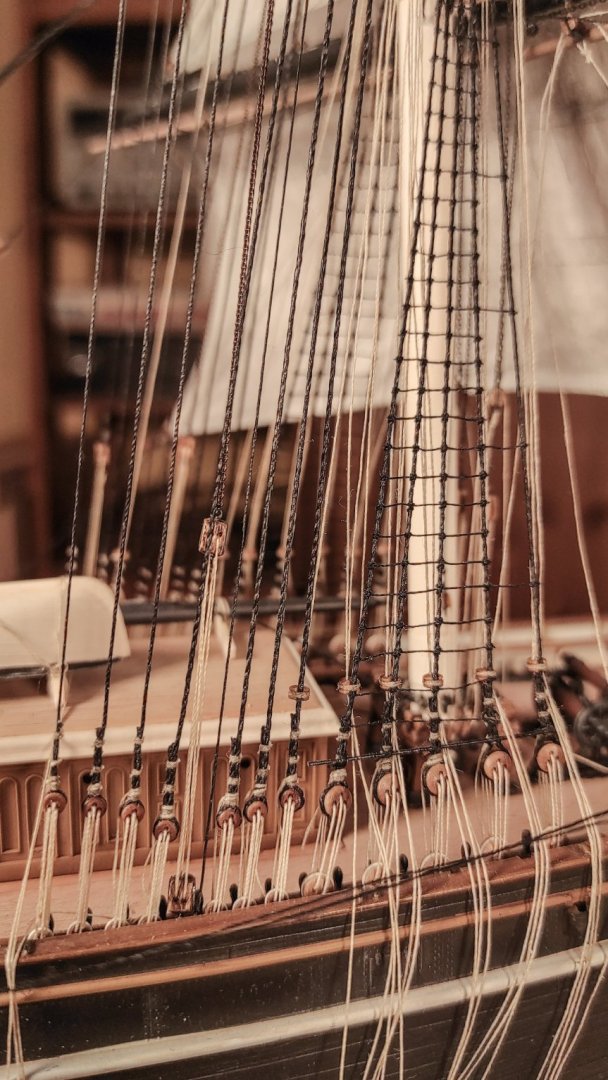
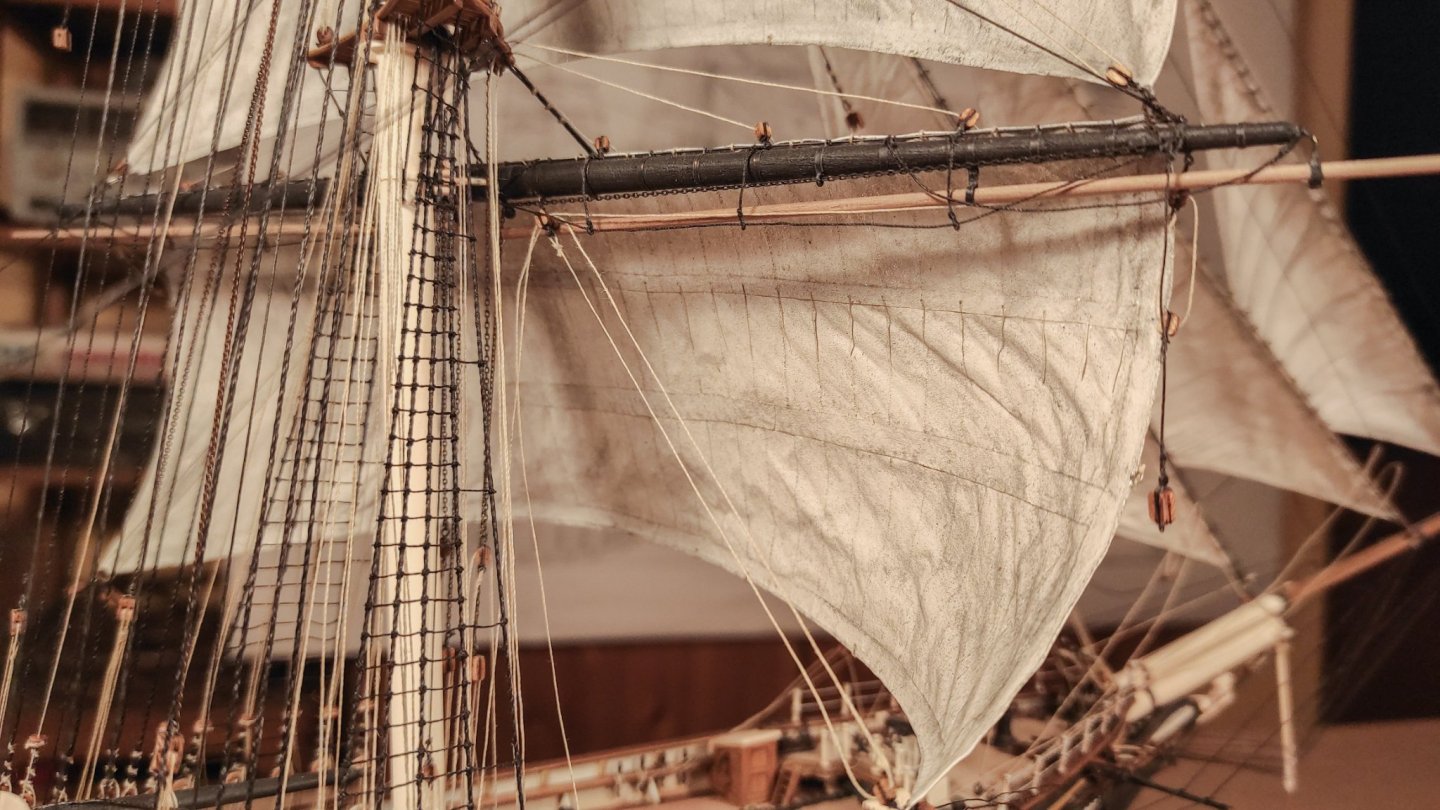
Hello everyone! It’s been a long time since my last update. After completing the fore mast, I have experienced a lack of motivation and the will to move on something else. Meanwhile, I have received from my wife a resin 3d printer, and so I started a side project: a small Italian steam locomotive, the Gr 835, in 1 to 87 scale Here it is: It is designed in Blender and printed on an elegoo mars 2 mono, more than 90 individual parts. But with the locomotive completed, I started to look again at the lonely Cutty Sark and the spark ignited again! So…. Update time! Spencer gaff and furled sail This sail is one of the less documented and a bit of guessing is needed. The gaff provided by revell is not good enough, so I opted for building a new one. Since I was making the Spencer gaff, I decided to create the spanker boom and gaff as well. I will talk about them later on in the build. Here you can see, from top to bottom, the spencer gaff, the spanker boom and gaff All of them were airbrushed and weathered as usual. As far as I can tell, the spencer sail was rarely used, so I opted for a furled sail. As for all the other sails, the material is painted modelspan reinforced with metal wire. The flat sail has been wetted and then sculpted to mimic the furled shape. Here you can see some images of the process: The brails are used to shape the sail and make it fast to the mast. The pole visible in the previous images is just a placeholder used while shaping the sail. In the final arrangement, the sail is provided with hanks and fixed to the relative jackstay behind the main mast. With the sail still detached I added all the needed lines: two sheets with relative blocks, four brails (two for each side), outhaul and inhaul beneath the gaff. Alongside with the work on the sail, I added all the blocks on the main mast needed to rig the sail (four blocks for the brails on the jackstay and block below the main platform for the inhaul) and the eyebolt for the standing rigging of the gaff. Once all the preparation work has been done, it’s time to attach the sail! I started with reeving each hank to the jackstay and the passing all the lines to the relative blocks, and this is the result: The main mast is still not glued. Finally, just to remember the long-term goal, two pictures of the ship as it is now: Thank you all!


- 399 replies
-
- 10
-
-
-
- cutty sark
- revell
- (and 2 more)
-
Cutty Sark spanker, spencer and staysails rigging
Bruma replied to Bruma's topic in Masting, rigging and sails
Here I am again! Sorry for the delay, busy weeks at work. Thank you both for the great info provided and for the useful pictures, they are what I was looking for! No apologizes needed at all! As I said, I'm really grateful to all of you for your constant help and support! That practice explains the discrepancy between the rigging and the actual pictures. I think I'll show my spencer in this fashion. Thank you again! Just for the sake of discussion, I have found another picture with the spanker furled in the opposite way: In the end I think they just did what they want, depending on the captain's habits and sea/wind conditions.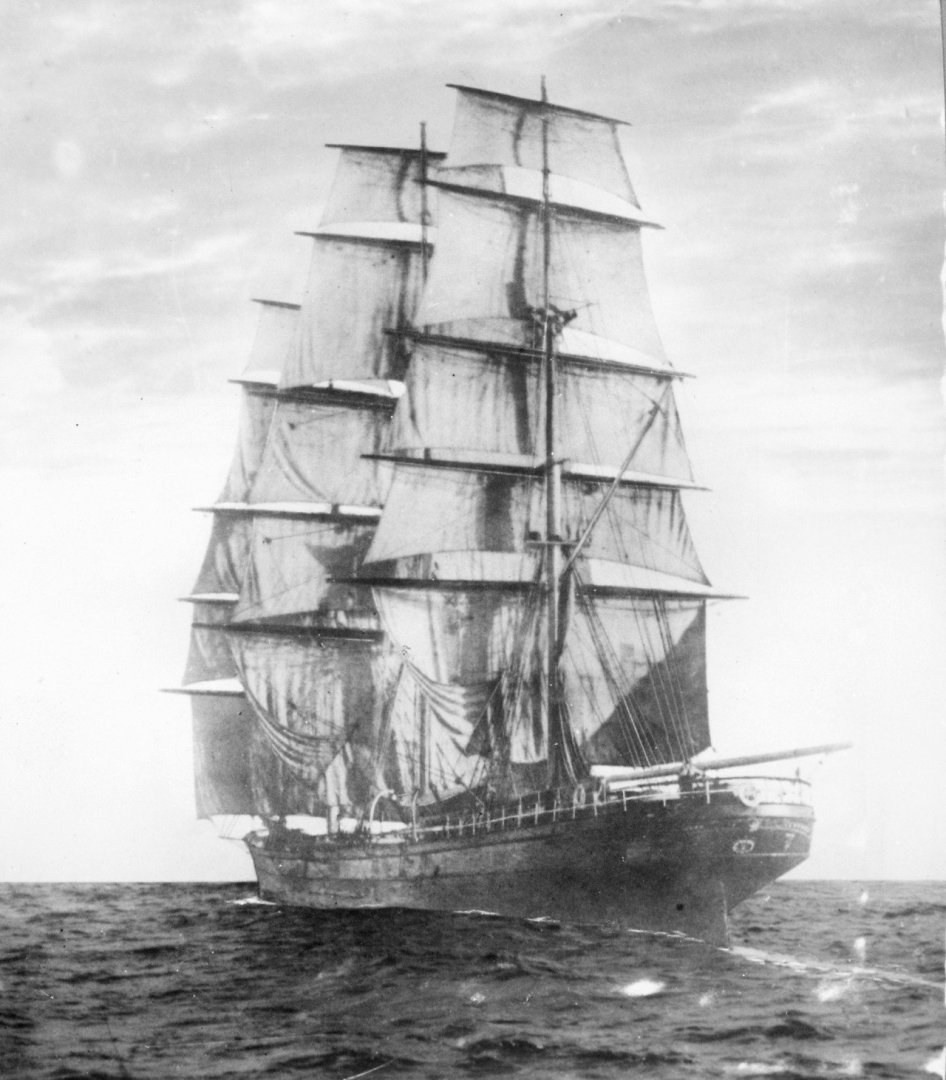
-
Cutty Sark spanker, spencer and staysails rigging
Bruma replied to Bruma's topic in Masting, rigging and sails
Thank you both for taking time to help me! Sure! You are right: it is another gaff sail on the main mast. It is called "spencer" in Campbell's plans, that's why I have used this name. It is visible here in this portion of the sail plan: Yes, you are right and I understand that. I was mentioning the outhaul because if there is an outhaul that take the sail to the end of the spar, there should be the relative "inhaul" to take the sail closer to the mast. In my understanding, the furled sail should be all along the mast and not also along the gaff as depicted in my picture. The main problem is exactly that picture, I started to ask myself if I was right seeing part of the sail furled along the gaff, and I don't expect that. Sure, thank you! It is the firs time I see this kind of sail furled and pictures such as this one are exactly what I was looking for! If you have some other one plaese share them! Again, thank you both!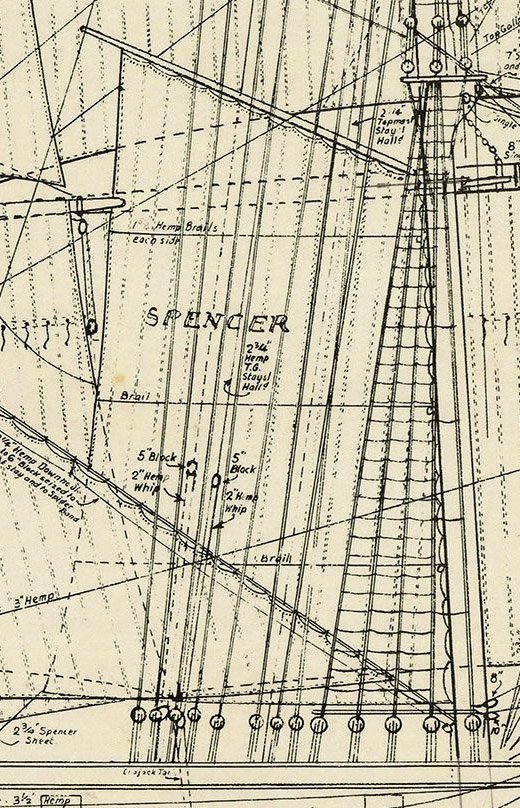
-
Cutty Sark spanker, spencer and staysails rigging
Bruma replied to Bruma's topic in Masting, rigging and sails
Hello again. More than 70 views and no answer. Given the amount of knowledge present in this wonderful community, and the kindness shown answering to all my previous questions in this section, I start to fear that my question is not easily understandable, (due to my bad English). If so, let me know, and I'll try to explain myself better! Thanks again! -
Cutty Sark spanker, spencer and staysails rigging
Bruma posted a topic in Masting, rigging and sails
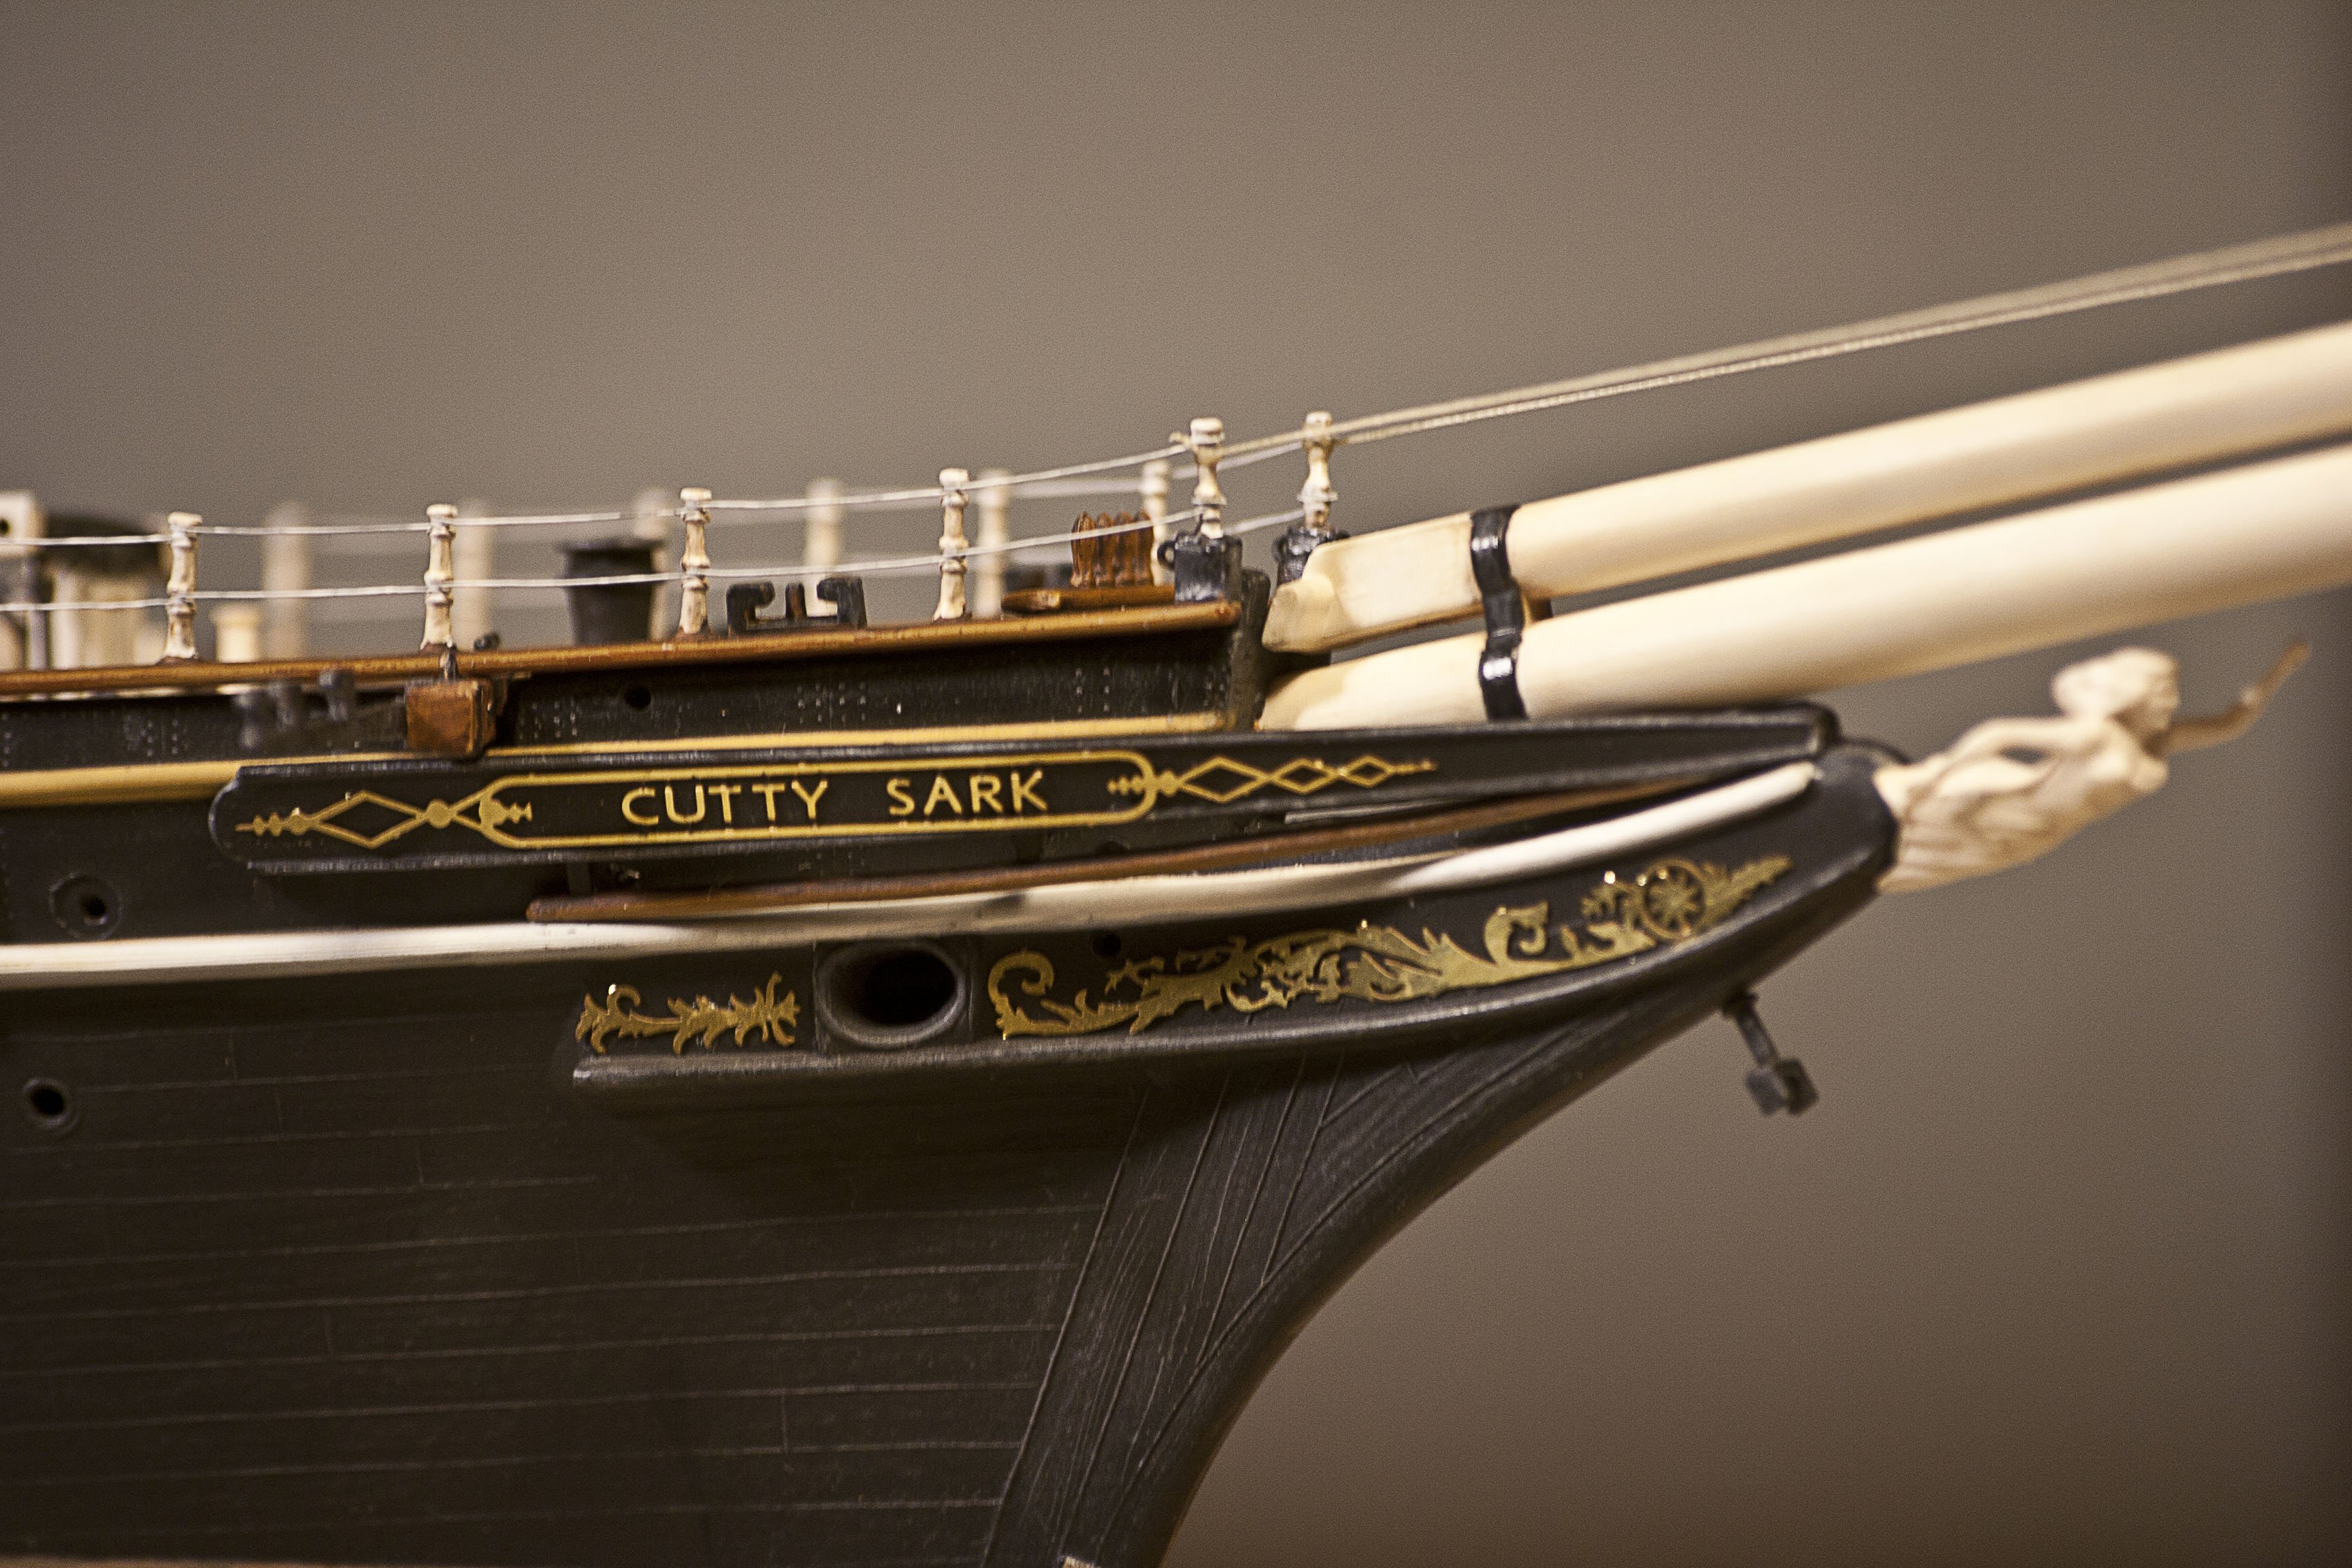
Hello everyone. I’m building the Cutty Sark: https://modelshipworld.com/topic/25323-cutty-sark-by-bruma-revell-196/page/7/ and I want to set almost all the sails, showing them under a moderate wind, something similar to this condition: As you can see the spanker is set, but the spencer is not. And here I have the first question: how is the spencer sail furled? And in general, how is it rigged? It is not mentioned by Underhill and just lightly by Longridge, but I need more information. The only source I was able to find is this picture: But on the Campbell’s plans there is an indication for an out haul, meaning that the entire sail can be furled by sliding the head of the sail closer to the masts. And so we have the second question: are the spencer and spanker sails fitted with hanks also along the gaff or only along the mast? If so, there should be something similar to a jackstay on the lower end of the gaff, is that correct? If the answer is no, how are they set to the gaff boom? And lastly, the third one: let’s say I want to show the main royal staysail, the main topgalland staysail but not the main topmast staysail, are they set and furled, or they are removed from the respective stay and set only if needed? If they are furled, can you give me some advice on how to show them? It is clear when it comes to the jib, for instance, but not on this particular sail, at least to me. Thank you all in advance!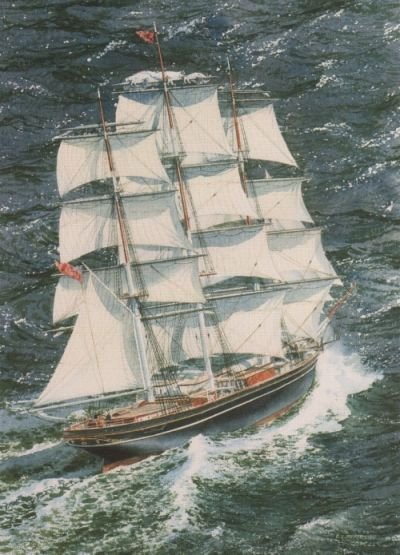
-
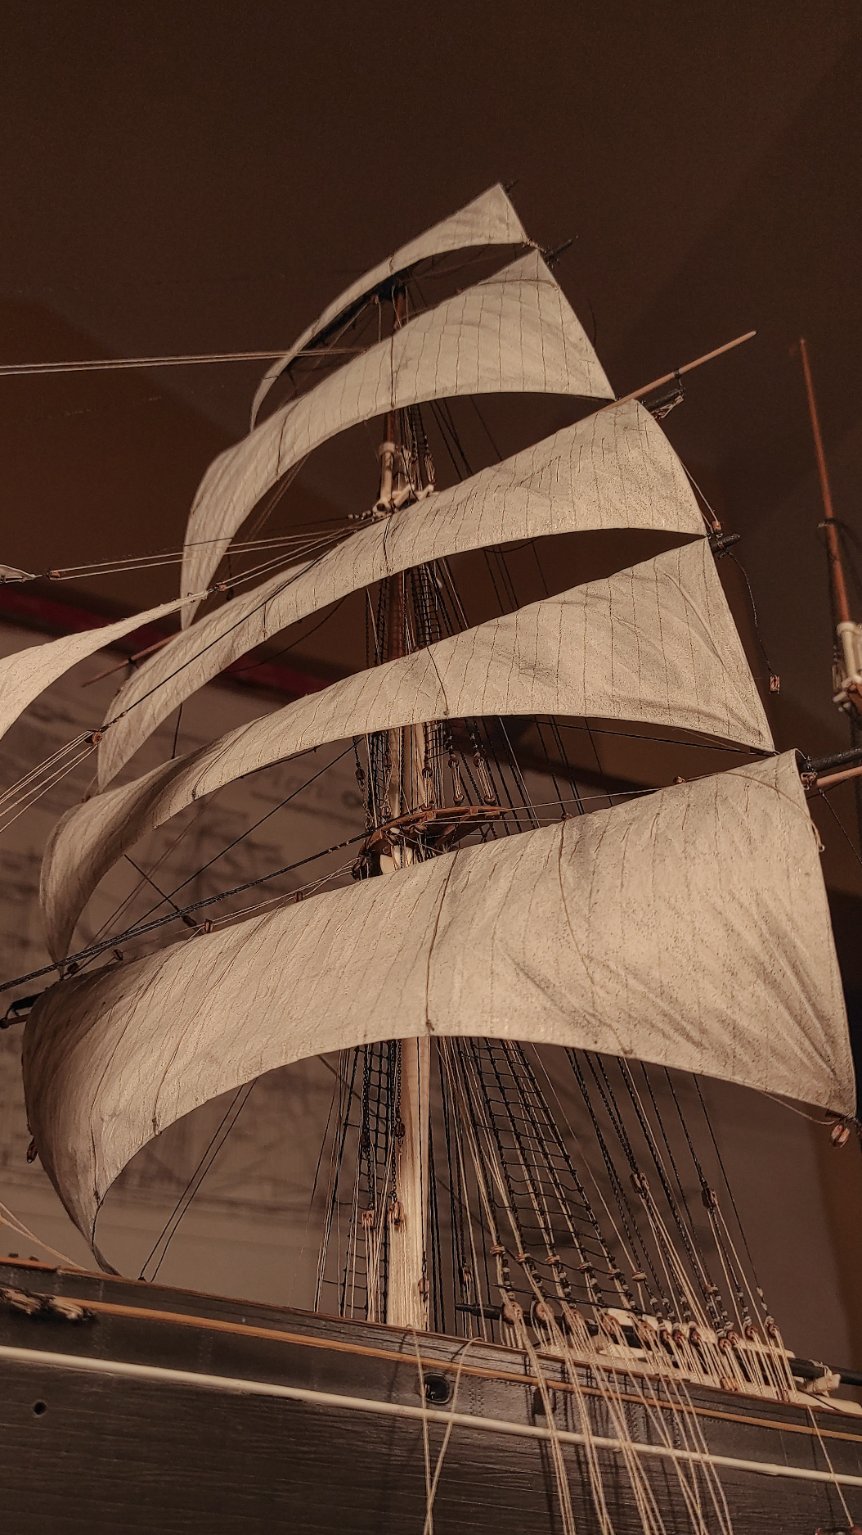
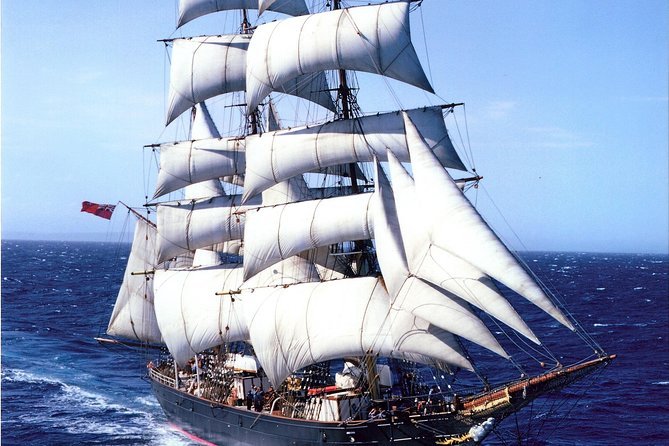
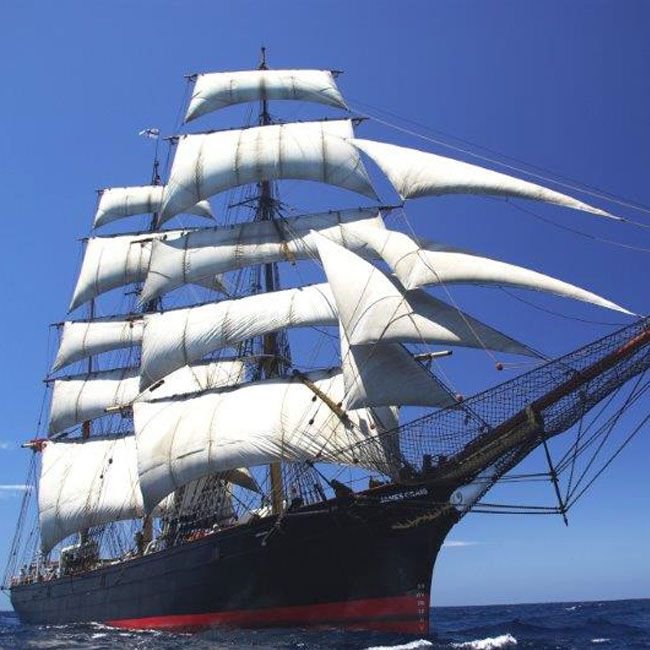
Thank you all for the likes and for taking some time to write comments, they are all really appreciated! I’ll try to answer to every questions: I have taken all the sizes of the sail from the scaled Campbell’s plans. I have a master copy made of paper and then copied the shape on the silk span. All the sails are double checked so I suppose and hope that the size of the lower topsail is correct. Another cross check is the distance between the two yards: their positions are fixed and they fit with the plans. I have also checked the length of the yards: longer yards may change the aspect ratio of the sail. But again they are in accordance with Campbell's plans. So, long story short, I think I’m right I see your point and I can agree somehow. Thank you for pointing it out, it is a great argument of conversation and one of most interesting to me! Let me explain my point: #1 If possible, I don’t want to use painting or other models as reference. The model you posted is wonderful, far better than mine, and the modeller who created it is surely a talented one, but still the model is his own interpretation of the real ship. When I started to think about my sails I collected some pictures of real ships under moderate wind and I tried to replicate the effect. Here you have two exples on the James Craig: And one of the stad amsterdam: When I saw them I realized that this was the look I wanted to achieve. Surely there are also other examples that show flatter sails, such as this one: But I prefer the first one and that’s what I have tried to replicate. So, point #2 I think that sail shape can greatly depend on the skipper and the sea conditions, but both the shapes can be accurate. That being sail, I’m not completely satisfied with my result, there is surely a margin of improvement Yes, but I think I’ll stick with this angle. A close hauled configuration might result with a heavier look of the ship (in my opinion) and it will occlude more the deck. With this angle and the corkscrew arrangement of the sails, if you look at the ship from starboard she is still light and elegant. But it is absolutely a subjective point. Yes, and I’m glad you noticed. I didn’t mention it being afraid to bother too much, but there are many small details such as this one all over the place. They took a good deal of time and effort and they may get lost in the intricacy of the rigging, but I know they are there and now, thanks to you, I know that they can catch the attention of someone else. Yes they are all ready and easily detectable from their respective fairleads, but i’ll belay them only at the end. Once I wil brace all the yard properly I’ll be able to tighten them. Yes, all the sails are secured to the yards, with lines and blocks. Then I put the yarda on the mast completing the rigging on the mast itself and I move on the upper sail. Maybe, but there is still a lot of work to be done. I can think about that later on. Surely I will put them only if I will be able to paint them properly. The toy effect is always there and I want to avoid it. Thank you Shipman, I’m really happy. Surely I’m not alone: without the support of the entire community I would not have been able to achieve this result and you are one of the most important members of the support team! This is another thing I'm considering. Surely I will not use resin. It is too expensive and dangerous for the model. We will see… Again, thank you all!


- 399 replies
-
- 5
-
-
- cutty sark
- revell
- (and 2 more)
-
Thank you very much for your comment, I'm happy you like it! It will be a slow progress, but I would like to document the work on the main mast in deeper detail, there are many hidden parts and each yard can be considered a small model. I hope you will like it! And thank you all for the likes!
- 399 replies
-
- 4
-
-
- cutty sark
- revell
- (and 2 more)
-
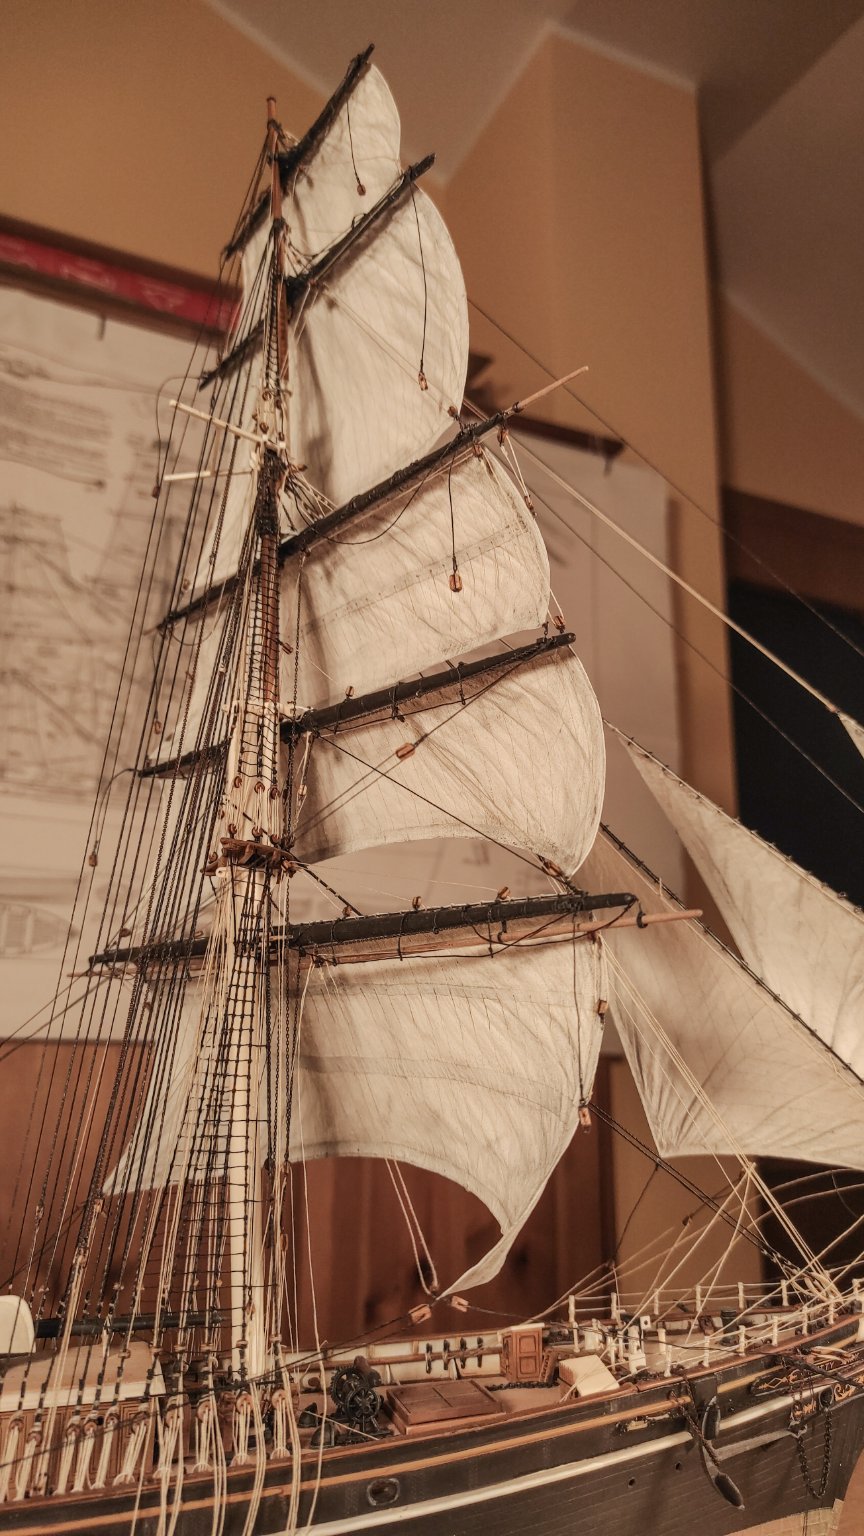
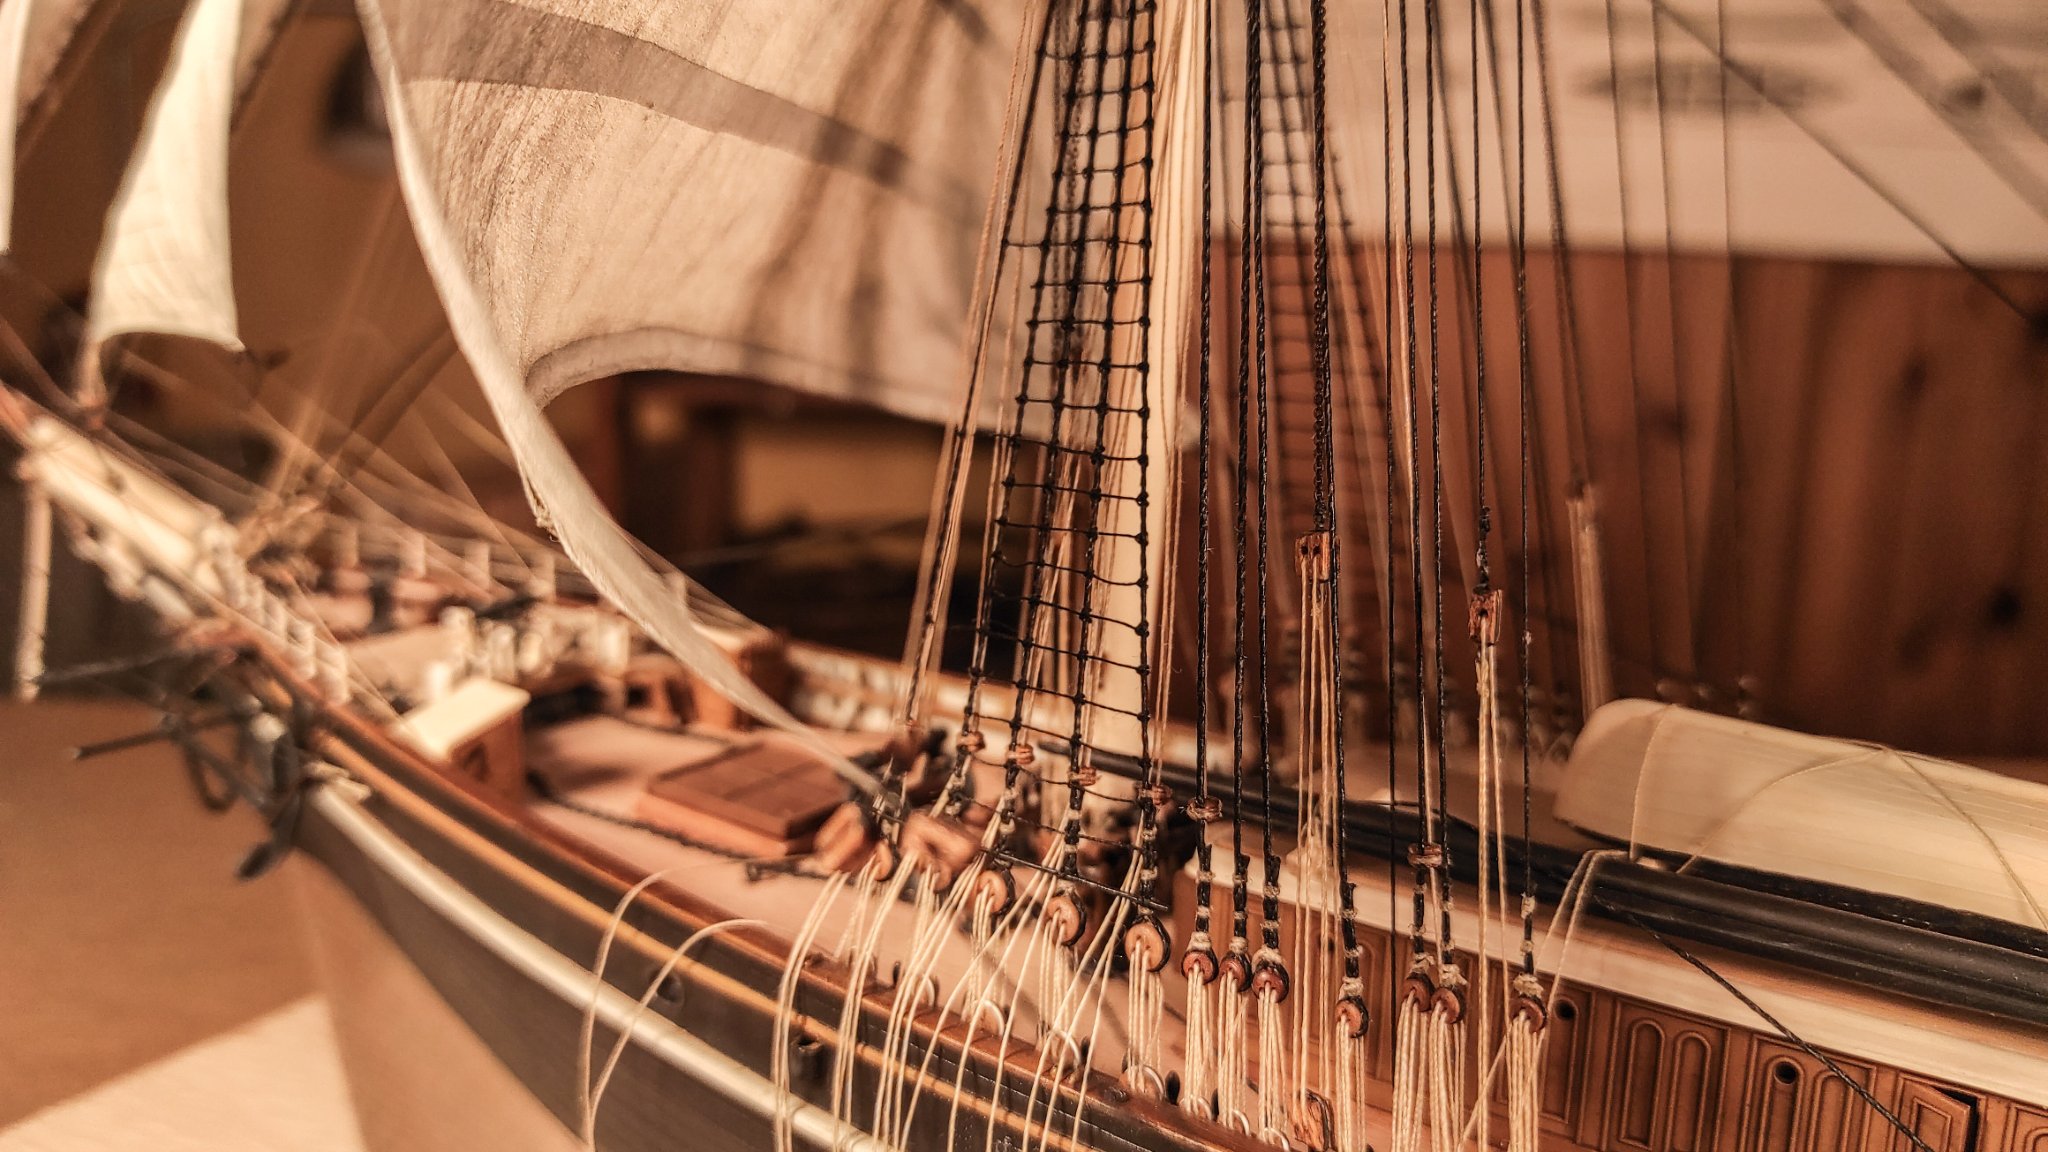
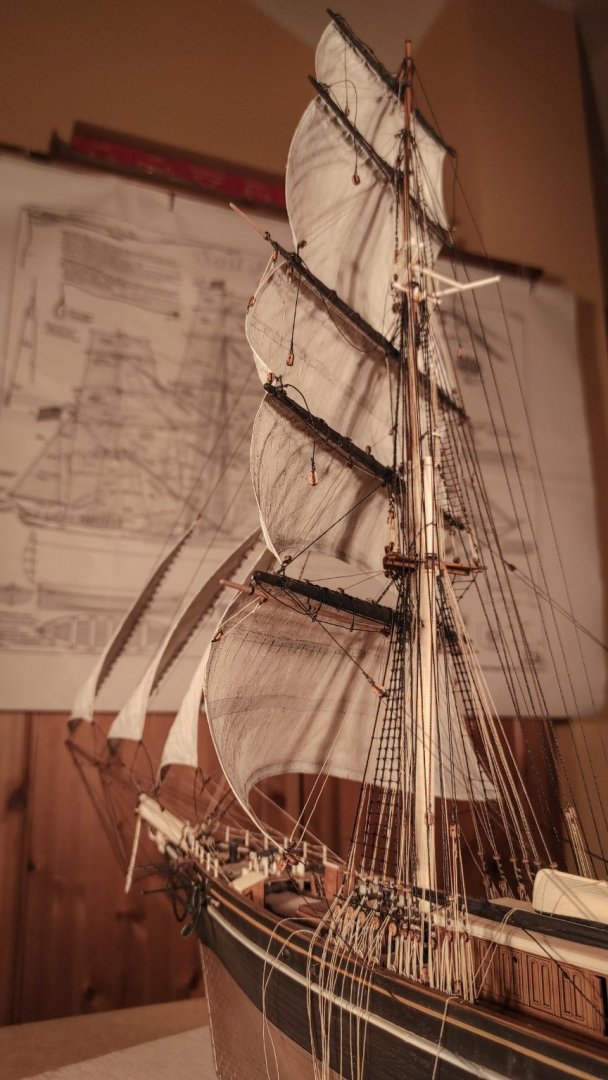
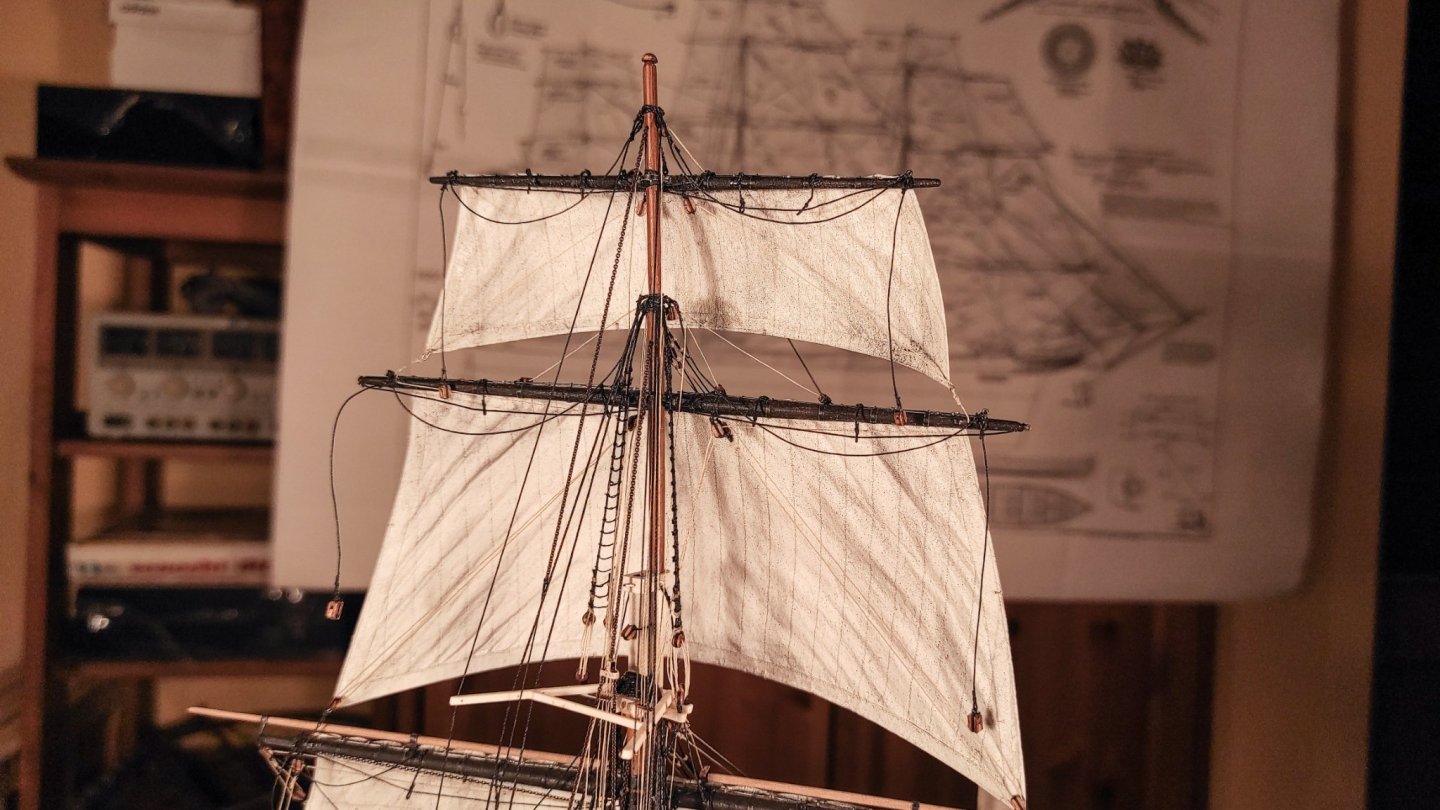
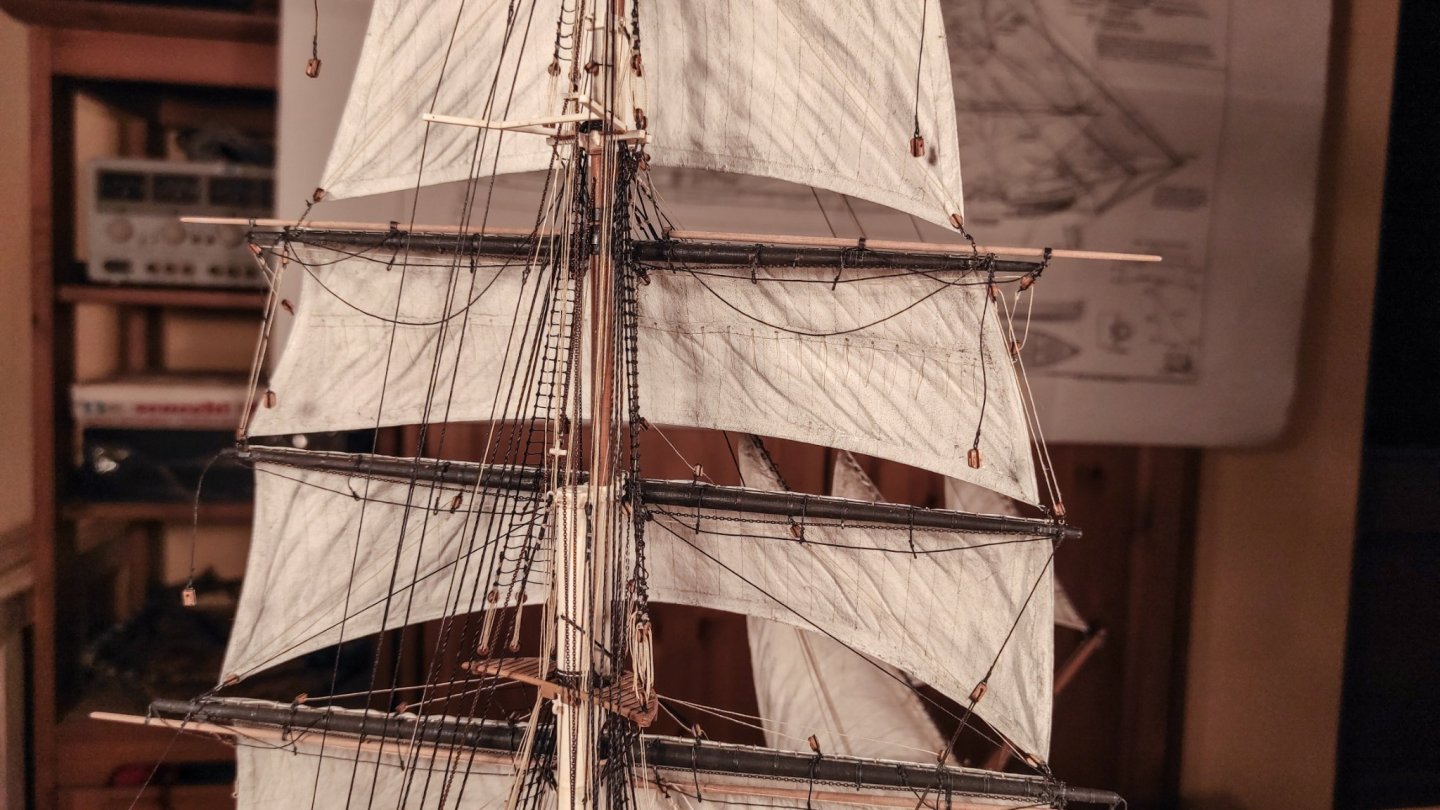
Hello everyone. I have finally found some time to photograph the model as it is now, with the fore mast completed. So, it’s update time! Sails #2: fore mast rigging and sails! These square sails are the first square sails on my model and the first square sails of my life, and they have been quite a challenge. The technique used is the one described some posts above. It has been a great journey, with a really steep learning curve. My main references are Longridge, Underhill and Campbell and as far as I can tell all the standing and running rigging lines are present in my model. The braces are still missing, they will interfere while working on the main mast, so I’ll put them later on. Still I didn’t resist putting some of them just temporarily, to visualize the braced yards and the corkscrew arrangement of the fore yards. Ok, enough talking. Here you have some pictures. Hopefully not too many… And here are some details. As you may already know all the yards are scratch build. I have also added the fairleads on crosstrees, tops and lower shrouds, with all the running rigging passing through the respective fairleads. The gin blocks used for the halliards are also visible. They are all scratch build: And here are the last details: reef points. In my opinion thread is too thick, so I have used single bristles from an old brush and a drop of CA gel glue In this last picture it’s also visible how I bent the sails to the jackstay. Please note that the sheets are not in the final position: I will shape the last part of each chain close to the sail to simulate the wind pushing them forward,, but I will do it only once all the braces will be in place. I hope you like them!


- 399 replies
-
- 12
-
-
- cutty sark
- revell
- (and 2 more)
-
Good to see you back on your model! Keep going!
- 4,152 replies
-
- 3
-
-
- cutty sark
- tehnodidakta
- (and 1 more)
-
Sorry for the delay in getting back to you. Yes, they are there to help the sail maintaining their shape. I have used a 0.4 - 0.5 twisted aluminum wire (at least I think it is aluminum, it is gray). But the point is: use what you think is the best solution for your model and scale. The wire provide also a simulation for the bolt rope, and they size tent to vary during different periods and sail sizes. I have made many test to find the best solution for me, and I'm glad to share my small achievement, but the process needs to be changed depending on your models. Plus: testing is a lot of fun! You might enjoy the journey more than the destination, for me that's the case!
-
Hi again. I've only used the lighter version so far, and I'm at my first ship model, so take my words with caution. There are many parameters that has to be taken into account: scale technique used (are you going to pant them? if so, with wath colors? Are you going to shape thet? ecc) period of the ship (generally I would say older -> thicker sail) If you want you can have a look at my sails here: https://modelshipworld.com/topic/25323-cutty-sark-by-bruma-revell-196/page/6/ post number 180. Those sails are made with the lighter version. In case of a ship of the line at the same scale a thicker version would probably fit better. Feel free to ask more if needed!
-
Thank you all guys! I'm really happy to see you like them, and I hope to be able to post some updates soon! The fore mast is almost completed!
- 399 replies
-
- 5
-
-
- cutty sark
- revell
- (and 2 more)
-
Hi Mike! No, to me the product you pointed out is not the silkspan. You can try to look for modelspan too, it is the same product. It is/was used for rc airplanes, in order to cover the ribs on wings and fuselage. Try to call an RC model vendor you trust. I bought mine from Mantua Model: https://www.mantuamodelshop.com/catalogsearch/result/?cat=&q=modelspan You may try to contact them and see if they can send it to France.
-
Thank you all, again, for the kind comments and likes. In such a long build any source of motivation is welcome, and your appreciation is a great encouragement!
- 399 replies
-
- 3
-
-
- cutty sark
- revell
- (and 2 more)
-
Thank you, Vladimir for sharing your Cutty Sark. In two weekends you have achieved what I managed to do in more than one year! Even if you are not planning to work on her in the near future, I'm sure you will see the end sooner than me. I can't wait to see more!
- 4 replies
-
- 2
-
-
- Cutty Sark
- Revell
- (and 1 more)