
Bruma
-
Posts
179 -
Joined
-
Last visited
Content Type
Profiles
Forums
Gallery
Events
Everything posted by Bruma
-

USF Confederacy in 3D | Blender
Bruma replied to 3DShipWright's topic in CAD and 3D Modelling/Drafting Plans with Software
You are doing a tremendous job! As a blender user too, I'm well aware of the effort needed for complex projects such as this one. Thank you for sharing and inspiring us! I'm particularly interested in your uv techniques (still to be done) and your materials. Even now, they look quite good!- 107 replies
-
- 2
-

-

-
- Frigate
- Confederacy
- (and 1 more)
-
Thank you Rob for the answer and sorry the typo: " Can you tell us something about the speed cooperation? " was intended to be " Can you tell us something about the speed comparison? "
- 399 replies
-
- 1
-
-
- cutty sark
- revell
- (and 2 more)
-
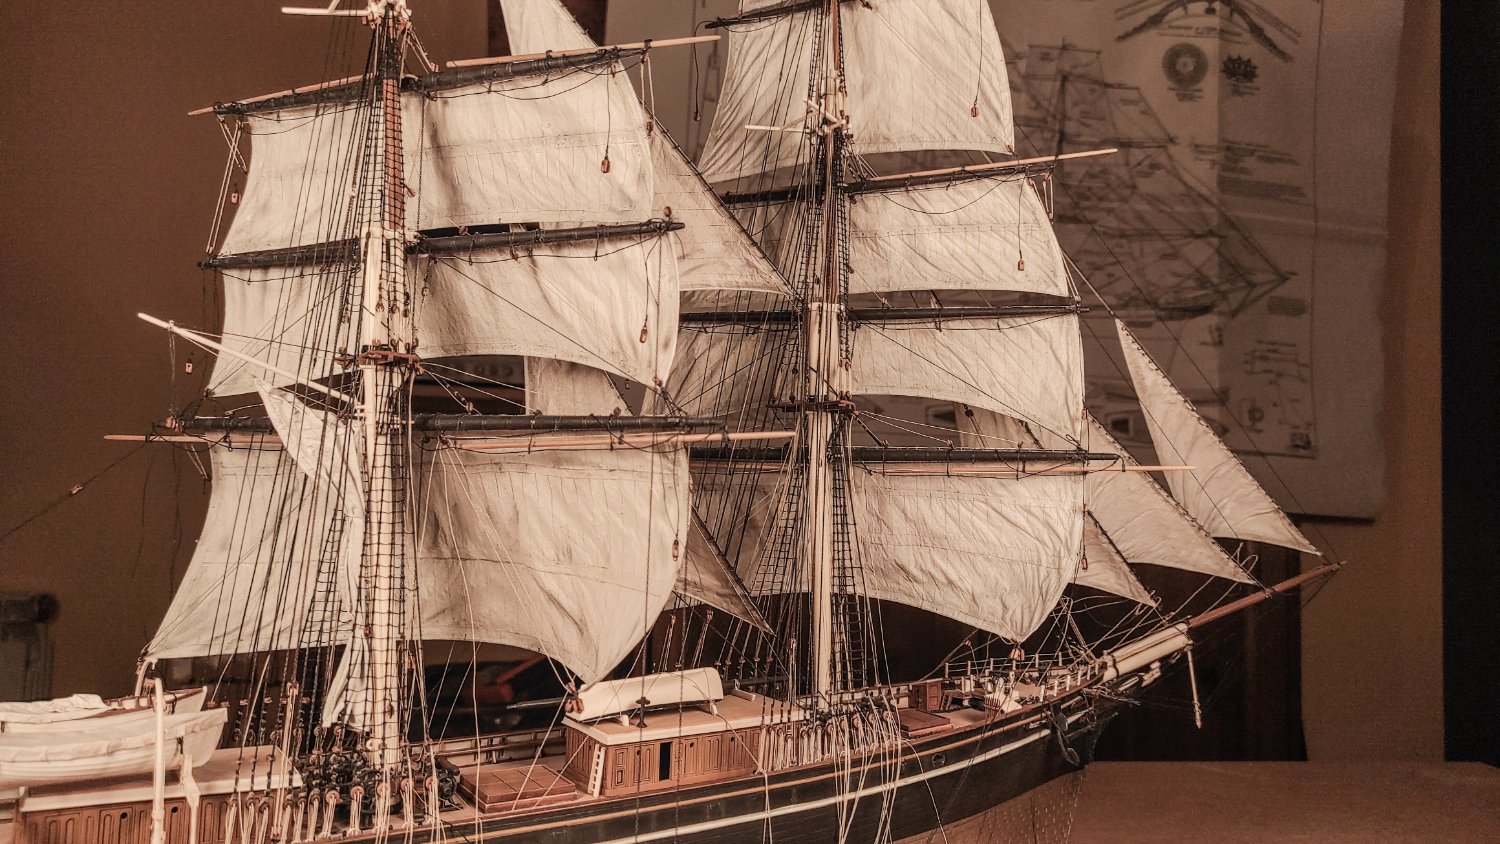
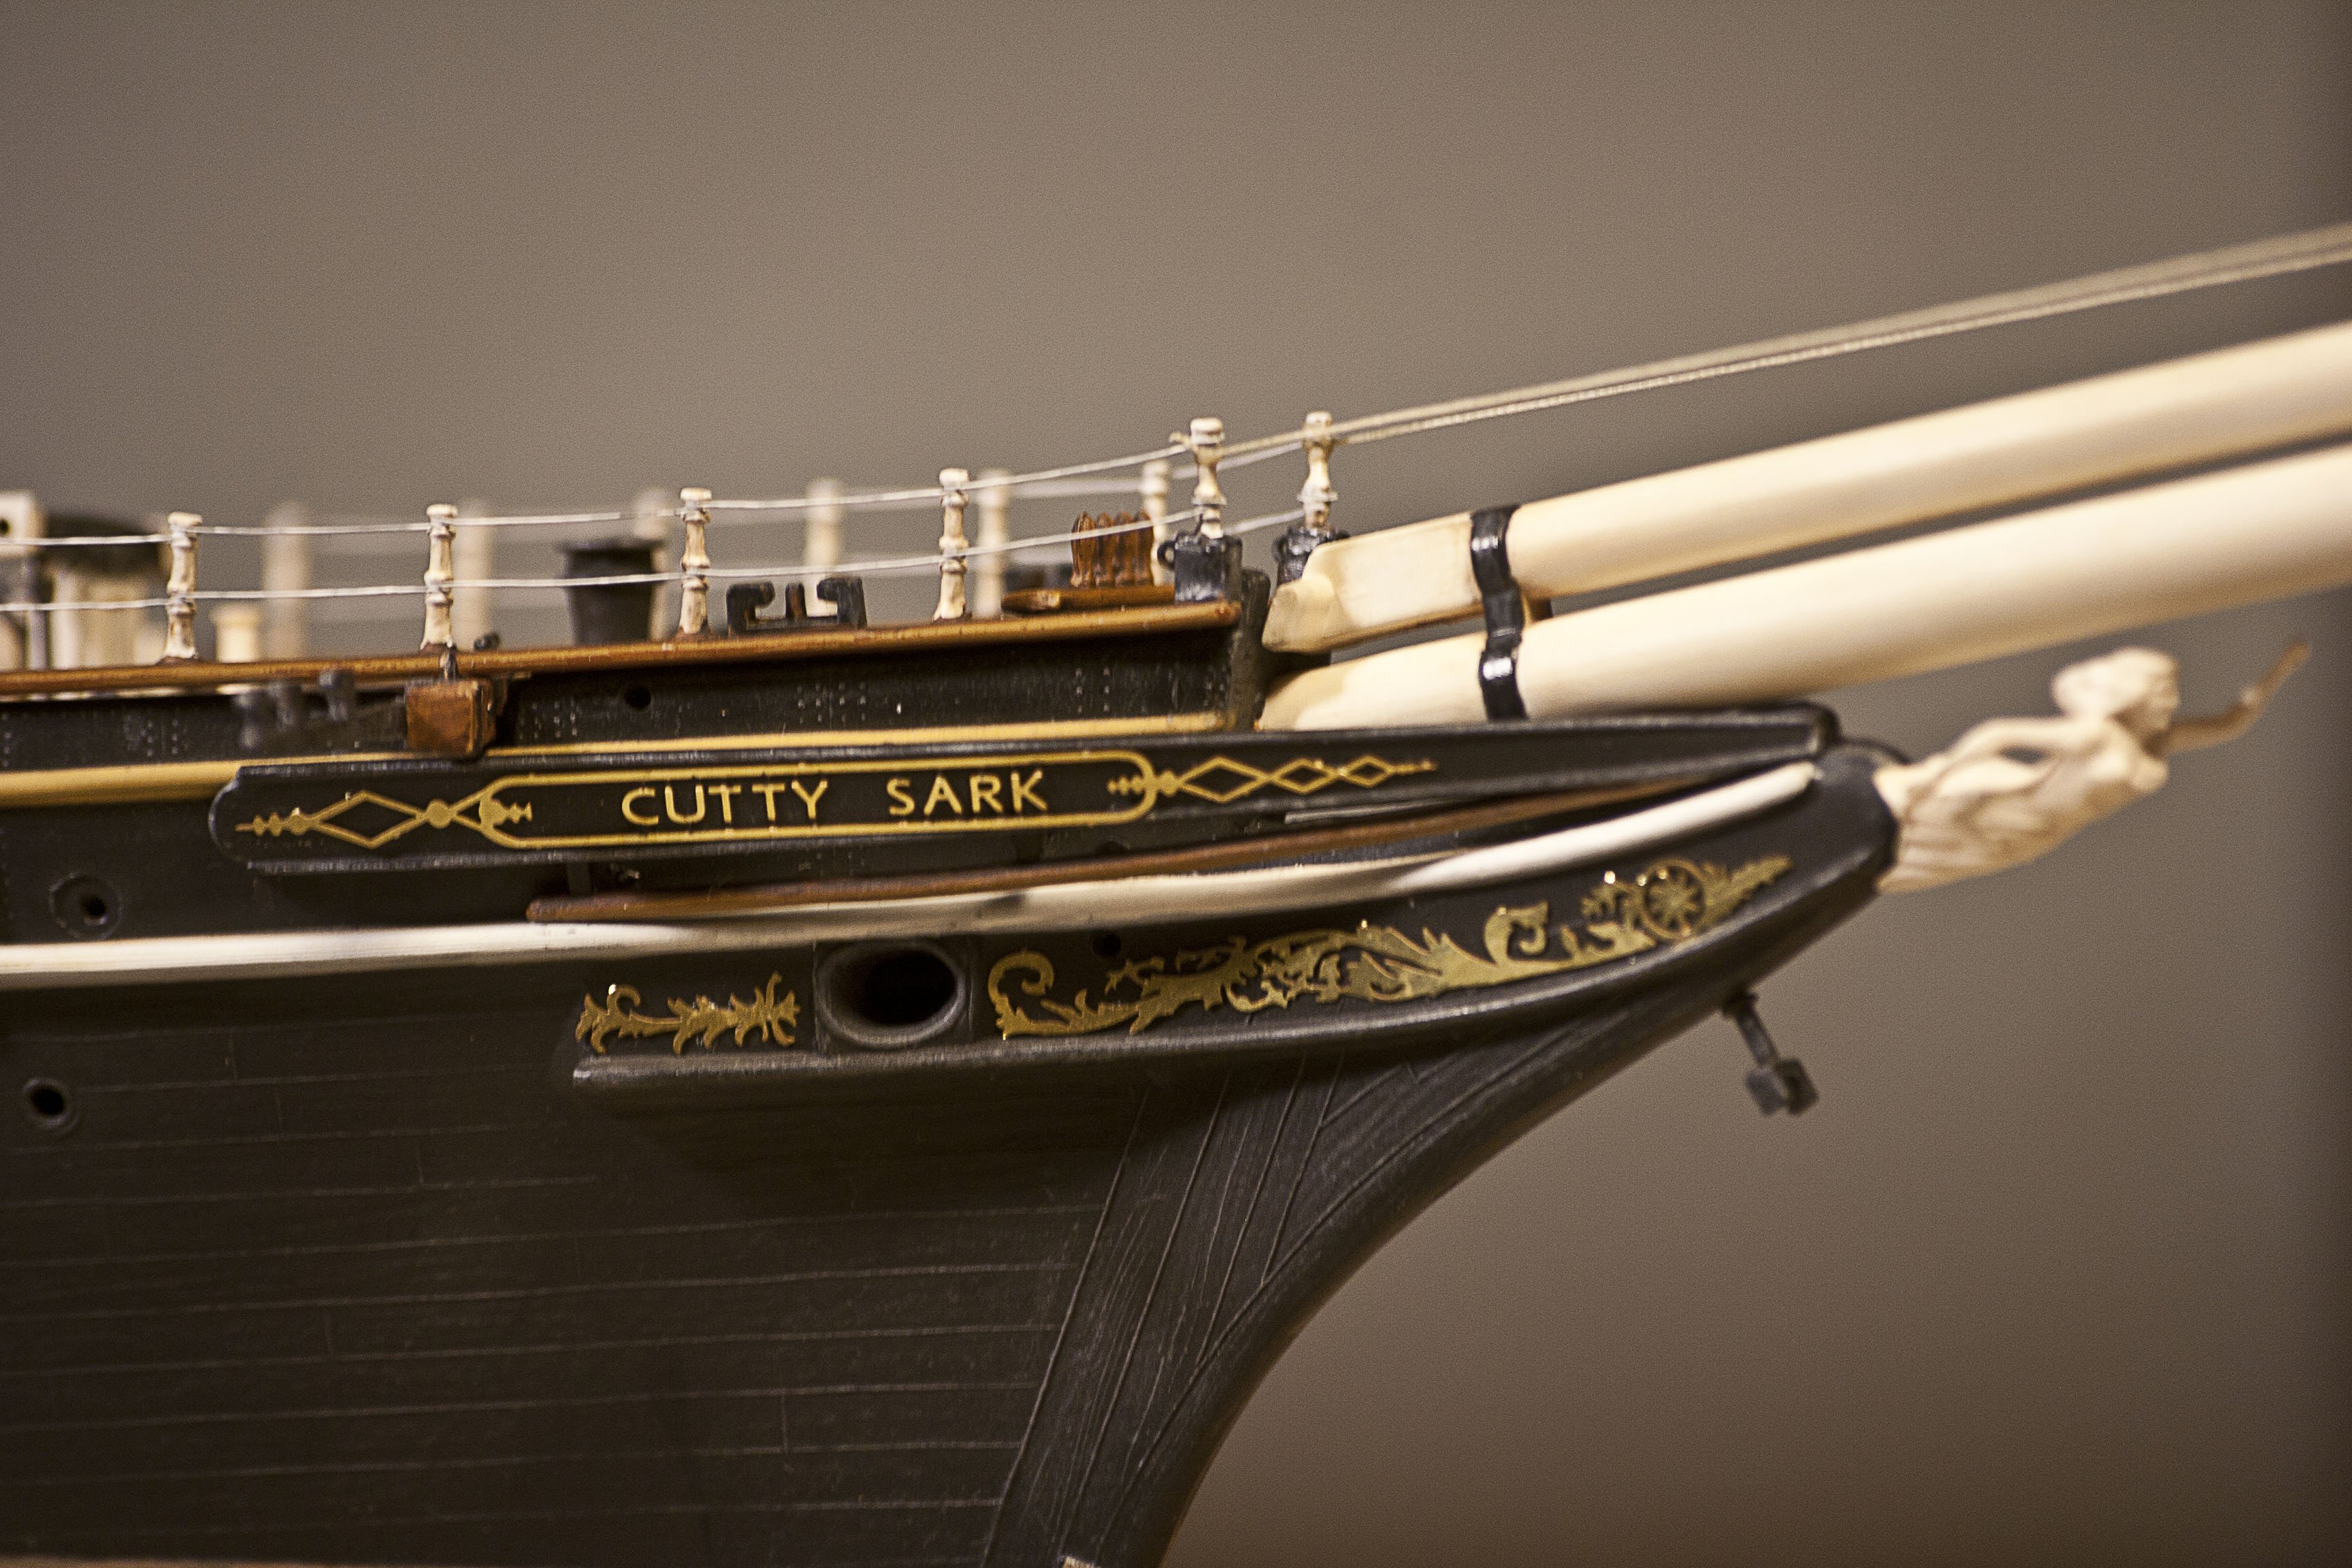
Thank you everyone for your comments and likes, and I'm sorry for not getting back to you sooner. Let's try to answer some questions: Really nice comparison, Rob; thank you! Can you tell us something about the speed cooperation? Does all that mass slow the Americans down, or is their massive sail plan enough to catch and take over the tea clippers? Thank you, Kevin; I really appreciate your comments! Now, about your question, please keep in mind that more than 5 years ago, when I started building the Cutty Sark, all I knew about her and sailing ships in general was that they need wind, and they are better stay afloat, full stop. I have decided to build her precisely to learn more. This means that many of my first decisions were a little bit more "light-hearted". I saw the color in the pictures, and I tried to replicate it. Now I would say that the red-ocra you suggested is definitely a better choice. That beeing sail, I tool some small liberty in the color scheme just for my pleasure. The aspect I cared the most was and still is, the functional part. I want my model to replicate all the mechanism, all the lines, all the blocks present in the real one. This is the area where I try to stay as close as possible to the real ship. Paint comes and goes, ingenuity will live forever! Thank you all again!
- 399 replies
-
- 3
-
-
- cutty sark
- revell
- (and 2 more)
-
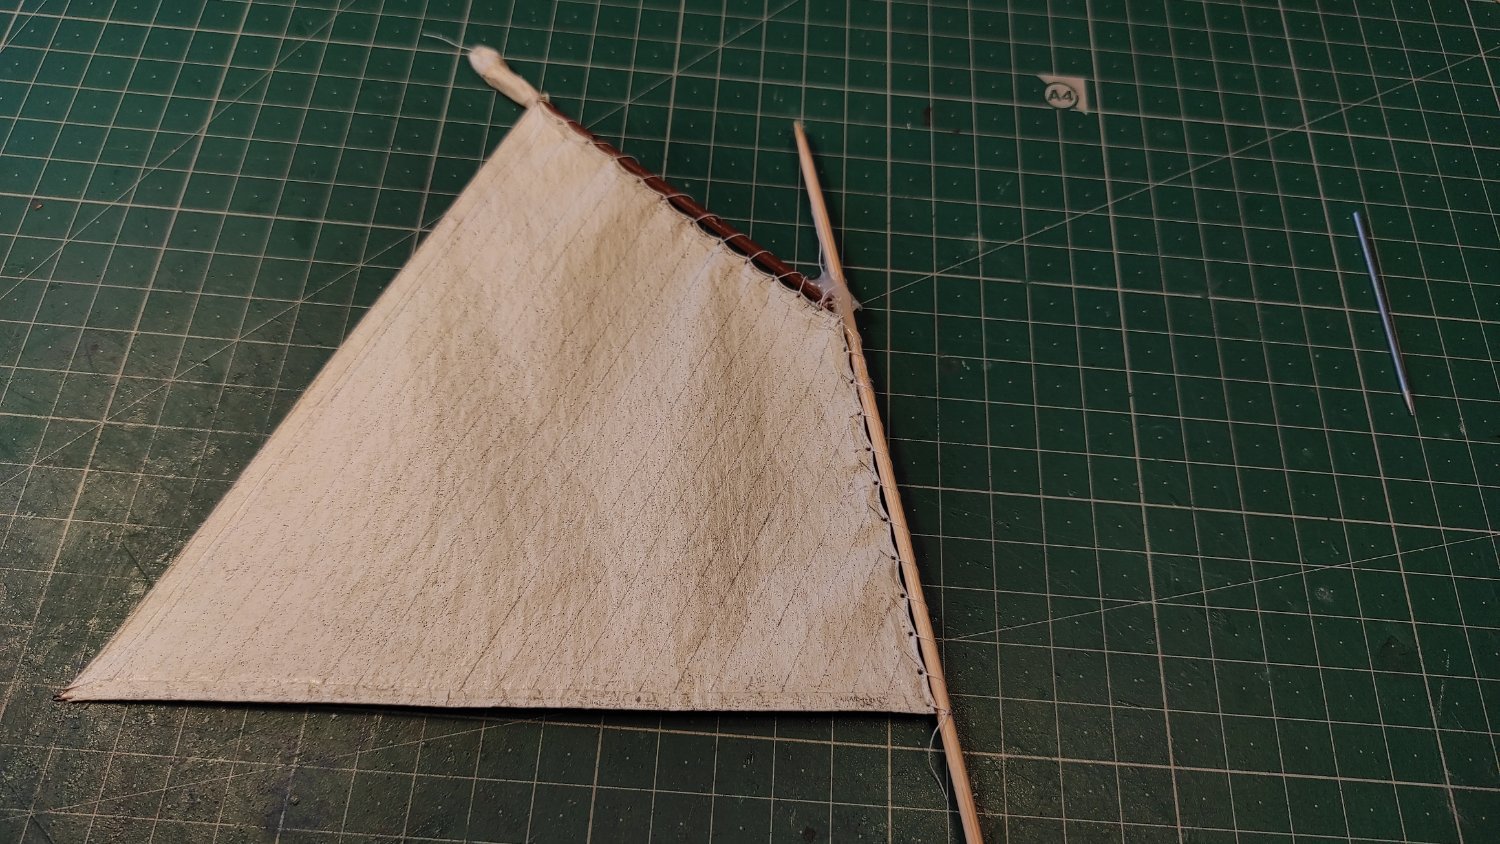
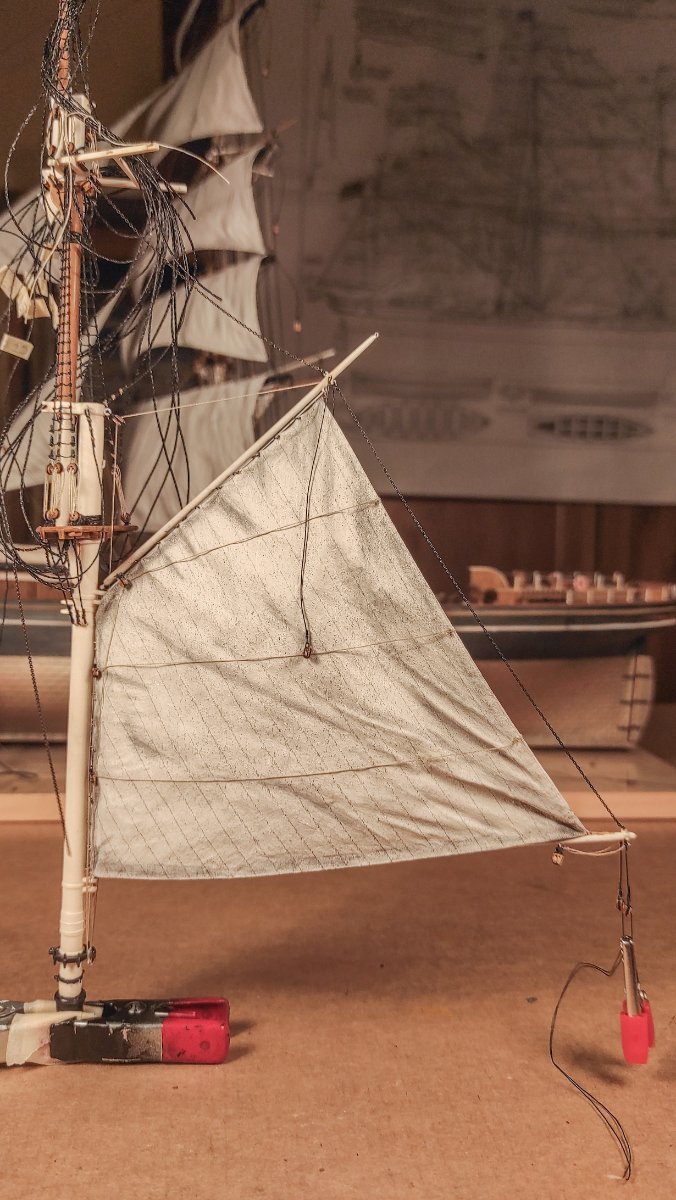
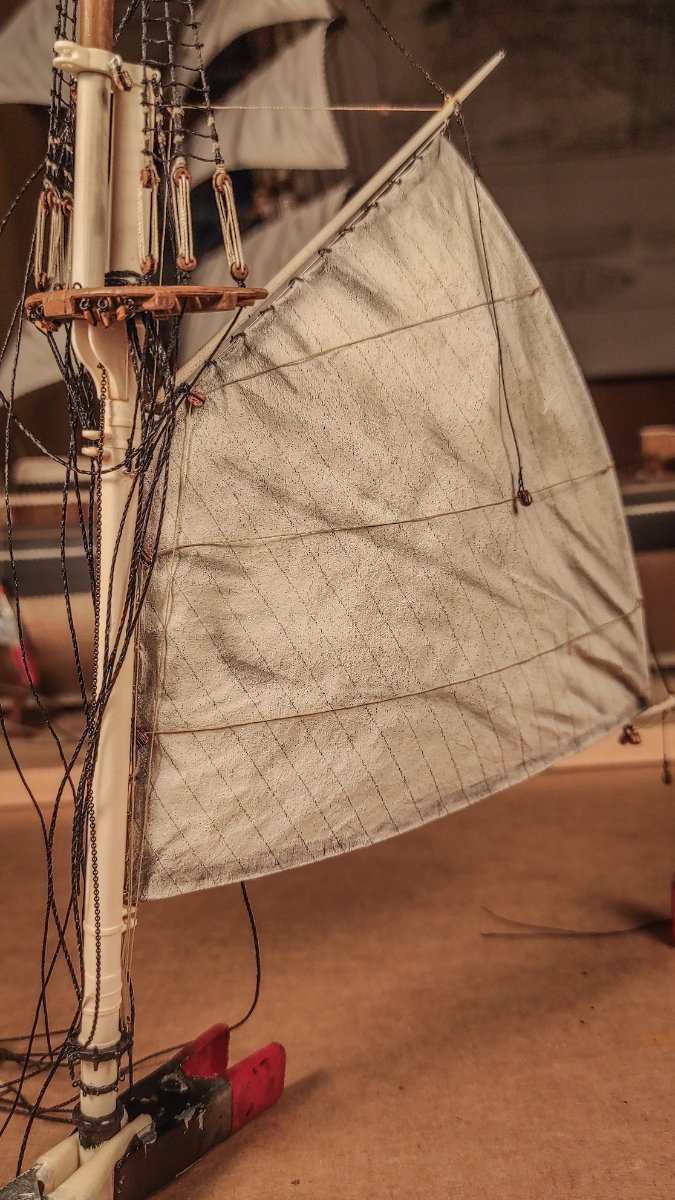
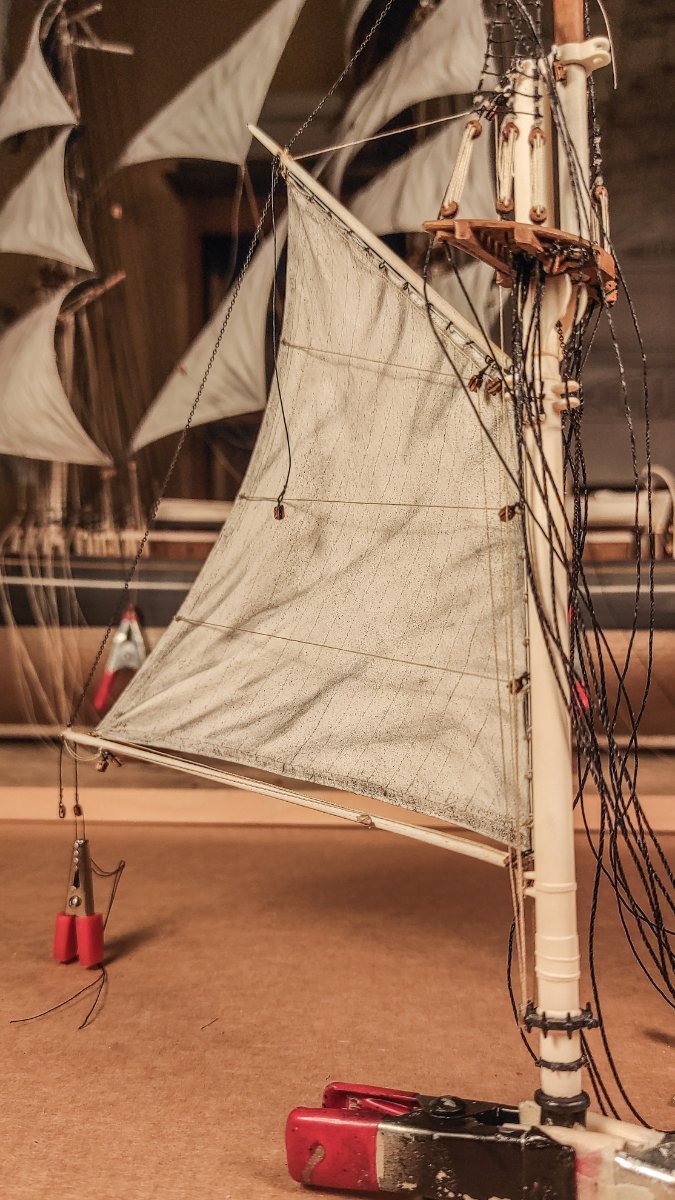
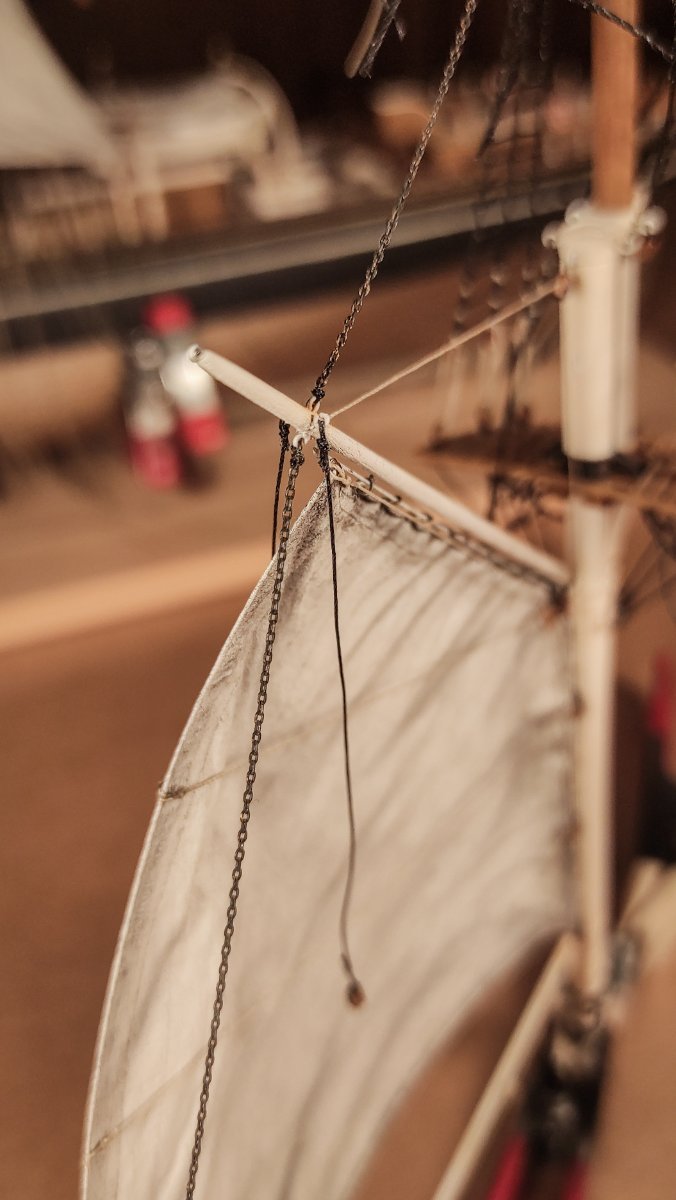
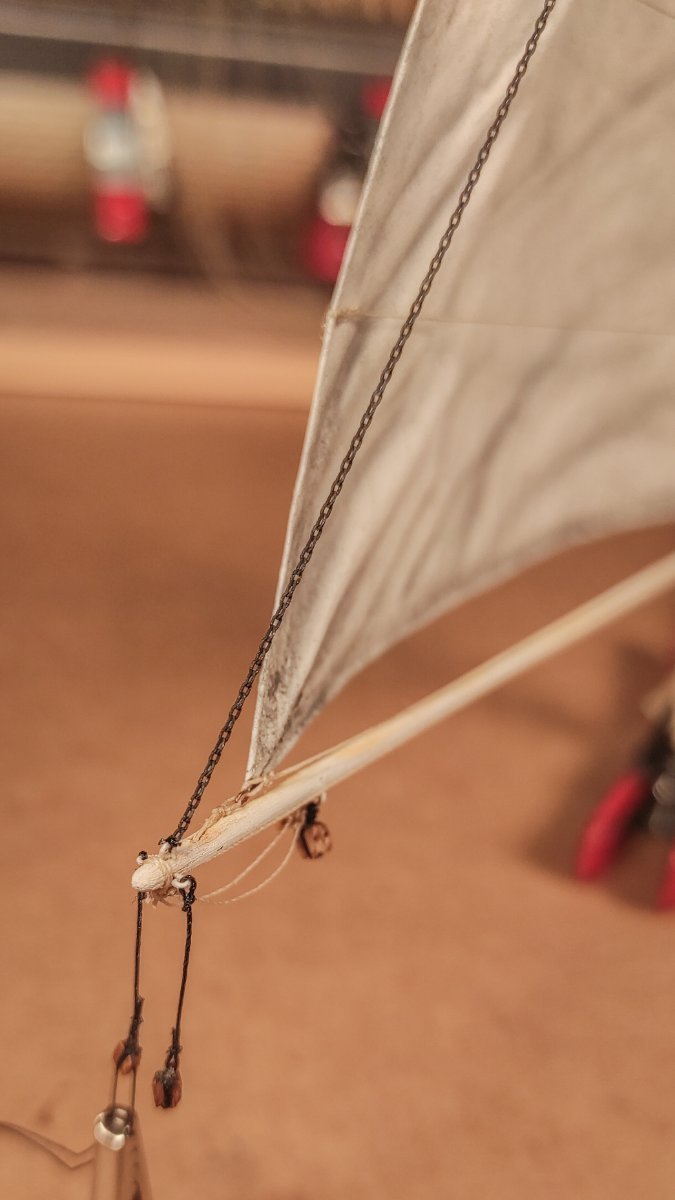
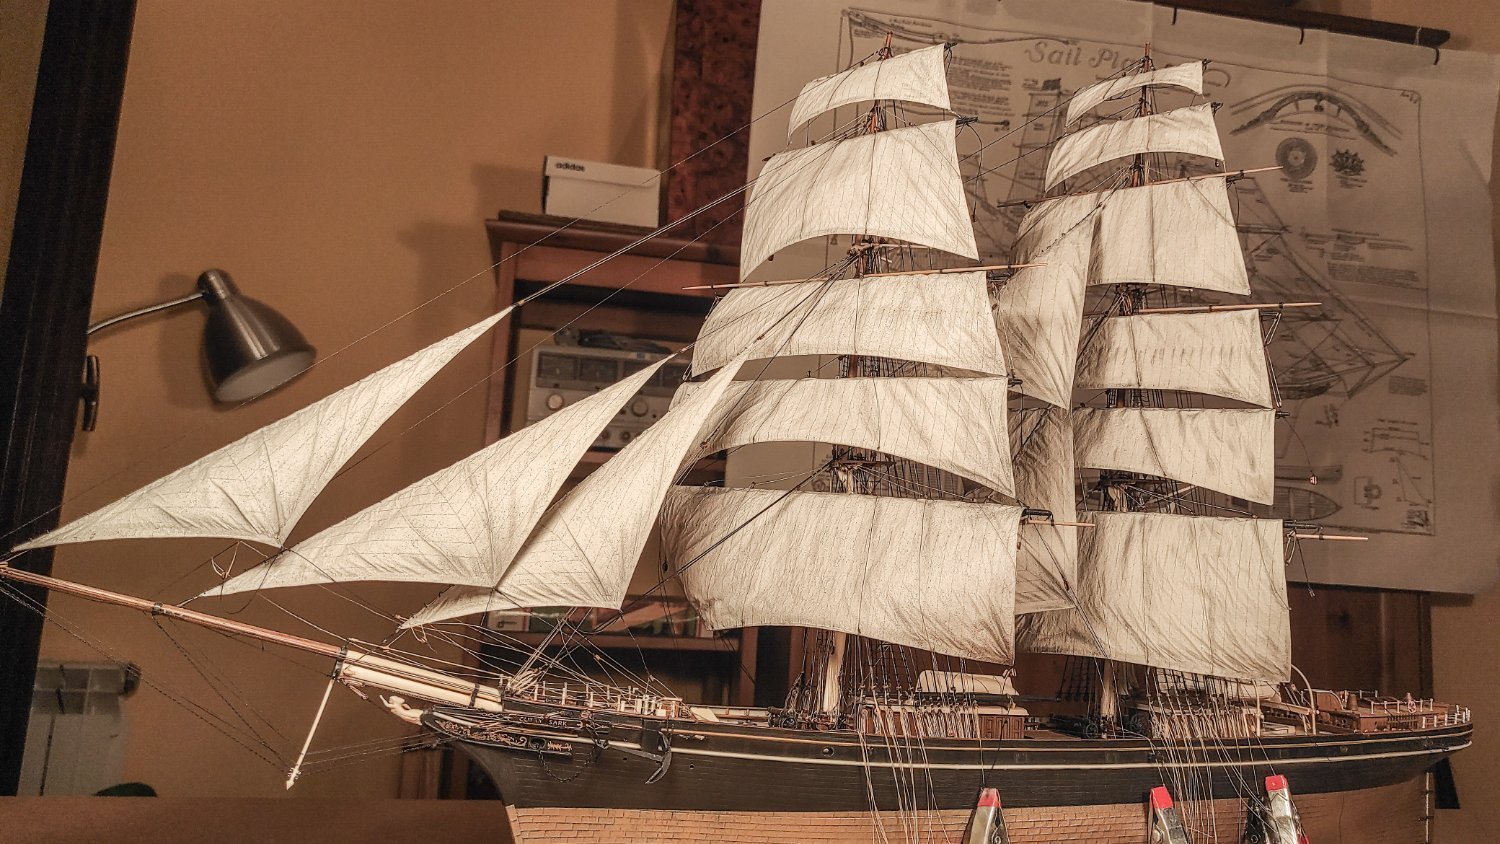
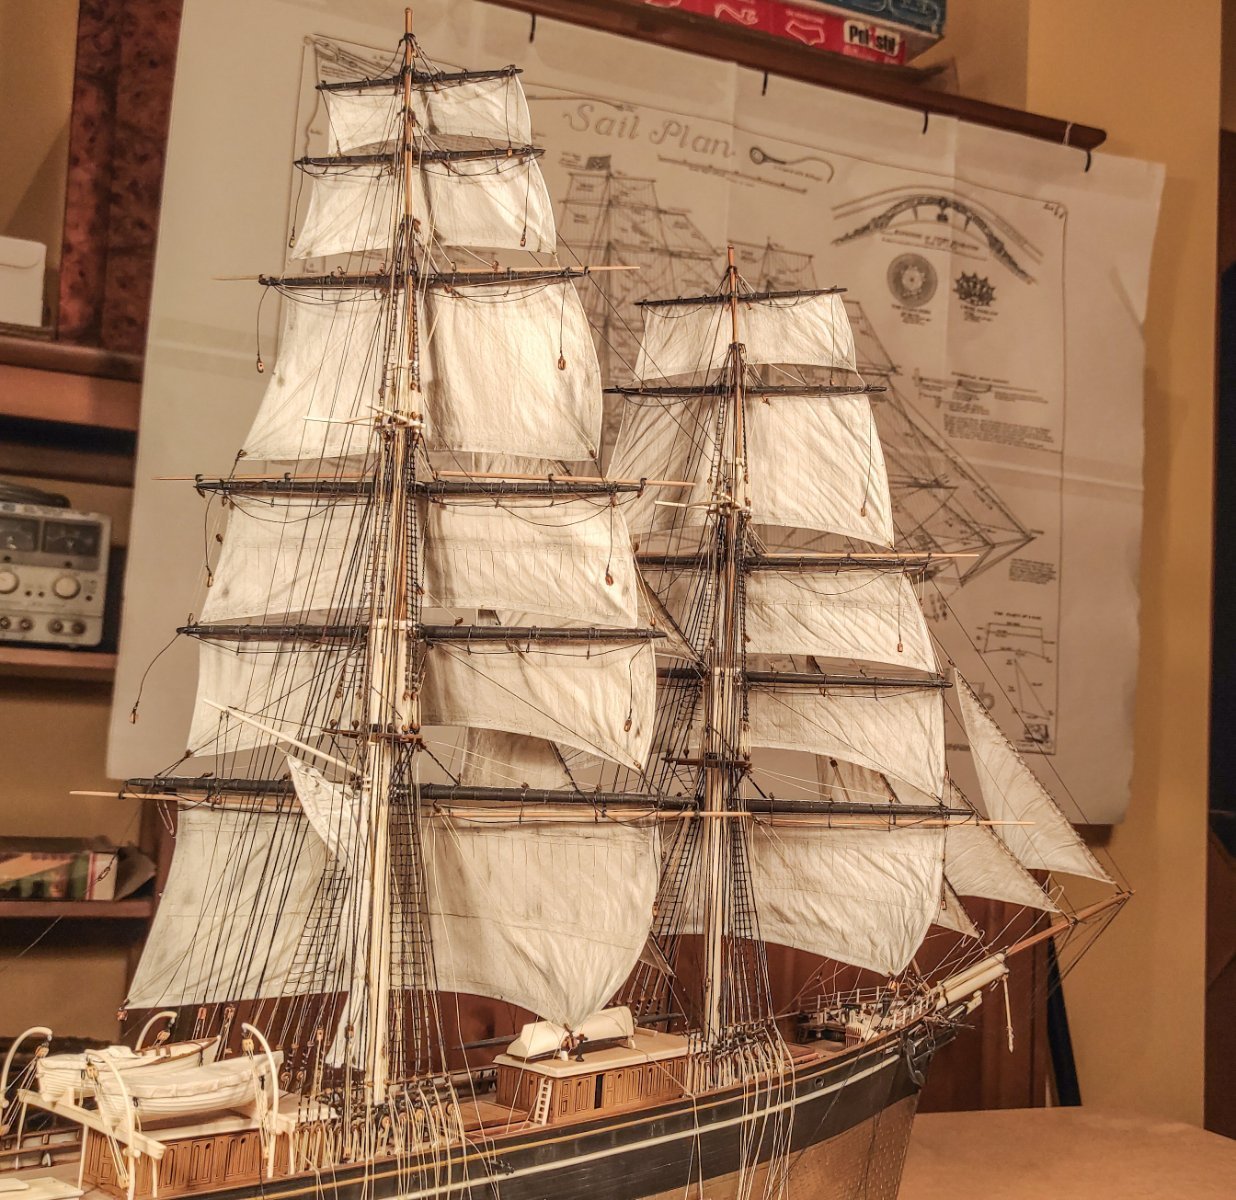
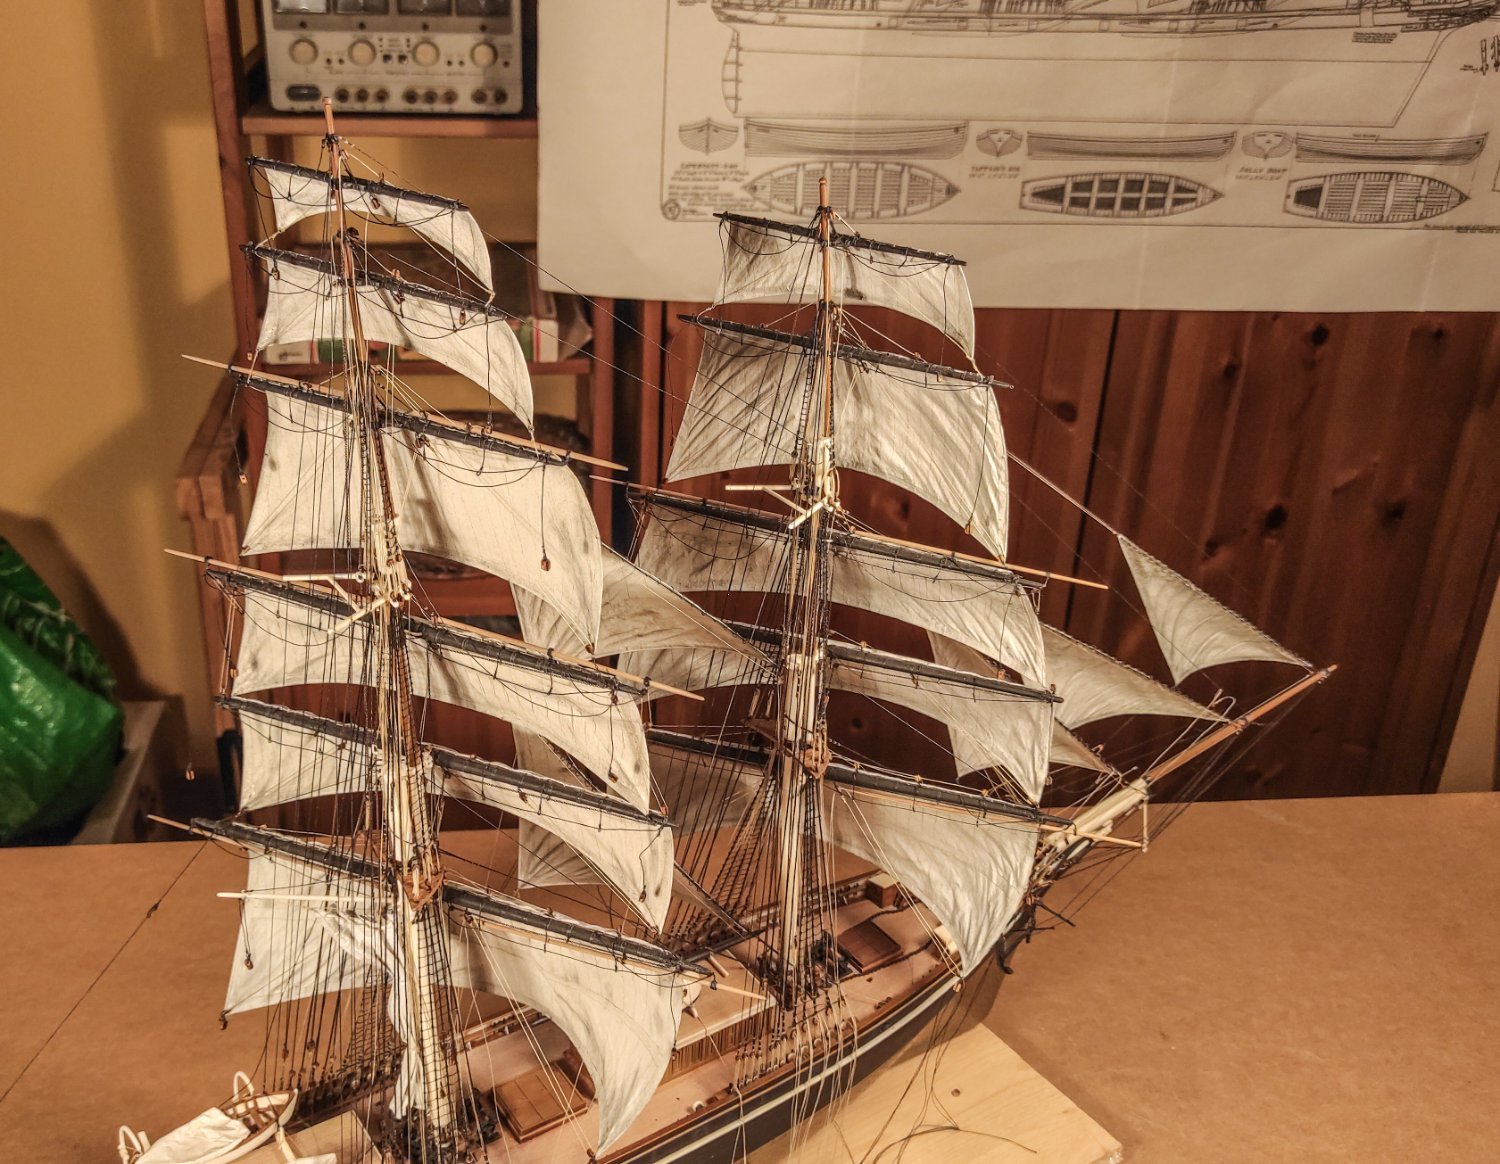
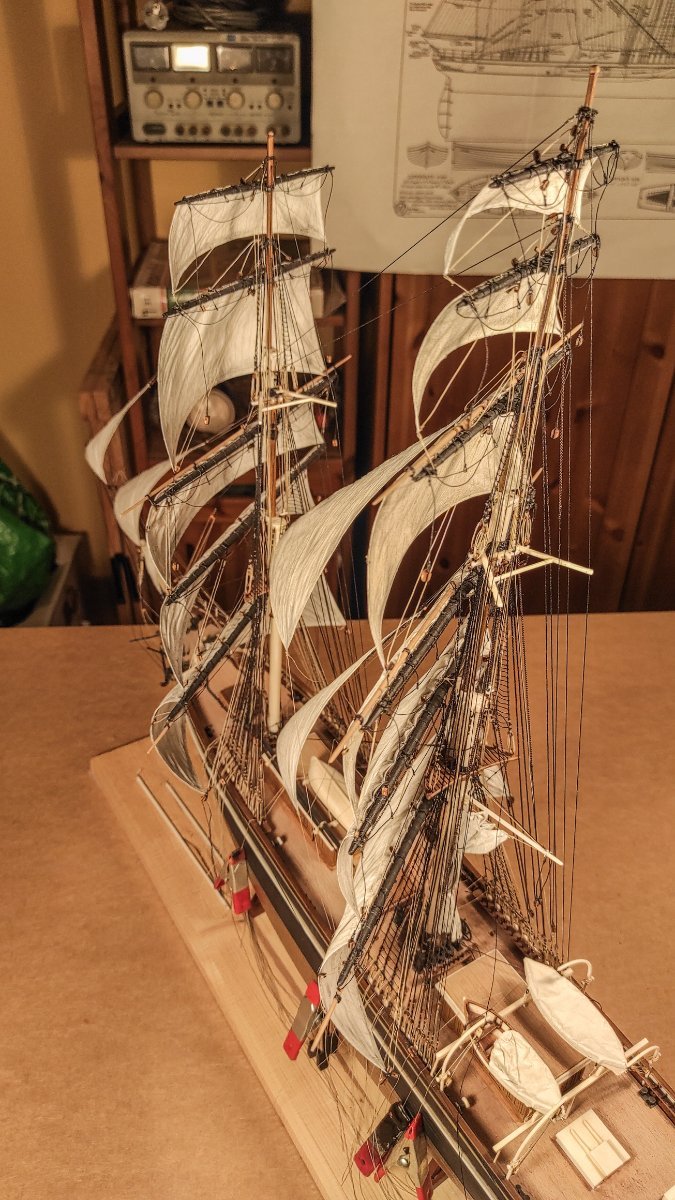
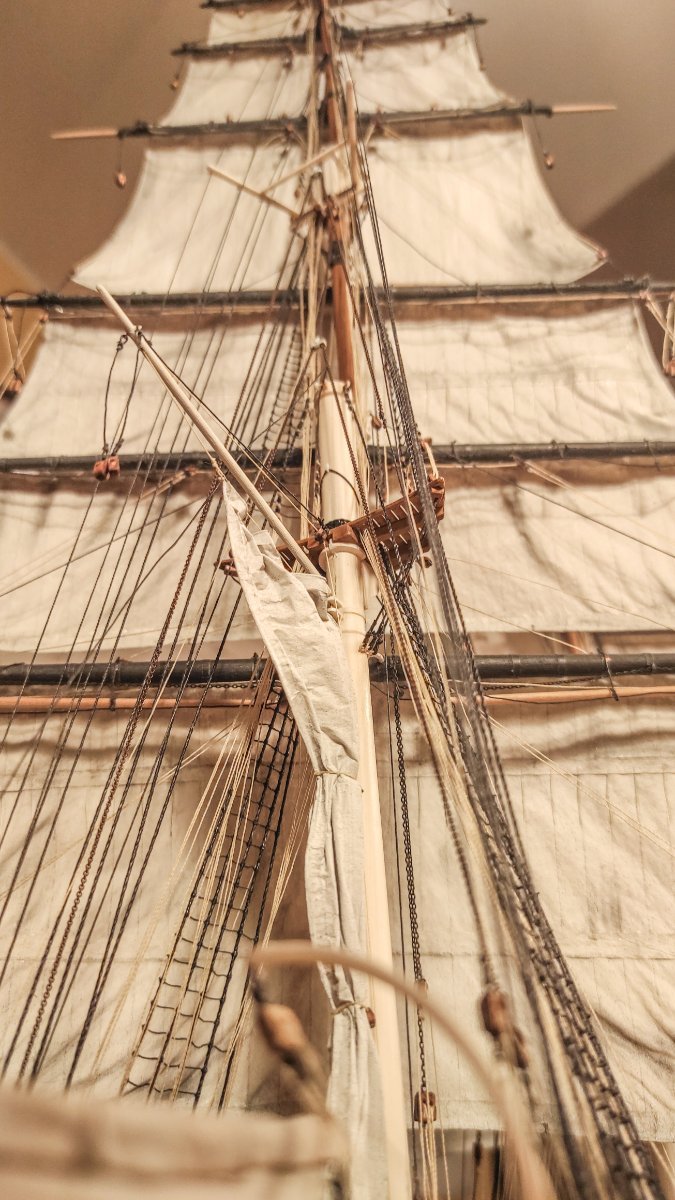
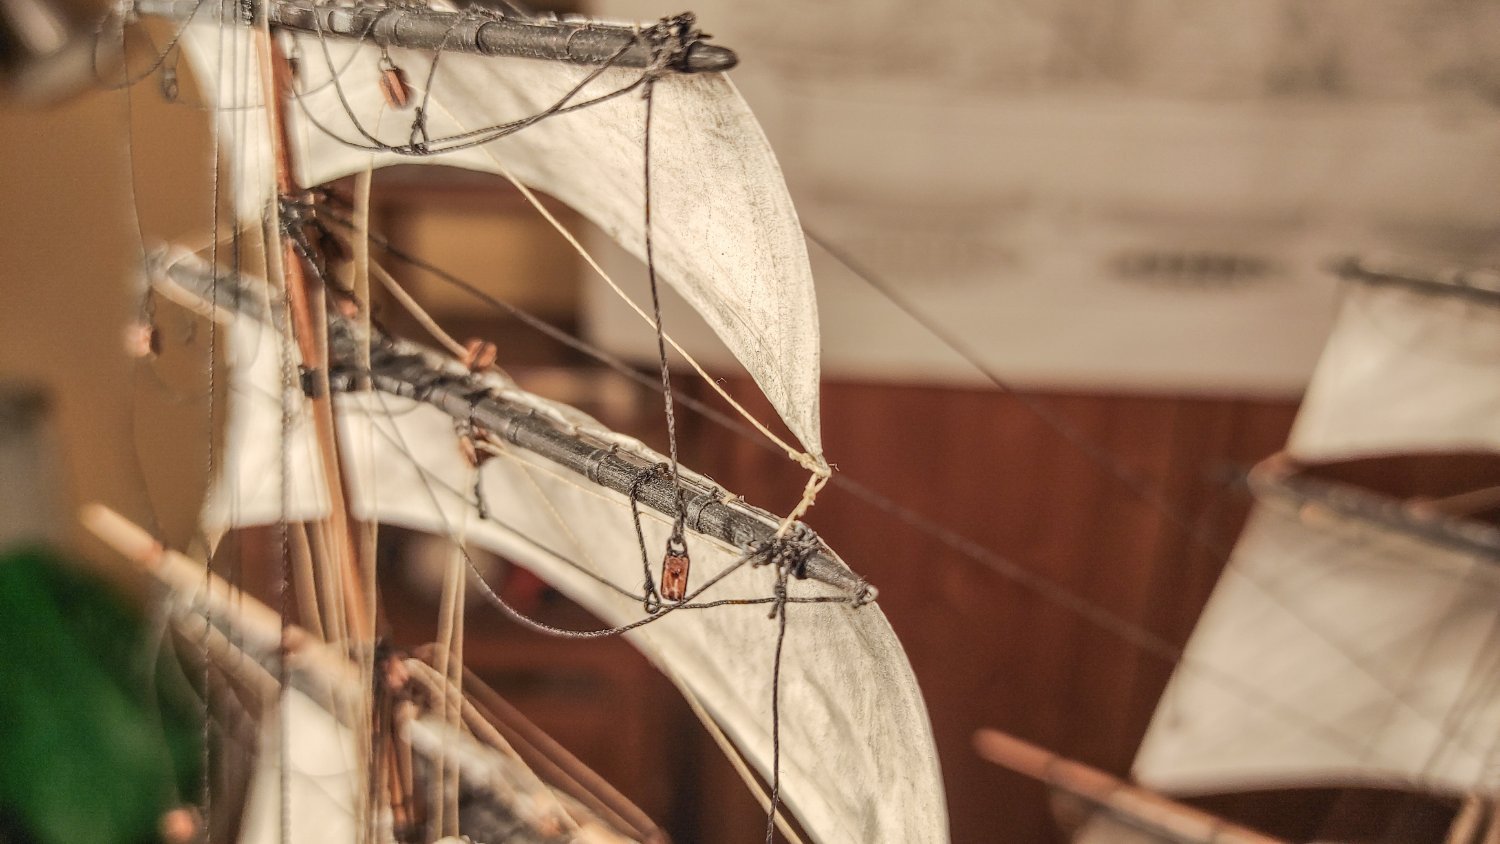
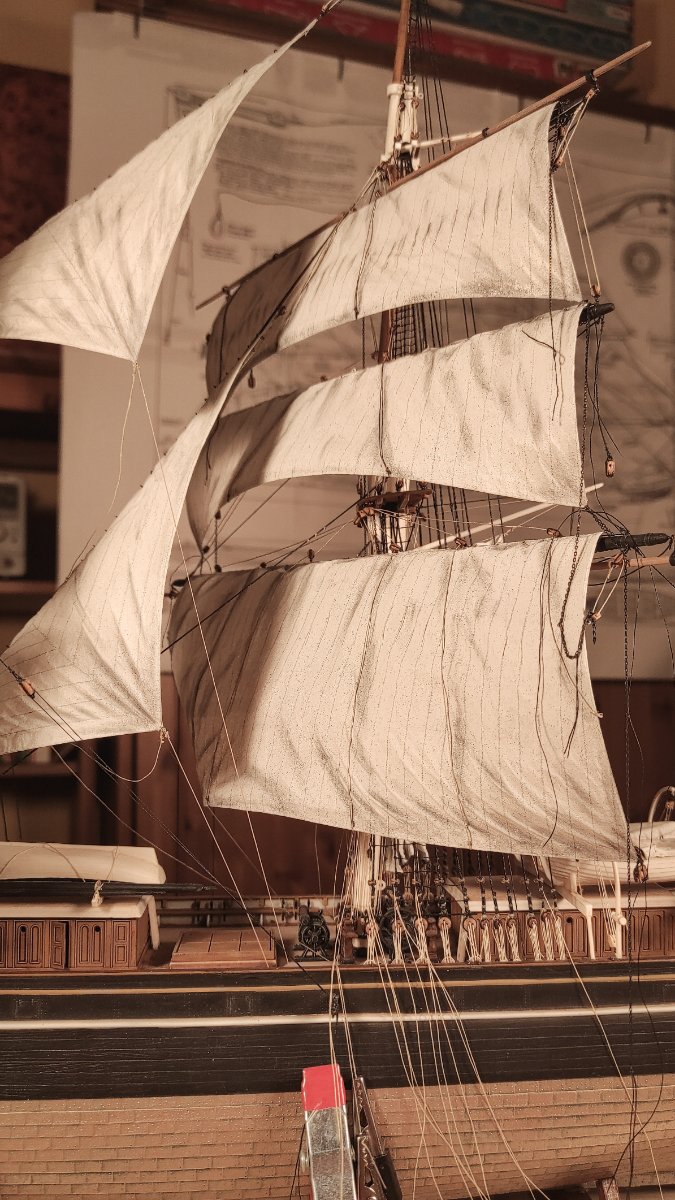
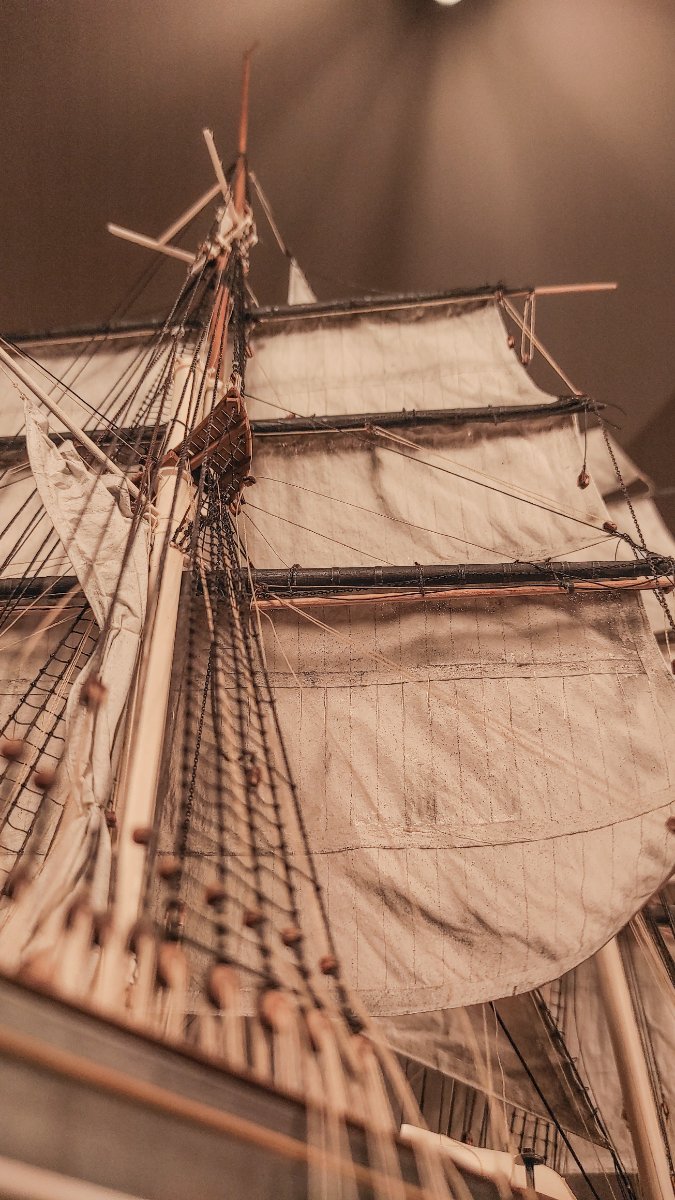
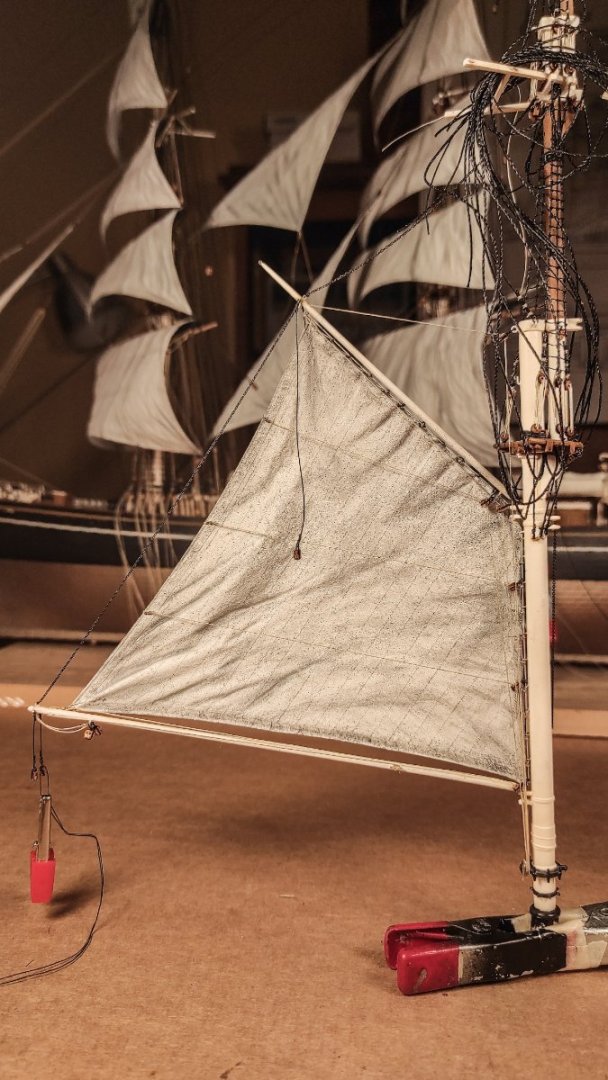
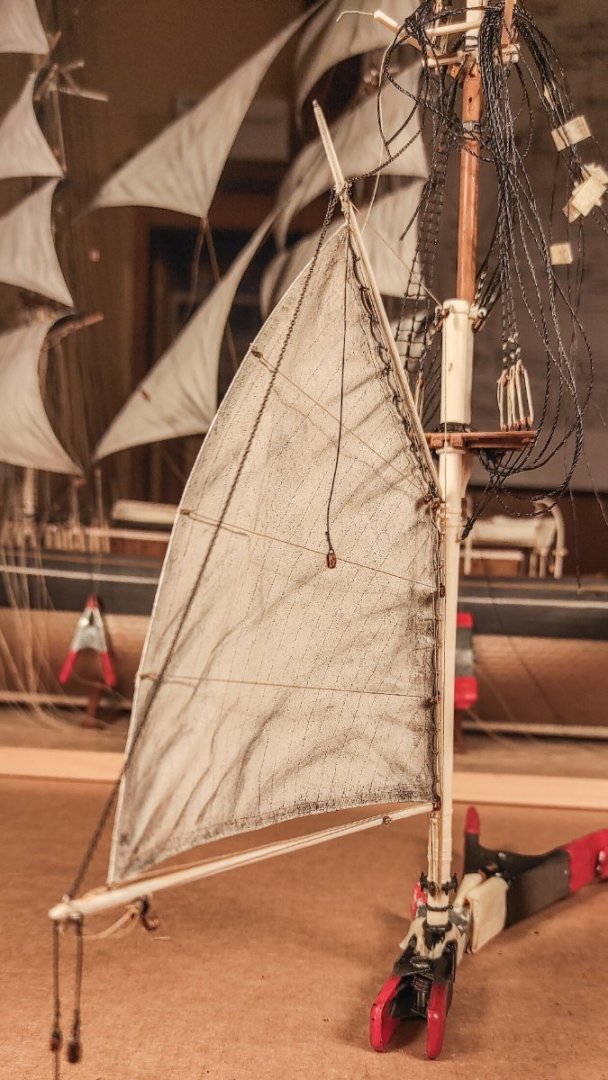
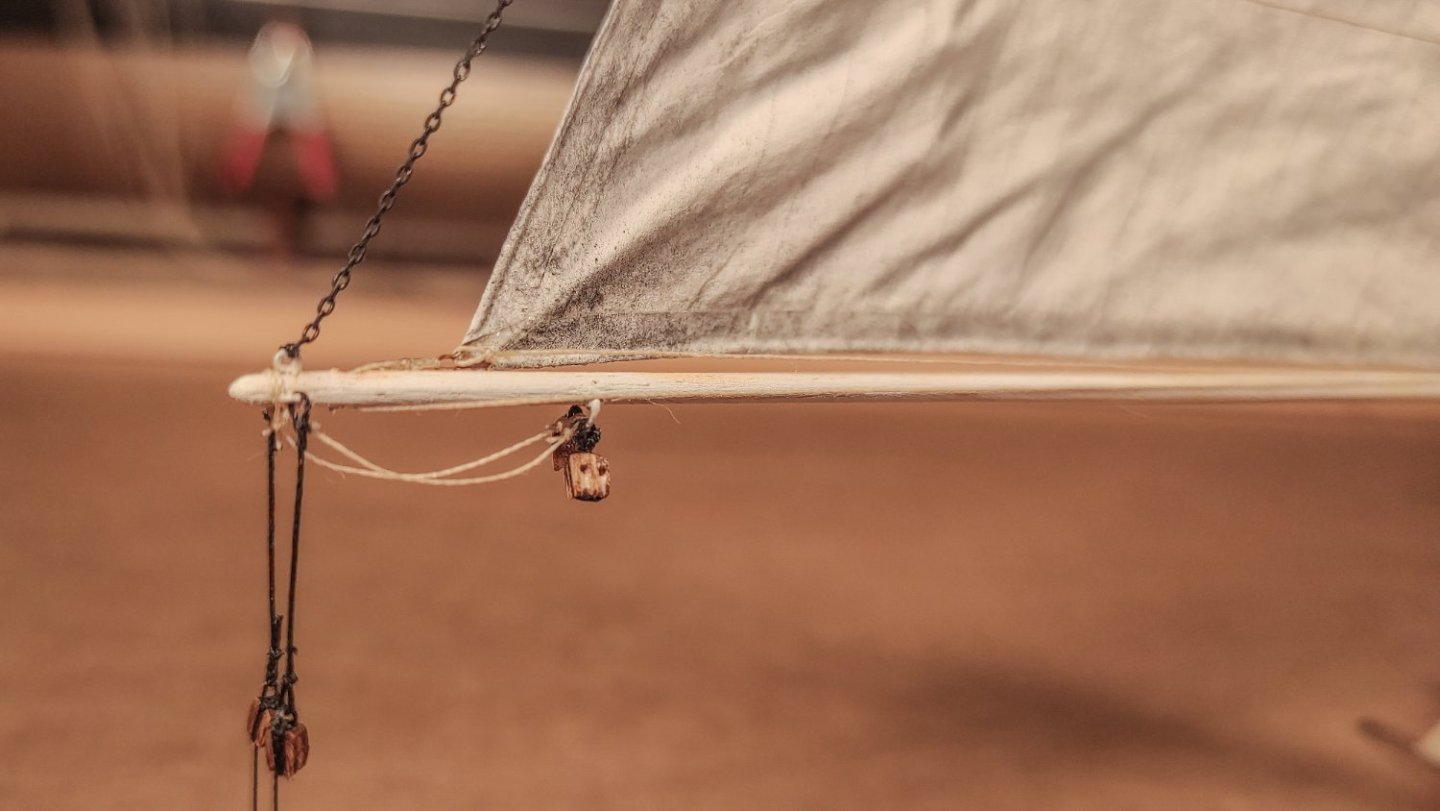
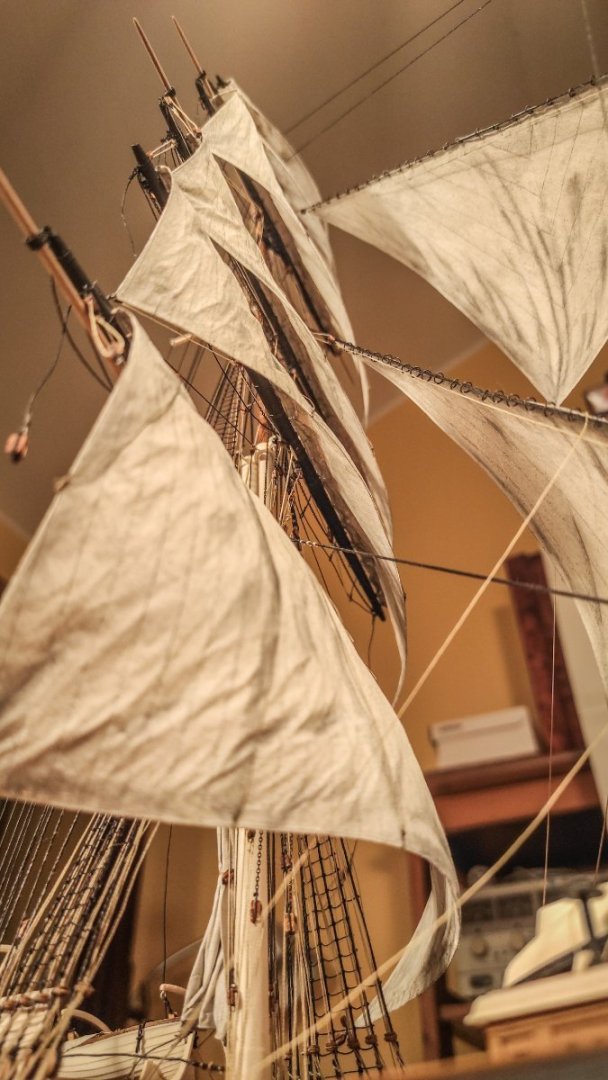
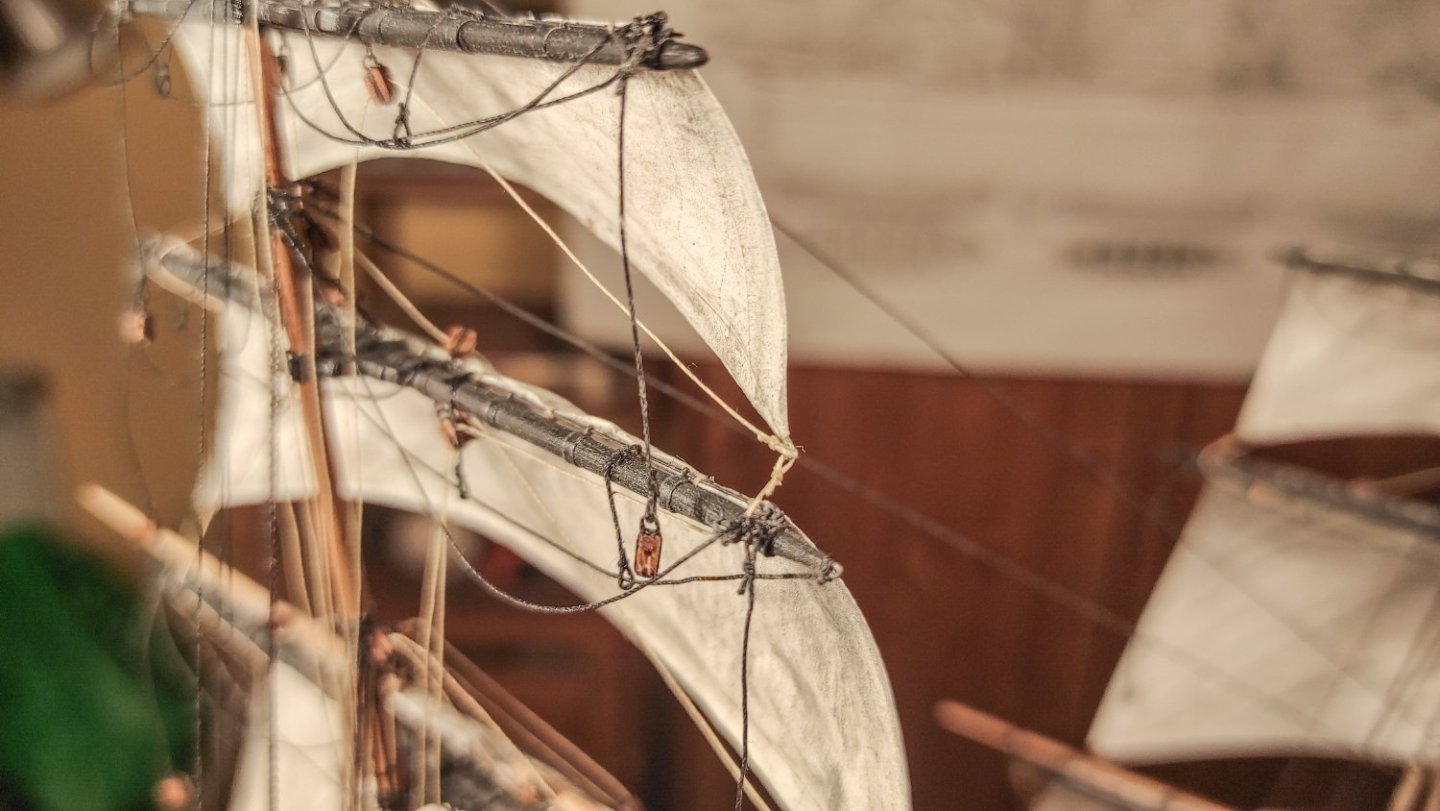
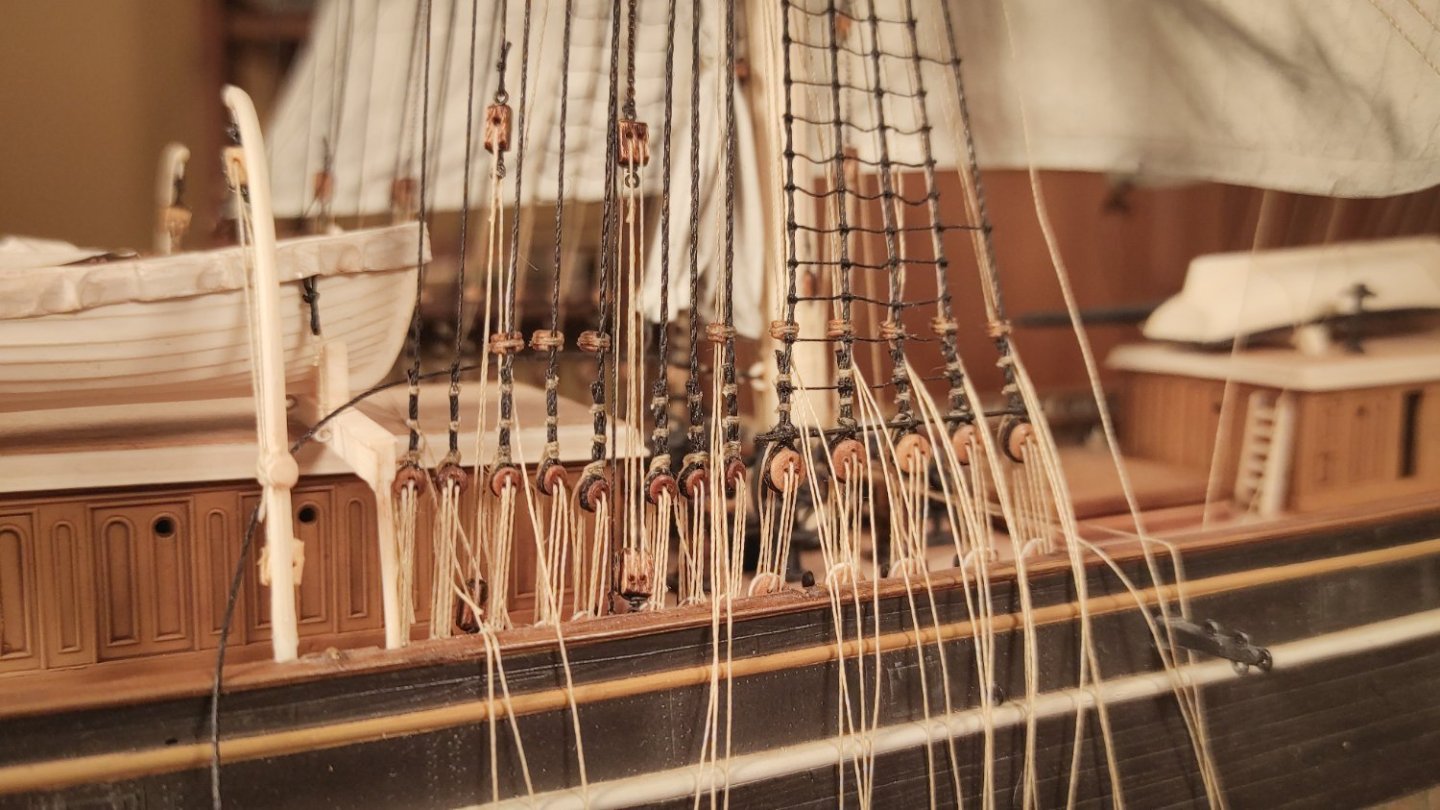
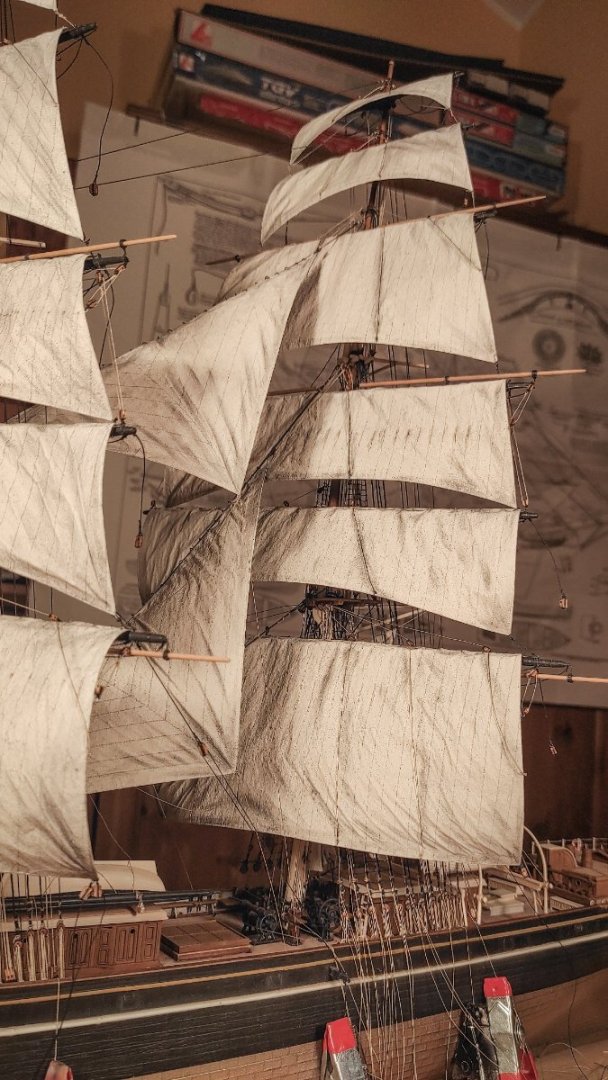
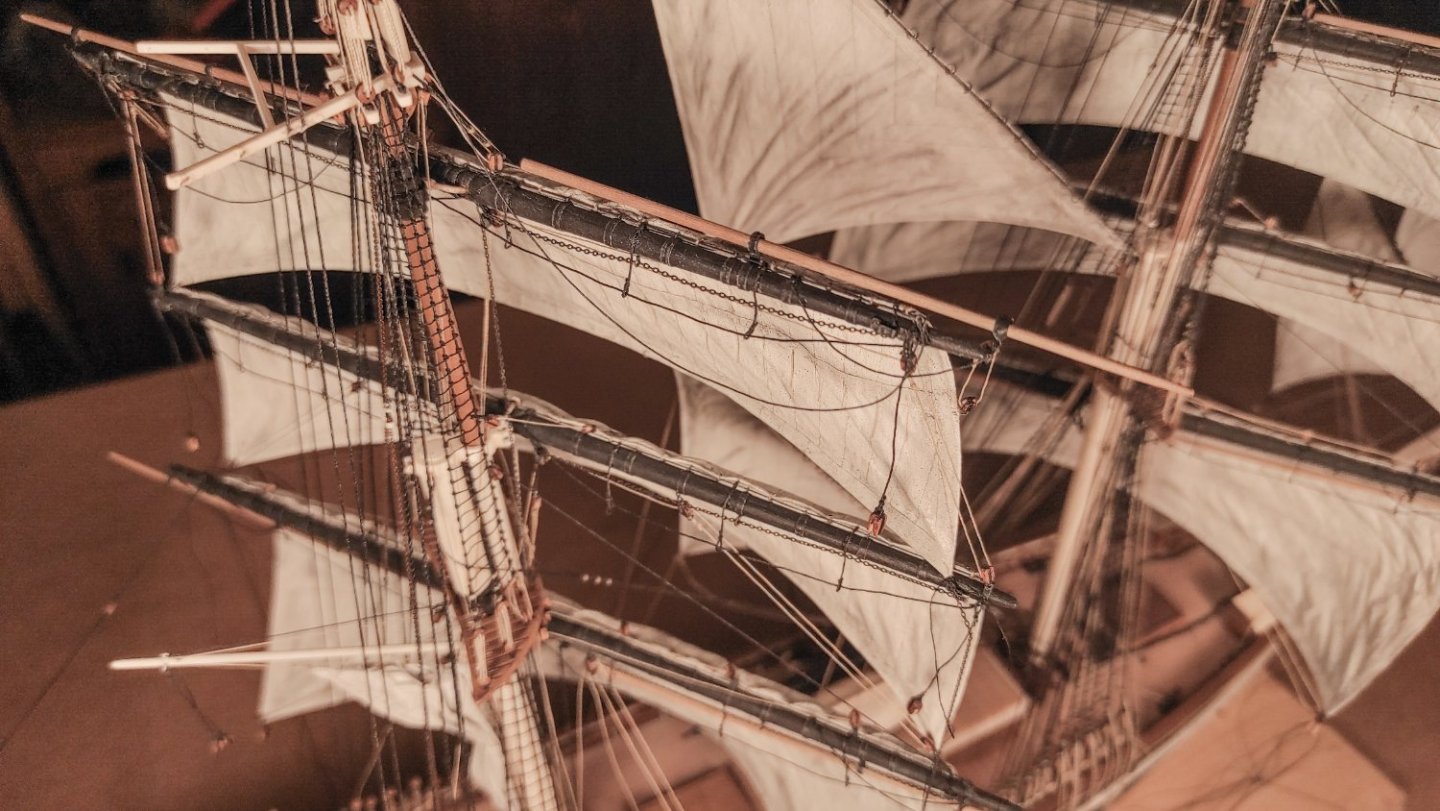
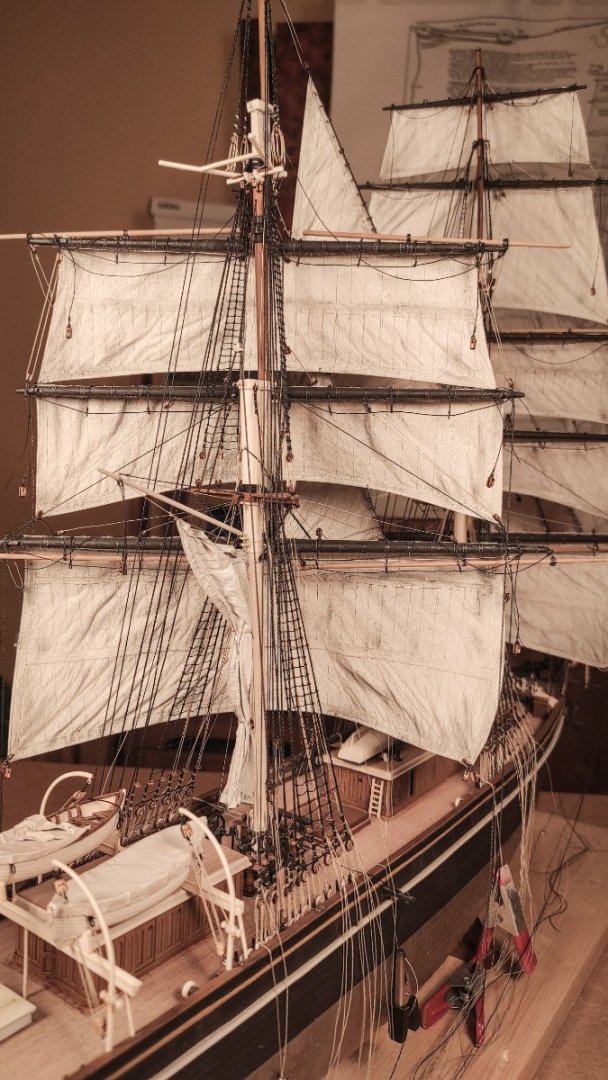
Hello everyone! It’s time for another update: Spanker! This sail is quite peculiar, and so is its rig. I have had to study a lot, both Campbell’s plans, Longridge and here on the forum. There are still some gray areas, but, overall, I hope I have depicted this sail with all the detail needed. I have decided to install the sail and the rigging on the mast before installing the mast itself. I find this approach quite satisfactory, giving me more space to work with. The vang and the boom has been prepared before, see post number 225: https://modelshipworld.com/topic/25323-cutty-sark-by-bruma-revell-196/?do=findComment&comment=866710 All the metal parts were fitted before installing them on the mast. The sail was made in the usual way, apart from the fact that I needed to fashion a contraption to secure the sail on two sides: one on the mast and the other on the vang. Once the sail has been shaped, it is ready to be fitted on the mast. The luff is tied to the jackstay on the mast’s aft side, while the head has hanks and it is free to slide on the rail under the vang. It is fitted with both in and outhaul. The outhaul reeves through a sheave inside the vang, on the aft part of the peak. The leech and the foot are free, secured to the boom only via the in and outhaul, in a similar fashion used on the vang. In and outhaul are secured to a cleat on both sides of the boom. The sail is also provided with brails on both sides. The number of the brails is unclear. I have followed Campbell's plans, adding three of them for each side, with the respective block attached to the mast’s jackstay. Double boom guy pendant, sheets blocks and hemp vang are also already there, with the running part still missing. Well, enough writing, here are some images of the final result: And here the overall assembly, dry fitted: As always, thanks for watching and feel free to point out any errors, missing parts or inconsistencies!


- 399 replies
-
- 9
-

-
-
-
- cutty sark
- revell
- (and 2 more)
-
@Kevin-the-lubber Kevin, I have browsed your picture archive at least three times in a row by now, and they are just fantastic! A true gold mine! Thank you for sharing them; they should be more visible to the entire community, since they are really useful!
- 399 replies
-
- 3
-
-
- cutty sark
- revell
- (and 2 more)
-
Darryl, thank you so much for the pictures (I downloaded them all!) and for the useful information about the vane! It is really a nice story, worth knowing. Since I'm displaying my Cutty Sark under sails, it seems fine to omit it, but it would have been a nice touch for an "in port" diorama!
- 399 replies
-
- 3
-
-
- cutty sark
- revell
- (and 2 more)
-
Hi Kevin! No, unfortunately I was not able to download them, and I didn't want to bother you; it was probably a problem on my side. If they are available in some other way without requiring time and labor from you, I'll be glad to try again! Anyway, in my opinion, some of the artifacts present now are not original. In Campbell's plans there are no stars or t-shirts, and I think I'll stick to the plans, they seem more authentic to me. Campbell indeed mentions the flag on the spanker gaff and I'll put them, they are a nice touch! Thank you, and good luck with your Cutty Sark!
- 399 replies
-
- 4
-
-
- cutty sark
- revell
- (and 2 more)
-
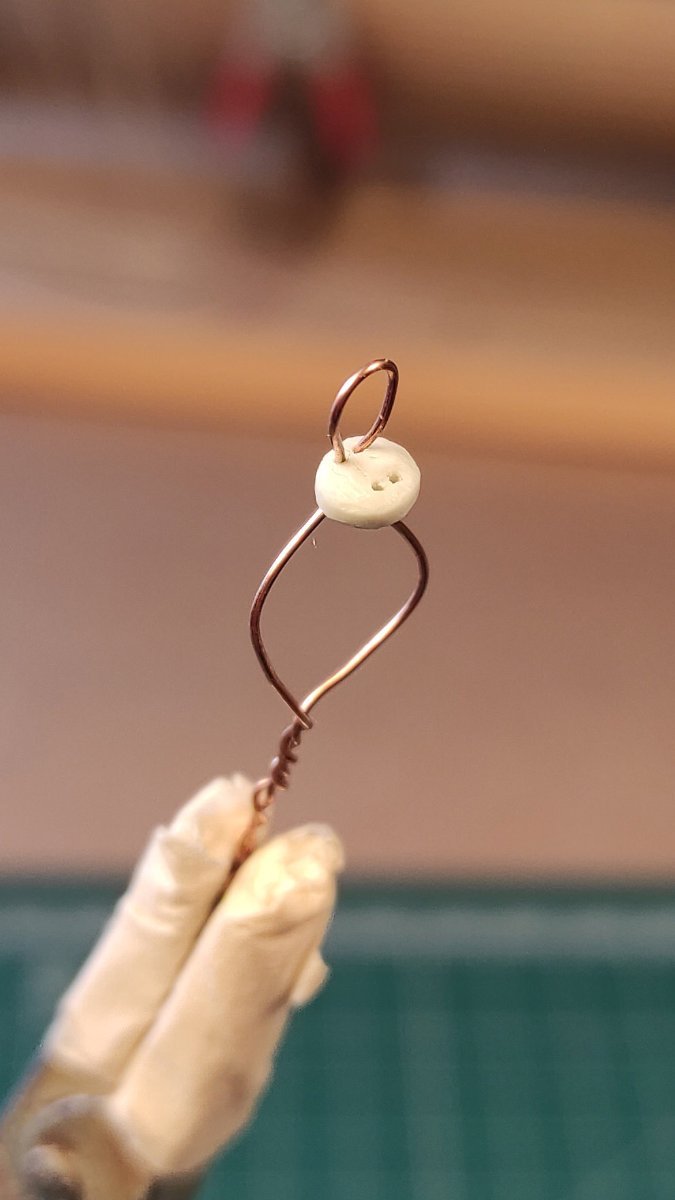
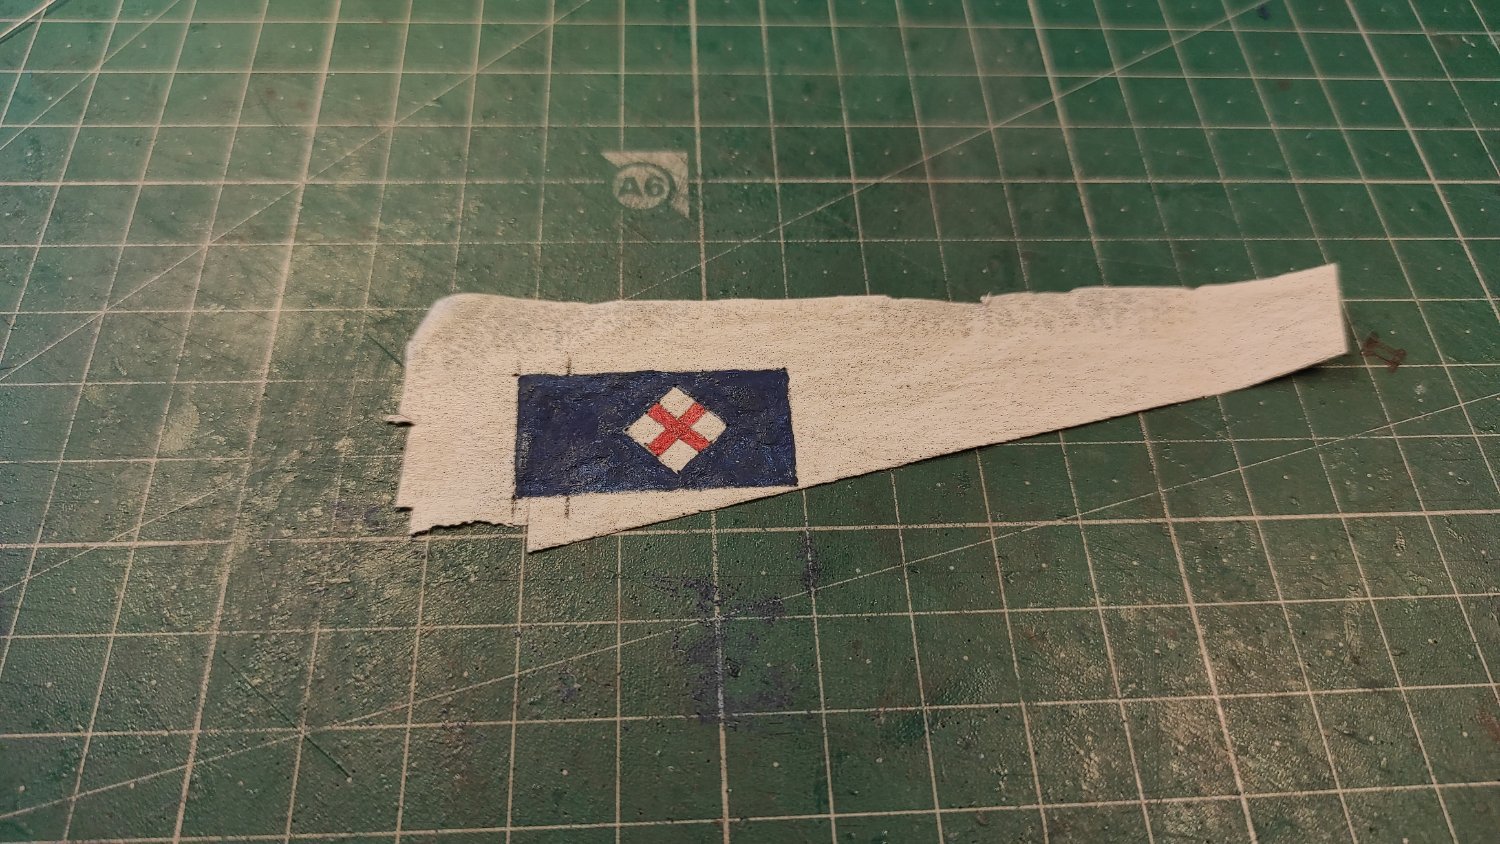
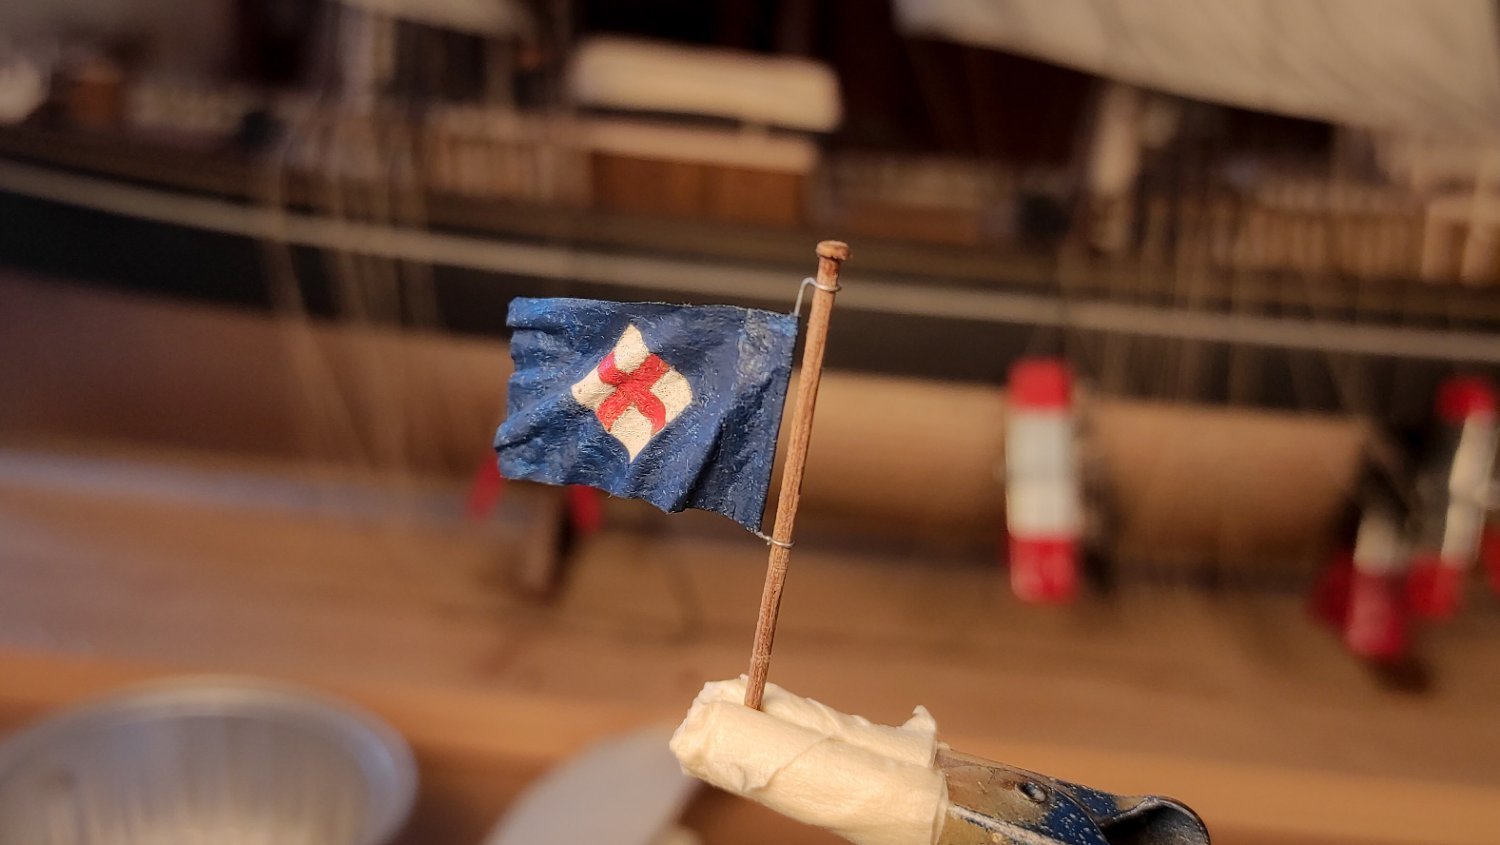
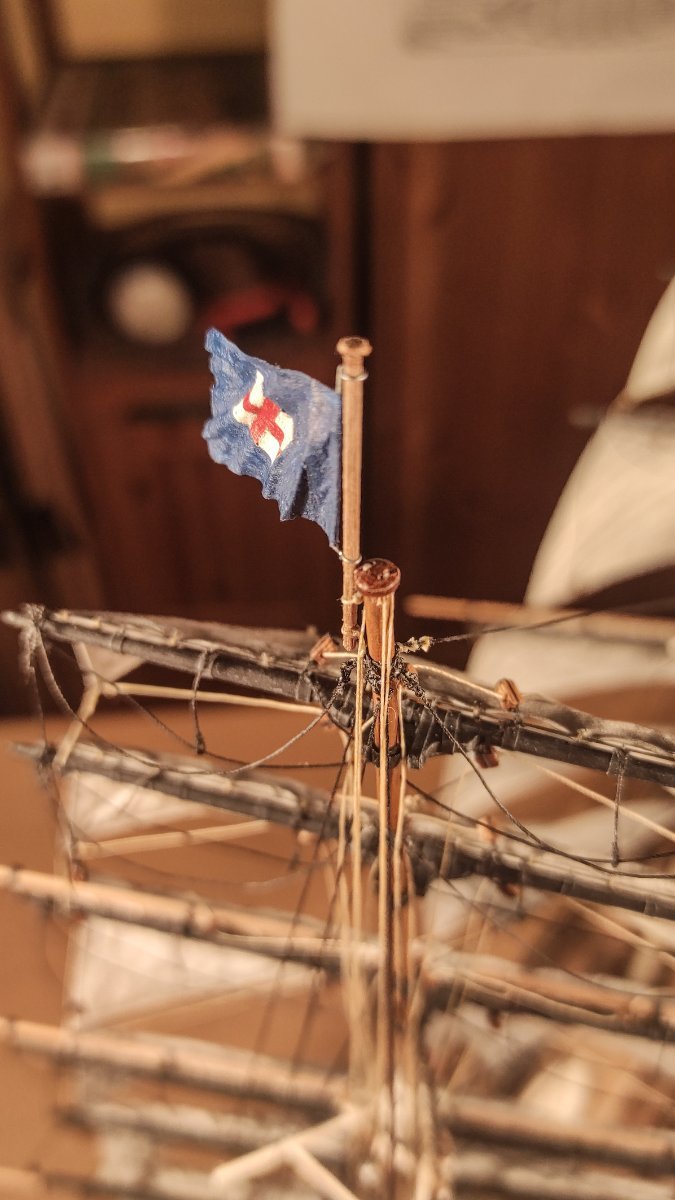
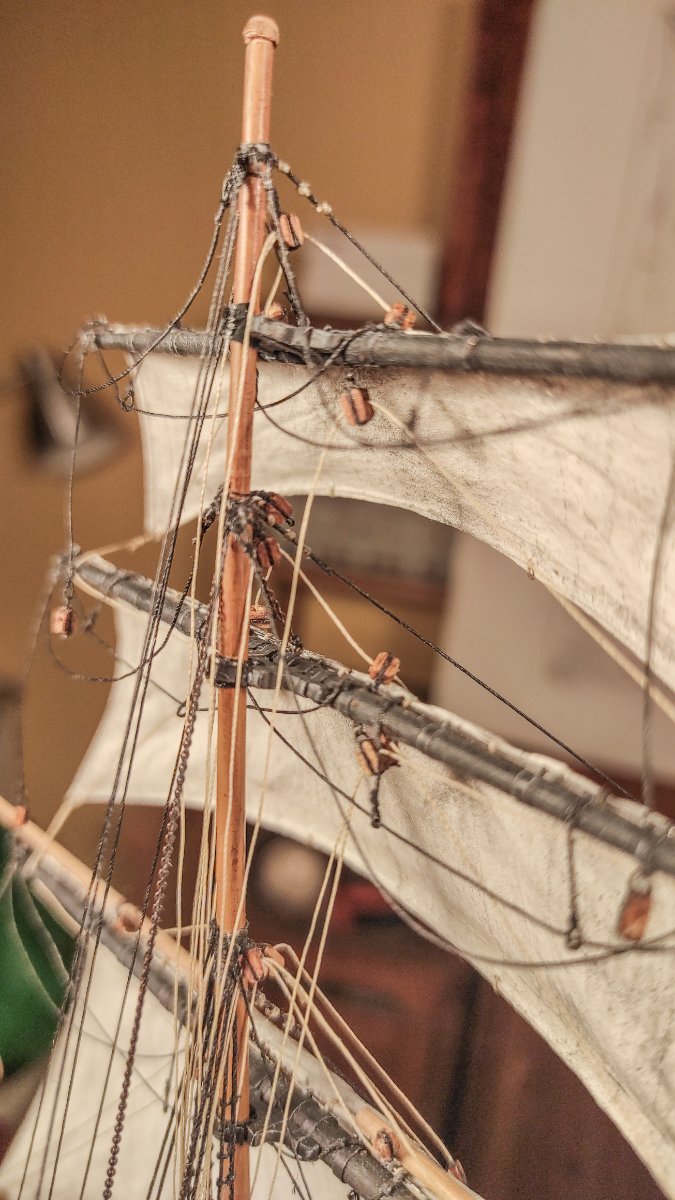
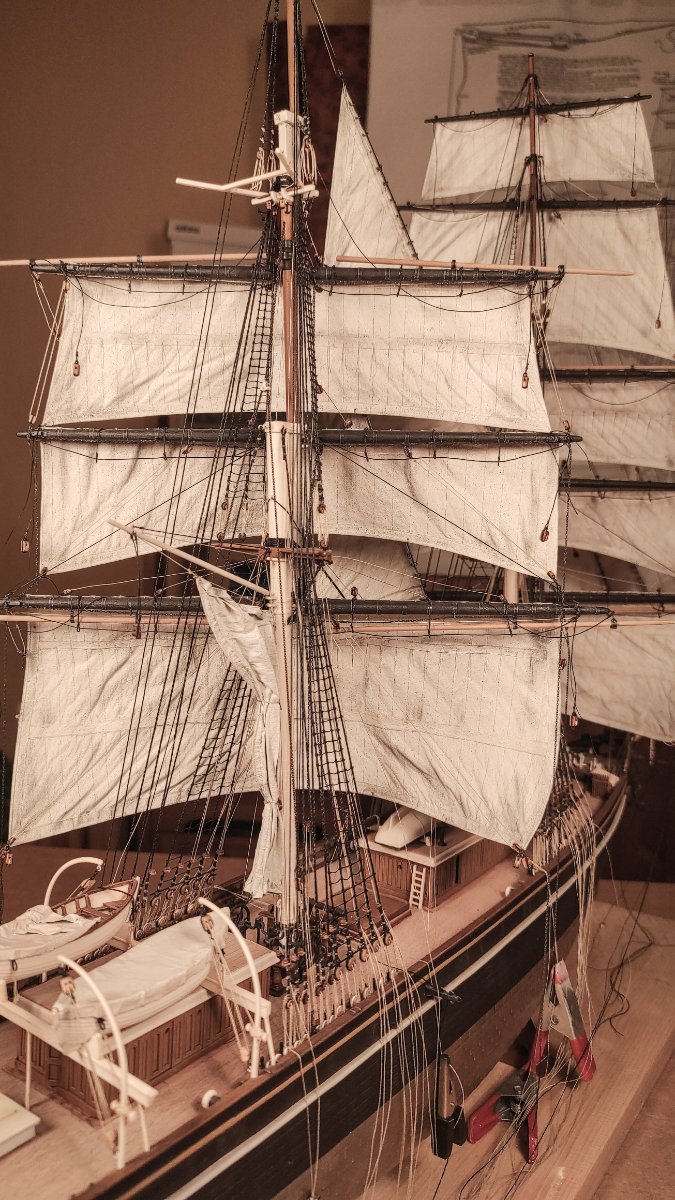
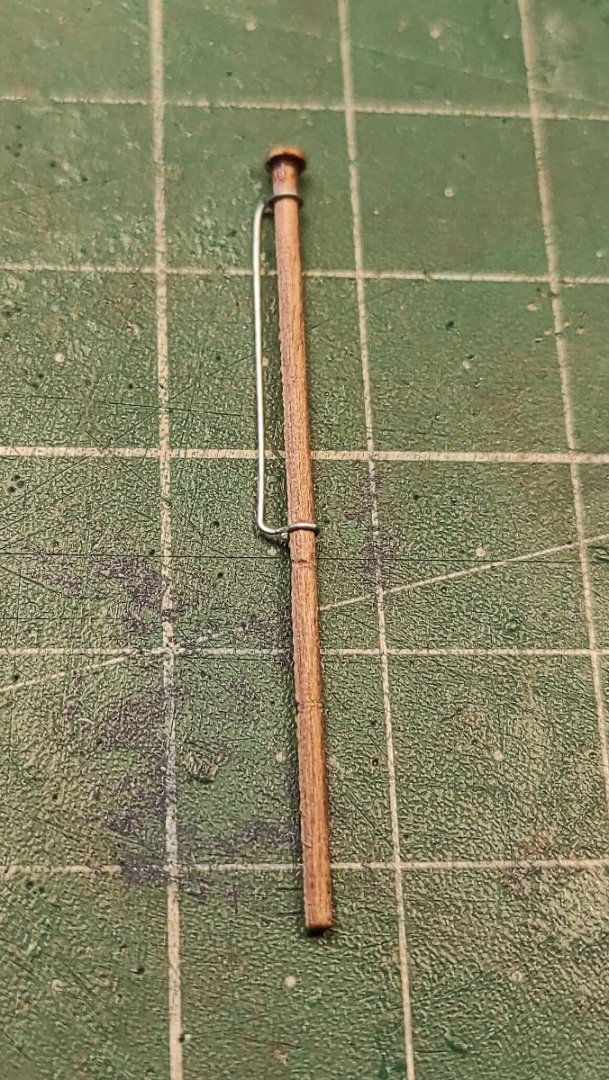
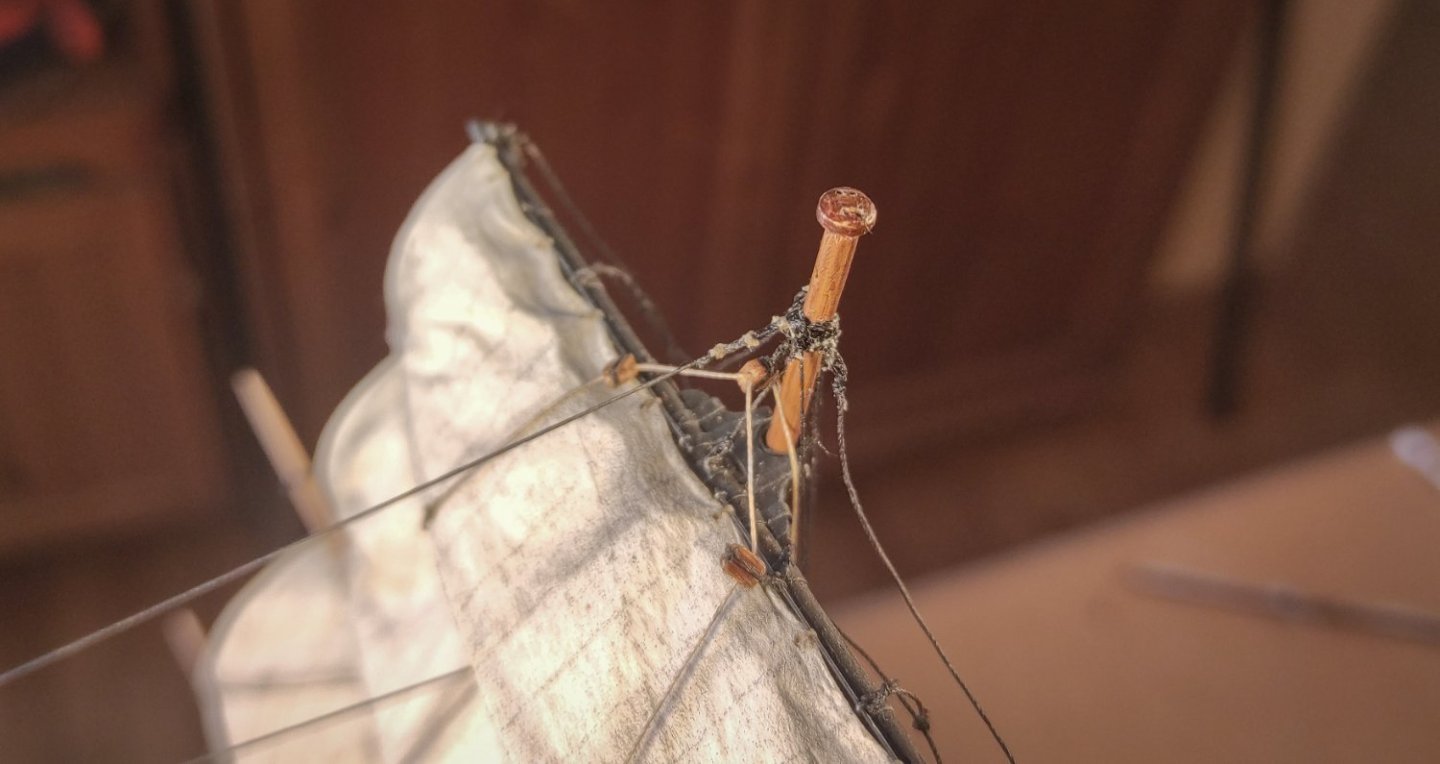
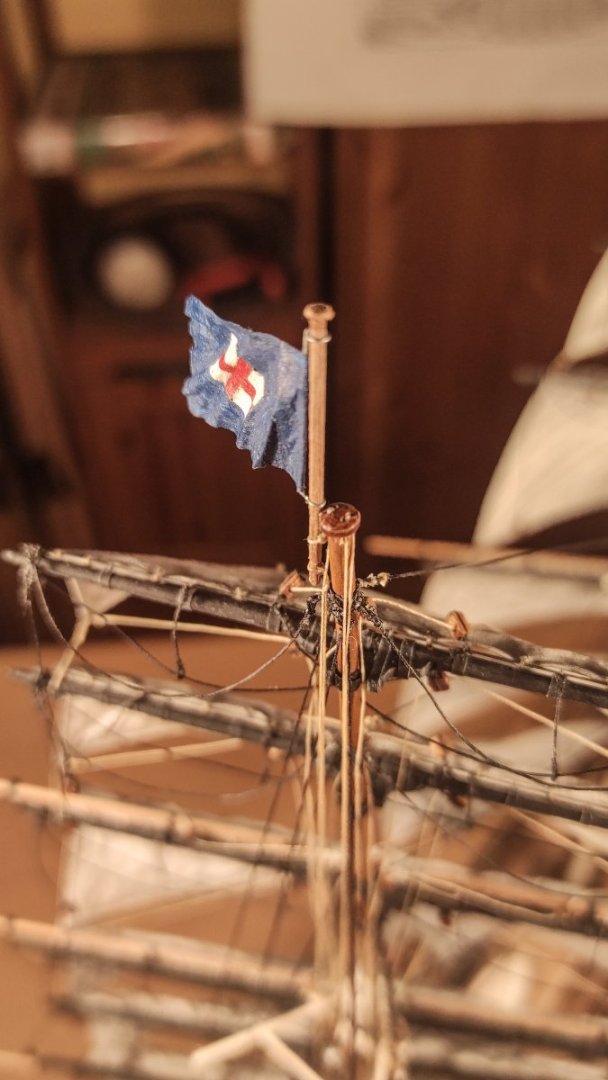
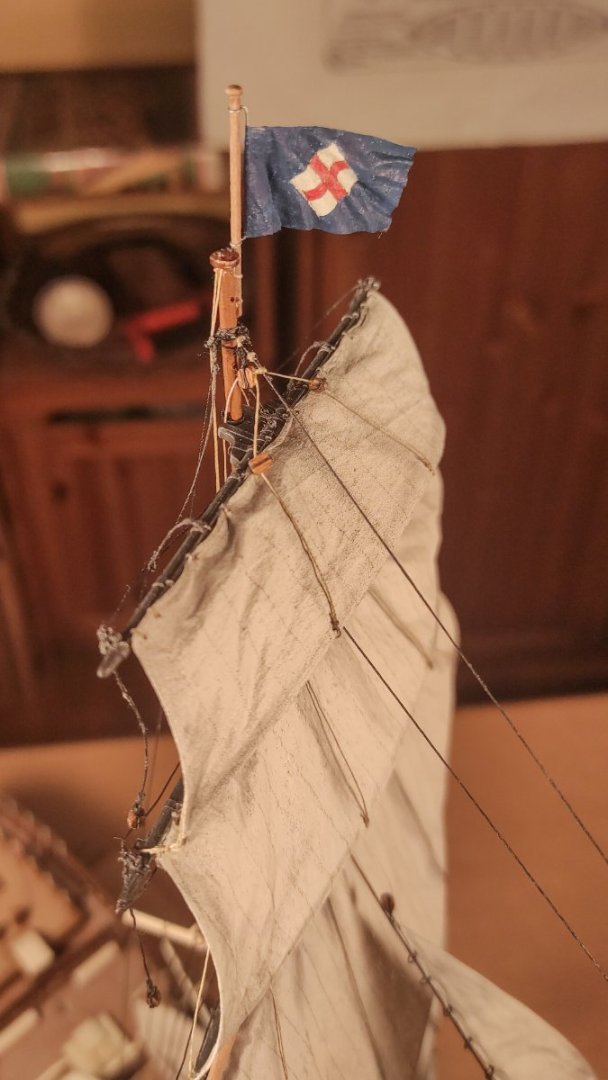
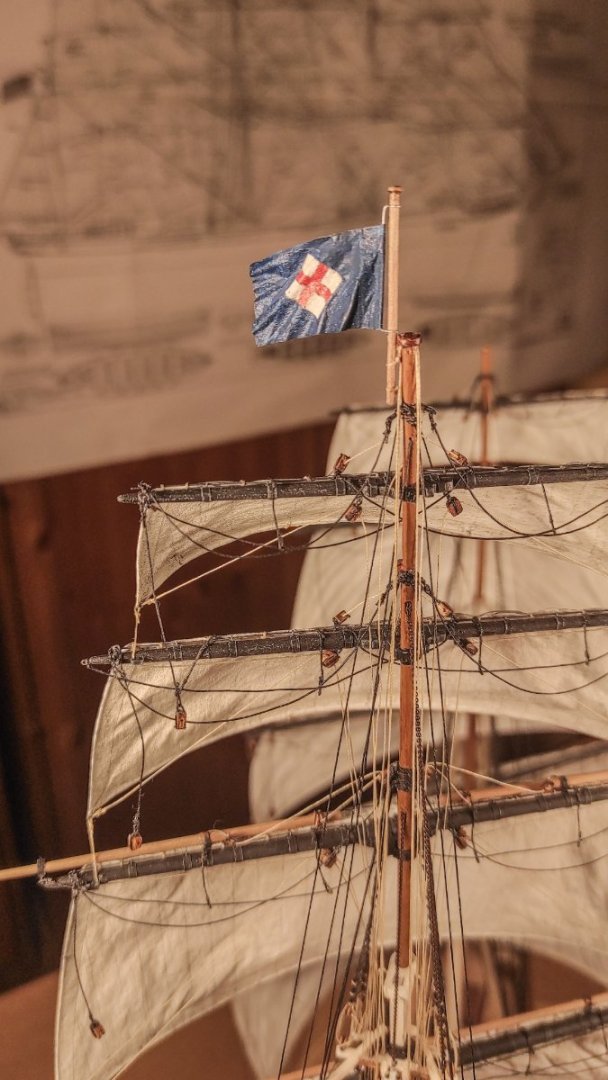
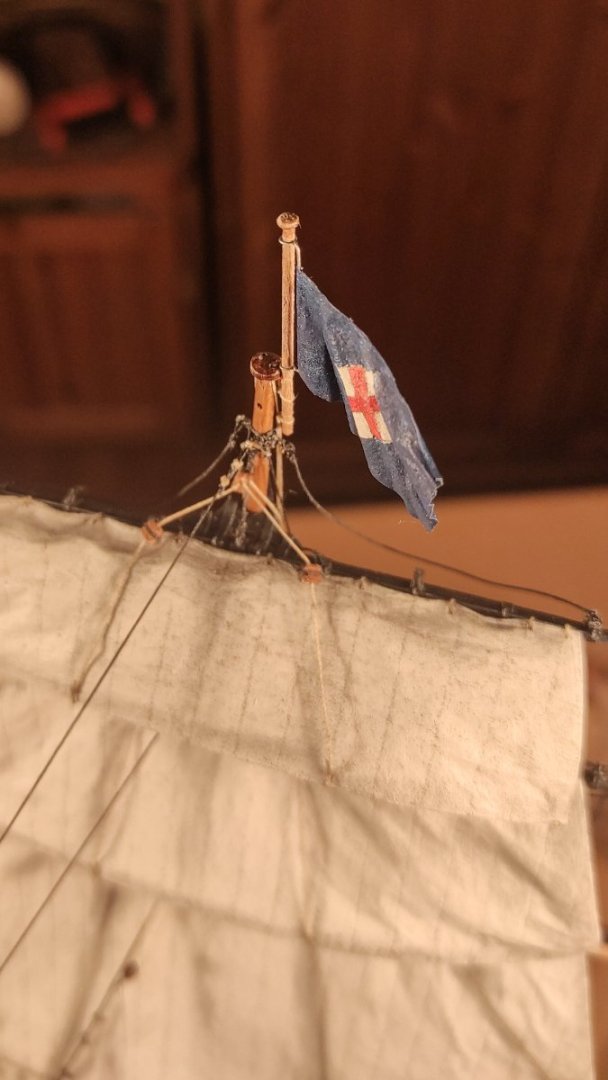
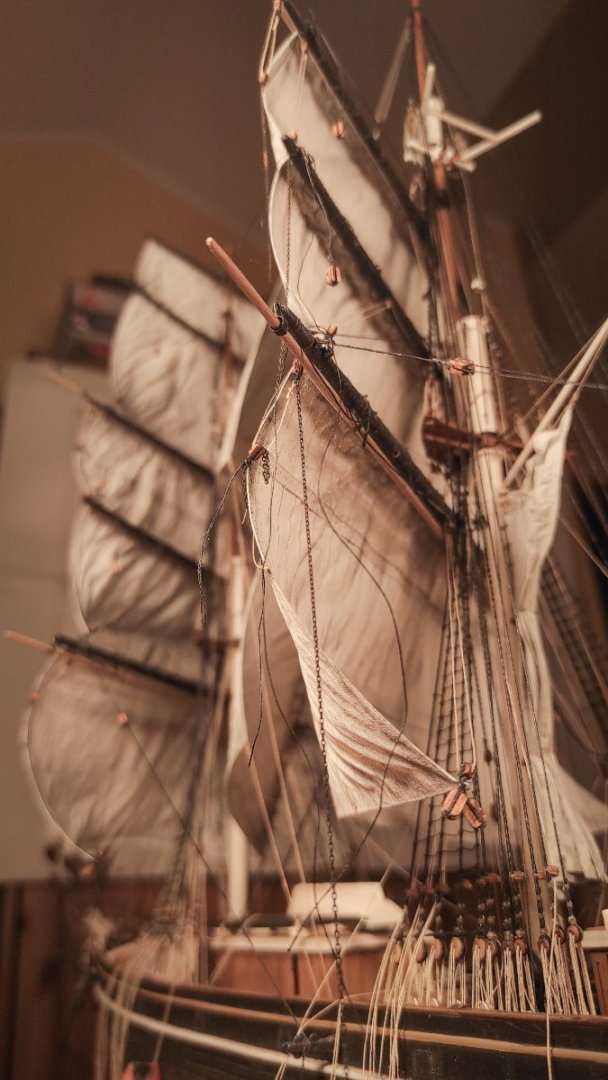
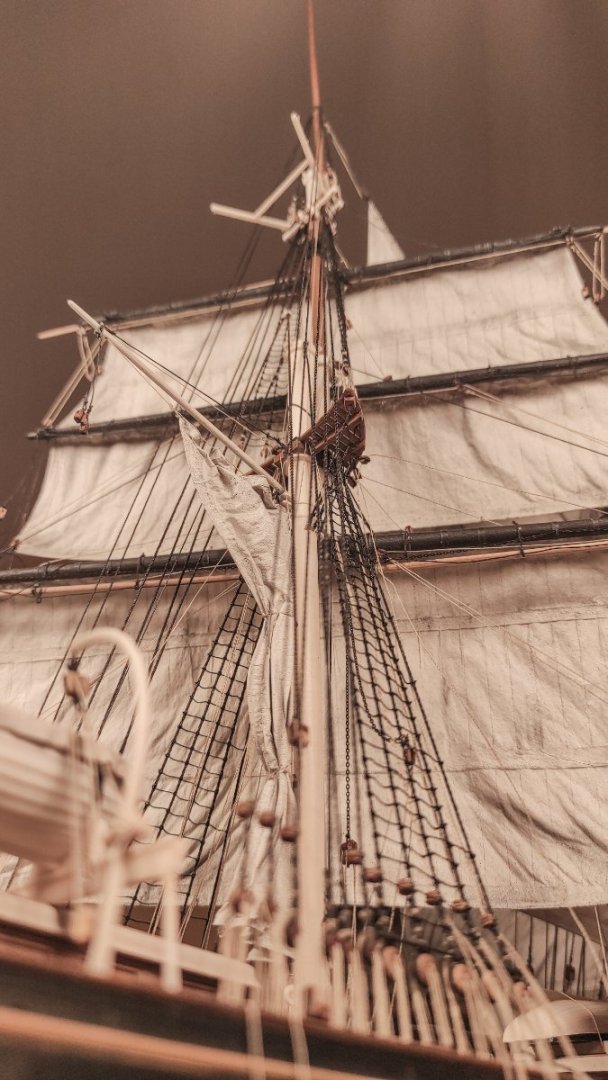
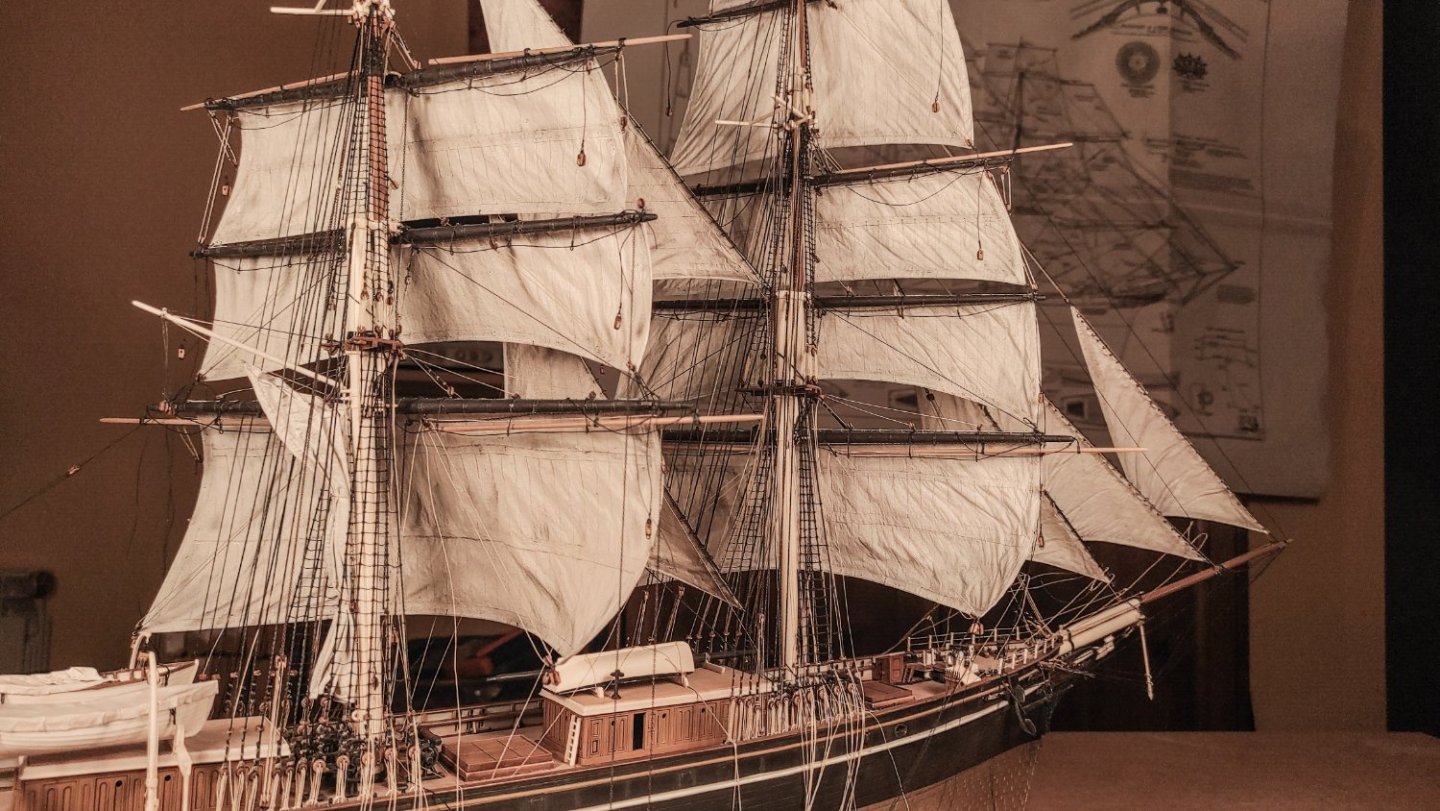
Hello everyone, It’s time for updates: Main mast finally completed - Main flag in place! First of, I need to thanks again the community for helping me to figure out this topic, here is the link to the discussion about the flag and the way it is rigged: https://modelshipworld.com/topic/34781-cutty-sark-main-flag-hoisting-and-rigging/ With all the information needed, I started the construction of the pig stick: Here it is still to be trimmed in length… After that, I turned my attention to another key element in order to rig the flag properly: the truck. I decided to use a piece of sprue shaped and painted properly and glued on the mast top. In order to reinforce this delicate part, I have added a small metal pin. The placement of the holes for the sheaves is critical and the diameter of the mast needs to be taken in consideration. In the end, all comes together nicely. Here it is during the process and in his the final assembly on the mast top: Now it’s time for the flag itself. I have opted for the trusty modelspan, using a scrap piece left from the sails. It is already painted in a dirty white, perfect for the Willis Hose flag. After tracing the main component with a pencil, I painted it with acrylics: Now it’s time to put it all together, with halyard and downhaul. I have rigged two of them, one for each side. The port side is the one with the flag, the starboard side is empty but with the lines in place. The flag has been shaped after wetting it a bit. I tried, as always, to simulate the wind effect. I’m not too disappointed, even if there is still a lot to improve. Here is the final result: I’m still not completely sure about the orientation of the flag. I’m trying to simulate a beam/broad reach - point of sail, but I’m not sure about the proper flag orientation… Any suggestion is welcome, the flag can still be oriented! As always thank you for your time!


- 399 replies
-
- 8
-
-
- cutty sark
- revell
- (and 2 more)
-
Cutty Sark main flag hoisting and rigging
Bruma replied to Bruma's topic in Masting, rigging and sails
Thank you both for taking the time to answer my question, and in particular, thanks to Bob for the detailed explanation. Now the "pole solution" or the "pig stick" as I have learned, makes a lot more sense. And thank you for pointing out the error by Campbell about the location of the actual flag, this makes sense too, allowing the flag to wave freely above the mast. If I can make it 96 times smaller, I'll go for this solution. There is still a doubt in my mind: once the pig stick is near the skysail, I can see only advantages, but it's a long way from the deck, filled by lines of every type and many different obstacles. During this journey, a piece of canvas seems to me to be way more convenient than the "pig stick". This question is just for my curiosity. I understand that you already devote much time to answering me, and I have enough information for my model, so feel free to skip the question! Thank you again; I have learned a lot! -
Cutty Sark main flag hoisting and rigging
Bruma replied to Bruma's topic in Masting, rigging and sails
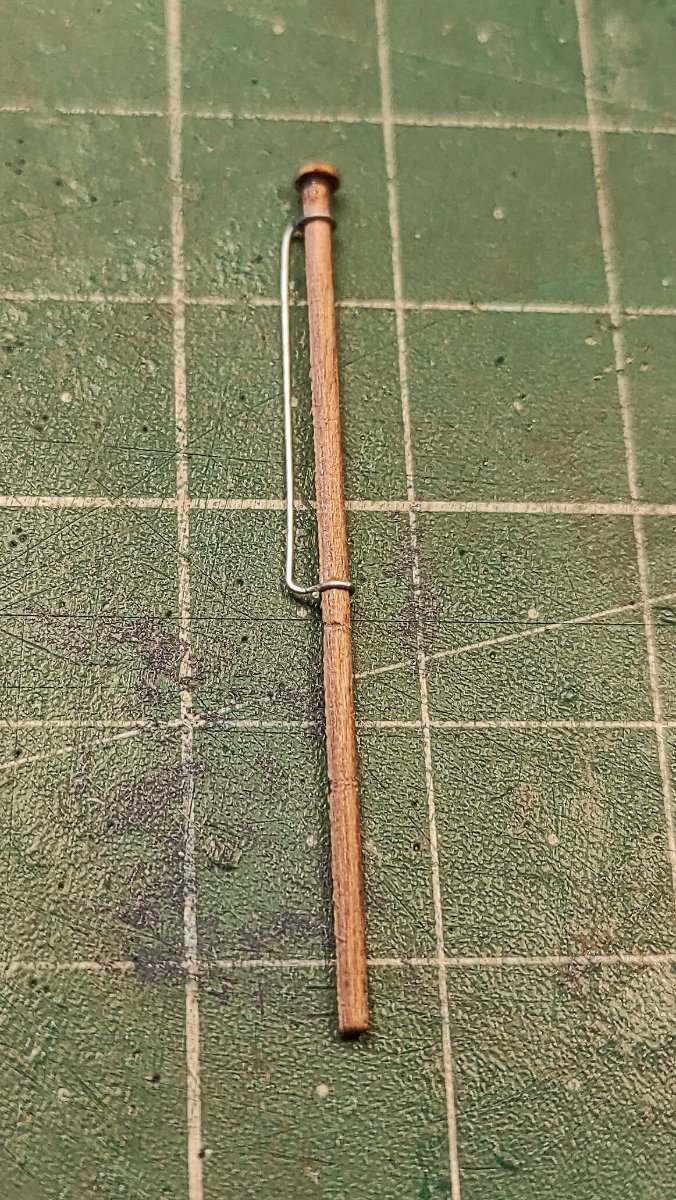
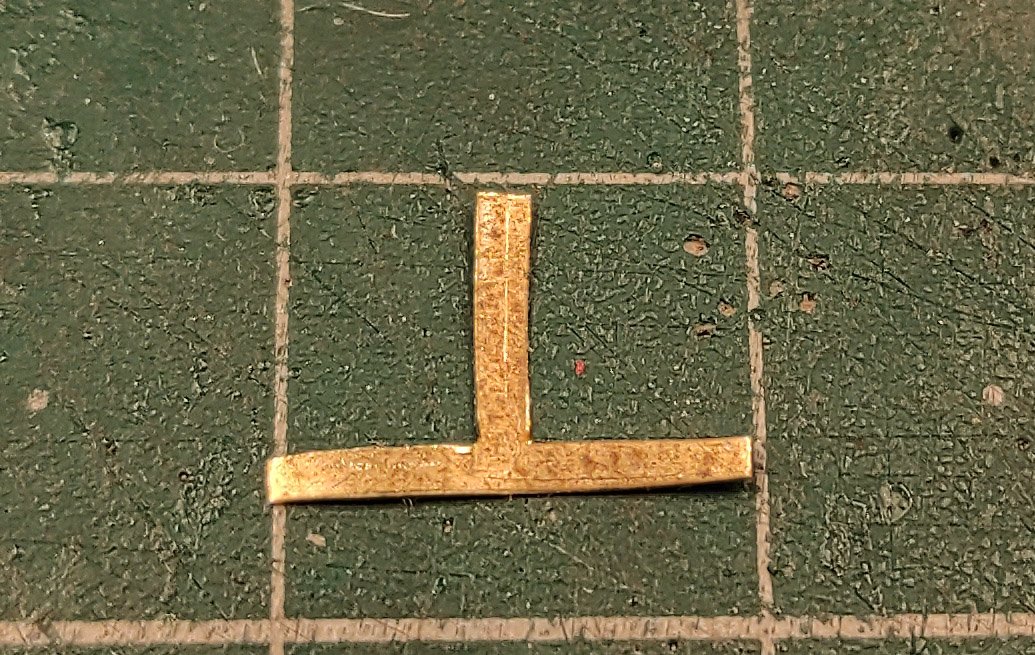
Thank you, Henry, for your quick replay. I agree that the "pole" solution is unpractical, to say the least... Underhill mentions "a truck with two sheave holes diametrically opposite, used for signal halliard." I think I will use the same for the main flag as you suggested. For future viewers' benefit, here is the truck drawing by Underhill: Thank you again!
-
Hello everyone, I'm buiding the revell Cutty Sark and I have completed the main mast: https://modelshipworld.com/topic/25323-cutty-sark-by-bruma-revell-196/?do=findComment&comment=990947 Campbell's plans show a flag on top of it: but I can't figure out how the flag pole is fixed to the masts, and how the flag was hoisted and lowered. I can't find any references in Undehill's masting and rigging or in Longridge's cutty sark book. Do you have any ideas? I'm sure it does not relate only to the Cutty Sark, similar arrangement should be found any clippers in general. Thank you in advance!
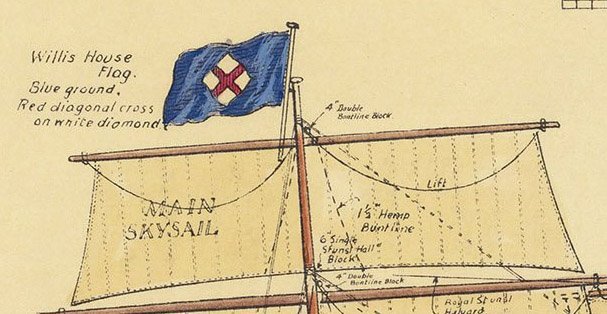
-
Pay attention at the backstay: in my opinion they should run outsider the spreader, not inside. That's the point of the spreader itself.
- 89 replies
-
- 2
-
-
-
- Cutty Sark
- Revell
- (and 2 more)
-
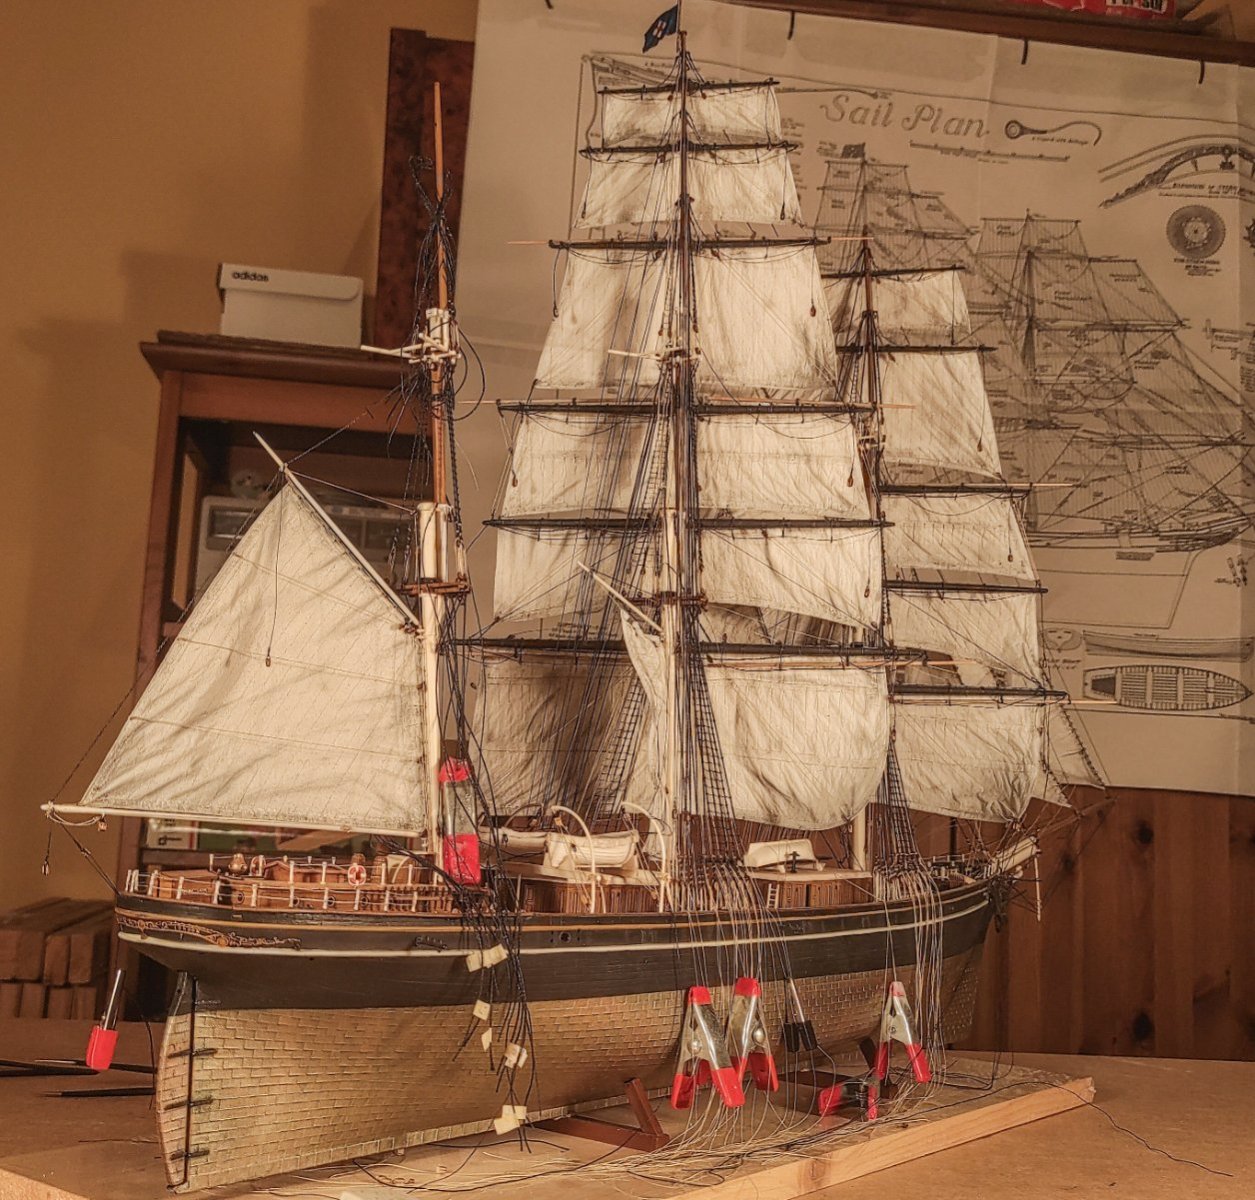
Thank you everyone for the comments and likes! It's really nice to see that there is still someone interested in this long and slow build! It seems that the flag mystery struggles to find an explanation, I will probably post it in the masting and rigging section hoping to have more luck! Speaking about doubts and, I have another one: I didn't put the royal stay sail on. It is ready, all the block are there, but once I put the sail in its final position, it looked a bit too much for the ship. The overall impression was a bit too heavy, and I preferred to omit this sail. Now, the question is: what is the most realistic situation in this case? Can I let it as it is, with no sail and no running rigging? Should I put at least the running rigging or even add the sail furled down to the fore mast? I will go for the most realistic solution if possible, and it would be nice to read that as it is now, with no sail and no running rigging, can be a realistic enough situation... Thank you all again! Thank you George! Your first guess is the right one: it's an old power supply!
- 399 replies
-
- 4
-
-
- cutty sark
- revell
- (and 2 more)
-
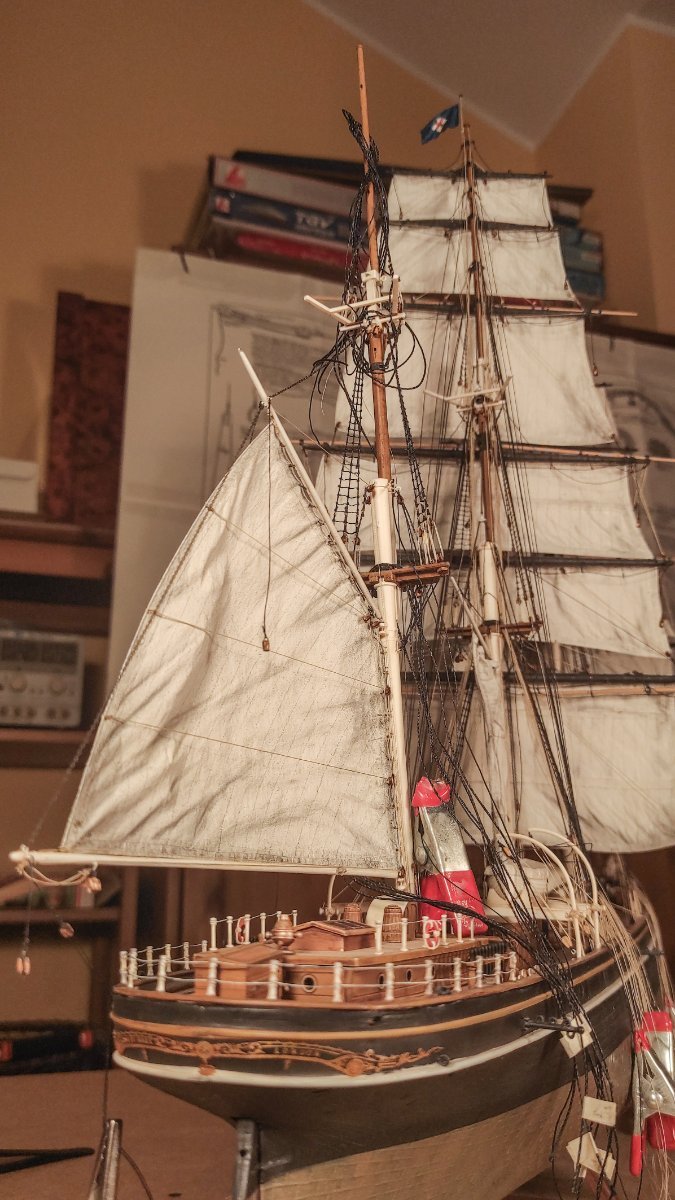
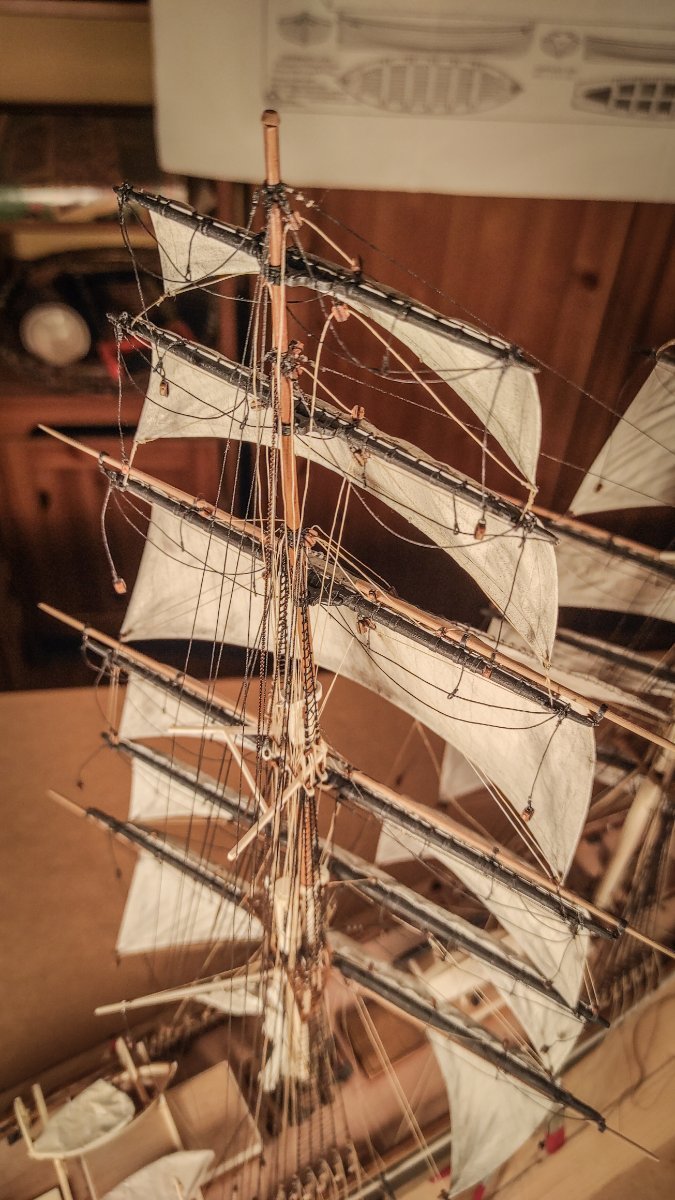
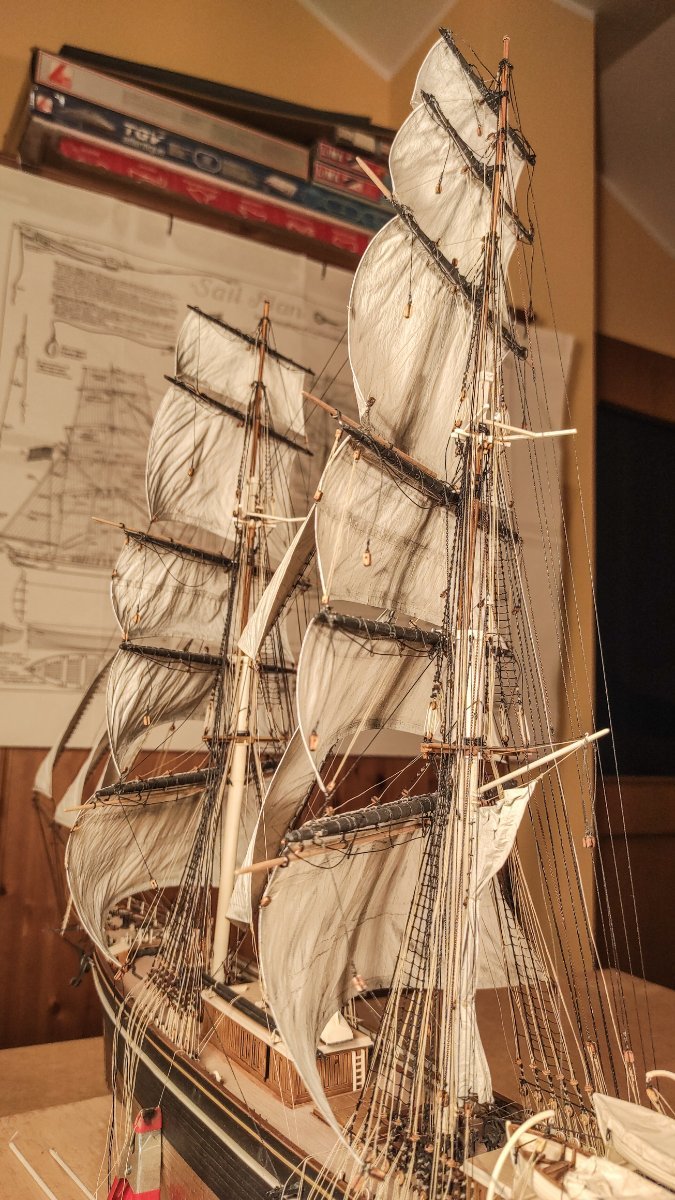
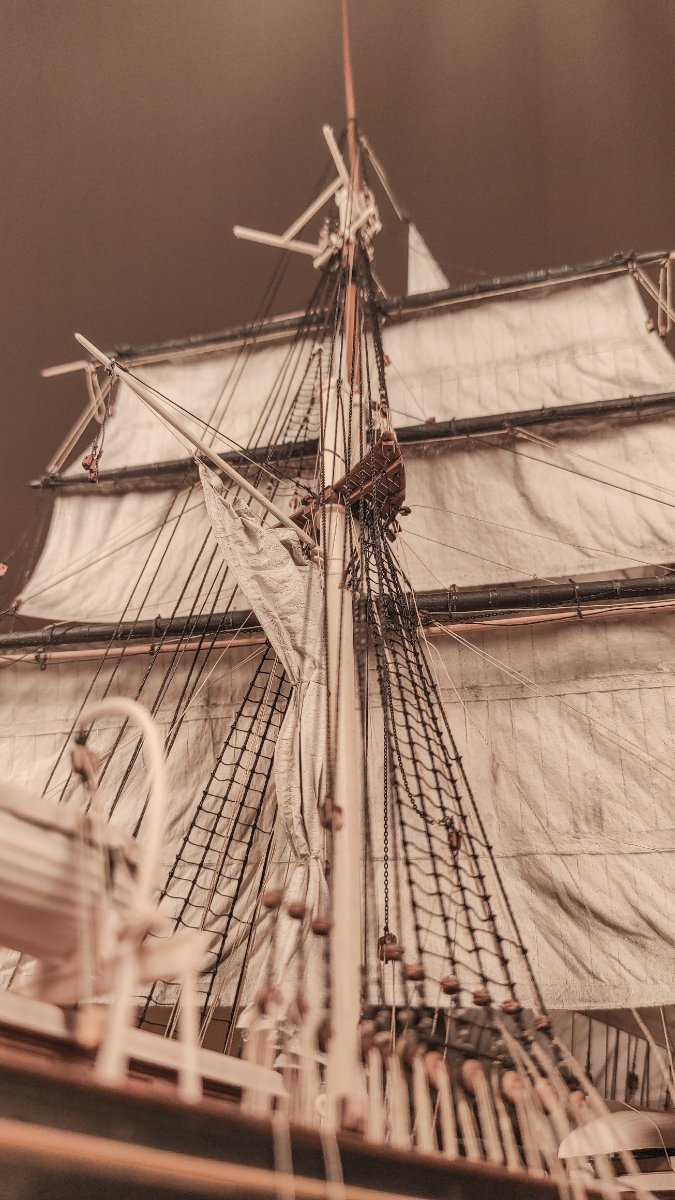
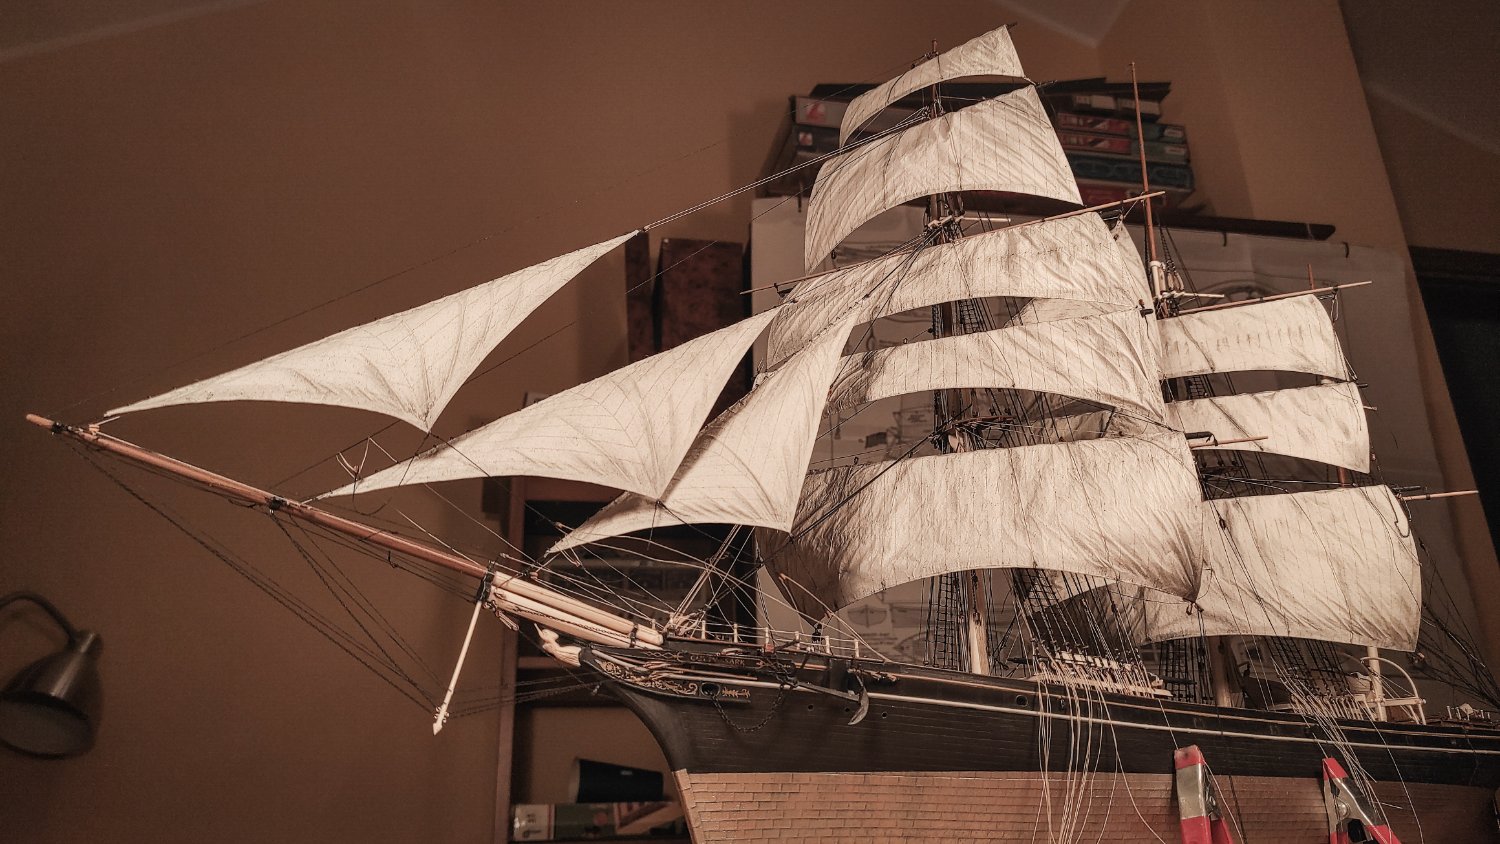
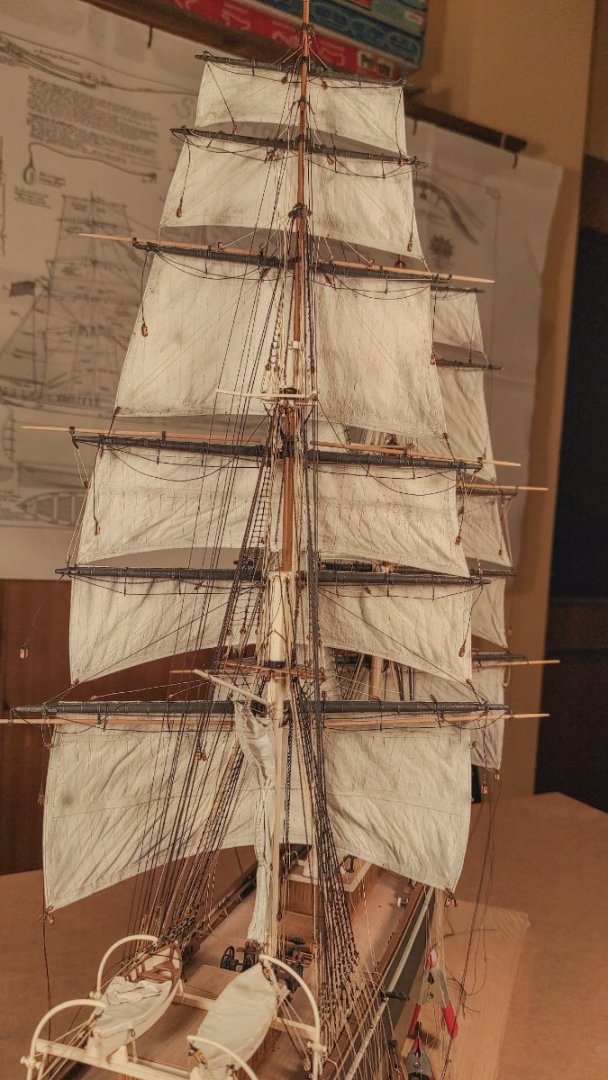
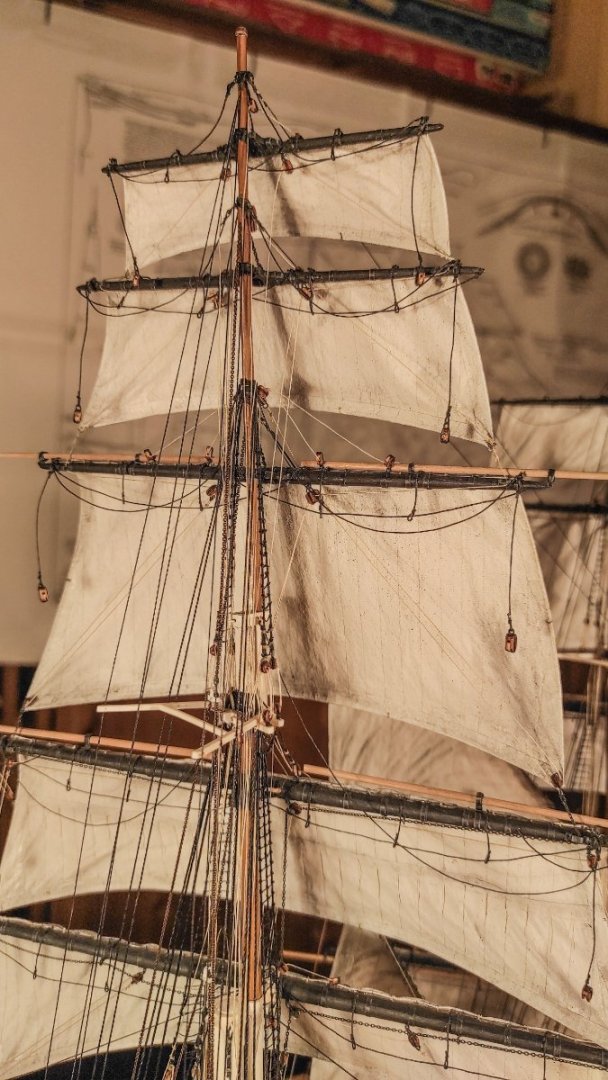
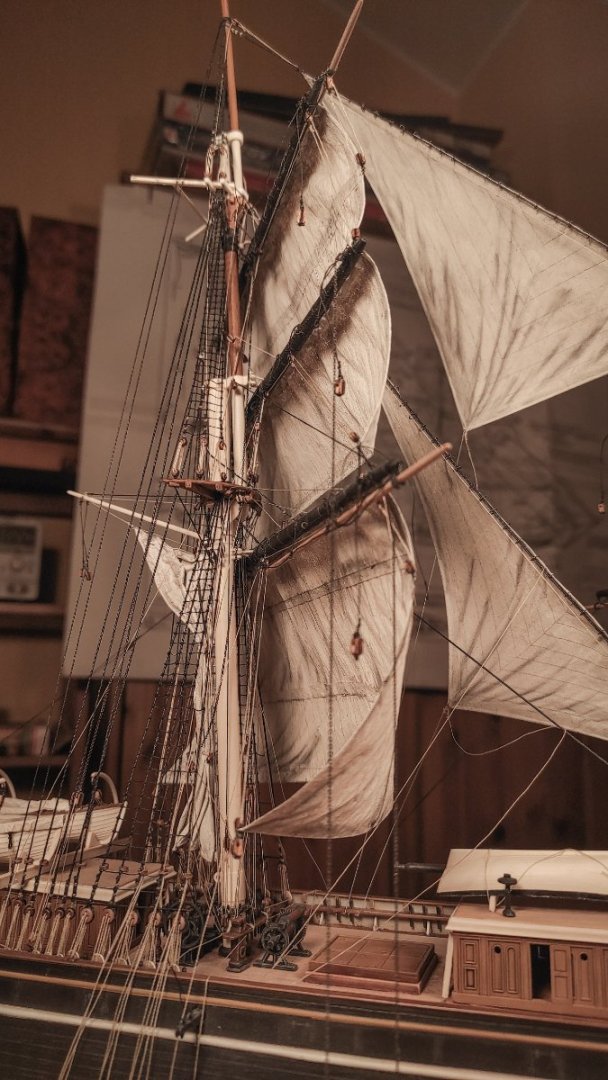
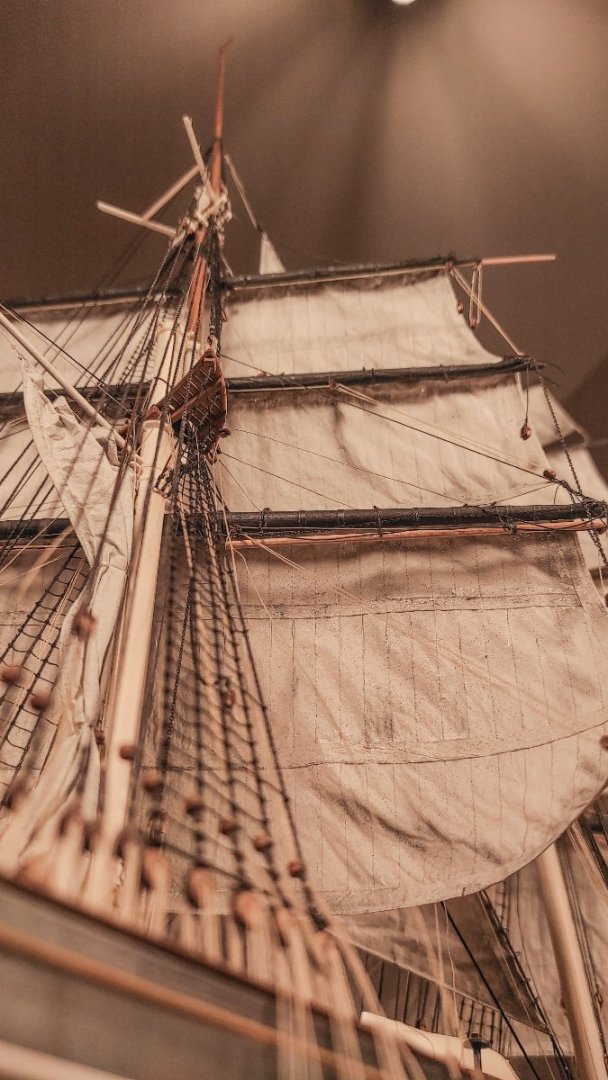
Hello everyone! It’s been a long time since my last update and I have had to dig three pages back to find my build log! This means that I’m extremely slow, but also that the community is well and worthy, with many build logs running, which is amazing! But now, it’s finally update time! Main mast completed (almost…) Three sails were missing: topgallant, royal and skysail. Apart from them, other important items were missing too: main royal and skysail stays, topgallant, royal and skysail backstays. They were missing because I needed to figure out where to place them exactly. The masts provided by Revell are longer than the one depicted by Campbell, so they need to be trimmed down and the arrival point of the last stay and backstay need to be arranged accordingly. To do that, I preferred to mount the yards with relative sails in order to double check my measurements. This approach was followed also for the fore mast, but here is even more important, due to the additional sail on top (the skysail). As for all the other sails, all the rigging is present. A side note is for the halliards: they are on the opposite side of the fore one, and they will swap sides again for the mizzen. The number is also different, to accommodate the skysail halliard on the main mast. Attaching the stay to the aft side of the fore mast was not an easy task. The area is really busy but in the end I manage to do it… In the end I’m not too disappointed and I’m another step closer to the end! Anyway, let’s see some pictures, I hope you like them and feel free to point out any mistake you see, your comments are priceless! Now a question for you: Campbell’s plans shows a flag on the main mast: Do you have any ideas on how the flag was hoisted and fixed to the mast? Thank you in advance!

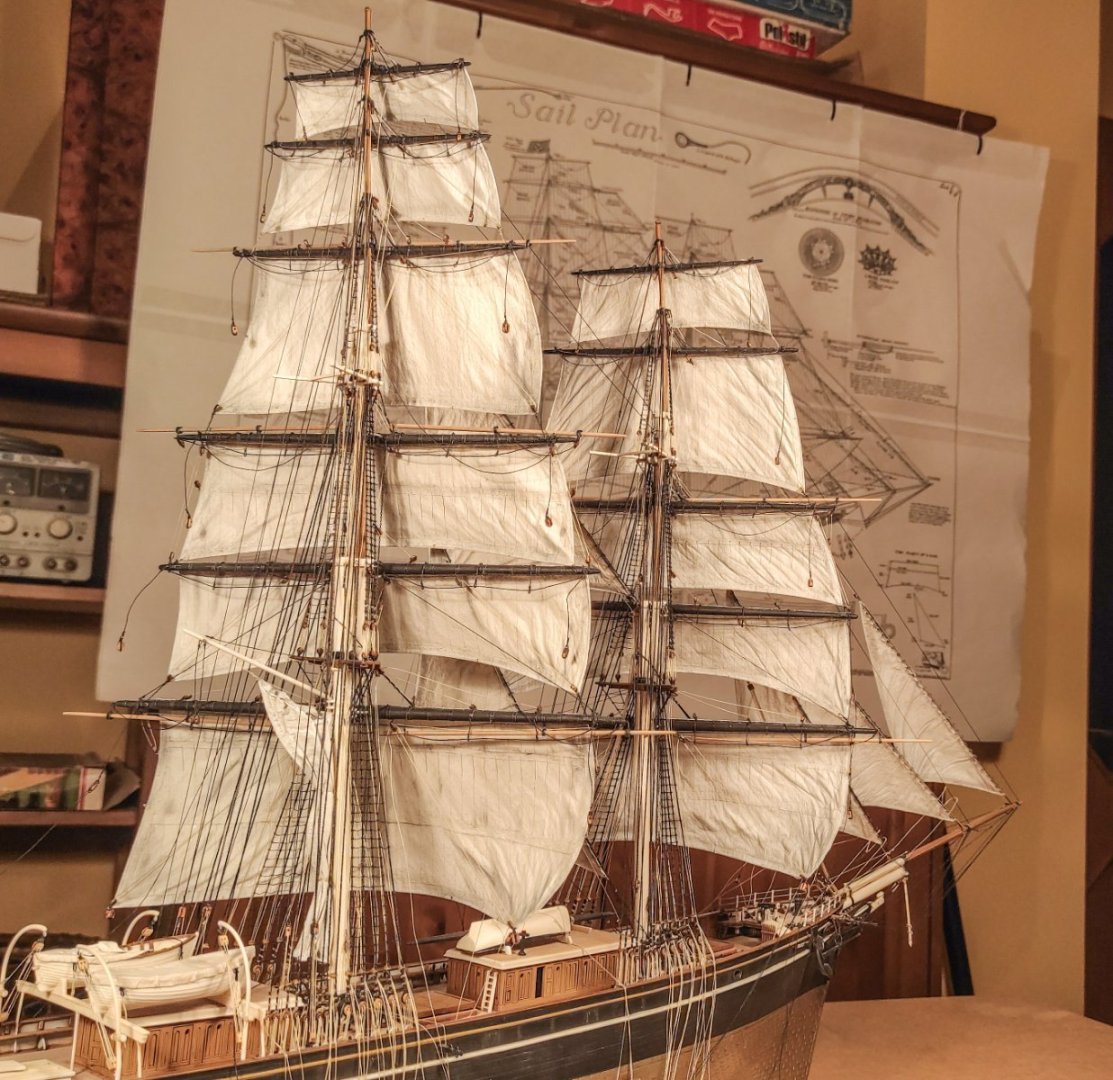


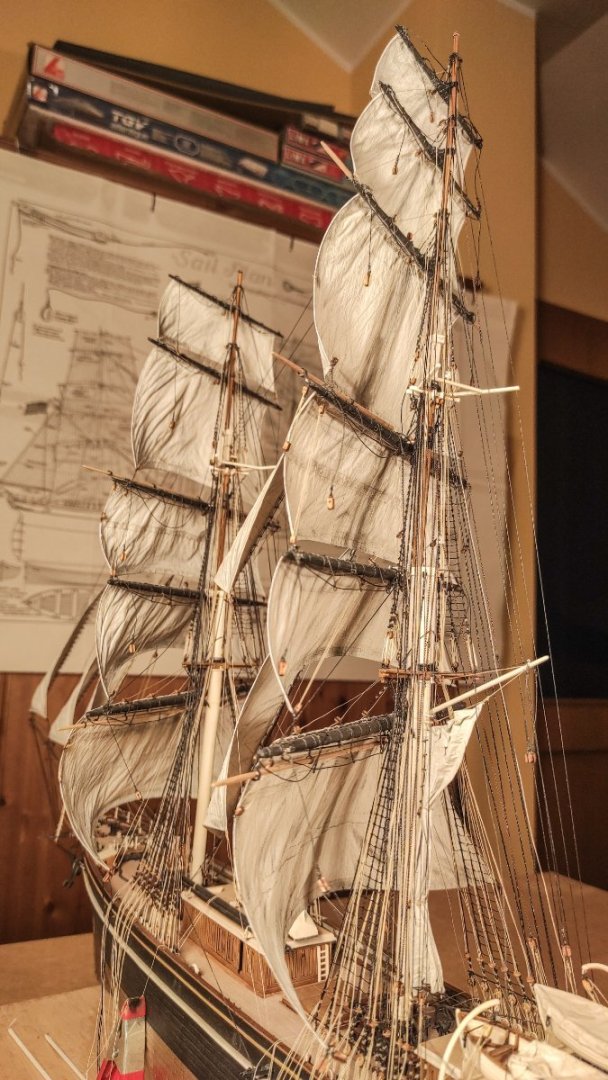


- 399 replies
-
- 12
-
-
-
- cutty sark
- revell
- (and 2 more)
-
Nicely done George! This task is really time-consuming, and I think you cannot understand how much until you do it by yourself! I have massively underestimated the time needed to build mine. You seem to go fast though! Keep it going, they are beautiful!
- 602 replies
-
- 2
-
-
- Flying Fish
- Model Shipways
- (and 2 more)
-
If I may add something, don't glue them now if you plan to fully rig the main mast. They will get on the way and you will hate them. Ask me how I know...
- 89 replies
-
- 3
-
-
- Cutty Sark
- Revell
- (and 2 more)
-
Thank you, I really appreciate your visit and comment! I hope to be back at work on my Cutty Sark soon, many things are still to be done... Hi Rob, the smaller one are from Trumpeter master tools, article number 08010, “30 cm Universal Fine Chain” 2x 30 cm chain in each packet. Hope this helps!
- 399 replies
-
- 2
-
-
- cutty sark
- revell
- (and 2 more)
-
Thank you all for the comments and like, I really appreciate every one of them! Mine are from Amazon, but I'm experiencing the same problems, even if I use them only by hand, no power tools. Even so, the smaller one are really fragile and in case of metal holes, I punch a small opening with a pointy bit before using the drill bits themself.
- 399 replies
-
- 2
-
-
- cutty sark
- revell
- (and 2 more)
-
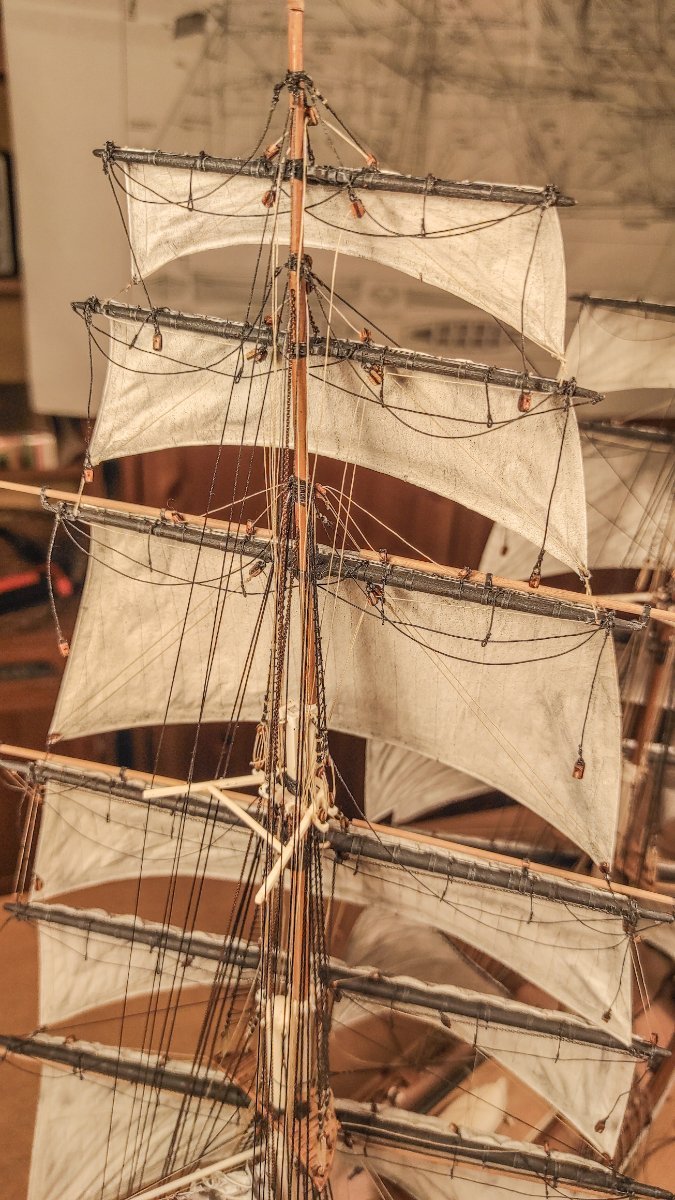
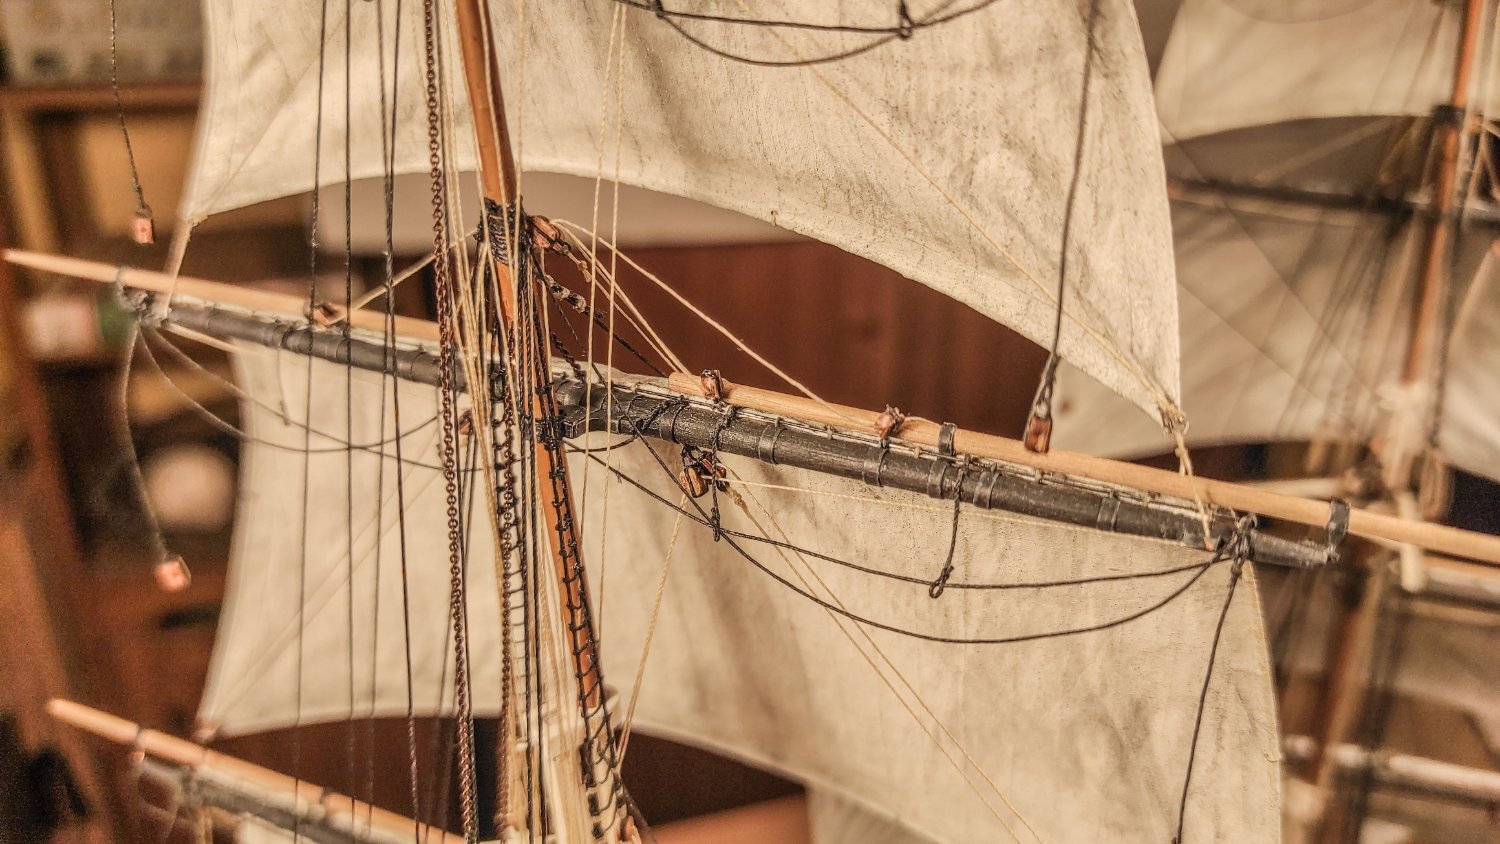
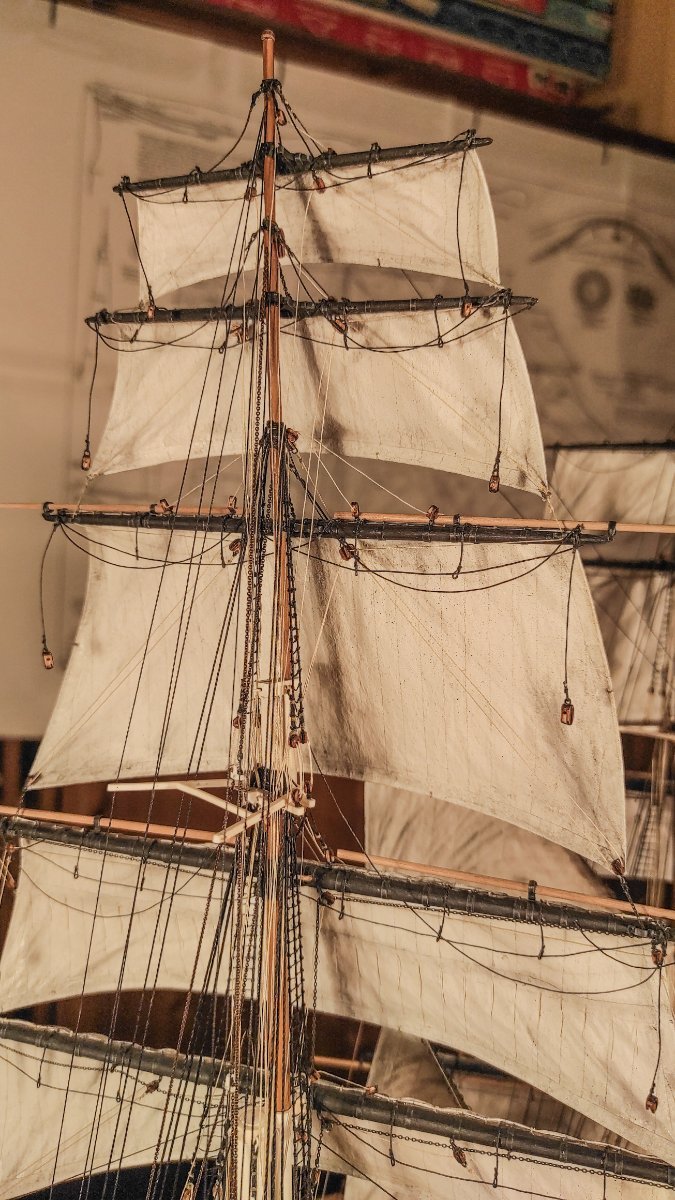
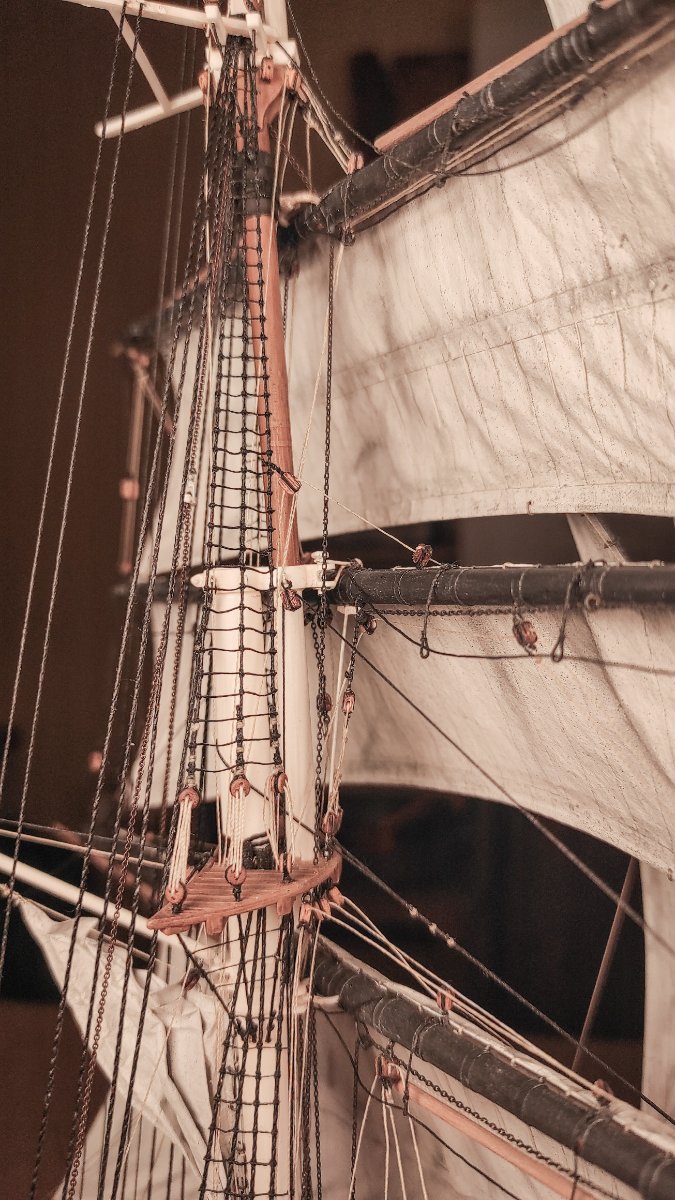
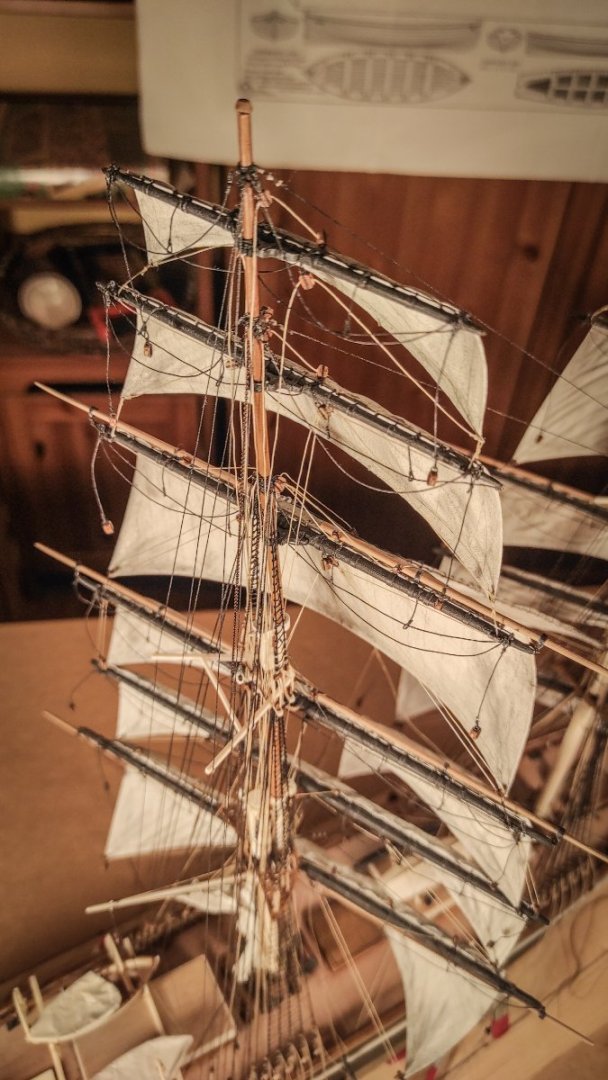
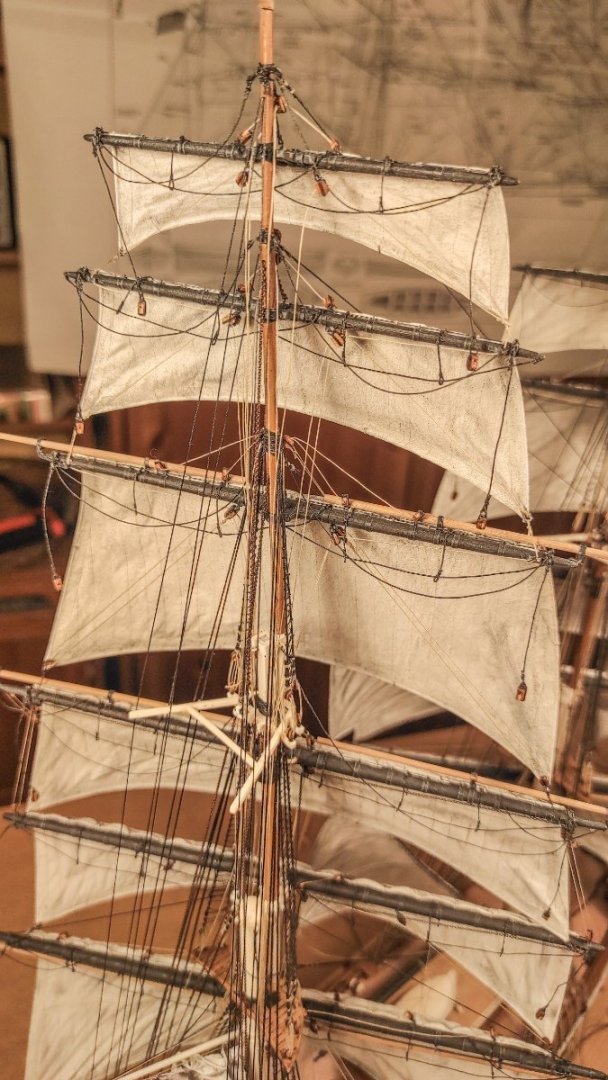
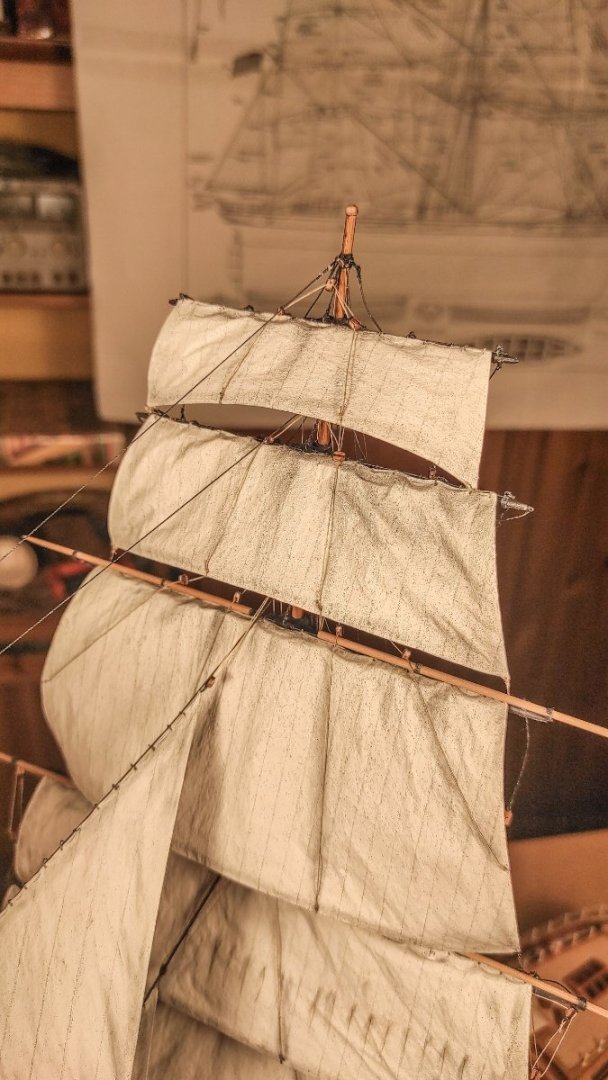
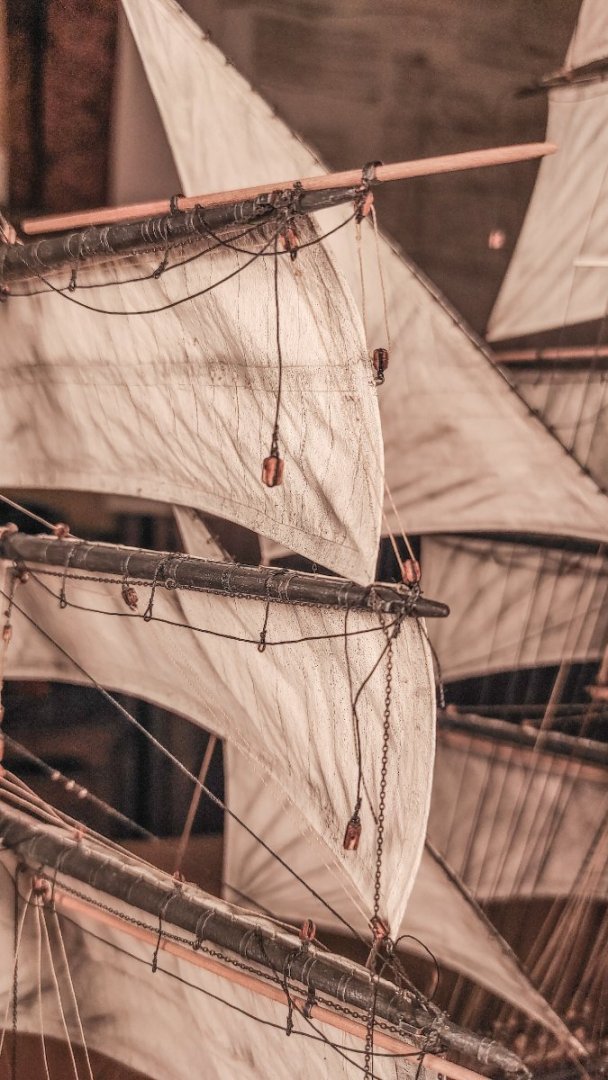
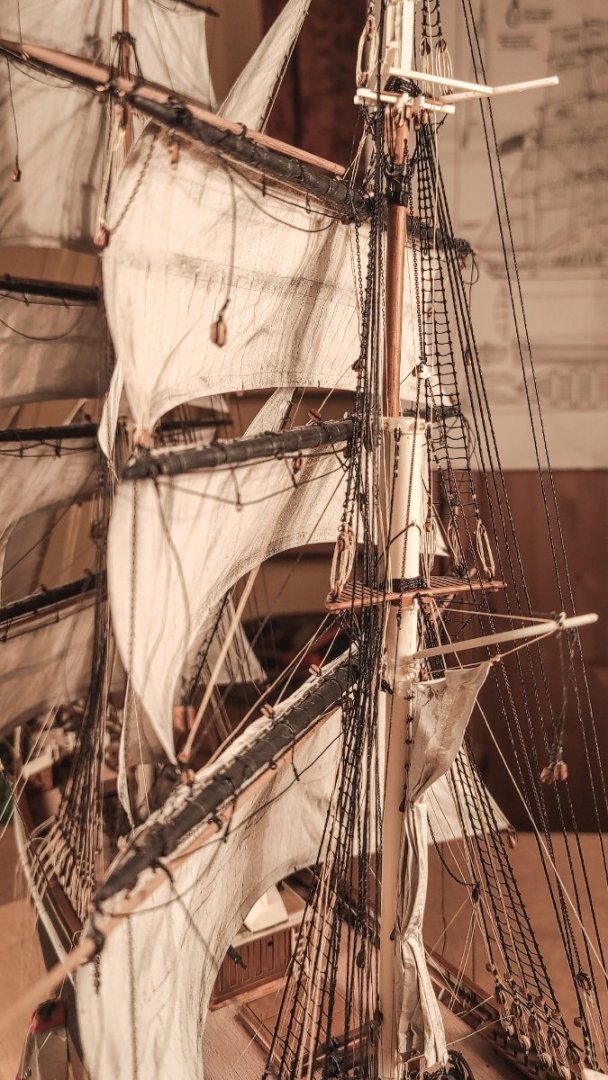
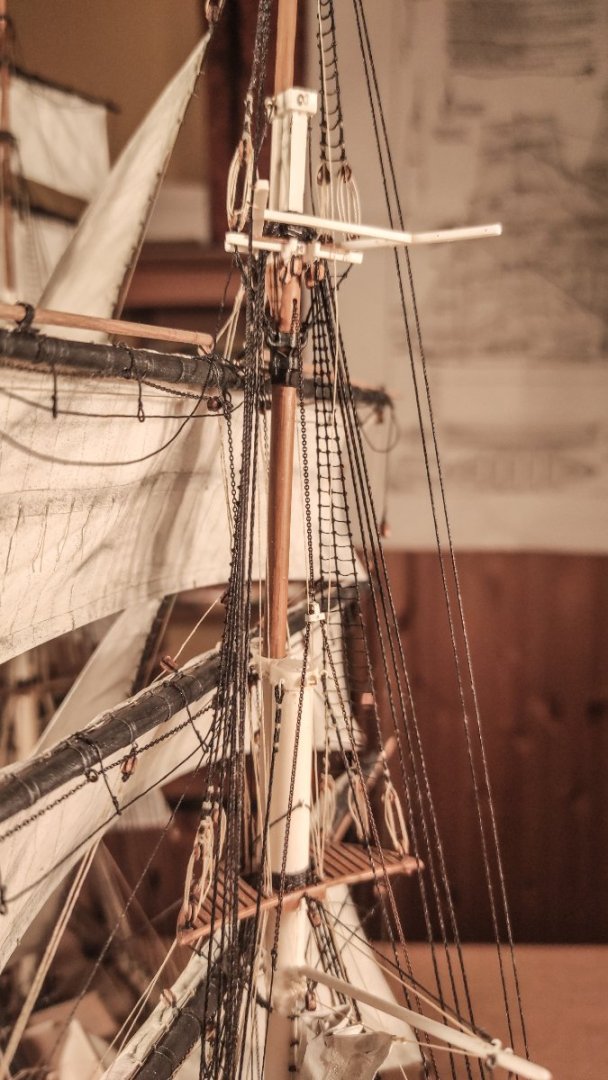
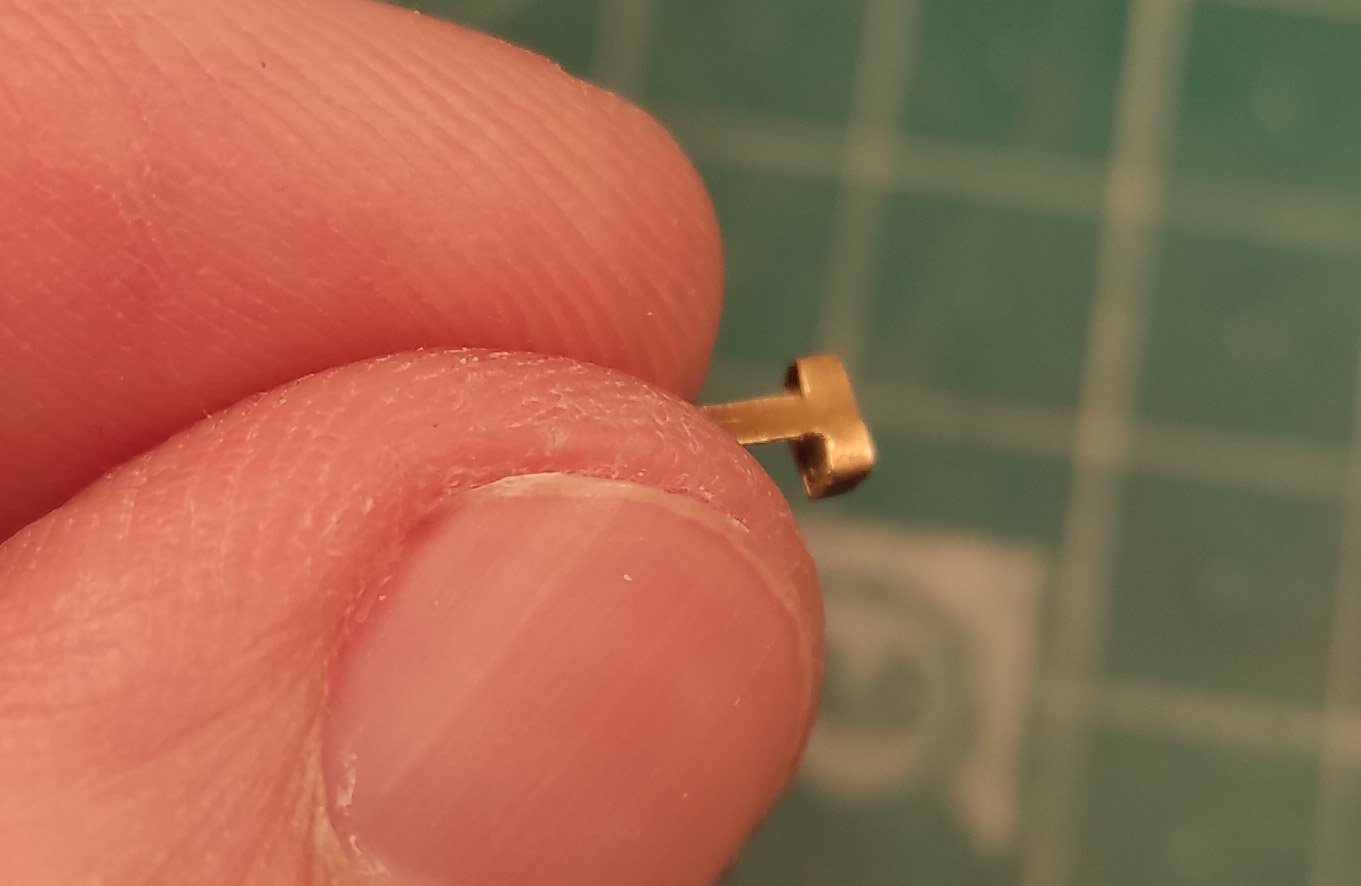
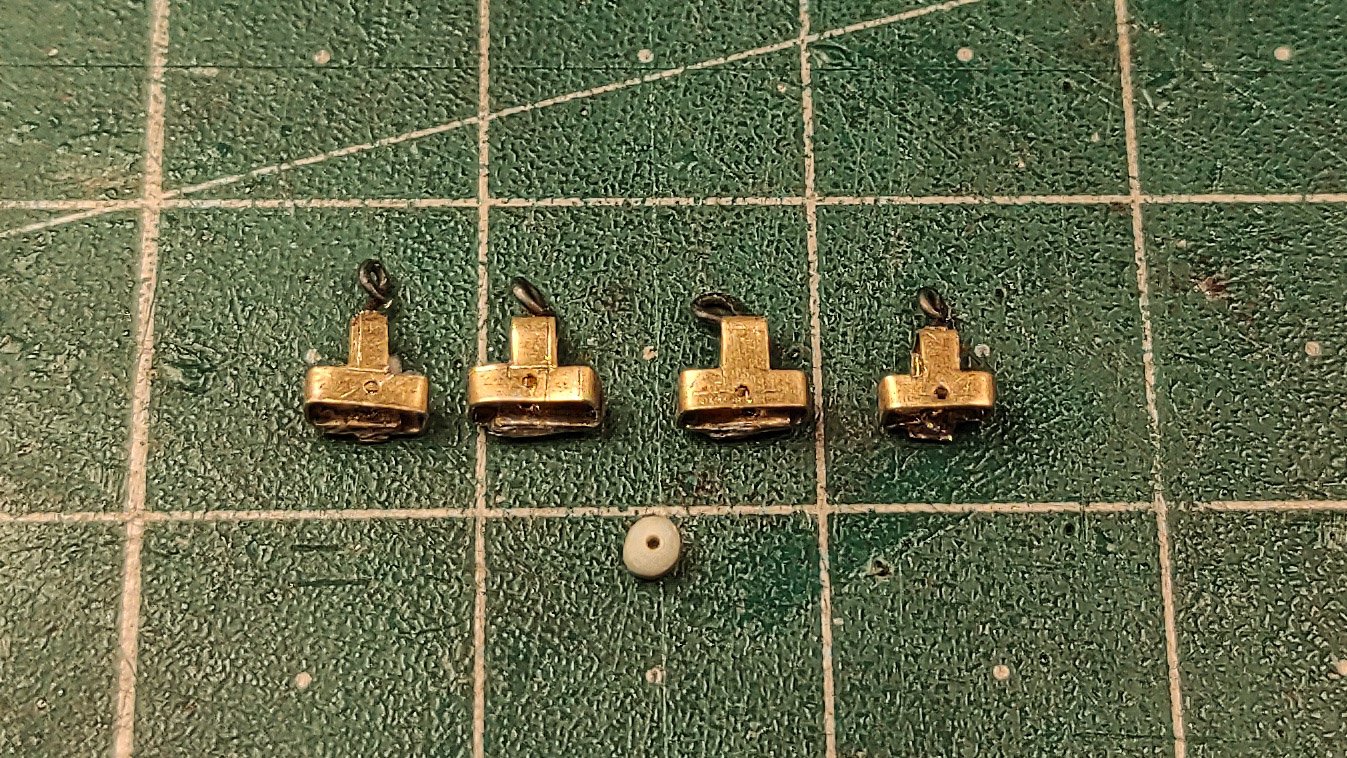
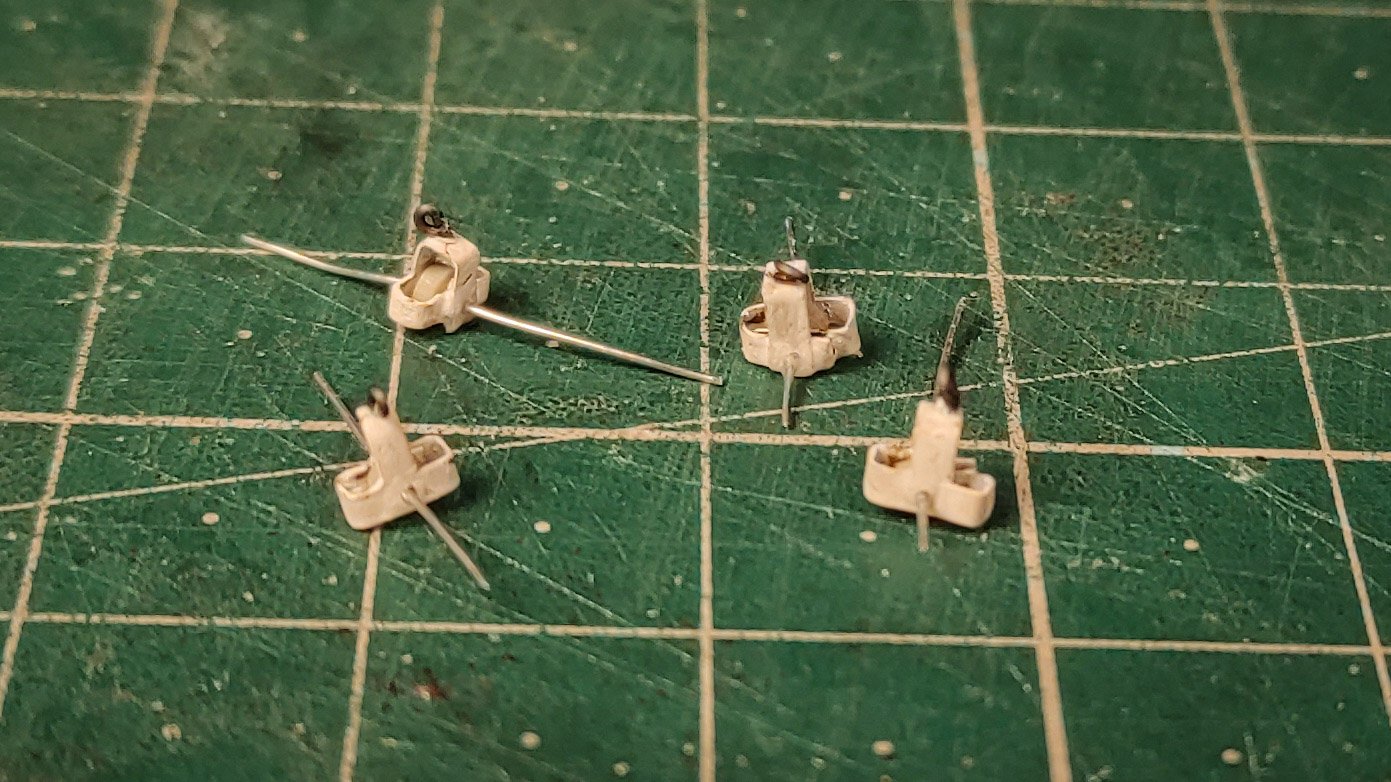
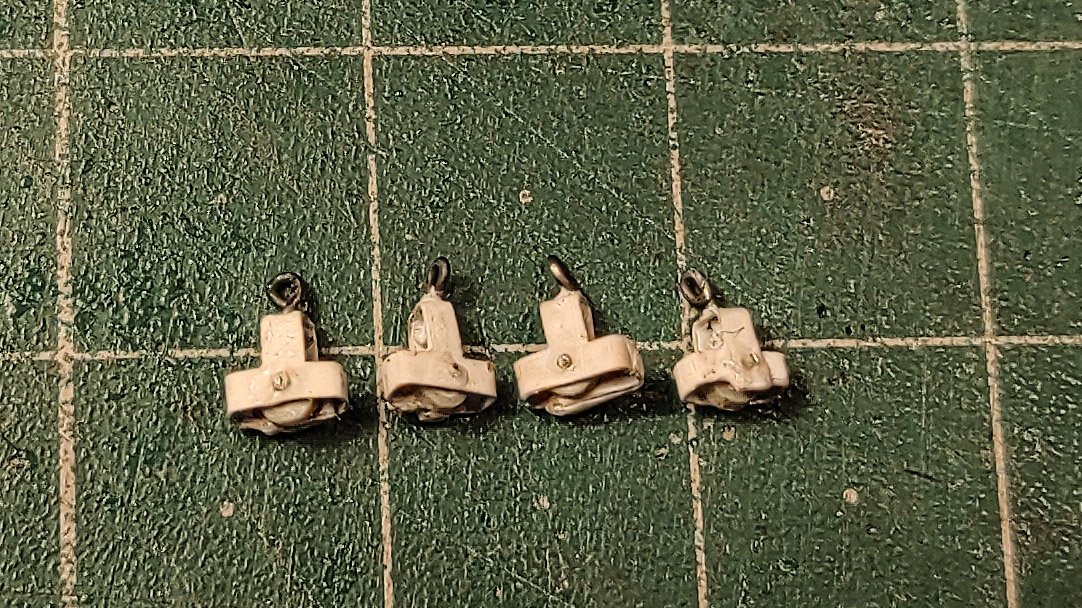
Hello everyone, time for another update: Lower and upper topsail. There is not so much to say about this update, all the techniques are already been used before, so I let space for the images, hoping not to bore you too much. In the following pictures are all together many small scratch builded parts: the crane of the lower topsail and the yard support, the gin block, the tube parallel and the leather protection, the fixed chain sheets for the upper topsail and the chain of the main topgallant. The upper top sail is fixed to the mast with a small pin inside a predrilled hole in ordet to make a stronger bond. This hole is quite critical since it needs to be oriented to simulate the corkscrew arrangement of the yards. Just a mention to the chain sheet: they are still to be trimmed, just in case I need to change them once all the sails will be installed and the yard braced. In the end, just a small sequence to show I made the gin blocks. That’s all, I hope you like them! Marco


- 399 replies
-
- 14
-
-
-
- cutty sark
- revell
- (and 2 more)
-
I was referring to the holes at the bottom of each leg, simulating sheaves. They were filled, and I cleared them for further use. In the end, I was not able to find a clear evidence of their function, I think they might have been used temporally, to have a better leverage in some tricky situation but take it as it is: a mere supposition made by a not competent desperate modeler!
- 399 replies
-
- 3
-
-
- cutty sark
- revell
- (and 2 more)
-
Vladimir, I'm sorry to hear about your recent mishap, but I'm happy to see you already recover! This strokes can be really tedious, but you tackle it very well, and now she seems to better than before! I'm really impress by your model overall and by the rigging and the metal work. You are showing great determination and skills, and they are paying off!
-
Get well soon, Kevin! I'm really curious to see the new resin parts on your beautiful model!
- 444 replies
-
- 1
-
-
- Cutty Sark
- Revell
- (and 2 more)
-
Hey George, really wonderful progress as usual, she is growing into a masterpiece! Looking at your yards, a question comes to my mind: are you following the precise measure of the real ones? They seem to me a little bit too large in diameter, but I'm not an expert by any means, and they might be just right as they are. Mine is just an impression, usually they appear to be slimmer, and they surely are on the Cutty Sark (but they are made out of metal and this might be the reason). Sorry for bothering you, mine is just curiosity. Congrats again for your great model!
-
You are doing great with this small beauty! Rigging can be really daunting at first, but once you get into it, it will gradually be easier. Keep going!
- 248 replies
-
- 3
-
-
- Cutty Sark
- Revell
- (and 2 more)
-
This is just so beautiful! One of the, if not "the" best sea diorama without resin I have ever seen! Your taste for colors and your attention to details are really remarkable! Thank you so much for sharing this marvel and for taking the time to explain the making process. It is really inspiring! I hope I will be able to do something similar for my Cutty Sark. Thank you!
- 542 replies
-
- 4
-
-
- Sphinx
- Vanguard Models
- (and 3 more)