
Bruma
-
Posts
179 -
Joined
-
Last visited
Content Type
Profiles
Forums
Gallery
Events
Everything posted by Bruma
-
 Wonderful job, a real pleasure for the eyes, especially the metal work!
 -
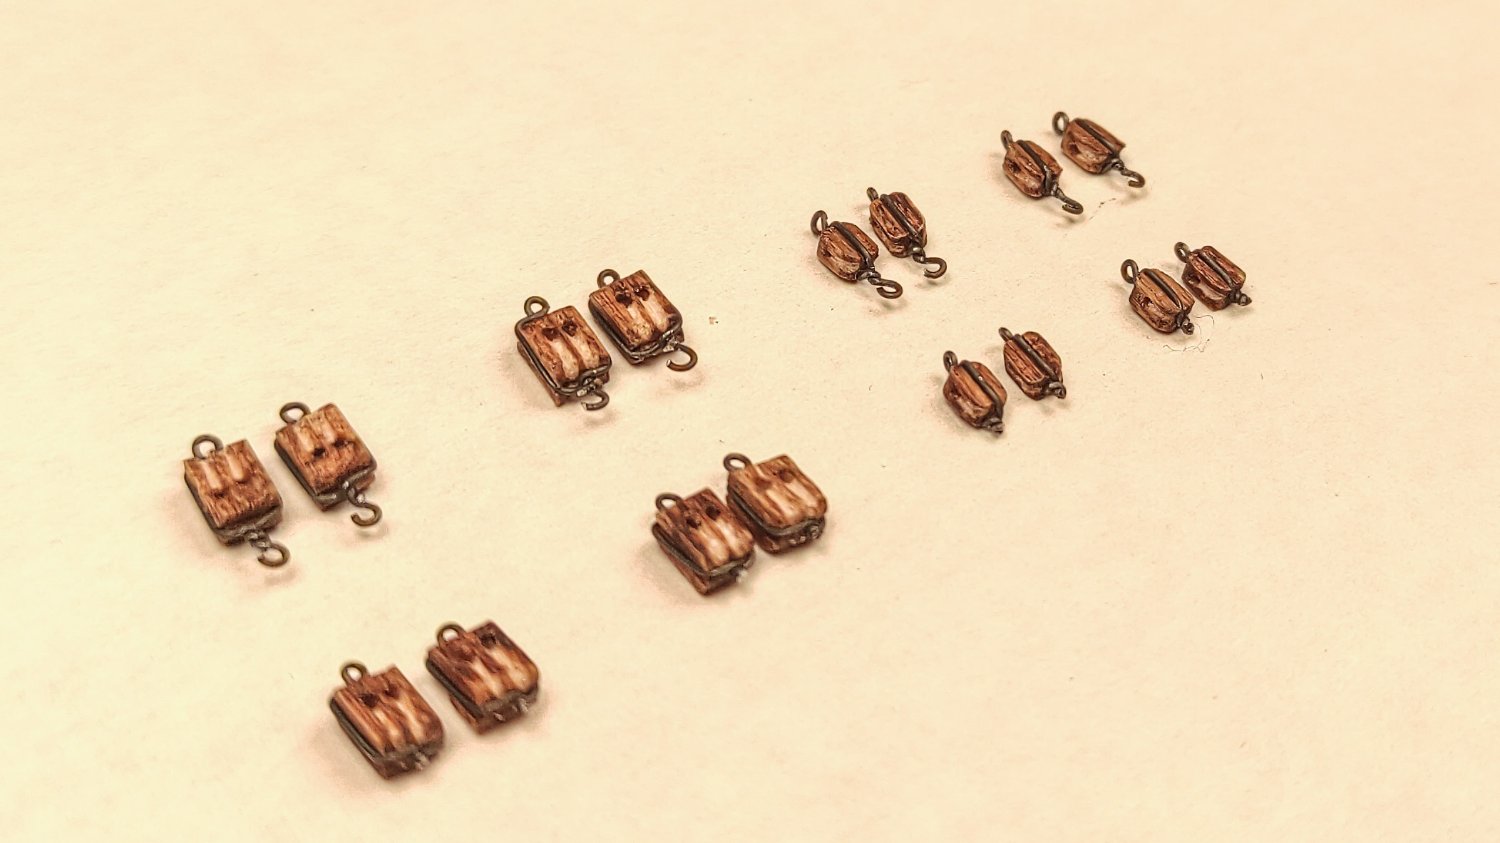
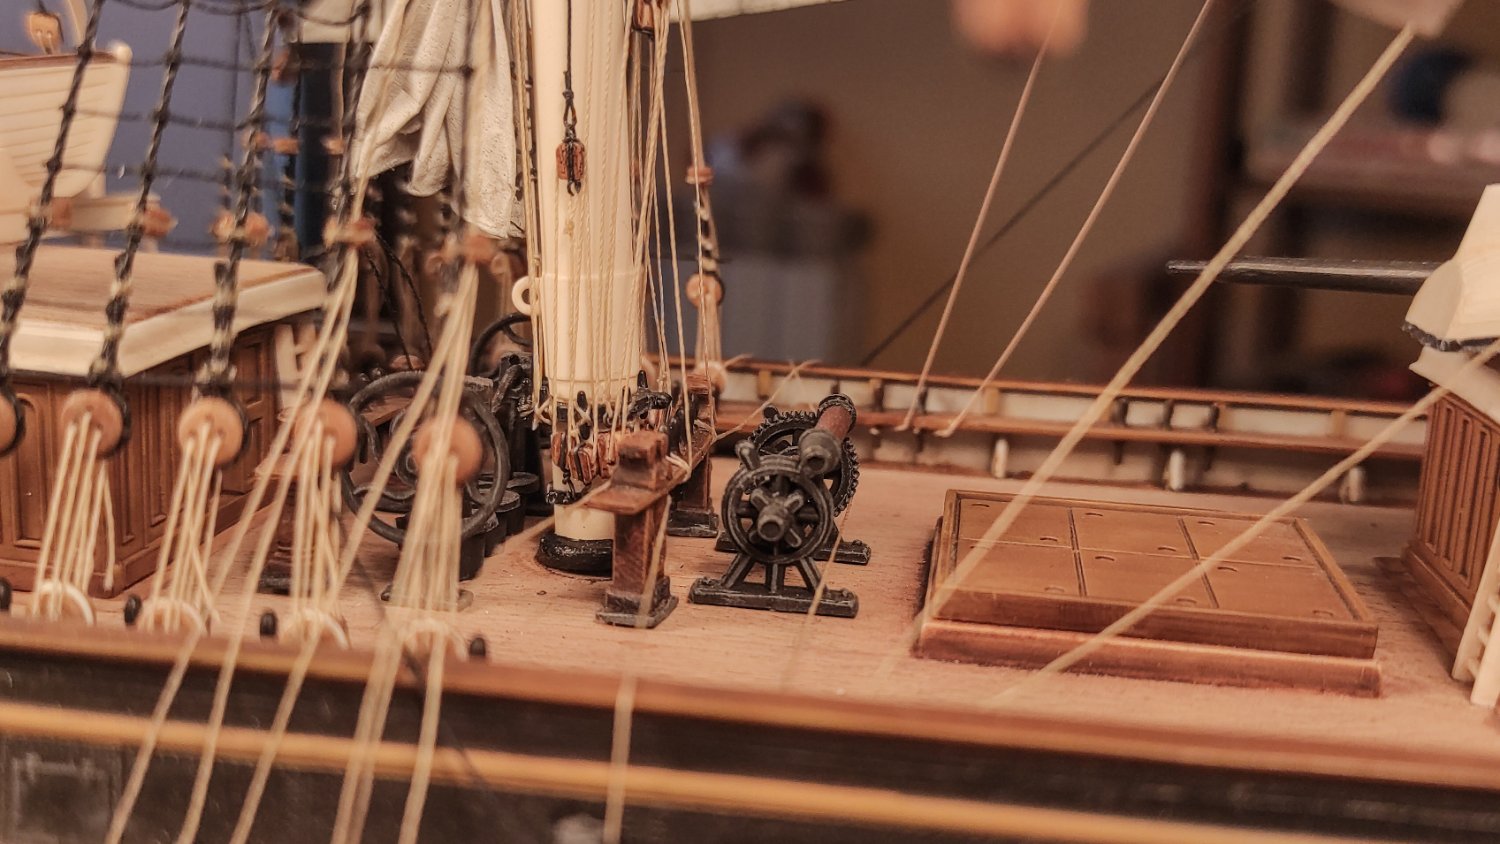
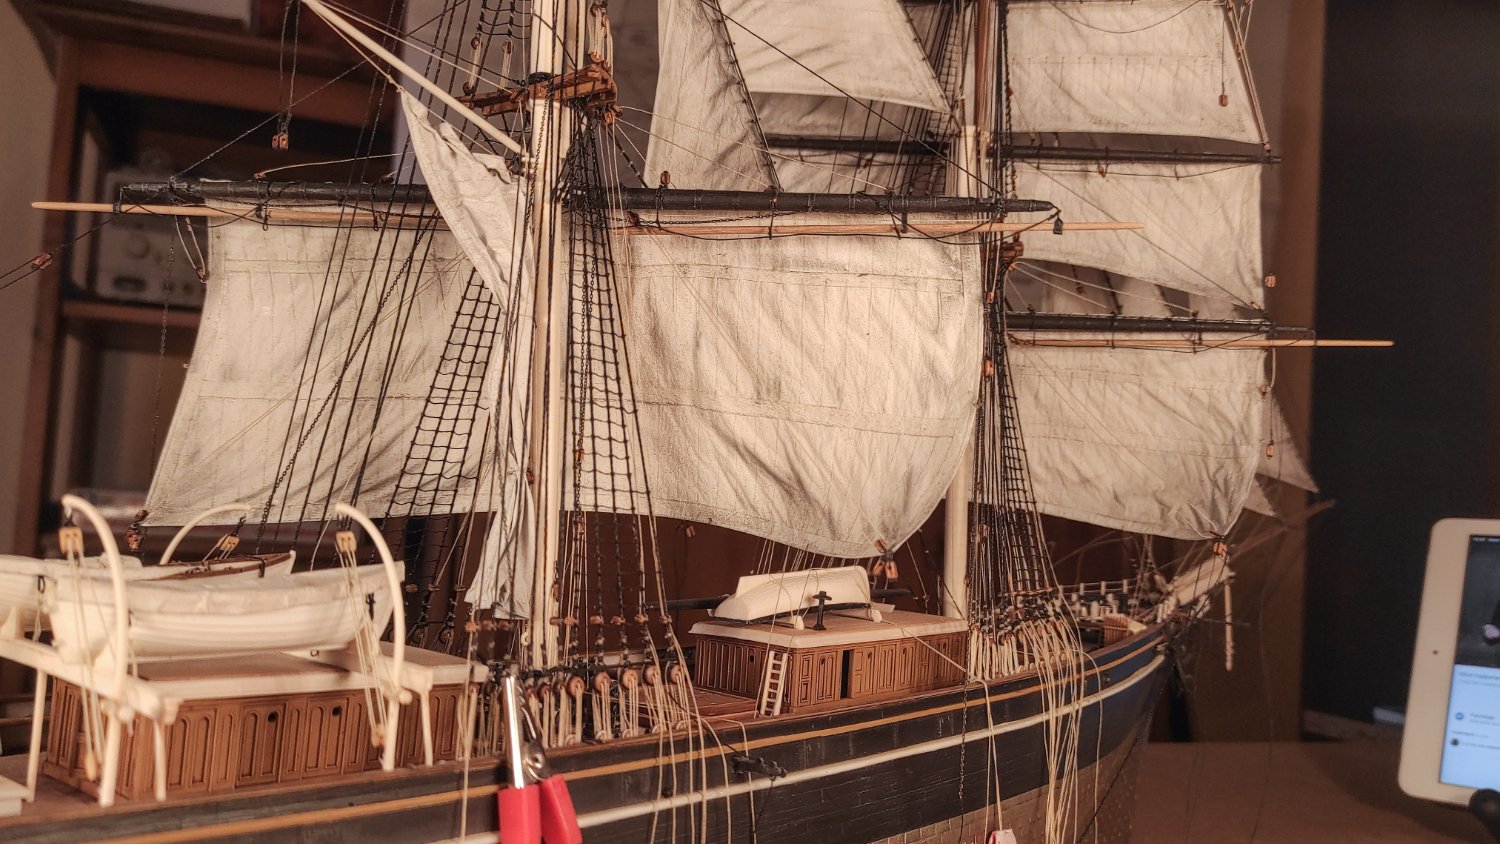
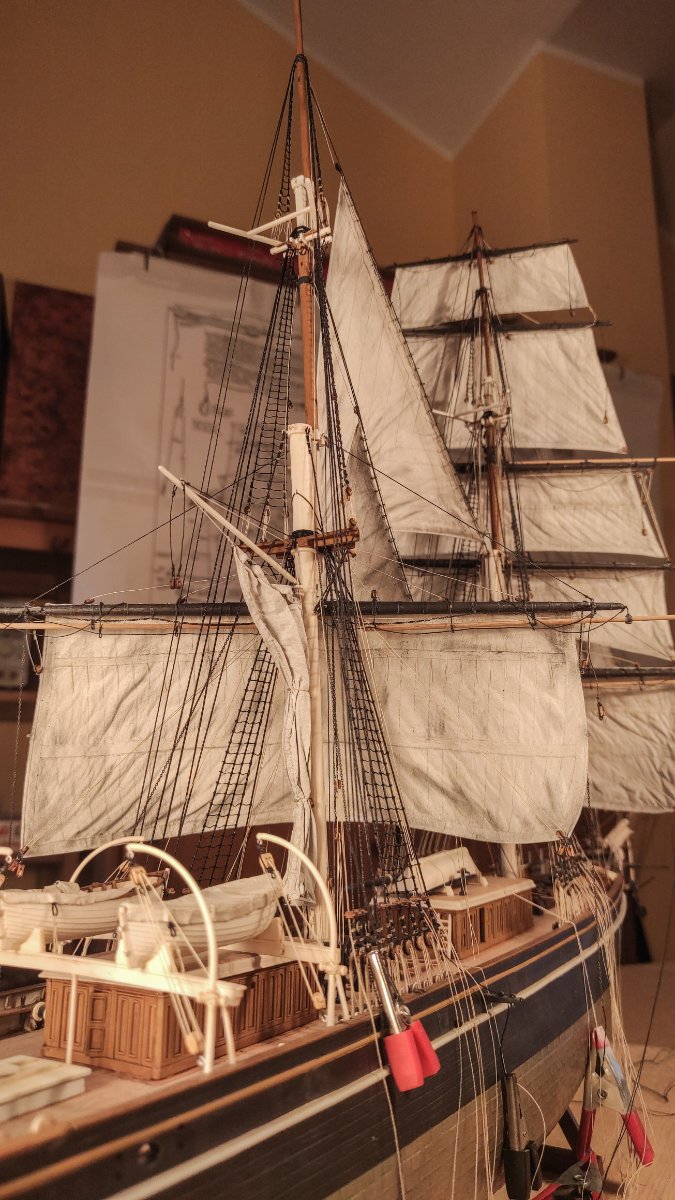
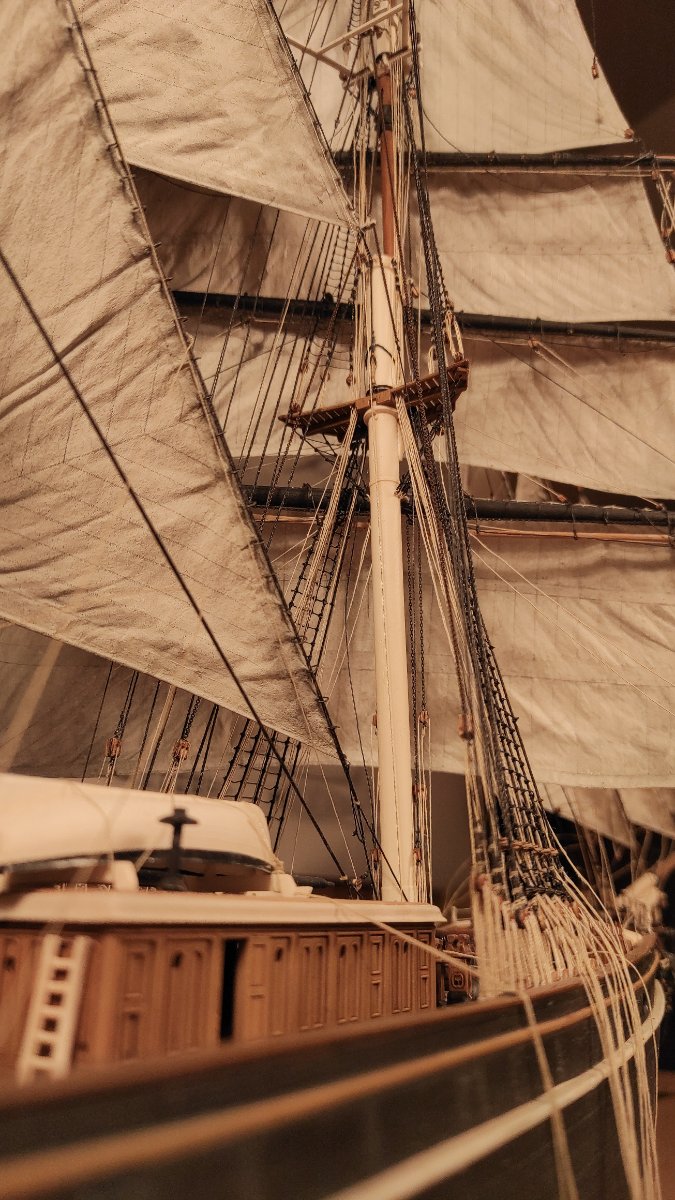
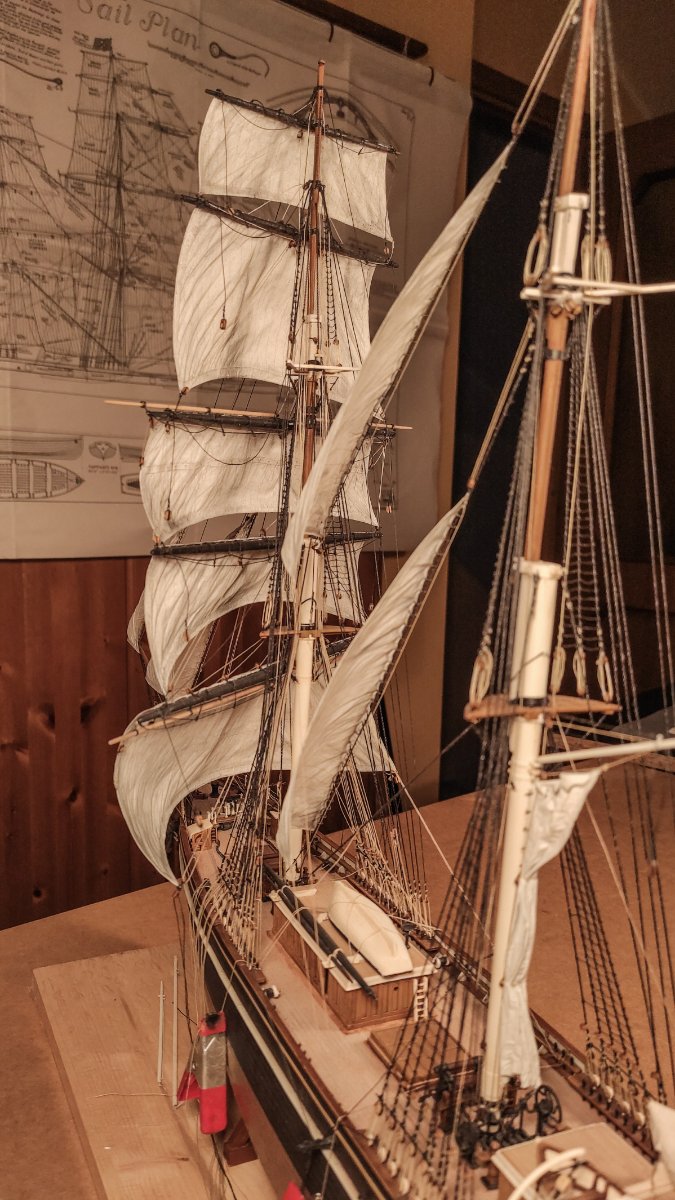
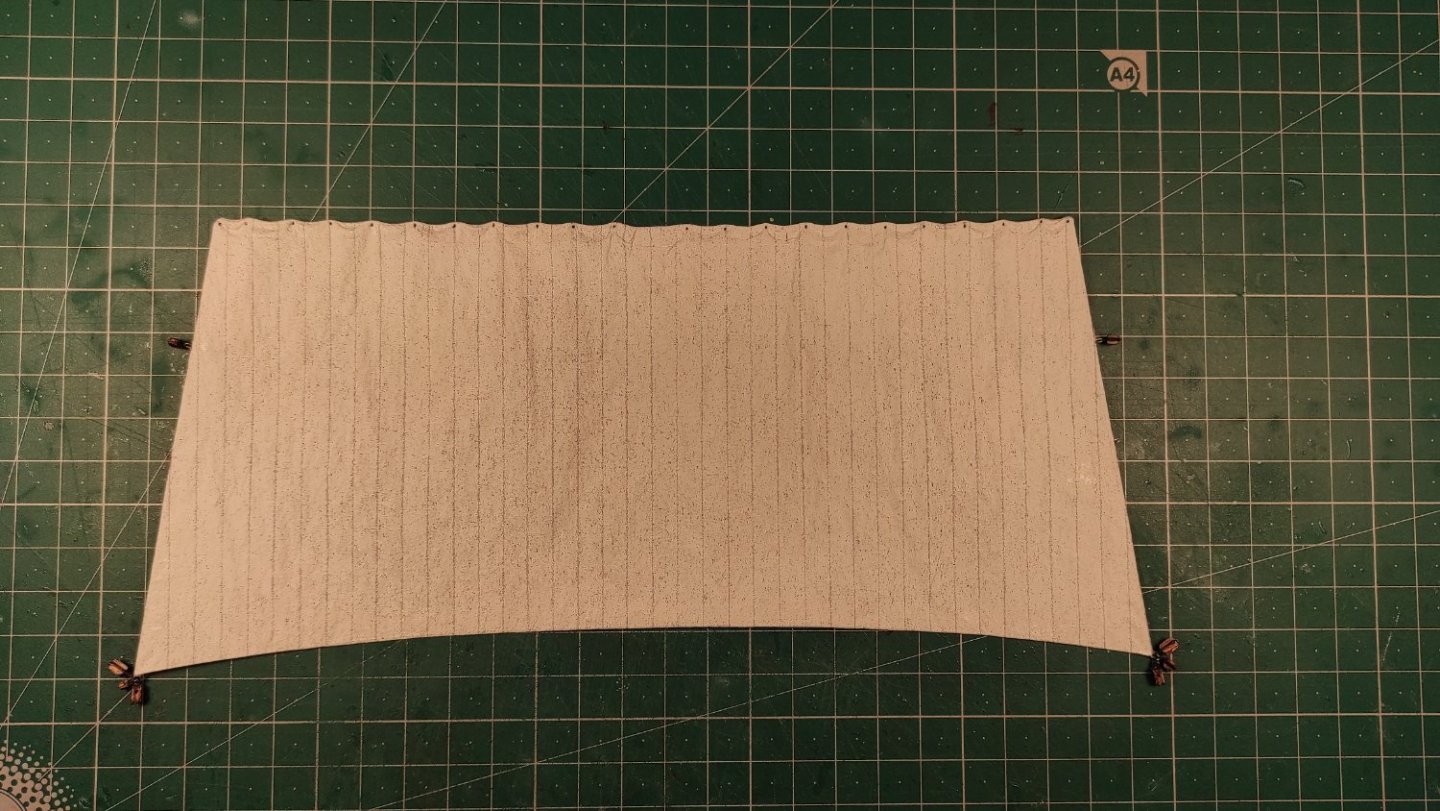
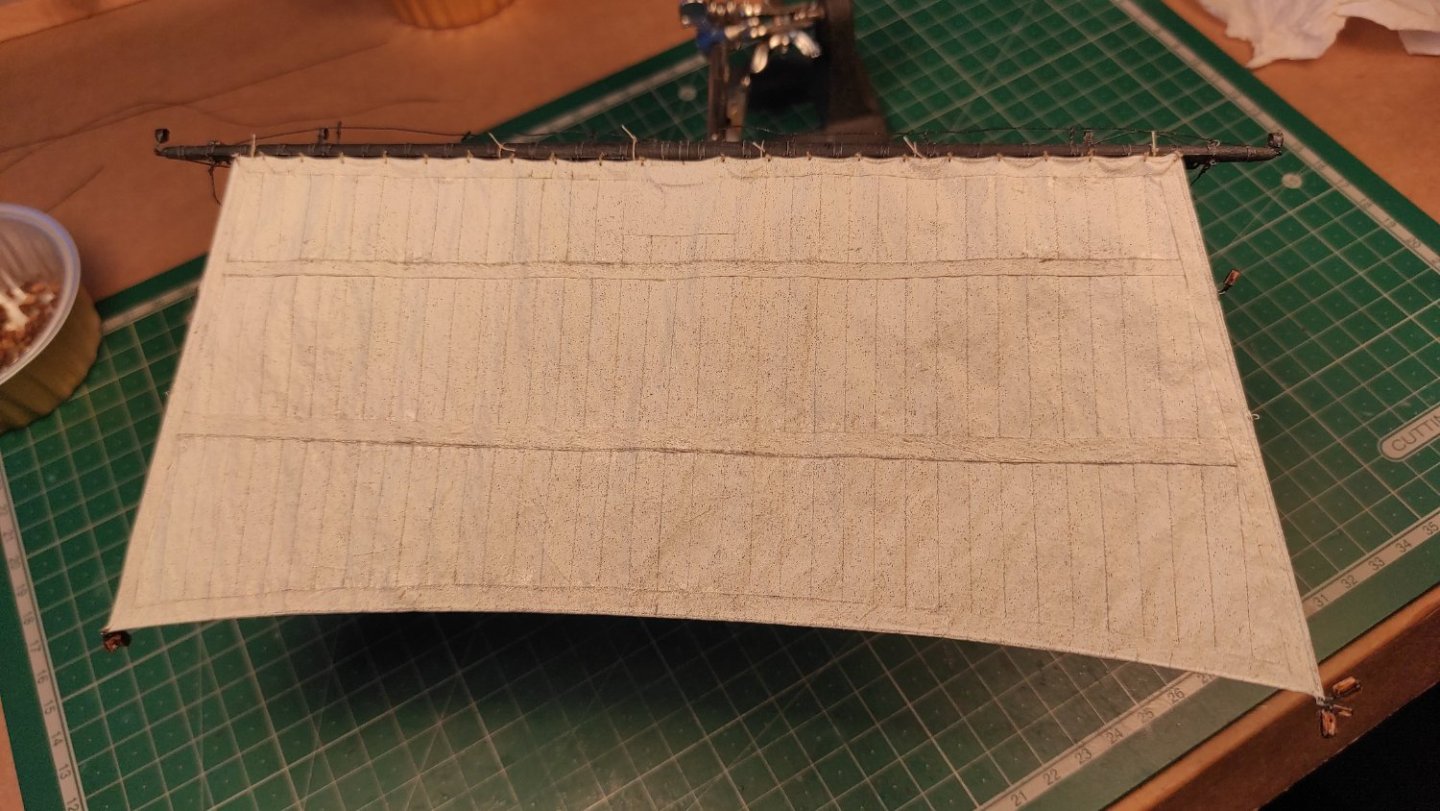
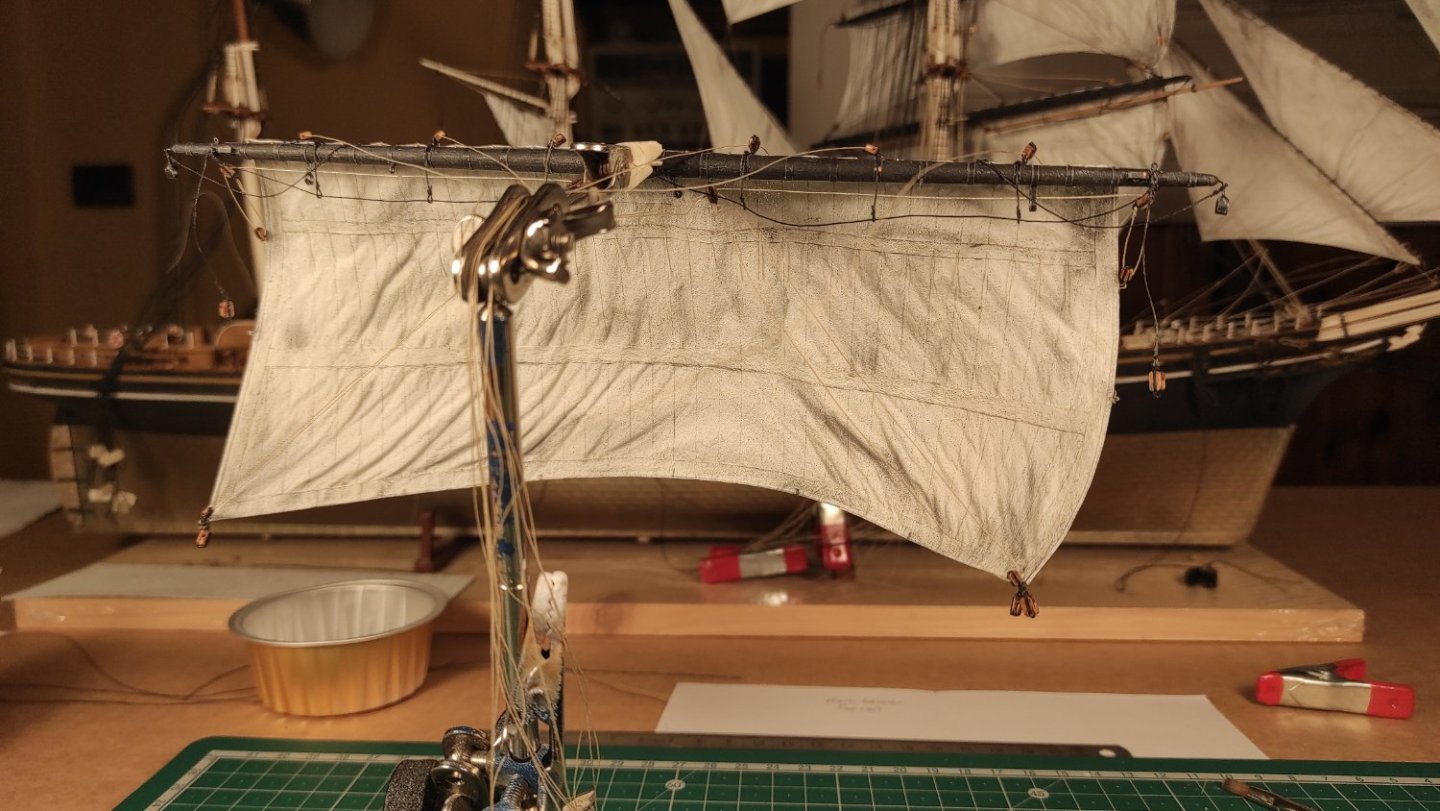
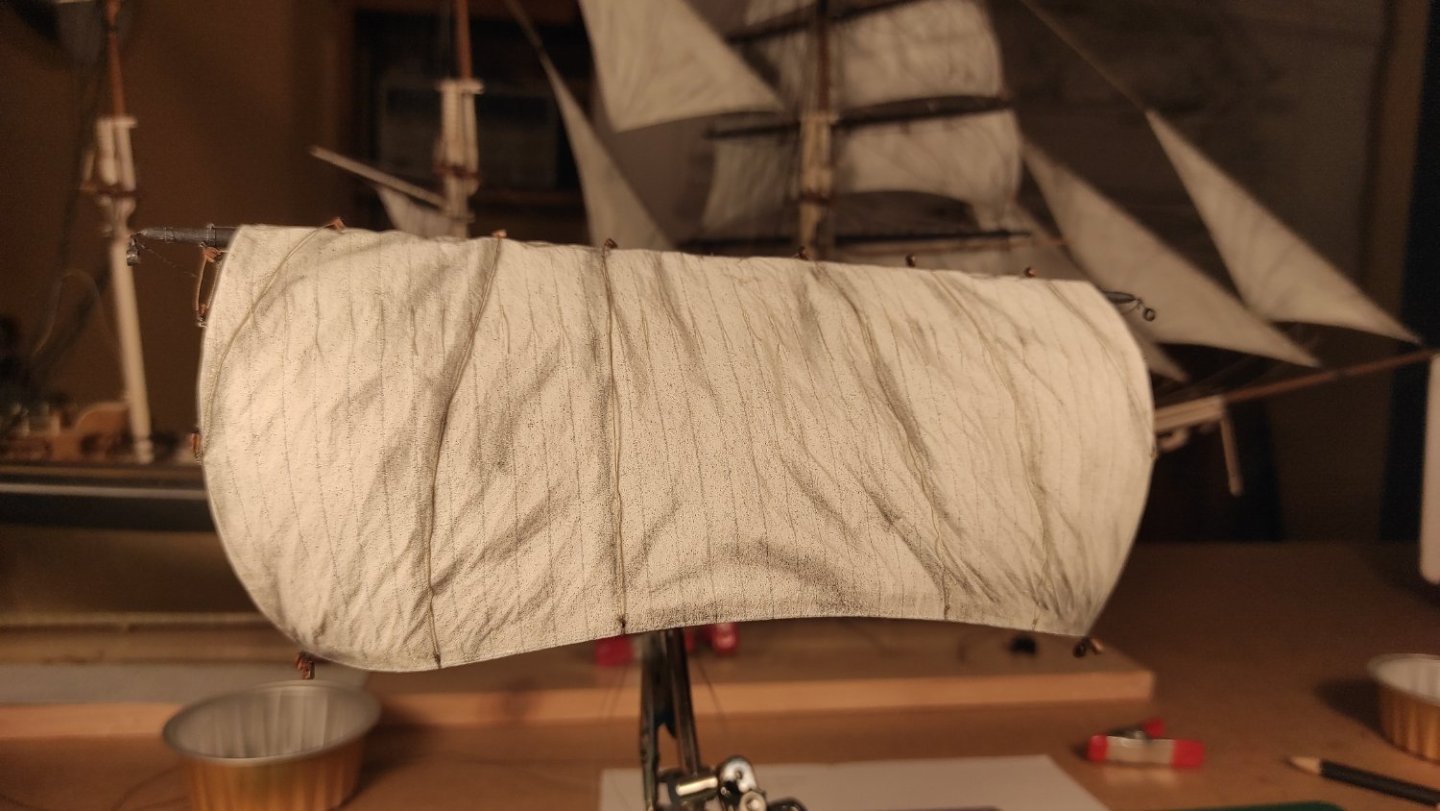
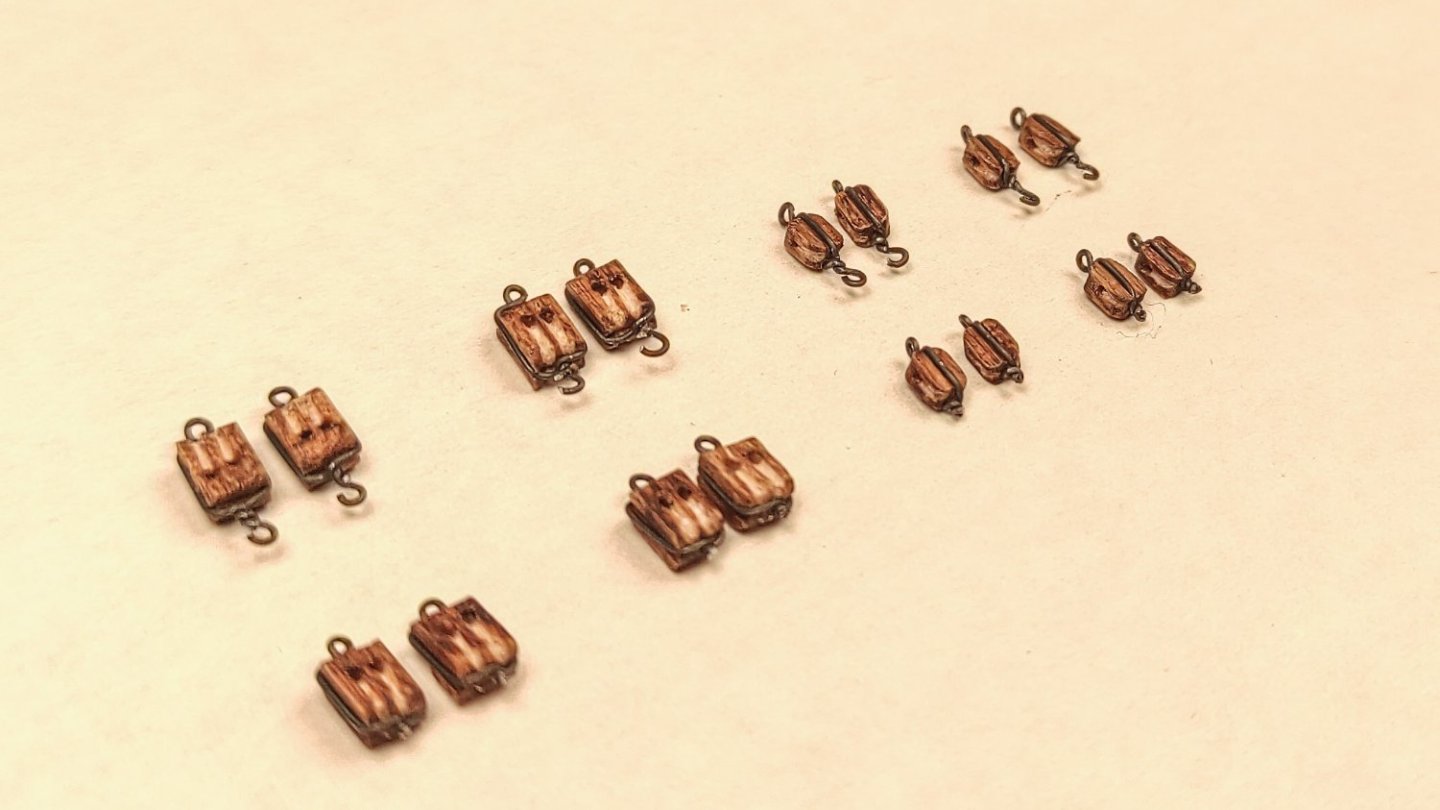
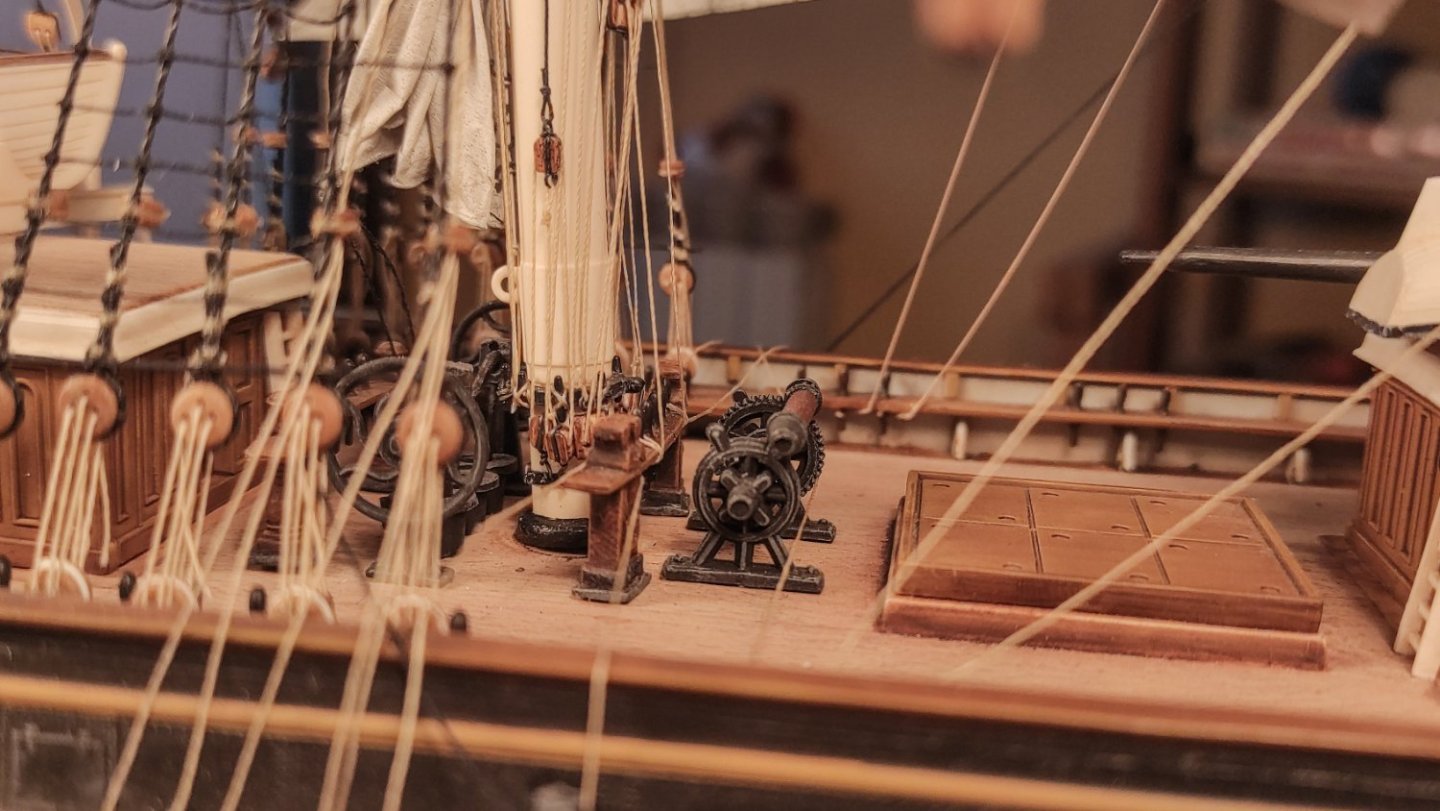
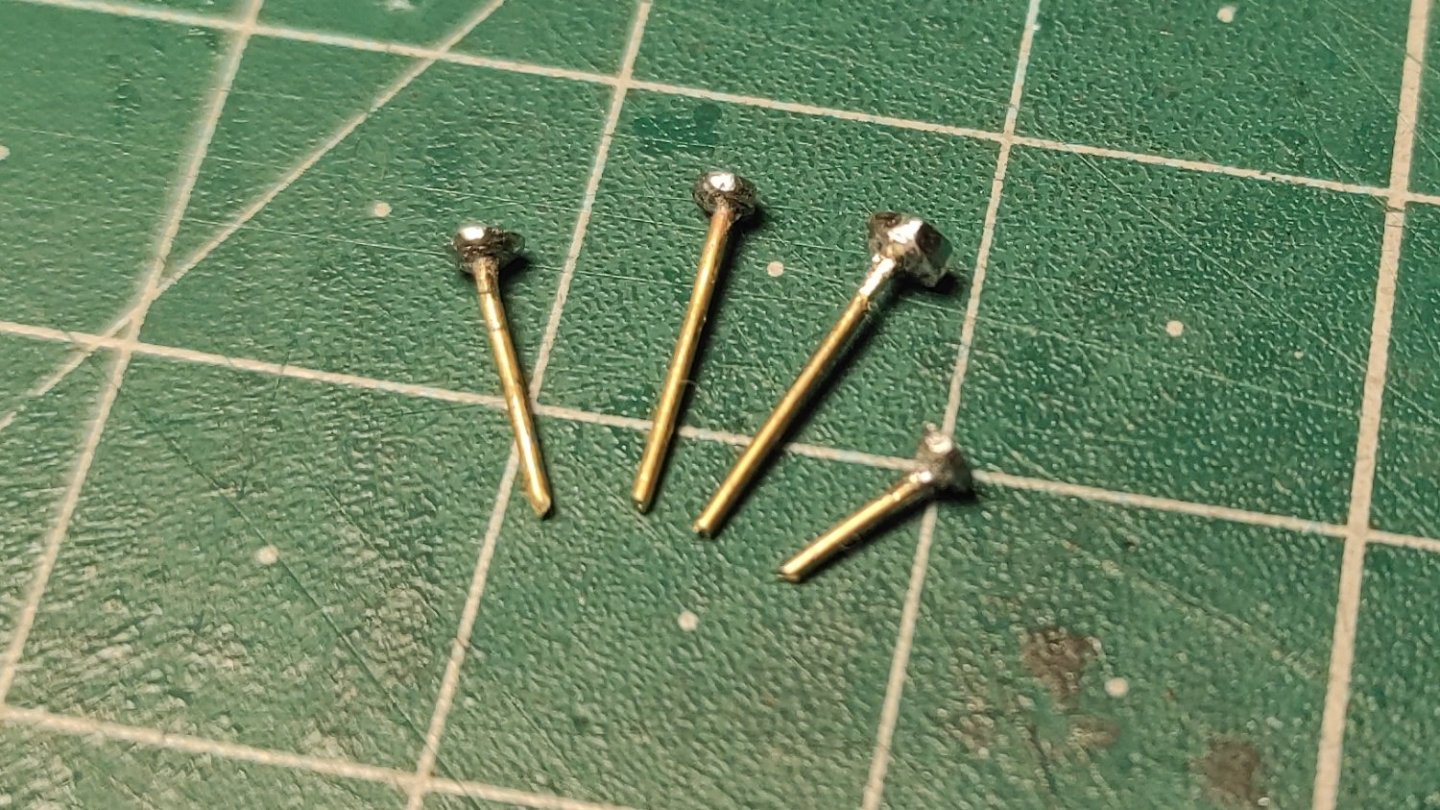
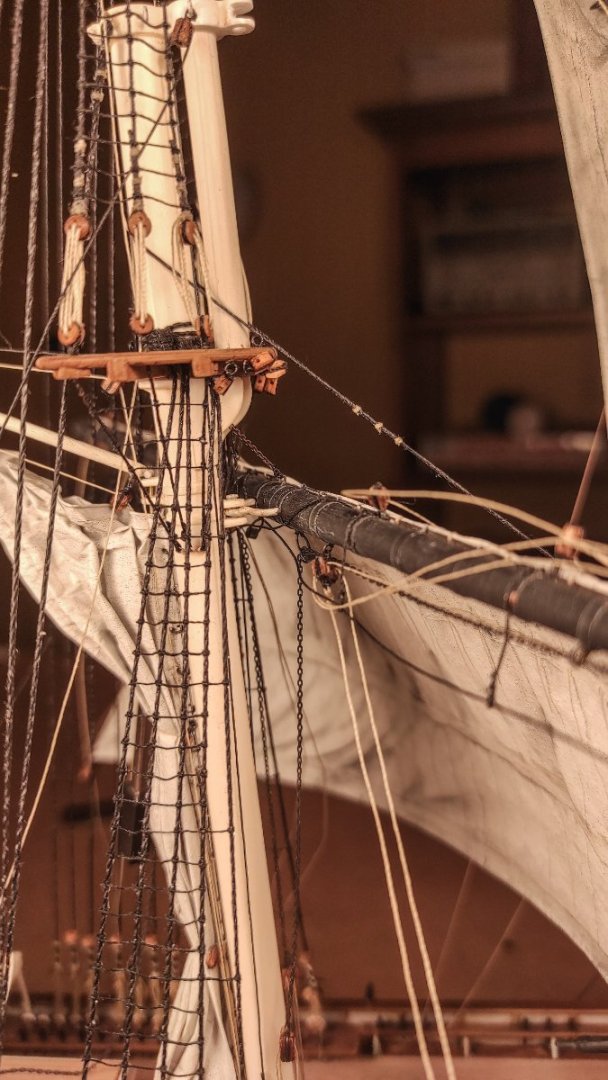
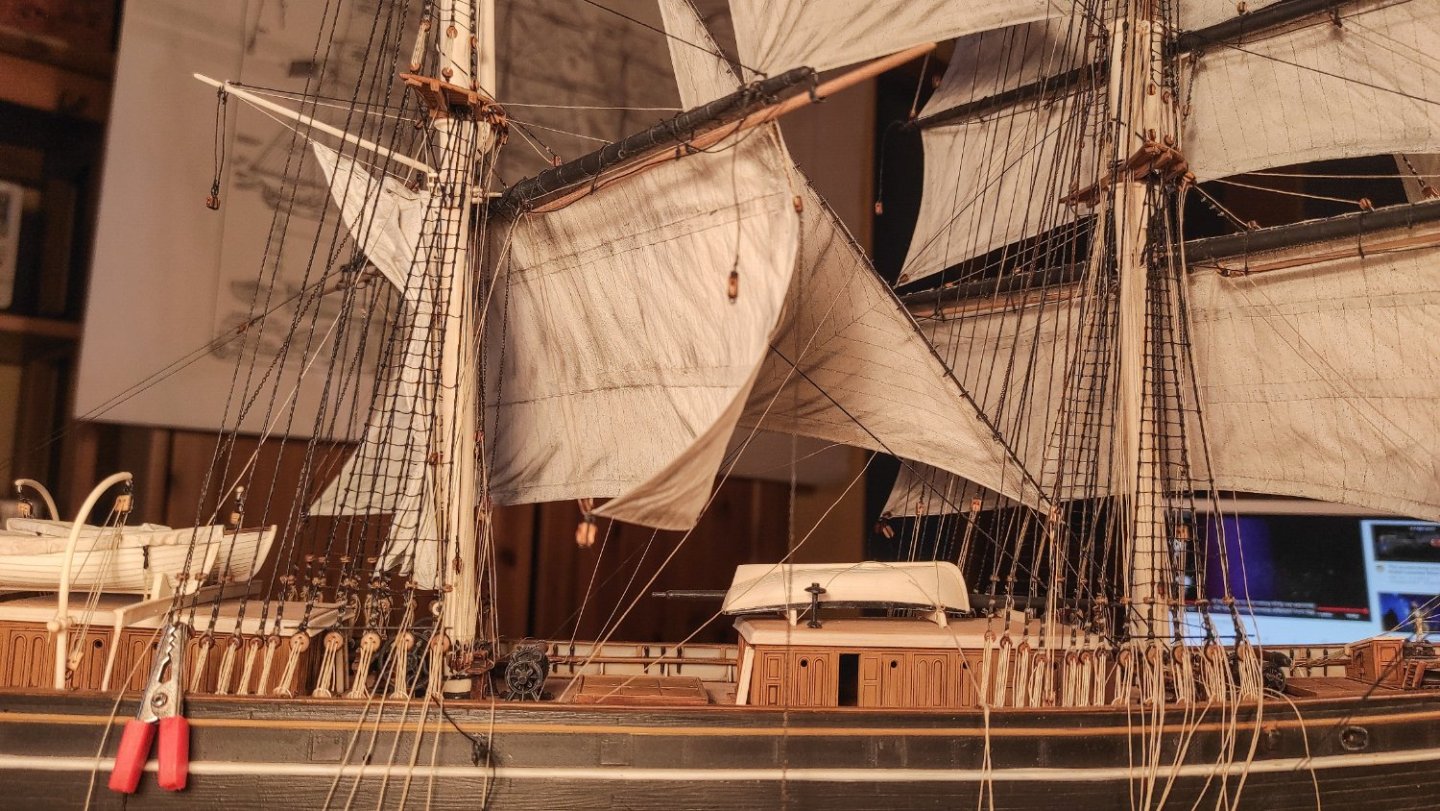
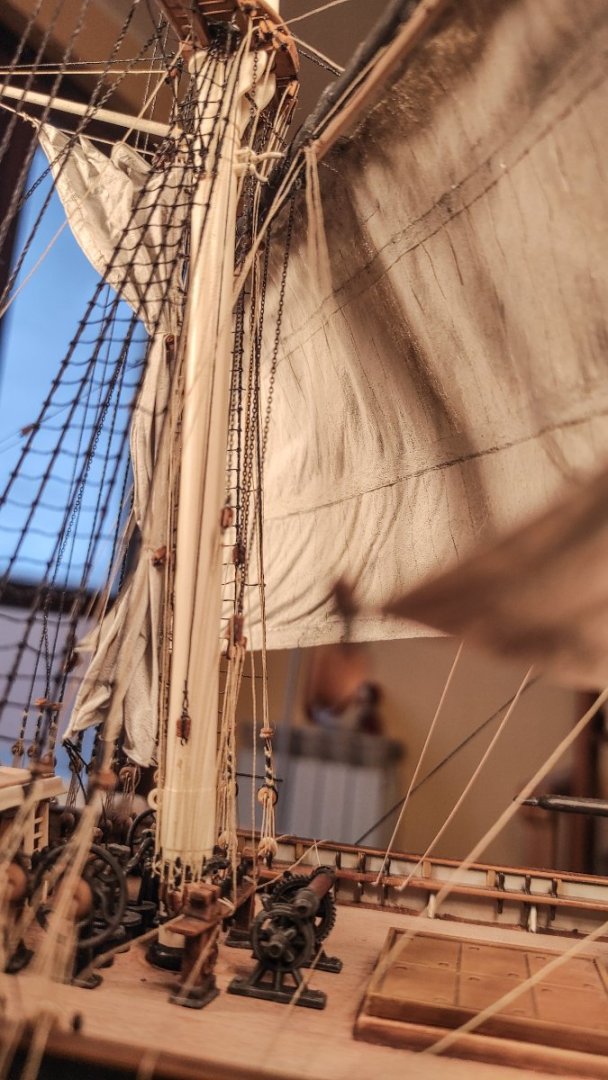
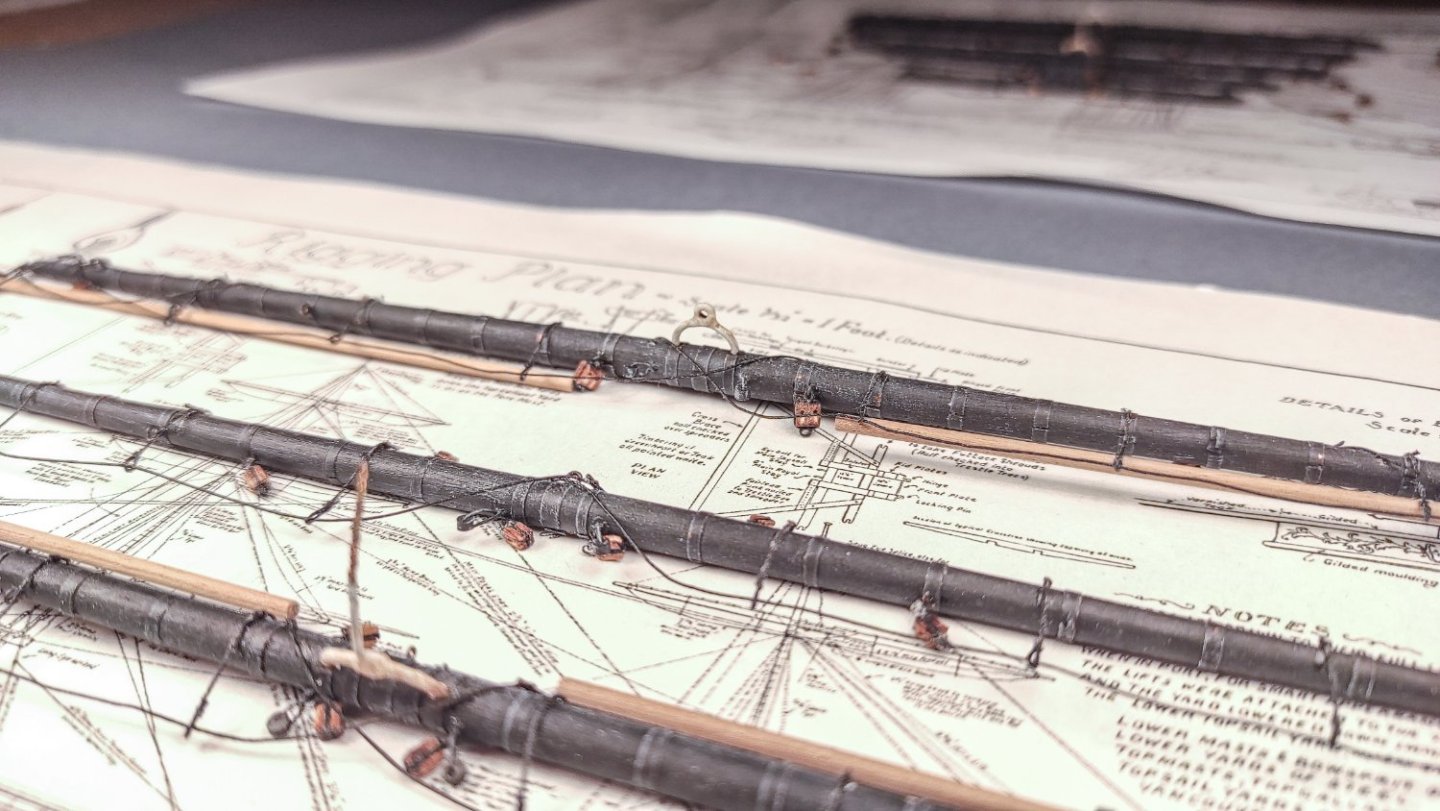
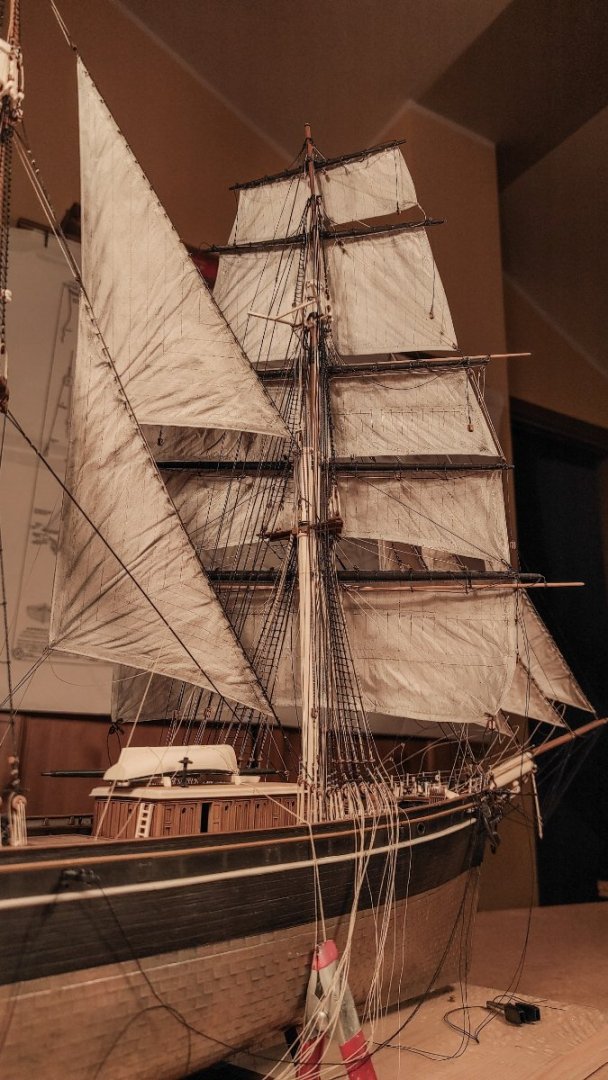
Hello everyone. Here I am again with some updates. Main Course Main course is finally completed, and I would like to share some pictures of the work in progress. The sail before being shaped: And the sail just bended on the jackstay: Note the six white pieces of thread. They are a safety measure to secure the jackstay at the yard. They will be removed after the sail is shaped by the weight of the flour. After shaping the sails, I started adding all the rigging: buntlines, leechlines, clewlines, reef tackle and the lower topsail chain sheets: In the above images the reef points are also visible. They are made of single brush bristles, the smallest thread available to me is still too big. Before installing the yards and the sail to the mast, I prepared all the purchases for the main yard lift, lower topsail sheets and topgallant sheets. The mast base will be almost inaccessible after the sail is installed, so I prefer to add them now. Some of the blocks used for the purchases: And the purchases installed on the mast foot: Since the yards are all made from scratch, theyr anchoring system to the mast needs to be created from scratch too. Here are the pins used to secure the yard to the mast allowing the yard to swing freely: And the yard finally mounted to the mast. Once all the preparation work is completed, I can finally install the yard and the sail. All the lines previously fitted, can now find their way to the deck through the fairleads and blocks. Note that all the lines still need to be perfectly tightened. I’ll do the after after the braces will be installed. Now I’m working on the lower topsail. Still a long way to go. Thank you all for your comments and likes!


- 399 replies
-
- 16
-

-

-

-
- cutty sark
- revell
- (and 2 more)
-
Hi Kevin, nice job on your yard arm! If you don't mind, I have a question for you. The sheet block you modeled seems to be inspired by the Underhill drawing. However, both Campbell and Longridge, seems to agree that this was not the system used for the Cutty Sark. Their drawings show two metal blocks, one for each side, for the lower topsail sheets and not a single-double sided and centered block. And a similar arrangement for all the upper yards. The configuration suggested by Campbell and Longridge is the same that is currently displayed on the real Cutty Sark. Do you have other sources? Lastly, about your question, once again I completely agree with Ian, but, in my understanding, there is only one fairlead for each side, not two. It is located in the back of the yard, and, in my understanding, it needs to stay on the segment that start from the lower side of the pulley on the tip of the mast (facing the poop) and ends on the sheets block close to the mast.
-
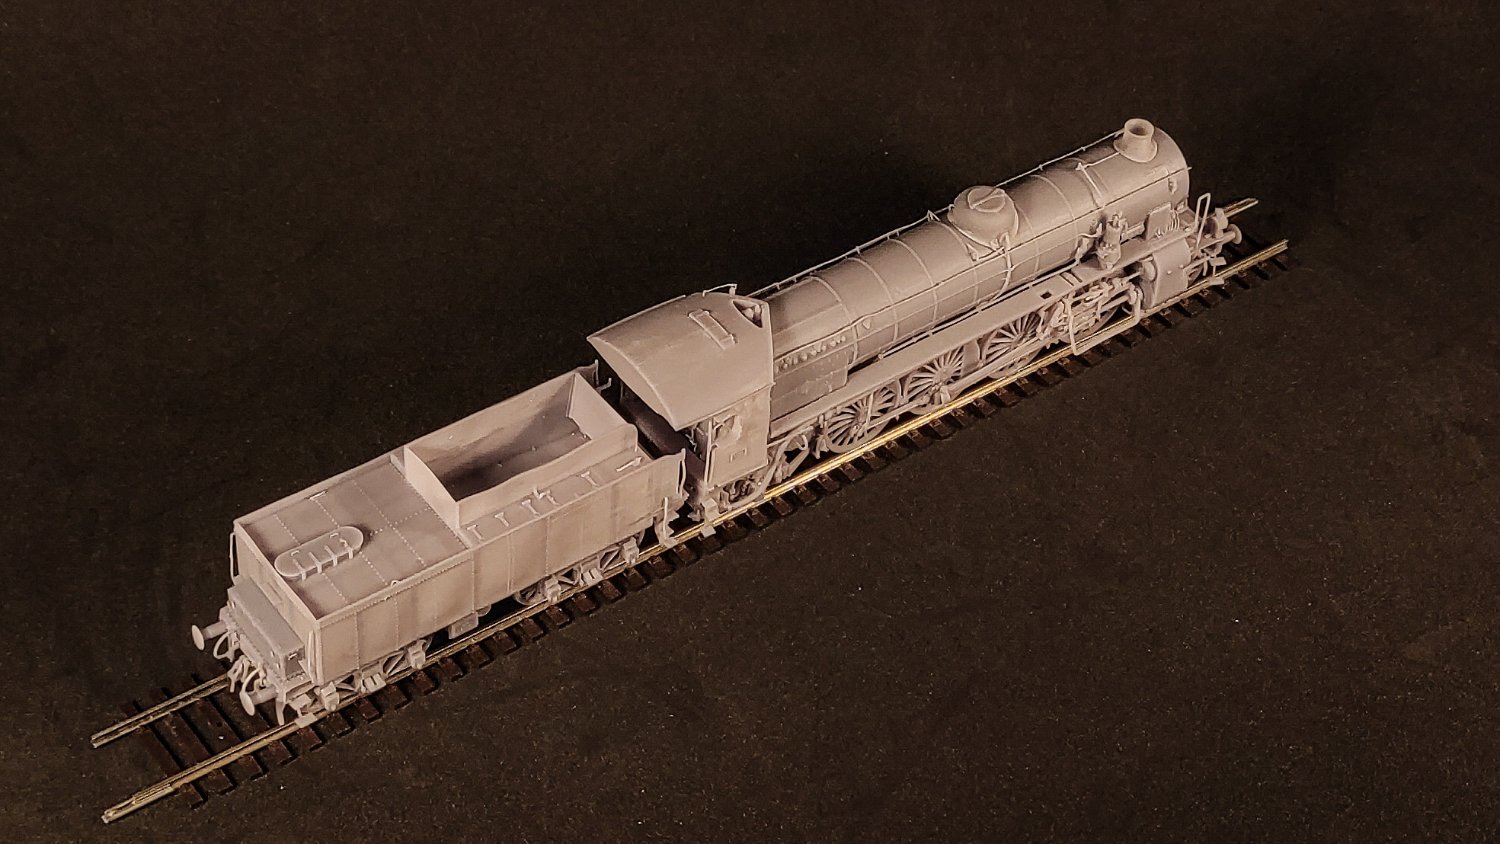
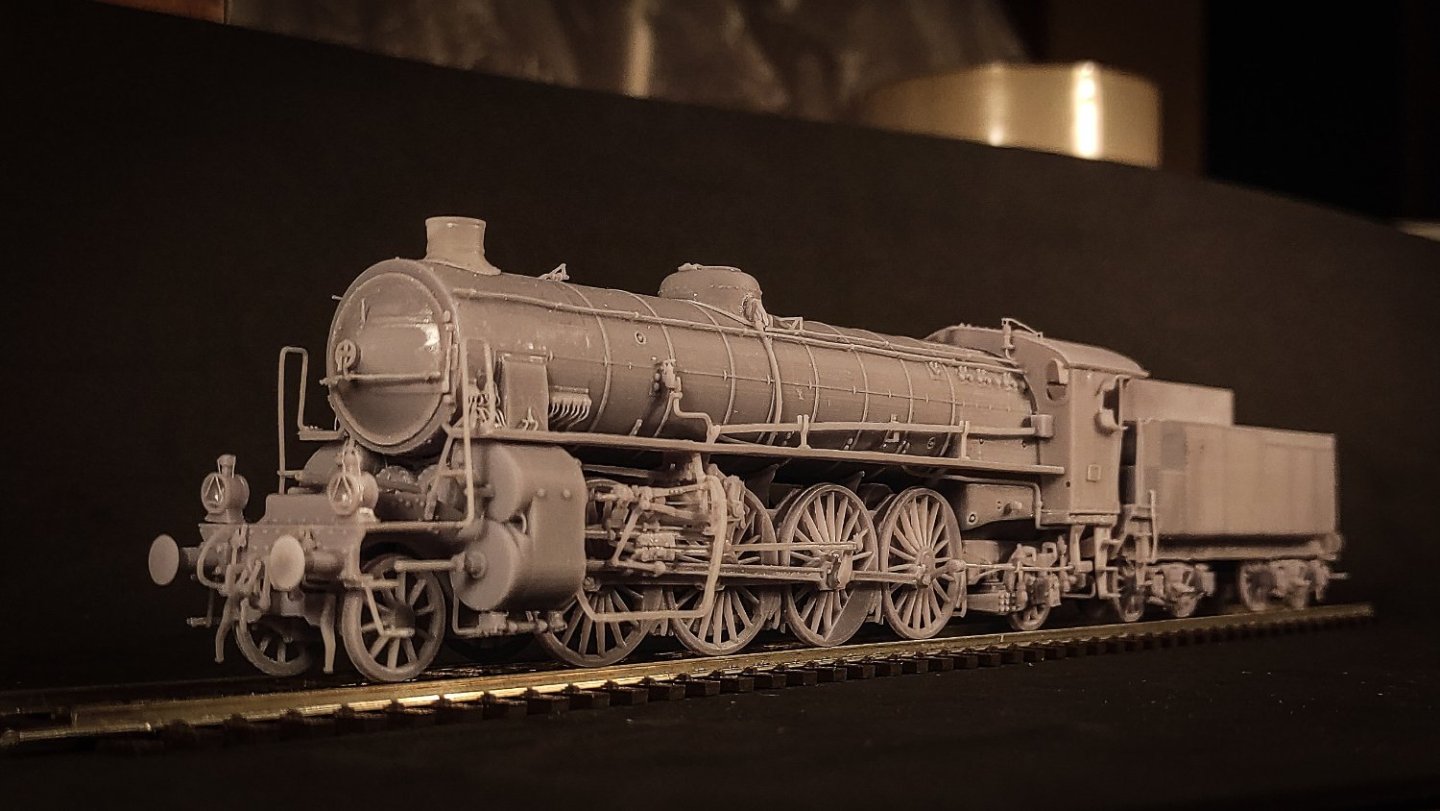
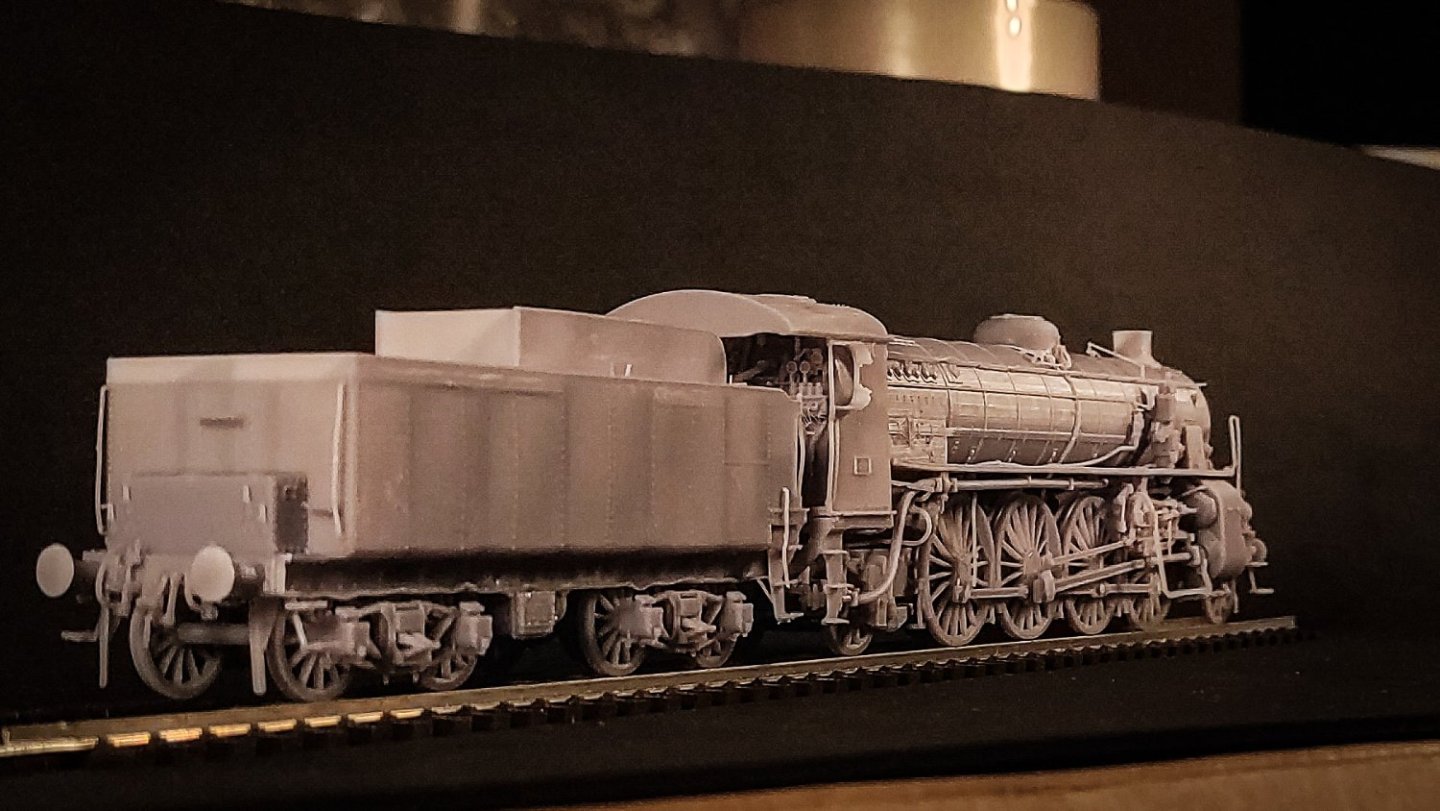
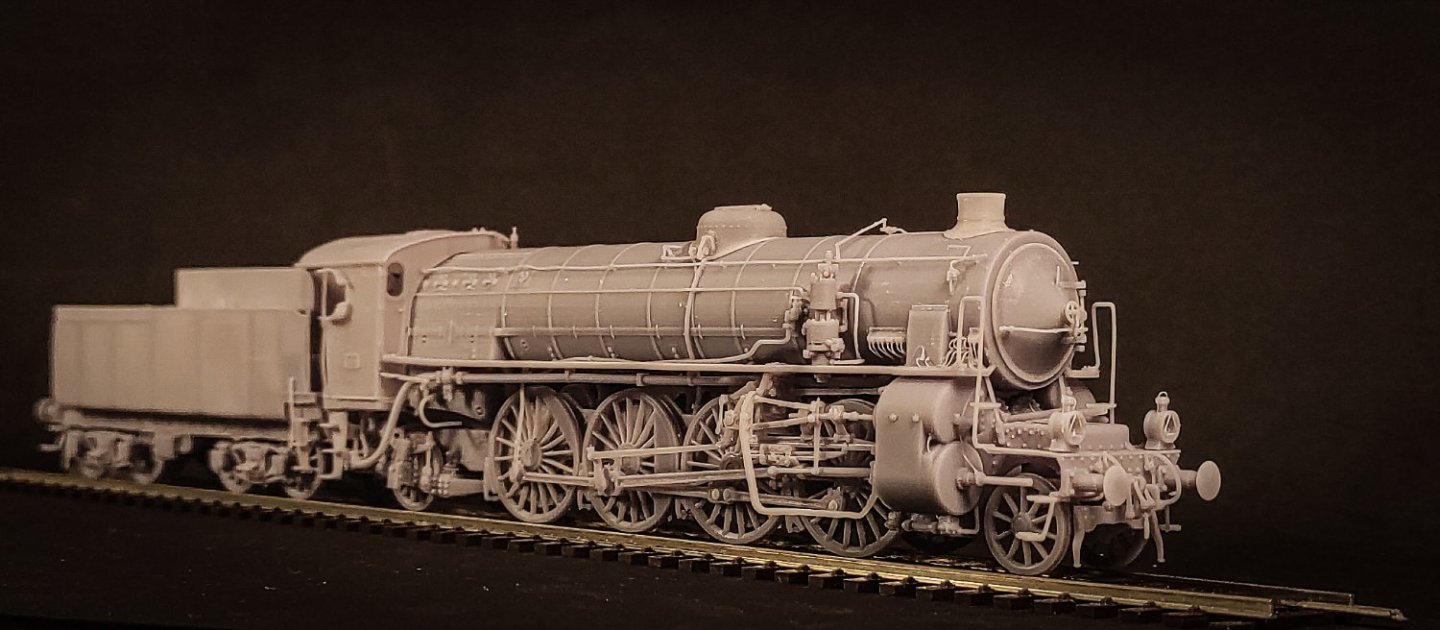
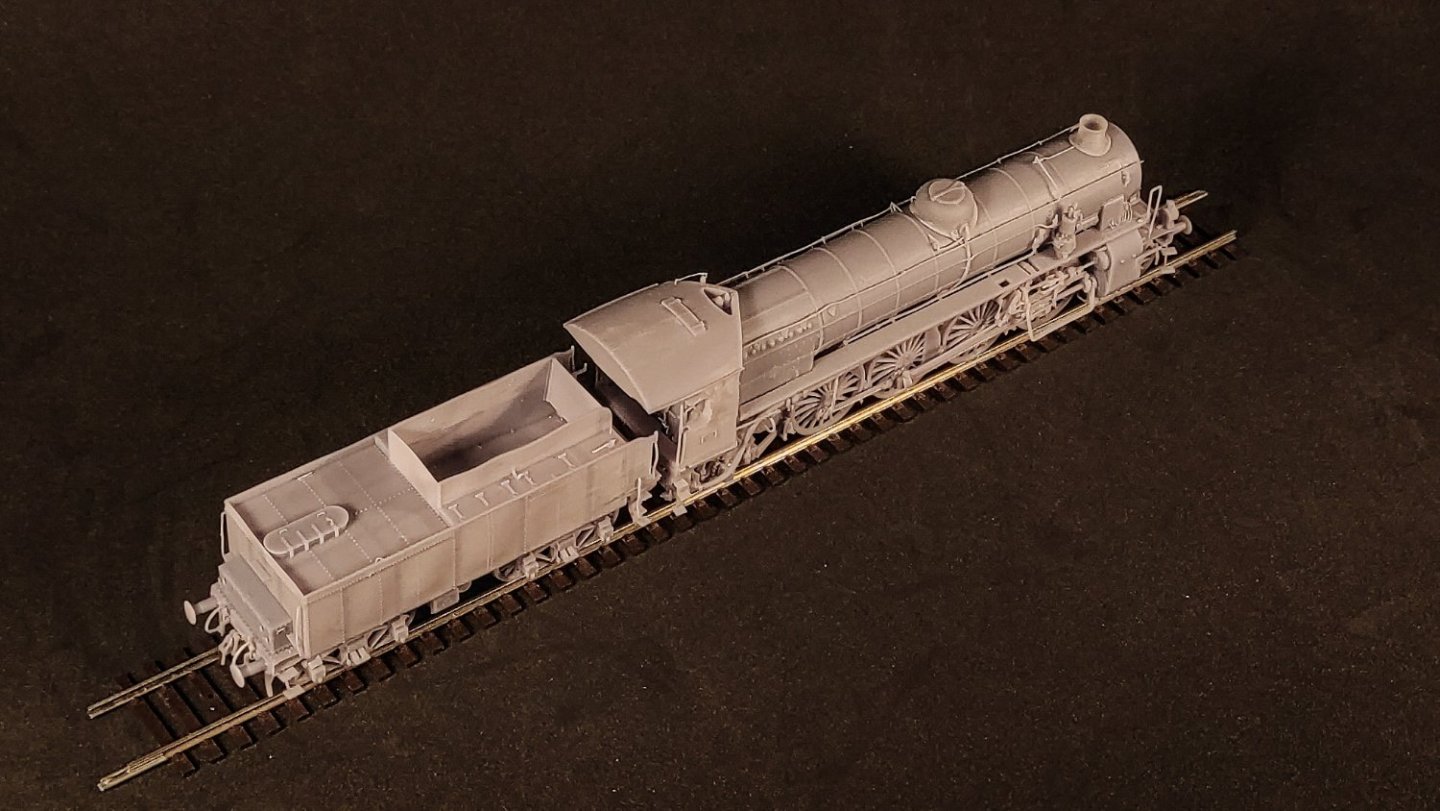
Thank you all for your like and comments, I really appreciate all of them. Once again, it's important for me to know I'm not alone in this long journey. This community is not only an incredible source of knowledge and skilled modelers, but also a great motivation for this time demanding hobby. Kirill, good to read you again! Any new project from you? I really miss your wonderful Galleon! I agree: this close up shots are my preferred too! Well, I don't like them too, to be honest. And the plan is to put my Cutty Sark in water, with a moderate rough sea. It will happen only later on, once and if the ship will be completed, and I will do that only if I'll be able to create a good enough sea, but I will surely try, this is my goal. And yes, again, I was looking for this old fashion experience, without high-tech solution. For me, it's all about the journey, not the destination, and for this old lady I feel appropriate to use old school techniques. But, to be fair, I also enjoy 3d printing and this is the demonstration: Yes, to overcome the boredom of yards making, I started another love affair with an Italian steam locomotive. This time it is not a small one, but one of the biggest and most powerful built in Italy, the mighty Gr 746, 87 times smaller than the original (H0 scale). It's made by more than 200 parts, all of them 3d printed. I have modelled all from scratch in blender, and printed at home with my trusted Elegoo Mars 2. I hope you like her! Well, it's not sea worthy, but I hope you like her too! Thanks again!
- 399 replies
-
- 11
-
-
-
- cutty sark
- revell
- (and 2 more)
-
Wait, finished?!? You are a wonderful mix of speed and accuracy. The result is stunning, your Glory is really a testament of what can be done with passion and skills. I like many aspects of your job, but probably the most important is your will to test new solution for old problems, and your sails are just that! They turned out convincing and I like them! Thank you for sharing this journey with us, it is, and it will be for a long time, a source of inspiration for many modelers.
- 3,560 replies
-
- 3
-
-
- clipper
- hull model
- (and 2 more)
-
Once again, wonderful progress from this beauty! I don't comment often, mainly for the language barrier, but I check constantly your log looking for progress and inspiration. Really nice gin blocks and the stays are adding a lot of character to her. Thank you for taking the time to explain every process, it is really useful and eye-opening.
- 602 replies
-
- 2
-
-
- Flying Fish
- Model Shipways
- (and 2 more)
-
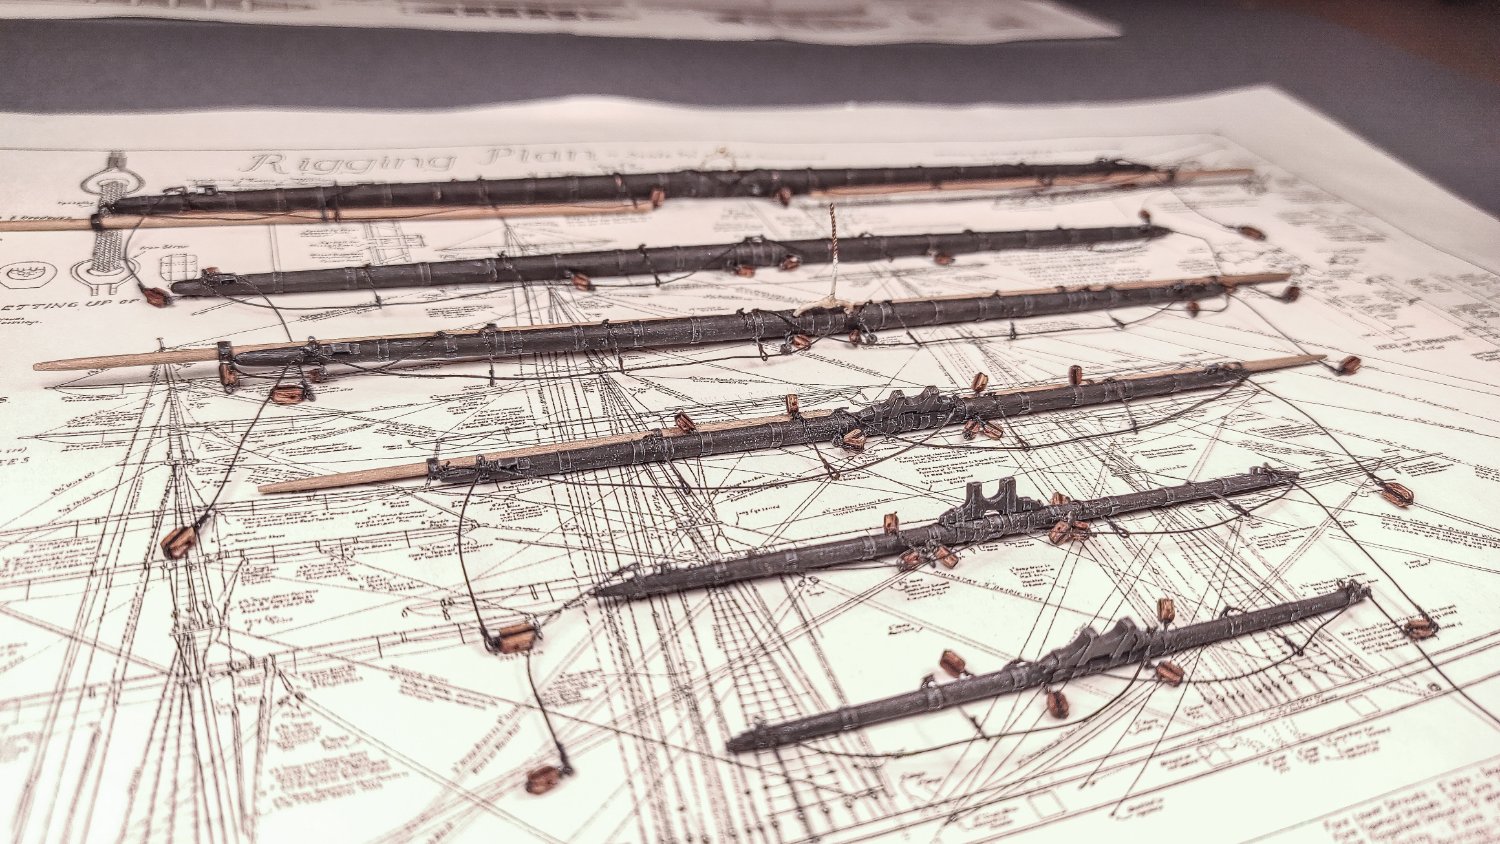
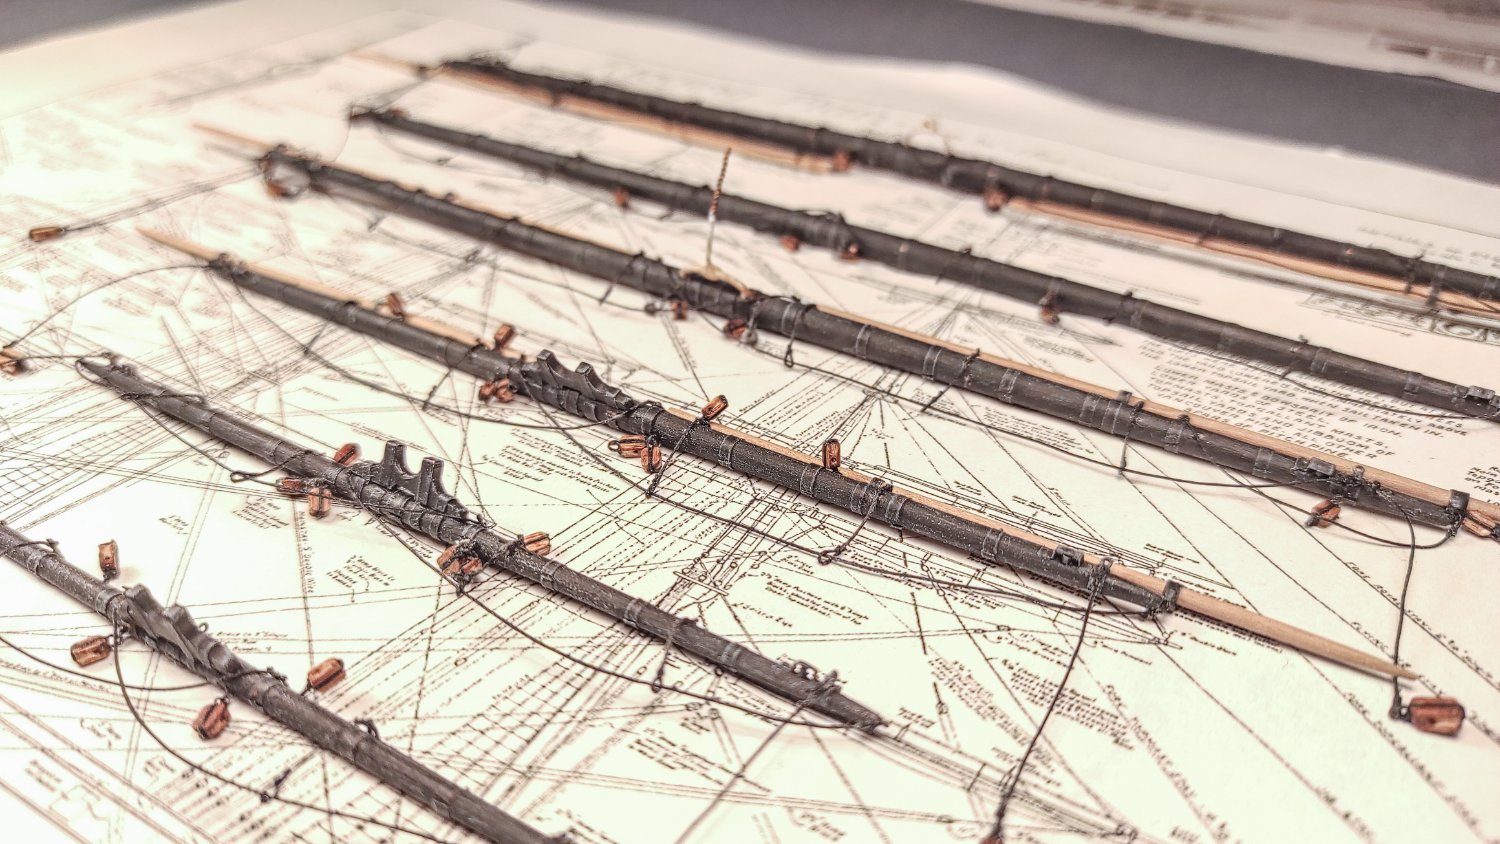
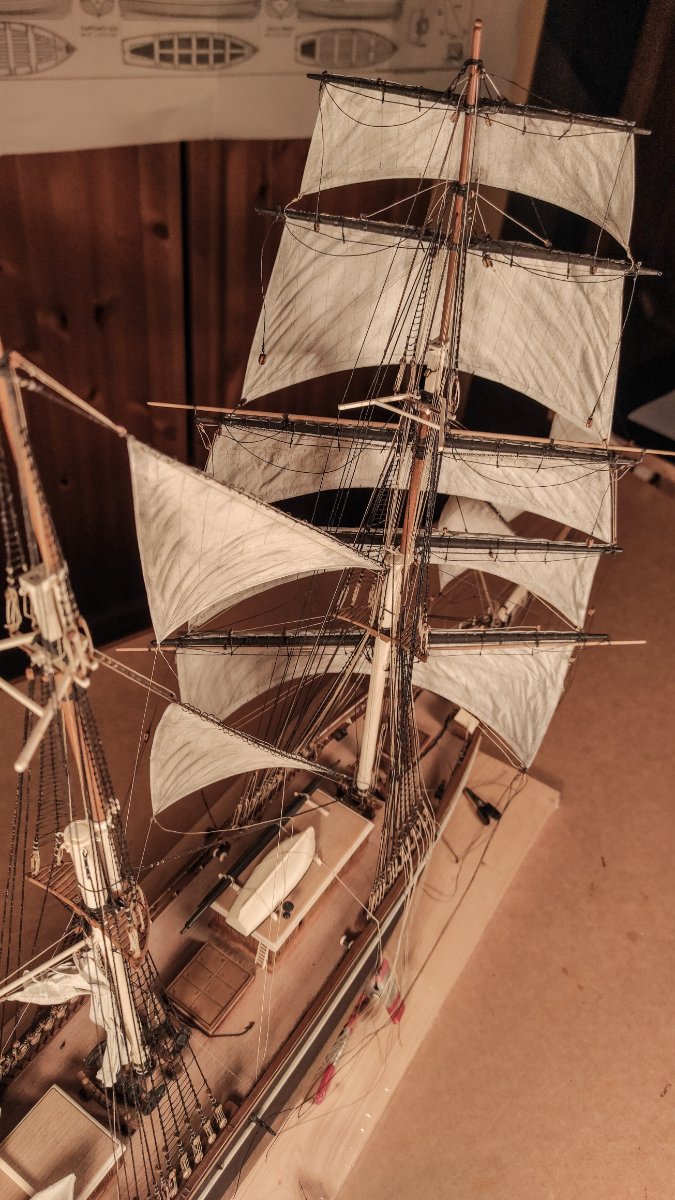
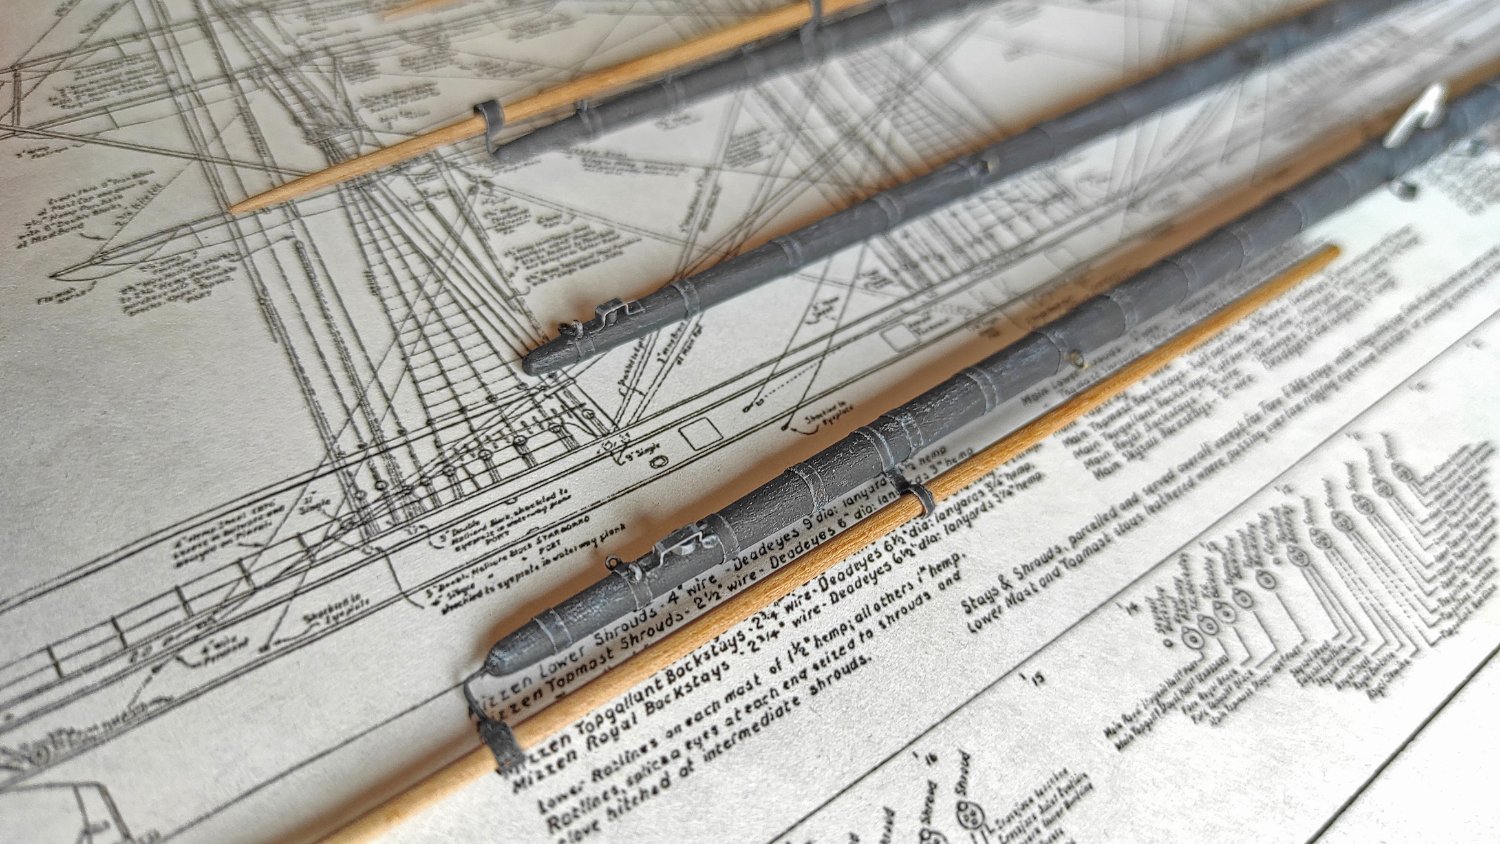
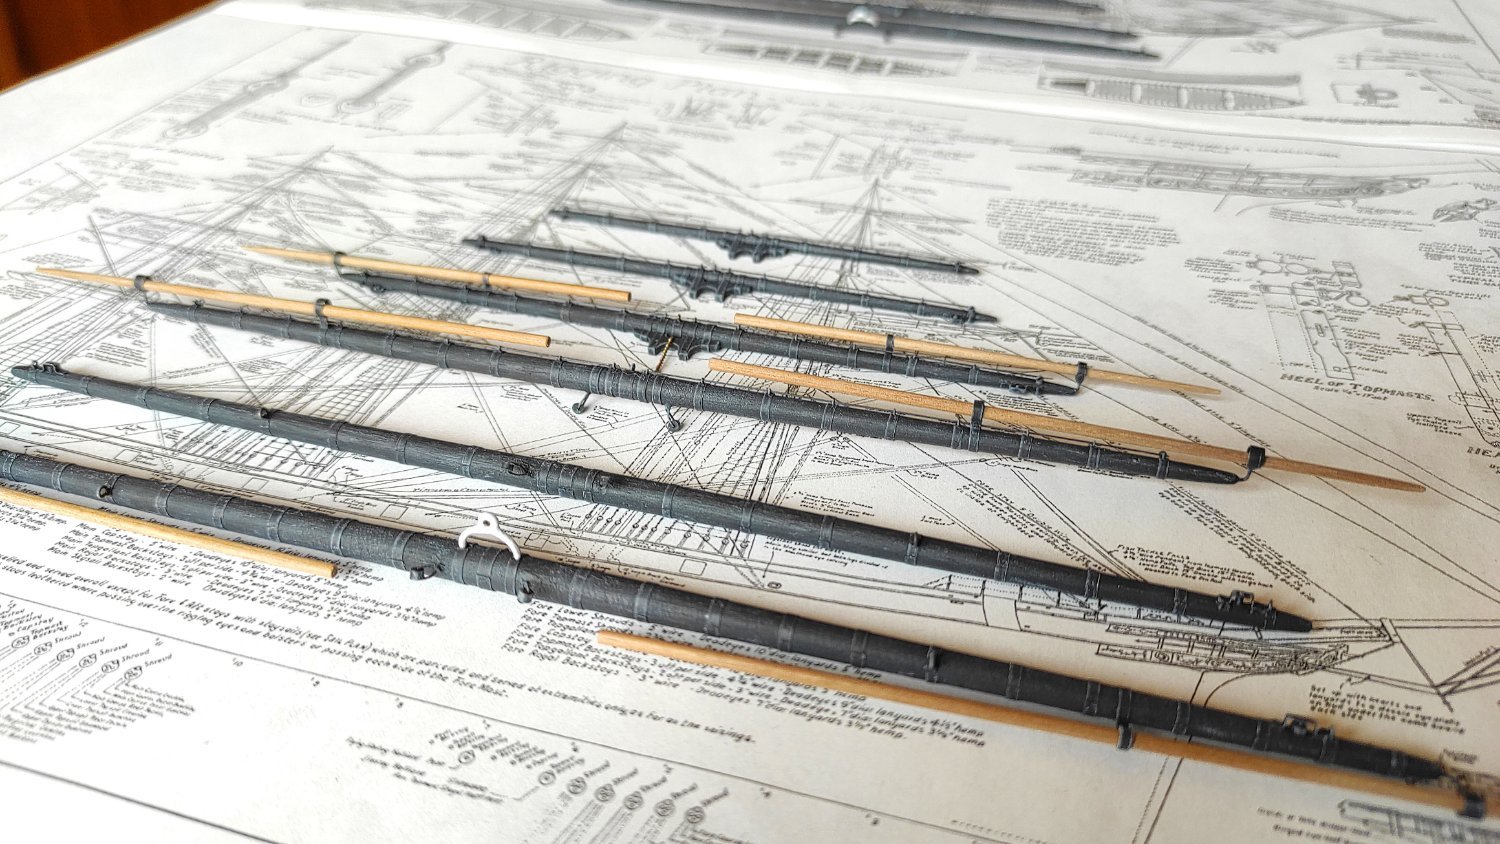
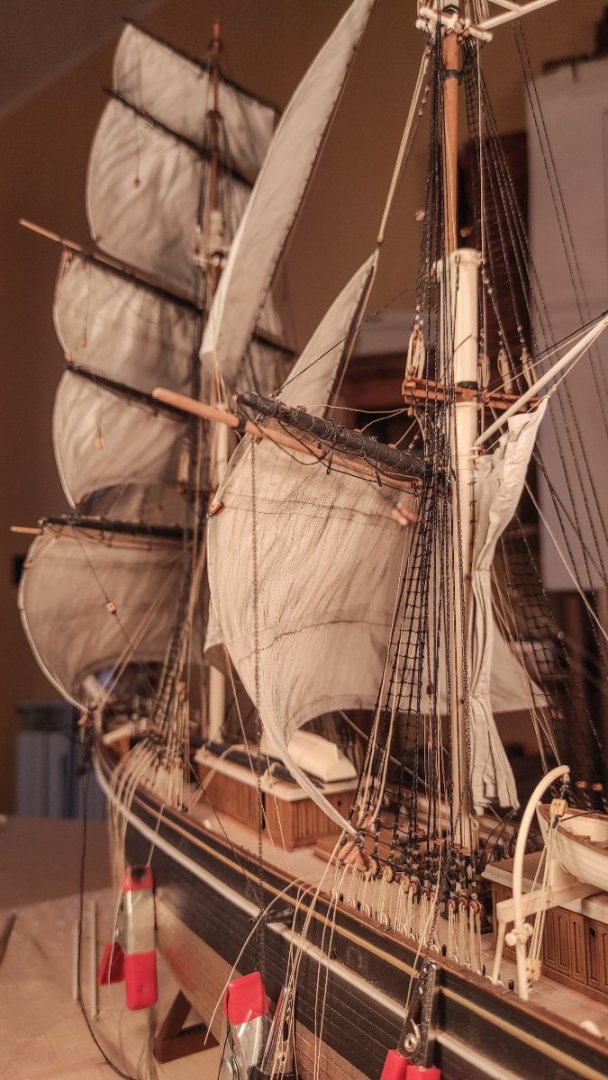
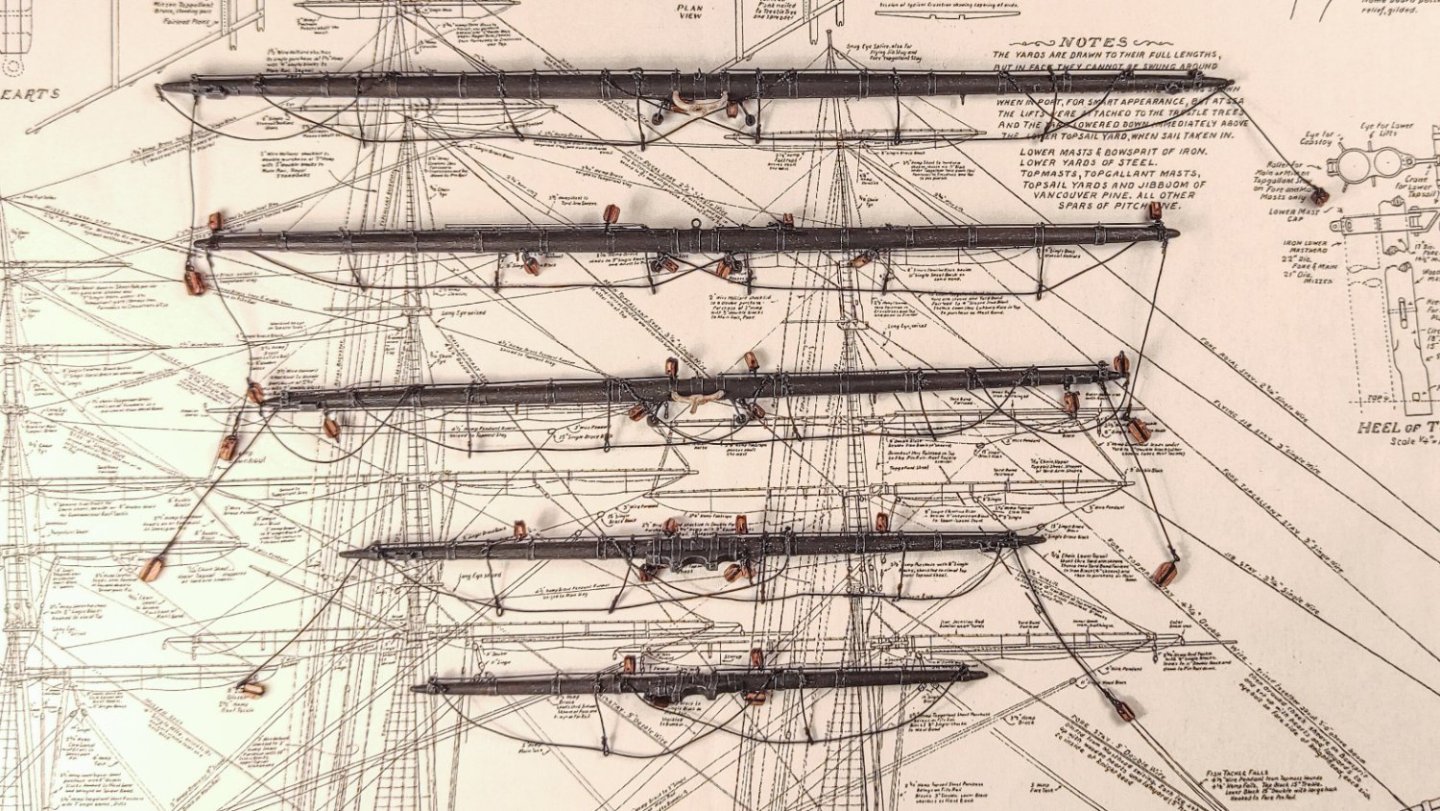
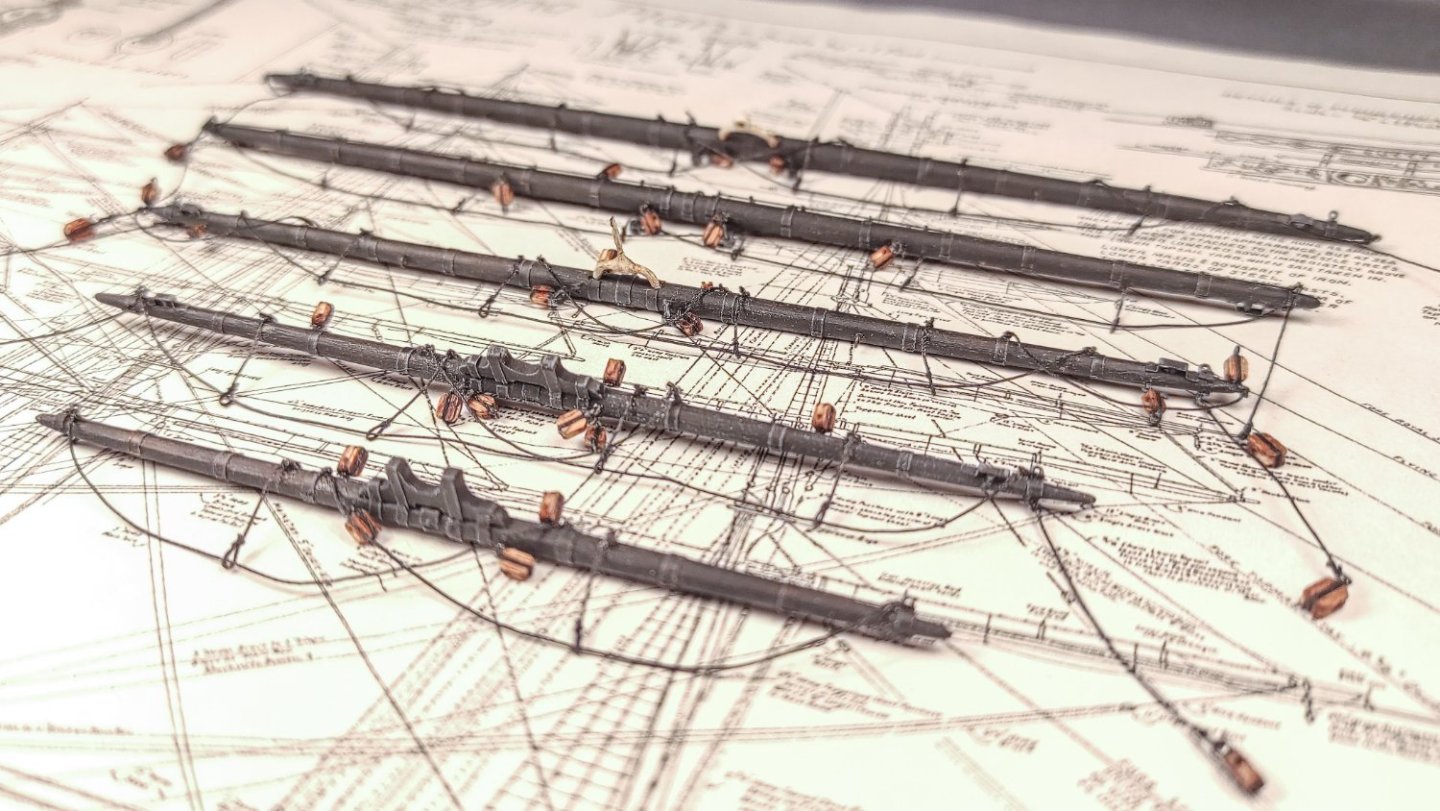
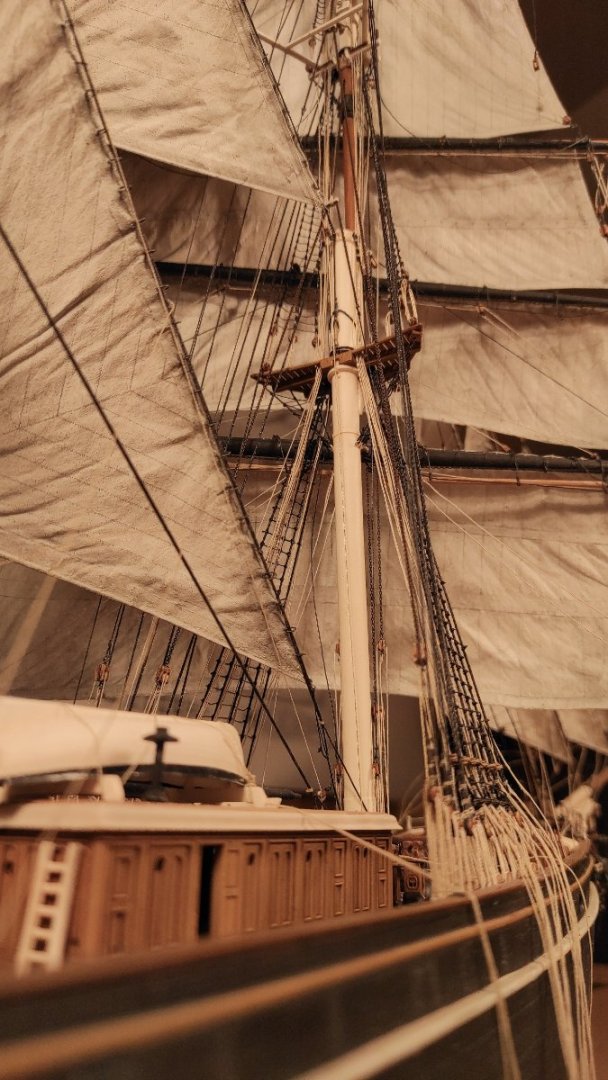
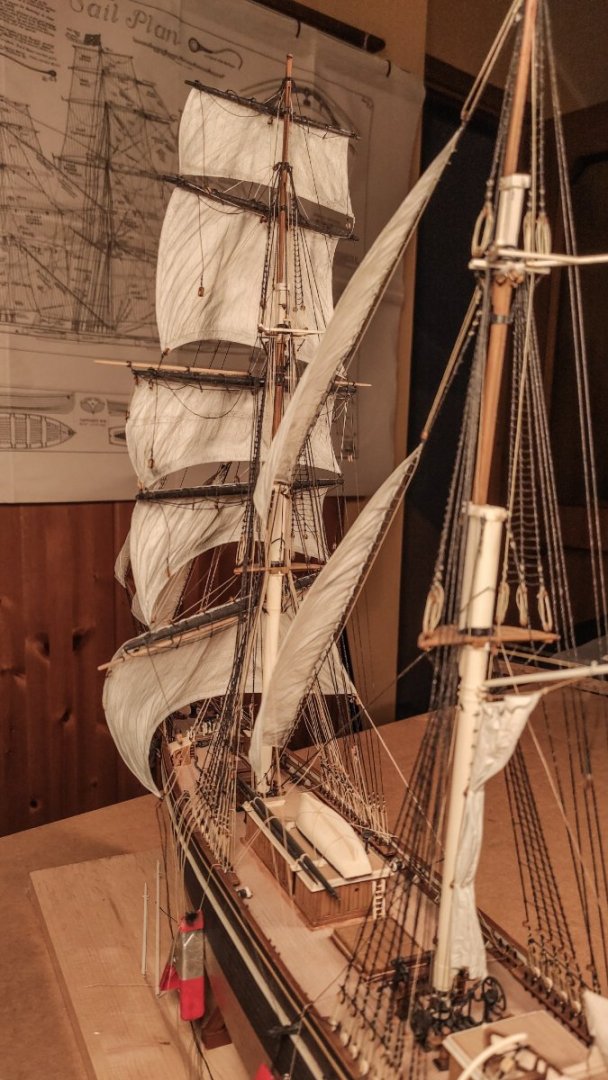
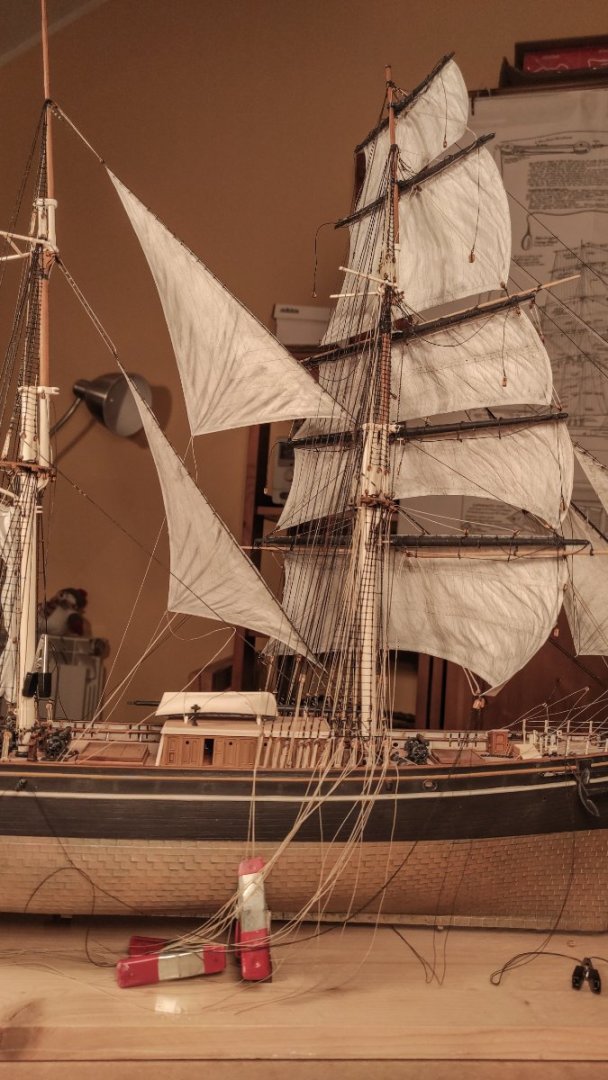
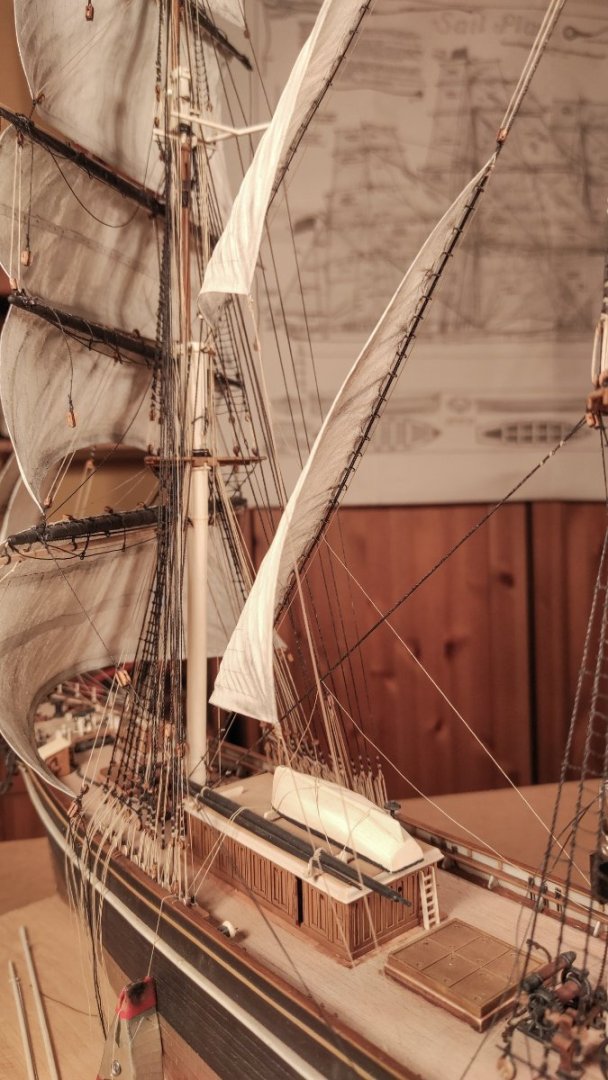
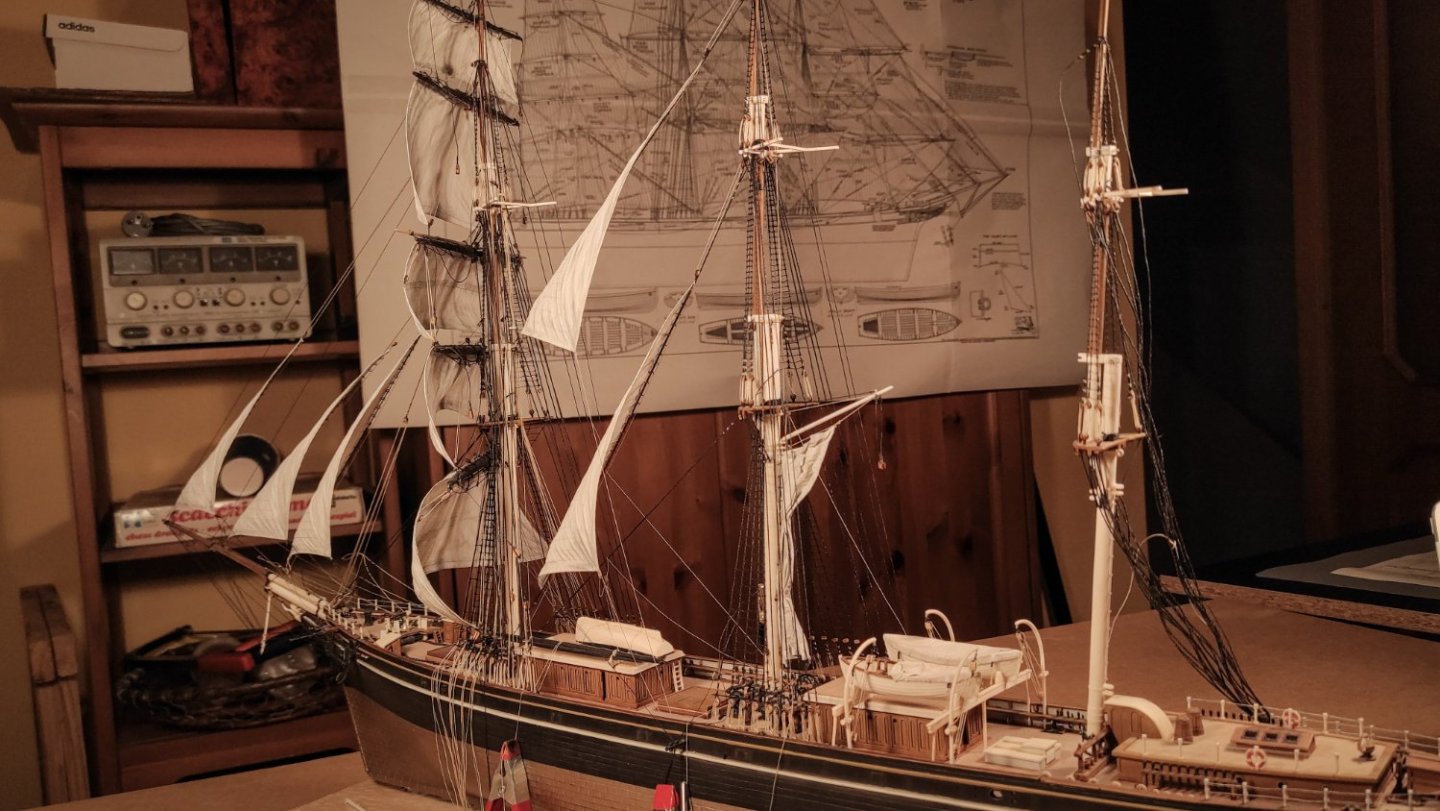
Hello everyone again. First of, thank you to my long time supporters Cirdan, Shipman and Keith Black for their likes, it's really nice to see you still aboard after all that time! And secondly, today is finally update time! Main and mizzen yards completed. I know you are bored by my yards, and I am too, to be honest... Completing the rigging of the yards has been a long and not so funny journey, but here I am at the end! Almost 100 blocks of different size with relative knots and eye bolts, 50 stirrups and 30 footropes almost stopped my Cutty Sark. But I-m glad I did them together and in one pass. So, here they are, main and mizzen yards completed and fully equipped: Main: And mizzen: But there are also some other news: Main topmast and main topgalland staysails. Those staysails are similar to the fore ones, and I have used the same techniques, apart for a small detail that I would like you to find. Do you spot something strange, not uniform, or simply not good enough? If you can, take some moments and have a look at the pictures: Did you notice it? Well, I sincerely hope no, but please be honest! And here is what is concerning me: for the fore sails, I have supported the billowing sails by stiffening the sheets on the lee side with CA glue. It worked quite well but now, on the main staysails, the sheets are just too long to be supported by stiffened tread. So, after a lot of testing and guessing, I have used painted copper wire instead. I know it's different, and it can be spotted by a close inspection, but the general effect of those big billowing sail is more important for me, so I decided to use this technique. What do you think about? Are they acceptable? Please, let me know your opinions! Now, with all that tedious job done, I hope I can be back posting more regularly new updates! Thank you all for your support and patience!

- 399 replies
-
- 12
-
-
-
- cutty sark
- revell
- (and 2 more)
-
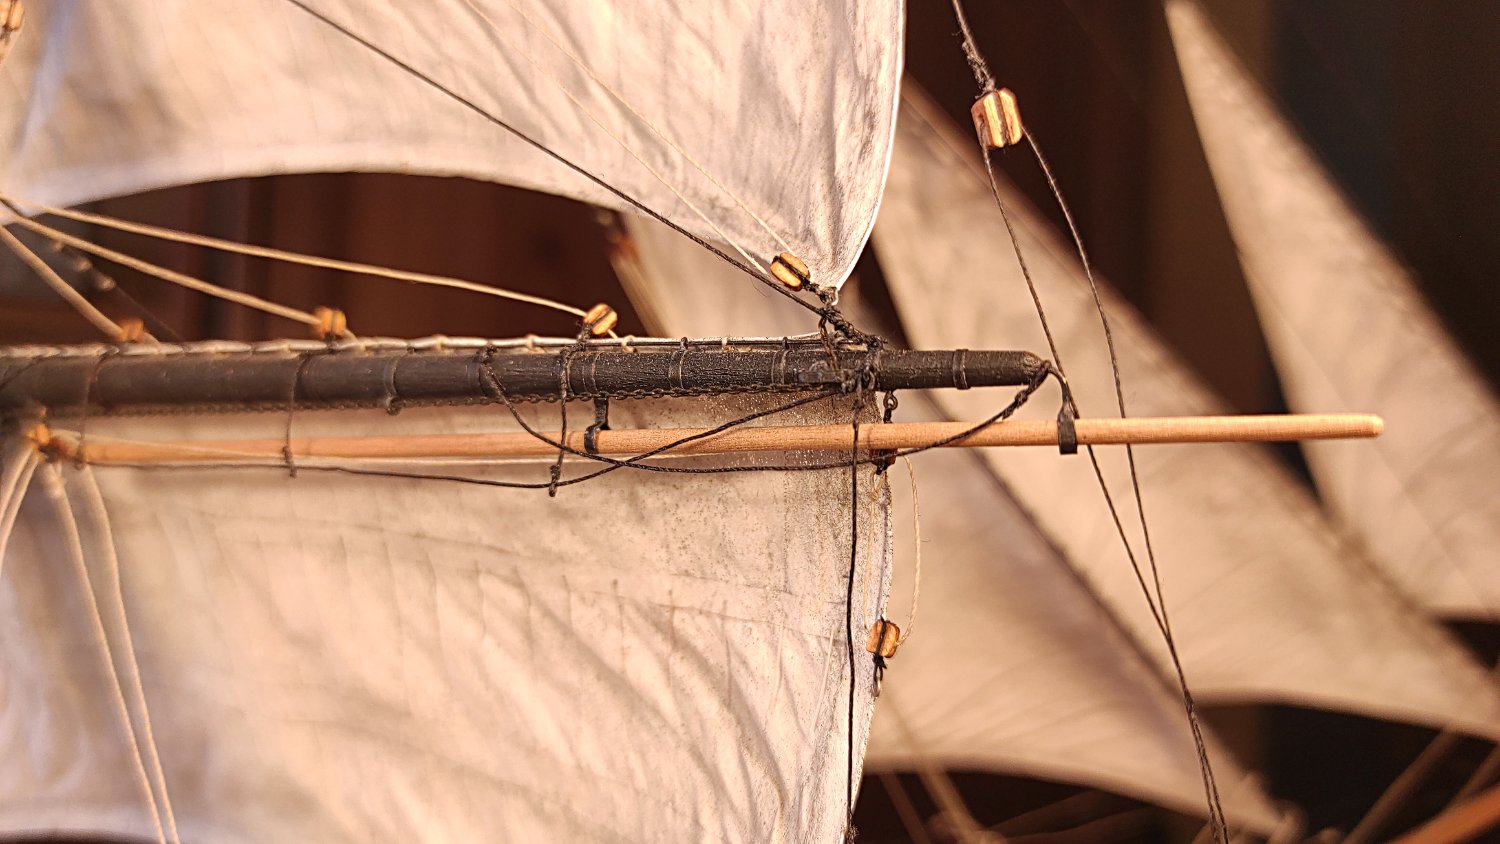
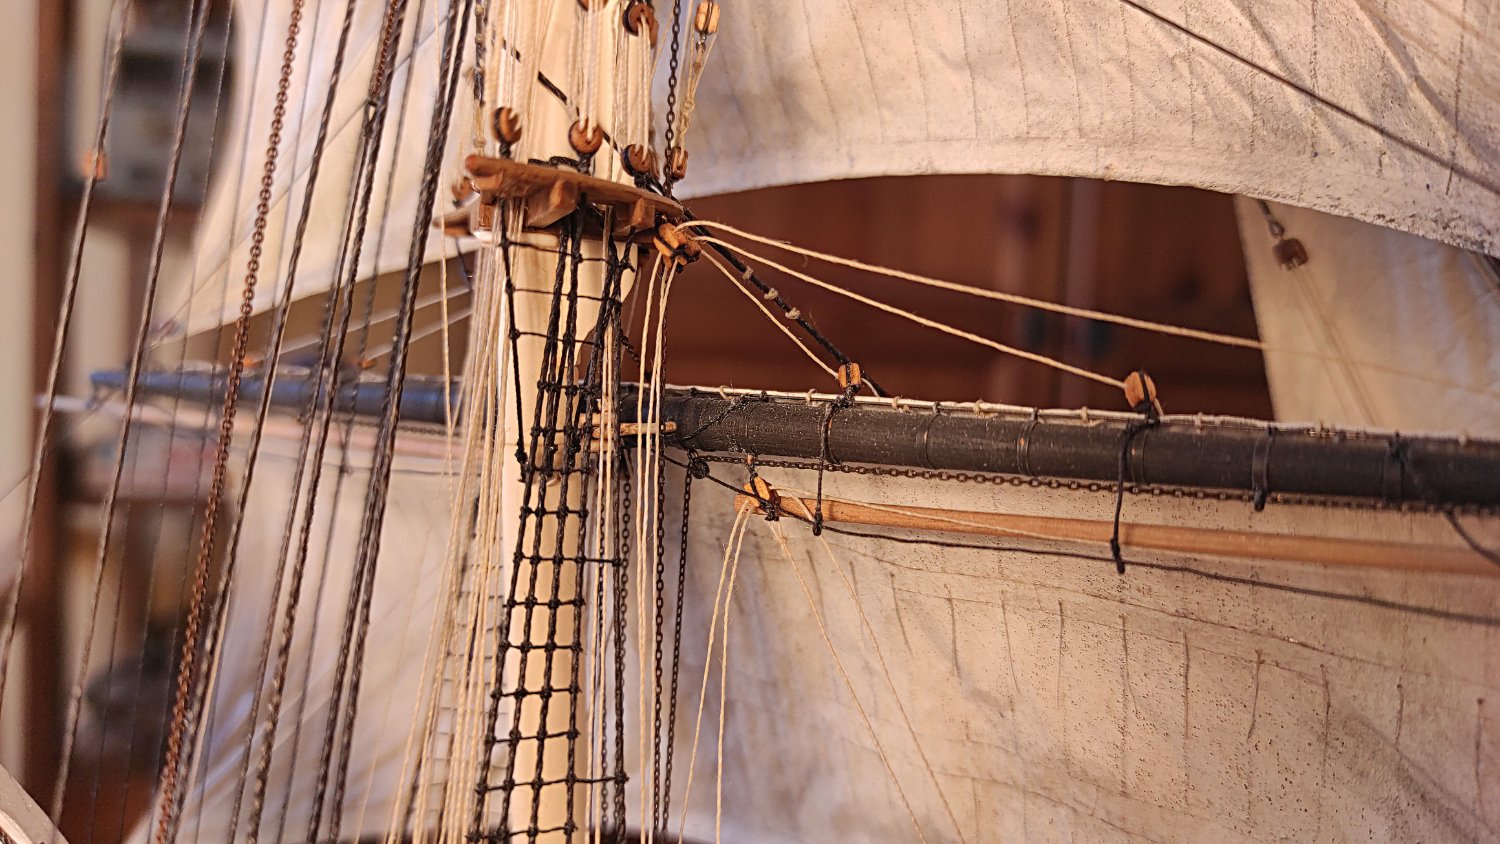
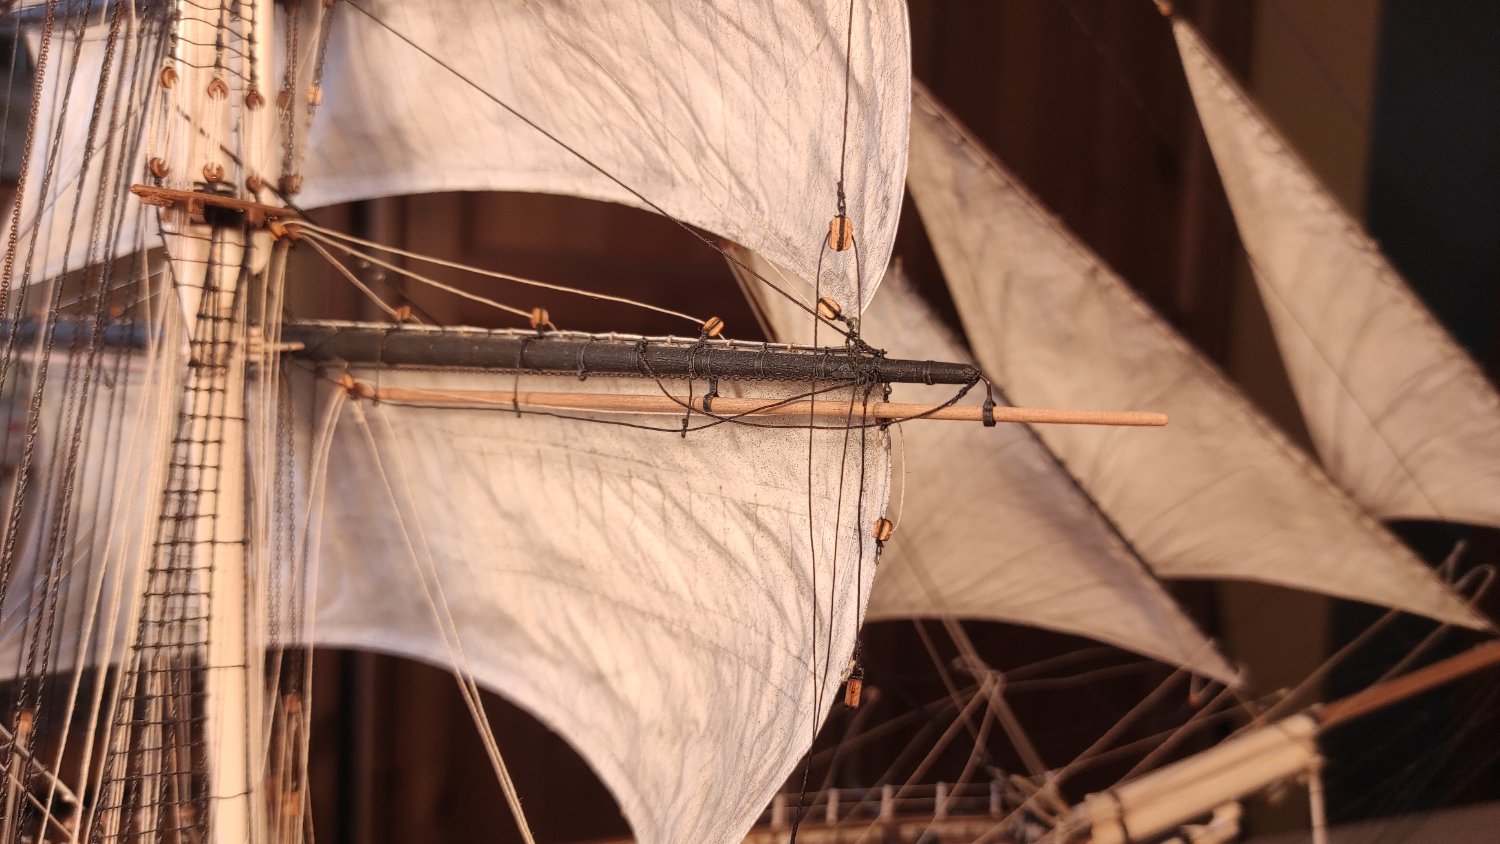
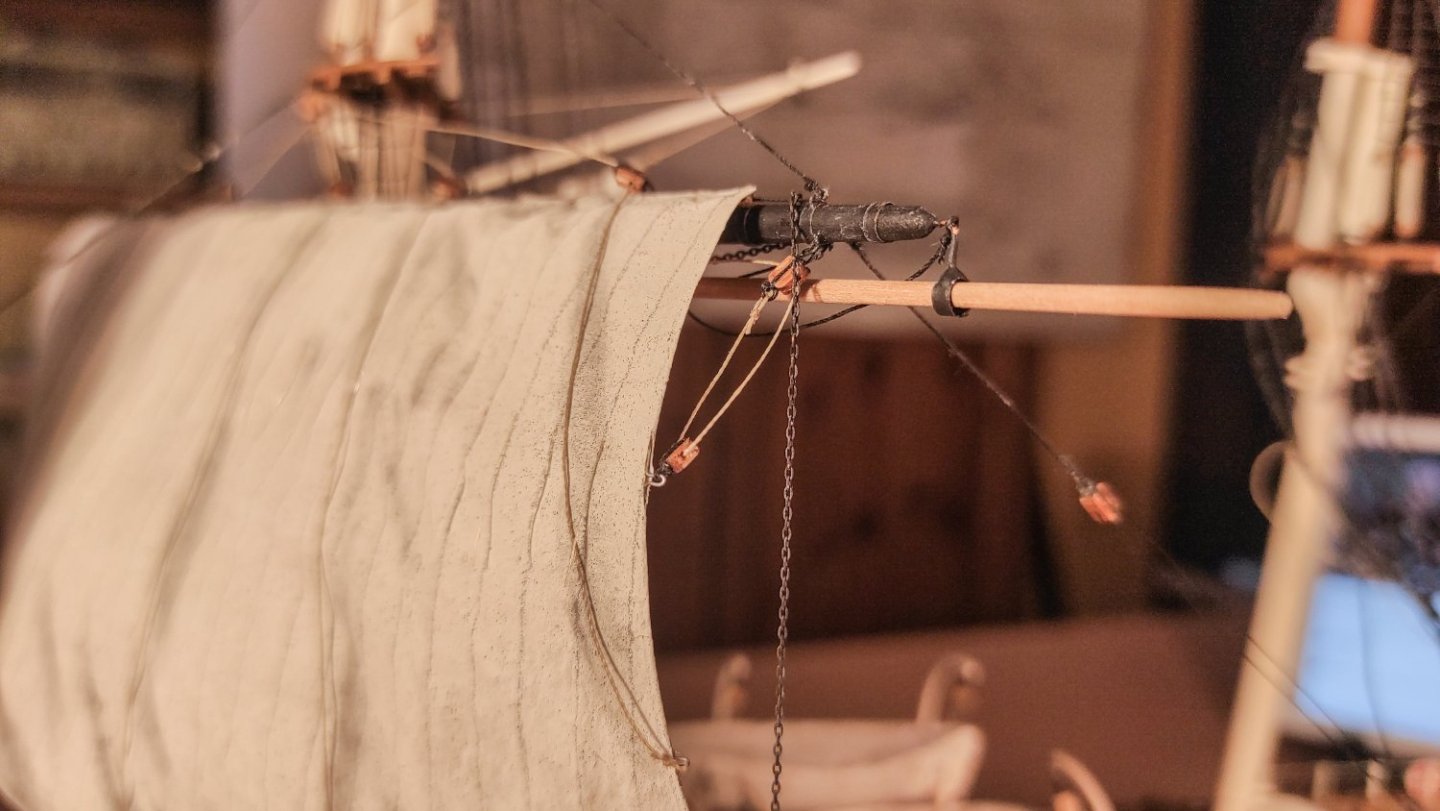
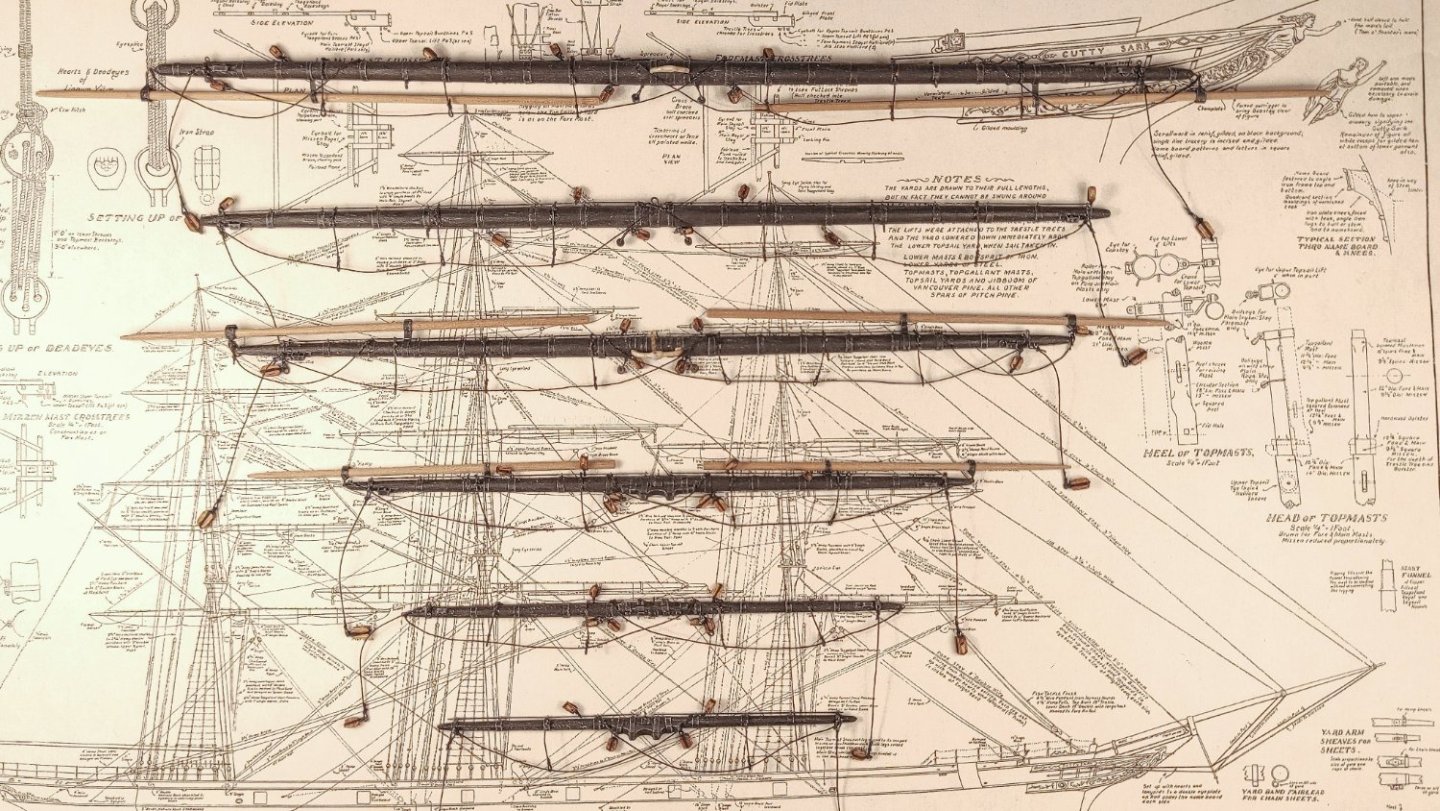
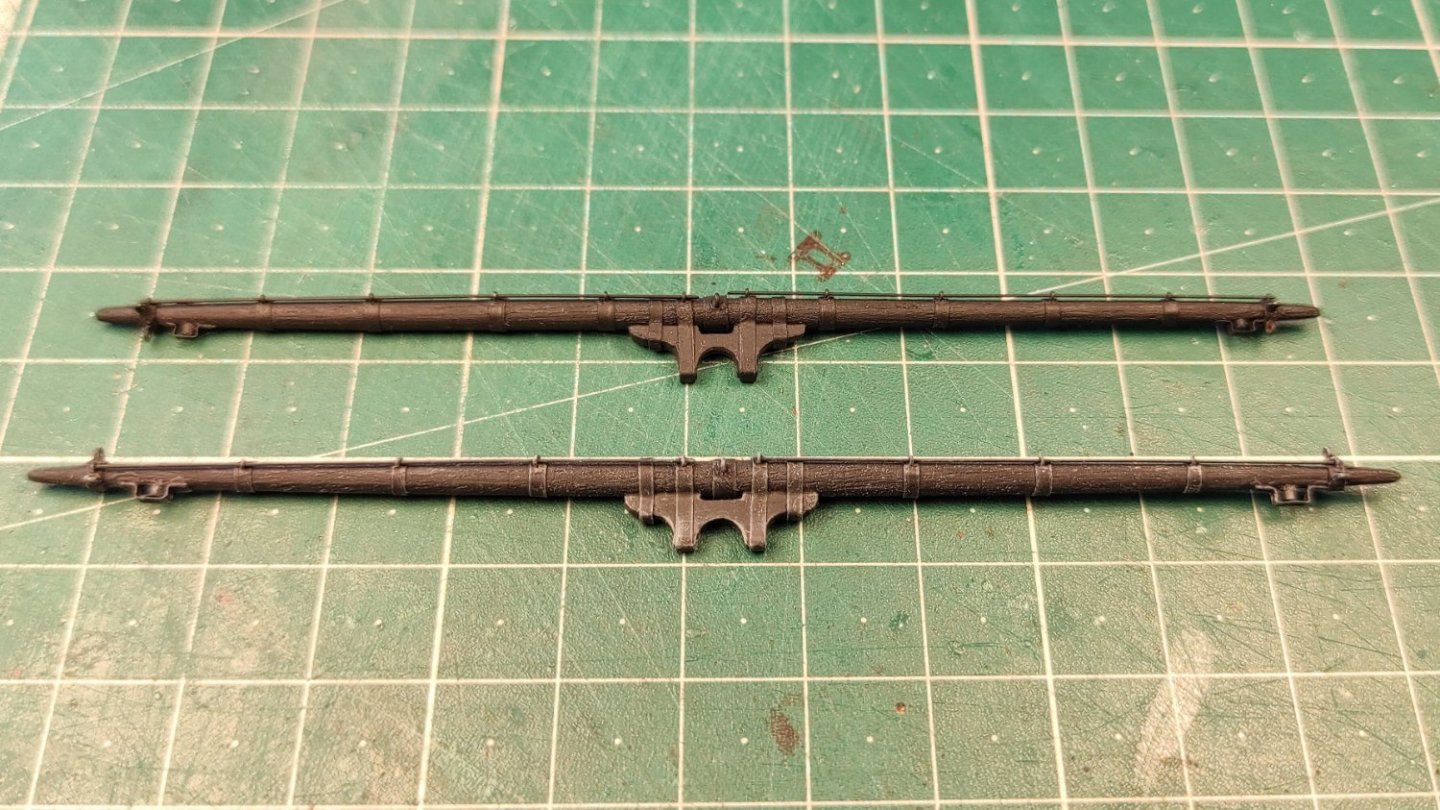
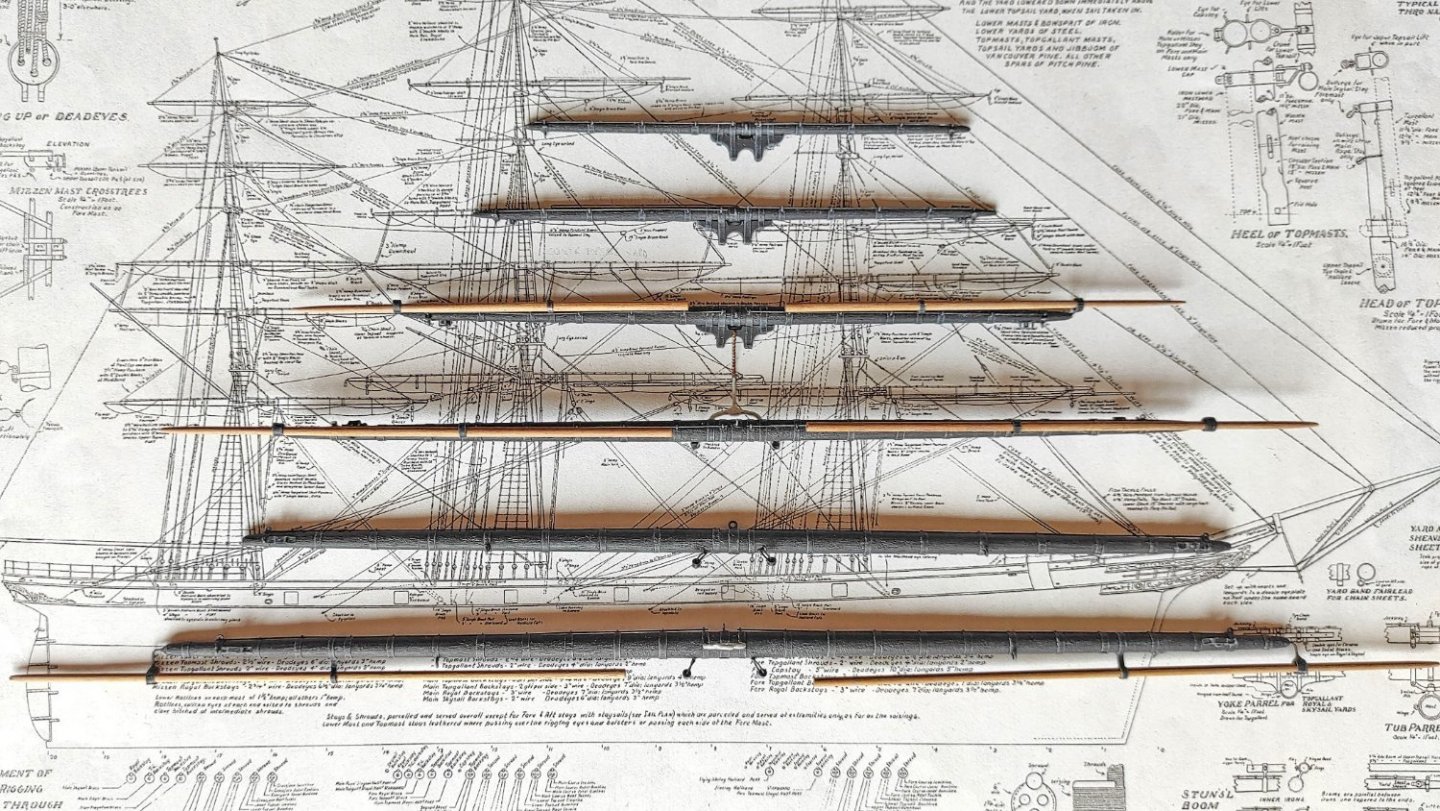
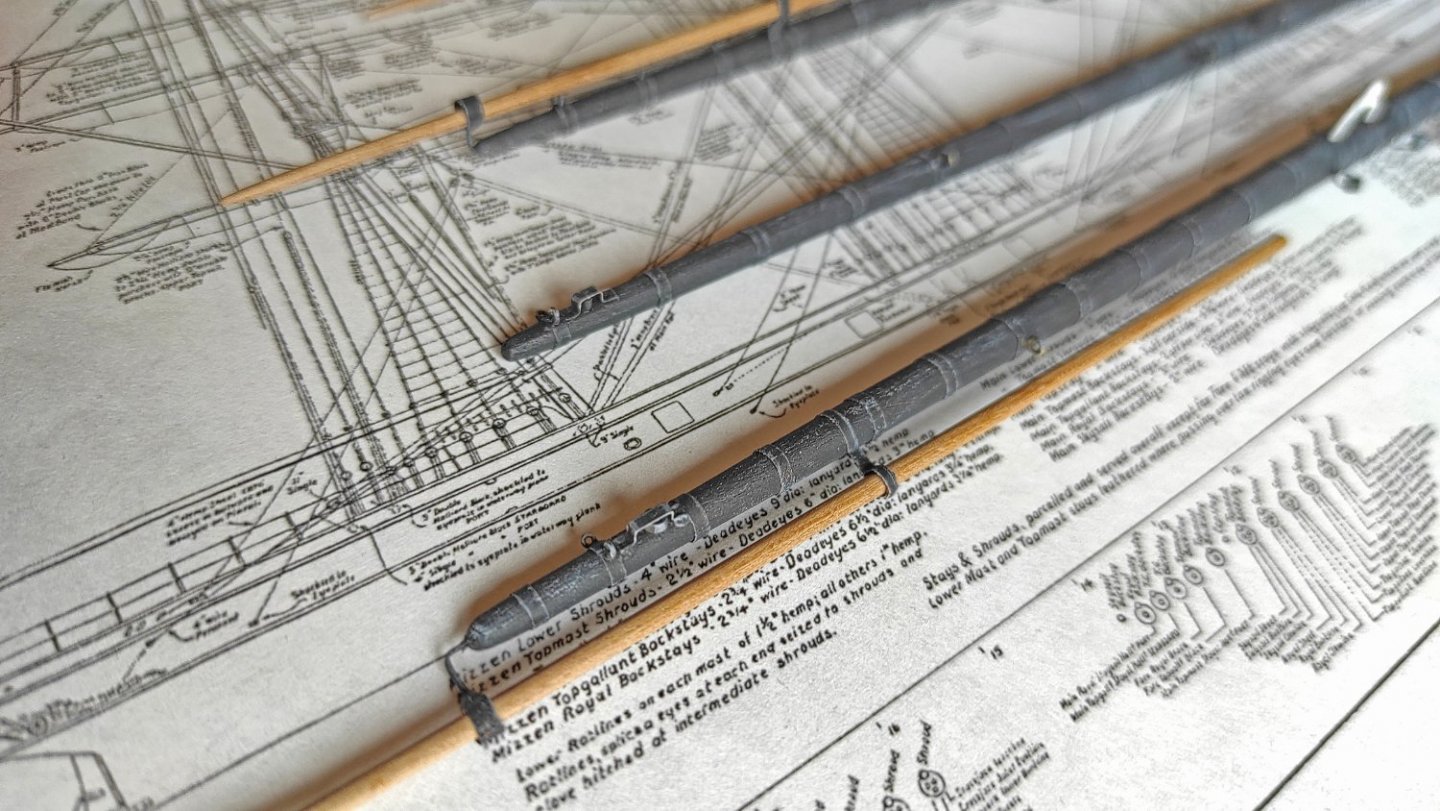
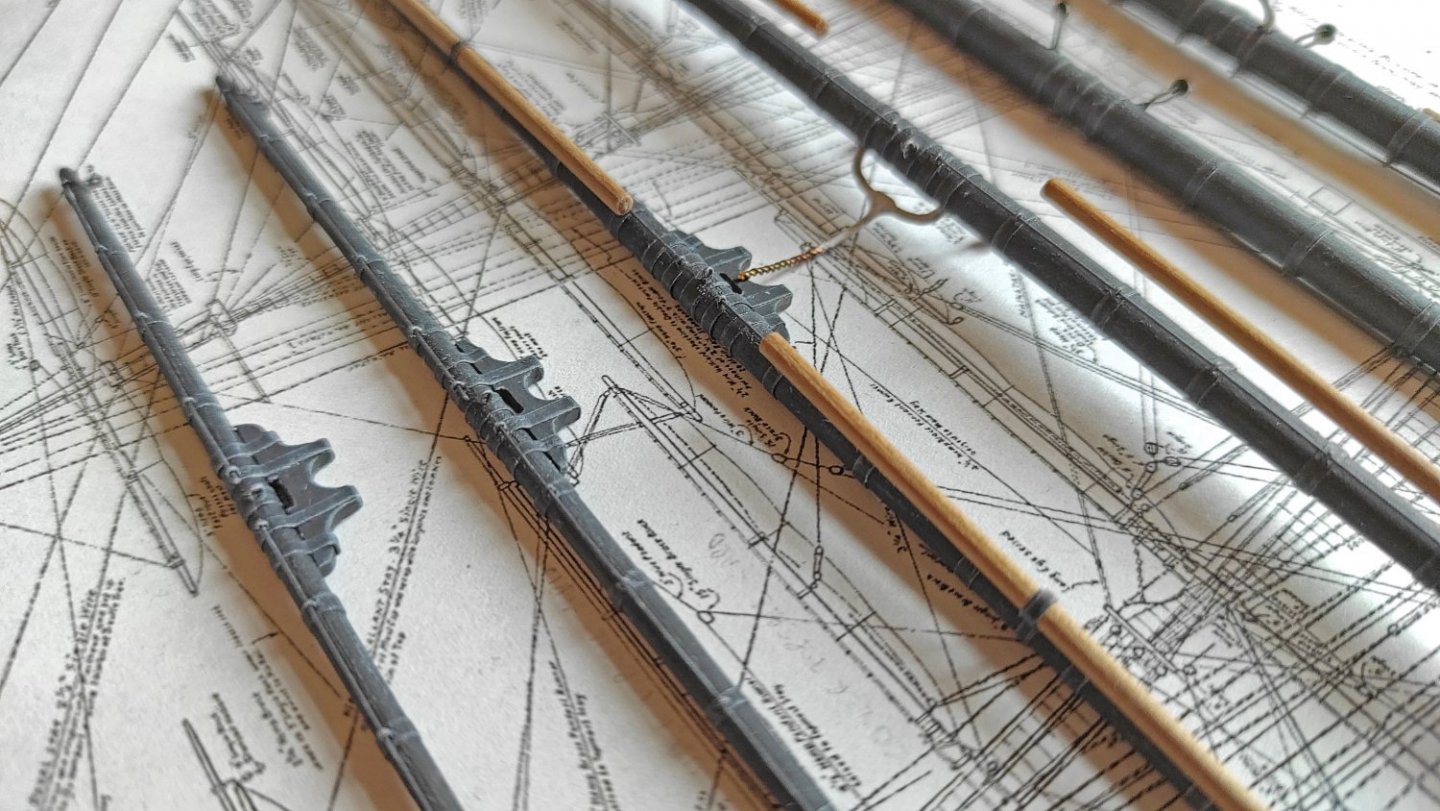
Hello every one! I'm still alive, and the build is still running, but painfully slowly... Fully rigging the yards is a very long process. Hoping to be more effective, I'm working on both the main and mizzen yards, but it takes time and the result is not always huge. I can spend easily two hours adding detail that are invisible 2 meters away. But still, I'm making progress and I will post them as soon as they will be completed. I would like to post some picture of the fore course yard, hoping to be helpful for Kevin (go and check his wonderful build here: and maybe to some other modelers in the same situation.


- 399 replies
-
- 9
-
-
-
- cutty sark
- revell
- (and 2 more)
-
Hi Kevin! You are doing great, and I constantly follow your updates. And yes, your conclusion about the chain sheets are right (or at least I agree with you!) and I agree with Ian's answer. If I may suggest, try to rig the sheets purchase on the mast as soon as possible. They are pretty challenging and working with some free space around them might be helpful; this will be a crowded area... I wish you all the best with the furled sail, I'm sure you will be able to give them a proper redemption. I will post on my build log (so I don't mess with yours) some detail about the fore course yard arm, hoping to clarify the rigging. If you don't mind, I would like to share with you some thought: 1: if you go for redoing the masts in resin, consider to improve the revelle version. Some details are not well reproduced, and you can surely improve them with small effort. The main one is the cap band shape. They are well represented in Campbell's plans, and there are many pictures of the preserved ship. Not doing them properly is one of my many regrets about the build... 2: full rigging the yards is a challenge. Not a technical one, I'm sure you can do it, but it takes a huge amount of time, and it is a repetitive job. When ratlines says they are boring, the yards rig steps in and says: hold my beer! I don't want to discourage you, it is rewarding, but just consider it, and plan it properly. If I can be helpful, please write, and I'll try to give my two cents.
- 444 replies
-
- 1
-

-
- Cutty Sark
- Revell
- (and 2 more)
-
George, what a wonderful job! I keep following you in silence, and it is a real pleasure to see this marvel growing. Unfortunately, I am not able to help you for the halliard. I'm more familiar with the Cutty Sark, but she has standard single block for each halliard under the fore trestle tree. I'm sure someone else will help you! Thank you for sharing your build!
- 602 replies
-
- 1
-
-
- Flying Fish
- Model Shipways
- (and 2 more)
-
Hi Kevin, you are doing great with your Kutty Sark, keep going! I know your feeling, I have been in this tunnel for very long time. For me, it was the first approach to rigging, and it was hard! Add to this the language barrier, and you can have a glimpse of my desperation. On the other hand, one of the reasons that pushed me to build my model was to better know the real ship, how it was organized, how that brave sailors' ménage to guide her through the seven seas. And slowly I can finally say that now I know! And it is an immense satisfaction. Knowing each lines, knowing why they are there and being able to fly over this intricate wonders is really rewarding! Where others see a mess of line and spar, you see ingenuity and order! So keep reading, write down your question and try to solve them, write what you find out and what you start to understand. Make some drawing to better show yourself what you know and what you still need to understand. That was the way that I followed. After a while, you will start to look for answer in specific areas rather than read it all over again. And about shortcuts... Well... There aren't! At least for me. What might seam a simplified version or an irrelevant part, can turn out to be fundamental later on, and you might regret that shortcut. And you seem to be that kind of guy who is looking for perfection... Lastly, ask! Many other expert members of this community have helped me a lot! And, if possible, I'll be glad to do the same!
-
Thank you Mark for taking time to answer my question, I really appreciate that! I completely agree with you about halyards and downhaul. That was my interpretation too, and I will display them in this way. The biggest question is about the sheets... The sail plan by Campbell display whips for the fore stay sails, but not for the main and mizzen stay. They seem to be made of two simple line, one for each side. Without any further information, I think I will make them that way, even if a lot of doubt still remains. Thank you again for helping me and congratulation for your masterpiece!
- 525 replies
-
- 1
-
-
- cutty sark
- mantua
- (and 2 more)
-
Nooo! So sad for you! But I'm sure you will come back stronger! Never give up!
-
Here I am! Yes, I usually apply the wash over the acrylics, and I like to use the Humbrol Enamel Thinner. It is less aggressive. But you should always be careful: if you insist too much, you can wipe out the acrylic beneath. A coat of flat clear can help, but I haven't used it on my Cutty Sark. Just make some tests and see how it goes with your acrylics. I usually use Gunze acrylics. Why oils and not acrylics? Well, oils are softer, they dry really slowly so that you can adjust the effect as you like. They are really fun and easy to use! And I have used them also for the metal plates on the hull. In that case, I have used a wash of green and blue.
- 399 replies
-
- 3
-
-
- cutty sark
- revell
- (and 2 more)
-
Thank you all for the likes and comments! Well, as said, I tend to never use pure colors. If I do so, I apply an oil filter later on (usually a shade of brown) to modulate the tone, to give some variation and to tone it a little down. Oil colors are really great, you can try to use them on some spare parts just to give them a try! Thank you, Shipman! I already did that, even if only slightly. In my opinion, a light weathering helps to mitigate the toy effect on the model. All the wood panels, the metal fittings, the hull and even the sails are weathered.
- 399 replies
-
- 6
-
-
- cutty sark
- revell
- (and 2 more)
-
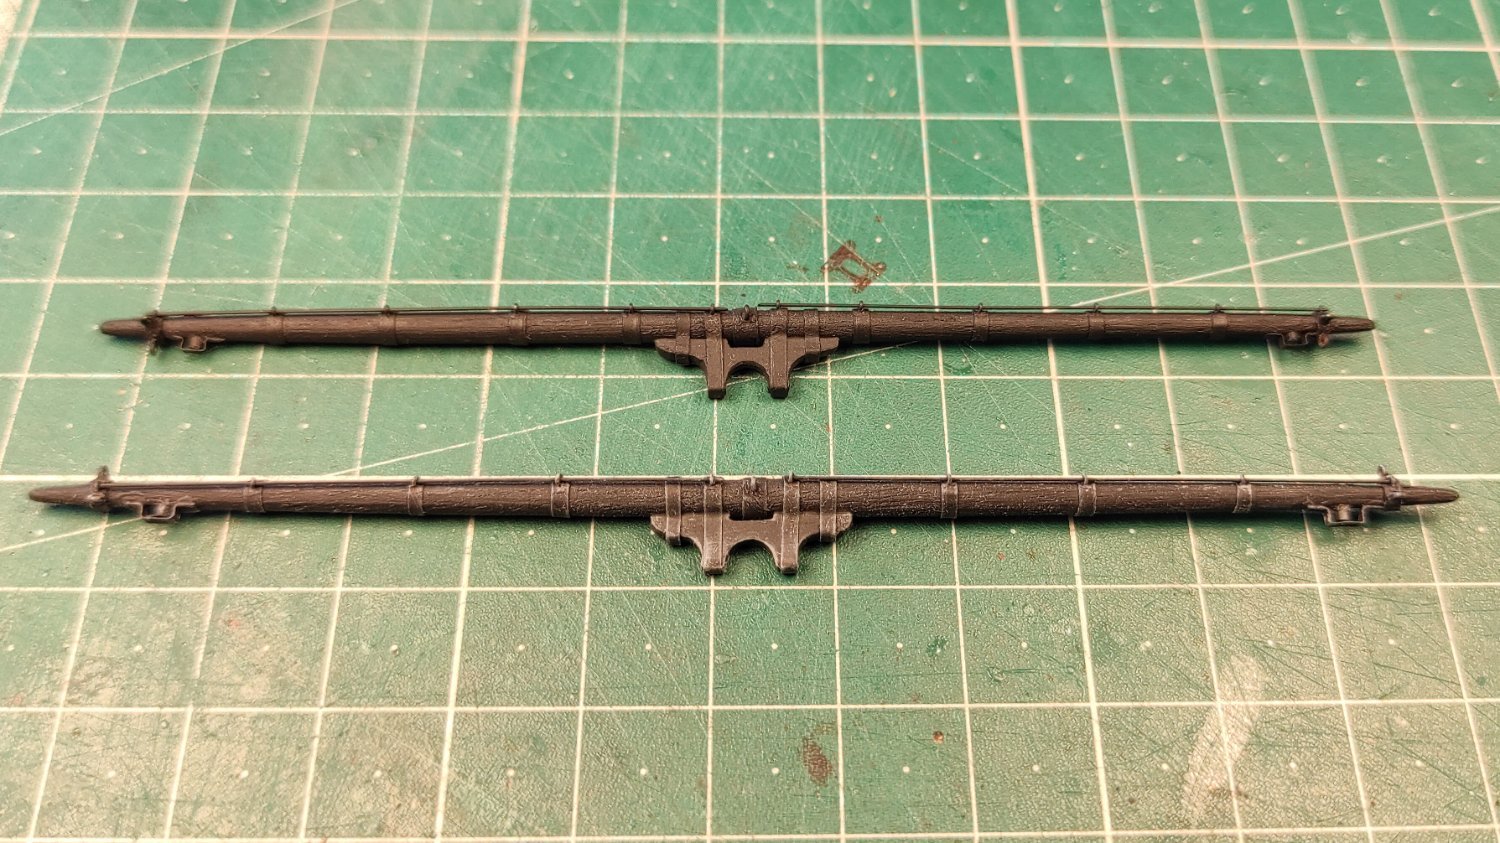
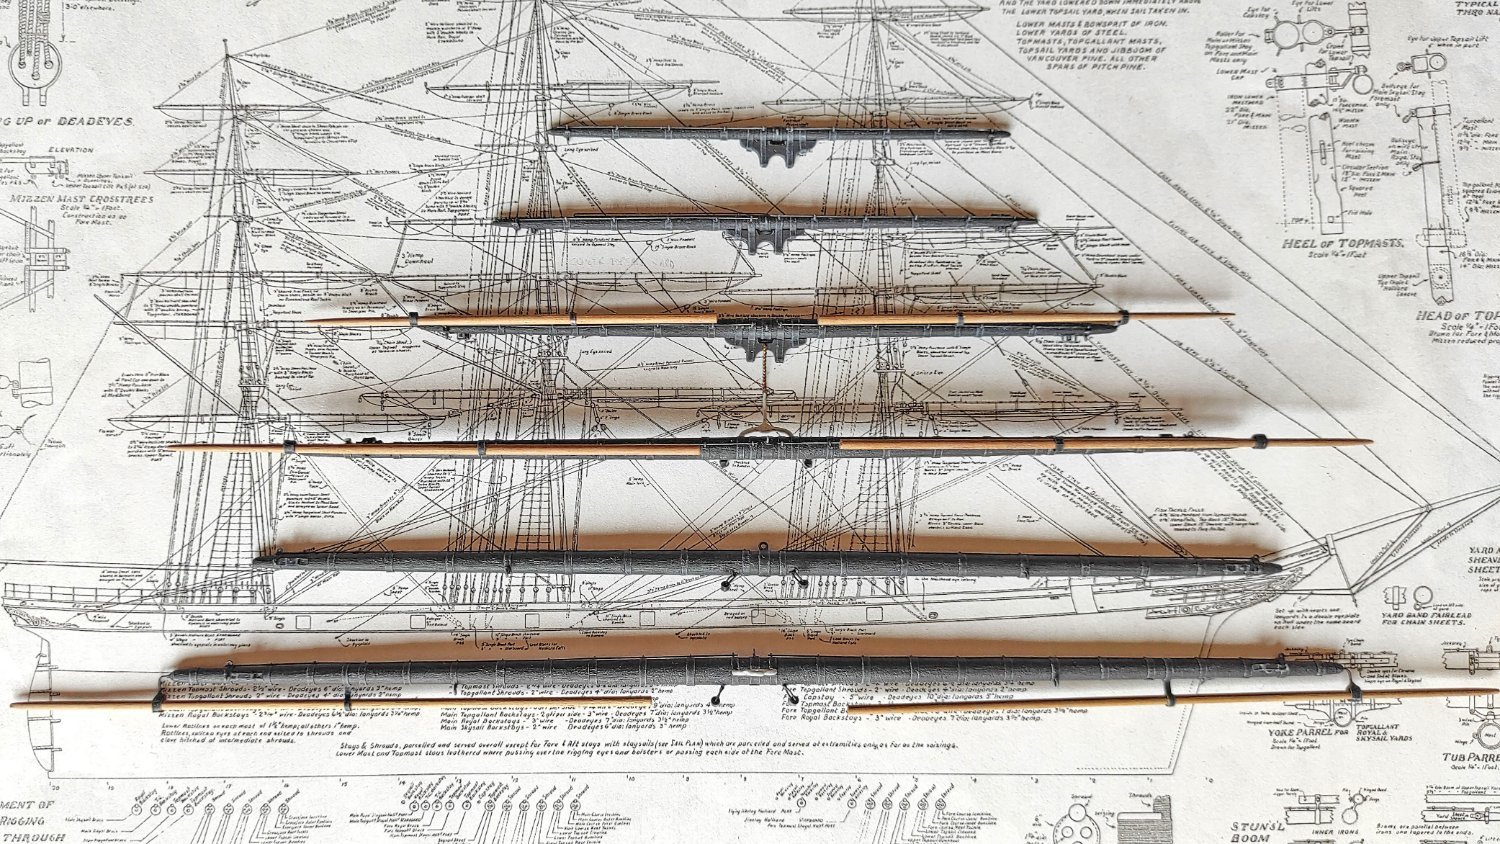
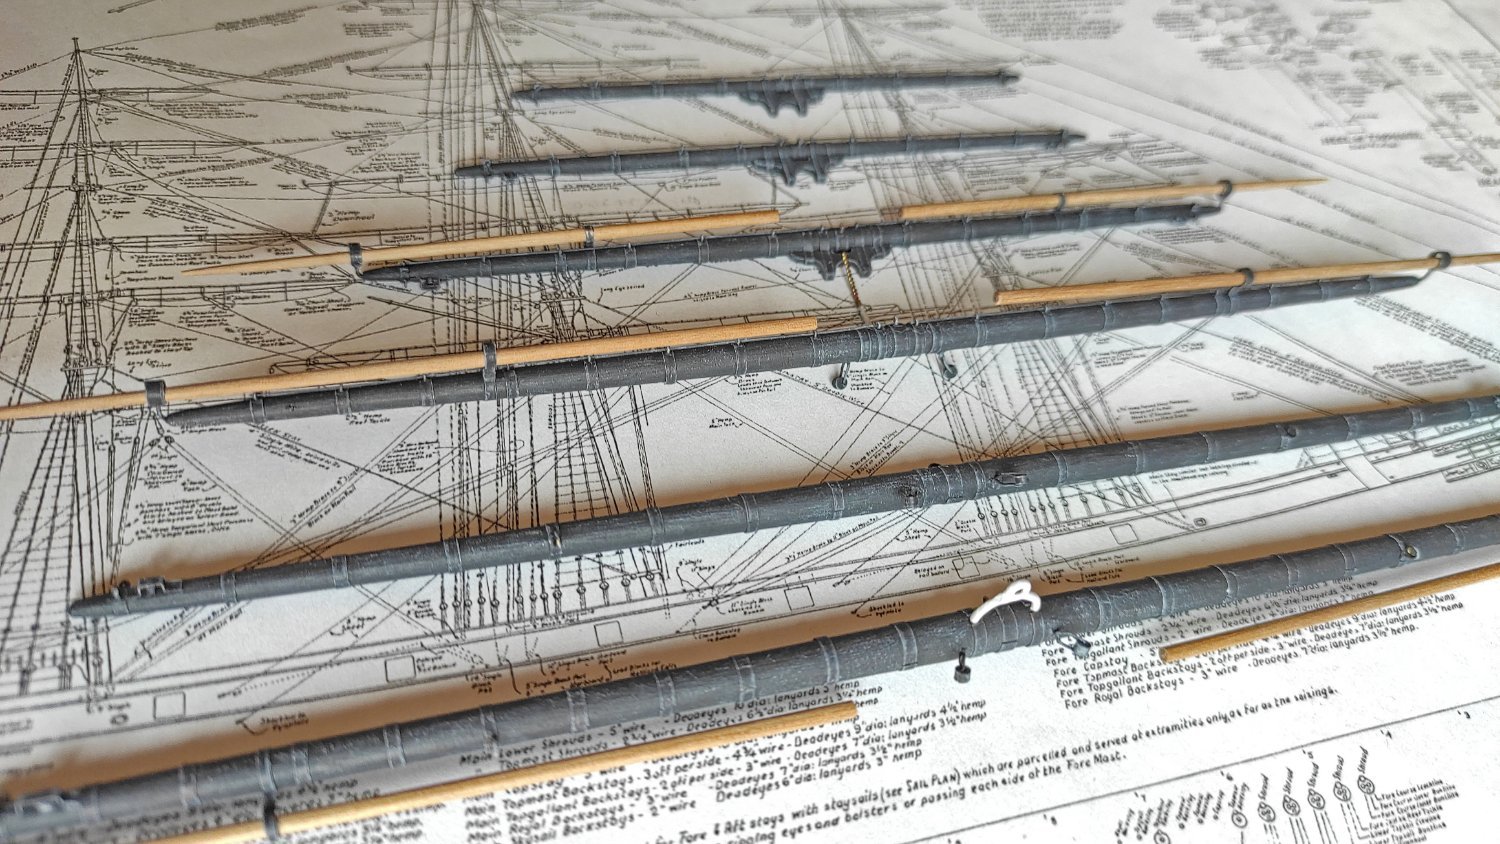
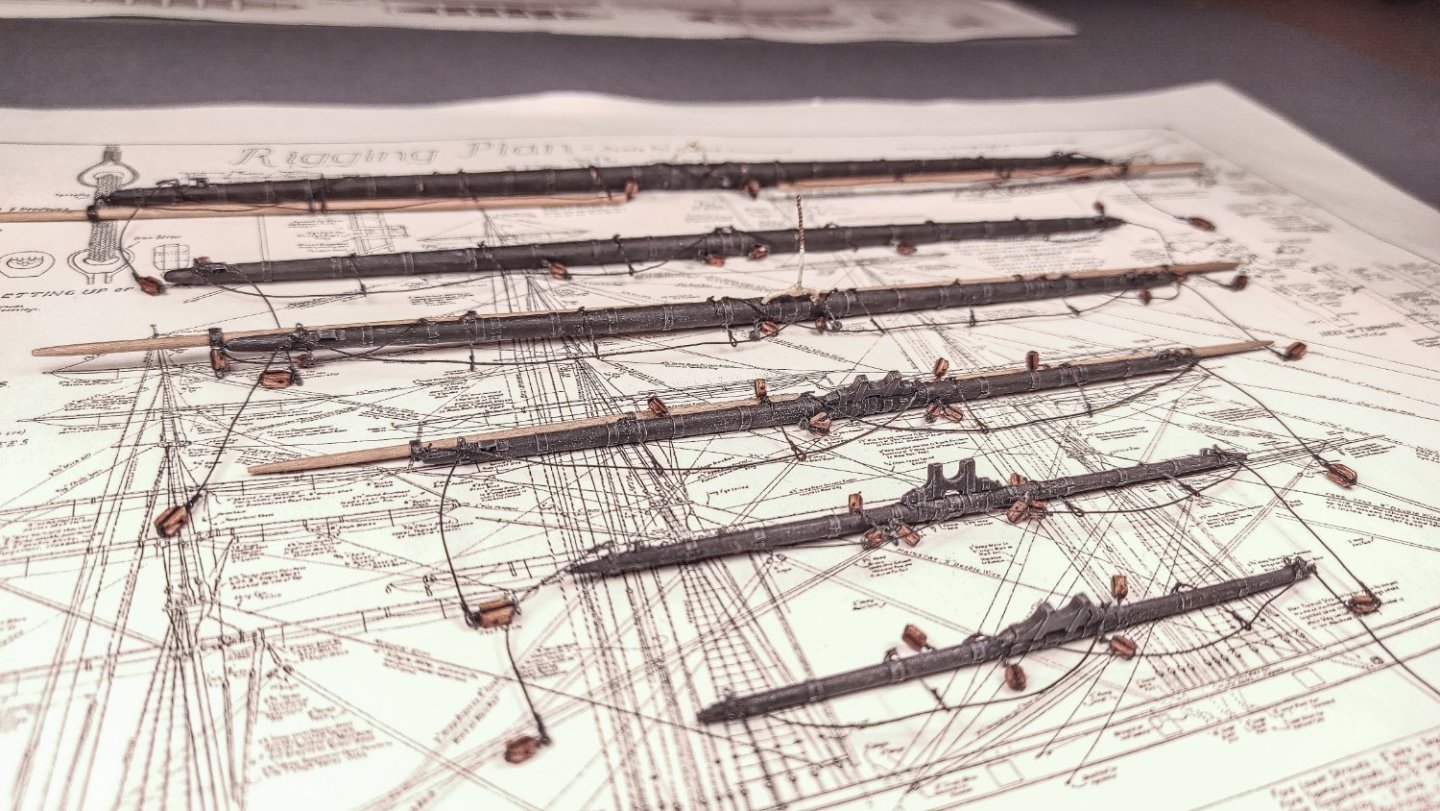
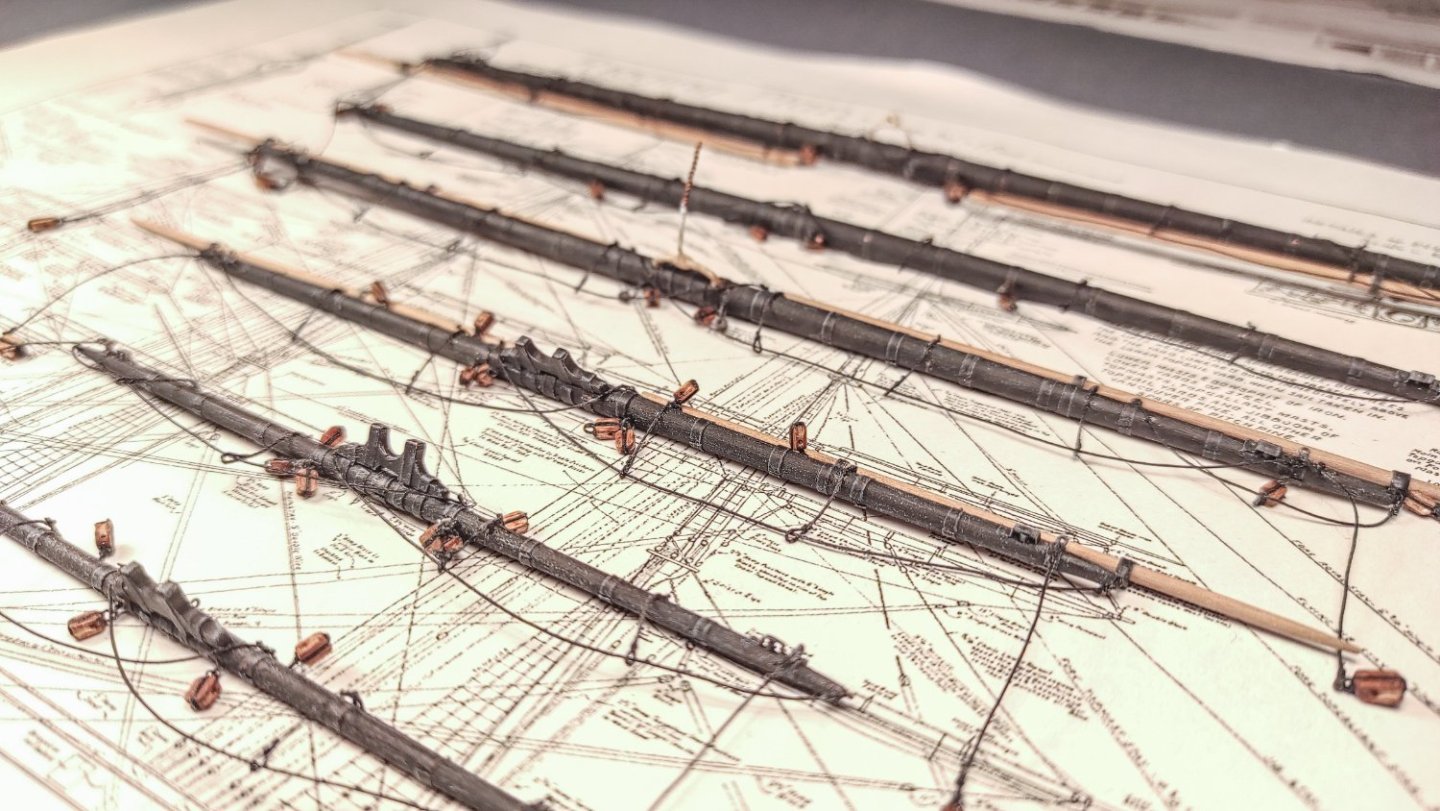
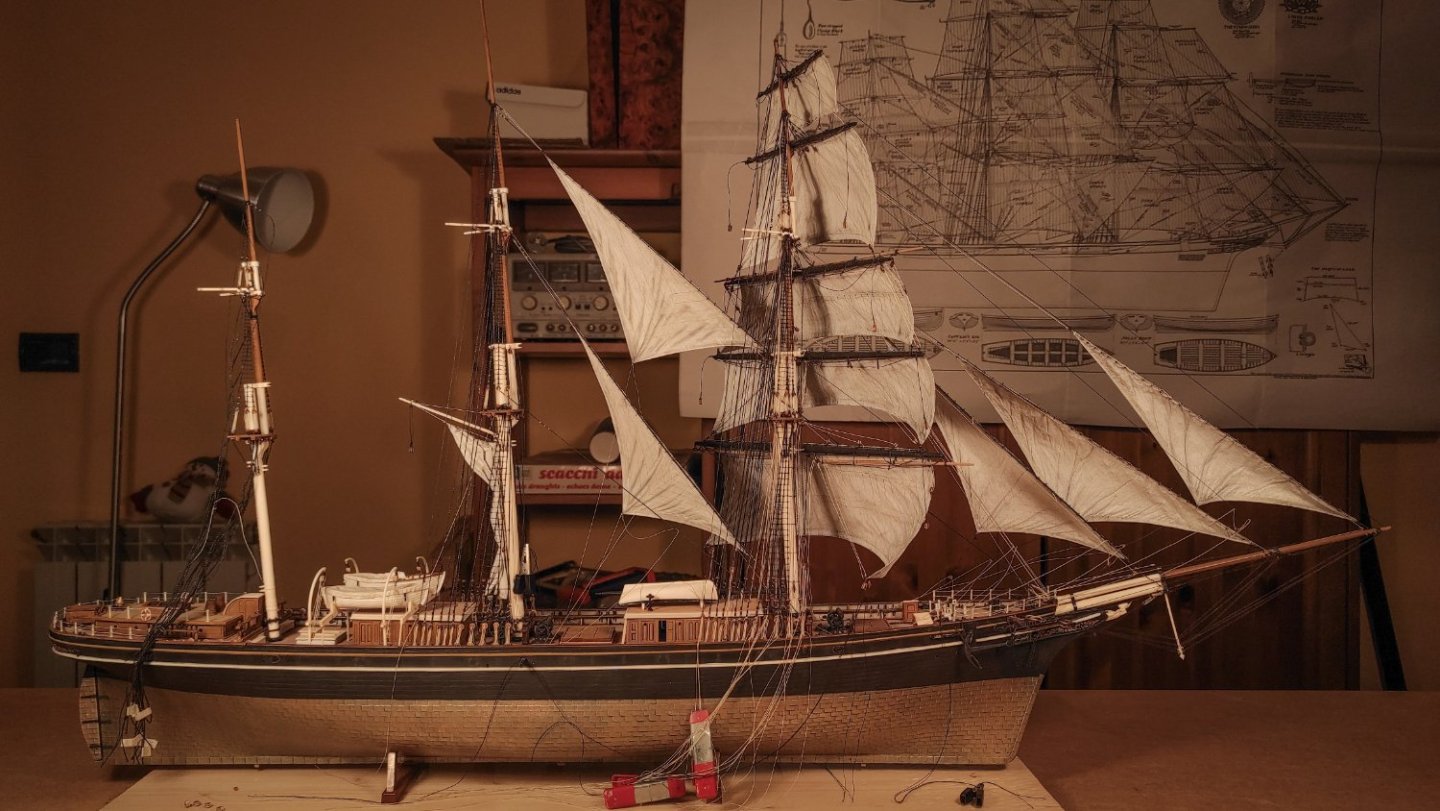
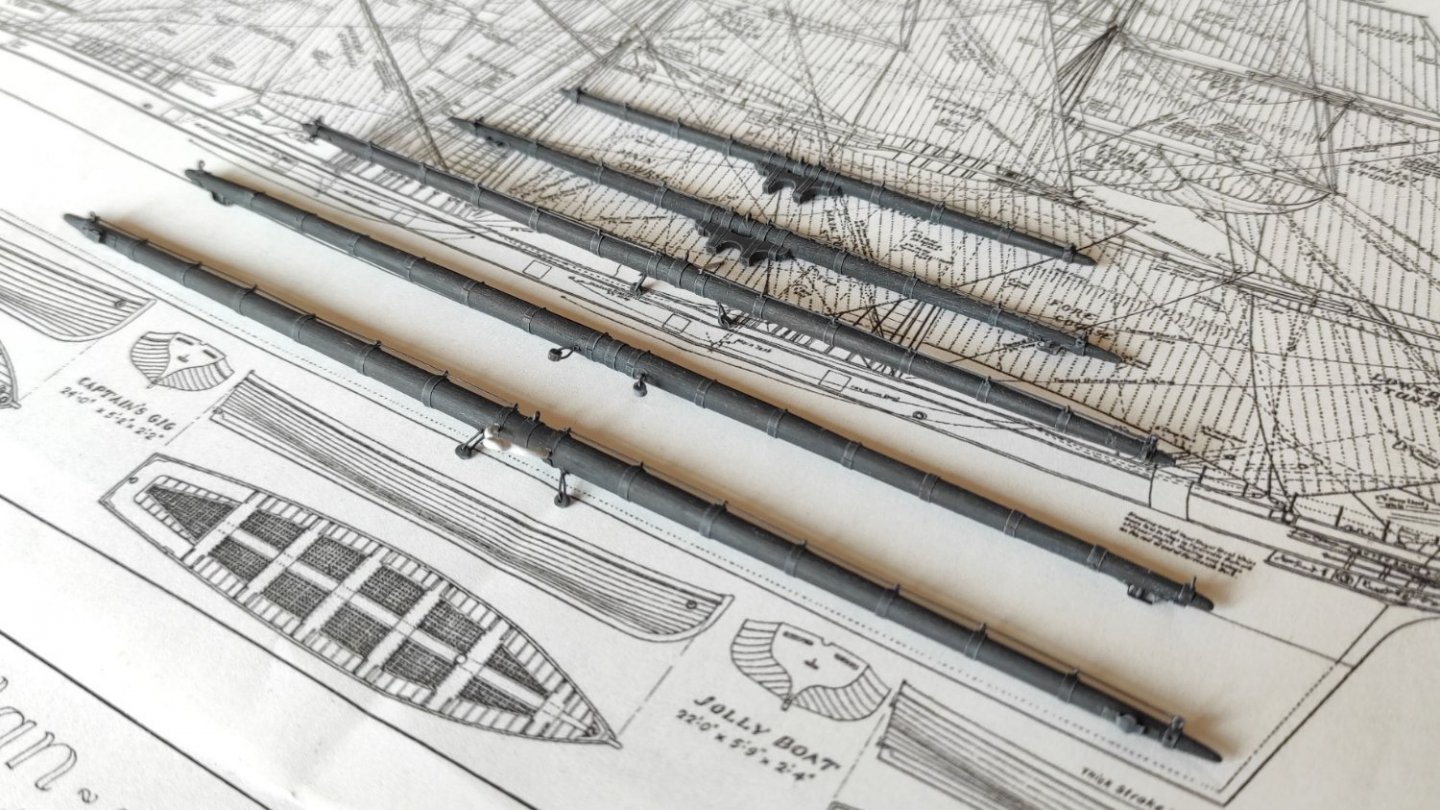
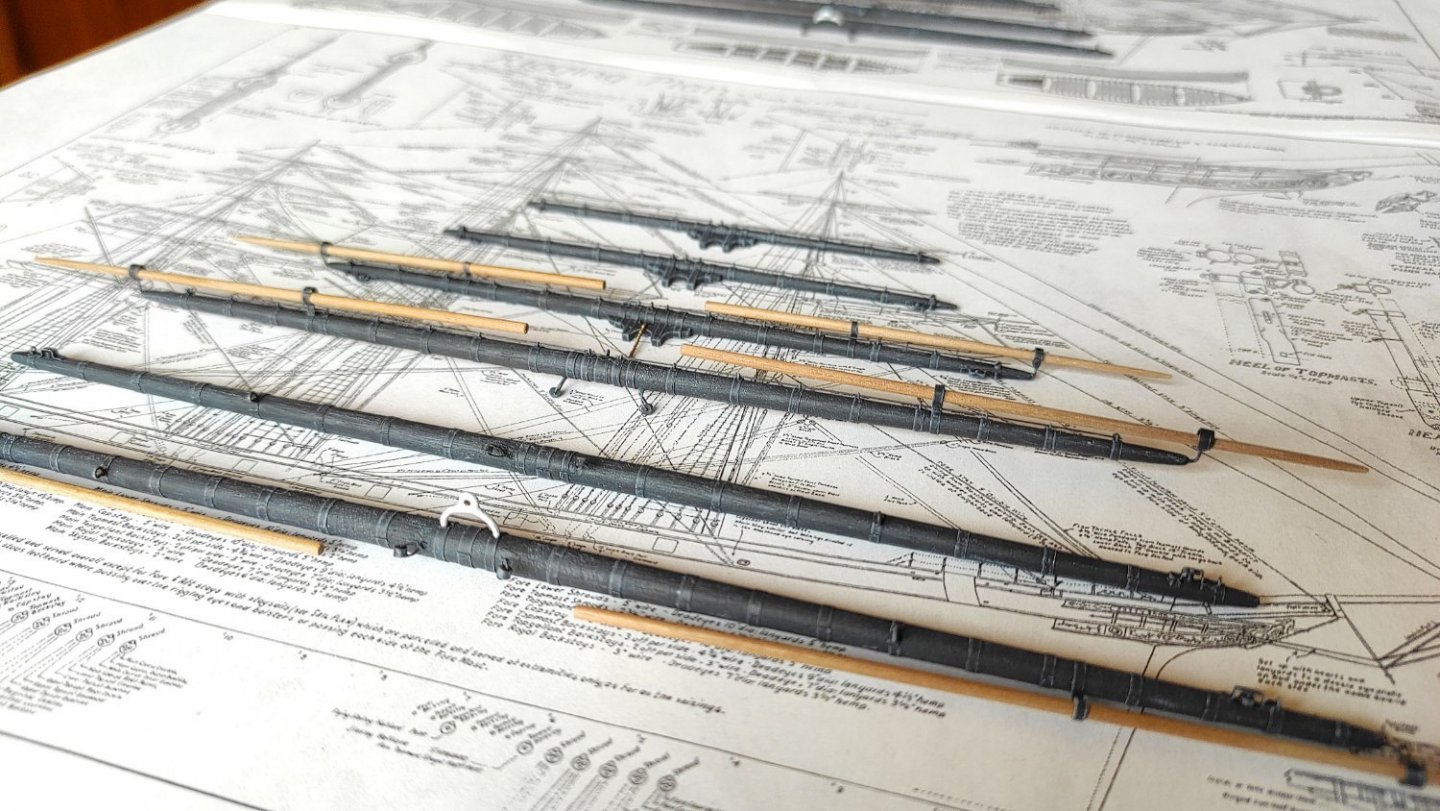
Hello everyone. Time for a small update: Main and mizzen yards painted! The process is the same I have used for the fore yards, but this time I documented it a little better. All the yards has been painted with the airbrush, with a uniform coat of acrylic tire black. I never use pure colors, such as pure black or pure white. Once the paint is dried, I try to enhance details and give a little less uniform look with the dry brush techniques. Oil colors are perfect for this task. Here you can see the pre and post dry brush: And finally, all the yards painted and weathered: I hope you like them!


- 399 replies
-
- 11
-
-
-
- cutty sark
- revell
- (and 2 more)
-
Wonderful job on the pin rail! I assume you have 3d printed them, are they in resin or fdm? If in resin, make sure to reinforce them on the lower side, as you know, resin tend to be brittle. How do you get the ship curvature right to model them properly?
- 444 replies
-
- 1
-
-
- Cutty Sark
- Revell
- (and 2 more)
-
CA gel worked for me. It has a slightly longer curing time, and it is easily applicable with a toothpick. The excess is also easy to remove with a clean toothpick. You are doing a fantastic job, and I'm sure you will do better than me! Did you already glue the fife rails around the masts? If not, do not glue them! It will be easier to rig the mainstay and the maintopgallant stay.
- 481 replies
-
- 2
-
-
- Cutty Sark
- Revell
- (and 2 more)
-
Cutty Sark spanker, spencer and staysails rigging
Bruma replied to Bruma's topic in Masting, rigging and sails
Hello everyone. I'm back on this topic for two reasons: The most important one is that I did'n thank you for your last important answers! I was totally convinced I did it, but in fact I did not. I'm really sorry about that and I hope that TIPP and Sailor can take my apologies even with such a big delay. Helping someone is not taken for granted, and it takes time and effort, so I'm really sorry guys. Here, at post #225: https://modelshipworld.com/topic/25323-cutty-sark-by-bruma-revell-196/page/8/ you can see what I was able to do thanks to your help and information! The second one is that I have some other questions... I still have to rig the spencer gaff vang and sail sheets. Longridge sais: "the sheets were arranged, like the sheets of the headsail, with egg-shaped blocks to pass over the mizzen stay, with a tipping line to facilitate the operation". How do you interpret that? One or two blocks? And, more important, where is supposed to start and end the line passing thought the block-blocks? For the gaff, the only reference I was able to find is on Campbell's plan. He says "3" hemp Vang P&S and 5" block". But again, not mentioning the running part. The question is always the same: where is supposed to start and end the line passing thought the blocks? Any help will be greatly appreciated! Thank you! -
I will do a quick test as soon as possible, and I'll let you know. Back then, when I made that decision, there were so many tings to take into account that I probably missed that one...
- 399 replies
-
- 1
-
-
- cutty sark
- revell
- (and 2 more)
-
Thank you again, John. At least now I know I did my homework properly and that there aren-t many more info about this subject. I might give it a try in the masting and rigging section, in case this discussion has been missed by someone. Thank you again for taking the time to help me!
- 399 replies
-
- 1
-
-
- cutty sark
- revell
- (and 2 more)
-
Thank you again, John. I'm talking about the spencer, the one on the main mast. The spanker (on the mizzen) is better documented. Hi! I'm really happy to see other Revell Cutty Sark being build. It's a wonderful kit of a magnificent ship! I'm sure yours will be far better than my modest attempt! Thank you for the kind comment!
- 399 replies
-
- 2
-
-
- cutty sark
- revell
- (and 2 more)
-
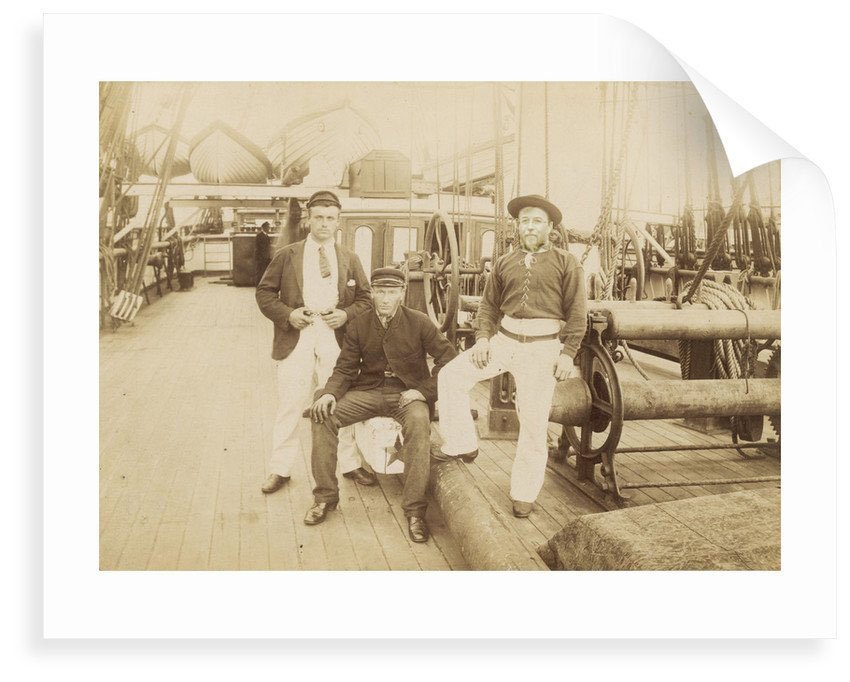
What a nice idea! Thank you! Here I am, on board, with my two mates. Did you spot Mr. Bruma?
- 481 replies
-
- 2
-
-
- Cutty Sark
- Revell
- (and 2 more)