Mirabell61
-
Posts
7,406 -
Joined
-
Last visited
Content Type
Profiles
Forums
Gallery
Events
Everything posted by Mirabell61
-
 Thanks for the answer Bob, an excellent technique for color separation, thats for sure.... Nils
 -
Awesome work Mike, a lovely cutter, the plank fitting to the bowpost looks fantastic and professional made Nils
- 452 replies
-
- 4
-

-
- cheerful
- Syren Ship Model Company
- (and 1 more)
-
Many thanks Denis, glad you like it Nils
- 2,625 replies
-
- 3
-
-
- kaiser wilhelm der grosse
- passenger steamer
- (and 1 more)
-
Very fine and accurate work Bob, I like your color giving. How did you get the blue color so sharply in the middle-line of the head rails (wow !!) Nils
-
thanks for your words of sympathy Garry, maybe the experience (laminating wooden bends), if not already known, may also be of help to fellow builders Nils
- 2,625 replies
-
- 5
-
-
- kaiser wilhelm der grosse
- passenger steamer
- (and 1 more)
-
Many thanks Bob and Bill, there are probably quite a lot of valuable "know hows" in relation with model aircraft building, especially those made in the good old way with all the framework and shrink-span tissue coating..... Nils
- 2,625 replies
-
- 6
-
-
- kaiser wilhelm der grosse
- passenger steamer
- (and 1 more)
-
Hi Keith, Thanks for your words, I should have thought of the "laminating way" of those bends earlier..... Nils
- 2,625 replies
-
- 4
-
-
- kaiser wilhelm der grosse
- passenger steamer
- (and 1 more)
-
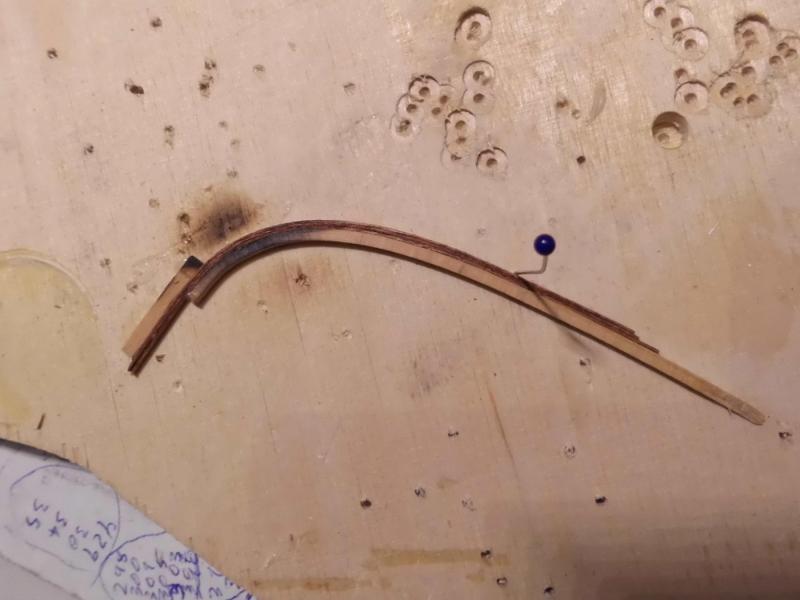
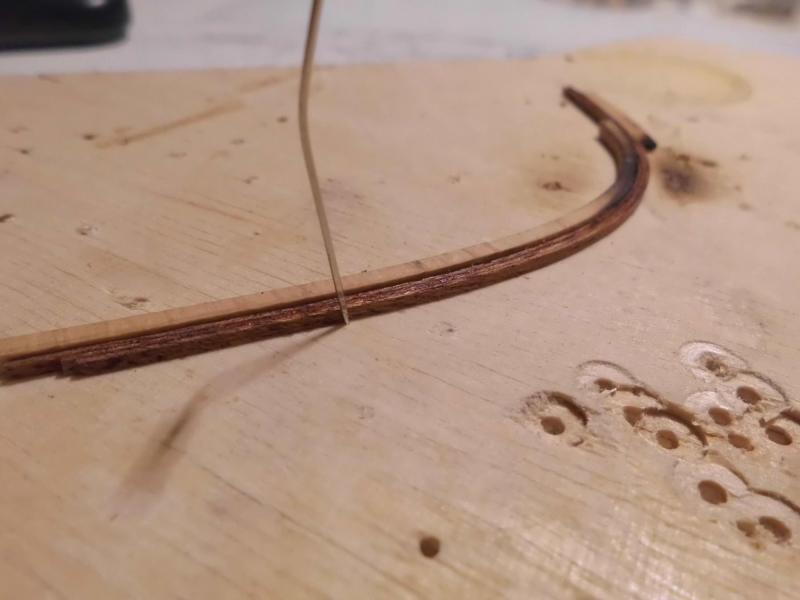
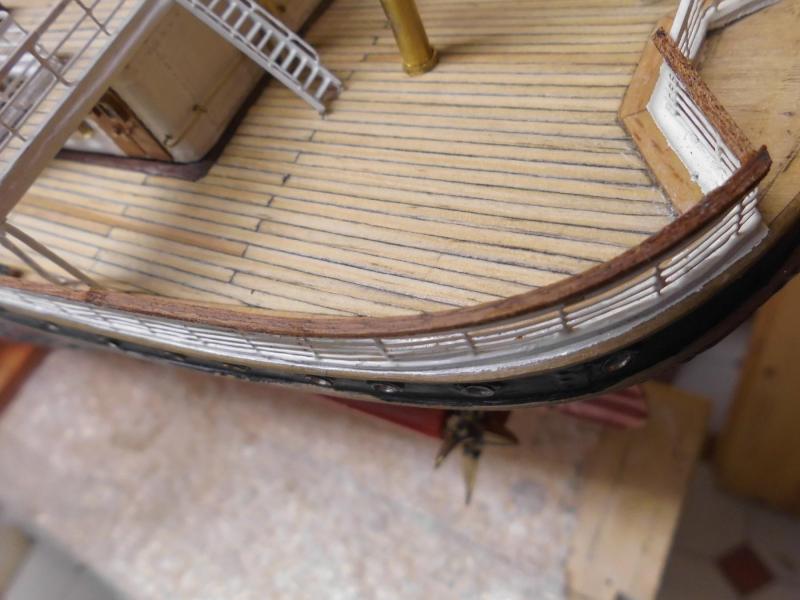
Thank you very much Carl and Michael, and all the "likes"... Carl, the etched stair sides and the steps are only folded and you`re right, afterwards (after priming and painting) glue into place with a drop of CA Michael, right, I agree, although I have highest respect for the skills of those professional builders work in much earlier days Nils Here is a little update ....... on the making of the aft handrail portion in place where the railing performs the rounded bend. I tried several times two flat bend the mahagony handrail by wetting and soaking, with and without heat, etc, very frustrating and without success. Then came the idea not to flat-bend over the 1,5 mm wide side, but to flat-bend and laminate 3 single 0,5 mm thick strips with CA and with help of a little jig, Sigh of relief, it worked out well. Only have to mount and carefully sand down to the required flatness

- 2,625 replies
-
- 34
-
-
- kaiser wilhelm der grosse
- passenger steamer
- (and 1 more)
-
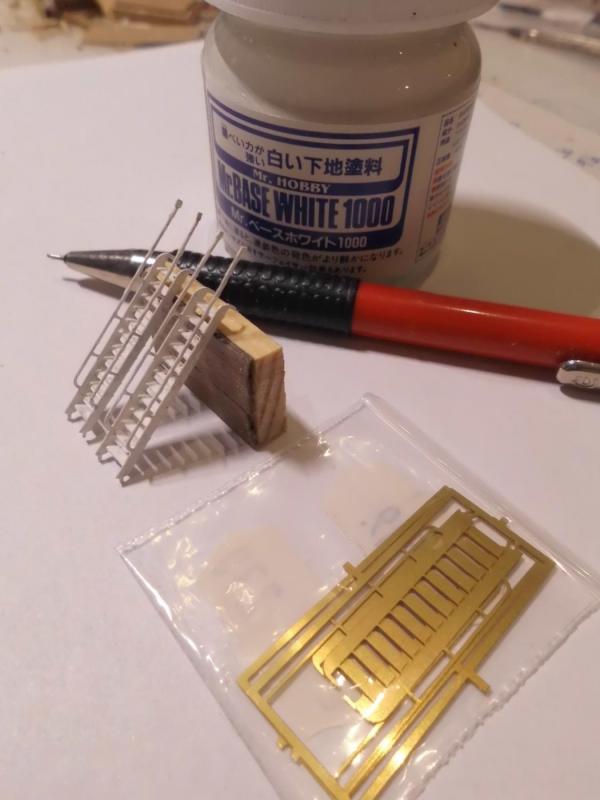
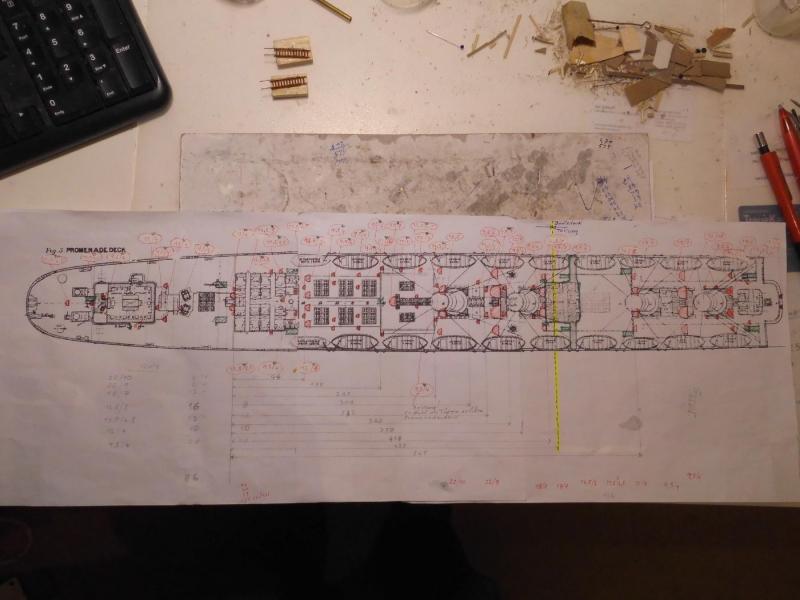
Little update... the stairways are quite easy made due to the pricise brass etch patterns. One of my most importent work documents is the orientation plan for vents, red indicated (size and tube diameter), and the stairs, green indicated Nils folding and primercoating the stairs


- 2,625 replies
-
- 20
-
-
- kaiser wilhelm der grosse
- passenger steamer
- (and 1 more)
-
Hi Alex, great work with the metal stamp and it`s heattreatment process, looks like it will have a long stand time. What thickness are your brass plates, and do you have to aneal those for stamping ? Nils
-
Ed, thank you very much, its slowly coming together and its fun with the fitting out of the decks.... as far as the work is concerned, I can only return a bunch of compliments to you for your wonderful "Exreme Clipper " build, which I love so much, a great model shipwright performence Nils
- 2,625 replies
-
- 2
-
-
- kaiser wilhelm der grosse
- passenger steamer
- (and 1 more)
-
Thank you very much Gerhard, I`m only adding tiny bits and pieces, but when holding the hull in hands I can feel the constantly increasing weight, although the hull was such a lightweight, when taking it off the build-slipway some months ago. Probably its the brass parts and the metal plating coat that owe to the weight.... Nils
- 2,625 replies
-
- 4
-
-
- kaiser wilhelm der grosse
- passenger steamer
- (and 1 more)
-
Steve, your "caulking" of the hull plank edges prior to mounting pays off... , I like the effect very much Nils
- 165 replies
-
- 1
-
-
- finished
- model shipways
- (and 1 more)
-
beautiful work Steve, Nils
-
Hi Patrick, you`re surely becoming to be a specialist for interlocking removeable sections on a model. A professional modelmaker company for extrusion dye formed resin section part kits could not have done it better, Great model and super work, Bravo !! Nils
-
Thank you very much Patrick and John (Neptune), and thanks to all the "likes" Patrick. a very kind compliment, much appreciated, glad you like it... John, thanks so much for your nice words, and for your catch up.... I`ve put on the aft portion of the boats deck now on permanently and it worked out fine. Of course something came to eye after mounting it and clamping it down, I noticed that two of the benches below on the promenade deck were just mounted in the way/ space where the upward stairs should be placed, and four of the holes for the downward vent tubes had been planked-over on the boats deck and forgotten to be cut free again, but both little misfits can easily be put right again. Nils
- 2,625 replies
-
- 4
-
-
- kaiser wilhelm der grosse
- passenger steamer
- (and 1 more)
-
Those sweet lockers look very nice Karl.... Nils
-
Karl, thank you very much for your compliment and your nice words, much appreciated... Viele grüsse aus Glinde Nils
-
fantastic work at the stern Liberto, beautiful decoration, ballustrades and rudder and harmony with wood and colors Nils
-
Pandora by marsalv - FINISHED - 1:52
Mirabell61 replied to marsalv's topic in - Build logs for subjects built 1751 - 1800
beautiful work Marsalv, those chainplates look very well done.... Nils -
Thank you very much John, I also love those benches, they were the nicest I found after some related search with help of the web.... (photo etch kits), they are for the "Titanic" in scale 1:144 Nils
- 2,625 replies
-
- 6
-
-
- kaiser wilhelm der grosse
- passenger steamer
- (and 1 more)
-
Thank you very much for your kind comments and compliments, Albert, Bob (raf), Jeff, David, Denis Bob (cap`n), I`m so pleased that you liked the progress Also thanks to all the "Likes" for looking in... Nils
- 2,625 replies
-
- 6
-
-
- kaiser wilhelm der grosse
- passenger steamer
- (and 1 more)
-
Great to see you back at the table again Patrick, I`ve been missing your update posts the last days.... Nils
-
Chuck, your rigging so far looks lovely, as well as cutter and masting wunderbare Arbeit !! Nils
- 1,051 replies
-
- 5
-
-
- cheerful
- Syren Ship Model Company
- (and 1 more)