Mirabell61
-
Posts
7,417 -
Joined
-
Last visited
Content Type
Profiles
Forums
Gallery
Events
Everything posted by Mirabell61
-
 Thanks Piet, the next full ship photos will take some time before posting, as there is so much to do first.... Nils
- 2,625 replies
-
- 4
-

-
- kaiser wilhelm der grosse
- passenger steamer
- (and 1 more)
-
excellent design and beautiful first model Chuck, Nils
- 269 replies
-
- 5
-
-
- Queen Anne Barge
- Syren Ship Model Company
- (and 1 more)
-
very nice and clean work Mike, your "Cheerful" looks top... Nils
- 452 replies
-
- 2
-
-
- cheerful
- Syren Ship Model Company
- (and 1 more)
-
thanks very much Denis, I was using brass profiles for the deck edges with the "Heinrich Kayser" merchant steamer superstructure, so there was a little experience made there... Nils
- 2,625 replies
-
- 5
-
-
- kaiser wilhelm der grosse
- passenger steamer
- (and 1 more)
-
Lawrence, thank you for your compliment and the nice words... Nils
- 2,625 replies
-
- 5
-
-
- kaiser wilhelm der grosse
- passenger steamer
- (and 1 more)
-
Thank you very much for your input by comments Ben, Roger and Carl, very much appreciated.. Nils
- 2,625 replies
-
- 4
-
-
- kaiser wilhelm der grosse
- passenger steamer
- (and 1 more)
-
Hi Bob, that was also my thought at first......, but 20 boatstations = 20 winches, a very costy solution, gues there were many yards of ropeline on board, as well as shackles and "round the corner blocks" in order to also serve several lifeboats. I think Ben is right when he highlights the recovery perhaps even of maned lifeboats from sealevel Nils
- 2,625 replies
-
- 6
-
-
- kaiser wilhelm der grosse
- passenger steamer
- (and 1 more)
-
thanks for visiting the log Ben, you`re very welcome,...., and thanks for your kind words.... yes, I have been looking for the purpose of those winches on the boats deck, and agree they must have been multi-purpose auxiliary.. for boats lowering / Hoisting I have in the meantime found a pic showing one of these winches on the boatsdeck of the 1899 launched "SS. Hamburg", after WW1 serving for the US as "USS Powhatan" Two drums of same diameter for winding fore- and aft pulleys of a lifeboat. (pic kindly borowed from the web) Nils

- 2,625 replies
-
- 15
-
-
- kaiser wilhelm der grosse
- passenger steamer
- (and 1 more)
-
Hi Albert, a wonderful hull that is...., the framework, all woodwork, the rudder hinges, and the shingles at the aft corner windows look fantastic, a pleasure to look at Nils
-
thank you very much Bill, Roger, and Greg, and all the "likes" Bill, thank you for your suggestion to use slow curing resin, I`ll bear that in mind when I begin the boat casting.... Roger, thanks to you, that tip is also very much appreciated, you make it sound so easy to make..... Greg, yes Greg, I was thinking of leaving the boats seating away, and had already made a wooden cover (as canvas). A strong fender rope should go round the sheer. Perhaps I would take one or two boats only with drawn back covers, providing sight to the interior Nils
- 2,625 replies
-
- 7
-
-
- kaiser wilhelm der grosse
- passenger steamer
- (and 1 more)
-
thank you Martin, I was soldering with my most powerful iron here, in order to get enough heat to the metal enabling and the solder flow. Was too anxious to use the gastorch so close to the painted parts.... Nils
- 2,625 replies
-
- 5
-
-
- kaiser wilhelm der grosse
- passenger steamer
- (and 1 more)
-
Hi Gerhard, thanks for your word, Hope you had a pleasant and enjoyable vacation Nils
- 2,625 replies
-
- 6
-
-
- kaiser wilhelm der grosse
- passenger steamer
- (and 1 more)
-
lovely work James, the wood, the parts, and the way of mounting, relects and provides the instant impression I had myself, of having a Billng kit before me. when I was building these many years ago. I remember very good straking lines over the outside bulkheads, and precise fit of parts. The pic of that hull, mounted with deck and bullwark fit speaks for itself... Nils
- 32 replies
-
- 1
-
-
- billing boats
- norden
- (and 2 more)
-
many thanks to Steve, Grant, John, Patrick, Pete, Albert and all the "likes" Steve, thanks for your comment, glad the model is liked by yourself Grant, nice compliment, much appreciated John, Thanks for the compliment, I`ll try to remember enclosing an overall status view now and then Patrick, I`m very pleased it finds your approval Pete, your kind words and your compliments are much appreciated, I also liked the part of "....project workflow all laid out in the head....", because its realy so only without fine details, then I work with scetches...and looking up semi-material (profiles and so) I can use Albert, thanks for your compliment, I`m pleased you like it.... Nils
- 2,625 replies
-
- 7
-
-
- kaiser wilhelm der grosse
- passenger steamer
- (and 1 more)
-
Many thanks for your kind comment Bob, I`m pleased you like it.... Nils
- 2,625 replies
-
- 4
-
-
- kaiser wilhelm der grosse
- passenger steamer
- (and 1 more)
-
Papegojan 1627 by mati - FINISHED - 1/48
Mirabell61 replied to mati's topic in - Build logs for subjects built 1501 - 1750
Hi Matt, your Dutch pinnace is a beautiful model and a pleasure to see this being built on your shipyard. I love and admire your accurate and clean work, also beautiful photographing.... Nils -
MONTAÑES by Amalio
Mirabell61 replied to Amalio's topic in - Build logs for subjects built 1751 - 1800
Amalio, your positive model is so awsome to look at....... fantastic handcraft work, a lovely ship !!! nevertheless I have given up to straign my mind, what you are doing the outer mold for, of couse it fits like a second outer skin........, hopefuly you will provide the solution to that thrilling "riddle" of yours soon. I trust you have an mighty ace-card up your sleeve.... Nils -
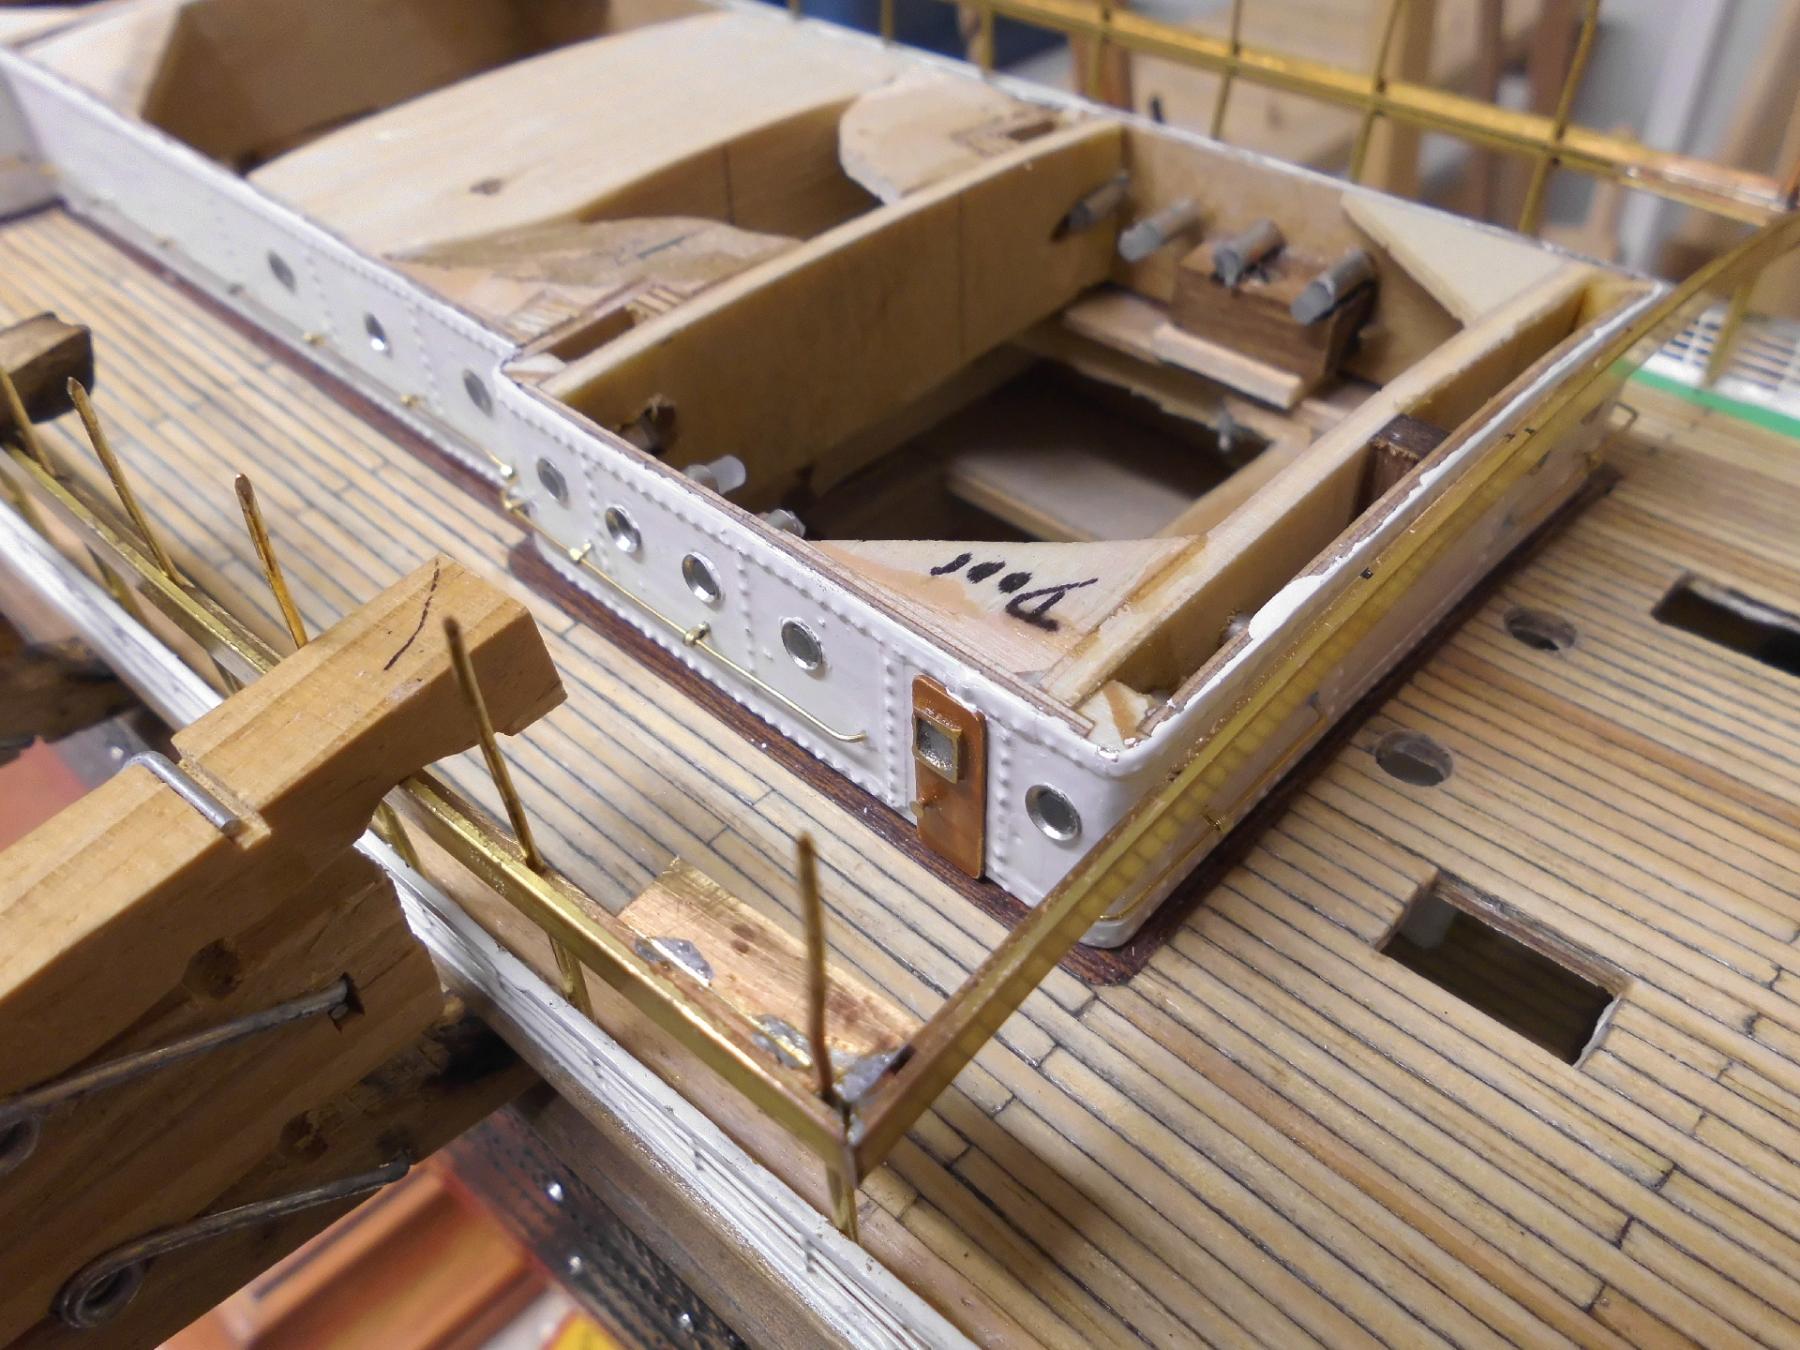
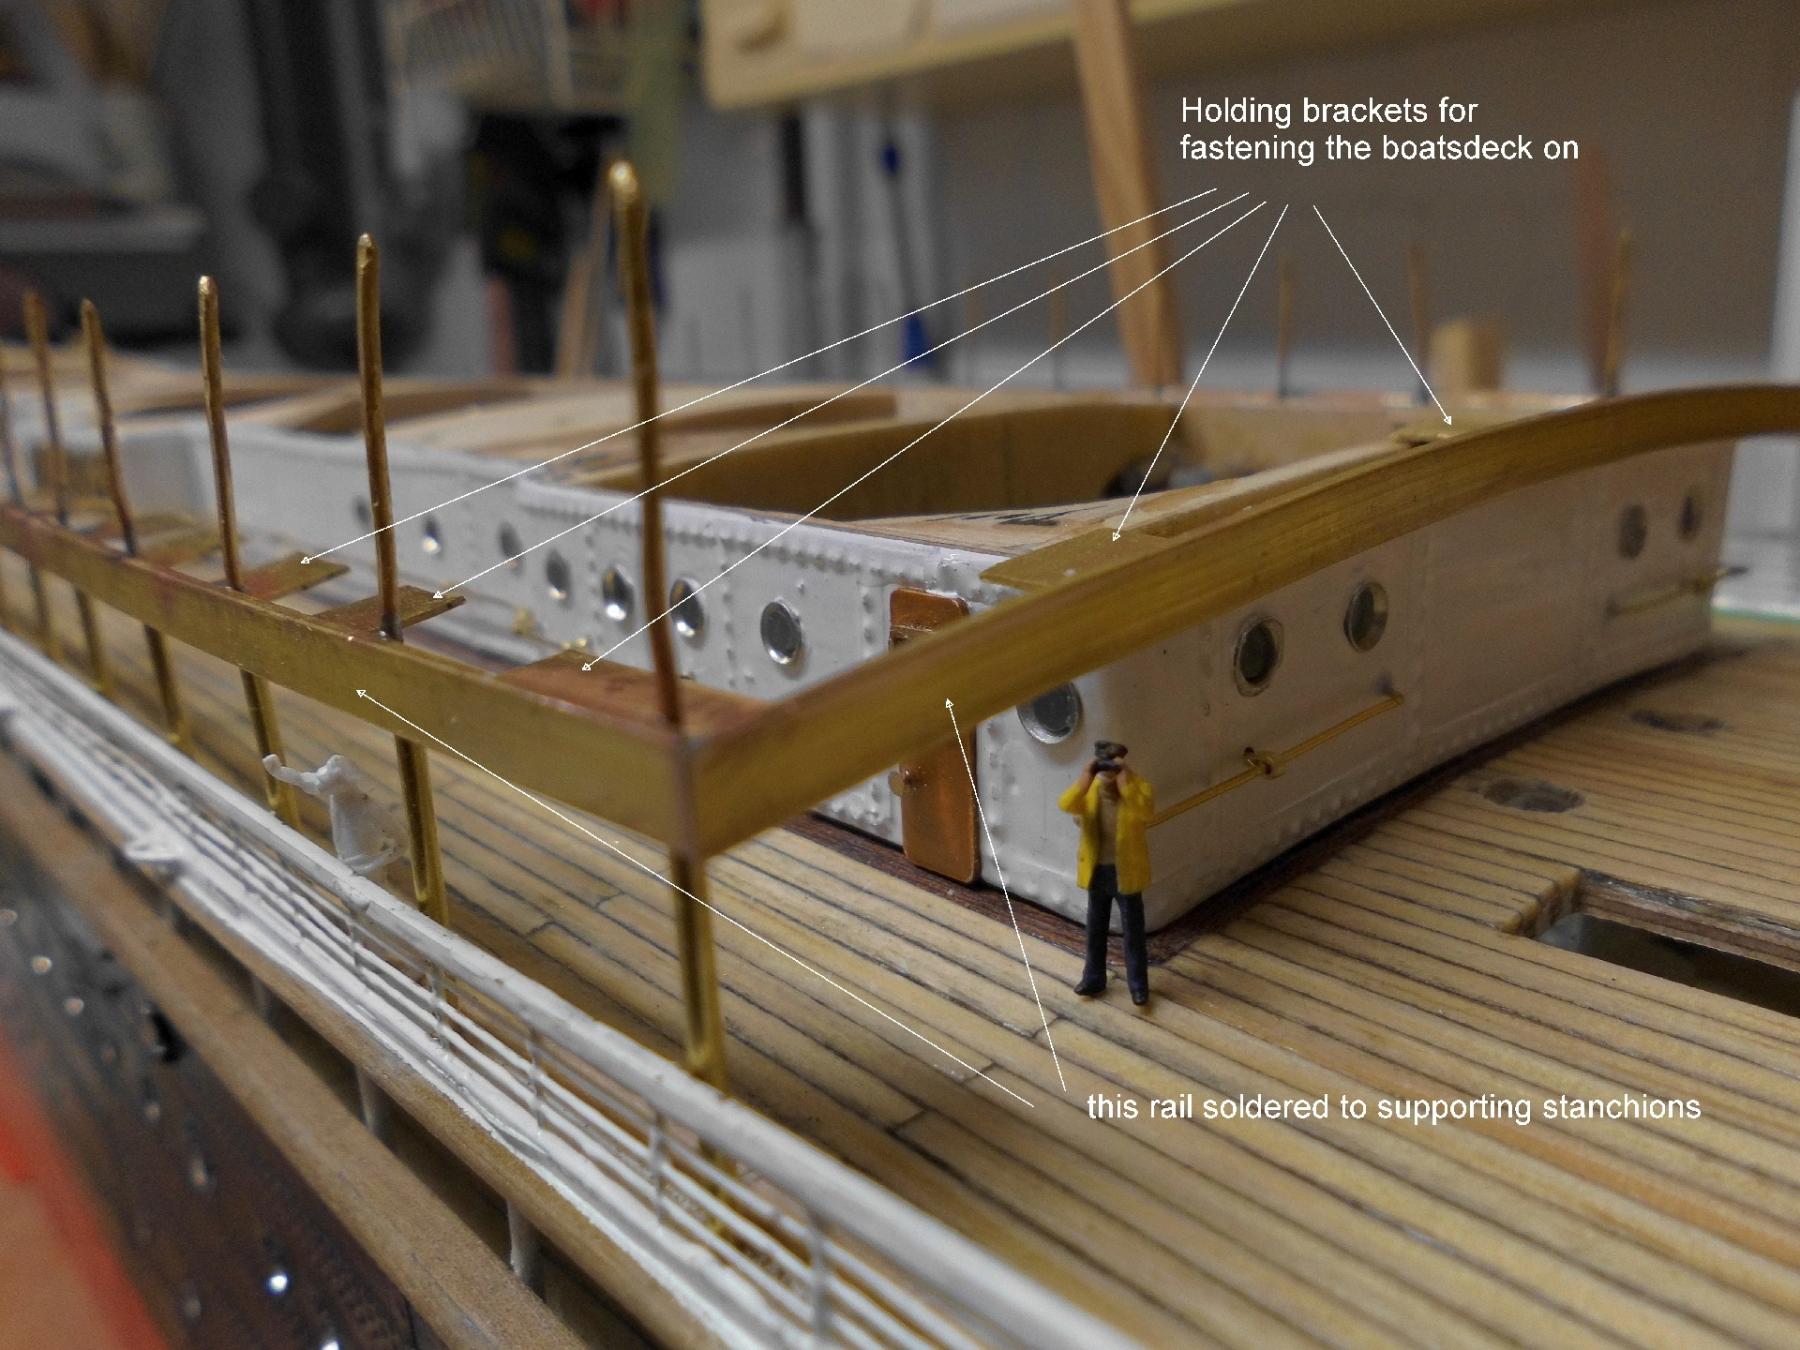
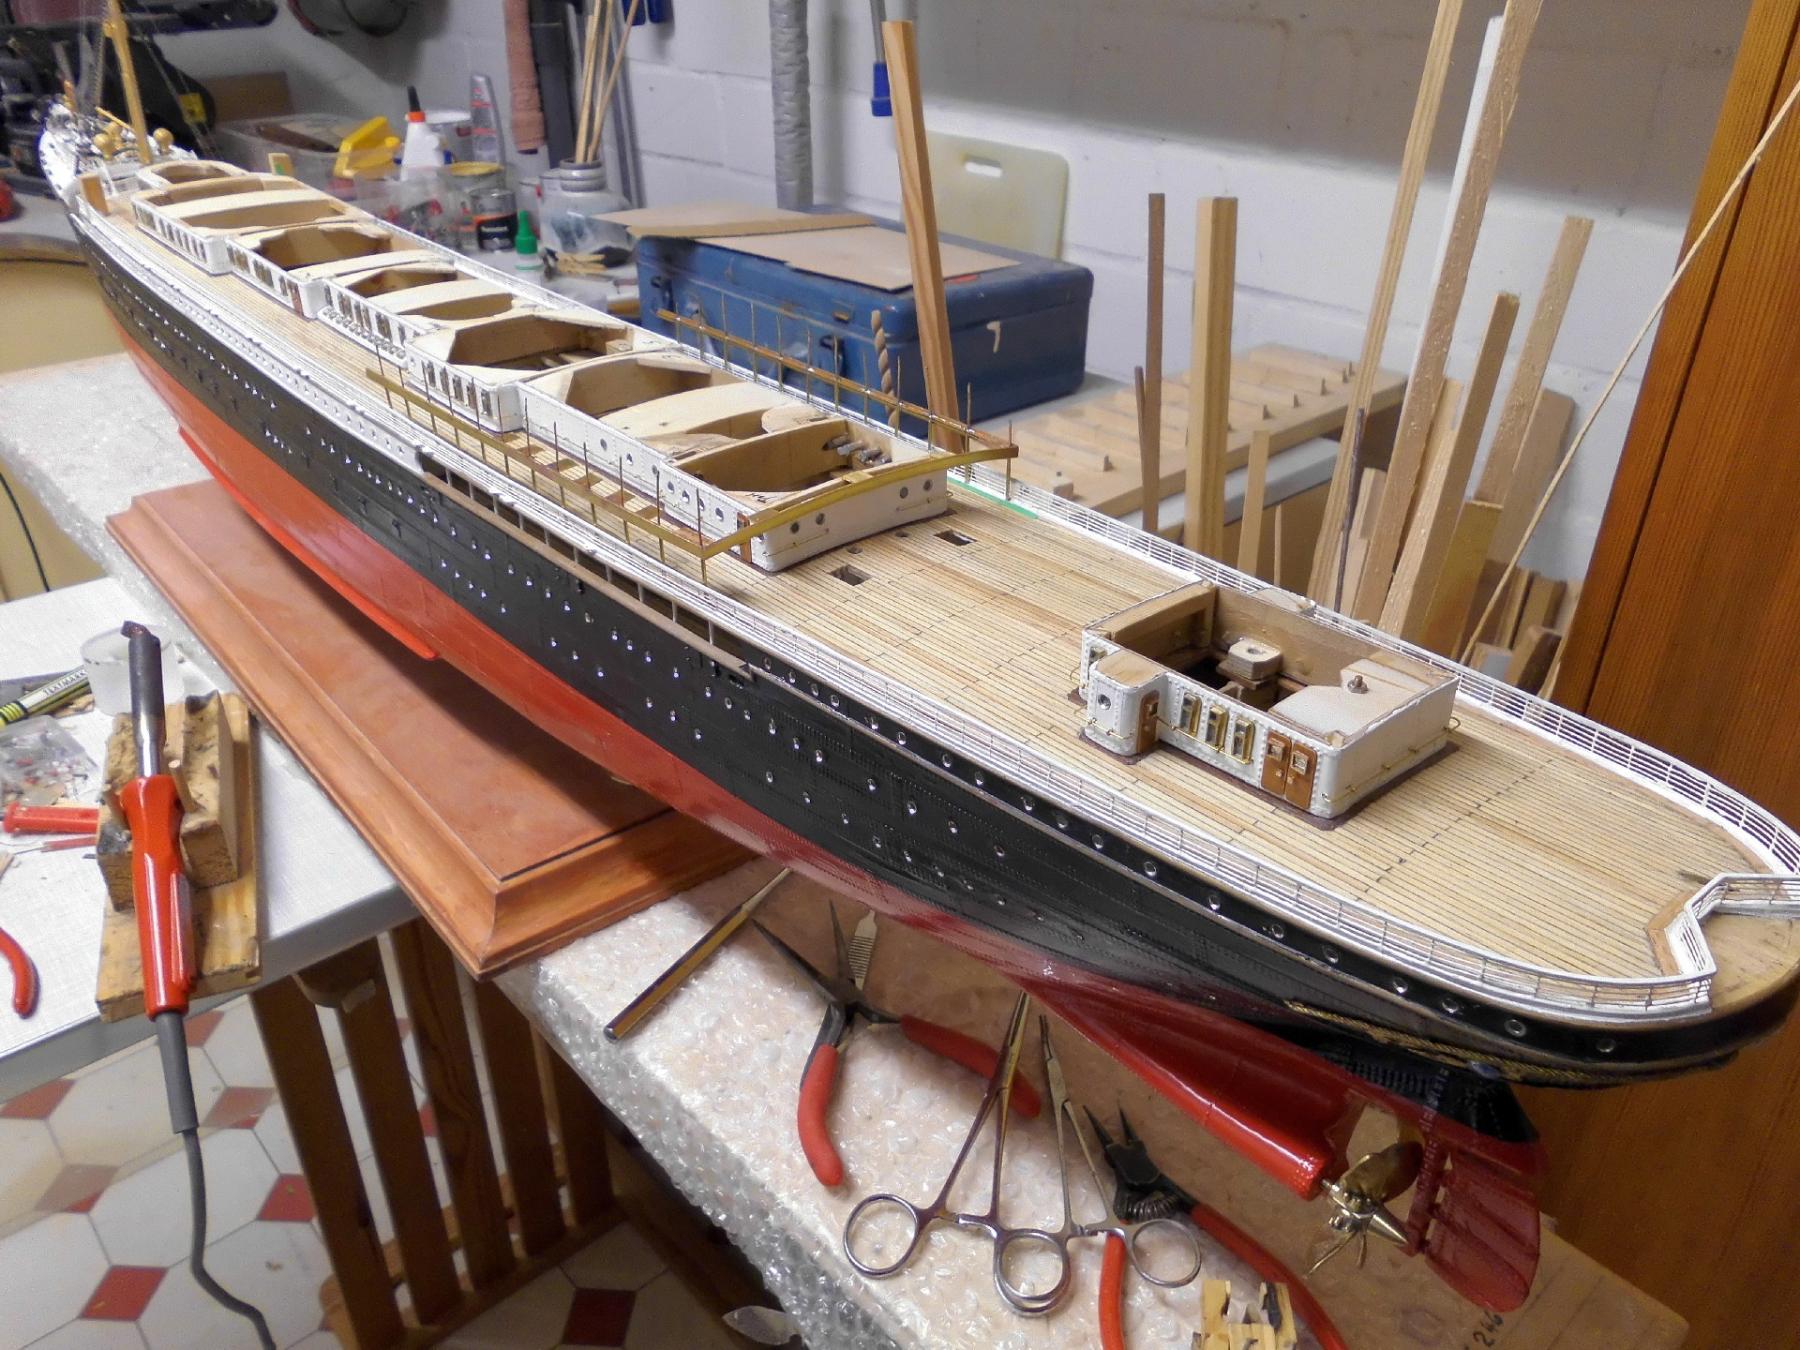
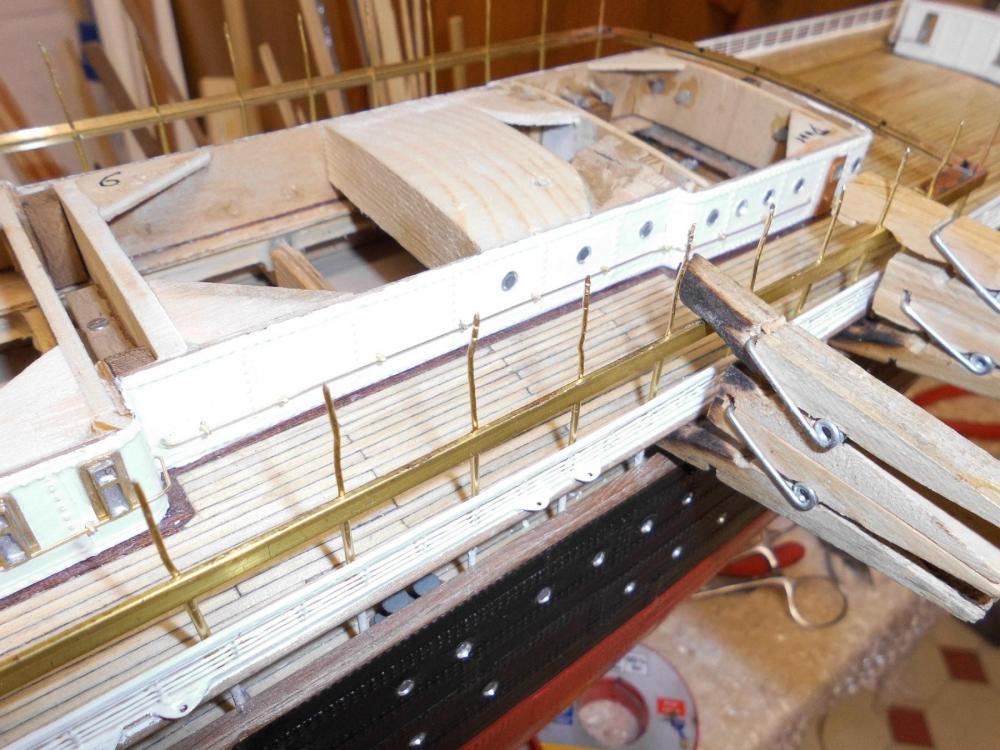
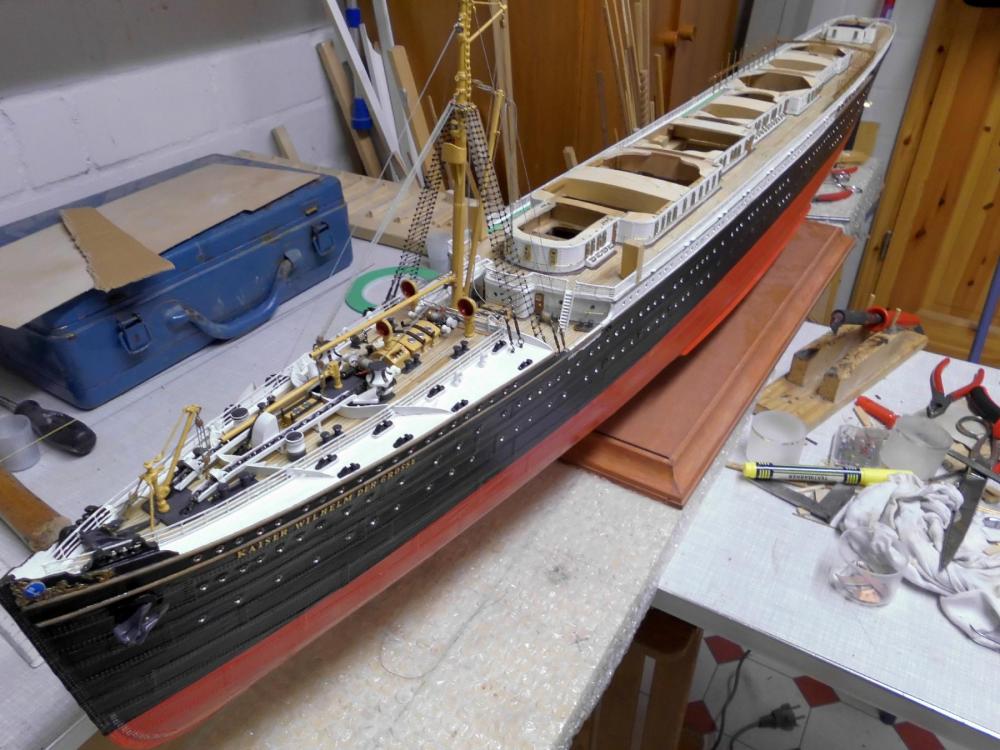
Update.... the fastening of the deck-edgerail works fine, its also quite riged afterwards. The wooden deck will end about 2 mm away from the rail edge, so that partialy the railing on the aft boatsdeck portion finds a good hold, and same time its a good waterlead all around the deck Nils preparing for the soldering work the rail must be kept down on the spacer tubes and fixed there during soldering the overstanding stanchions will be clipped off, before the deck goes on now the most tricky part is done (aft boatsdeck edge-rail)


- 2,625 replies
-
- 34
-
-
- kaiser wilhelm der grosse
- passenger steamer
- (and 1 more)
-
Siggi, wunderbar !!!! it looks brilliant (both modsels) in that case with "sealevel" Congrats to to that achievement, you did a fantastic job... Nils
- 58 replies
-
- 2
-
-
- barge
- ships boat
- (and 1 more)
-
Thank you Carl, much appreciated, I`ll keep in mind to ask Kees, when the time for boatsfabrication arrives..., relating to the challenge, I`m always open for innovative techniques, as far as I can do with my humble toolpark Nils
- 2,625 replies
-
- 8
-
-
- kaiser wilhelm der grosse
- passenger steamer
- (and 1 more)
-
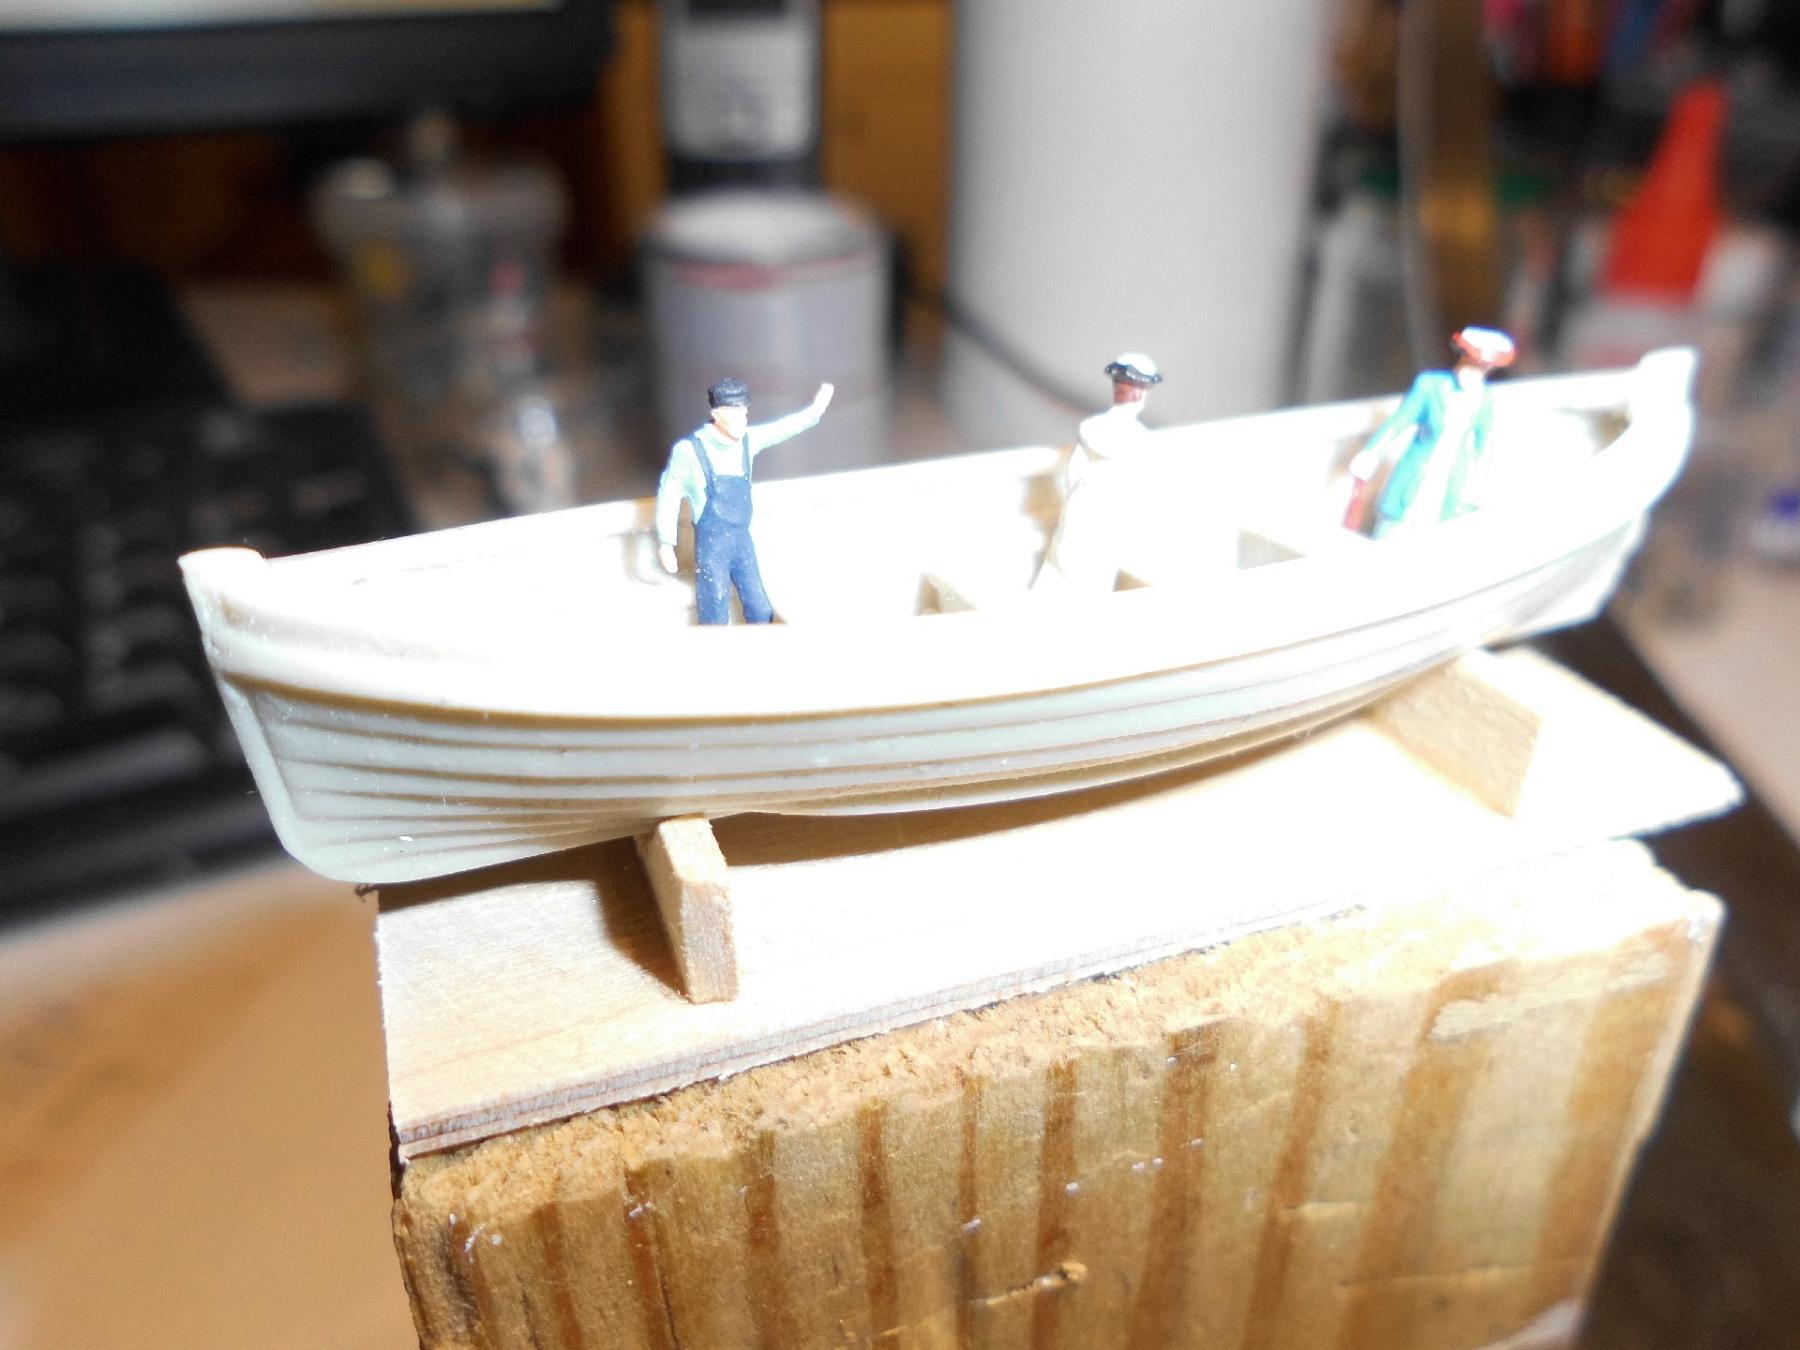
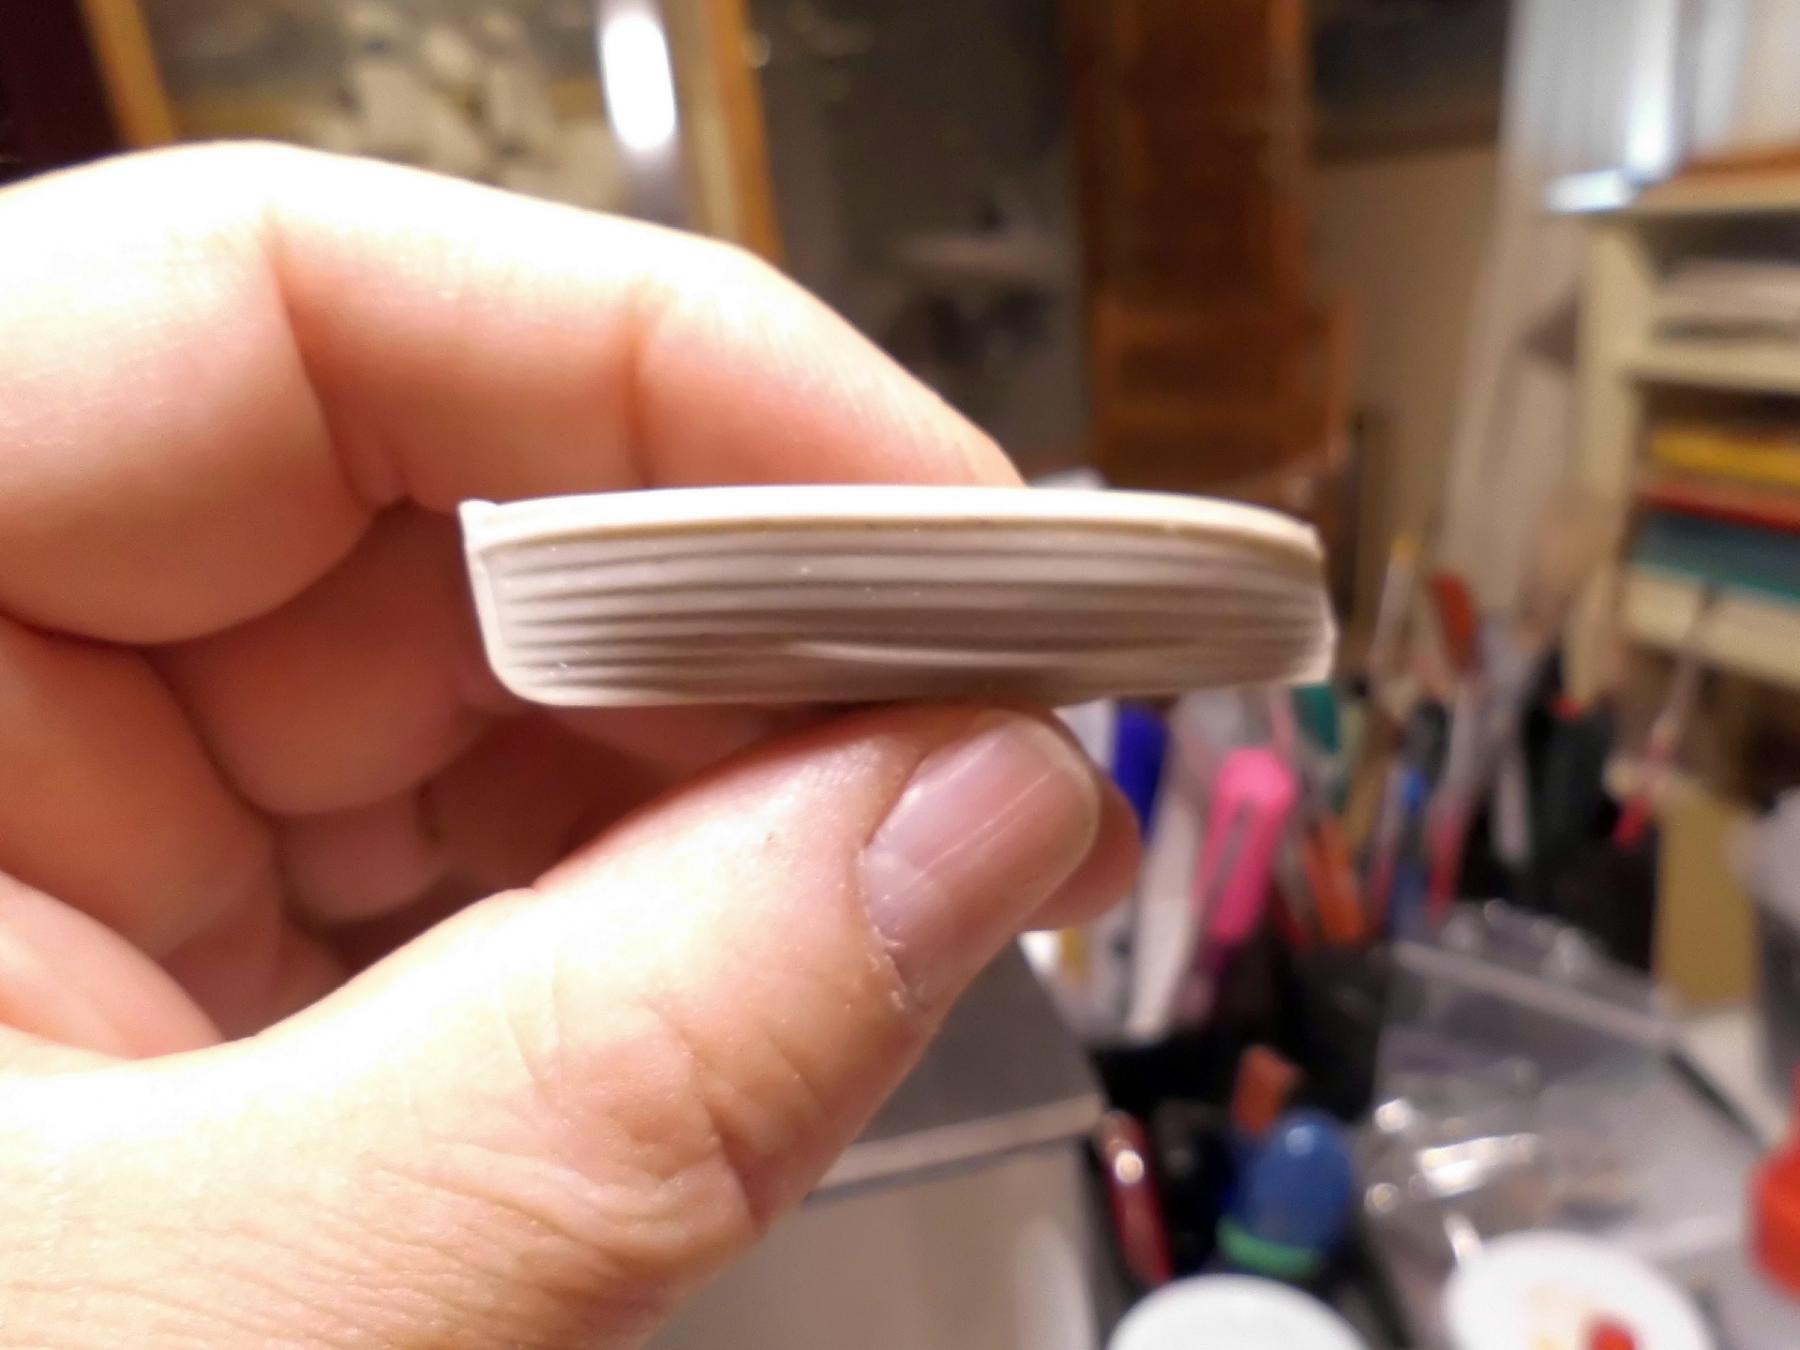
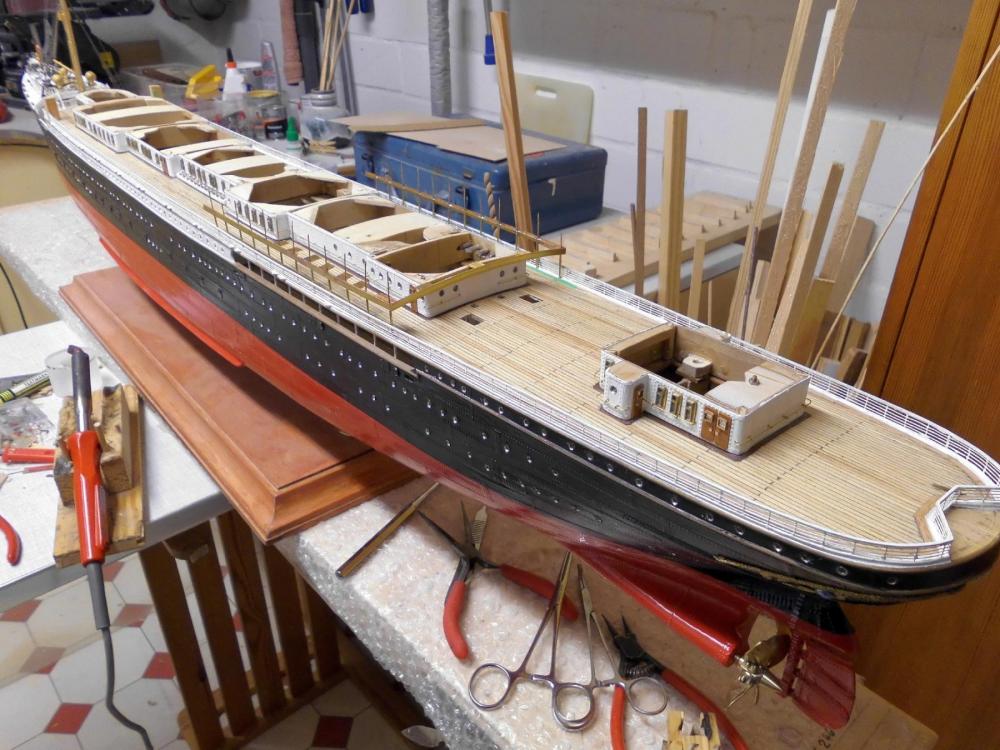
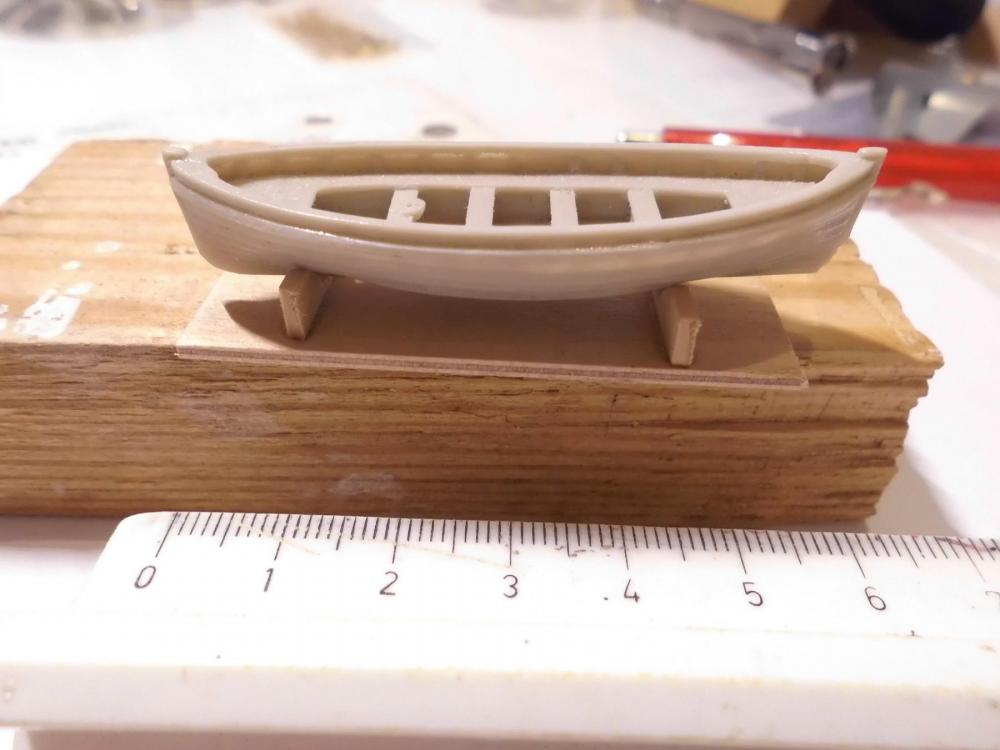
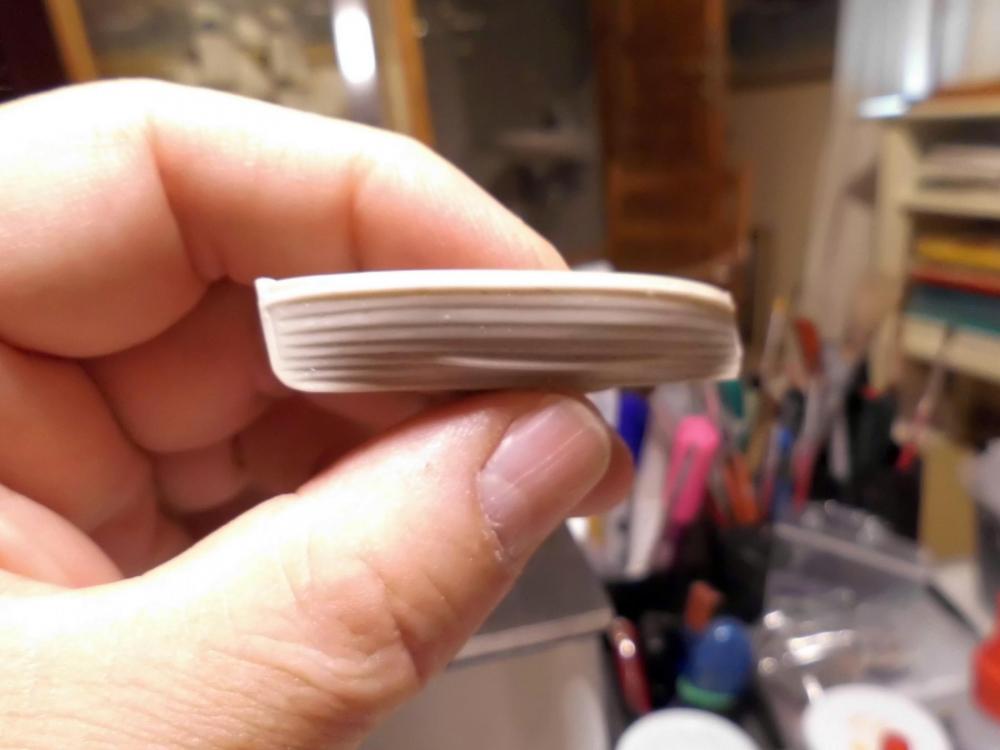
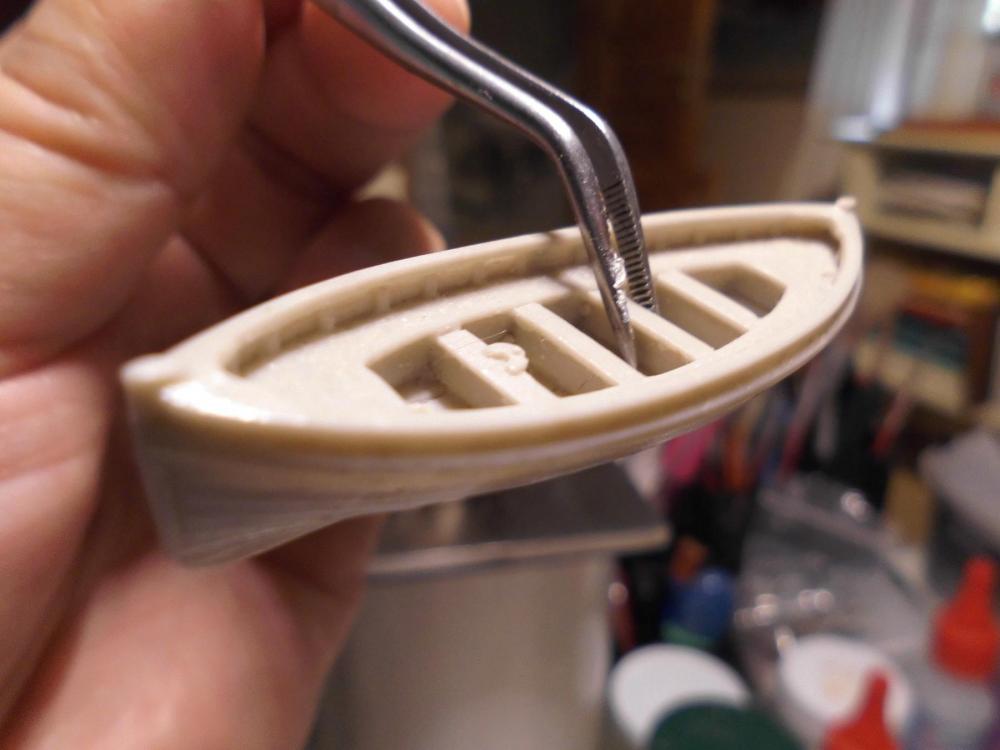
Many thanks to Tony, Mark (Taylor), david, and Carl, and all the recent "Likes".... Tony, thanks for your words... If you search the web for a certain build plan you may not always find a plan in the quality as detailed as you know them from the kit plans, but for a scratch builder, one must be happy with whatever was found. Often there are books with printed lines- and frameplans, and if you have luck you can see the corresponding frame spaces.... Mark, thanks for your compliment, in the moment for example there are no plans how to fit on the upper boatsdeck, so its basicly working to what I think may workout, and doing trials... David, unfortunately I have no experience with hot air styrene forming over plugs, or vacuum forming, like member Kees did with his hulls (very interesting method) Carl, see enclosed pics... it is my aim to go for that way. Some months ago I found and purchased a clinkered open double ender lifeboat in scale 1:144 with fine structured and detailed hull and also exactly 60 mm long (Bingo ! ), this perhaps may be the one to be used for taking a mold. But there remains the challenge of using a self made model,,, The problem I have, is the missing experience with making tiny silicone molds for the resin cast. Probably have to learn by doing... Nils the figurines are scale 1:160 in an 1:144 boat the model comes without rudder and oars and is a beautiful little model of a heritage lifeboat 60 mm long to fit neatly in the spaces on the boats deck

- 2,625 replies
-
- 23
-
-
- kaiser wilhelm der grosse
- passenger steamer
- (and 1 more)
-
thanks for your nice compliment Bob, no understatement ! you`re doing an excellent job on your builds Nils
- 2,625 replies
-
- 5
-
-
- kaiser wilhelm der grosse
- passenger steamer
- (and 1 more)