Mirabell61
-
Posts
7,417 -
Joined
-
Last visited
Content Type
Profiles
Forums
Gallery
Events
Everything posted by Mirabell61
-
 Update... here 2 of the 6 swan-neck hydrants that go to the promenade-deck, just inside of the railing... Made from anealed 2 mm brass wire, bent and solder-fitted with sleeve and flange..., they will be painted red Nils
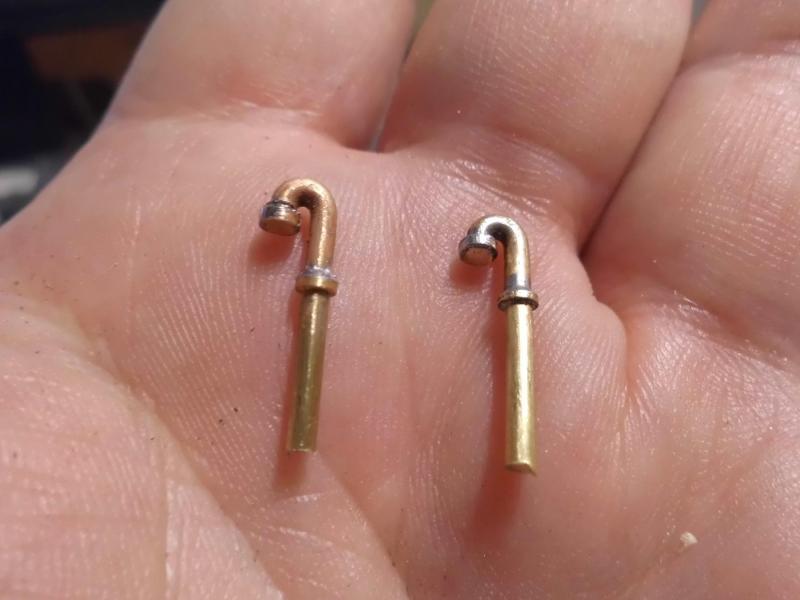
- 2,625 replies
-
- 19
-

-
- kaiser wilhelm der grosse
- passenger steamer
- (and 1 more)
-
Peter, thank you very much for your suggestion..., I`ll leave that final decision till later on. These tiny parts are so fragile, that the slightest "clean-brushing" may seperate the CA joints, because the glue film in the joints is so thin. I understand your comment well, but on the other hand the brass handrails and the brass window frames fit into the given scheme as well as with the painted surfaces.... Nils
- 2,625 replies
-
- 5
-
-
- kaiser wilhelm der grosse
- passenger steamer
- (and 1 more)
-
beautiful work Toni, I like that half shut forecastle bulwark and the partially planked gundeck... Nils
-
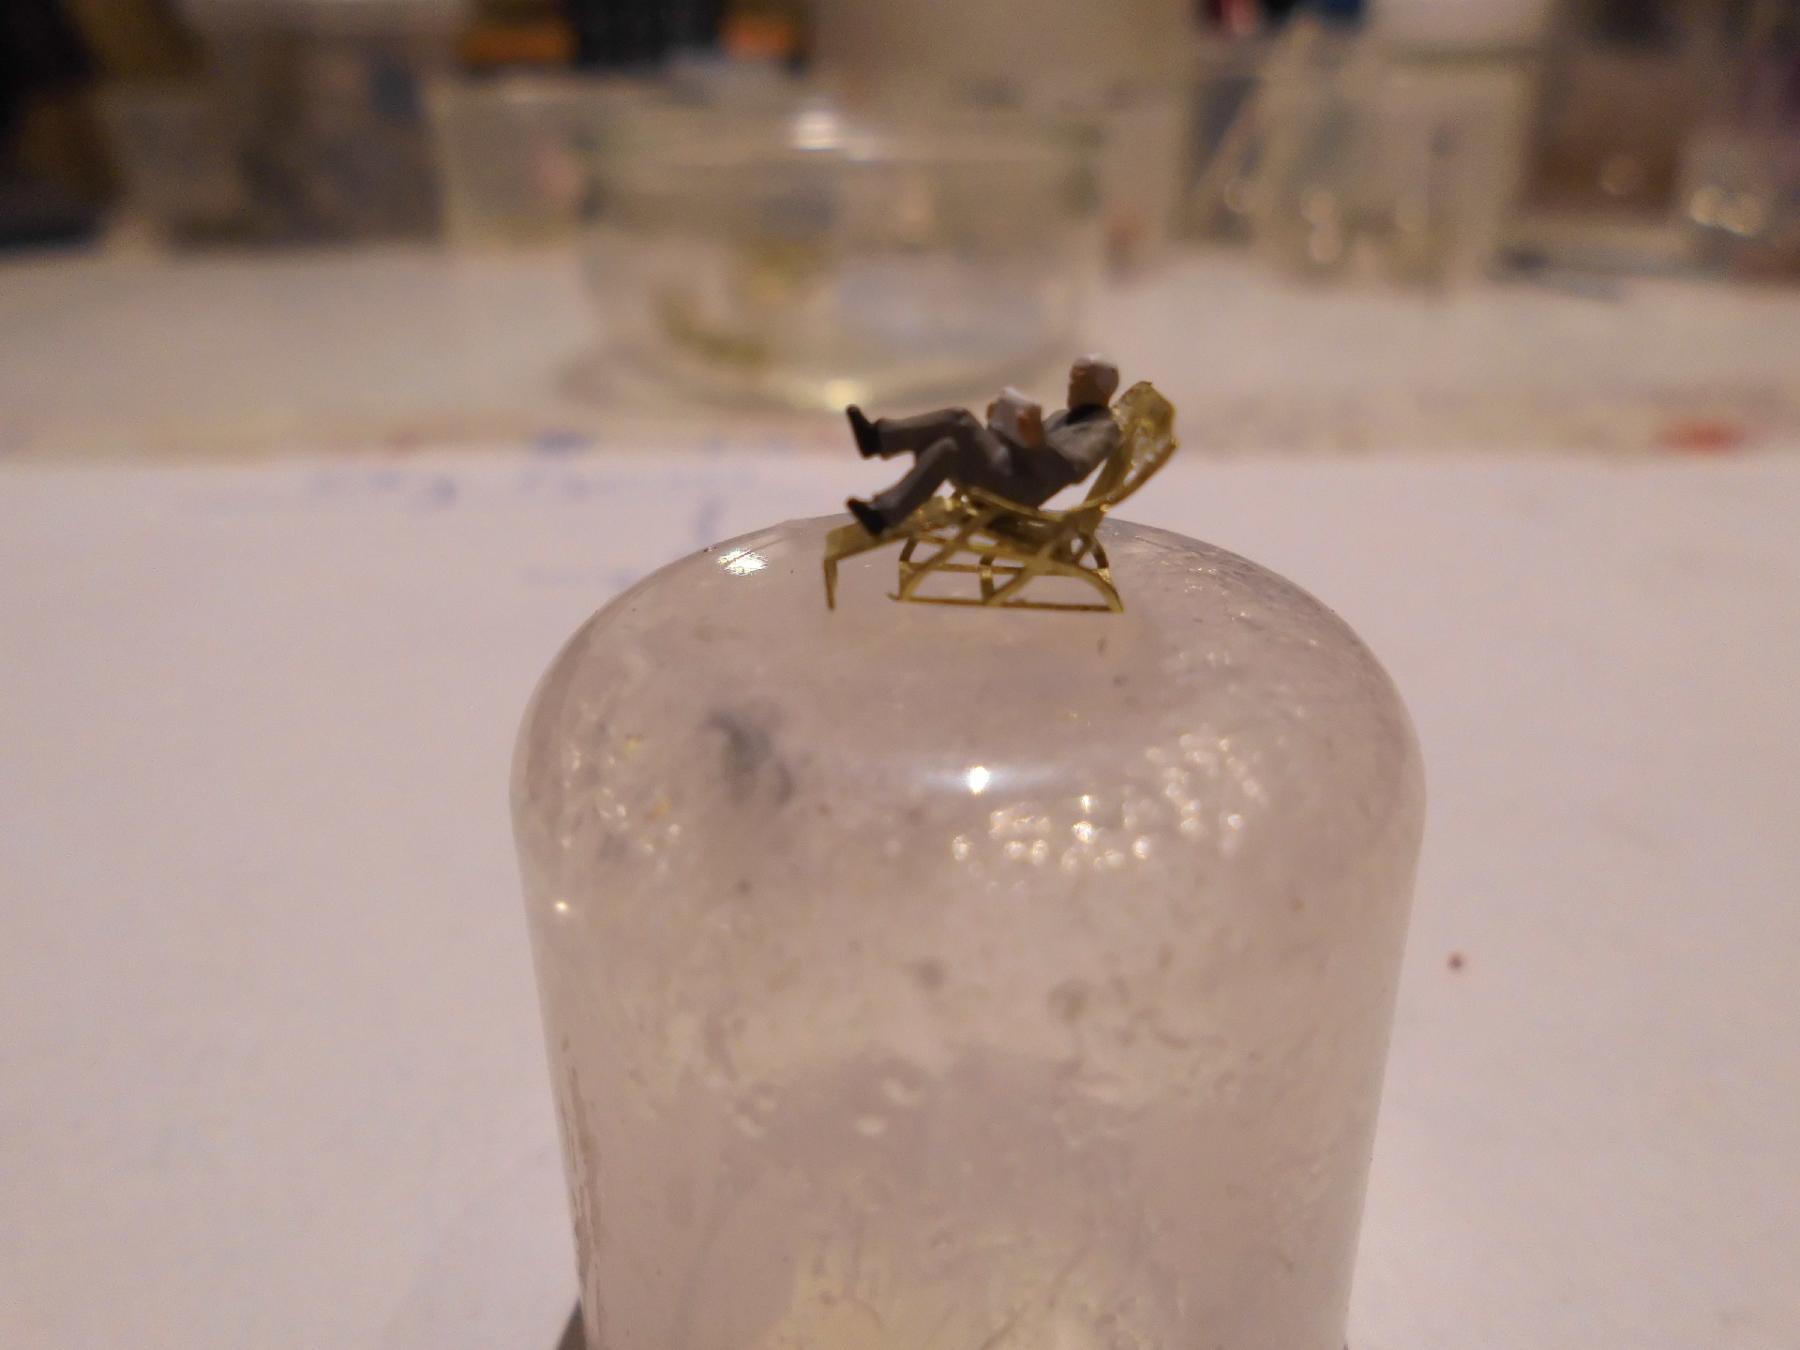
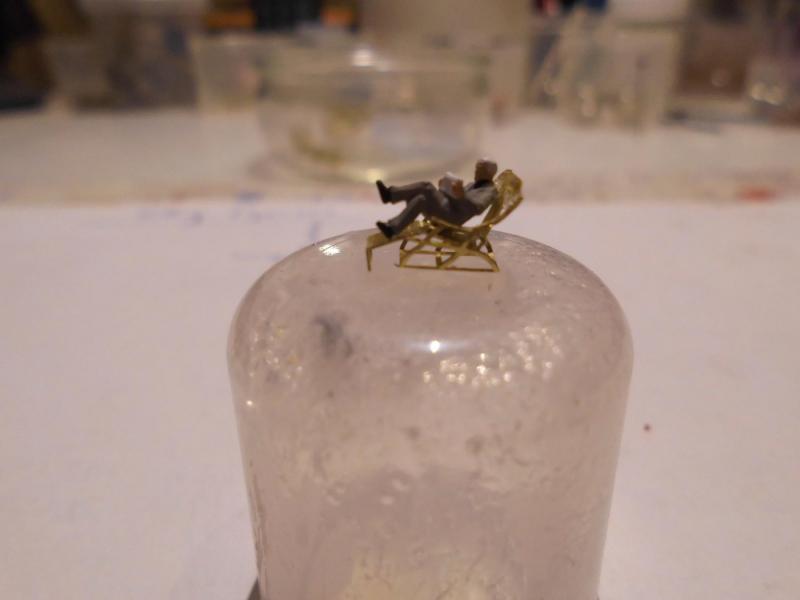
Many thanks Martin and Glenn, for your kind appreciations.... Martin, I`m pleased you like those little deckchairs.... I thought that I would`nt paint them and the benches, because then it would easily look like plastic Glenn, I`m also having those little flakes of CA on my fingertips, because I simply forgot to use the debond agent directly afterwards, thanks for your compliment Nils
- 2,625 replies
-
- 3
-
-
- kaiser wilhelm der grosse
- passenger steamer
- (and 1 more)
-
good progress Patrick, she is a nice modern yacht with elegant lines and decks.... Nils
-
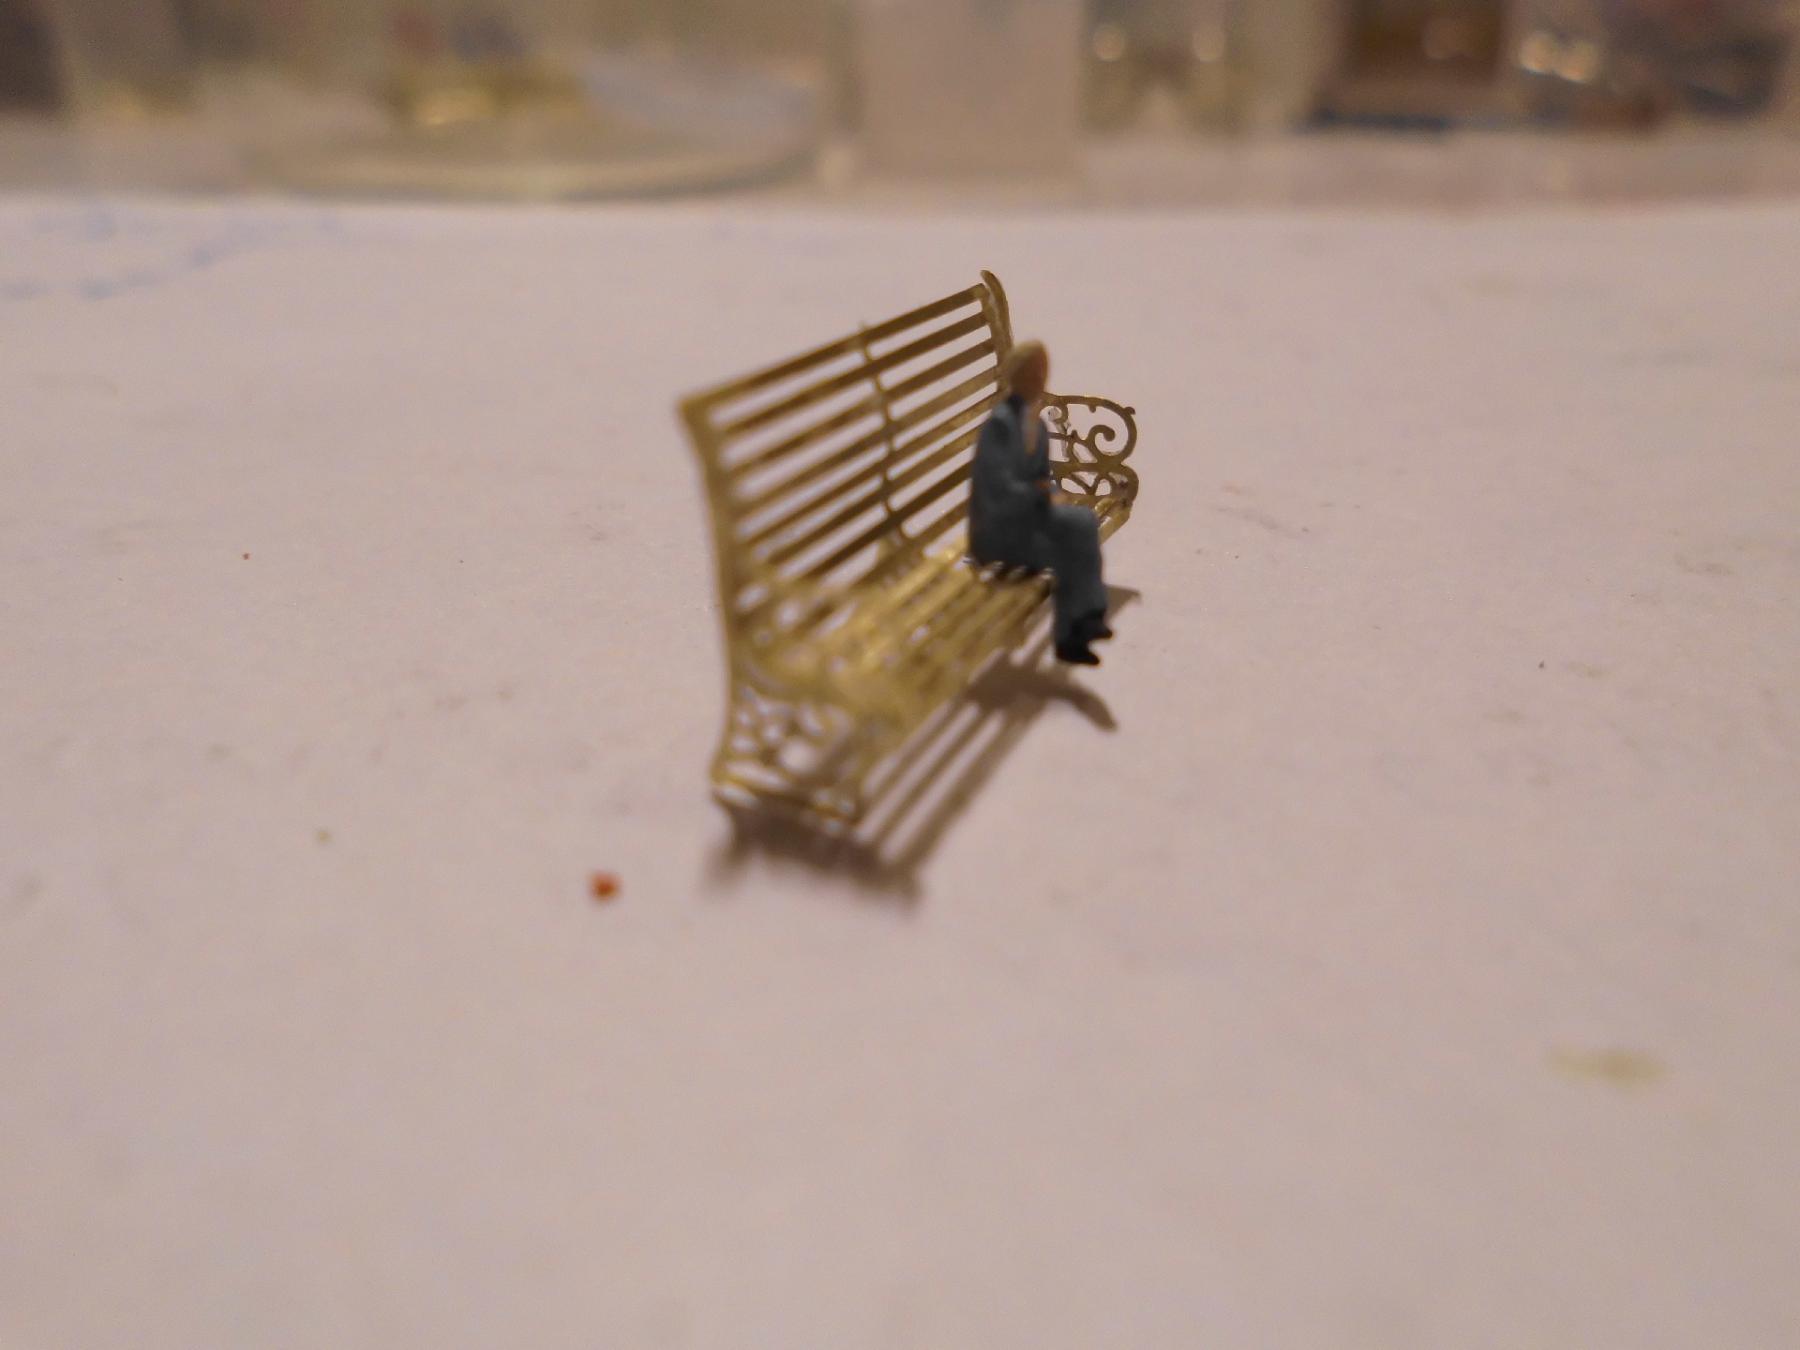
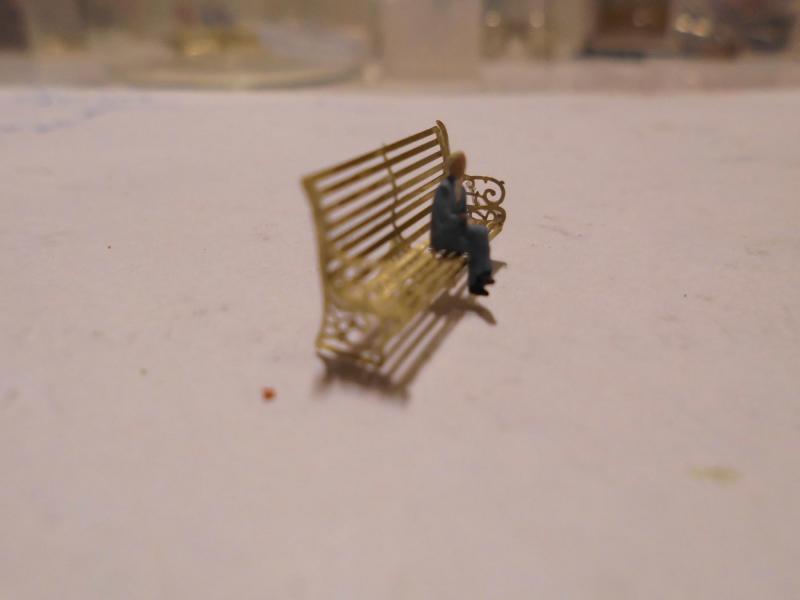
Thanks to Bob - Nick - Carl - John - B.E. - Patrick and to all the "likes" Bob `(cap`n), I fell in love with those nostalgic bench etchings the moment I discovered these on the Australian web page, because I never saw them before, and best of all, in scale 1:144 Nick, thanks for looking in, and for your nice compliment Carl, thanks again for your kind advise, much appreciated John, Thanks for your nice comment, nice play of words,.... (bench mark),.. B.E. your kind comments on vents and etched benches are much appreciated Patrick, yes, I think they will be good looking on the promenade deck and other areas under the Atlantic sunshine, most occupied with sitting passengers watching the rolling sea and the ships wakes Nils
- 2,625 replies
-
- 5
-
-
- kaiser wilhelm der grosse
- passenger steamer
- (and 1 more)
-
Hi Liberto, I just had to have a second look at that ingenious set of punch / shaping tool set ( self centering convex pin included) you made for the shields metal fittings. Thanks for sharing this brilliant idea Nils
-
Many thanks Johann and Nenad, for your nice and appreciated words.... Nils
- 2,625 replies
-
- 5
-
-
- kaiser wilhelm der grosse
- passenger steamer
- (and 1 more)
-
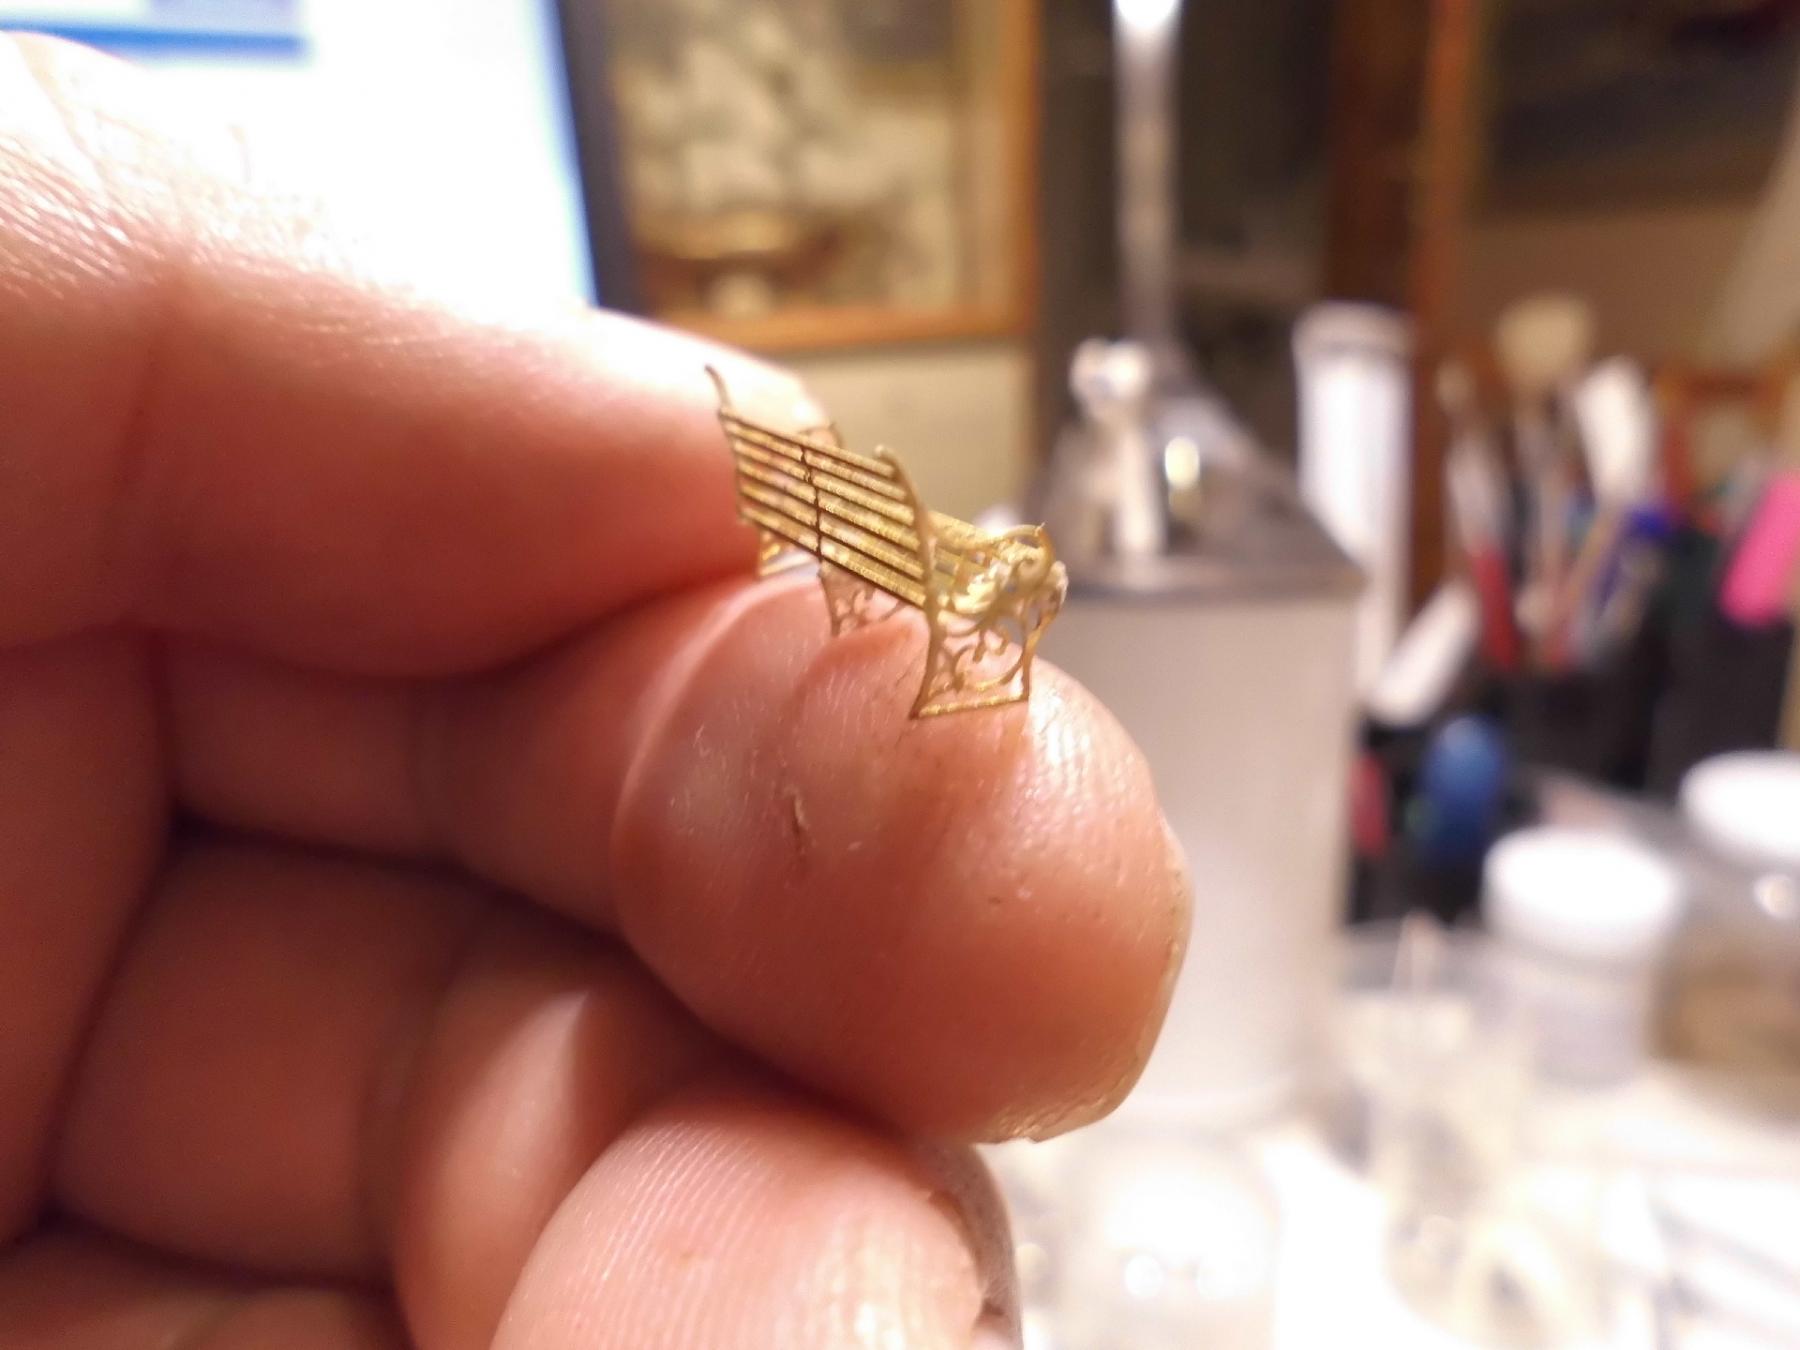
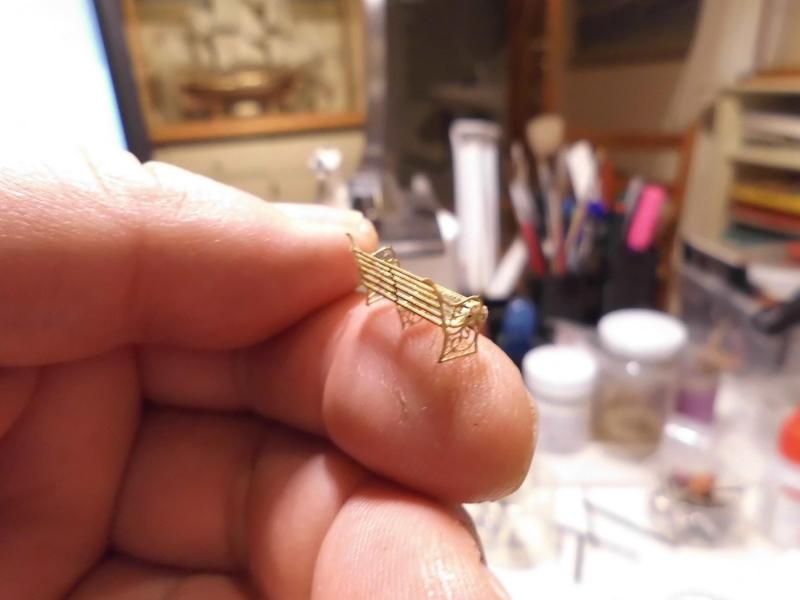
Thank you very much John, your compliment is much appreciated, and I saw you were catching up with the build log, thanks for looking in. Today I assembled one of those benches ( fiddely stuff I must say ! ), but I think its acceptable with a bit more routine it will do.... Trust Bill and Carl were right with their recommendation to avoid soldering (thanks again Bill and Carl) , The CA connection of parts is strong enough for this. Also thanks to those for all the " likes" Nils

- 2,625 replies
-
- 27
-
-
- kaiser wilhelm der grosse
- passenger steamer
- (and 1 more)
-
Thanks Bill, much appreciated your suggestion, think I´ll sacrifice one of the etched parts for trials, if I should loose confedence, the CA stands ready anyhow... Nils
- 2,625 replies
-
- 4
-
-
- kaiser wilhelm der grosse
- passenger steamer
- (and 1 more)
-
lovely 3D rendering Sal, Congratulations, I wish I could do such skilled and awsome designing with aid of my PC.... I read in your introduction to this project that you are having at least 30 years of Auto Cad experience, and that shows...., Unfortunately during my active business time I never found someone who was able to describe the way of 3D design thinking in understandable way to me, versa the "old" three views drawings during my time of career. I believe the 3D design is a complete different approach in thinking is`nt it ? Nils
-
Carl, thanks for your kind comment...., I´ve been thinking of that alternative in using CA as well, in fact the manufacturer of these parts recommends the use of super glue.. Nils
- 2,625 replies
-
- 5
-
-
- kaiser wilhelm der grosse
- passenger steamer
- (and 1 more)
-
Thanks very much Bob, yet I`m a bit anxoius to start the soldering of those tiny, thin parts. In this case even a drop of solder would be too much, I am thinking of using tiny portions of soft solder paste (flux already mixed by) in scarce limited dosis aplication. I remember using this once for gas tourch soldering 0,4 mm brass railing wire to stanchions on the "Heinrich Kayser" steamer model. Will do some trials first.... Nils
- 2,625 replies
-
- 6
-
-
- kaiser wilhelm der grosse
- passenger steamer
- (and 1 more)
-
Thanks Carl, I have no doubts with the deck-sitting furniture, its the style of the era and looks good regardless to the ships name. Besides that I was pleased to find any at all in this scale . There were some benches in plastic (train gauge N ), but they did`nt find my approval.... Nils
- 2,625 replies
-
- 7
-
-
- kaiser wilhelm der grosse
- passenger steamer
- (and 1 more)
-
very nice looking model Jack, also good idea with the equal spaced rail for positioning the oars in the display cabinet Nils
- 170 replies
-
- 2
-
-
- gokstad
- dusek ship kits
- (and 1 more)
-
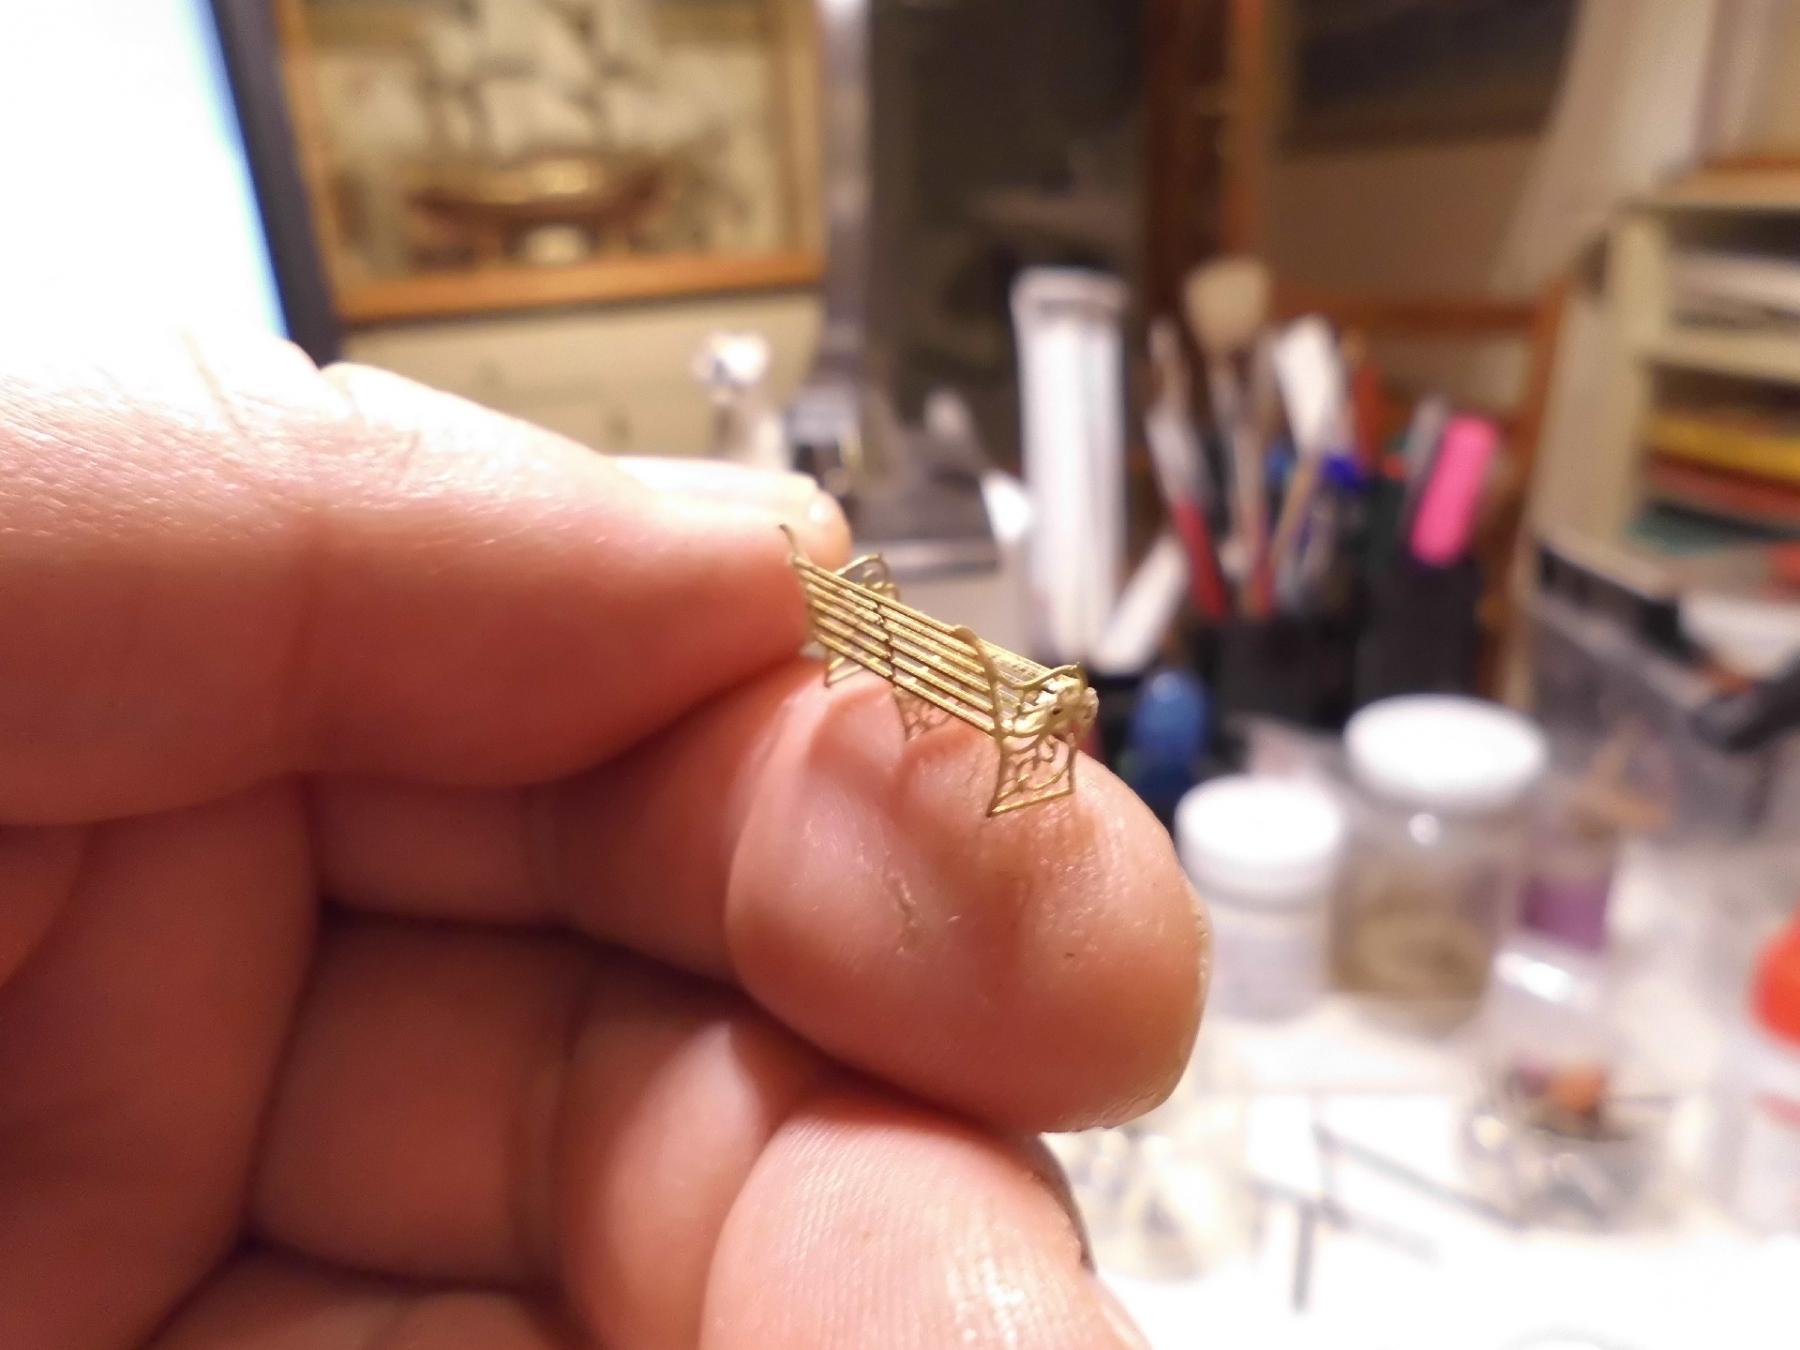
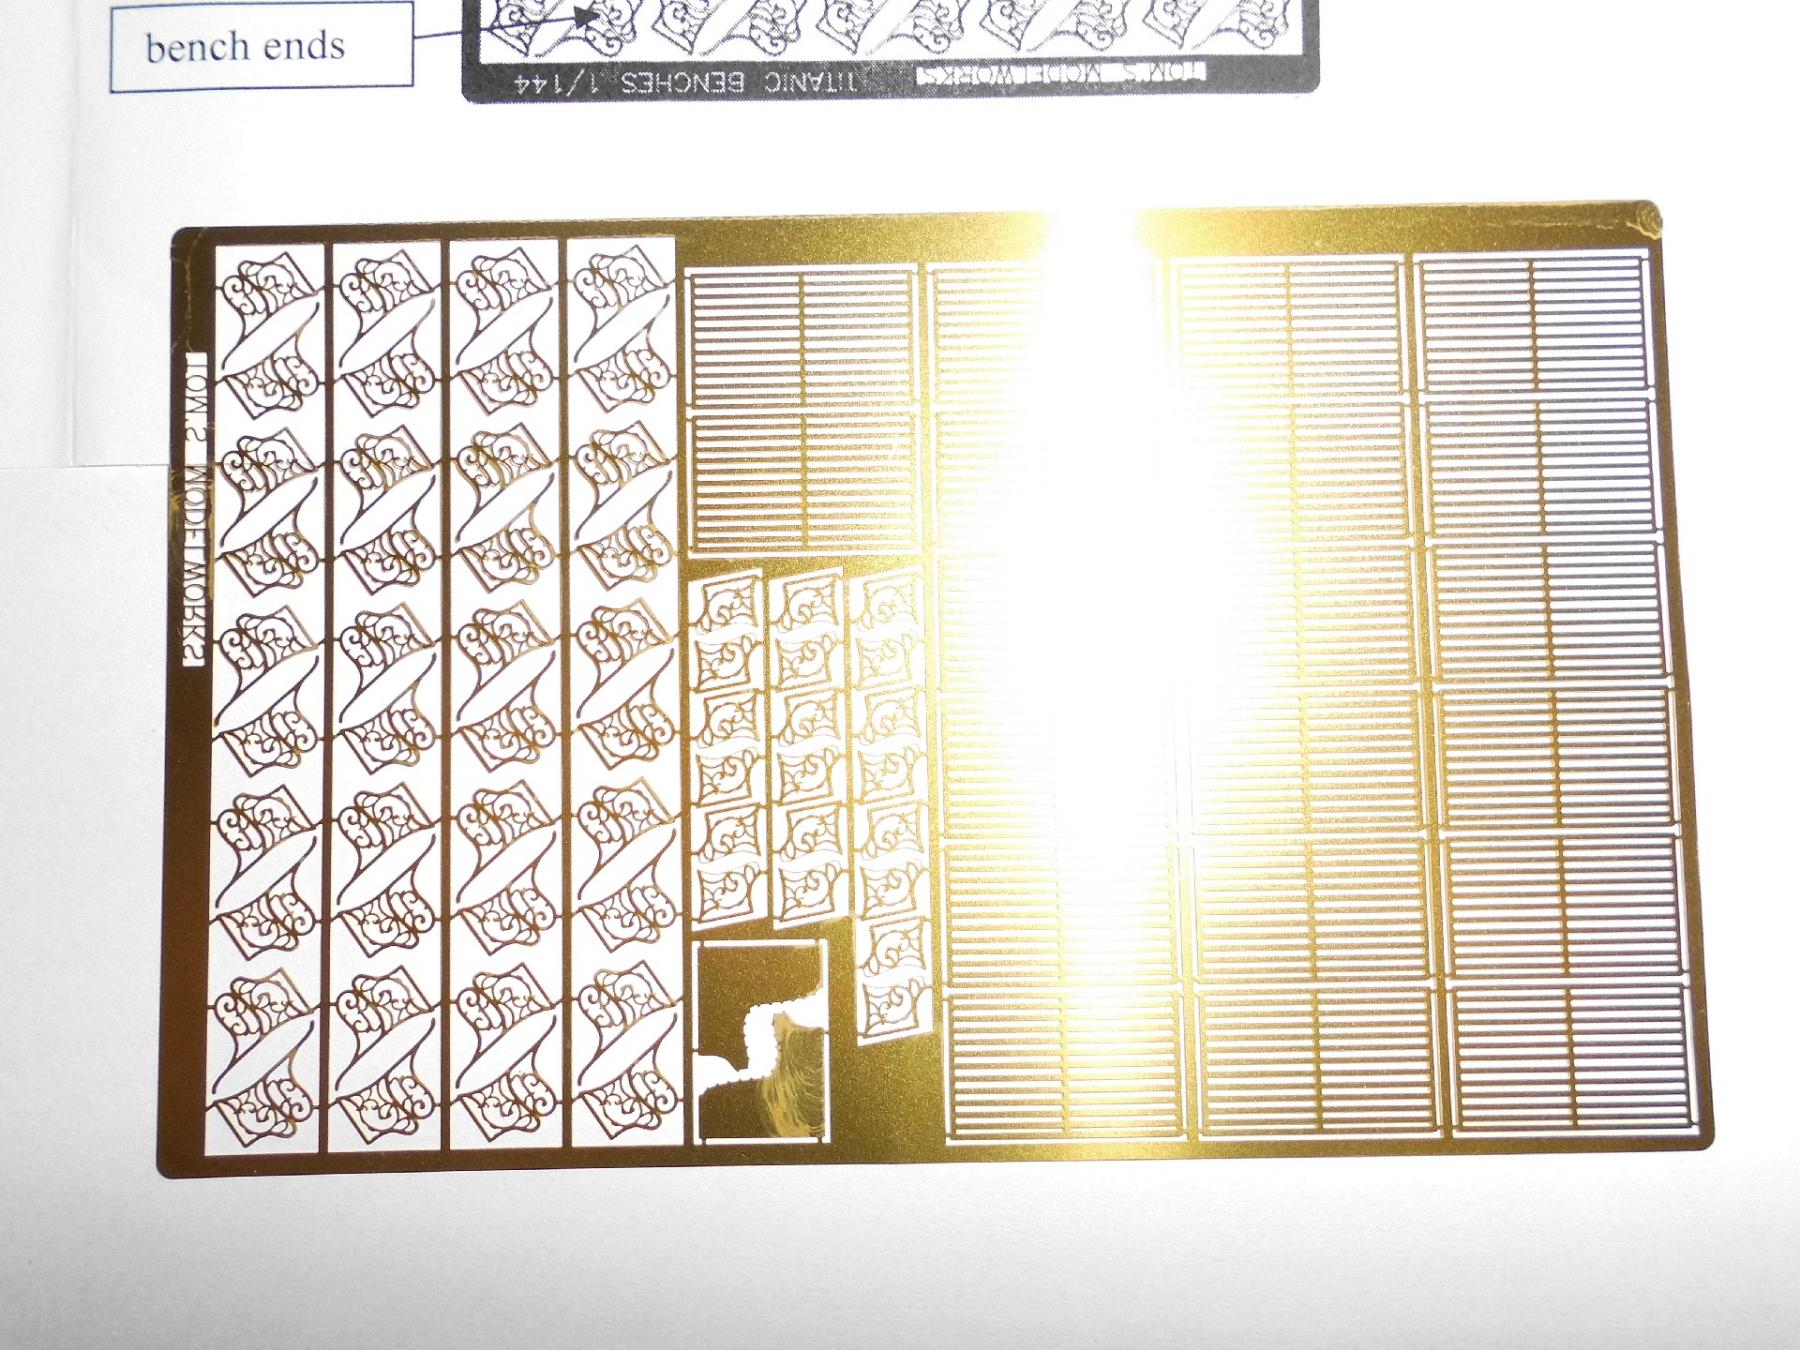
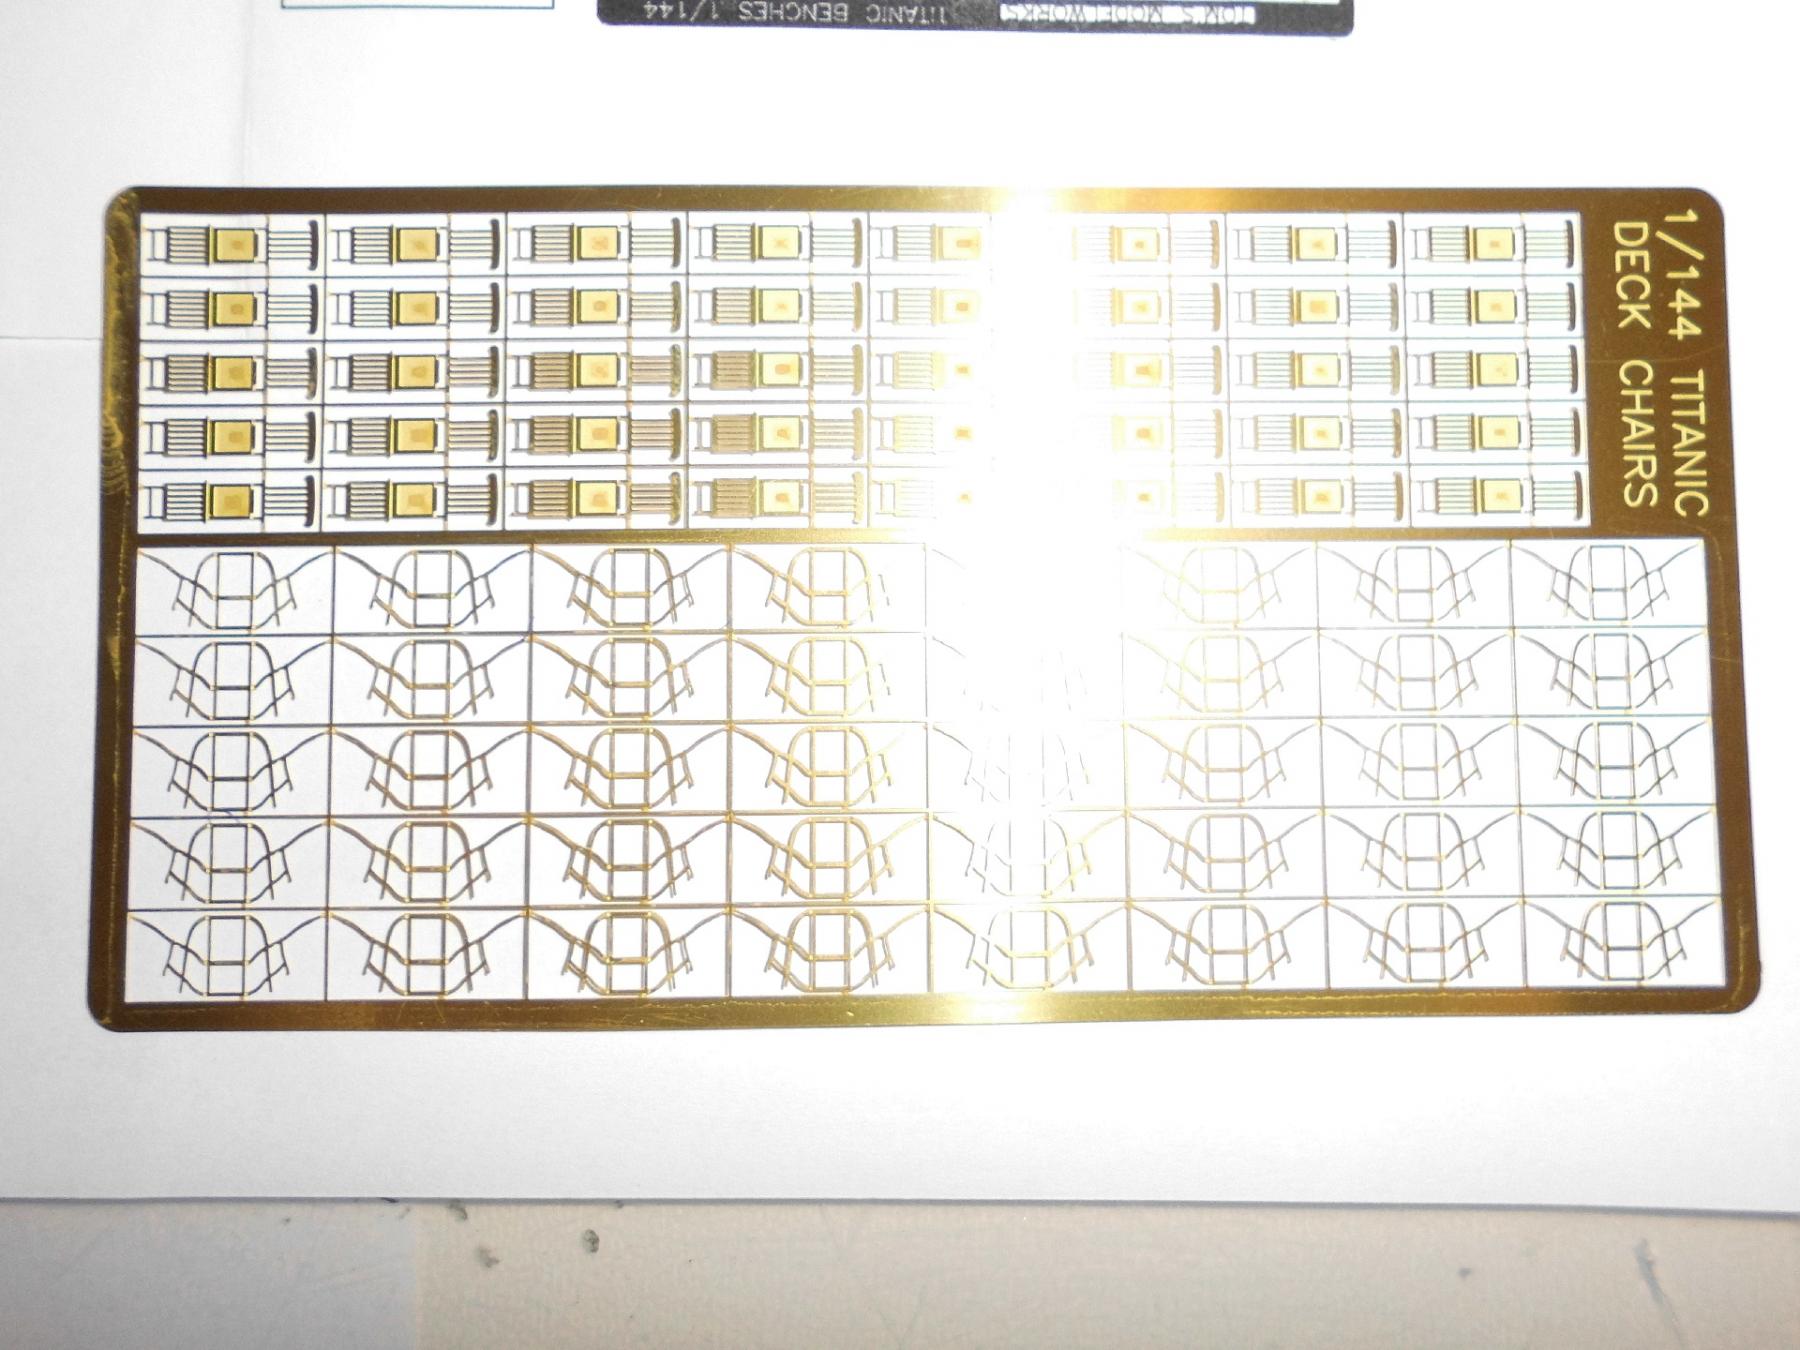
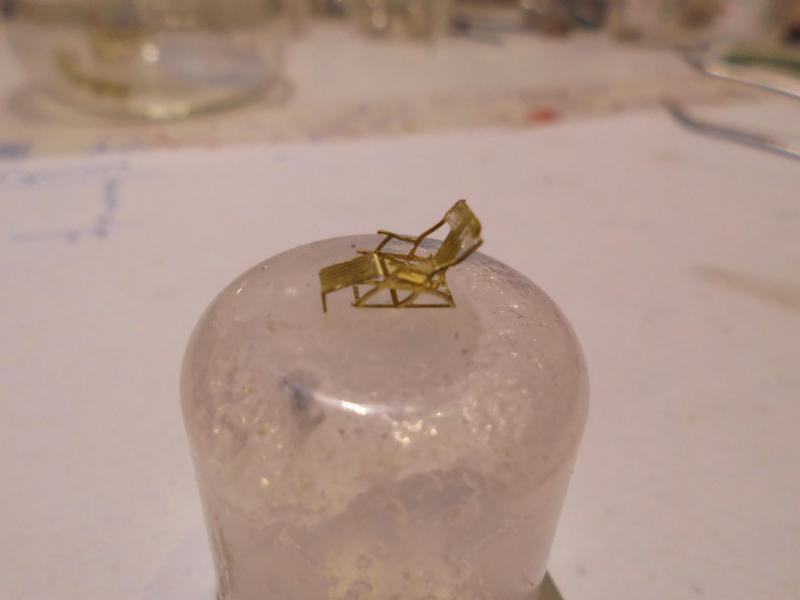
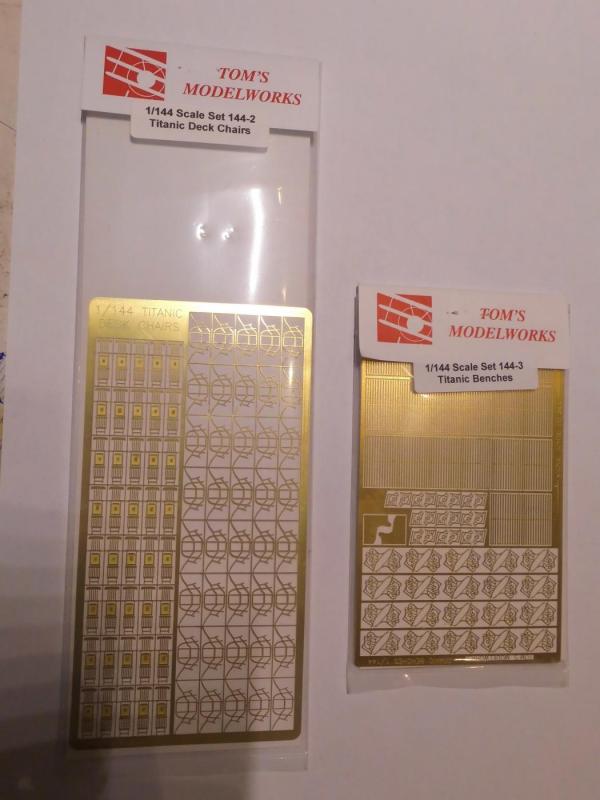
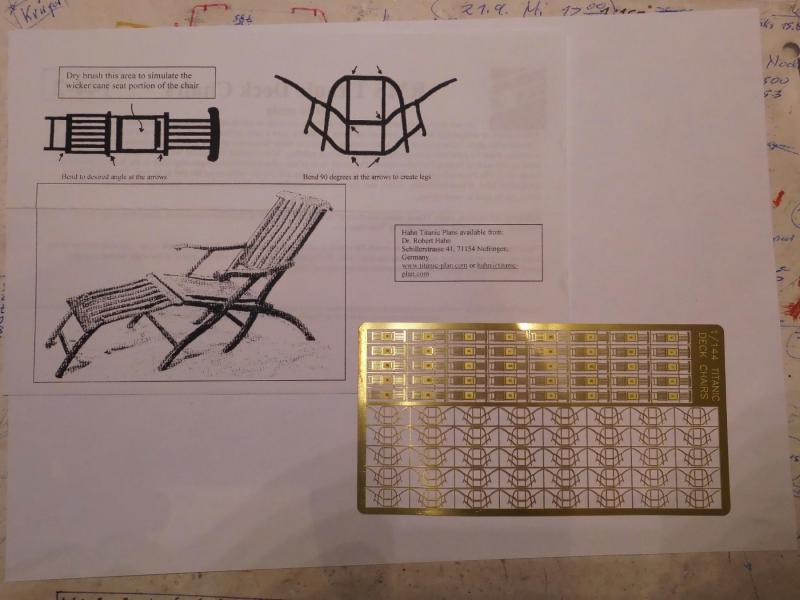
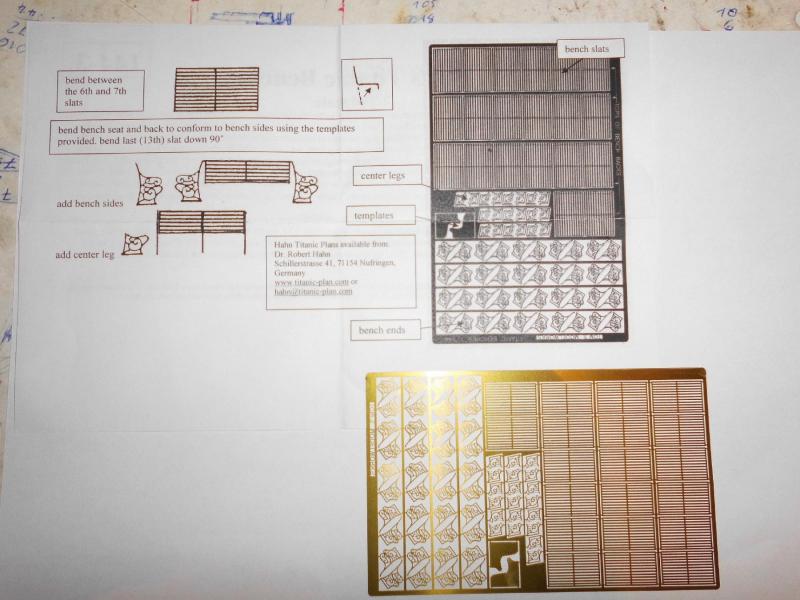
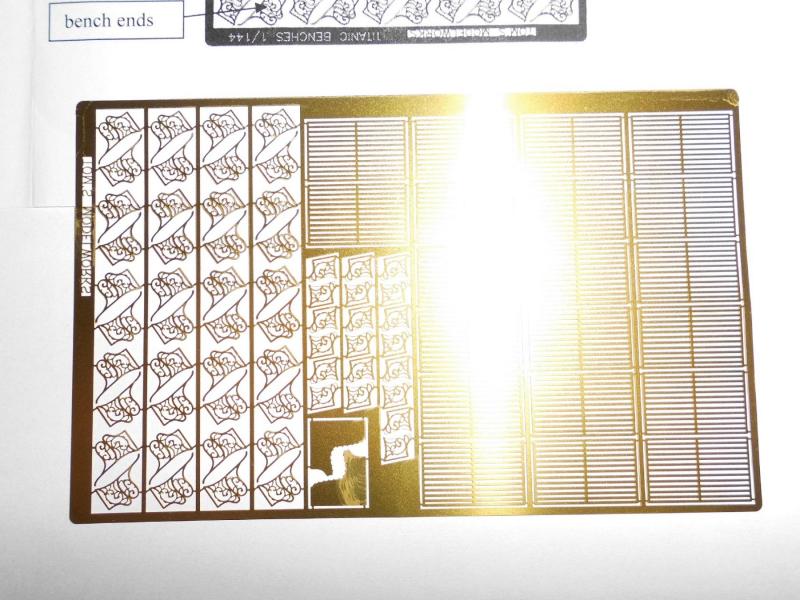
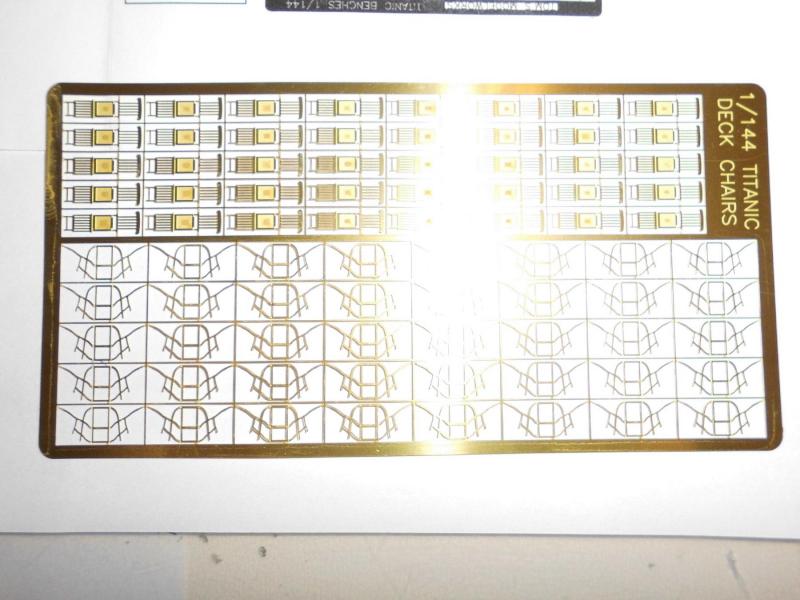
Update 40 deckchairs and 20 benches in scale 1:144 This is what the good looking filigrane etched build brass kits look like. Will be quite a tough soldering job to get things into the right shape I guess...., have`nt started yet...., may require some holding gig.... If they workout, its worth the effort... Sorry for the flash reflections on the last three pics Nils
- 2,625 replies
-
- 19
-
-
- kaiser wilhelm der grosse
- passenger steamer
- (and 1 more)
-
Many thanks Keith, Am very interested in the technique you describe, shall certainly be watching when you go for it.... Nils
- 2,625 replies
-
- 4
-
-
- kaiser wilhelm der grosse
- passenger steamer
- (and 1 more)
-
Bob, great ship.... I`m very pleased that those electroformed vents worked out so well. The technique. is very incouraging, and now its time to see the results, well done ! Nils
- 348 replies
-
- 4
-
-
- pequot
- cable ship
- (and 1 more)
-
Thank you very much Rob, like your compliment... yes, I`m quite pleased with the metal vents. (bowl on tube). In opposite to later liners, after WW1 the ships started to show more streamlined type vents with not so easy to model designs. I often ask myself how the builders-model makers made those, if not from rather expspensive resin cast tools and moulds Nils
- 2,625 replies
-
- 3
-
-
- kaiser wilhelm der grosse
- passenger steamer
- (and 1 more)
-
wow Patrick, busy as a bee, not even time to finish the tasty apple inbetween..... Very good progress, looks great Nils