Mirabell61
-
Posts
7,417 -
Joined
-
Last visited
Content Type
Profiles
Forums
Gallery
Events
Everything posted by Mirabell61
-
 Thank you very much Bob, I`m pleased you like it.... Nils
- 2,625 replies
-
- 6
-

-
- kaiser wilhelm der grosse
- passenger steamer
- (and 1 more)
-
Hi Patrick, thanks for nice compliment. I`ll be concentrating on the handrails next..... Nils
- 2,625 replies
-
- 5
-
-
- kaiser wilhelm der grosse
- passenger steamer
- (and 1 more)
-
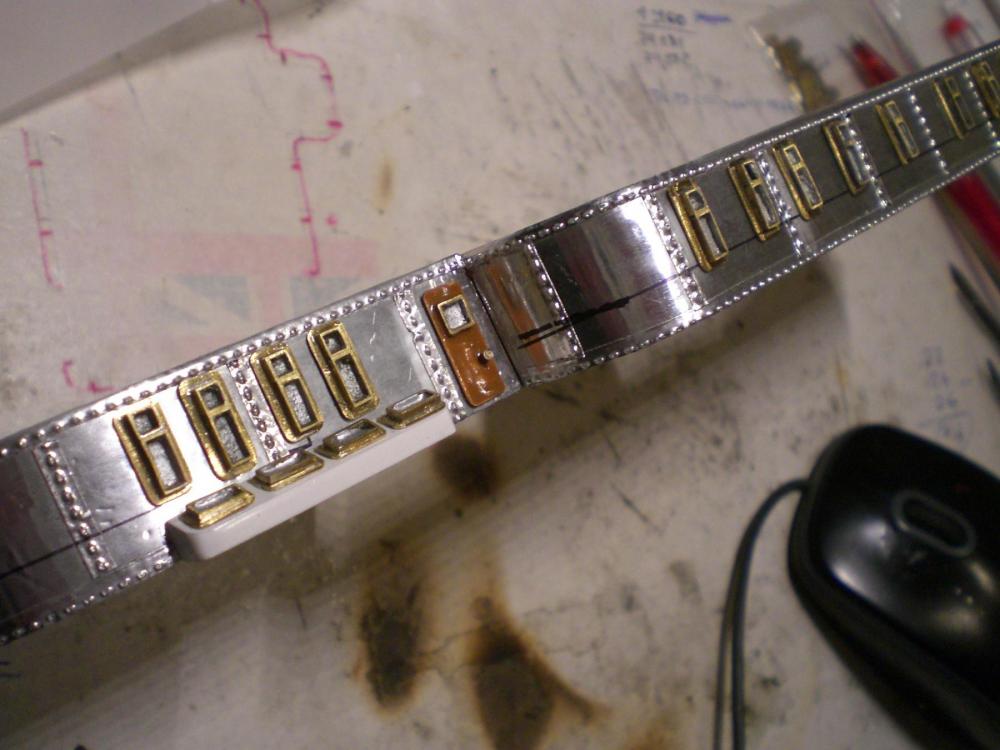
Thank you very much Denis, yes, its quite time consuming with the metal foil. Whats a bit tricky, is to get clean round cuts through the foil where the portholes are, because the foil ca`nt be drilled. I use the sharpened edge of a tube with an integrated centerdrill where its centerpin stands out appr. 1 mm. Once the hole is centered and the foil cut through, its easy to drill the rest through the wood. Nils
- 2,625 replies
-
- 6
-
-
- kaiser wilhelm der grosse
- passenger steamer
- (and 1 more)
-
Denis, that hull is coming together very nicely, and an interesting shape for the forward cabin.... Nils
-
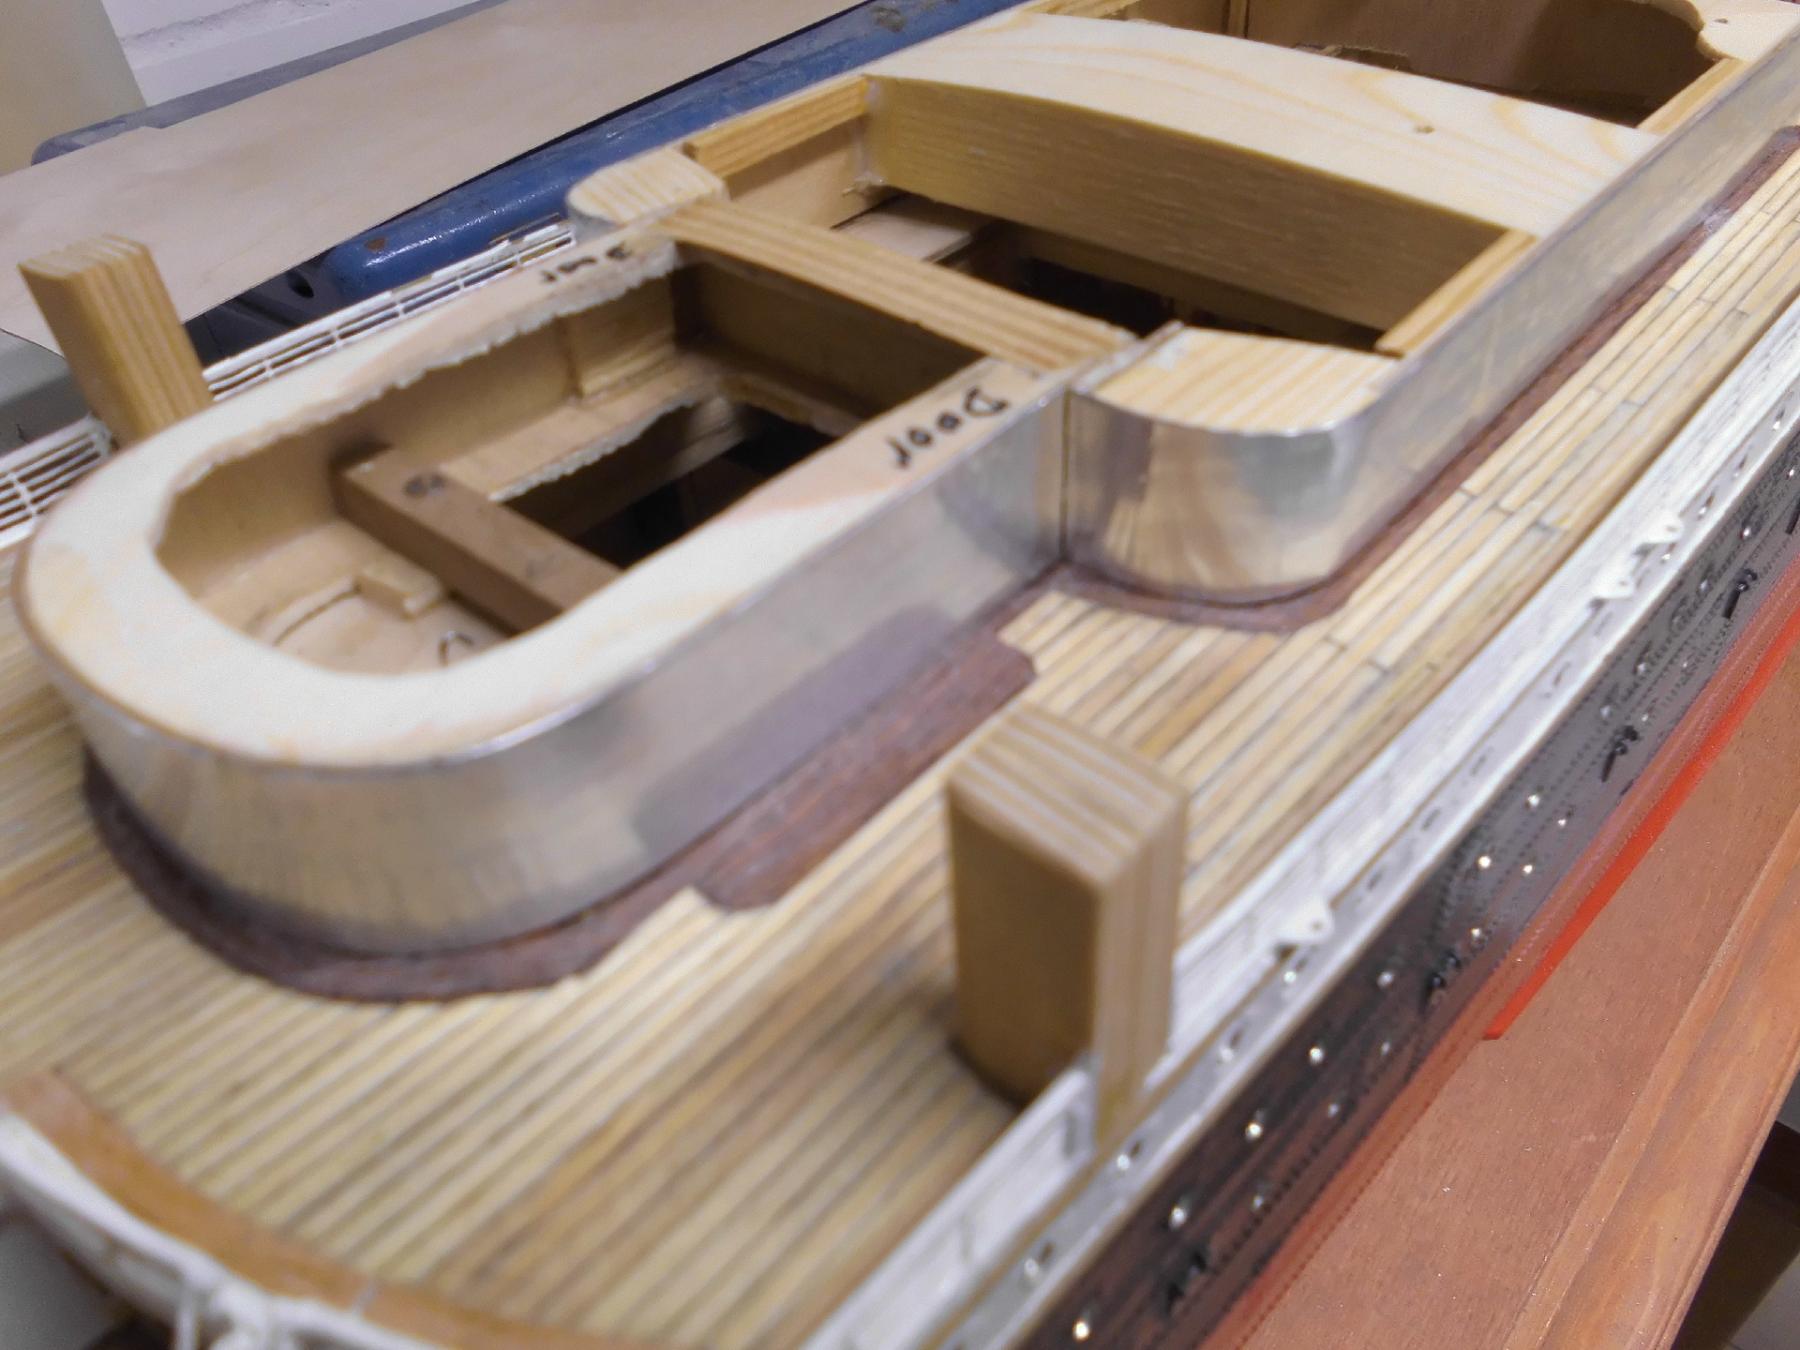
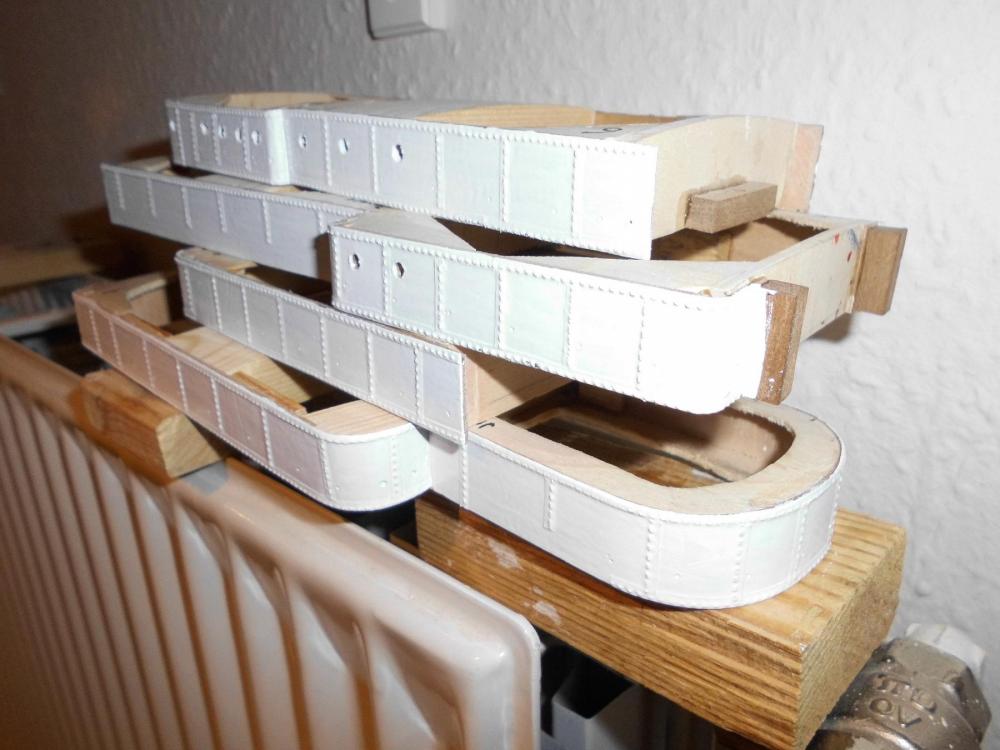
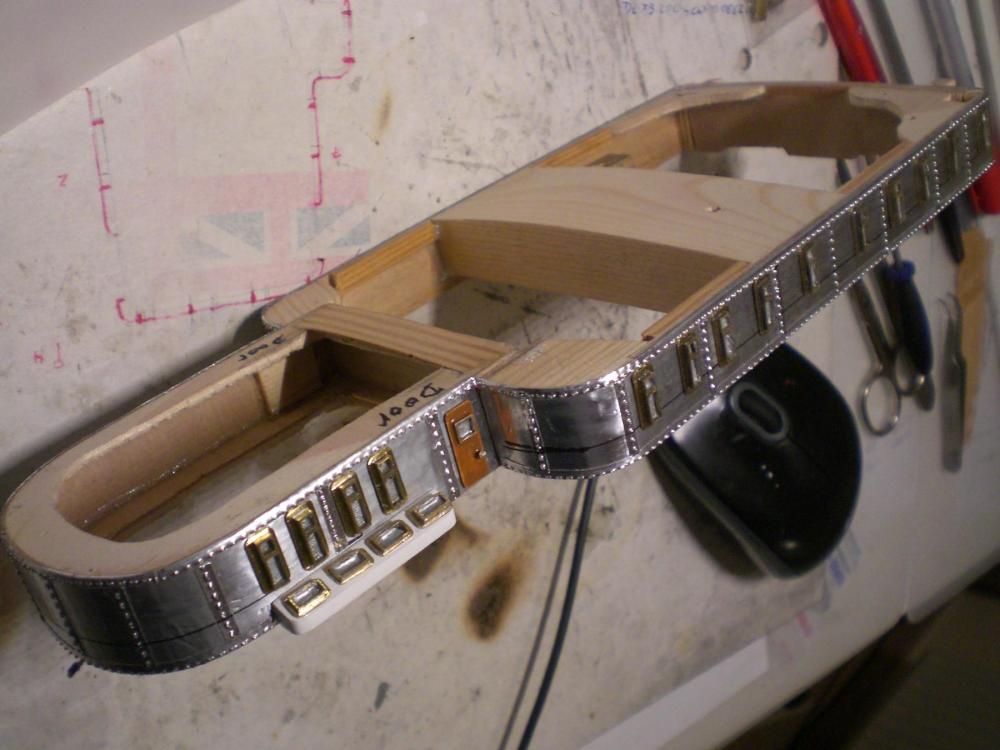
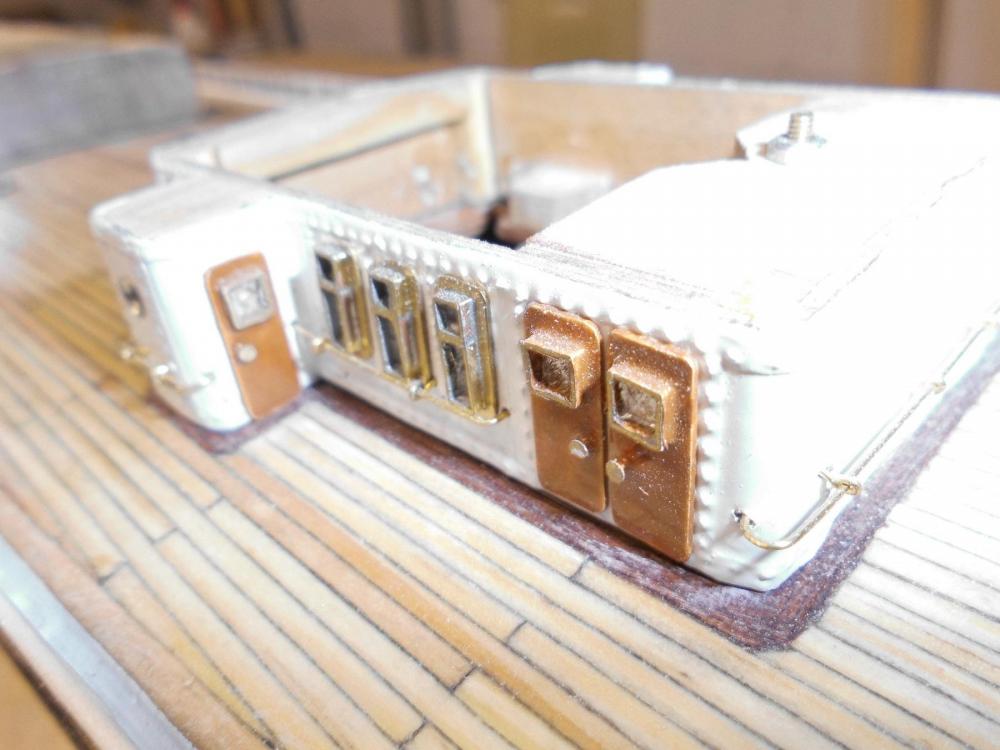
Thanks for your compliment Denis, I`ve been "riveting" the cabin walls and bringing in the holes where there come portholes. All tiny holes for the handrail stanchions have been drilled in. Also primering has been done and the painting for the four sections. The unpainted section shows what it will look like with doors and windows.... Nils doors and windows not permanently glued on yet... Handrails still missing.... the portholes shall look like those in the ships hull (metal sleeves with "glassing" from grasscutter 2 mm diam. Nylon line )
- 2,625 replies
-
- 22
-
-
- kaiser wilhelm der grosse
- passenger steamer
- (and 1 more)
-
David, good work ! , I like your attempt for the self made chain plates and deadeye stroppings Nils
-
Carl, thanks, yes, you`re right there is a vac, connection socket, I`ve never tried it yet because, the cleaner is quite loud, but I`ll do it next... Nils
- 2,625 replies
-
- 6
-
-
- kaiser wilhelm der grosse
- passenger steamer
- (and 1 more)
-
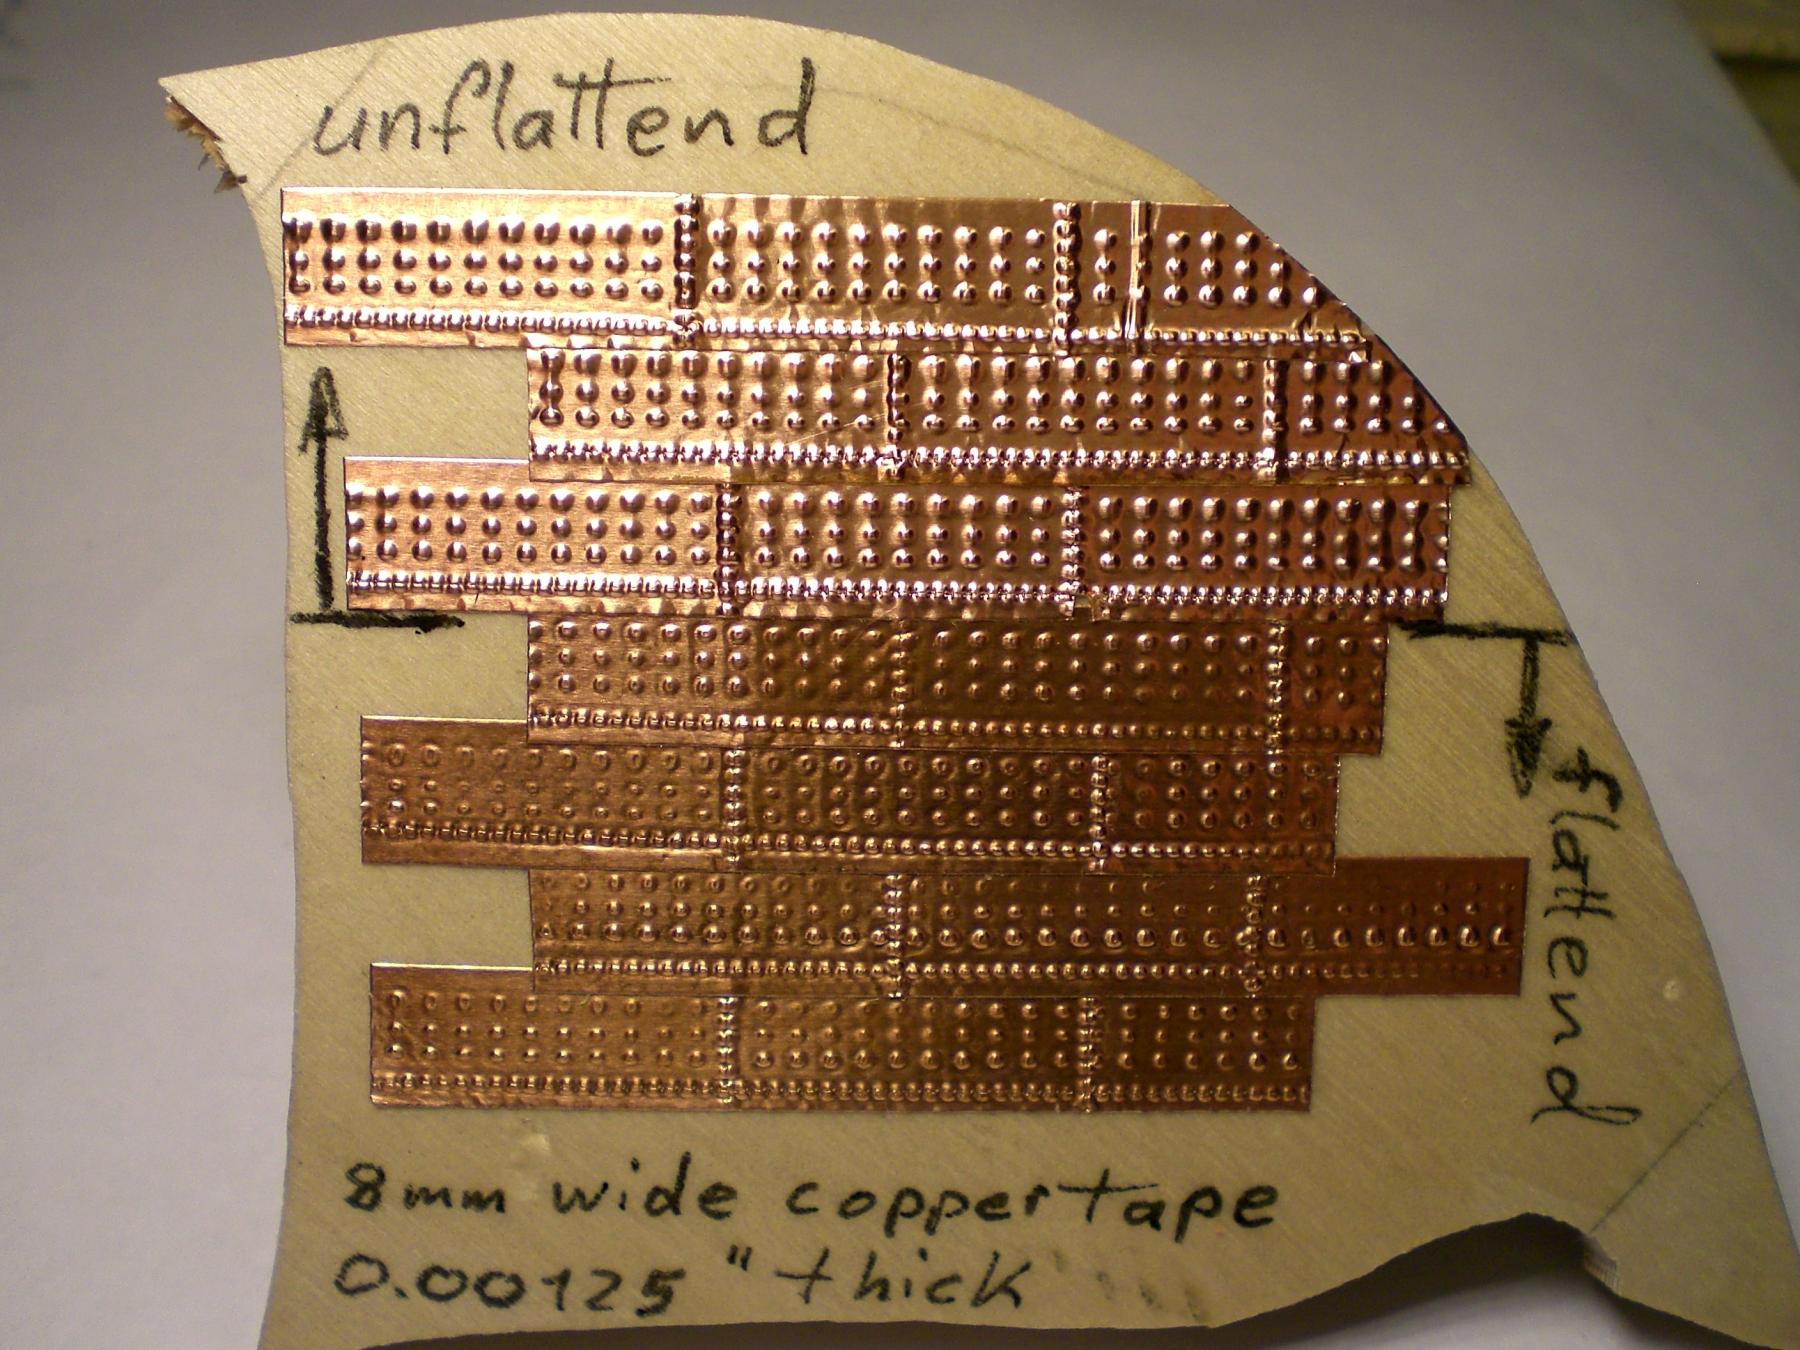
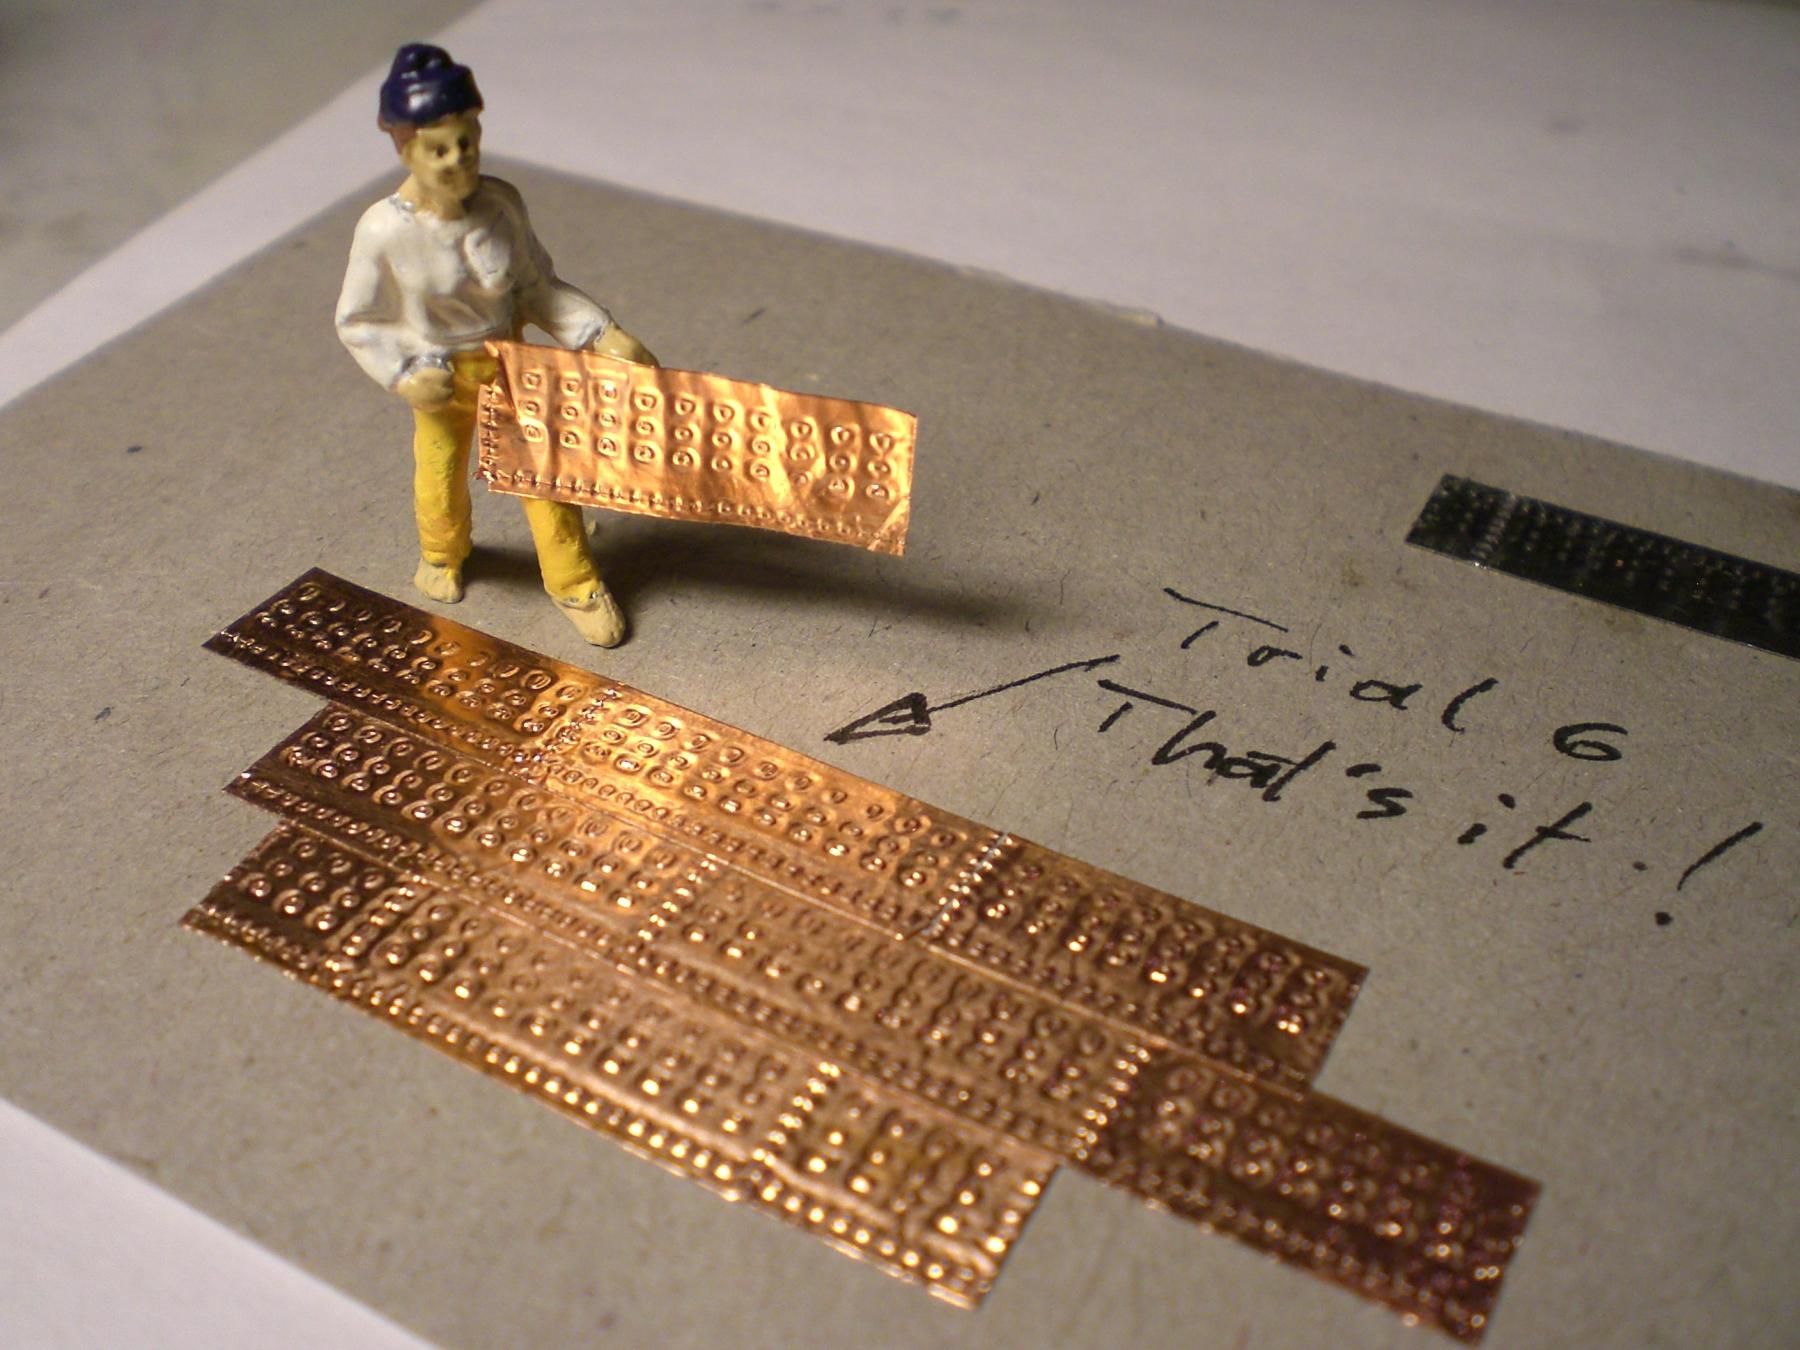
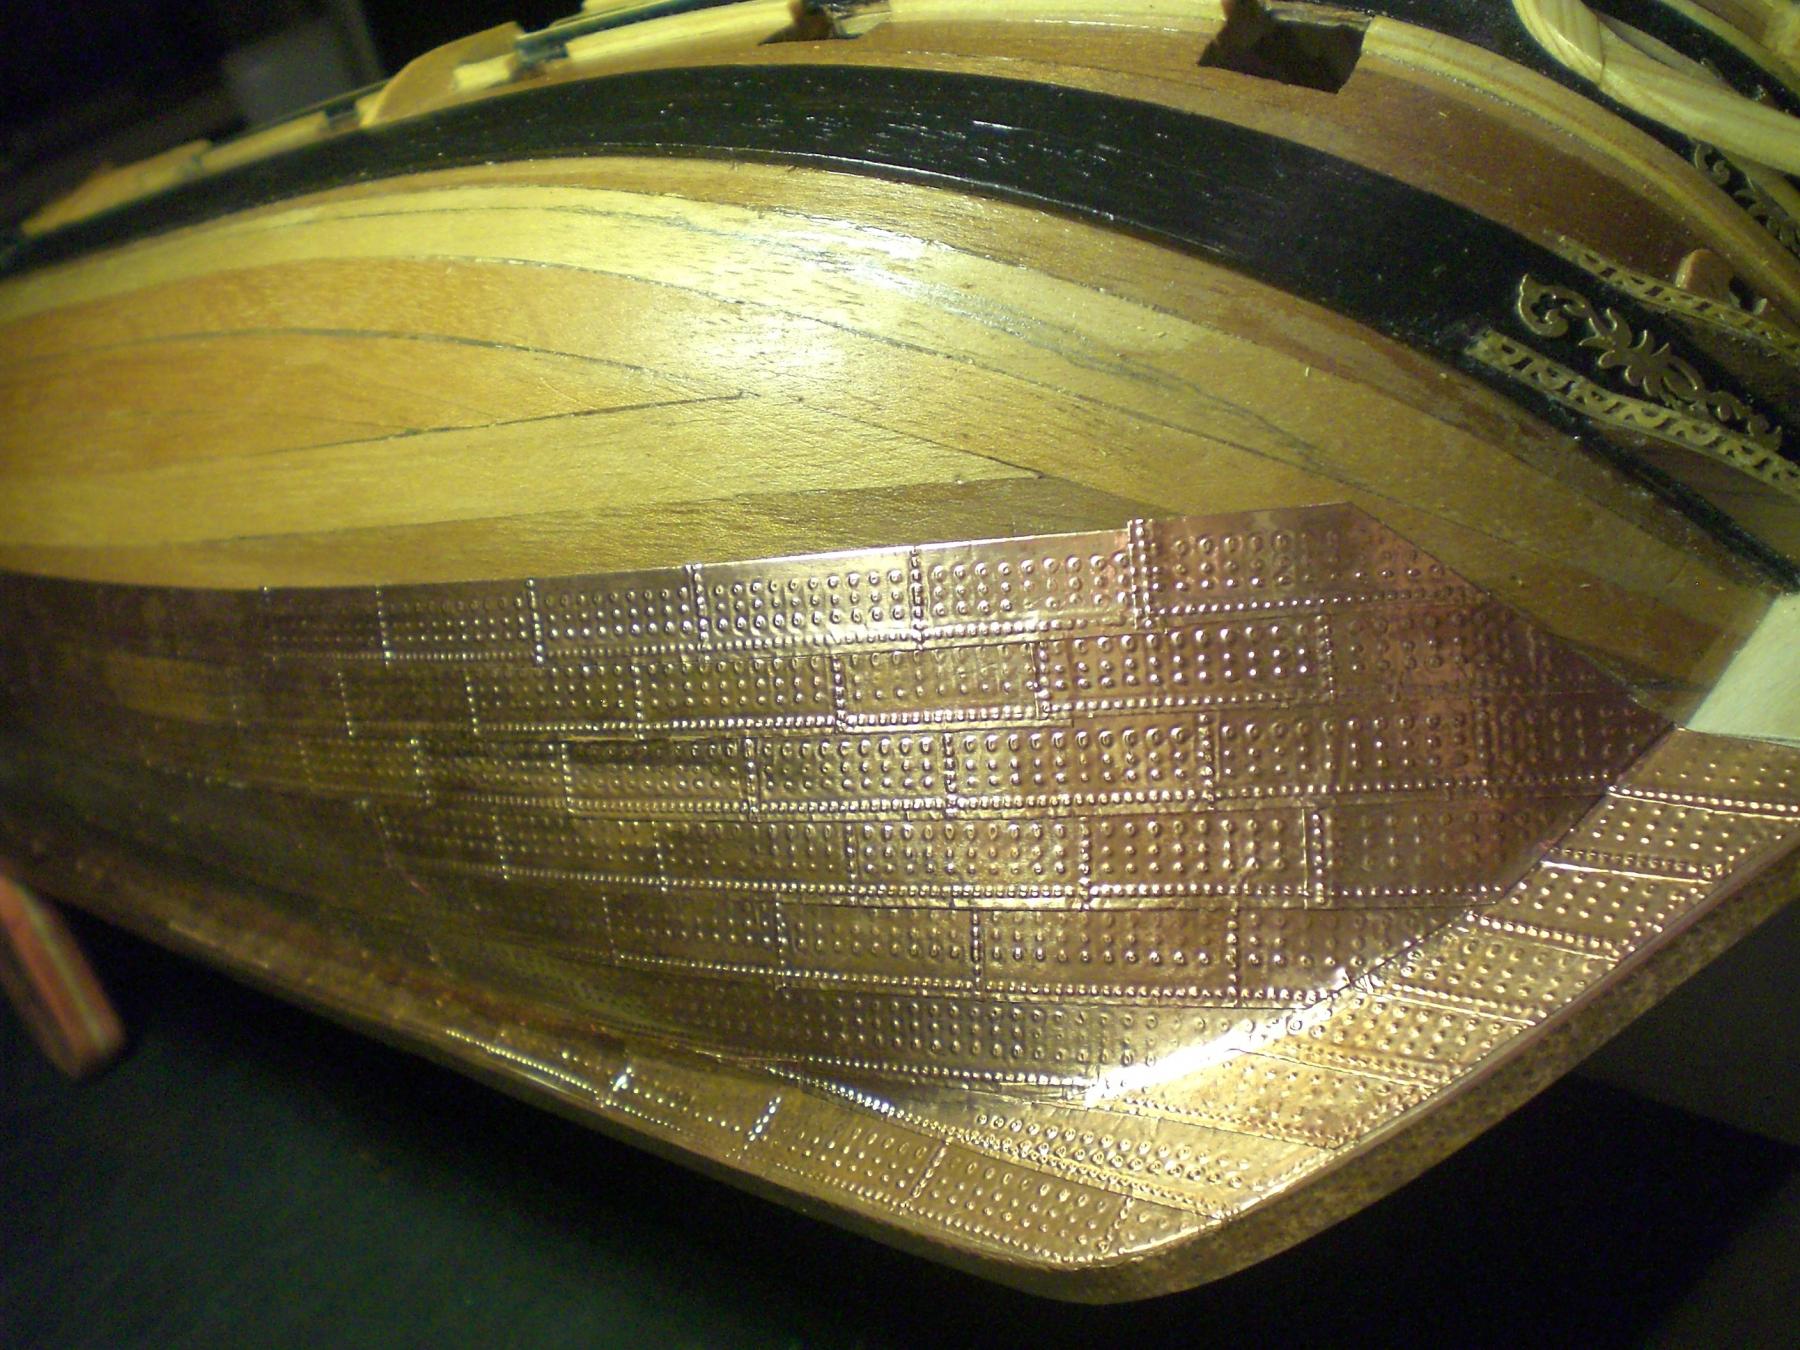
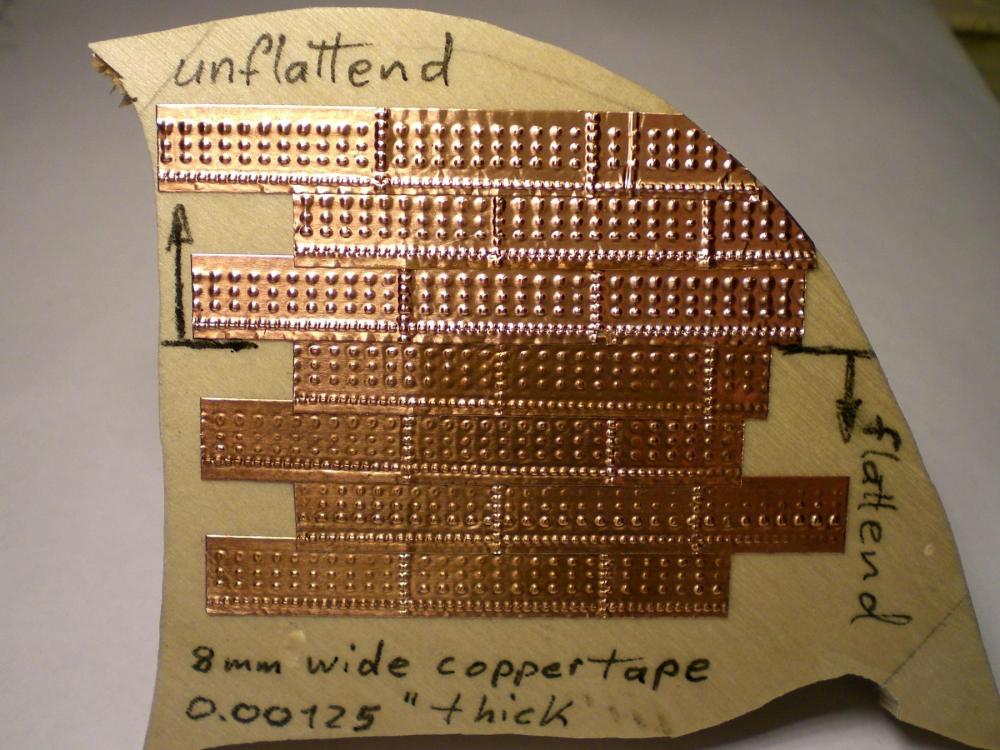
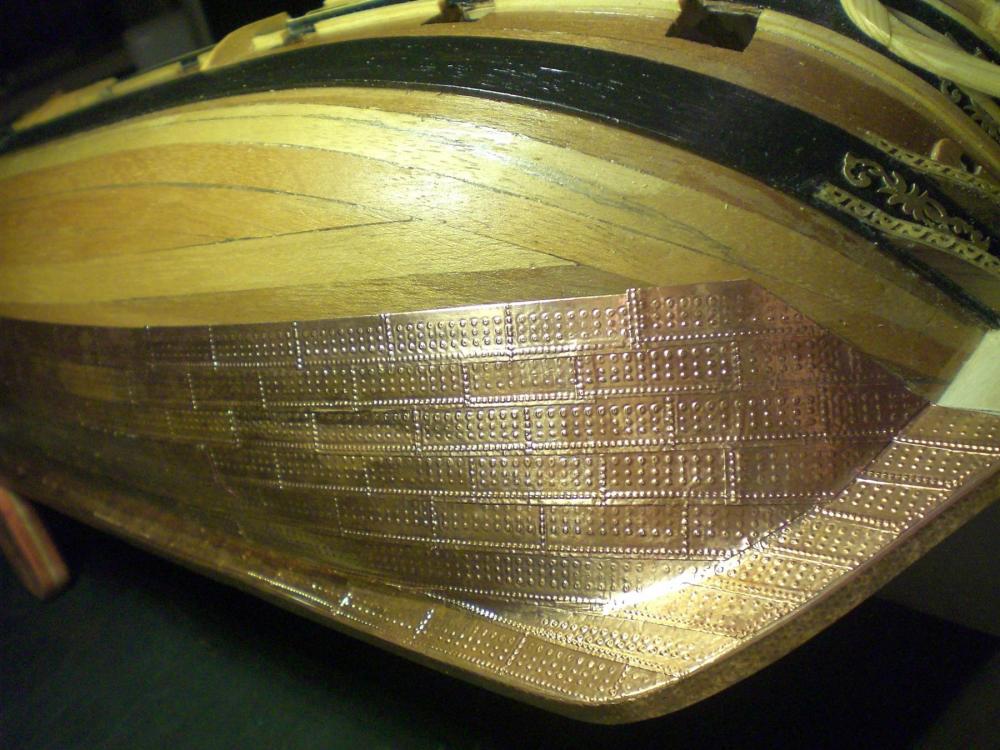
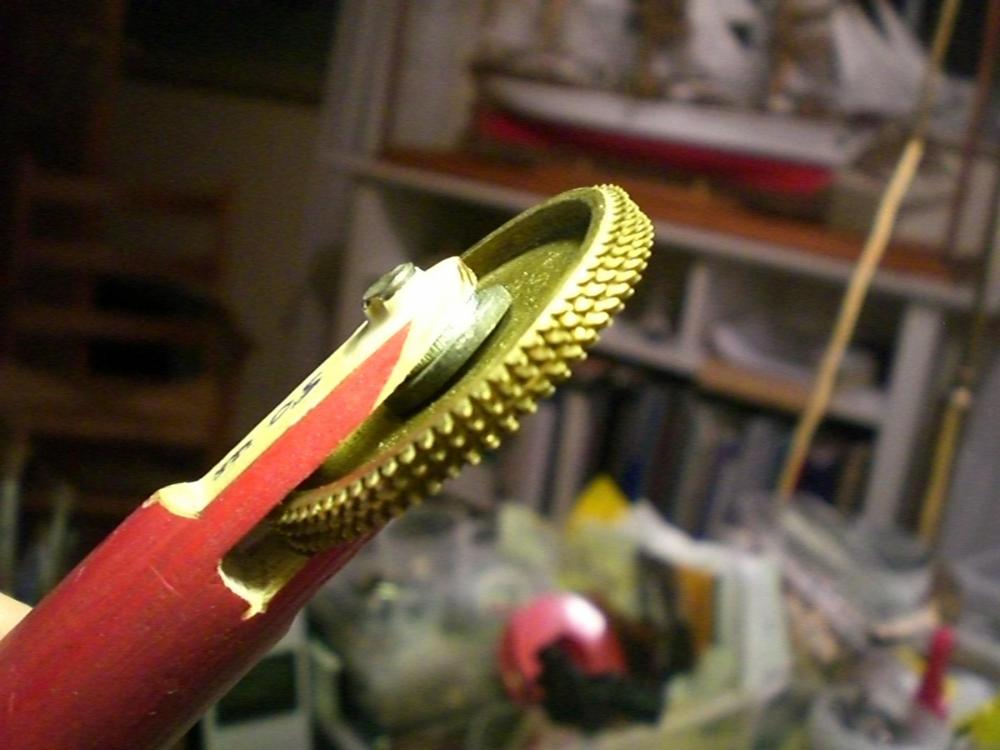
Hi Rob, had a look at your trials with the coppering...... if you wish, here is a tip.... my first Trials have been for the bin, but I would`t like to give up so easily. Some time ago member Dirk posted a very helpfull link out of that "mini sail Switzerland" assotiation relating to coppering. Together with B.E.`s Prior Input I started a new Trial with real adhesive copper tape. (Tiffany tape) It would in scale size 1:64 be necessary to place 88 to 125 nails per plate of size 6 x 19 mm. After some Trials I managed to place 88 nails, flattening the surface afterwards, and having the overlapping plates borderline-nails placed at half distances compared with the the main field. Unfortunetely the staggering of the nail lines in the centerfield is beyond my possibilities in this scale. The reproduceabilty is given due to the embossing Tools I made. The sample here shows the "Tiffany Tape" coppering of the HMS Pegasus with 88 nails per plate, nail surfaces flattend down after poncing. The poncing is done with two different wheels. The 3-disc wheel is used for the larger sized inner field, oin order to obtain a better regular structure. Of course I could have bought the plates, but I wanted to see if I could do it selfmade and in acceptable way. Nils

- 1,208 replies
-
- 7
-
-
- great republic
- clipper
- (and 1 more)
-
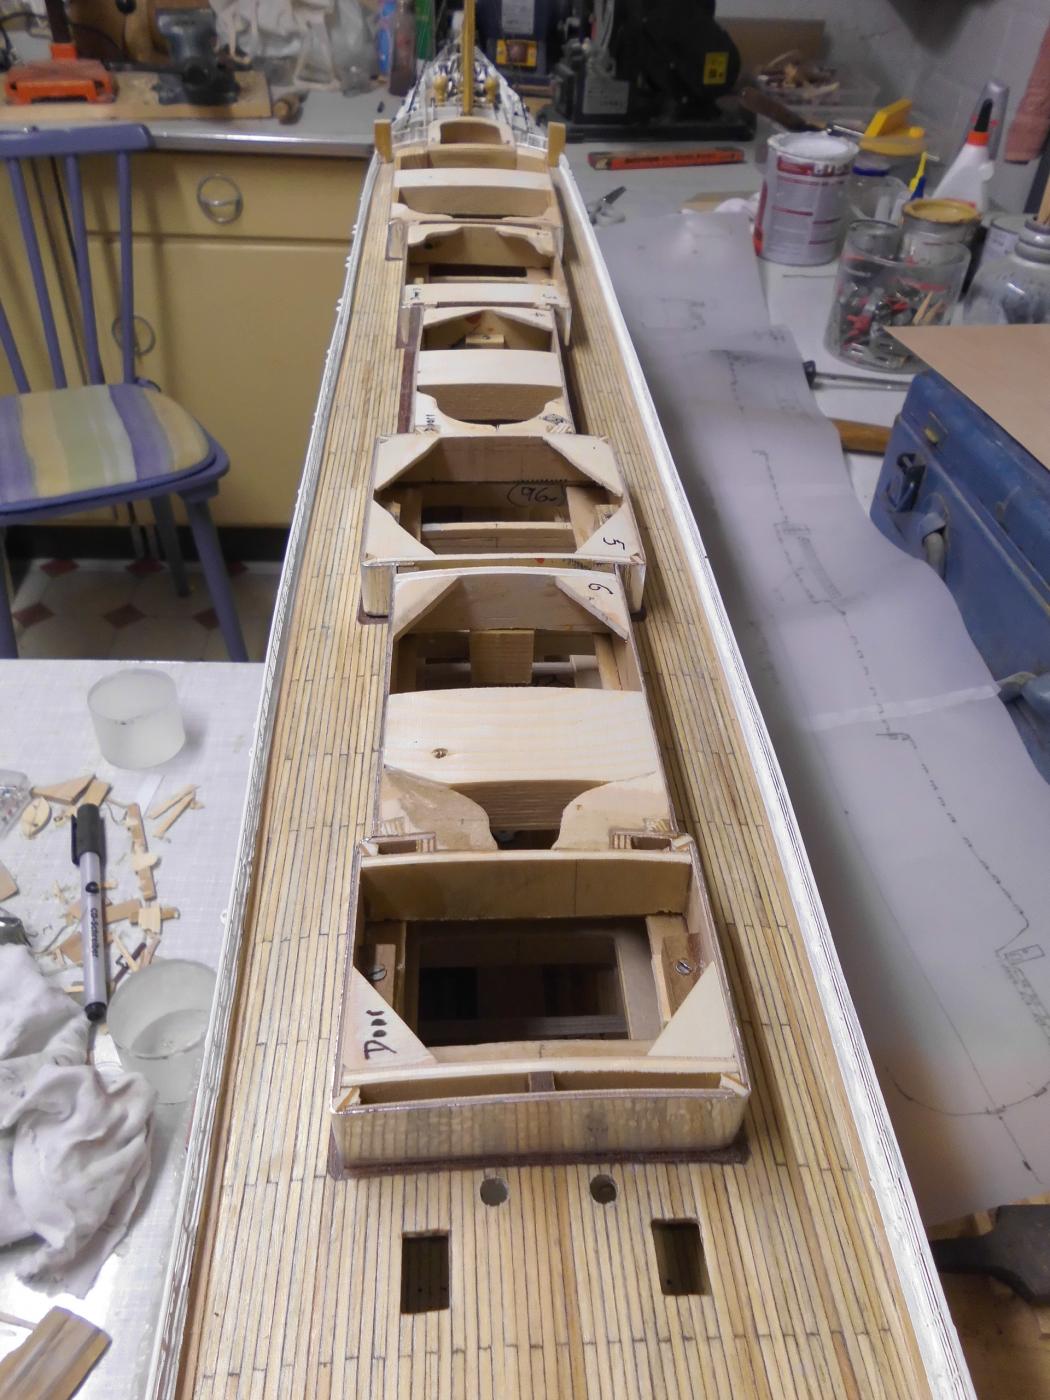
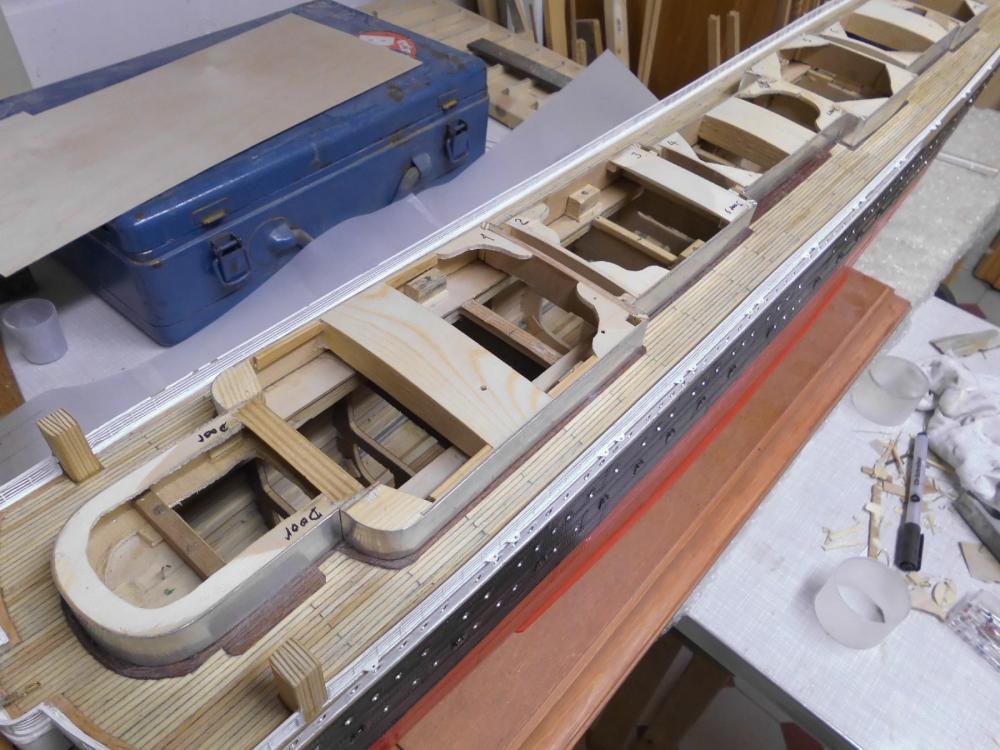
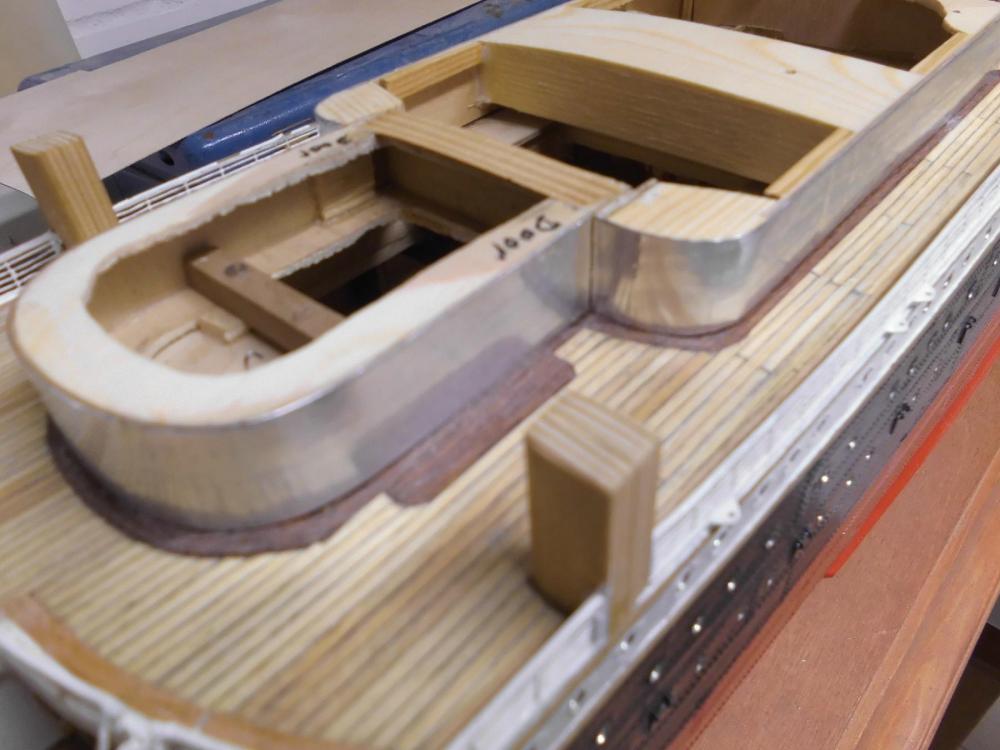
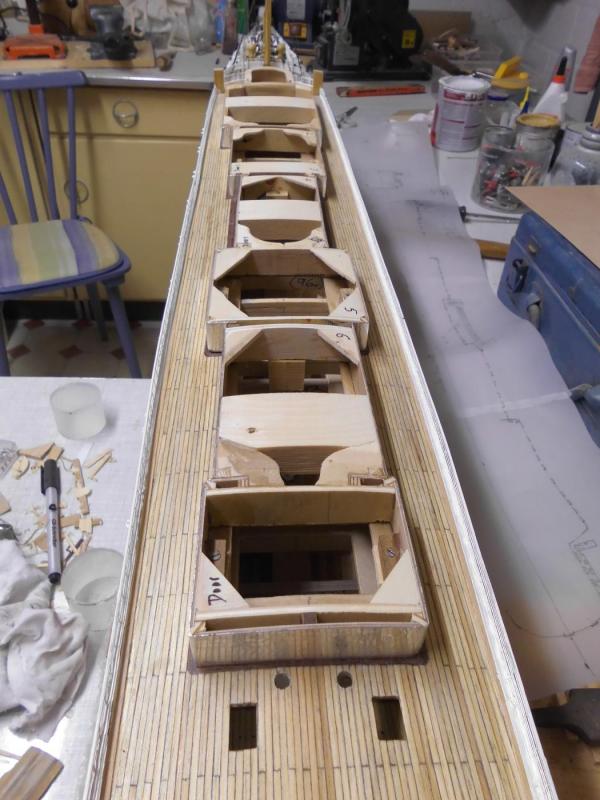
Update..... all the raw promenade deck cabins cladded with metal sheet (but yet missing the to be followed structuring) are now dry-fitted in place. All windows, doors and portholes are prepared for assembling. the handrails will be fitted, when the cabin walls are painted. There will be very many bowl-vents, standing up later on, these all require a sufficiant mounting base when the decks are bored through to set them in. I`ll have to do a final check if there are enough appropriate wooden supports (plates ,strips, lugs, etc) to hold the vent tubes safely, as long as there is still access to the cabin spaces.... below Nils all cabin spaces stiffed out with supporting means here the metal surface, yet without structuring... the four outcuts aft of the cabins take up the two vents coming from the deck below...., and the two stairs, also from the deck below this is just to show how much dust is in the air, when the disc grinder is operated, and I forgot to temporary put a plastic foil over the ship
- 2,625 replies
-
- 22
-
-
- kaiser wilhelm der grosse
- passenger steamer
- (and 1 more)
-
Good idea Rob, I love ingenious thinking methods thanks for sharing !! Nils
- 1,208 replies
-
- 2
-
-
- great republic
- clipper
- (and 1 more)
-
Many thanks Ken, also for that link, I did`nt know that source yet..... Nils
-
super brass work Ken, Nils
-
Hi Rob, I´m realy amazed how those thin wooden (rather broad) stripes followed the 3-dimensional curvature of the hull lines. Was that thin ply with outside pine layer, or pine veneer ? You`v tried out an alternative and inovative way of fast planking, and if you`re planing to do a second planking, this first planking is a good foundation to work on. Even if you`re intending to leave as is, putting on a little filler resin here and there (for later painting). you`ll have an extreme lightweight hull Nils
- 1,208 replies
-
- 3
-
-
- great republic
- clipper
- (and 1 more)
-
amazing, Patrick, its fantastic what all this "lilliput craft" bears behind its walls and decks. A real good job you certainly can be proud of Nils
-
Thanks Piet, much appreciated, your nice comment Nils
- 2,625 replies
-
- 4
-
-
- kaiser wilhelm der grosse
- passenger steamer
- (and 1 more)
-
Thanks so much Martin, those sidewise skylight frames were realy fiddely work, and not so easy to hold during filing in order to get them shiny again after the soldering... Nils
- 2,625 replies
-
- 5
-
-
- kaiser wilhelm der grosse
- passenger steamer
- (and 1 more)
-
nice progress Martin, I´ll be looking forward to your rudder fittings.... Nils
- 467 replies
-
- 1
-
-
- fly
- victory models
- (and 1 more)
-
Congrats Druxey, your Hospital Barge is a real gem !! it is beautifuly built and a pleasure to look at Nils
- 641 replies
-
- 7
-
-
- greenwich hospital
- barge
- (and 1 more)
-
Many thanks Mmdd, very nice historic pic, is this also from your book ? Due to the window shape I unfortunately ca`nt identify where the background area is situated on board, but due to the lighting condition it must be outdoor somewhere..... Nils
- 2,625 replies
-
- 5
-
-
- kaiser wilhelm der grosse
- passenger steamer
- (and 1 more)
-
Thank you very much Patrick, Nils
- 2,625 replies
-
- 5
-
-
- kaiser wilhelm der grosse
- passenger steamer
- (and 1 more)
-
thanks very much Carl, I´m pleased you like it.... I know that at this scale some modelers only paint the frames and window panes to the background walls, alternatively I have chosen the frames in brass with a clear varnish coating ( keep them shiny )and the window panes resembled with silver grey paint Nils
- 2,625 replies
-
- 7
-
-
- kaiser wilhelm der grosse
- passenger steamer
- (and 1 more)
-
Frégate d'18 par Sané , la Cornélie
Mirabell61 replied to JohnE's topic in CAD and 3D Modelling/Drafting Plans with Software
Beautiful lines John, the frame body plan as I understand shows typical french lines, very elegant design... Nils -
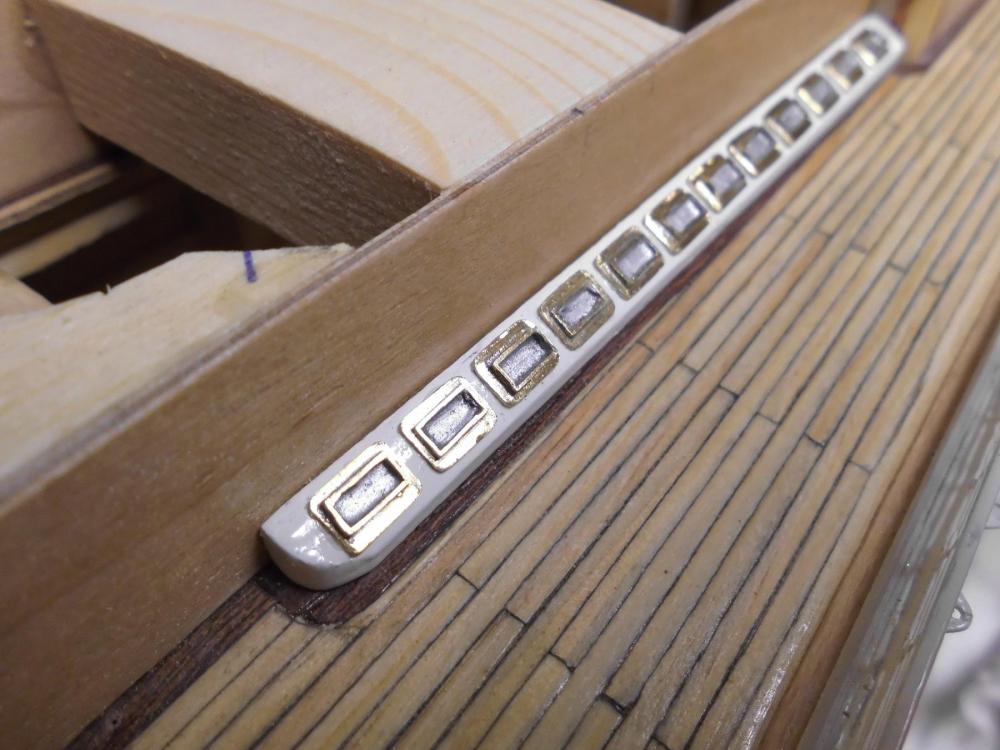
Update.... machine room lights, dry-fit in area of waist between the two last funnels. I only fitted 12 lights on every side, in actual it would have been 15.... Nils
- 2,625 replies
-
- 22
-
-
- kaiser wilhelm der grosse
- passenger steamer
- (and 1 more)