Mirabell61
-
Posts
7,417 -
Joined
-
Last visited
Content Type
Profiles
Forums
Gallery
Events
Everything posted by Mirabell61
-
 many thanks for your words Denis and Bob, and for your nice compliments... Denis, I never thought I would finish all those ships, but to avoid uncompleted "hulks" on the shelf its better this way... Bob, yes, and next to other things many hours are spent down in my hobby room, I have my web-connection and my PC standing there as well and so a pensioneer`s life does`nt get boring Nils
 -
Thanks Michael, I had the Pegasus standing on the shelf with rigging and sails for weeks and months whilst I started the KWdG, and did`nt recognise the meantime dust settlement on the model. So I know what frustrating effort it would take to clean a unprotected model standing over a longer time... Nils
-
thanks to - Pete - Jason - B.E. - Crackers, for looking in and for your kind comments.... Pete, my hobby- and workroom is in the cellar of our home, equiped with heating and conected bathroom (was foreseen as a guest room when the house was built) The HMS Fly I meant, is the one Martin is captain of.... Jason, Thanks I know, lucky me, for the room....., If you like, the other models can be viewed by clicking on the links in my signiture, it takes you to the build logs, go to the last the individual last posts there for final pics... All models pictures are also in the gallery for completed scratch built ships, only the "Bohuslän" steamer is in the kit-built gallery for completed ships B.E. every time I have completed a model I find no suitable place in the other floors of our home, so the last solution is to hope there will be a place in my hobby room. Trust the space is exhausted now Crackers, yes , by the time and unwillingly my hobby-room becomes a bit "museum character", but I like to have the models in view when sitting at my desc, and my wife kindly lets me arrange the interior as I desire Nils
-
Thanks for explaining Michael, the steambox and it`s function,.....relatively simple and smartly done ! Thanks for sharing Nils
-
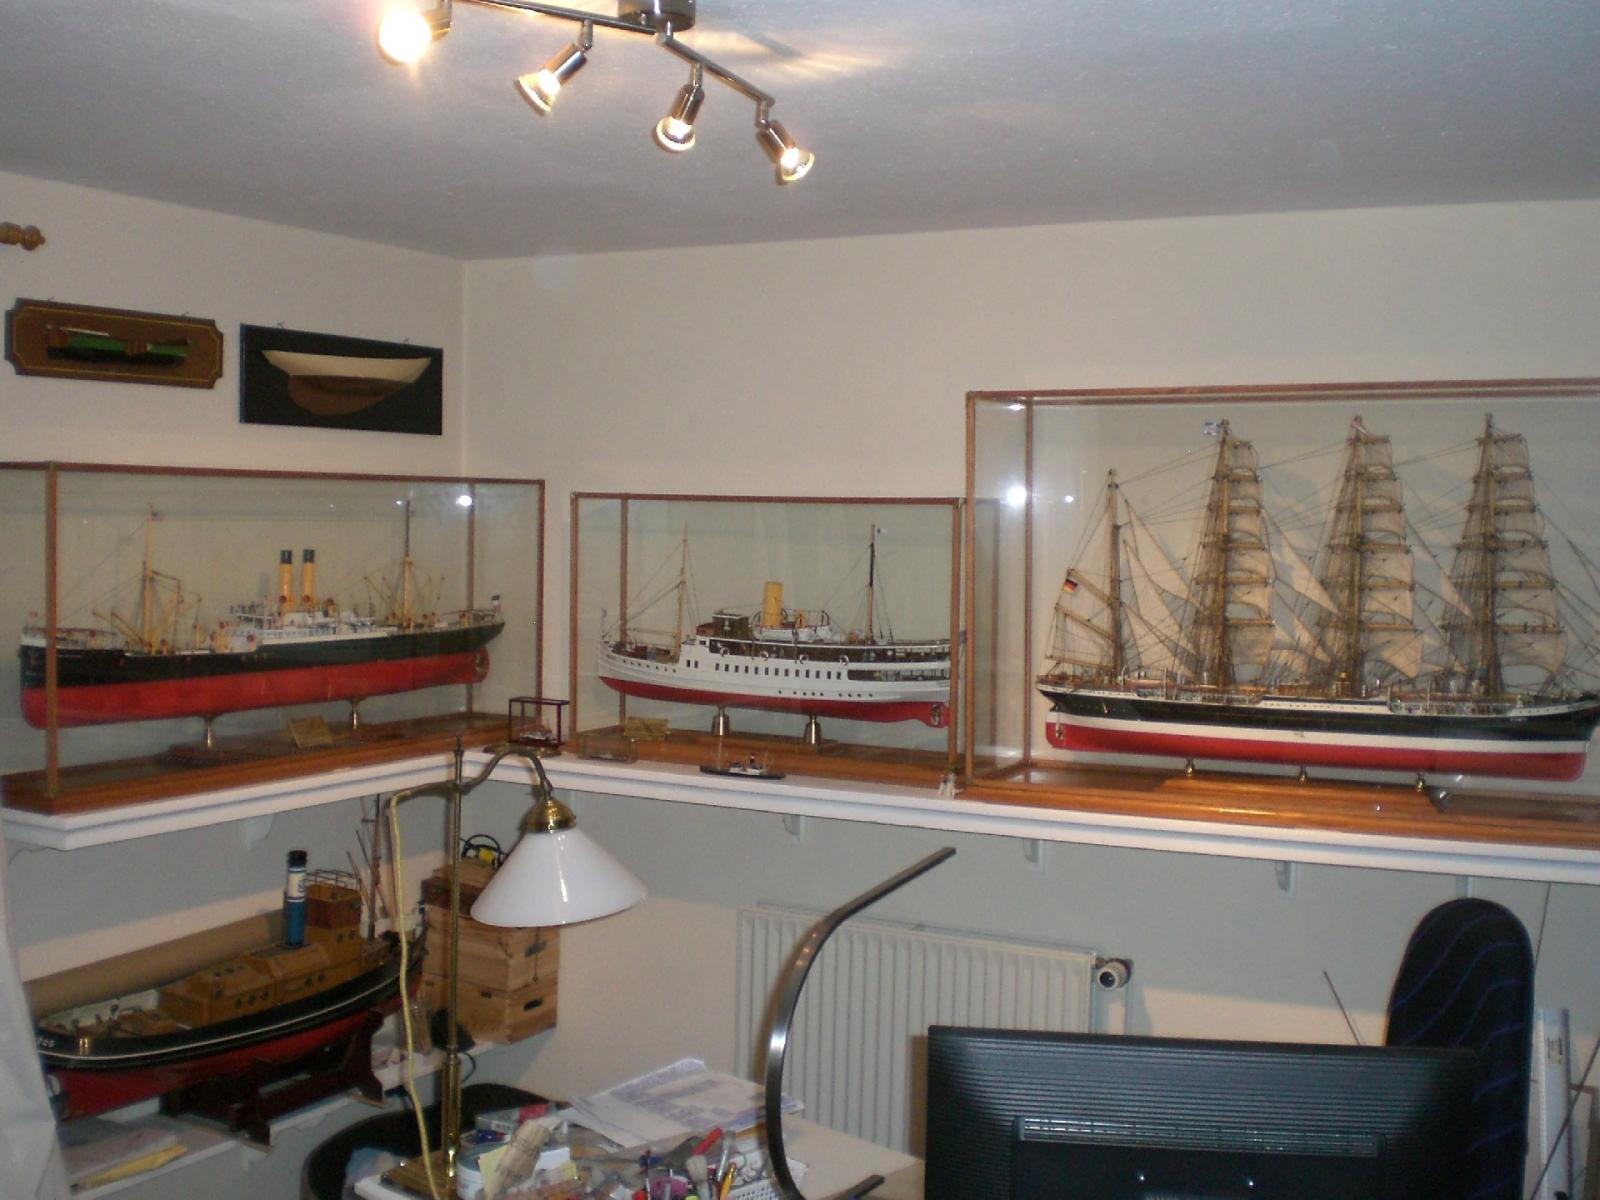
Martin, I thank you very much for your congrats and your nice words. This build was a nice experience to go through, I think the rigging part was the most challenging.... Hope to see your next progress on the "HMS Fly" soon. Here`s a shot of my work area, all cleaned up again, its surrounded with ship models, my little maritime "museum", ready to go for continuing the KWdG (under plastic, in the moment) stapled over the "Gorch Fock" Nils


-
amazing and beautiful lightweight hull Michael, its great to see how fine the thin frames came off the supporting build frames in excellent condition and shape as you planed it to be. How did you lead the steam into your "steambox", it worked out very well. One more question : as you are intending to let her into the water later, did you glue the planks edge to edge as well ? (epoxy / glas fibre reinforced coating planed ?) Nils
-
Patrick and Pete, thanks to both of you so much for your nice words and compliments, very much appreciated, glad you like the model Nils
-
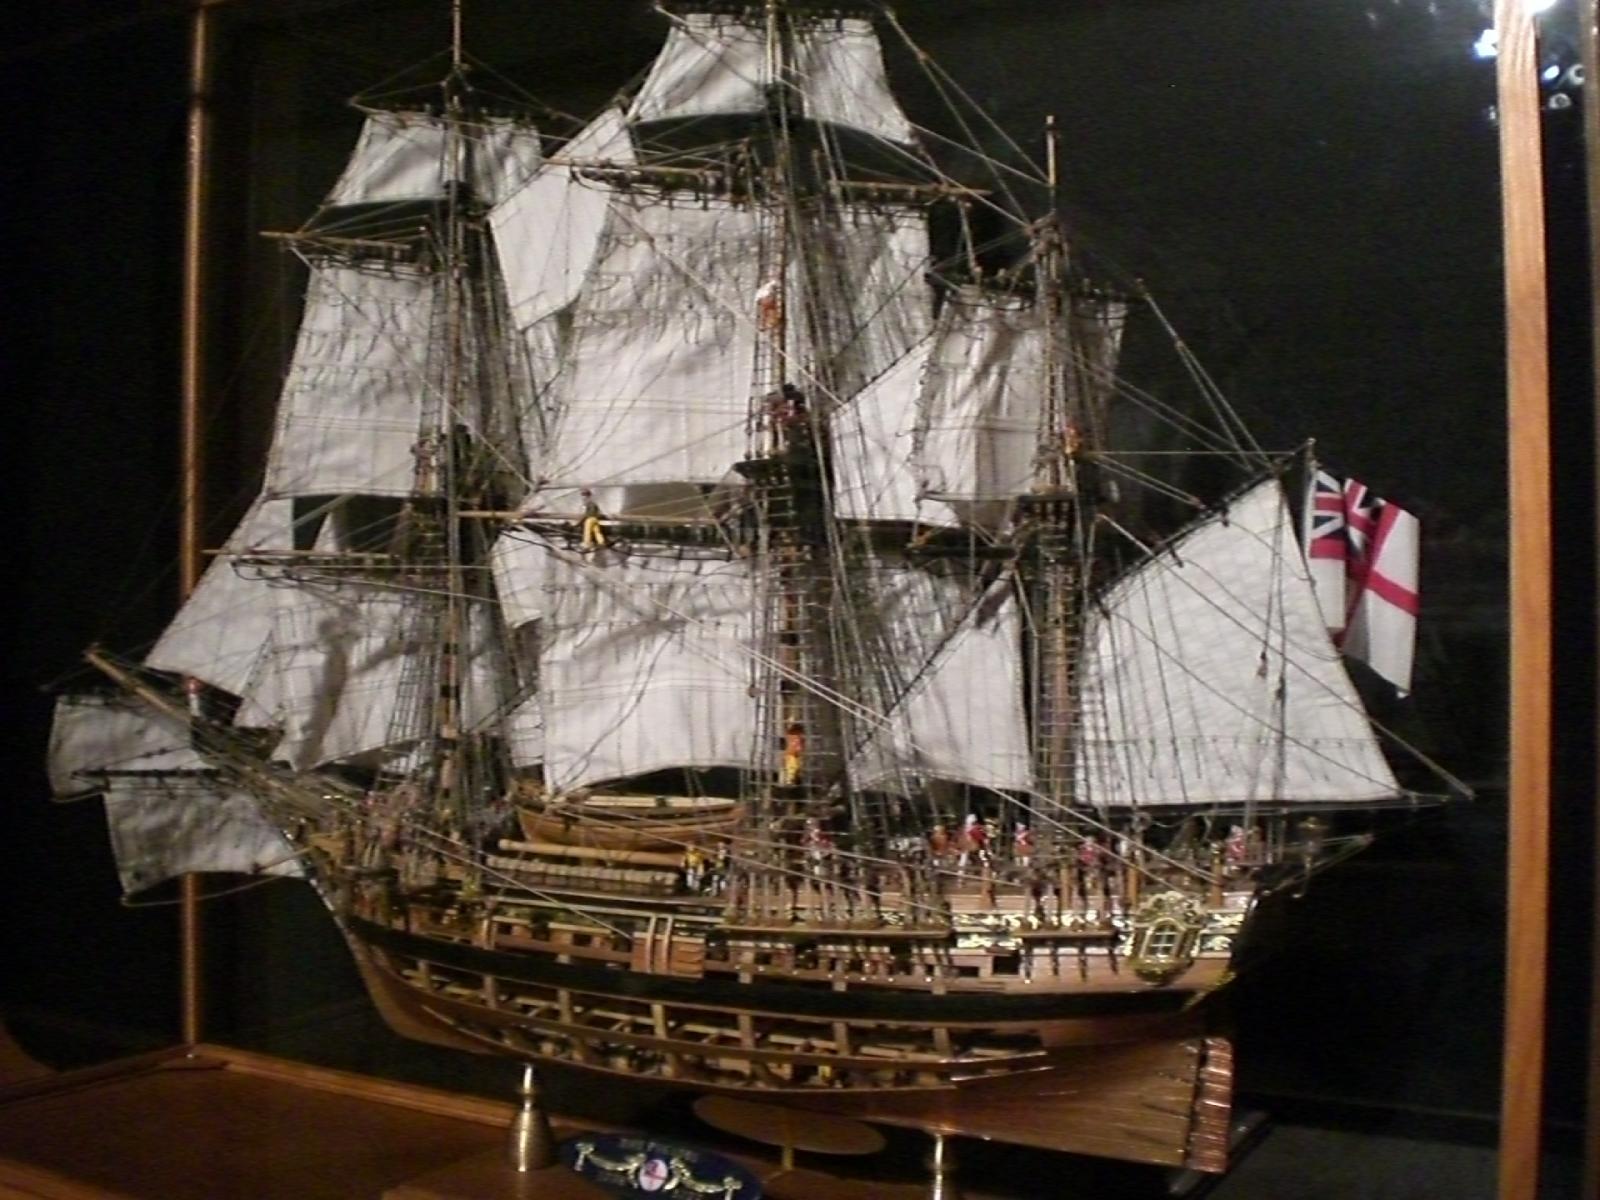
That`s a very fine compliment Peter, many thanks to you, Slowly there are some more "Swan Class" gun sloops, next to yours completed, and coming in the near end phase, trust there will be a real fleet with MSW one day.... You`re right with the imagination of forklift moving of those cases. The KWdG Hull is looking at me all the time, and saying..... I`ll need an appr. 1500 mm long dust protection case one day, what are you going to do about it ?..... Nils
-
Thank you very much for your appreciative word Mark, this model (in scratch build) has found quite a large interest by followers of the log. Thanks again to you, and all that made their kind comments, suggestions, appreciations, expressed their "likes", I would be very happy if I was able to provide the one or other inspiration to my 1:64 scale fellow "Swan Class" builders. Nils
-
Danke für die netten Worte Dirk, will be switching to the KWdG model, but have to clean up my work shop areas first Nils
-
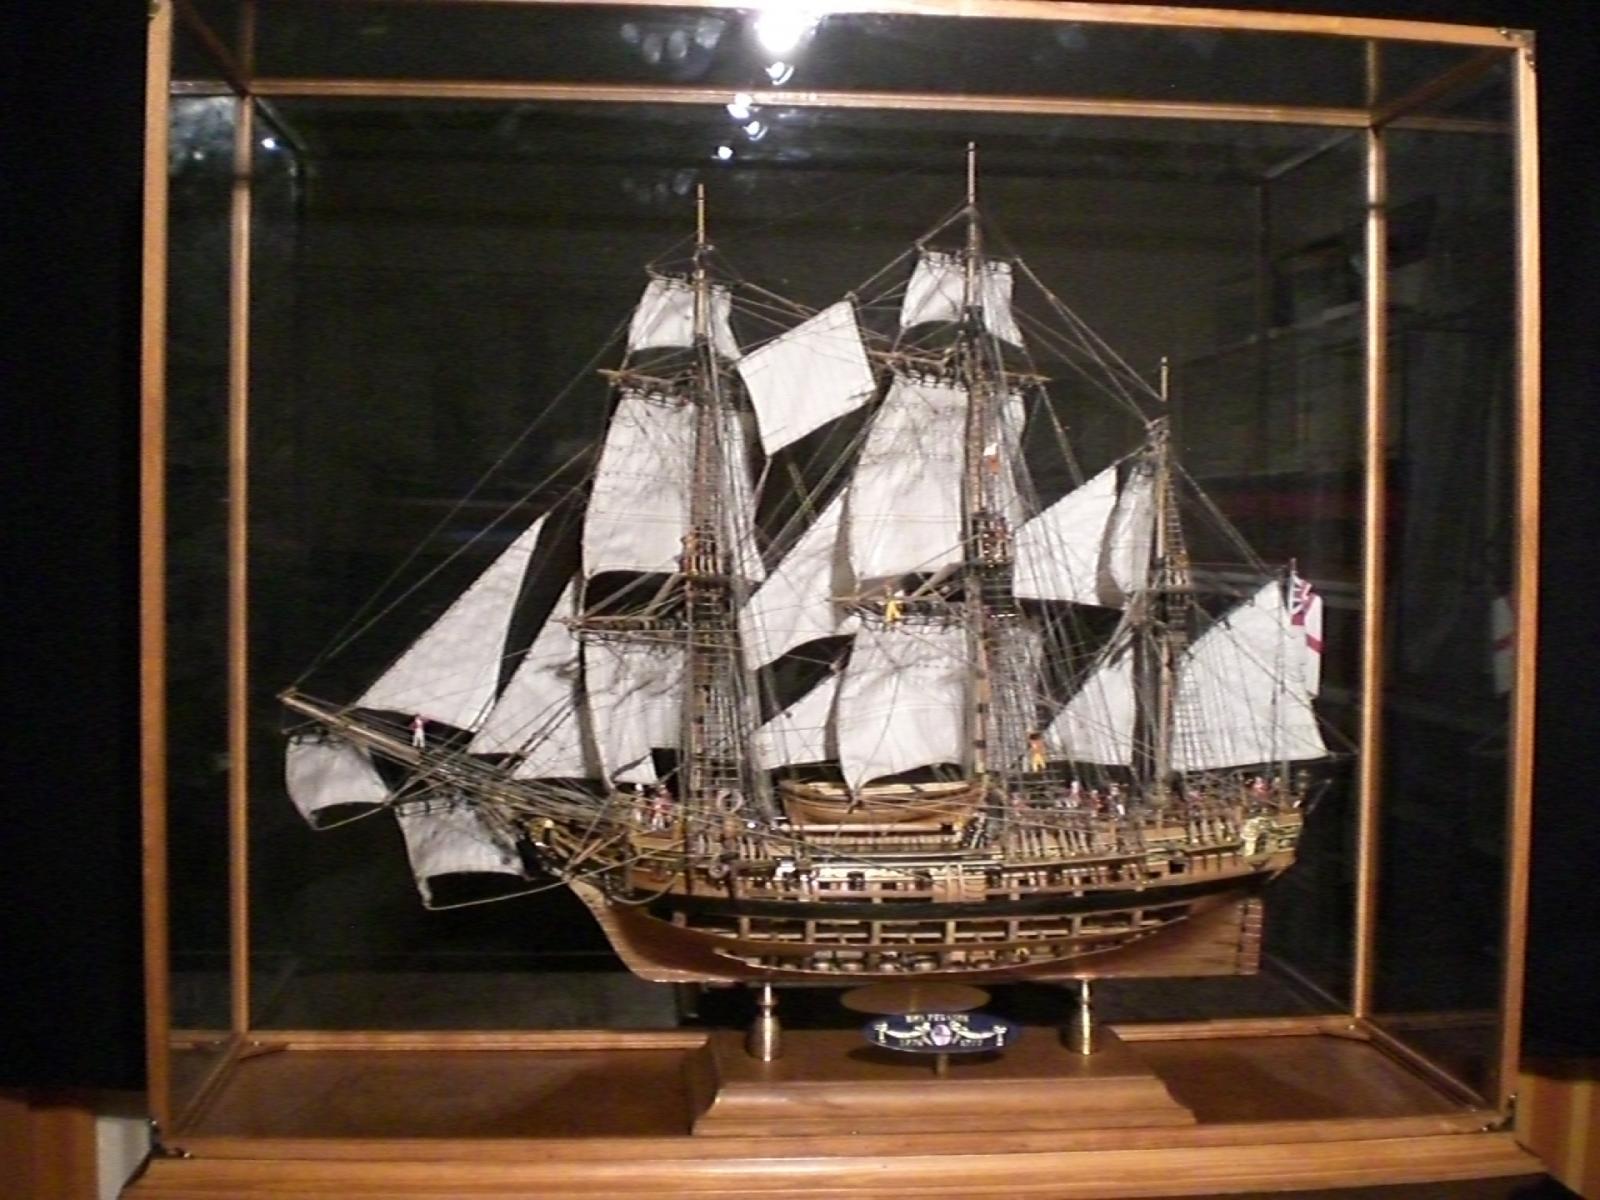
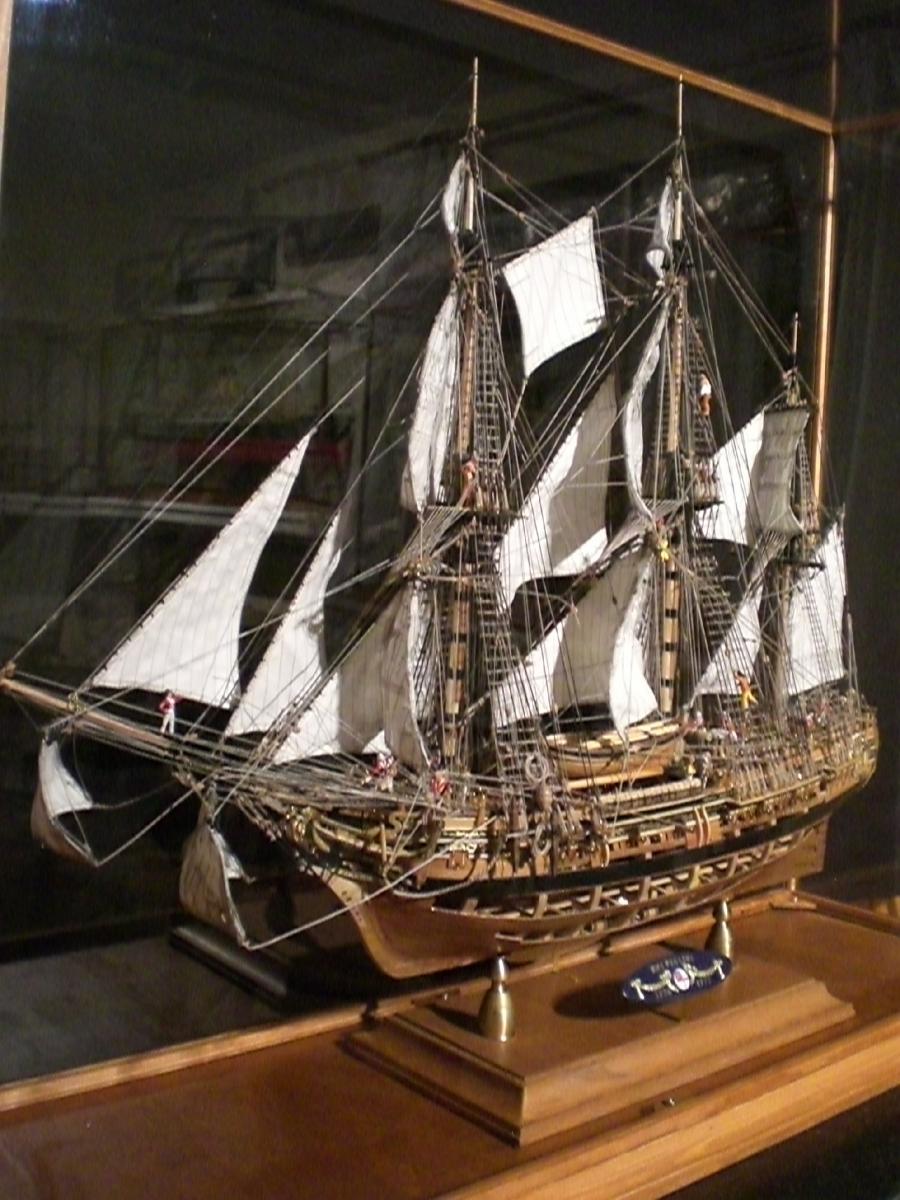
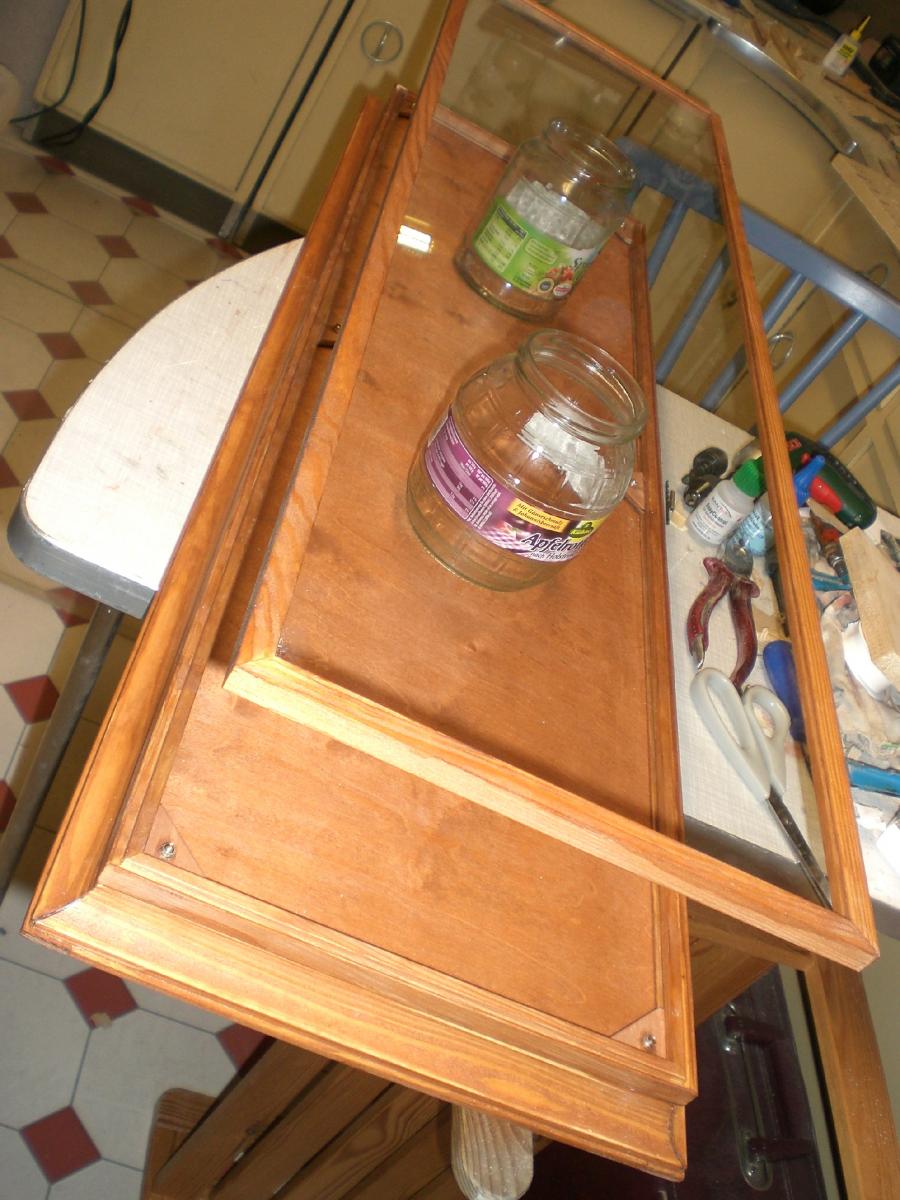
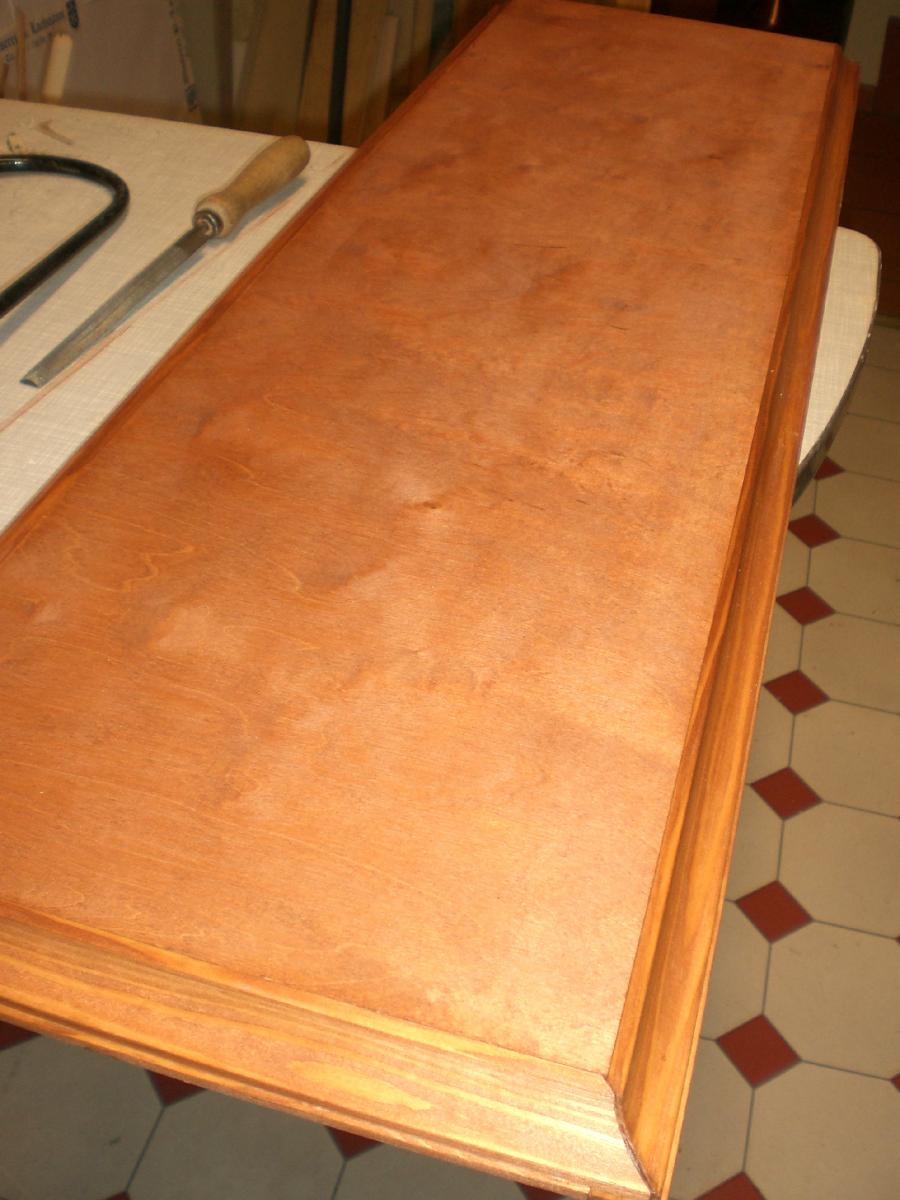
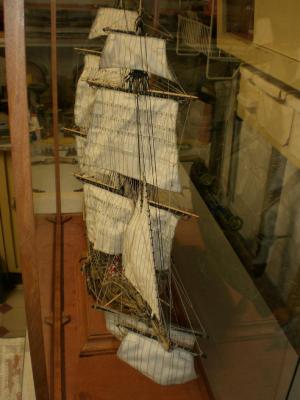
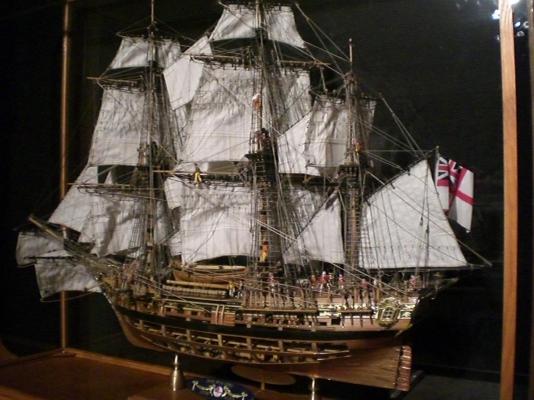
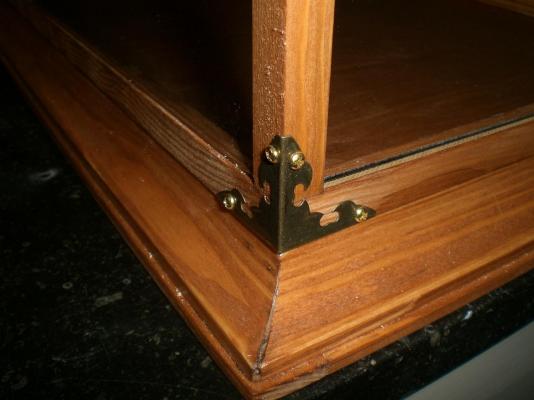
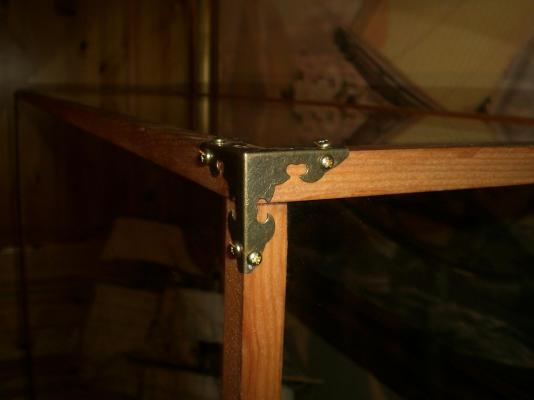
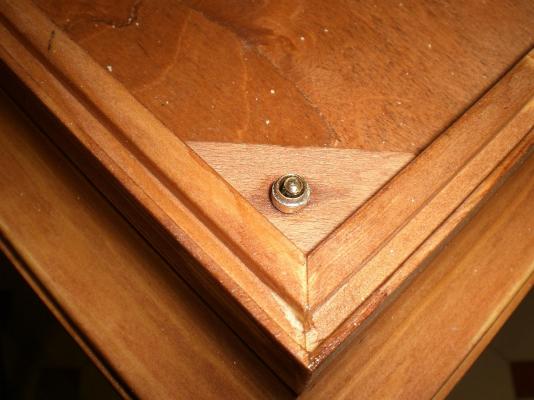
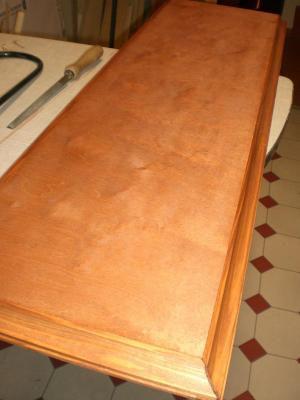
Display case,.... the final.... today the display case has been completed, and sowith the project is done Nils the preliminary "grip" on the upper large glass side is fixed to the wall cupboard and is a useful third "hand" when mounting put the model in it`s place already whilst mounting sides and top pictures taken through the glass never auto-focus correct (sorry for pic quality) I use these screws rather that sink head screws because of the better strength and handling


-
Thank you very much Bob and Anthony, Your kind comments are much appreciated.... looks like the case is coming together quite right, the glasser did a good job when cutting the glass, so I could do the wooden framework with quite narrow tolerances. Guess that the sides can be fitted tomorrow and perhaps also the metal corners. The ship on it`s stand will rest on the case baseplate, and be fixed with small strips of double-side adhesive tape to avoid shifting inside the case. The case is tailor-suited to fit on a wardrobe in my hobby room, so that the view from at least 3 sides will be granted Nils
-
very attractive model Lami, hope you can seal off the hull good against overcoming water later on Nils
-
"HMS Banterer" on the lake, very impressive pictures Lami, a wonderful model under sail.... Nils
-
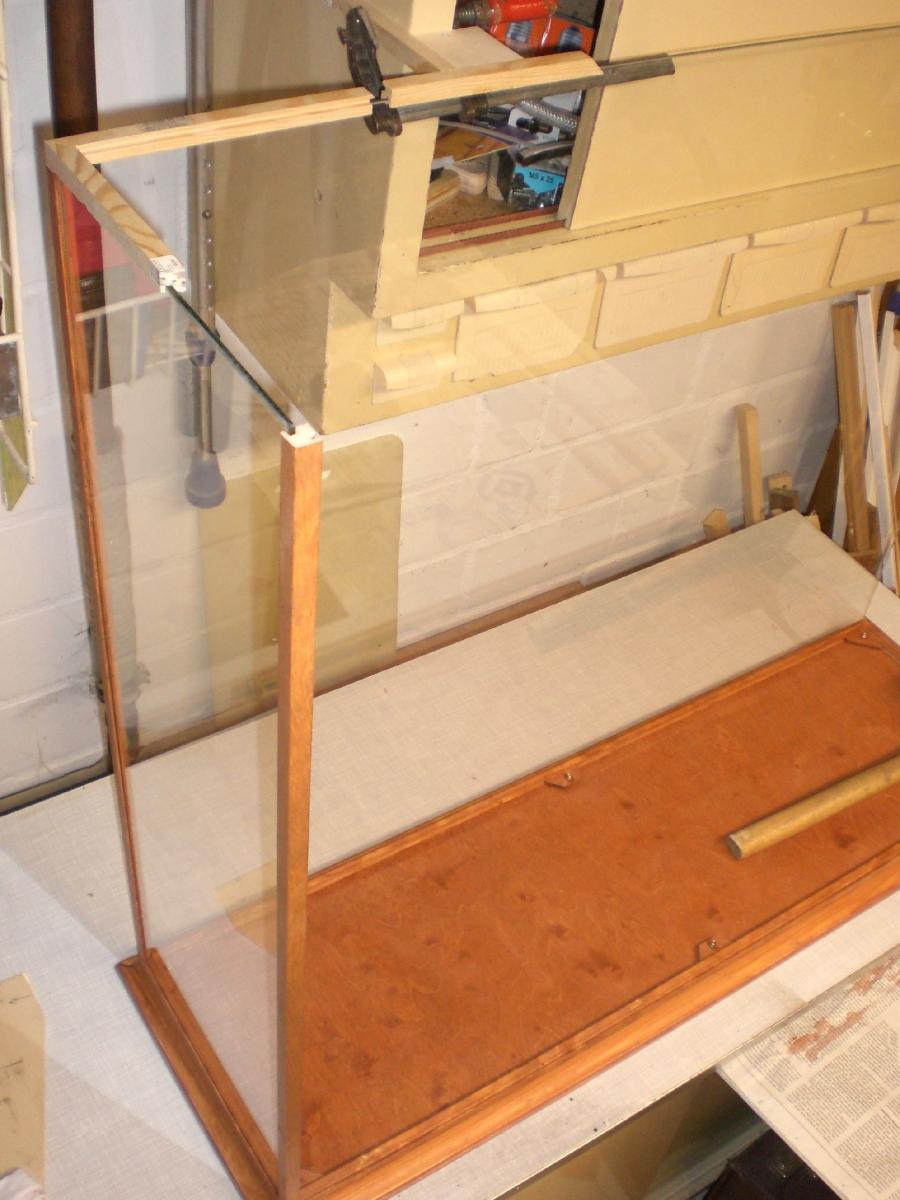
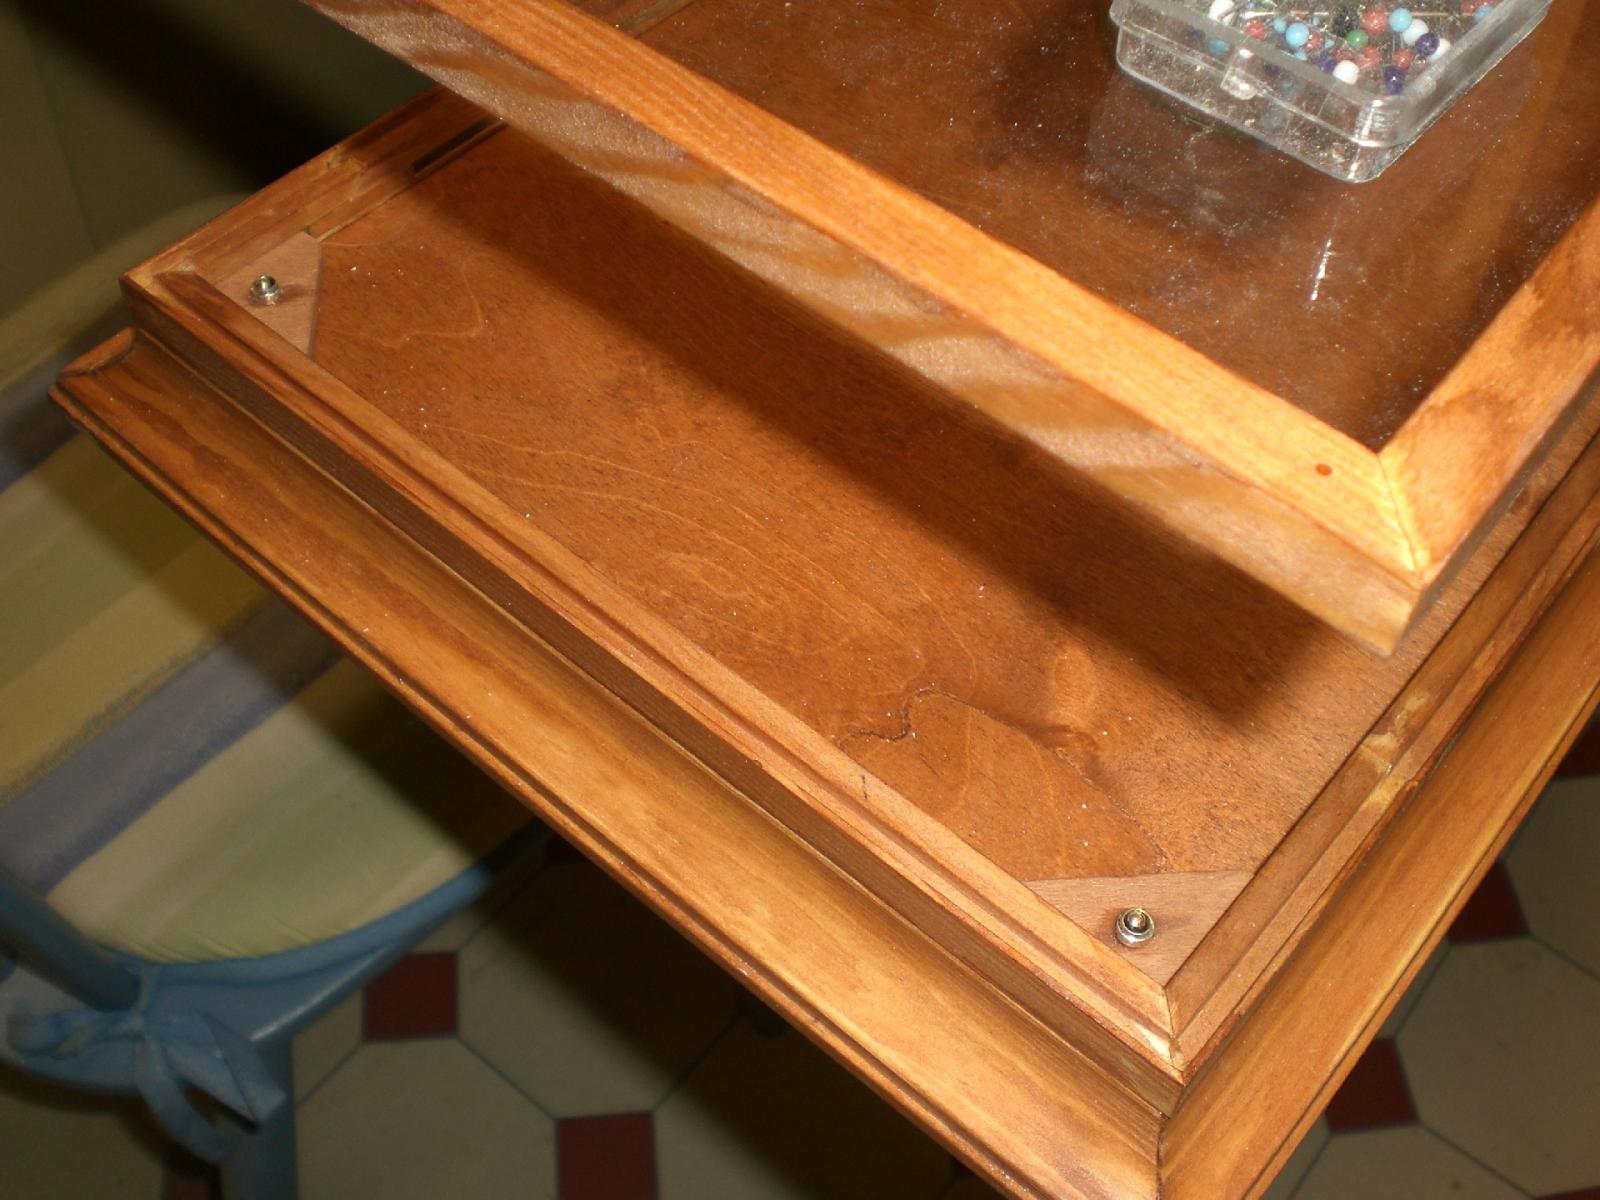
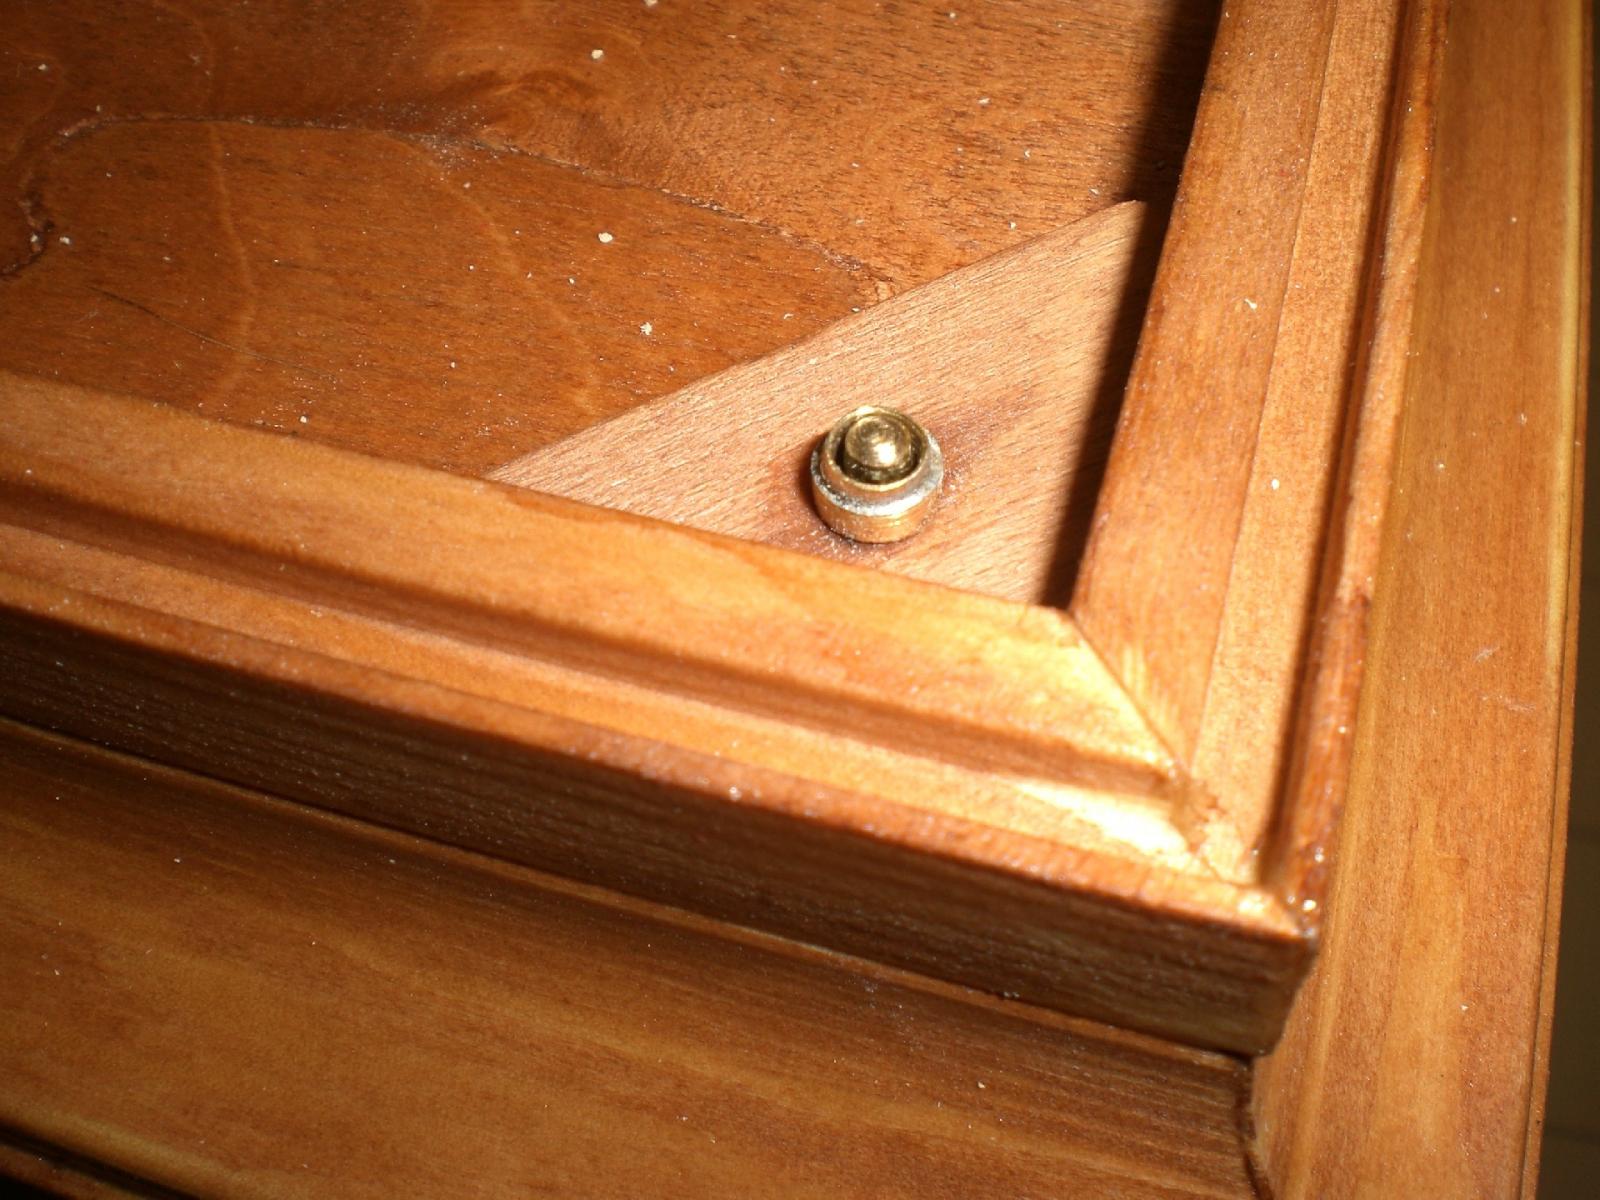
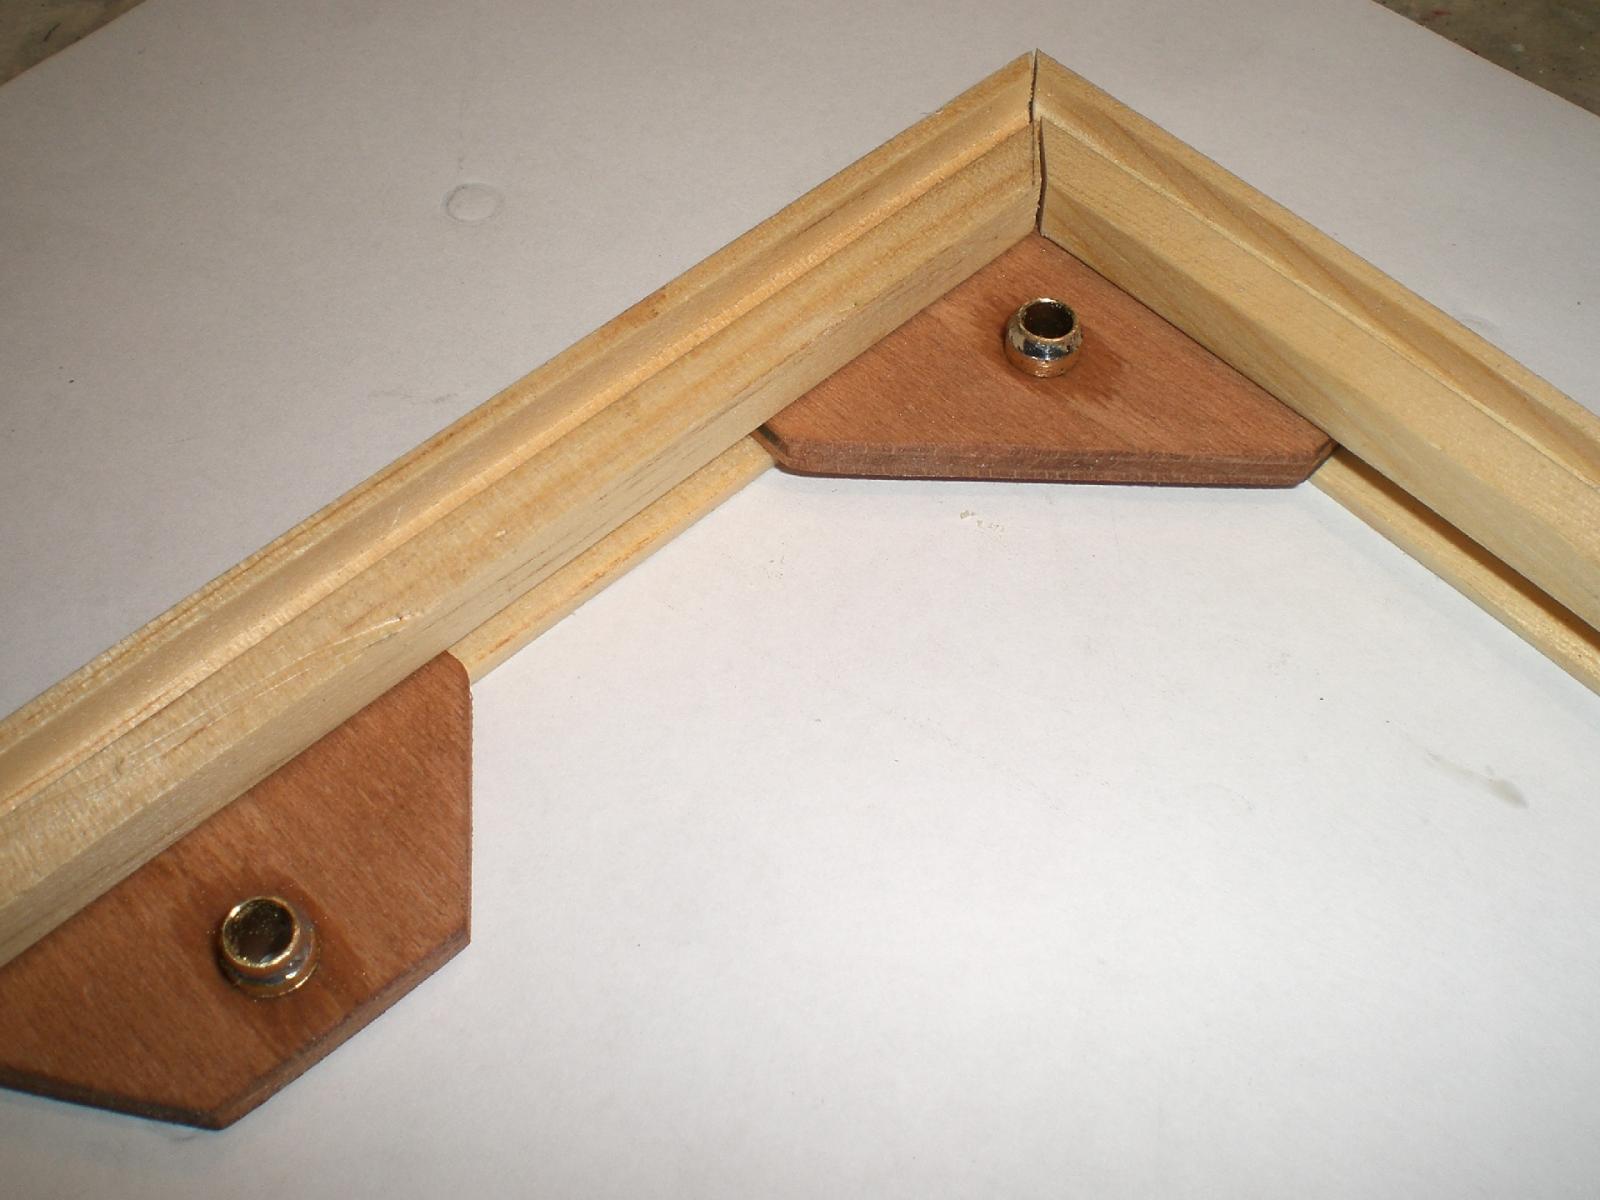
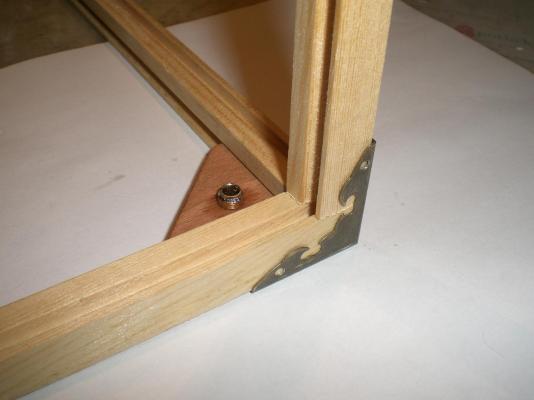
Update display case.... Base with positioning pins and top cover (glassed) done, now the sides need to be framed and fitted.... all wood is stained in cherry tone Nils the top cover has excatly the same outer dimensions as the base frame here the brass pins can be seen in place (in 6 places)


-
beautiful build, large model Iami, very interesting project for remote control, Guess you`ll need about min 31/2 to 4 kg ballast to keep her stabil on windward course. Are you intending to place the ballast down low into the hull or external removeable keel ? and perhaps a second rudder with larger lateral area when remote sailing ? Nils
-
beautiful work Johann, its a pleasure to watch these boats being built relating to technique and accuracy Nils
-
Super and very inspiring work Kees, it`s lovely to watch the experience you gain with this material and its possibilities for shaping / resembling model steel structures Nils
- 434 replies
-
- 2
-

-
- pelikaan
- beamtrawler
- (and 2 more)
-
Thanks for your appreciative word Denis, Nils
- 2,625 replies
-
- 3
-
-
- kaiser wilhelm der grosse
- passenger steamer
- (and 1 more)
-
lovely Steve, ....."the eightlegged riggers".... adding additional lines,..... I prefer and am using regular window glass, 4mm, for it`s continious clearness, it`s stiffness, easy cleaning and less tendency to static loading (dust). The disadvantage is the weight of glass compared to plexiglass, but if the display case rests on a sideboard or well fastened shelf afterwards the weight is not a knockout criteria. Regarding to the venting, there will be no extra openings, in fact I tried to avoid any gaps or openings, for keeping out smallest dust-particles. I`ve practiced this with good success for years already. A set of precise cut and deburred glass panes costs me appr. 50-70 Euro, depending on the size from my local glasser`s shop. Guess that plexiglass will be appr. the same costs. When putting the "bonnet" part down over the model to rest on the display case base, and have the pins slip into position it takes two adult persons to do this slowly and carefully. Nils
-
Thank you Denis, all my cases to date are made in this way, the tone fits everywhere (room, furniture, sideboard, etc...) Nils
-
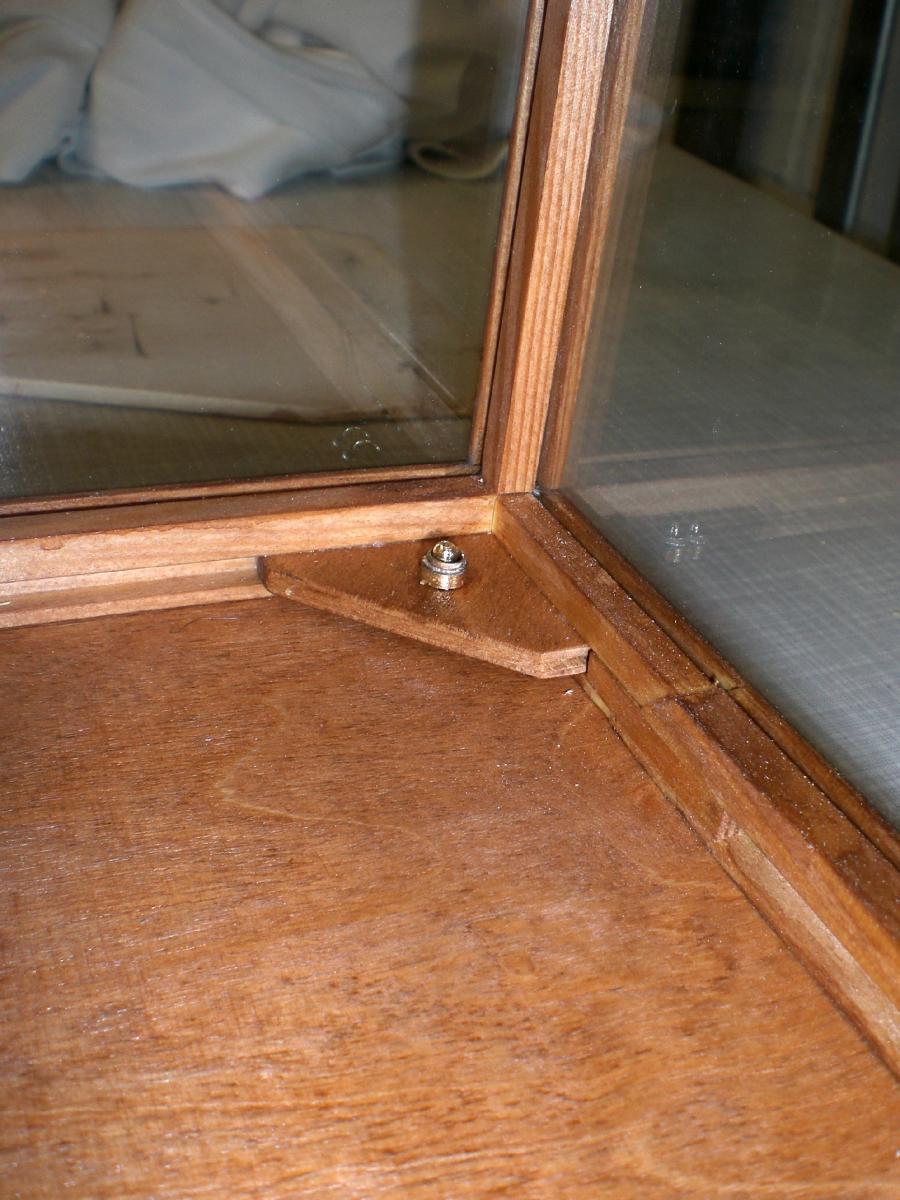
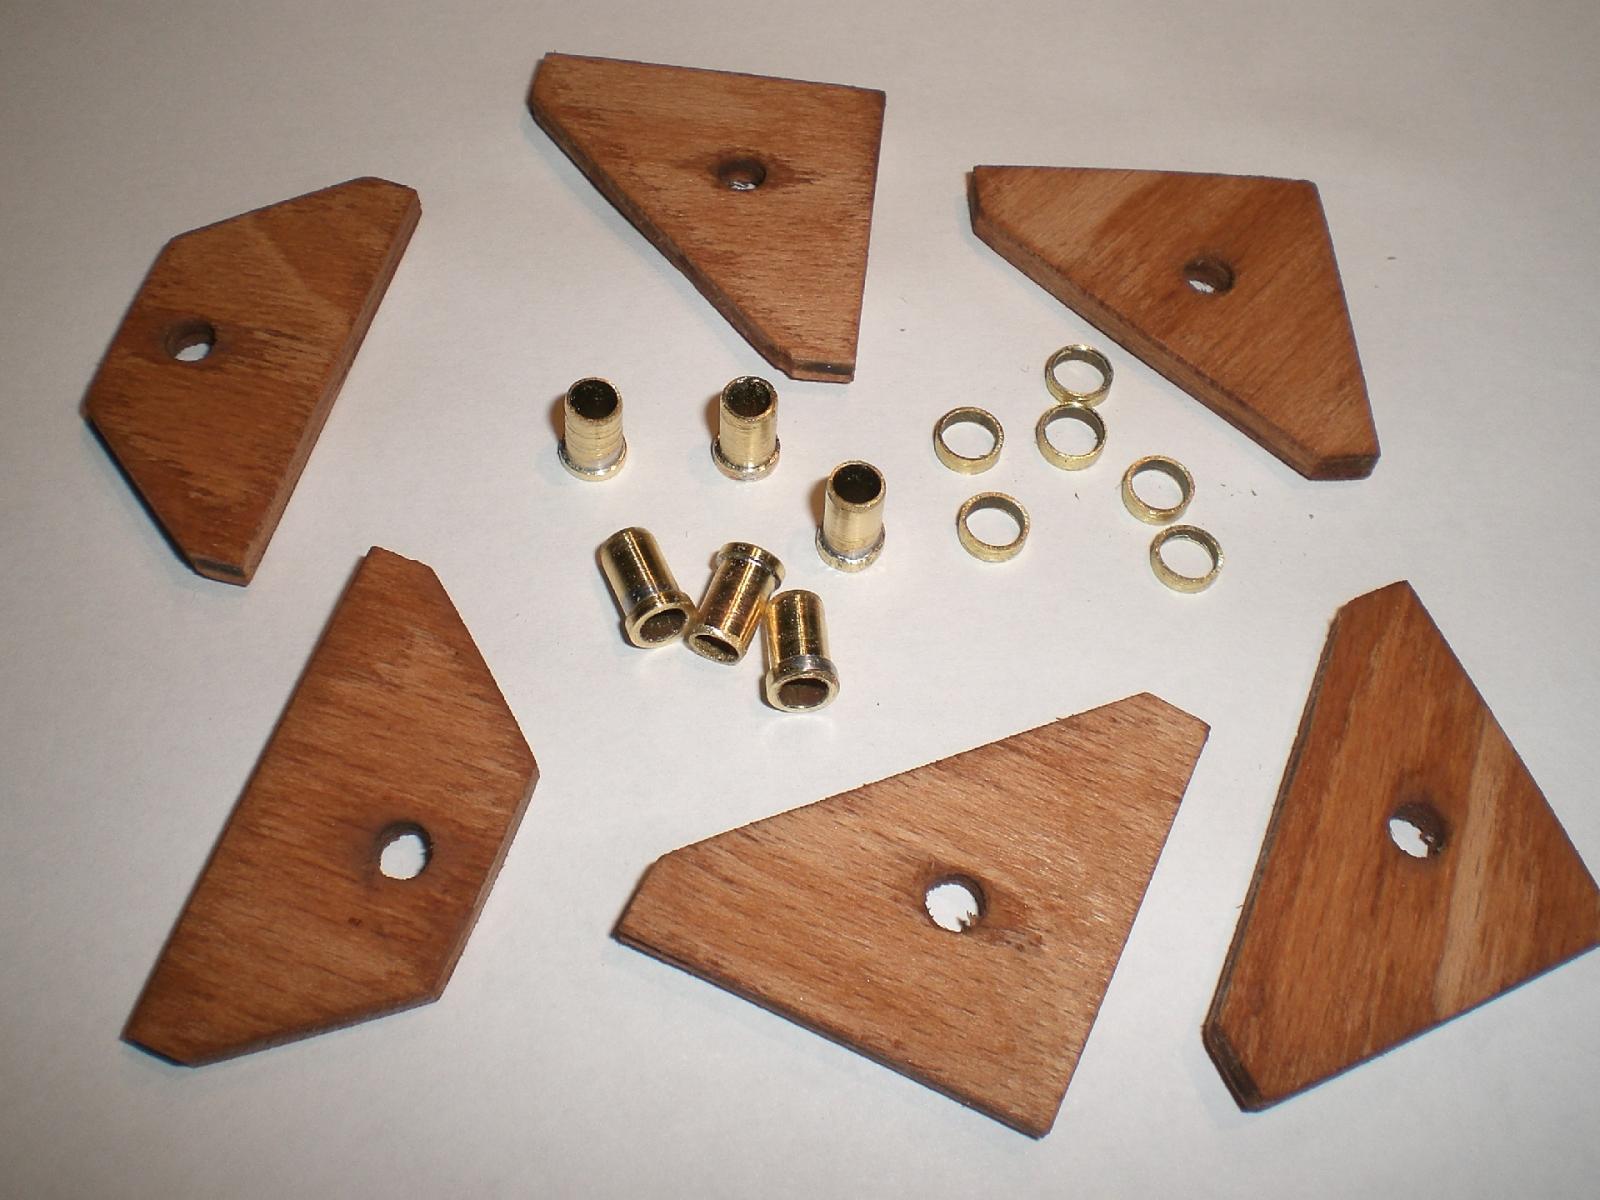
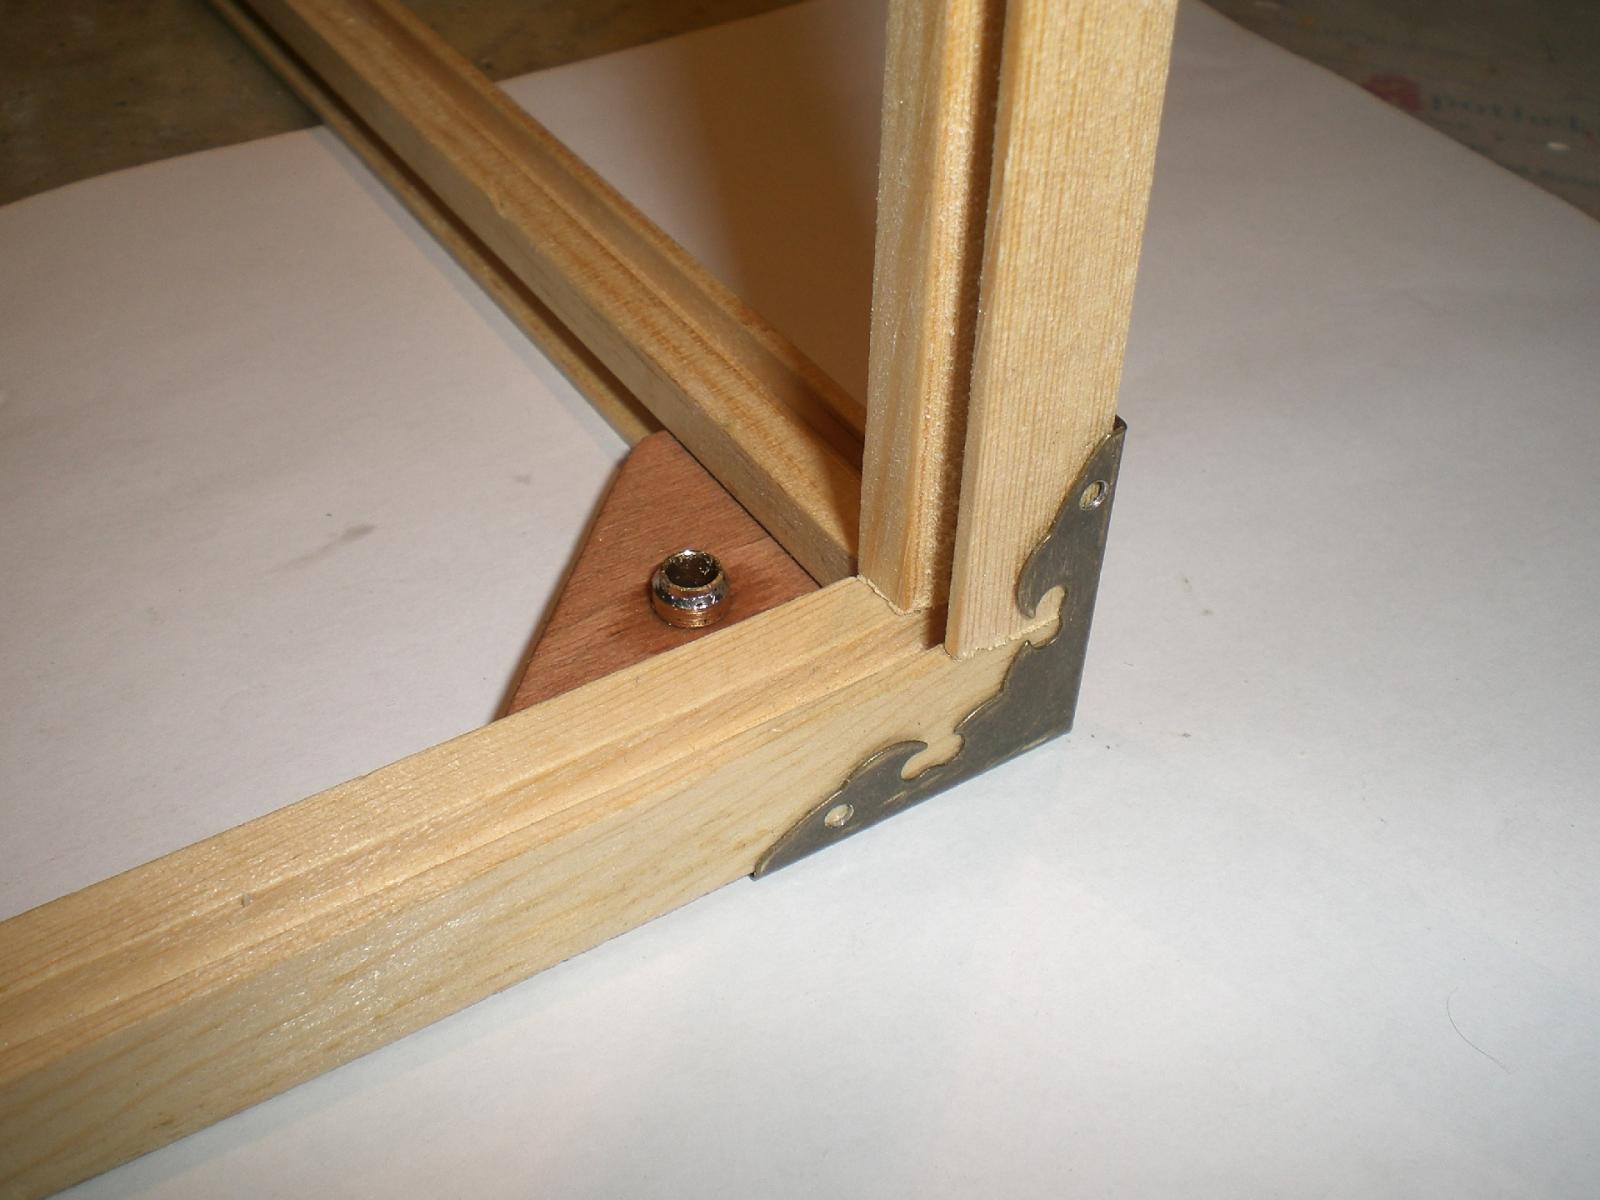
Update display case..... Nils Baseplated stained in cherry tone The framework, also to be stained, is positioned with round 3,5 mm diam. pins in 6 places, that are centered in bushings. the pins are screwed into the baseplate, not shown here. The grooves for taking up the glass are 4mm wide and appr. 4mm deep corner- and side bushing carriers (here dummy), mounted and soldered corner with reinforcement metal fittings


-
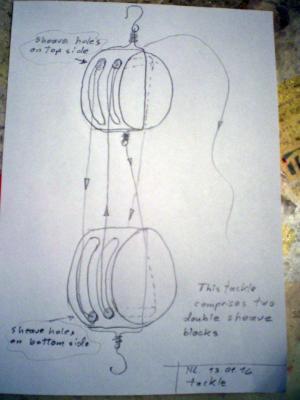
GG, I`m not sure if I understand what you mean, I presume you only have two double-sheave blocks and would like to tackle these correctly. Here is an enclosed little handscetch showing in detail how you can do it...... You may have to strop the blocks accordingly. Watch for the position of the sheave holes Nils