MORE HANDBOOKS ARE ON THEIR WAY! We will let you know when they get here.
×


Mirabell61
-
Posts
7,403 -
Joined
-
Last visited
Content Type
Profiles
Forums
Gallery
Events
Everything posted by Mirabell61
-
 thank you Donny Nils
 -
2 mm blocks Popeye must be something for watchmakers or so, where the the whole mothly production Output fit in a matchbox. Would love to see if anyone has tackled those yet Nils
-
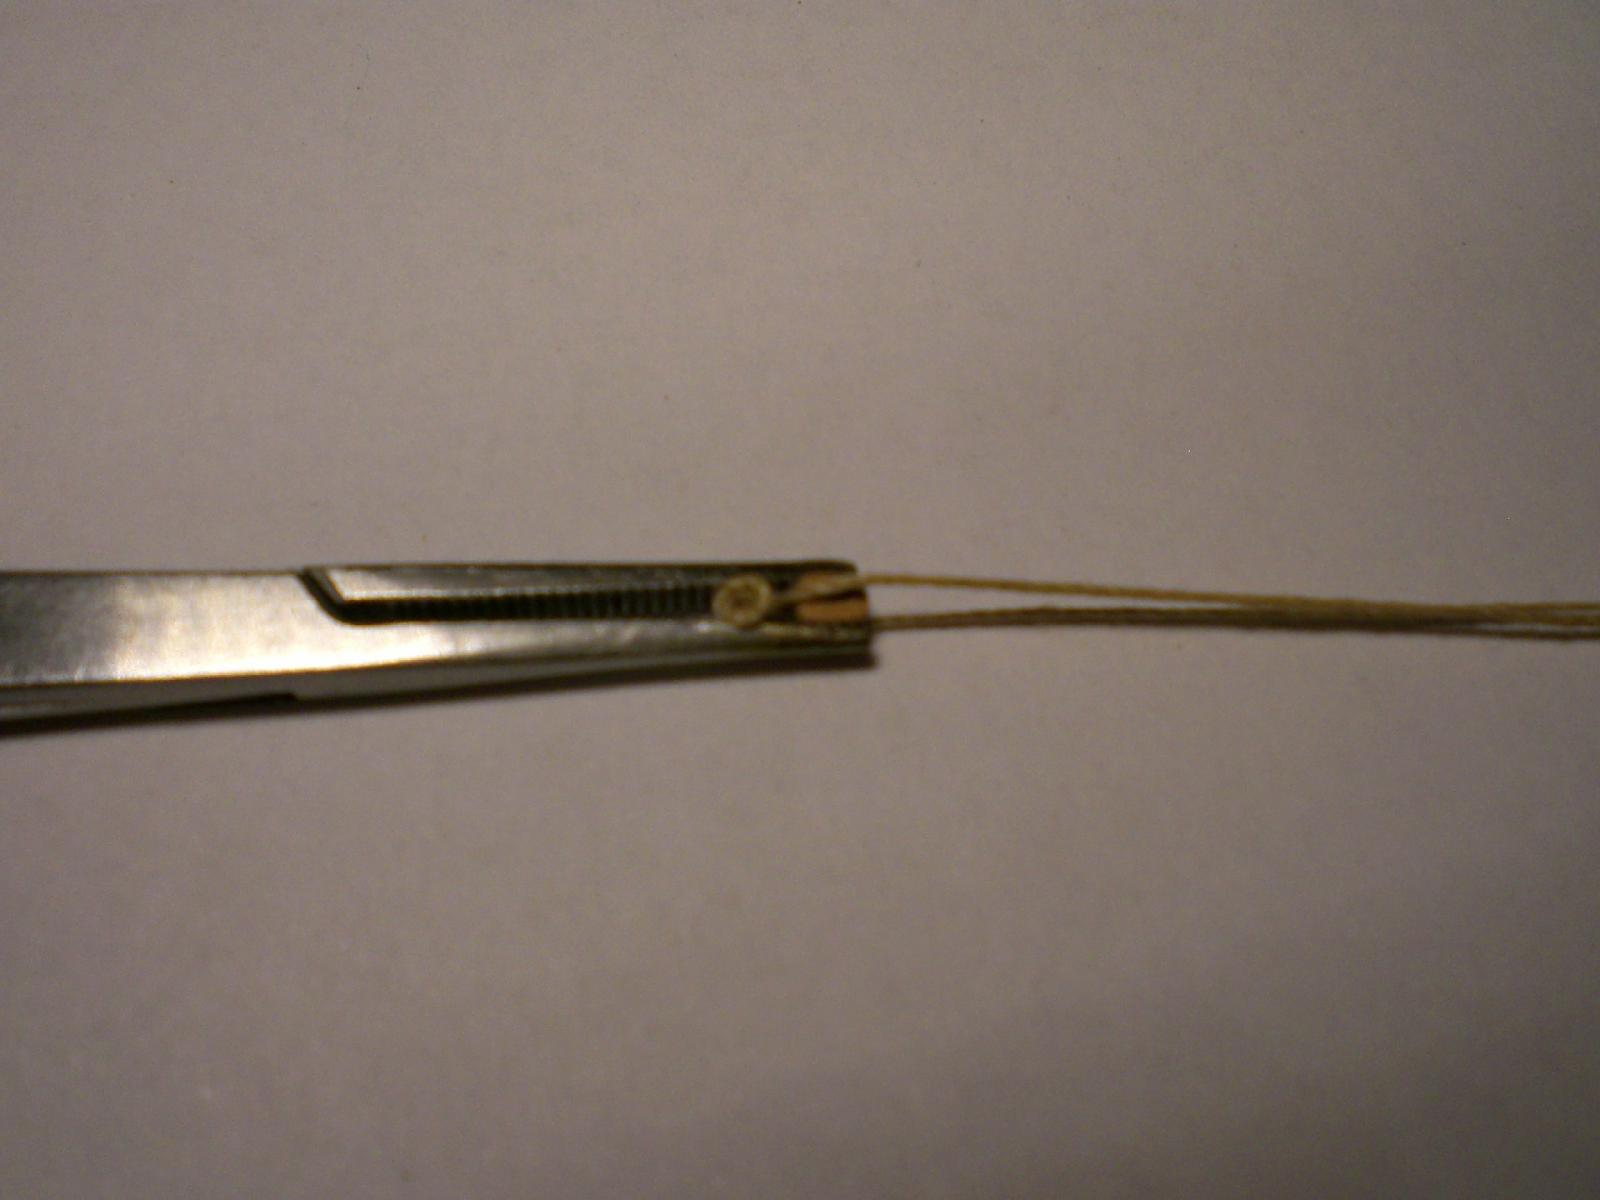
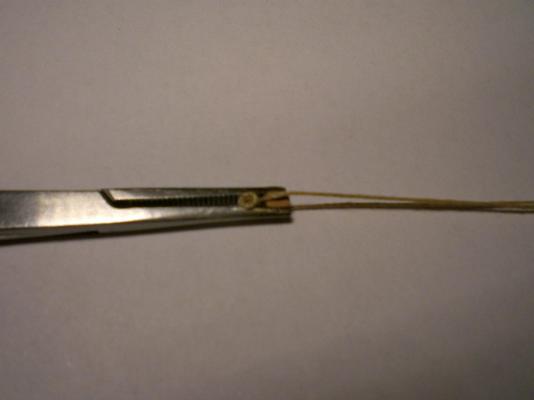
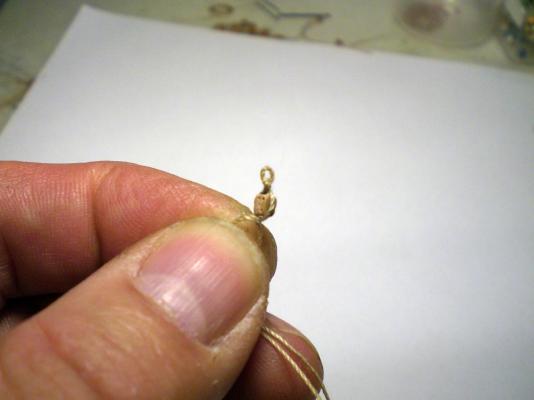
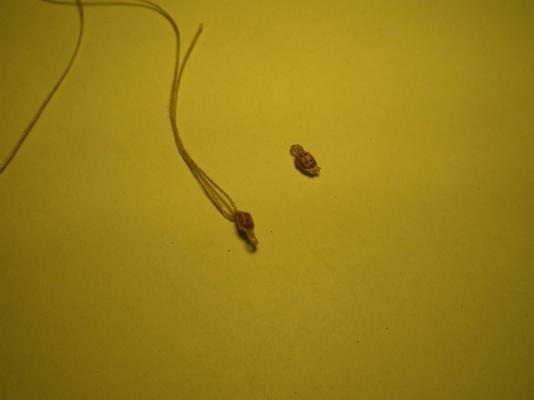
the thined out end is only appr. half the original Diameter, and there is no fringing out of the end. By this means it is easier to fiddle the thread into (and through) the sheave hole Build log part 43 to follow.... Nils
-
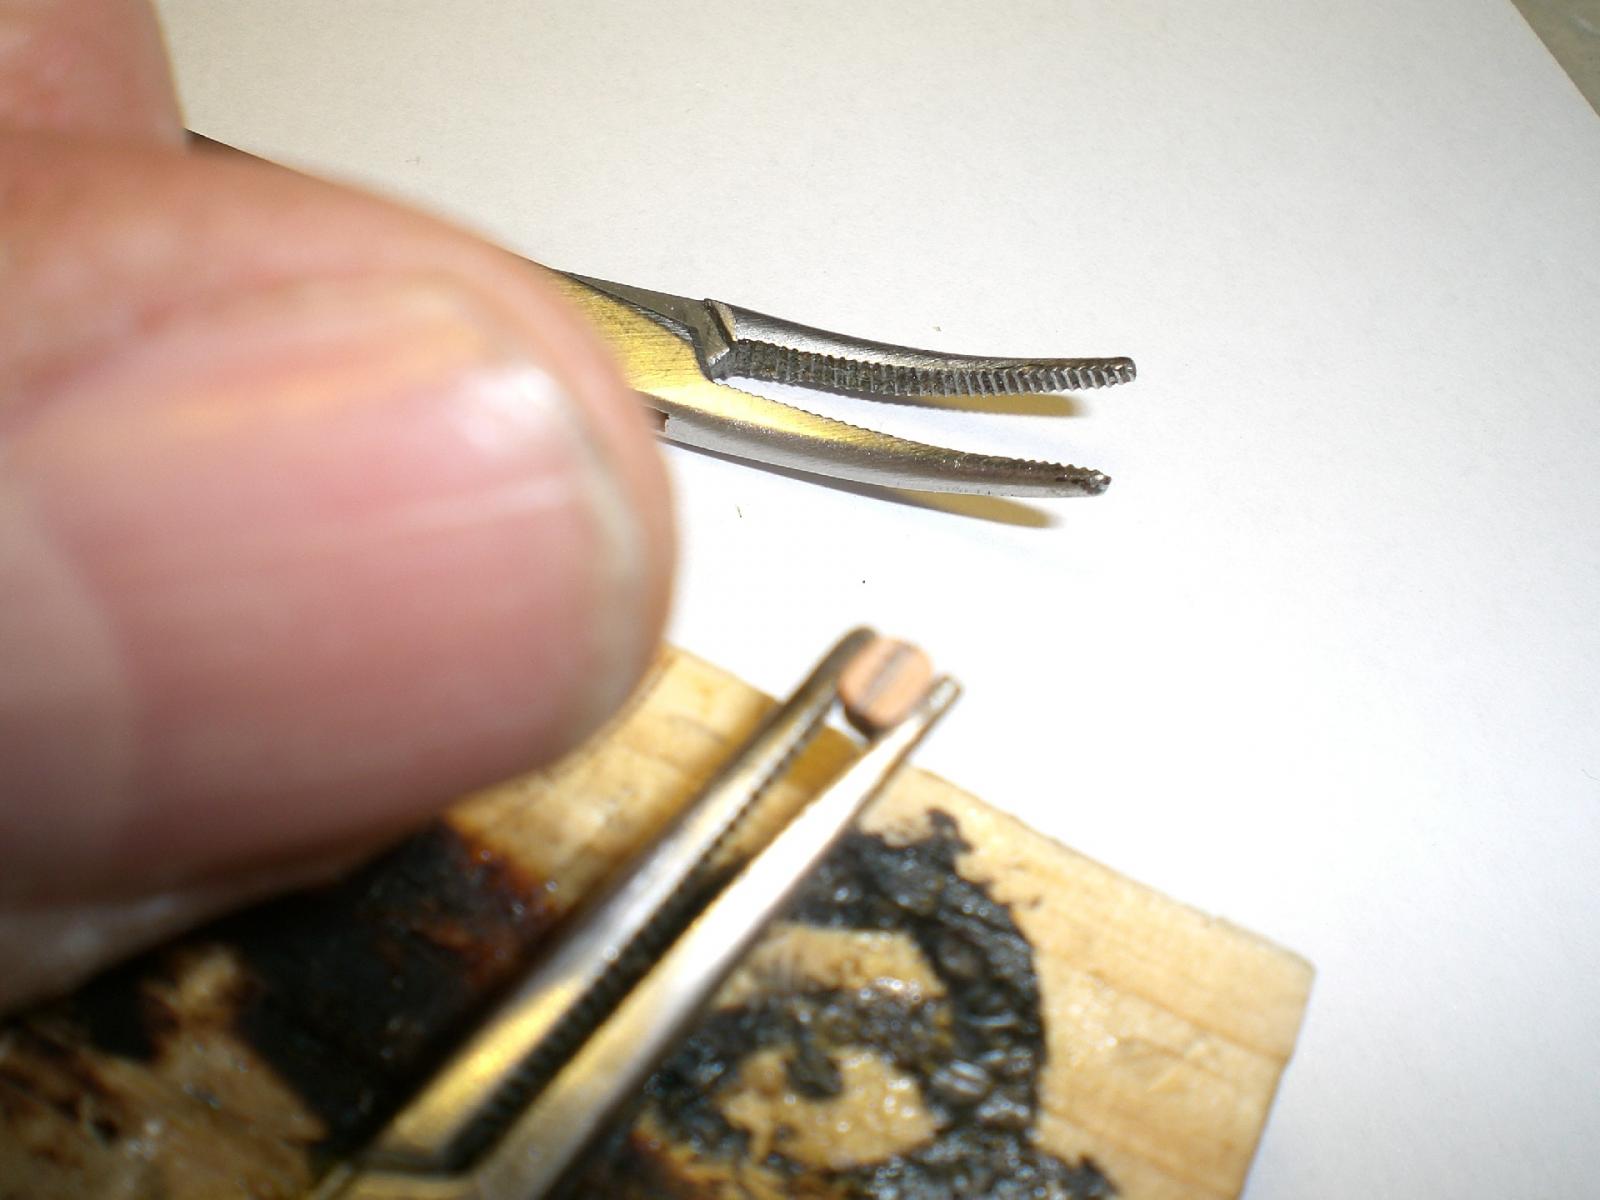
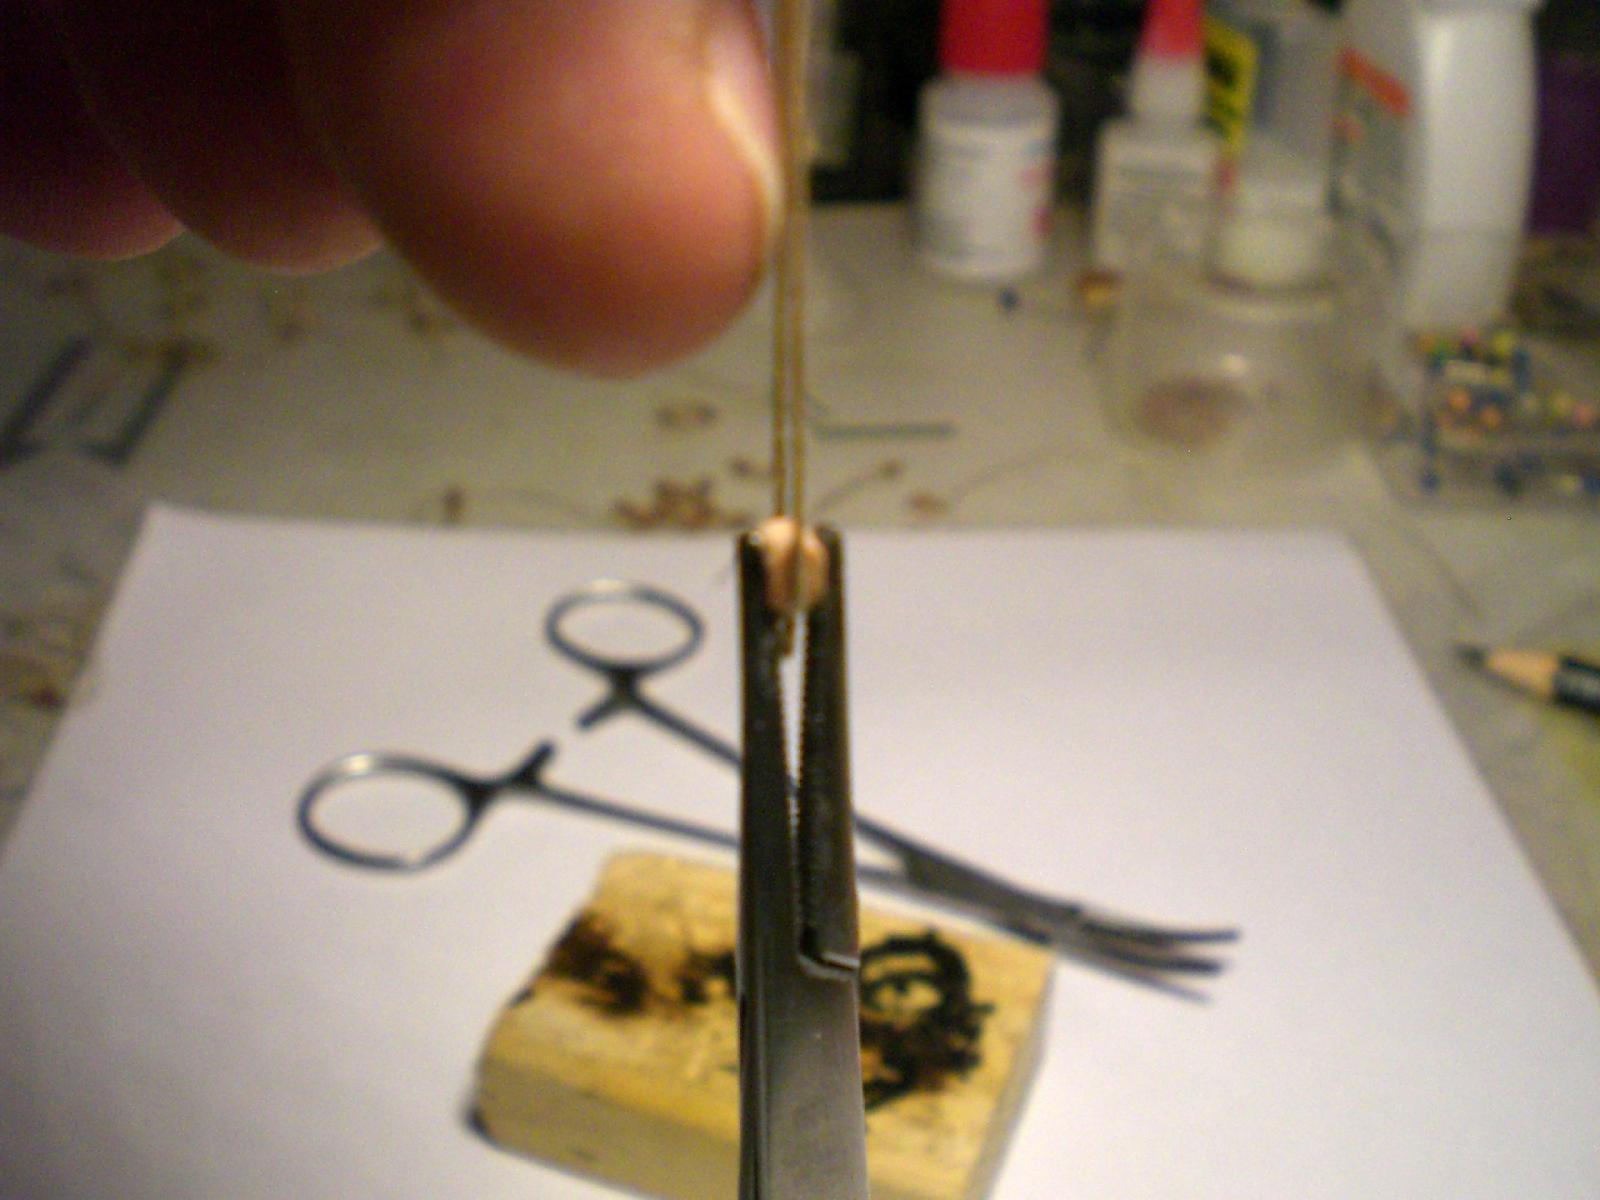
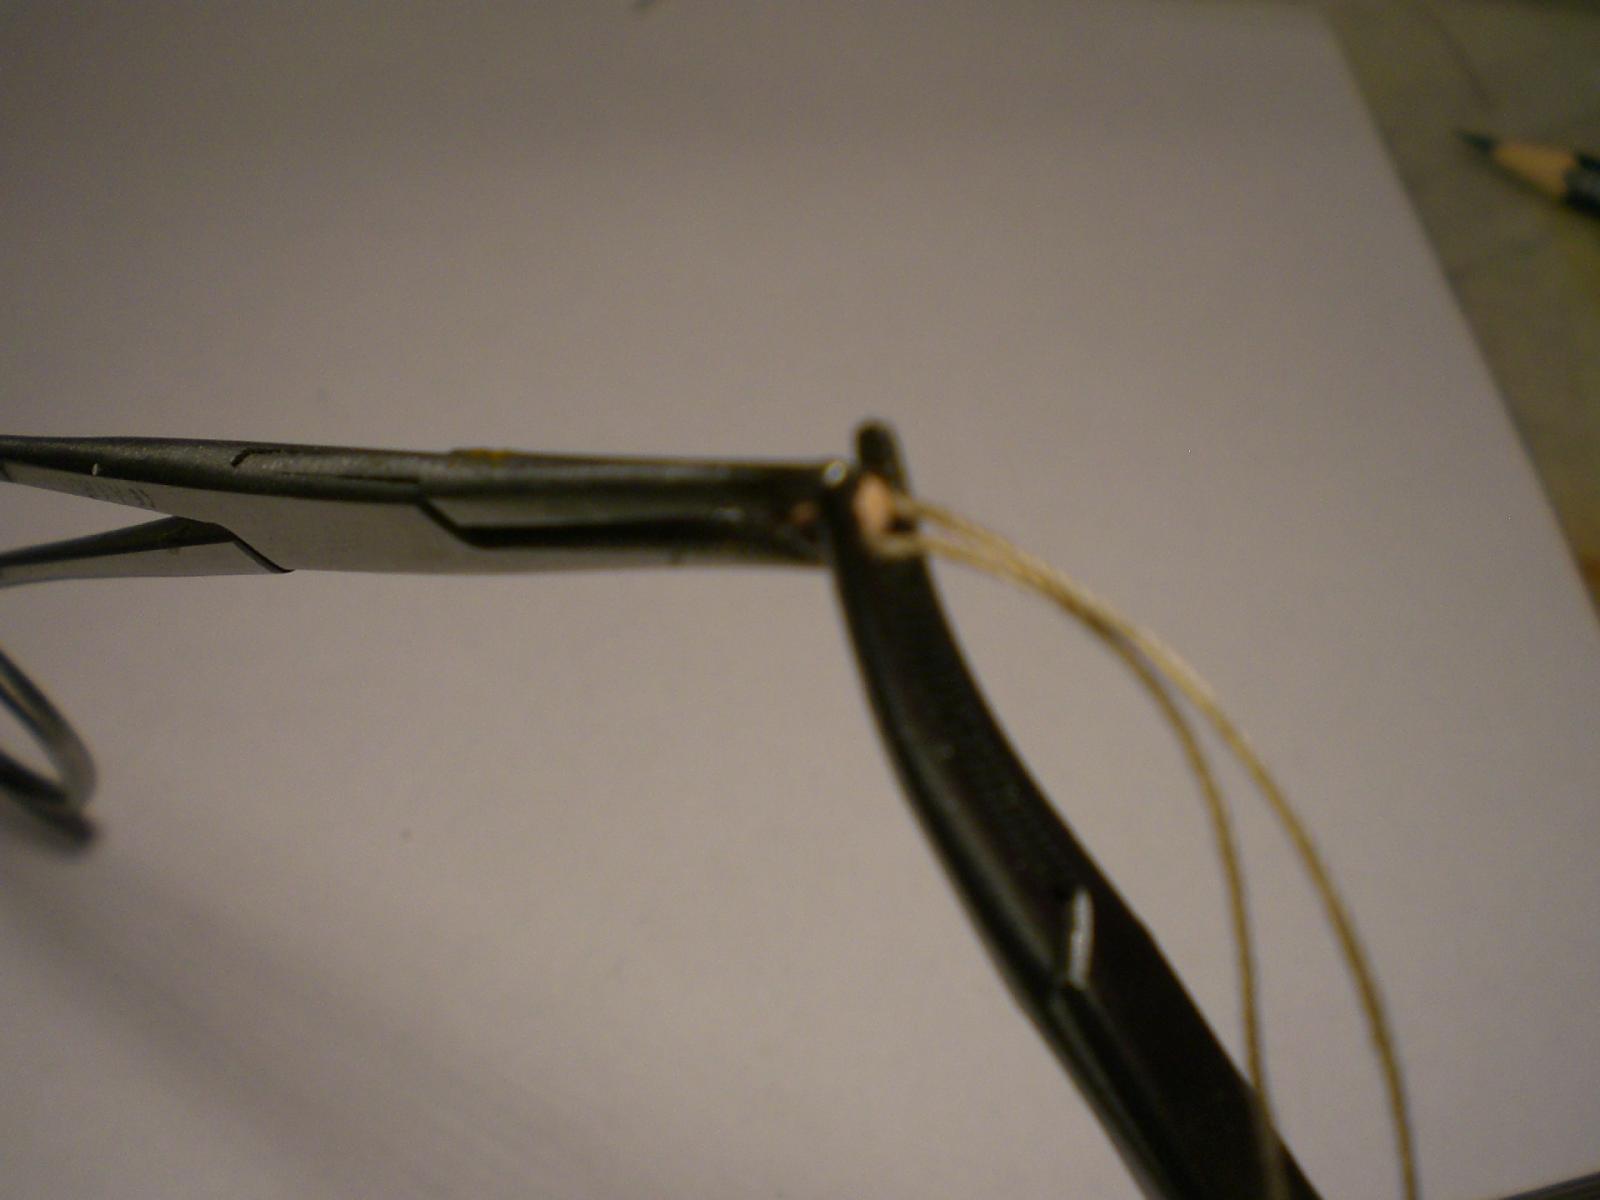
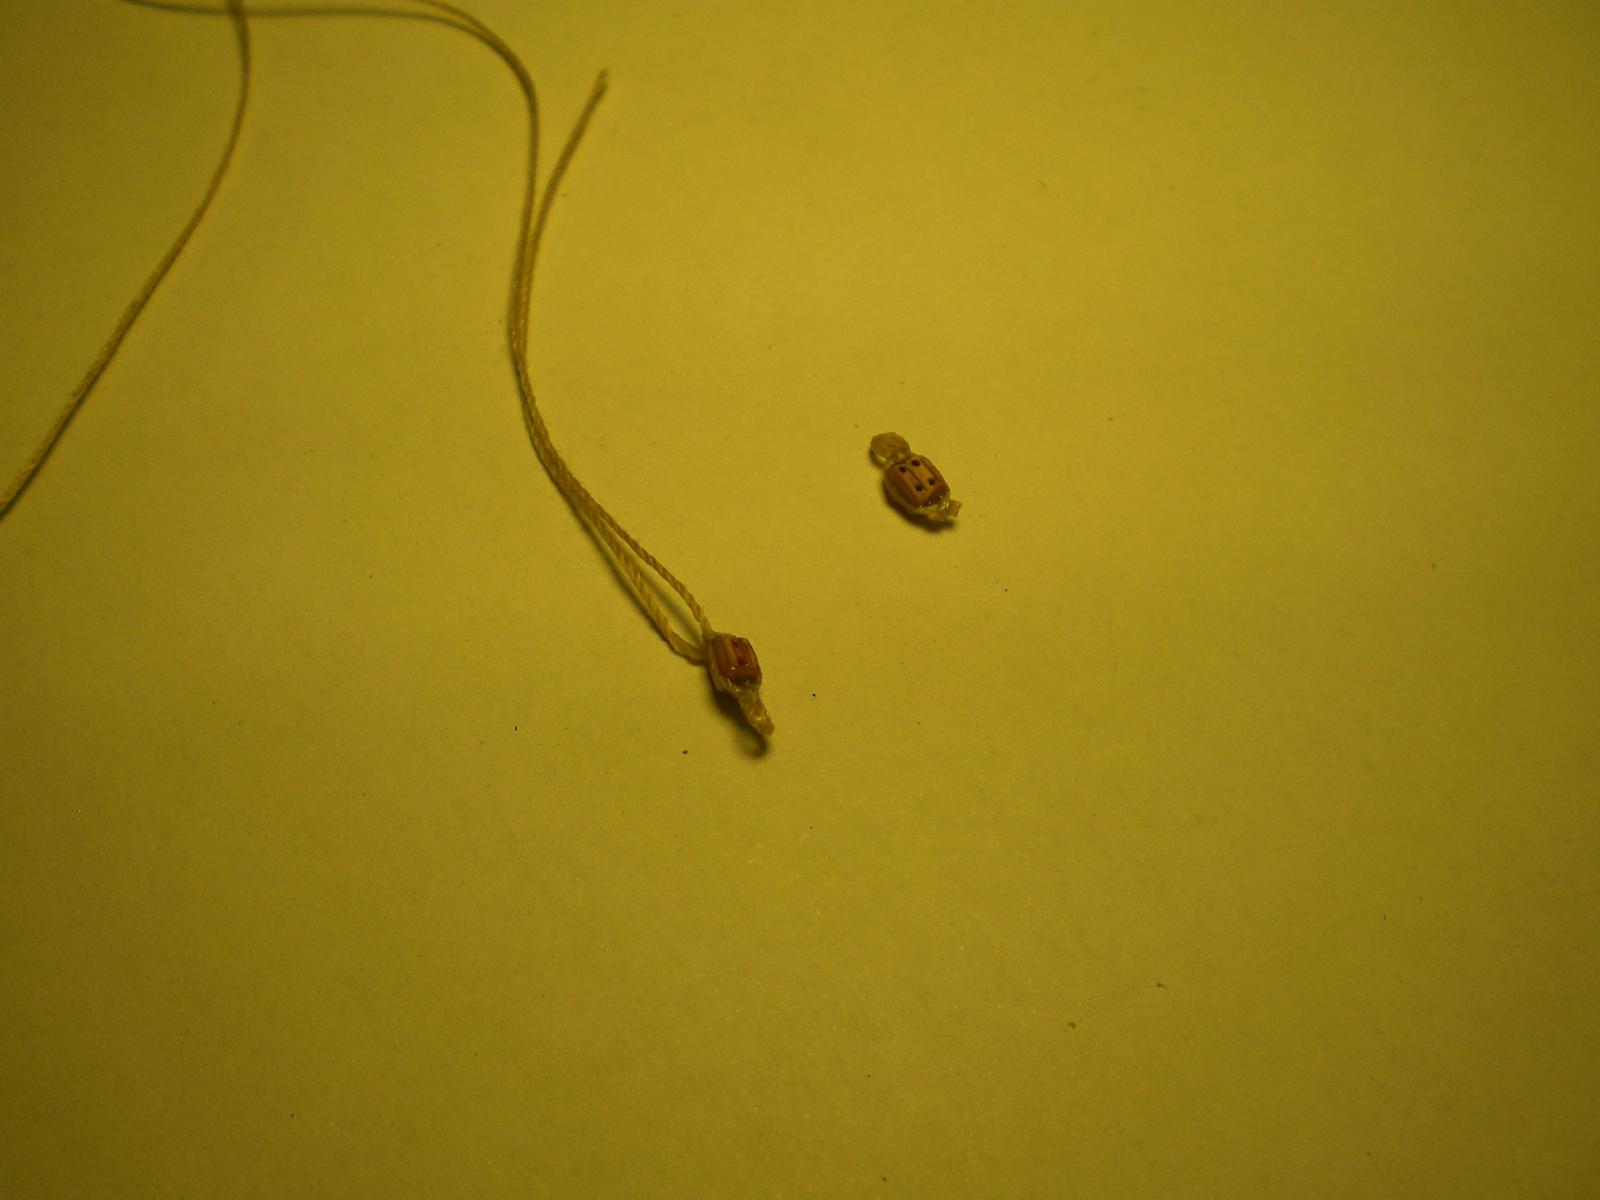
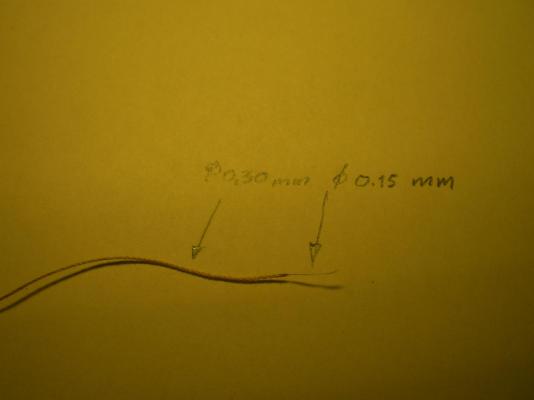
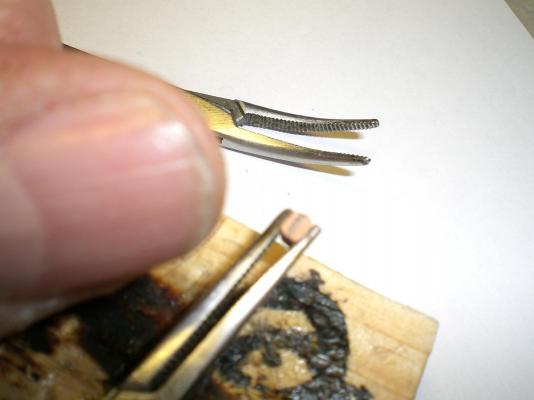
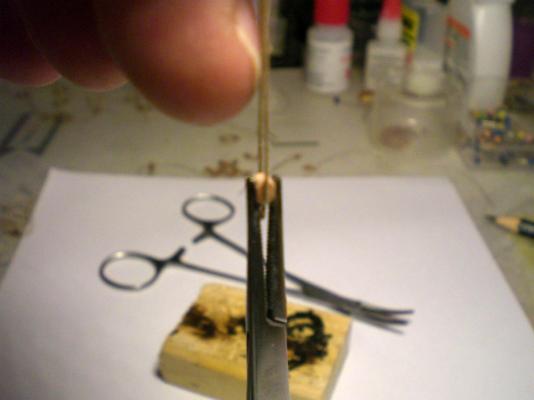
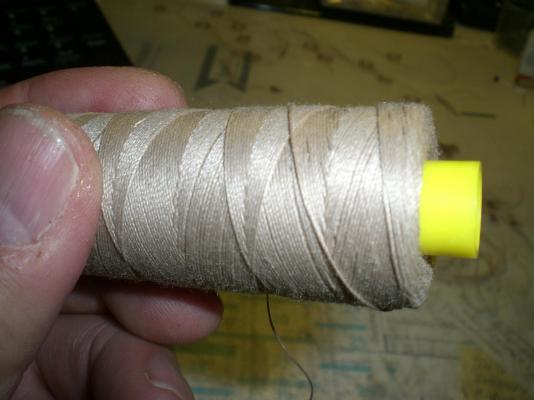
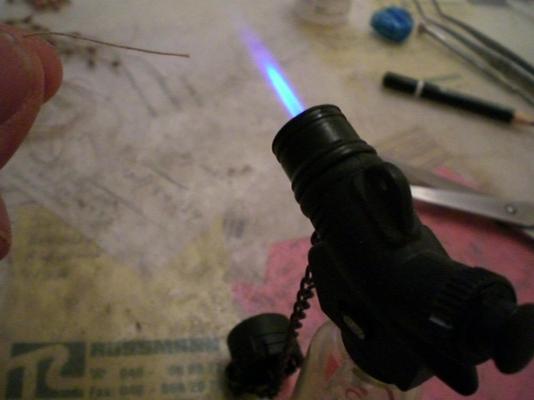
David, I found several different type "Pearl tweezers" by Ebay, Thanks again for your tip Nenad, probably I shall stick to the method I already practiced with success, but very weary to go indeed Martin, my Hands are still quite steady but my eyes are at the Limit when trying to get the thread into the sheave hole Nils Build log part 42 stropping the tiny blocks.... this is the way I do it, pending having knowledge of an easier way, of which I do not know yet... I work with These medical grip tweezers. One hold the block firmly in place and allows Access to the notched groove for the strop (both sides) tie a first Little Loop around a small sized drillshaft into the thread, this Loop goes to one end of the block two strop Ends layed around the block and fixed carefuly into the grooves, whereby the Loop must sit on Center Position aft of the block here the second tweezer Comes into the game... and holds the positioned strops in place so that the second knot can be tied, capturing the block as tight as possible then Looks like this.... double- and single sheave blocks repeatable work.... to go the thread (rope) I use is 0,3mm hemp Colored 100% Polyester, the Advantage of Polyester is that it can be heated thined down and stretched at the end. Otherwise I would never get those Ends through the mini sheave holes ist just a very fast touching of the thread end into the flame, and then immediately stretching it out between thumb an pointer finger. Always have to do several attempts to get the right thined out end


-
Thanks for the tip David, I never saw or heard of those Special jewelery tweezers before, but I`ll go on search after that.... Nils
-
Hello Omega, that is a very impressive build, I love that sight into the open structure and deck and all in scale 1/192, I never thought that this would be possible in that way... Well done ! Nils
-
Thank you Martin, the most tricky sequence on the whole build to date is the fideling and sheaving of those tiny 3 mm blocks, with two tweezers, a scalpel and a very sharp Little scissors in Operation. I am looking out for a way to do that more professional, because in the Moment it is very much time consuming Nils
-
Hello Mick, on the 3rd last pic you Show those wonderful blocks with attached hooks, question: what length is the wooden block itself ? The ship is looking very good Nils
-
Thanks Nenad, I think I I had the choise again to determine the floor decor in my hobbyroom it would be uni-Color... Nils
-
Thank you Ben Nils
-
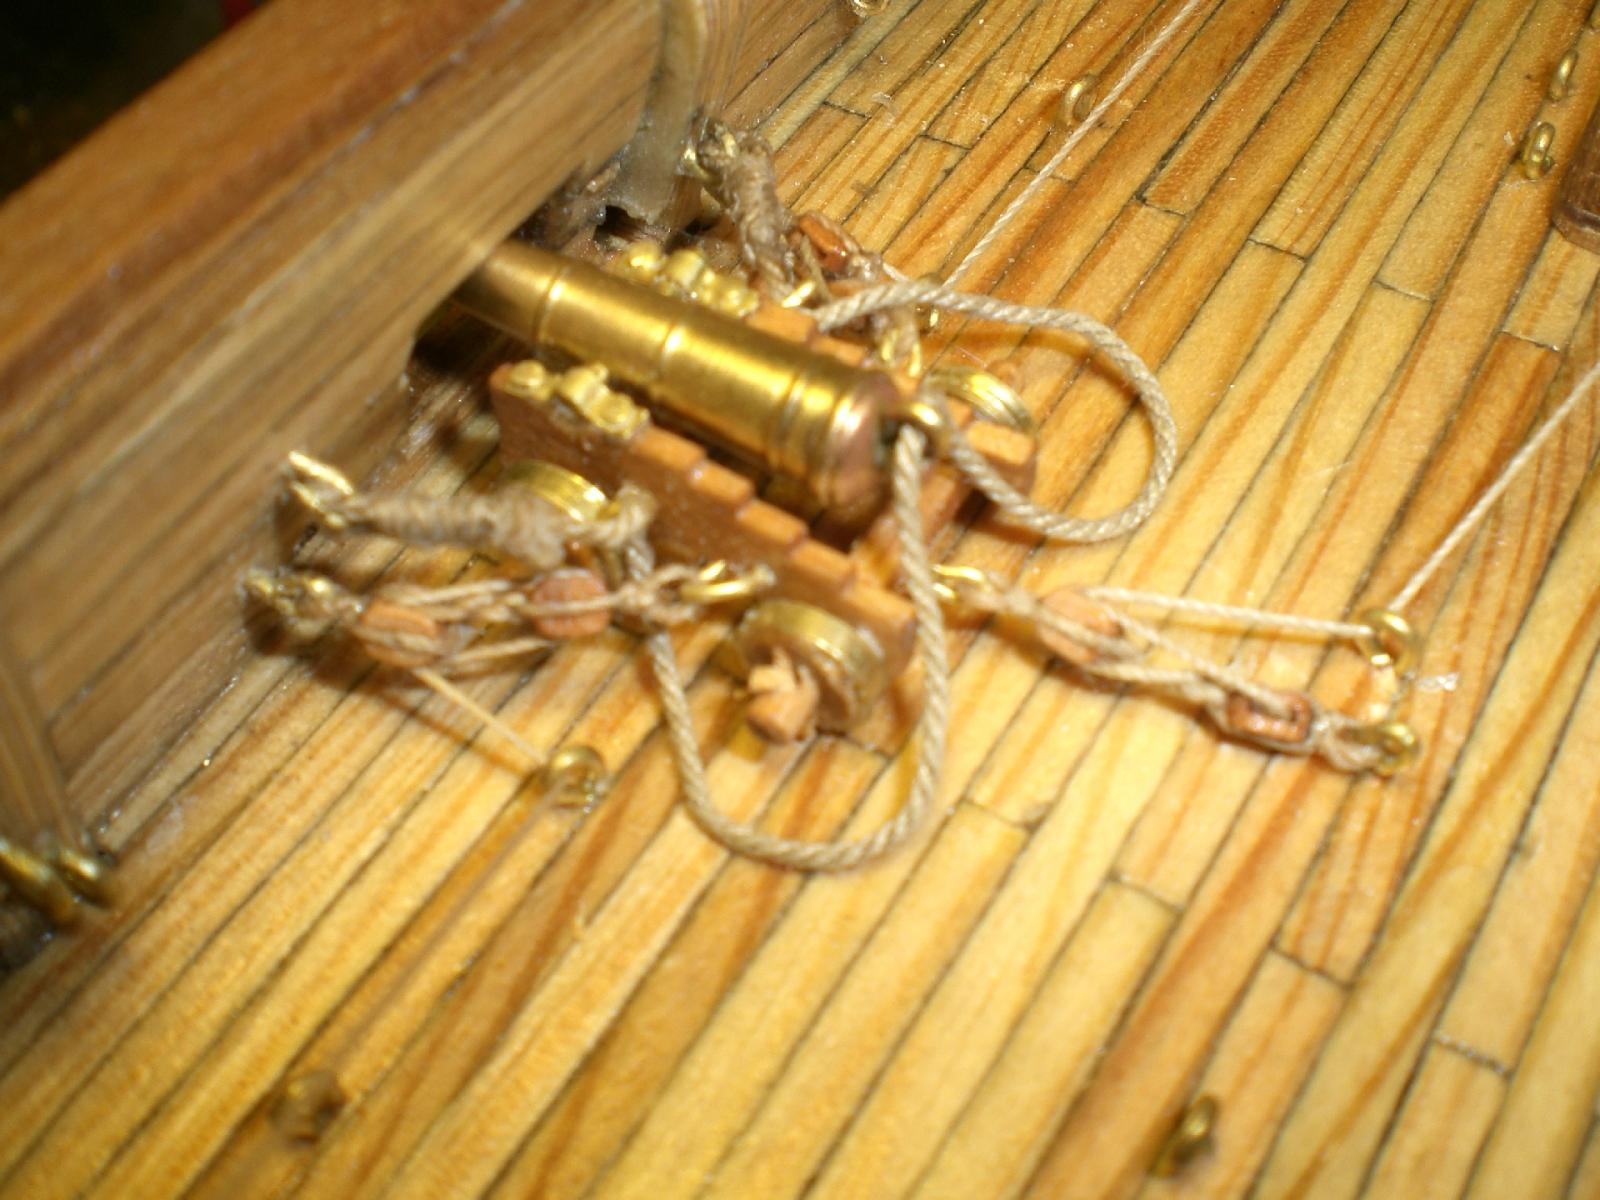
Very smart way of Fixing the carriages B.E. thanks for sharing your experience I have to remember that one.... I had finaly put a drop of CA on each of the four wheels. The metal wheel rims would prevent the CA from soaking into the Wood and rundown the outer rim to the lowest Point (contactpoint to deck). The tricky Point is to get the Tackling on and by untangling the threads with several tweesers at the same time I was straining my brain how this could be avoided. Sometimes the tiny 3 mm block slipped out of the stropping and I had to relax inbetween to Keep calm.... Nils
-
Thank you very much Geoff Nils
-
Oh David, I have by no means a mastermind and with my 66 years I have to write a list for groceries from the Supermarket every time I go, in order not to forget half of it. When modeling, my mind goes at ease, when I have an idea to a solution I have the strive to see quite quickly if it works...., scetch, dummy, mock up, etc..., you`re right, maybe a Little gaga sometimes Cheers Nils
-
Thank you Pete, your nice comment is much appreciated... The gun Tackling is quite time intensive and may take the whole week, if the house gardening work outside does not take overhand Nils
-
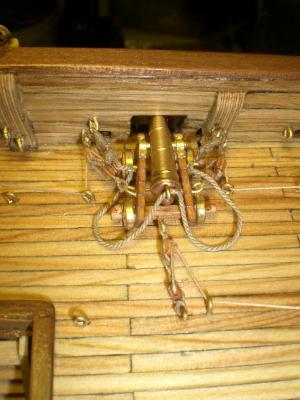
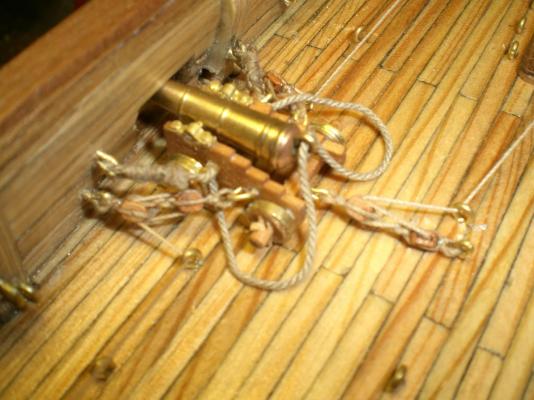
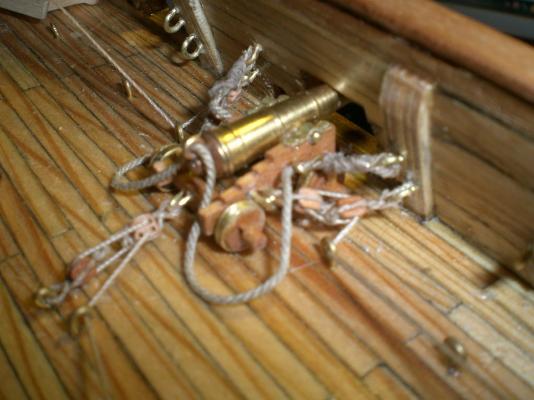
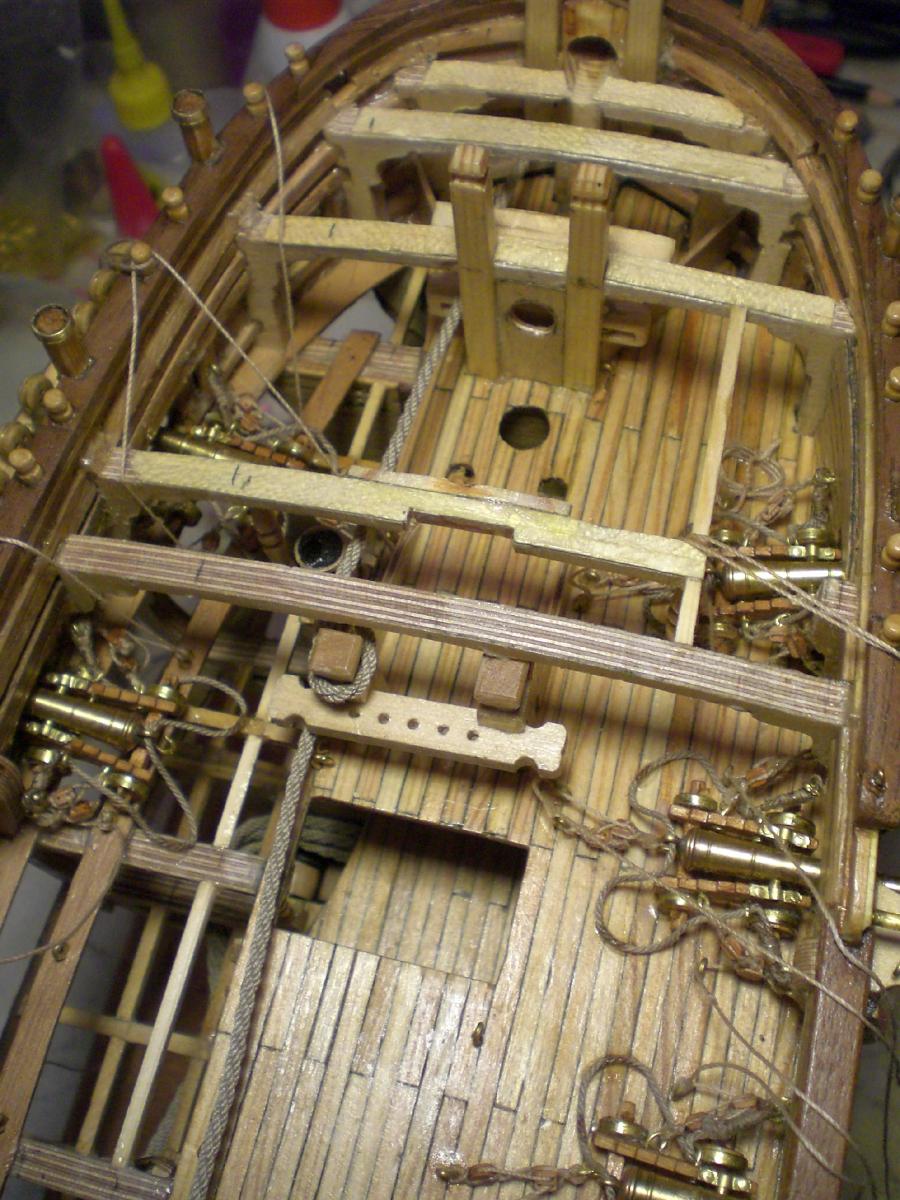
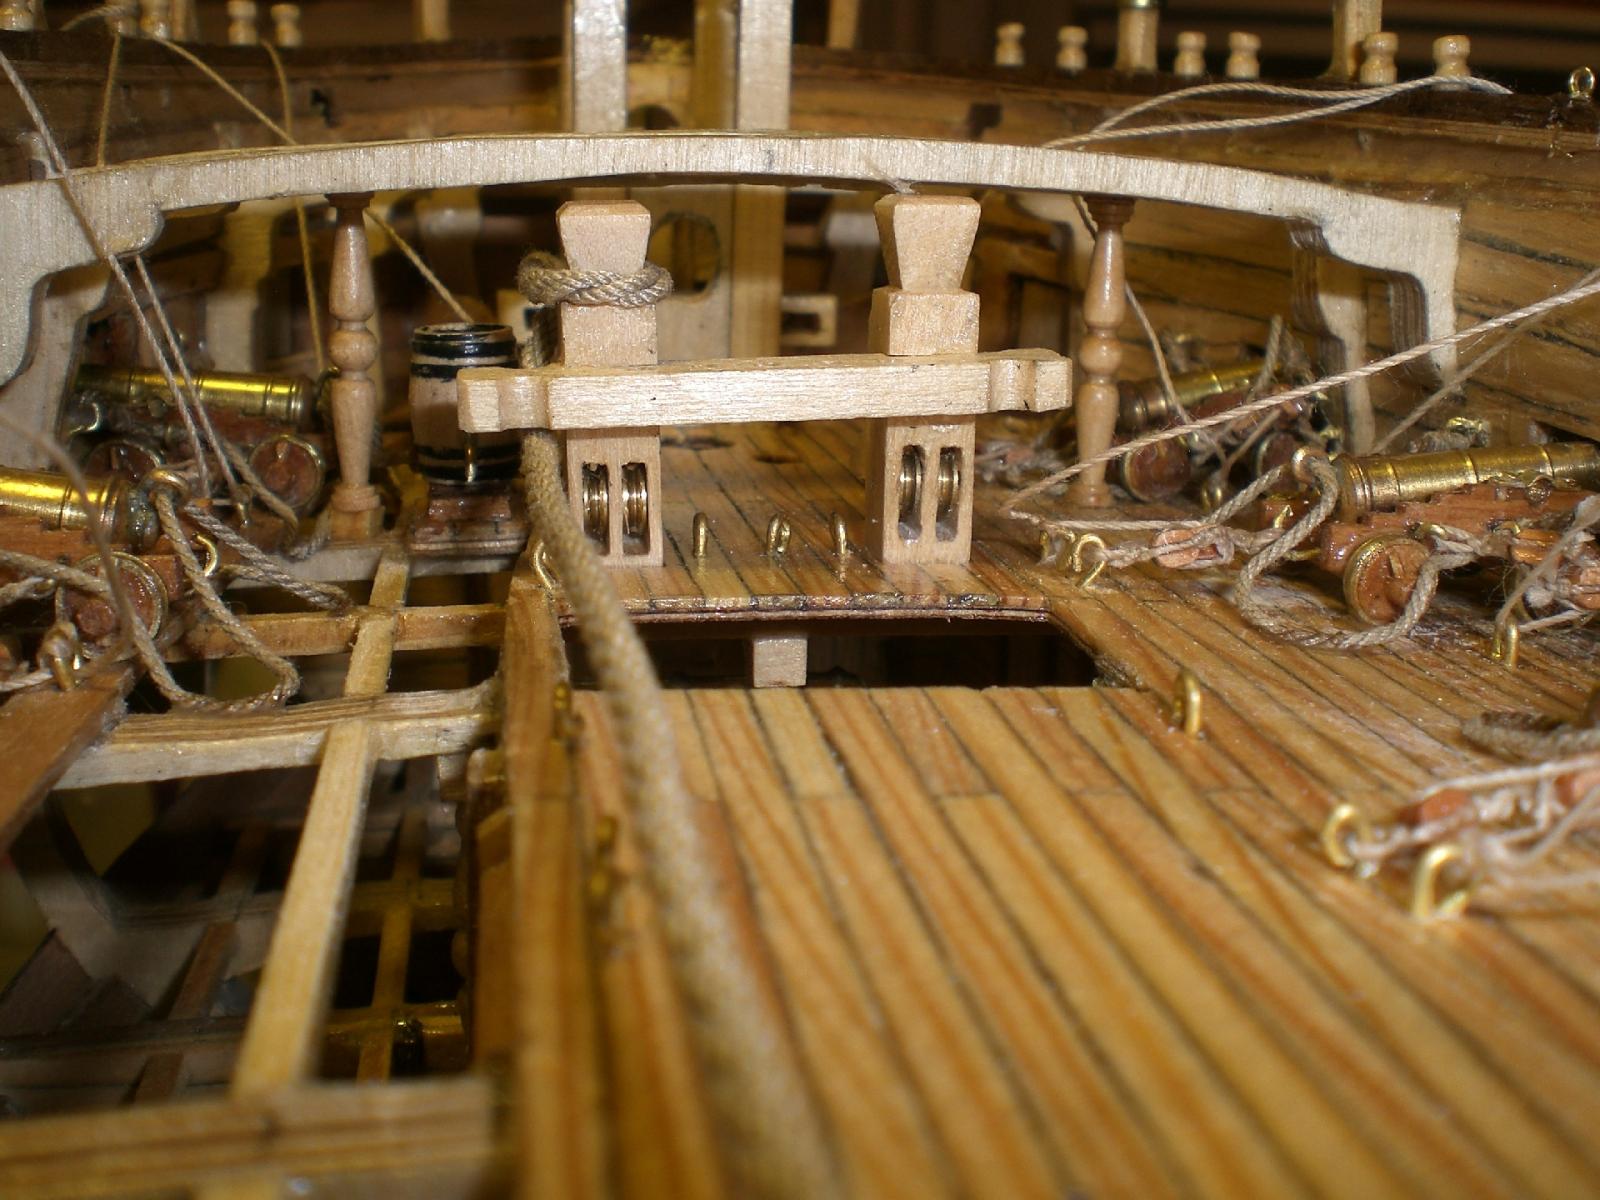
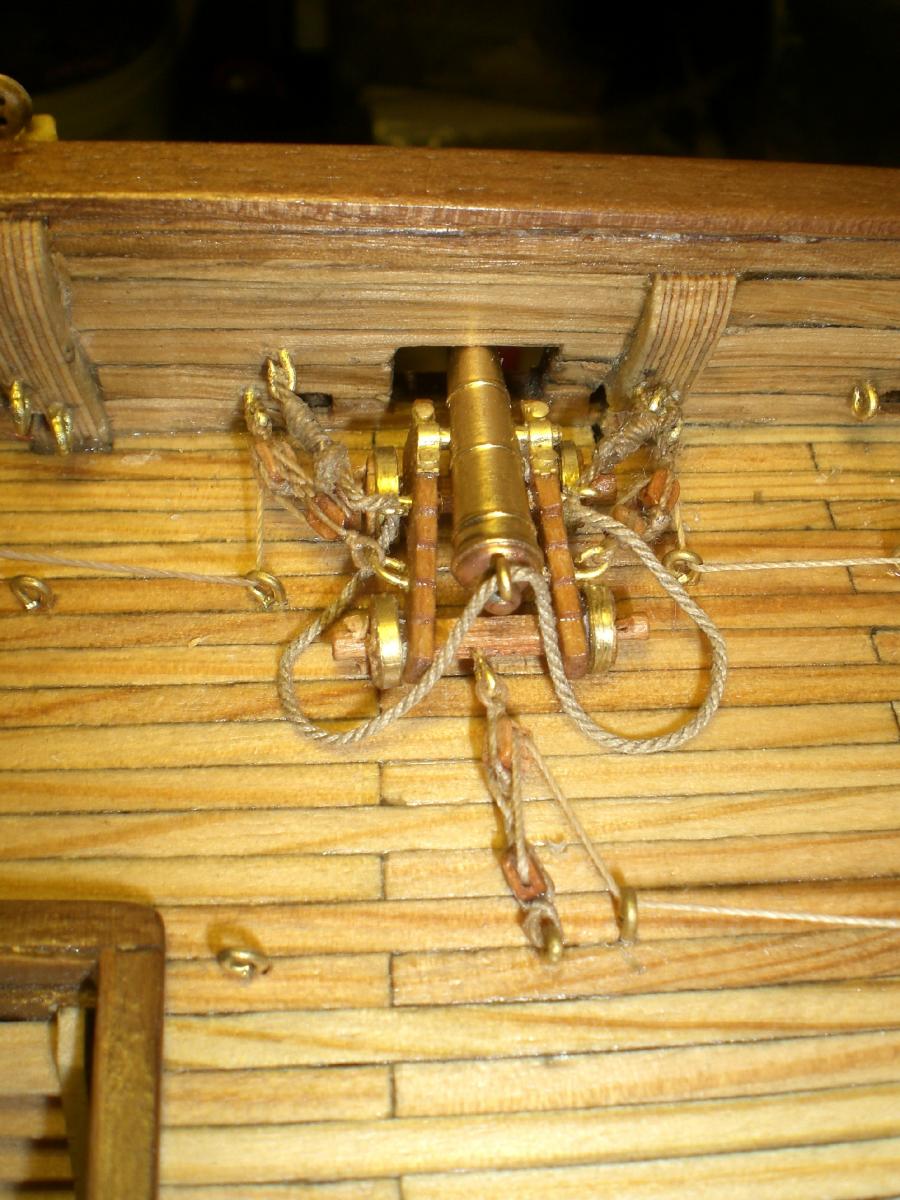
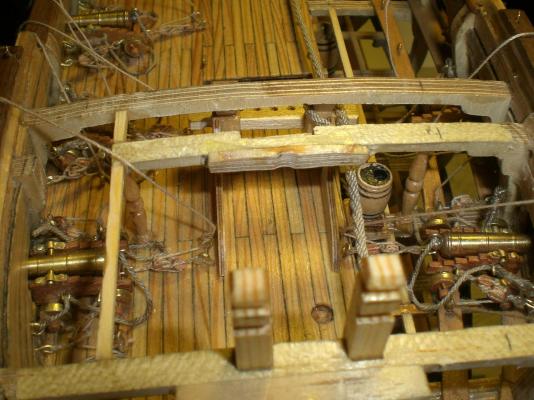
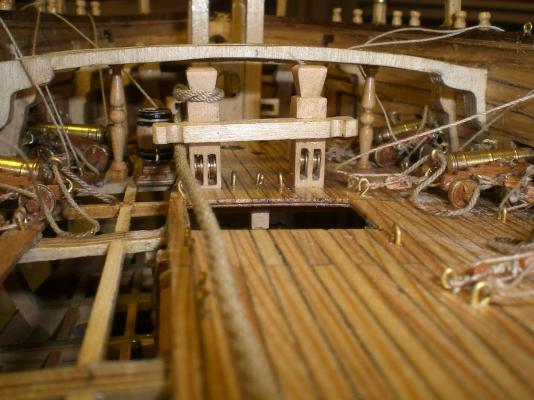
thanks Popeye, rigging those small 3 mm blocks is driving me crazy, especialy when the neat tackle is taken from the seperate pretackling device and transfered to the positions on the gundeck....., the tackle trys to tangle up and twist extreme. I have also given up my own Obligation not glue the carriages on...., but now CA helps to secure the Position. Would love to hear what fellow builders do in that case ? Nils Here some pics of the gun Tackling, I started with the most difficult ones under the forecastle deck here also the horizontal beam with the maessenger return rollers, it also supports the anchor cable above the Manager board an -pit the riding bit is pushed in a bit too deep (still loose) on the left side, thas why it does not apear straight here Nils


-
Very impressing work Johann, well done ! Nils
-
very good looking Framework Craig, precise and clean, are you going to do cutaways in the outer Skin later on ? Nils
-
Good idea Mark, sometimes like here it`s the inovative approach that sets a new interesting view... Nils
-
Very good looking ship Ken, would love to see the rigging come on... Nils
-
outstanding work Mark !, for what reason is the Druid not on horizontal keel Level on the stand ? gues you had a Special thought along with that.... Nils
-
Thank you very much Bob Nils
-
very nice hull Pete, I like the lines of that brig Also that mock up bulwark Arrangement, well done ! Nils
-
Thanks for your appreciative words Dave, I also had a look at your ships on the web, it`s a nice Homepage I like with lovely built displayed models Nils
-
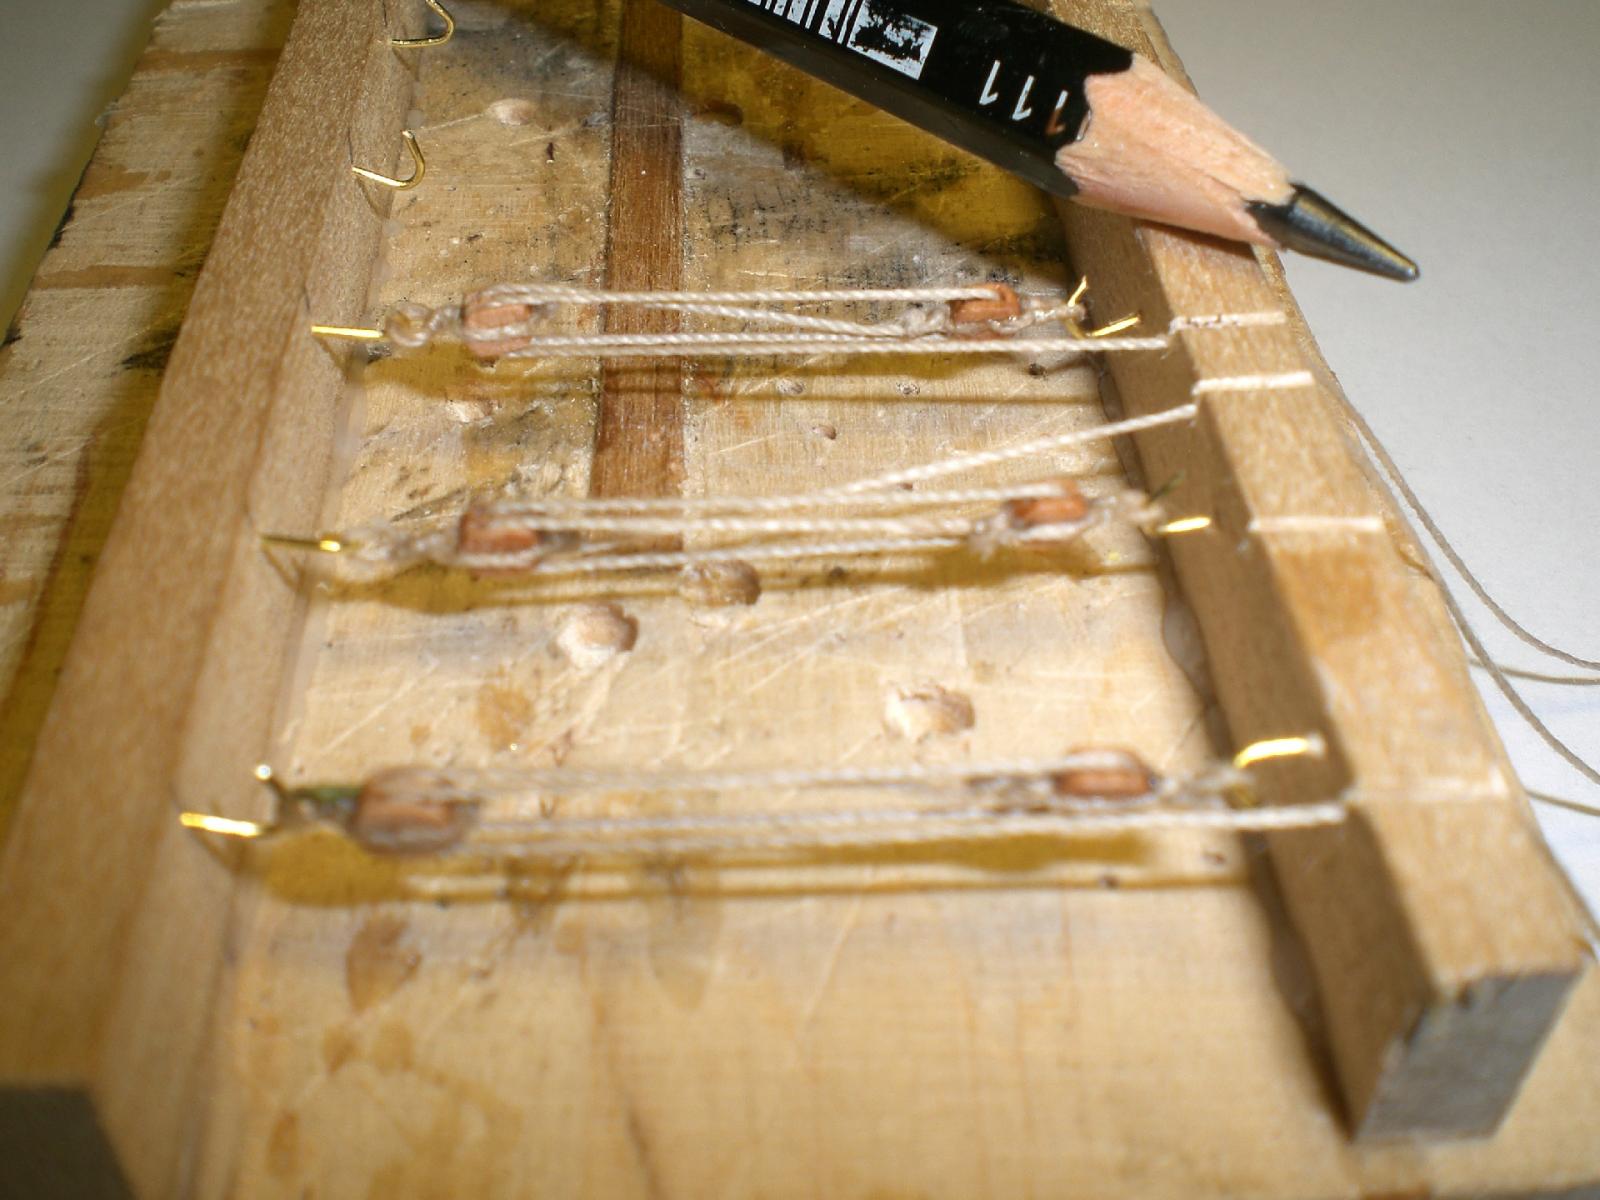
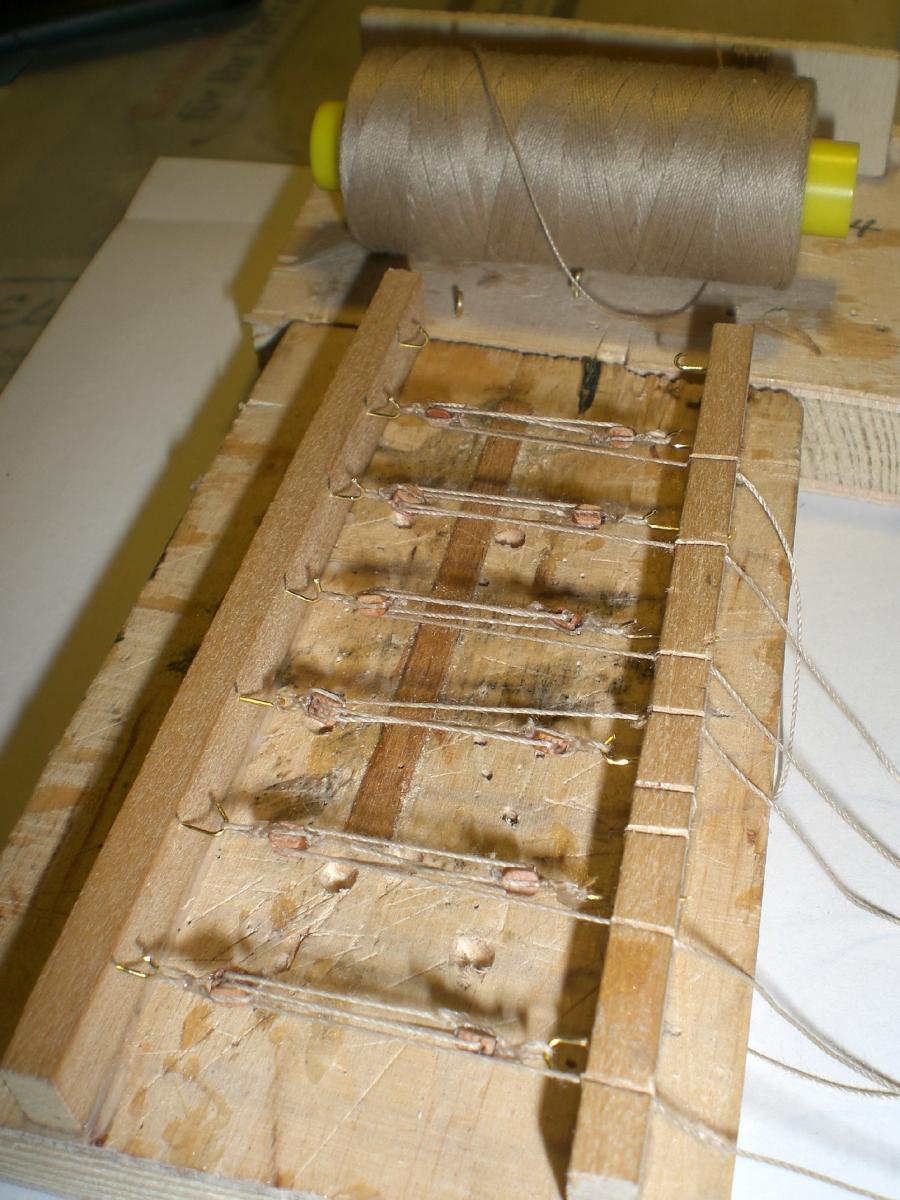
Hi David, the thought was first to prevent those Tacklings from getting all twisted up from alone (without doing anything to cause that) if I just lay them on my deskboard... and second, to get them easyer hooked into the bulwarks eyelets, I would possibly have become an heartattack by Tackling on the ship... Nils
-
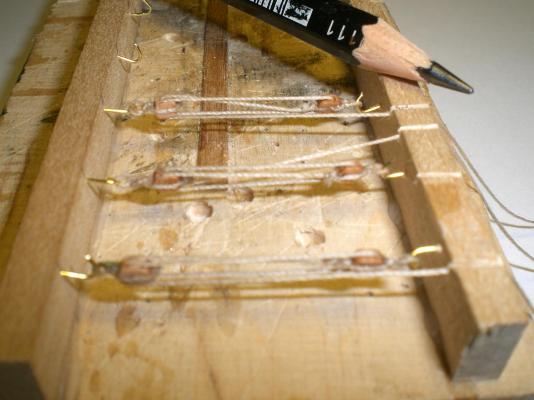
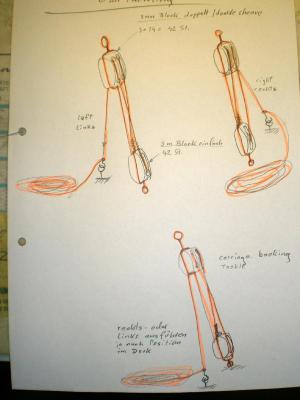
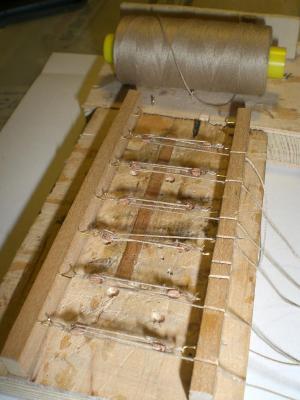
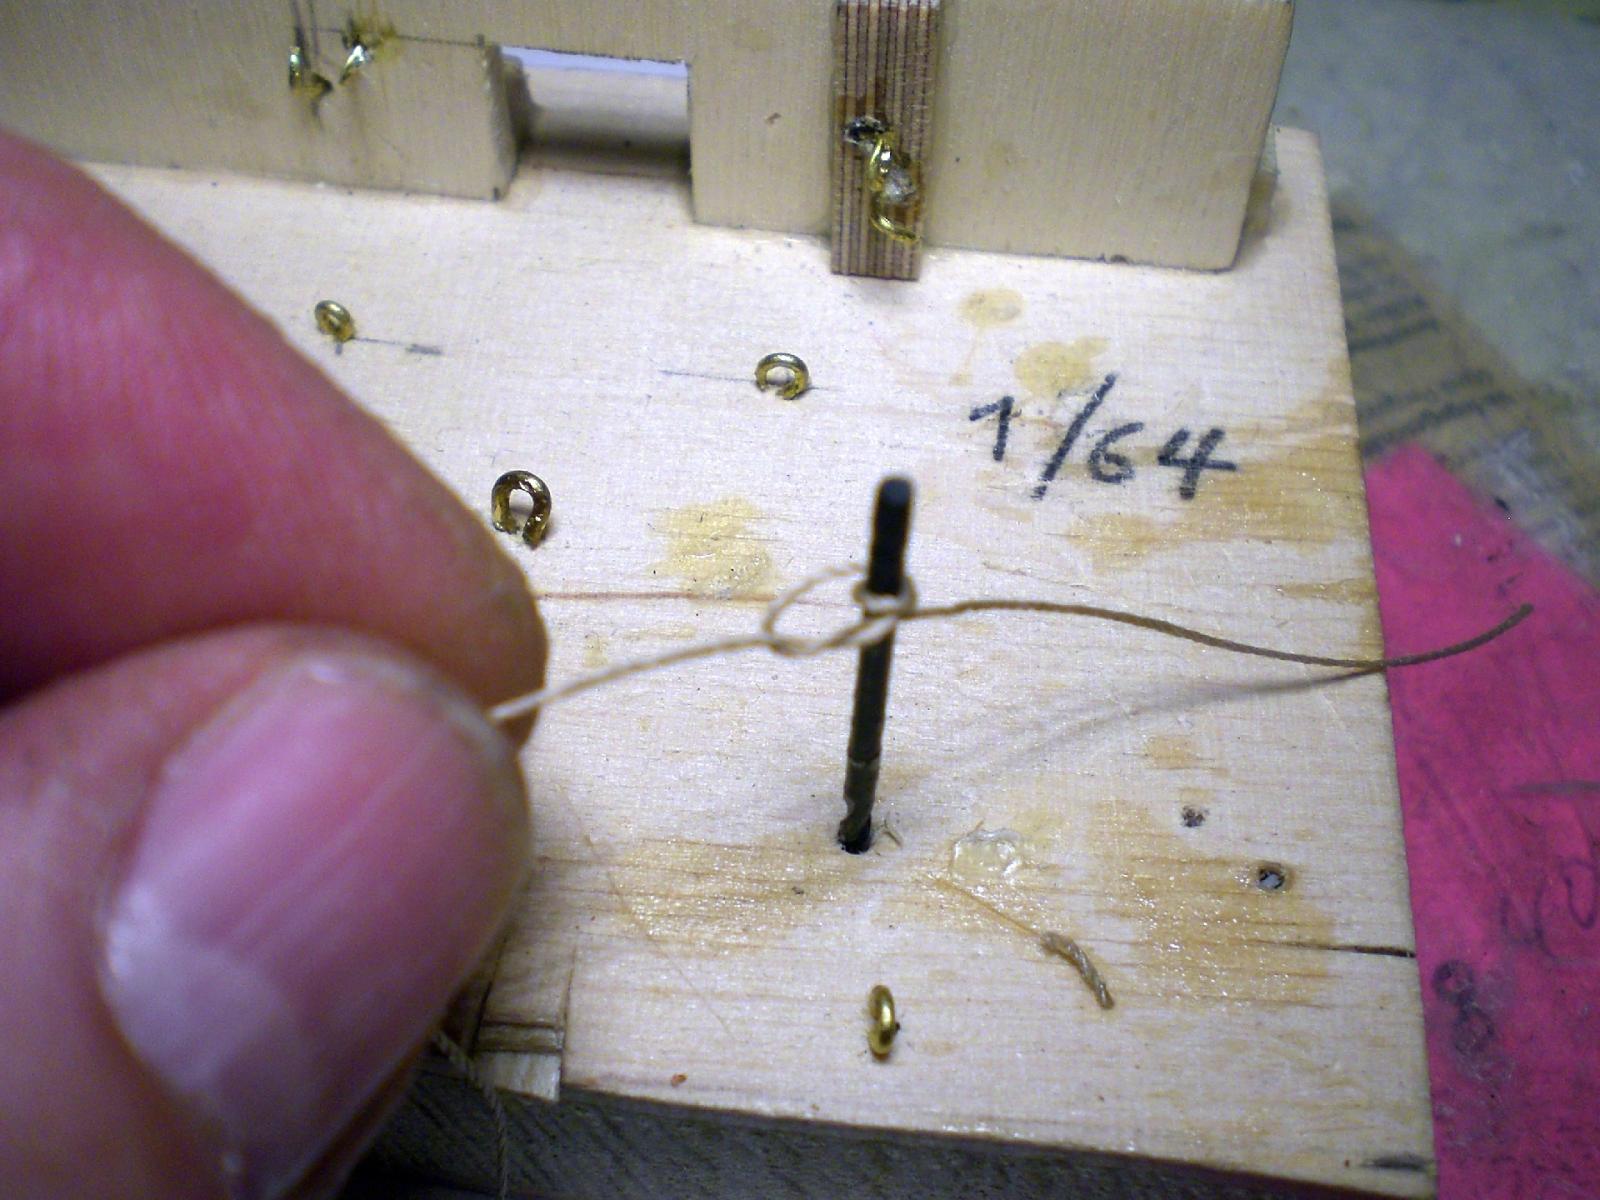
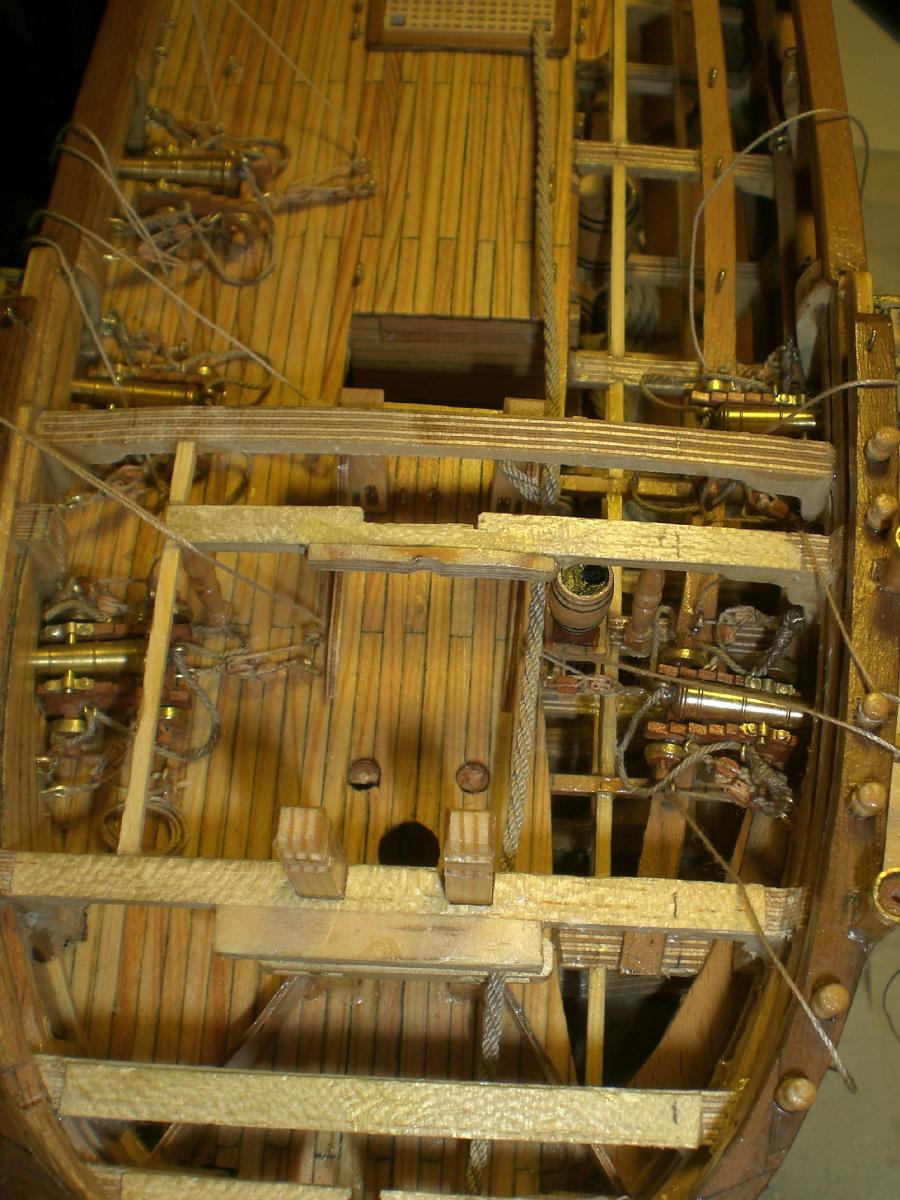
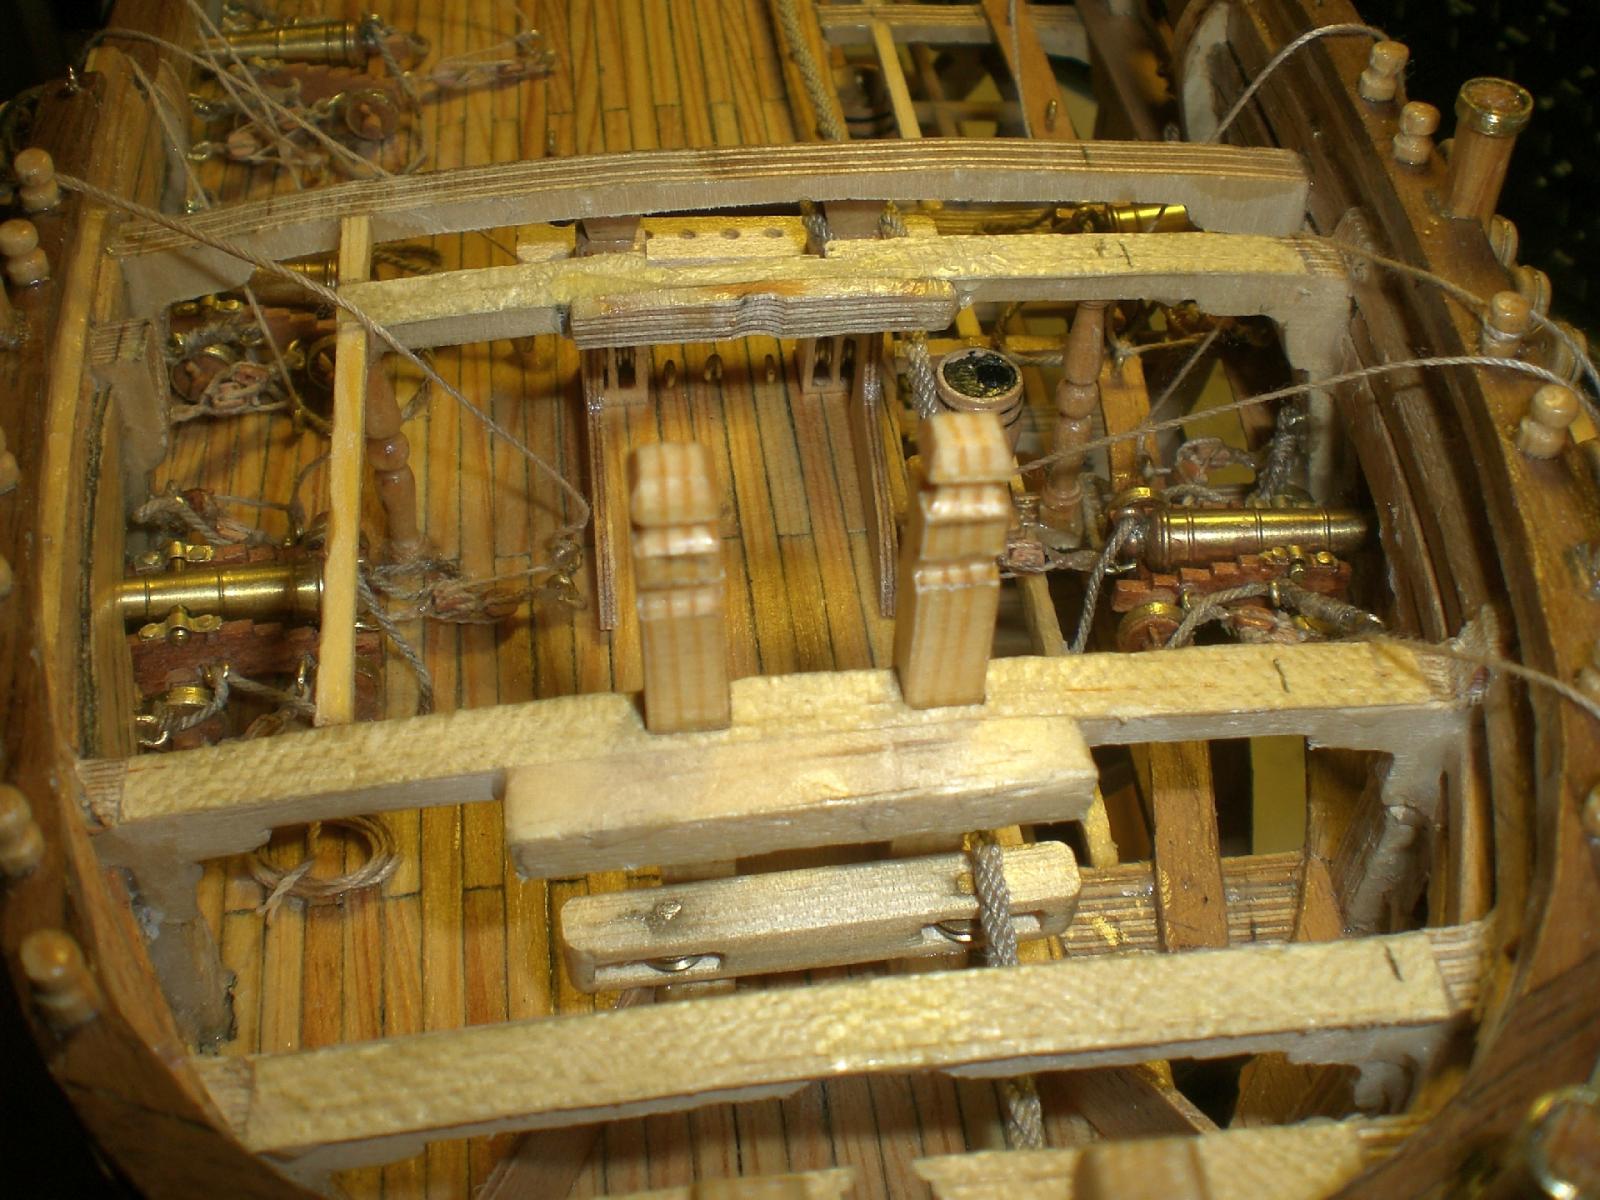
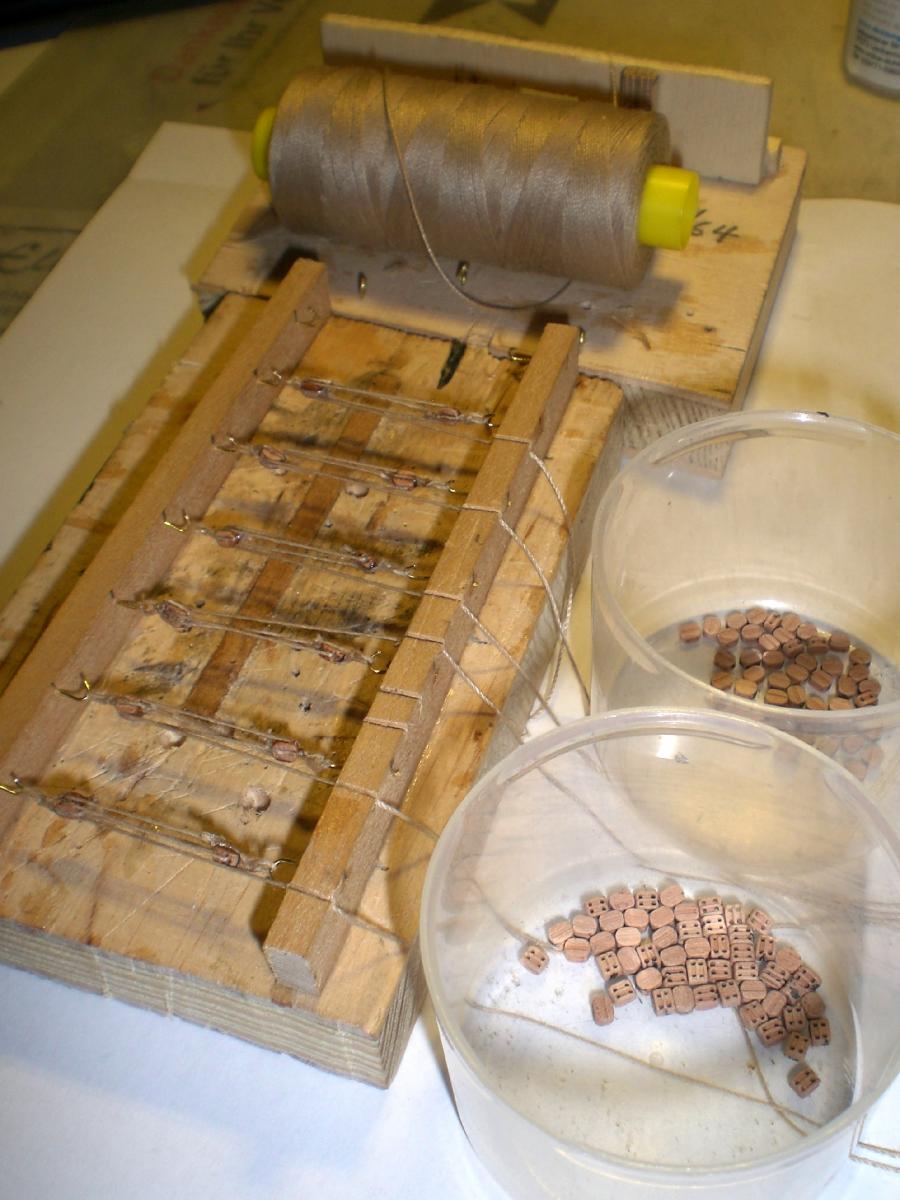
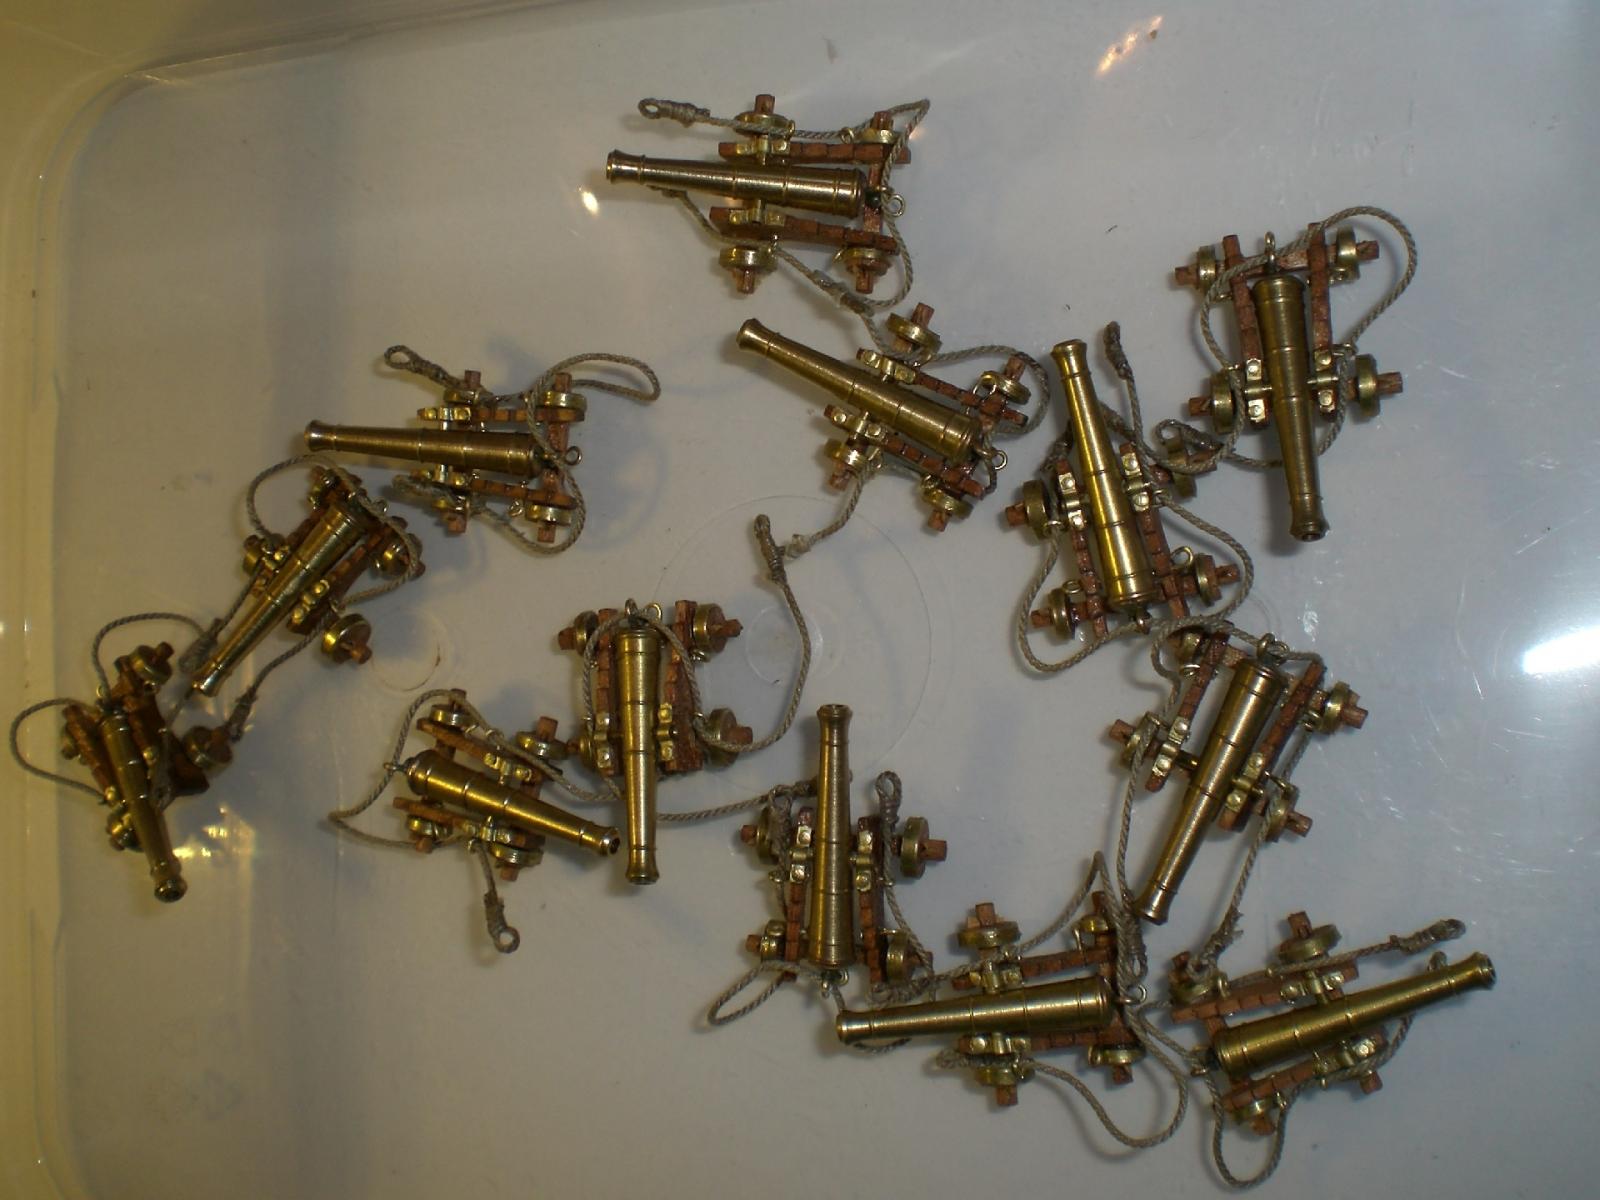
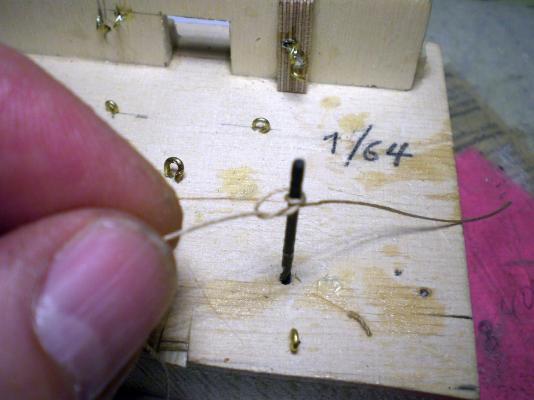
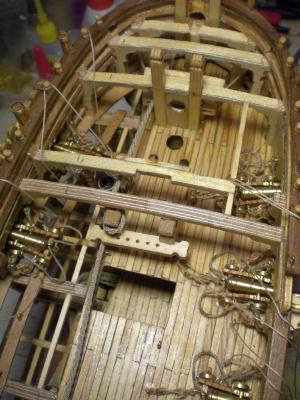
Build log part 40 Working on the gun tacklings in the Moment.... this is a very weary Job with these good looking but very small 3mm blocks ( single and double). Instead of cotton rope I used 100 % Polyester thread in natural hemp Color, which Looks the same, but gives the possibility to thin out the Ends (soft flame / heat) for doing the sheaving through the tiny holes there are left and right Tacklings and the carriage backing tackle the breech ropes are all pretackled to the carriages this Little device helps to pretackle the blocks I do 6 at a time (for two guns) the runner Ends are not belayed properly yet. This first test mounting was just to see if the Position can be achieved with the 3 Tacklings only I think I`m not going to glue the carriages to the deck Nils