


Mirabell61
-
Posts
7,324 -
Joined
-
Last visited
Content Type
Profiles
Forums
Gallery
Events
Posts posted by Mirabell61
-
-
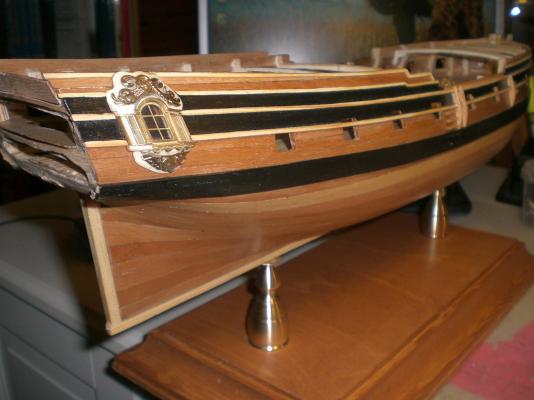
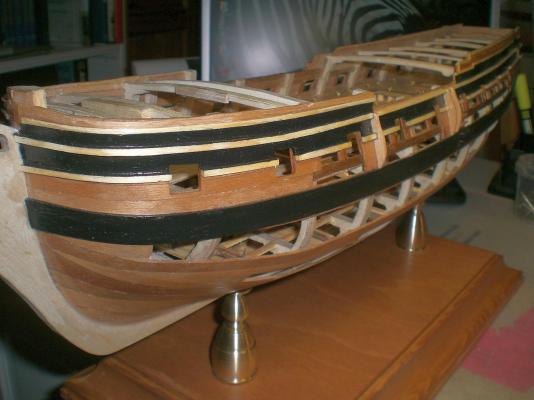
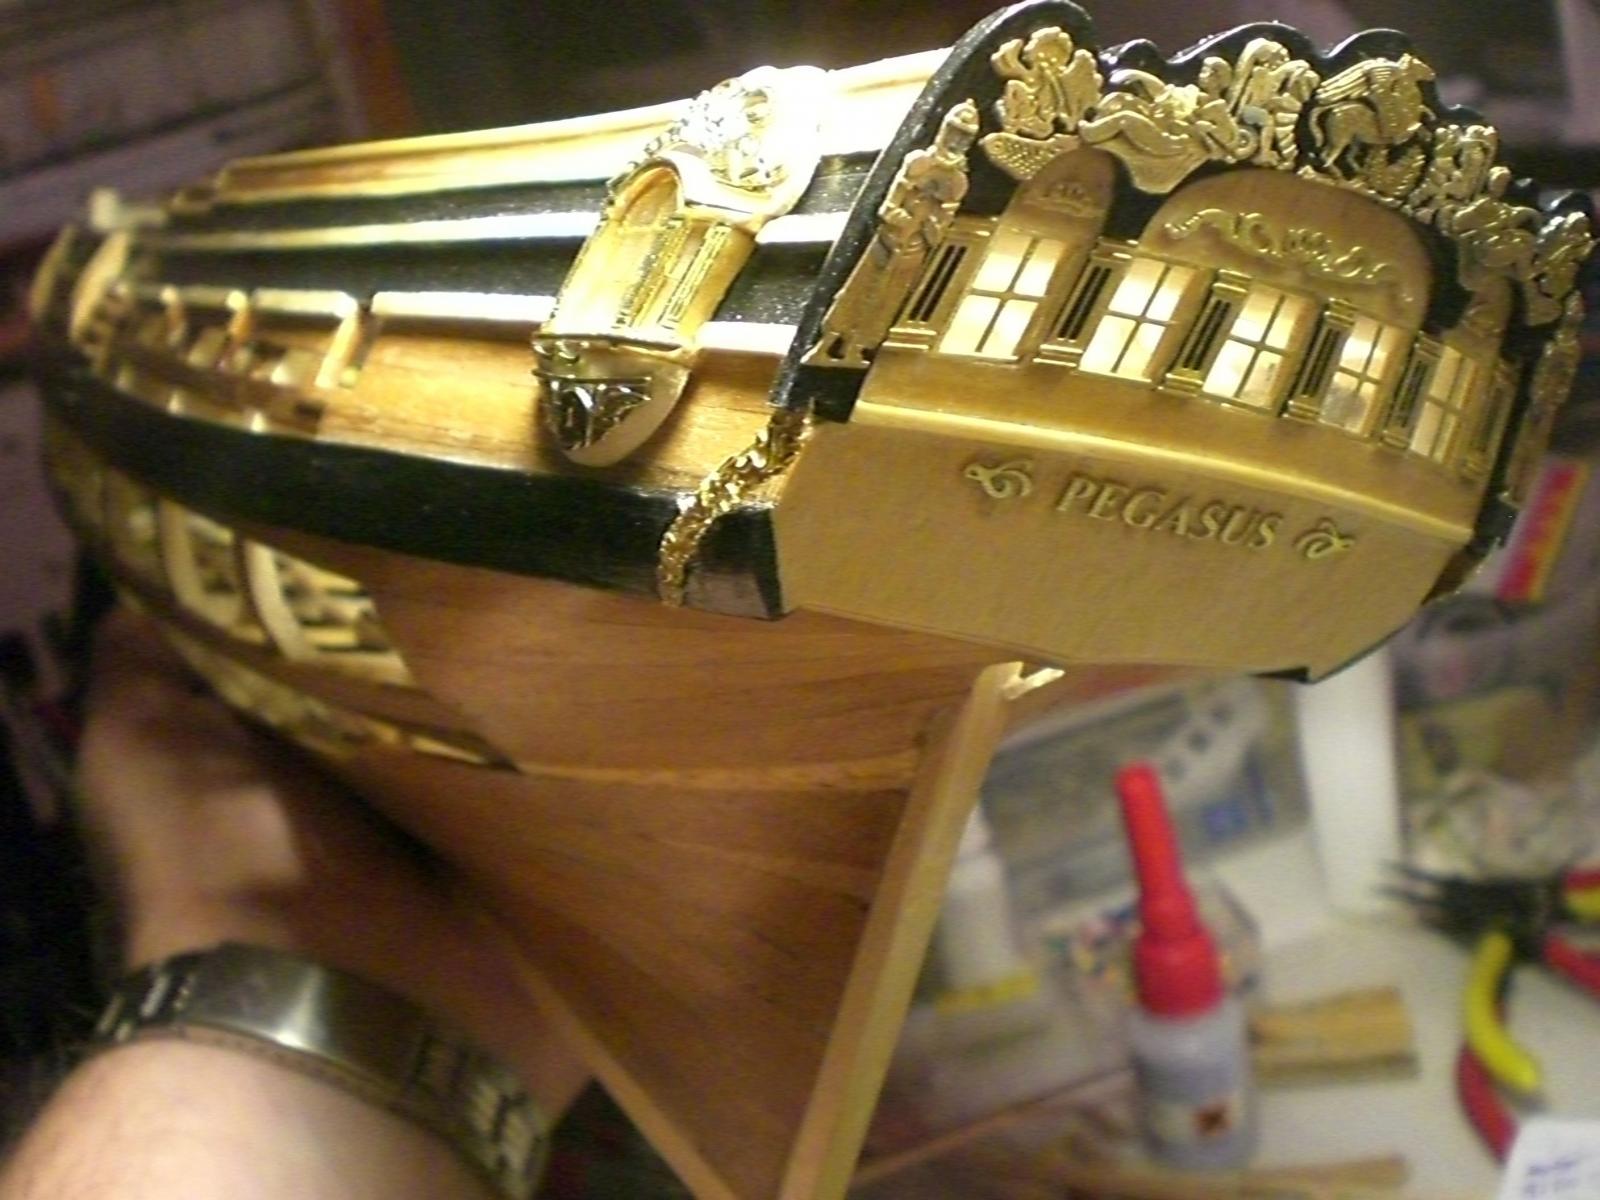
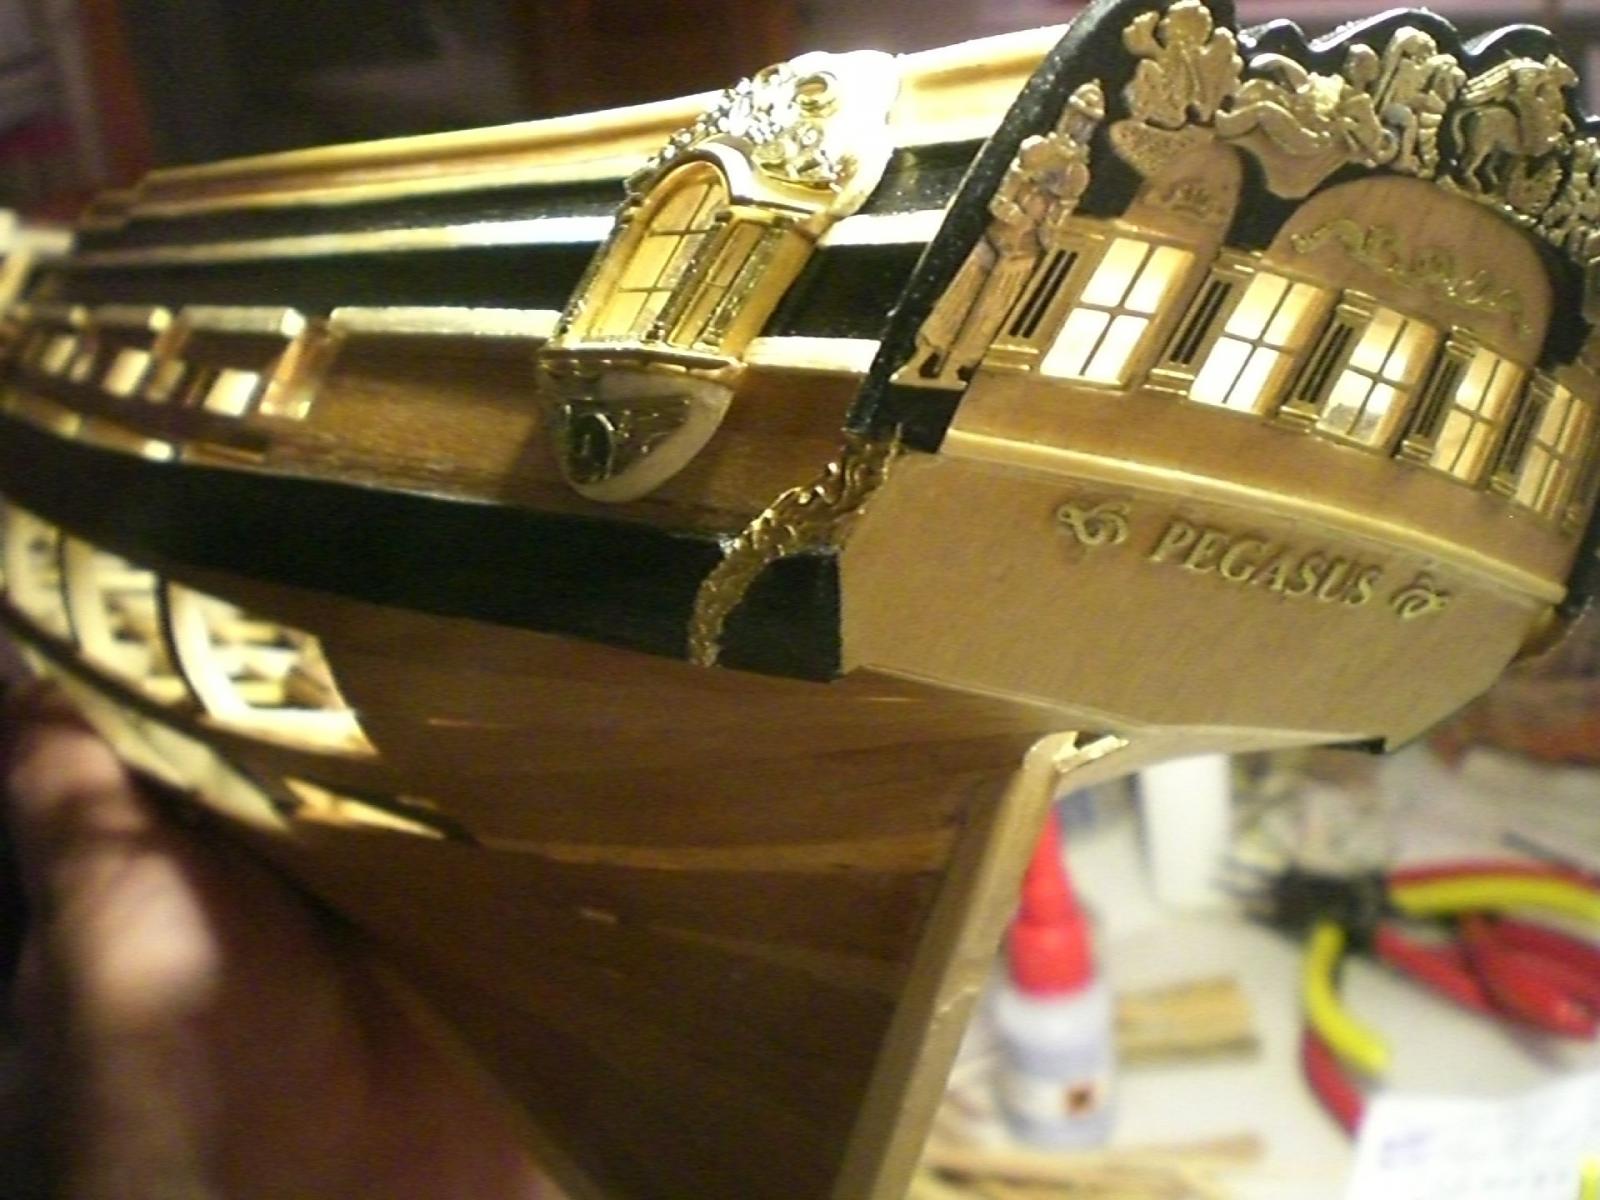
Lot 15 of my Pegasus buildlog
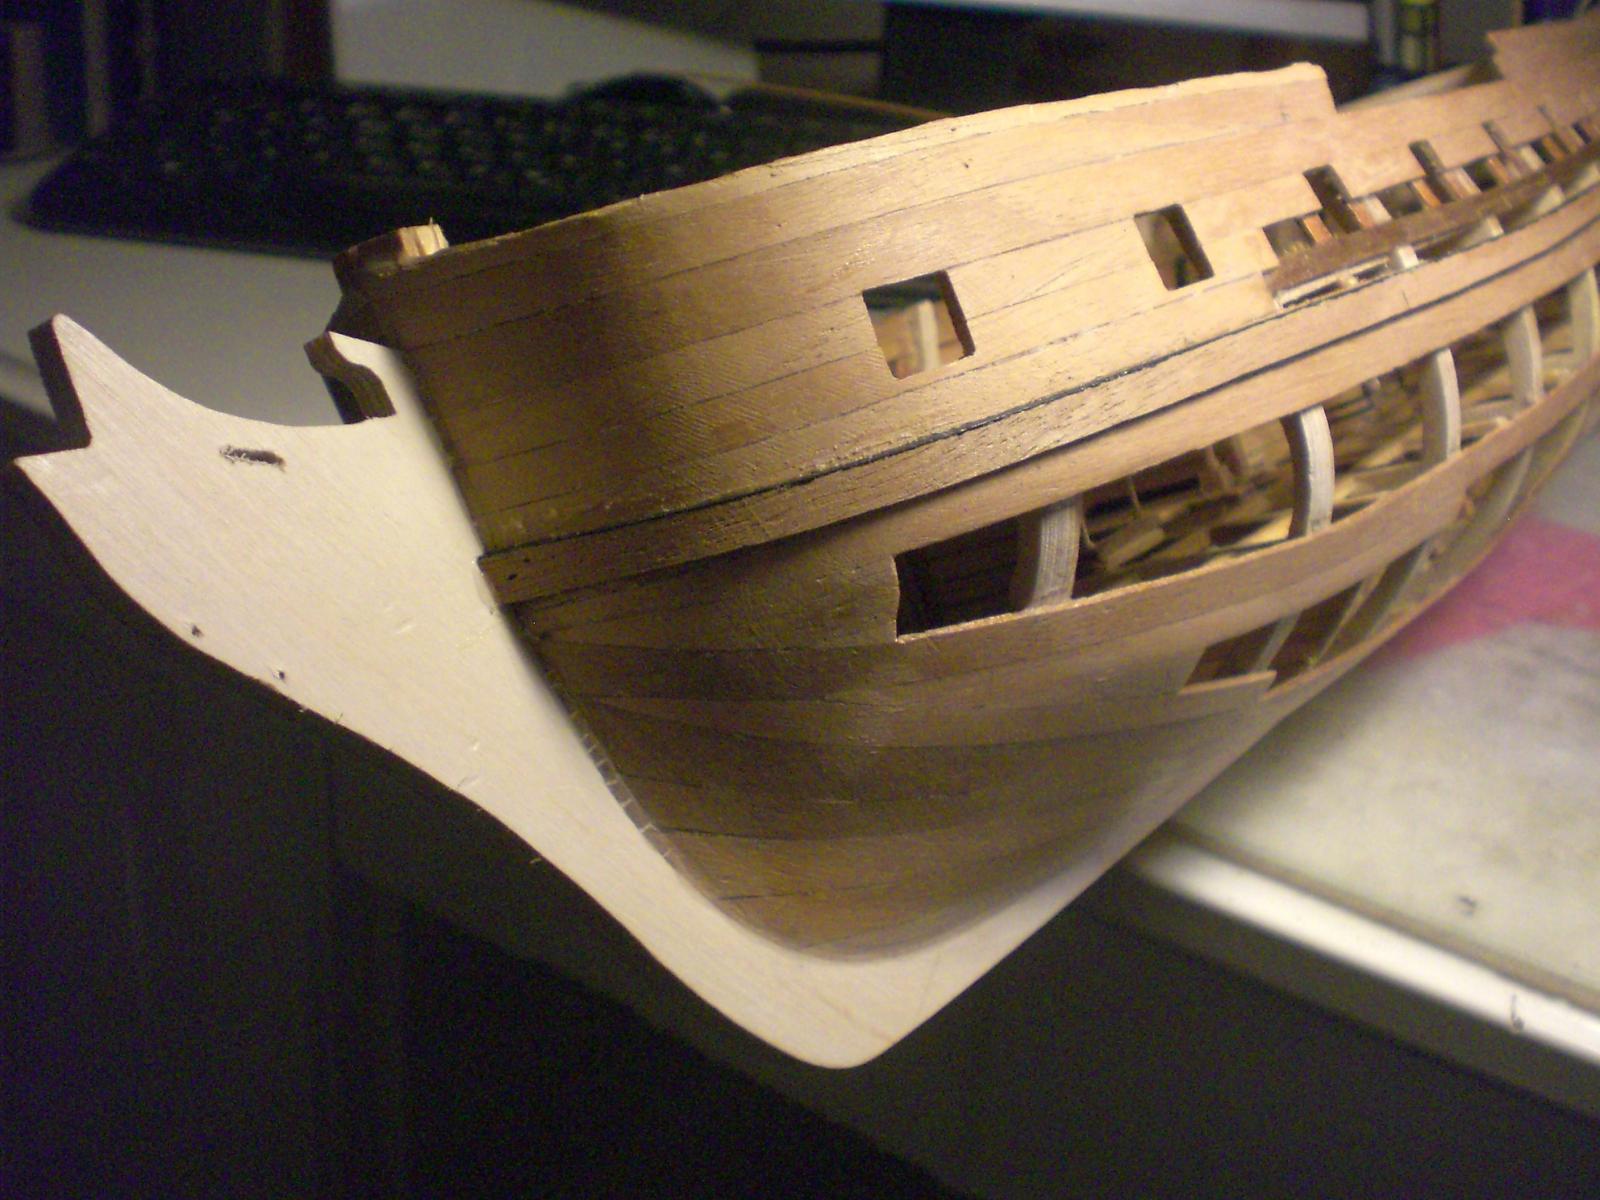
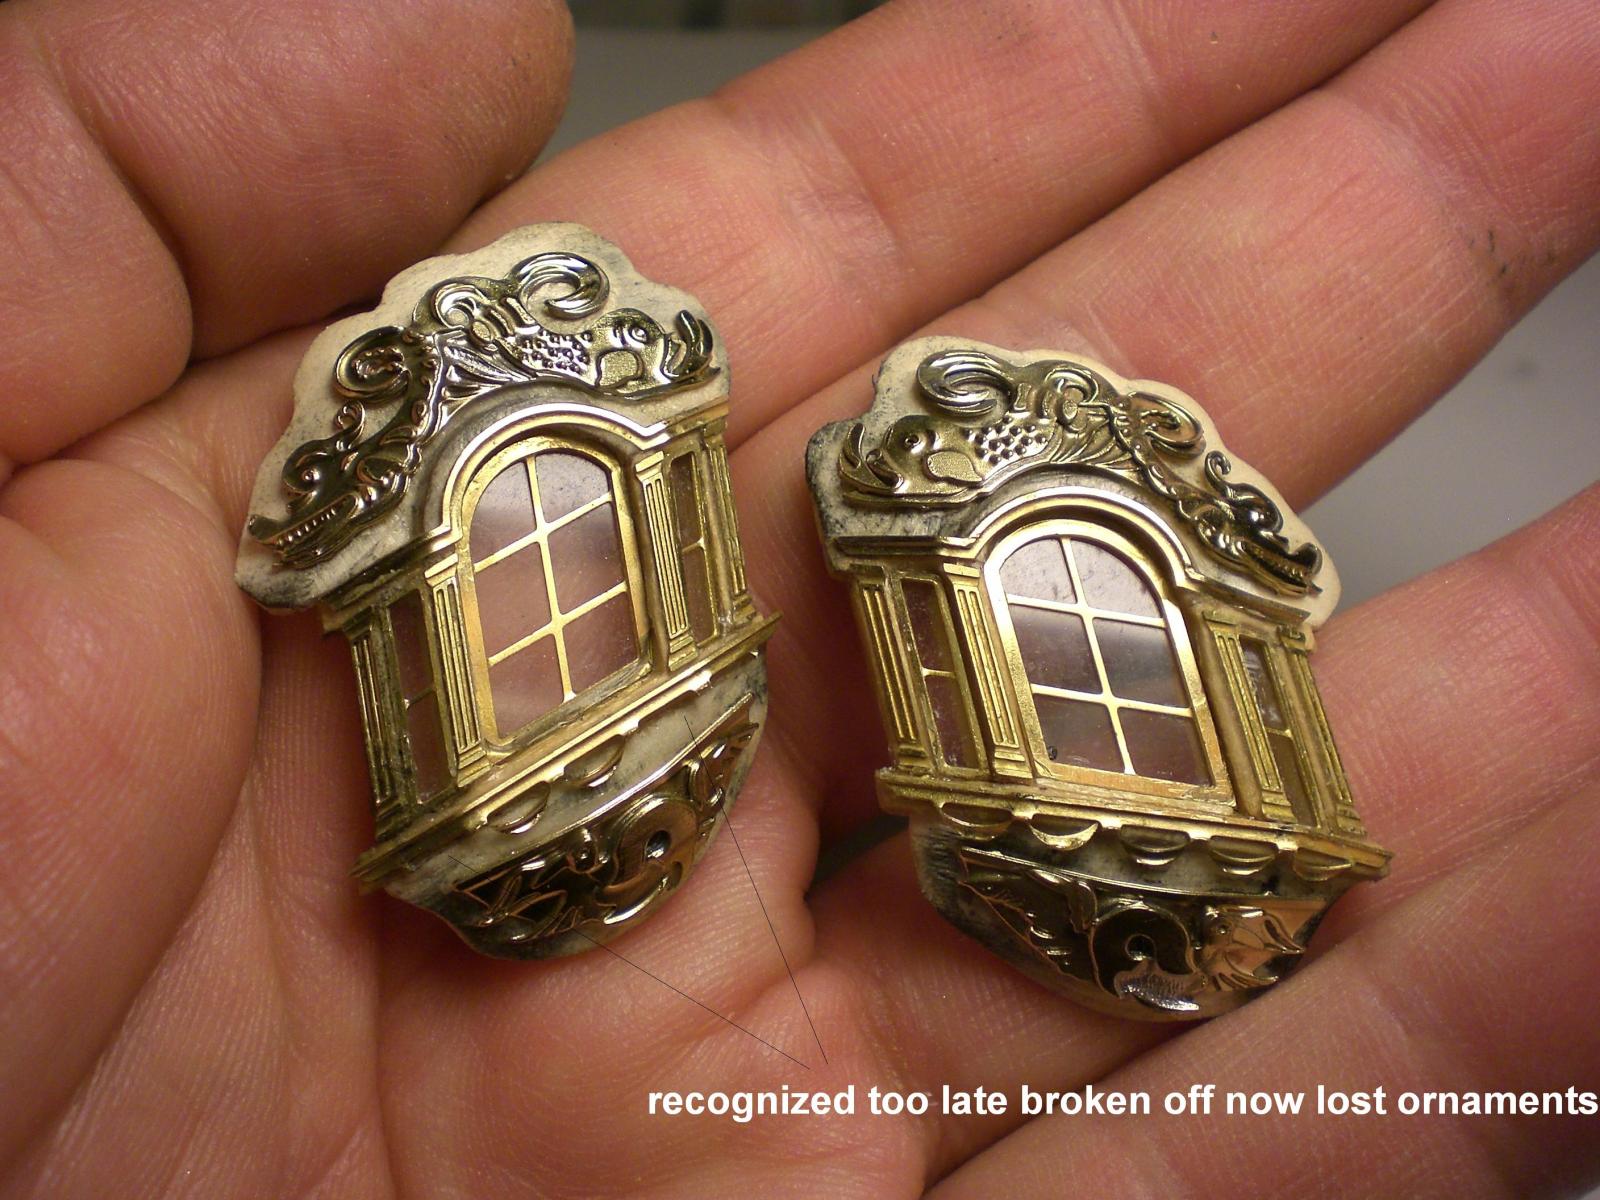
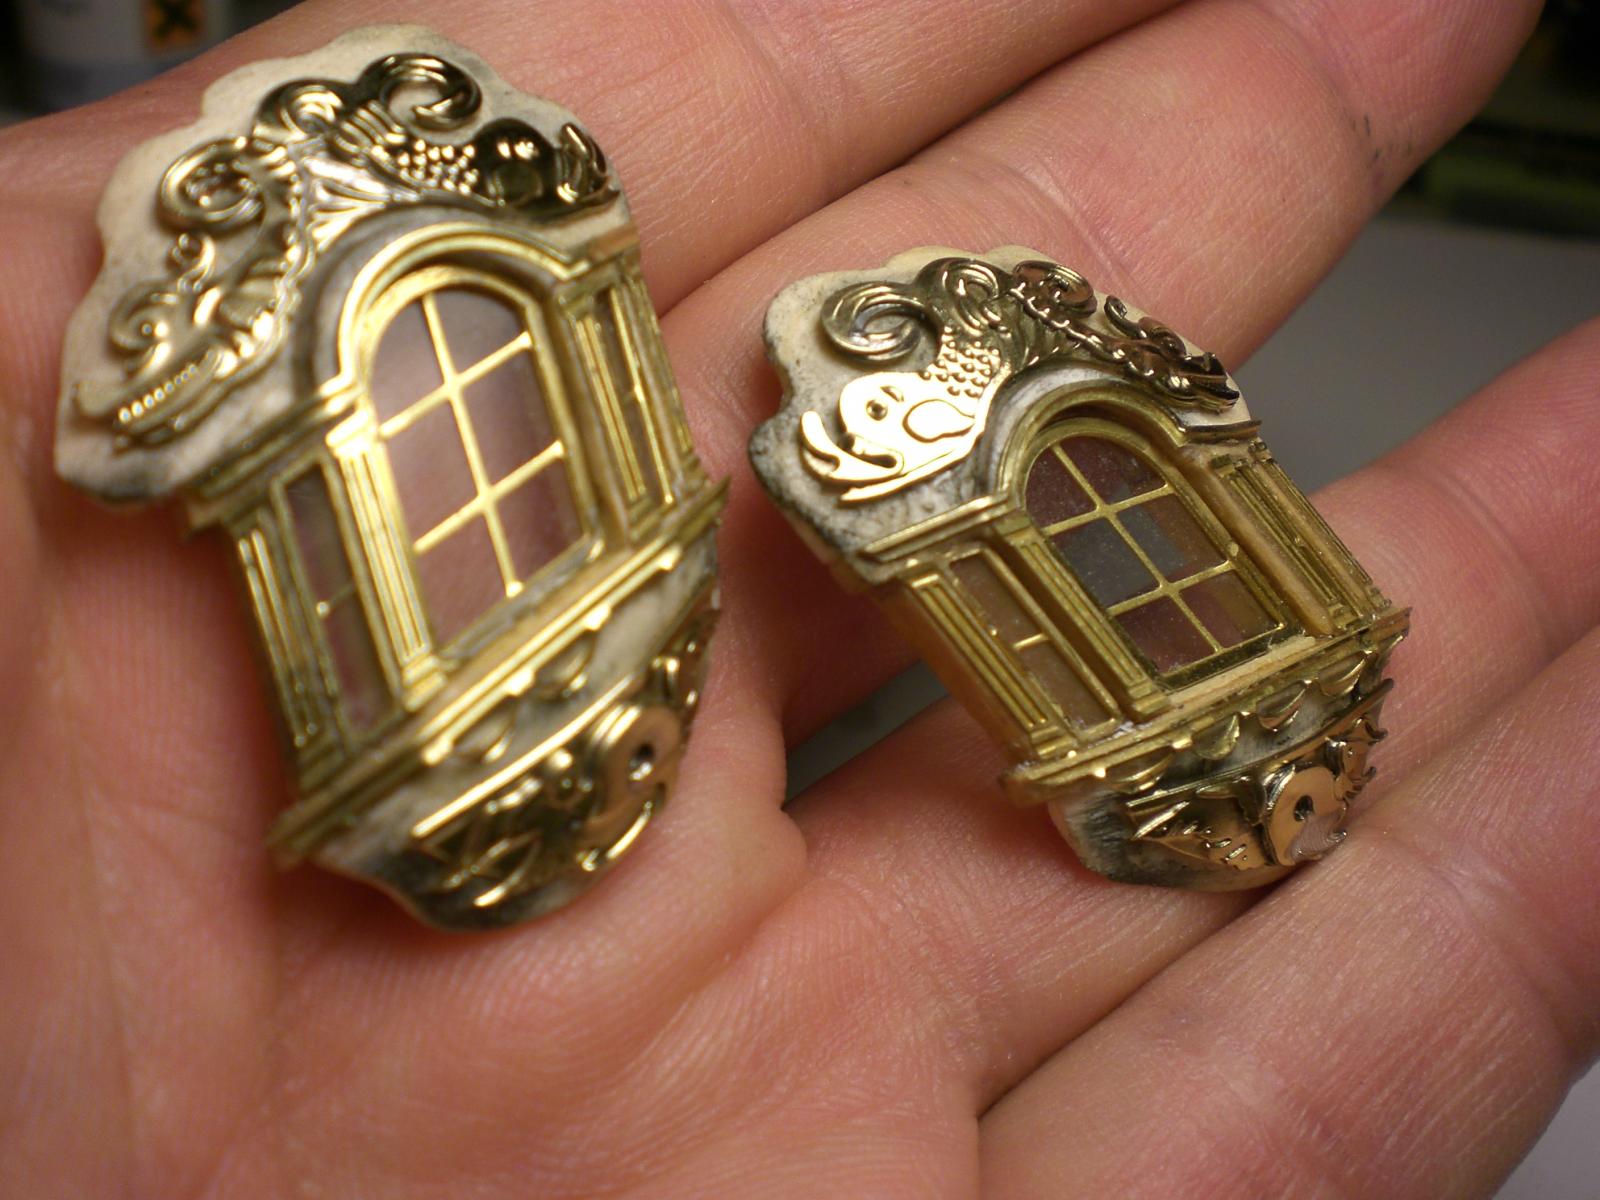
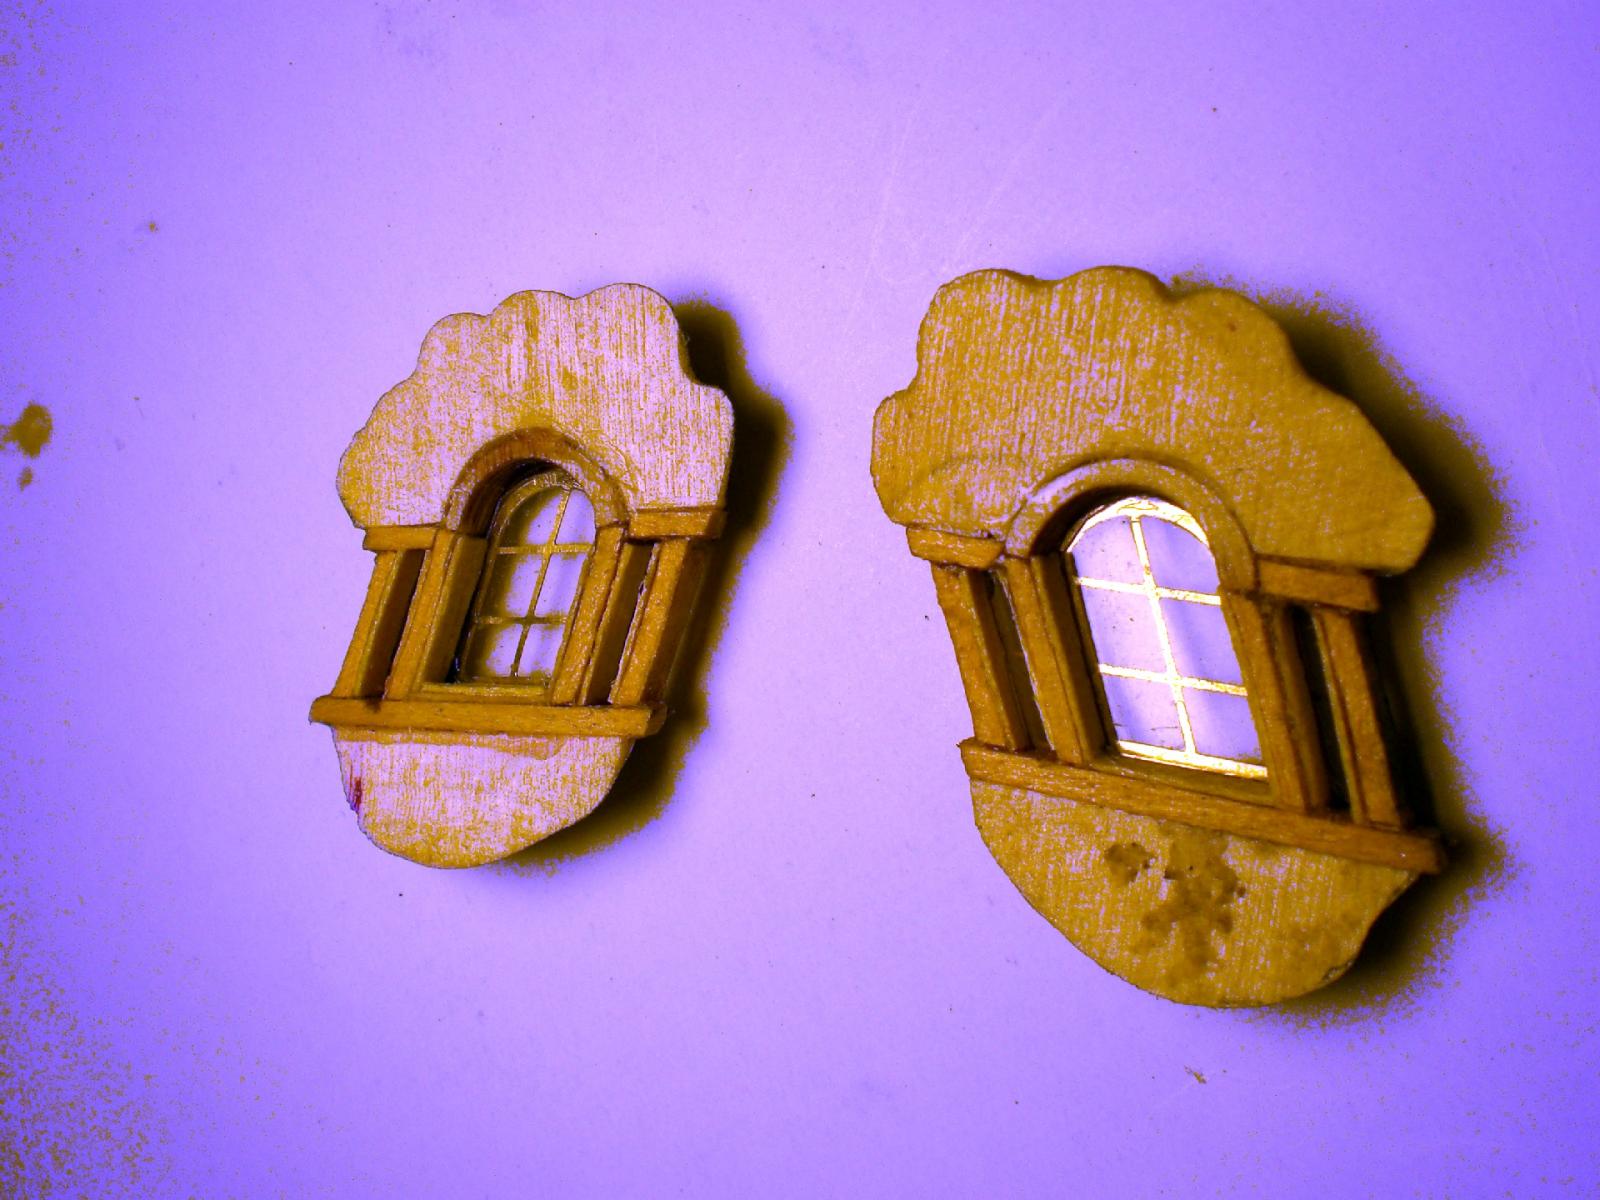
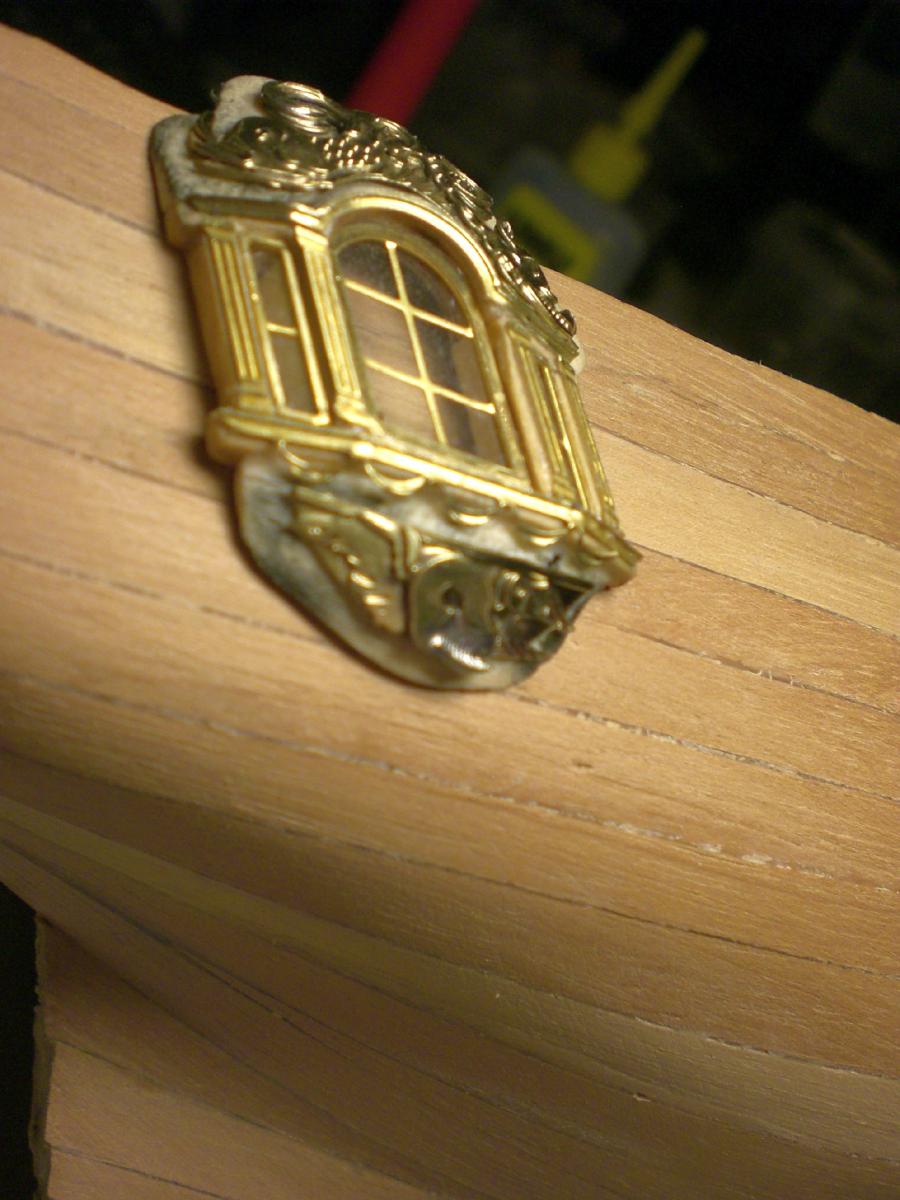
rear Windows completed window Panels mounted, but badges remain removeable untill a later building sequence

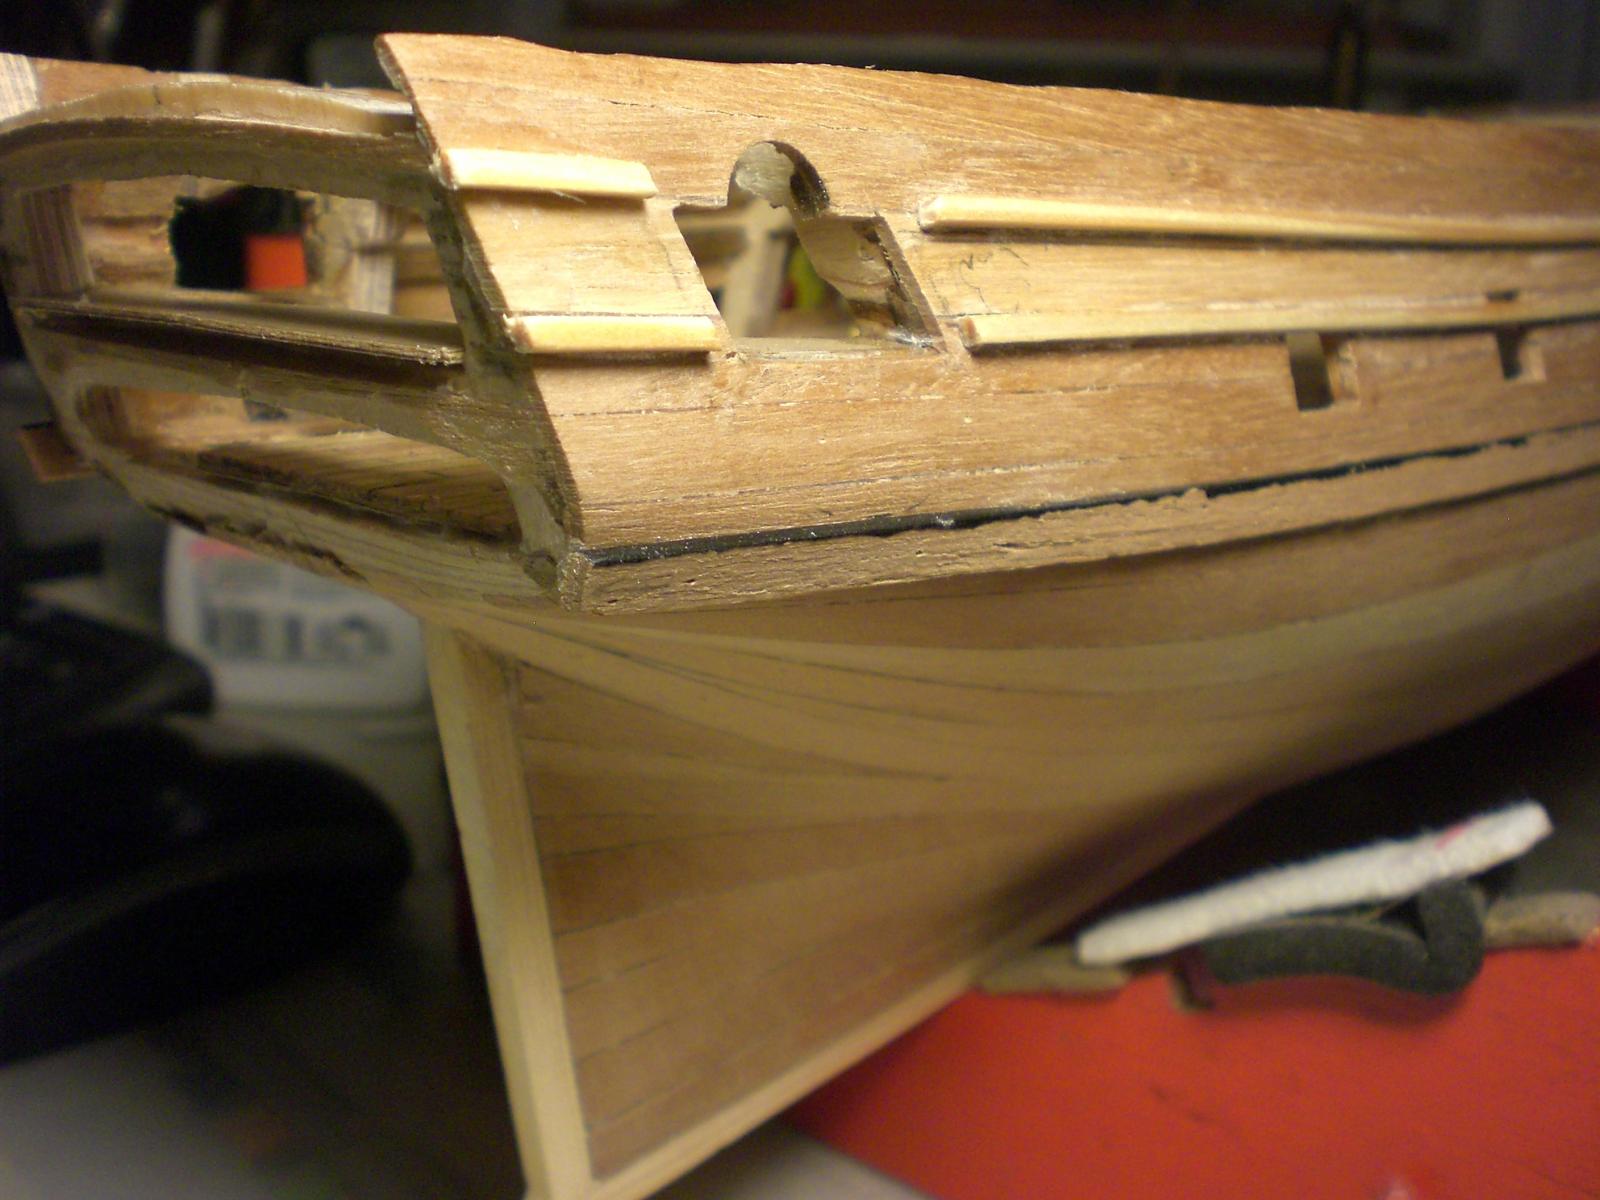
the raw opening for the rudder shaft and a small centerbore allinged through all decks above has allready been done
sorry the pic could have been taken sharper
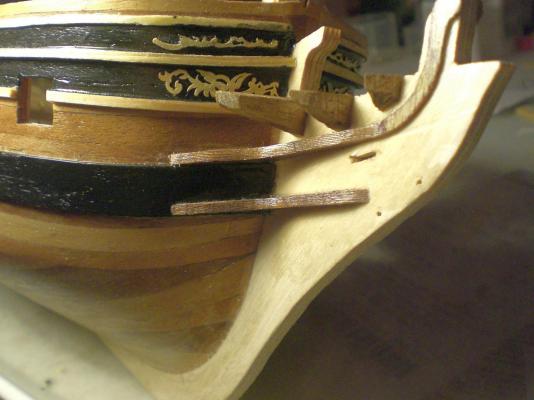
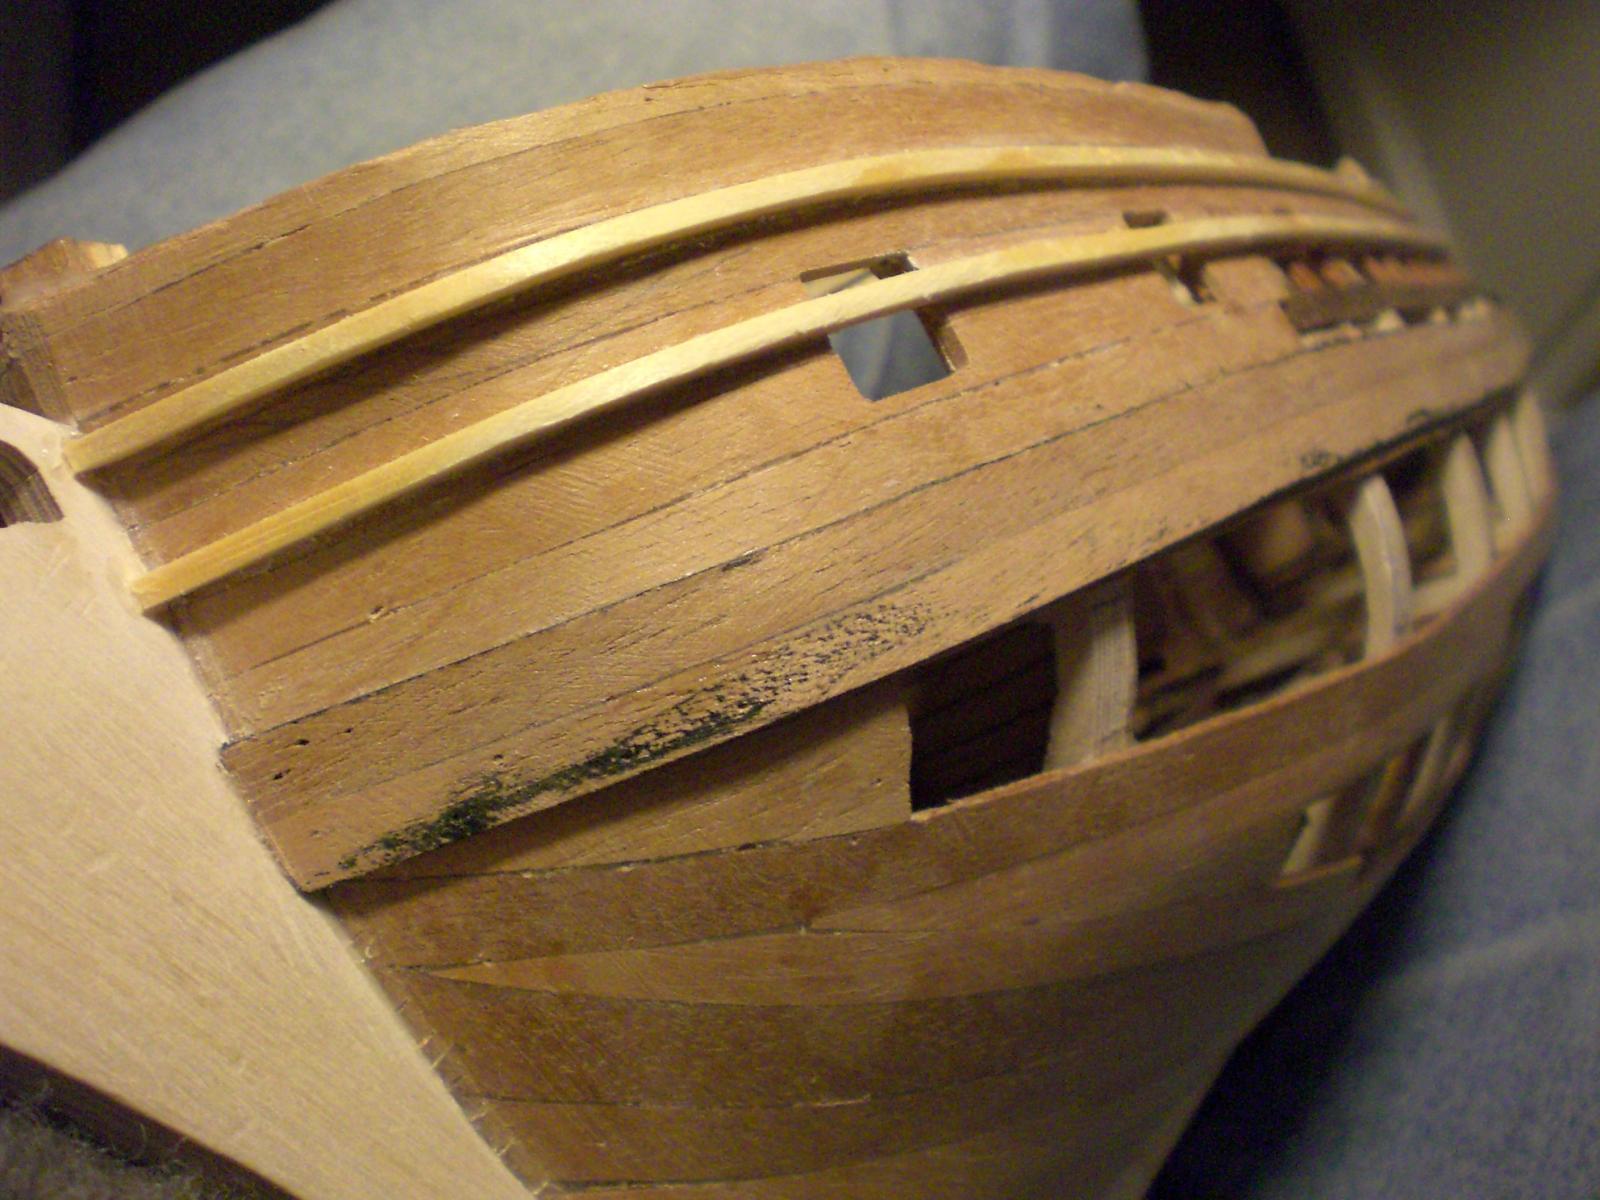
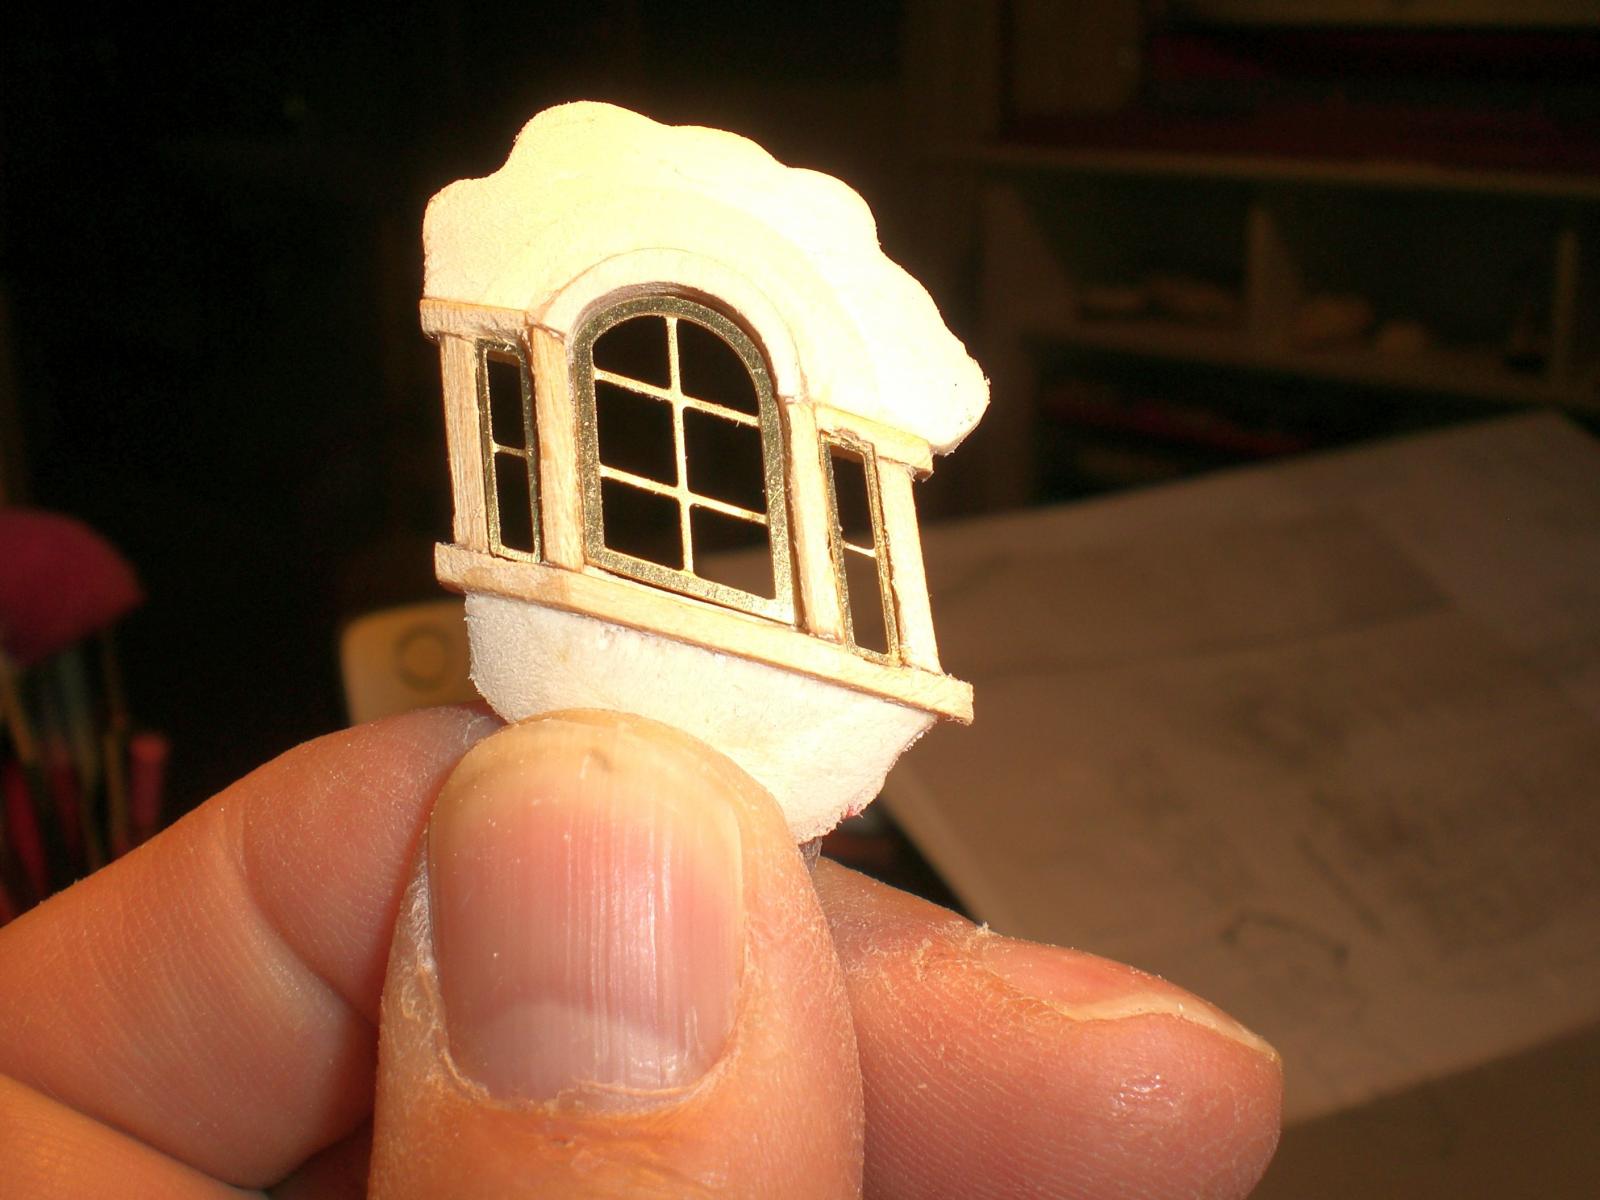
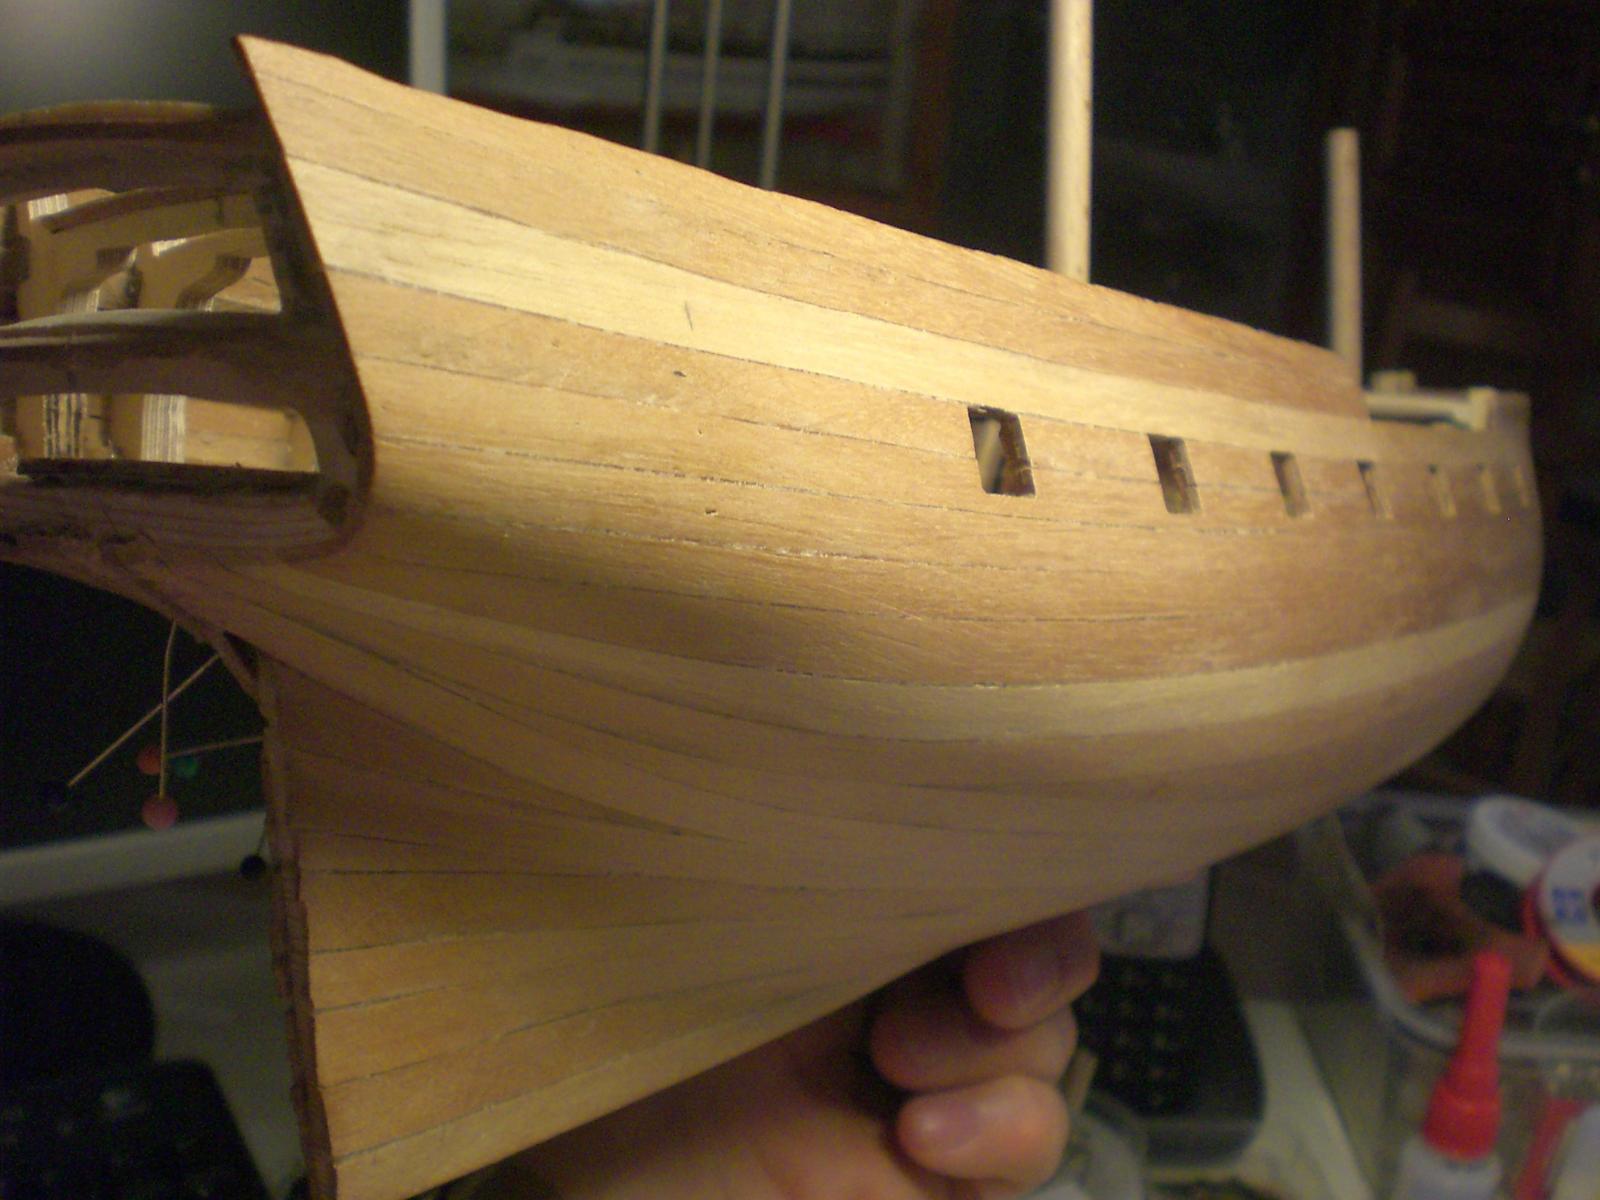
starting on bow decoration and woodwork there
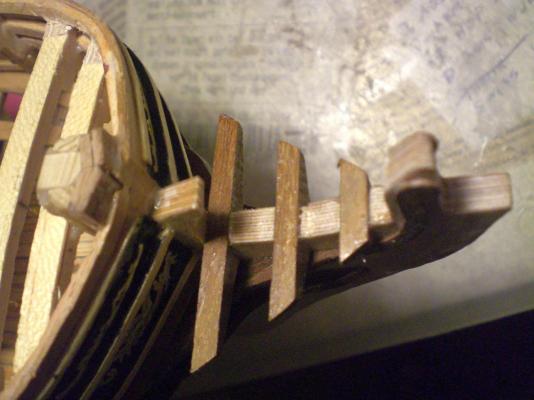
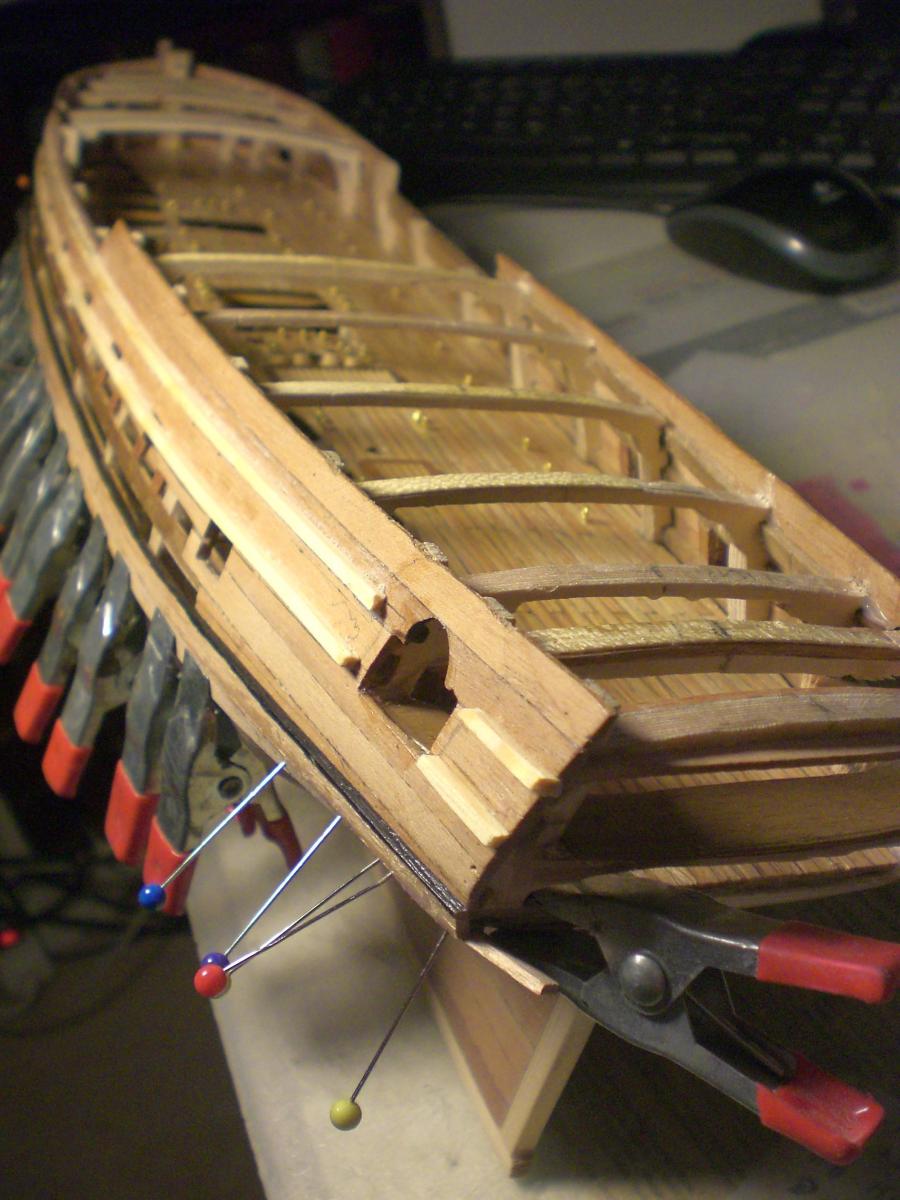
These 3 beams should be strong enough...
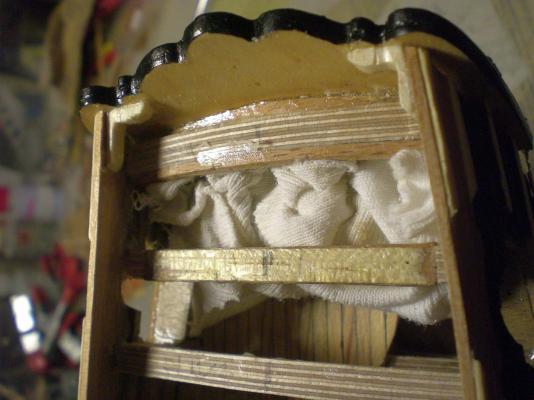
have to protect somehow the aft cabin Windows from inside against sanding dust
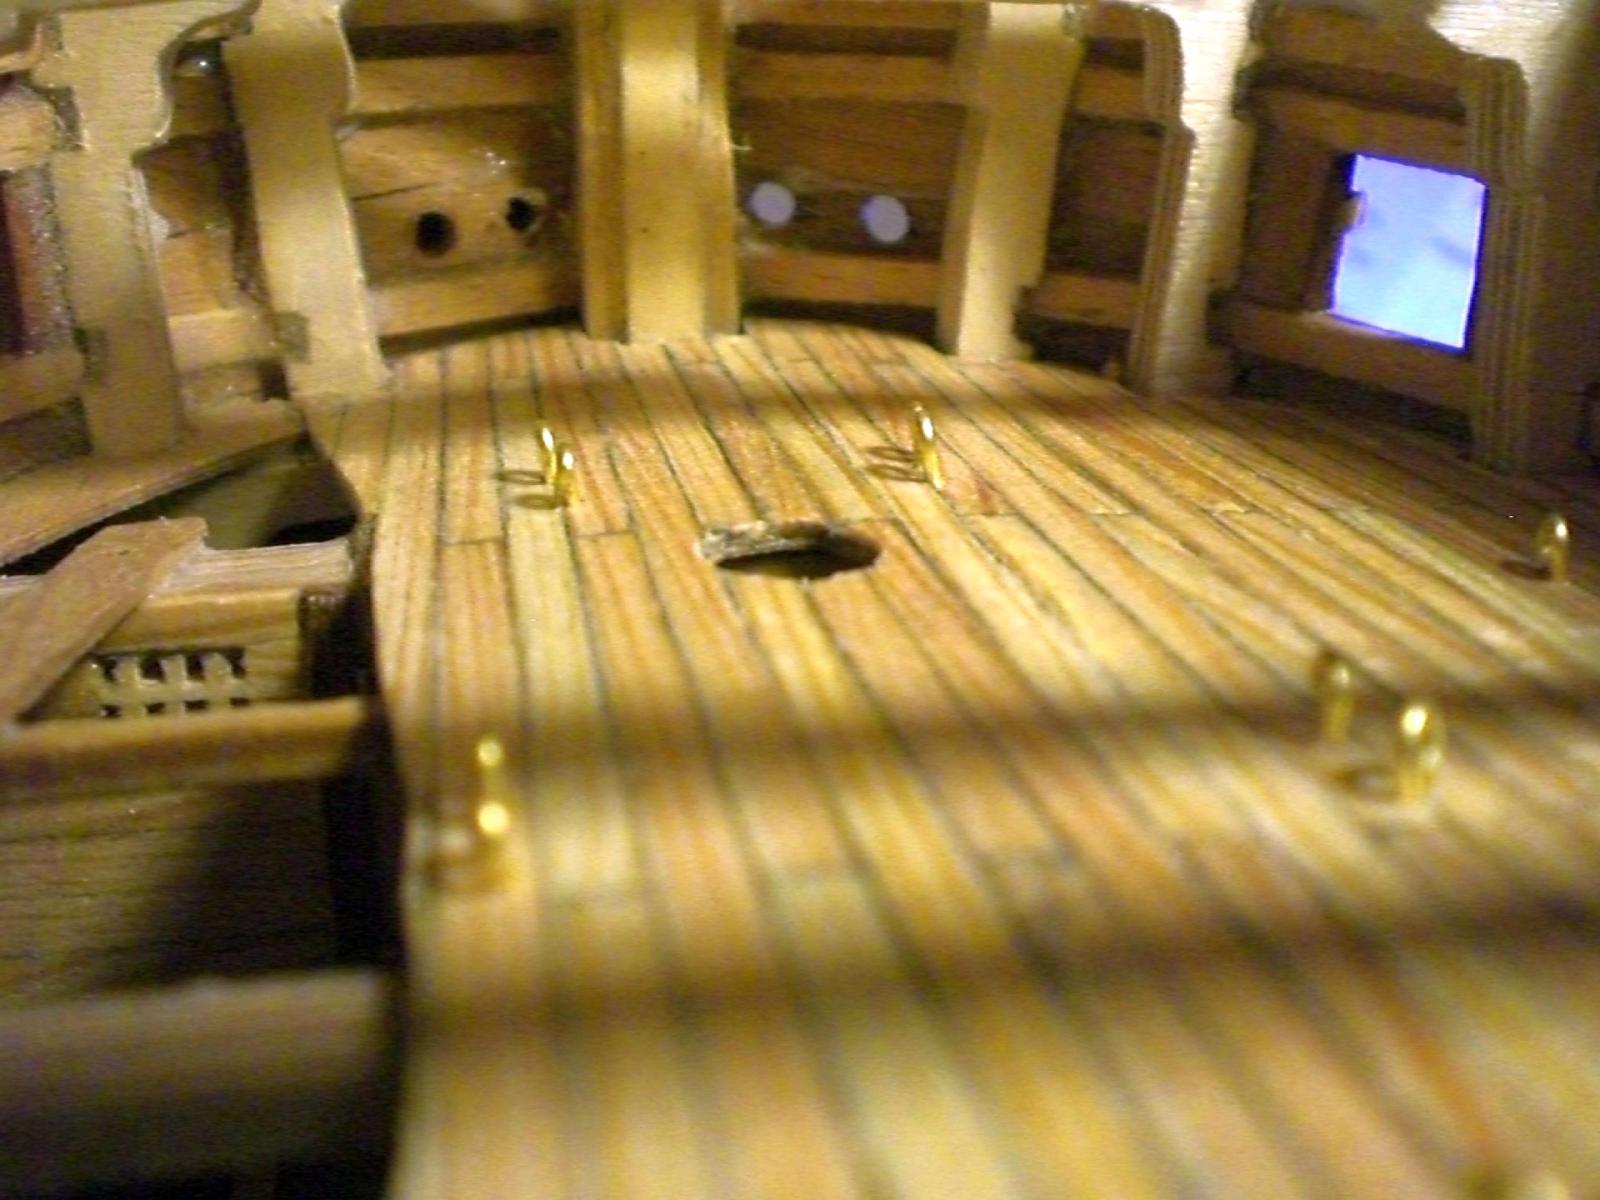
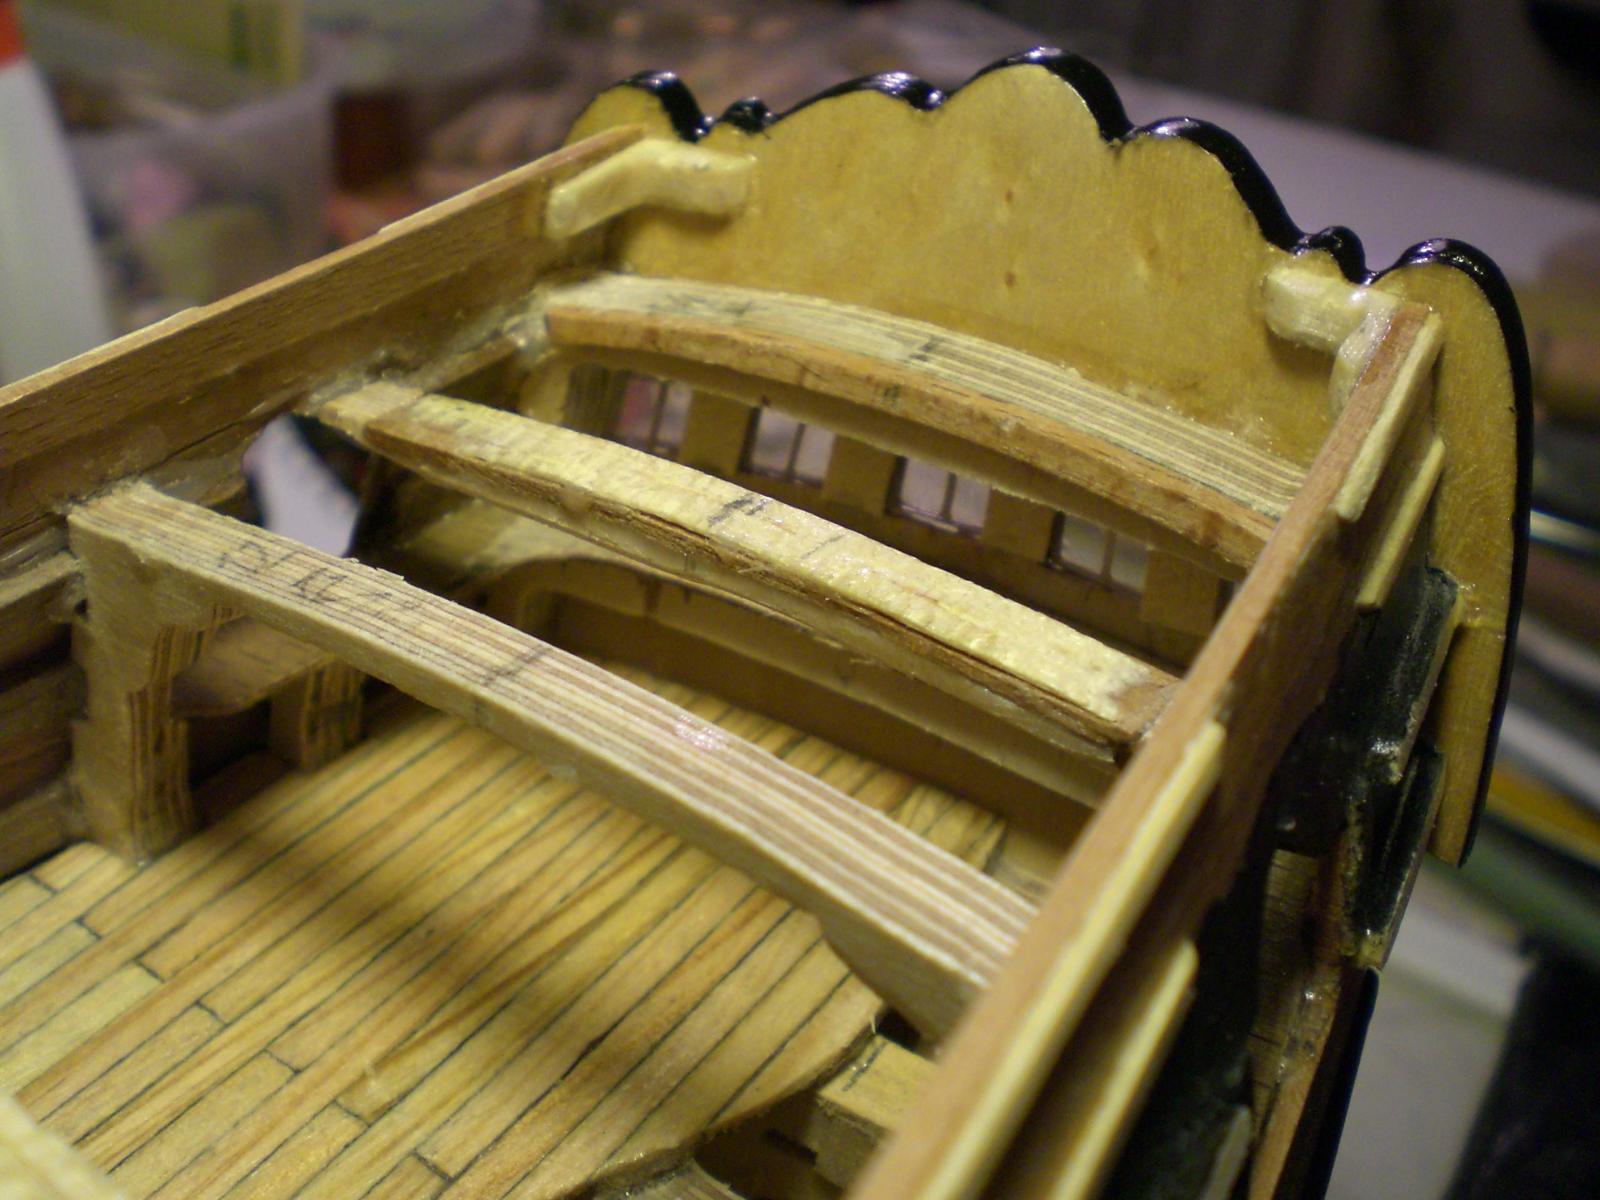
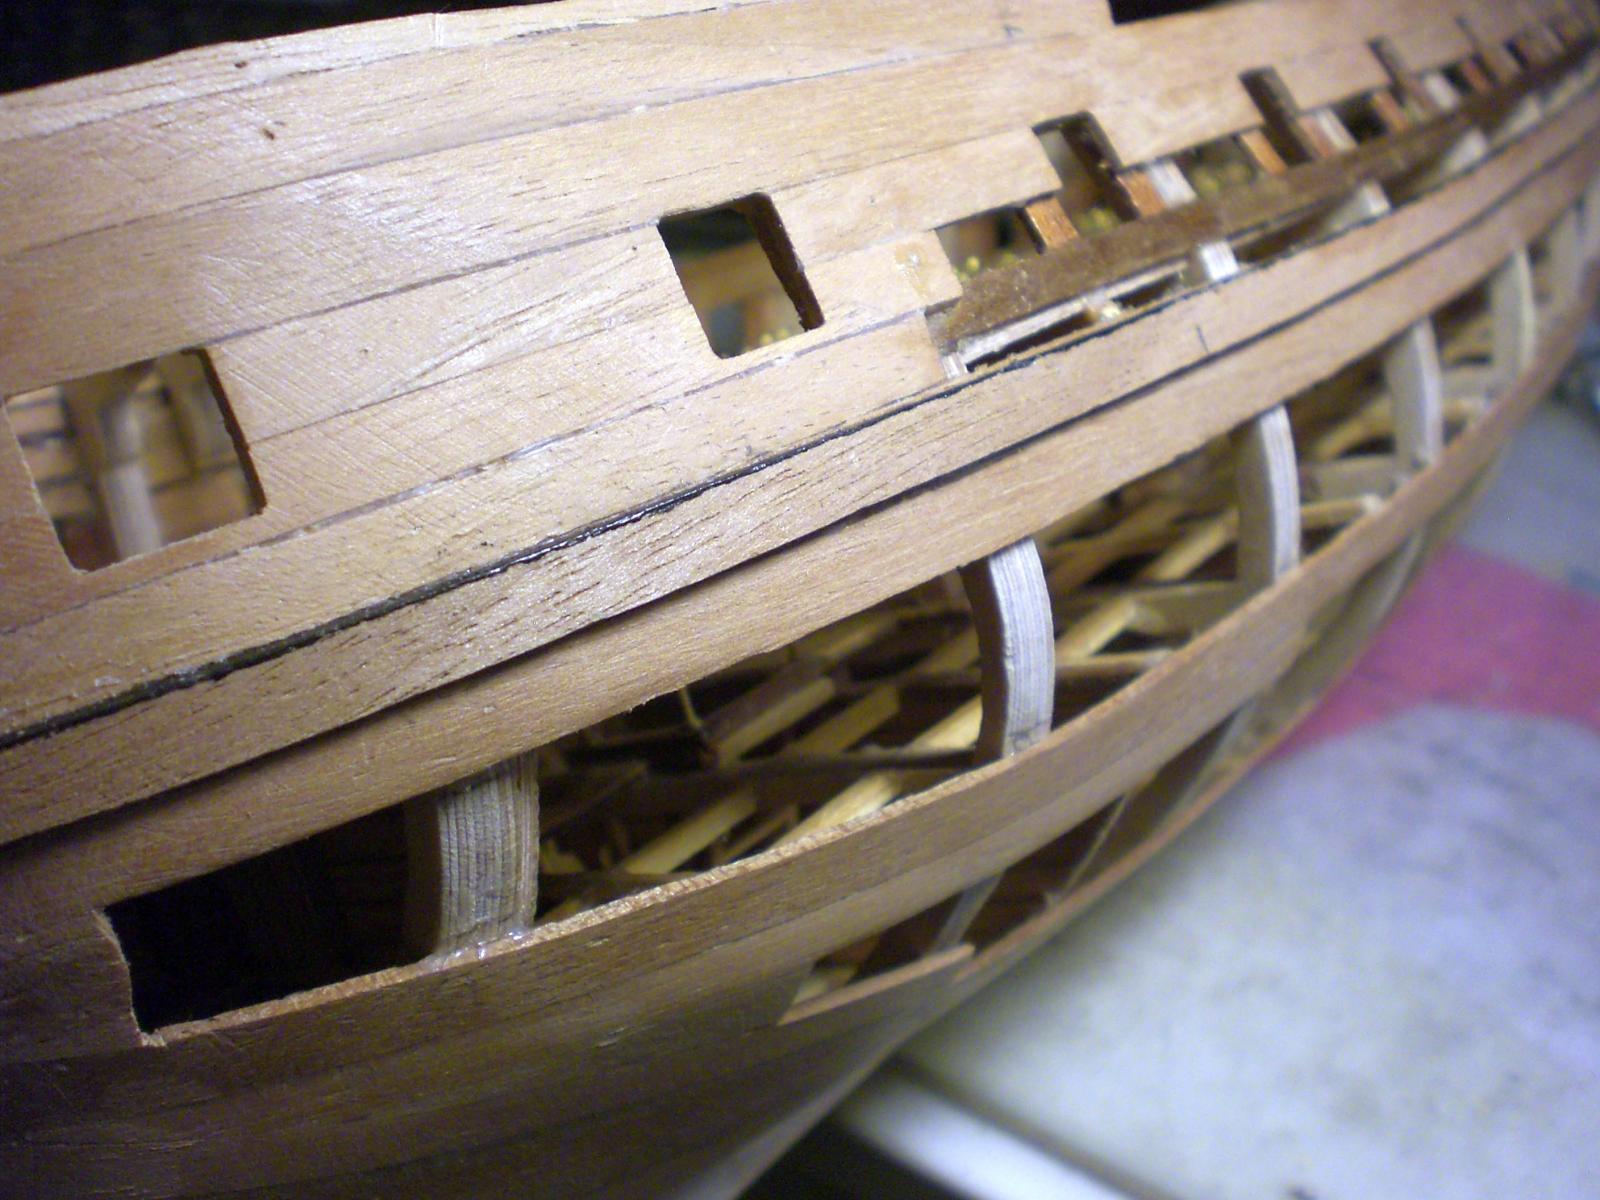
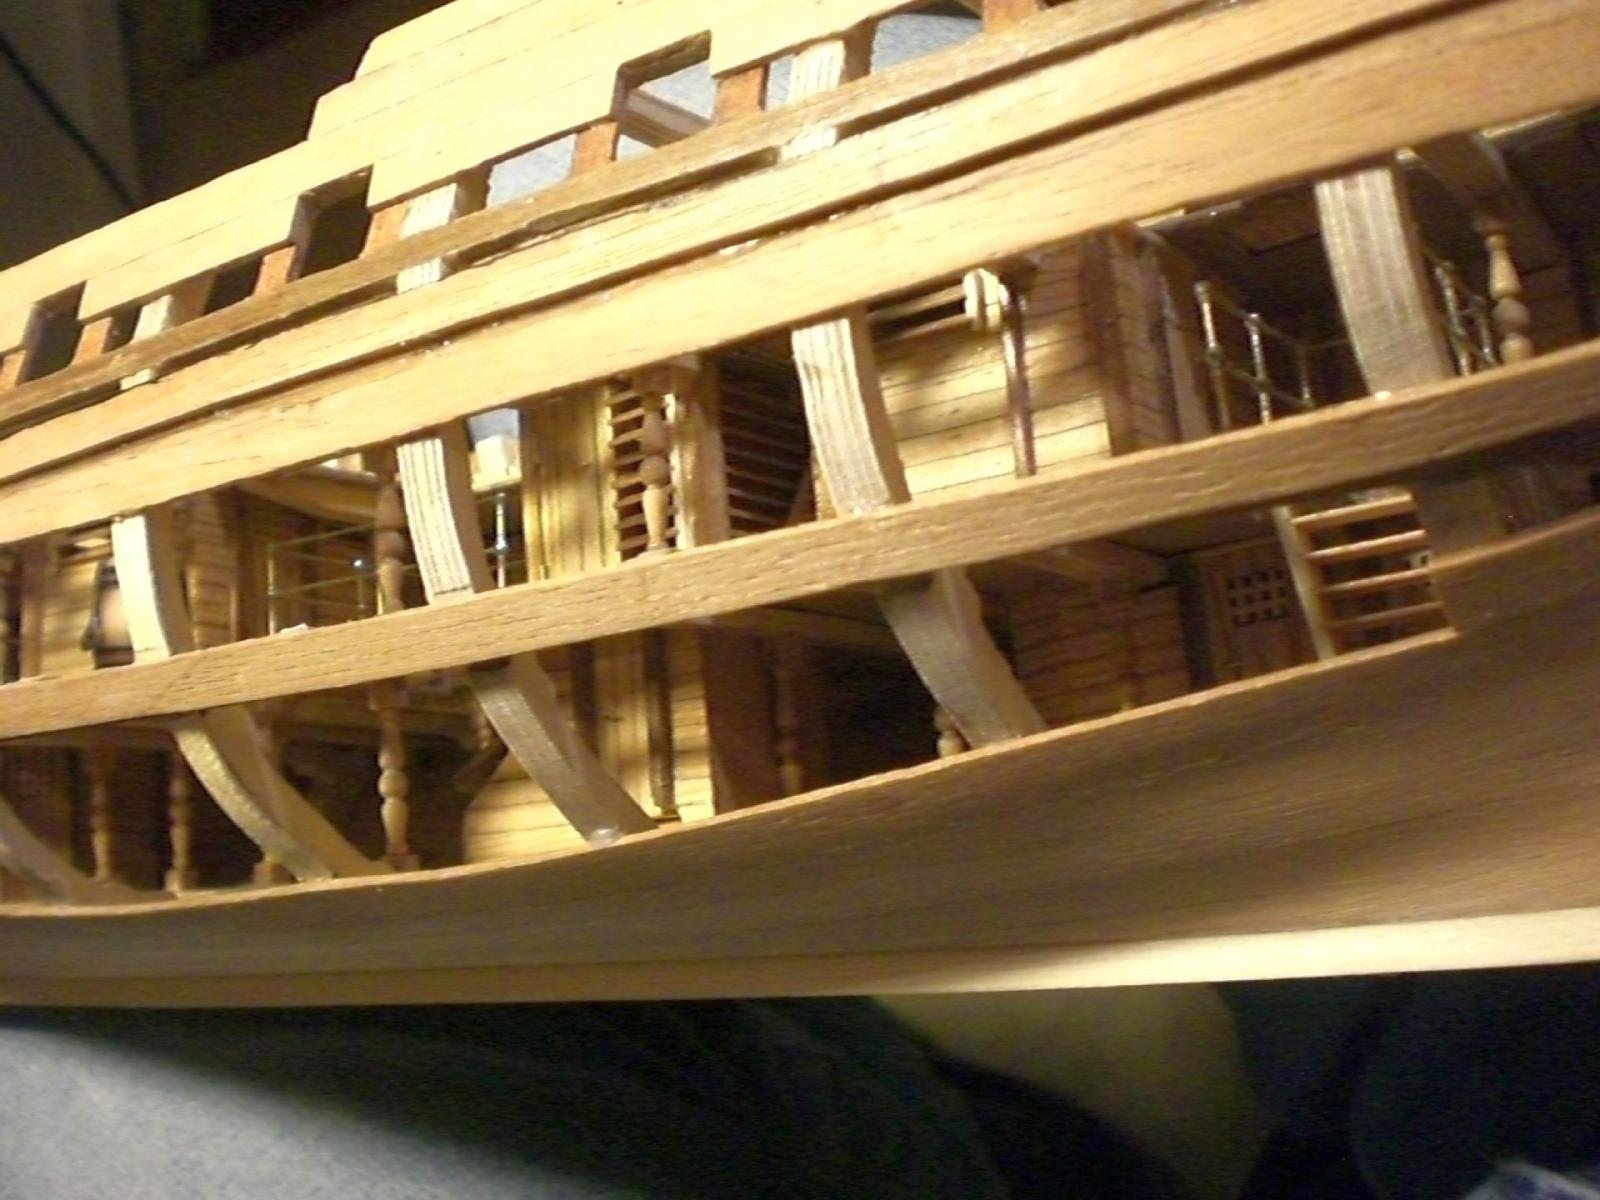
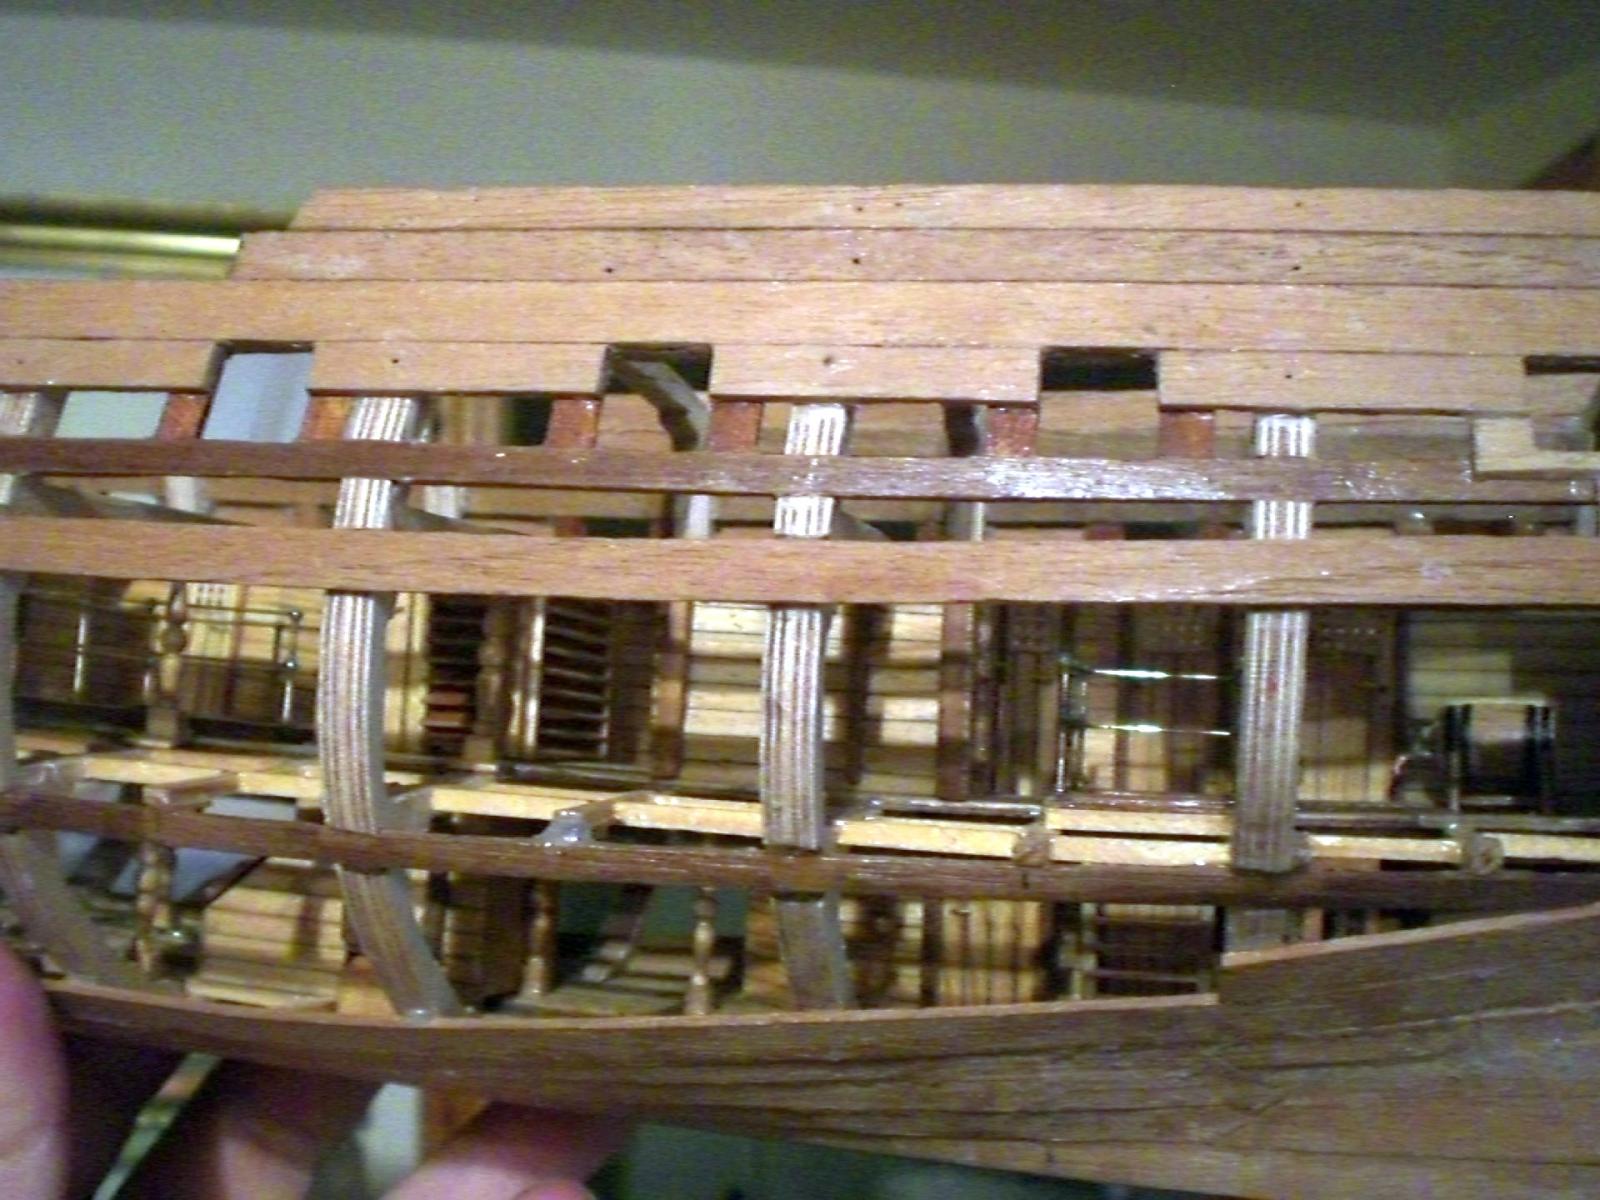
view under rthe forecastle deck
a Little further on

Looks riged enough for adding the fine-work on to
the preliminary 8mm bow dowel fits in perfectly

- Elmer Cornish, mtaylor, PeteB and 6 others
-
 9
9
-
Hi Eddie
if you should`nt allready have seen it.... tune in to U-Tube in a spot staring Gregory Peck and Anthony Quin " The Boston Man" in probably the best and breathtaking bluewater Gloucester fisher schoner races ever on film. Whoever is intending to model this type, shall be grooved in real quick in making up his mind afterwards.
Nils
-
Thanks for your words Eddie, I`m glad you like it
There will be some more Input from my behalf tomorrow during the day.....
By the way... I know now where I have seen Information of the "Elsie" you are building, it was many years ago in a book I have of Carlo Sciarelli, (unfortunetely not published any more) titeled "DIE YACHT" , published by Delius Klasing & Co. in Germany. I picked the Bluenose instead at that time because it came out from Billing Boats, sad to say it is still 3/4 completed but on the shelf. My wife is allway pushing me to complete it, before I start any other new Project.
Would love to see and follow your Project well proceeding as it moves towards the finishing line
Nils

-
Lot 14 of my Pegasus buildlog...
portside ready for applying silk black

ready done in the appropriate Areas
here the stand Comes into the game..., use pine Wood board combined with 1/4 hollow profiled Woods and rectangular stipes for below. All is varnished in 2-cover Cherrywood stain, this covered with silktouch clear varnish. The pedestals are made from very priceworthy old brass candleholders from the local fleamarkets around Hamburg area
only preliminary test on testing distances and lengths of Stand pedastel bolts
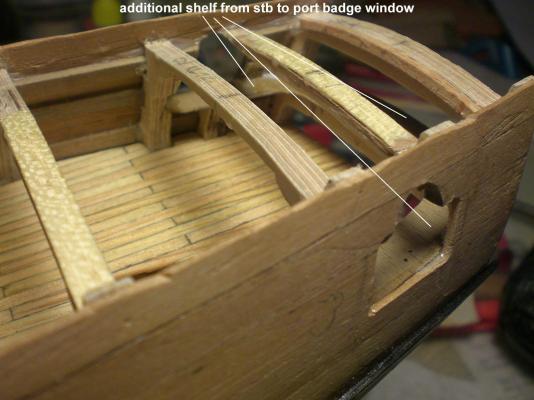
positional check for soldered "3D etch layers" onto fries Support
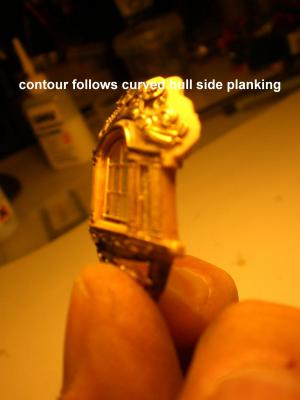
further positioning check, note the heights, the Amati plan template I find was too low in height
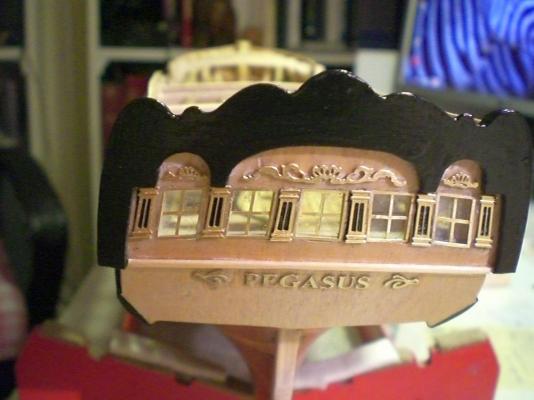
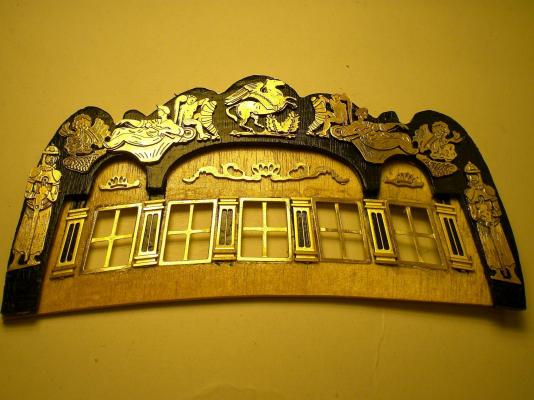
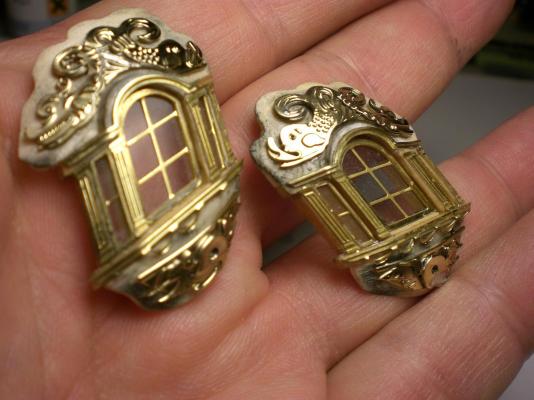
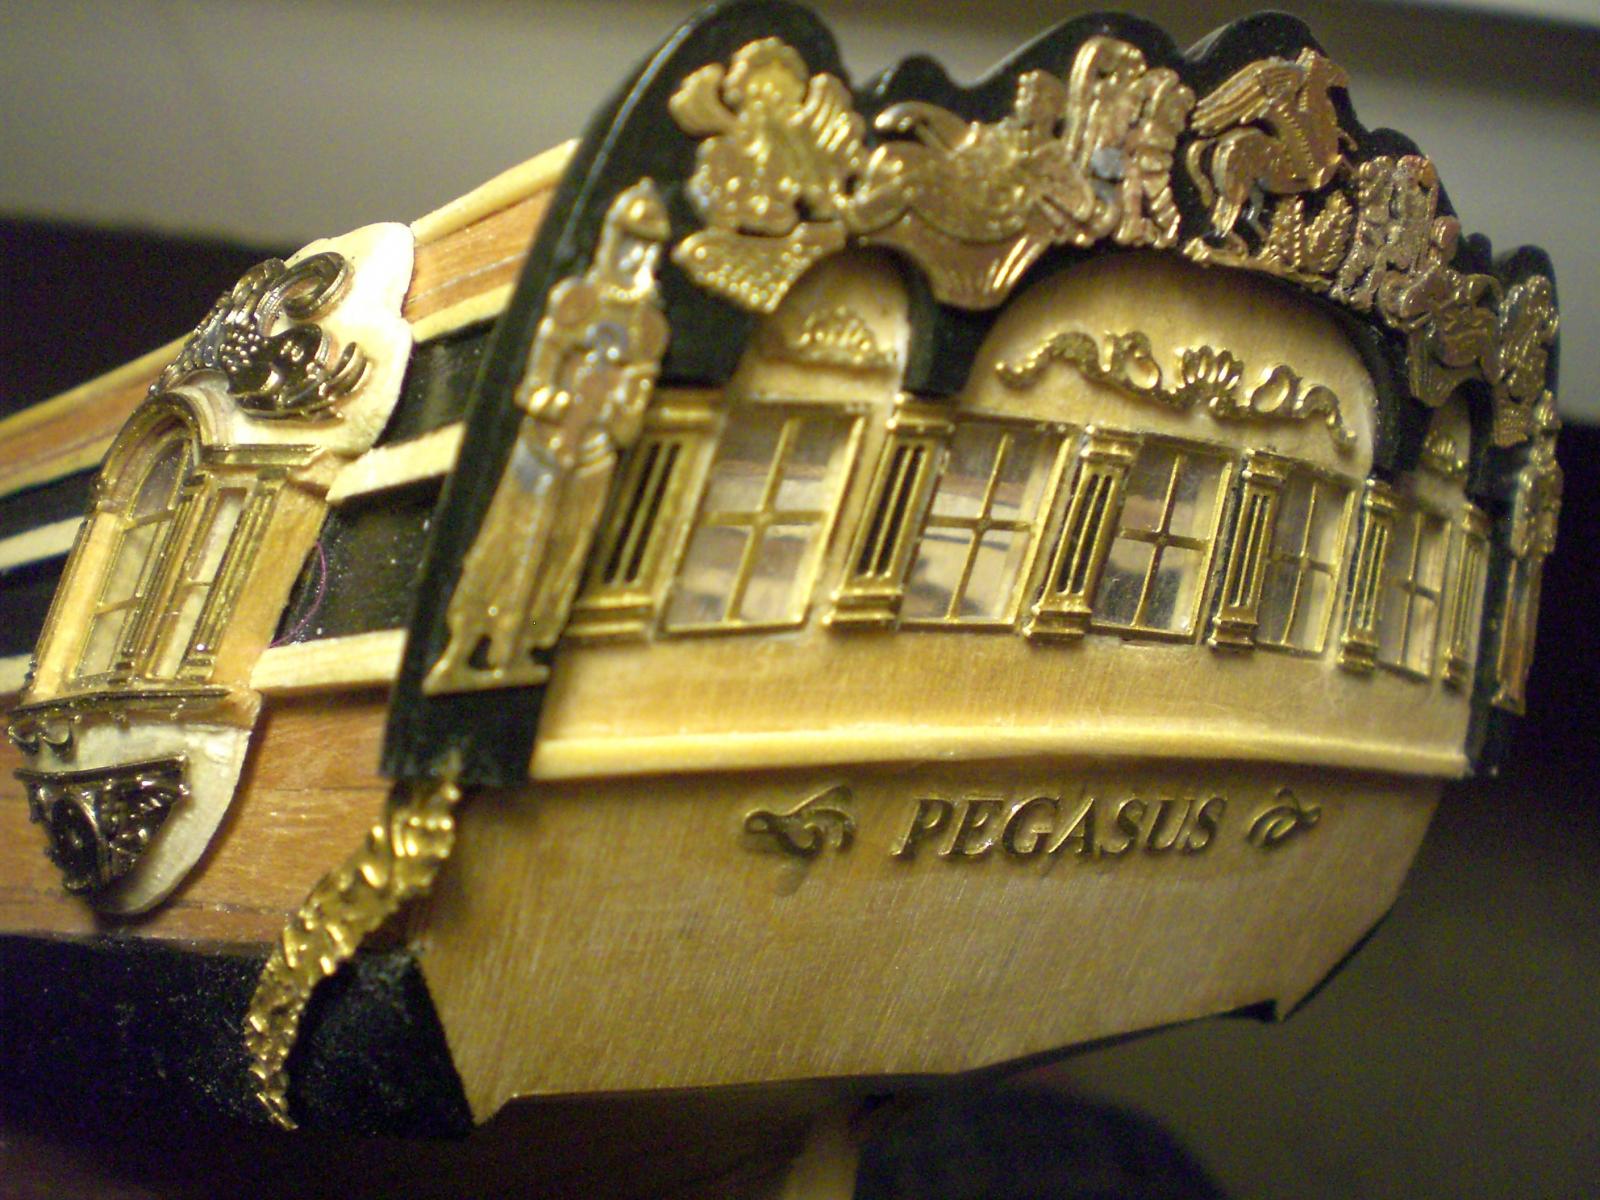
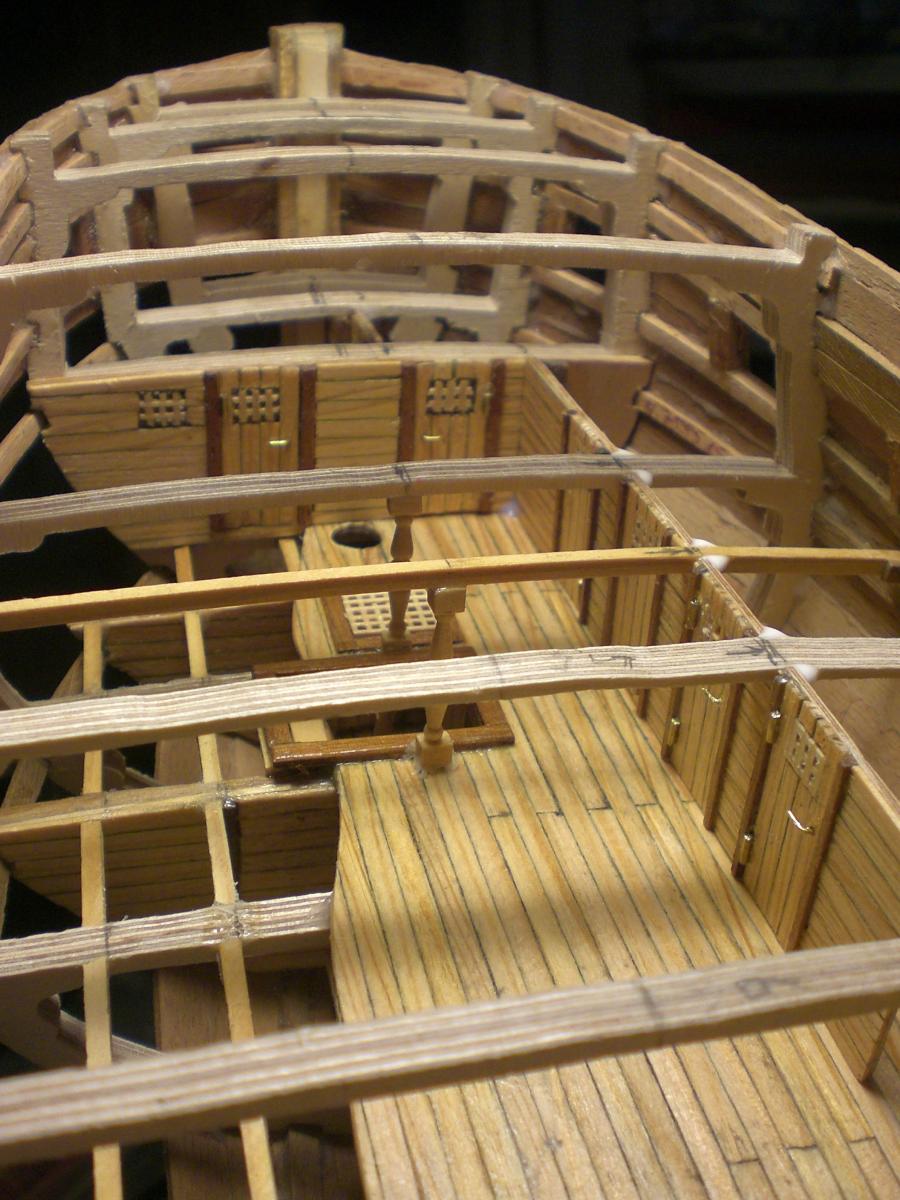
Ships Name and window panes permanently assembled
poop bulwarks increased in height and Support brackets mounted to the rear plate. One of the next days I shall Need to tackle Fitting out the Stern interior and the appropriate bulkhead Panels

things are moving on now. I think I will leave the brass character to the decorations and therefore pre-conserved the shiny brass surfaces with a coating of high gloss varnish
- mtaylor, Elmer Cornish, herask and 7 others
-
10
-
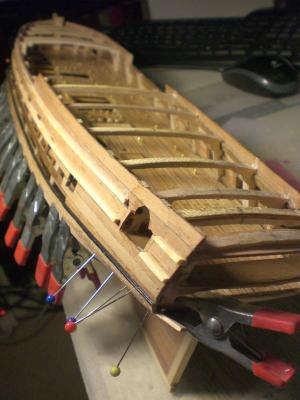
Lot 13 of my Pegasus buildlog...
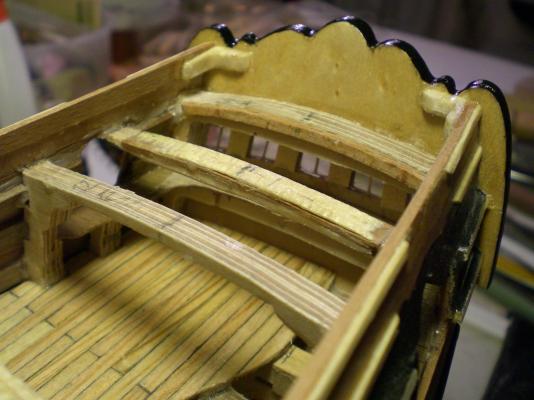
when doing the window outcuts the inner Frame at this Position had to be partially removed, I left the lower remains Standing and used this for Fitting a "3 side around the Stern" window shelf into the masters cabin
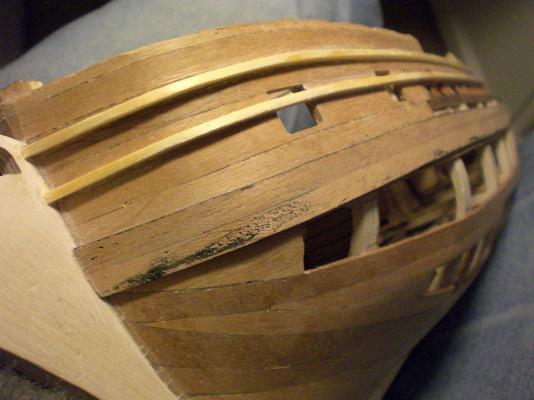
the upper of the two waleplanks is fitted at stb.
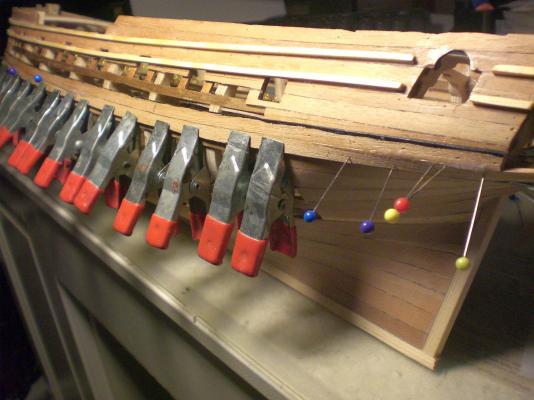
the lower waleplank on port side is permanently fixeed into place (edges pre blackend to ease later black silk varnishing of the waleplanks
upper port aft view
lucky for me the upper two pine stripes followed easy around the bow without breaking and just by prewetting with the toung. Use semi thicsotrope super acettate glue for this. I would not be able to provide Fingerprints after the Acetate session !

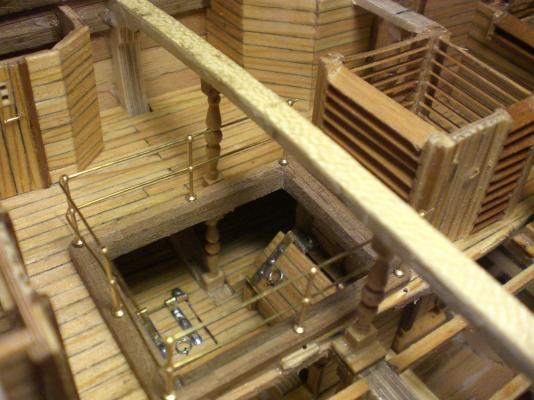
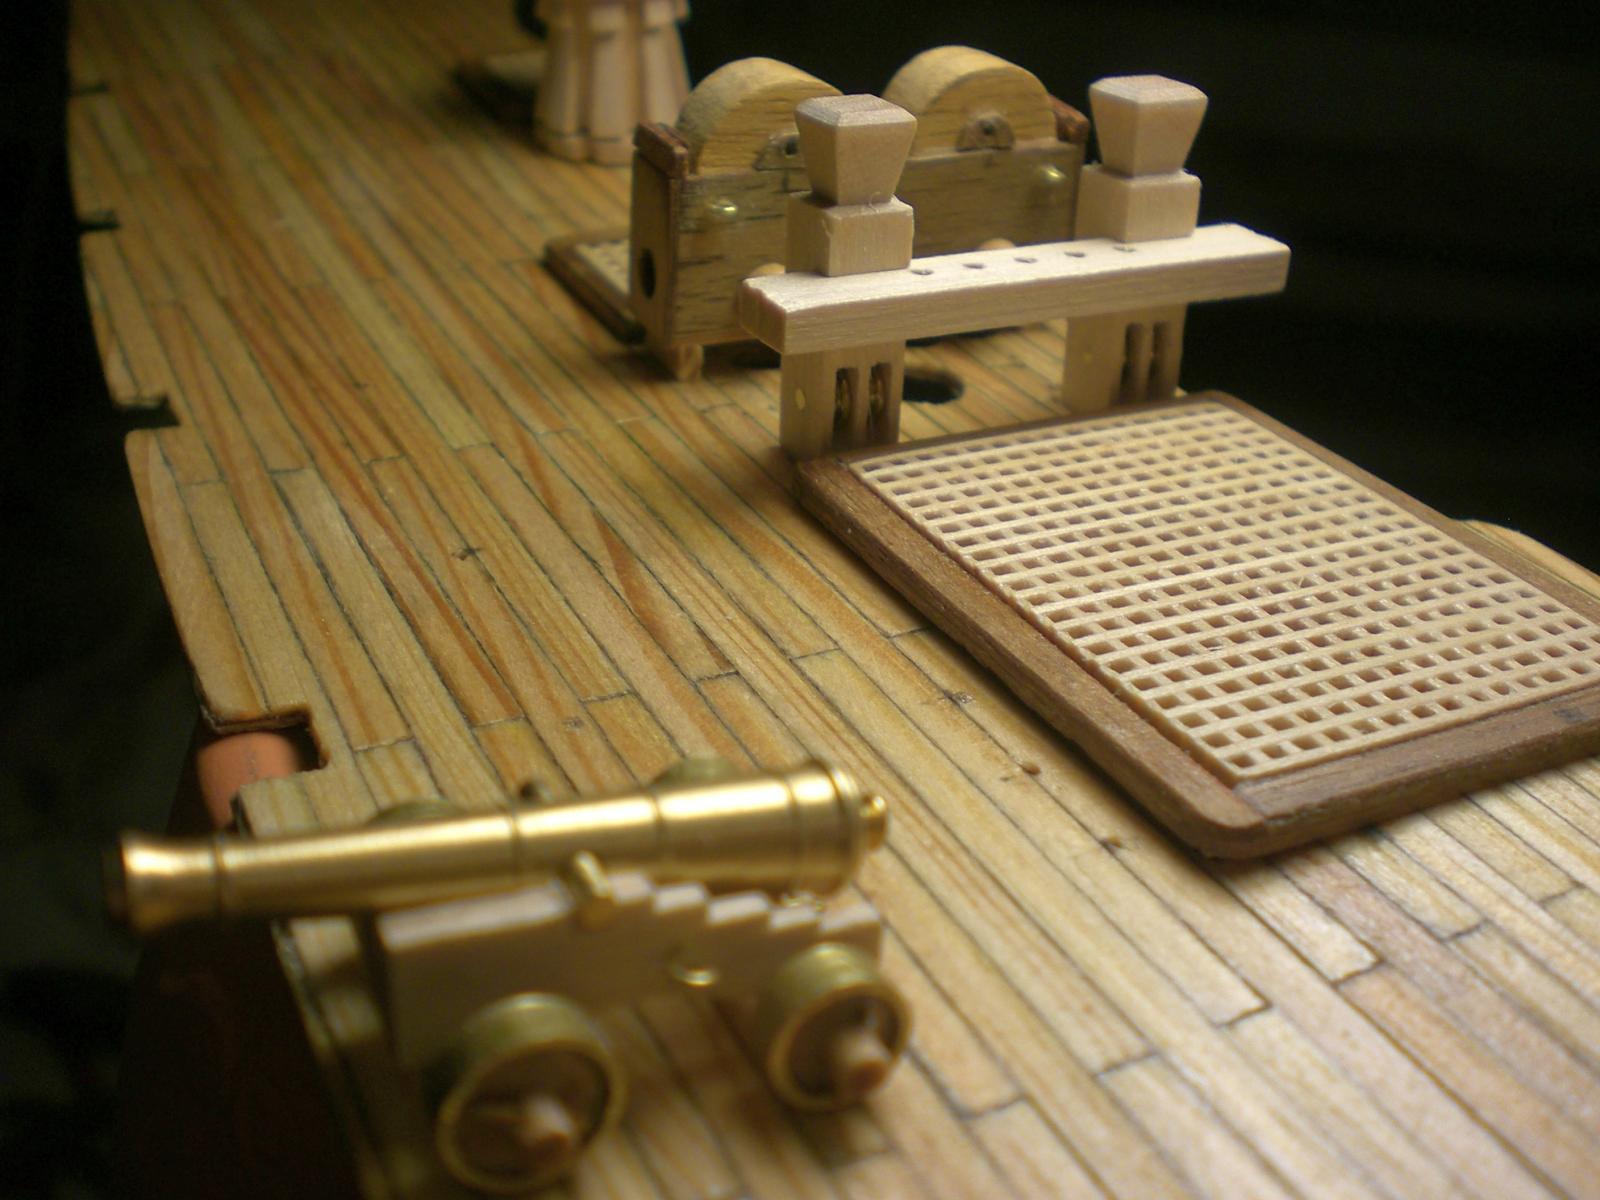
the tight fit grating has been removed here to give view to the aft donward staircase from gundeck to intermediate deck.

stb side Barrel slide supports and outer Boarding steps
likewise on portside. Here additional bits of planking were required, but I think they do`nt hinder the view into the hull
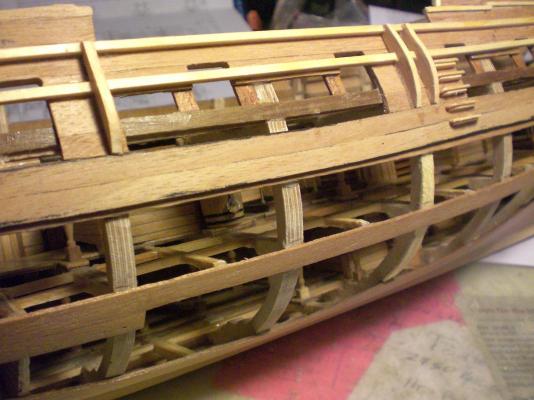
in the Moment I am questioning my brain how and where it would be best to fasten the deadeye tackle on in not desturbing the Riggung optics and view to the inside later on
- mtaylor, PeteB, Elmer Cornish and 2 others
-
5
-
-
Mark
again many thanks for your advice concerning "Swanies" publications I shall do some digging in the web.
Yes, the keellaying of my build was 3rd April this year, but as I mentioned to Aldo in my reply some days ago, fortunately after my retirement I have the time to work in more or less steady flow. I`m intending to drop in one or two more reply Posts on my buildlog during the day
Nils
-
Hello B.E.
I would have liked answering to your Christian Name, obviously not known to the Forum comunity to date, but never the less highly appreciate and thank you in finding helpfull advice from such a knowledgable and talented british naval ship model specialist. I thank you for your comments and confirm that you senced a bulls-eye hit for the intentions I may have had had along with this build. I picked the Swan Class vessel type because I fell in love with the lines, the not too difficult skill Level, the size it shall take in an selfmade glasscasing afterwards, the reasonable Prices for Amati plan and the high precision Quality of the etched part Panels. I then started seeking Input , by doing so, also came across this superb Forum and was so lucky to find even detailed buildlogs of high skilled fellow builders. New to me was to see builds even in scale 1:48. So the idia was Born to, implement impressions of what (that could possibly be adopted to scale 1:64) should find into my own build. Unfortunately I found no literature nor publications on the internal Fittings. So what you see from my Pictures is referenced to notes I made when sighting These lovely open hull buildlog sequences I admire so much. I never had any layout plans for the individual decks except the Amati ones displaed in the plan. Usually I prefer scratch build Projects, so studying the Amati plan gave the innitial kick-off.
Also many thanks for your comments on the british naval gun Features, and please if you would`nt mind, I would appreciate If you would kindly feel free drop a line whenever you like, if you should see Major deviations to historic Approach in the further sequences of my build. As the gun from the Pictures is only a Trial one and my mind was free to pickup impressions of naval guns out of the web, the protyp was made basicly for dimentional checks. I also intend to provide full sails rigging, knowing that my experience with recent tallship rigging i did is a different Story compared to 18 century rigging. So I`m starting to seek like a sponge for Input on this Feature as well.
Regards
Nils
-
Hi Eddie
your "Elsie" buildlog reminds me that I still have a 3/4 finished Billing boat Version of the "Bluenose" (nearly same lines) on the shelf. Pls. Keep Pictures of your nice model and of your buildlog coming in
Nils
-
Hi Rob
Tanks for your response, of corse you recognized the jokie about the chained slaves...
but at this time I unfortunately ca`nt afford the David Antscherl publications and would highly appreciate any Input i.e. about how These oars had been inserted at the bulwark pivet Points, If not into the unbuffered square litte bulwark outcuts. I gues they would`nt have used 12 oars at a time, and where could These oars be stowed away ( perhaps next to spare mastparts next or under the cutter?). This is really not so important it was just going round in my mind.
Nils
-
Augie
thanks for your Swift reply. I share Your remarks for using wooden stocks, that also was the reason for my question when sighting the Detail.
The assembly of the anchors in my own build are still many days ahead but you know yourself that the modellist allways has sences Aware for detecting things that could be of use in some time ahead. Shall furtheron follow your splendid build with great interest anyhow
Regards, Nils
-
Hi Augie,
Very impressive handcraft work, I must say outstanding !!!!, it is a pleasure to follow your buildlog. One of the many Details I like are also the anchors, are they available from any model web shop or are they scratch built?
Reards, Nils
-
Hi Swan Class shipbuilders
I have a question with the rowing of a 300 tons displacement vessel... in lack of wind
...who please would like to share his / her Knowledge in describing how a ship like this was moved by rowing. The Amati / Victory Models plan Shows 6 openings for oars on each side, therefore would asume the ship should be carrying at Maximum 12 heavy type oars somewhere. These must have been quite Long, so by limited space on board where were they stowed away during sail sessions ? How many men per oar, how did they find sit positions on the gundeck ?, any Special spheric bearings to stick them through ?, In my mind there is somewhere stll the picture as to the Ben-Hur Film with slaves in chains.
Would very much appreciate any Input on the swan class rowing
Nils
-
Hi Gary
wonderfull admireable work, I get the Feeling of spending a day taking up impressions during a tour on a real heritage shipyard
Nils
-
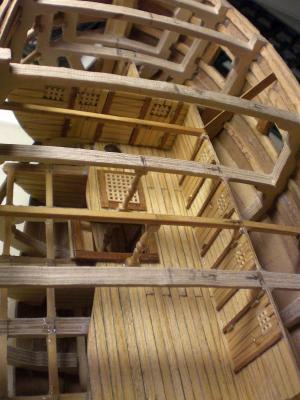
Part 12 of my buildlog.....

portside also sanded and upper waleplank fitted (edges pre blackend)

selfexplaining

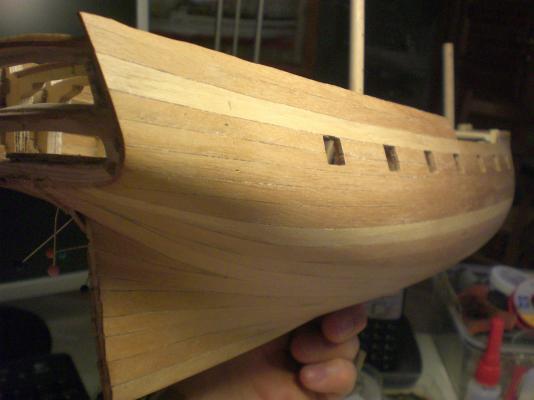
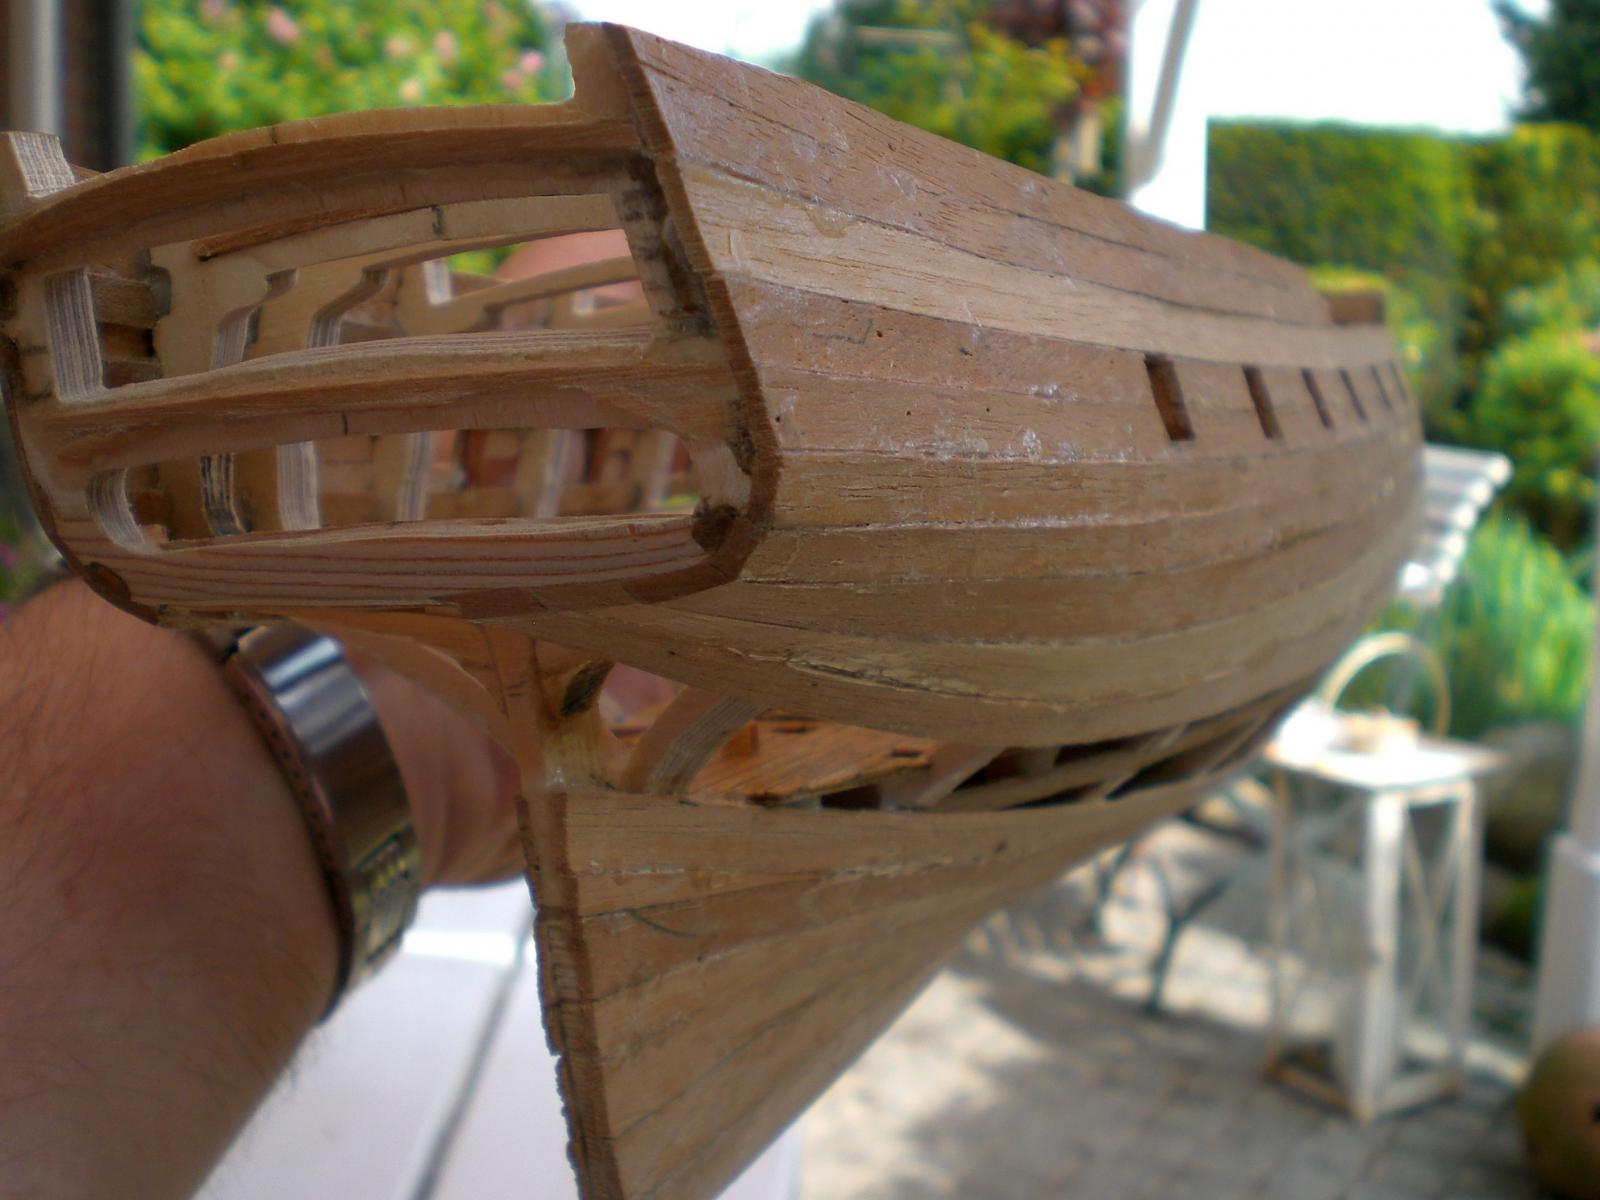
planked hull with upper wale Planks bothsides

this is the extent ouf outcut in the portside hull
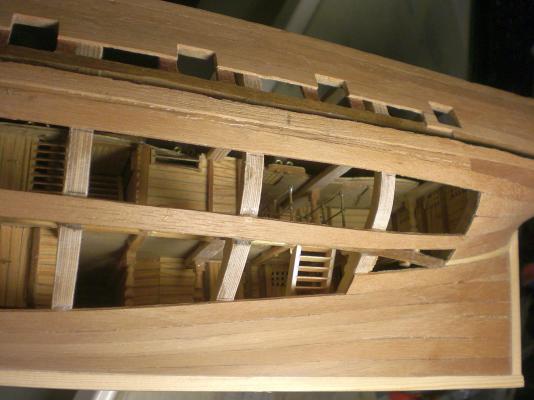
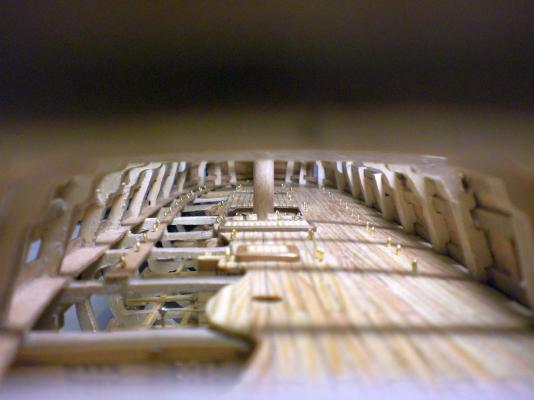
the sectional gundeck is allready placed and view to aft staircase as well as the downward stairs between upper well and pantry (covered by grating)
the round hole in the gundeck in front of the aft grating takes up the axis of the gundeck capstan

a few planking details
badge window outcuts made and the lower waleplanking added

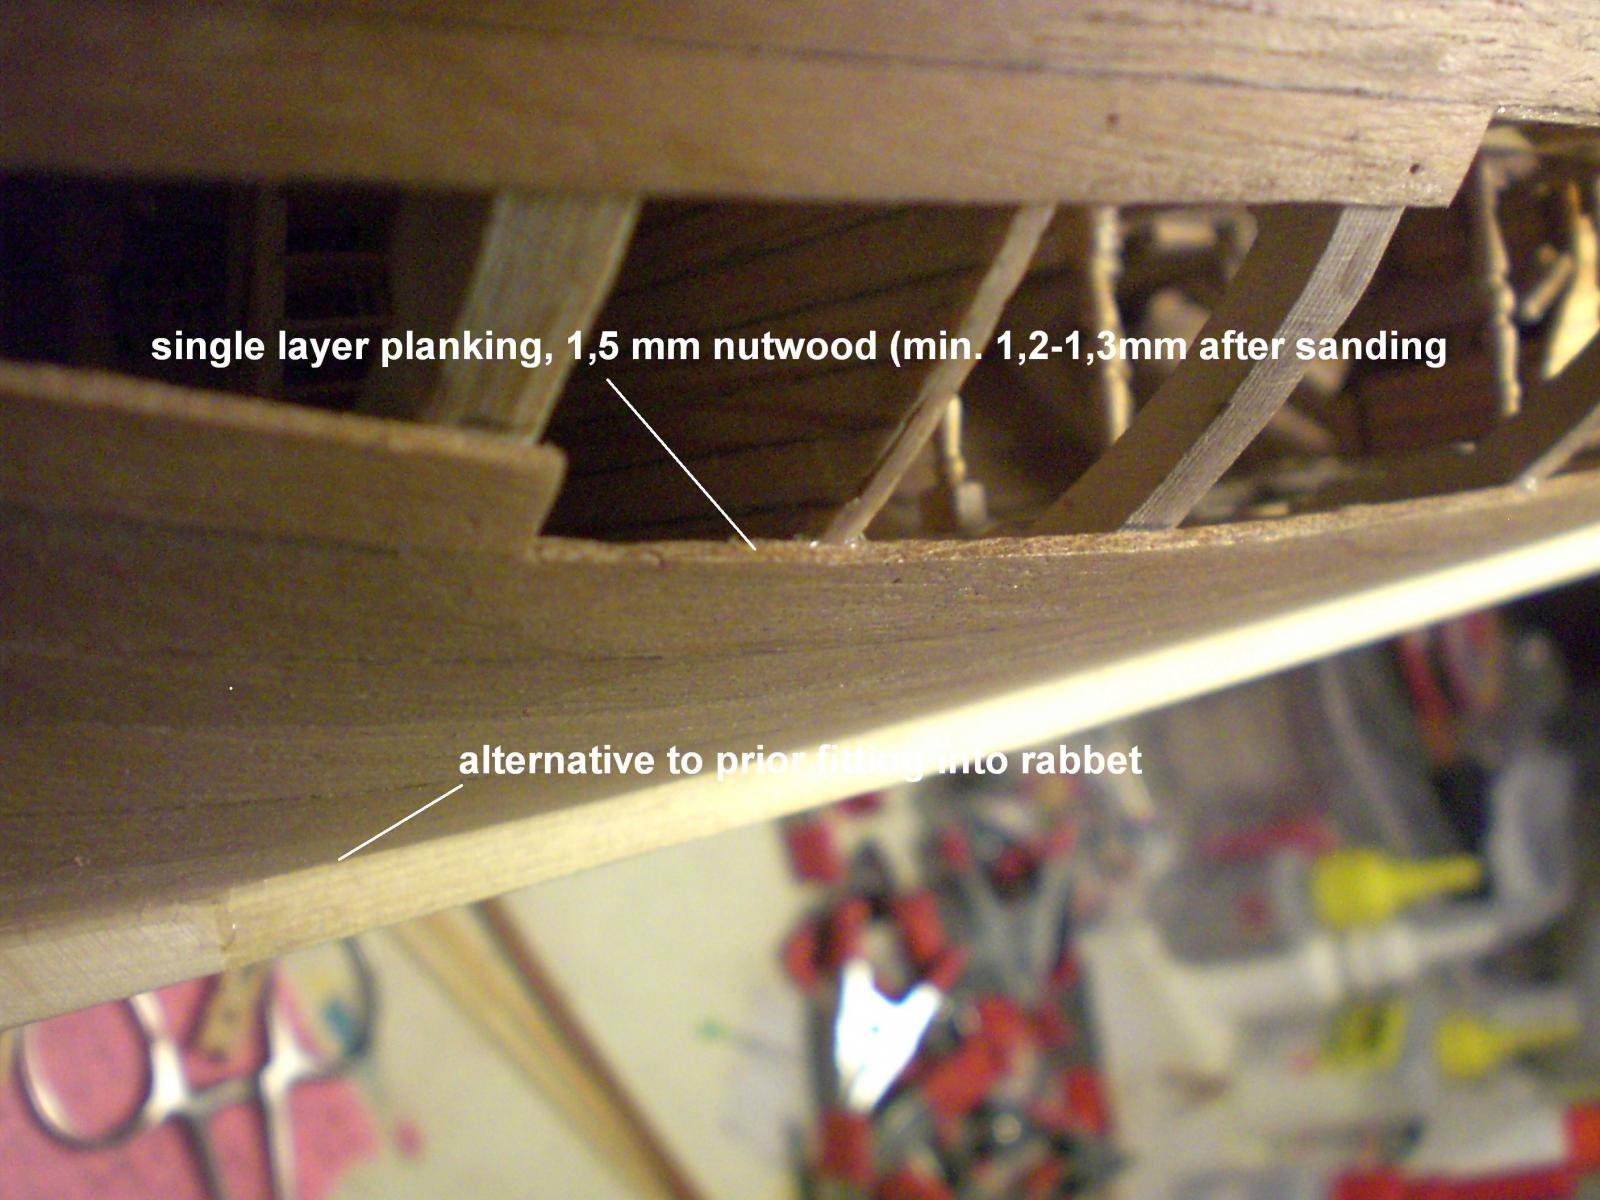
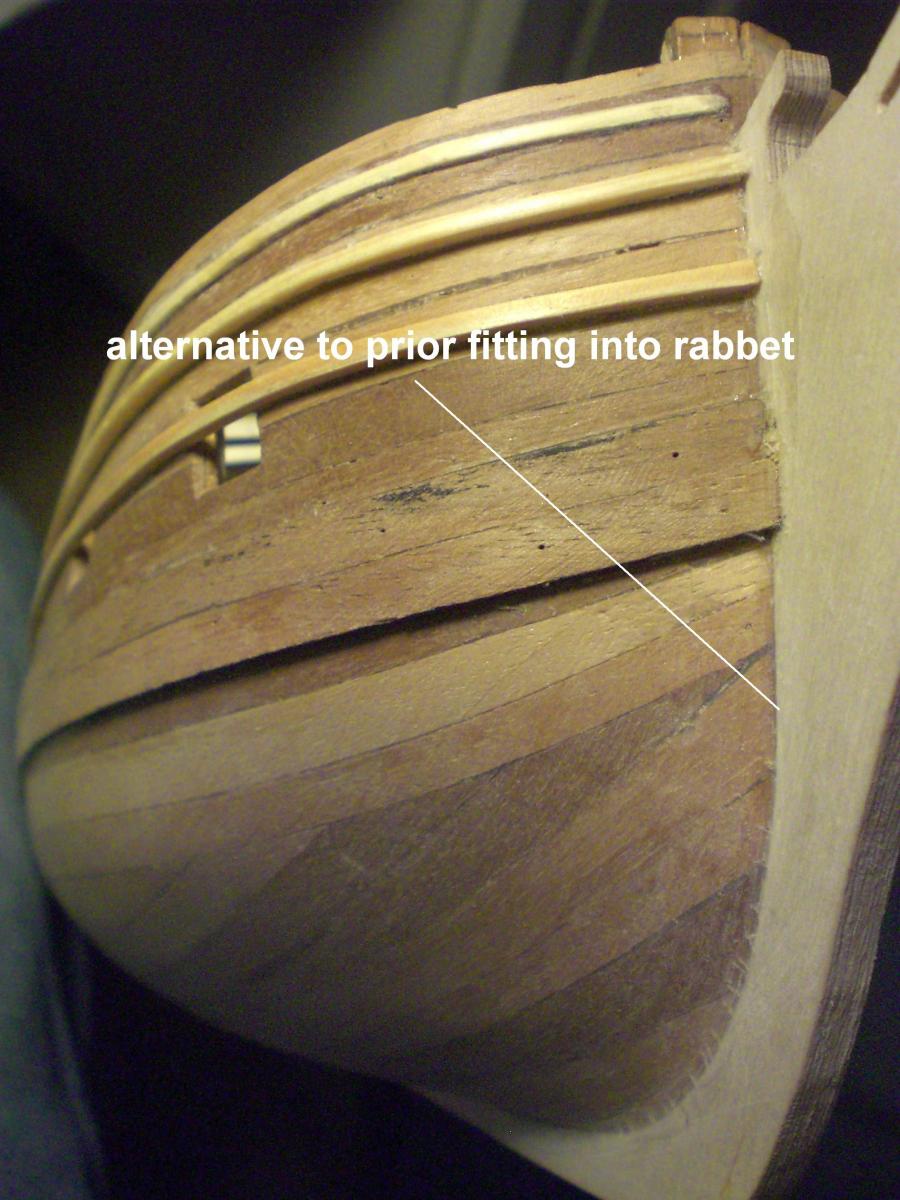
I`m quite pleased with the results for the optic Appeal because i di`nt cut rabbet bettings into keel and bowpost Prior to planking in the applied scale 1:64
- NMBROOK, thomaslambo, PeteB and 5 others
-
8
-
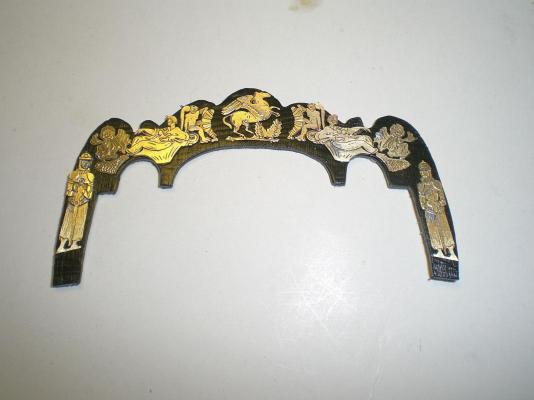
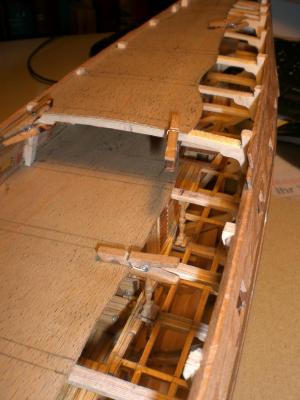
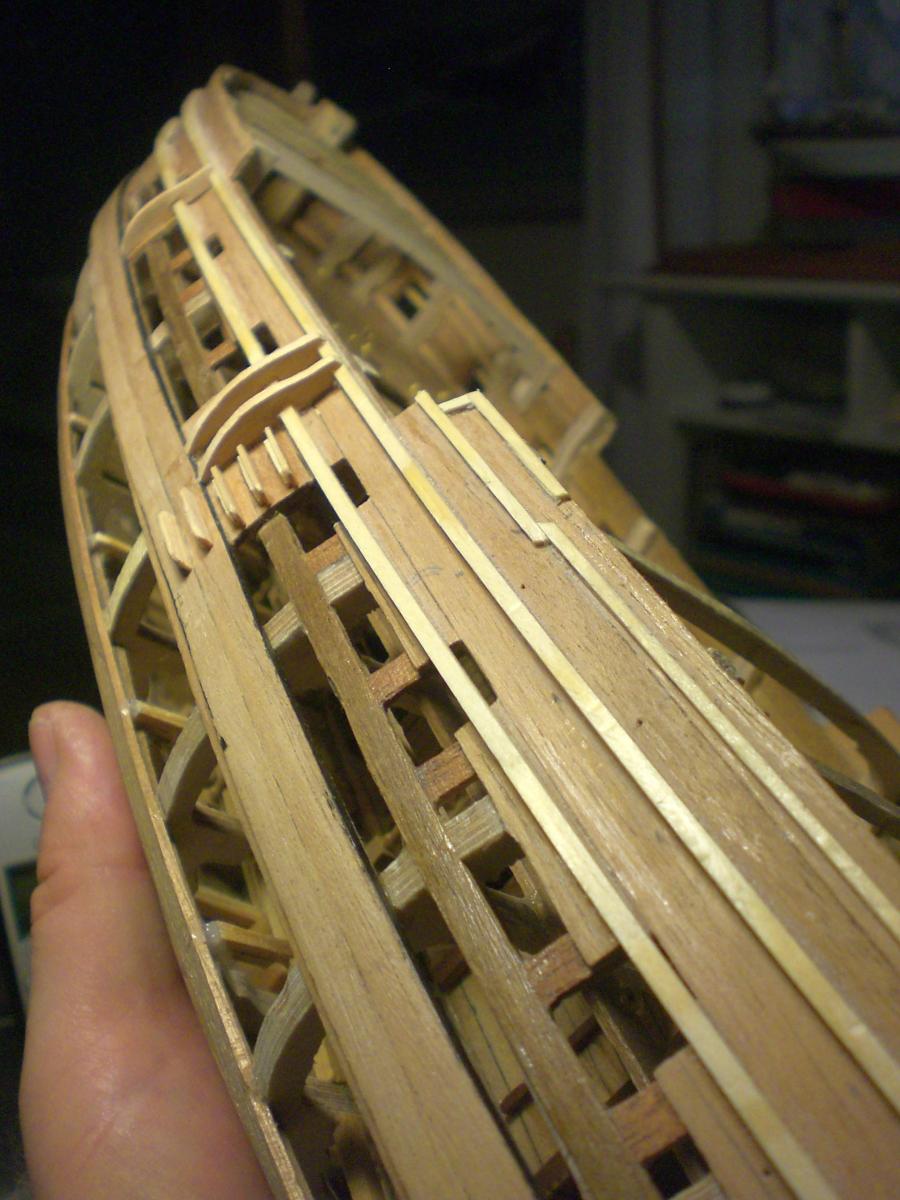
Part 11 of my buildlog.....

raw build, ready for Fitting the brass decoration

etched brass parts and celloloid windowpanels fitted
selfexplaing
sorry for Picture Quality with this one

backside of badges

pic taken before outcut in the aft planking was done
pic taken through Stern window outcut of masters cabin

rough Version of portside still without wales placed
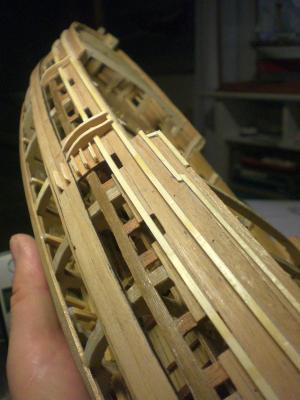
sanding of starboard hull side completed. It seems there is no square cm that is not somehow sphericly shaped

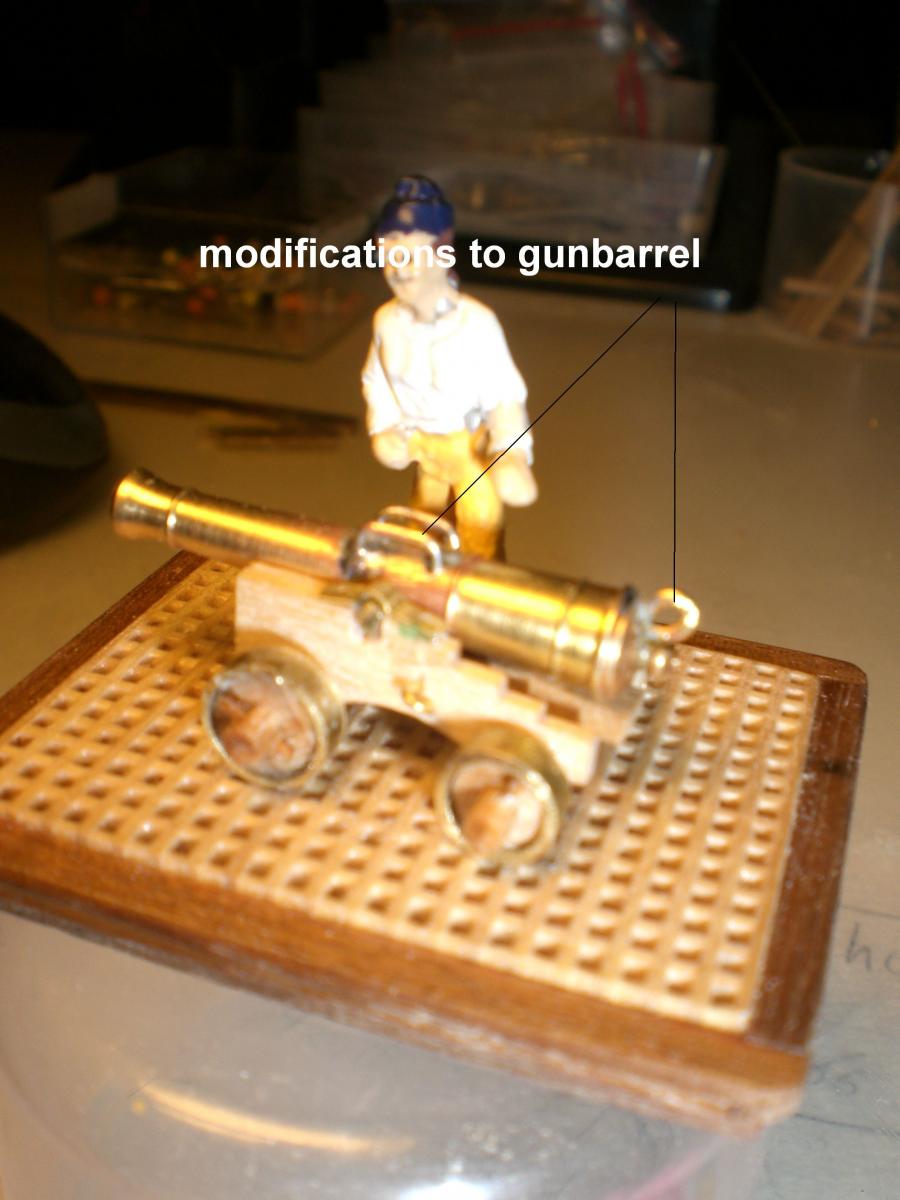
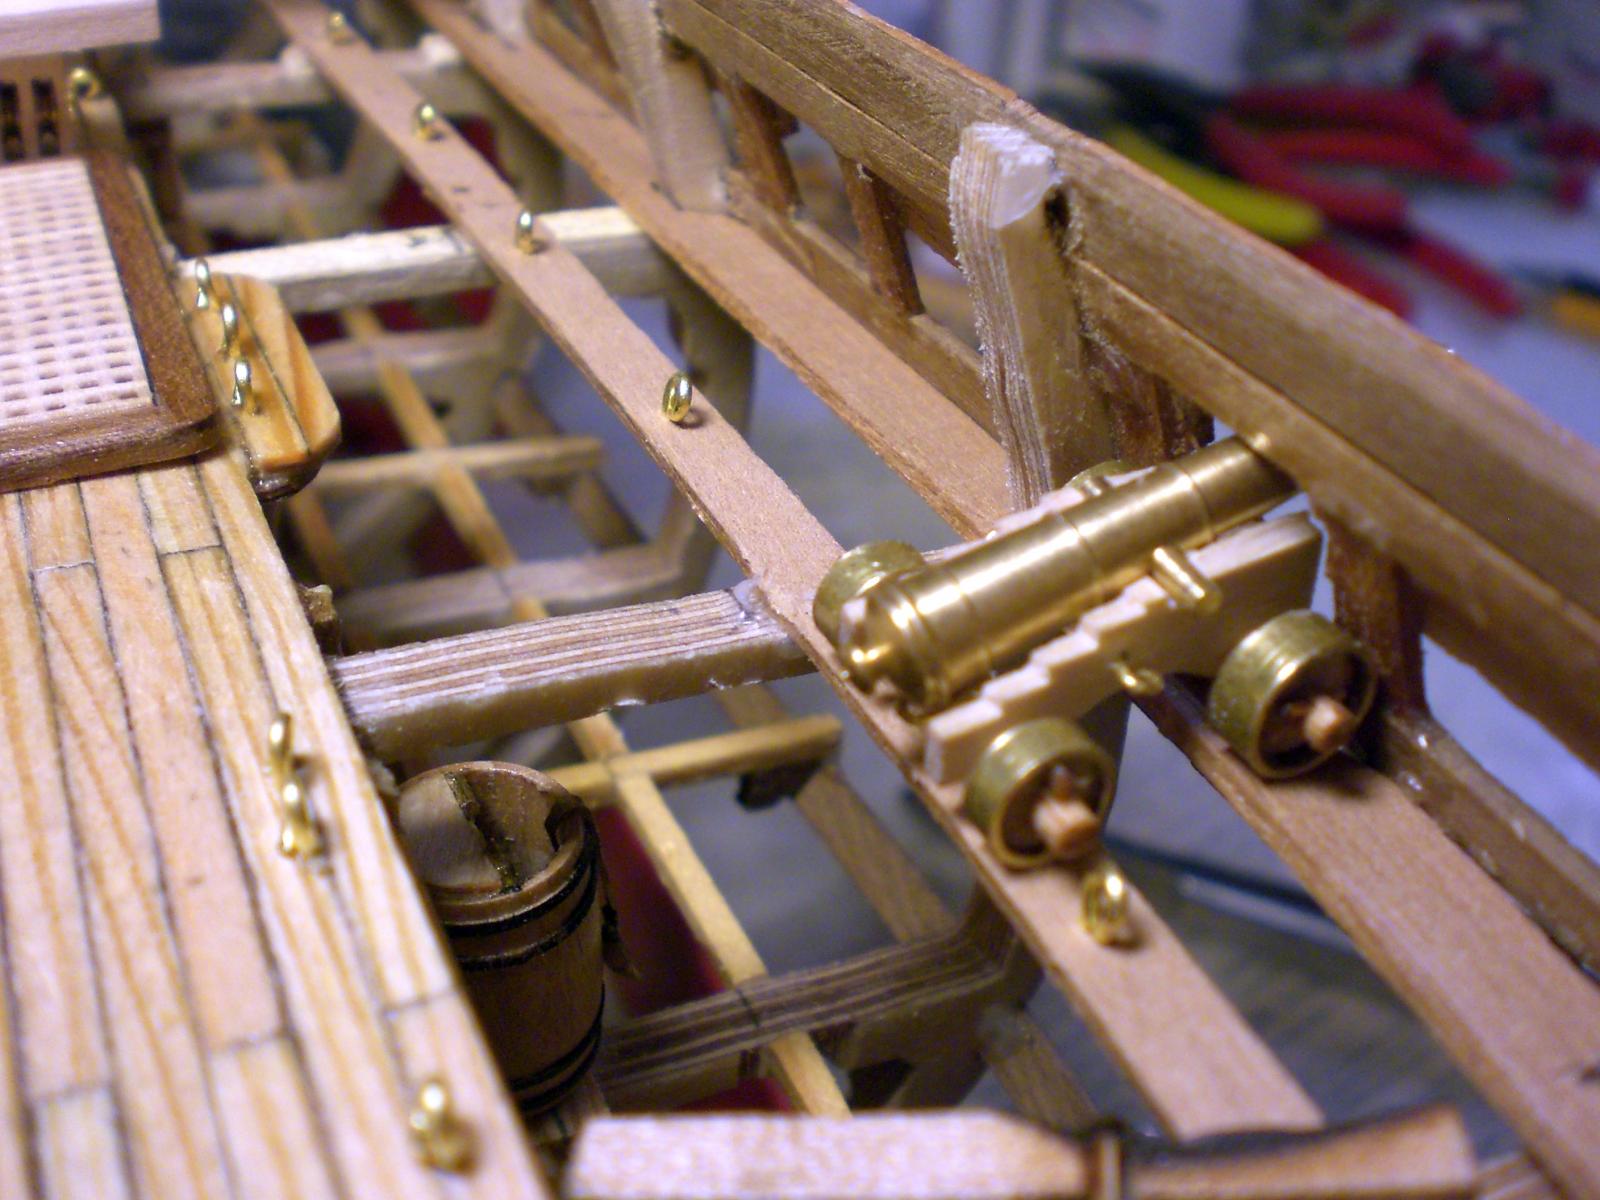
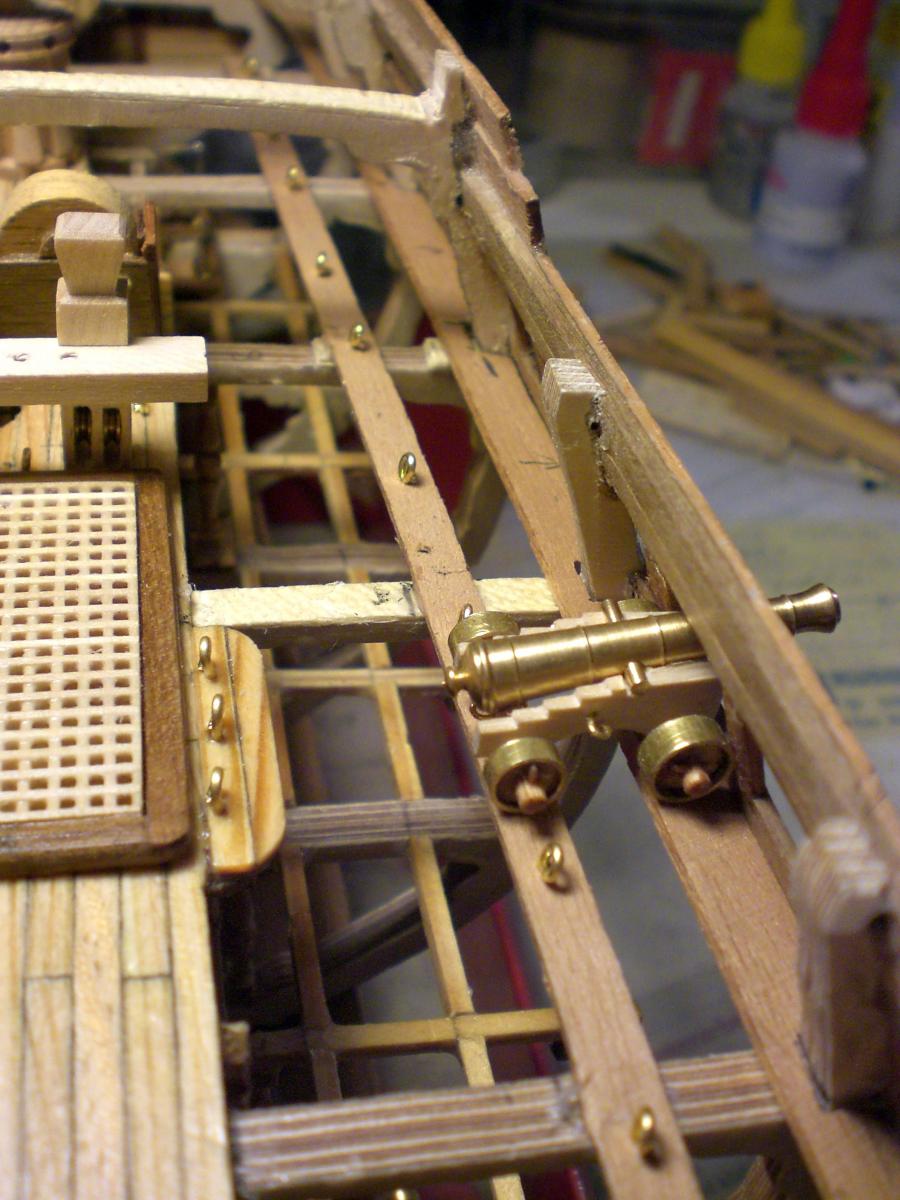
some (trial) modification soldered to 6 pounder gunbarrel
The next buildlog section shall present how the bowpost extentions, the outer keelbeams and the sternpost are fixed to the hull
- zoly99sask, Mike 41, DORIS and 4 others
-
7
-
I have a question to fellow modellists and Moderators....
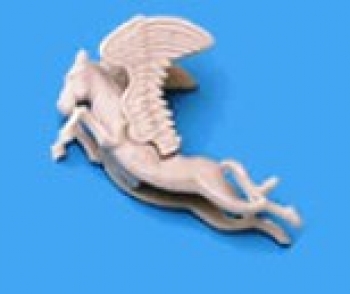
this picture I borrowed from the web is showing the Amati resin gallion figure of the Pegasus in 1:64 scale. I bought this but would definately prefer to a Version in brass or other metal casting or so. Does someone know where to contact ?
having an Special Investment casting made fron a waxmodel would probably turn out very expensive, and I have been searching the web in vain for a metal made ( like metal necklace charm, keyholder charm, or so....) Little Pegasus that could be modified to suit. and hopefully in an appropriate scale.
Regards,
Nils
-
-
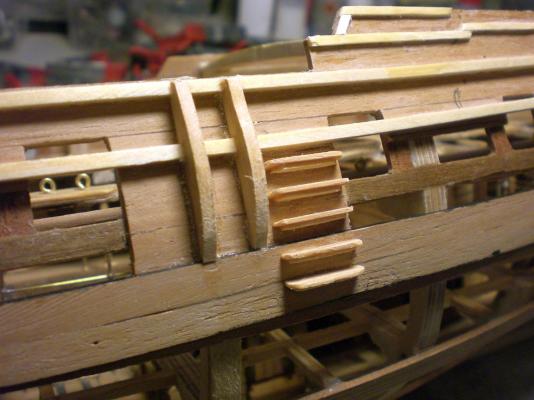
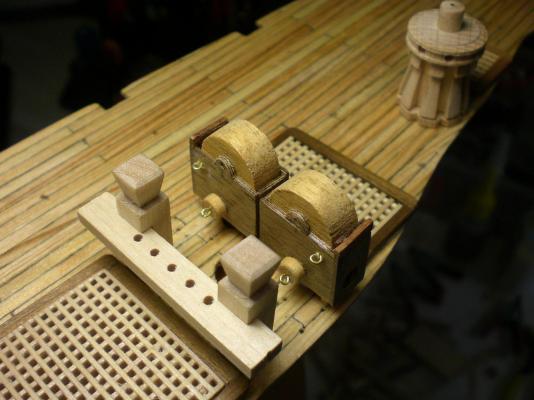
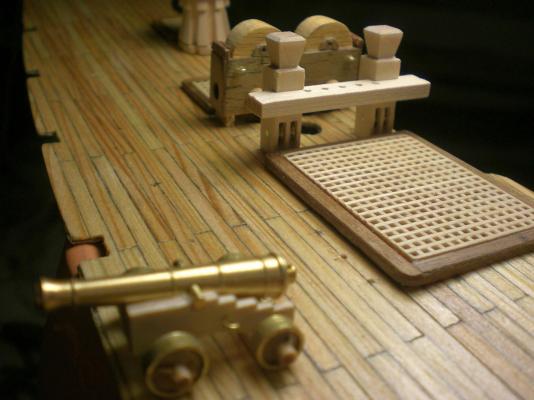
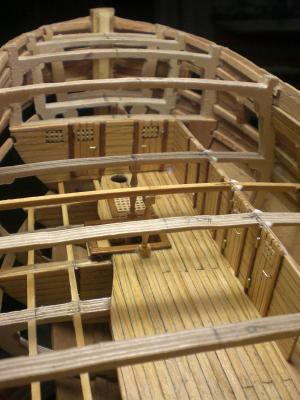
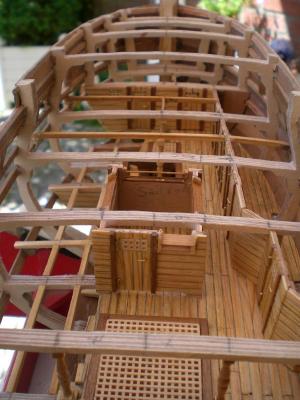
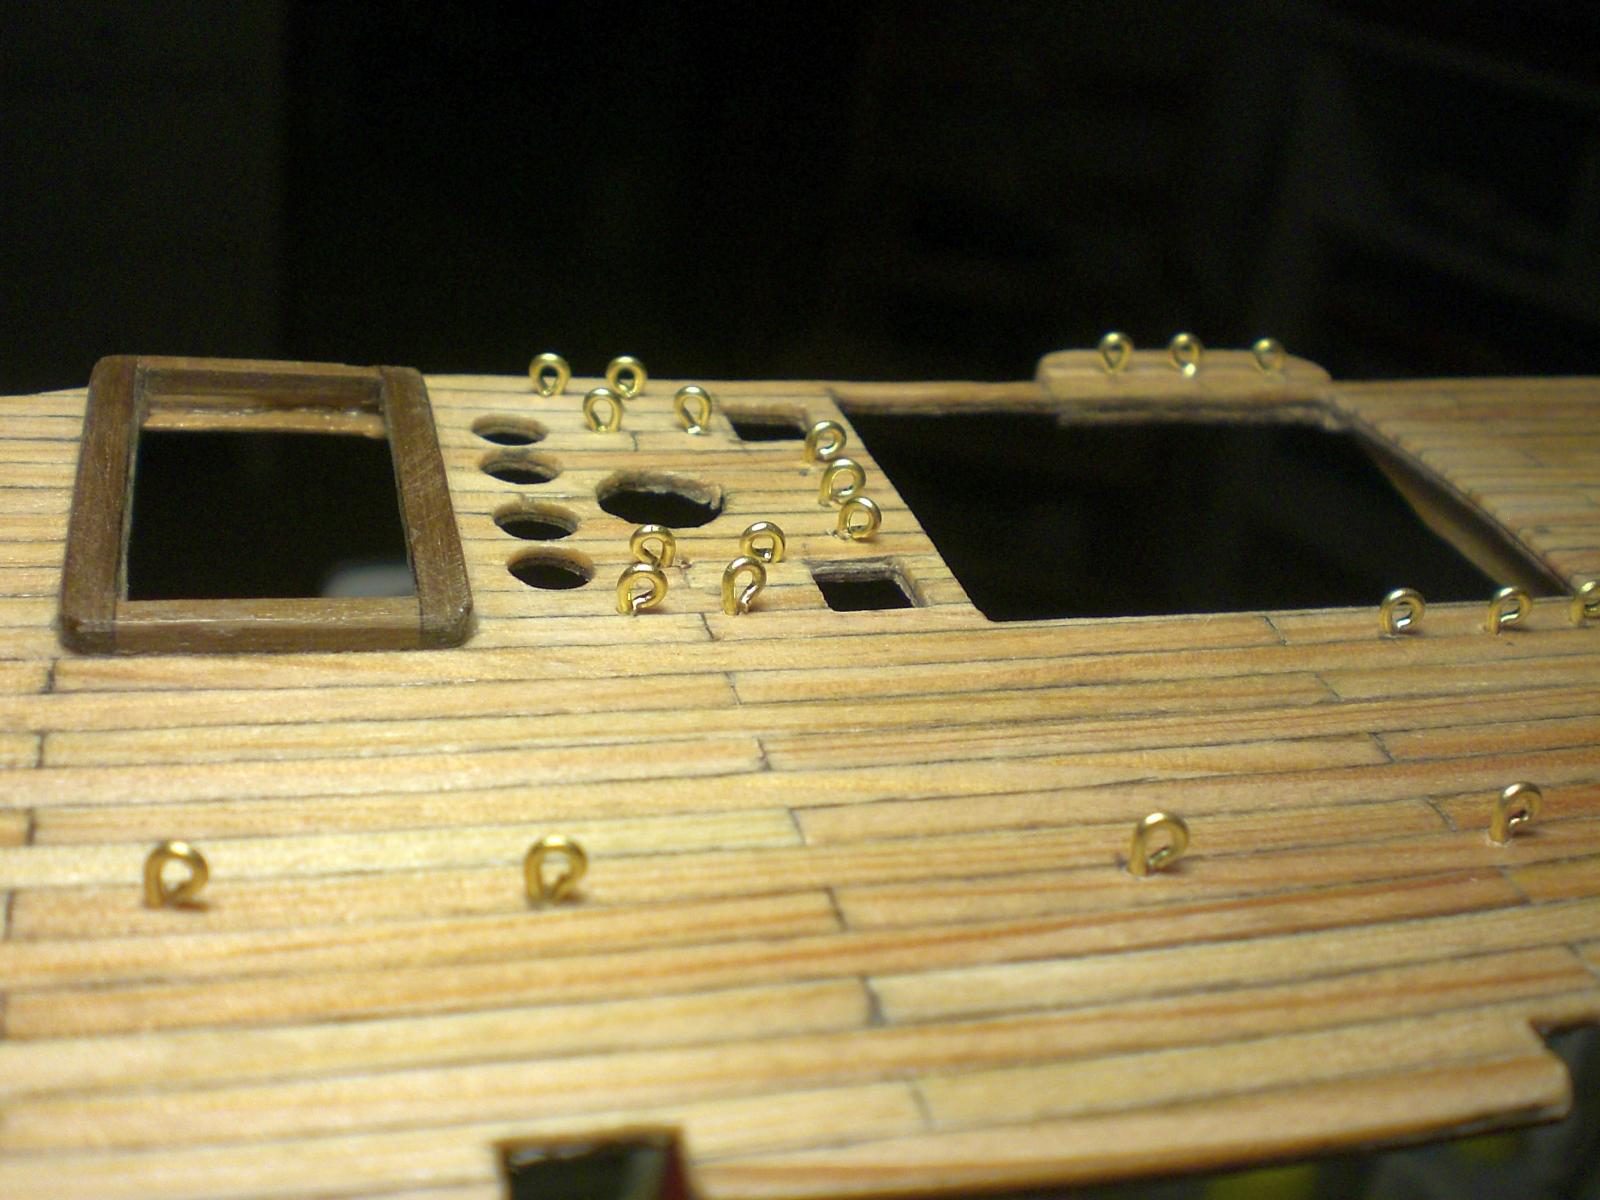
lot 10 of my Pegasus buildlog.....
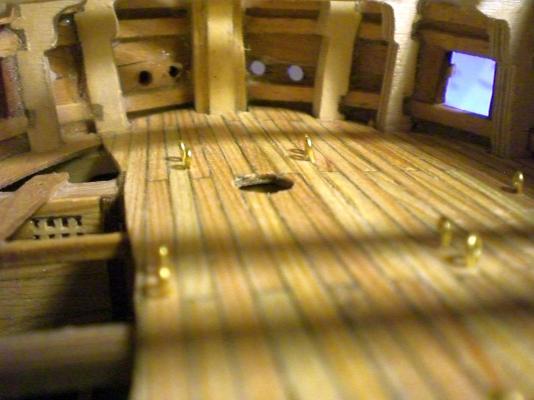
doing positioning check on gundeck
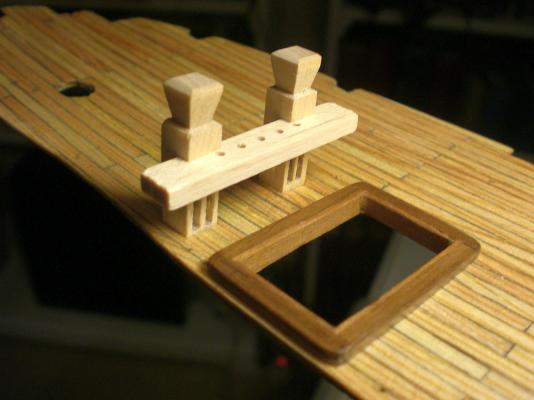
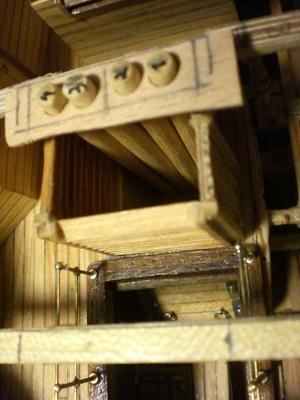
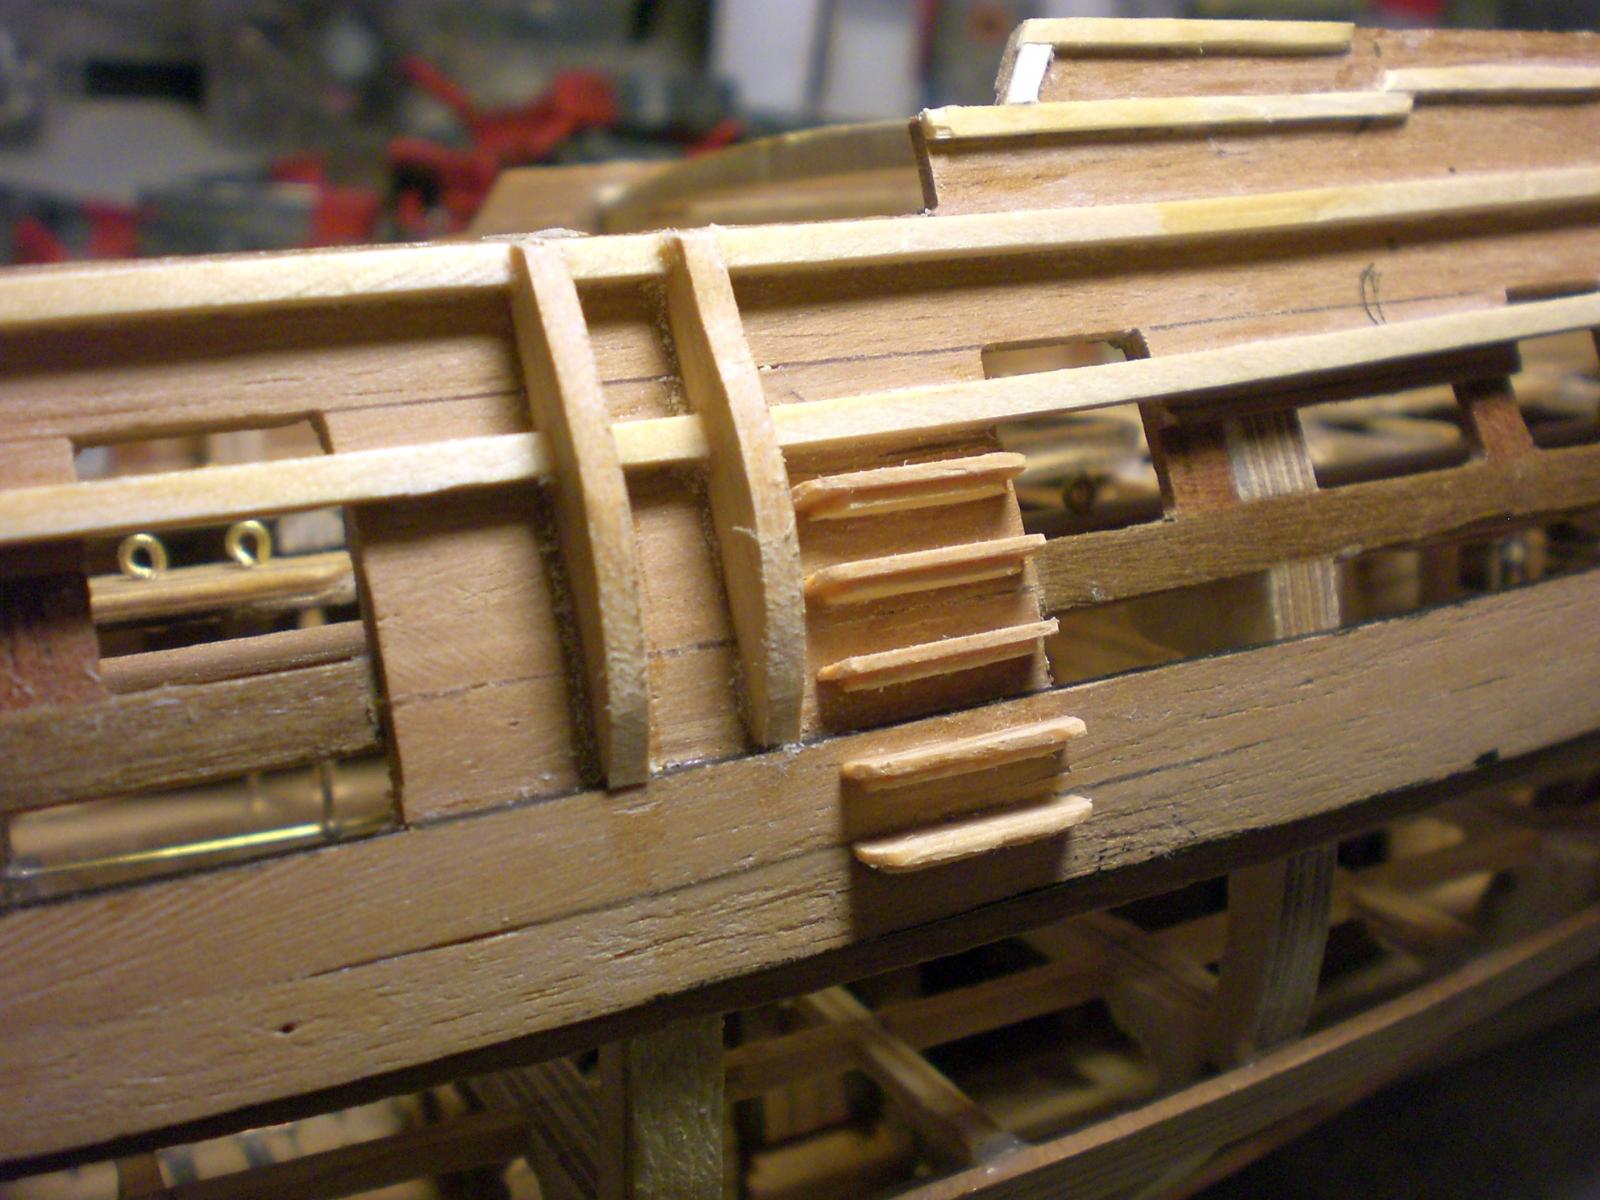
hatch entry of front downward staircase. Belaying pin rack from RB- Models modified with brass rollers in both Posts
self explaining....
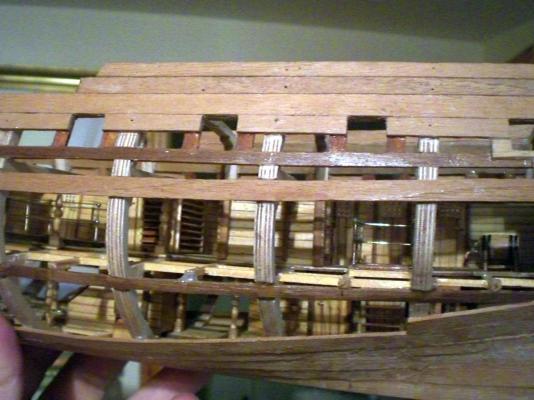
looking at both cargo and intermediate deck view through portside outcut
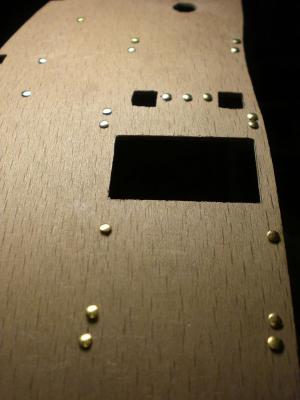
because of no later possible Access to the eyelets above deck all such Points have to be safely countered. the brass pins I use have large enbossed flathead, are very priceworthy at Ebay, are available in different lengths and differ from 0,5mm to 0,8mm in wire Diameter, depending on where they shall be fitted. gun-carriage eylets have 0,5mm diam. whereby the gun deck and bulwark-tackles shall be of 0,8mm. Fitting goes together with inner bulwark planking later on

self explaining

this Status of the gundeck does not hinder the slipping in from above, due to it`s flexibility

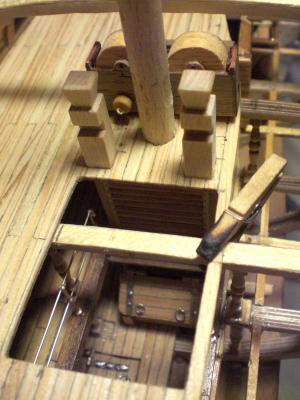
These wonderfull milled capstans (in propper scale !) are also RB models Inetnet shop product. under the grating aft of the chainpump boxes the rear staircase runs down from gundeck to intermediate deck

how to Position the portside guns and their tackle when there is no deck........
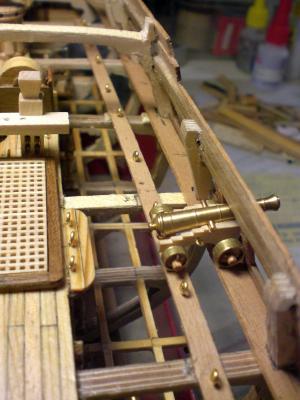
port of the main hatch grating I needed an extra Little deckextention to place the appr. eyelet tacklepoints. The gun is not permanently fitted yet, only for Position check
At this stage I am thinking of how doing best the Aft quarter badges in order not to ruin the beautifull etched brass parts, shall probably provide solution in the next lot
- avsjerome2003, DORIS, herask and 3 others
-
6
-
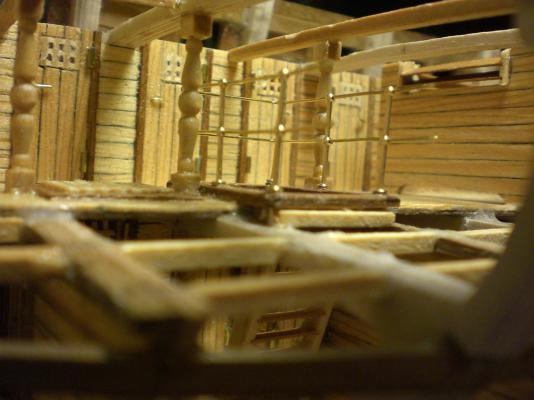
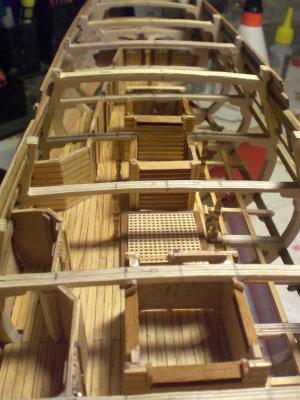
here are prepared lot 9 + 10 of my Pegasus buildlog.........
front area downward staircase
here the safety railing for the holdhatch in the intermediate deck is fitted. The grating of the gundeck hatch shall fit here as well
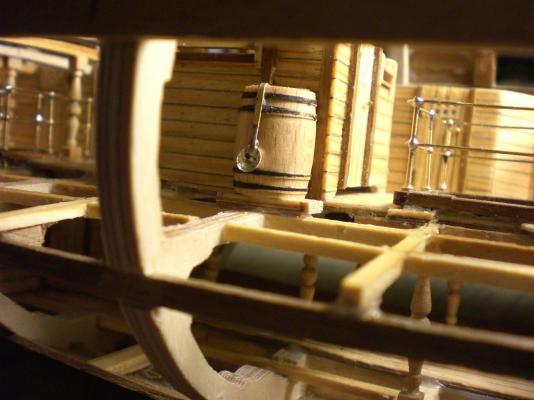
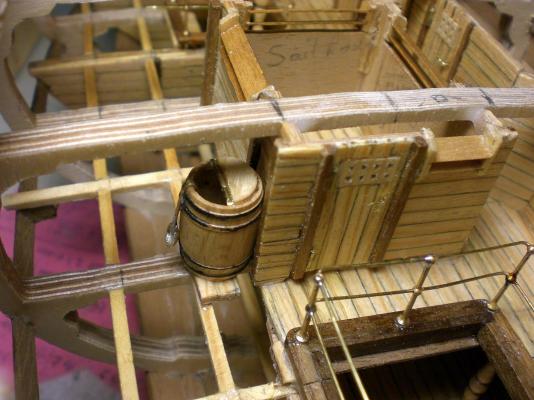
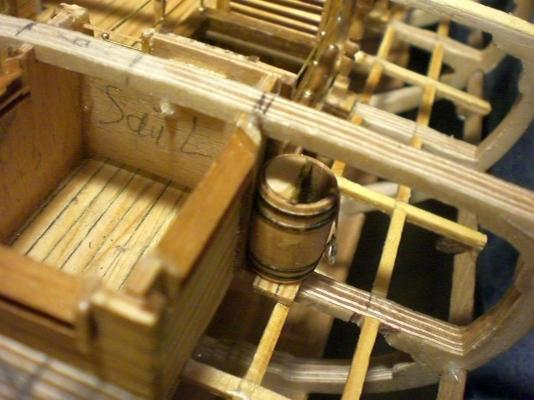
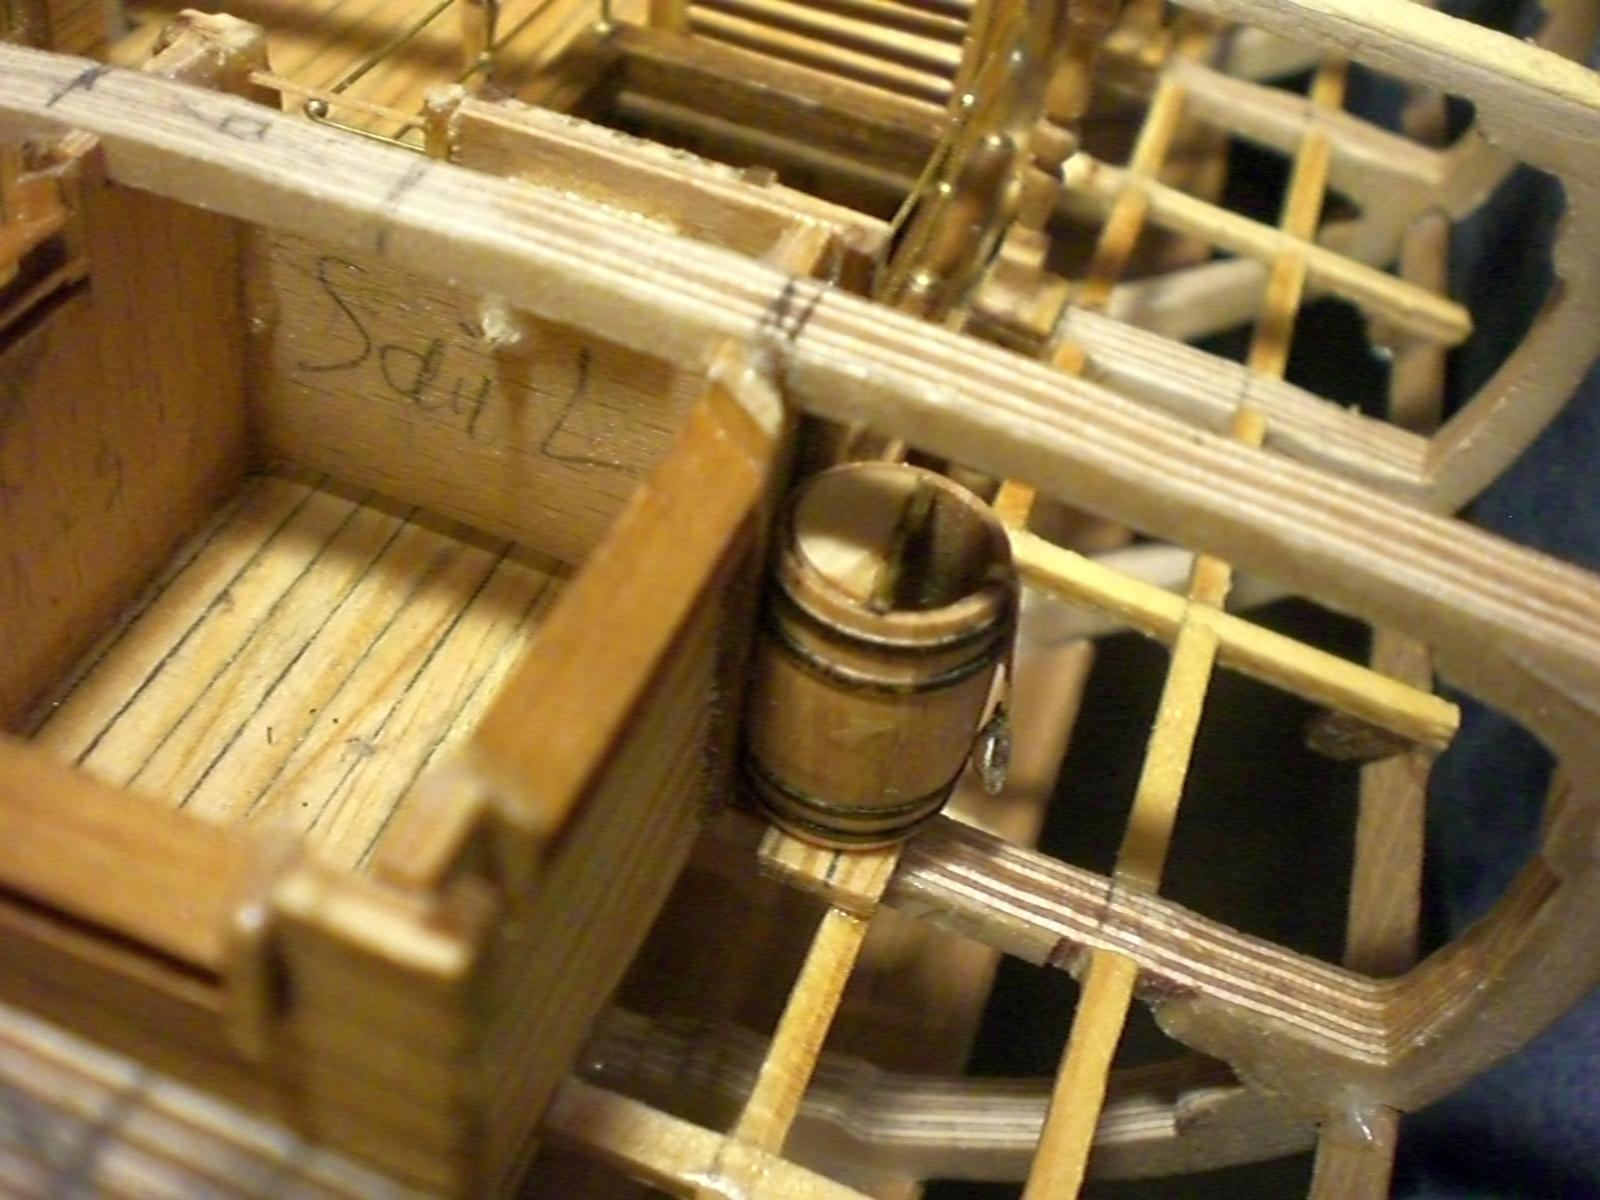
the freshwater Barrel with halflid and large spoon finds it`s place on portside next to the sailroom
self explaining.....
upper well Containment with 4 chainpump tubes and bottom base for the pump discharge boxes
Sailroom as well as pantry have Ventilation blinds fitted
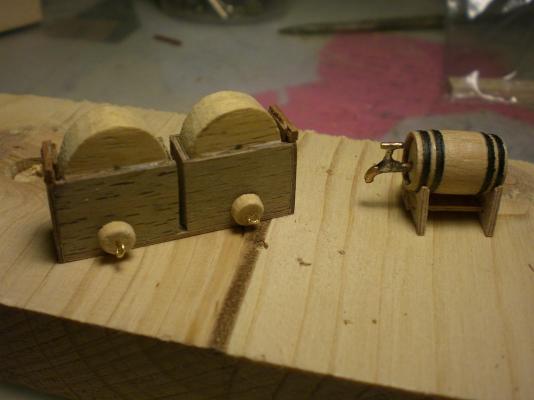
chainpump boxes with chainwheel covers, slide Panels at dischargeports and drainplugs at lowest Point. Also the rum-Barrel with tap is waiting for first filling
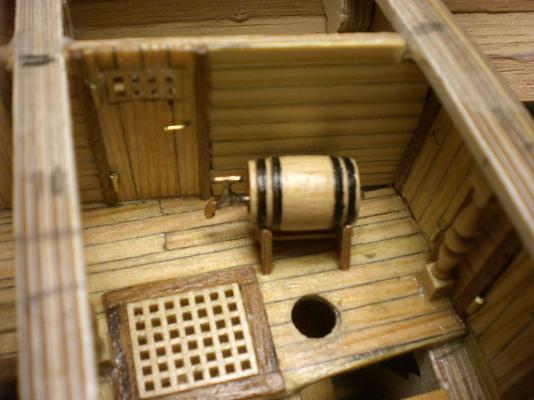
the rum-Barrel finds it`s place starboard of the mizzenmast Position in the officers quarter of the intermediate deck
starting with the gundeck
gundeck from pine-planked 1 x 3mm strips on 0,8mm ply Basis. The deck will be slipped in from above as I described earlier in this log
-
Hi Toni,
you have a fantastic model, I very much admire your skills and the results when sighting your buildlog, it`a pleasure to see this. To what degree shall you complete the intended Version in 1:48 ? Such a model would be a pride to Display ie. in the Hamburg maritime Museum.
Will you be placing it on a stand. One question I have : Are all These precise cutten frame- beam filling parts, etc. povided by an extensive kit with ready cut / milled parts, or must they be taken from a plan set, and Hand cut ? I trust in both cases it must be very ambitious time intensive Task to get the detailed parts seperated logisticwise somehow well marked and well prepared for sectional assembly. An outstanding Job you are doing !
Nils
-
8th lot of my Pegasus buildlog......

note, the sternpost has been sanded down to half its width Prior to planking, so final width after planking and sanding is at average 4,5mm`, trust that the rudder shall later on be of this thicknness at it`s widest thickness
the 3 mm width planking of deck and walls are identical (3mm x 64=192mm in reality, seems realistic, being about 1,5 width of the sailors shoes). By the way, all Deck and wall planking edges are charcoaled by means of a soft pencil. This gives the tarline effect regarless to thickness even after sanding
allthough many wooden structural parts, the hull is of remarkable low weight and still stiff and rigid
selfexplaining view
view aftwards, now in foreground the sailroom has been added, behind are grating on hold hatch, Upper well housing and pantry. On starboard side traffic corridors, sailorcrew and marinesoldiers accomodations. Between upper well and pantry (here not visable) a staircase goes down to the cargo floor. This may be the main trafficway for fast Access from the filling room (under the waterline) via aft staircase in the intermediate deck up to the gundeck
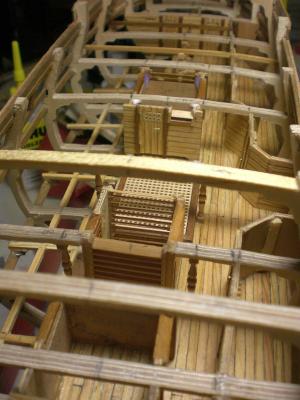
same Features with view from top, aft

birds view intermediate deck nearly complete.......
the sailroom space seems to be limited, but could not be increased due to spaces between surrounding facilities
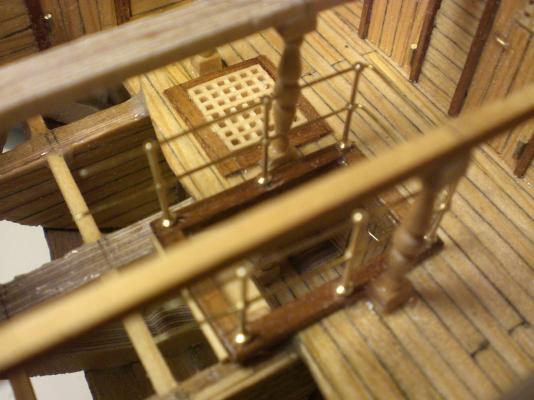
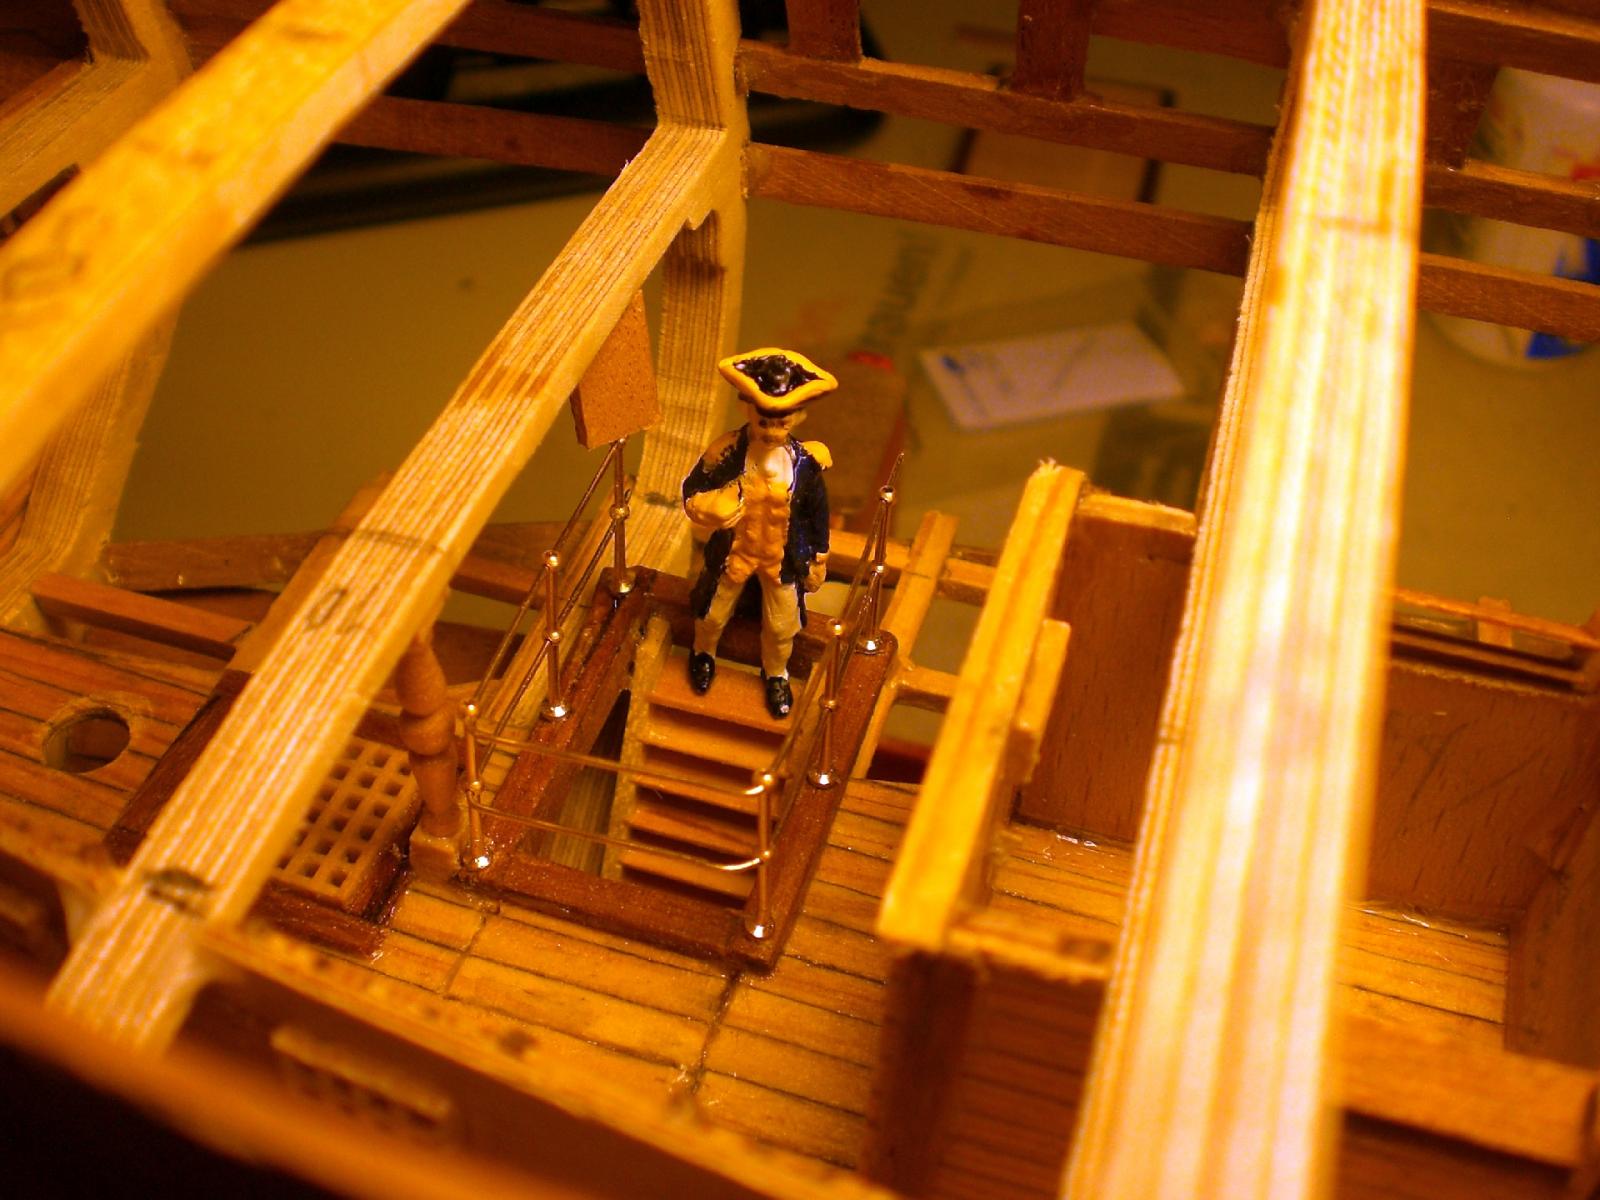
interior staircases fitted with railings to increase safety in battle and when ship is rolling

again intermediate naval inspection..., the officer means that in a far future a day will come, where even the stairs will have to equiped with handrails
at this Moment I have`nt made up my mind yet if I should apply coppering, White "Antifouling Appeal" that allows the plank and grain structure to be recognised, or nothing of both.
Would appreciate any fellow builders coments on this....
- herask, zoly99sask, NMBROOK and 3 others
-
6
-
Danny
I was so much surprized and amazed from what I saw when I read through your buildlog. I find it breathtaking ! When I was a 8 year old child, a brother of one of my pals in Capetown once showed me a 17th or 18th. century and about 1m Long shipmodel he was working on. I could not believe that someone could be so much knowledgable of the techniqes and skills applied in those "ancient" days and being capable to adopt this into a scaled model. All the workmanship, the Features, the particular Wood connections looked like what you are doing. Because all The following years to date I never came across something alike again, except from Special models in maritime Museums etc. I would love to see what your model Looks like completely rigged, with or without sails. Are you perhaps intending to build an admiralty type demonstrator model ?
This also applies to the other high skilled modellists introduced in this Forum as well, their babies basing on TFFM plans and in scale 1:48 eg, Toni`s Atalanta I read through just before. At the time I picked the Plan of the Pegasus because I loved this ship classification for my own Project, I was not aware of what is being built in several model shipyards at this time. I have myself amoungst others,finalized Tallship models like the threemastbarque "Gorch Fock" in Version of the 60ties and the flying P-liner fourmastbarque "Pamir" in the Version she foundered in 1957
Nils -
Aldo
the keellaying was in April this year, we now are nearly 4 months later I asume that would adequate for the build Status provided one has the time to do so. But I am retired from work and took up ship modeling again. The reason it Looks like speedy session Basis on the fact that I started issuing buildlog Posts out of my photo documentation just a few days ago.
Nils


HMS Pegasus 1776 by Mirabell61 - FINISHED - scale 1:64 - 16-gun sloop
in - Build logs for subjects built 1751 - 1800
Posted · Edited by Mirabell61
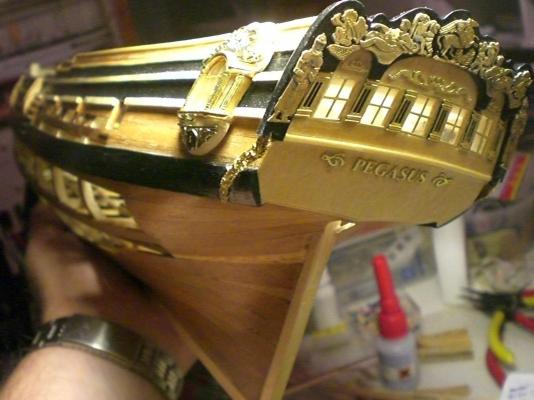
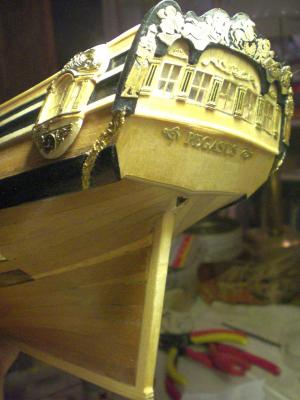
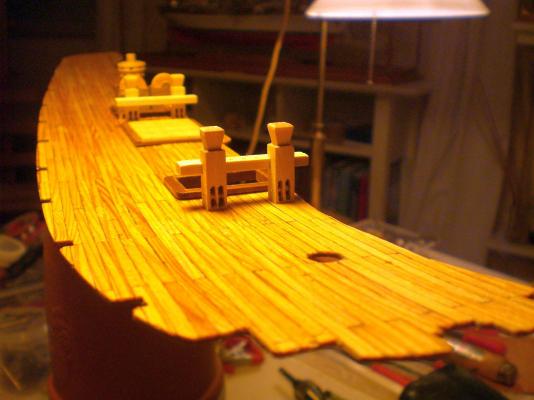
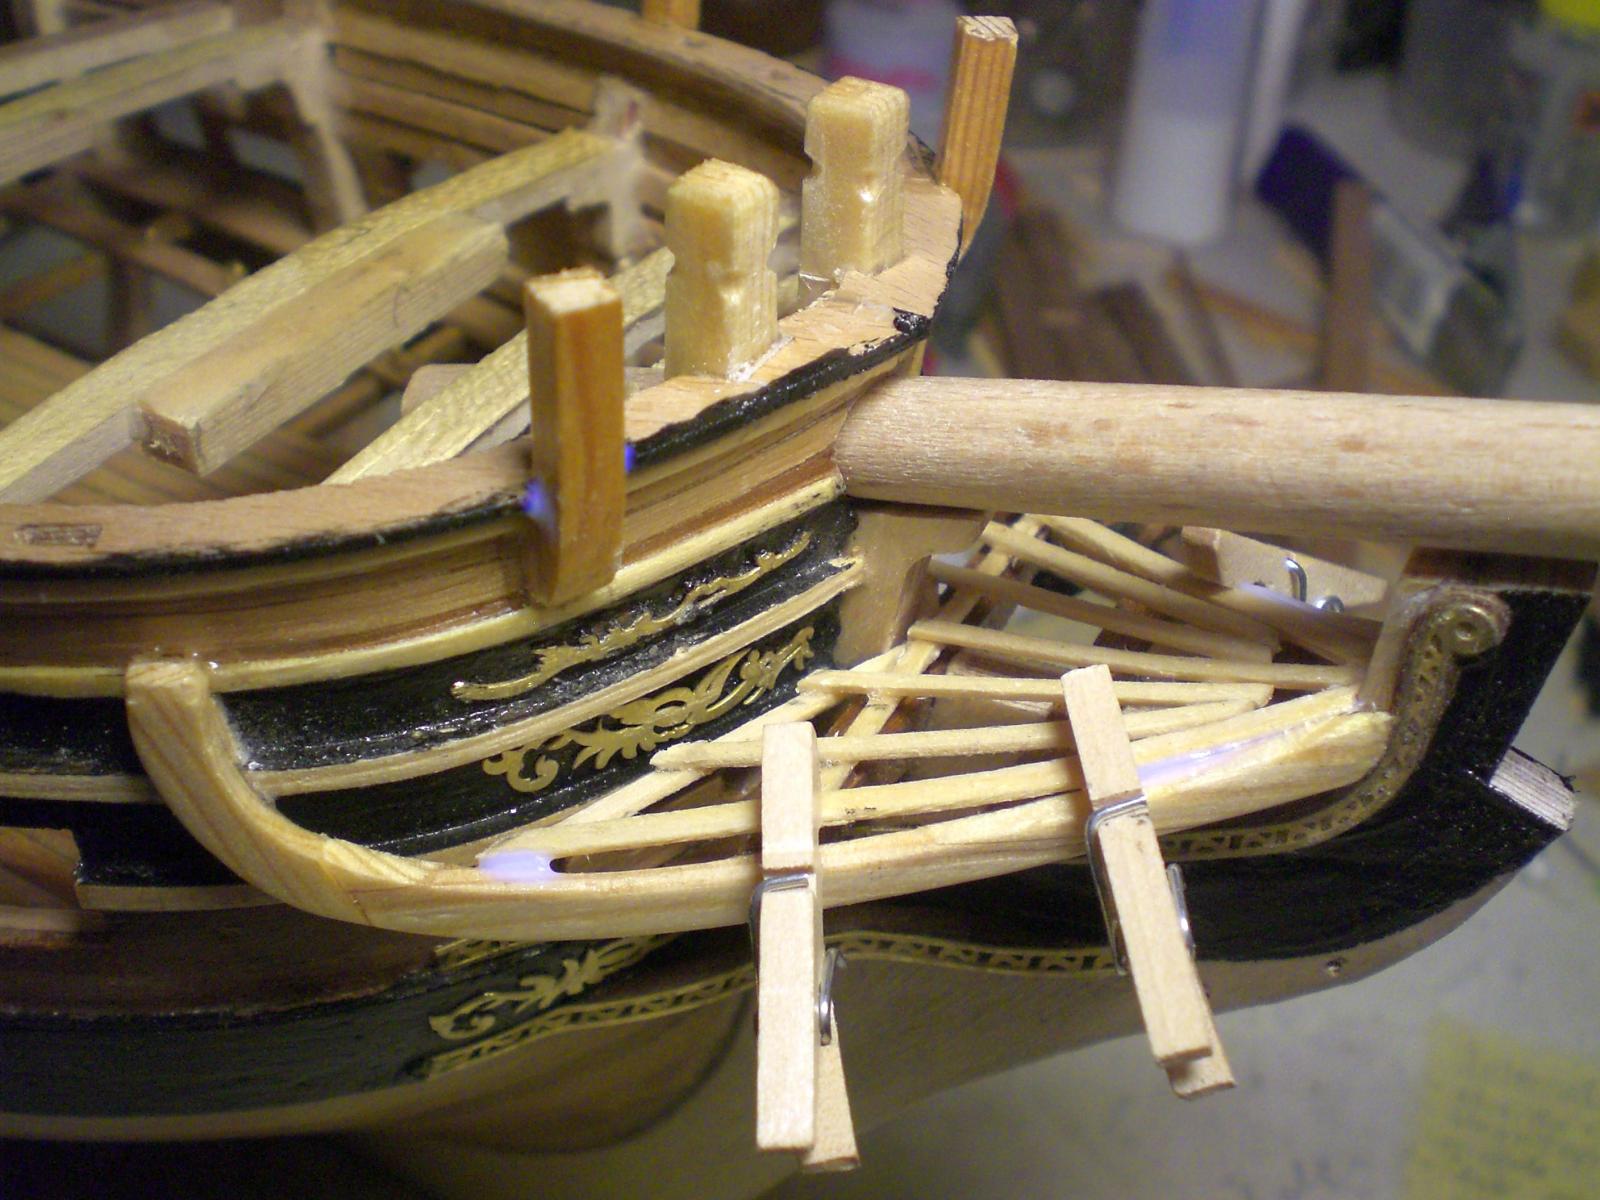
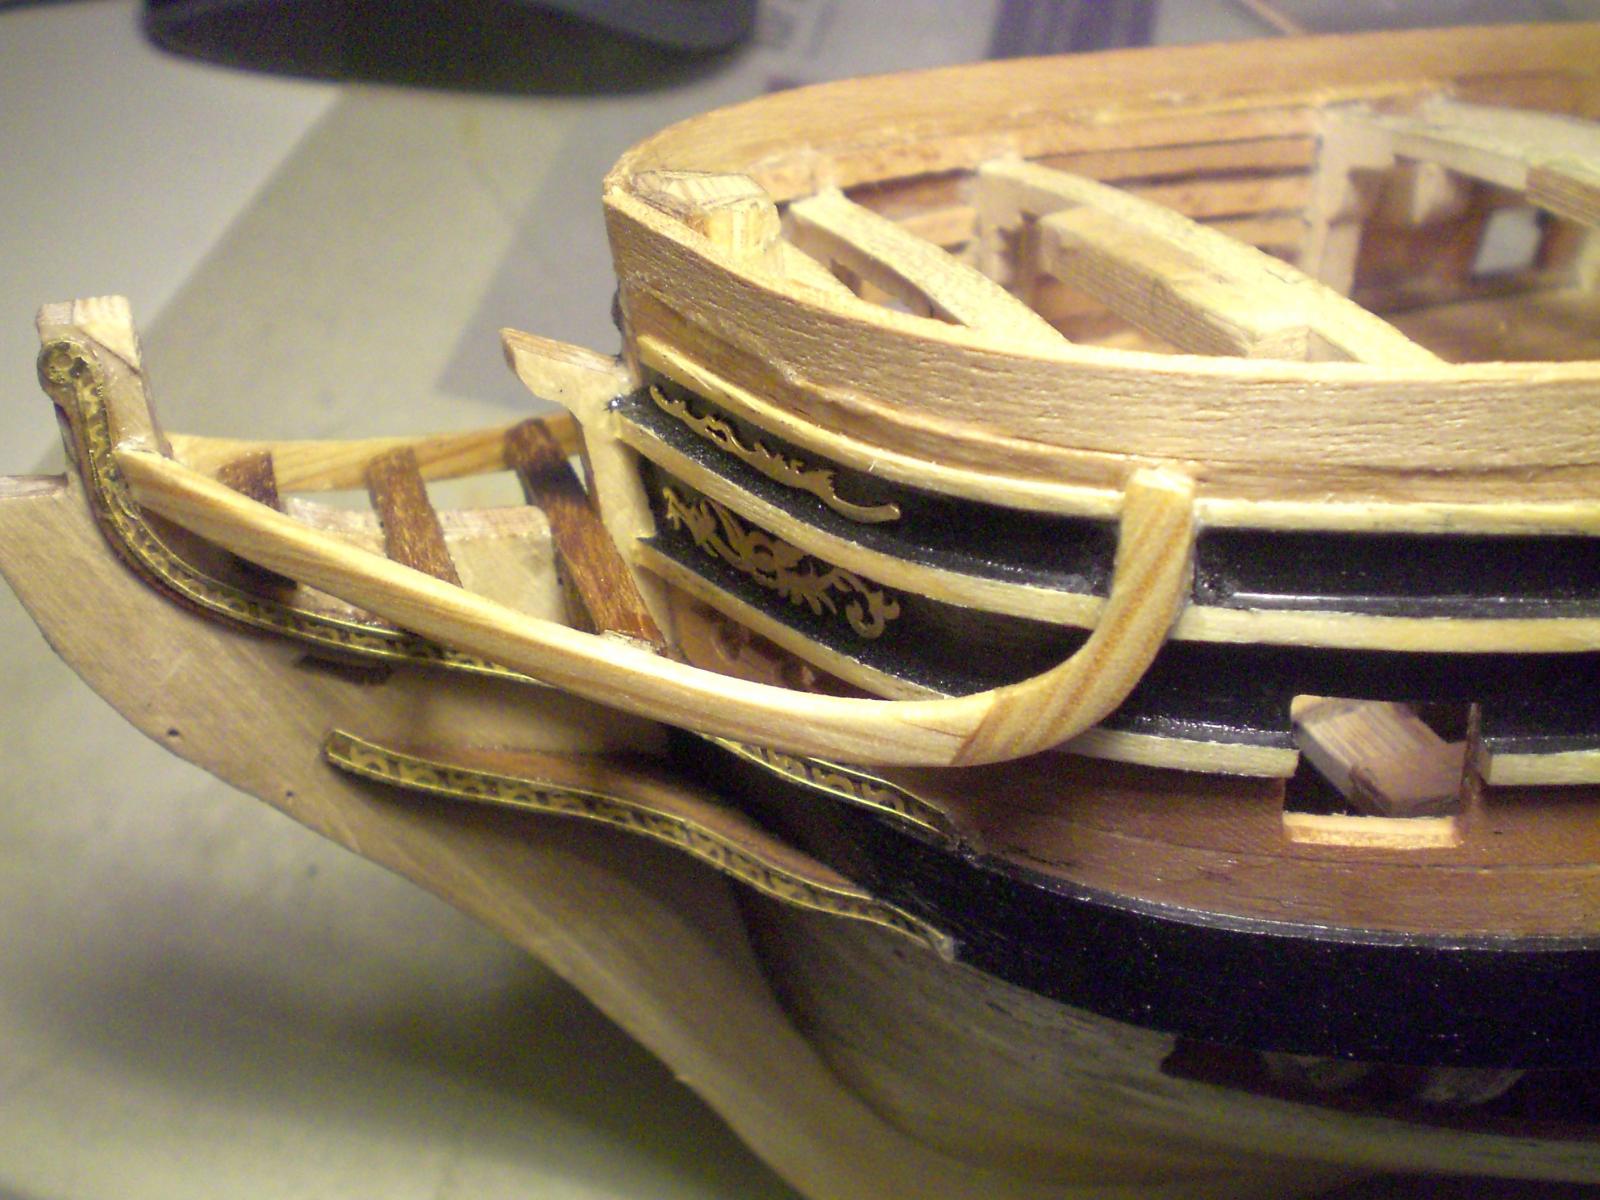
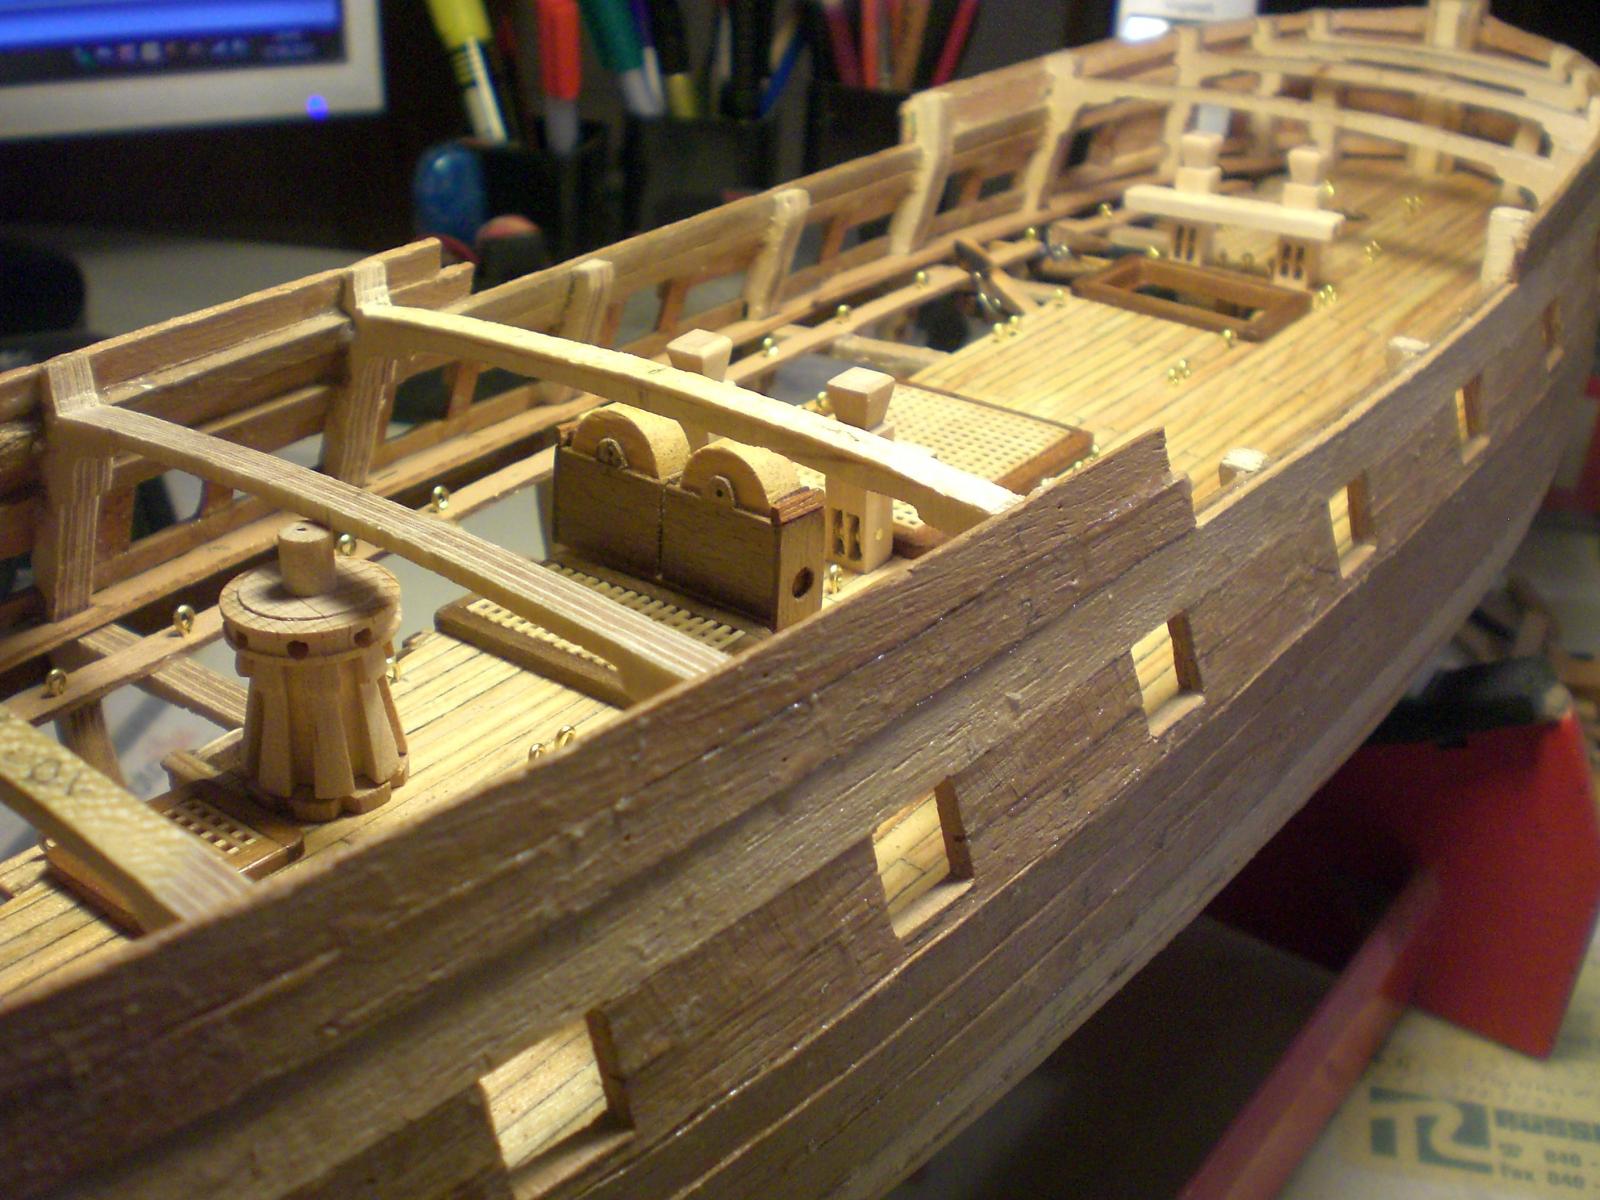
Lot 16 of my Pegasus buildlog
there are still so many to do, I could carry on everywhere, but have to organise the futher build carefully....
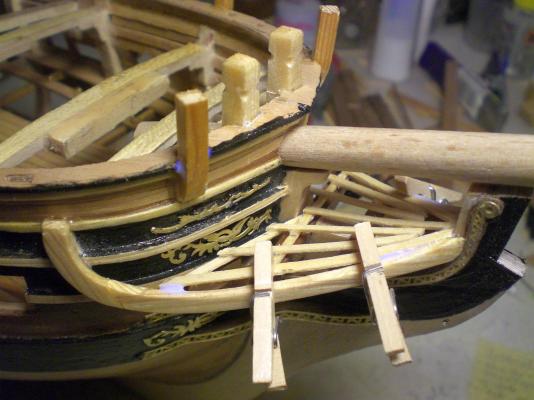
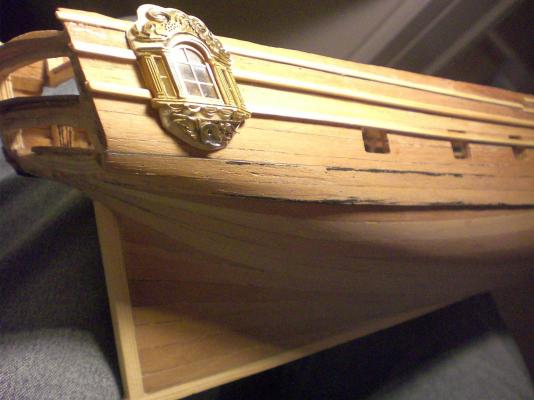
I prolonged the black wale-stripe into the bow area, took off the Little brass bird figure before and Need to replace it again
here is the Little duckie again...
self explaining
prefit of the namegiving figurehead, Chris Watton prefers resin as material, for shrinkage reasons, but still i`m mind pregnant with a brass Investment casting or so ( the sponge is still not soaked...)
how to do by simplest means
self explaining
doing a litte bit further here
I really am not pleased with the forecastle Access Little "pigion-ladders" squeased in between guns and forecastle aft bulhead as planed in the drawings, in lack of space, so here is my solution (B.E. Blue Ensign might be having a smile on his face allready)