HOLIDAY DONATION DRIVE - SUPPORT MSW - DO YOUR PART TO KEEP THIS GREAT FORUM GOING! (Only 51 donations so far out of 49,000 members - C'mon guys!)
×


Mirabell61
-
Posts
7,407 -
Joined
-
Last visited
Content Type
Profiles
Forums
Gallery
Events
Everything posted by Mirabell61
-
 Hi Jason, thanks for looking in....and your compliment, yep, I was my self amazed how easy the planking is with this hull shape. I started up at the sheer line, working downward towards the keel. There were only two planks down at the keel I had to fit in after tapering them at both sides.... Nils
- 692 replies
-
- 4
-

-
- eagle of algier
- chebec
- (and 2 more)
-
Hi Antony, Thank you very much for your kind and good comment...., yes, I`ve been thinking of plain gold color for the decorations, but not yet of leaf gold, no experience with that so far, but I would like to learn the way of application. You`re definately right, it would look much nobeler than paint would do. Do you have experience with leaf gold plating such small objects ?, or perhaps with electro galvanic plating ? Nils
- 692 replies
-
- 4
-
-
- eagle of algier
- chebec
- (and 2 more)
-
Thanks very much for looking in Dave, am pleased you are enjoying the build.... Nils
- 692 replies
-
- 4
-
-
- eagle of algier
- chebec
- (and 2 more)
-
Hi Jon, your Bluenose schooner looks beautiful, looking forward to the final picture set... Nils
-
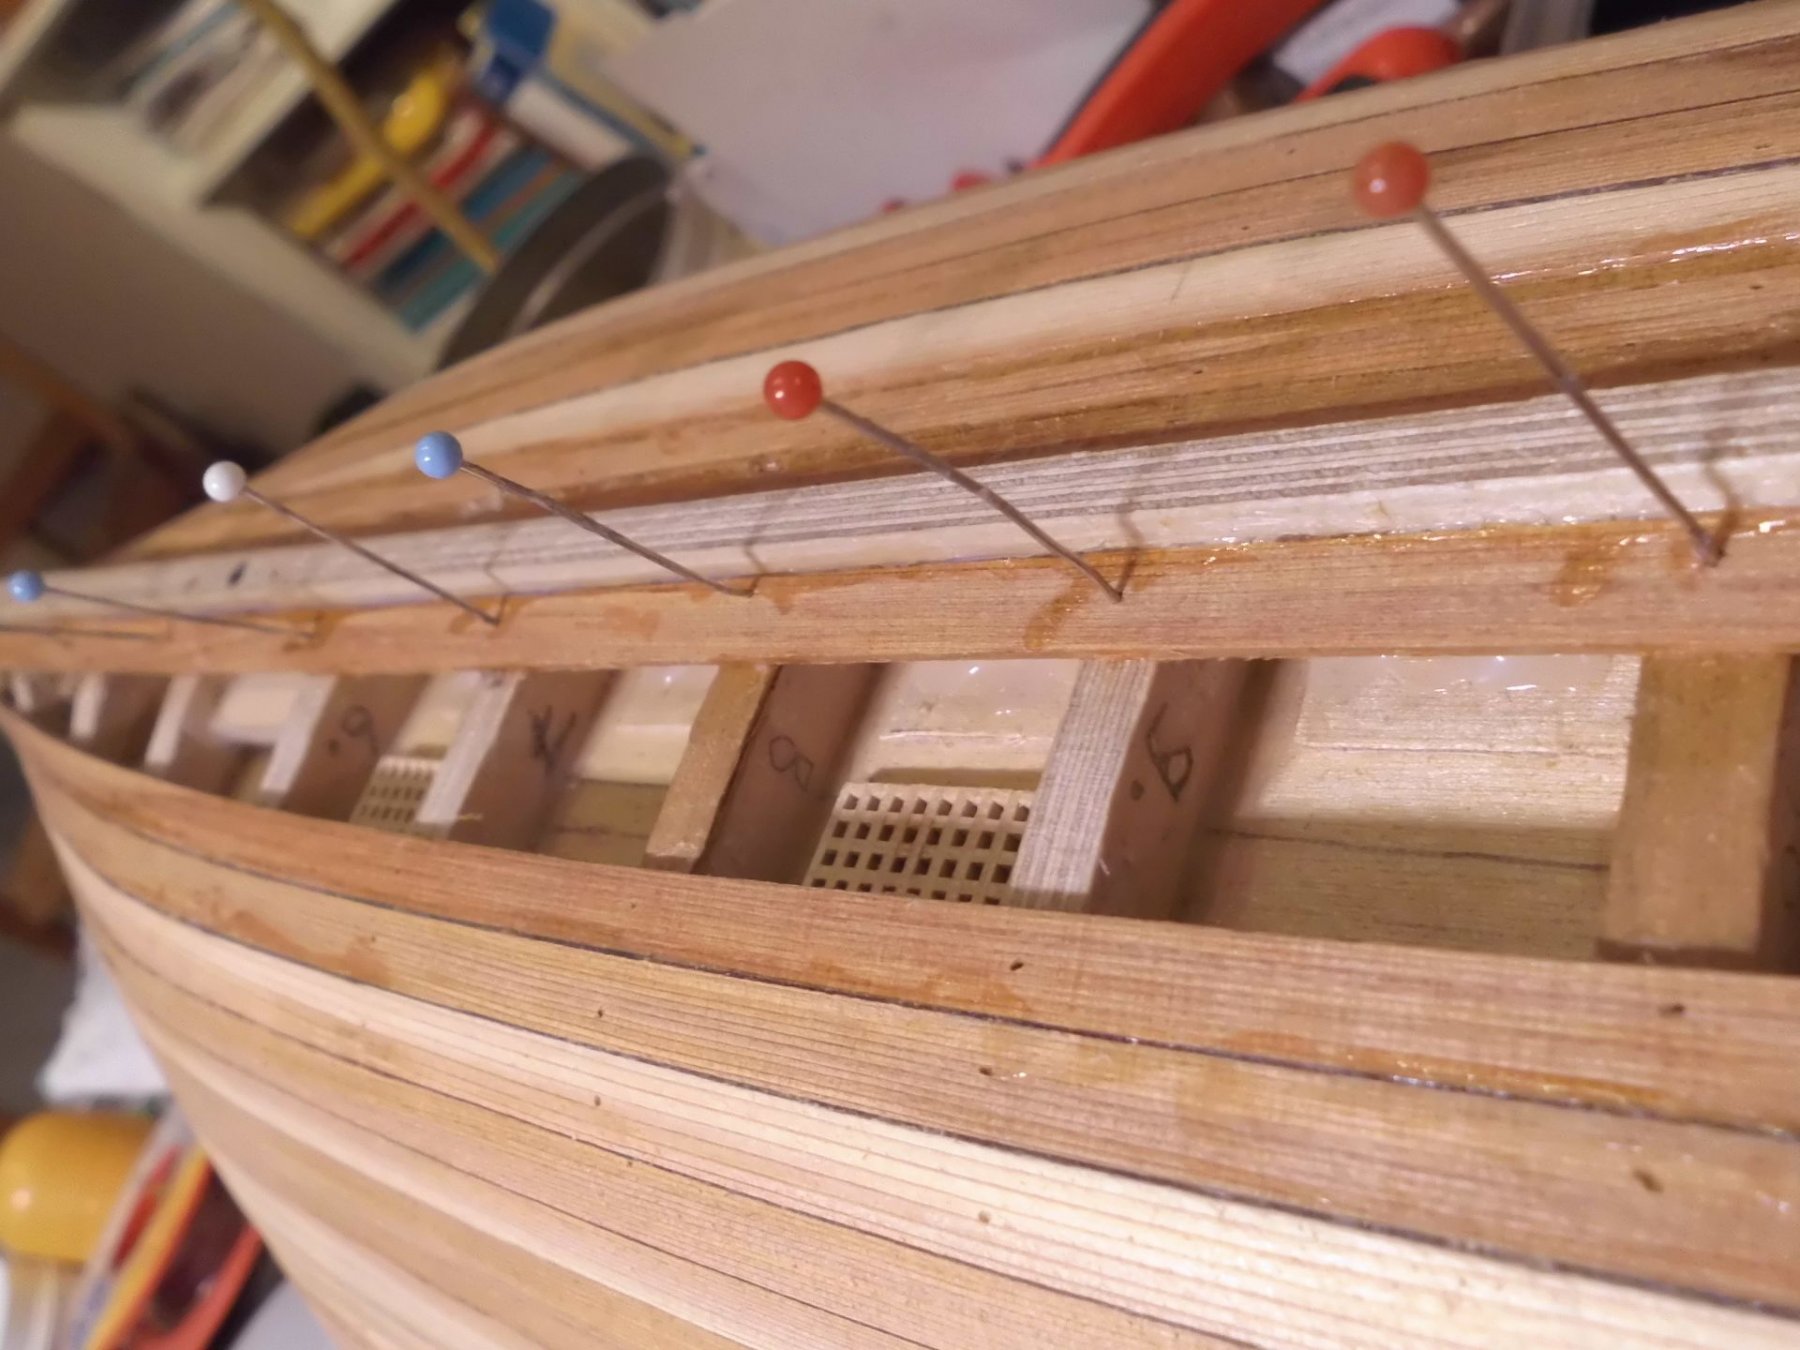
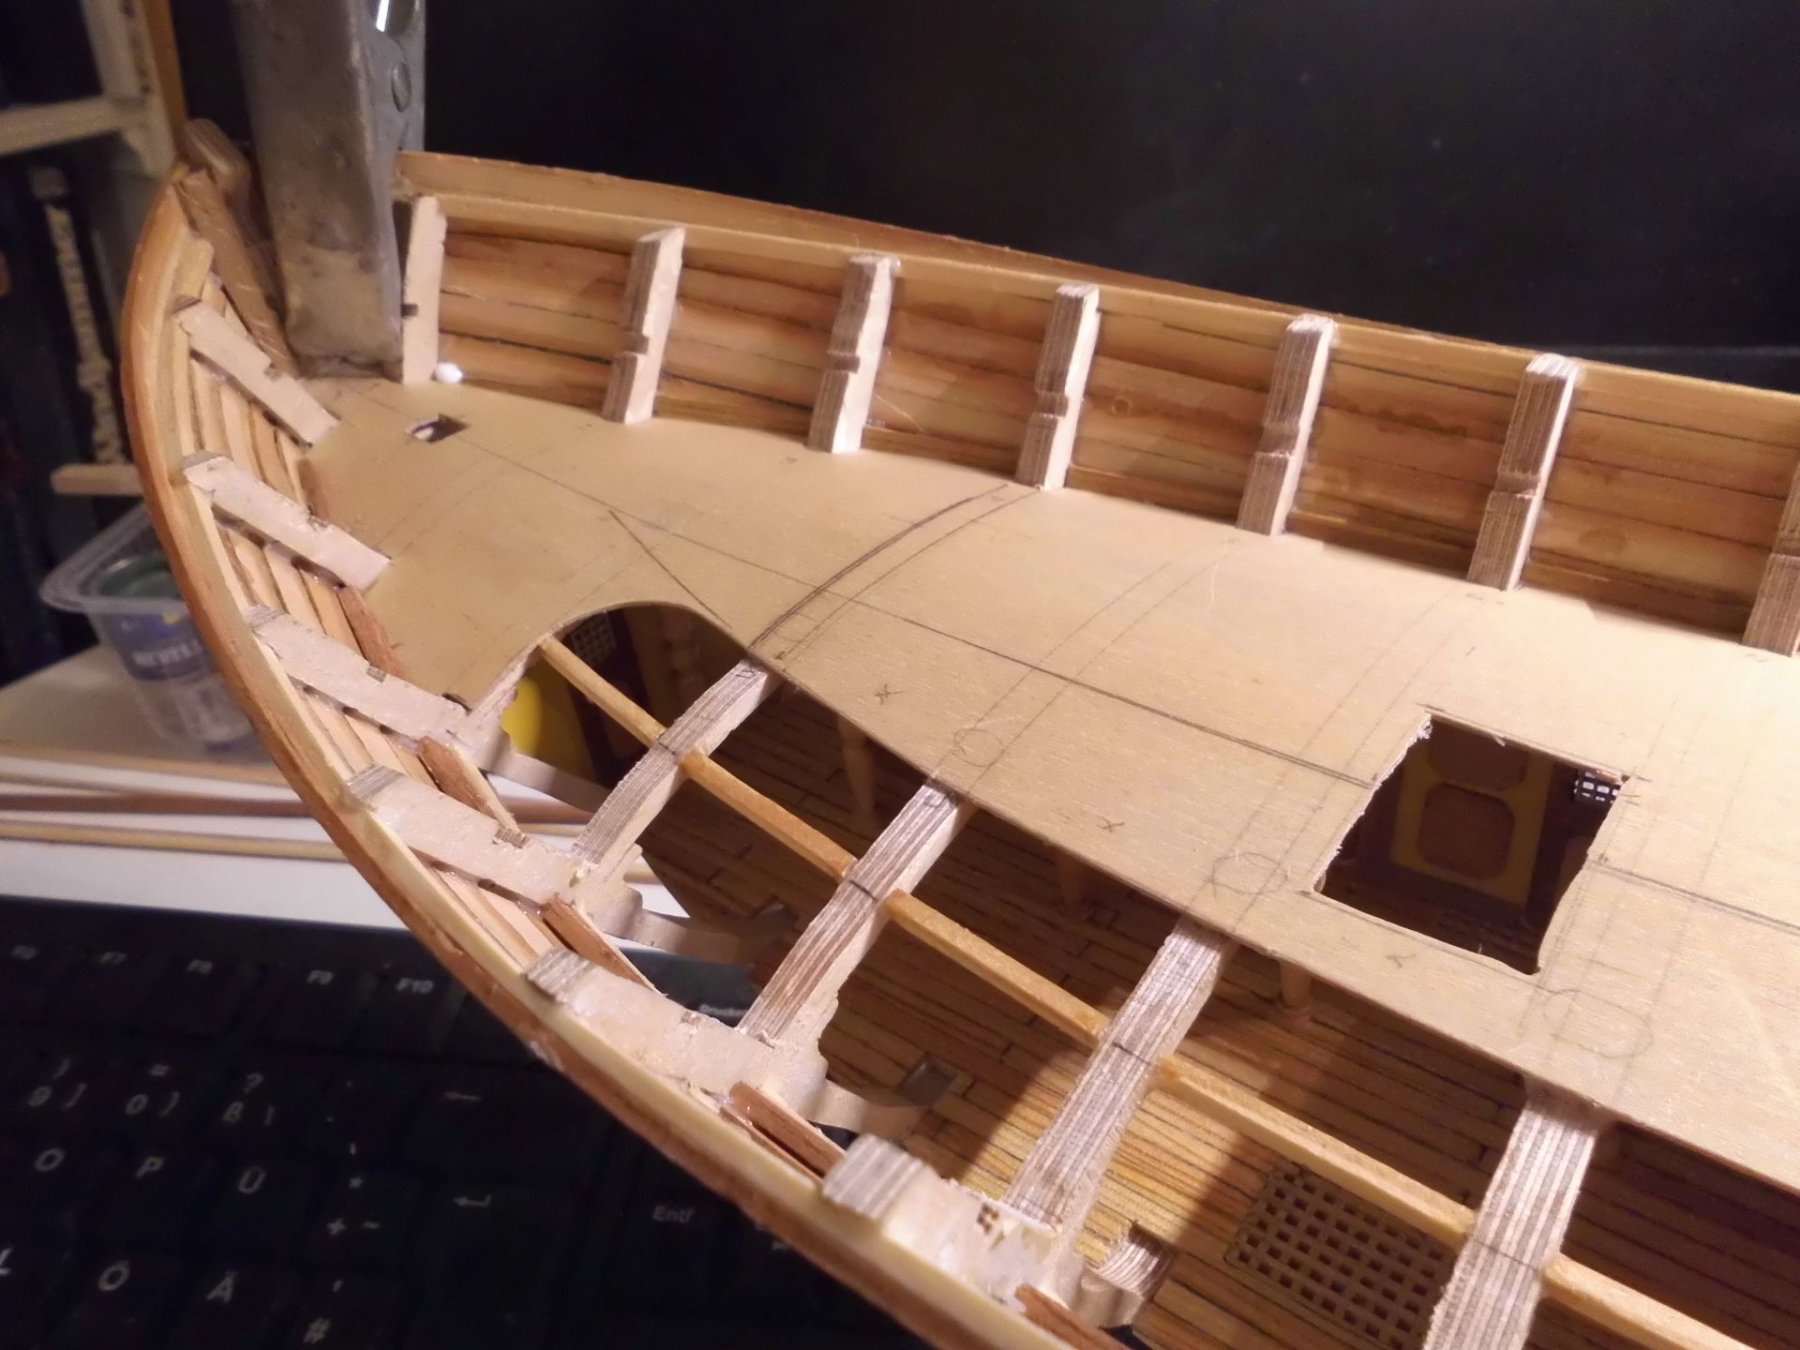
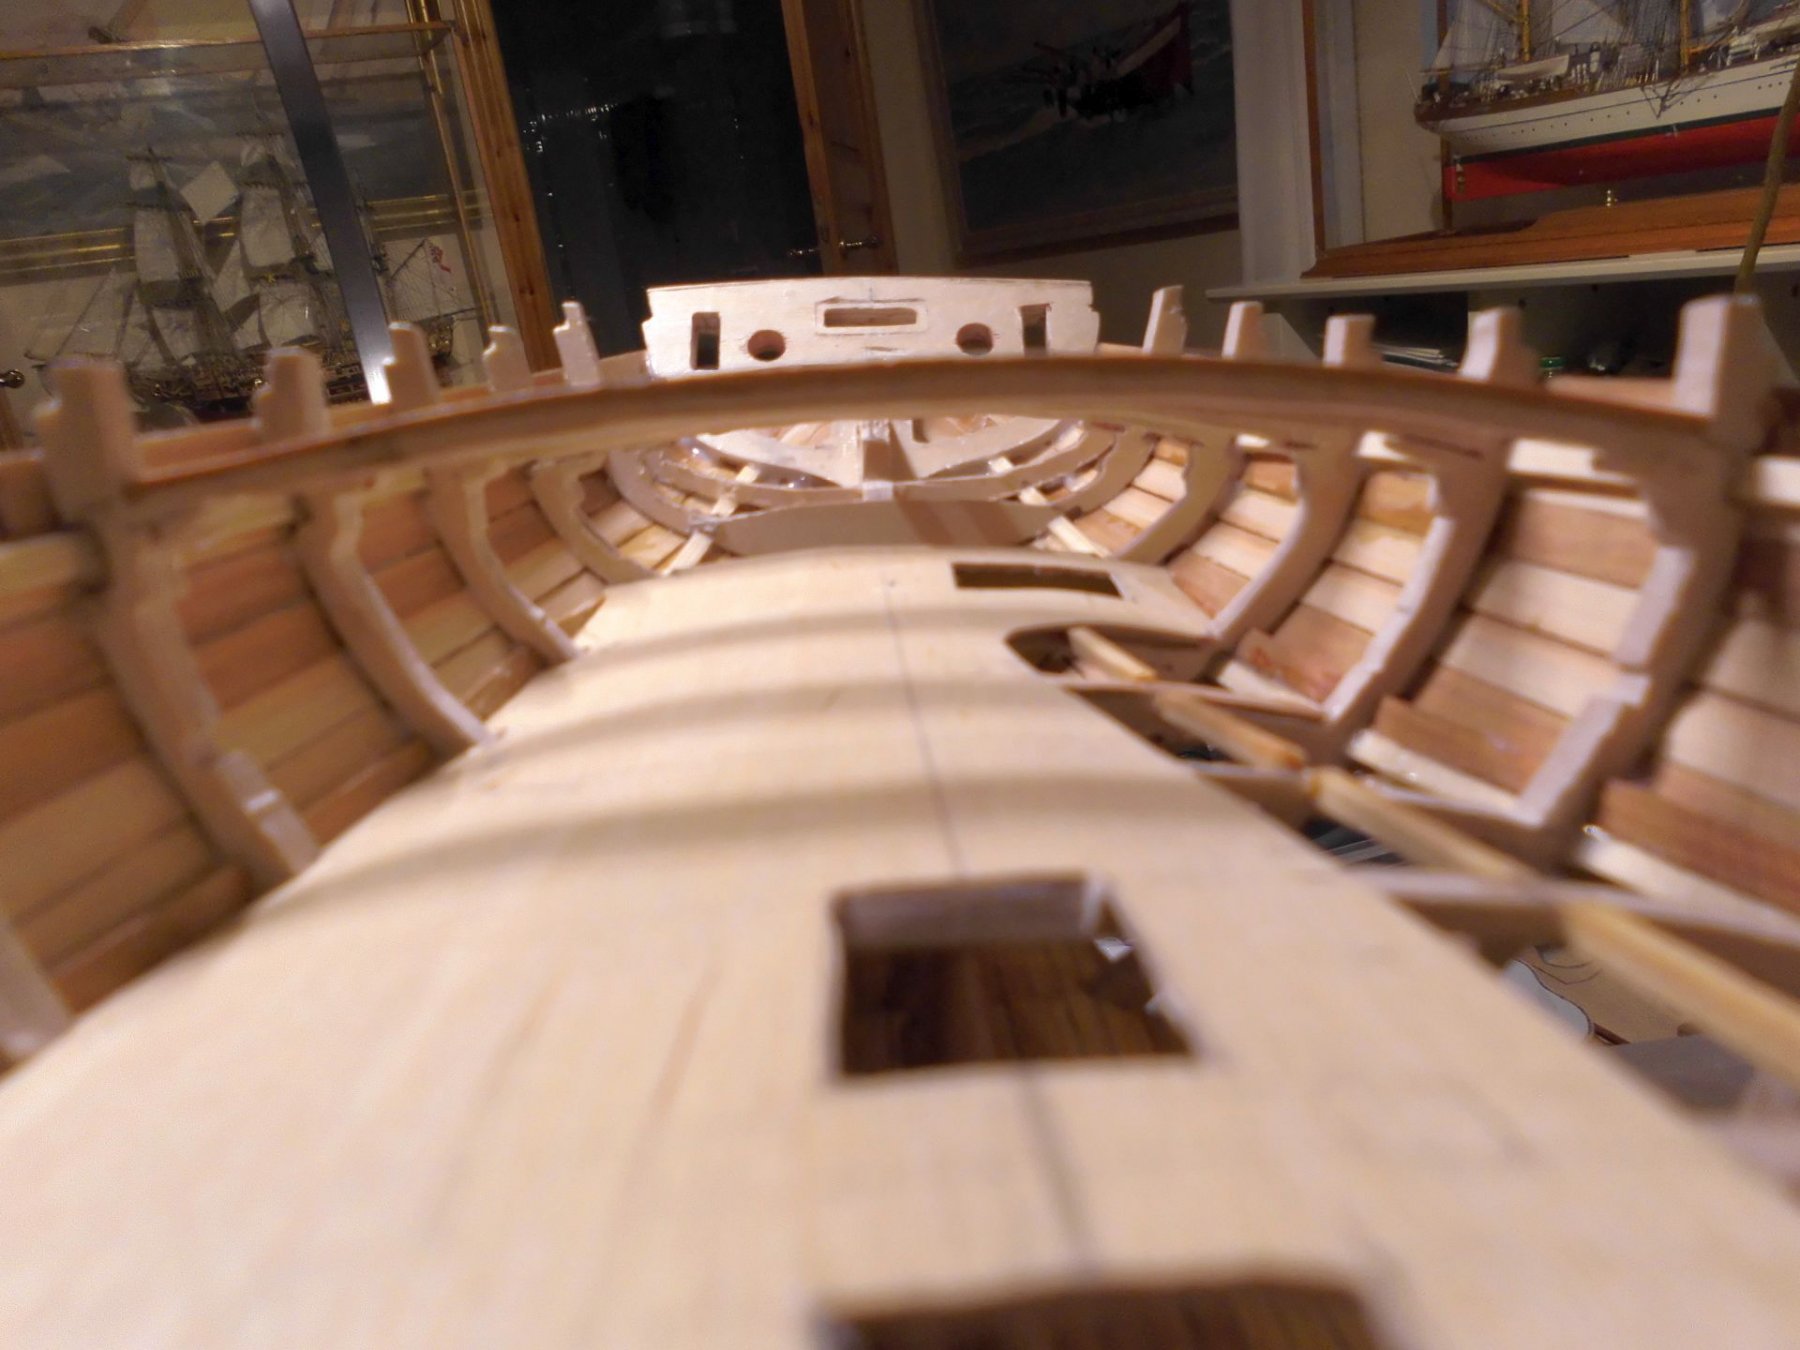
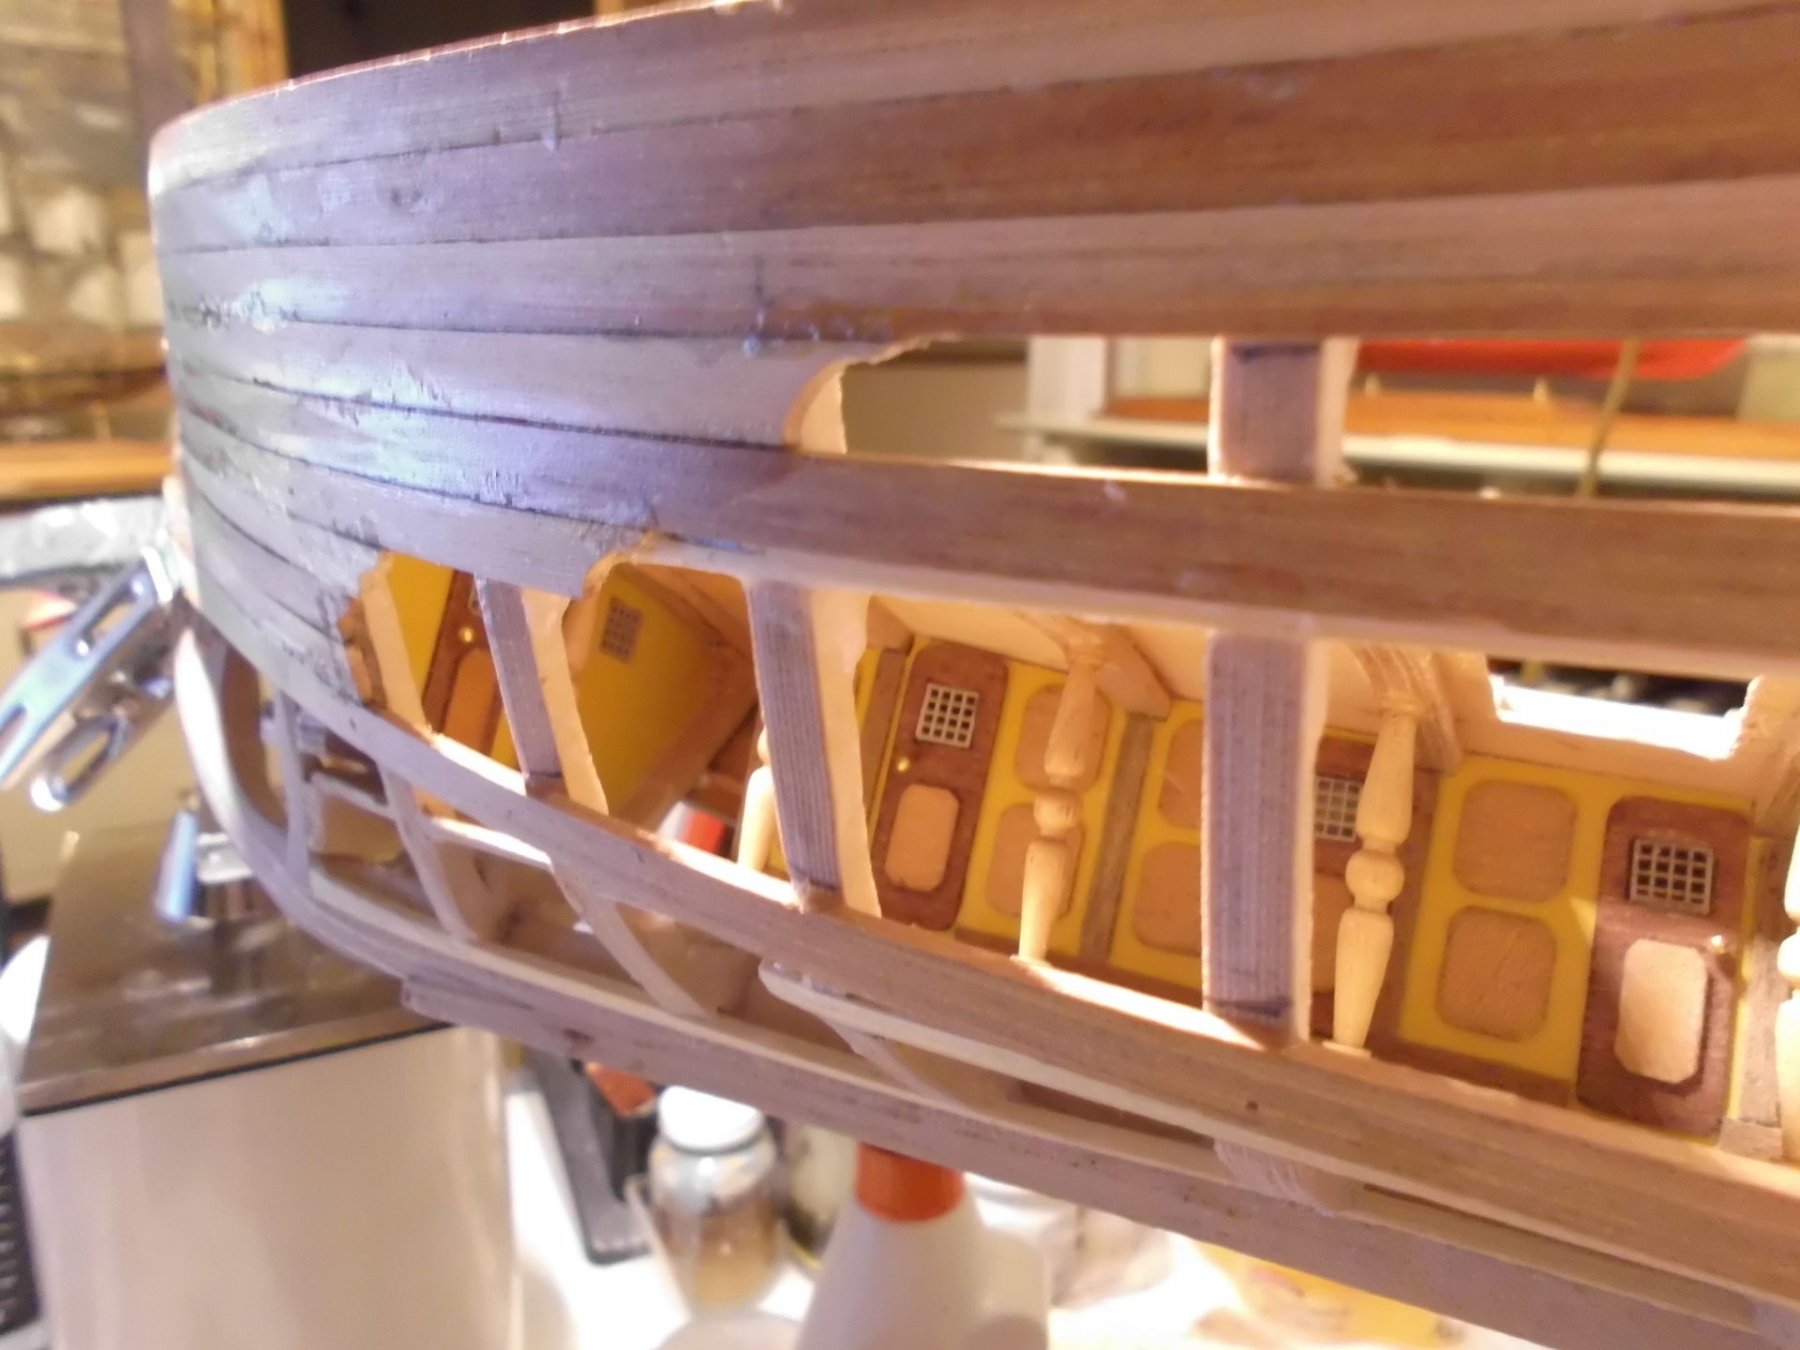
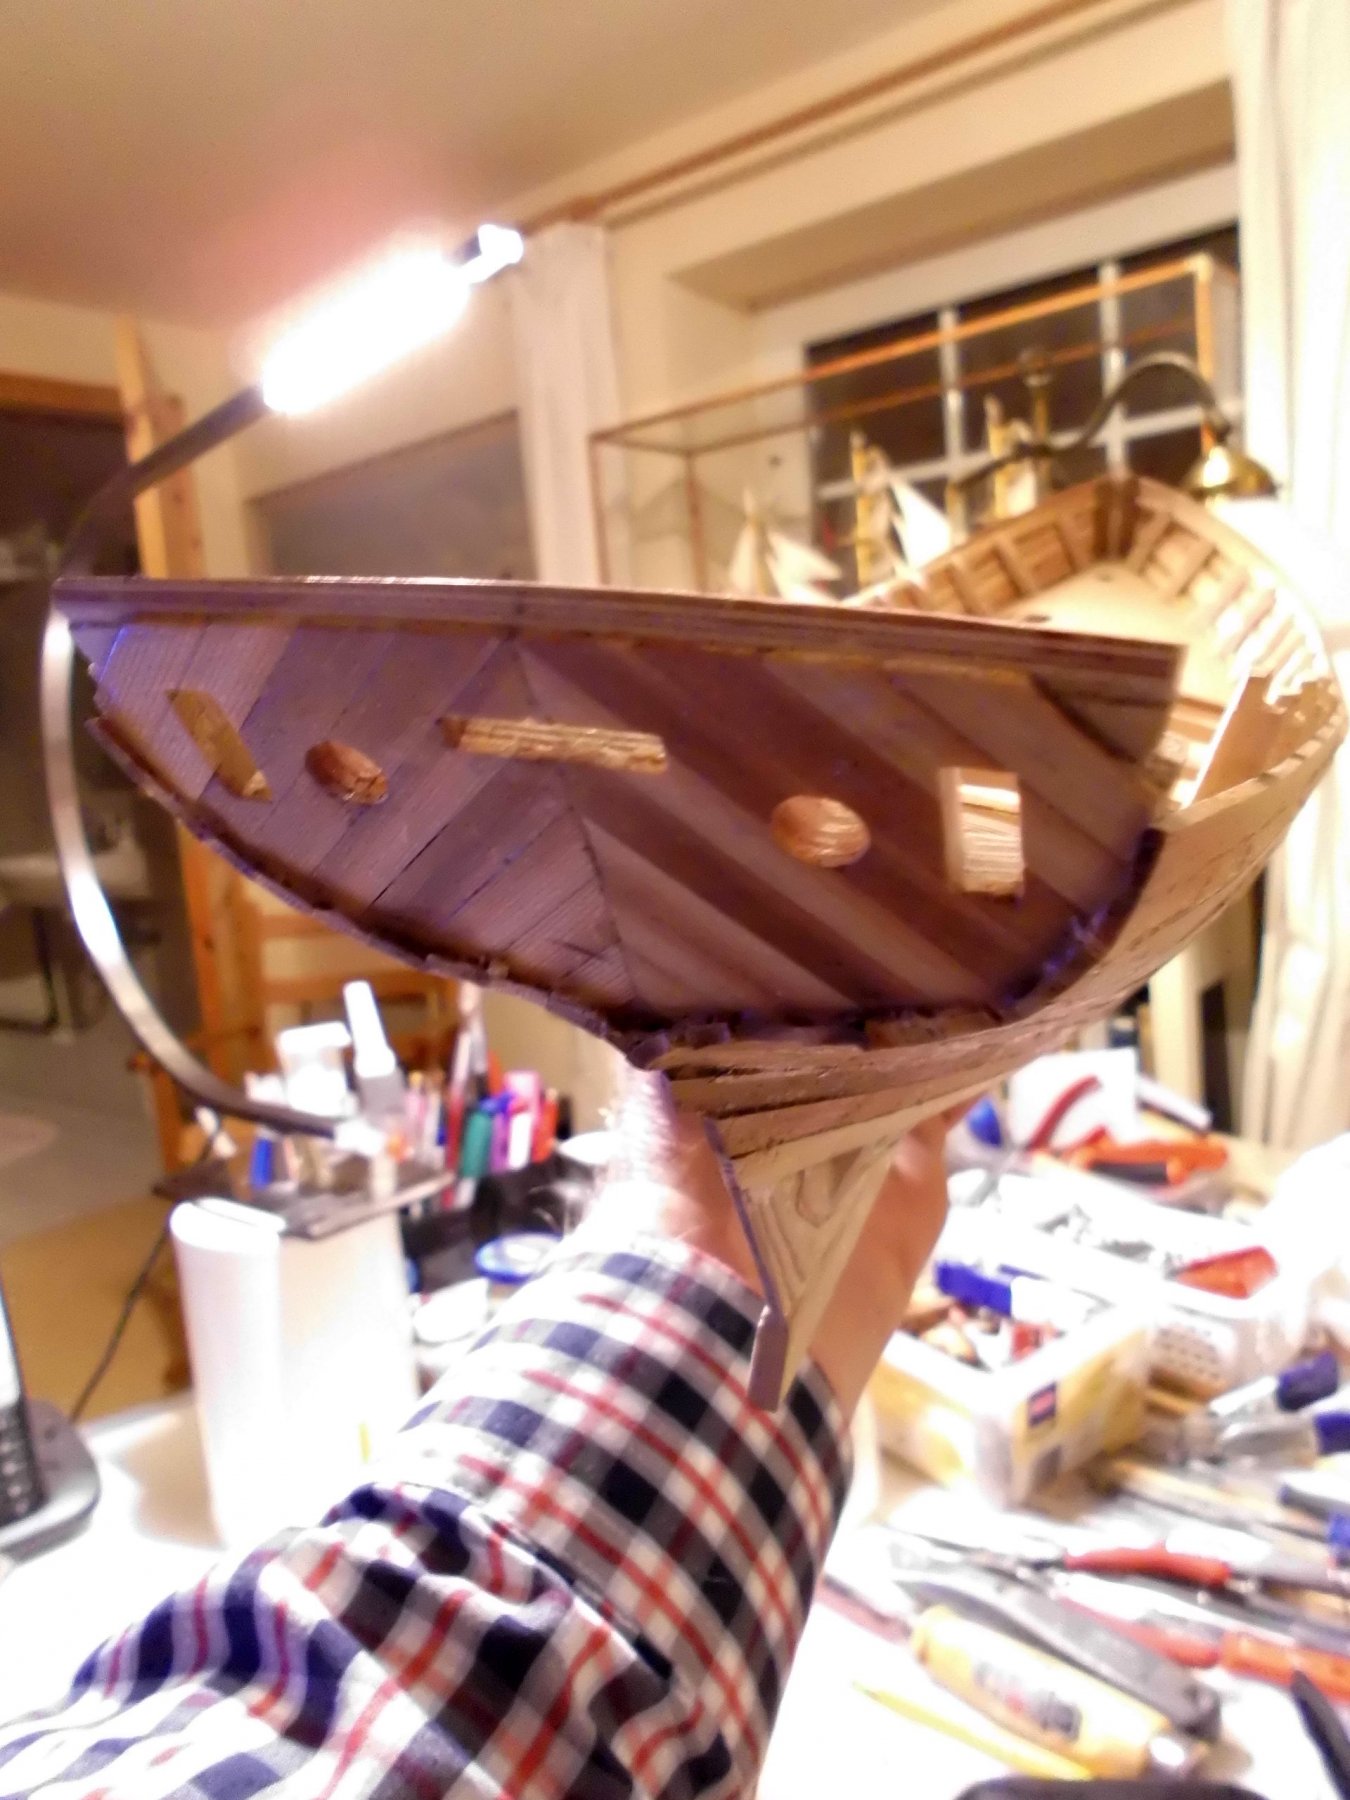
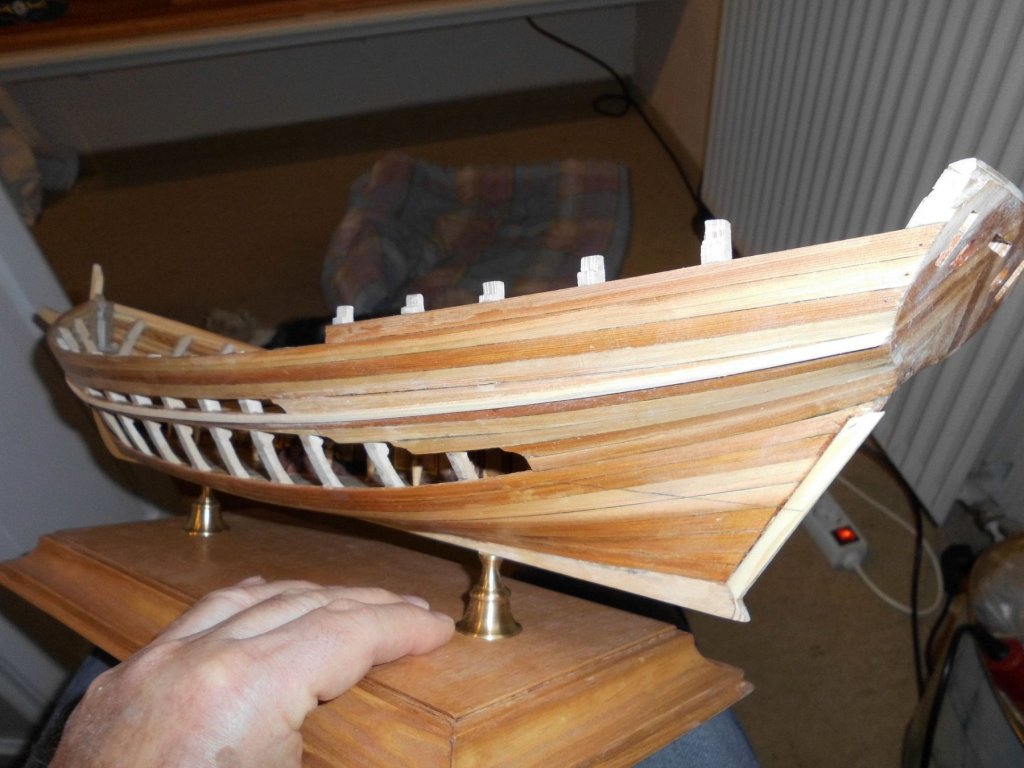
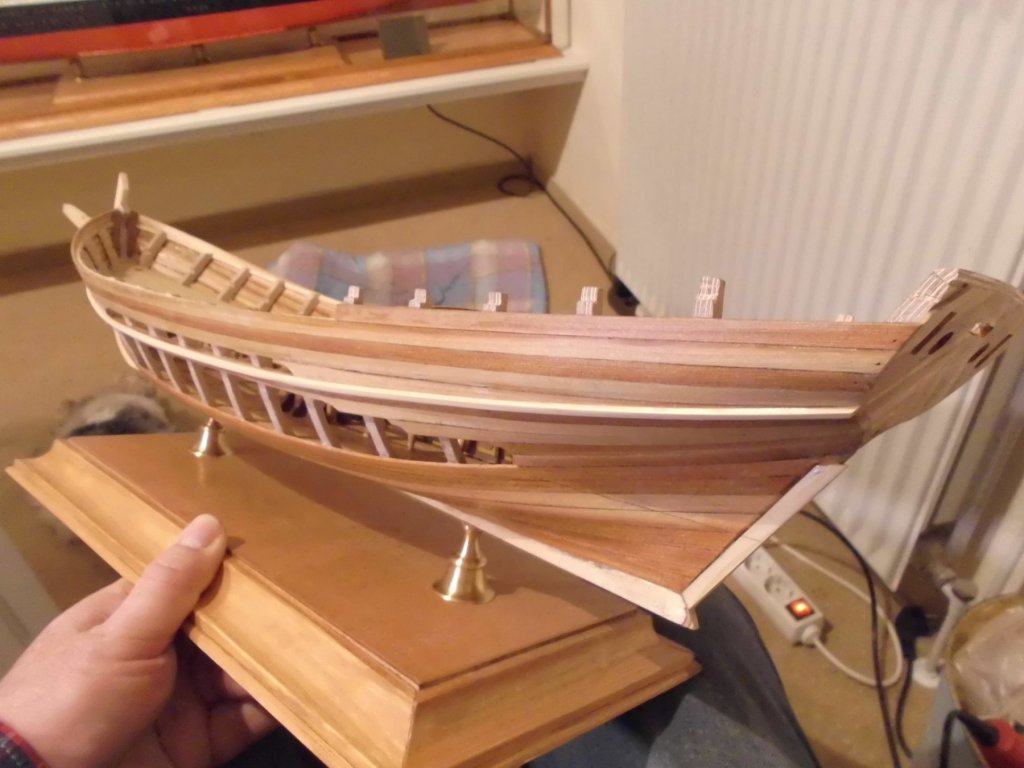
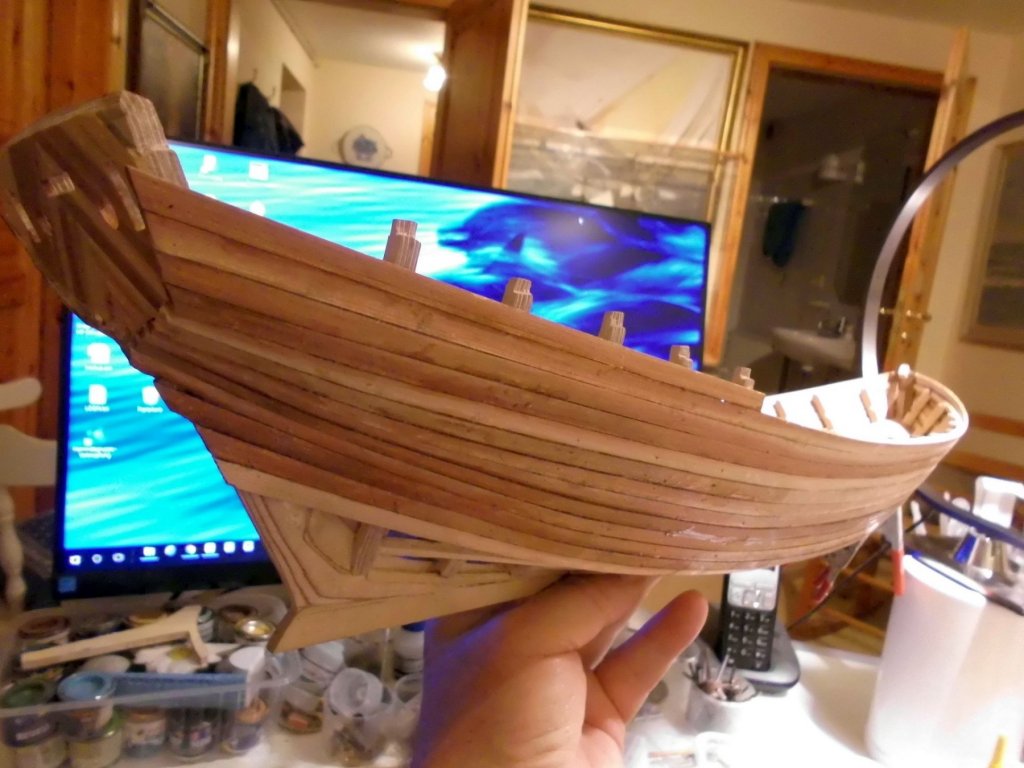
Update : planking completed, except for that of the the uppest stern grating deck....., one of the side rails put on, but not complete yet, stand stained in cherry wood color, and bow- and stern post fitted.... Nils the pencil-line marking (waterline) is marked all around, the underwater ship wil prbably be painted white later on....
- 692 replies
-
- 25
-
-
- eagle of algier
- chebec
- (and 2 more)
-
lovely work Johann, a pleasure to look at... Nils
-
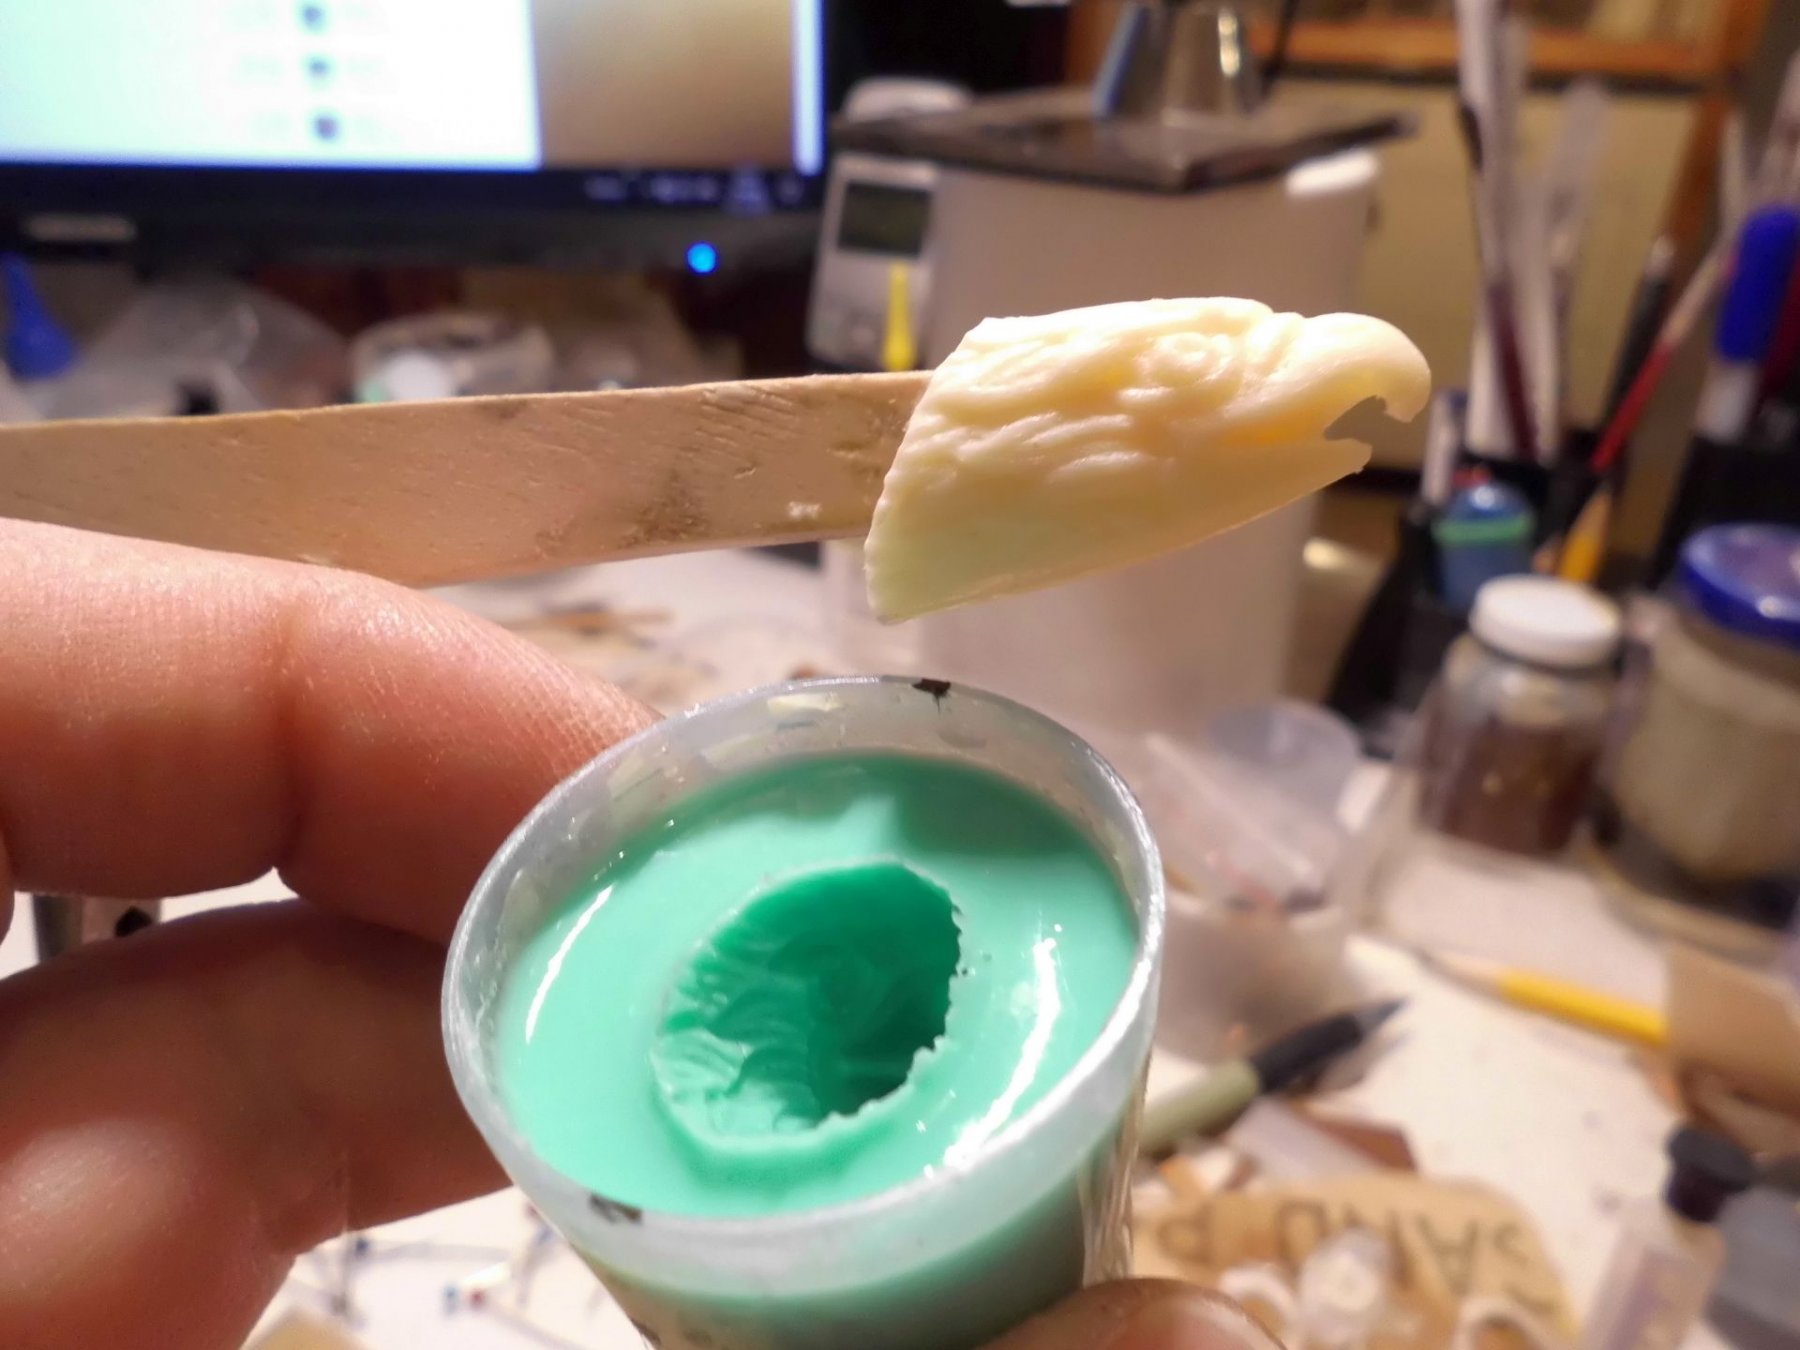
Hi Keith, I use the silicone components from source "Troll Factory", green silicone Cautschuk, softness 20 shore and white catalyst , mix 1:1, appr. 10 minutes curing time. for the resin parts I use also from Troll Factory, PU liquid resin and liquid hardener, mix 1:1, appr. 5-10 minutes curing time. Parts come out white... as separation media for the mould I use brush applied separation wax, also from the same source. When I did this first time, I ordered the components from Ebay. The first parts I made with good success were all the ships boats for my "Kaiser Wilhelm der Grosse Steamship" Nils
- 692 replies
-
- 6
-
-
- eagle of algier
- chebec
- (and 2 more)
-
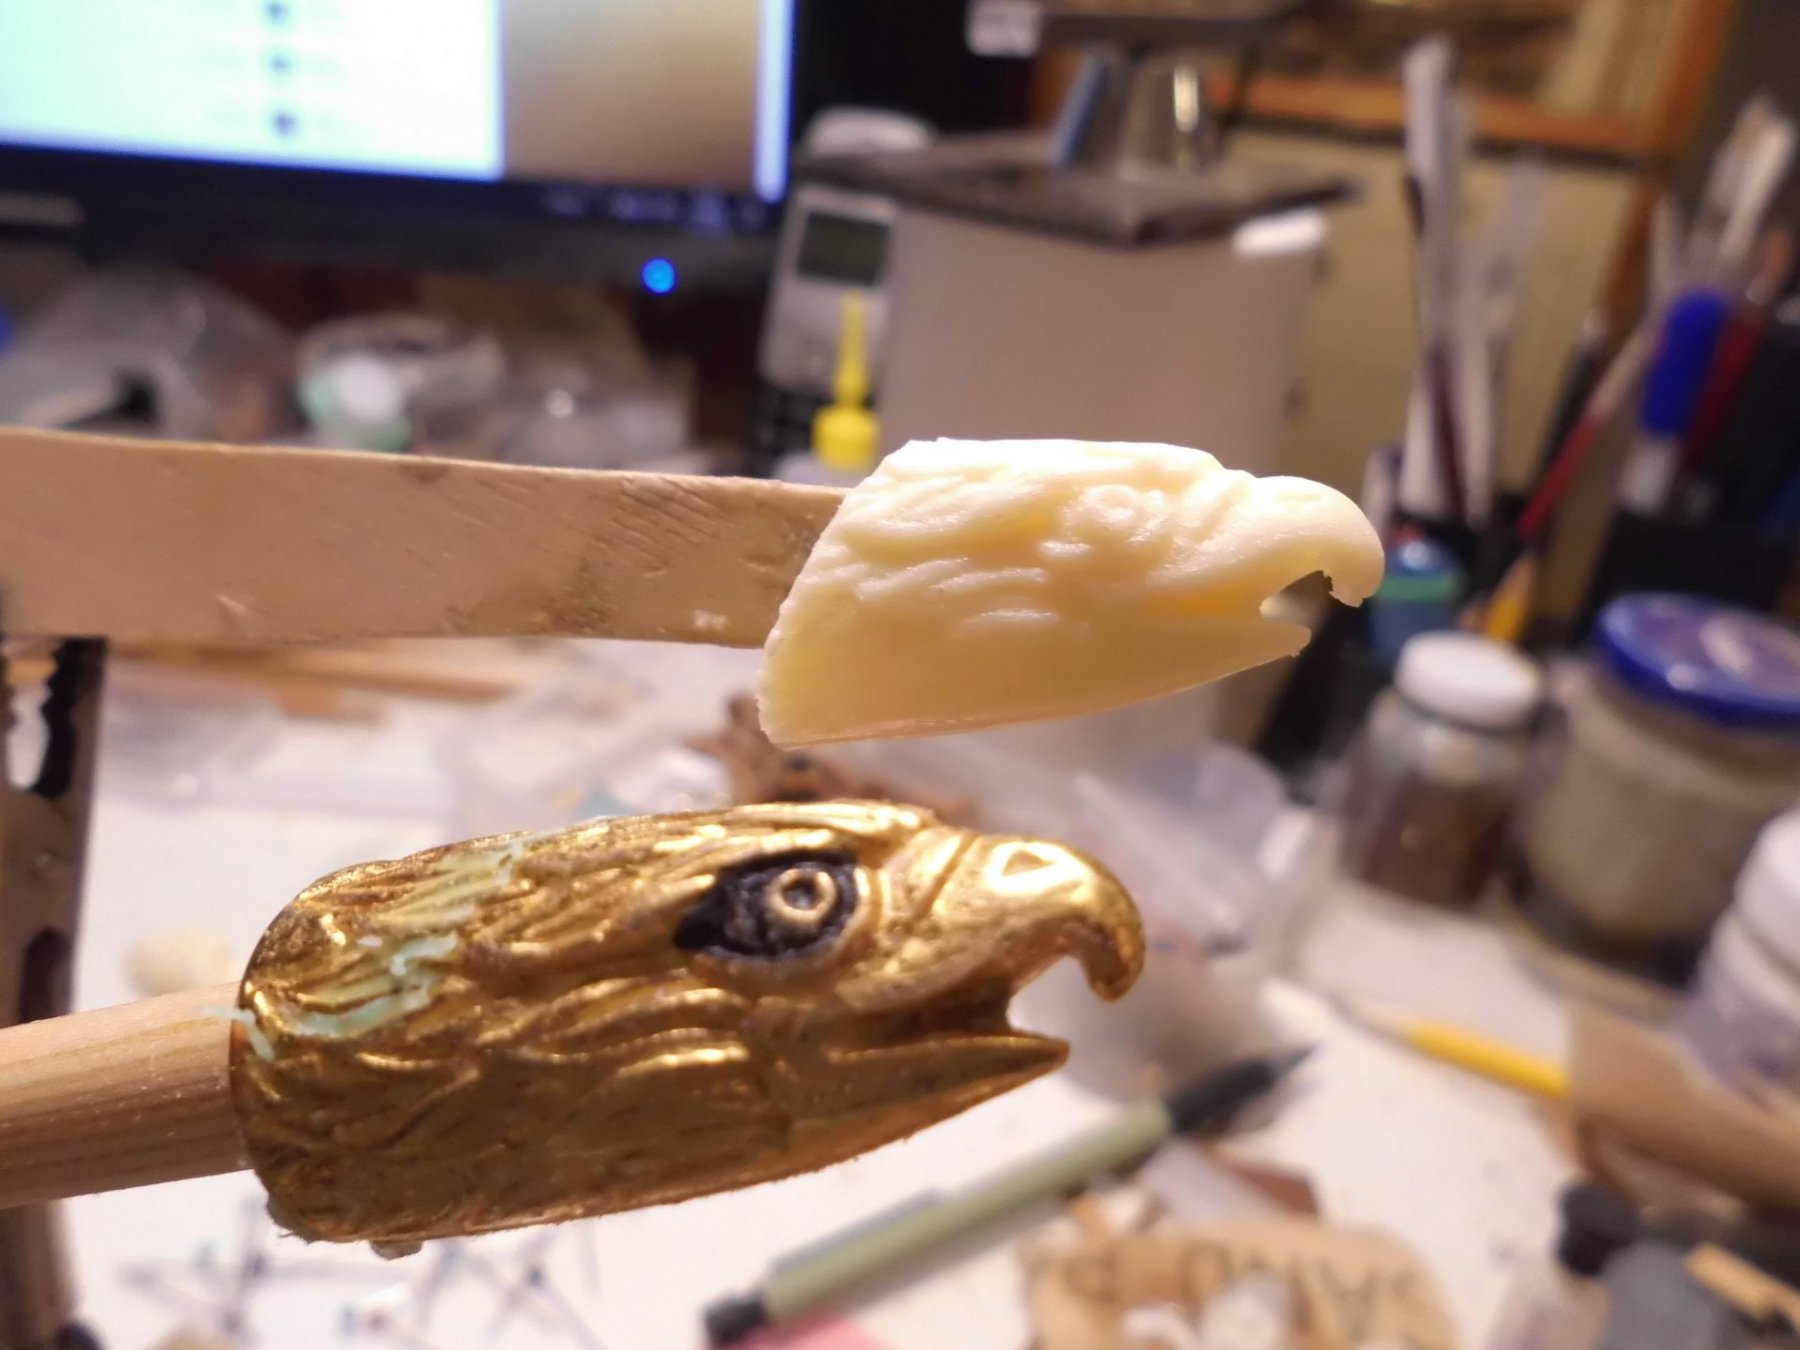
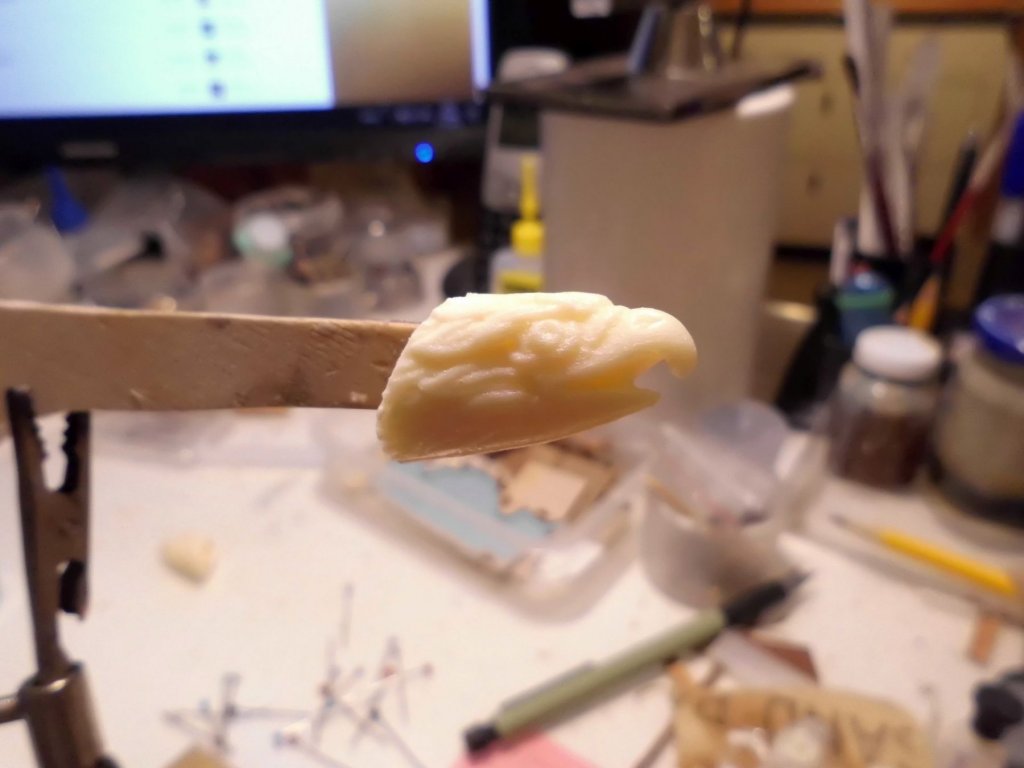
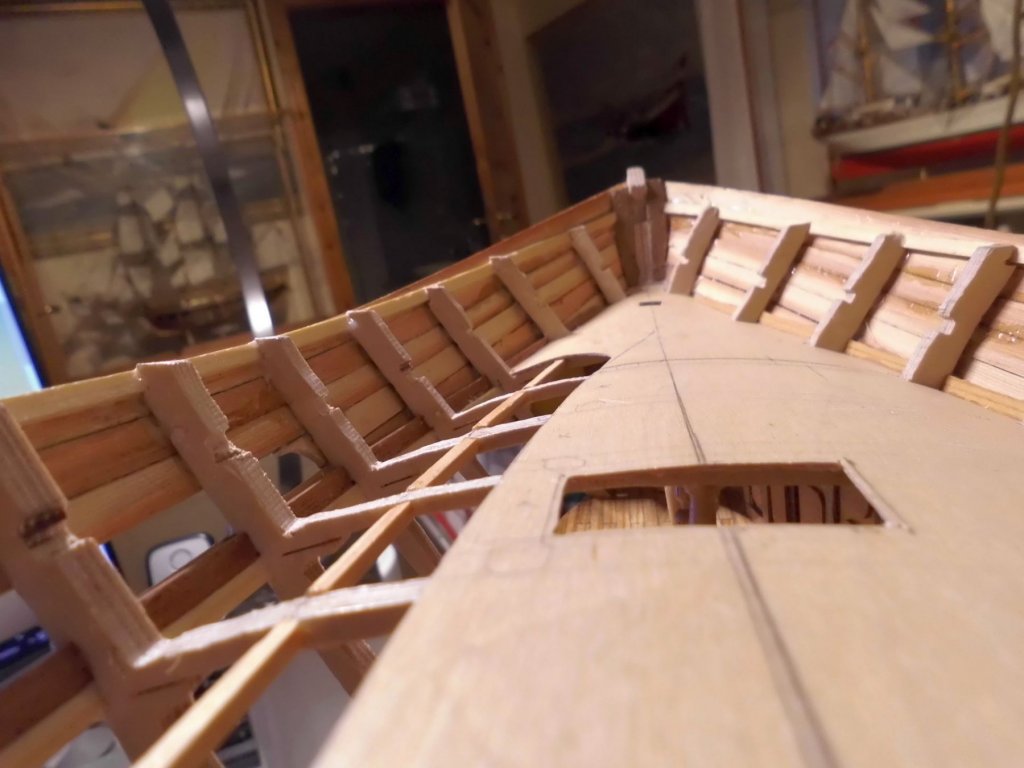
Update : today made the figurehead from cast resin..... (will be painted later on) The pattern is from an metal cast eagle head valve-cap like some of the motorcycle- and triker freaks use to tweak up their hot wheels..... Its easy to take a silicone mould for the job.... Nils here the few last planks are put on


- 692 replies
-
- 14
-
-
- eagle of algier
- chebec
- (and 2 more)
-
wonderful Jim, mist over the forrest and the Rockies in the background.... Nils
-
many thanks Denis, I`m pleased you like it.... Nils
- 692 replies
-
- 3
-
-
- eagle of algier
- chebec
- (and 2 more)
-
Thank you Keith, yes, that worked well, and I`m happy to note that hull now stays straight... Nils
- 692 replies
-
- 3
-
-
- eagle of algier
- chebec
- (and 2 more)
-
Hi Richard, nice to have you on board, you`re very welcome, enjoy the trip.... Nils
- 692 replies
-
- 3
-
-
- eagle of algier
- chebec
- (and 2 more)
-
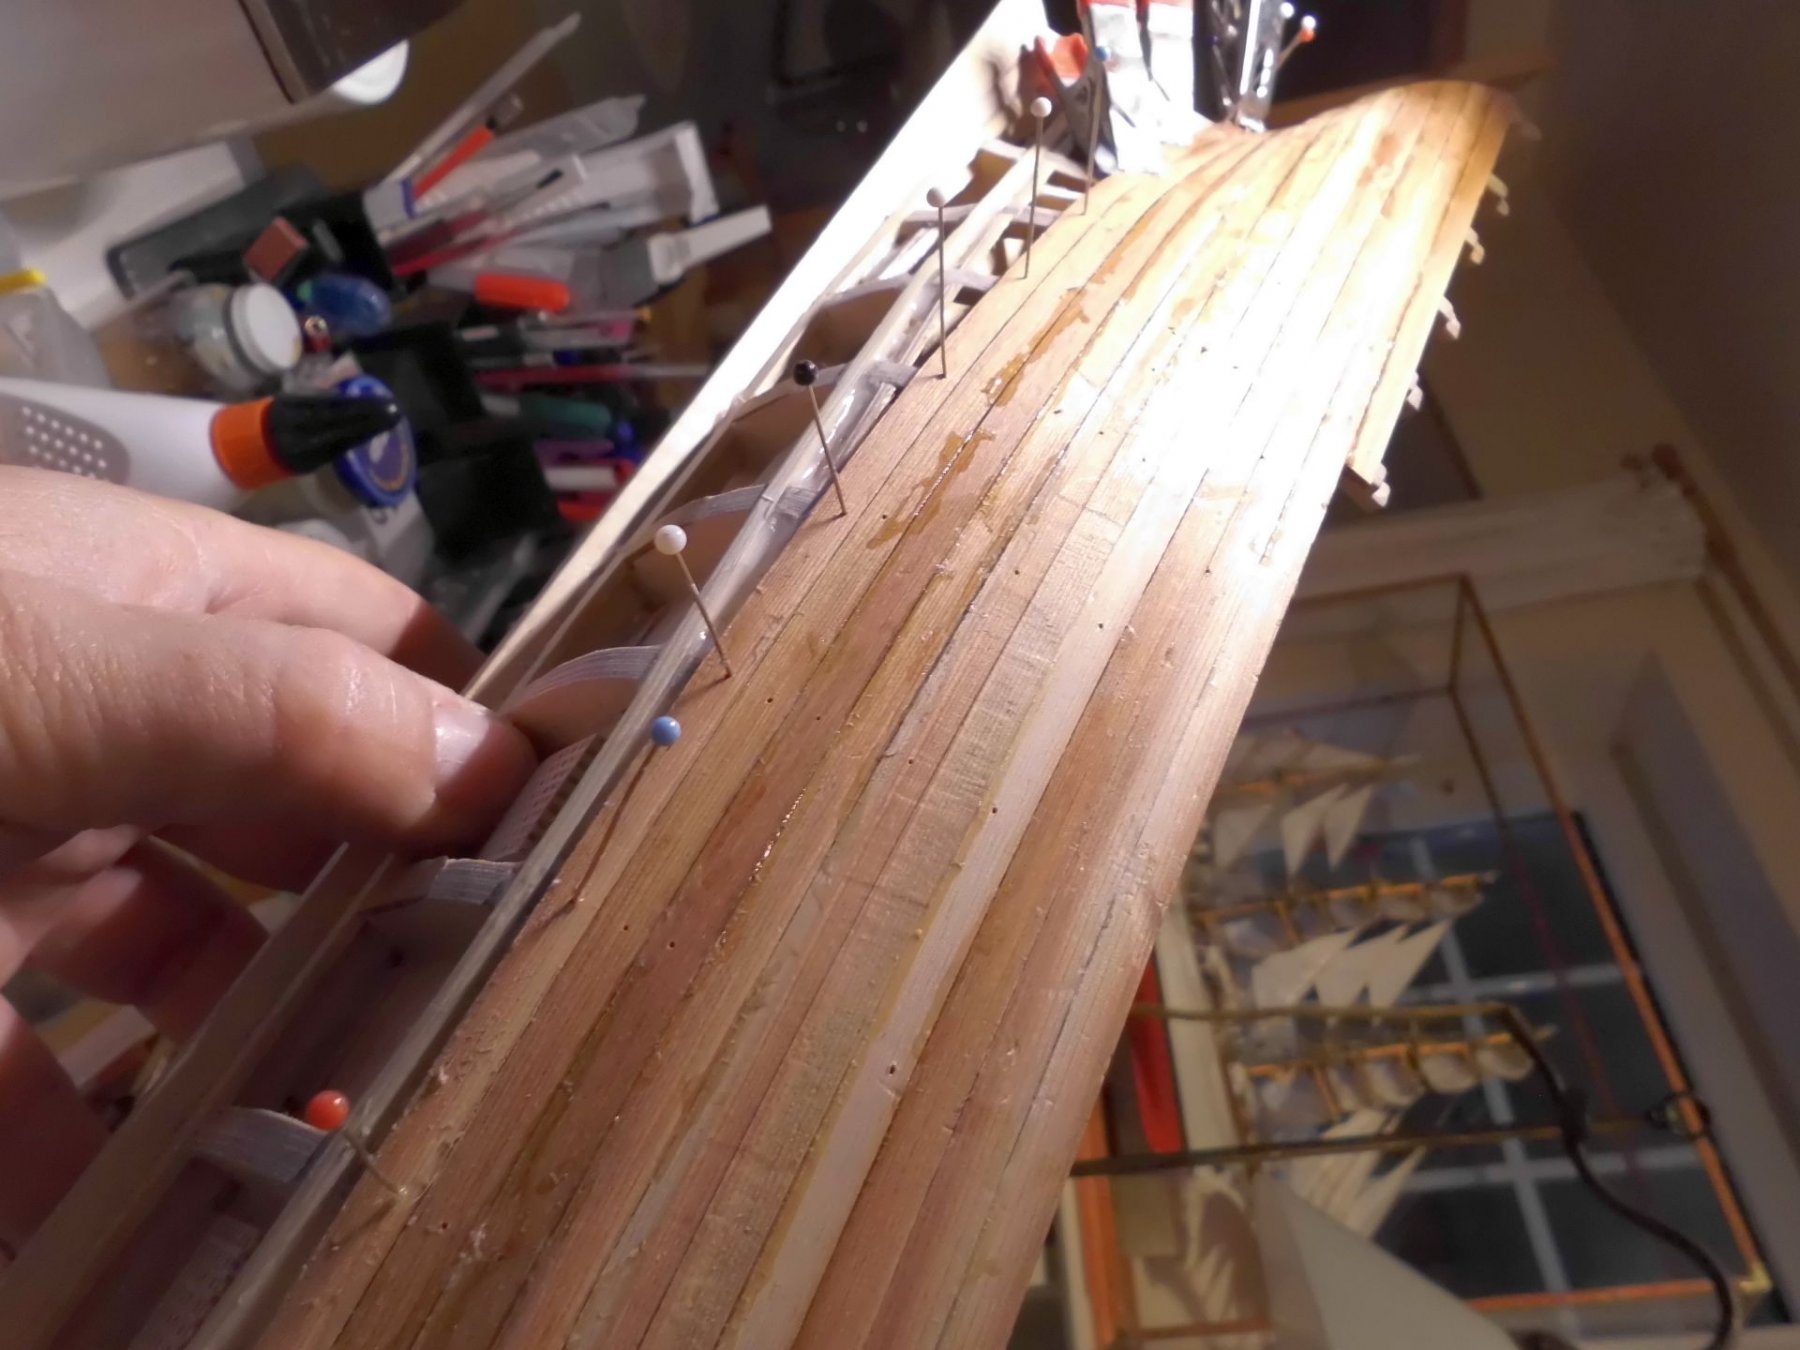
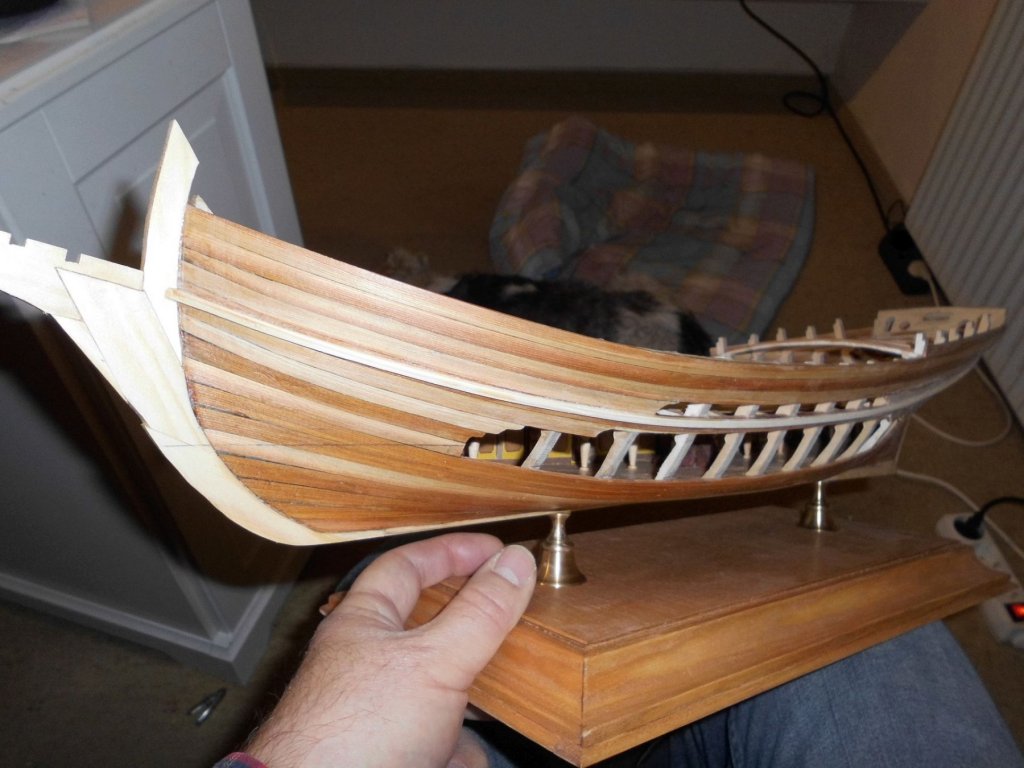
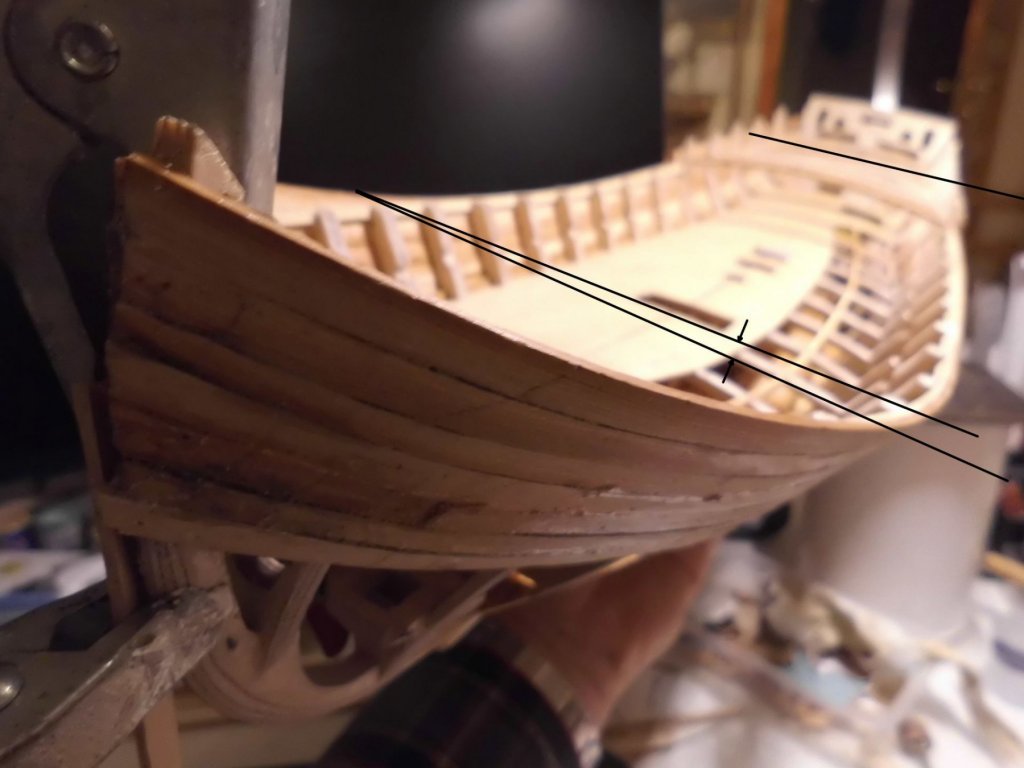
Hi Michael, welcome to the shipyard, and many thanks for looking in again...... the outside of the planking is still a bit uneven in the raw condition, but this time I`ll try to fair the surface by scraping with a blade of my cutting knife. I already tried it especially on the straight and convex surfaces. The scraping methode produces fine chips (mini shavings) rather than the dust that sanding causes. For the concave surfaces I`ll probably need to do some sanding... Nils
- 692 replies
-
- 2
-
-
- eagle of algier
- chebec
- (and 2 more)
-
Thank you very much for your words Bob, much appreciated.. Nils
- 692 replies
-
- 2
-
-
- eagle of algier
- chebec
- (and 2 more)
-
Thank you very much Antony and Piet, also thanks to all the "likes" in the recent days.. Antony, thanks for your nice words, much appreciated... Piet, am pleased that you like it, .... to date the untwisted hull remains in the corrected situation, hopefully until all the planks are on... Nils
- 692 replies
-
- 3
-
-
- eagle of algier
- chebec
- (and 2 more)
-
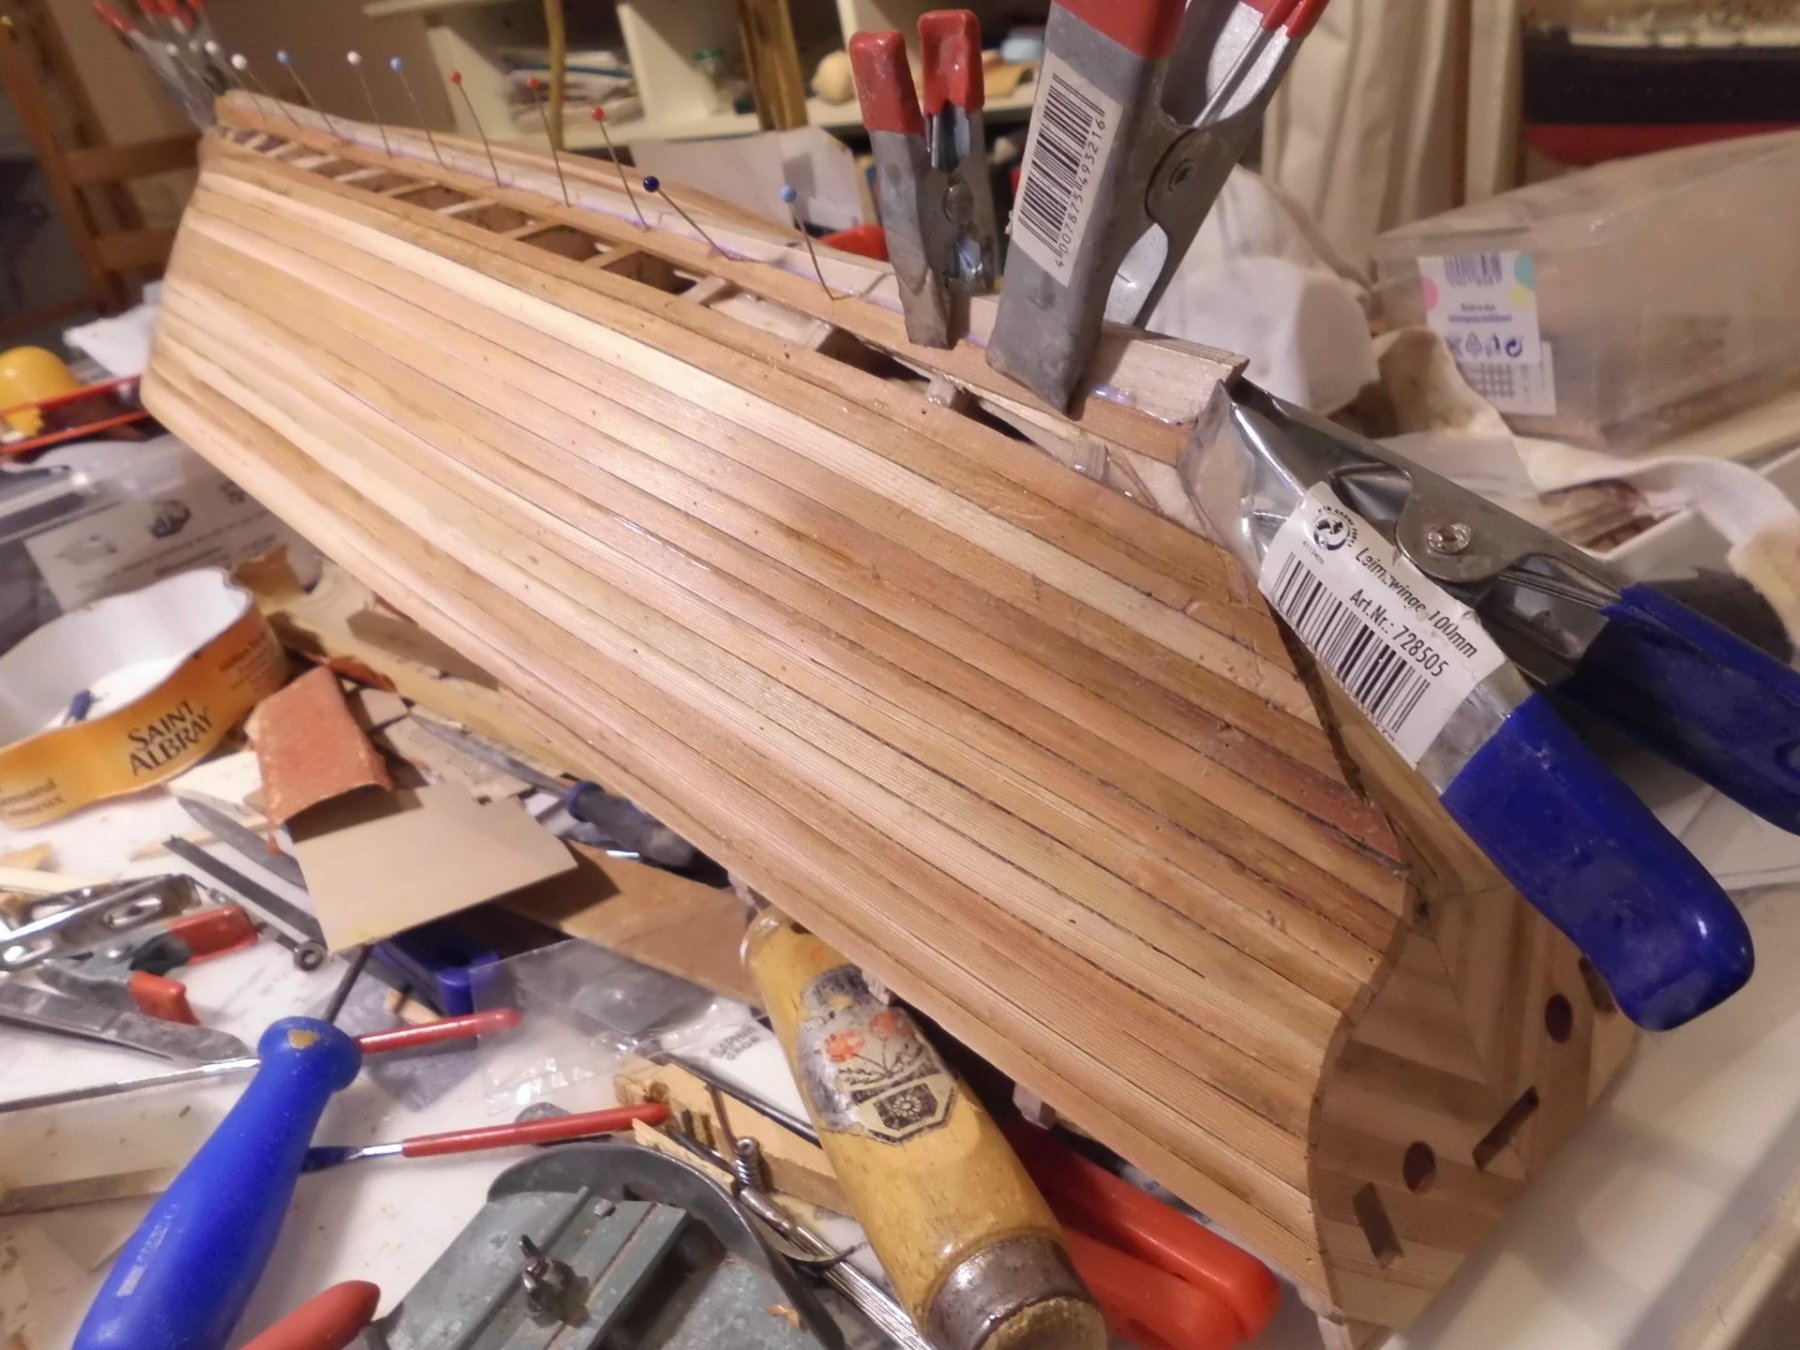
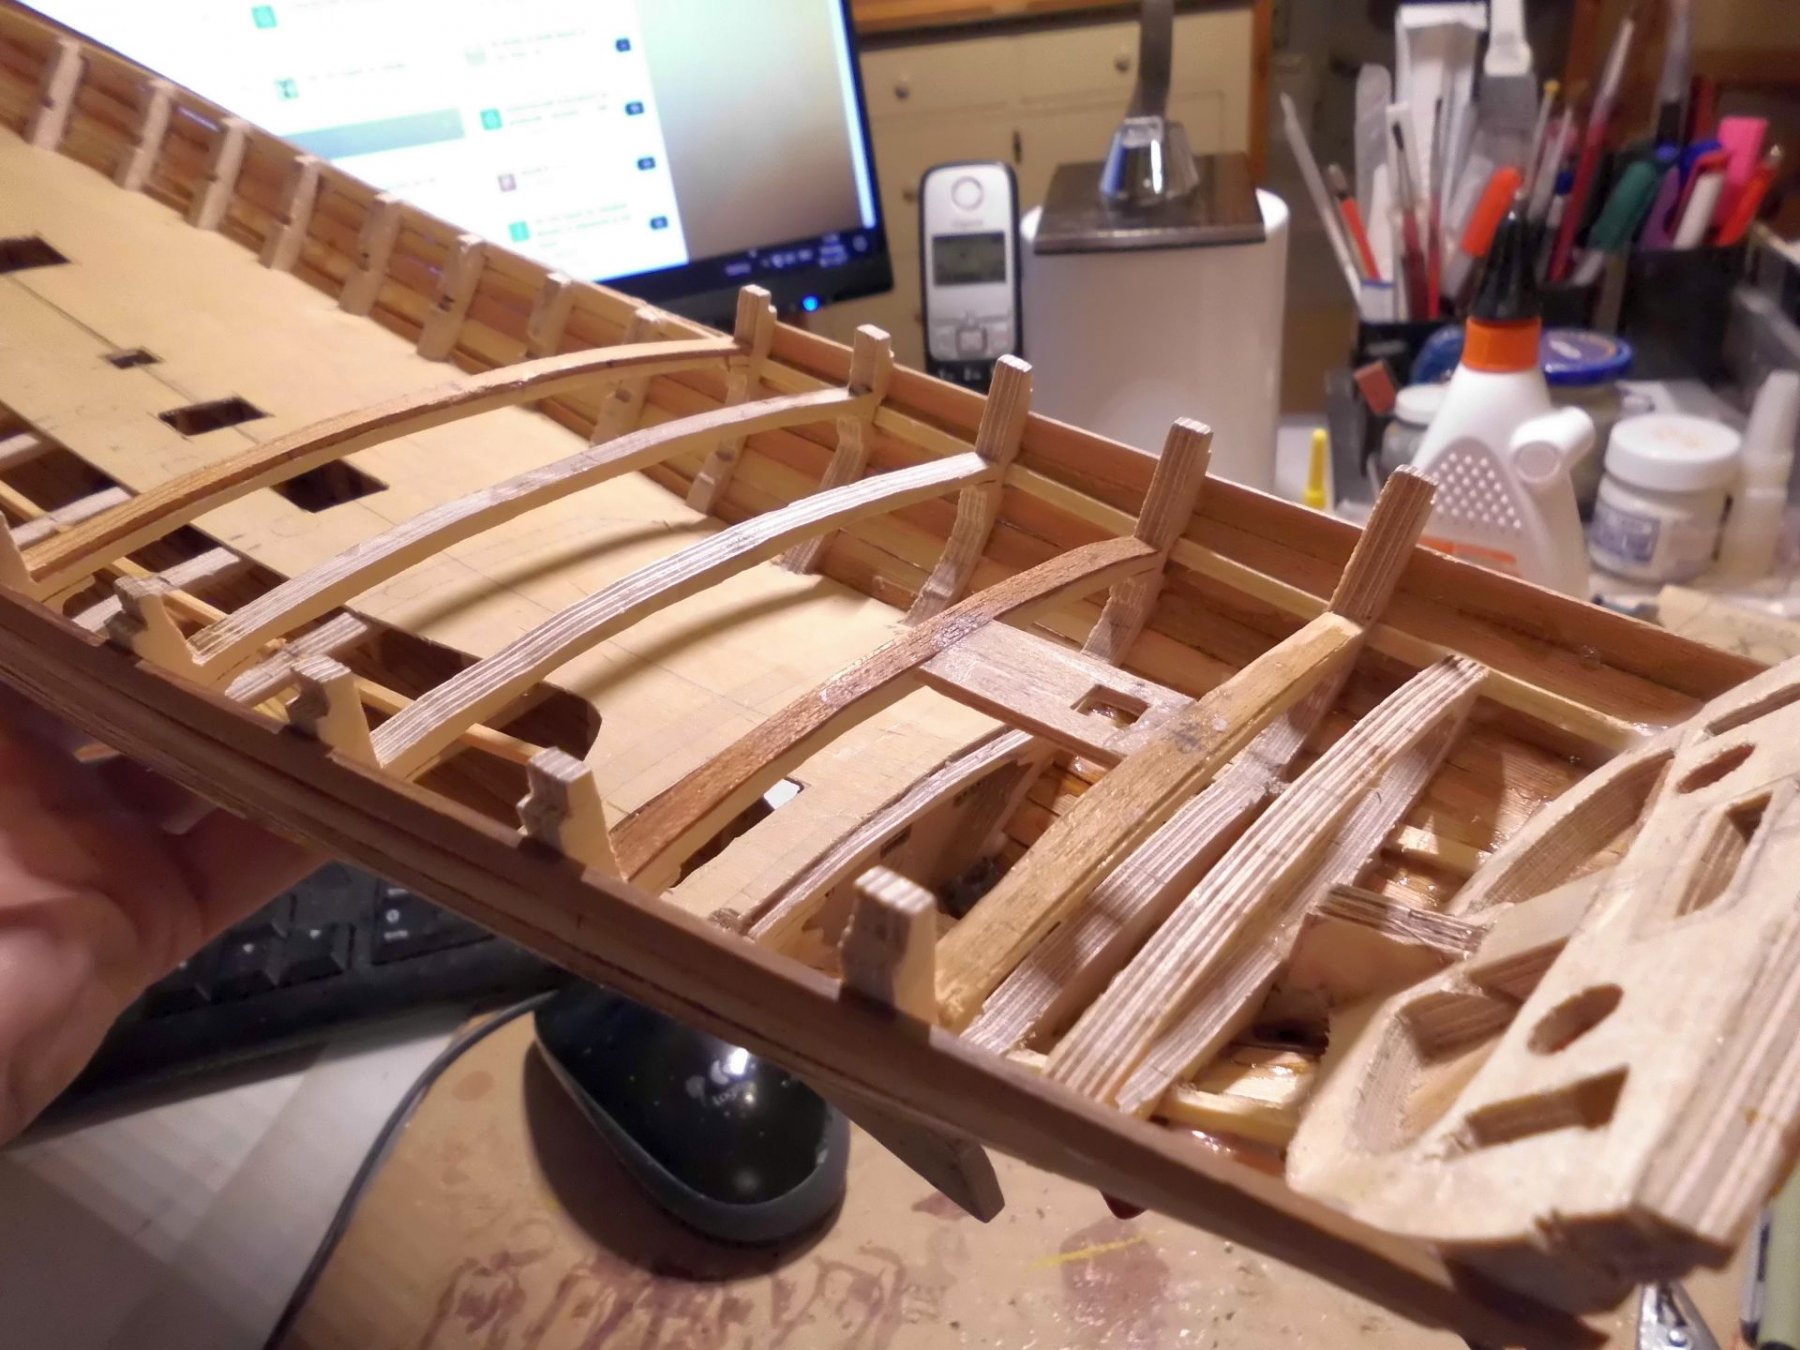
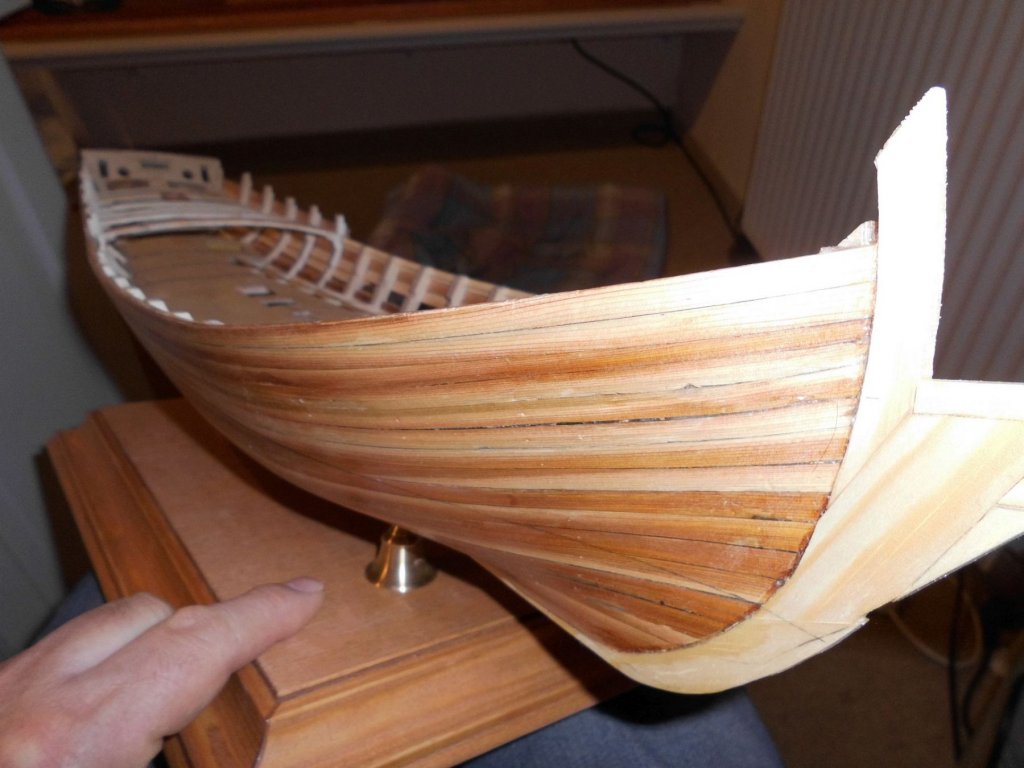
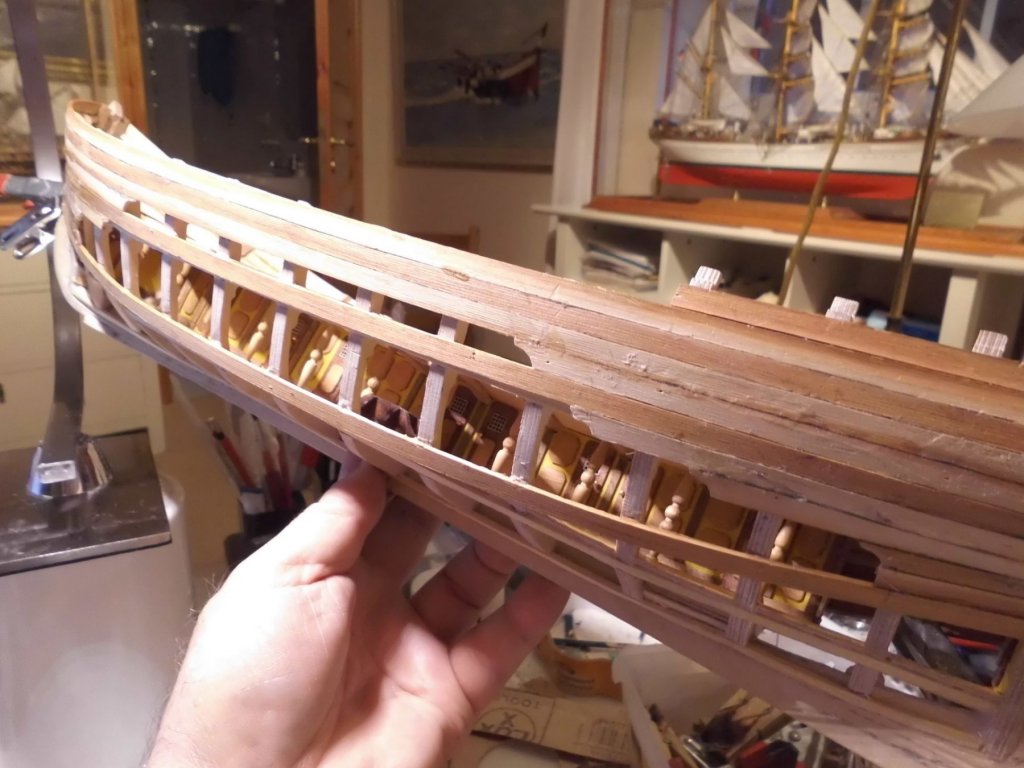
Update : about 3/4 of the planking is done, it went quite well so far, only 4 planks had to be tapered a little bit in the bow area, and no stealer planks fitted so far. On port side the viewing openings can clearly be seen. I hope all stays well and will overstand careful sanding during fairing. The planking is glued on with PVA white Express glue As the plank edges were not put glue on, I added some very thin viscosic white glue (Uhu Holzfest) in to the thin gaps from the outside. It cures fast, is transparent and is quite hard. That glue is normaly used to repair-glue loose wood joints on furniture, chairs, etc., and I have good experience with that. Nils will be appr. 18 planks per side


- 692 replies
-
- 20
-
-
- eagle of algier
- chebec
- (and 2 more)
-
Many thanks Dan, it looks as if the twist is now under control, after repeating the correction process 3 times, but I have`nt got all planks on yet. I had the same idea with spraying water mist onto the wood when under strain while the torque was on, but then was too anxious to get unwanted distortions. I`ll keep that good sounding suggestion in mind though, thanks for your input on that, trust it may help others who possibly have the same problem The more planks that go on makes the hull stiffer and stiffer, and a light weight hull at the same time. As I have single planking and a raw plank thickness of 1,5 mm, some of the thickness shall be sanded away during the fairing of the surfaces. All looks good so far Nils
- 692 replies
-
- 4
-
-
- eagle of algier
- chebec
- (and 2 more)
-
Update : yesterday had a little fright, when viewing from bow to stern over the length axis I recognized there was a little warp in the hull, due to the unsymmetrical planking arrangement and the tension of the planks on the framework. Was a bit upset, but that was to be expected. Then, after seeking a solution to to compensate the warp, the model was clamped in a vice at the front keel portion, and a thicker plank tied to the upper stern deck, so giving a lever on port side where I could lay a lead weight on over night, in order to twist back the warp. This morning I was pleased to see that it worked fine (happy agin) , hoping it may stay this way Nils
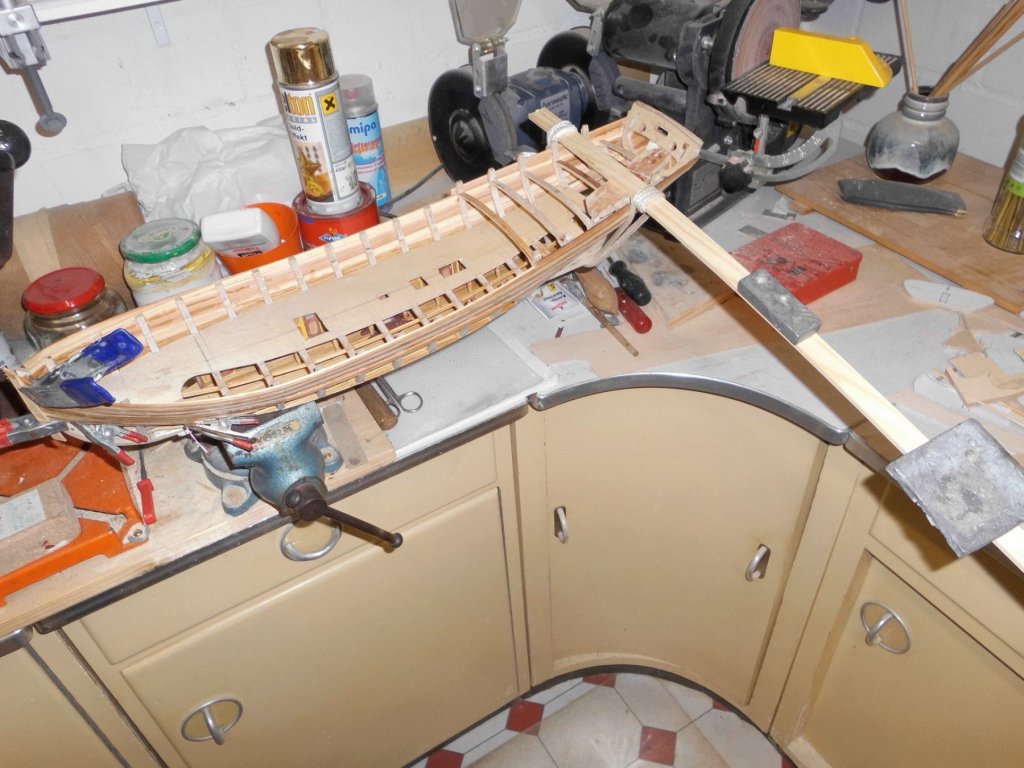
- 692 replies
-
- 18
-
-
- eagle of algier
- chebec
- (and 2 more)
-
ancre Chebece 1750 by Jeronimo - FINISHED
Mirabell61 replied to Jeronimo's topic in - Build logs for subjects built 1501 - 1750
super work Karl, somehow the filigran structure reminds me of an instument builder building the fine wooden resonance body, like for a violin, cello or so, I know its completely different though .... Wunderbar !! Nils -
Congrats B.E. to your new little gem. A wonderful model..... Nils
- 91 replies
-
- 3
-
-
- 18th century longboat
- model shipways
- (and 1 more)
-
Many thanks Jim, wish I had the talent to do such paint work, also a good idea with the clock in the background to show the duration it takes.... Nils
-
Hi Jim, thanks for answering, incredible work...... I can imagine how you are holding the dagger brush between pointer finger and thumb, whilst the brush is resting on the middle finger, probably you guide your hand along some kind of linear supporting rail. However done, it is a fantastic result !!!!
-
Wow ! love that one Jim, one can feel the fresh breeze driving the windjammer... I have a question to the technique....., how do you do the wonderful thin rigging lines / ratlines, etc....? Nils
-
Many thanks Denis, am pleased that you like it. I`m involved in planking right now, left, right, etc... in order to avoid warping the hull. It will take some time to get through... Nils
- 692 replies
-
- 4
-
-
- eagle of algier
- chebec
- (and 2 more)